Kimjon
-
Posts
2181 -
Joined
-
Last visited
-
Days Won
1
Everything posted by Kimjon
-
Yes, 1:1 ratio motor to jackshaft, then clutch to axle/wheel. Sorry, I was assuming that you were doing that.
-
Yes, as long as gearing to jackshaft is 1:1 ratio. If that's the case it's no different. If gear ratio differs, then your engagement rpm will reflect the difference. It may still work fine, but something that you need to consider. I normally cut about 10mm of spring out on my lower powered drift trikes to raise the spring tension and in turn raise engagement rpm up for the clutch. This is similar to raising rpm on a car and then dumping the clutch = faster take off and wheel spin goodness.
-
@Muncie have you seen this kids channel on YouTube. He makes cool stuff, especially given his age. Think your motor is the same or similar?
-
Is your temp gauge reliable? My LT1 motor into a VN commodore conversion had massive overheating issues, I did everything you could think of and couldn't solve the problem... Then out of desperation I purchased a cheap temp gauge from repco and hooked it up. Yeah...turns out I was trying to solve a problem that didn't exist. It was the original temp gauge that was the problem.
-

Random slightly cool stuff you built but not worth its own thread, thread
Kimjon replied to h4nd's topic in Other Projects
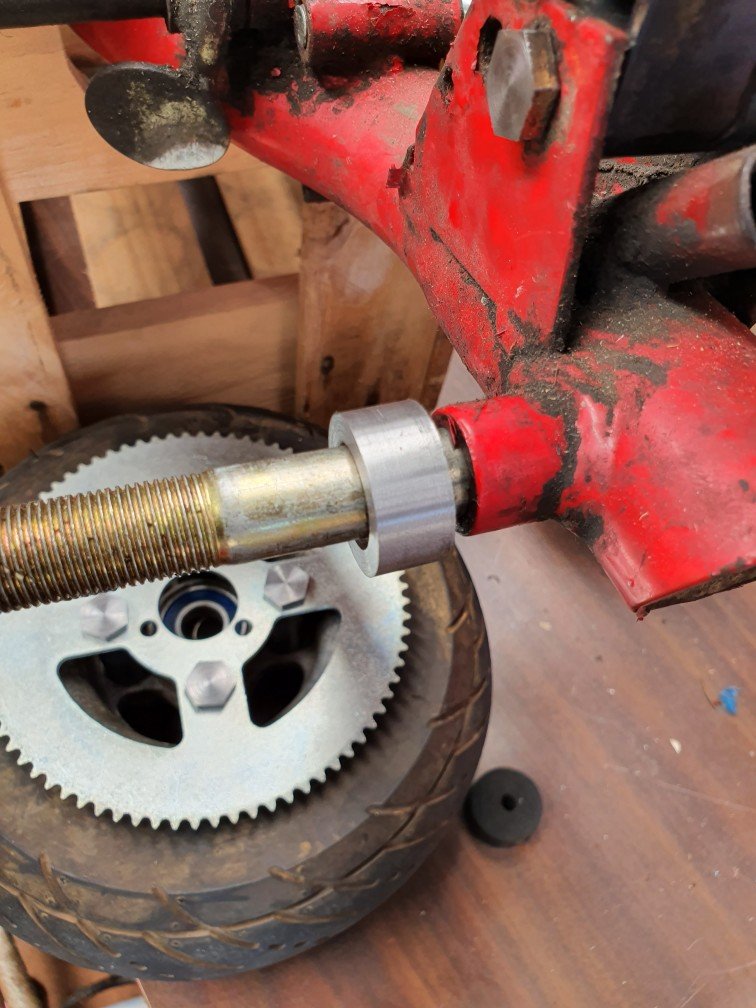
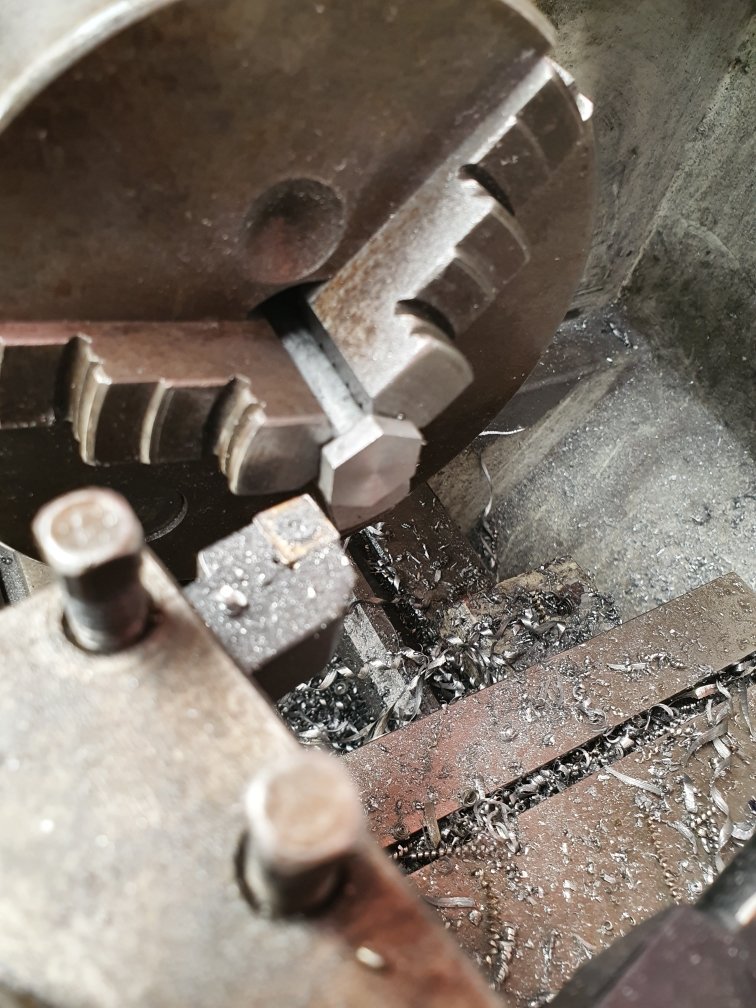
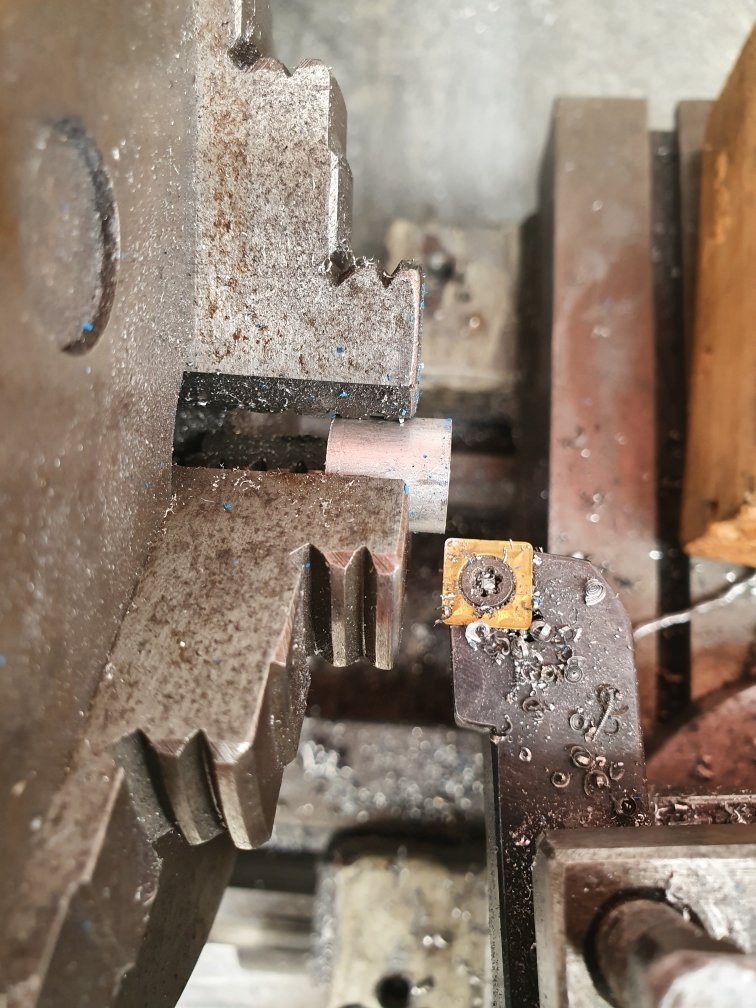
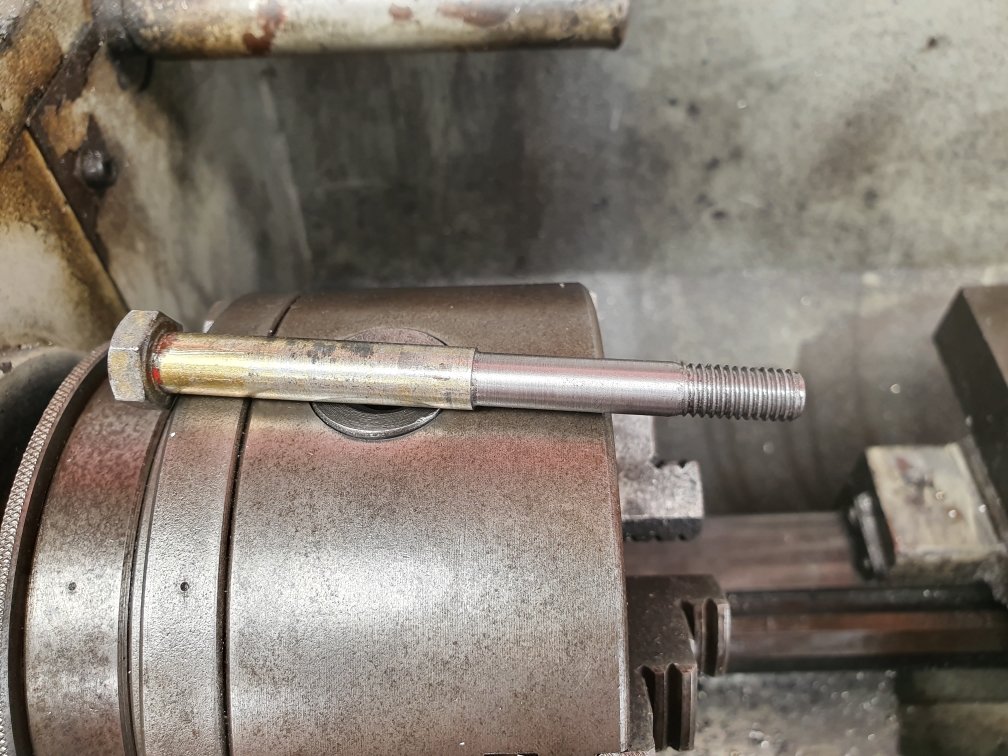
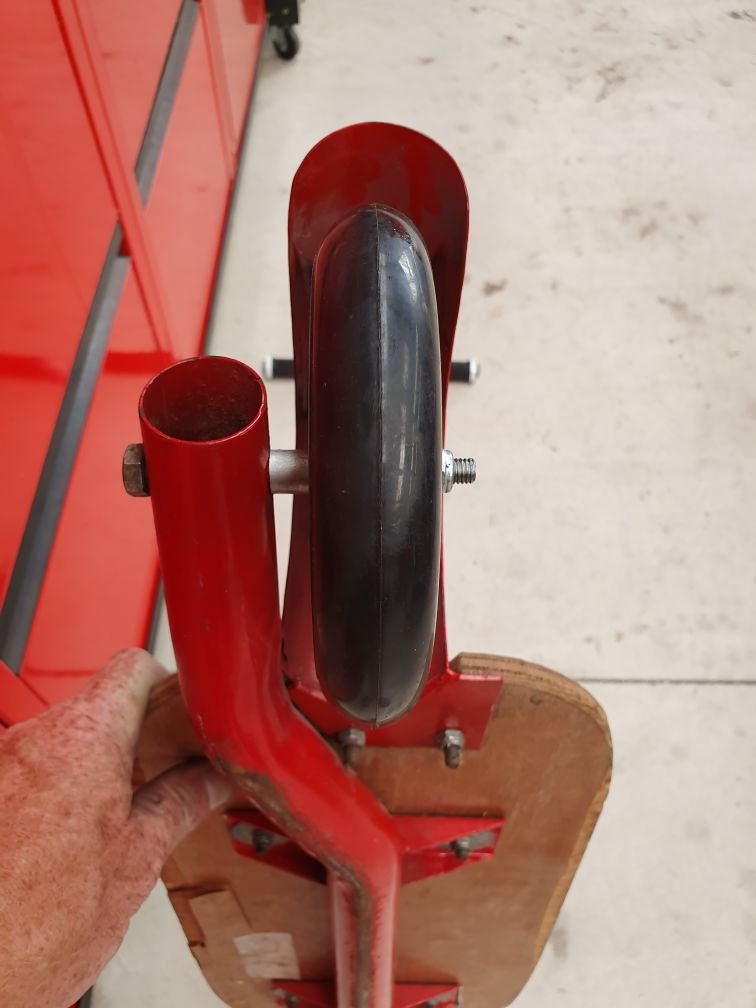
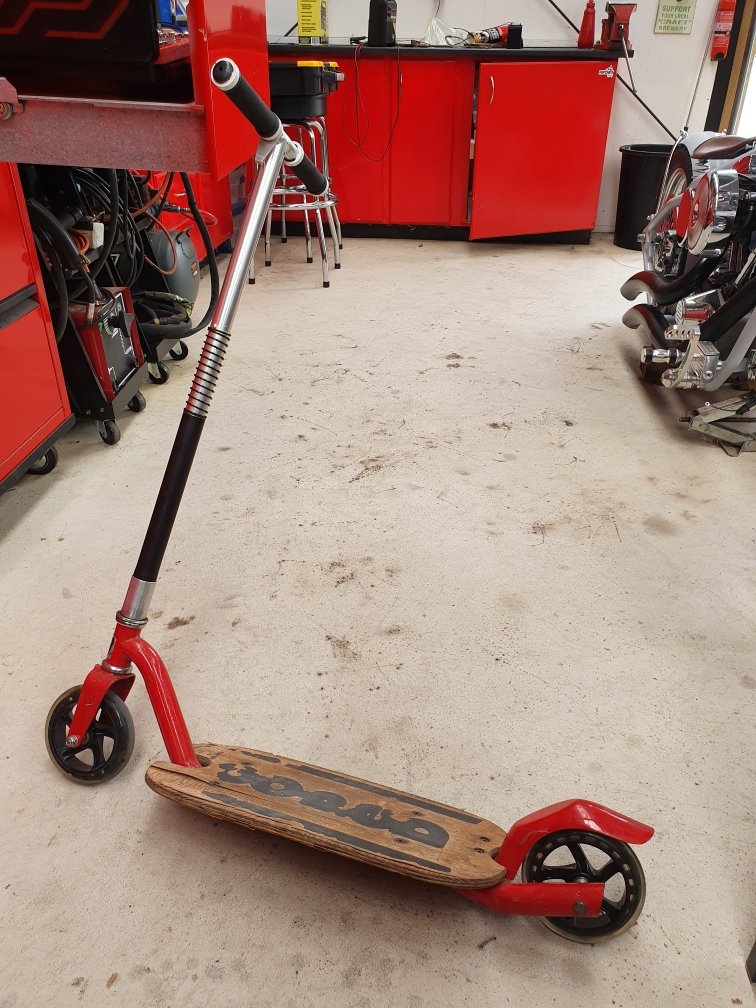
I stole the wheels off a goped that I got for $10 at kumeu a few years back. It's called a "Know-ped" and was made by go-ped as an environmentally friendly version for California without an engine. Anyways...I wanted its wheels for my other gopeds, so I just converted the know-ped to use these cheap scooter wheels. Calling it a win! Turning the 3/8unf straight bolt down to 8mm to take the scooter bearings. A spacer made from aluminum. Sweeeeetttt!!!! All done. Calling it a win/win. I get the wheels for use on the motorised gopeds, and still get to use this one with the kids.
-
Random slightly cool stuff you built but not worth its own thread, thread
Kimjon replied to h4nd's topic in Other Projects
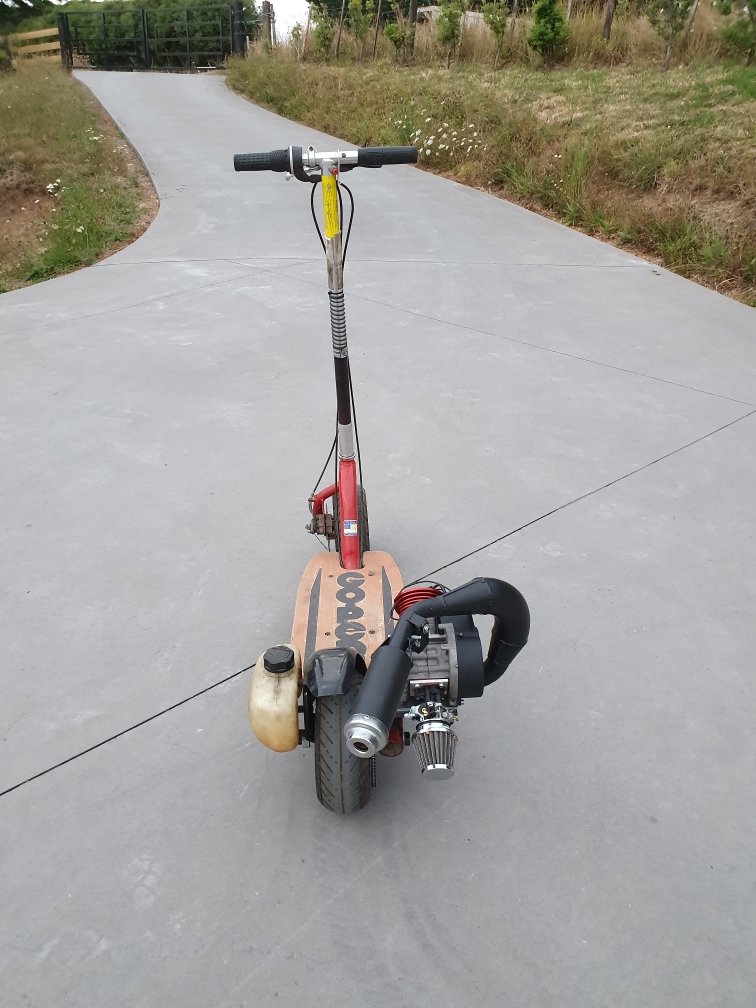
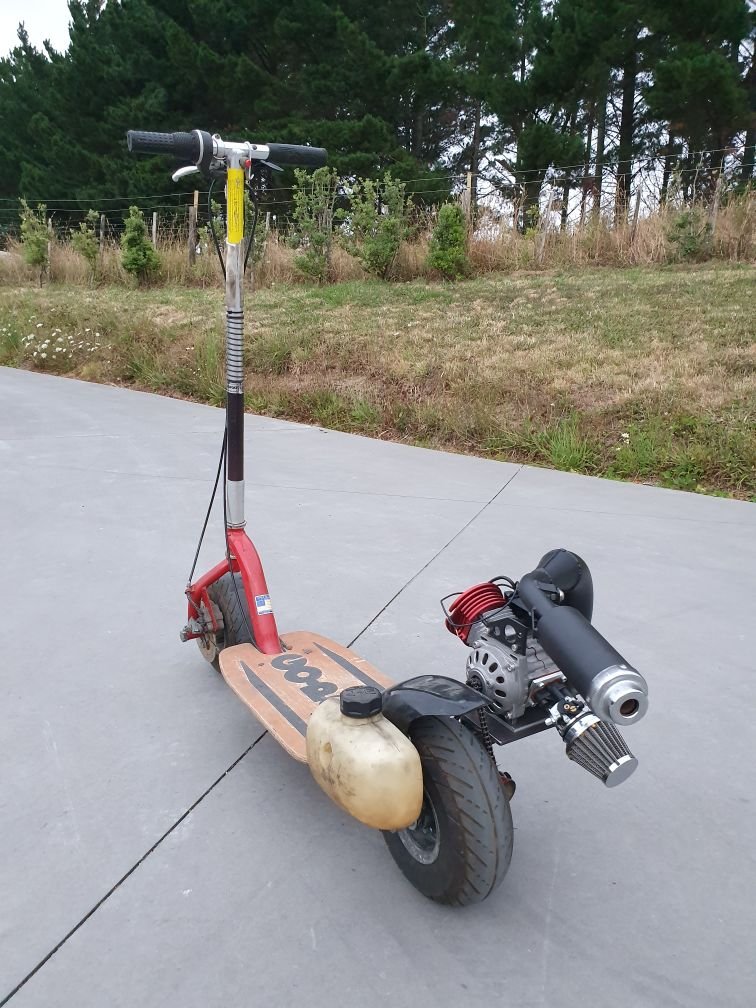
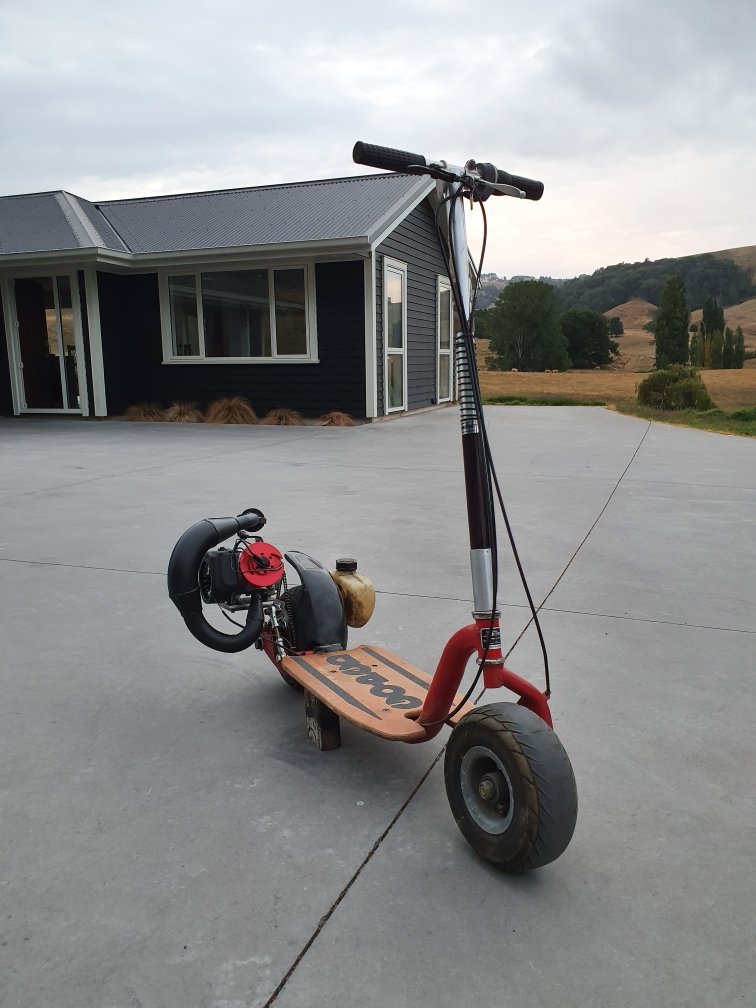
Another goped build. Needs tuning to run right, but I lack the space to get it up into powerband where it wants to run. Its showing real potential though with a newly found ability to drift it. It's going to end badly, probably with another broken arm like last year when I taught myself how to do goped wheelies until failing epically...but yolo✌ Specs: Model - Goped Sport Engine - 23cc Zenoah G23LH (rebuilt with new bearings, seals, cylinder, plug, gaskets, piston and rings) Carburetor - Walbro high performance 167A Exhaust - Dominator expansion chamber Spindle - ADA 0.75" (way to big off my small driveway). Other - velocity stack, air filter, aluminum tank mounts, upgraded engine bolts etc... Nothing over the top, but given room to work the powerband it will be a weapon! -
Okay, I'm starting to realise I may be pushing the limits here. There's a lots of motor on this scooter now. It's all but done, but I can't start it as the current pull start can't handle the compression. I tried to start it with a drill and fucked my drill!!! So I've ordered a different "easy pull" that I'll adapt to fit this motor. Basically it shifts the diameter of the pull start outward to increase torque in your favour. So...more waiting on Aliexpress to deliver the goods...
-
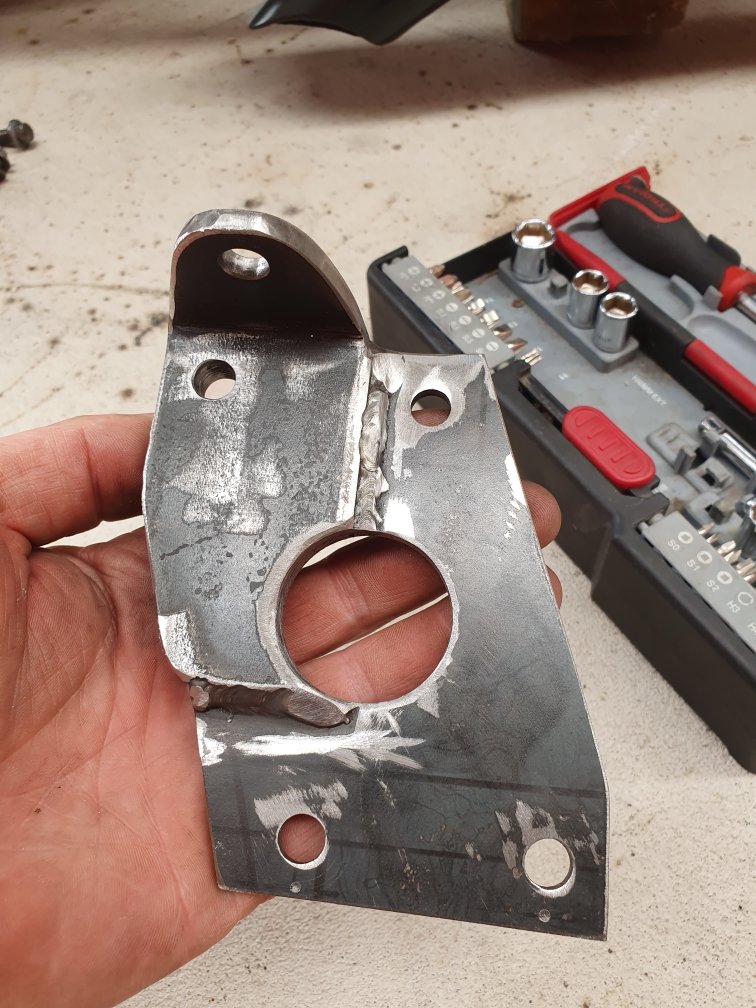
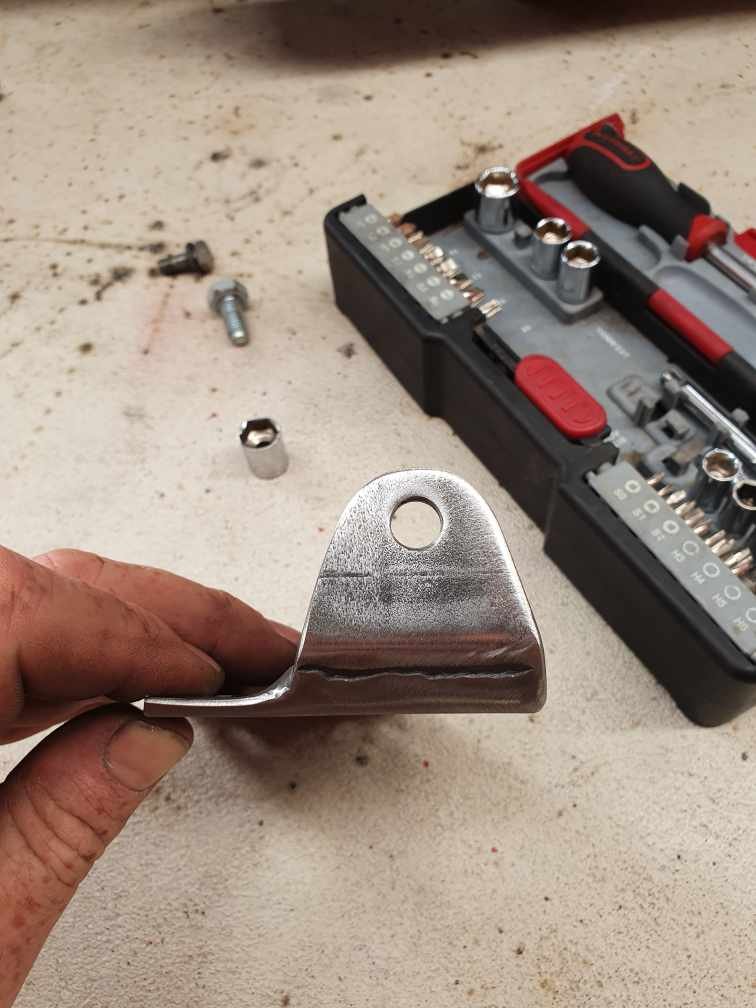
Improvements made to bracket. Looked "a little heavy" for my liking...so off to Jenny Craig's she goes! Nice hole, with a cheeky peek up her skirt. Rounded all the corners with a generous radius. Ready for paint now. Much happier with its appearance. If something is ugly, it's best to not draw attention towards it, so by doing these extra steps hopefully it'll become less visible and go unnoticed.
-
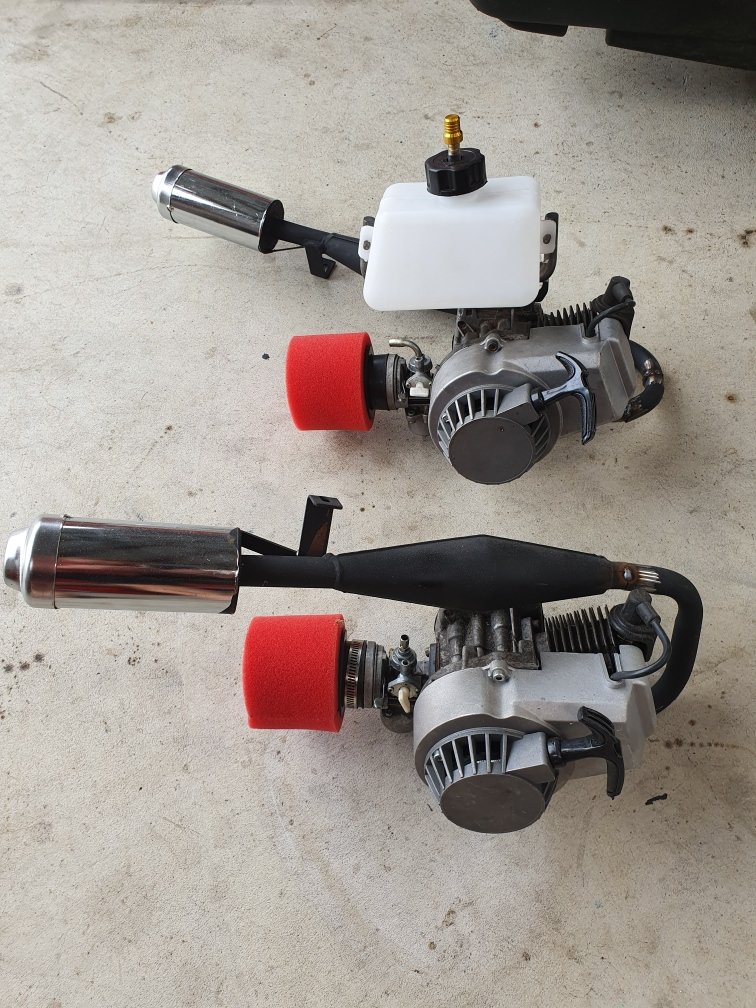
Kimjon - No13 (twin 49cc motors on a drift trike)
Kimjon replied to Kimjon's topic in Other Projects
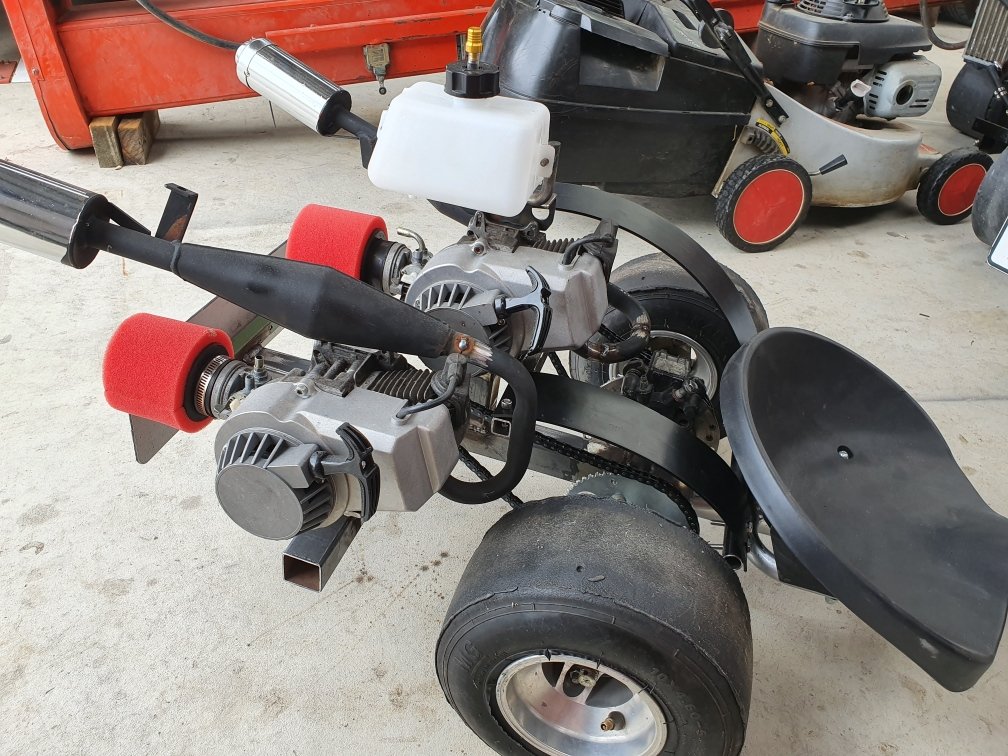
Did more work on this very neglected and long forgotten project Finally finished welding all of the various frame parts. Fitted chain guards to protect the rider from a flailing chain blow to the kidneys! Two motors....mmmmmmm....tasty!
-
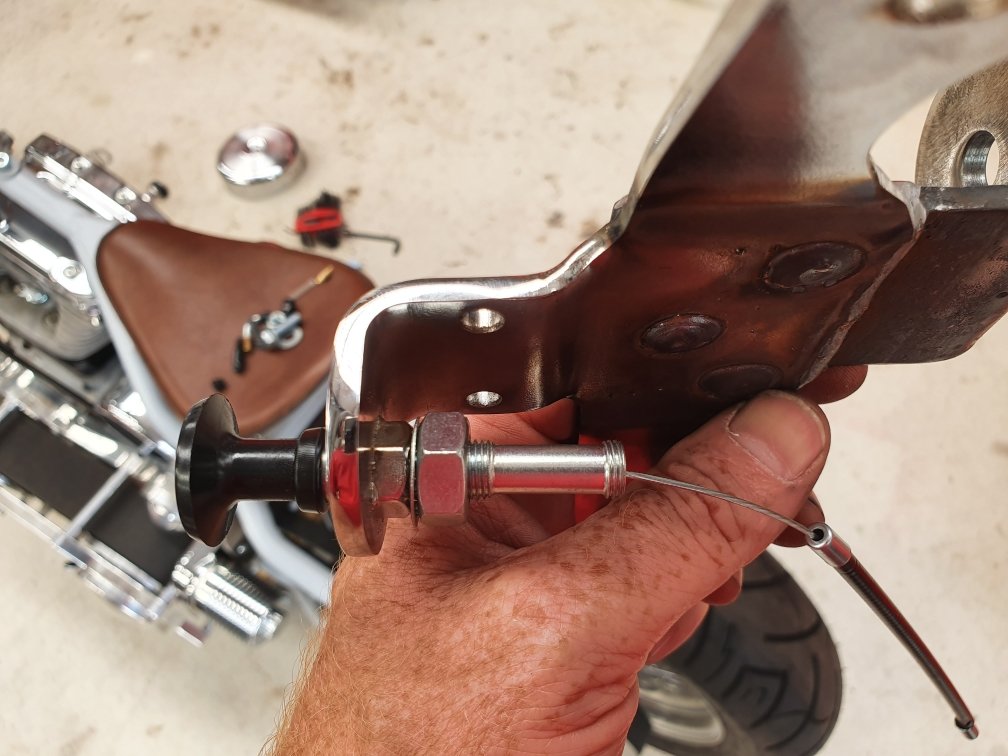
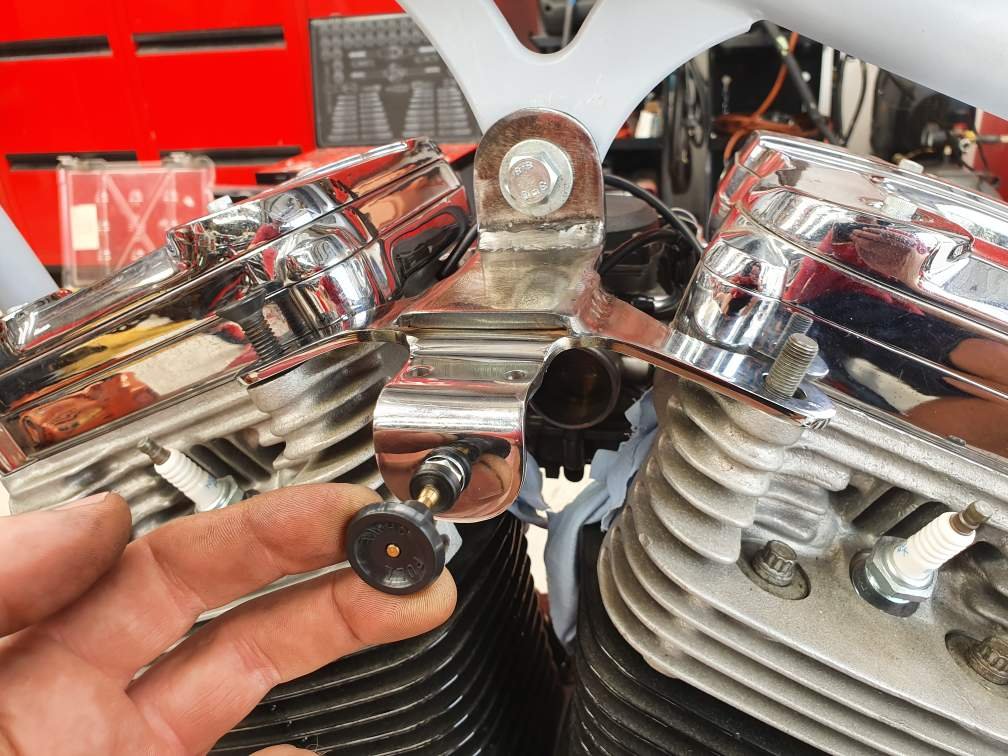
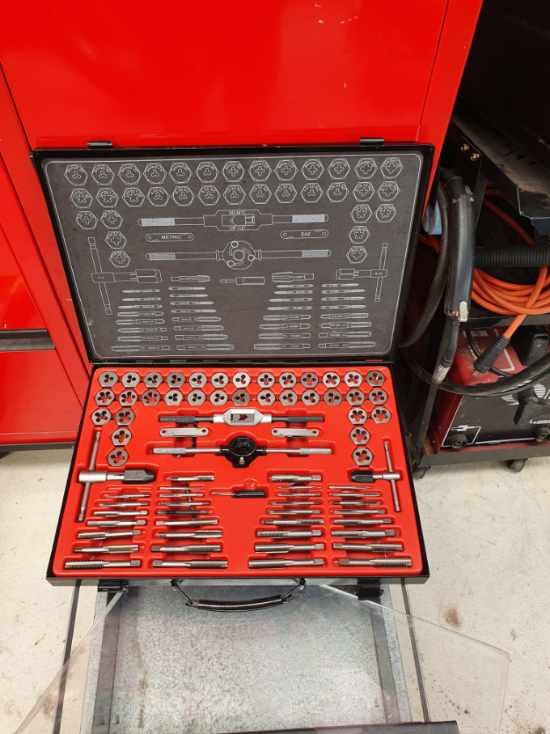
A small package with lots of mandarin writing on it that I can't read arrived today. I get pretty dam excited by these, it's like Christmas everytime...as I've usually long forgotten what it could be inside, so its always a fun surprise opening them up. Ah yes, I remember...a choke cable. No, not the one my wife ordered from the 50 shades catalog (we're still waiting on that one), a choke cable for the harley. Looks easy enough to install, I'll just unbolt the old fucked one and put it back together with the new replacement as it's a direct factory part eh? Ummmm no...no I won't...cunts!!!! Someone in china decided that they'd mix imperial and metric. To be fair Harley's already are, been a mix of American and Japanese parts as is. But then the Chinese get involved in the aftermarket parts world and fuck with it again. Yup, wont fit. My engine steady/choke mount is 5/16UNC in size. The part supplied is M10x1.0!!!! WTF???? Who makes a M10x1.0 bolt for a non specific application??? No one in their right fucking mind is the answer. This isn't the be all in tap and die sets, but its fairly comprehensive. Nope, no M10x1.0 in here, nor in my other 2 tap sets either. So fuck it...drilling it out and getting rid of the thread altogether. I looked at it and thought "hmmm, why does it even matter", it's got a collar on one side and I can use the nut supplied on the other side...then drilled the fucker out to 10mm. And it works perfectly. So problem averted.
-
Random slightly cool stuff you built but not worth its own thread, thread
Kimjon replied to h4nd's topic in Other Projects
Thanks...auto correct strikes again. Fixed it... -
Random slightly cool stuff you built but not worth its own thread, thread
Kimjon replied to h4nd's topic in Other Projects
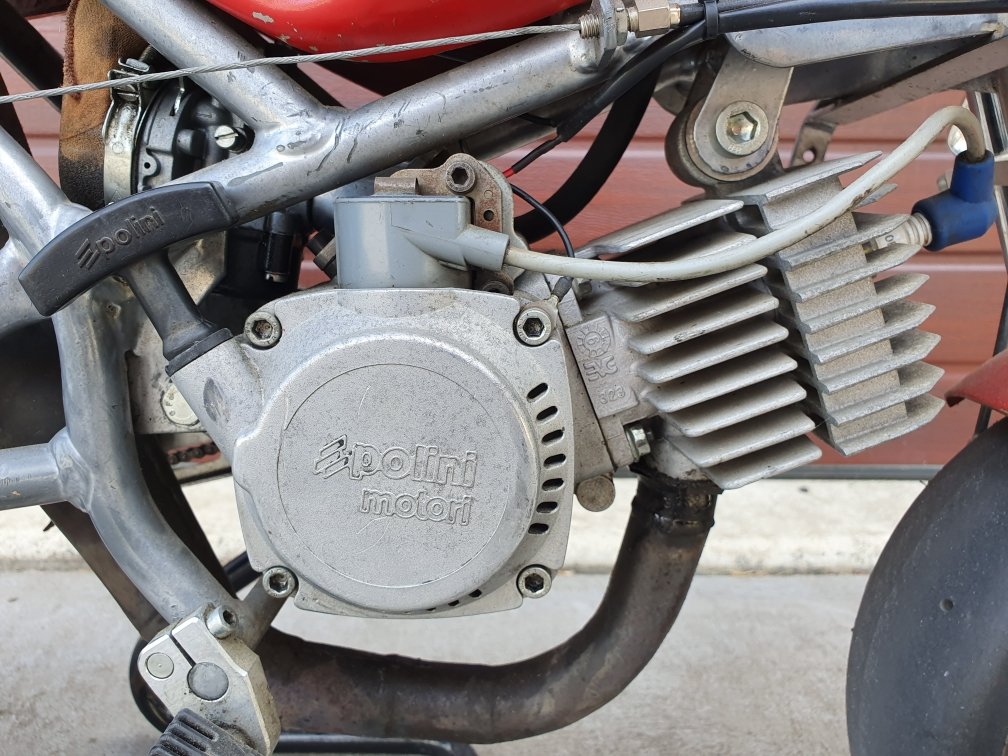
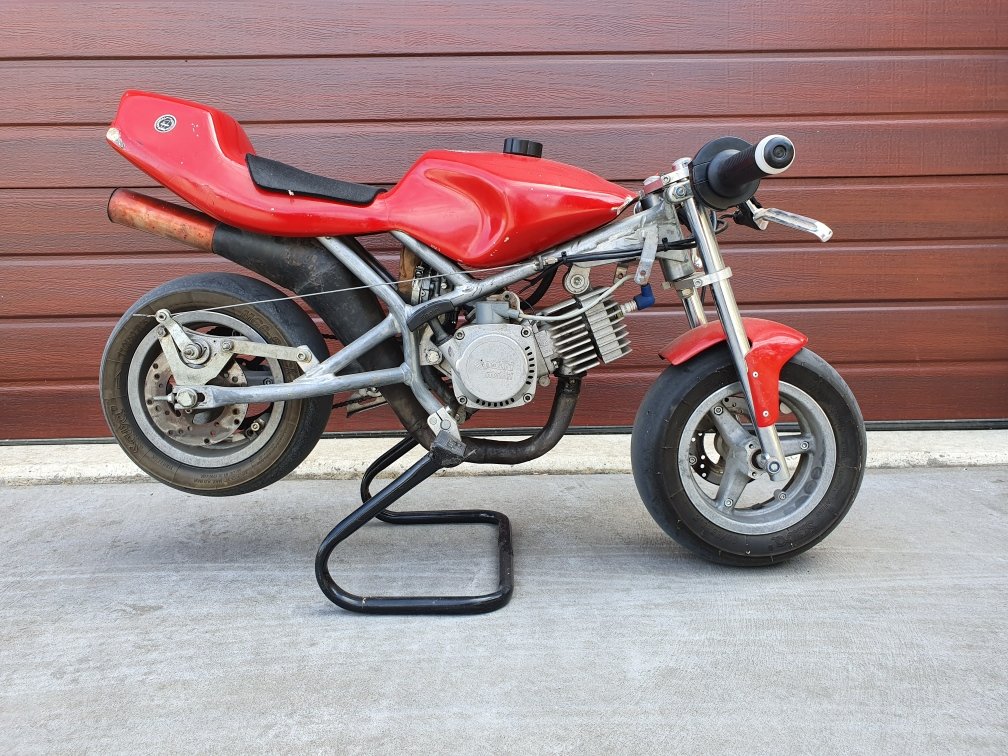
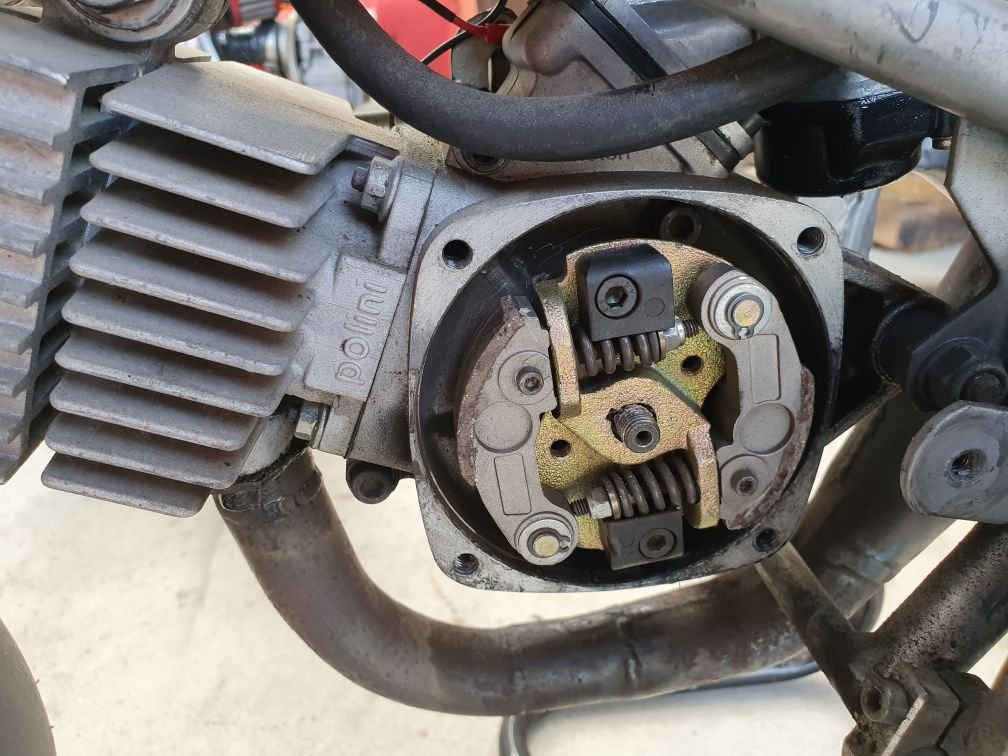
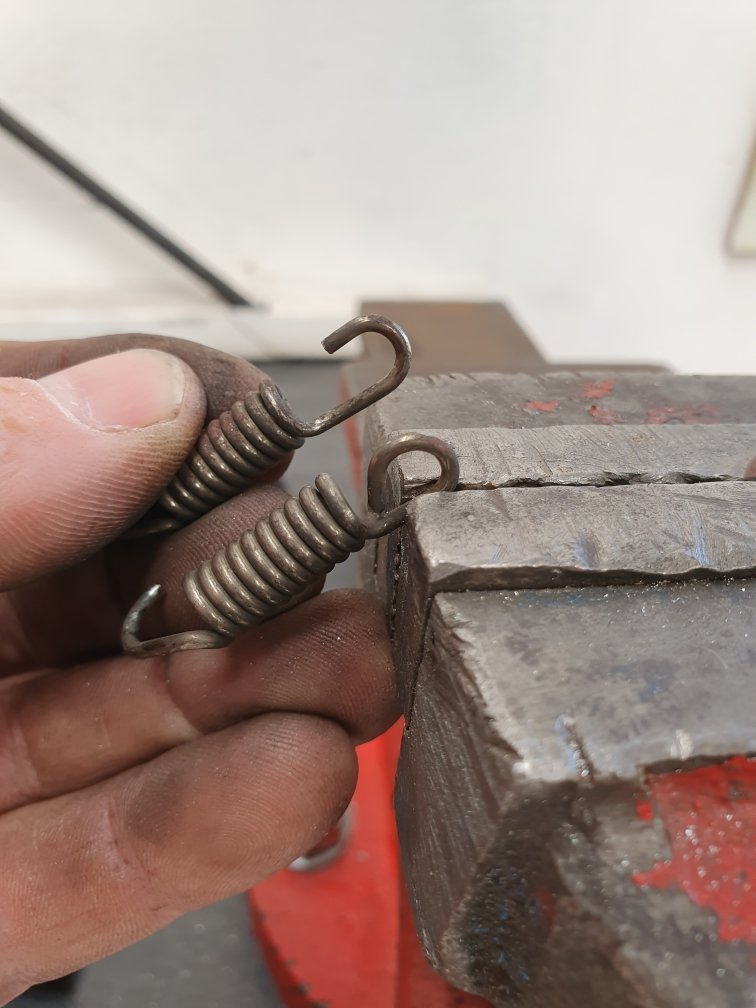
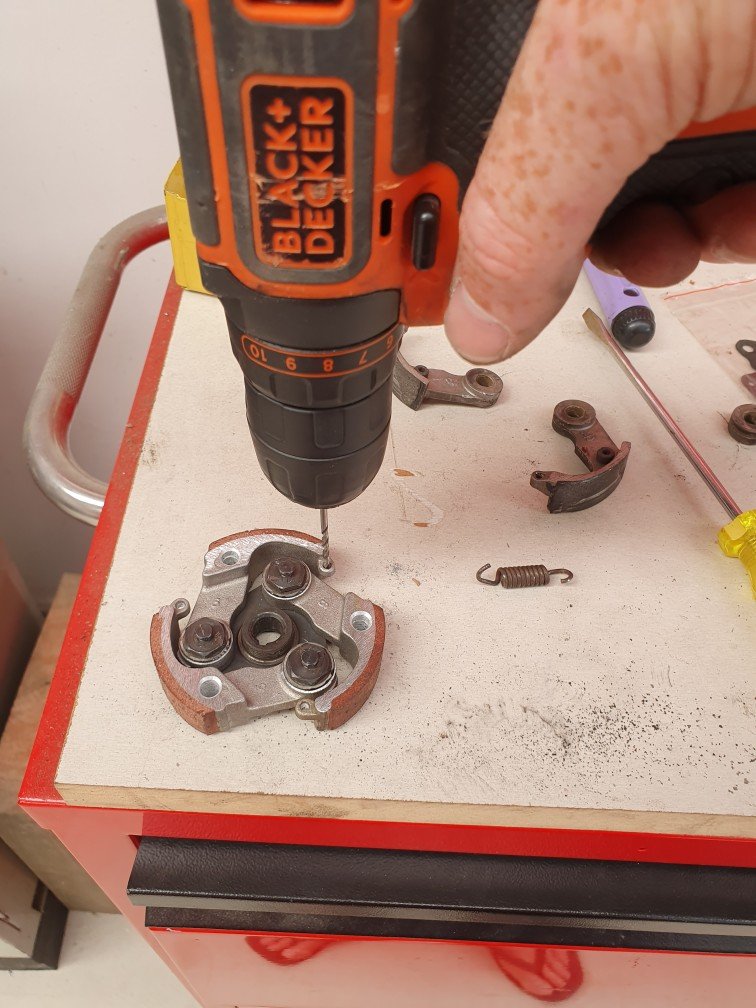
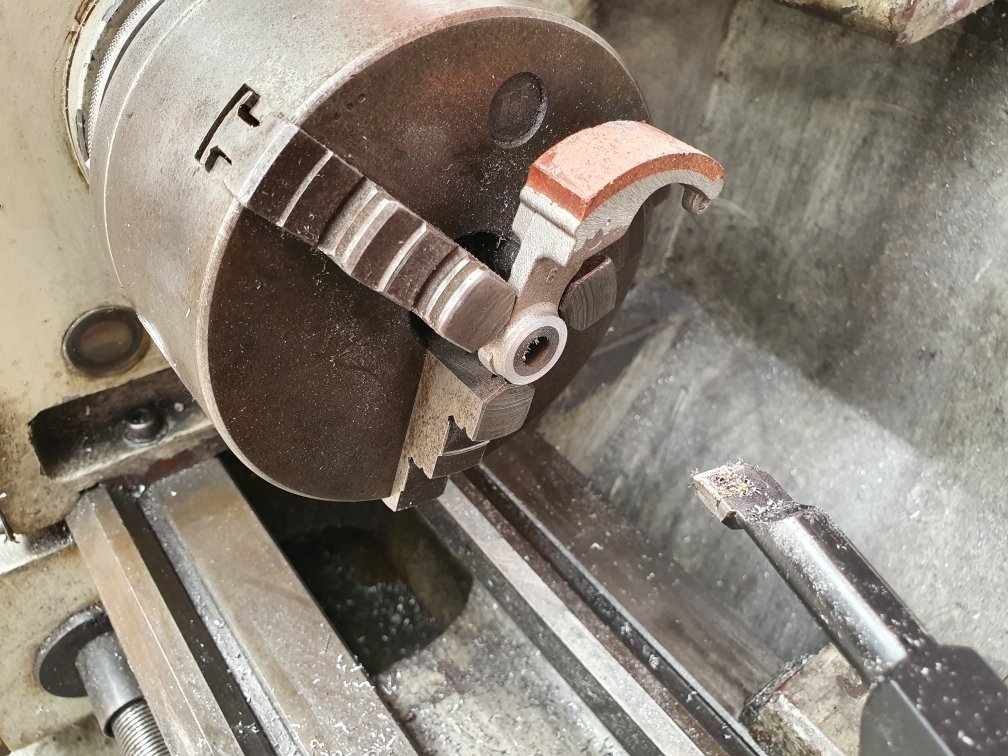
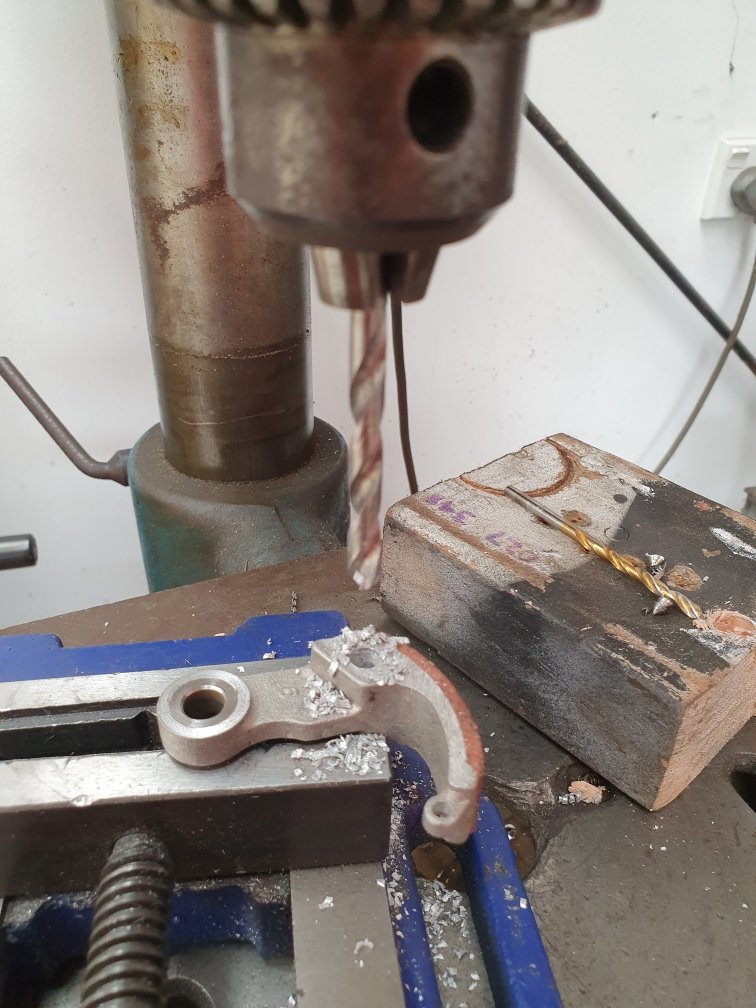
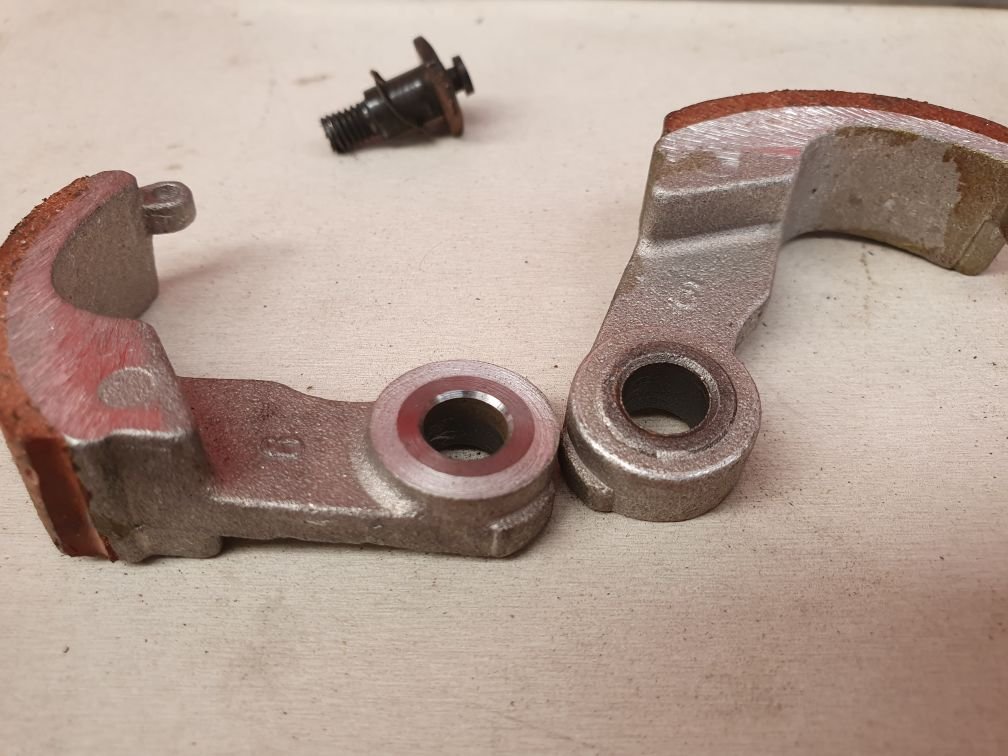
Okay, it's no secret I'm into some pretty niche things. Gopeds, drift trikes, lowrider bikes, skateboarding, gokarts, tallbikes, etc...etc... none of them are popular in NZ by any stretch of the imagination. Now this is about as niche as it gets. 39cc of polini awesomeness! It puts out 6.5hp and sounds like an angry beehive!!! Pops wheelies when the powerband kicks in...its mental. I picked it up a few years ago, with the goal of cutting it up and putting the motor on a goped. As it turns out, its basically the grandfather to the pocket bike craze and is highly collectible in Europe, some selling for over €2500. So needless to say, I won't be cutting it up anytime soon. The clutch fucked out, so I brought this "high performance" clutch. Well if the goal is to add excess weight to the rotating assembly, shift the engagement rpm down low where it's not making power and decrease speed, fun, your will to live as much as possible...then yes, this clutch excels in all those areas. I had other goals, like simply returning it to being awesome like it once was. So, I brought a Chinese clutch for a 49cc kids motorbike, that didn't fit either, then modified it to fit the polini by adapting the new clutch arms to fit the polini hub center. I cut the arms down in the lathe, to fit the polini bolts. Drilling to lighten the arms, this raises engagement rpm. Shortening the springs to put more tension on the arms, this further raises the rpm. Drilling the arm spring pockets to remove the shit casting marks to allow smoother operation, and allow the much fatter polini springs to fit. Back in and running like a dream! I know its ridiculous...I know. However its definitely one of those things that fits the saying "don't knock it until you try it". Not in the way someone may say having sex with men feels awesome "don't knock it until you try it"... no, nothing like that. This is more in the have you ever driven a rotary category... it's only purpose is to make you smile.
- 1289 replies
-
- 15
-

-

-
Fuck yeah, that looks awesome as is. Those proportions are spot on! I'd leave those wheels on it just like that. My mum was an avid designer/landscaper and she always said it really doesn't matter what or how something is made, as long as the proportions are right, it'll look amazing. That's why certain cars look so good, yet they are just cheap crap cars...and other cars that have had hundreds of thousands spent on them look like shit. If the proportions/scale is wrong, it'll never look good.
-
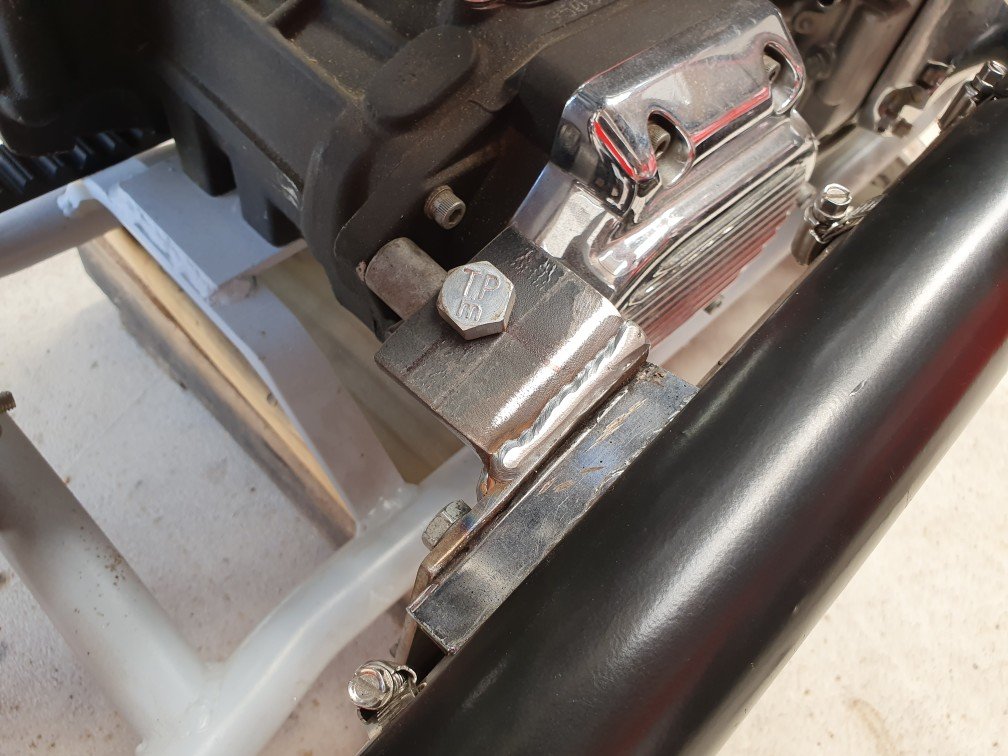
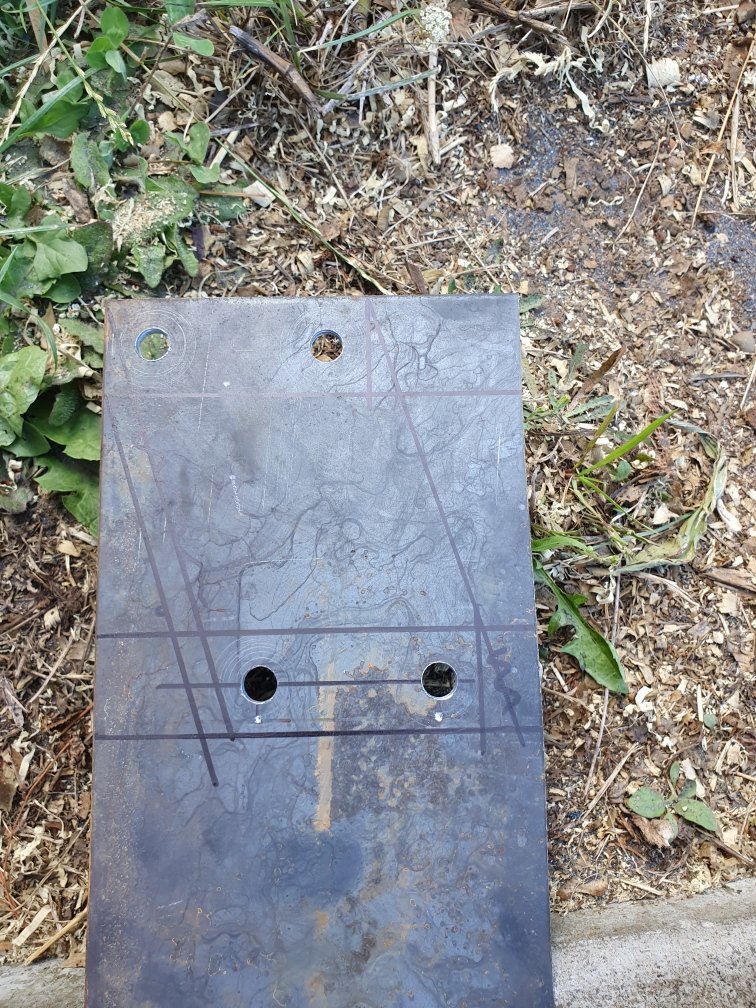
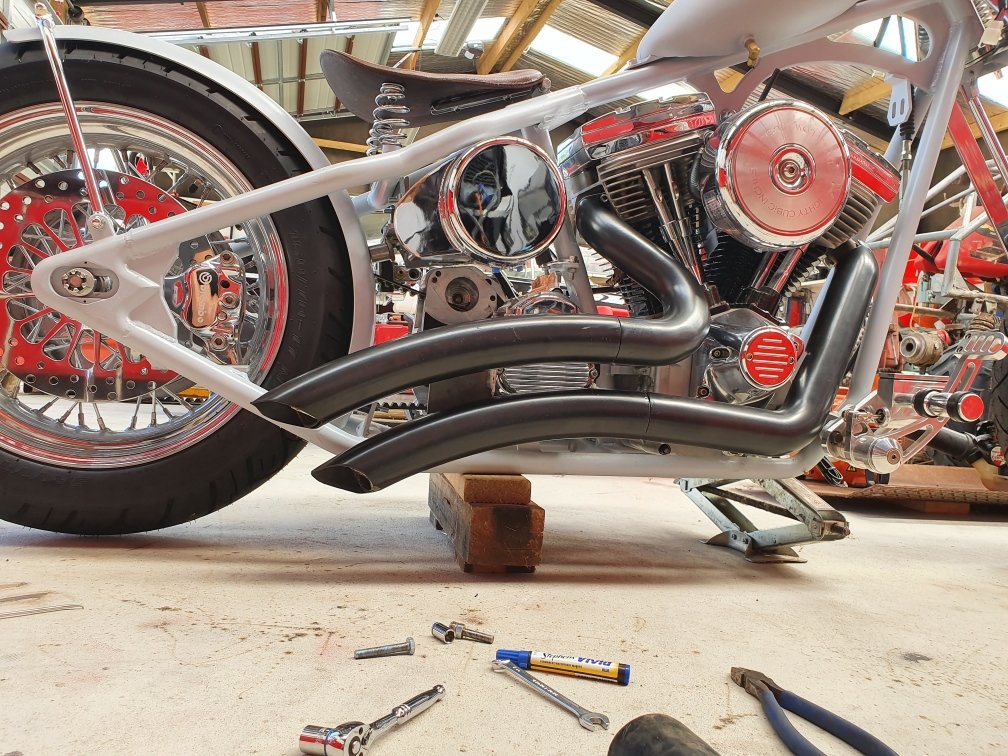
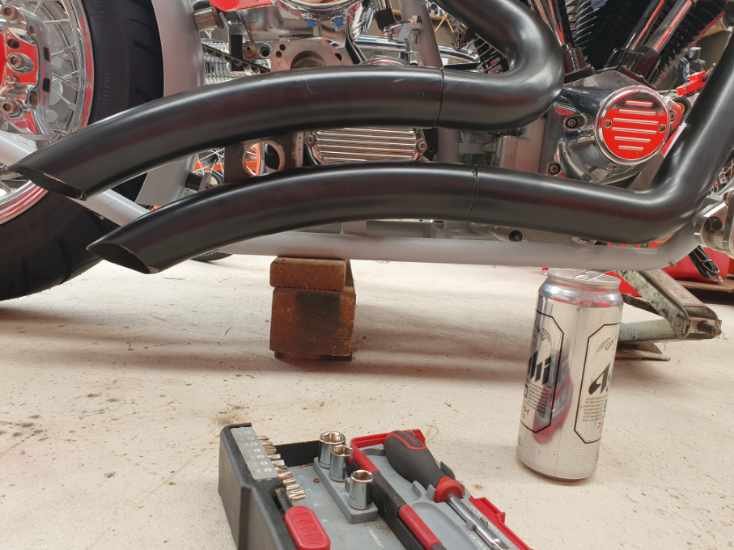
My exhaust had a terrible bracket on it that sucked! My OCD couldn't handle the fact that the two pipes weren't parallel. Over a 400mm section where they run along side each other, the gap was out by 10mm from front to back. I saw this as an opportunity to fix two problems. 1) make it look right to the eye 2) raise the lower pipe by 15mm and the upper pipe by 5mm. This will really help with ground clearance, maybe not completely solve it...but certainly won't hurt. So: Marking out, lifting the holes by 10mm. And looking at the pipes for nice sweeping parallel lines. Success!!! So, lower pipe is now 15mm higher than before, with nice clearance around all the bits you don't want a hot exhaust touching. Happy as fuck! I'm probably going to cut the lower pipe mid span and shorten it by about 40mm to bring it inline with the upper pipe and my frame angle where it heads up to meet the axle. But that can wait for another day.
-
They are a bead lock system. Its likely missing the internal bit, which is just a tab that clamps down on the bead. It's for hardcore karts that have so much power they'll spin the rim inside the tyre. By hardcore I mean shifter karts like 250cc 2 strokes etc... I wouldn't worry about it, as it's not going to be a problem with less than about 40hp. On mine, I mixed up epoxy and glued them in to seal. Then cut the protruding thread off on the inside rim section with an angle grinder. You could use thread sealer like loctite if you happen to have it on hand? Held air for like 6 months or more ...no leaks at all.
-
Random slightly cool stuff you built but not worth its own thread, thread
Kimjon replied to h4nd's topic in Other Projects
Sorted! I put little 5/16 cap head screws at the end of each shelf, to stop any round materials from rolling off, though I doubt its really needed (better safe than sorry I guess).
- 1289 replies
-
- 10
-
-
You can see how I did it here:
-
Cut down the quad bike hubs to fit. Normally about just below the holes in the original hub (but measure first). Then redrill to suit gokart hub. I'll try find a pic on my old phone. Lathe is an advantage...but not totally necessary.
-
Random slightly cool stuff you built but not worth its own thread, thread
Kimjon replied to h4nd's topic in Other Projects
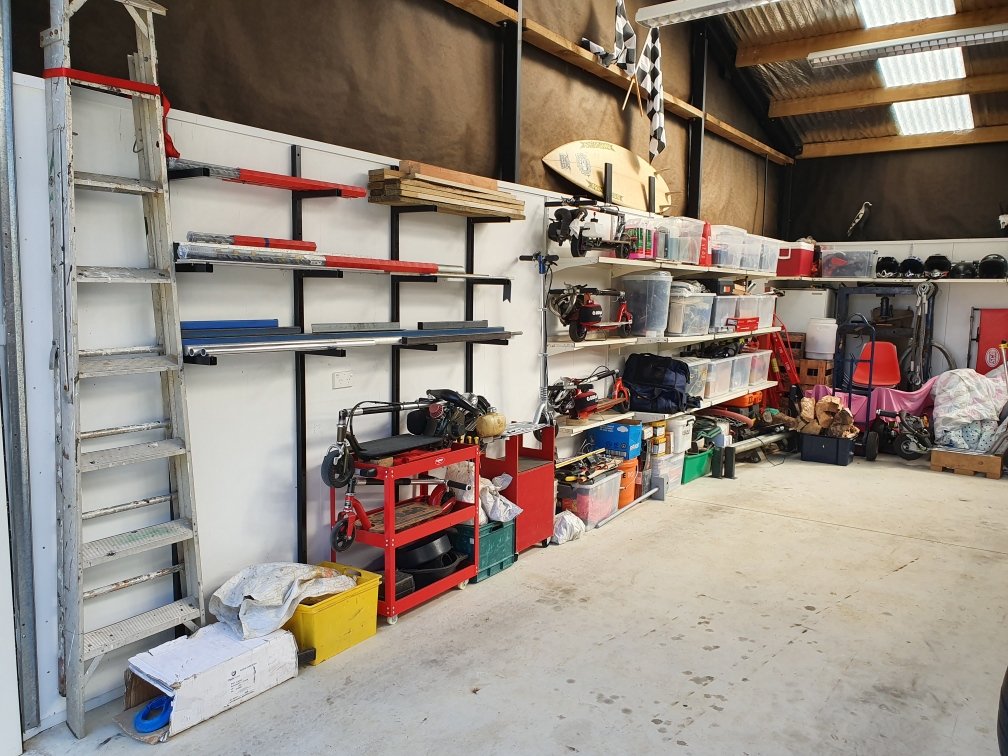
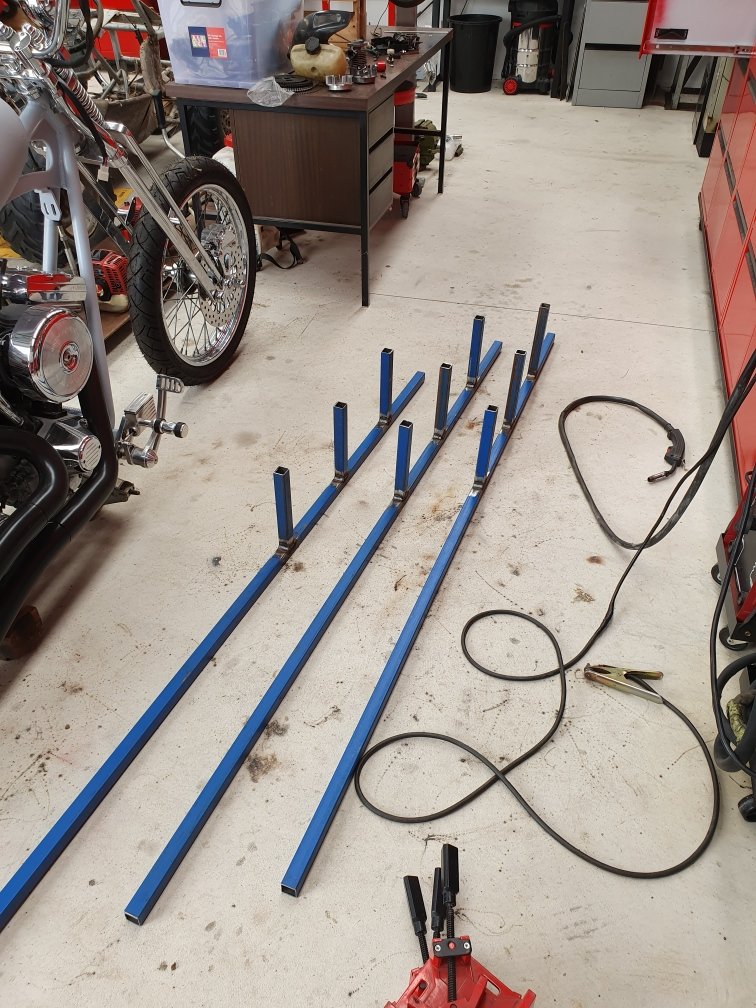
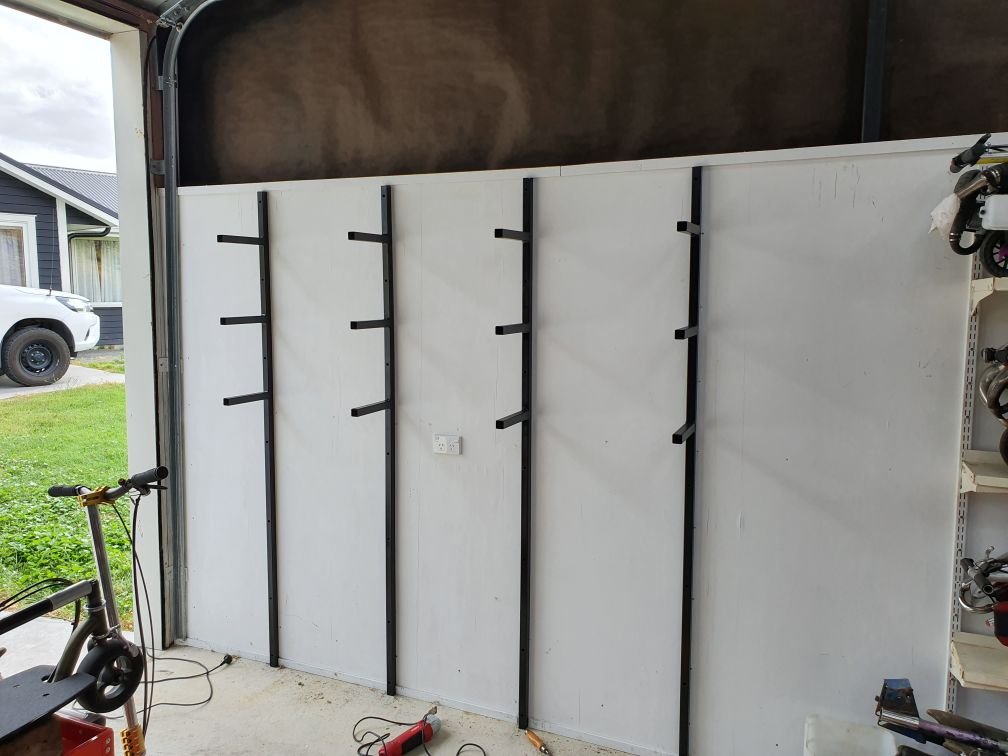
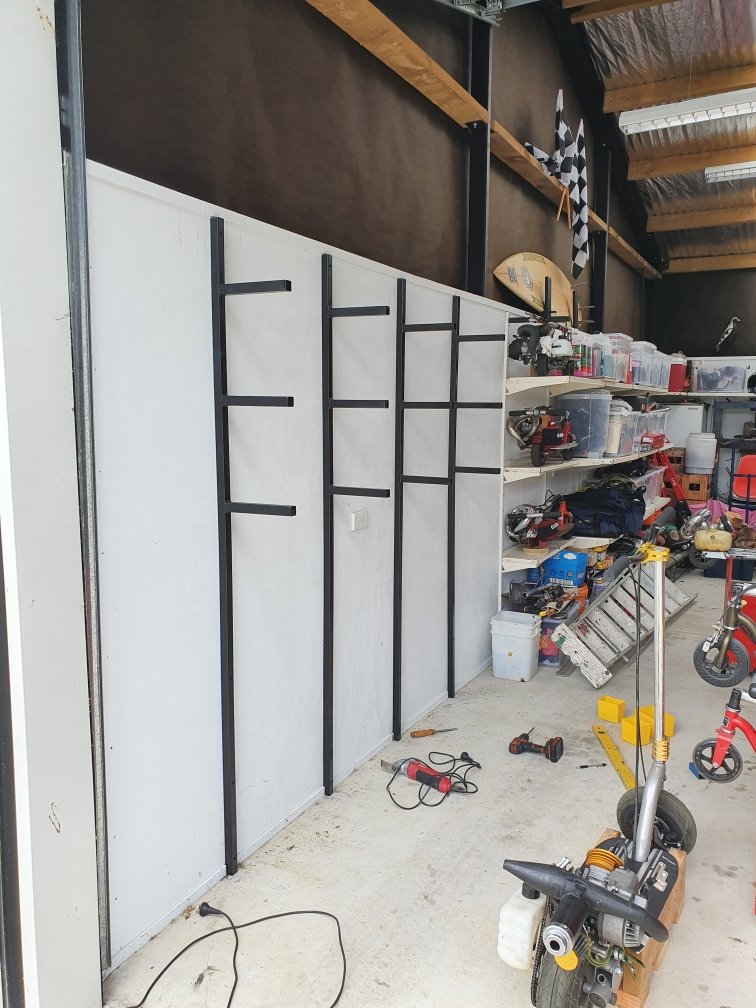
I'm a total storage slut! Love to have a place for everything...and everything in its place. So: Steel/storage racks. I can fit anything from 0.6m to 3.6m lengths of steel/timber. The racks start at 1225mm so I can fit a sheet of plywood or whatever under it leaning against the wall. I feel another shed tidy up coming...
- 1289 replies
-
- 11
-
-
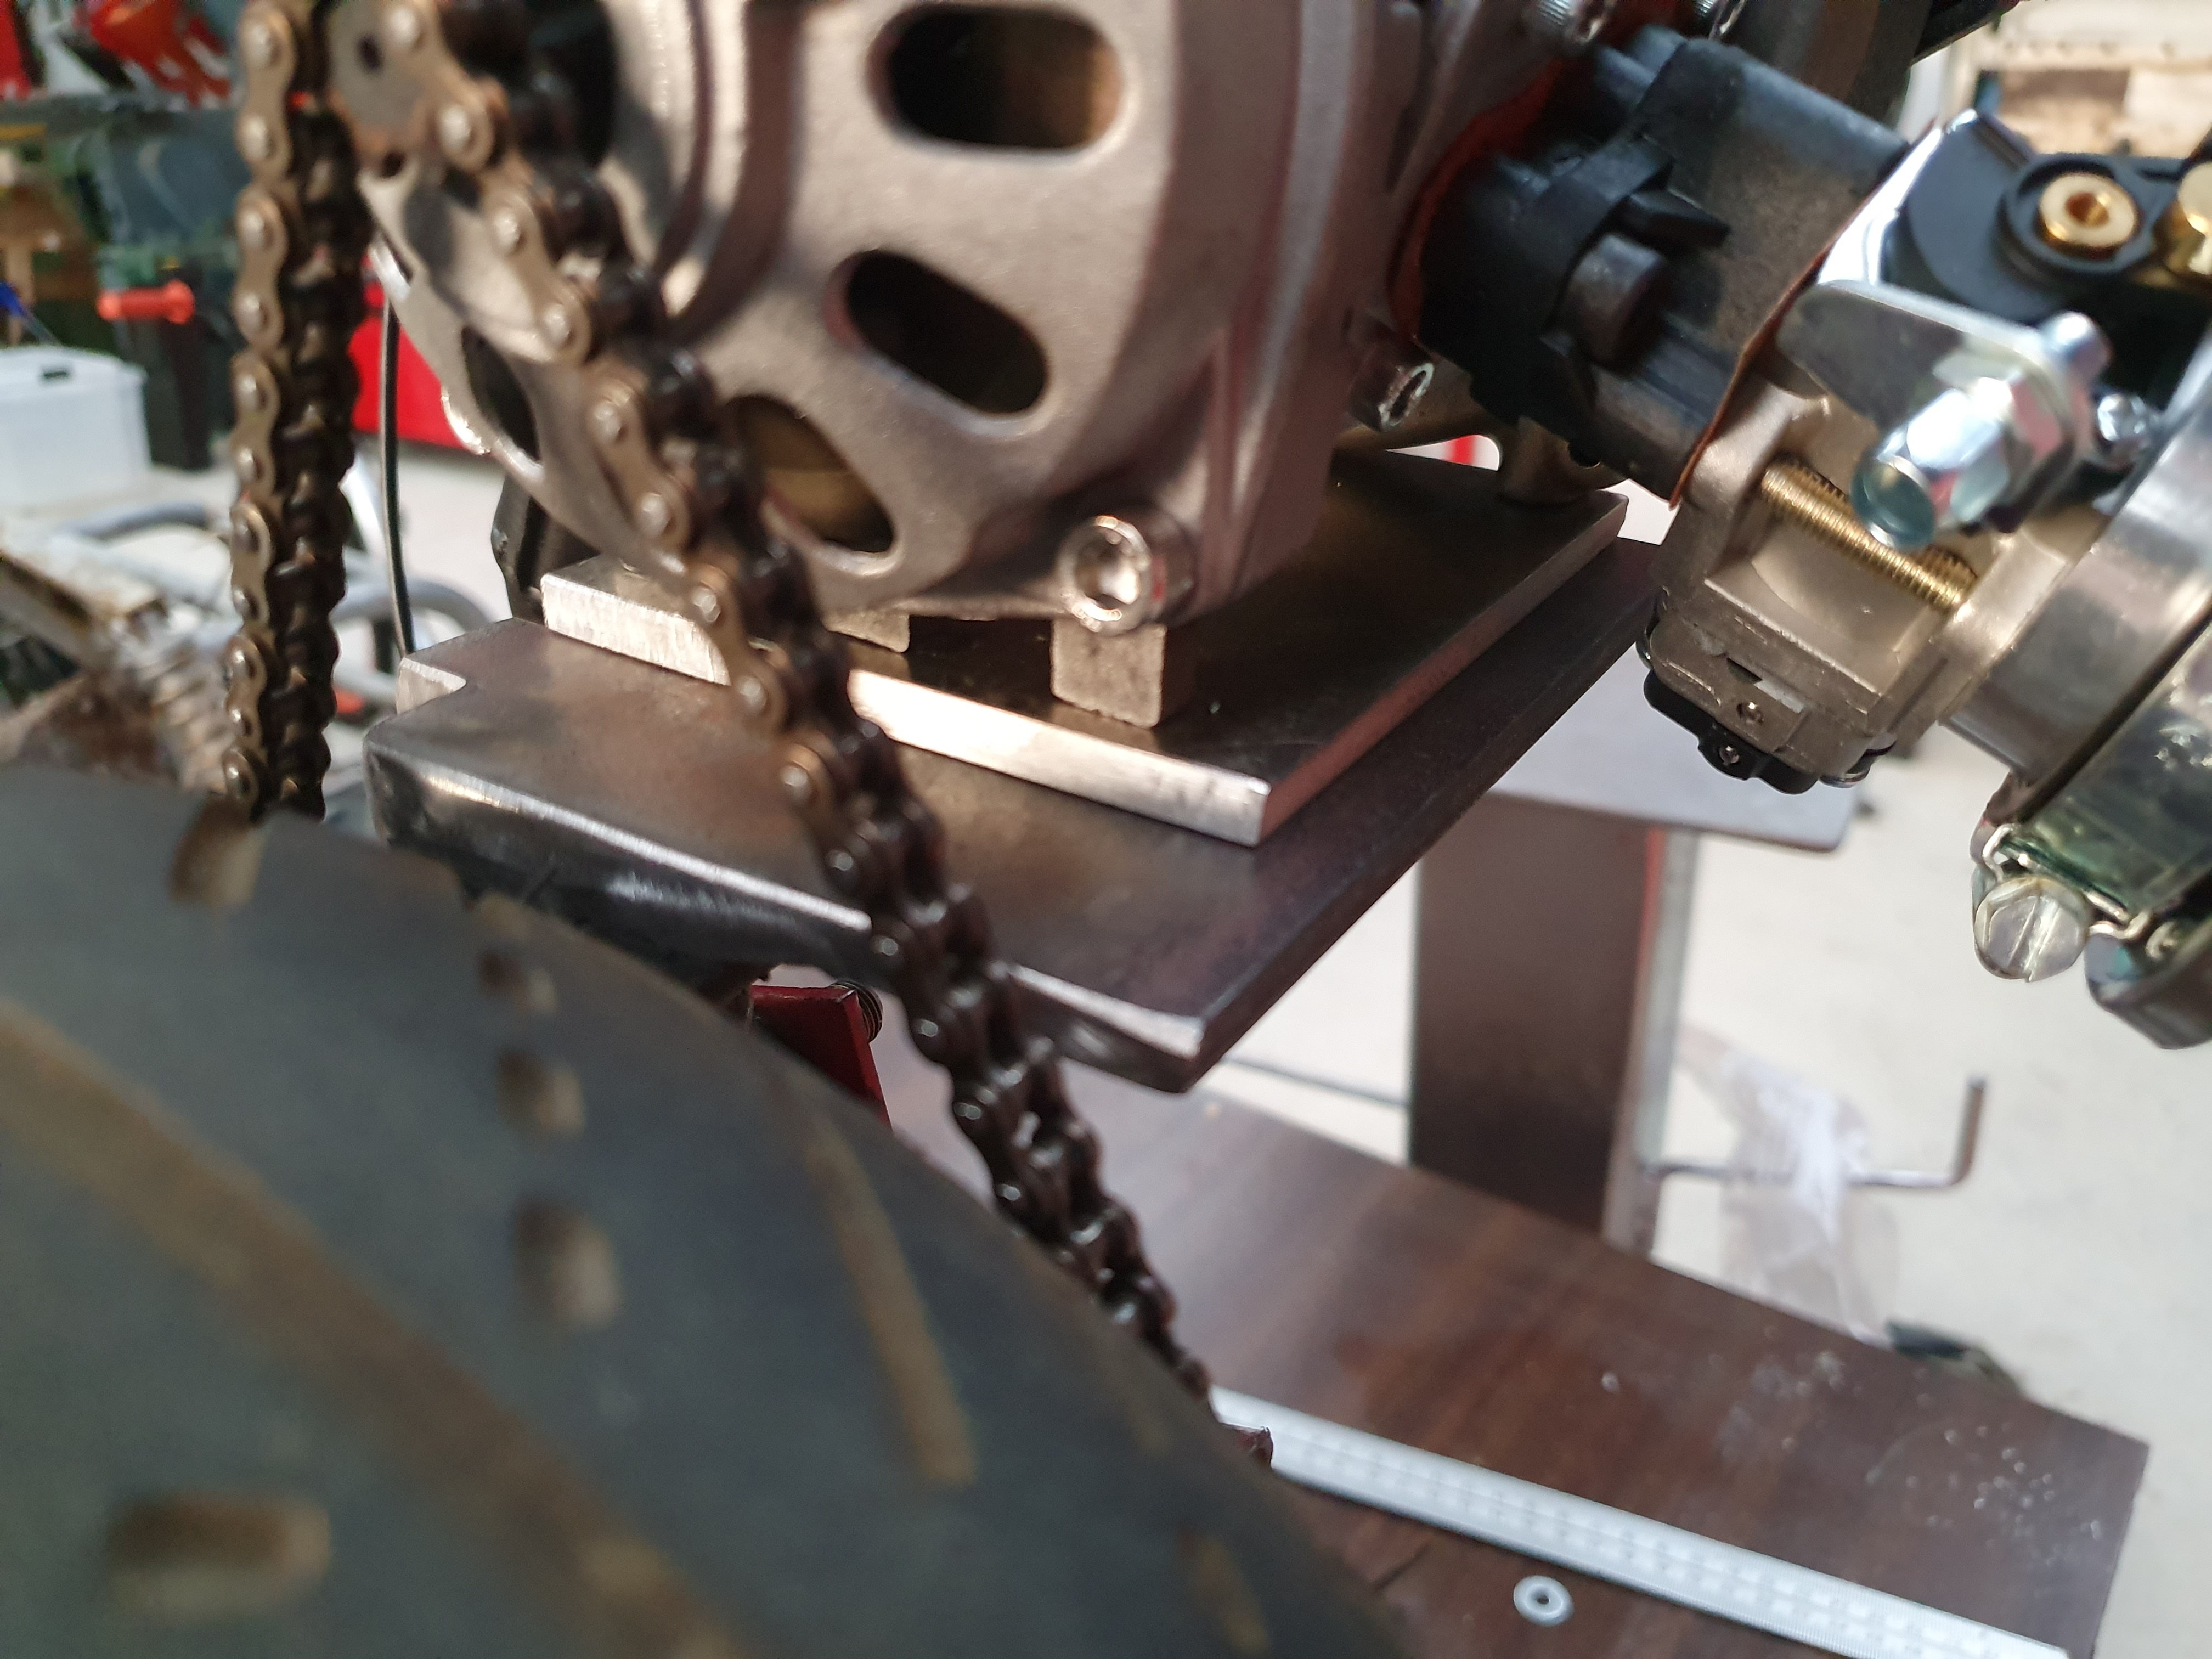
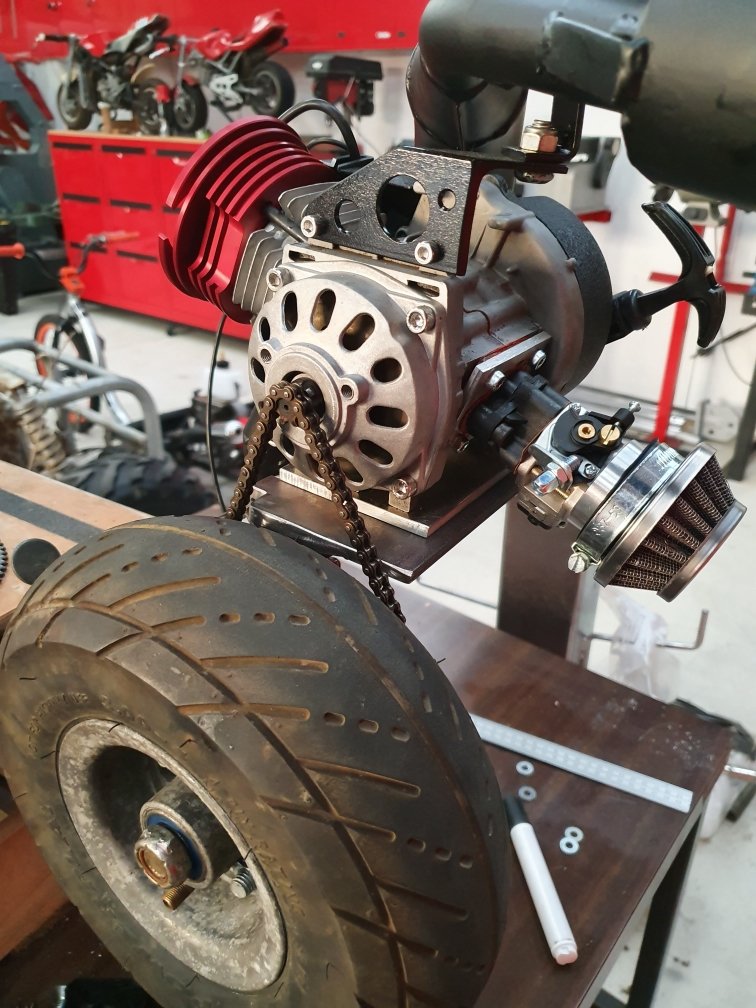
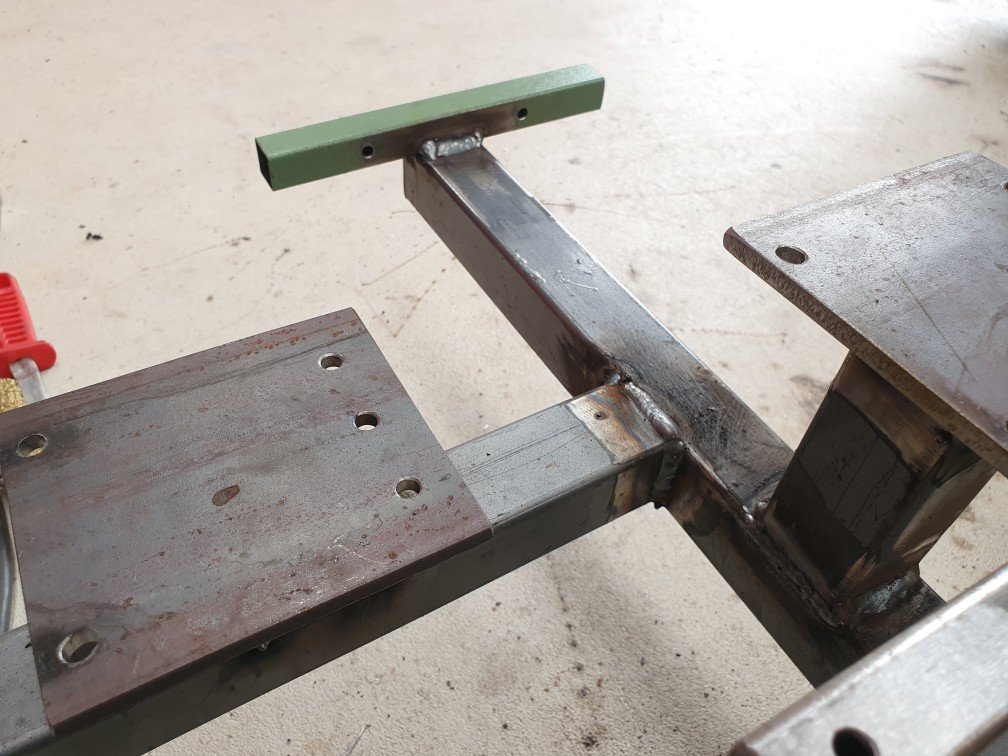
My chain tension (lack of) was going to cause issues, due to the combination of parts landing on a half link. I started making a chain tensioner device, but I was struggling for room. I kind of mocked up a working solution...but I wasn't in love with it. Then I had an epiphany...i could add a spacer block under the motor to lift everything up to create the desired effect. So that's what I did. I can fine tune with the threaded rod and pivoting engine mount. That was always the intention, however it would be asking too much to move it as far as I needed to, just to set the tension pre chain stretching. I'll tidy it all up and get it painted now that I know it's going to work.
-
Random slightly cool stuff you built but not worth its own thread, thread
Kimjon replied to h4nd's topic in Other Projects
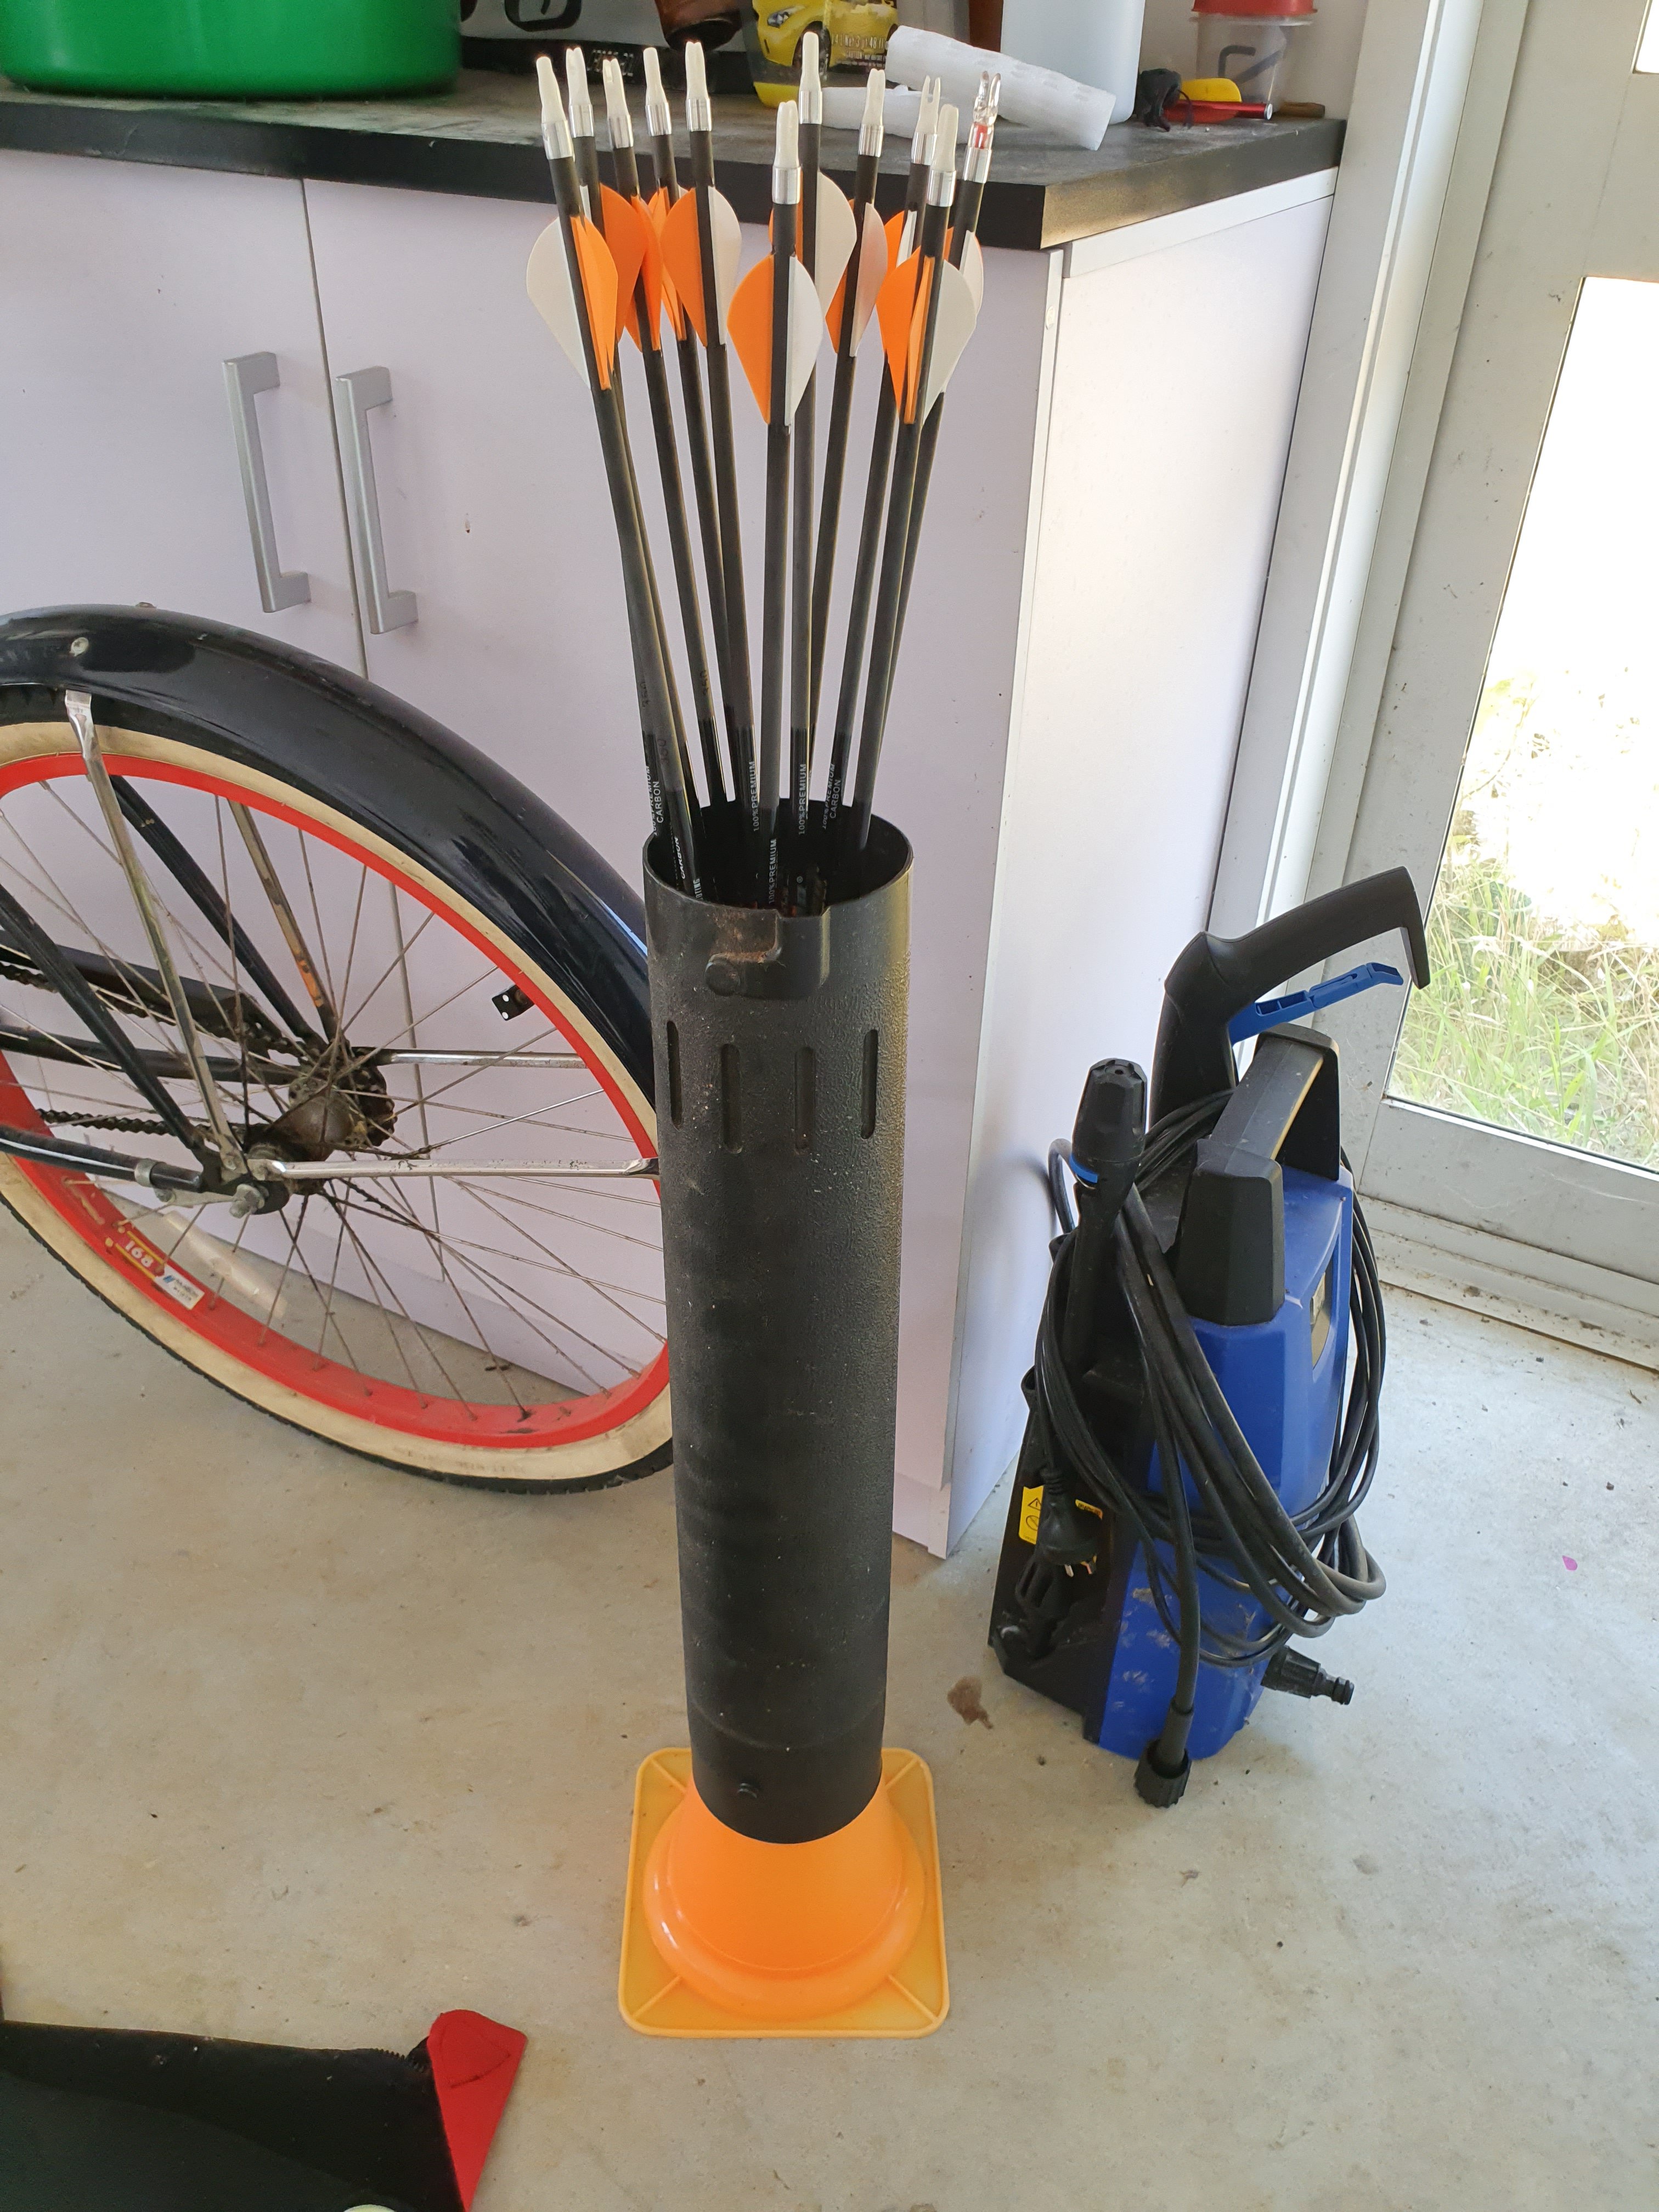
On a roll...arrow stand made from a sports cone and the vaccum tube from a leaf blower...
-
Random slightly cool stuff you built but not worth its own thread, thread
Kimjon replied to h4nd's topic in Other Projects
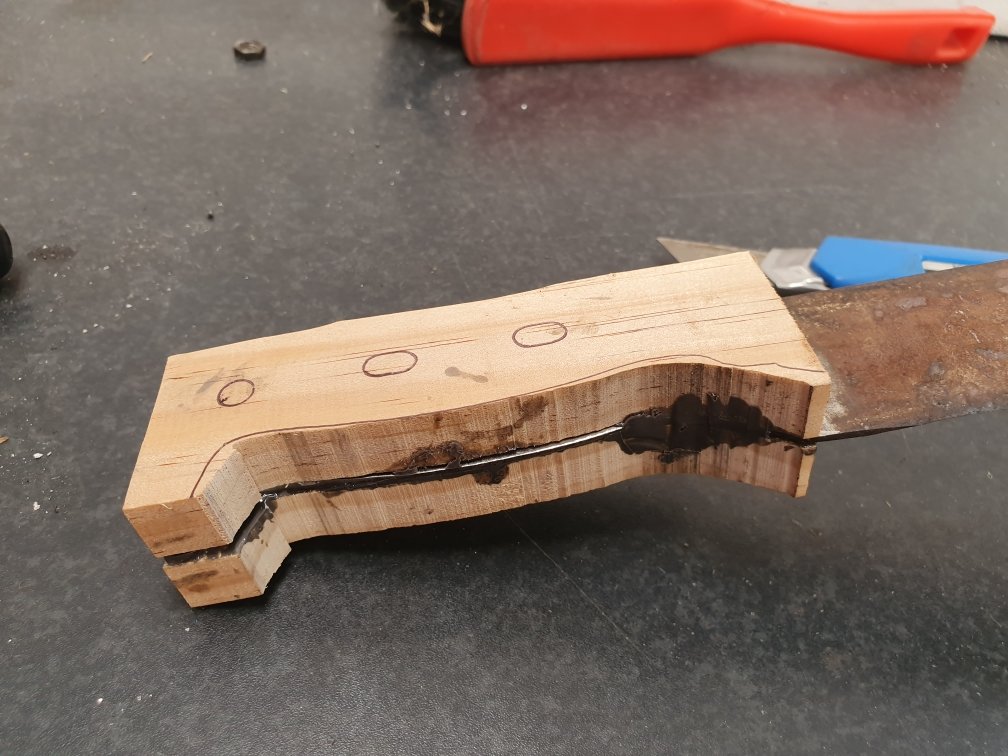
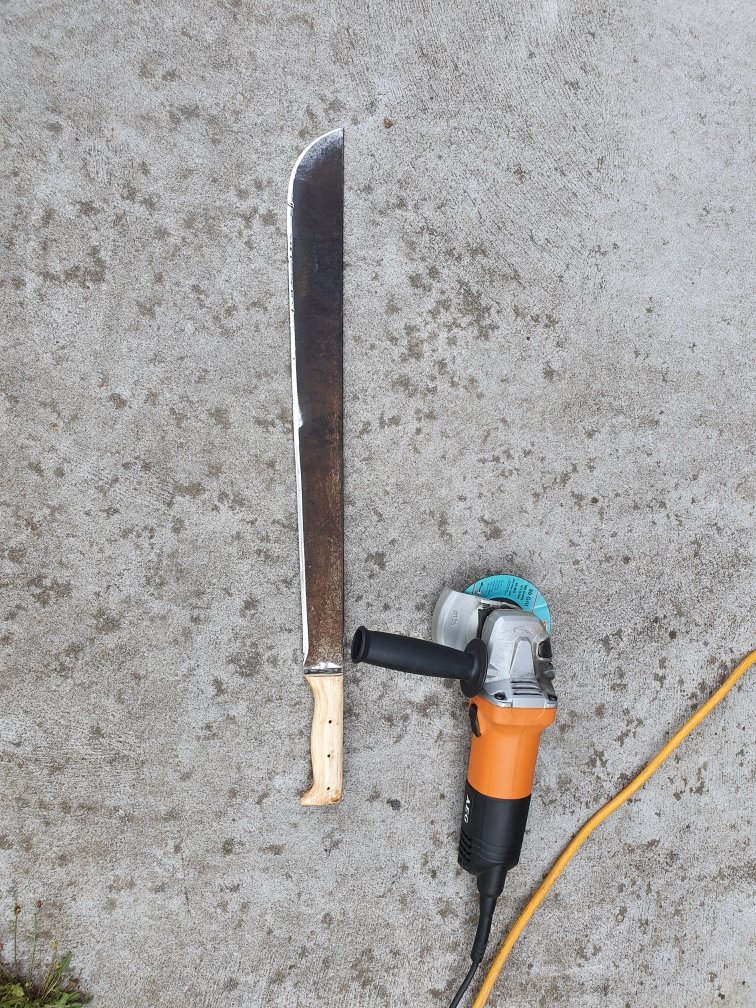
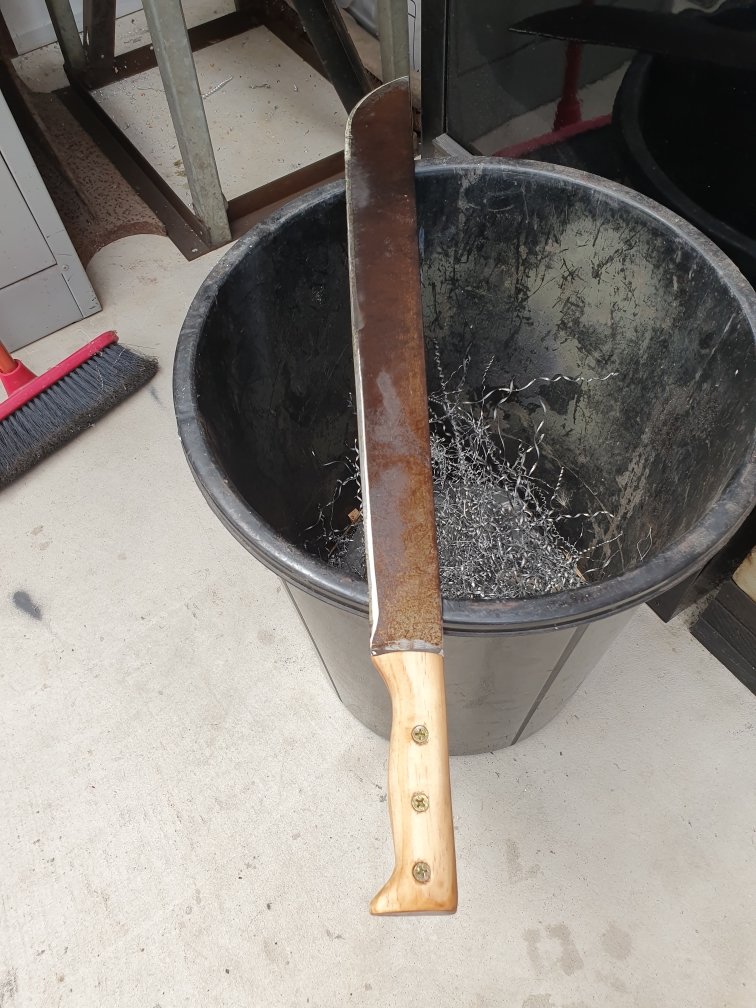
I've had this for over 30 years. Its had 2 other handles in that timeframe and on Wednesday the last handle broke again after 20 plus years...so onto No3... Took the time to reshape it a bit more this time. When I say "took the time" I'm talking 5 minutes to glue it together and then leave it overnight...and about 10 minutes tops to shape it with a flap disc.
- 1289 replies
-
- 13
-
-
Kimjon's - 4 doors more whores (64 Impala)
Kimjon replied to Kimjon's topic in Projects and Build Ups
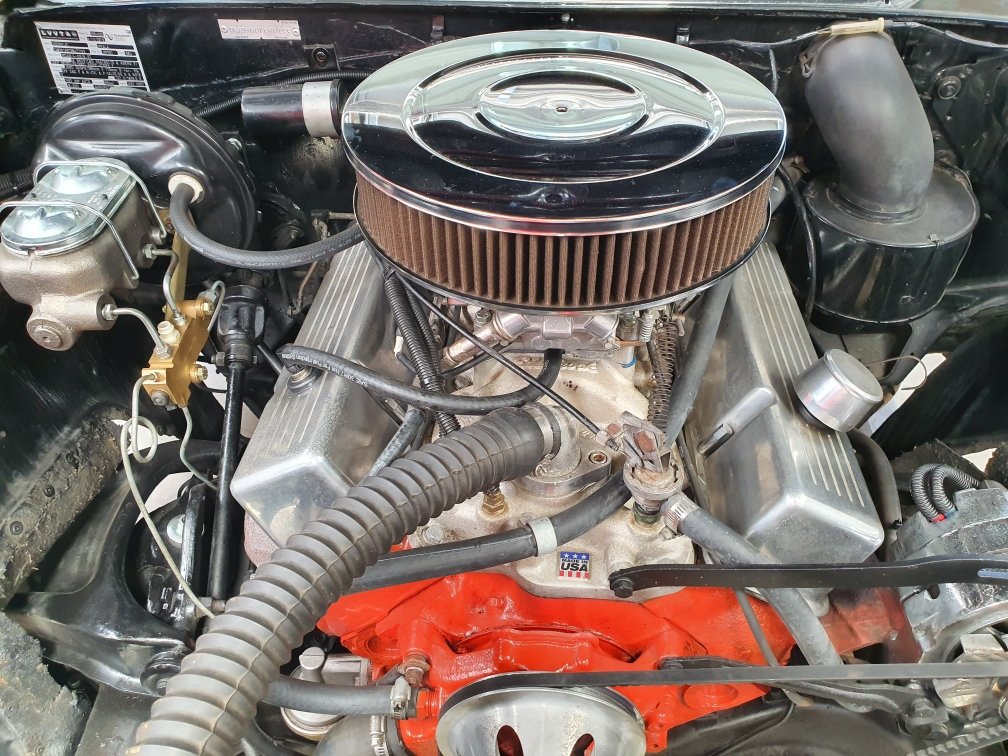
Fuck yes! The pcv valve solved so many problems. 1) oil leak from rear of engine, where old road draft tube was = gone! 2) Stinky engine smell that permeates the cabin = gone! 3) heat sink to carburetor issues causing fuel evaporation = gone! Well my 20km return trip with 4 stop/starts didn't have any issues, so maybe prematurely judging this one...but I'm calling it a win. I ended up blocking the road draft tube hole and using a more traditional setup out the valve cover. Main reason was due to oil separation. Someone removed the can inside the valley that separated oil from gases prior to exiting the road draft tube. They did this to fit the edelbrock manifold. If I used this port without the separator I'd suck shit tons of oil out this port and into my carburetor. So I went to the rocker cover, as it has a splash guard in place already for this purpose. Makes you wonder why modern cars don't use a pcv valve system...oh, hang on...
-
Kimjon's - 4 doors more whores (64 Impala)
Kimjon replied to Kimjon's topic in Projects and Build Ups
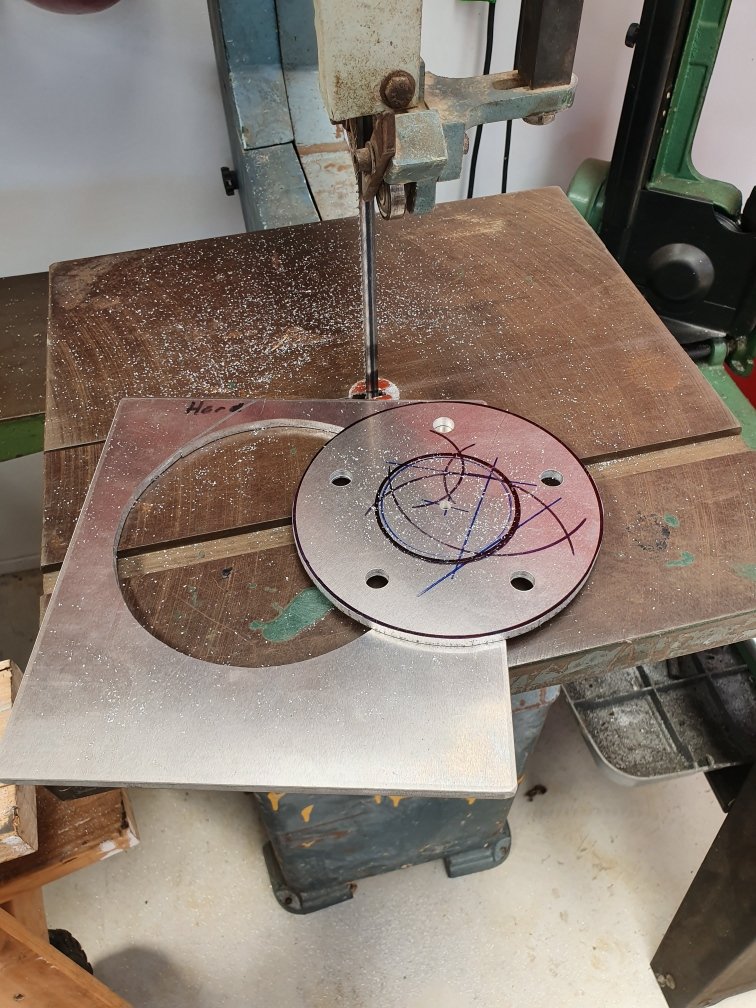
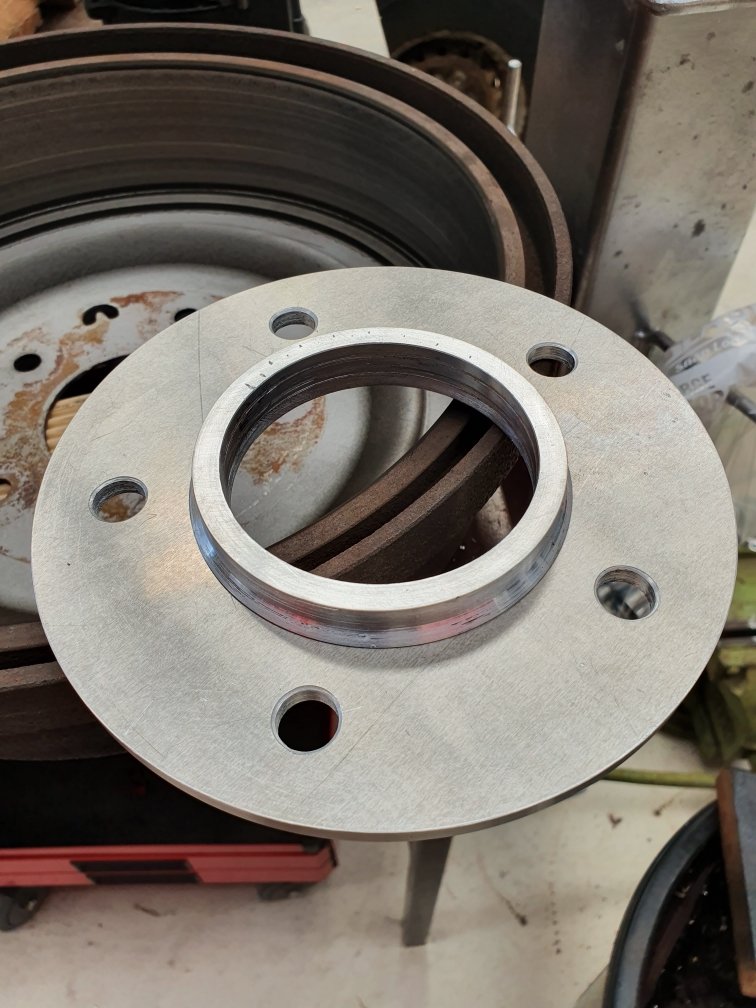
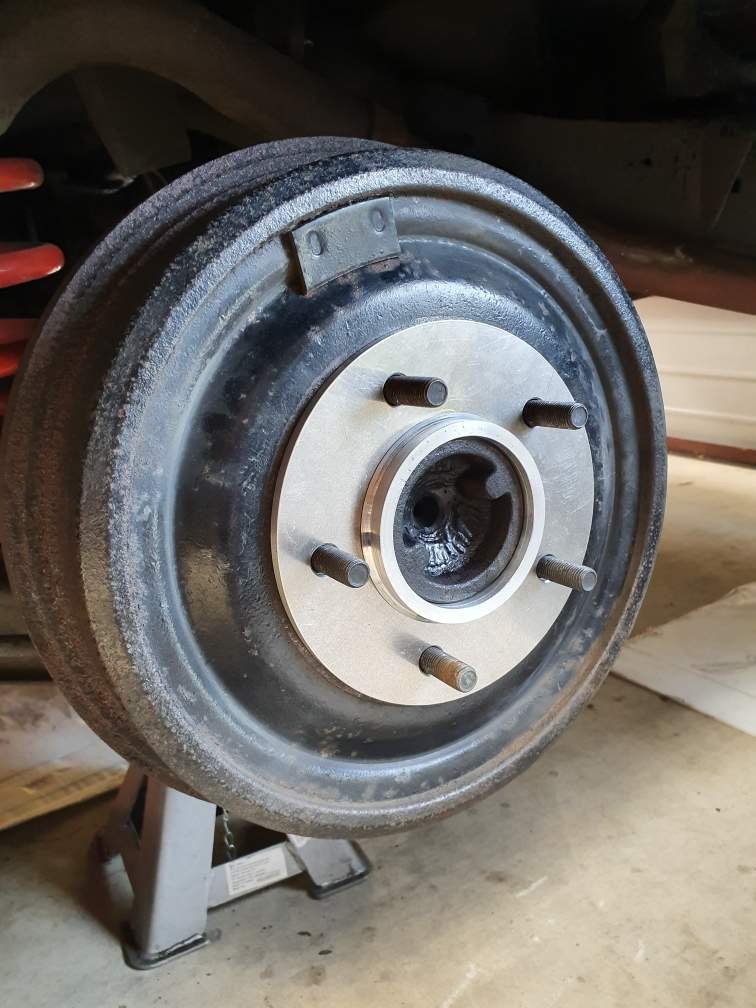
Made this today, I'm testing out a potential offset option. Only way to see if my idea is heading in the right direction is to mock up a wheel with this to check clearance. And offered up to the rear hub Boom! Like a glove!!! Theres still 10 plus turns of thread engagement on the wheel studs, so pretty happy with that.
-
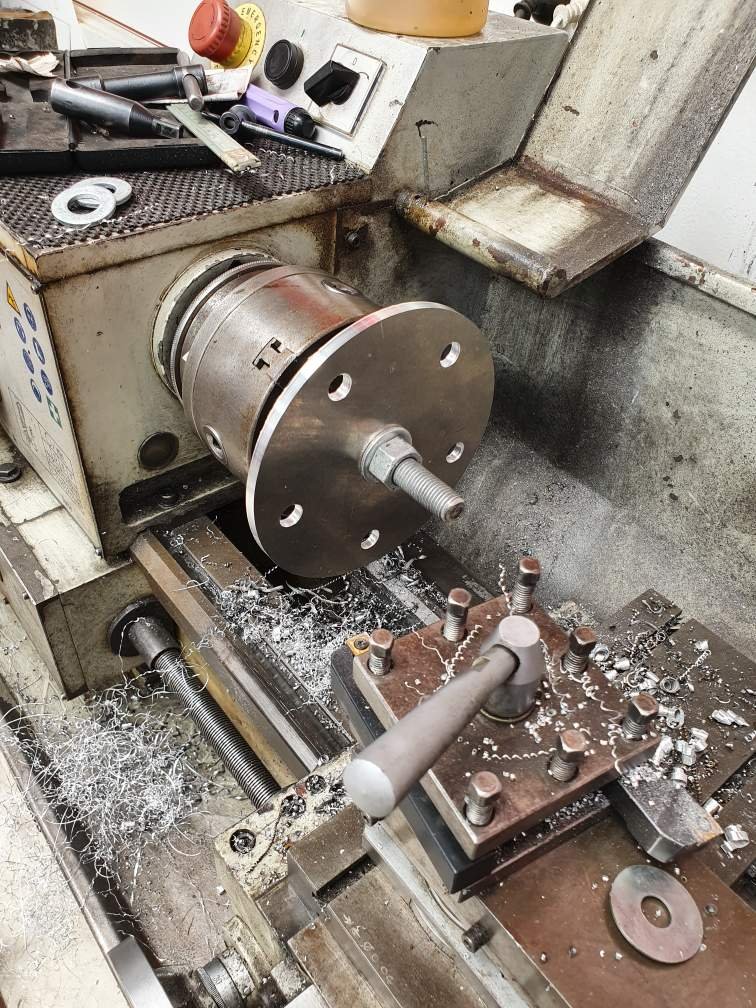
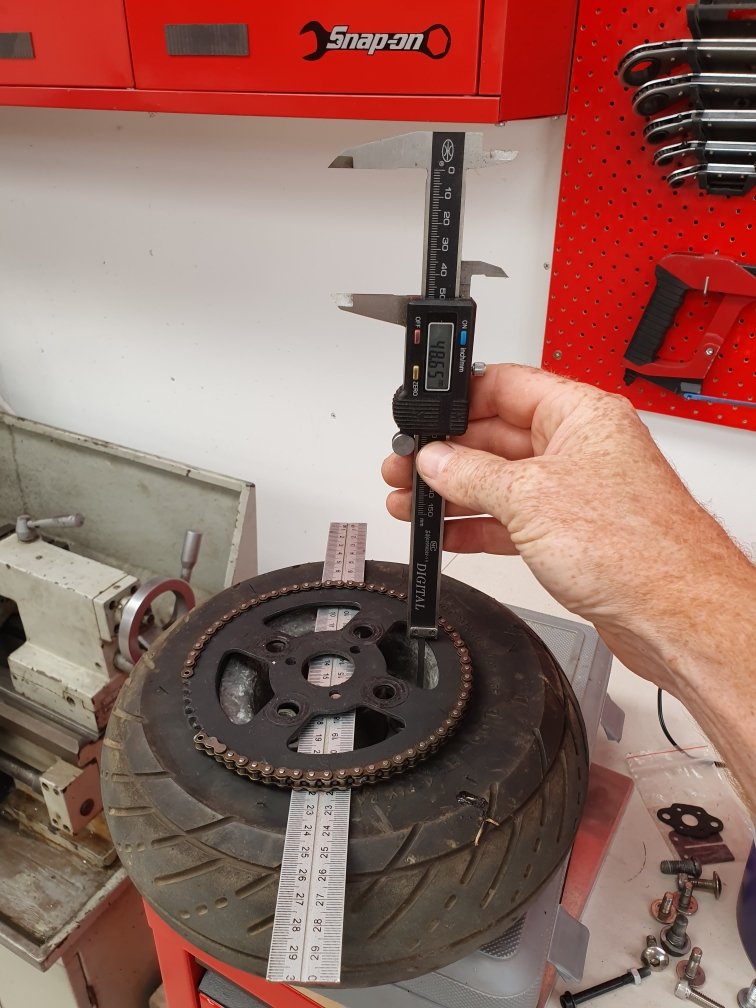
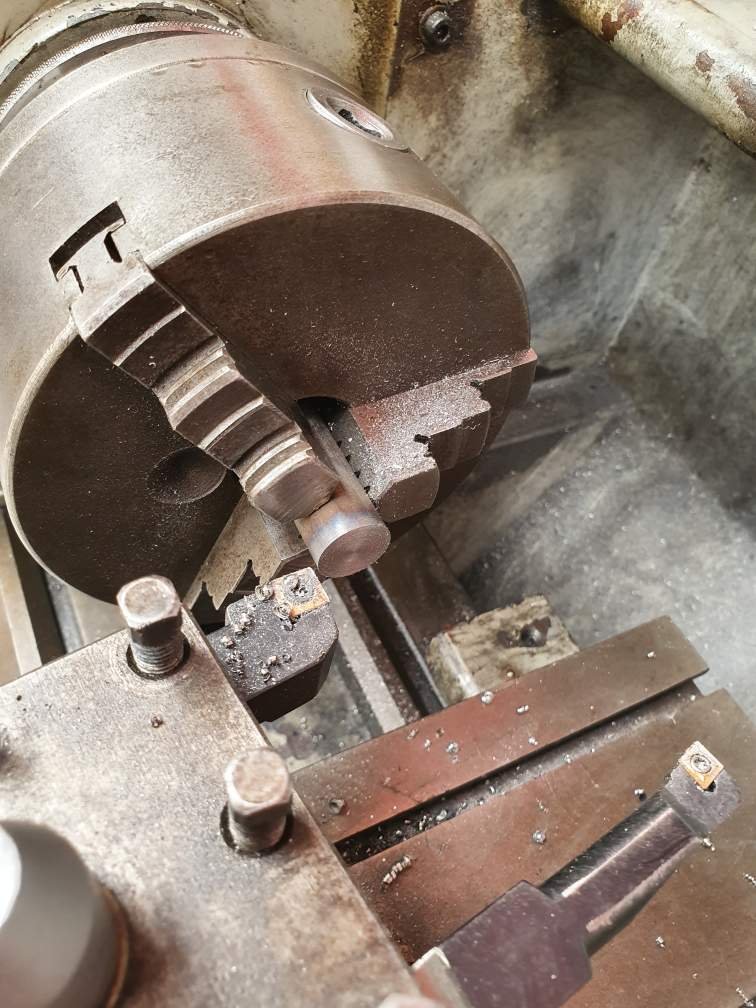
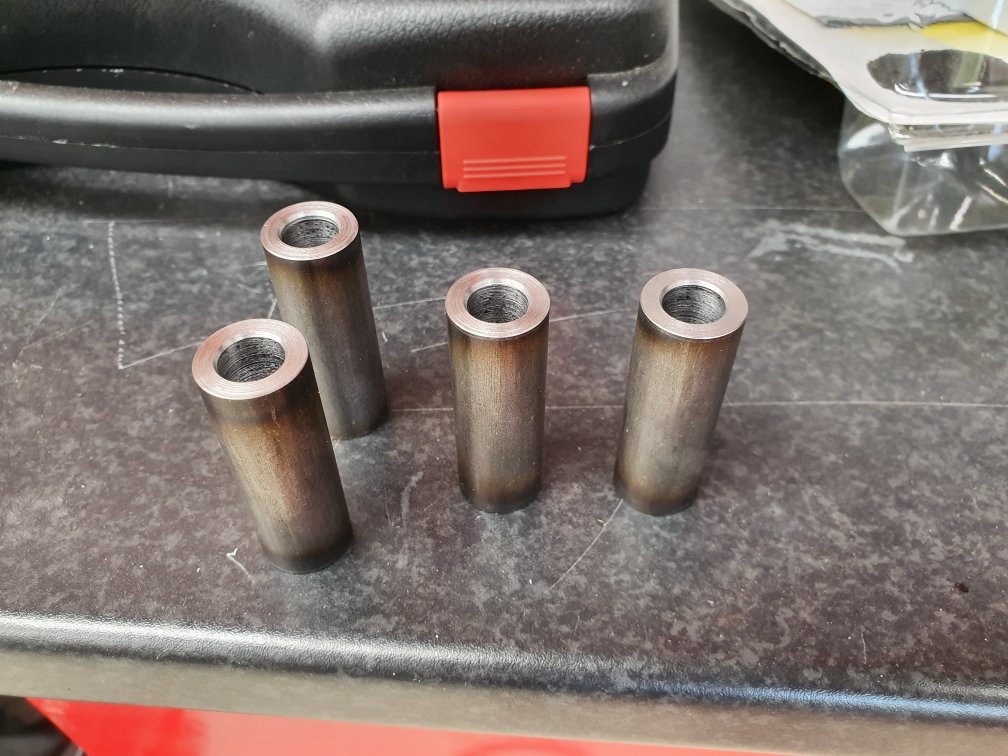
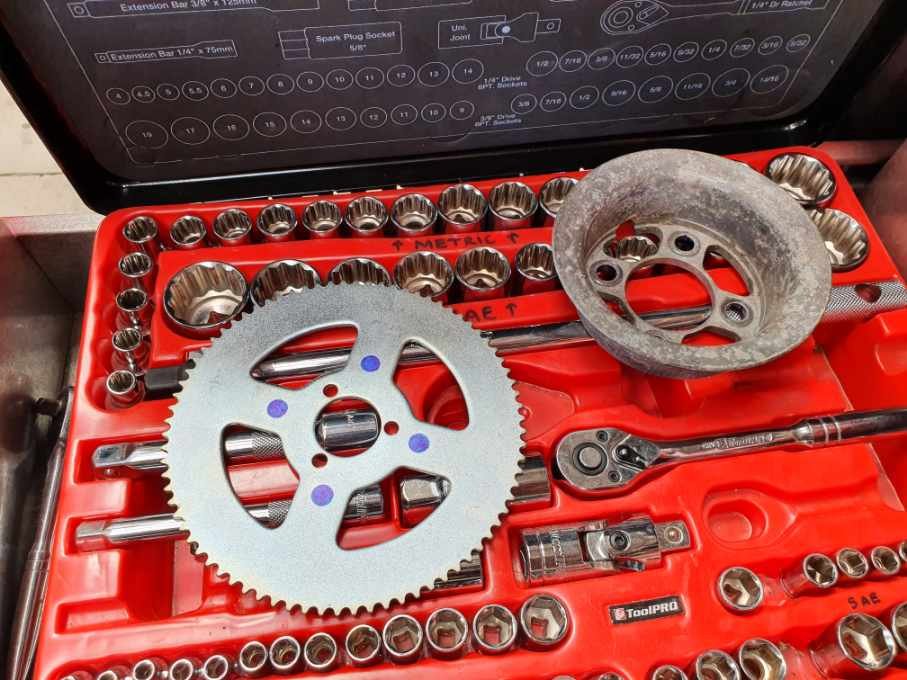
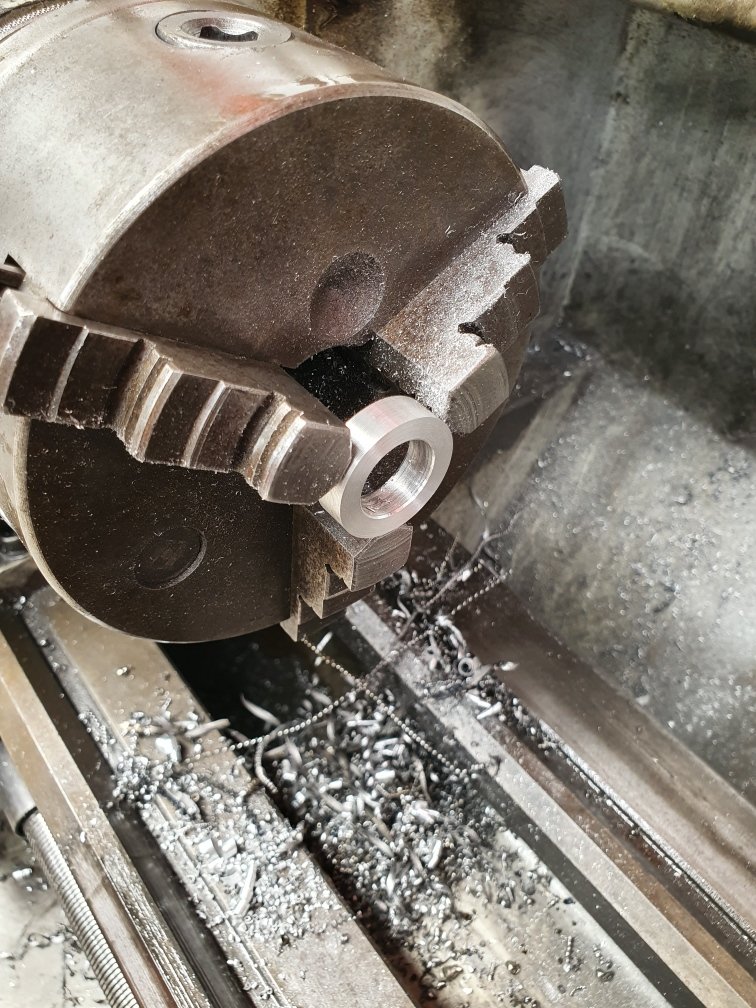
Something that I've been putting off for a longtime. Not sure why, but I hate making solid round bar into tube...knowing that I could buy it with a hole already in it (but never do, becauseI don't need 6m of random tube lying around afterwards). Anyway: Working out a baseline to start with. Doing the part I didn't want to do. Took less that an hour start to finish...so I'm not sure why my whiney bitch side of my brain took over here? But 4x "tubes" precision engineered to within near perfect digital vernier accuracy of each other. Setting out the sprocket I'm going to use. Blue Mark's new holes on corrected pcd. Test spacer. If you going to make a change...make a big one. Best advice I've ever received in life. By doing big change, you get instant feedback ie. you have a baseline, then make a big change and you now have a range. Now just rationalize it and you're bang on in 3 easy steps. And here it is. Perfect! Not bad for something that was never made with this feature. Sounds like a simple task, but getting it to sit as tight as possible to the frame, but not interfere with it was a challenge. I even machined 1/3 off each bolt head to get it about 2.5mm plus another 2.5mm closer each way. Chain only has minimal clearance on tyre...but it works!


.jpeg.cefb82eda3ed93b273faf18cdf310c6b.jpeg)


.jpeg.4f2770cd743ffa6c2b82c9b905e44233.jpeg)