Flash
-
Posts
1,719 -
Joined
-
Last visited
-
Days Won
2
Everything posted by Flash
-
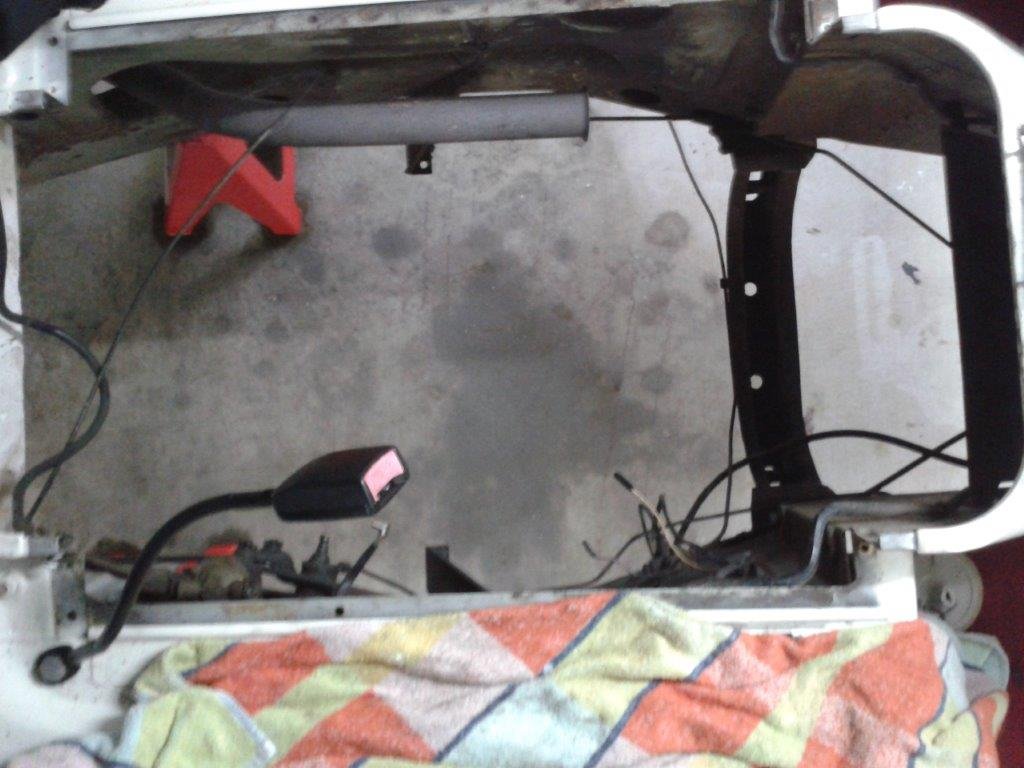
Today's task was to remove the old steering column, steering box and column gear shift as it's a single unit. So I lifted the floor mat in the drivers footwell as the first thing that needs to come out is the steering column surround plate that is bolted down to the floor. Now it's at this point that things start to get interesting. Firstly a little bit of background information. The previous owner bought the van to use as a delivery van for a flower shop that his wife was starting. They thought that a quirky delivery van would make a good marketing tool for the shop. Since there were going to be water filled buckets of flowers slopping around in the back they wisely decided to get the entire rear floor Rhino lined. At the same time the Rhino team lined the two front footwells. What would have been nice is if the boys at Rhino had pulled out the fixing bolts and lifted the inspection plates before sealing the floor, but that would have been to much work I'm guessing and why would you give a toss about the poor bastard that has to maintain the vehicle into the future. So the result is that the four little star headed bolts had been neatly covered with a 3mm thick coating of Rhino line and you couldn't even pick up where the lip of the panel is. FFS !

-
Those rims look bloody choice.
-
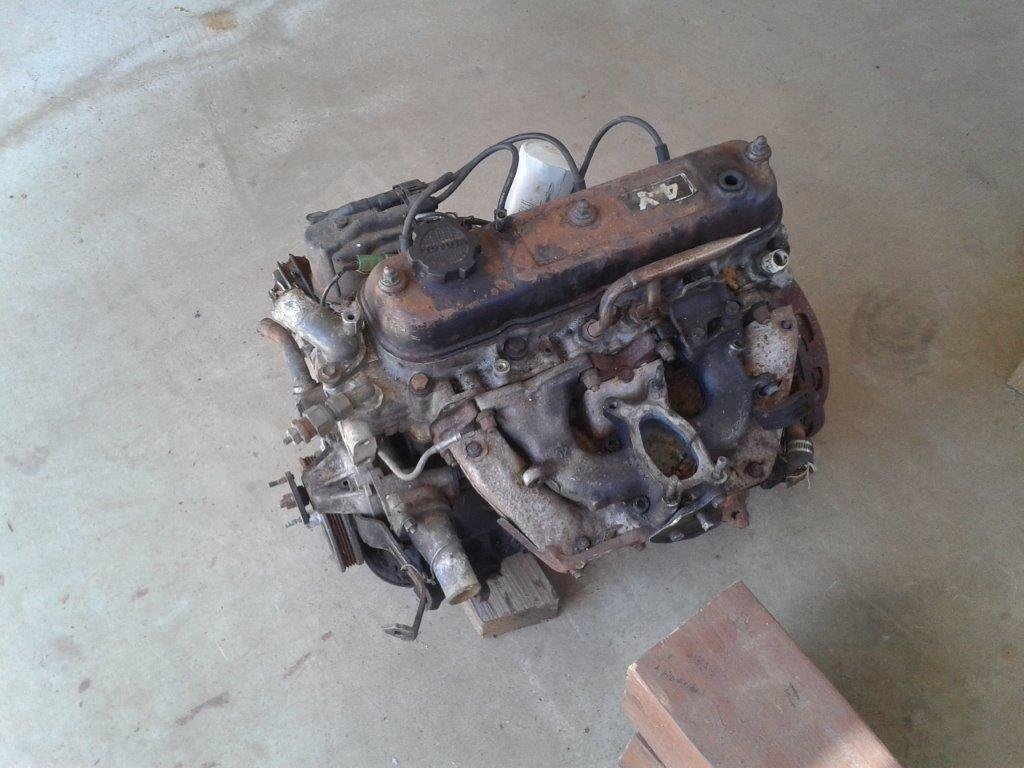
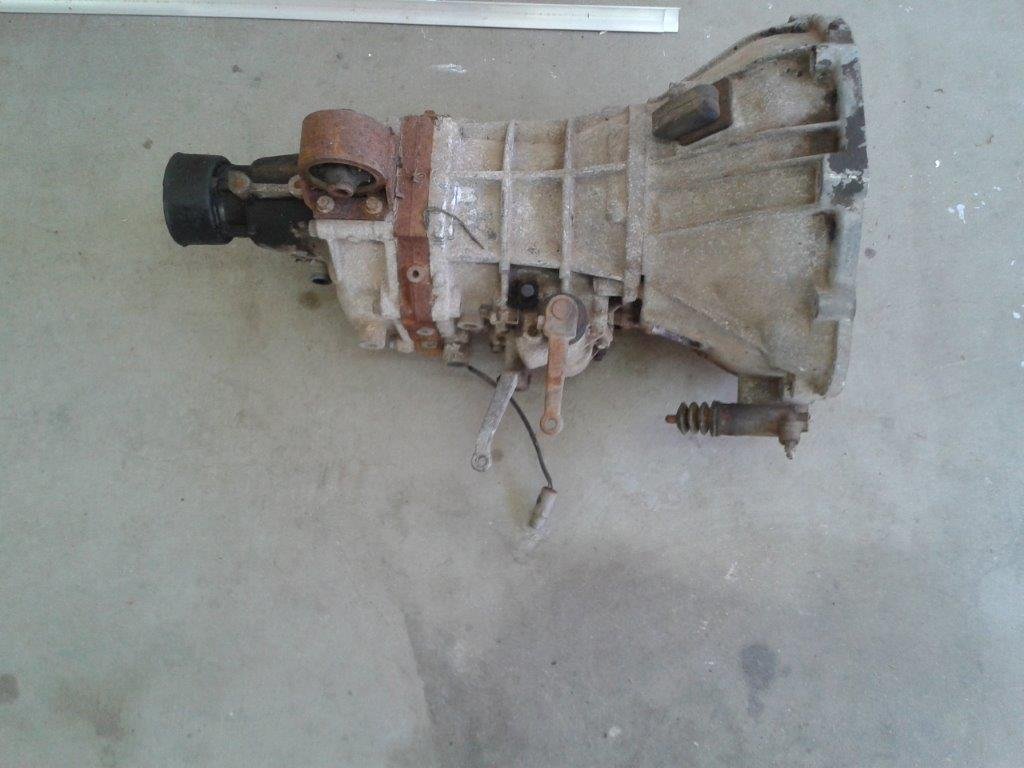
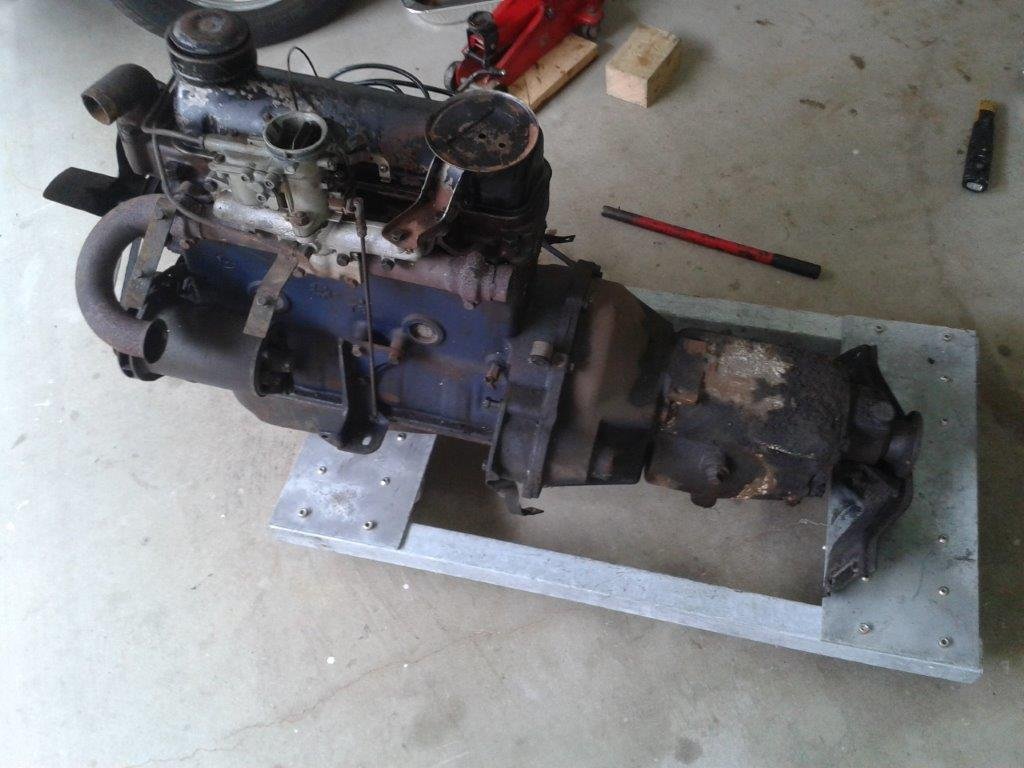
After morning smoko I thought I would crack into the next step of the "proof of concept" so I headed into the back garden to retrieve my mock-up 4Y motor out of the back of my second Toyota donor van. Loaded the motor onto my trusty wheel barrow and moved it under the back carport so that it is out of the weather. Grabbed the loose Toyota gearbox at the same time. First order of business was to take some measurements to see if the mighty 4Y will fit in the puny Thames engine box. Results of prelim measurements are as follows: Mighty 4Y - 510 mm wide at widest point. 670mm long from back of block to front of viscous fan. Thames - 505 mm wide at widest point. 654 mm long from back of block to front of fixed fan blades. So from the look of the width I should just be able to squeeze in the 4Y. From a length perspective I suspect that I may need to ditch the viscous fan on the 4Y if I'm going to retain the original Thames radiator. Nothing that an electric fan can't fix if this comes to pass. I still need to take some comparison measurements of the two gearboxes but I'll do that tomorrow.
-
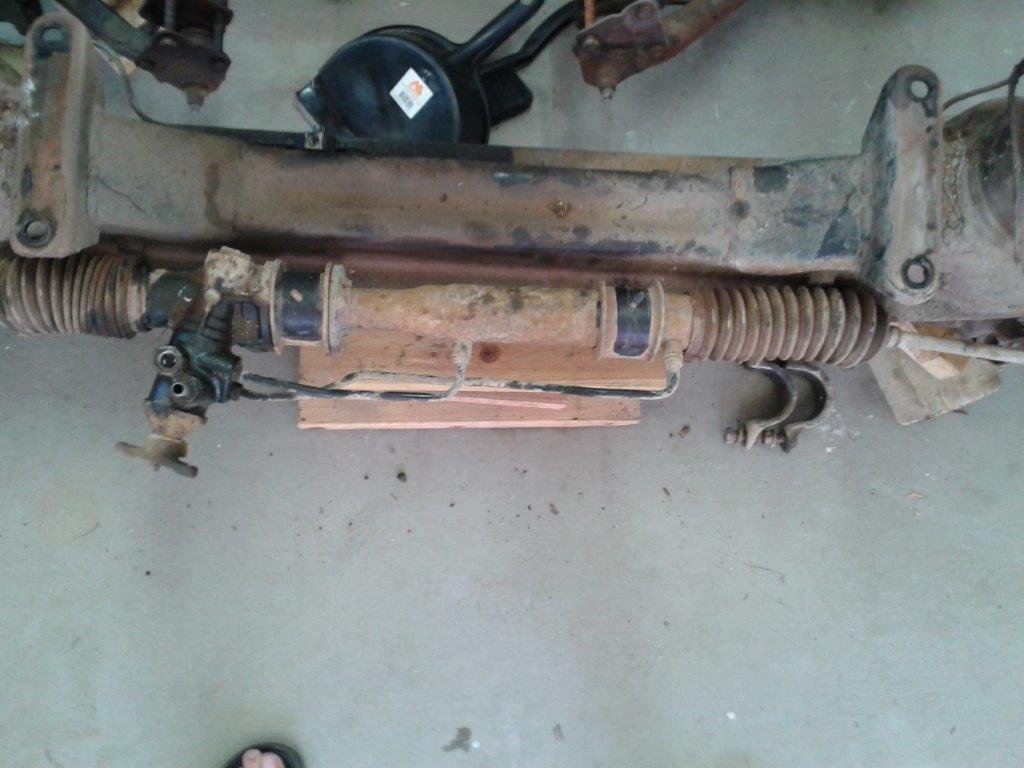
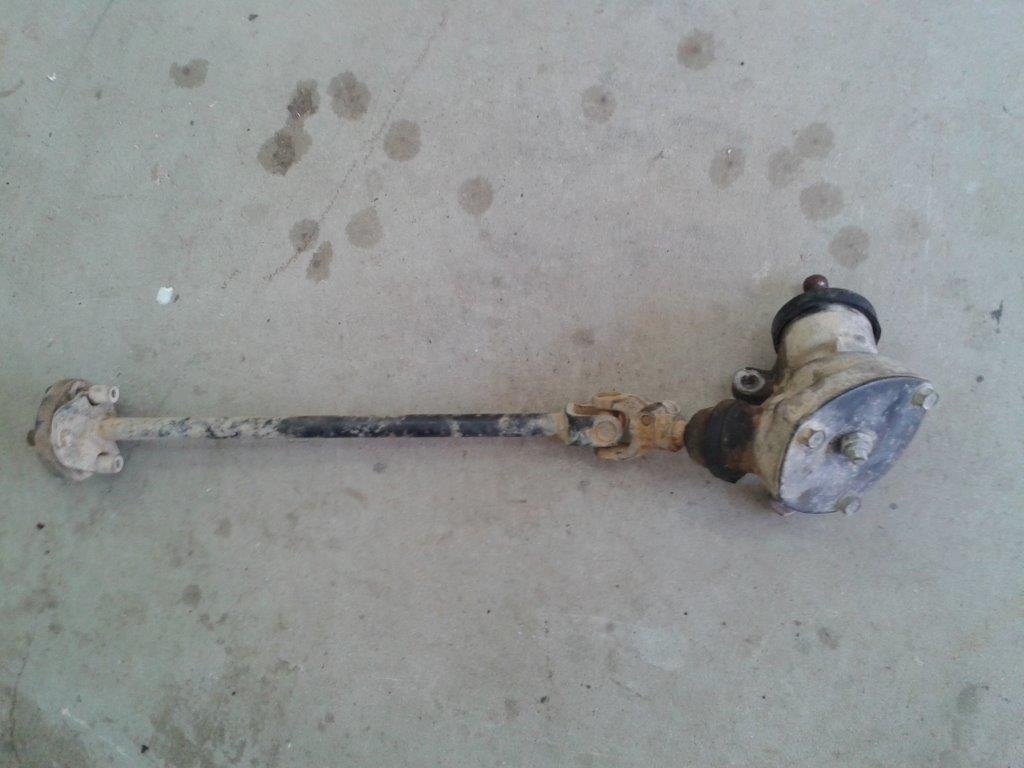
The sun was out again today and with the weatherman predicting a 90% chance of rain tomorrow I decided to continue stripping parts from my donor vans. Today's patient was the '96 Mitsubishi Express van. Before morning smoko I had managed to pull out the power steering rack and the angle box that links the steering column to the steering rack. I offered the rack end up to the Starwagon steering arm only to find that the newer Express has a larger diameter tie rod end. Luckily the smaller tie rod ends from the Starwagon have the same thread as the Express rack end so I quickly pulled the Starwagon tie rods and affixed them to the Express rack ends. Instant win. I'll need to cut the rack mounting lugs off the Express beam and glue them onto the Starwagon beam before I can bolt the rack on permanently, but I was able to mock up the rack and the pivot points on the Express rack align perfectly with the pivot points for the upper and lower arms on the Starwagon beam so that is another win. No bump steer for me. Next step is to see if the spline on the Express angle box will match the universal on the end of the Toyota HiAce steering column that I will be using, but I won't know that until I have pulled the steering column out of the HiAce. I don't want to use the Express steering column as it is fairly chunky and way more modern looking than the old 80's HiAce and since the column is pretty prominent in the Thames, I want to retain the older look if possible. Anyway a few pics to brighten up this dull post. Thanks for reading.
-
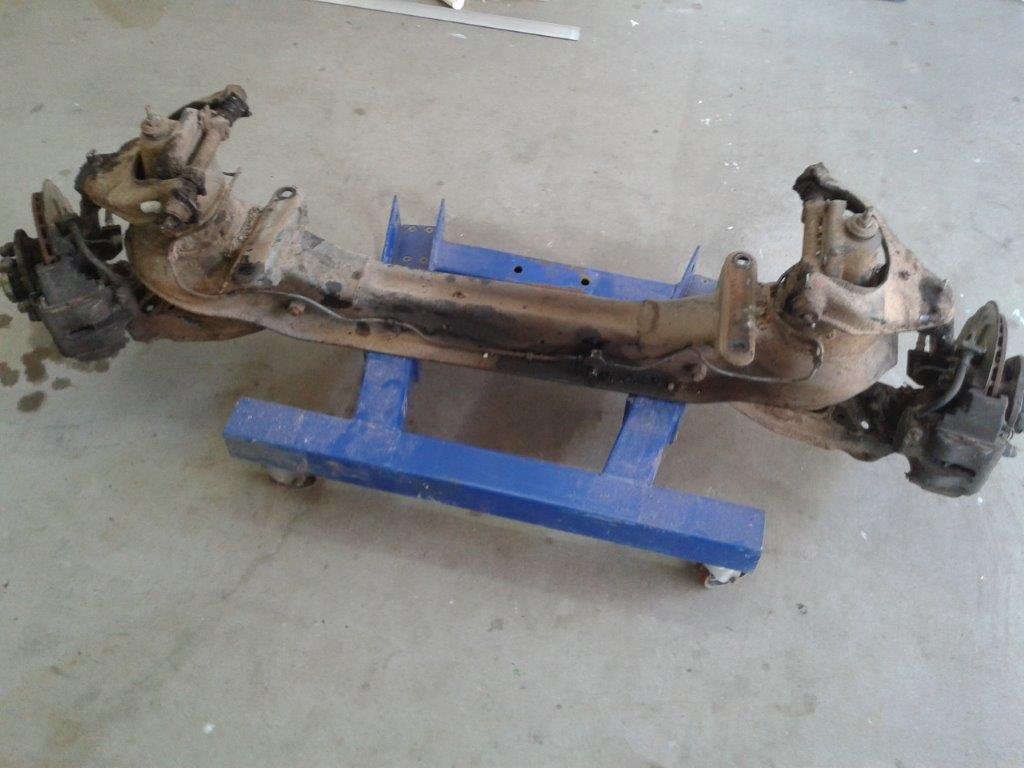
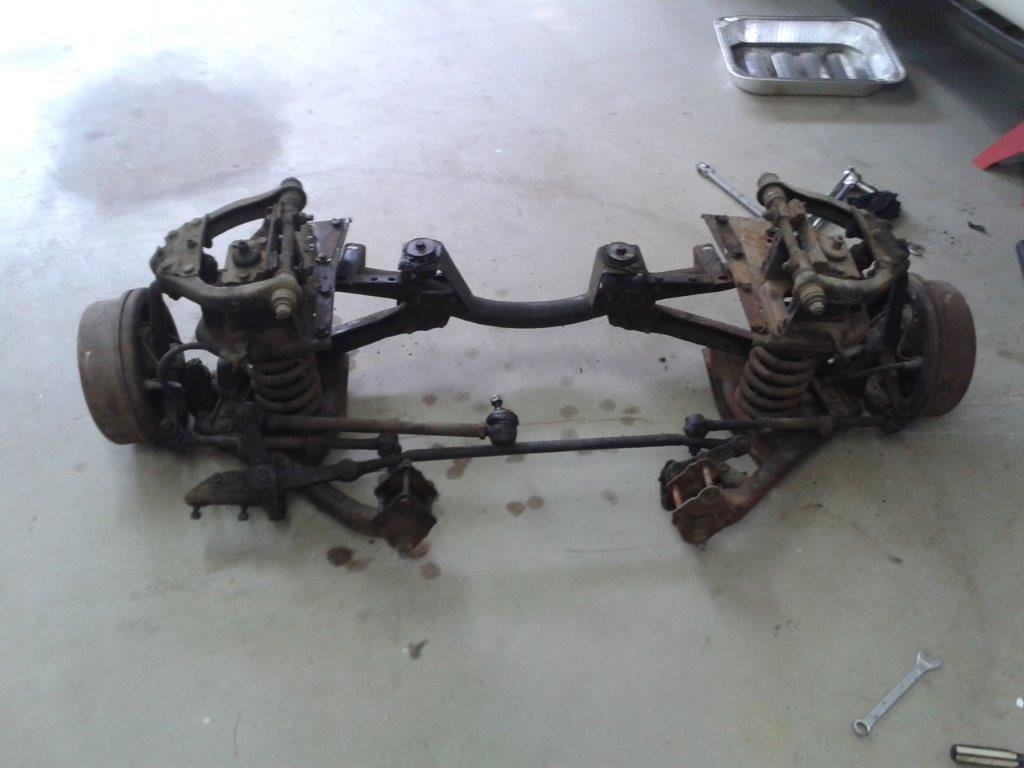
Original plan was to pull the steering out of the Thames today, but I woke up to a sunny day after three days of intermittent rain so figured I'd take the opportunity to remove the replacement front end from the mighty Mitsubishi Starwagon as its currently sitting out in the elements. Cranked up some Lynyrd Skynyrd at full pitch to get the blood flowing and in next to no time this happened :
-
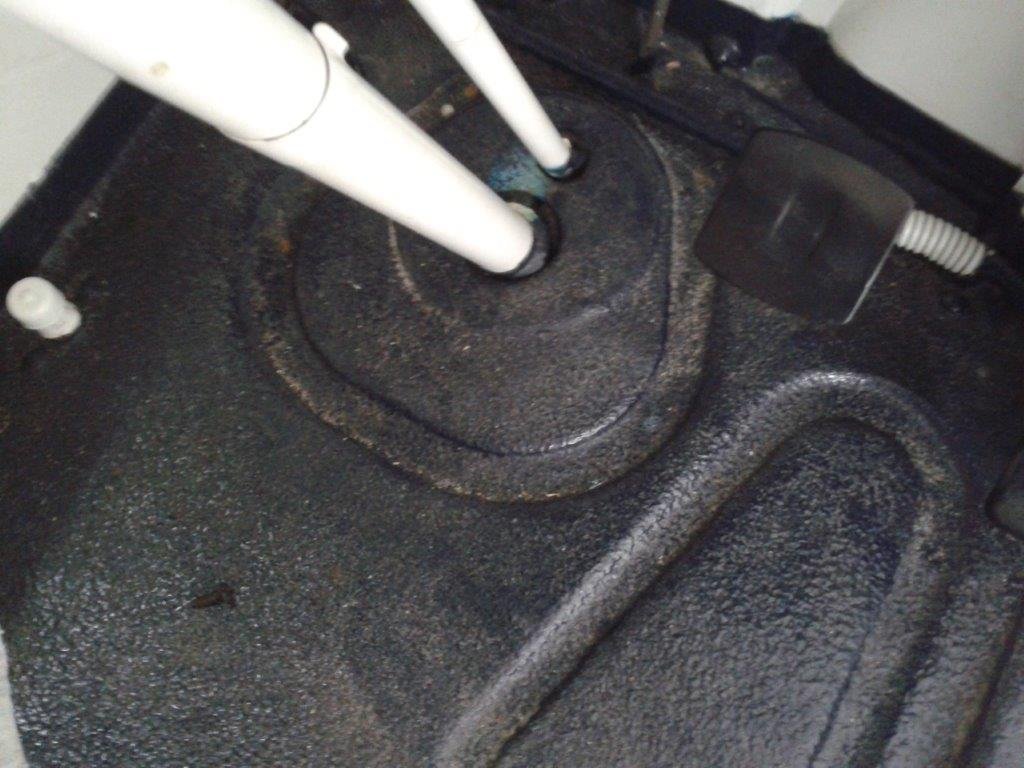
The plan for tomorrow is to pull out the steering column / box which is a single fixed unit and incorporates the gearbox column shift mechanism. This steering box is almost completely seized. Most owners make the mistake of topping up the steering box oil using the filler on the side of the actual steering box, but that unfortunately leaves the top bearing race dry. The proper procedure is to top up from inside the drivers cab using a hole located about a third of the way up the steering column that is normally covered by a flat metal 3 quarter round collar. I suspect that incorrect topping up over the years is what has caused mine to seize. I filled it up a few months back hoping that it might free up, but no such luck. My plan is to convert to a steering rack and angle box from the '96 Mitsi Express van that I have as this is a forward facing rack. But this depends on whether the rack is the correct length for the older style Mitsi L300 front end that is going in. I can't see Mitsubishi having changed the front track width between the older and newer generation vans, but you never know. I will also need to check that the pivot points on the rack ends line up with the pivot points for the upper and lower suspension arms on the older Mitsi front. If not I'm going to encounter bump steer issues. Last thing to check will be that the tapered rod ends are interchangeable between the older and newer generation Mitsis. With a bit of luck they are. . All will be revealed when I start stripping the Mitsi later this week. Stay tuned. Thanks for reading.
-
Which left me with this vast open space .... not.
-
Then this happened: Check out the super narrow inlet manifold and hockey stick exhaust manifold that Ford cobbled together to get everything in the narrow engine bay.
-
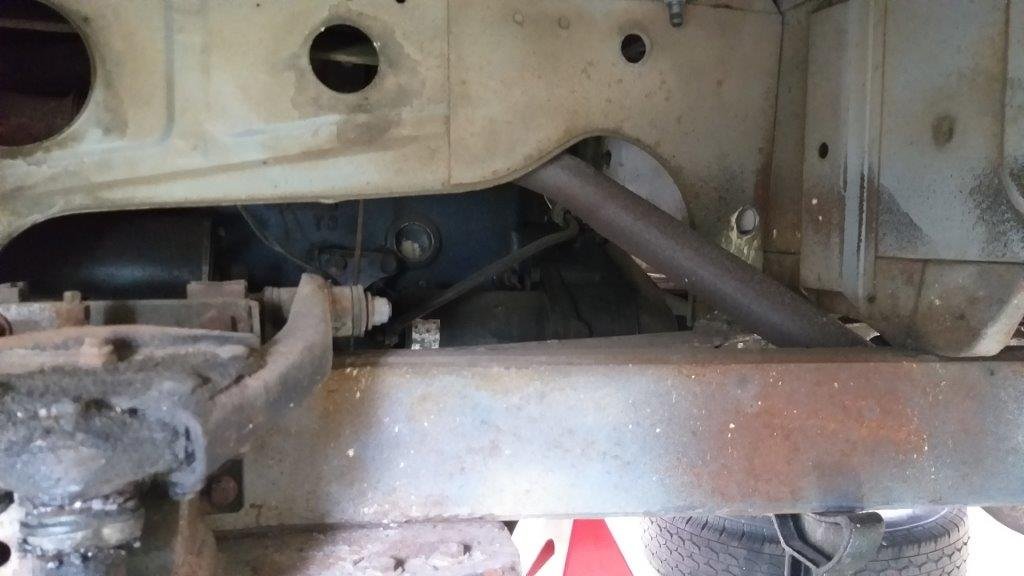
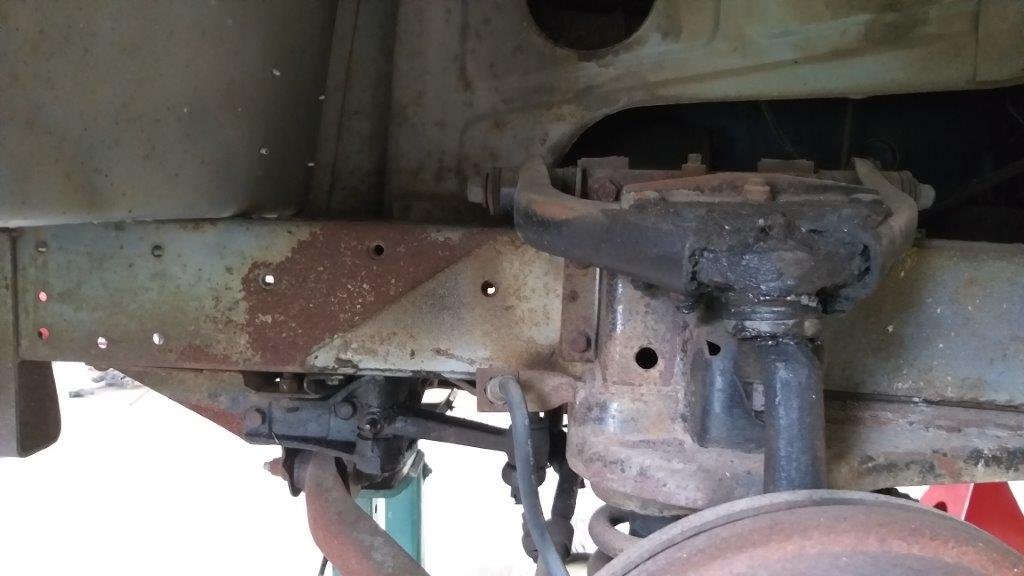
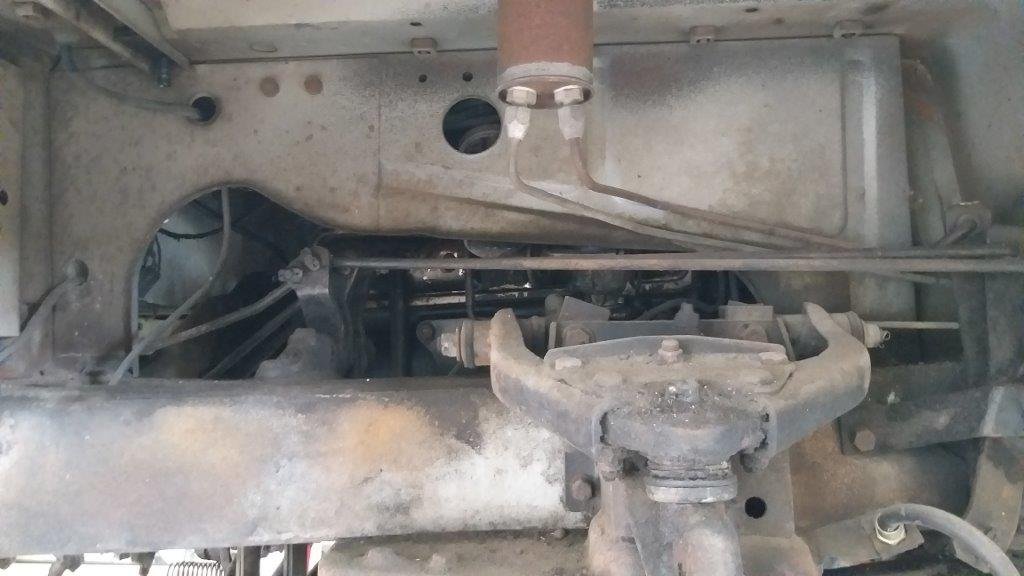
Had a productive day in the shed again today. First this happened:
-
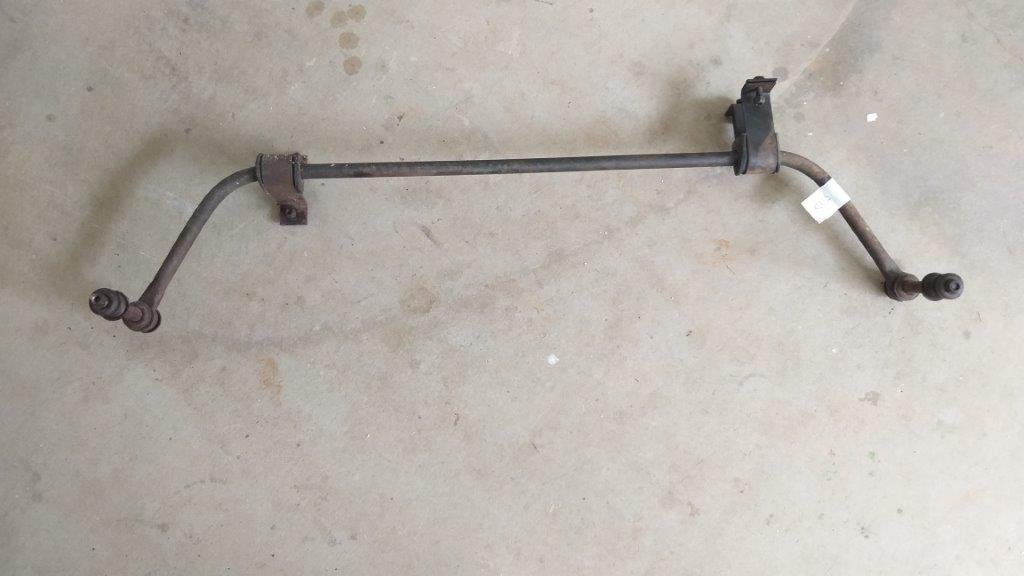
With the front up on stands I started swinging a few tools. Needed to blow the dust off my imperial spanners which haven't been used for a good while. Chassis seems nice and dry with just some surface rust. First bit removed was the front stabiliser bar. I was expecting the nuts and bolts to be really seized up, but they came out with very little effort. The engine is usually lifted up into the cab and out of the passenger side door, but with a mint interior I'm having none of that. Since all of the front suspension needs to come out anyway I'm planning to drop everything onto the floor. Lunch stopped play, but plan is to carry on tomorrow. Thanks for reading.
-
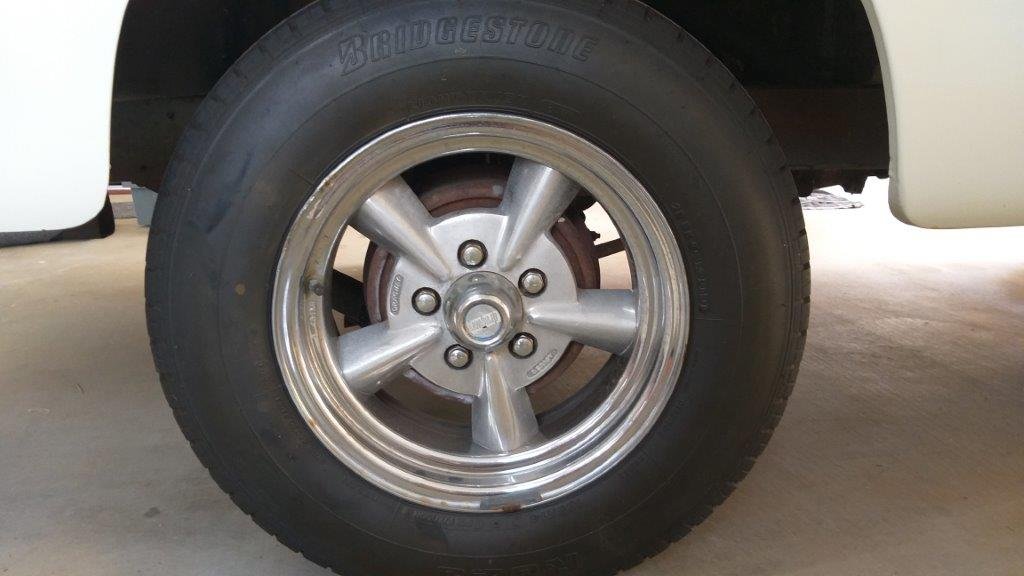
Here is a picture of the right hand side rear arch which shows that the rear wheels are also not centralised in the arch.
-
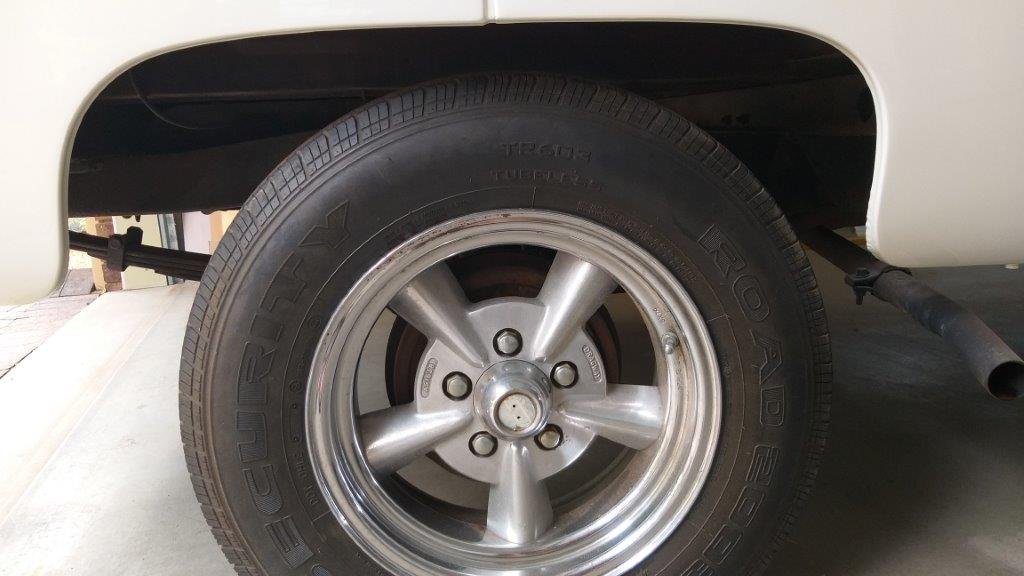
Bit of a milestone today. Finished up the last of my decking just before smoko so with just a few odds and ends left on the house reno front Mrs Flash and I have taken a decision to spend every alternate week working on the van. Started off by pulling the van out of the shed to give the floor a good sweep. Then spent a bit of time taking some reference measurement of the existing front suspension before I start pulling the lot out. Interestingly neither the front wheels nor the back wheels sit in the centre of the wheel arches. Looks a bit odd once you have noticed it. Fronts sit about 50mm towards the front of the arch as shown in a pic of the left hand side front. Right hand side measurements are exactly the same. Not an issue at the current standard road height, but could be an issue once I've fitted the L300 front end which will give me around a 70mm drop. So current thinking is to locate the L300 front beam so that the wheels sit in the centre of the arch.
-
Coming from left field here, but has the diameter of your water pump drive pulley changed ?
-
Your progress is absolutely amazing to see. Thanks for sharing. Keep up the good work.
-
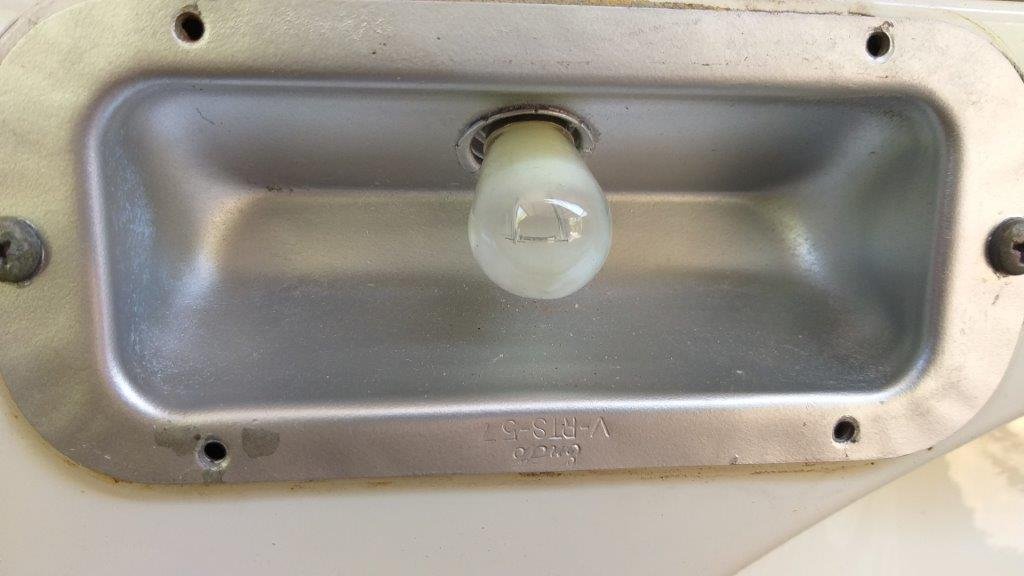
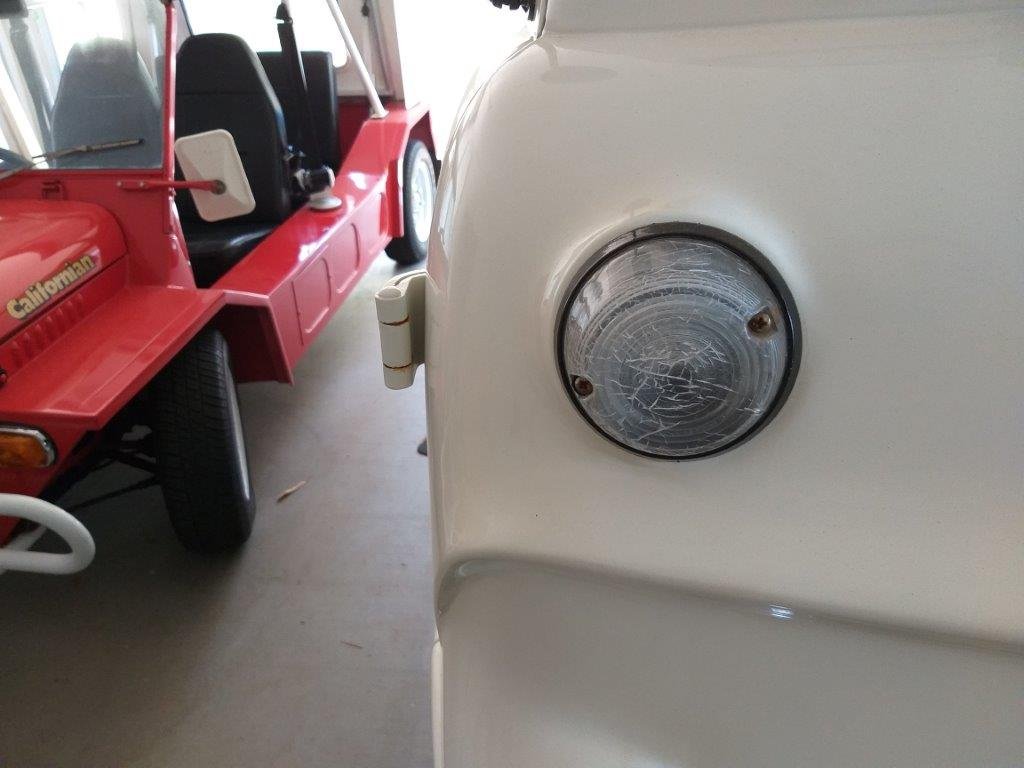
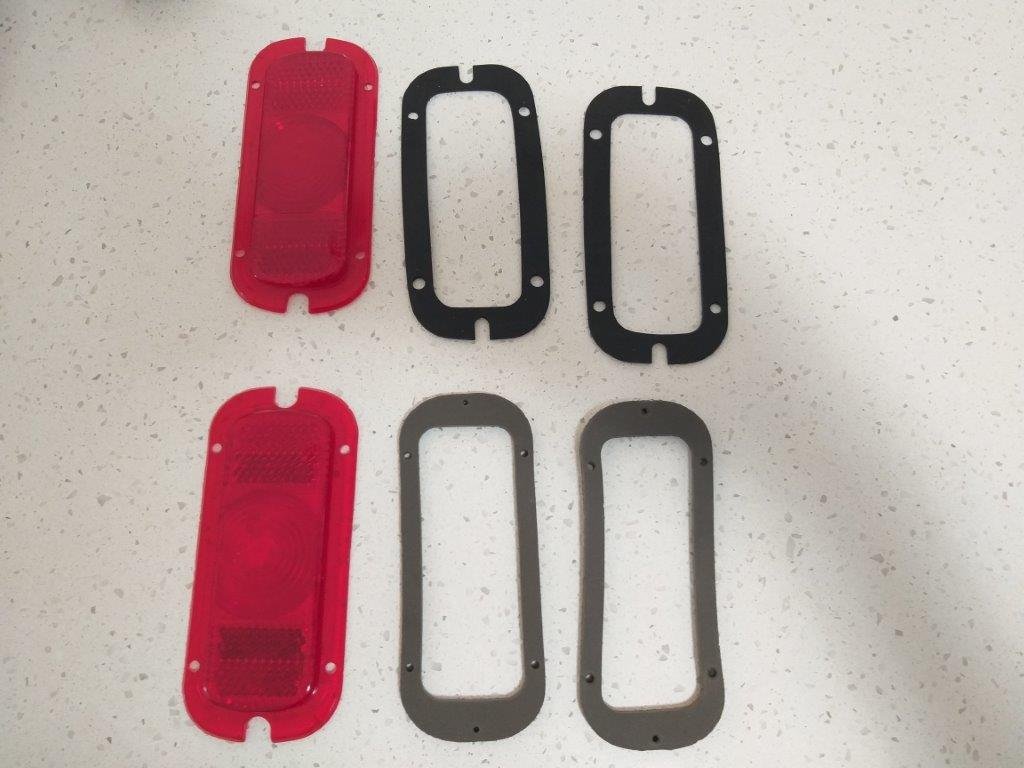
Moved on to the rear lights that sit in the lower rear valance. One of the old lenses had a really deep scuff mark in it so I figured it would be worthwhile replacing both sides with new lenses. Pulled the lens off and detached the lamp body from the valance and discovered another home made cork gasket. For some reason the left side rear brake light blows quite often so I thought I would try to figure out what is causing the issue while I have everything apart. The left back light is wired across to the right light and then the wires head off towards the switch mounted up front. Seems weird that only the left hand brake light blows. Might be something in the lamp body or a pinched wire running between the two lights. Will require more investigation. Thanks for reading.
-
Fitted the new lamp to body gaskets and the new rear indicator lenses and took the opportunity to mount the lamp housings correctly so that the lenses are correctly orientated. Looks heaps better. Amazing what a difference the little things make.
-
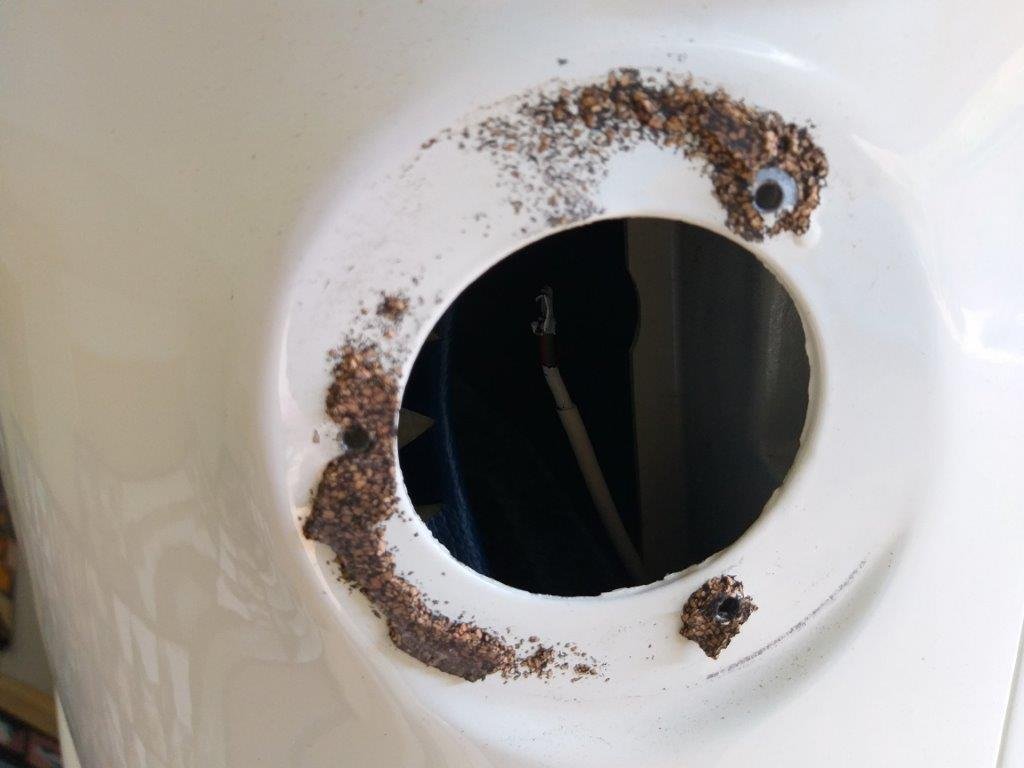
Was really nervous that I might damage the paintwork getting it off, but a bit of gentle work with a plastic scraper and a bit of a polish and it came pretty clean. I didn't want to get too aggressive around the mounting holes for fear that the paint might lift, but its way better than it was.
-
With the front indicator lenses done I moved on the the rears. One of the home made cork gaskets had managed to firmly attach itself to the body leaving this mess. .... aarghh ...
-
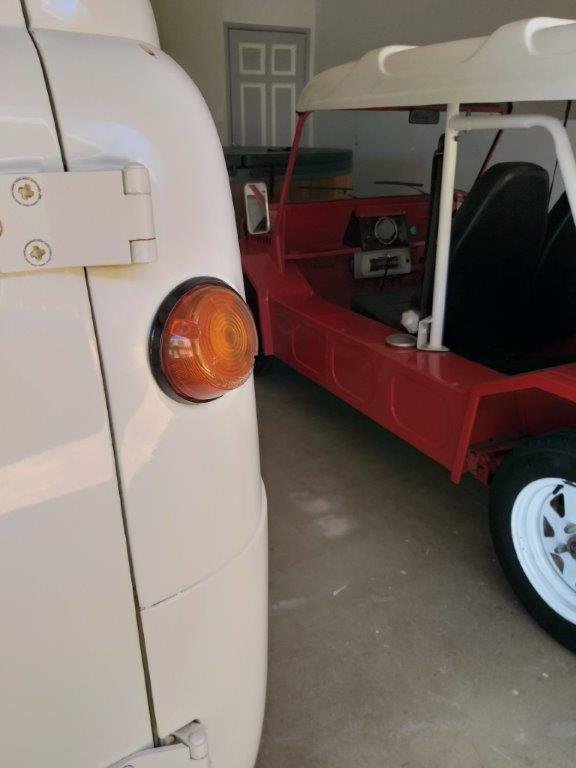
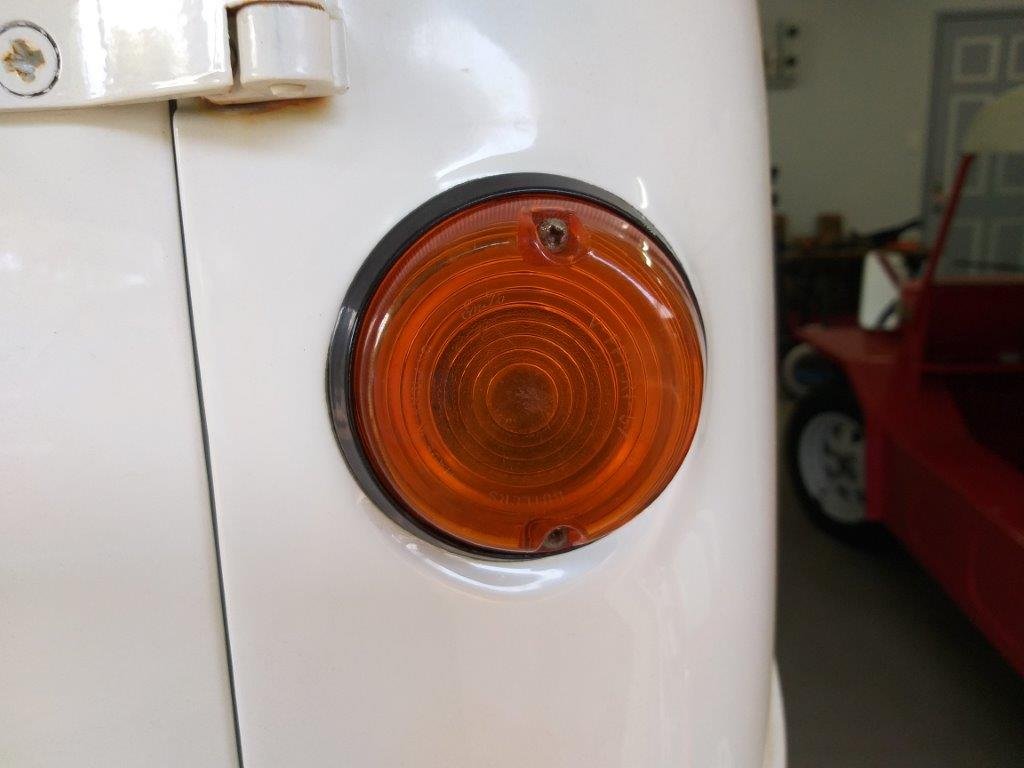
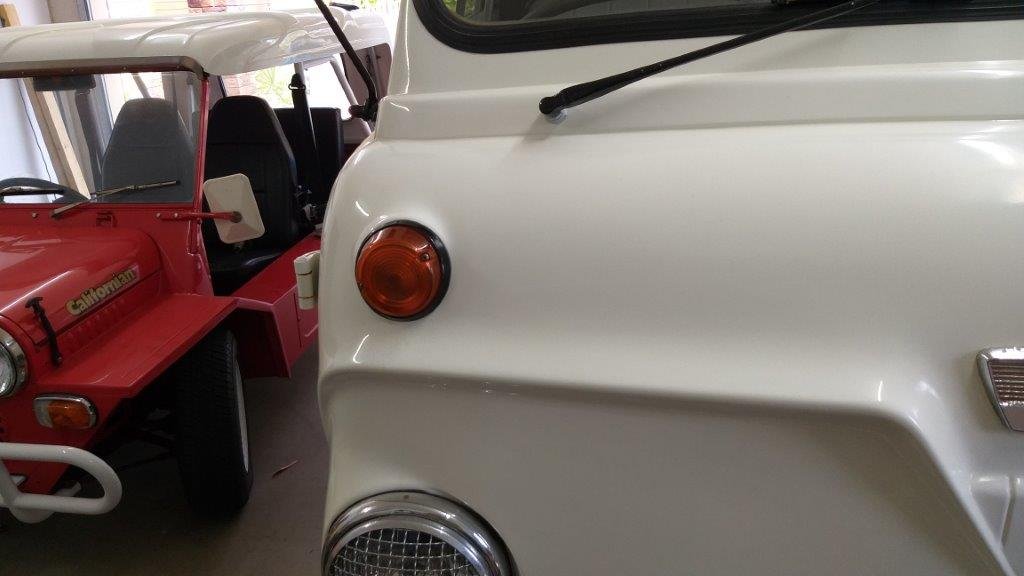
As we were having morning smoko the rain started falling, so I saw it as a sign that I should move indoors and steal an hour or two on the Thames. Started off by removing the front indicator lights to install the new lamp to body gaskets. Turns out someone had made their own cork gaskets which was better than finding the lamp body mounted directly onto the paintwork. Installed the new body gaskets, re-fixed the lamp housings and installed the new lenses. I'd made a decision to go with amber lenses up front rather than the original clear lenses. First reason was to give the front a bit of colour as its pretty bland at the moment. Second reason is that I had heard that the clear lenses don't hold up in the harsh OZ sun as well as the amber ones. Sadly the new fixing screws and rubber sealing rings were inadvertently left out of my parcel so I had to use the old screws. Easy enough to replace when they arrive with my next shipment. Before and after pics to show the improvement. You can see how badly the clear lens had deteriorated. Thanks for looking.
-
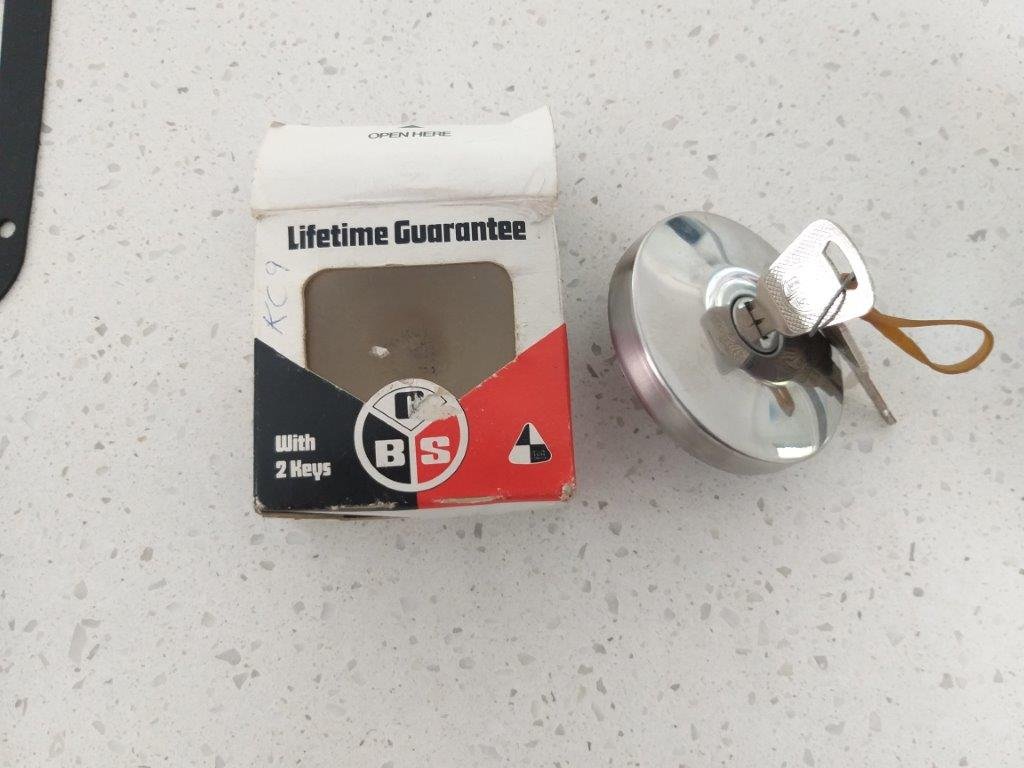
Some NOS goodies arrived from the UK today thanks to Sandy from the Thames 400e Owners Club. New tail light lenses with gaskets, new indicator lenses with lamp body gaskets and a locking fuel cap. One of the indicator lenses is a different shade of orange which will drive me insane, but I'll order in another lense with my next batch of parts and hopefully I'll end up with a matching pair. We are still donkey deep in our house reno, but hopefully I can get a gap to fit these over the next few days.
-
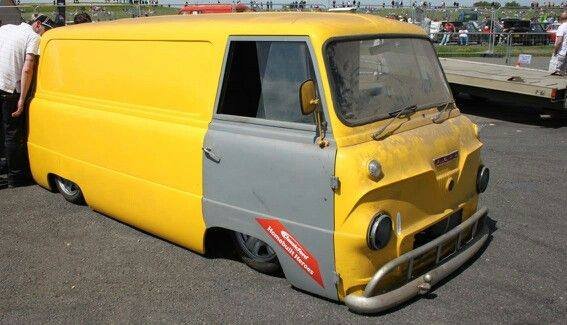
Dedication is a polite way of putting it Browndog ! My next door neighbour used a slightly more colourful term when he saw yet another scruffy looking van pitching up yesterday. Waited for him to go out before I parked it right up against the shared fence. Don't think he is going to be too happy, but it was the only place left to park it ..... the joys of suburban life. Yep, L300 and HiAce share the same Ford stud pattern as far as I can tell. 12 slots seem to be a popular choice here. I've seen pictures of two OZ based Thames vans that have been fitted with 12 slots. I've yet to remove wheels on the donors to take my own measurements but from the info I've managed to find on the net the L300 has a front track of 1449mm compared to 1346mm for the Thames. HiAce rear is 1445mm compared to 1397mm for the Thames. Should close up the fender gap a bit more and if need be I can move to 7J rims over the current 6Js. I'm not a fan of the current look where the wheels sit way in from the fender lips. From the brief measurements that I have taken I reckon I should be able to dial in some low with the stock L300 front end just by the way it will be positioned. If I need any more low I can source a set of dropped stubs from the USA where the L200 utes were Dodge badged. According to what I have read I would need to swap the L200 stubs left to right to retain the forward control steering setup. The Thames rear axle currently sits on the underside of the leaf springs. So to get matched low at the rear the simple option would be to mount the Toyota axle on the top of the leaf springs and convert the back from the Thames hydraulic arm dampers to shocks. Or keep the axle on the underside of the Thames leafs and get the springs re-radiused. Half of me thinks that I should consider going to a 4 link rear setup with coil overs which would allow me plenty of flexibility with the back ride height in the future. When I did the Bedford I stuck to the original single leaf springs which I had to have re-radiused when I fitted the dropped spindles and although it looked good I was pretty stuck with the ride height after that. Would be keen to get some input on a 4 link rear setup from anyone who has done this as it would be my first time. Or there is always this bagged UK van that has been seriously modified for ultimate slam.
-
I'm still firmly in the "hunting and gathering" phase of my Thames resto mod project. So the newer L300 is a definite fail if you are looking for a straight forward front suspension swap into something else, but having said that the forward facing steering rack and angle box look promising as an alternative to the archaic steering box setup on the Thames. Getting back to the front suspension it was pointed out to me by Cletus that the way to go is the older mid '80s L300 vans as they have the fully detachable front beam. So for the past few weeks I've been hunting for one of these older vans. Here in OZ there seem to be still a few of the 4 wheel drive older vans around, but the 2 wheel drive versions are pretty thin on the ground. I managed to eventually track down a 1984 Starwagon, only snag was it was located almost 600km away and was a non runner. Did a deal on the van for $250 and managed to snag a cheap return trip on an empty transporter that was coming back our way if I was happy to wait. Van arrived home earlier today. I chucked a battery in it, primed the carb and she started first go. Hasn't been run since 2017 so she is a bit smokey, but I don't plan on using the motor so I'm not too fussed. Shoved the van on my ramps and had a bit of a nosey around underneath. Initial measurements of the Starwagon mounting points are pretty close to the distance between the Thames chassis rails so looks like a relatively straight forward swap. I've now got my own private "pick a part" stash of 4 Japper vans when I eventually start the conversion. So the loose plan thus far is: Complete front suspension and brakes from a 1984 L300 Starwagon. Steering column, angle box and power steering rack from a 1996 L300 Express Toyota 4Y engine and 5 speed column shift gearbox, drive shaft and rear axle from a 1986 HiAce Picture of the mighty Starwagon for you to perv over. Thanks for reading.
- 740 replies
-
- 22
-

-

-
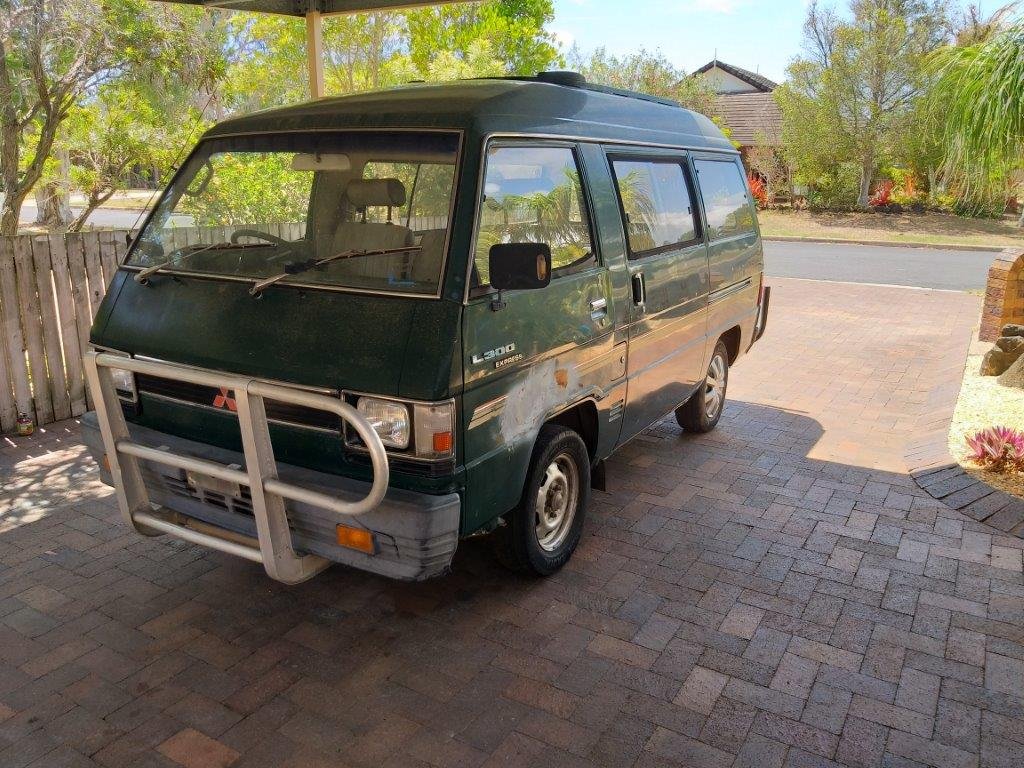
So after swapping a few yarns with a local rod builder I've changed direction on my front suspension for the Thames. Original plan was to stick with the standard cross member - there are actually two cross members, one for the front pivot of each A arm and one for the back pivot of each A arm - go figure. Anyway this was causing me headaches with the oil sump setup and I also wasn't keen on keeping the standard steering arms with the joints that need greased every 1000 miles. I figured if I was going to have to throw money at a steering rack and disc brake conversion I may as well bite the bullet and look at changing the entire front end. Back in the day L300 front ends were popular with the street rod fraternity and many L300 front ends are still used today. Did a bit of research myself and also got some guidance from Cletus and MaxPower and figured if I could pick up a cheap enough L300 I'd give it a go. Started to watch FB and sure enough a real cheapie came up yesterday. Only located 50km away, so hooked a hire trailer up to my mates Landcruiser and we headed down earlier today. Van is now home and since it would be rude to fire up my drop saw on Chrissy Day I'm going to take the day off deck building tomorrow and will spend a bit of time under the Mitsi with a measuring tape plotting and scheming . Added bonus is that the Mitsi has an aftermarket AC setup fitted which I'm hoping I can also move across to the Thames. Being a forward control van the steering setup is also perfectly suited to the Thames. Anyway, here's a picture of Mitsubishi's finest. Happy Christmas everyone.
- 740 replies
-
- 15
-
-
-
All good this side. Came across to OZ for an adventure and fell in love with the tropical heat. Now based in Queensland.
-
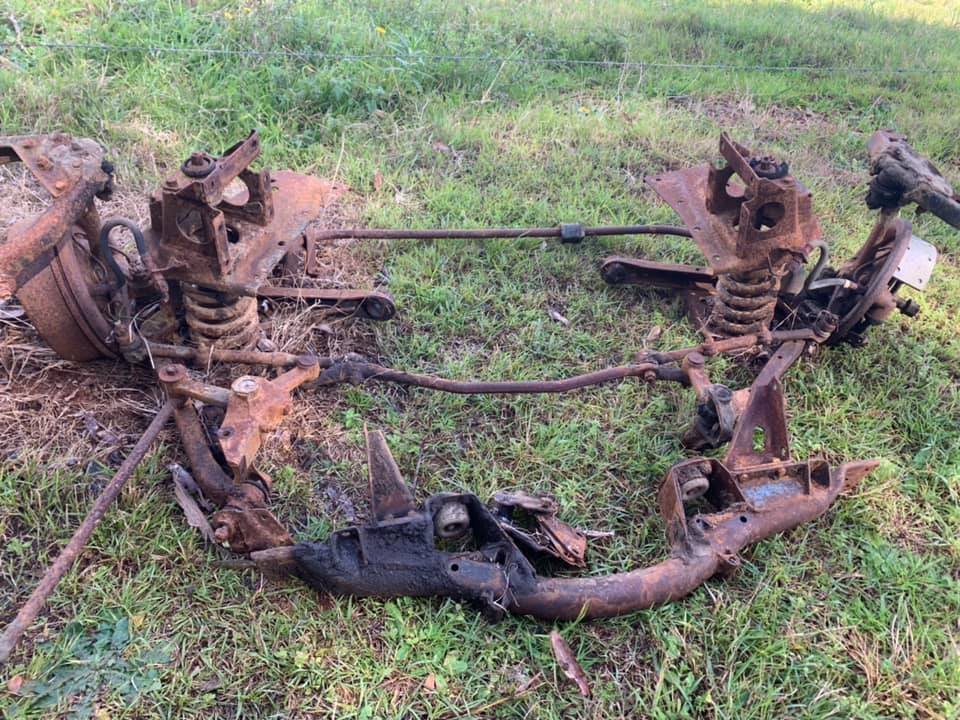
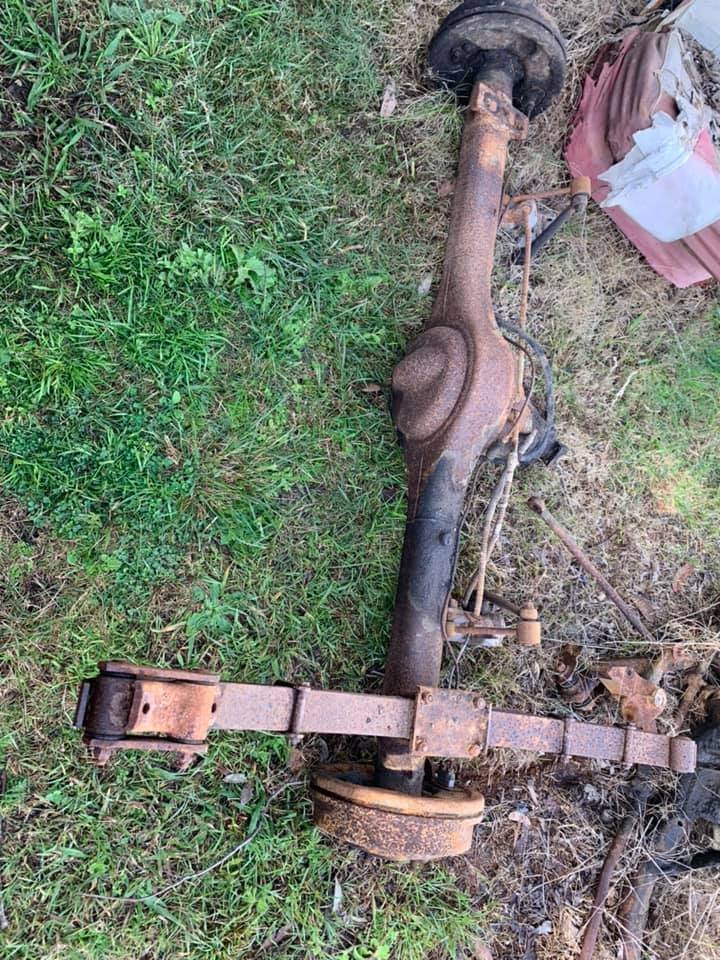
So a few months back a hotrodder on the book of faces had stripped a Thames van that he is turning into a rod and had offered the standard front and rear ends "free to a good home". The van has been sitting in a paddock for a good few years so everything is covered in a good deal of surface rust but otherwise seems fairly solid. Since my current plans are to keep the stock upper and lower wishbones and stub axles I figured it was worth having spares. Only problem was that he was based in New South Wales. Anyway, beggars can't be choosers, so yesterday I completed a 1,200 km round trip and am now the proud owner of a bunch of manky looking Thames bits. Gotta read up a bit on setting up a "pickling bath" so I can start to get things cleaned up, so keen to hear how others have gone about this. Anyway picture time or it didn't happen.
- 740 replies
-
- 10
-
-