Flash
-
Posts
1615 -
Joined
-
Last visited
-
Days Won
2
Everything posted by Flash
-
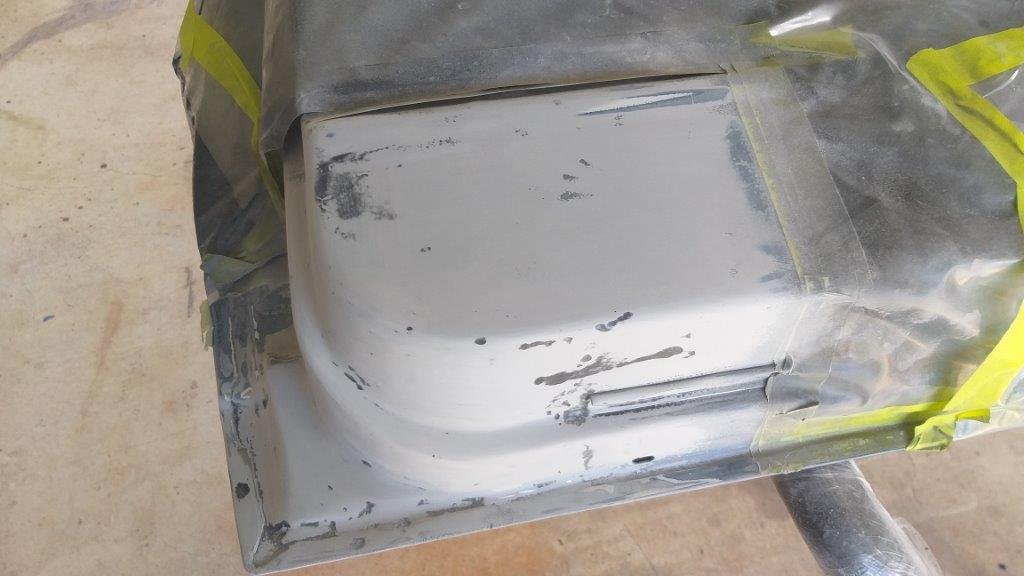
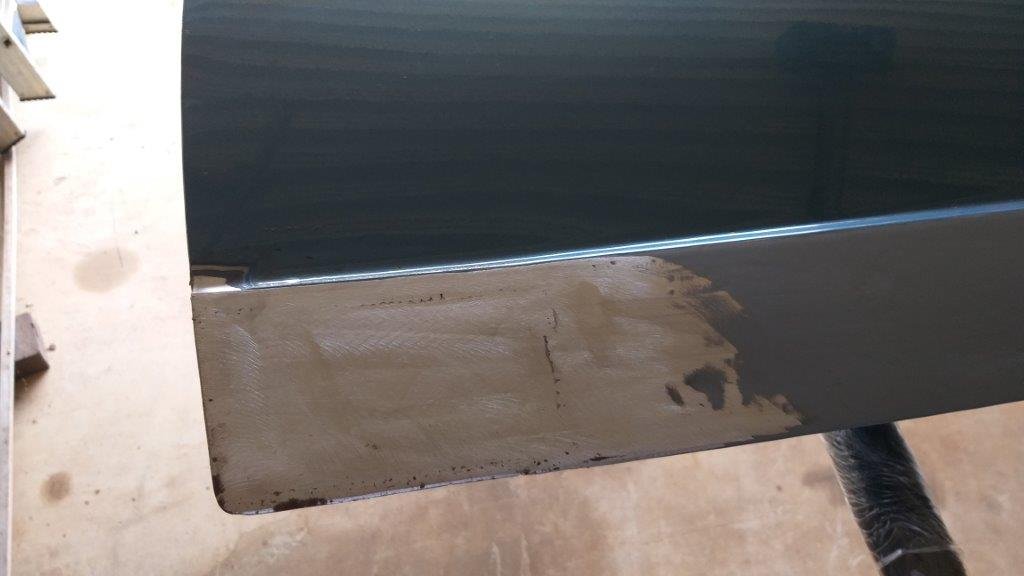
Gave the angle sanding a go today using a shorter block and its looking much better. Thanks again for the advice.
-
Yep, the ripples are a real bugger. Just below the inner skin too so I can't even get in from behind to knock them. I'm cursing my decision to pull all the bog out, but I wanted to make sure there was no more rust lurking under there and also the bottom panel definitely had that bloated look that you get when too much bog has been applied. Was also sitting way proud of the same lower panel on the front fender and back quarter panel with all that mud. So having said all of that I'm glad I removed it. It's just dealing with the aftermath now. I reckon the cross hatch sanding pattern that the video shows is going to be the silver bullet. Never even crossed my mind to try that, so I'm really grateful to you for the suggestion. Can't wait to give it another go.
-
Excellent tips there. Thanks for sharing Tori. I've learnt something new.
-
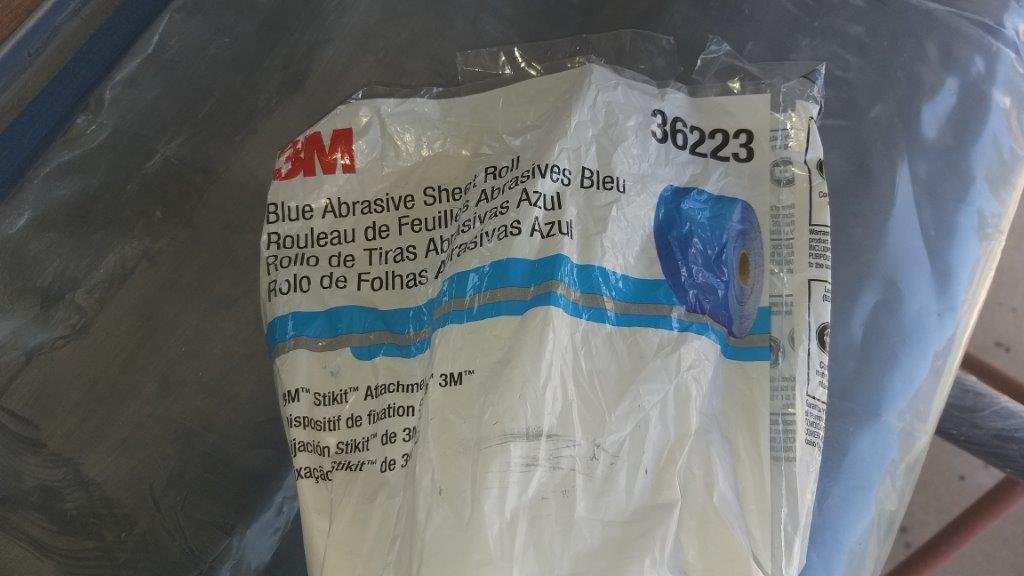
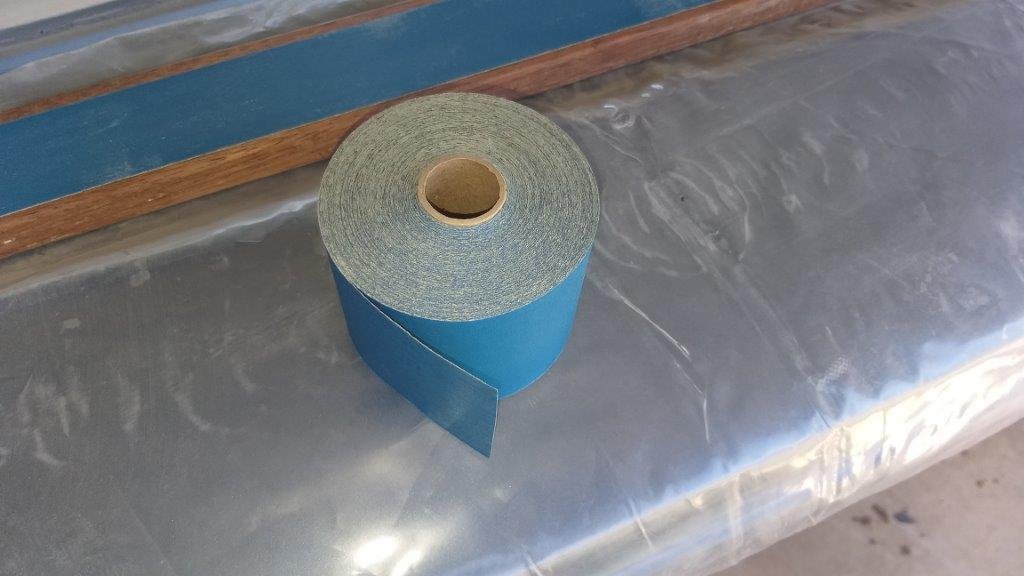
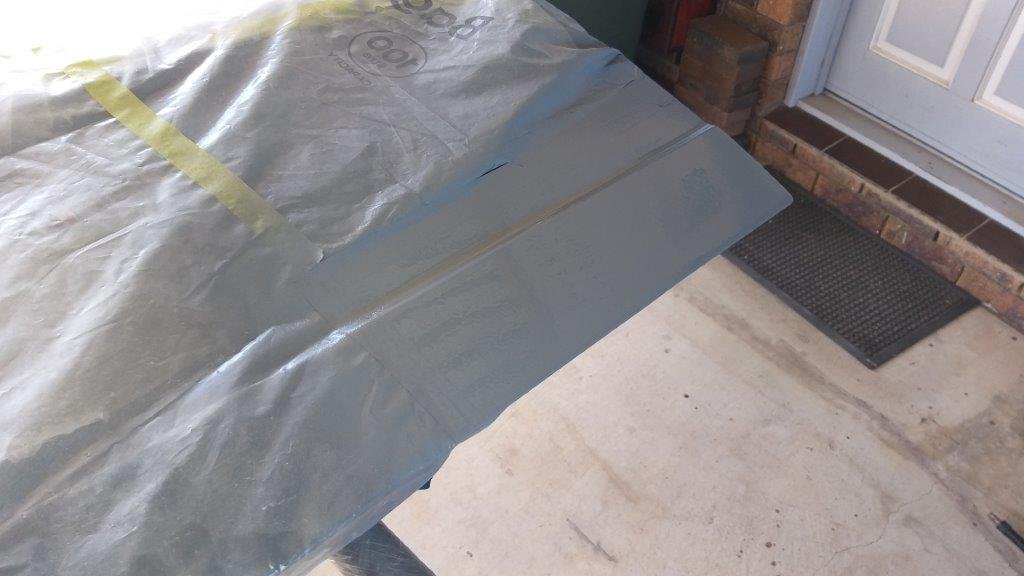
The driver's door is another matter though. I am really battling to get the whole lower panel even. As mentioned earlier whoever had previously had a go at that door decided that taking to the bottom panel with a ball peen hammer would help keep the thick layer of bog in place. Try as I might I just couldn't get rid of the waves. Desperate times call for desperate measures so I ended up ordering a roll of 3M stick back sand paper which arrived yesterday, so this morning I hooked into it. Created the world's longest sanding block using an off cut of hardwood decking, but I'm still not 100% happy. I'm thinking that the board needs to be even longer so that the block never leaves the door surface. I'll re bog and try with a longer piece of wood. Hopefully this will do the trick. Thanks for looking.

- 194 replies
-
- 11
-

-
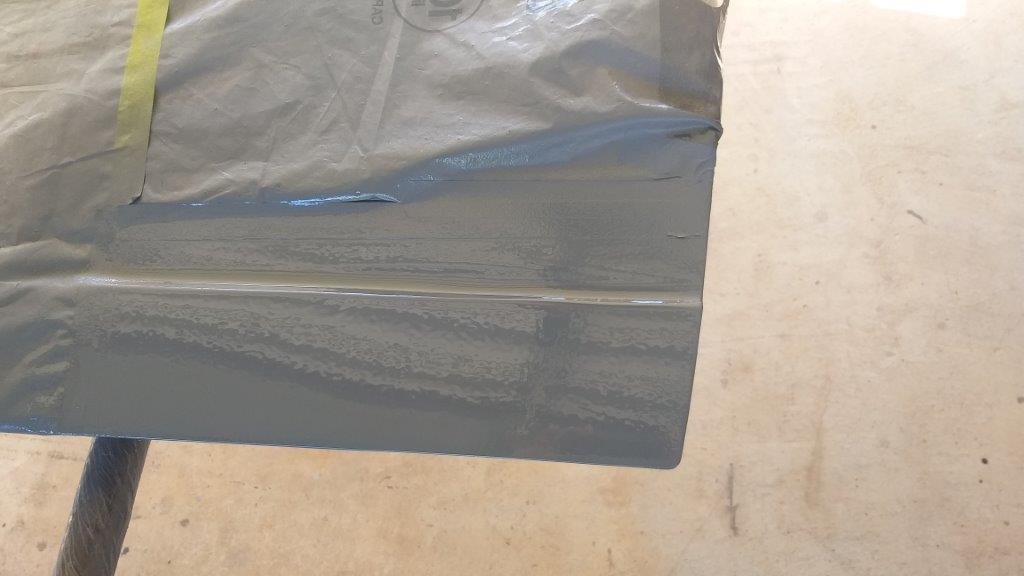
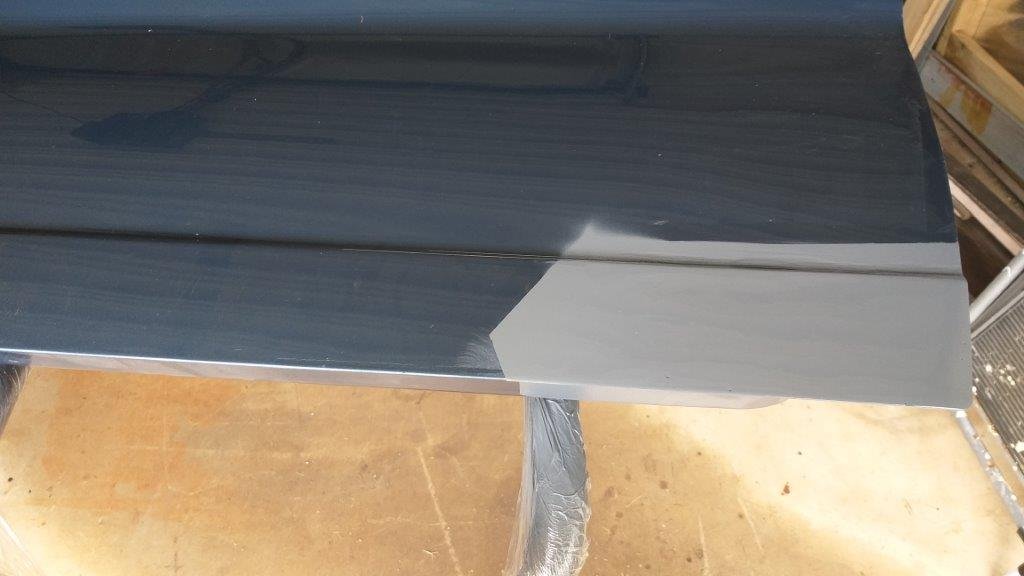
Pretty happy with the way the passenger door has turned out. Black check coat on the first round of bog revealed some low spots. I gave the second round of bog a few days to rest before another check coat and sand, then a quick coat of spray filler to deal with a few small air holes which I left for another few days before sanding. Finished off with a double coat of 2K primer. I'm using Raptor epoxy primer which seems to end up with a rippled finish straight off the gun. Seems to smooth out fine after a slight tickle with a bit of 800 grit wet sanding though.
-
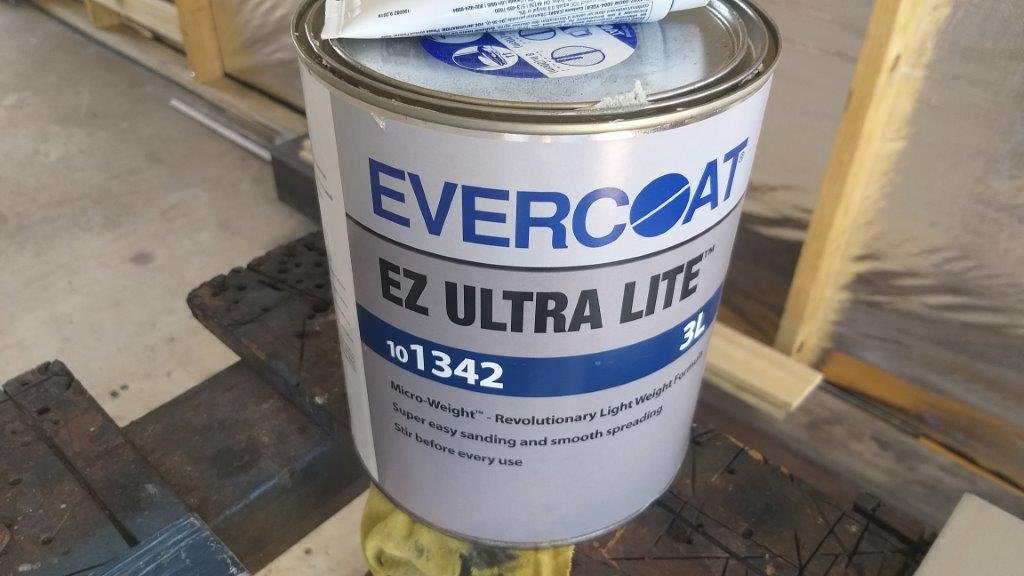
I'm still steadily plugging away at smoothing out the Mustang door patches. I invested in a tin of Evercoat ultra lite filler. What an improvement over the usual off the shelf spare's shop stuff. Way easier to sand and a lot less air holes to deal with. Would happily trade again.
-
Yesterday my mate got a gap to glue in the door patches for me. A light skim of bog will be needed to get things mint, but I'm pretty chuffed with the results. This morning I gave the new metal a quick spank with a flapper disk and then chucked some epoxy primer about the place. I'll start the bog work over the weekend.
- 194 replies
-
- 26
-
-
Hiya Andrew, Thanks heaps for taking the time to read my thread and thanks also for the feedback and encouragement. Your project sounds interesting too. I'd love to be able to get the column shift to work on my van, but the biggest issue is the one that you have highlighted namely being able to get the changer to "rest" in the 3rd and 4th gear position with a push up for 1st and 2nd and a push down for 5th and reverse. As you have probably already read in my posts, in my case I'm using morse cables for shifting and the "latency" in the cables makes for a very inconsistent result. Sometimes its perfect, other times not. A botched gear change could end up with severe consequences and that's my biggest fear at the moment. Sadly I haven't had a chance to work on my van for a good few months now, but hopefully i can get back onto it over the winter. All the best with your setup. Sounds like you are on the right track. Cheers, Gordo
-
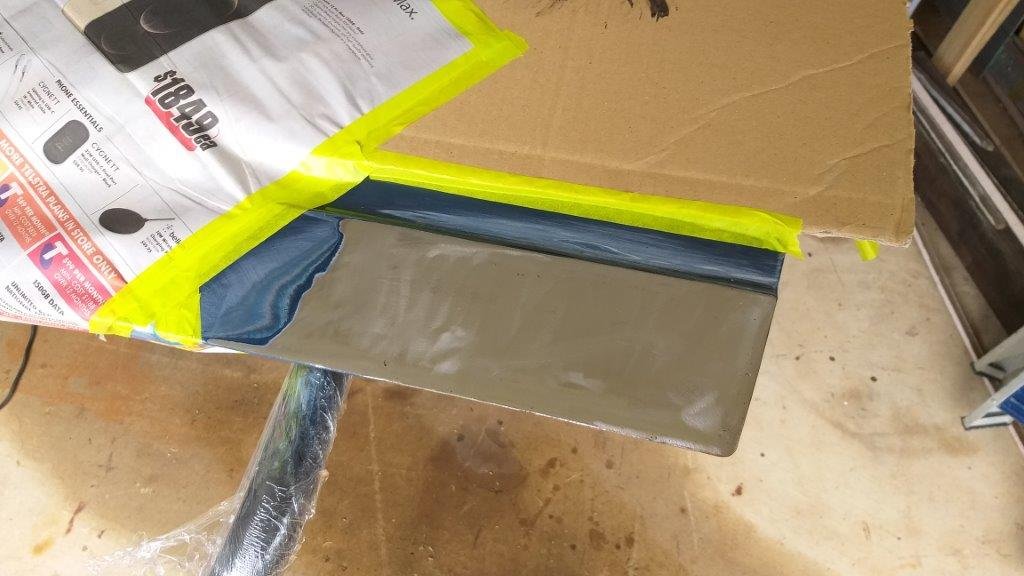
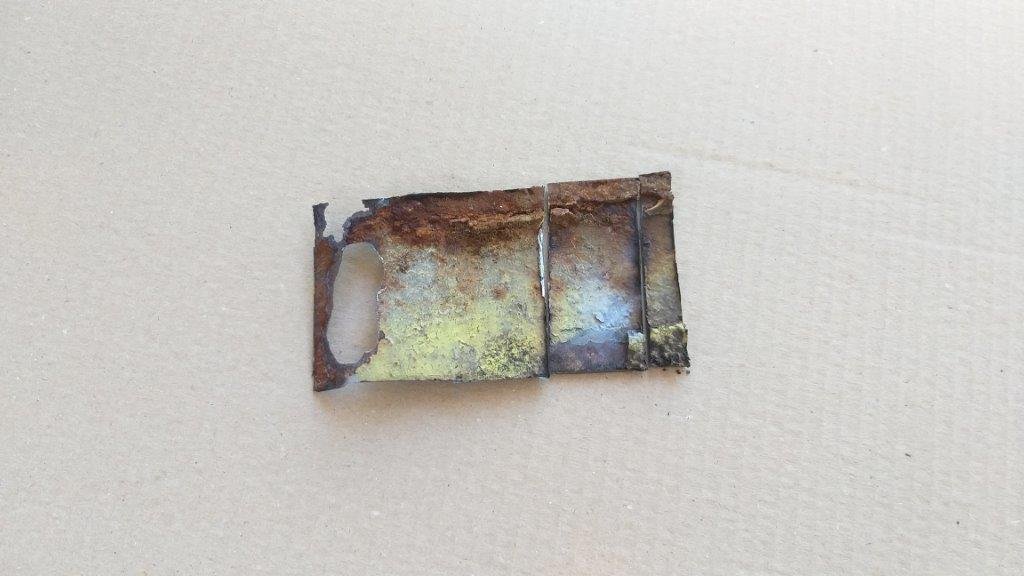
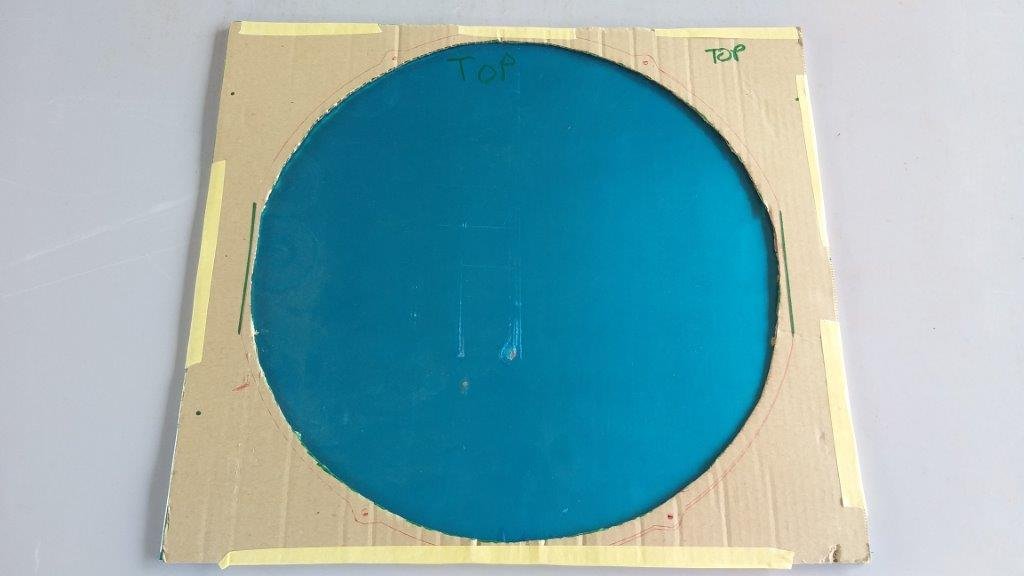
Spent the morning cleaning 50 year's worth of dirt, flaking paint and other crap out of both door shells. Once the patches are done I'll squirt a heap of rust converter at the bare internal bits and then give both shells a liberal coating of cavity wax. Hopefully that should keep things stable for a while longer. Talking about patches I've made the cardboard templates, so cutting the panel steel should be fairly straight forward. I've also given the inner skins behind the patches a good few coats of zinc paint. Took the opportunity to squirt some etch primer on the bare lower panel where I removed all of the bog. I'll chuck some epoxy primer on the new patches and this lower panel once the welding is done. Just need to check when my mate Cameron has a gap in his schedule to tackle the welding for me. Thanks for looking.
- 194 replies
-
- 23
-
-
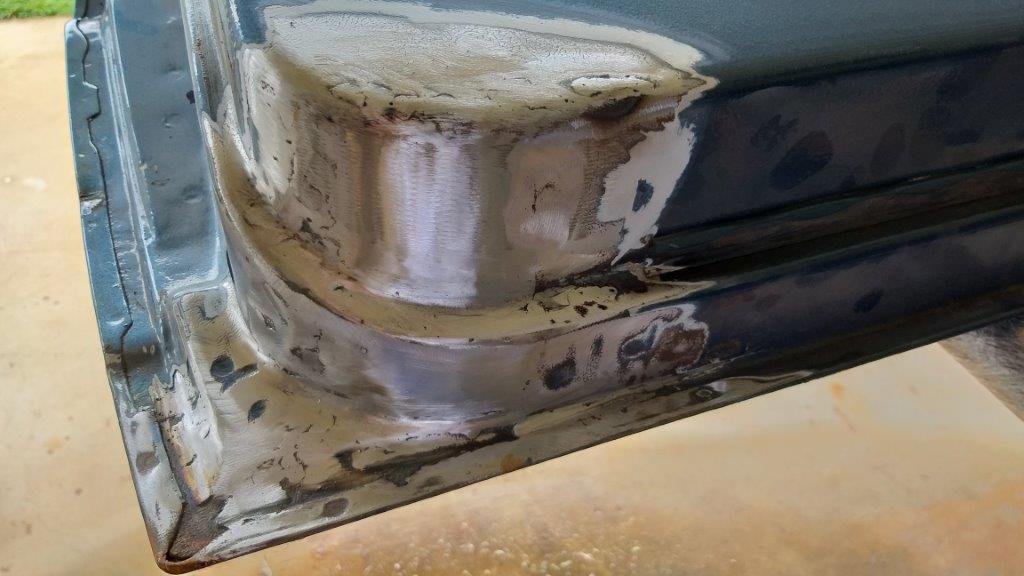
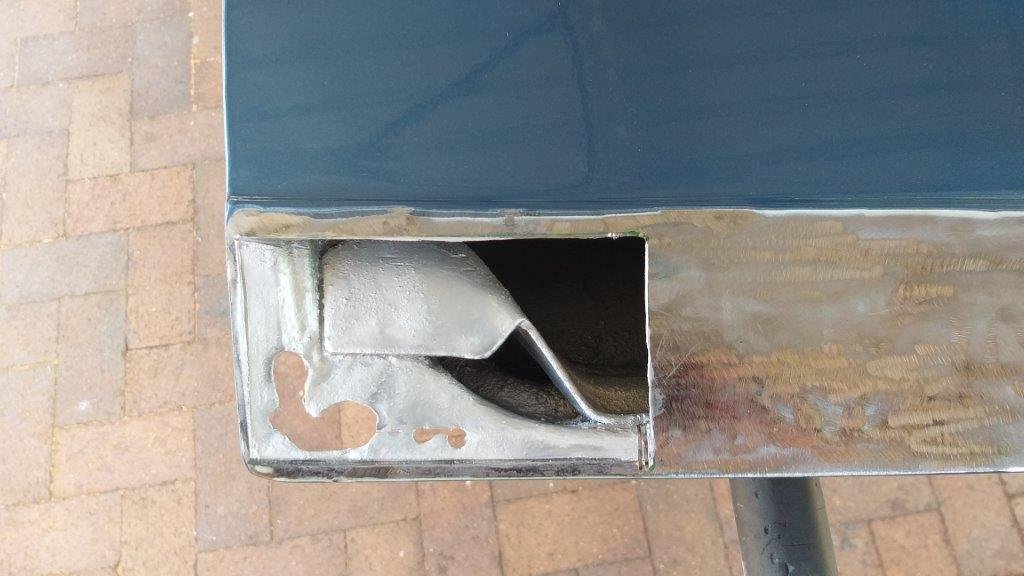
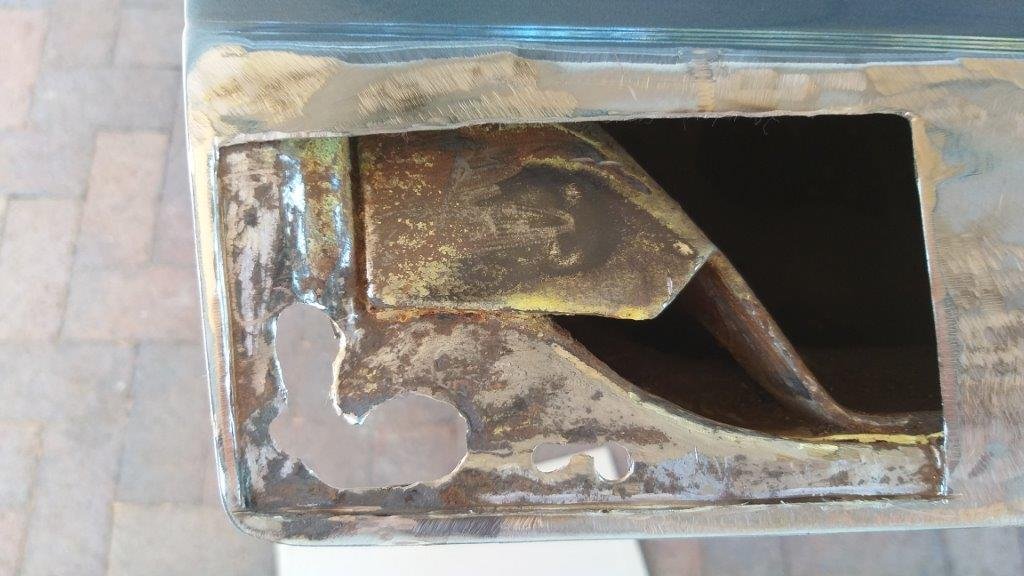
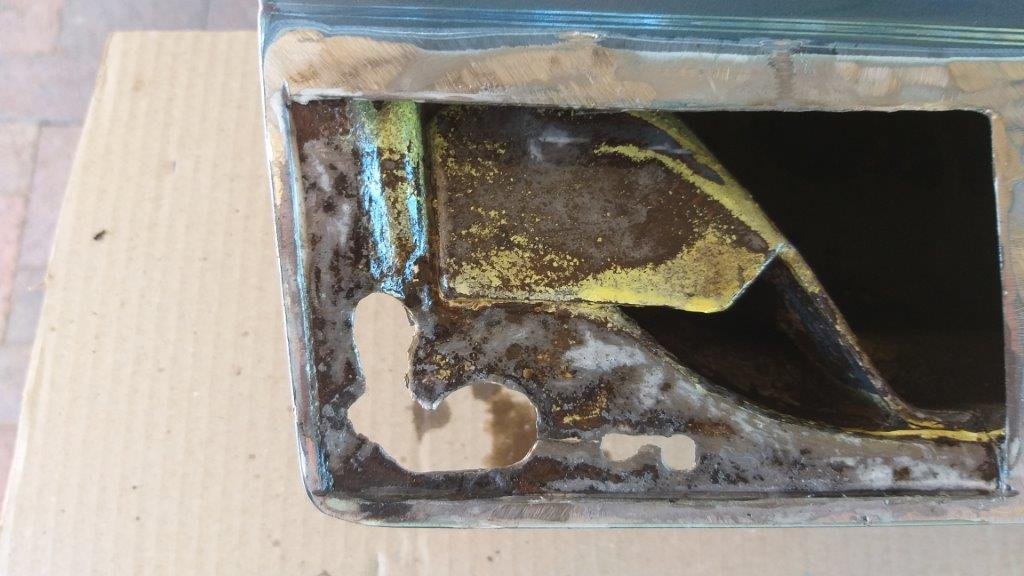
Hey, hey it's driver's door day. Got the door disassembled before morning smoko which was good. After smoko I unbolted it and chucked it on my stand for a better look. Unlike the other door this one showed definite signs of bog in the rust bubbles and the lower door panel shows definite signs of bog bloat. Gotta love those Mericans ! Gave the rust bubbles a quick spank with a flapper disk and sure enough ..... heaps of mud. Ended up chasing it all the way along the lower panel. Luckily it only came up to just below the dip into the upper panel, so that was good. No other rust apart from the front section, so that is positive. I'm thinking that the rust was showing back in 2010 when they painted the car, so they just did a quick bog job to cover it up. Nice ! With the bog all removed I cut an opening around the rust and yep, same as the other door, the small gap between the inner and outer skins was packed with dirt and debris. Got it all out and cleaned up the inner skin with my dremel. There are a few places where the inner skin has gone too, but that should be easy enough to deal with. Chucked some rust converter on the inner bits and called it a day. Plan for tomorrow is to tidy up the cuts and make some cardboard templates for the patches. Thanks for looking.
- 194 replies
-
- 22
-
-
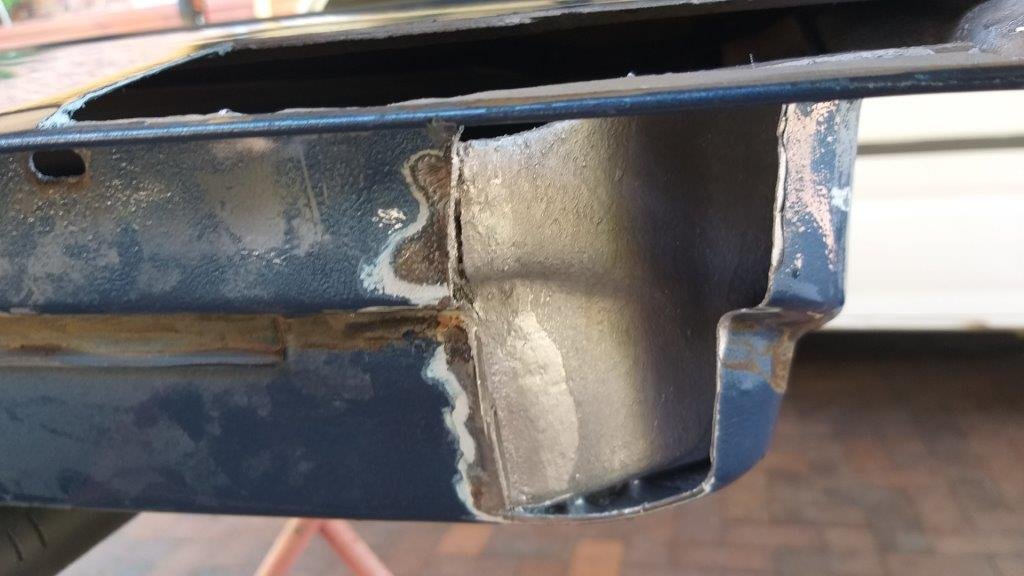
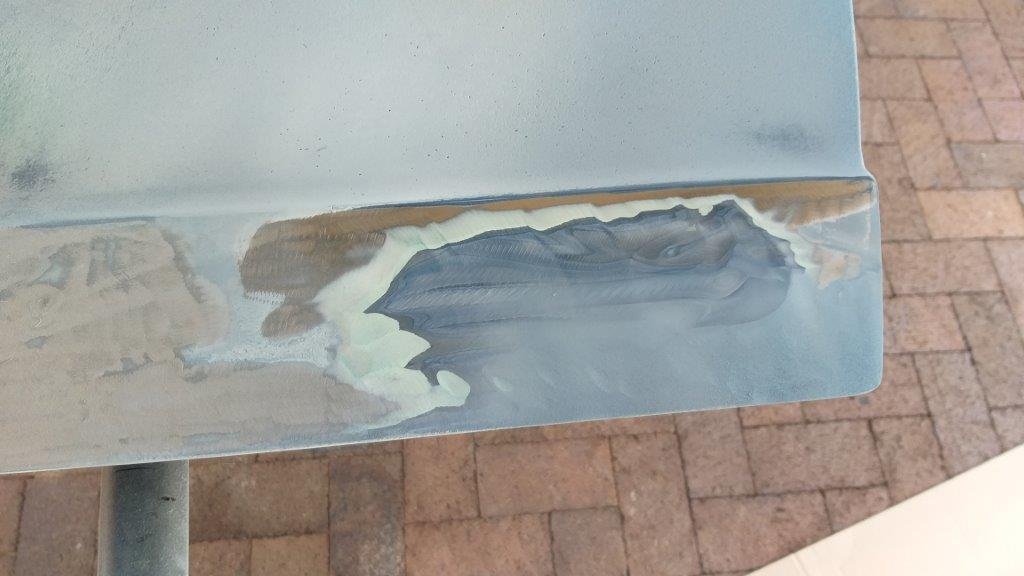
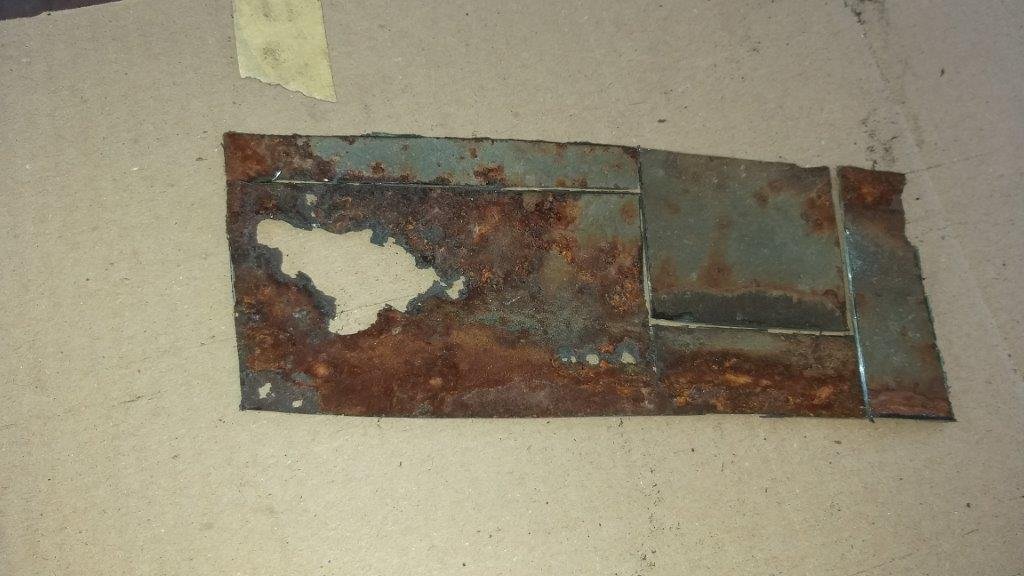
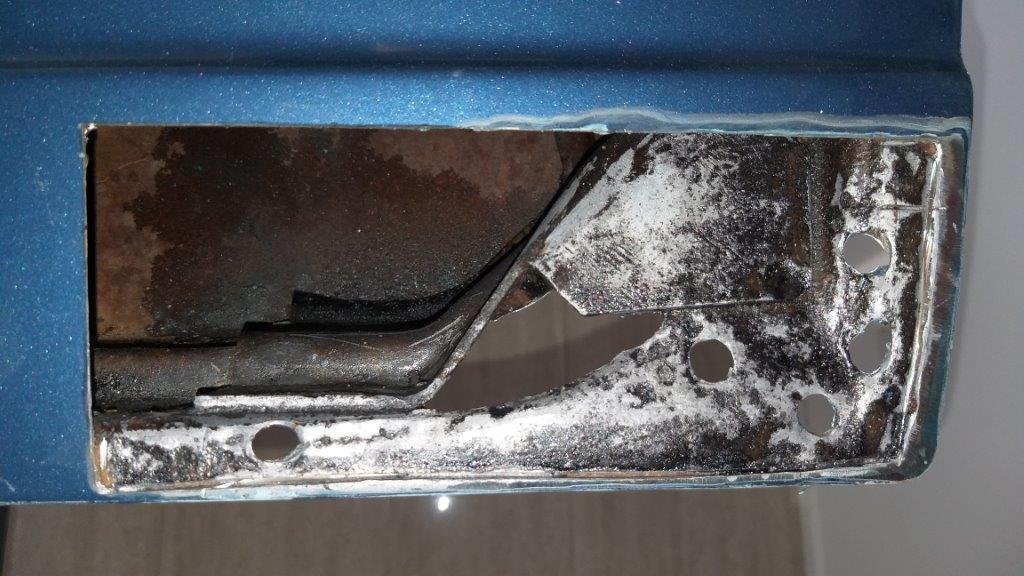
So the underside also looked pretty ugly. Again, I slapped it with a flapper disk expecting to find bog, but again no bog in sight. Cut out the nasty stuff and cleaned up as much of the inner as I could reach and applied a coat of rust converter. I'm relatively happy with the outcome thus far. I'll gut the driver's door tomorrow and then pull it off for some similar treatment. Thanks for looking.
- 194 replies
-
- 21
-
-
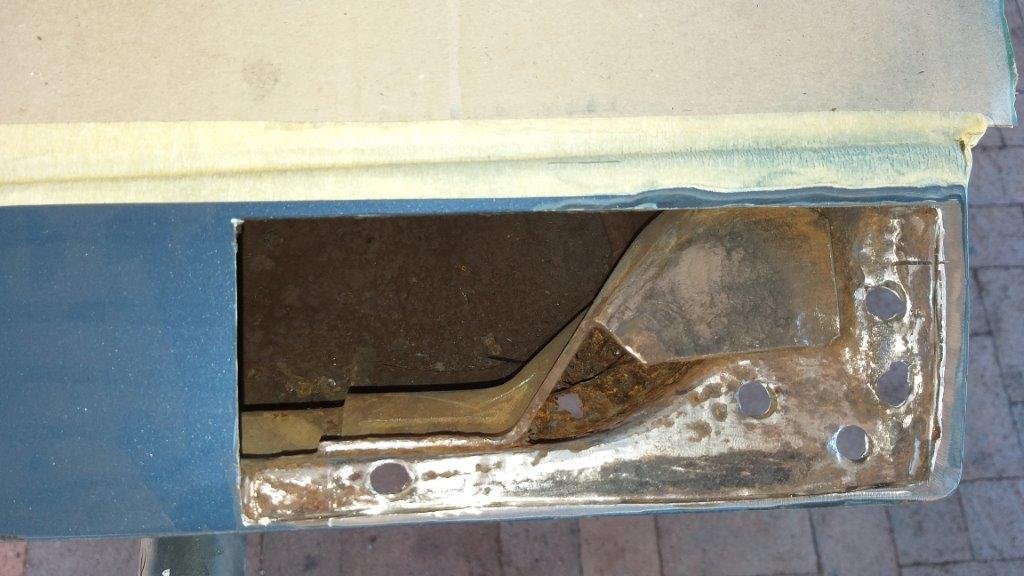
Got the passenger door off and stripped first thing this morning. Started picking at the scabs with a flapper disk after morning smoko and I must say that I am pleasantly surprised. The car was painted in the USA back in 2010 and they have a bit of a reputation for applying thick layers of bog to everything that they touch. Even although the car doesn't have that "bloated" look, I was still expecting to encounter my fair share of the stuff. Surprisingly not a bit of it. Who would have guessed ... Anyway, after realising that I was dealing with factory original steel only I started to make small cuts around the rust holes and slowly progressed the size of the cut until I had mostly clean steel on the inner side of the cuts. As suspected the internal skin was pretty crusty but I gave it a tickle with my dremel and it cleaned up okay. Its pretty solid so I just chucked some rust converter on the inner skin and I'll let that go off for a day or two before I apply some zinc paint. Next up is the underside of the same door.
- 194 replies
-
- 15
-
-
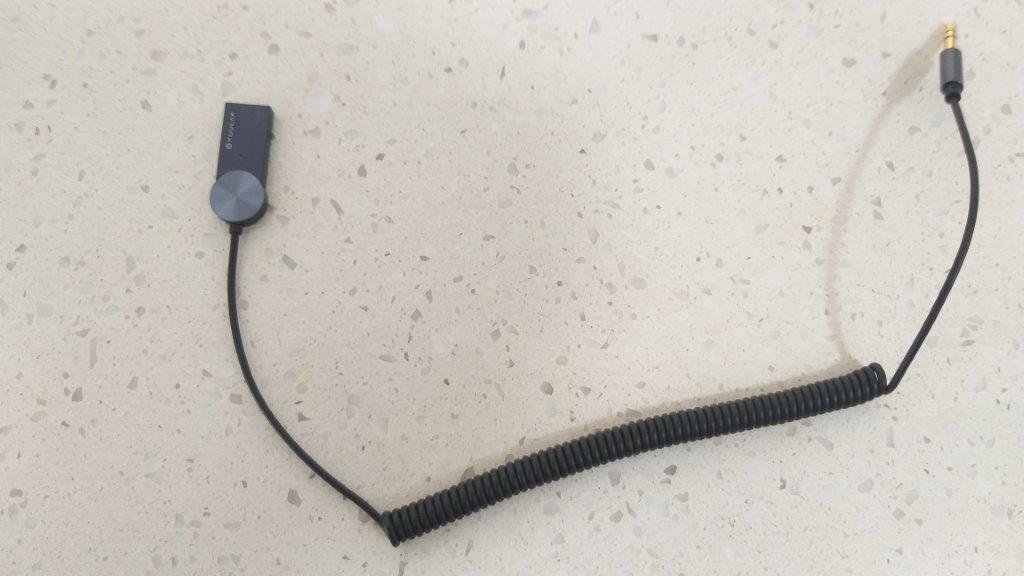
Before I pull it apart to tackle the rust I thought I'd get some paint color matched, so took the Mustang for a drive into town this morning to visit my local automotive paint shop and picked up 2 litres of base coat. Hopefully its a good match, but only time will tell. That chewed up most of my morning so I spent the remaining time playing with the sound system. Luckily the previous owner threw a good few dollars at a period looking modern head unit that has an aux output and some new kick panel speakers. Whilst I wish it was blue tooth enabled, beggars can't be choosers so I chucked a few dollars at a cheap and cheerful blue tooth USB thingy. Plugged it all together and although it works like a charm it looks a bit untidy. So my plan is to setup another ignition fed 12 volt socket that I will hide inside the ashtray together with the USB stick and the aux cable. Should make for a far neater look. Anyhoo, plan for tomorrow is to pull the passenger door off so I can deal with the rust. Over and out.
-
So with the window regulator removed I figured I'd have a peek around the inside of the door to see how that looks. Had to remove the main glass as well as the quarter window and frame to get a really good look. You can just see the rust where the inner and outer door skins are sandwiched together. And check out the factory original finish on the hinge panel. Nice ! Despite this, the rest of the door is really solid so its well worth saving. While I've got the door pulled apart I may as well bite the bullet and deal with the rust. Unlike the driver's side this door is pretty well aligned .......for a 60's Mustang, so over the next day or two I'll pull the front fender off and mark the hinge locations before I unbolt the door. Its a bit more work, but well worth the effort.
-
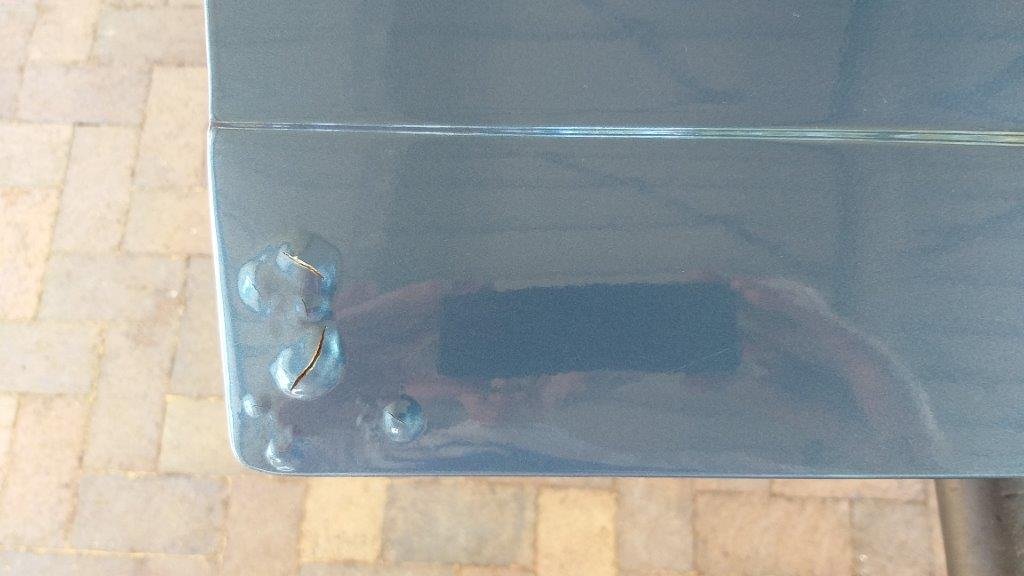
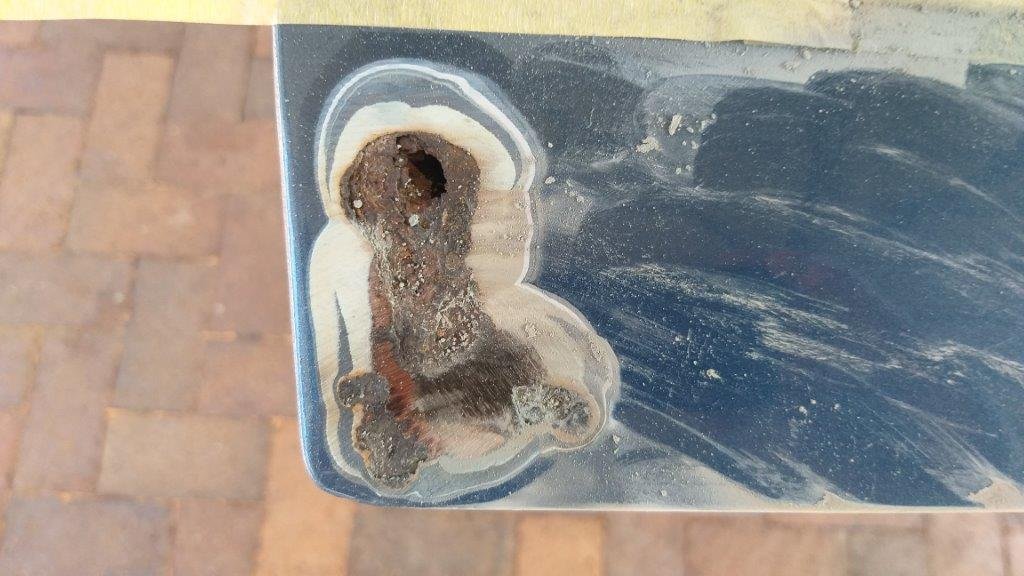
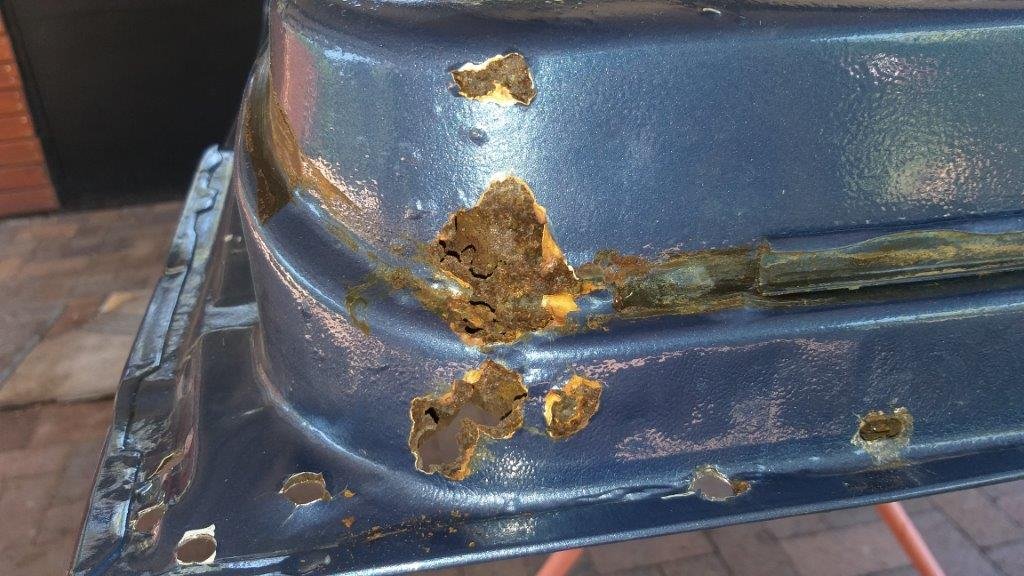
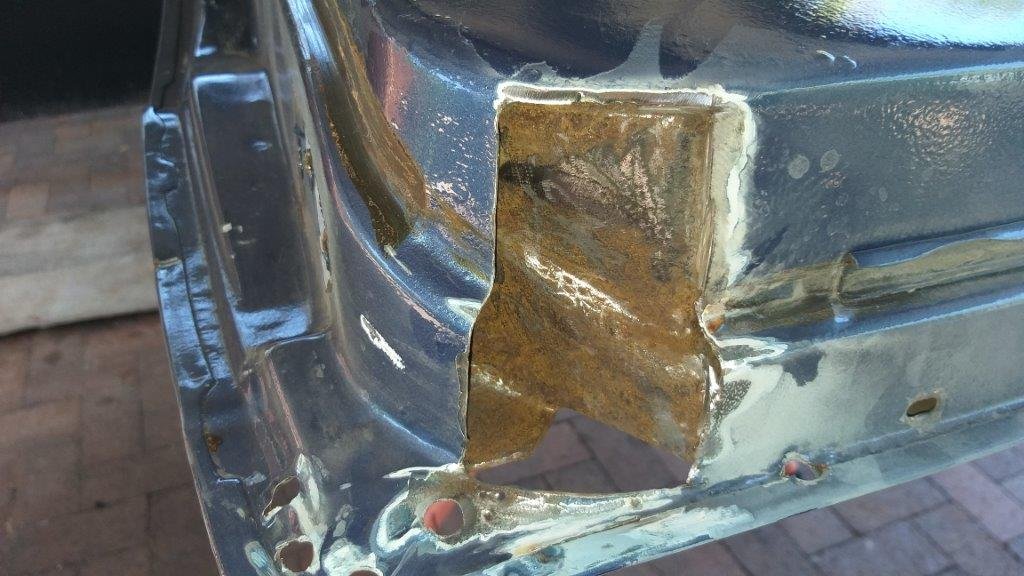
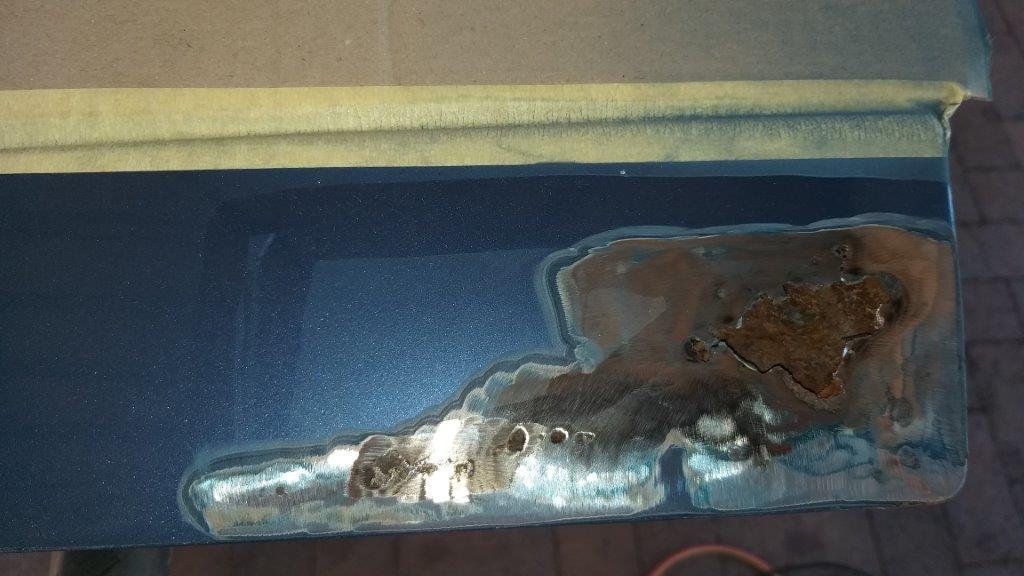
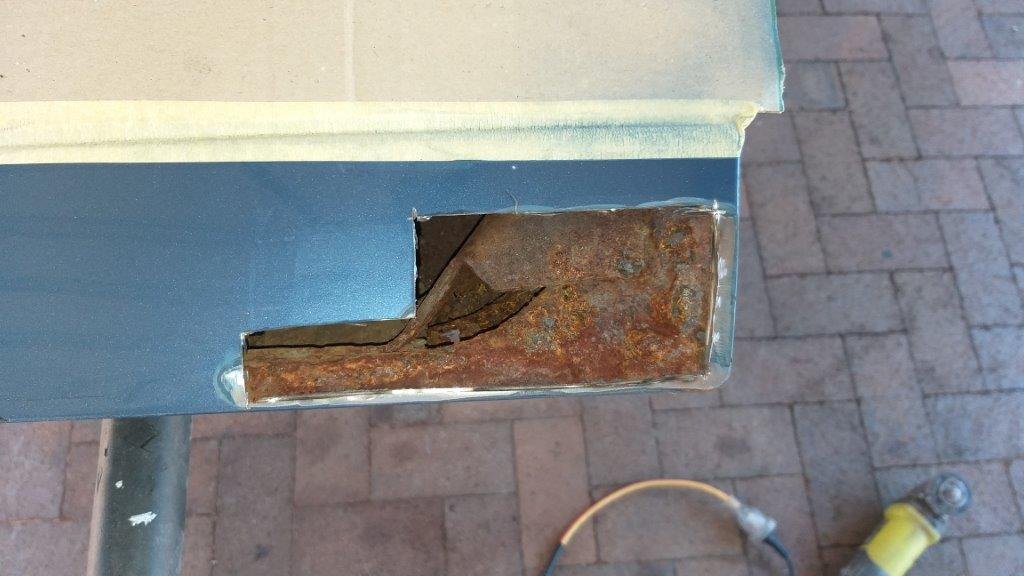
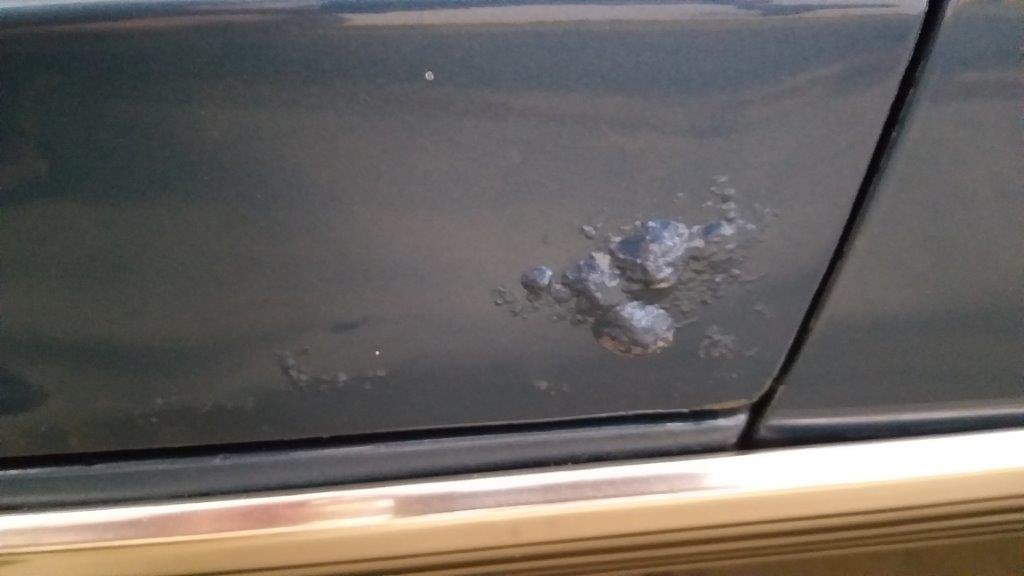
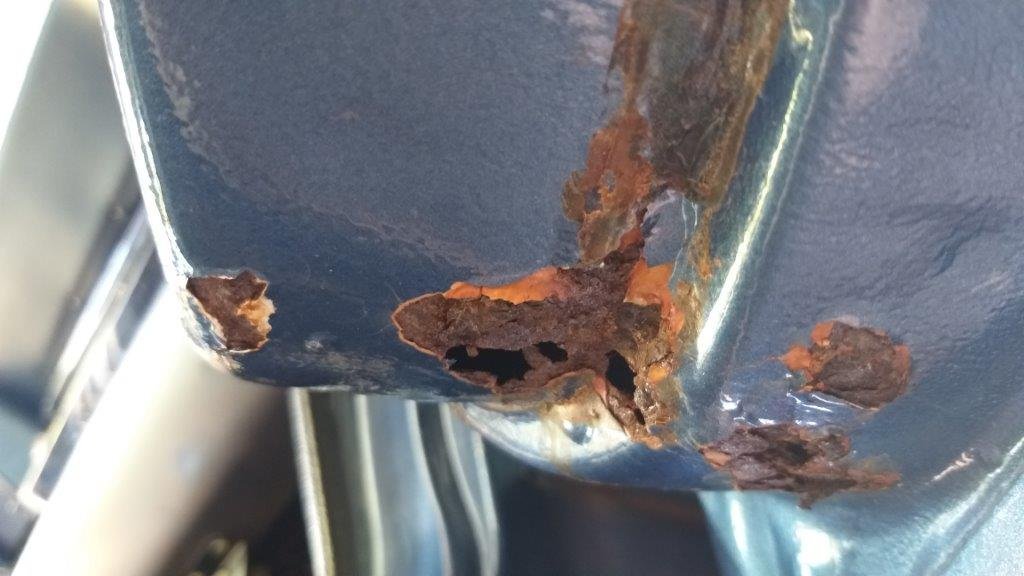
As previously mentioned there is rust in the bottom front corner of both doors. Up to now I've resisted the temptation to pick at the scabs as I know it's going to be ugly. Here are some photos of the passenger door. Too nasty.
-
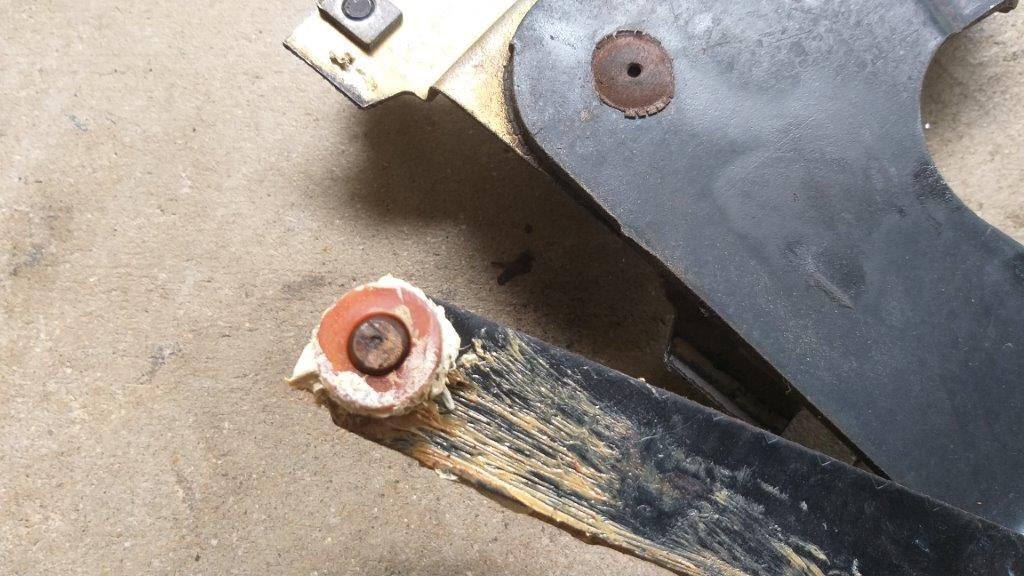
Next up was the door lock. For some reason the key would not open the door from the outside and the interior pull up knob was stiff as hell. Pulled the whole door latch out and discovered a badly worn retaining bush that was allowing the return spring to slip past it and jamb up the mechanism. Luckily I had ordered in a pair with the window rollers, so it was an easy fix. I'll do the driver's side at some stage. Photo of the new bush in place. Thanks for looking.
-
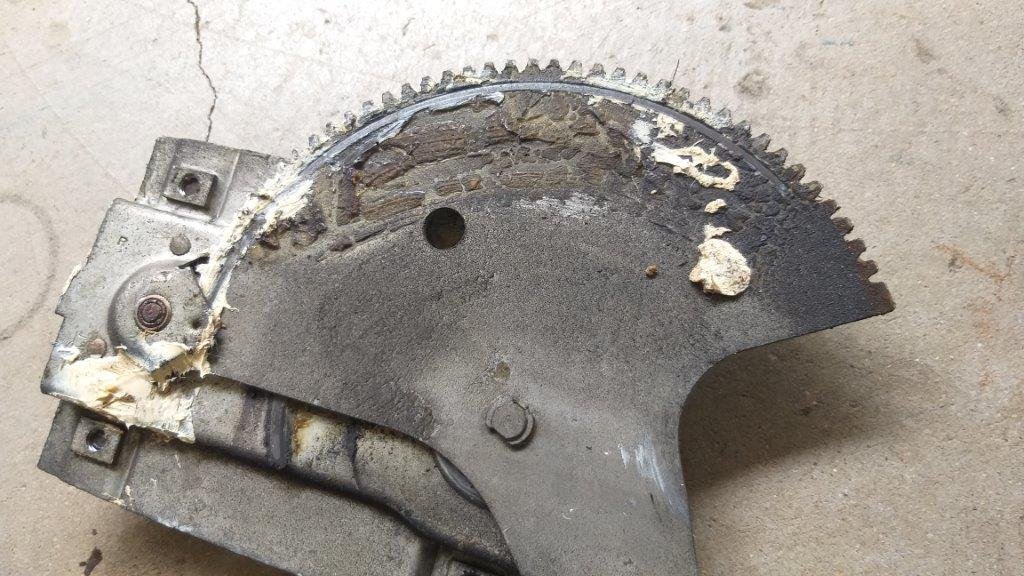
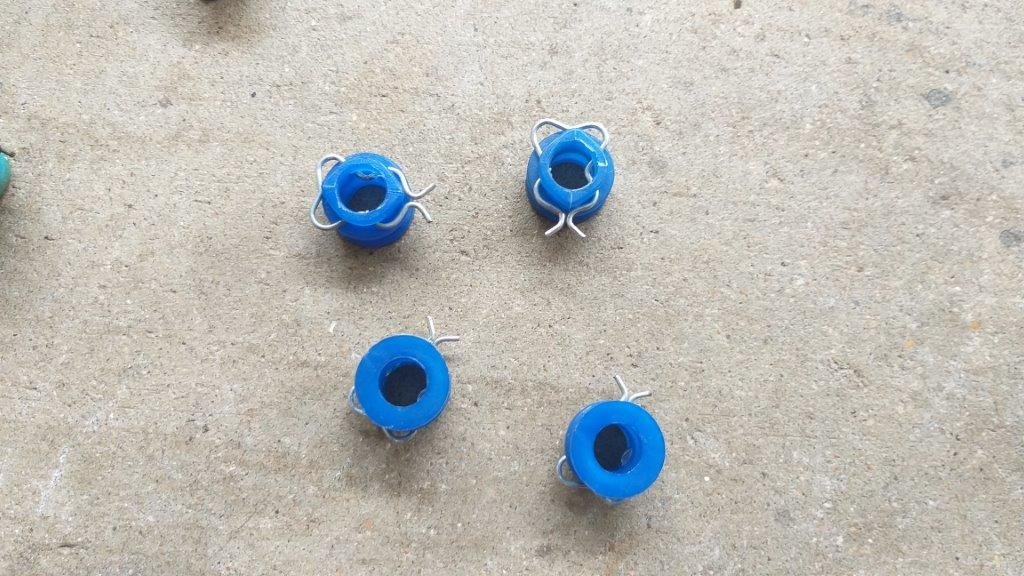
The focus today was on the passenger door. I pulled it apart to sort out the stiff window winder and door lock. First up was the window regulator. There are definite signs that someone has been here before as the rollers are not the factory original ones. Looks like whatever lubricant was slapped about the place has gone hard and is jamming up the works. This coupled with one of the rollers that has seized on its pin seems to have been the cause of the issue. I gave everything a damn good bath in some de-greaser and ran some sand paper over the crusty pin. Chucked in a fresh set of rollers while I was about it. Mechanism is now smooth as silk.
-
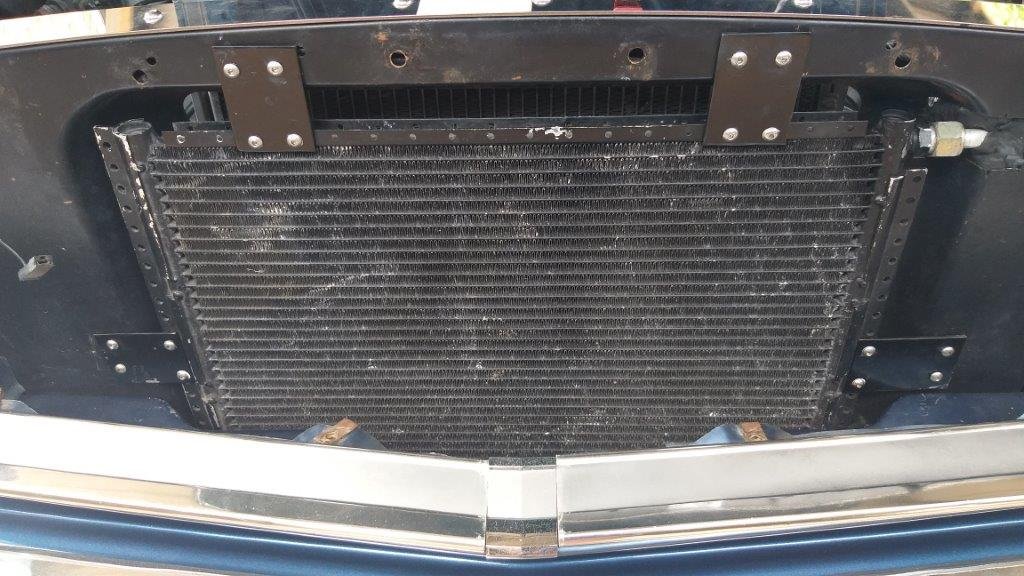
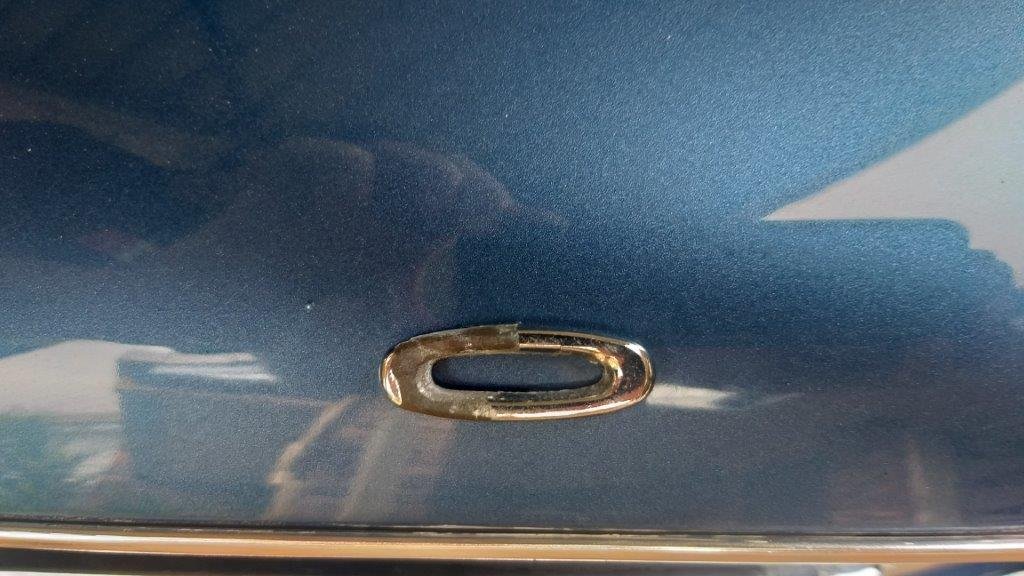
I started off the morning by chucking some new o rings on the a/c condenser fittings which then allowed me to bolt in the condenser using simple mounting brackets that I cut out of some spare aluminium. Gave them a lick of black paint so that they don't stand out behind the grill. According to the previous owner the a/c system has been in pieces since 2014, so that's a bit of a milestone. Just waiting for a diode to arrive so I can then wire the thermo fan up to the a/c system. Then I should be ready for a re-gas. Fingers crossed that it all still works. Treated myself to a few easy jobs for the rest of the morning. Replaced the manky looking Ford lettering on the bonnet as well as a broken hand brake handle using some cheap and cheerful Scott Drake parts. Tomorrow I'll tackle the stiff passenger side window regulator and the door latch on the same side that won't unlock with the key. Thanks for looking.
- 194 replies
-
- 12
-
-
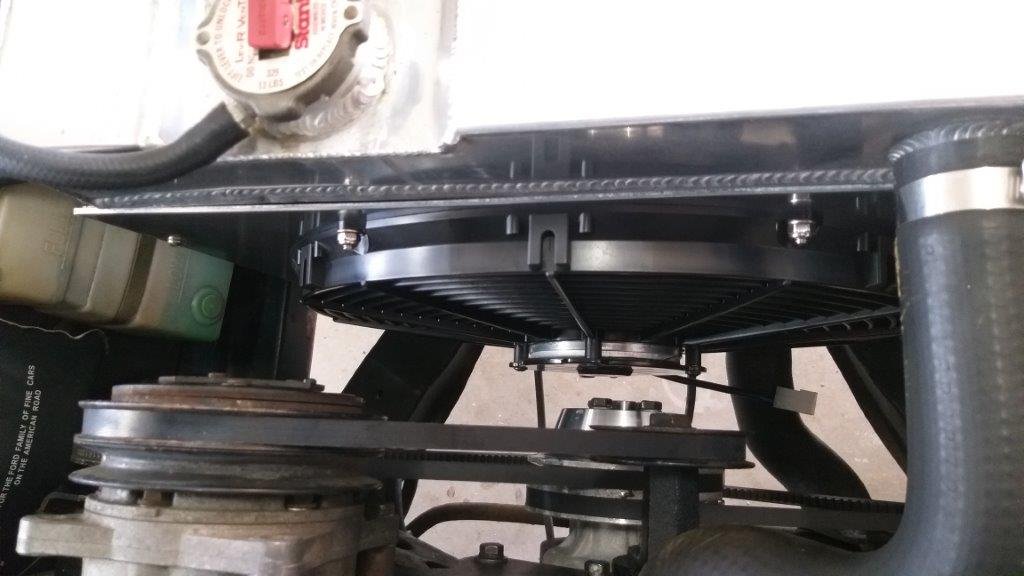
Fitted the new Spal and its custom shroud after morning smoko. It's pretty snug, but I'm happy with the clearance. I dug through a few old wiring looms that I have stashed in my shed and found a female electrical plug that matched the male plug on the Spal, which was good. Fired her up and ran her up to temp. Yikes that Spal sure moves a heap of air. In other news my mixed batch of a/c line o rings pitched up so tomorrow I can chuck the a/c condenser back in. Happy days.
- 194 replies
-
- 13
-
-
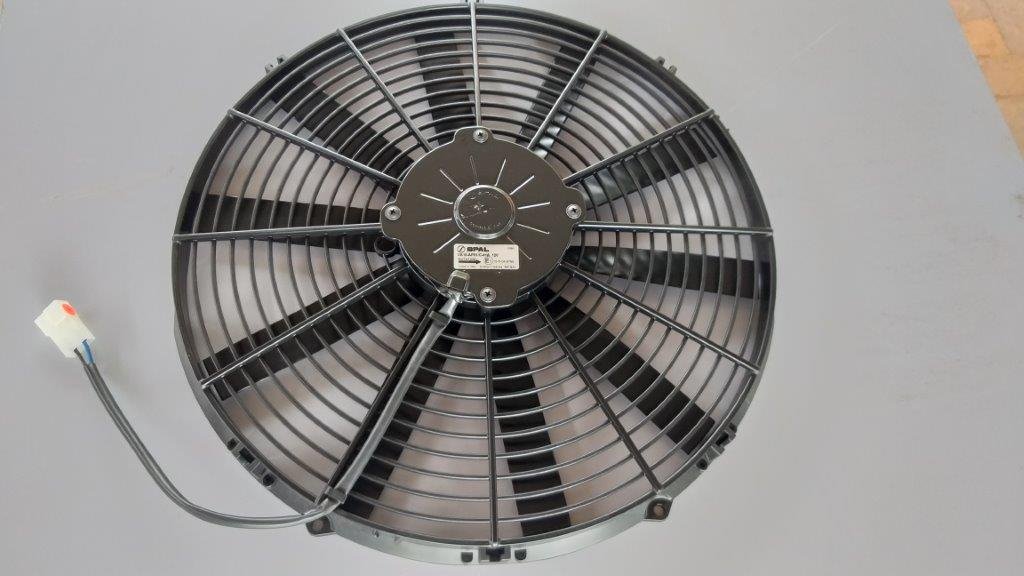
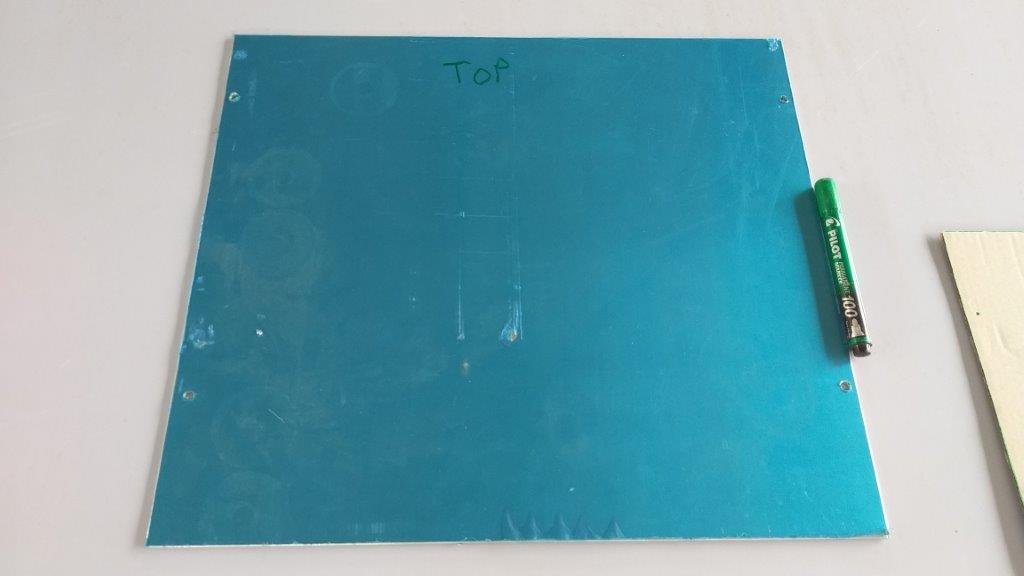
In my last update I mentioned that I was heading off to my local wreckers to check out twin thermo fan options. Well whilst I enjoyed a good few sunny hours strolling around the wreckers and managed to dodge most of the cow patties left by the organic lawn mower, I failed to find a set of twin fans that were small enough to fit on the piddly little Mustang radiator. Most setups from the older generation Fords and Holdens measure around 600 mm wide, far larger than my 465 mm by 440 mm radiator core. There were a few dual speed single fan options, but these proved to be thicker than the space I have available between the radiator and my water pump pulley. So I ended up going with plan B which is a 16 inch Spal puller fan that I will wire up with dual feeds, one from the existing thermo switch and an over ride feed triggered by the exciter wire for my a/c compressor. Anyhoo, the fan pitched up late last week, so I thought I'd spend the morning sorting it out. Now I'm not a huge fan of the usual attachments that push through the radiator core to hold the fan in place, so I decided to fabricate an aluminium mount that would double as a radiator shroud. Managed to scrounge an aluminium off-cut from my mate Cameron and I did a bit of carving this morning. I'm pretty happy with the end result. Just need to chuck it in and give it a whirl. Thanks for looking.
- 194 replies
-
- 14
-
-

SR2’s 1947 Vauxhall “Rigamortice” Discussion thread.
Flash replied to sr2's topic in Project Discussion
Better to spend time in the shed than in front of the PC, I reckon. -
Not a bad pre WOF result, so hopefully you are able to get it all legal shortly. Chuffed to see that you have removed that fake grill. It spoiled the classic Imp front end look in my opinion.
-
SR2’s 1947 Vauxhall “Rigamortice” Discussion thread.
Flash replied to sr2's topic in Project Discussion
Jeez, slow down Simon. You are making the rest of us look bad LOL. Seriously tho, good work mate. You are steaming through it now. -
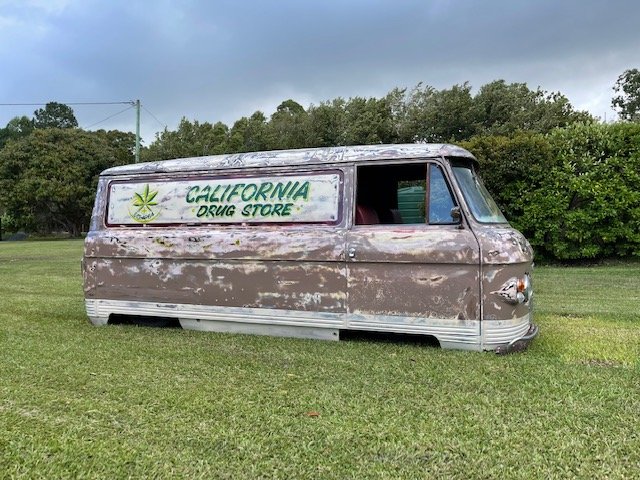
In other news many of you will remember the green Mitsi Starwagon that gave up its front suspension for the Thames. Well the engine and 5 speed manual gearbox from that van made their way down to New South Wales and have been given a second lease on life powering along this bagged Commer van. Mick the owner took the Commer along to this year's Summer Nats where it drew heaps of attention. Looking at this photo its hard to believe that there are a set of wheels lurking under there somewhere.
- 715 replies
-
- 17
-
-

-
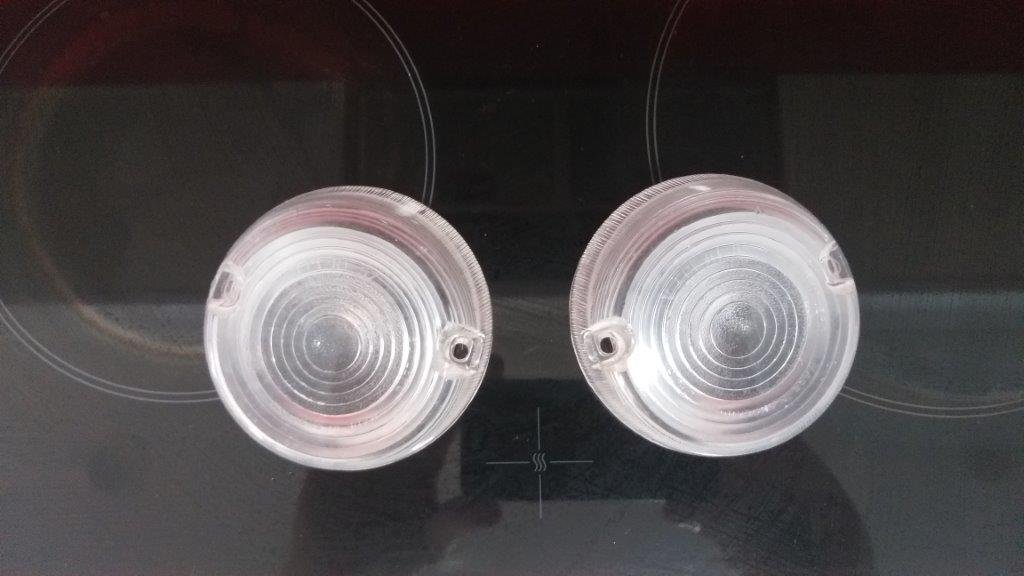
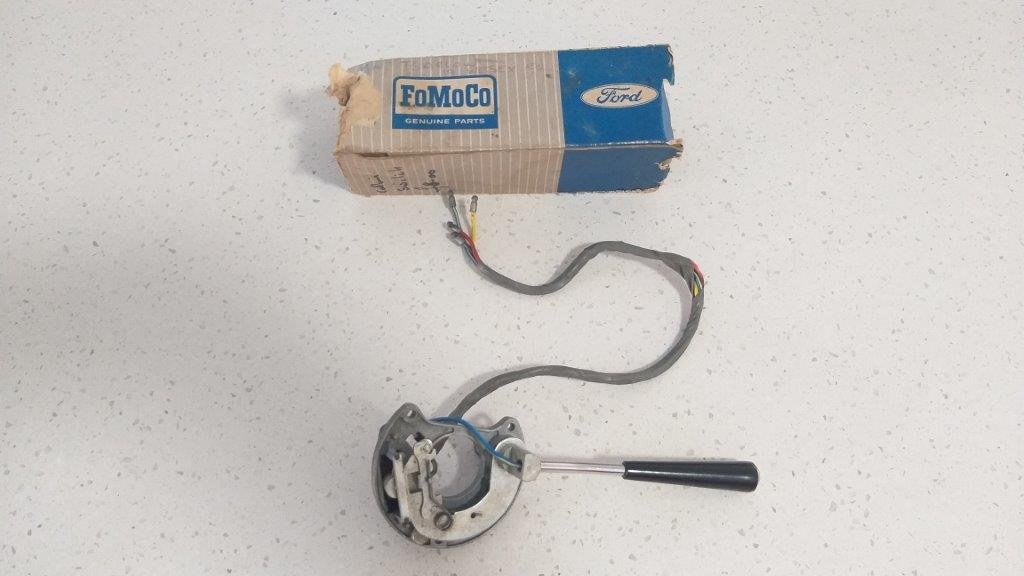
With the Mustang hogging most of my car time these days the poor old Thames has just been languishing in the shed, but she is never far from my thoughts. In the November edition of the UK Thames Owner's Club magazine Sandy announced that after over 30 years of running the club almost single handed he is stepping down for a well deserved break. So with the future of the club being so uncertain I decided it was an opportune time to order the few remaining parts that are unique to the 400E range. These left the UK in early December and arrived safely down under two days ago. The clear park light / indicator lenses are a 400E only part and I was lucky enough to grab a pair of NOS ones as well as a NOS indicator stalk. Its always such a pleasure when it comes in its original box which has somehow survived for almost 60 years.