Flash
-
Posts
1615 -
Joined
-
Last visited
-
Days Won
2
Everything posted by Flash
-
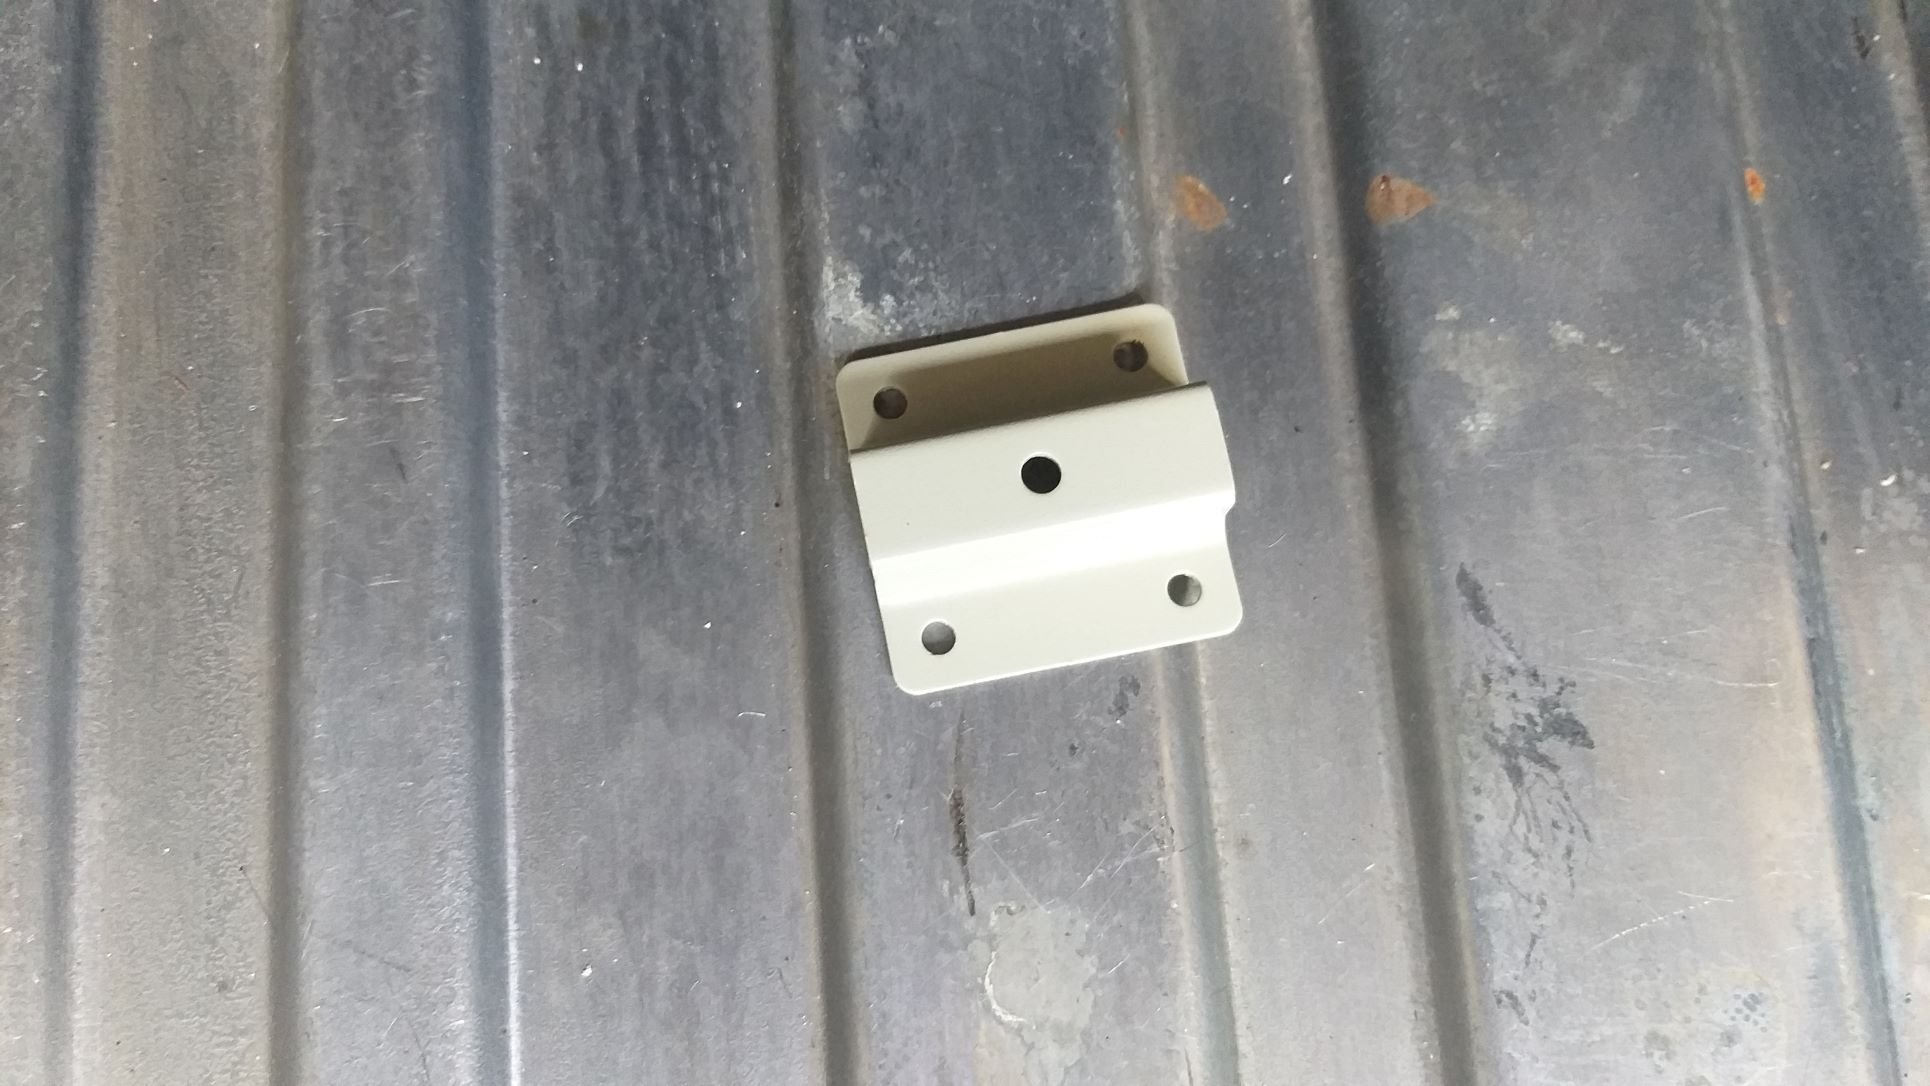
Didn't want to start hacking things off the floor so rummaged around in the shed and came out with this little bracket :

-
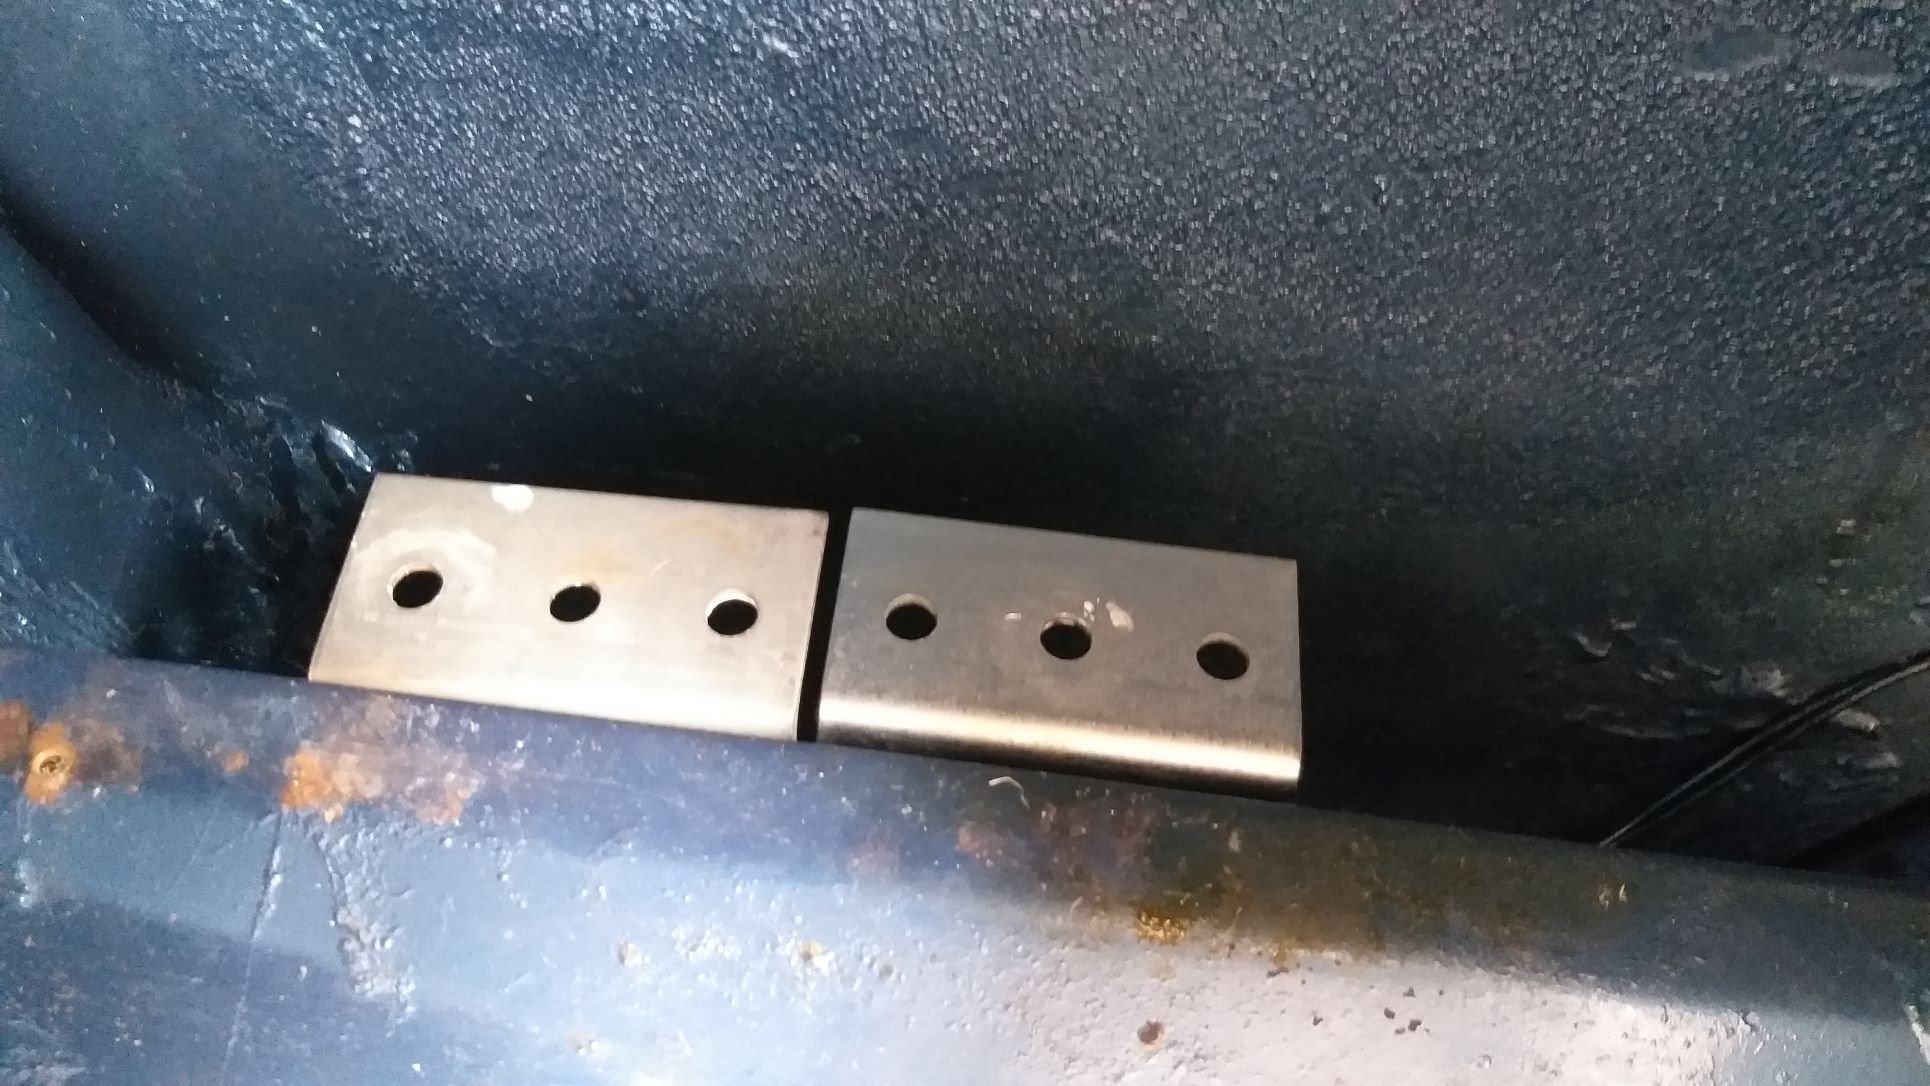
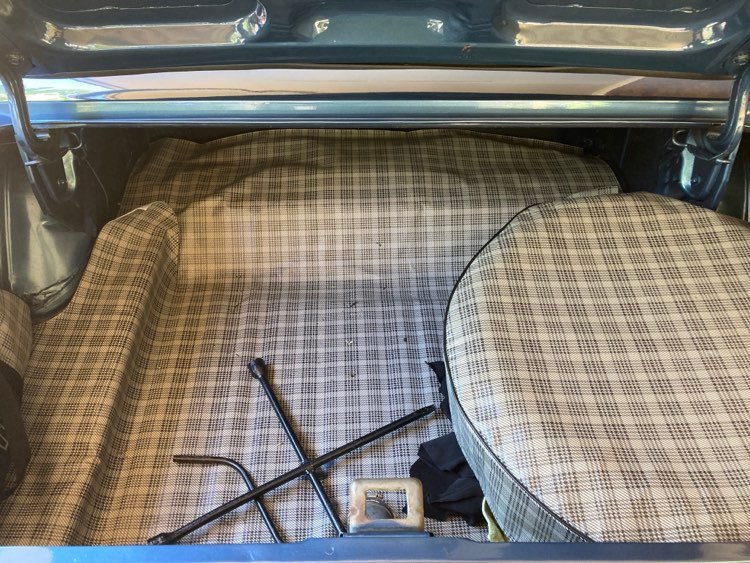
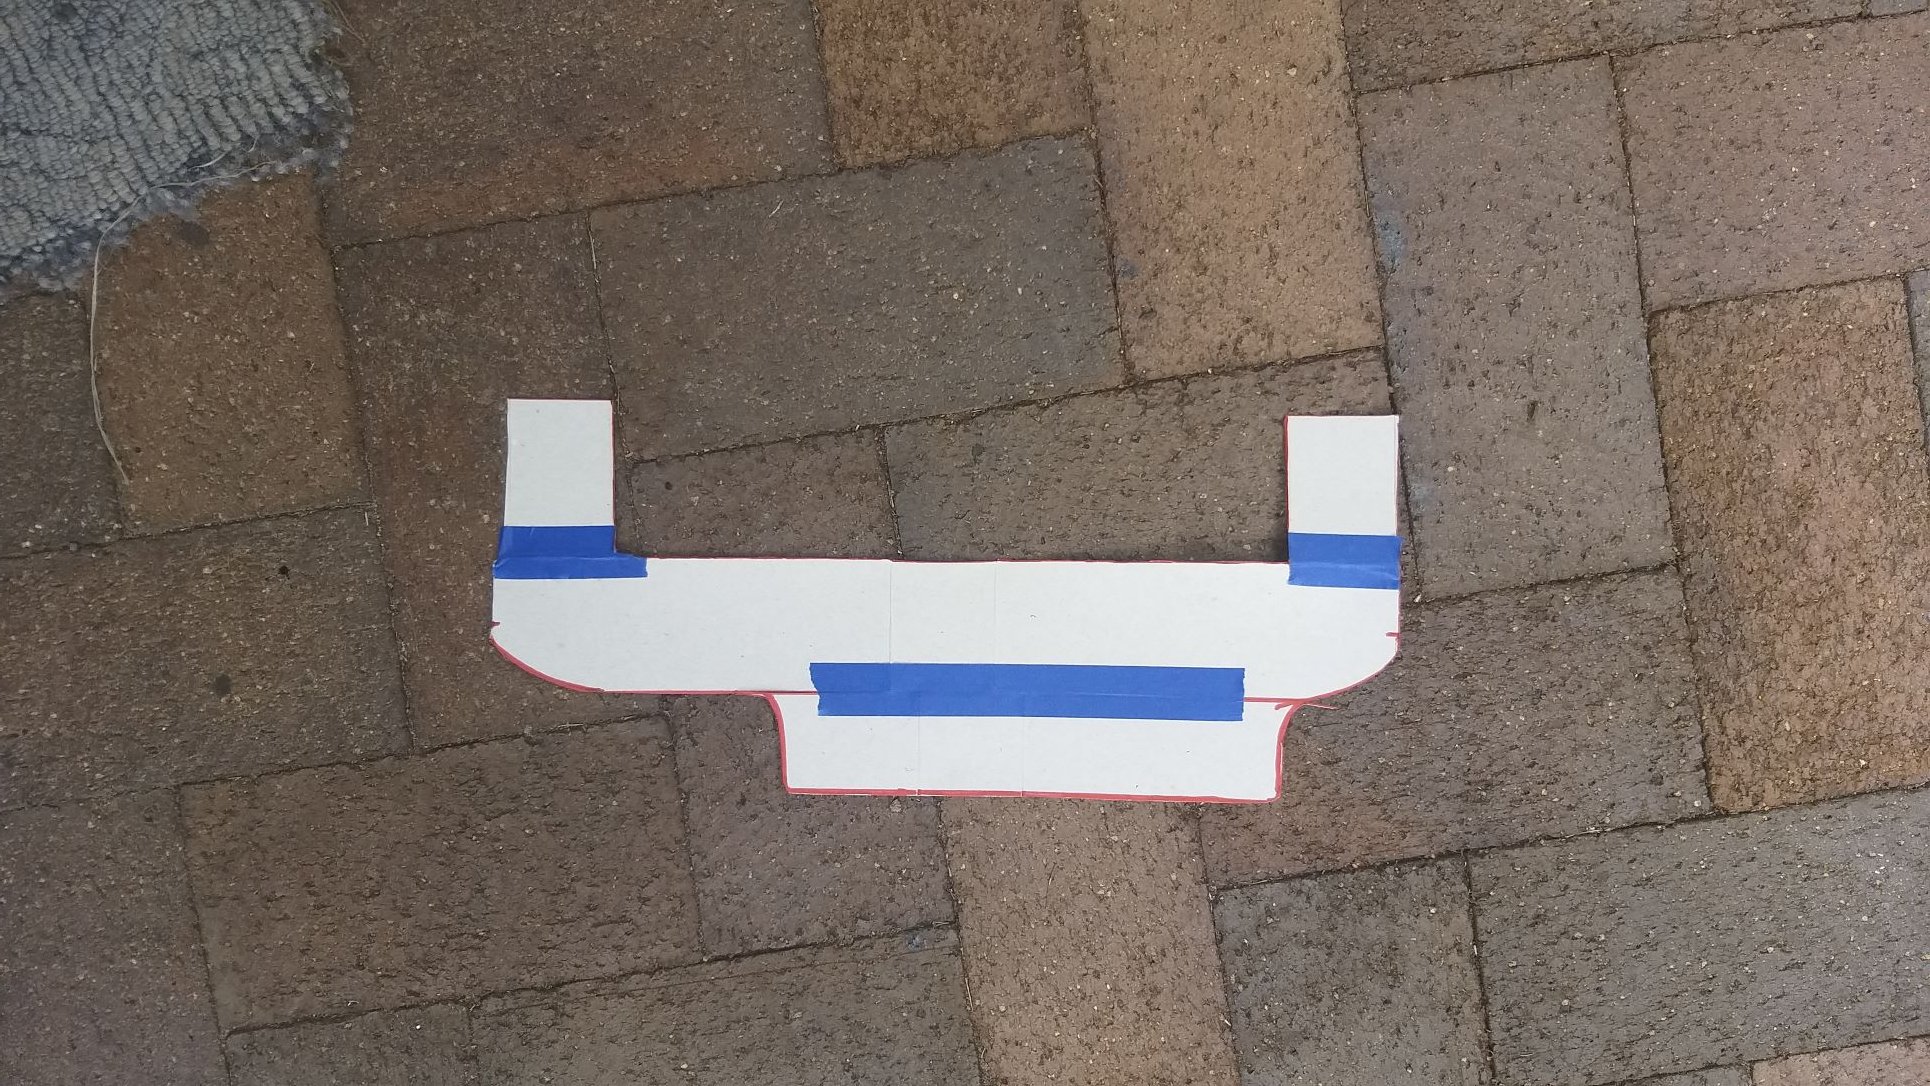
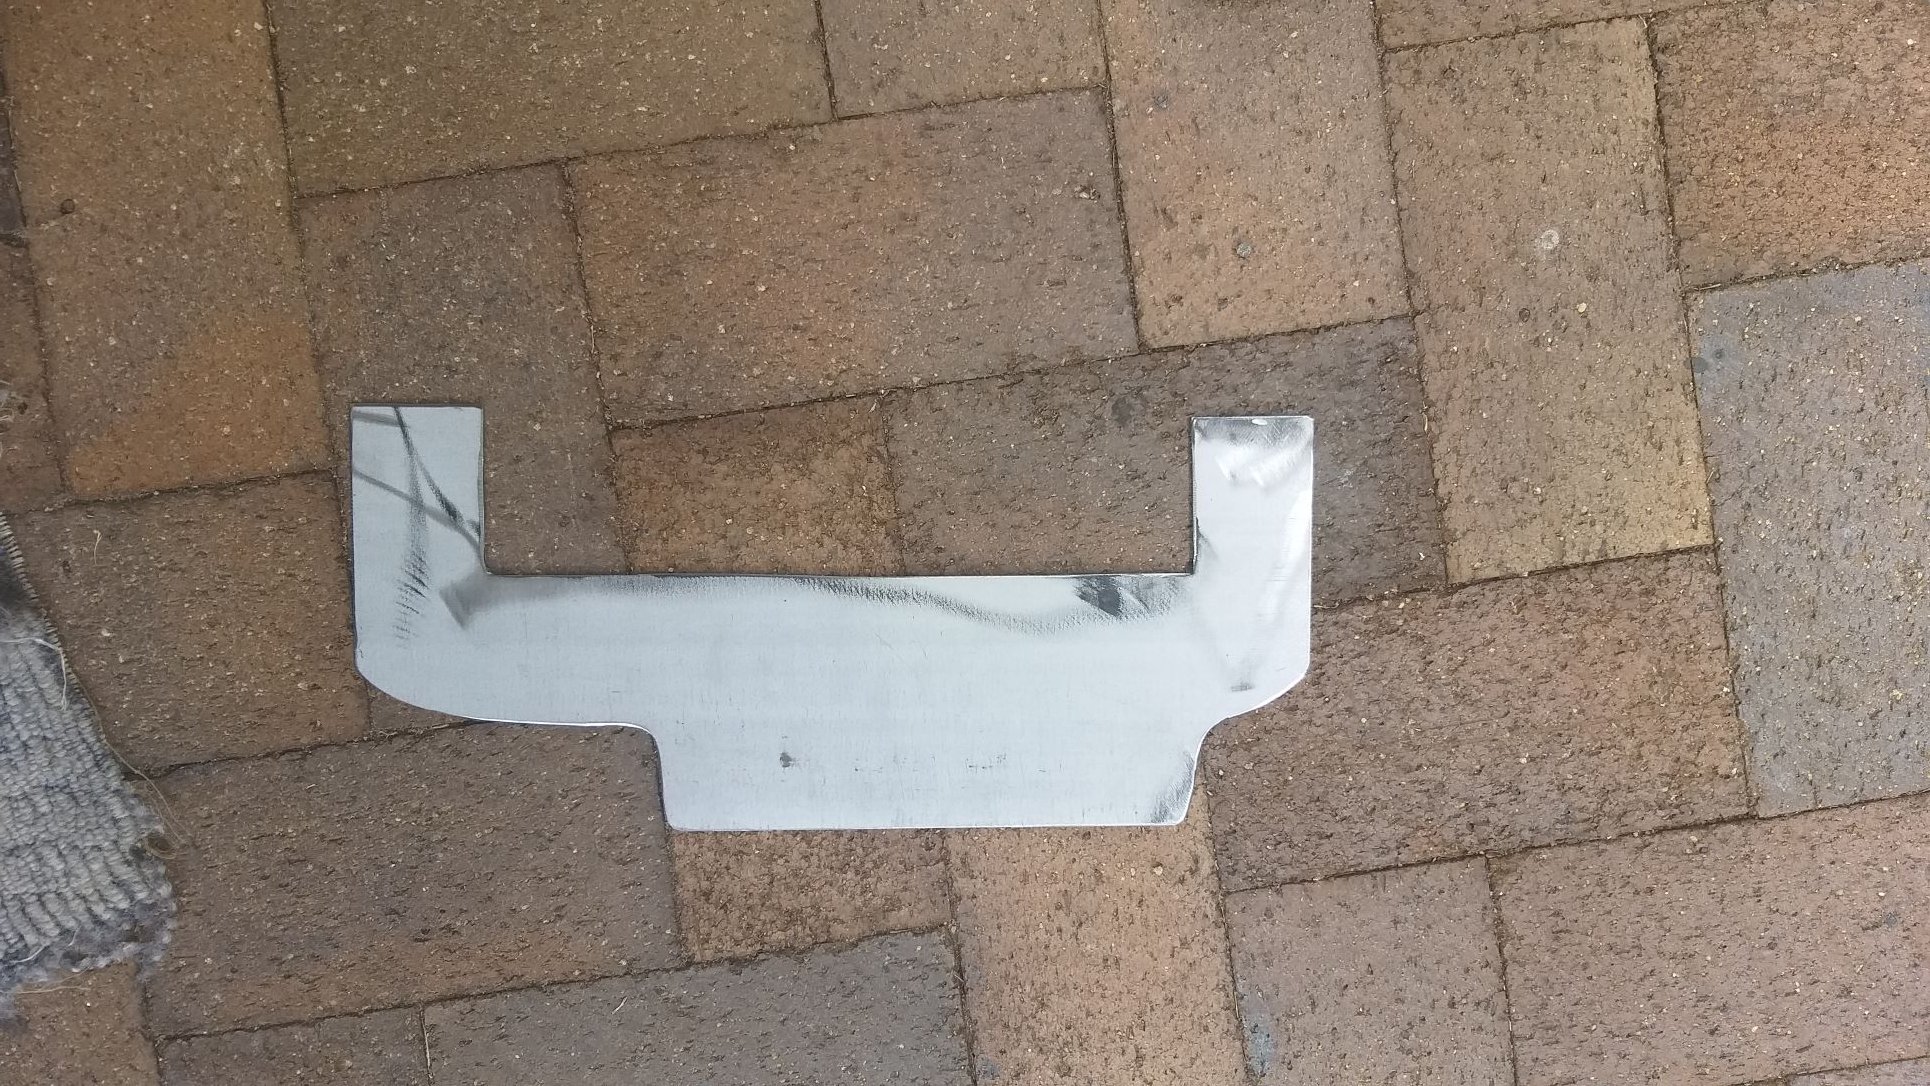
With the battery now safely tucked up in its new home, I turned my attention to fine tuning the rest of the boot layout. First up is the relocation of the spare wheel as its original position now clashes with the battery. Tried a few things and settled on trying to tuck the spare up against the back seat backing board. All that is needed is for me to replicate the factory hold down bracket that looks like so:
-
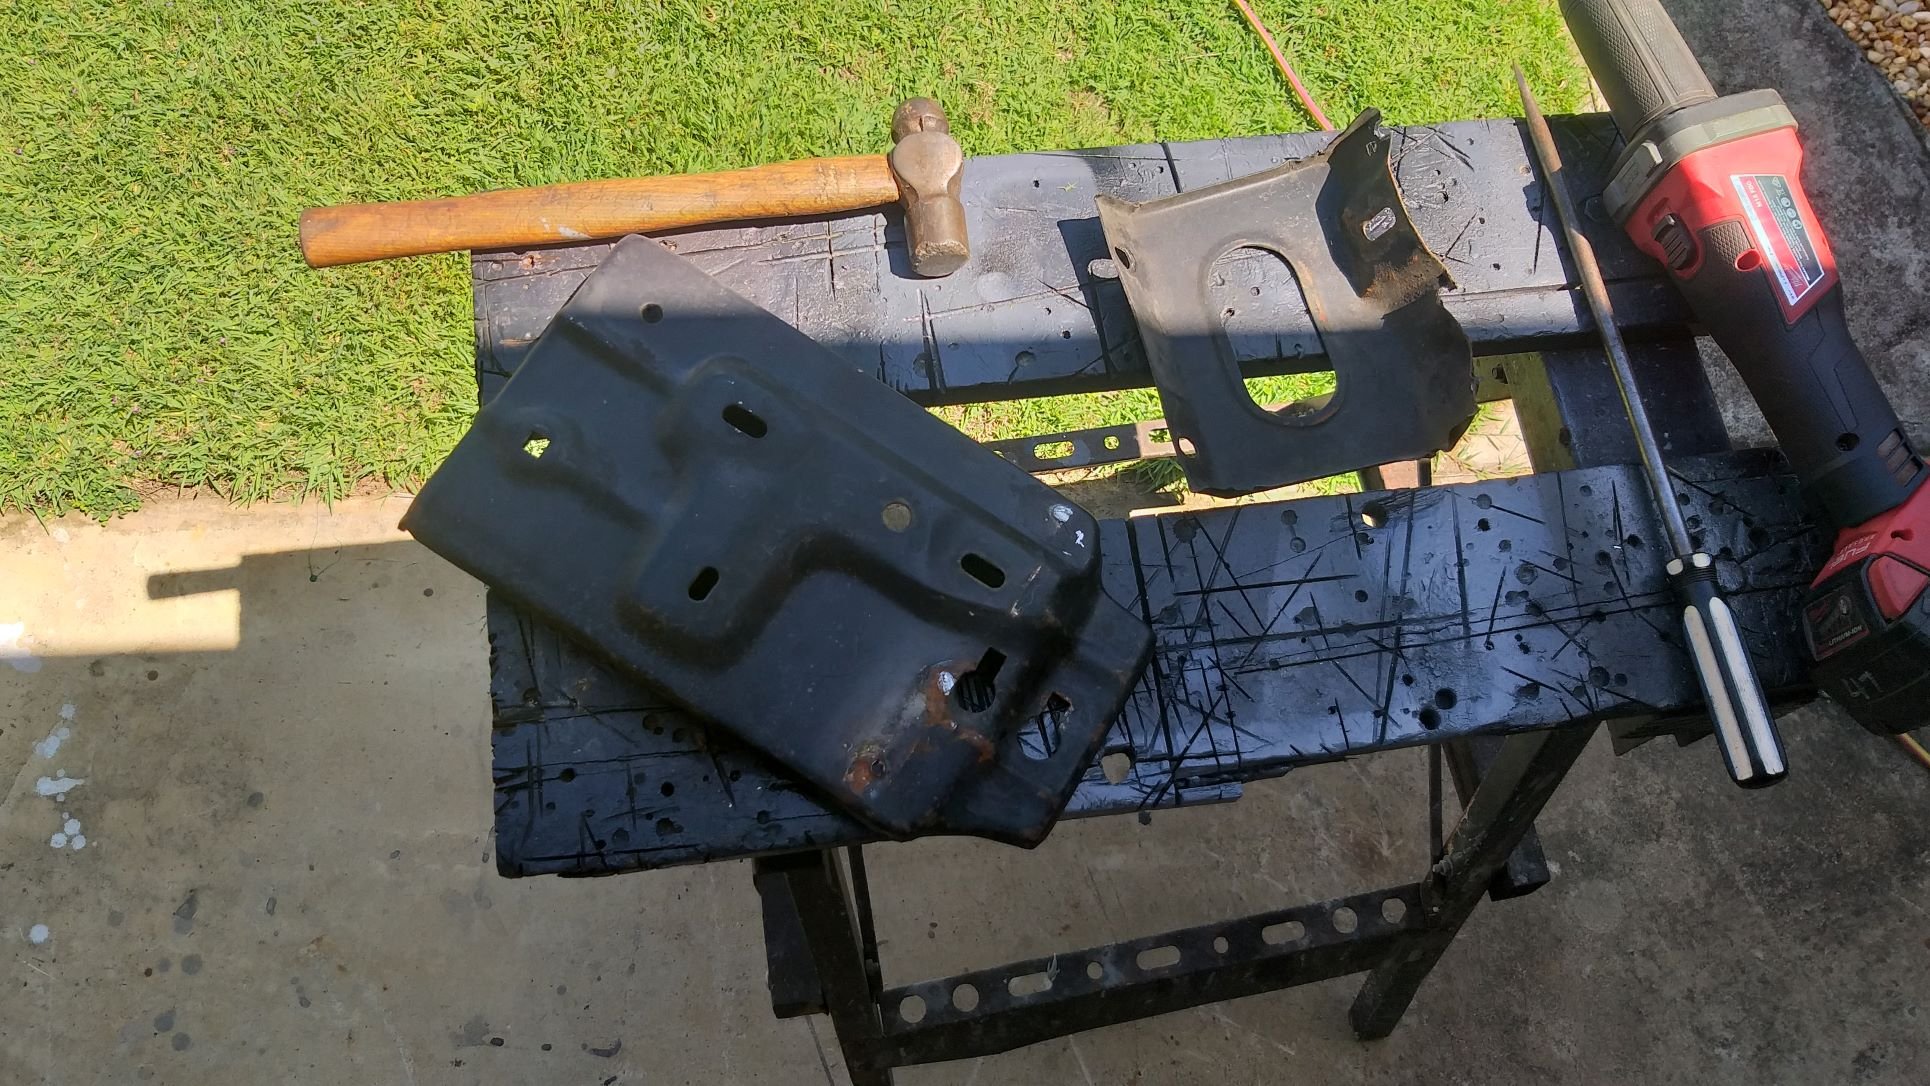
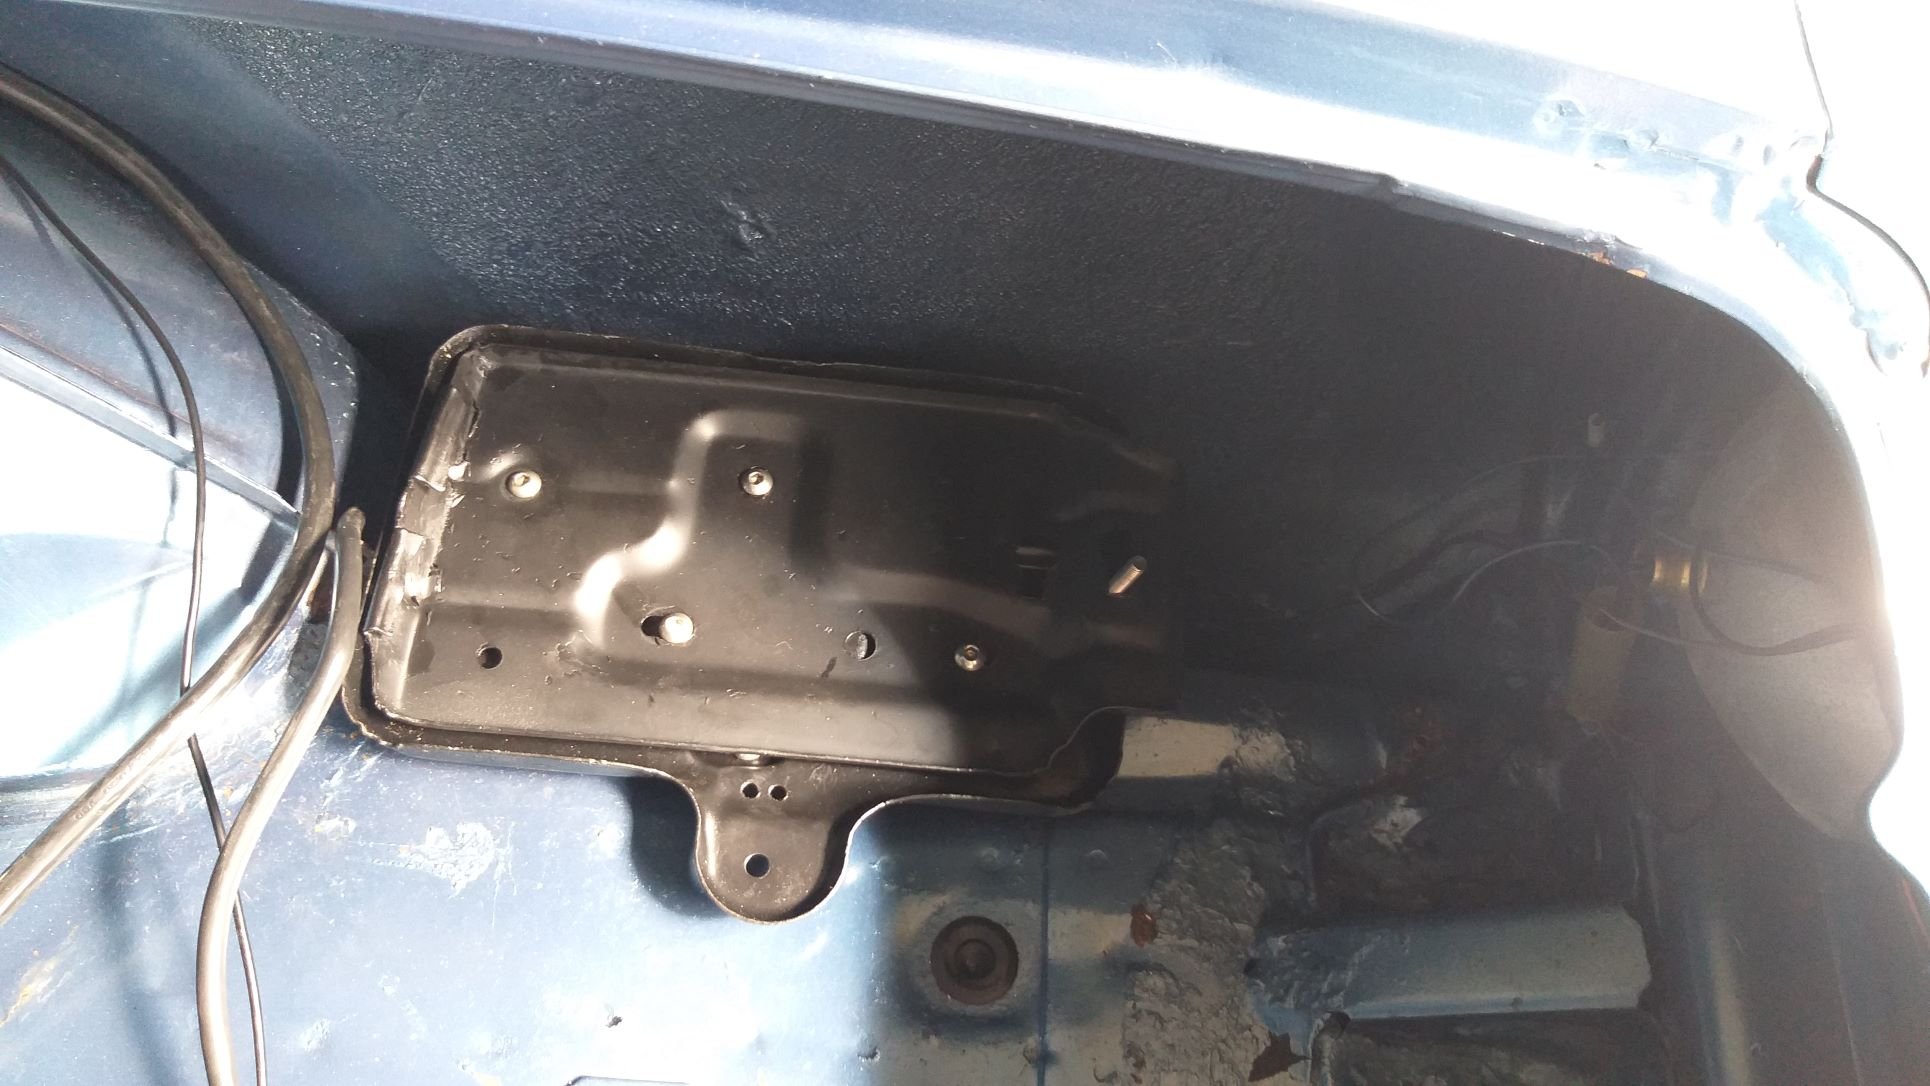
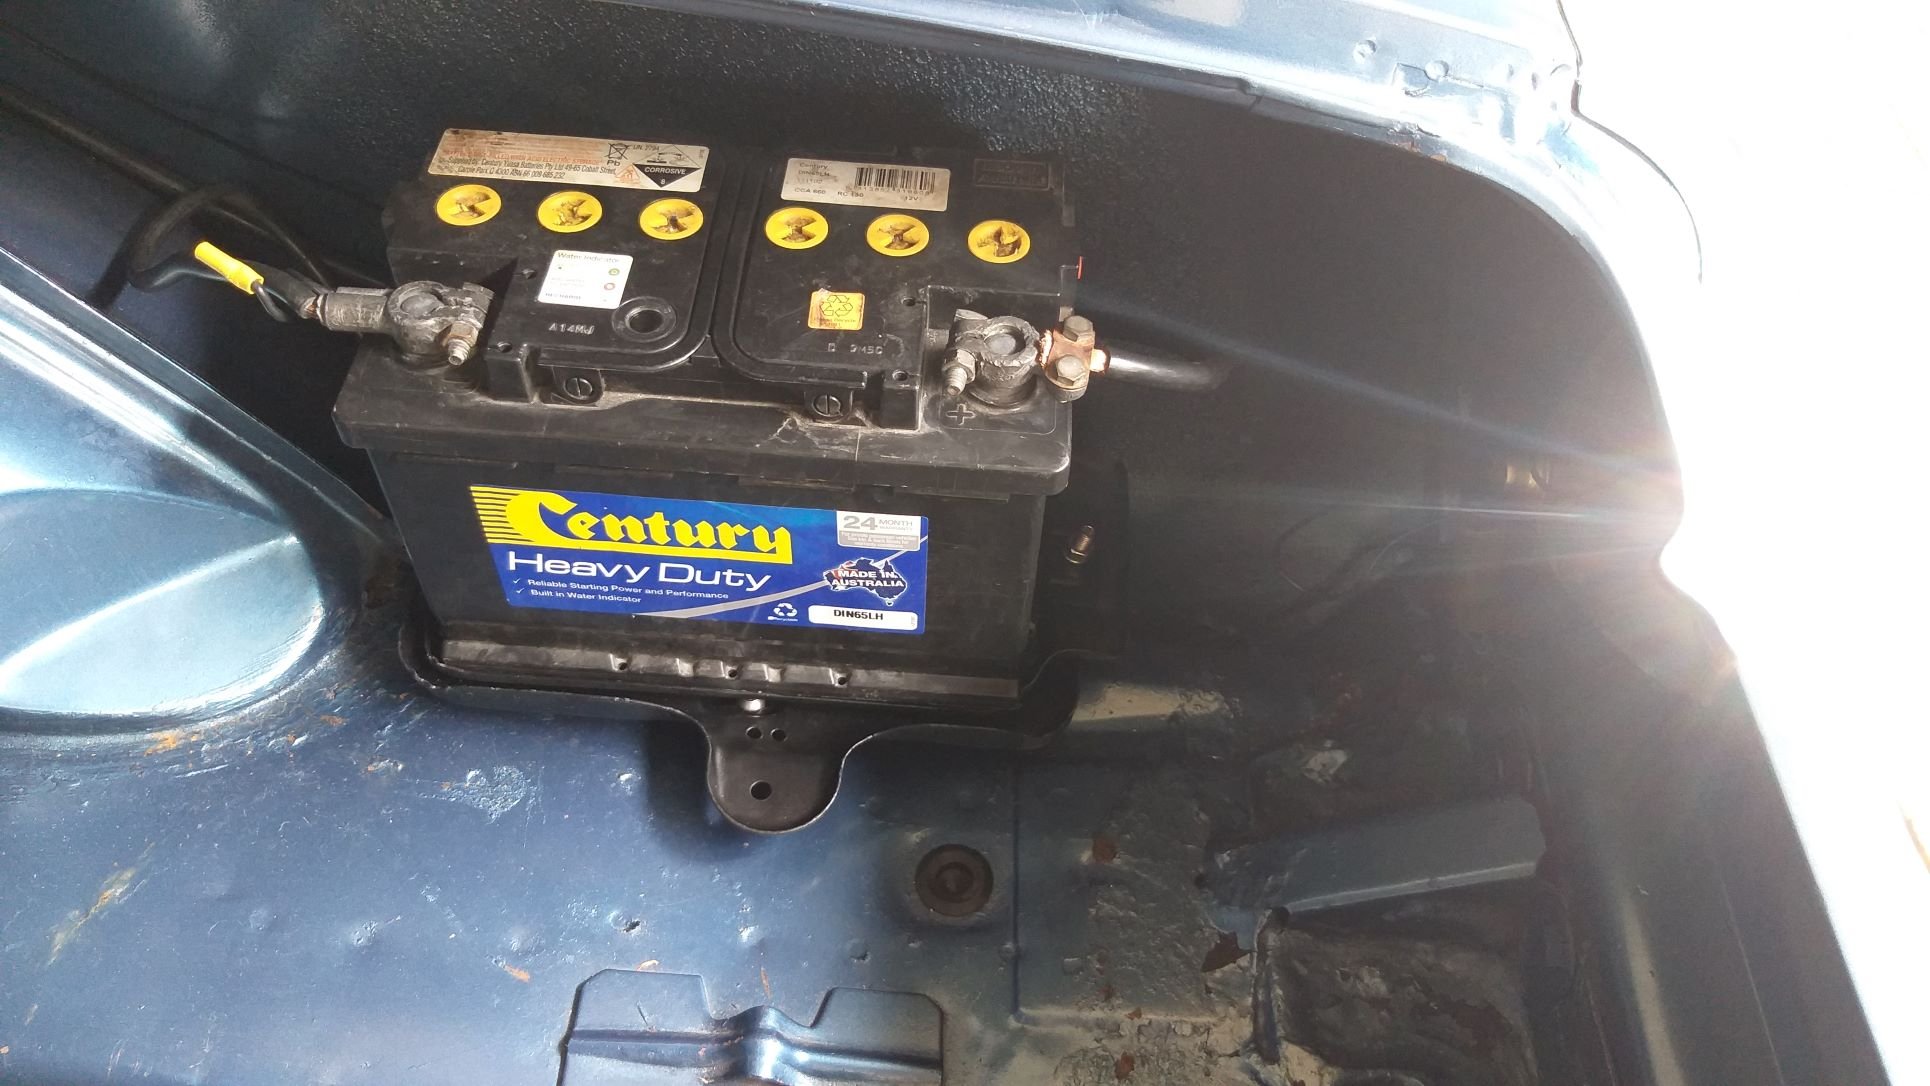
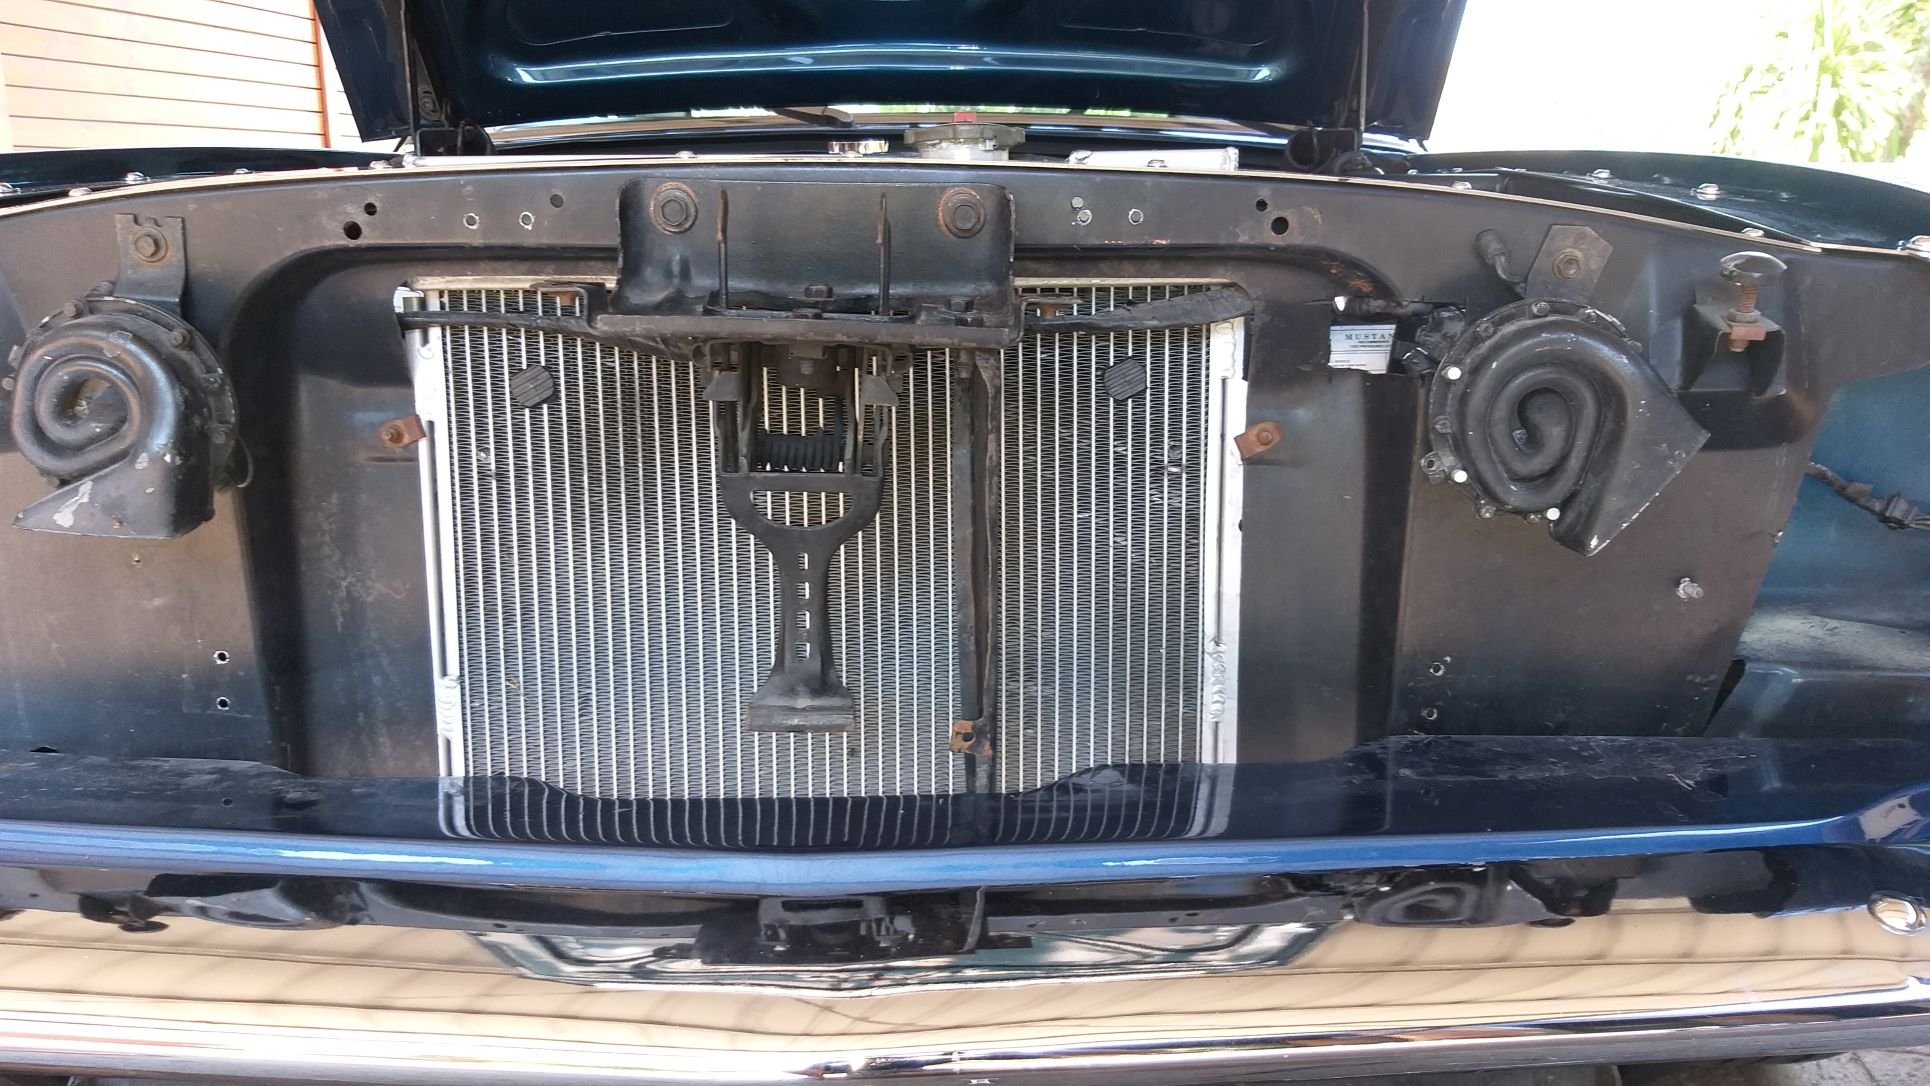
Battery relocation - Chapter 4 Next step was to pull out the original engine bay battery shelf to create the additional space needed for my bigger radiator. The whole thing is held in with 4 bolts and came out easy enough. What I really like about the Mustang tray is that it holds the battery down with a little foot clamp rather than the Mitsi tray which uses the old hooked threaded rods and a cross bar over the top of the battery. Checked the dimensions on the Muzzy tray and its just slightly smaller than the Mitsi tray, so I figured why don't I see if I can modify the Muzzy tray to bolt inside the Mitsi tray. That way I get a nice double thickness tray to help support the battery over the void and at the same time I get to keep the neater foot clamp style battery mount which looks way neat. Luckily the angle bracket on the Mustang tray is only held on with 3 tack welds, so those were easy enough to break. Cleaned the Muzzy tray up, poked a few more holes, slapped on some paint and the battery relocation is now done and dusted. Very happy with the result.
-
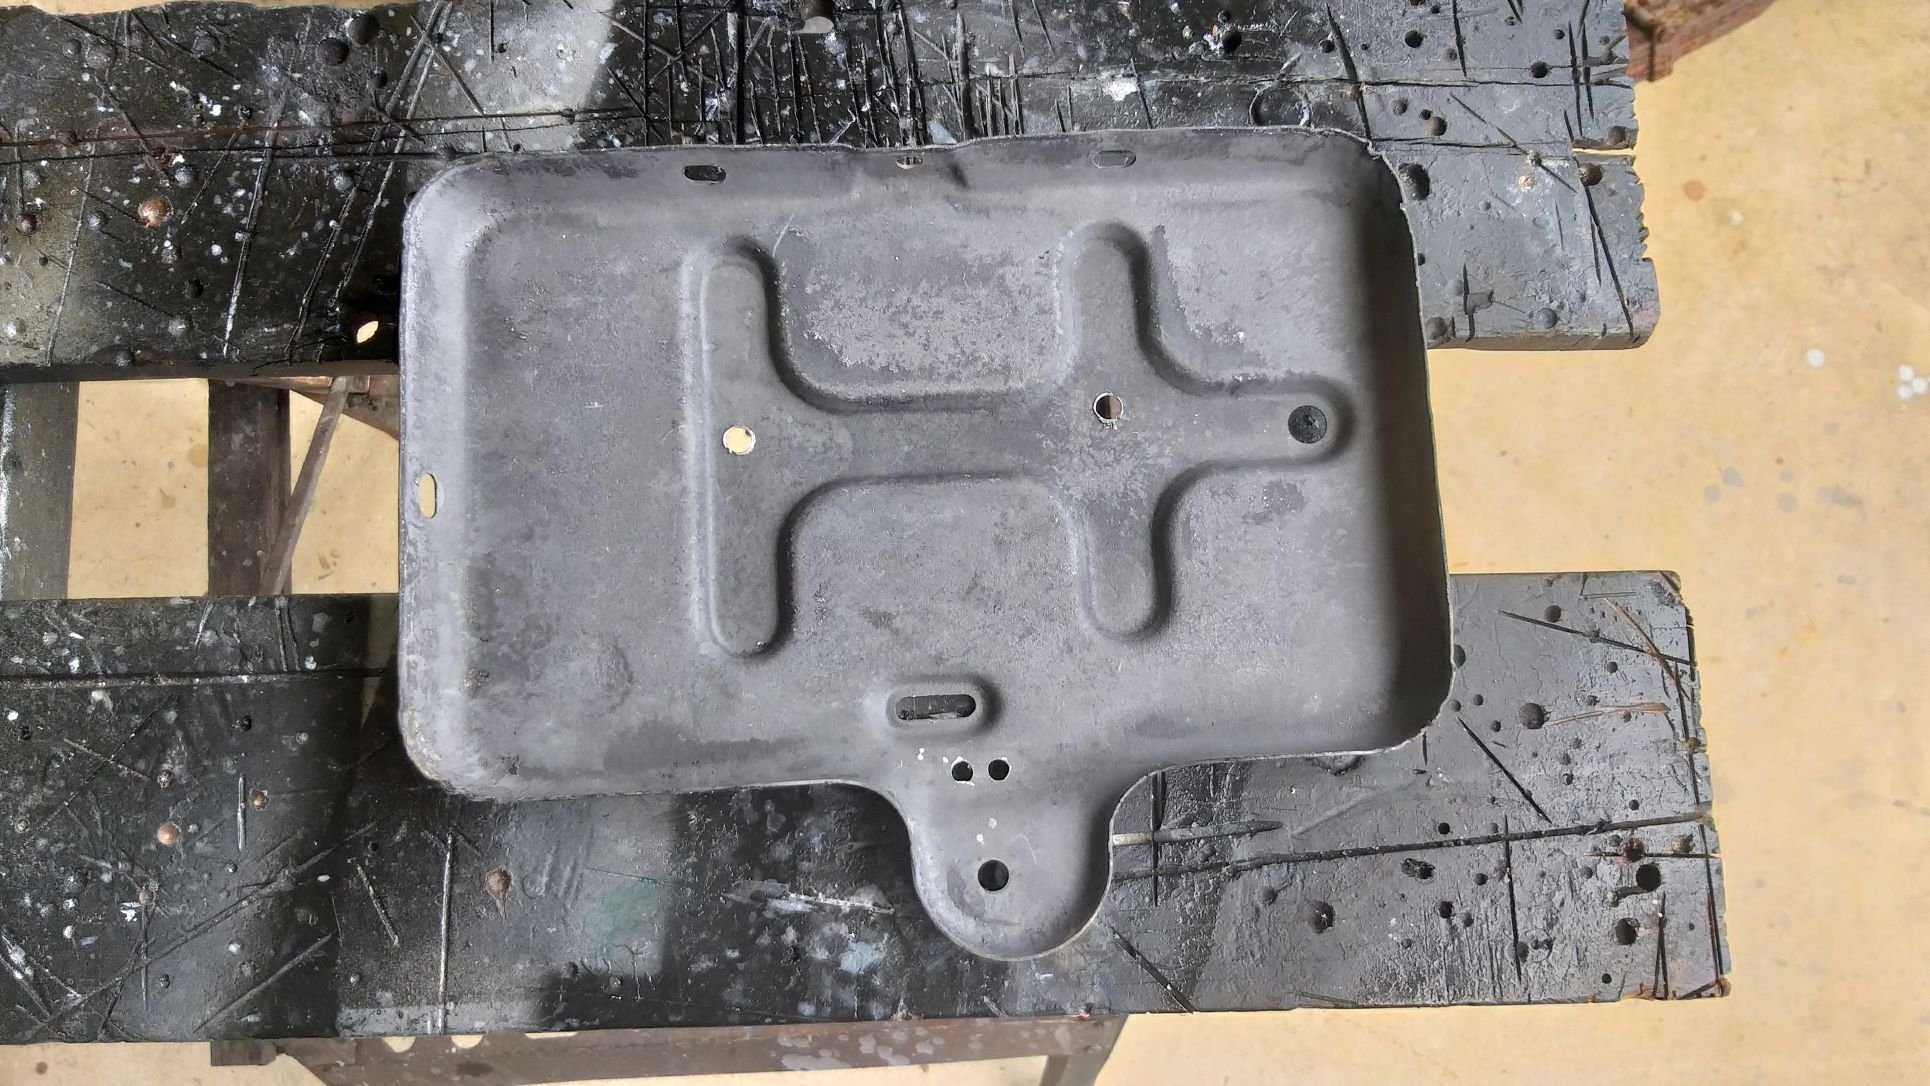
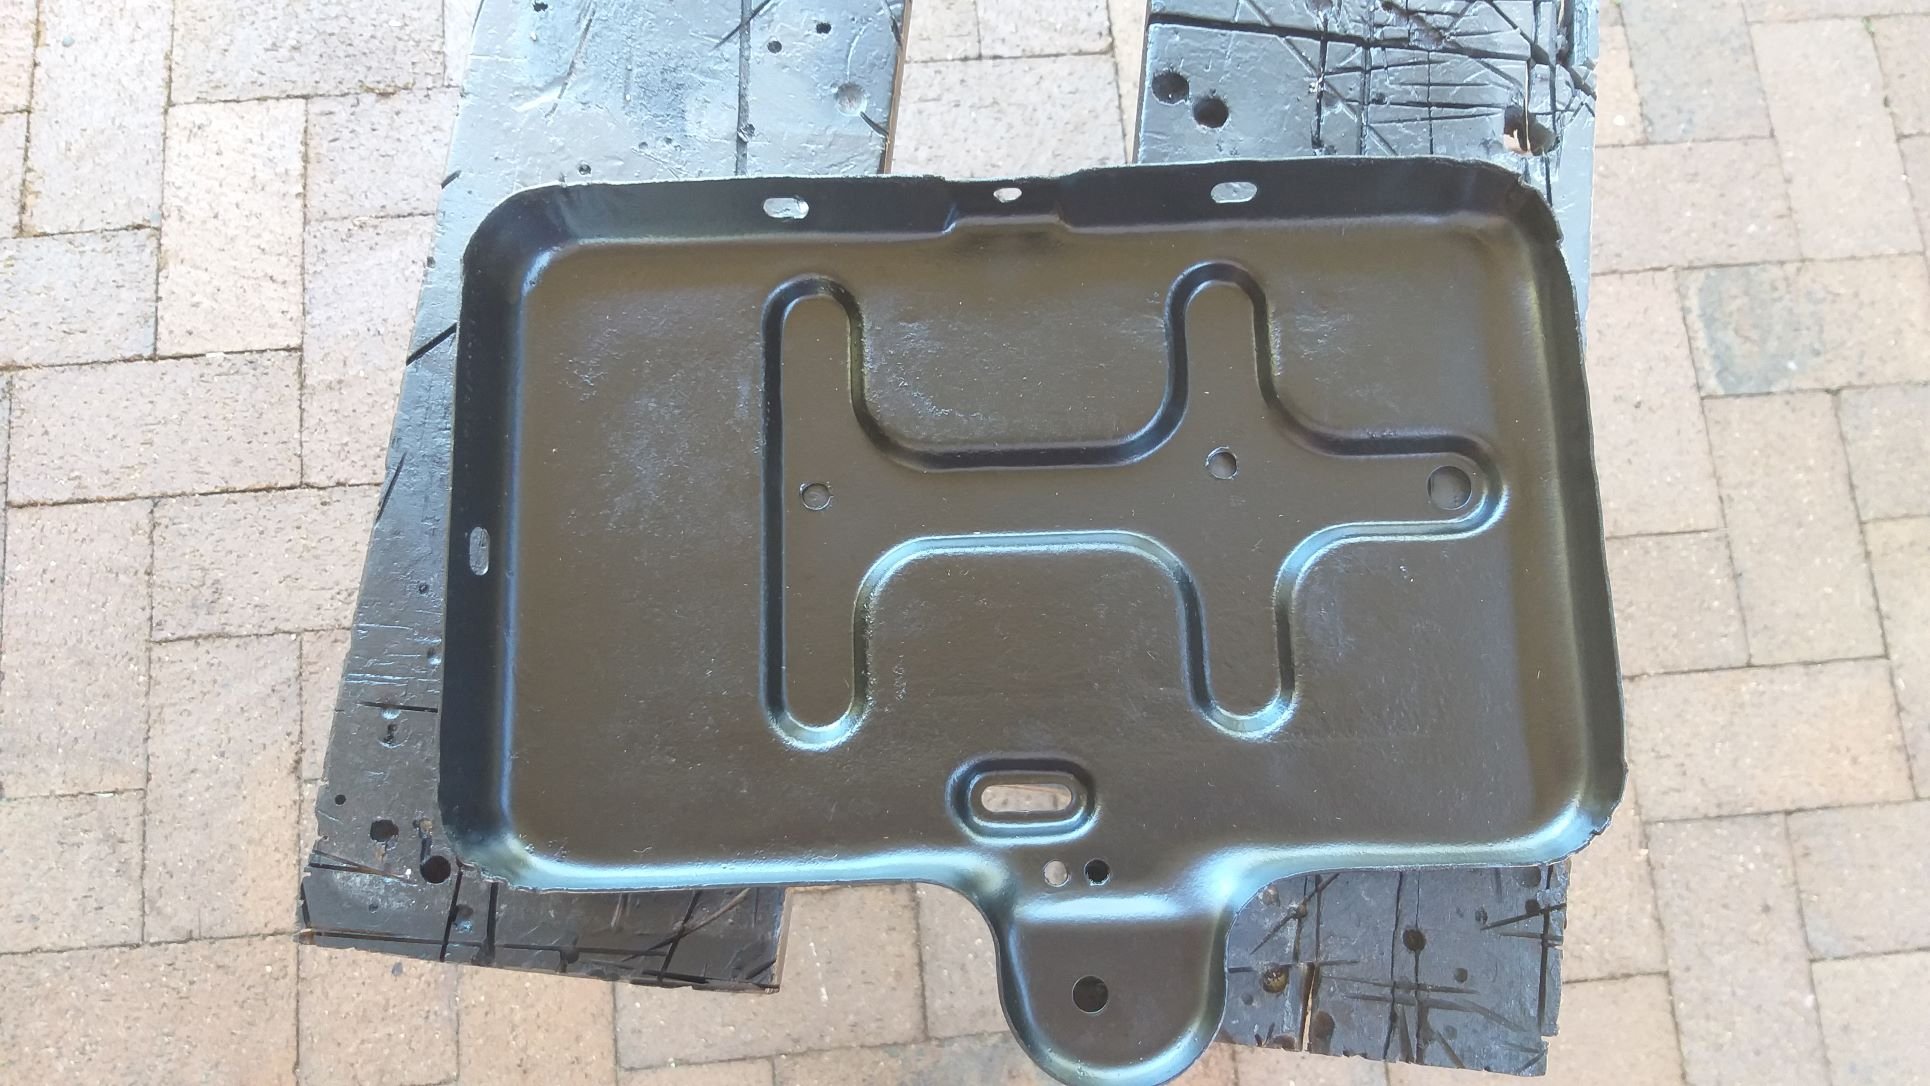
Battery relocation - Chapter 3 With the foundation brackets mounted in place I returned to the shed for another scratch around and came out with an old battery tray left over from one of my donor Mitsi vans. Had a good bit of surface rust but was otherwise solid. Chucked it in my vinegar bath for a day and it came out absolutely mint. Poked a few extra holes in it, cobbled up a few spacers and gave it a test fit. Works perfectly. Slapped a bit of primer and satin black on that sucker and we were ready to rock.
-
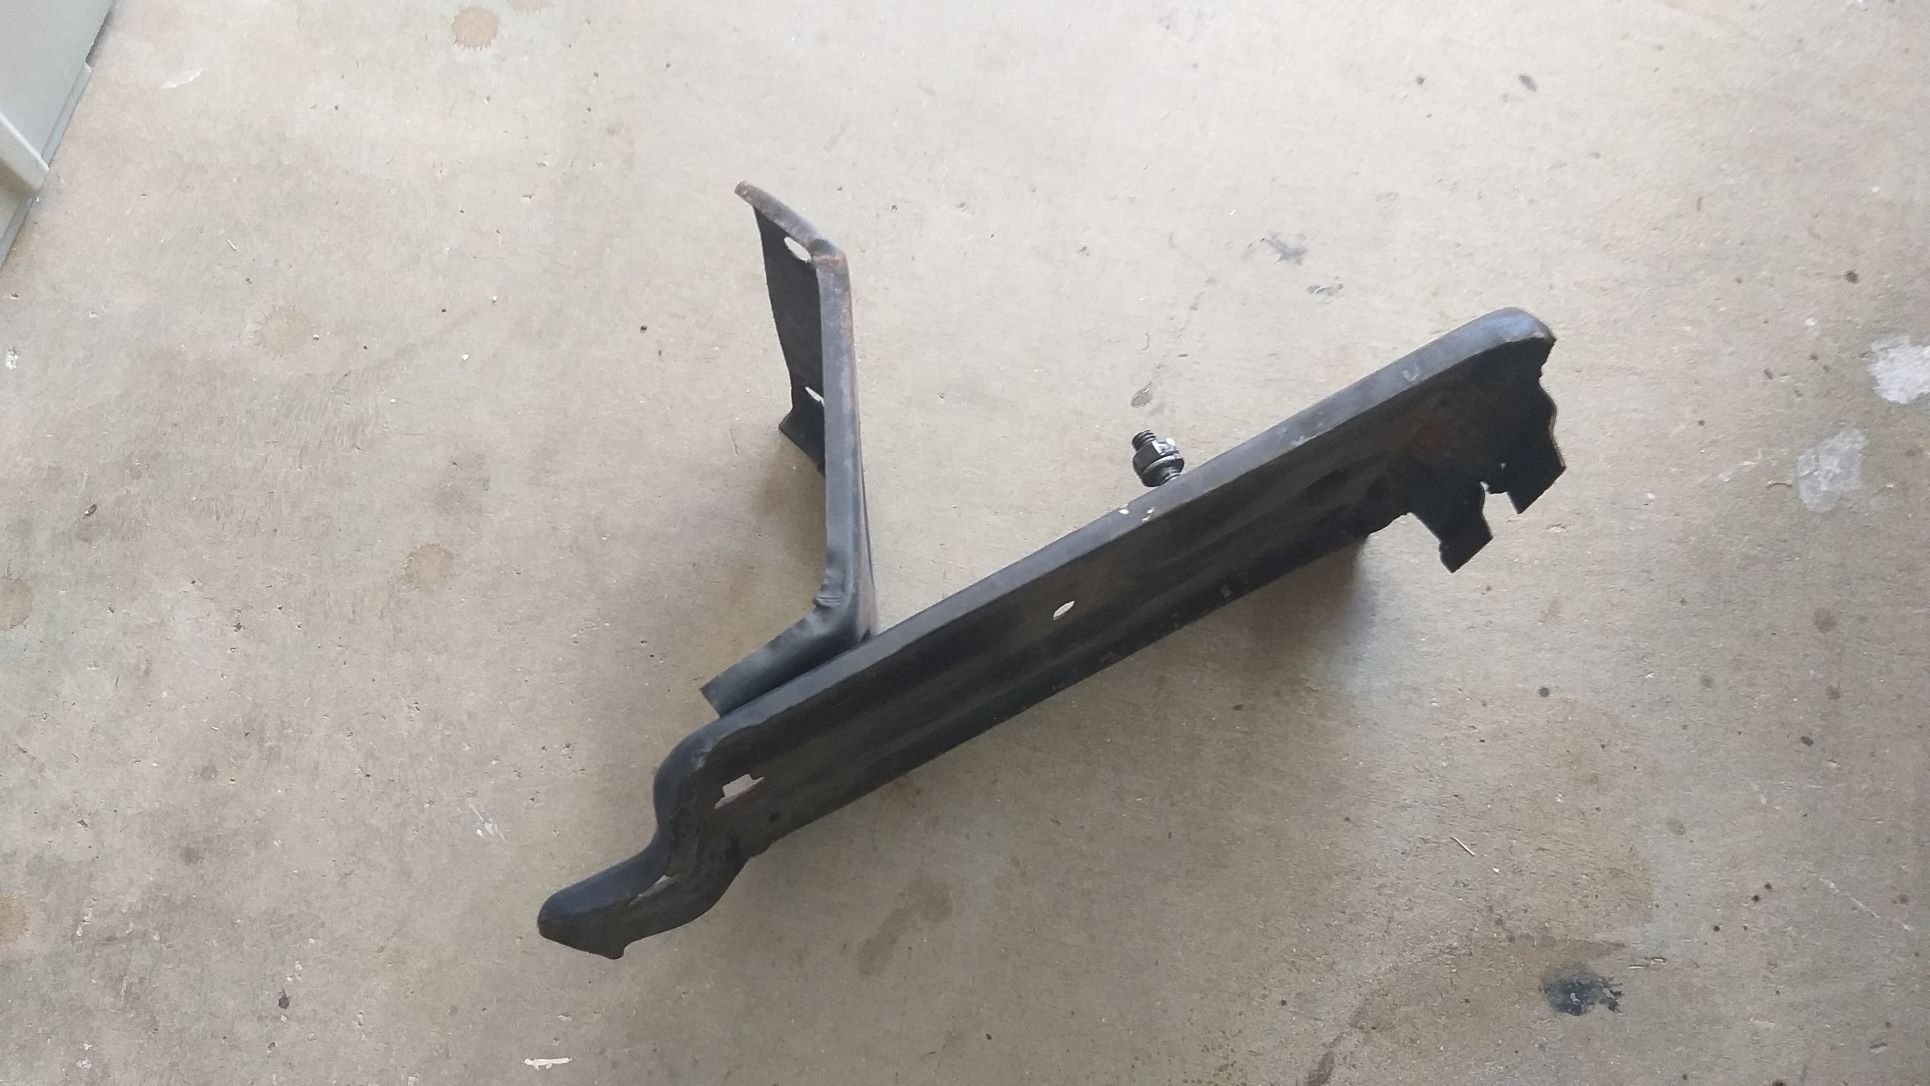
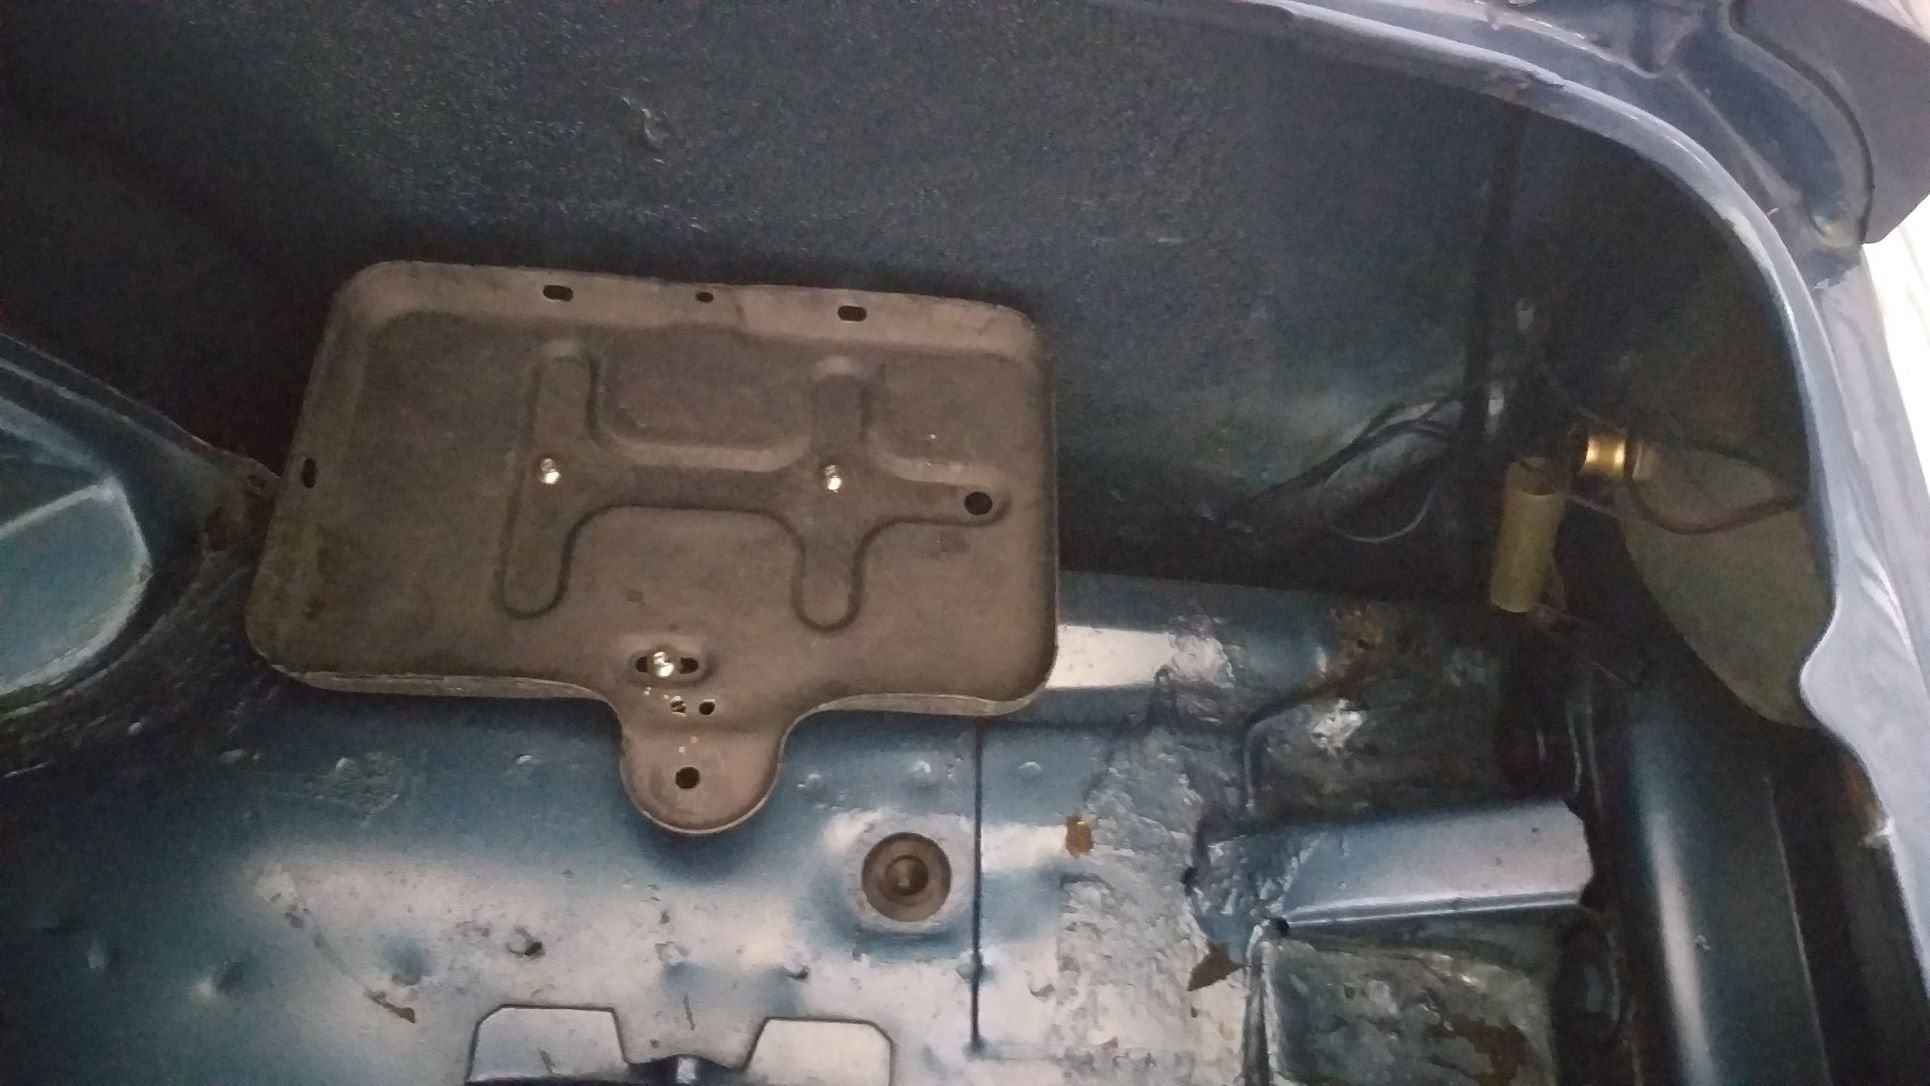
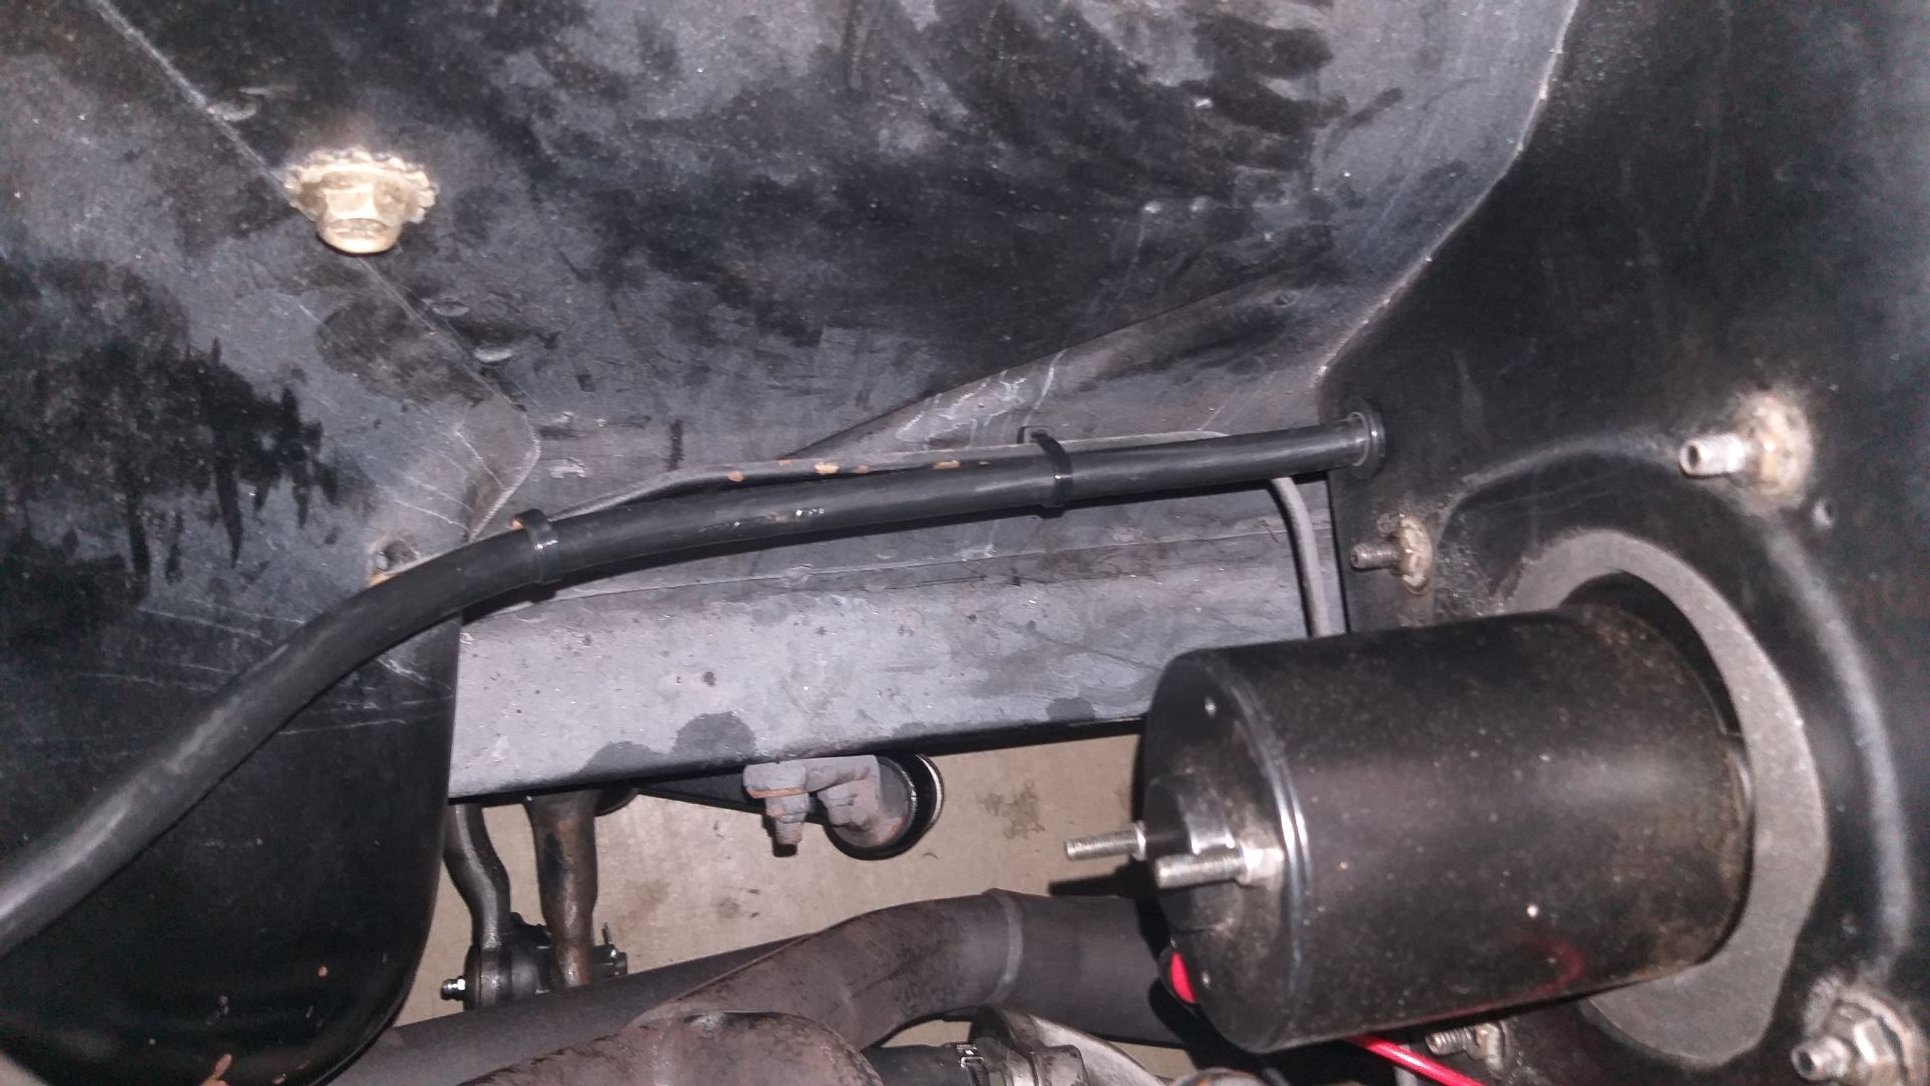
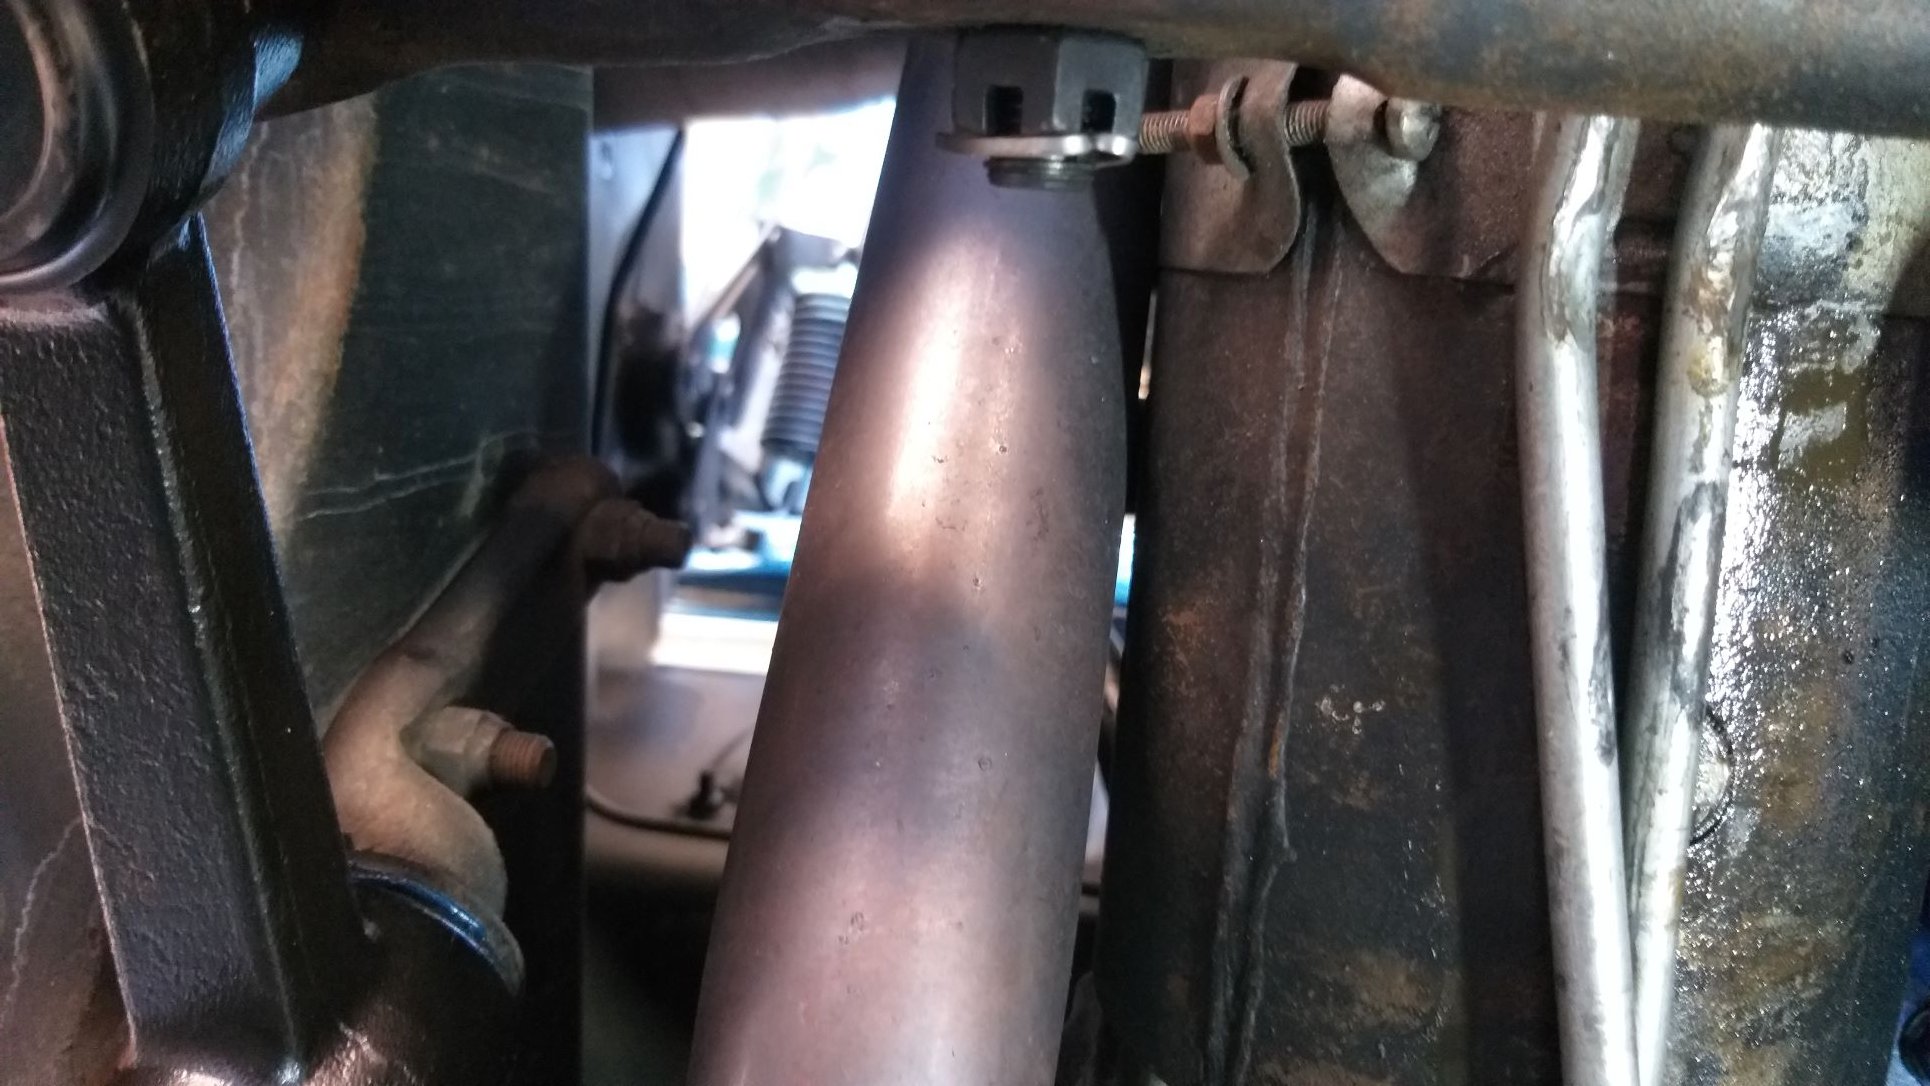
Battery relocation - Chapter 2 Since the new battery cables are sitting on the right-hand side of the boot, it only made sense that I should locate the battery there. After a bit of thinking I figured the best solution would be if I could tuck the battery up against the side of the rear quarter panel, but that would necessitate cantilevering the whole thing over the void between the boot floor and the side. Not impossible to do. It will just need some beefy support as the battery is not the lightest thing around. I scratched around in my shed and came up with a set of angled brackets that would do nicely. Drilling the mounting holes was the trick bit as I don't have one of those fancy 90 degree drills, but by dropping the right-hand exhaust I was able to squeeze my drill past the rear leaf spring and managed to poke through the 4 mounting holes needed. The brackets look a bit skew in this photo, but I had no choice as the panel has a slight angle to it. Nothing a few custom spacers won't fix.
-
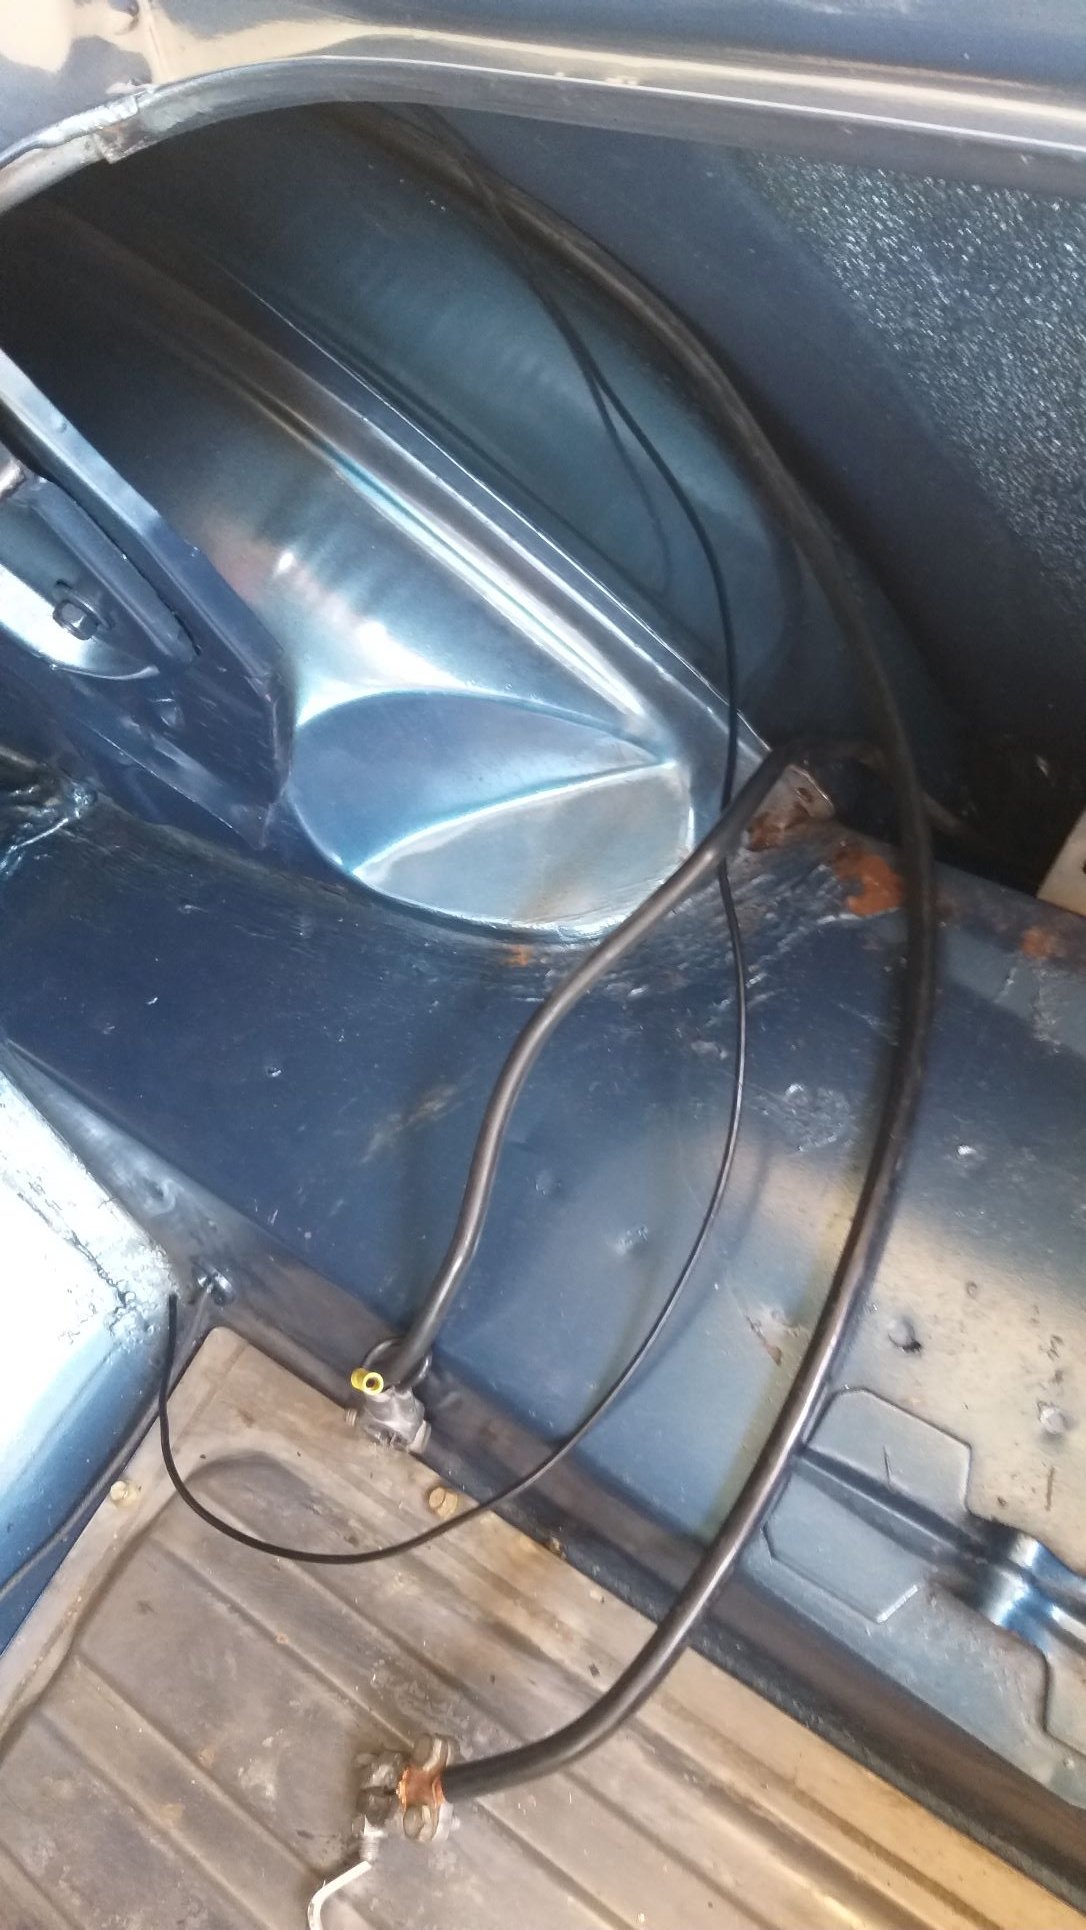
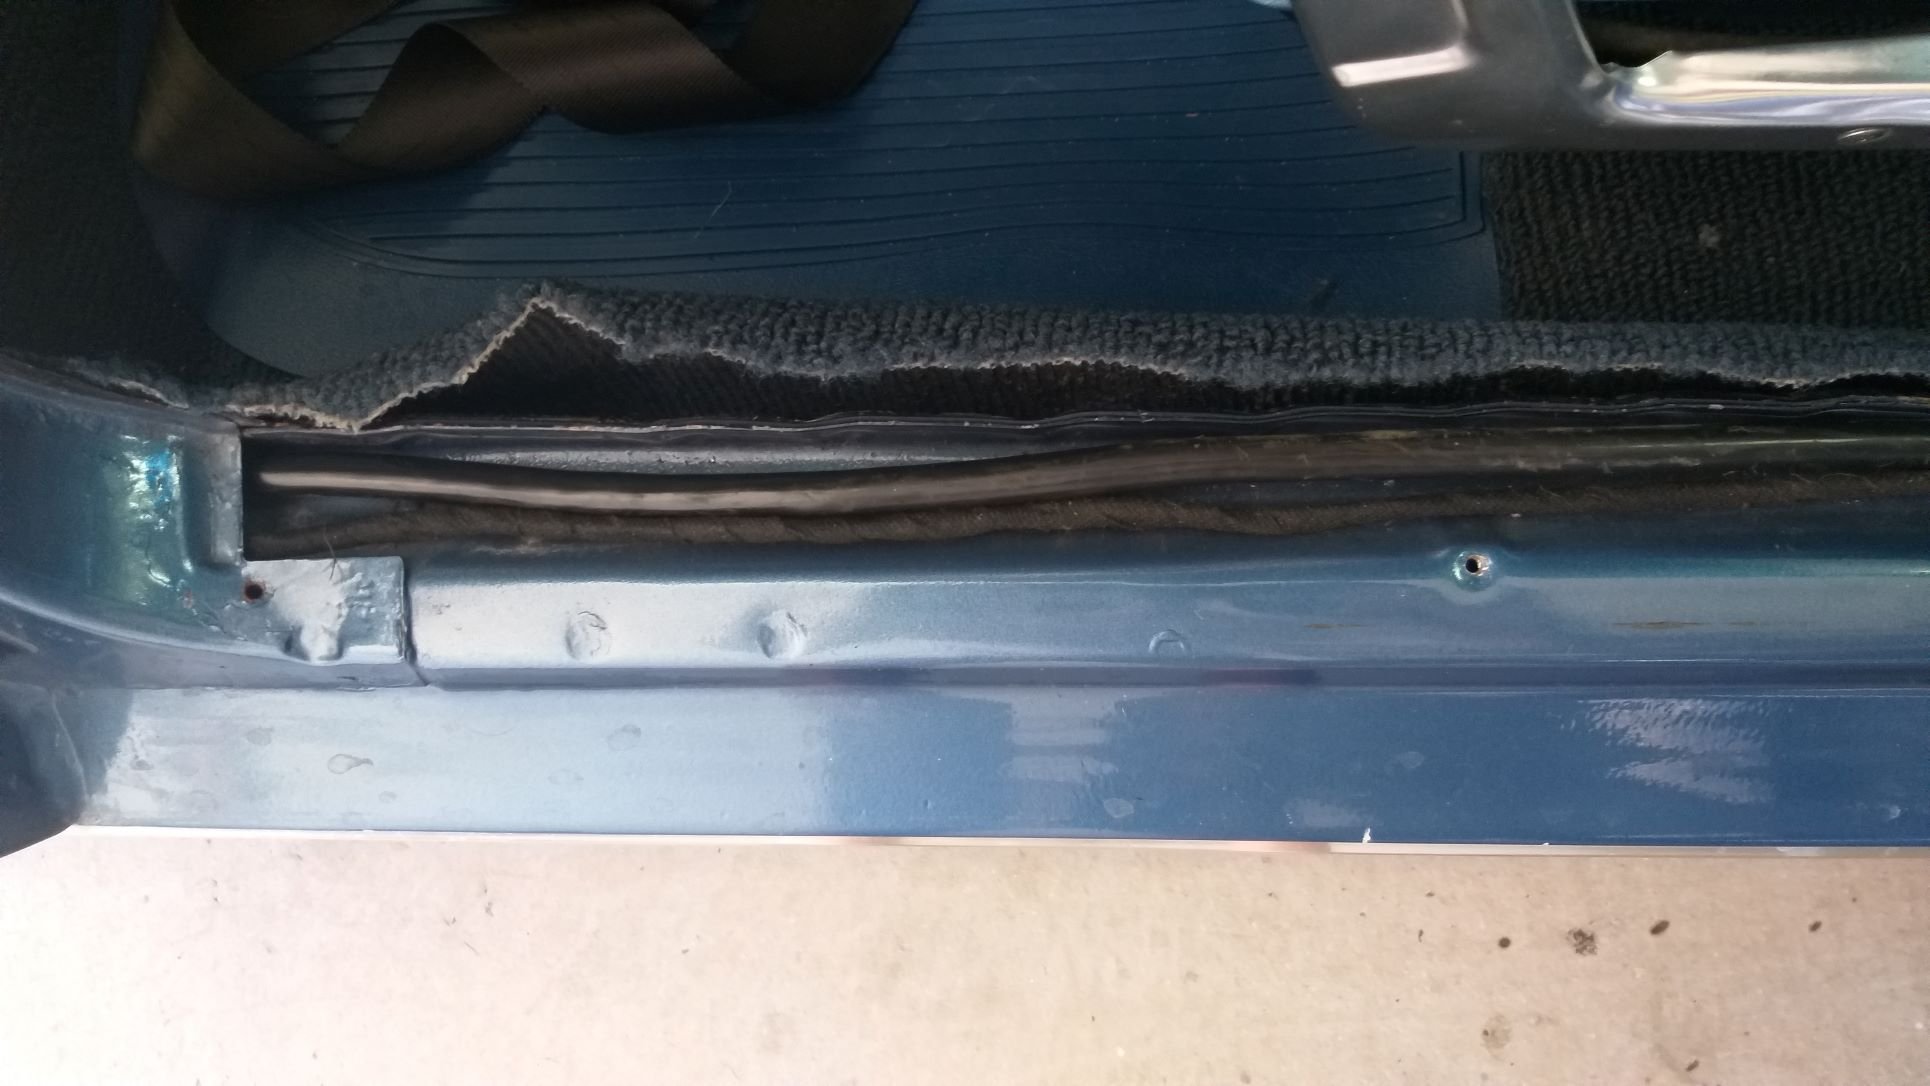
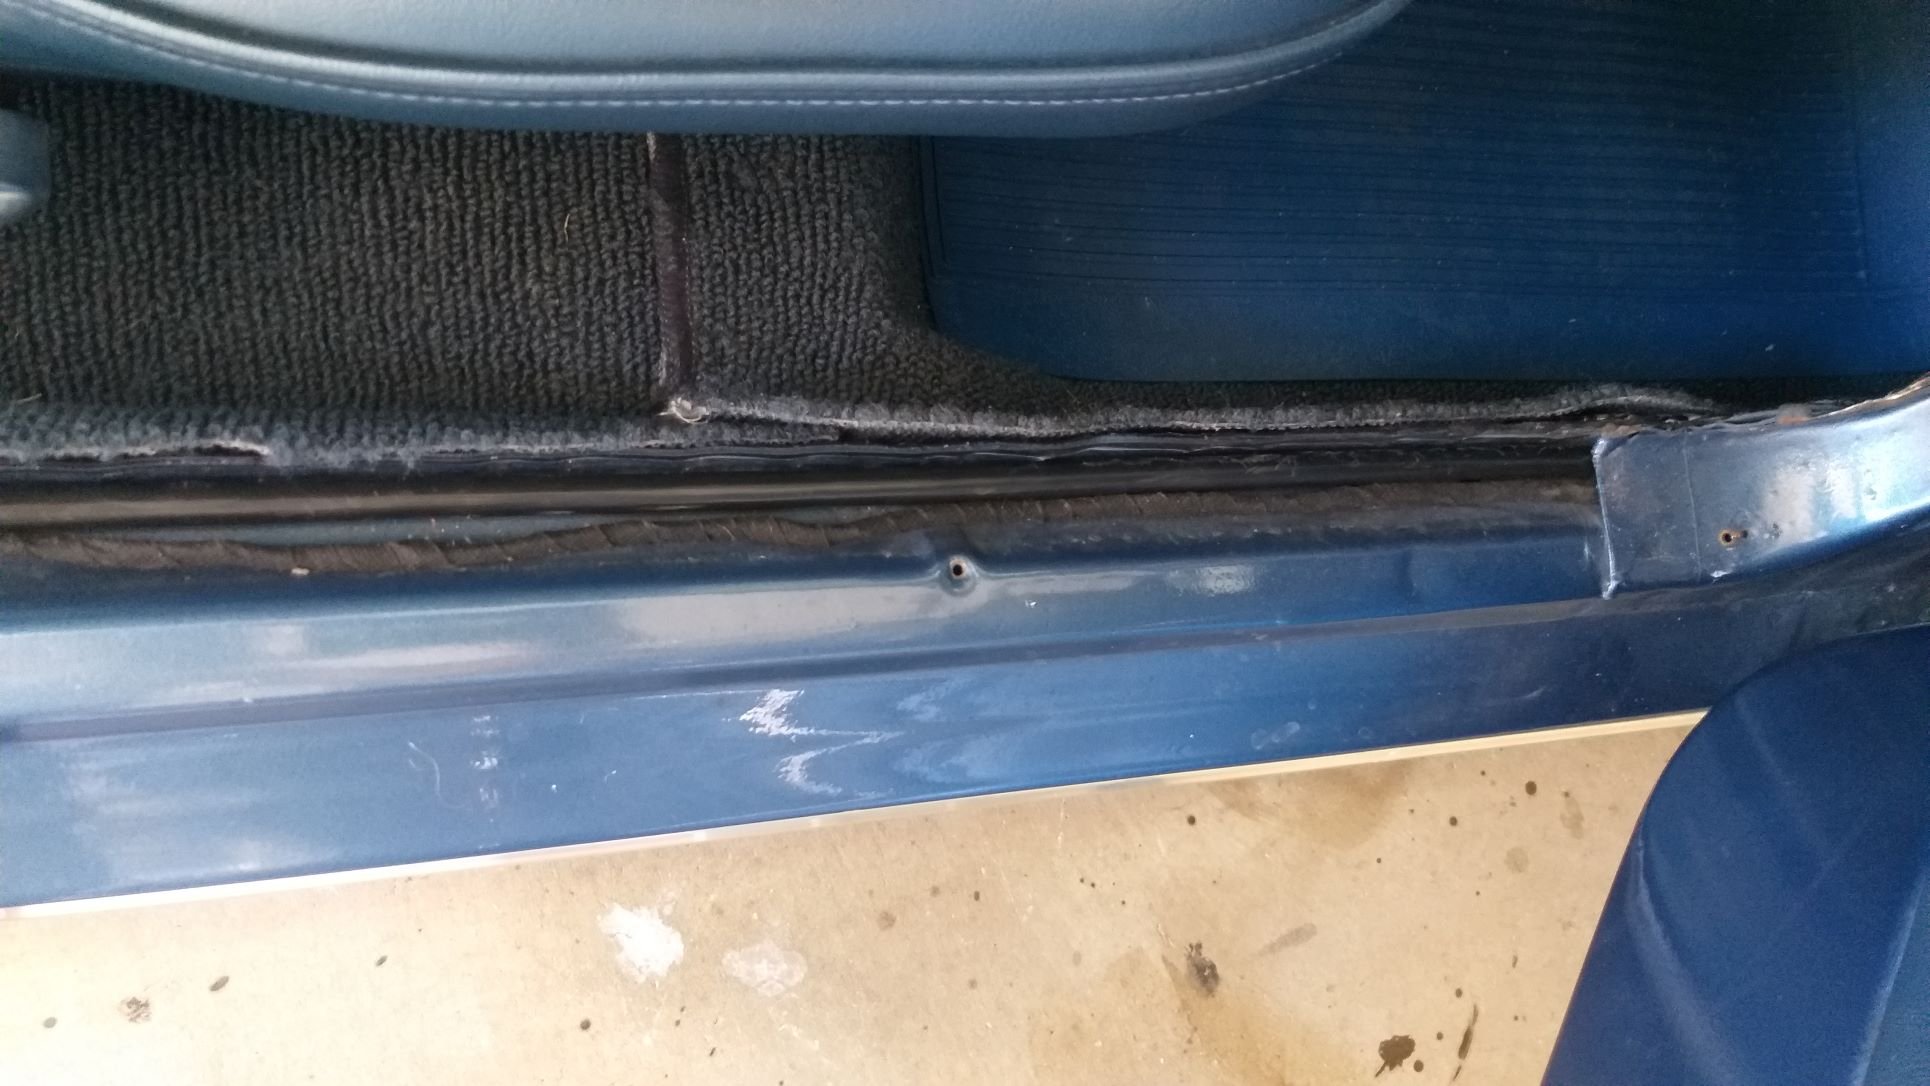
Battery Relocation - Chapter 1 A few weeks back I ordered a 5-meter length of 230-amp battery cable. My plan was to route this through the right-hand rear quarter panel and then down the inside of the door opening cunningly hidden under the factory thread plate. The only other thing needed was a hole in the firewall and a rubber grommet to protect the cable. Whilst I was chucking in the big battery cable, I also ran a 5mm wire to my fuse box. This will allow me to keep power to my sound system and other bits and bobs even if my main battery cable is switched off by my anti-theft kill switch. A few photos of the cabling which is now in position: The wiring on my factory fitted starter solenoid together with the additional wiring for my thermo fan relays and fuses needs a bit of a tidy up, but I'll do that once I've finalised the plan in terms of thermo fans. More about that subject later. Thanks for looking.
-
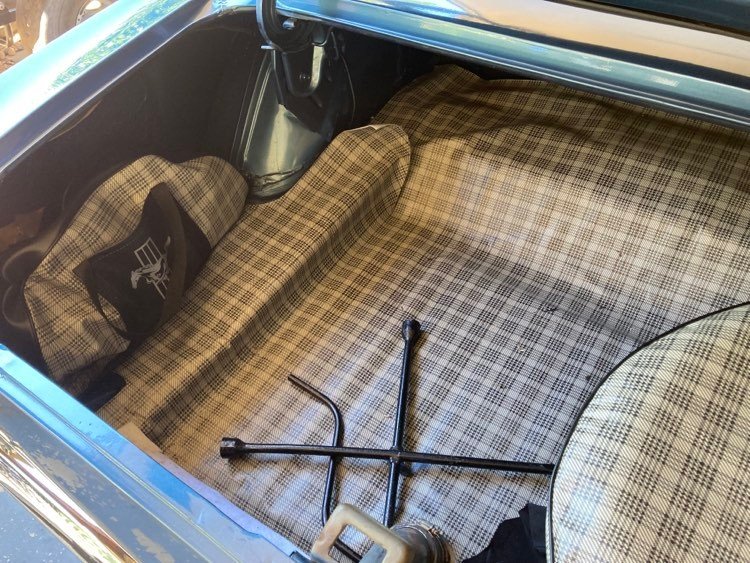
With my newly ordered radiator slowly meandering its way up from Victoria I figured I'd get ahead of the game by making a start on the battery relocation. Now the old Muzzy boot is not the most spacious that you have ever come across with the full size spare wheel and mandatory Mustang branded kit bag that contains my emergency tool roll and jumper cables taking up most of the space available. Adding a battery into the mix is going to make things decidedly cozy. So what to do :
-
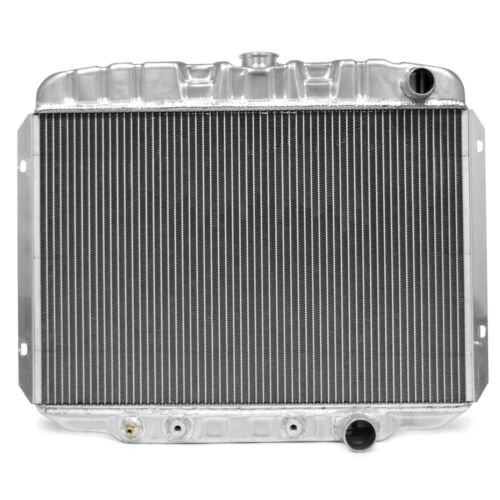
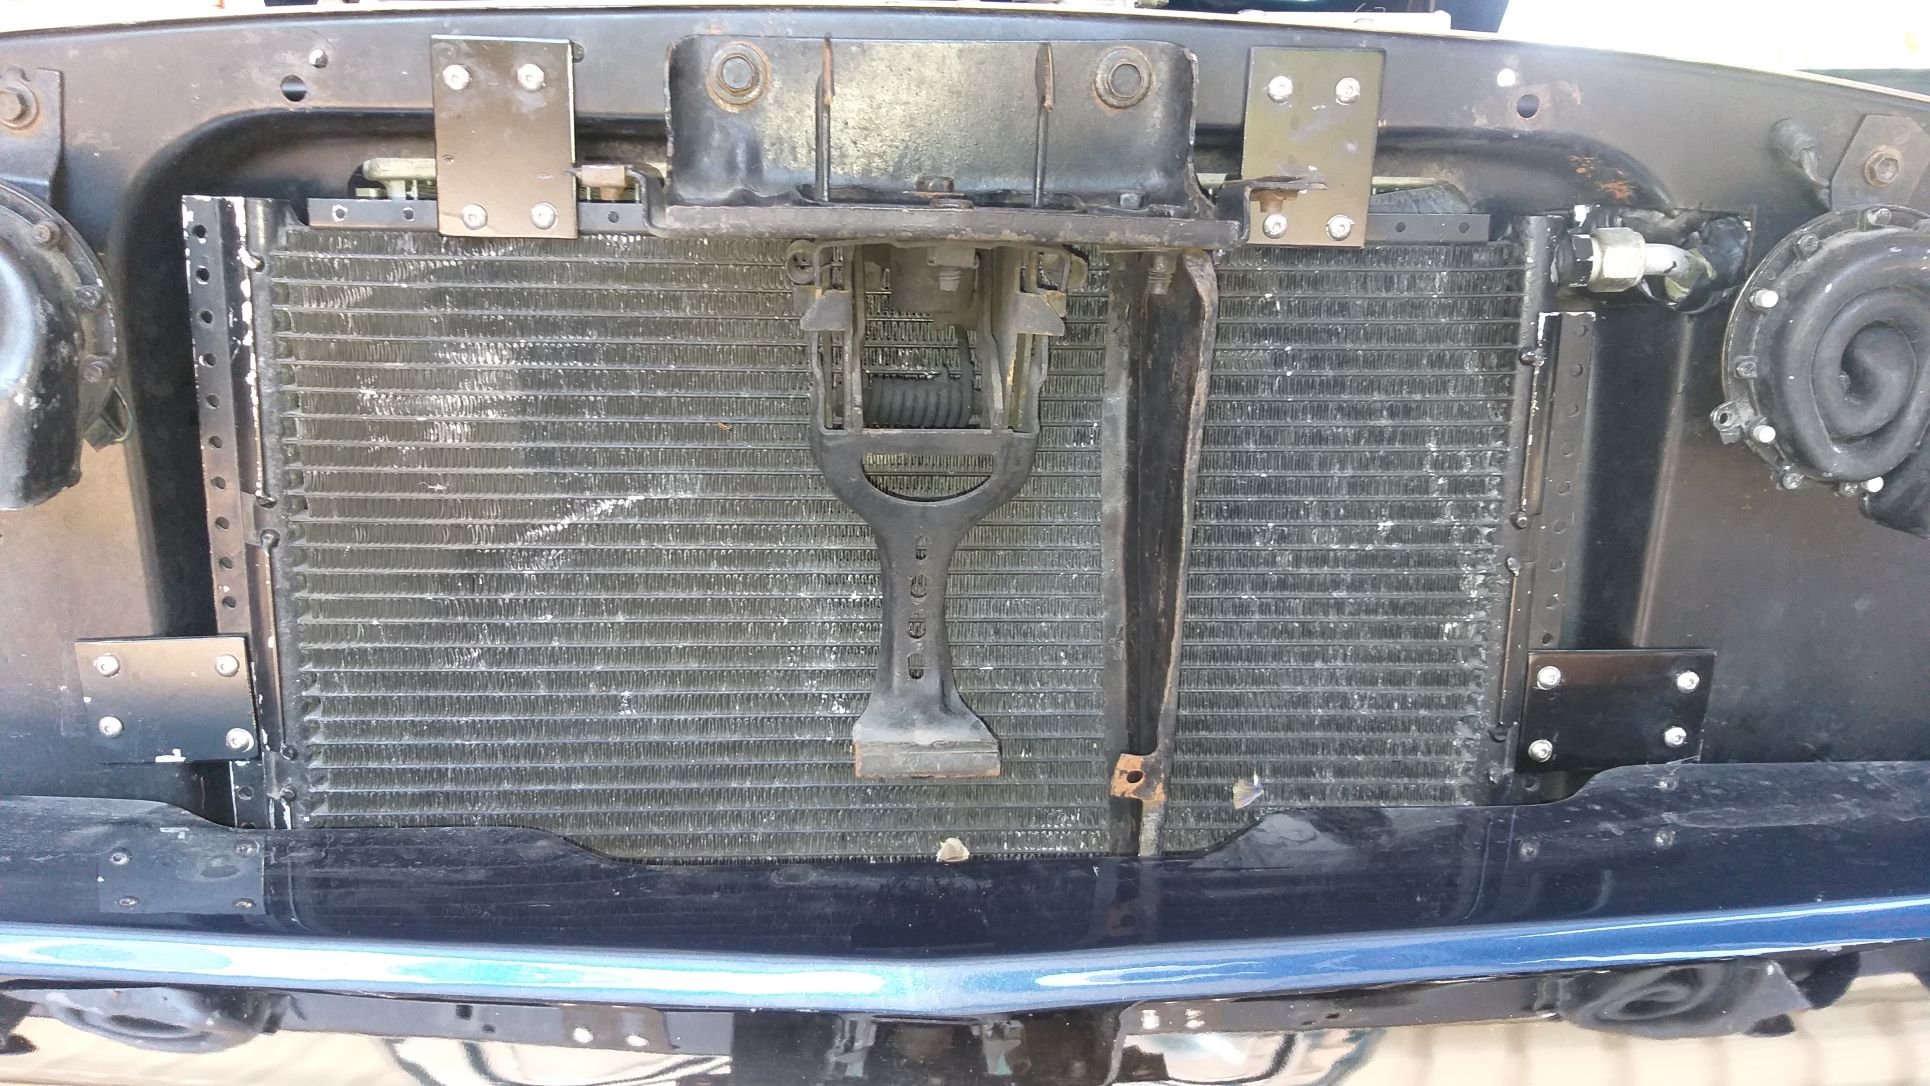
Cooling Issue - Chapter 8 I’ve been running the Muzzy sans a/c condenser unit for just over a month now and the cheap and cheerful 3 core radiator is coping really well with the engine temp barely making it past the thermostat opening threshold. So, to my simple way of thinking all indications seem to point to an air flow issue. I’ve spent a good bit of quality time with my good friend Uncle Google and have come across some interesting info. As previously mentioned in 1965 and 1966 the 260 and 289 equipped Mustangs were fitted from factory with a 17 inch radiator. A/c equipped cars were fitted with a radiator shroud. In 1967 Ford moved to a 20 inch radiator with a 24 inch option for a/c equipped cars. Then in 1968/9 they moved on to the 24 inch radiator across the range. Although by this time they were offering big block power plants as an option they were still fitting the larger radiators to the small block equipped cars as a standard offering. Now you have got to ask yourself why would Ford spend the extra money on a bigger radiator if they didn’t need to. The general consensus from those “in the know” is that the cooling on the first cars was marginal at best and borderline critical on cars fitted with a/c especially in the warmer states. I then spent a good bit of time researching how to upgrade one of the earlier cars to the 24 inch radiator and it’s a pretty straight forward exercise. Apart from having to cut open the radiator support panel to suit the bigger radiator the only other major issue is the battery which is in the way. Many have overcome this by cutting a chunk out of the inner fender panel and welding in a shaped panel. That together with the installation of a ’69 battery tray results in the battery being tucked up against the inner fender rather than the radiator support panel. The other option is to relocate the battery to the boot and this is the way that I intend to go. Not only does it solve the space issue but it also allows me to add an extra level of security as the bonnet on the earlier cars opens from the outside and with a starter solenoid conveniently mounted in plain sight on the inner fender and no steering lock the old Muzzy is a prime target for a spot of thieving. Having the battery tucked away in a locked boot with an isolator switch fitted will hopefully make things more difficult for any teenage joy rider who is ballsy enough to take on a left hooker. So, with this all said I’ve ordered an ACP Maxcore 2-row Performance radiator from Custom Mustang in Victoria. Even although it is only a 2 core the unit is fitted with 1 ¼ inch tubes so the flow is equivalent to a 4 core but with a narrower profile. It still has the inlets and outlets both on the right hand side so from a plumbing point of view all that is needed are the standard upper and lower radiator hoses from a ’69 Muzzy. Anyhoo, here is an image of the sexy looking Maxcore which will hopefully reach me sometime next week.
- 194 replies
-
- 13
-

-
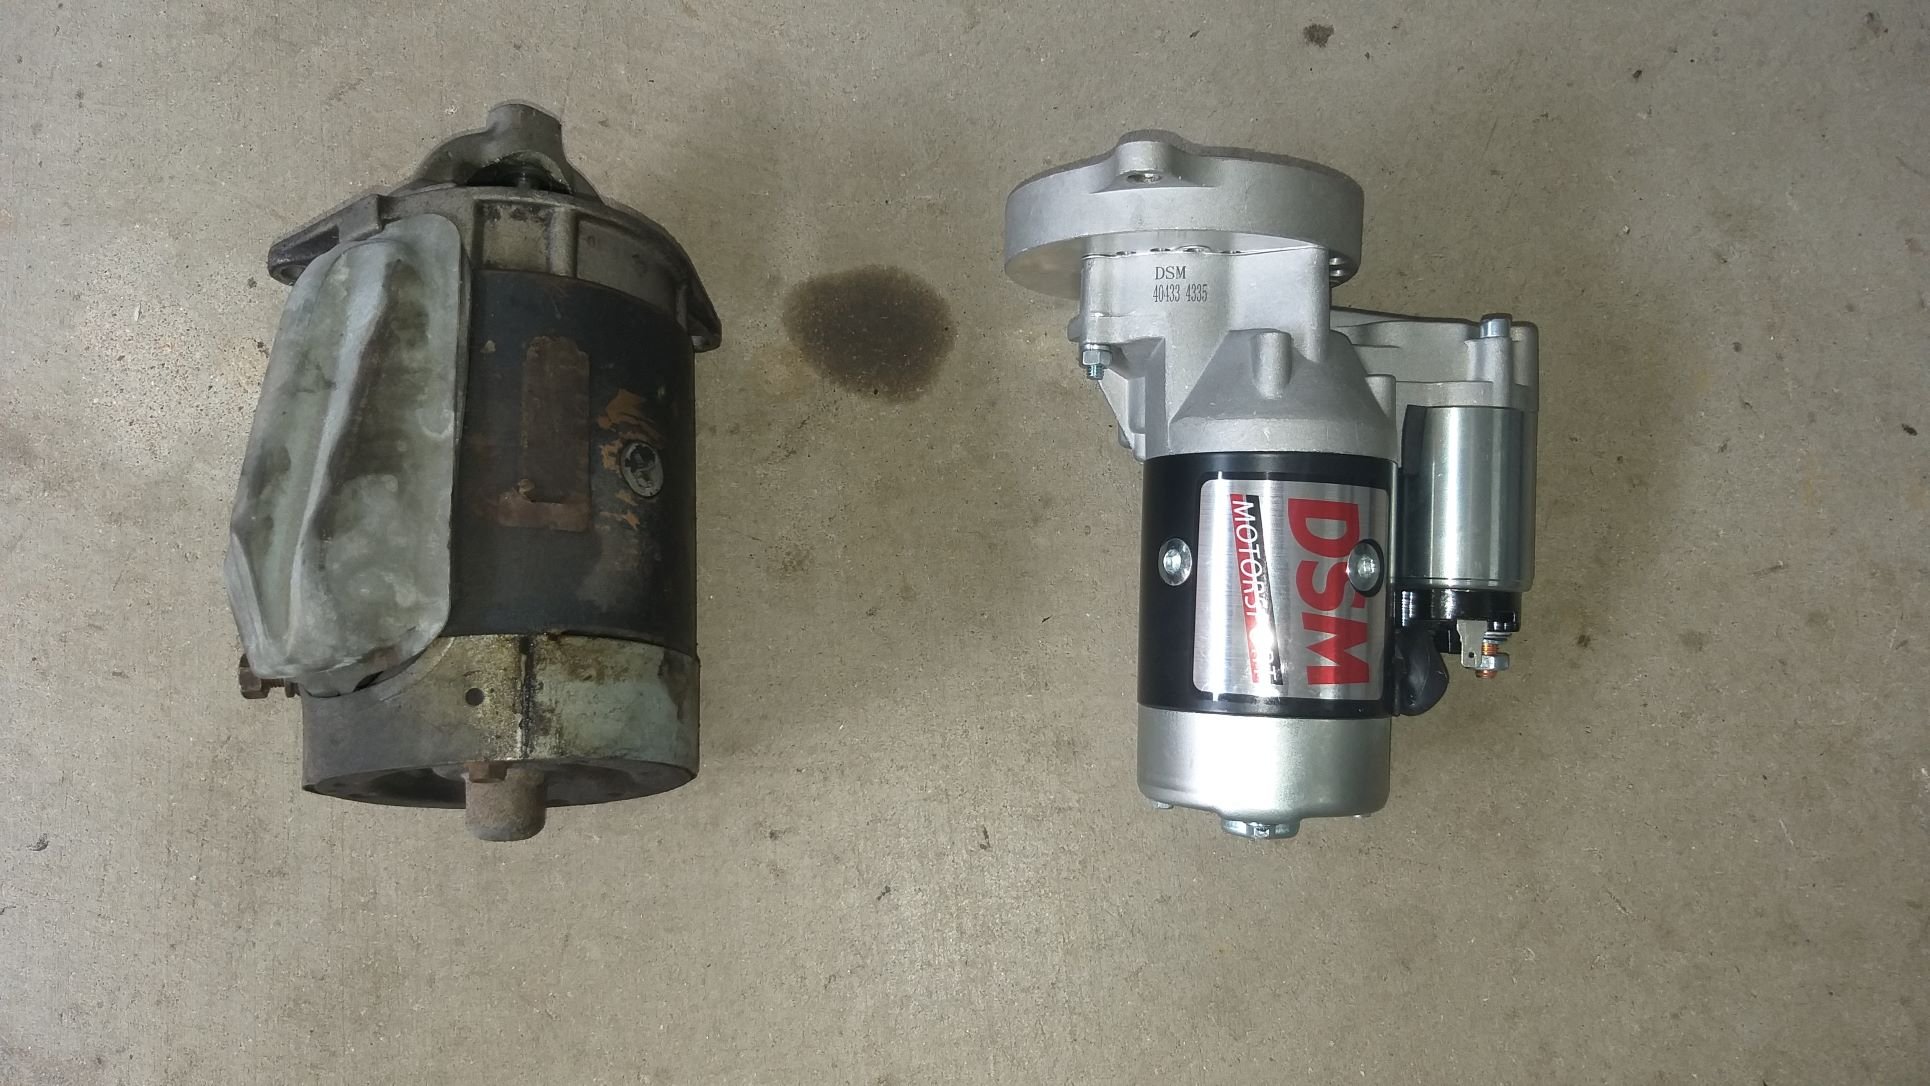
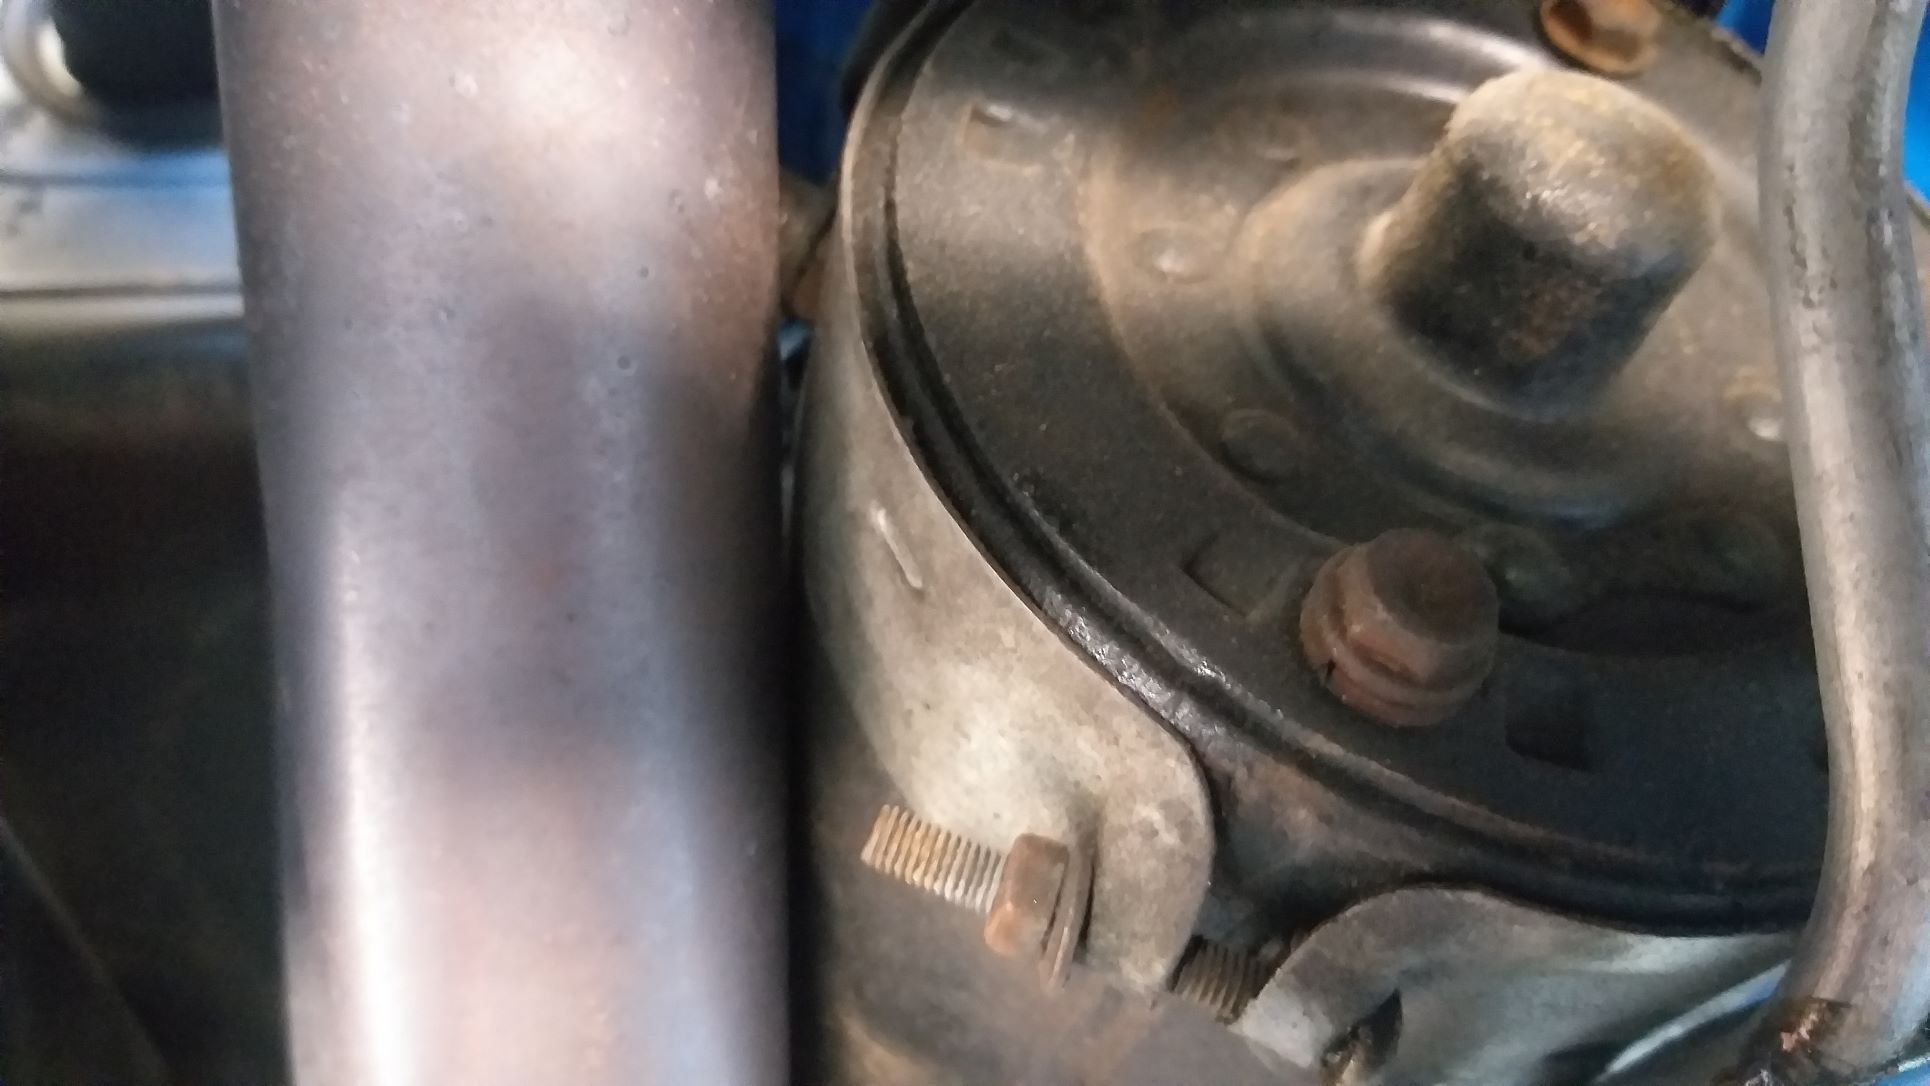
Some have solved the starter issue by fitting an aftermarket high torque mini jobbie which supposedly provides more header clearance, so I ordered one in. It arrived late last week so I chucked the Muzzy back on the stands. Had to pull the header off to get the original flapper style starter out, then mucked about with the angle settings on the new high torque to get it tucked as close to the engine block as possible. Offered up the exhaust branch and ...... instant fail. Not even enough clearance to fully tighten the header bolts. Tried all of the possible adjustment settings on the mini, but the pics below show the best I could manage and again I wasn't able to fully tighten the header bolts. Okay so that's not going to work. Ended up ditching the mini and have reinstalled the original. Not really proud to admit this, but I ended up spanking the offending header tube with a BFH to create a bit of clearance and I'll order in one of those silver heat shield blankets that are supposed to help. Thanks for reading.
-
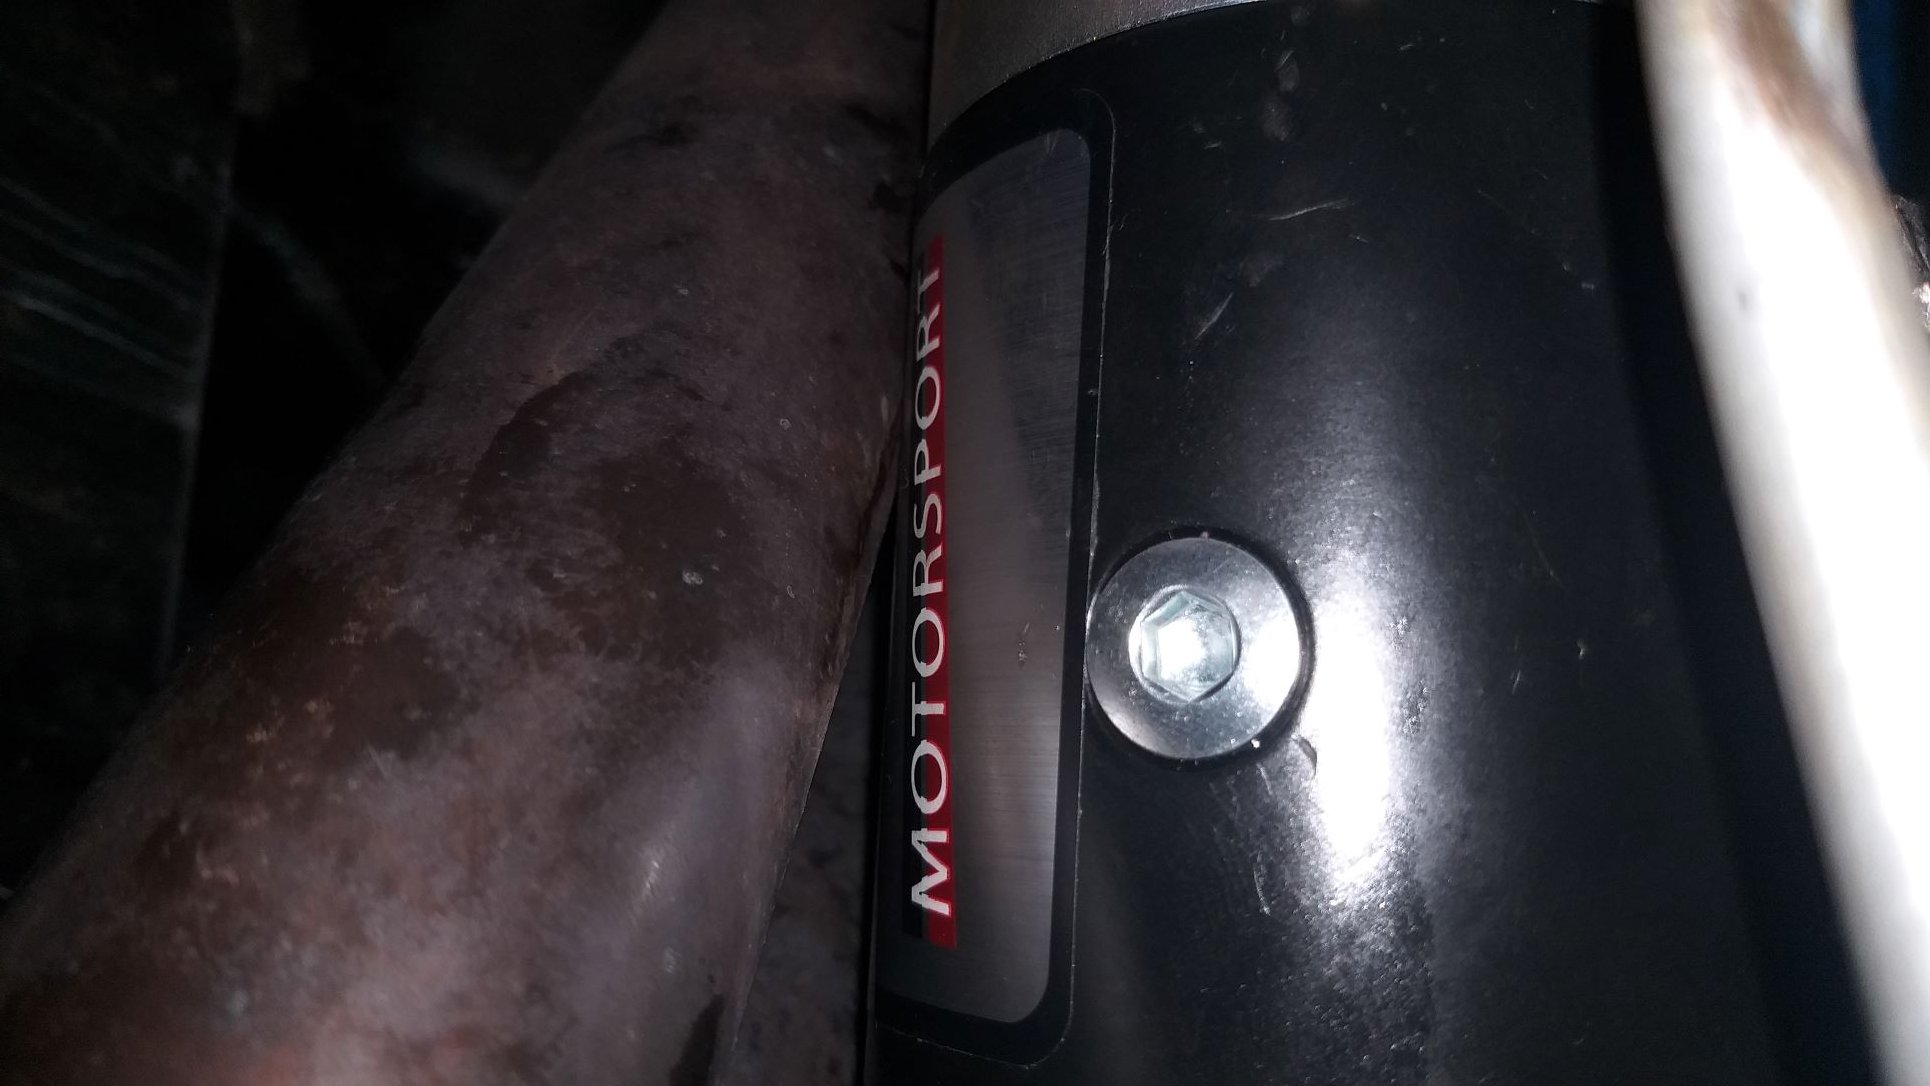
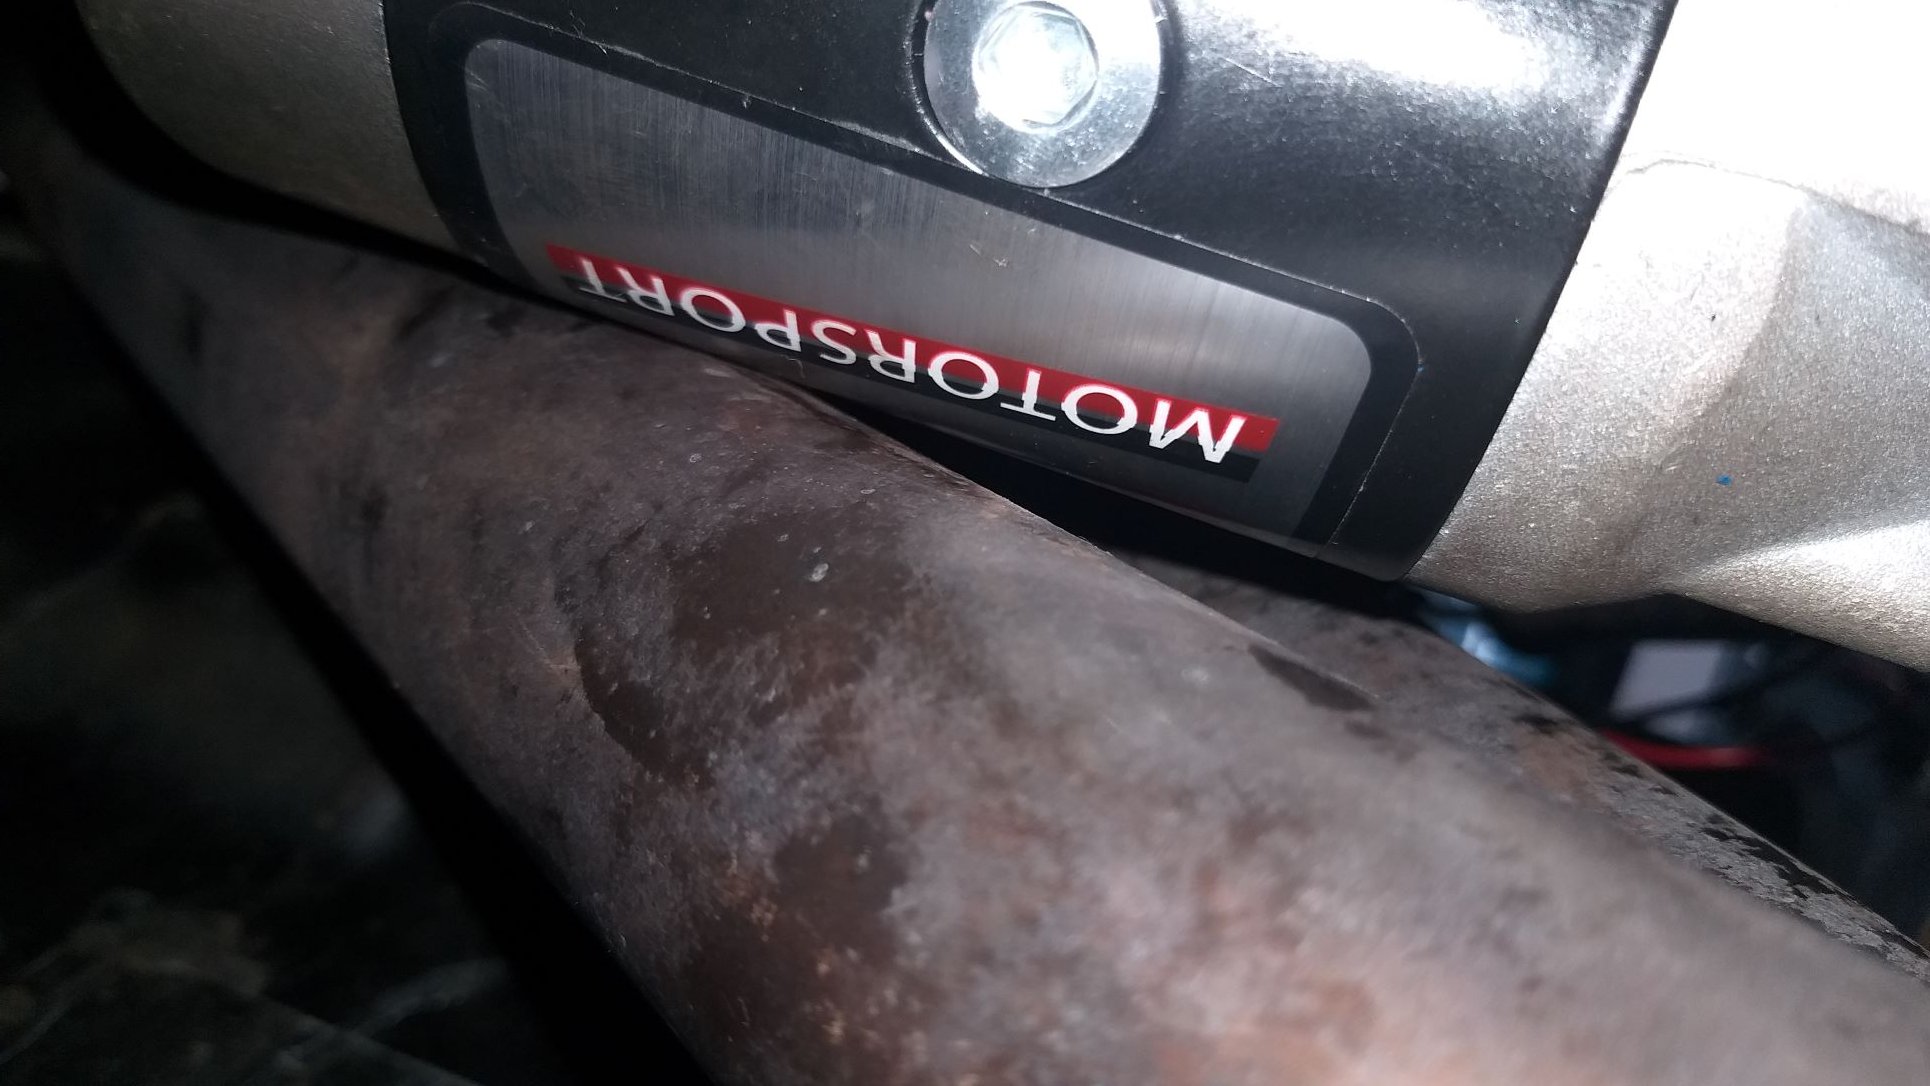
Bless me Father for I have sinned. It has been two weeks since my last confession. I've been driving the tits off the old Mustang and it's running really well. Even took it along to a local burger meet last Saturday night and got to swap a few yarns with the owner of a '65 that is similar in colour to ours. Started to rain before I got a chance to take a side by side photo, so you'll just have to take my word for it. Anyhoo one thing that I had noticed during my travels is that the starter motor behaves quite lazy on warm starts. Shoved it up on my ramps for a look see and sure enough the right hand side exhaust branch is hard up against the body of the starter motor. Noice ! A bit tricky to photo, but you get the idea:
-
My 66 has an electric pump for the windscreen washers. Looks to be factory fitted. The washer is activated by pulling on the wiper switch knob. Turning the wiper switch knob clockwise activates the wipers. Single speed wipers unfortunately.
-
Yep @CUL8R, you are bang on the money in terms of these old beasts not liking wide wheels and big rubber on the fronts. I'm currently running 8J zero offset rims all around on my 66. Front rubber is 225/50/15 and rears are 245/50/15. Fronts do rub on full lock due to the bead on the front rims hitting the outer lip on the upper control arm. I'm about to fit 5mm spacers up front to see if that will solve the issue. Apart from the rubbing my setup hasn't negatively affected my road handling. Car is smooth as silk at any speed. But having said this I've completely refurbished my front suspension and the tyres are brand new. I agree with @CUL8Rthat your issue is likely to be poorly fitting rims and may be exacerbated by worn components. How old are the tyres and are they showing any signs of uneven wear ? @Gee, I've looked through your list of other issues and apart from the rust they are all pretty straight forward fixes. The best thing about these old Mustangs is that they are so easy to work on. There are heaps of really good "how to" videos on the net that are specific to the first generation Mustangs. On top of this parts are plentiful and relatively cheap.
-
Good to see another Tang on here. I'm looking forward to your updates as things progress.
-

Discuss here about Yoeddynz's little Imp project...
Flash replied to yoeddynz's topic in Project Discussion
Hey Alex, I was saddened by the news of your Dad's passing and just wanted to reach out and offer my condolences to you and the rest of your family. -
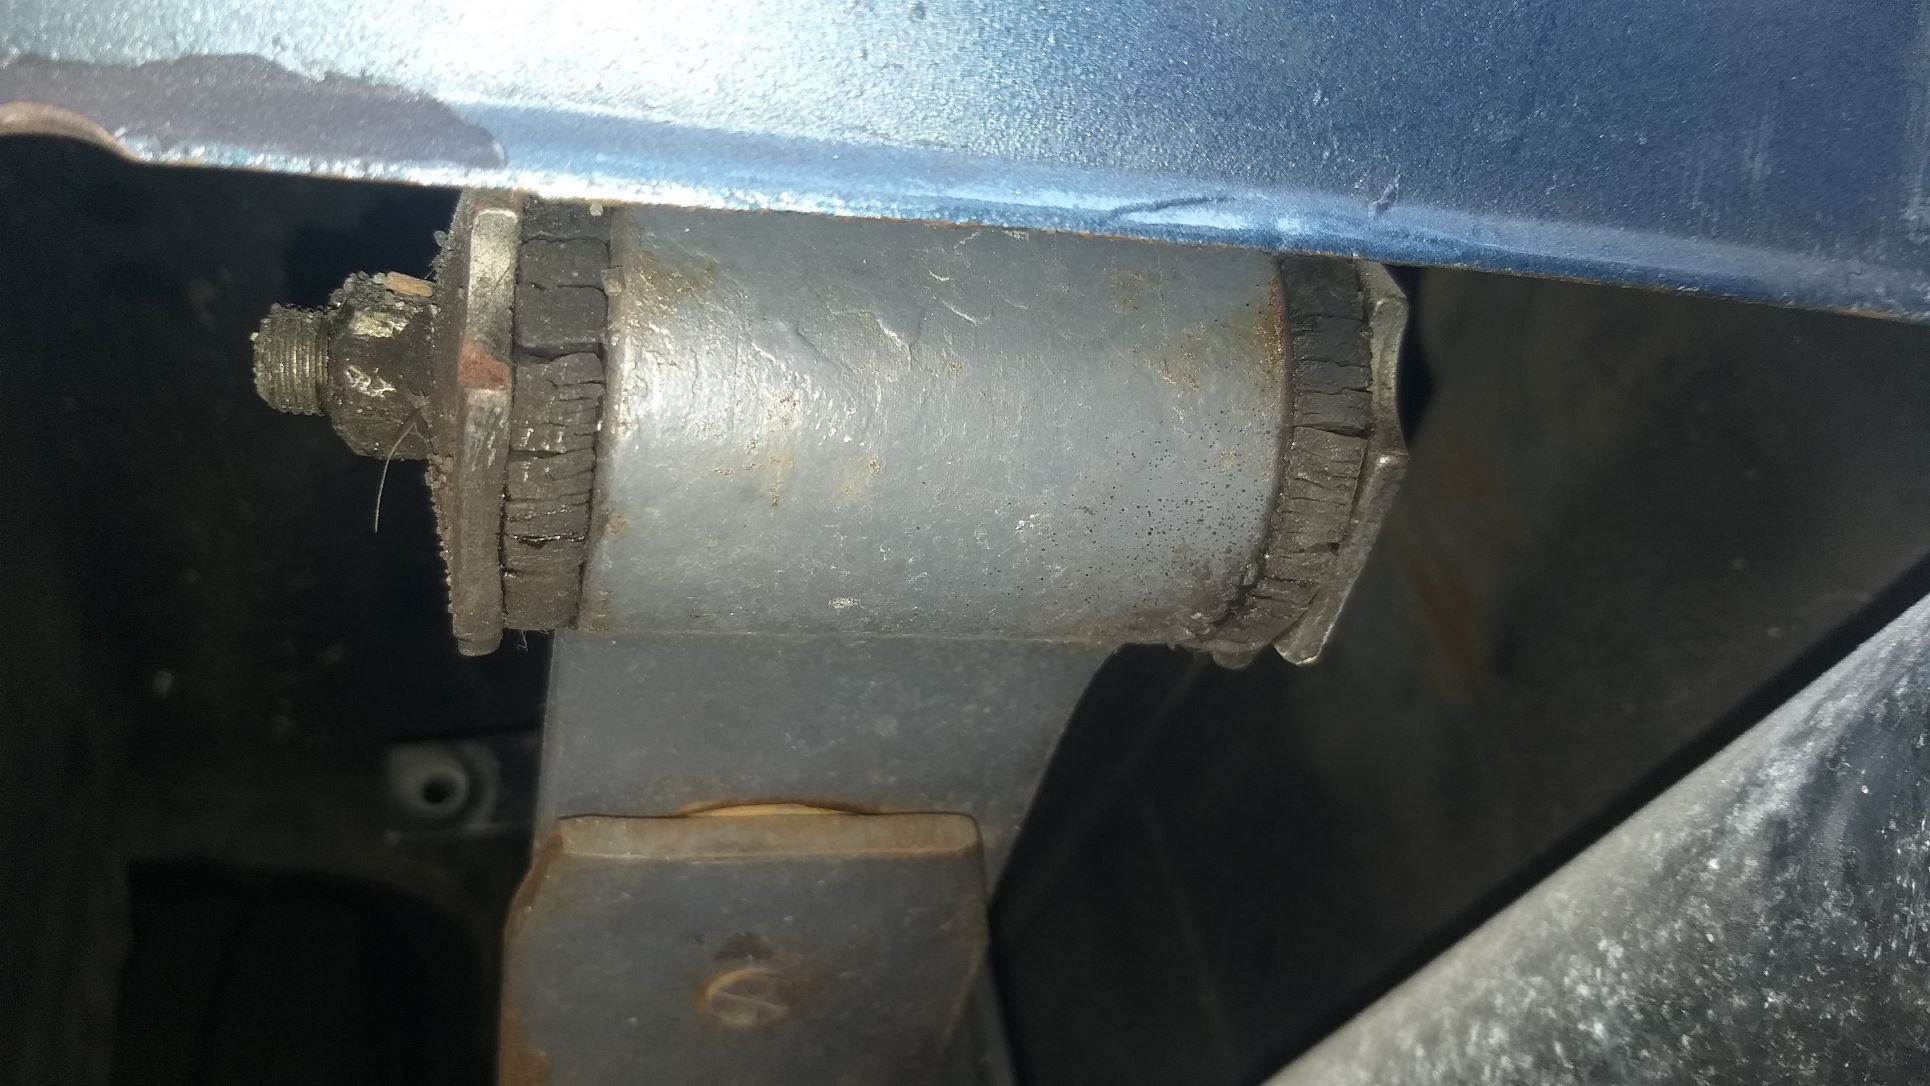
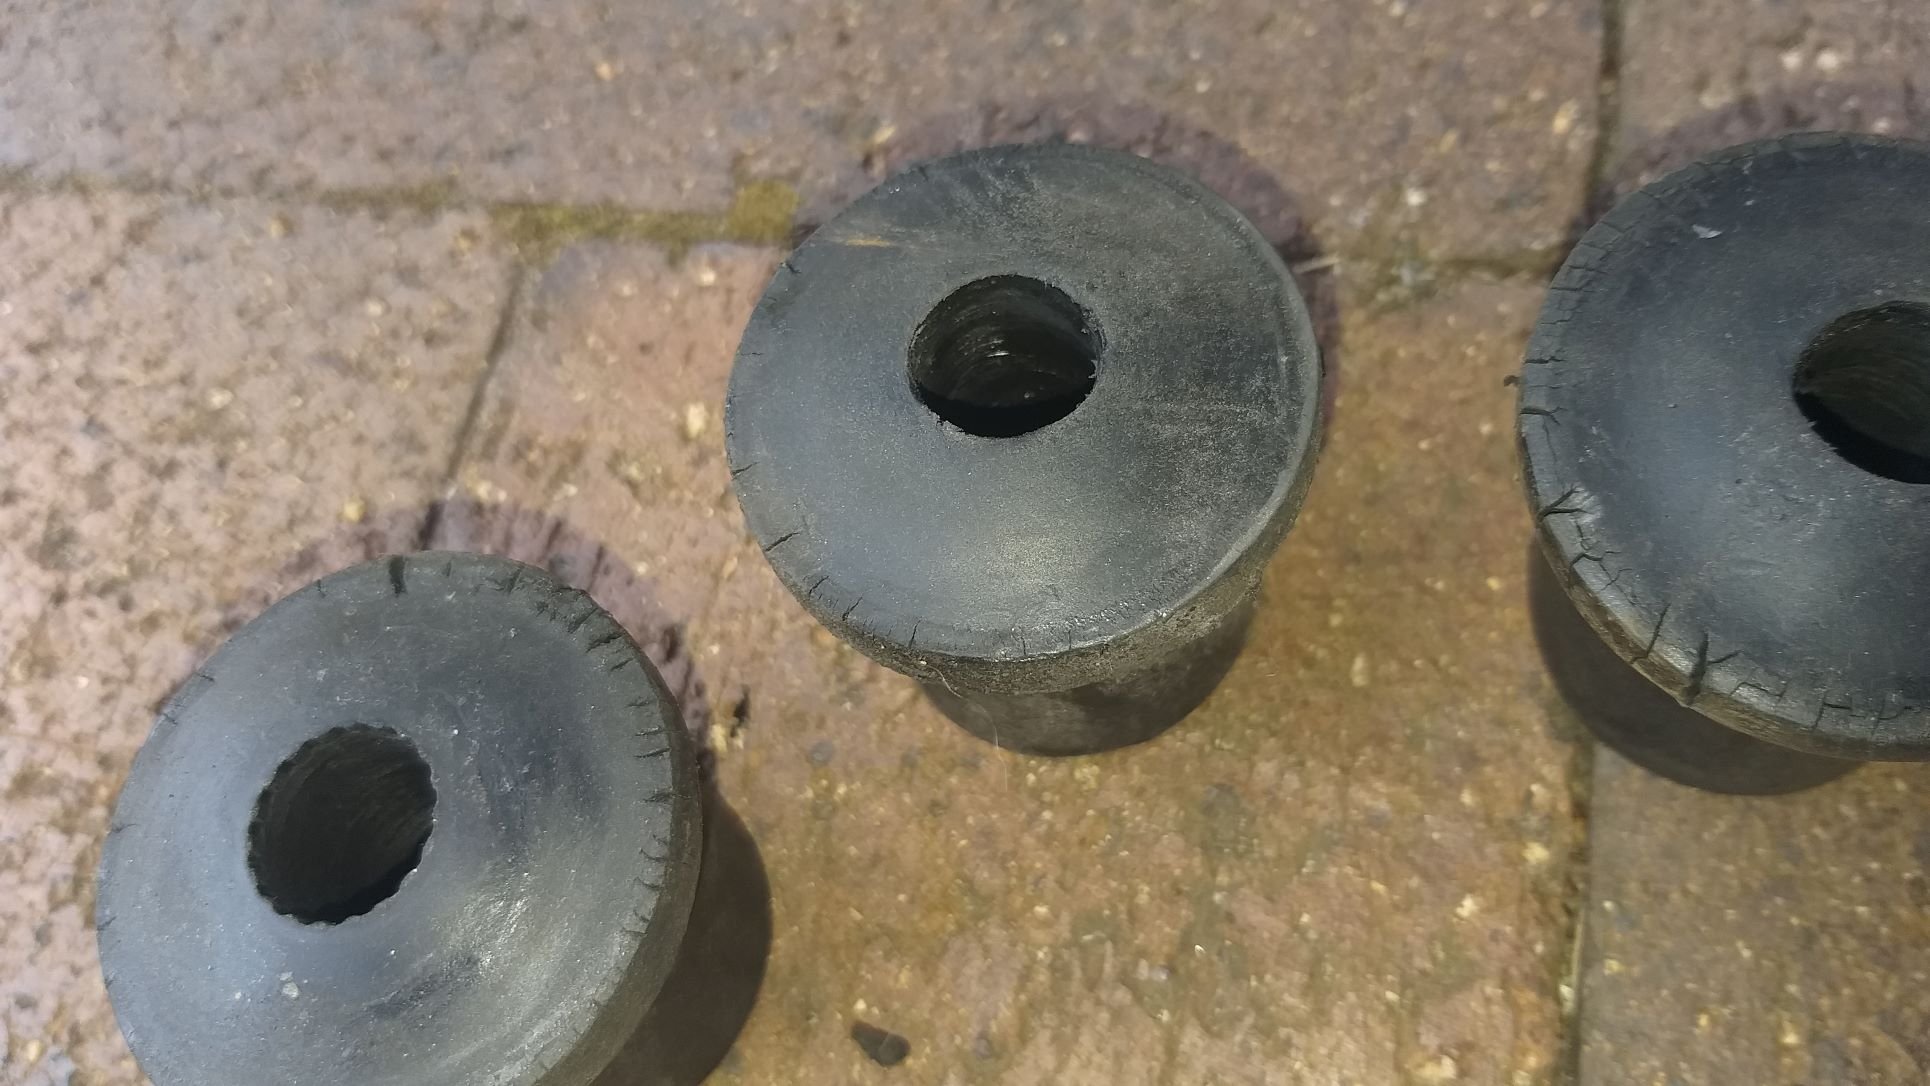
Another quick and easy task today. The leaf spring shackle bushes were looking a bit flogged. I pulled them out and whilst the exposed ends looked pretty shabby the inners were still in decent condition. Replaced both sides with new ones anyway and chucked a bit of lubricant on them while I was at it. It seems to have cured an annoying squeak that was coming from the back whilst negotiating speed humps, so I'll take the win.
- 194 replies
-
- 11
-
-
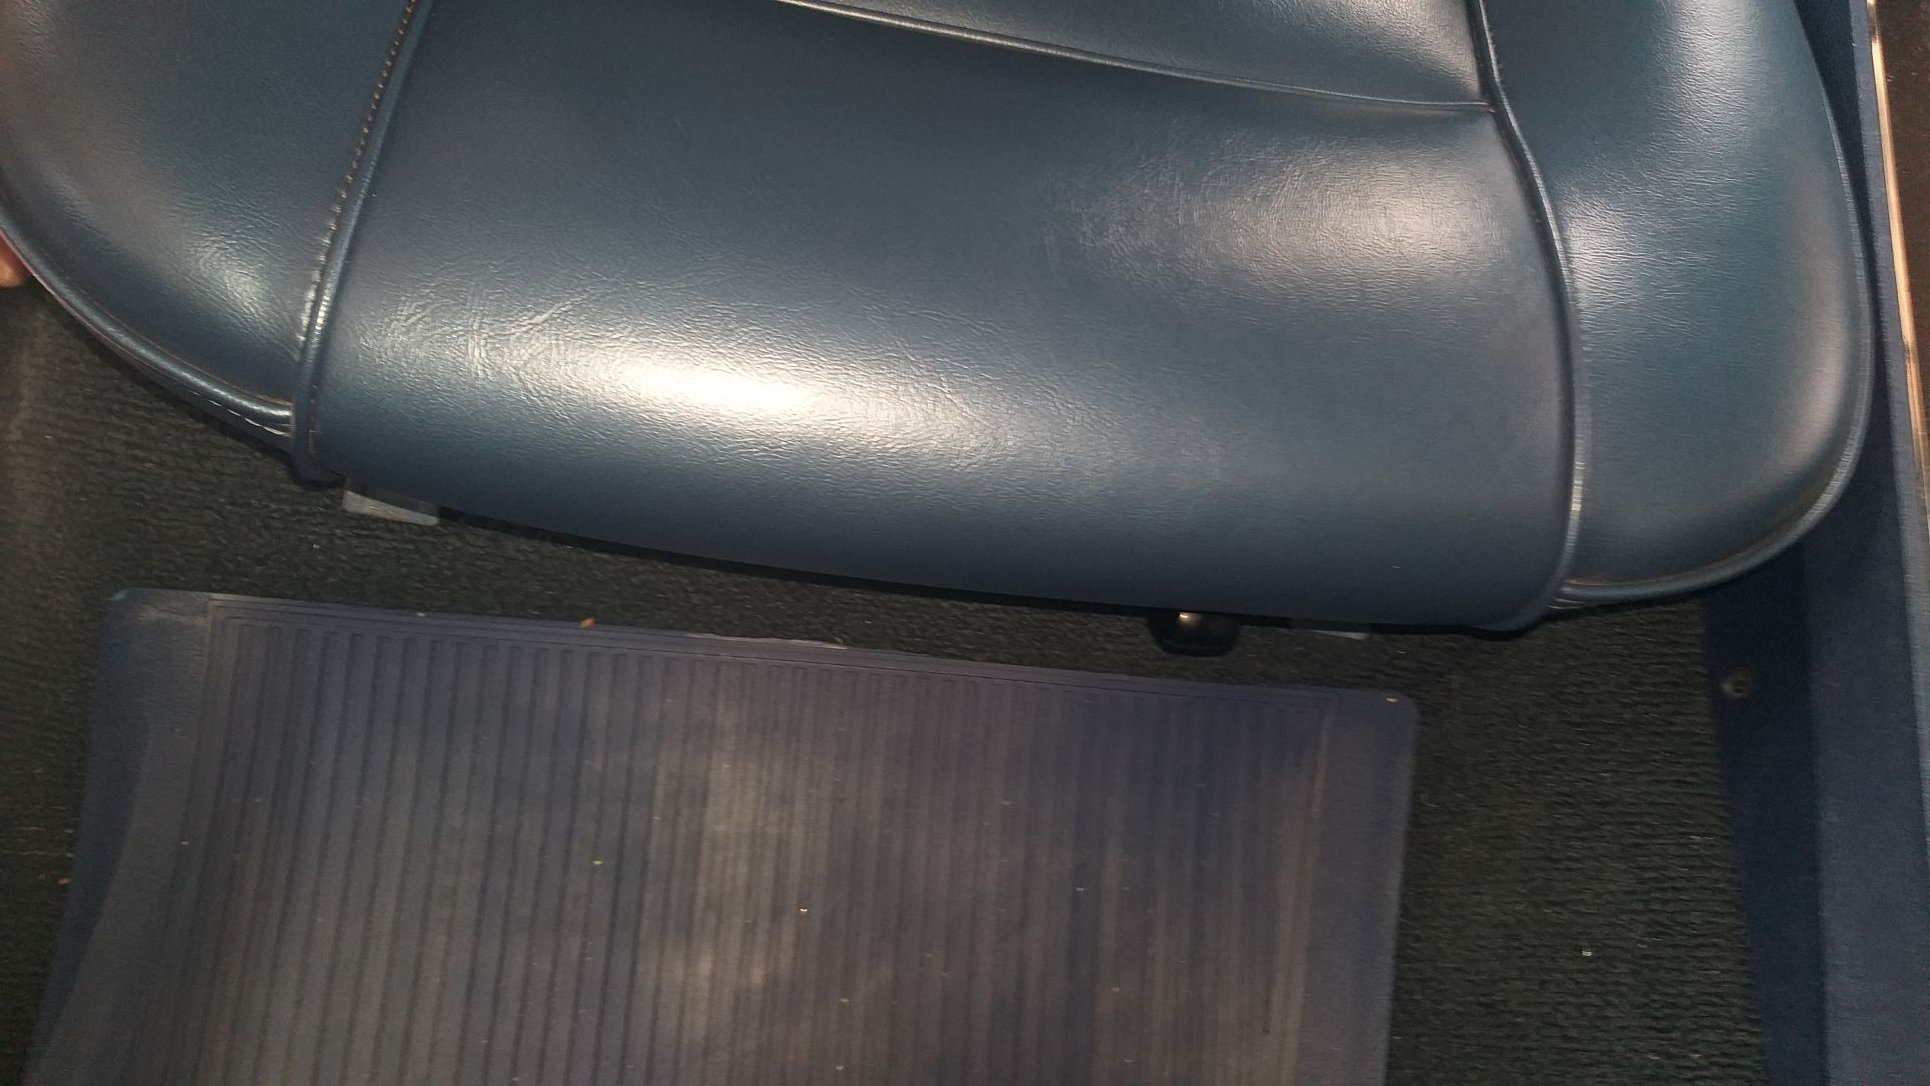
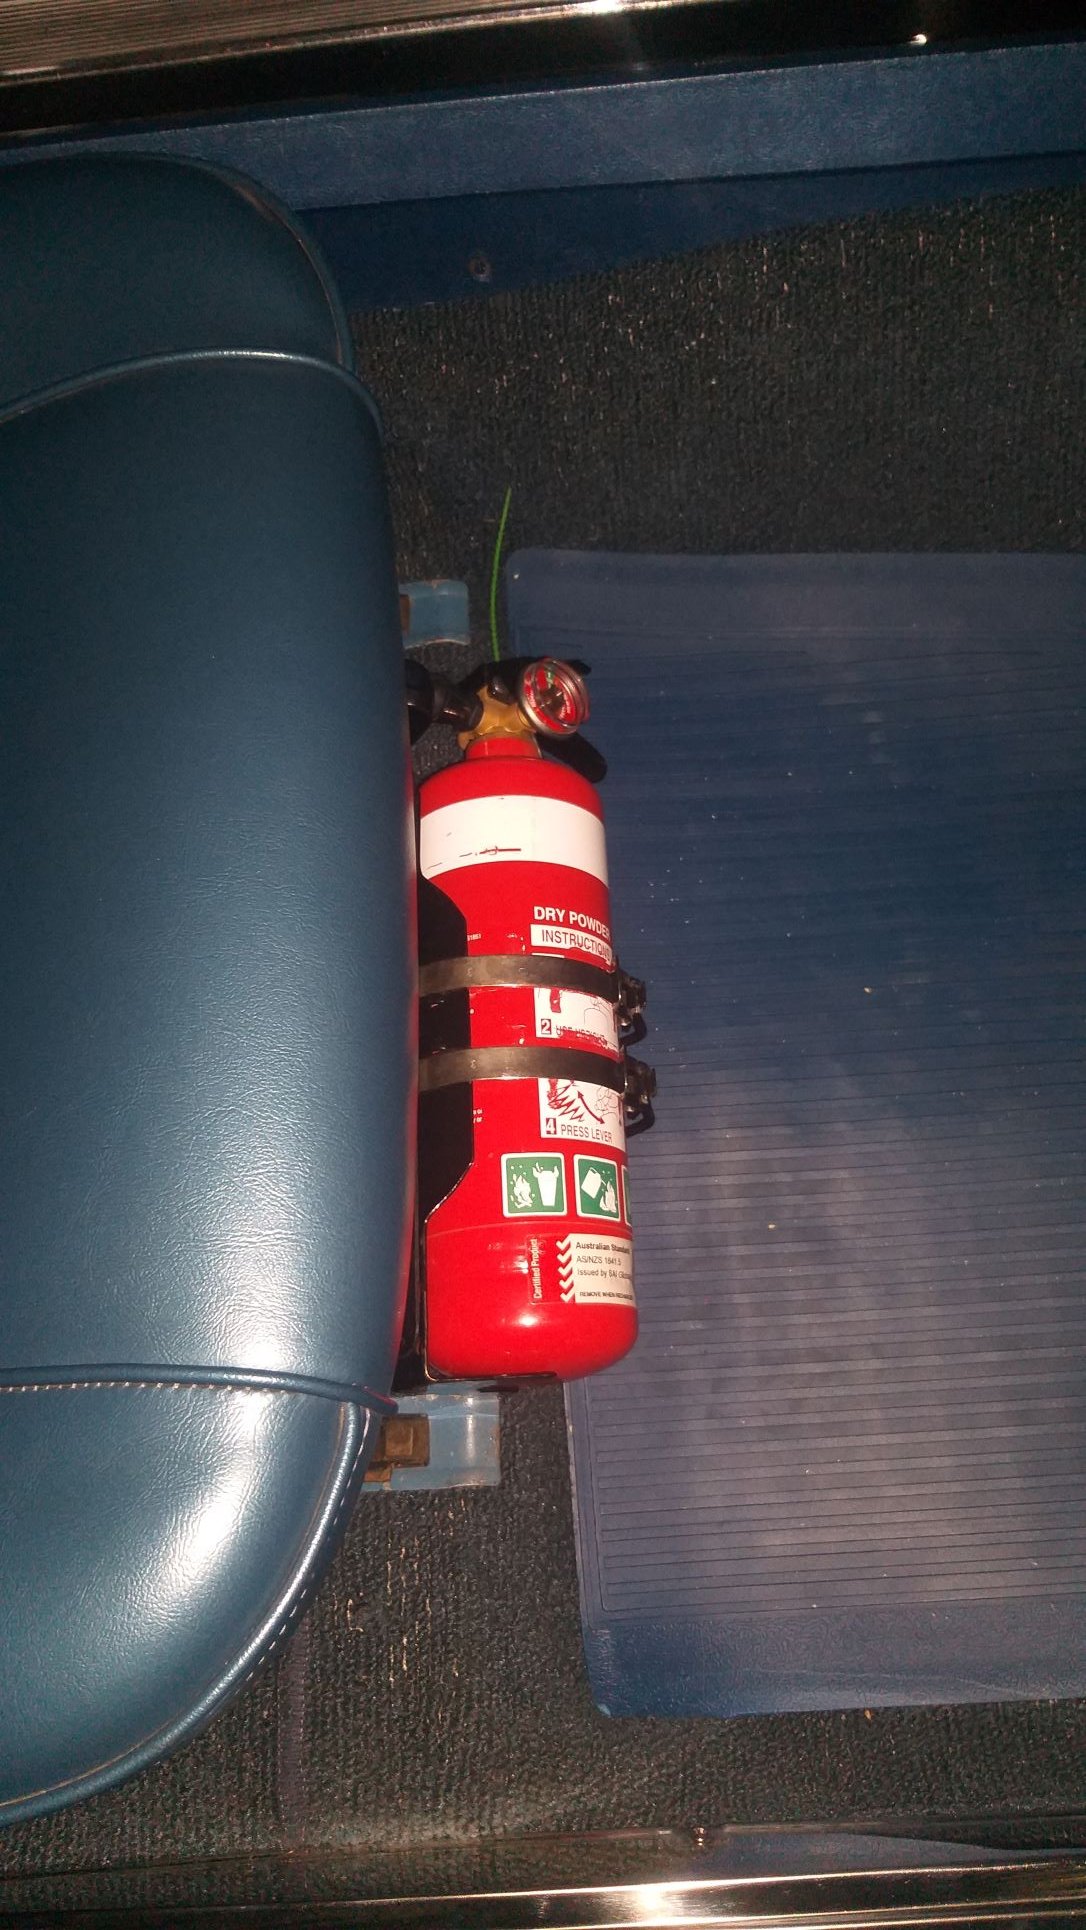
Still ticking a few small items off the "to do" list. I spent a few hours knocking up a bracket for a fire extinguisher which I have tucked up in front of the passenger seat. Hope I never have to use it.
-
Thanks for this. Yep, I have been investigating a similar option for my Thames van, so it did cross my mind on whether that might be an option for the Mustang. Biggest issue is finding the real estate underneath to mount this. I've dropped it so low to the ground and on top of this it's pretty busy under the old Mustang what with the dual exhaust, big auto tranny and the fuel tank that runs across almost the full width behind the rear axle. I thought about trying to tuck it up inside one of the front fenders with a small duct, but sadly just not enough clearance.
-
Thanks for the additional comments fellas. First thing this morning I re-wired the thermo fan back to the temp switch. I'm not able to hear the fan come on over the rumble of the V8 so I'm thinking that I might just temporarily fit a little indicator light inside the cabin so that I can monitor exactly when the thermo fan cycles in and out. I'll keep the a/c condenser out of the car for now until I upgrade the radiator. Spoke to a local a/c parts supplier who supplies kits to many of the muscle car and hot rod boys this morning as I wanted to find out if there is such a thing as an a/c condenser that is less restrictive on airflow. Turns out that although you can get high performance condensers that will improve a/c efficiency they pretty much all have the same airflow properties. When I described my overheating symptoms, he straight away said that I should be looking at upgrading the radiator.
-
Good point @kws. Something I haven't through of. I reckon I should do a bit of research on that. Thanks for posting.
-
Cooling Issue - Chapter 7 Took the Muzzy out for a hoon this morning, whilst taking some readings with the infrared temp gun. Maximum top temp on the thermostat housing - 183 F Upper radiator hose - 156 F Lower radiator hose - 145 F Looks like the removal of the a/c condenser from in front of the radiator has drastically improved air flow to the point where my cheapy 3 row aluminium radiator can now cope. Since running without a/c is not a long-term solution I'm thinking a radiator upgrade is on the cards. I've read some good reports about the Scott Drake (Shelby licensed) 2 row aluminium radiators. Even although it's only a two row, the tubes are 1 and 1/4 inches each and they have fitted a baffle in the top tank that aids coolant flow across the whole core. At around the $600 mark it's worth a punt I reckon, so one of these is top of my list for next month's Mustang spend.
-
Cooling issue - Chapter 6 Spent a few hours yesterday pulling the front of the car apart and have temporarily removed the a/c condenser that is located in front of the radiator. My thinking being that this may be impeding airflow. Time will tell, I guess.
-
Cooling Issue - Chapter 5 I'm now running a 180 F thermostat in a freshly flushed system. I've also bypassed my fan switch so that my Spal runs permanently. Took the car out on a 50km open road journey and at first things looked promising. Then during the last 5km of the journey whilst travelling along at around 80 km/h at steady revs with no cars ahead of me, the temp needle suddenly started to inch higher until it reached the highest that I have experienced so far. Got home and quickly grabbed the infrared temp sensor gun. Yep, sure enough 209 F on the thermostat housing. That is almost 10 degrees higher than my previous record. Checked the top radiator hose at idle and that was sitting at 184 F compared to the bottom radiator hose at 163 F. So, although the 180 F thermostat seems to hold the temp down for longer than the 160 F thermostat did, it's definitely not the silver bullet I was hoping for.
-
Hey @chris r thanks heaps for posting this. Pretty interesting info on there and as you say another slant on the issue. Almost everyone you come across makes a compelling argument for their theory, so it's really hard for total newbs like me to figure out the best direction to take. It's a bit of a lottery to be frank. Yesterday I was hoping to take a test drive with my new 180 degree thermostat fitted, but I picked up a leak from the thermostat neck so had to address that. I'll add the coolant this morning and give it a whirl.
-
Okay, so I chickened out and have ended up fitting the 180 F thermostat that I have in stock. Figured it was worth a try. Flash, over and out.
-
Thanks heaps for the link to that article @cletus. Makes for interesting reading. Funnily enough earlier in the week I was looking at an alternate style Robert Shaw balanced sleeve thermostat that is sold by Flowkooler. Anyway, getting back to the article, it certainly looks like it debunks the GT350 guy's theory about keeping the coolant in the radiator longer. I was interested to hear that you have had the best success with the maximum flow option. After boldly saying that I was going to try the 195 F thermostat in my last update I've subsequently chickened out and installed the new 180 F thermostat that I have in stock. I'll give this one a try for a while and will report back on my findings. The other thing that I have done is hardwired my thermo fan to an ignition positive so that it will now run continuously. Here in sunny Queensland we tend to run a/c in the cars almost all year round, so I figured the fan is likely to be on most of the time anyway. I'm still planning to replace my cheapy 3 row radiator with a 2 row Shelby alternative. The two row comes with 1 and a 1/4 inch vanes and is reported to be about 30% more efficient than my current cheapy. It also has a baffle built into the top tank which aids coolant flow across the whole core. I think it's going to take a few rounds of trial and error before I am happier.