Rhyscar
-
Posts
921 -
Joined
-
Last visited
-
Days Won
1
Everything posted by Rhyscar
-
Thanks @cletus much appreciated!
-
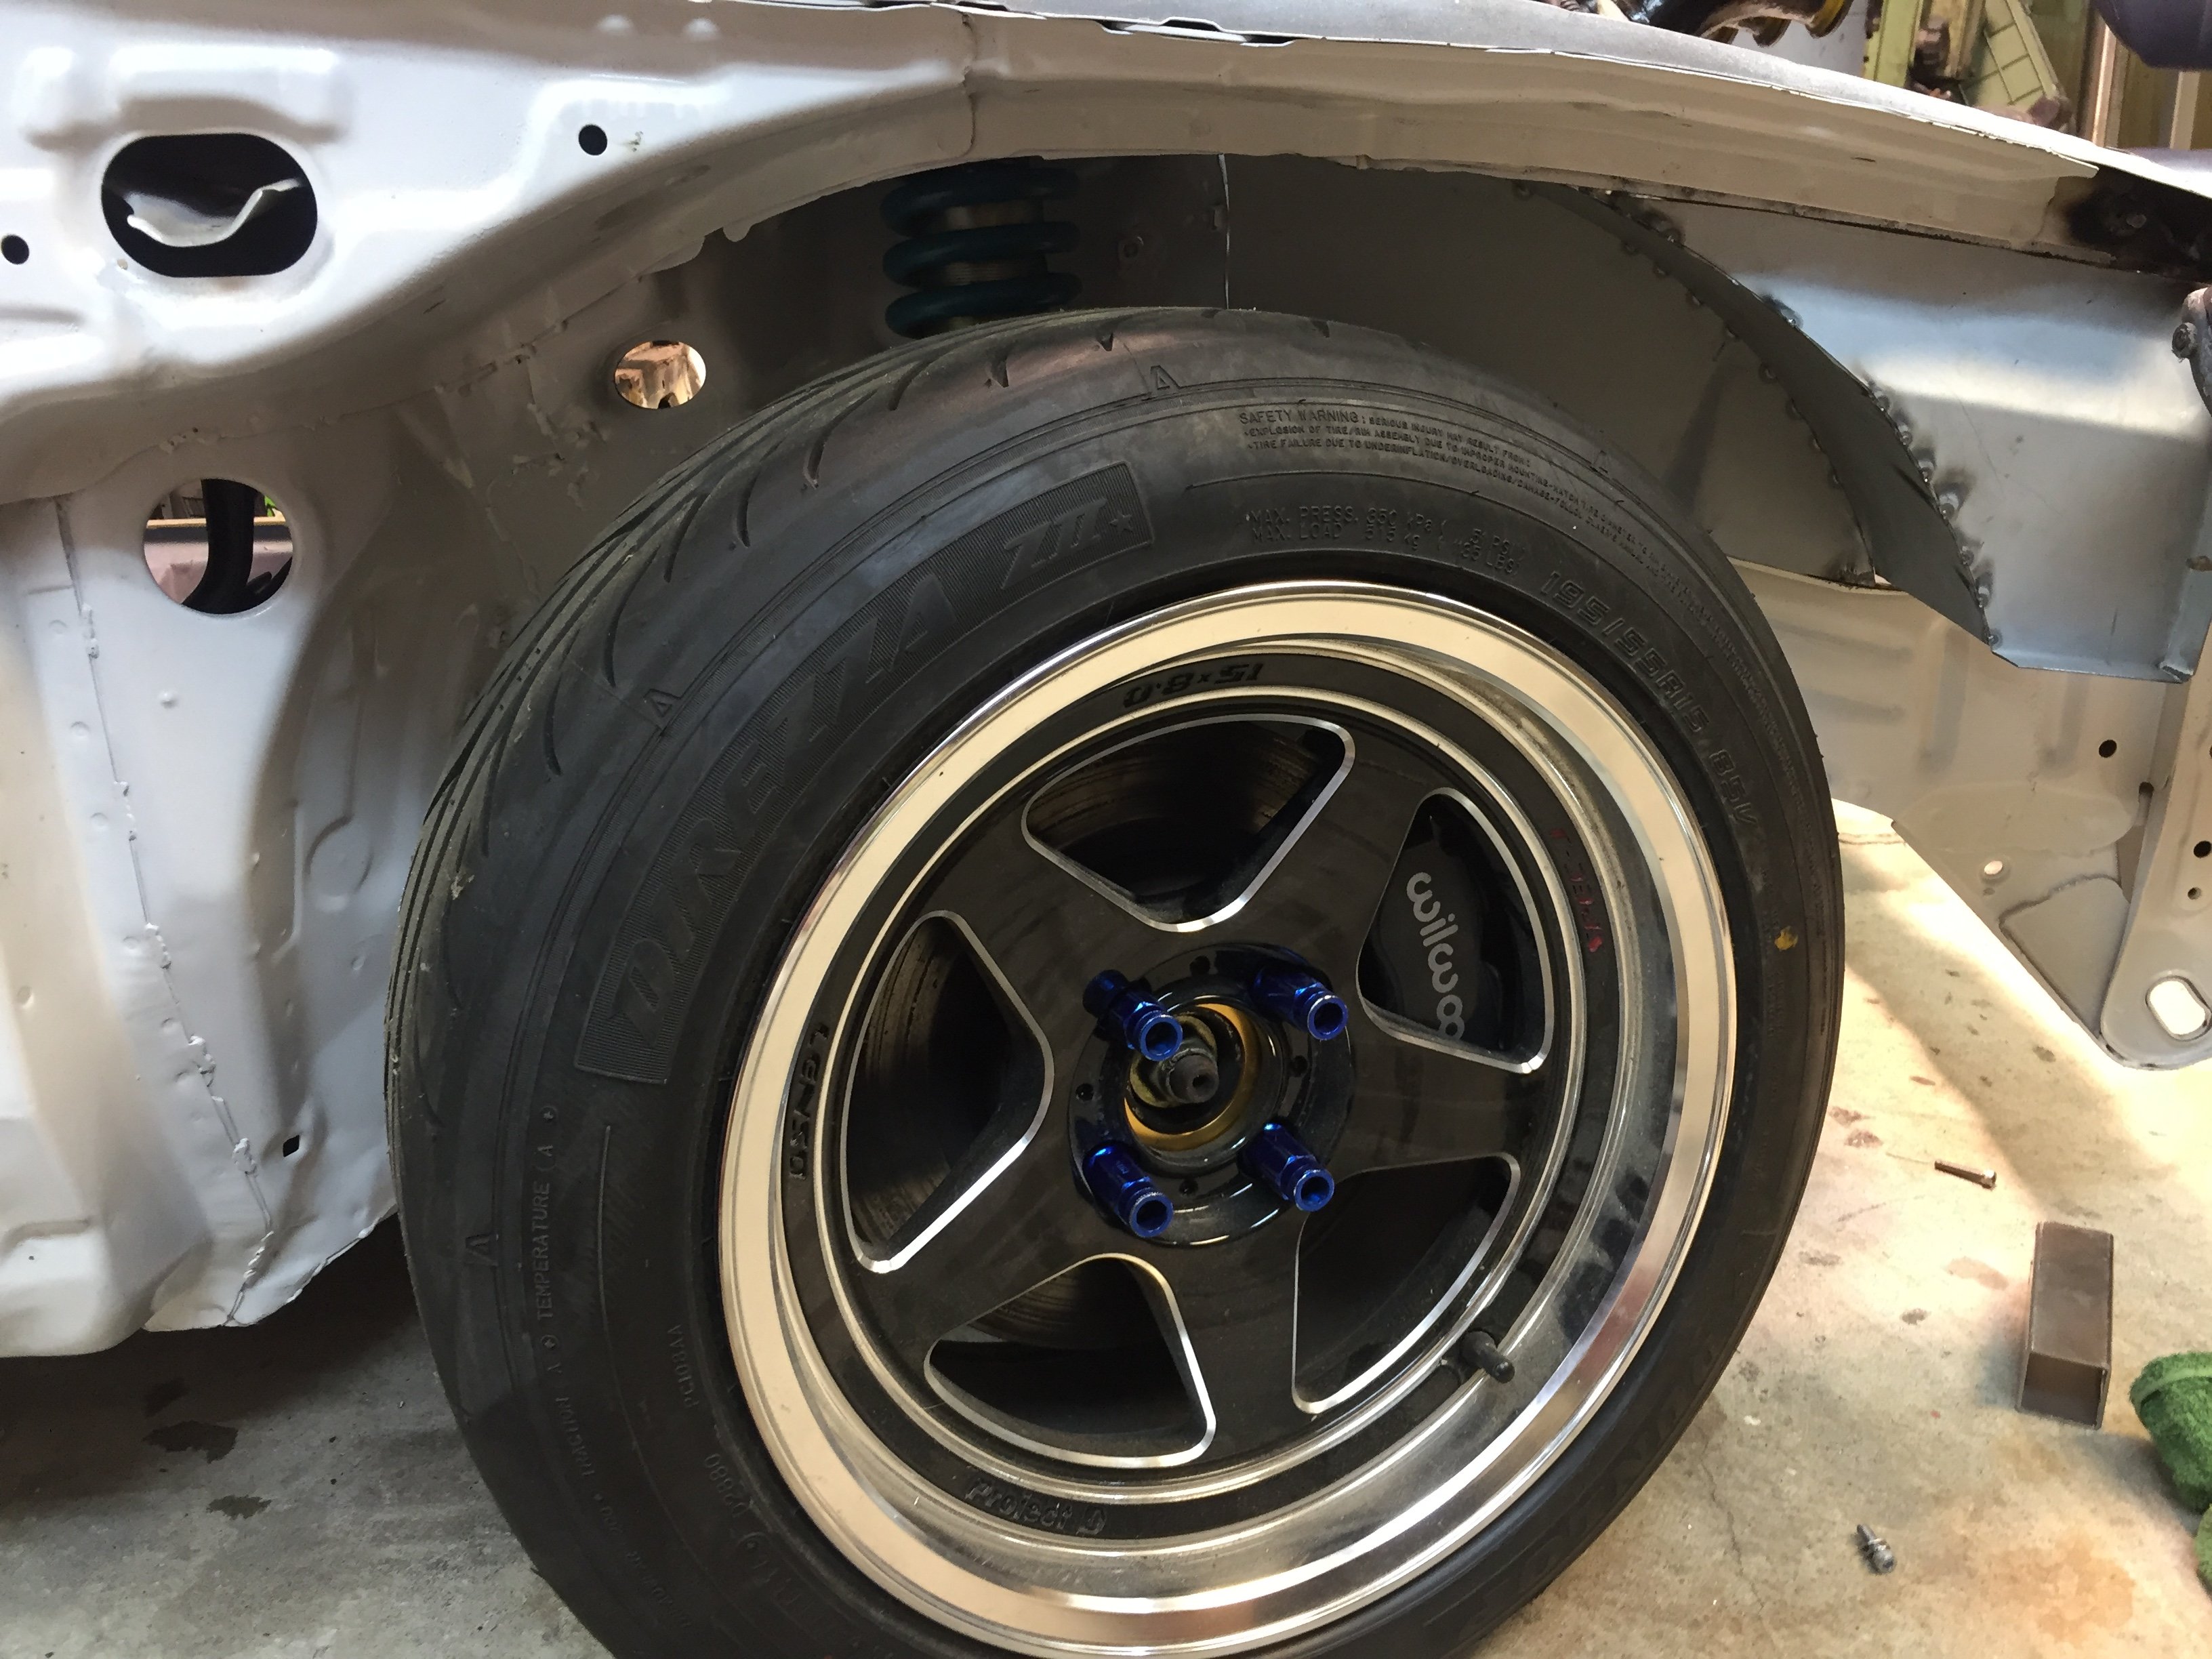
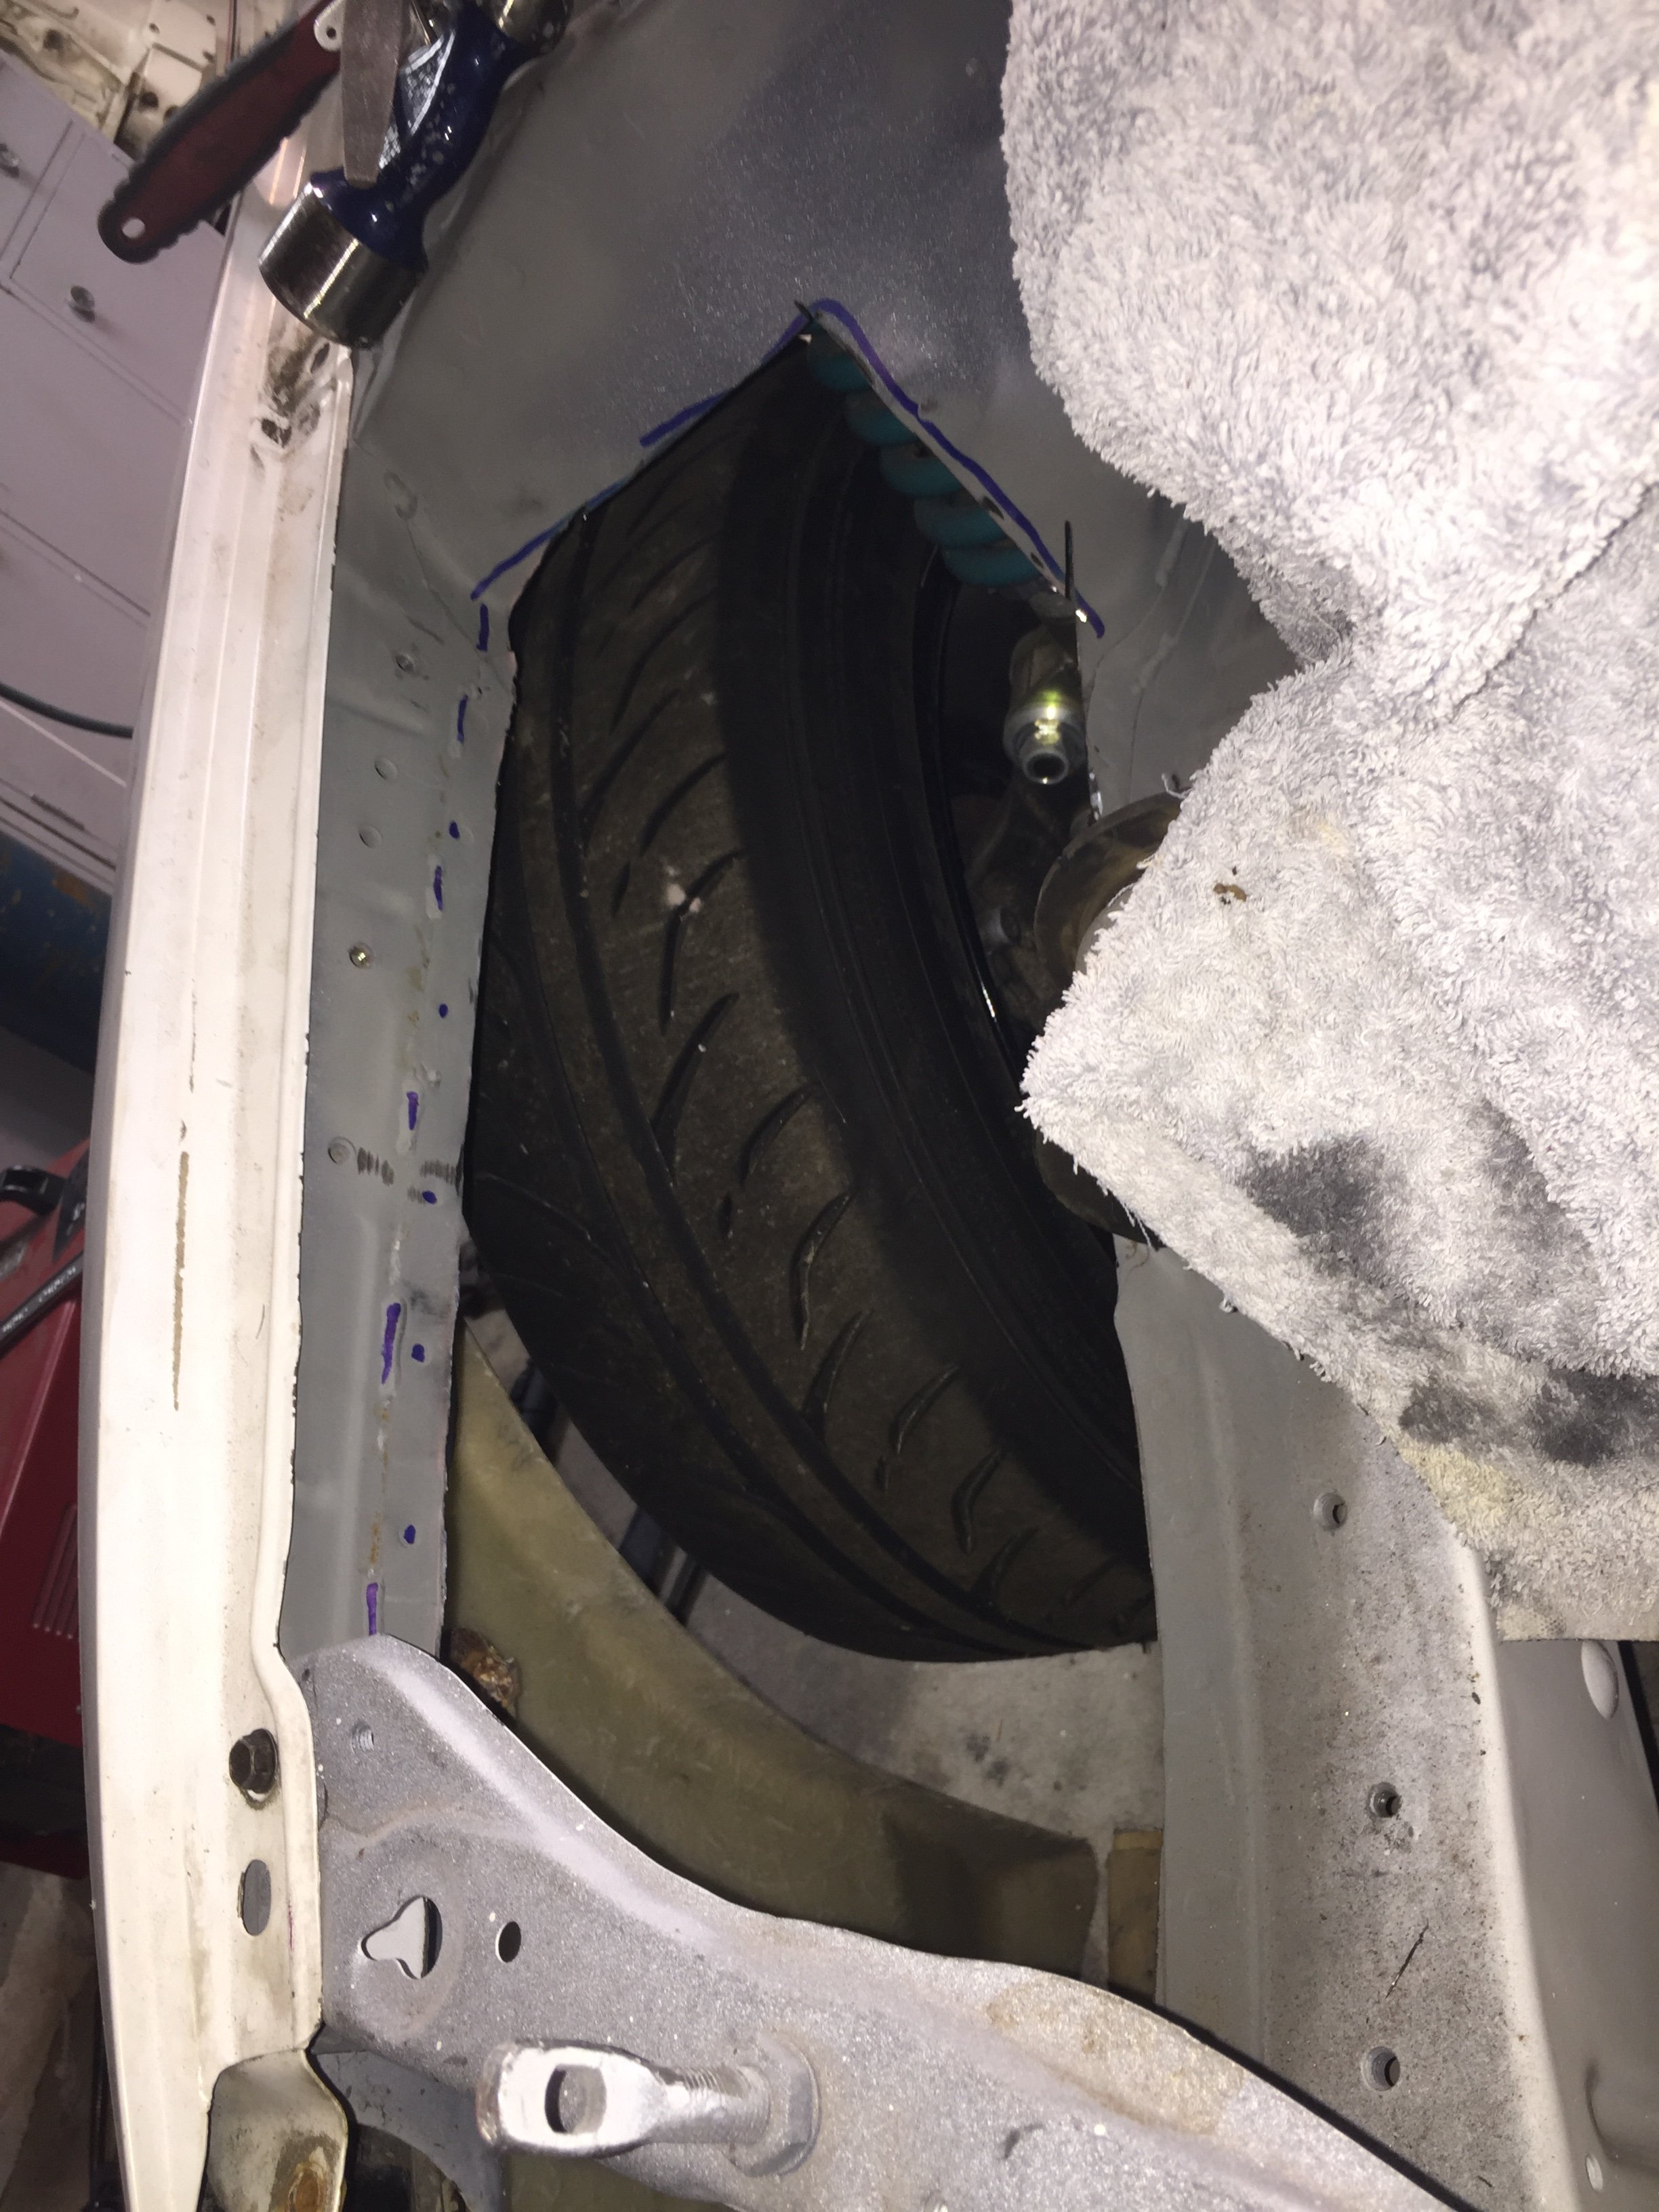
Just wanting to check what I can do to my seam above my wheel in cert world. I have enough clearance (just) for full compression without it touching but just wanting to be doubly sure I can’t damage the tyre on a big compression. This is being built to do jumps on targa.. A double seam like this provides quite a lot of strength to a sheet metal folding so I’m not sure if I can cut it back then stitch weld a doubler over the gap or something similar? In the past ive bashed seams like this flat but that doesn’t seem like the right thing to do either.

-
Yeah I’m liking the white on white option I think.
-
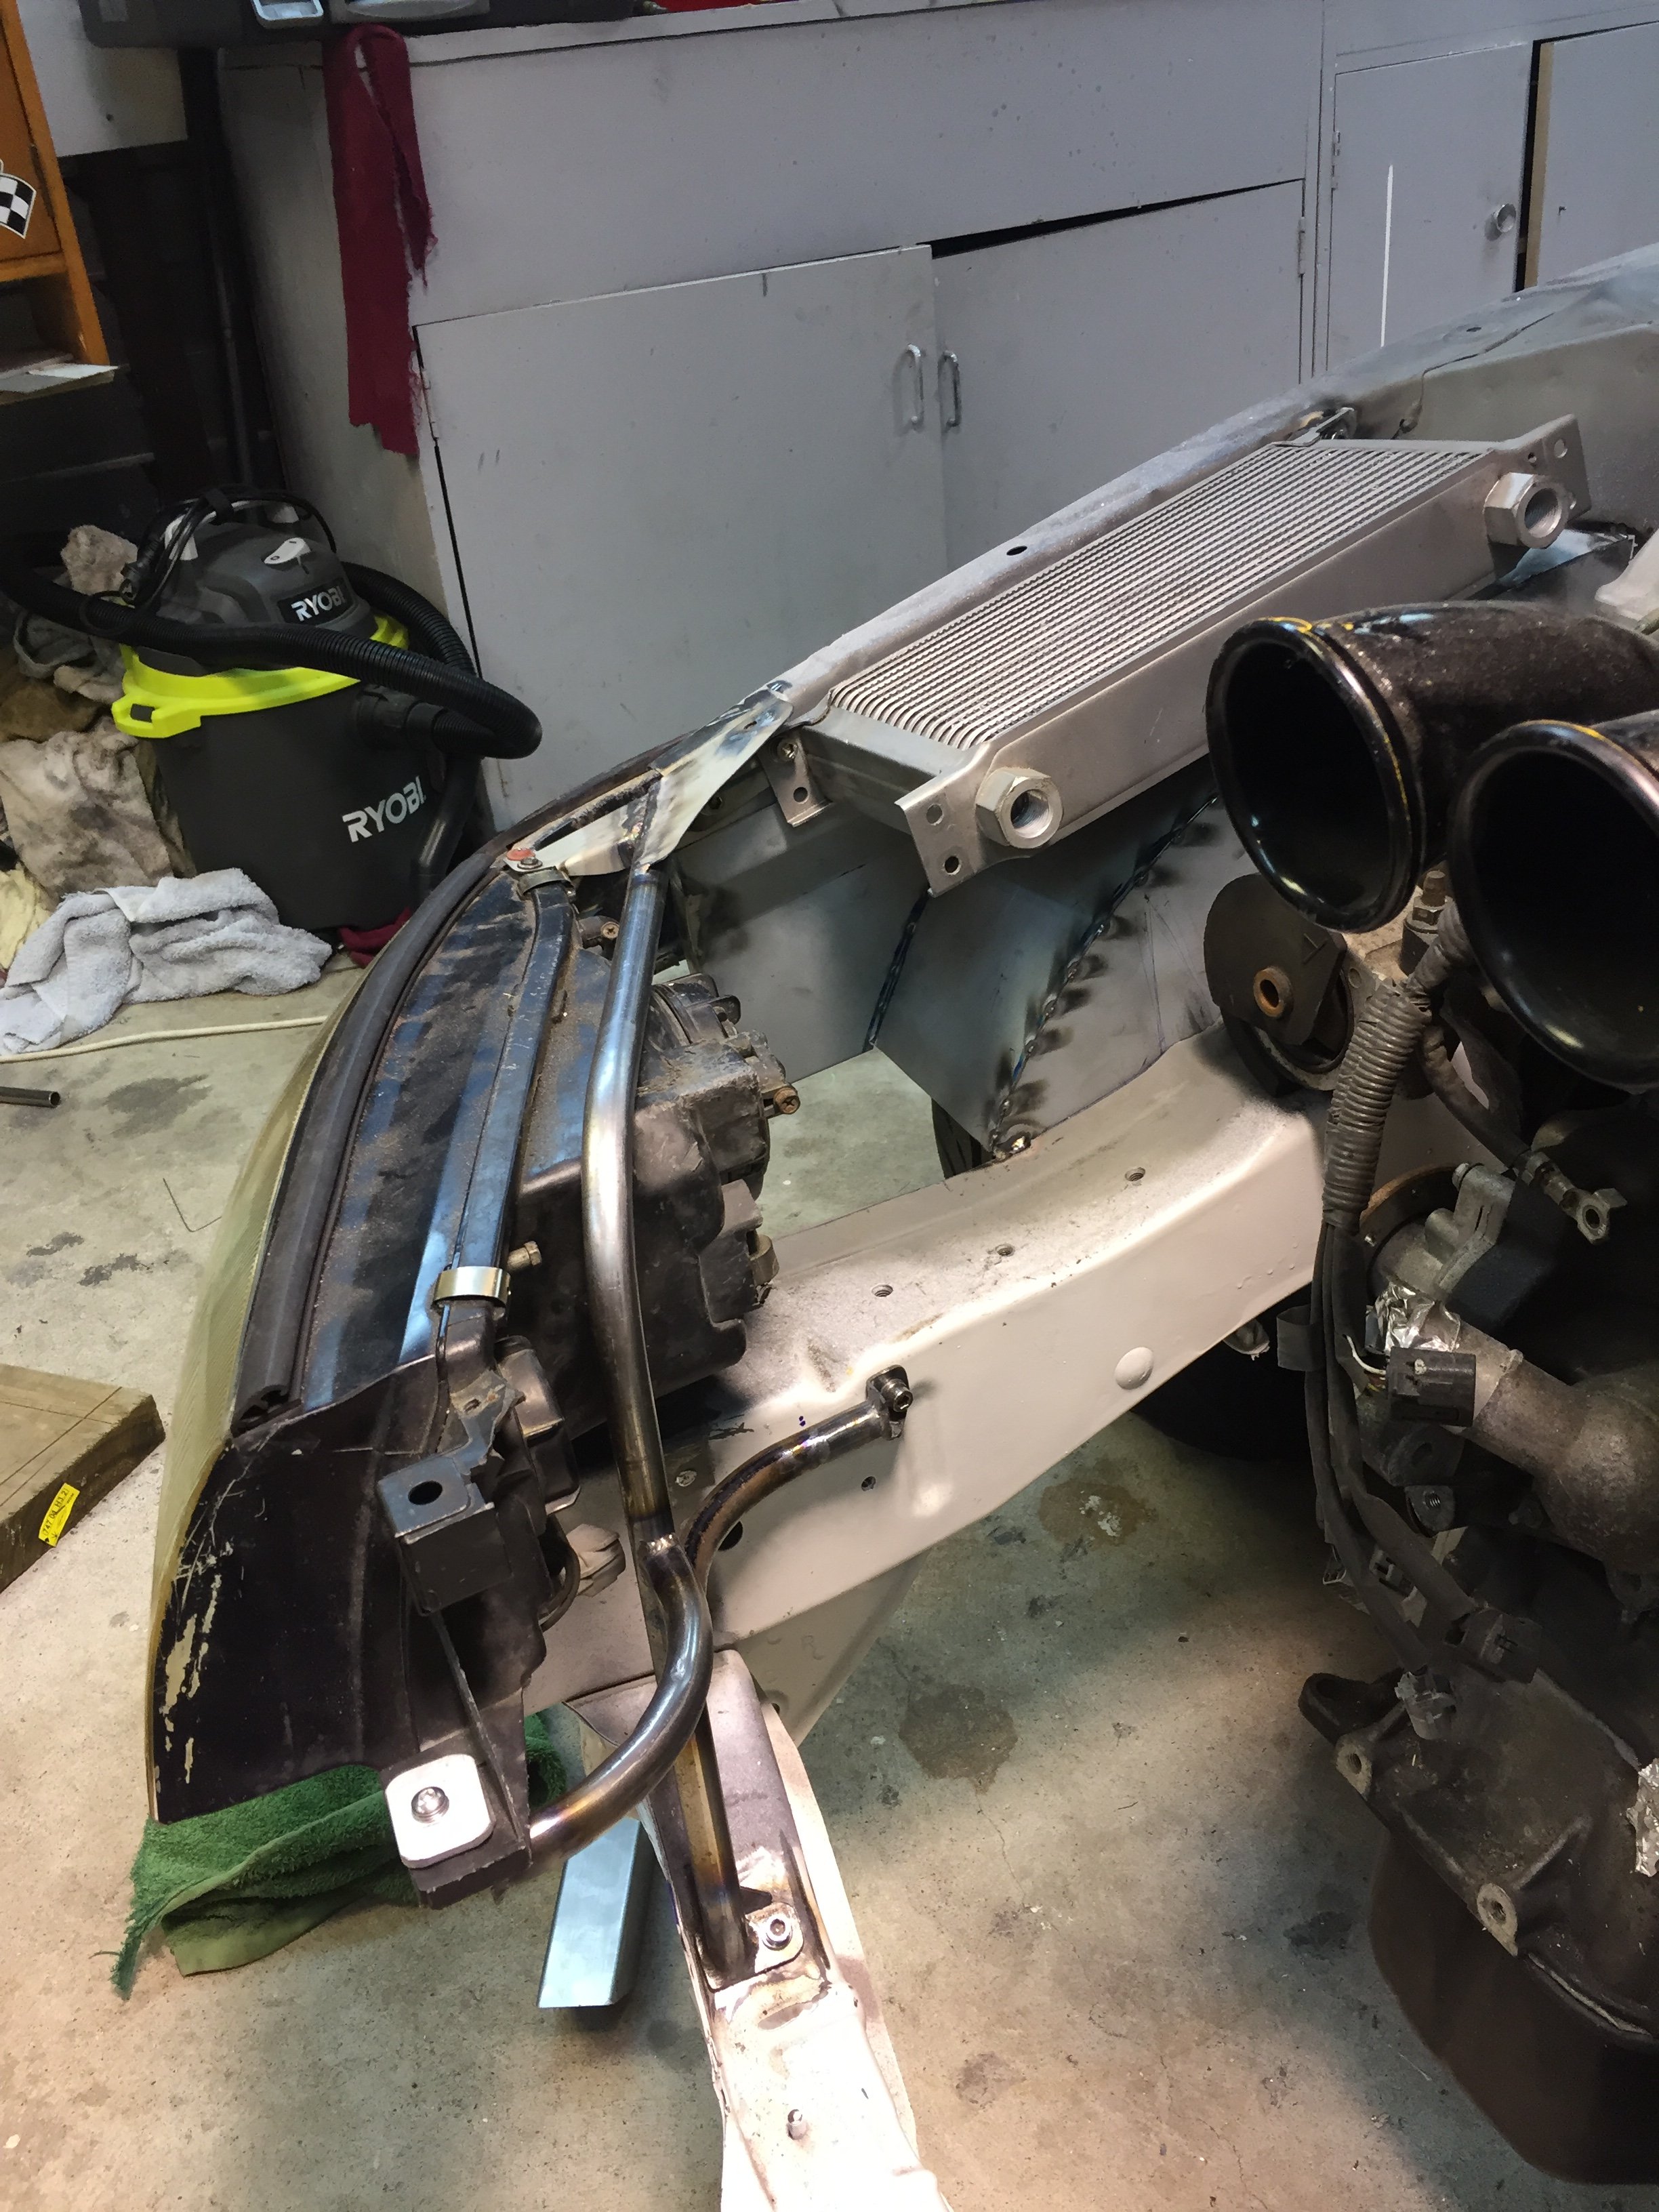
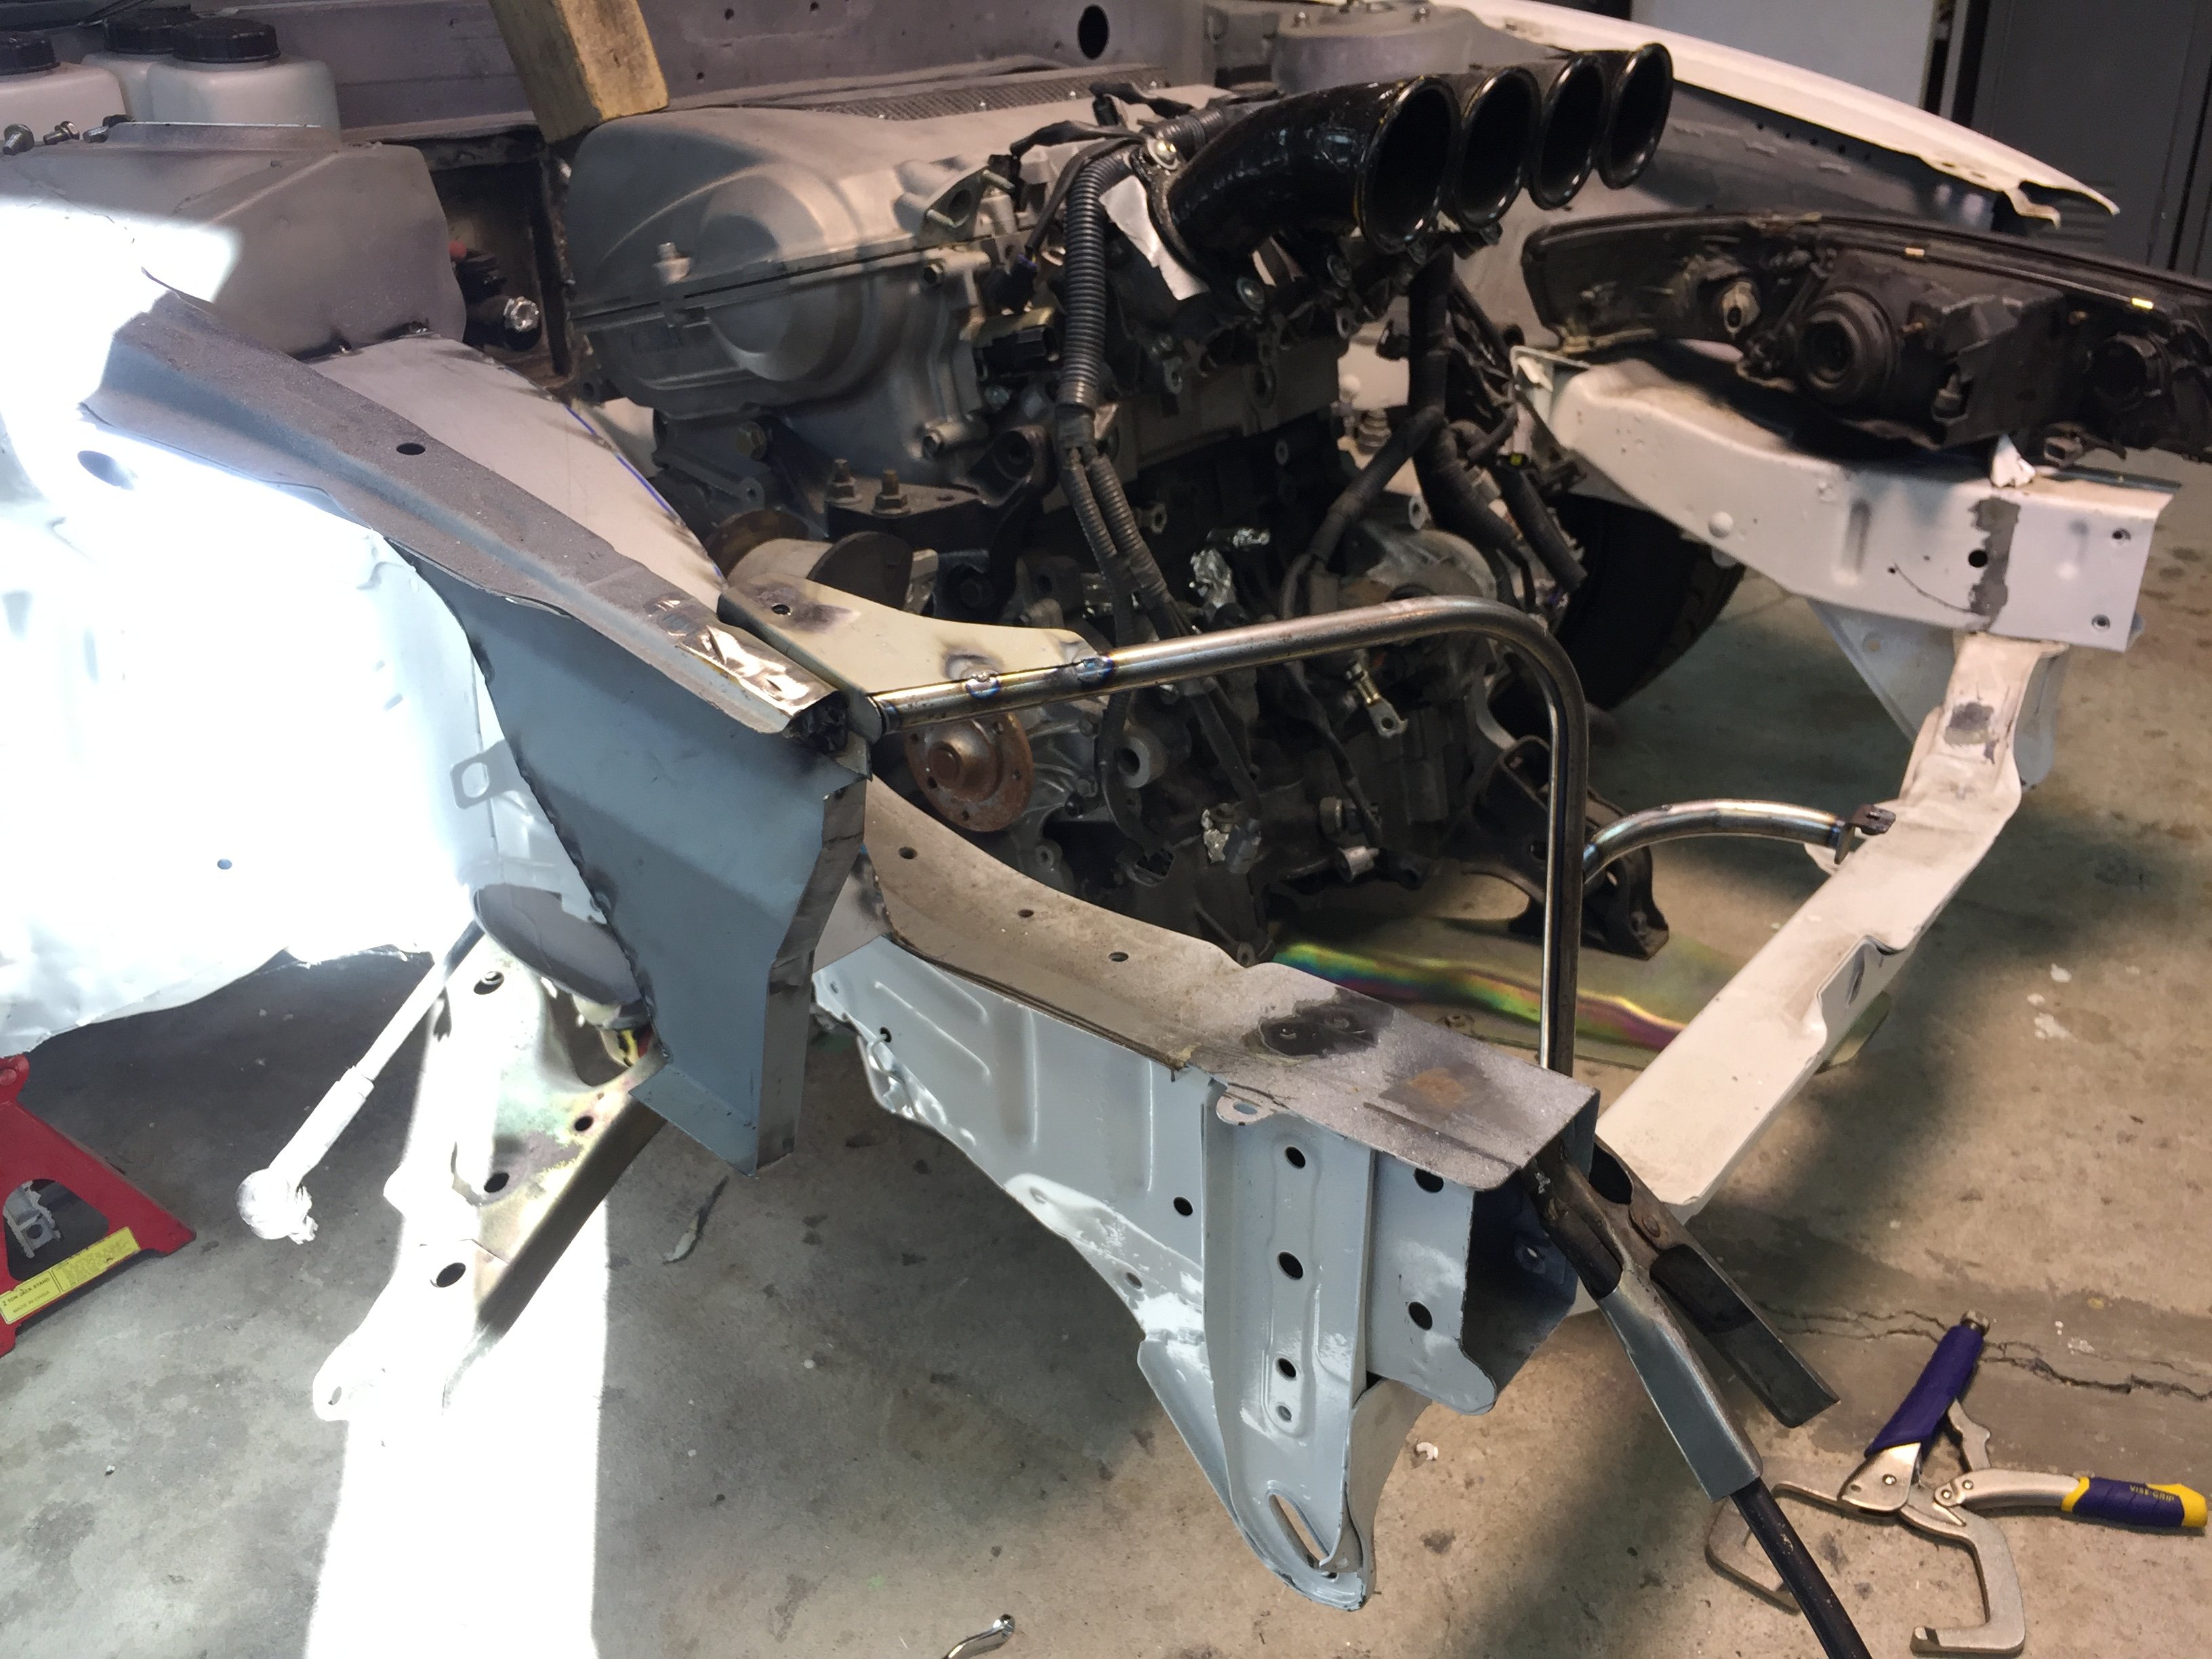
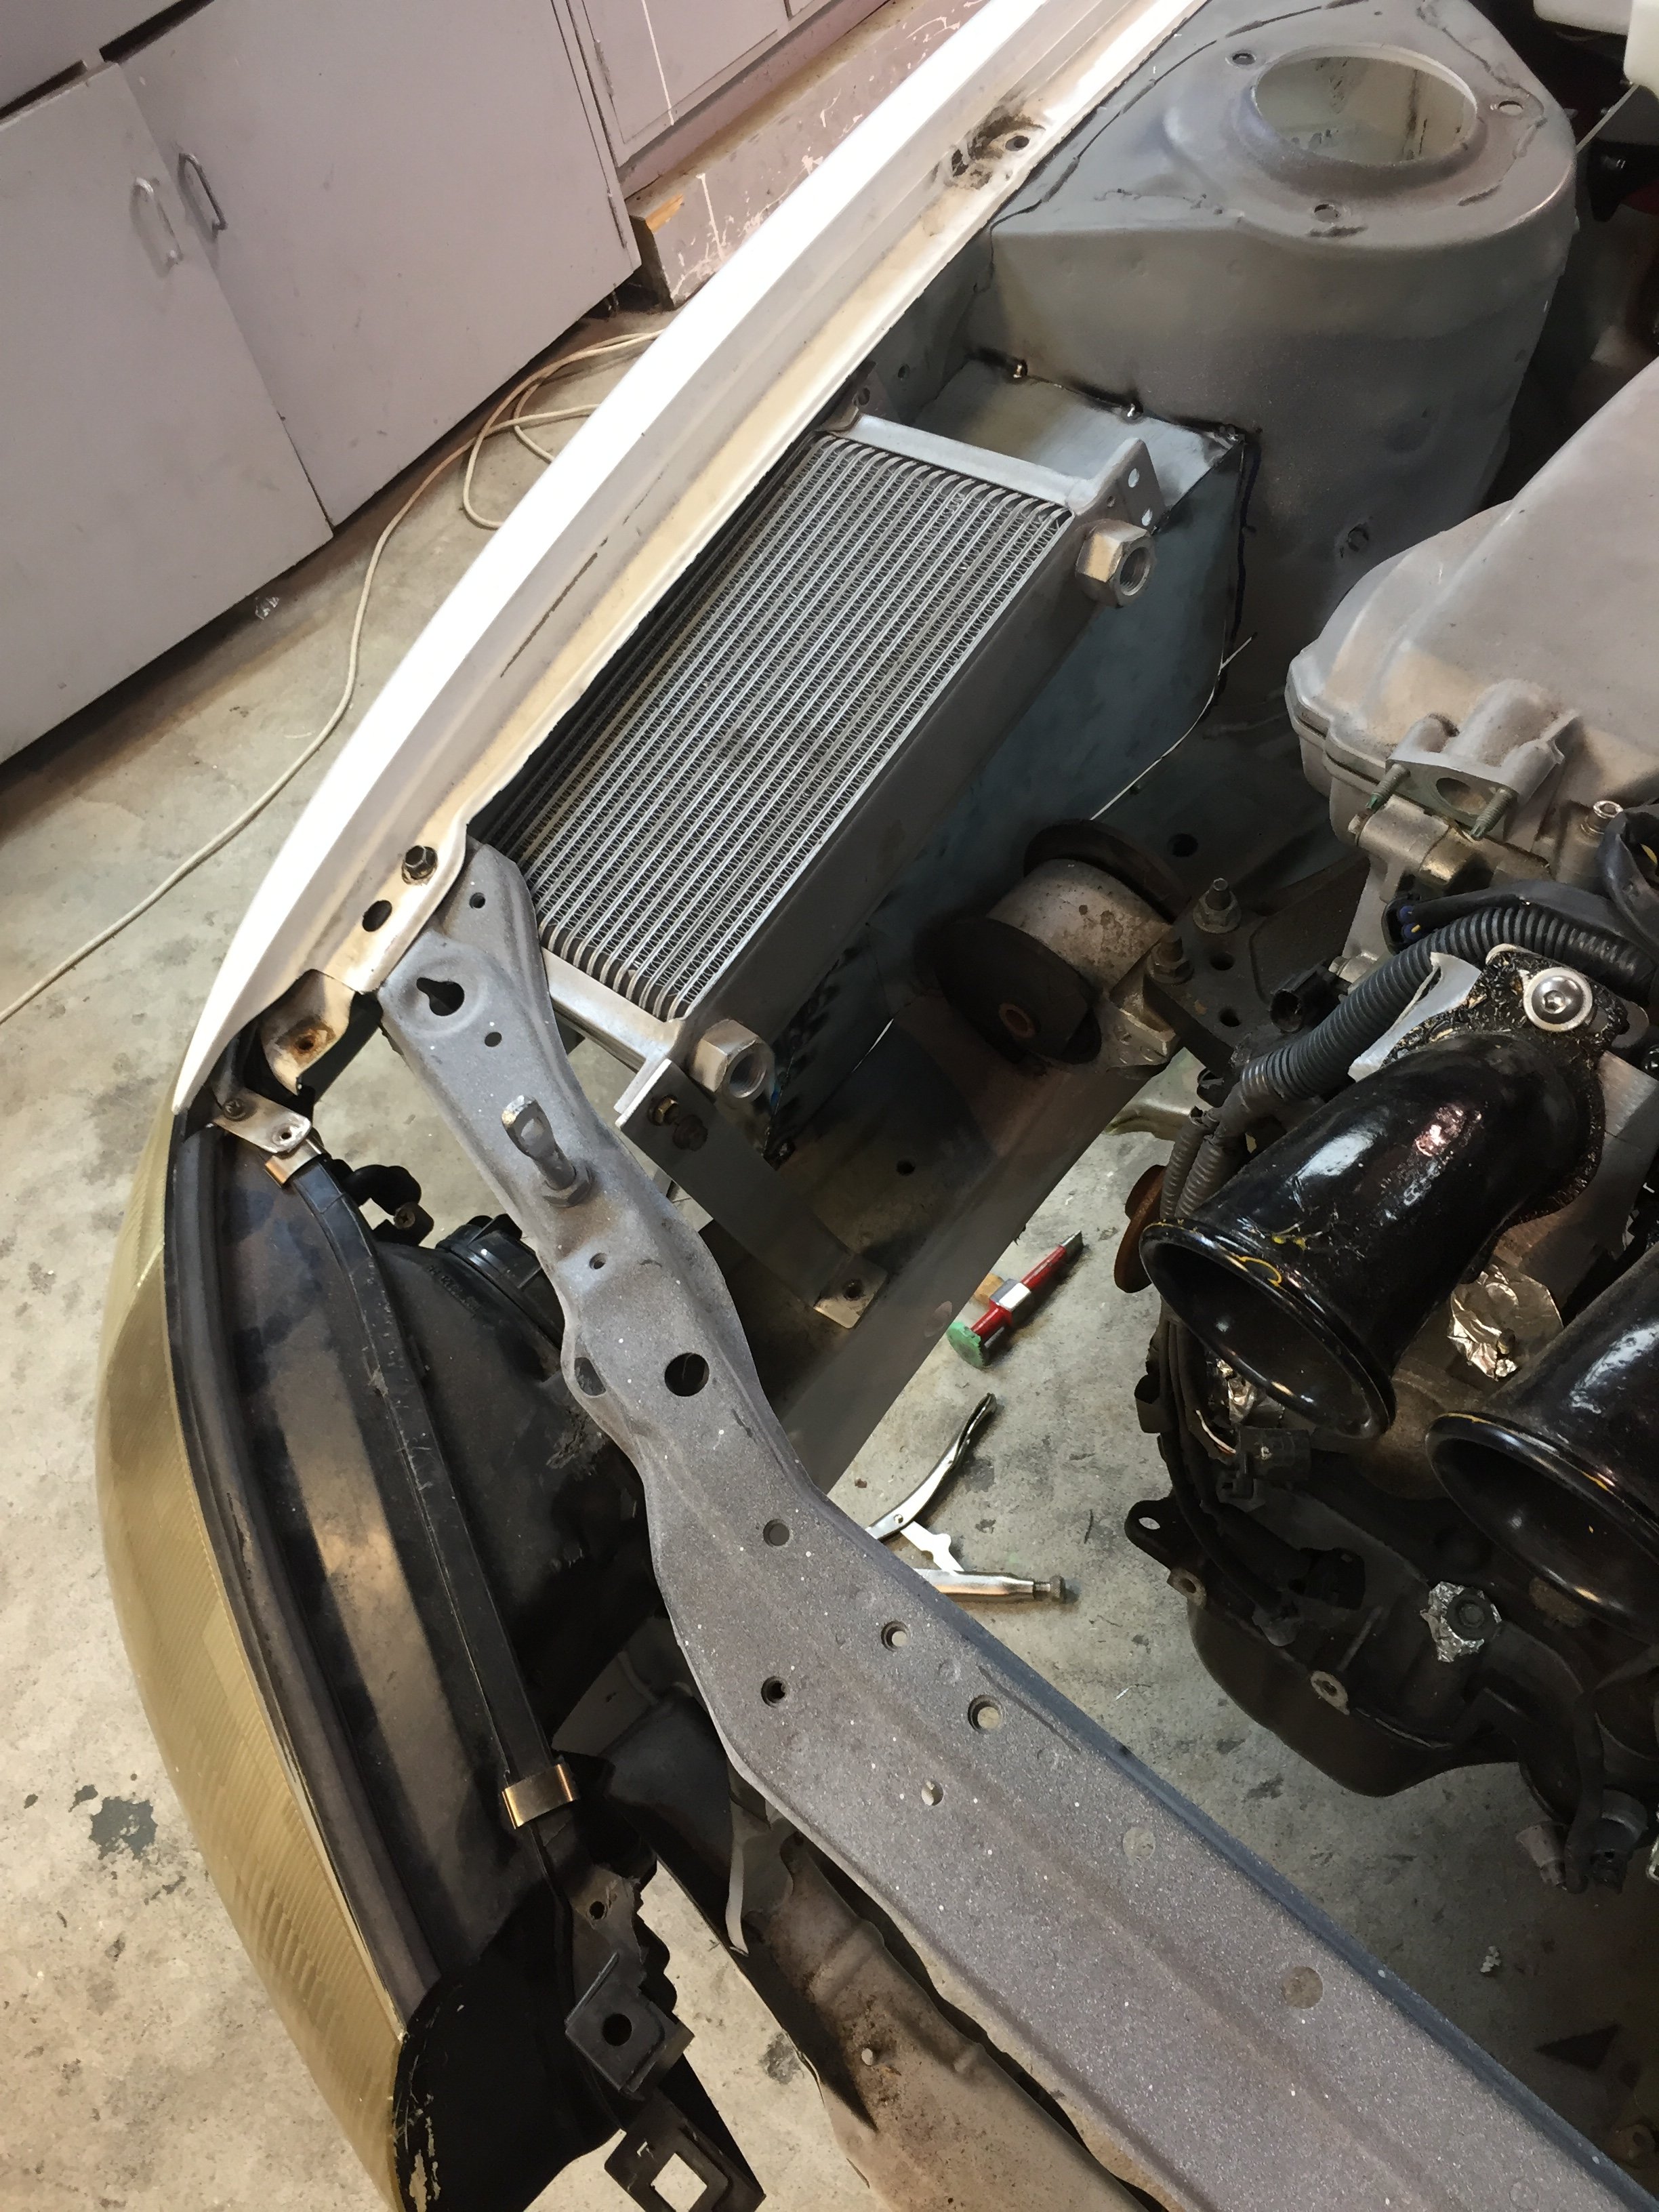
Added a few more braces to the mounting without trying to make it too strong so frontal impact etc isn’t effected too much. Has some movement so I’m sure will rattle with solid engine mounts but shouldn’t effect night driving too much Hopefully saving some weight too I’ve cut heaps of shit out of the front end and not a lot going back in.. got oil cooler mounted and will start ducting that when I convert my shed back to Ali after I’ve finished all this mild steel fab. Any opinions on what colour/coating these headlight mounts should be?? They unbolt so I can remanufacture when I crash it/bend it. a) zinc passivated like subframes b) powdercoat white c) powdercoat gunmetal grey d) other options?? Im 76.9% sure engine bay will be painted white. Tossing up gunmetal cause it looks tidy but like the idea of the carpet matching the drapes etc.
-
so much room for activity at full lock. Time for some caster you say?? I’m really trying not to talk myself into making some bottom arms for this...
-
-
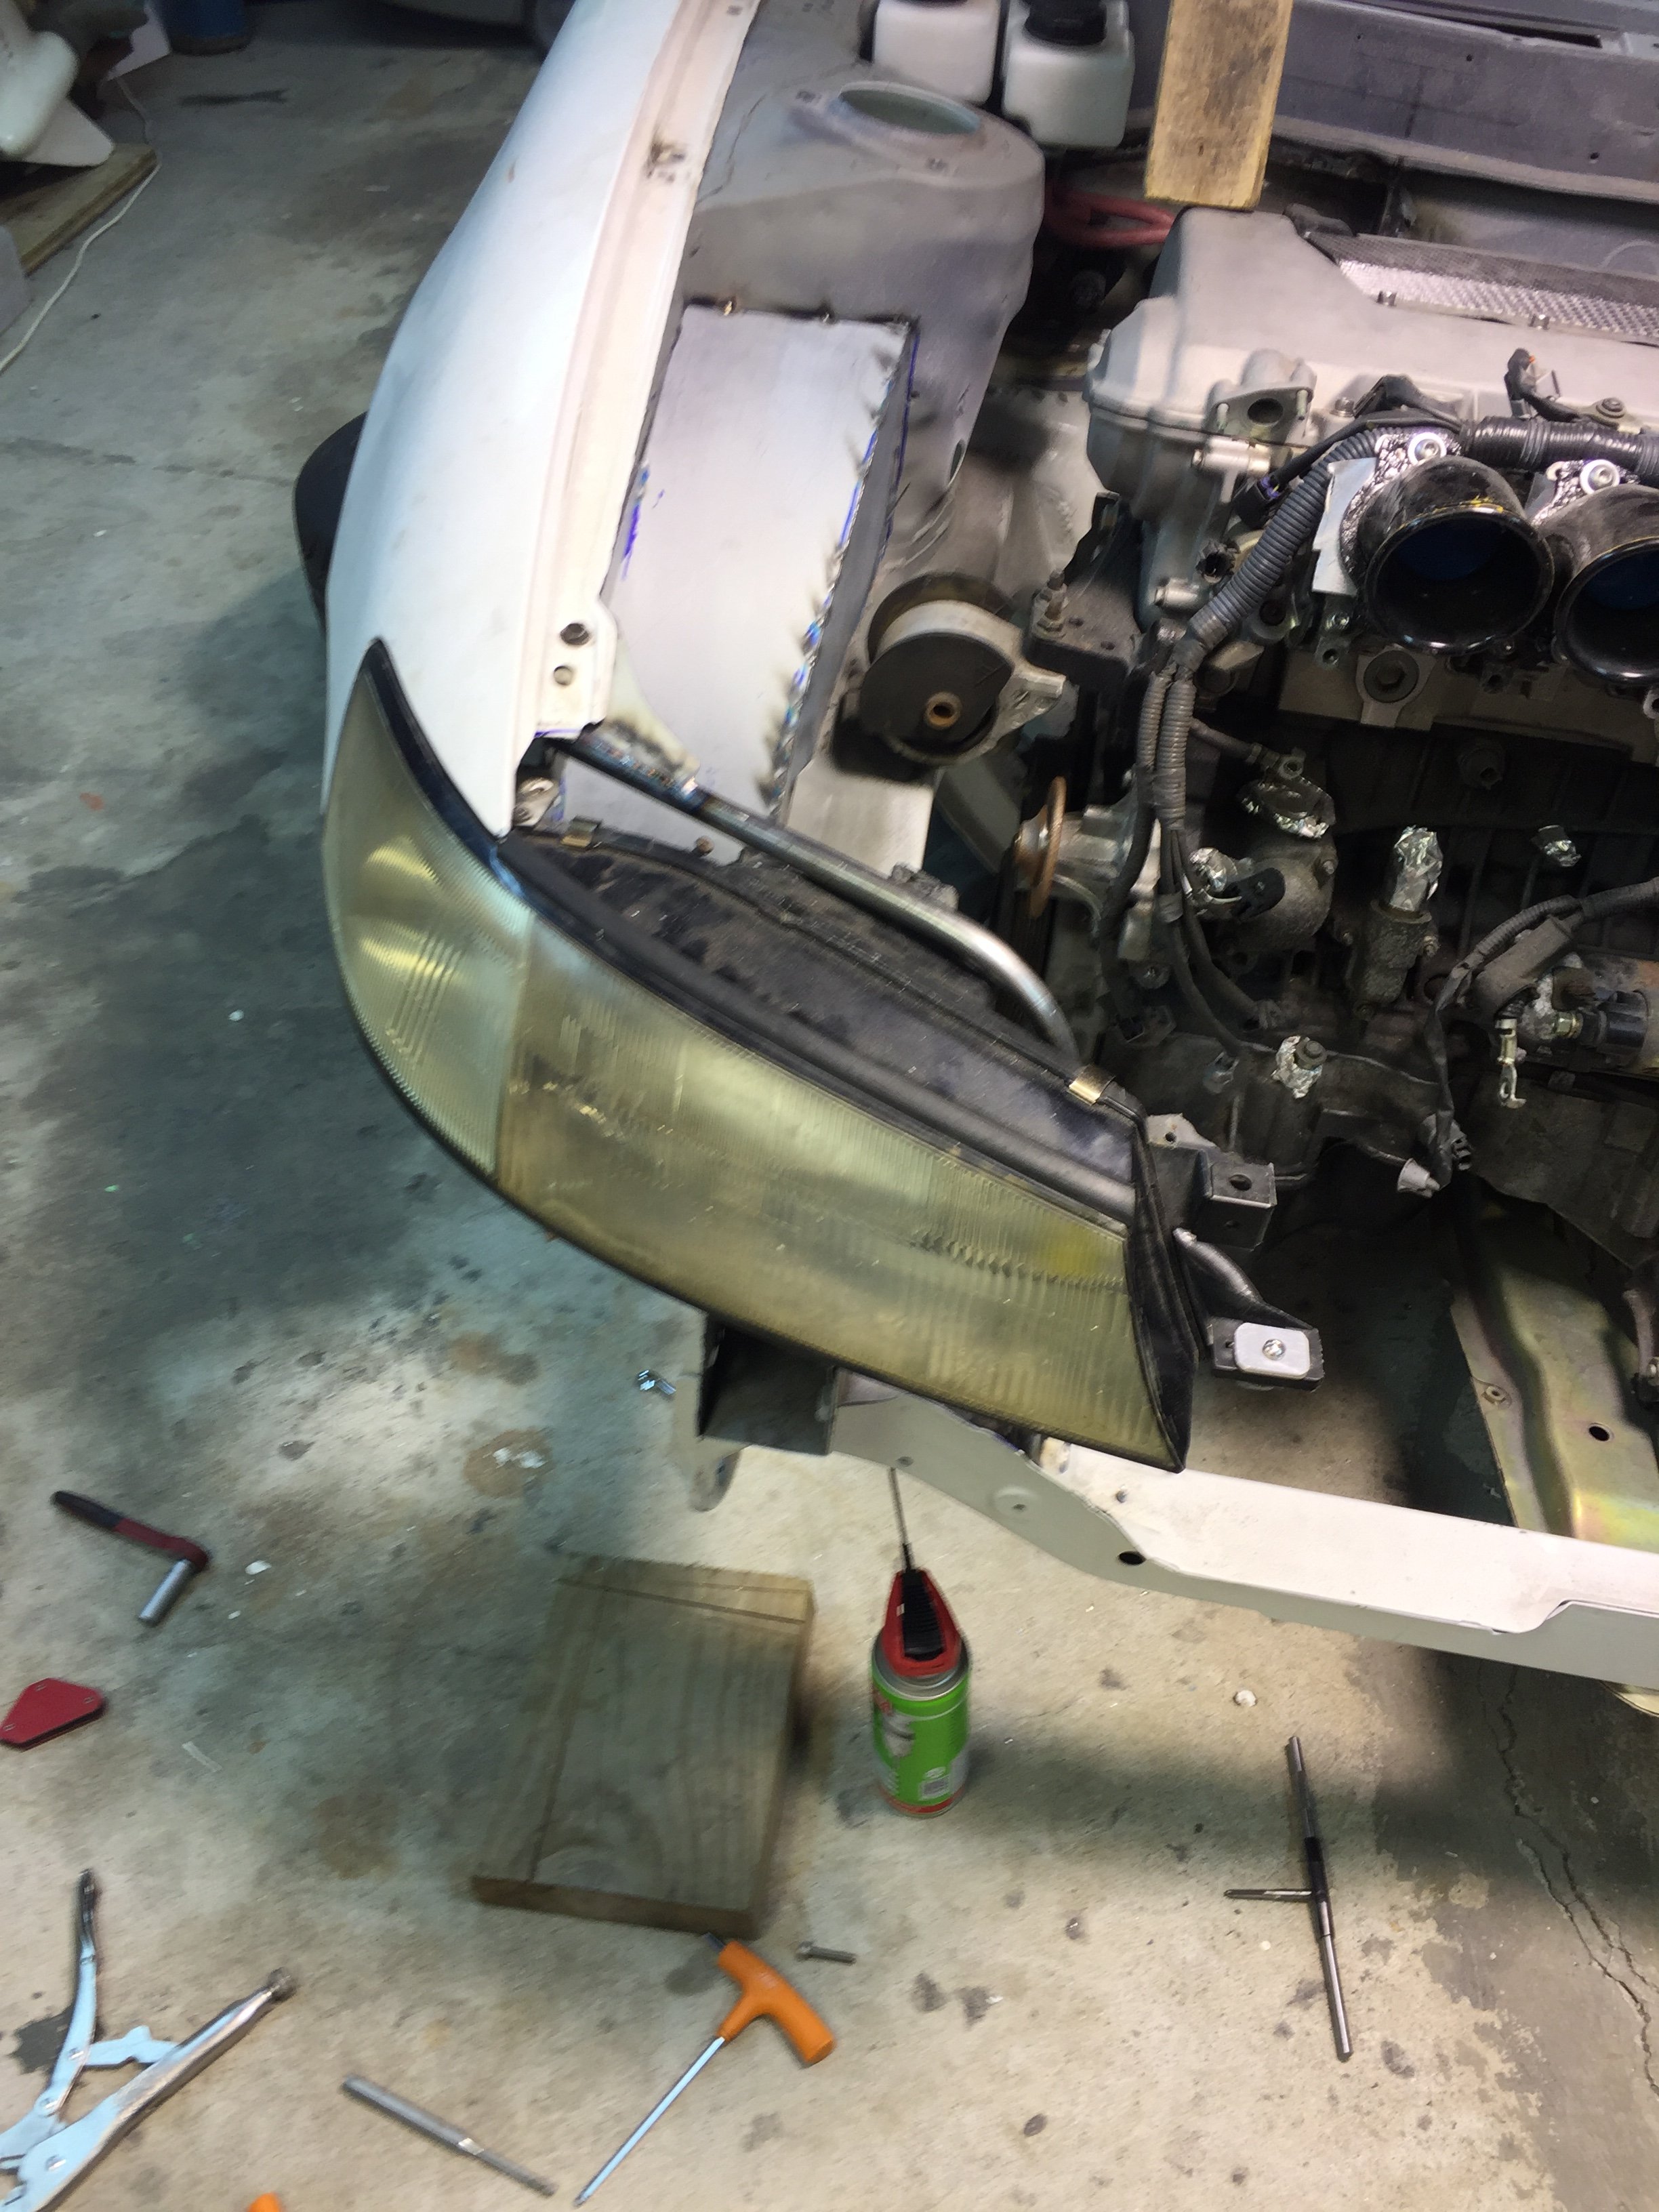
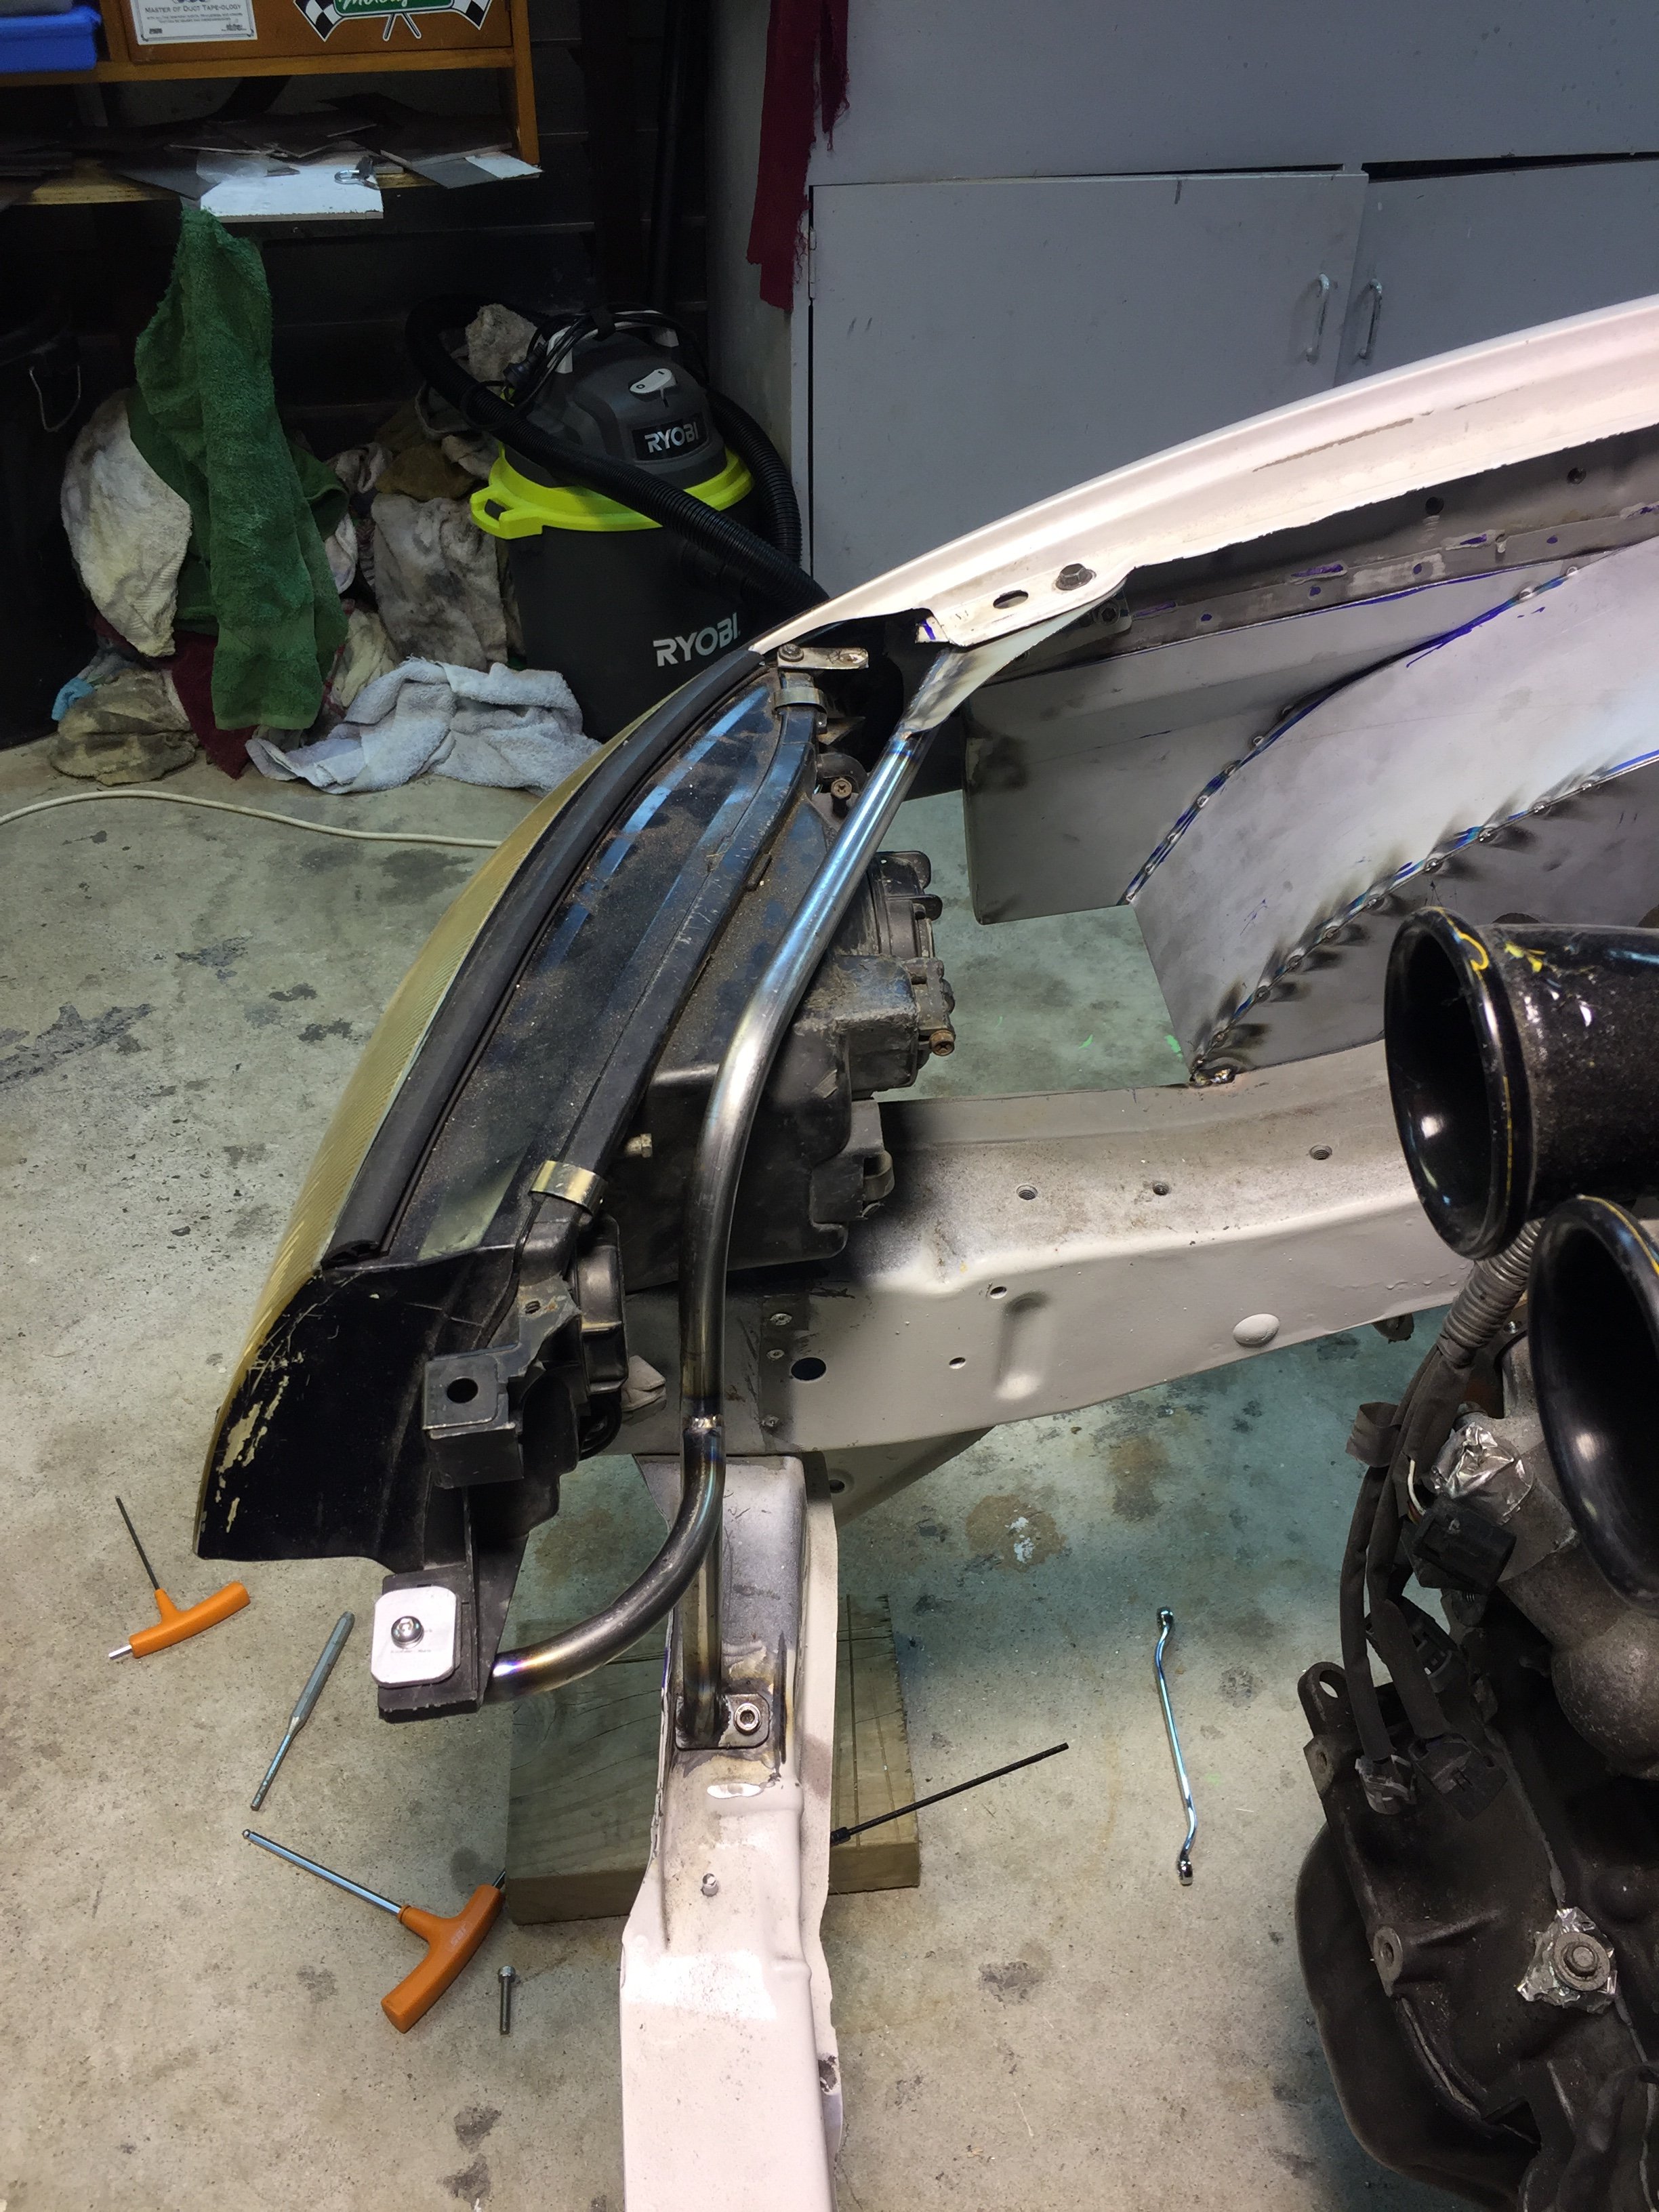
Today’s progress. Headlight 95% mounted
-
Will be vented out the bonnet when I get the rest of the ducting done
-
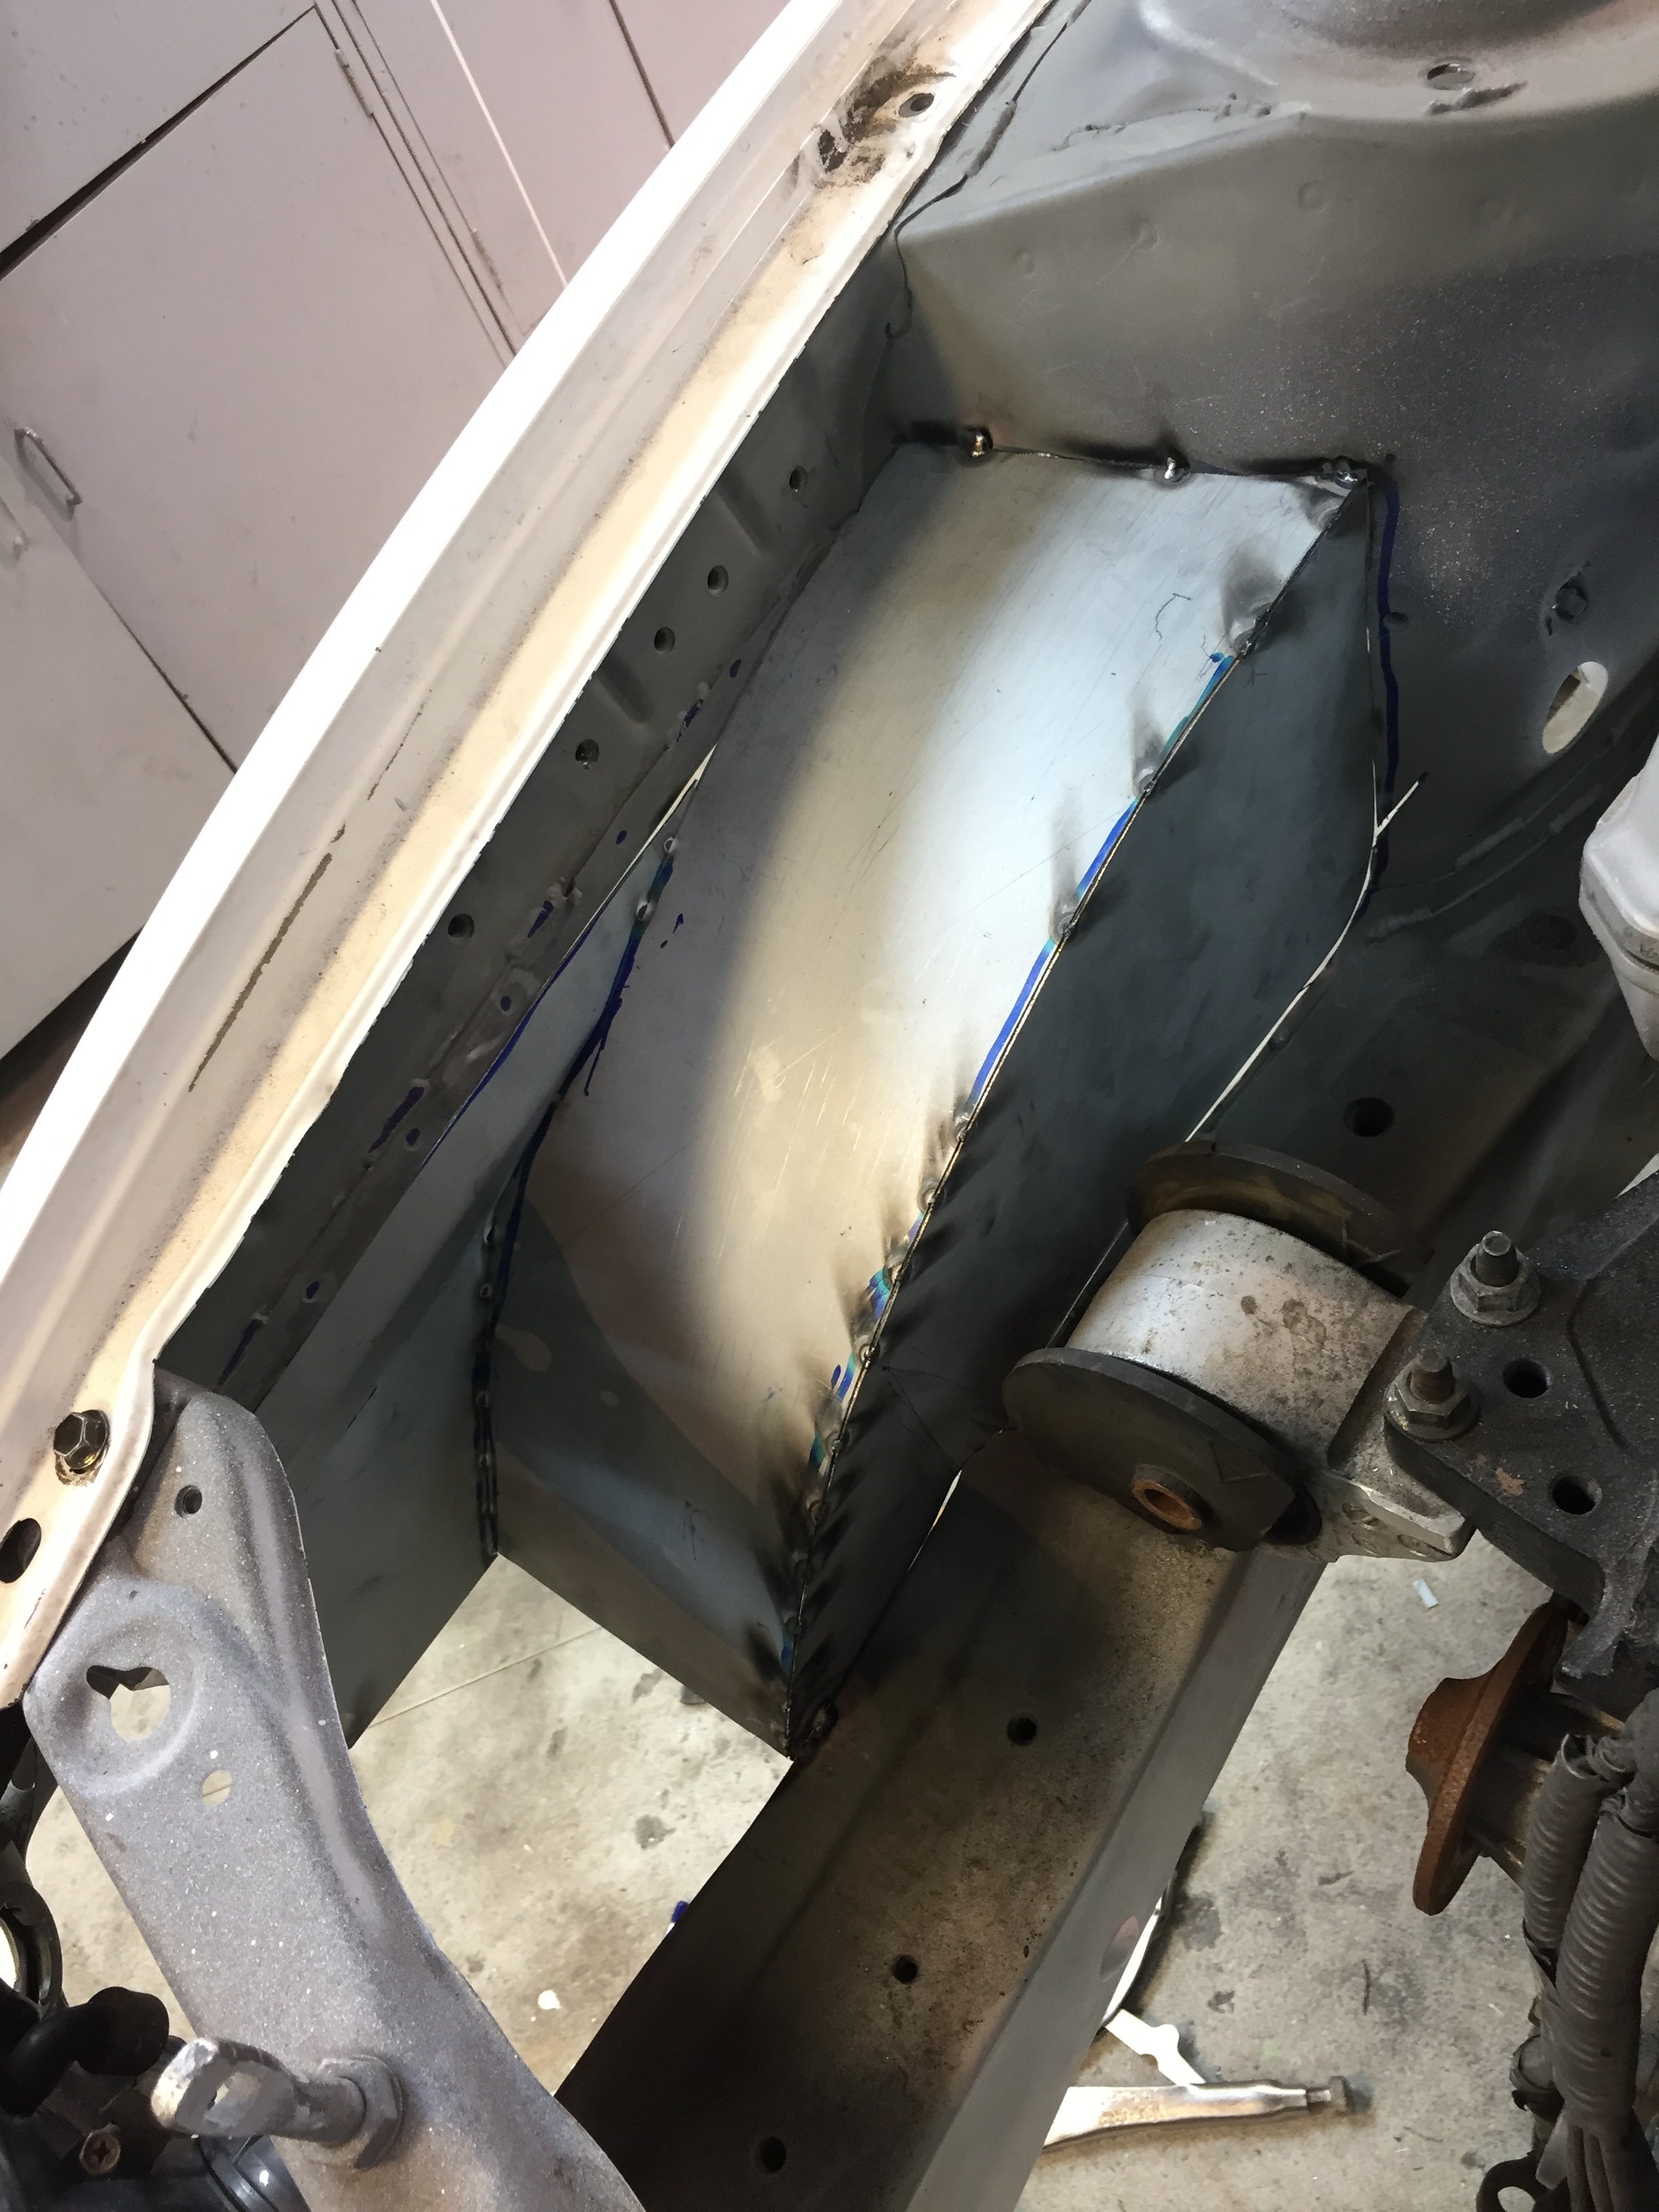
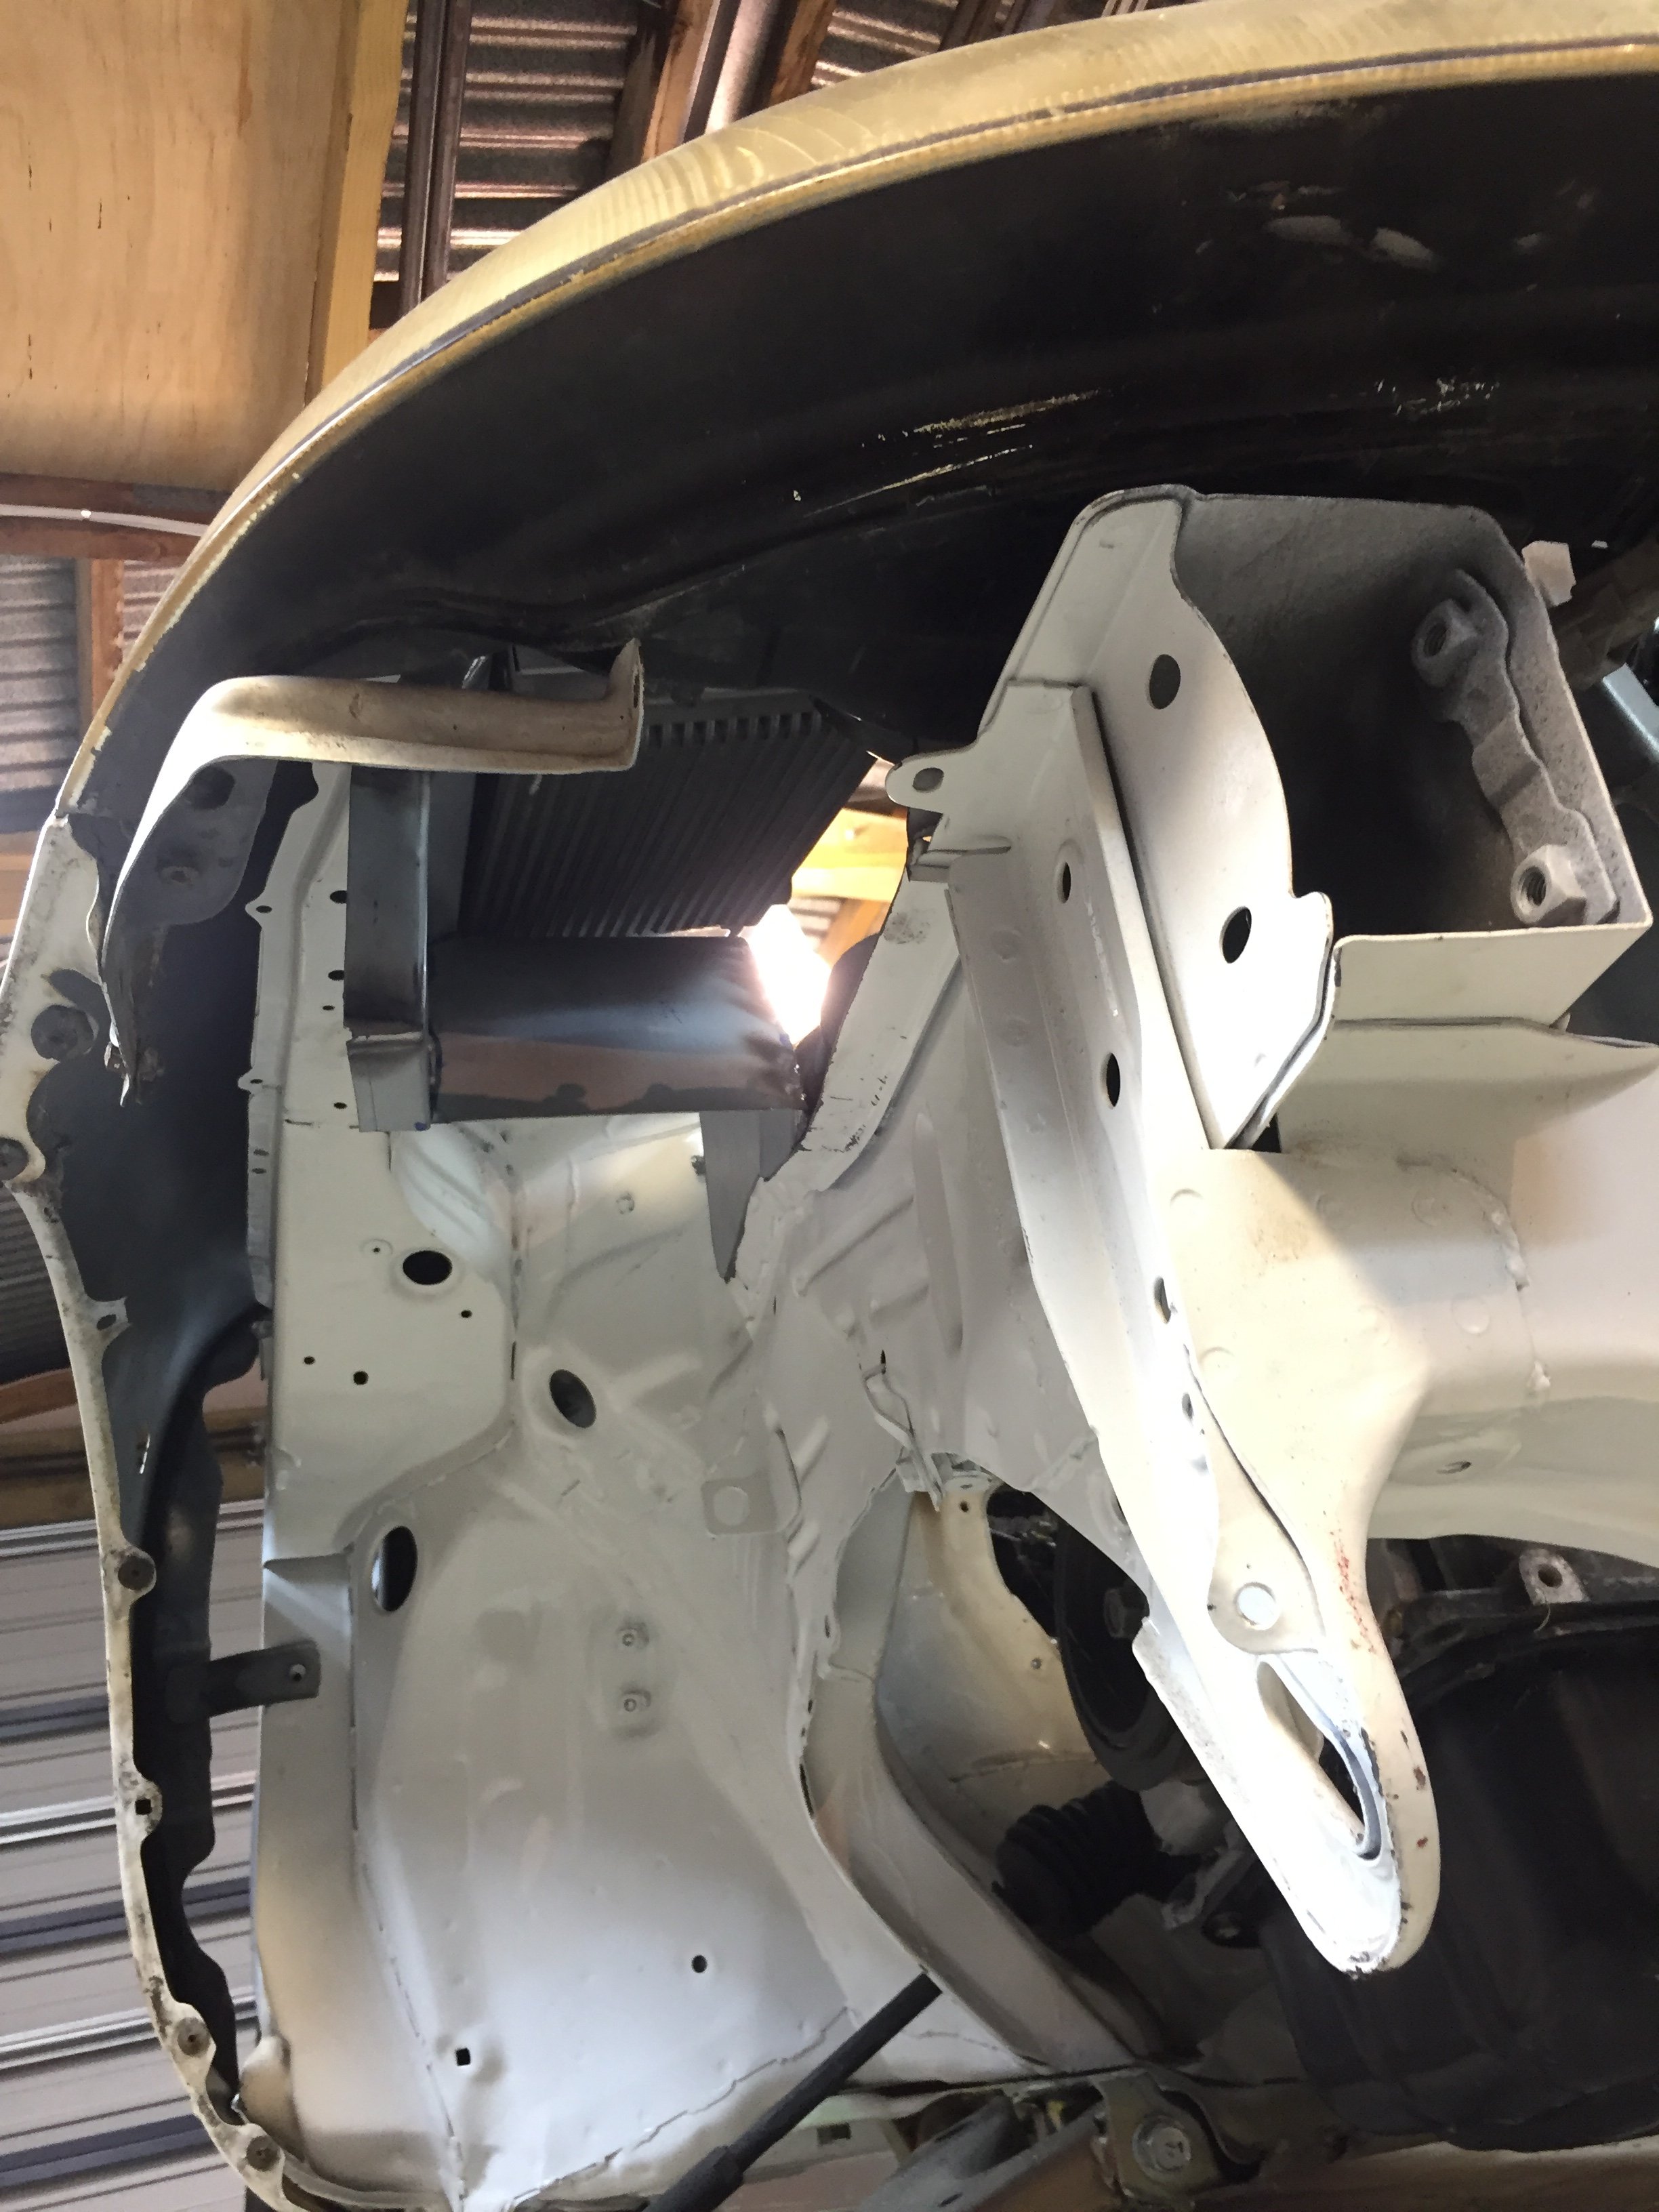
Have been making some progress on the first tub. Holyfuckshitballs it is heaps of work! Cooler will sit on top of the tub and be fed from bumper below as such.
-
Cut out the front tubs to make the appropriate clearance needed for the ride height and got a bit carried away with the grinder. Long story short I’ve got a bit carried away again and want to manage the airflow in the dead spaces of the car such as this from high pressure areas to reduce drag Made some cardboard CAD templates but not yet happy with the result so watch this space Decided the radiator support also will go once I replicate the headlight mounting points also as I won’t have a radiator in the front and will free up space for the air box. In summary not much actual progress but a swell of enthusiasm and motivation which is generally the predecessor to shit getting done!
-
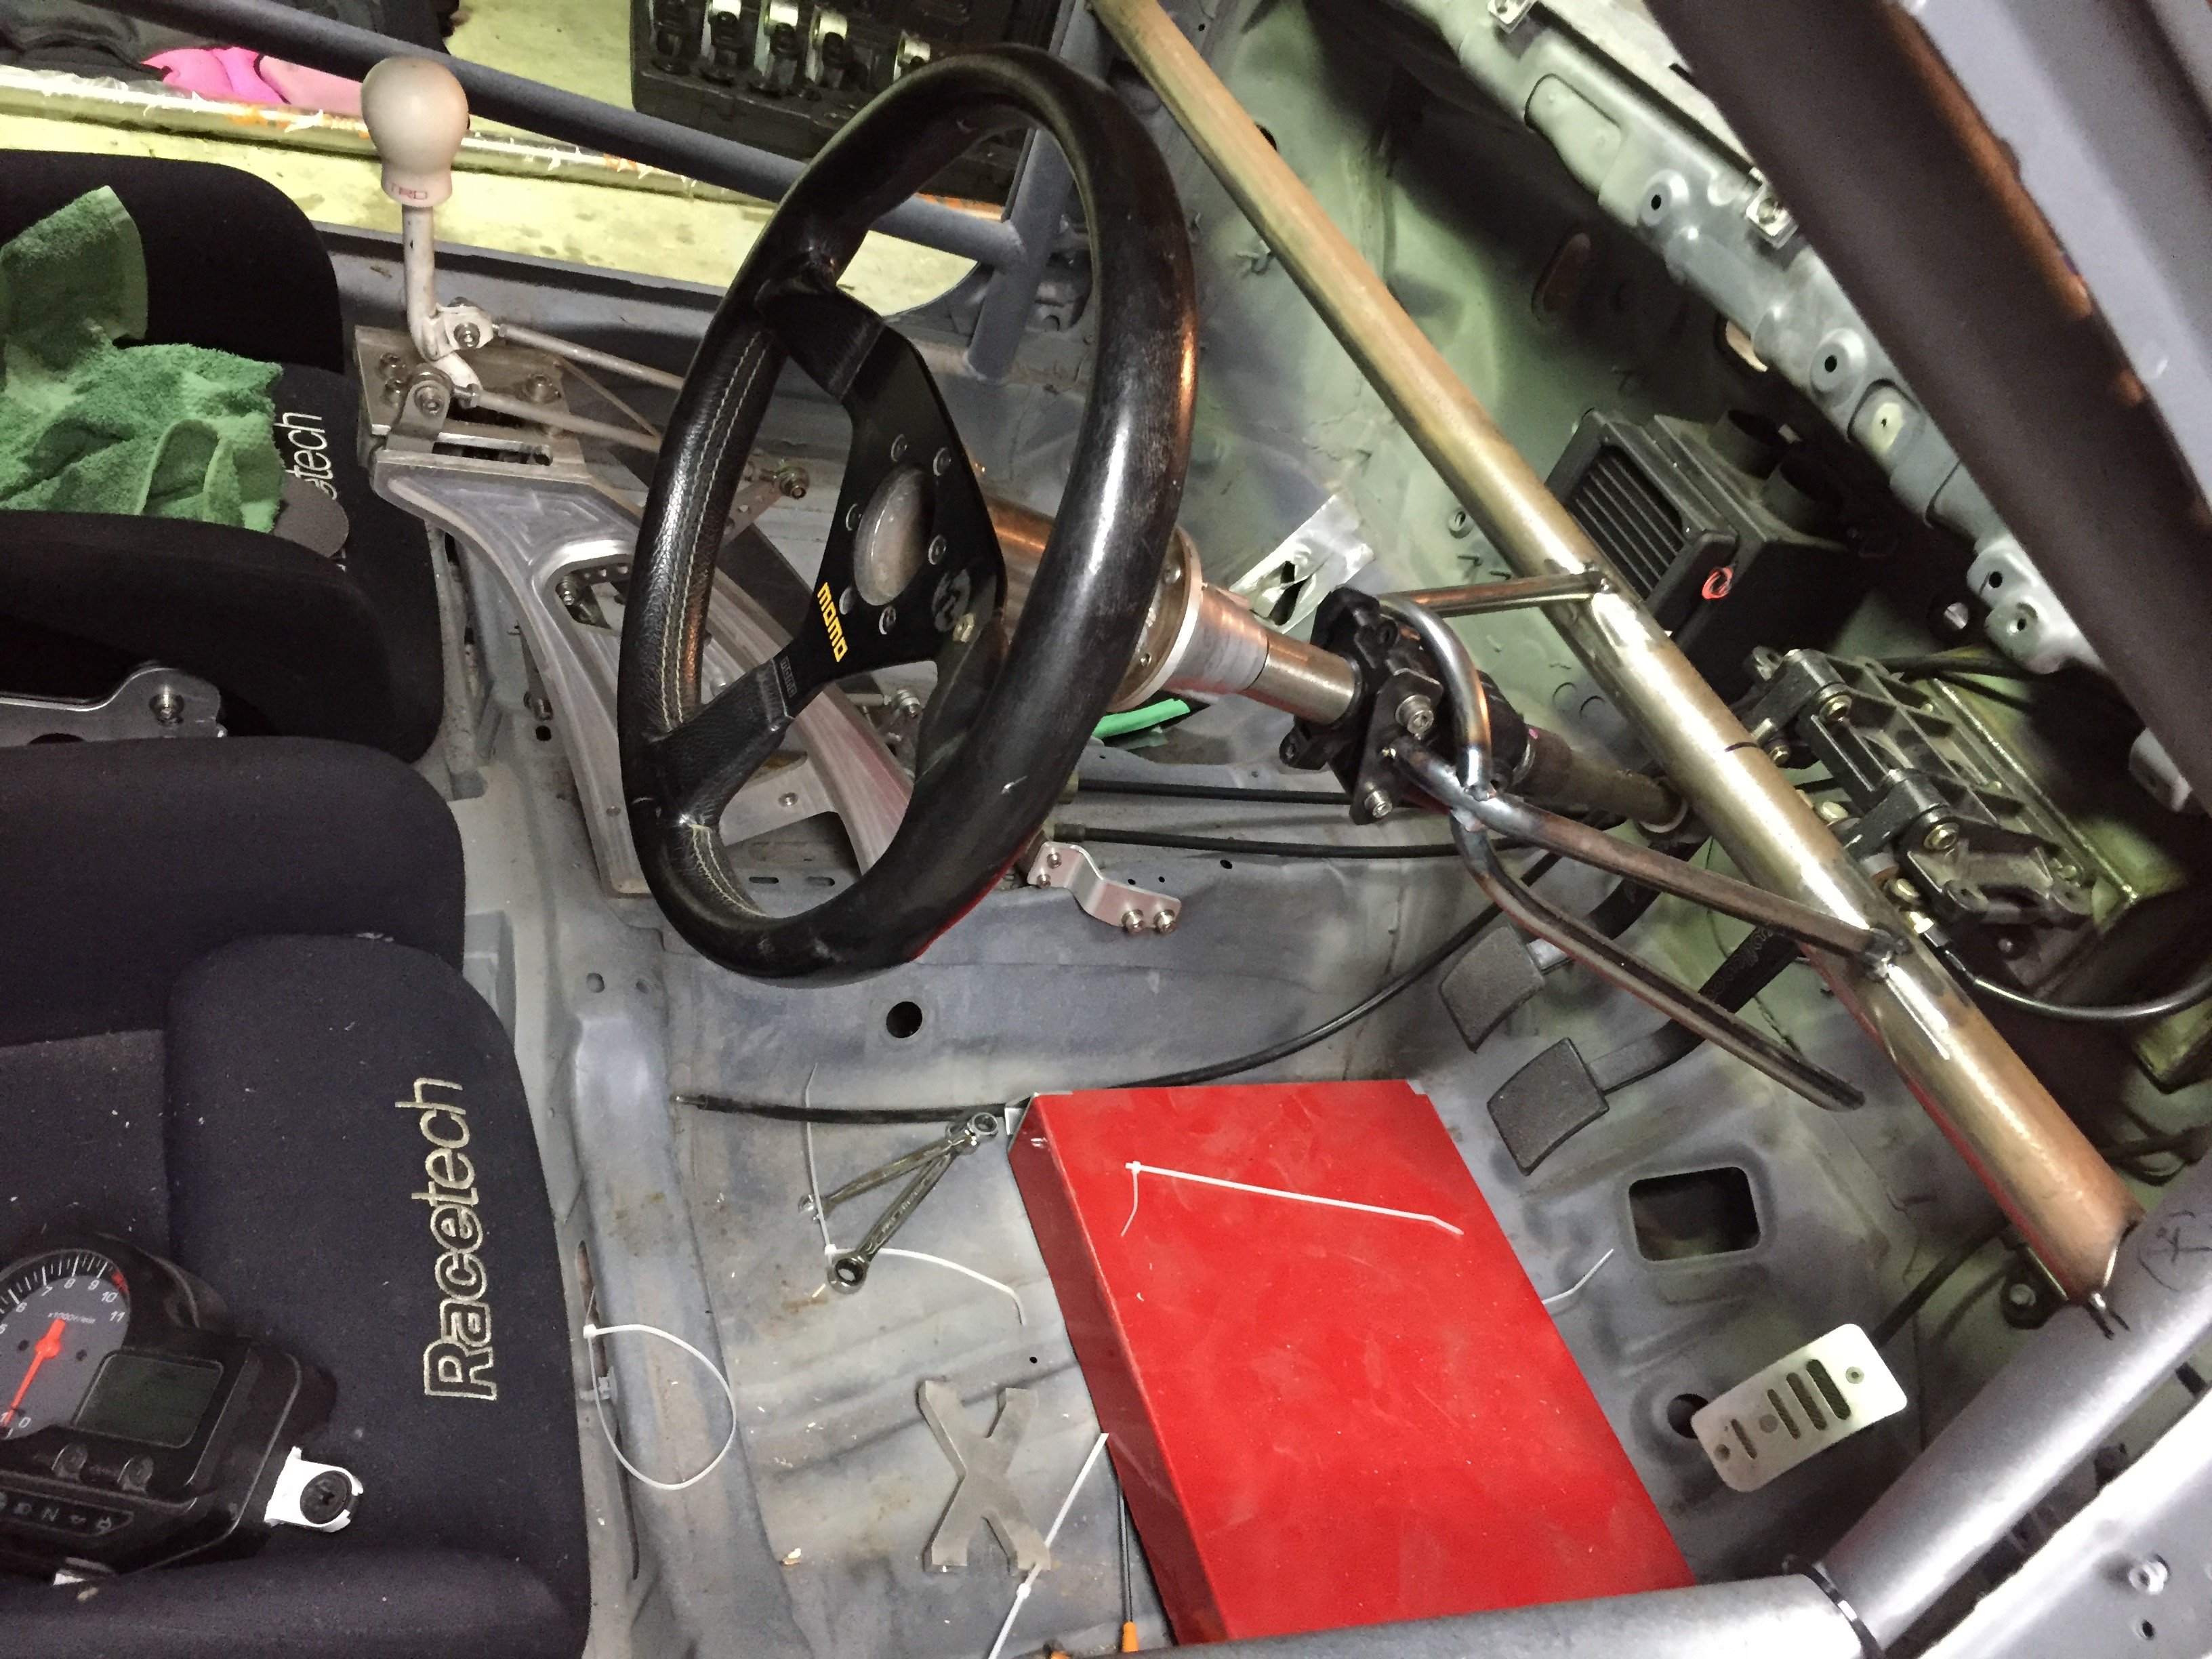
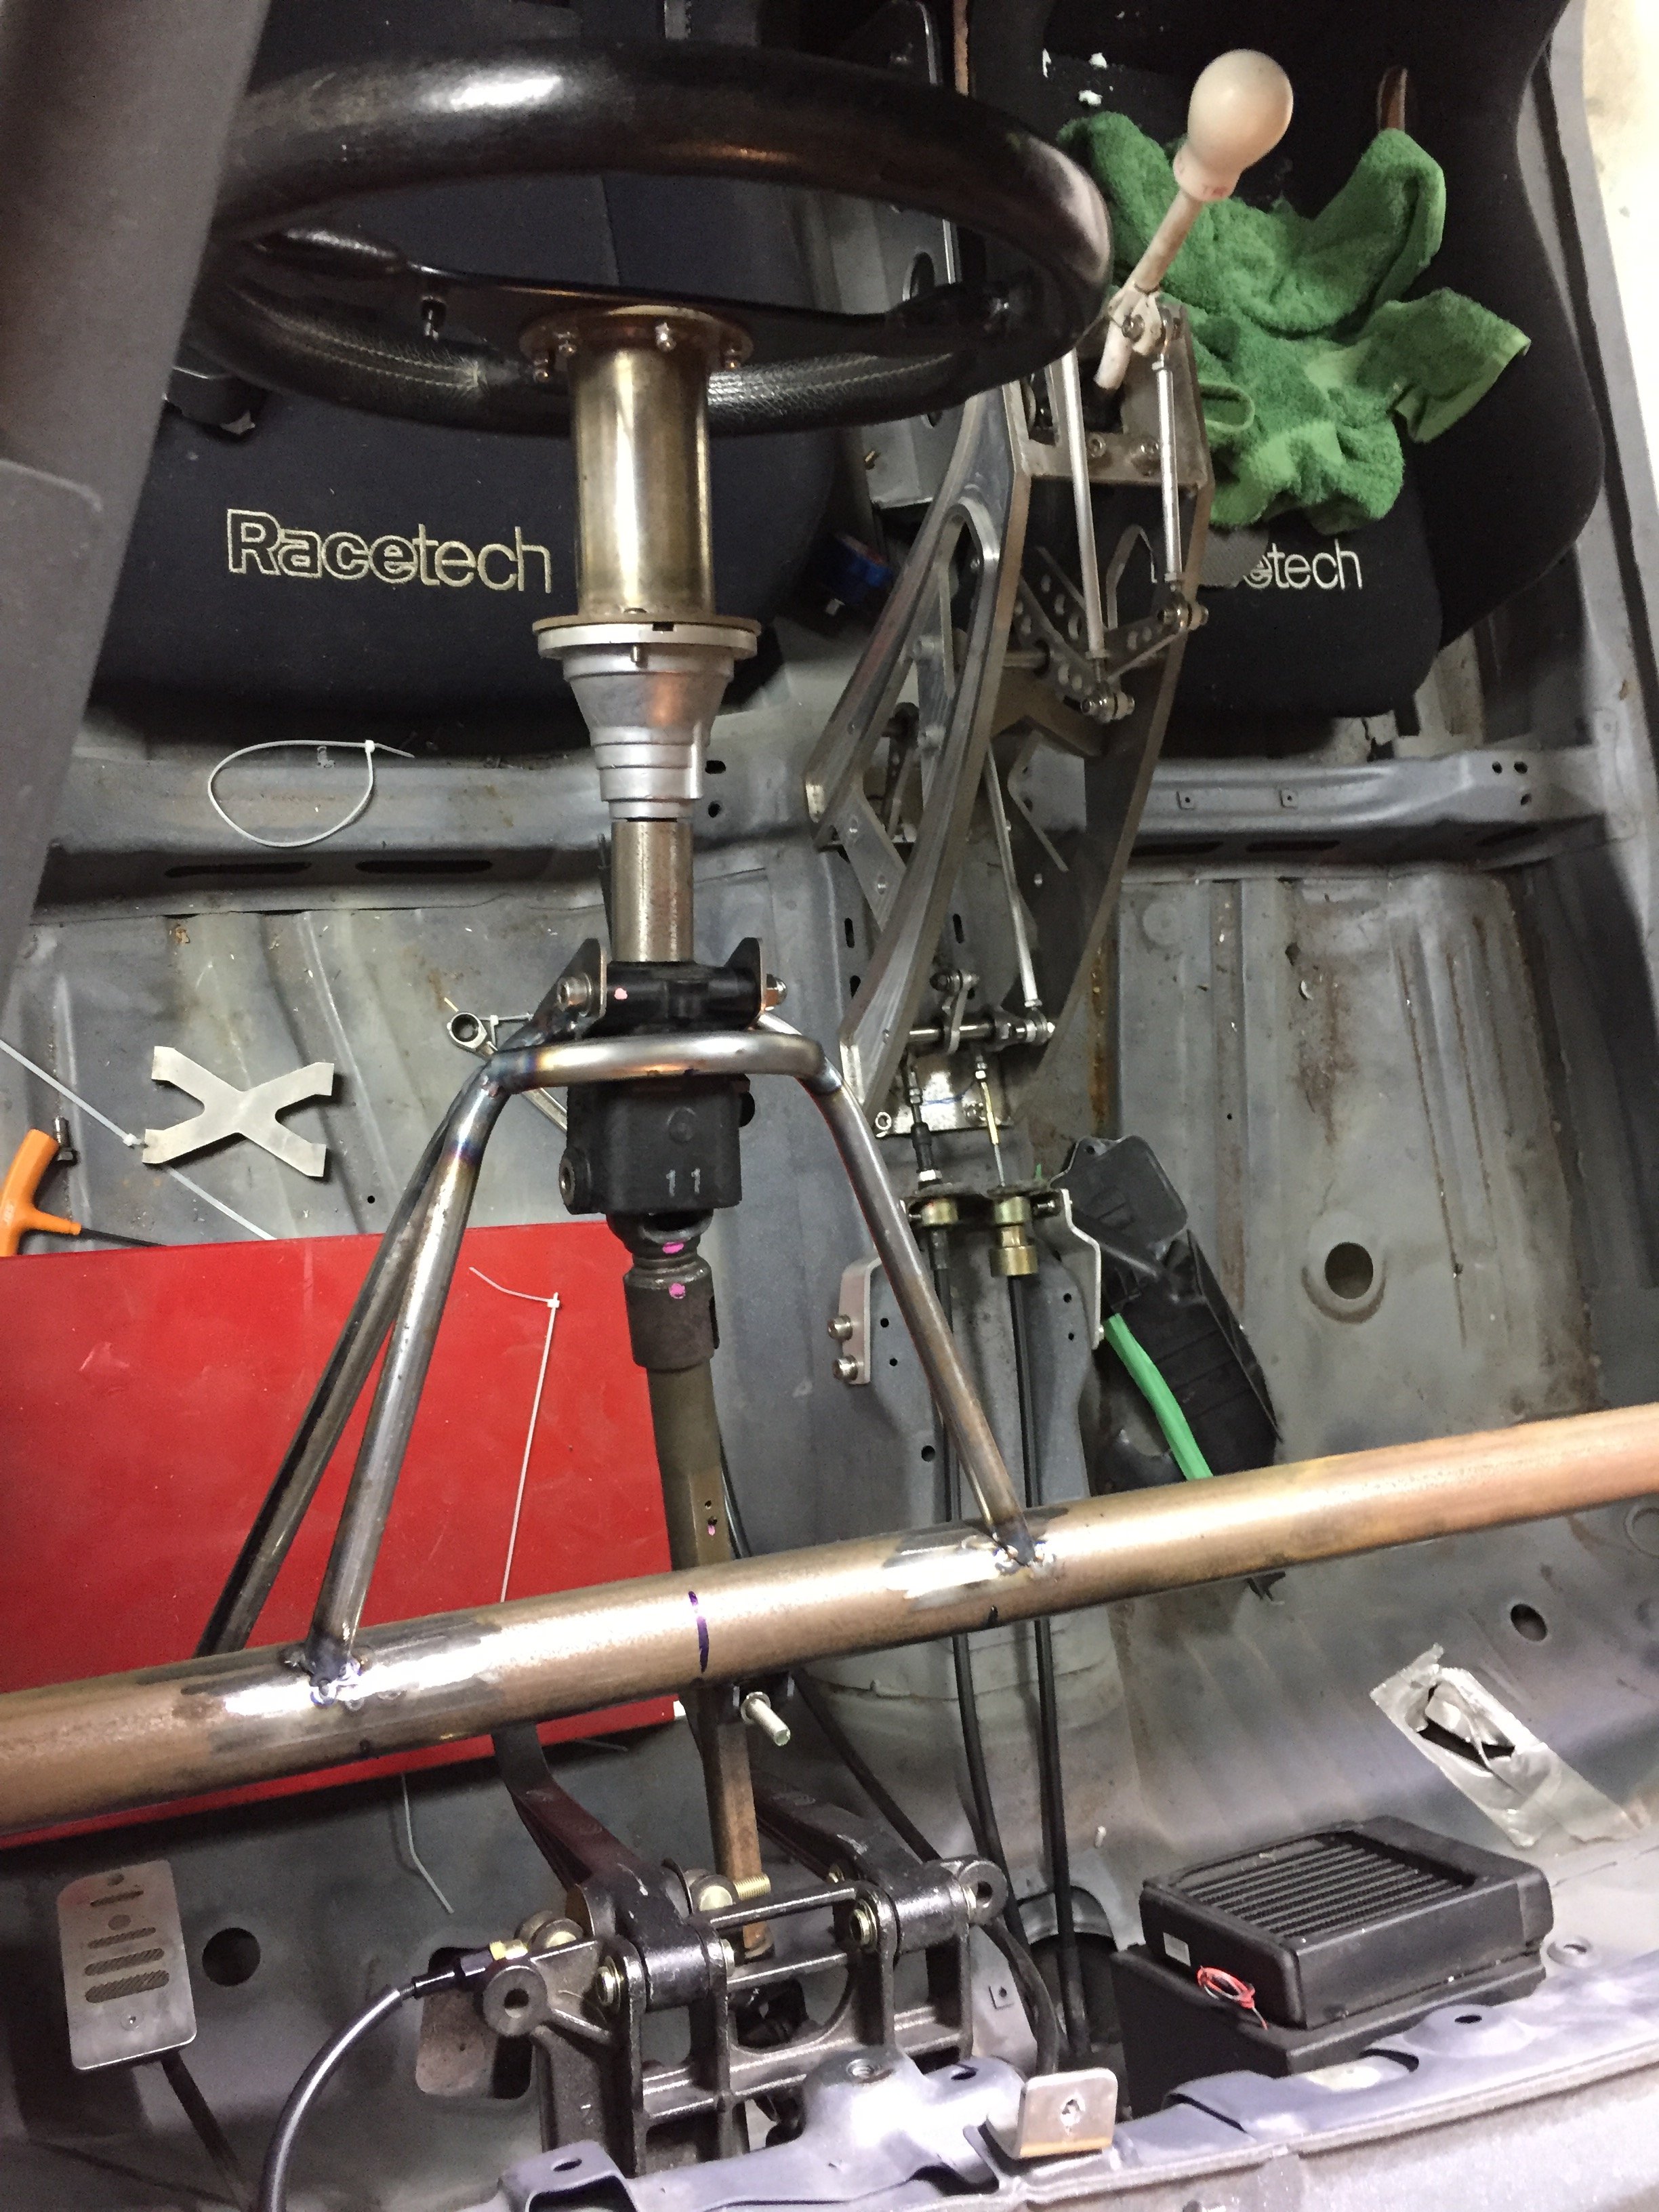
Been doing some more work/destruction on this after the summer break. I managed to motivate myself to have a racecar I can hoon around the country in in the near future (before travel/kids) so need to crack on. If I can get all the fab work and body painted in the next 12months I’ll be happy then I’ll just wait for a cash injection to finish it off adding the ecu and expensive bits. Have done some some work on the top of the fuel tank but not finished just yet I’ve come across a few challenges that are hindering further progress. (Mainly my brain not being able to figure out how it will work/come apart) Needed to remount my steering column as it had too much flex and wasn’t happy with it. Not finished yet but happy with the direction I’m heading in and getting good use of my pipe bender! makes mounting the motorbike dash and a few other things a lot easier too.
-
Here is said motivation requested
-
Awesome thanks Clint! Anyone you or others could recommend in Hamilton? yeah agree it makes a mess in a crash too. I’m aiming to use 1/2” tube at this stage as all it needs to do it hold the headlights and grill in place really.
-
The rears strength is replaced by the cage where there’s a solid tube between the strut towers and triangulation between the strut tower and bulkhead (where the trailing arm is mounted). Oh and also forgot to mention that the cage in the pics will be cut out before recerting and more elaborate cage fabricated.
-
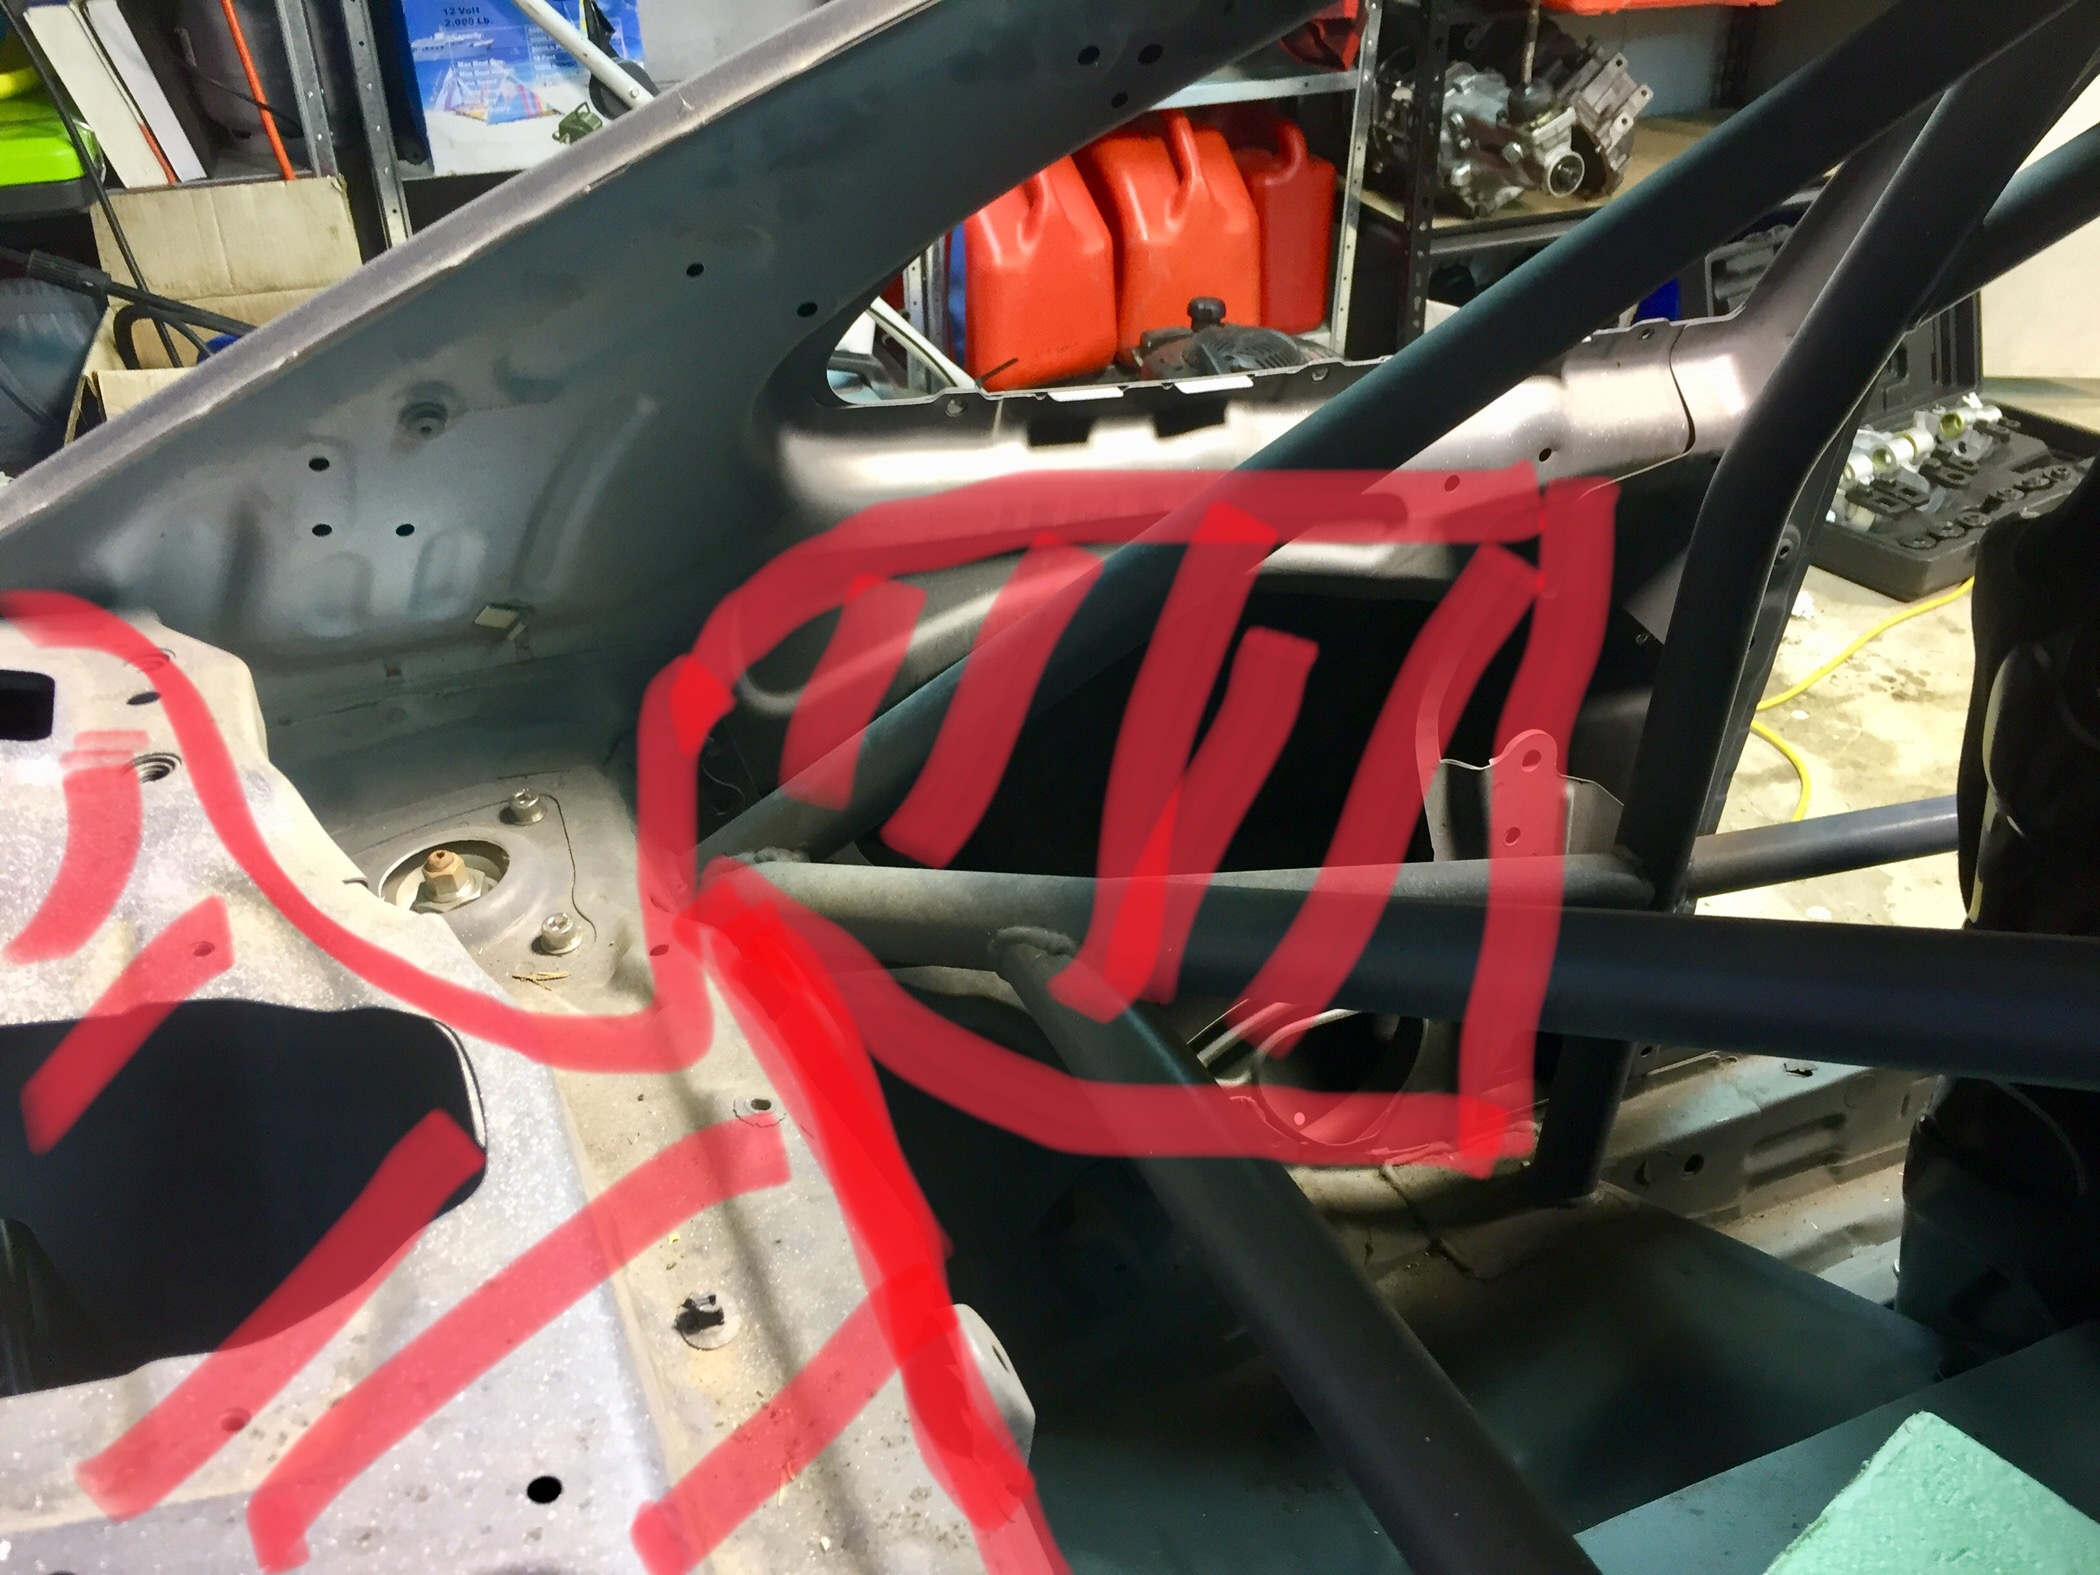
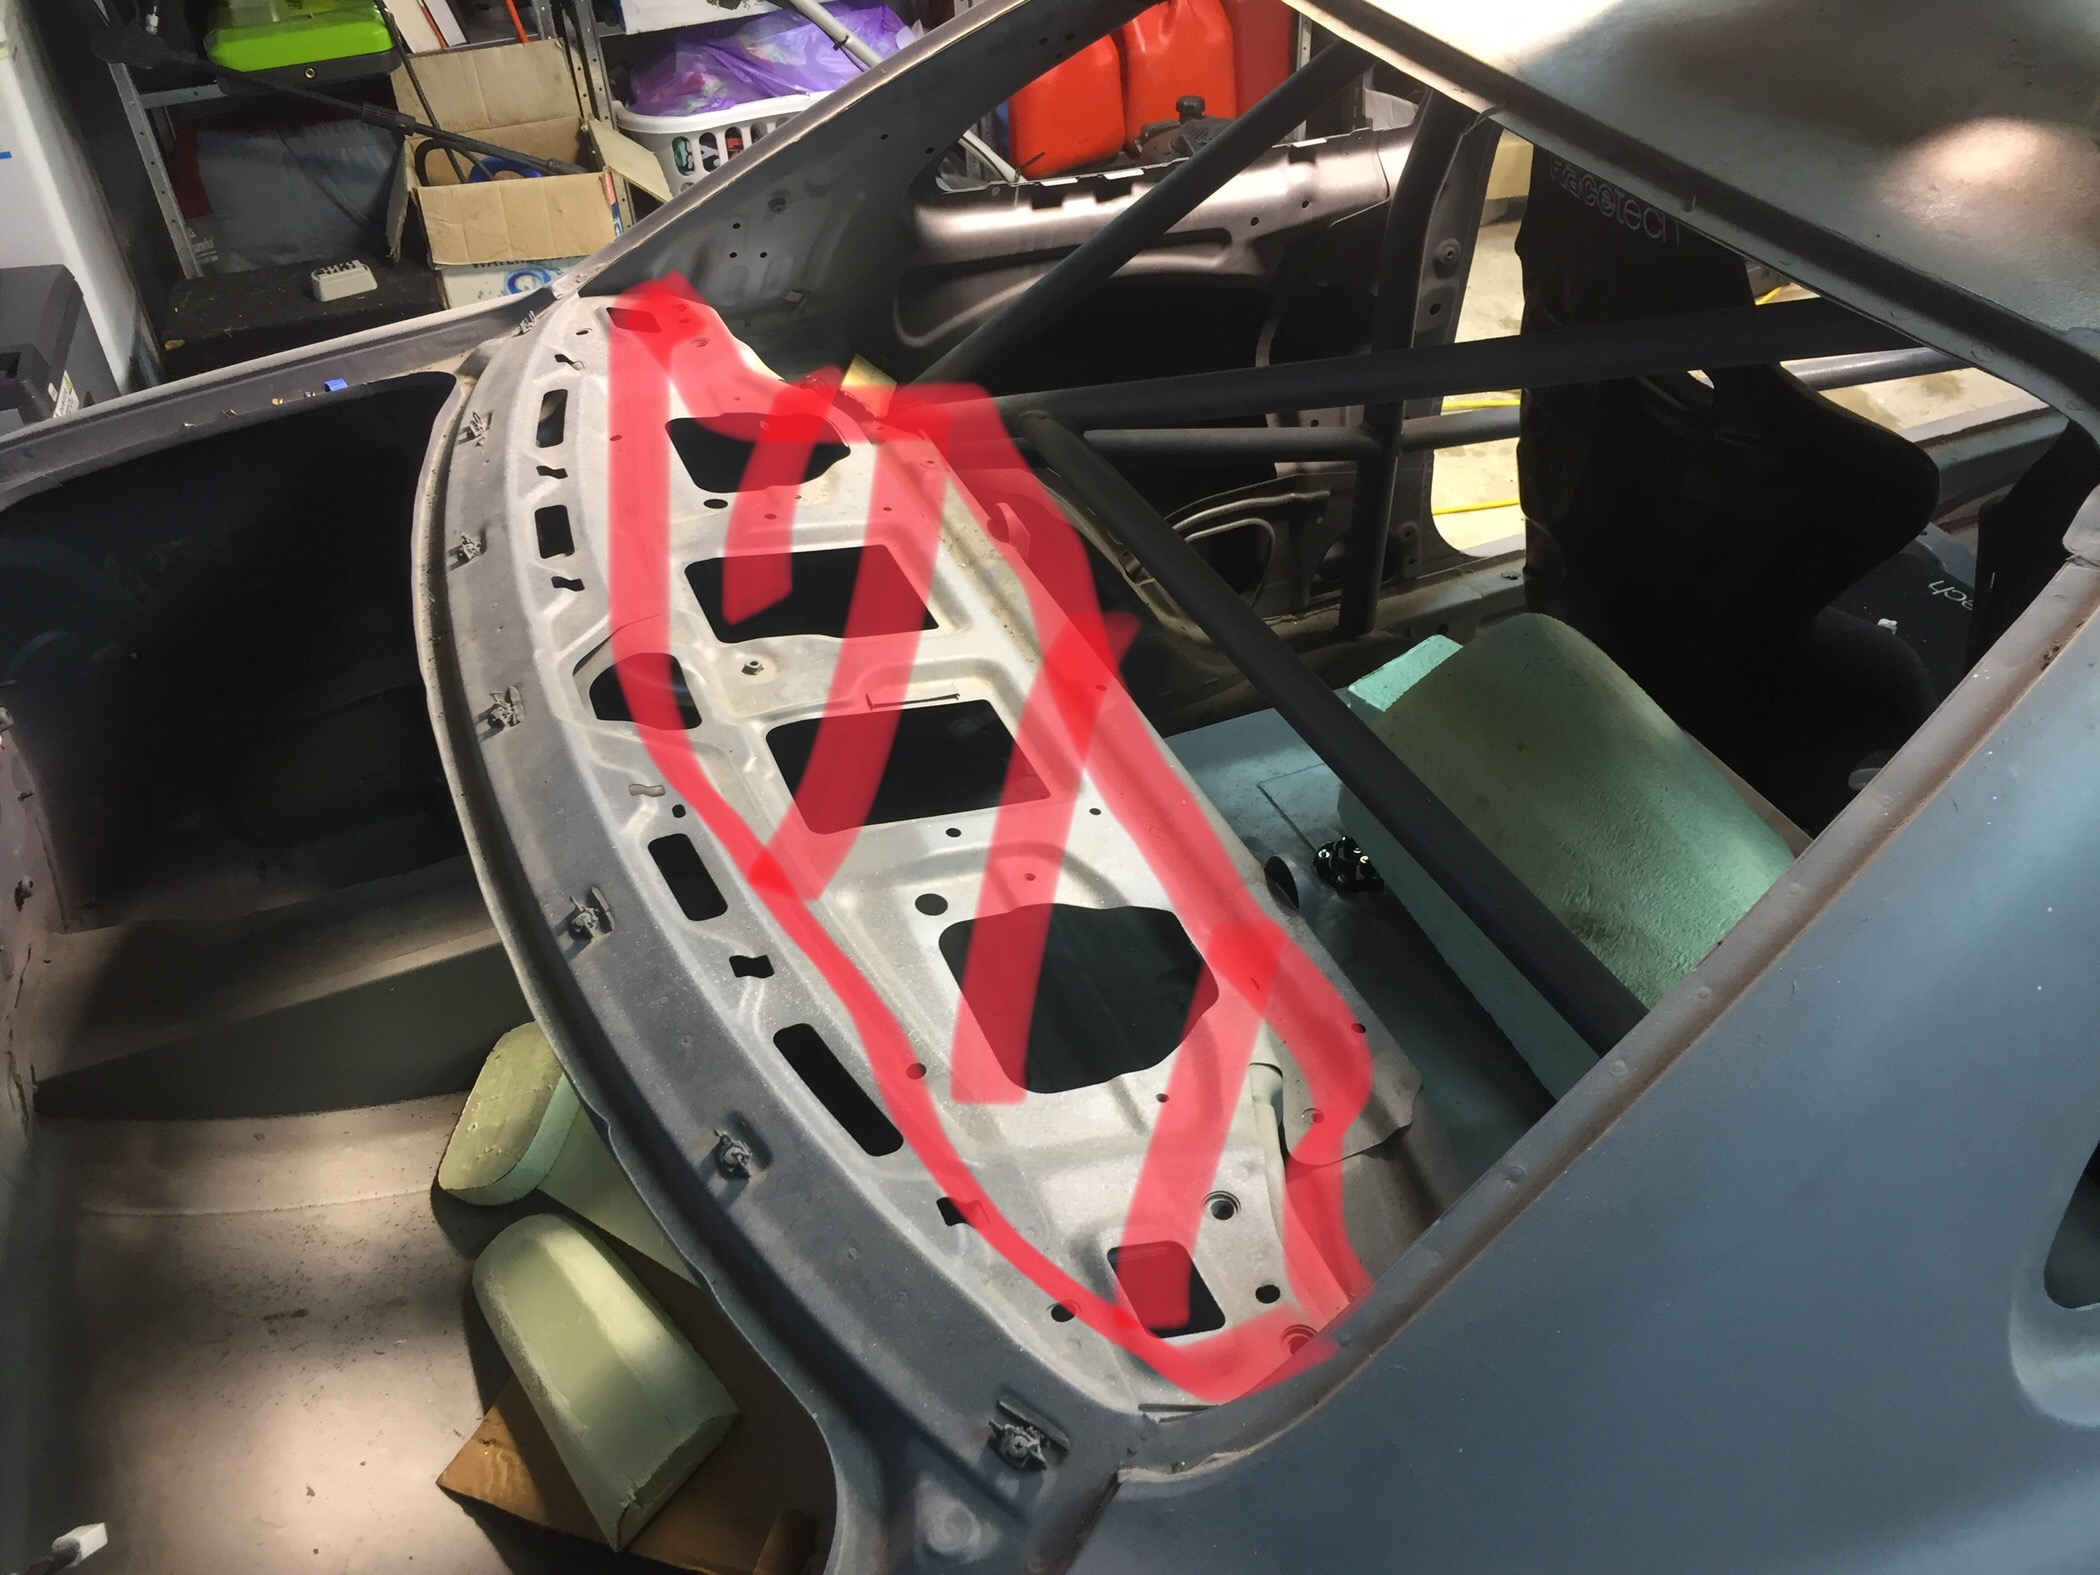
Hey guys, starting to make some decisions about my racecar build that require cert input. Firstly feel free to judge me for what I’m about to suggest I hate the thought of being another dick who wants to chop the front off his car and tube frame it but it literally solves a bunch of problems such as wheel clearance/oil cooler location/airbox location/aerodynamics and airflow management etc etc. I plan to leave the chassis rails and lower radiator crossmember untouched. Just chop the top arm off where the panel mounts and run it forward to mount the headlight and pick up a bonnet pin location. I’ll also run a bumper support tube for bumping people at the racetrack supersix/stockcar style. Is this allowed for the road? The car is caged and requires cert for other body mods (tunnel/pedal box/rear diffuser and fuel cell). Are there any exemptions or different rules for cars with authority cards in circumstances such as this where front impact etc is less of an issue. Im also keen to cut out a few additional bits of panel steel in the rear of the car. My fuel cell is under the car so I’d like to chop out most of the parcel tray and the unnecessary double skin below the b pillar. I will leave the support for the bottom of the rear window and adequately brace it so it doesn’t flex. Since it has a cage the extra bits of steel aren’t really needed for strength and removing it will save some weight and make it look nicer. Any thoughts on if this is certable? Car is a 1991 Toyota levin so no real strength required in the rear of the car
-
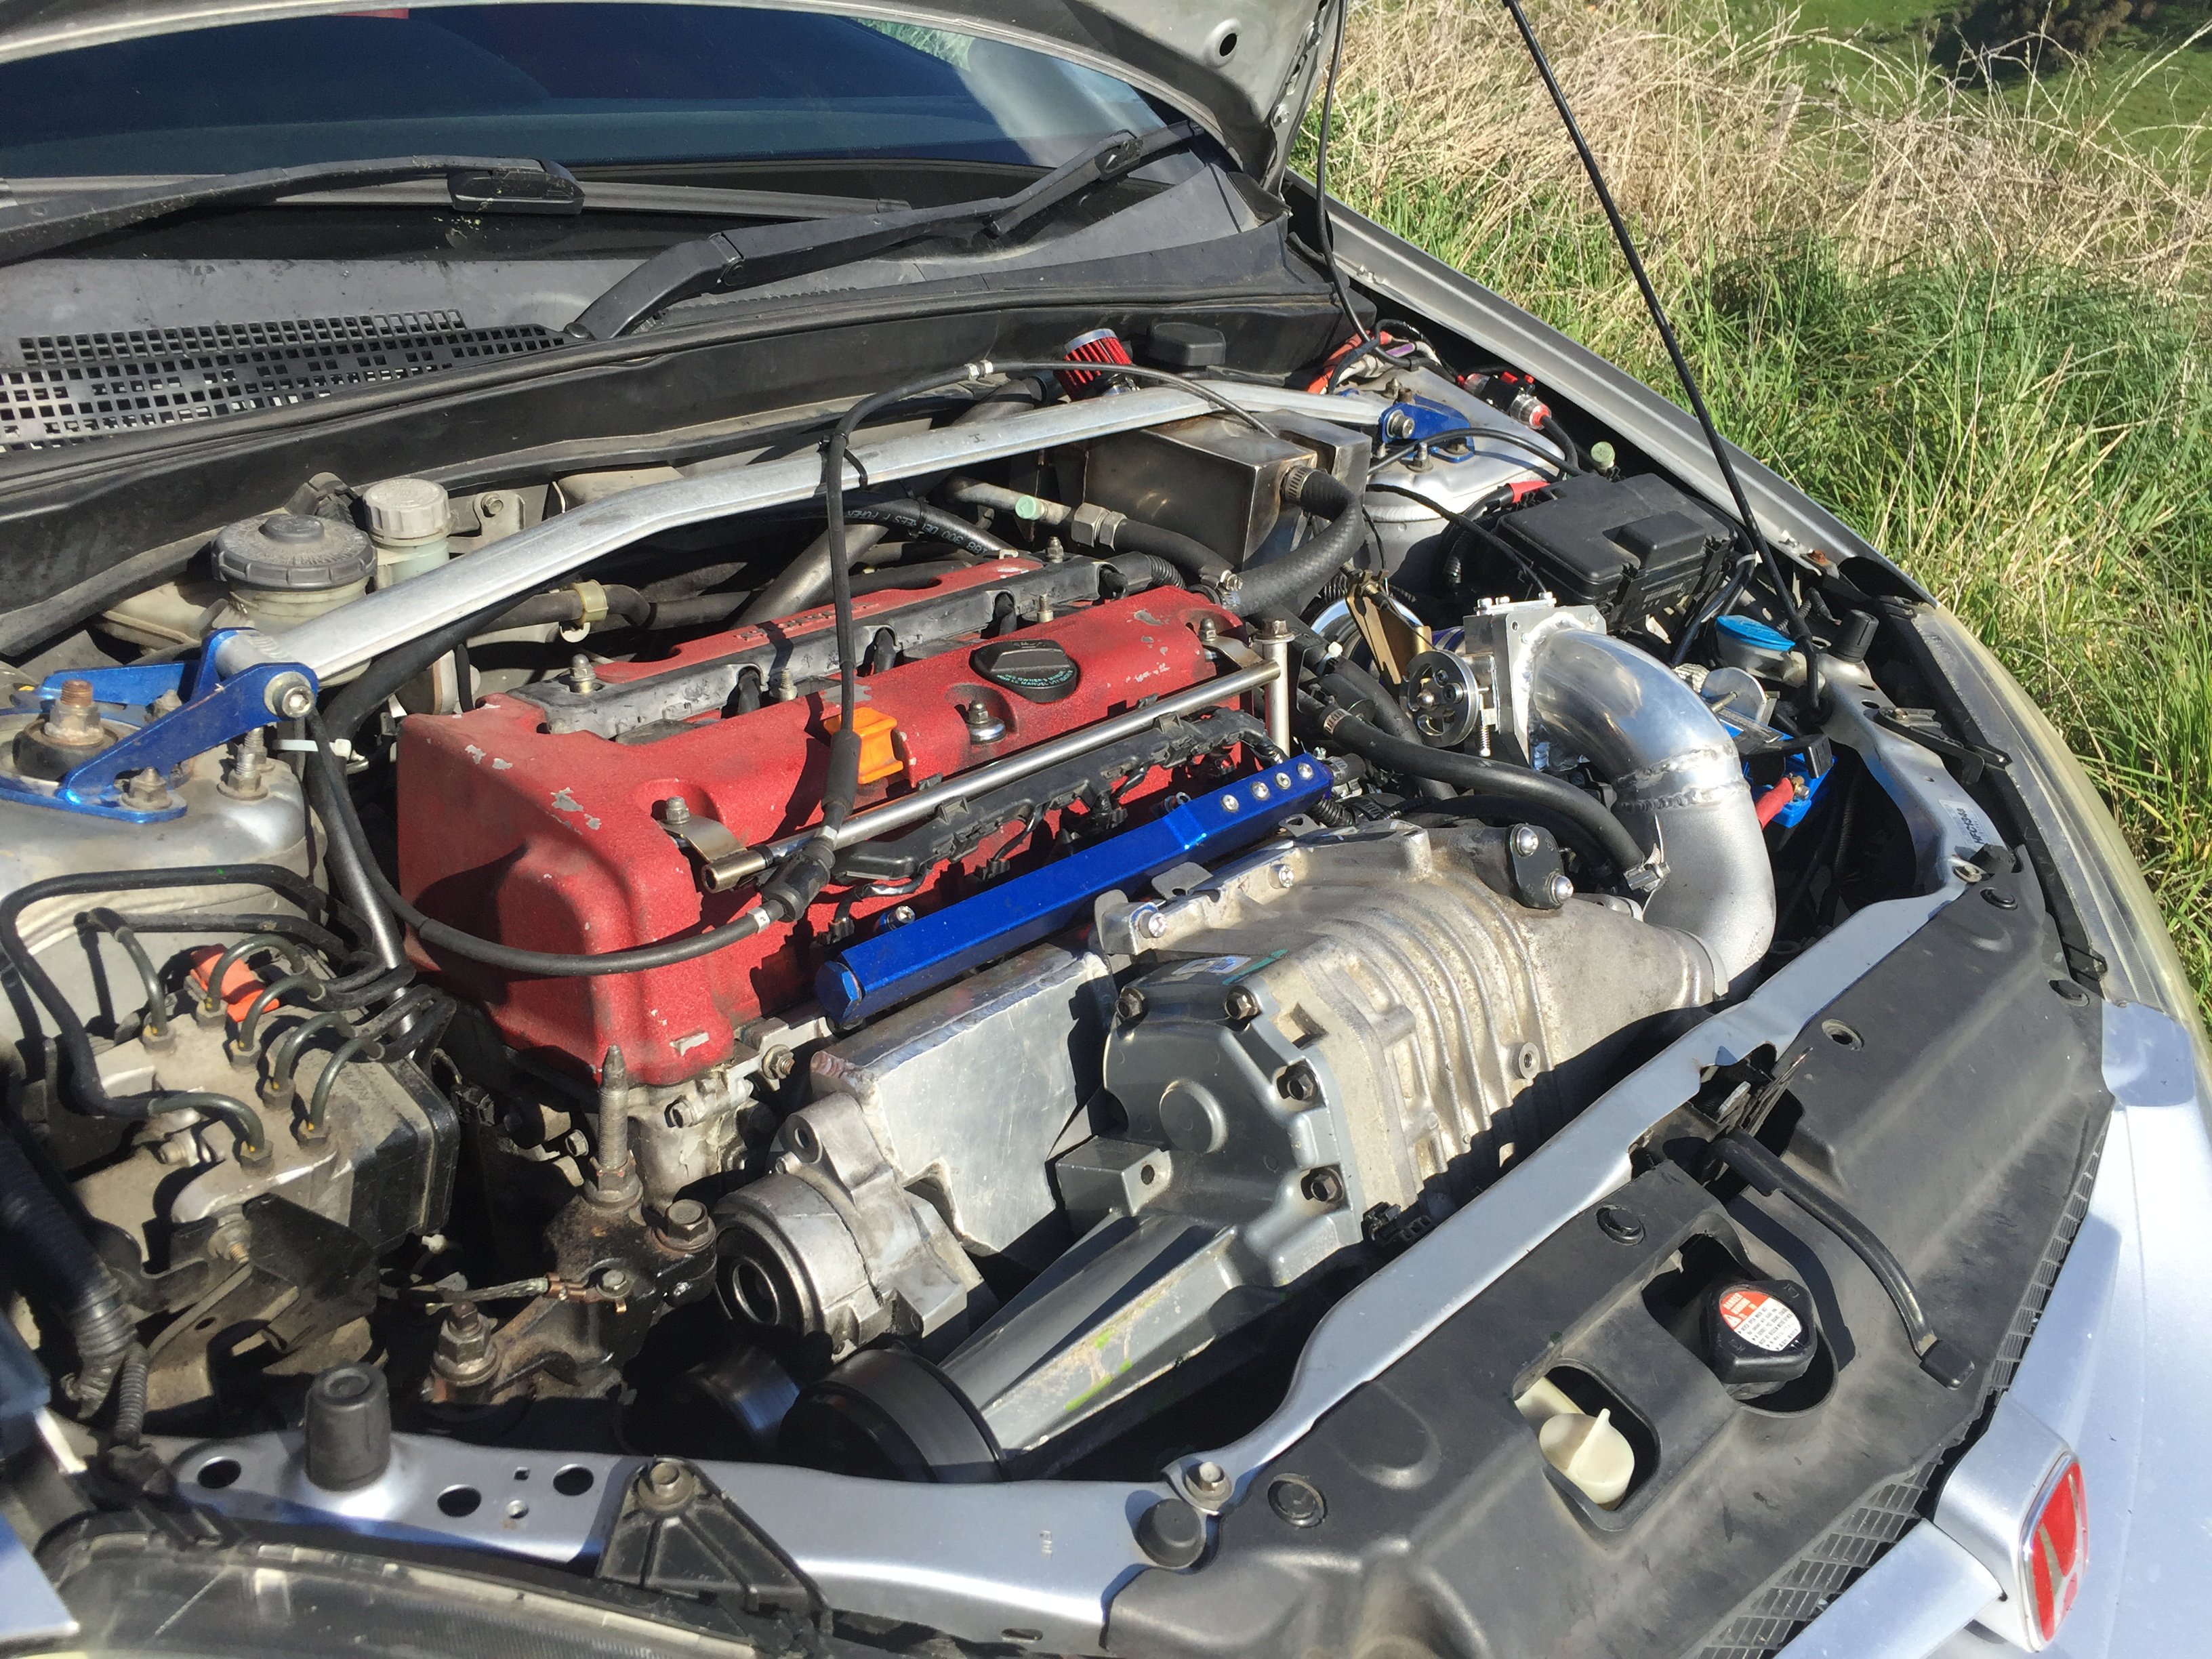
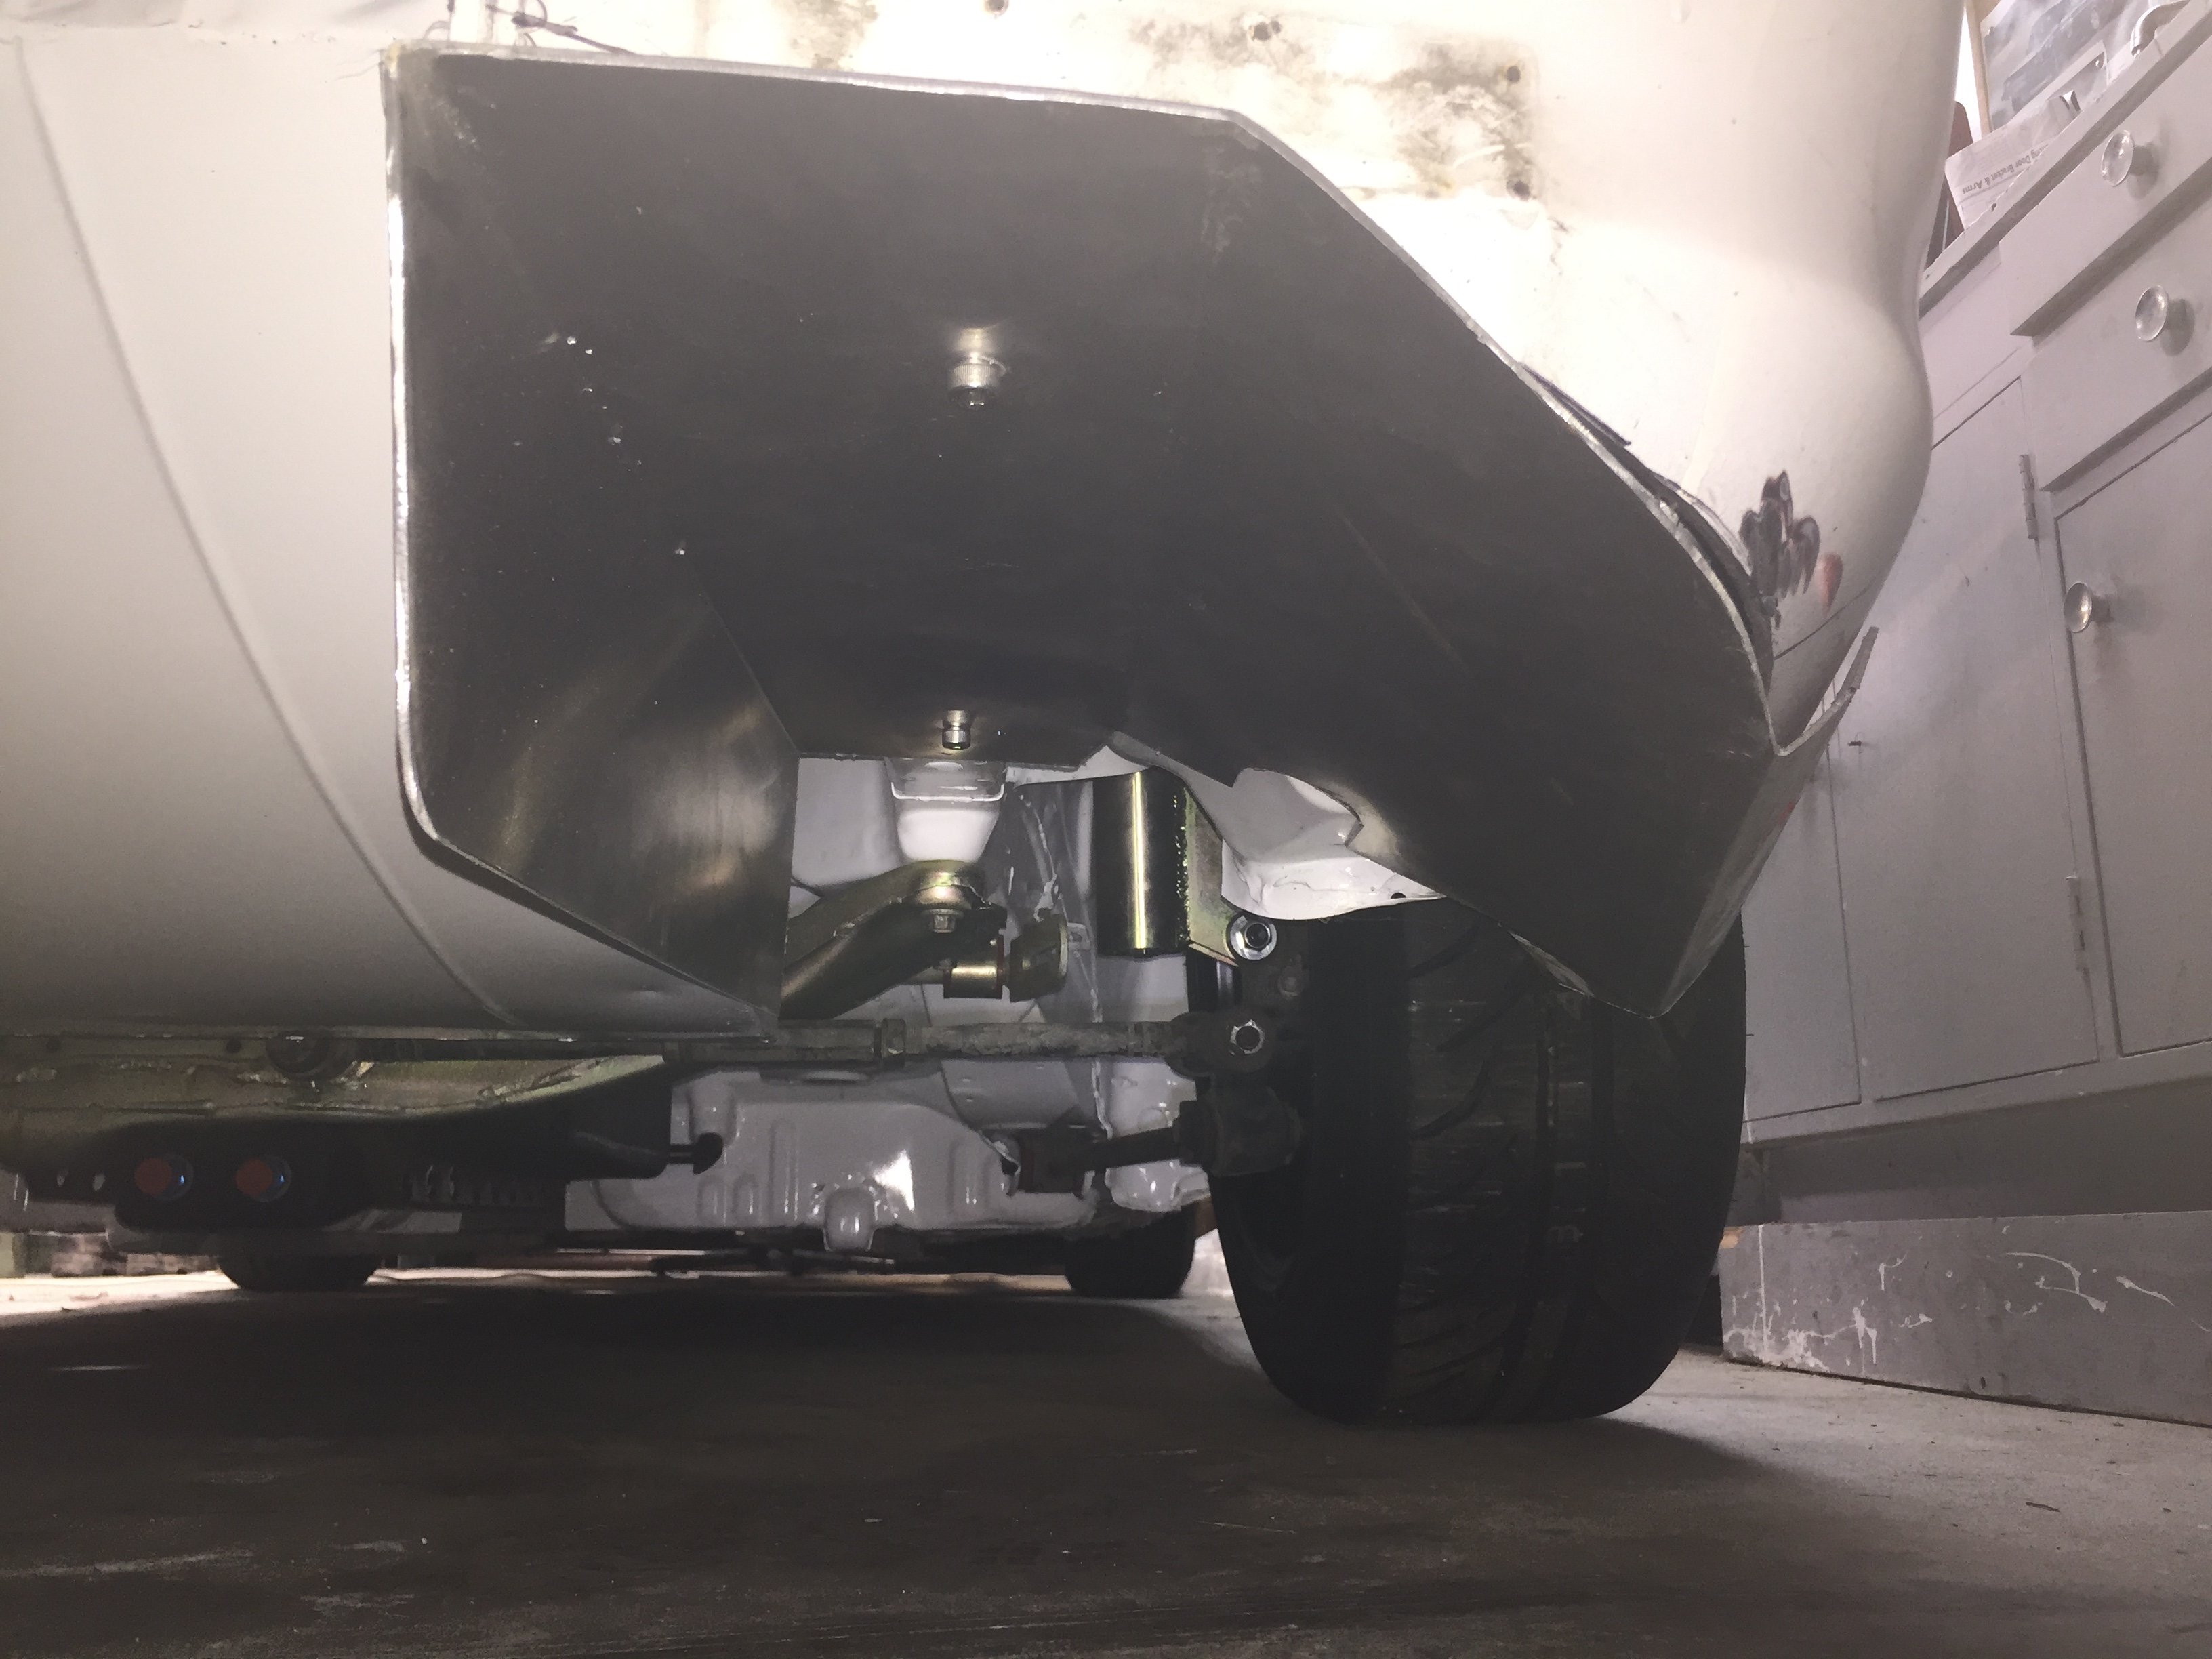
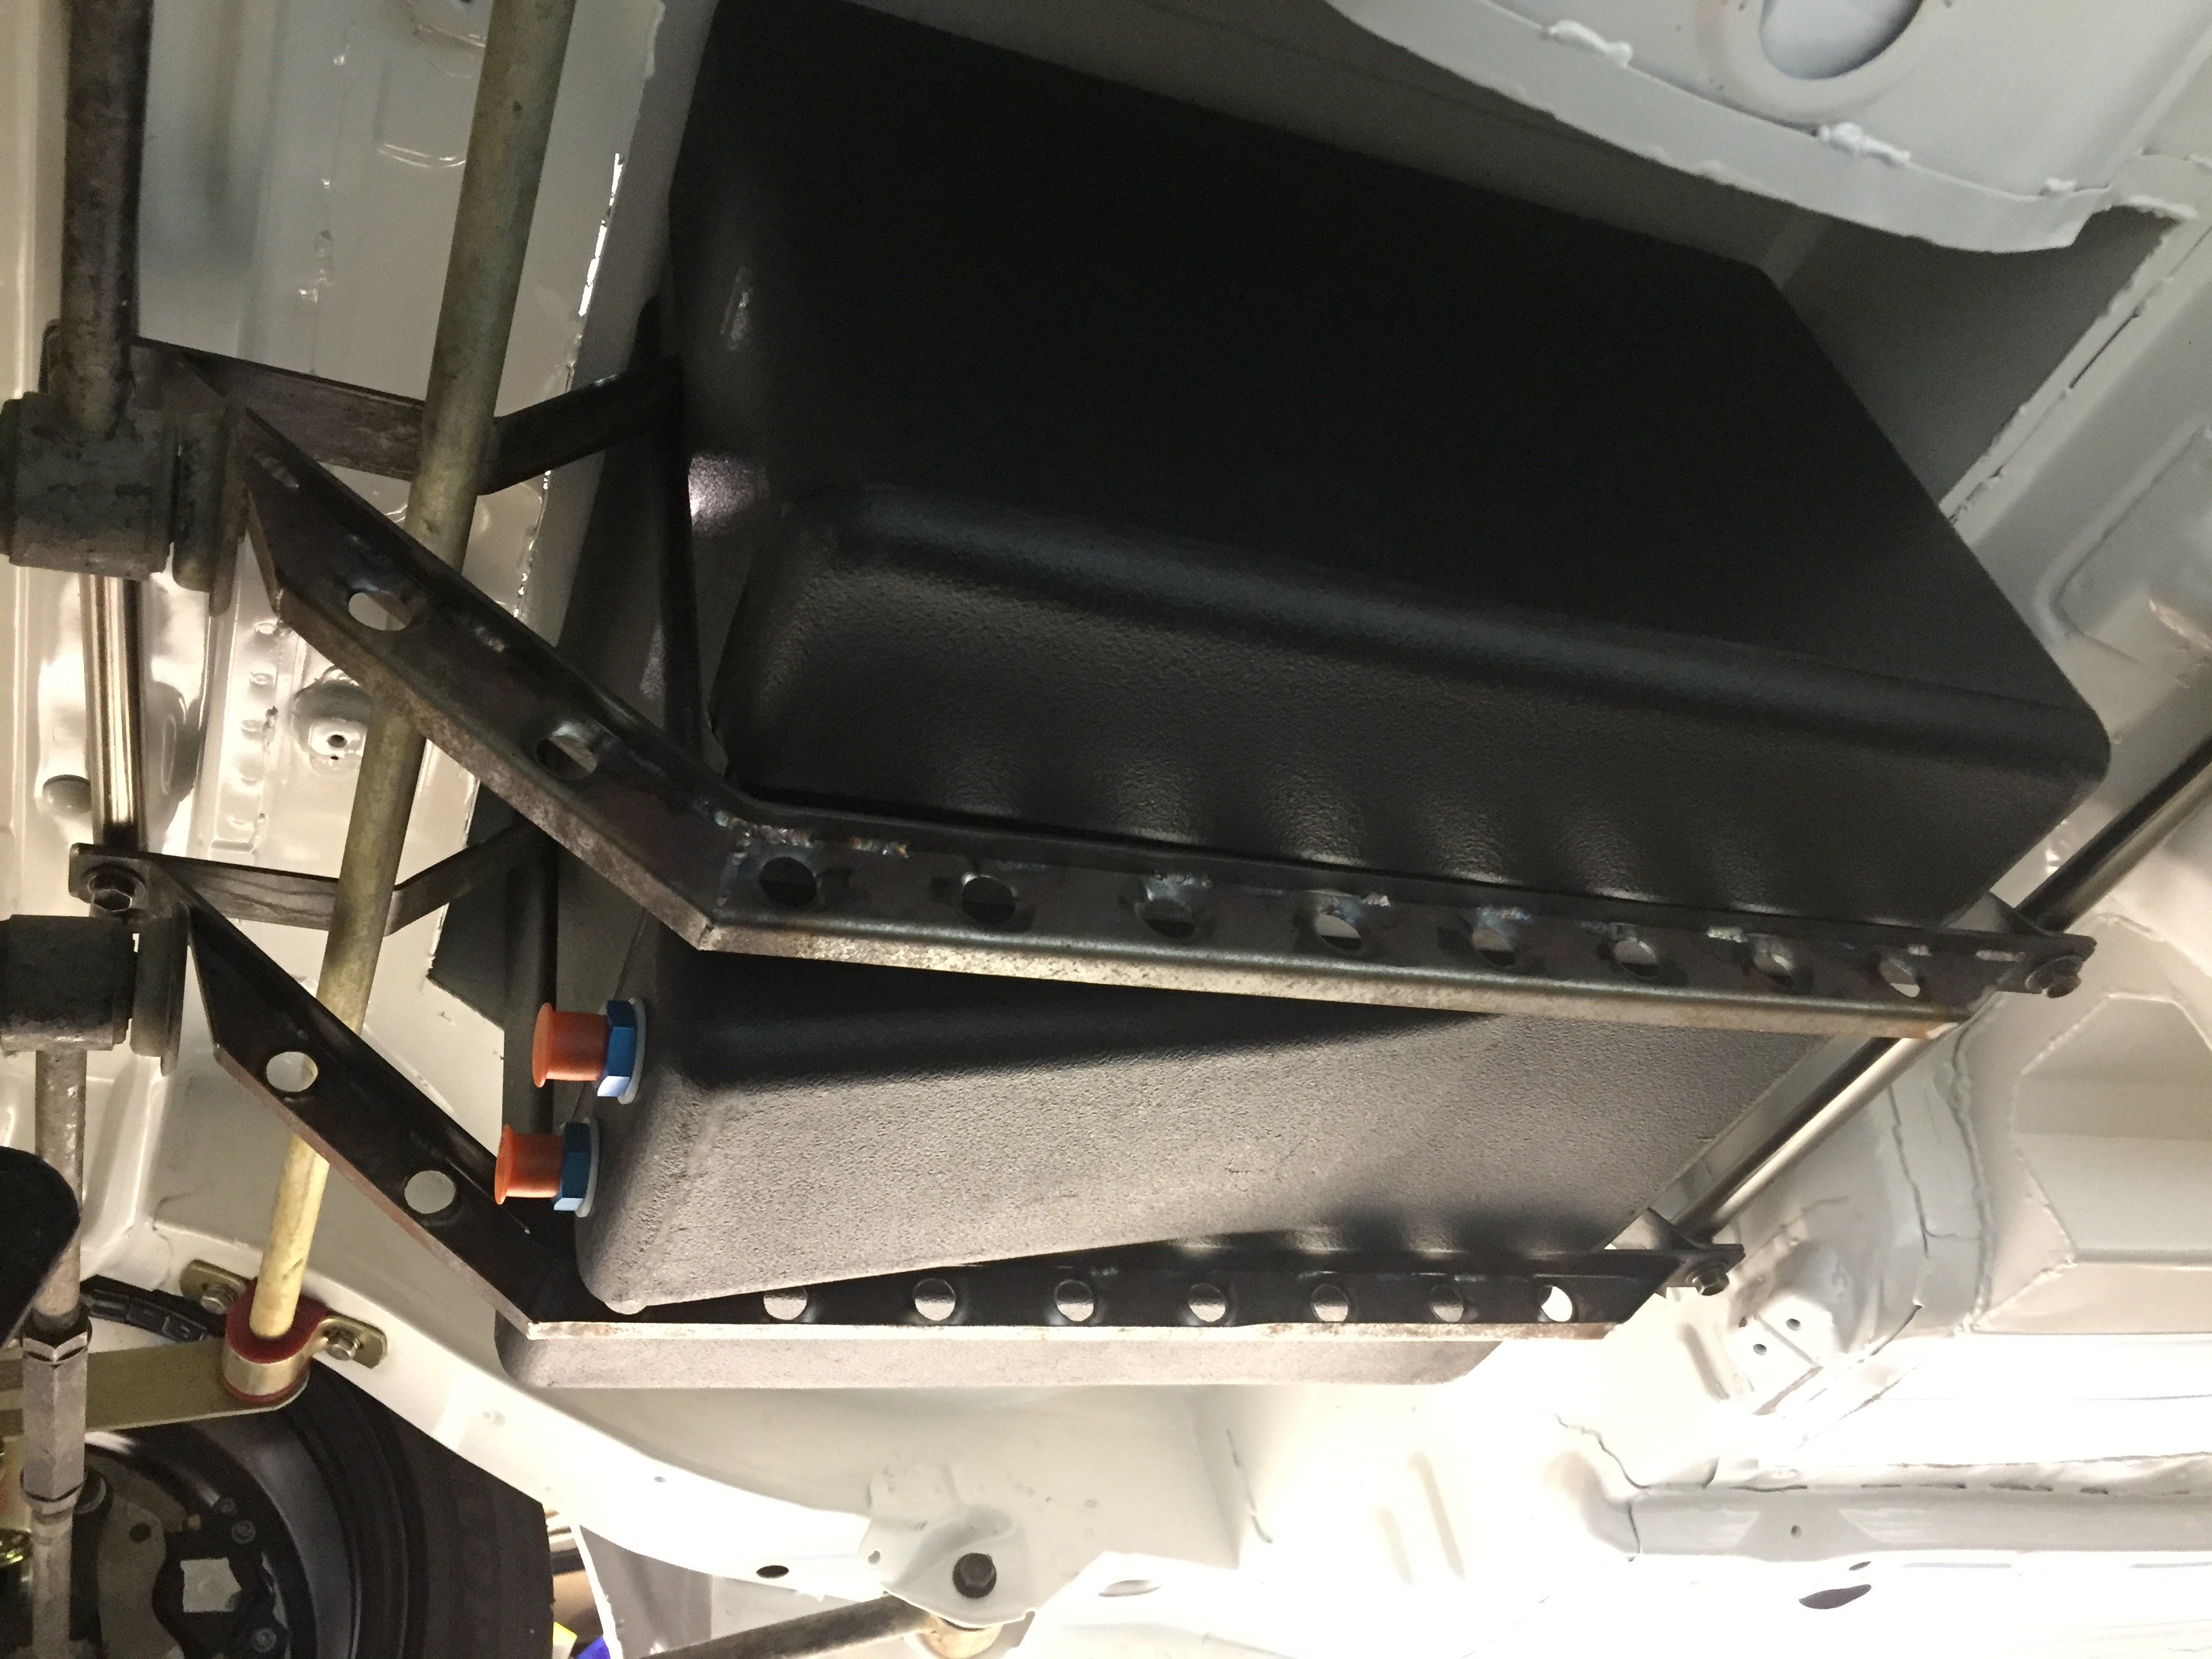
So it’s probably about time I put an update on this. Since I last posted a lot has changed. I bought a house and got engaged! New shed is grouse and been actually working on the car and other people’s car quite a lot. Namely supercharging a k24 Honda engine. Damn it goes good. Progress report; rear diffuser side plates folded and fitted. Aim here is to empty the air from the rear tyre wells cleanly and just look cool and be functional-ish Lots of room for activities (got to get a bloody exhaust out here somehow too - but that’s a problem for another day) Fuel cell mounting is now complete also. Maybe over engineered it a little but it’s not going anywhere in a crash most importantly. Mounted straps to stainless tubing front and rear with bosses welded in. Was the strongest/lightest combo I could think of doing. Pretty glad this job is done it was a pain in the ass Haven’t finished off the plumbing for the top end of the fuel cell yet. Maybe it should be next on the list?
-
This is 100% shock issue. Good road feeling relies on 3 things; not shit tyres, shock control and weight transfer. For OP I think your suggestion of 6/4 would work well but agree with sheepers comments that it may not solve the issue. I've run really stiff Springs on the road in the past on a sub 1000kg car with relatively average shockage. A semi slick will make it feel 1-2kg softer than it actually is due to increased grip with more roll/weight transfer. I'm an advocate of buying the best shocks you can afford and everything else takes care of itself. Chuck a bilstein at it and suddenly turns into an awesome car to drive...
-
So haven't put anything up here for a while and there has been a tonne of progress. Mainly due to gay new forum issues so I'm guna give it a go and if it frustrates me this might be the last time I post here. In the meantime if you guys want to keep up to date with the build and shenanigans I've started a Facebook page in an attempt to make sponsorship etc a bit more attractive to prospective companies. Check us out and give us a like here: https://m.facebook.com/NARMotorsport/?tsid=0.5935628854363311&source=typeahead So here goes some pictures... Wish me luck. Lots of new shiny paint and bolts on the engine to make it go faster of course New gearbox cross member cause the old one was a sight for sore eyes. Also remounted engine so hopefully this time it doesn't want to jump out of engine bay... Got some doors on it with brand new rubbers etc. Looking pretty good. Still waiting for front guards, valence and bits of trim to come back from panel beater to assemble the rest Yes that is a dog chasing the hedgehog under the fence in the next section... Haha That seemed pretty painless nice work kk/admin. Will trade again. More updates to come. Almost ready for full rewire and new loom to be made.
-
Yeah I don't think we are going to make all the rounds. Nick wants to but I've just started a new job and Mrs wants to buy a house this year so may just do a few of them. Might just pick a few of the better roads cause it's a hell of a trip to make it down by the time I get down there and back. Guna do some rallies this year?
-
Where'd you get that heat shield stuff from? Guna have to make us one of those! Nice work with cam timing too guna make a big difference ours is 2 or 3 degree out I'm fairly certain Fuck I'm guna have to drive the shit outa my thing to stay in front of you this year..
-
Have you direction tested the fan? Also worth checking the calibration on the temp sensors. Ducting may help? its possible that at a certain speed you end up with a stagnant area in the front of the car with the engine bay behind? This is why HUUGE splitters are awesome.
-
Oh woohoo thanks heaps!
-
Nicks managed to paint the inside and underneath of the car. A huge amount of work has gone into seam welding/strengthening and tidying up the shell before this stage. Most of the panel work on the car has been completed also, doors and guards will be going to panelbeater in the next week or two to get tidied up and sprayed professionally to make sure its the best quality finish we can afford. Like a brand new car Twin batteries in the rear seat this time. Previously had single battery in boot but was a bit of a pain in the arse and would like to run 2 batteries if we end up with charging issues etc. Strut tops have been strengthed so we can do some mad jumps. So I've been between jobs for a few days so spent a bit of time in palmy helping Nick out assembling and cleaning stuff. Everything is being cleaned, repainted and repaired before being installed. Time consuming but will be worth it in the end. Got the car rolling. Subframes/suspension and diff have all been sanded back and repainted with CV black which should wear pretty well with the stones. They look amazing (picture doesn't do them justice) Mounted fuel pump (Nick was cringing while I drilled holes in the brand new paint). Spent heaps of time cleaning fuel and brake lines then covering with protective rubber/plastic tube to protect them from the stones. Foot plates re-installed. Also cleaned and repainted the heater box and installed the wiper assembly and steering column/pedal box. With this cage we were able to move the seats back a good couple of inches. The seating position was very tight before and we are both 6 foot so being able to move the seats back and lower will make a huge difference. Really looking forward to driving it like this! Thumbs-up seal of approval... <a href="http://s1101.photobucket.com/user/touge_ae101/media/Mobile%20Uploads/_20170108_094229.jpg.html" target="_blank"><img src="http://i1101.photobucket.com/albums/g437/touge_ae101/Mobile%20Uploads/_20170108_094229.jpg" border="0" alt=" photo _20170108_094229.jpg"/></a>
-
Nice smooth laps there good work! If the inside edges look like they have less wear, those nittos are able to be flipped on the rim for the inner edge becomes the outer. They will probably have a more square lip which is wear your grip comes from essentially. might get another 2-3trackdays out of them as long as its not raining!