


Adoom
-
Posts
2199 -
Joined
-
Last visited
Posts posted by Adoom
-
-
3 minutes ago, igor said:
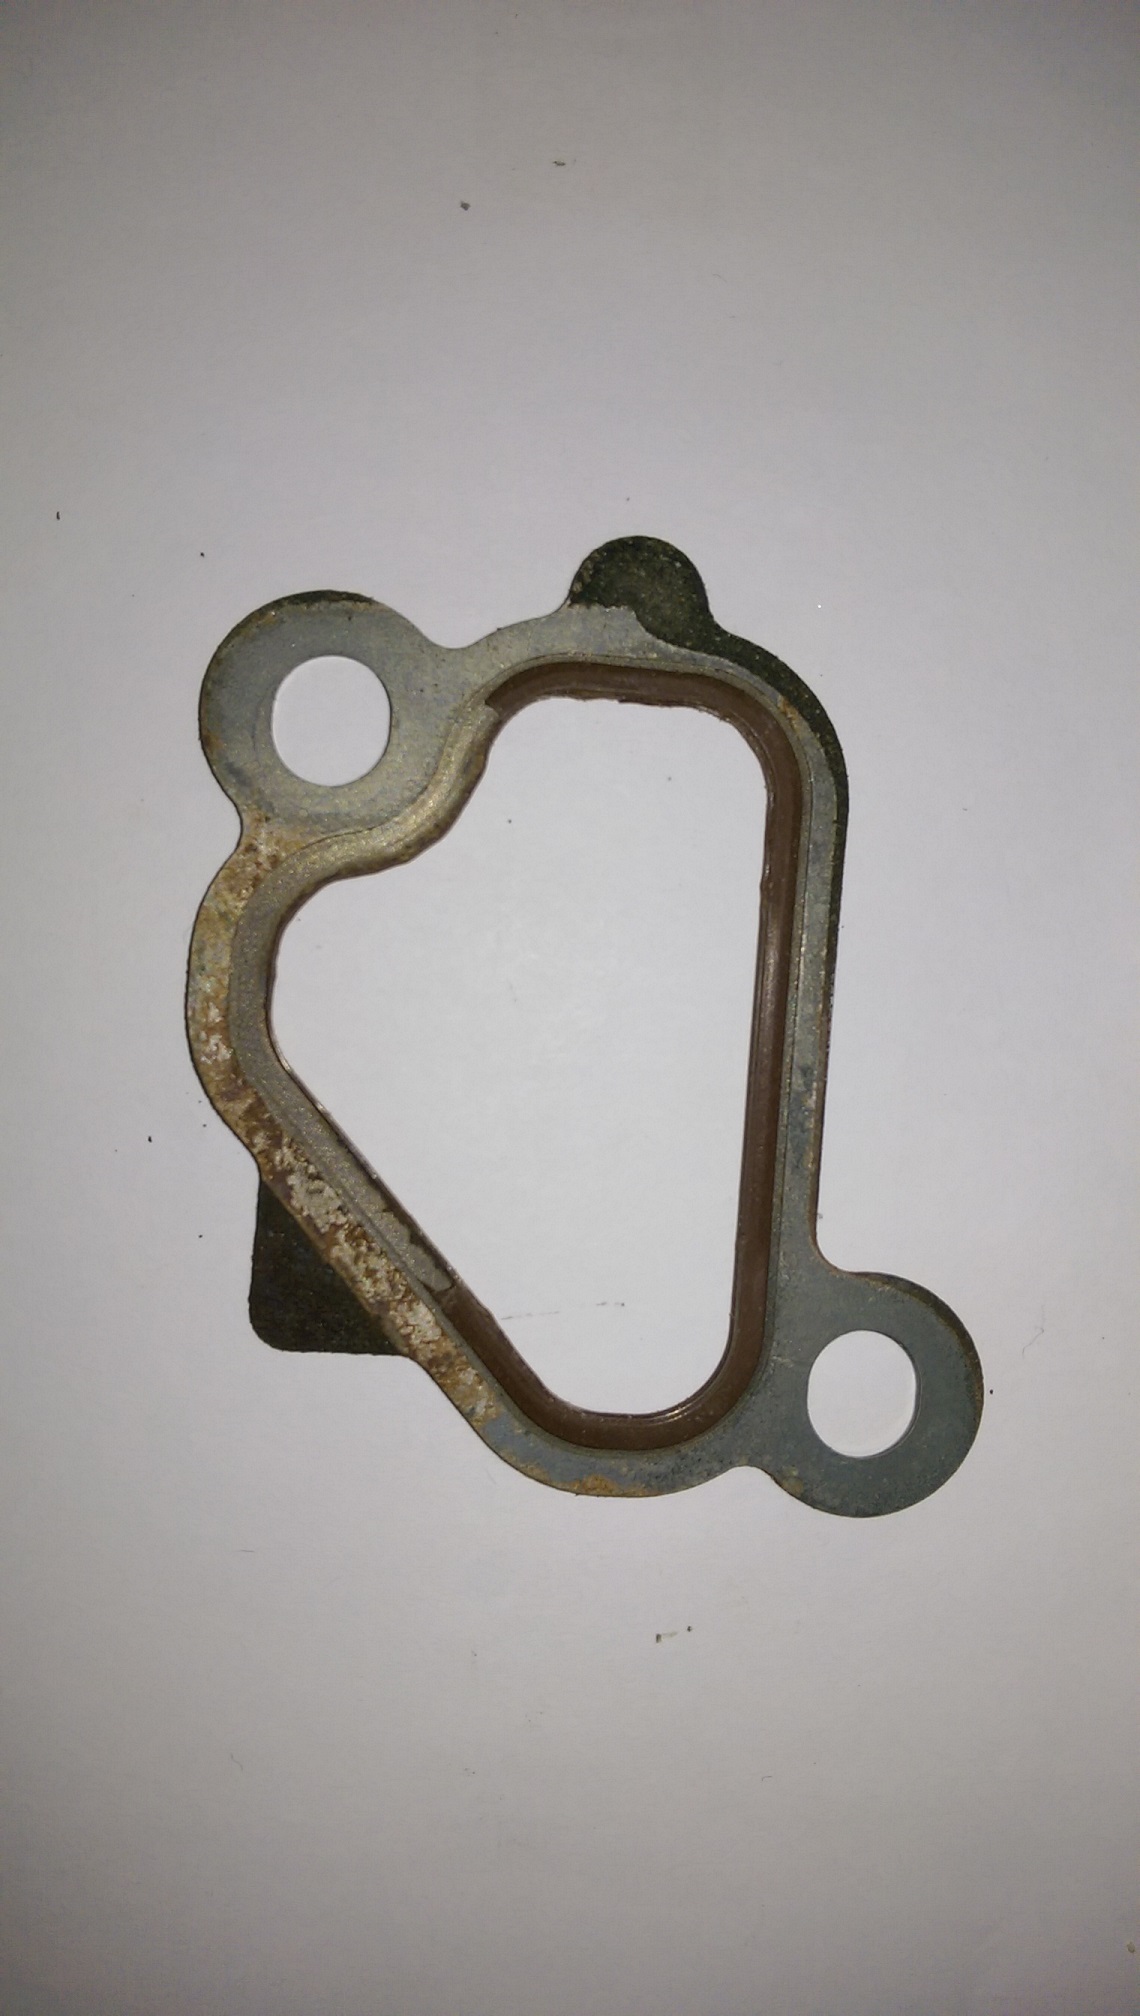
Are the water bridge gaskets just normal paper ones? If so weetbix box to the rescue.
It's a 3 wafer metal gasket with a thin 'rubber' seal on the top and bottom of the inside edge. The seal part has pulled off and the metal is a bit crusty.
If I cannot get new ones, I will try clean them up and put a little gasket goo on them.

-
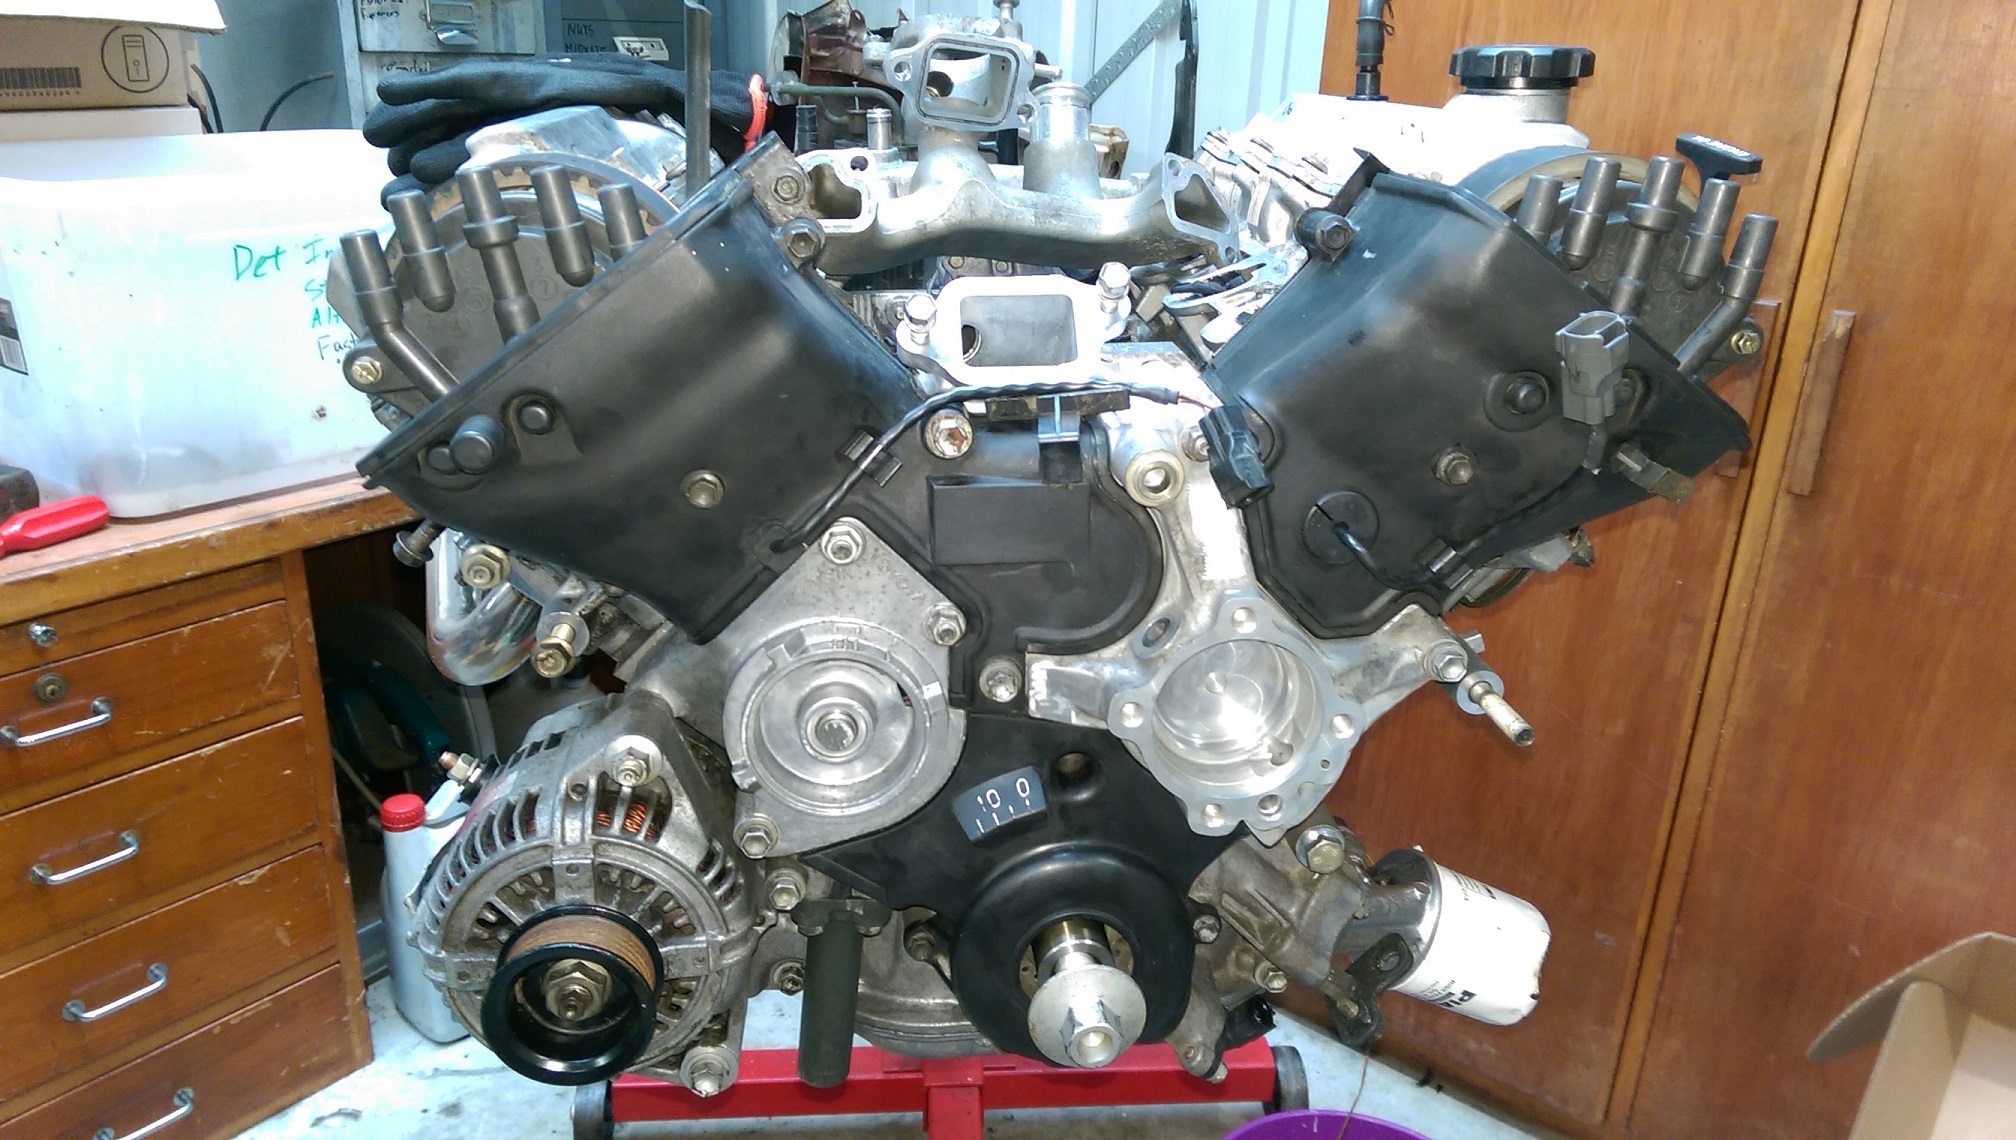
Timing belt and water pump installed. New not-cracked distributor rotors installed. Cleaned covers and stuff installed, everything was covered in waxy oily stuff.
I've hacked up the tensioner and hydraulic fan pump cause I only need the alternator.
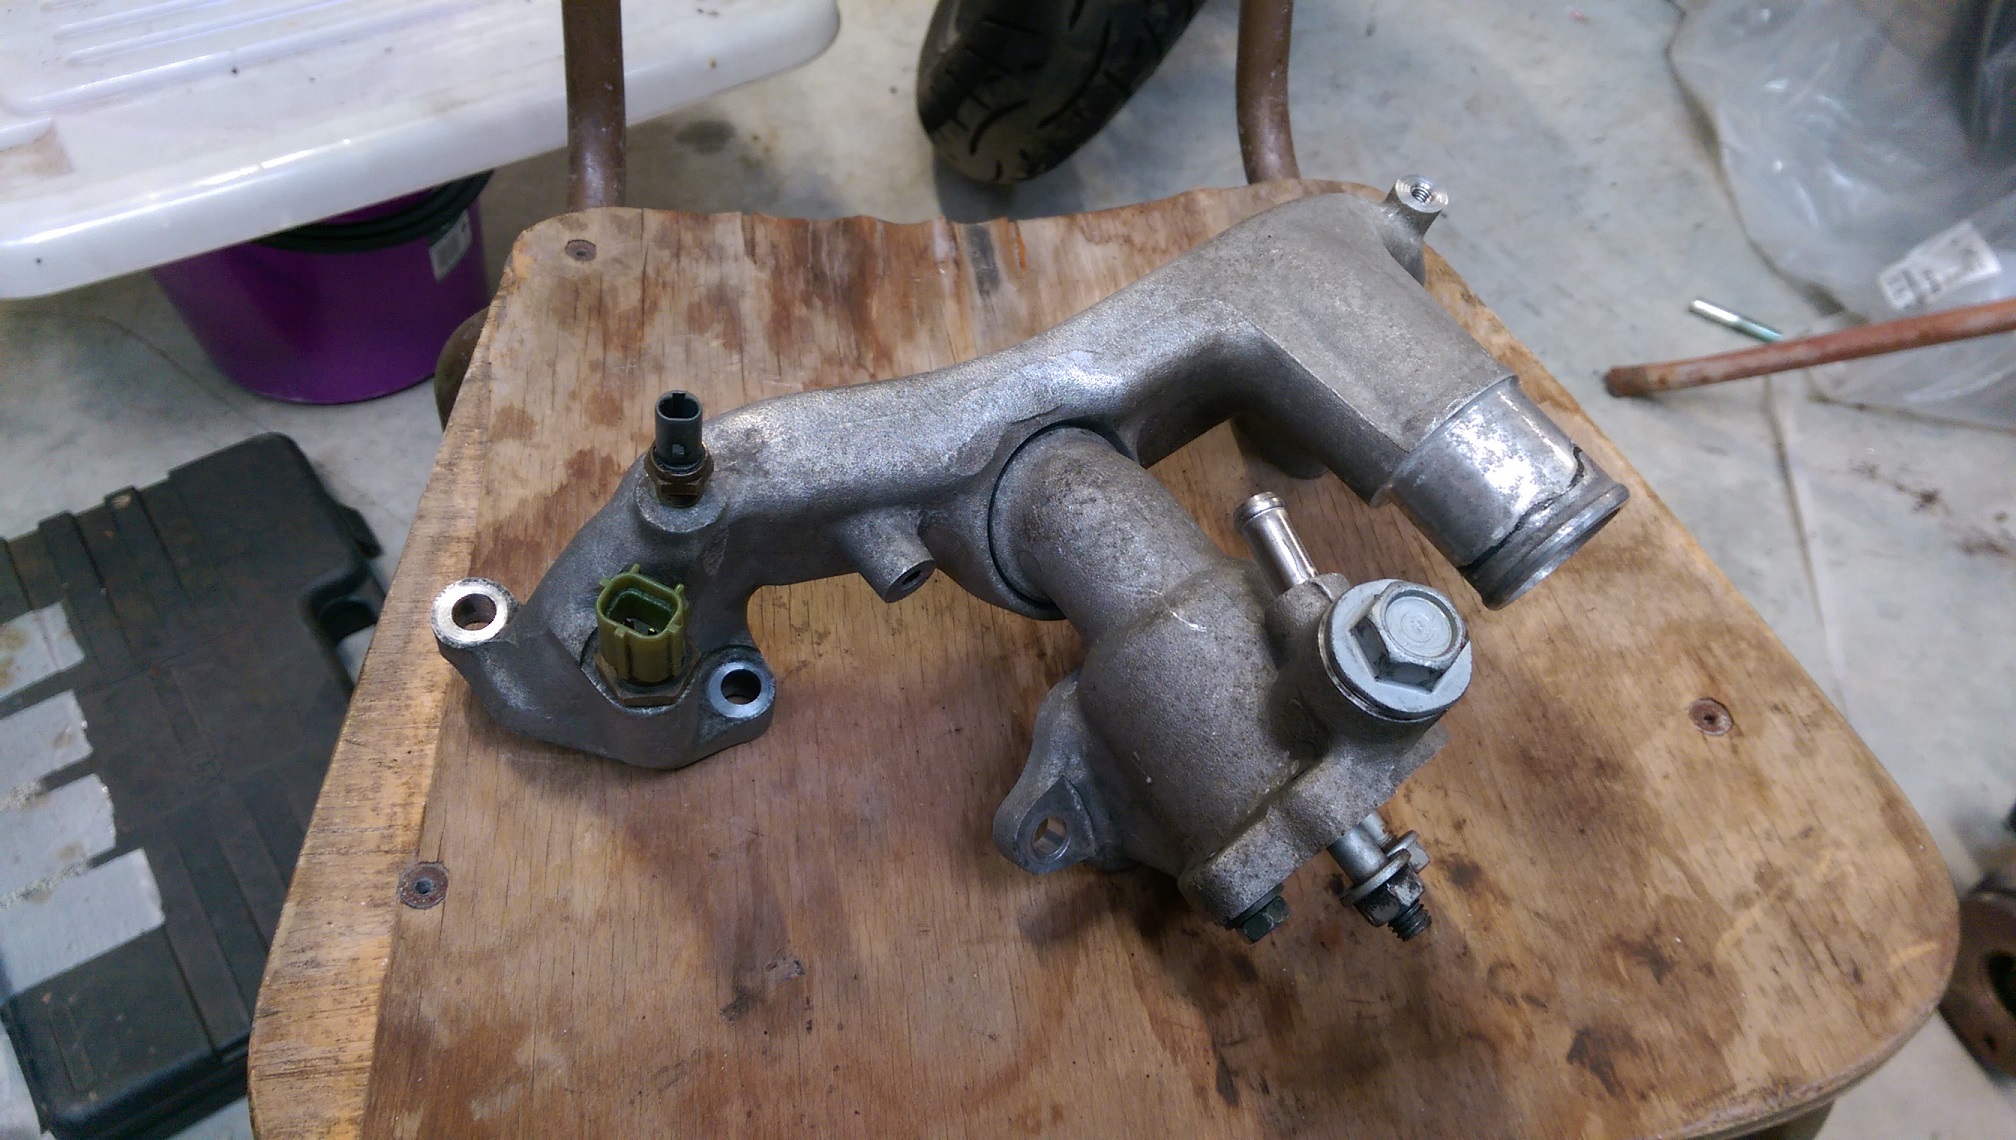
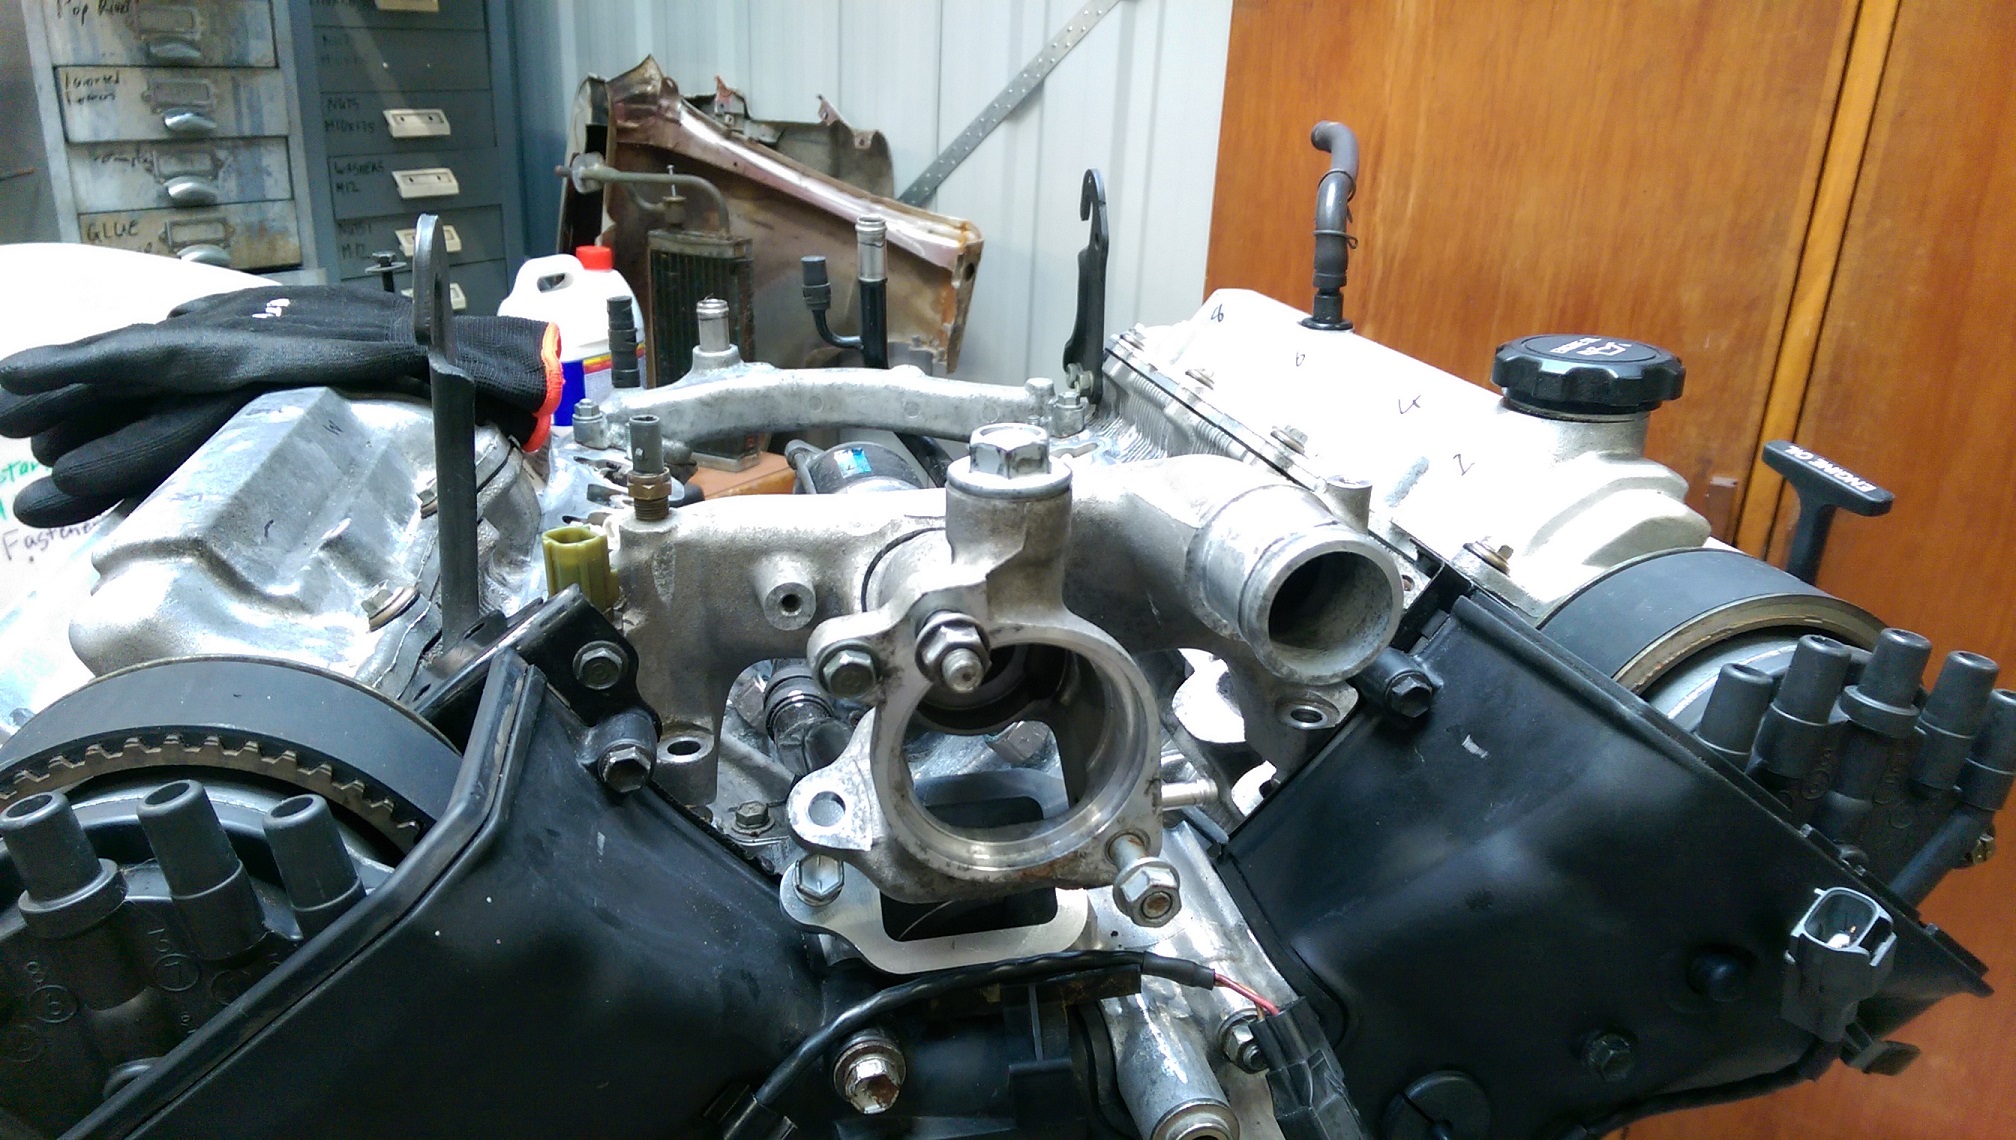
But to remove the water pump, you need to remove the thermostat housing from the 'water bridge'. It's only held in with two bolts and a big o-ring. Easy, right?
WRONG! Mine was held in with two bolts, an o-ring..... and a bunch of aluminium oxide, so I was unable to remove it. I had to remove the water bridge too.
It goes here.
So now I need the gaskets for the water bridge. Rockauto don't list them. Amazon have them, but don't ship to NZ. Hopefully Toyota can supply them separately, not in a kit.
I did eventually get the thermostat housing off the water bridge. I had to put it in the vice and use a bit of wood as a lever/hammer so I didn't damage the aluminium. It took lots of small wiggling and oil and WD40 and levering and banging and twisting.
-
 3
3
-
-
The RockAuto timing belt/water pump for the 1UZ finally arrived after a month or so. via Belgium?! 1/3 - 1/2 the price of buying it locally, including the freight! And it's all brand name stuff.
I started changing that tonight. The engine has been in bits waiting for the timing belt for some time. So I just had to turn the crank to the right place and pull the belt off.
Well, good thing I did change the water pump, cause the old one had seized.
-
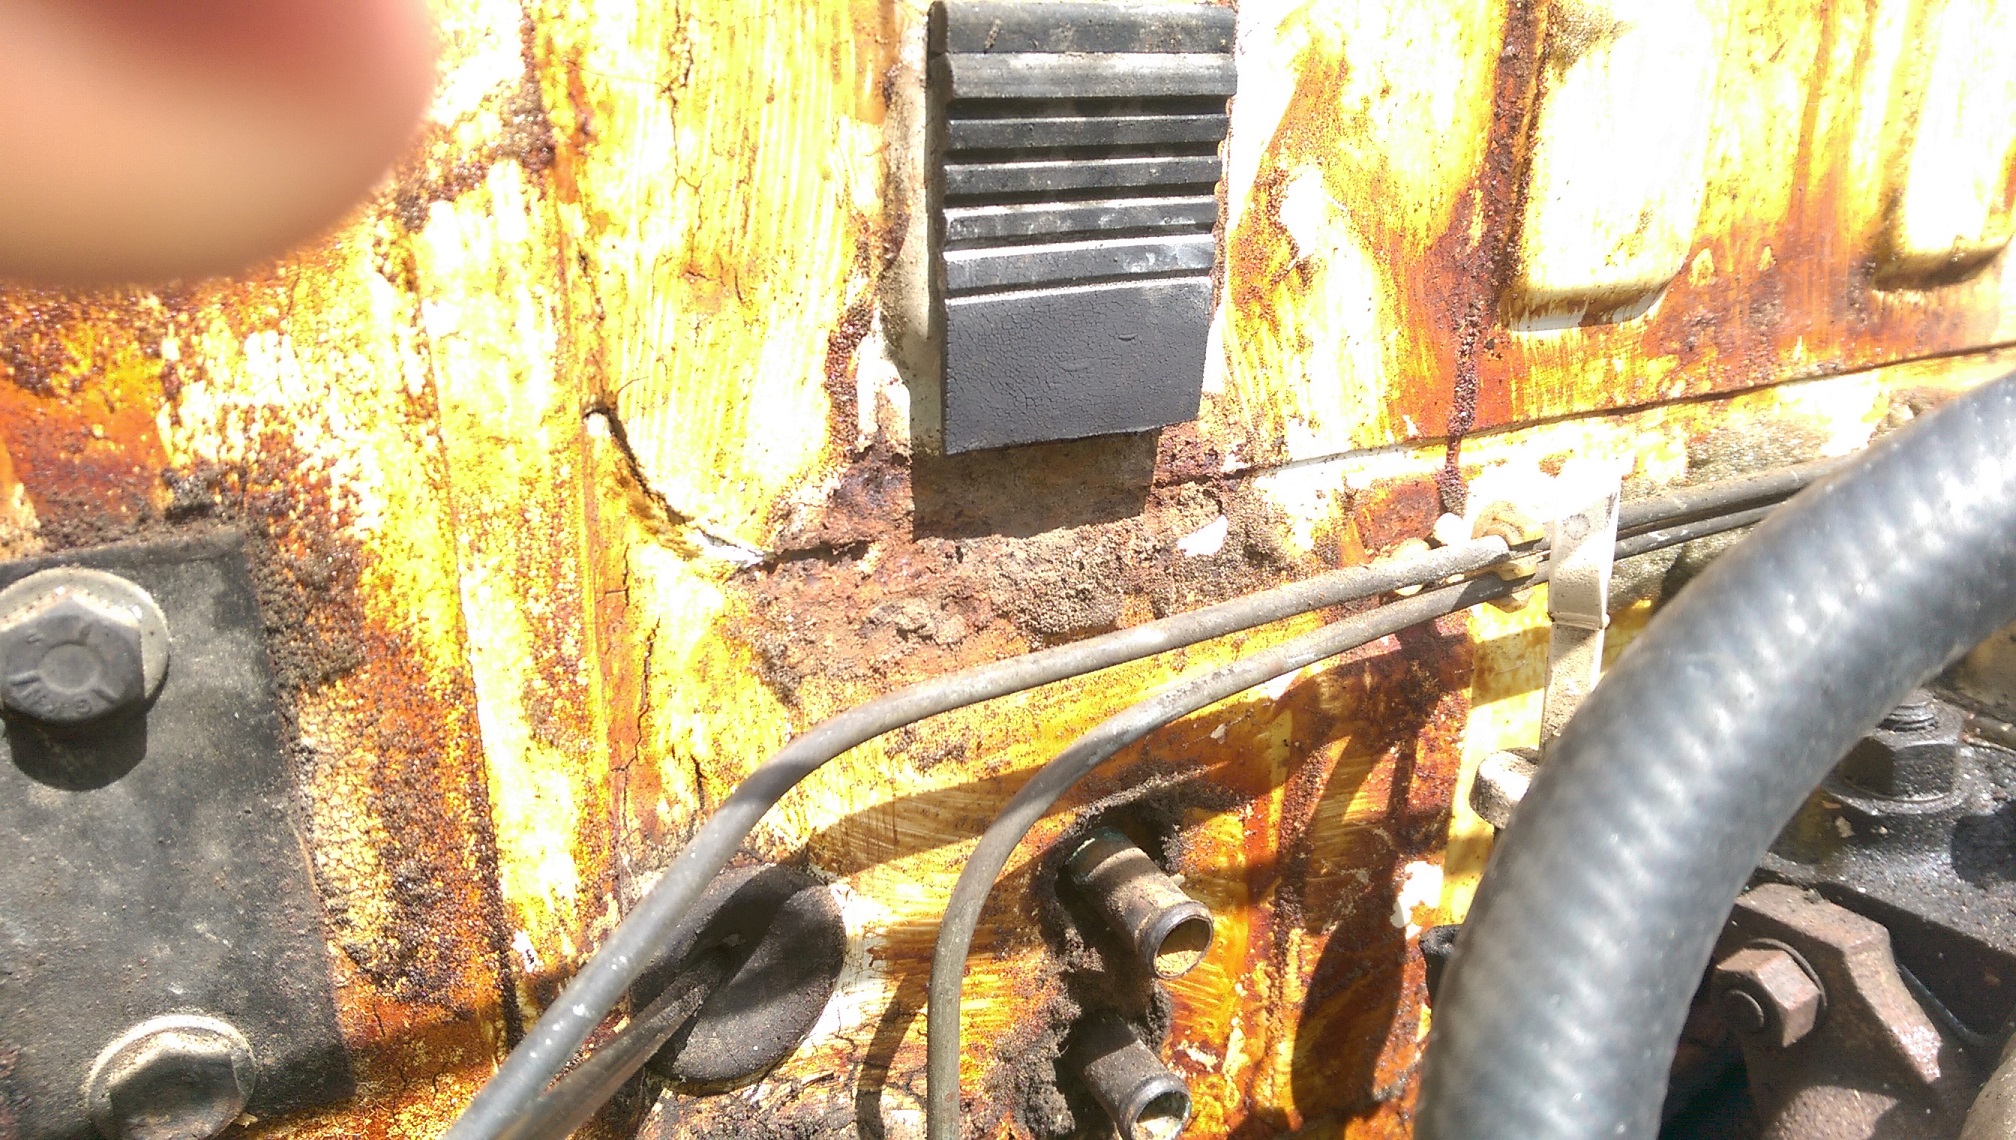
So after losing a little blood and bending a fingernail back on itself, I managed to cut, hack and tear the rubber foam pad off the firewall without removing the engine.
This is the only bit of rust! Some of it is probably just the mud that caused it. All the orange shit is glue.
I also used my AliExpress bore scope and had a look in the sills. I didn't see anything bad in there. I will still cut out a bit of the inner wheel arch that will open up the end of the sills where they usually rust. If it's okay, I can just weld it back in. This way I don't need to cut the guard, just to have a look.
I also used the bore scope to have a look inside the rear guards and down the bottom of the c-pillars . And all okay!
-
4
-
-
Thanks to @Threeonthetree and @Nick Ritchie for OS Freight Services. I have a heater with a motor that isn't broken by me. And some patch panels for the rear wheel arches, B-pillar and a corner above the rear windscreen.
I also got a 1972 Triumph 2000 Auto last week which is probably going to take over being the 1UZFE conversion project from the yellow one.
-
2
-
-
Click here for Project Thread
Discuss here.
-
Click here for the Discussion Thread
So I initially bought this for the front guard, for my other project. Adoom's 1976 Triumph 2500 TC.
But despite looking like shit on the surface, it's waaaaaaaaaay less rusty than my 2500. So I think I will move my V8 plans over to this one.
I still reserve judgement until I remove the windows and get the engine out and I can see the firewall.
It's the original paint, which is thin and failing.
The doors have a little bit of surface rust, but they are all solid, even along the bottom!
No rust in the heater intake box, thing.
No rust under any of the wheel arches.
No rust under the petrol flap.
No rust in the gutters.
Sills look solid, I still need to have a look inside them with my china 'endoscope'.
I've pulled the carpets out and no rust in the front corners of the footwells.
No rust where the bottom of the front panel meets the guards.
I've pulled back as much of the rubber/foam sponge from the firewall as I can and there looks like there might be a little bit of rust there.
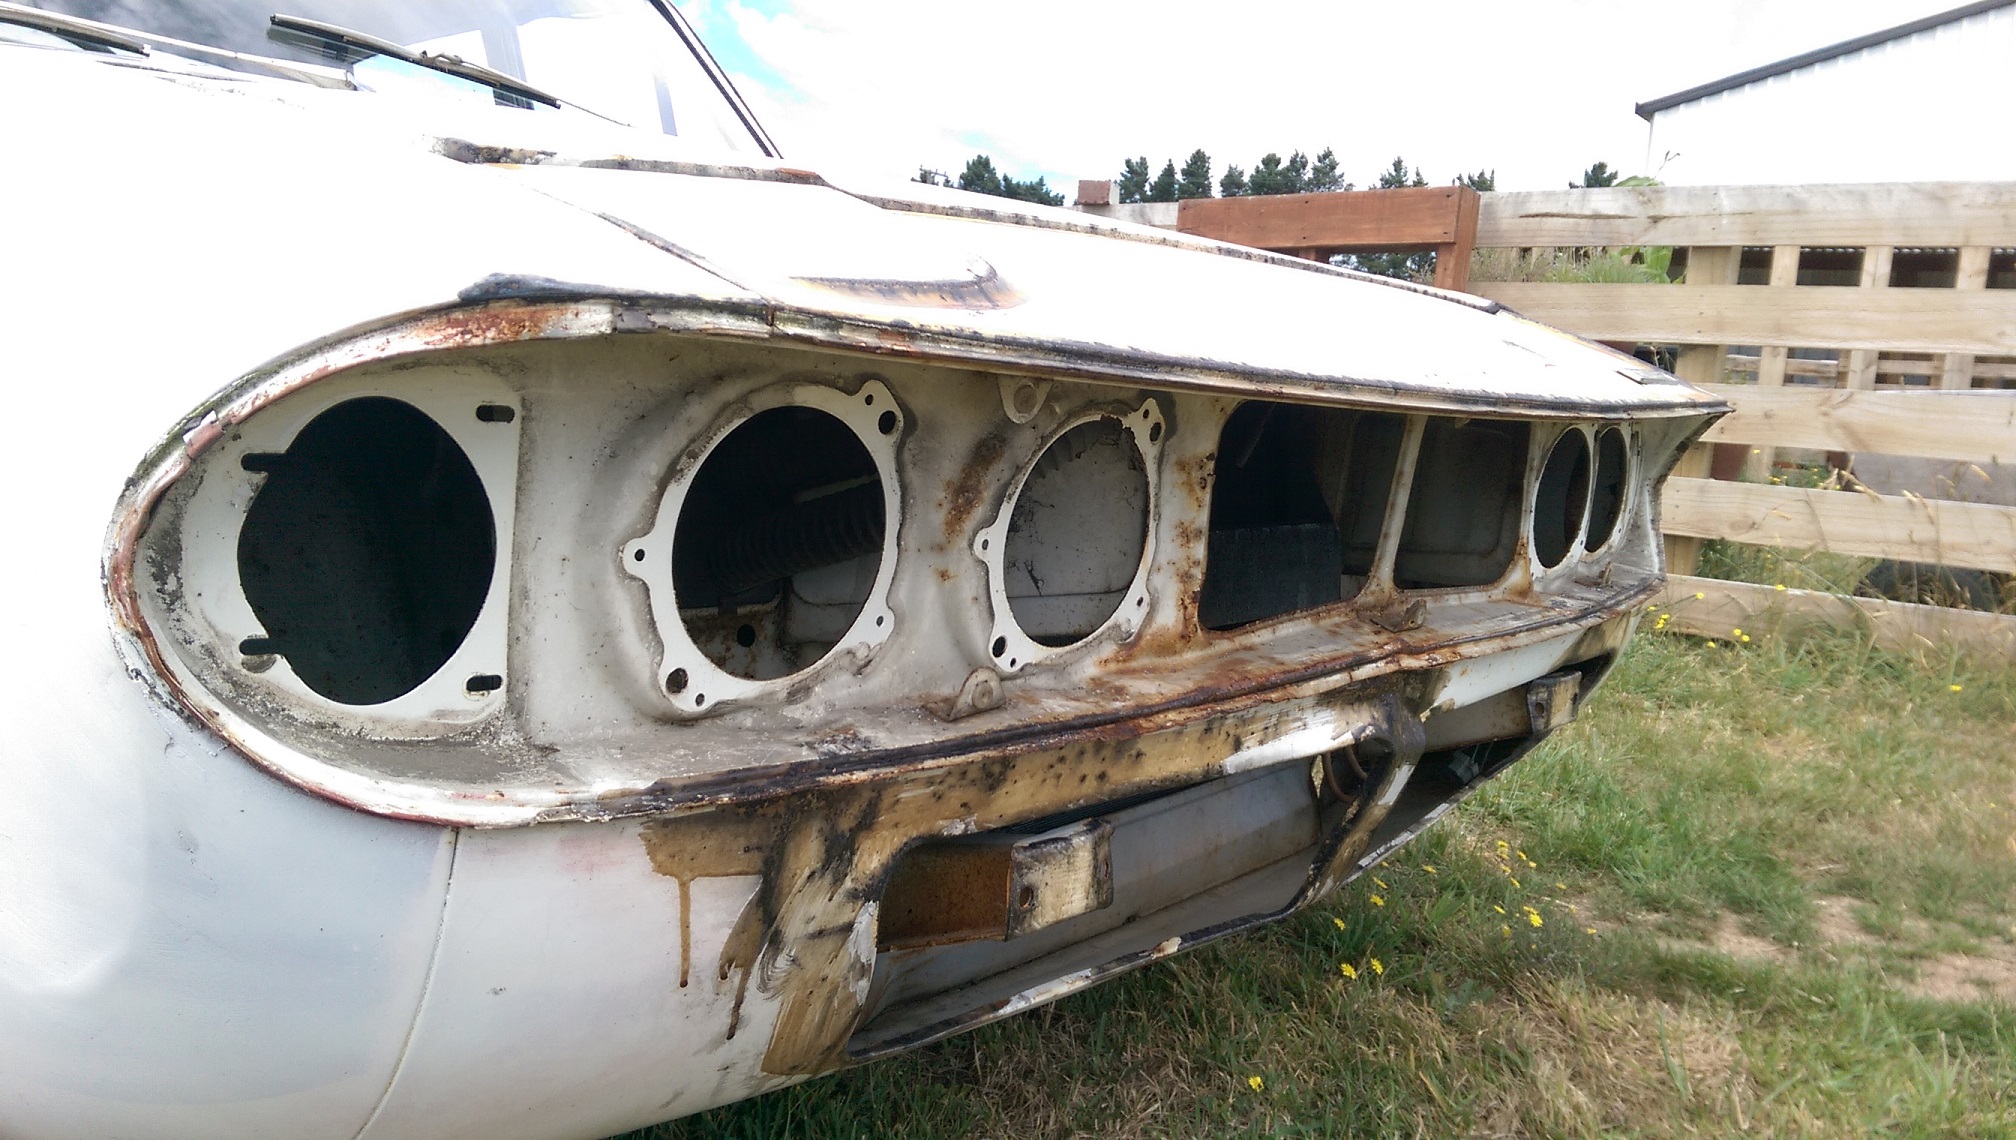
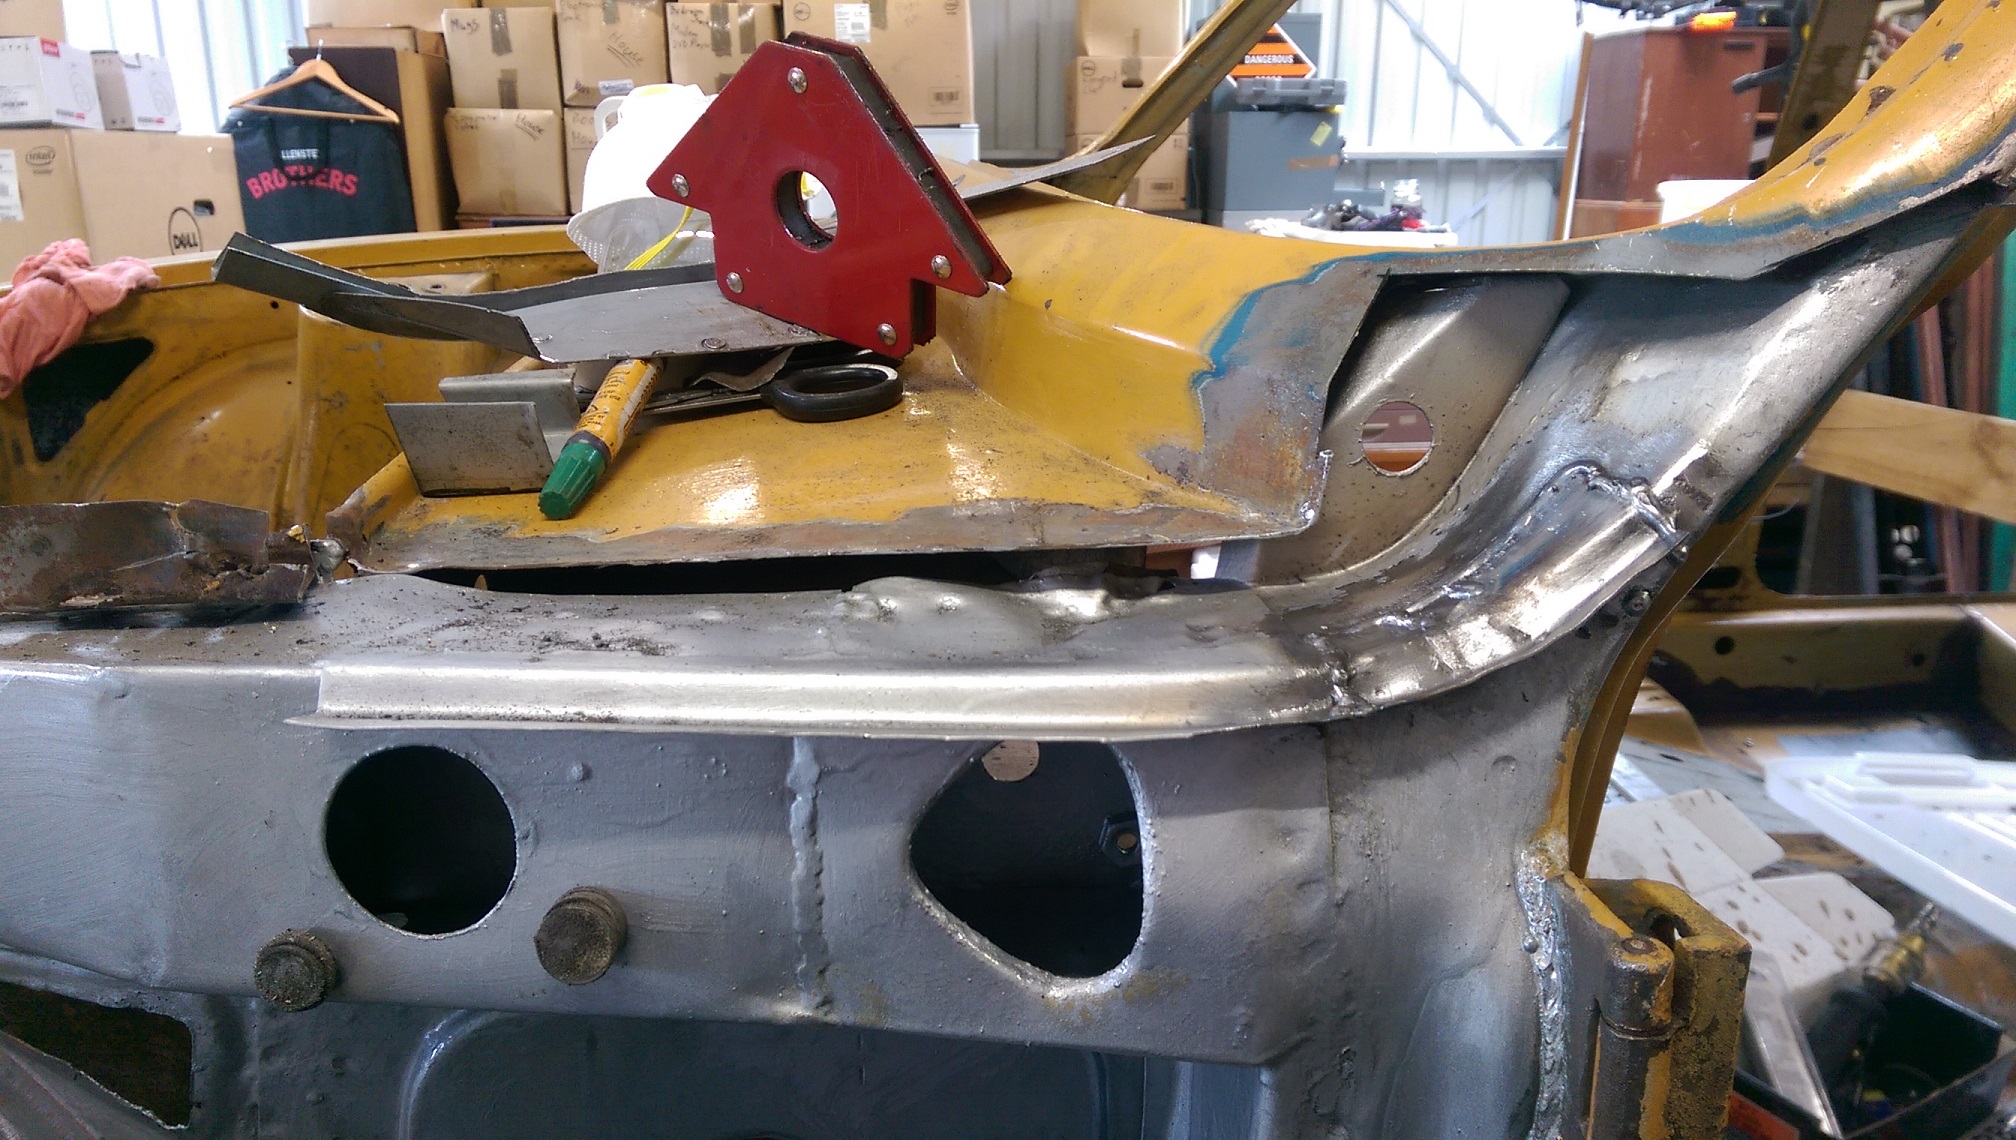
The bad. The front panels are a bit mangled. I'm hoping I can get them back into the right shape. I've got the 2500 to use as a template.
The OMG. Wof failure sheet said "check fuel tank for leak". I found the leak! The big hose for the filler neck has a crack at the bottom, so when you turn right with a full tank or just put fuel in it, it leaks petrol INSIDE THE CAR! You can see in the boot and under the rear passenger side seat area has no underseal and the other side does, because the petrol has just washed it away.
I have started stripping the car, but I need to keep it drivable/movable and mostly watertight until I can fit it in the garage. That won't be until the house is finished, which apparently might be around the end of Jan, and I can move all my house shit out of the garage.
-
4
-
-
This bit required much adjustment to make it the right shape. It is a better fit than the rusty one it replaces though.
The top part isn't attached, it's just there to test fitment. It also needs work before I can attach it.
-
Just saw this fulla guy North of Carterton at lunch time. Beeped at him with the effeminate horn on my shitty white corolla.
/LING POST
-
2
-
-
And a bit more.
-
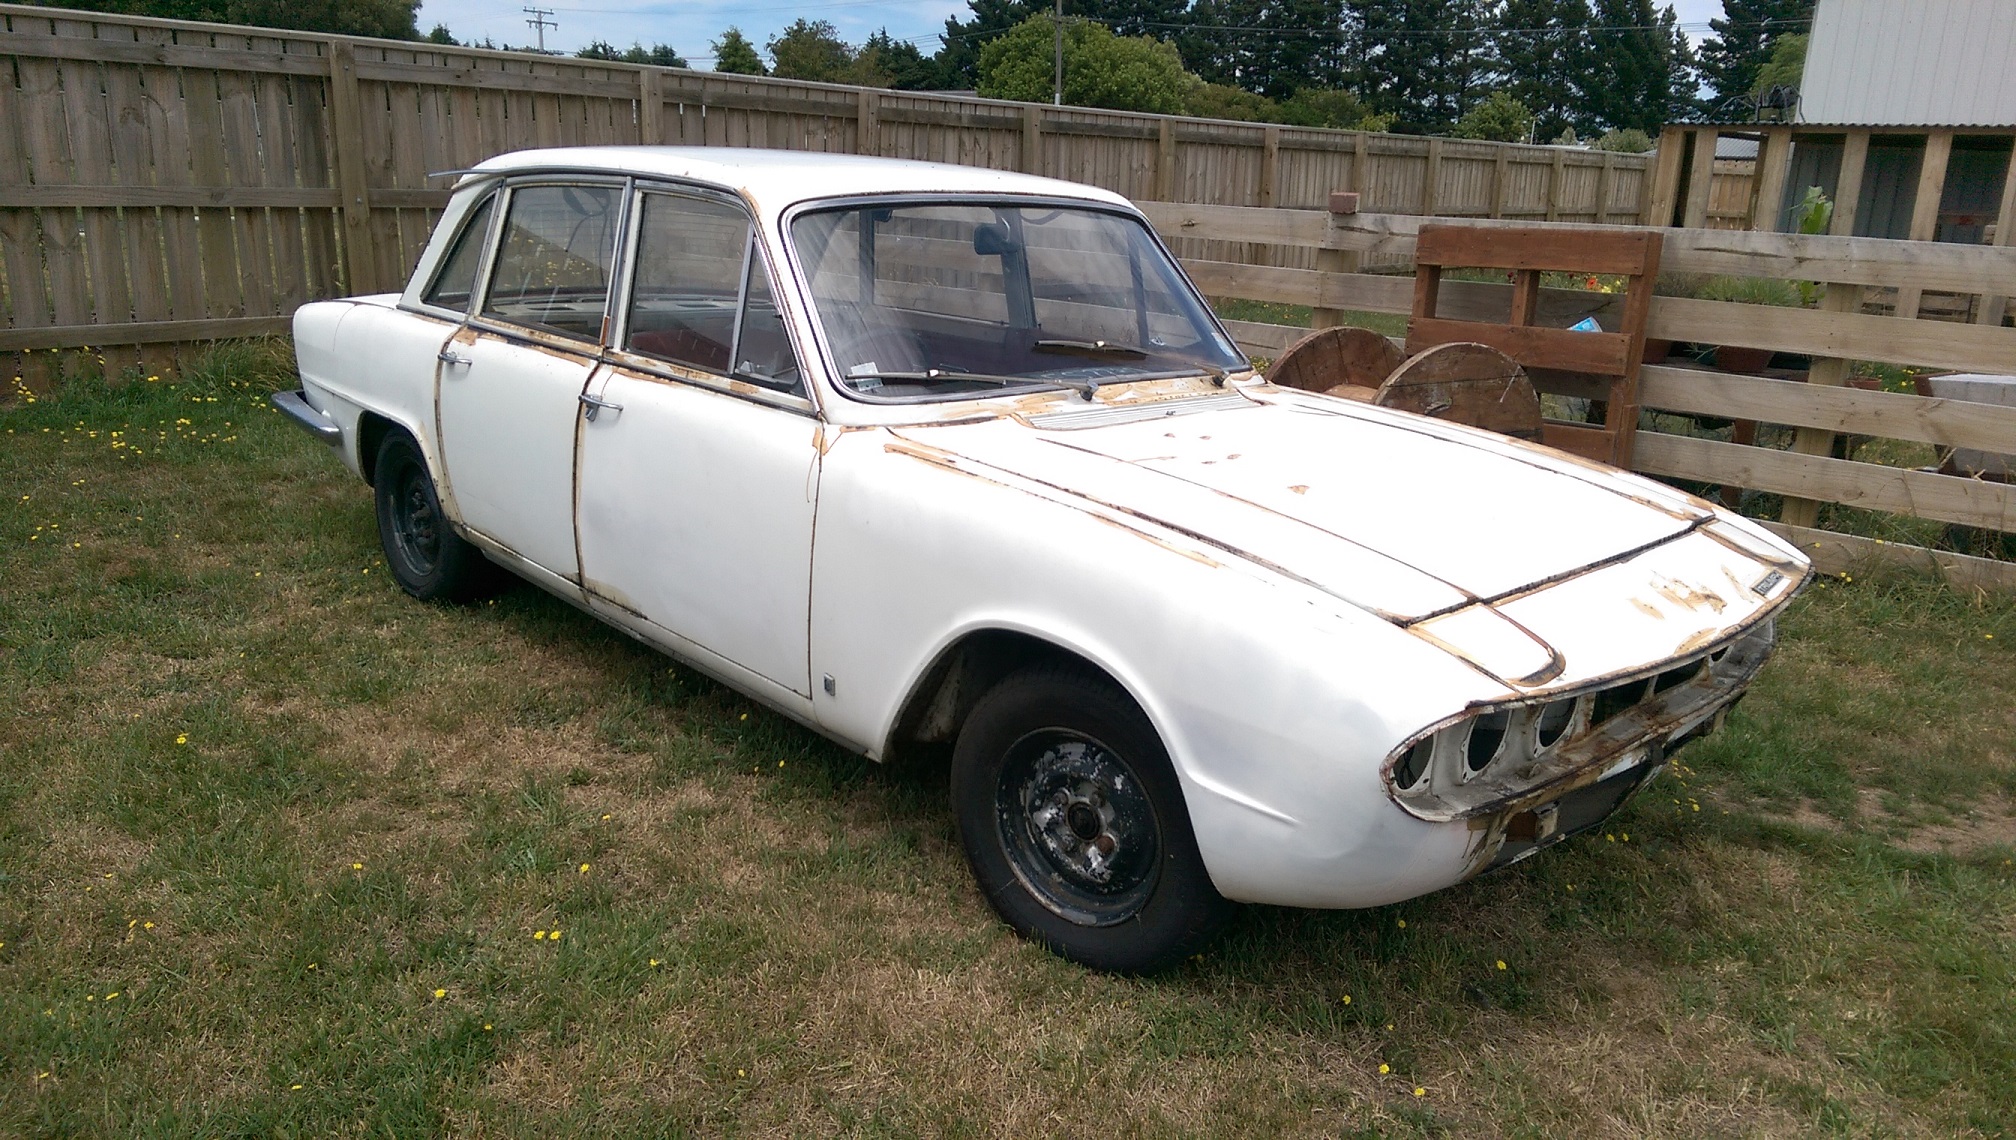
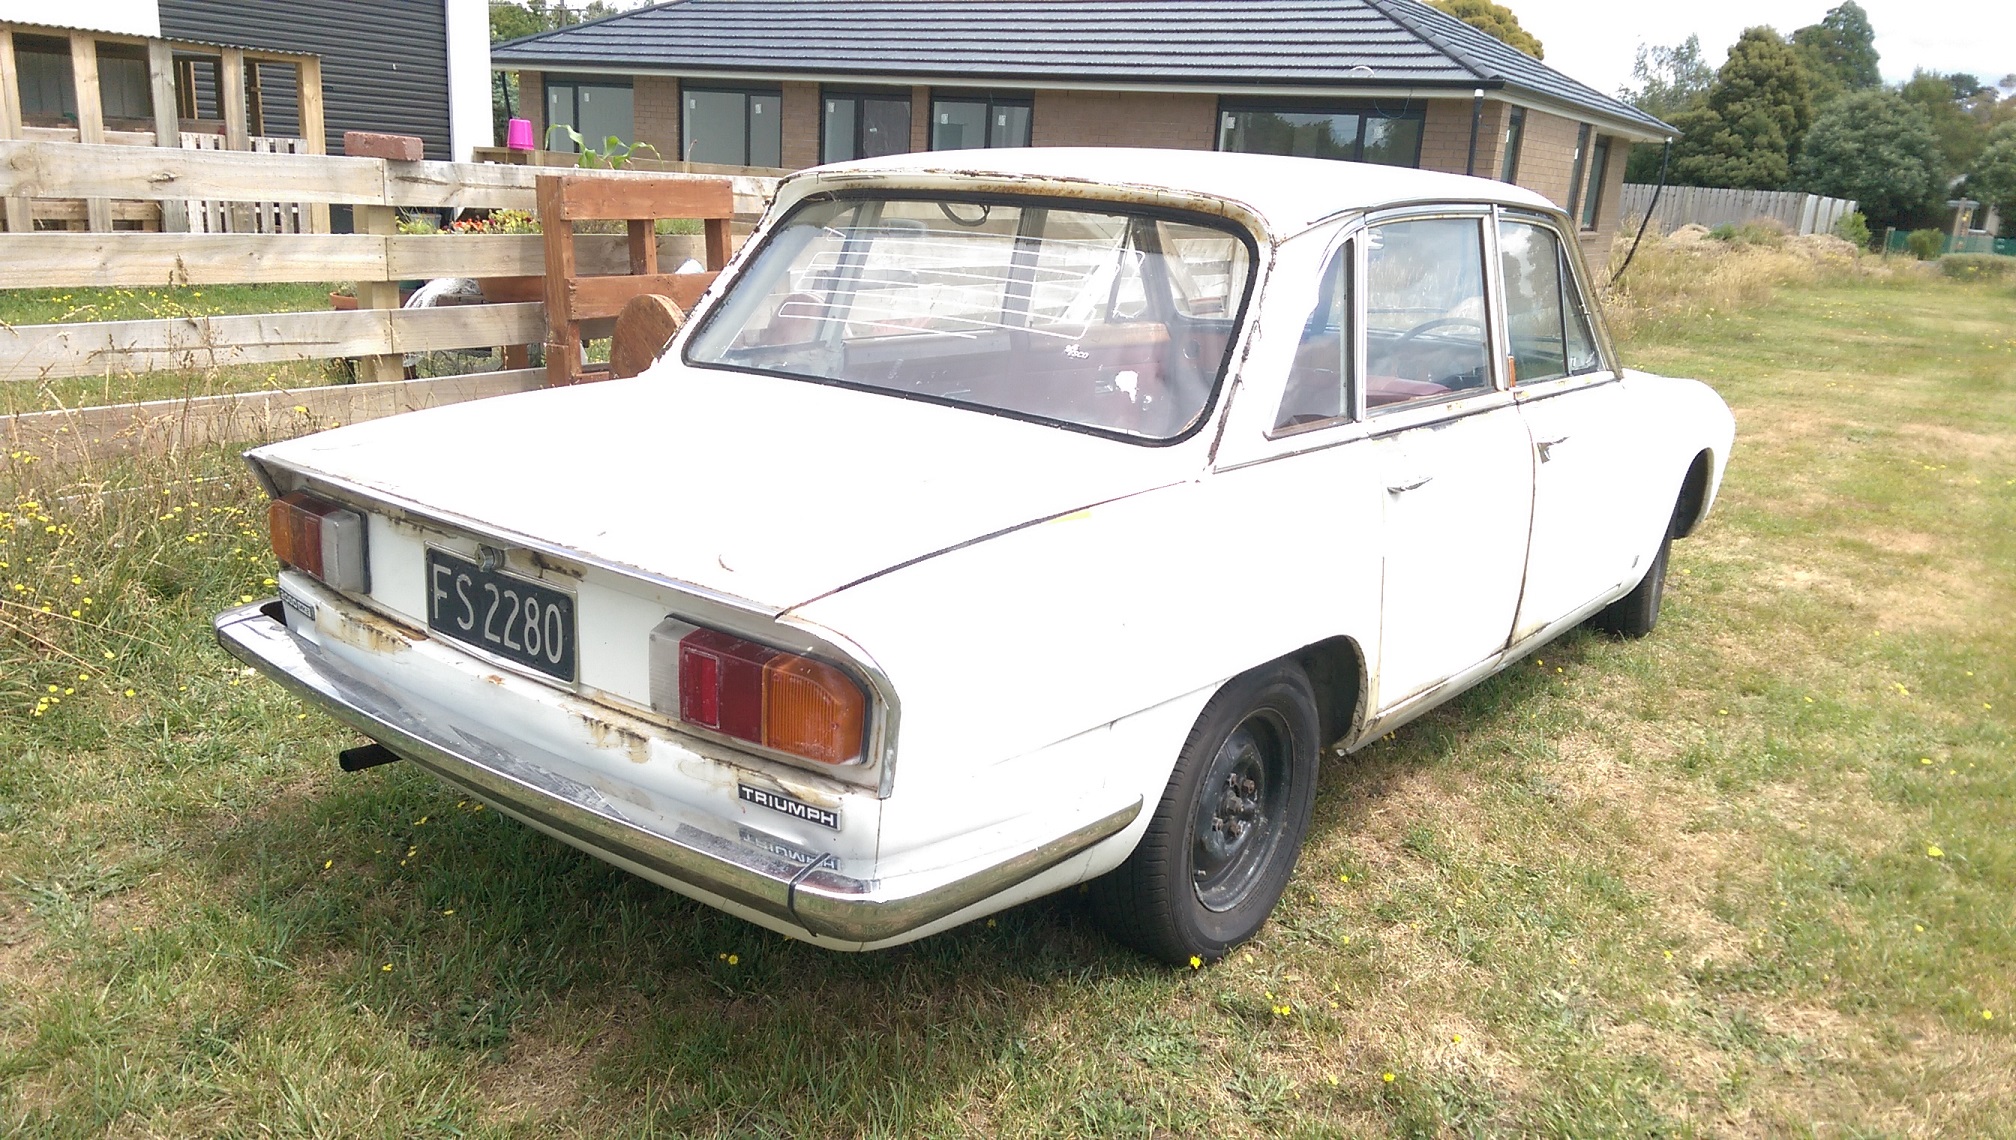
So... uuuuh, I bought another one. For SFA. It's a 1972 2000TC auto. White, with red interior.
I had originally intended to get it just for the front guard and maybe some spares. But from initial inspection, without removing any parts, it seems to be substantially less rusty than mine. The paint condition is really bad. The guy I bought it off said he had sanded it back because some surface rust was coming through, then some rattle can paint chucked on, but the surface rust came back up so it got a WHOLE BUNCH of rust converter all over it. I suspect it is the original paint.
I don't have it home yet cause of tow vehicle problems, but my brother it looking after it for me. Hopefully I get it home after xmas.
I want to strip it completely to see what the rust situation is then decide if I transfer my plans over to that one and put the yellow one to the side. It's kinda a shame, I've done a bunch of work to the yellow one and there is still a bunch of work left to go.
Buut, I will have to wait till my house is finished, APPARENTLY by end of Jan, cause there is no way I can get another Triumph in the garage while I'm living in here and my house stuff is taking up 1/3rd of the space..
-
19 minutes ago, chasinthemirage said:
Does anyone know of anywhere that sells fuel injector seal sets? Haven't had any luck on google except for one place in Aussie. The seals I need are for the RB30ET injectors. Could possibly match them at DSL etc but would rather just purchase a set if possible.
Edit: Already spoken to Appco/BNT who don't have listings.
o-rings?
http://www.nzefi.com/product/fuel-injector-service-kit-nissan-r32-rb20det-rb25de-rb26dett/
Or these guys. http://www.cdlautoparts.co.nz/media/product_range/cedele/EFI Injector Components Catalogue - April 2012.pdf
-
2
-
-
Zip zap
-
2
-
-
1 hour ago, Shakotom said:
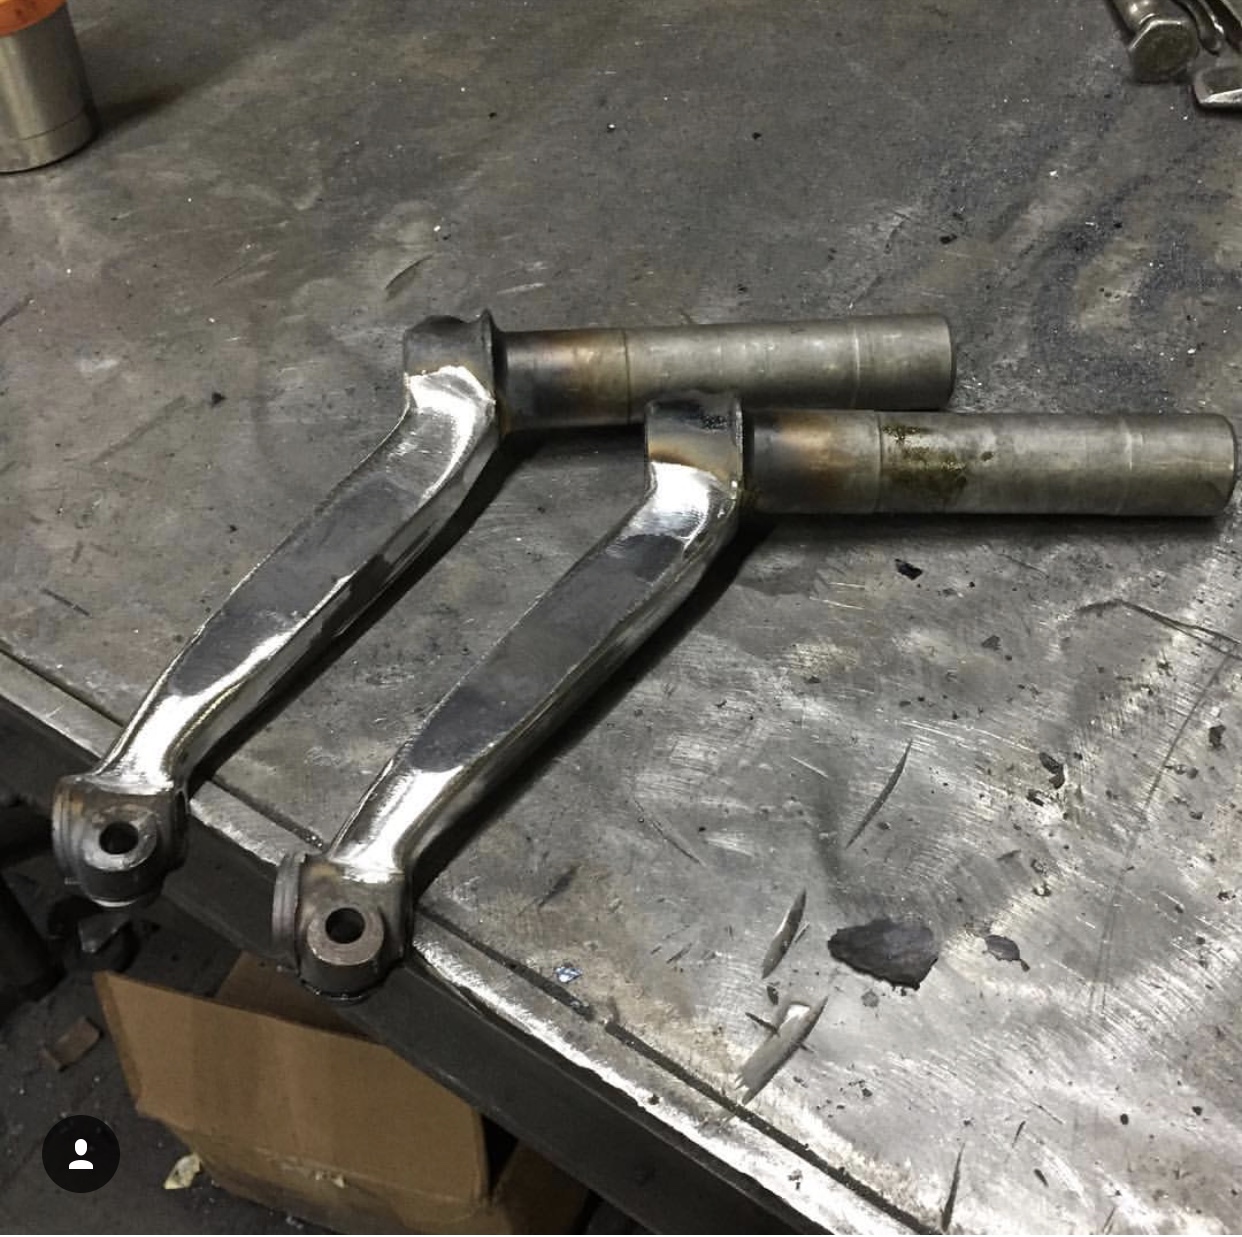
So I’m guessing these VW extended trail front trailing arms are no a go for cert if the trailing arms are made of cast materials?
lengthered to increase caster, centralise wheels in guard and supposedly reduce bump steer/ dead spots in steering on super lowered and narrowed beetles
OMG you hang wheels off the ends of those spindly things?!
-
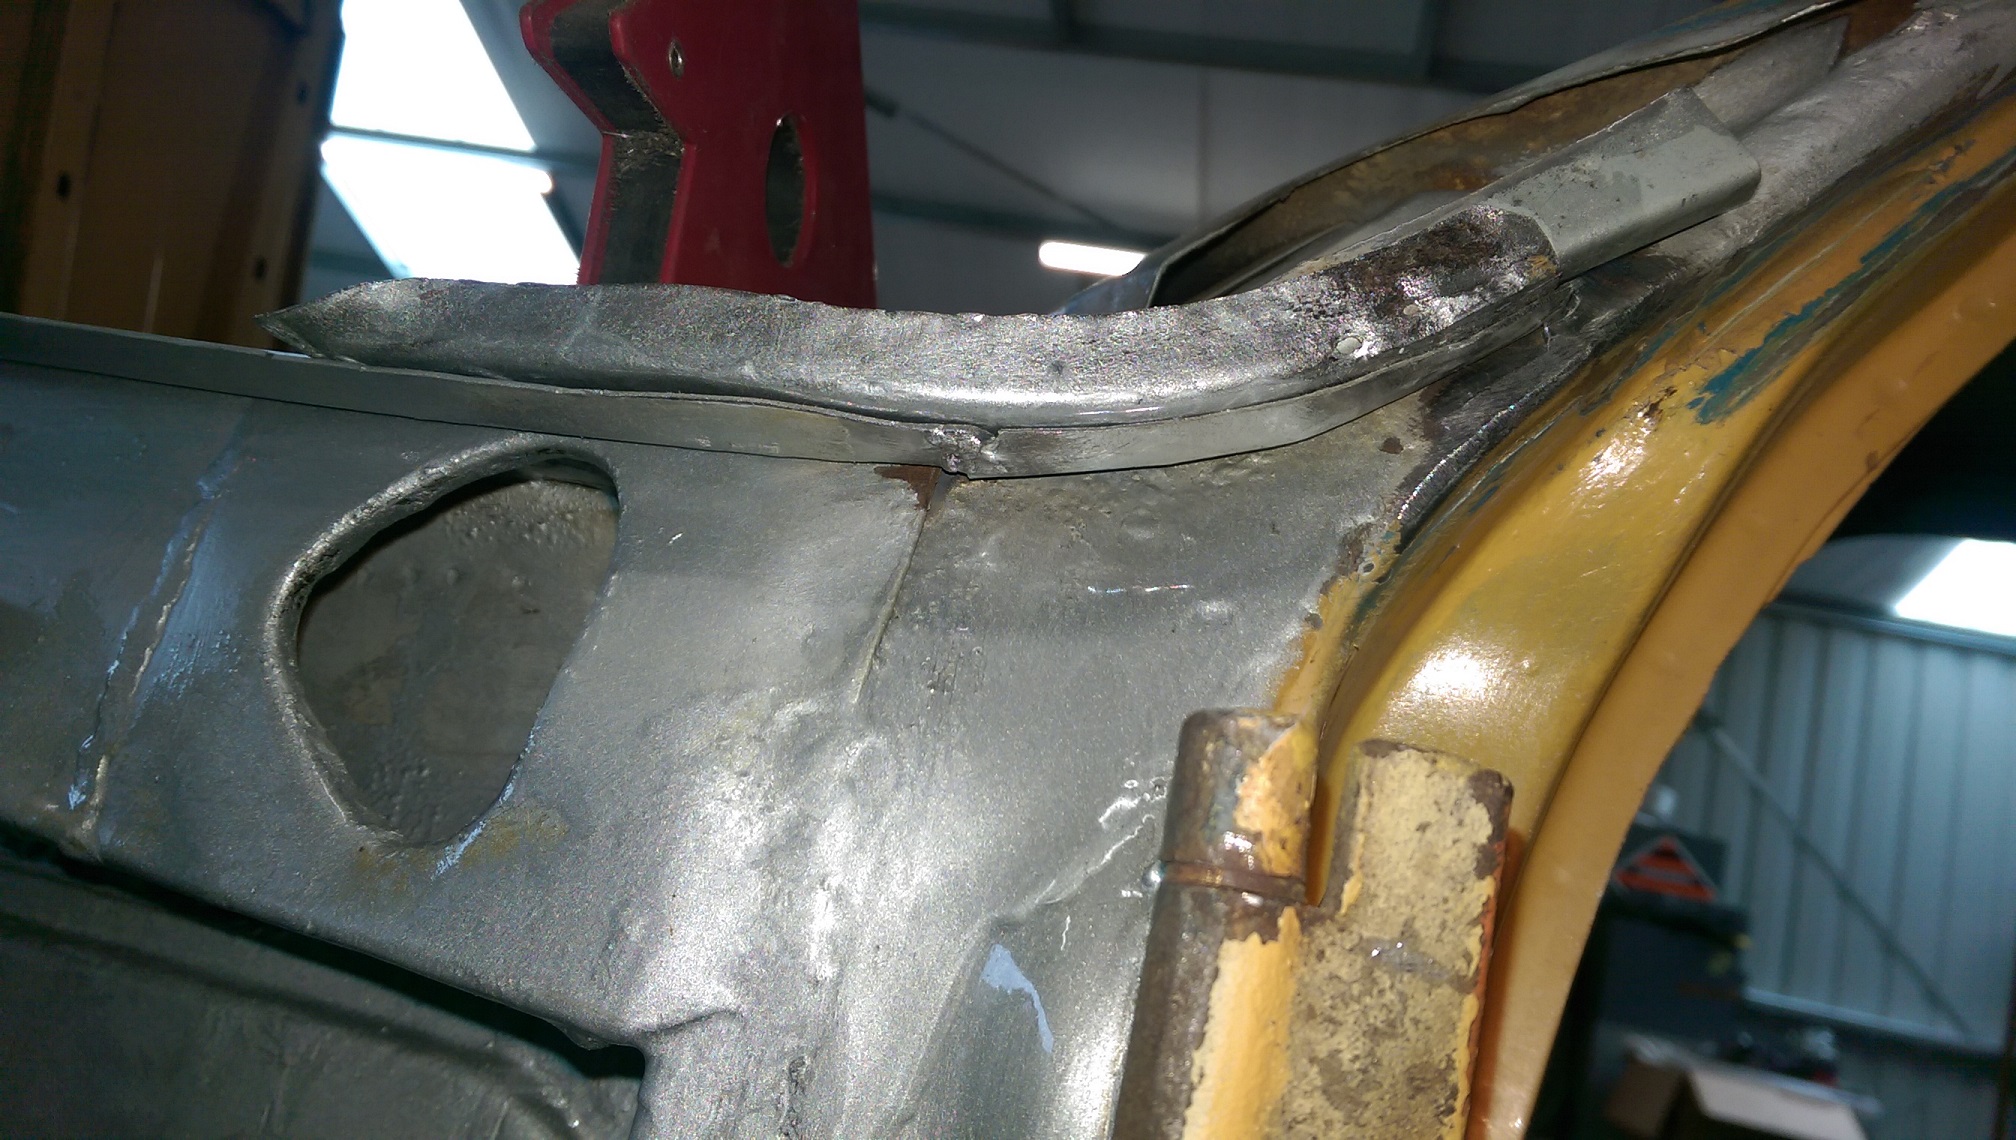
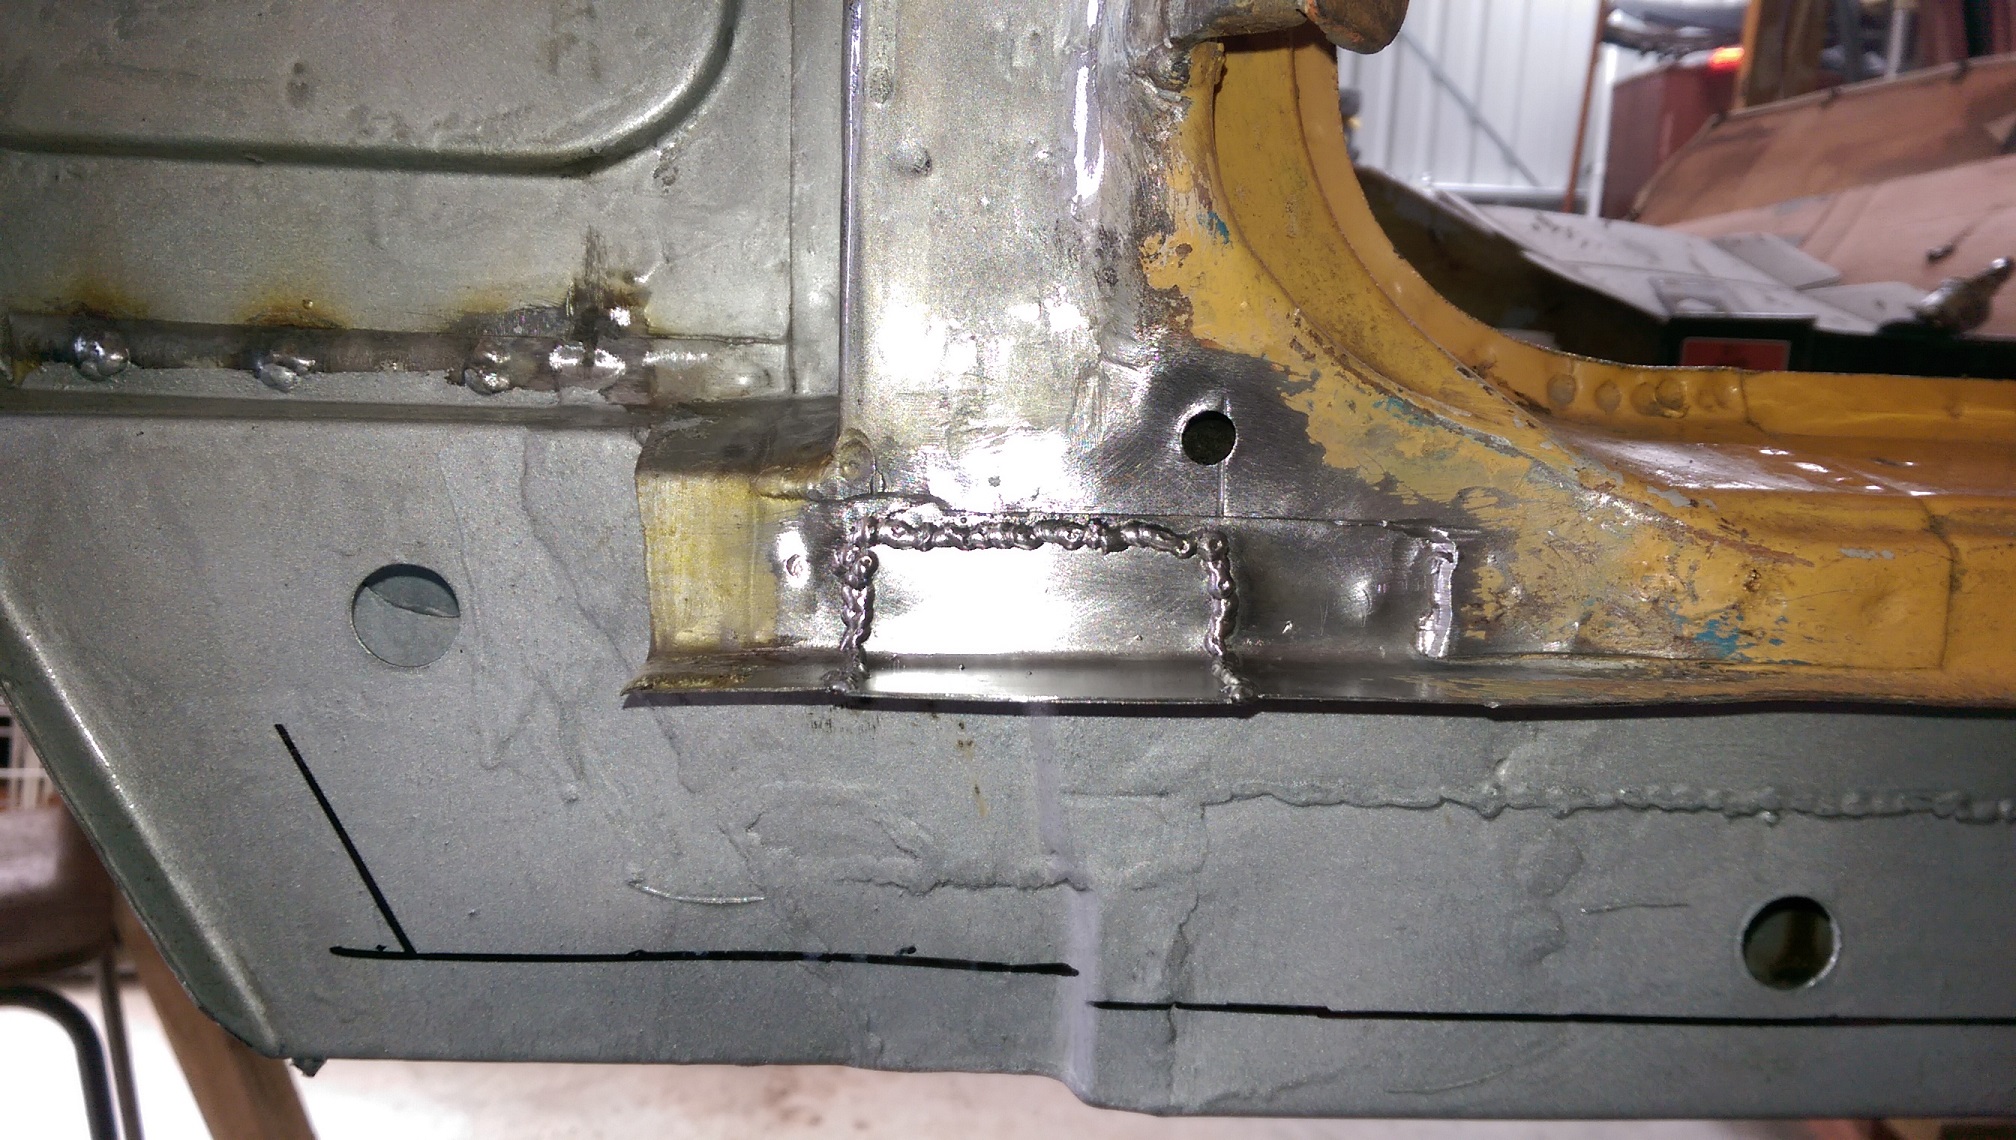
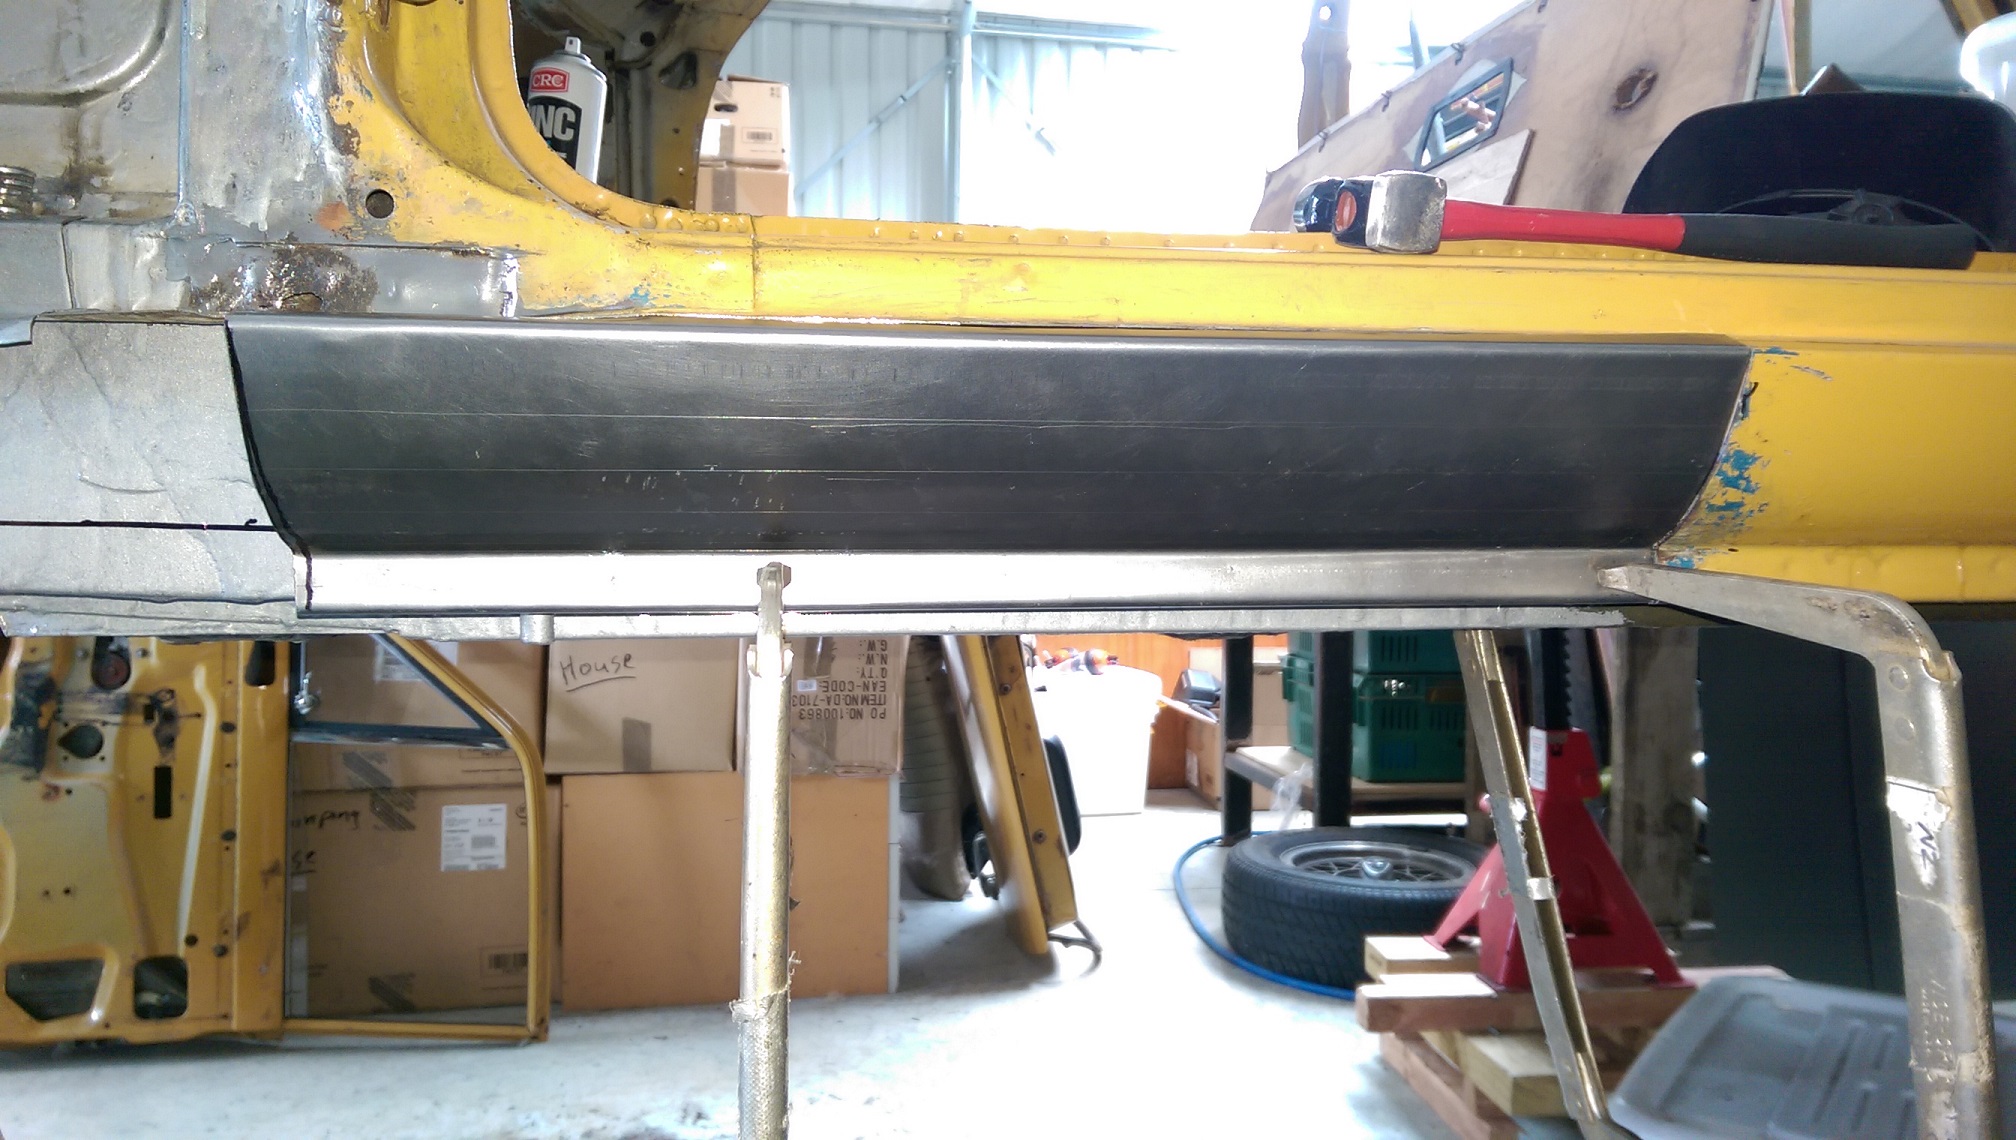
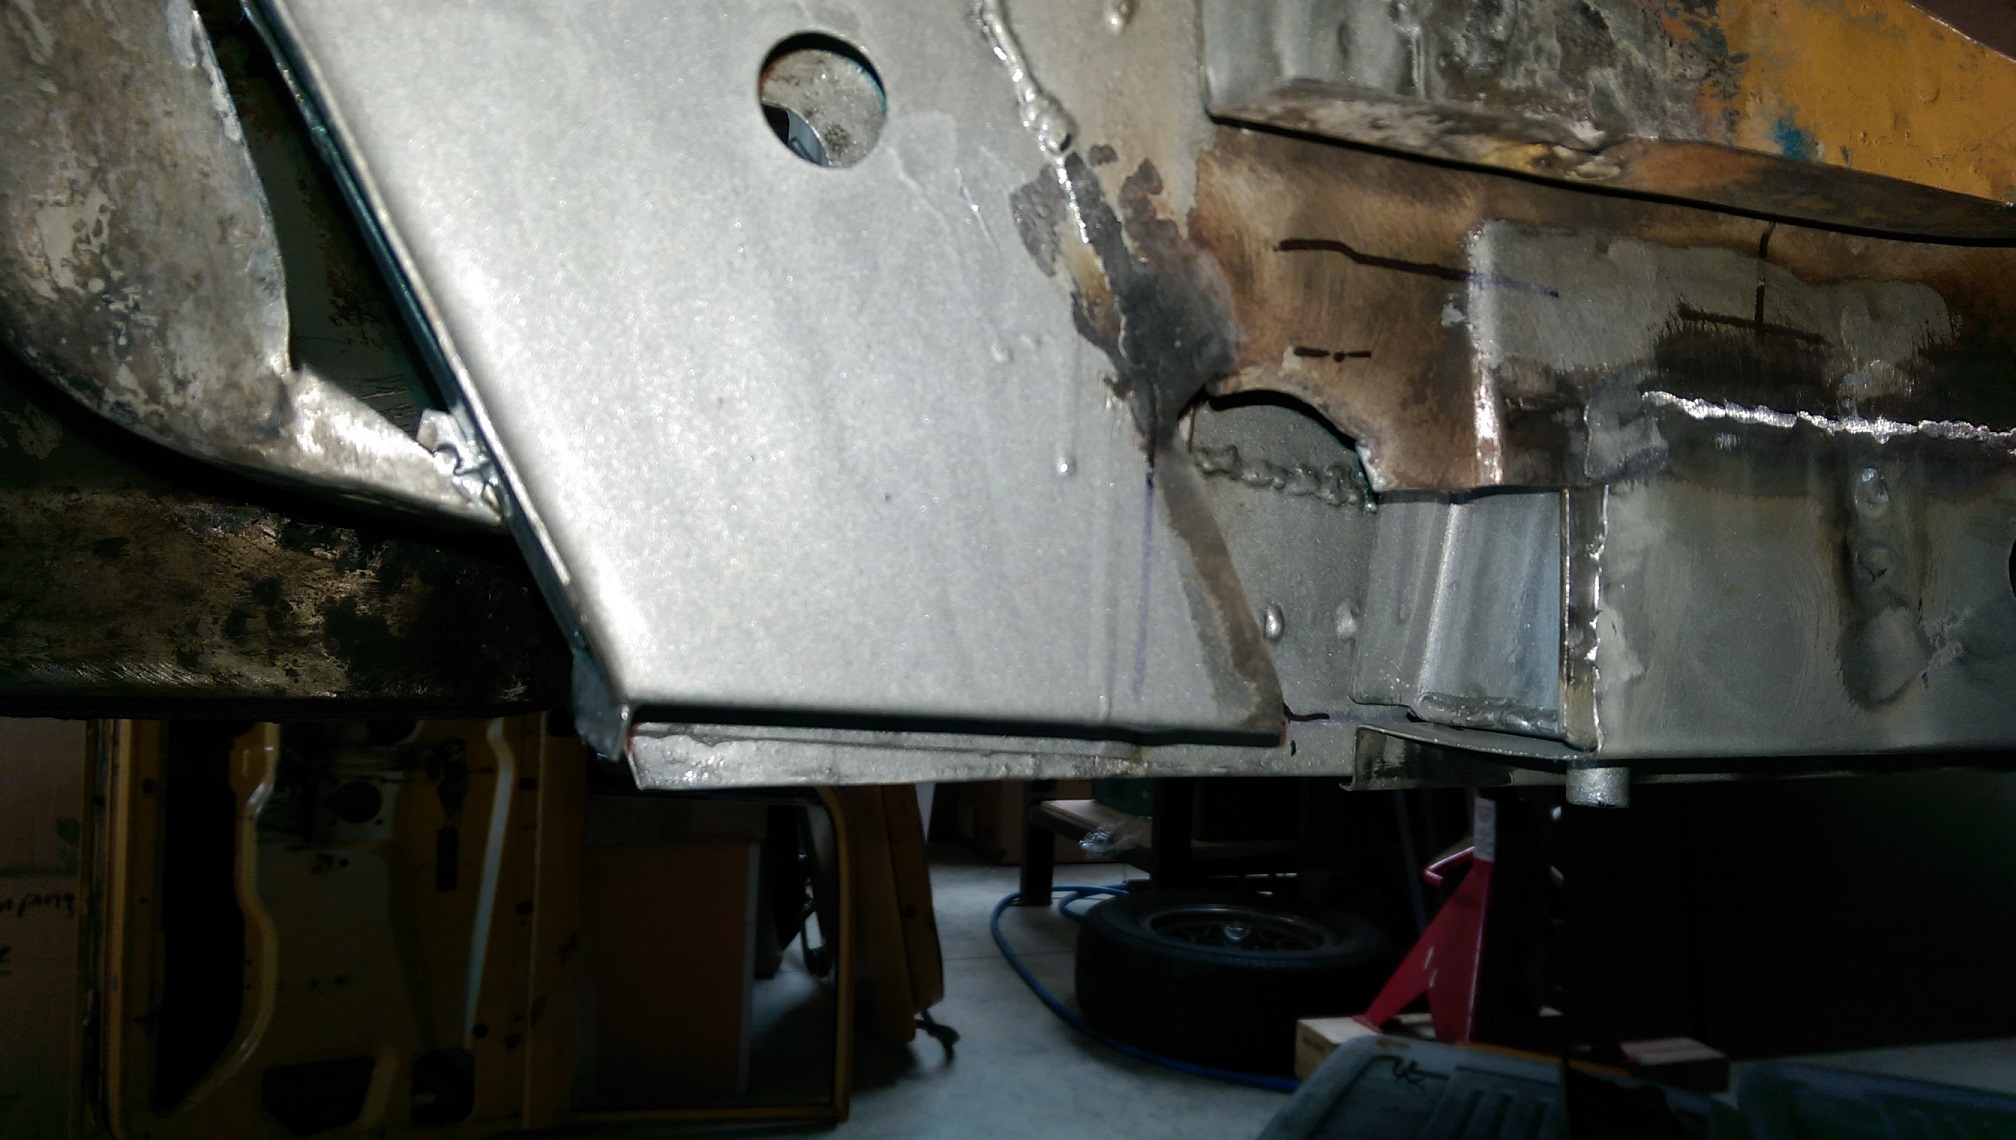
Somehow it took most of today to make this bit.
Most of the time was trying to get the curve right. I think this is as close as I can get it without starting all over again.
I need to cut out and patch that rusty hole before I can start tacking the sill on.
It will need a skim of filler I think...
-
5
-
-
The two I just found have a metal clip or a plastic clip. You need to get behind with a screwdriver and push the sides of the clip in.
-
There will be a clip you can access through the tiny wee hole behind the sprayer. You probably need to take the hatch off to get the right angle of penetration for optimum manipulation of the cli....p.
I'm not sure what the clip looks like, I removed my wiper stuff years ago for weight reduction, because racecar.
-
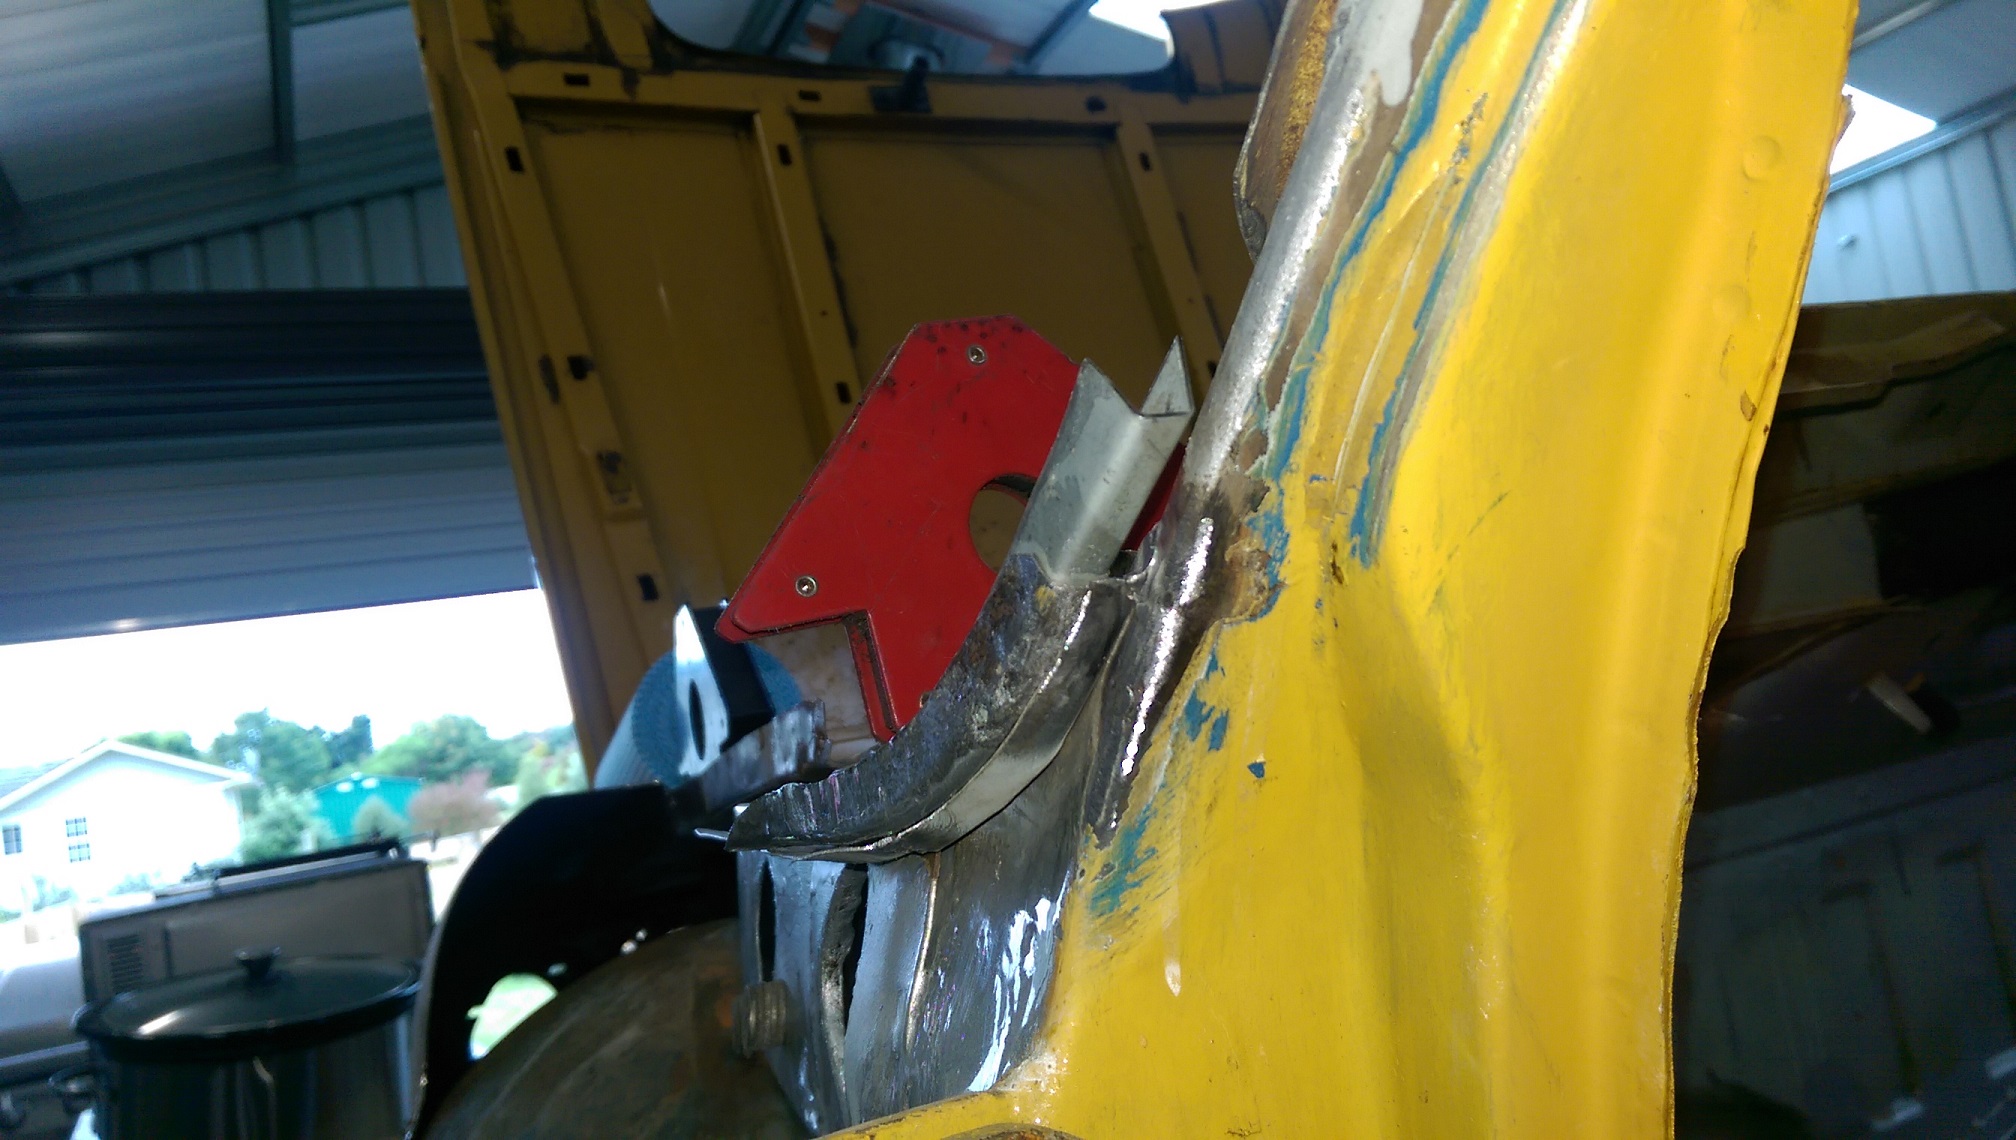
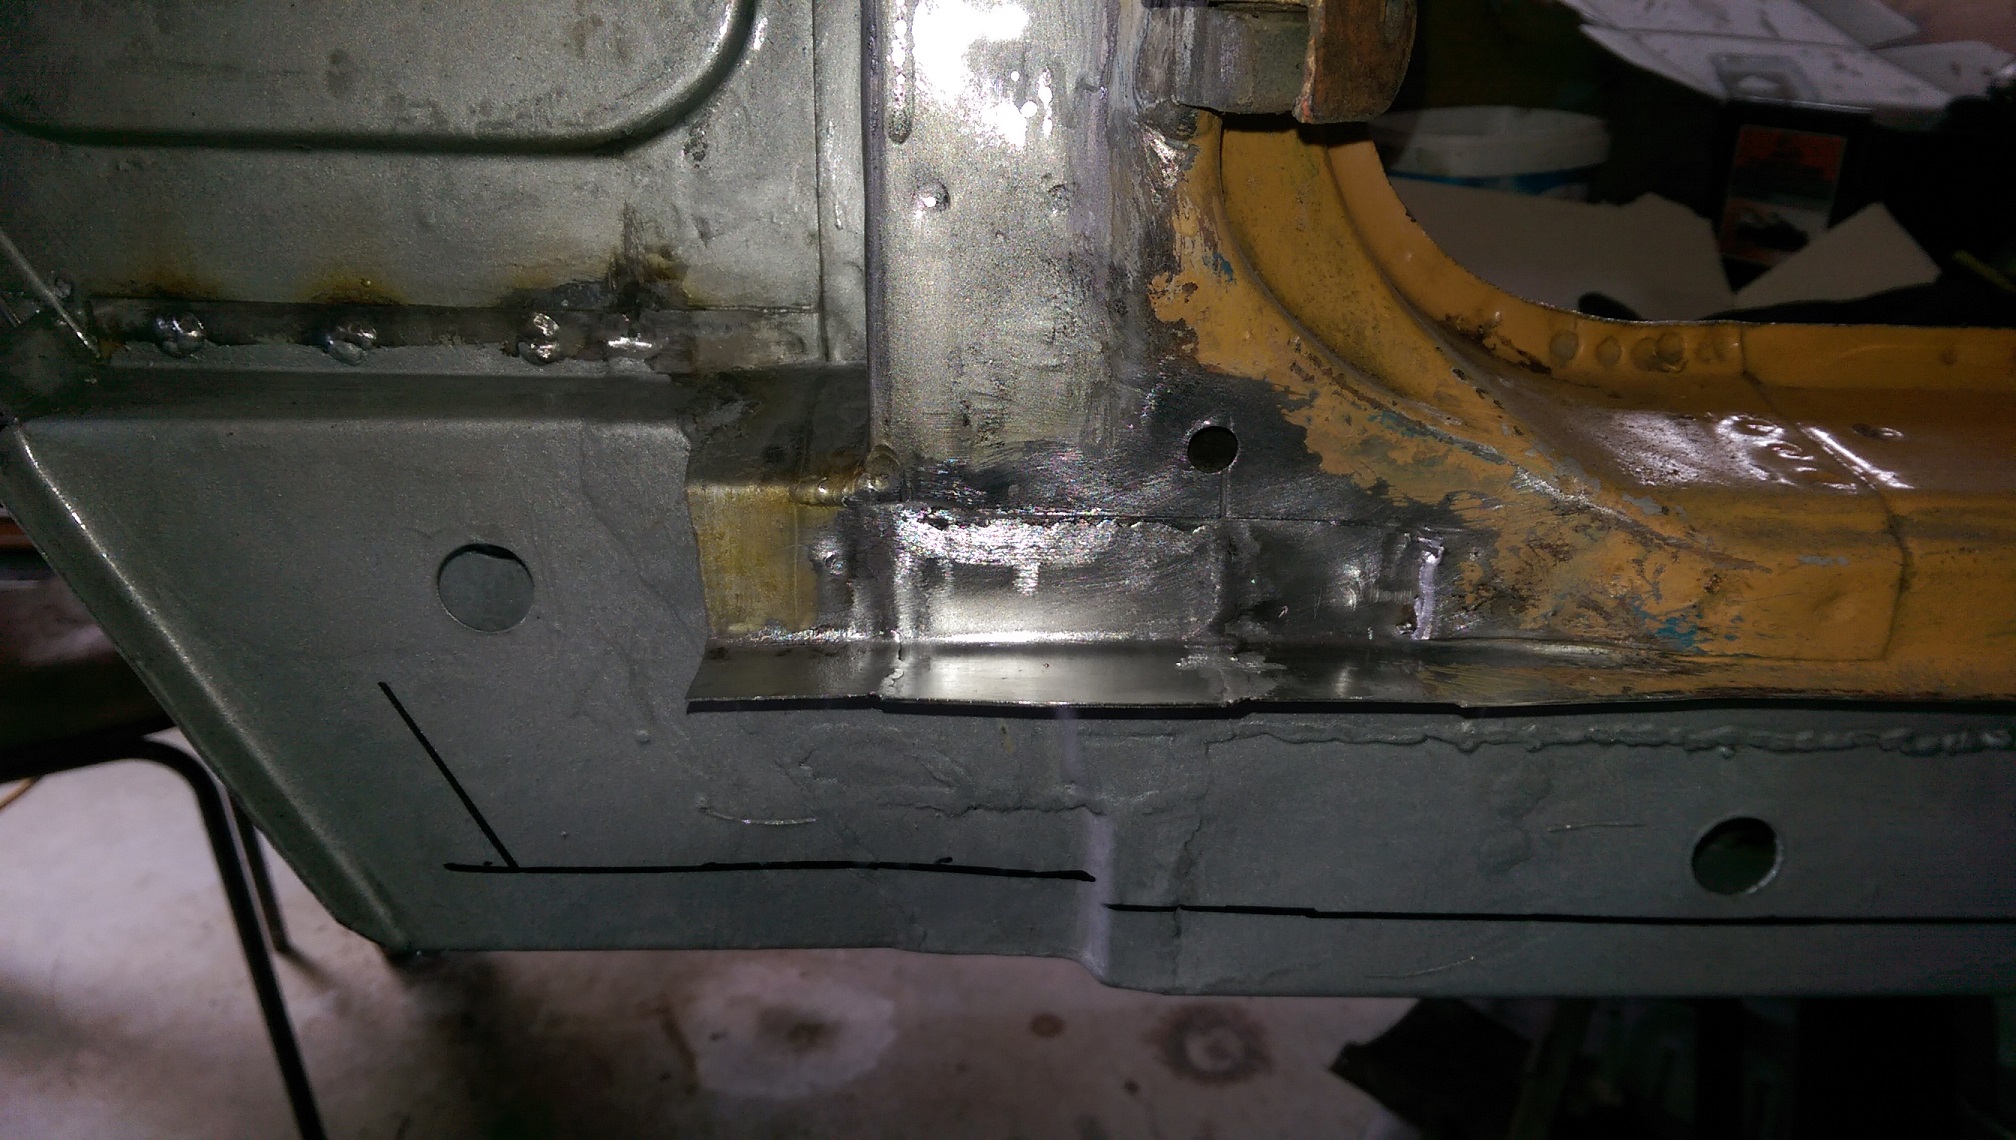
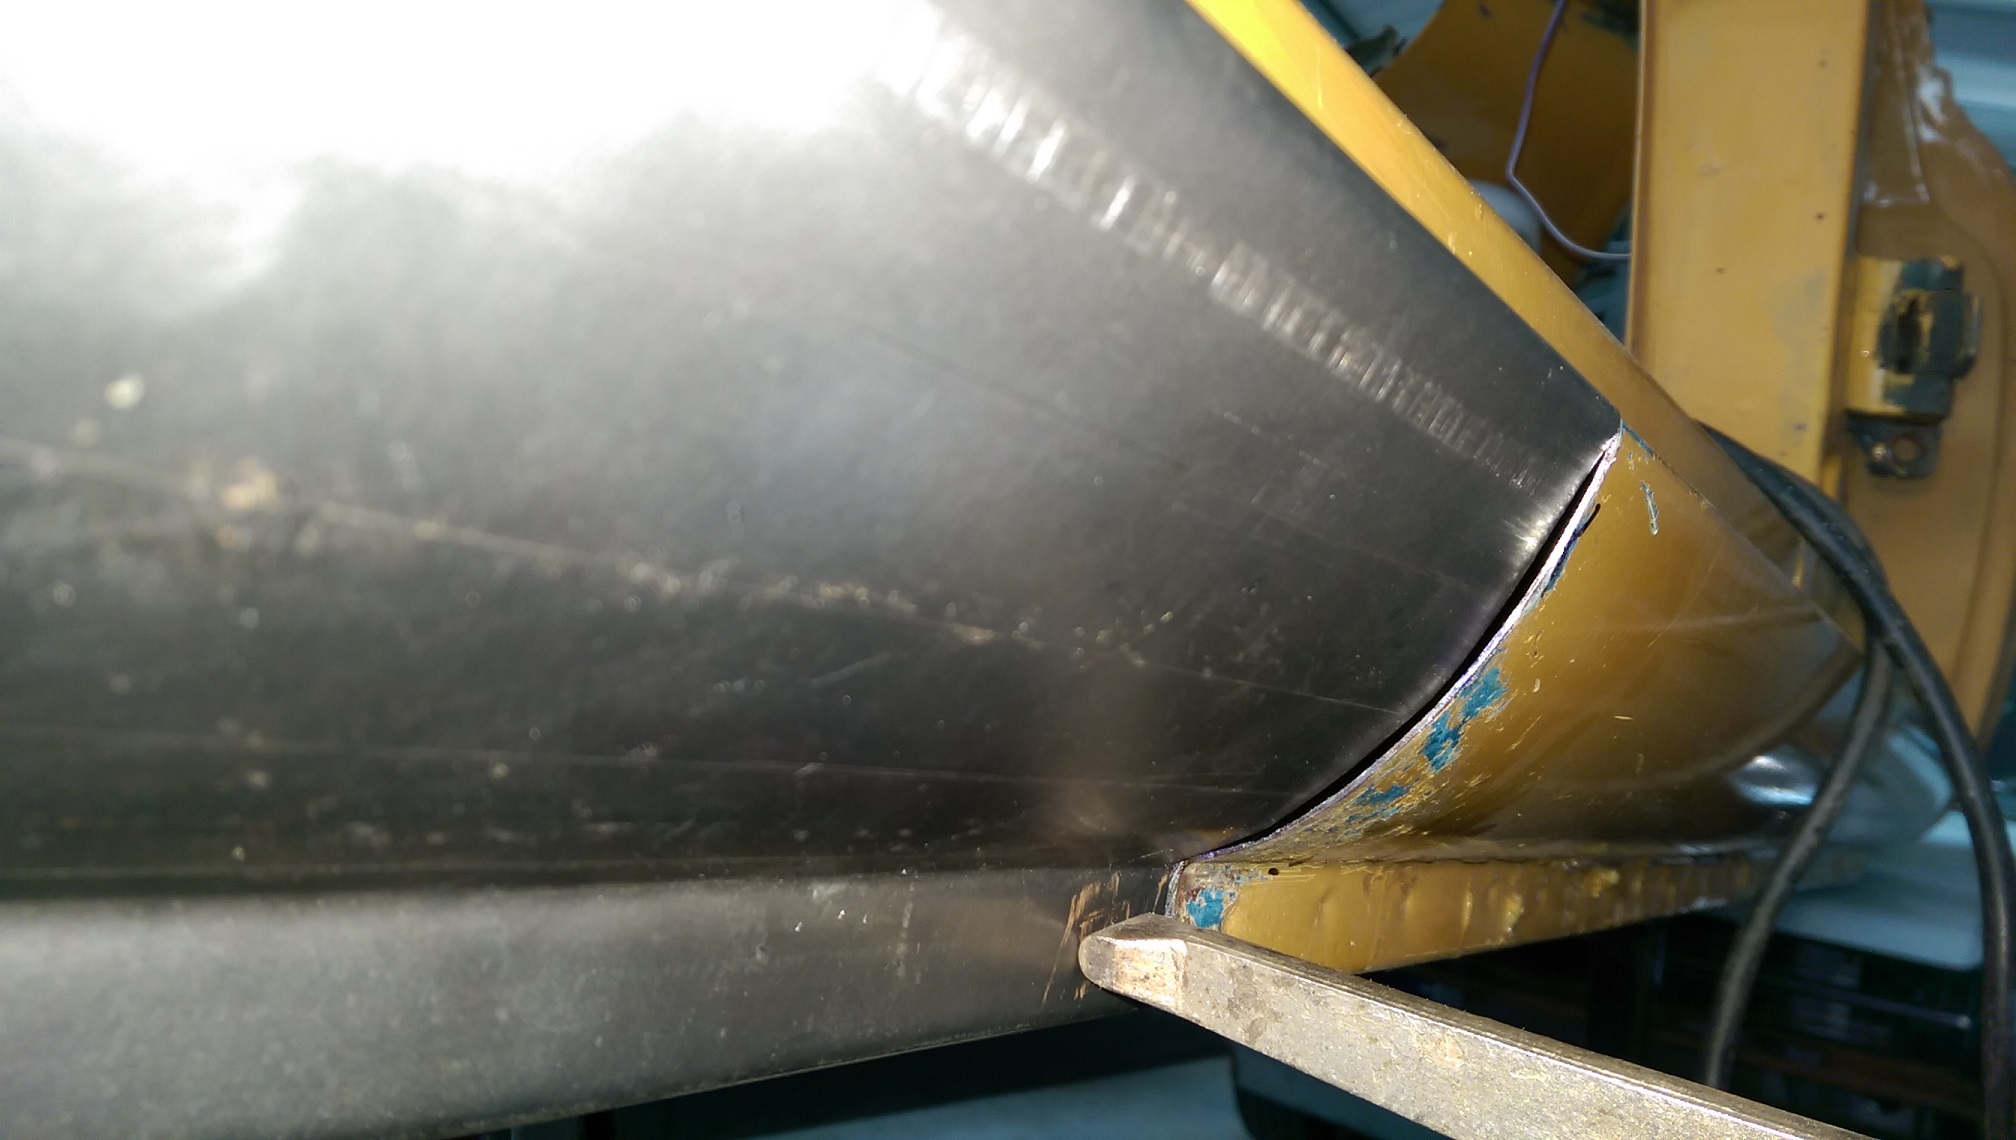
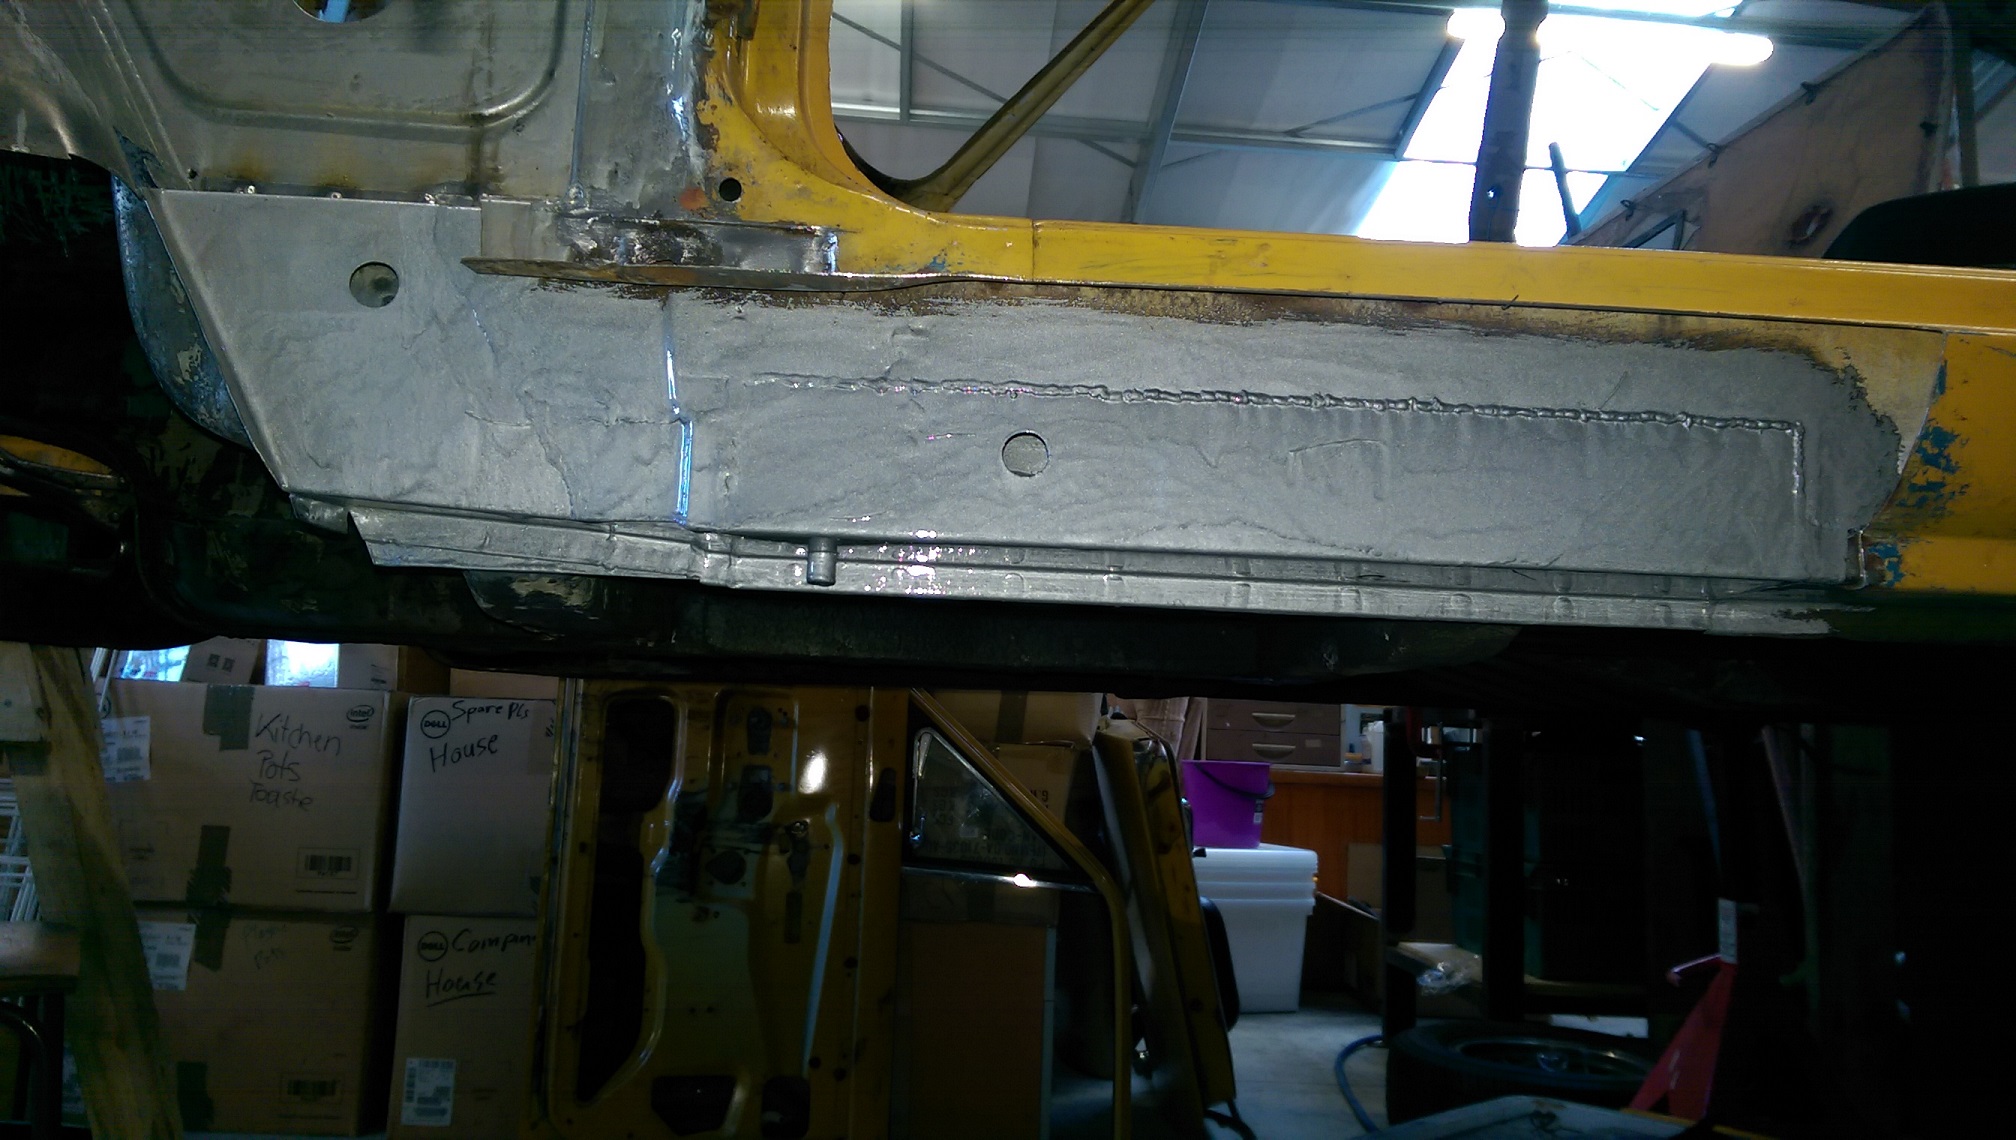
Then after much fettling I glued it in.
And made the bit with the step in it to fill the gap. I made this in two parts otherwise I don't know how I would do the step.
I didn't bother grinding the welds down completely, since they won't be seen, I did tidy some of them up a little.
-
5
-
-
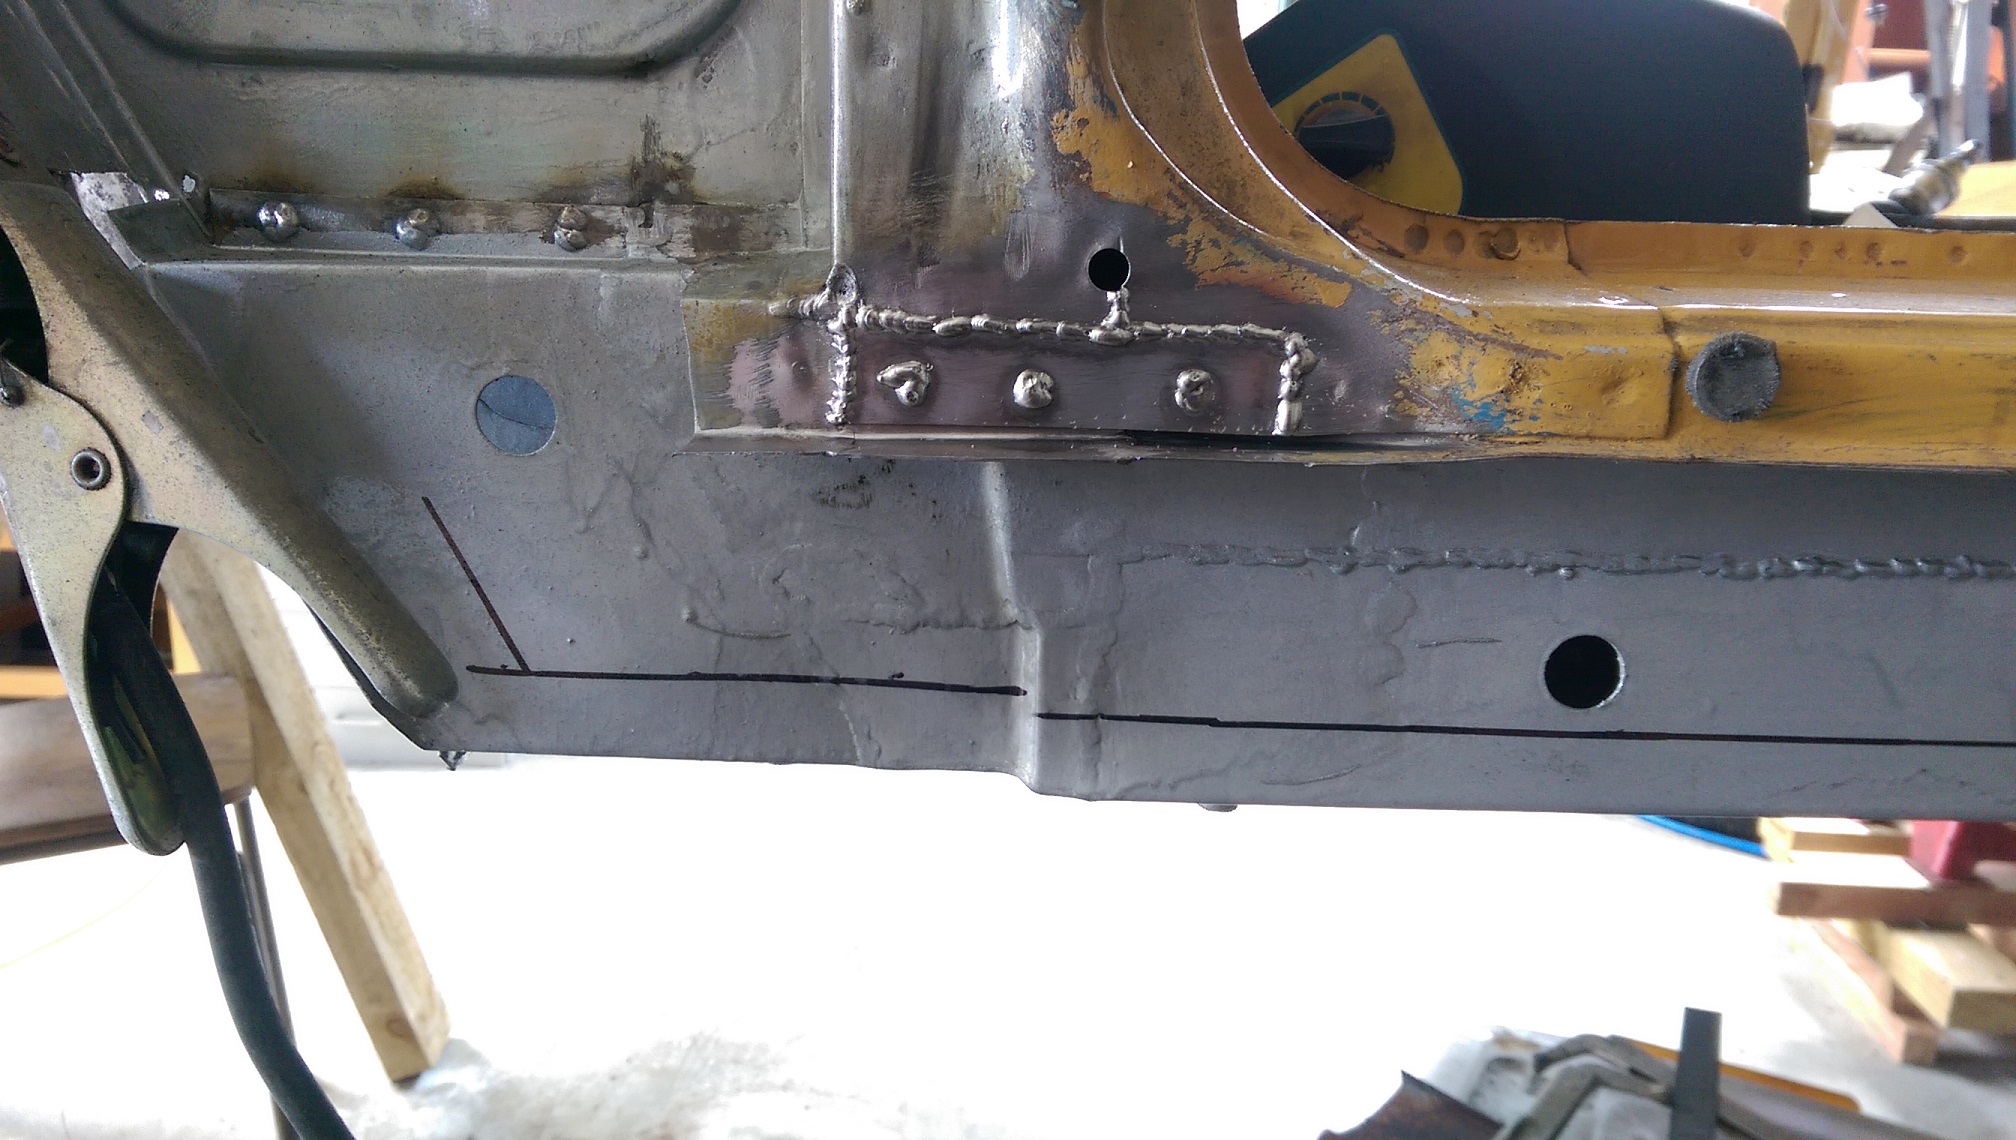
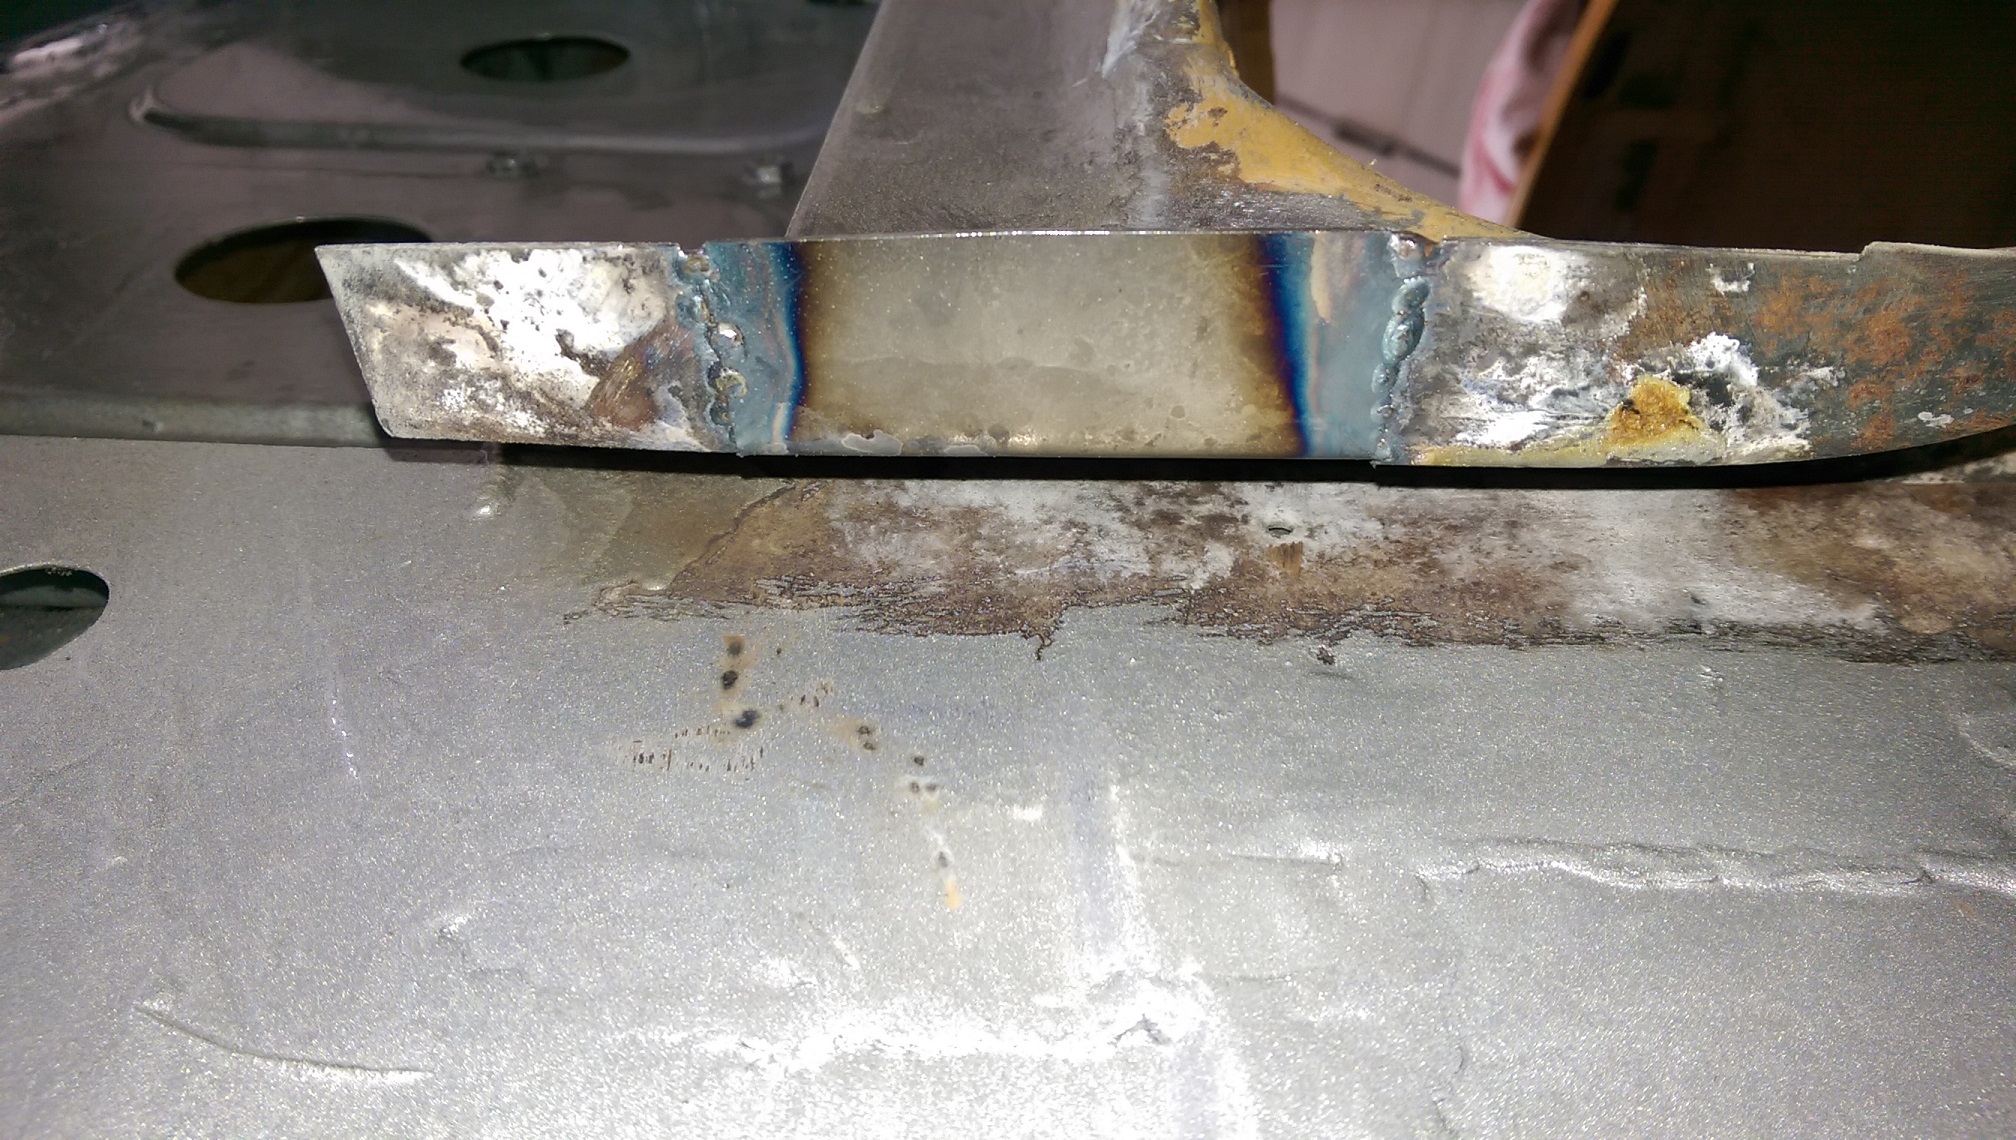
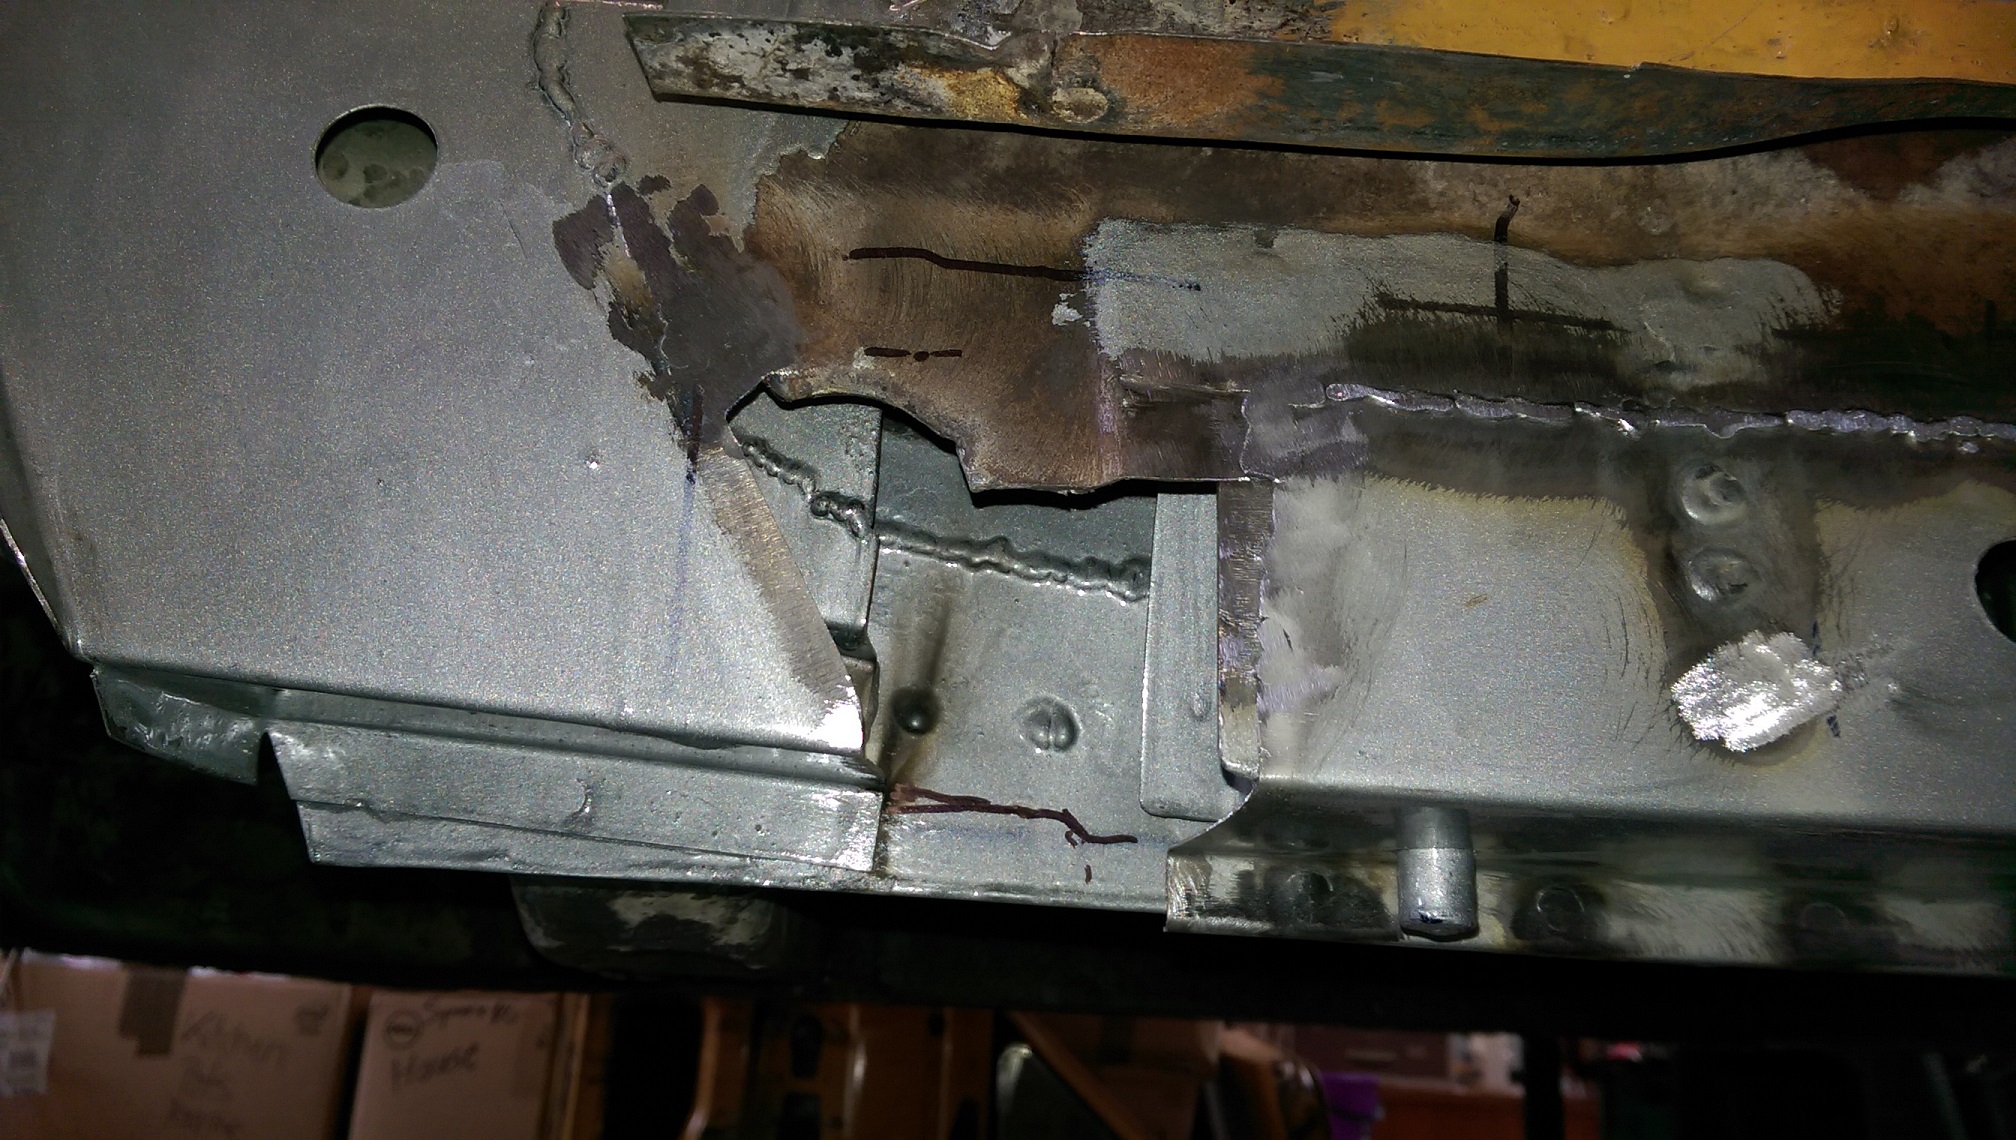
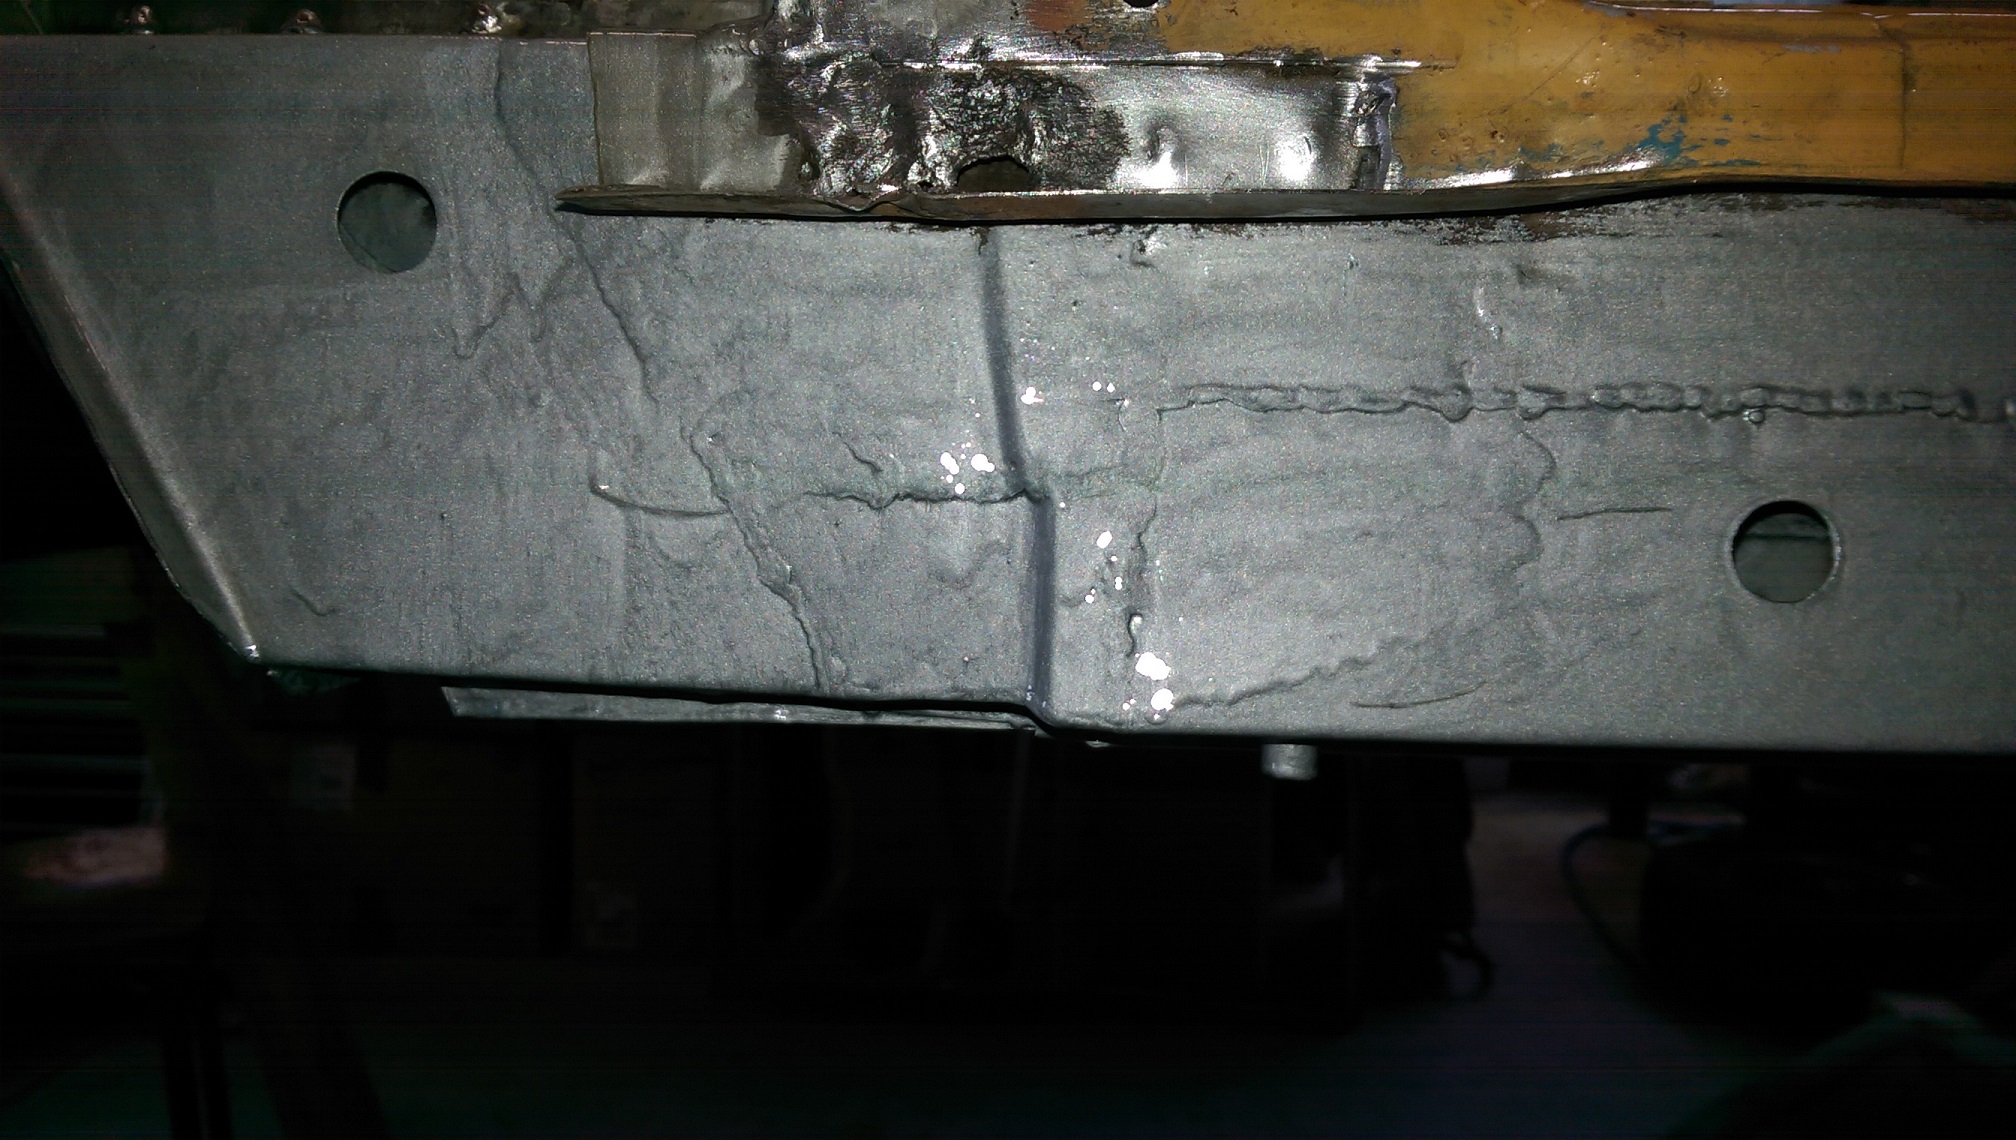
Glued the jacking point in, then proceeded to grind off two of the new spotwelds while trimming to fit the middle sill panel.
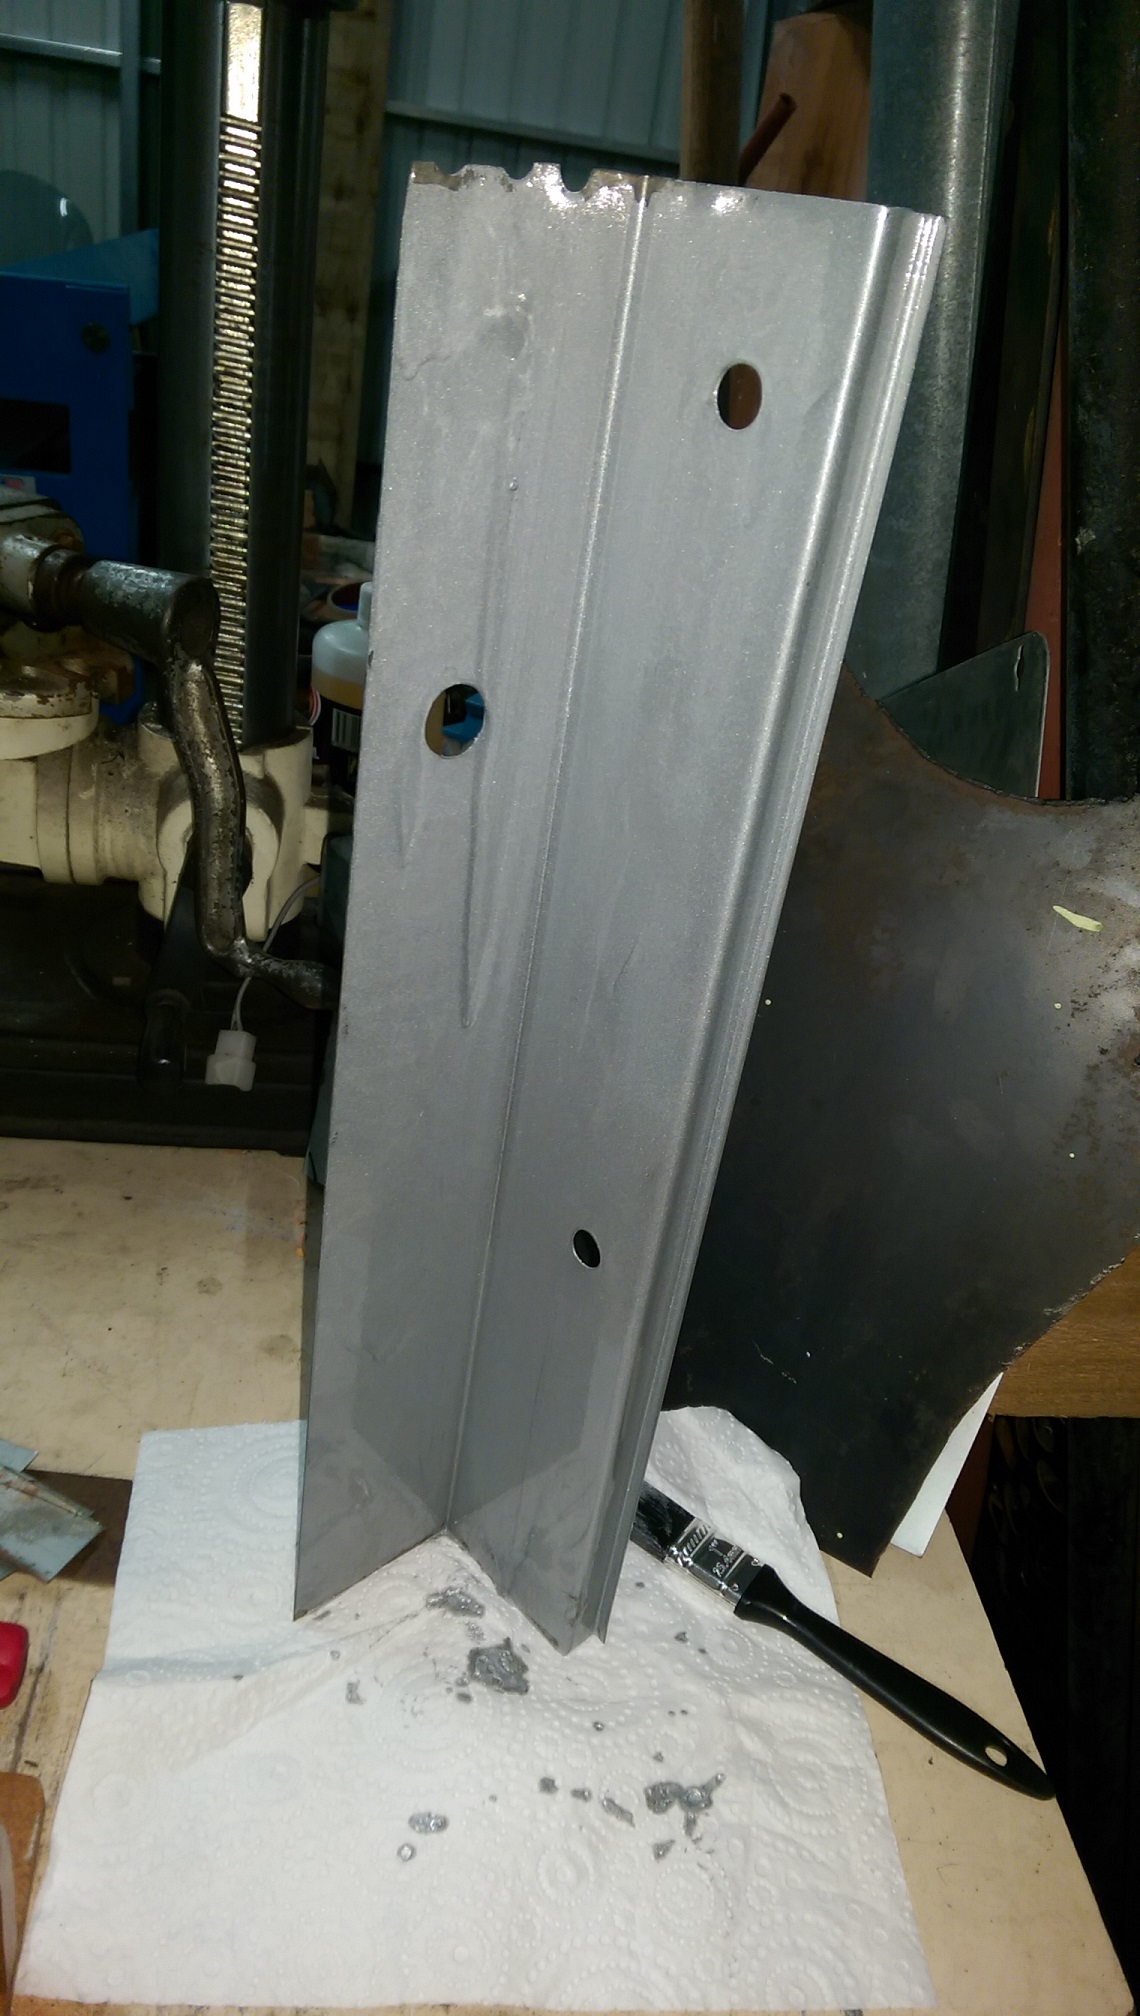
And the middle sill panel. I got the folds in the right place FIRST TIME!
-
3
-
-
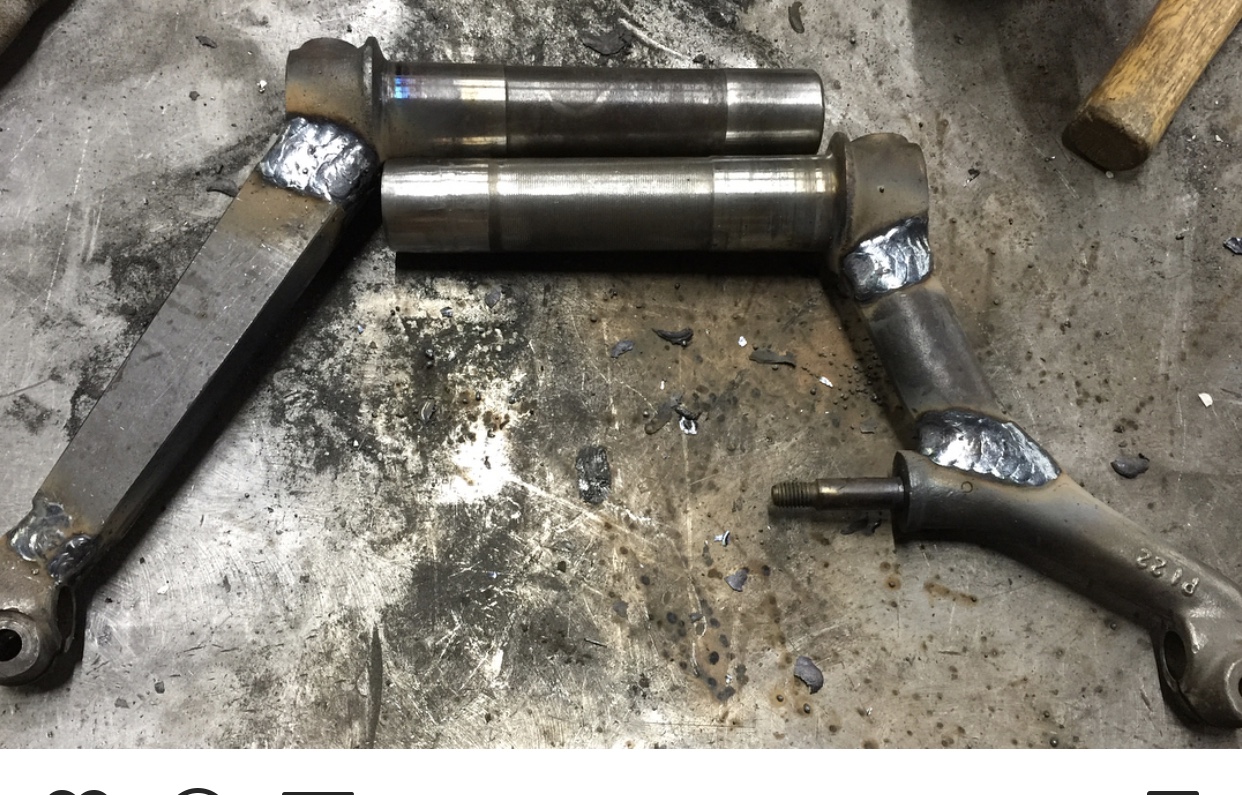
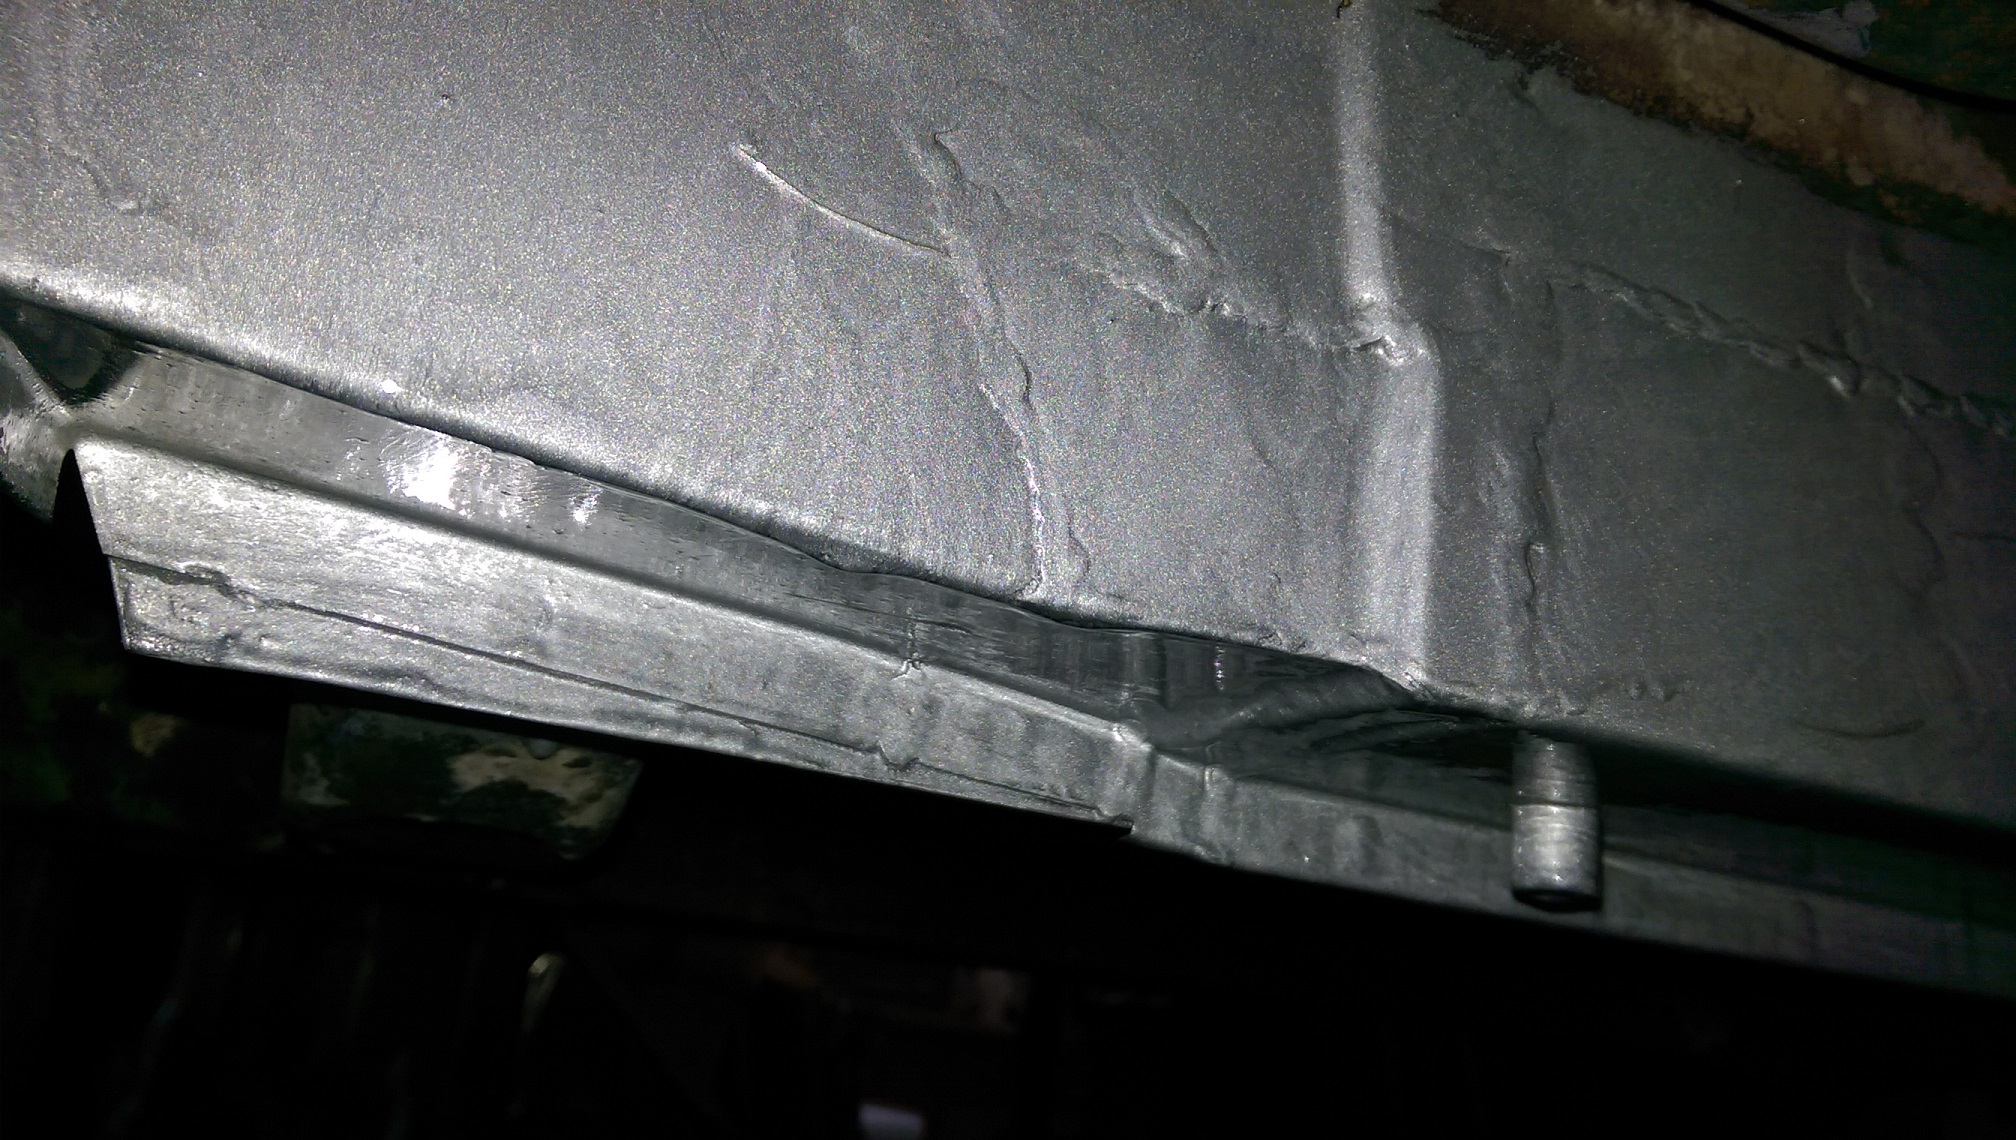
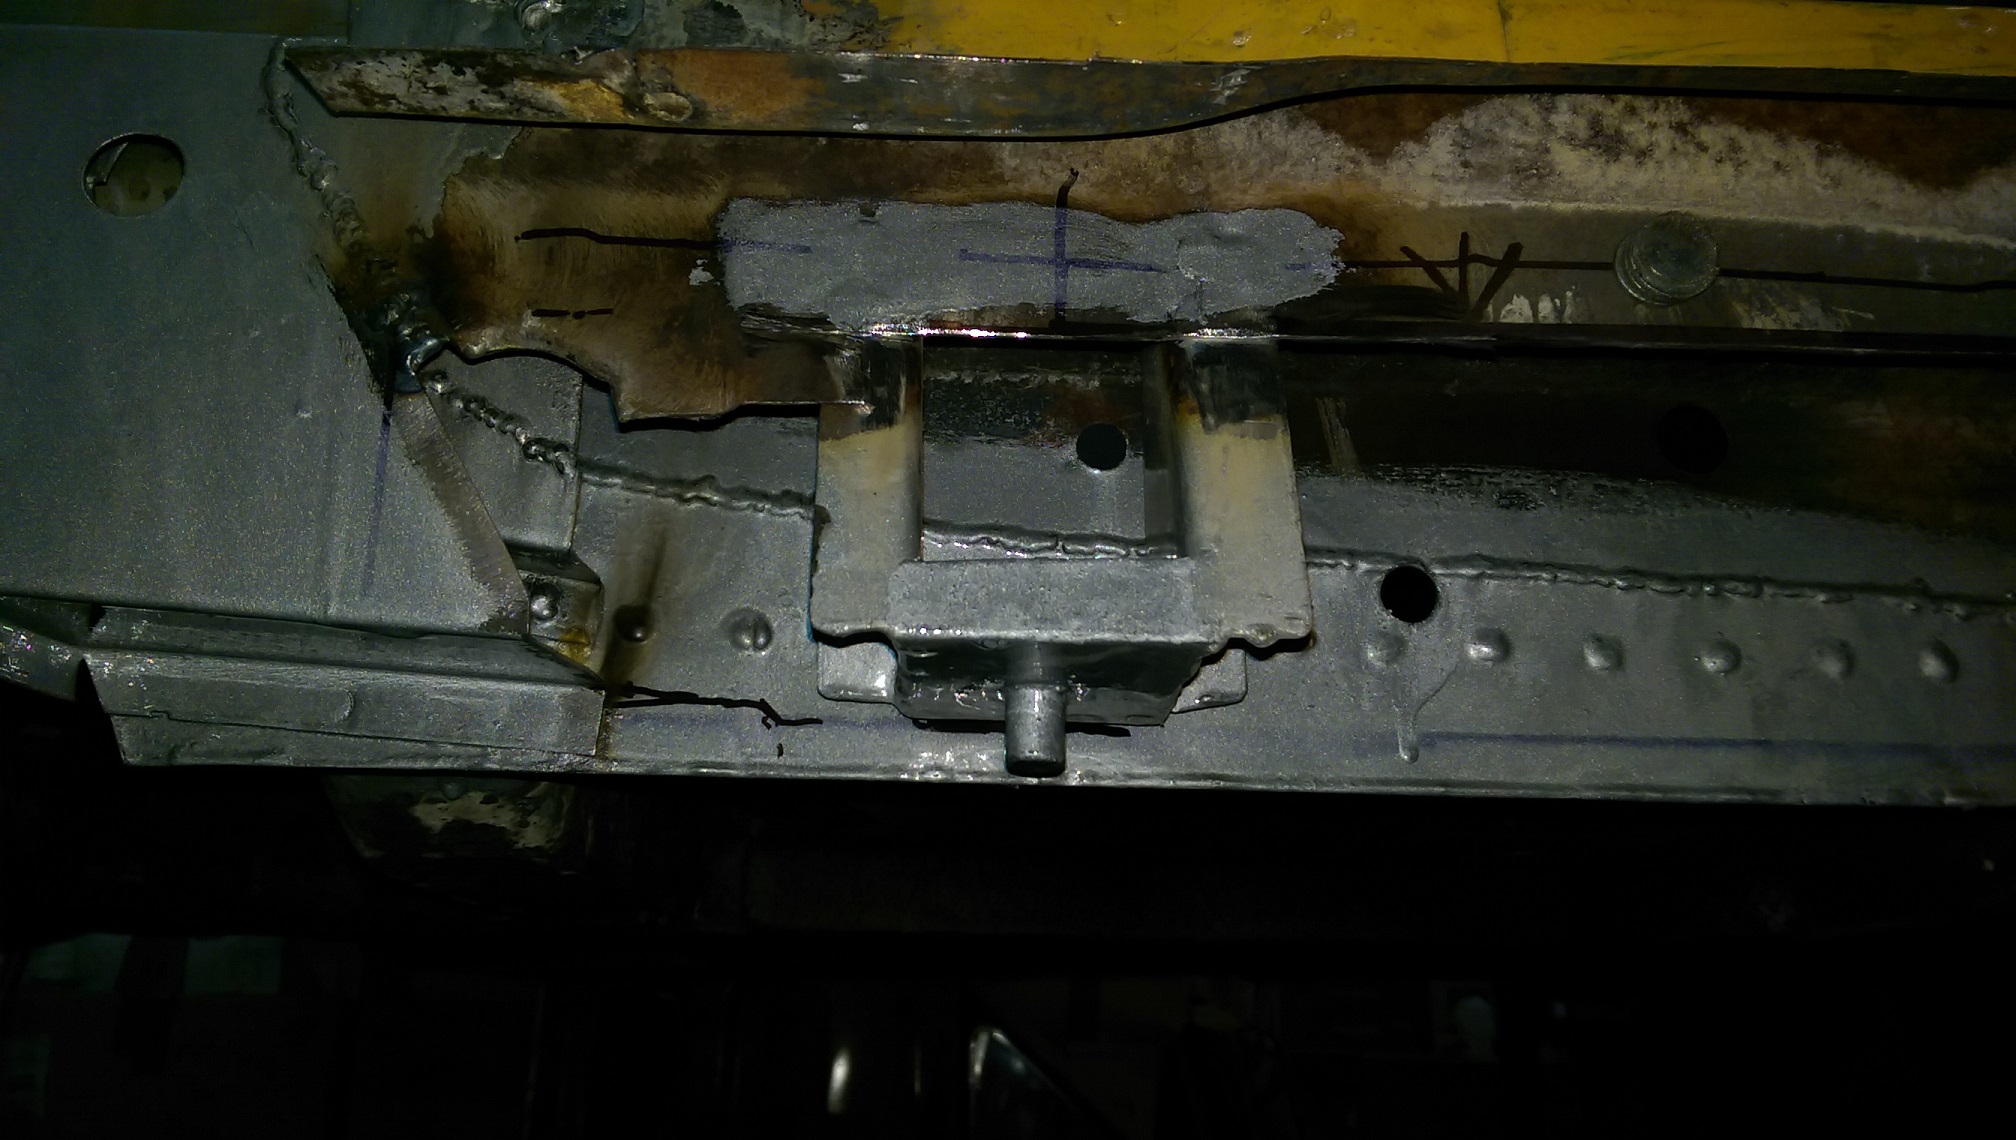
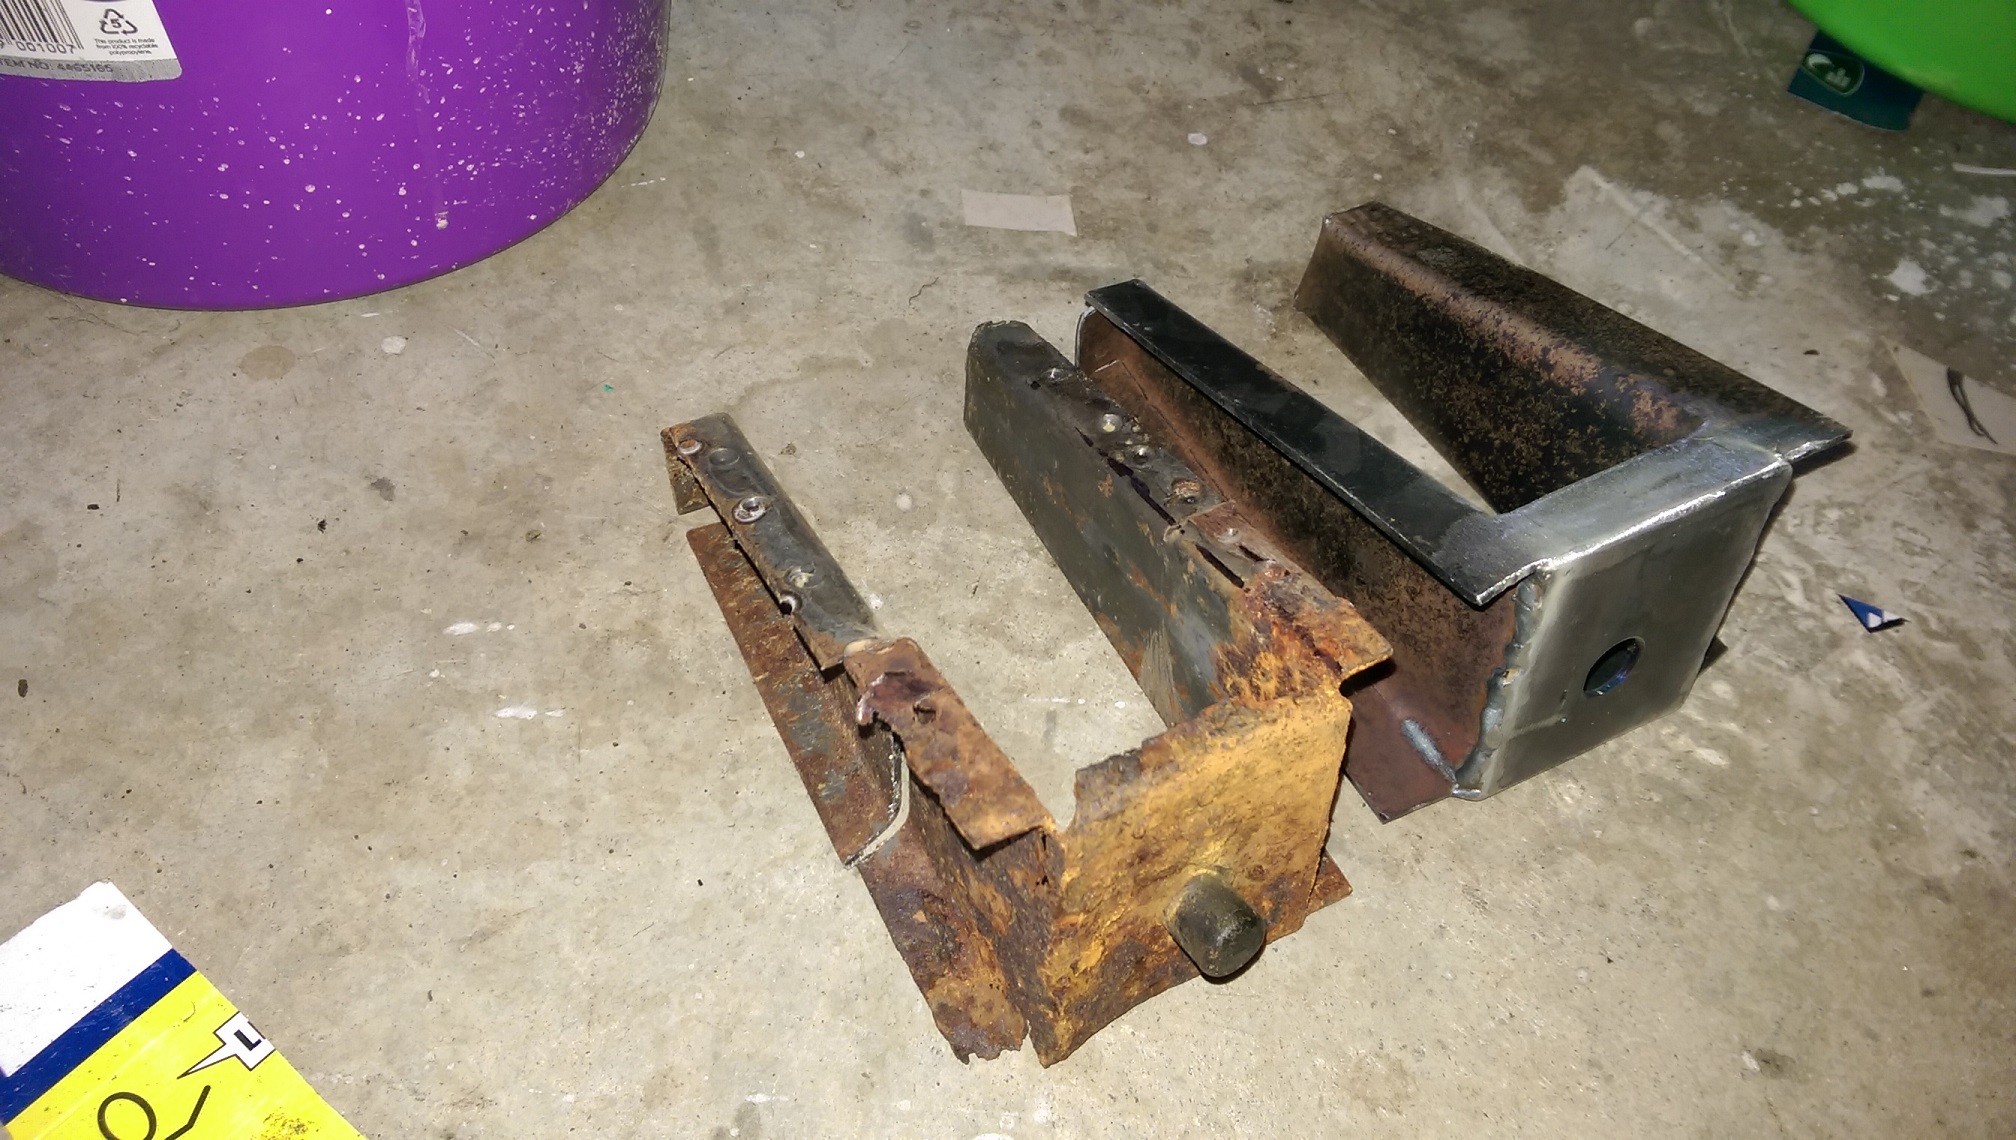
Made most of the jacking point. I still need to linish the welds a bit. no one will see it... but I will know. And sacrifice a big bolt, or something suitable for the stub thing.
Mine is made from 2mm, the original is 1.2 or 1.5. I started off trying to use my bender... it's only rated for 1mm, I did one bend and realised it was damaging the edge of the clamping 'finger'. Dang. So I moved to the vice, a block of wood and a big hammer.
-
4
-
-
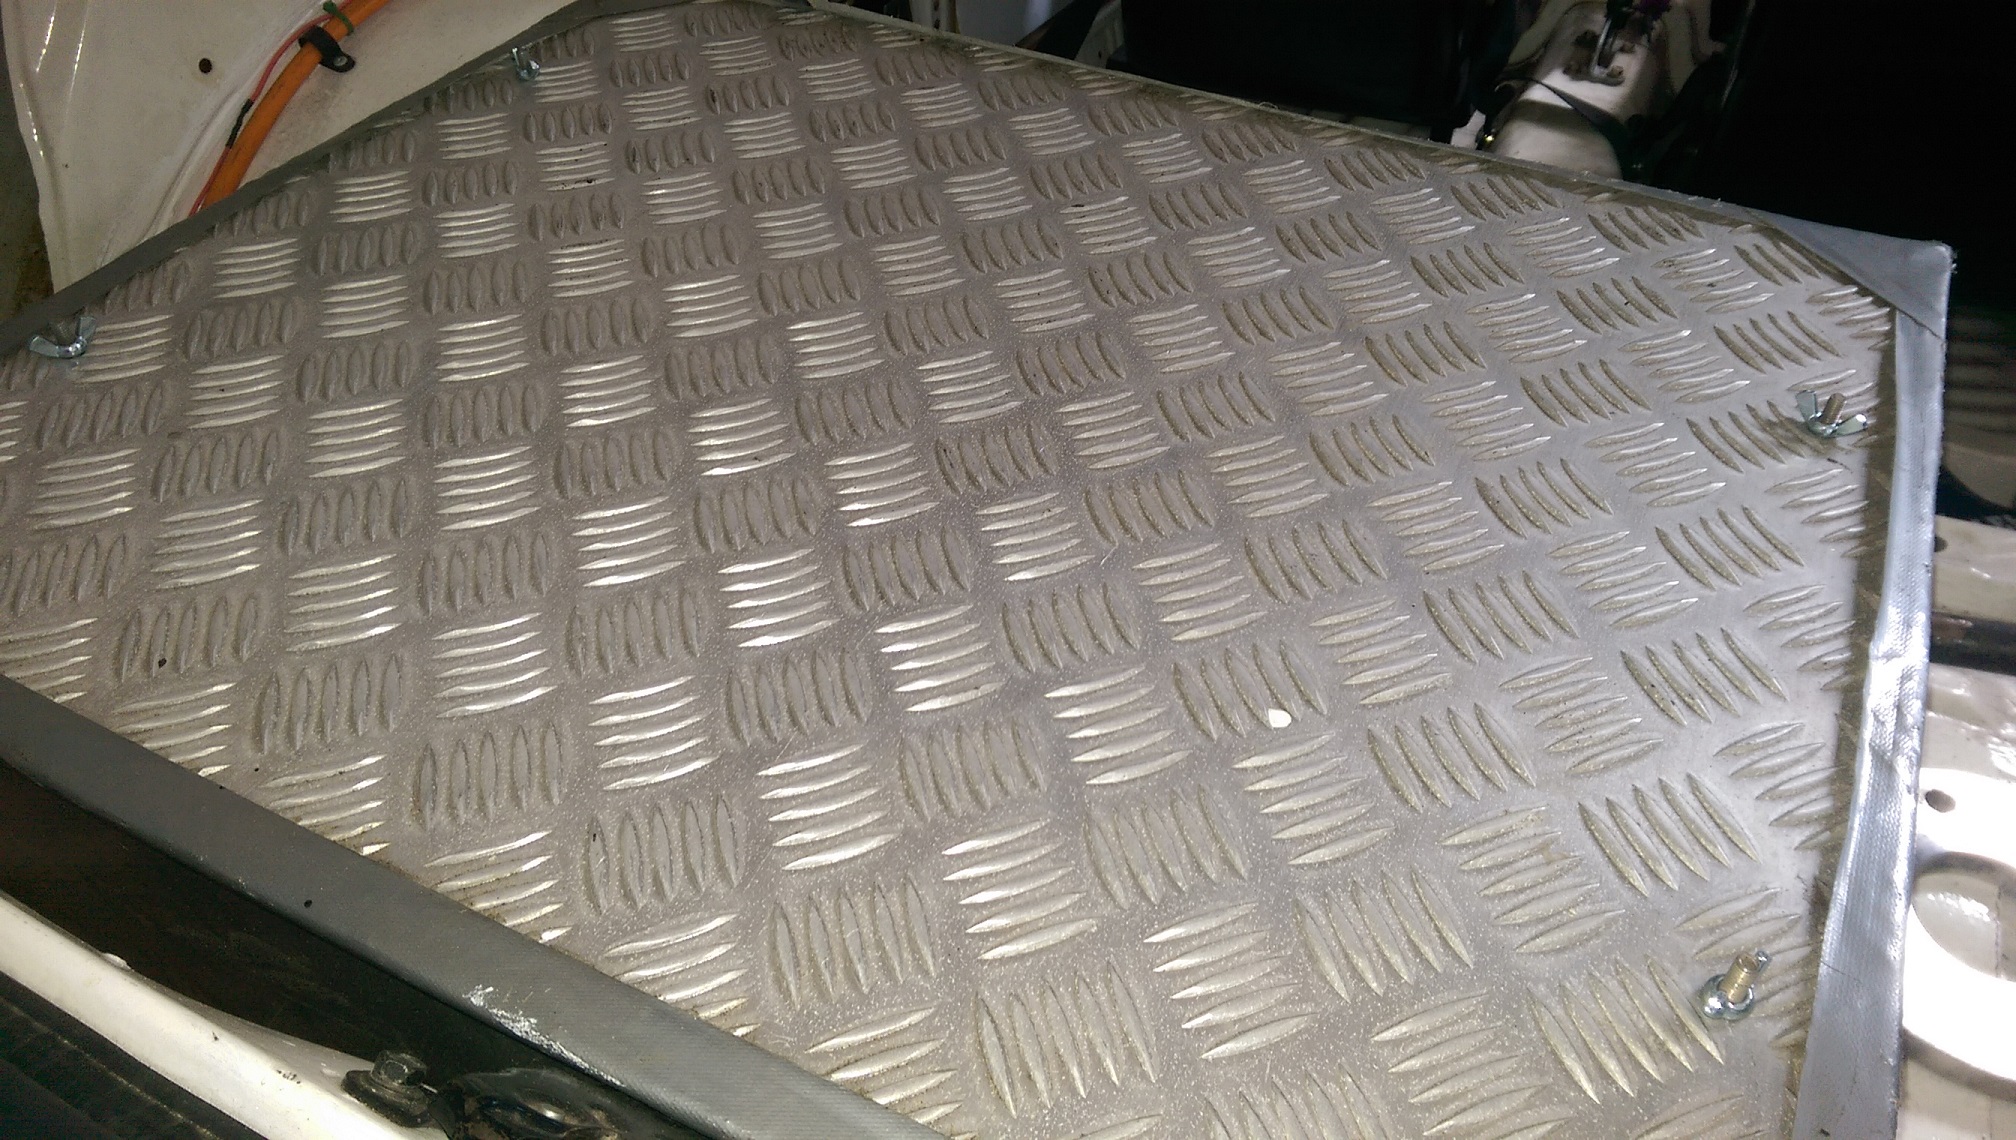
It's only taken me many YEARS, but I finally remembered to get some wingnuts for my boot box while I was at the wingnut shop. Now I can open it without having to find a 10mm spanner.
-
1
-
-
1 hour ago, Seedy Al said:
Hey guys.
Surface Rust removal on a flywheel.
Basically I have a flywheel thats been kicking around out side for a little bit, and I wanna remove the rust off it before I machine it.
What would people's suggestions be? Looking for a solution I can soak it in.
Coke has been one thought, but worried as I remember seeing videos in my youth of coke desolving nails etc.
Or do I try vinegar, ? Or some other type of cleaner?
Wire brush??
Or electrolysis. I had good success trying this on a rusty spade...blade. It's easy, you just need baking soda from paknsave or something, a bucket big enough for the flywheel, another bit of metal to make more rusty and a battery charger.
-
I'm no expert. I'm looking for something 3.3-3.5 and LSD to put behind a 1uz in my triumph that doesn't weigh a million heavy. The 350z seems the most promising option I've come across so far.
Commodore and Falcon have something that might do, but I suspect it's overkill for my application and people want squillions for the LSD versions.
I have a borrowed R200 from an S14 or S15 that is 4.1 ratio. It has 4 mounting studs on the back. The output flange bolt pattern is 3 sets of 2 holes.
As far as I know, the 350z R200 has one mounting stud on the back plate. The back plate might be interchangeable with the 4 stud???. The output flanges have 6 evenly spaced holes. Maybe the output flanges are interchangeable???
And that's everything I think I know
-
The 350z has an R200 viscous lsd in, AFAIK, 3.3 for auto or 3.5 for manual.
I'm looking for one closer to me than the tardme guy in orklund who wants $400+ pickup only...


Adoom's 1972 Triumph 2000
in Projects and Build Ups
Posted
I ordered the water bridge gaskets from Toyota. $18.50 each. Here tomorrow.