Taistorm
-
Posts
2056 -
Joined
-
Last visited
-
Days Won
1
Everything posted by Taistorm
-
BBQ Build - Attempt to build a reverse flow offset smoker
Taistorm replied to Taistorm's topic in Other Projects
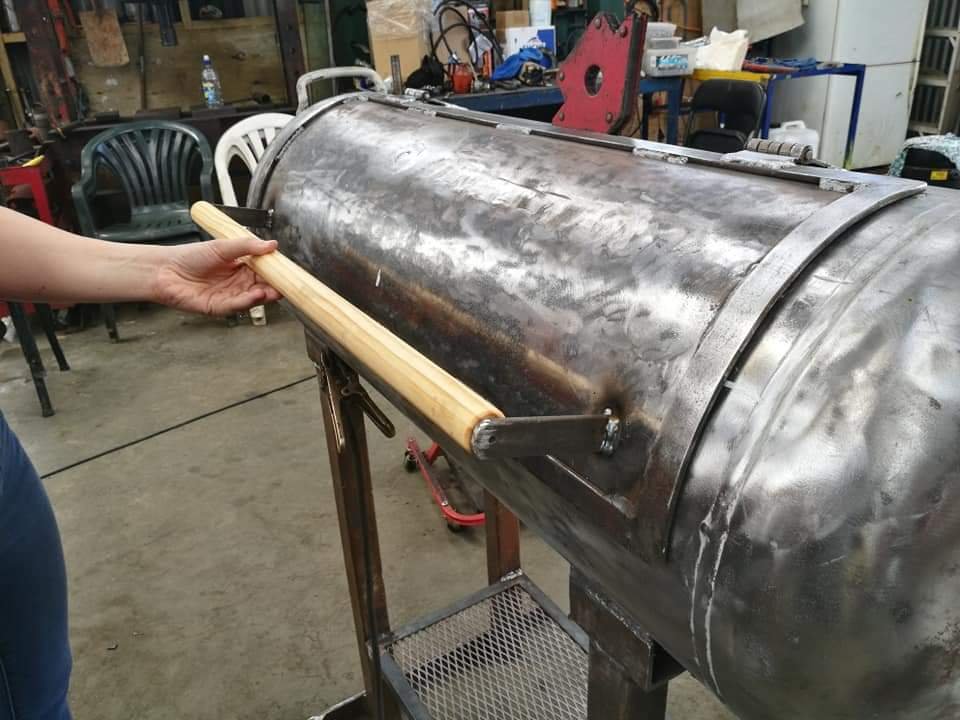
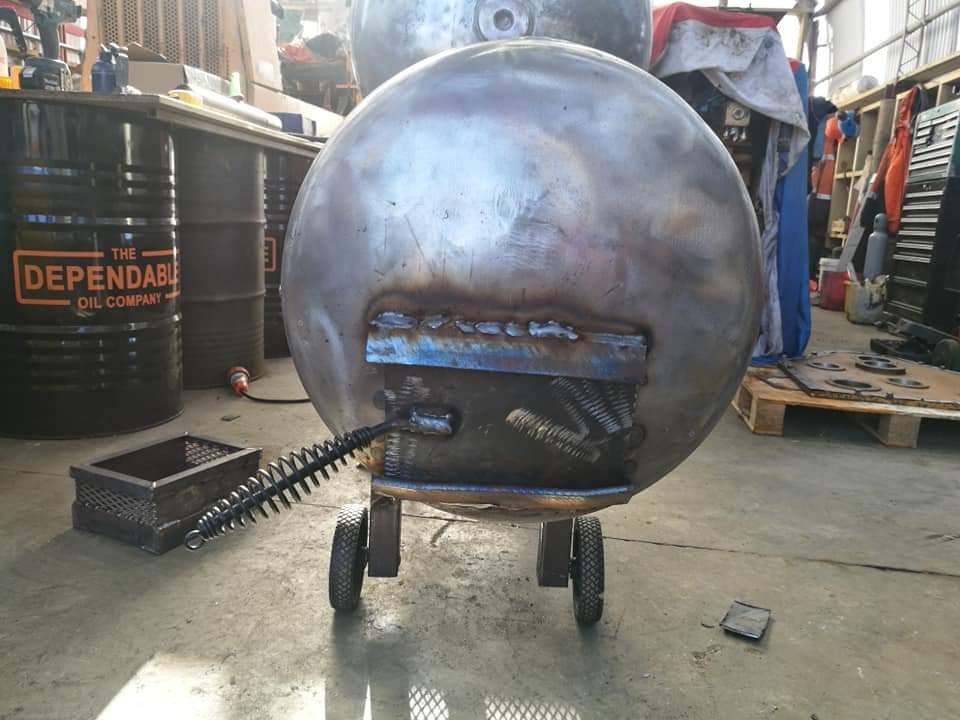
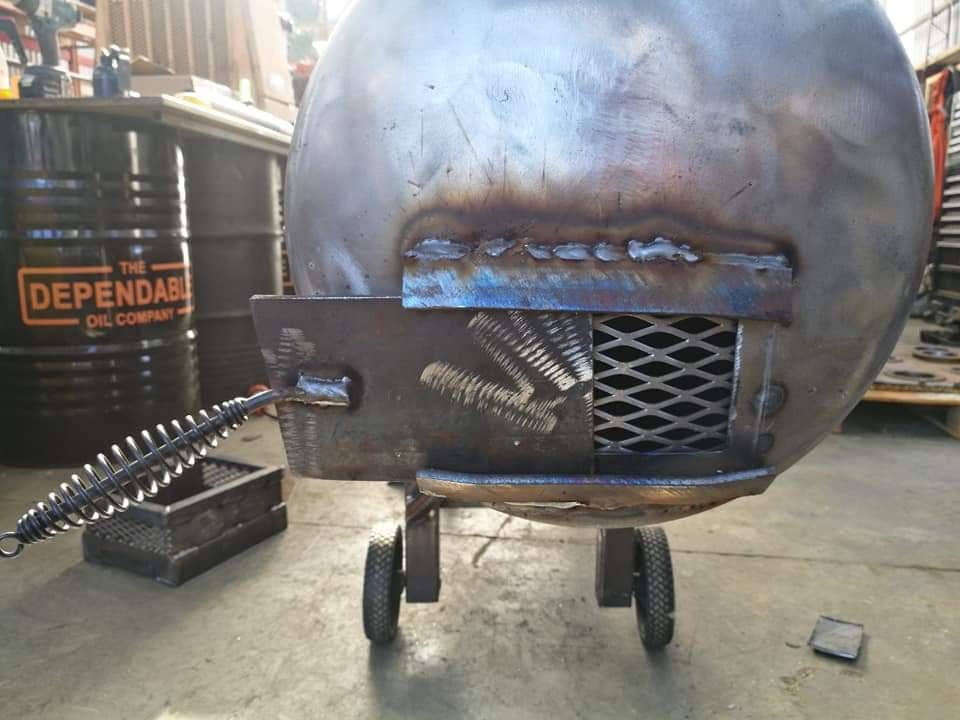
Added some more to the damper. Fitted a vertical bit of plate and some angle to act as a stopper. I'll dress it up a bit more so it looks a bit tidier before it's painted. Then made some handle mounts for the doors. Pretty straight forward. And fitted with the pine mocked up. And some 50x5 angle for stoppers for the charcoal basket. Also I welded in some angle at the front to increase rigidity and pull it a bit straighter. Have since cleaned up the welds so it's nice and flat.
-
BBQ Build - Attempt to build a reverse flow offset smoker
Taistorm replied to Taistorm's topic in Other Projects
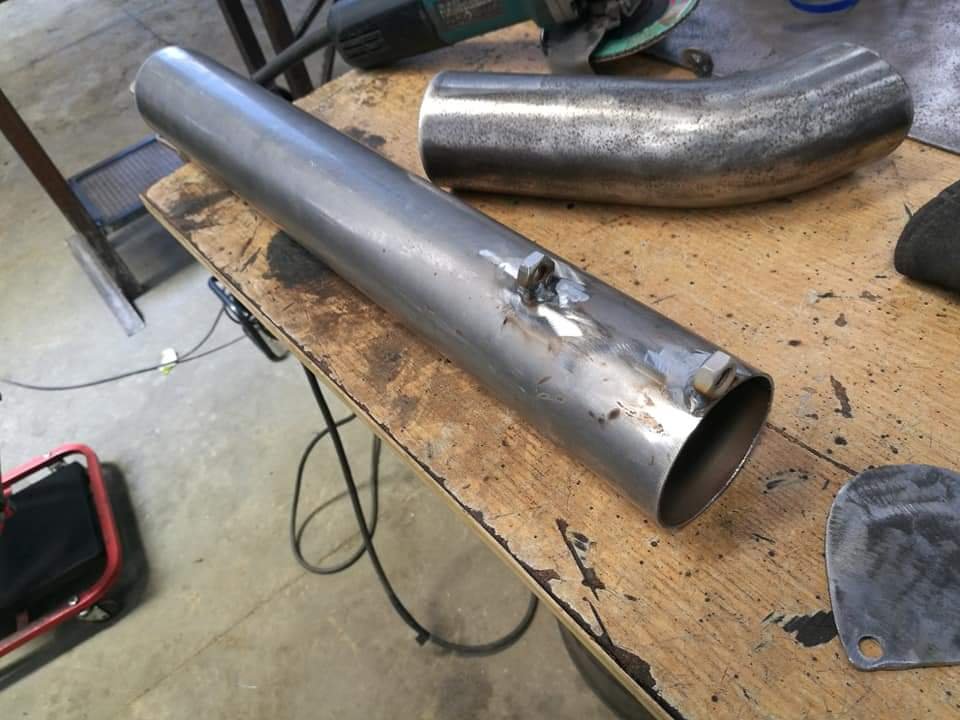
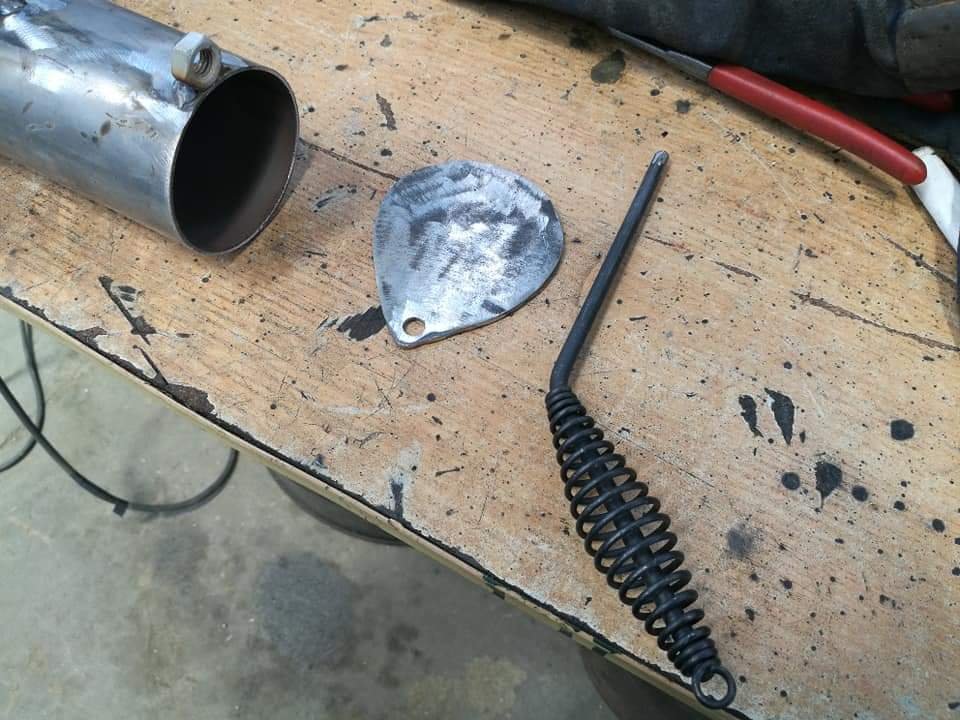
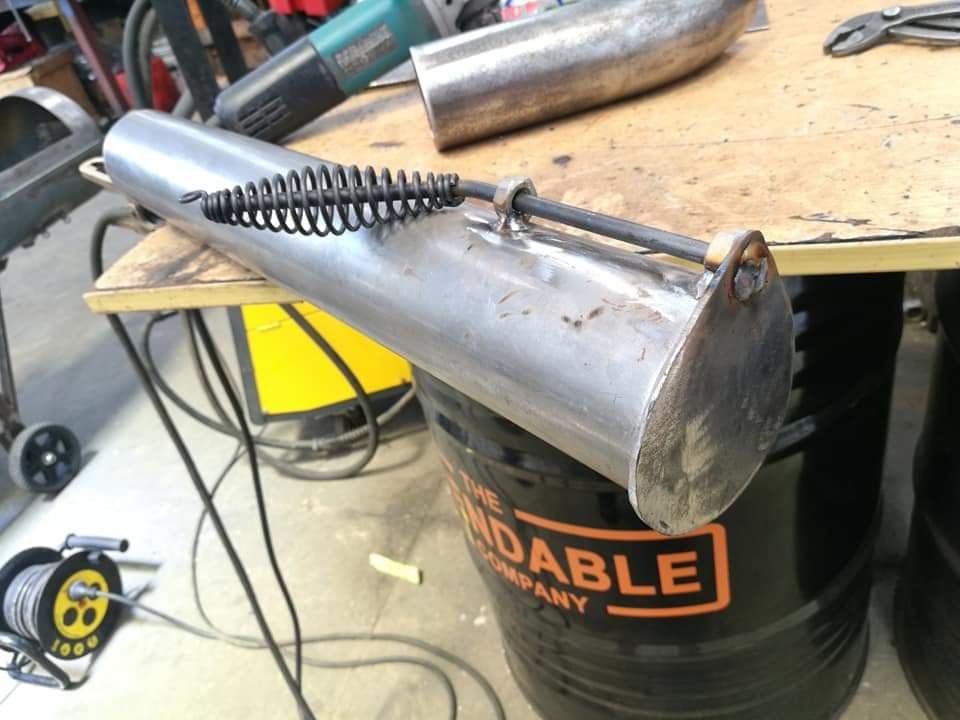
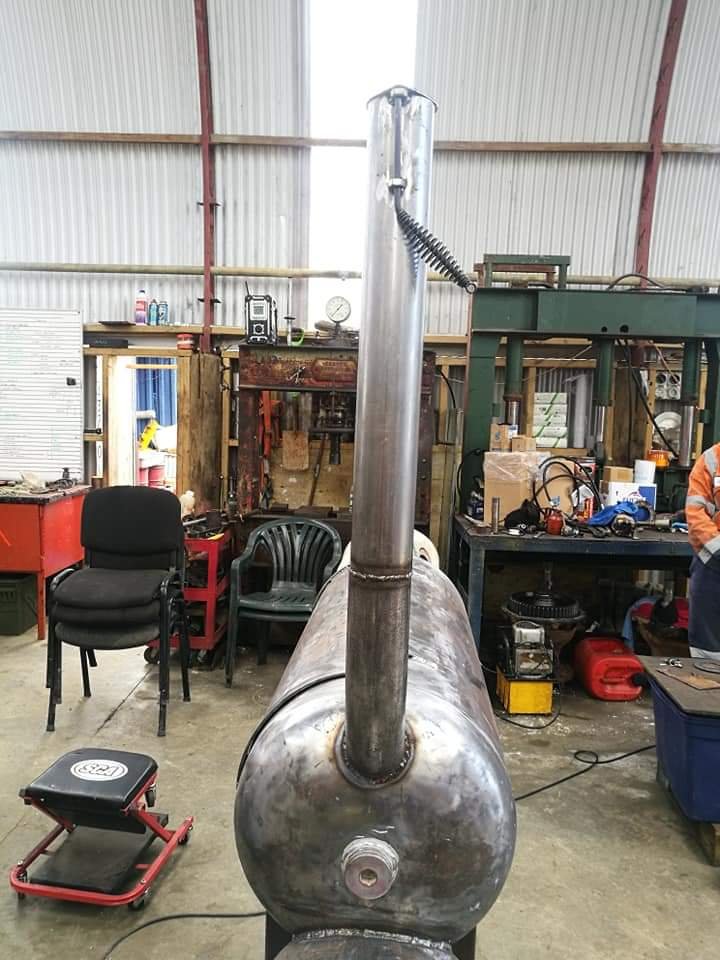
Alright, got a half day in on this today with the help of the mrs and I'm Fucking stoked with where I'm at. Can finally see the finish line. Started off with sorting the chimney and flue. Cut a length and a bend, welded in some locators for the adjuster and made a top hat that's fixed to a chipping hammer as the adjuster. I positioned the handle offset so the flue can be fully opened for max heat. Pretty tall stack, mounted it about 3 inches above the main grilling plate and high enough so people don't have to try and dodge smoke all day.
-
BBQ Build - Attempt to build a reverse flow offset smoker
Taistorm replied to Taistorm's topic in Other Projects
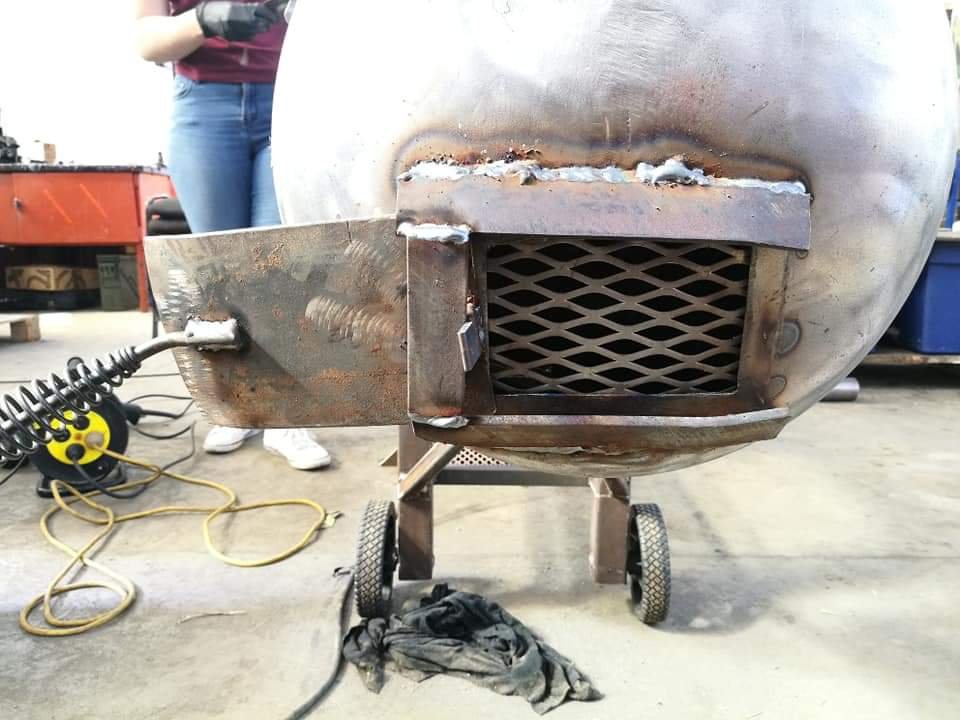
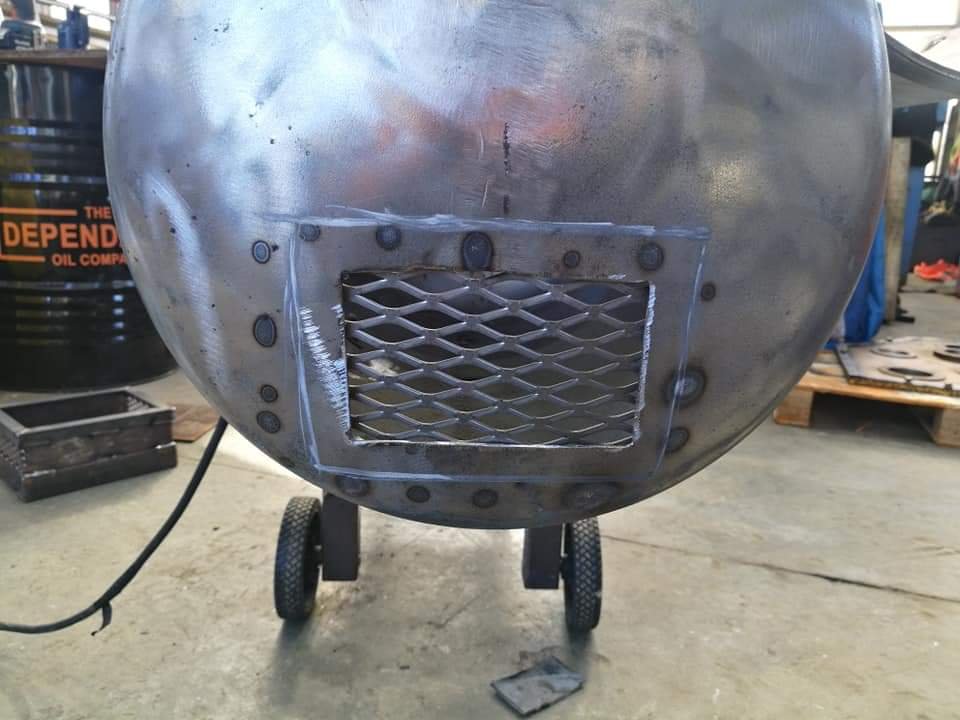
Also threw together a damper/lower vent. I was unsure on how to go about this as the tank has various curves. I initially cut out an opening then welded in some mesh behind it. I played around with bending some steel for rails and also bending the slide door. Stuffed around trying to get the rails to work and managed to get it functional. I brought a cheap chipping hammer for $6 to use the handle for the door. Not 100% with the damper overall, but it works. I'll add on a stopper as well and clean it up a bit. Hopefully get another hour or 2 in tomorrow.
- 54 replies
-
- 13
-

-
BBQ Build - Attempt to build a reverse flow offset smoker
Taistorm replied to Taistorm's topic in Other Projects
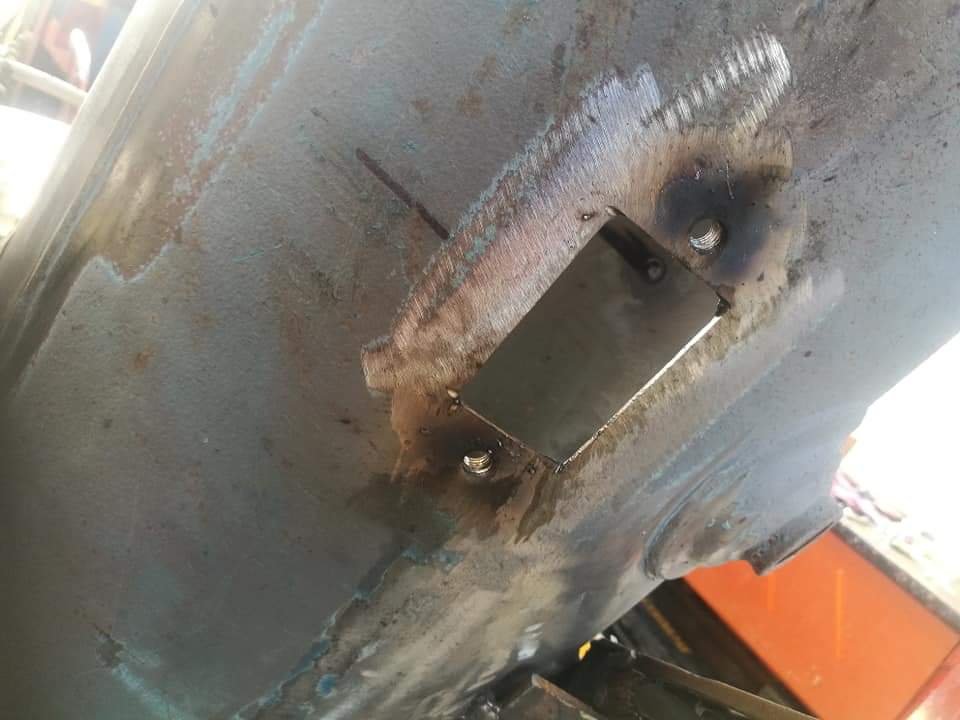
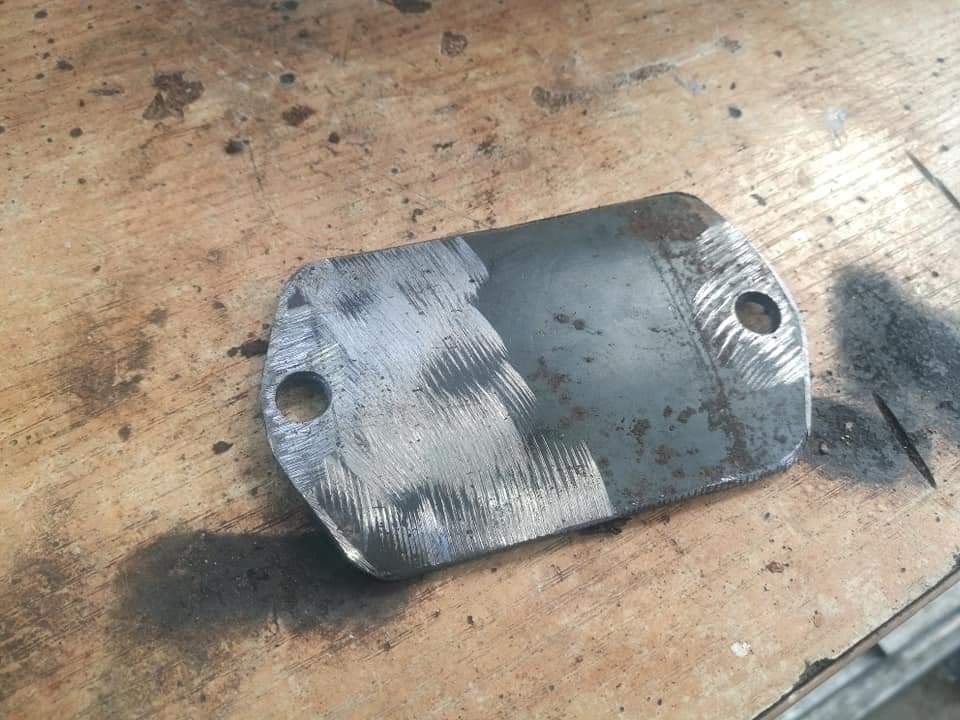
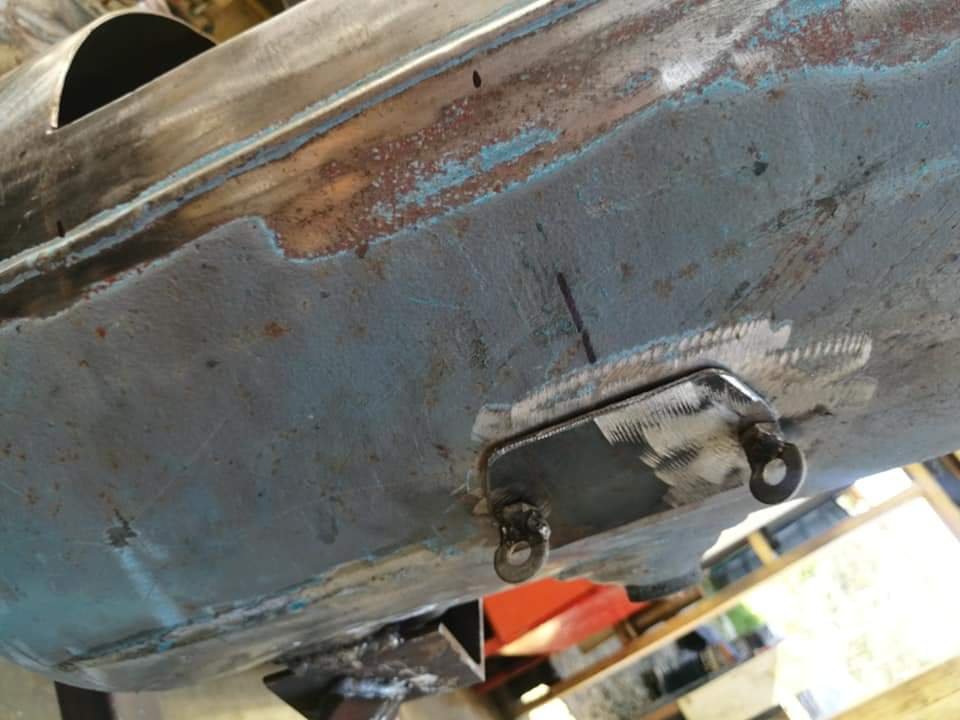
Cut some holes towards the bottom of the cooking chamber and fire box, drilled some holes and made some nuts captive. Cut some tabs. And made some fully hectic wingnuts. These really are just cleaning/drain ports. I was going to utilise the bungs already in the tanks but they are quite small and also would require a lot of cutting and Fucking around to make them suitable so decided on an easier alternative. Should be easy for clearing ash and grease etc. Can kind of see where they sit below.
-
BBQ Build - Attempt to build a reverse flow offset smoker
Taistorm replied to Taistorm's topic in Other Projects
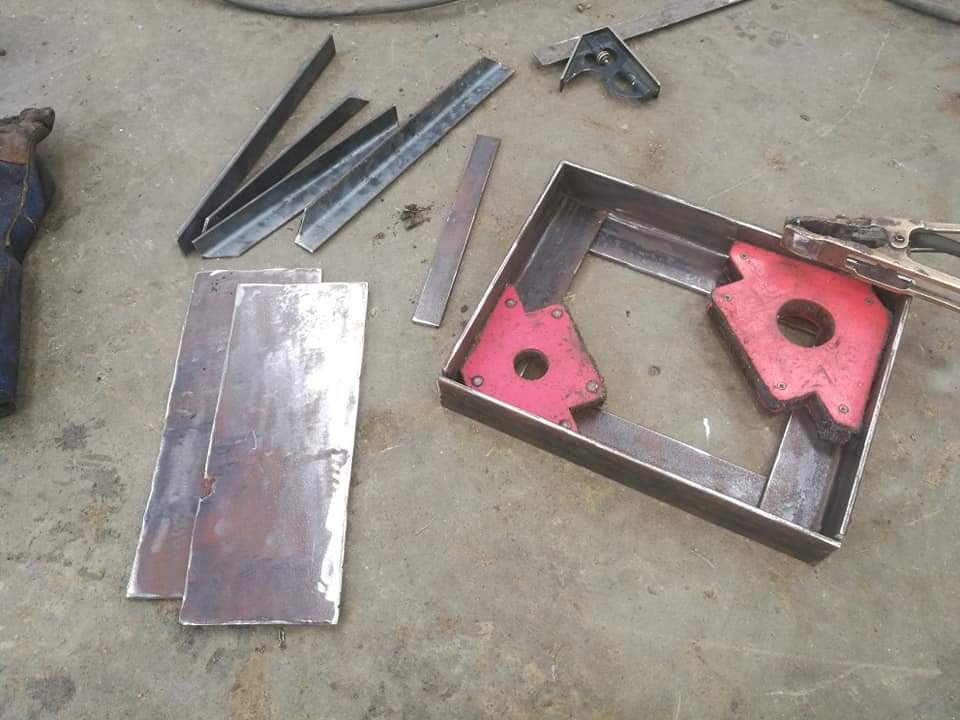
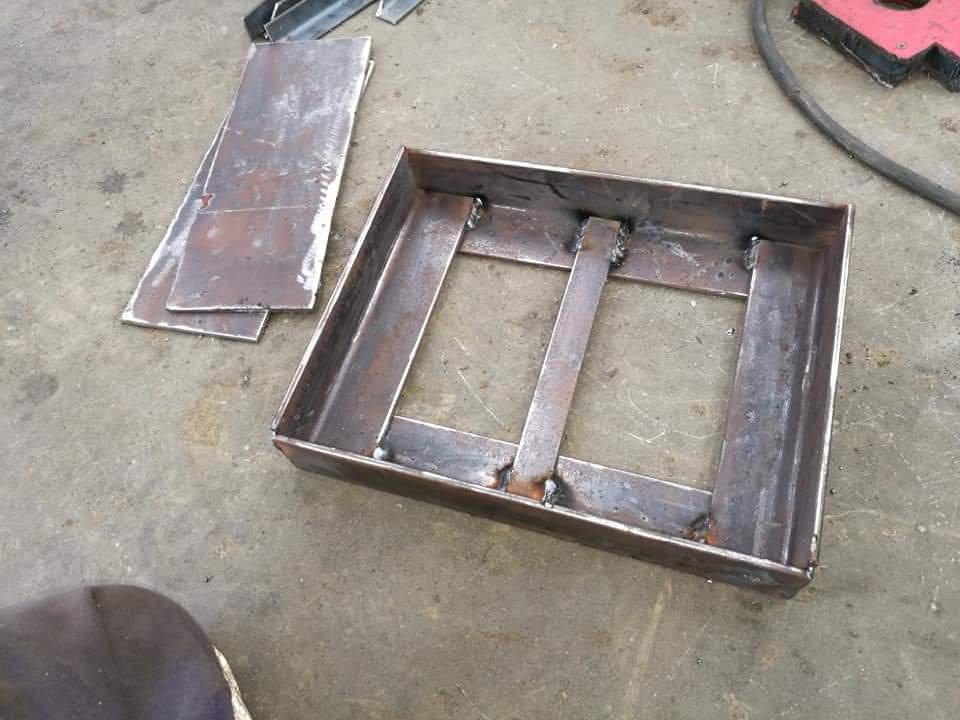
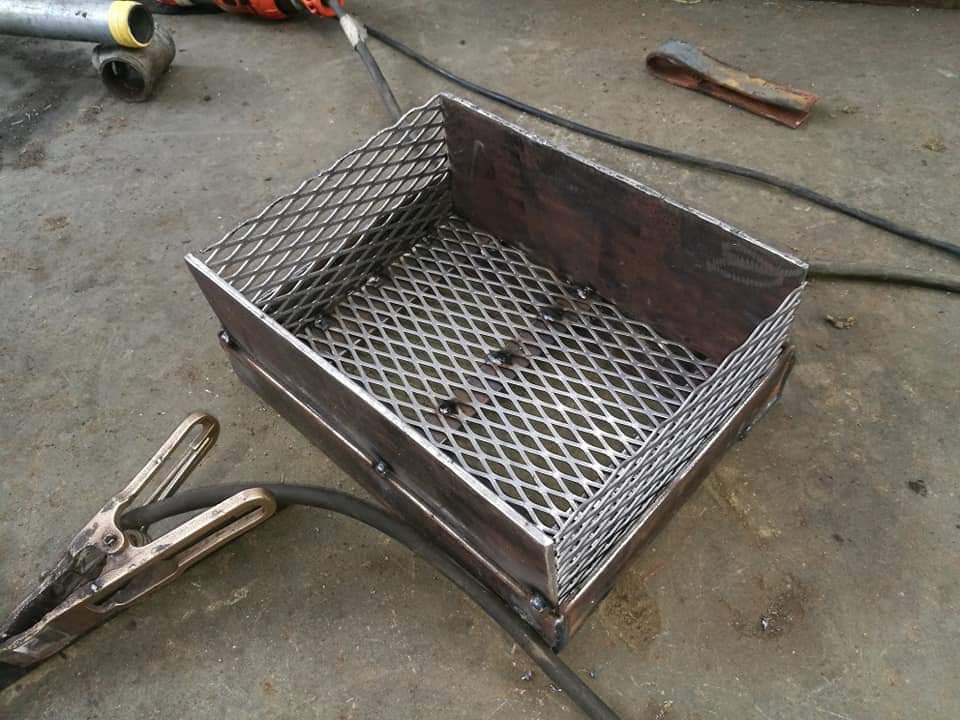
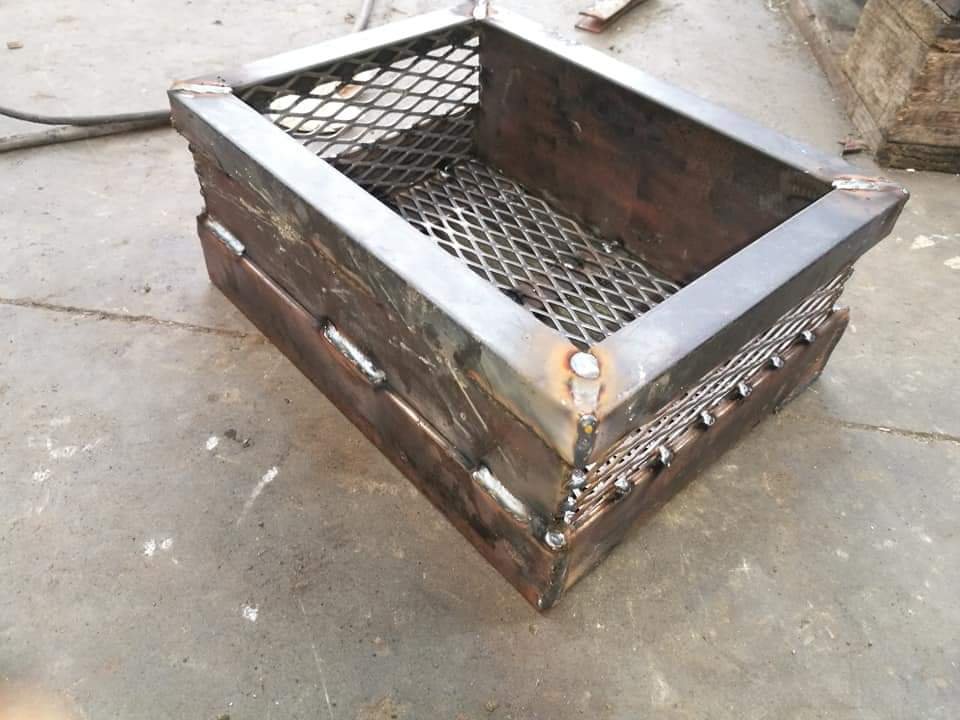
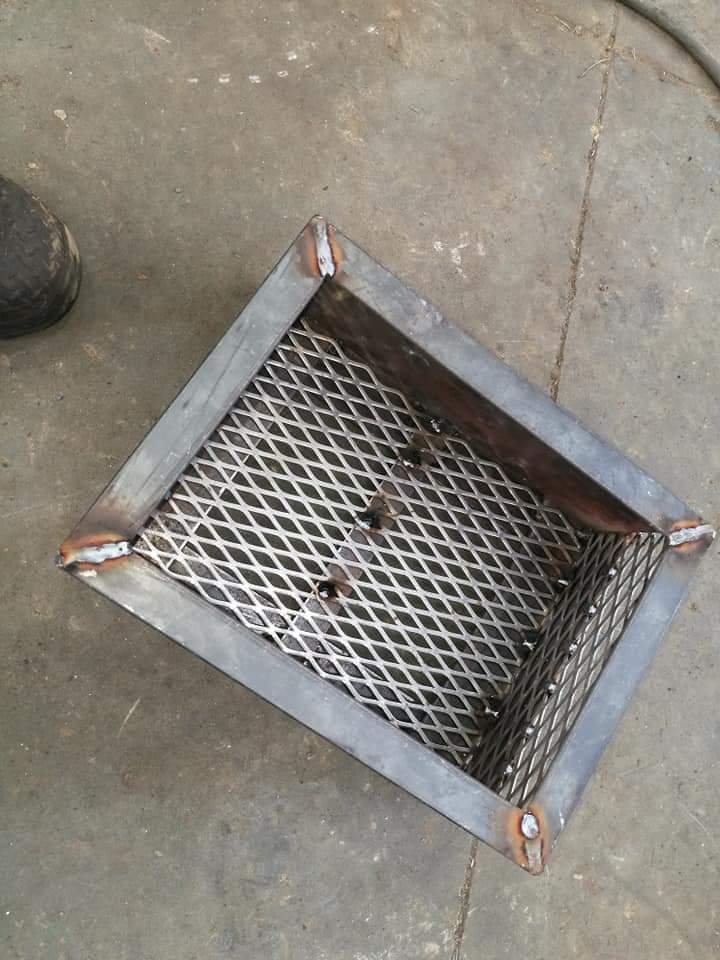
Missed the original deadline as the bros birthday was on Monday but it doubles up as an xmas present as well so he can wait. Did some more work yesterday and smashed out the inner firebox/coal cradle thingy. Cut some steel, mostly being 5mm angle and plate. Put it together with some of the expanded mesh. Then did a top frame thing with some left over 3mm angle. It actually looks pretty good once it's sitting in place. There's a decent amount of weight to this so it should help with heat retention and it's easily removable to help with cleaning out the old ashes. All that's left on the firebox now is the damper vent, a grill and the handle. Cheers
-
BBQ Build - Attempt to build a reverse flow offset smoker
Taistorm replied to Taistorm's topic in Other Projects
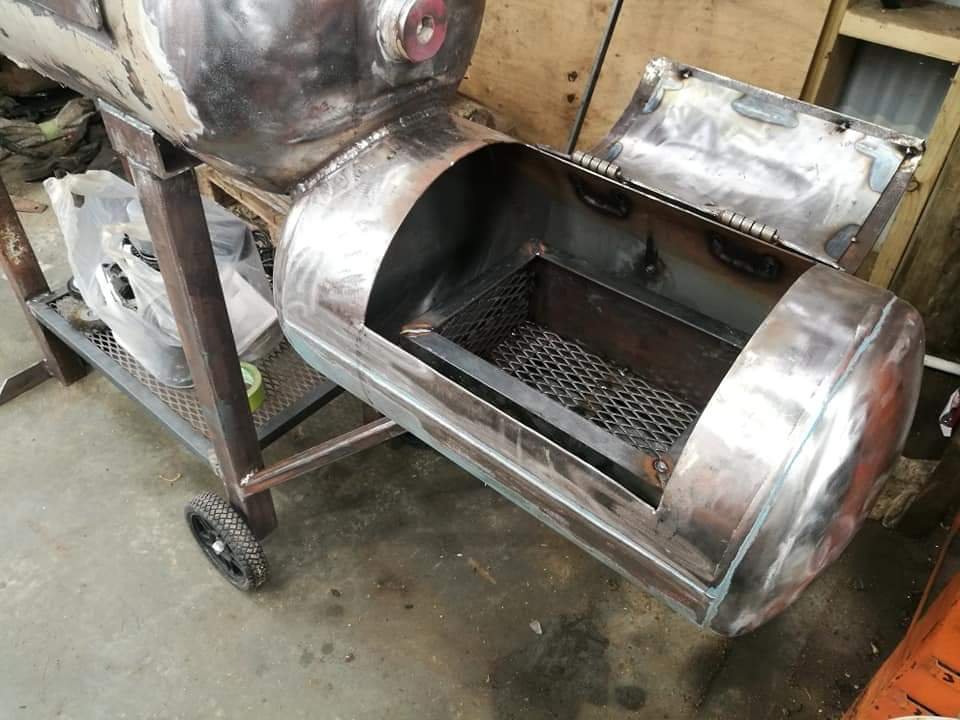
And lastly we got the firebox door sussed. I had a harder time getting this one kind of right, and the bends close enough to work. Forgot to take pics mid build but it was pretty much the same as the other. The main difference is that the door opens further back, this is to allow for more room for grilling/searing. Pretty happy with how it's all looking right now. List of things remaining are the mount for inner firebox, inner/removable fire box. Grill rails for both chambers, grills for both chambers, front bench frame, chimney with vent and firebox vent. These plus mounting up the gauges, doing the lid handles and paint. Also hopefully get this done throughout the week. Man this is a lot more work than expected haha. Ahh well. Chur
- 54 replies
-
- 16
-
-
BBQ Build - Attempt to build a reverse flow offset smoker
Taistorm replied to Taistorm's topic in Other Projects
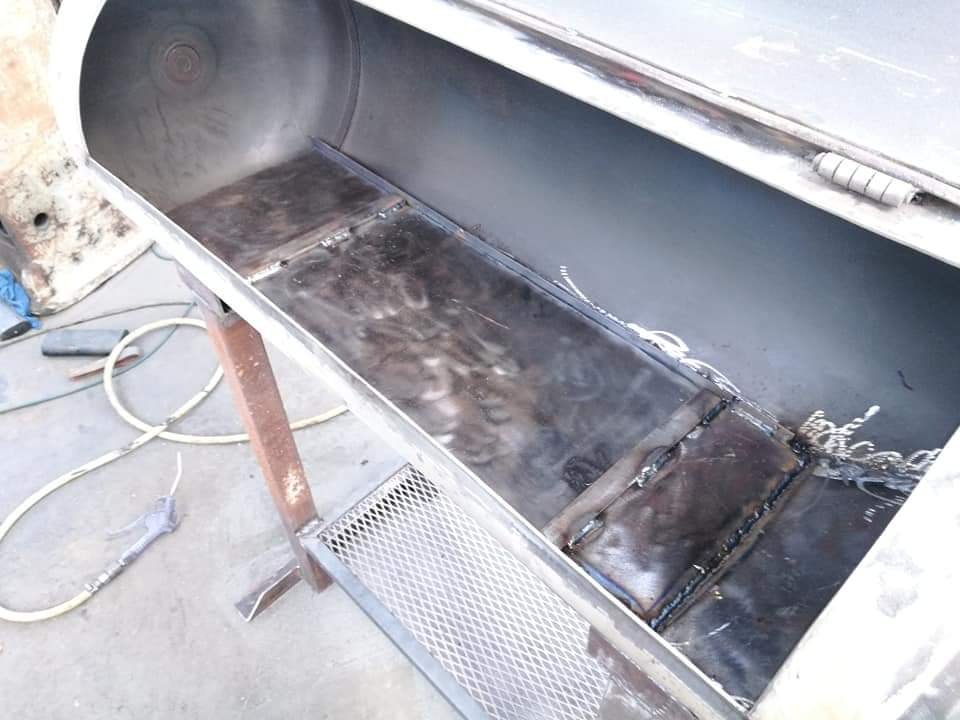
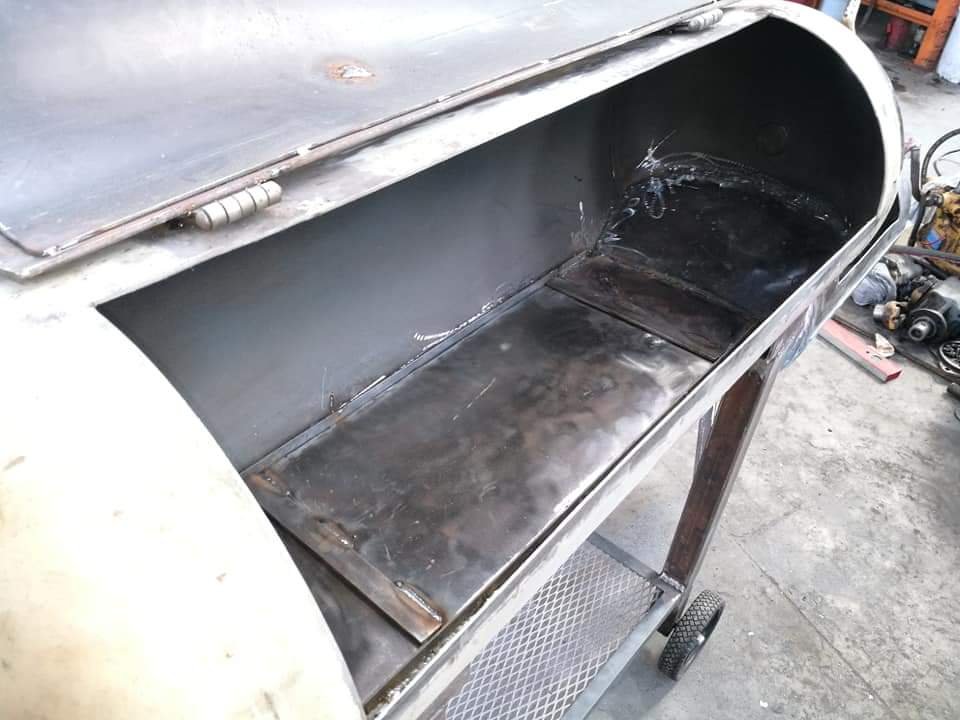
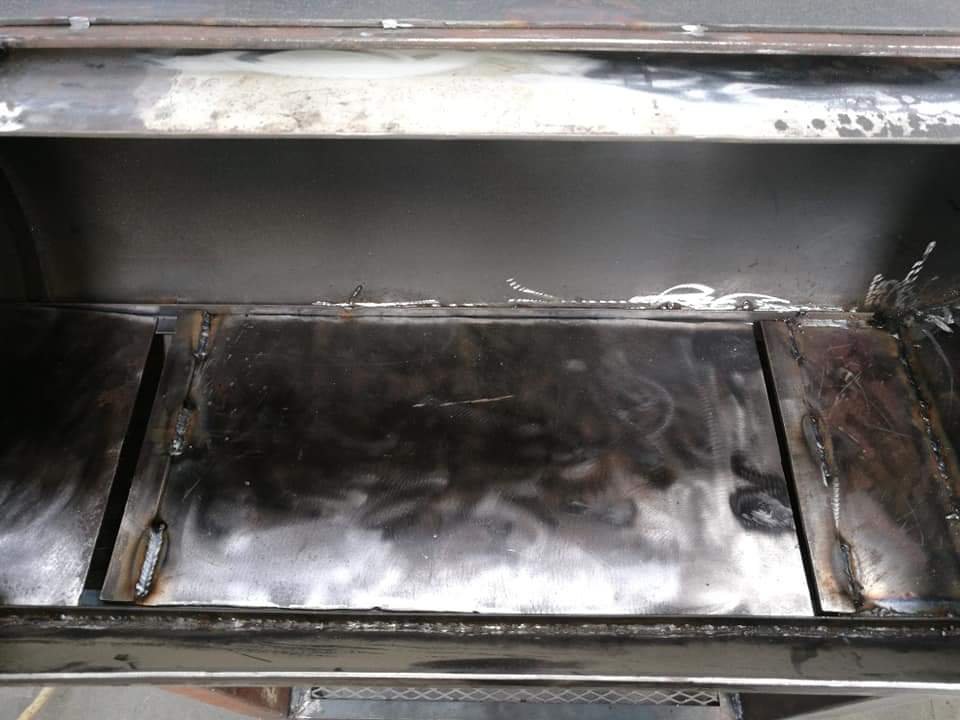
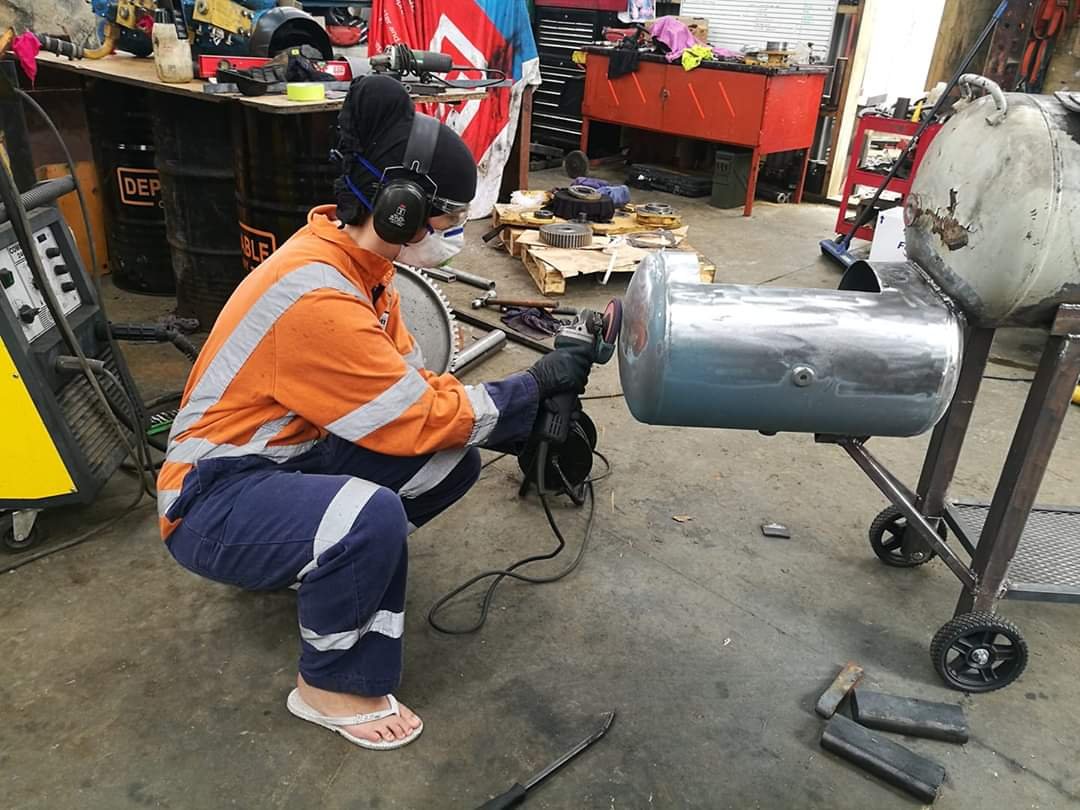
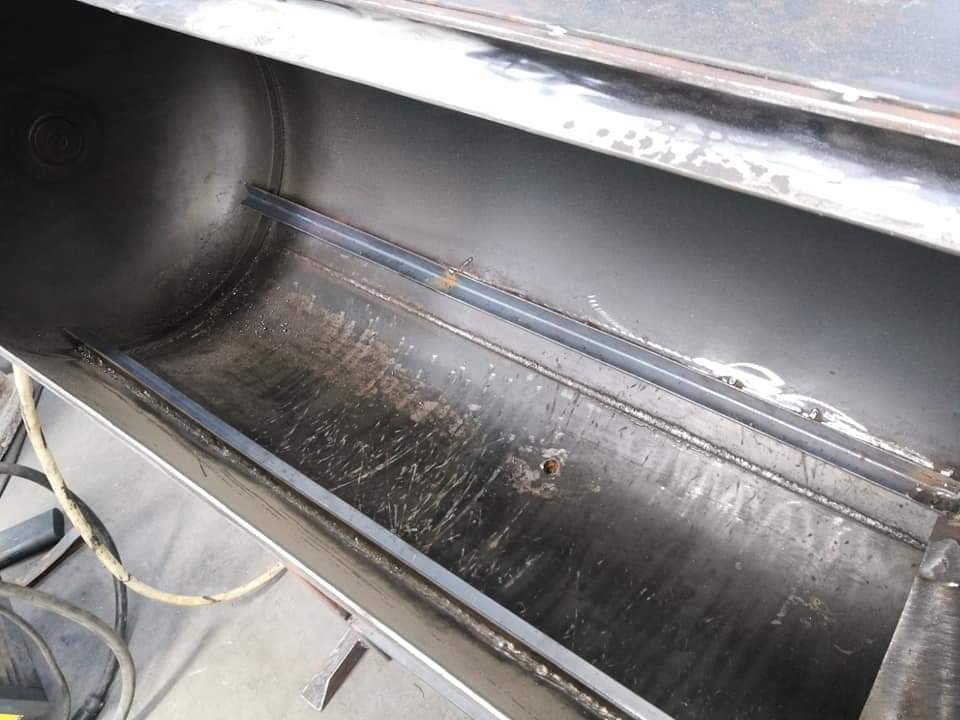
Here's the baffle/tuning plate setup. Used 3mm plate with an overlapping step to try and keep everything sealed half decent. Might look at changing to 5mm plate later and possible more plates to help with different heats. It's all removable for easy cleaning. It's not the tidiest but it should be functional, keep in mind a lot of this has been rushed as I don't have much time left and I'm not a precision engineer haha. And my minion/fiance gave me a hand with the sanding and metal prep which helped a lot! Gotta love the Samoan safety boots.
-
BBQ Build - Attempt to build a reverse flow offset smoker
Taistorm replied to Taistorm's topic in Other Projects
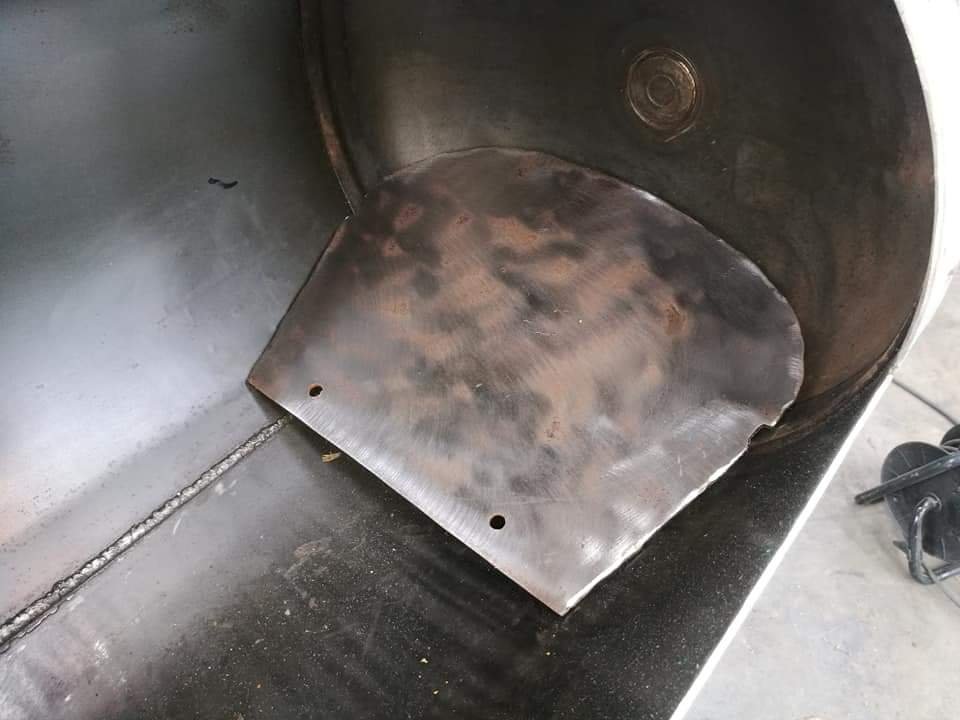
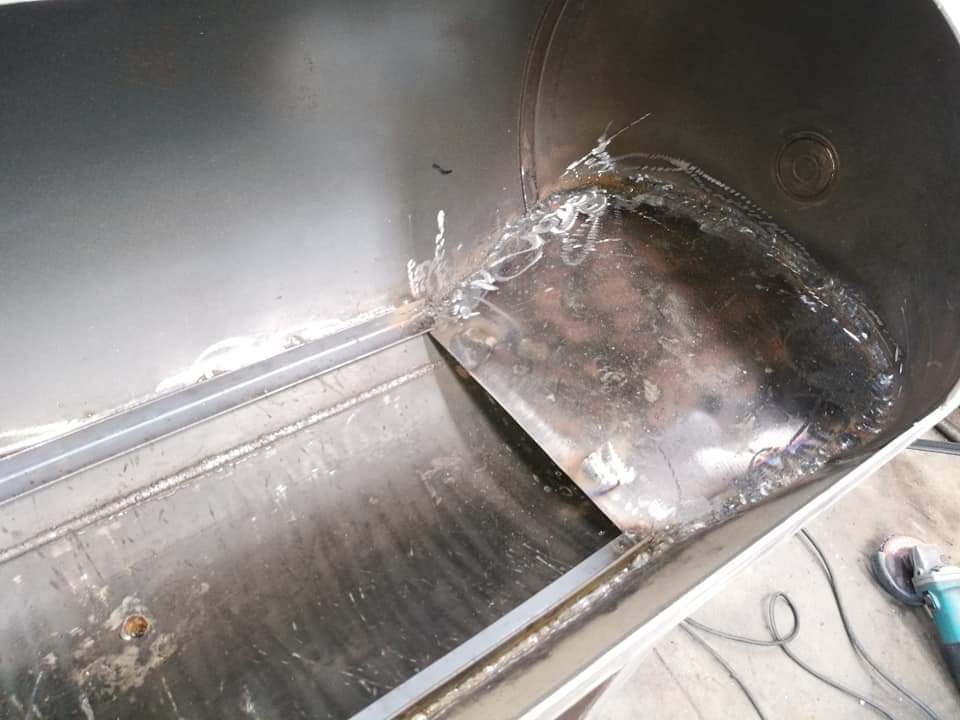
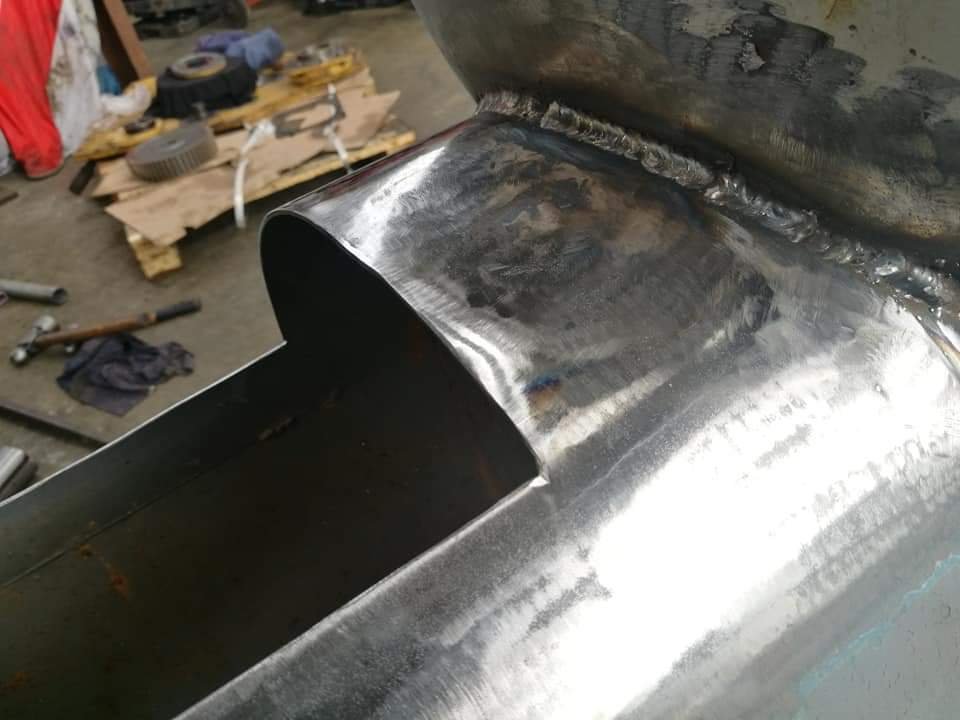
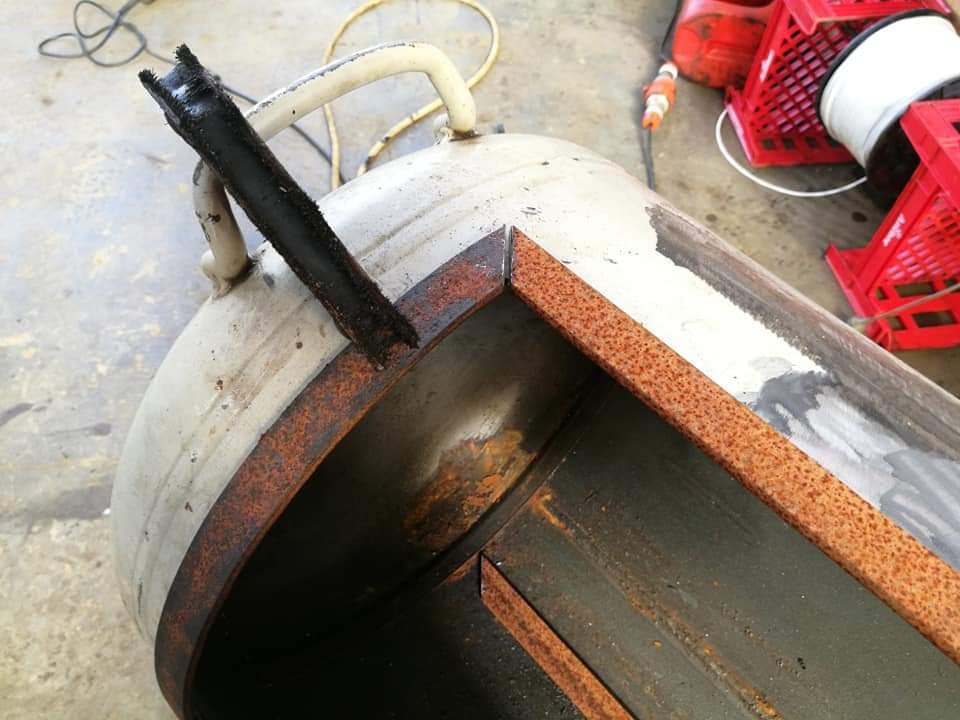
After that I tried to clean out the tanks and ran the torch throughout to try and cook out any toxins and oils but it wasn't too effective so we will just got it really hot when we season it. Here's a pic of the firebox to main chamber inlet. Making up the baffle was a Fuck around (seemed easier in my head). I ended up gassing out some 3mm plate for the opening then welded in some angle to act as a rail. I'm not proud of the welding haha. It's shit, the cutting was shit and couldn't re do it so had a bit of filling to do. This as well as not being able to get the mig tip in close enough and at poor angles for the most of it made for a shit time but ahh well, most of it will be hidden.
-
BBQ Build - Attempt to build a reverse flow offset smoker
Taistorm replied to Taistorm's topic in Other Projects
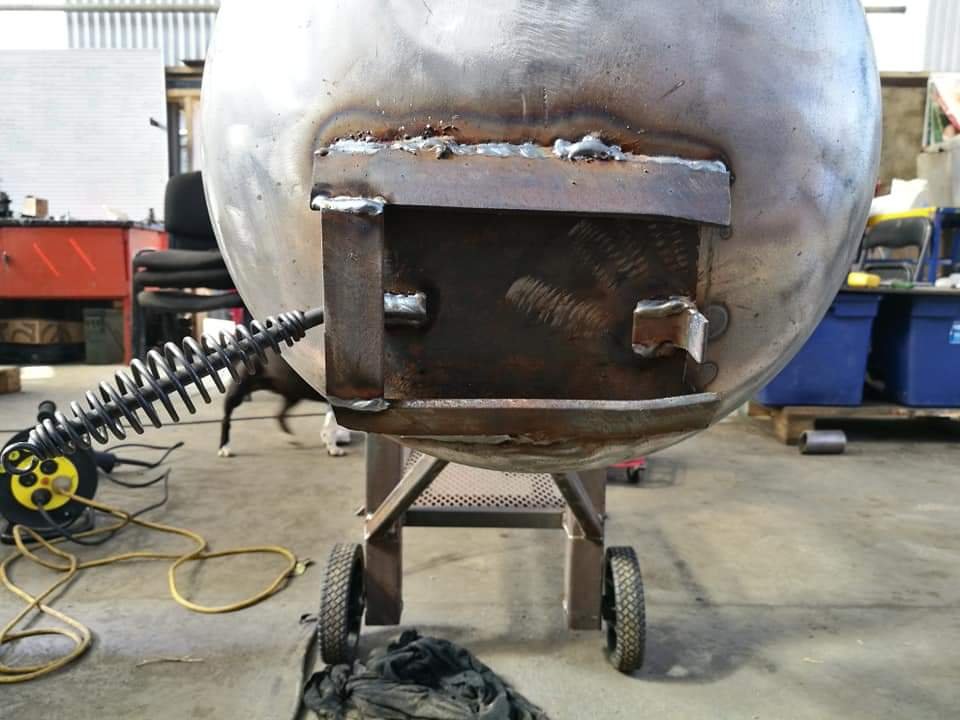
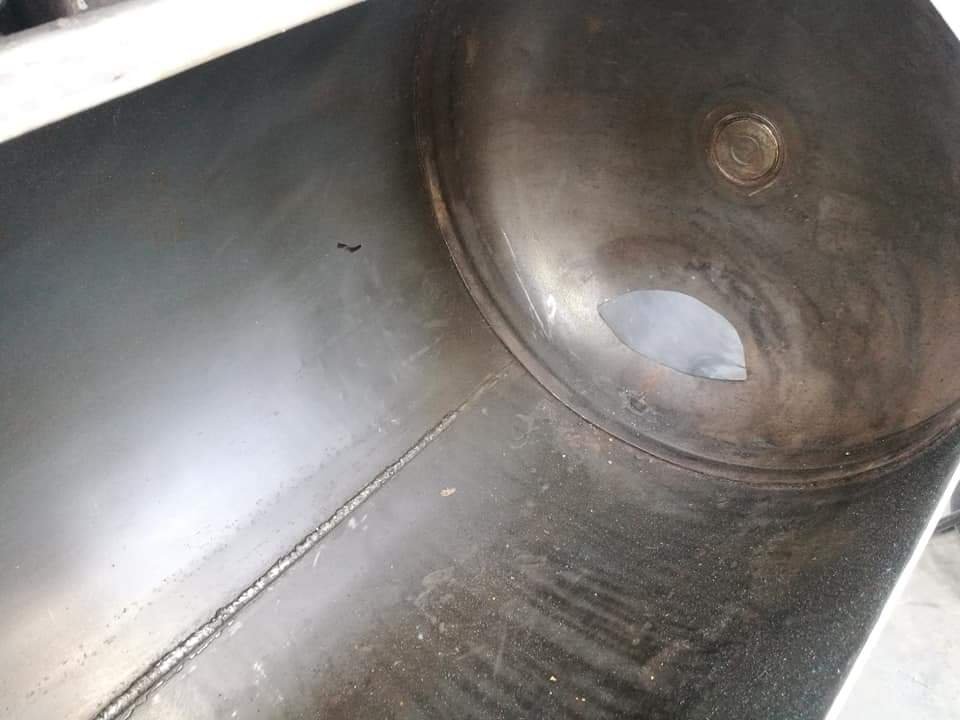
Spent most of today trying to crash this out. Got a lot done still have heaps to do. First off I trimmed the front foot and welded it on. Then I cut out the door/lid for the Fire box. It looks a bit wonky, and it was hard to get it looking right as the Fire box was a little off level. Next I heated up the dent and tried to bash it out a bit. It's not mint but a lot better now.
-
BBQ Build - Attempt to build a reverse flow offset smoker
Taistorm replied to Taistorm's topic in Other Projects
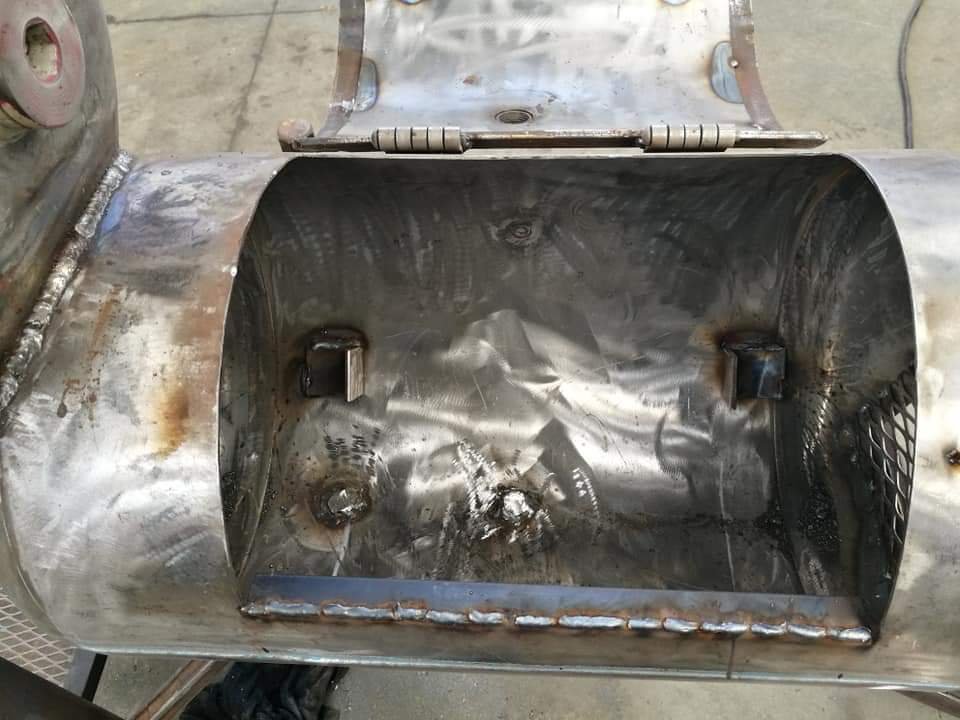
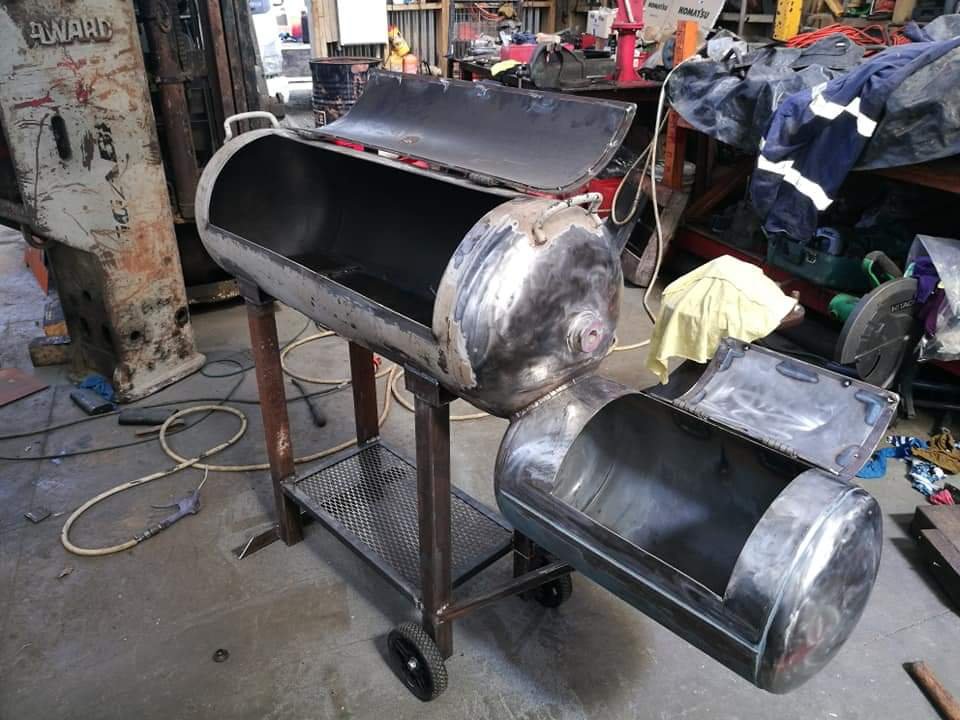
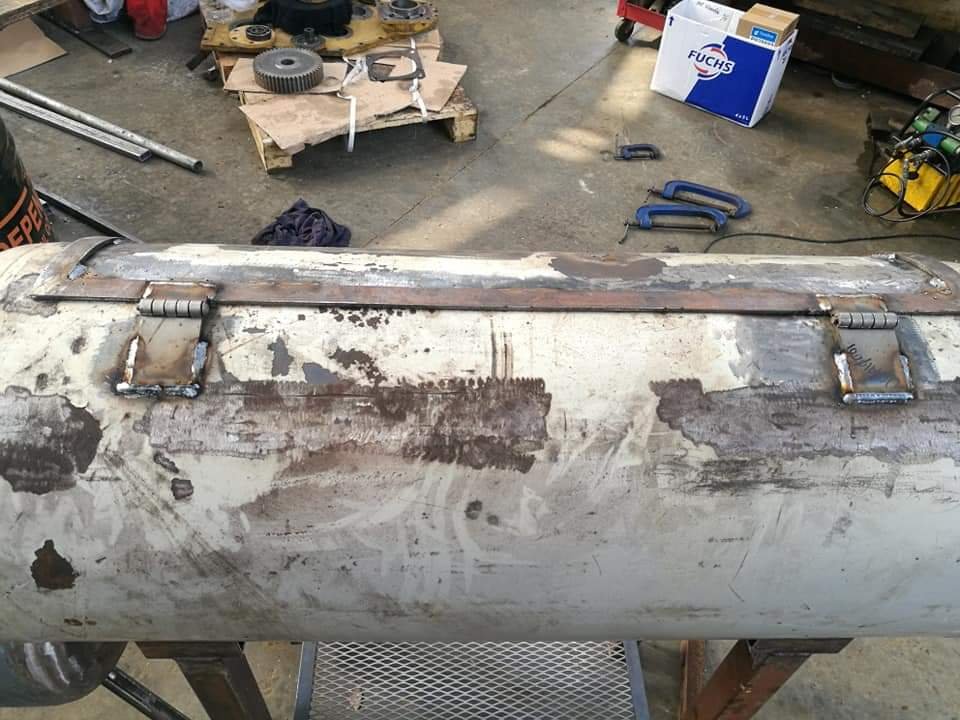
Ok guys I managed to get a about an hour and a half in today and now I have reached an awesome milestone and pretty stoked with what I got done. Finished off the door/lid (bar handle and temp gauges). Stitch welded the outer section of the frame. Trimmed and welded on the hinges, and now we have a functional door/lid. It sits pretty well, should be relatively flush once I trim the spot welds underneath and it's weighted well and sits at a good lean when open fully. Going to get a full day in tomorrow so hopefully it will be mostly finished. Cheers
- 54 replies
-
- 10
-
-
BBQ Build - Attempt to build a reverse flow offset smoker
Taistorm replied to Taistorm's topic in Other Projects
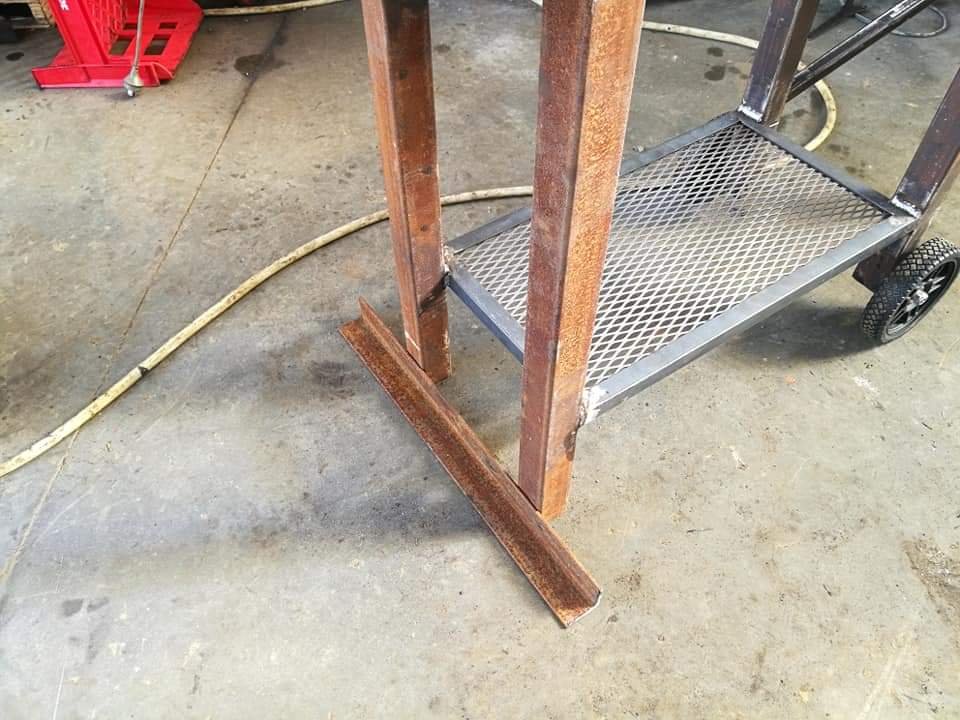
Only managed to squeeze about 1.5hrs in since Monday which sucks as I was hoped to get a few more. Ah well little progress is still progress... I've cut out the main chamber lid and cleaned up the edges. Cleaned out most of the sludgy build up up there's not much rust at all so pretty happy. Will need to get it burnt out pretty well though before seasoning. I've also managed to start cutting and bend up the lid outer frame. It should over hang about 20mm so hopefully it seals well enough other wise Will need to look at some heat seal. Also cut some 50x3 angle for the legs. Should help add a little more weight to the front and make it a bit more stable. Will probably tidy it up and chamfer the ends though.
- 54 replies
-
- 11
-
-
BBQ Build - Attempt to build a reverse flow offset smoker
Taistorm replied to Taistorm's topic in Other Projects
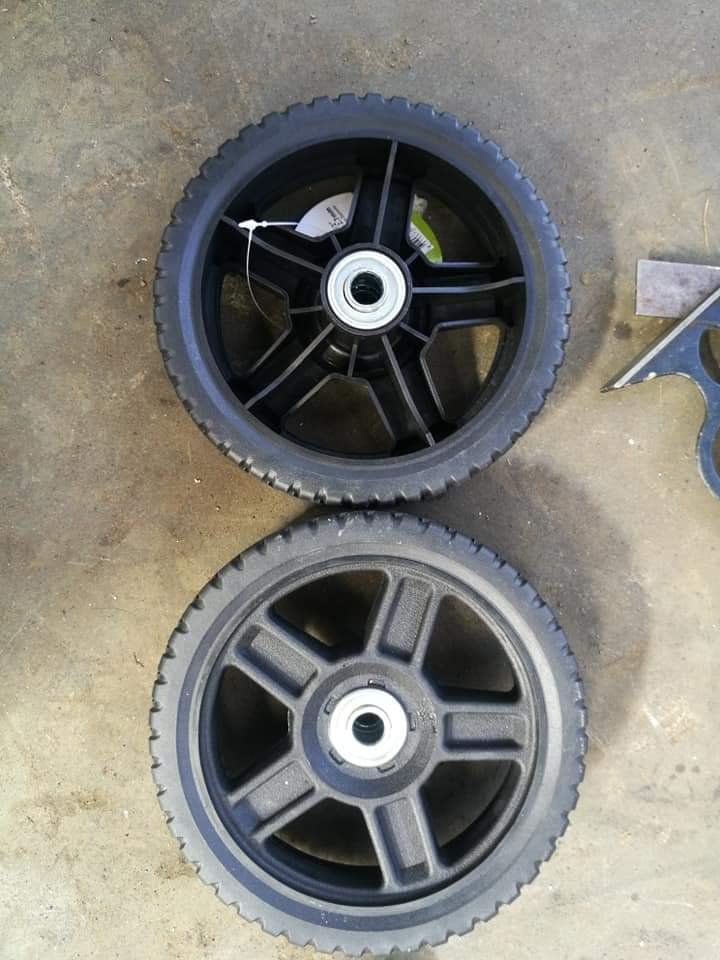
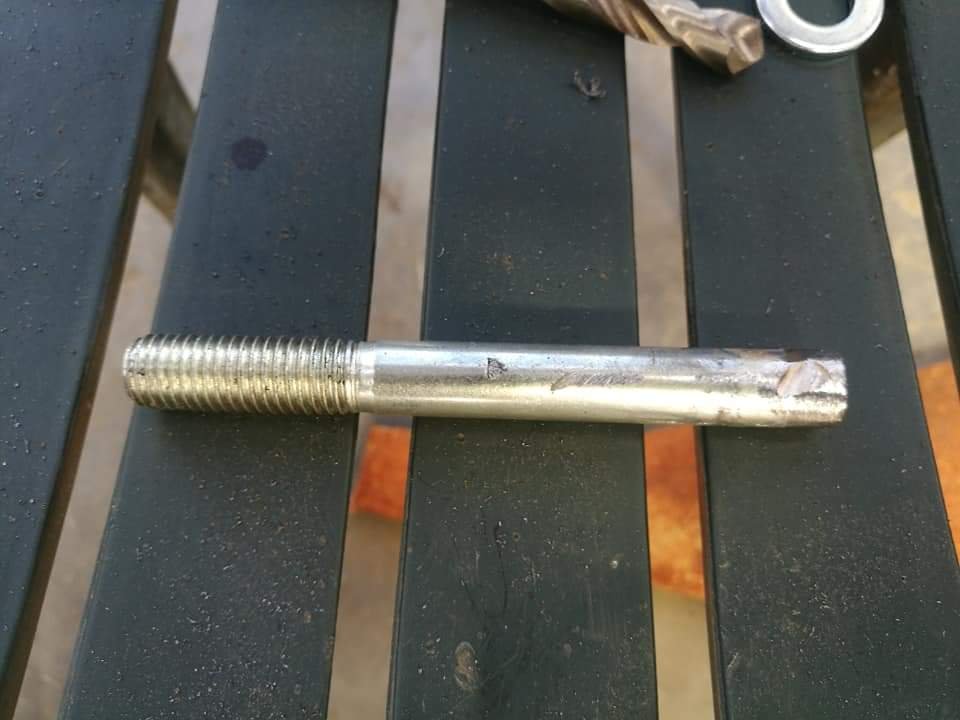
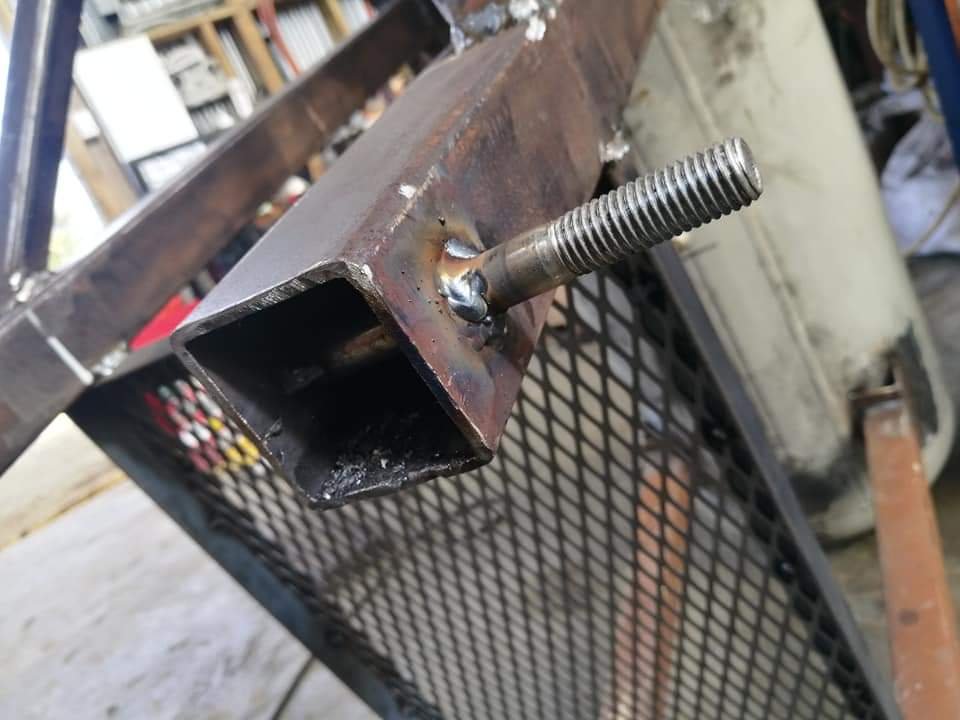
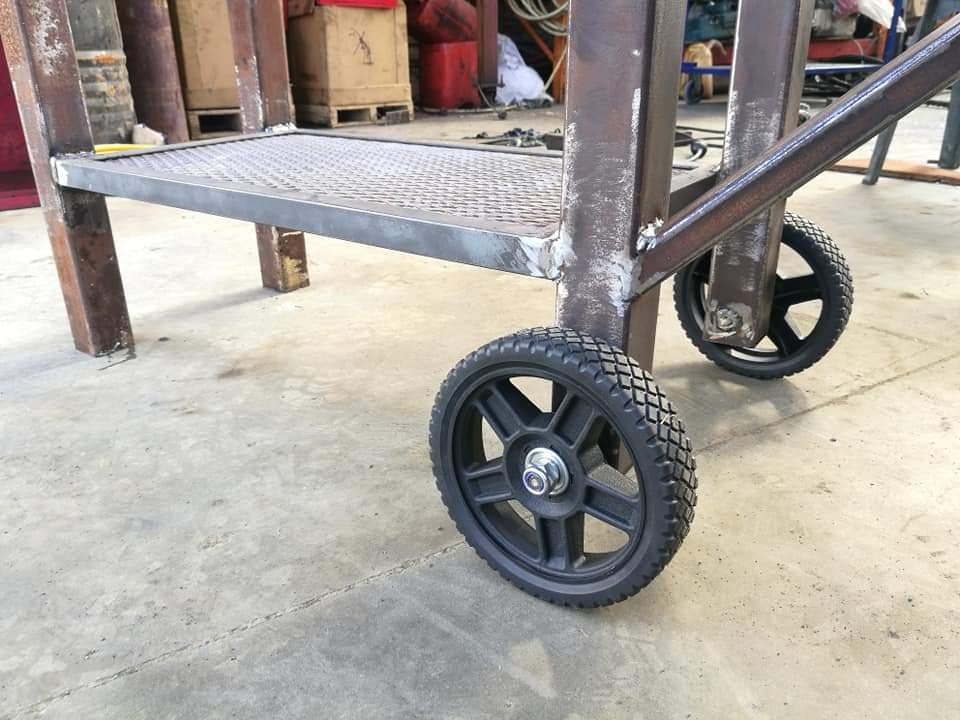
Figured this thing was getting too heavy to lift around the work shop and move out of the way so I decided to do something with the wheels. Got a pair of these for about $20 each from bunnings (rated to about 25kg each). Chopped the legs about 70mm and drilled out some holes. I was going to just bolt the wheels to the legs but we didn't have anything long enough to suit so I ended up trimming the hex off the bolts and used it as a spigot on the legs. Tacked them on and the wheels bolted on perfect. Not pretty but they're functional and it's now 100x easier to shift around.
-
BBQ Build - Attempt to build a reverse flow offset smoker
Taistorm replied to Taistorm's topic in Other Projects
Cheers bro ! Yeah definitely give it a crack. Will be going reverse flow. I've never personally used one before but hear it's the business and yeah far better for maintaining a more consistent temp. Combined with a good fire box setup it should be pretty easy barbecuing. As for the got plates there will be one on a removable shelf on the fire box for searing and will have 2 removable racks in the main chamber. -
BBQ Build - Attempt to build a reverse flow offset smoker
Taistorm replied to Taistorm's topic in Other Projects
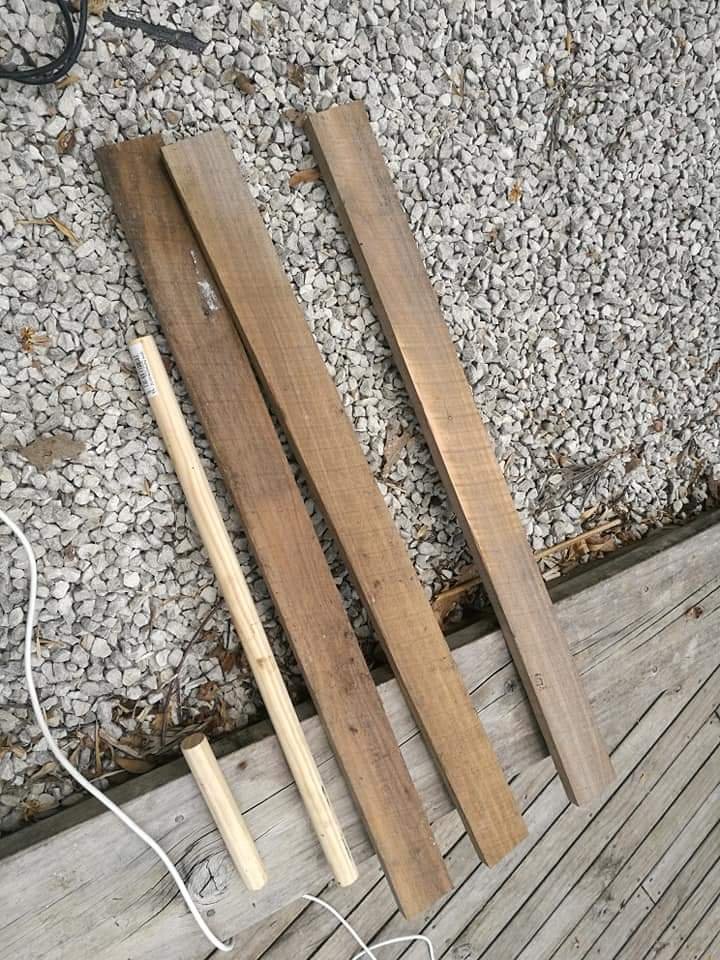
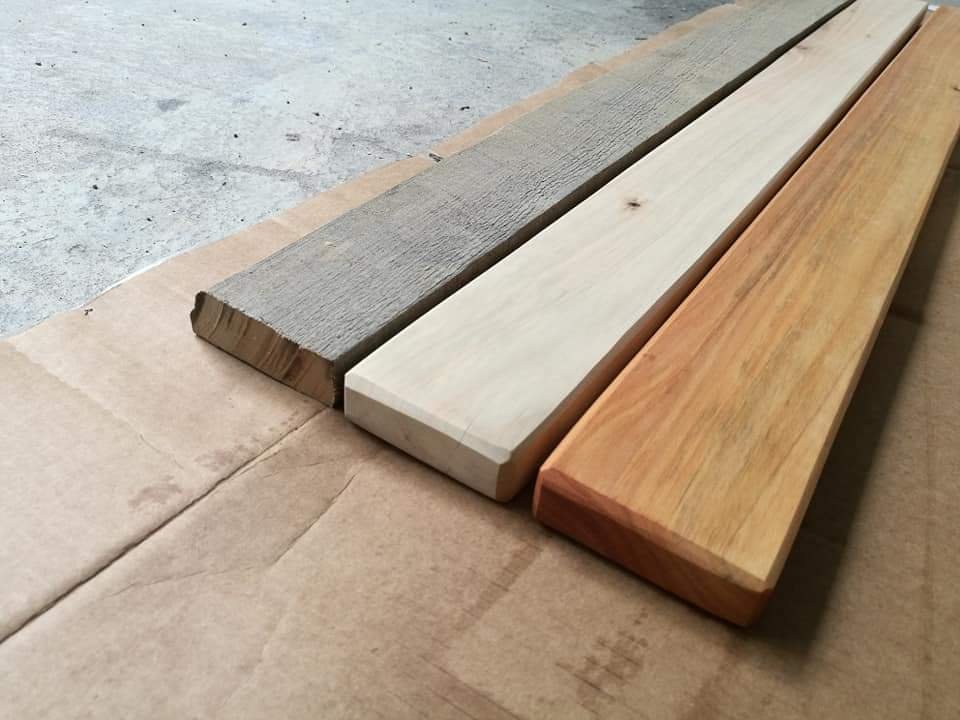
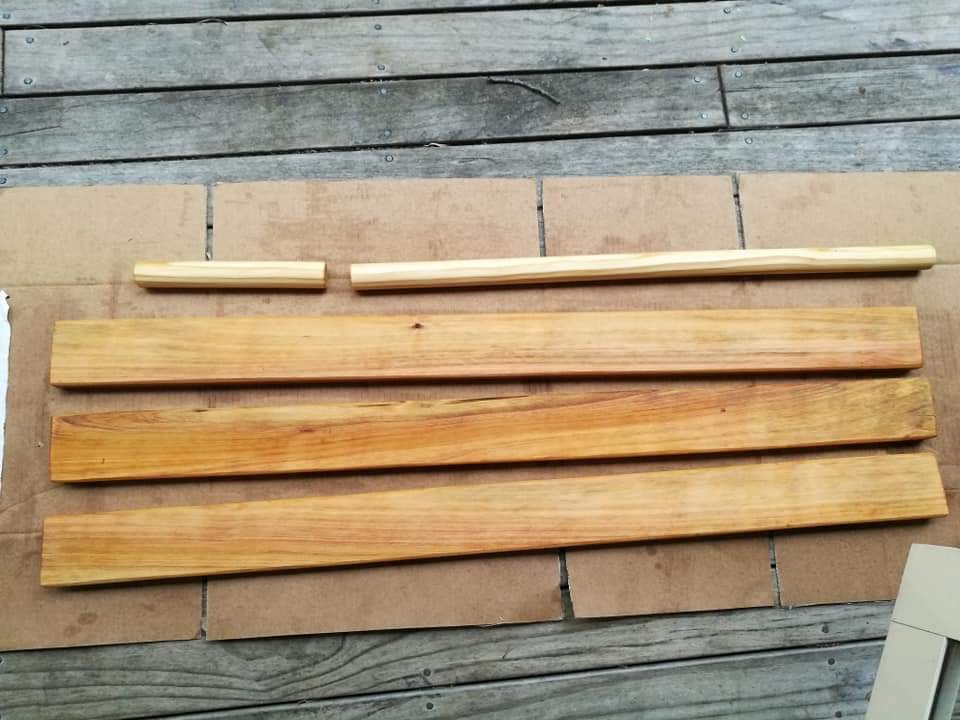
Picked up a pine dowel for the lid handles and got some macrocarpa lengths off the olds for the bench. Cut these all down to size, then with help from the other half we sanded them back and threw some linseed oil stain on them. Sanded to 240grit and chamfered the edges. First coat of oil and pieces side by side to show the different stages. 3 layers deep (on the rark). Some sweet colour and nice grain out of the Mac. Should look pretty sweet once it's all fitted up. This is where I'm at right now. The next stage with be the lids/doors then the main chamber baffles. Will see how we go anyway. If anyone has any ideas please let me know, just making it up as I go. Cheers, Tai
- 54 replies
-
- 15
-
-
BBQ Build - Attempt to build a reverse flow offset smoker
Taistorm replied to Taistorm's topic in Other Projects
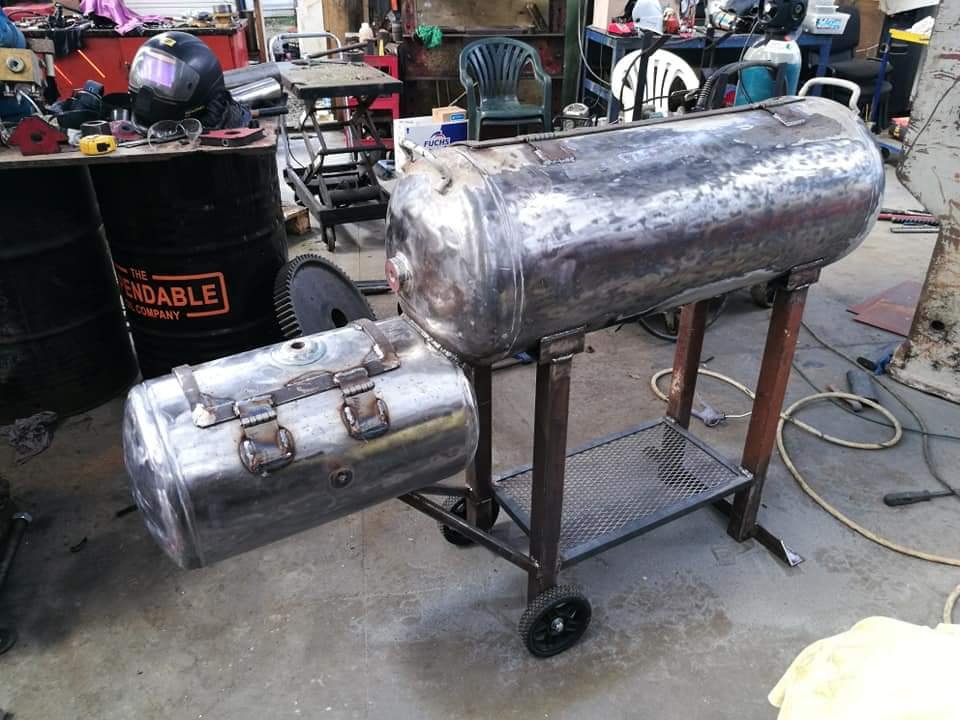
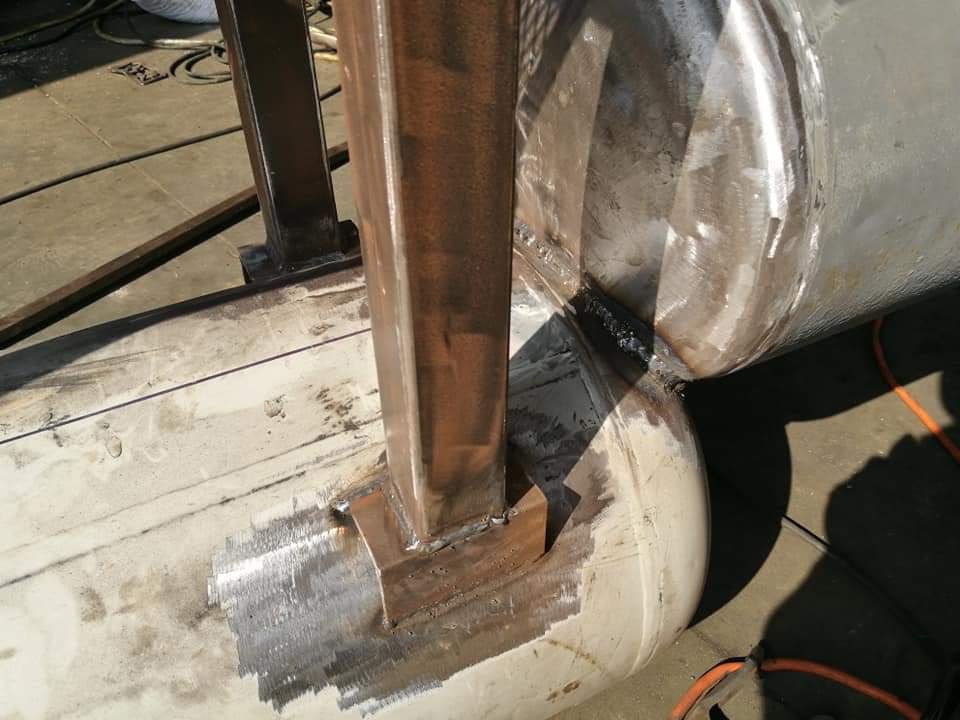
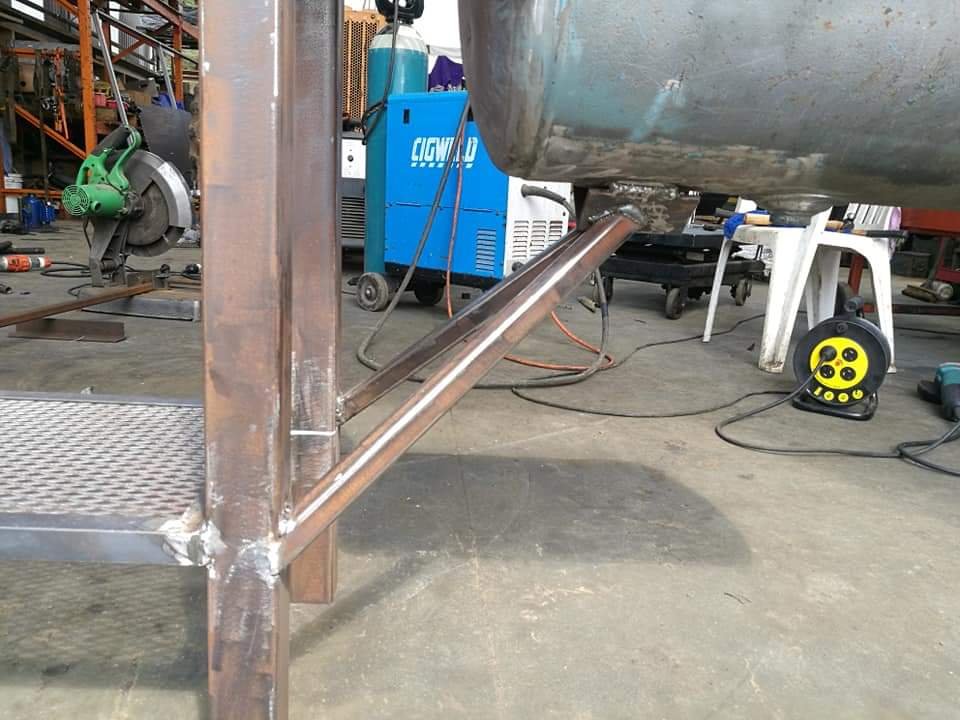
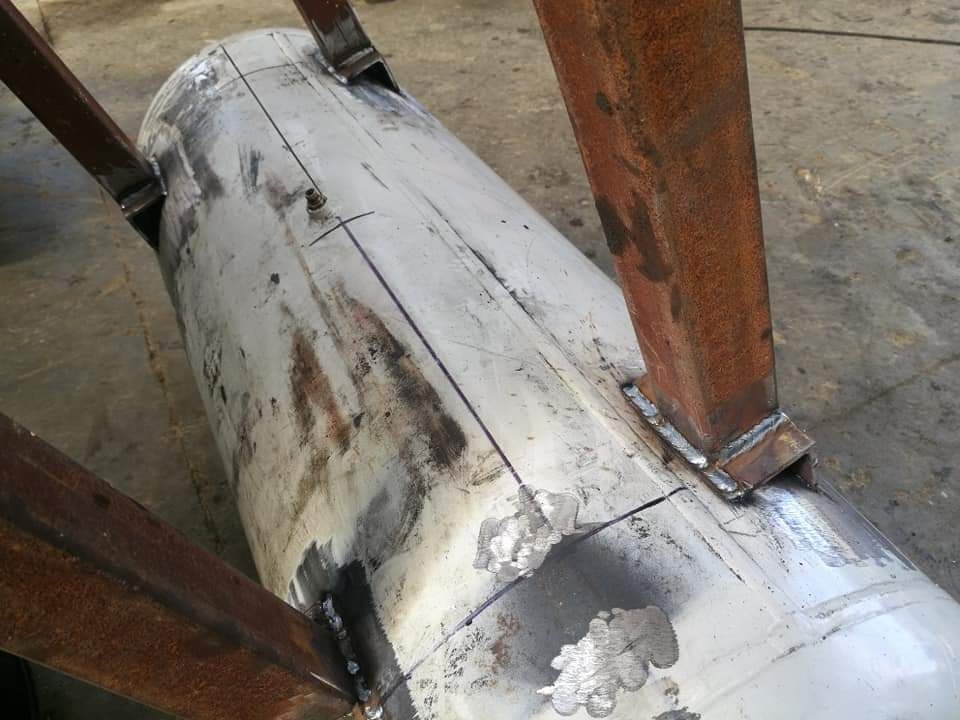
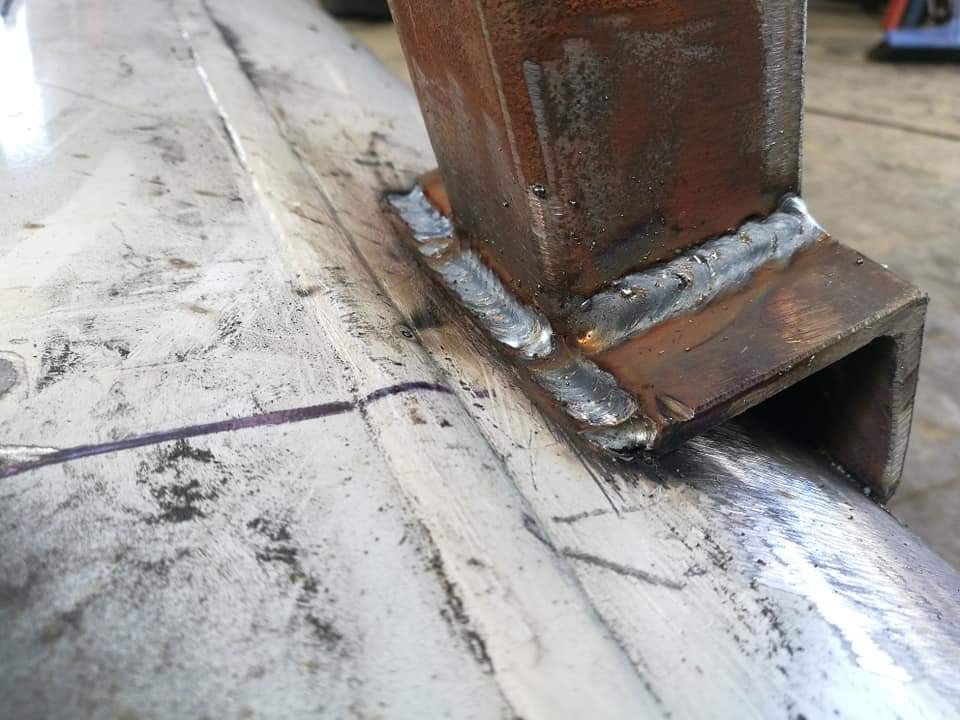
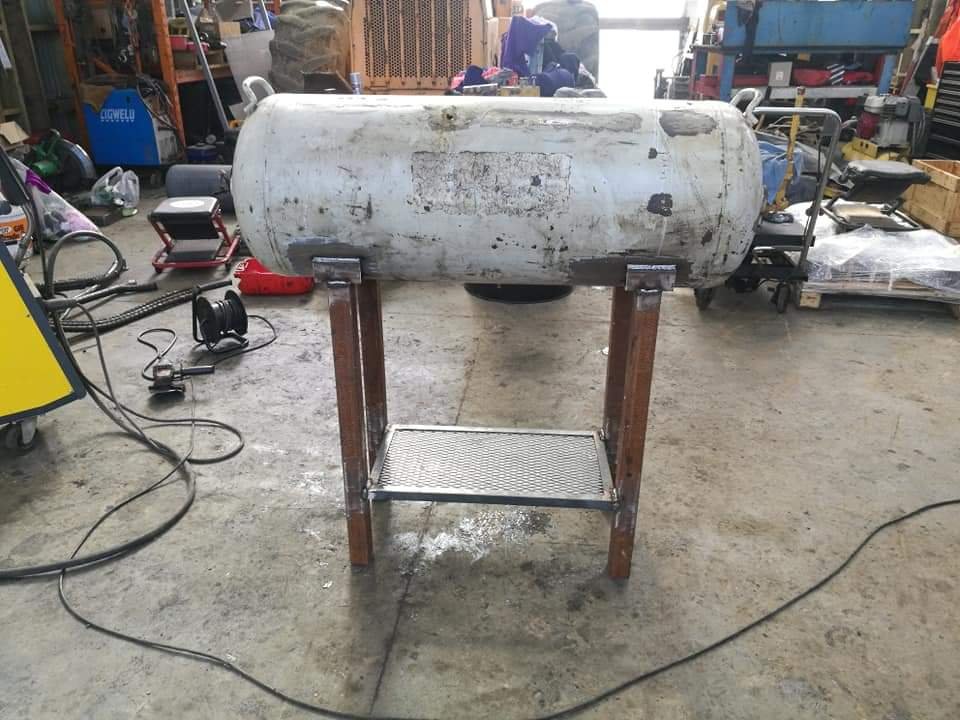
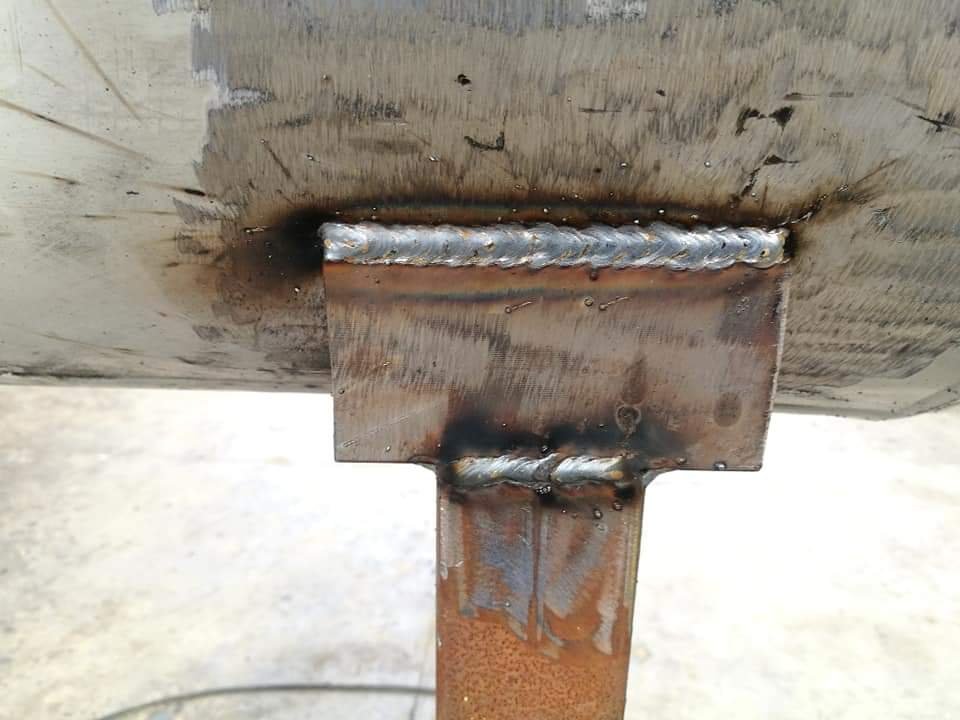
Yesterday morning I grabbed another roll of wire then tried to get my welding on, the bloody mig stopped working (bad contact on the feeder wire plug) so ended up having to use our old backup welder. The under side was the closest so had to fill a little which I'm not too happy about but it looks ok and is hidden. I also cut some support legs out of 20(or 25)x5. Had to piss around with getting the angles right so it sits relatively even. Mated these to angle and stitched them together. Pretty happy with how it looks and sits. It's heavy as, maybe a bit over 60kg as it sits atm. I think the tanks are around 3mm. I'll weld in a foot brace to the front legs to give it a bit more weight opposite to the Fire box and help with lateral movement (it's pretty stable as it is however).
-
BBQ Build - Attempt to build a reverse flow offset smoker
Taistorm replied to Taistorm's topic in Other Projects
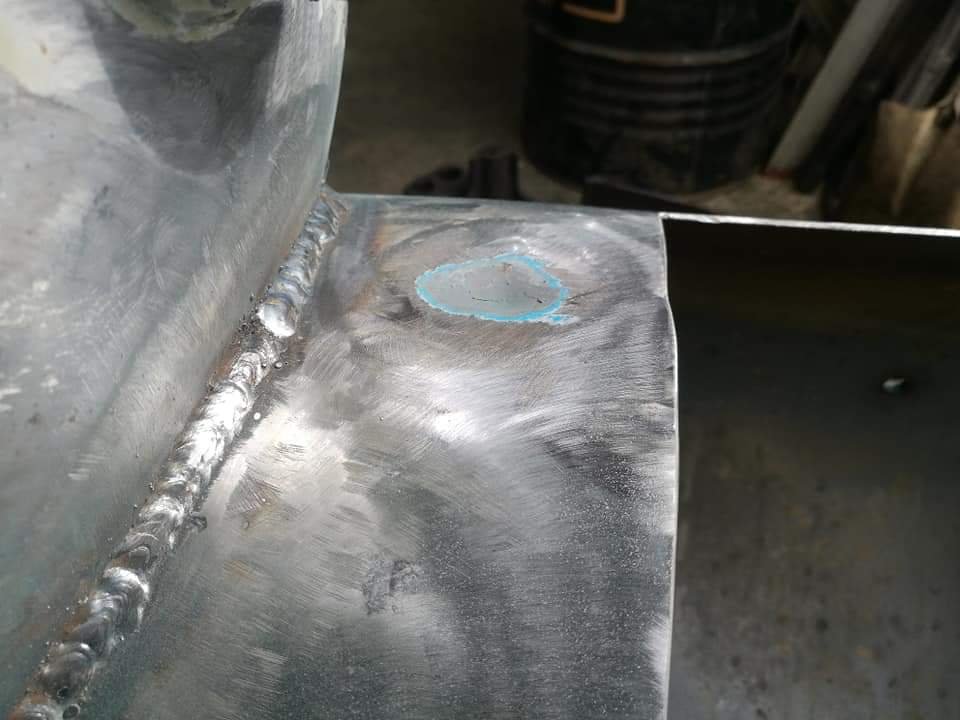
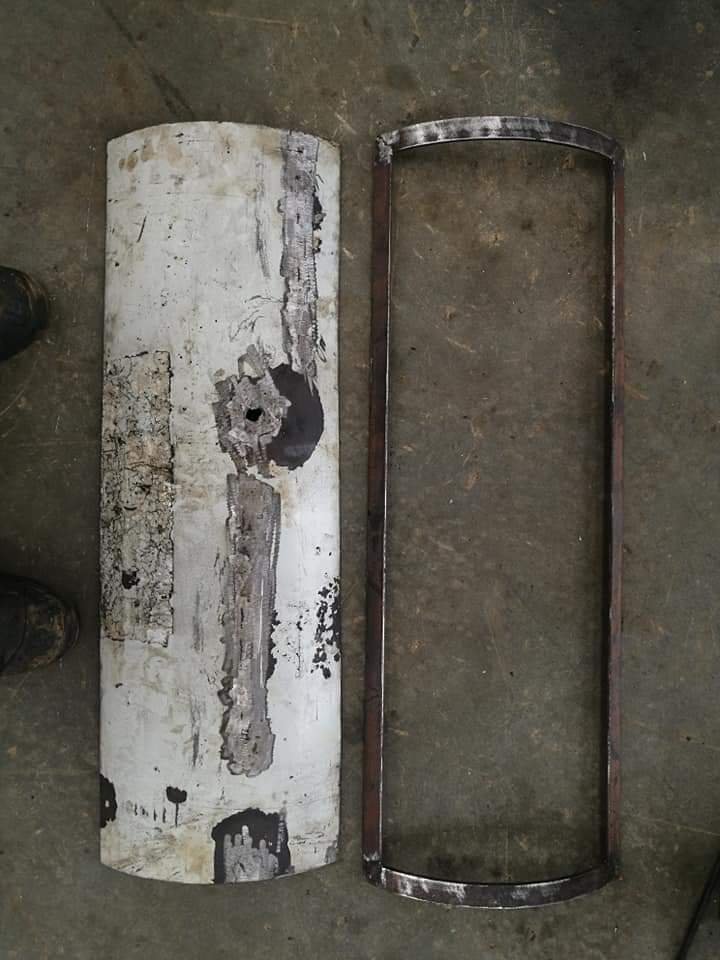
Cut out the top left section of the Fire box. There's probably an easier way of doing of this but I have had minimal fabrication/engineering guidance and have mostly learnt as I go, across the last few years through work. I just did rough marking then cut it bit by bit until it was close enough. I cut a hole in the main chamber approx 30mm smaller than the Fire box cut out and ran a flapper wheel around the hard to reach areas (didn't take any pics sorry). I then tacked it in place and the bloody welder ran out of wire!
-
BBQ Build - Attempt to build a reverse flow offset smoker
Taistorm replied to Taistorm's topic in Other Projects
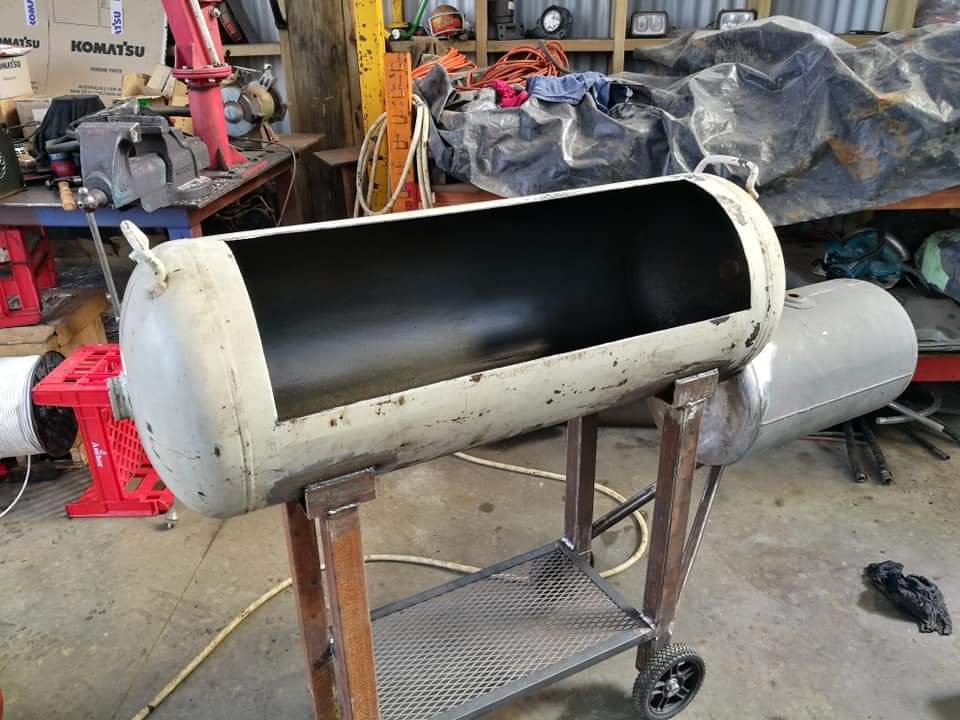
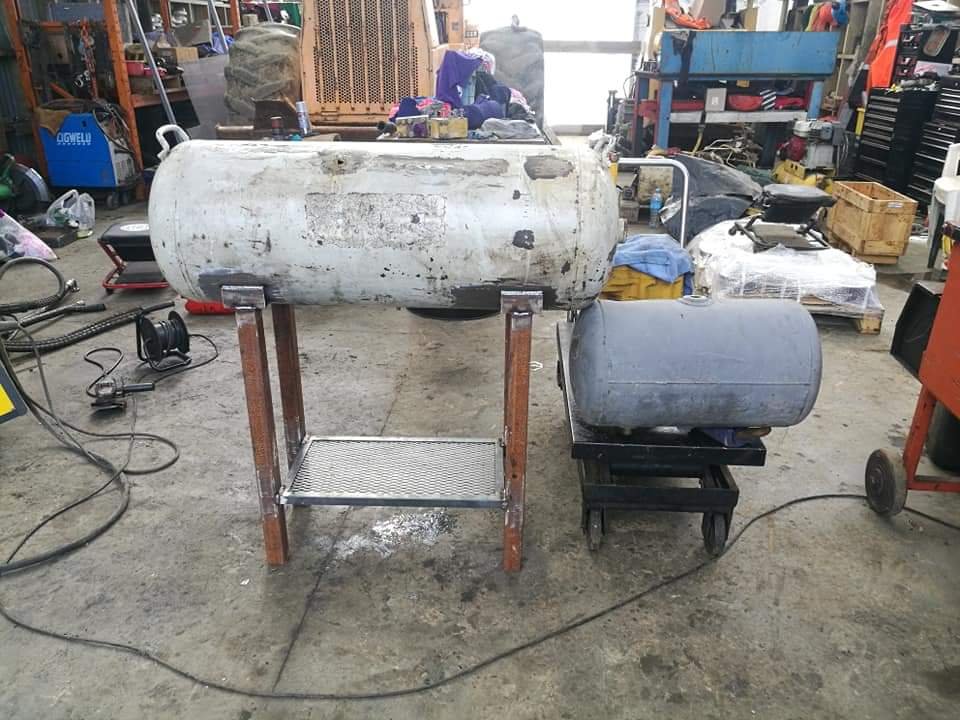
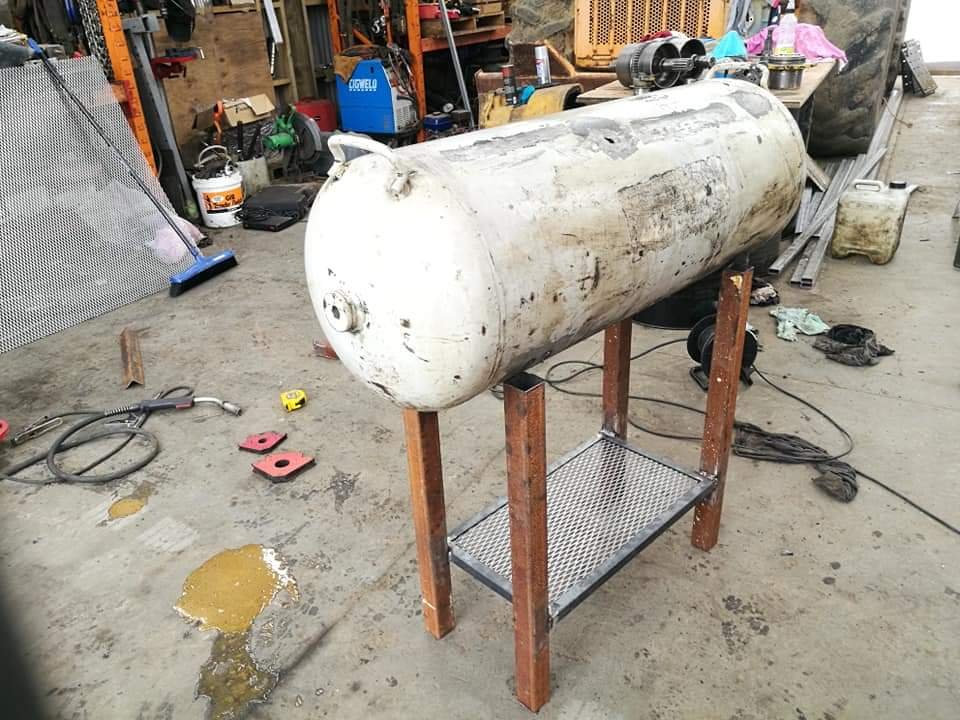
Cut some 50x3 angle for the tank/leg mounts and zapped them on. Fire box offset tank mocked up.
-
BBQ Build - Attempt to build a reverse flow offset smoker
Taistorm replied to Taistorm's topic in Other Projects
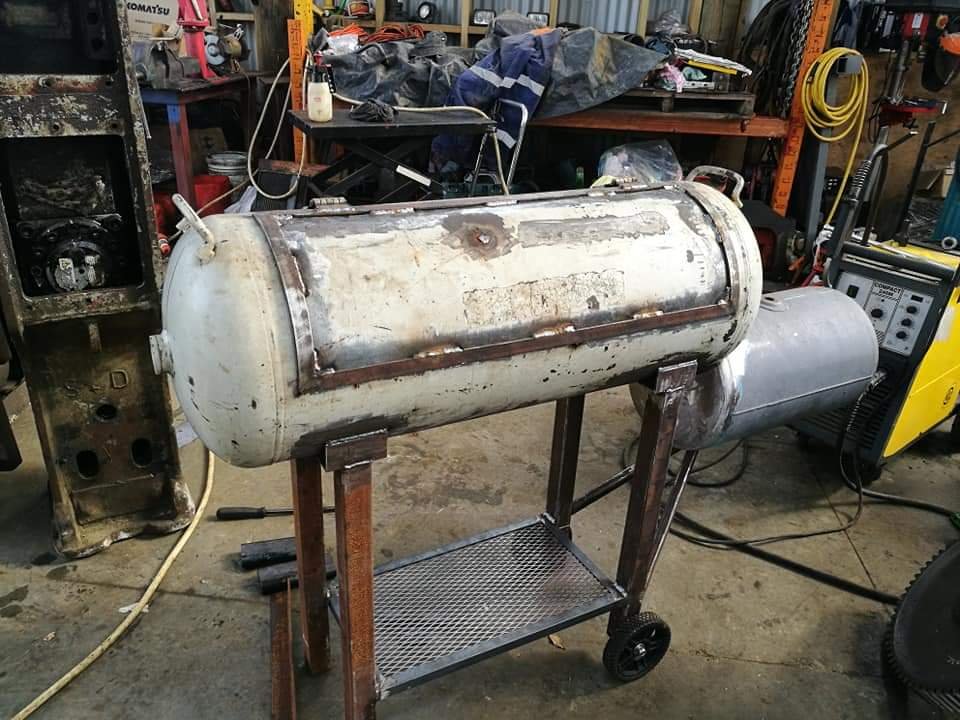
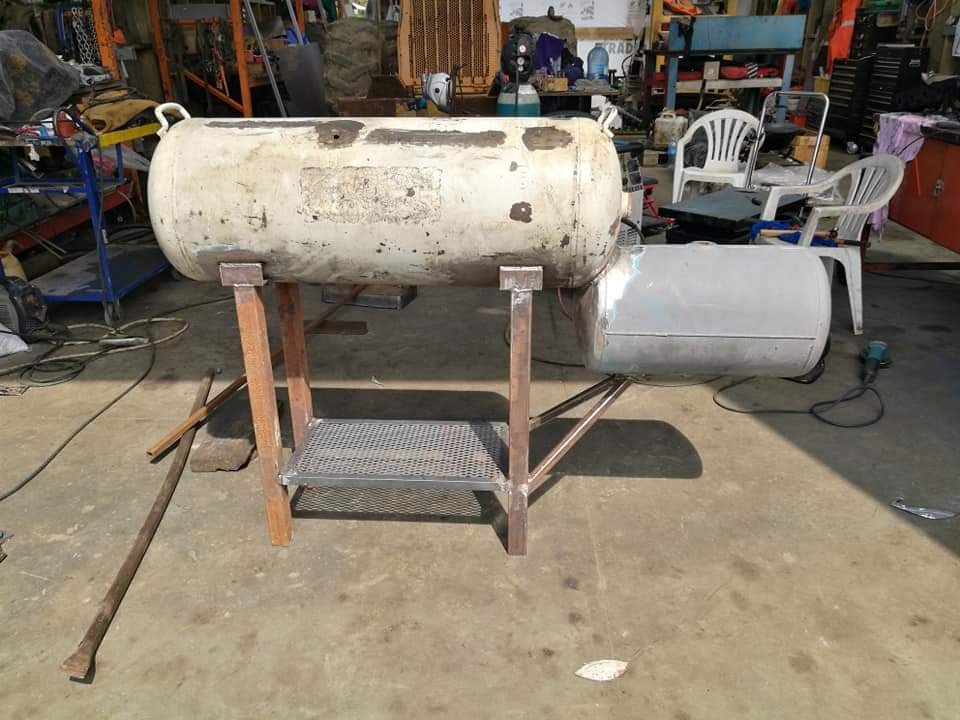
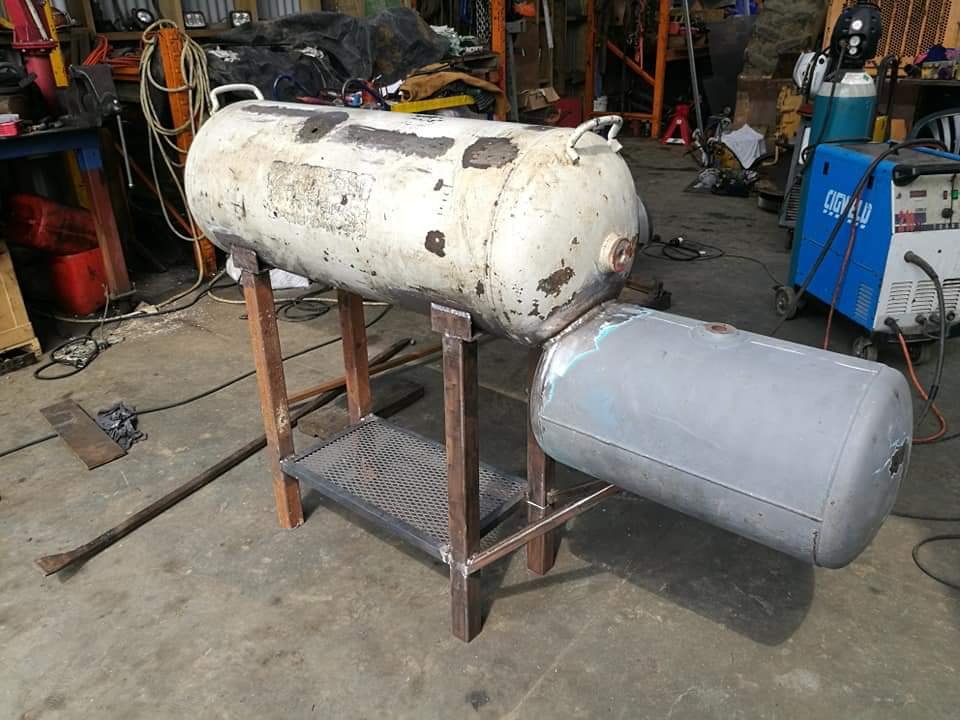
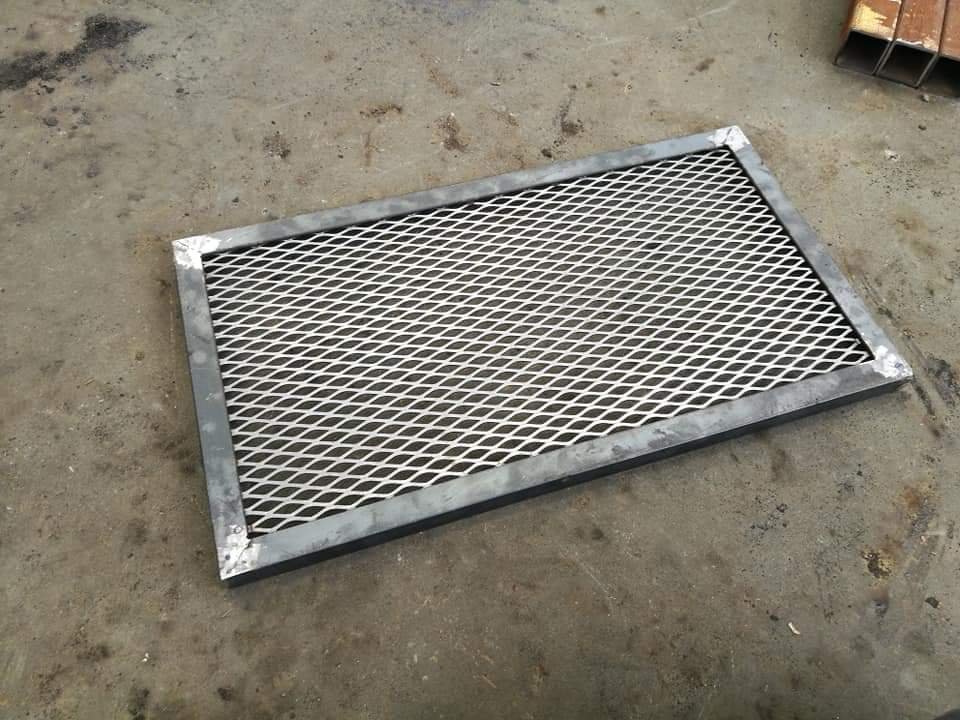
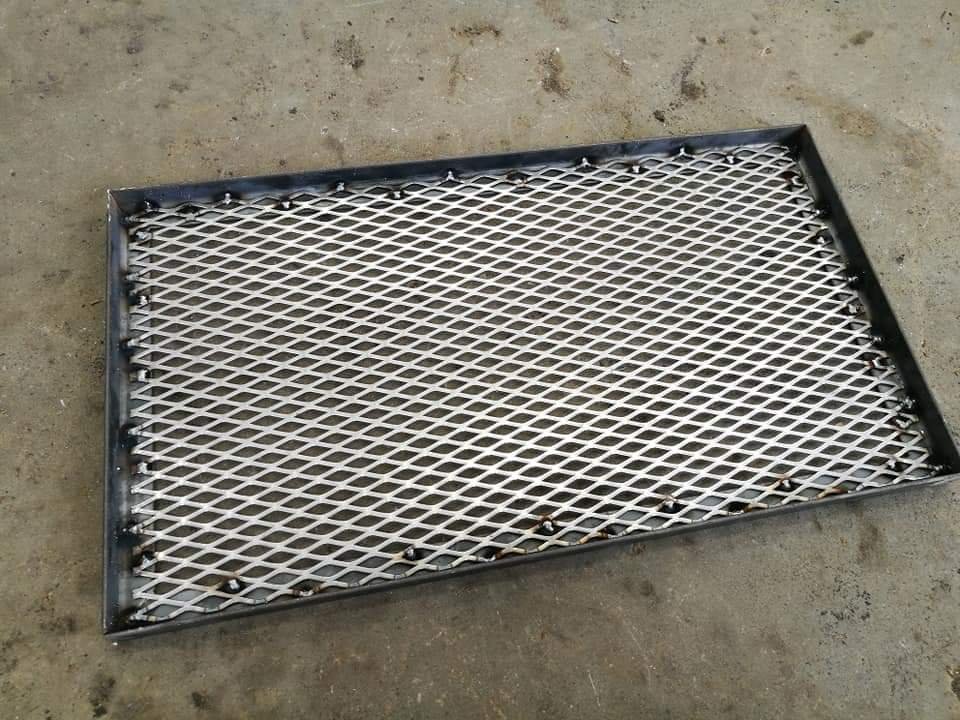
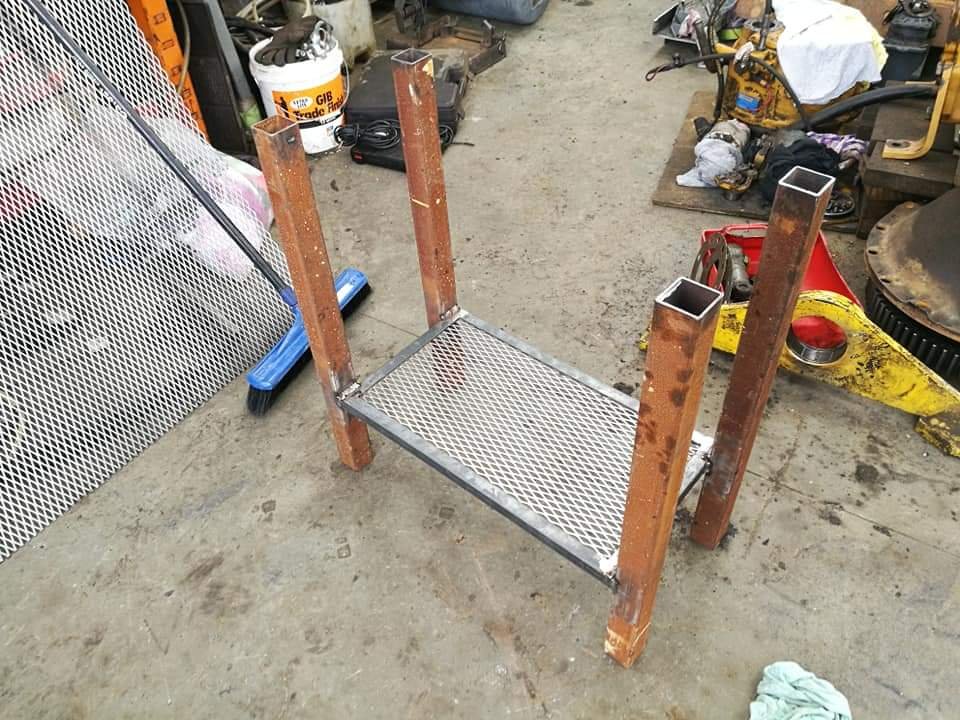
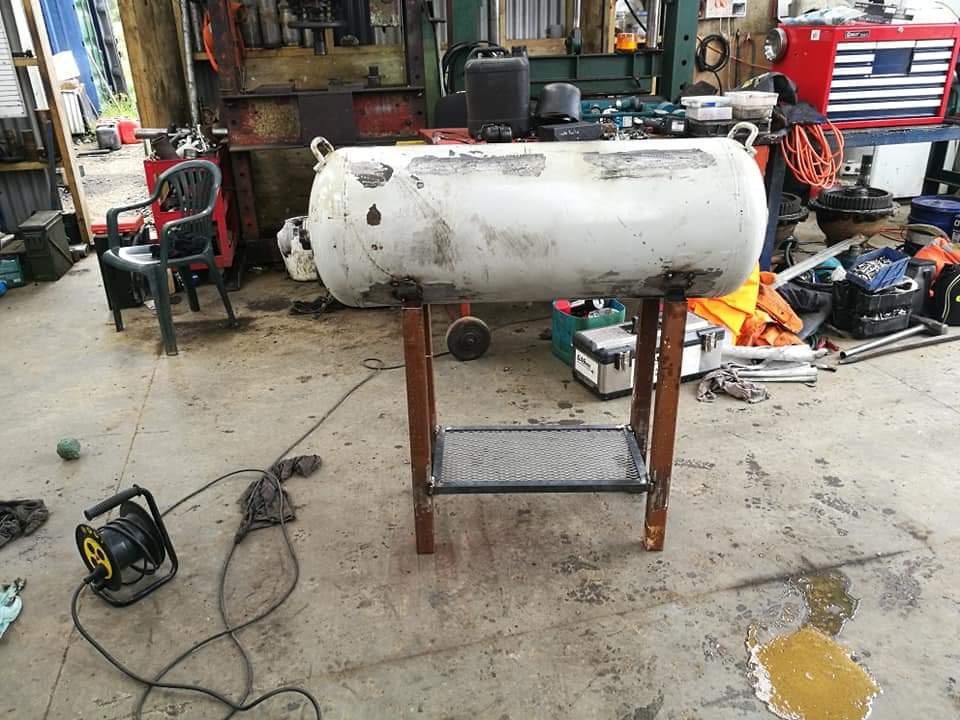
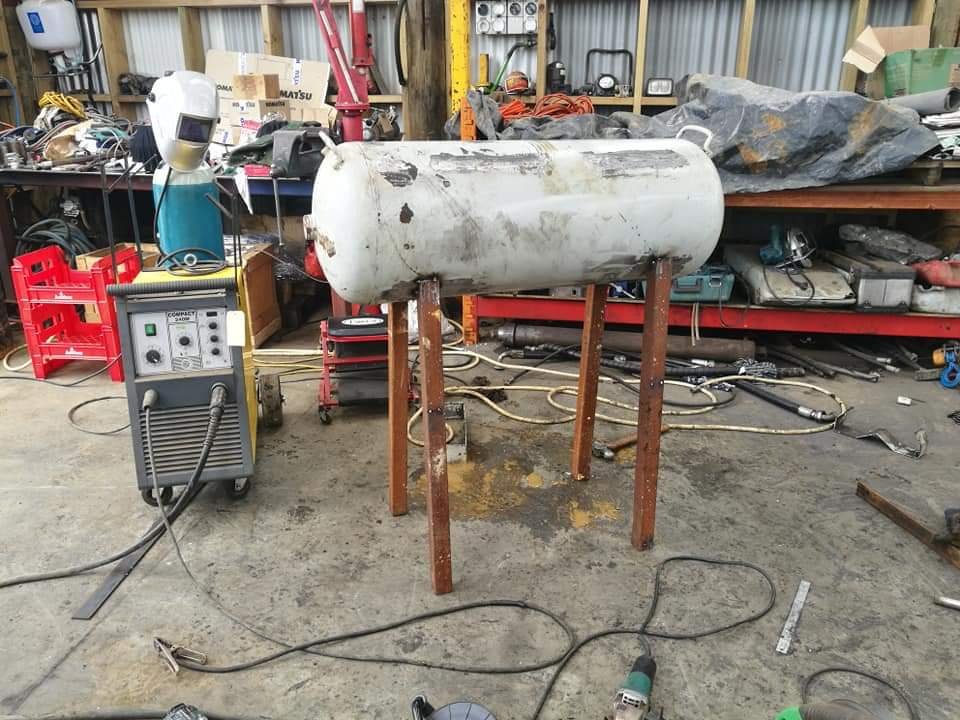
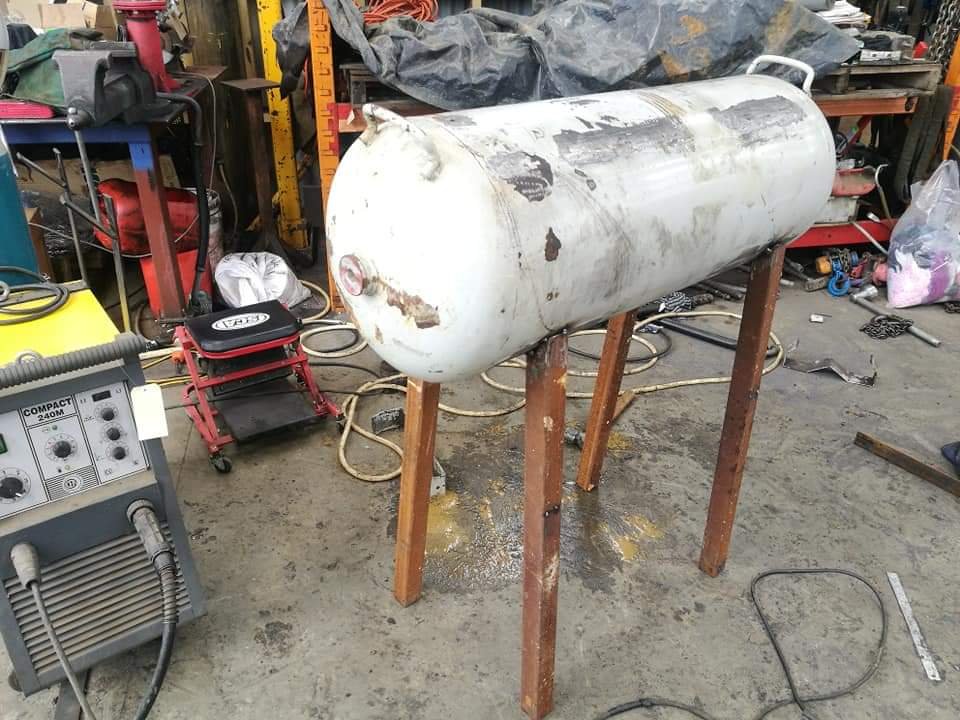
Decided I'd make a lower shelf and fix legs to it to try and keep everything relatively square and act as a frame to sit the tank on. Used 25x3 angle and 3mm expanded mesh (mesh was pretty pricey as I had to buy it in a 2400 x 1200 sheet). I just tacked the mesh on the underside. It should be strong enough but I may weld a support brace across the middle for peace of mind. And the legs welded on. Then the compressor mocked up. I also chopped the legs 150 so it sits at a better height (I think about 750) so it's at around waist height.
-
BBQ Build - Attempt to build a reverse flow offset smoker
Taistorm replied to Taistorm's topic in Other Projects
Cut some legs out of 50x3 box. Cut a 45 on the top ends to try give a tapered stance but it was a shit idea. I couldn't jig them in place easily and tried to tack them on. Everything was out and it looked like shit so ripped them back off.
-
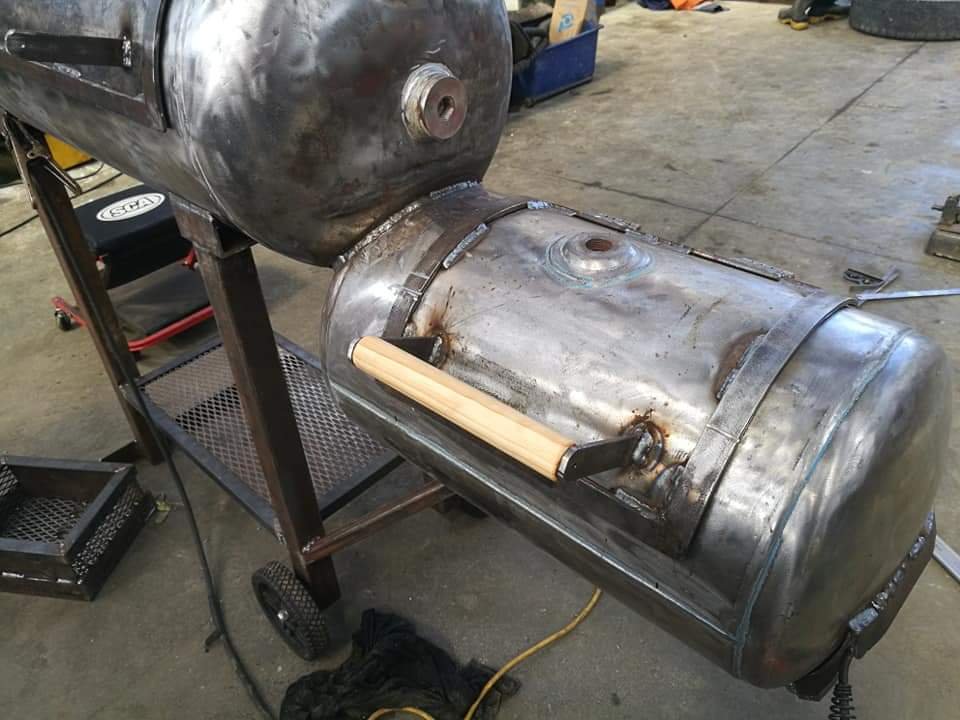
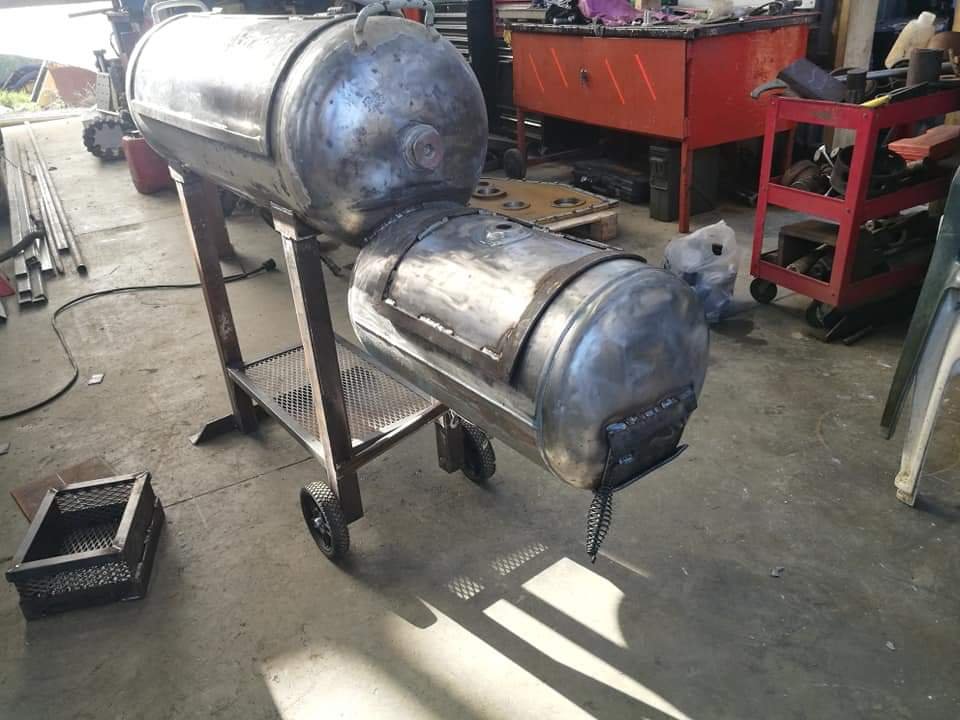
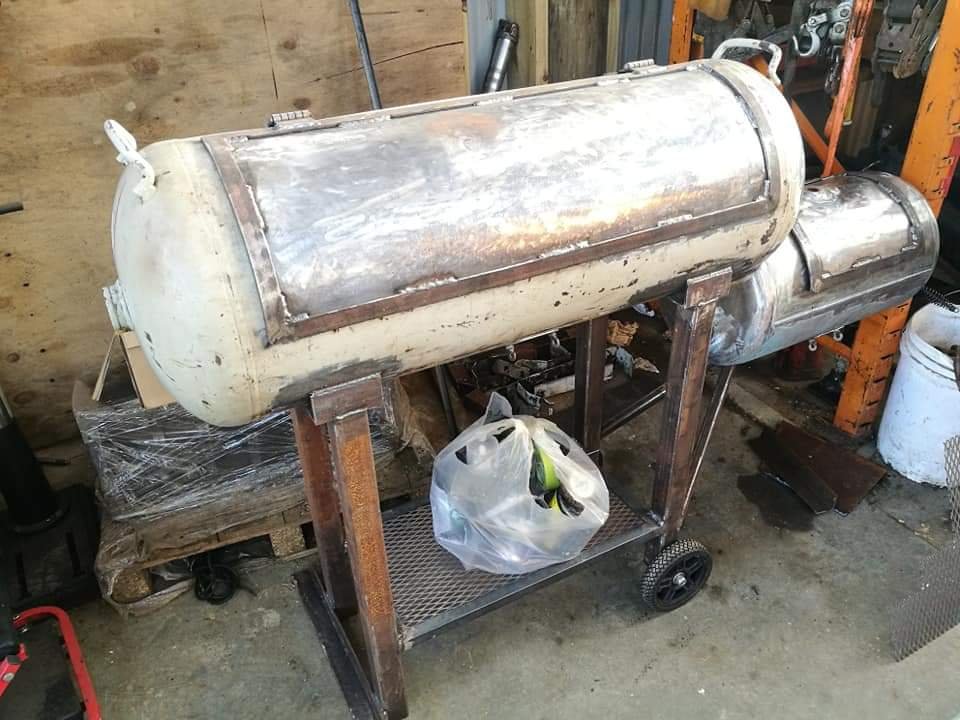
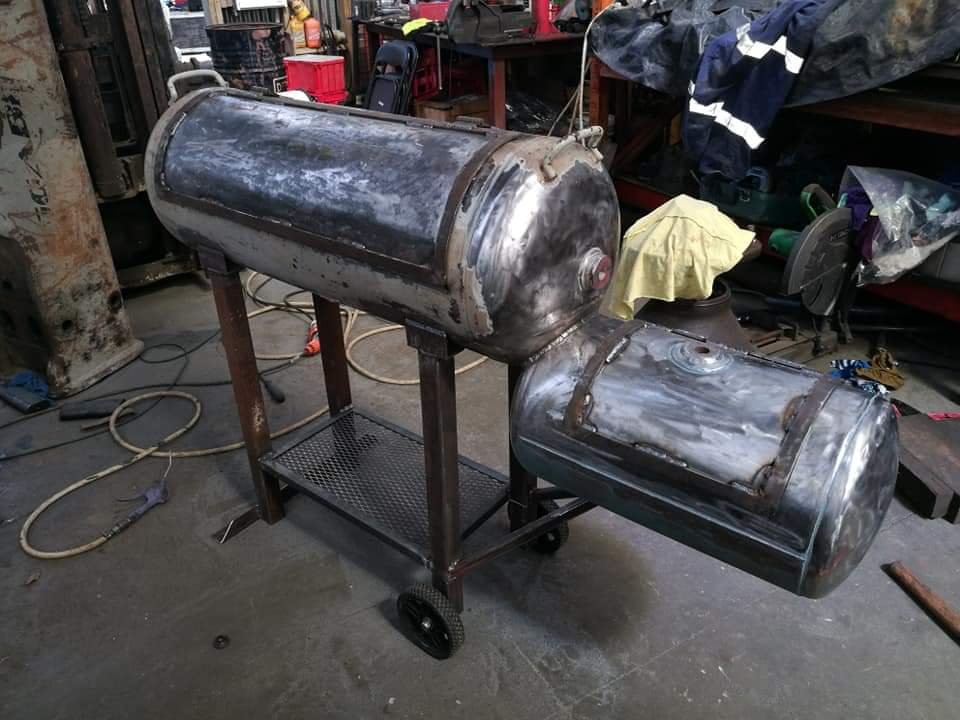
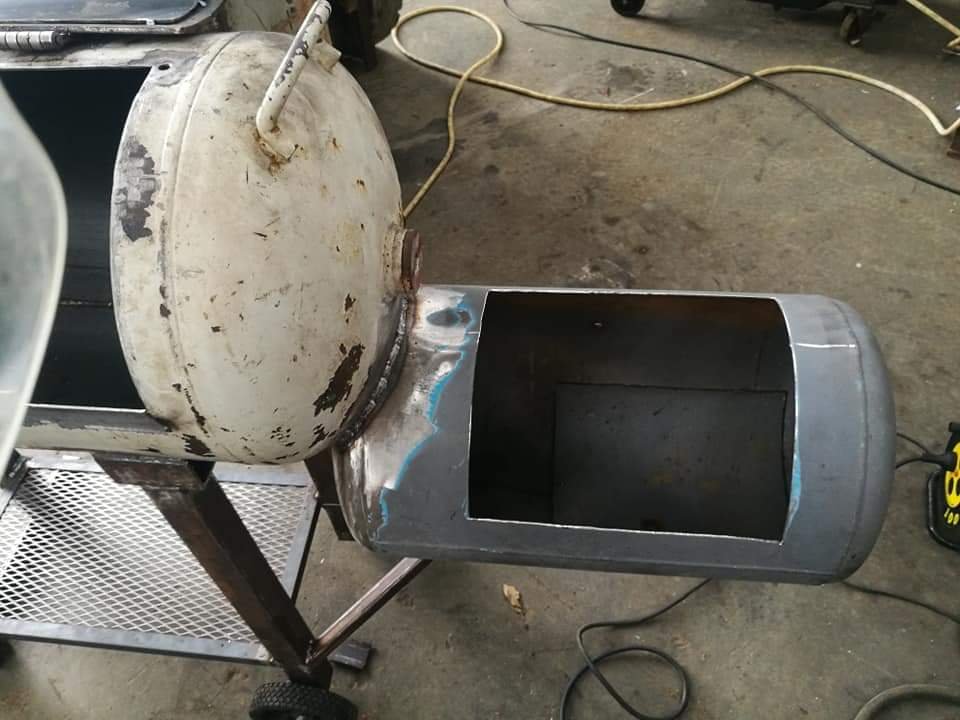
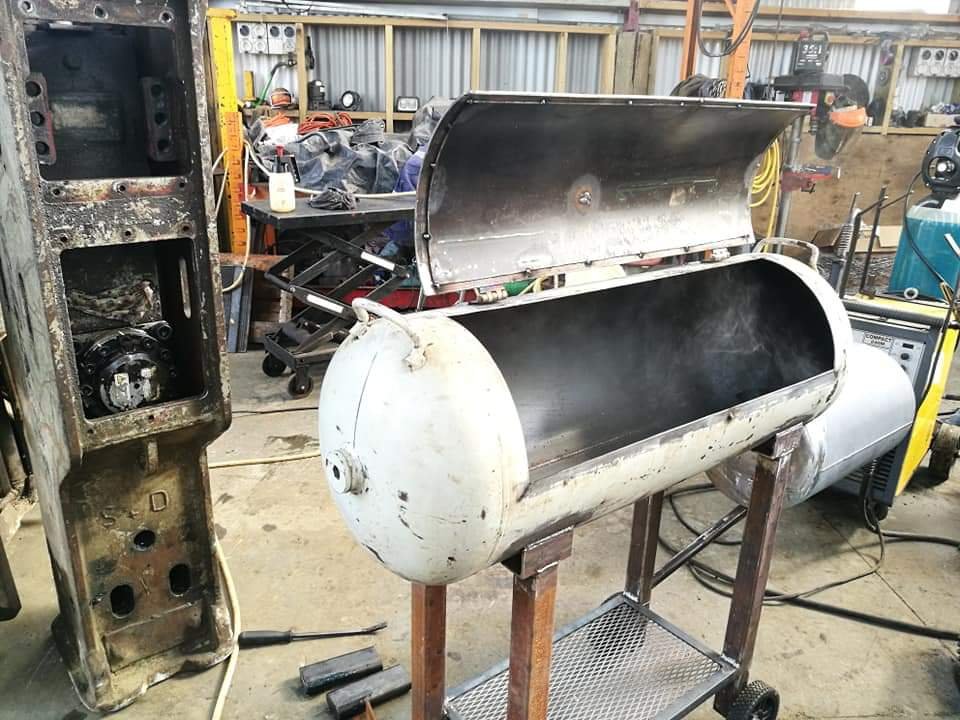
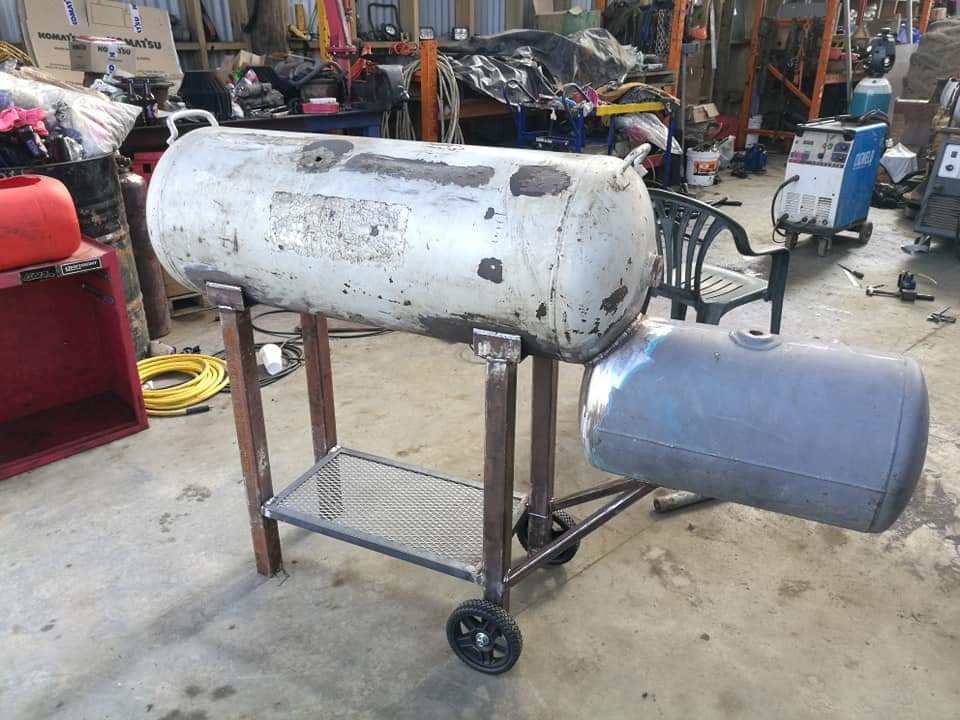
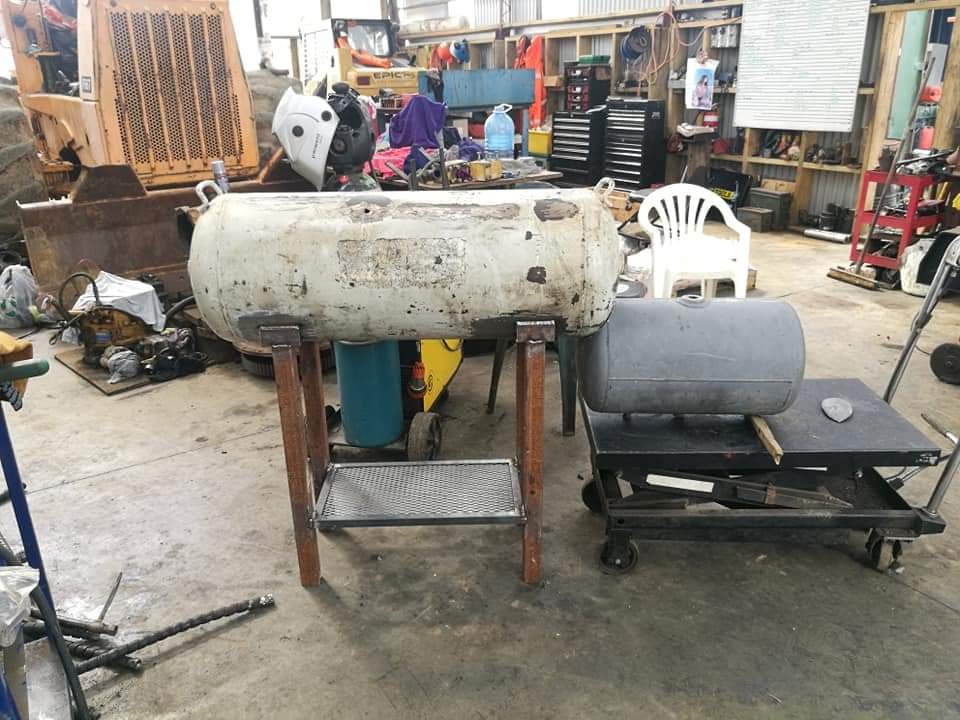
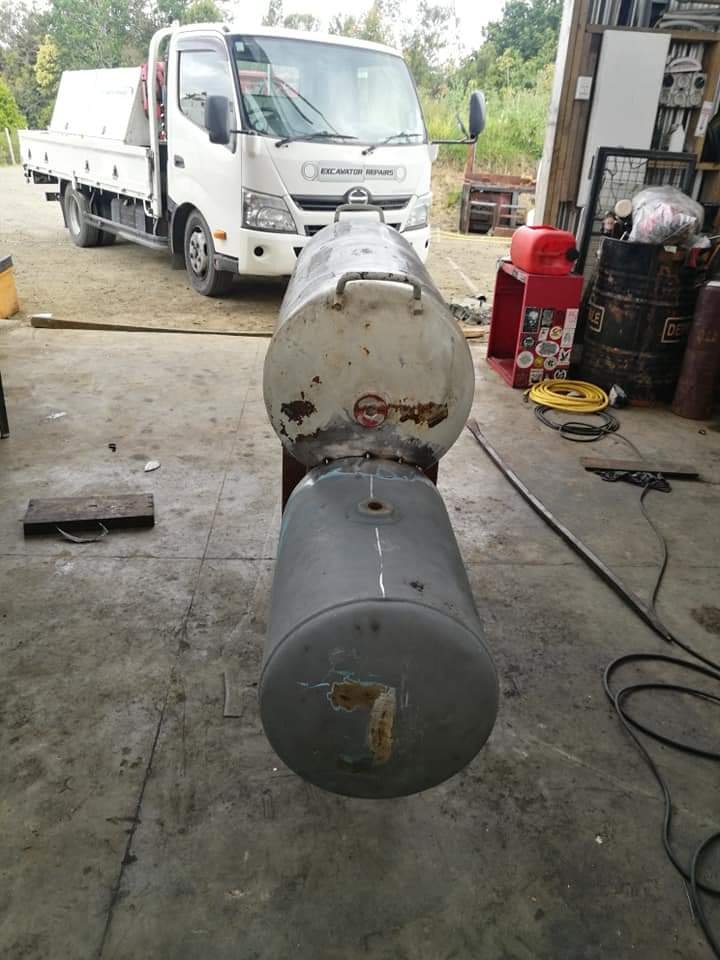
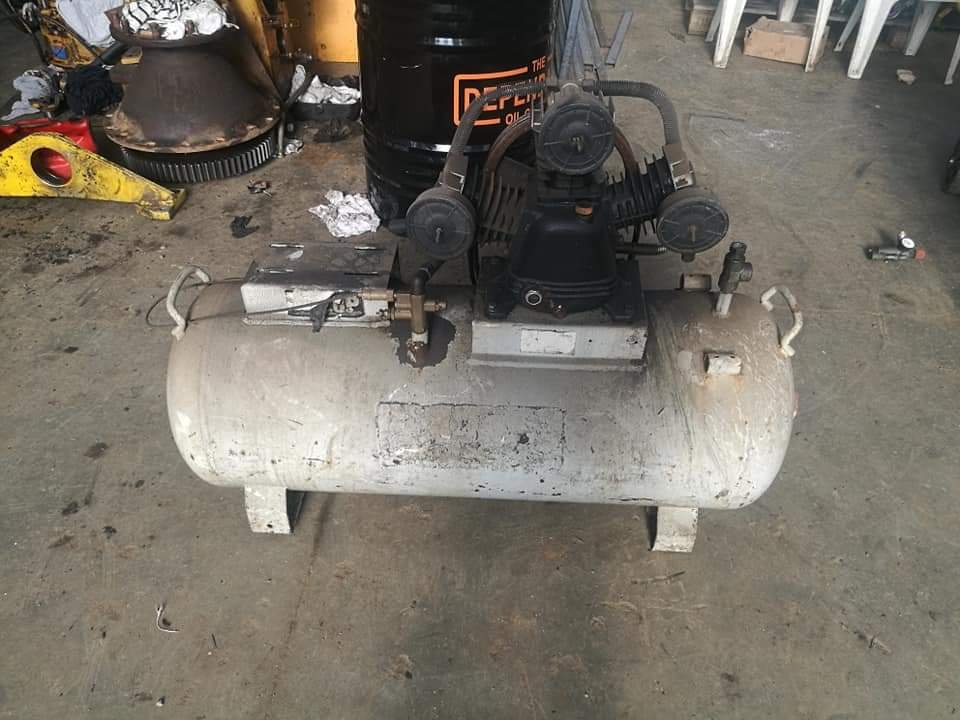
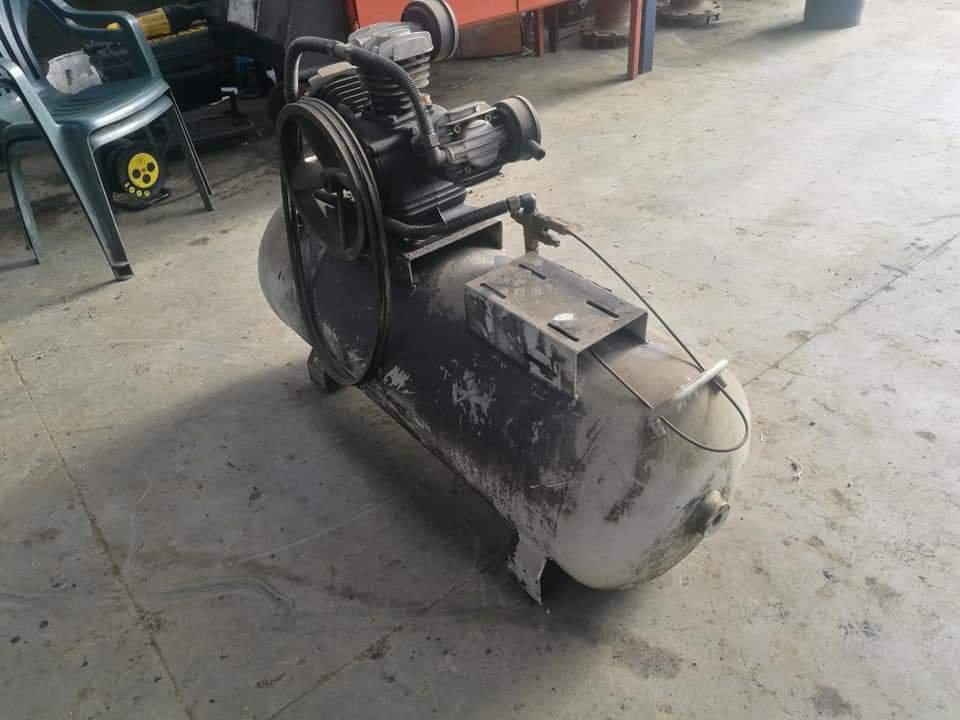
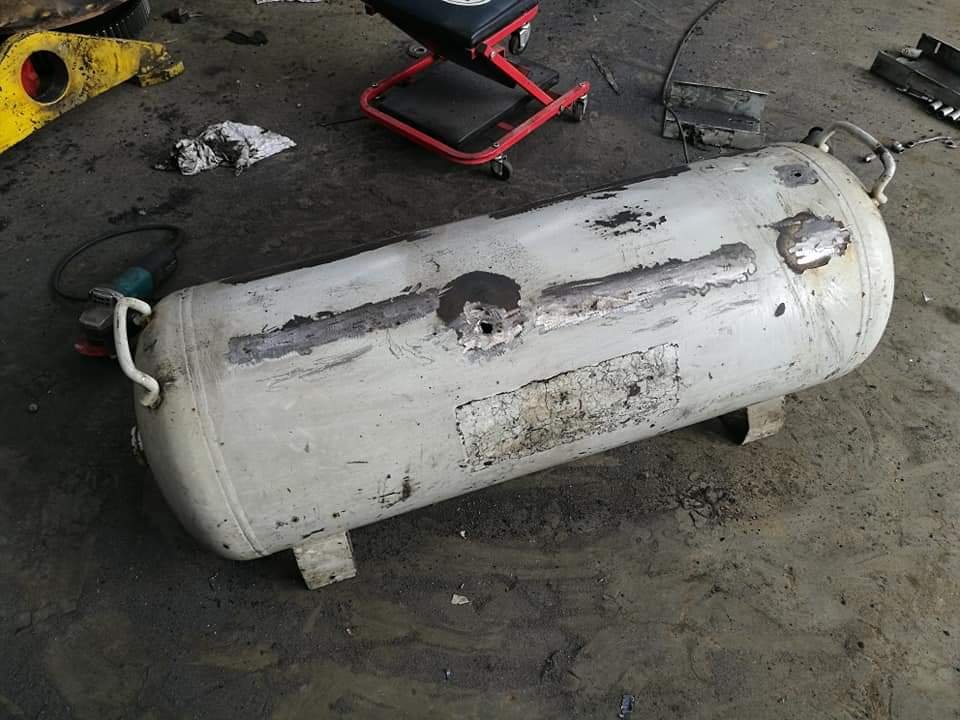
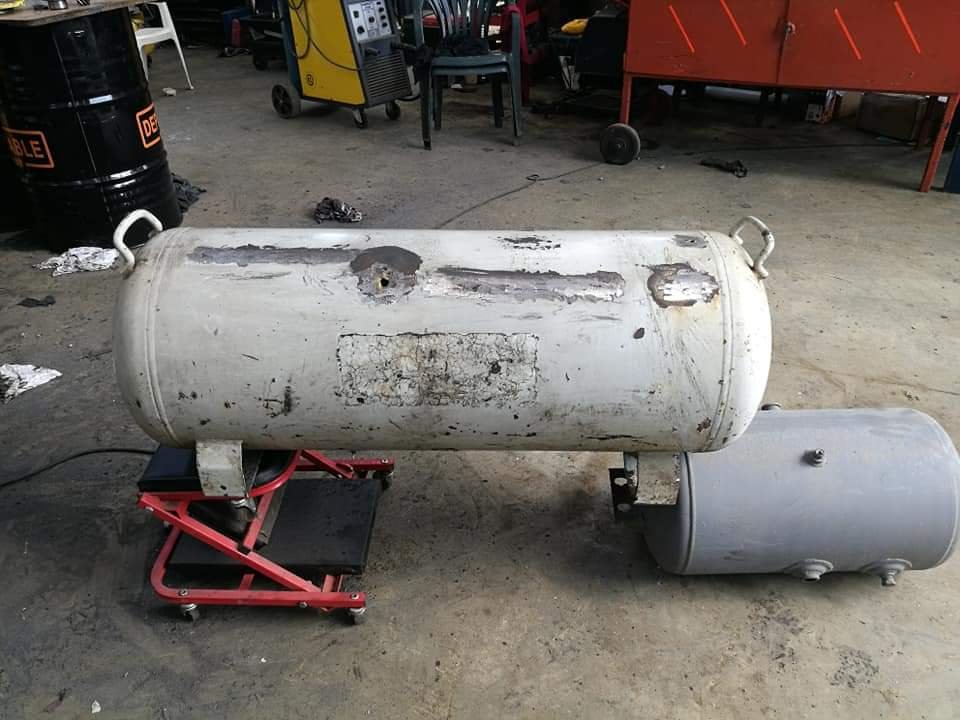
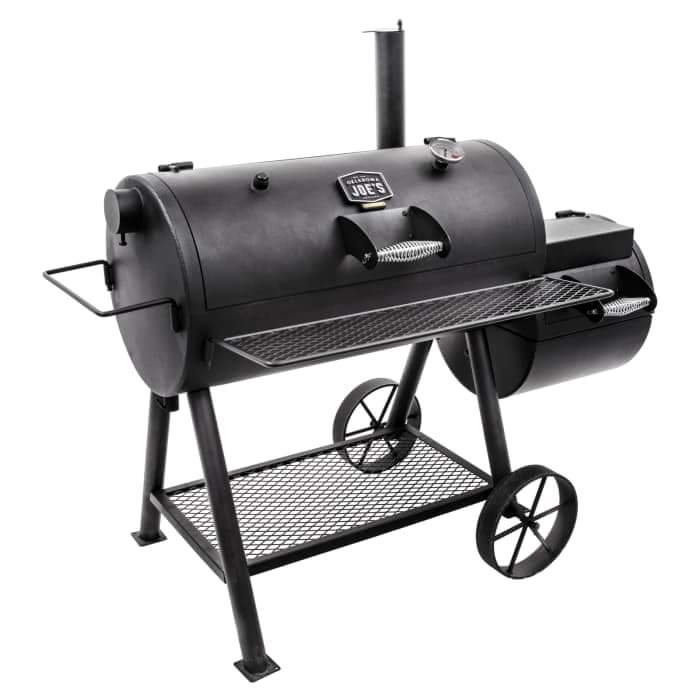
So I figured a fair few of you fellow OSers are in to your barbecuing and probably also into your charcoal and low and slow. The brother and I have been rolling a little base spec weber kettle across the last 8 years or so and with his 30th birthday coming up I figured I get my a into g and build him a proper setup. Just to give you a little background, my brother is a chef and has worked at some pretty awesome spots and operates in the kitchen as well as low and slow pits so he's pretty capable and has mean passion for it. Anyway I had been planning to do this about 6 months ago but only just started building this last week, trying to get an hour or so in after work and a bit of time on the weekend where I've been free. All the guides and builds you see online make it look pretty easy but I've had to freestyle all of this and dick around with replanning mid build a few times and has been harder than expected, especially with it needing to be finished by the end of next week haha. Here's where I'm at anyway... Was going for a setup kind of similar to this popular Oklahoma Joe Reverse Flow Offset Smoker. So we had an old air compressor with a seized engine at work so swapped some beers with the boss and claimed it, along with a smaller air tank that was lying around. I think it is around 100L and the smaller tank is a bit bigger than the swapper log bottles. Stripped them down and mocked up.
-
AKL: Recommend a mobile windscreen guy?
Taistorm replied to Sambo's topic in Upper North Island Region
Glass guys are pretty good to deal with. They're based out in Wiri but are mobile. -
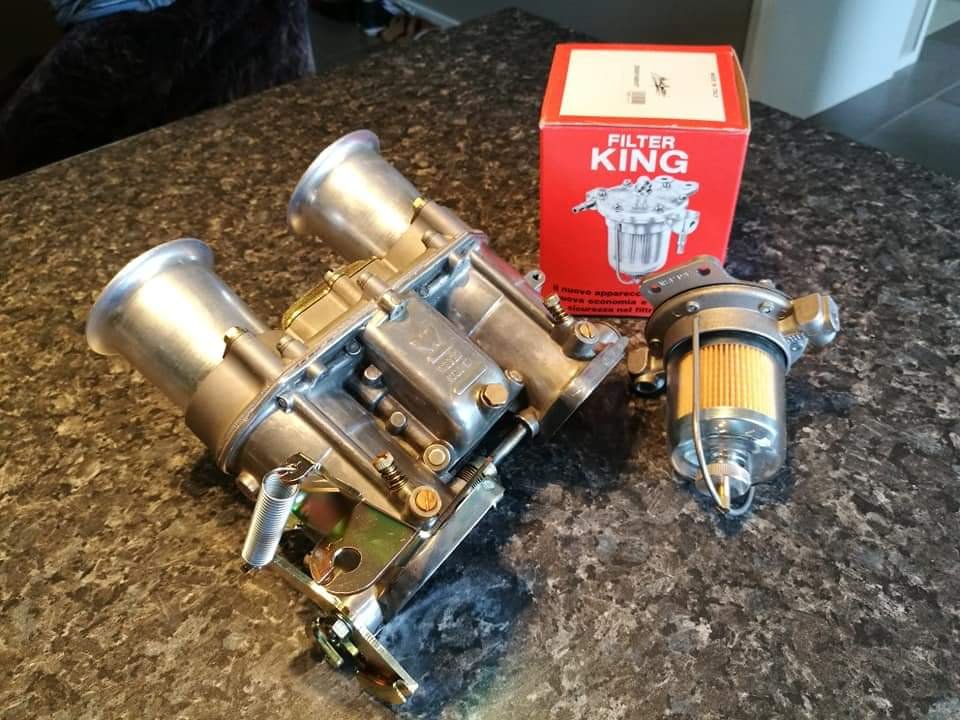
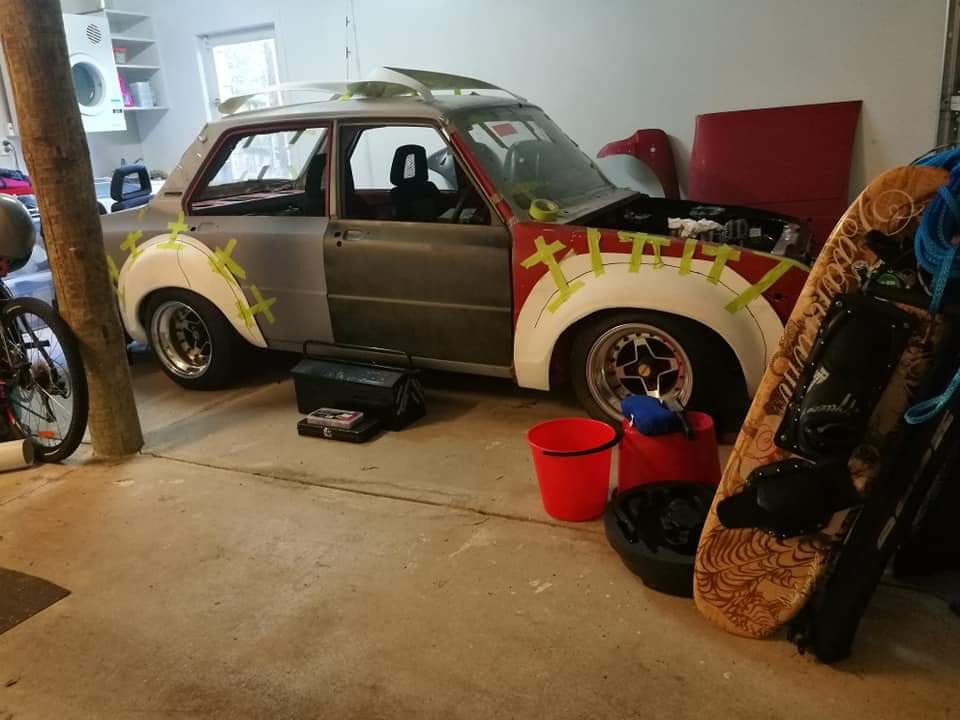
Also finally got my Escort flares off Bruce a few months ago. Going to chop them up and have a crack at fibreglass work, moulding them a bit better to the 1300 and getting the fitment right. Theoretically it looks easy enough but will soon find out. The guards didn't cost a bomb so not a great loss if I butcher them haha. And yesterday I finally got a call from Murray at Weber Specs saying that my carb is ready so shot around after work to pick it up, along with a malpassi fuel pressure regulator. He's done a top job but damn he is expensive, even with mates rates ! Ah well gotta pay for quality so let's hope she's purring when she fires up. That's all for now anyway, off on holiday in a few weeks so probably won't be anything to update until maybe December if I find spare time to work on the old stead. Chur, Tai
-
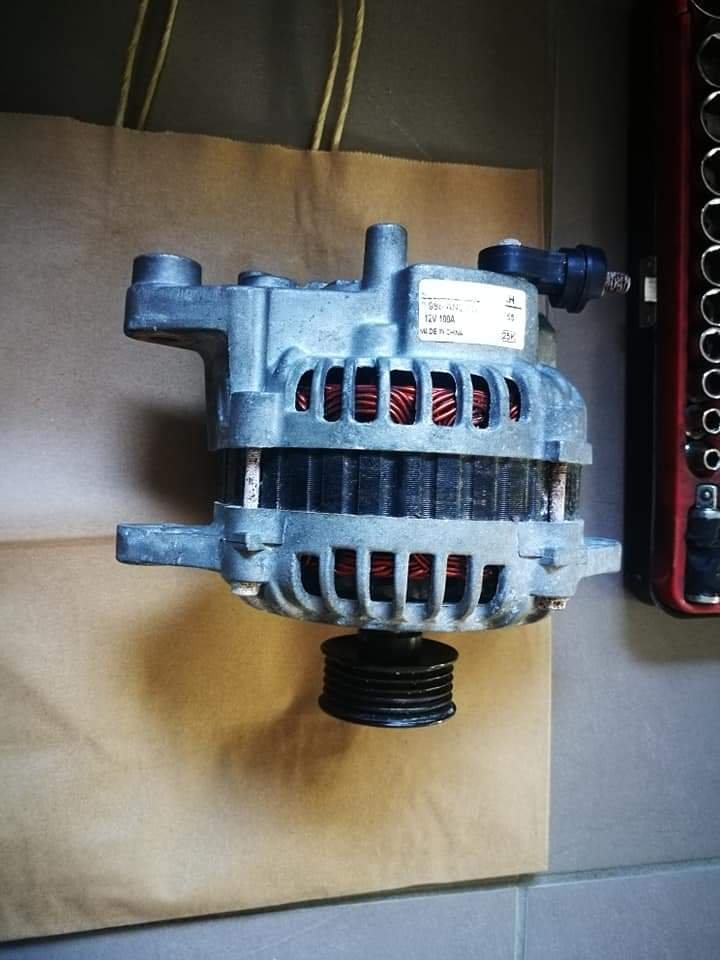
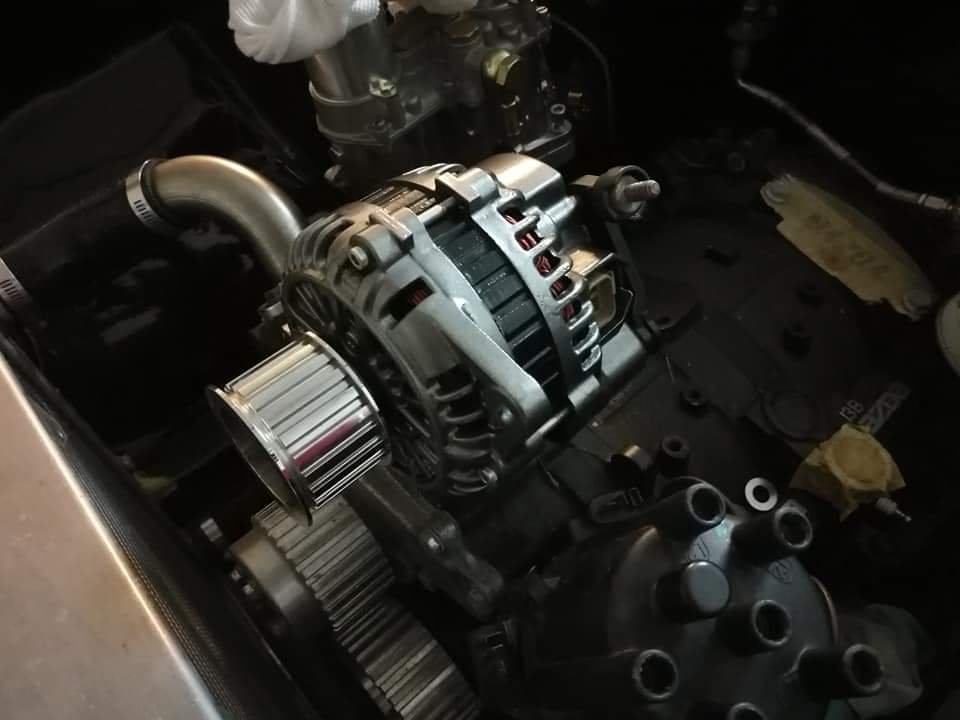
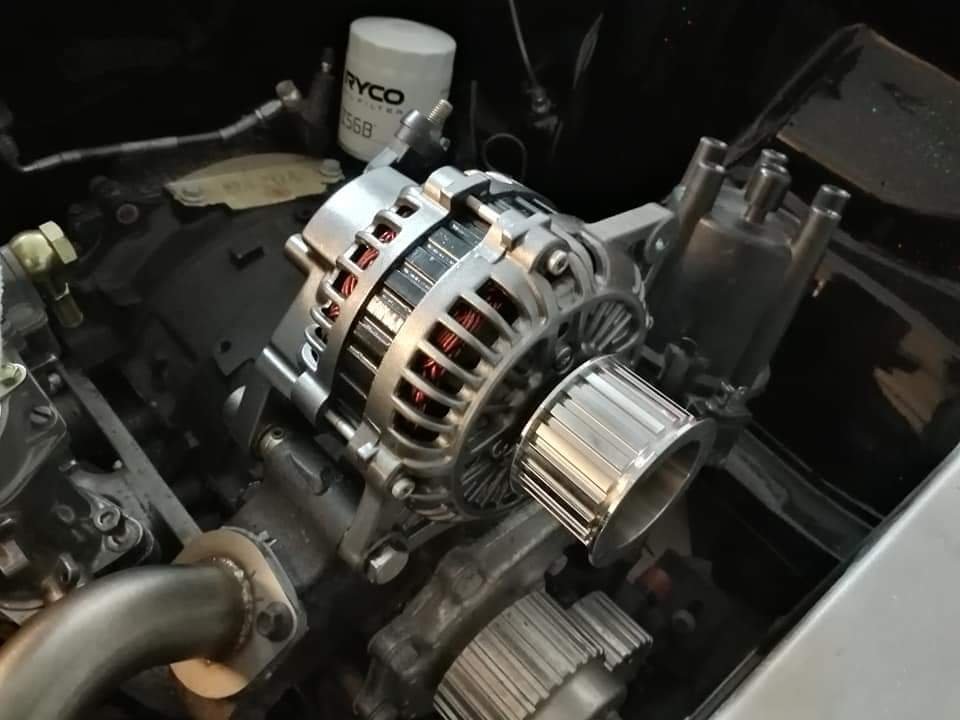
About a month ago I also decided to clean up my fd alternator. It was brand new but sat in a wet box in storage for about a year so oxidized pretty bad. I dismantled it, stripped it back, and repainted it in cast iron silver and black (looks more glossy and slightly metallic in person) and reassembled it with stainless fasteners. Came out pretty sweet for a can job but will see how it lasts. Before: After:
-
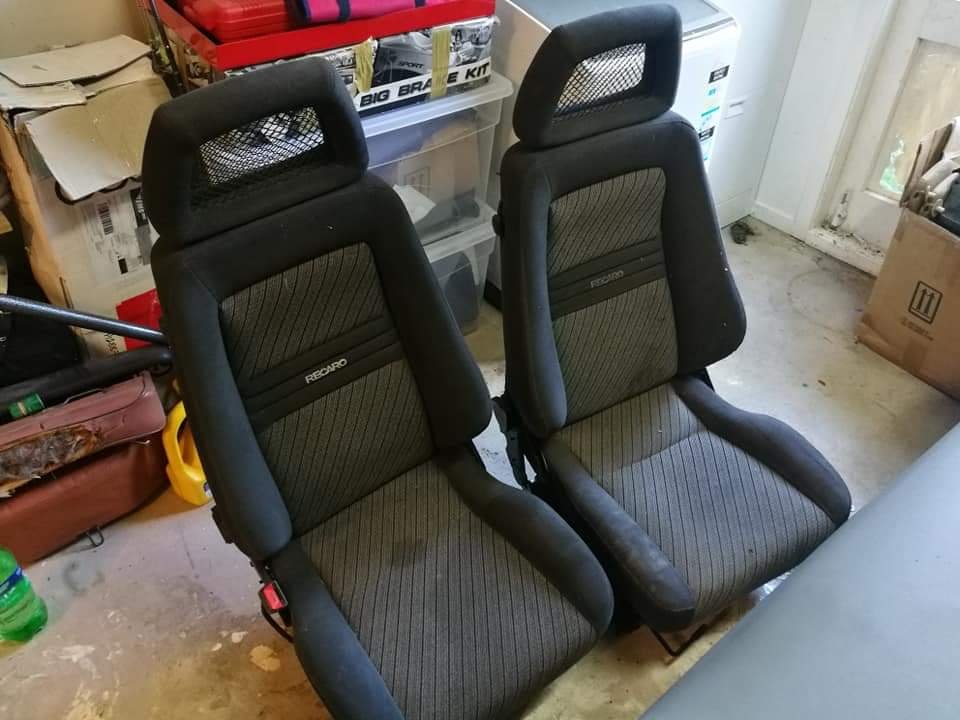
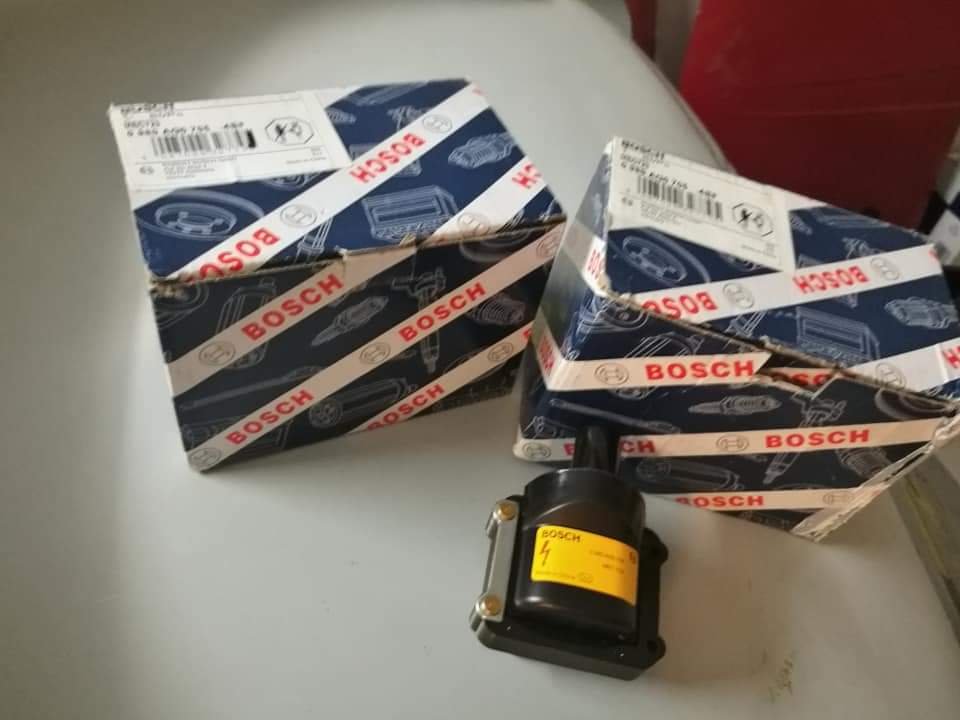
Haven't been up to too much lately. Just stuck on the grind at work and super busy, however I've picked up a few bits and pieces for the old girl. As my old Speedhut gauges are CANBUS and am no longer running an ecu, I have purchased another set of mechanical gauges to use as well as fuel sender. Basically the same design as my other ones but have changed it a little. Also found another pair of Recaro fishnet seats for cheap which are in better condition than my others but are also narrower to suit the limited space in the 1300. And I've grabbed a few Bosch MEC723 coils.
-
Might be worth contacting steel and tube as well