~Slideways~
-
Posts
1,610 -
Joined
-
Last visited
Content Type
Forums
Downloads
Events
Gallery
Everything posted by ~Slideways~
-
Thanks, they'd be the 276mm ish ones and non brembos? My plan is to use some GTO sumitomo 4 pots and figure out the best rotor to try keep it a sleeper type thing.
-
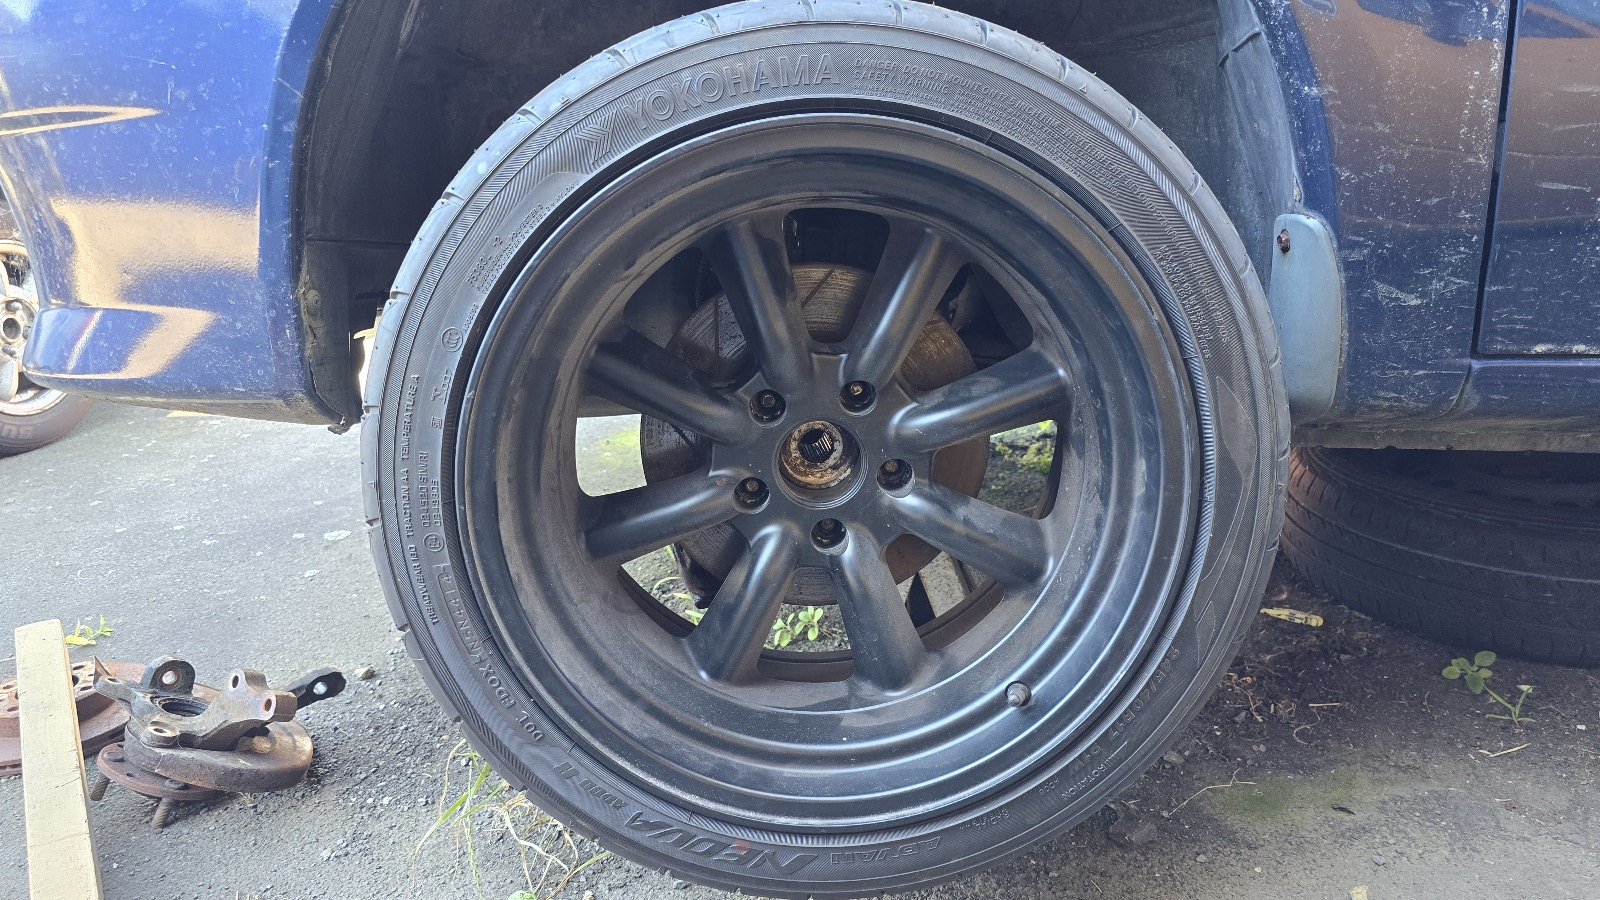
Test fit of some 17x9.5 -20 wheels that are for my 200sx. Obviously a bit silly: Then a factory jzx100 16inch wheel, centre bore is too small but gives an idea. Also terrible offset. Plenty of space with these 280mm rotors within 16's. Also found a replacement monsoon shield.

-
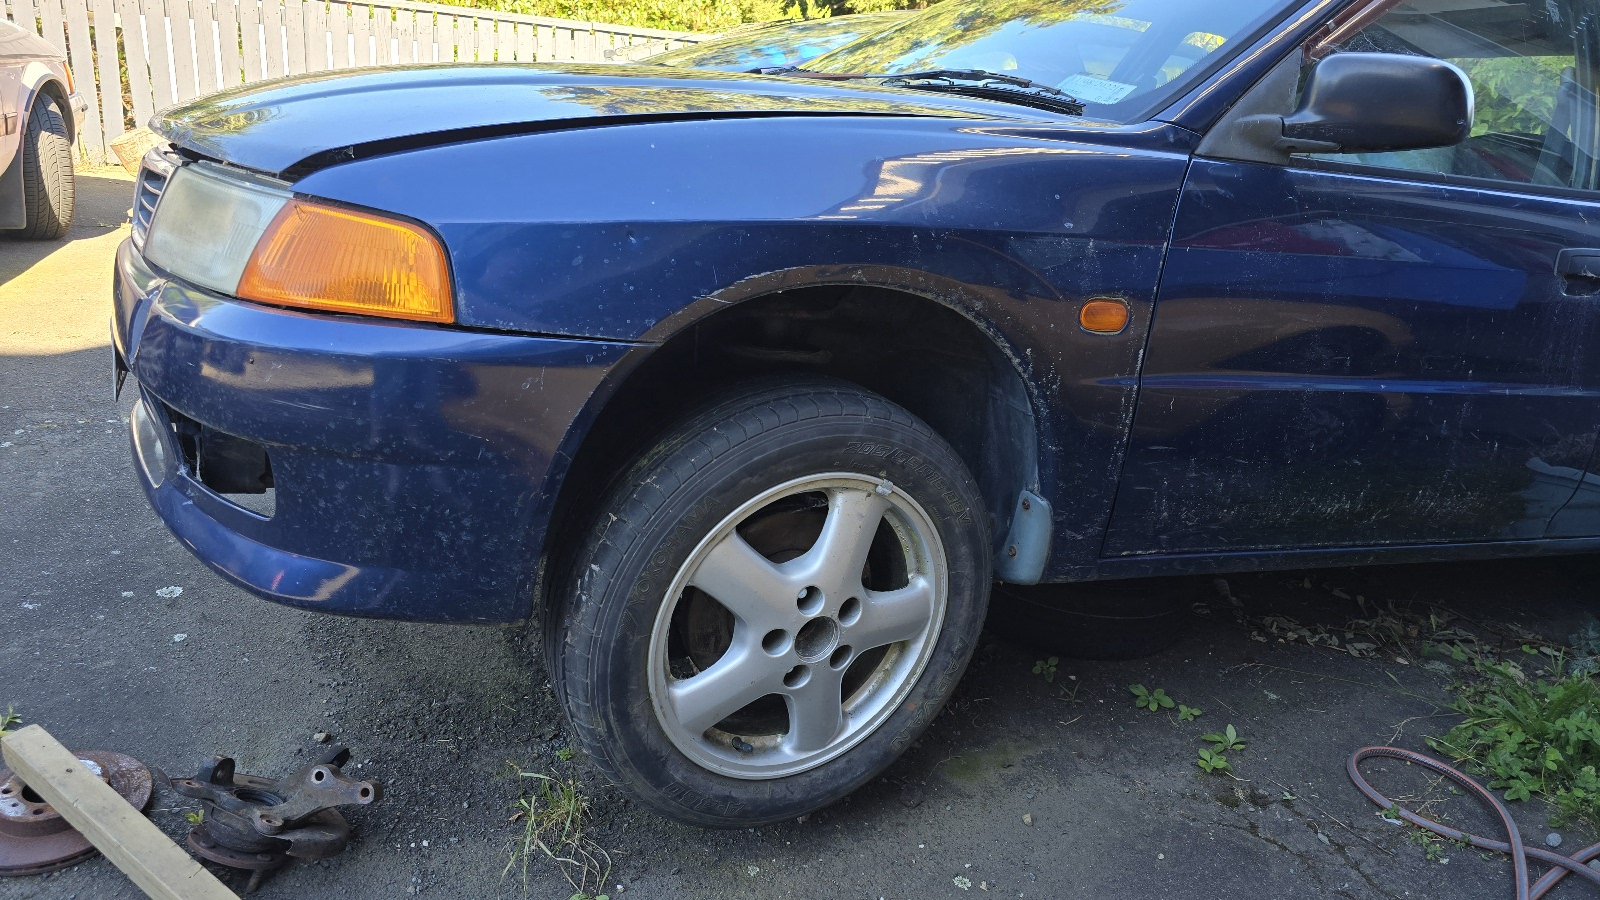
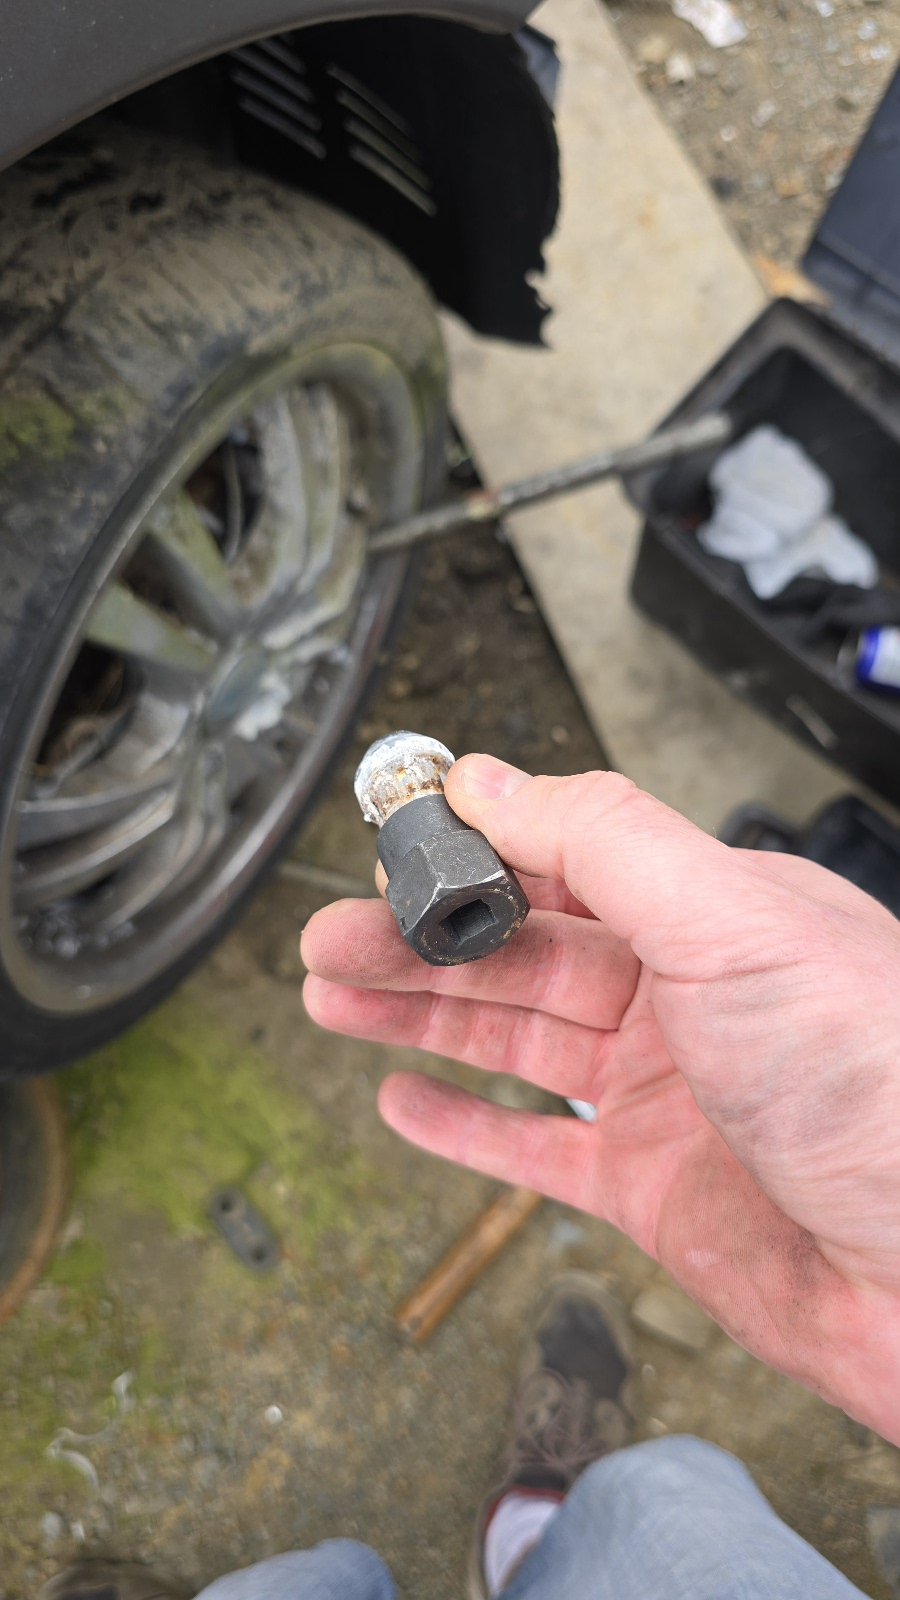
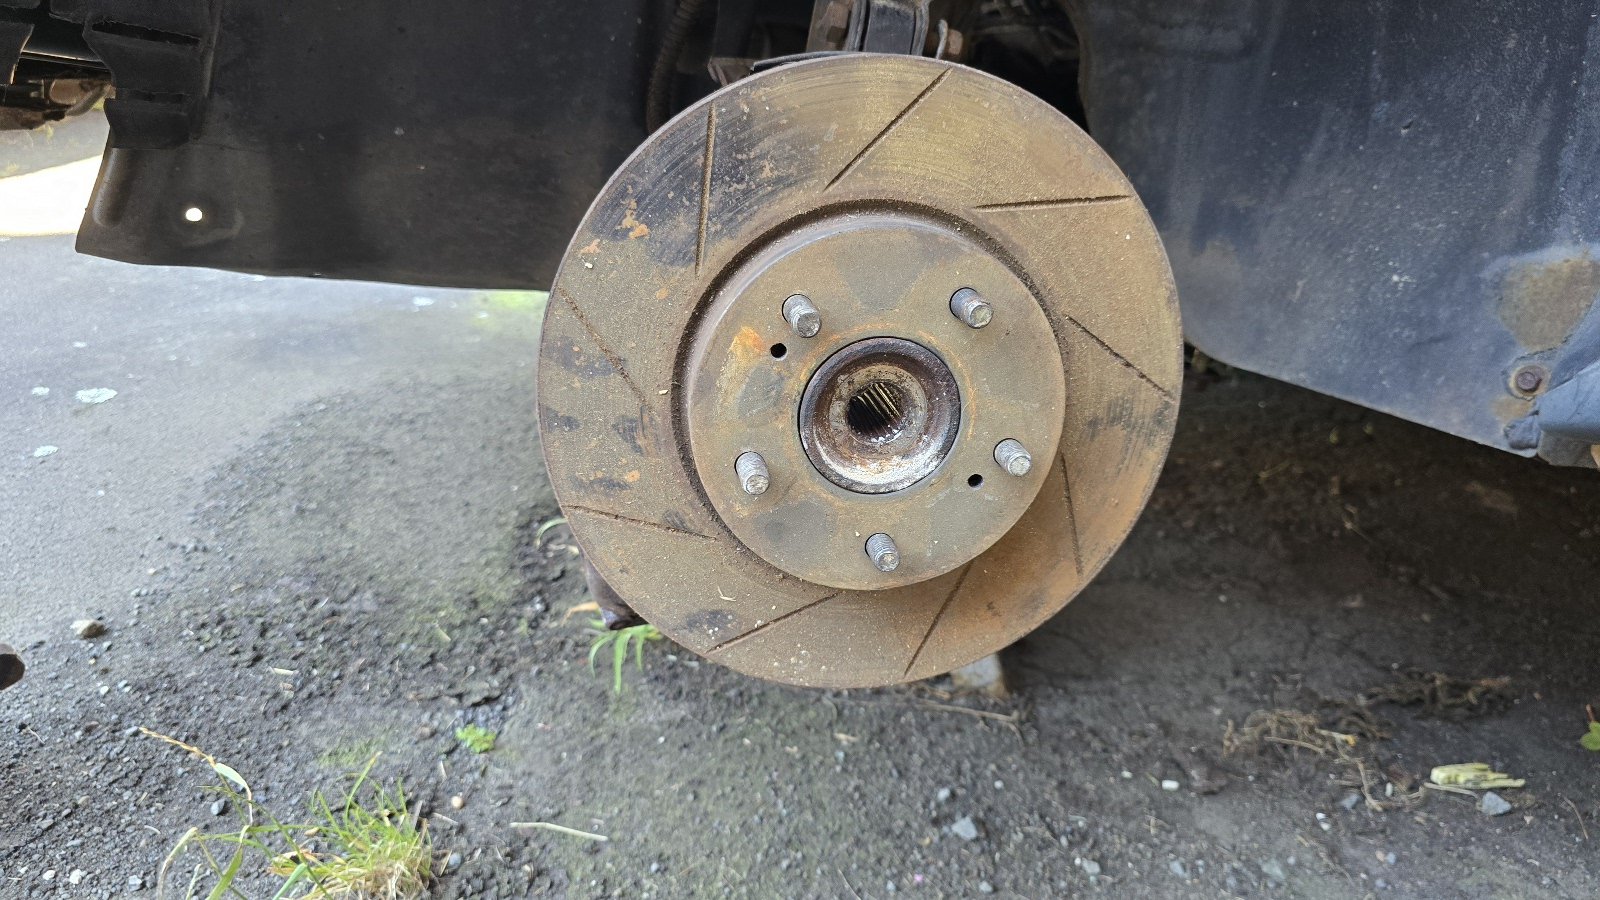
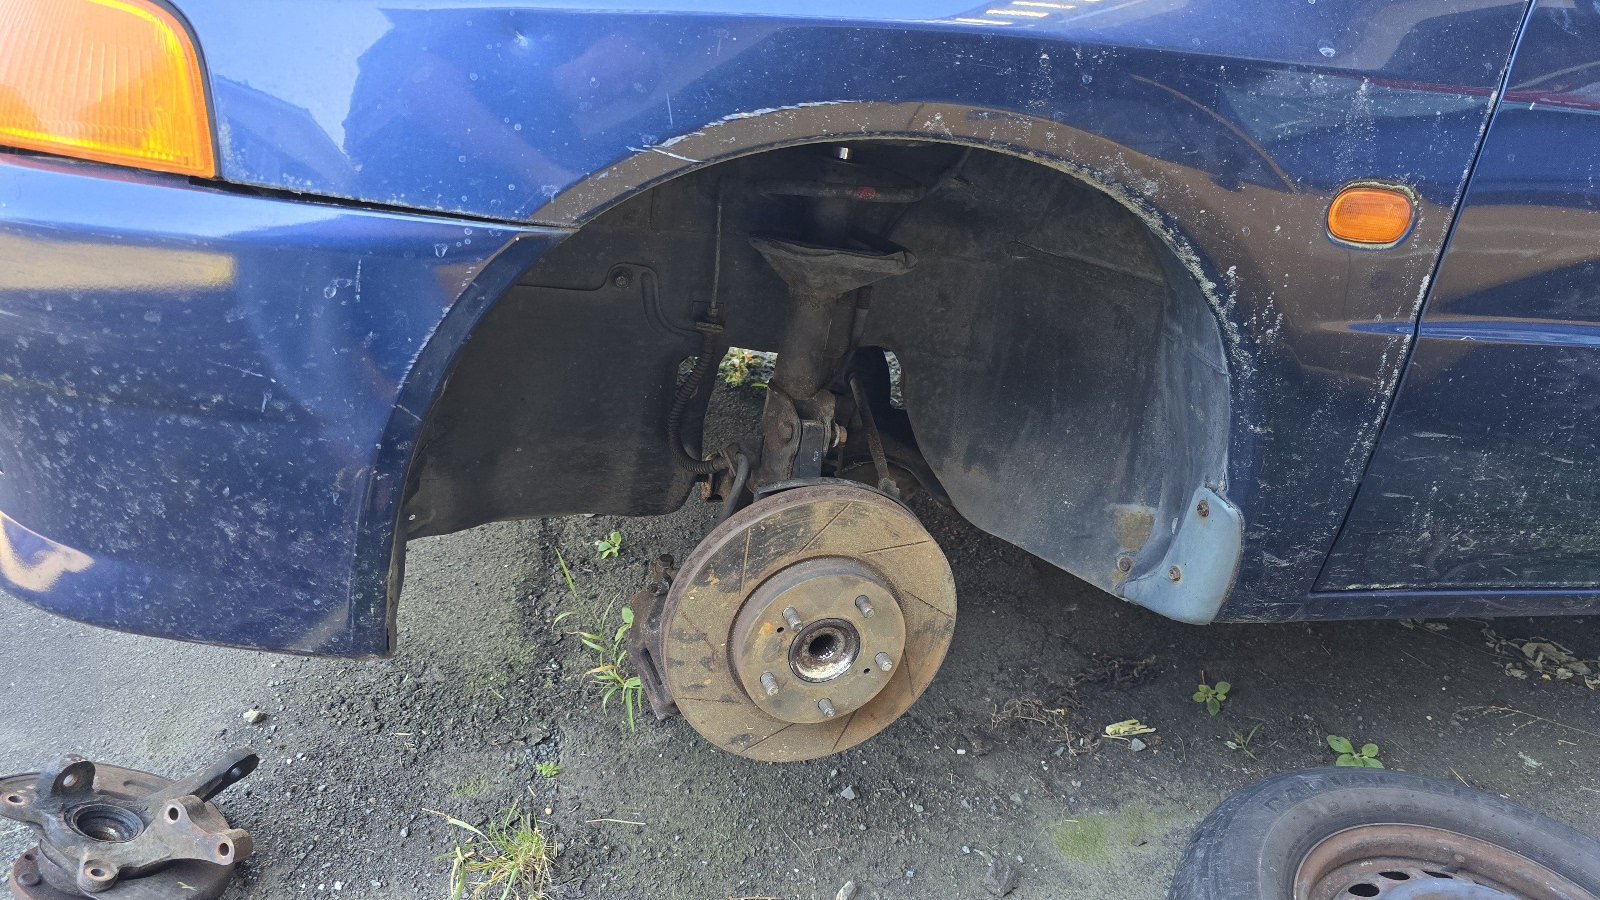
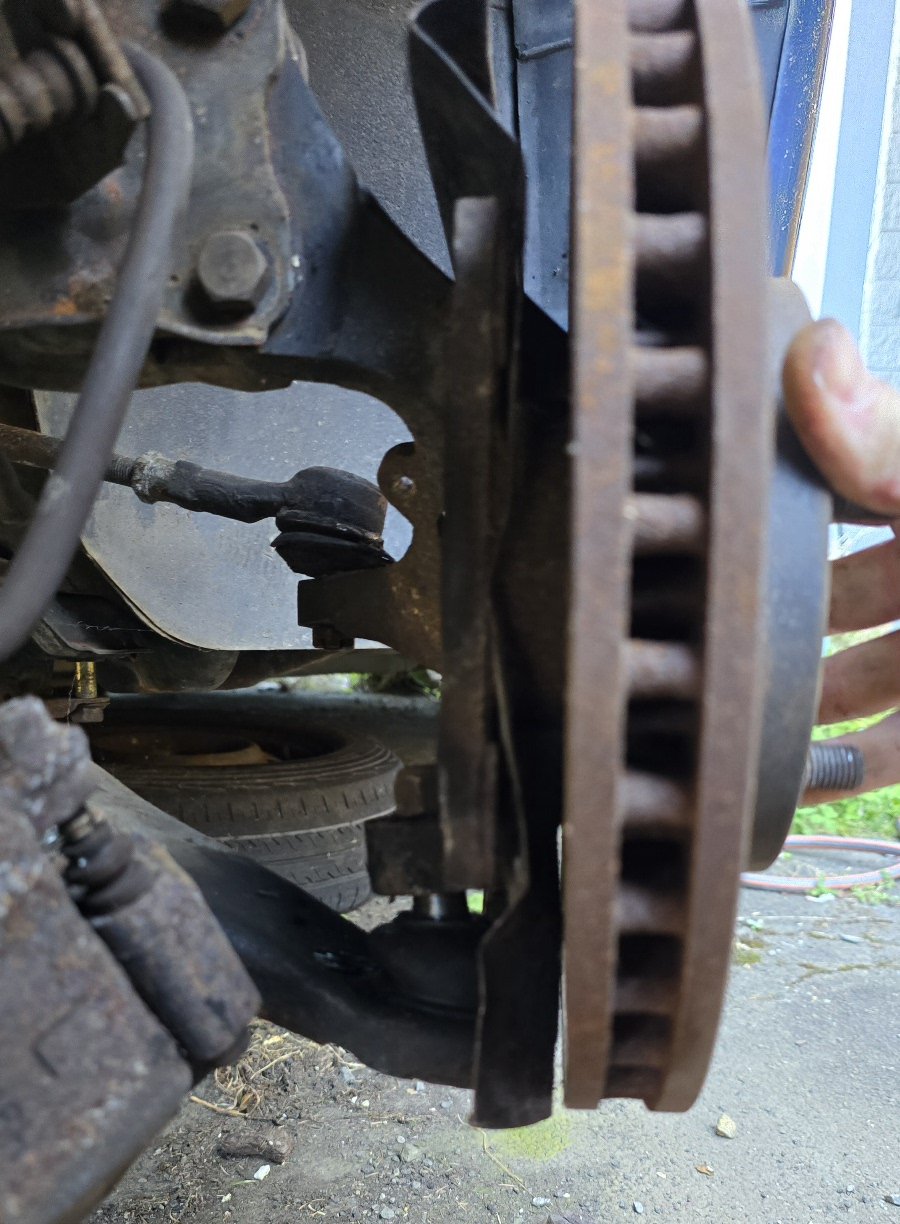
This thing! Found a 5 stud FTO at pick a part, read on an old forum that they are a direct bolt on. Went to go get them and found the wheels still on the car with lock nuts. Annoying, tried getting them off but ended up get a set of these lock nut removal sockets that you hammer on. Went back a few weeks later and got them off. All bolts on and correct width to mount to the struts, low ball joint is correct etc. Interestingly the backing plate has 4wd stamped in it, even though it's a fwd FTO. Out of interest I tried fitting some s14 280mm rotors and they almost fit. Centre bore is right but touches the back plate a bit. Easy fix but will most likely use mitsi rotors.
-
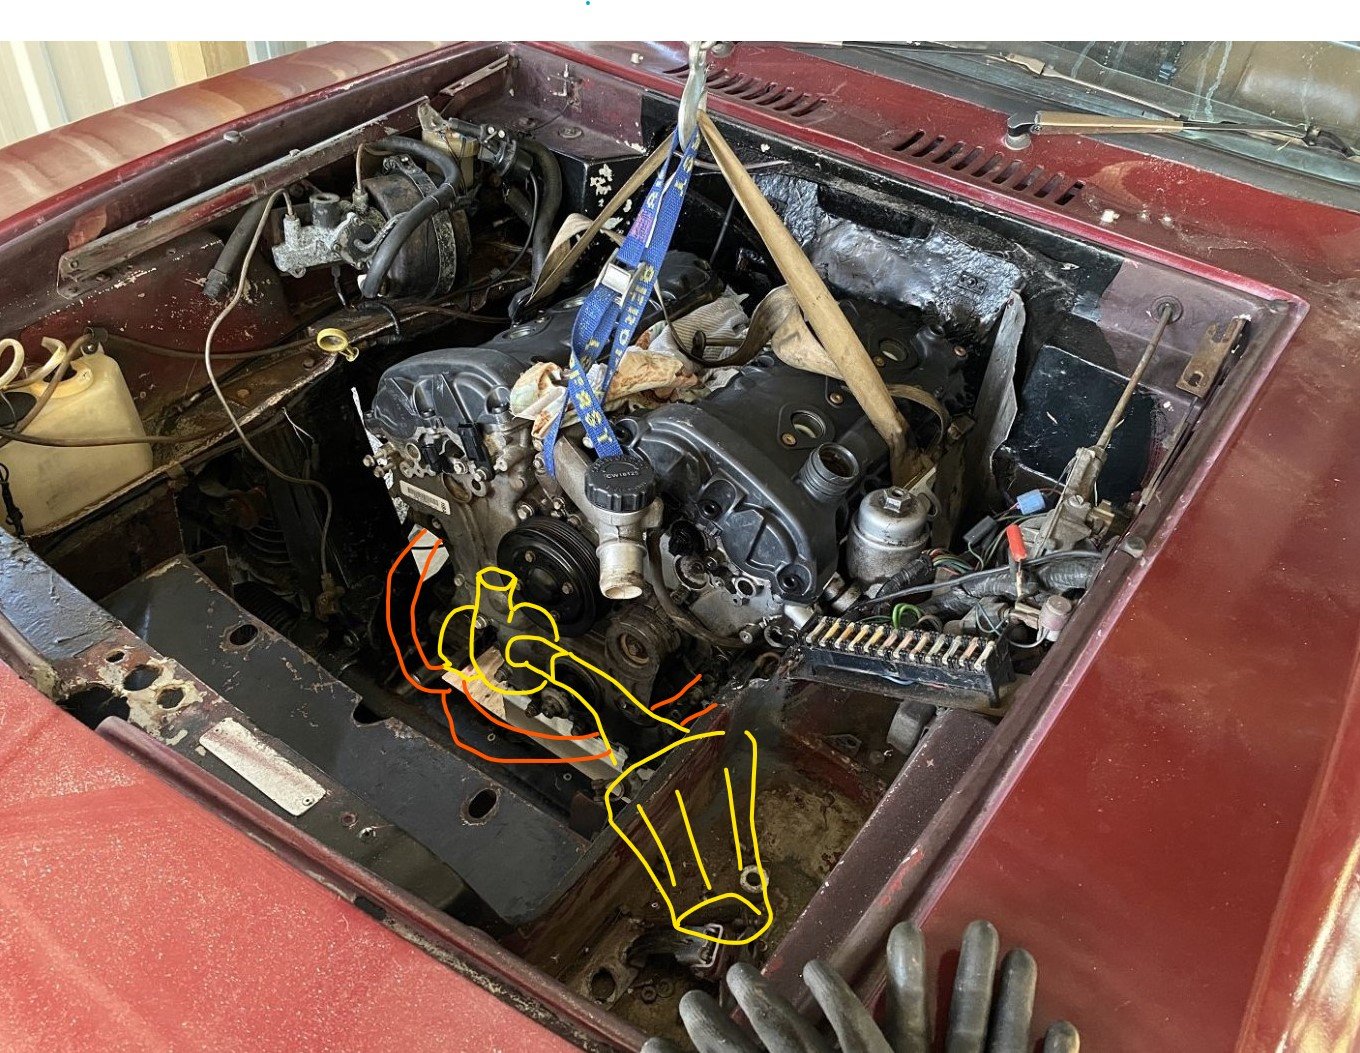
Crank bolt has to be torqued to 239ft/lbs Mine only goes to 150ft/lbs. Also don't have the TOYOTA SST to hold the crank pulley in place. So off the the scrap pile and made this happy looking thing: Worked well and easy to get it to 150ft/lbs. Now for the other 89, I'll have to find a bigger torque wrench, one of those torque multiplier jobbies or maybe use the 1/4 or 1/2 turn more method.
-
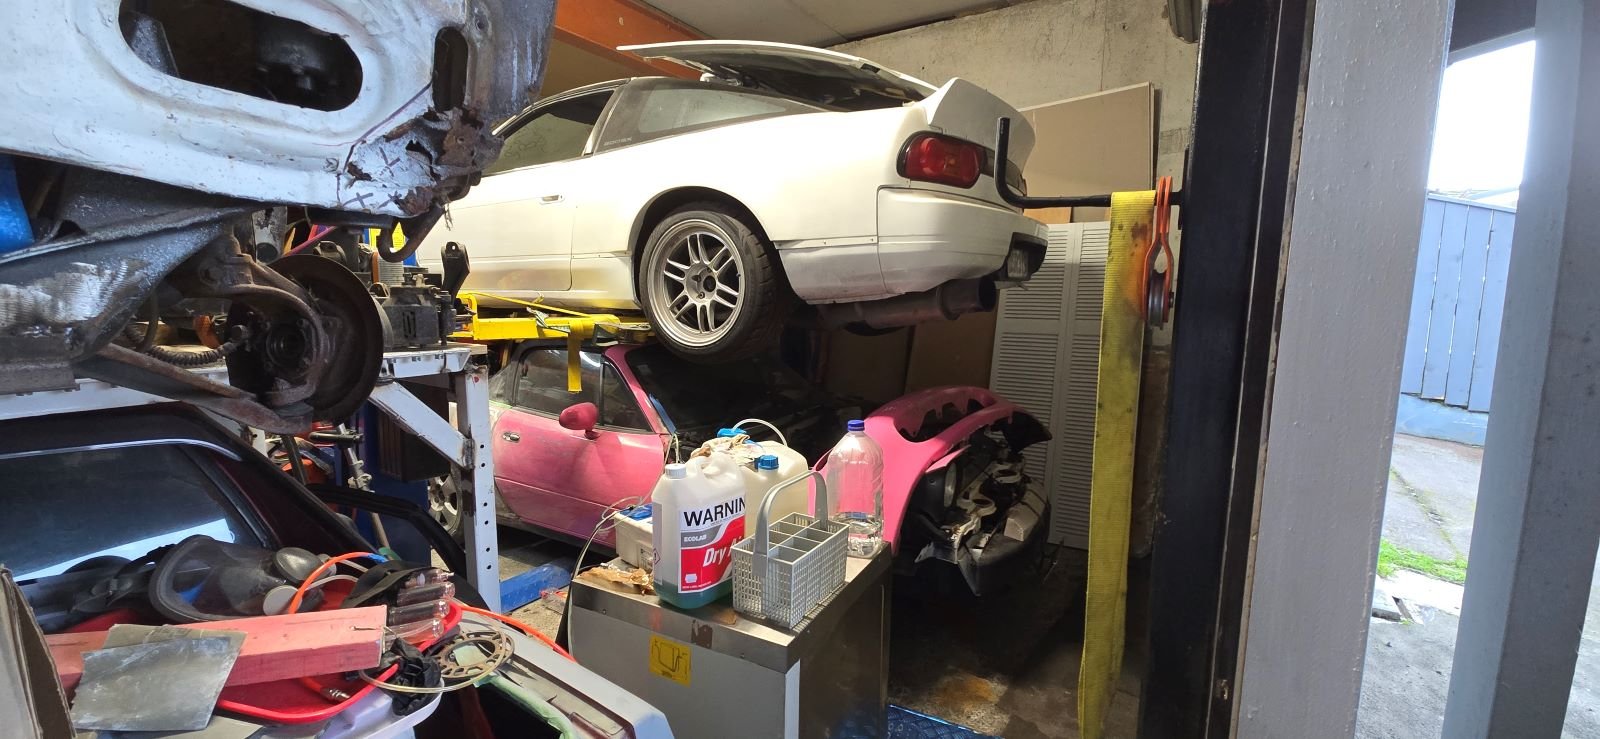
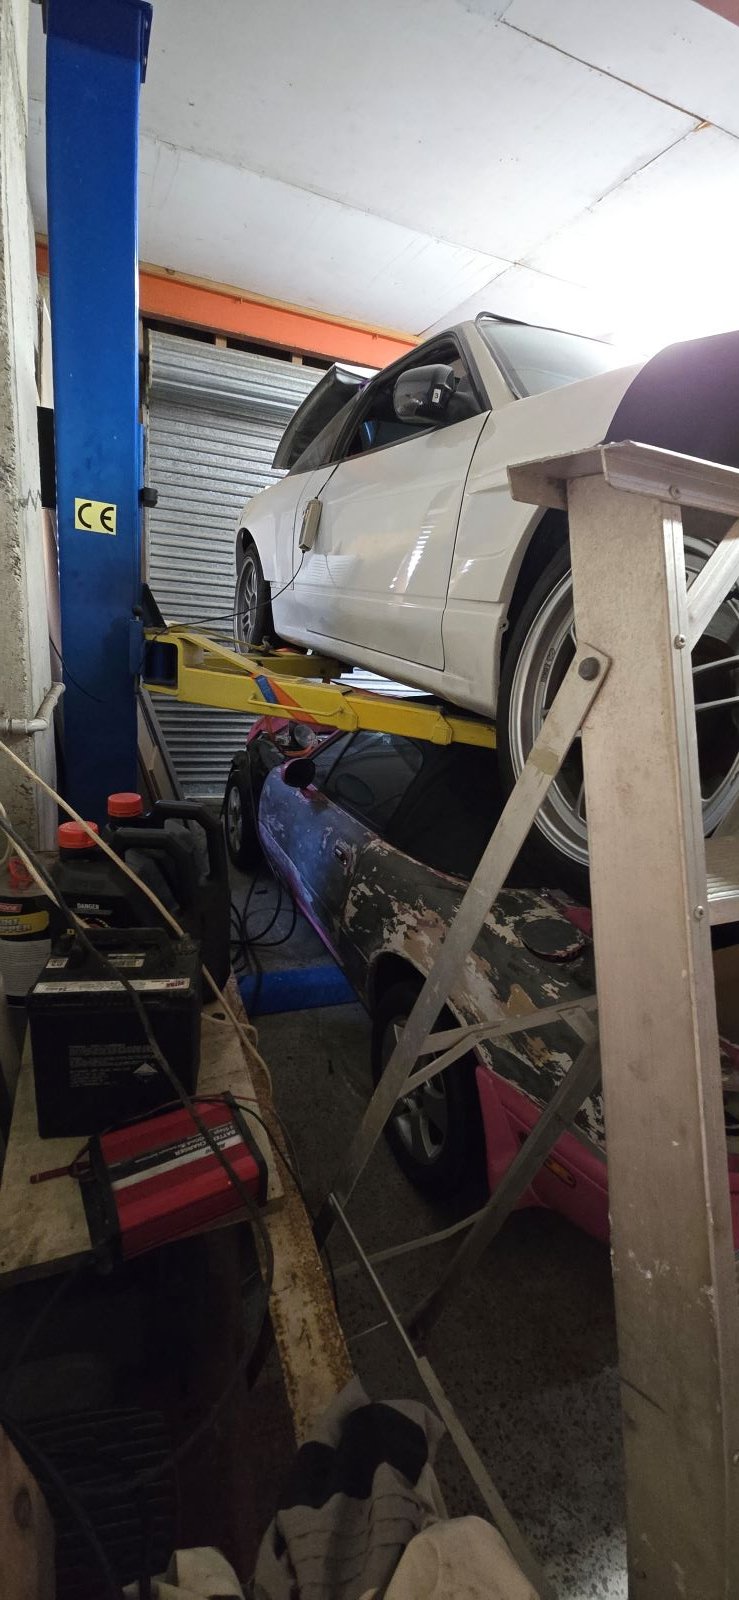
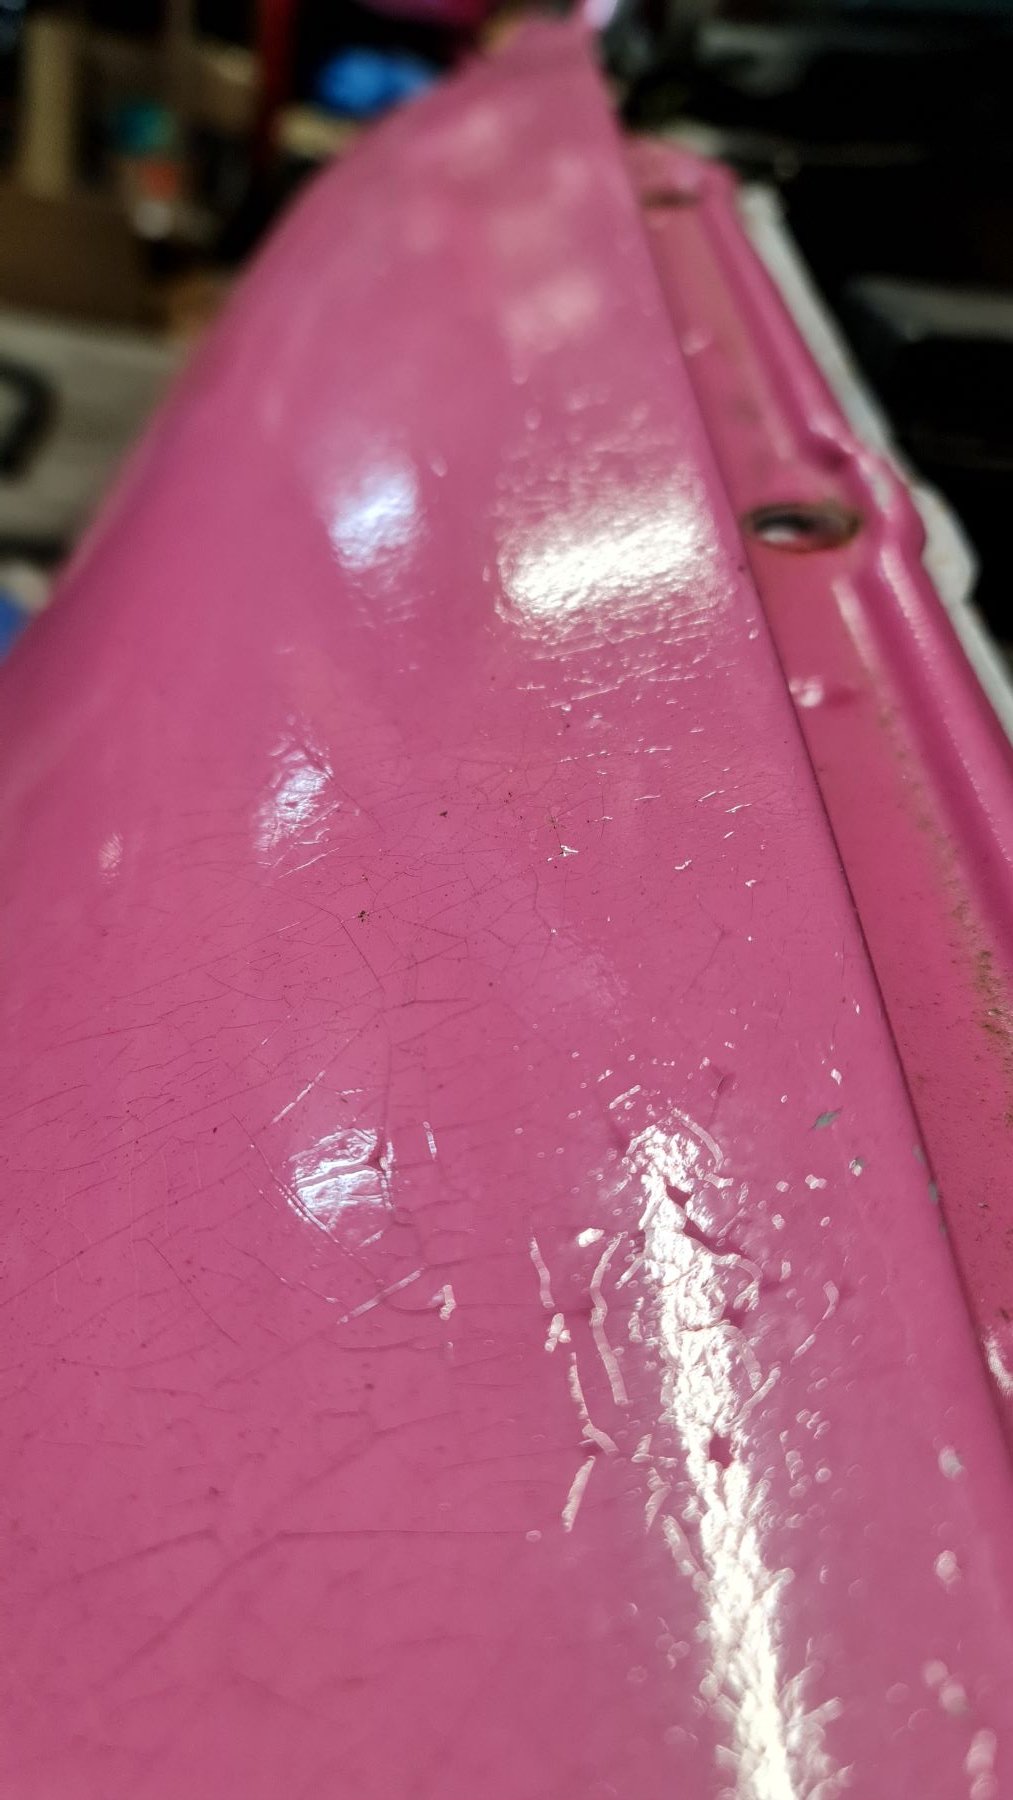
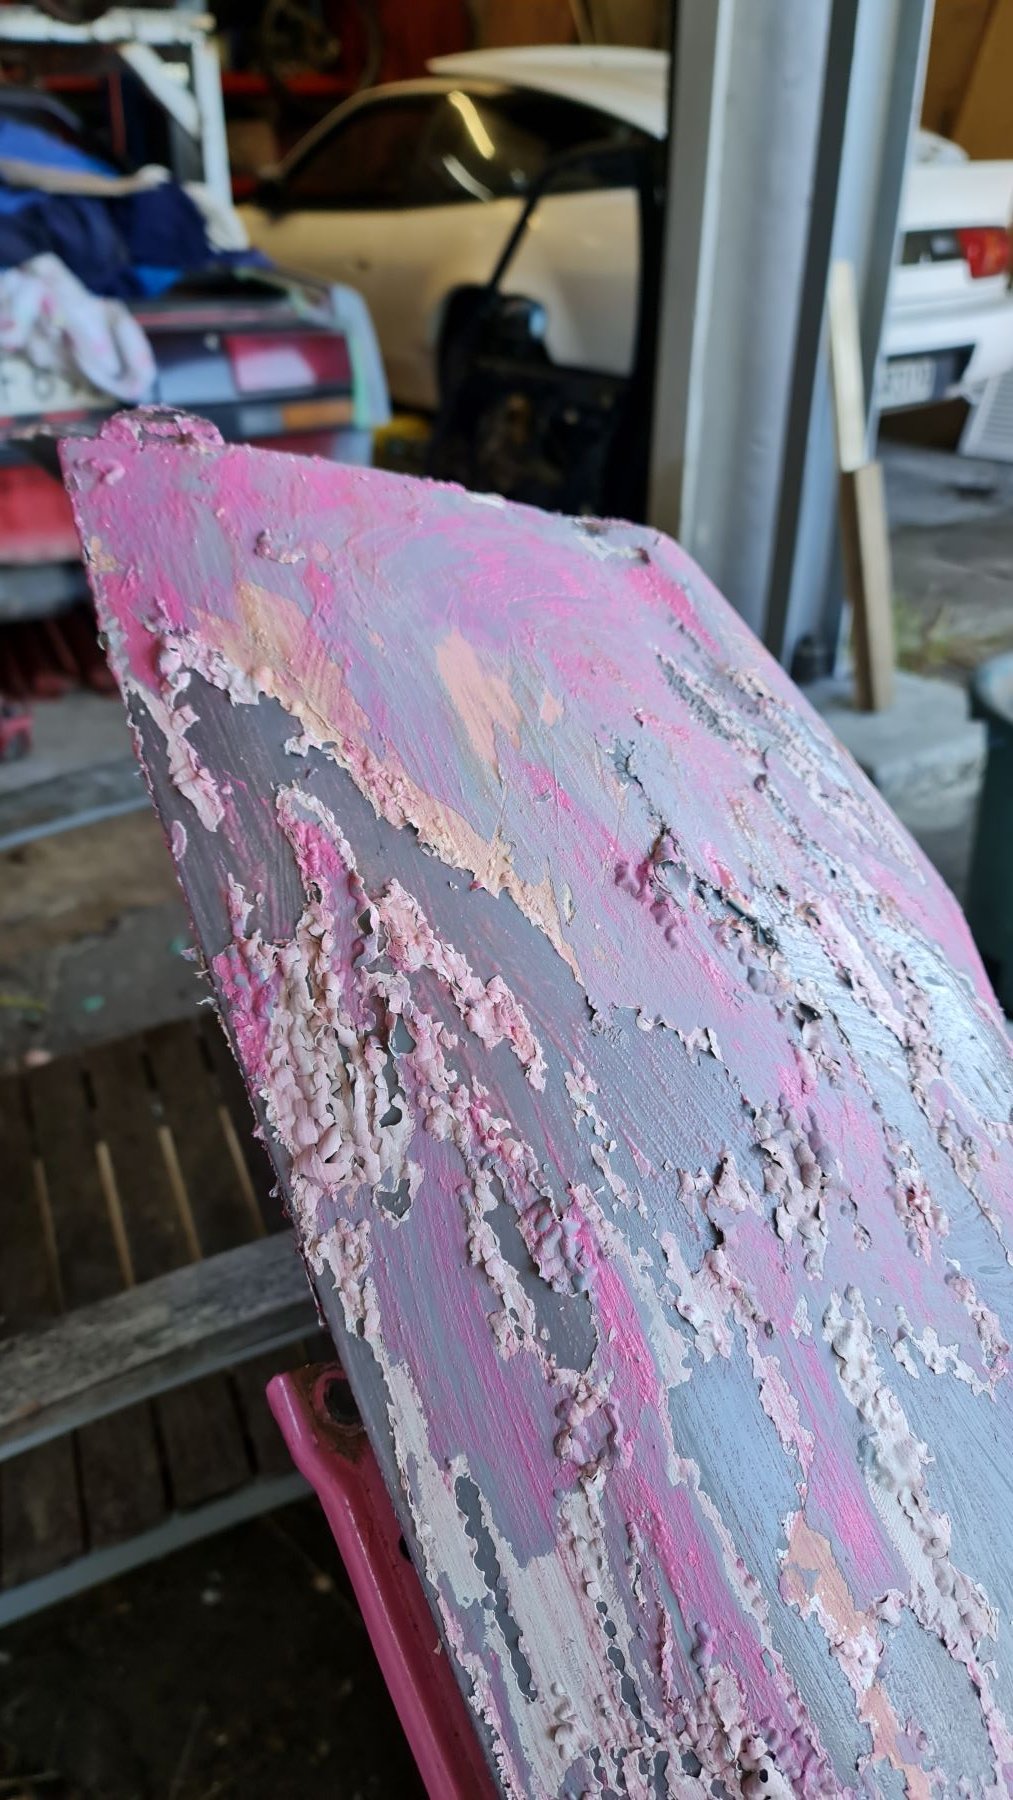
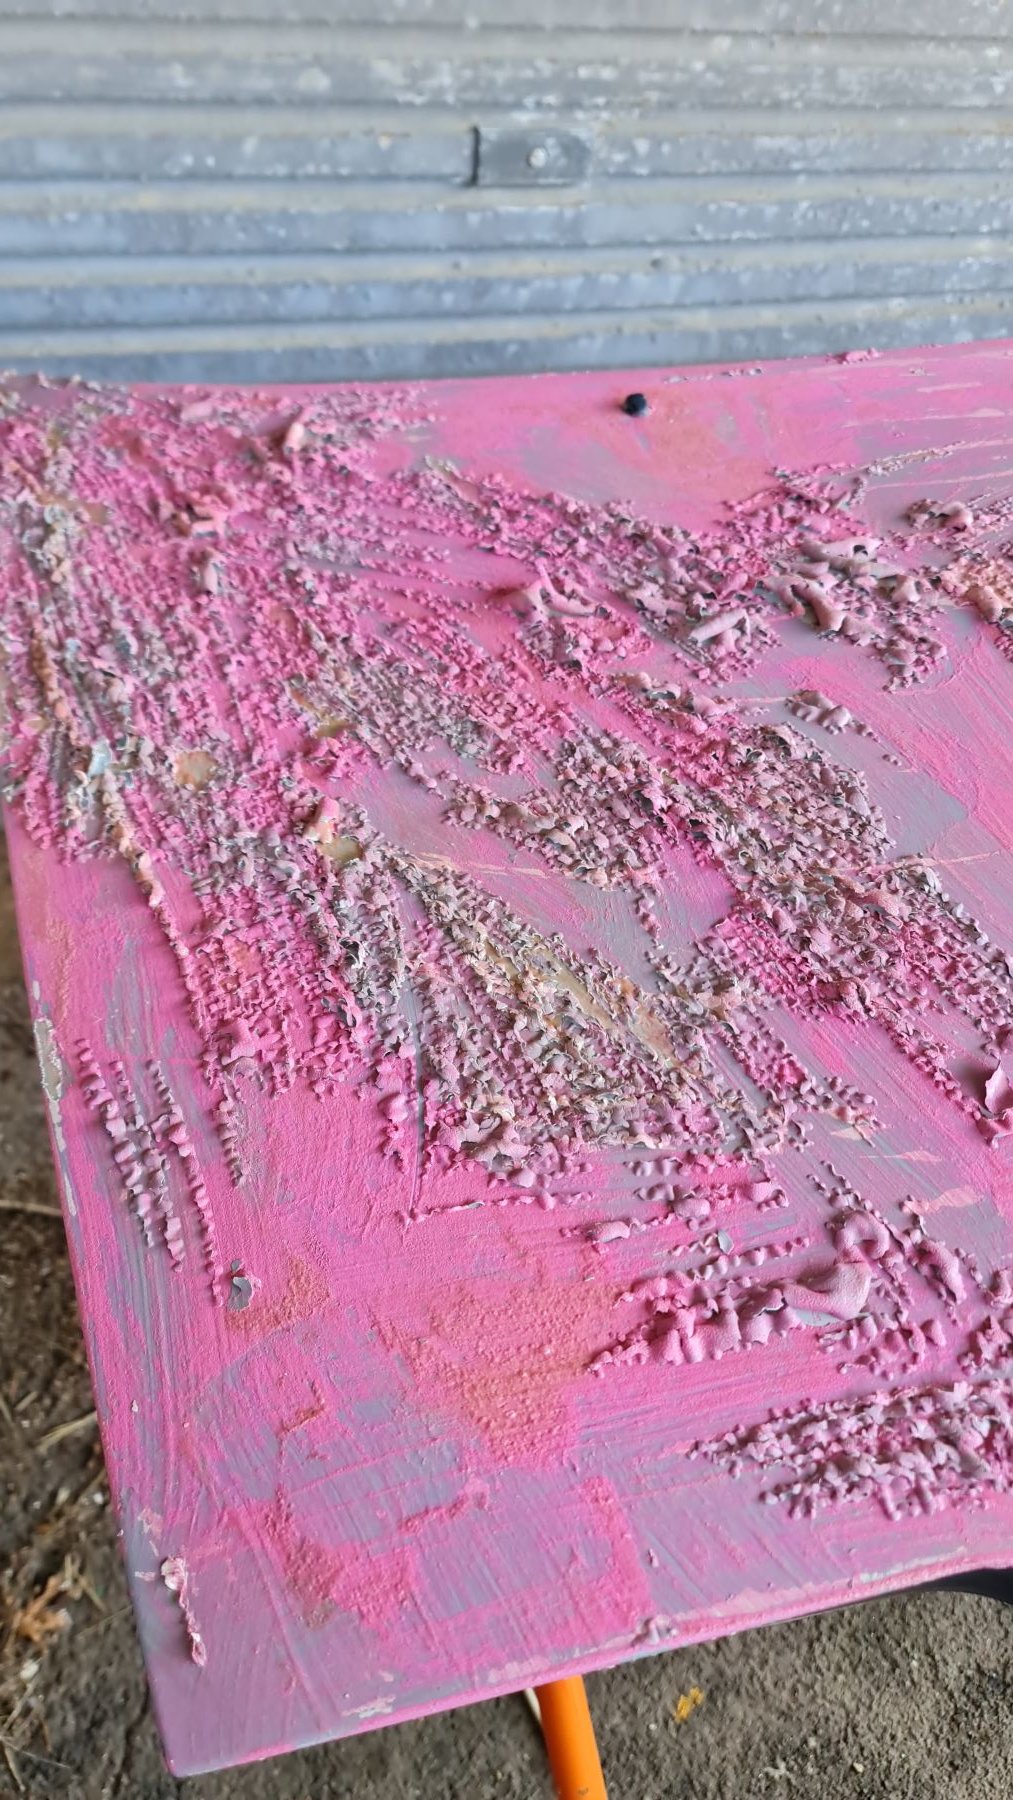
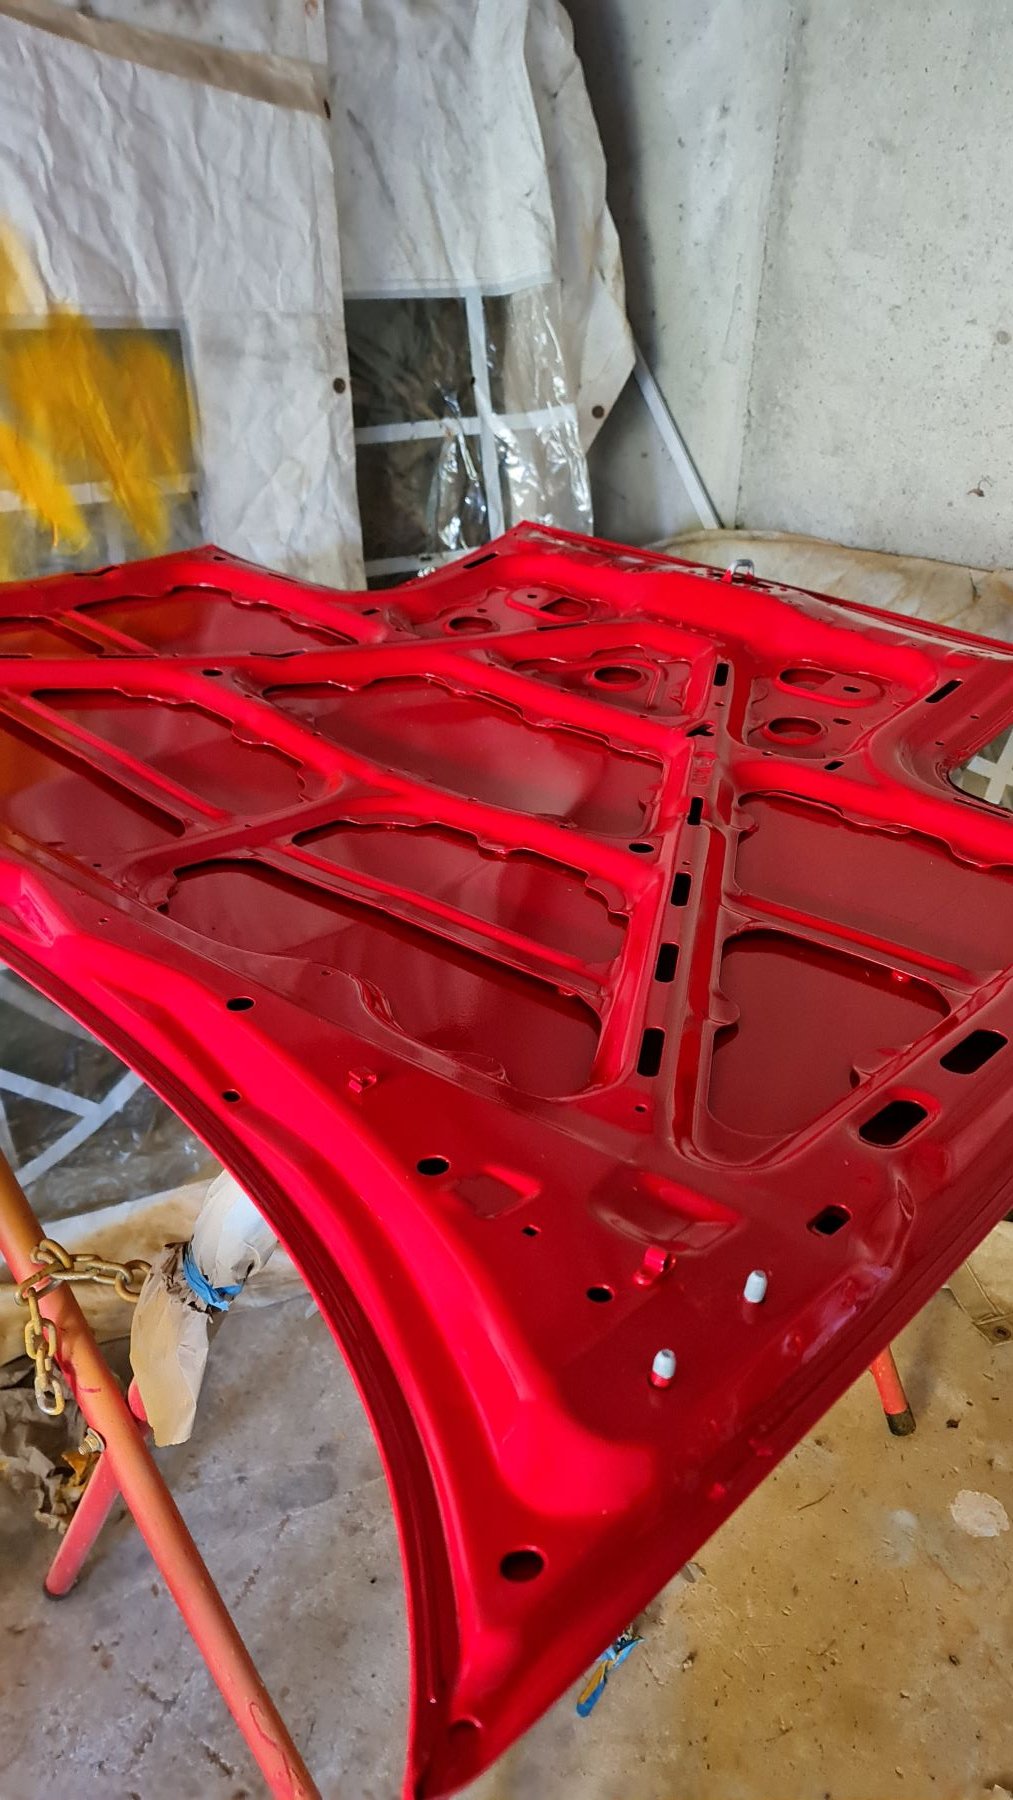
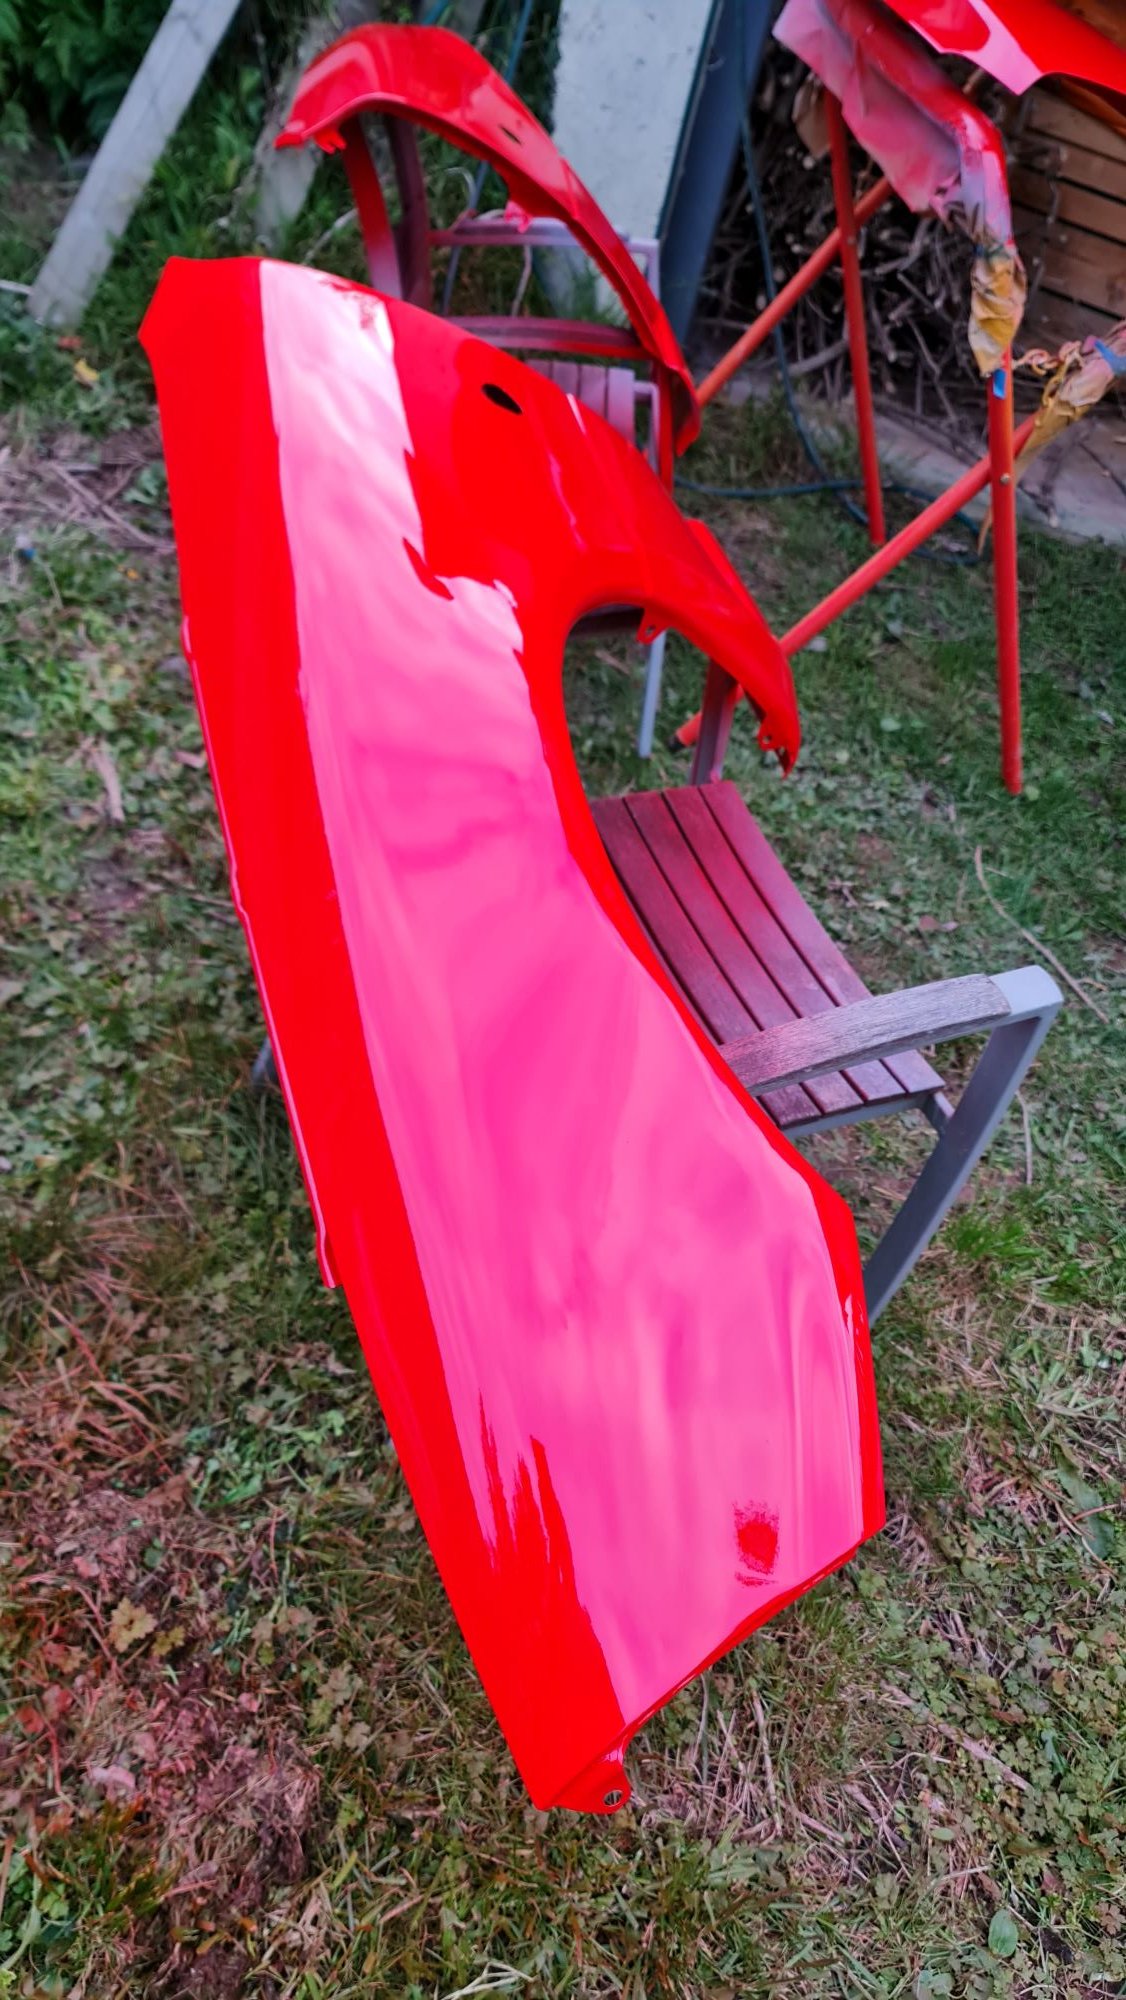
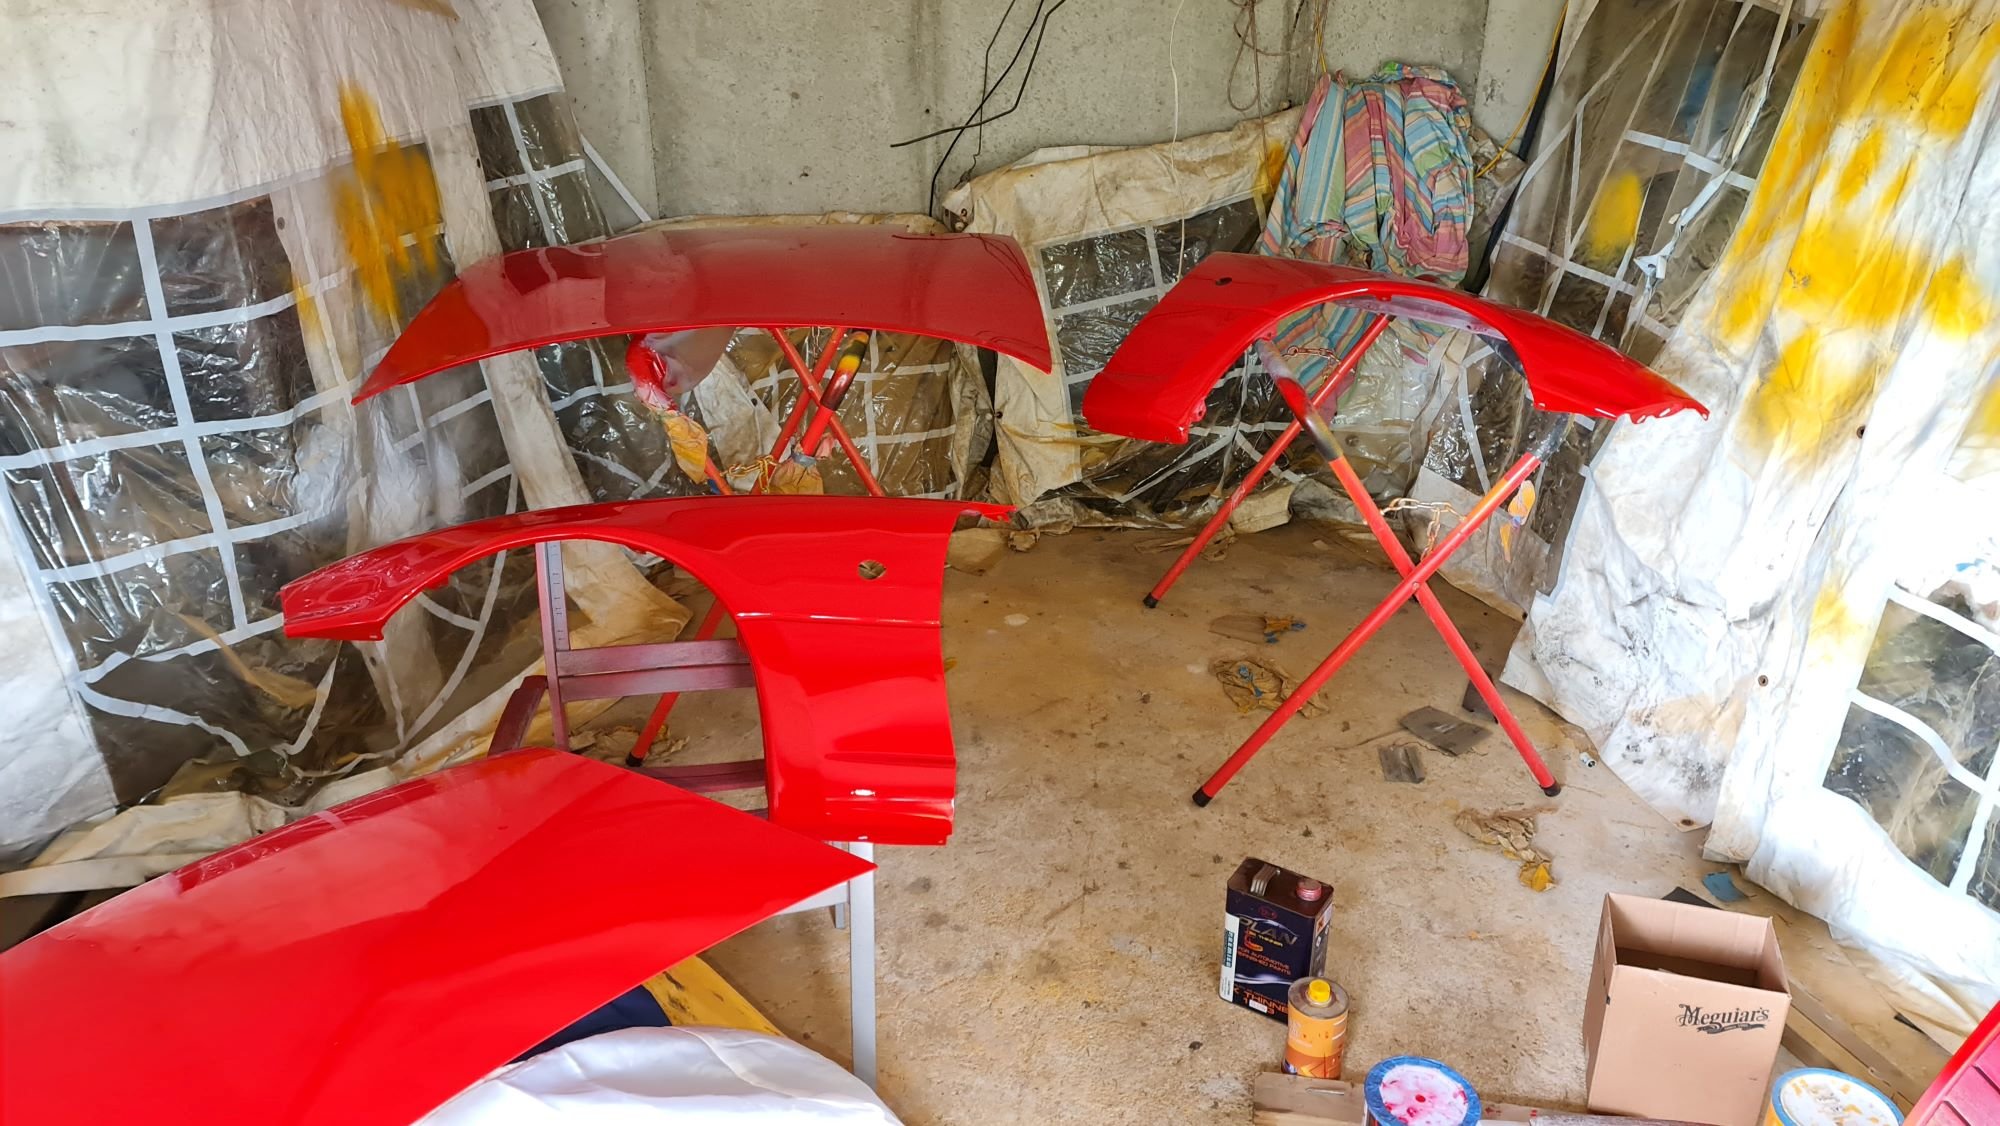
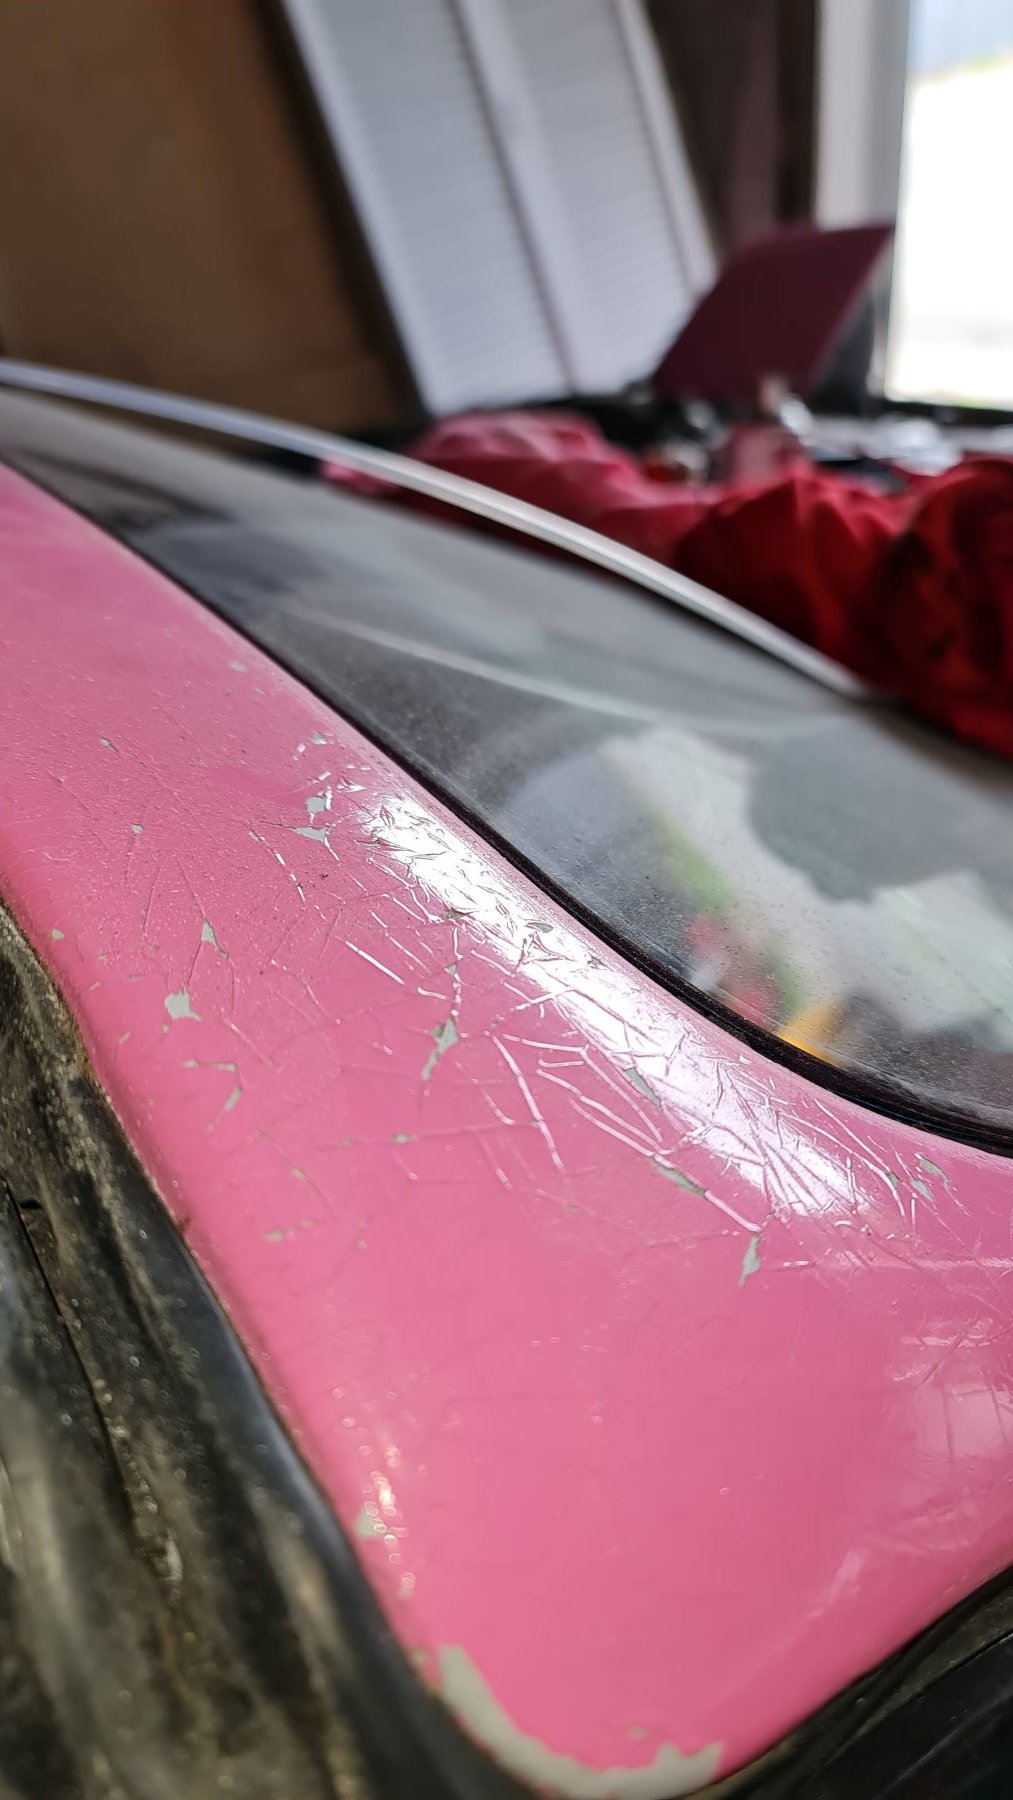
Bugger, its been 10months since that last post I really wanted to have this back on the road by now but so many things keep happening. Life or other car projects I thought would make me some money but now the car market has really slowed down so not much point anymore. One was a pink mx5 with a bad paint job. Thought I'd tidy it up but the paint was so bad I ended up stripping it back to bare metal. The labour just isn't worth it, but I can't stop now. So this pink jobby has been in the way: I even started working on the 200sx up a bloody ladder lol... I have bare metal resprayed some bits of the pink one and made it red: Now I've moved the pink car out of the way since these bits above are done. It'll go on the back burner now and I can lower the 200sx down again. I've kind of lost track of where I am with it but decided to just start on something. Which was to modify the coil adapter plates, I was never happy with the spacers to bolt the coils to the plate (10mm tubes siting on top with a bolt through and not enough threads into the plates) so I cut up some 10mm alloy plates to tig weld to the original adapter plates instead. When I made the adapter plates originally, I didn't know how to TIG weld aluminium. I still don't....but I did my best lol. This is the best one. The others are too horrifying to put on the internet but they work and I'm getting better haha I don't think I took photo's while making it but here is the raised better location for the 2nd wastegate: At some stage I made a blanking plate for the o2 sensor in the downpipe. Also oil feed and drain fitted. And here it is with all 3 adapter plates welded and mounted:
- 419 replies
-
- 10
-

-
Saw this in Tawa last week, looks great in the flesh. Hope you aren't trading it in for an Outlander...
-
Didn't know there was another similar name haha, not me anyway. But yep, smack bang in the middle now. Wife, 2 kids, a dog and a mortgage. And yet I'm still driving the same 80's and 90's stuff haha. EDIT: It been suggested I talk to one of the Thomsens about Mivec turbo stuff. I haven't yet because I don't want to waste their time with a project that isn't on the top of the list. I've had a GS350 for 10 years now! I barely drive it though, it's for the wife and kids. Good car, getting a bit war torn now though, it's a 2008 so getting a bit old I guess but it's stupid reliable. I actually bid on a Leaf a few days ago, only planning to get it if really cheap but it went higher than I wanted. Just want to try out an EV really. Amazing you can pick one up for $3500 now, just the bad battery cooling (lack of) that wrecks them. Hmmm my wife suggested I get one of those cheap leaves so I don't have to worry about parking, but.....how far would $3500 get me with a turbo mivec awd sleeper...
-
Funny, I can see their workshop from my desk now after moving work buildings. Thinking about this car recently, with moving buildings I can't always get a secure car park anymore so would have to park in the wild. Which sucks, because I've been driving stuff that gets stolen a lot. So my thoughts are, either buy a boring Leaf for the commute and not care about parking, probably still drive something interesting once a week. Or building this lancer up into a sleeper type thing. Still 5x114.3 but maybe base the brakes on fitting within 15", or possibly 16" with hubcaps to hide the 5 stud? Black intercooler. I'd prefer to fit some better seats, but could put supercheap auto seat covers over them. There is also the problem of life being so damn expensive these days. Car projects are a very low priority unfortunately. Except the ones I plan to sell.
-
I even tested it in my Yellow MX5 and same behaviour so it's definitely nuked something on the ecu or break out board. Annoying but I guess it's not like I nuked a $2k ECU and it seems to be mostly functioning.
-
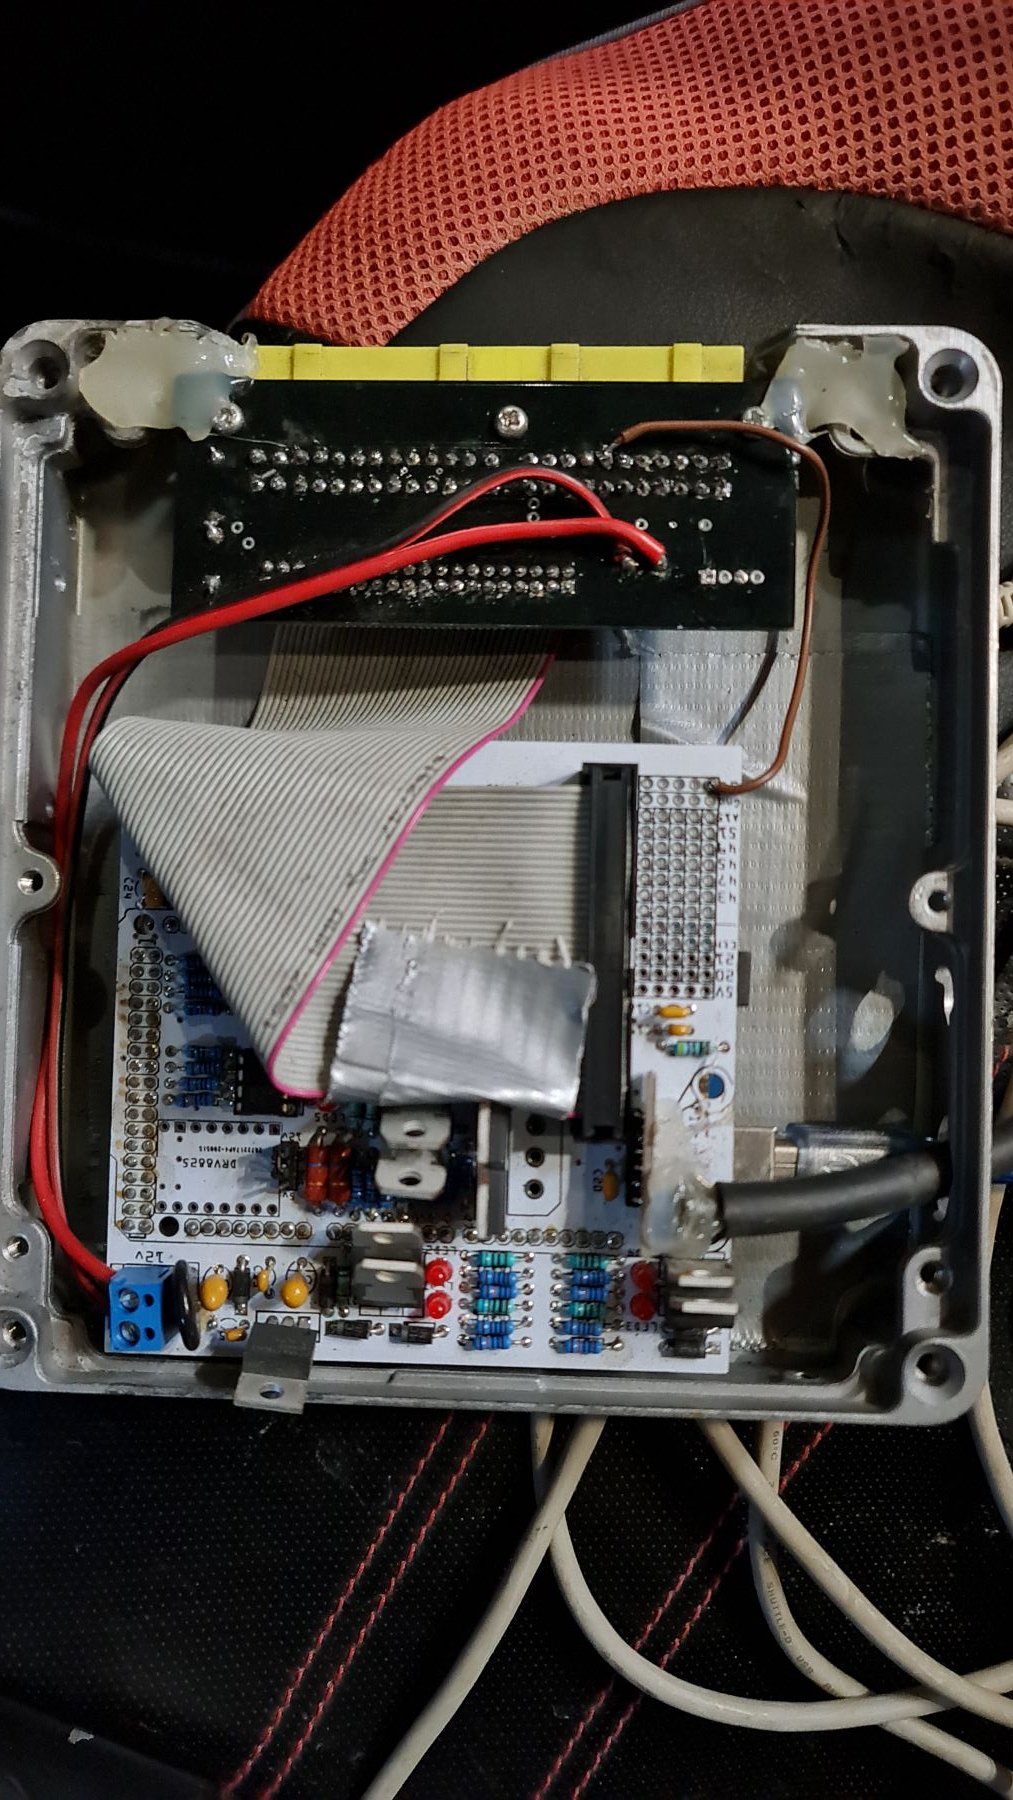
Hey thanks heaps for the info, super helpful. I got the Fuel pump and fan working with a ULN2003a chip, before I got it working I thought the ULN was faulty on pin 45 because at the time I couldn't get it to prime. I was checking things with a multimeter and saw that the Arduino was sending 5v to pin 45, but still no pump. Checking some more and I managed to slip and short the 12v and Ground then the magic smoke came out of the adaptor board. Now the radiator fan comes on permanently. Yay fun... removed the speedino board and adapter then found that it looks like it had nuked the trace (on the adapter break out board) from 12v to the pin on the ECU connector (pin 1A from memory). Fck... So I soldered a wire to bridge the connection with the dead trace, doesn't look like it connects to anything else. Now it's back to the rad fan being controlled properly, i.e. I can change Tunerstudio to trigger it at say 10deg C so it comes on on demand. But now I don't see any RPM and no LED's to show ign or injector activity. Fck sake. Had a close look at the Speeduino board and adapter. All looks fine, checked for burnt components, all look ok. Checked for continuity of resistors etc. Checked for continuity for the Crank and Cam signal wires. Put Tunerstudio into the hardware test setting, I can now trigger injectors and ign with the board LED's firing and the I can hear them in the engine bay. So that's good.... but what is wrong? I assume I am still not getting crank or cam signal. Possibly next I'll try bypass the breakout board and IDC cable for the crank and cam signal. Or maybe bypass the whole board and wire directly to the ECU plug. Cars are fun. EDIT: so I have MAP, TPS, intake temp, water temp, working fuel pump and rad fan. But no RPM, no injector pulse. Maybe a mosfet is fried or still a trace issue.
-
Cheers for the link, I'll do some research on using the ULN2003. Have PM'd.
-
Here's a video of the first start, I'm genuinely surprised how well it idles from cold etc. Cold start is bad but then it idles straight away. This is with the fuel pump jumped via the diagnostics plug. Hopefully I'll figure out getting the ecu to trigger the fuel pump. https://youtu.be/toCfkd0BbO8?si=jZJvmsDtOWLo17_n
-
The TPS wiring was interesting, the 1.6 NA6 MX5 has a 3 wire TPS, you'd expect 5v, Ground and Signal. But it is just an on/off switch on these, unlike the 1.8 (and apparently the auto 1.6). For a Speeduino or any ECU you need to change it to a VTPS. Variable voltage, not just on/off. Normally a BMW one with an adapter like earlier in this thread. I did some testing and could not get the Speeduino ECU to get a signal from the bike TPS at all, even the BMW one. It looks like the stock ecu/wiring doesn't provide 5v to the plug at all, and the Speeduino plug and play ECU's reuse one of the wires to send the 5v's. So since I made my own using a Speeduino v0.4.3 universal board I needed to do this manually. See brown wire here, this takes 5v from the speeduino board, to the adapter board to the pin that goes the the TPS plug: Once I did this, the Tunerstudio software works with the bike TPS no problem. Now the next thing is that I can't seem to get the Speeduino to turn on the fuel pump. I forgot to remove the SIG fuse like it says in the manual, but I think it may actually be the same issue as above. The manual is referring to the PnP MX5 speeduino ecu, not the universal board I have used. The 'mx5 adapter board' to use the original mx5 ecu plugs also has no instructions at all so I am just working it out as I go along.
-
Also this test bench mx5 is one I bought with a terrible terrible paint job, not the colour... just the quality: I originally tried sanding it, but it was so bad I used chemical stripper to take it right back to the metal. The idea was to practice body work and paint then try make some money on the side. Lots of sanding, primer and then paint. Came out awesome:
- 165 replies
-
- 11
-
-
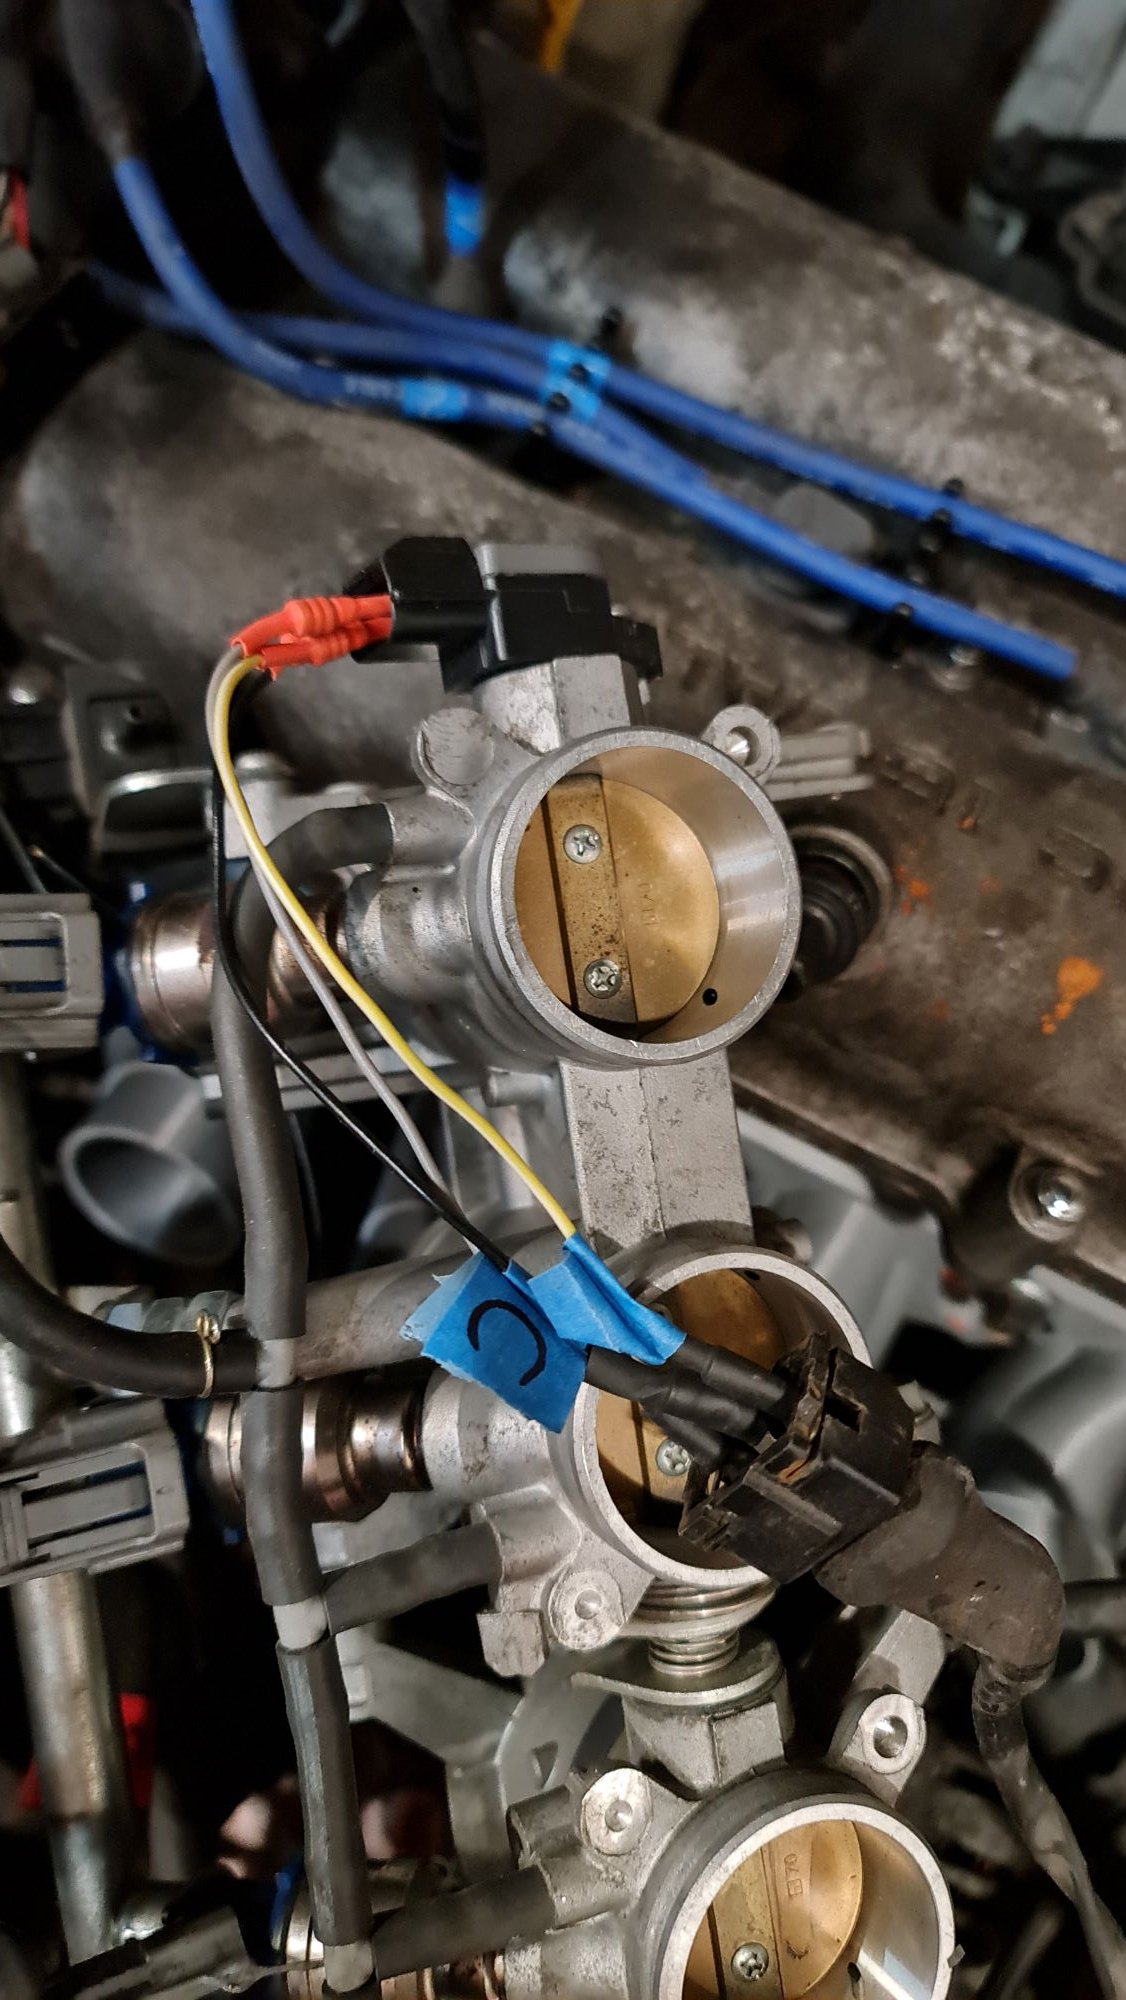
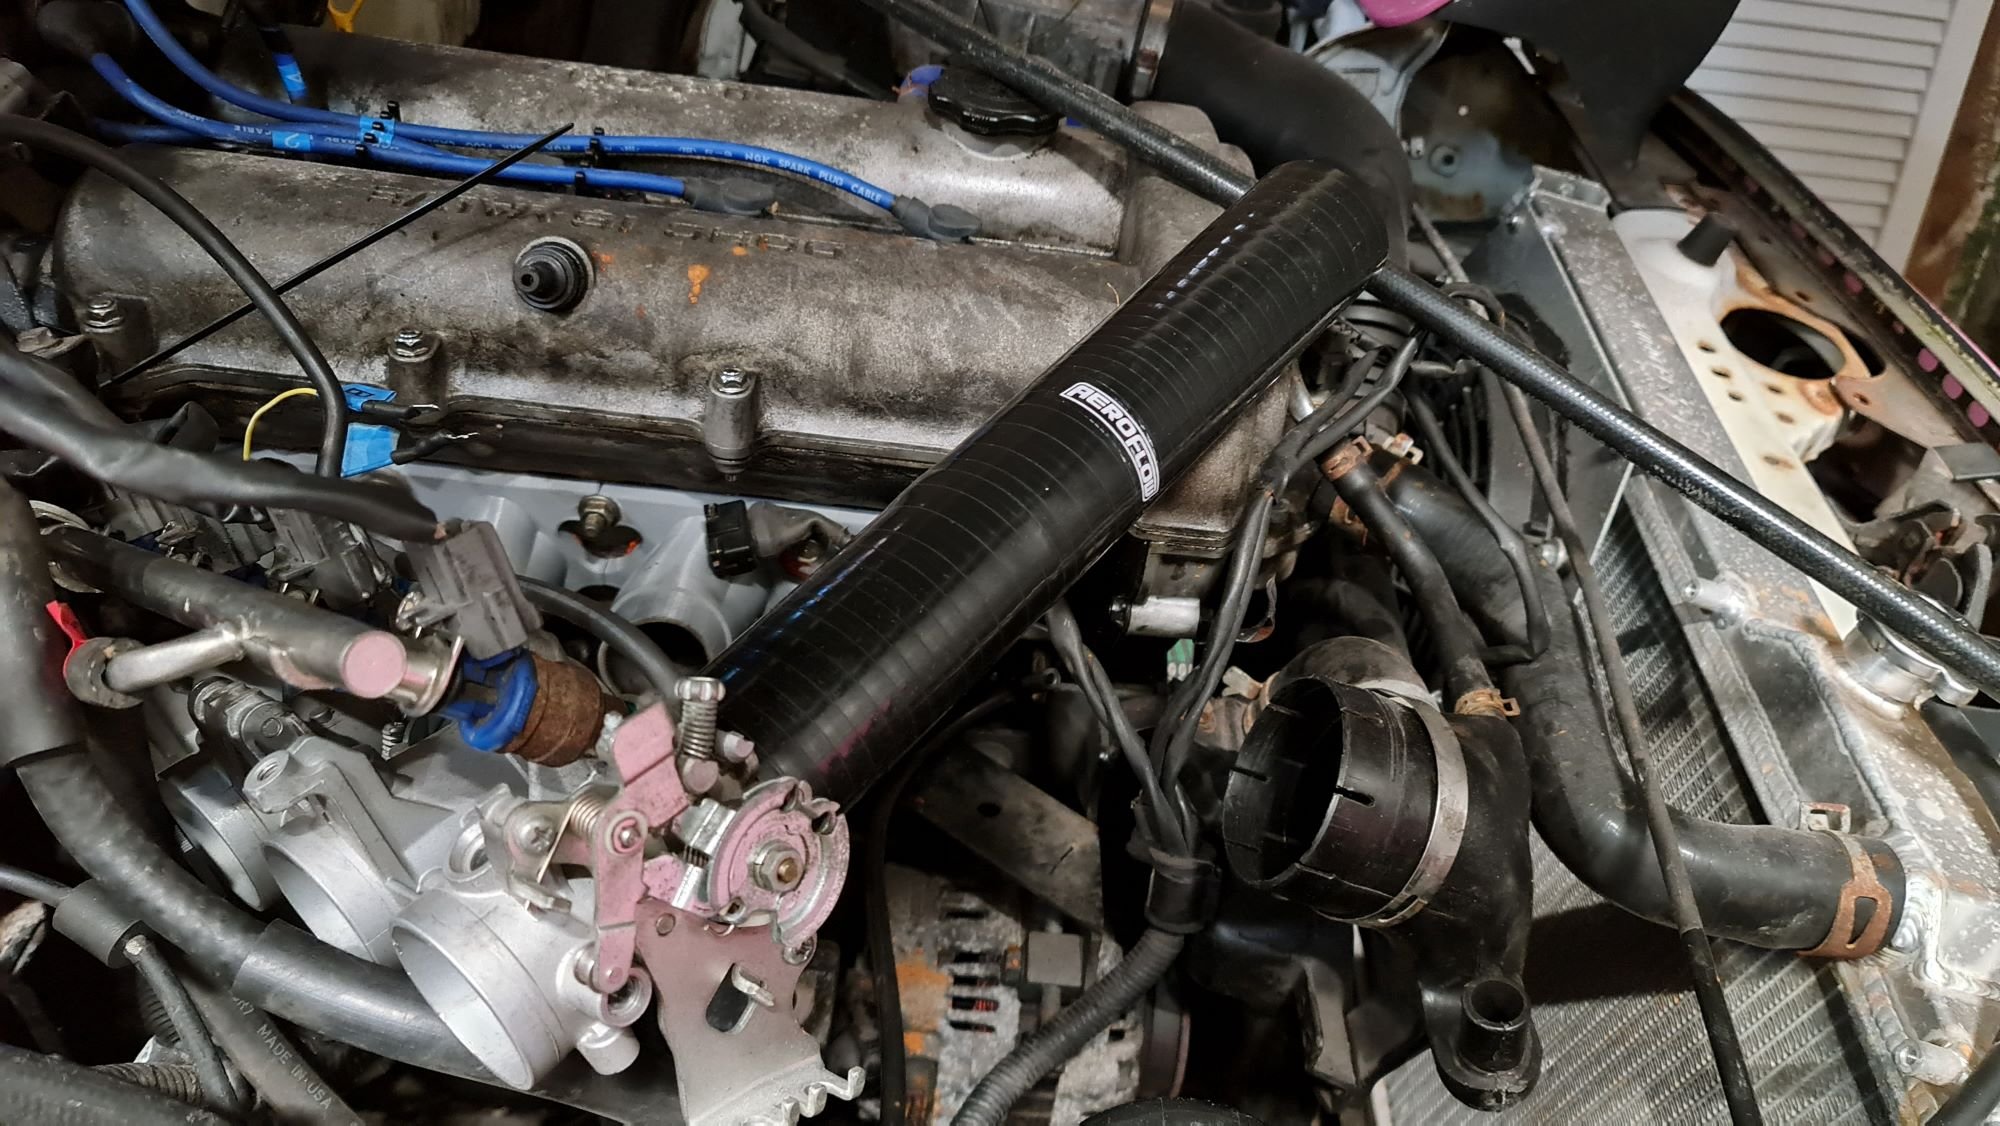
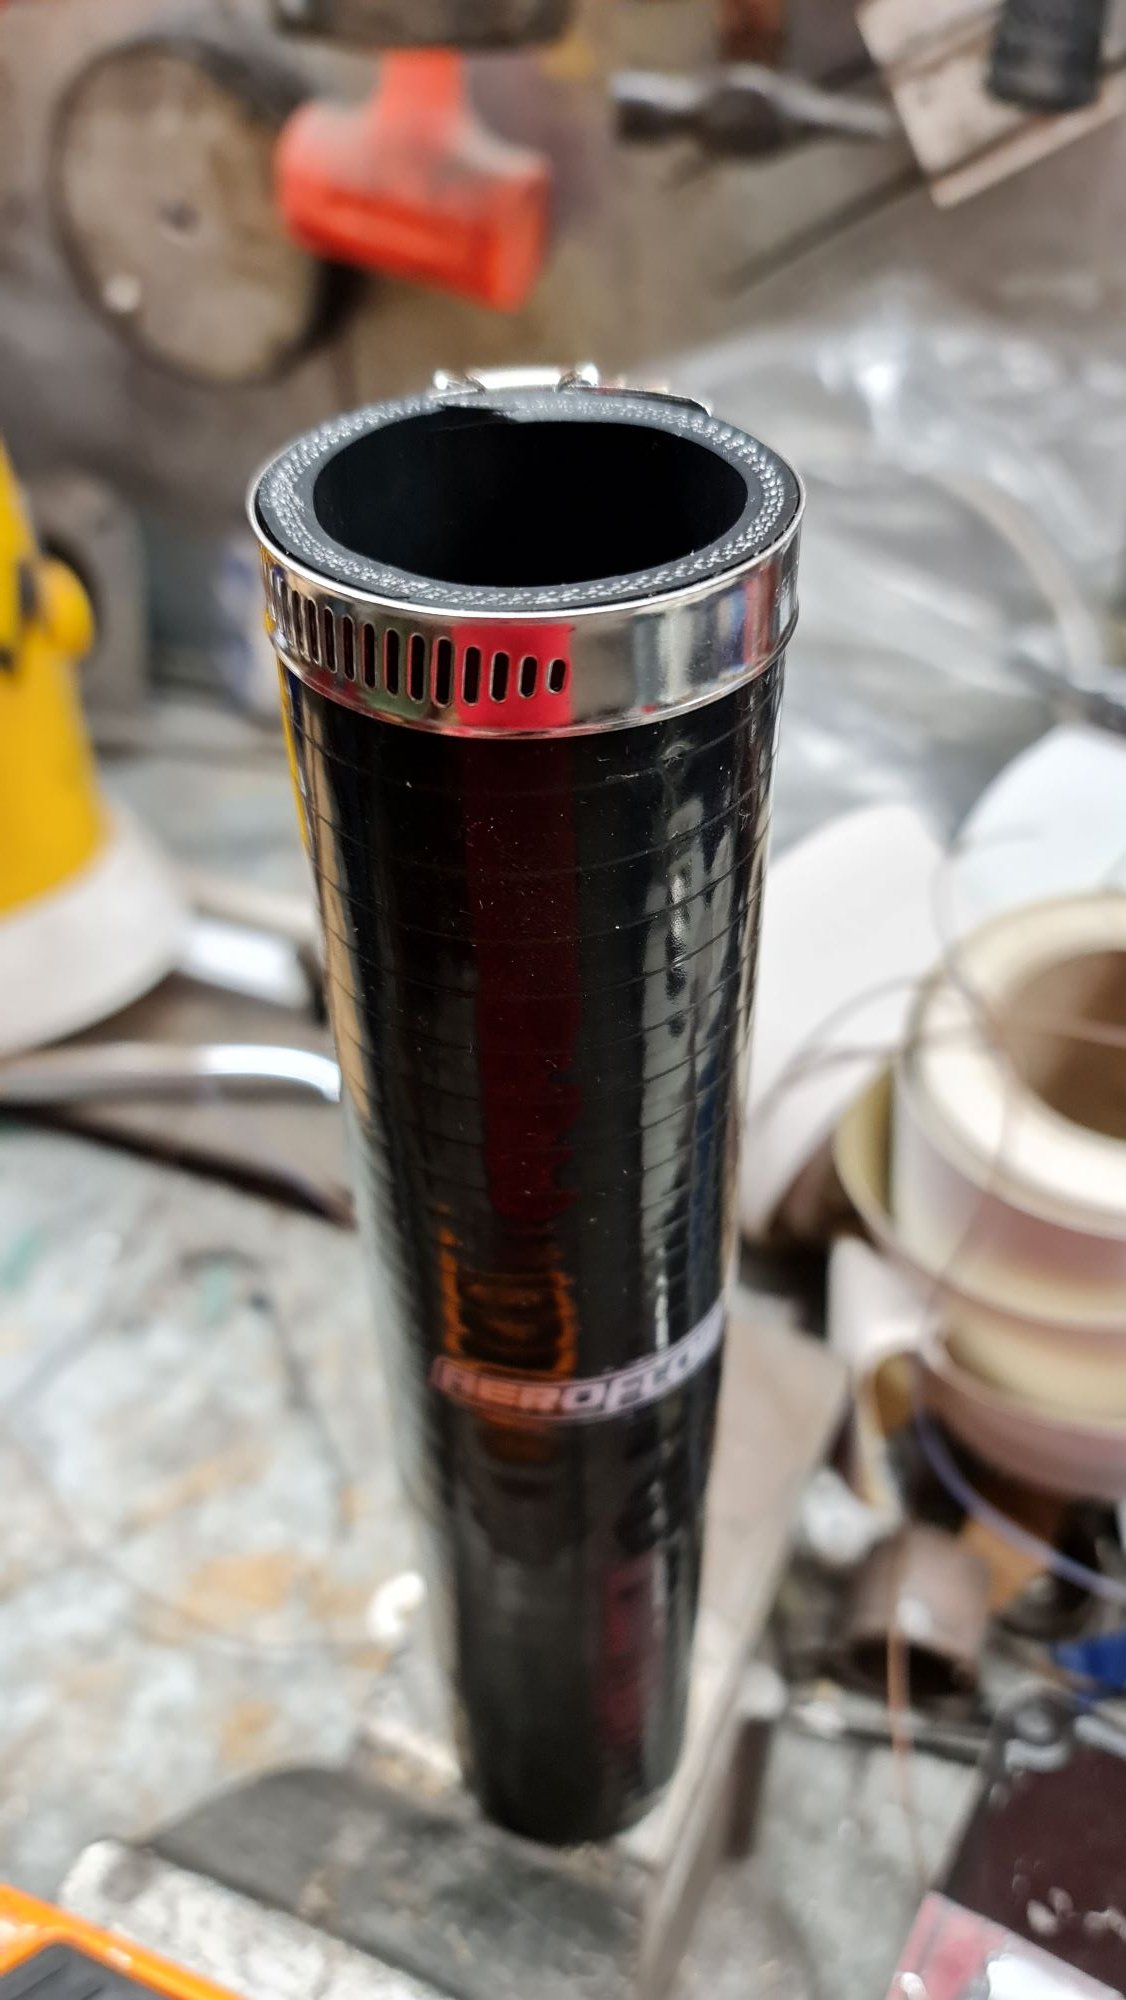
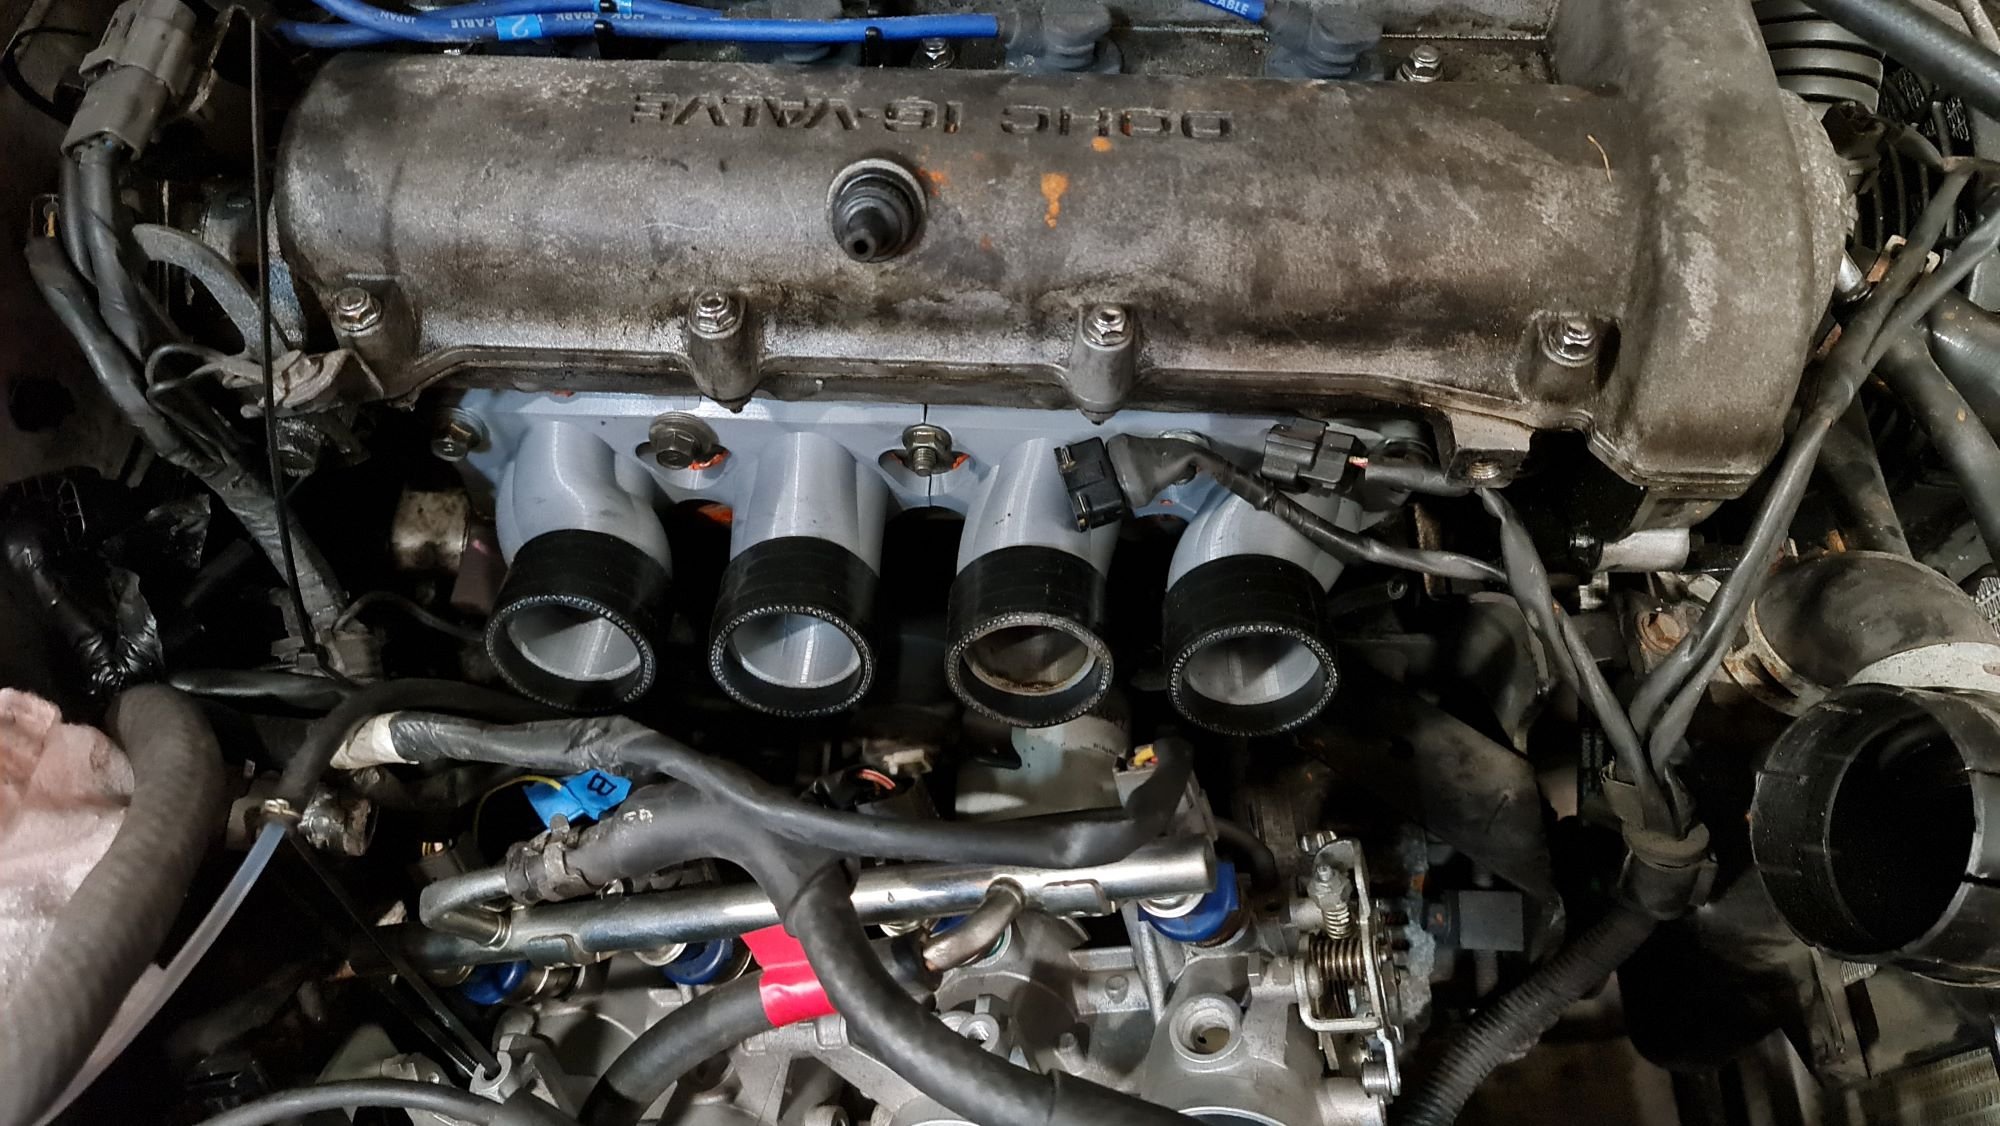
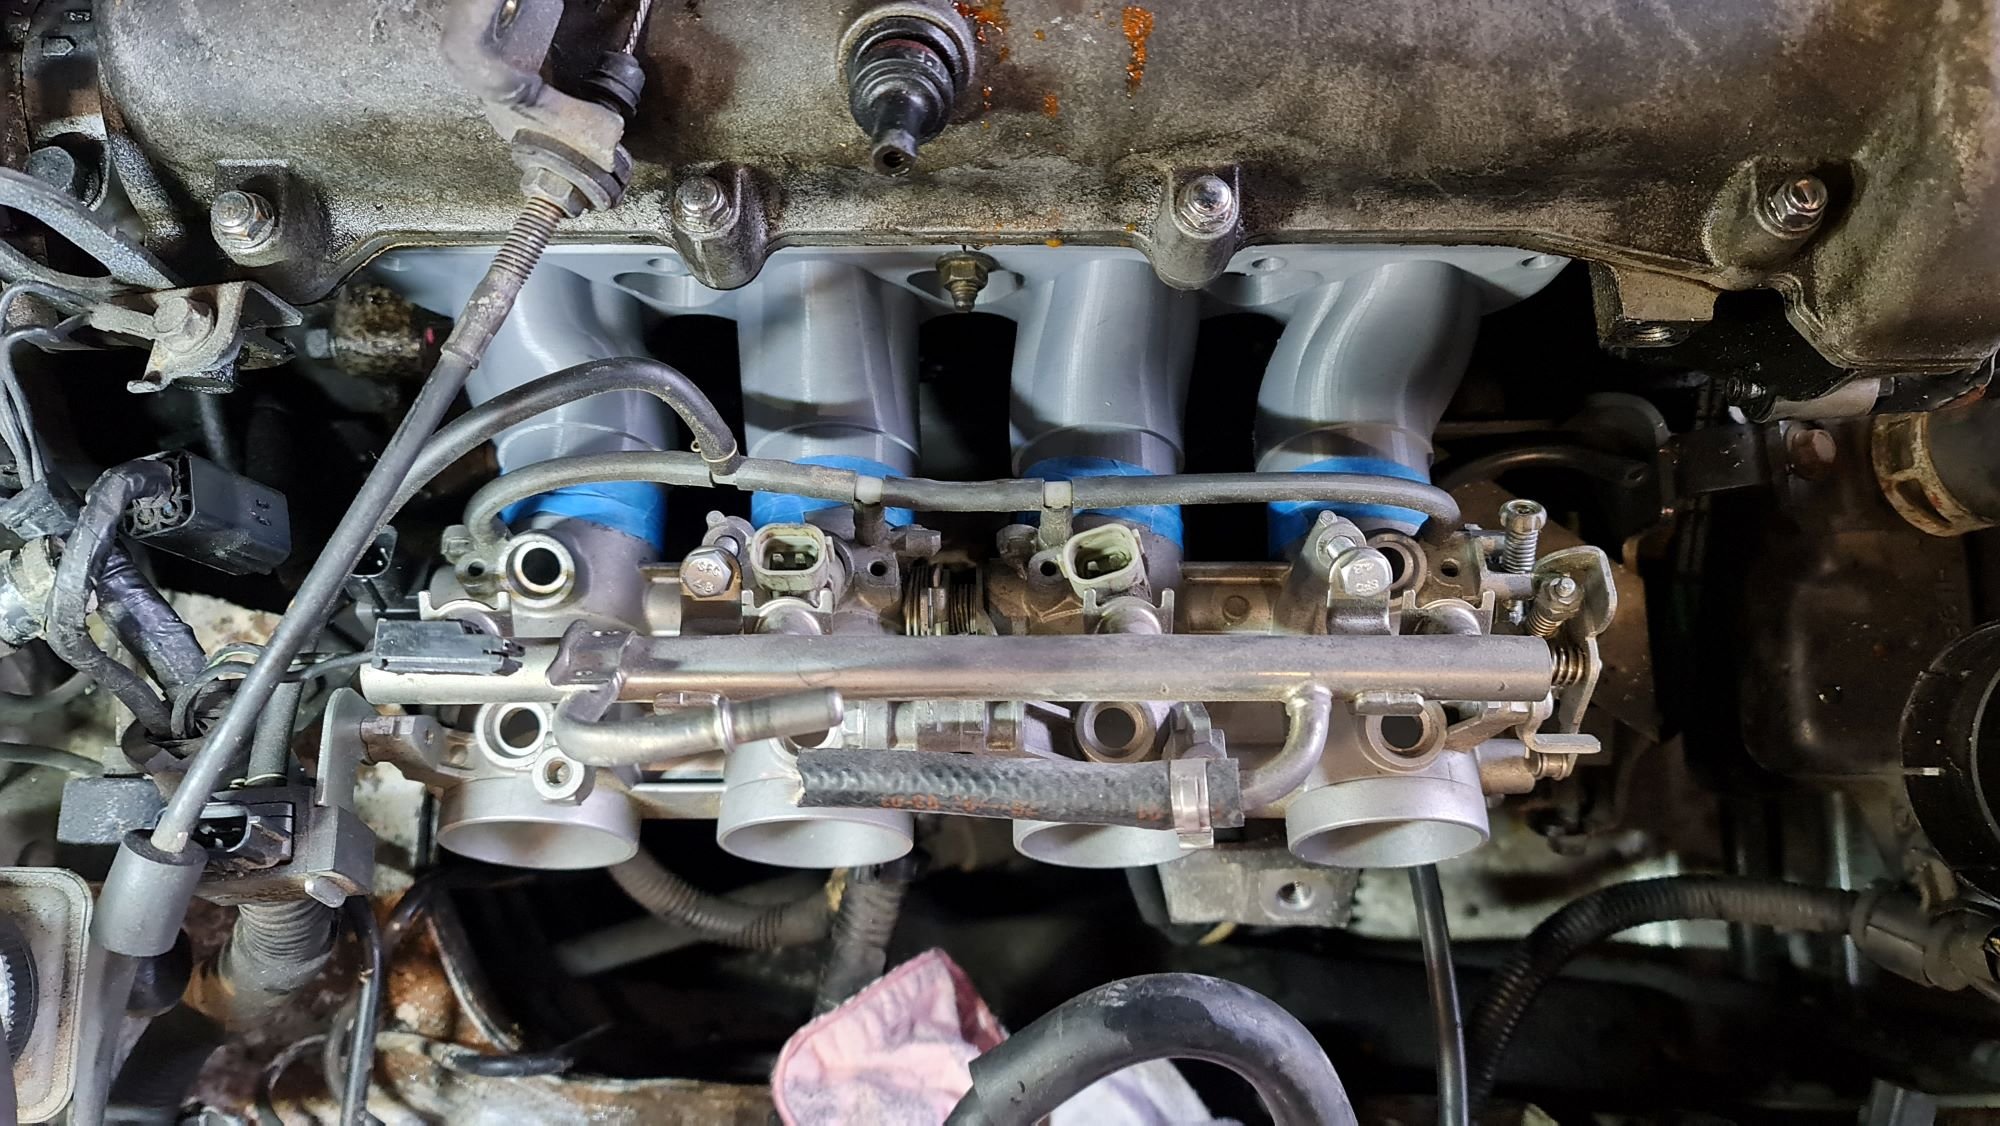
Bought a length of silicone joiner to fit the manifold side of the ITB's: Used a hose clamp to use as a cutting guide: 30mm lengths: Clamped to the ITB end but not the other yet, it's tight enough for this testing: Also figured out the bike TPS and made a temporary adapter loom thing...if you can call it a loom...scrap wires maybe?
-
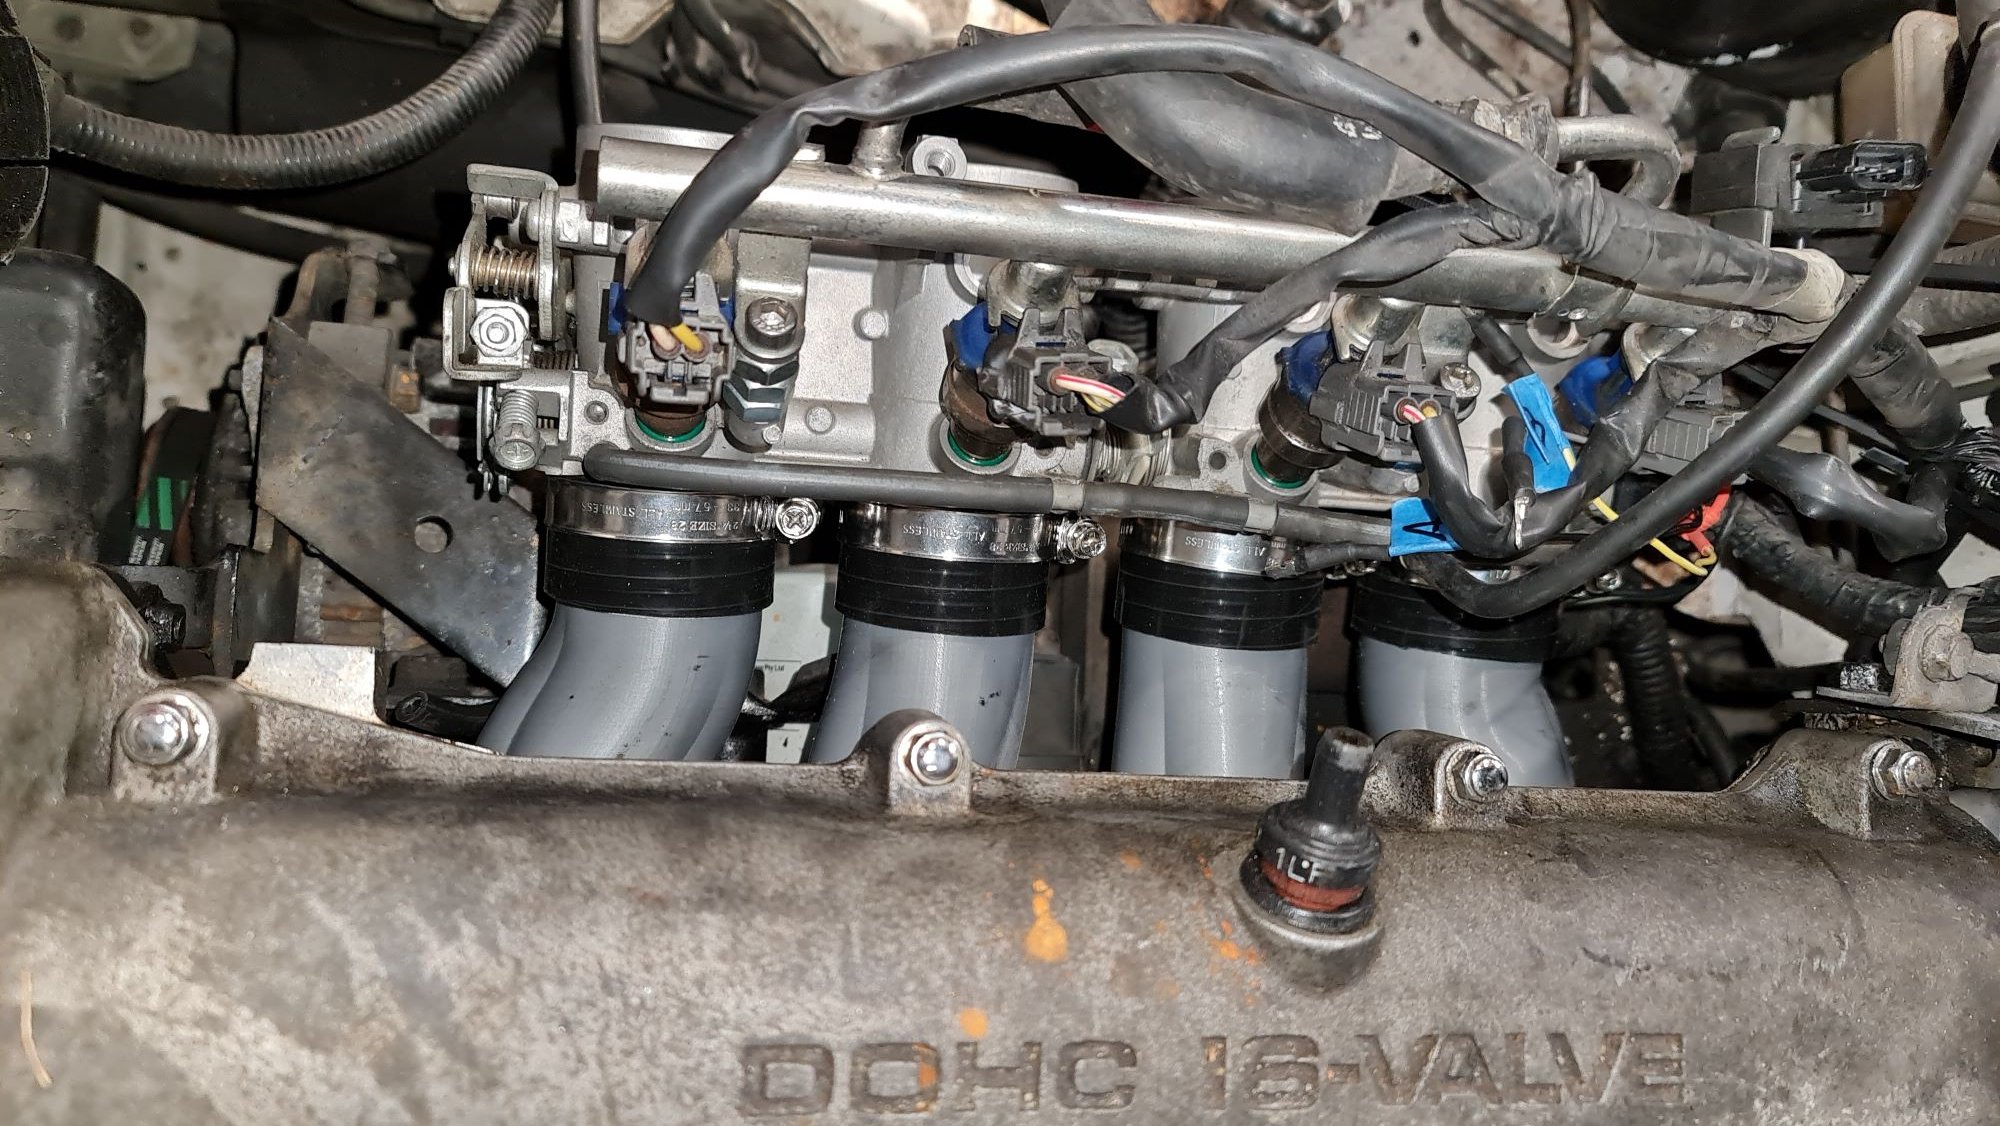
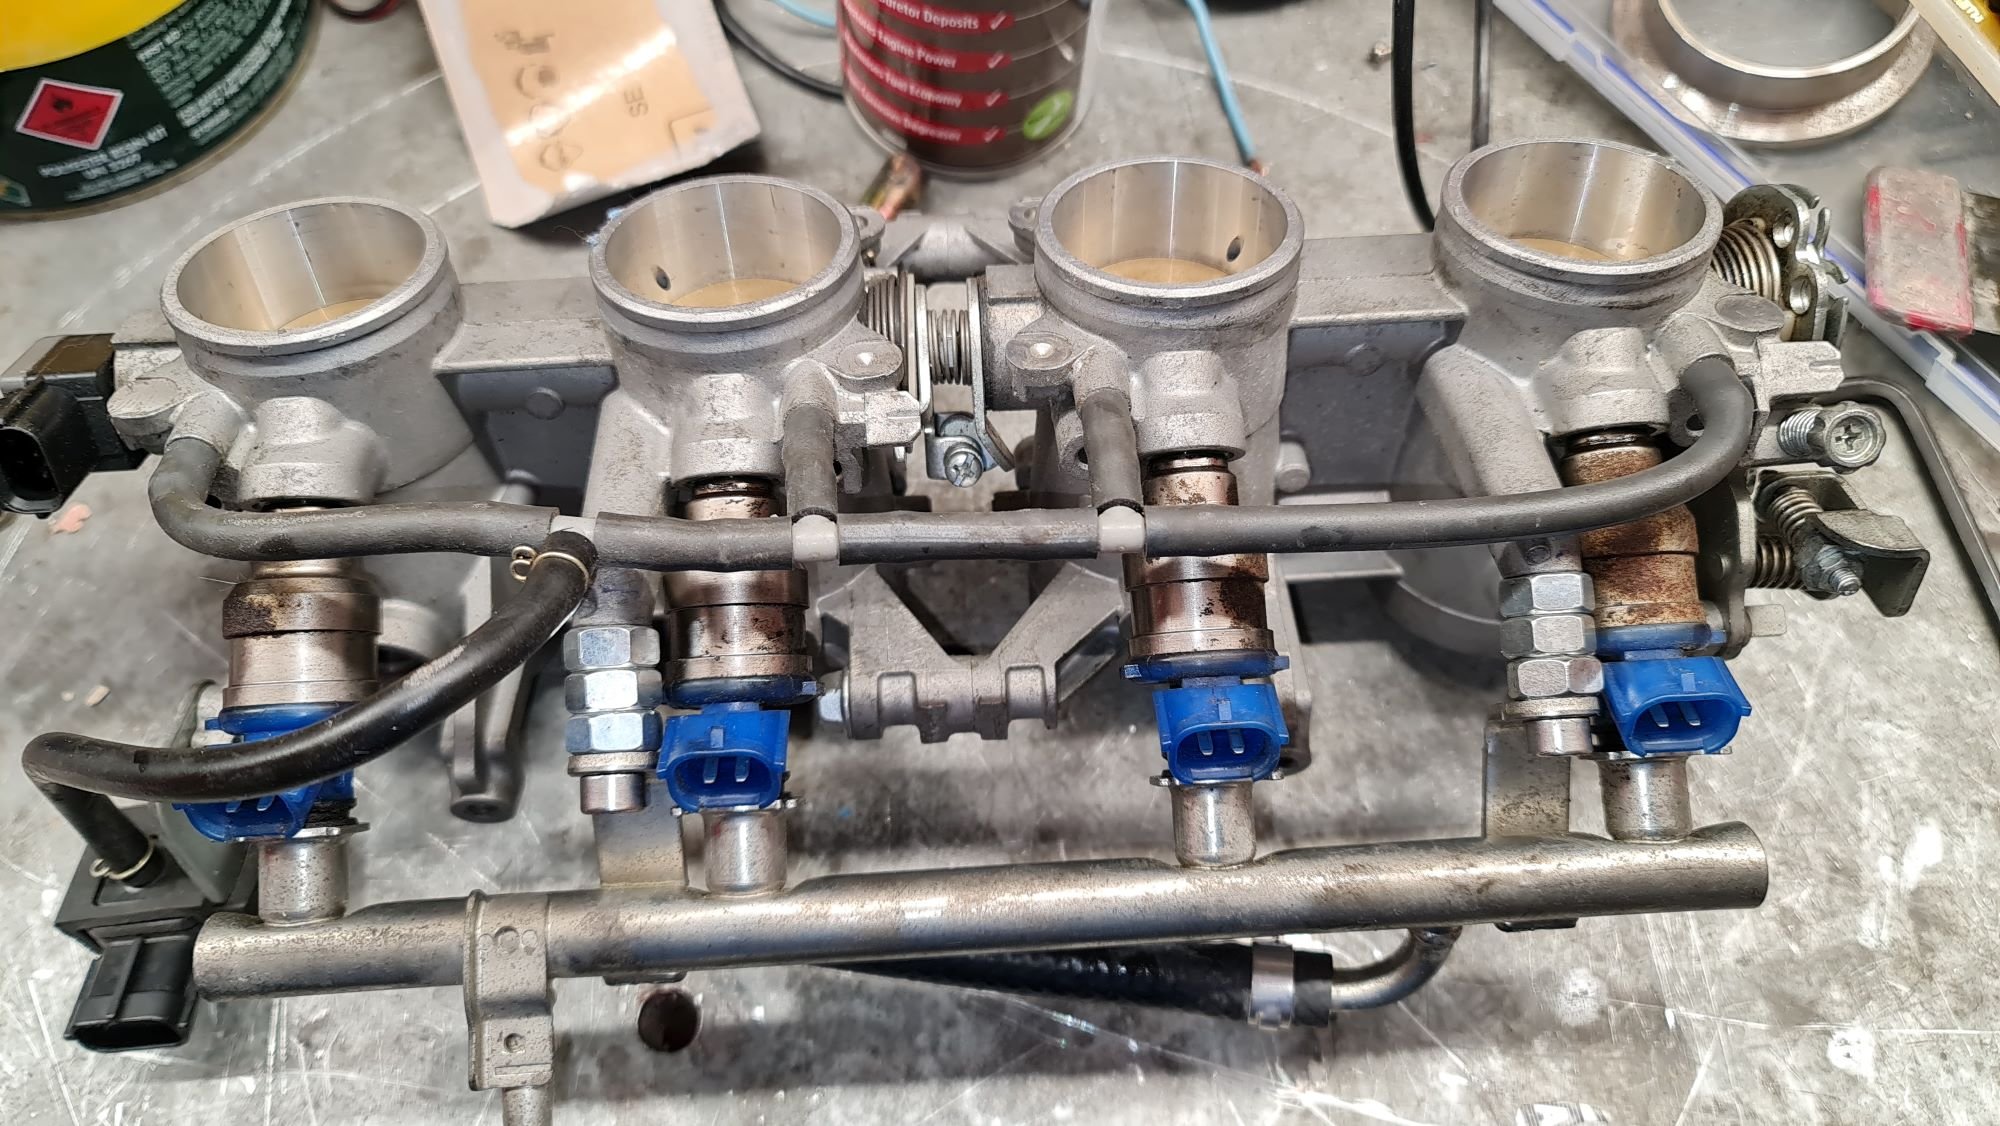
The bike ITB's didn't come with the injectors and they needed to be a long pintle type. I was originally going to try use some 1jzgte vvti injectors I had already and see if the short pintle was a problem. But then I looked at the b6ze mx5 injectors and they are quite long too. Test fit, using some o-rings that fit the bottom end and spaced out the fuel rail with some nuts. Looks like they are meant to be there?! They are a basic single hole type unlike the 1jz ones but should still work, plus bonus is they sit pretty much flush too:
-
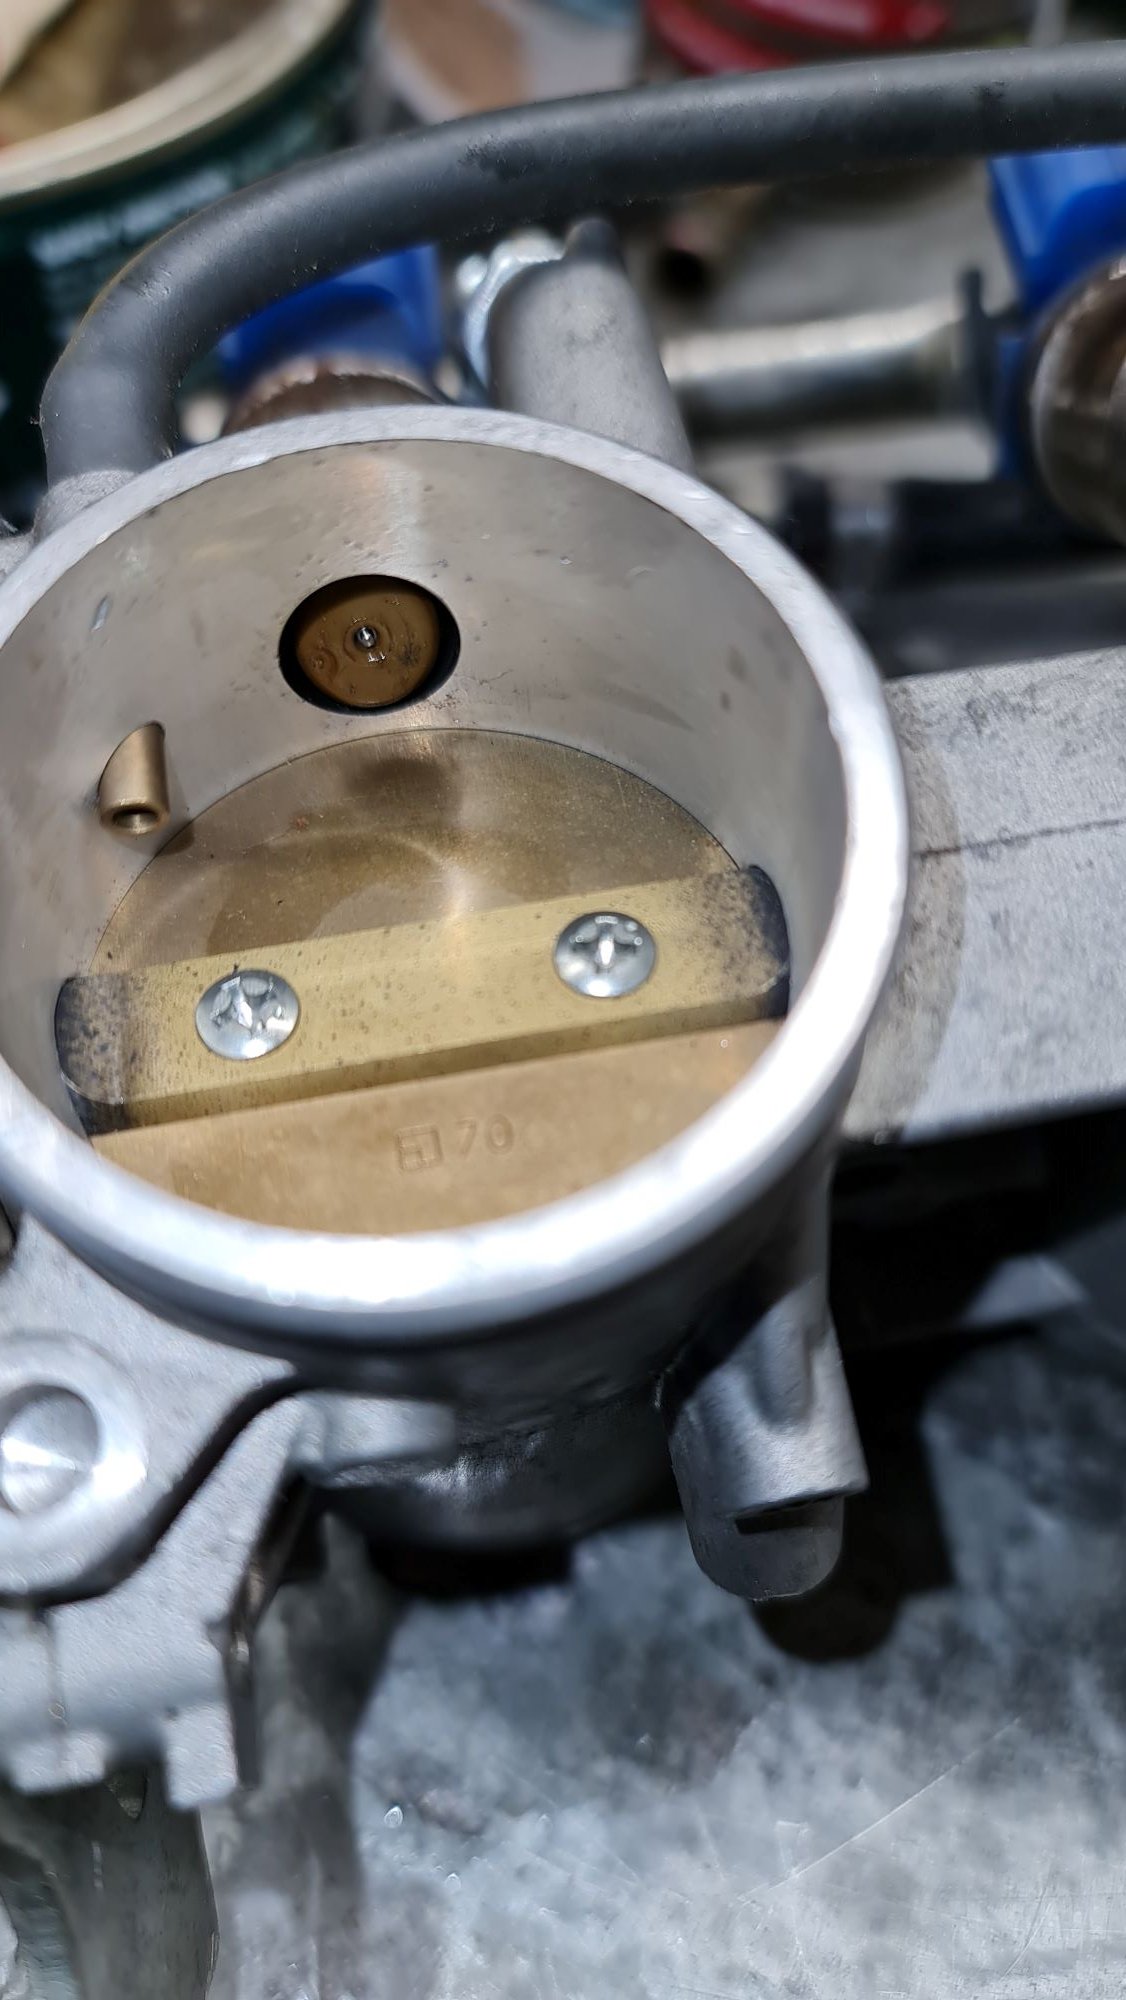
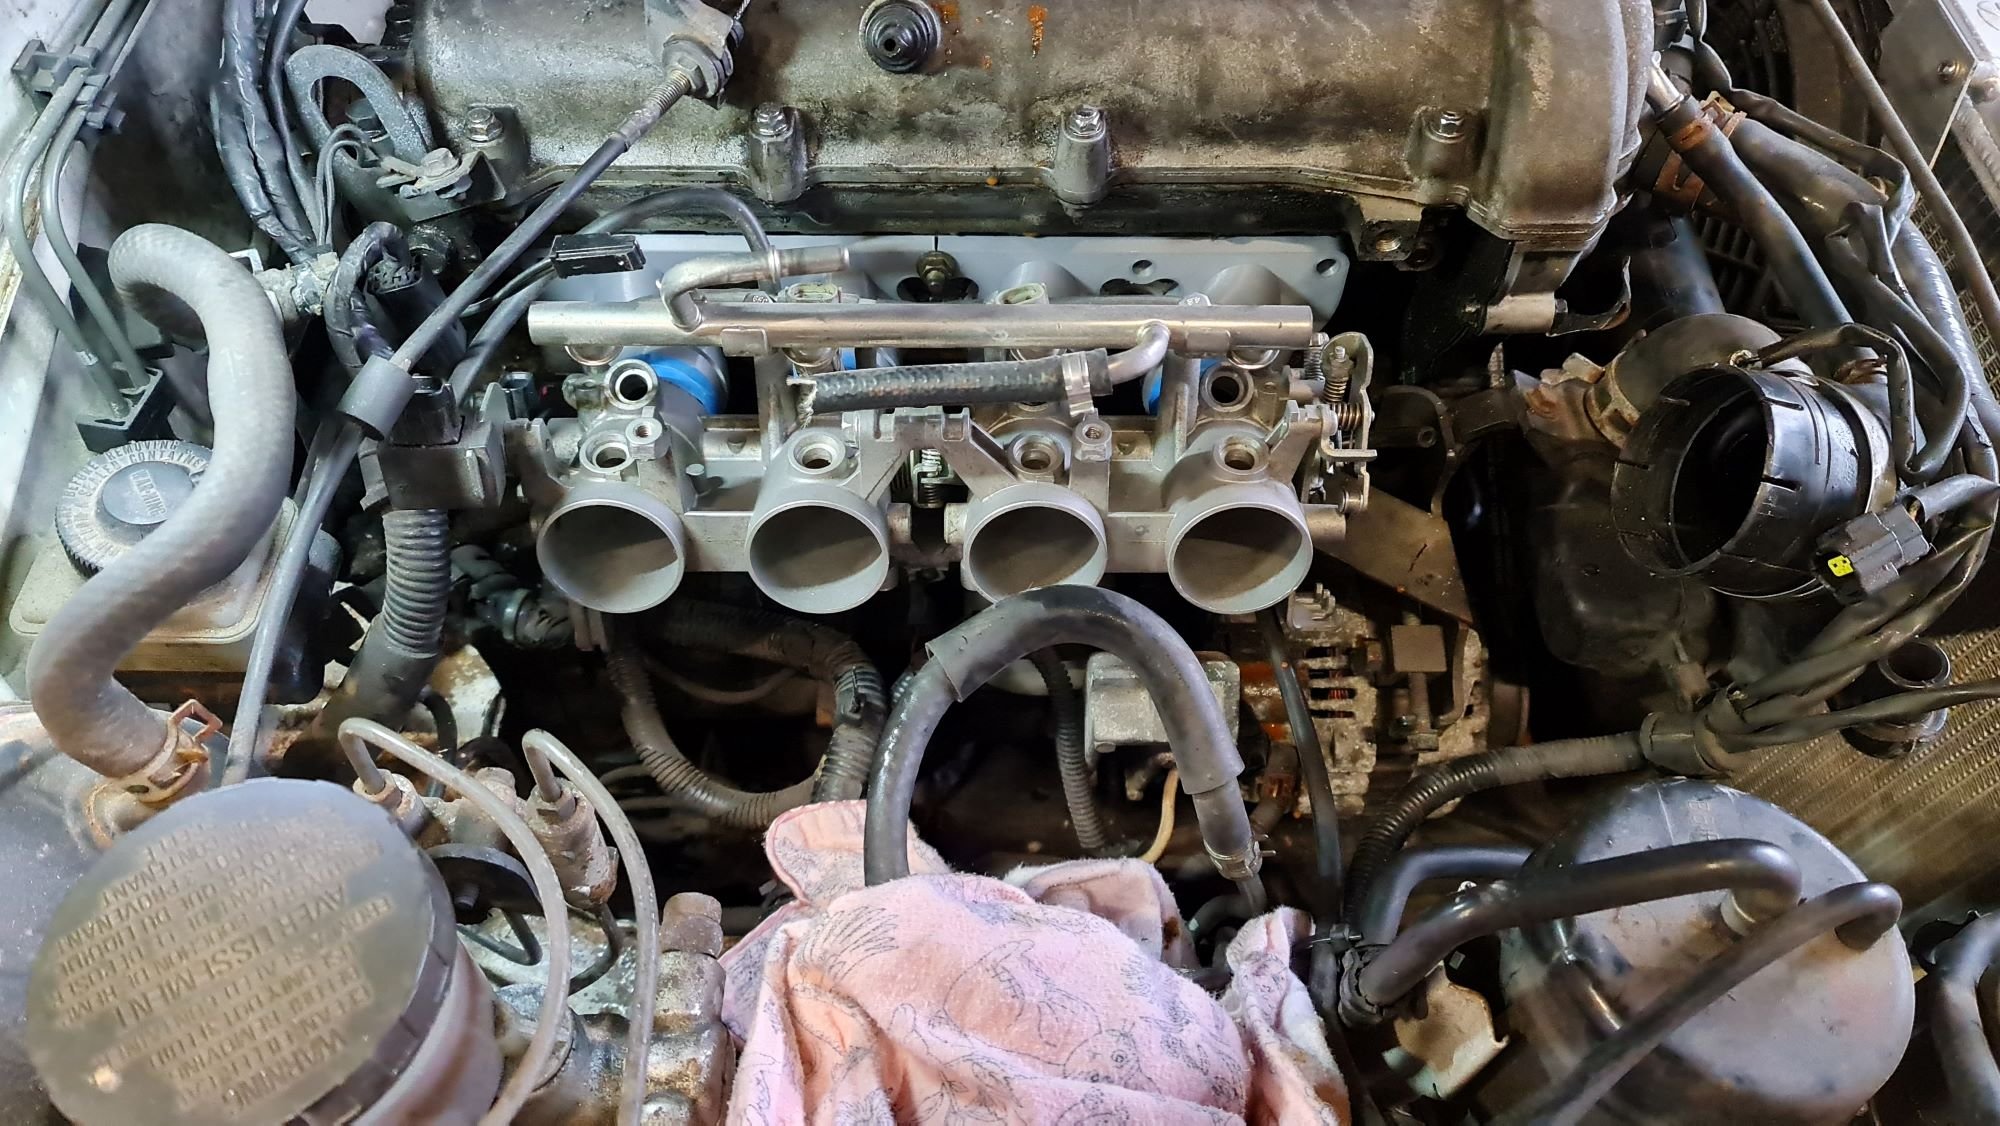
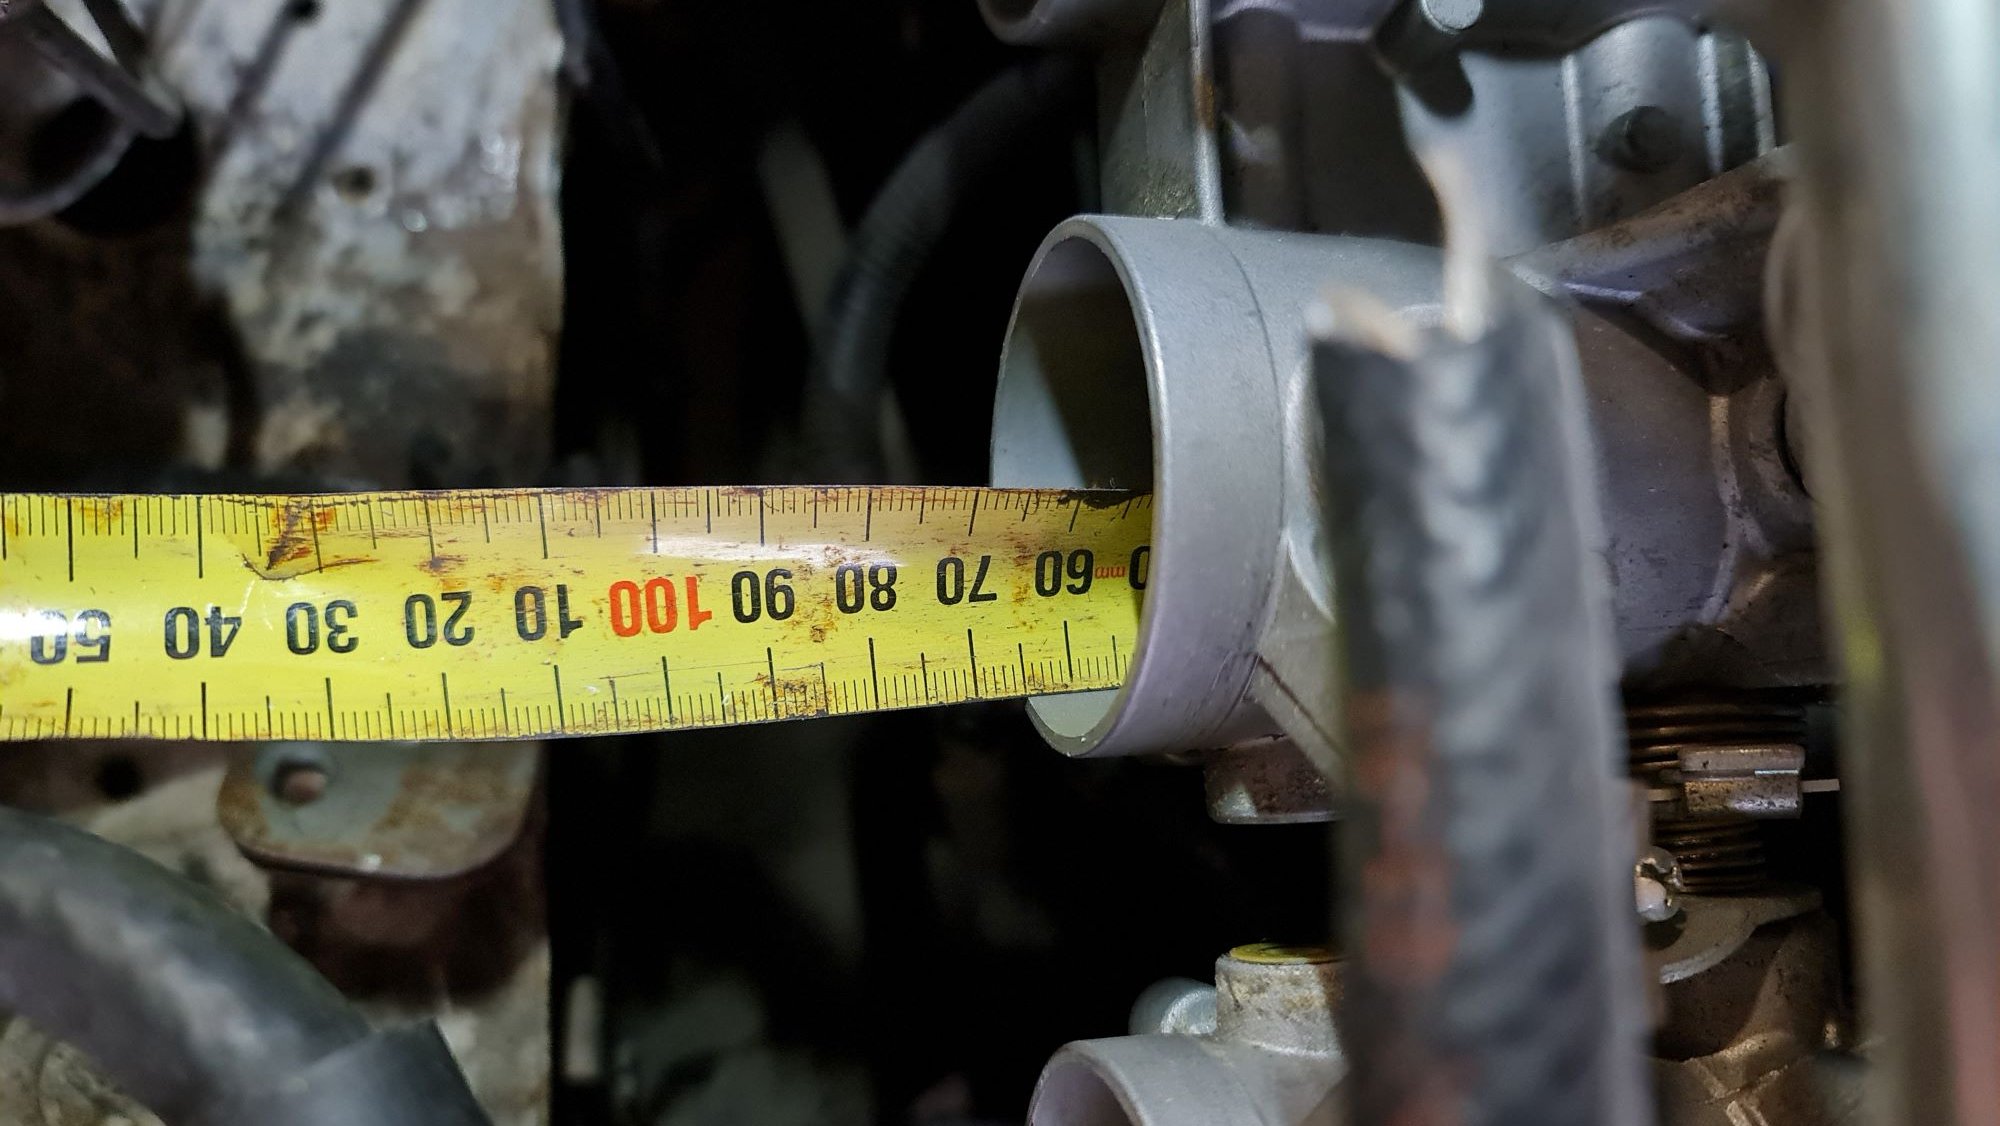
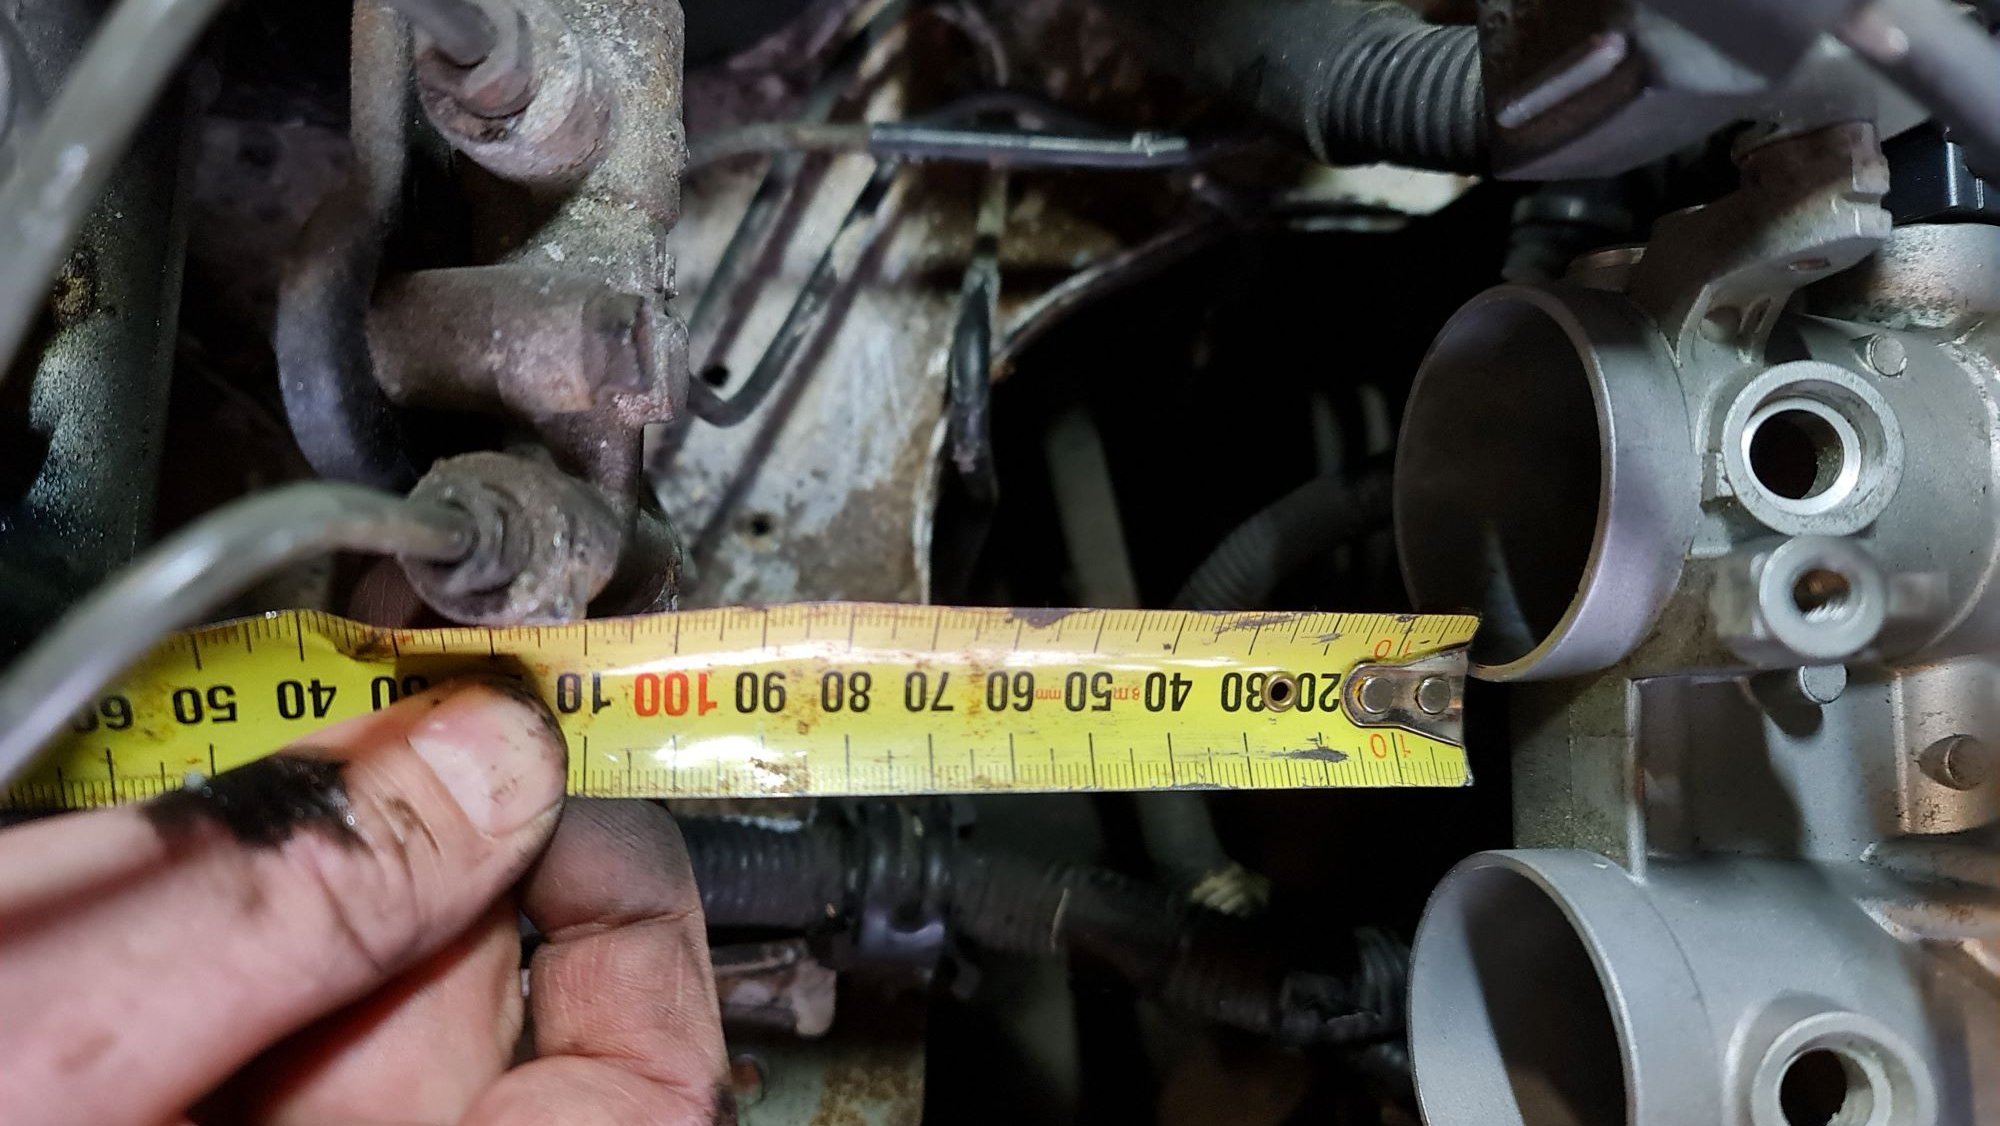
I picked up another mx5 recently, with a super crappy paint job. So I am stripping it back and practicing body work/paint on it. While it's in pieces I took the intake manifold off so I could test fit the 3d printed ITB manifold I made ages ago, must be 2 years already. This is only printed out of PLA+ but final print will be in Carbon Nylon stuff. The engine is messy but I'll fix that later. It lines up nicely and doesn't foul on anything at all. In fact it frees up heaps of space: Not sure if I will run the throttle cable above or below and also need to see if I have enough cable movement to open the TB's fully. There is about 100mm space for the trumpet before it'll touch the brake line junction box thing, which could be moved too. Since it was a double throttle plate design, which I've removed the first set of TB's there is already roughly 65mm before the throttle plates. There is probably some Maths to do here... Total length to the head mounting surface is about 175mm without trumpets
-
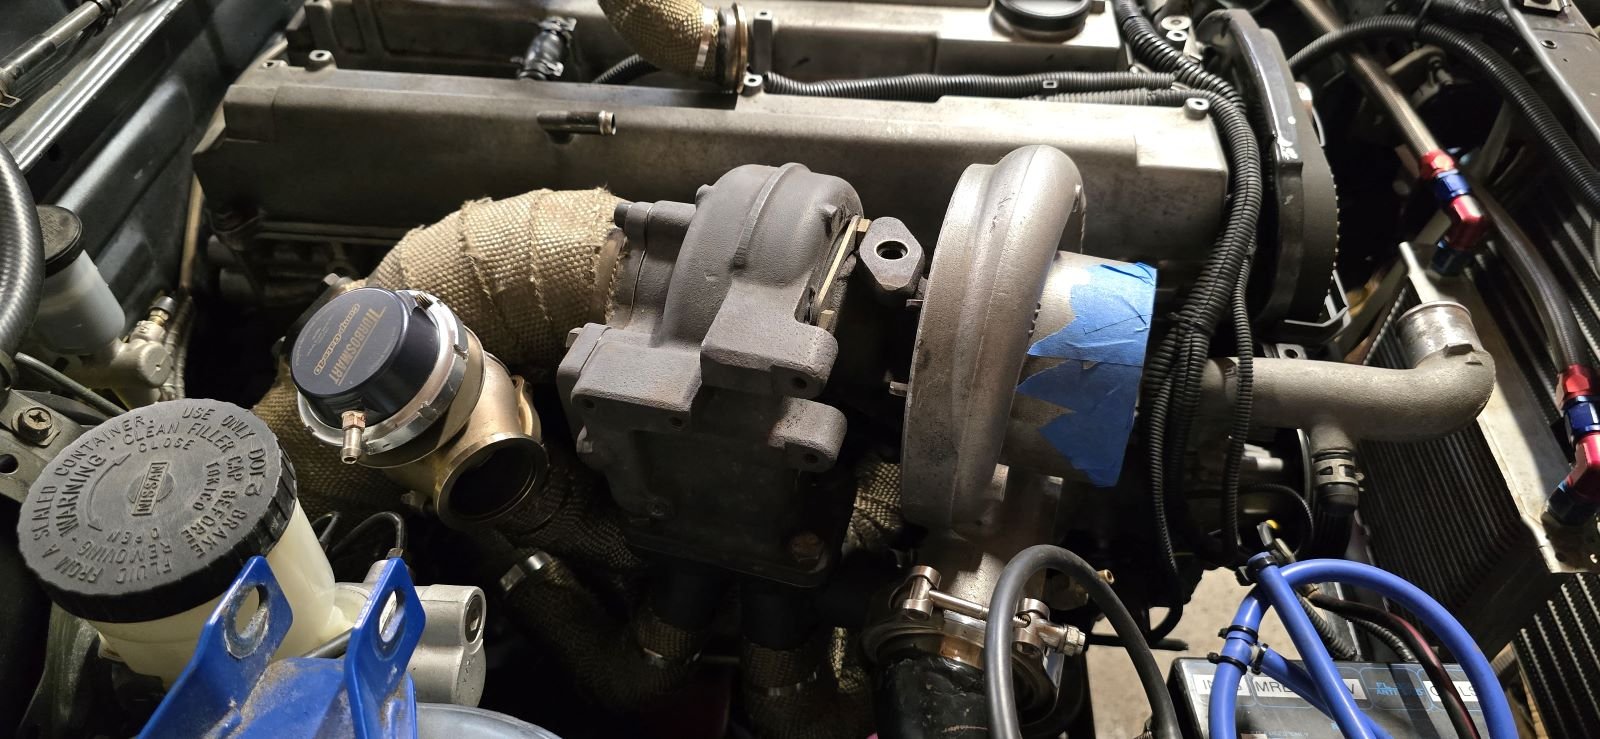
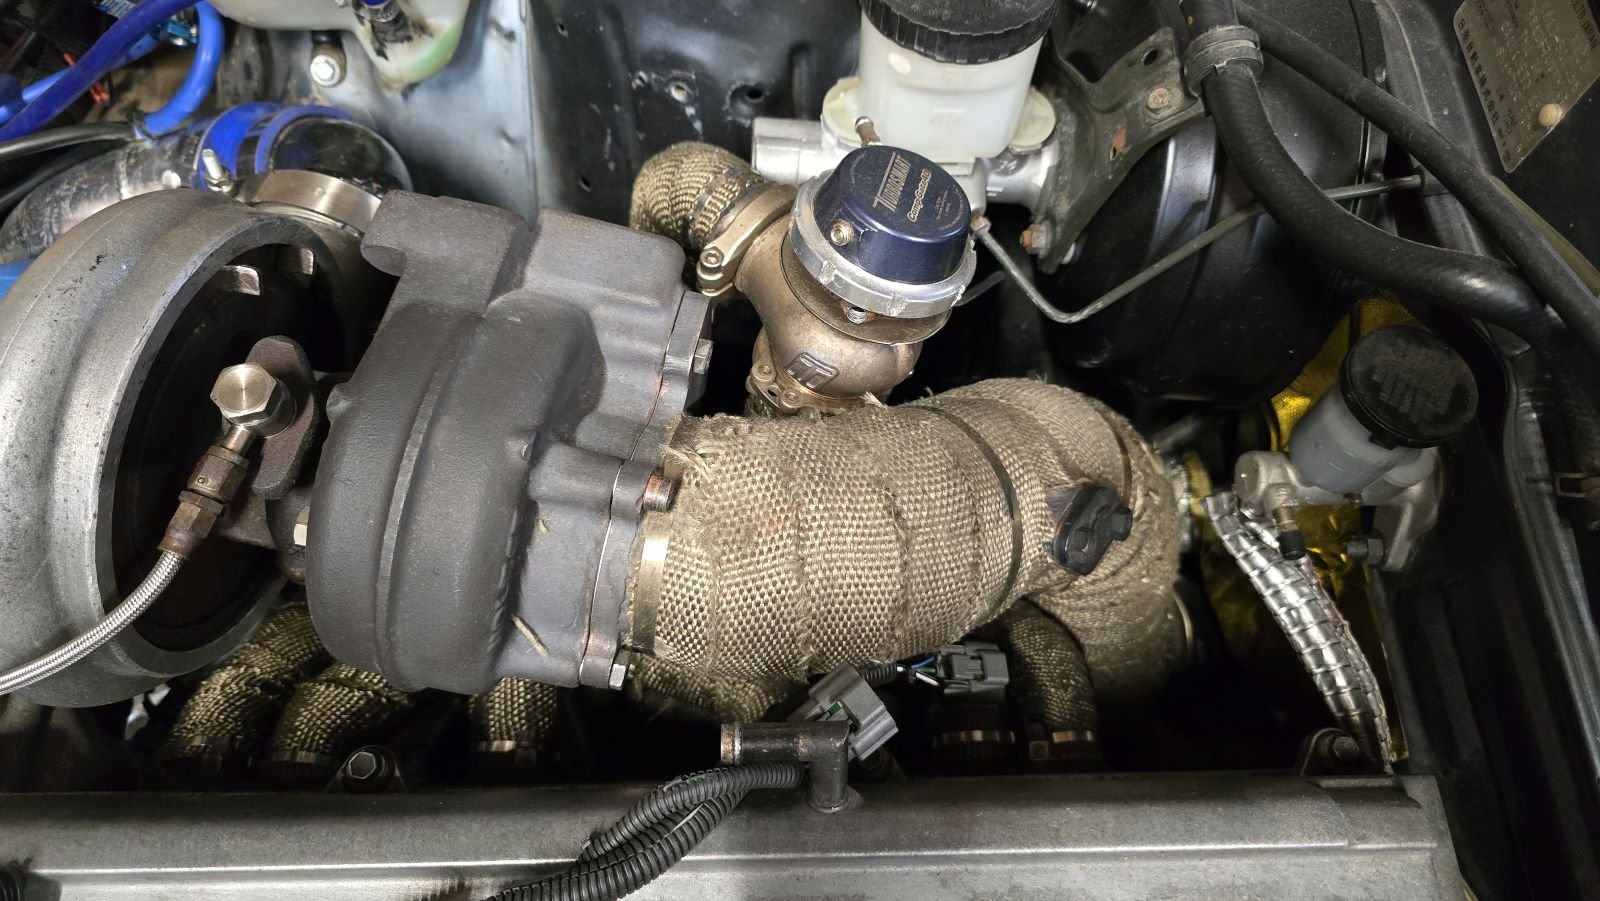
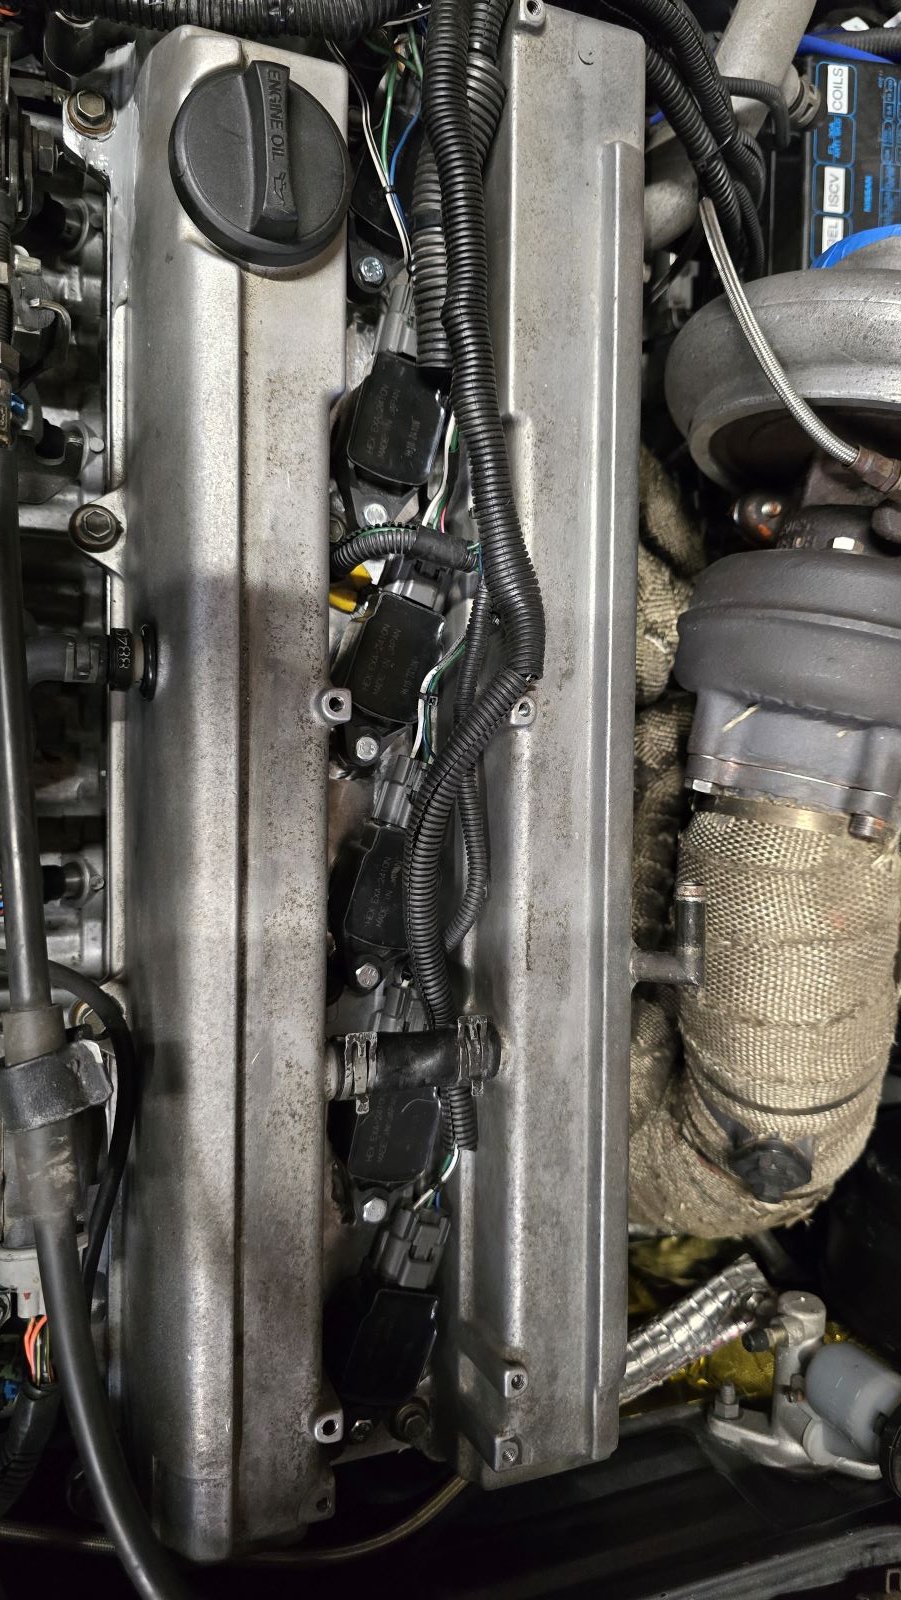
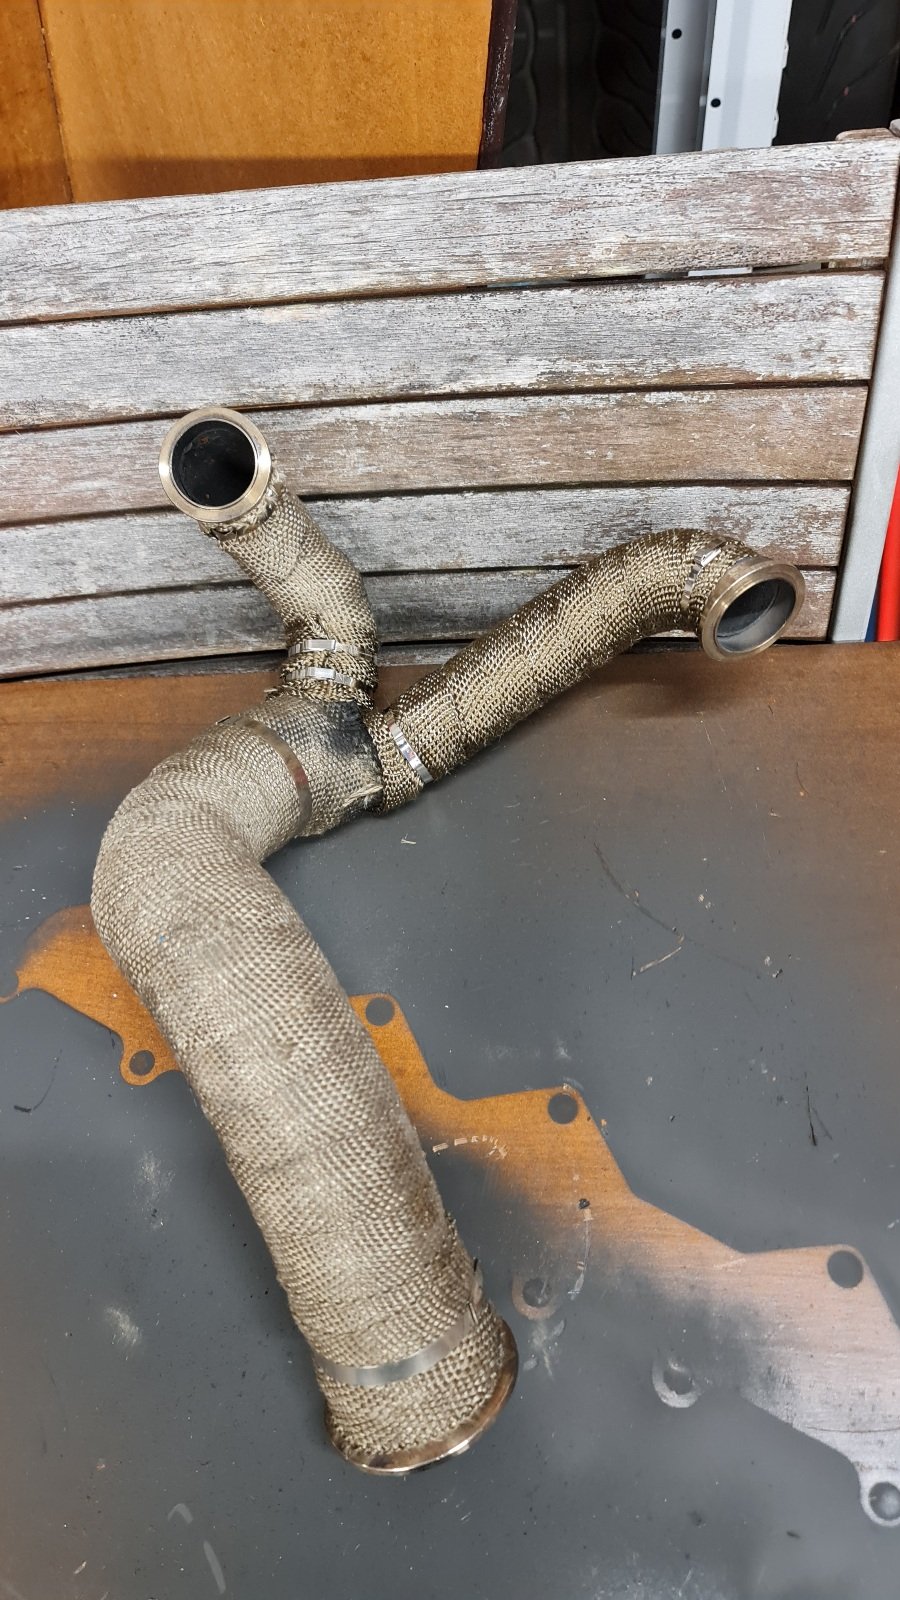
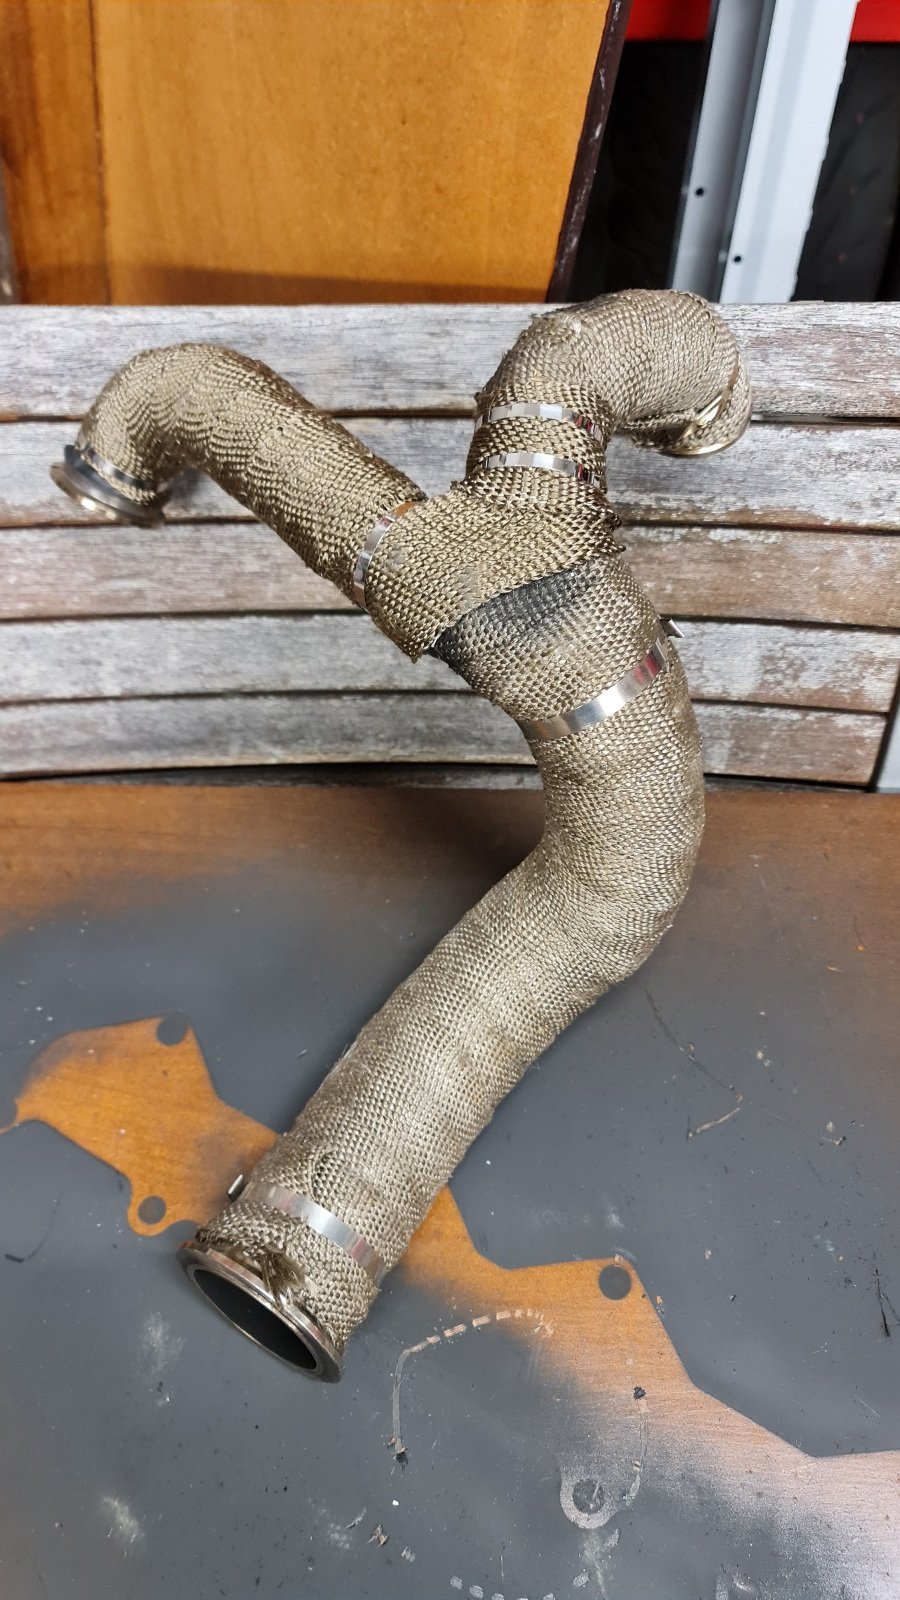
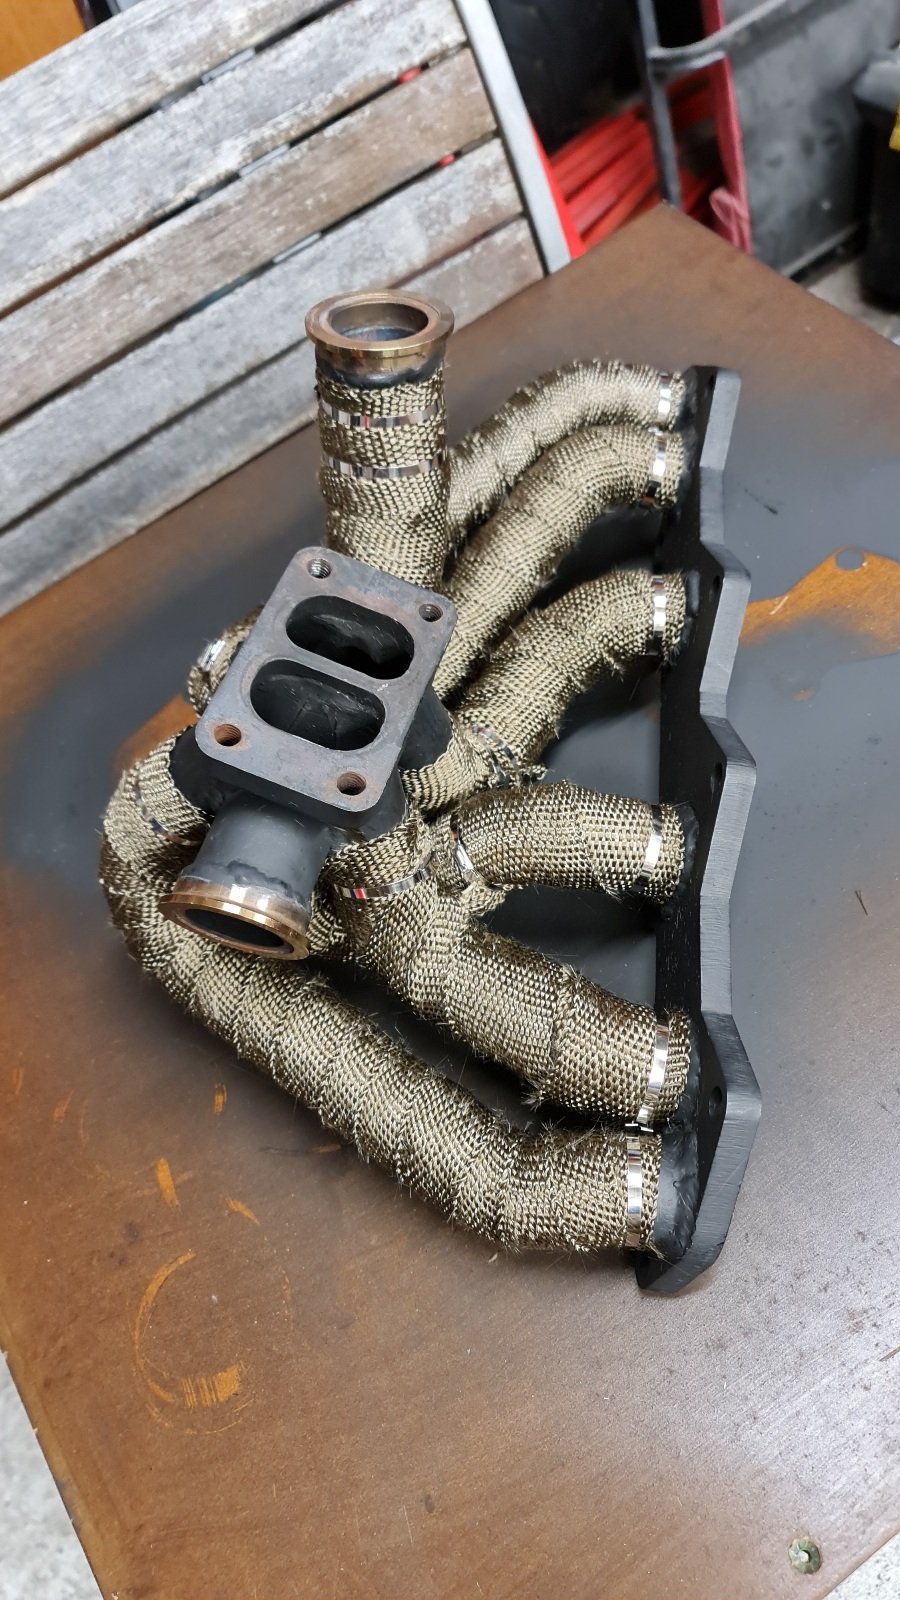
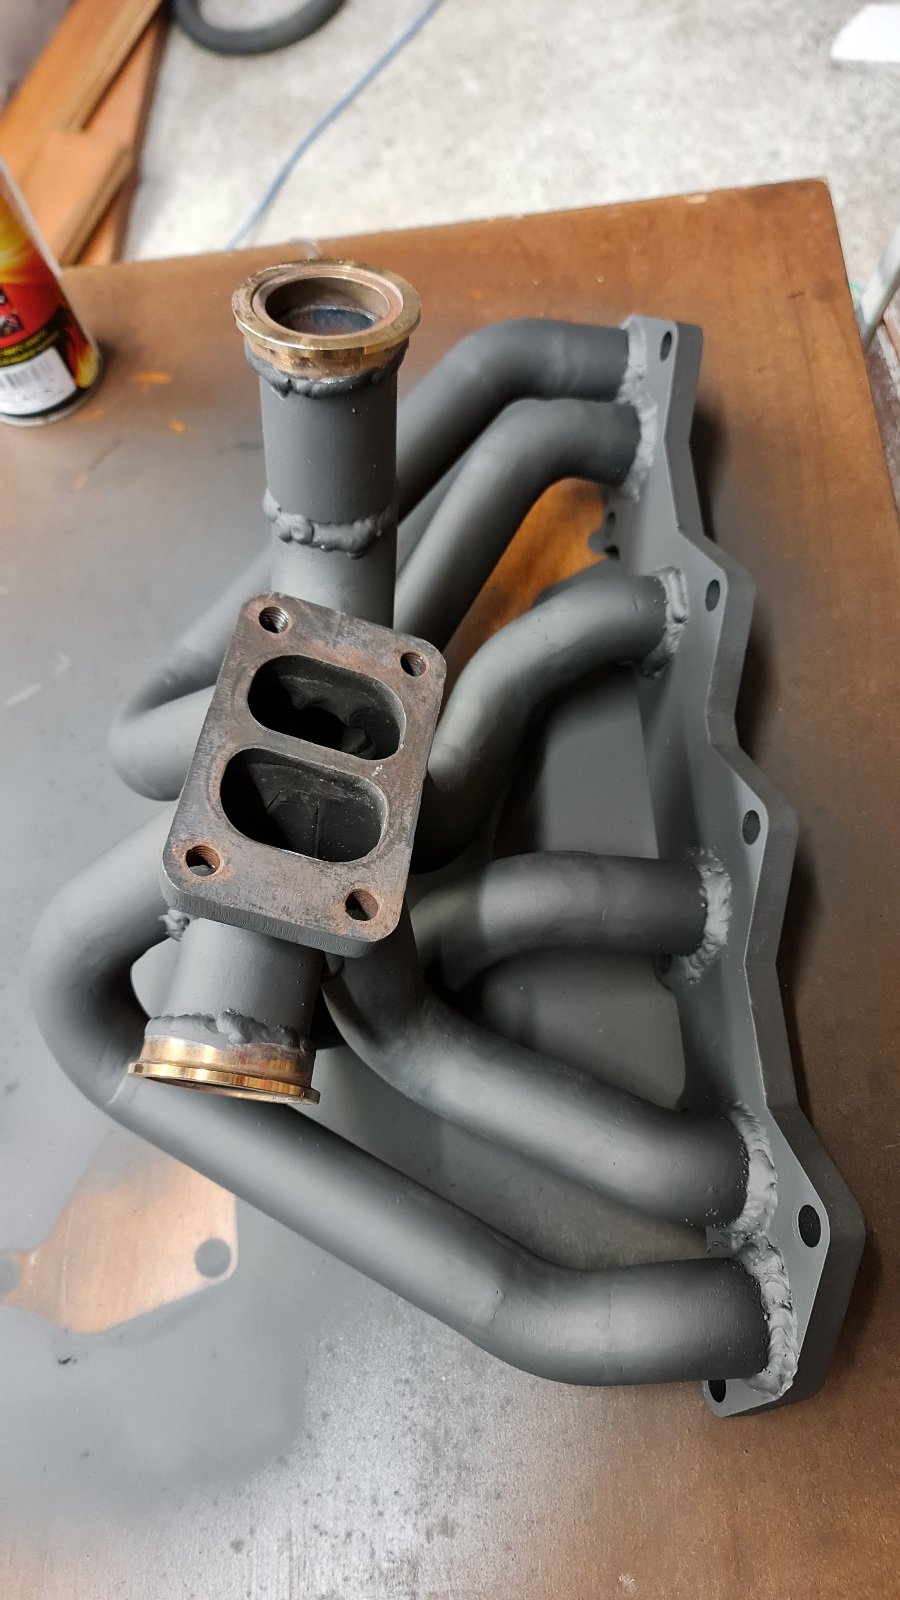
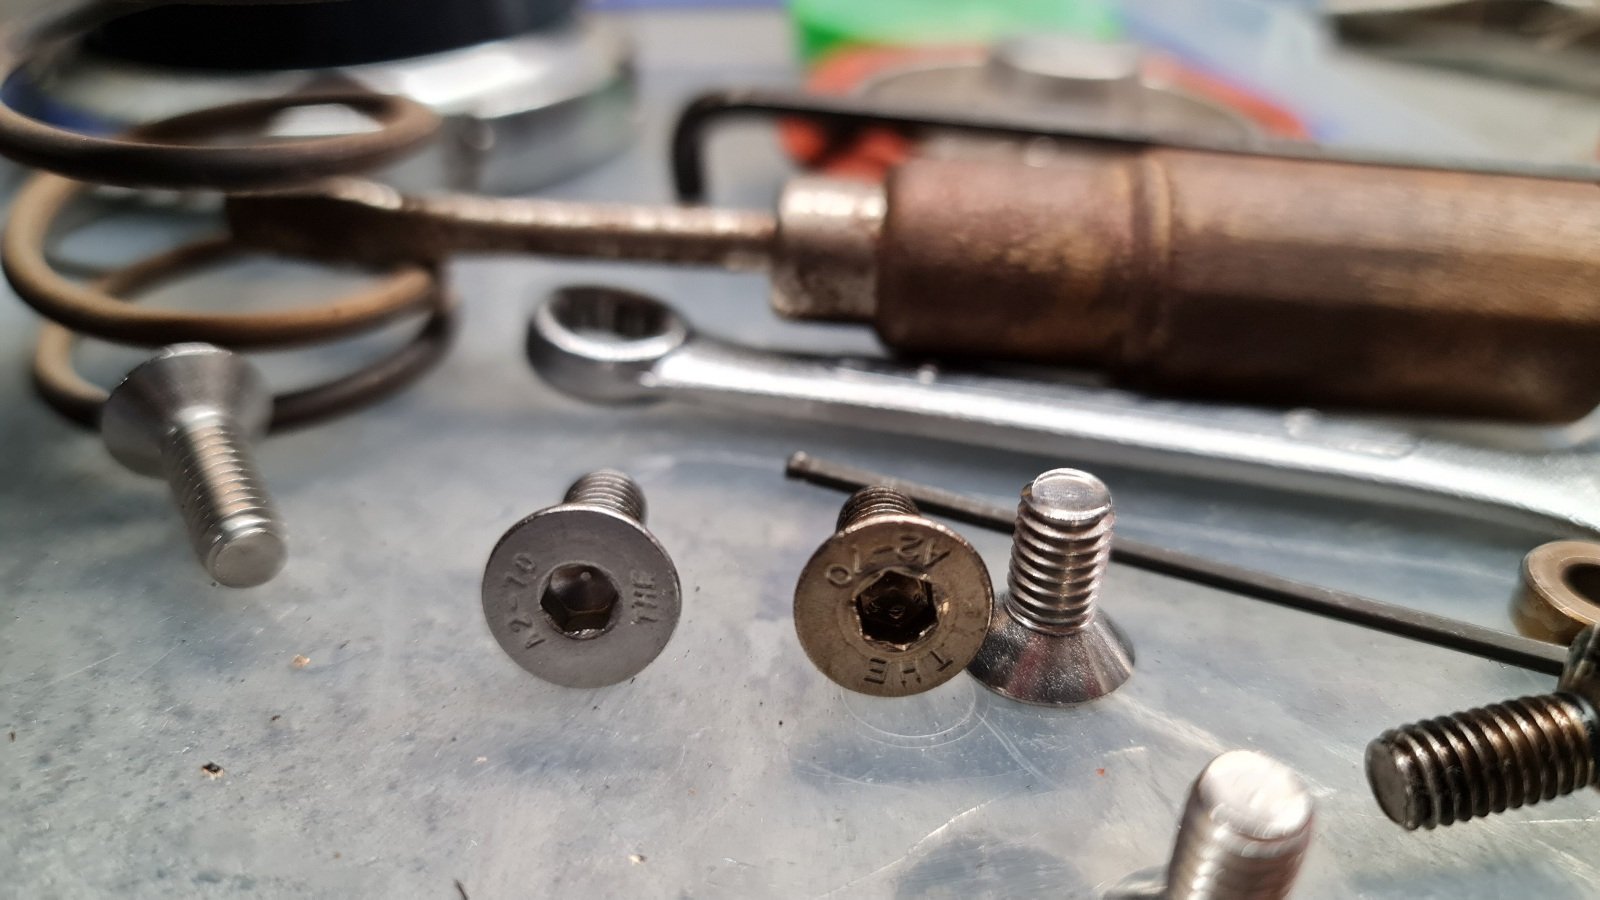
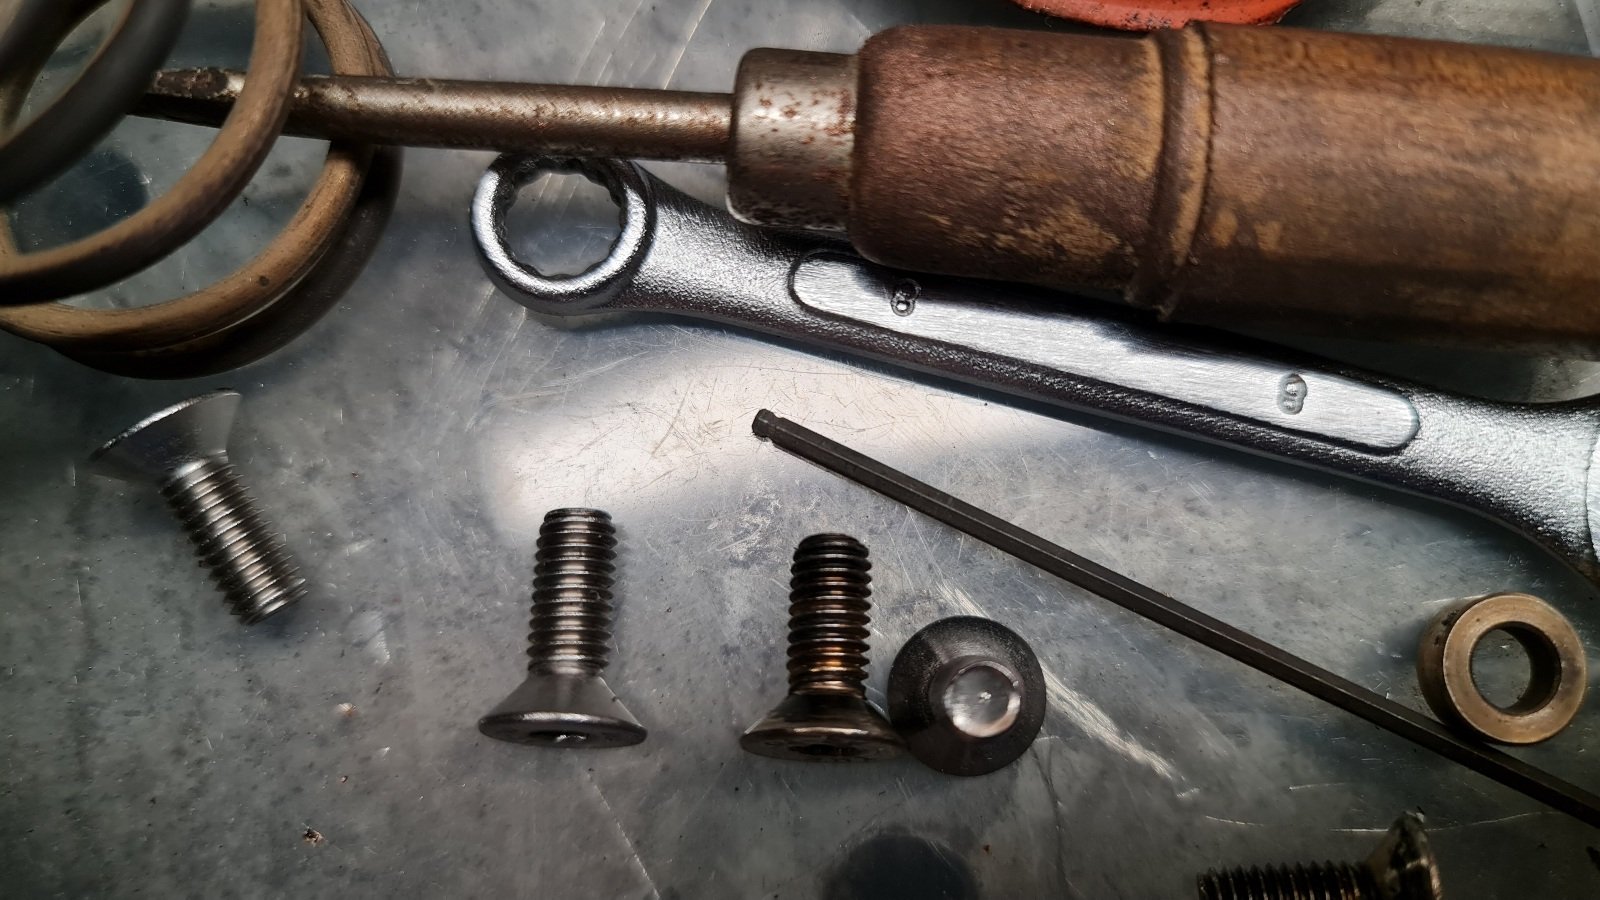
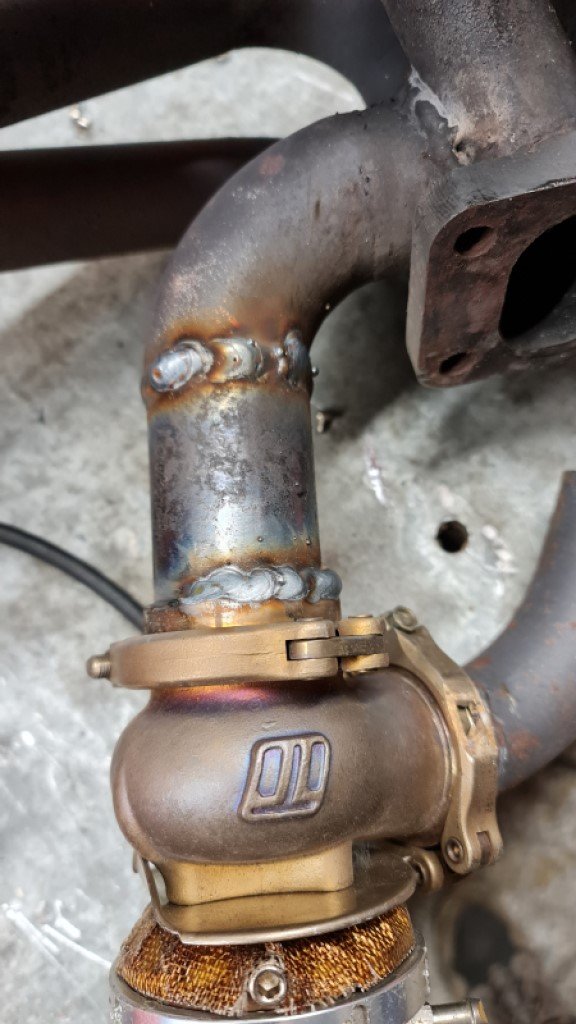
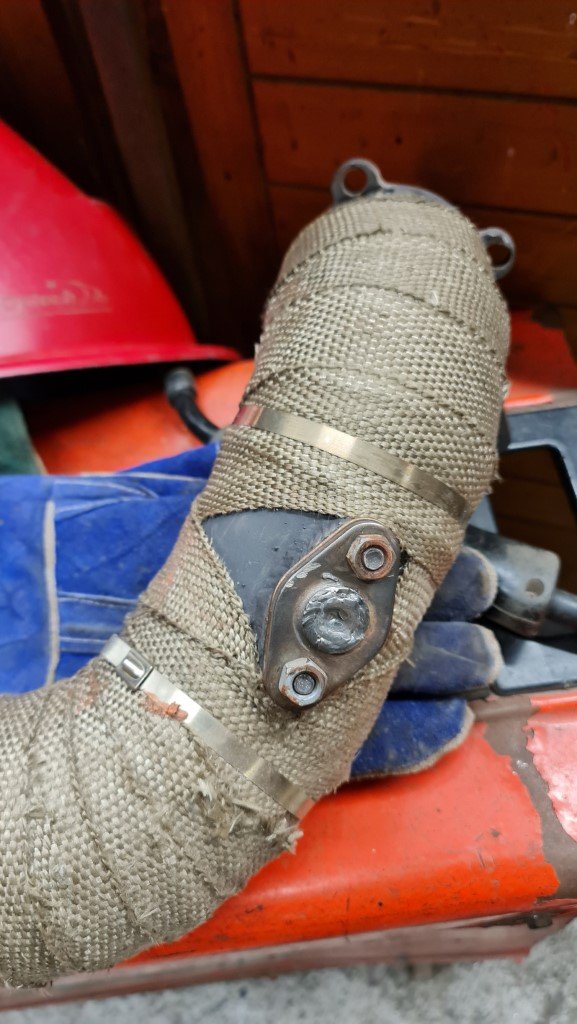
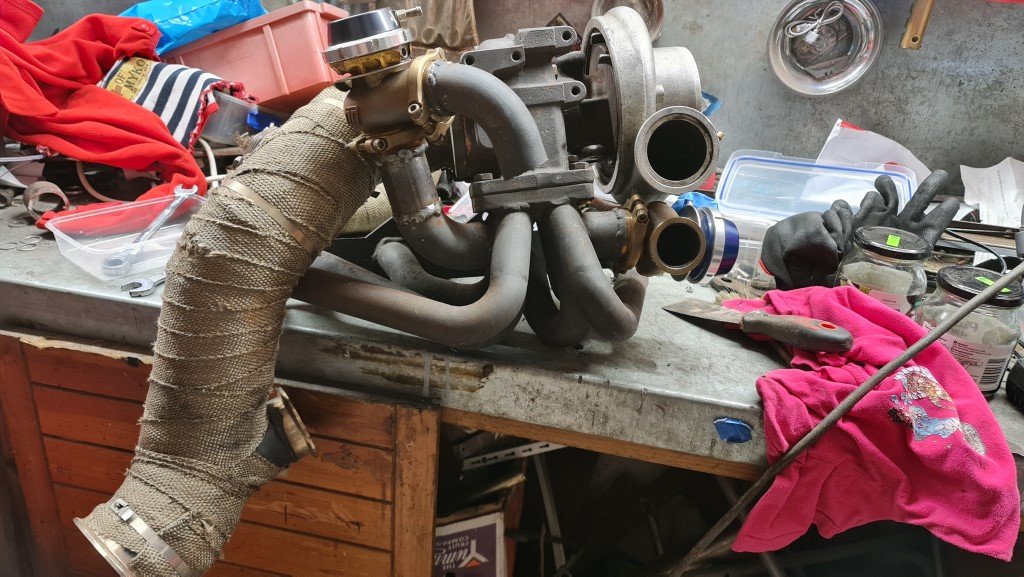
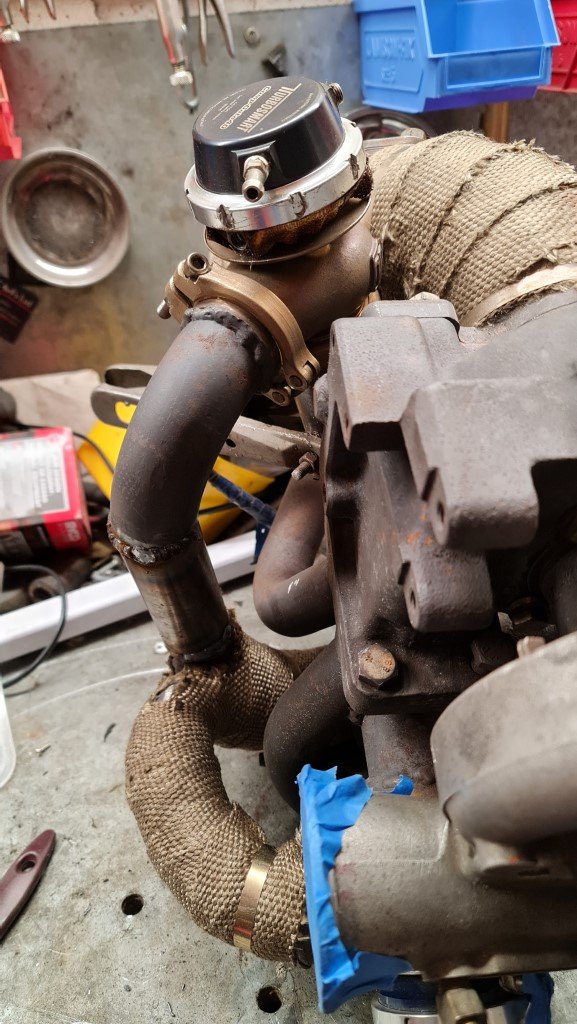
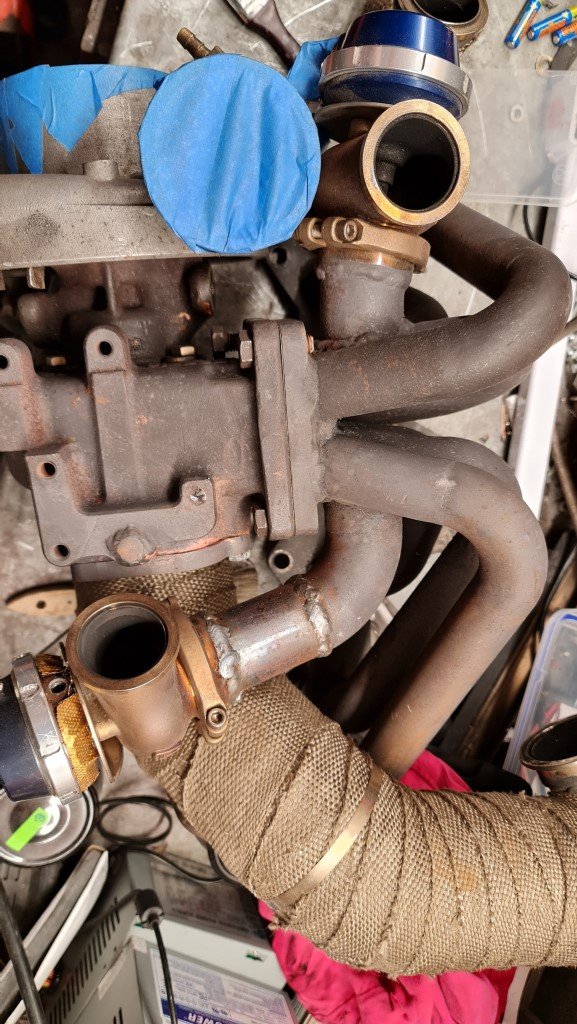
Found the right screws at Anzor, same head taper, allen size, 'THE' manufacturer and same 304 stainless. 16mm long, so maybe 1.5mm longer than the originals but they don't bottom out so work fine: Repainted the manifold: Decided to heat wrap the manifold, not too worried about rust since its thick wall stuff: Back on the engine: Also painted and wrapped the wastegate outlet to dump y piece:
-
The main issue is that the thread is a stupid one which no one has and there is no room to tap it. Turbosmart eventually made their own, which I used with an AN fitting which helped but still got really hot. The other issue is when I designed the manifold I didn't take into account this being a tight spot, hindsight etc. This should solve the problem though.
-
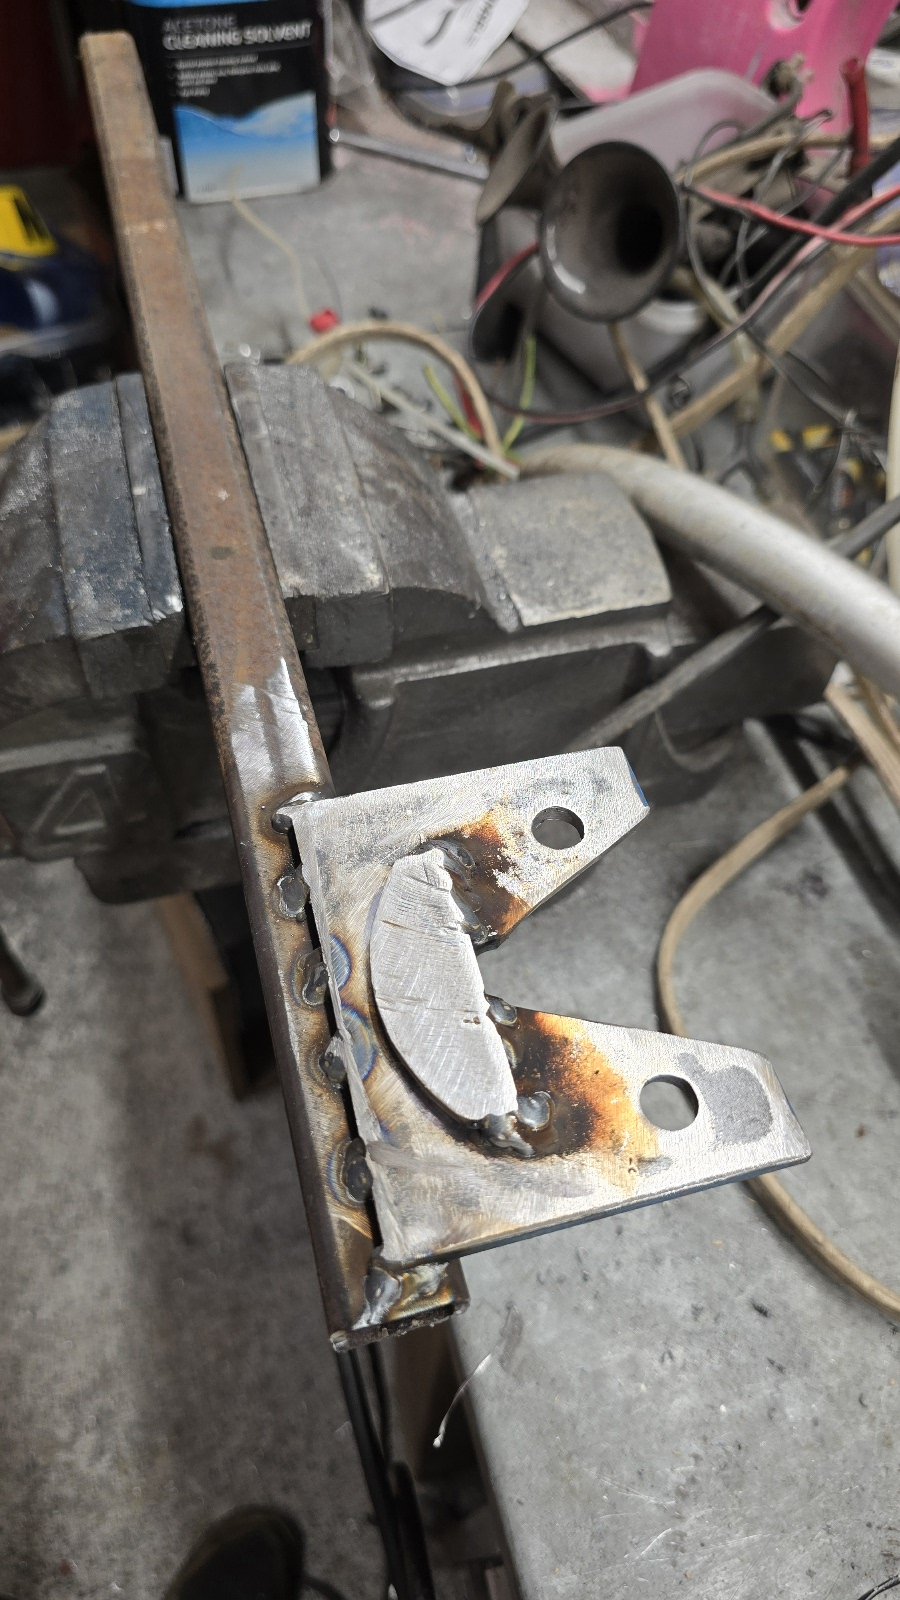
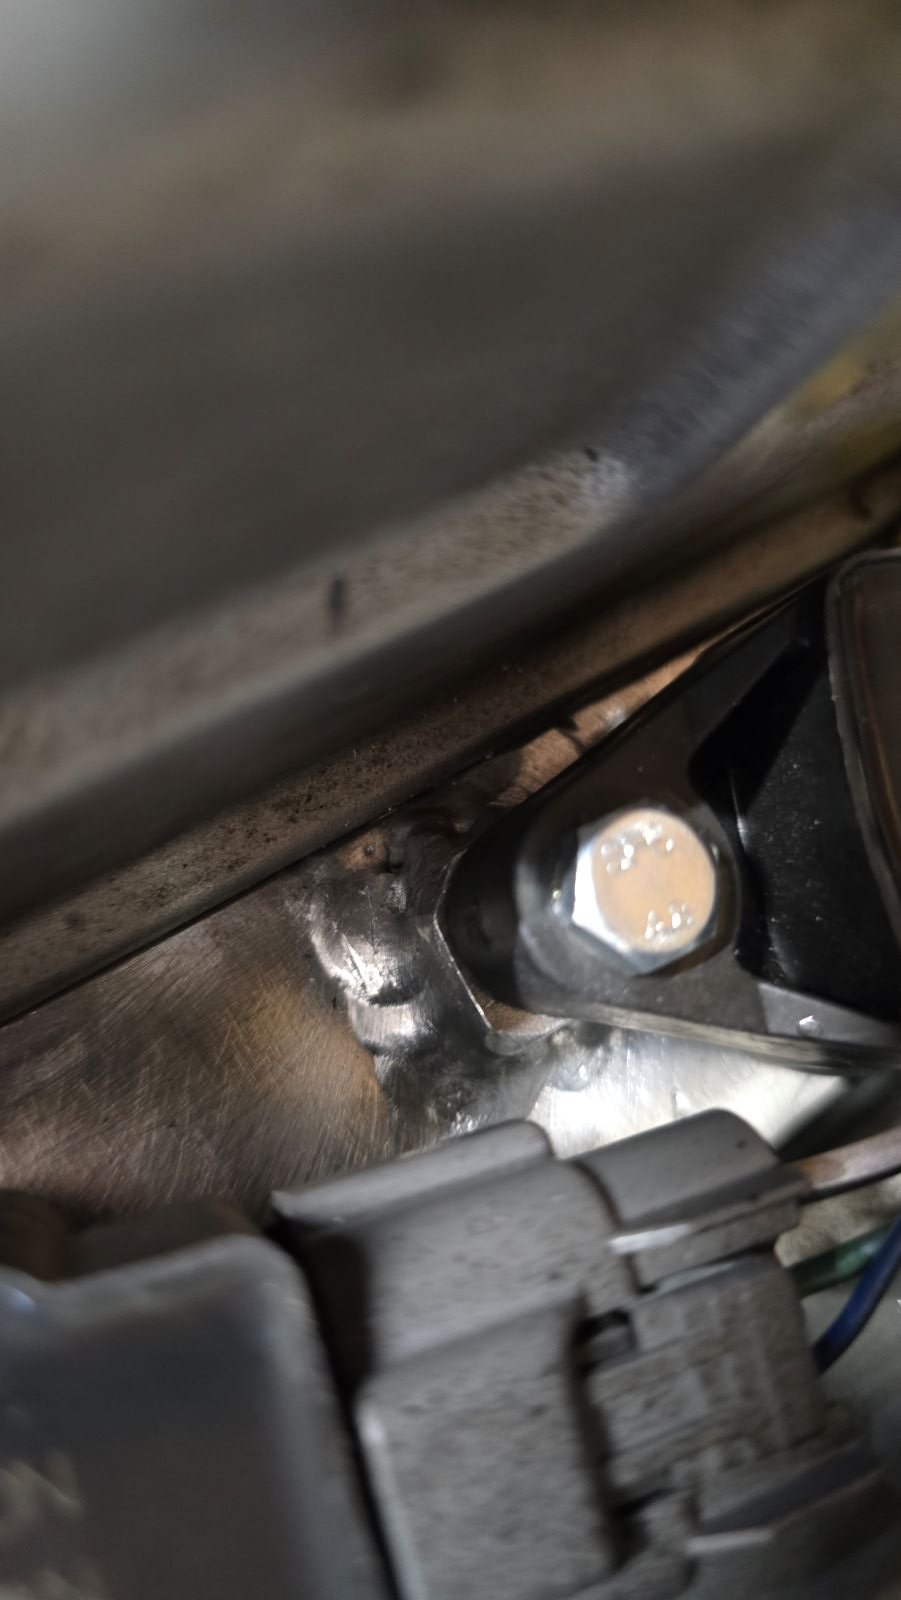
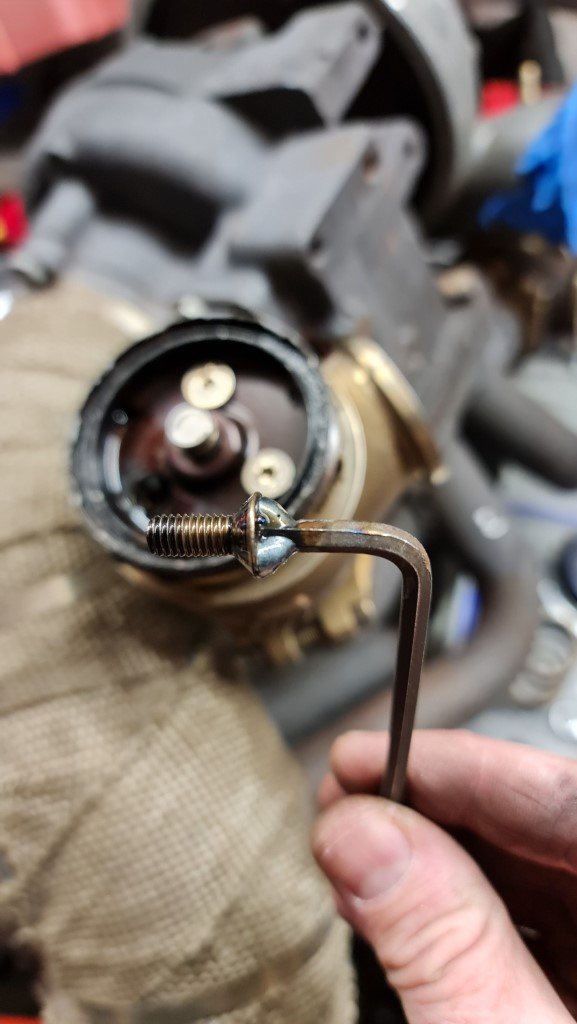
To solve the problem of one of the wastegates being in a tight spot and melting vacuum lines, after trying heatshields and all sorts, the only really solution was to cut it off and raise it higher. Which took a surprising amount of test fitting to make sure it didn't foul on anything else. So I lifted it up this much: But now you can sort of make out that the wastegate outlet goes nowhere since I had to cut that off too. A bit of cutting and changing the angle it goes into the y-piece and this should work. It looks like I didn't change much but it was miles off before. So now I needed to take the top of the wastegate off and twist the base of the diaphragm housing, to make the vacuum port point away from the heat. Which I couldn't do before. Unfortunately 1 of the allen screws was seized in there, I bent the allen key and eventually rounded the hole too. Fck. Tried a few other tricks but the bugger would not come out. It's always the last bolt. So I mig'd the allen key to the head and got the damn thing out. Bastard: Hopefully not too hard to find a replacement. Thread is just M6 and a2-70 means it's 304 stainless. So unless the head is some weird tapper, it should be fine to replace it. I also cut off the old un-used oxygen sensor and welded up the hole to make a blanking plate: Taking the opportunity to make small improvements like this while it's apart again, will make it really nice to work on in the future. Like the water pipe I modified earlier now means that I can fit and remove this big (3.5" diameter) downpipe without having to remove anything else.
-

Adoom's 1975 Reliant Scimitar. Discussion.
~Slideways~ replied to Adoom's topic in Project Discussion
Text here.
-
Or they lied like Toyota did haha
-
Those turbo'd vtec b16 and b18's always impressed me 20 years ago I remember an orange civic screaming down the Manfeild straight. Looked like a show car type thing but stupid fast. My old 4agze turbo only made 38kw more than that and it took 20psi!
-
200kw at 4k is really impressive, I think 250kw is a good number to work with for reliability too, especially if it holds till lets say something like 8k. Being an evo 4 you'd be using the twin scroll stuff right? I don;t think I'd be able to use a stock 4g93 manifold unfortunately, since they have the tiny td04 round outlet flange. PS what's happening with that starlet? I remember looking at it years ago and thinking 'man that's cool'. Now that I'm old and mature, I'm thinking 'man that's cool'
-
Hard to really know the quality control just looking at it I reckon, except for maybe crappy casting and machining. I once had a T3/04e type chinese thing, it spooled well made good power. But lasted about 1000km's, the thrust bearing appeared to be made out of very soft brass and it wore away fast then ate the compressor wheel. The journal bearings looked ok. If I took it apart I wouldn't have been able to tell the quality of the brass. This was ages ago though so maybe things have improved. On the other hand I have a Kinugawa td05 on my Safari, after a bunch of research on Ausy 4wd forums and it has held up really well. That was a reasonably expensive 'knock off' though I guess.