d.p.n.s
-
Posts
3118 -
Joined
-
Last visited
Everything posted by d.p.n.s
-
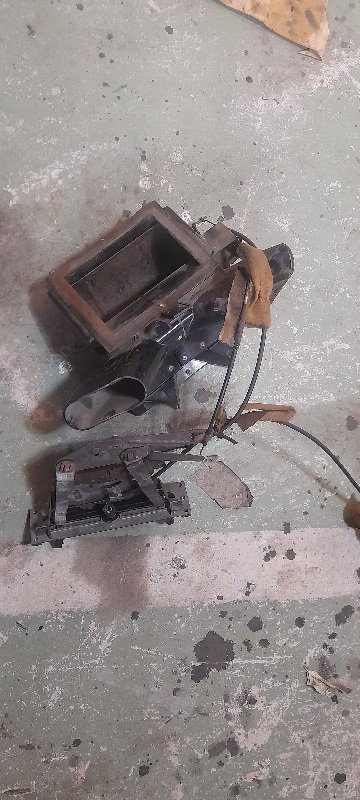
I was about 99% done with the wiring from rear end to bulk head ...till I hit the hazard switch.... it didn't work ....I turned the key off...shut the garage door.... that was last weekend. just having a play with the engine bay loom with what's going to go where and start laying it out and I thought I would have a quick look at the hazard switch ( thought I might have left a earth offf) turns out ut was a power wire.... temporary power to one red wire fucking bang ......hazards are go also couldn't get the heater motor to do anything other than be on or off. and seeing as I only want demist I decided to rip it all out . screwed and riveted the heater box to demist so it won't move ..removed all the controls and shit and going to replace with a simple switch........1 step forward 2 steps back ...but may as well do it now

-
dug my barn find period correct Cheviot hotwires out today....(if that's not a thing it will be ..and add shit loads of tax to things...). then I got out the elbow grease and spent a few hours giving it some..
-
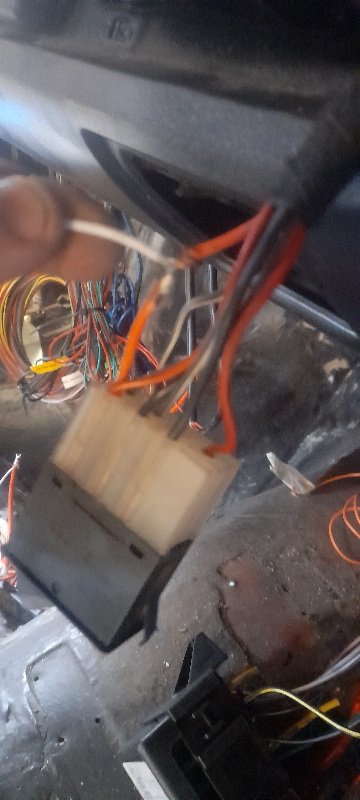
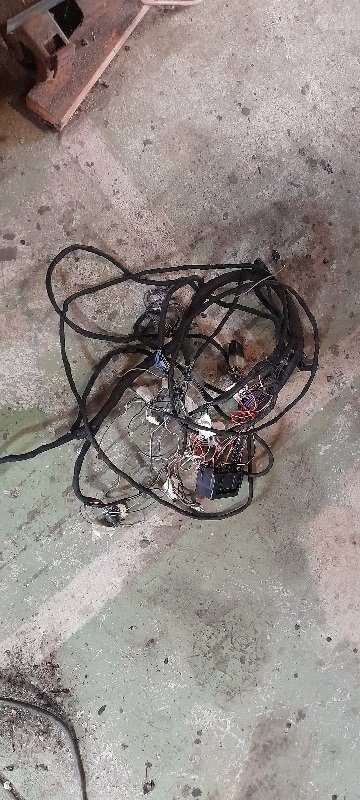
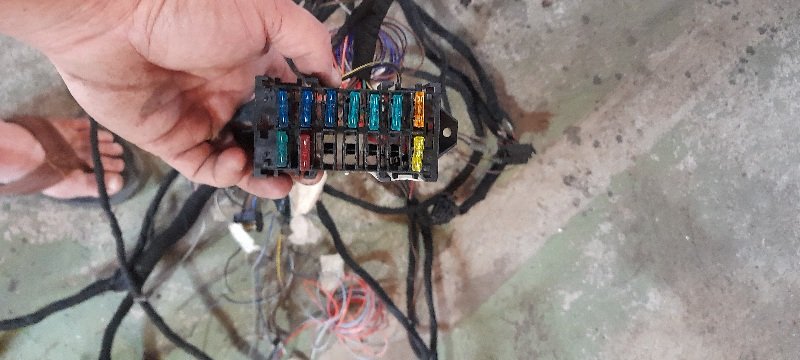
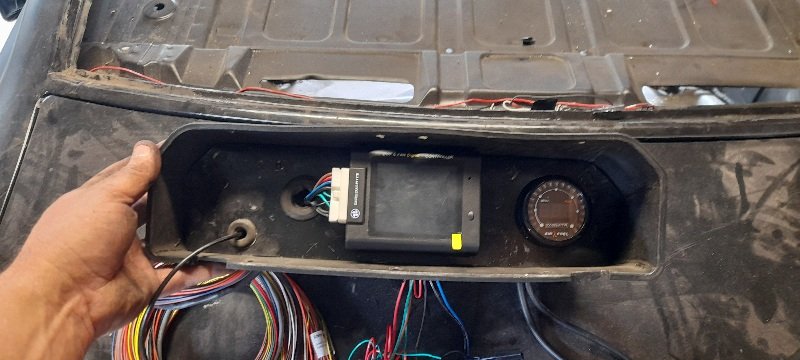
git a boxs ticked today ..... 1st got the power run from boot to kill switch (with small extra wire for anything constant) then from switch to cabin side of the bulk head connector engine bay side ready then dug out the loom I thought I had finished 7 months ago ......turns out no....I hadn't. ran that from taillights to bulk head connectors..including dash , switch gear ,heater ect ect ect still need to test and then mount fuse box also tried the center console and fucking hated it ...so went back to original plan....mount ecu ,water pump controller and wide band in glove box.....and USB cable for laptop. soooo much better .. still shit loads of wring to do.
-
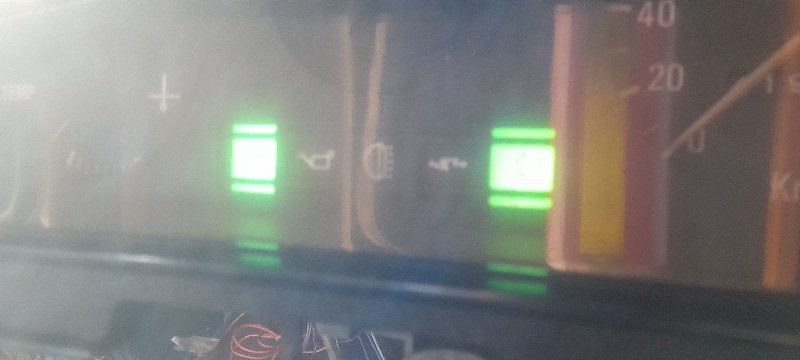
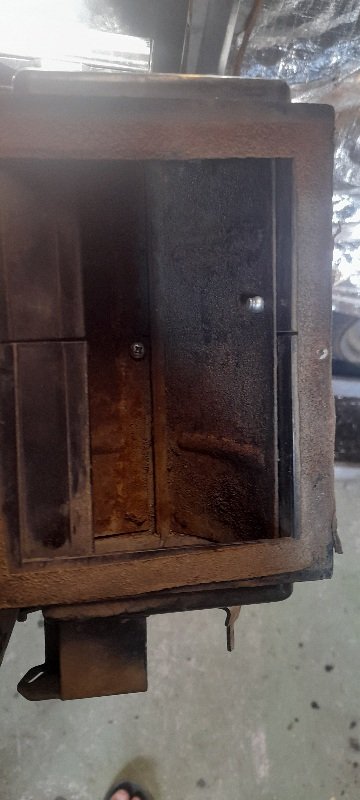
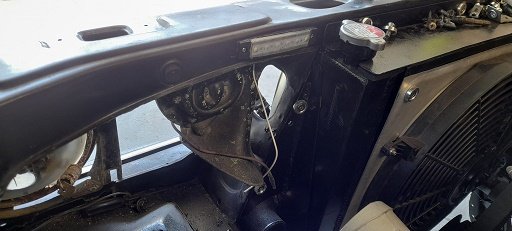
thought I would see how the small LED lights are at night when it's dark. not bad.... 1 of the dark pics is the boot and one is the engine bay....
-
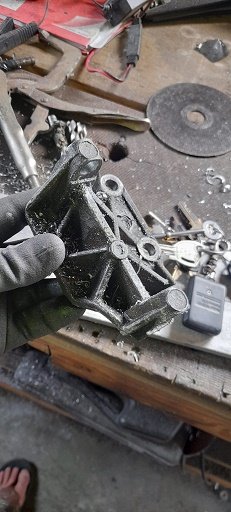
knocked up an ALT bracket ( not pretty but its strong and works ) even the standard pinto fan belt fits means i have room on the other side now for all the other shit made a bracket for the crank sensor found the best place for the EWP and put the washer bottle back in factory spot so with the ALT thats 4 more things in place before wiring. the plan is.....,wire up car and electric water pump stuff. , do fuel system . , . do brakes ,, do coolant , do ecu, , do interior
-

any builders in chch looking for a cashie in the new year
d.p.n.s replied to d.p.n.s's topic in South Island Region
thanks for that I will look into ut again in the new year. -
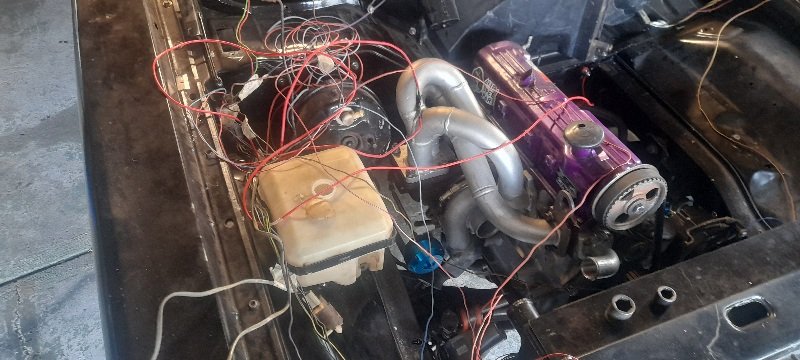
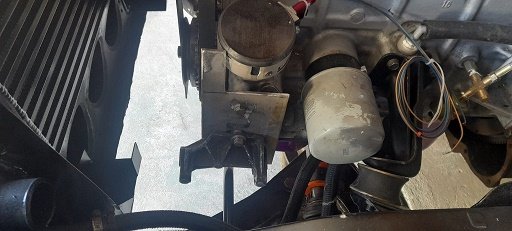
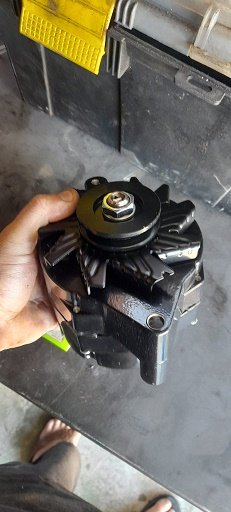
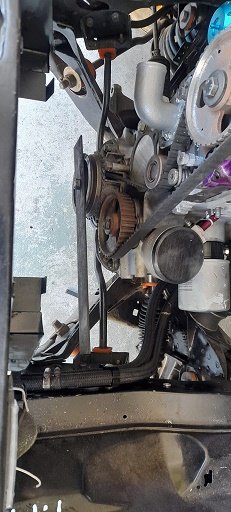
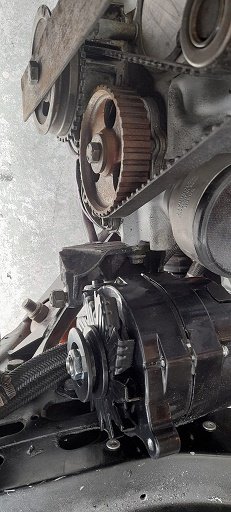
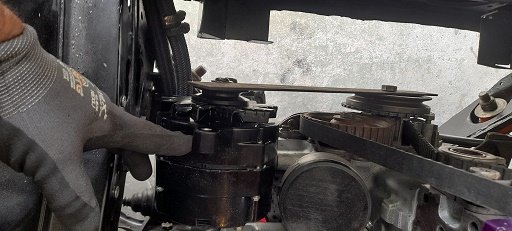
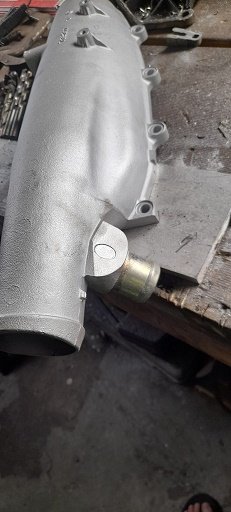
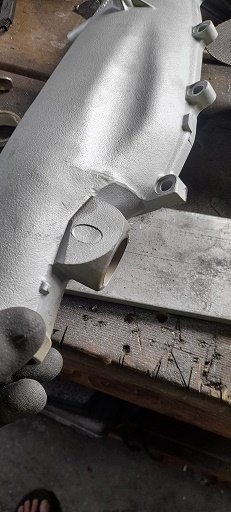
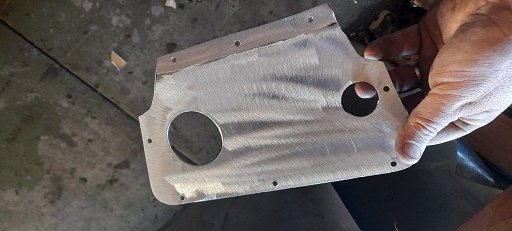
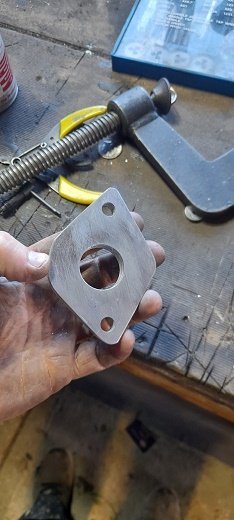
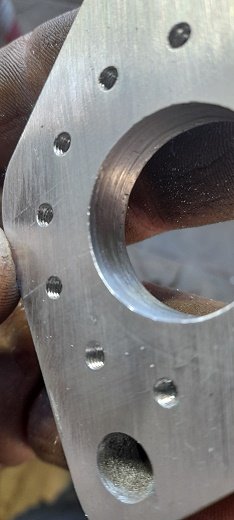
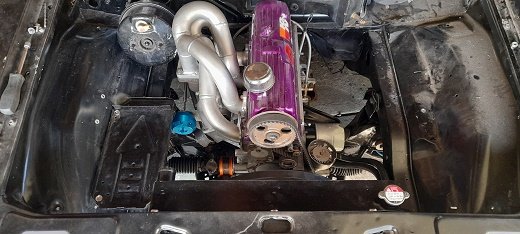
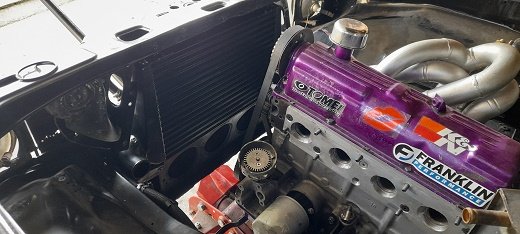
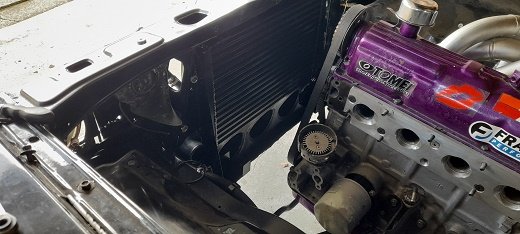
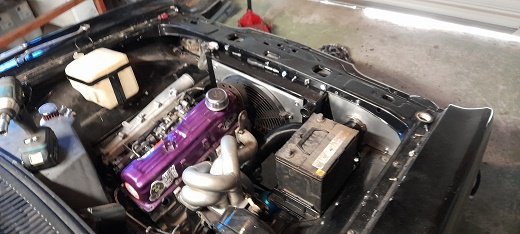
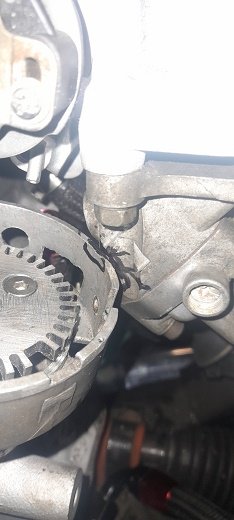
so one of the things needed to be in place for wiring is an alternator . i bought a high output 1 wire falcon 100amp one (it was brand new ,under warranty and within my budget ......just pretty big) but who would have thought mounting it would be such a pain in the ass....(100% my own fault) it cant be mounted in the factory pinto position due to. *the radiator in and out let are on that side *the turbo is on that side *both radiator hoses will be on that side as well as coolant hoses to turbo *electric water pump needs to go over there somewhere *turbo to intercooler piping needs to gover there somewhere *turbo air feed so it means it has to go on the other side of the motor lol.....i did think about running it off the driveshaft i looked at so many ways of doing it and making mounts that i gave up yesterday and sat outside drinking beer... thought about it today and did some basic measurements and found that a standard pinto alternator mount should work...so i drilled out the mount holes for the larger alternator bolt i then found if i flip it upside down and use one of the 2 bolt holes in the block in front of the fuel pump mount it will stay there and i can slid the alternator and bolt on and its almost perfectly inline with crank pulley then i tried the inlet manifold on and it was a no go....so there isnt anywhere to put the ALT so the manifold needed work. i had to remove a small tab at the end of the inlet , remove what ever that thing is next to the IACV (those 2 small holes will need fulling before it goes on for the final time.)the BOV mount needed to go (not using a BOV anyway so ill block that hole off) and then some extra clearance and it fits i still need to make a plate that will bolt to the 2 holes on the block and maybe pick up one of the fuel pump holes aswell and the ALT bracket can then bolt to that....but all in all that allows me 35-40mm of adjustment for the belt. use to think cortinas had a huge engine bay
-
any builders in chch looking for a cashie in the new year
d.p.n.s replied to d.p.n.s's topic in South Island Region
had 5 people intrested in it and no one showed up to even have a look....its crazy man -
any builders in chch looking for a cashie in the new year
d.p.n.s replied to d.p.n.s's topic in South Island Region
been advertised for a couple of months mate ....not one person has shown up to look at it. -
any builders in chch looking for a cashie in the new year
d.p.n.s replied to d.p.n.s's topic in South Island Region
cheers mate ..the window is 1200mm wide and the door is 1495mm. -
any builders in chch looking for a cashie in the new year
d.p.n.s replied to d.p.n.s's topic in South Island Region
I have rung and asked a few months back now ..and even gave them the dimensions... as seeing as the door was only 300mm wider than the window and as long as a it was strengthened above the door ..we should be fine... but I'll ring again in the new year and double check.. cheers -
any builders in chch looking for a cashie in the new year
d.p.n.s replied to d.p.n.s's topic in South Island Region
did you need consent mate? as I've heard no and yes now. -
any builders in chch looking for a cashie in the new year
d.p.n.s replied to d.p.n.s's topic in South Island Region
as far as I was aware it fell under exempt form consent.. -
any builders in chch looking for a cashie in the new year
d.p.n.s replied to d.p.n.s's topic in South Island Region
thanks mate ill look into that. -
hi all. im struggling to find a builder to do some a few jobs ..been looking for about 3 months now but apparently builders are busy as fuck...and we cant even get someone to even come and have a look. we want a window taken out and French doors put in.. if anyone is keen and whats some pics or more details ...let me know.. cheers Dan
-
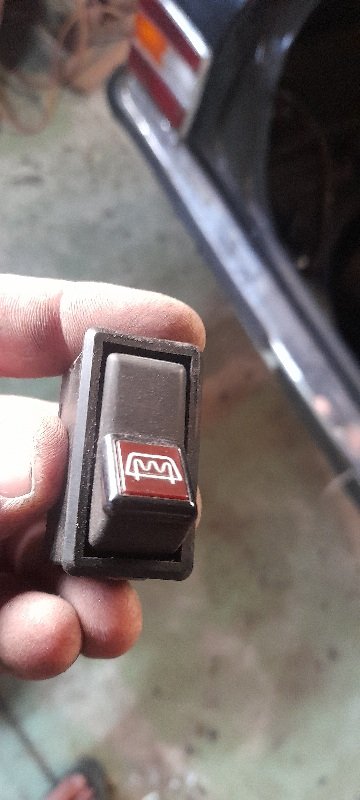
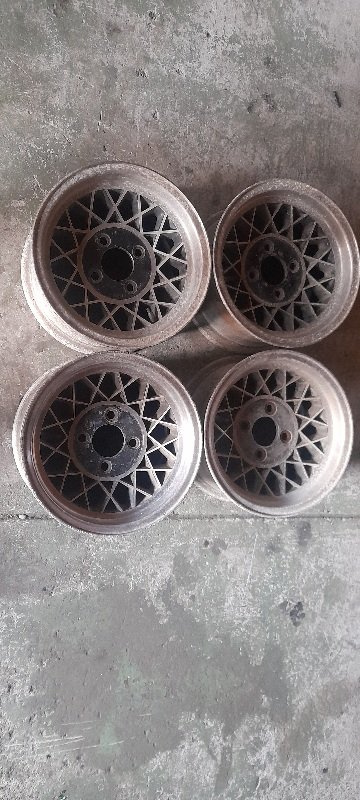
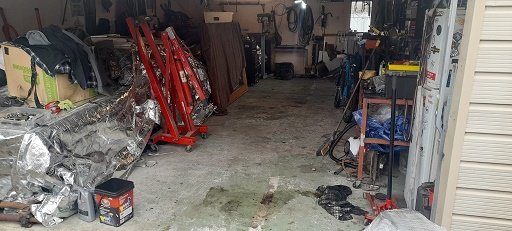
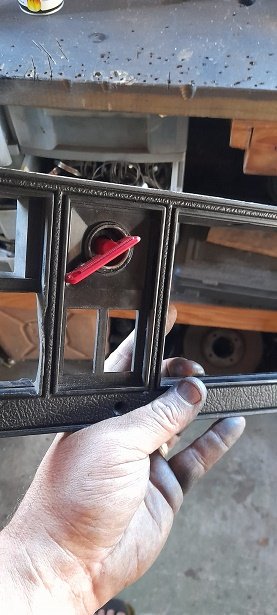
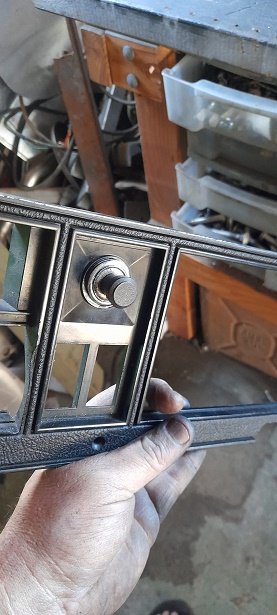
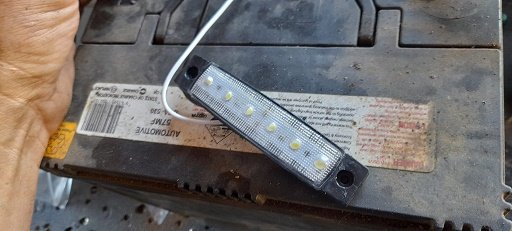
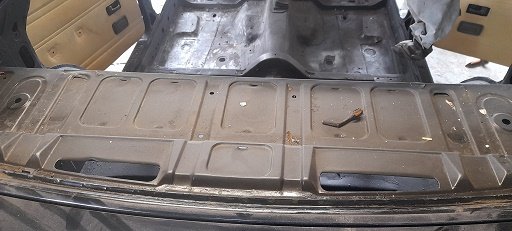
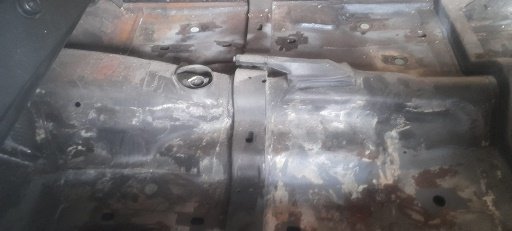
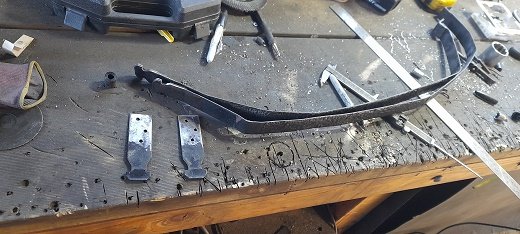
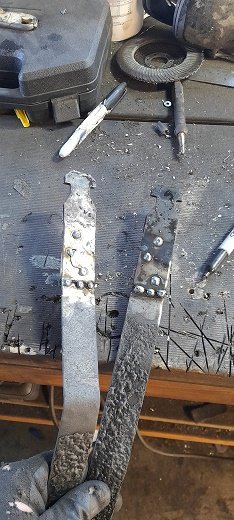
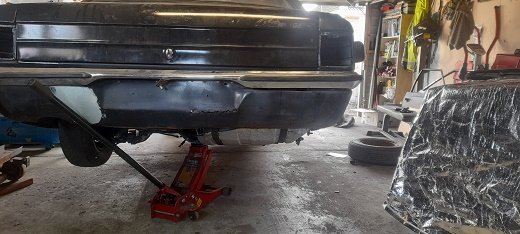
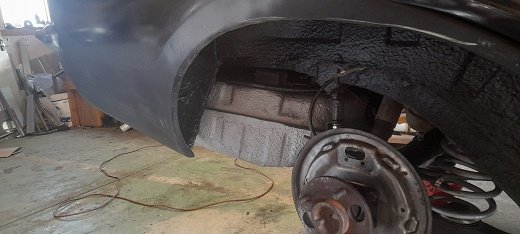
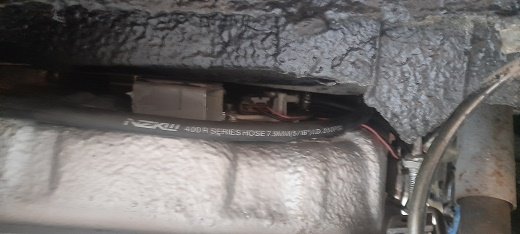
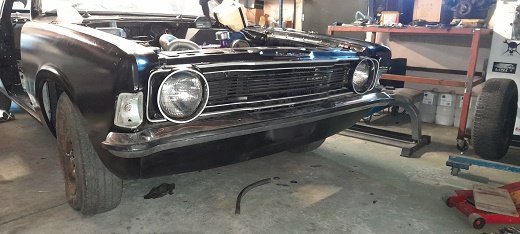
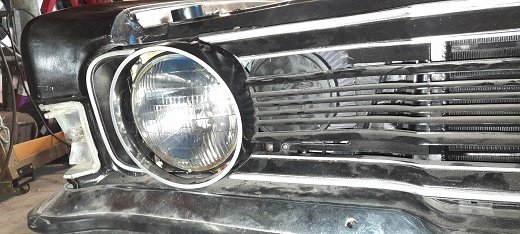
warning ....long dribbling on post so its been months....just had so much shit on . works busy . kids are busy . started training again . kids have sports..ect ect ect life basically ay. my nephew killed the pinto in my old mk5 .....didnt realize there is no rev limiter or what level on the dipstick the oil needs to be at. soi told him to find another running motor and we can go through it together ill teach him how it all works and he can get to know what its like to remove and refit a motor and strip ,clean and rebuild one. .....then we went into lock down so i ended up doing it all as i knew i had other shit to do....long story short the motor was ok...the head was fucked and i had it on and off a few times...then other shit whet wrong and i eventually ended up using another head and new head bolts....but its gone now....if im honest it was a fucking nightmare..ive never had issues like this before.. in-between working on this car we had a bunch of house renovations we wanted and they all turned to shit.....apart from the guttering ...that went smoothly. had builder after builder fall through on building a deck.....and lets just say it ..im not a builder ..unless its steel im uncomfortable (still need one in chch if anyone wants a cashie in the new year) ......another long story short i built a deck and thank fuck it turned out ok. all the sides and steps are all done now....and pretty much every weekend since finishing ...its fucking rained lol so i left it a few weeks and started cleaning the garage it had 3 cars in there and was full of renovation shit ( 2 cars in there somewhere ) all cleaned and sorted iy out during the evening last week last week it was Pissing down at work so thought I would make a list of how things are going on the black mk3...kinda wish I hadn't!!!!. but I im going to try and get it done for 60 years of mk1 cortina here in chch ....it is October next year....but I do have a full time job, sports ,wife ,kids ,kids sports , and I'm a massive procrastinator .. the garage needs sorting out 1st.... but here is the list lol. enjoy shell. *unsure what's under the paint.. different shades of black , bonnet isn't even sanded , some of its ratt can. (not going to get painted till later in life.) *2 of the doors are held on with 1 bolt each ,2 doors still arnt on the car.(one of them is still.missing chrome and handle.. *bonnet not bolted on and assisting catch. * frontvand rear screens just sitting there. *front valance needs some hole drilled in it. *rear valance needs rust work doing. interior .....(empty) * have front and rear seats. *have door cards and handles (I believe). *dash is welded in and dash pad on. *have some seat belts front and rear from a mk5 (needs freeing up,cleaning, and front buckles needed). *have new carpet *have some sound deadening (on its way) * think there is a roof lining *gauge cluster ....I have pulled it apart and cleaned it and put LED lights in. Rear end. *aussie diff ...rebuild with 3.7 gears and a LSD(pinion seal still leaking....have read that you need to remove pinion nut and put sealing on the thread and then put it back on.). *needs shocks * might make a panhard rod......maybe later on. front end. *fully stripped clean ,rebuilt with all new bushes,bearings and rod ends. * needs shocks.. lights *yes front ,rear and indicators (not the best but should do the job). wiring *I have remade the loom from the tail lights to the fire wall connectors (that long ago ...I can't remember what is what.......hope I make them. *changed the old fuse box to spade fuse box and moved it into car. *no engine bay loom.. cooling *pil cooler mounted (need 1.more hose from memory). *intercooler modified and mounted (need to do piping) *radiator modified and mounted including fan and shroud...(still need to do all the hoses and piping ). *electric water.pump and controller (still.needs mounting and wiring). *air filter mounted ... *heater all.monunted (needs hoses). gearbox *yes....factory 4 speed...untested .but mounted.. *clutch and pressure plate....old ones from sitting under bench ( don't think the engine will.last so change then). motor *factory standard motor (old as fuck) just to test it all works... *stripped ,cleaned ,new gaskets and seals. *custom turbo manifold (mounted) *evo td05 turbo (mounted ) with pil feed and return done. *still.need to do coolant hoses. *still.need to do boost controller *crank trigger mounted (need to do sensor mount) *dizzy trigger made and mounted (and tested for home signal) *still need to do breather tank *iet manifold adapter made and mounted *iGTIR nlet manifold needs mounting. (still untested) *IACV set up (not tested).. *need to do inlet temp sensor *need to do vacuum lines . *FPR needs mounting *ls3 coil on plugs with buikt ignitor. ( still need mounting ). *800cc evo injectors cleaned tested mounted) *link atom x ecu (still needs mounting and wiring) fuel system. *intake pump made ,modified and mounted *tank mounted *still need to do fuel lines and hoses. *still needs wiring up. brakes. *I have a mk5 booster and master cylinder (not fitted) *need front discs *have front calipers (need to be stripped checked ,cleaned and rebuilt. * front caliper rebuild kit on its way *I have spacer kit for front calipers. *rear shoes on the way *rear cylinders on the way *no brake lines or hoses. wheels *yes 13x7 hotwire ......(need some tyres) and probably a heap more shit... so i made a start yesterday i removed the rear window as the seal was in 5 bits and was going to leak like made ..and also i need to try and sort the hood lining out . the rear lower edge is mint ..nothing like the white mk3 and the parcel shelf may be the best ive seen. the passenger side floors had some foam mat shit glued down and was a pain in the arse to remove (some one has already removed the factory sound deadening...then there was orange tape over all the factory holes (no bungs ...just tape) and tape over some just holes and what looked like chisel holes .. so i fixed them all in all the floors look pretty good ....some paint and i do have a bunch of sound deadening mats on the way then today i was thinking that the biggest job may be the wiring ....so i thought if i start putting everything where i want it then it will make wiring the whole car a bit easyie. started with the wideband 02 and electric waterpump controller. i wanted to put in place some anti theft devises here is one (wont share the others). and ive had a few break downs in the dark and it sucked and the mk5 ghia had this pretty cool factory light under the bonnet and i thought if im wiring this car from scratch im going to add in some LED lights. so i bought some waterproff running board lights and switches .. 1 for the boot 2 for the engine bay and 1 big LED interior light....got the boot and engine bay ones in oh and i got some hotwires ...and sold the center caps for almost what the rims cost. well thats it .....once again sorry for the long post
-
Discuss here about Yoeddynz's little Imp project...
d.p.n.s replied to yoeddynz's topic in Project Discussion
immediately thought of you when i seen this. -
my new problematic daily....its a mk1 focus st170
d.p.n.s replied to d.p.n.s's topic in Other Projects
wellllllll how's life after 13 months with a problematic st170. to be honest.....its not that bad... the engine check light is on all the time and the car has no issues... every now and then it feels like it loses some power...and when I check the code it's usually timing has advanced.... I've been clearing the codes and off we go again...it fucking hates 91 and seems better on 95/98 more than NPD 100. flew through a WOF in August that was the year ownership mark.. not as bad on fuel as all the brits complain about. just gave her a service today..new oil ,filter, air filter, some fuel system cleaner... see how the next tear goes... I fucking hate the dual mass flywheel....may do something about that.. apart from that ..I would love to get back to work on the mk3s....but I have my nephews mk5 here that needed a replacement motor....thats been a bitch and still not running ..need to swap another head on.... and I actually have mates that aren't into cars....( fuck I know....strange ay)..but those men have teenage boys now with cars aswell so I find my self pretty popular with shit cars living in my driveway .....makes me feel like I should apologize to my dad for some reason......and I get more contact from them than I do there dads now lol.... but 1 day I will get back to it........also had to work through this past lockdown.... hmmmmmmm next year maybe
- 36 replies
-
- 14
-

-
or even cut the bottom of the gaurds off and move them out ....Zak speed styles.
-
yes to the 2 door and yes to the mk1 bubbles.............DO IT
-
also had a go at 3d printing a drill guide with stanless inserts 4x10⁸ to 4x114.3
-
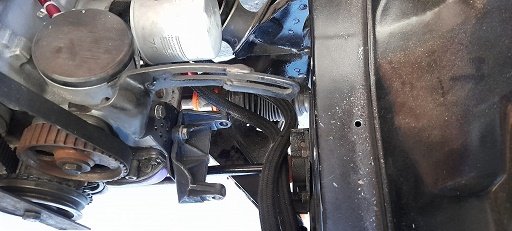
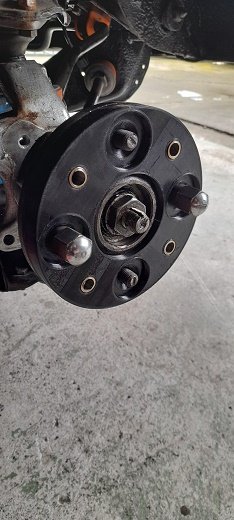
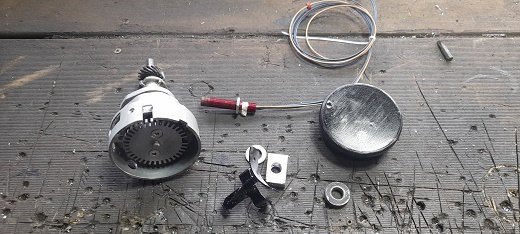
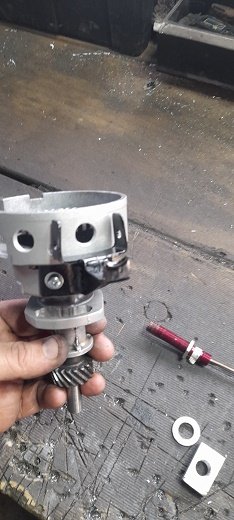
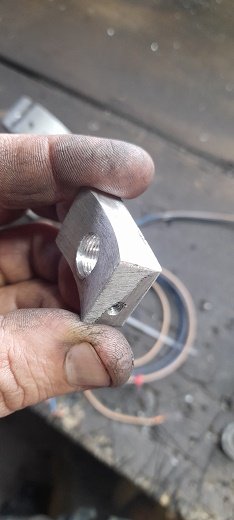
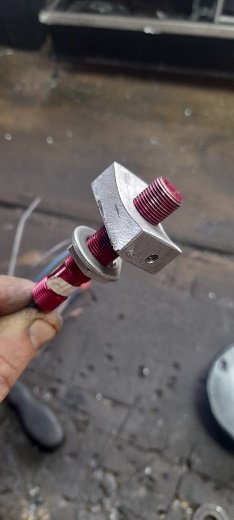
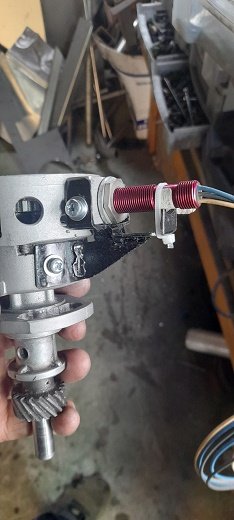
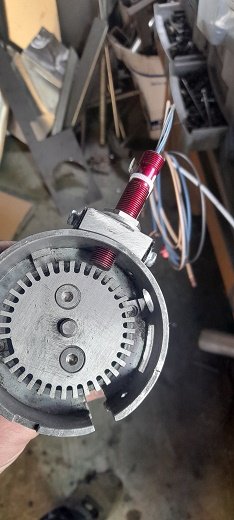
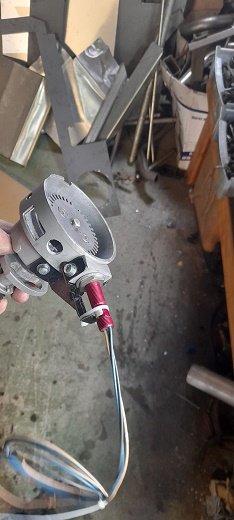
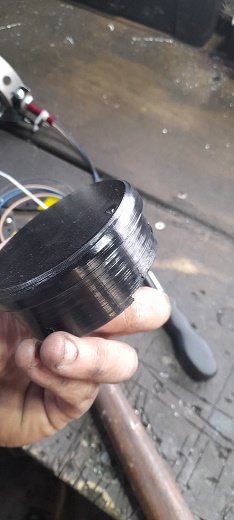
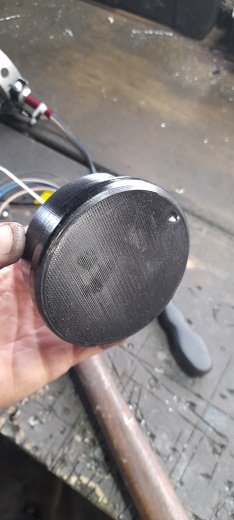
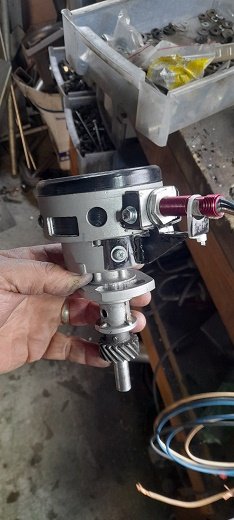
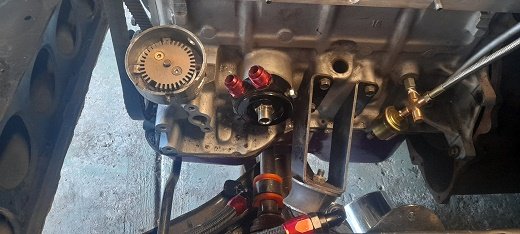
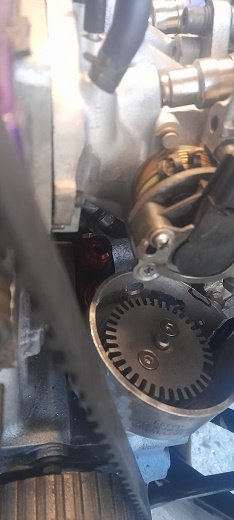
next was to finish off the dizzy/trigger 2/home signal . so the shaft is pinto with pinto cog... the dizzy housing is xf falcon with a home made bush and the small tab on the side drilled and slotted so i can bolt it down to the block.. made and welded a mount on for the 63mm 36-1 trigger wheel i had cut. (i have also had a mate test this for me and the signal works well.. so i made a small bracket for the cheer hall effect sensor to hold it and brace it. all the parts bracket screwed on made a alloy mount for the sensor (thanks browncorona for the tap to thread it) all mounted in place having a few beers with nismo_capri and he designed and printed me a 3d cap for it. all complete and finished and bolted on another off the list
-
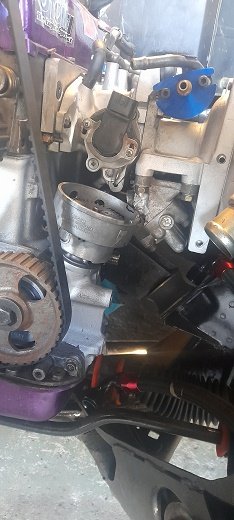
next up was the thermostat housing replacement because i don't have a thermostat and i wasn't sure what rad i would end up using i thought i would just grab a Davies Craig 90 bend and just make the base out of 10mm alloy. ..i drilled all the holes about and tapped them all so i can have adjustment if needed.......didnt drill all the way through....lol but thats that done and the top hose should nice and easy ....apart from needed the turbo water out runnig into it as well.
-
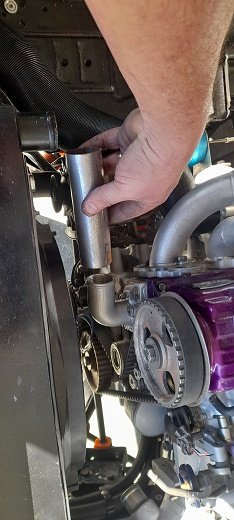
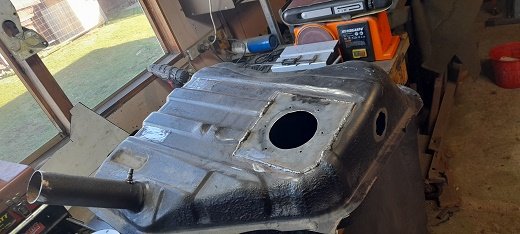
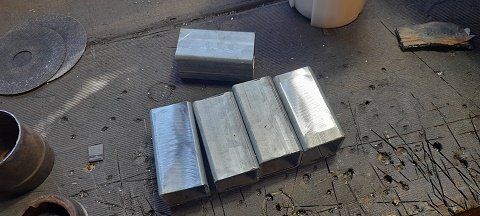
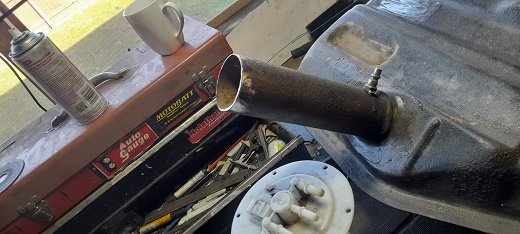
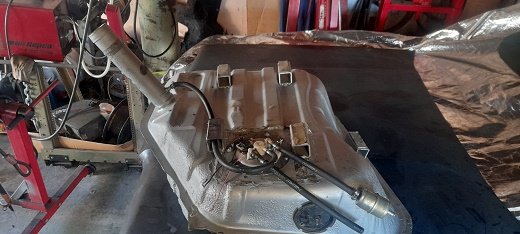
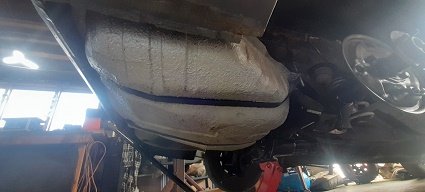
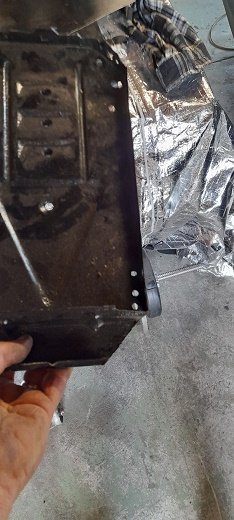
i made a list today of what needs doing and its huge....man its huge. so i decide to try and finalize each part as i go... so 1st up was the fuel supply . i finished welding the pump mount face up. the tank needs to sit lower in the car so the pump has room under the floor and doesn't get squashed ...i worked out it need to sit about 40mm lower.and lucky for me i have some 40x40 so i cut some the length's of the rubber tank pads and welded them on and then glued the pads onto them. the filler neck needed to be extended as well the end of the filler is stuffed so i cut from a spare tank.......yes 40mm longer that was welded on and even tho i trust my welds i also learn from my mistakes so i took the time to seal all welded areas and check for pump clearance ..i also put the factory sender unit back in with the feed pipe cut and bent over the tank straps needed to be made longer . so did the tank strap bolts. fuel pump back in for the last time..breather run to the filler neck.. fuel feed and external filter added and a short fuel return....these will go to the hard pipes once they turn up and are made. and the tank all mounted
-
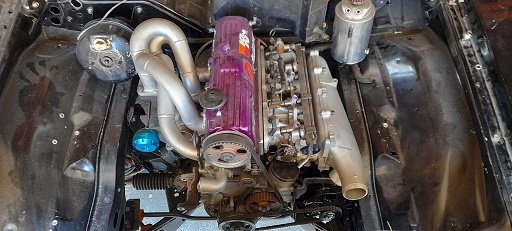
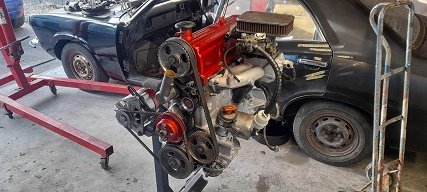
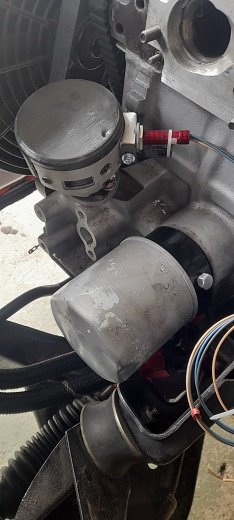
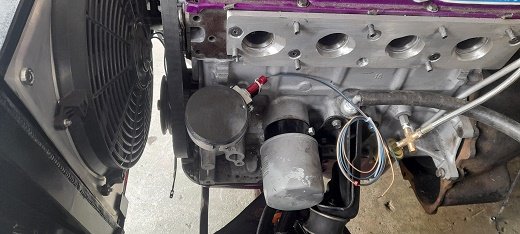
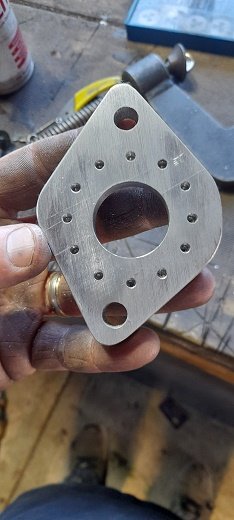
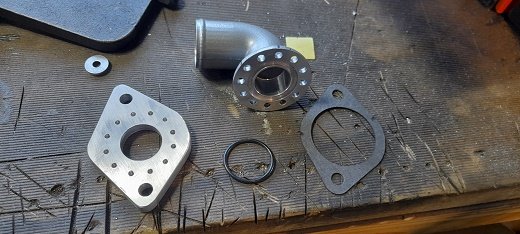
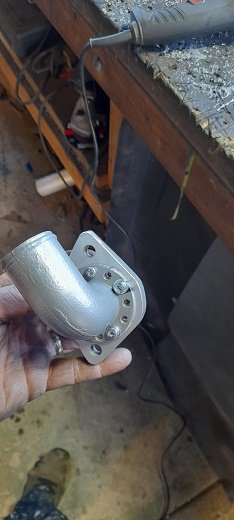
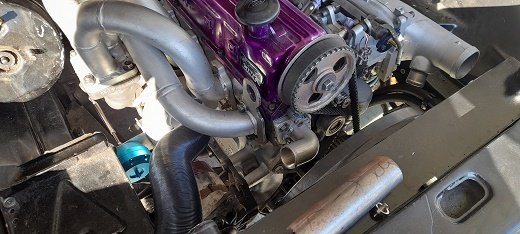
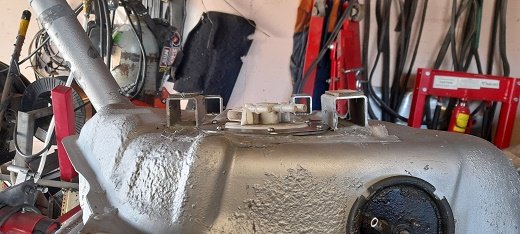
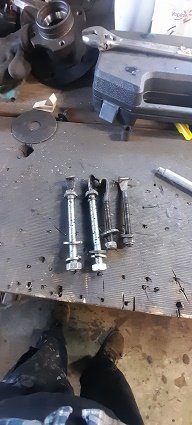
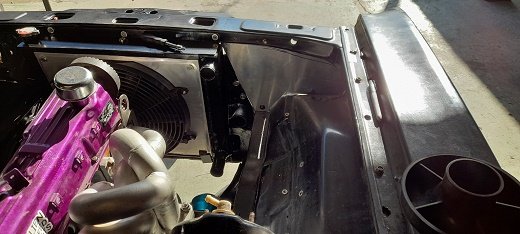
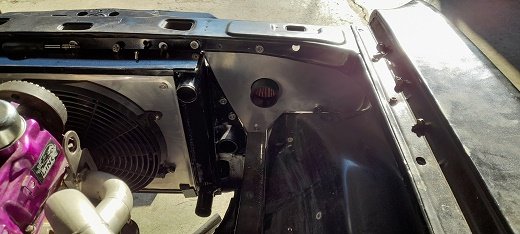
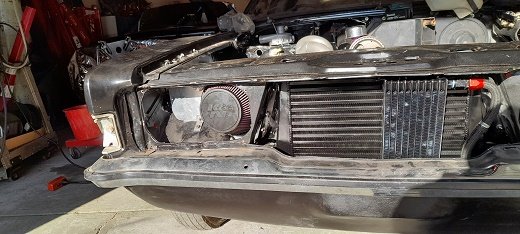
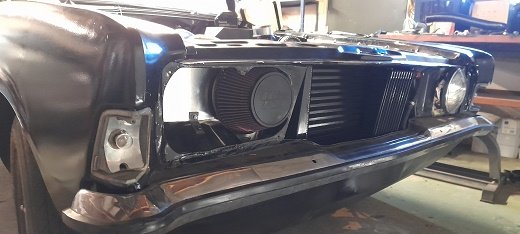
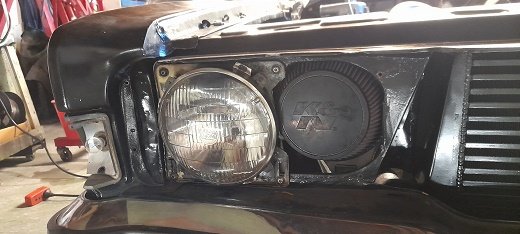
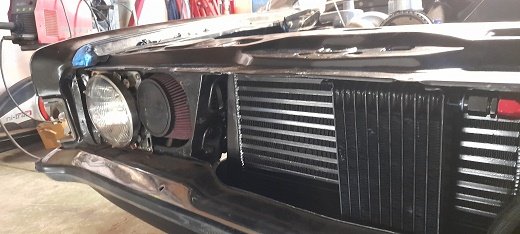
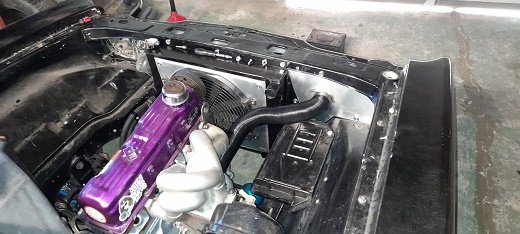
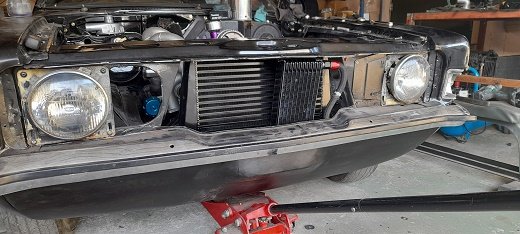
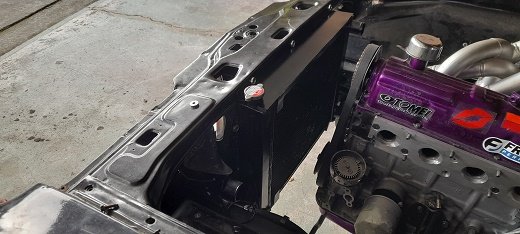
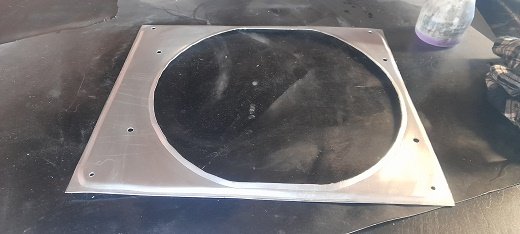
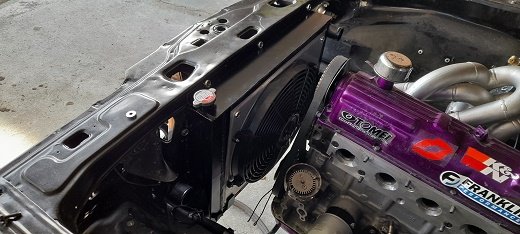
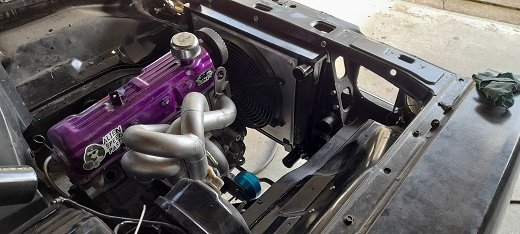
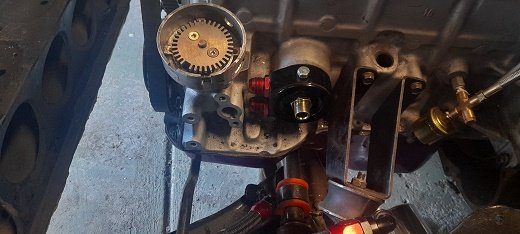
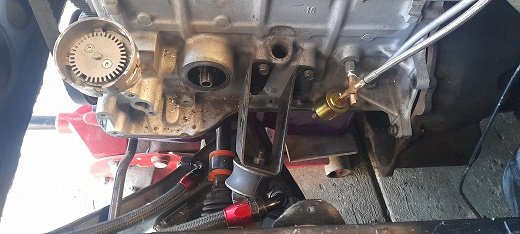
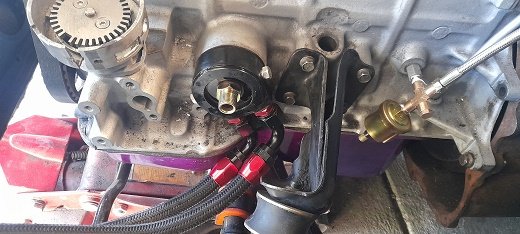
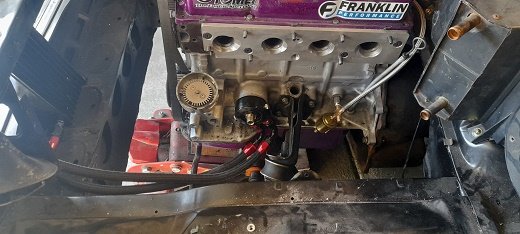
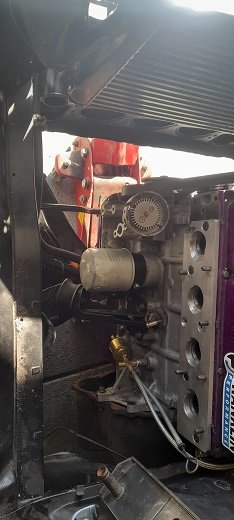
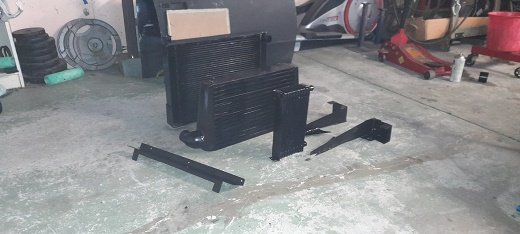
so you know when you think its going to be a nice easy straightforward job..... oil cooler was mounted...all i had to o was put the oil sandwich plate on and run the lines.. i center bolt for the sandwich plate must have been put in a real safe place as i cant find it.....so after over nighting parts from Auckland i bolted the sandwich plate on ran the hoses and cut them to lengh...........then i put the inlet manifold on and it seems that all the IACV stuff is in the way and then so is the dizzy...there is next to no room under there now and also noticed that the dizzy housing is also touching the IACV ( will clearance that with the flapper disc) and it seems that if i turn the sandwich plate down it hits the block and no room..turn it to the back and the engine mount is in the way. so i thought about cutting and shutting the engine mount and then i remembered the rusty old parts wagon had some pinto mounts i had never seen before ...so out came the mount box and these are that mounts that came on the rusty wagon the problem area mount mount comparison and bingo......problem sorted......well that problem..i need to get ne hoses now as the ones i cut dont fit. on another note i made mounts for the radiator 9thats a 70mm dual pass rx2 rotary radiator). then pulled the oil cooler , intercooler and radiator and mounts out and gave them a nice clean paint. oil cooler in intercooler in radiator mounts in radiator in made a shroud for the 14" fan shroud and fan in now tha battary tray hits the inlet manifold no matter where i put it ..and luckily enough these came in right and left hand drive and the sides of the engine bay are the same ....so i moved it to the drivers side...trimmed a corner off to move it back a bit (dont worry about the booster as i dont have brakes yet but i am planning on cylinder bolted to the fire wall and run a remote booster) and the air filter.....i made a head shelf hole cut for filter adapter filter in had to trim the light bracket also had to clearance the grill for the filter and oil cooler works well ......cant see much at all unless you look hard intake pipe for the turbo and the engine bay is starting to look much fuller..just got to mount over flow tank and washer bottle and breather tank on the passneger side.