d.p.n.s
-
Posts
3118 -
Joined
-
Last visited
Everything posted by d.p.n.s
-
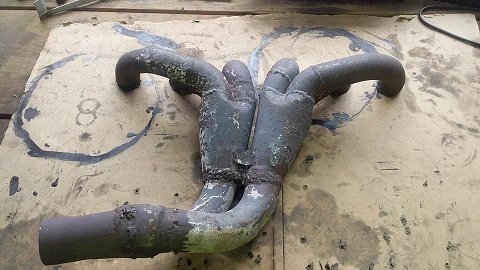
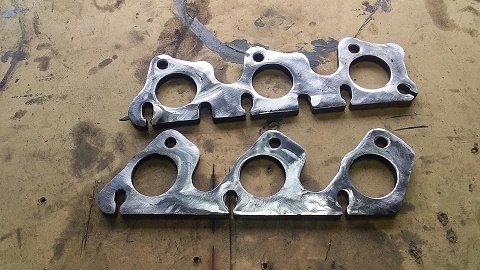
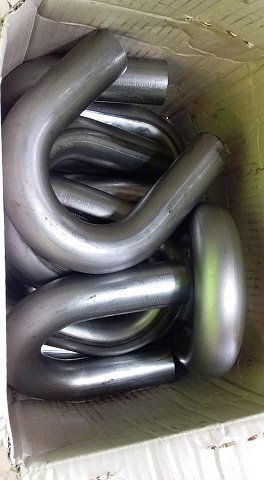
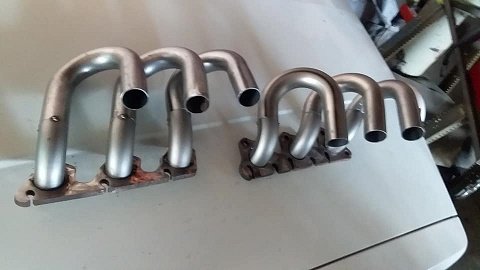
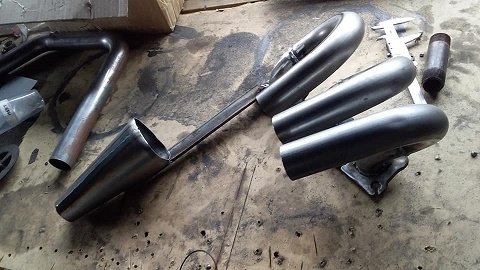
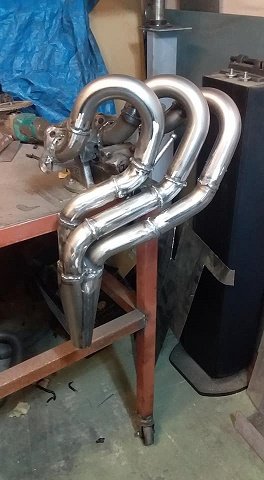
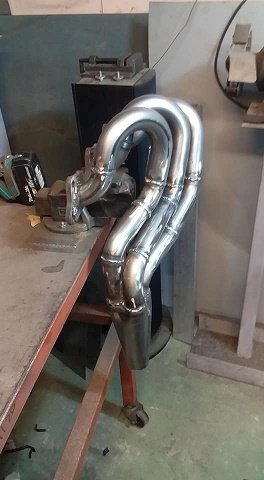
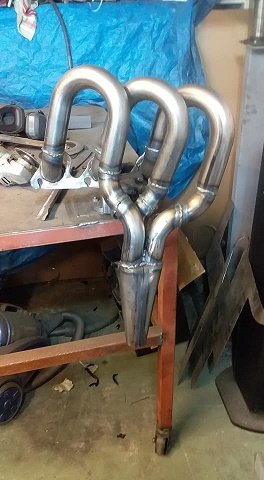
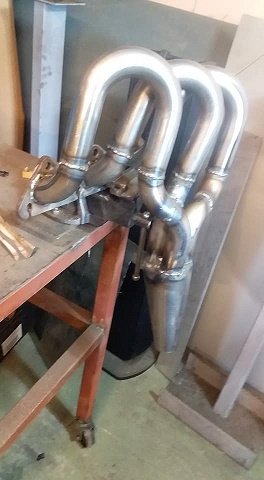
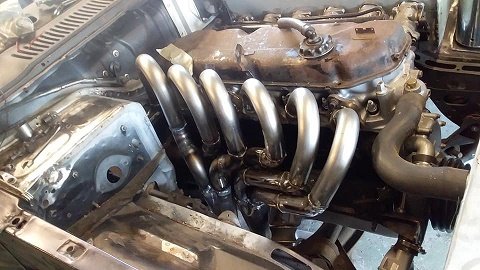
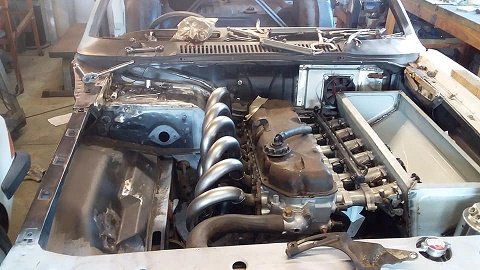
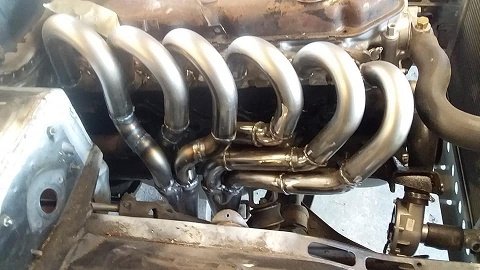
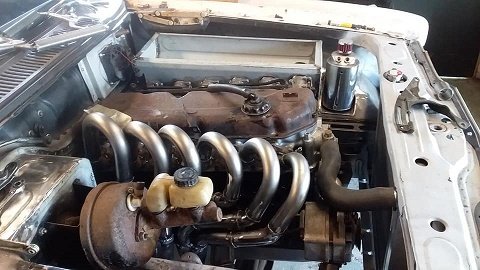
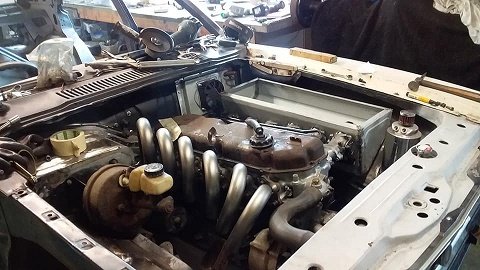
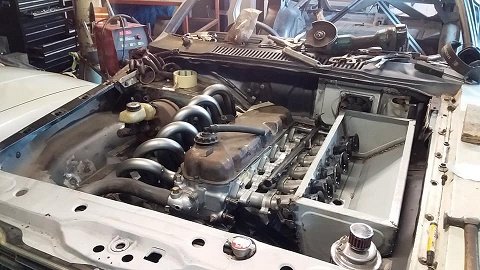
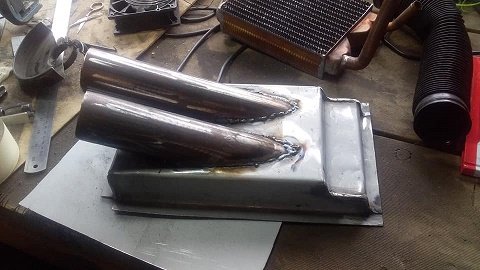
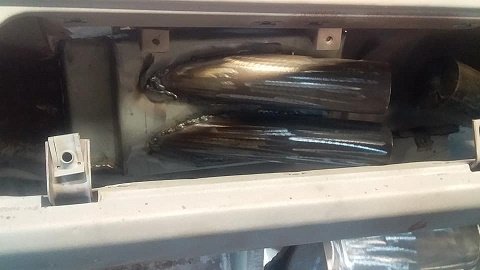
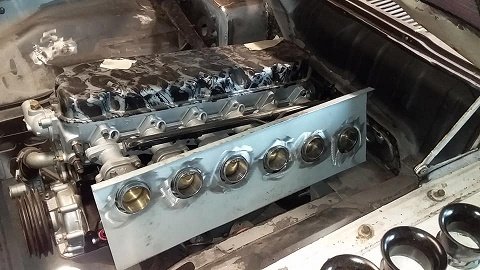
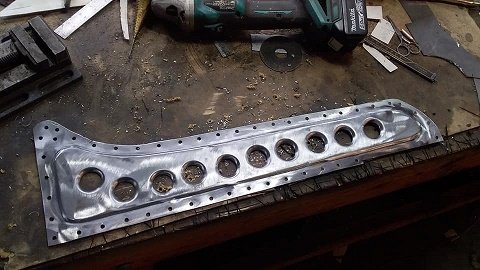
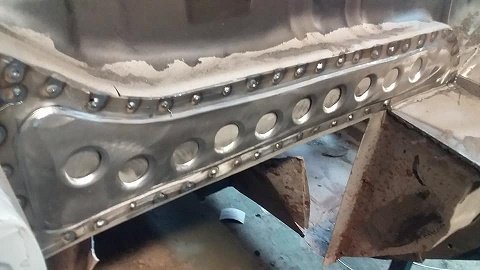
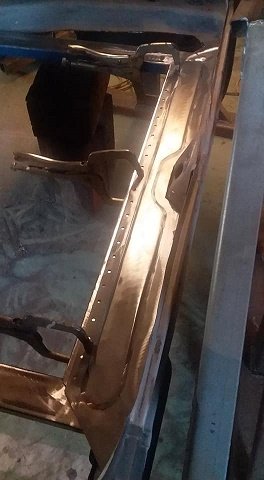
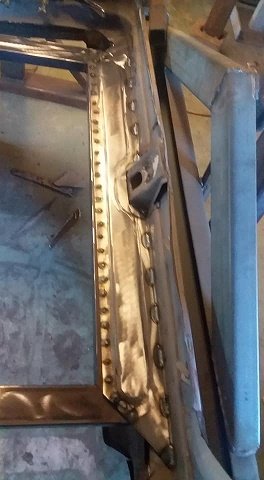
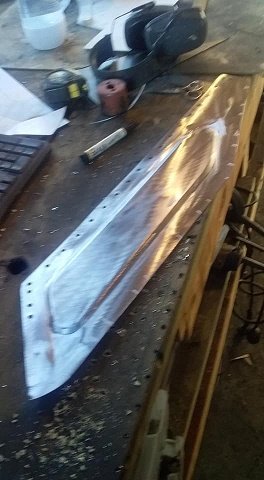
this is the 1st set of headers iver ever made and no i cant tig weld so mig was used........they will be wrapped to cover my shame ........and heat. so i dont like any of the off the shelf headers for the 4.1 and much prefer the huge looping JDM style headers .. these are the crap headers that cam on the motor. the only good part was the flangers so i cut them off to re use. i was talking to a guy in aussie that builds high performance 200 and 250 xflow motors and he said the ideal set up for a street car and will work with a lot of setups. 6 into 2 using front 3 and rear 3...41mm tube 660mm primerys 3into 1 collector.....then 2" -2.5" dual exhaust to the rear of the car with mufflers and a v8 stlye x pipe.. so i ordered some bends.........and i got all 6 within 10 mm of the 660mm and each other. at least there is room to play with then started with the setup i wanted it to look like before i build the rest. then made the rest front 3 rear 3 bolted in

-
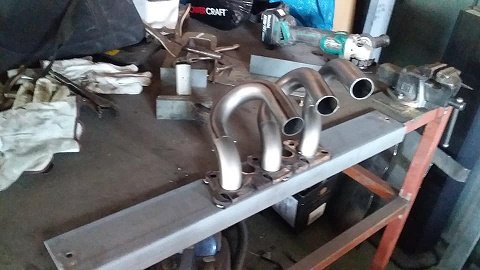
some exhaust bits turned up so i made a start on my 1st set of headers ive made.... just need to get somemore bits and ill fully make them up.
-
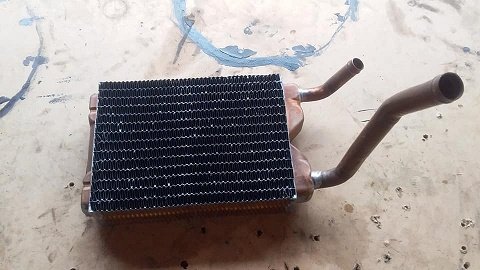
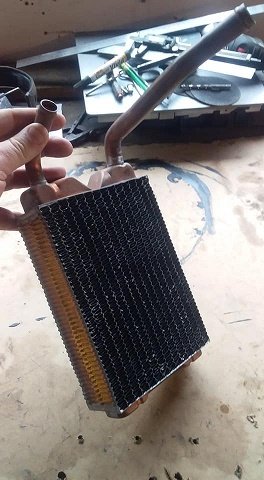
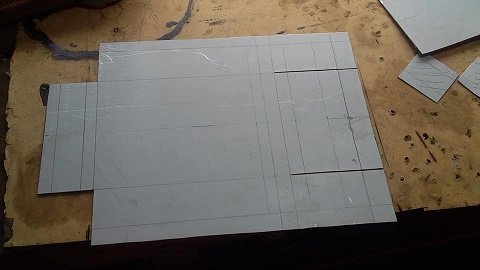
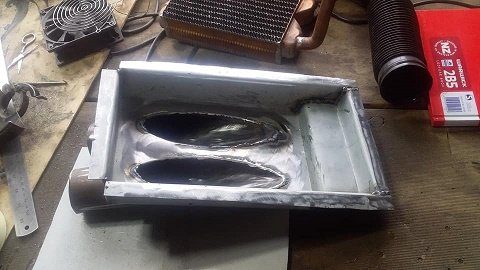
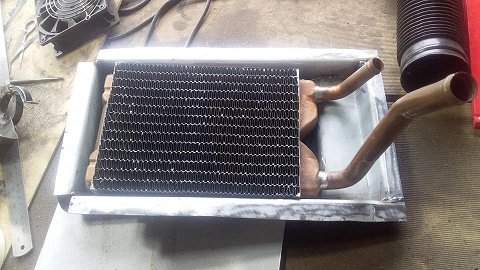
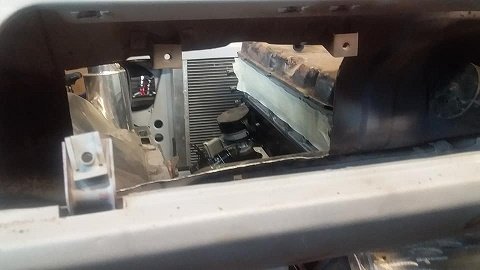
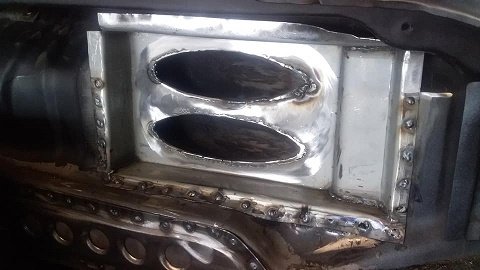
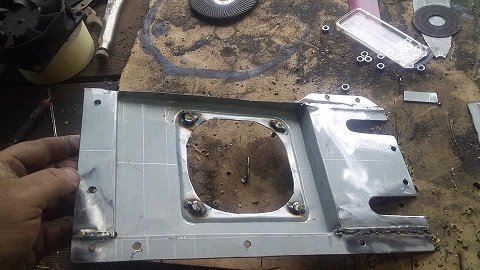
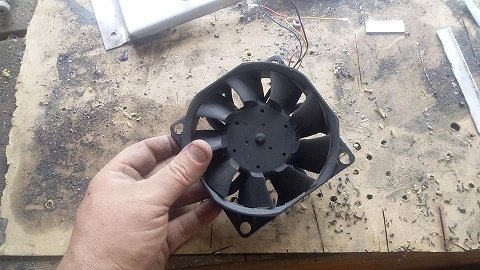
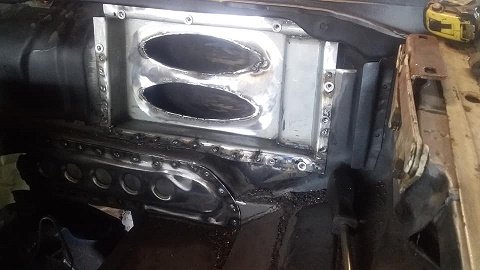
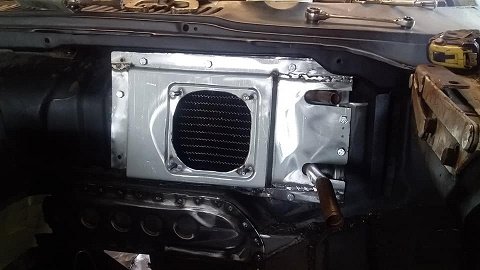
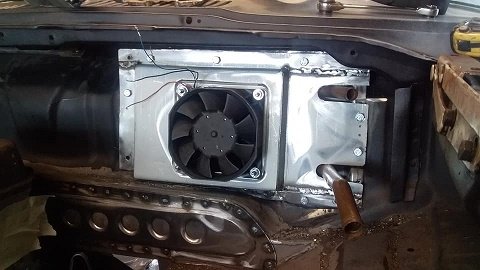
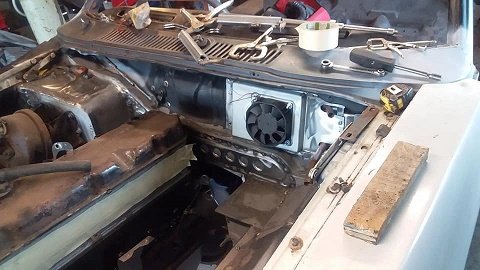
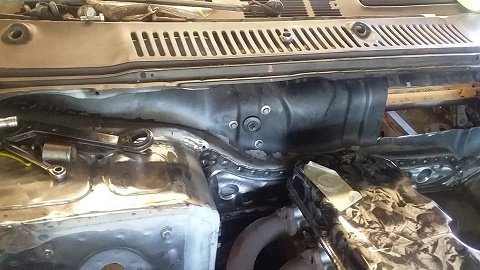
ticked another off the list......heater well more so demister...( only ever use the heater in my mk5 for the screen).. once again it had to be made with off the shelf parts for ease of replacements. so i started with a 72 camaro heater core... so i made a box for it that will be welded into the firewall like a pocket. trial fit then i cut a hole in the firewall just behind the glove box. then put the box in and plug welded the front. (will fully weld the back once back on rotisserie ) made a front cover the fan i bought is a pc fan but will run on 12v and cut your fingers off......5200rpm and moves 253cfm of air. then put it together. im going to make covers to clean up and cover the back of the fire wall.so all will be hidden. this doesn't do it justice as the battery i used wouldn't even start a car
-
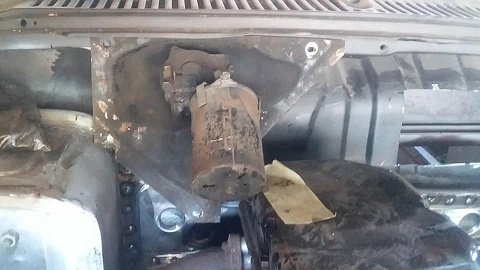
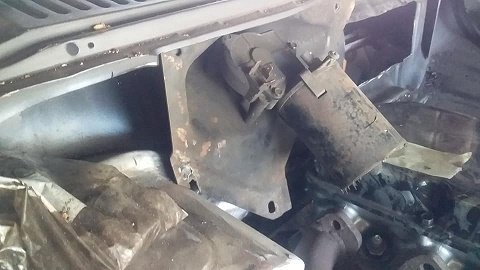
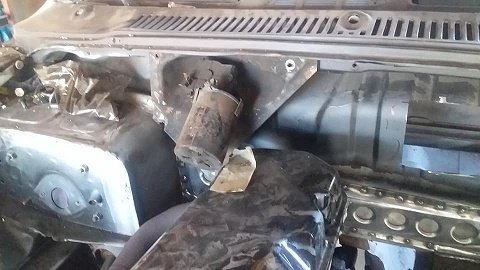
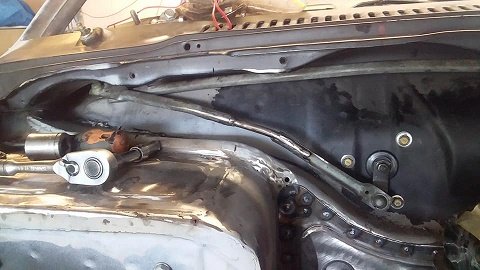
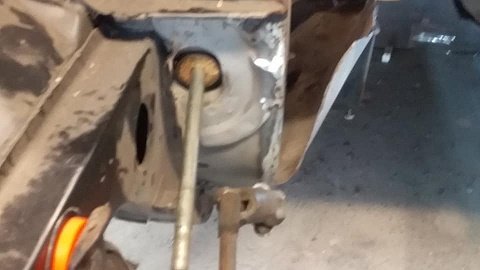
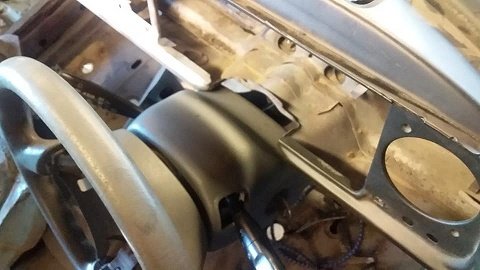
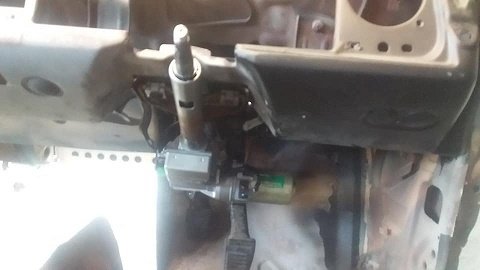
i was wanting to have a look at the wipers and see what can be done. ive never been a fan of the ugly motor bolted to a plate screwed to the firewall setup... and when i tried it in place .....seems the flacon motor is in the way.........lucky me. i could have just unbolted the wiper motor and clocked around a bit and drill new hole......but it would still look crap. so i maked out where the center of the motor kind of needs to be and looked at some option..... i found i could just bolt the motor under the dash and bolt it threw the firewall using roofing rubber sealing washers then i just had to cut the rod turn the end around and weld a rod into join them. much better.....hopefully the heater core i bought turns up soon so i can start making a heater.....or even the bends so i can have a go at making headers.
-
cheers mr MACKAZ. much appreciated.
-
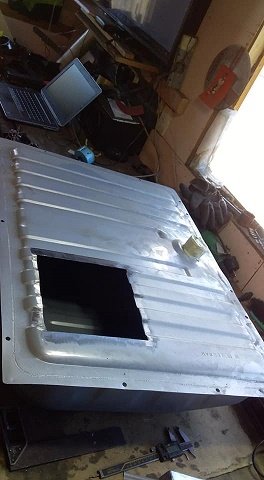
to be honest mate no the tank is a factory reproduction of a 65-69 mustang so no baffling at all... its a bit different to most cars ive build in that i normal build something a want to race/track day /hill climb ..and i would use surge tanks and baffled tanks but this car wont do any of that. even ford Australia described the 6 cylinder cortina as a lead tipped arrow that was fast in a straight line and wouldn't go around a corner.....so with that i believe the factory ba turbo intank pump with small surge capacity will do the job for me...and i wanted ease of parts you might want to go baffled and intank ....at least the wagon has a underbody tank like the van? and not the side tank like sedans......i think
-
cheers mate. and yes there is a drain 8n the bottom channeled to the center
-
ive said it before and ill say it again.......... fuckers
-
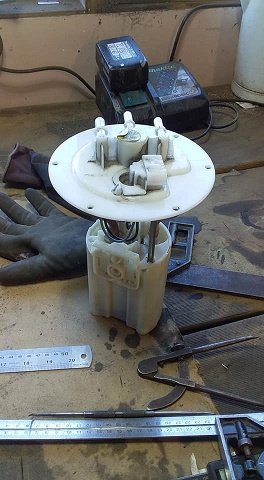
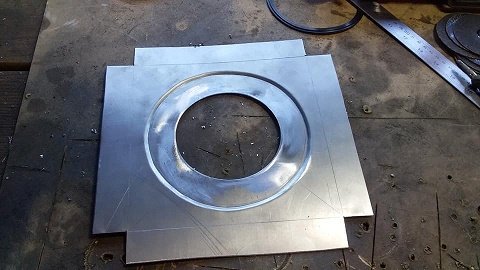
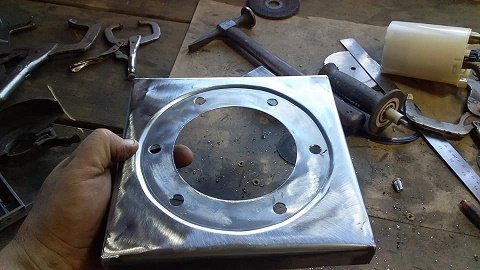
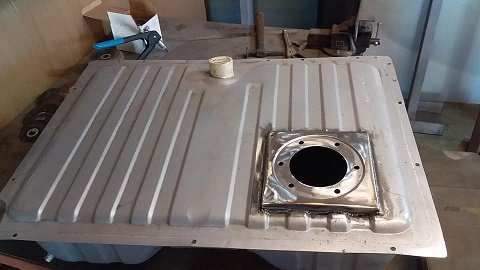
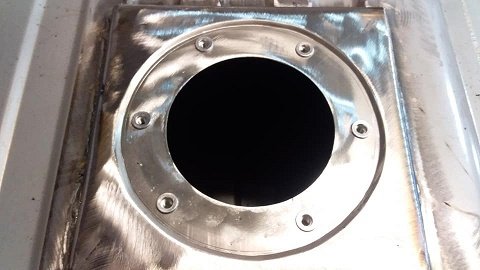
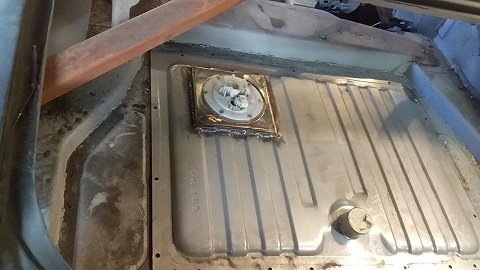
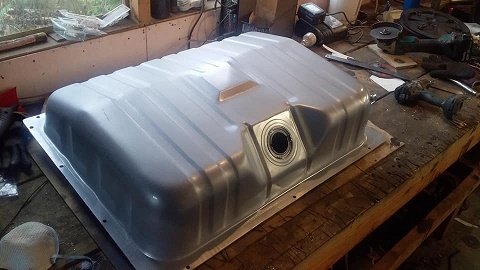
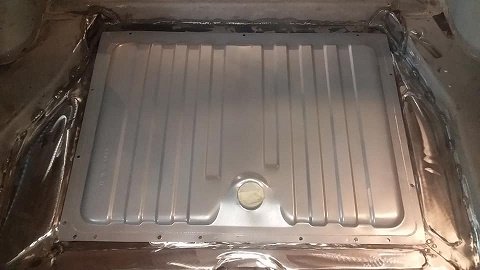
ticked another thing off the list......fuel pump. i went with falcon BA turbo intank setup....reasons being they are cheap second hand (this one $40) as they have a tenancy to stop working.......the main reason for that is they rise and sink with fuel level and tend to full with crap ....rise and not sink back down so they suffer from starvation .. they supply more than enough fuel for my needs and new or second hand readily available. . it will be fine for me as i will mount it at full compression so no need to rise and sink....i just needed to make a mounting plate then i had to cut a hole in my brand new tank weld it in add some riv nuts all done
-
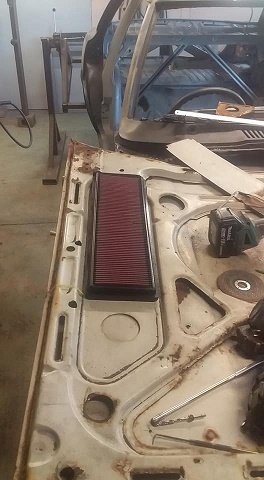
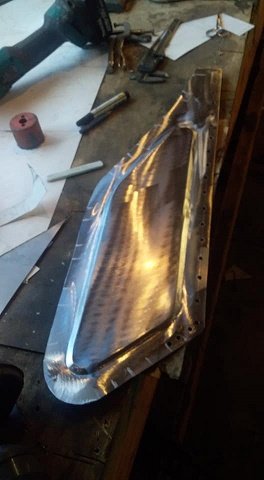
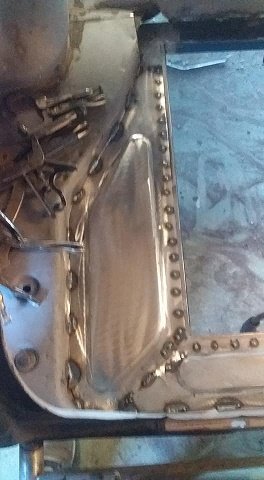
pulled the card board air box apart and changed a few measurements and made a steel one....just tacked for now but its a good size.. some pics so far.
-
i did think about that and looked at a lot of different pics. but i have had a picture in my head for a long time now of the look i want....and its getting there. i fully understand it wont be everyone's cut of tea but it will be the mk3 iv always wanted...
-
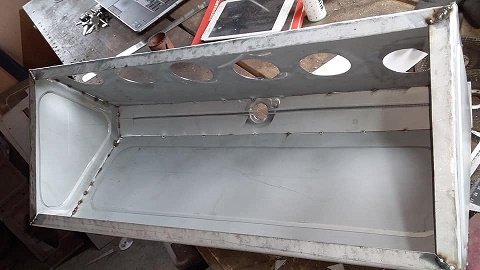
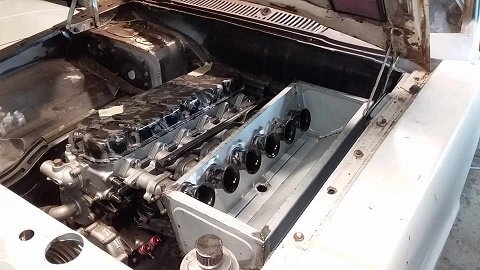
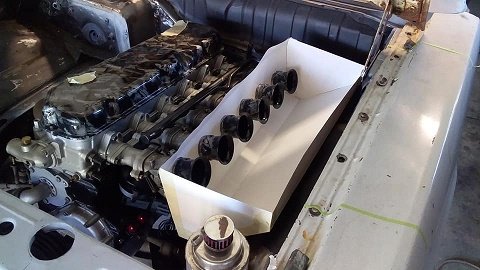
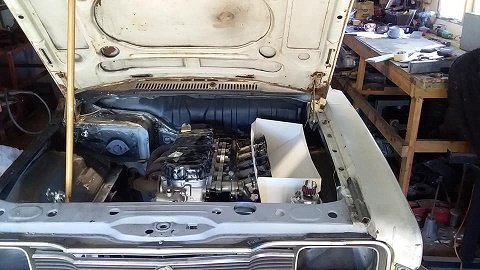
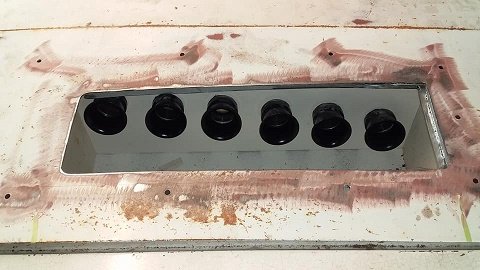
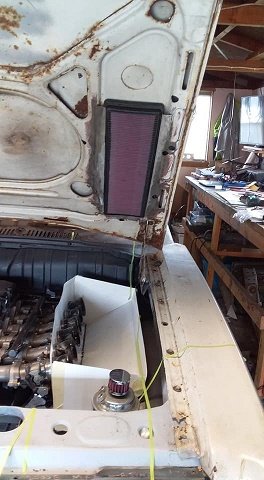
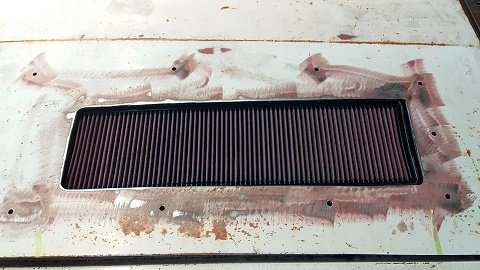
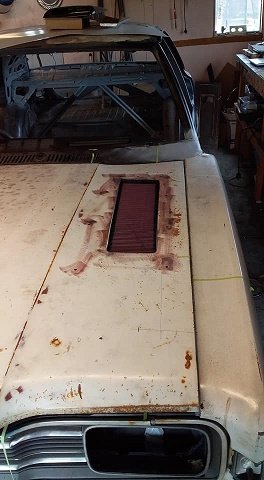
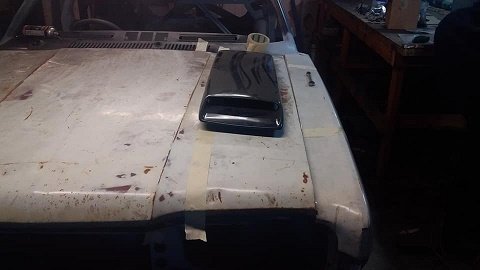
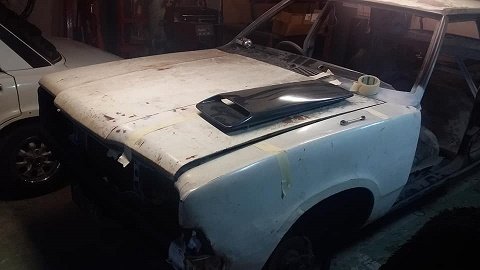
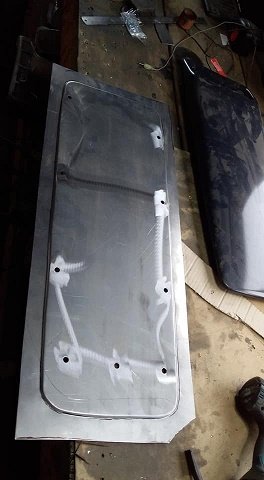
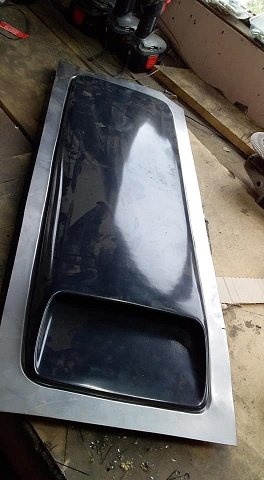
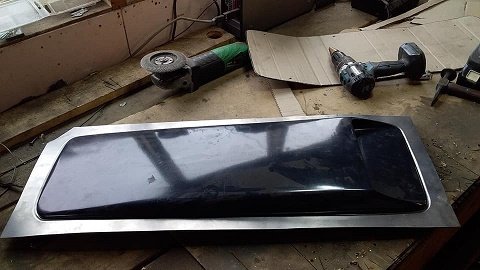
have been thinking about the air feed and was going to weld a recessed plate into the bonnet for the scoop but the bonnet has so many curves i think i might stuff it up.....so had a re think. made a card board airbox to see how much room i have to play with once i had marked out the area on the bonnet and drilled the holes for the scoop i took the bonnet off and flipped it over. the bonnet its self has indentations on both sides and they are almost perfect for the Porsche air filter.. i marked out the area needed for the filter and cut it out....needed to make a wee bit more room. trial fitted the filter again i then made some sides and back so that the filter can now slide in from the front and be held tight and sealed to the bonnet refitted the bonnet and checked the hole for placement filter in and scoop on. im pretty happy with it so far
-
thanks mate. the bead roller is only 8" but has made the things i do look alot better.. i love it..
-
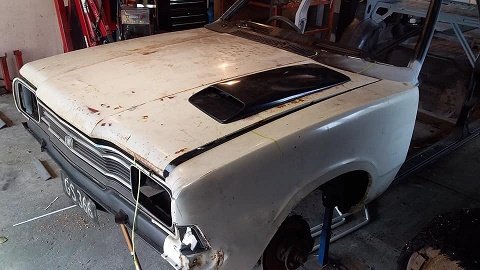
im stunned as well mate...lol ..just wanted to try my hardest and see what i can actually do..its not perfect but im happy with it so far man.....still only basic tools as well and so far 98%all me......and fuck thats a cool feeling.. i have wanted a aussie mk3 for probably as long as i have wanted a xa coupe..(this one was cheaper) coming from a race car it had a cool inlet manifold and 350 holly but i was about to fall a sleep one night and had an idea.........and its coming up to 2 years soon hahaha
-
cheers man its been a head scratchier..i didnt want it to look cheap and half arsed ...could have just made a box in the bay and feed air to it via a hose......but i want the wank value of seeing the ITBs when you open the bonnet ....lol. a lot easier than whet your upto mate.....way to precise work for me.
-
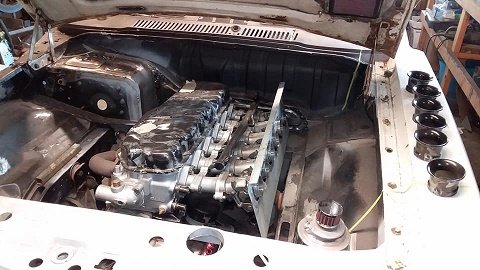
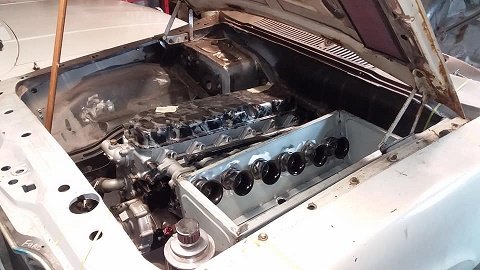
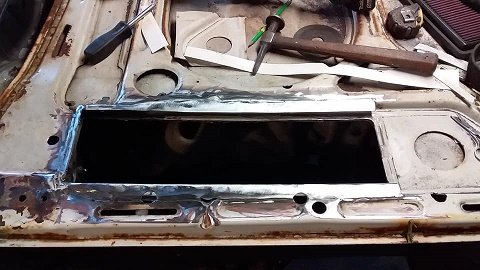
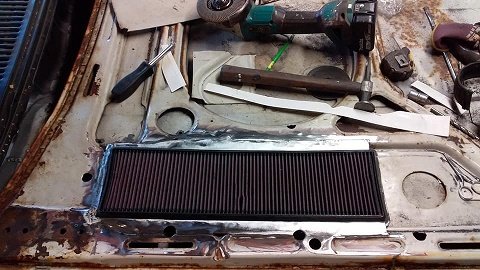
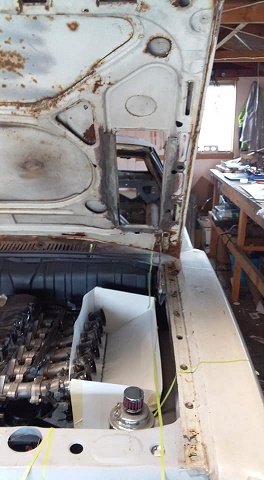
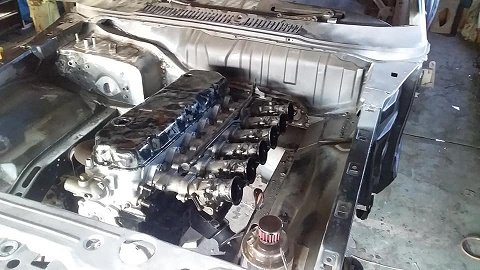
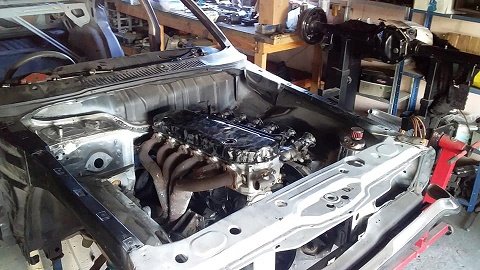
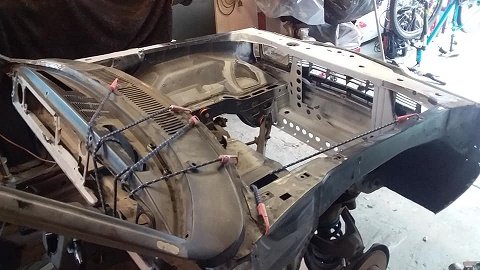
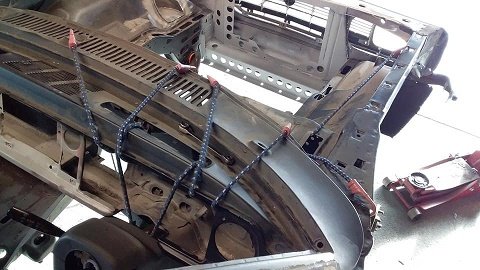
so now the motor and box are back in i can make a start on a couple of things one being the tunnel...just need to put the clutch fork and slave cylinder in on the passenger side and the starter and clutch pedal on the drivers side and i can finish it off.. and the cold air feed/air box...i want a sealed box feed air from the outside but when you one the bonnet you can see the ITBs (other wise whats the point ay lol) all so regardless of the colour i paint the car i all ways planned on painting the bonnet the same as the falcon XAGT. i looked around at bonnet scoops for ages and wasn't keen on the wrx scoop on your mums honda style ...had to be long low and slim.....so went with the falcon XWGT scoop so it looks like it will fit the plan is to have the scoop on the bonnet with the filter on the otherside of the bonnet so when you open it you can see the filter and then when closed it will seal onto the box around the trumpets. now the easiest way for me to do this is to make it all out of the car then cut a section out of the bonnet and weld the whole thing in so i made a cardboard template and cut some steel out of the sheet and bead rolled around the template flip it over and it means the scoop will be recessed into it. i did some searching on the interwebs for panel filters and it turns out i might have found the perfect one......size and price. ....so i ordered a Porsche 928 k&n panel filter 517mmx157mm and around 20mm thick. and this is the room it will take up. cheers
-
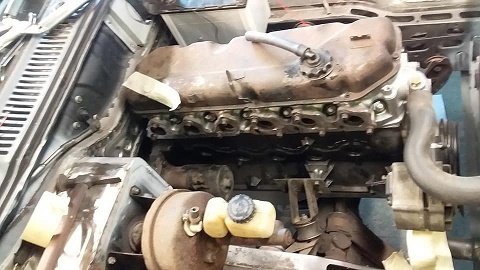
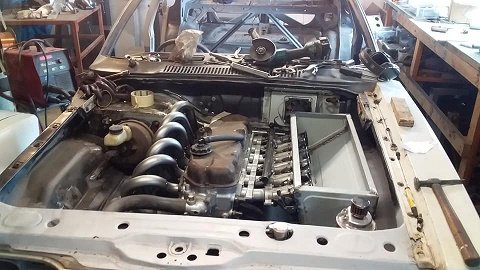
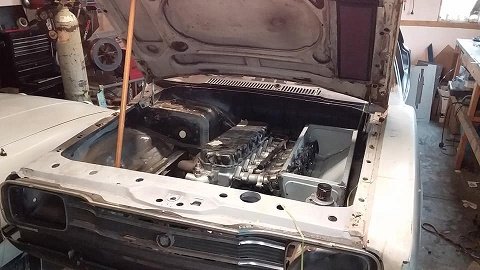
motor and box back in so i can make the tunnel ....airbox and and few other things before it goes back on rotisserie......might make some new headers as well
-
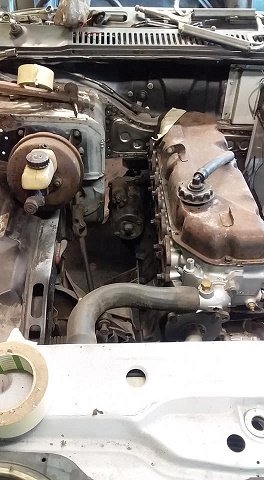
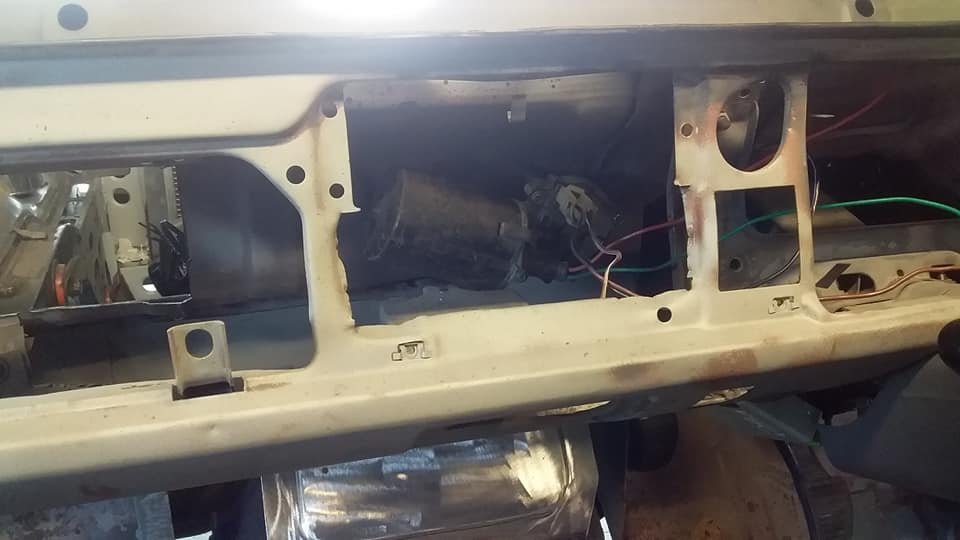
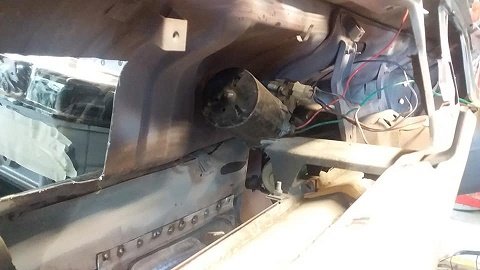
while im waiting for my engine hoyst back i thought i would clean up some parts of the engine starting with the area at the top that has the fuse box .....also welded up all the engine bay loom plug holes. then i looked at the wirewall didnt want to start from scratch but it needed to look cleaner . much better
-
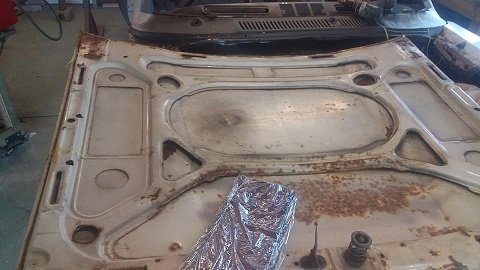
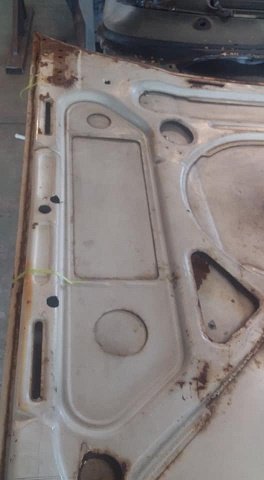
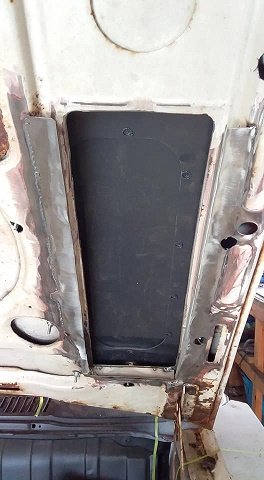
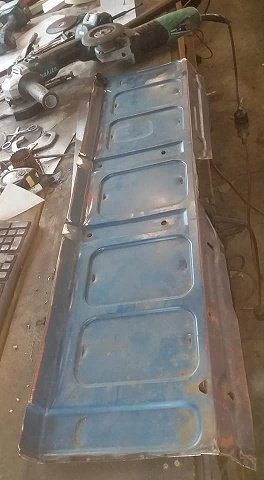
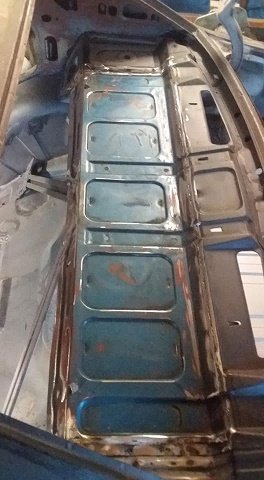
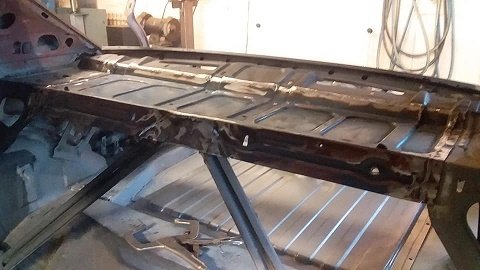
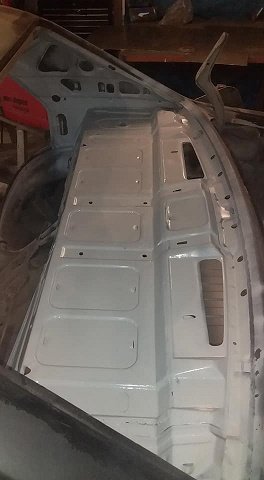
parcel shelf time yay. as you can see it looks like some has put the mighty dof dof 6x9s in with what can only be presumed an axe and fucking big hammer. lucky for me there was a car being wreaked last year and i cut the shelf out of that. and one out one in
-
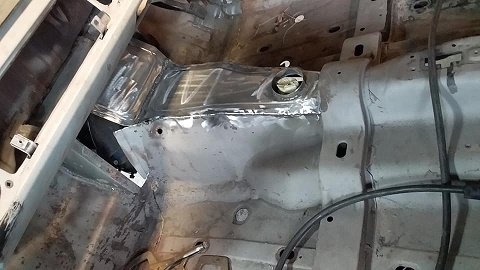
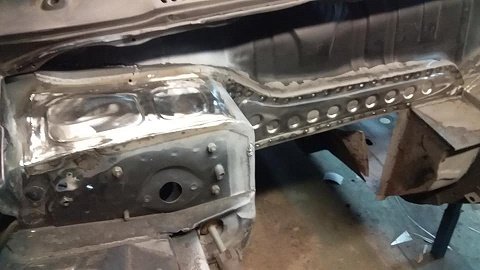
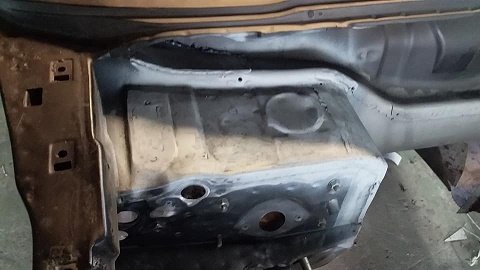
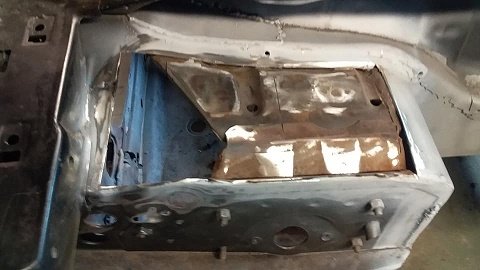
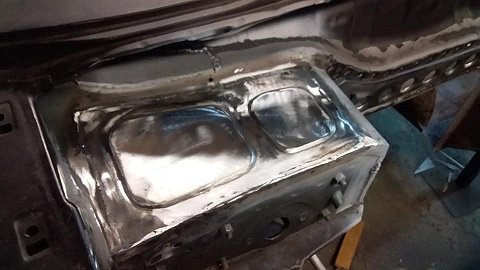
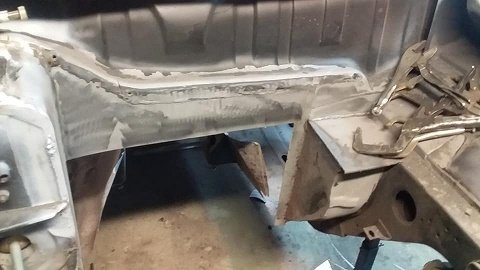
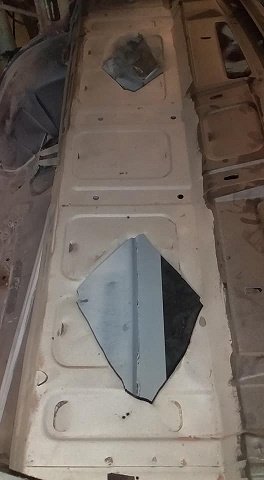
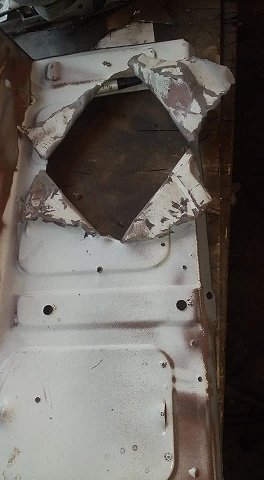
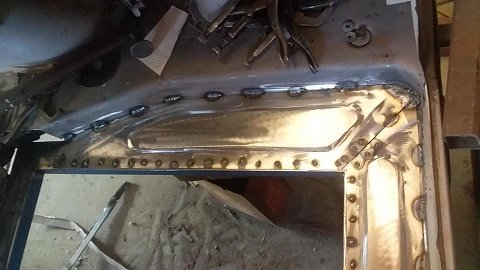
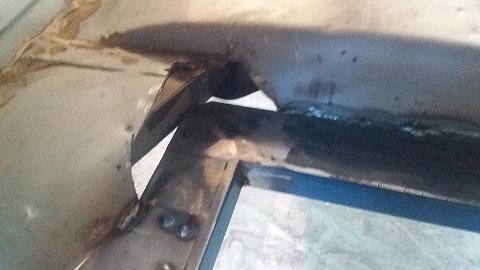
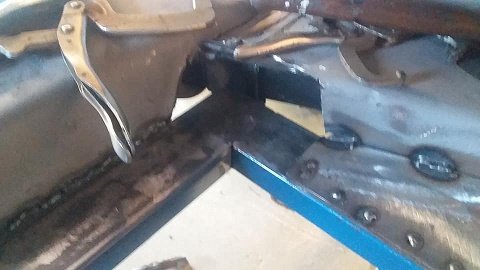
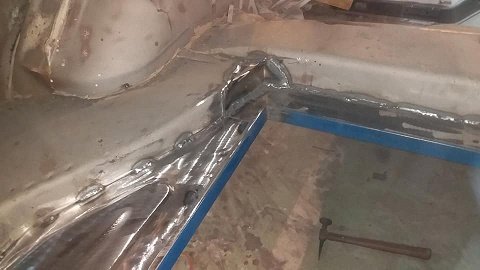
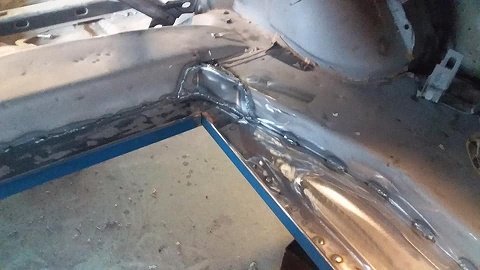
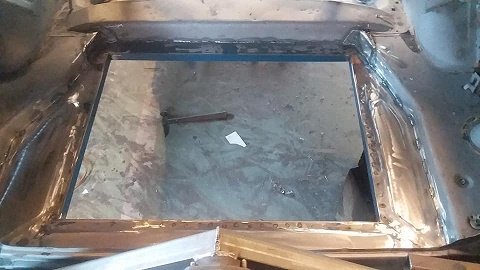
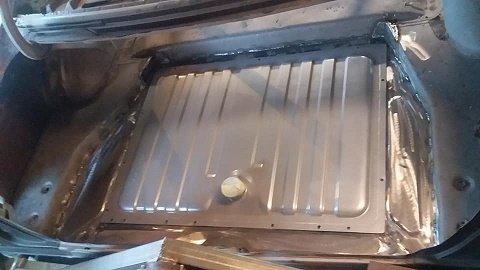
fuel tank boot floor time.... i wanted to change the tank as the cortina one was stuffed so i looked around and decide on a 68 mustang brand new was $210 landed..and that meant losing the boot floor wheel well (didn't like that anyway) it was in good condition and got blasted with the shell so i advertised it and donated it to another build. so i started with a massive hole in the boot and decided to use some box section and the main brace after i welded it up i measured again and found out i stuffed it up hahaha.....measure 6 million times kids and cut once..so after i cut 100mm out of it i welded it back up again so after getting it right i tried it in the hole...apart from having to cut a 45* off the back corners for the chassis rail it fitted. and i welded as much of it in as i could. then it was time to make new floor parts....starting with the rear part. then the passenger side then the drivers side. then made the 2 caps for the back corners from where i had to trim it for the chassis rails. then a quick clean up throw the tank in to see if it fits
-
welcome along mate.... love the work
-
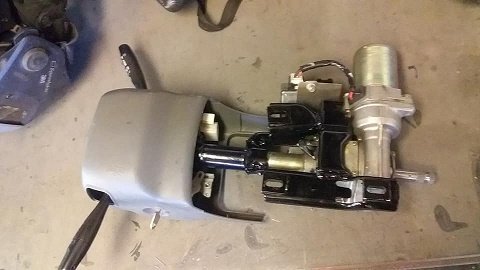
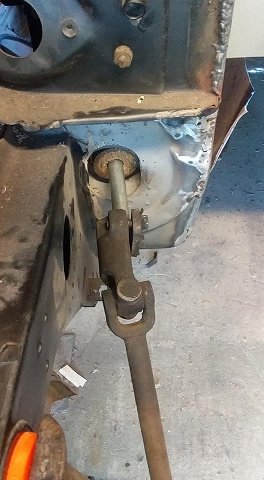
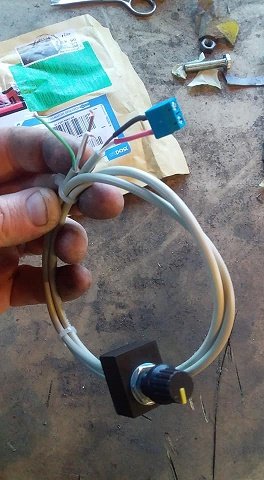
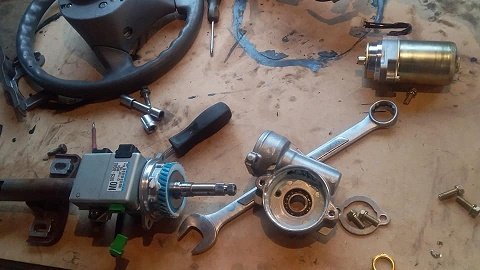
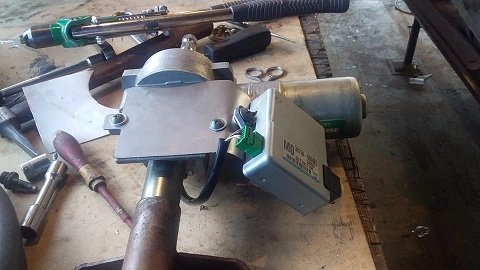
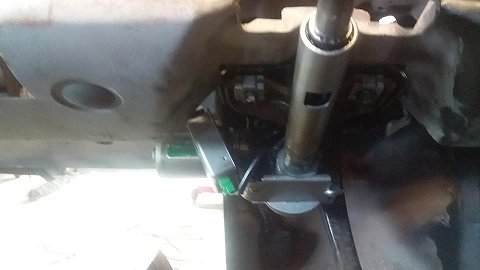
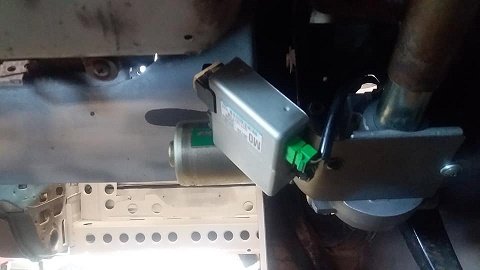
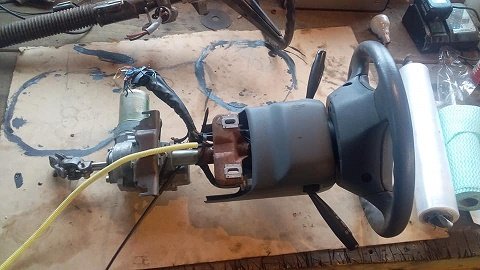
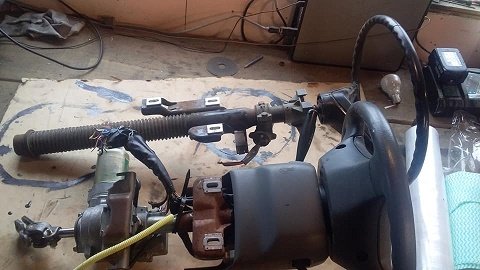
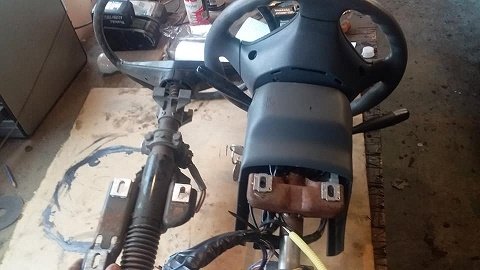
been pretty slack lately......blame it on the change of seasons and getting dark early....but thought i would carry on with the EPS setup. so i used all the bungee cords known to man to hold it in place as well as a shaft and wooden ring to help center it in the hole. once i had it where i wanted i cut up the mk3 mount and welded it all in place so the the suzuki coloum bolts up to the 3 points the factory shaft did. then painted it and put it back together then i bolted it all back in to see how it fits....really happy with it even like the way the factory suzuki cowl fits up... bolted the make do shaft up. i also contacted a guy i used when i put one in my escort years ago...hes in Ireland ..hes store is closed down now but we talked and i sent him pics and details and some money and he made me a wire in potentiometer to control it. so i just need a boss kit and find a steering wheel i like....get a section of steering shaft made with correct ends and its good to go..
-
i was looking into it a while back. but im just wanting to build a standard spec motor as a replacment for the. mk5 and yes the manifold was made for evo 4 turbo....its pretty old...mate had it made about 10 years ago and since then if he doesnt have a need for it i buy it and he gets 1st refusal if i decide ti sell it .....and we can back and forth like that lol
-
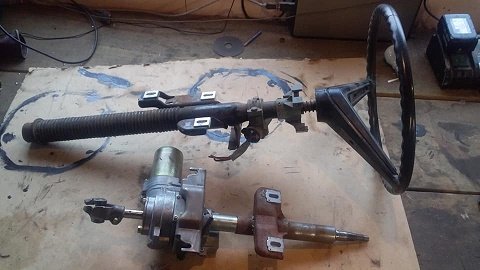
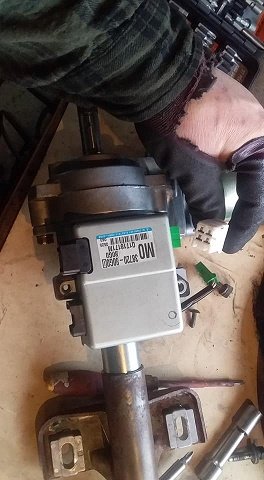
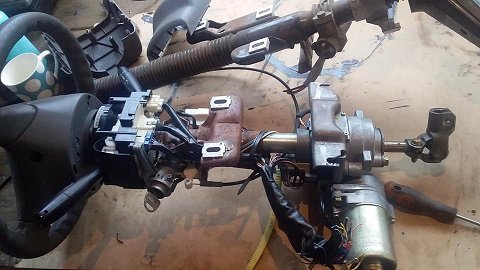
i started having a play with the EPS..i stripped it down to the basic unit. here it is just mounted up with pedal box in and just 2 bolts ysing the suzuki steering mount.( pretty good really for a Japanese part and 2003 tech in 76 car) the motor and gears hung down pretty low so i pulled ut a part to see if i can tuen5 the motor and gear drive 180 being just 2 bolts made ut easy to flip 180 so ghe motor is now on top of the unit....but the wire from the motor would reach the ecu for the EPS so i made a small bracket to move it off to one side then bolted it back up to see and all in all very happy...it now buts the motor up under the dash.....so thats the 1st part of the mounted sorted.
-
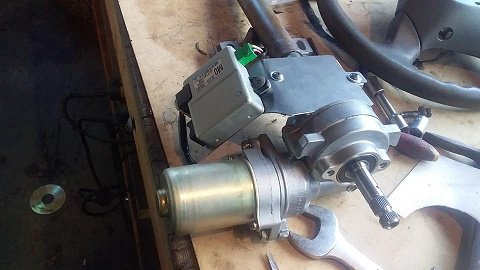
love it when new toys arrive......got my EPS coloum today....looks bloody close to the mk3 the mounting bracket is same dimensions its to close to the dash....but might just use the factory cortina bracket anyway. but it came with cowl...key .ignition.lights and wiper controls......perfect