


yoeddynz
-
Posts
17532 -
Joined
-
Last visited
-
Days Won
137
Posts posted by yoeddynz
-
-
Off to the scrap steel place? Bugger. I need some Iron for some wood and bike sheds etc
-
Hopefully it's not made from steel
-
 1
1
-
-
18 hours ago, flyingbrick said:
have you heard rust is a problem on them
No I know nothing about byd (except for apparently shite range...
 ) but I now know quote a bit about Chinese steel and paint quality on ldv vans. I'm still removing rot from this van..

-
 3
3
-
 5
5
-
-
Wait till the rust starts

-
1
-
-
But the price of it though..

-
-
-
6
-
 1
1
-
-
There's also this one sitting somewhere in London village, pic sent to me by hannahs brother.

Meremere one is probably handier.
-
4
-
-
Cheers stu. I'll try out the tube first though because I think it'll work out well and the place said their sell me a short length.
-
1
-
-
@BlownCorona cheers for ideas!
A few months ago I rang a plastic supplier in Nelson and inquired about clear plastic tube. They can supply 25mm od tube. The inside of the alloy tube is 25.4 iirc. So if the plastic is thick enough I can machine some o ring grooves at each end of a small length (say 5mm longer each end of the sight window I'll machine out from the alloy tube) this should be fine to seal up and remain removable if I make the cap fitting removable (a through pin or grub screws?)
I'm making a new one peice tube setup now, without the joining flanges.
-
2
-
-
@Indiana_Jones how much did you score the tamiya spray setup for? I'm keen on one, not just for models but also little jobs in workshop. I figure there's possibly clones available on aliexpress but not yet looked.
-
2
-
-
-
so many other uses too...

-
1
-
-
-
Yeah what he ^ said. I'm going to be running synthetic oil which seems to stay clearer too.
I am tempted to drill out the cap and fit some tiny momentarily on switched led to light up the tube. But I need to find something suitable to use, like off a keyfob etc.
Keen on links to something suitable. Has to be tiny.
-
1
-
-
- Popular Post
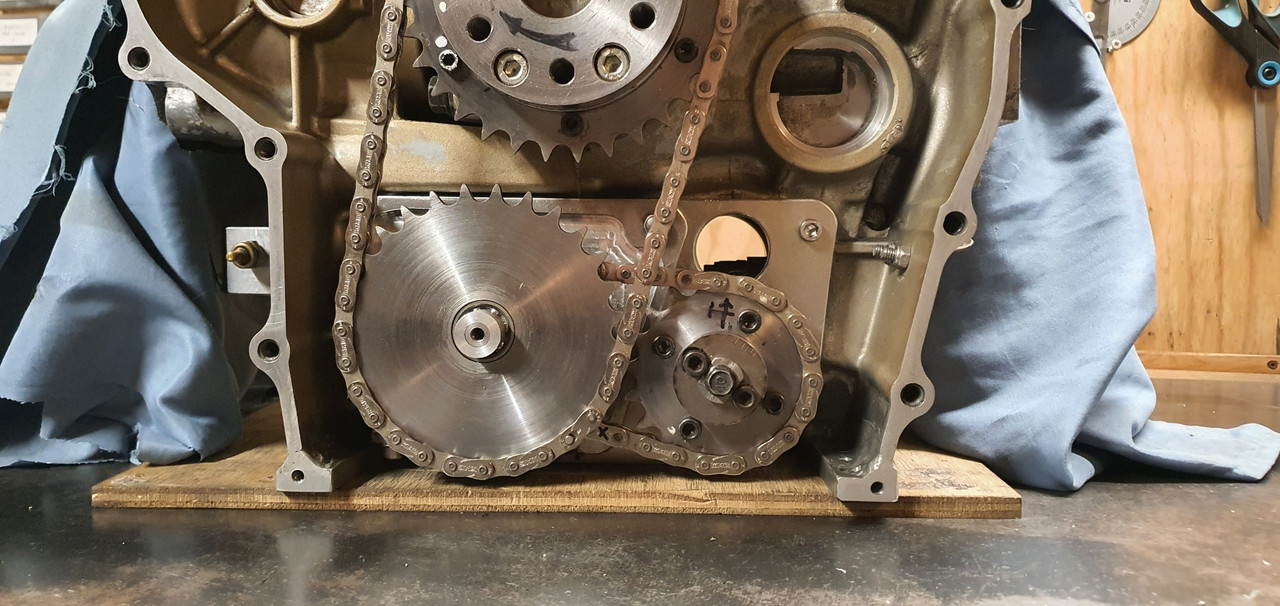
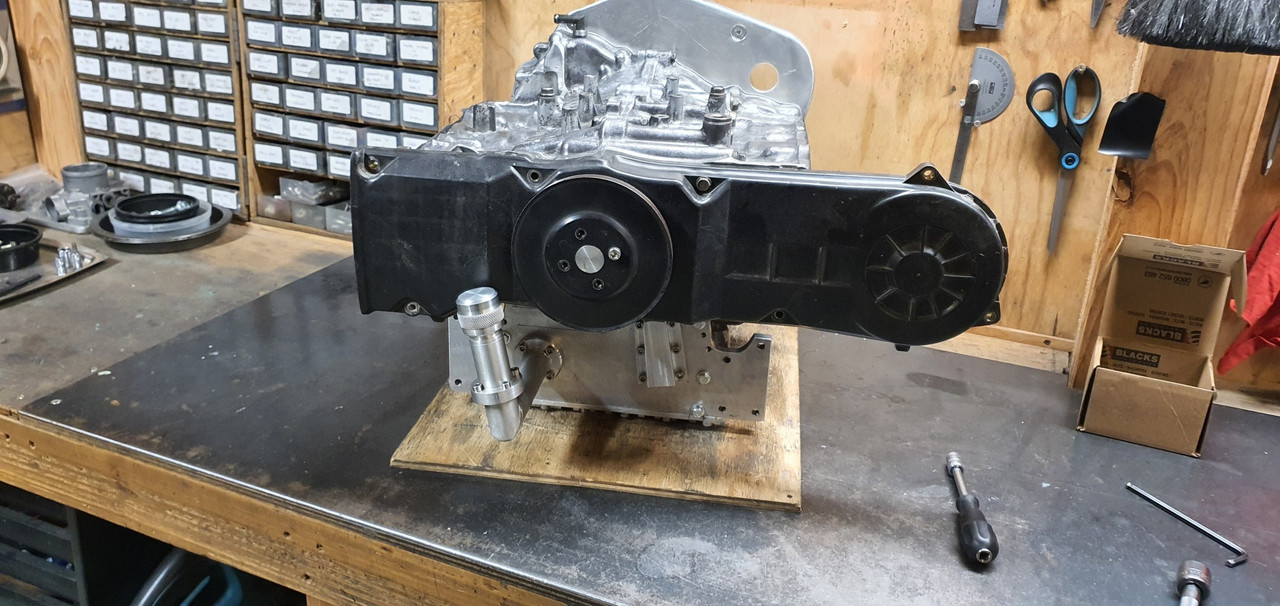
I've not done as much on this project as I'd hoped recently but still chipping away at it.
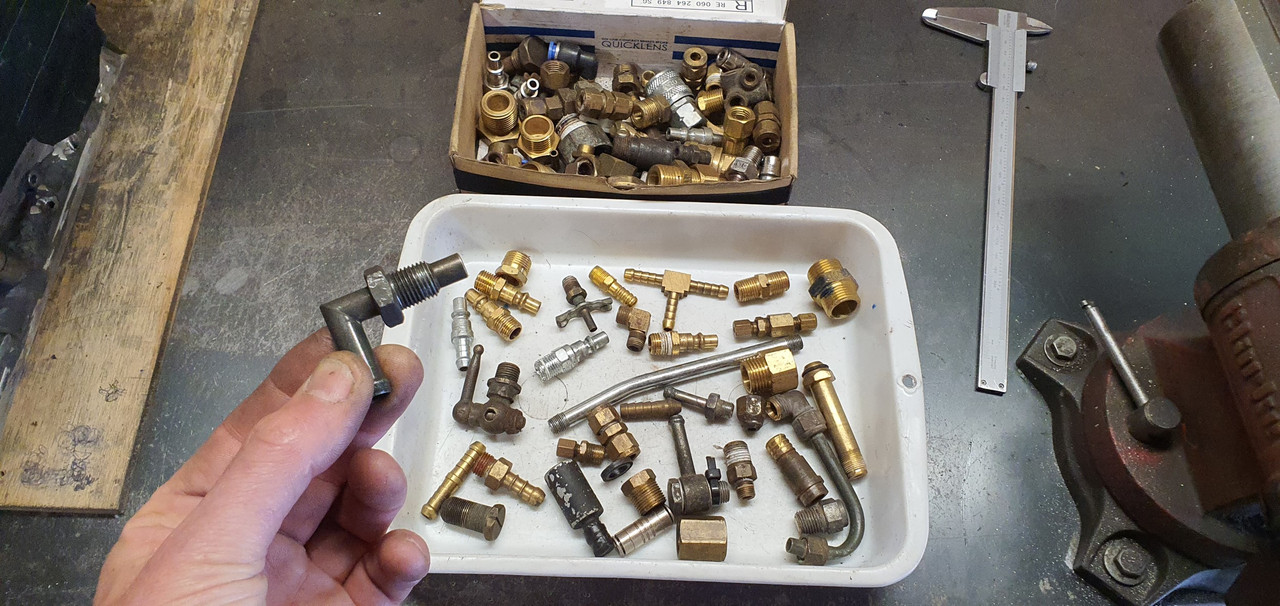
Crankcase ventilation is sorted. I had a rummage through my box of fittings and found a suitable vent pipe thingee...
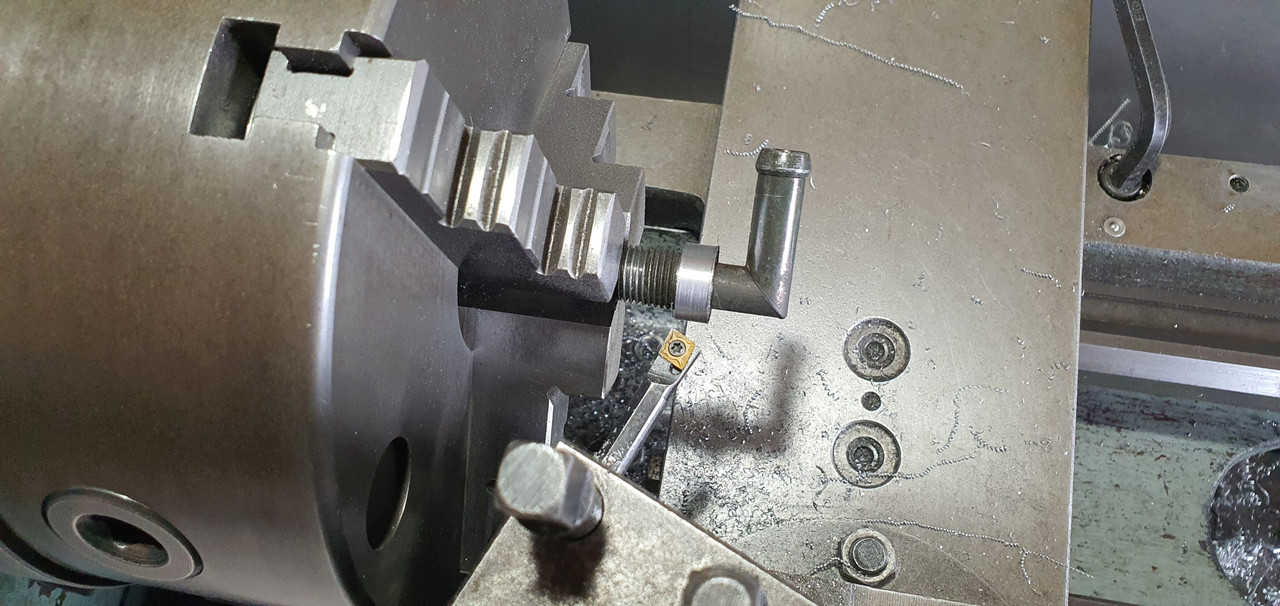
Into the lathe and with a tiny boring bar I was able to reach in to machine the hub down to a neater size...
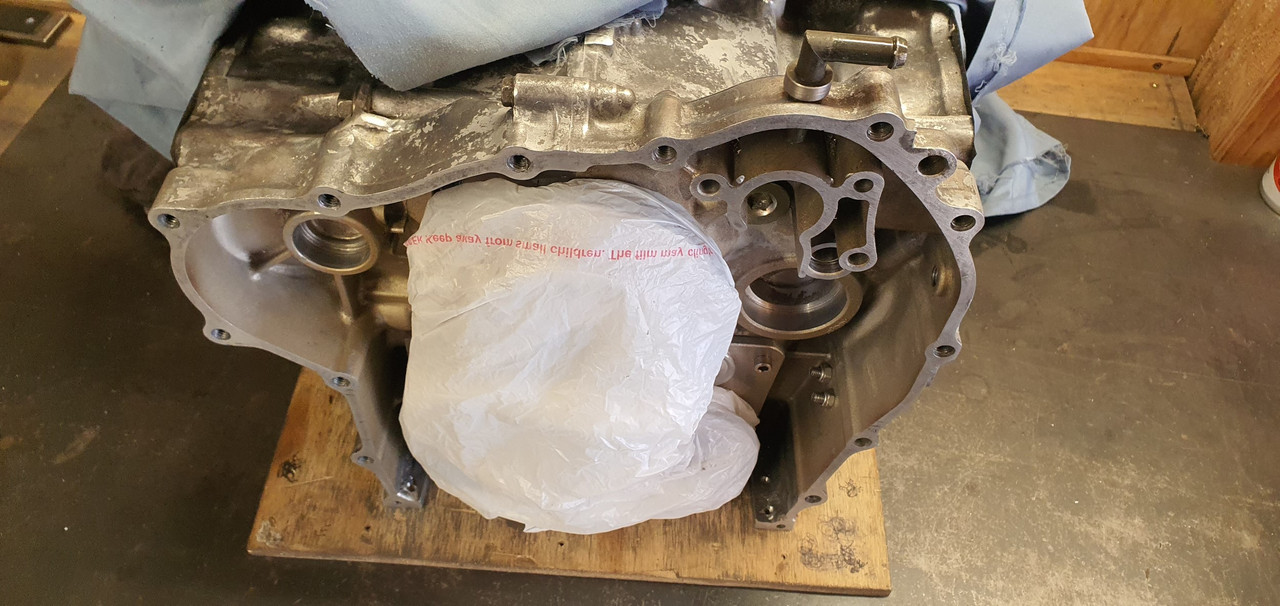
Covered the vital bits to avoid swarf getting in the works then drilled and tapped a hole to suit..
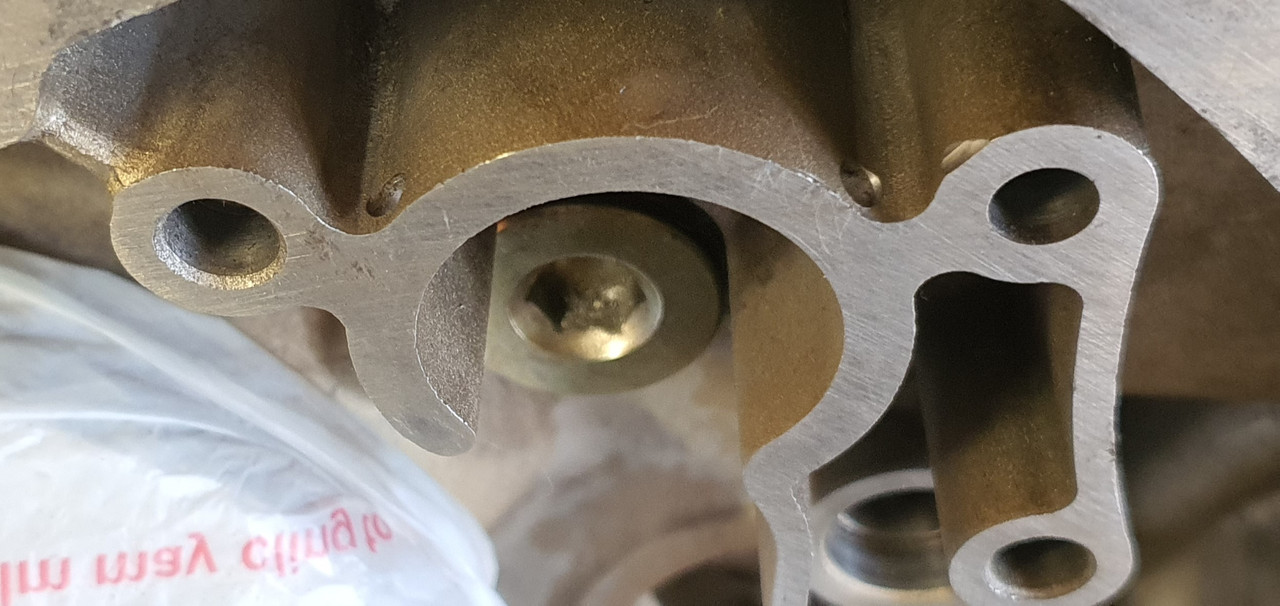
Drilled two drain holes to avoid any build up of of oil accumulating..
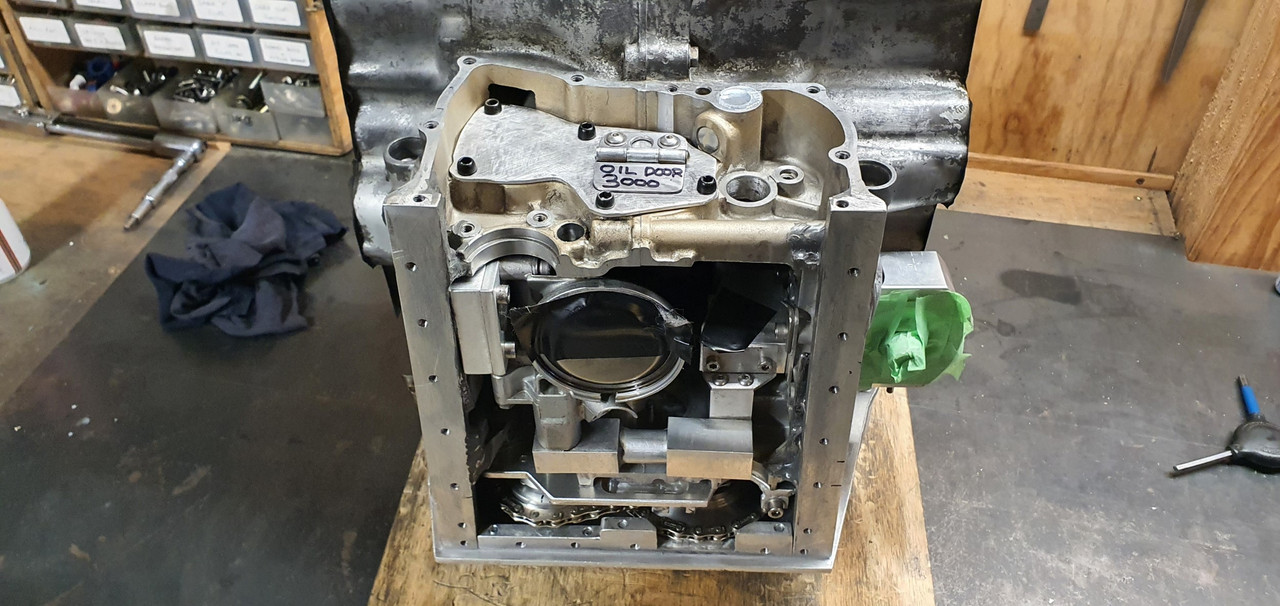
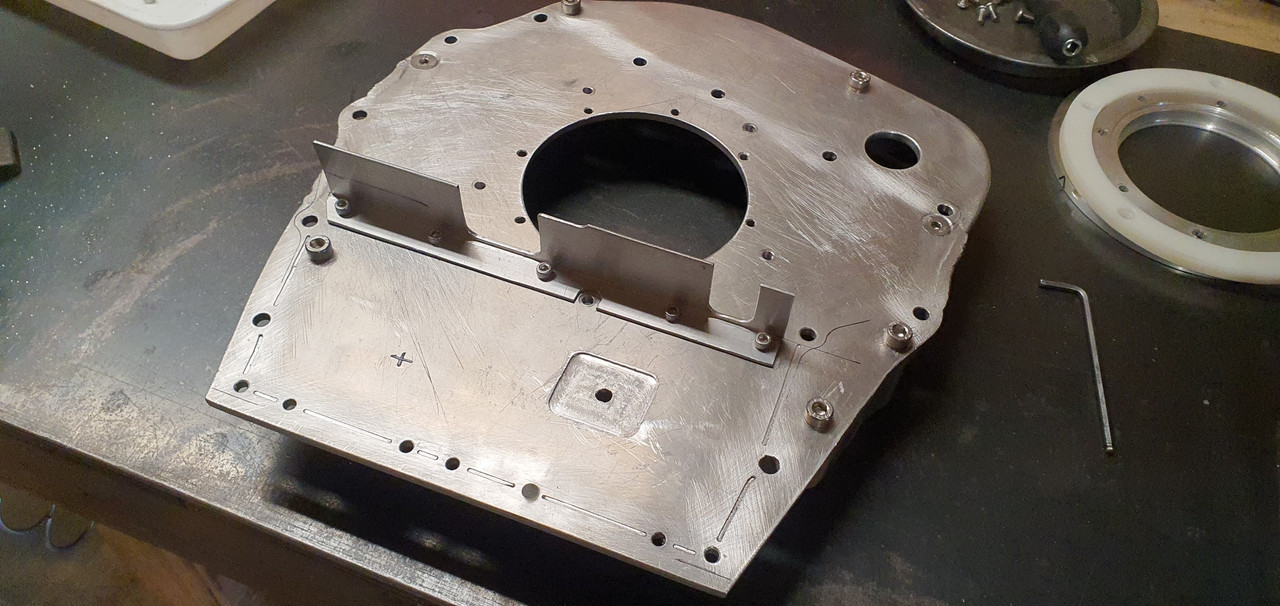
Next jobs in line were to add some extra baffles to help stop oil surge. Remember a while back I had put many bits through a Jenny Craig program in a bid to make them lighter. Well I realised I should have left this plate at its full fat weight and not added this big hole which will let oil surge too easily...
Silly me. Now I had to fill that hole and I was damned if I was going to disassemble all that lot to do it. So machined up a plug, as light as I could but still heavier than the material I had removed in the first place. Oh well..
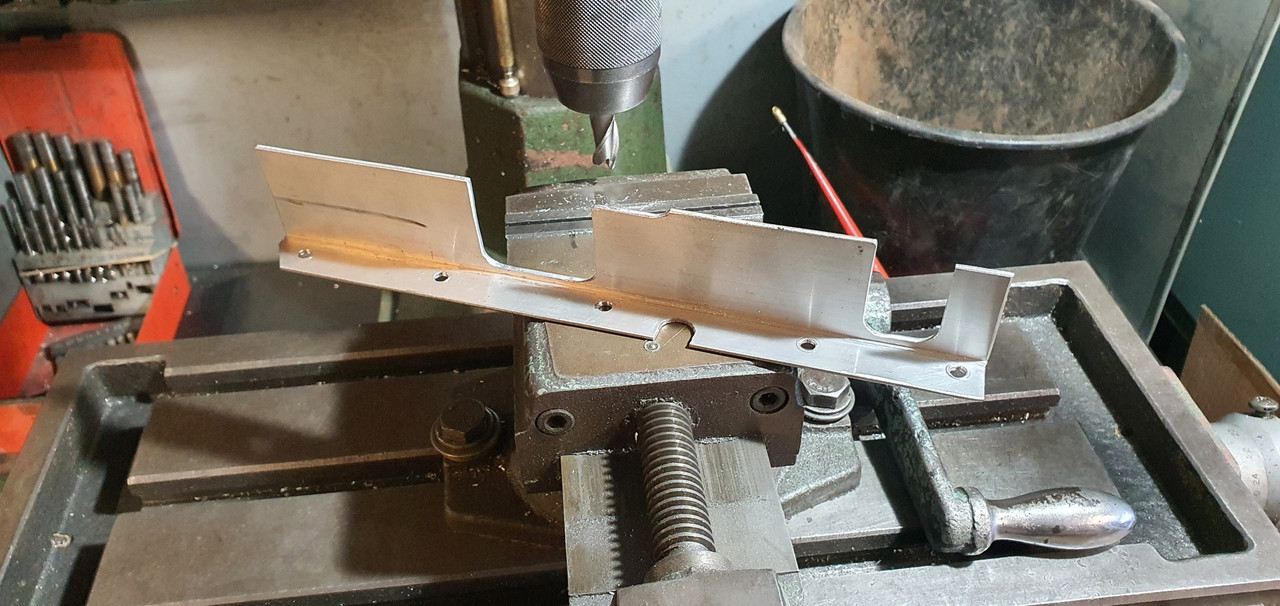
I also wanted to stop oil flowing out of this area under heavy braking so I made another flap. I now have two flaps.
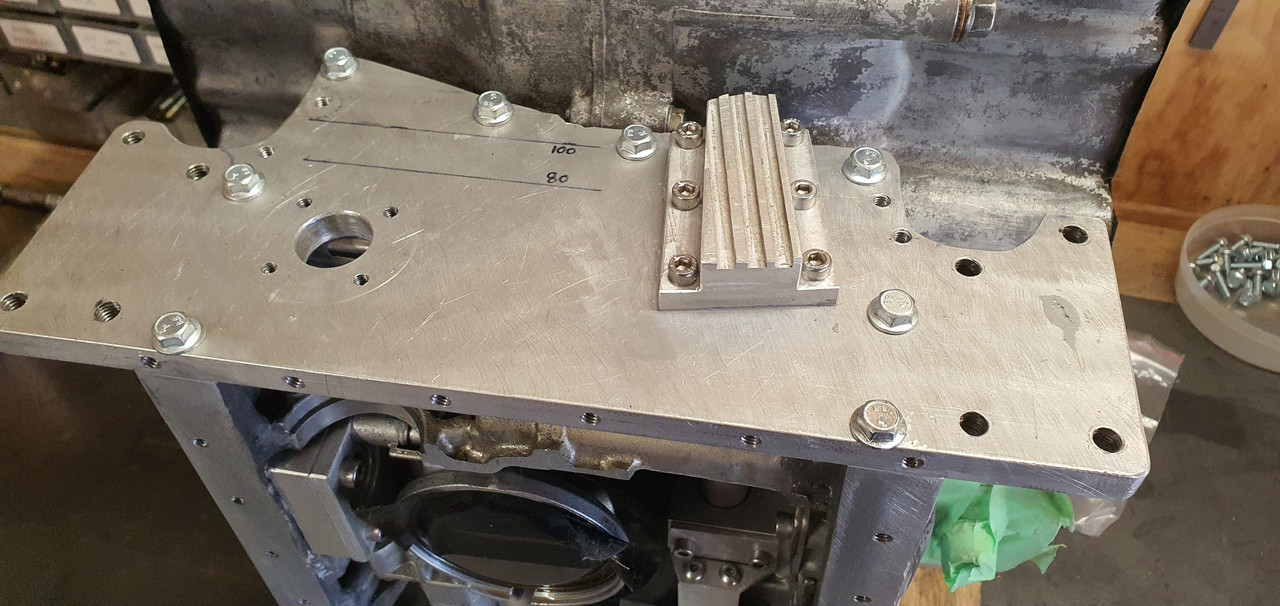
I machined up a bit of alloy angle..
It was bolted here...
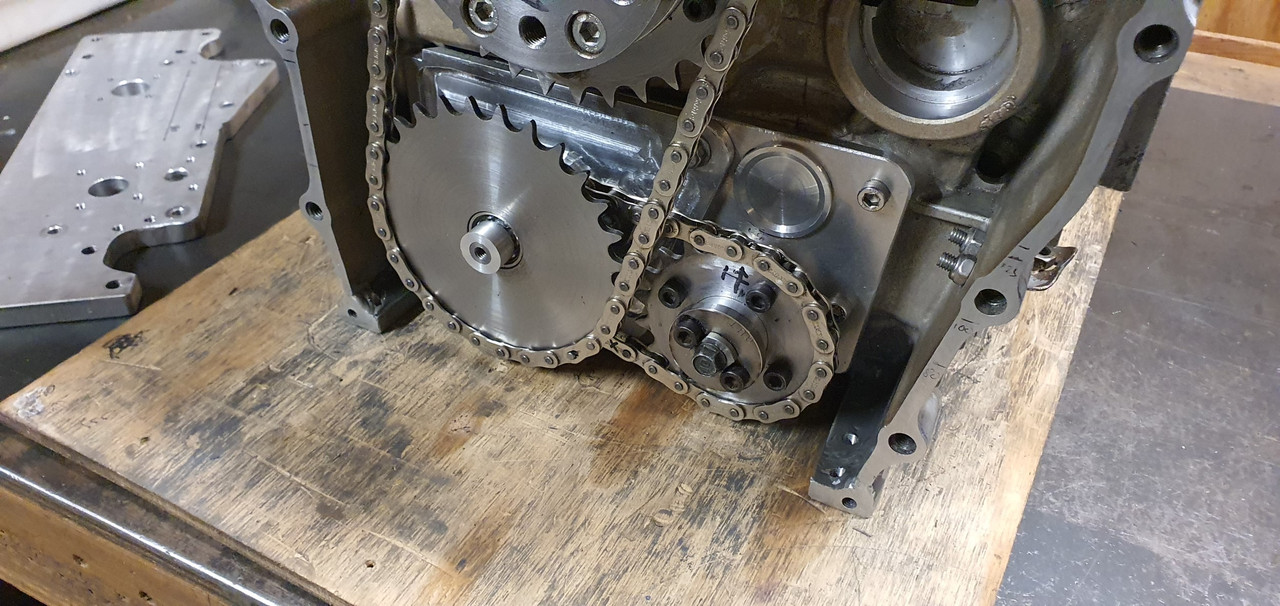
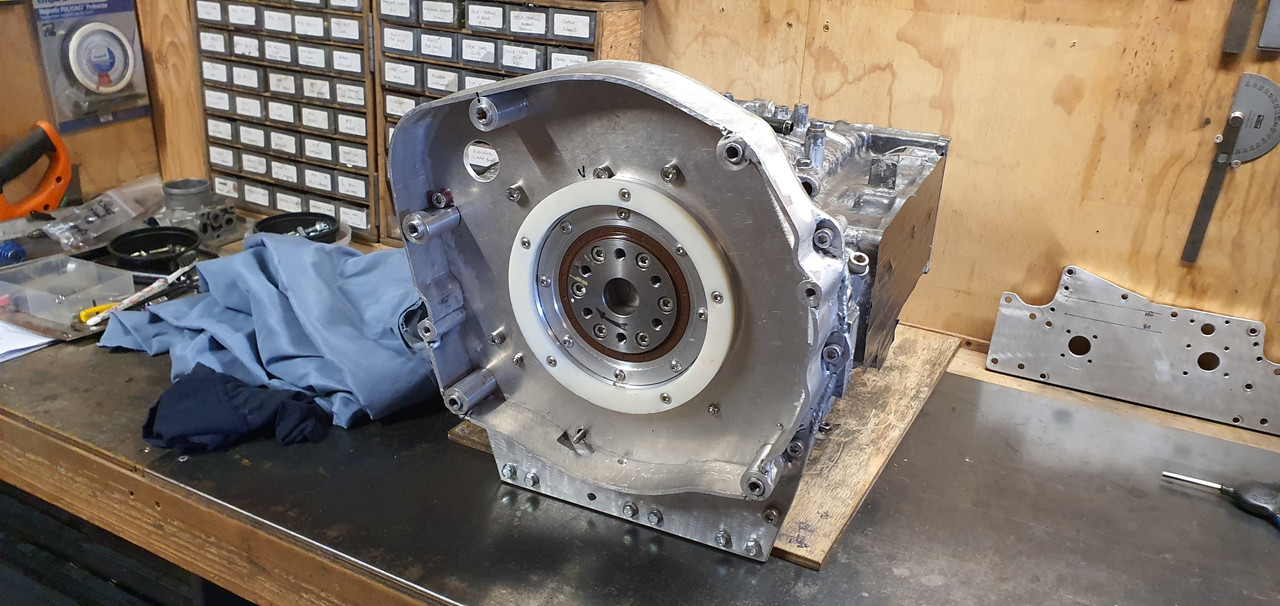
In a similar fashion to the 'oil door 3000' its purpose is to help stop oil wafting up the back of the bellhousing plate under heavy braking. Content with the sump baffling situation I could now start sealing and bolting the plates in place. I bolted the backup thrust bearing mount in place on the bell housing and then the bell housing was bolted up to the block..
The thrust bearing was bolted up..
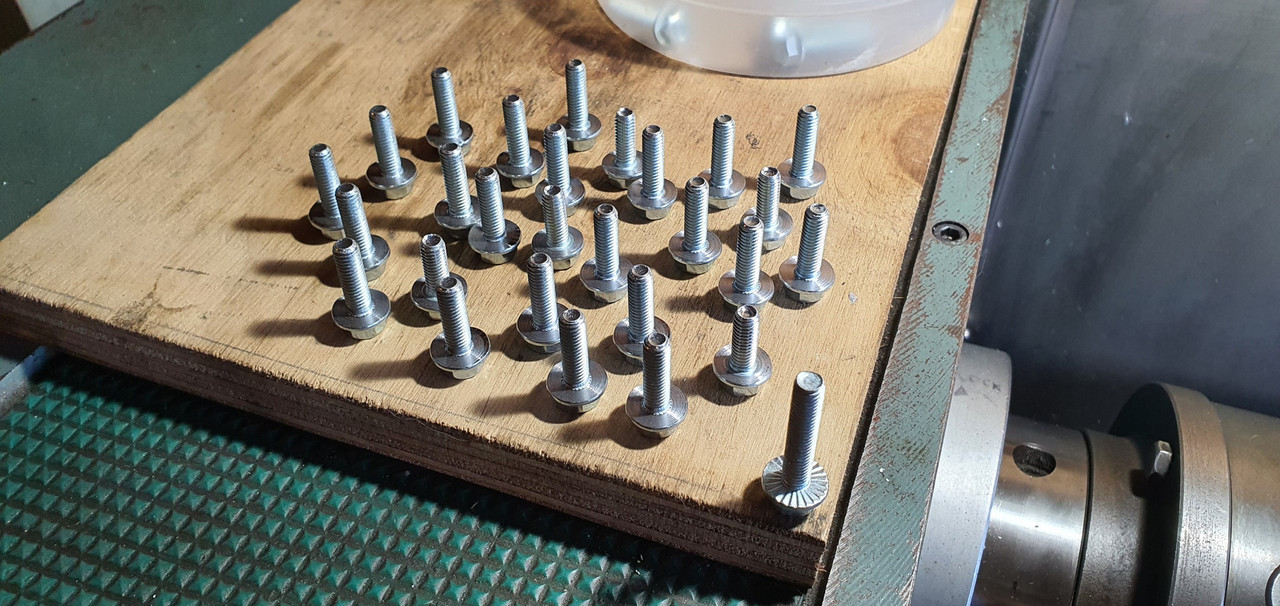
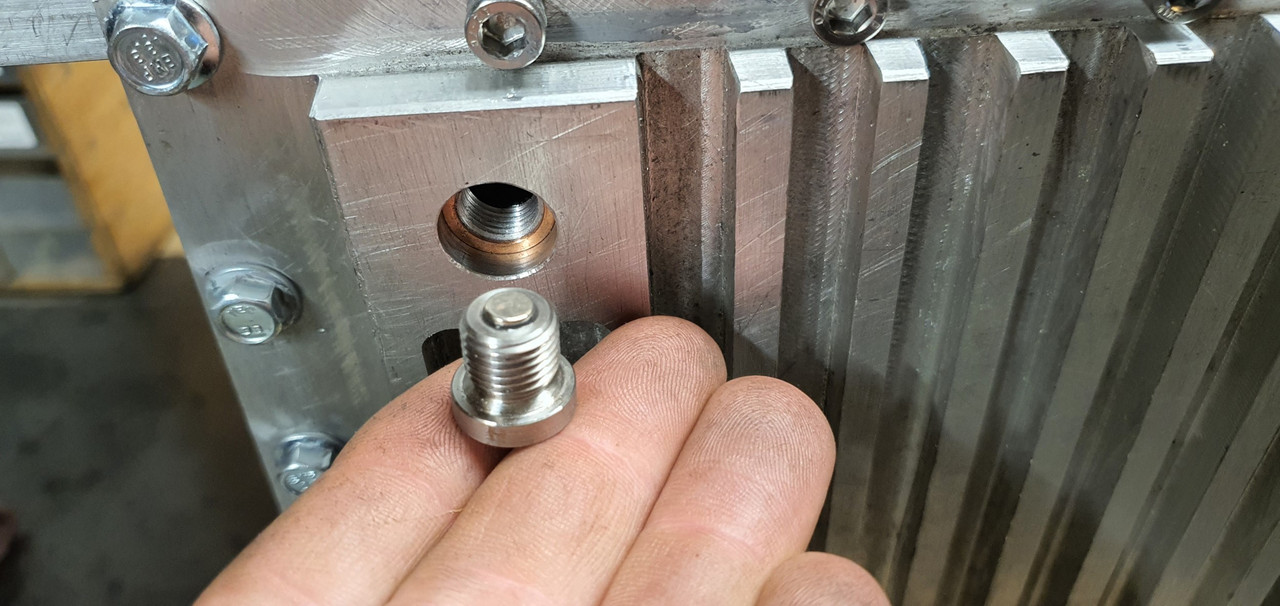
The engine mount plate was then bolted up. I had bought a load of flange bolts for this and the sump but they had serrations under the heads which I had to machine off first..
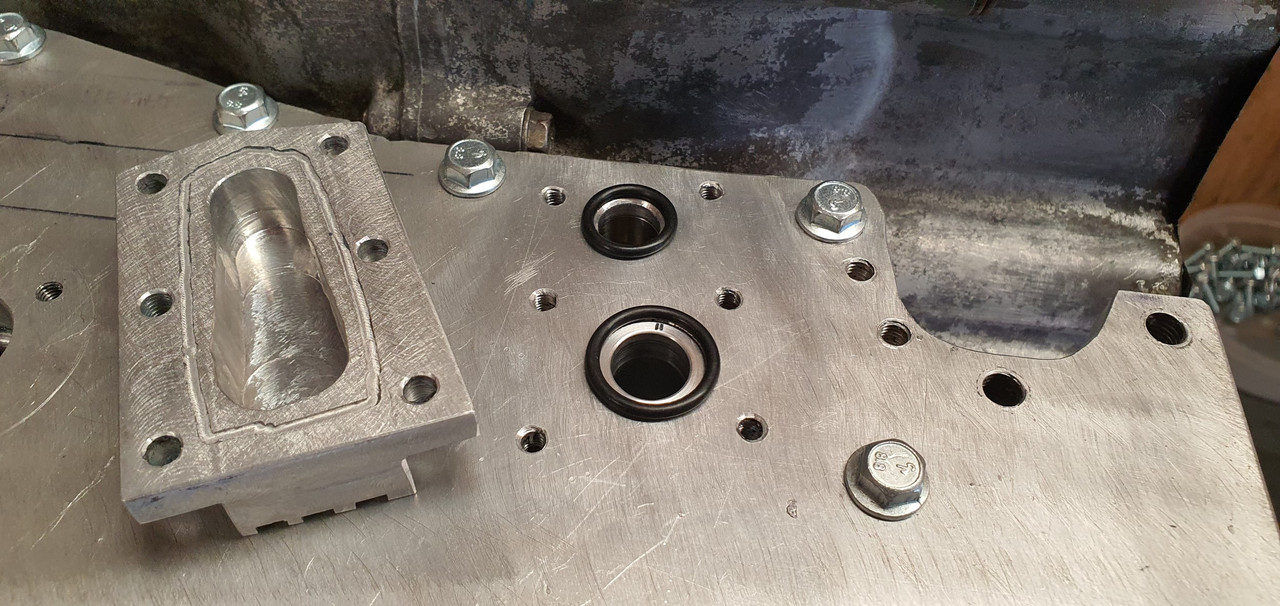
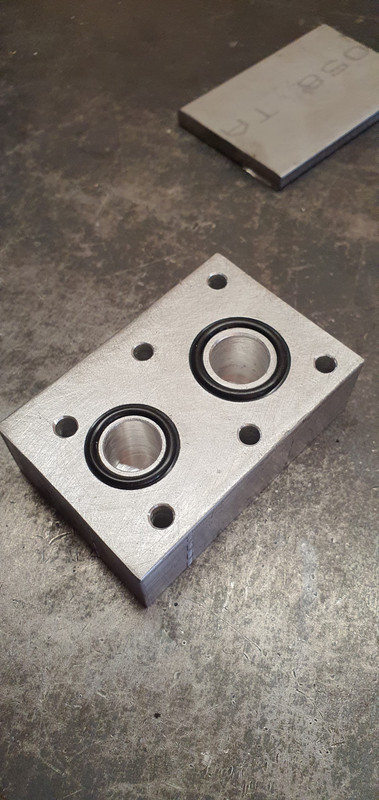
Plate bolted up well. Now to connect the last bit of pipework for the oil system. But I wasn't really happy with my transfer port block sealing arrangement. This thing here...
I had designed it to seal with sealant, held in place with a sealant groove.
But picturing the sealant being squished inwards towards the holes started the paranoid cogs in my brain turning. Yes it forms a nice neat bead and its pretty strong stuff but the thought of possibly having a tiny bit get dislodged in time and finding its way into the oil way to potentially block the crank feed did not impress me. So I decided on a change of design using O rings...
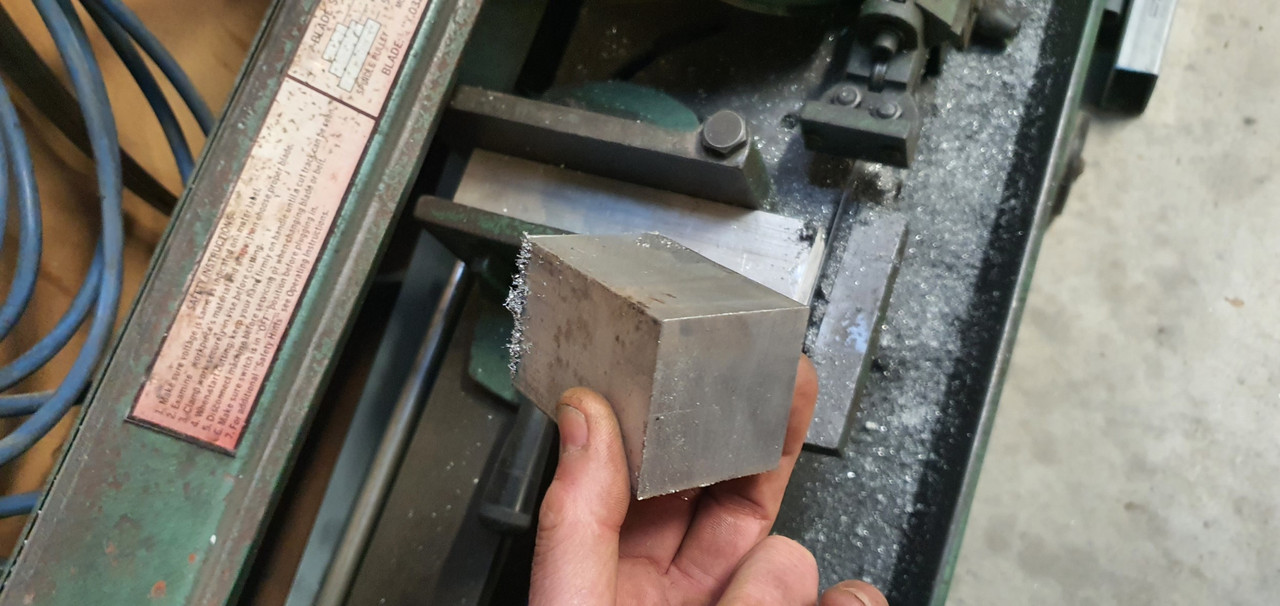
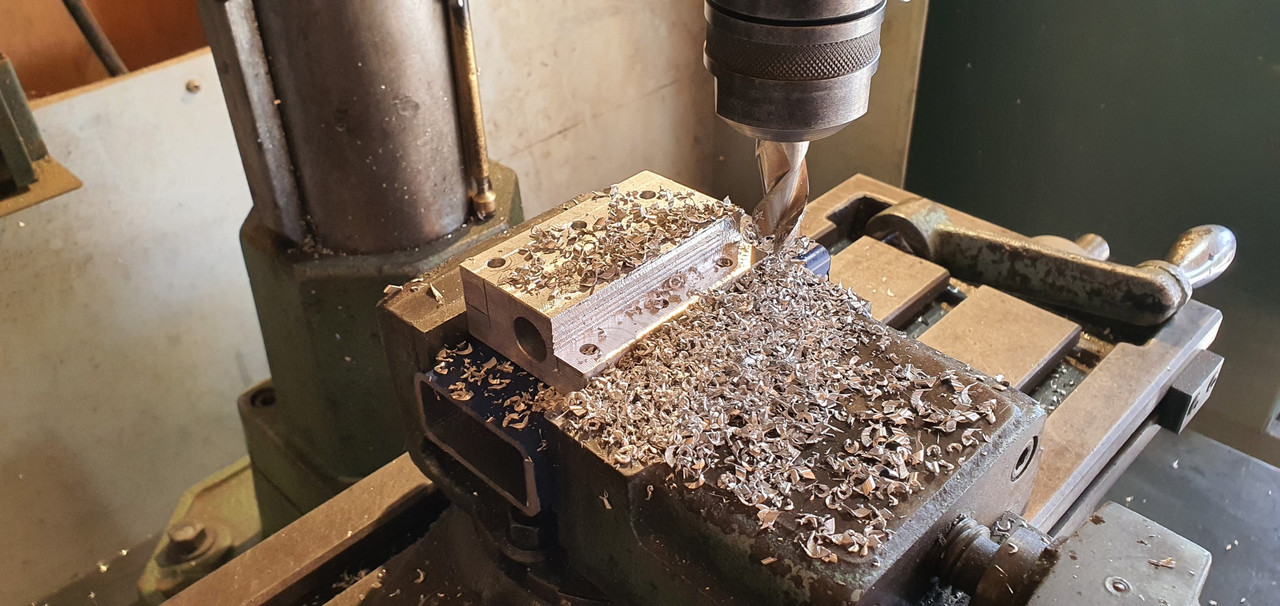
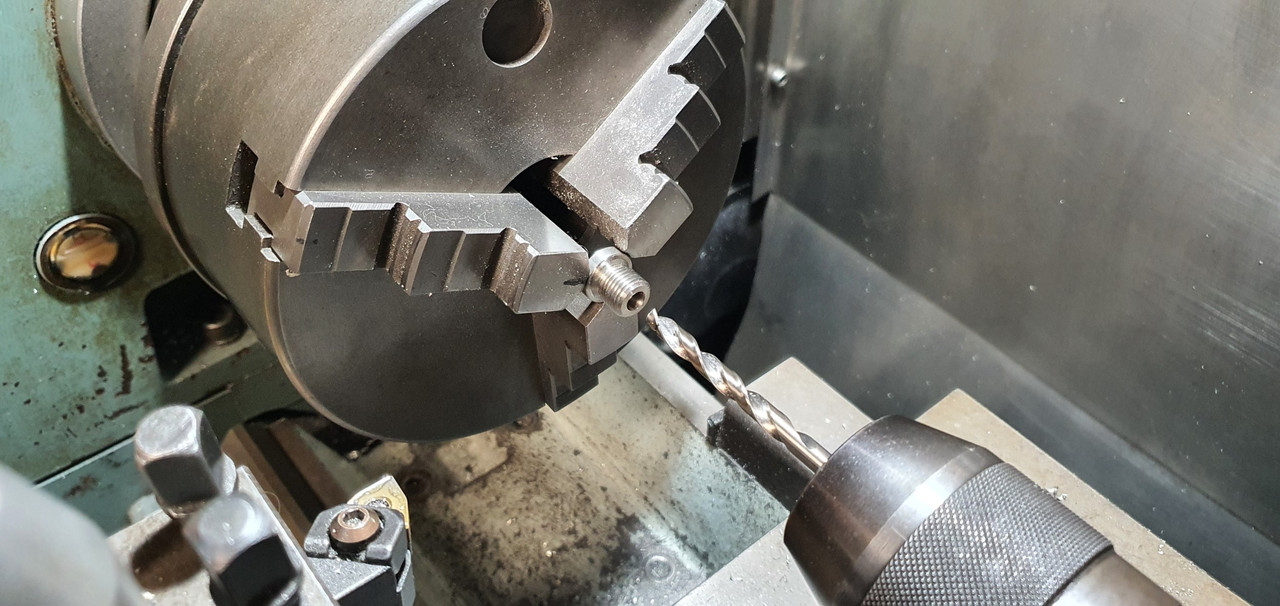
I cut a big lump of alloy off some stock...
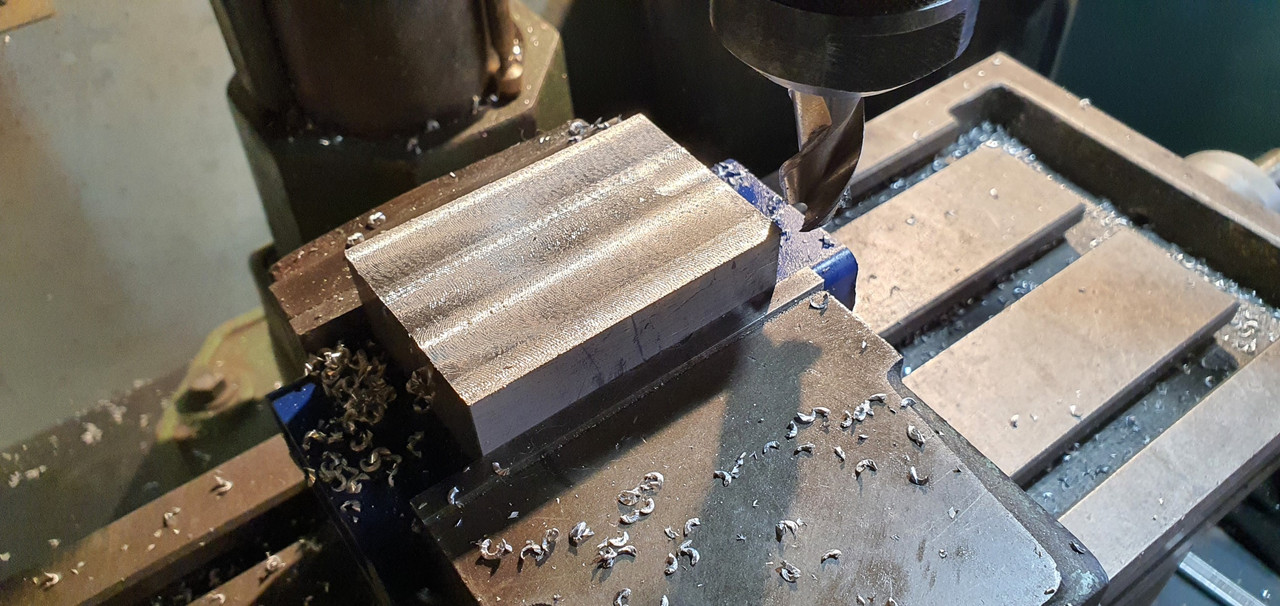
Cut that down and machined it..
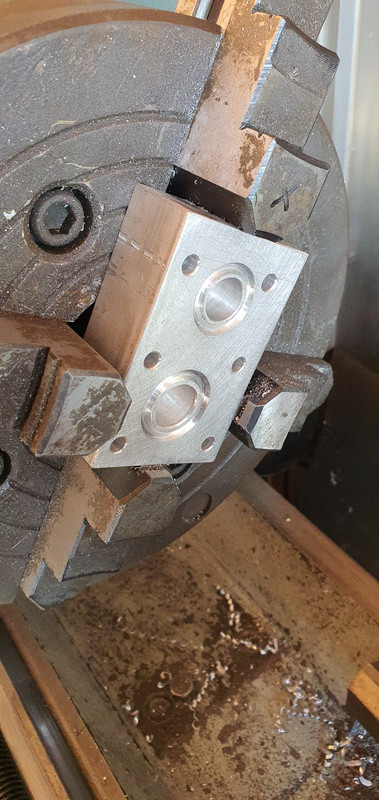
Did some very careful measuring, marking and setting it up in the four jaw chuck so I could machine some oil ways and O ring grooves..
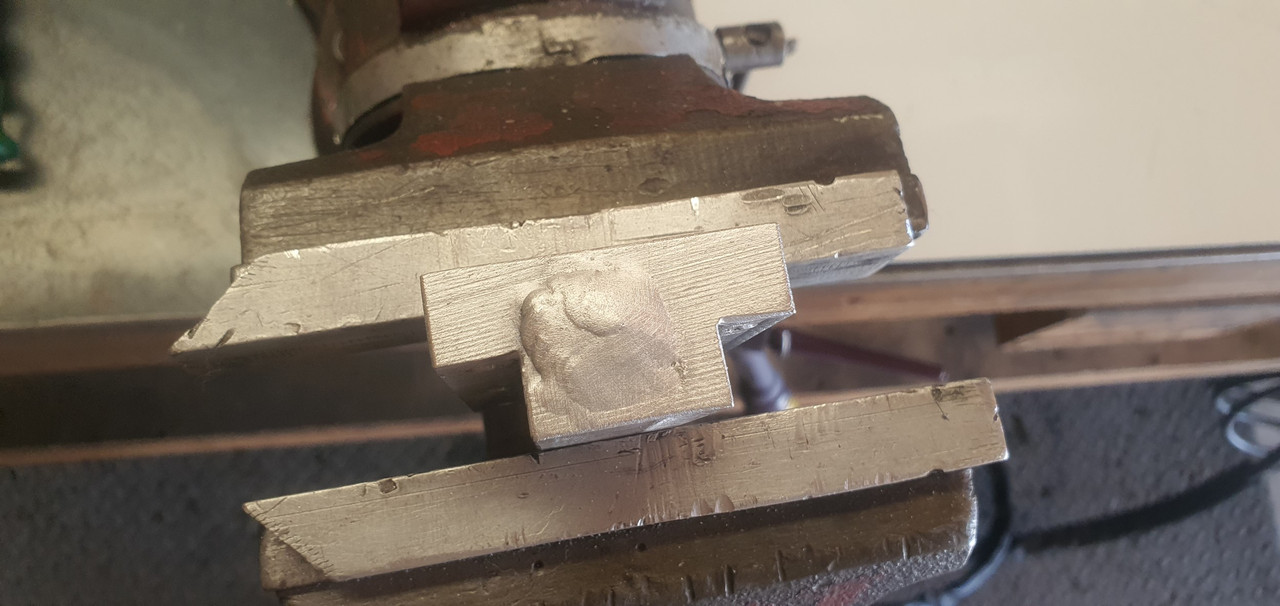
Sealed the end of the transfer port with a plug and welded it in..
Bolted it up and I'm now able to sleep again.
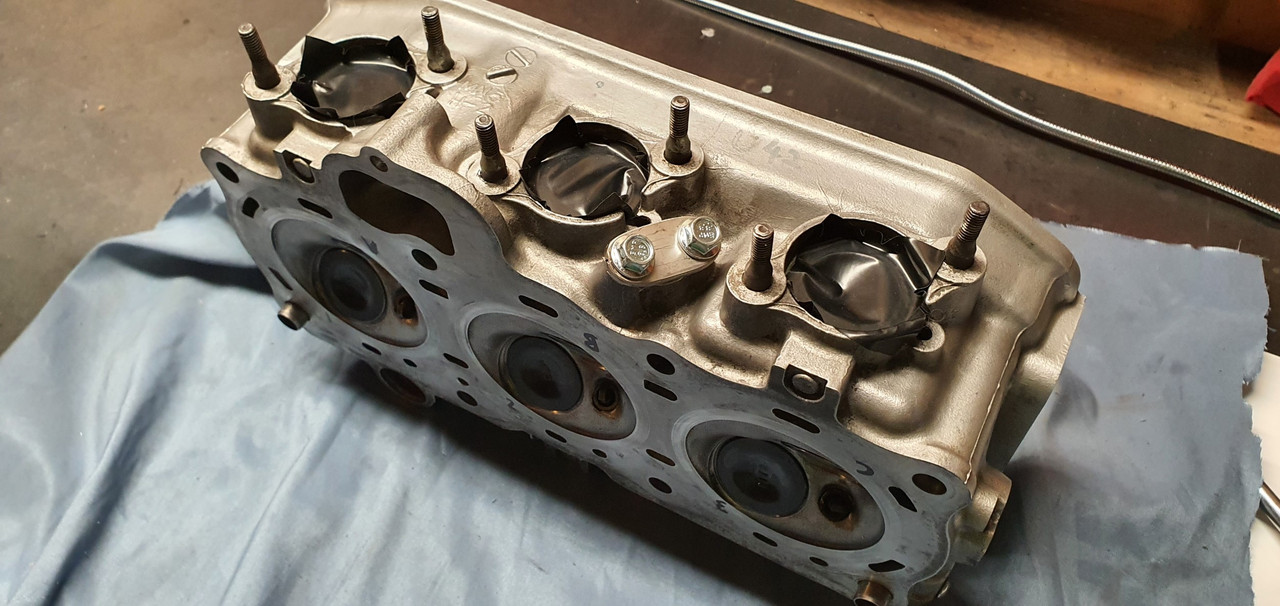
More holes to seal. There were two remaining air injection ports to seal up, one on each head and getting rid of these ugly lumps of metal. I cut and drilled some stainless plate to suit...
Much better.
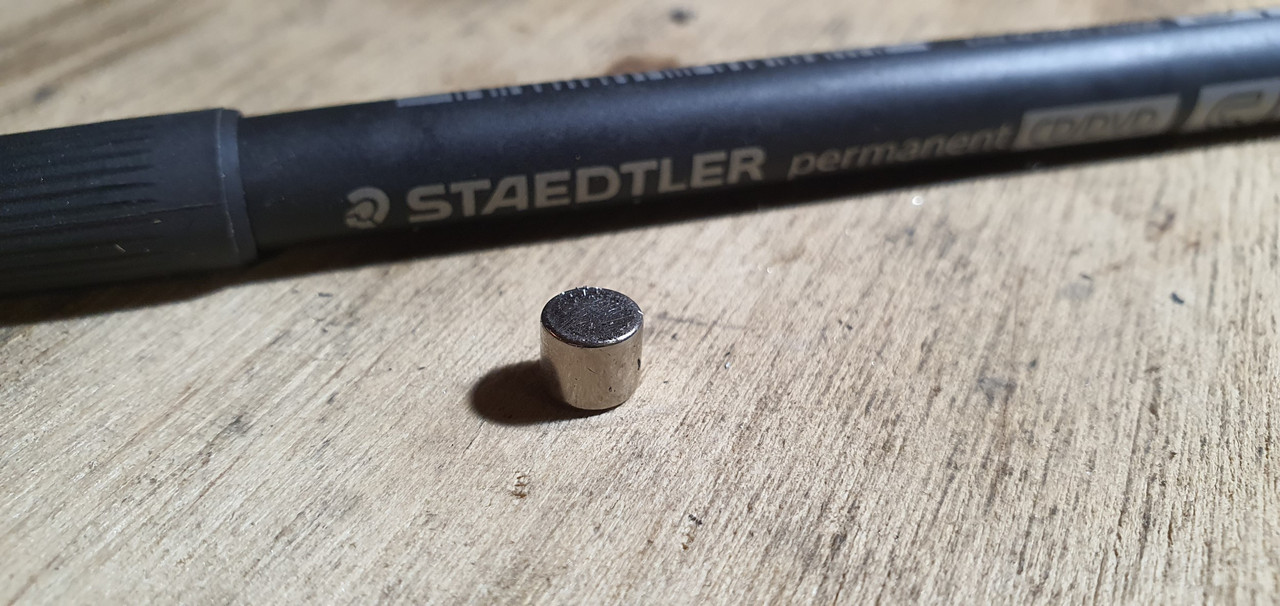
Another little job ticked off was the sump plug magnet. I drilled into the stainless plug just deep enough to fit a very powerful tiny magnet I'd found on a keyfob thing..
Epoxied in place..
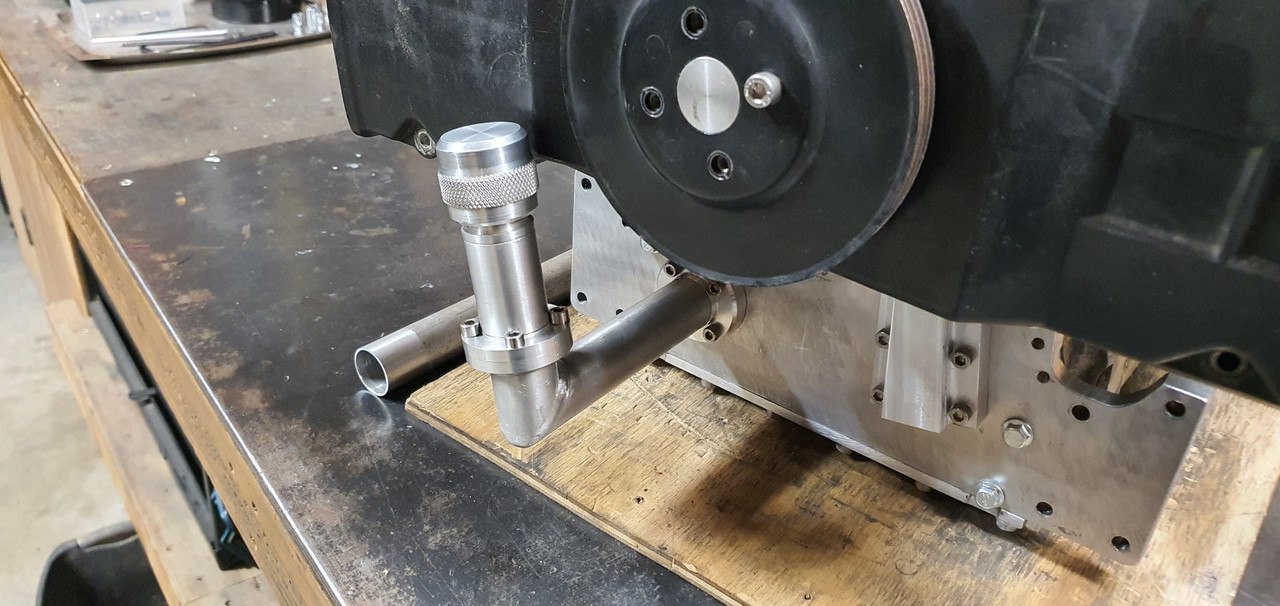
Continuing on with all things oil I shortened the oil filler neck to a height I was happy with.
I'm now trying to decide on how best to possibly add a little sight window into the tube. The flange I had made to allow the filler neck to be removed so the cambelt cover can be removed easier is possibly not needed any more with the neck being so short. The planned oil level is also at or just above the flange join thereabouts. I'm going to have a think about this aspect a little more before I commit to final epoxying of the bits together. Luckily its all easily unbolted so I can be changed anytime in the future anyway.
-
51
-
1
-
- Popular Post
- Popular Post
Nelson Arbath. Owner can be seen sitting in sun, having a beer and admiring his little car
")
-
17
-
A message I just got from hannahs brother in London village..
"I cycled past a k11 si yesterday, didn’t have phone on me so no pic sadly but I’ll describe it’s incredible beauty… dark slightly shiny/pearlescent green, 3 door, blacked out rear windows and boot, spoiler on roof at back, little spotlights either side at the front but low down, below the other lights. Very lovely! being driven extremely slowly by an old chap who looked about 90. Probably owned it from new. Dream car!"
-
3
-
3
-
-
Crap pics I know but as slow as an XJS is I couldn't quite catch it in our mighty 50 series hiace..
-
7
-
1
-
-
^ facelift, lifted and on its face.
-
1
-
-
This van is looking so sweet!
I think you need to raise the back up, not lower the front..
")
-
2 hours ago, dmulally said:
Question: why was I even born
It was all going so simply when you just had the one imp with a plan in mind.
I'm happy to relieve you of the burden and take the van off your hands. I'm nice like that.
-
1
-
-
-
Thanks so much man. I'm hoping it all works out ok for your amusement and my sanity.
-
2
-
1
-


.jpg.6dfb2ede42654da7eef39b5ee3acf04f.jpg)


dmulally's pimpin' Imp
in Project Discussion
Posted
Oooooooh. Where did you get that spoiler from?