solidstripe
-
Posts
949 -
Joined
-
Last visited
Everything posted by solidstripe
-
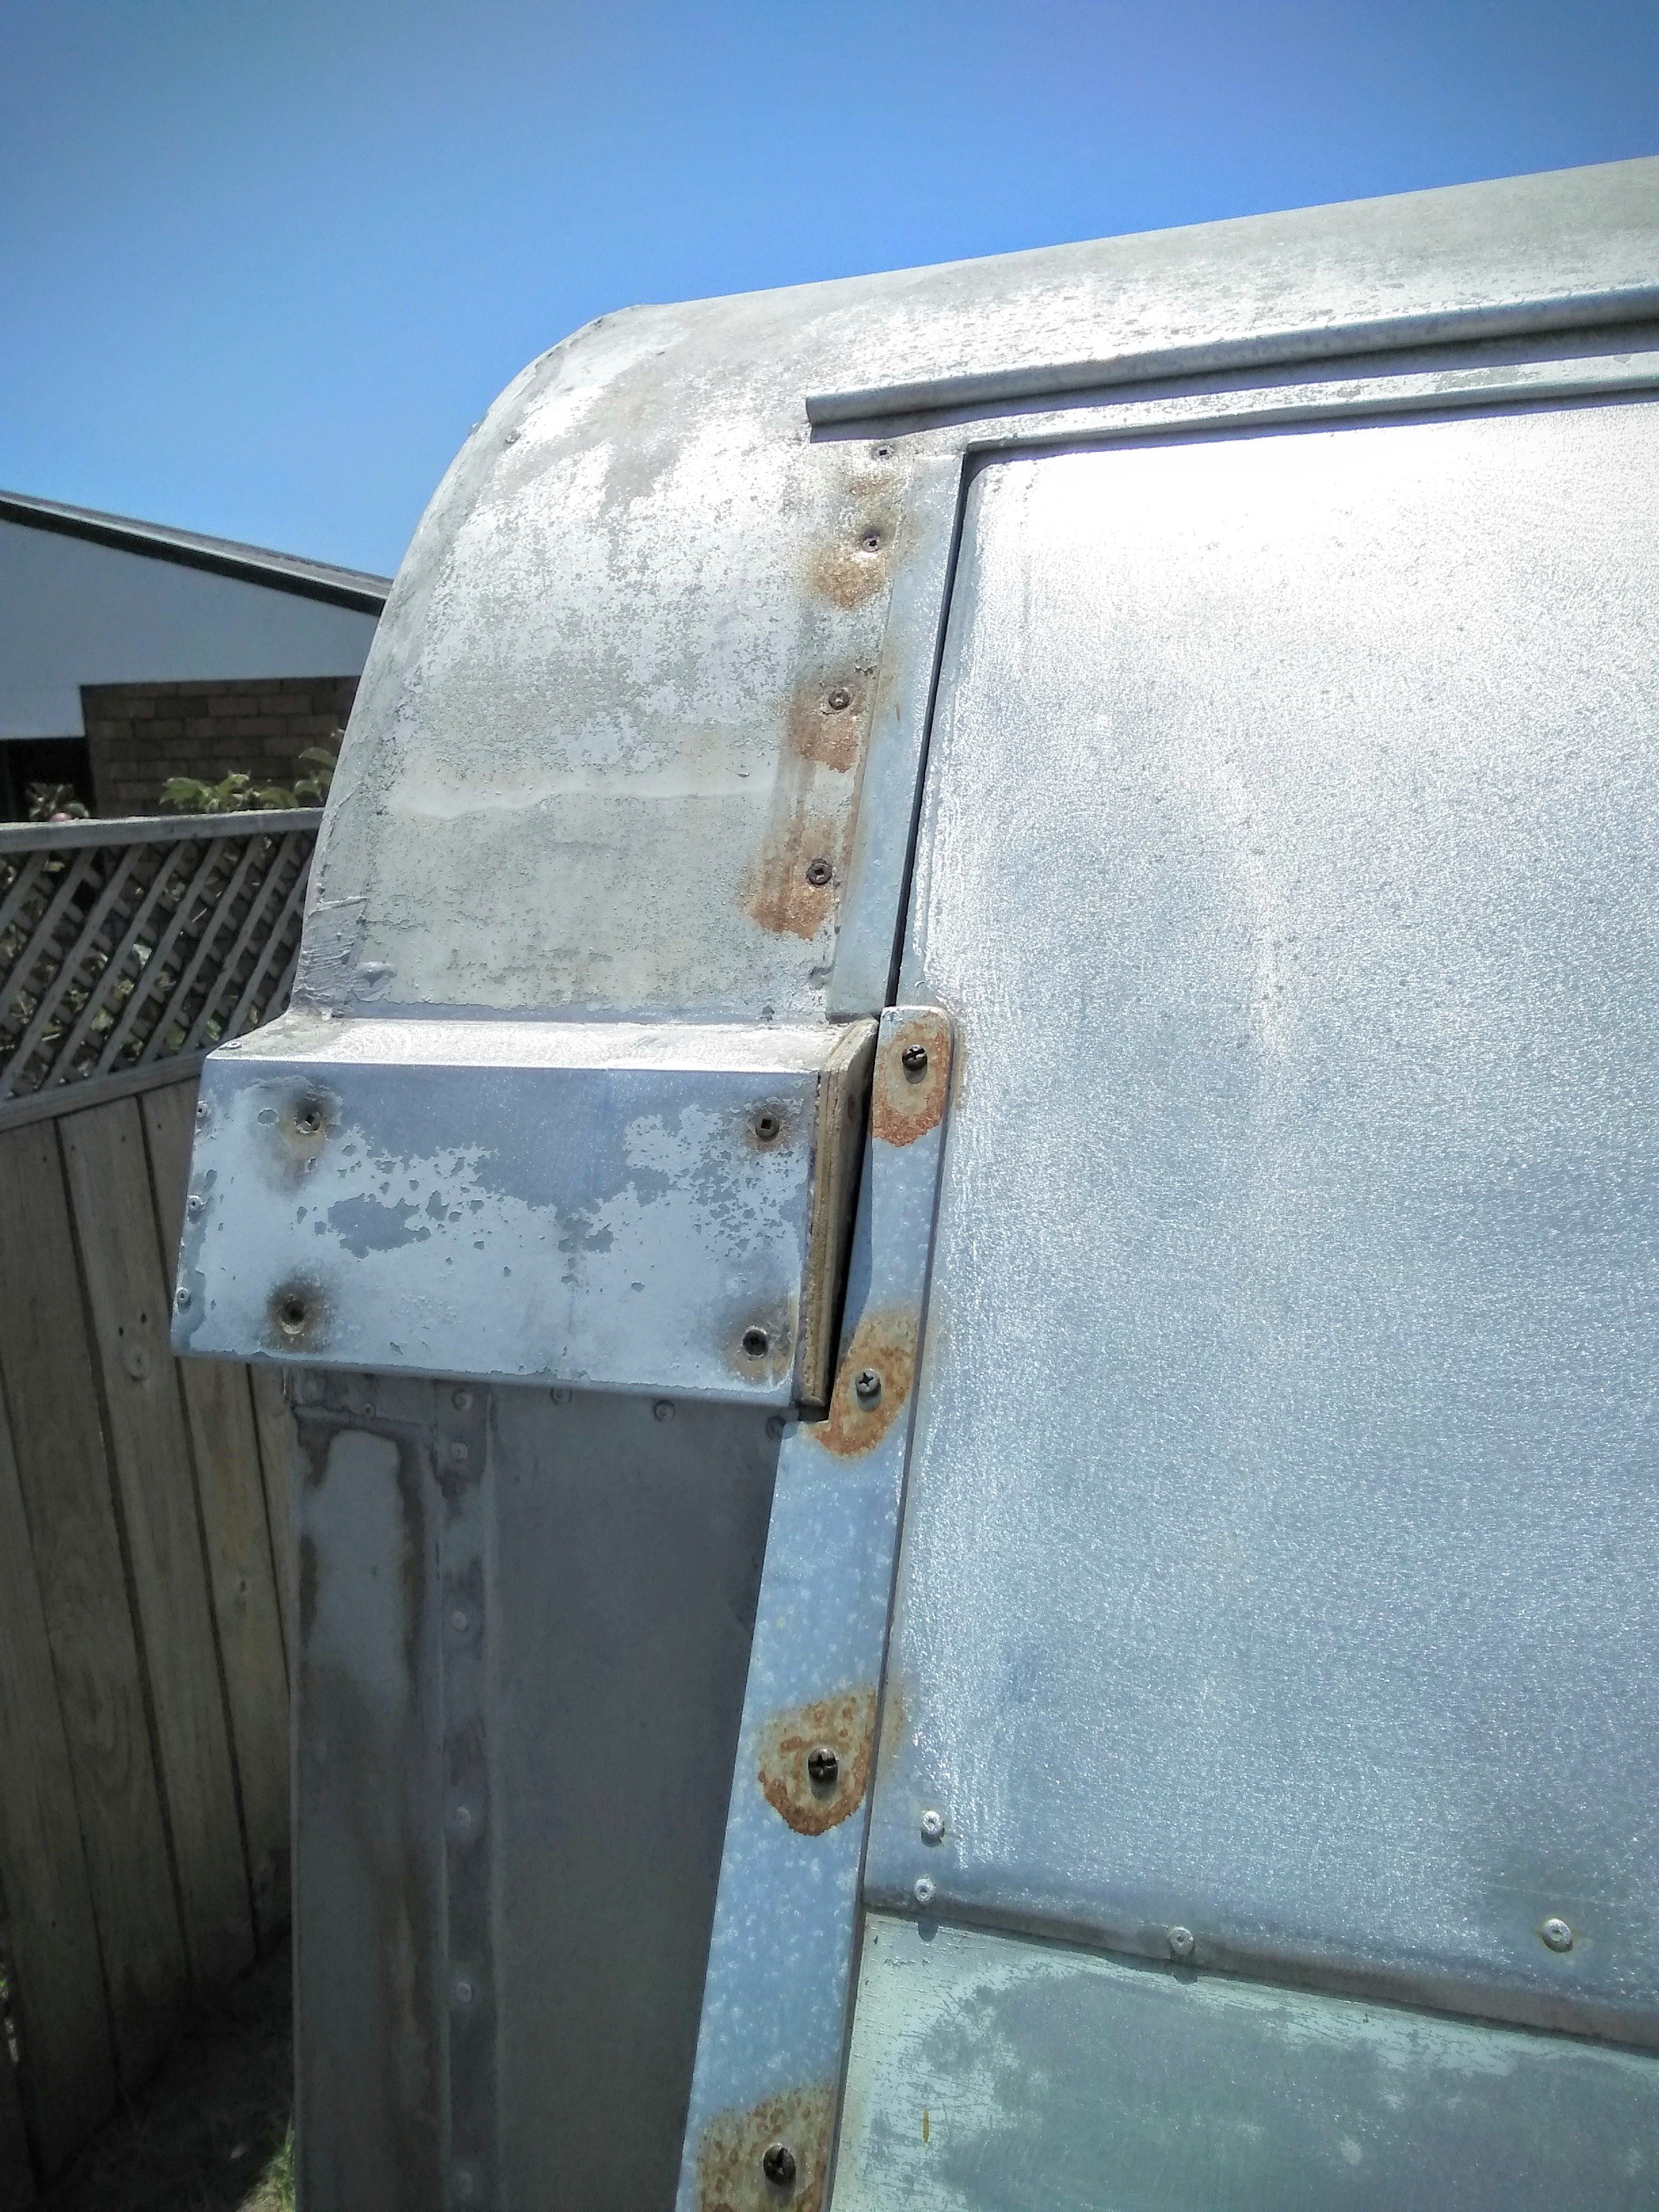
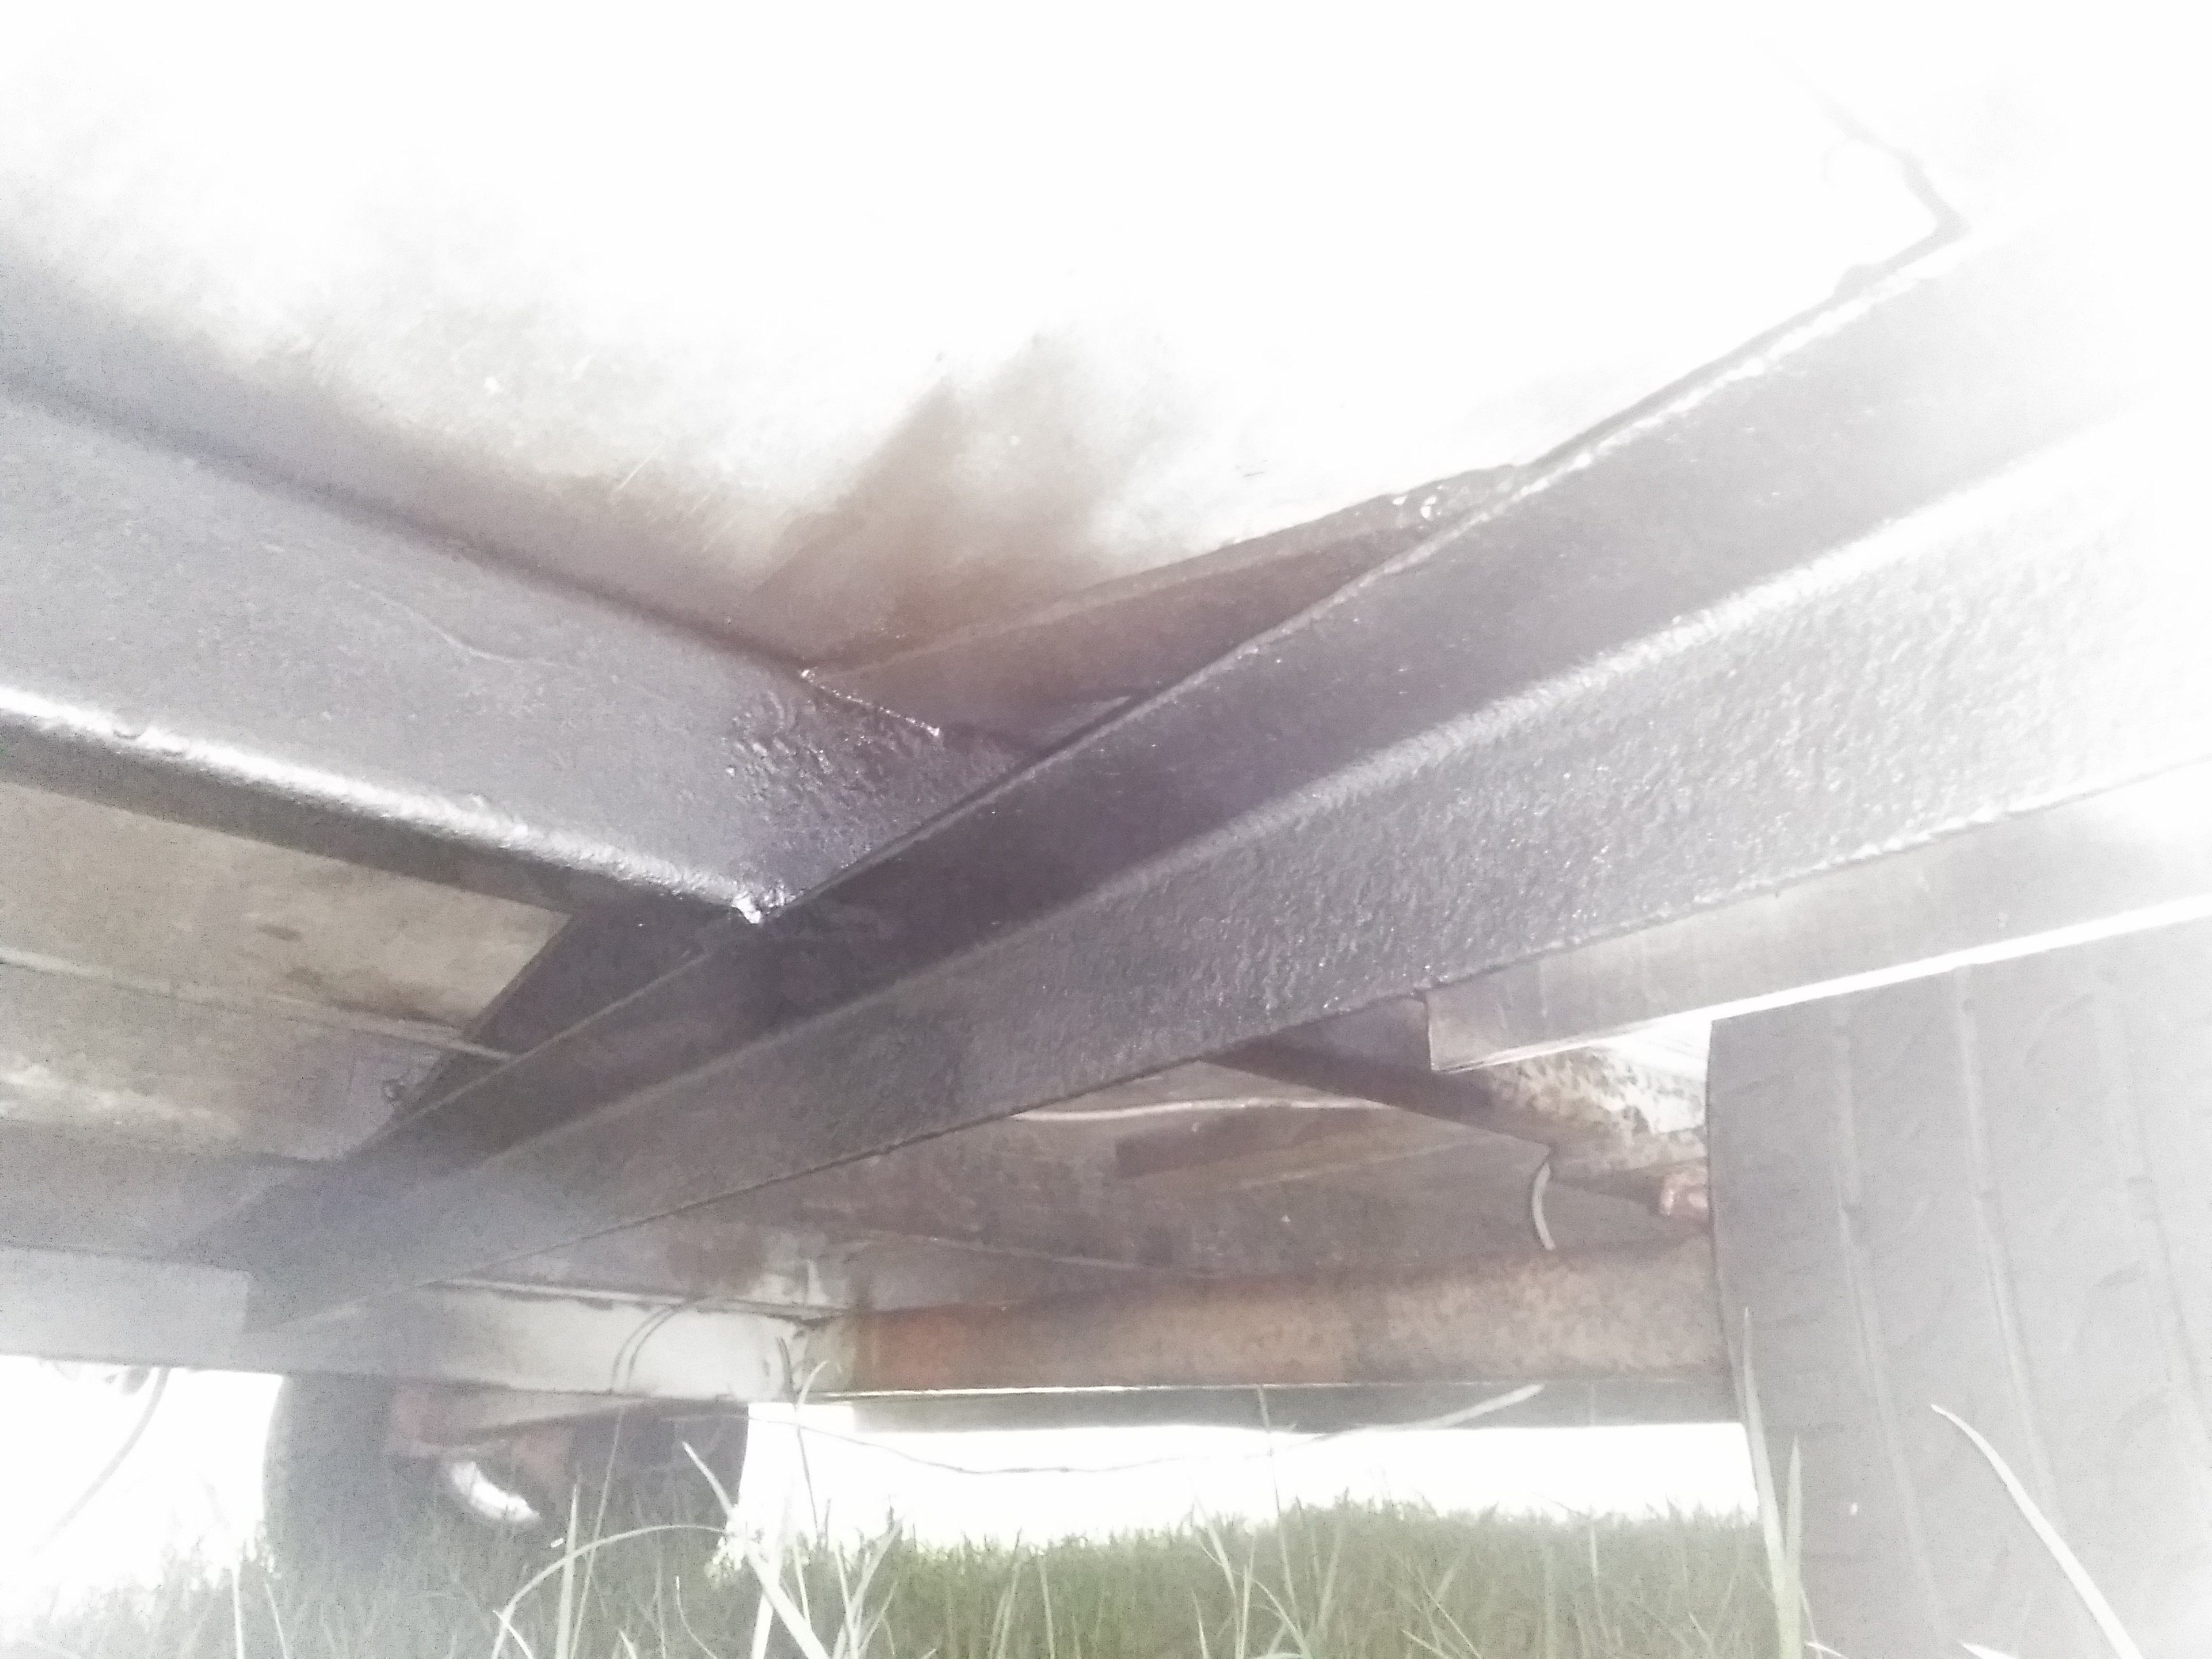
Cheers ears! While the old boy had done a great job of the rear end conversion, this junction detail here had me concerned about moisture ingress. It has an "internal gutter" for want of a better word underneath but I wanted that to be the last line of defence, not the first:

-
Swage lines! That sounds so much better than "logs" hahaha... Where about's did you work Chris? It was a bit of a mish trying to find cladding or even a wreck to take some off so ended up just making it ourselves. Measured once but it didn't feel right and realized I had to offset the measurements a bit to allow for the shrinkage from folding. Thankfully came out pretty good for a first try. All sorts of toys! Hopefully by the time it's done it will have space to fit at least 3 - 4 motorbikes, or a kei car (anything up to 3m long or so depending on the bumper set up) and/or a dingy and still sleep our family of 4 and be self-contained. AND still work as a functioning office too! Bring on the working holidays... haha
-
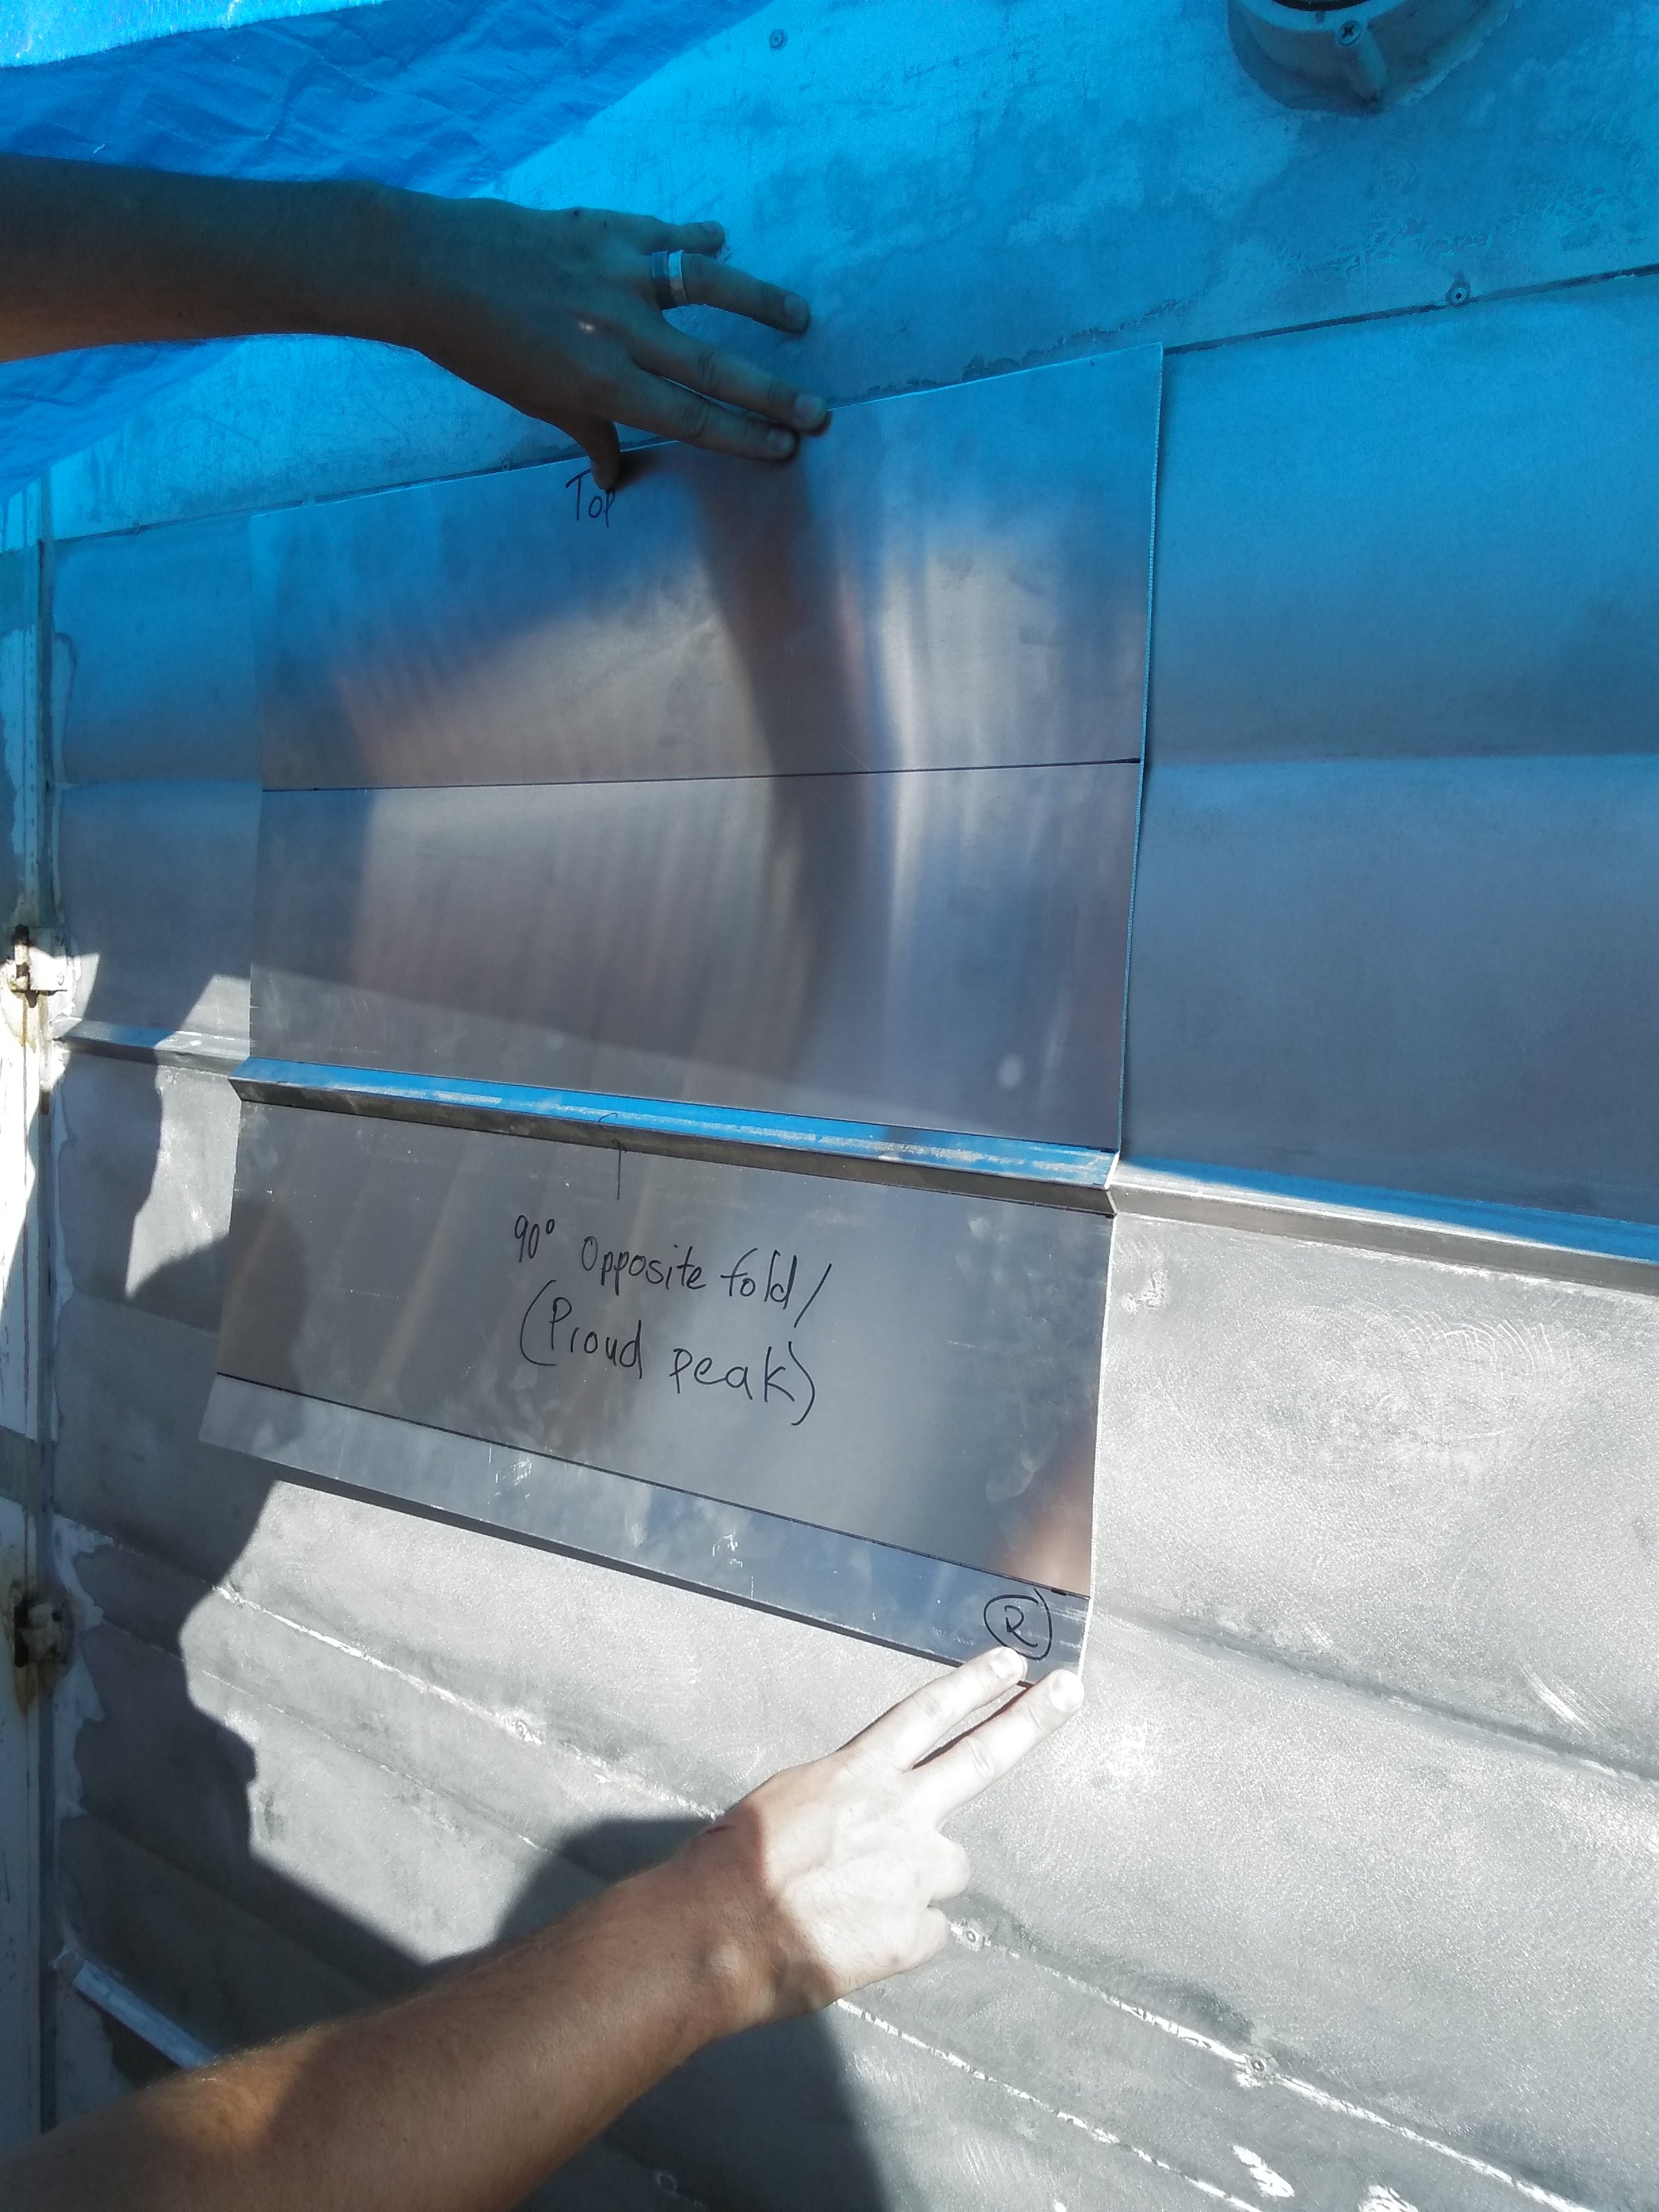
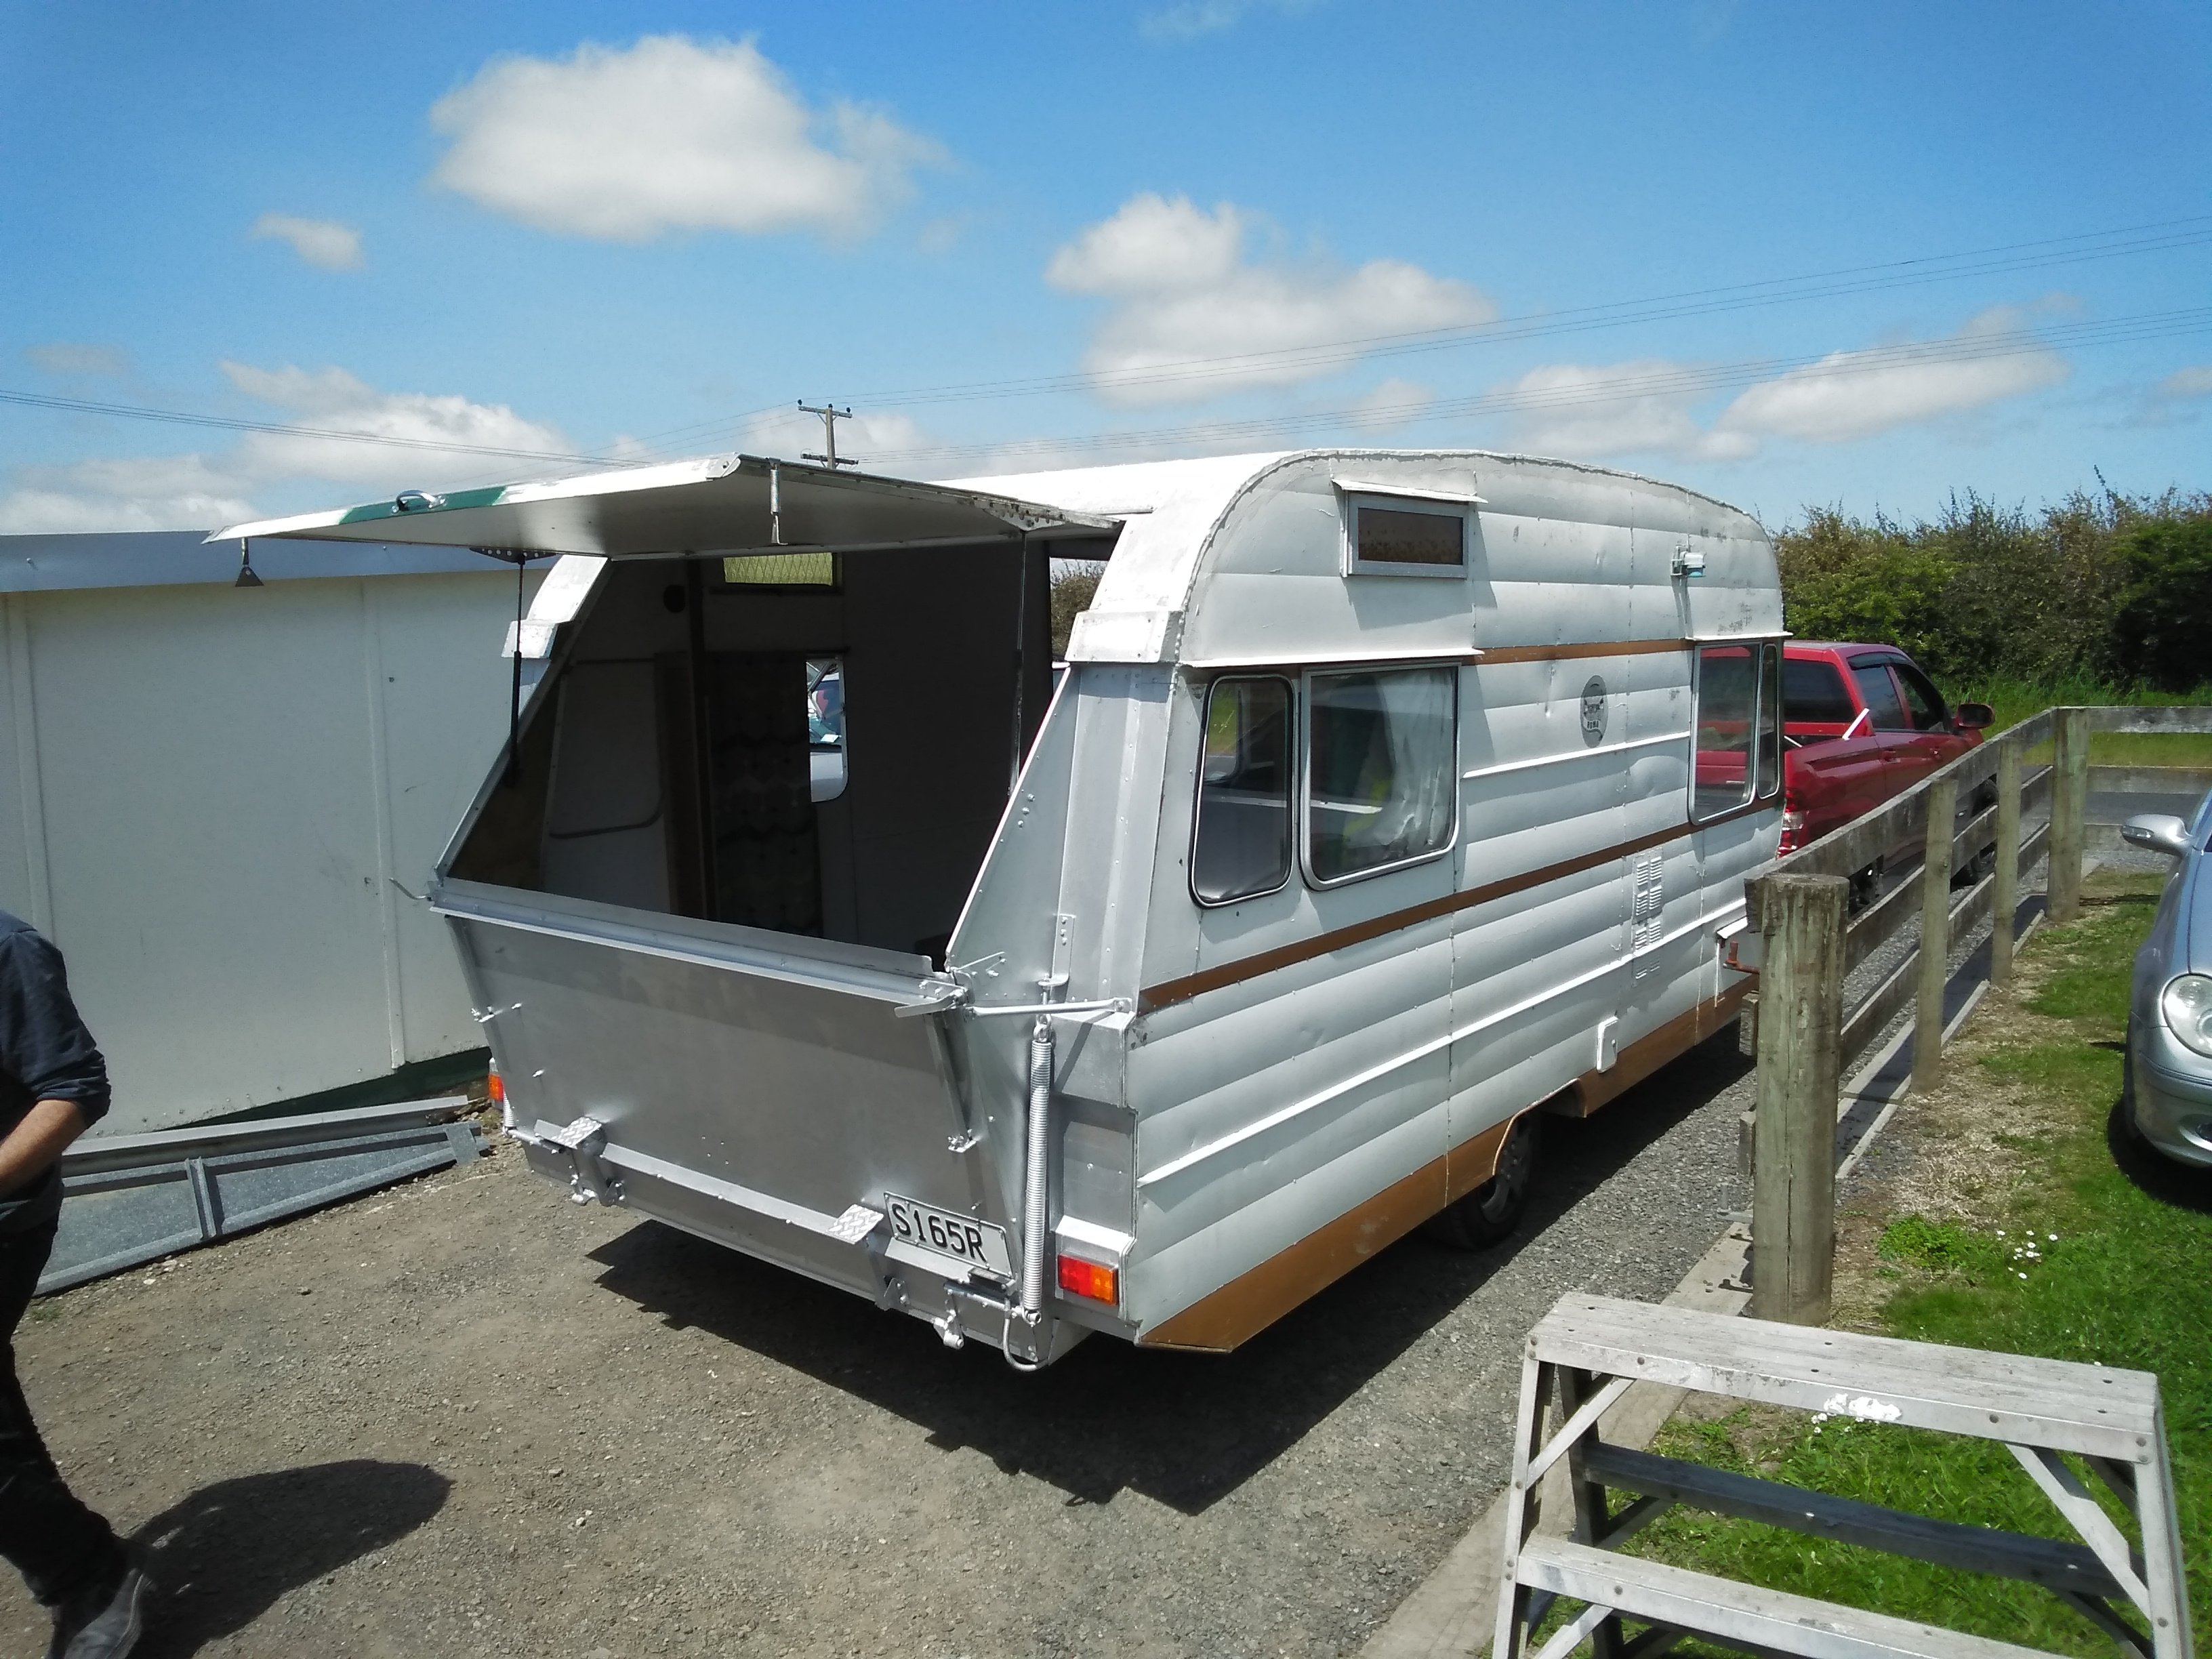
If anyone else needs this type of cladding, back fold about 10 degrees for the "log" type joints and then fold 90 degree for the angled body lines. They should be kind of curled up on themselves, but then once laid flat and rivited on, the "logs" will buldge out giving that typical caravan cladding look. Also, don't go bigger than 1mm in thickness with the ali as it gets hard to bend, is more expensive and unnecessary. The stuff that's on there is probably around 0.5mm? You can see the new stuff as it's shiny in the photo below. Seal the joints with MS marine sealant (not the black stuff as it gets everywhere!!). Oh, and hammer the ends of the angled body lines down once in place so its all flush and matches what's there.
- 33 replies
-
- 10
-

-
Next up, measure up some ali sheet and the bro-in-law folded it up at his work - boom, new cladding to replace the deleted windows.
-
First things first, full steel brush down of the chassis, rust treat and chassis paint:
-
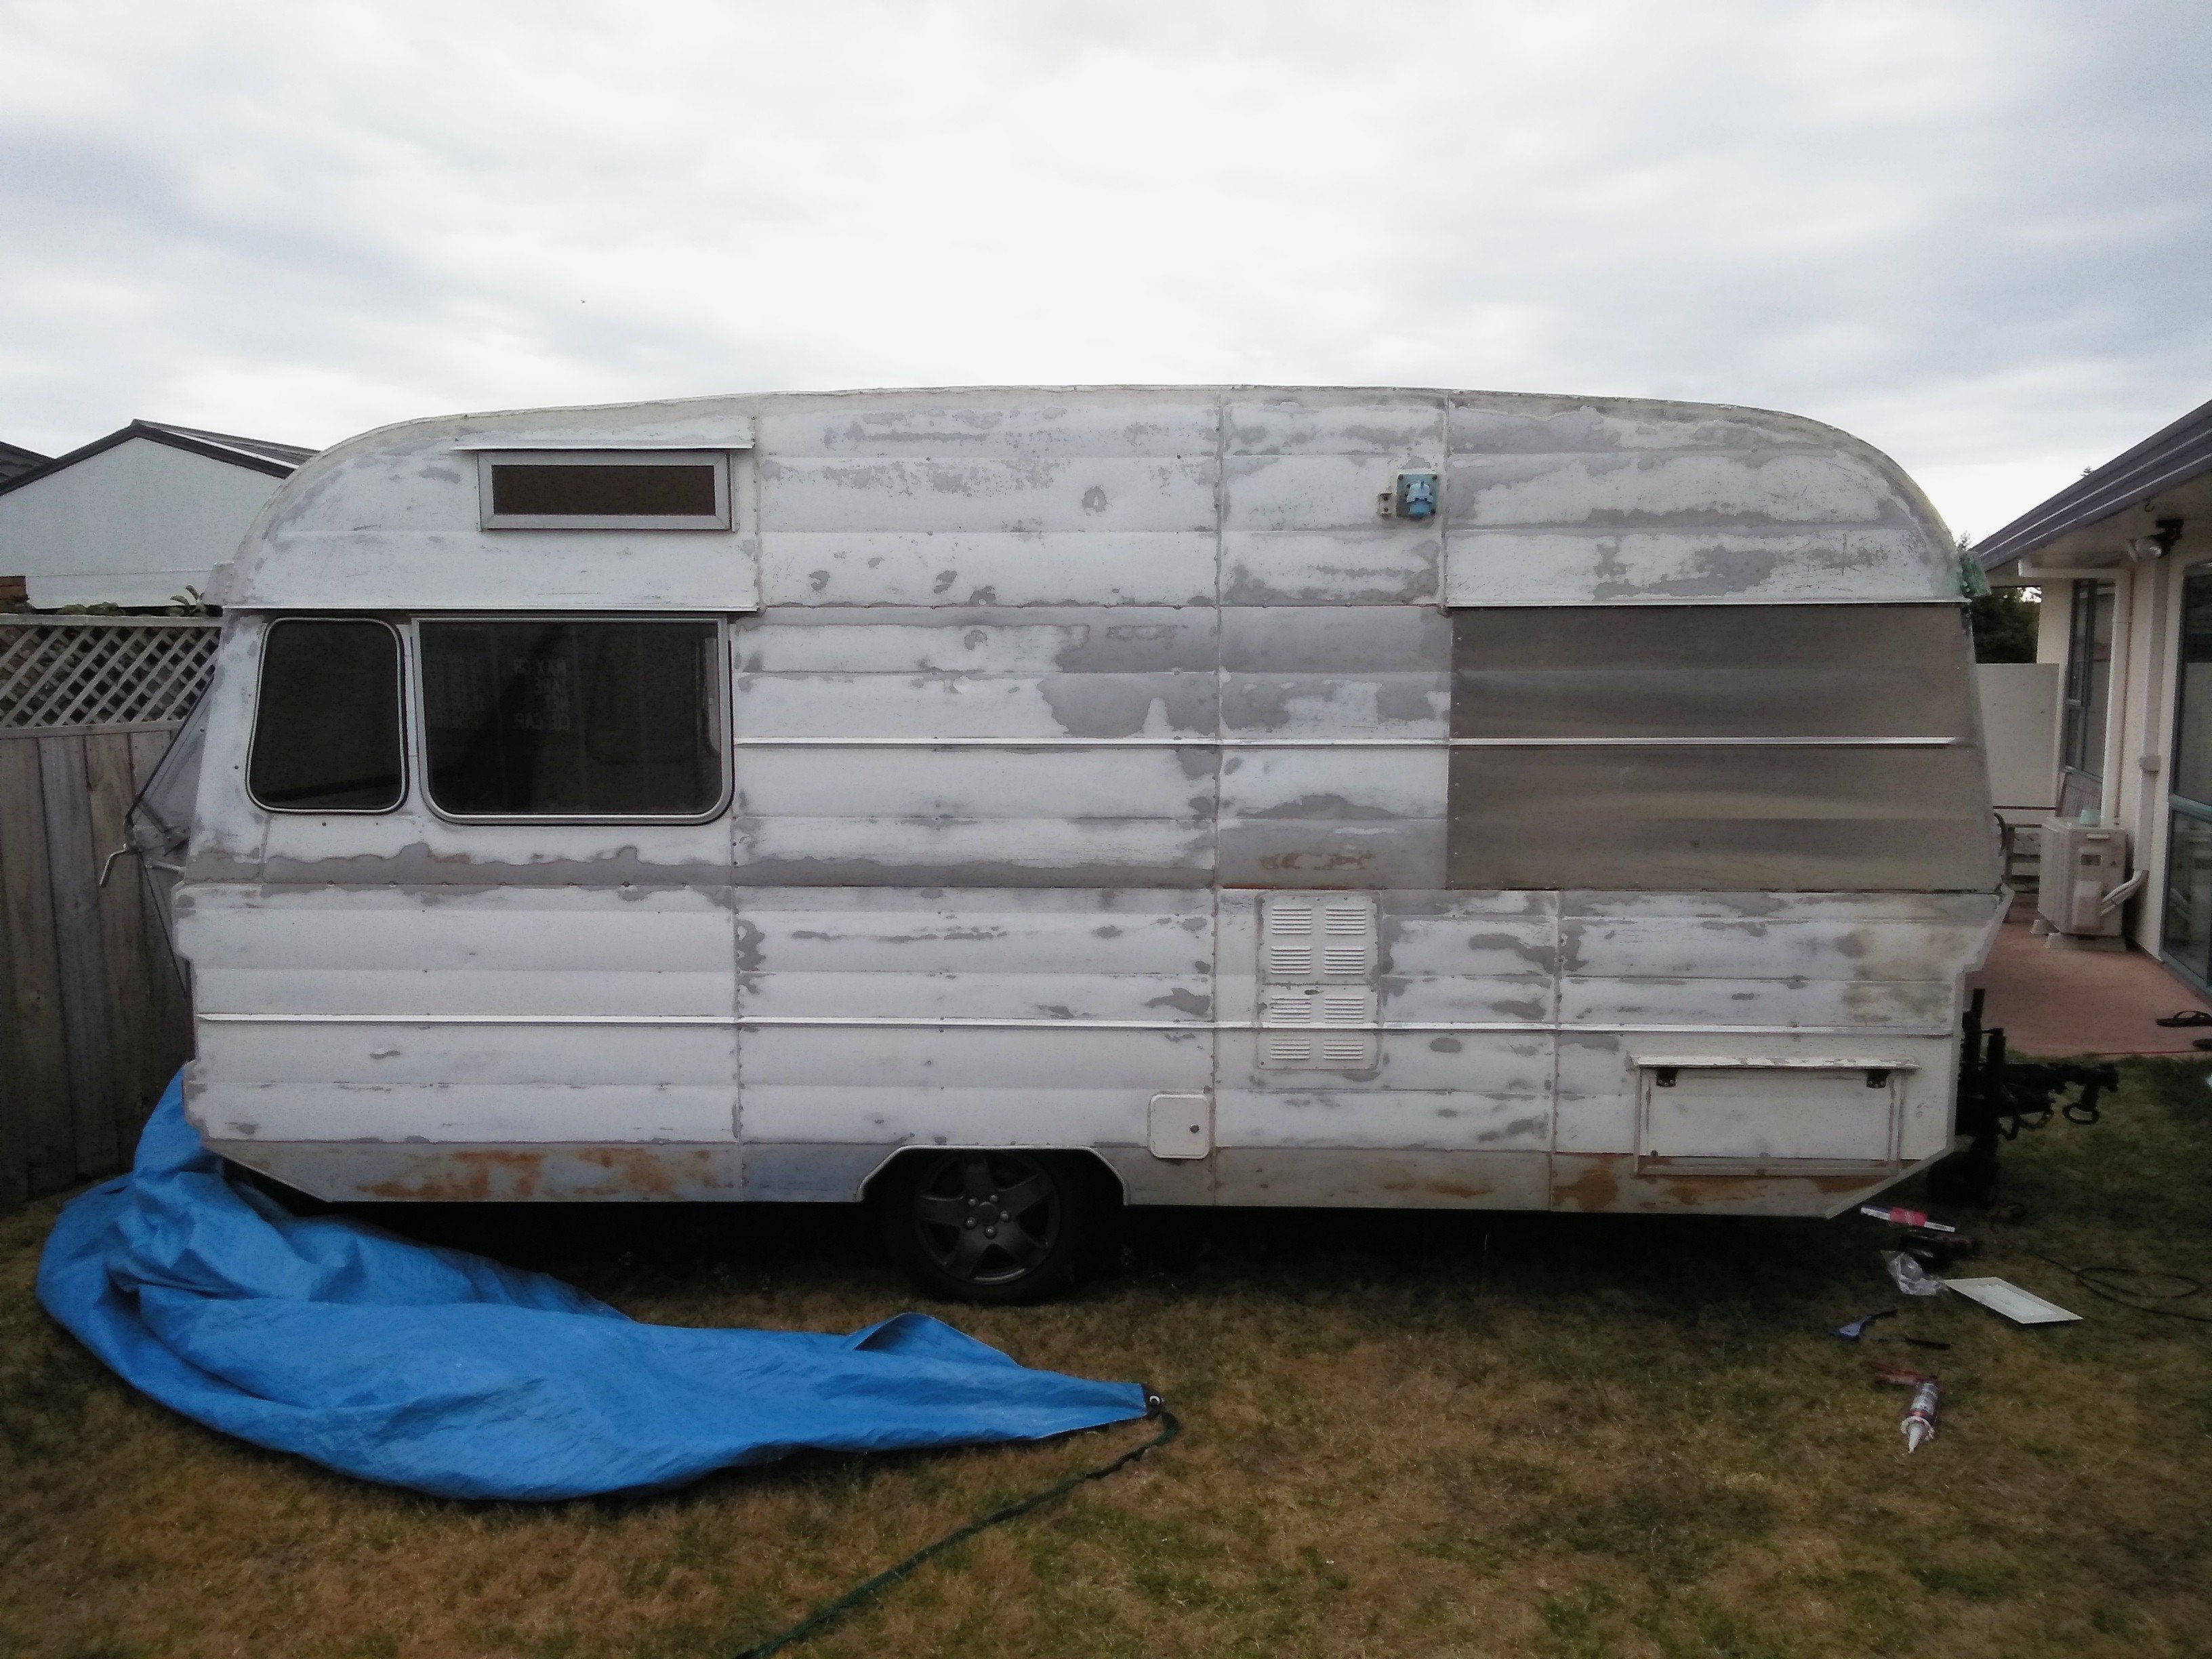
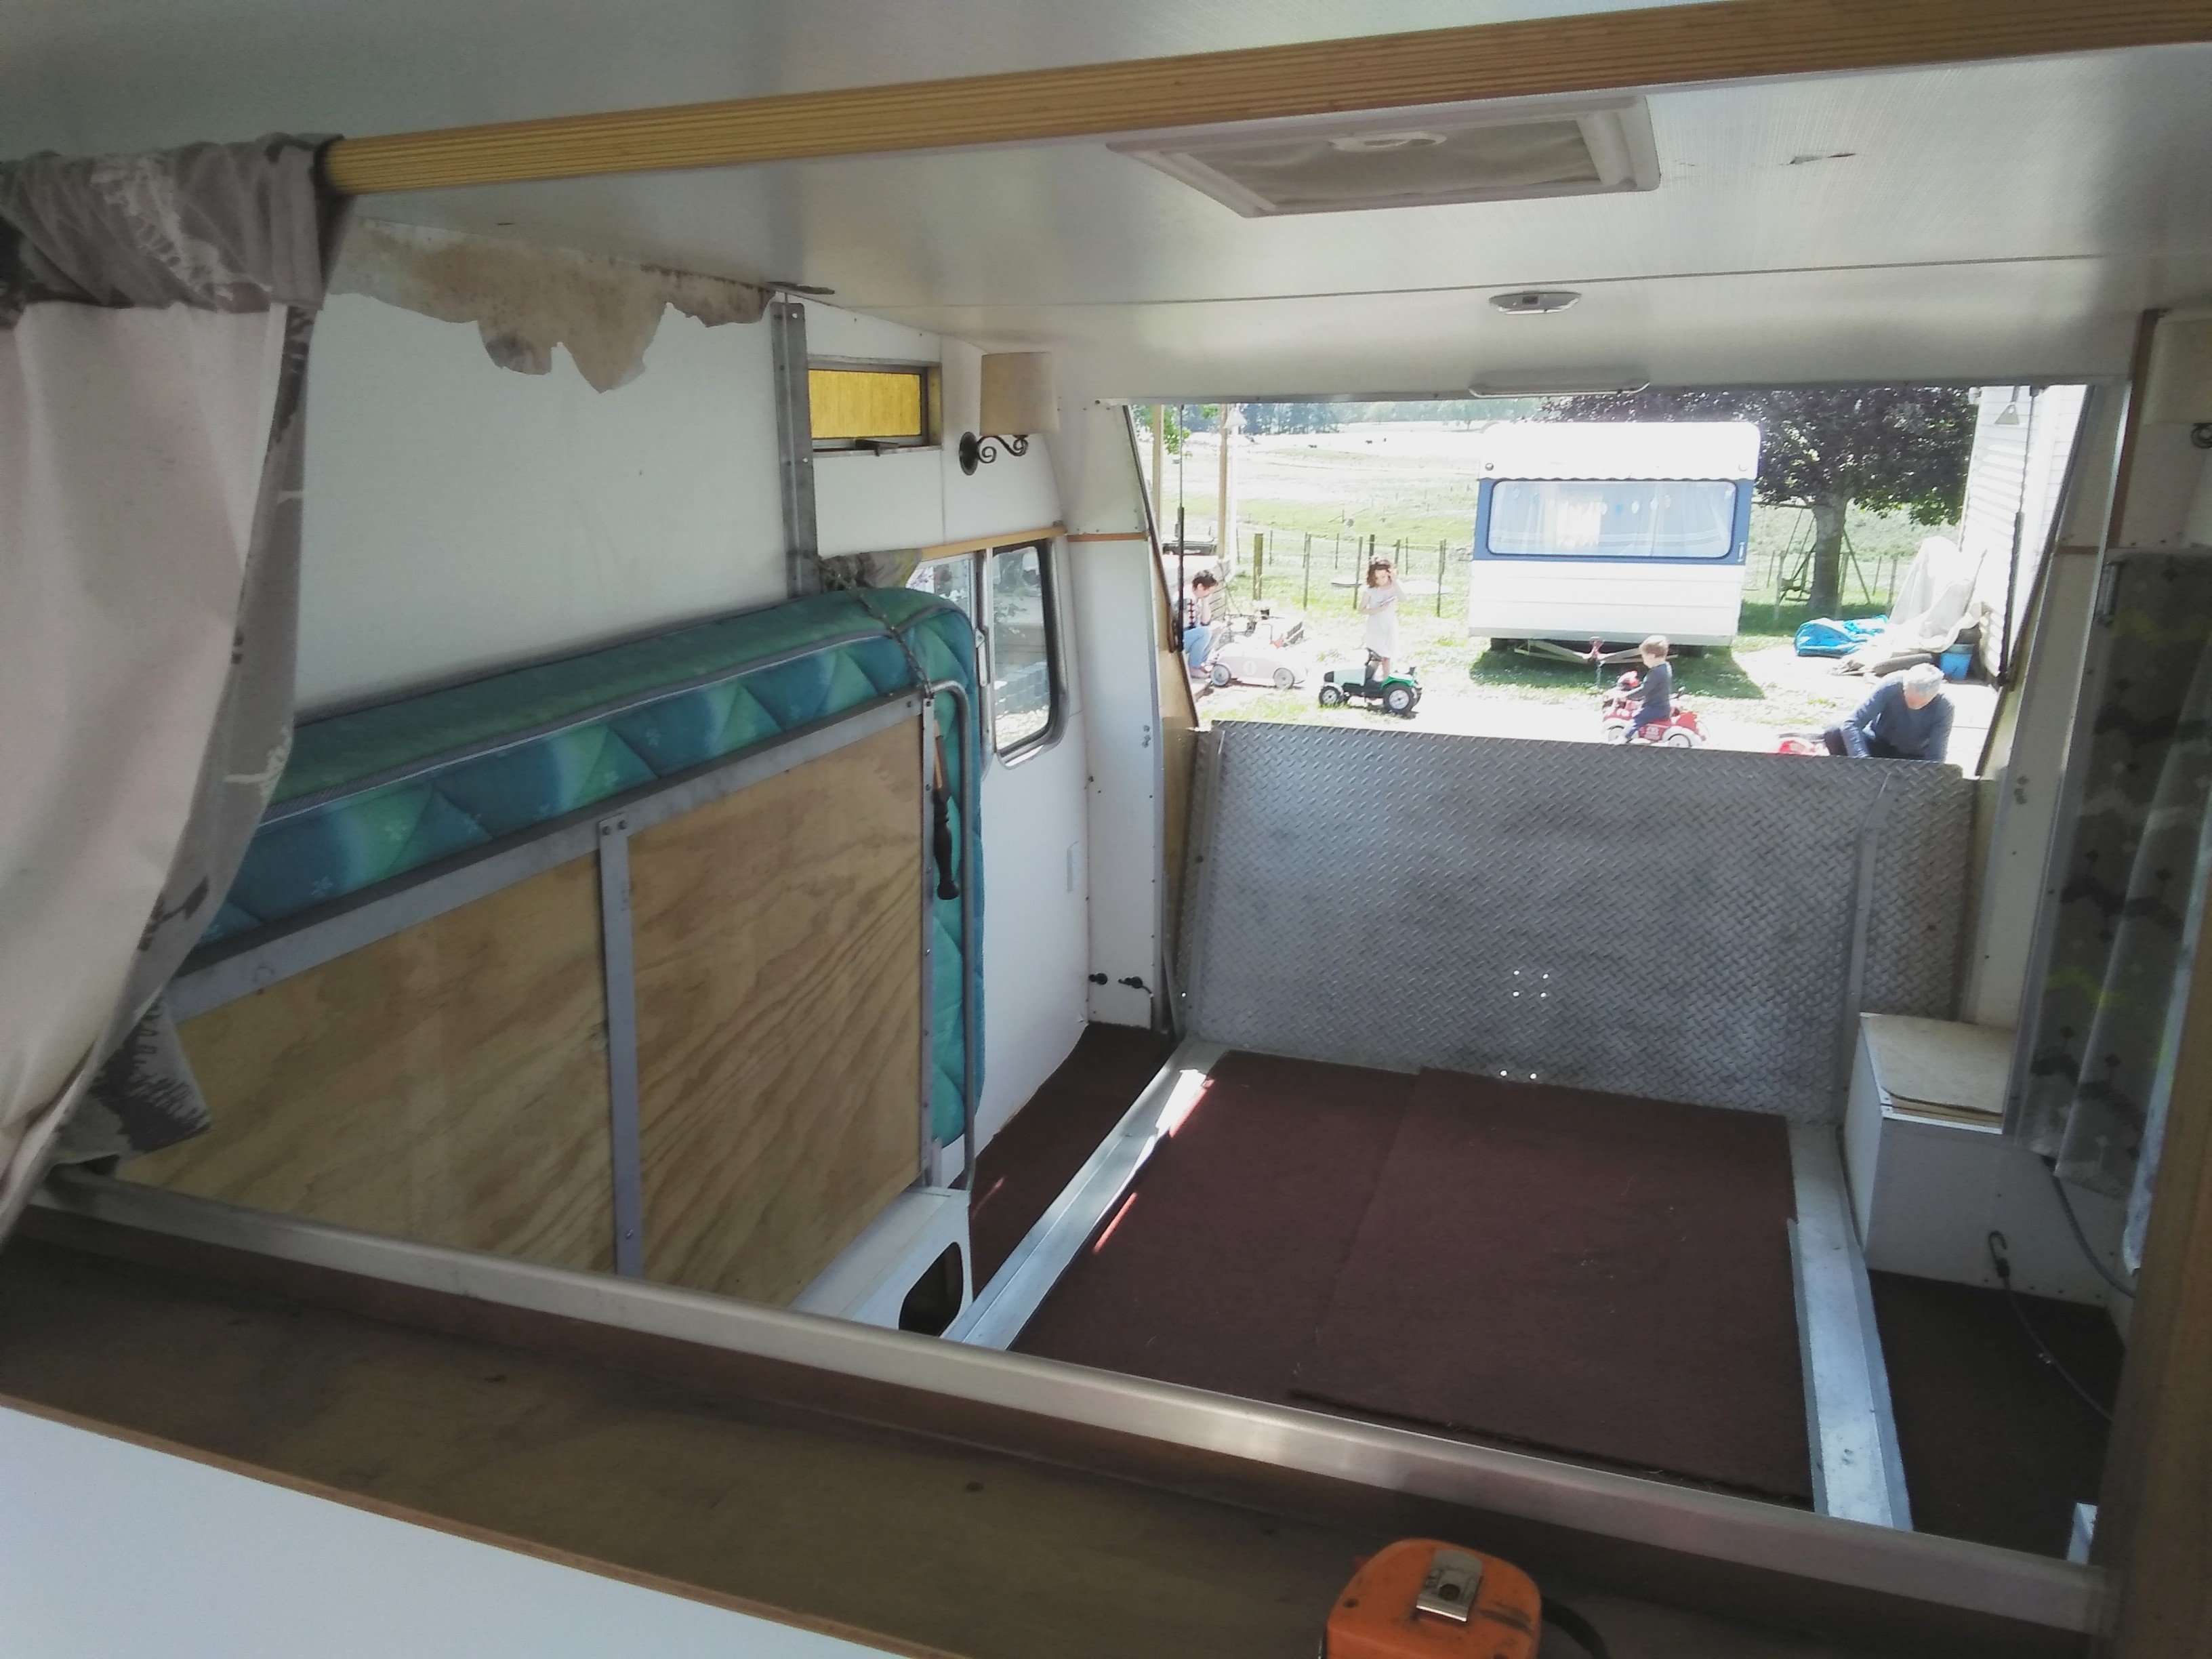
He had used random ply over windows that had been removed and it had some leaks but the structure was sound.
-
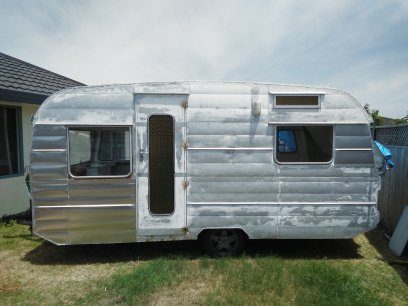
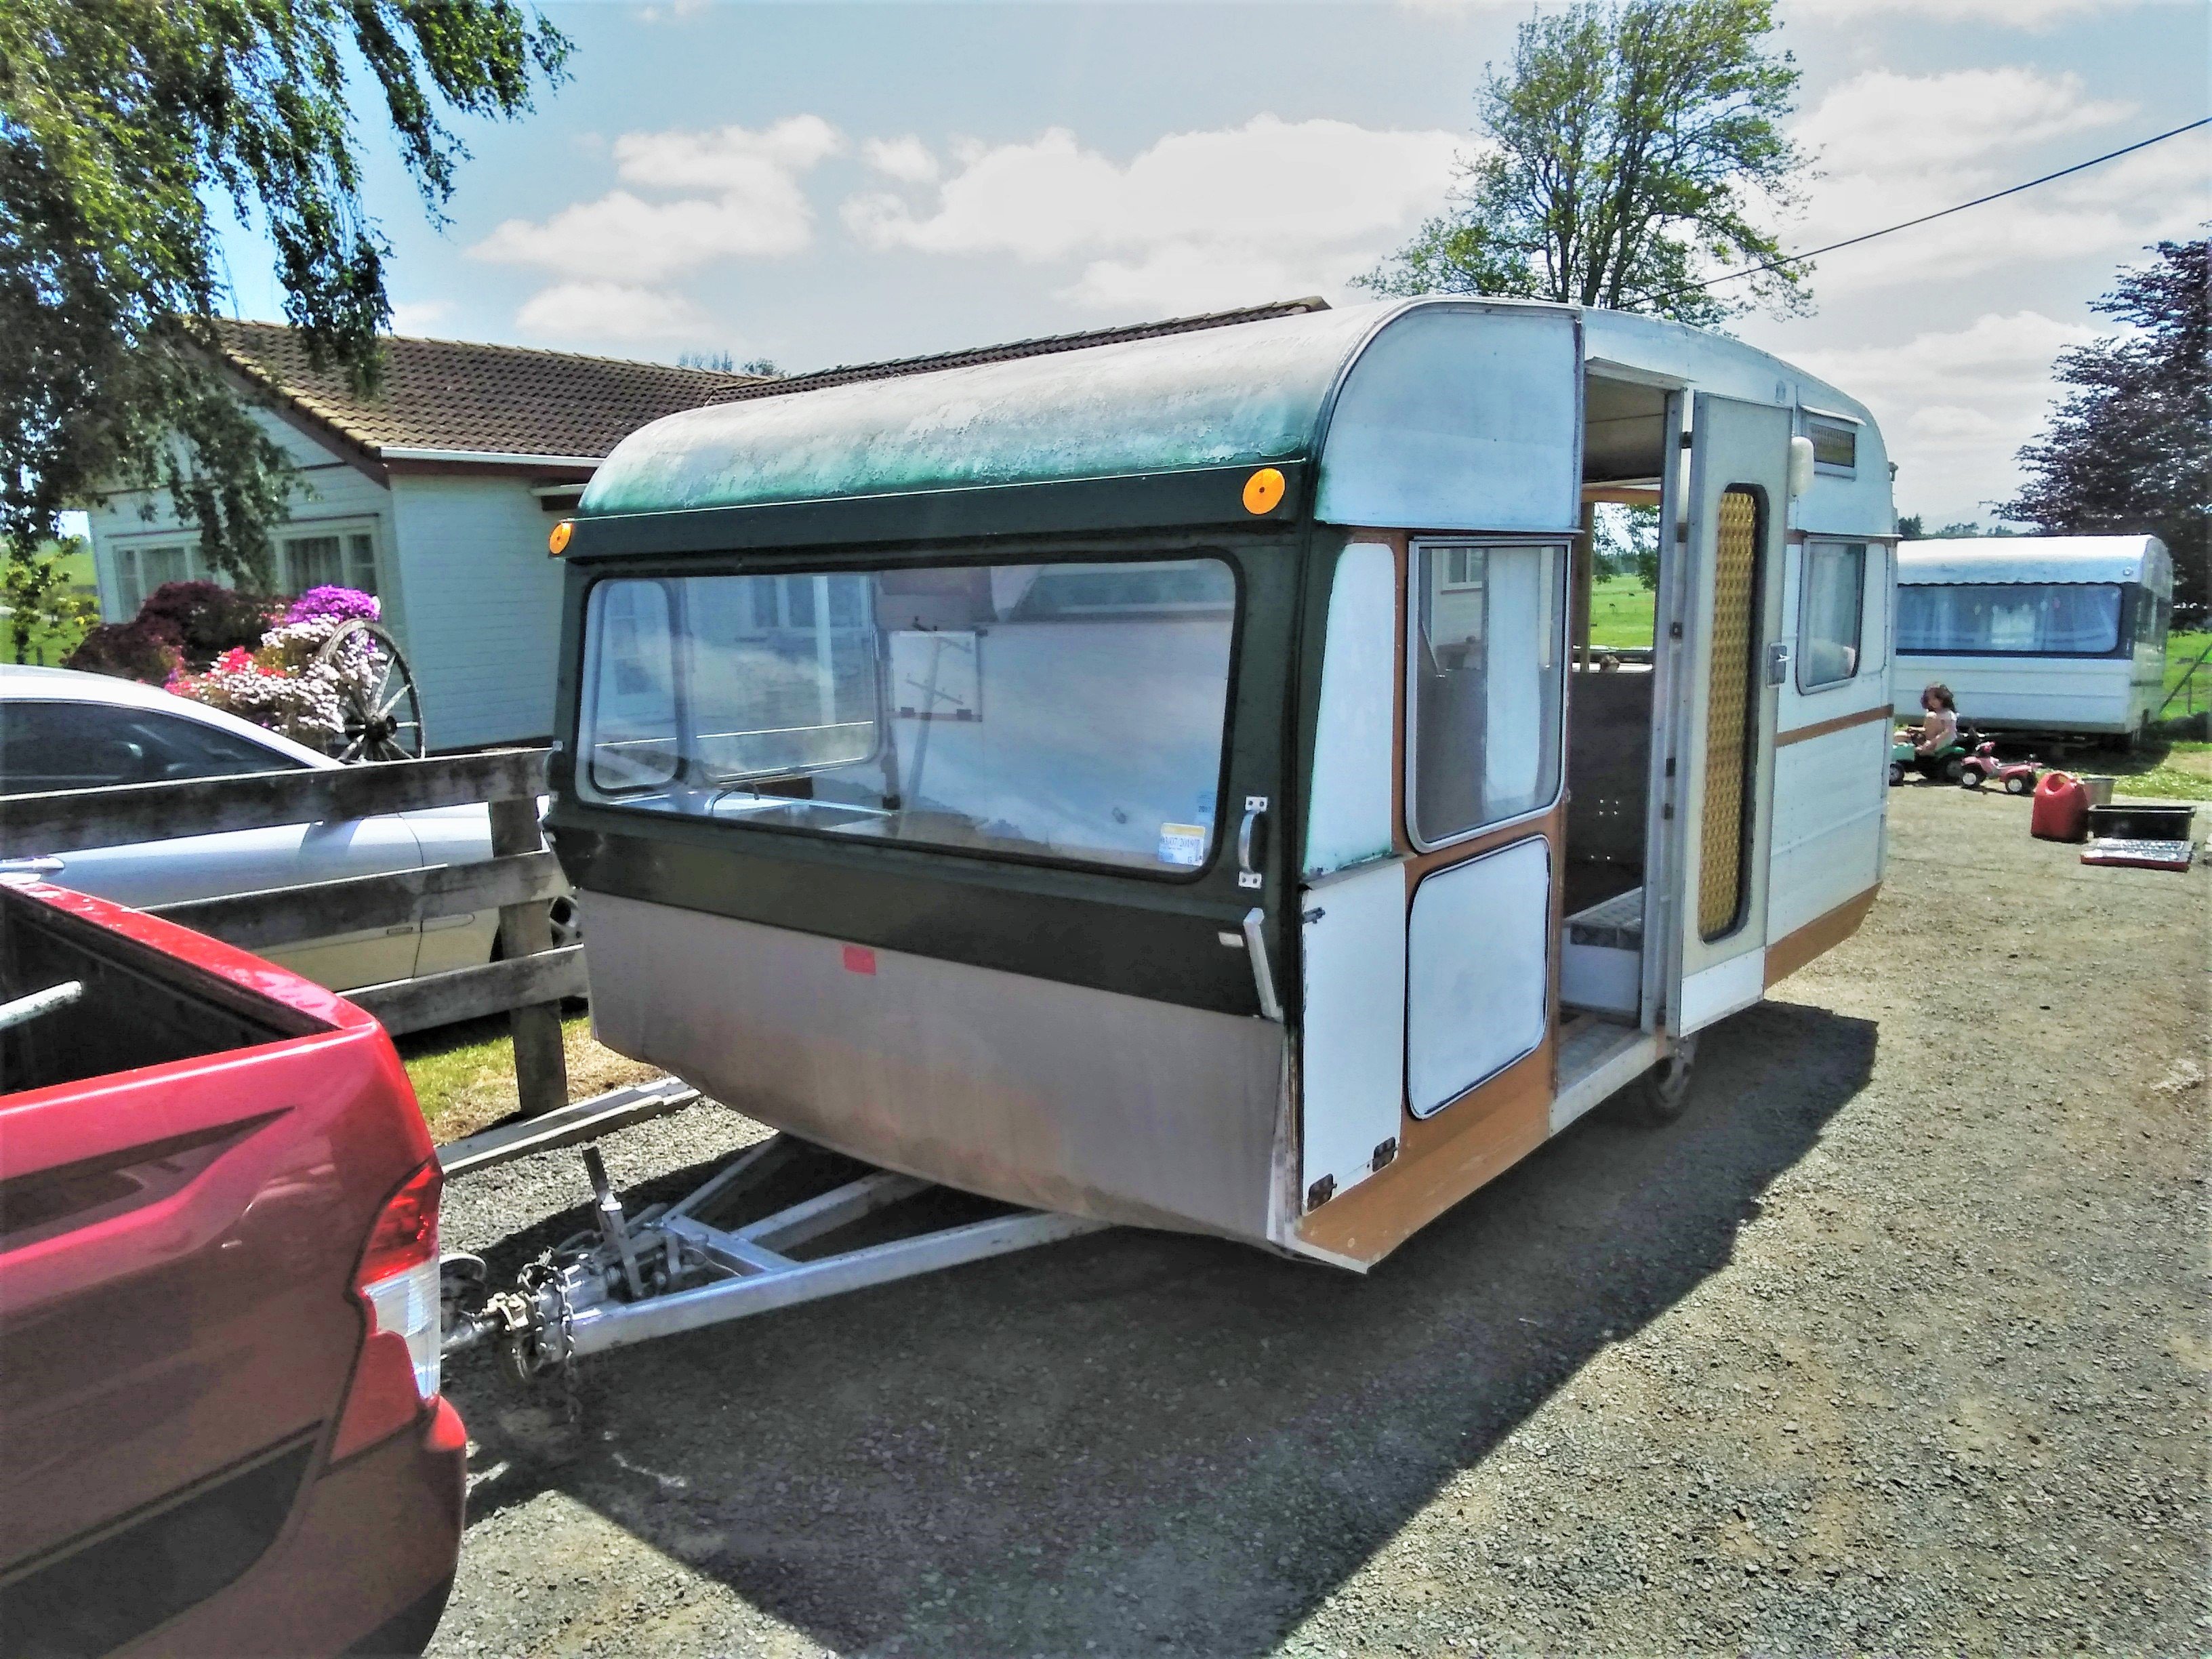
Don't know if peeps are into caravans on here? Anyone else got any threads? I've seen motorhomes. Anyway, got this sweet '80 Roma caravan that is a bit different. The story goes that it was owned by an old engineer that wanted to get his Ford Model A (or T) to Ford meets, but it wasn't exactly easy to drive it to each meet, so he cut the back off his caravan, strengthened the chassis and turned it into a O/S toy hauler. He had a single fold up bed and a little kitchen up front and modified the back to use as a ramp/deck and could drive his car in, cart it around, then when he got there, drive it out and fold his bed down to stay. Primo! However, it was pretty beat up and in need of some love when we got it:
- 33 replies
-
- 14
-
-
Pics/vid's of CB/XR plz
-
Sold - Going to a good new home in Hawkes Bay at the end of the month.
-
-
-
-
And she's up for sale with a fresh WoF and Rego. DM if interested and have cash. She'll be up on TM soon.
-
Oh wow!! Long time no see! Man it's good to see it again! How's it running? Did the guy I sold it too fulfill his dreams of RB26-ing it?
-
A
-
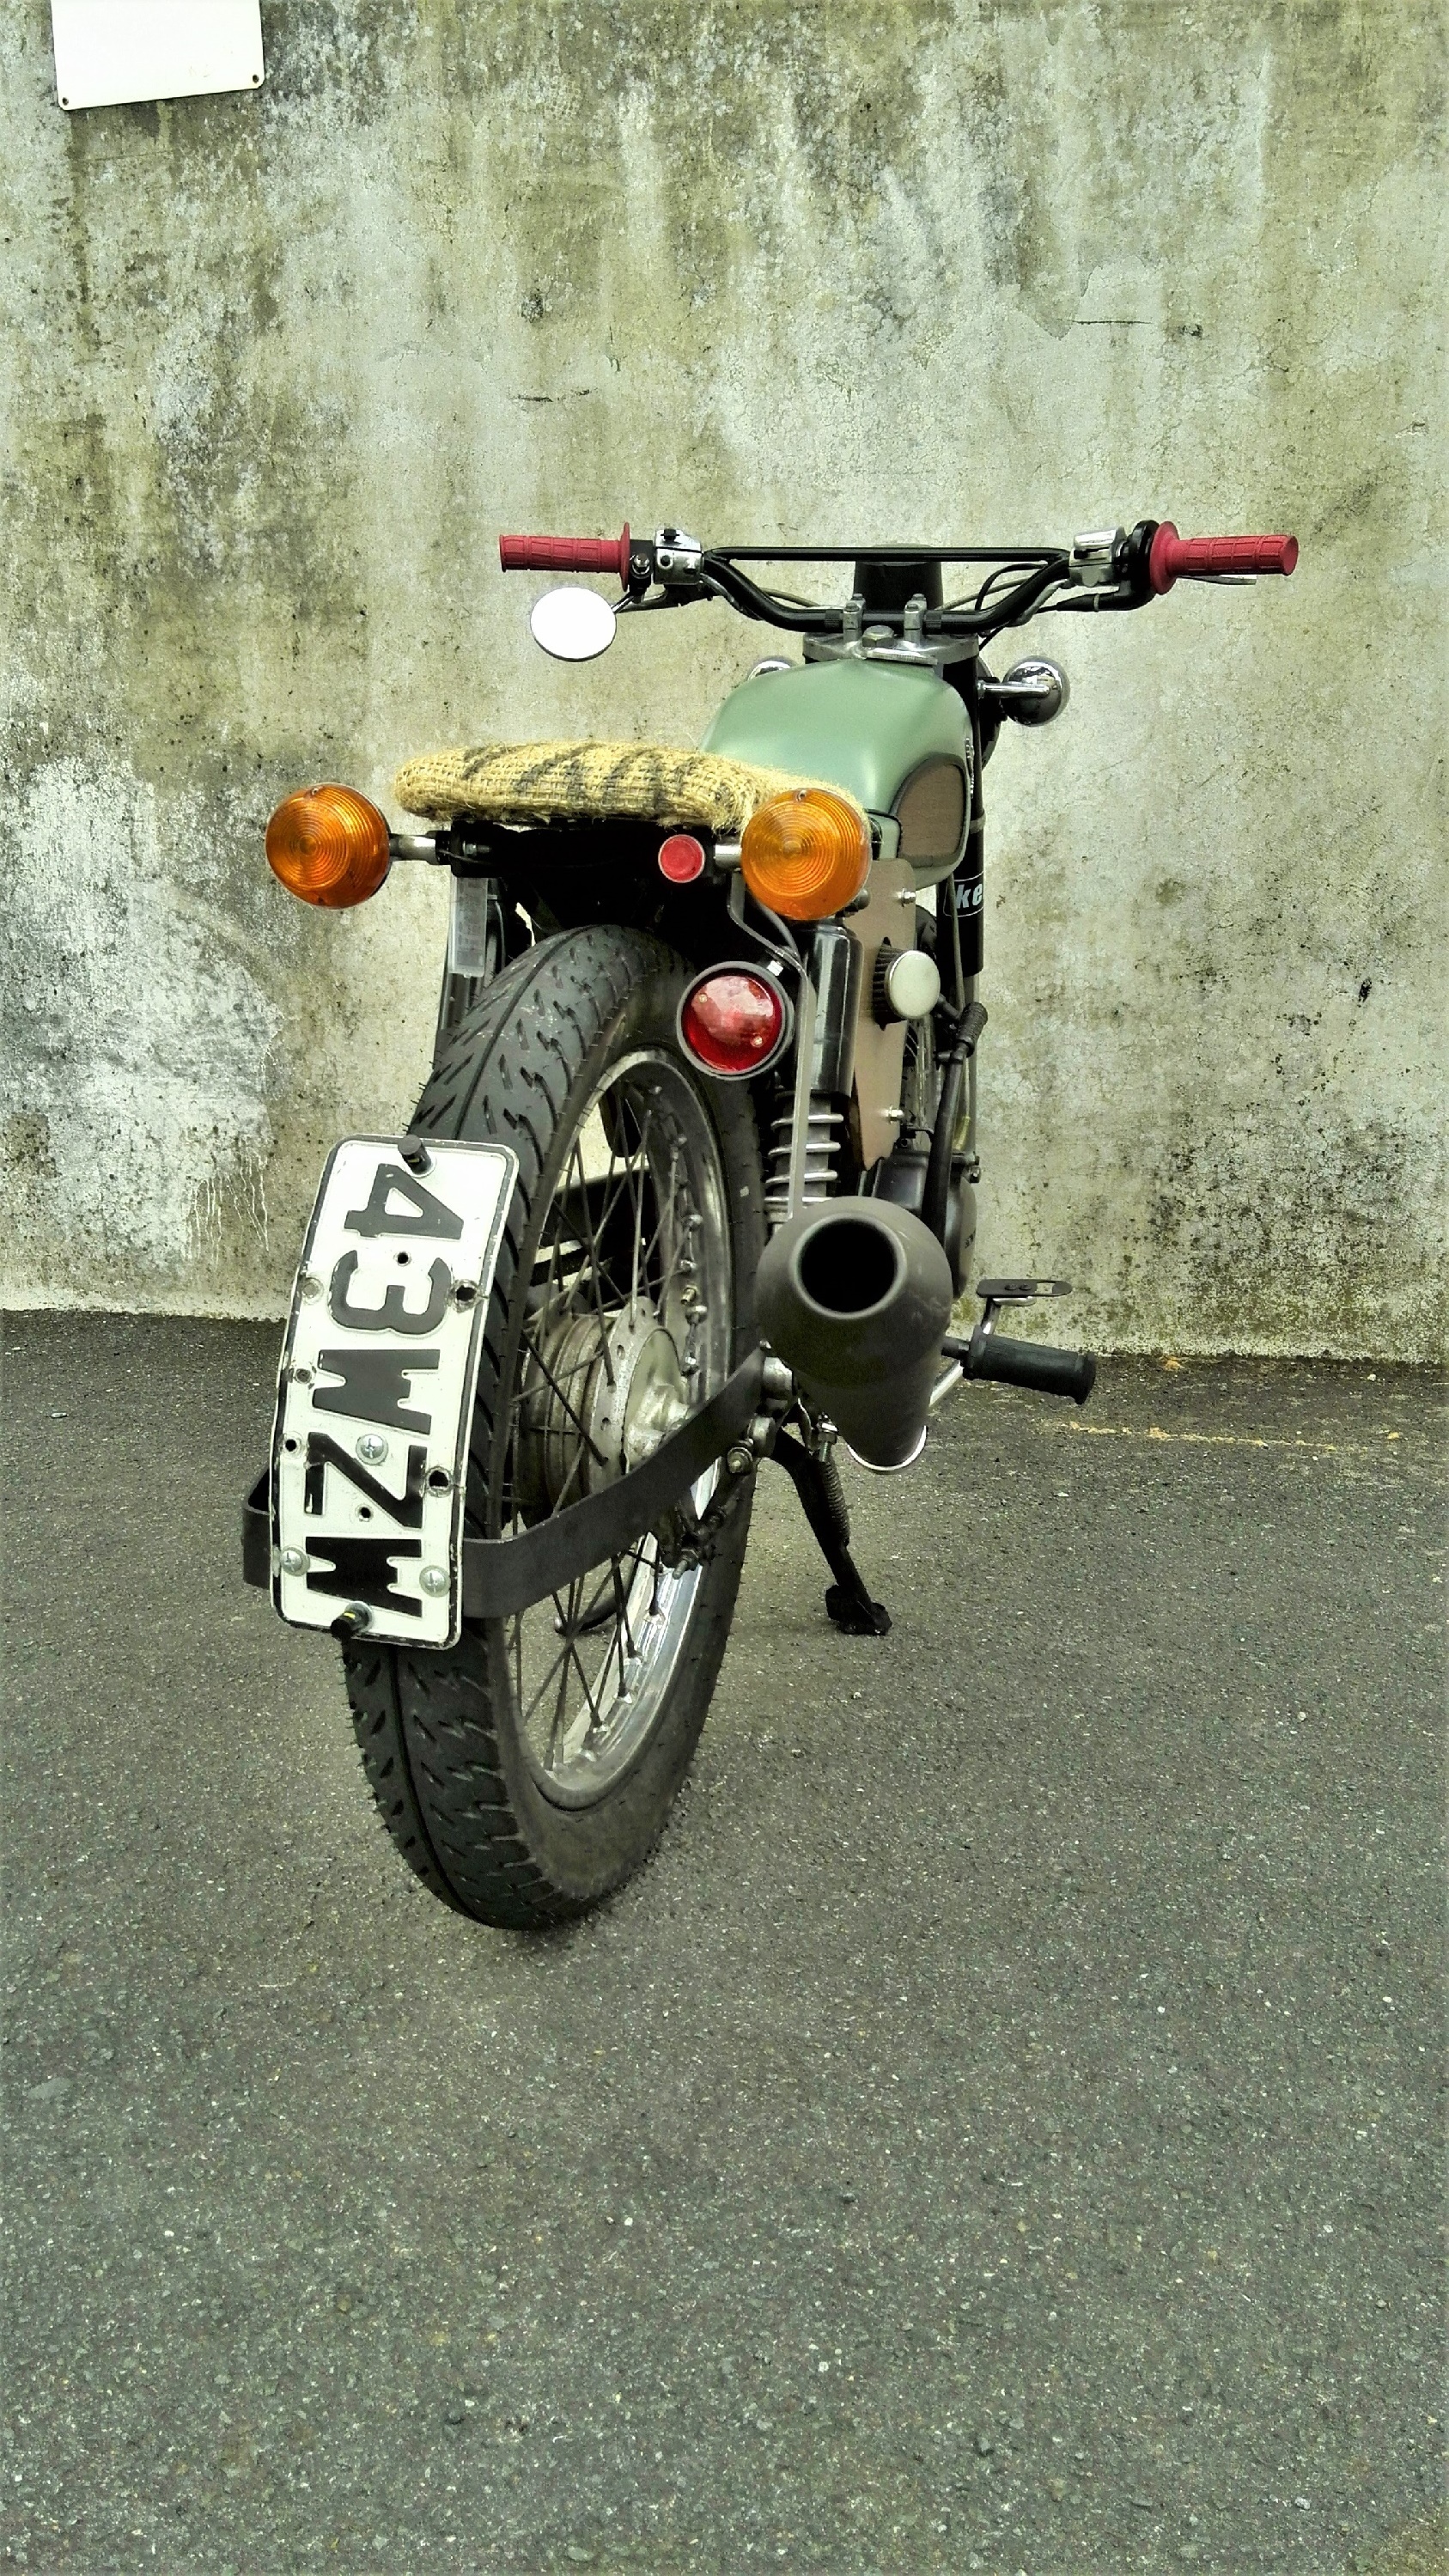
Also, does anyone have a front sprocket cover for an XR200? As you can see, mines MIA somewhere. If so HMU for $$
-
Hey bro, yeah local as. I'm sure we will run into to each other sometime as I use it all the time. If you see me round just toot like crazy so I know its you haha
-
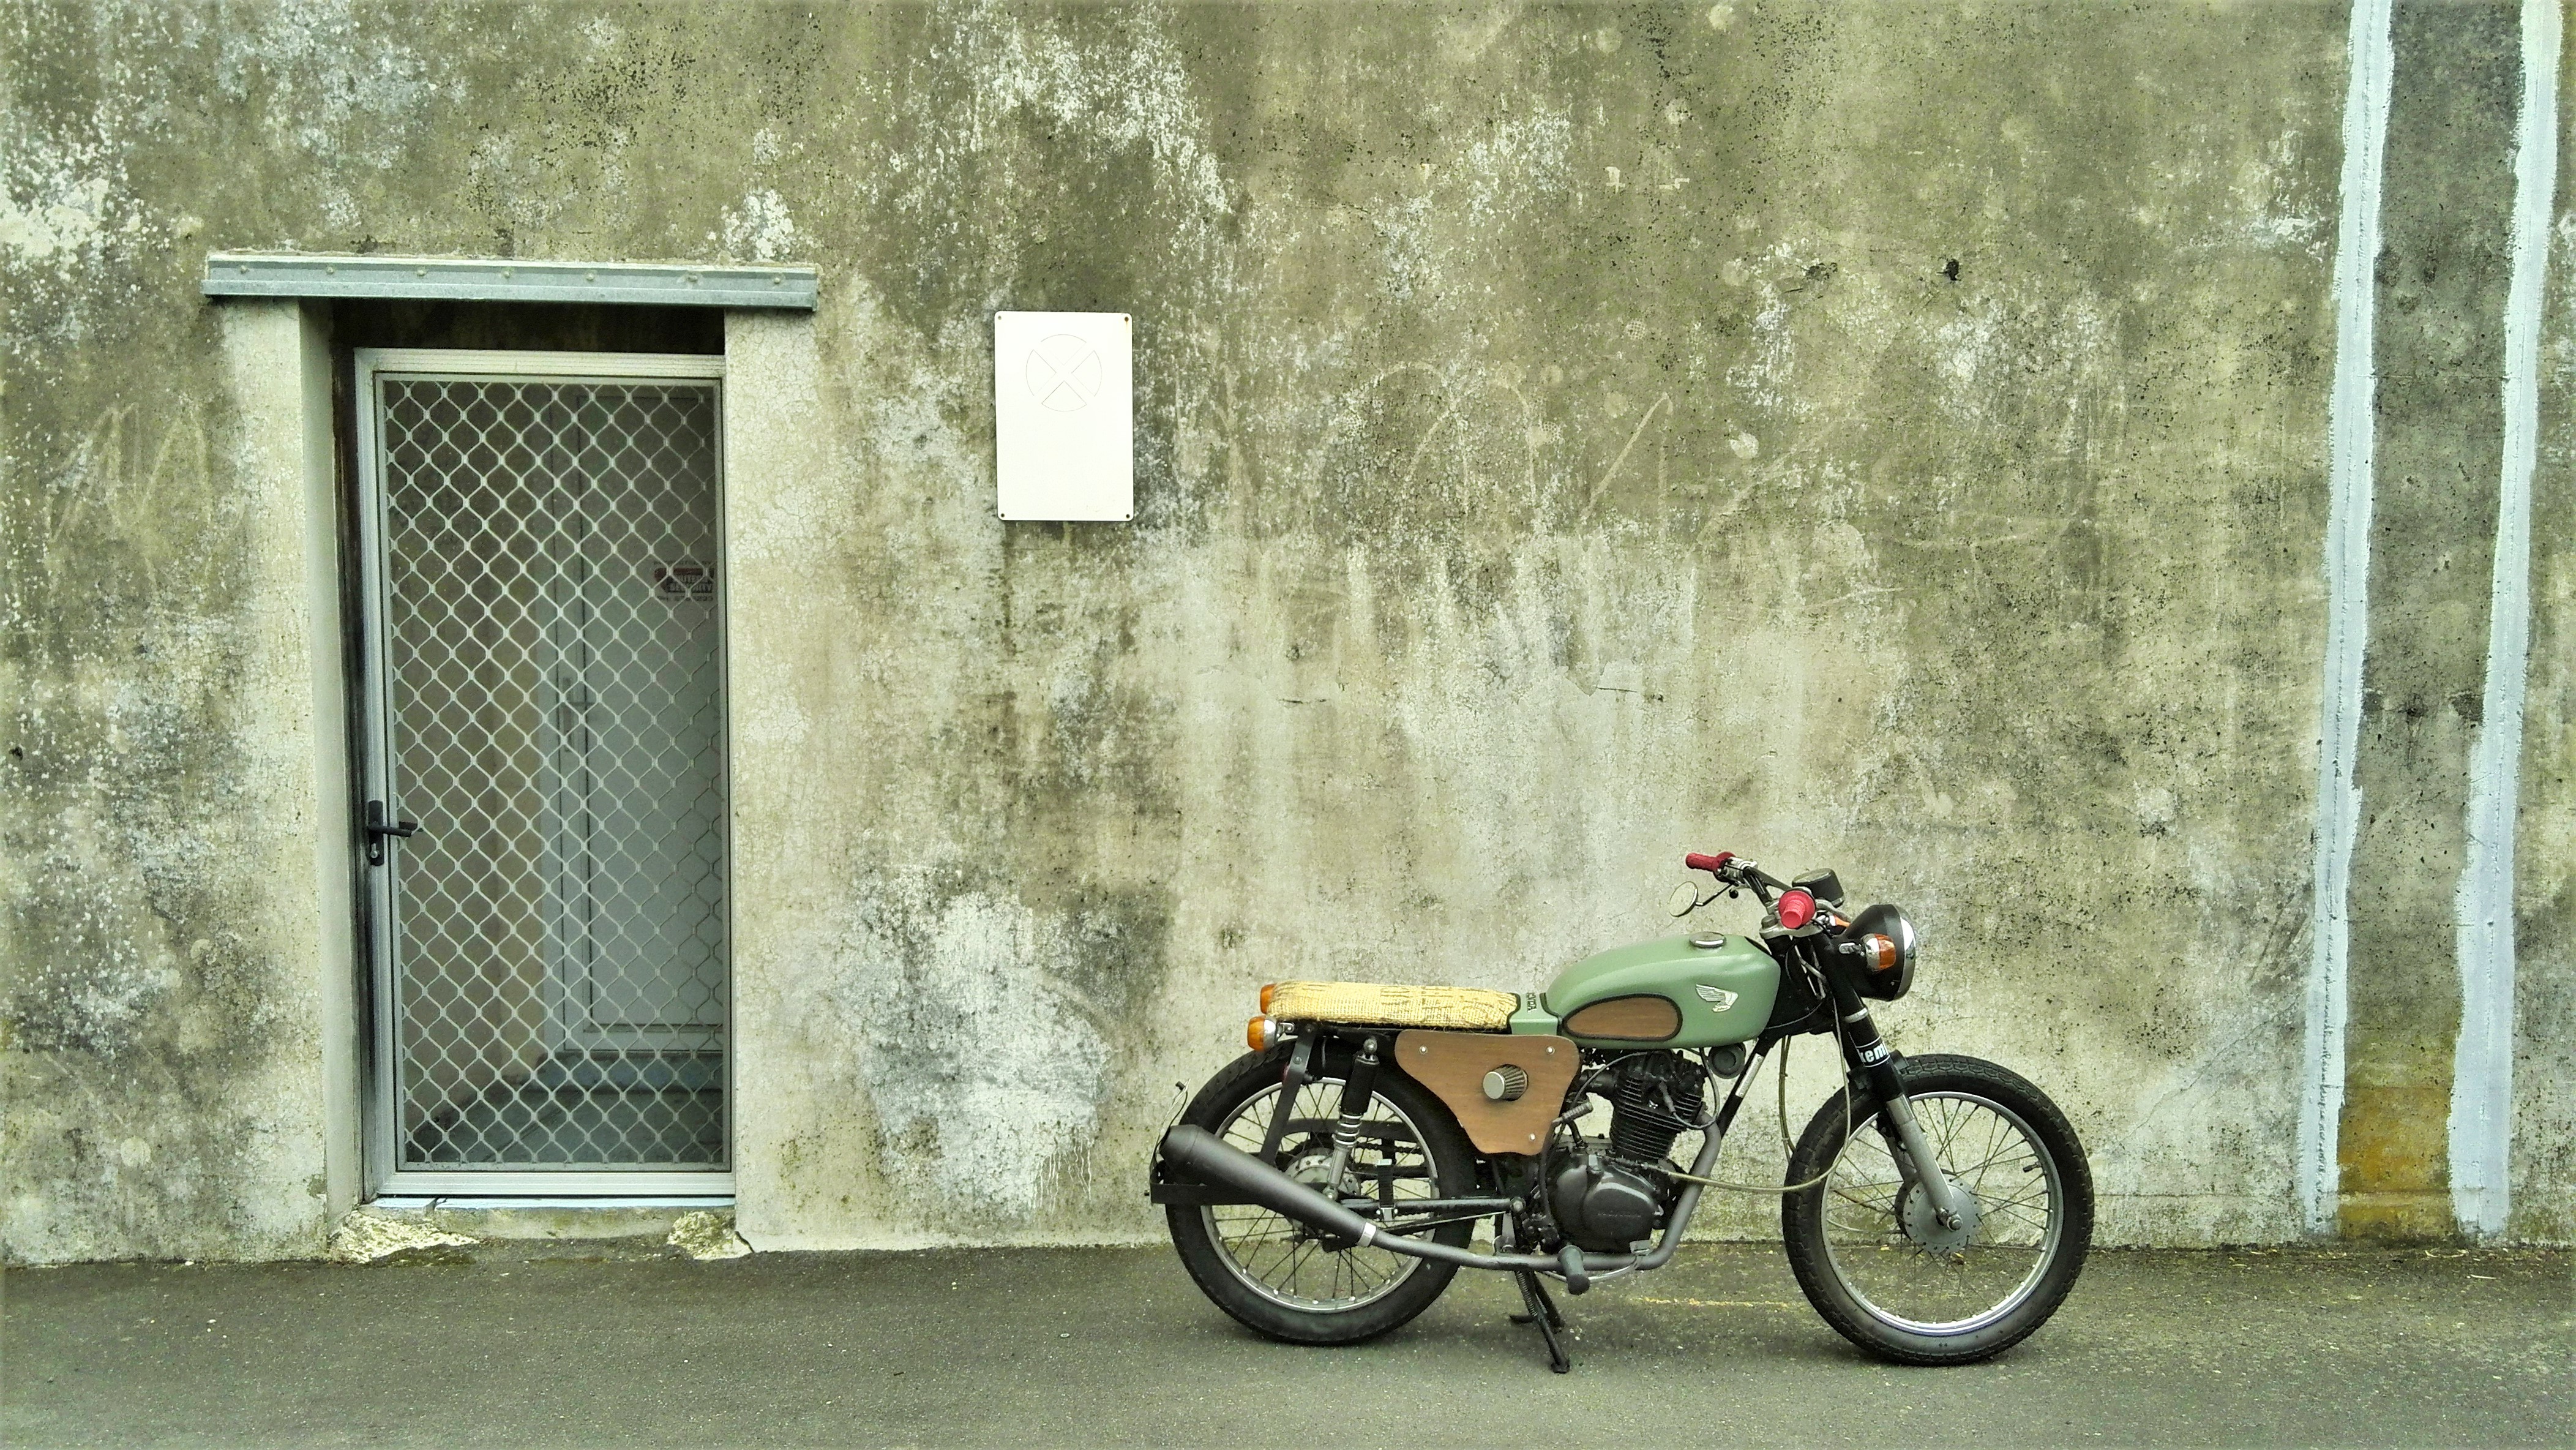
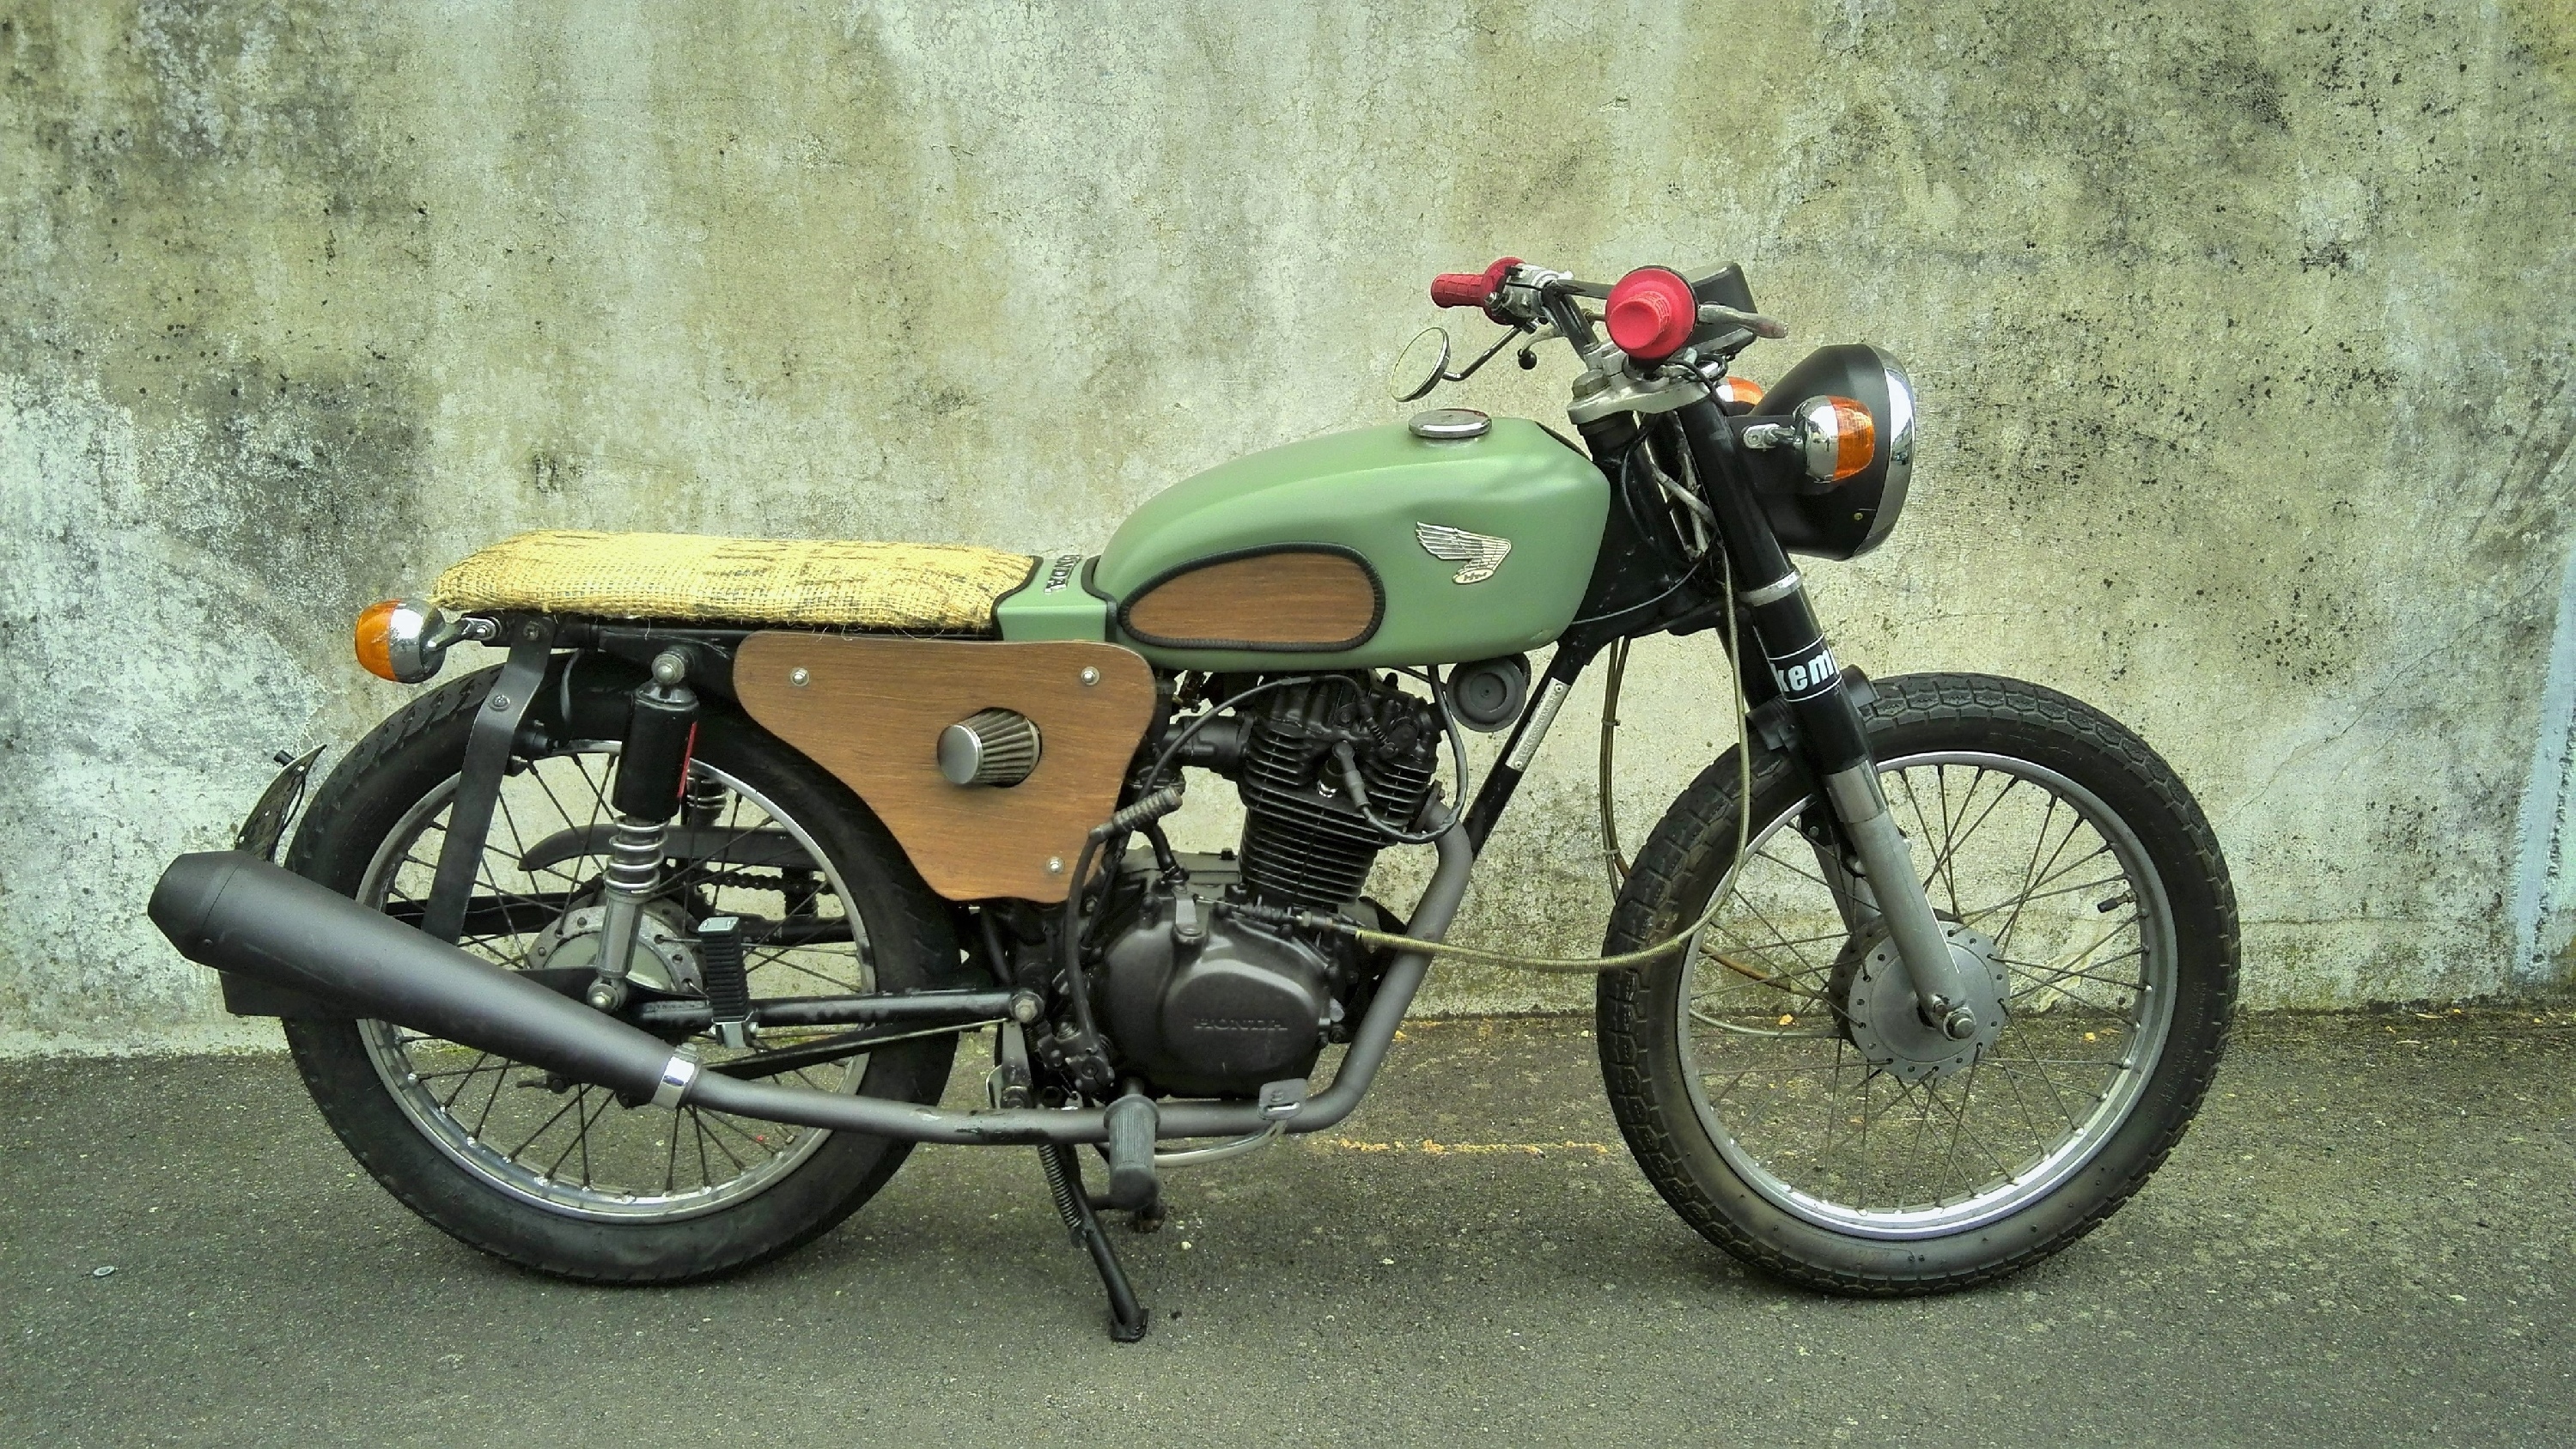
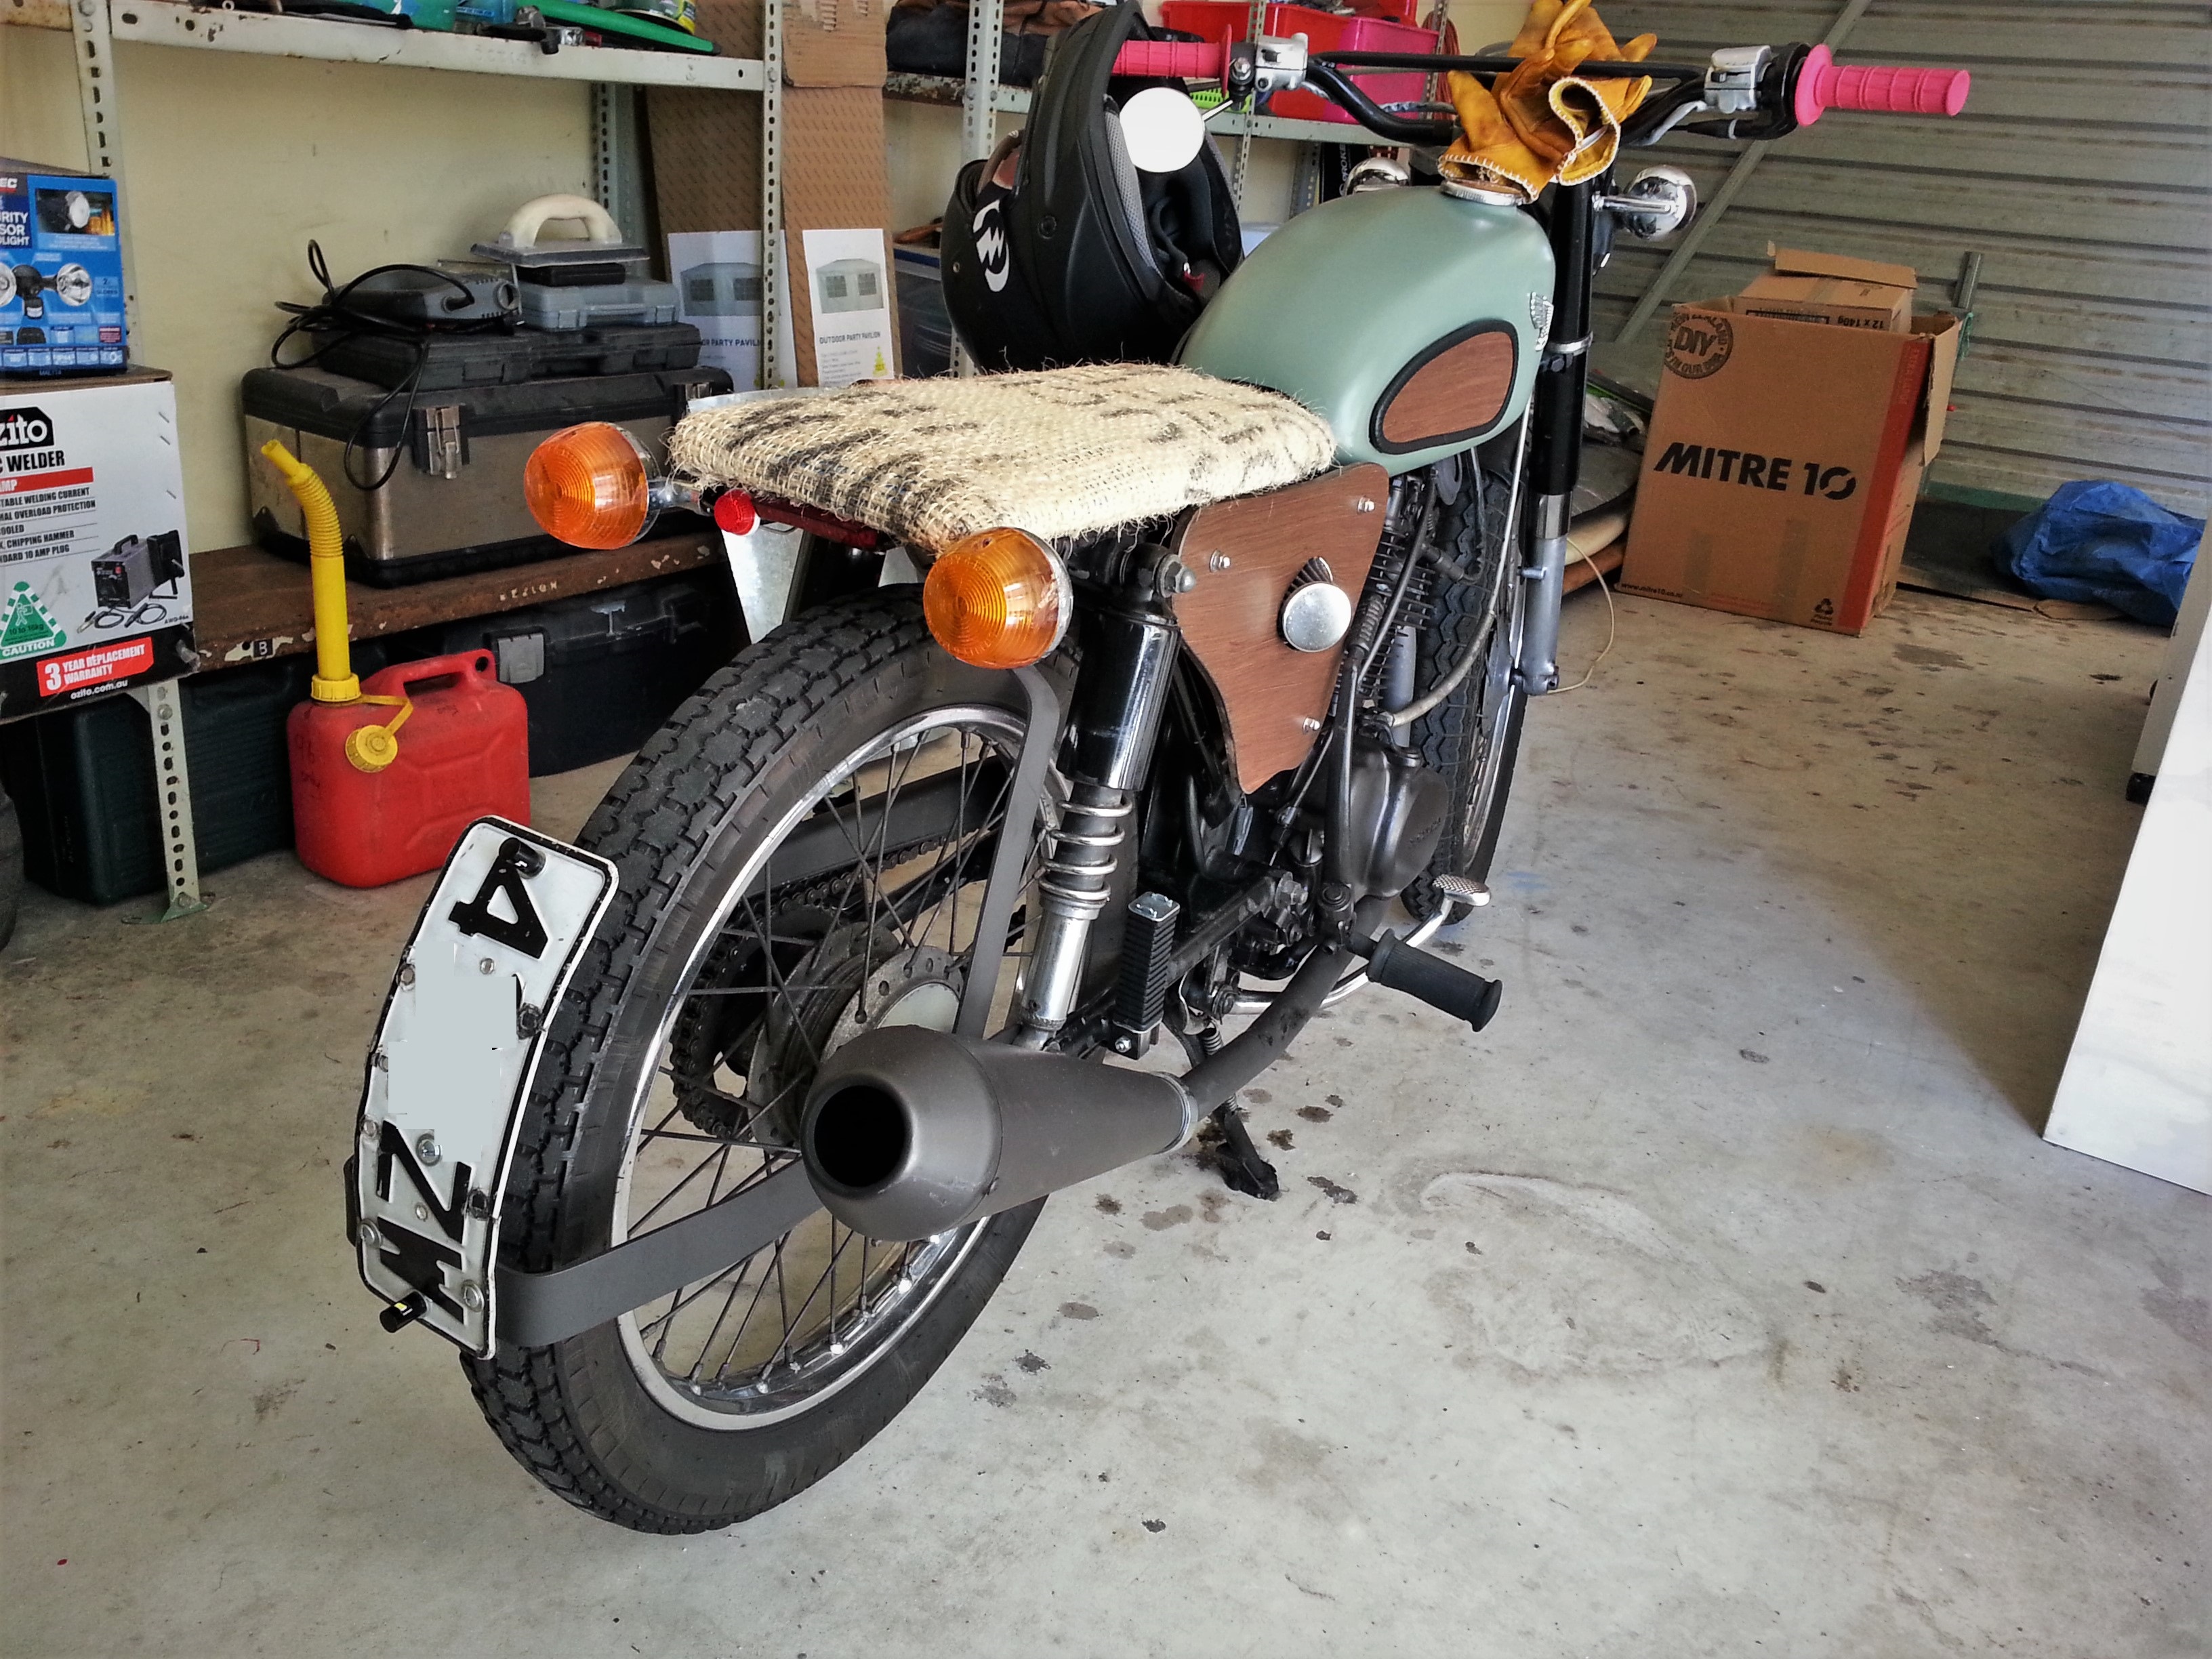
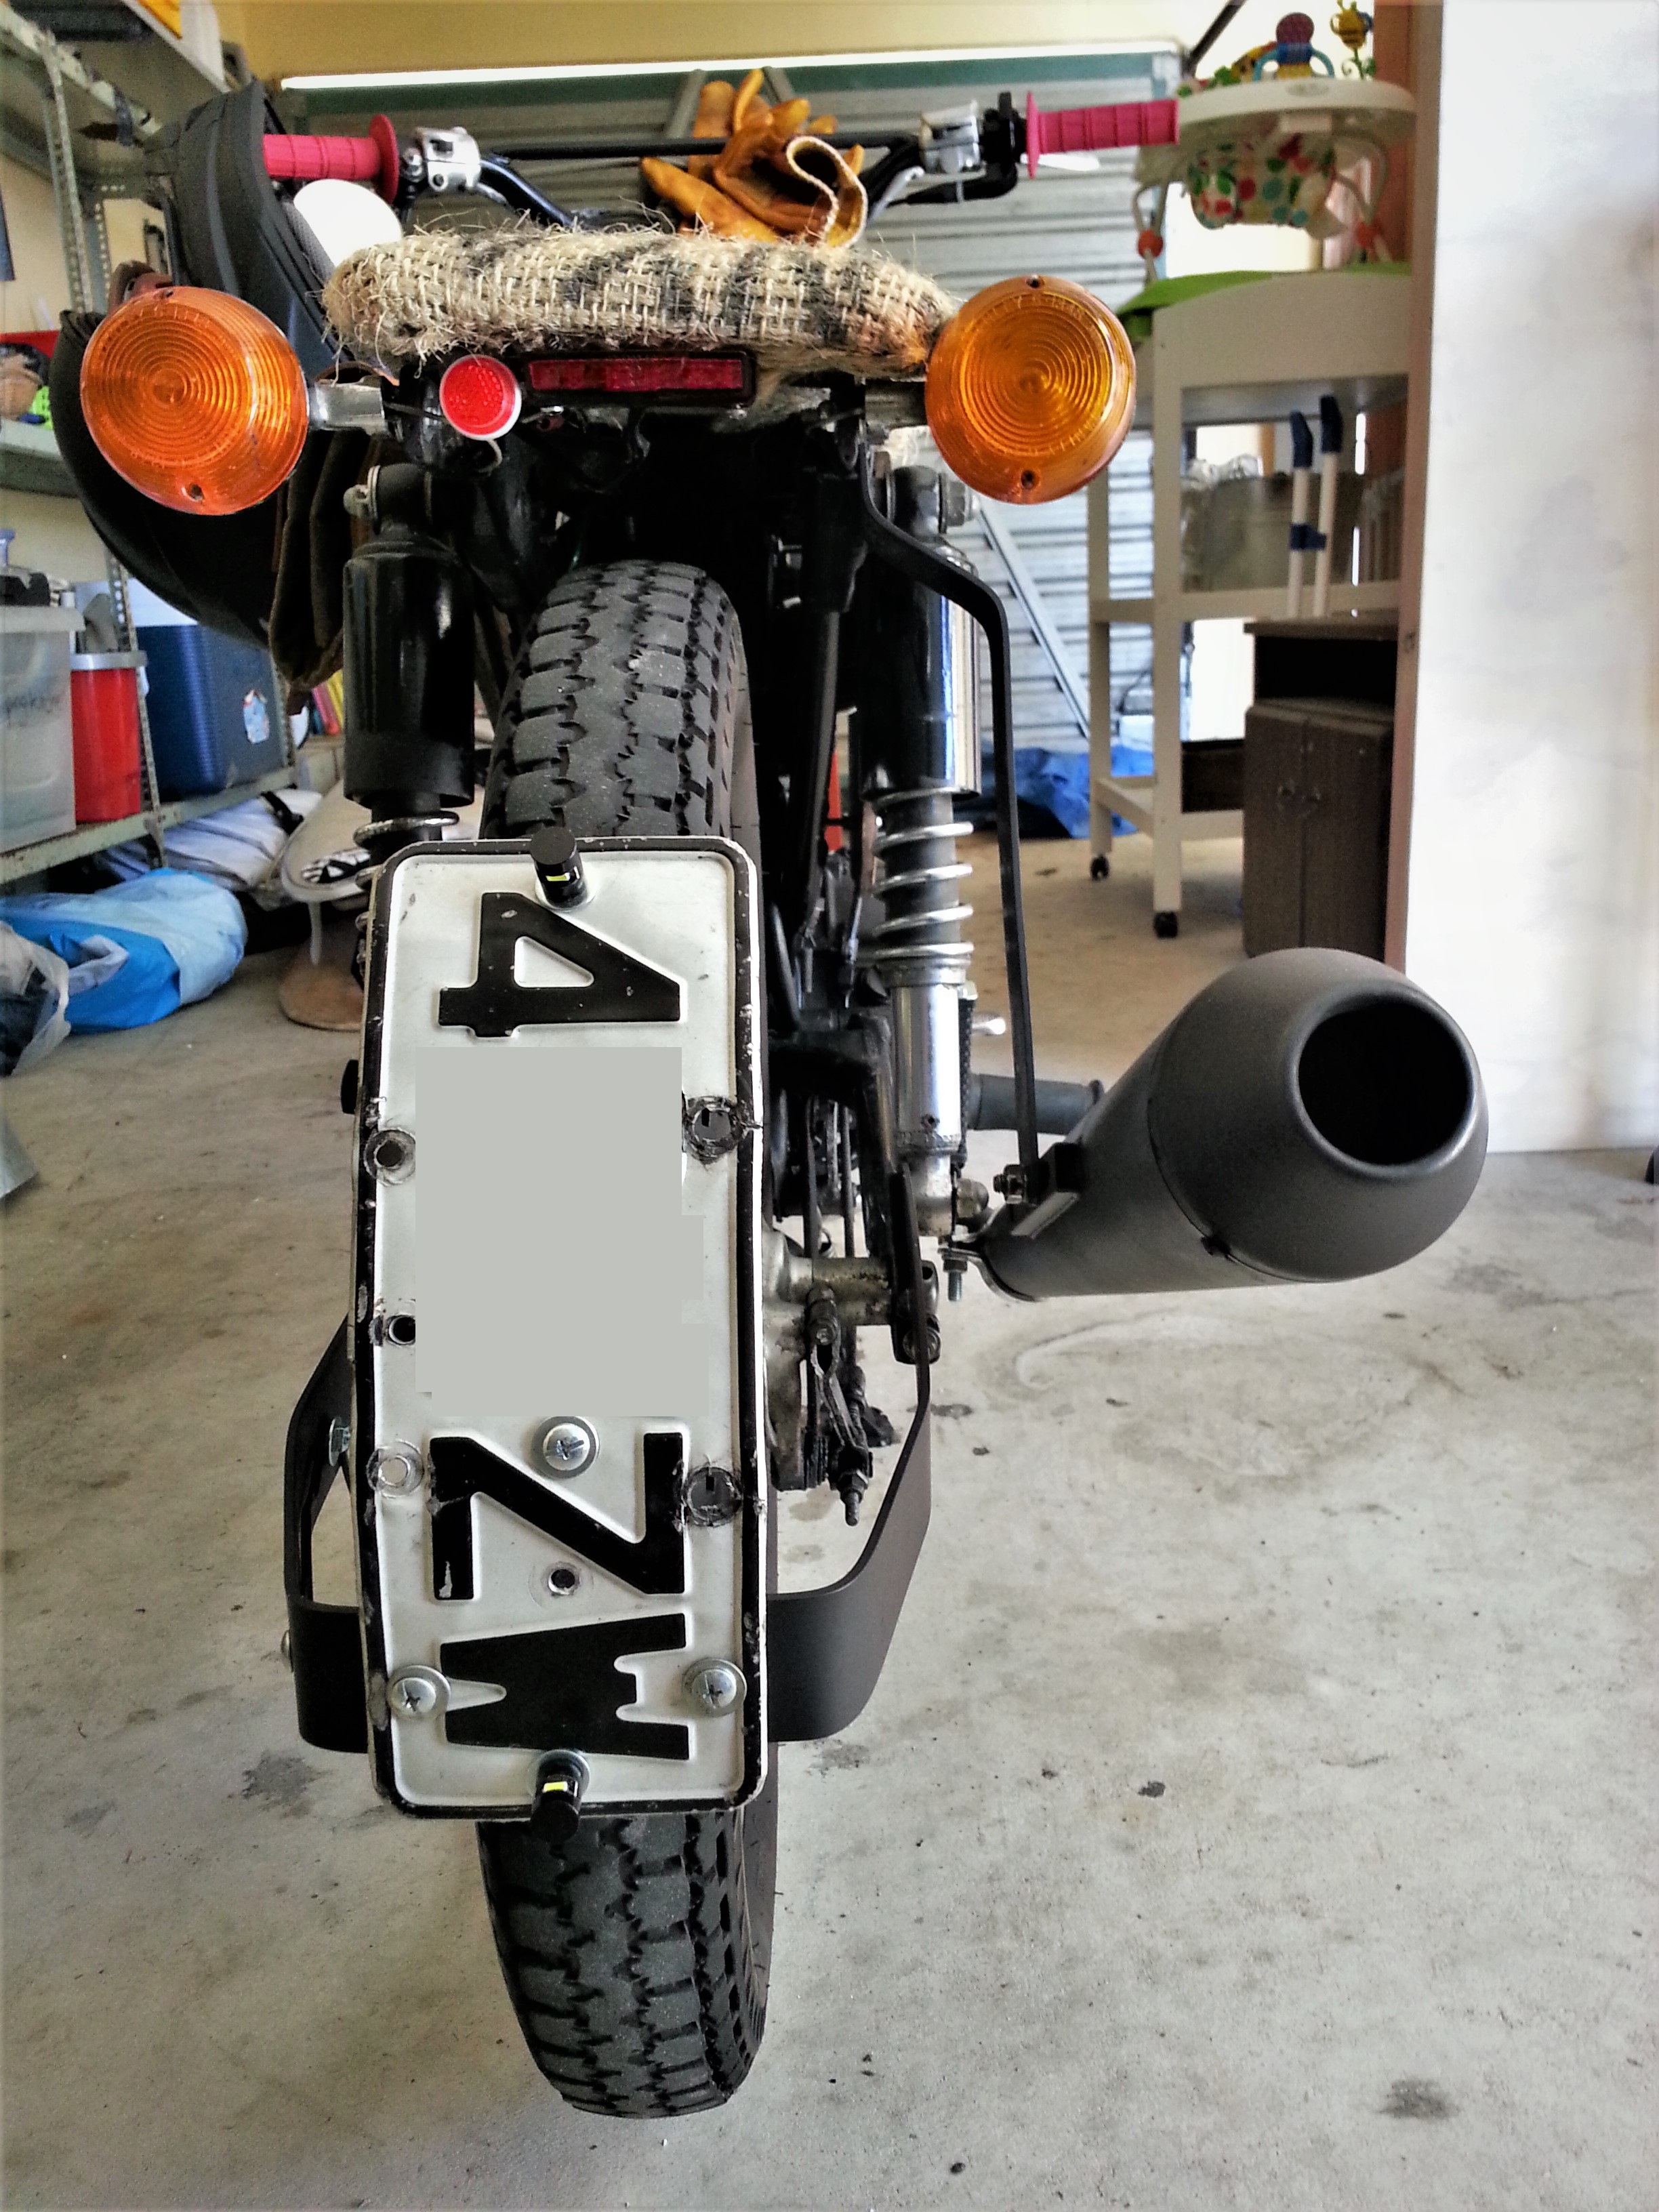
Oh choice, thanks man - it's still going hard! Just got some new clutch plates for it cause the clutch is on the way out, but other than that, just gave it a paint and stuck it in. Only had to do the intake pipe and that was it And the rest of the XR200 went to a good home too with some local guy wanting to retro upgrade his suspension (as I hear the '89 was better than the '90+ or something?) On another note, I redid the rear number plate holder which now doubles as the rear guard out of 3mm aly flat bar - way more sturdy. Also fitted two new little LED rego plate lamps top and bottom (cause of the curve of the plate it needs two haha) and pillion pegs for the WoF. I tried to argue that it never had rego plate lamps, but if that's all it needs I don't mind. Also redone the muffler bracket so it's a lot more sturdy now and hopefully takes the pivot stress off the head Next up: going to have a crack at making a bit of a tracker-type tail thing for it so I can relocate the tail light as it keeps rubbing on the rear tire and I don't know how much more they can both take haha....
-
Cheer ears!
-
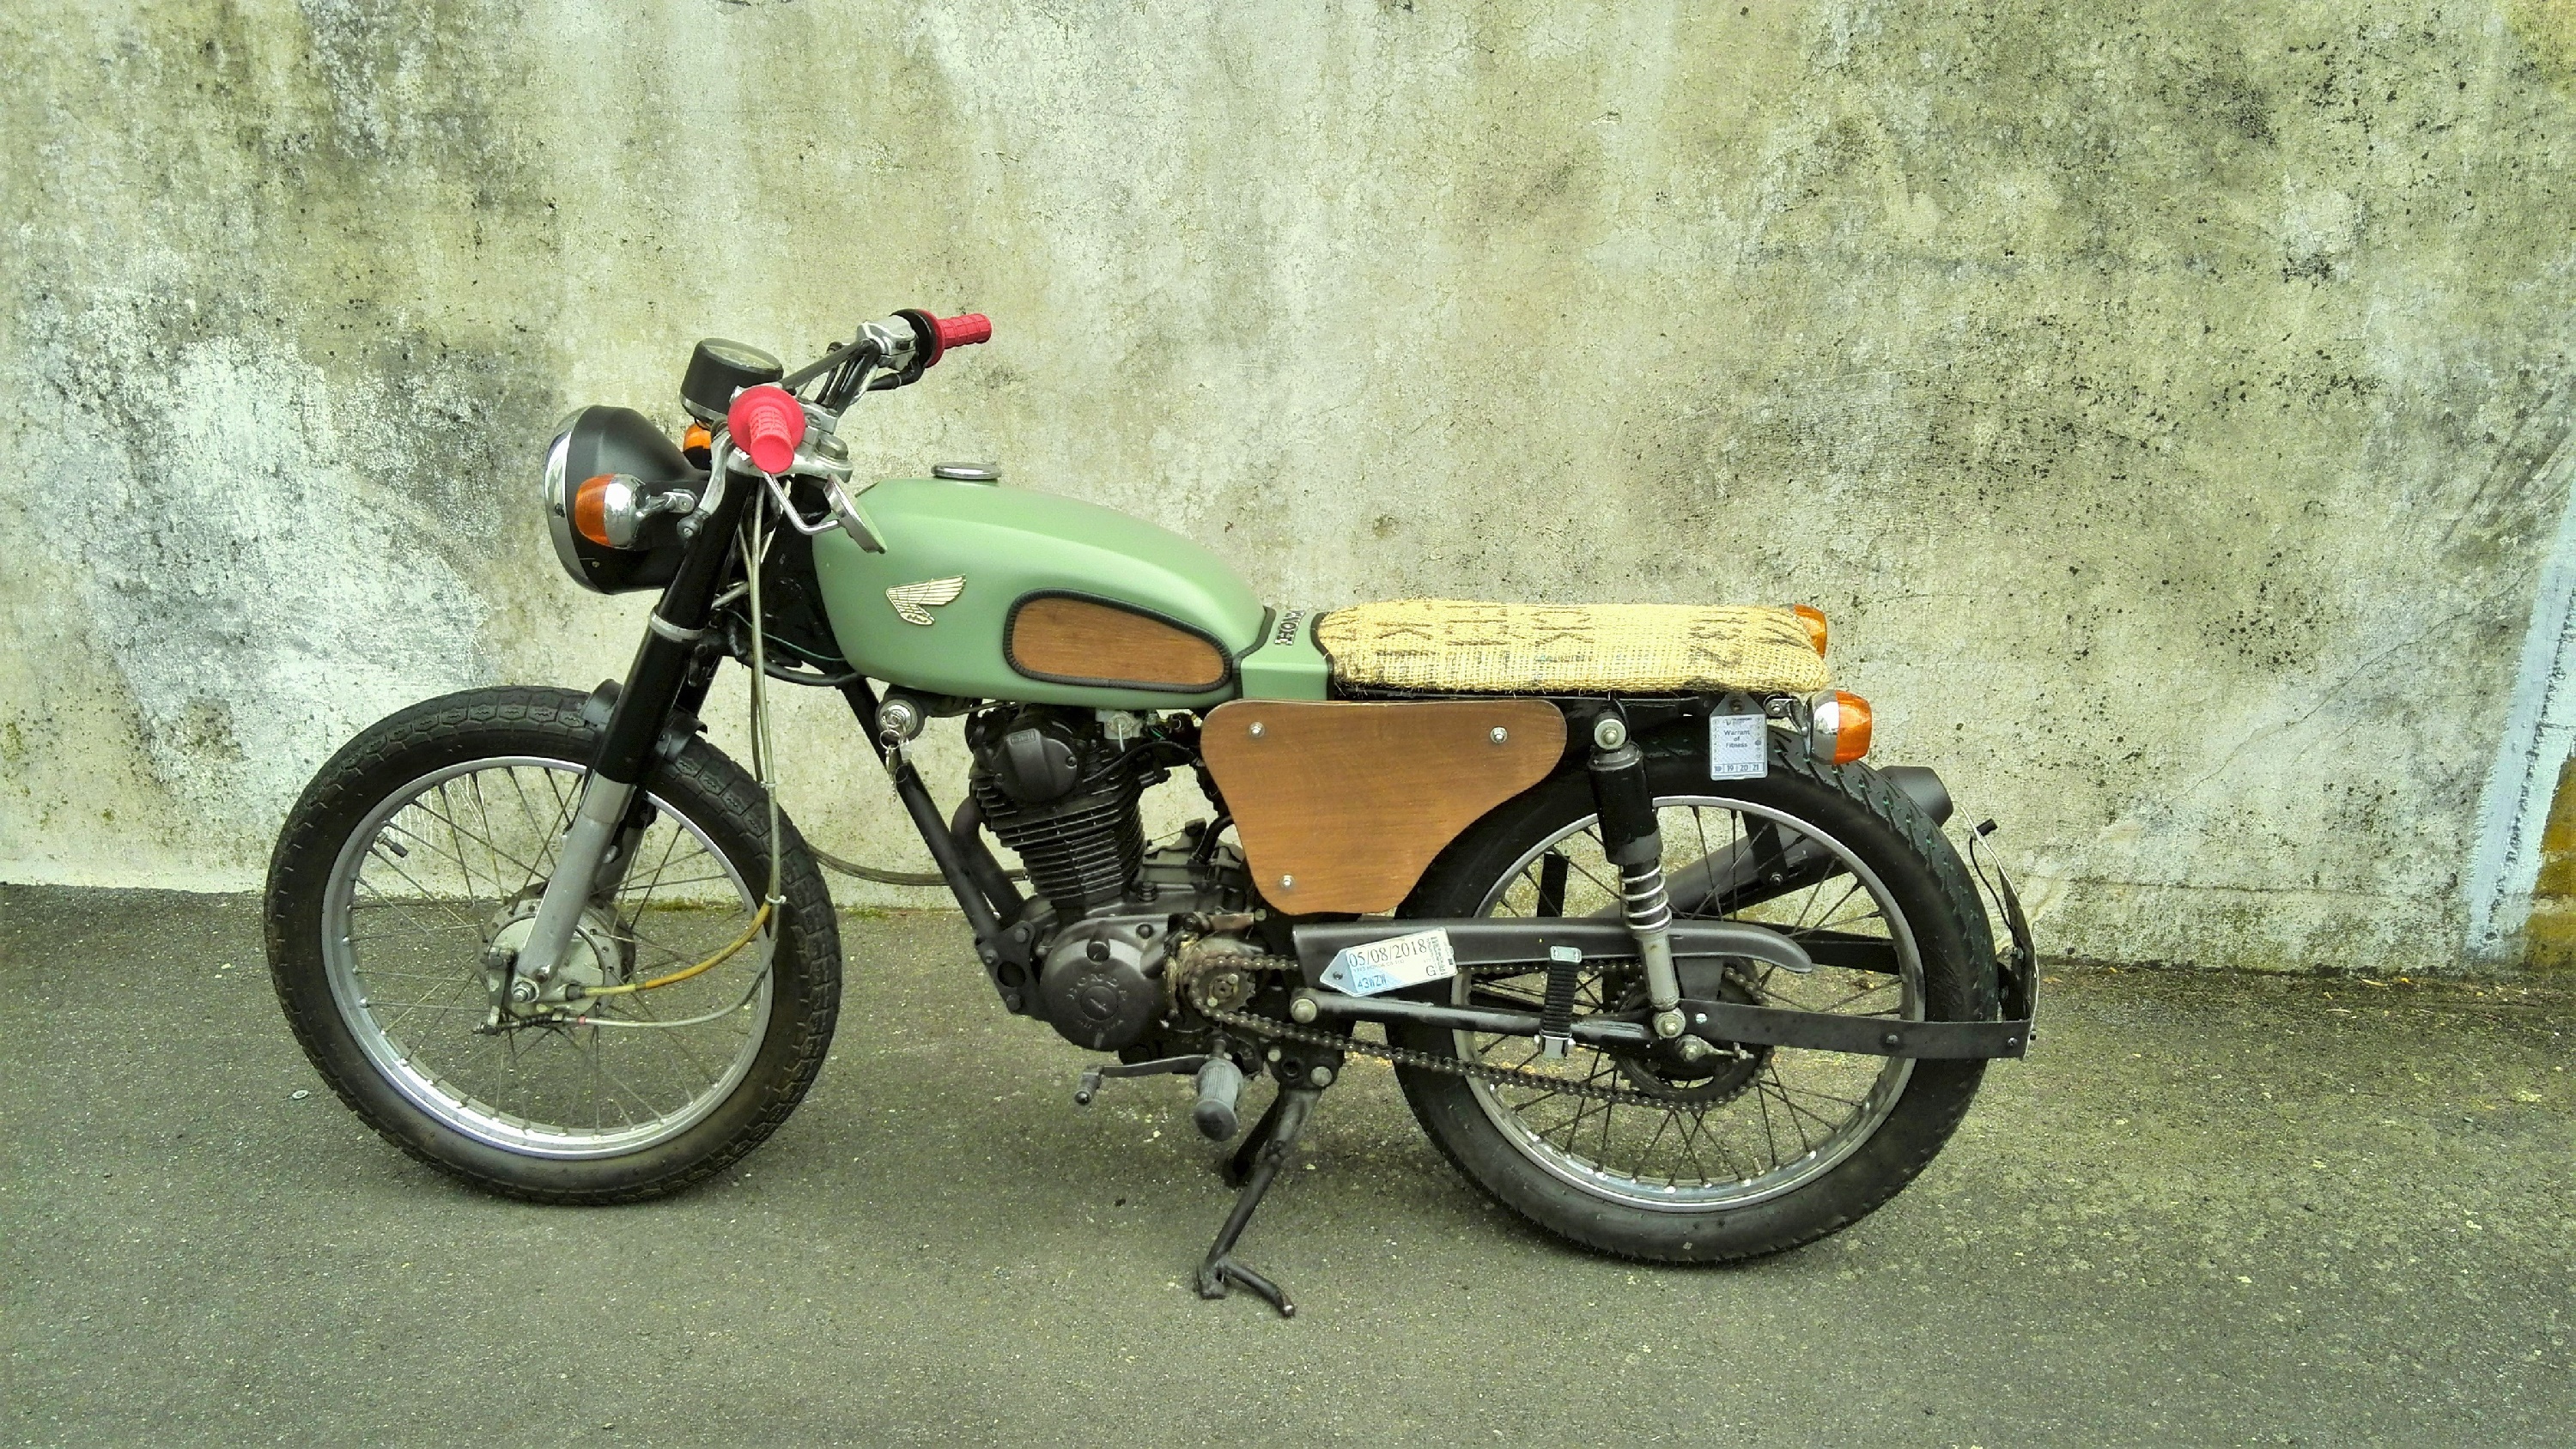
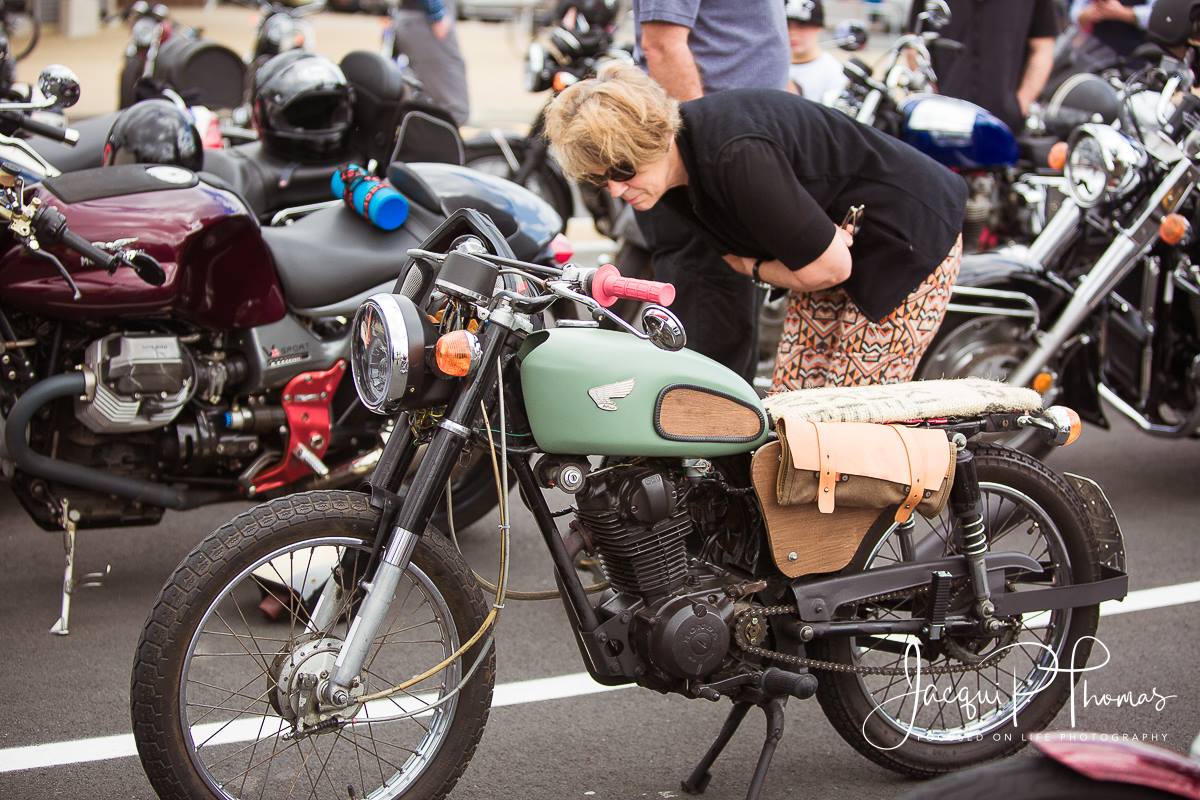
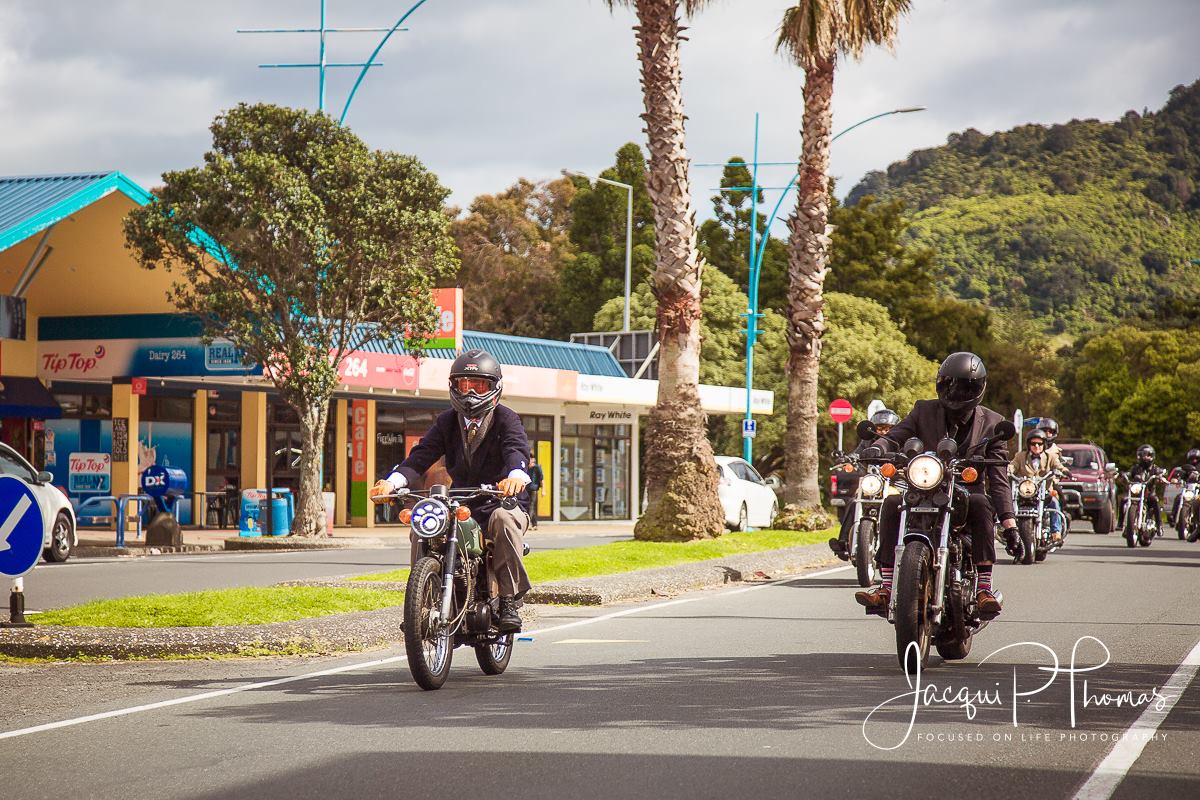
So this lil bronze bottler won "Best Bike" at Distinguished Gentleman's Ride in Tauranga out of 140 or so bikes that attended - whoop whoop! Not too shabby considering it was one of the smallest and cheapest there haha. Check out the link below to more pics from the day:
-
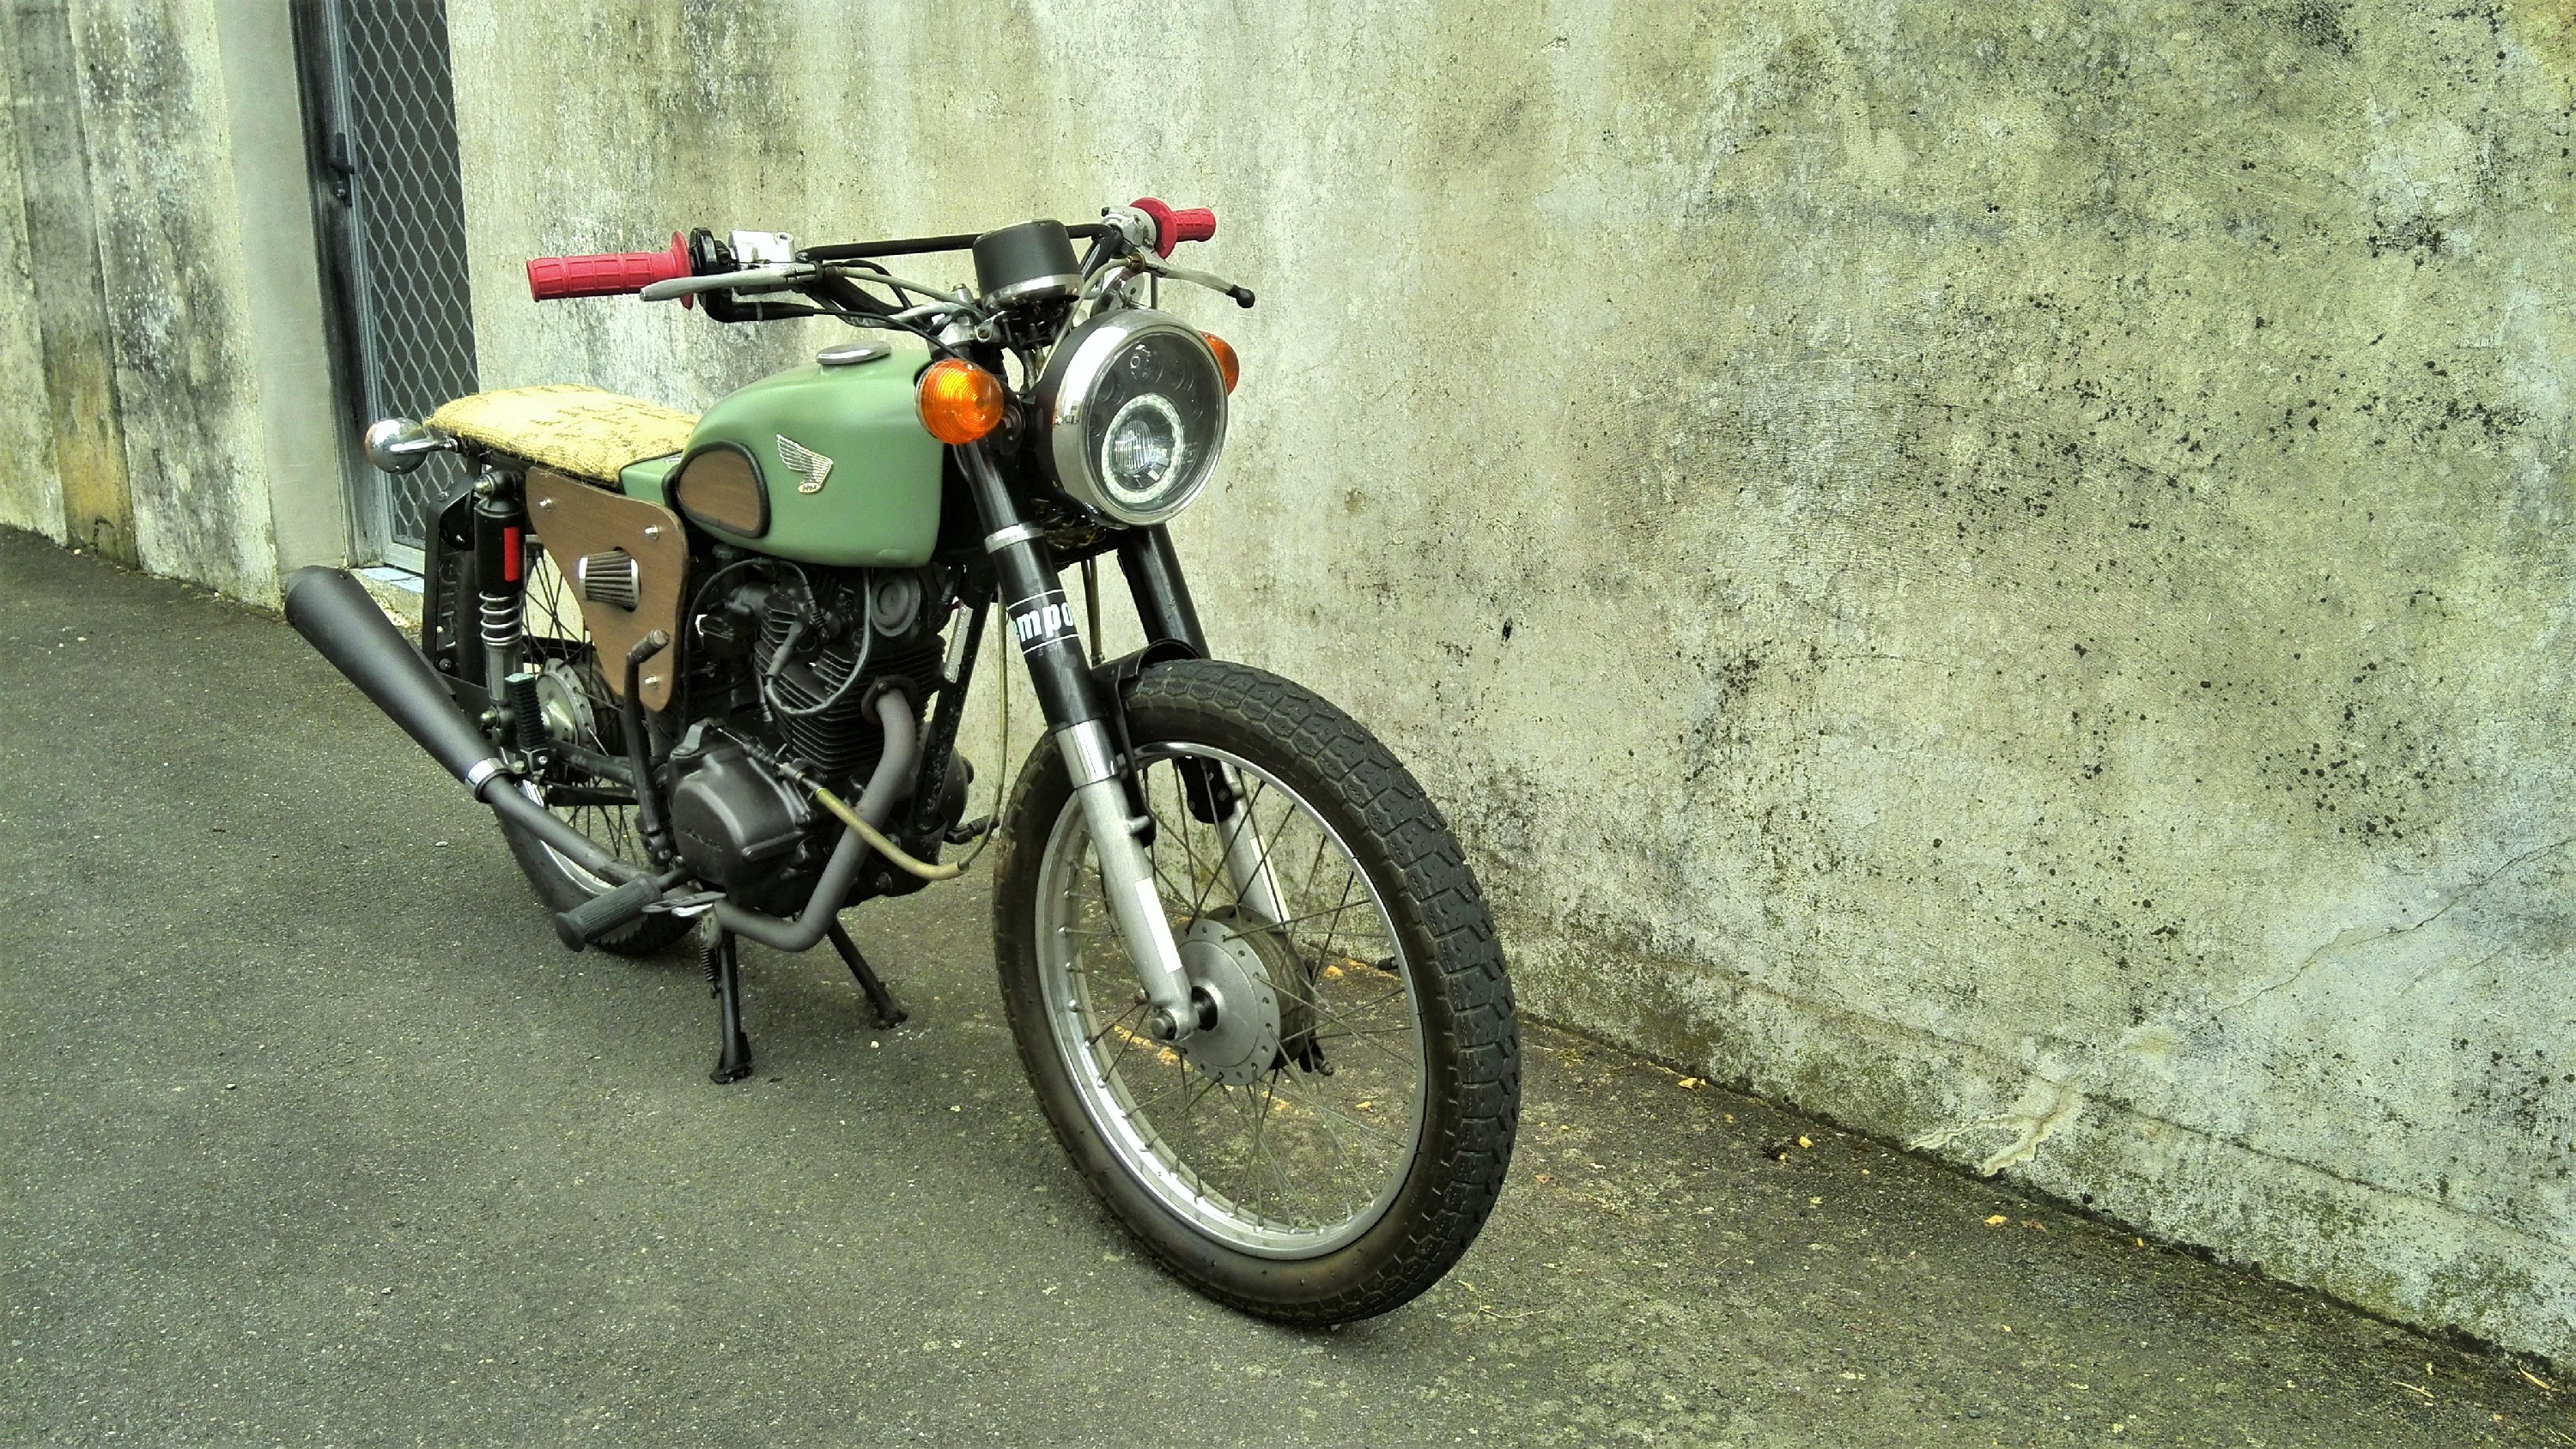
Back guard needed to go, and got annoyed at the prospect of having to make a plate holder and another smaller rear guard so came up with this idea. Hopefully it's WoFable? Also was going to go full LED with the lights but thought I'd keep the stock brake and indi's as they have grown on me. Hard mounted the indicators to the frame and relocated the taillight to the seat. http://
-
Haha, thanks Nick - and cheap! Plus you get a feed out of it
-
This is awesome bro! Excited to see how it progresses. Go the CB's!