

Ned
-
Posts
8482 -
Joined
-
Last visited
-
Days Won
1
Everything posted by Ned
-

Kumeu Hot Rod Festival - 16-17 January 2016
Ned replied to pusherman's topic in Upper North Island Region
Good thing you practised them engine swaps -
yeah, i just read a bunch about it on this forum and everyone said steel bundy is fine if youre not a wuss, including cam, so bought steel. Got to cams and he told me i was a cheap cunt for buying steel on his recommendation from 2 years ago (and turns out he never actually bought steel himself in the end haha)
-
i need to take more photos... Some cool cat (slacker.cam) tidied up some of the standard wiring yesterday because there were a bunch of no longer used bits in there etc as you can probably tell, all the super lush shit generally gets done by Cam and im the dick in the background complaining and doing sub-par work
-
Kumeu Hot Rod Festival - 16-17 January 2016
Ned replied to pusherman's topic in Upper North Island Region
KP with teardrop OK to enter? Or should I find a towbar on a cool car to hitch the teardrop up to? -
Not a super exciting update picture wise, but heres what happened over the weekend some cool dude (cam) made me a lush bracket to mount a new coil and little tiny igniter right onto the block, next to the dizzy. He painted it after and looks the business for sure! i made cam angry when i put the pretty new thing in the dirty old thing without cleaning it and making it look good while it was out i didnt take a photo of the end result because i threw my toys big time working on bloody hard line! getting hard line right is a PITA and i dont ever wanna do it again! but here's a token pic anyway... thats before final bend and flare on the end, and also before the return line was added. Put in new 5/16 steel hard lines for feed and return. Fuel system is now the pretty TTT made thing with 1/2" feed and 5/16 return with AN fittings. 1/2" goes through soft line and filter to the back end of a Bosch 044 (china) and comes out as 5/16, which then goes to hard line to the front of the car to another filter and through the standard fuel rail and reg with a new pressure sensor. From there back through the standard return line to the firewall, where we changed the hose to go to 5/16 again and runs through a new hard line back to the tank. we were worried about the 044 blowing the reg off the rail, or at least flowing much more than it would handle, and we'd have to slow the pump down somehow. Already thought up ideas of PWM controlling it to limit flow, or making a cool constant current supply to limit pressure, or extra reg... so thats why we installed the pressure sensor, so we could keep an eye on it. We finished the fuel system yesterday, put in some fuel, multimeter on the sensor and hooked the pump up to the battery and crossed our finders. Bloody works! no leaks, legit stable pressure (46.25PSI) so that was a very happy moment after messing around with it for so long and being worried about the dumb decision i made to buy a china 044 (not because china, but because 044 way over spec's a little 7K) after that we made a start on the wiring. Got supervised by Ed and by Houdini. More tonight and tomorrow and then maybe i'll be able to fire it up before burger boes on Wednesday!!! Some bad news though, wont be running it on my own hardware for the next little while, because the code (FreeEMS) isnt good enough to handle the factory trigger setup, so i'll have to write my own code to do that and there isnt enough time for that before burger boes, so going for a borrowed microsquirt to get it on the road and swap it over to my own thing later... good thing its the same pinout
- 24 replies
-
- 10
-

-
I do have to mention that to get it running this week, I will not be using my own hardware, because apparently I need to modify Fred's software so it is actually capable of running a standard 7K, but that's OK, well get it sorted but probably best to use a known ECU to get it running, and swap to mine later. Good thing i made it pin compatible
-
Maybe... Maybe...
-
Wiring has begun!
-
Got more goodies in the mail today! looking forward to putting this to good use
-
Had a quiet weekend this weekend. Did some RC flying with Cam, Jess and Jerm on Saturday morning, and then motivation dwindles quickly, and Sun afternoon i went to my sisters BBQ thing in Hamilton. Got SOME stuff done though! did some CAD work (Cardboard Aided Design) for a hall effect trigger wheel setup this is as far as i got before i broke my angle grinder Cam having a go at soldering up some fuel lines turned out mint! shit photo though, sorry... so the old return line fits very nicely inside the 5/16ths line i'm now running as feed and return, so soldered it all together and seems pretty legit to me! Also went to Zebra and picked up some new bits and bobs but wont bother posting photos of that, but got the m,issing bracket for the throttle, IAT sensor, bracket and gas filter for MAP sensor and a throttle bracket than might let me reverse mount the throttle cable as that would look much much better!
-
Burger boes has been moved for you BTW
-
Lols rusti, this is a purpose made hot plate, and there is a limit as to how long you should leave it on The most 'fun' bit is when you drop the board pulling it off the hot plate, because the solder is still liquid and all the parts fall off
-
Glad you guys like it lets hope the rest of it all works haha
-
Any chance of moving this a week so it coincides with Felixx being in Auckland? He'll be here wed 25th. Probably no big deal if it's too late, can just have 2 meets
-
it's not? didnt even realise haha. I'm keen for 2 as well, but burger boes is a pretty great thing to witness for out of towners, because its the only time people actually come to meets with some cool cars haha (and if it's a week later, i have SOME chance of getting my car there haha)
-
so i put some parts on! thought i'd share some of the steps for those who find this interesting and are unfamiliar with the process... so first of, you need to design a PCB on the computer, send it away and then PCBs show at your door 2 weeks later like so; Now we have a few options. I could throw dollars around and get a contract manufacturer to put the parts on. They charge about 20c per component to place (as a rough rule of thumb) and then there is a one of charge of ~1500 to get them to setup the machines etc. Very handy when you;re making hundreds/thousands of the same thing, but not when you have to make 1 board to make sure it works first! Option 2, you get friendsly with your soldering iron and you place all the parts one by one and solder them on with the soldering iron. This is how many DIY people do it at home, but this isnt the fastest and doesnt have a very good end result normally as nothing is on straight, and the solder leaves heaps of flux behind etc. Option 3, the option i went with, is spending a little more money, and the man making the PCBs will also make you a stencil. Normally these are grown (yes, grown, it's weird!) but the cheap option is laser cutting them out of thin stainless. What a stencil is, is where there are pads that need solder, they make a hole in the stencil so you can squeegee some solder paste over the top and it leaves solder where you want it, and not where you dont. The other option is using a solder paste dispenser, which is a little syringe driven by air to put some paste where you want it. anywho, solder paste is just that, a paste made of little tiny balls of solder, mixed with some flux. The flux makes it all stick together, and also helps the heat transfer around all the little balls of solder, and when you heat it, it all turns into real solder so after you put some solder on (hard to tell in the photos) we are ready to place some parts! and here is the first part placed! (brown-ish, slightly up from the middle) about an hour later, and all the little passives (caps, resistors etc) are placed! left = done, right = to-do hour 40, and all the bits are on! Notice the tweezers used to place the parts that board is about 65x90mm to give you some size ideas. So before you all ask "why place such small parts on a DIY board?! that seems way too hard!" well, those parts are actually quite big. They are 0805 SMD parts, which means they are 0.08 x 0.05 of an inch in size (2mmx1.25mm) which seems small, but these days people will use 0201 on a regular basis, and even though most get a machine to place them, some still do manual rework on them. Most contract manufacturers dont even have a machne capable of placing 0201s by machine and get done by hand. So 0201 is 1/20th the size on an 0805 the two circled parts are both just a resistor and do the exact same job, just a different size Now that the parts are placed, we get to heat up the whole board at once to reflow the solder and turn the solder paste into real solder and hold the components on properly This is done with a hot plate. Big aluminium plate that gets heated up to 200deg C and then you put the PCB on and solder paste turns into solder right in front of your eyes Sorry about the shit camera work, but heres a video in case you feel like seeing how it works Now just need to put the through hole parts on, and fix the solder bridges etc, and power it up and see if it blows up... (i hate that part... like starting an engine for the first time after a rebuild haha) edit! do they look similar? best thing yet though! it lights up! and the computer enumerates the serial port
- 24 replies
-
- 37
-
-
too late to move burger boes by 1 week chris?
-
just got this delivered!
-
just picked up some more fuel related bits from Tim at TTT Auto Engineering and Segedins. Cost a pretty penny more than expected, but is a lush job, and SHOULD be big enough to feed a 7K
-
china FTW my friend. how bad can it be right? fuel pressure sensor is china also
-
carbs are for suckers! also put a hole in the fuel rail for this So now i have a fuel pressure sensor on the fuel rail to go back to the ECU. Not needed, but i'm going to run a Bosch 044 (china 044) and thats gonna be a little overkill, so going to reduce the flow so want to be able to log the fuel pressure to make sure its not too much for the standard fuel pressure reg, and also enough for when i'm at max fuel etc.
-
Should work now
-
Lame balls! I'll fix it when I'm back in the office
-
Spent the weekend swapping engines //oldschool.co.nz/index.php?/topic/36476-neds-7k-drop-hatch-starlet/?p=1614406 next mission, wiring and plumbing EFI!
-
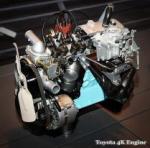
Spent the weekend at Cams working on the car. did this on Saturday and prepped the new 7K to put back in (theres 2 7Ks in this image followed by some fireworks show Then sunday, put new engine in the hole Fuel tank out, ready for EFI conversion didnt actually take any photos of stuff really so not much more to show and then the end of the day, stacked some cars in Cams garage KP is the first and only car to have been on the hoist, and this was the first time cam parked his precious 86 under another car on his hoist. Hope it's still standing! and then today, i received a nice box of bits from DigiKey. 988 little tiny capacitors and resistors etc, so ready for the PCBs to turn up!
- 24 replies
-
- 10
-
