dmulally
-
Posts
1,390 -
Joined
-
Last visited
-
Days Won
3
Everything posted by dmulally
-
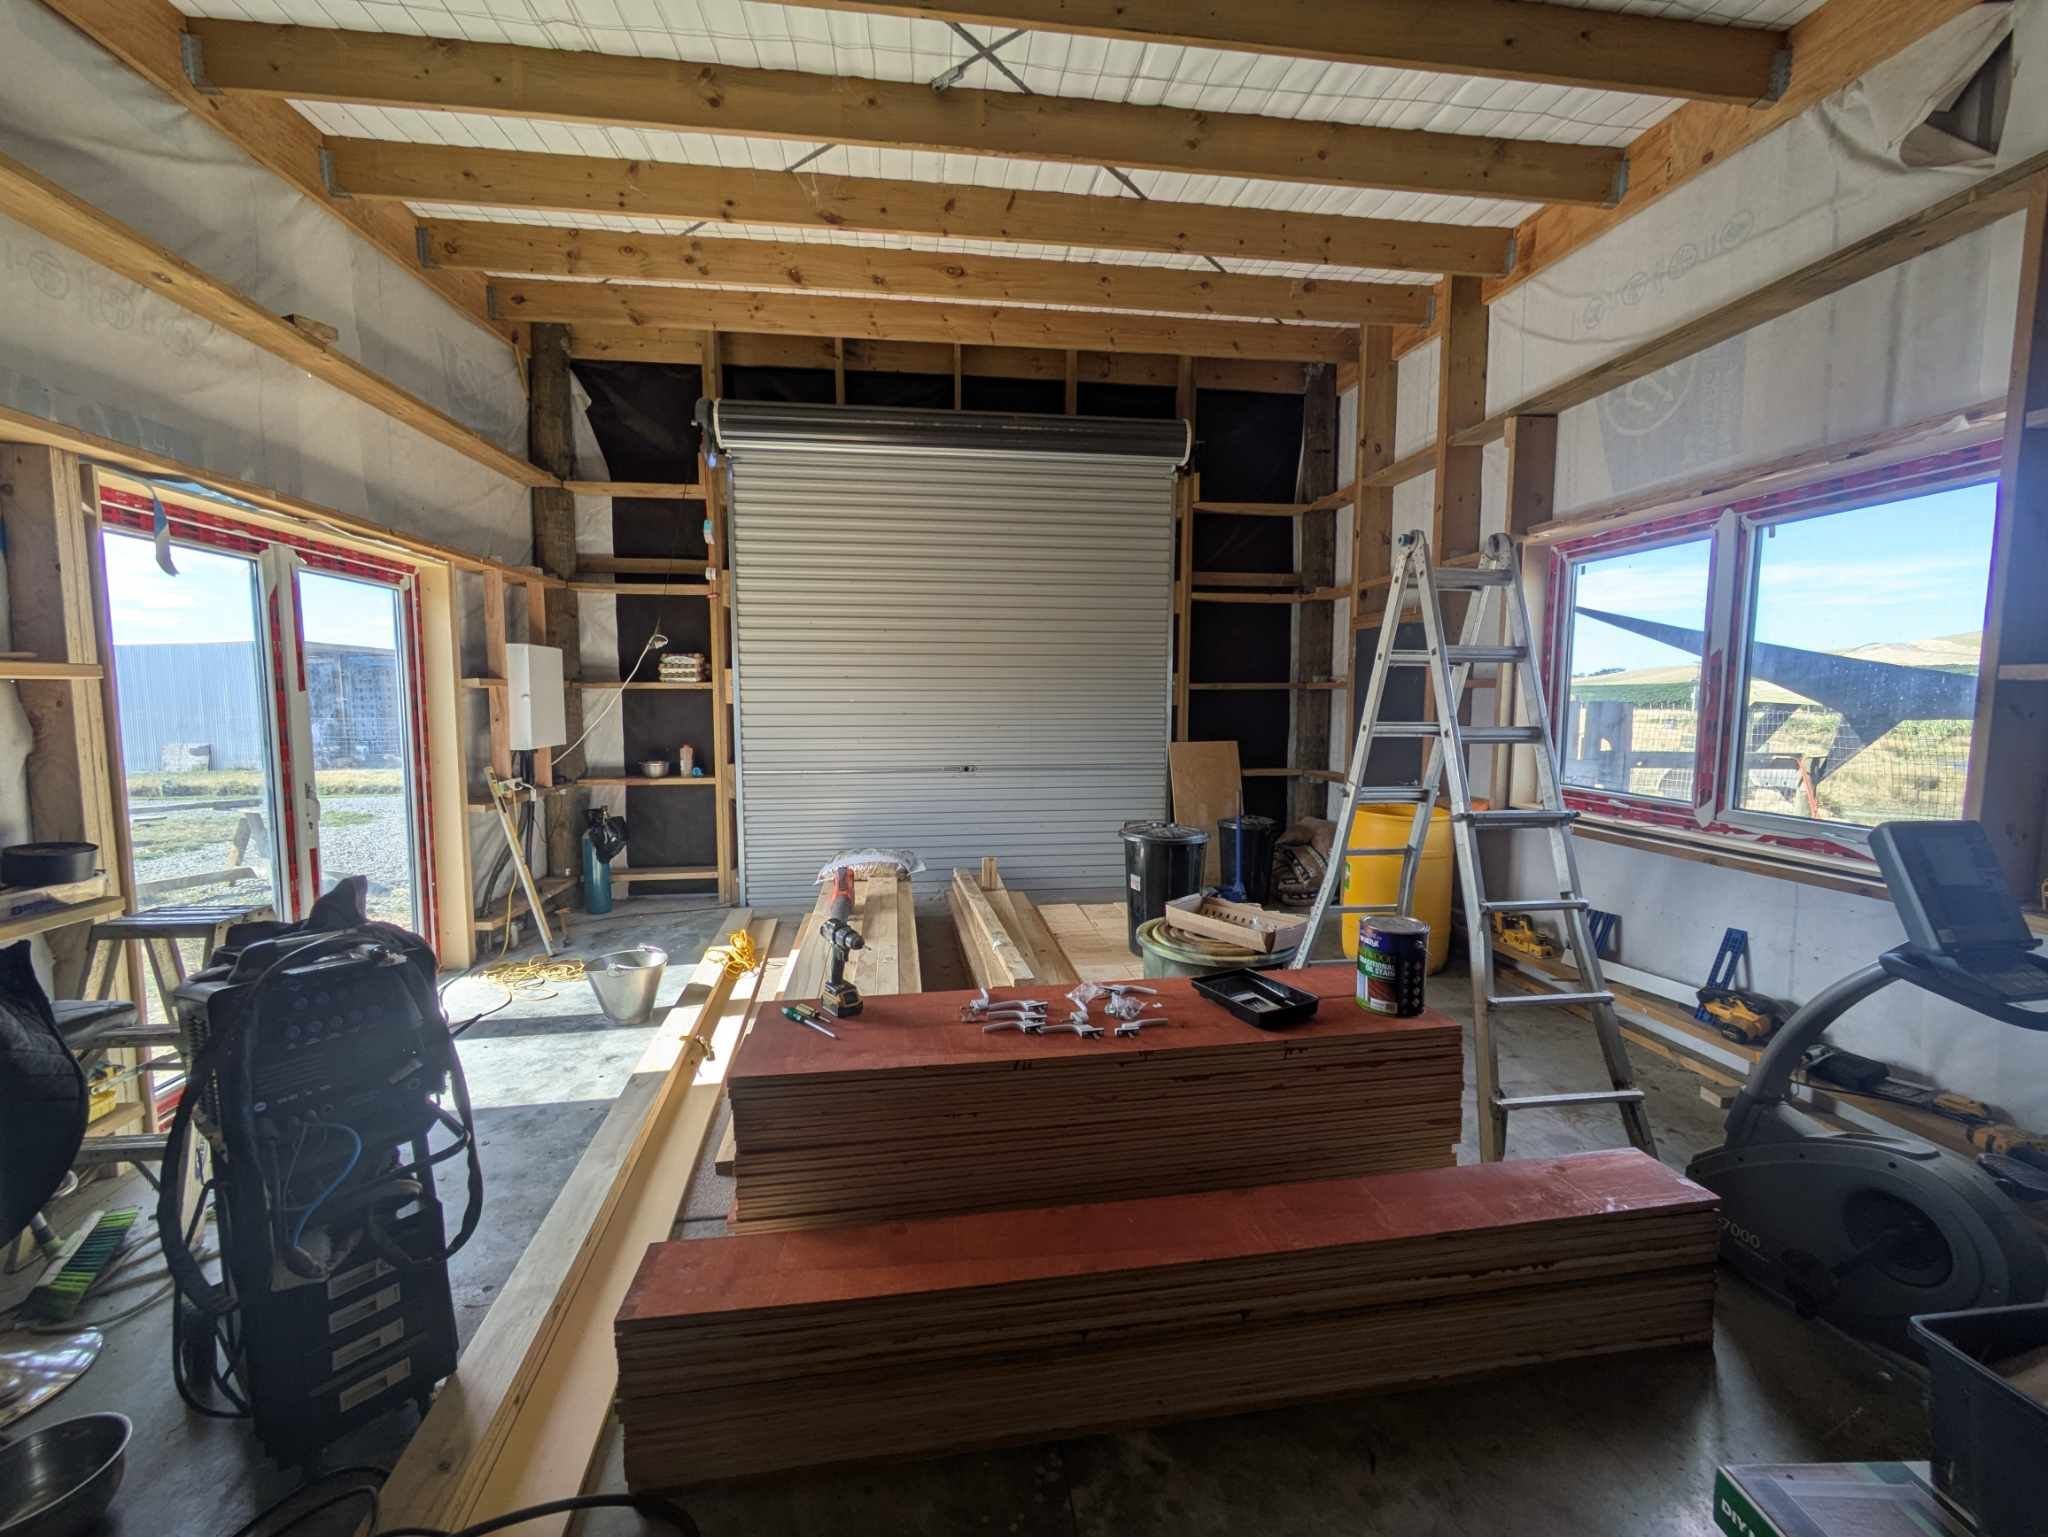
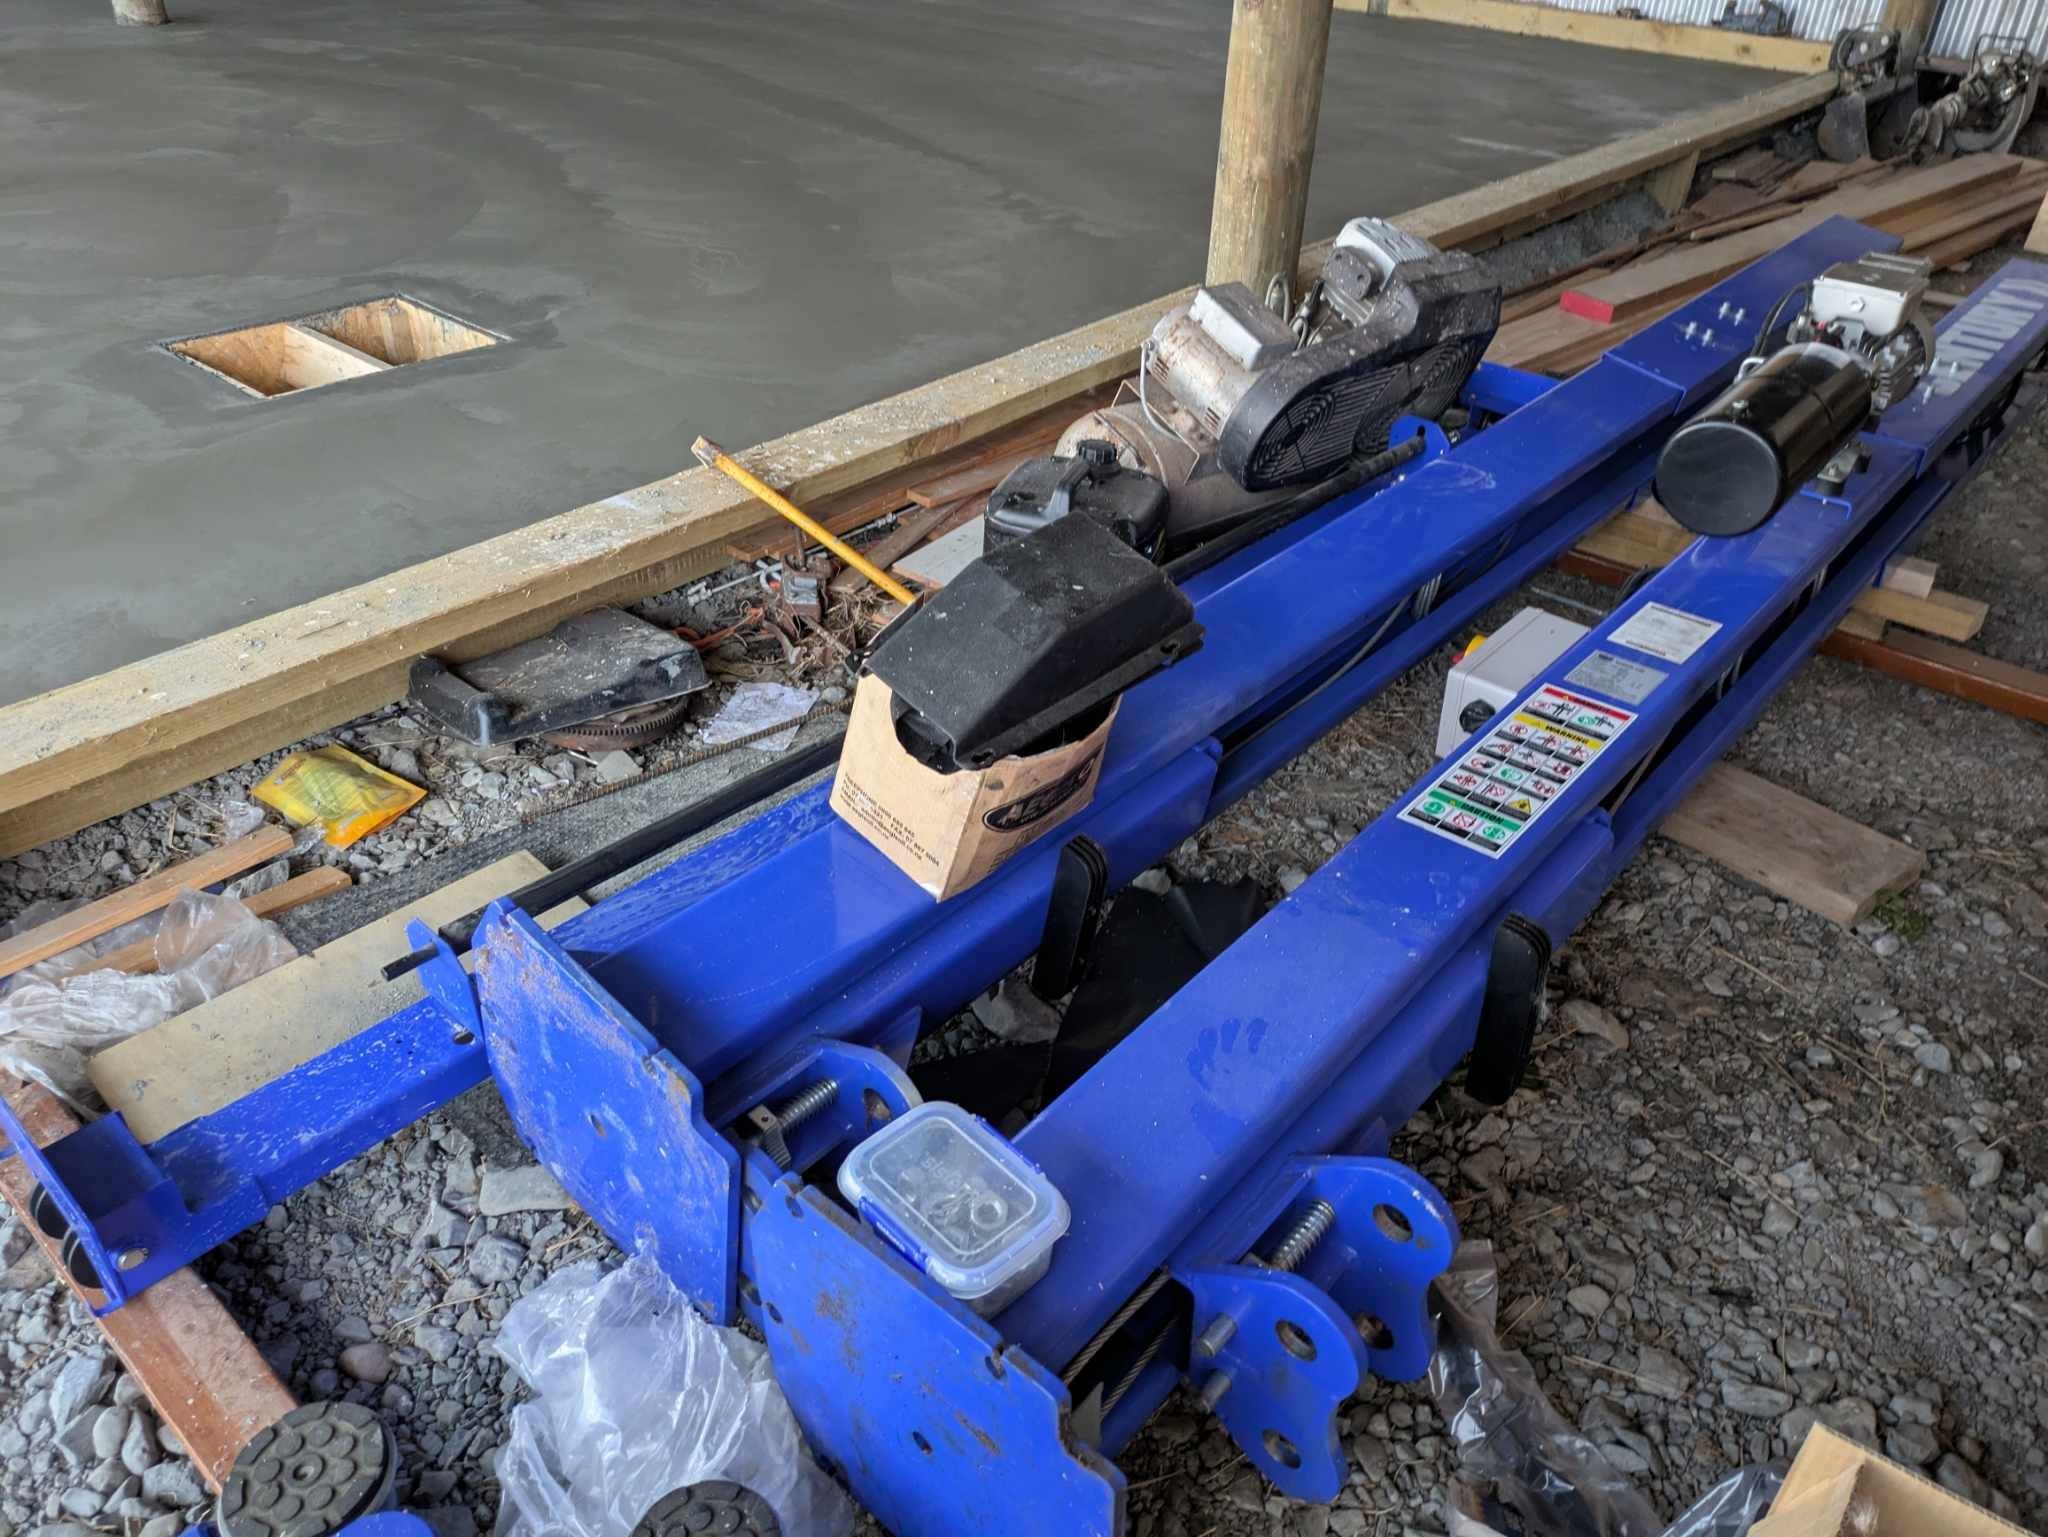
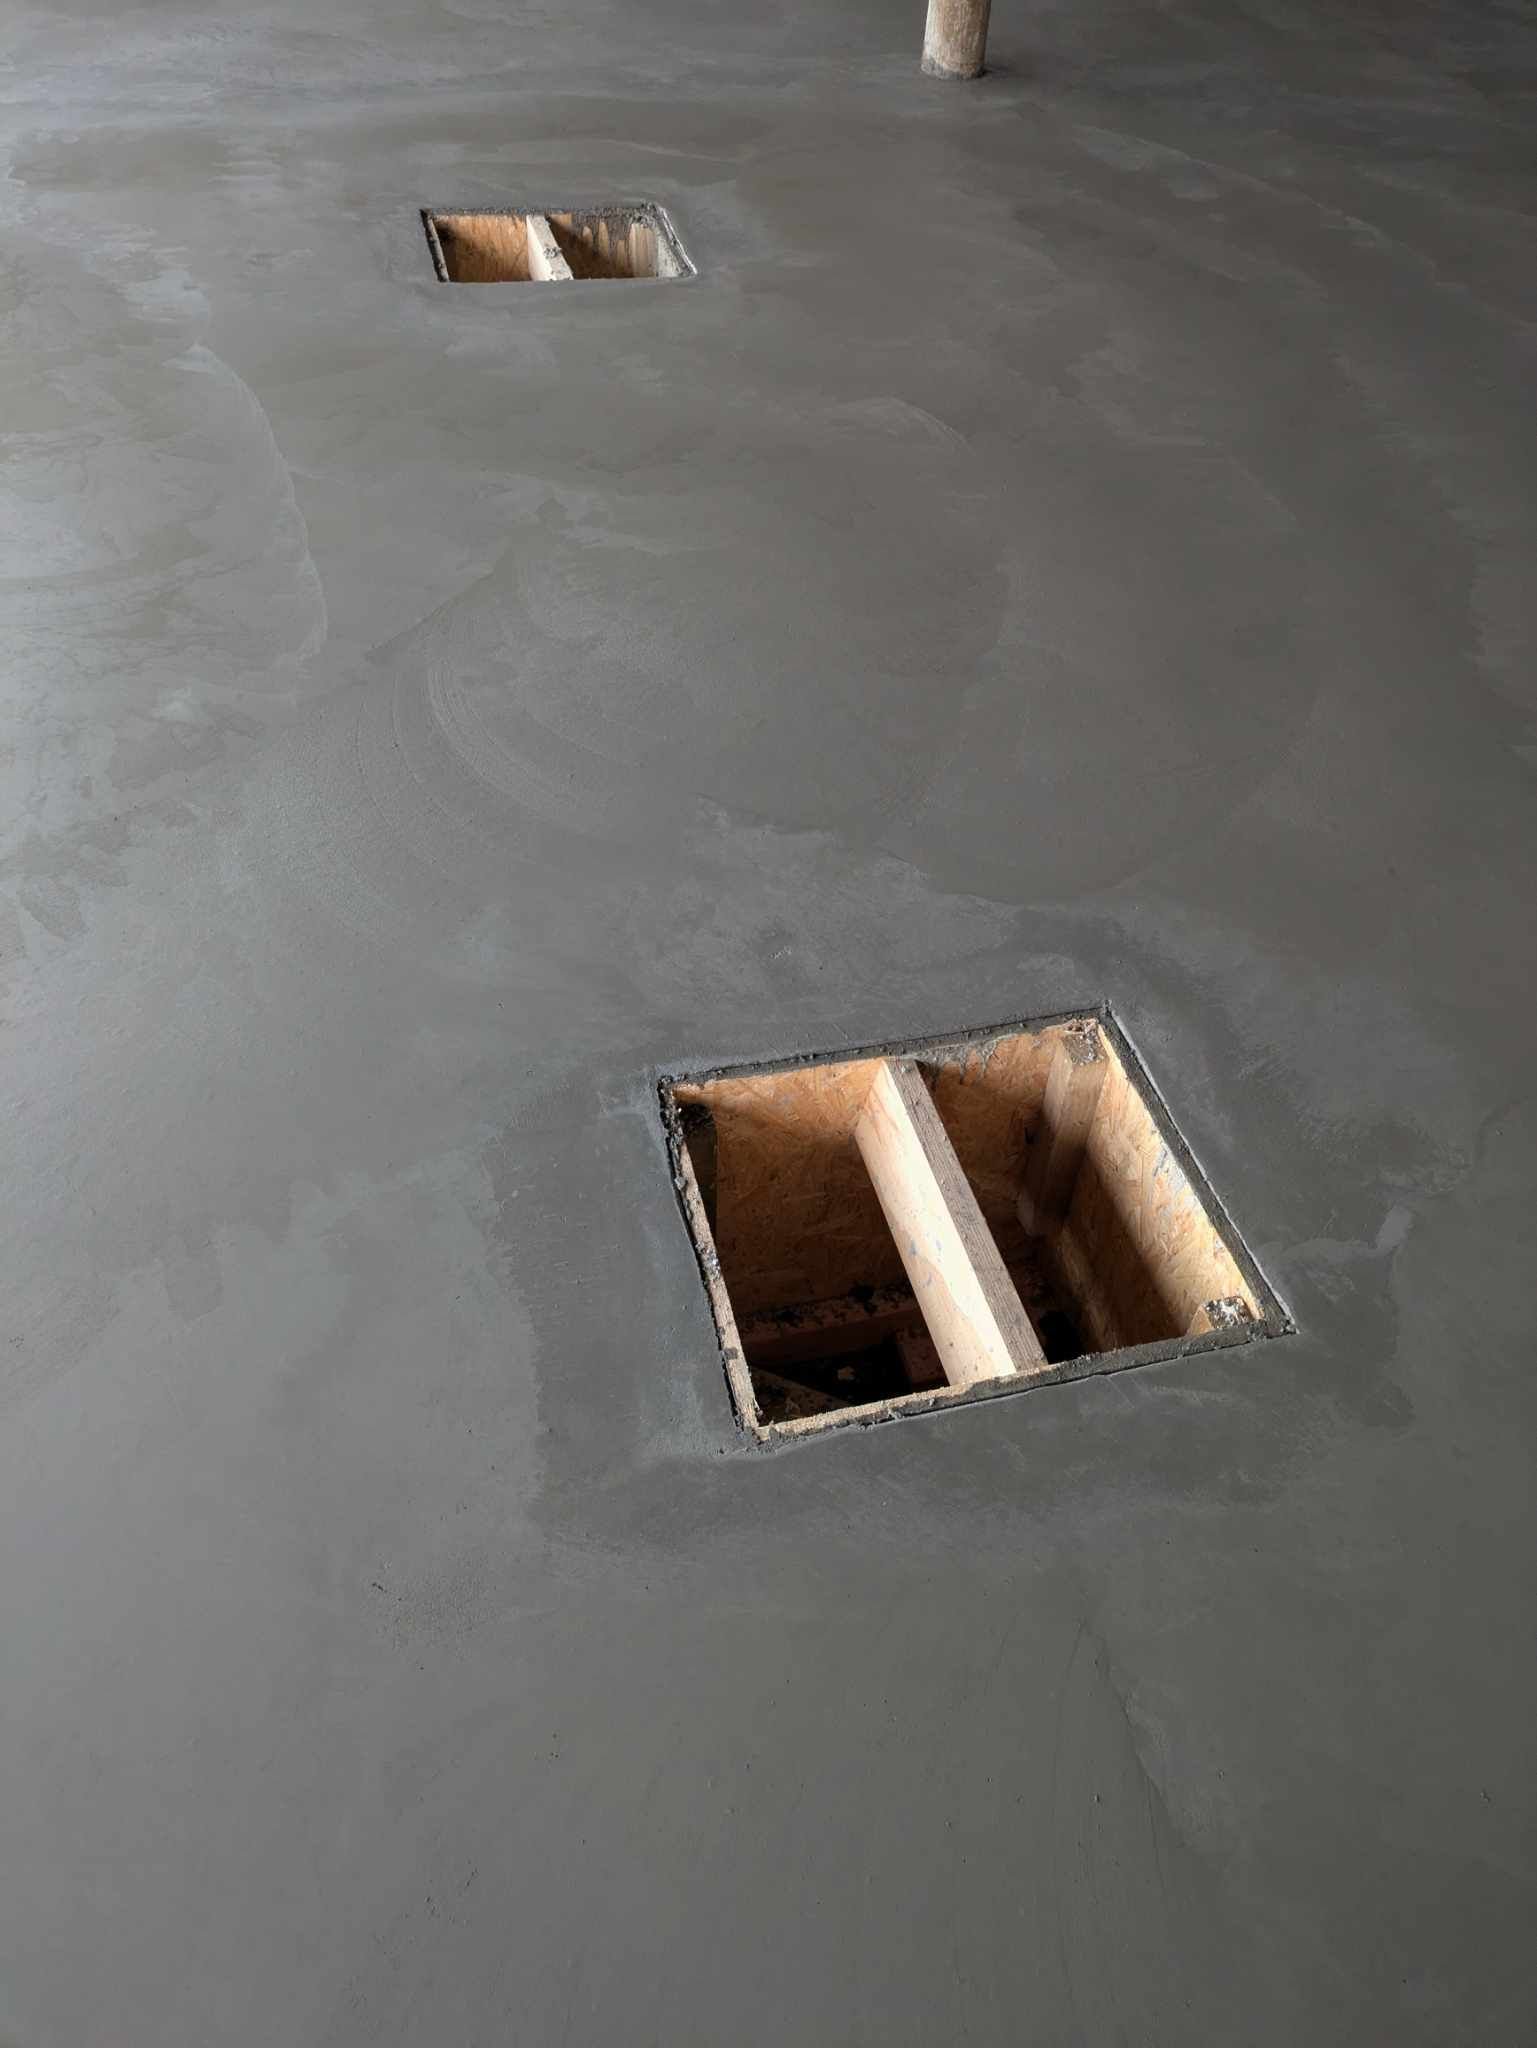
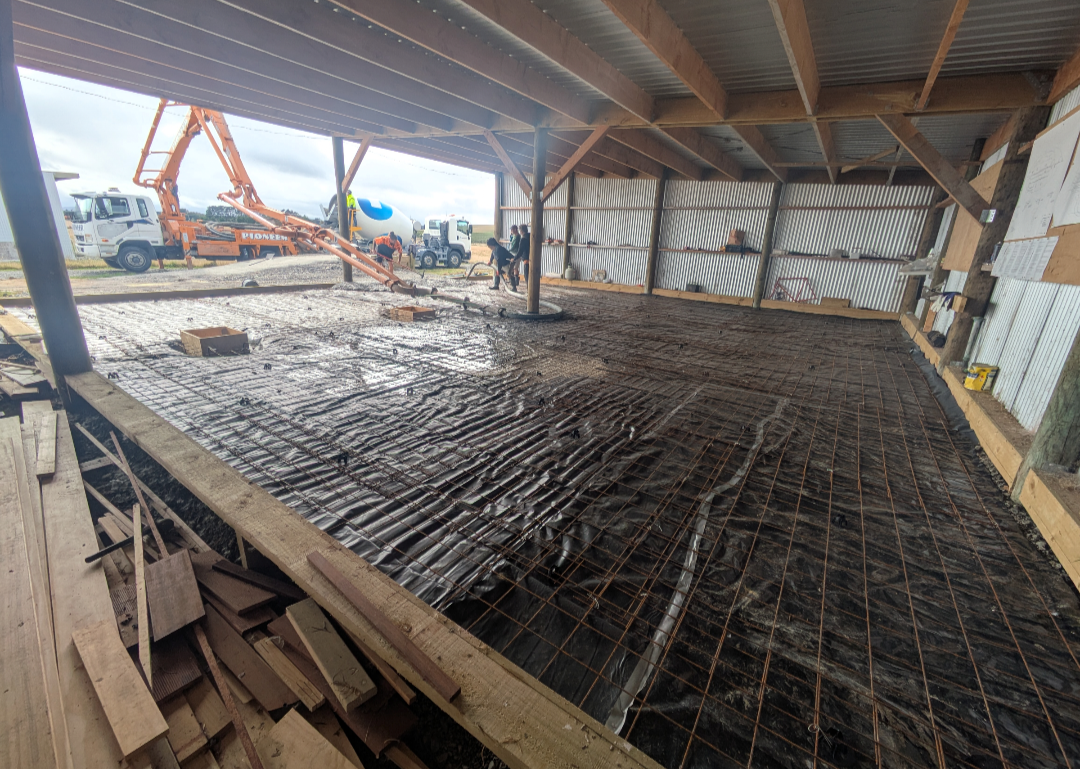
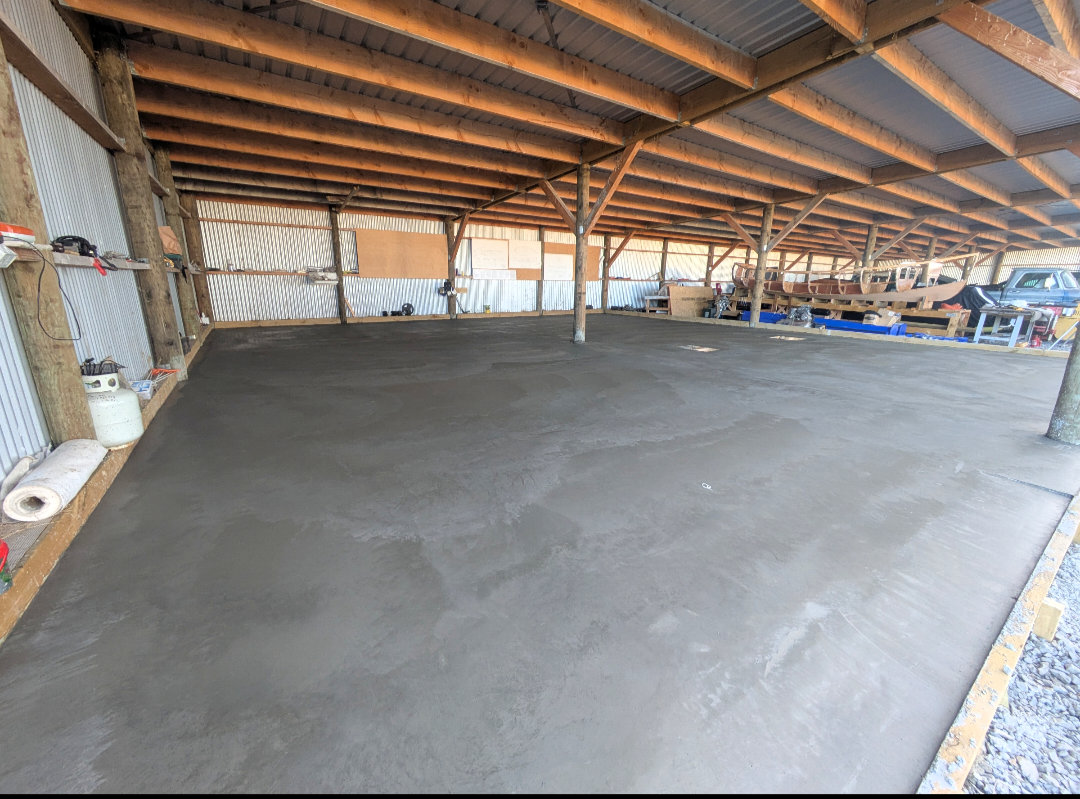
Cheers mate and kinda. I had a cabin in a smaller shed with a workshop. I am moving the workshop to the space I just concreted (150sqm) and extending the cabin to take up the whole of the other shed (72sqm). Adding windows and doors presently. But still have shitloads to go. It's a lot of faffing about but have been putting it off for years and need to extract the digit. The tricky part will be the hoist as it is going into a lower shed so had to dig in footers.

- 66 replies
-
- 11
-

-

-
Getting there slowly.
- 66 replies
-
- 15
-
-

Dmulally's 1985 Mitsi L200 Discussion Thread
dmulally replied to Bearded Baldy's topic in Project Discussion
Hi All, The day ended in the letter Y when it went in for a wof so I'm enjoying working my way through a long list of things that were fine the last couple wofs but are now suddenly life threatening. One thing it did fail on (was fine the night before when I checked ironically) was the parking lamp. Does anybody happen to know where I can get the front indicator assemblies from on shore? Not sure if they are shared with another mitsi model or not. Similar to an Imp actually which is a last resort as I have spares of those but will need to make mods. It did come with a spare but the parking lamp bulb assembly is rusted just like the one on it. -
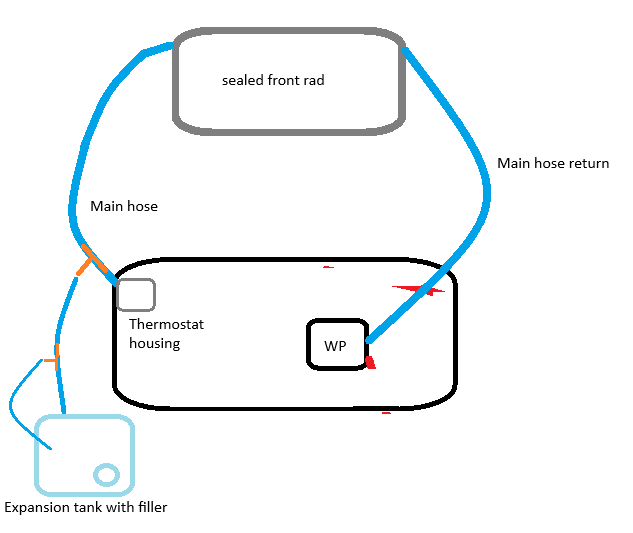
He has thumbs! Anyway I managed to nab one of these: I'll T piece into the main hose line and block off the heater. Similar to the question above, my car doesn't have a thermostat bleed line. Anybody know if I can plug it off or should I put a T piece in the hose line to the T piece on the main hose line such as this: Not sure there is anything on the block I can take it from.
-
Why is it always the pretty ones... They didn't use a pen, dummy.
-
Thought this was a bit special.
-
Yep. Whilst I'm waiting for the filler neck to come in from overseas I might go to the wreckers and look for a header tank like that one. I always run an external expansion tank anyway but could put me back on the road faster so I can test on it some more. Sucks seeing it ready for a drive and not being able to.
-
Cheers. Do you know what that smaller line goes to from the expansion tank?
-
What is a 120/130l sorry?
-
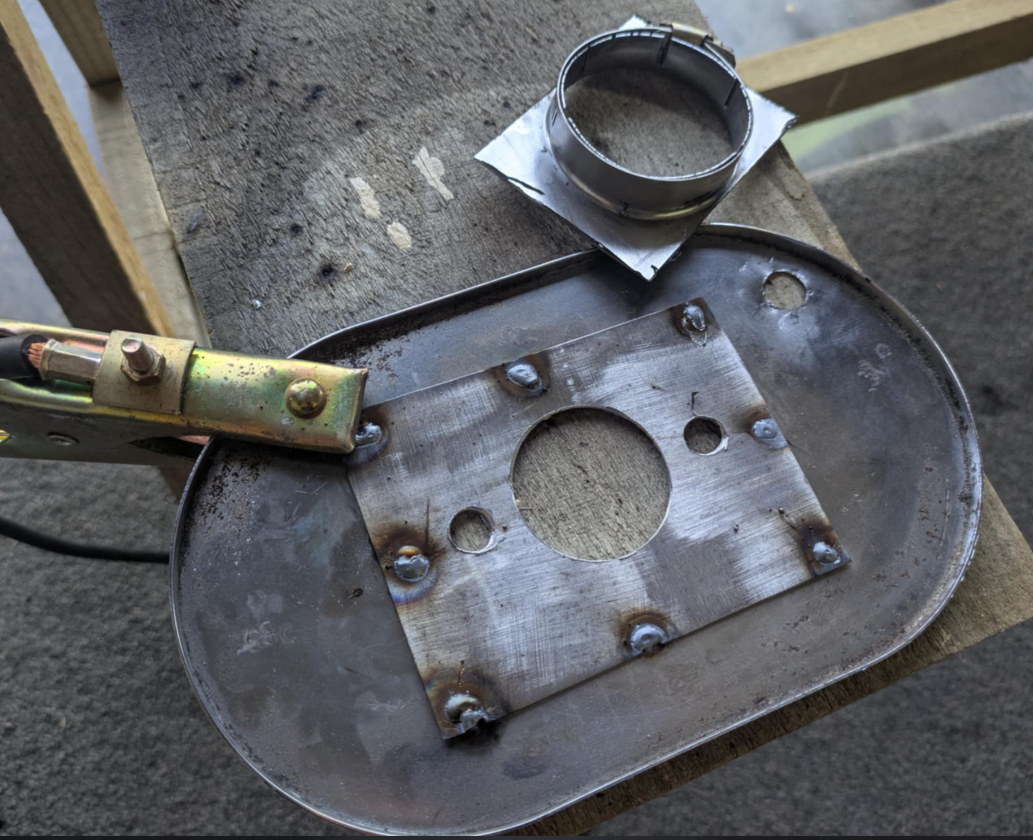
I thought my days of sticking a bolt in the heater line were behind me. I guess I can't change who I am. Ordered one of these:
-
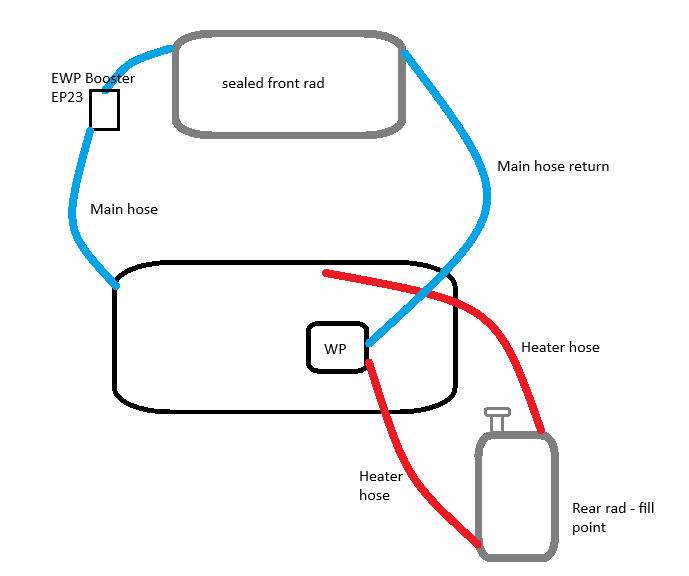
Thanks, gents. I might put an in line filler neck where the booster pump is and delete the rear rad. Any thoughts on looping the heater hoses? They can't be plugged easily as both as press in fittings and I may want a heater some day.
-
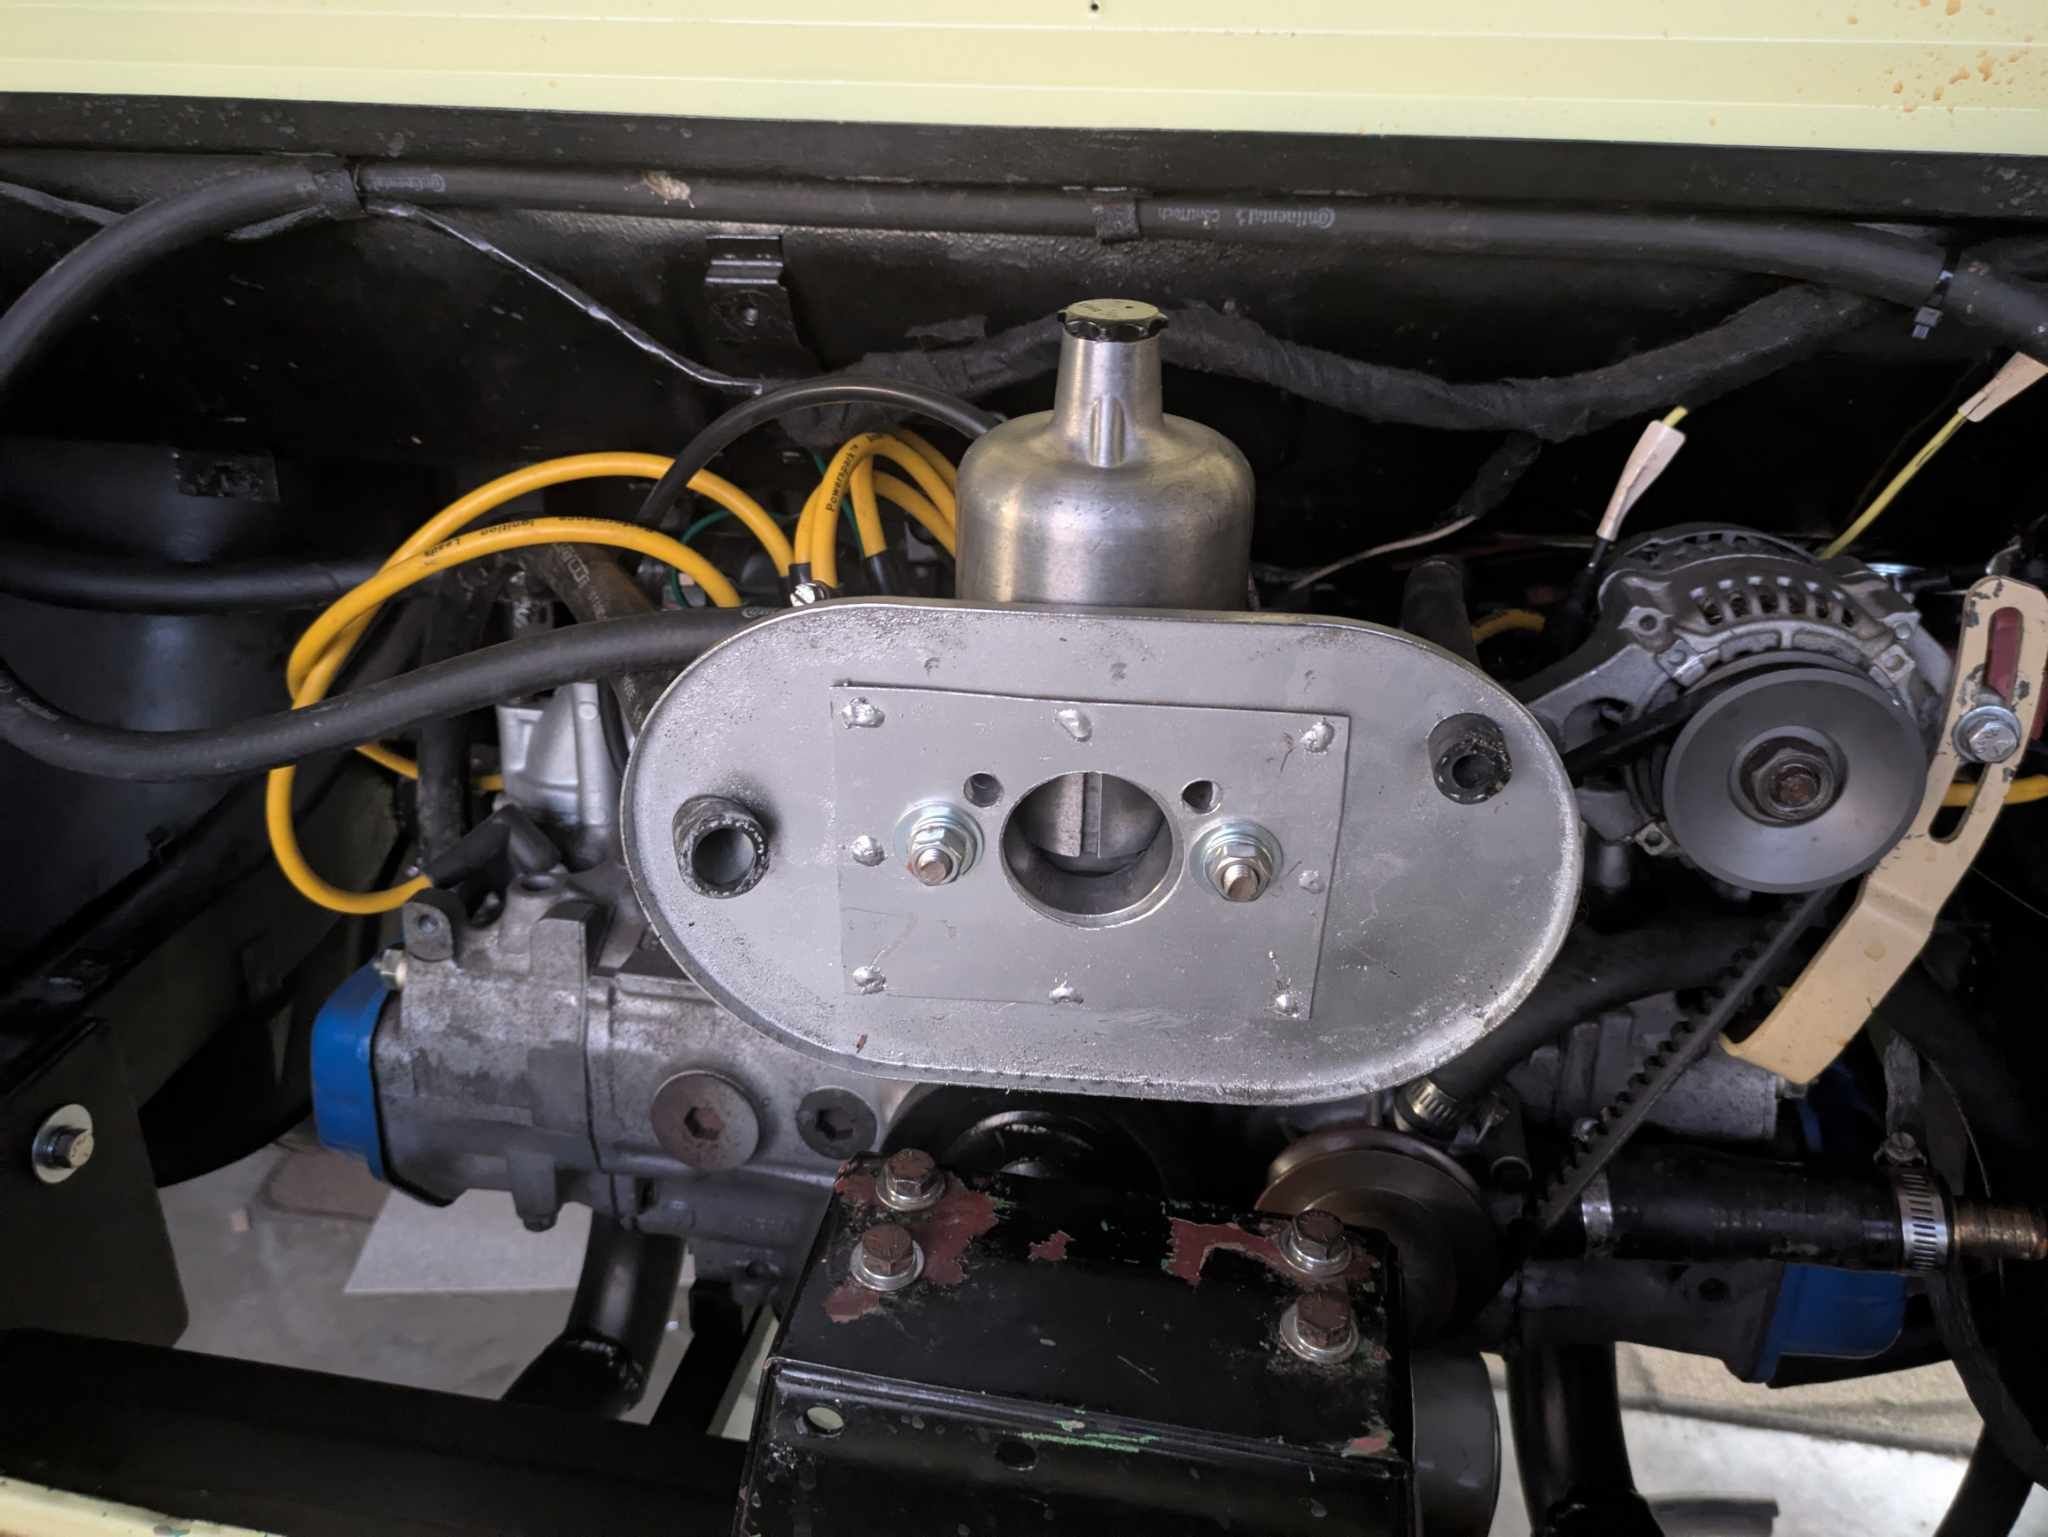
Might need a rethink of the cooling system and thought I'd throw it open to the brains trust. I recognise that it's the absolute worst time of year to be testing a new engine that is all alloy and in a car that has terrible cooling but I think it's too terrible. I have the main cooling lines going to the front rad via a davies craig booster pump. The thermostat is a stock OEM one. Keeping in mind I haven't even farted about with timing yet (have to do that on the open road as can't see any timing marks with this bellhousing on). The heater lines run to a Goldwing radiator close by to the block. Now after idling for as little as a minute the front rad hoses even near the block are cold to the touch where the rear rad is almost boiling. I have a thermo fan to add to it but really I can't imagine why it's that hot that soon. Unless by design because it's supposed to be for a heater and the designer wants it to be hot. I could take the rear rad out and just have the front rad but not sure what to do with the heater lines unless I put them in a loop or lengthen the lines to the heater that is already installed but not plumbed in and then add an inline filler neck which I can do but would have to figure out the highest point of the car to mount it at as the thermostat is higher than the front rad. Some pictures for your enjoyment and open to ideas. Last thing I need is thing overheating again. Diagram: Below is the thermostat housing with hose off to the front rad Below is the water pump on the engine with the main return line from the front rad and above it is the heater line. The other heater line is behind the inlet manifold. Another shot of the water pump and shows the heater line going to the top of the rear radiator. Hmmm should it be to the bottom of the rear rad? The lower rear rad heater line runs under the head and around to the back of the inlet. Front rad setup with EWP booster pump on the right.
-
Put some water in over lunch and mild panic when it started leaking out the front of the manifold. There was a water jacket up into the carb that I completely forgot about. Thankfully there is a step in the cast manifold for the water to leak out of and a quick check of the inlet sees no sign of water ingress but have taken the spark plugs out and blew some air in there and nothing doing other than a little fuel residue. Lucky I caught it in time as it could have ended in tears. I have a gasket and a small spacer I'll whack on whilst I'm at it. Also I'll glue a little vacuum port plug on and fill in the hard plastic spacer with epoxy so if converting back will need to be drilled out. Gary's paw for scale.
- 115 replies
-
- 17
-
-
-
Tried to take it for a cheeky test run and was having problems with the gears. I don't recall it being so painful last time but with the box at a different angle it seems to have thrown everything out of whack. For starters the gear stick in 1st was pretty much straight up. So pulling back to second it would go in gear but not quite fully seat. So out it all came which meant cutting a window in the gearbox cover I welded in (was meaning to do that anyway but this is a decent enough reason) so I could undo the uni and line it all up again. I took out an inch of the shaft and it sits a lot better now. Especially with R,2 and 4. I'm still not happy with it however as it's too tricky to find first. Perhaps I just need to get used to it.
- 115 replies
-
- 12
-
-
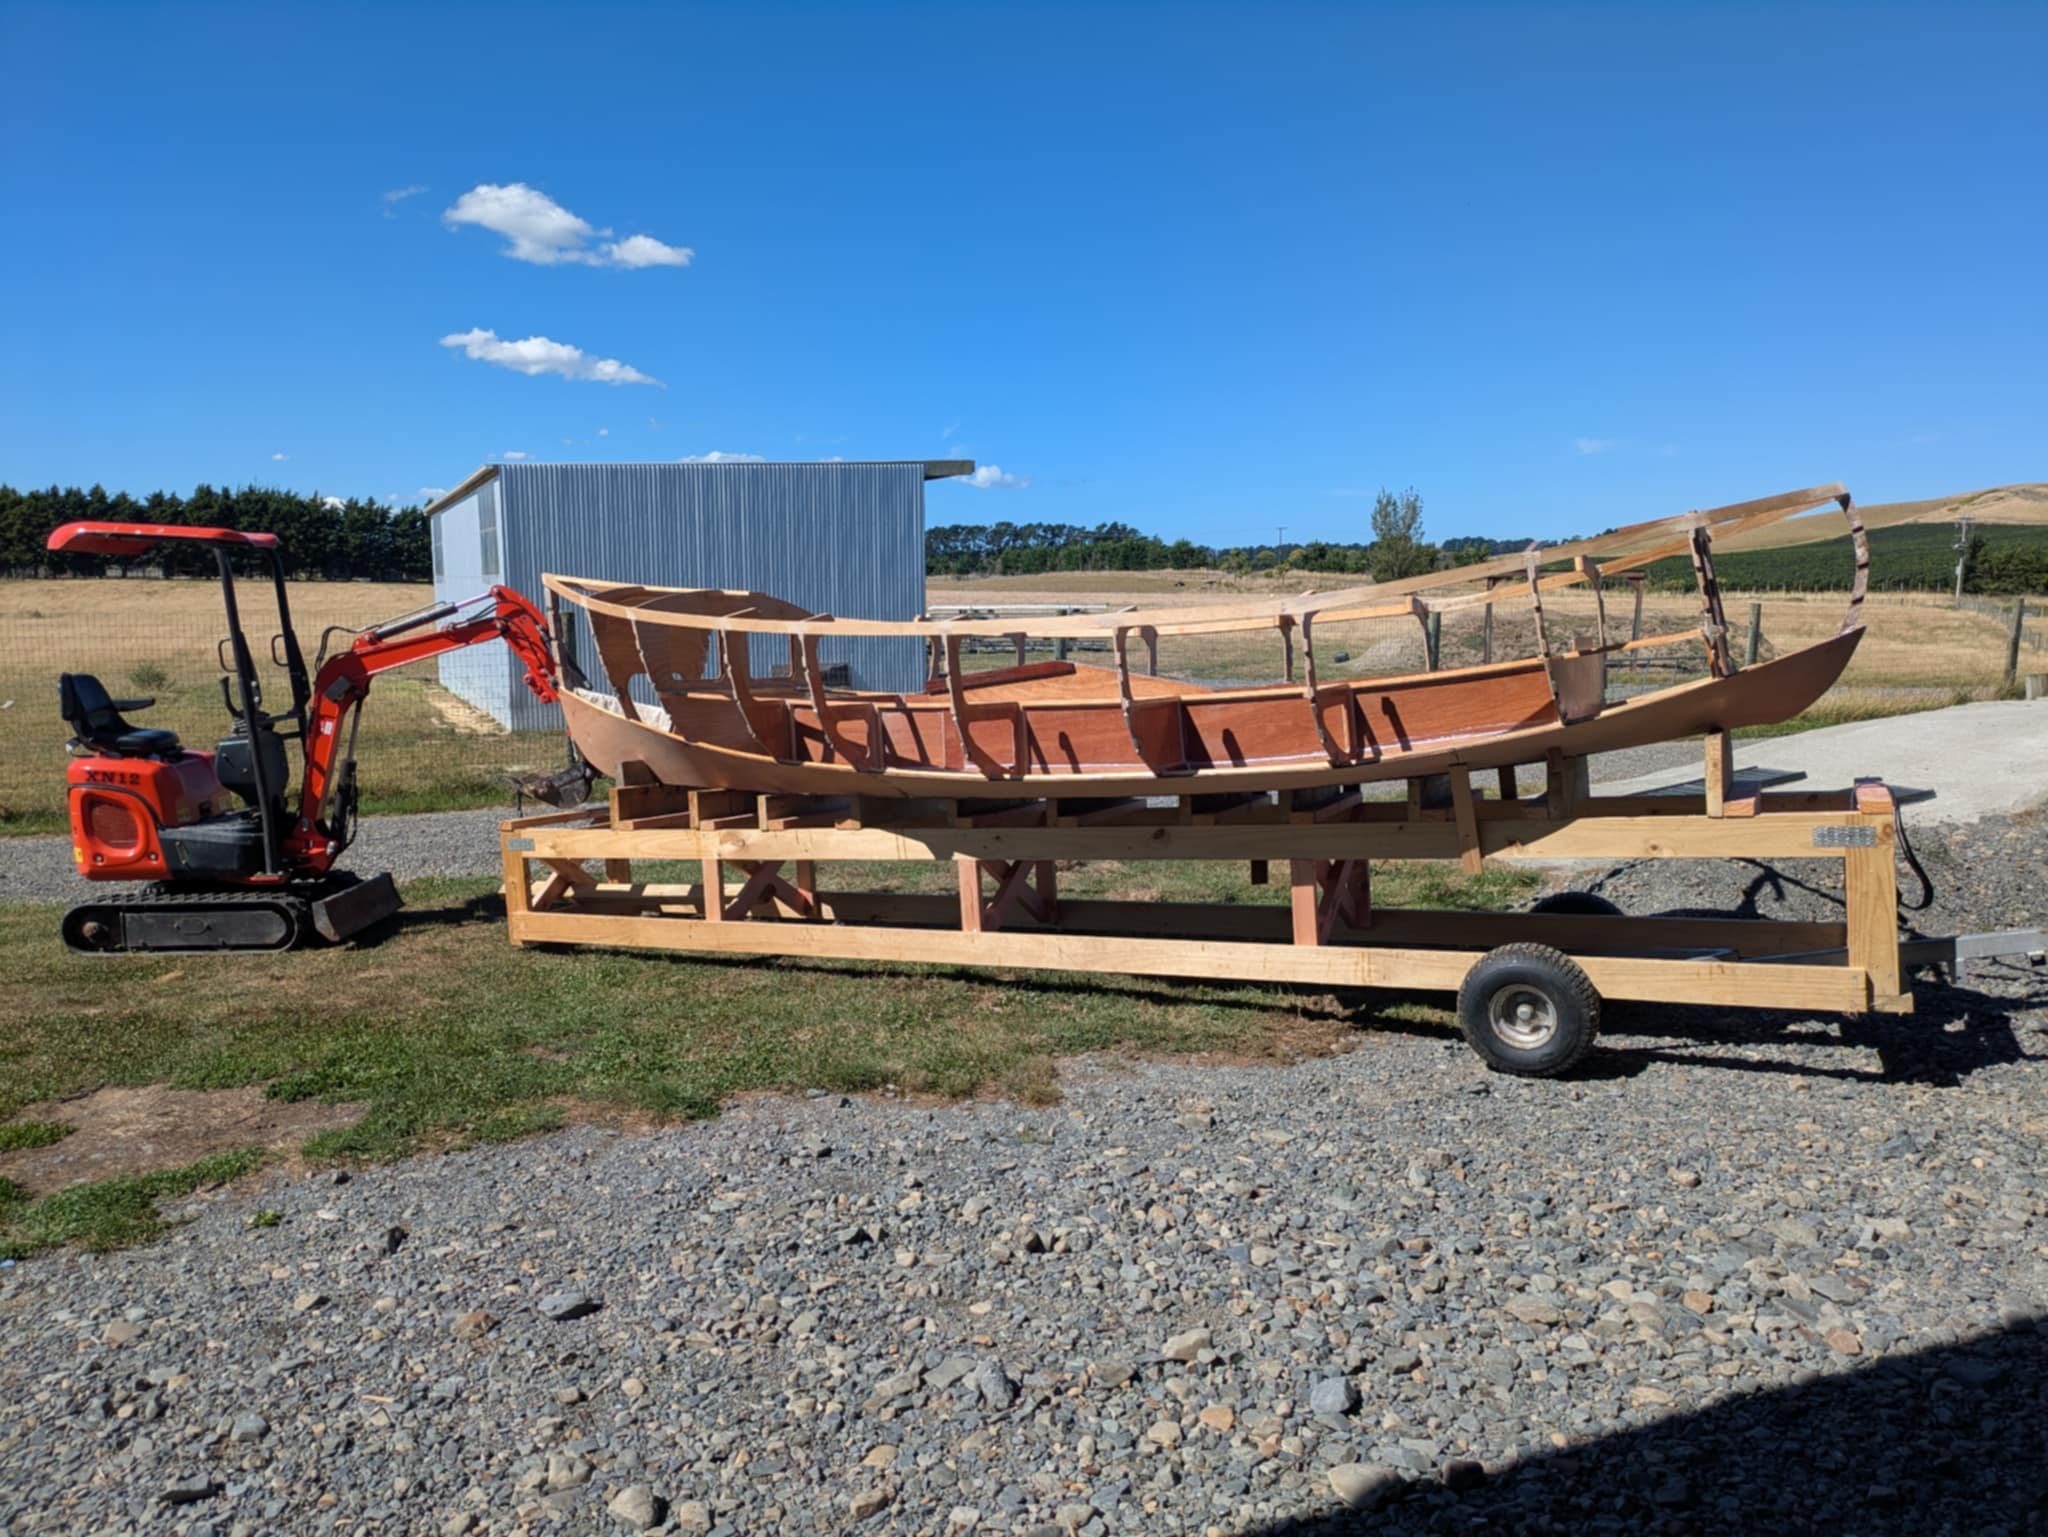
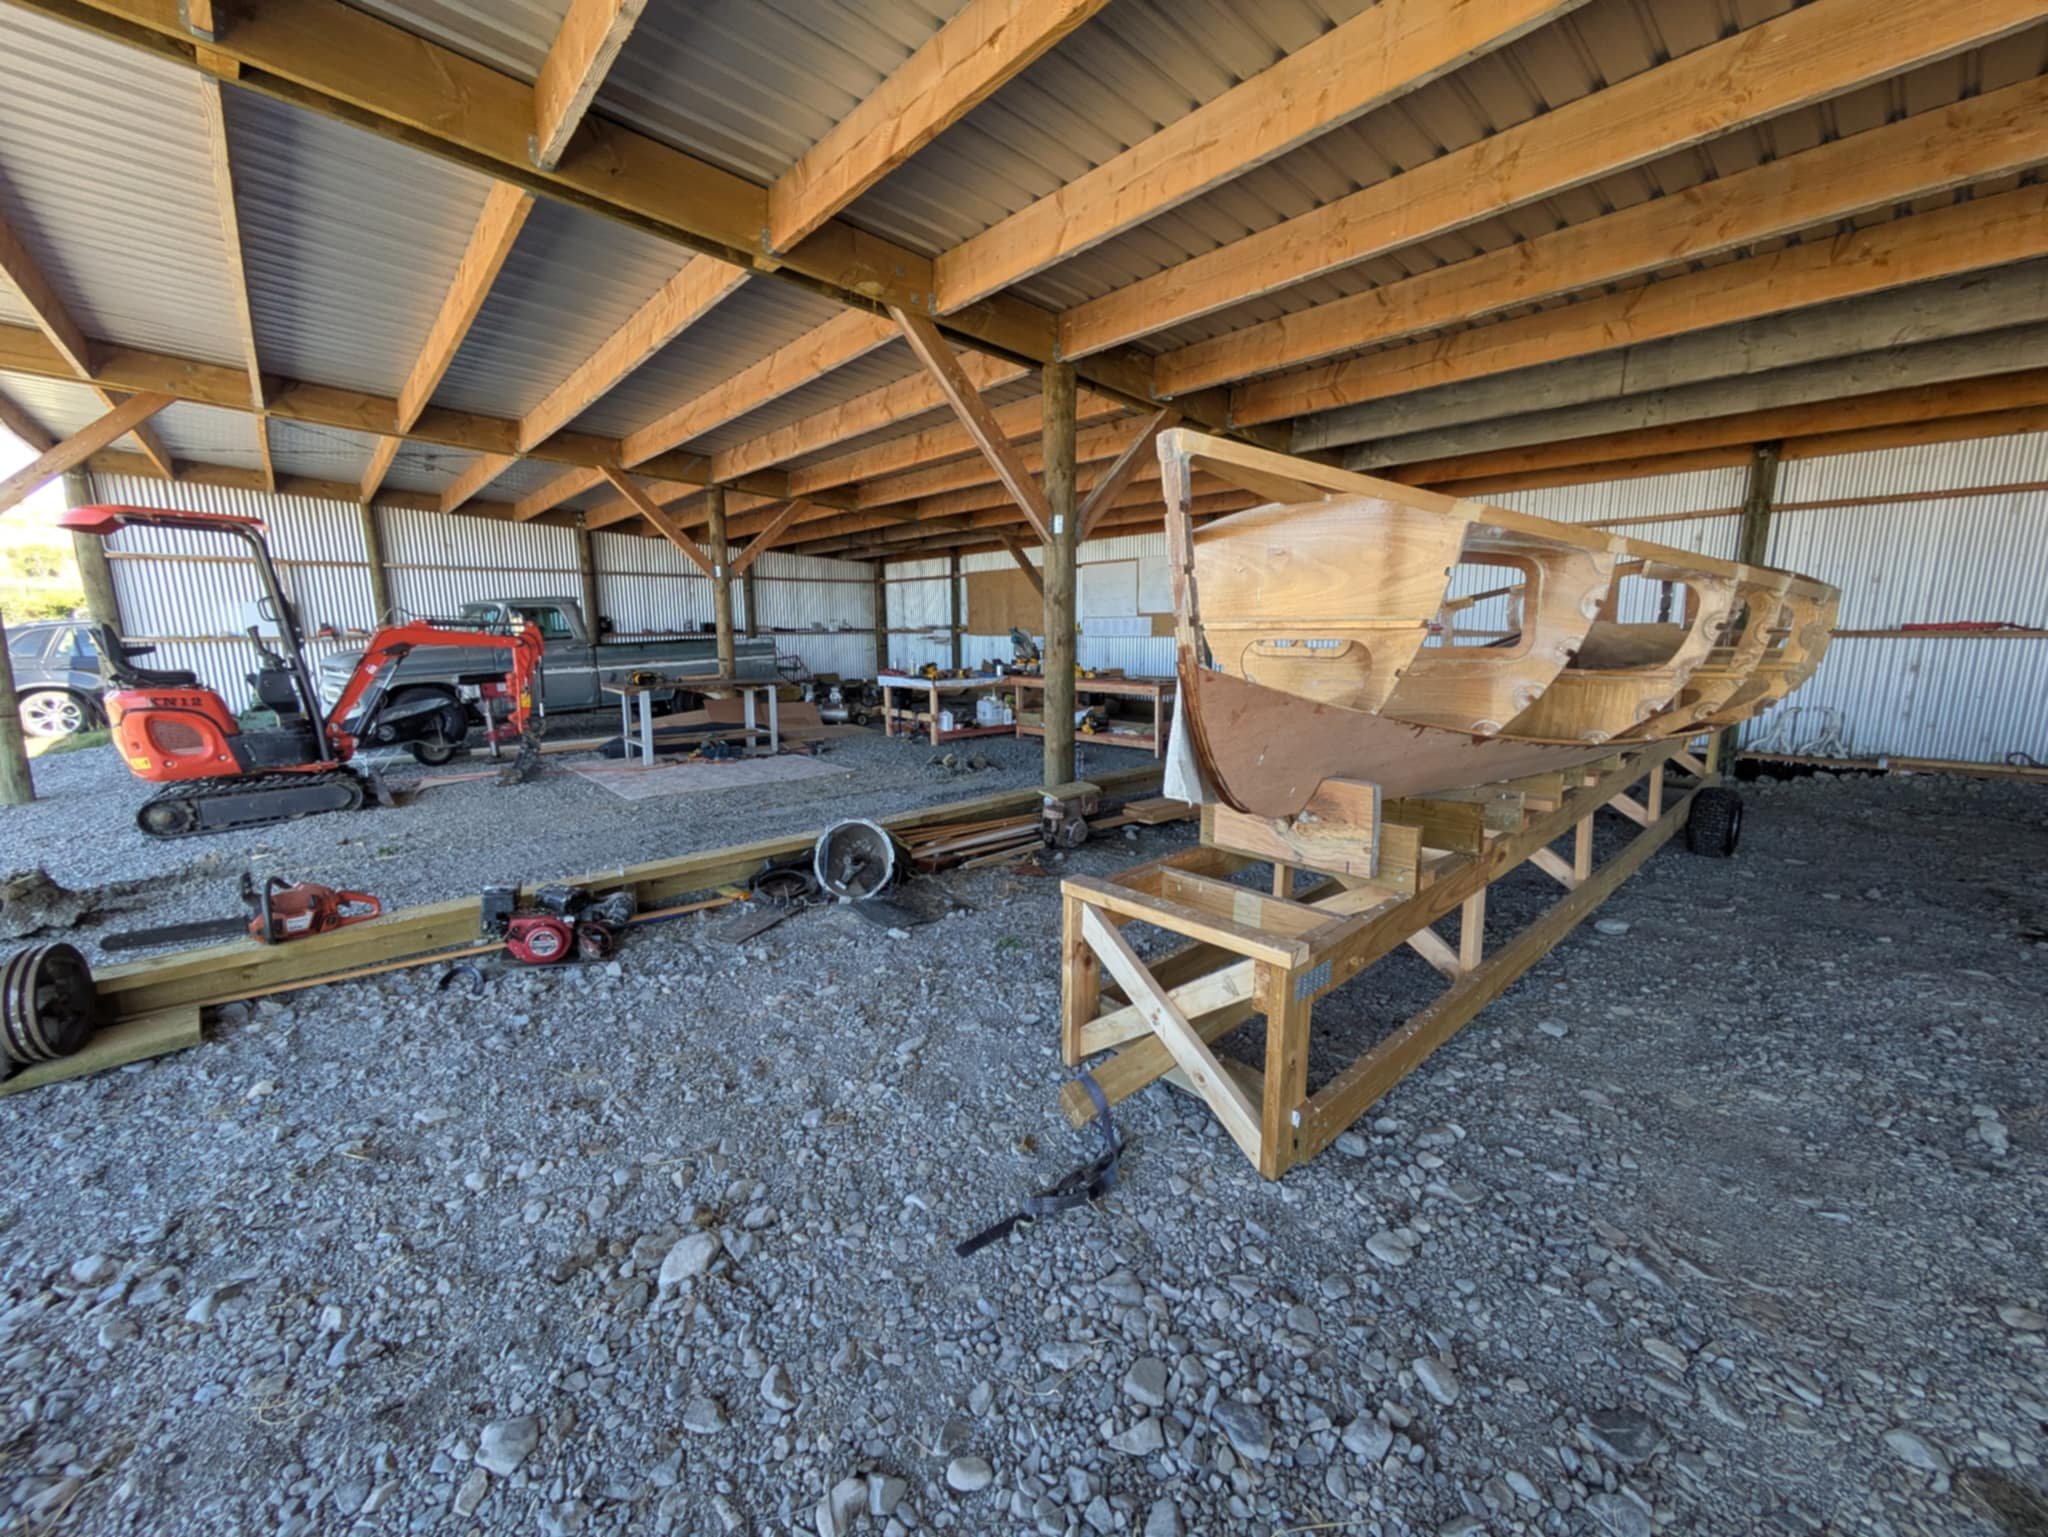
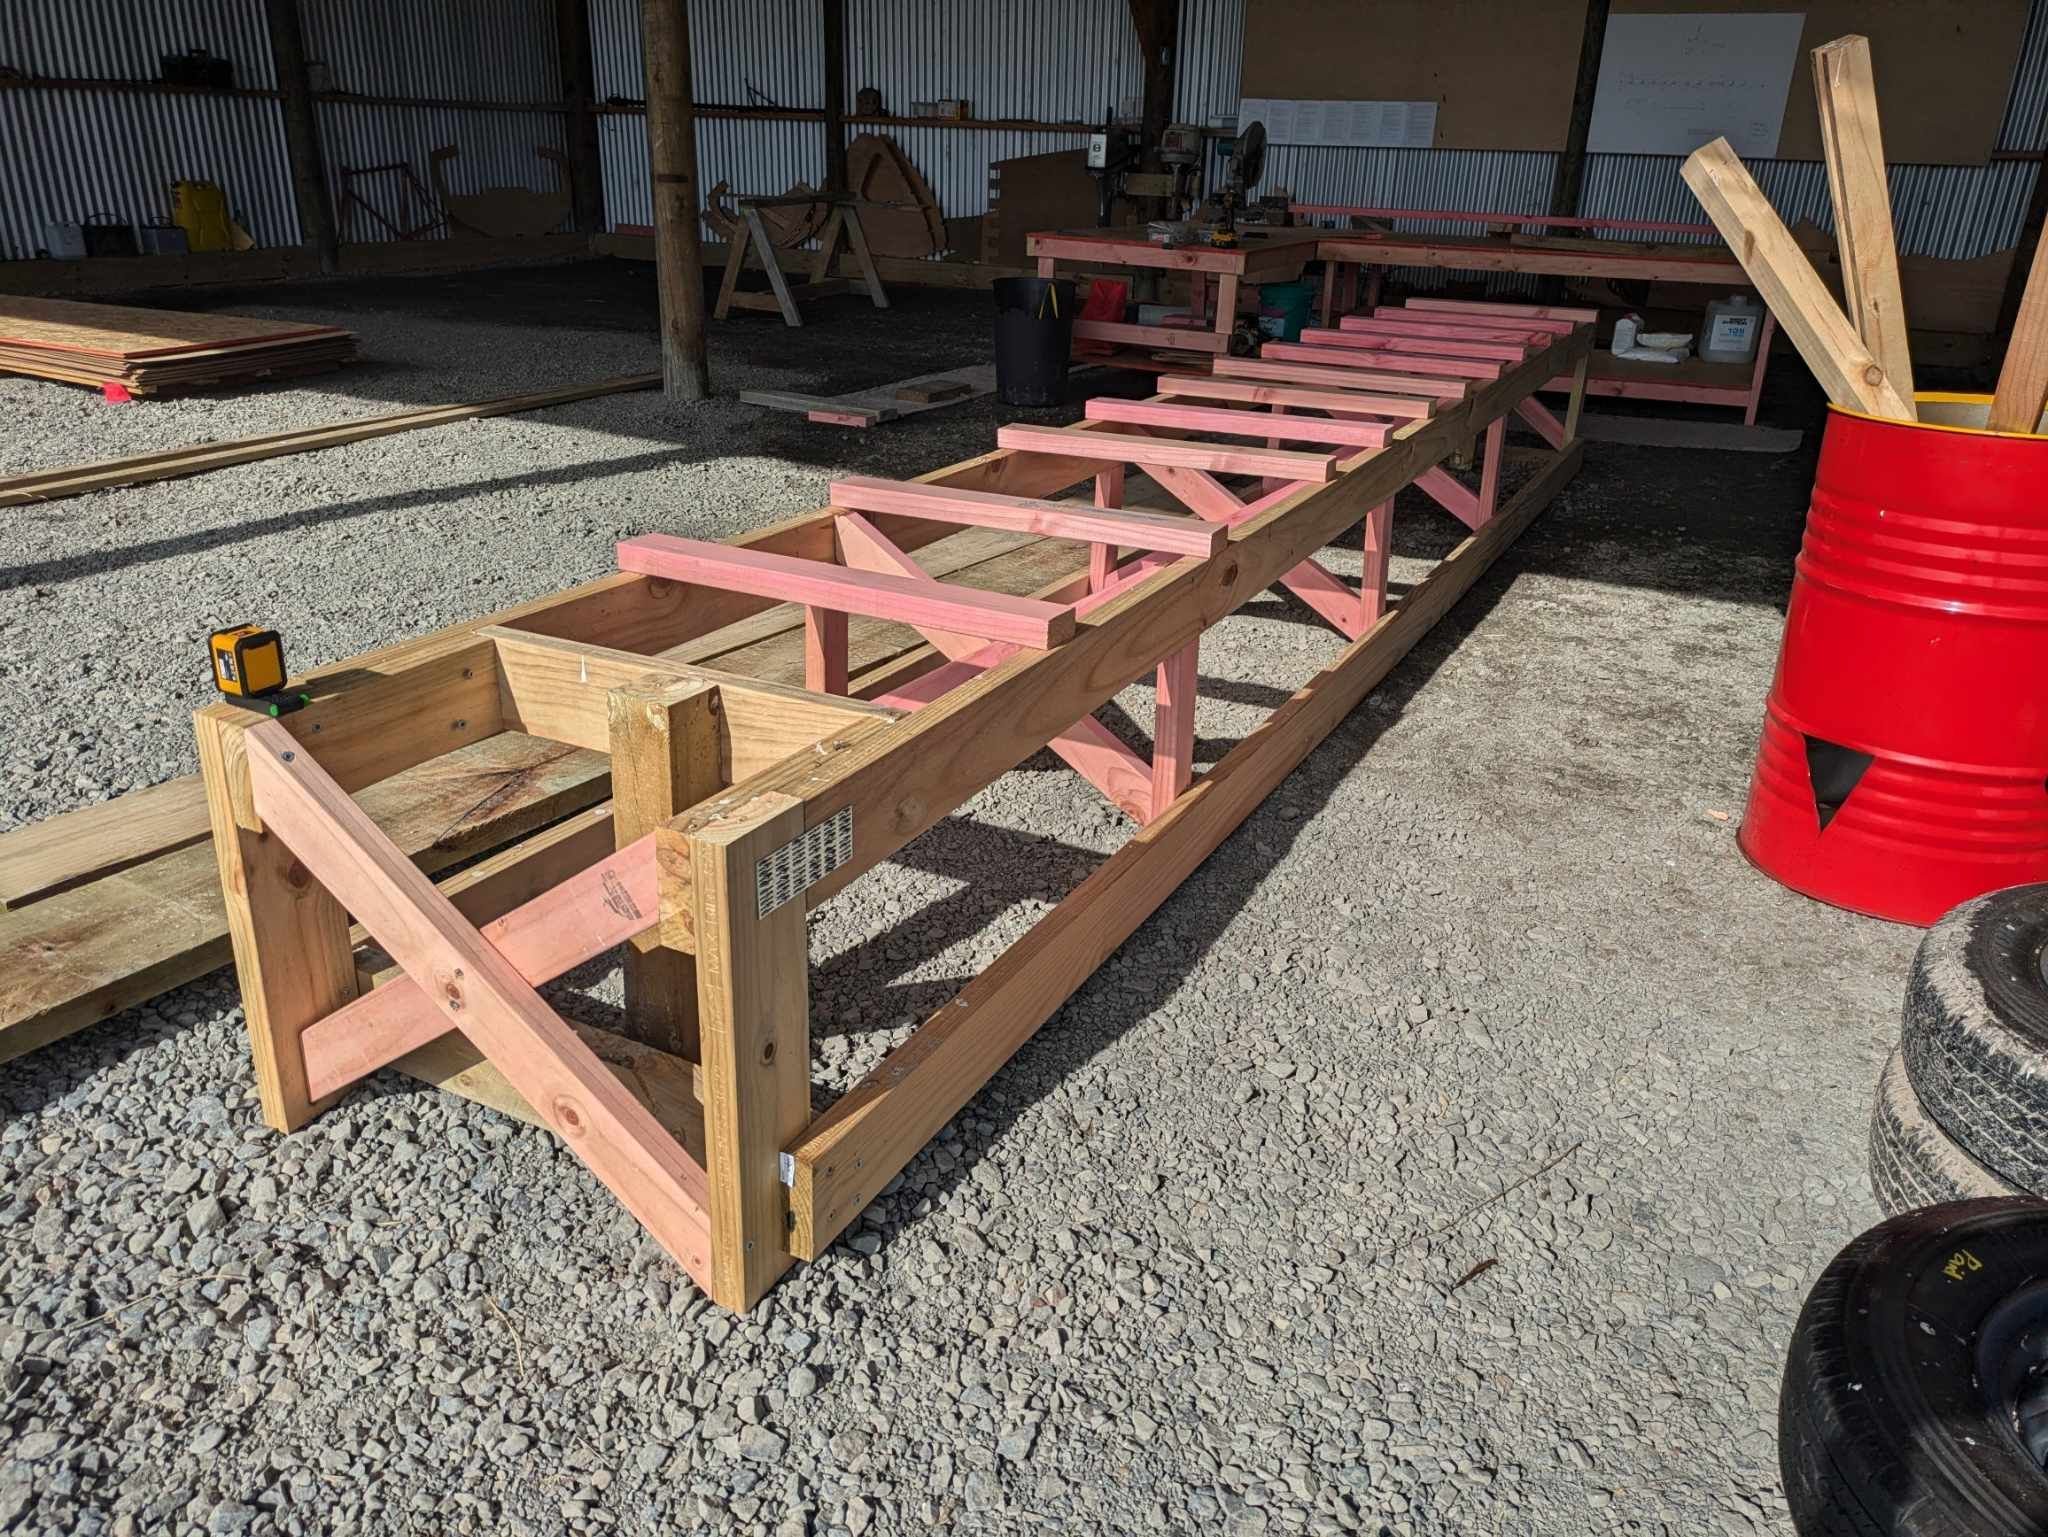
So got the boat moved to prep for where it was can begin for concreting. Went about as smooth as could have been expected really with a spray trailer axle saved from the scrappy and a post screwed to the front. Have made contact again with John W and he is going to do some calculations of where the mast needs to go. Which is the next step as well as the transom. So I'm not too upset about having to down tools. Might use some of the spare time to design the cabin for sleeping in. I want it quite low like a catboat so it's really just a cuddy cabin for storing shit and crawling in to sleep.
- 66 replies
-
- 20
-
-
Cheers mate. Thanks for the heads up. I'll get them drilled first thing.
-
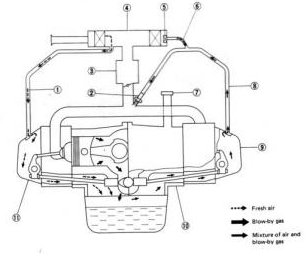
Today's effort was put into sorting the air filter out. I was just going to order a ramflo one until I saw the price of them so just modified the one in the parts bin to be able to fit. After the head gasket from the ea71 I wanted to give this one every chance of surviving. So I did some reading into what the flyboys do (ea81's are popular for light aircraft) I had to take the PCV setup seriously which I didn't mind sorting out. Next up is either relocate the battery or flush out the front rad if it has any crap from the last engine which when I found it was packed solid with coolant crystals.
- 115 replies
-
- 19
-
-
So the engine has been test fired and it was pretty good. Haven't plumbed in the radiator yet as it needs a good flushing but it sounded very crisp and the throttle response was instant. Wasn't sure how the throttle would be with about 10 meters of manifold and three corners a side. Today's job was to sort the exhaust as the parts came in. Still need some mounting bolts and in fact might tap the threads first as they are pretty average. Hopefully I don't have to put in a helicoil just yet. With the new much smaller mufflers I don't have to snake the bends forwards and then backwards again which should help with heat dissipation. The pipes are on an angle to steal an inch from sticking out too far. In the parts bin I do have a set of late model subie OEM mufflers which if it is too loud for LVV I'll shoehorn in there to get through although to get a Victory Vision through compliance I recall the dealer who sorted it stuffed the muffler with something but will have to check my old notes. This was the old exhaust: This is the replacement:
- 115 replies
-
- 15
-
-
John Welsford mentions using the same sets of screws for three or more boats. I use silicon bronze too as they dont muck up the belt sander when I get too close. They must be quite soft. The garboard plank will get screws in it but only when the the next plank goes on as per a clinker/lapstrake design. Ill probably leave them in because I doubt very much Ill be building anymore boats after this one.
-
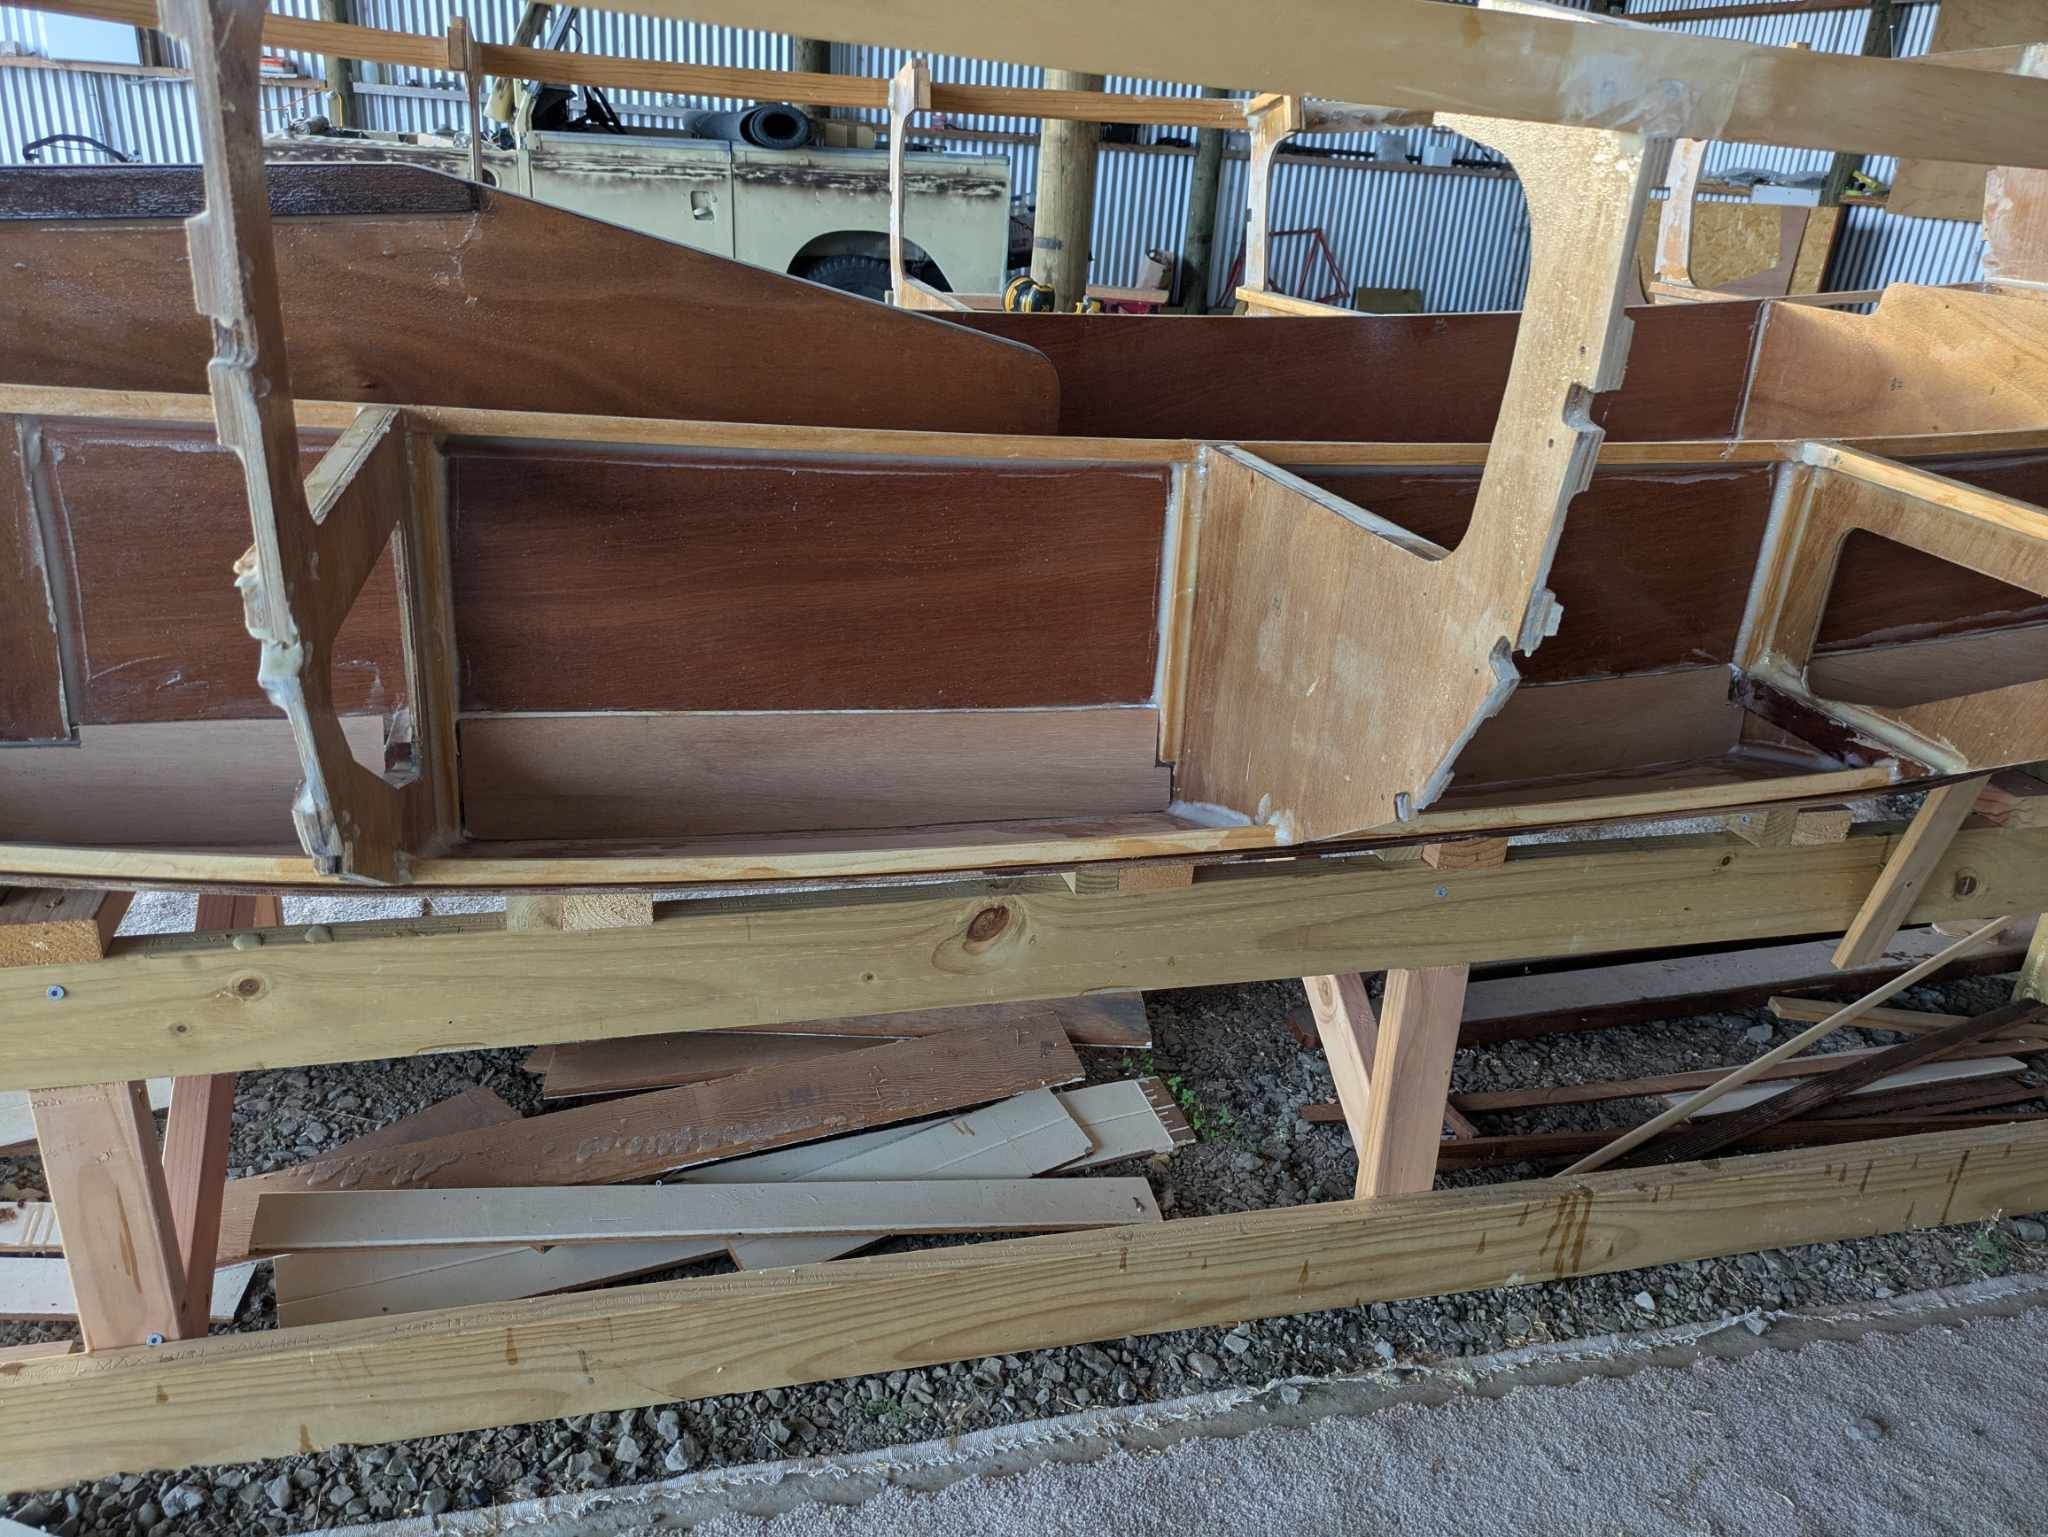
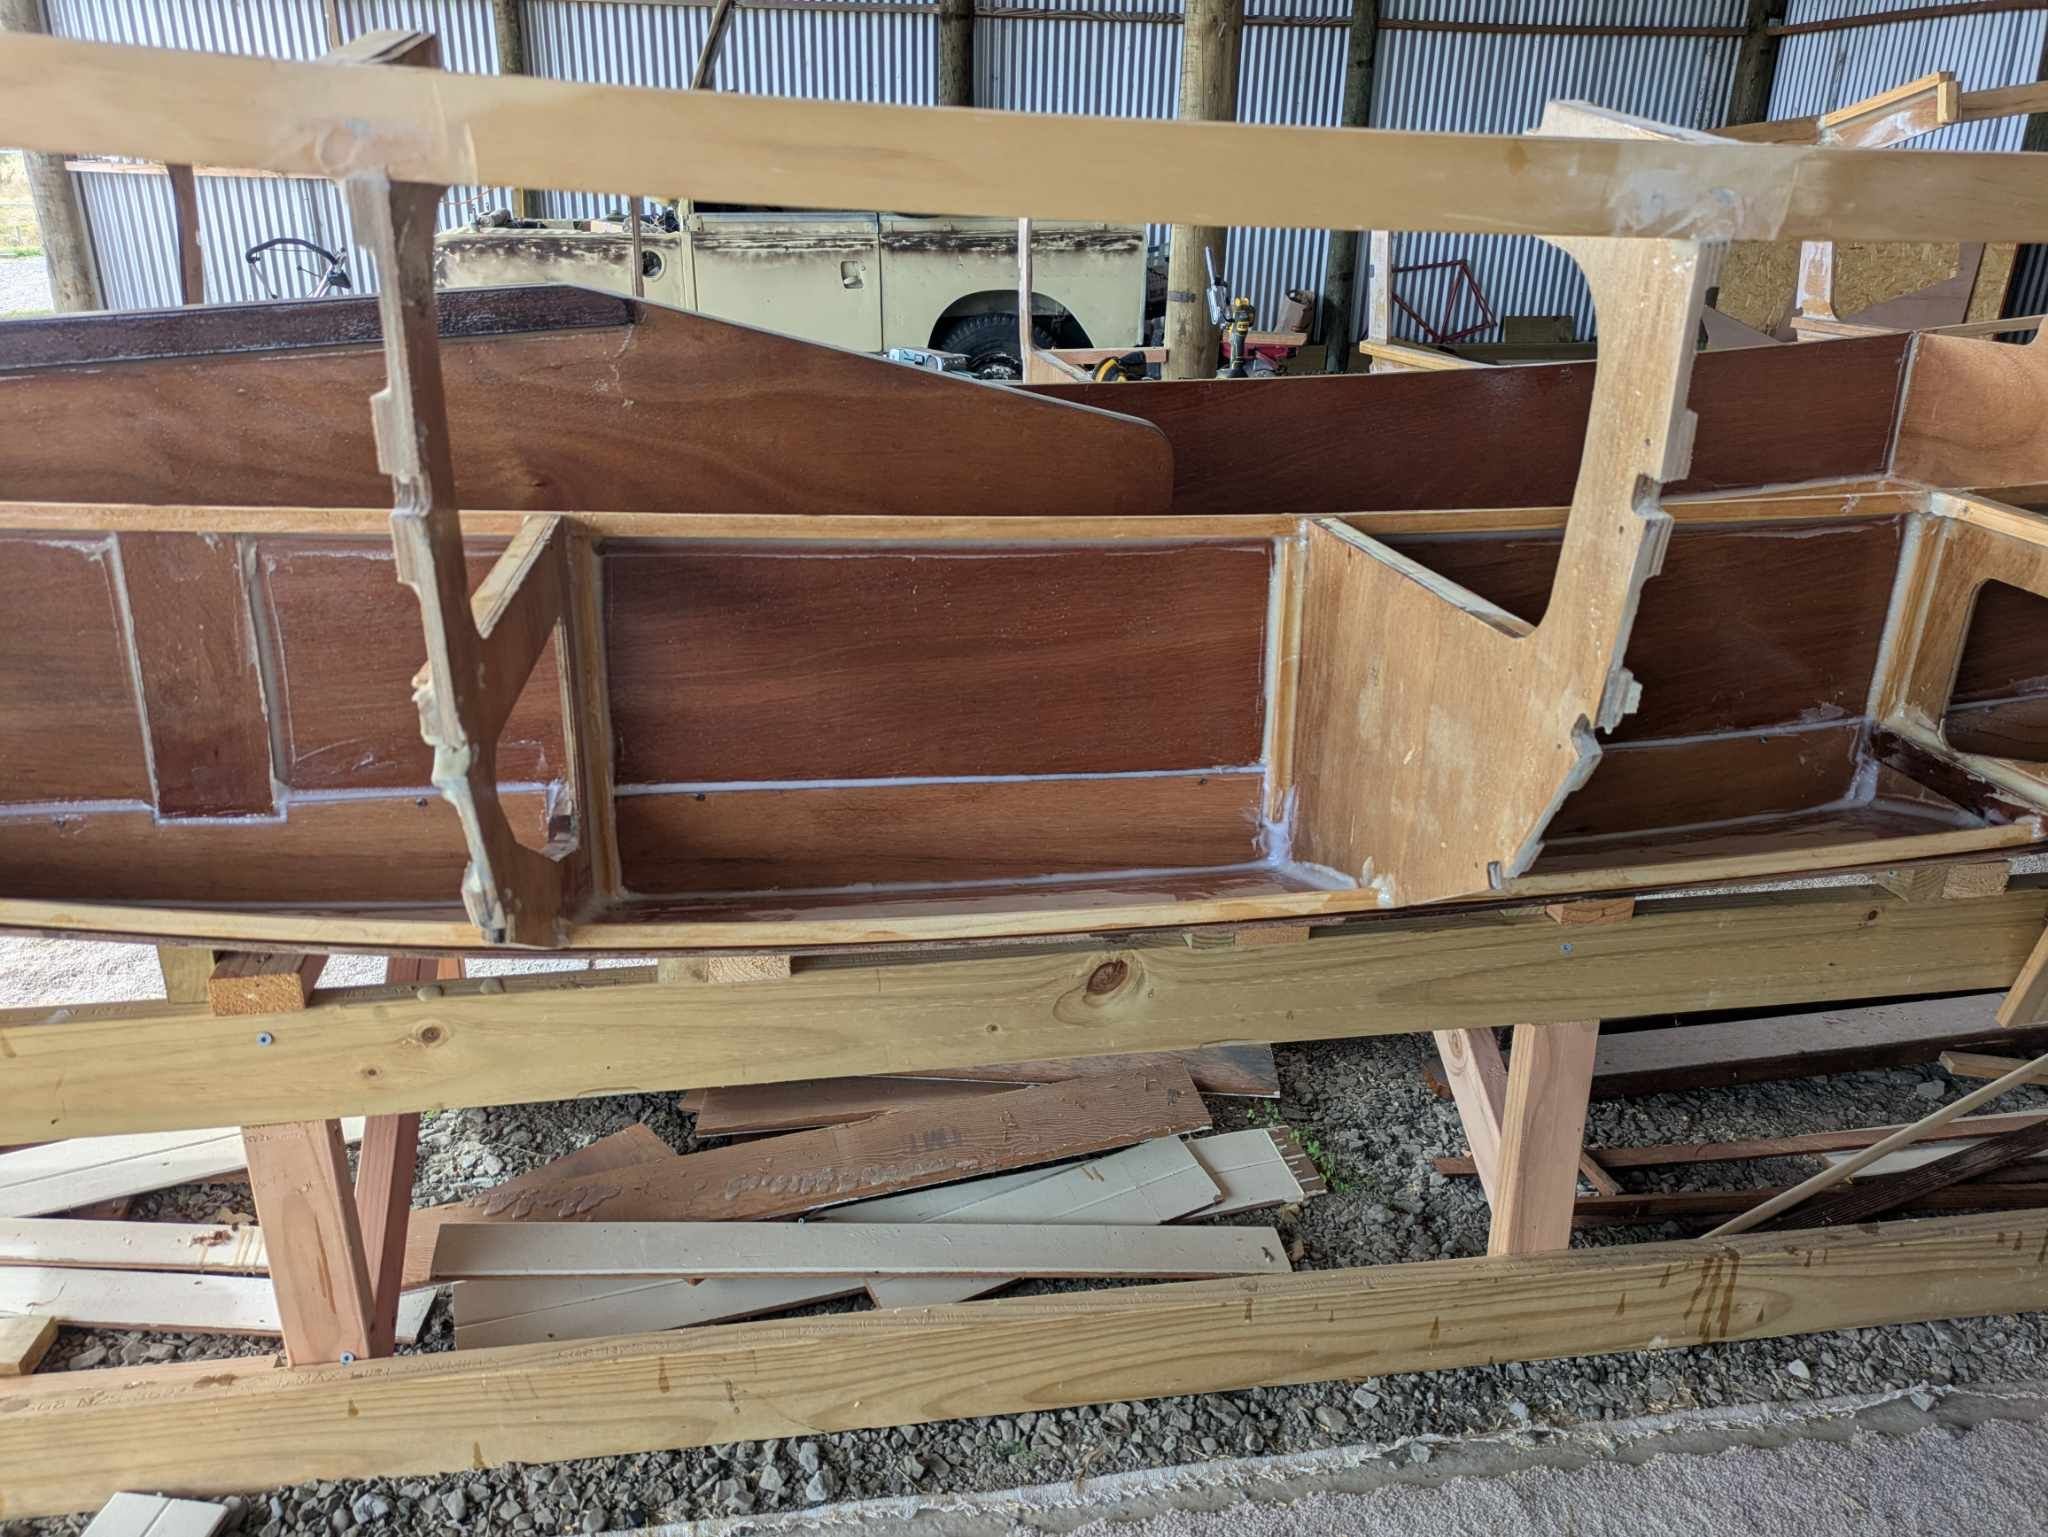
Finished the seat fronts which extended it all the way down to the garboard plank. Was quite finicky cutting all the weird and wonderful patterns but was comforted by each piece mirroring the other side. If it didnt Id be a little miffed. Below is it all glued in. The plywood goes such a lovely shade when epoxied it'll be a shame to paint over it. Was going to start on the transom but have had some major life changes drop on my lap this week. Although not unexpected it was something I've been putting off so I need to move the boat a couple of bays so I can concrete where it sits now. A bittersweet moment as I'm on a roll with it now getting it stiff enough to move but likely wont be touching it for quite some time whilst I sort other stuff out. Haven't figured out how Ill move the jig yet as it has posts concreted in at each end but I'll figure it out. Thankfully the landy is wired enough to drive so should be a matter of driving it right out and back into another bay.
-
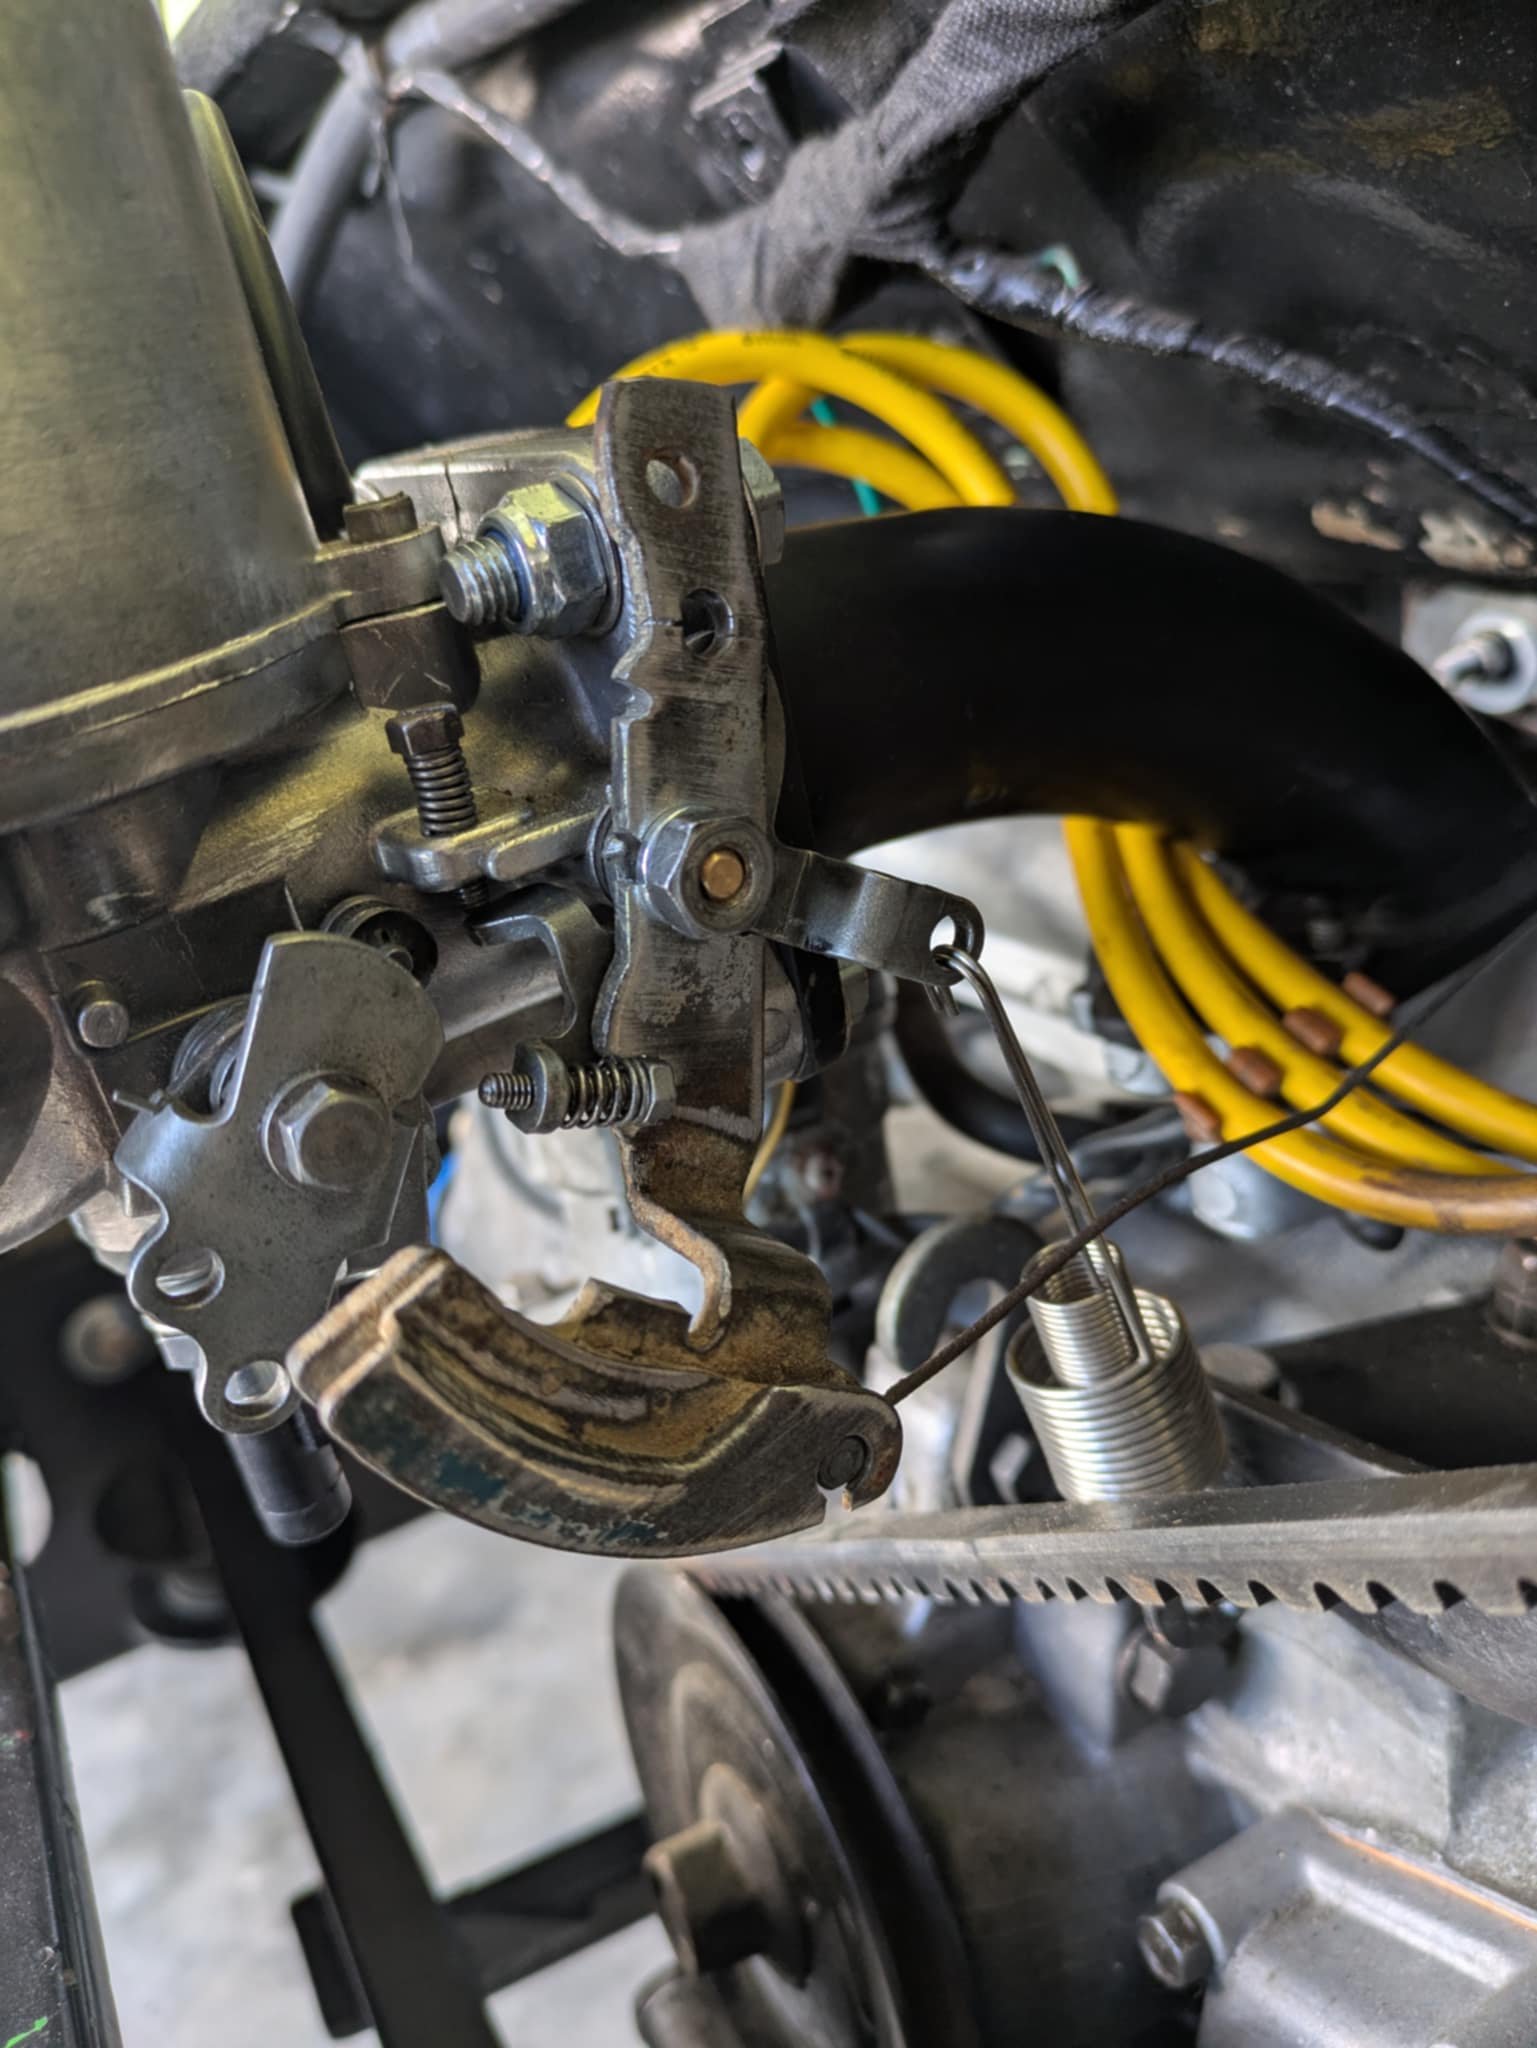
Managed to get the throttle cable connected. Still need to sort the choke however. Throttle is bits ripped off a nissan diesel in a landrover in the shed. It's upside down and back to front but gets 70% travel which will be fine for now. Especially running in a new engine. The next thing I need to take seriously is the exhaust. The old one was two full size mufflers and with the new engine bar in the way, simply won't fit. On order are some small hot dog style ones I've had success with in the past. They are quite small so may need to be packed for LVV but I'll cross that bridge later. Might look at putting a battery and radiator in tomorrow and trying to get it started. Still need to sort the air filter and breather hoses but a test fire won't harm it.
- 115 replies
-
- 16
-
-
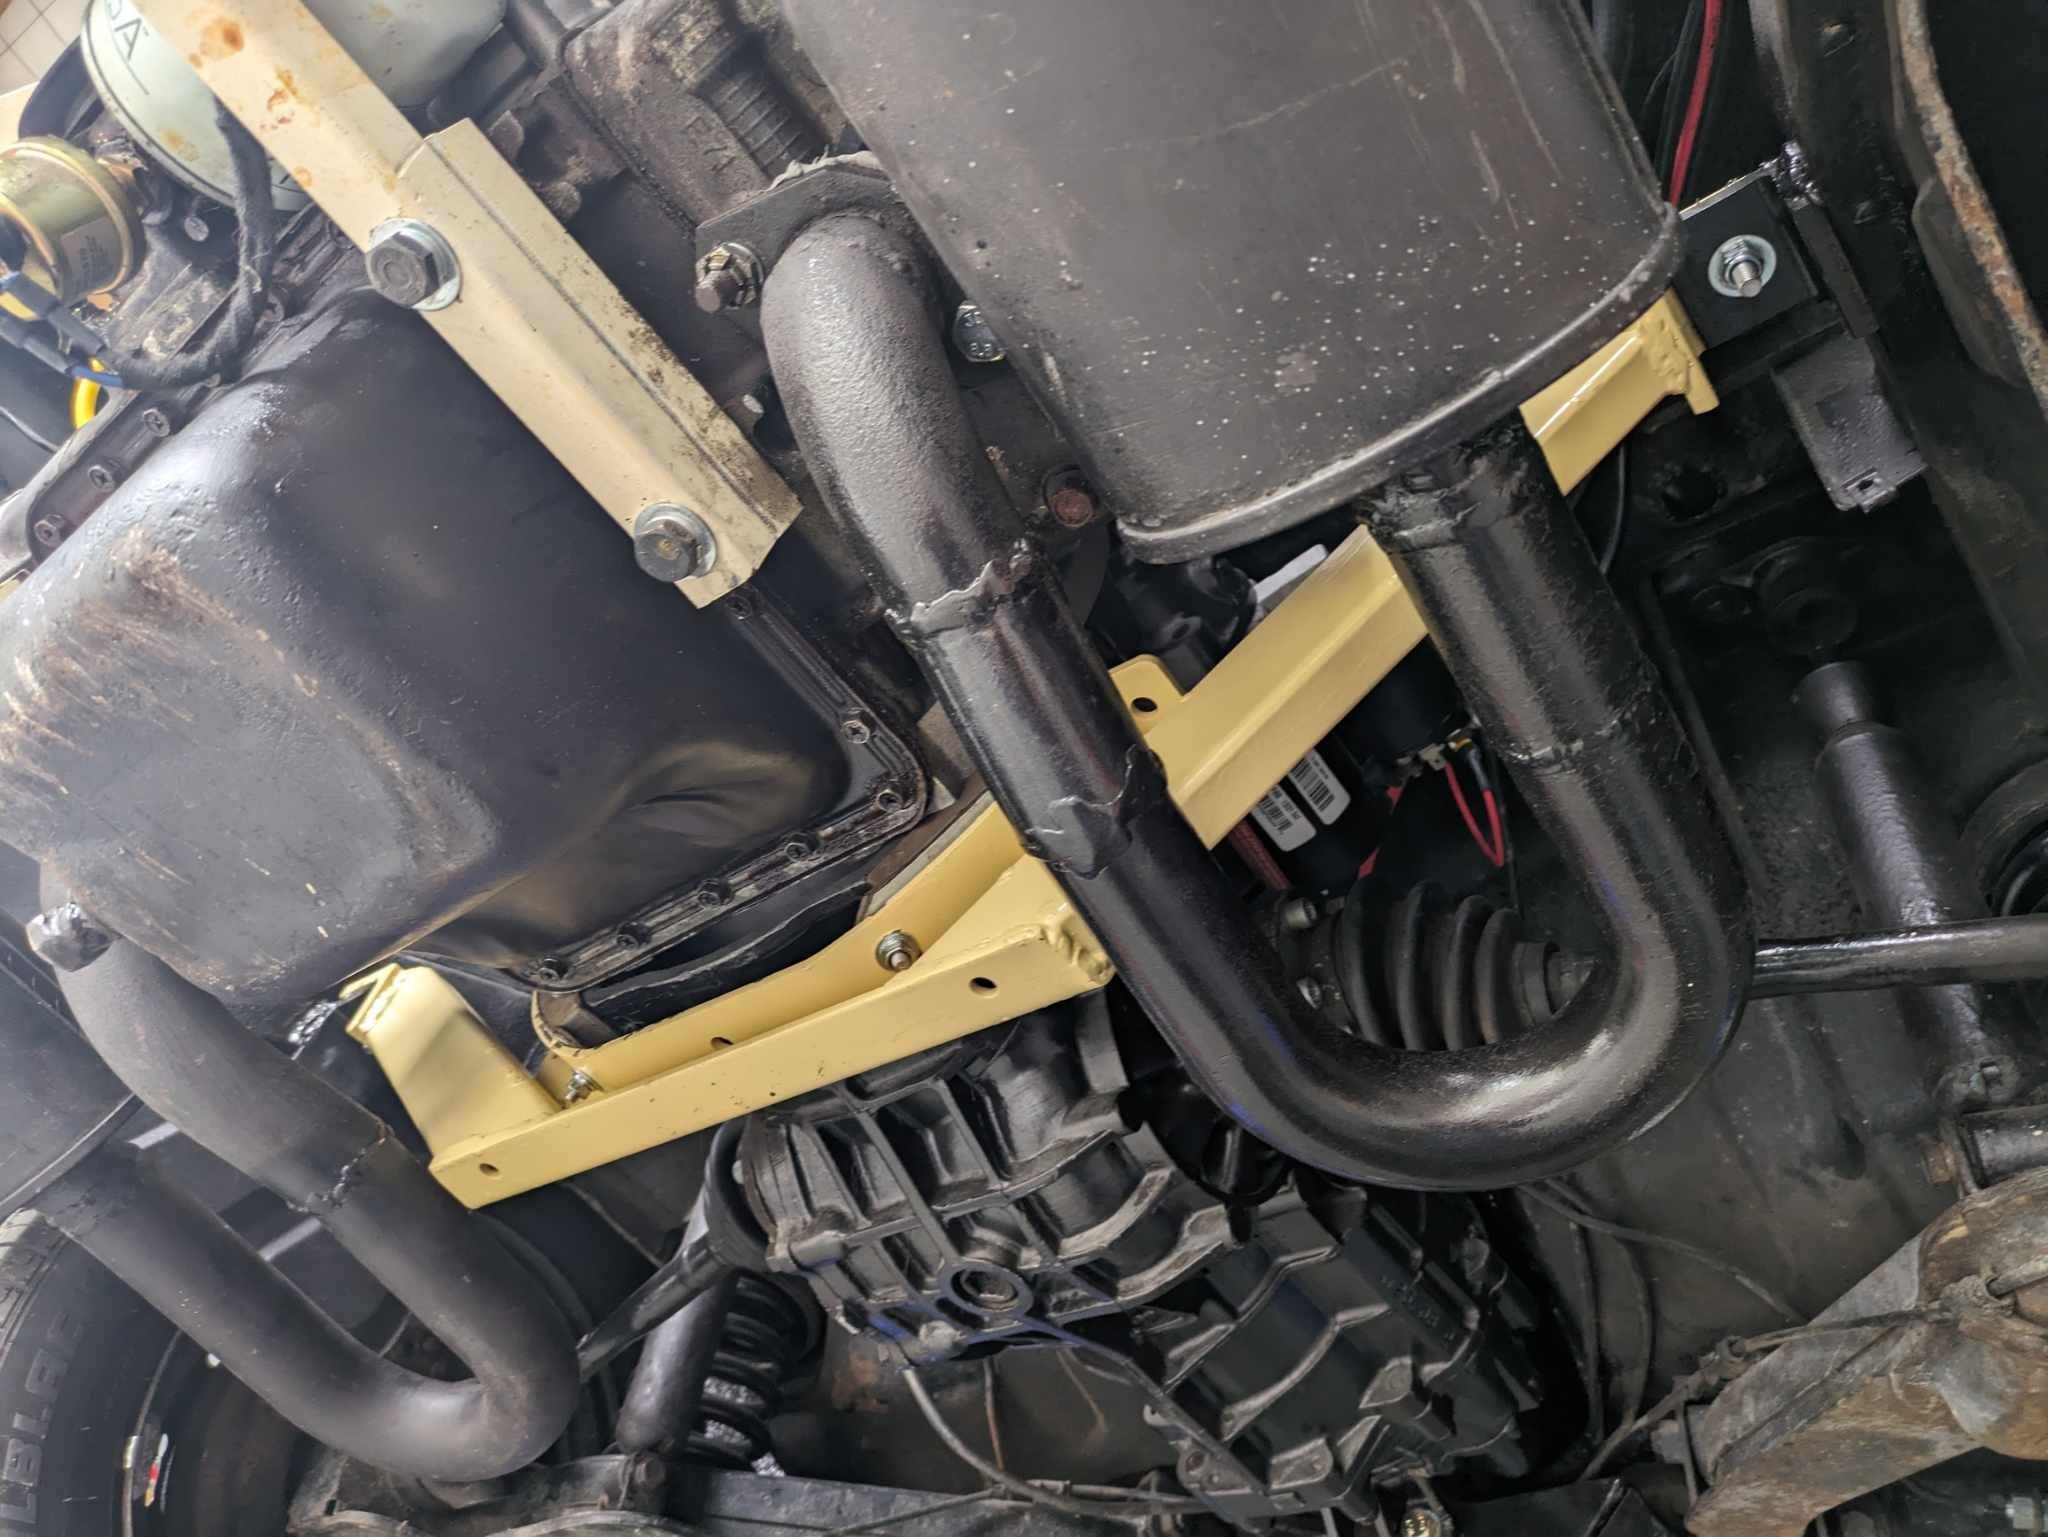
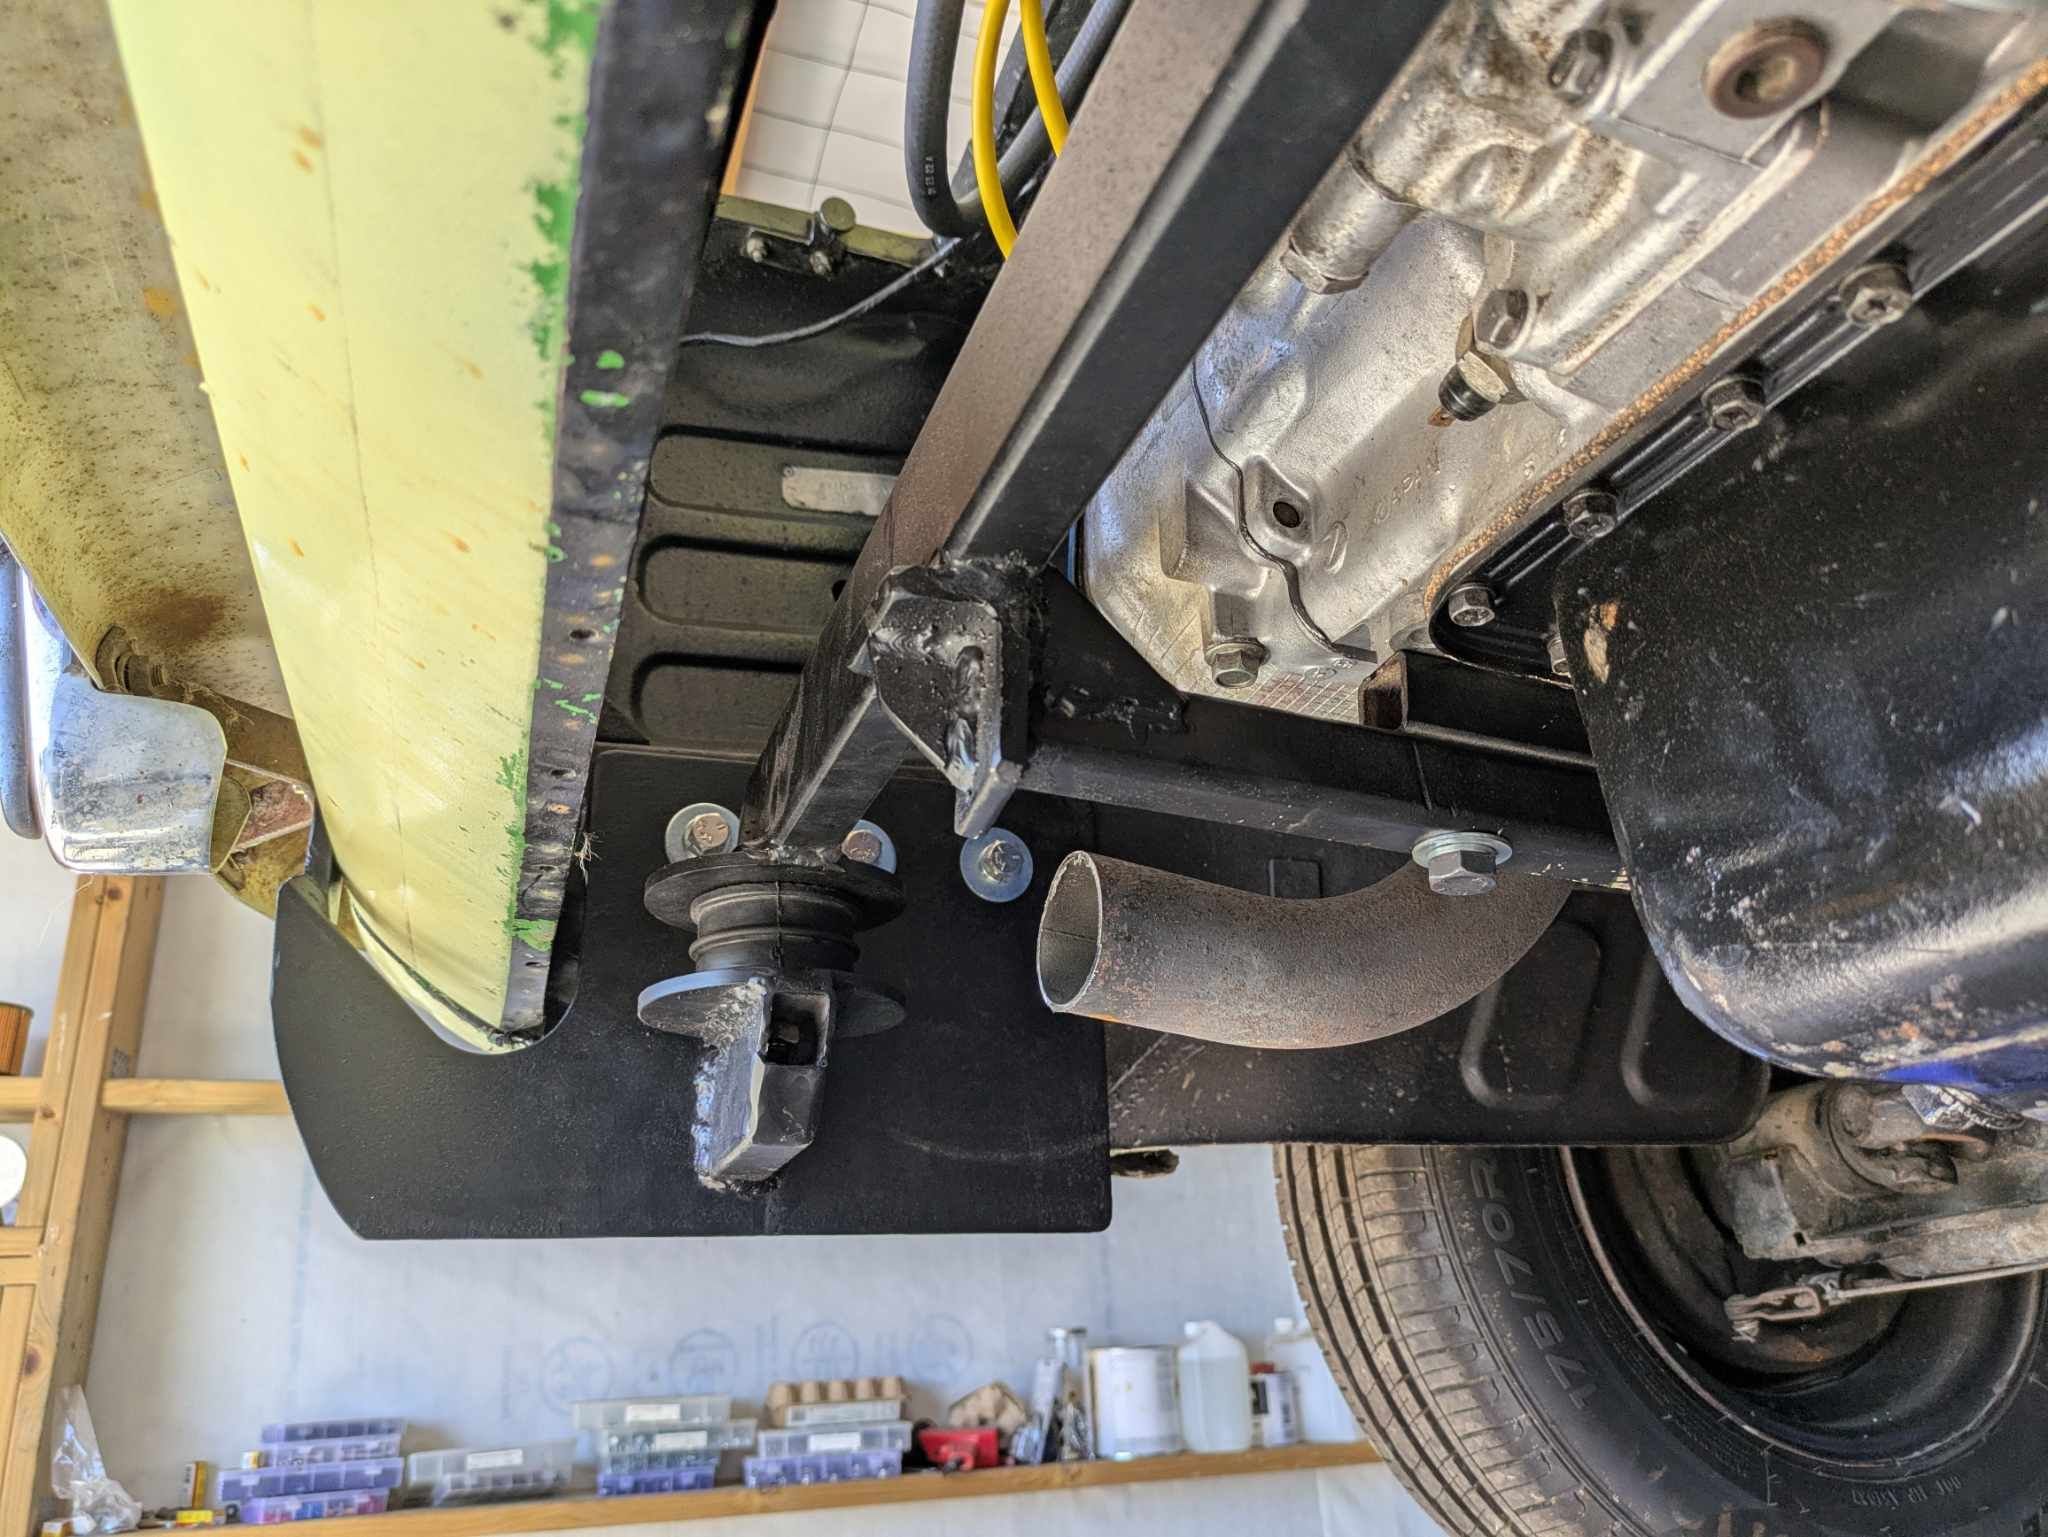
Gimpy spanner got the nut on with no dramas and the mount all fits thankfully. The bolts on the frame aren't long enough but will do for now and new ones an inch longer have been ordered. With it all bolted up including the bumper bar end bolts there is no flex so I can relax my flaps about a towbar. Although I will be eyeing off the space after the exhaust is done which should probably be next on the list. I was going to chop off the old engine mount but it isnt in the way and I could possibly use it for something yet. For comparison, here is the mount that it replaced which had it far too wobbly at idle.
- 115 replies
-
- 19
-
-

-
Mounts are coming along well but there is a little flex on the bottom of those plates that bolt to the rails. So am going to investigate what I'll need for a dinky little towbar. I already smell a tiny trailer project for the farm in the works. For the mounts I ordered some Volvo S40 ones but after two weeks I got a refund saying out of stock. So rather than order again and have to wait I found some land rover ones in the parts bin and they'll have to do. One end has a captured nut and the other has a window to get the nut on. As per usual I had to butcher a spanner to get it on and off. I'm almost up to a full set of spanners that have been cut down.
-
I think it was because I had the engine at a tilt to get the staggered twin carbs to fit under the parcel shelf. Thus making both halfshafts and cv's at different angles. But honestly I'm not sure. It could have also been the widened wheels not being balanced. I had them done at the same place that did my mitsi and after taking them to another place to get rebalanced they were well out.