Bluebear01
-
Posts
198 -
Joined
-
Last visited
-
Days Won
2
Everything posted by Bluebear01
-

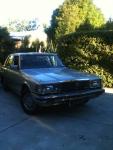
Bluebear01's 1983 1uz powered Toyota Crown
Bluebear01 replied to Bluebear01's topic in Projects and Build Ups
Something I've been looking forward to for a year, putting the front back together. Luckily my two boys didn't go and loose all my bolts, and lots of pictures makes it so easy. The paint turned out nice too which is a bonus. Now the front is all bolted up the fuse box & wiring can go in, then I'll figure out the ECU wiring. I've got new neighbors moving in soon, might be making a good/bad first impression depending on their tastes. Maybe I should hook up the exhaust first...
- 52 replies
-
- 17
-

-
Discuss here about Yoeddynz's little Imp project...
Bluebear01 replied to yoeddynz's topic in Project Discussion
What an inspirational build, absolutely love your attention to detail with all the little things! Was the worry with the heater pipes to do with heater efficiency, or more to do with helping engine cooling? -
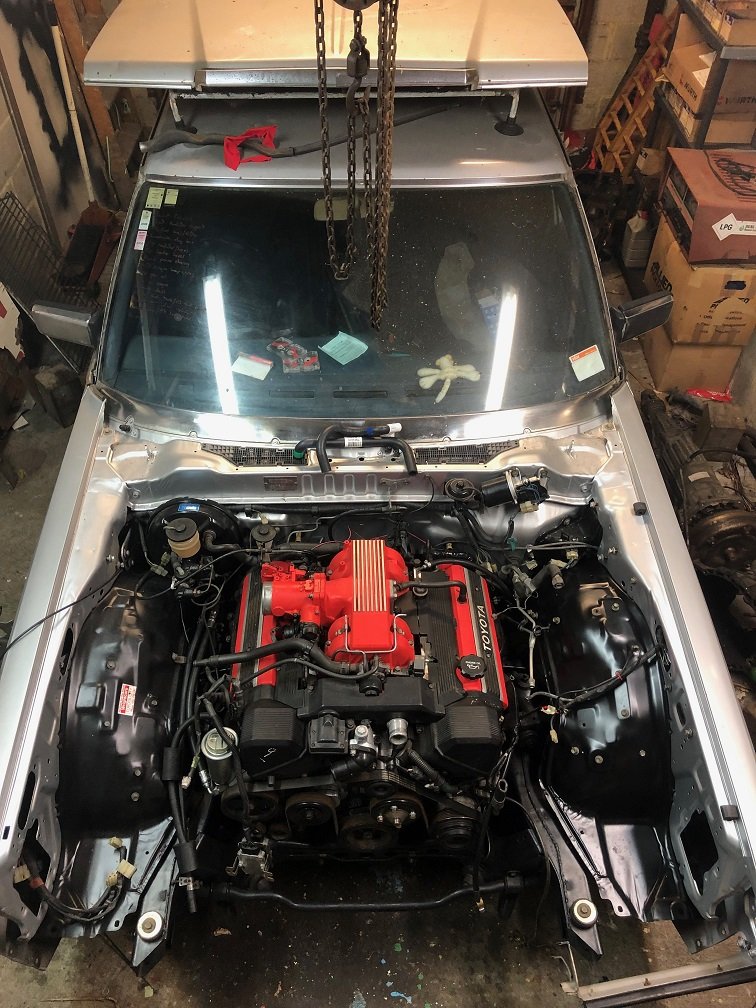
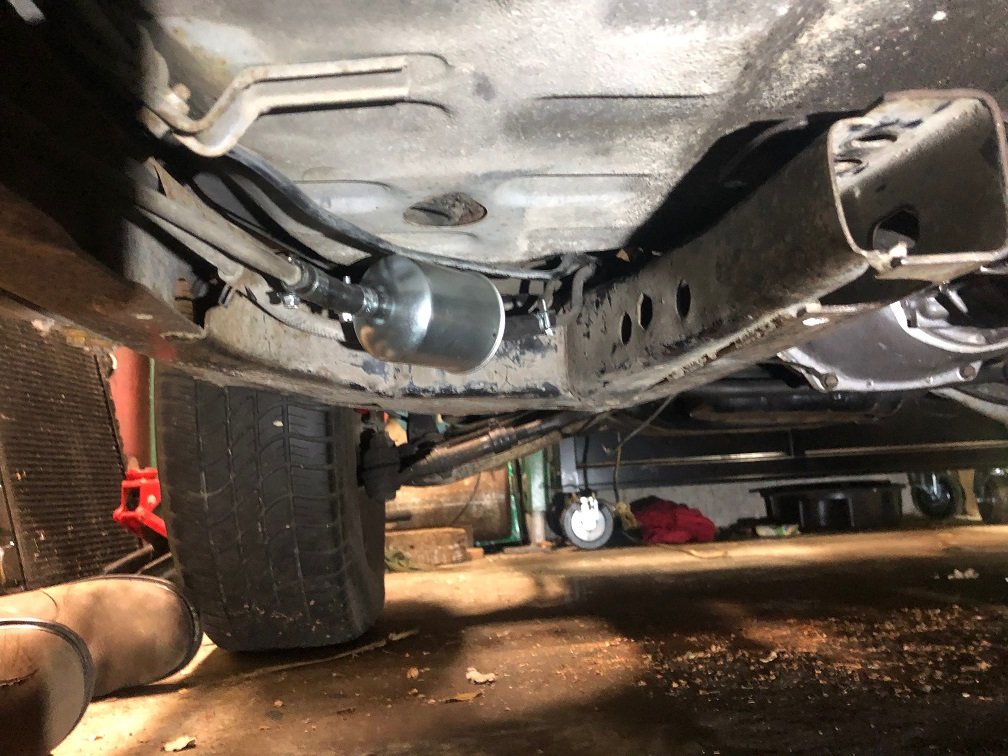
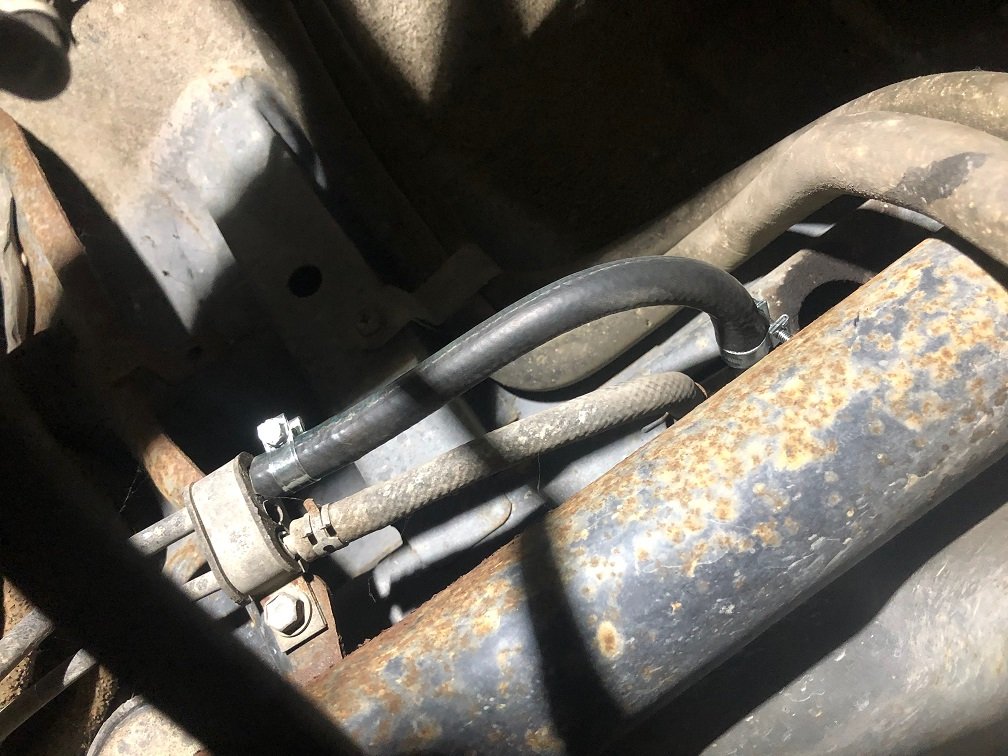
Bluebear01's 1983 1uz powered Toyota Crown
Bluebear01 replied to Bluebear01's topic in Projects and Build Ups
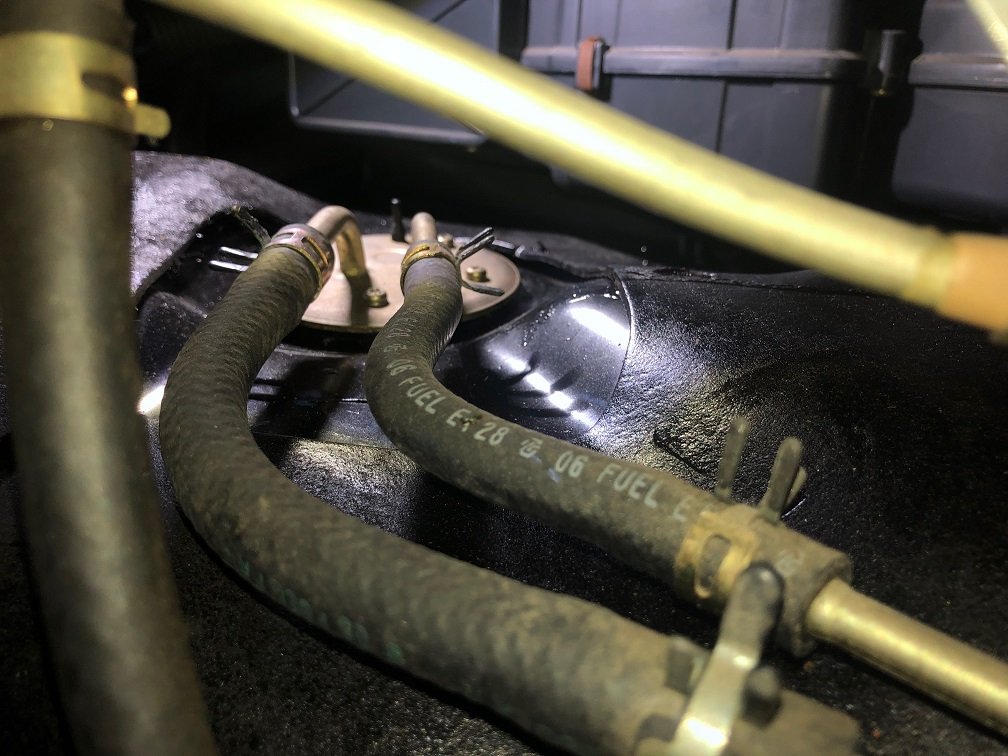
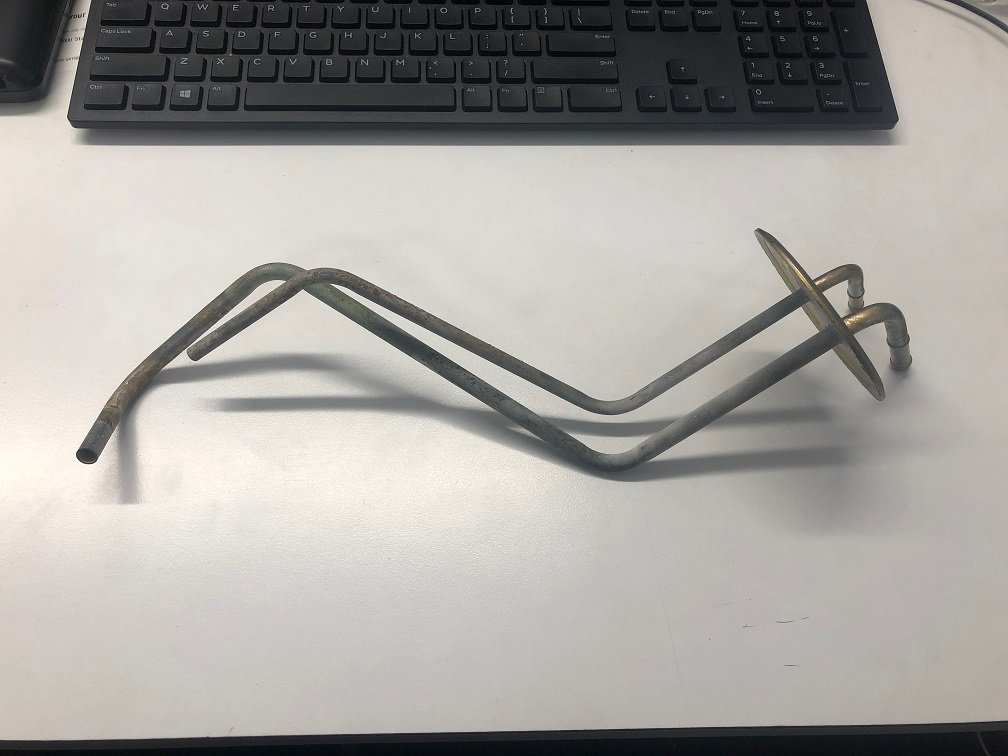
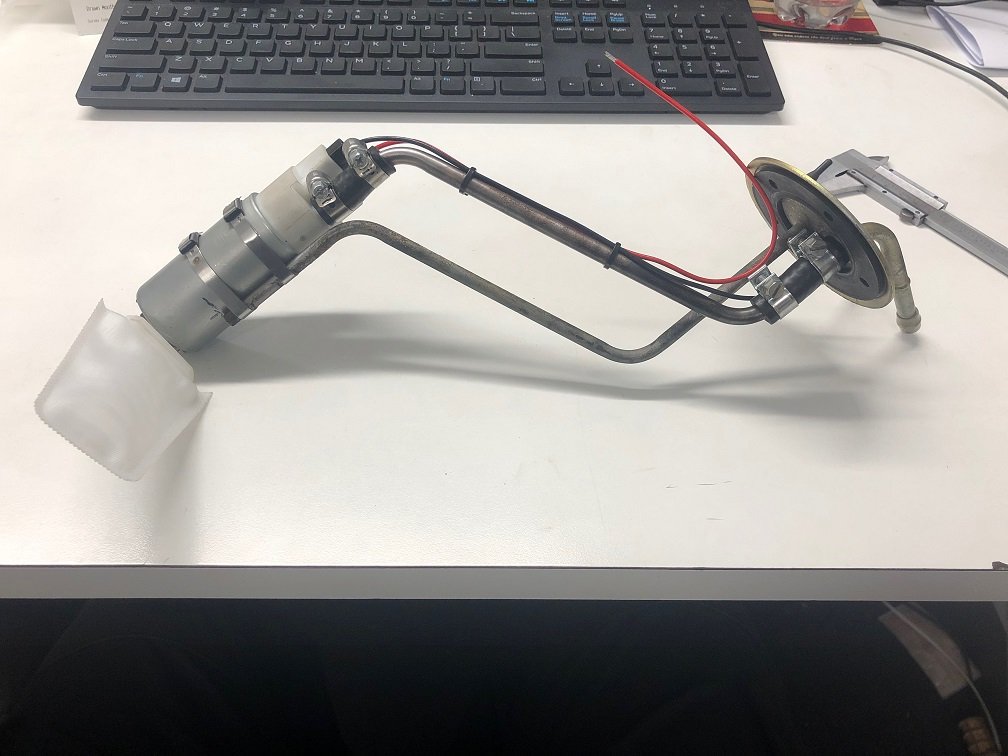
I've gone front to back replacing all the old low pressure fuel hoses. I chopped the engine bay fuel lines a foot shorter to tidy it up, and I found a nice spot underneath for the filter. The fuel tank pickup hole is tiny at 45mm, but I've managed to fit the new electric pump to the pickup and squeeze it through. I've ordered a bulkhead terminal for power, then it's just pump wiring and the fuel system is sorted... Thanks for watching!
- 52 replies
-
- 15
-
-
Bluebear01's 1983 1uz powered Toyota Crown
Bluebear01 replied to Bluebear01's topic in Projects and Build Ups
Coming up to 2 years since I got this engine, I'm hoping I can get it moving under it's own power this month. The engine is bolted in for the last time now and the gearbox crossmember is all sorted. The lengthened driveshaft fits beautifully, the clutch is bleed up and the pedal feels great! Next up is finishing paint on the front fenders & radiator support so I can put the dog box back together & rewire the engine bay. Getting painfully close to making some noise!
- 52 replies
-
- 11
-
-
Cheers for that! If I was to guess I’d say the relay is in the engine bay fuse box. Don’t worry too much if it’s a pain. It shouldn’t be too big a job for me to trace the wires through.
-
Also, I don't know if most Crown people have already found this but I stumbled across it a few years ago. A really nice detailed write-up on a few MS112 Crown fixes. I don't know the guy but my guess is his name is Barry. http://users.tpg.com.au/pschamb/crown.html
-
Wow, haven't checked this in a while! Cheers @Avenga! I'm currently sorting out an in tank fuel pump, and I noticed the wiring is there for an electric pump, even though this was always the carb model. It might be a long shot, but does anyone have a wiring diagram for the MS112 crown or know where the fuel pump relay/wiring is on the efi model? It might save me running a new circuit to the front. Cheers!
-
Bluebear01's 1983 1uz powered Toyota Crown
Bluebear01 replied to Bluebear01's topic in Projects and Build Ups
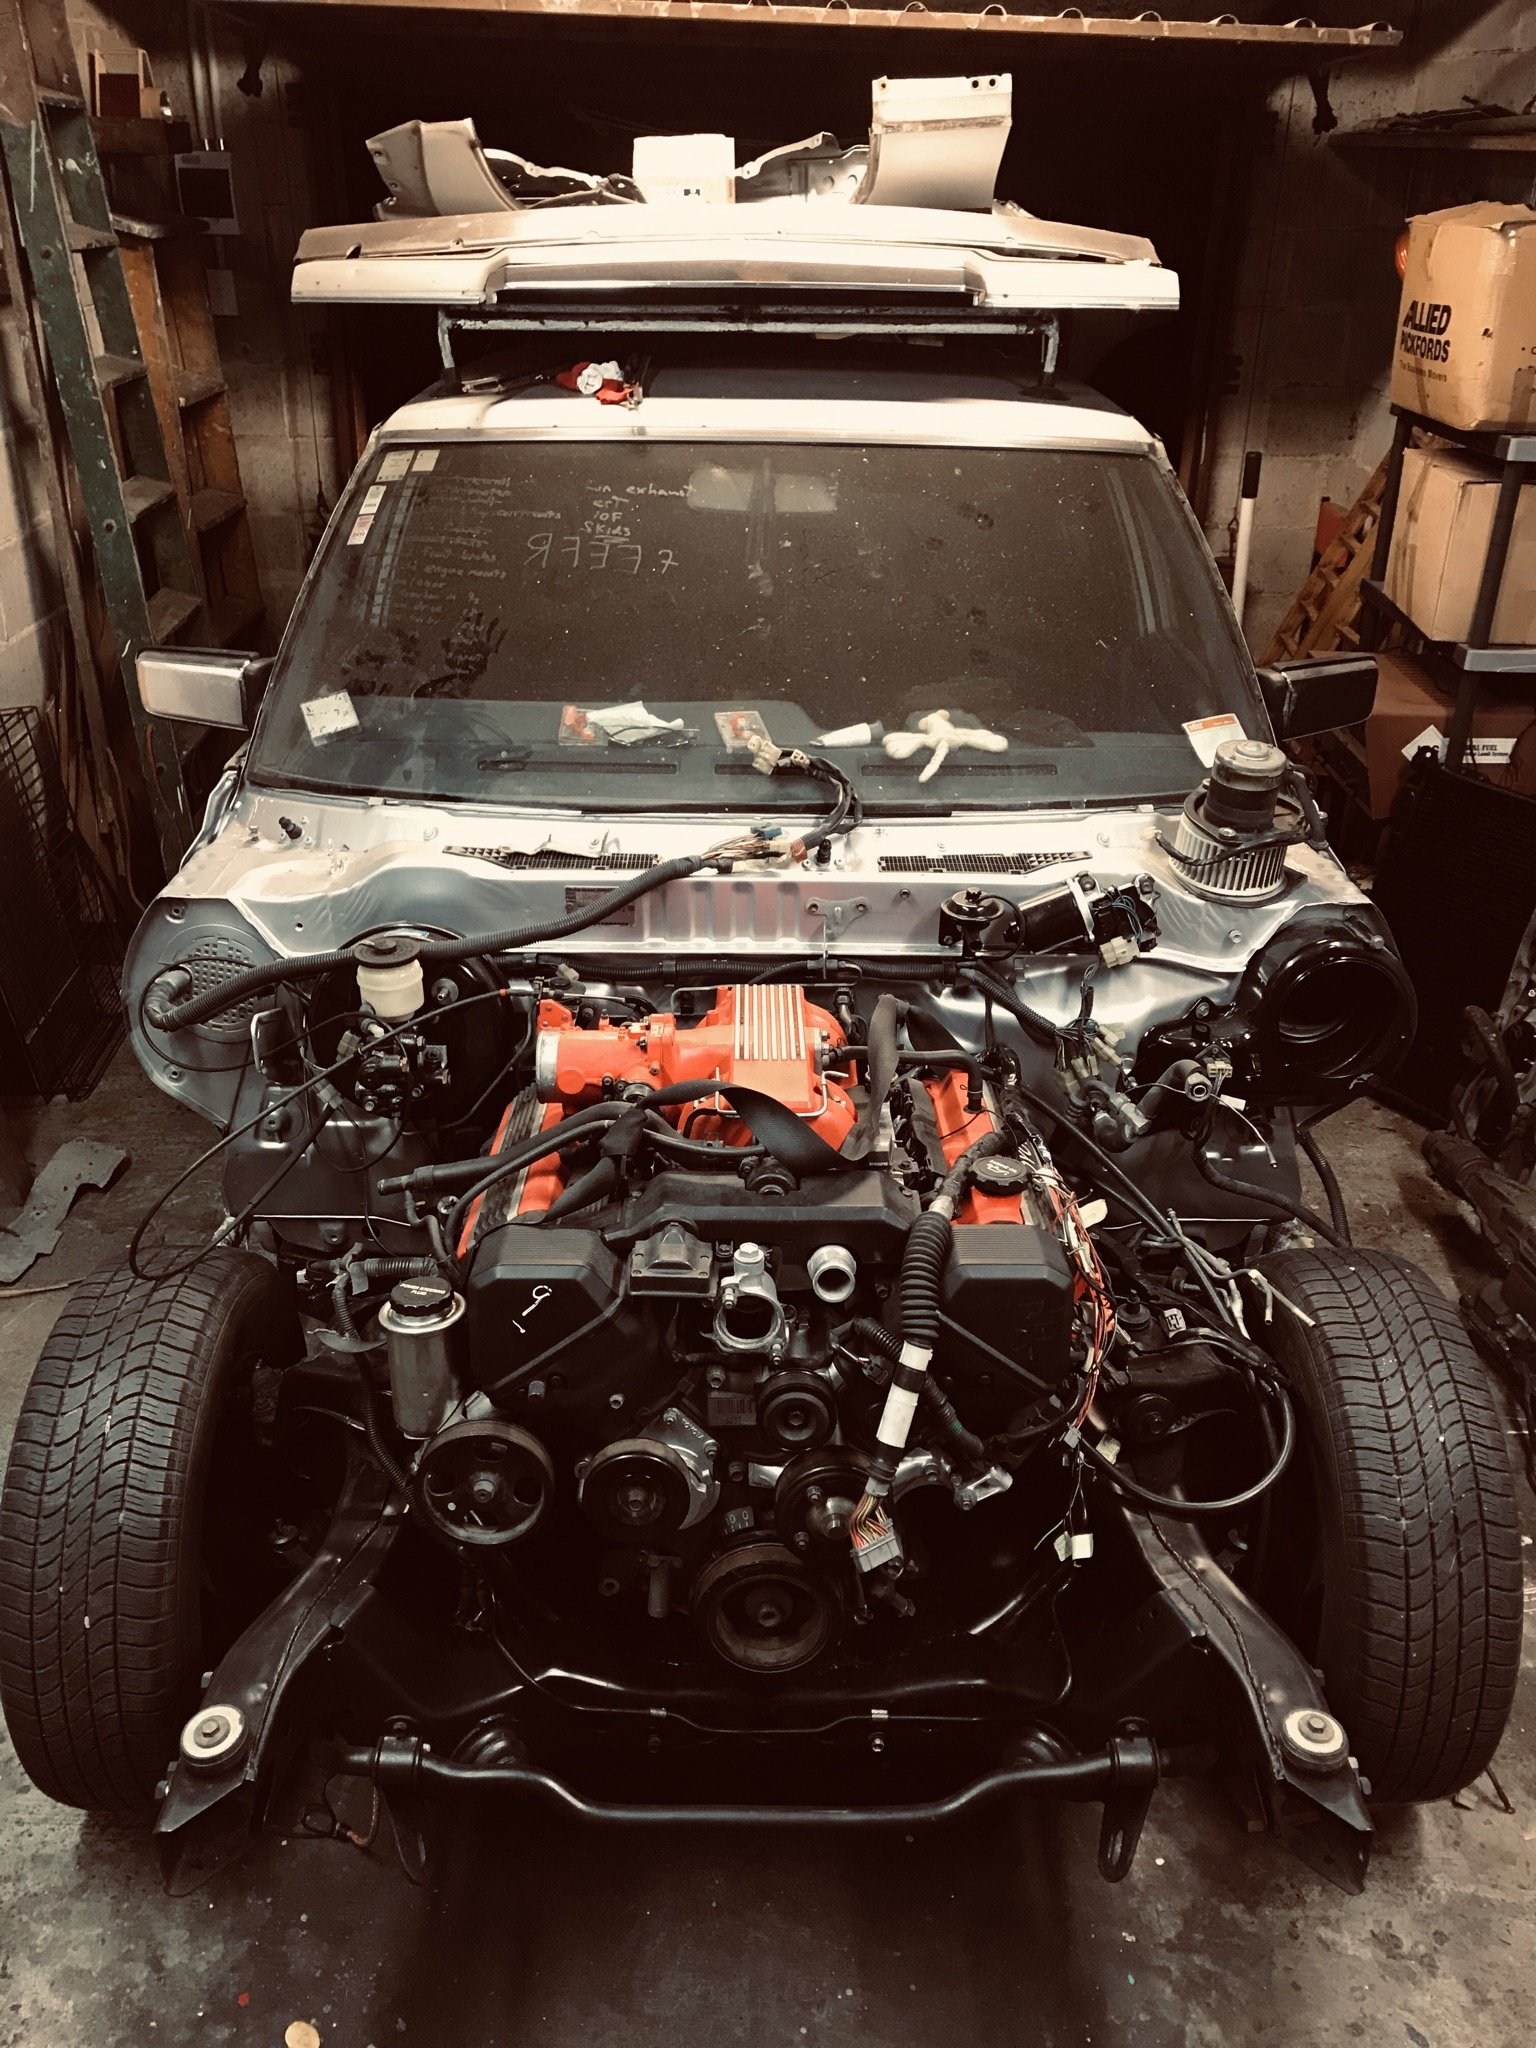
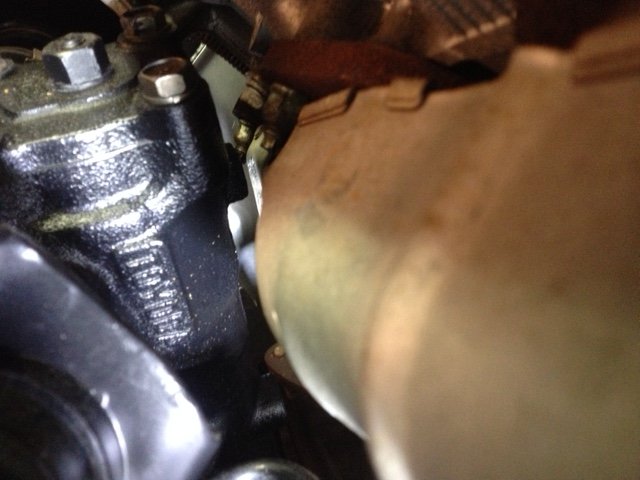
I've had to tweak the L/H manifold to get past the clutch slave, just rotated the flange by 90 degrees. I also made up the new clutch hard line. Engine mounts are done and bolted on for the last time. The new flywheel/clutch/bell housing combo had a weird issue where the thrust bearing would just about fall off the nose of the gearbox before the clutch was disengaged. I guess I could have spaced out the flywheel but I didn't like the reduced starter teeth engagement, so I ended up having the nose lengthened by 10mm by my local engineer. He made a nice job where the extension is pressed in another 10mm inside from the join, I feel much better about it now. I've just got to finish adjusting the pivot ball length & slave cylinder angle, then the whole lump should be ready to bolt in!
- 52 replies
-
- 13
-
-
Cheers for that link @Yowzer. I wish they had bothered to teach us that at tech, bloody interesting.
-
Bluebear01's 1983 1uz powered Toyota Crown
Bluebear01 replied to Bluebear01's topic in Projects and Build Ups
Haven’t done much over summer, but I have just about finished the mounts. I’ve had to give the engine a small tilt away from the steering box, I’m hoping any torque twist will be under 10mm, that’s about all the gap I’ve got. I’m getting the driveshaft lengthened by 110mm next week, it looks like the A series auto has the same yoke as the W55.
- 52 replies
-
- 11
-
-
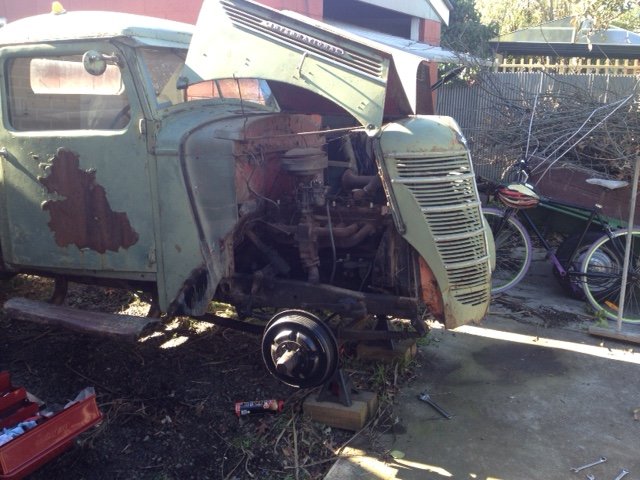
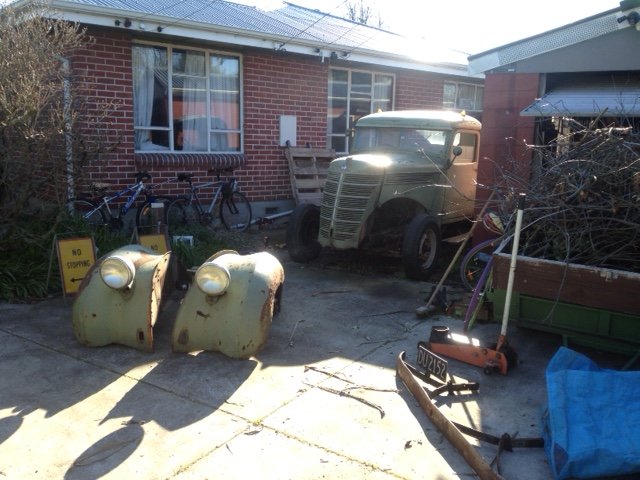
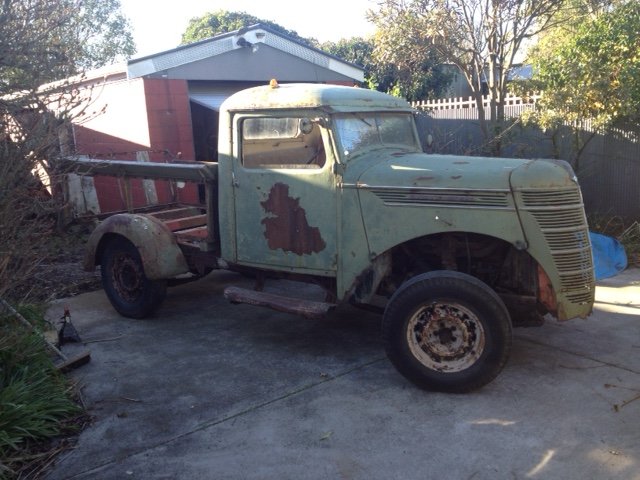
Bluebear01's 1937 International D-2
Bluebear01 replied to Bluebear01's topic in Projects and Build Ups
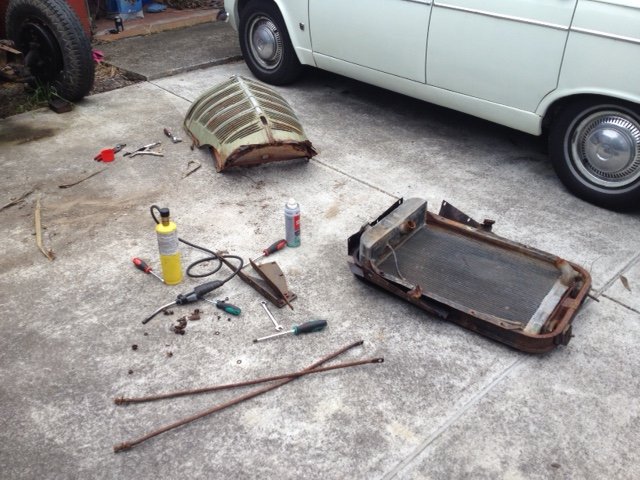
What a slack guy! I've been pretty busy over Christmas, but got a chance to put a few hours into this lately. We finished pulling the nose to bits and sent the panels away for a bit of love. Next step is getting the body off so I can fit this thing in my garage and crane out the engine. The radiator really fought us coming out, it's away getting a re-core priced up. And the rear brakes are also getting rebuilt. Once that's done we should be able to push it by hand, prob for the first time in 20 years!
- 4 replies
-
- 14
-
-
I saw that! Looks like you're doing an amazing job with that car. I do feel a little guilty with how nice it fits so far.
-
Bluebear01's 1983 1uz powered Toyota Crown
Bluebear01 replied to Bluebear01's topic in Projects and Build Ups
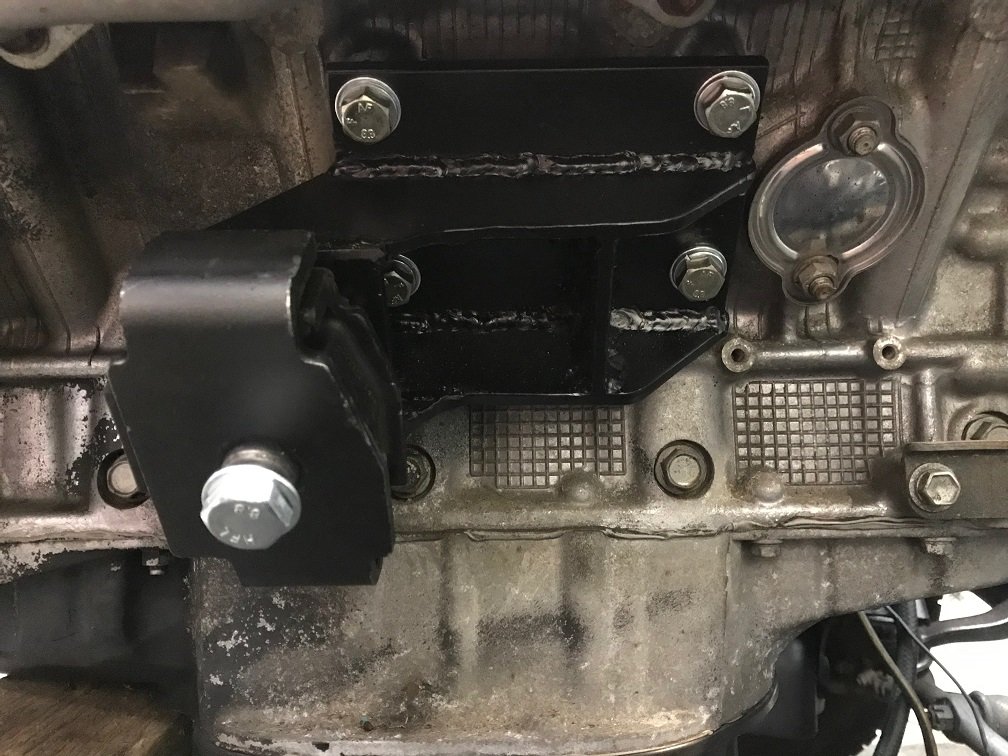
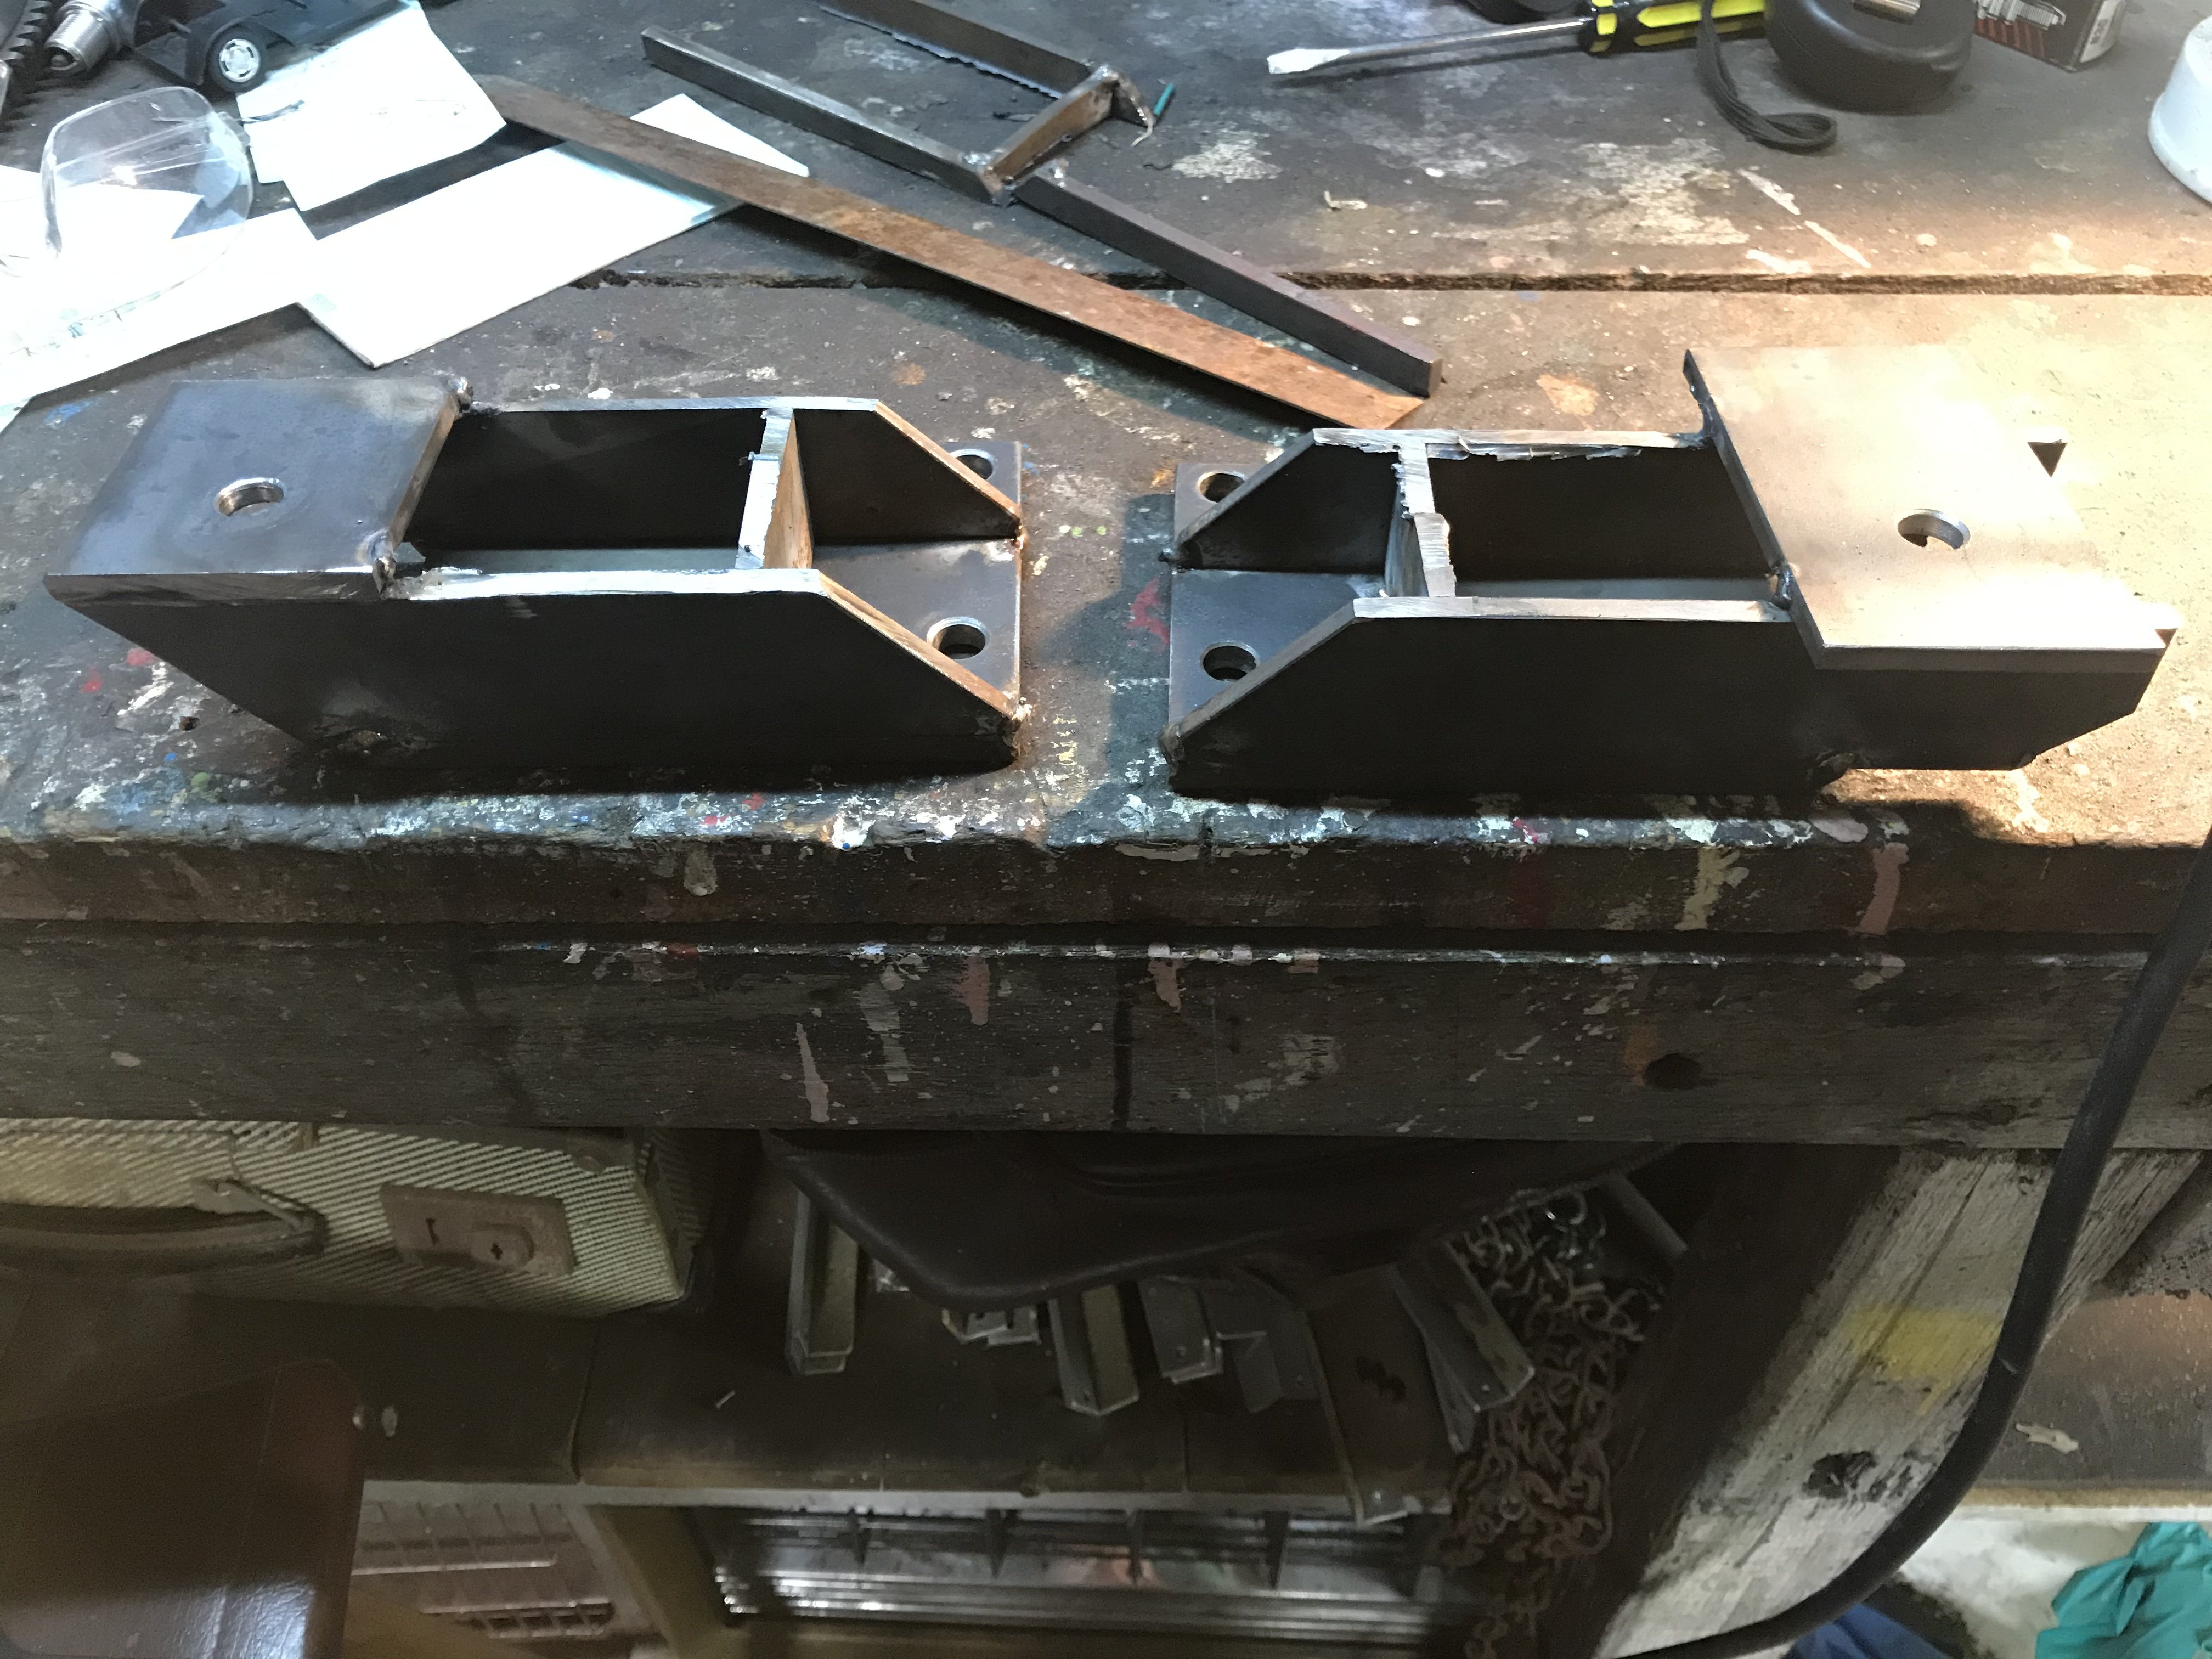
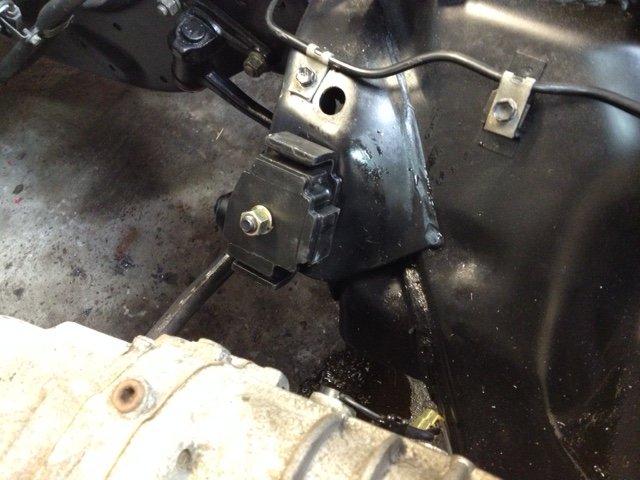
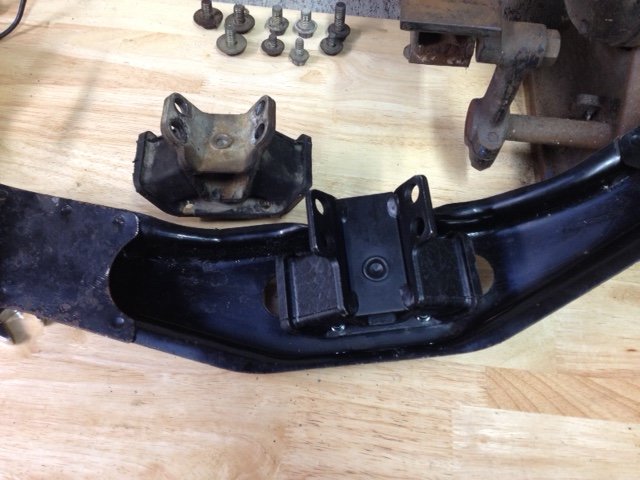
Mount time! I didn't have much choice with engine positioning. I've got maybe 10mm ether side. I'll take a threaded casting off the steering box to give it more room. The steering center link means I can't go back any further without cutting the sump but the crank pulley already sits a little further back than the 5m did. The remote filter housing just clears the factory mount position, it'll be easy to change from underneath. The gearbox mount for a RNZ147 Hilux has a greater offset than the factory mount, bringing the auto cross-member close to its original position. With all that lined up the chassis mount position is about 90mm offset to the 1uz mount position. The engine mounts from an FJ40 fit really nice in the limited space, have limits to catch the engine if the rubber fails & also have a female thread on the bottom which will make installation a breeze. The Mount Shop were super helpful with tracking those down. My father-in law came by, took some measurements & drew up some sweet brackets to bring it all together. Looks much nicer than I would have cobbled together, should make for a tidy job!
-
Cheers man, I'll put that into the long term plan then.
-
Bugger! Have you had bad experiences with them? If it does go pop what would you recommend as a better fit? Cheers.
-
Cheers man, it's a blast having him as keen as I am. Lots of good memories for him hopefully.
-
Bluebear01's 1983 1uz powered Toyota Crown
Bluebear01 replied to Bluebear01's topic in Projects and Build Ups
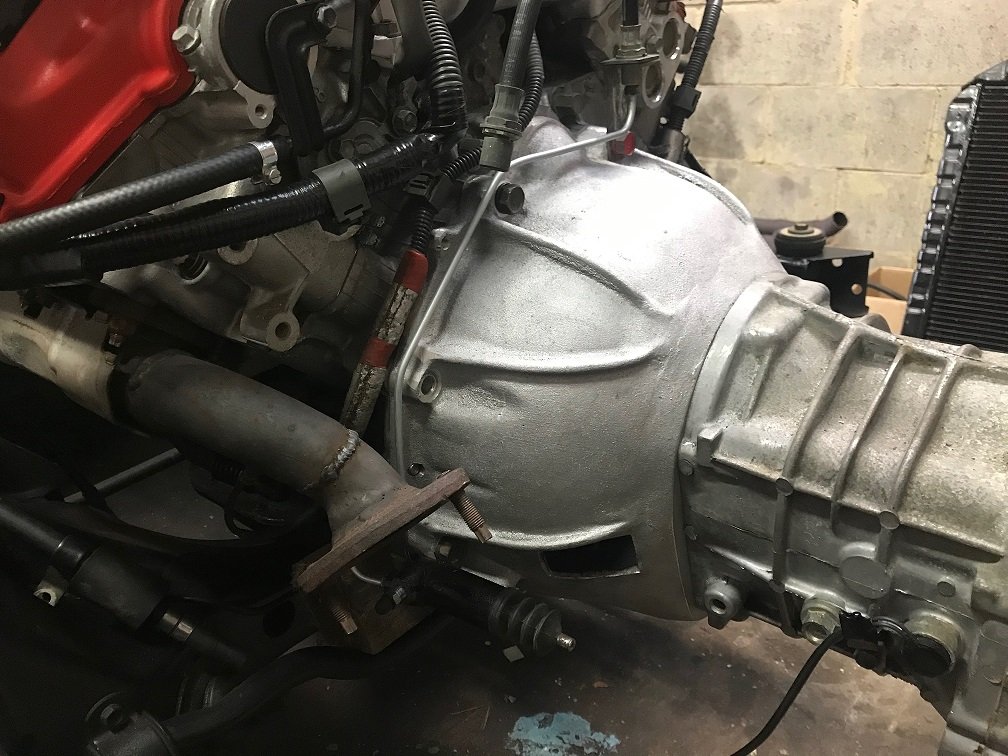
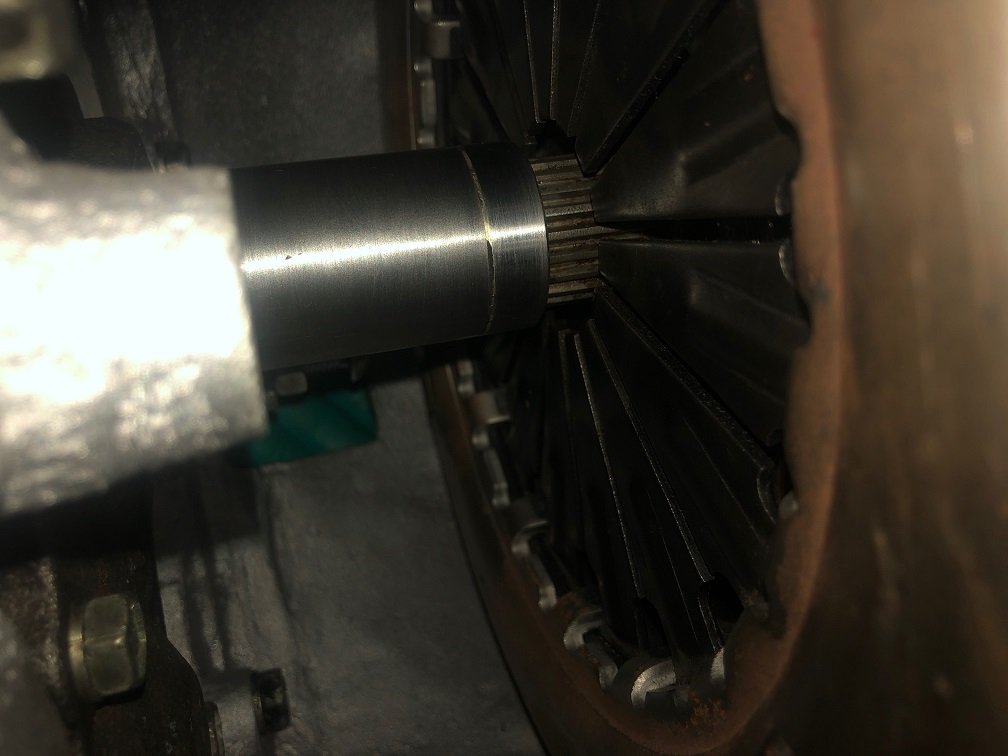
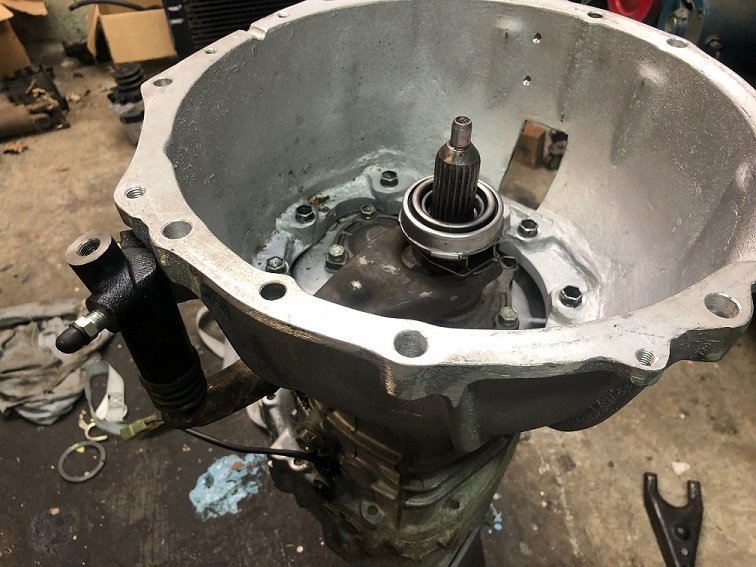
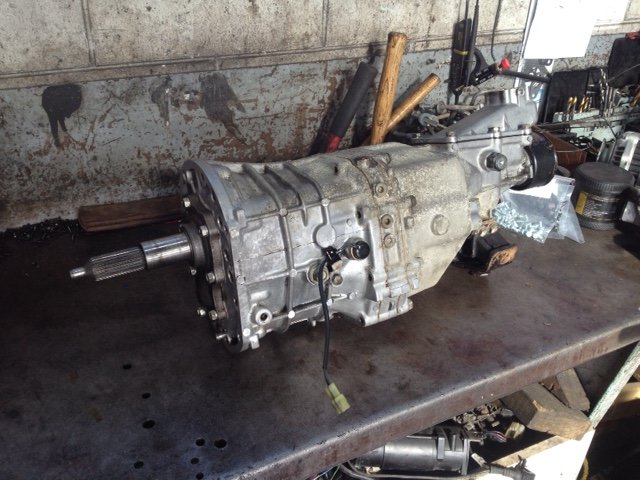
I cleaned up my W55 in preparation for bits coming from NZAD. The aluminum that was covered in oil from the old 21R came up like new! I can't believe something designed for a 4cyl can happily take an 8. Then I tracked the courier like a hawk for this! The casting looks really nice, super happy with it. The kit from NZAD came with bellhousing, flywheel & clutch kit. I just needed to cut the ring gear off my flexi plate, heat it up & drop it on. Happy days. Measurements show the shifter lining up nicely with the factory floor hole. The bell allows for the fork to exit either side which will he helpful. Hopefully I'll sit this on the engine & drop it in this weekend. Then I'll know how close everything is going to be!
- 52 replies
-
- 16
-
-
Found it! Dizzy, pickup, module, coil and spare module. I replaced my points dizzy with this after getting sick of replacing condensers all the time. It's yours for the price of a courier if you wanted to have a play.
-
I might have an electronic dizzy setup at home for the M, I'll let you know.
-
Cheers man! It is so refreshing working on this compared to the modern stuff.
-
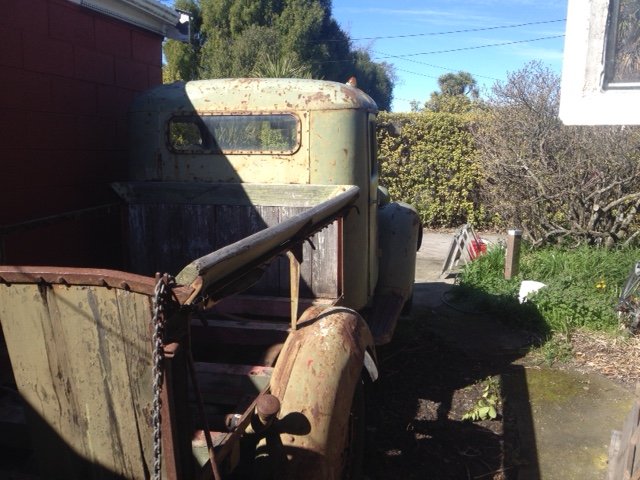
Discuss away on this old pile of pre-war rust!
-
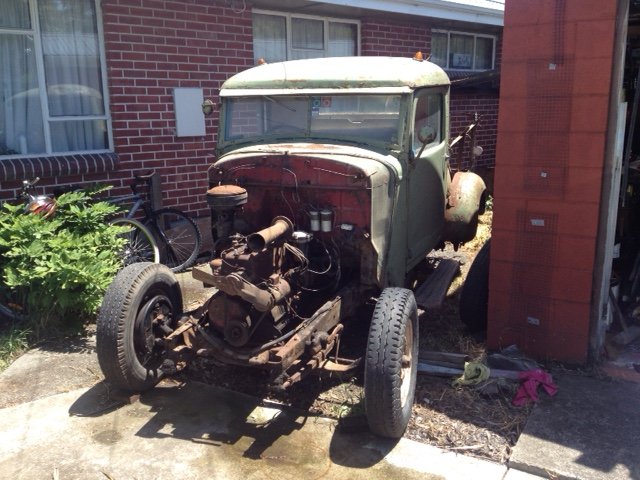
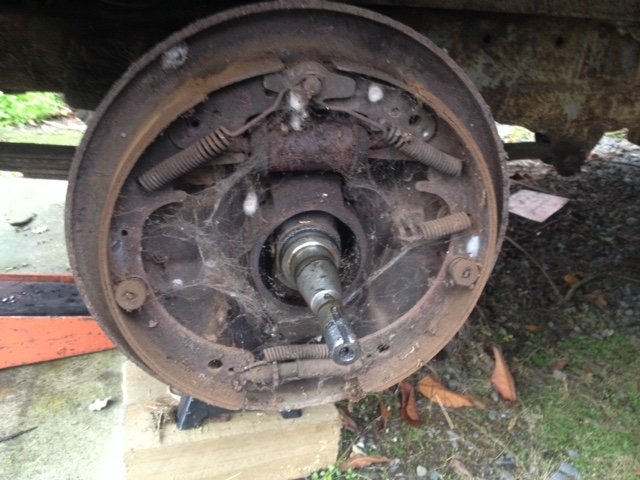
This old girl is an ex-military truck that has been in the family of a good friend of mine for a solid chunk of last century. It's only recently been pulled out from under the Macrocarpa it's called home for a few decades. The loose plan at this stage is to get it mechanically back to new, but keep it looking like it is now. Over the last few months I rebuilt the front brakes, replaced the wheel bearings & had the master cylinder re-sleeved. Today was a beaut day for getting more done. So many seized bolts though! Got both guards off & the steering linkages straightened/cleaned up. The front is back on the ground, next I'll tackle the rear brakes & fuel tank. It hasn't run in a bit, but does turn over by hand. I'll get the engine out for a look over after I get the body off. I do like the rat-rod look. We won't be going that way, but I can see the appeal. Anyone here play with these old things? Anything I should look out for? Cheers!
- 4 replies
-
- 37
-
-
Bluebear01's 1983 1uz powered Toyota Crown
Bluebear01 replied to Bluebear01's topic in Projects and Build Ups
I was getting sick of tripping over the engine, so it's sitting in there till I get clutch/flywheel bits. It fits real nice, but I think I may need to take a tiny bit off the sump to give more room for the steering centre link. .
- 52 replies
-
- 13
-
-
Bluebear01's 1983 1uz powered Toyota Crown
Bluebear01 replied to Bluebear01's topic in Projects and Build Ups
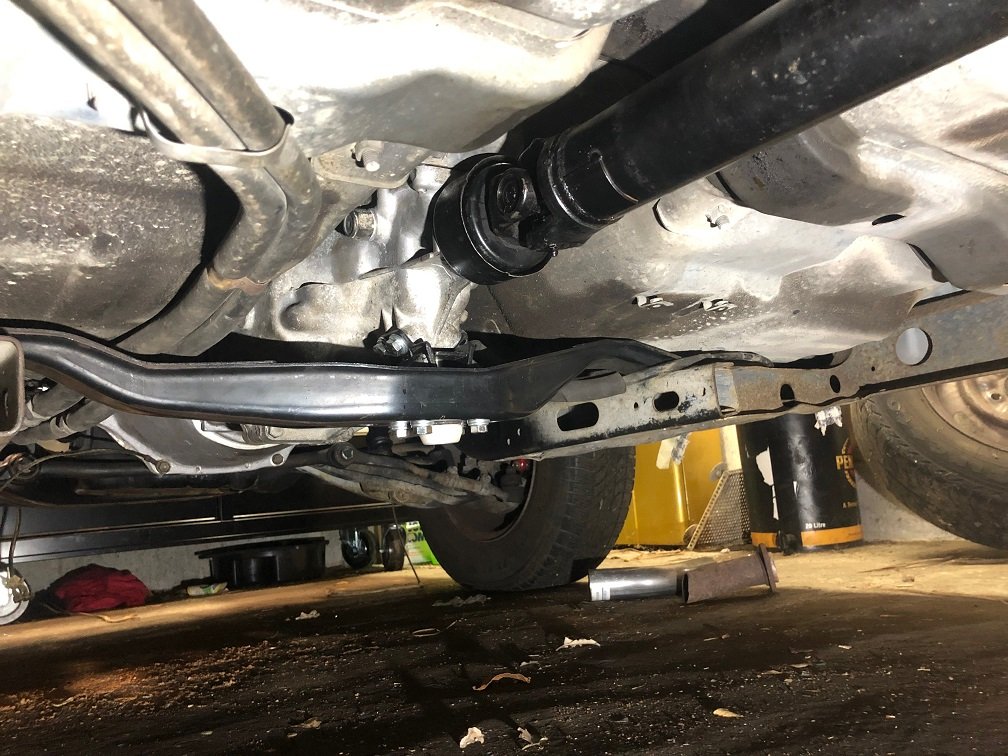
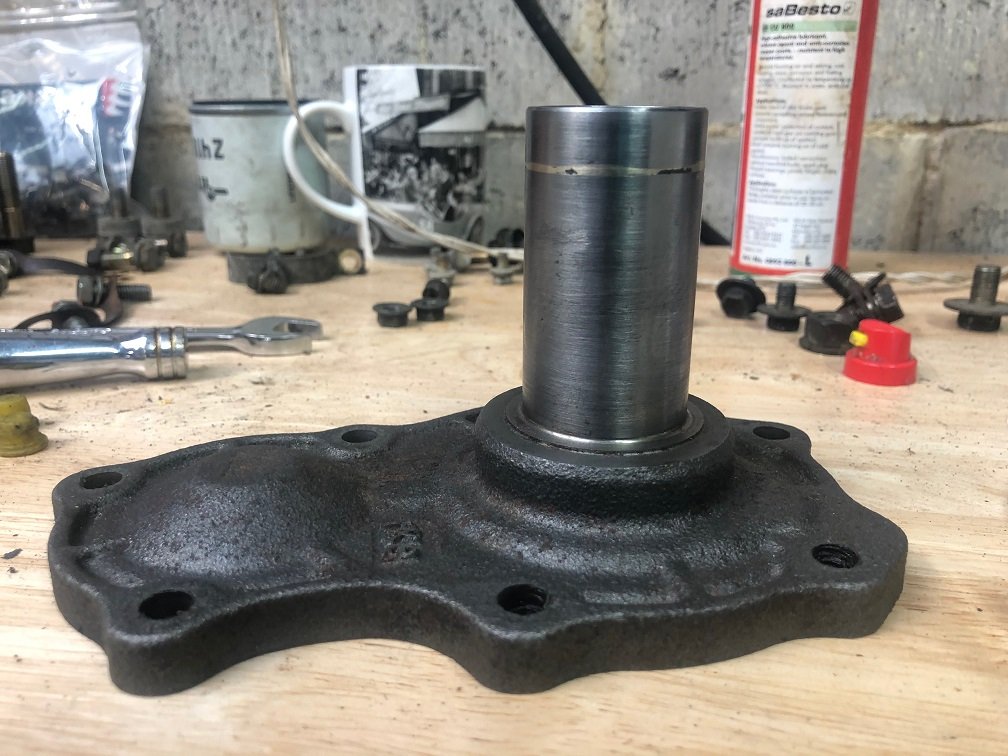
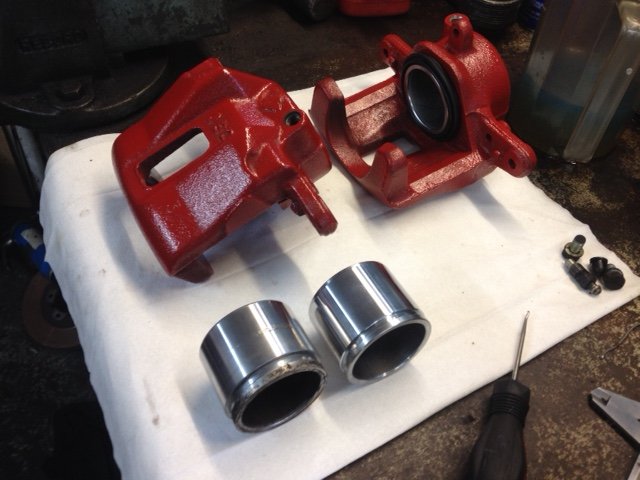
The callipers were in a bad way. Both pistons were frozen in and pitted, but Safe-R-Brakes managed to cross them over to a Mazda piston of the same size. Having the genuine pads was a life saver. It has all 12 separate anti-rattle clips, I think I was missing most of them. Should stop nicely now too! I see Repco has the Ferodo GP2 pads on clearance for $10 a set, anyone have experience with them being noisy/dusty etc? Thinking of getting some for the future.
-
Bluebear01's 1983 1uz powered Toyota Crown
Bluebear01 replied to Bluebear01's topic in Projects and Build Ups
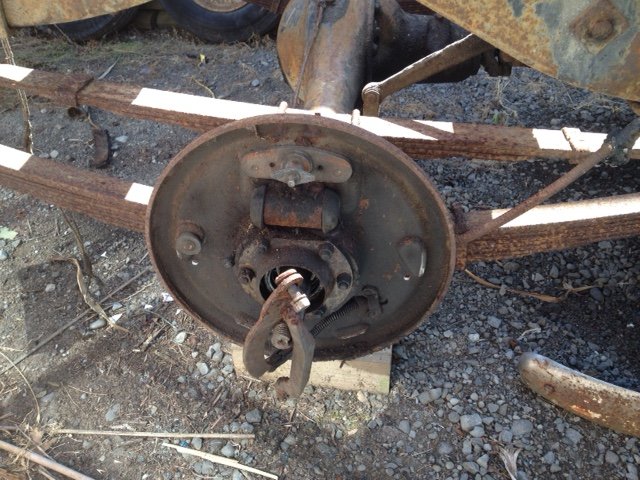
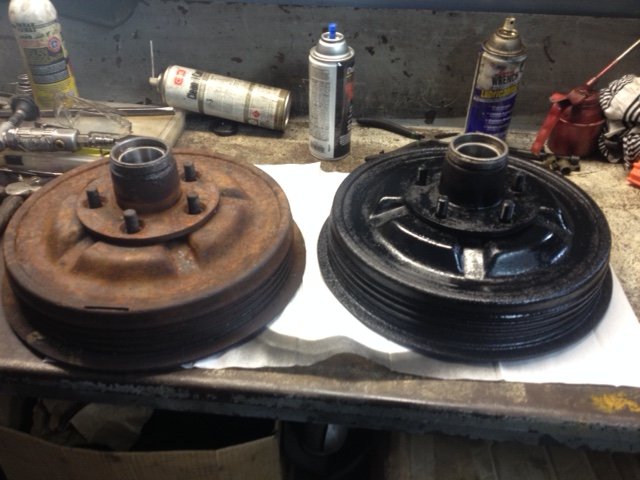
The front brake rotors arrived outa Aus and they look good! Ended up being a real pain to get wheel bearings. All the remaining stock had been on the shelf so long it took me 3 goes to get some that weren't damaged or had bits missing.


.JPG.8dd957ac9542e20a9c267c4d609feeec.JPG)