-
Posts
1,132 -
Joined
-
Last visited
Content Type
Forums
Downloads
Events
Gallery
Everything posted by Kiwibirdman
-

Auckland Monthly Meet - Wednesday 23rd August
Kiwibirdman replied to Threeonthetree's topic in Upper North Island Region
Apparently there is a Tesla being dropped round to our office tuesday for a couple of hours. We are getting to take it for a strop round Clevedon. I will be able to Barry on with some knowledge. -
It is. Will look even better when they go off and get HPC coated. I will get it running before coating just in case there are any places that hit the chassis and need some cut and shut.
-
I did have some very good advise from the panelbeater. Get all the bolt on panels, doors, guards, tailgate etc fixed first as they come off the car. Number of reasons, first is if you run out of motivation there are some good parts to sell, second progress can be seen along the way, lastly when you get to the stage I'm at the final assembly goes fast and is motivation to get done. I think I may have given up if I still had all the bolt on panels to do. The mechanical stuff, even as slow as this car has been due to making so many bits, is fun, Fixing rusty doors and guards not so much. Lots of cars get the engine and running gear sorted, body stripped and then never put back together because it all becomes too hard. Now when the car goes for paint it will come back ready for putting every thing together.
-
Blind Stupidity is the answer. And if I knew how much there was to change, not to mention rust to fix I probably wouldn't have bought it. I have built a few cars over the years. V8 conversions into HQ Holdens is a piece of cake, stand back and throw it in the hole and away you go. My Firebird was a big mechano set when I bought it, but most parts can be bought off the shelf. This is the hardest project by far because everything has to be changed to fit. My bloody mindedness also made things harder, I will have a column shift, the headers will go down beside the engine not through the inner guards.............. I have got a bit discouraged a couple of times, when I bought the car 13 years ago I could have got a really good HZ wagon for $3k and had it finished years ago. Then I think no one else will have a car like this and really there hasn't been that much money go into it. I'm so close that not finishing now is not an option.
-
Cheers. Slowly getting there. My mate came and repoed his MIG to fixed the floor in his wife's 1970 VW. Plenty of other stuff to do to keep me out of trouble.
-
I think the tunners got the LSD as standard, they had bigger yoke/universals on the diff.
-

Kiwibirdmans 1962 EJ Holden Wagon
Kiwibirdman replied to Kiwibirdman's topic in Projects and Build Ups
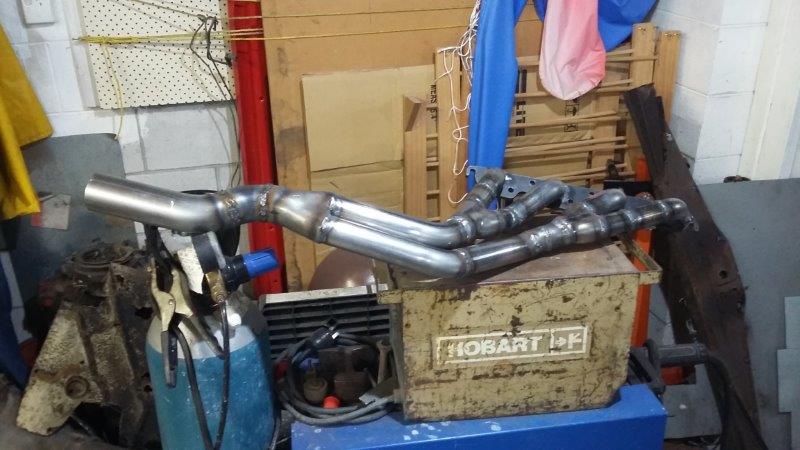
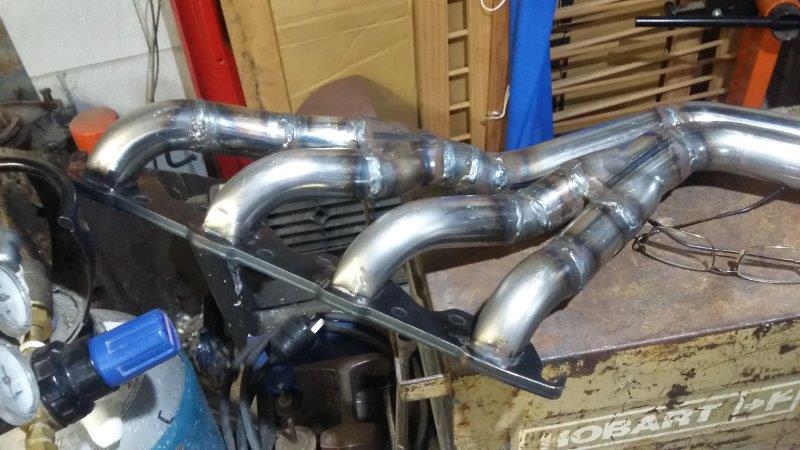
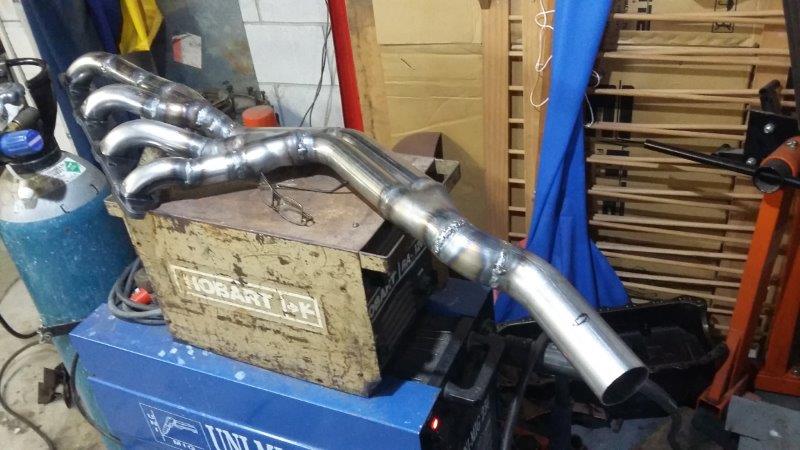
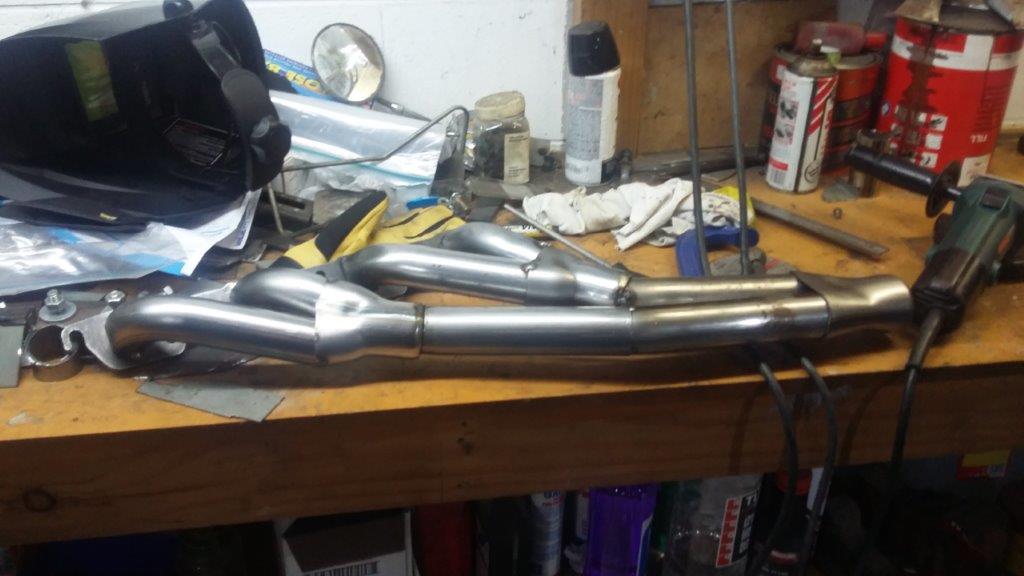
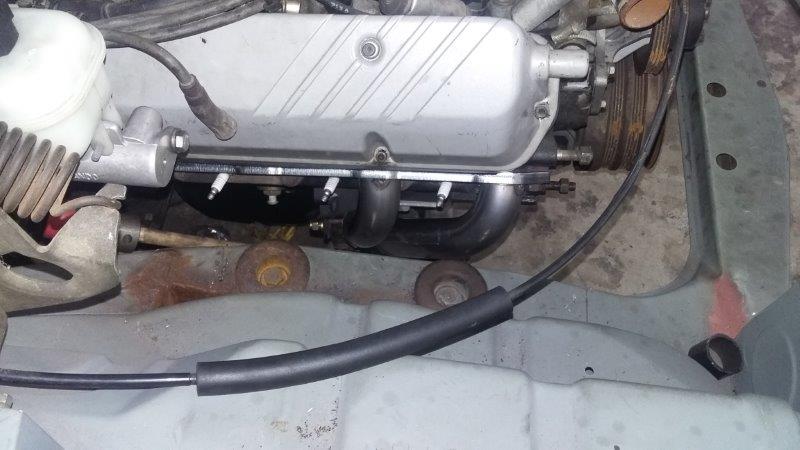
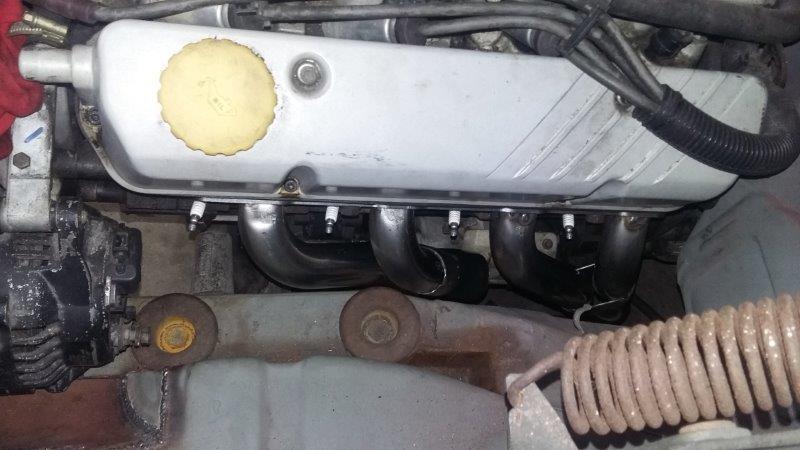
Headers are done. Drive shaft built, I had the original commodore one, and a second one that came with the diff. All that was saved was the original commodore yoke, everything else is new. The shaft is 3 inch so good for 6800 rpm or about 300mph in top gear (6800 rpm for the shaft). Should be good. New U bolts also turned up today from rare spares. I stuffed my back lifting 25kg bags of concrete in a big hurry in the rain today so I'm not climbing under the car tonight. A few photos of the drivers side. I am aware that the primary Y connections are wrong. There is not a lot of space!!!!!! The small drop in HP wont be noticed, power to weight should be similar to a current 325 kW HSV Commodore.- 131 replies
-
- 11
-

-

Kiwibirdmans 1962 EJ Holden Wagon
Kiwibirdman replied to Kiwibirdman's topic in Projects and Build Ups
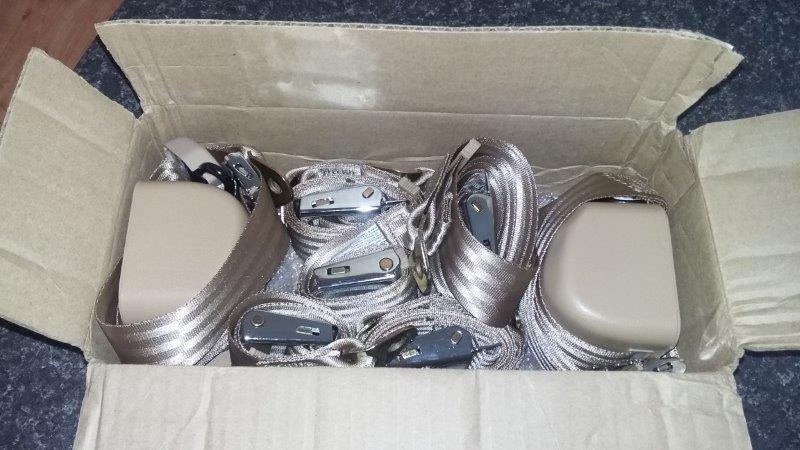
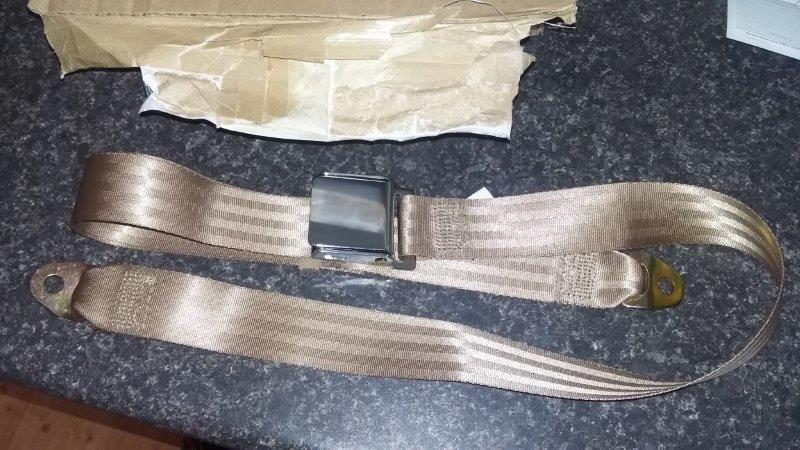
Had a box turn up today These should be good. I had priced belts up locally, same chrome buckles but only available in black. Local price for 2 detractor 3 point and 4 lap only belts was $800. These came from Wesco Performance, meet USA standards and were $485 sitting on the bench at home. The box arrived 2 weeks after order, it took a week for them to be dispatched. Very happy will trade again. Took all my driveshaft parts to ADL today to get one made up. Because of the cost of cutting the ends off the old drive shafts almost everything will be new. Probably not a bad idea. No so happy about the bloody cold, car is getting ignored because the garage is bloody cold and too damn big to heat. Buying stuff is progress. -
The lip where the 2 halves of the chassis rail are spot welded together no longer exists. Plenty of space for the pump and filter.
-

Kiwibirdmans 1962 EJ Holden Wagon
Kiwibirdman replied to Kiwibirdman's topic in Projects and Build Ups
Headers are almost finished. I have to take the last 44mm U bend back to swap for a 2 inch. I'm glad that I did this myself with help because they would have cost a fortune to get someone else to build.The passengers side goes in OK, drivers side needs to have the engine lifted to get in and out. Once the drivers side is out I'll post a photo or 2. -

Kiwibirdmans 1962 EJ Holden Wagon
Kiwibirdman replied to Kiwibirdman's topic in Projects and Build Ups
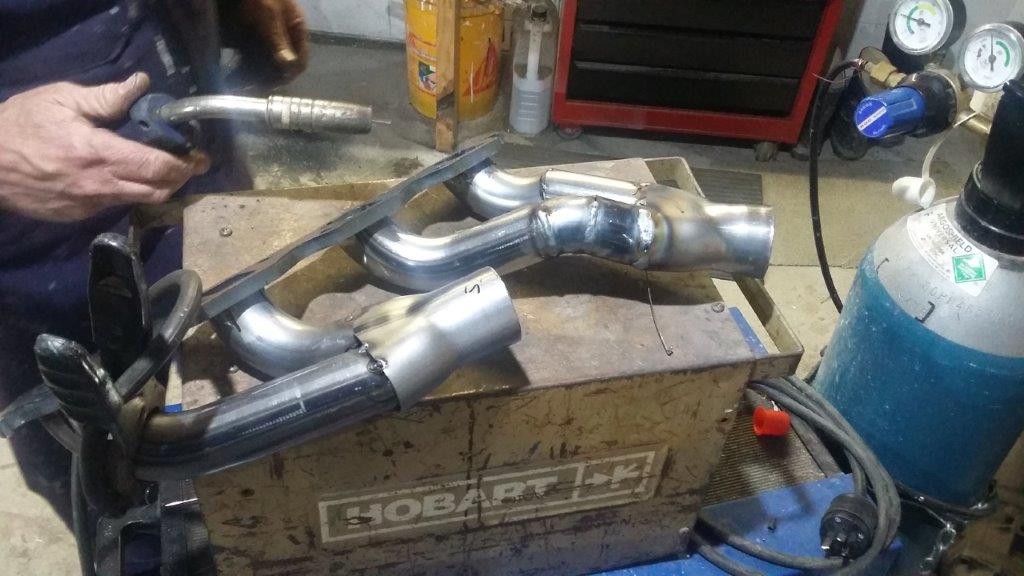
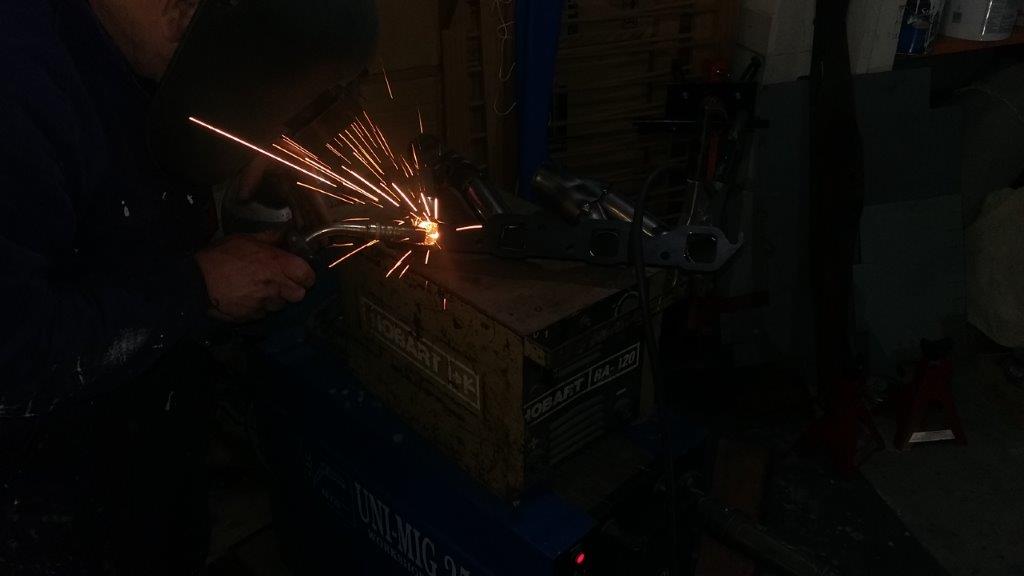
A quick up date before the monthly meeting tonight Big progress on the headers. I am glad I'm not paying for the time that has gone into building them. So far parts alone is $600 and still not finished. Here is the passenger side. It is only tacked together. Everything fits.........just. I am aware that the tube lengths are no where near optimal but I don't think dropping a few HP is going to be noticed. And the drivers side half done And a photo taken just as the welder lit up- 131 replies
-
- 10
-

-
I am using standard Holden rubber mounts. There is more clearance than the photo shows, there is about 10mm to the lip where the 2 halves of the subframe are joined together. I will be cutting that back when the engine comes out. Fingers crossed that the motor doesn't move that much.
-
These are the headers that go out through the inner guard. Being the difficult contrary bugger that I am I want my exhaust to go down the side of the engine. If there is a hard way of doing something, that will be the way I want it.
-

Kiwibirdmans 1962 EJ Holden Wagon
Kiwibirdman replied to Kiwibirdman's topic in Projects and Build Ups
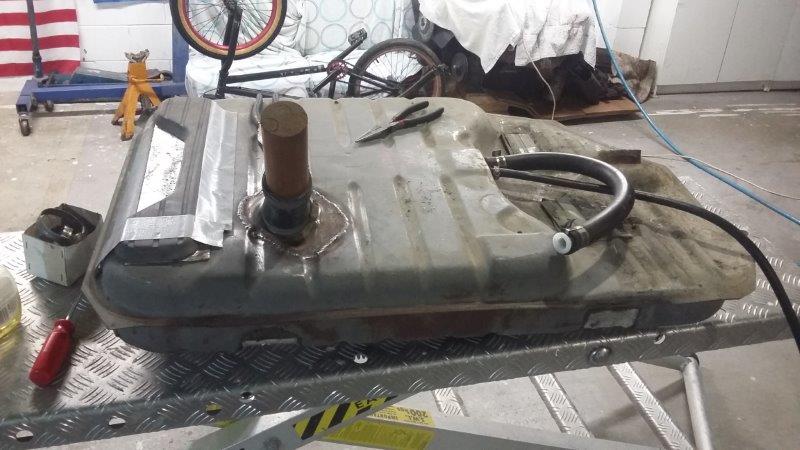
Here is something from Monday night last week. Being the proper engineers we are after modifying the fuel tank we pressure tested it for leaks on the weld. My compressor is over the other side of Auckland so had to go round the corner to my mates place who is doing the welding to use his compressor. Here is the tank all sealed up. Pressurized it to 8psi and found 1 hole in the weld on the new filler neck and 2 in the cap for the original filler neck. Had to take it back to my house, fix the welds, then back to the compressor to check again. Tank is now in the car!!! -

Kiwibirdmans 1962 EJ Holden Wagon
Kiwibirdman replied to Kiwibirdman's topic in Projects and Build Ups
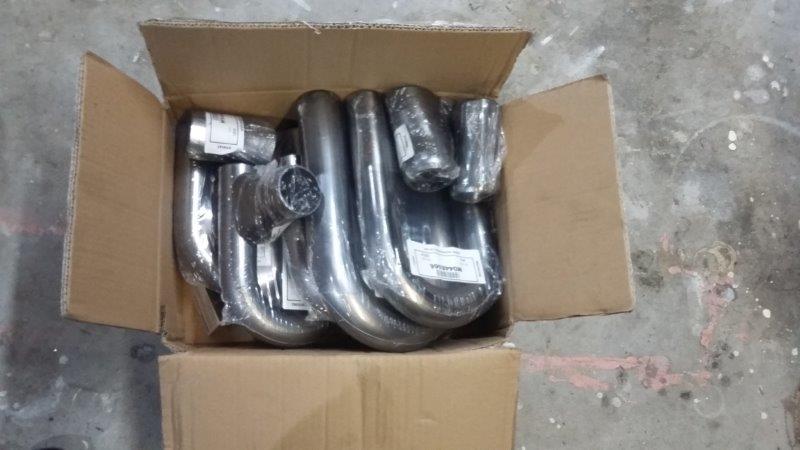
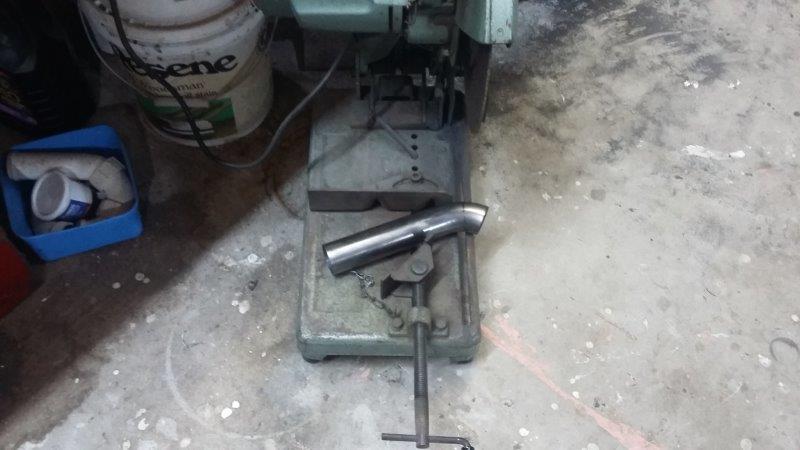
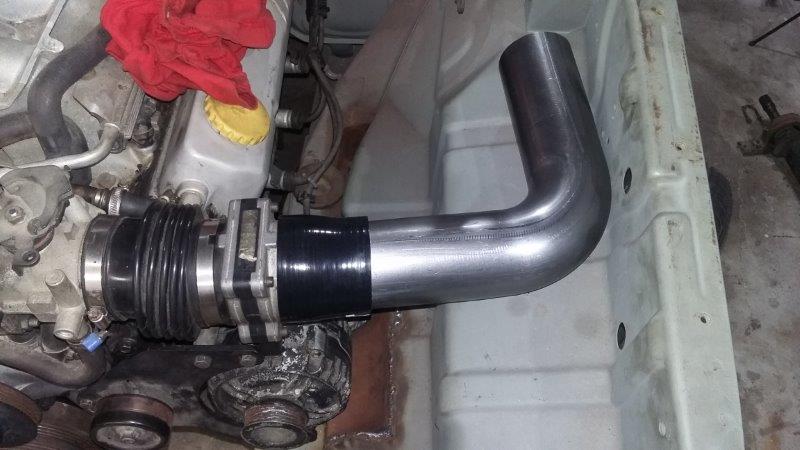
I went shopping at Autobend last week and came home with this lot. I still need to go back and get some more, they were almost out of the 41mm 2 into 1 cones, I got 2 and need 4, Some more U bends will be needed as well once I hve used up this lot and figure out what I need to finish off. Here is the start of the drivers side First 2 pipes are tacked into place. There is no way to get proper firing order tri-y design Passengers side Not much space down there, nothing hits!! Had to stop last night at 10:15 because the cut off wheel made too much noise and the kids wouldn't go to sleep. Here is a mock up of the intake I'm going to cut down the bend so it sits in the middle of the inner guard and will have a cone filter on the end. I wanted to make a cold air induction but no space. -
Checked the firing order and the separation is correct. Started building the passengers side and it should all fit OK. Going to be really tight on the drivers side. I don't think that Im going to be able to get the correct cylinders connected, no space to cross the number 3 and number 5 pipes over. I wonder how much of an issue it is?
-
I have done a fair bit of looking and head scratching about the headers, passengers side is front 2 cylinders and rear 2 connected, drivers side are first and third, second and fourth. I am not getting worried about primary pipe length, what ever fits is how it will be, the secondaries will be a long as possible. I get the feeling this will be another session of cut, fit, tack, cut apart, retack...........repeat endlessly until they have been built about 3 times before I am happy.
-

Kiwibirdmans 1962 EJ Holden Wagon
Kiwibirdman replied to Kiwibirdman's topic in Projects and Build Ups
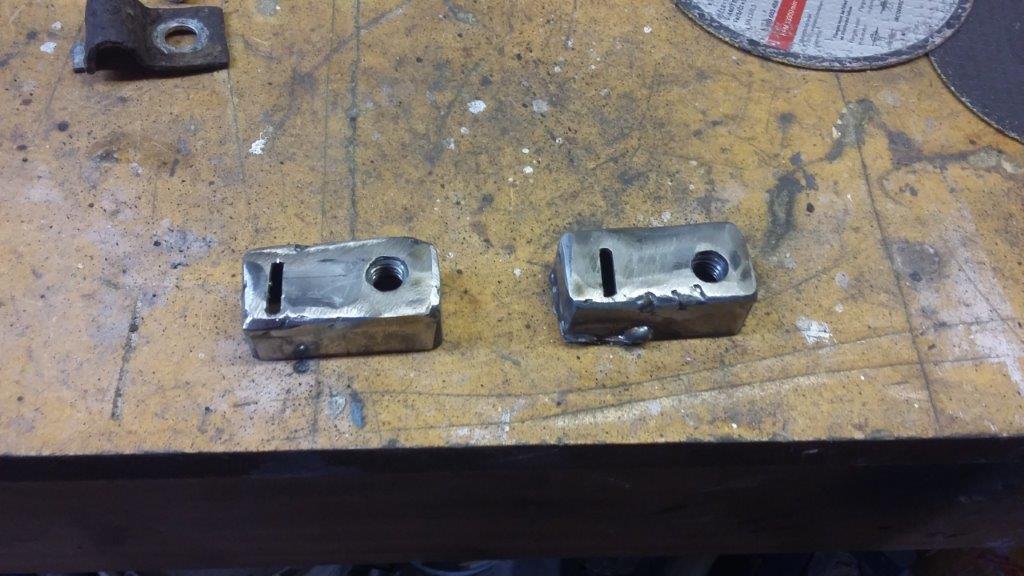
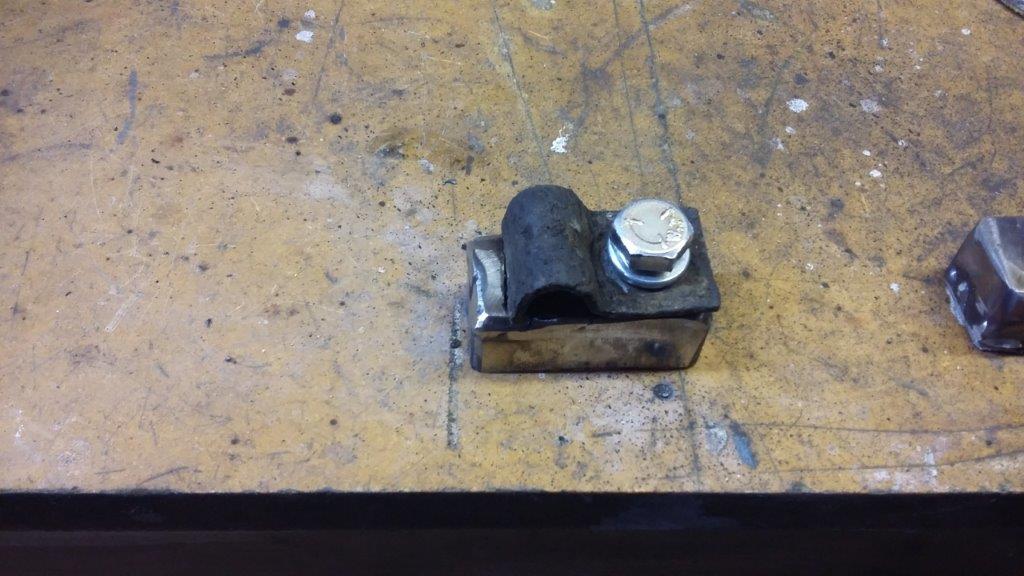
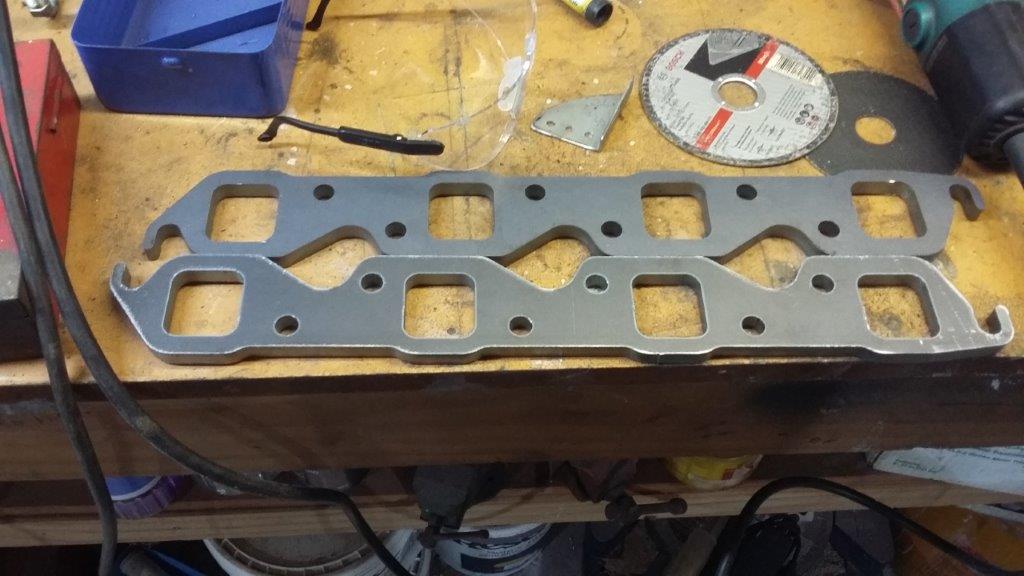
Some more photos Todays effort was to make a new mount for the park brake cable under the car. Another build the first version then have to make the same again. The one on the right was the first version which was OK until I cross threaded the bolt and stuffed the thread. Here it is the mounting bracket attached. Here are the header plates that came from Autobend. I have the passengers side one in place. It looks like I might have to open a couple of the bolt holes to line things up. I have been thinking about the headers a lot. The plan is to try and build a set of Tri-y's, the pipe lengths will be all over the place because of the lack of space. Off to Autobend on Wednesday to buy a bunch of U-bends and reducers. Any thoughts or ideas welcome on the discussion thread. -

Kiwibirdmans 1962 EJ Holden Wagon
Kiwibirdman replied to Kiwibirdman's topic in Projects and Build Ups
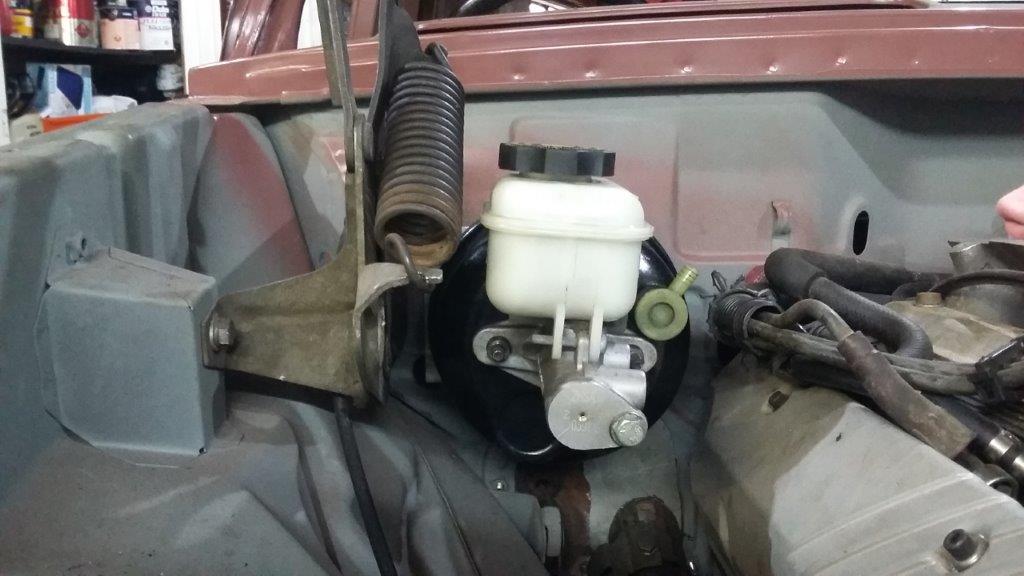
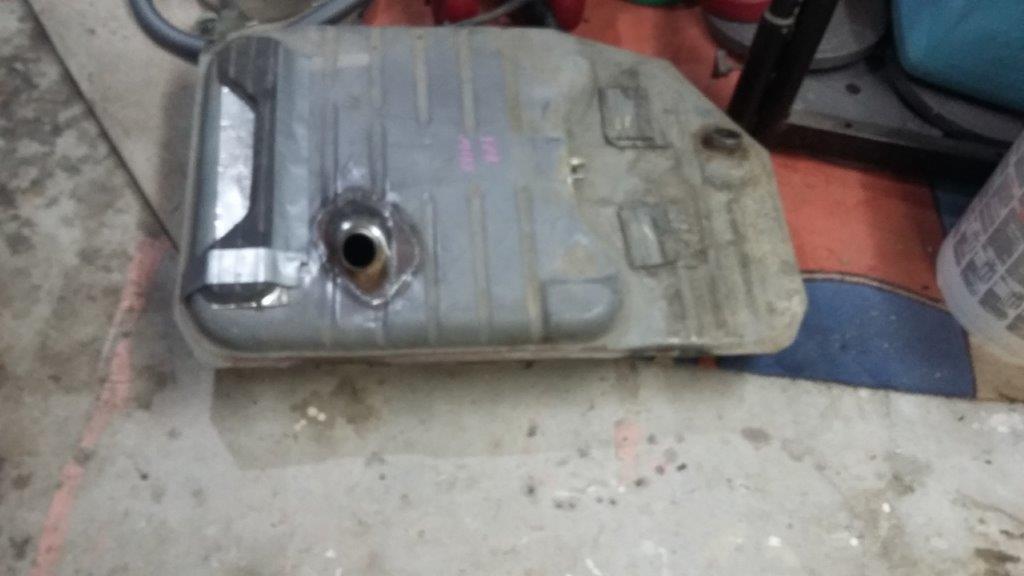
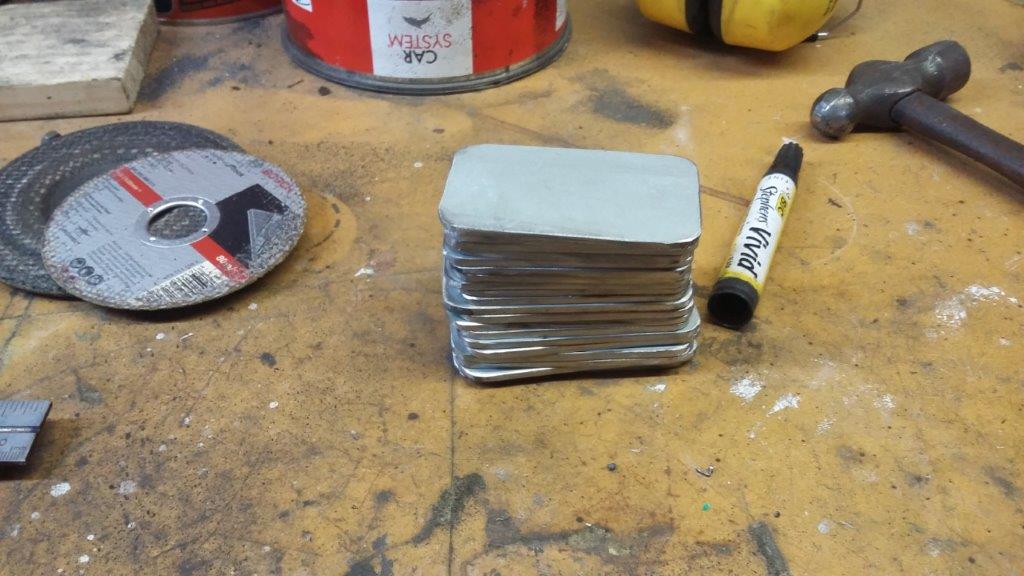
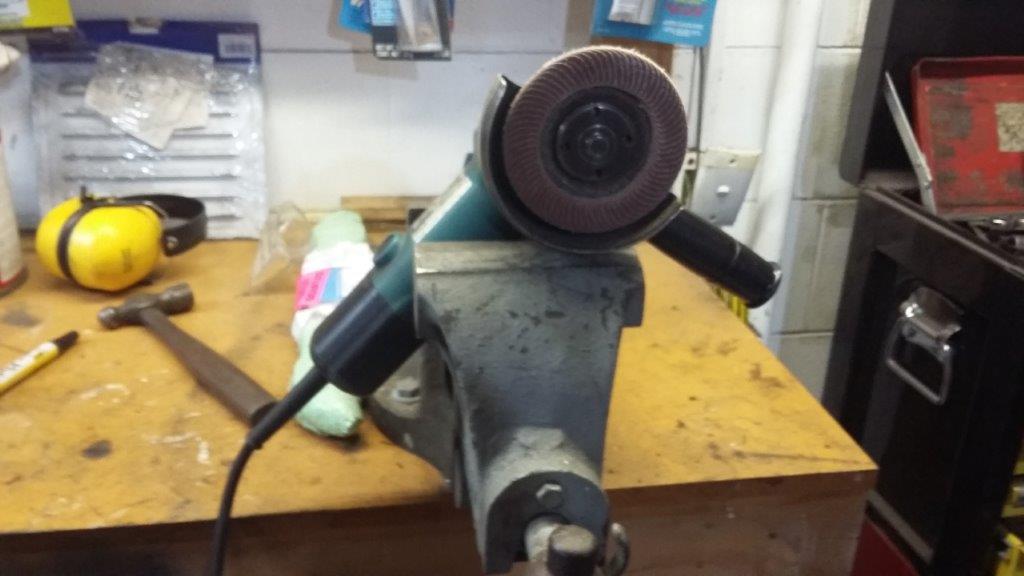
A long overdue update and photos Here is the brake booster, the lean to the motor is to create clearance between the plastic reservoir and the bonnet spring I went to fit the park brake and found that the brake pedal was in the way. Nothing that 2 hours of stuffing around couldn't fix. Once it was sorted and everything connected the position felt pretty good. Here is the modified fuel tank. An the hole in the floor for the filler pipe to come in. The steel box section beside the hole is for the tank mounts and the floor has been welded to it. Much stronger than before. I had been thinking about the seat belt mounts. There are doubler plates available from the likes of Fraser cars at $15 each and they still need to be drilled for the rivets or bolts that hold them together. I need 12 sets because the car came mounts for the driver and front passenger only, nothing for the centre of the front seat or the back seat. The original mounts on the floor disappeared when the floor pans got replaced. I had some 3mm plate and decided on Saturday to make my own plates. 2 hours later I had 20 50mm x 80mm plates with rounded corners and beveled edges as per the certification code. The still have to be drilled for the bolts and then painted. And for a laugh here is my DIY linisher -

Kiwibirdmans 1962 EJ Holden Wagon
Kiwibirdman replied to Kiwibirdman's topic in Projects and Build Ups
Good progress in the last couple of weeks despite having to go away for work Master Cylinder Mounted to booster with (hopefully) the correct clearance for the pushrod. Header plates have arrived, so now need to buy some U bends and start cutting and welding Filler is on the petrol tank, very useful having a second tank to chop up and steal the filler neck from Mounts for the traction bars cut off, shortened up by 15 mm and rewelded. Photos to come -

Kiwibirdmans 1962 EJ Holden Wagon
Kiwibirdman replied to Kiwibirdman's topic in Projects and Build Ups
Not much progress, spent a chunk of Saturday afternoon playing musical wheels with Glyn, the owner of the big blue mig in my garage, and his 1965 396 big block SS Impala. We swapped the 14x7 and 14x8 S/S cragars off my Firebird onto his impala. The 14x8s on the back fill out the guards nicely, so we left them on for a while. Firebird needs some love but not until the Holden is finished. I did get to Zebra parts today for a VZ commodore brake master cylinder. Mr Vapour got the last one I had when he spied it with the booster. I thought that there would be lots of them around, lots of the VT, VX and VY's being wrecked, not many VZ. Hopefully tomorrow will see me in the garage again, a night off from being the kids taxi. -

Kiwibirdmans 1962 EJ Holden Wagon
Kiwibirdman replied to Kiwibirdman's topic in Projects and Build Ups
Clint came round today to have a look at the car. After much looking he said mainly happy. The only thing that I got wrong is the mounts for the traction bars are too low by 10mm. They will hit the ground if a back tire goes flat. Not major, a bit of cut, shut and paint to fix. The other things are a gusset on the rebate in the front chassis where space was made to fit the top A arm and a strong back on the engine mounting plates, all easy stuff. Plugging away with other bits, fuel tank is mounted, still have to figure out the filler, brake pedal support is on the pedal box, some more holes in the floor welded up, UJ fitted to the steering rack. The list of stuff to do has got shorter, must be time for a new list. -

Kiwibirdmans 1962 EJ Holden Wagon
Kiwibirdman replied to Kiwibirdman's topic in Projects and Build Ups
It's been nearly a month since the last update. I had a 2 week holiday in Bali which slowed things up. Got back into it tonight working through the list of stuff to finish off, Universal is mounted to the steering rack, found that it hit the engine mount so that had to be clearanced, put the starter motor on and there is space to shift the knock sensor to the other side of the motor so the dip stick will fit into the HQ sump, clips fitted to the diff for the brake lines. Clint (Cletus as he is known here) is coming round for an inspection for certification next week so lots has to be done. I want his OK before it all get blown apart again and painted. Progress for sure. -
I have had success with a version of beavers idea, use the wheel with the nuts on 3 or 4 turns. The wheel has more weight than the brake drum.
-

Kiwibirdmans 1962 EJ Holden Wagon
Kiwibirdman replied to Kiwibirdman's topic in Projects and Build Ups
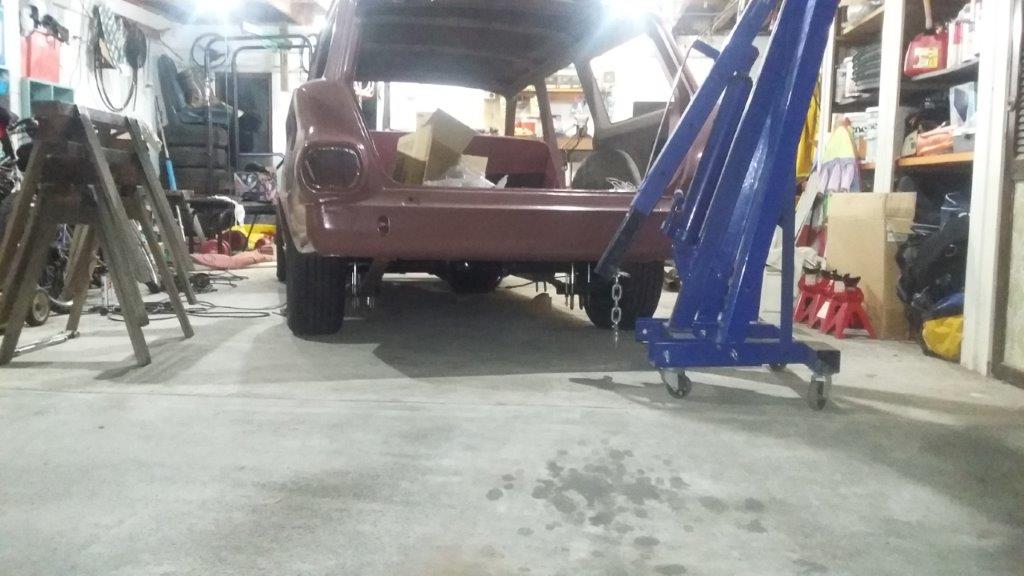
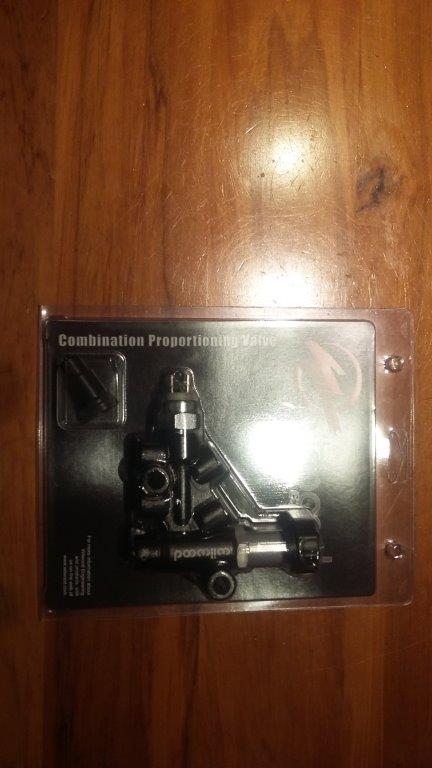
Its amazing how life gets in the way, last Saturday disappeared in being a taxi service for my eldest son for soccer out in Kelston, about 40 mins each way from home. I stopped into Pick a Part to see about another VX commodore master cylinder. Plenty of VT which were different and looked ugly as sin. I'll take a trip out out to Zebra tomorrow, their web site says they have 2. I did make some progress, new cans of paint and the rear axle is racing shiny black, no more 70's yellow. I forgot to take photos (as usual) while it was all on a couple of saw horses. New brake lines got made and a new HQ type flexible hose turned up from Australia. The mount on the body had the spot welds drilled out and will be moved. Car is back on the ground and suspension wound down (I love the threaded rod instead of springs at this stage). I'm pretty happy if I can get the final ride height here. A piece of 4x2 slides under everything with plenty of clearance. I also got a box from Summit racing today.


