


HumberSS
-
Posts
310 -
Joined
-
Last visited
-
Days Won
1
Posts posted by HumberSS
-
-
51 minutes ago, JR said:
Some guys were asking about a vapor blaster I made so thought I'd share how to make one and the results.
Its was a bog standard sand blasting cabinet. I'll give a brief rundown on how I did it. Every single idea was stolen straight from YouTube.
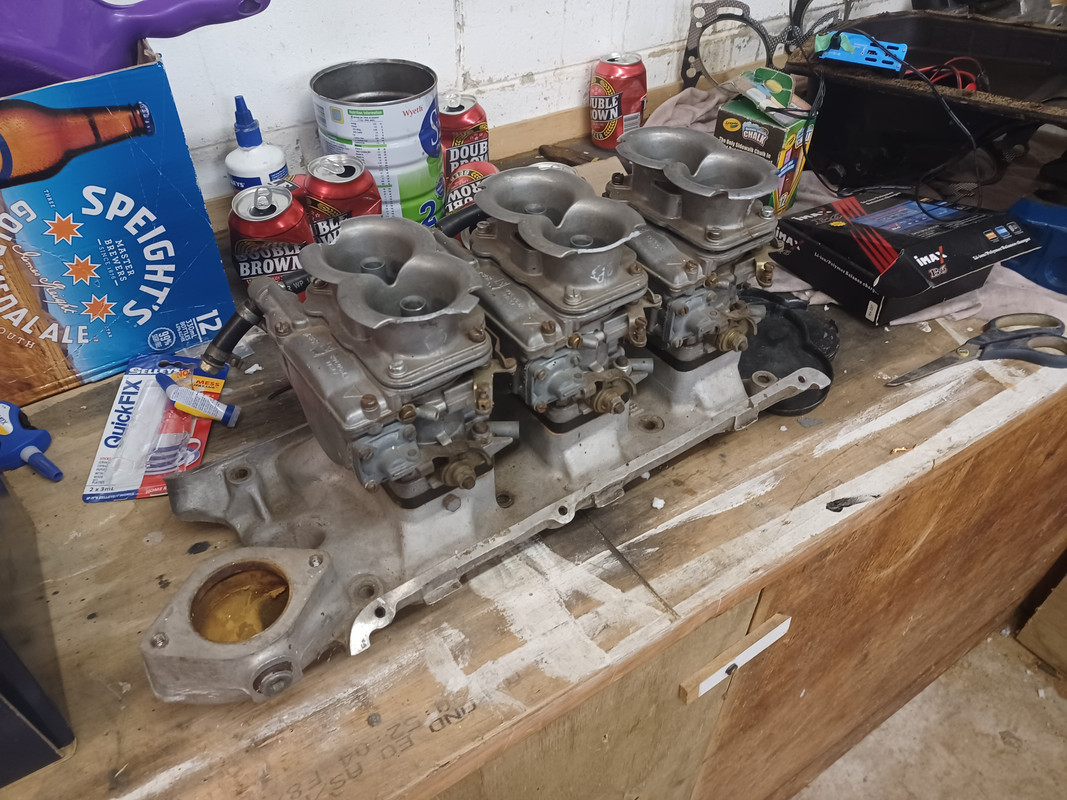
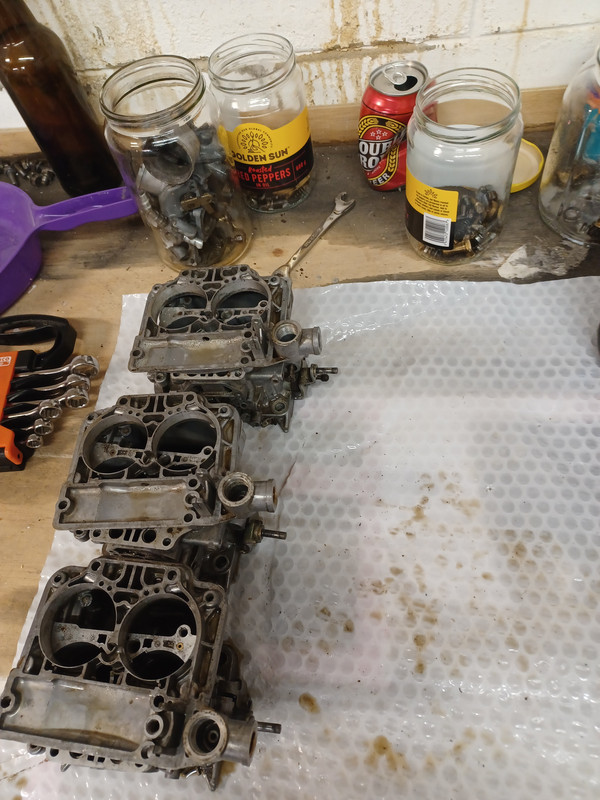
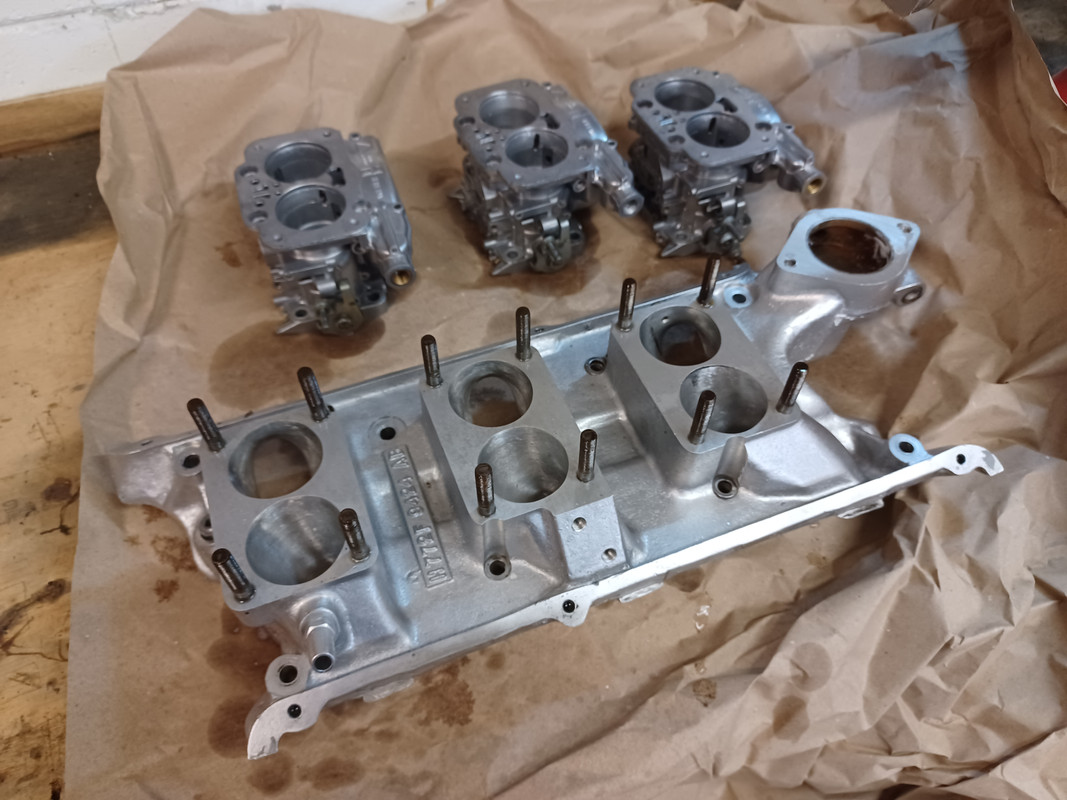
Basically vapor blasting fires a slury of water and very fine glass beads (must be round beads for a polished finish, not crushed glass) out of a slightly modified nozzle with compressed air.
It can be used for cleaning all sorts but is exceptional at polishing aluminum. It's non abrasive so can be used on machined surfaces.

When I assembled the cabinet I used a heap of sealant on all the joins. Worked well, it's water tight.
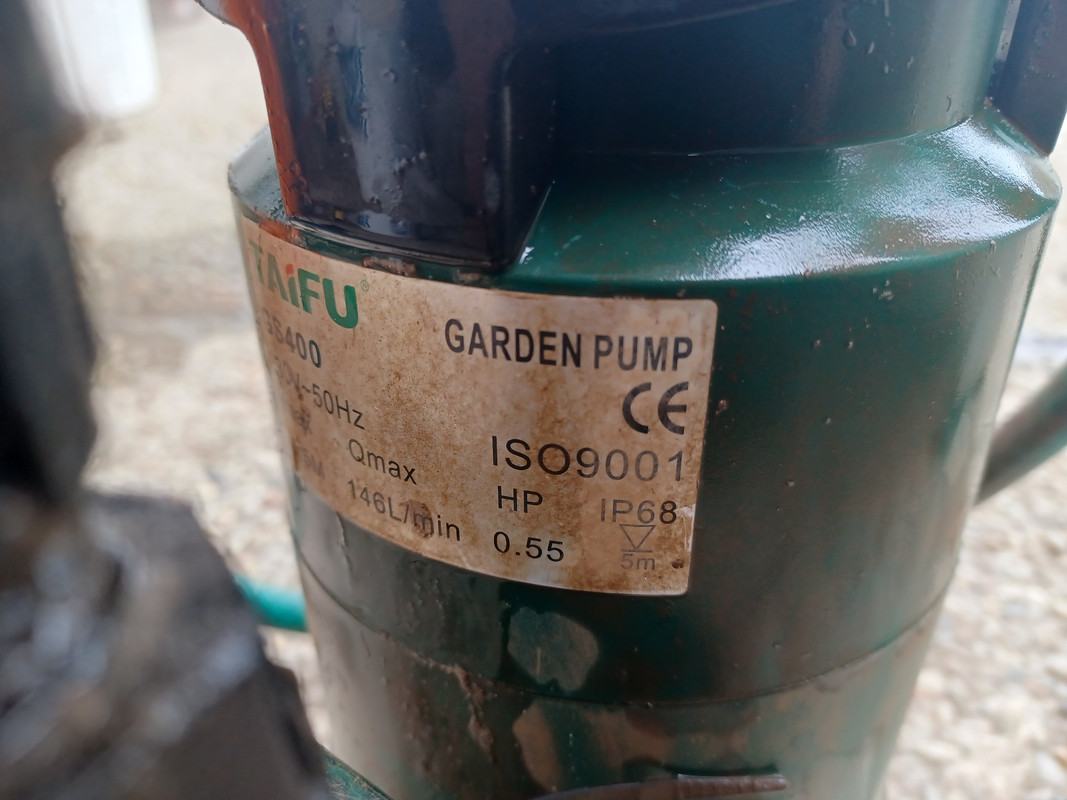
It's just your standard garden variety submersible pump.
I got the pump from a random tool shop nearby (just googled the cheapest) it was about $60-$70 from memory.
The outlet from the pump needs a tee. One of the tees needs to point back into the bucket. This is to make a slury, mixing the glass bead and water.
The other part of the tee goes to the gun.
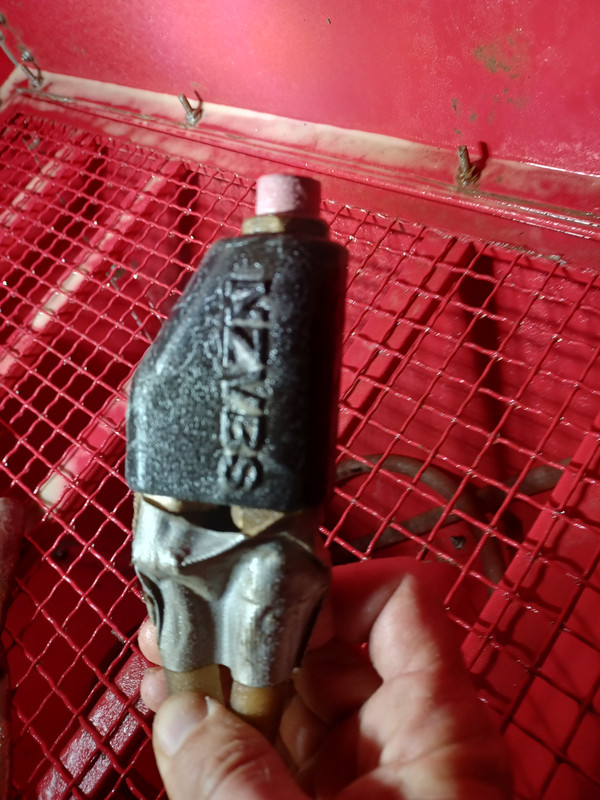
I got my gun from NZVBS. The dude was really helpful matching gun to my needs.
Then you just need a foot pedal to operate the air, a window wiper is a good add on and away you go.
They say about 5 parts to 1 of water to glass bead. It's closed loop, so recycles the slury. To clean the mixture just carefully pour the dirty water out and the glass beads stay at the bottom of the bucket.
A+, would trade again.
Does it take paint off?
-
Do you know of any MK2/3 Capris around for parts? Thinking old skool autos might have a few cuts? Failing that the fab for the rad mounts doesn't overly difficult, start by making some cardboard templates of what you are aiming for then go get them folded up at your local metal fab shop. Failing that see if someone here can do the job for you or go to a panelbeater. Be less than a days work I'd say...
-
 1
1
-
-
This project is so epic. Keep up the good work man, excited for you.
-
 1
1
-
-
On 08/08/2023 at 14:49, kpr said:
ac/dc tig, 200amp or more, budget around 3k. Any stand out machines these days? or chose your chinese shade of colour ?
Had a good run out of my Hugong from Duroweld in np
-
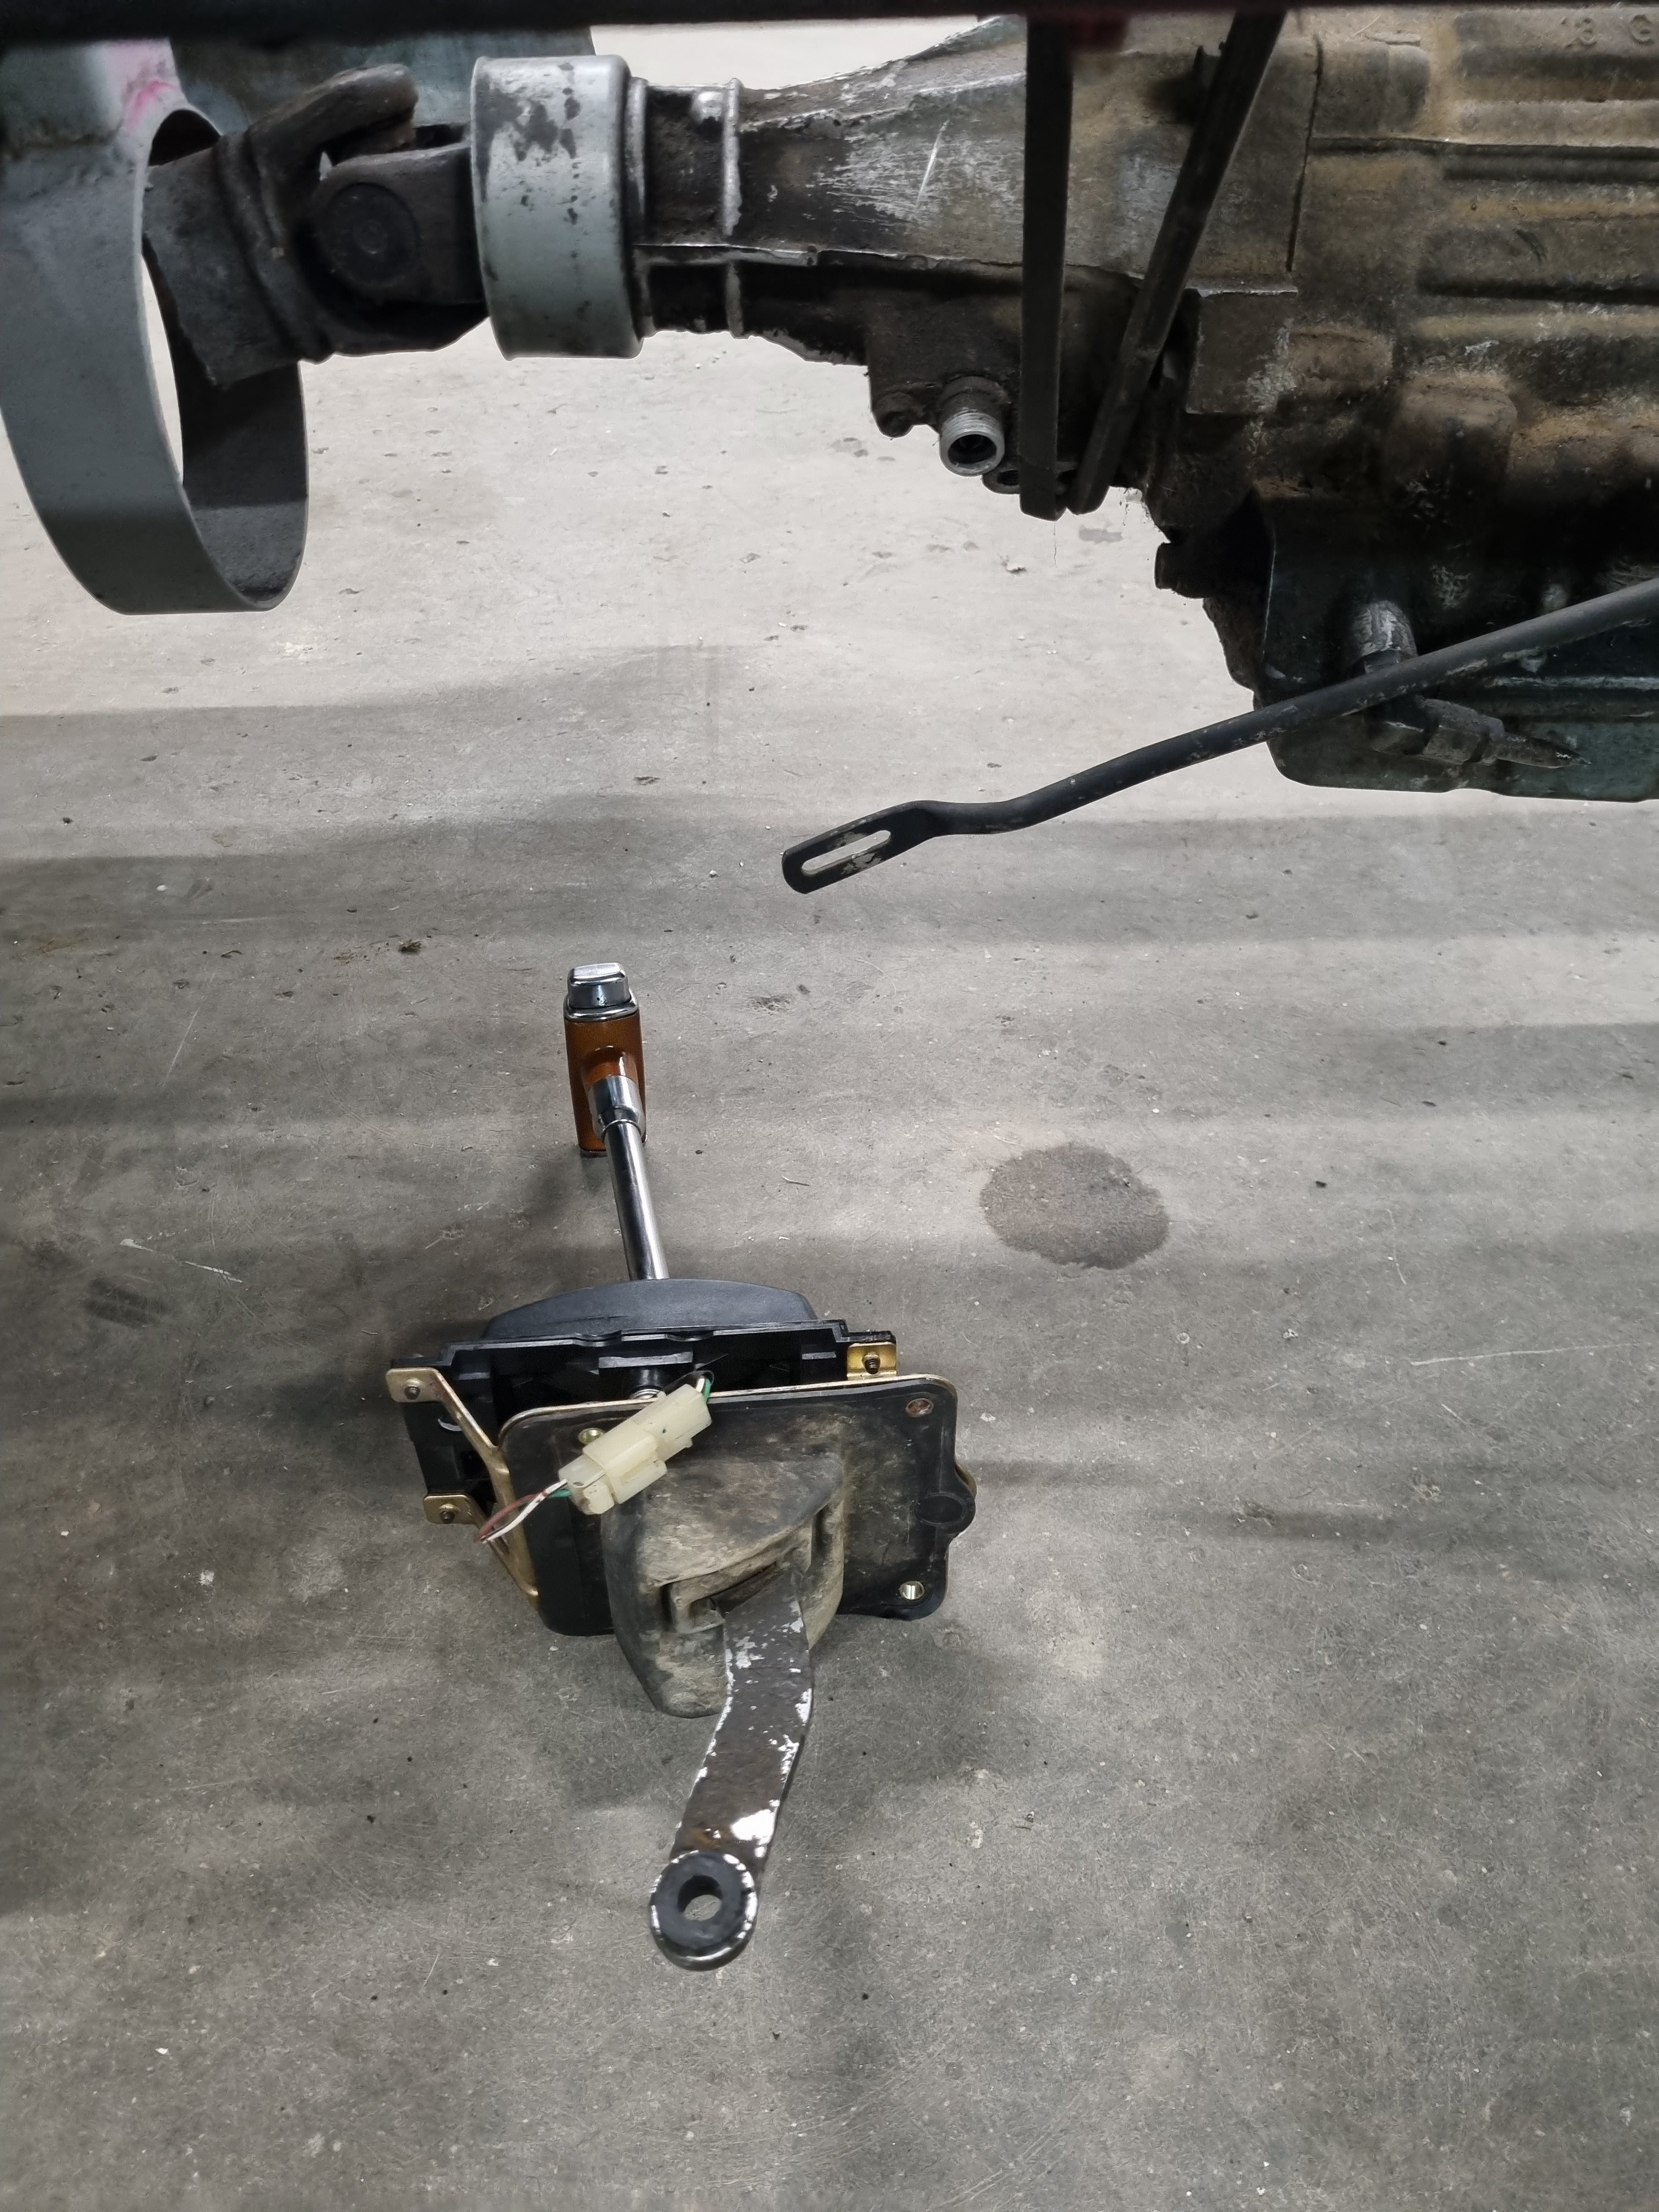
Do these k100 throttles on this build solve your height problems?
-
1 hour ago, sheepers said:
its for adjustment.
the is a special T bolt that goes through the end of the shifter and clamps that lever to it, its got a shoulder on it so the lever arm clamps to the shifter but it can still pivot.
Shot, thanks dude! Guess I need to find that special bolt. Actually will just make something.
-
Can someone tell me what the slot is for on the shifter linkage on a42dl trans? That's the original shifter too. I'm going to make a complicated series of linkages to translate it to the cab. @sheepers??

-
Not an Imp, but some Impy flavour here...
-
2
-
-
I feel like you need the word 'Jah' above Dyna
-
 3
3
-
-
For the collector I would just start, don't think too hard about it. Just chop 3 bits of pipe to roughly the merge you are aiming for. You can weld some from outside and some from inside. You will fuck the first one up, but it will give you a fair idea where to go from there... I pretty much did that, albeit slightly easier being 4 pipes, then panelbeated the end round over an anvil and trimmed back to get to secondary diameter. Give it a Hoon I say
-
1
-
-
I have lots of very strong torsion springs destined for the scrappy...
-
Are they sintered metal or plastic parts? Are you comfortable having no radius where the runner meets the mounting flange?
-
1
-
-
may be able to assist getting engines from Taranaki to @ThePog in Nelson..
-
1
-
-
26 minutes ago, Raizer said:
Very interested, I'm in Gisborne.
Lol I now know all about the lack of torque when you run a 400v 3ph motor off a 220v 3ph output VFD.
My ancient old mill motor can't be swapped to star/220v so it's looking like I'm going to be joining everyone else on here with AliExpress VFDs.
Pm me
-
1
-
-
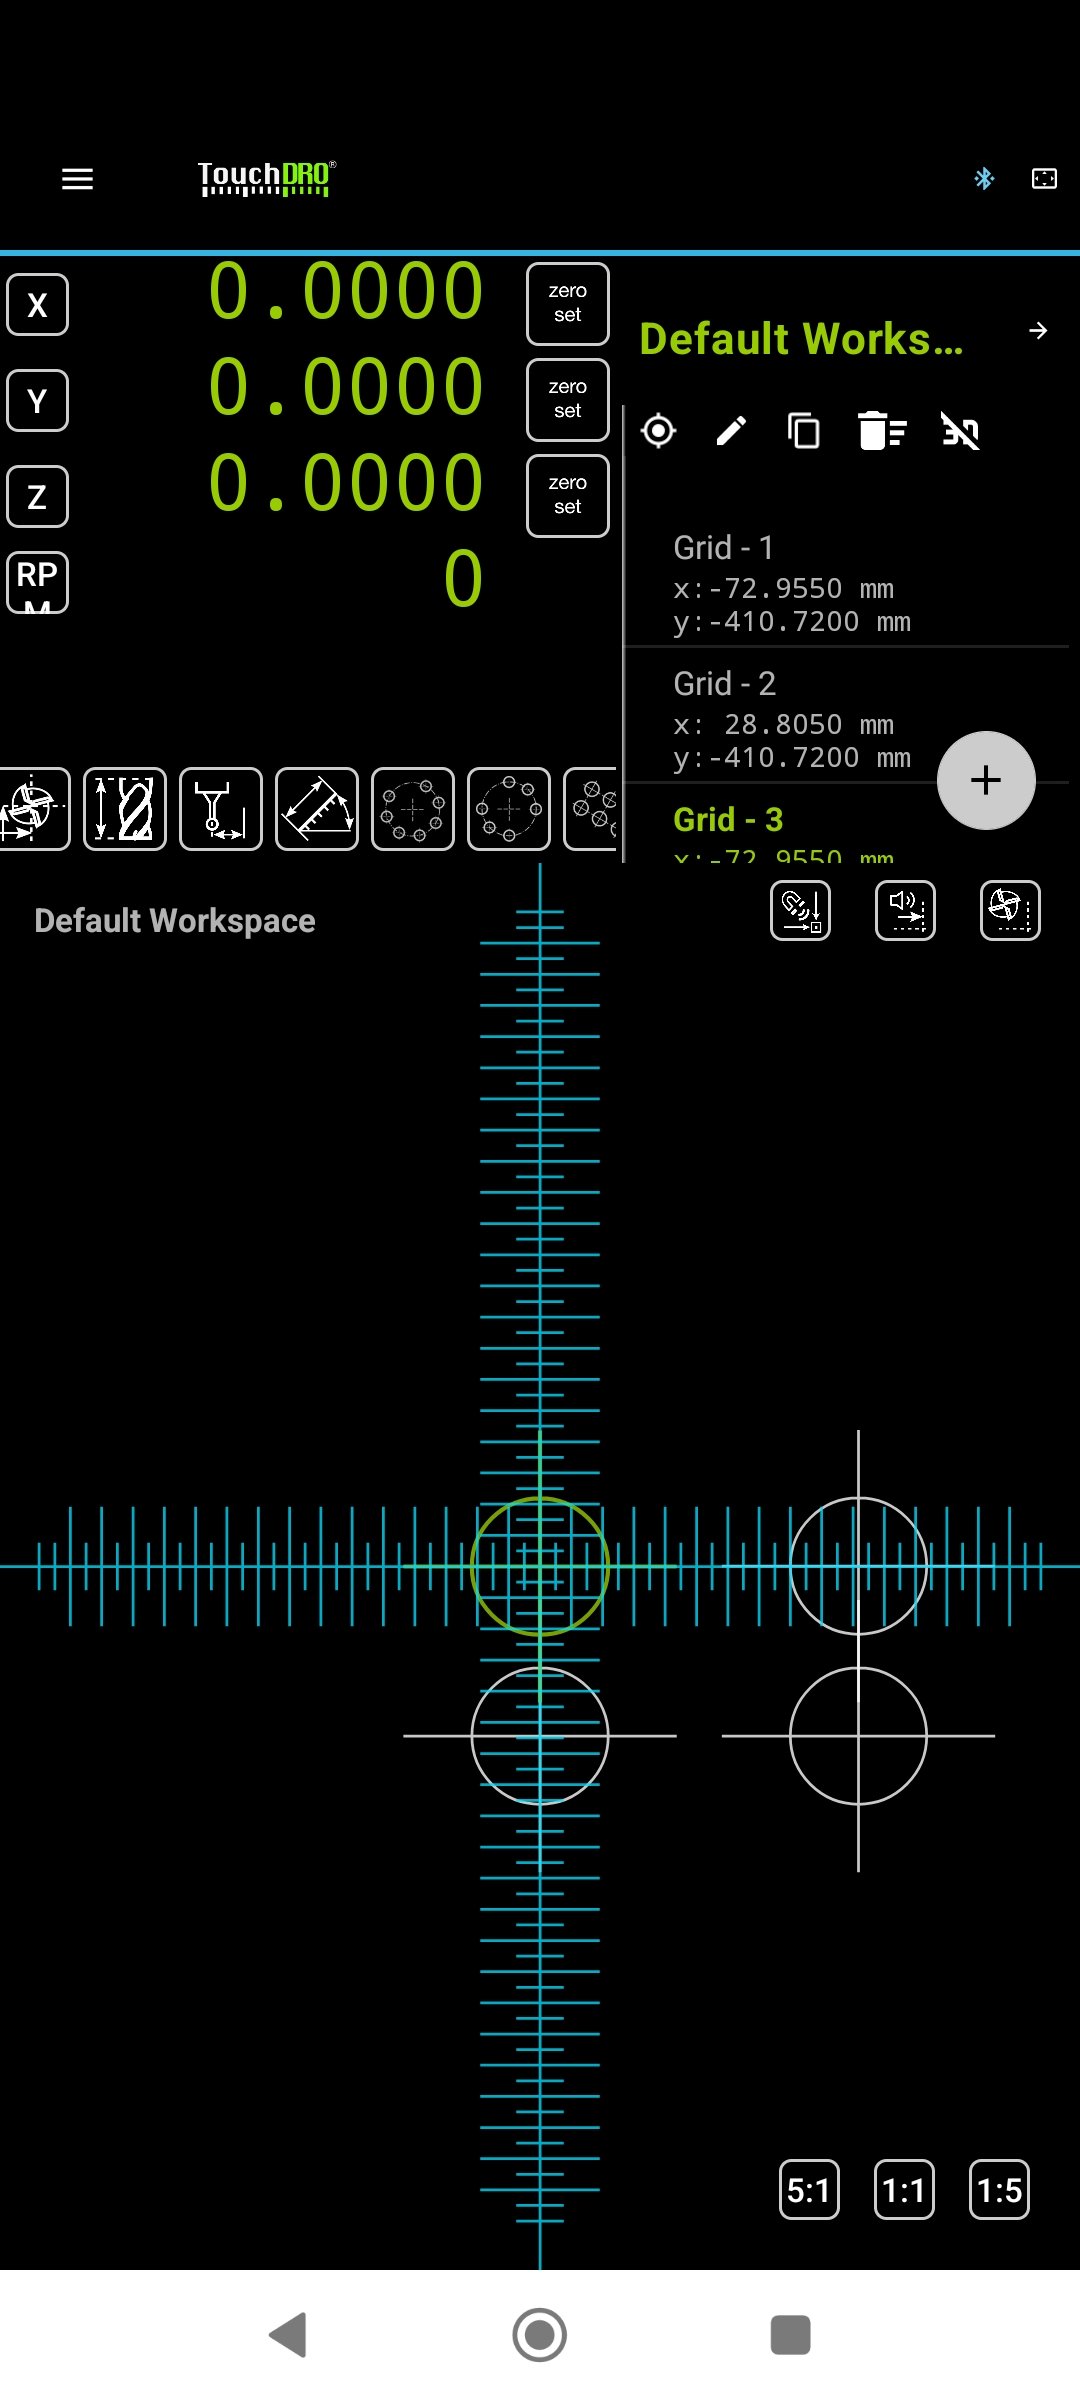
On 11/06/2023 at 01:05, Raizer said:
Loving TouchDRO still, just starting to learn a bit more about it's features like hole patterns etc.
That's just a screenshot of it running on my phone, it's way better on the tablet in landscape display.
Made an adaptor for @chris r and it nailed the hole positions etc.
Still got so much to learn with the TouchDRO and machining in general, but even a somewhat basic project like this has shown me a few things I'd do different to get improvements and also extended my tooling wishlist a lot haha.
Keeping an eye out for a decent deal on a boring head, rotary table and a few other things.
Might have a rotary table lurking around that you can have for fuck all. From memory it needed some love. Where are you based?
-
1
-
-
What trans are you using? I need to know wiring pinouts on my A42DL for my Dyna build. Chur
-
Prob easier to share my Pinterest board to show some further veins..
Things like this..
-
9
-
-
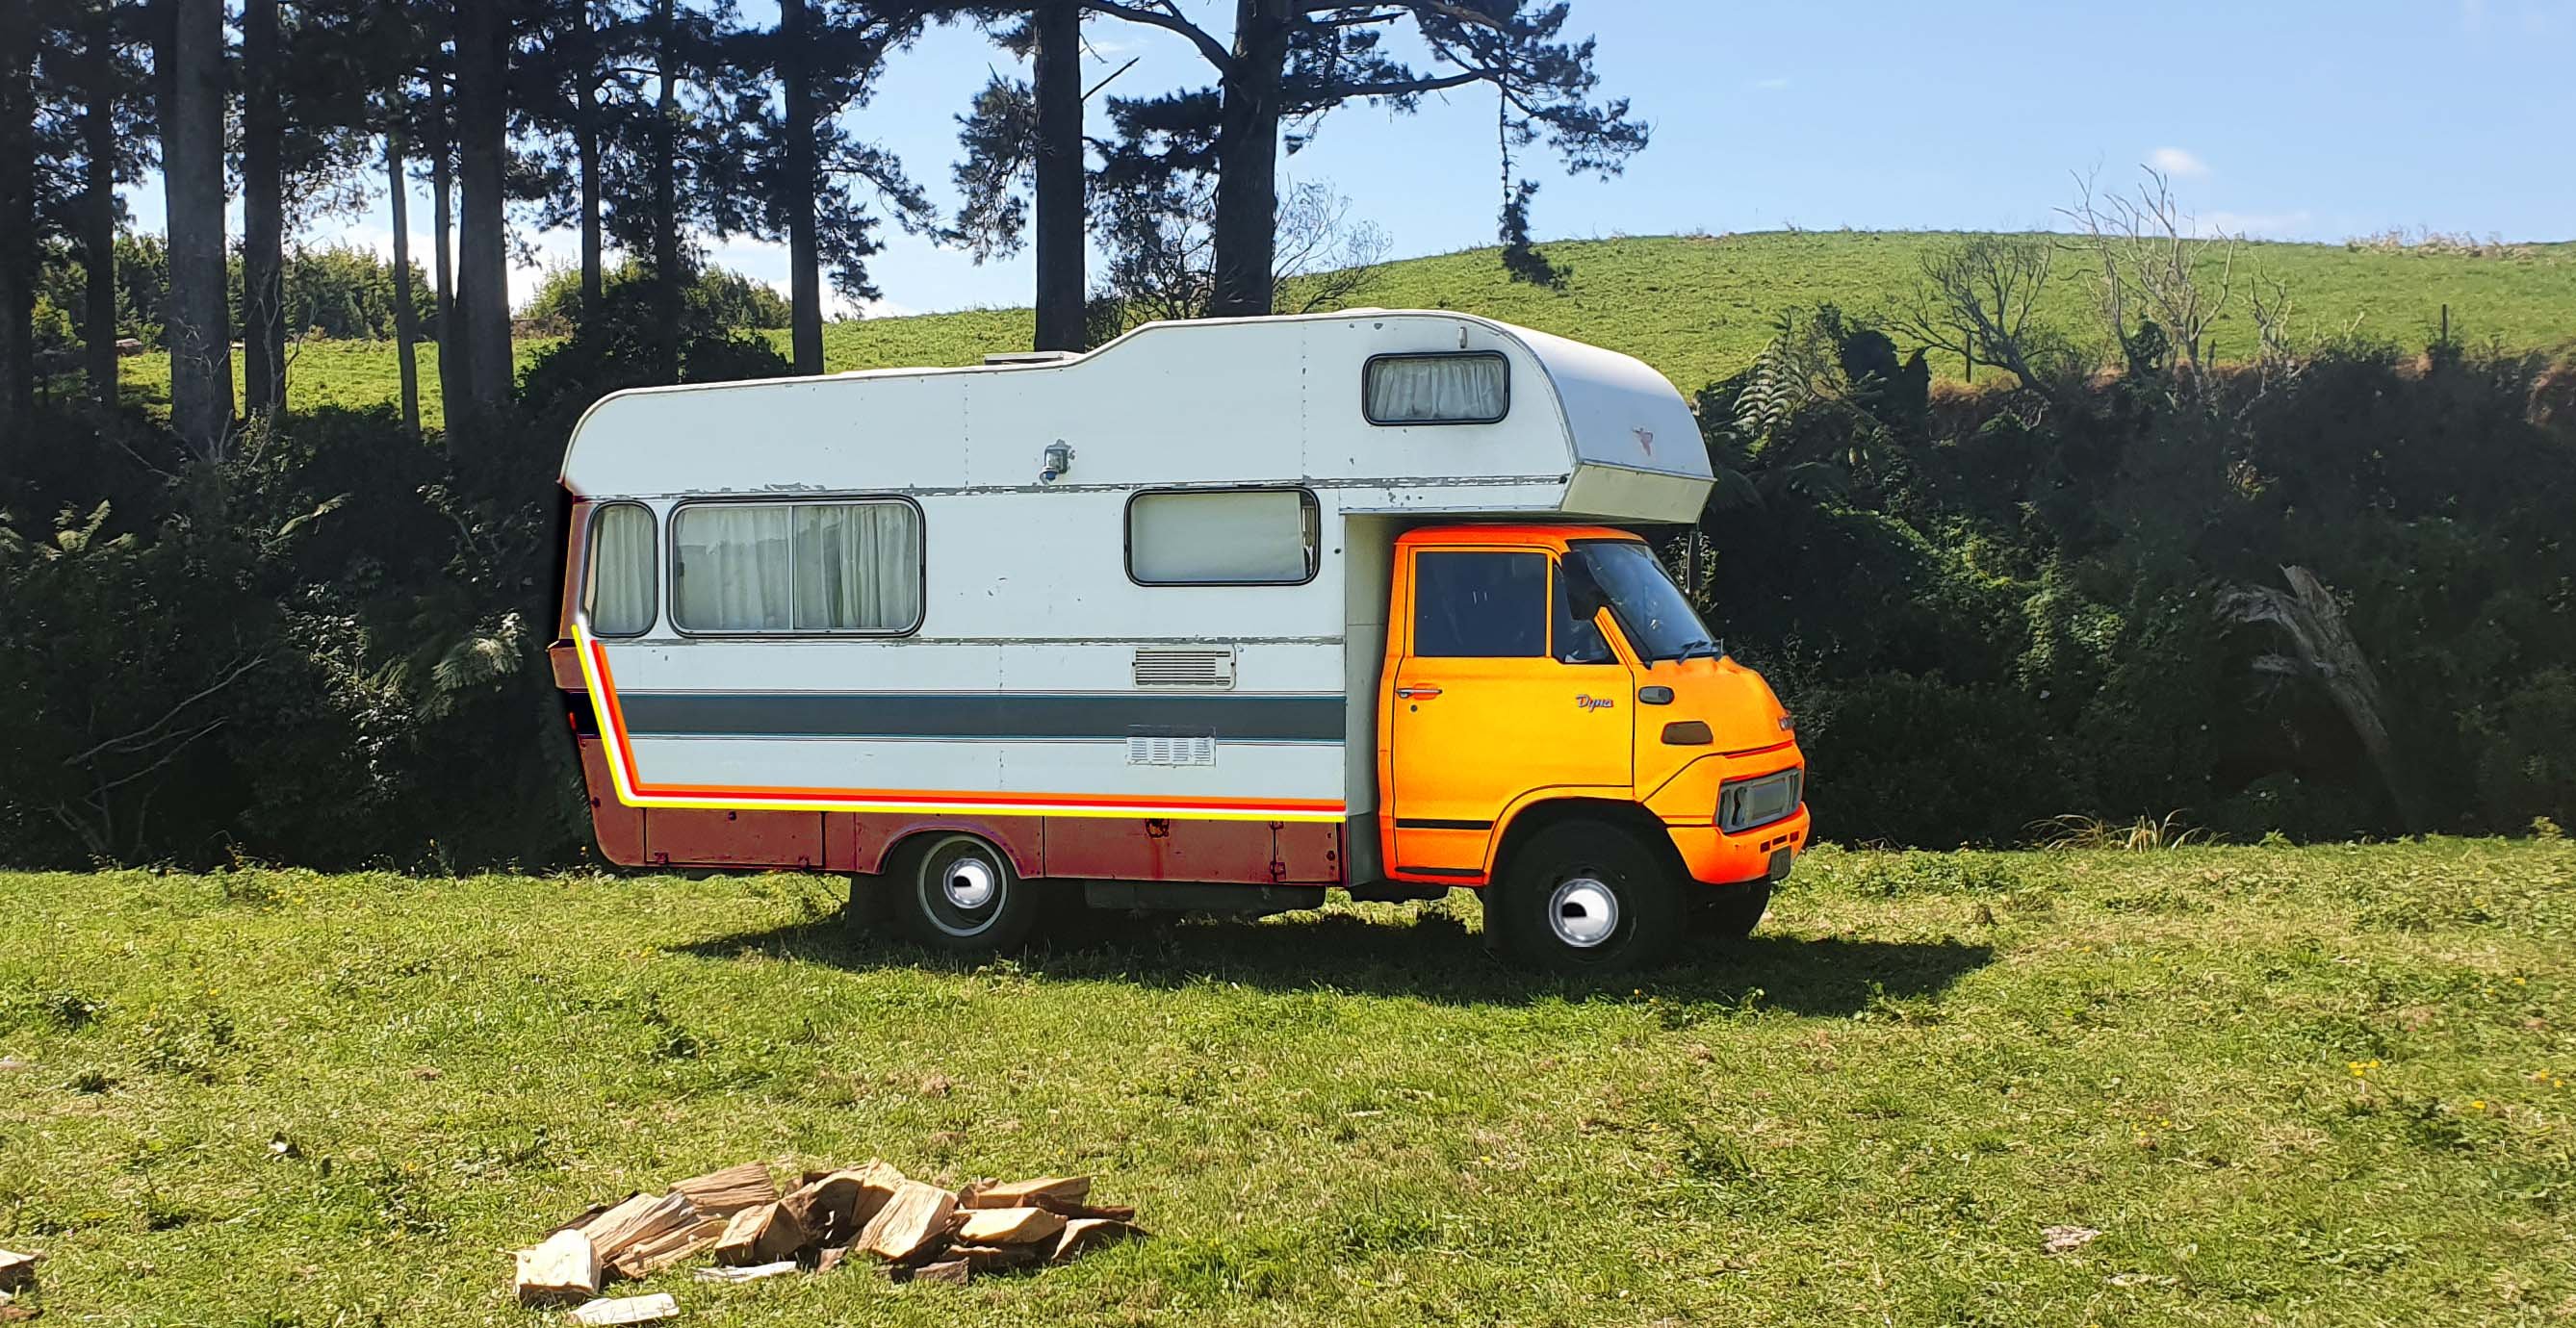
2 hours ago, HighLUX said:
Factory Toyota cream with stripes just swap hilux to say Dyna
I like the thinking. This is definitely on the vibe.
-
- Popular Post
- Popular Post
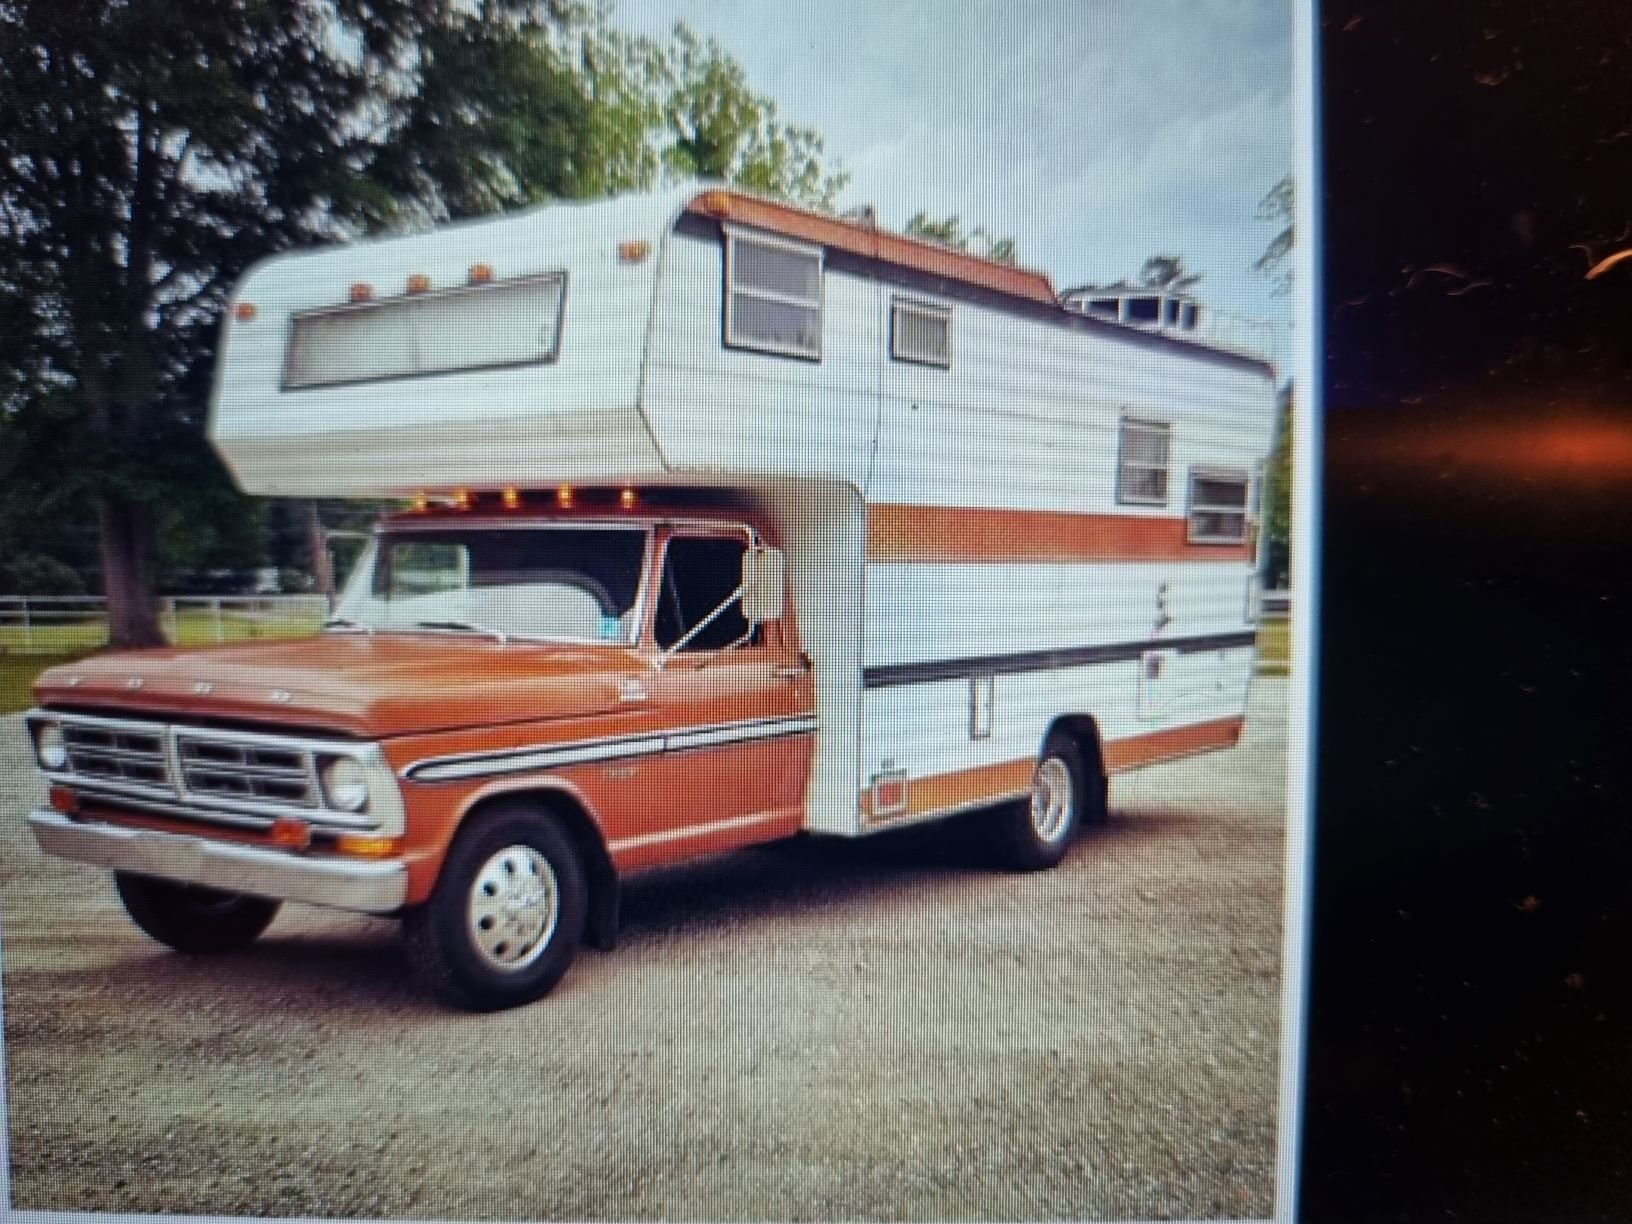
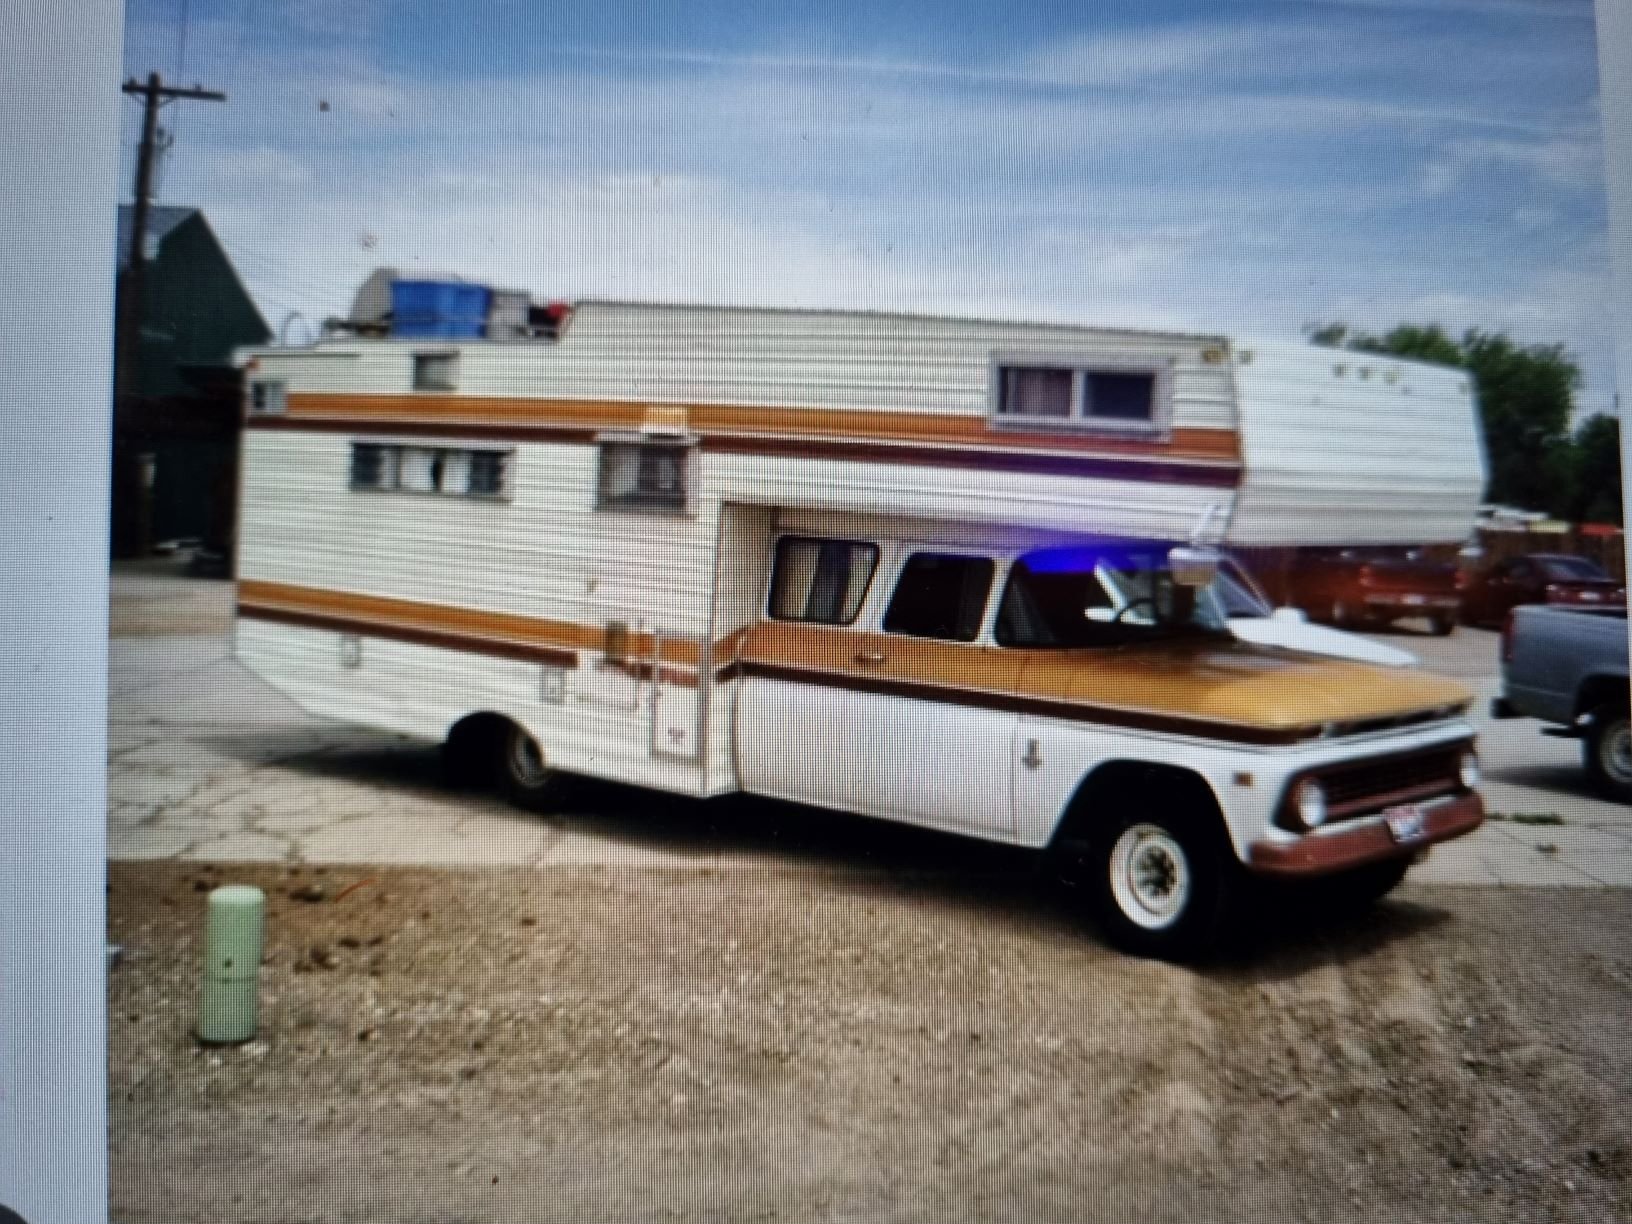
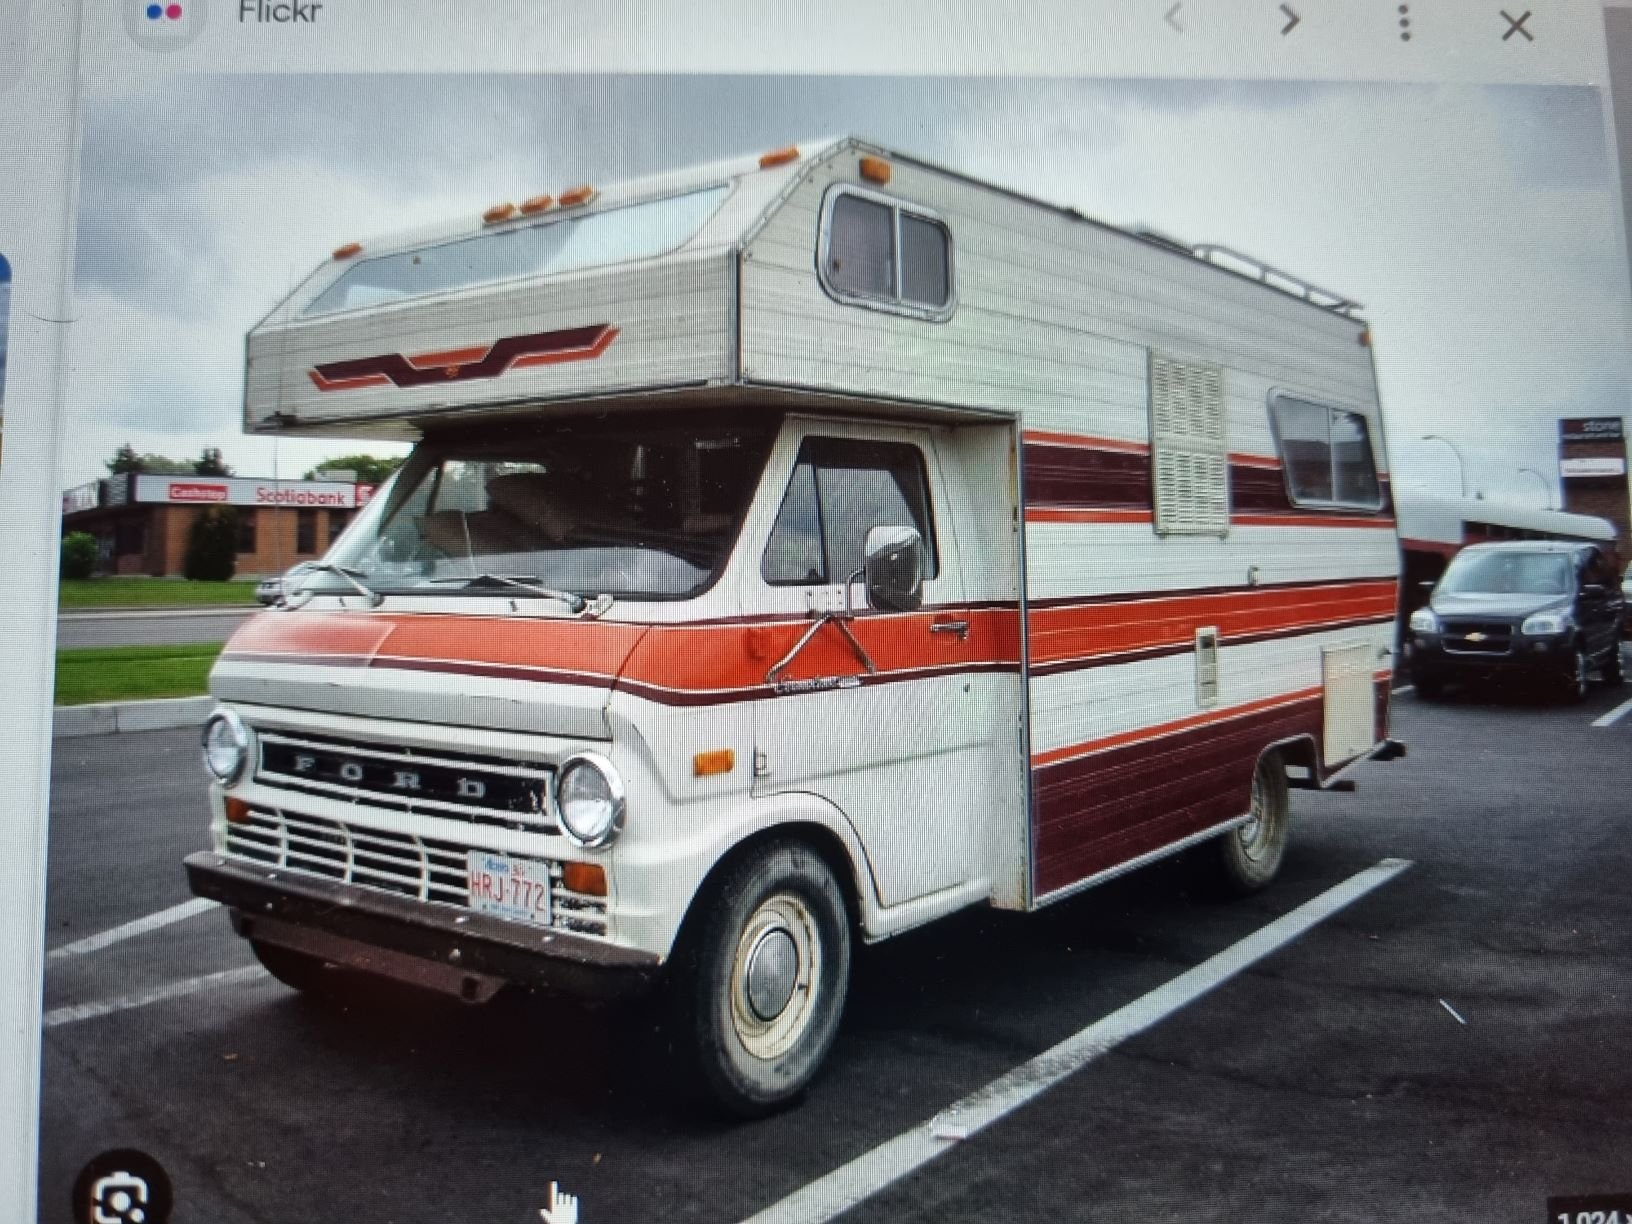
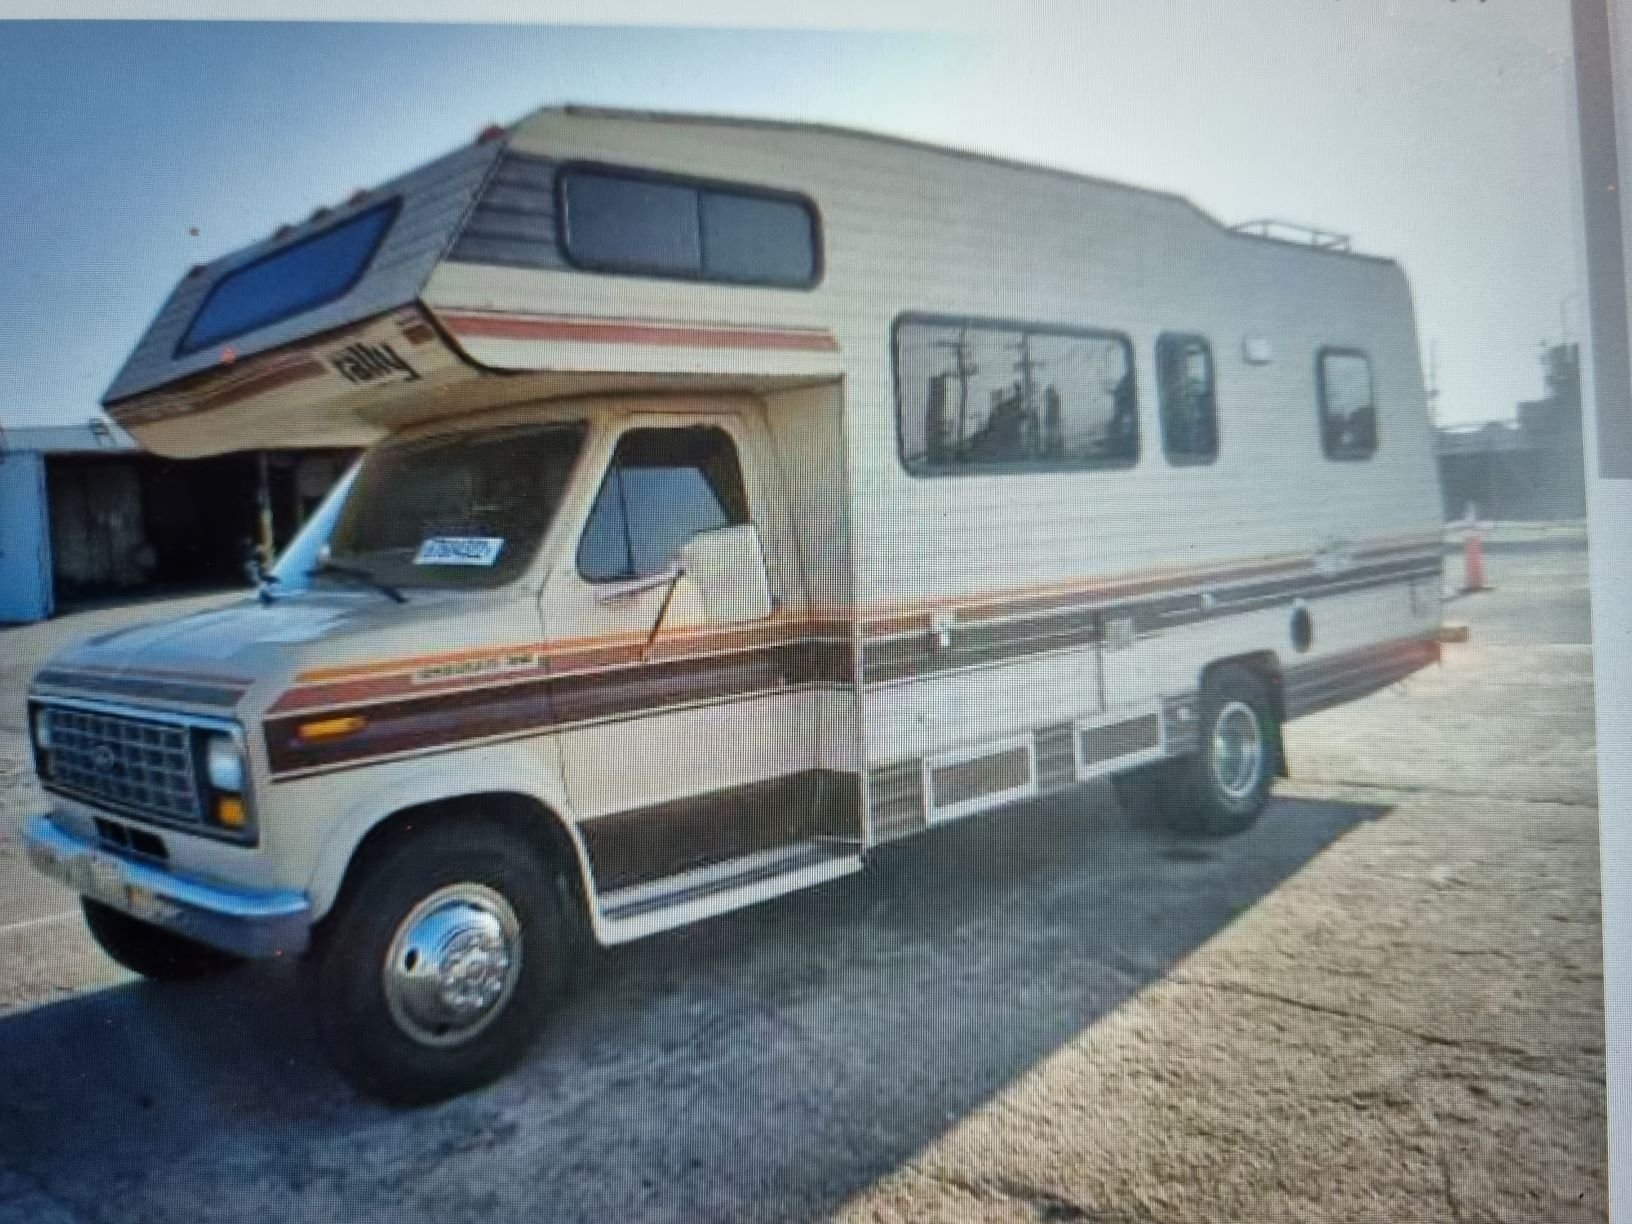
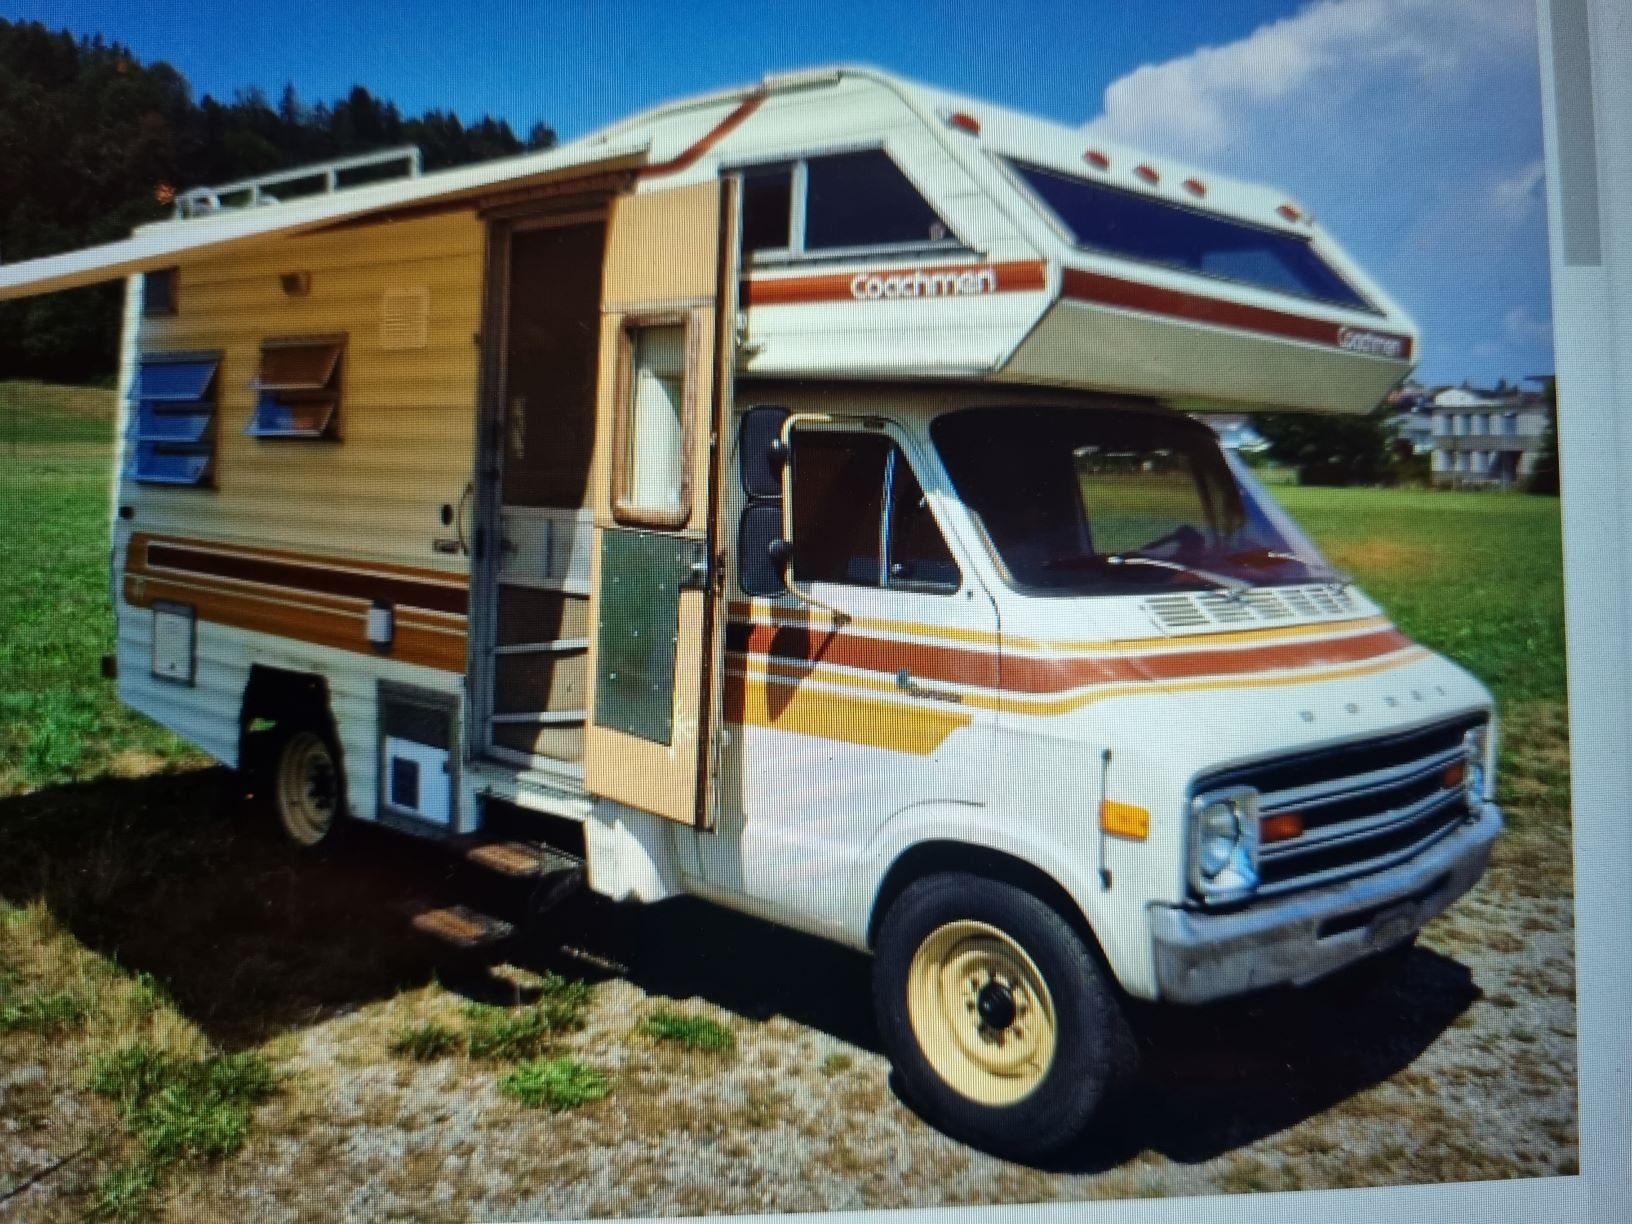
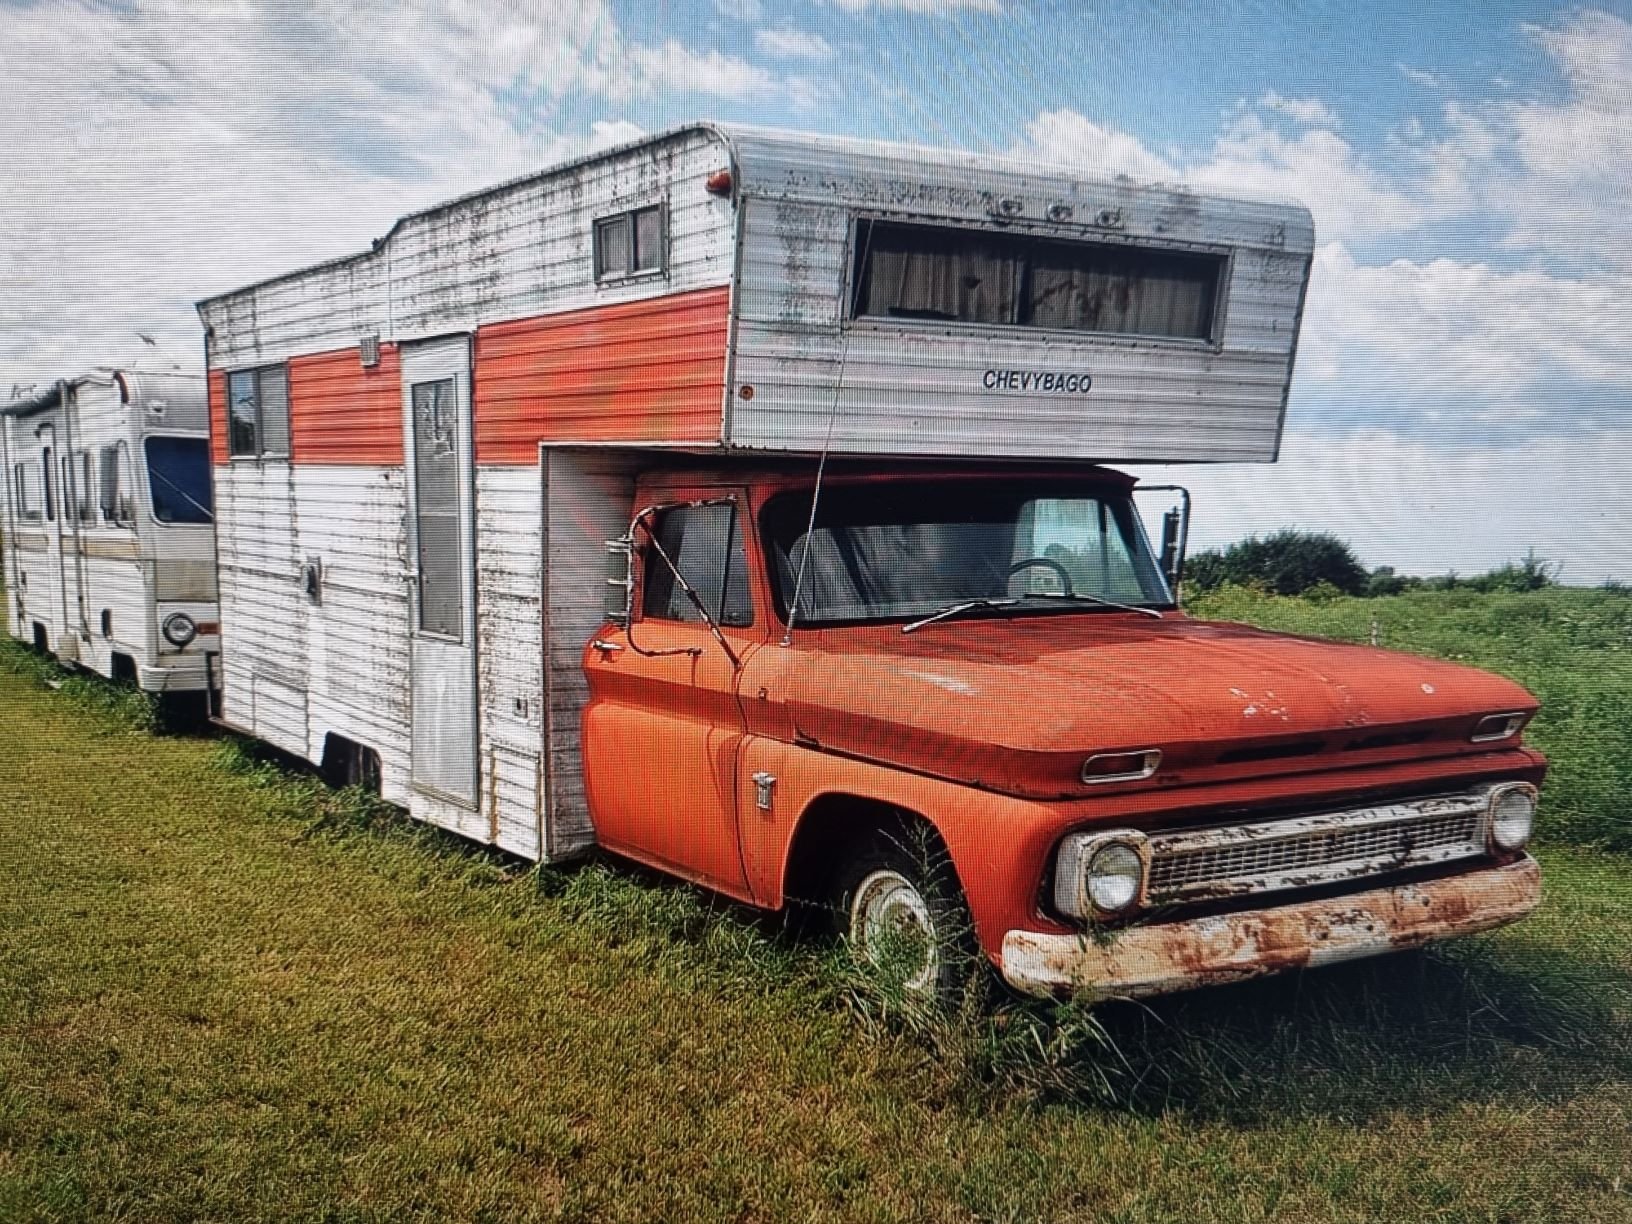
With body related thinking comes the thought of actually laying a coat of jam on this cunt sometime circa 2030. Anyway, I like dreaming and have a bit of a line of thought Id like to pursue. I think the vibe will be very Toyota, think red/yellow/orange stripe over a white body. Im stuck on the idea of the cab going either bright orange (KP60 type orange) or some sort of Cressida metallic brown. I havent exactly figured how I will tie the body to the cab with the stripe. I did a 5 minute bullshit photoshop job, which isnt it, but is worth throwing up here for the lols. I really dont want a white slug like all other campers, and the cab shape lends itself to something cool. Mood board below. comments welcome.
Oh and also shoutout to @dmulally for his very generous contribution to the cause - a lovely wing awning. Legend, and I fully owe you mate it wont be forgotten. Also great to meet another OSer in the real, absolute GC.
-
17
-
1
-
- Popular Post
- Popular Post
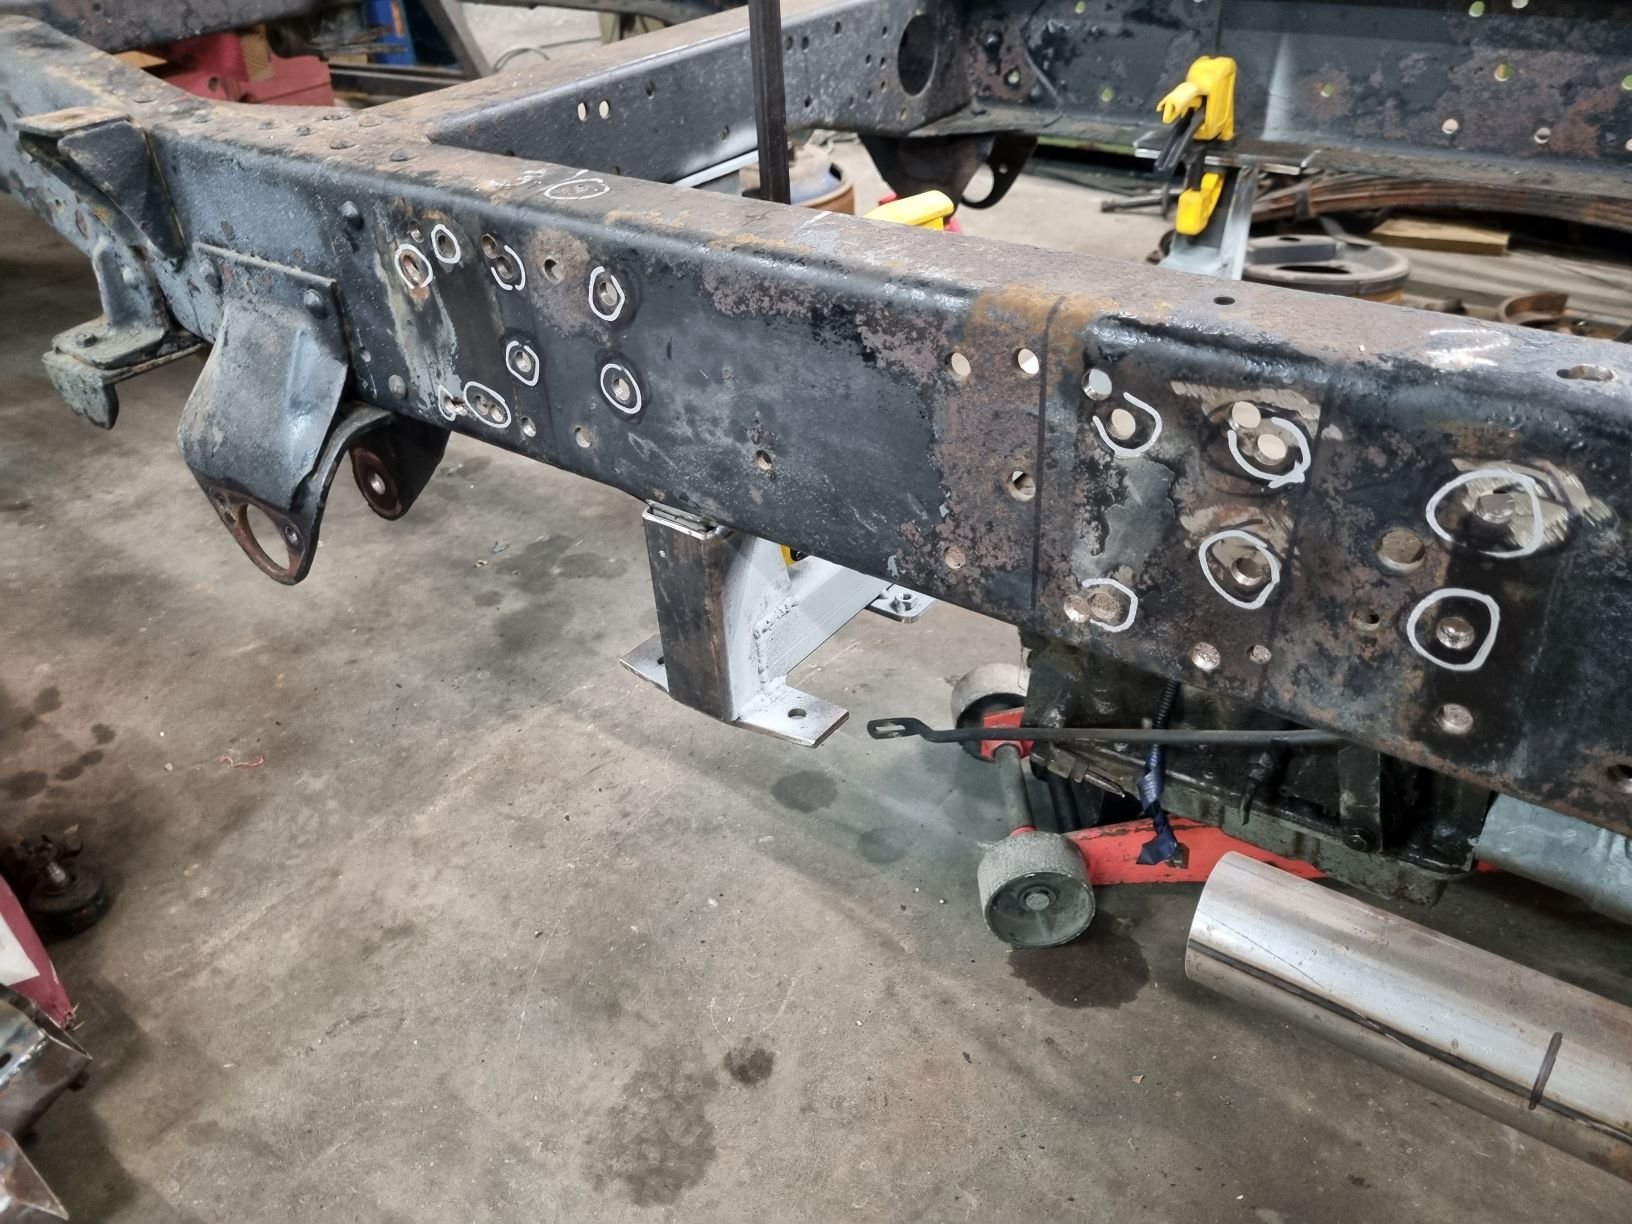
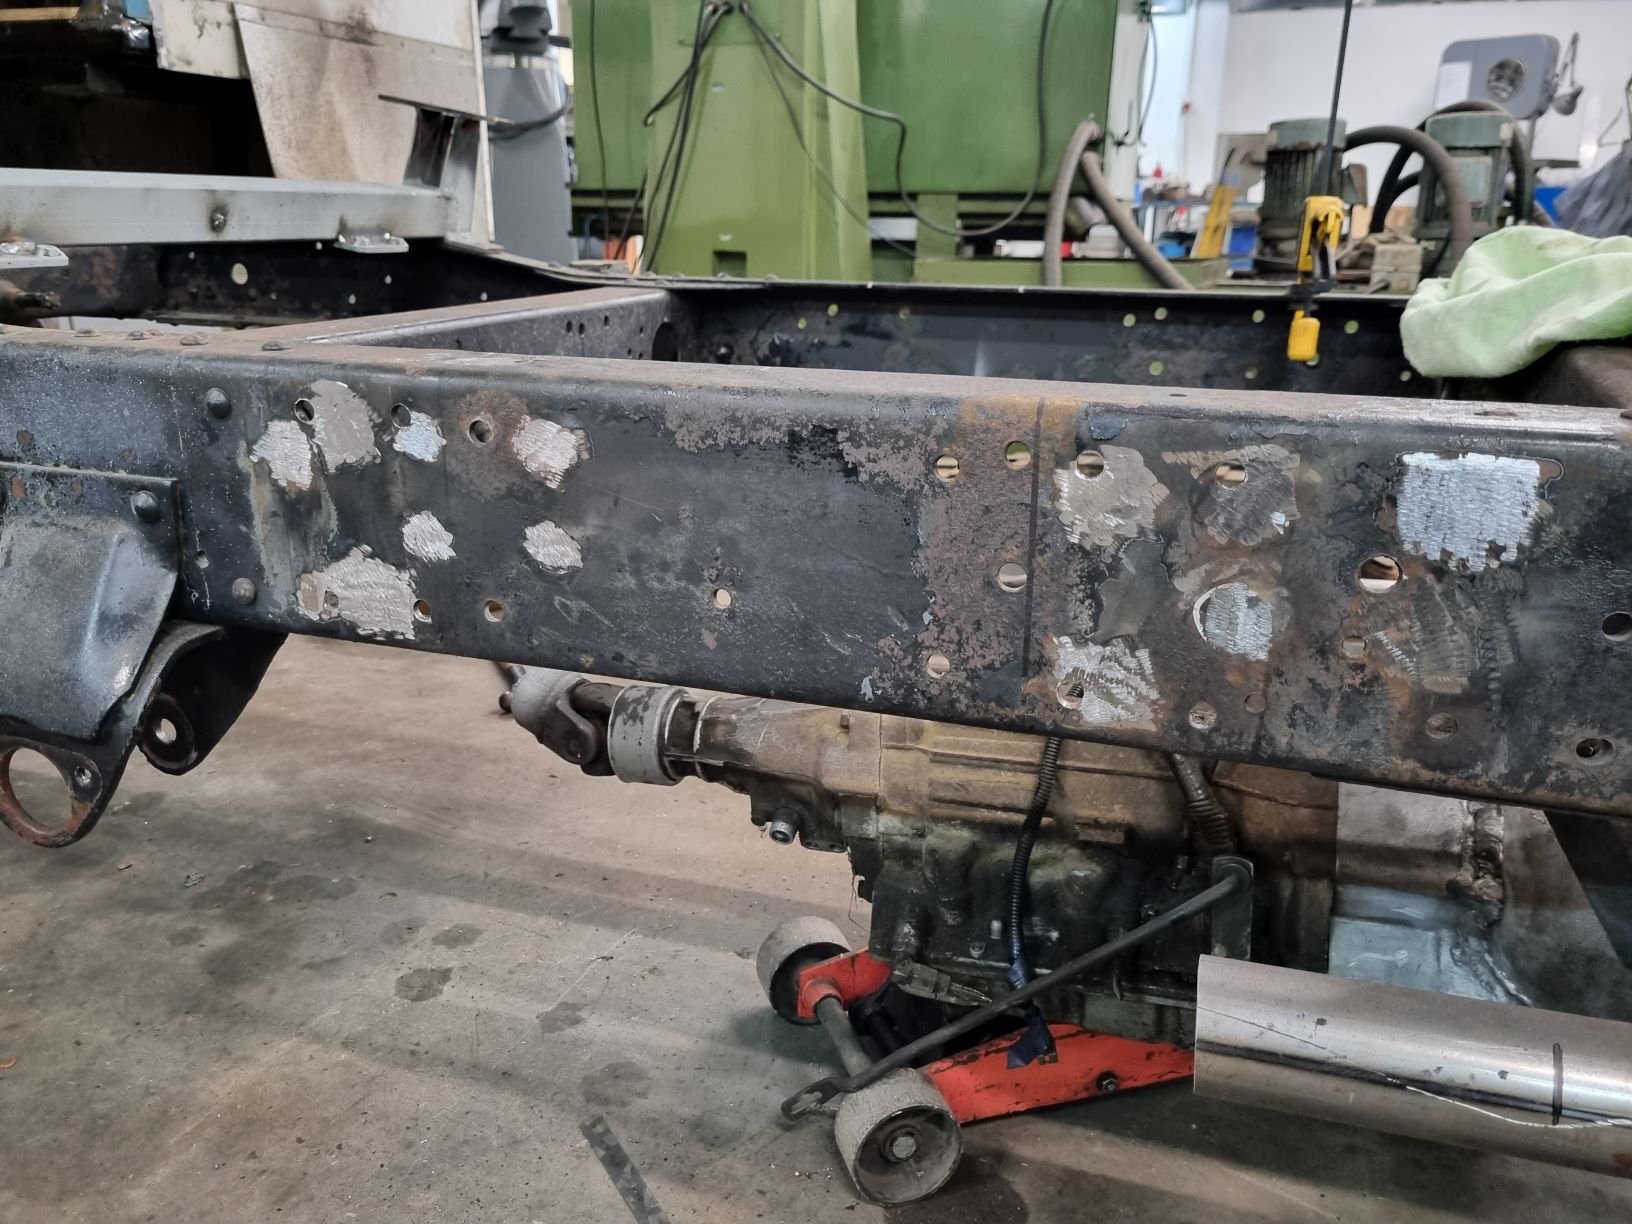
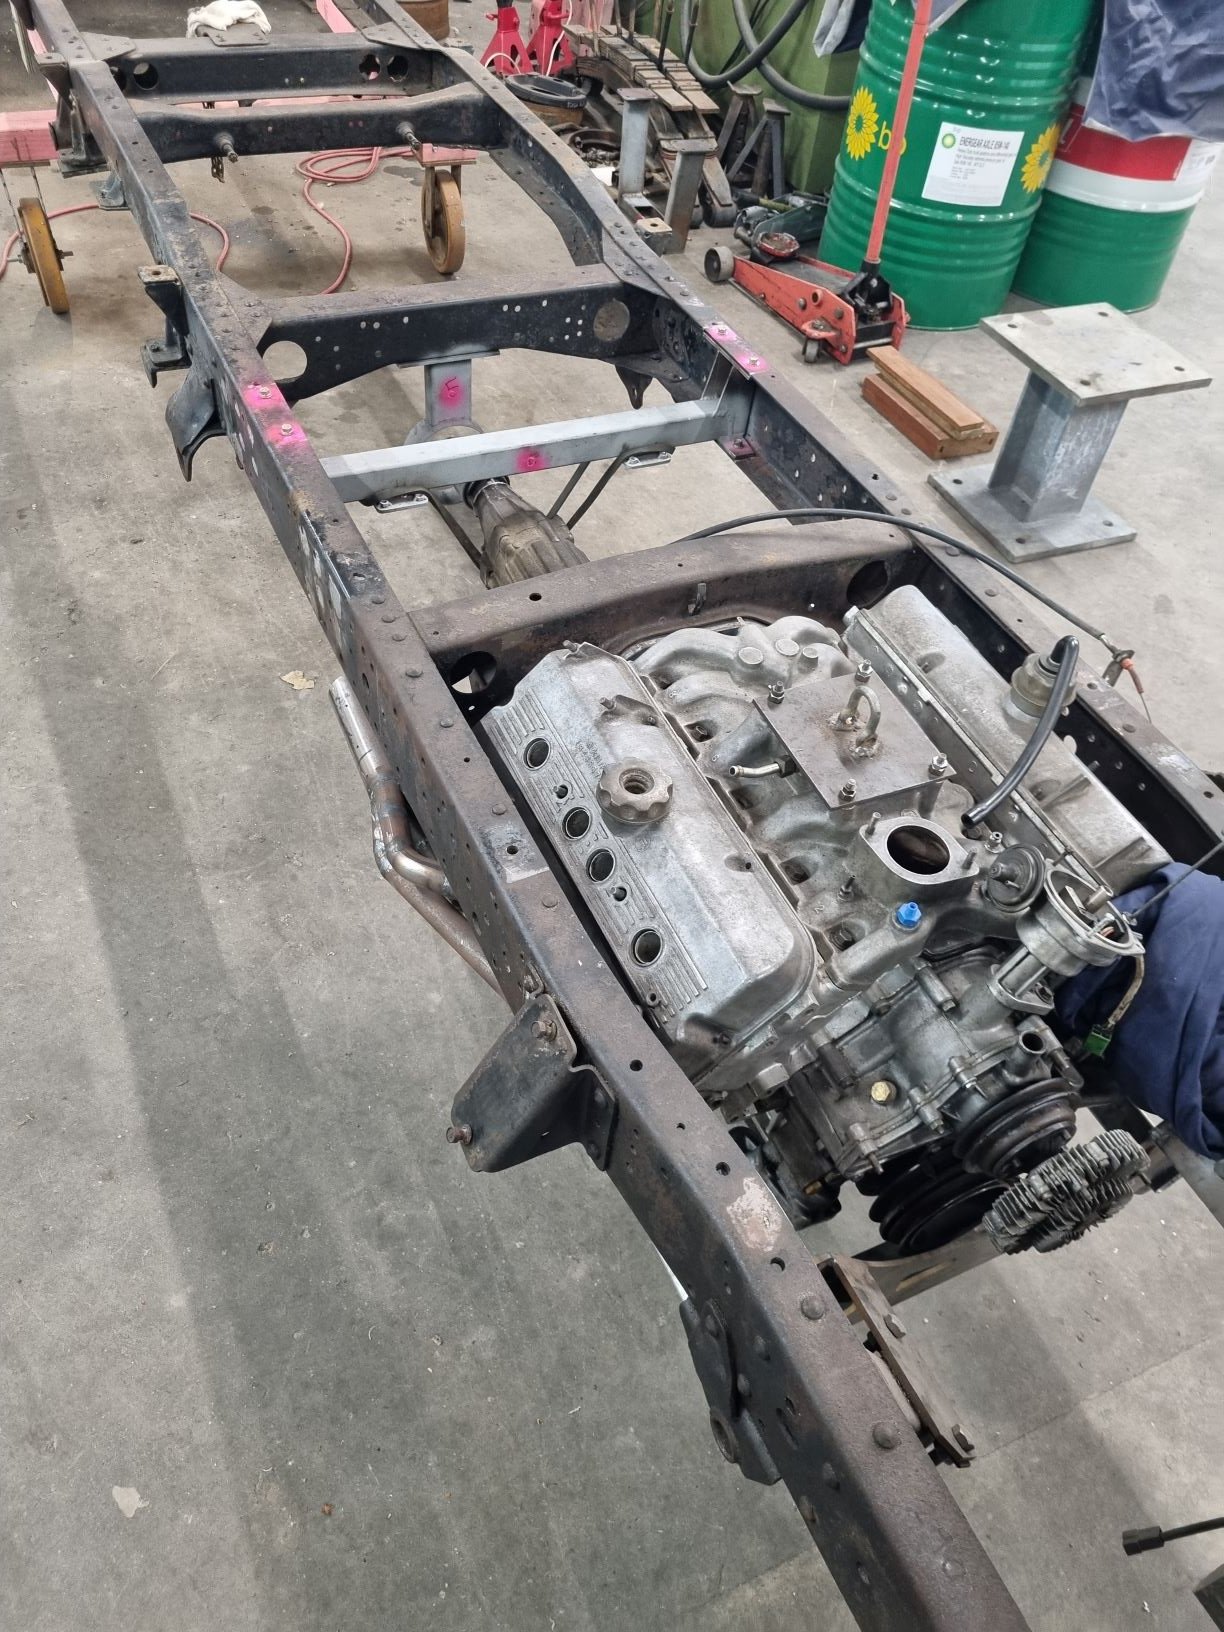
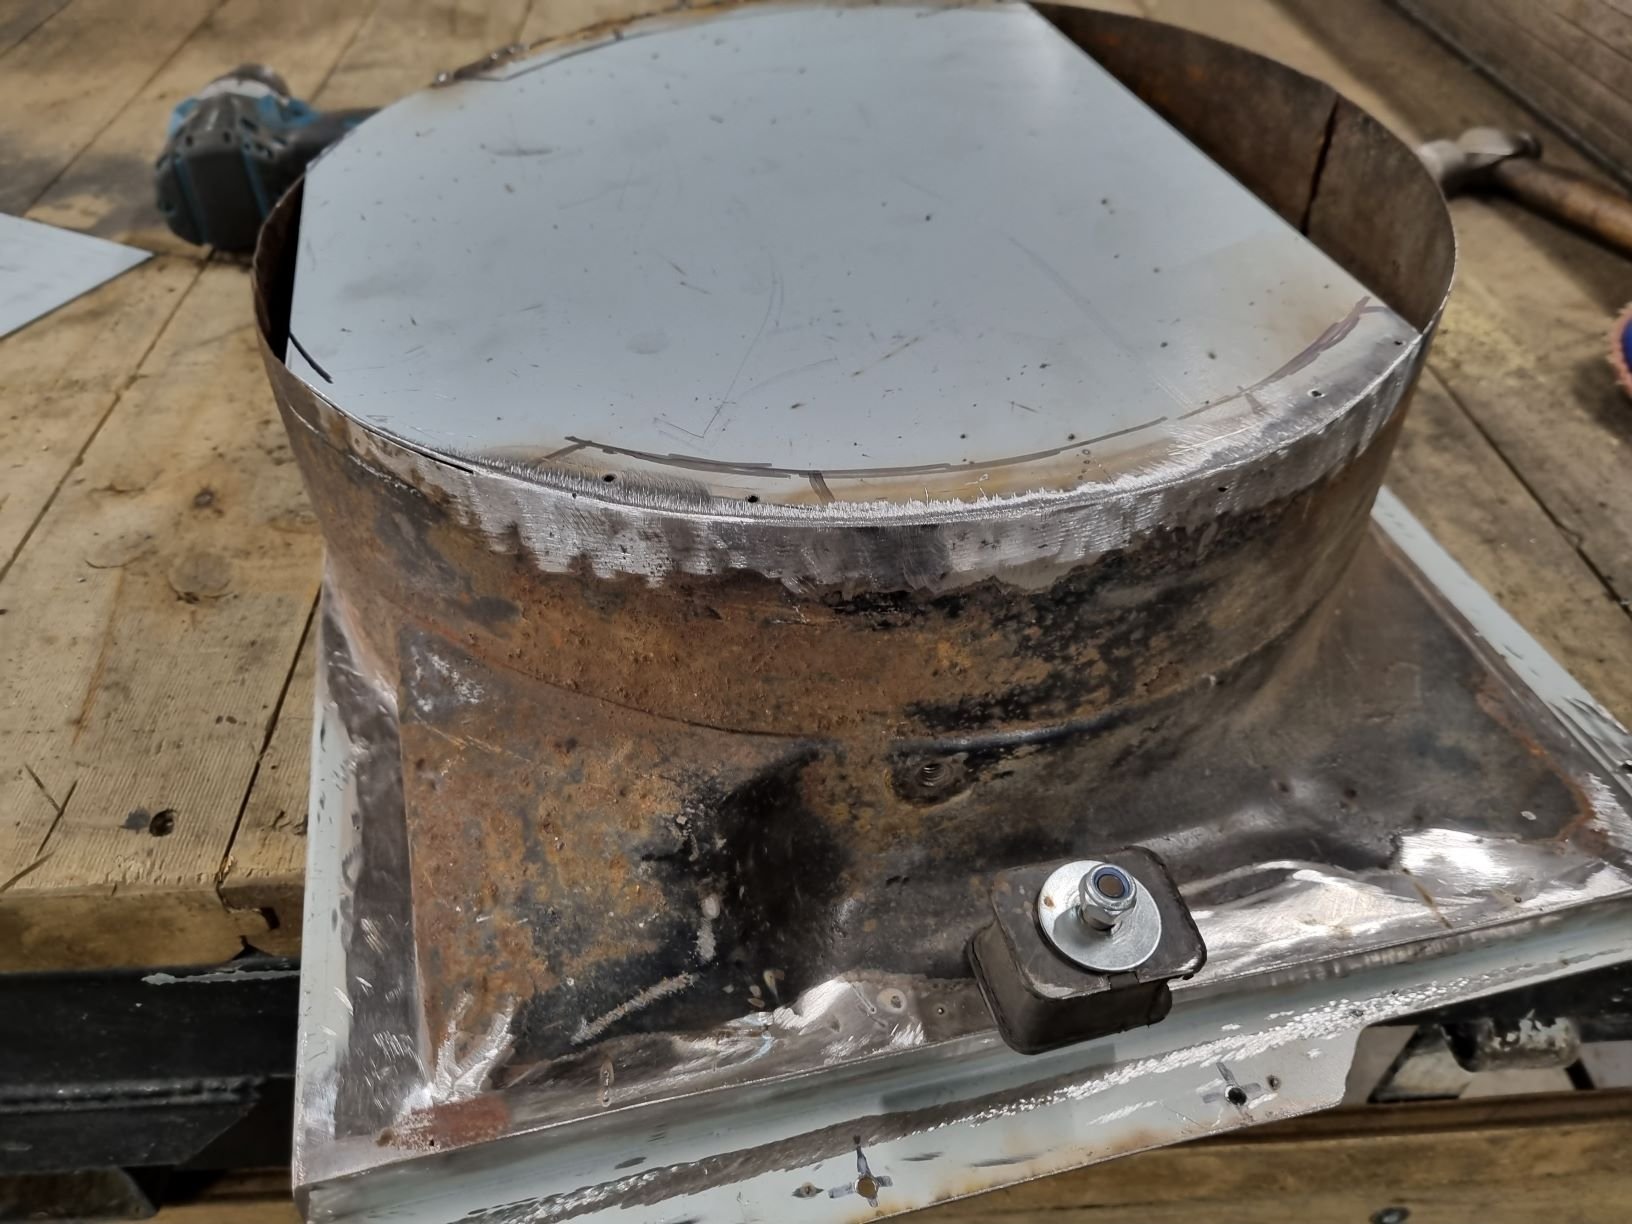
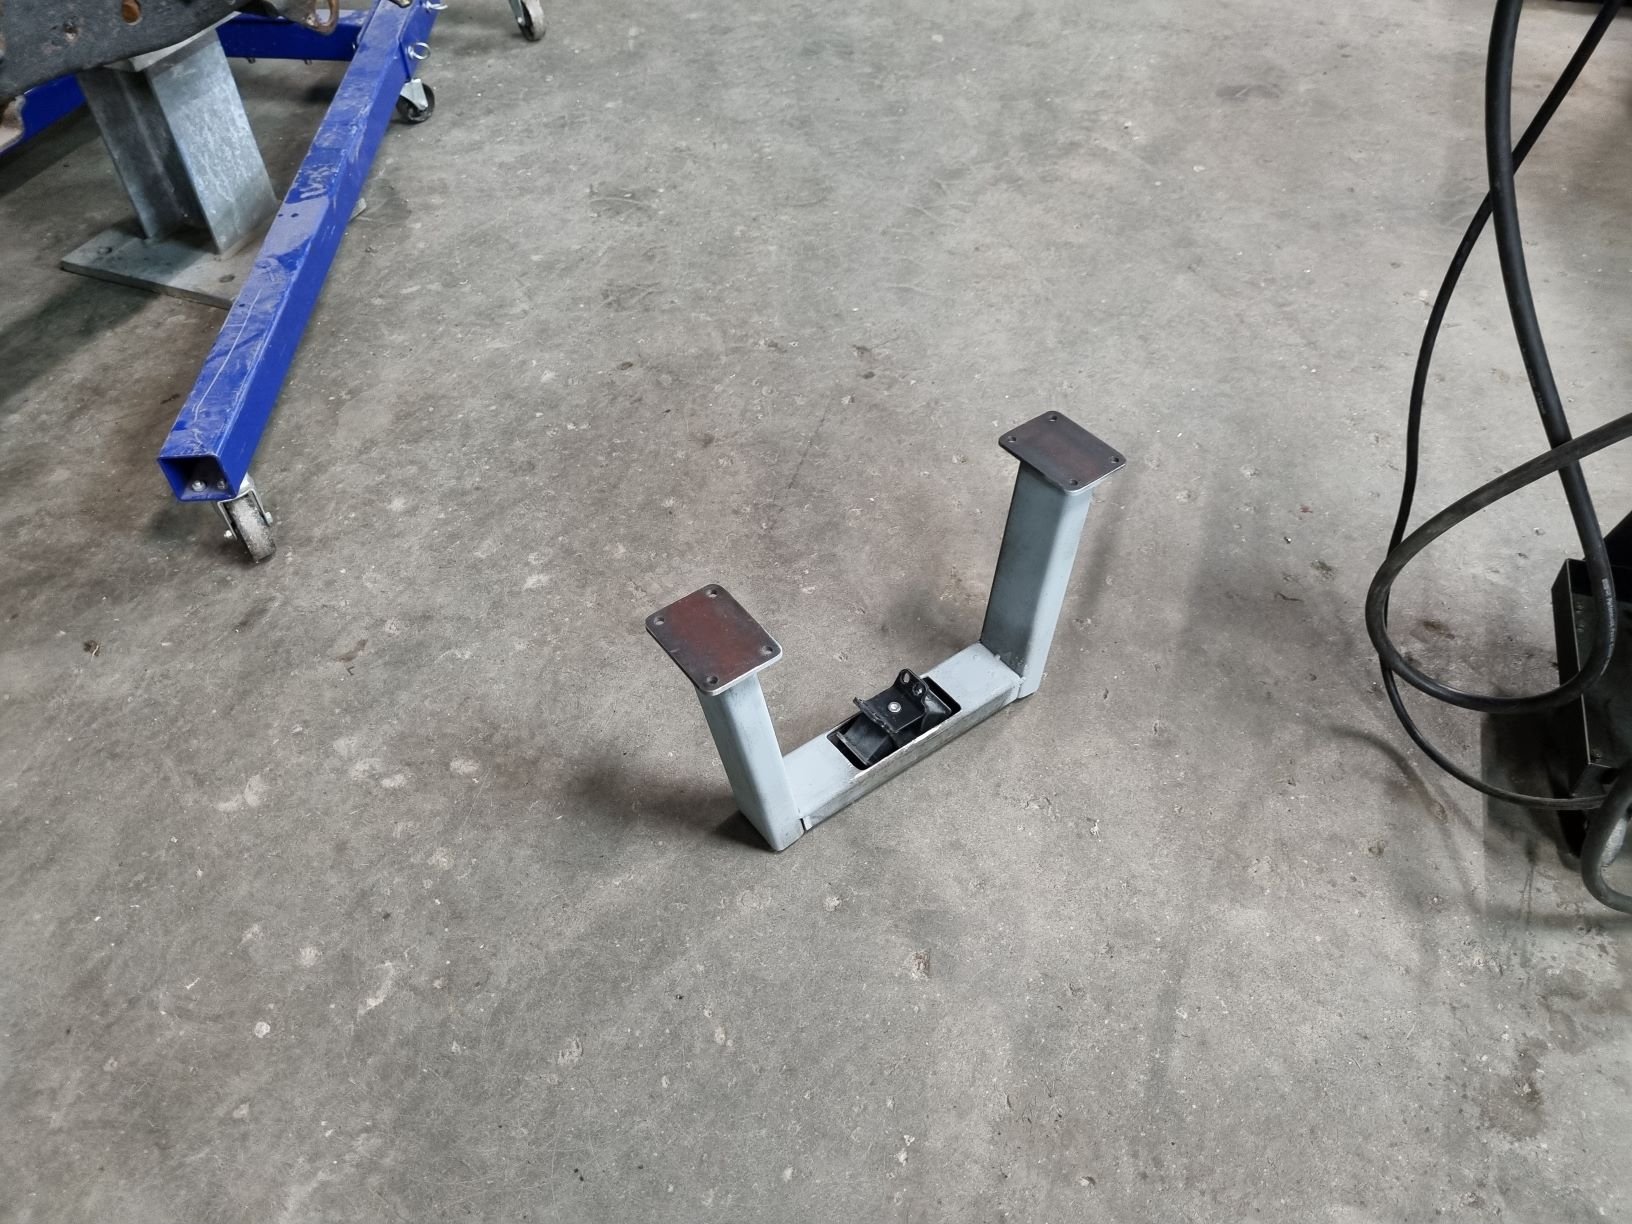
Next mish was to fill some swiss cheese in the chassis rail on the fuel tank side. I moved the mounting holes, but also there were a lot of holes there already and it was looking a mess.
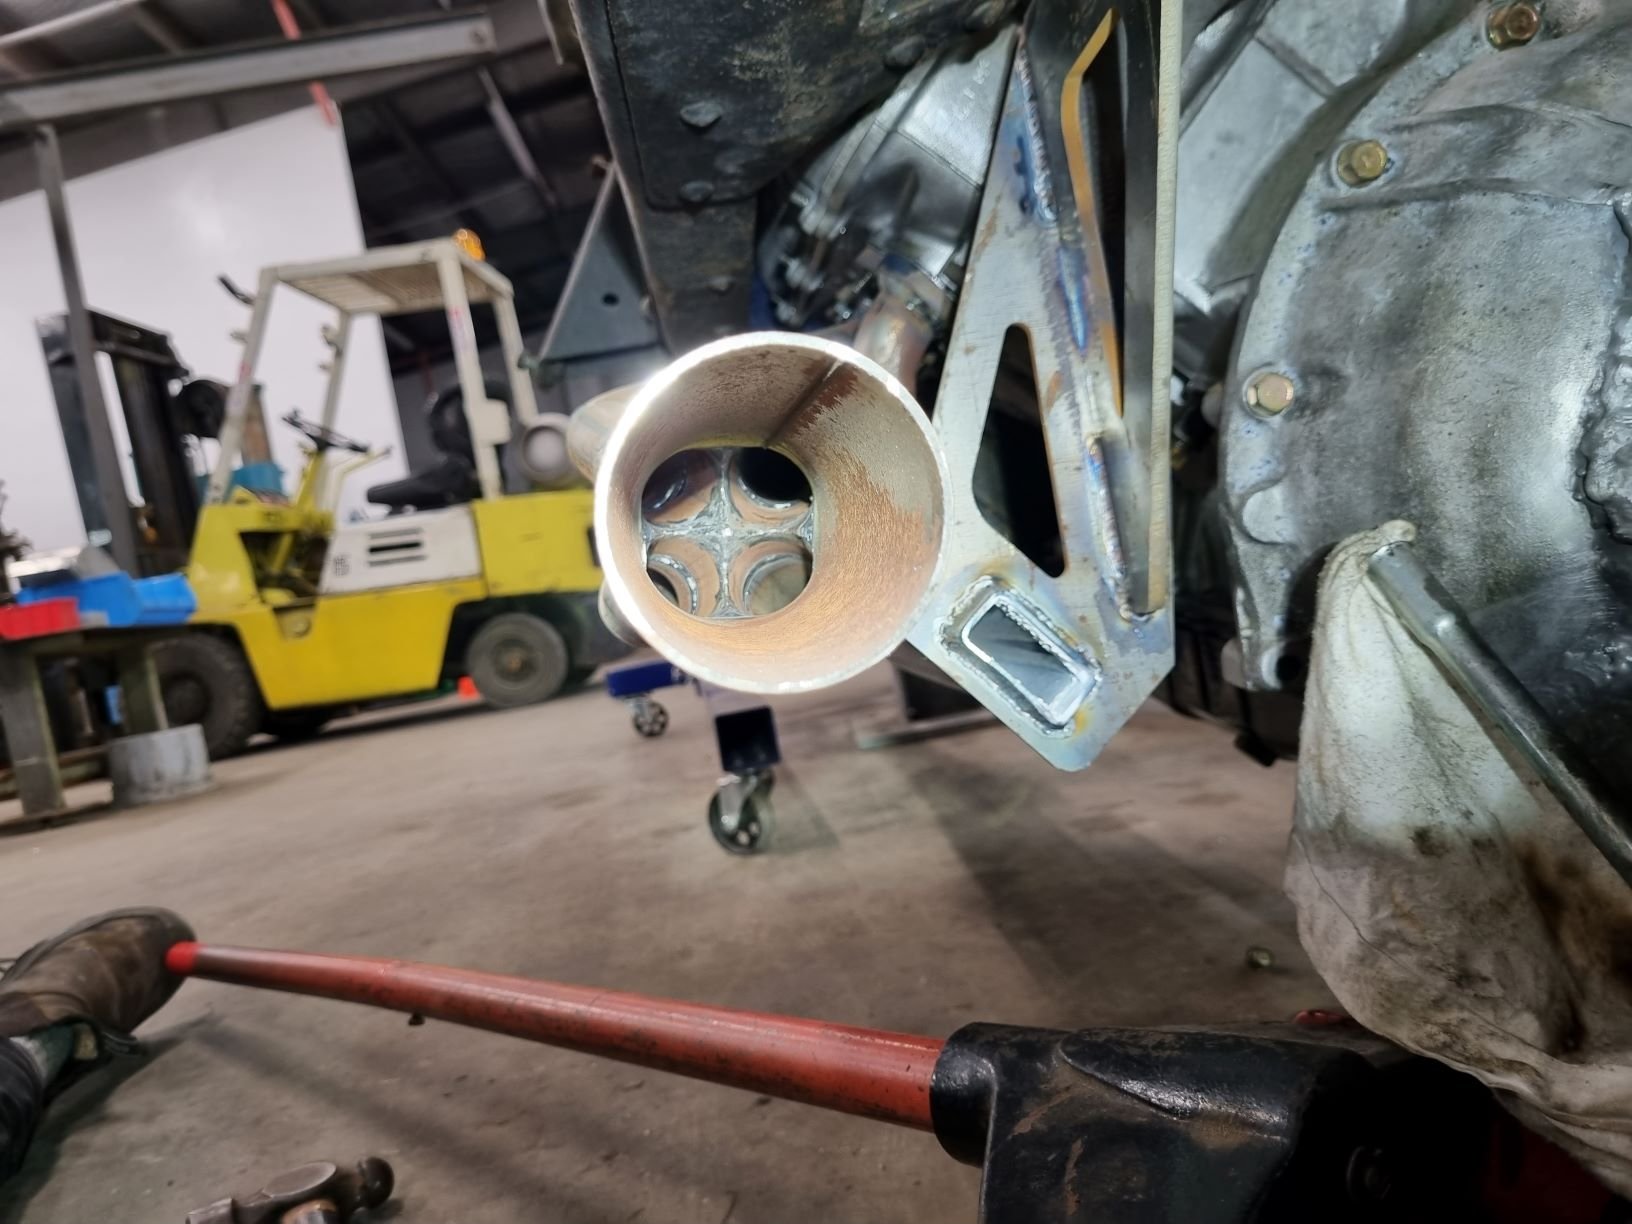
I also got a shot up the end of the collector, just cause...
I finished the driveshaft hoop also. Again butty, but functional.
Ive really only got the diff handbrake to complete, and a few bits turned up this week for that, so I will be turning my attention there in the coming weeks.
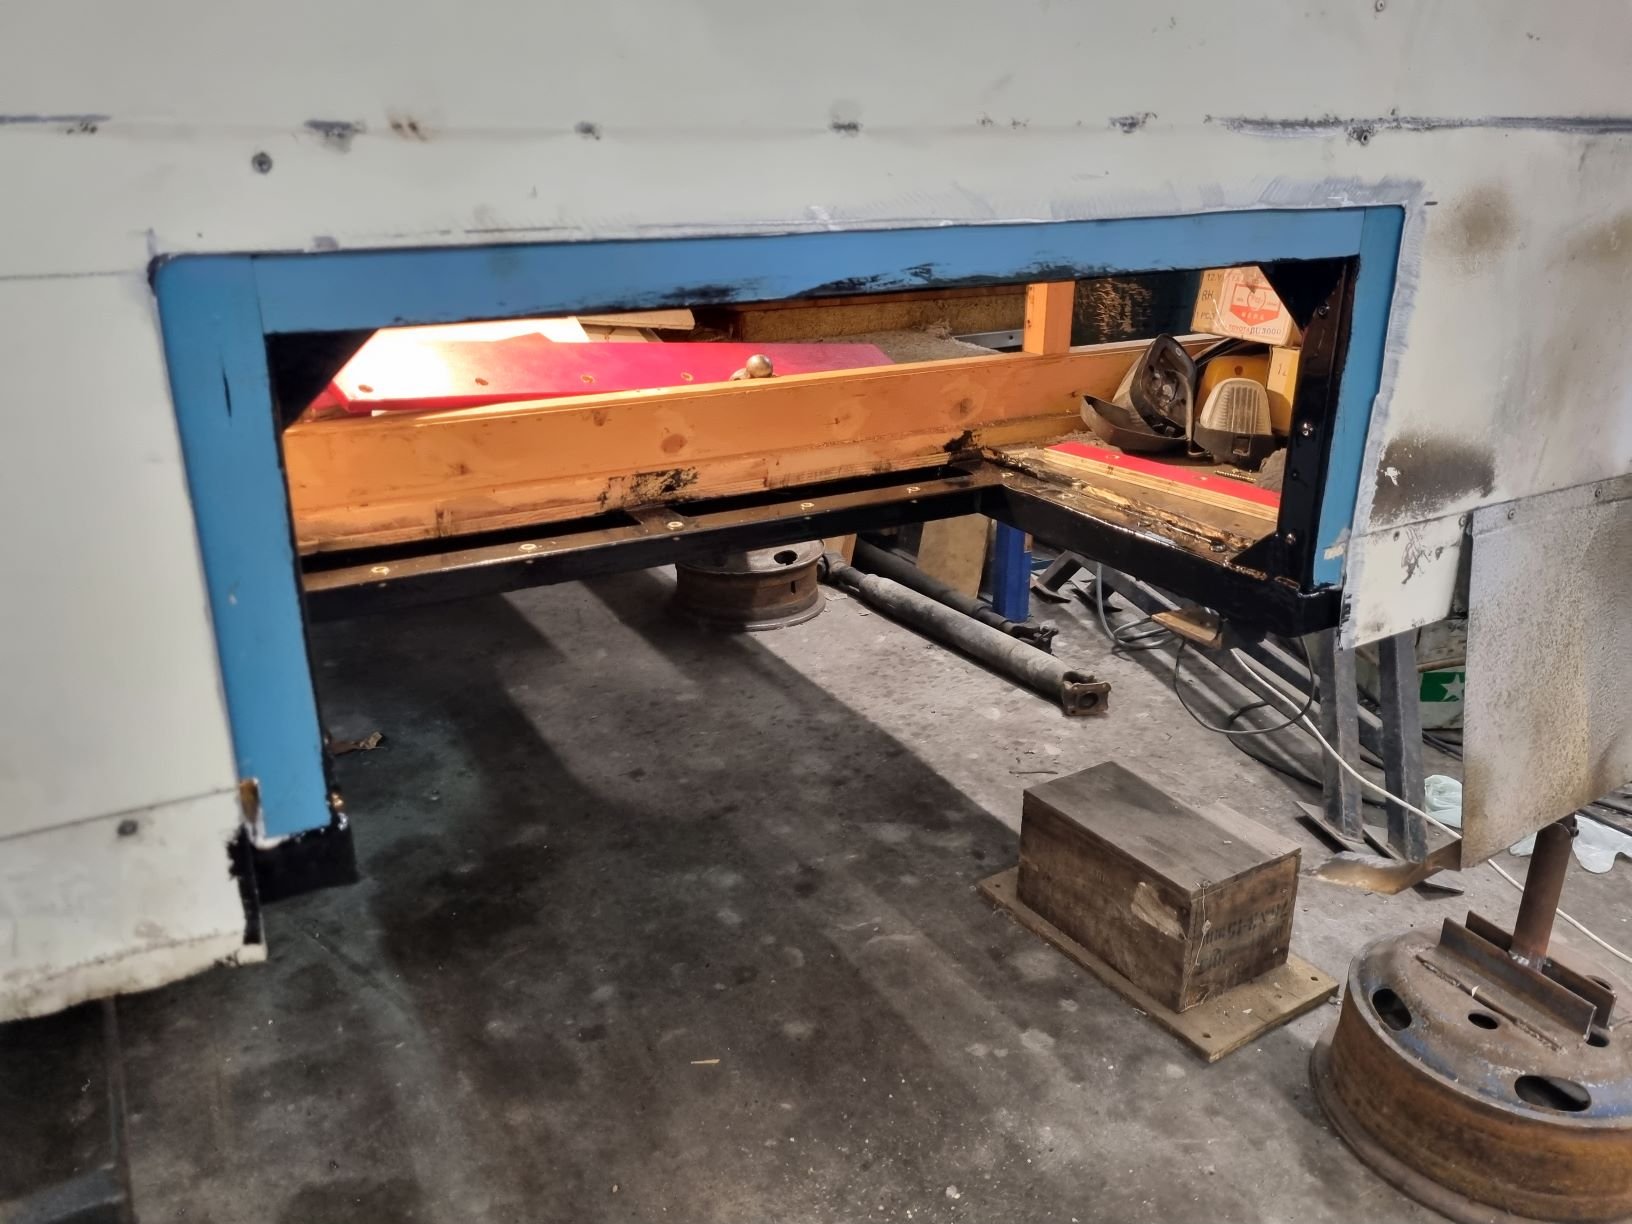
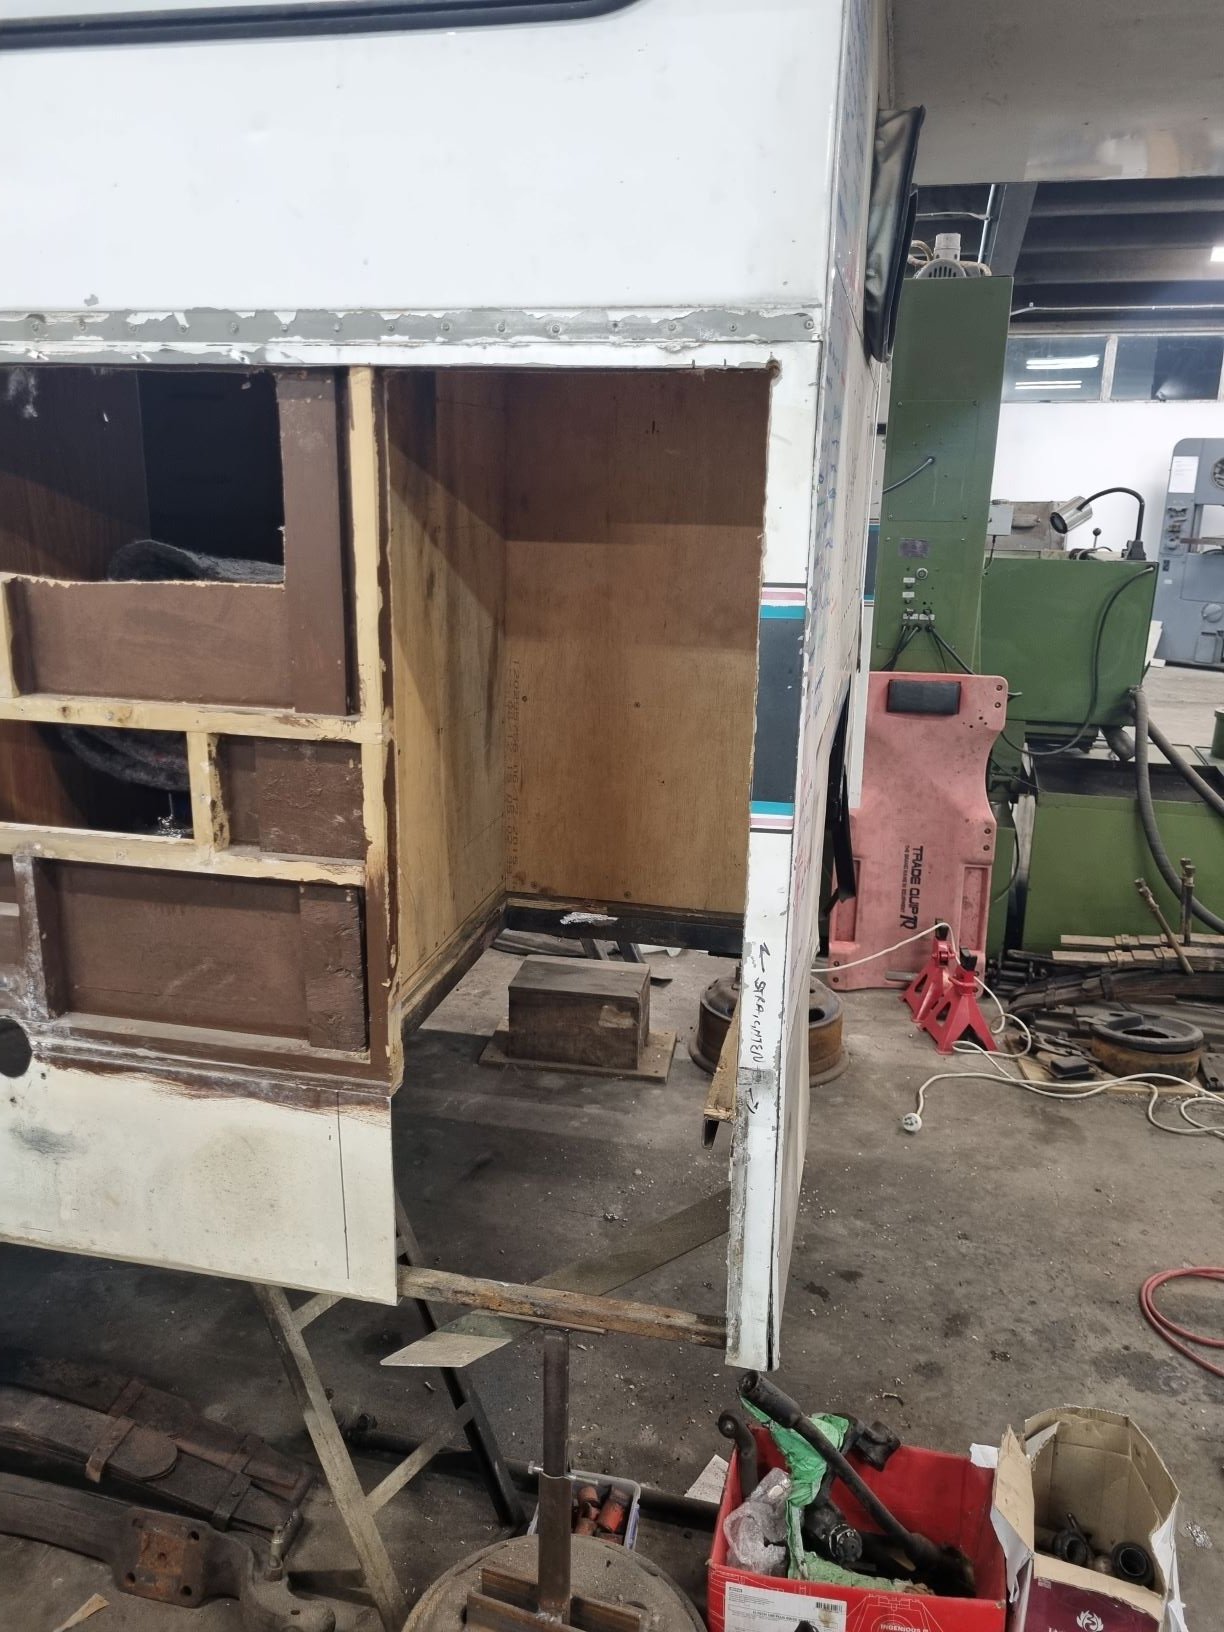
I moved back to tidying up some of the body interface. Painted steel, put rivnuts in holes etc for mounting engine cover.
Got stuck back into Califont and battery locker, cut out some more unnecessary shite and the old battery tray, so this is kindof ready for a bit more lining and framing up for batteries etc. Will need to at least decide on a battery format before I go further here. Would like to start reinstating the skin and framing up a door for here soon too. Ive also started looking at other body related stuff, with the impending end of major driveline fab thats where my next bit of attention will turn.
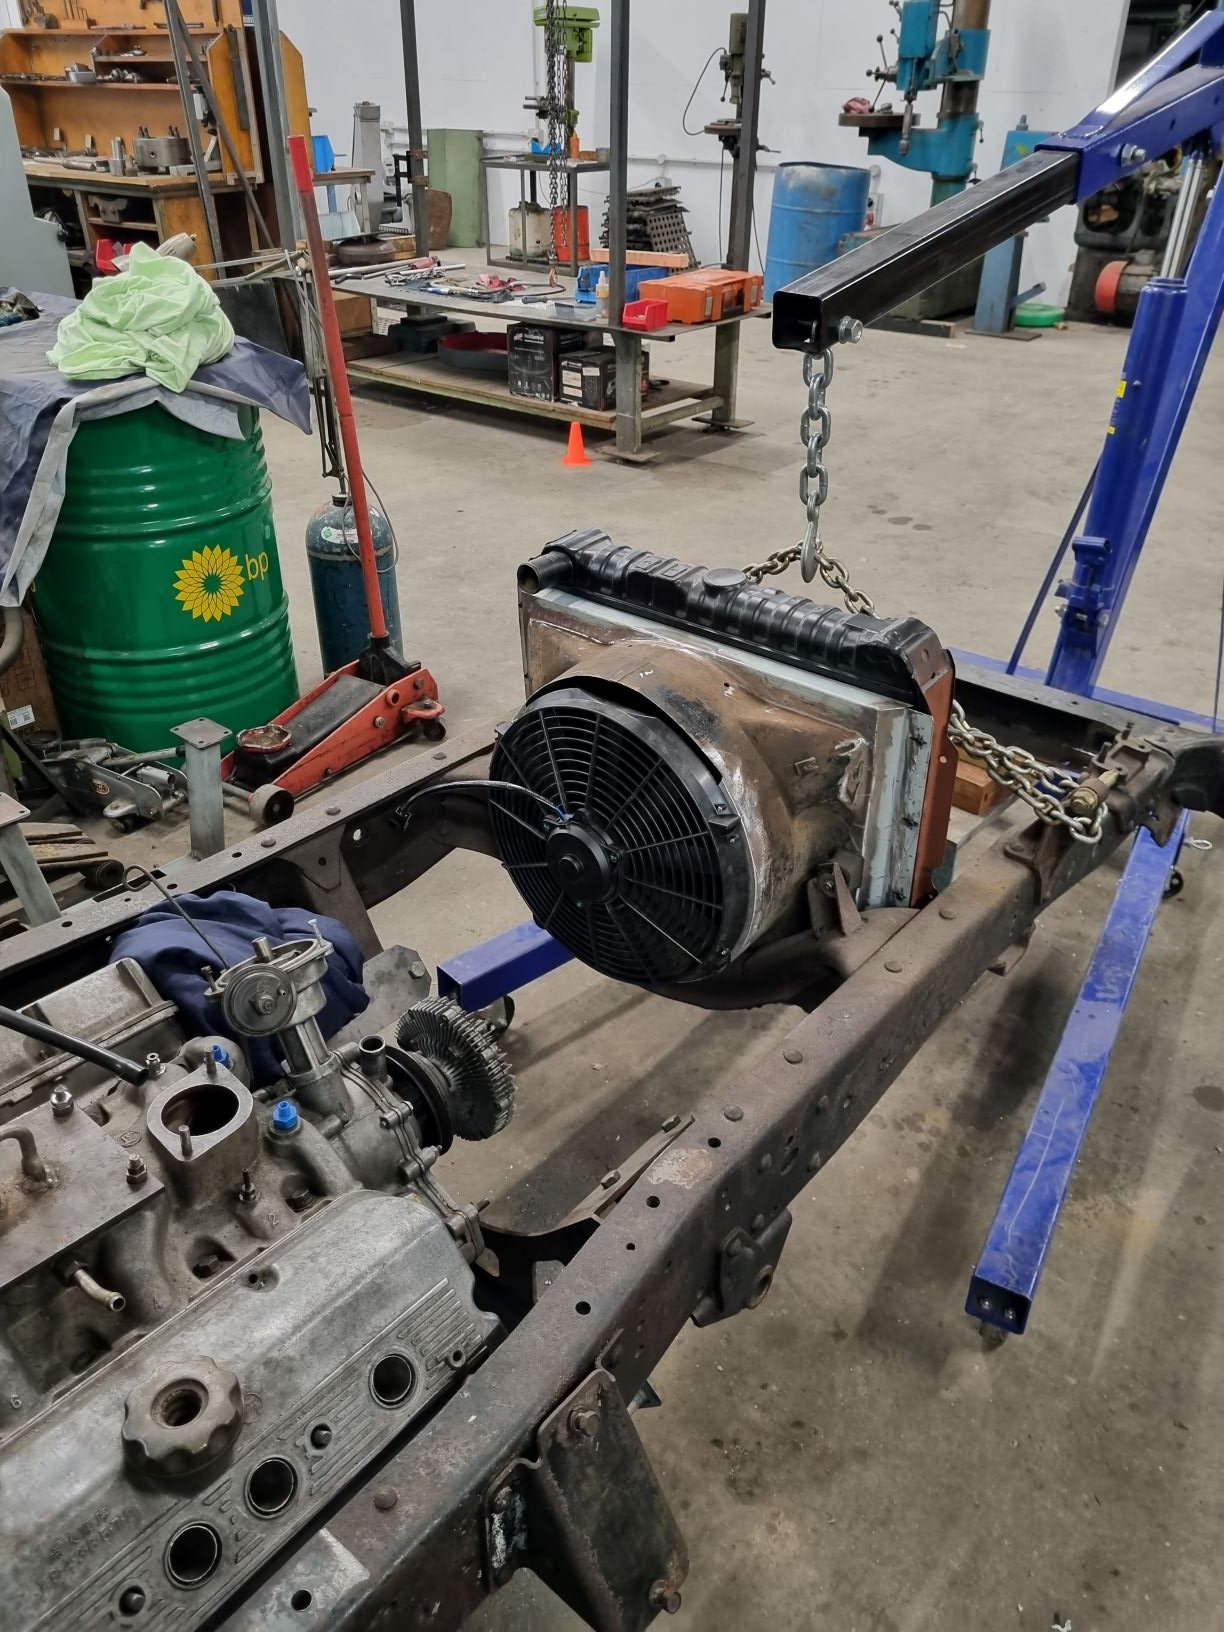
I also remounted the fan on the outside of the fan shroud instead of using the shitty radiator zip ties I had previously, as suggested by someone. Hindsight is a beautiful thing, as is perhaps laying off the doobs and beers when fabbing shit. I think I should have cut the shroud back a few inches to make purdy, but its done now and space is not a constraint here so Ill live with it.
-
15
-
- Popular Post
- Popular Post
So the last month has been basically busy with actual work, including being @ThePogs bitch - I was desperate, and he was clearly moreso... - The fucking project doesnt advance without the necessary lubrication to do so. Working for that cunt requires generous lashings of lube.
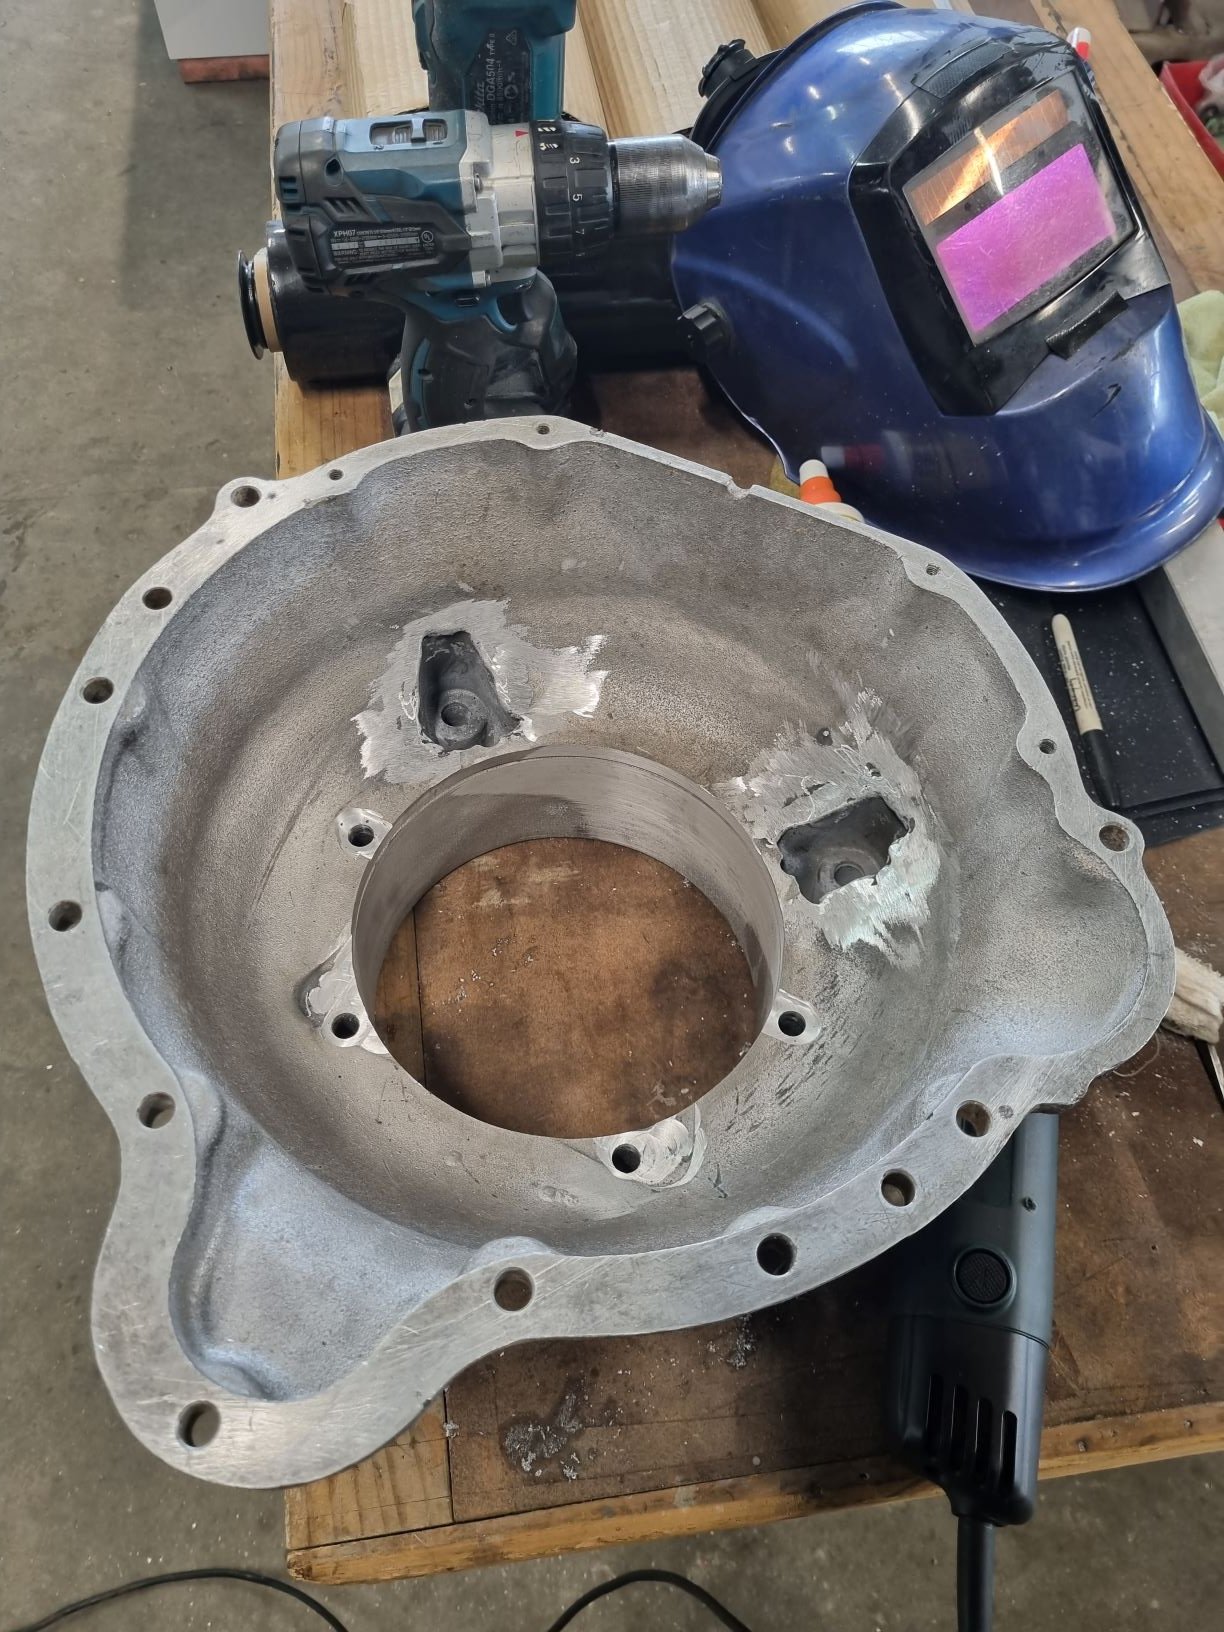
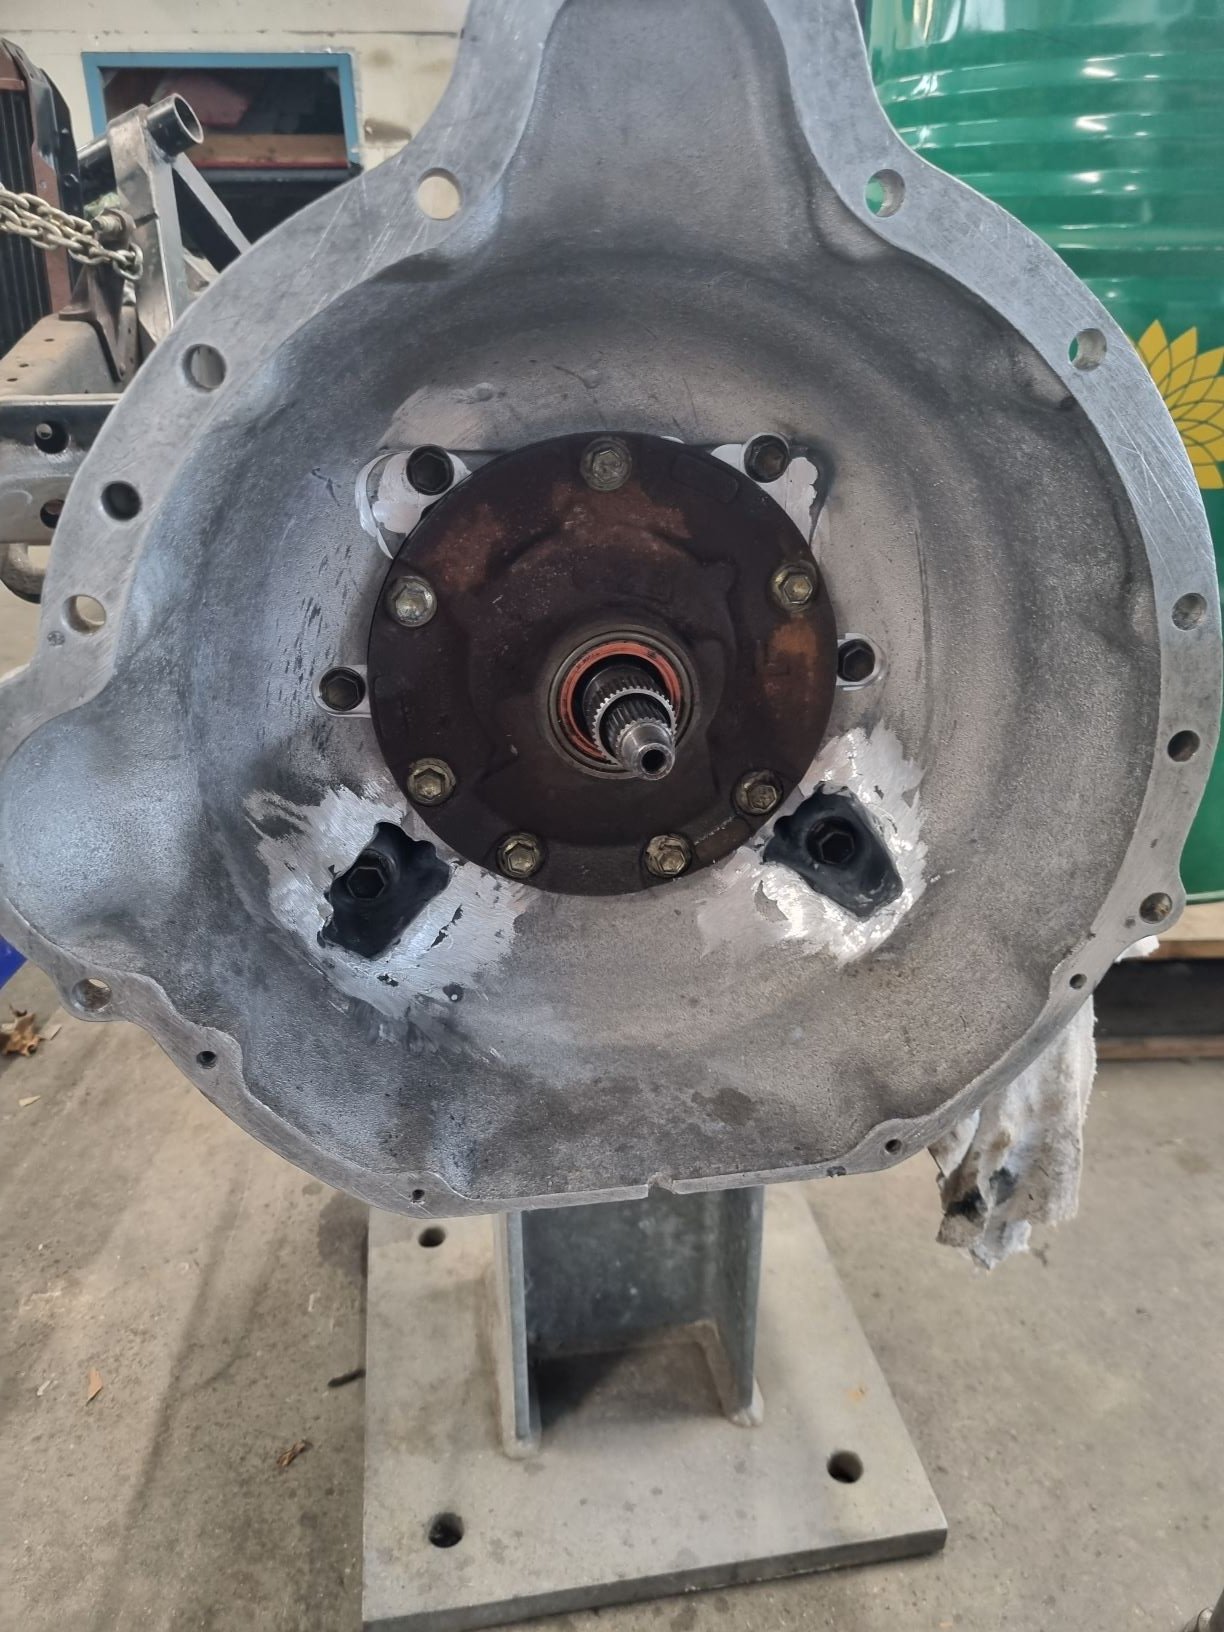
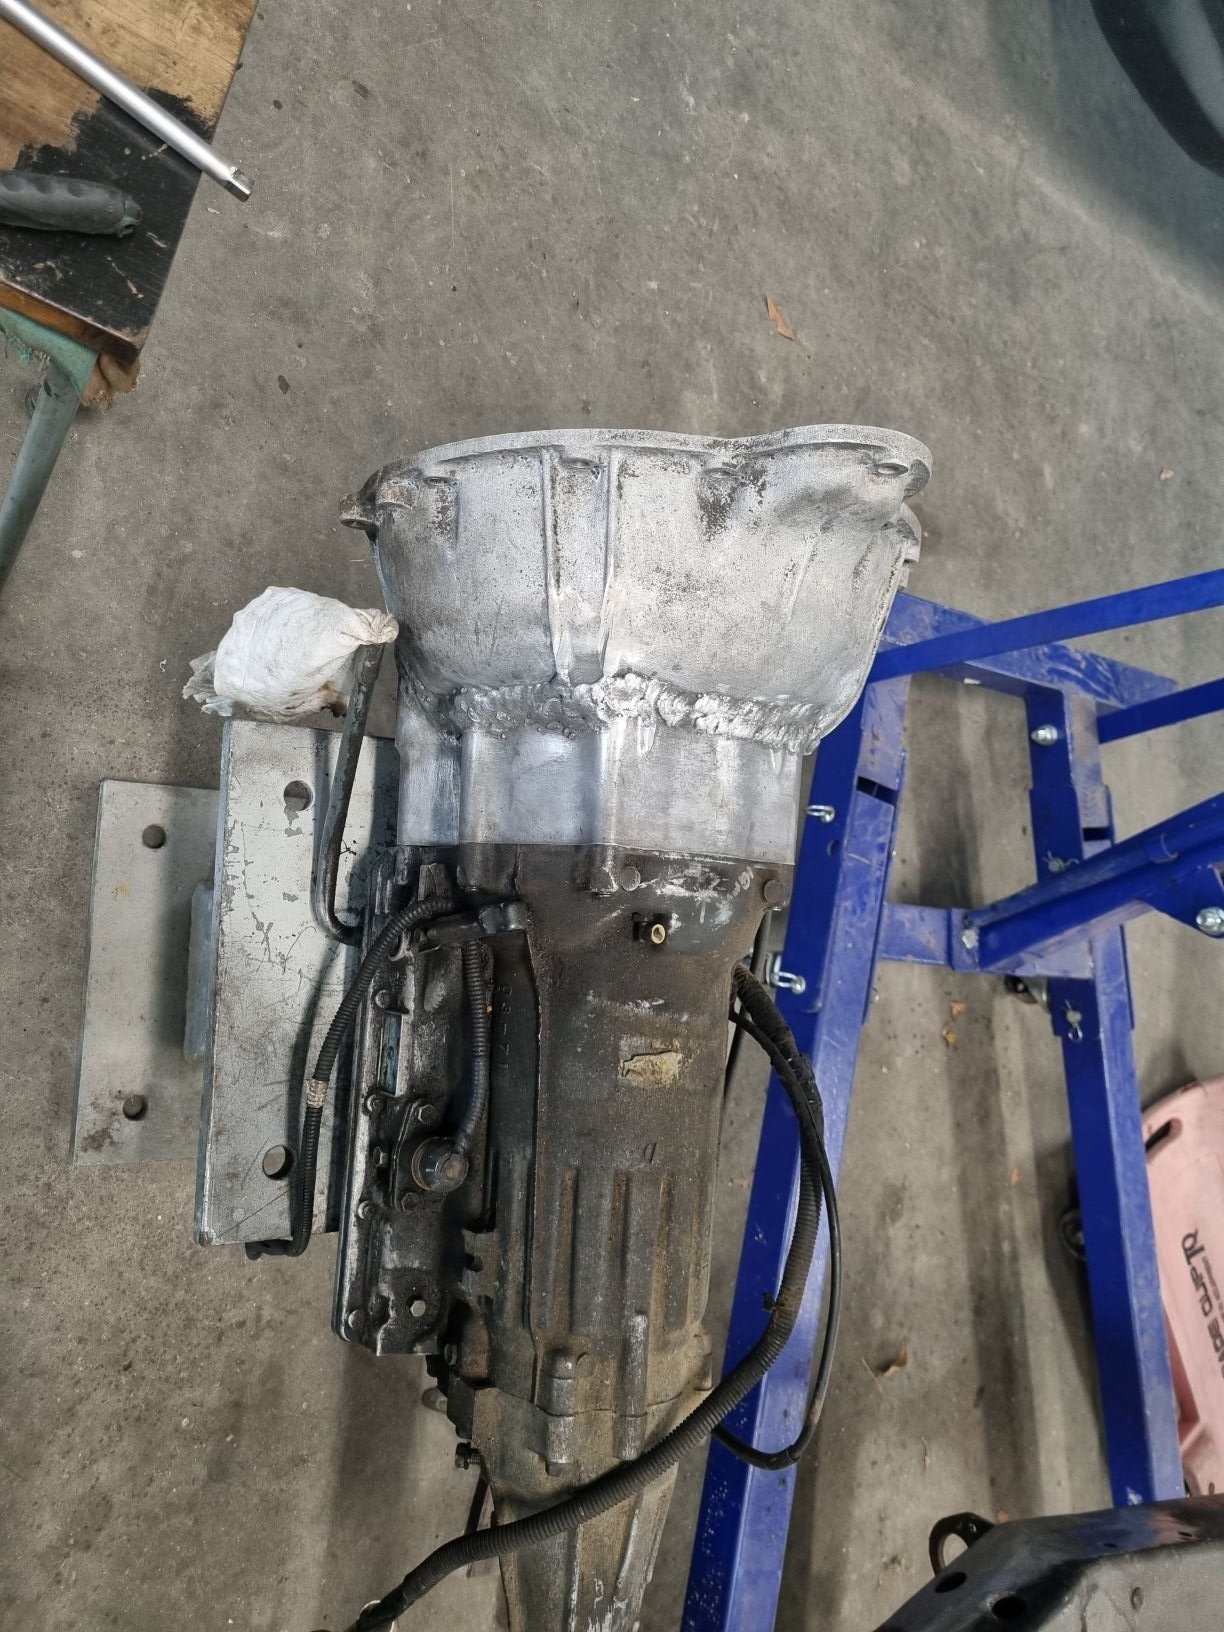
I finally finished most trans related things, still have the torque converter spigot to crank mod to finish, but otherwise all else is about there. I tidied up the welds and spot faced the mounting holes to the trans and got it all bolted up. Its not super pretty, but its fully functional.
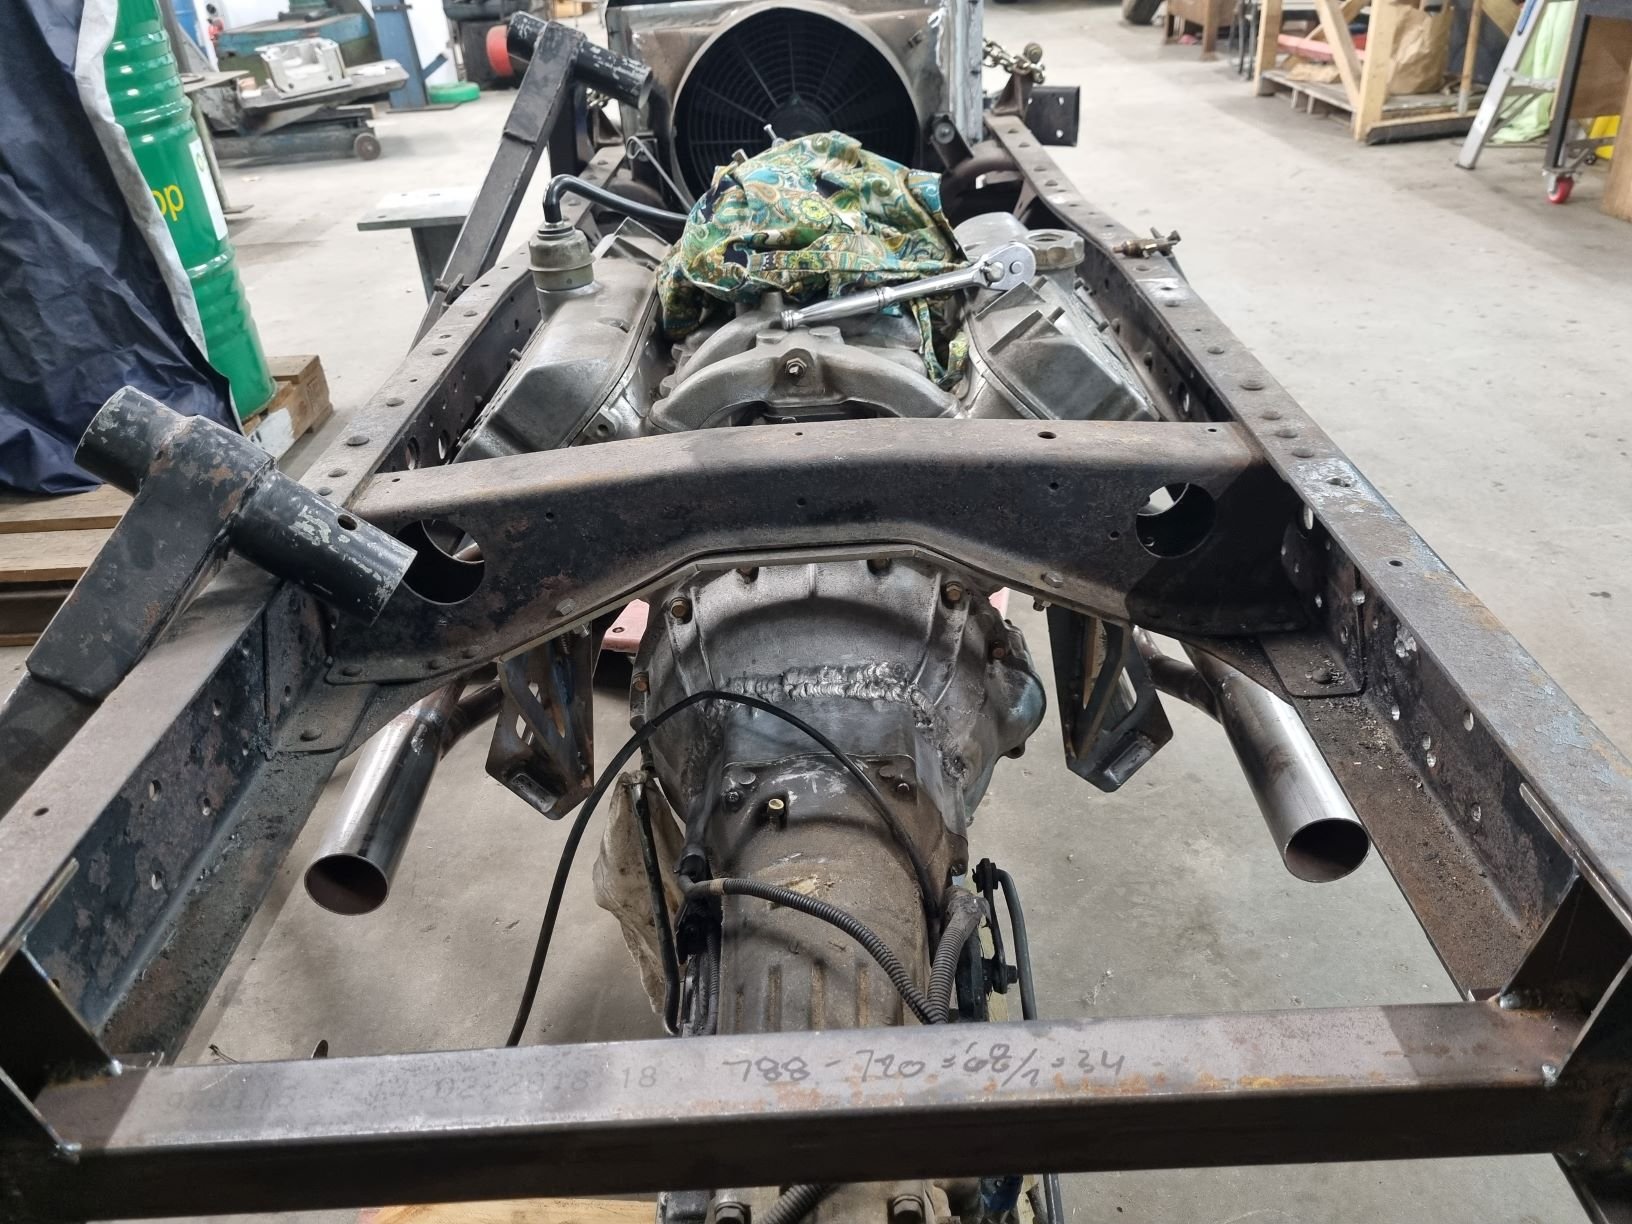
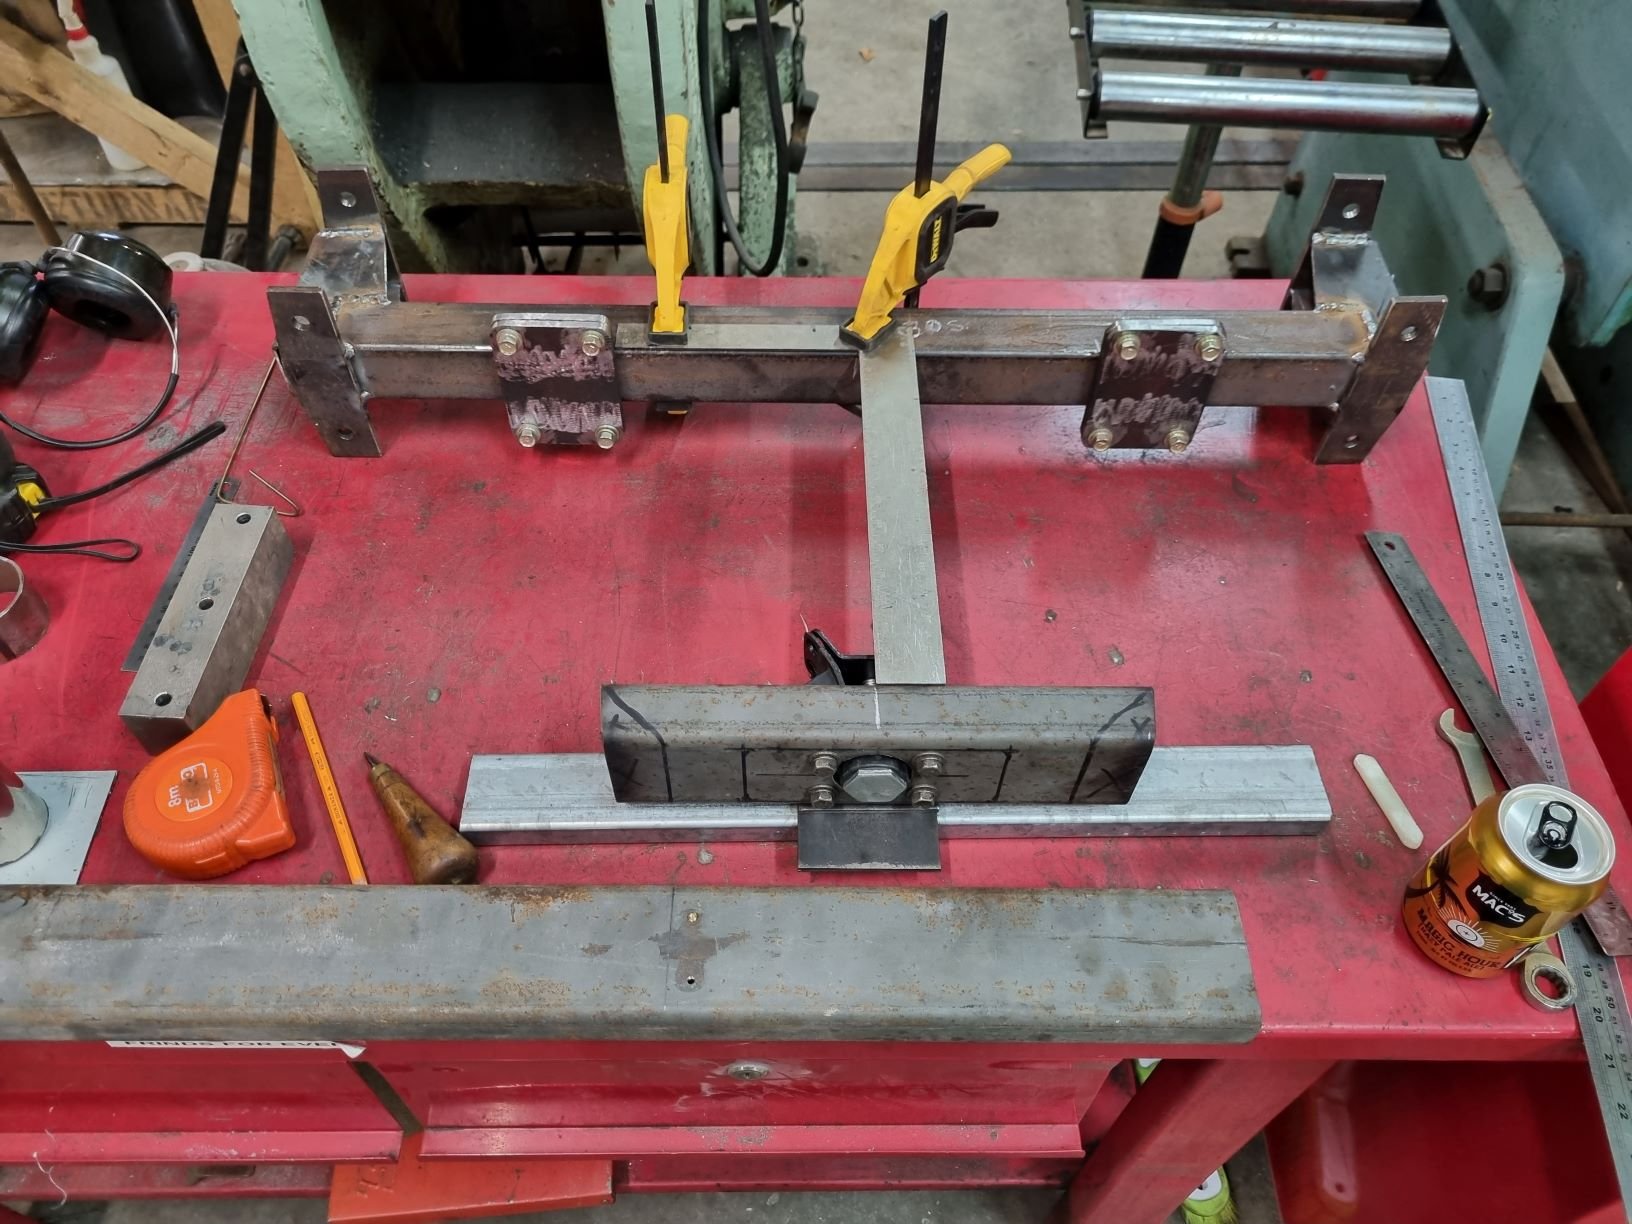
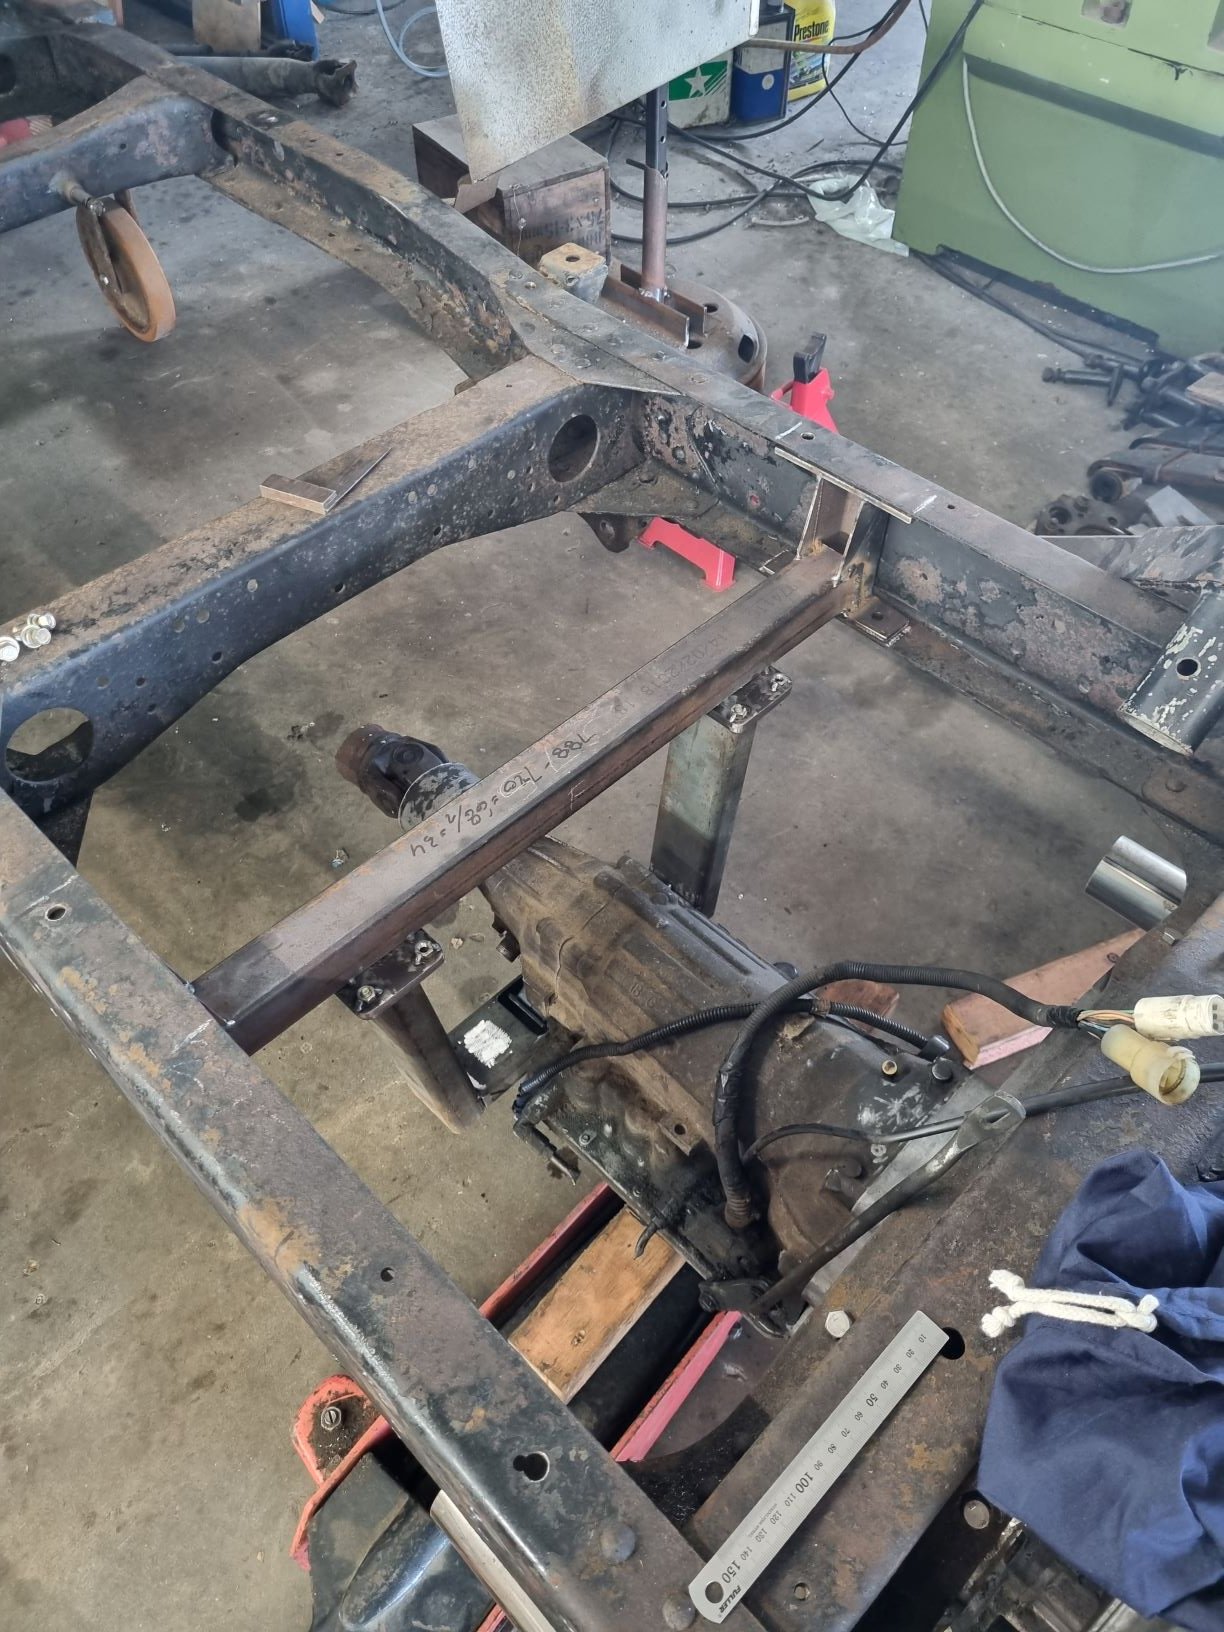
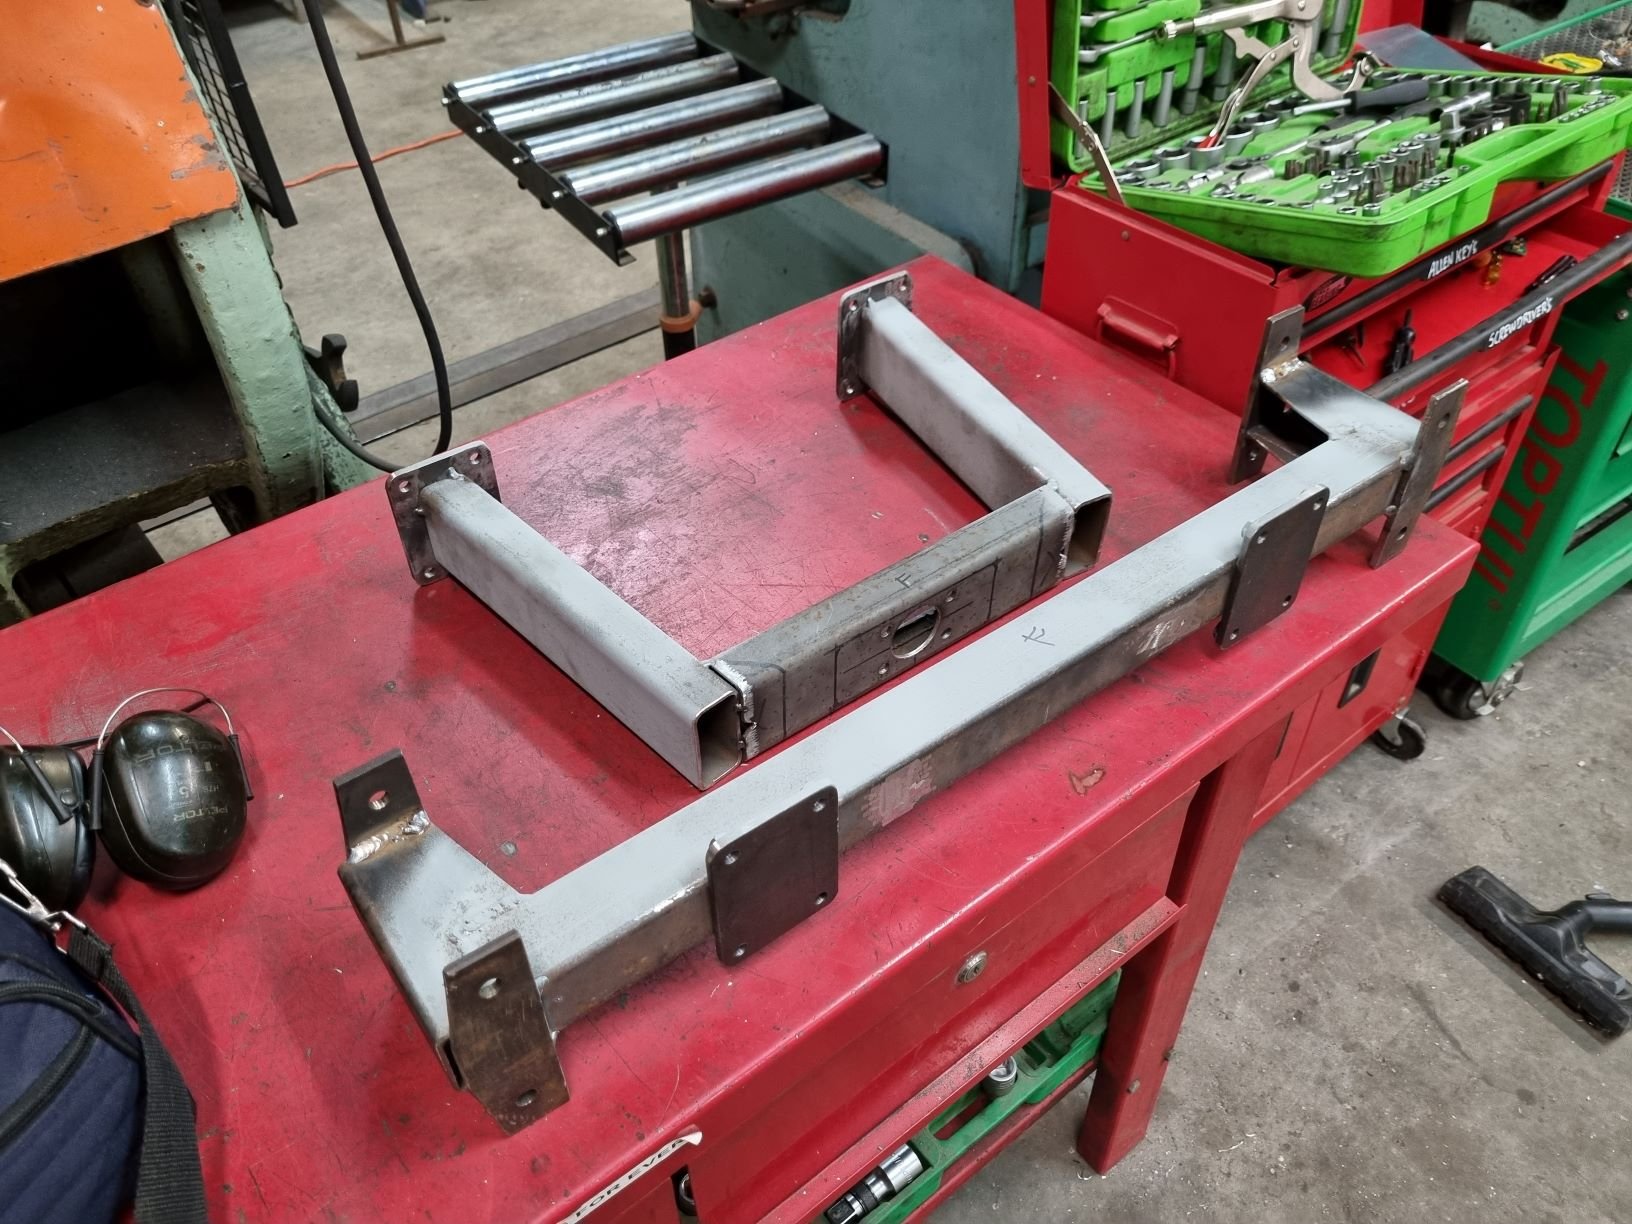
Then proceeded to sling it on to the back of the great girthiness, and continue with the next logical pursuit, finishing the crossmember. Its pretty butty, but in keeping with general heft of all things truck-like. I am also basically using up all the scrap steel in my workshop to do a lot of fab, so basically if the shoe fits..
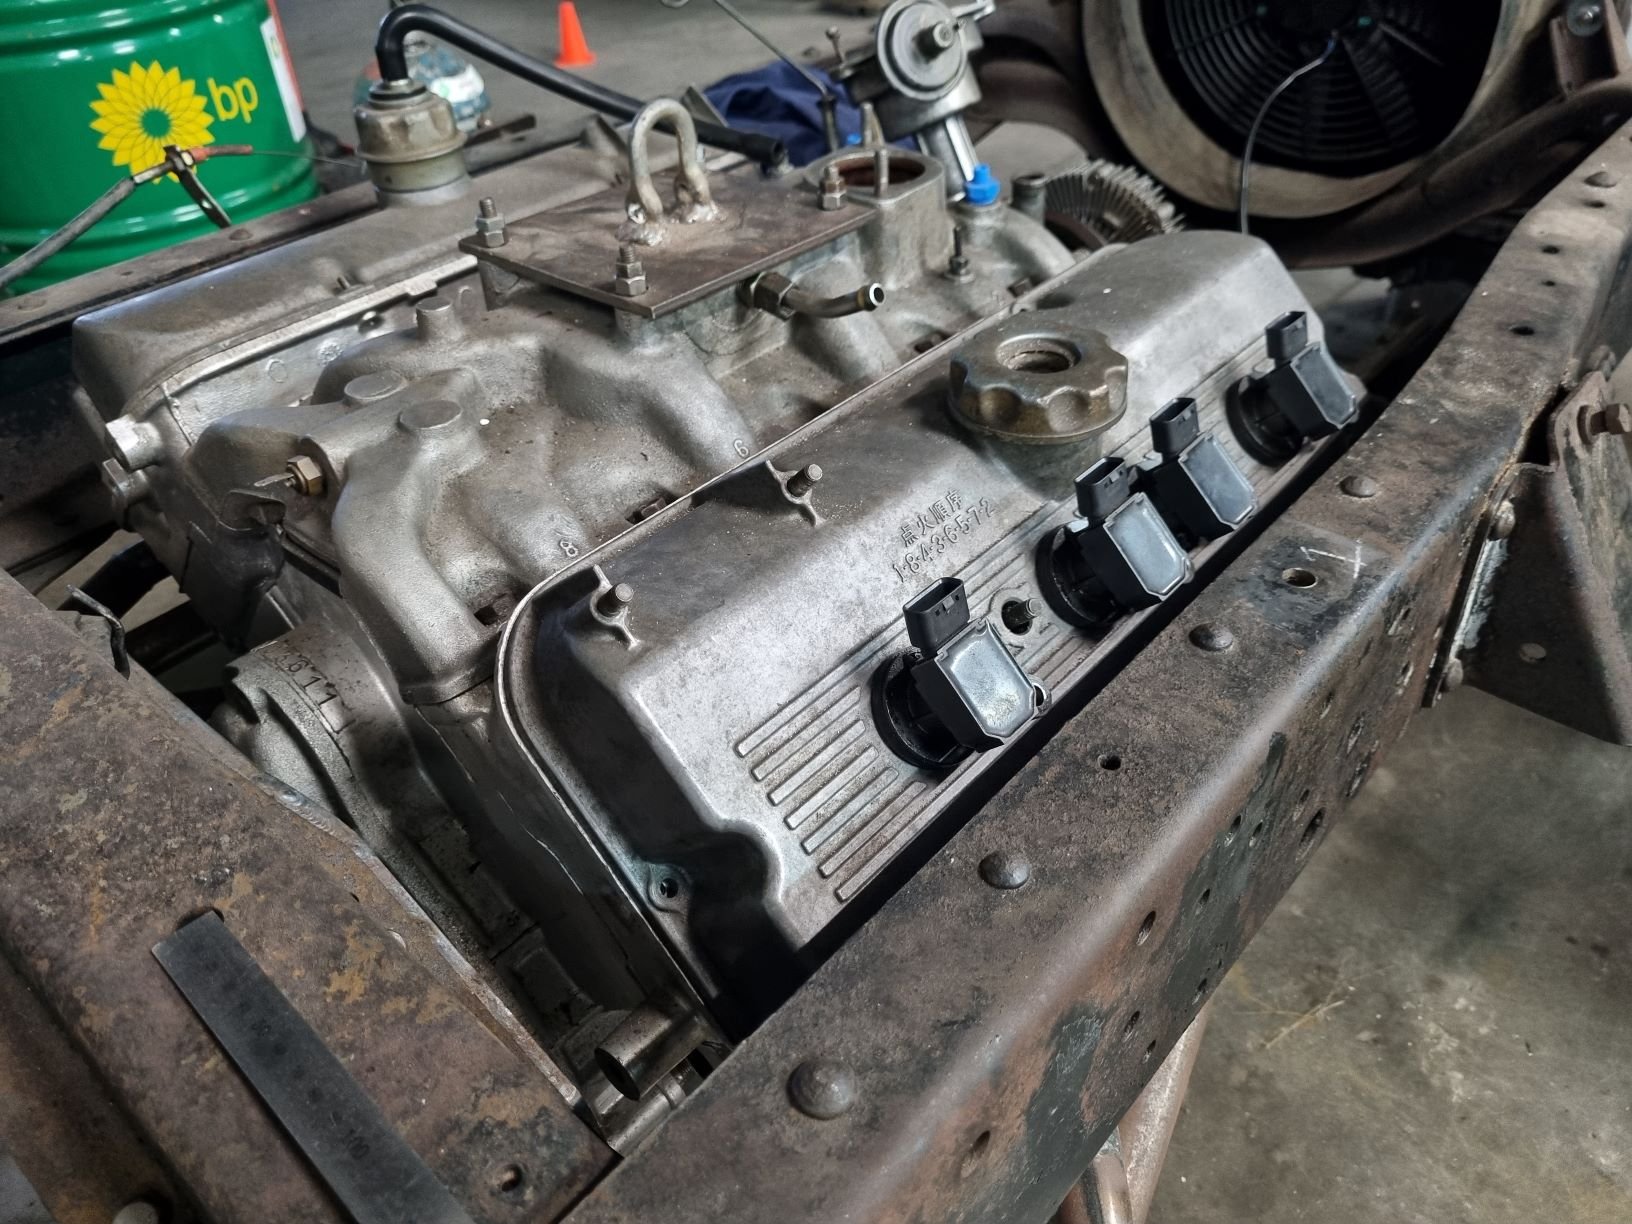
Whilst diagnosing issues with my corolla, which has now since been moved on in favour of vehicles that dont consume oil at a rate most consume petrol, I had the coils out. With a very, very satisfying 'pop/' I decided to jam them in the plug holes of the 4V. Its like Toyota engineers are lazy, shit designed 40 years later fits like a glove... I am seriously considering running COP with the carb using a speeduino and having mappable ignition with the carby - perhaps with the thought to future EFI options. It looks badass, and givne the price of new coils and a speeduino, its not a big step away from getting nice plug leads. Anyway, opine away.
-
16
-
I've seen people bake FDM prints in salt to remelt and sort of homogenize the parts to near the strength of a moulded part, basically sorts the interlayer adhesion issue.
Here
-
1
-
-
Assuming the real reason for tucking it in the container was to ensure it sweatily rusts away into oblivion...
Or to get it away from T seeing it every day. Bring it out once she's talking to you again..
Did it come with engine??
-
I take all mine to the local mechanics. My worker is making a centrifuge to purify his...


JRs MK2 Capri
in Project Discussion
Posted
http://www.oldscoolautos.co.nz/vehicles/