Kimjon
-
Posts
2181 -
Joined
-
Last visited
-
Days Won
1
Everything posted by Kimjon
-
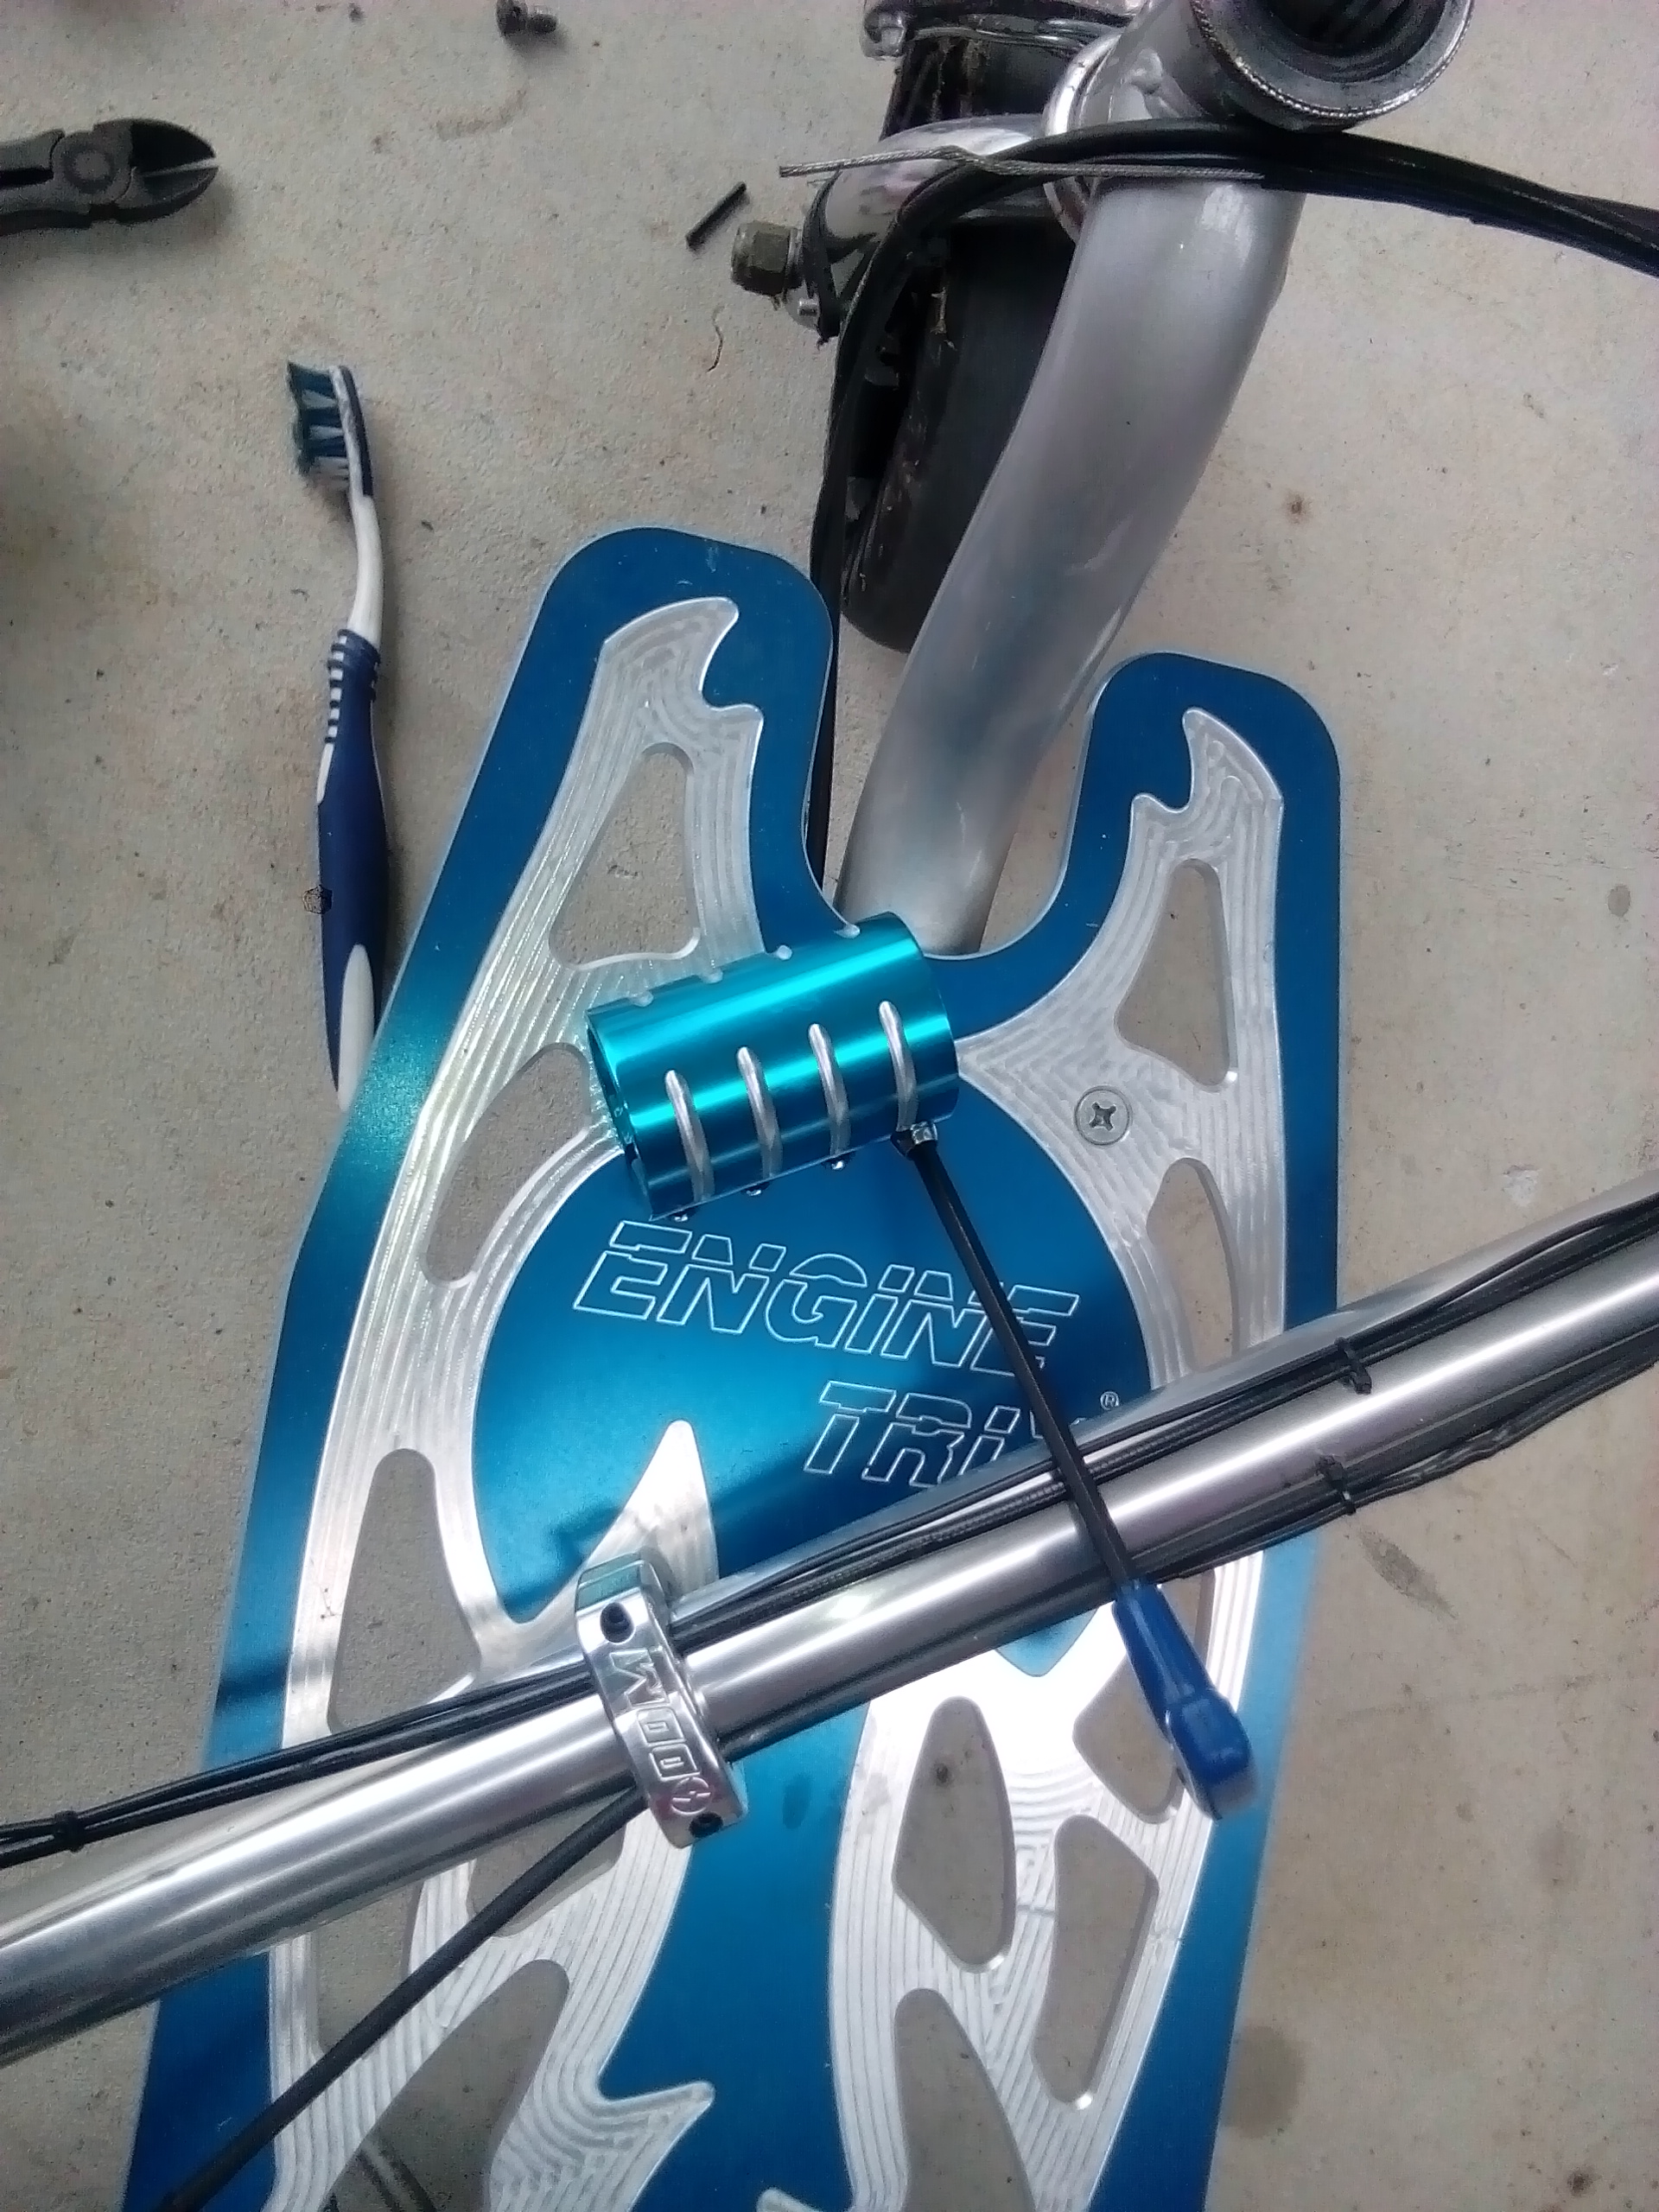
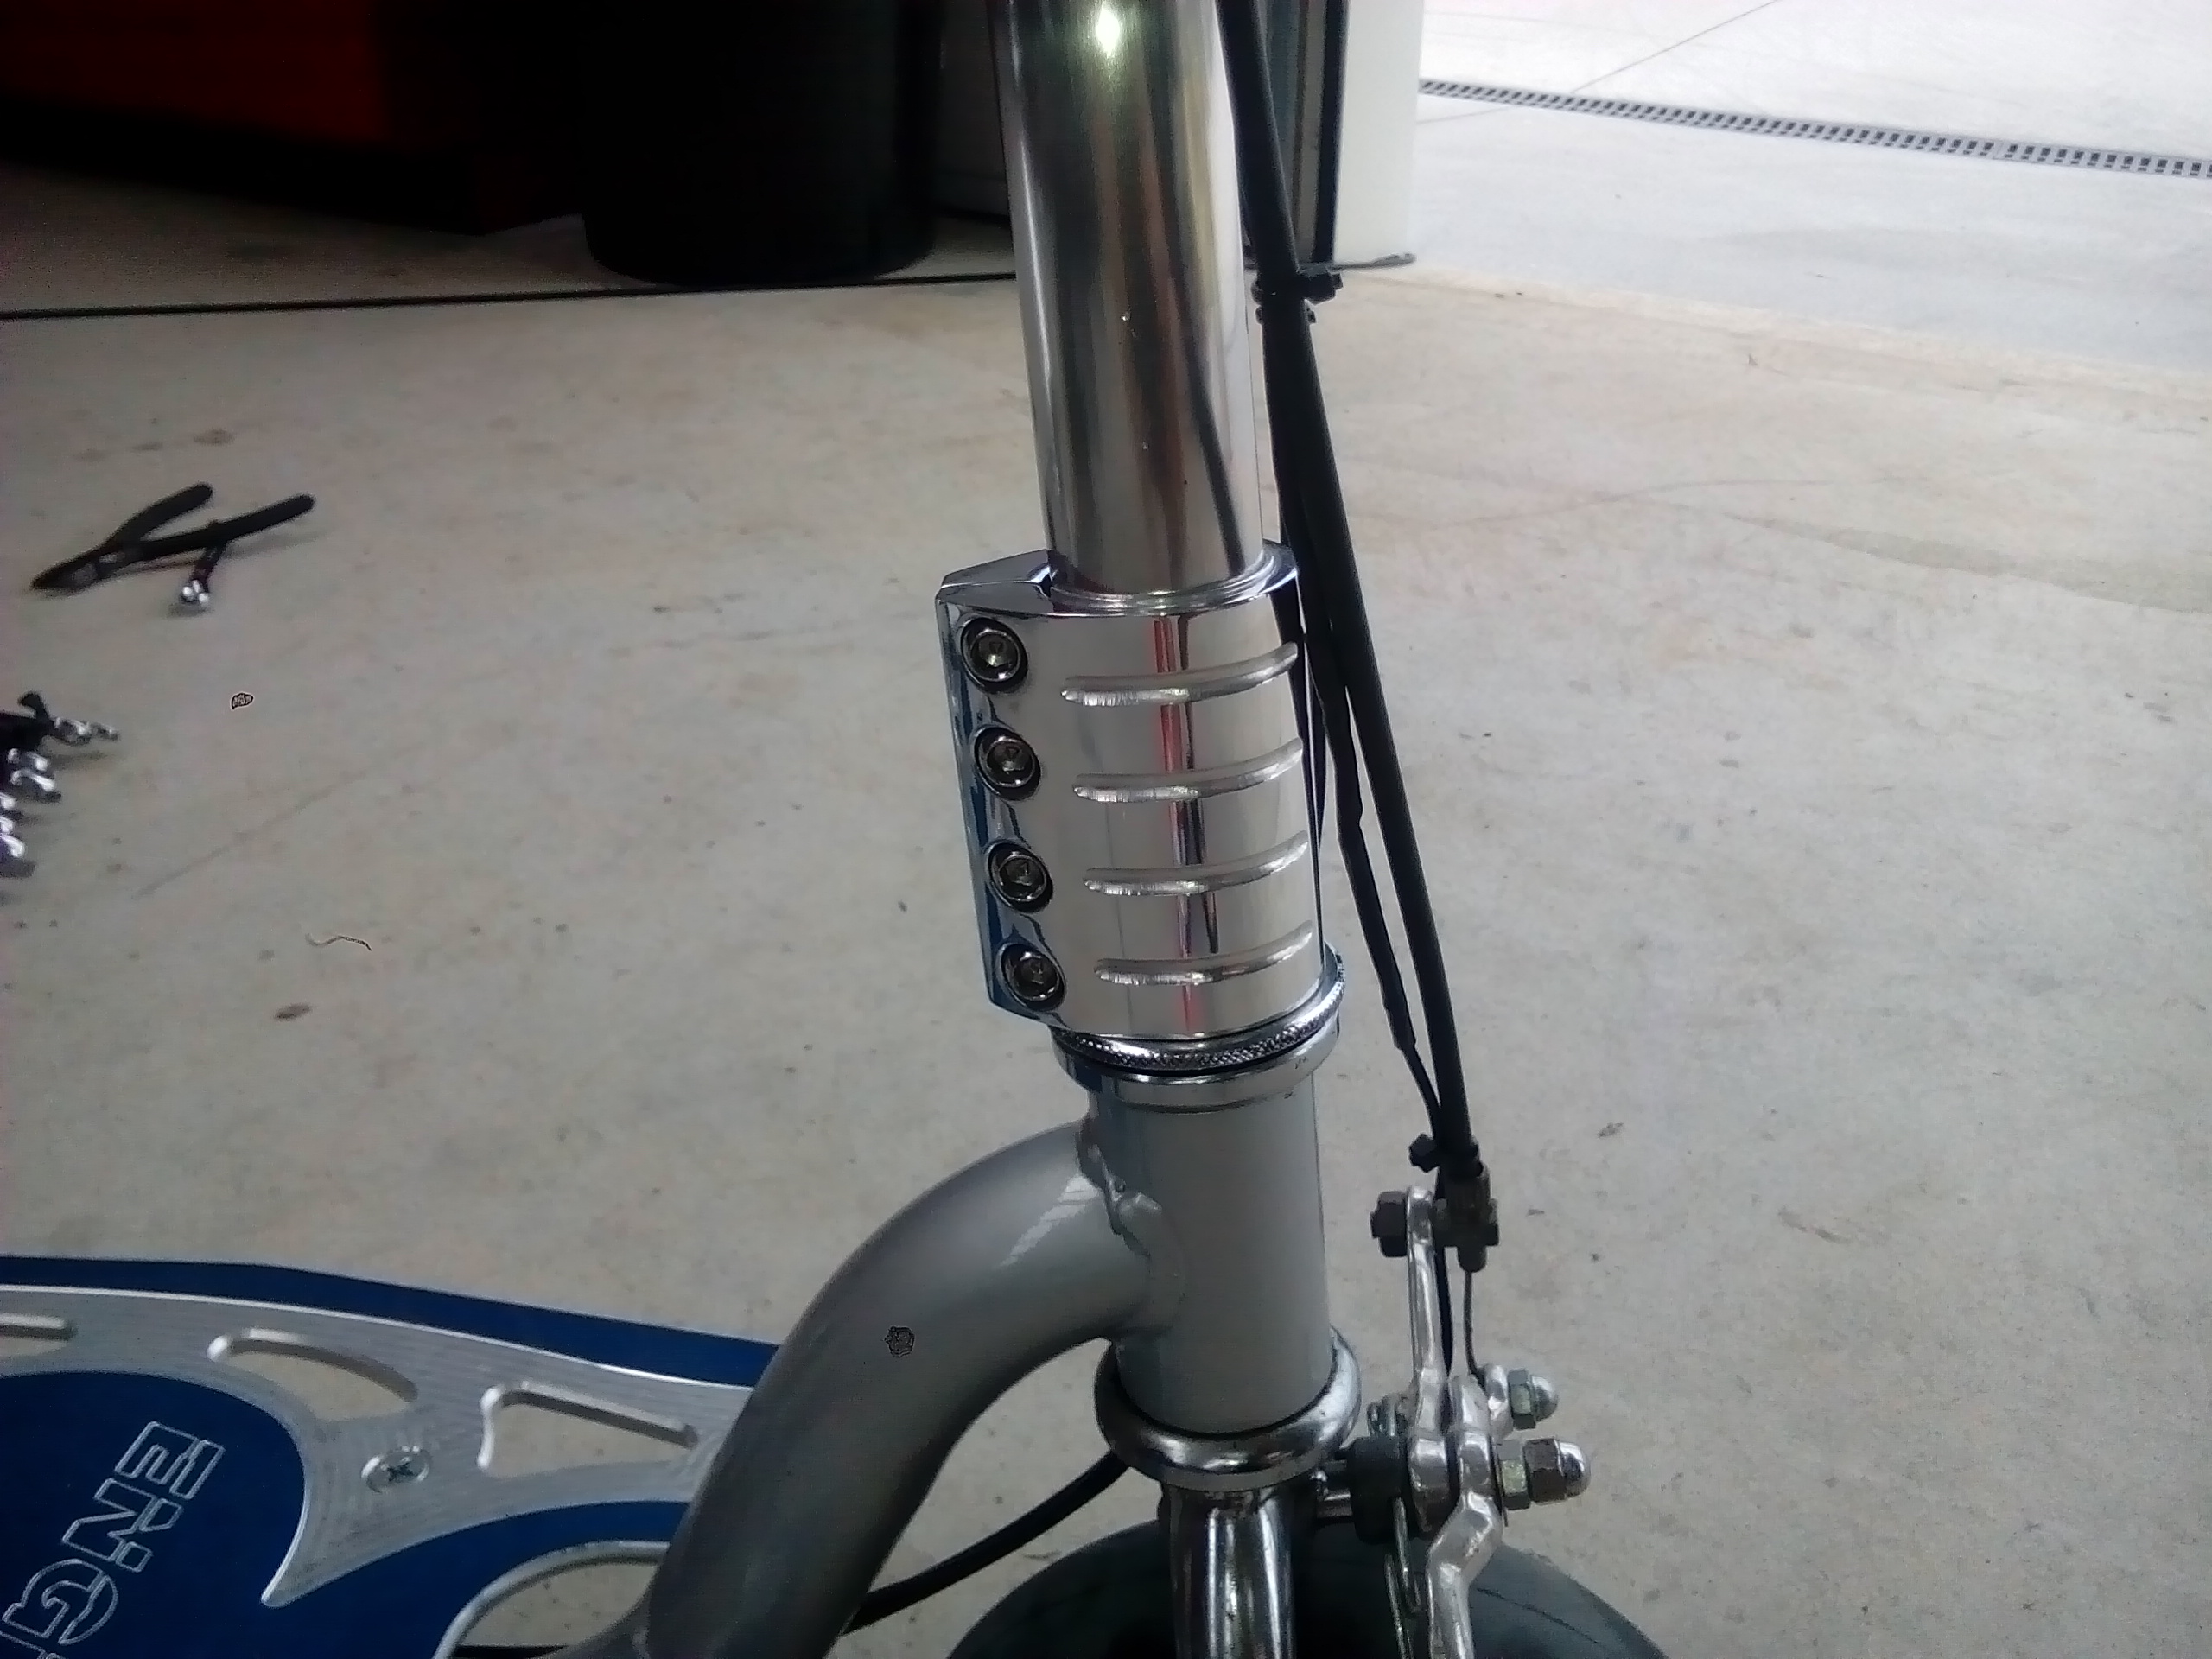
This was far more successful than I thought it would be. My stem clamp didn't match the colour of the deck. Normally I'd say "close enough" and leave it at that, however the two parts were so closely situated my eye kept getting drawn towards the mismatched blue's. Its been like this for 2 years until today, I thought fuck it...do something about it! Google revealed oven cleaner as a possible solution, truth be told I was willing it to work as the other methods were more involved. So here goes nothing: Offending colour mismatch above. Liberally apply oven cleaner, leave for about 5 minutes, then rinse off. Afterwards I scrubbed it with dish washing liquid to further insure it was clean. 100% removed all the colour...holly shit...it fucking worked(!) fully restoring my faith in the internet as a worthwhile place to find information. The oven cleaner leaves a natural finish, here it is installed back on the goped after a quick buff on the polishing wheel to shine it up. Total time start to finish less than 15 minutes...success!!!

-

Kimjon's not as cool or epic as Muncie's off-road goped Bigfoot scooter thingy
Kimjon replied to Kimjon's topic in Two Wheels
Nope. I'm waiting on a diaphragm carburetor and manifold from eBay, this will allow me to mount the petrol tank lower than the carb. Once that arrives it should be a goer? In the meantime it's still rough looking, so I'll keep chipping away at making the roughness disappear If you're worried about racing...I have plenty more to choose from... -
Random slightly cool stuff you built but not worth its own thread, thread
Kimjon replied to h4nd's topic in Other Projects
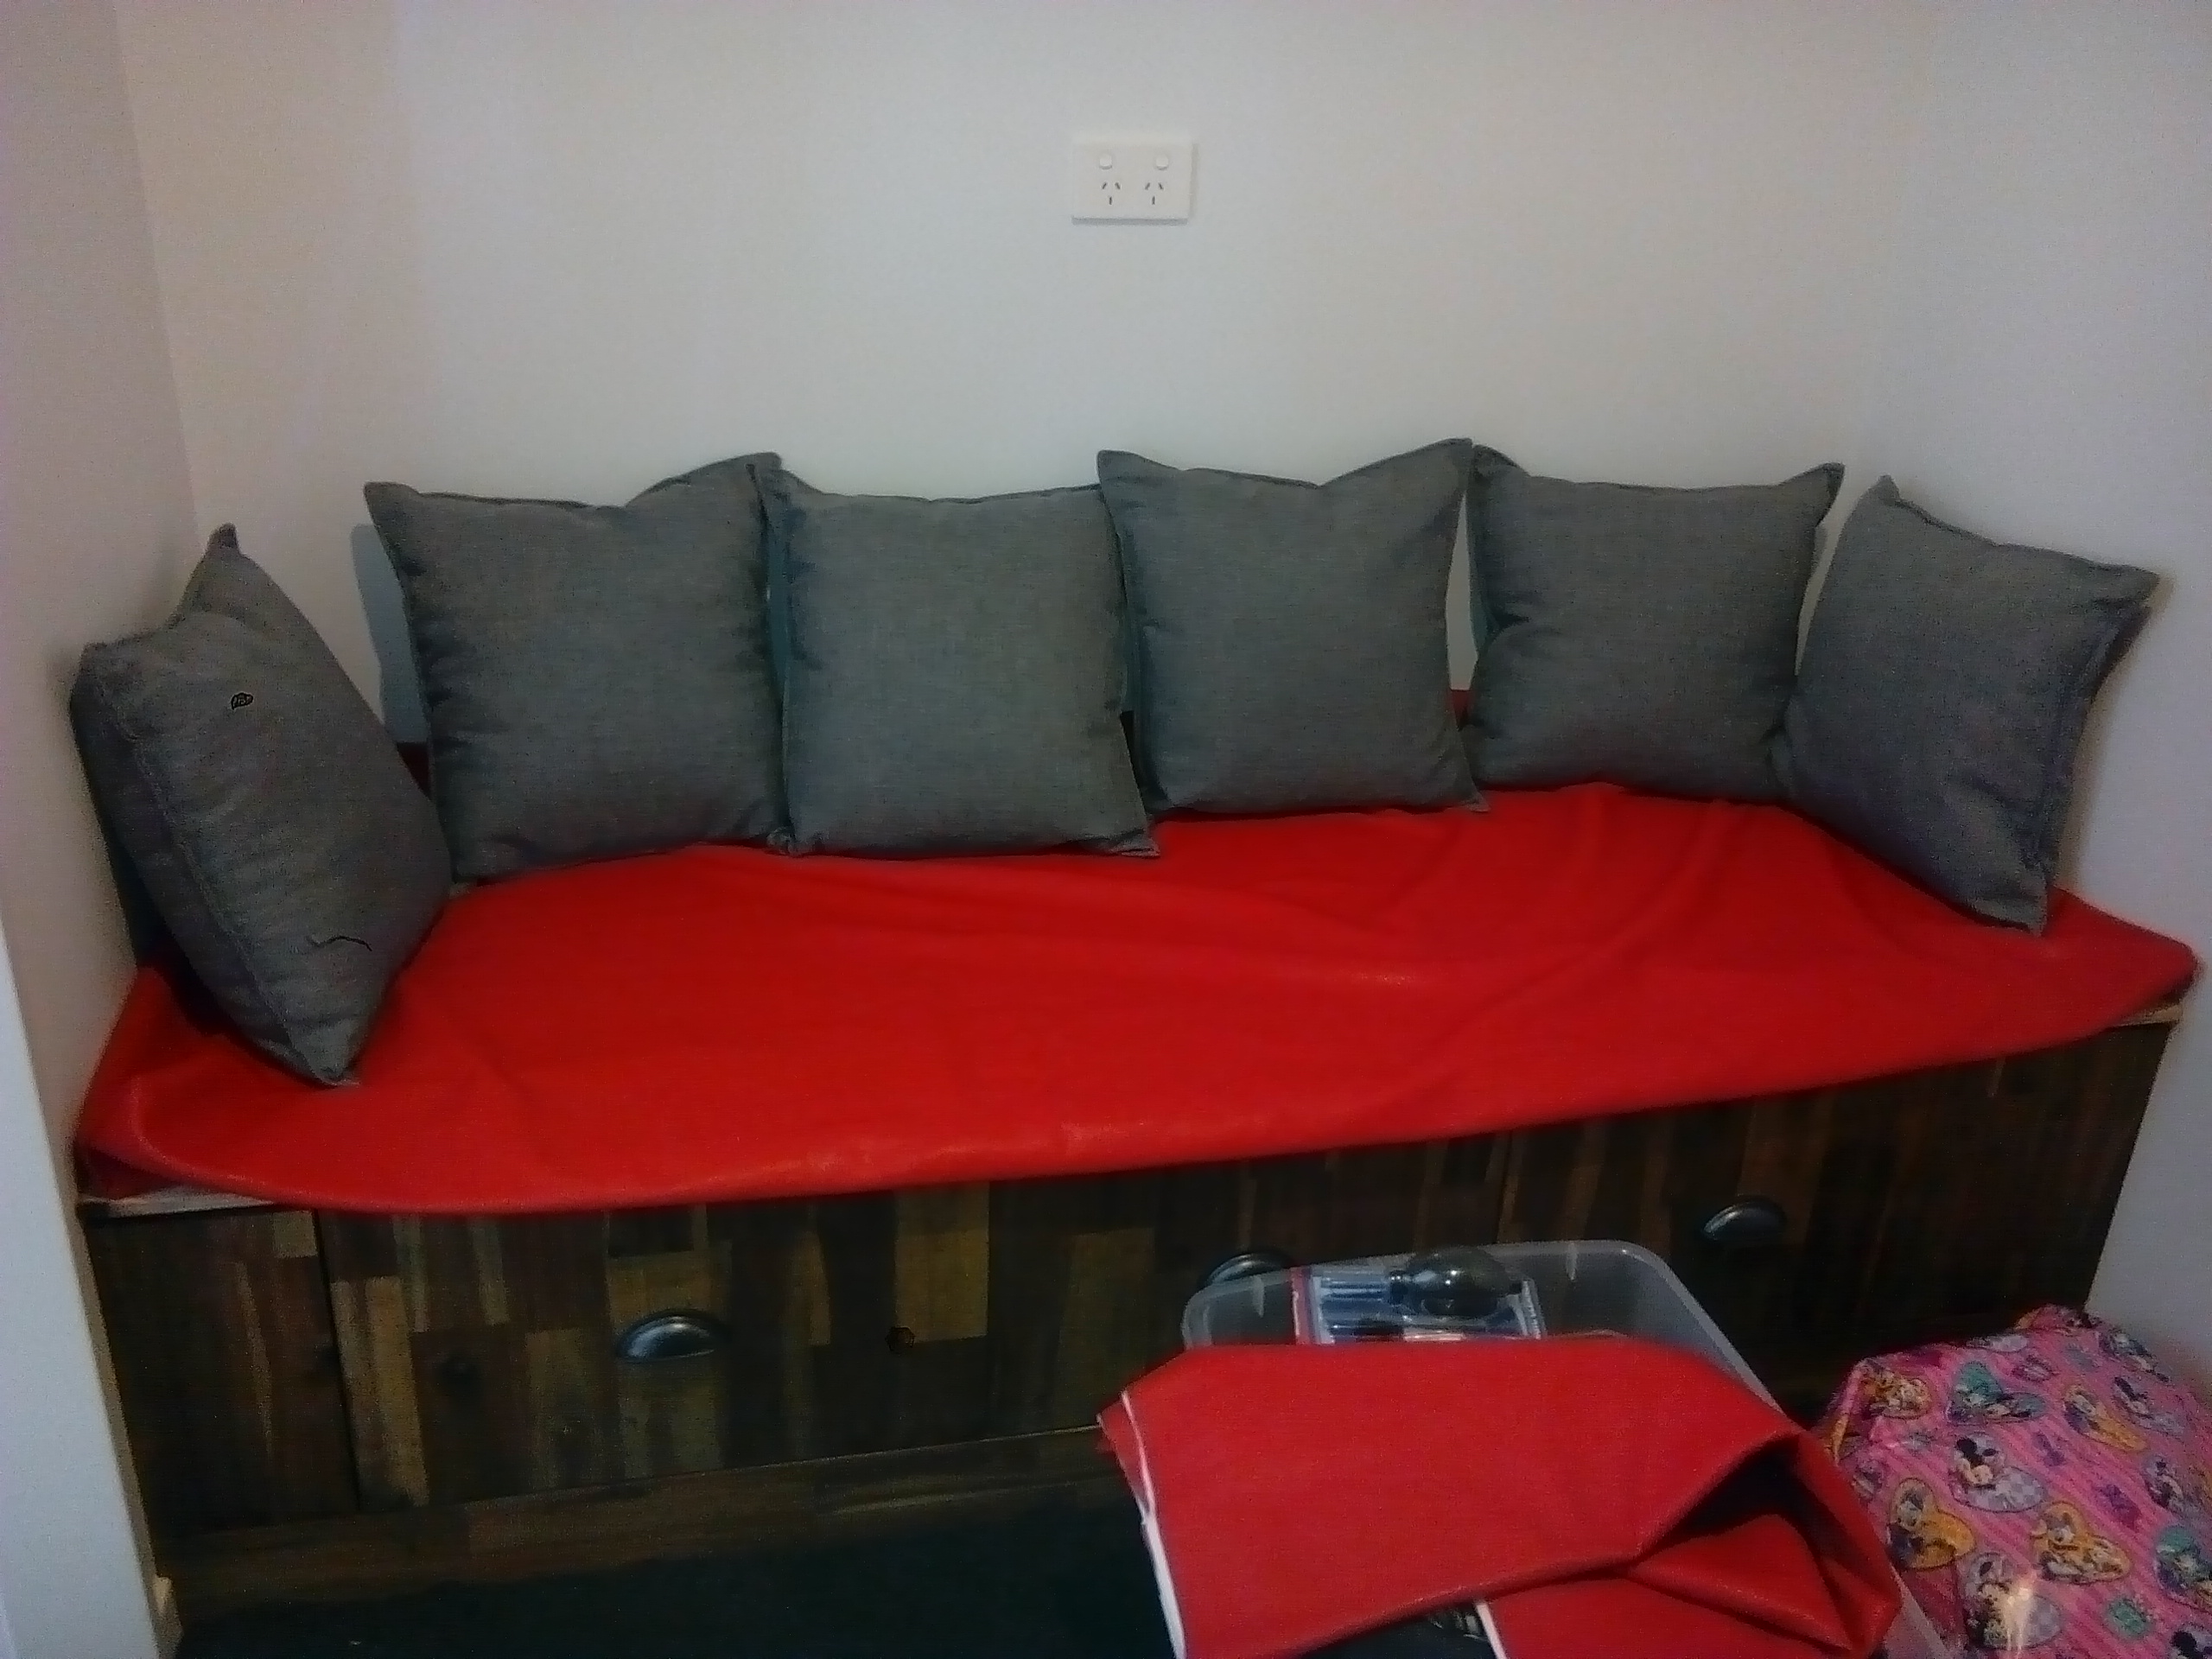
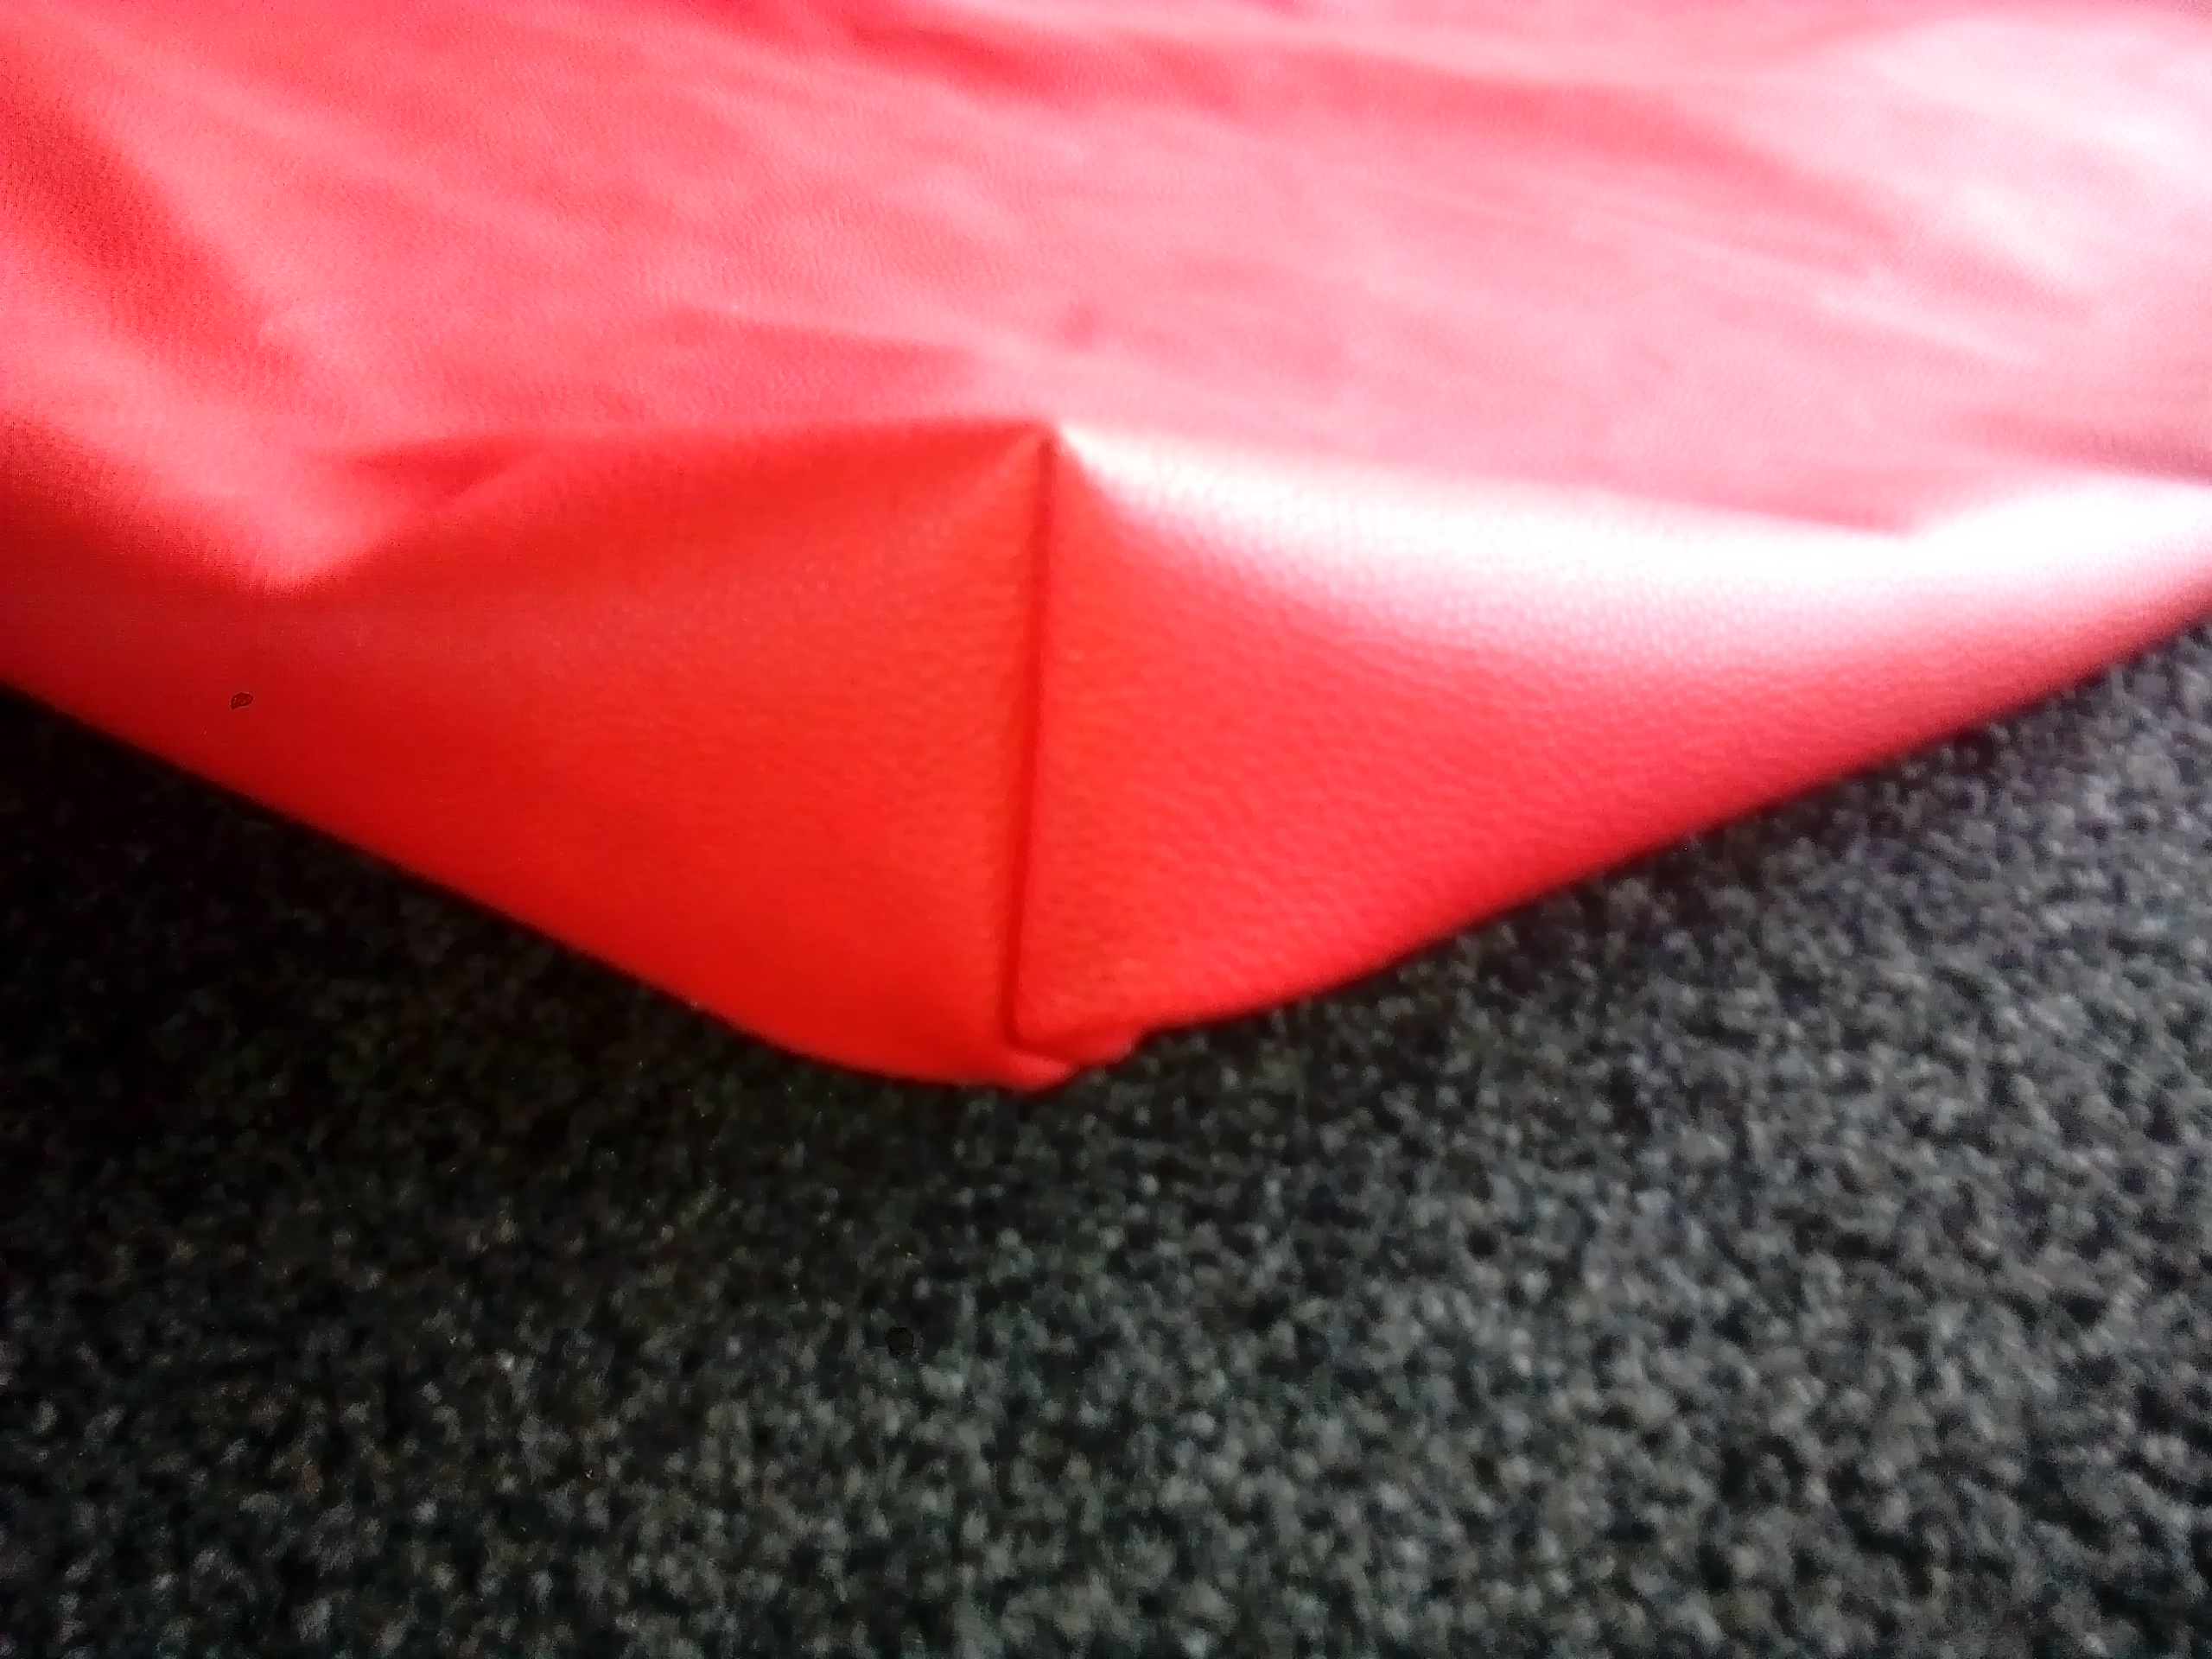
Here's what it will look like, just use you imagination as there's no foam in it yet.
-
Random slightly cool stuff you built but not worth its own thread, thread
Kimjon replied to h4nd's topic in Other Projects
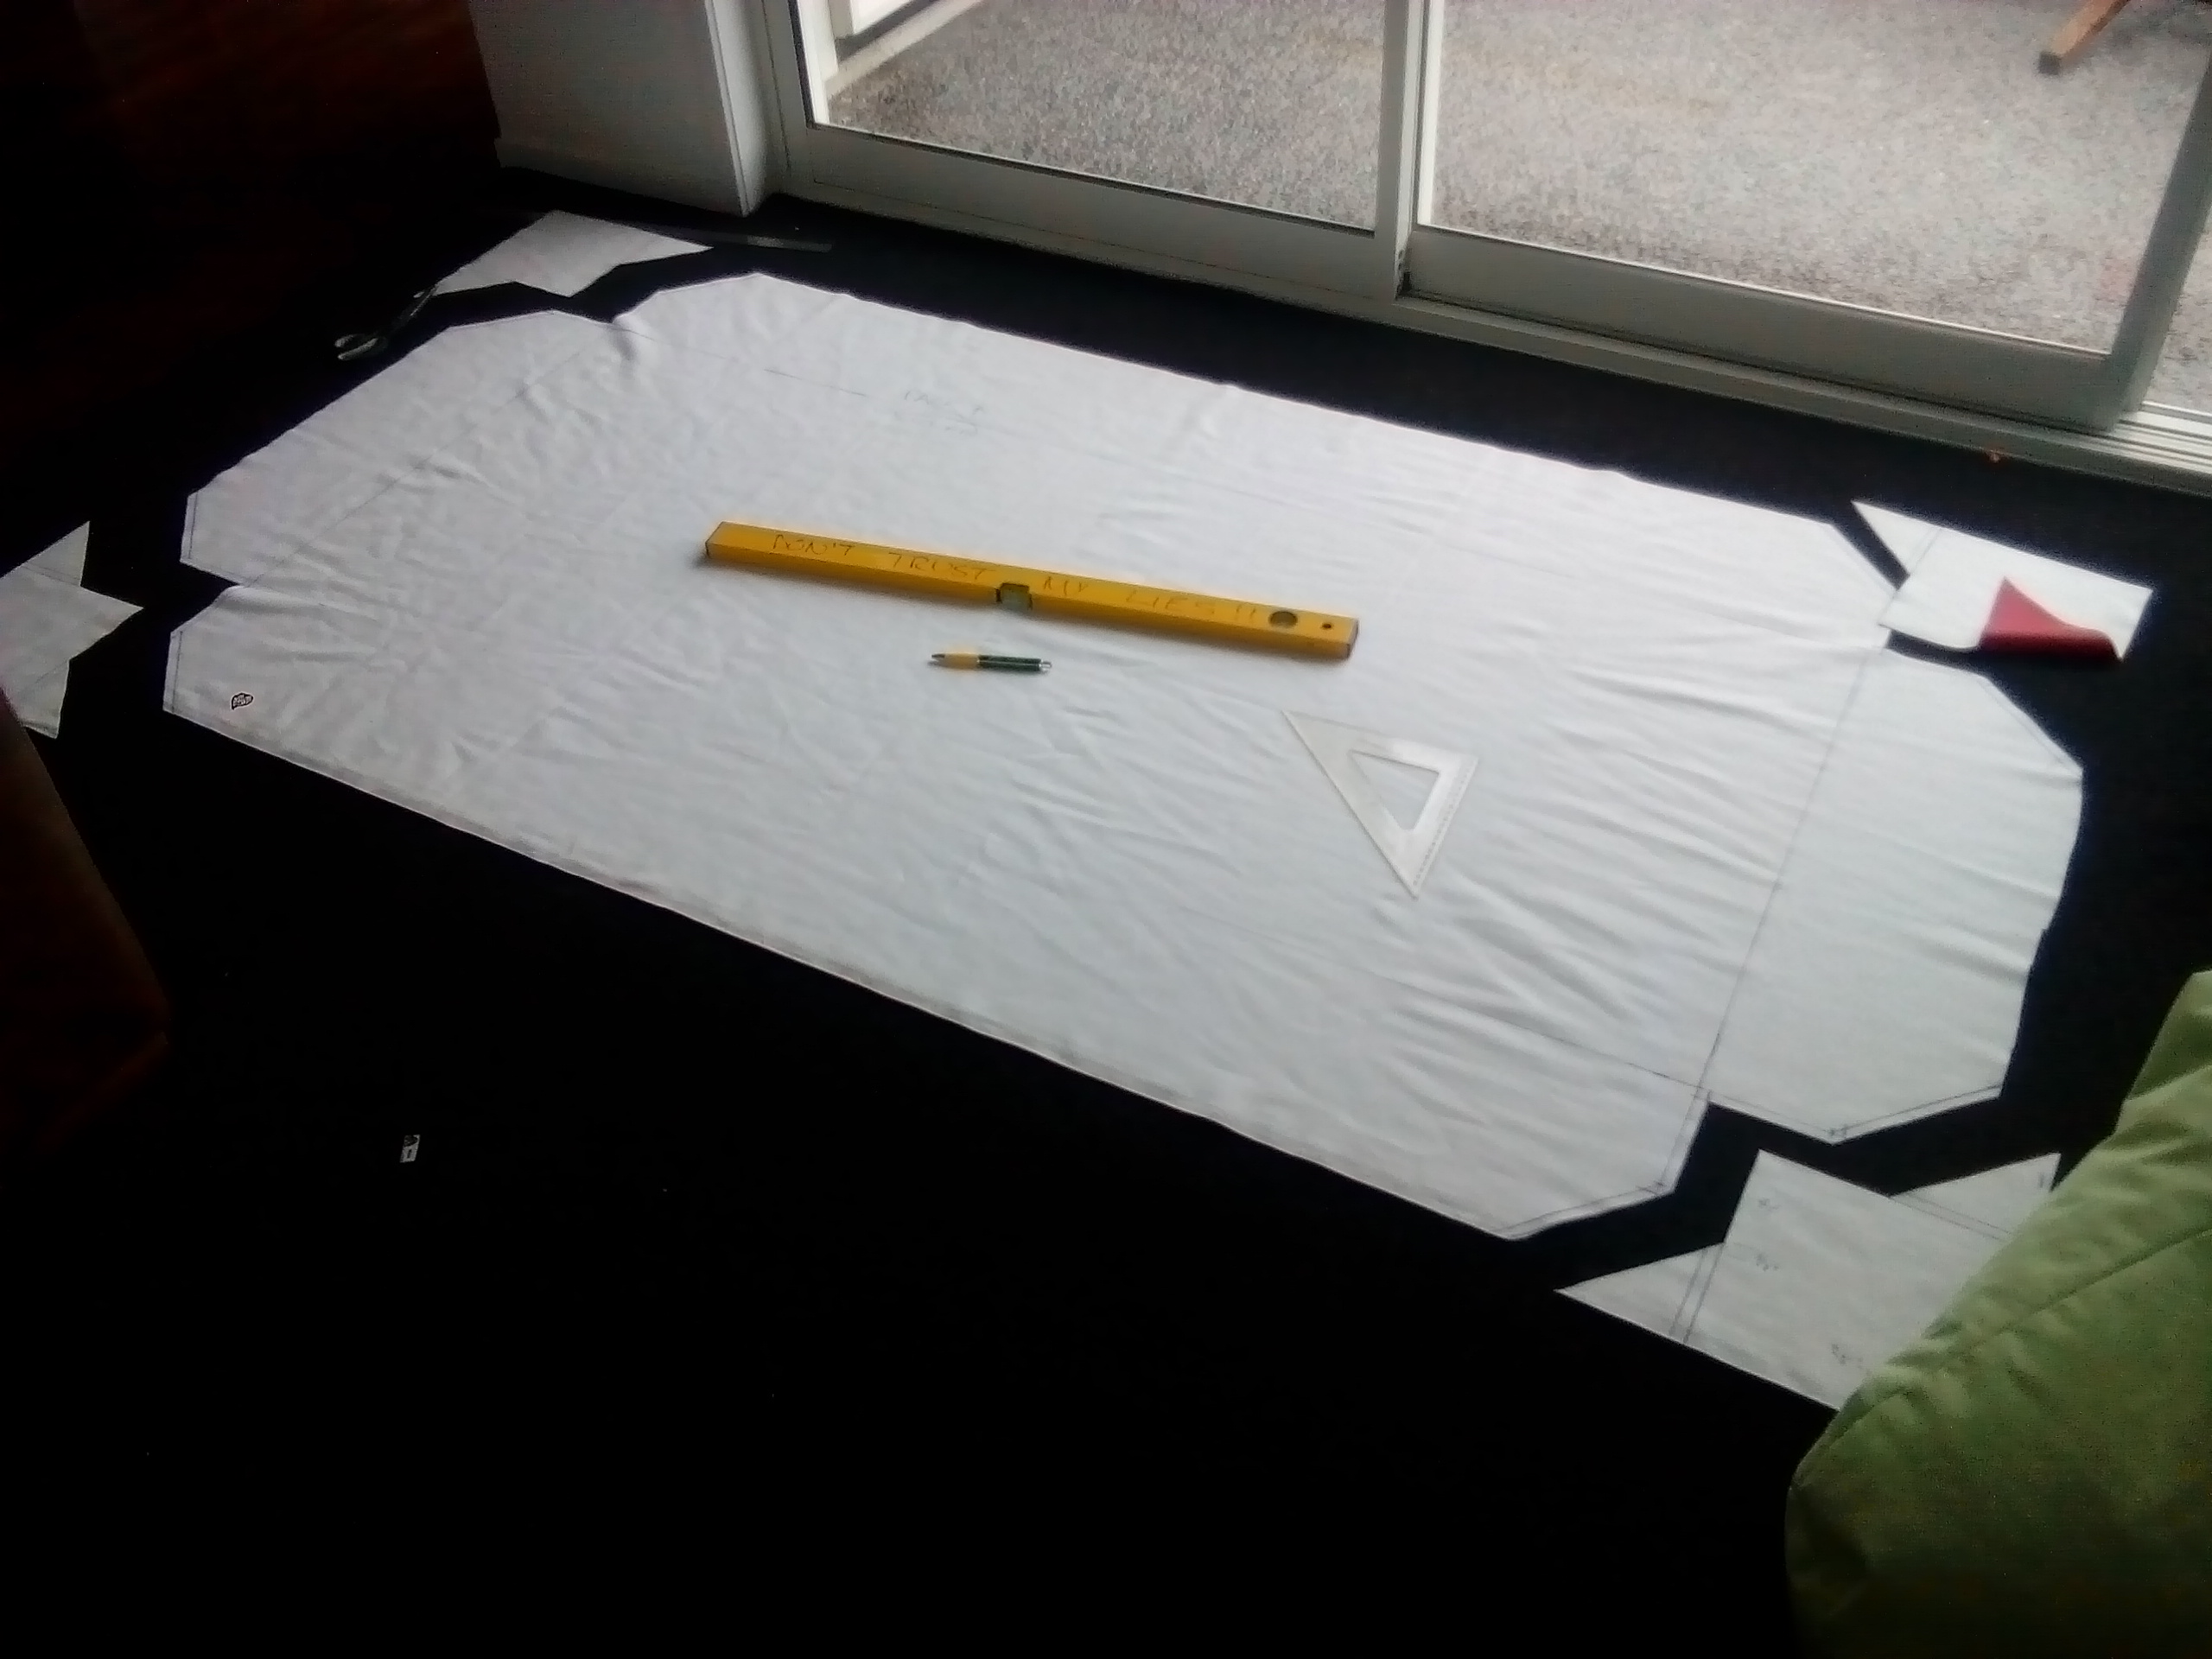
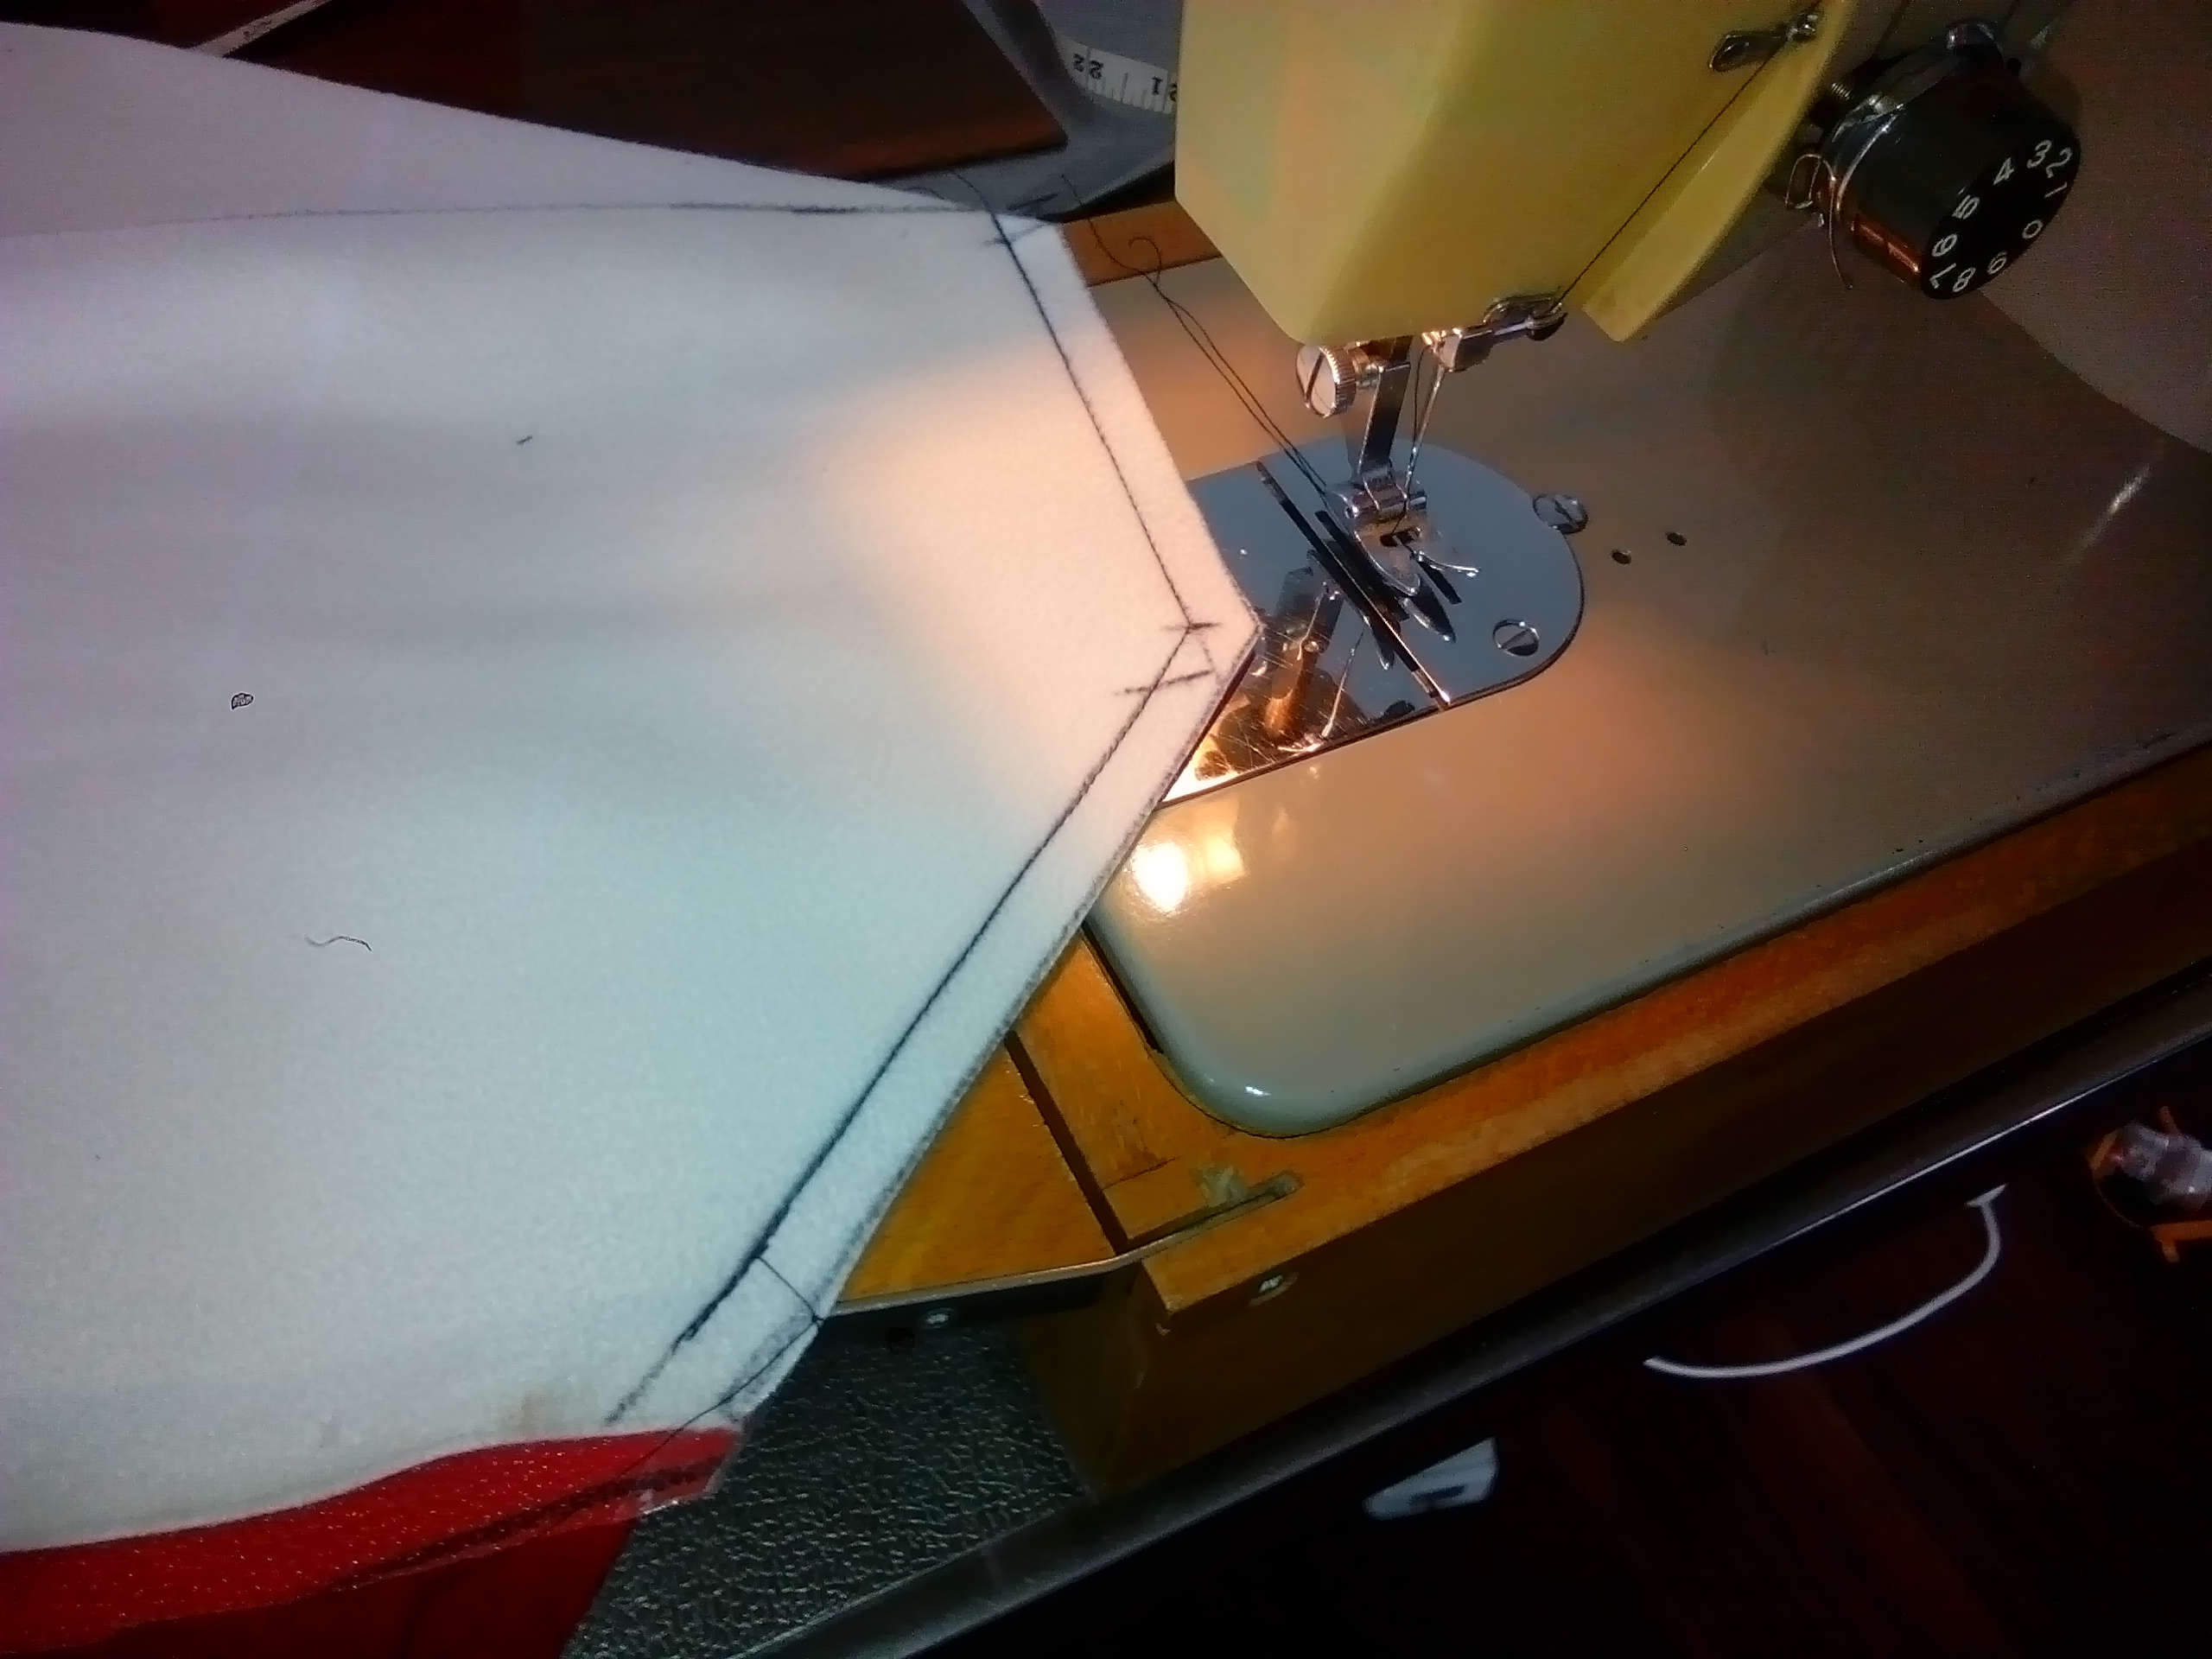
Brought a sewing machine off trademe for $14.60. Seriously, this has got to be the best value for money I've ever owned. Shit, you can't even get a decent feed at McDonalds for that coin these days. Anyway, I've put it to work. Did a few trials on scrap, watched YouTube for about 5 minutes to figure out why my first attempt was shit...then jumped right in. Like a boss!!! This will go on the filing cabinet bench seat in my wife's office. Just gotta get a foam mattress to go inside it to finish.
-
Kimjon's not as cool or epic as Muncie's off-road goped Bigfoot scooter thingy
Kimjon replied to Kimjon's topic in Two Wheels
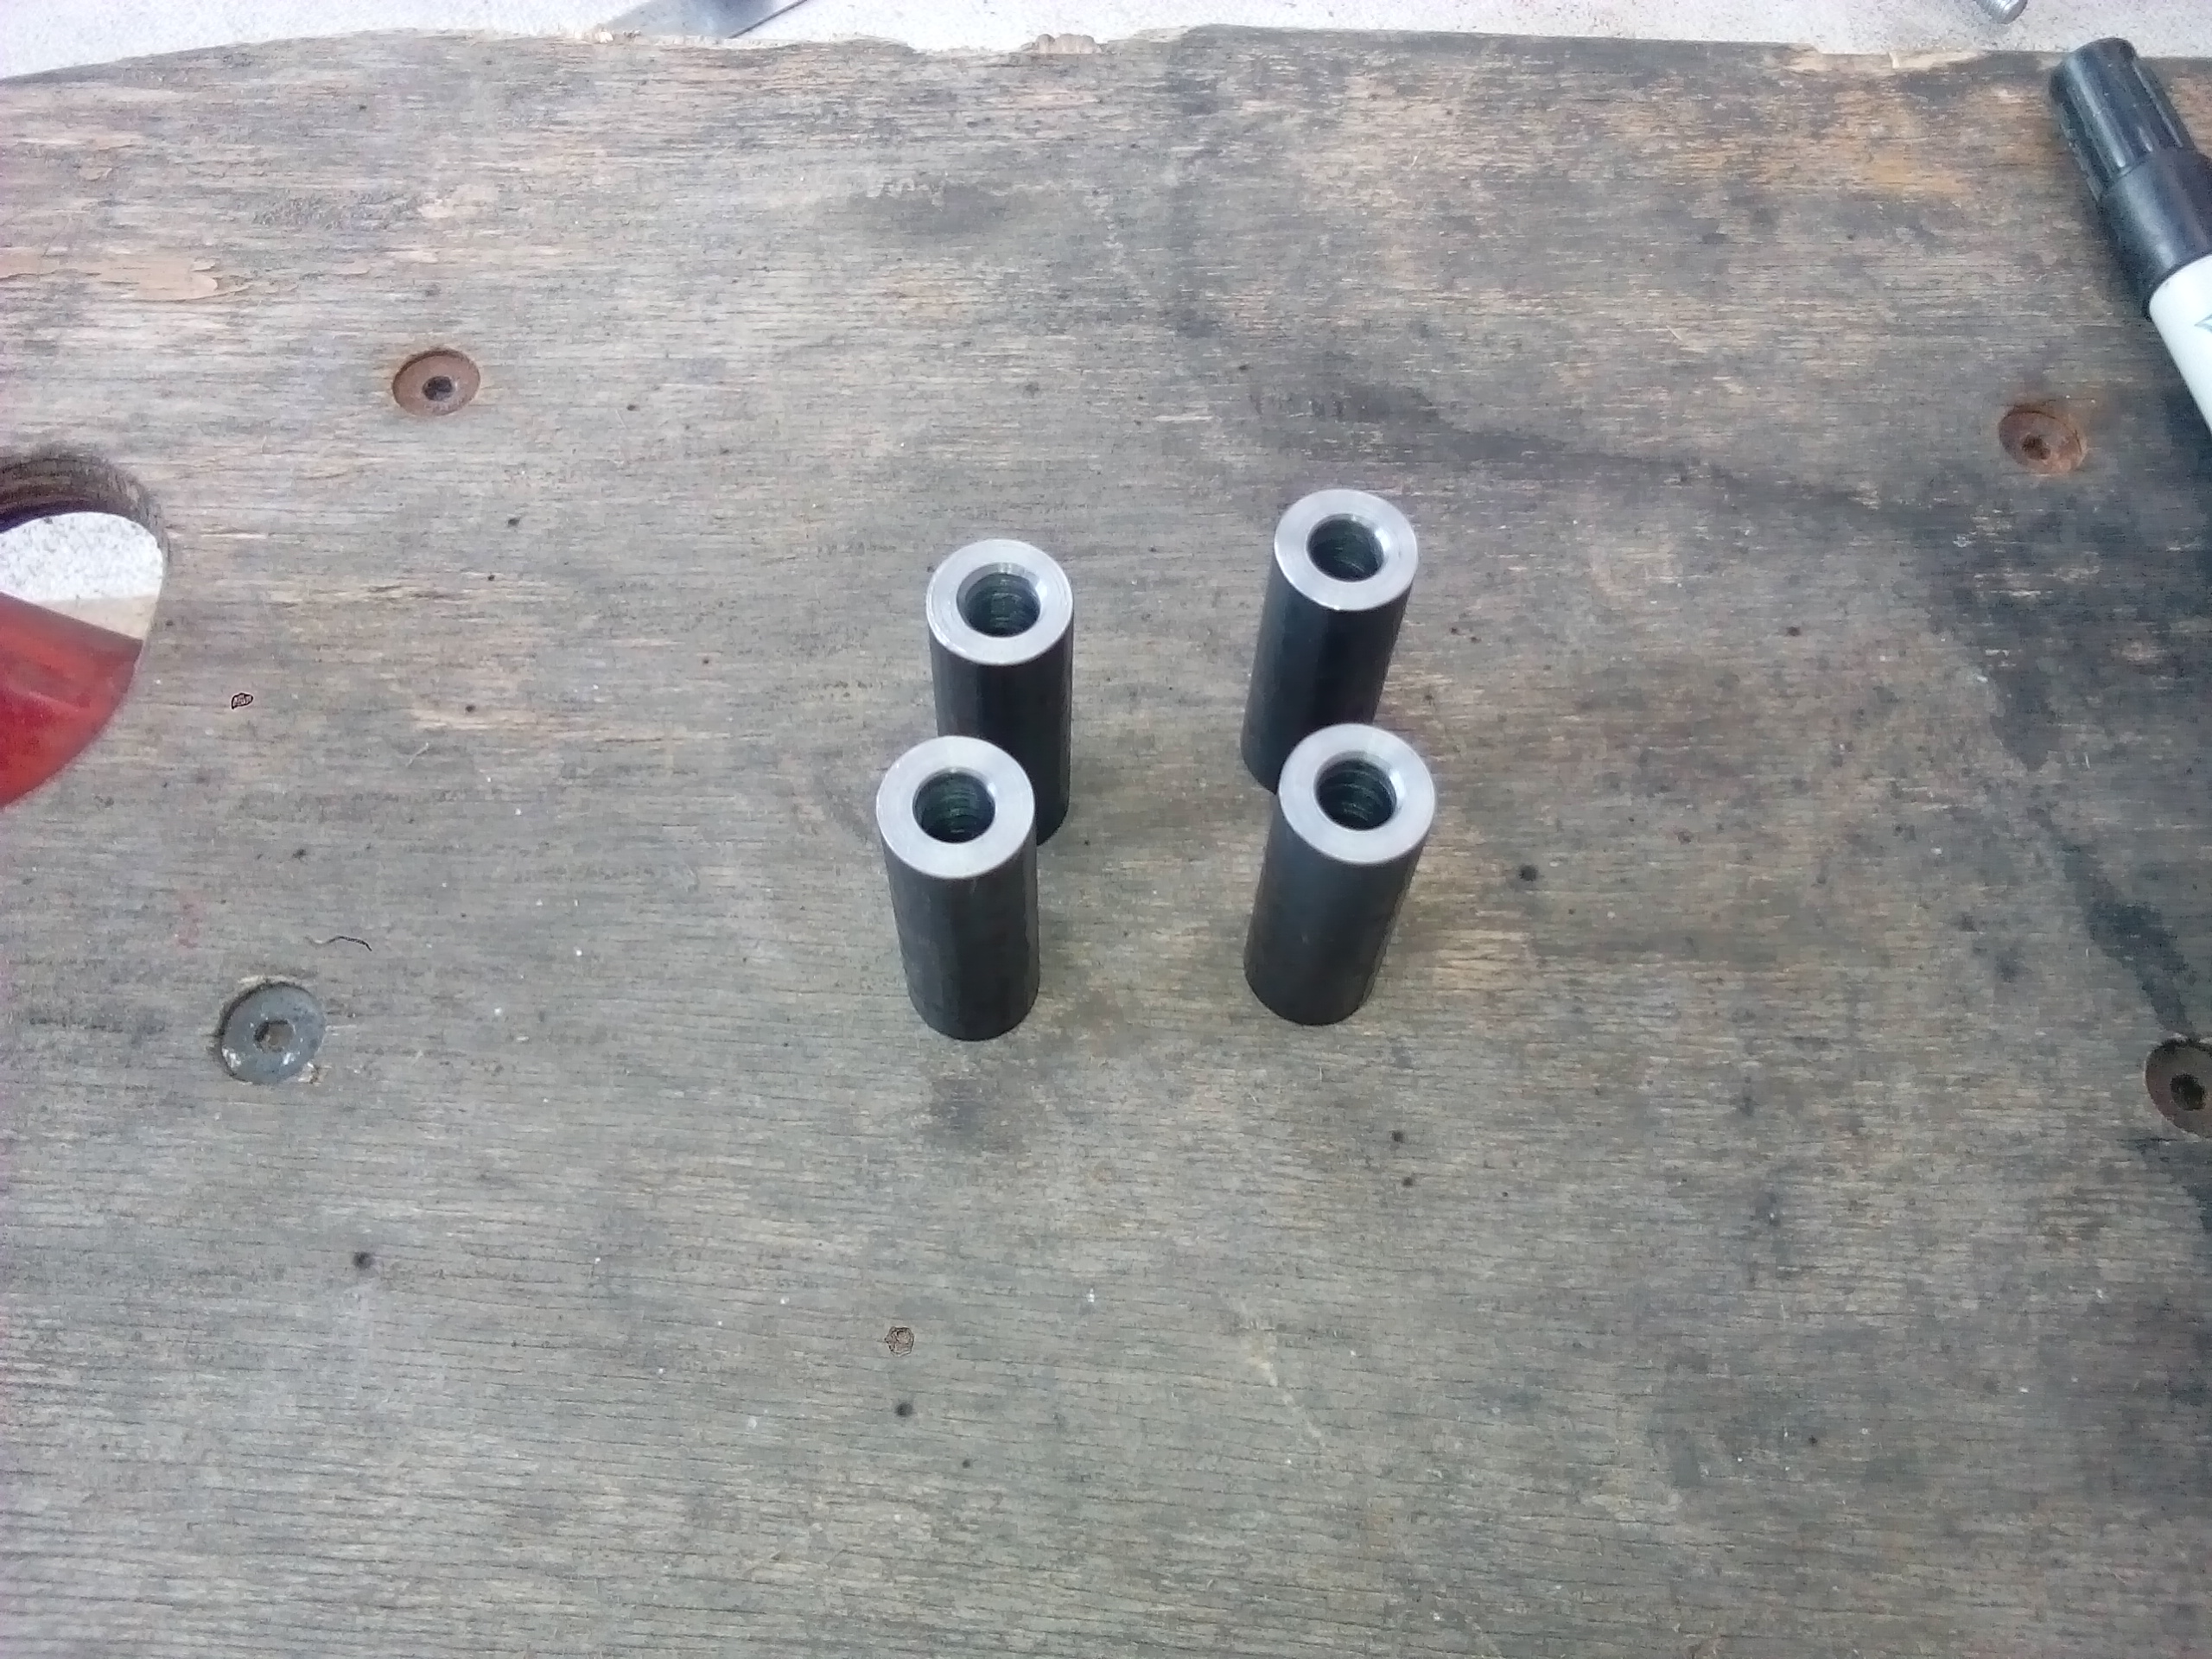
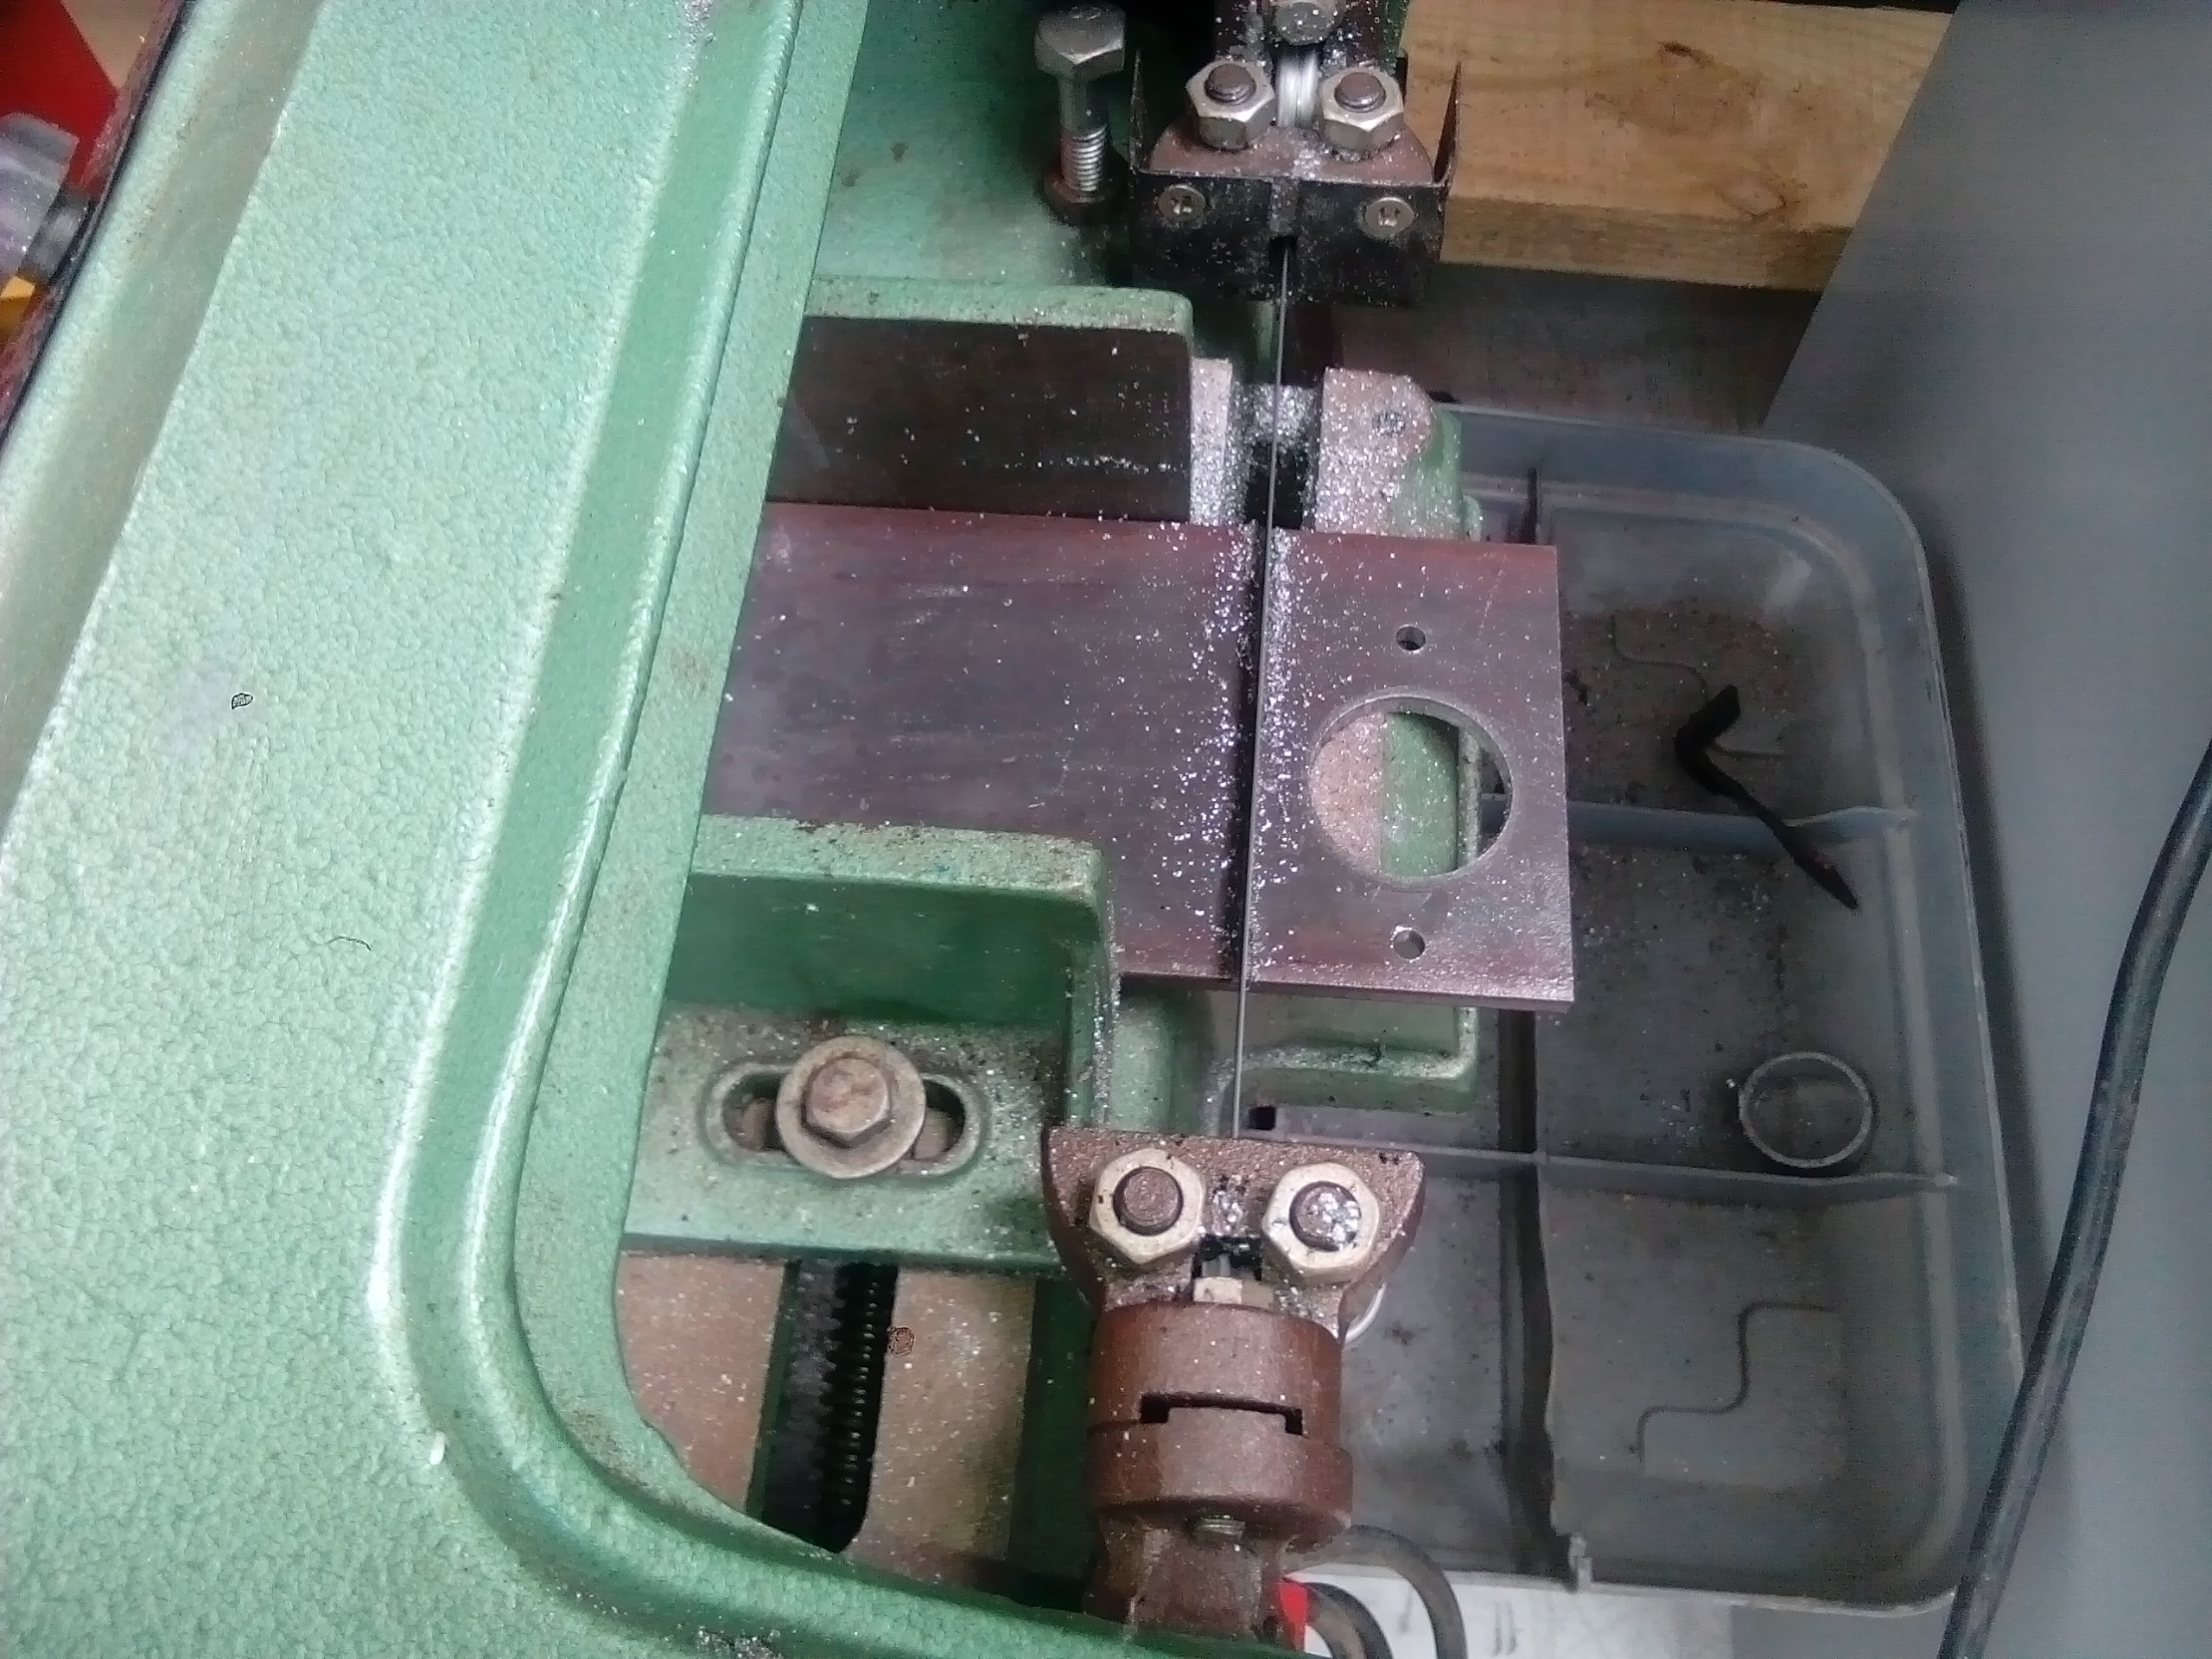
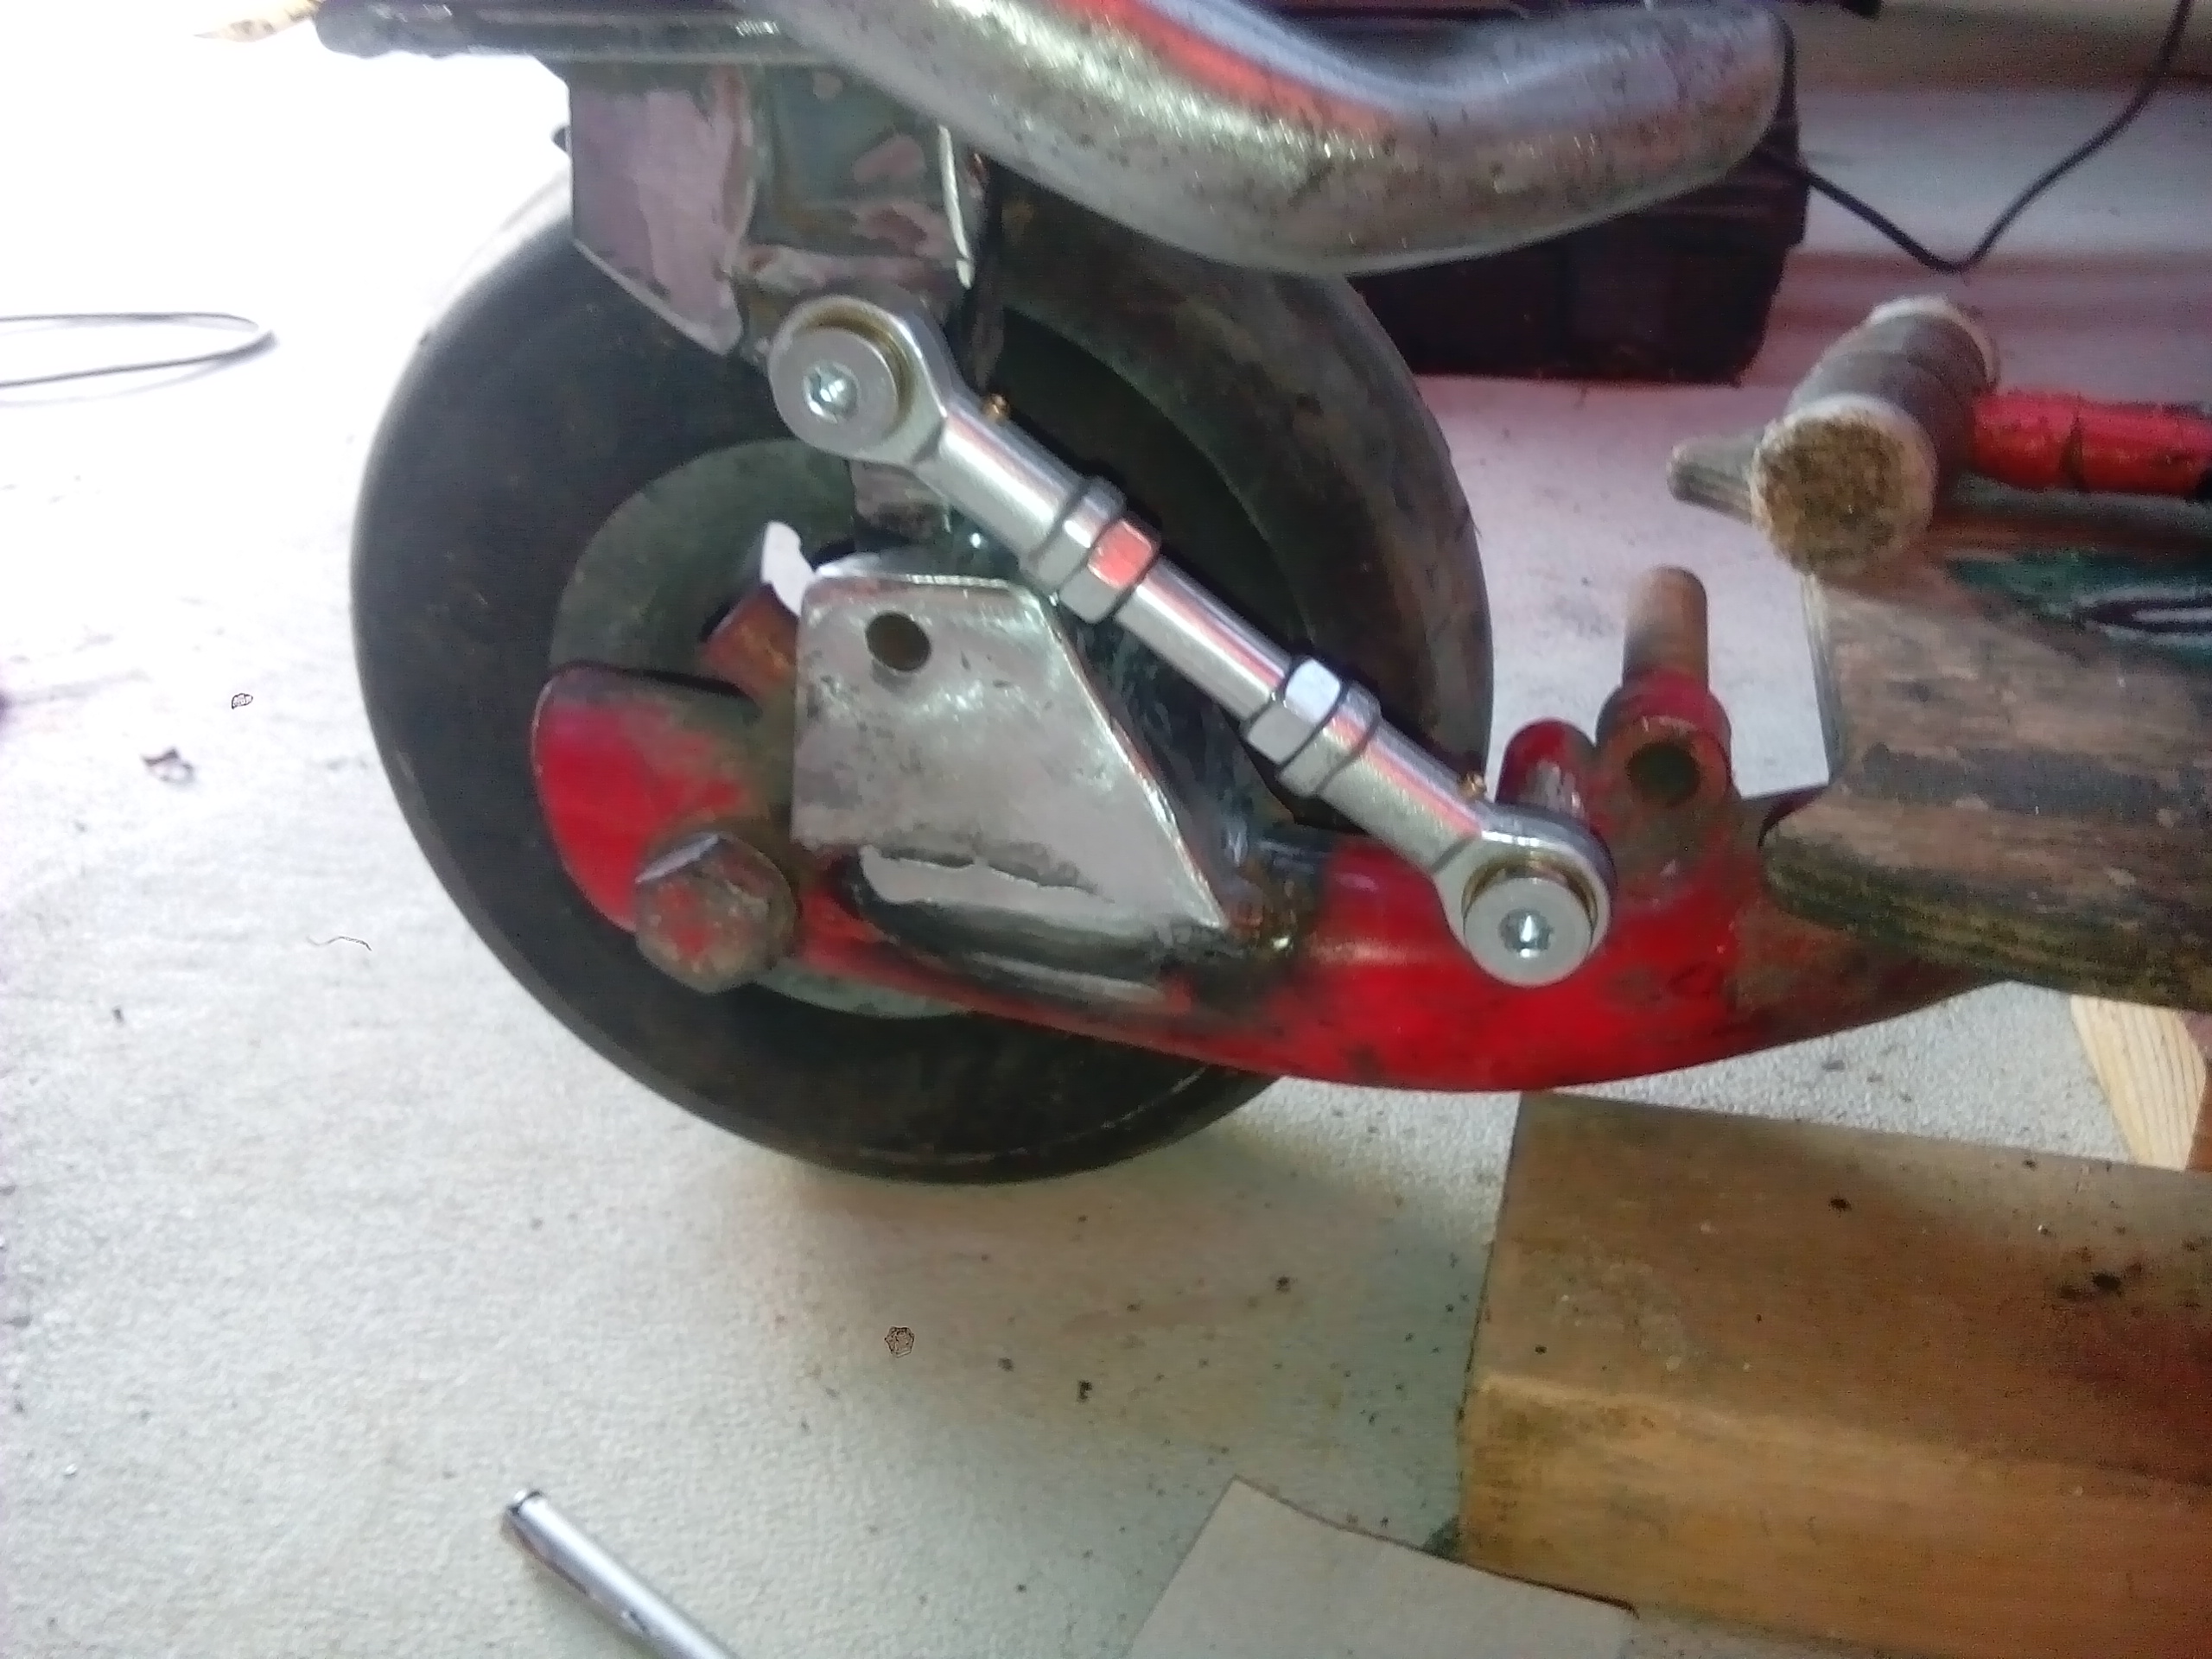
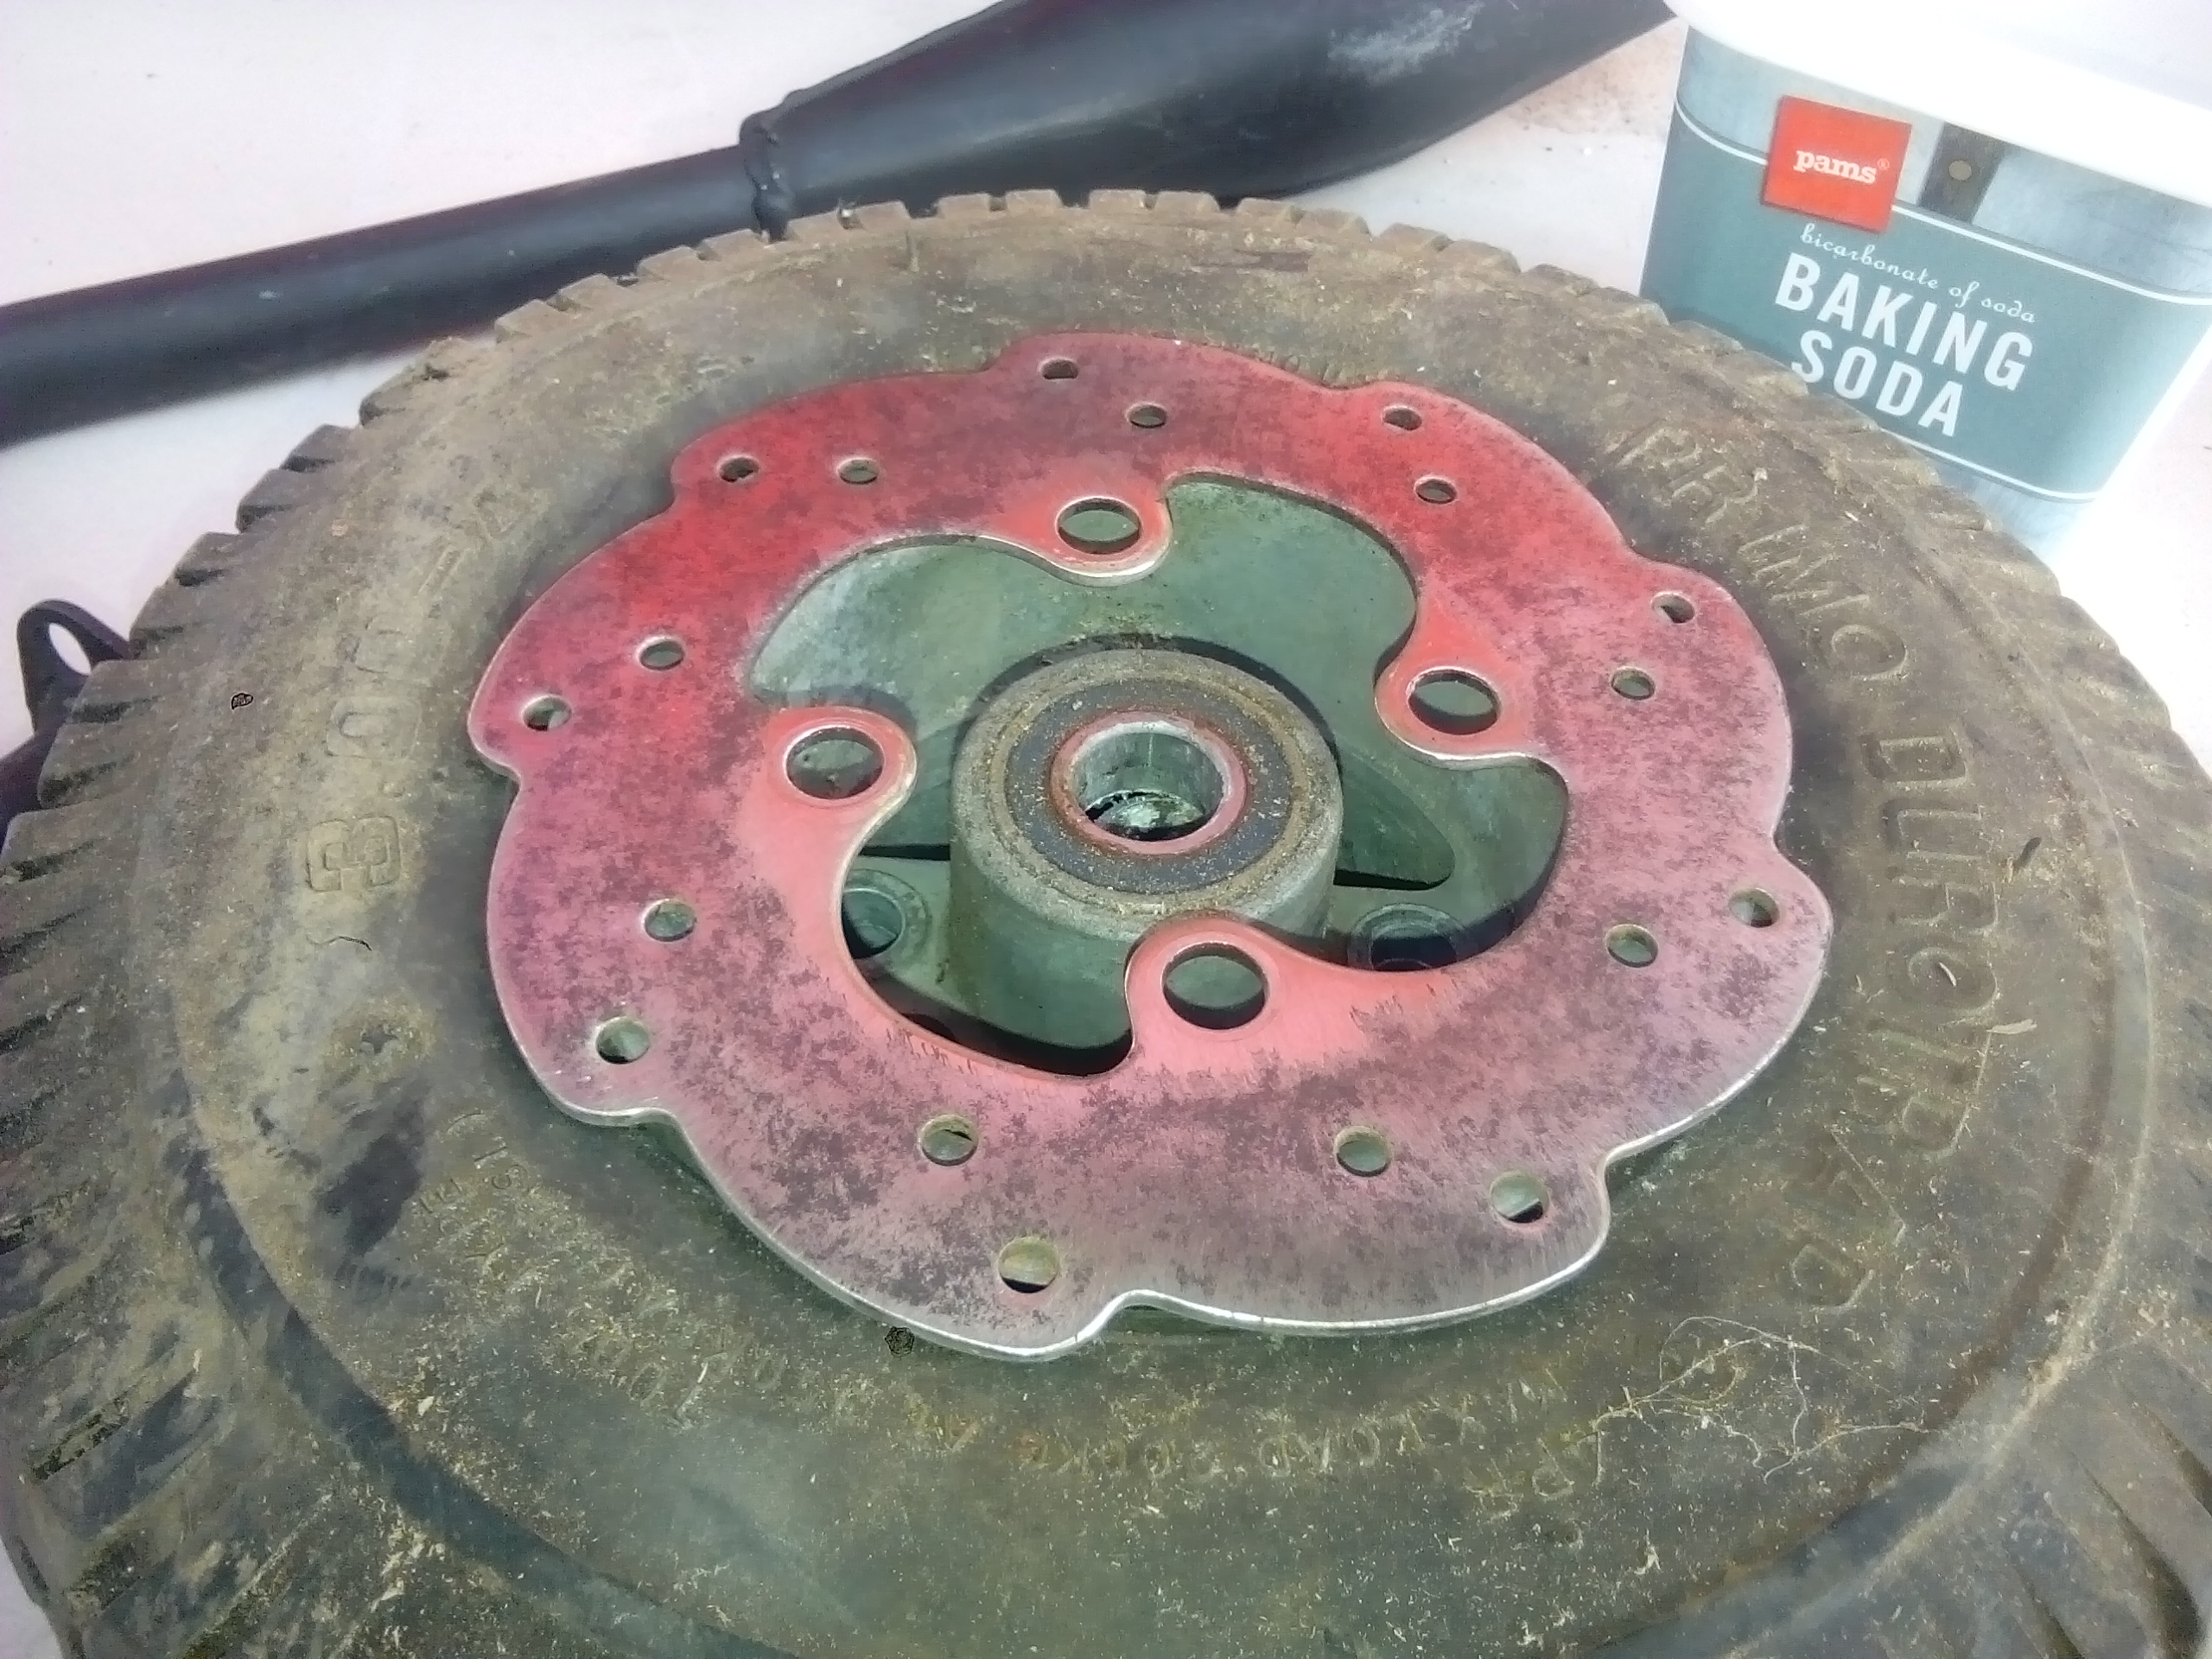
To adapt this to run on a sprocket (which it was never intended to do), I machined up some spacers that will set the gap between the tyre and the sprocket. These are all exactly 44mm long, which is the required distance from the hub face to the inside face of the sprocket. A long bolt will hold the two wheel hubs together and carry on through the spacers and pick up the sprocket.
-
Kimjon's not as cool or epic as Muncie's off-road goped Bigfoot scooter thingy
Kimjon replied to Kimjon's topic in Two Wheels
Added a fender. I'm using a mini quad rear mud guard which I had to trim down about 20mm, but otherwise a perfect fit. Here I'm setting the angle I want it to be, then welding it in place. And fitted in place.
-
I used a pit bike exhaust like this on the "Mike-trike" and it sounds amazing! https://m.ebay.com/itm/Pit-Dirt-Bike-110cc-125cc-140cc-Performance-CNC-Exhaust-Pipe-System-Muffler/112543077898?hash=item1a3417160a:g:lt4AAOSw4INZo97Q Soft quiet idle, then roars like a lion at WOT. I only paid $33 with free delivery from China door to door. It keeps the obscene noise levels down for neighborly relations
-
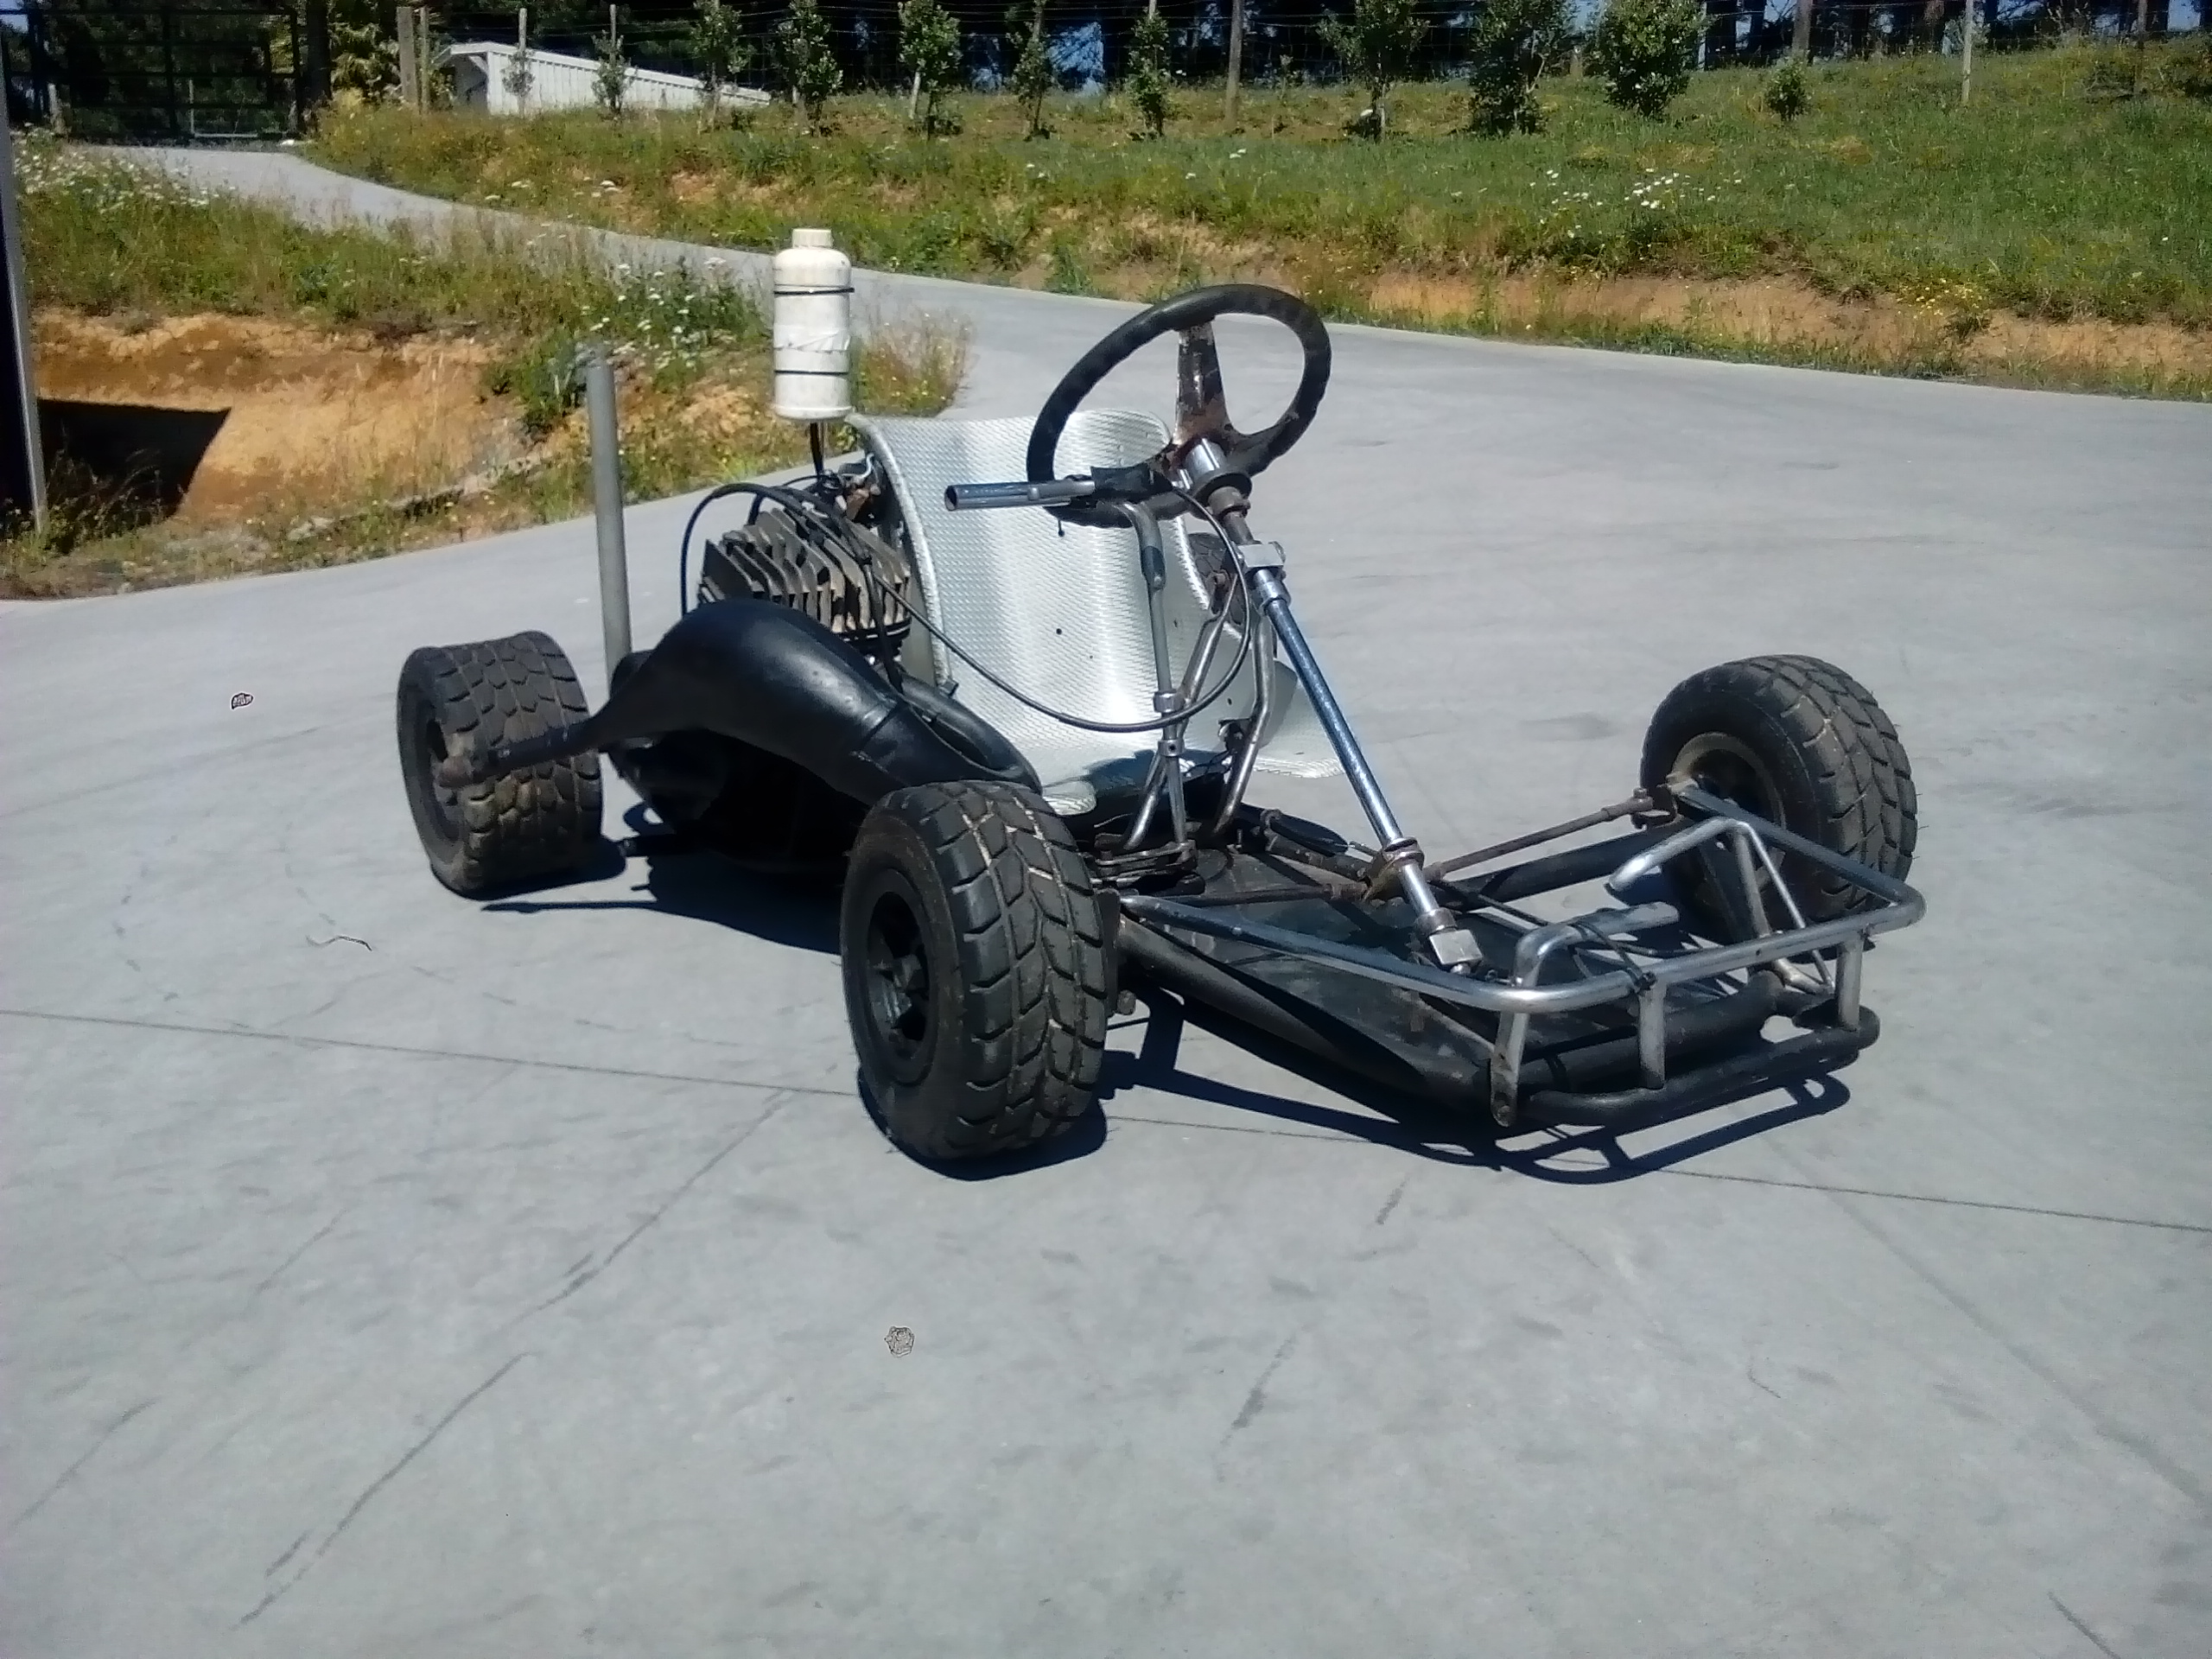
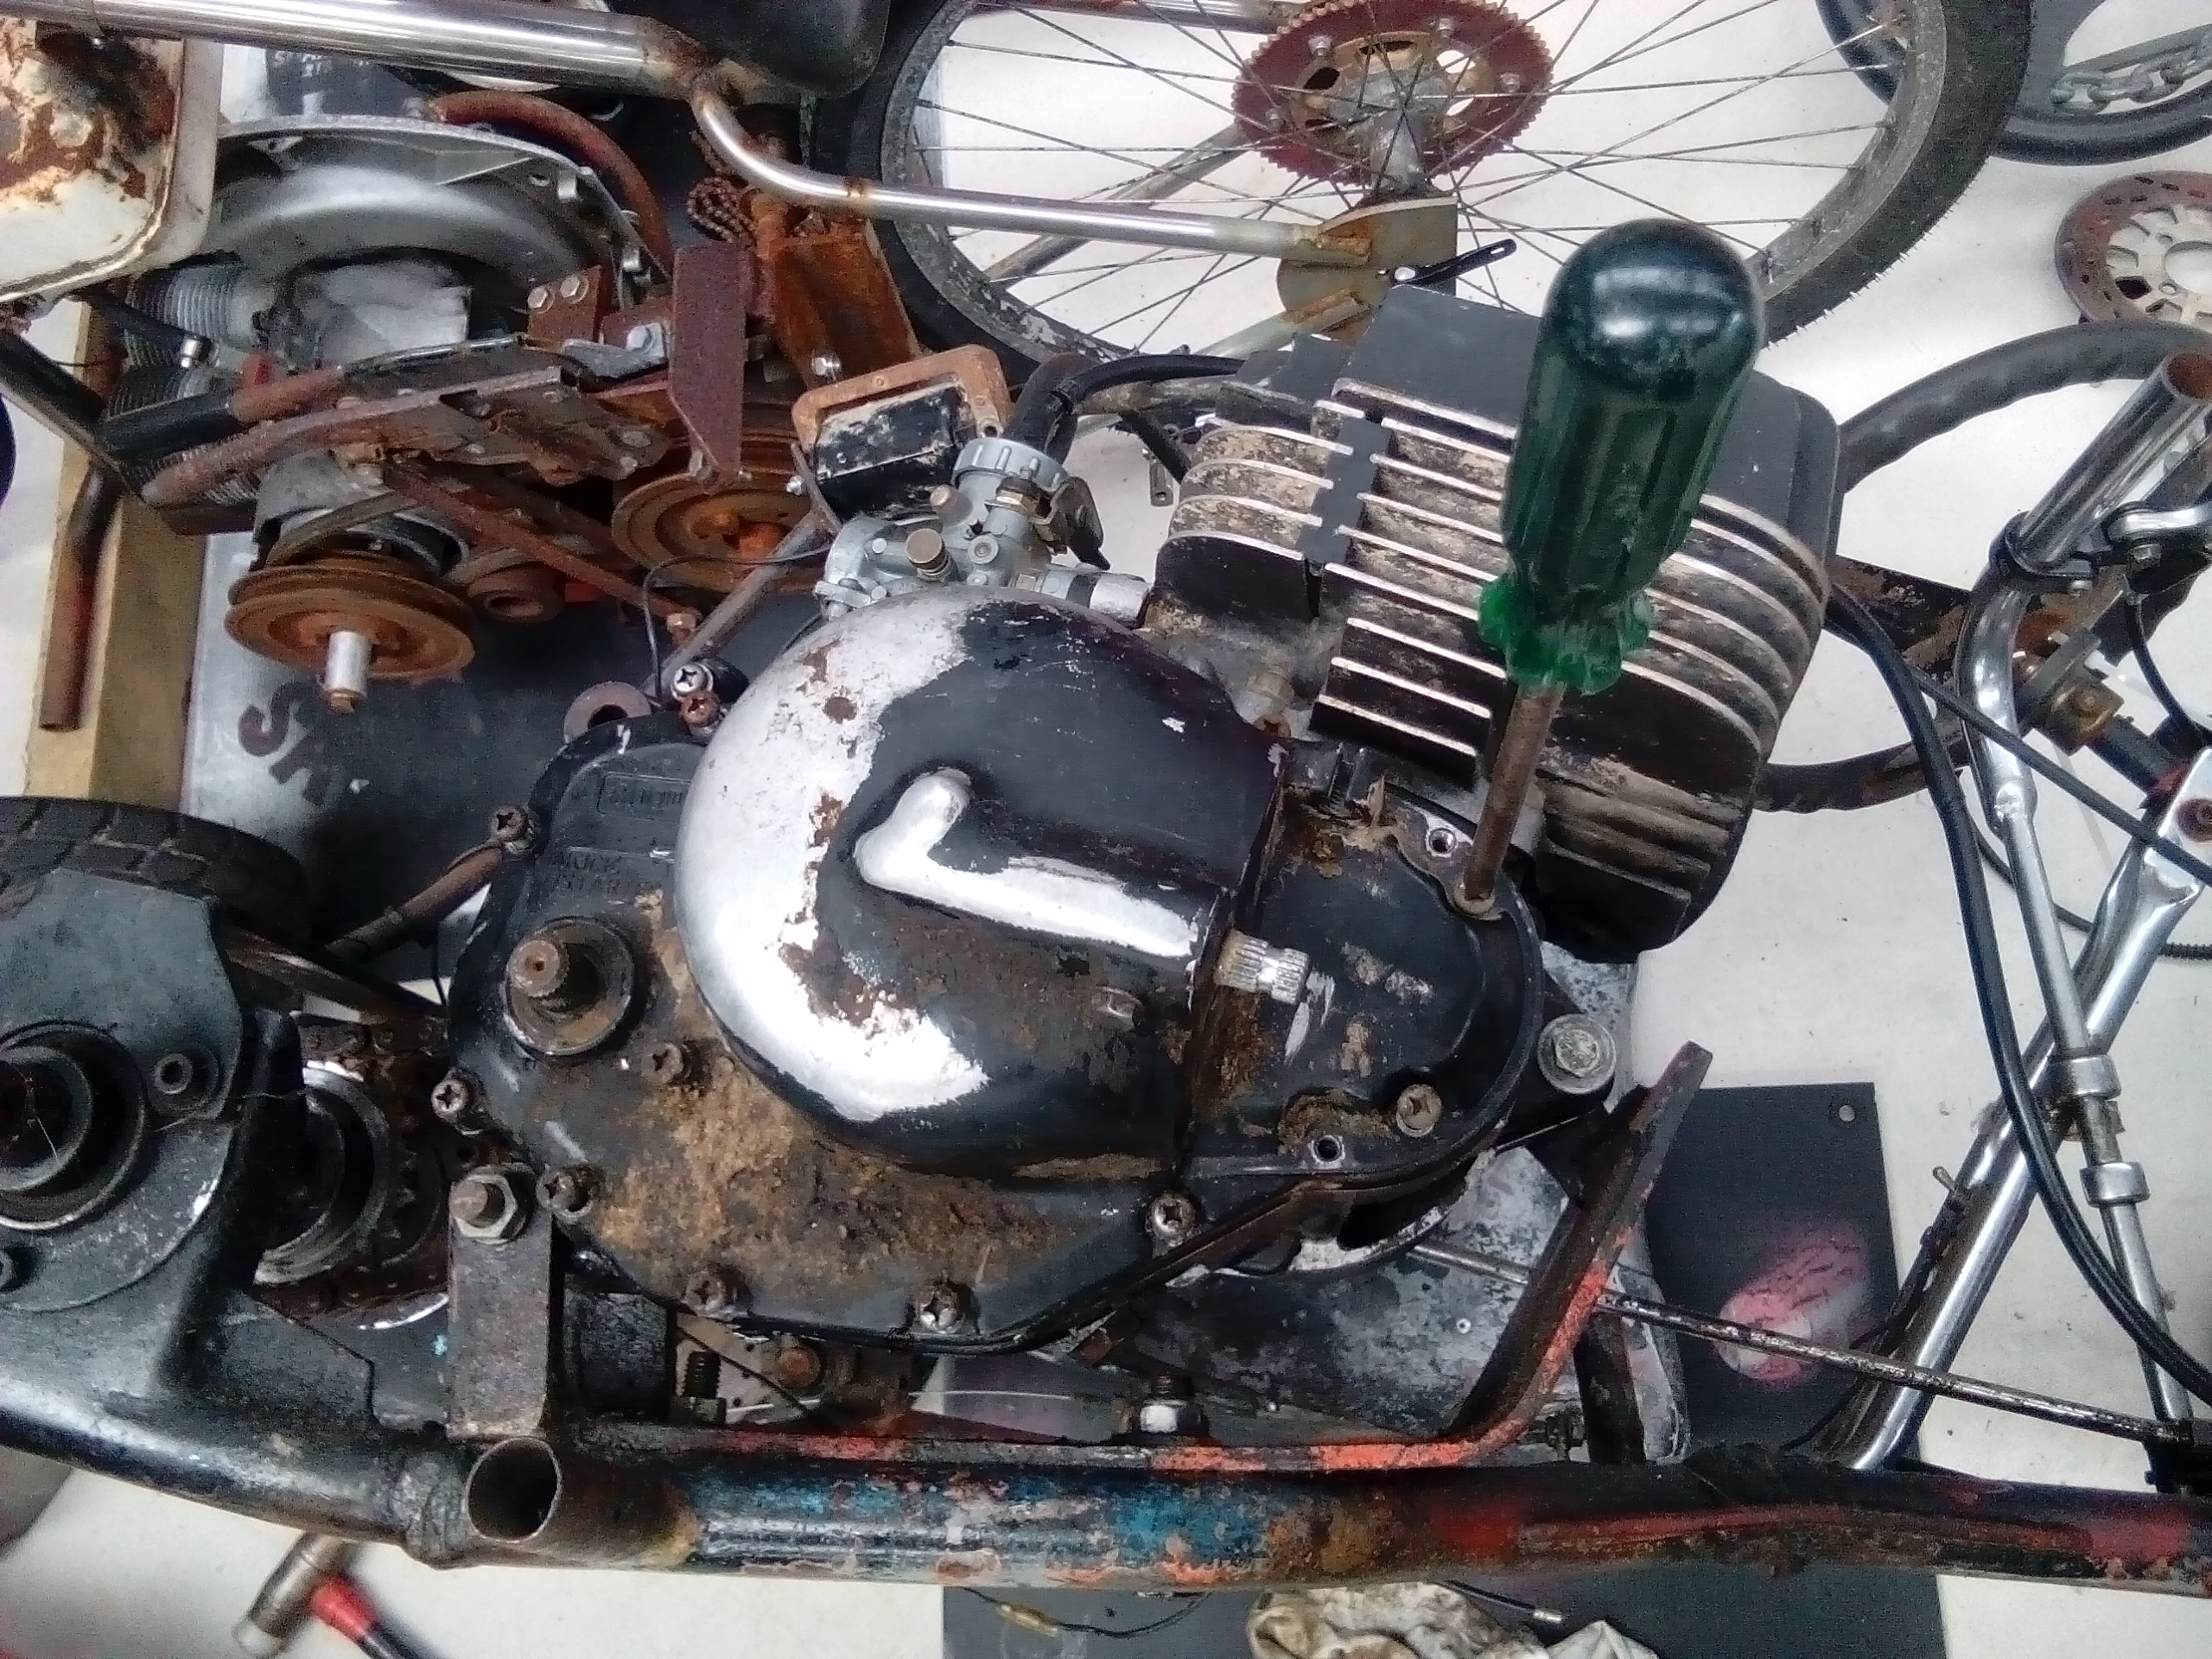
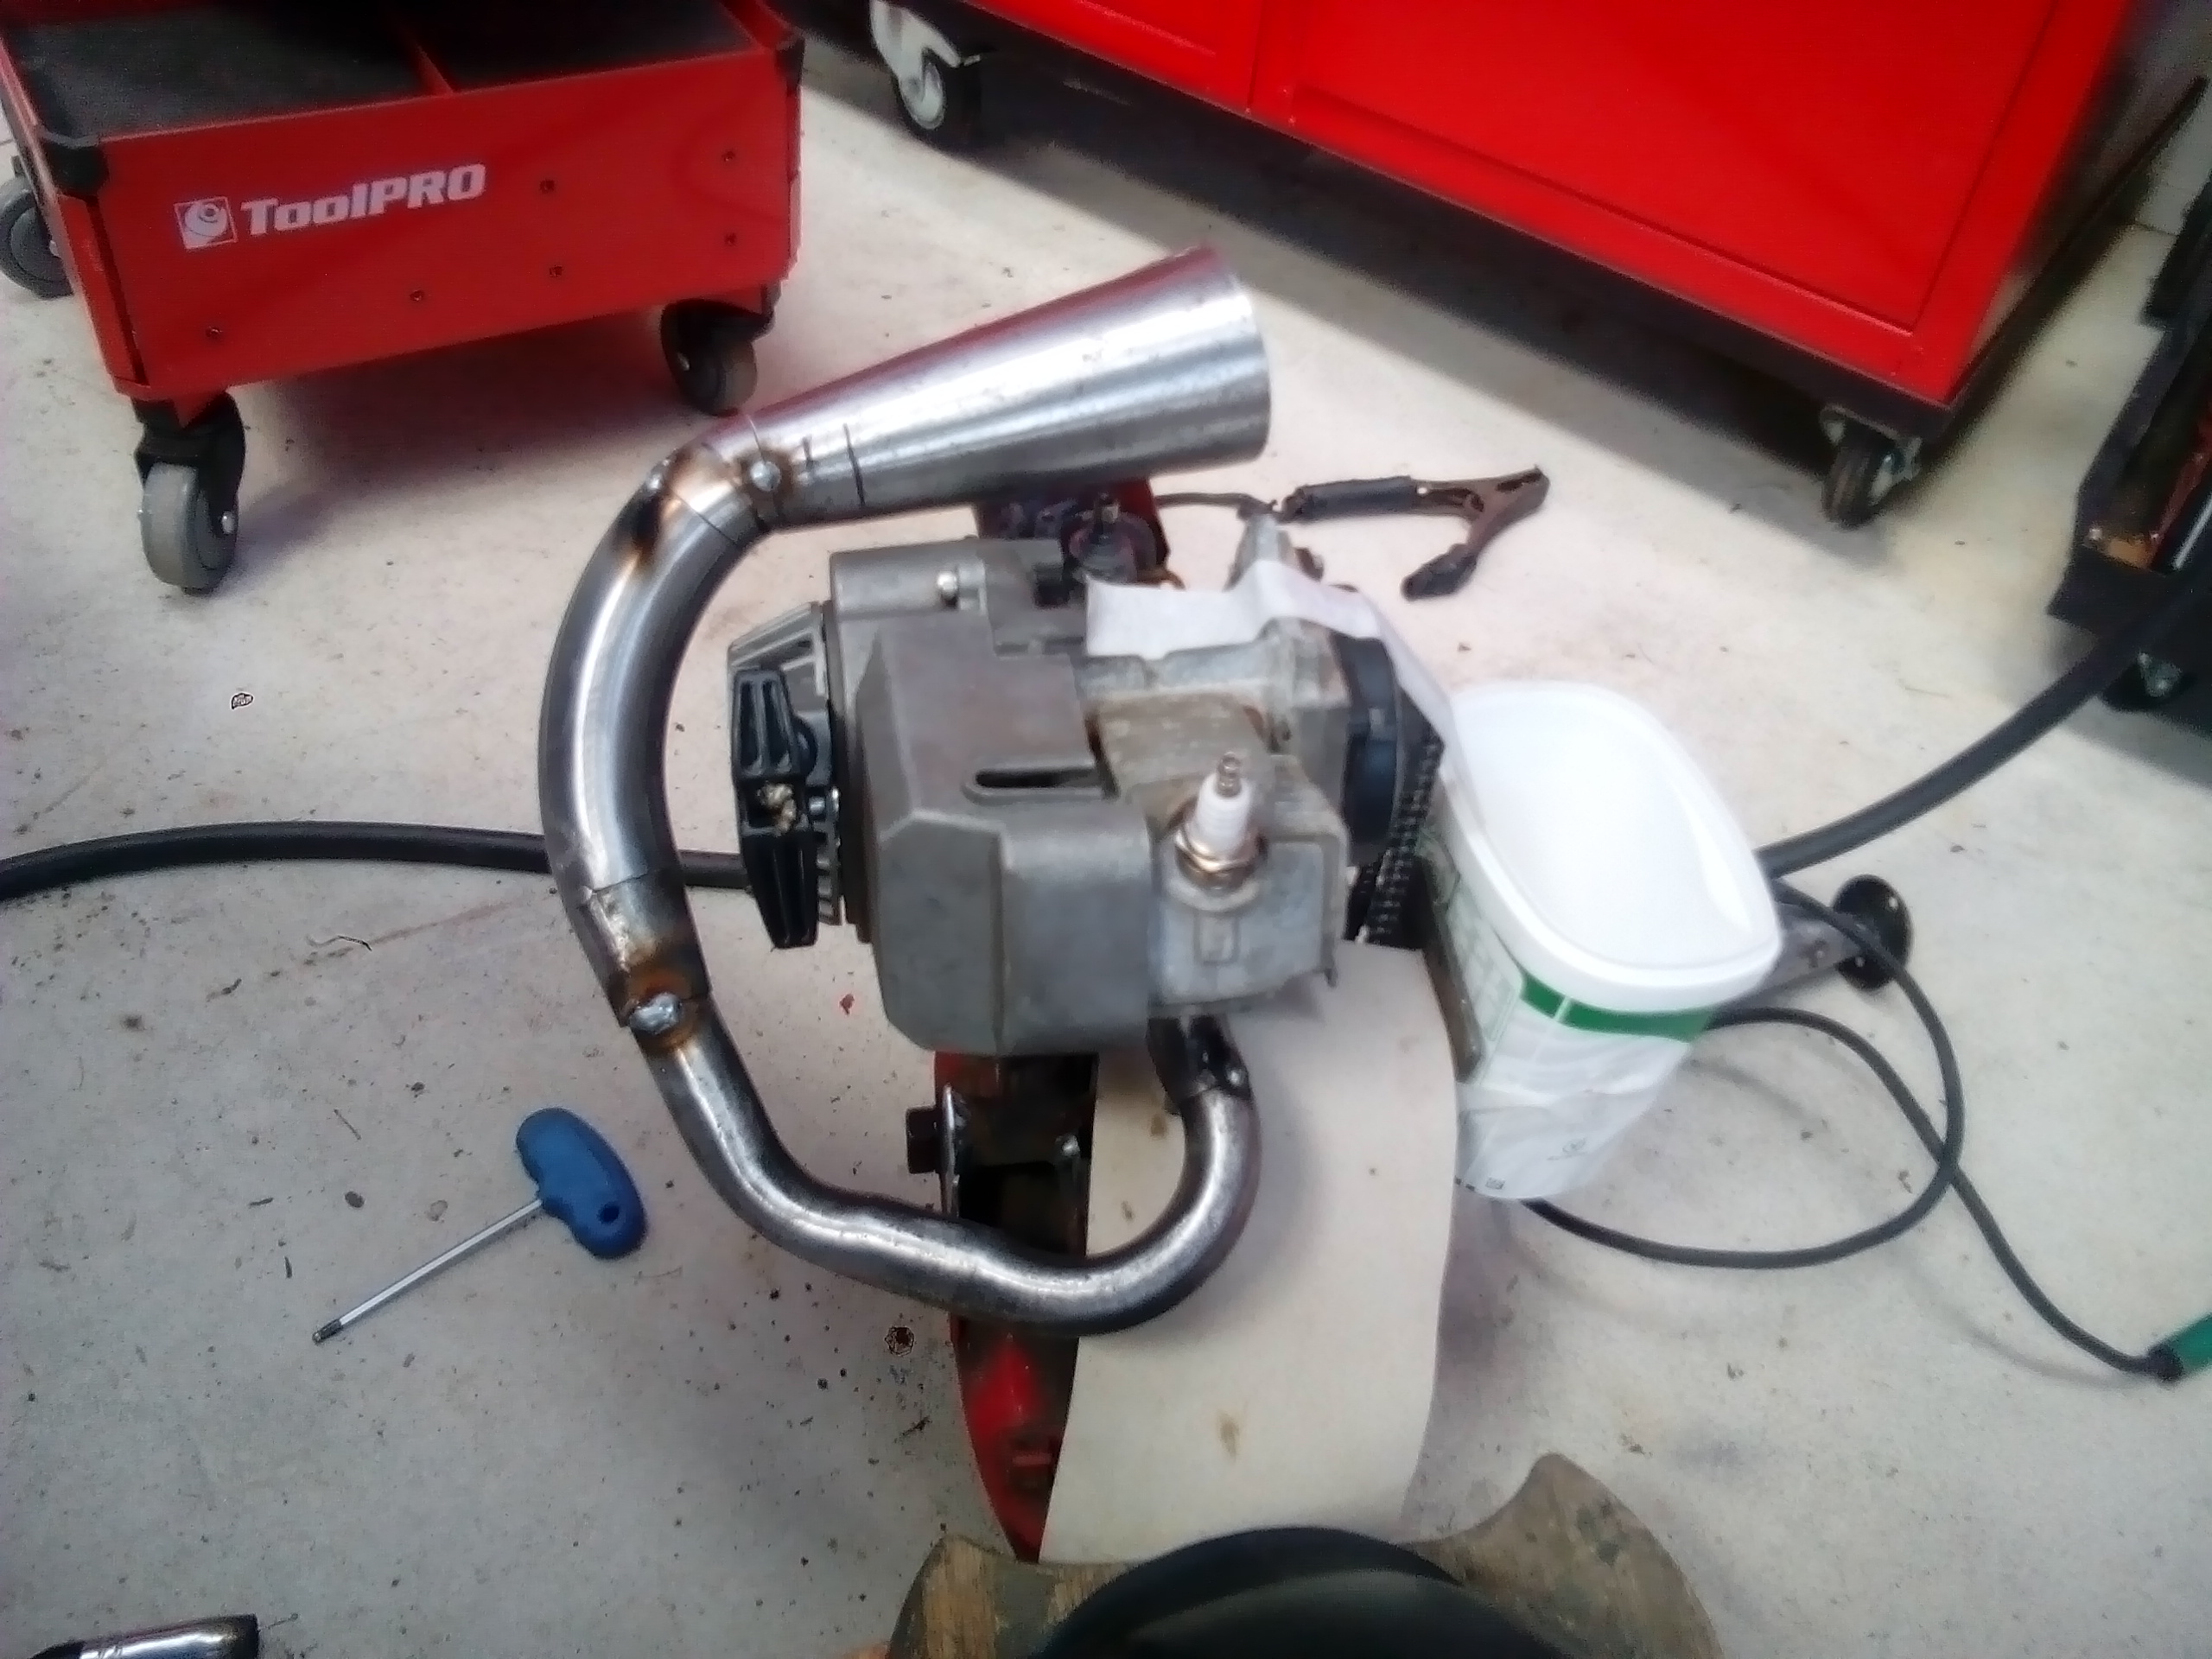
And then did a few quick tidy ups, like deleting the birds nest of a wiring loom, fitting a kill switch, seat, steering wheel, clutch, coil, cdi, cables...etc...etc... 10hrs later its sill very rough around the edges, but this happened: It's running so sweet now, very responsive revs, idles fantastic. It's weird, but I hate stuff hanging around my shed that doesn't go. Getting this thing going gives me a sense of achievement and closure. Now onto the next project
-
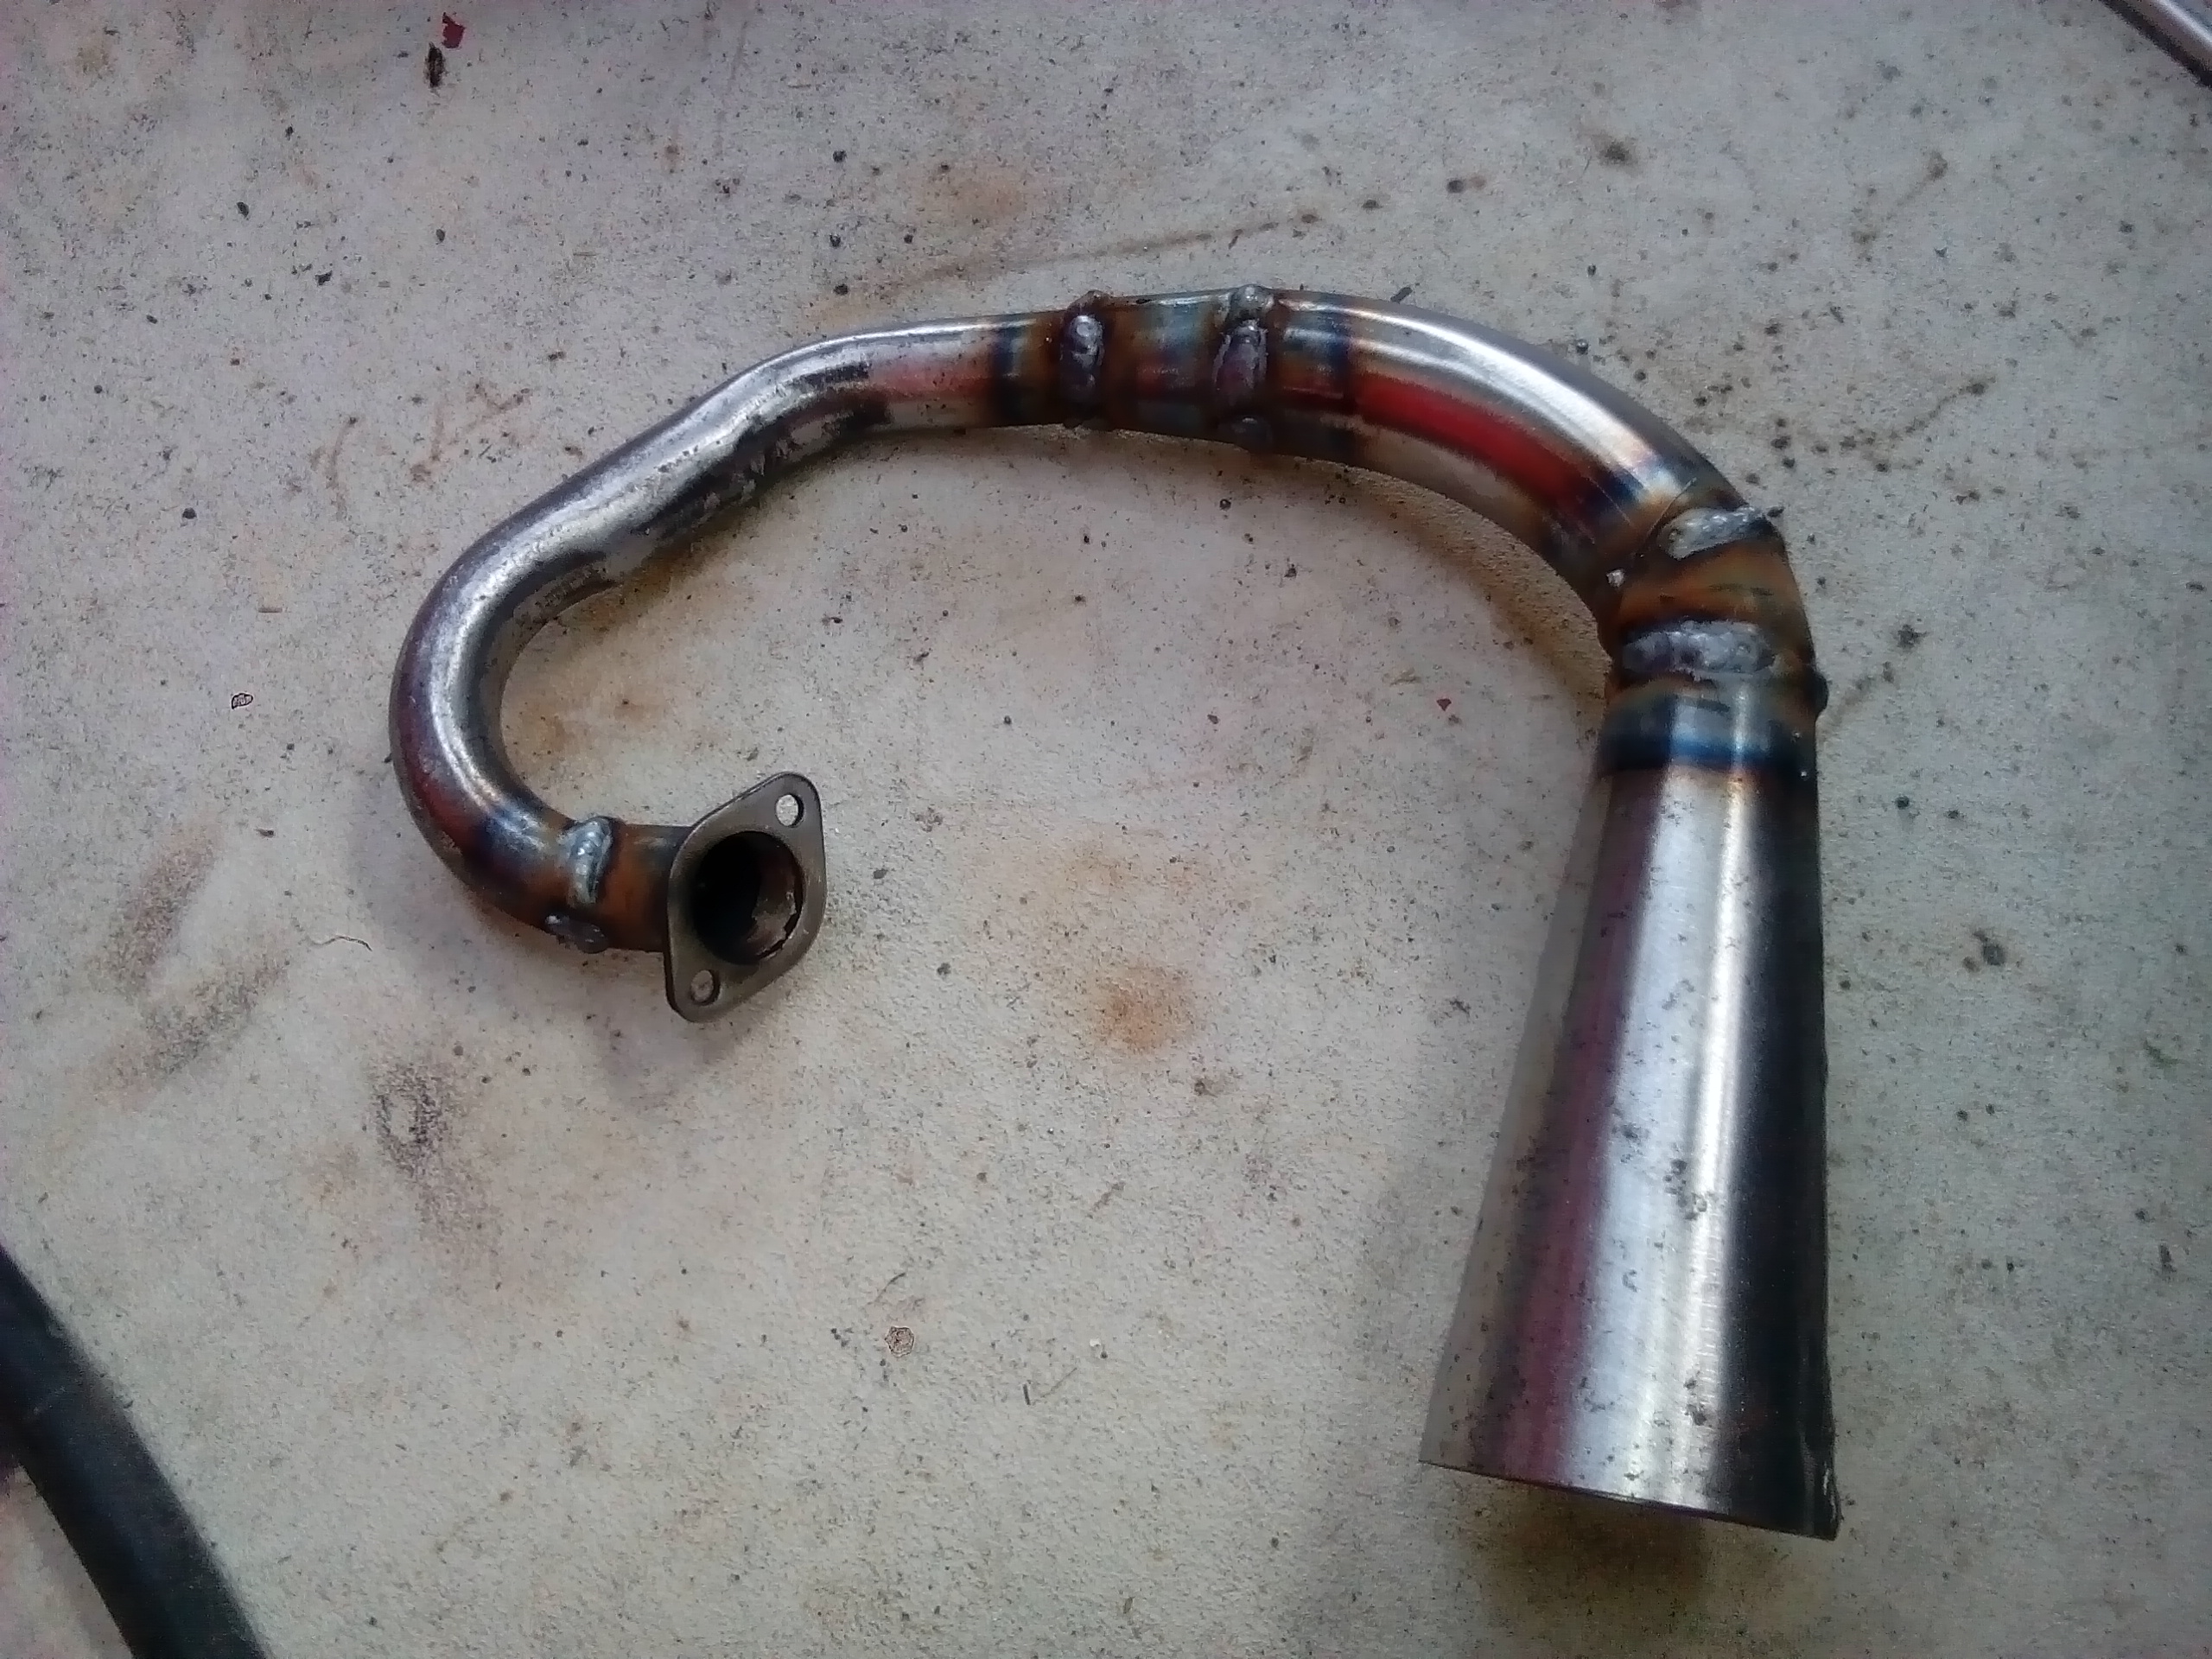
I then machined up an exhaust flange to adapt a motoX expansion chamber from a RM125 to this motor, as it had no exhaust.
-
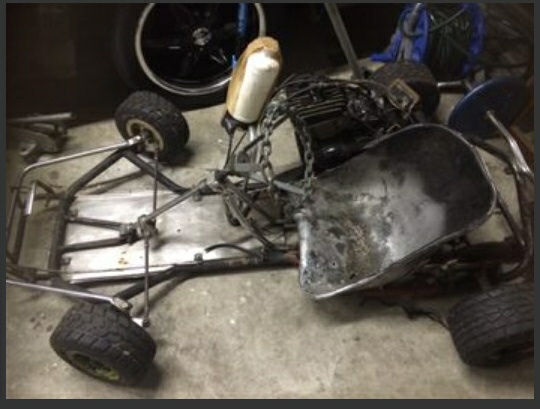
I got this as a project about a year ago, brought it home...realised it was not going to be as easy as I thought it would be to get it going, so I pushed it into the corner where it's lived ever since. But curiosity got the better of me the other day. It annoyed me that it may potentially be possible to make it run again, so I did. It took all day...and with a box of parts donated to me by a mate who has had about 5 TF's in the past, I systematically solved one problem after another until: eventually it looked possible to fire it up.
-
Another way of adding rake/trail is to put tabs on the front of the fork ends like this: This would enable your handlebar stem/post to be more upright, giving you more room on the deck to stand. You can still lower the ride height etc this way.
-
Kimjon's not as cool or epic as Muncie's off-road goped Bigfoot scooter thingy
Kimjon replied to Kimjon's topic in Two Wheels
Yeah, I'm thinking total weight about 5kg? What's yours weigh;-) Oh and thanks for the sprocket and chain...you're a GC Muncie! -
Kimjon's not as cool or epic as Muncie's off-road goped Bigfoot scooter thingy
Kimjon replied to Kimjon's topic in Two Wheels
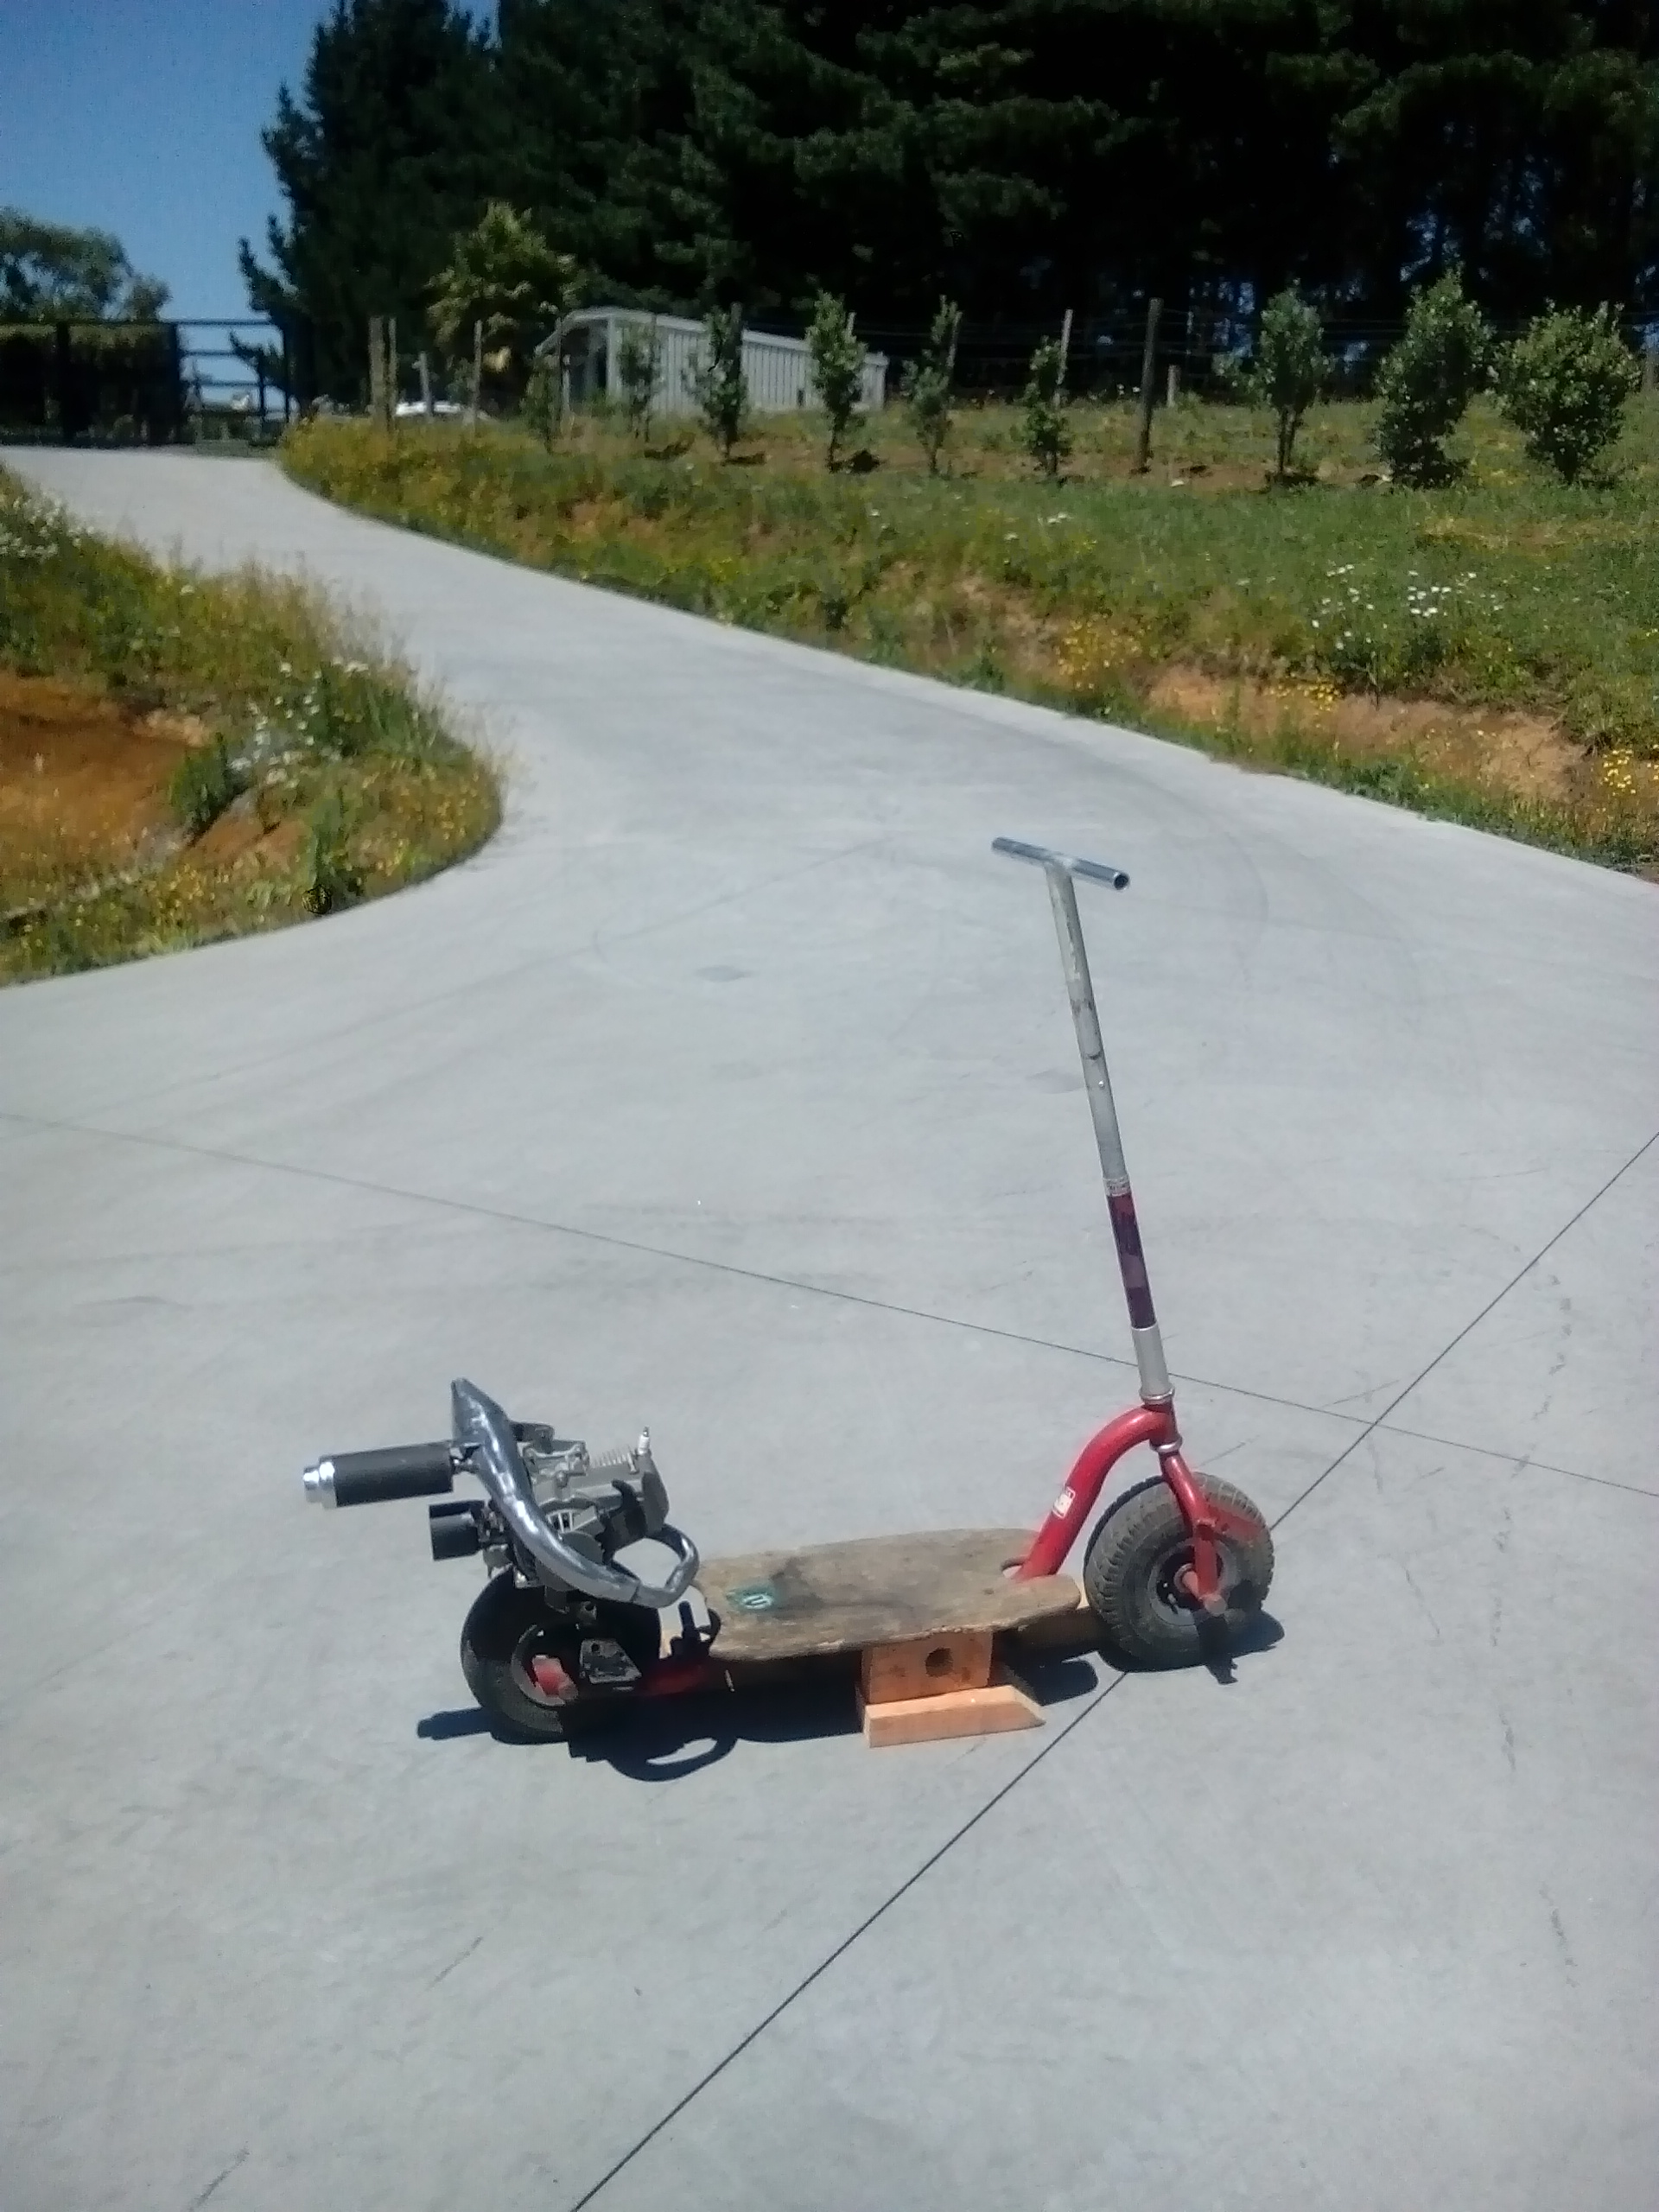
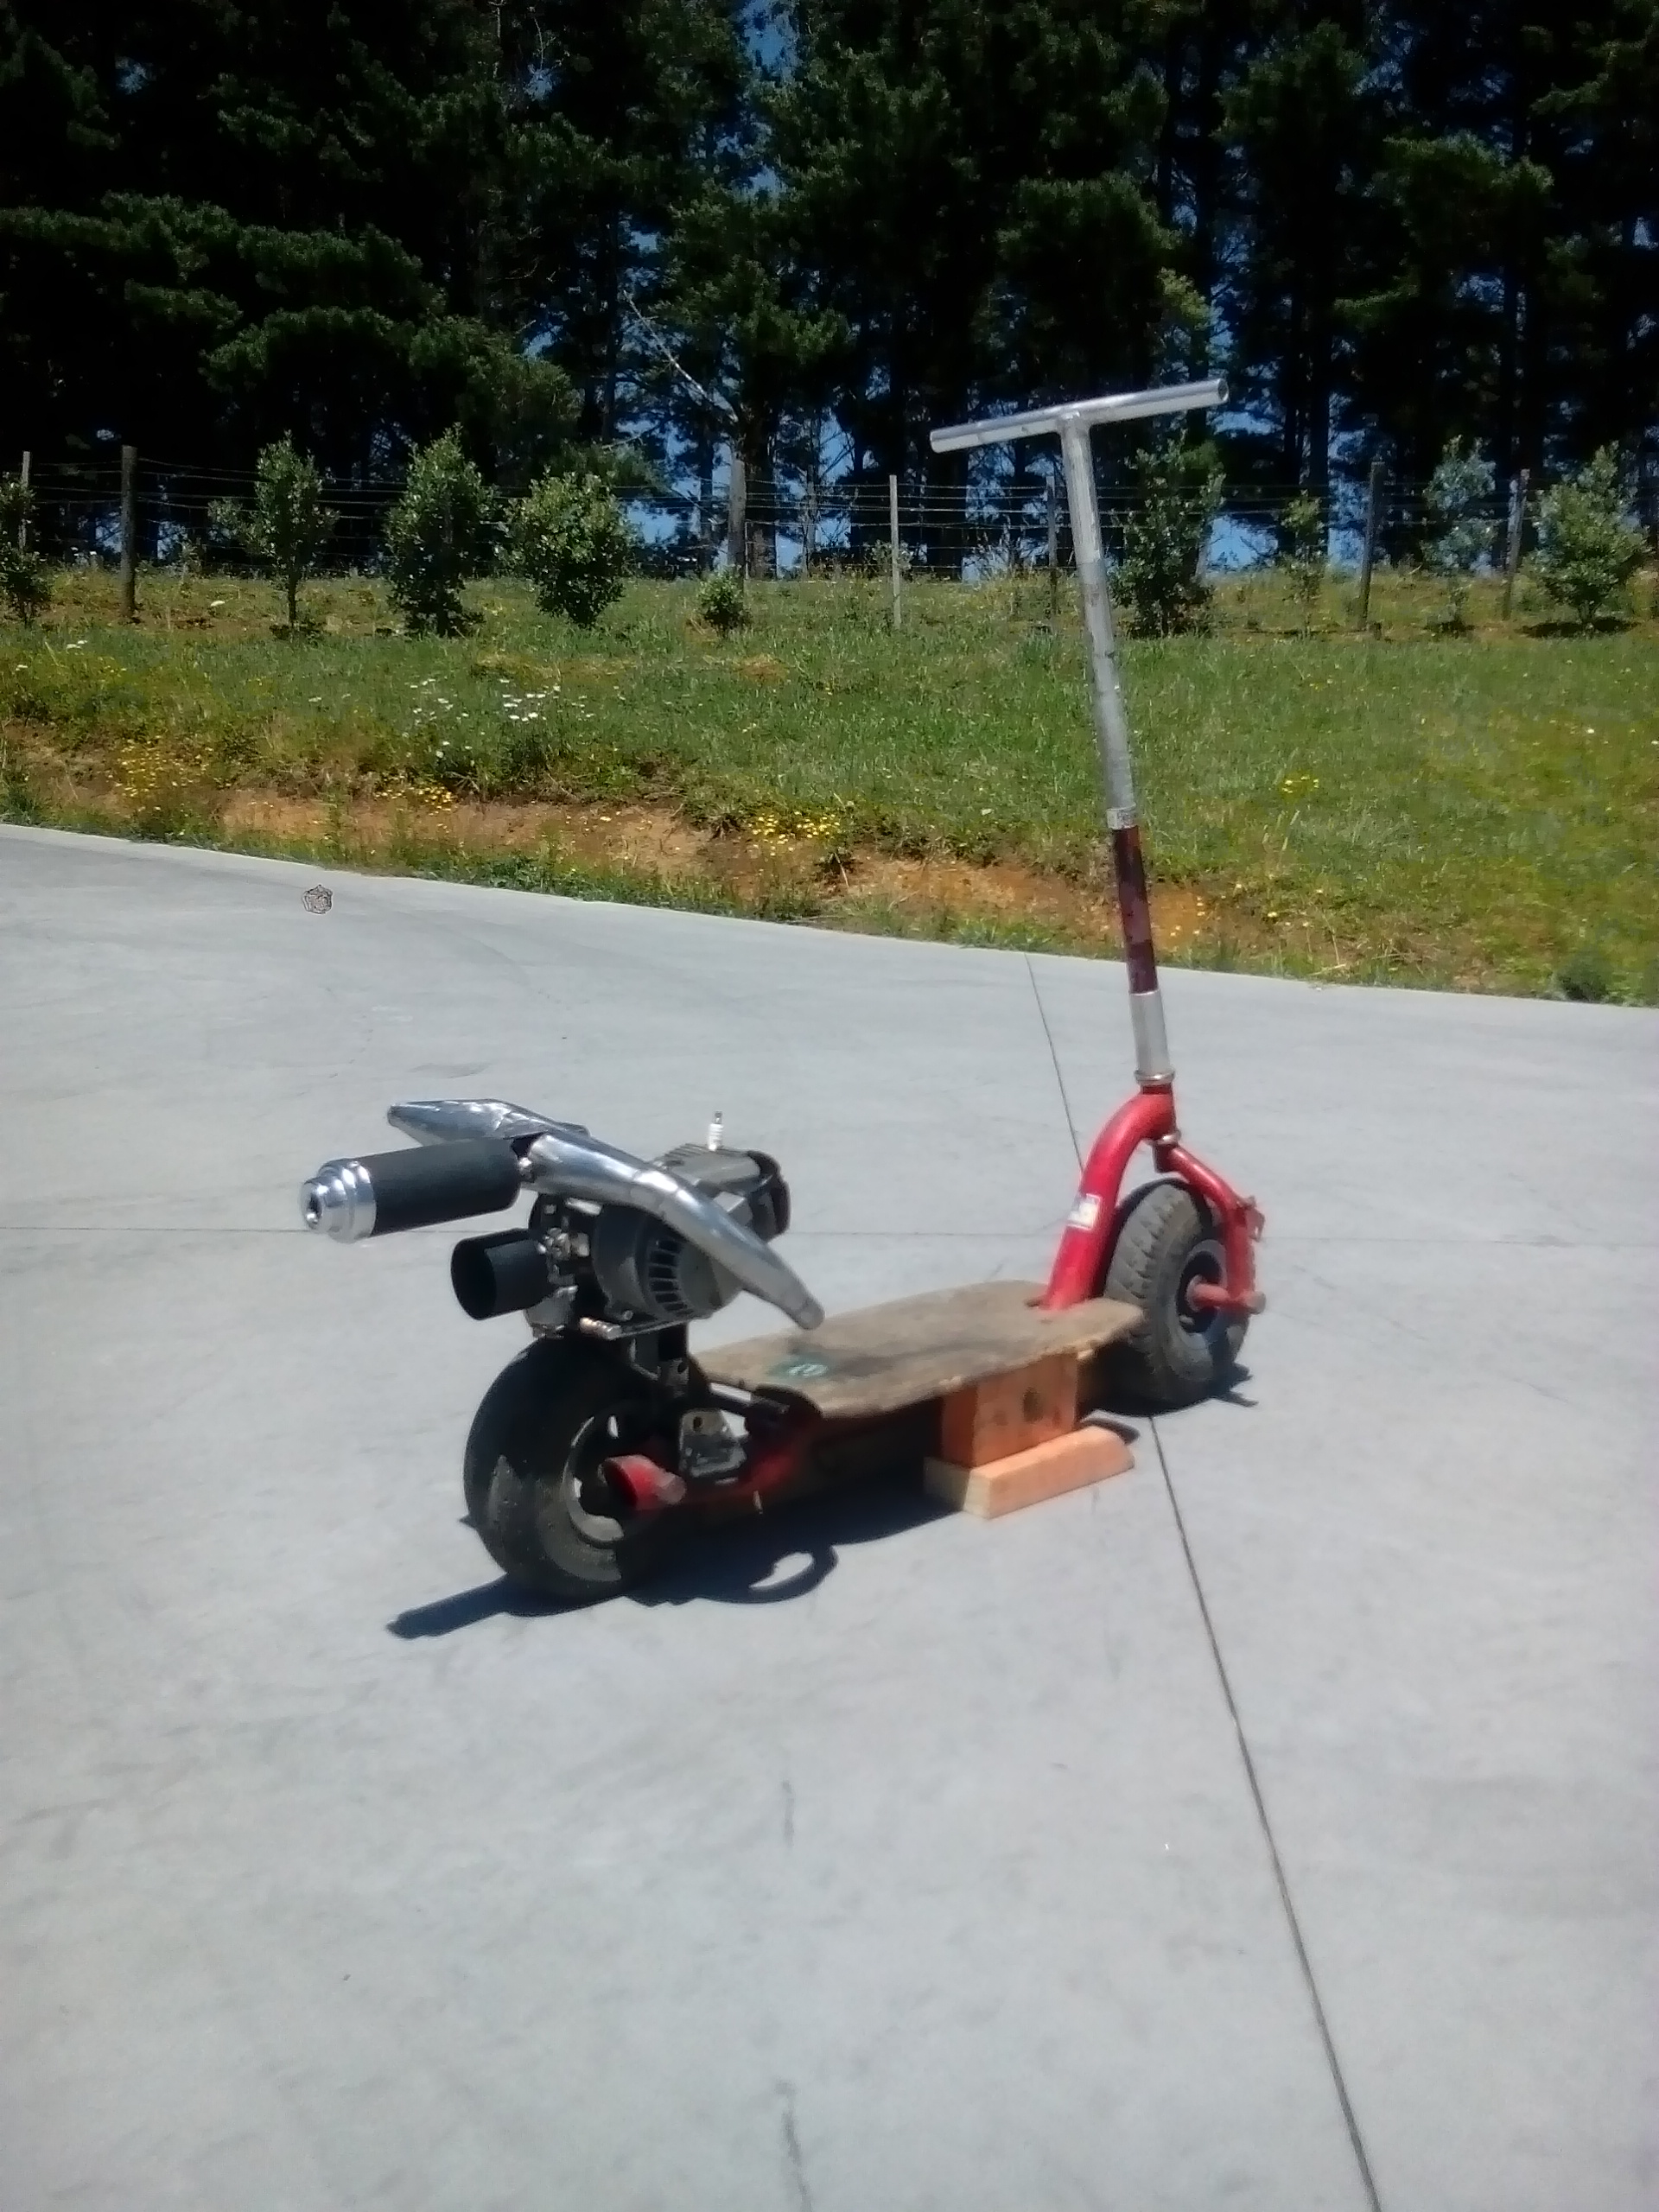
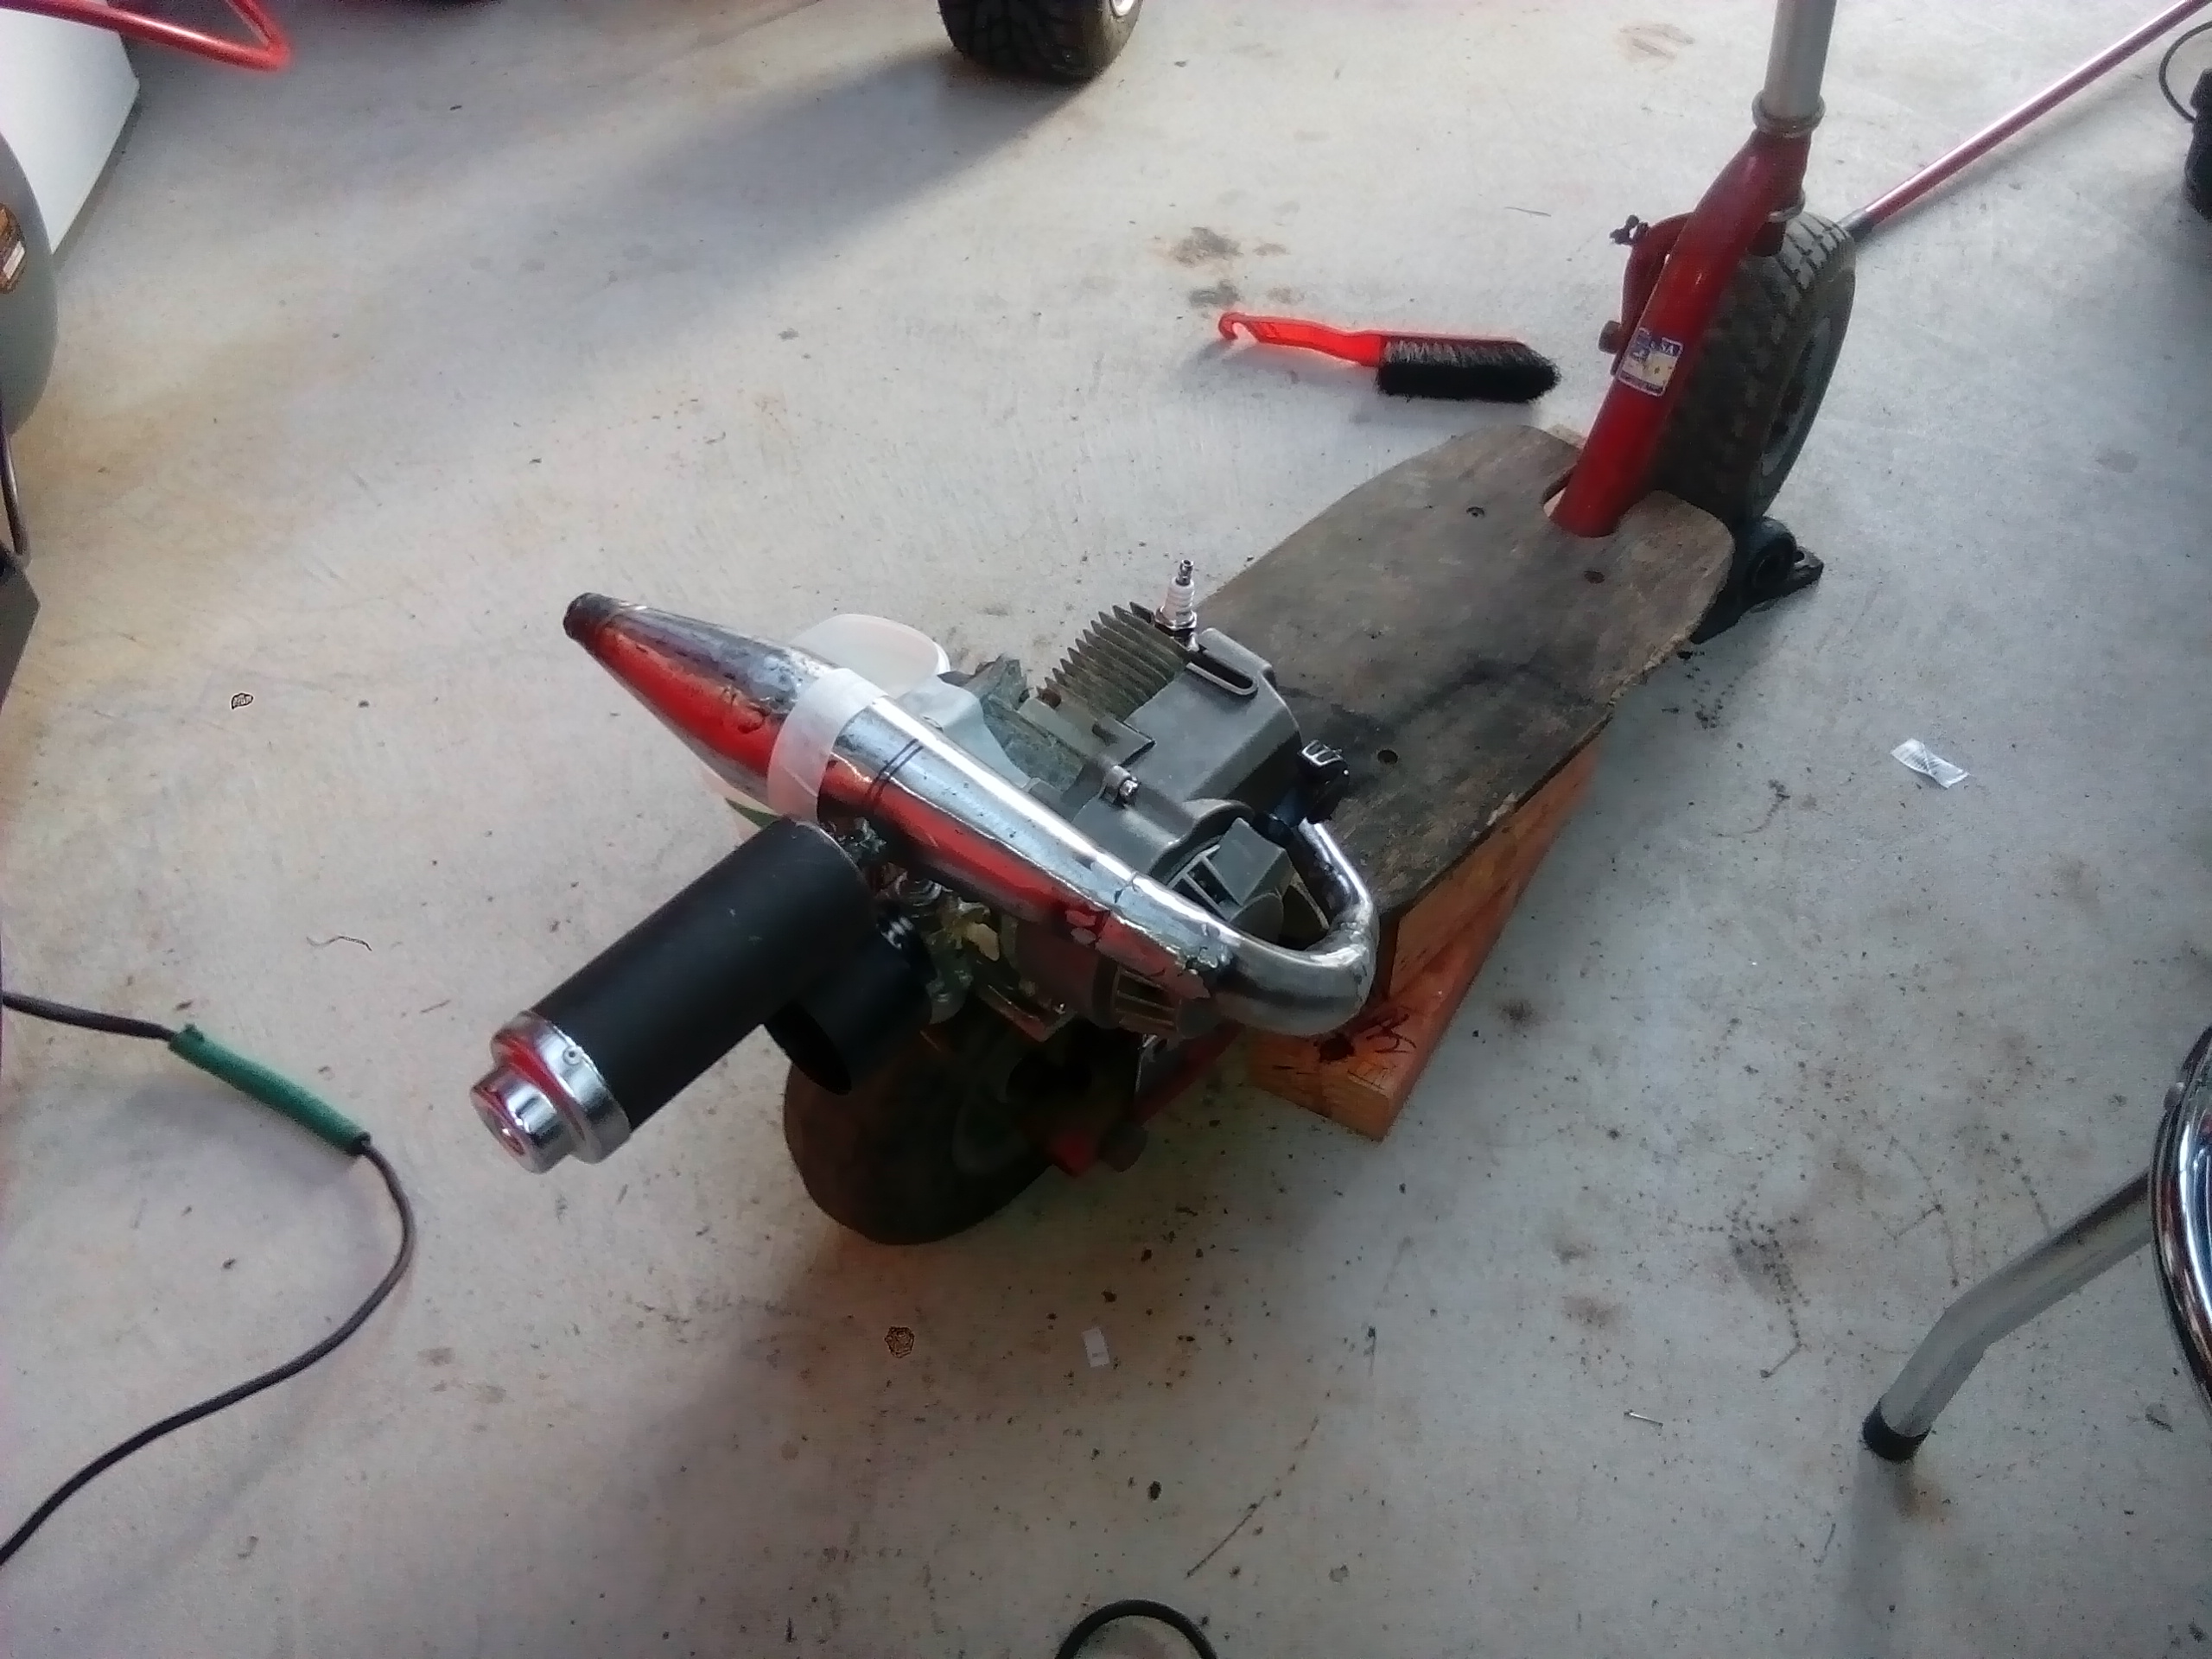
In a confined space its always hard to get an overall impression, so I pushed it outside for a first real stand back and admire look at it.
-
Kimjon's not as cool or epic as Muncie's off-road goped Bigfoot scooter thingy
Kimjon replied to Kimjon's topic in Two Wheels
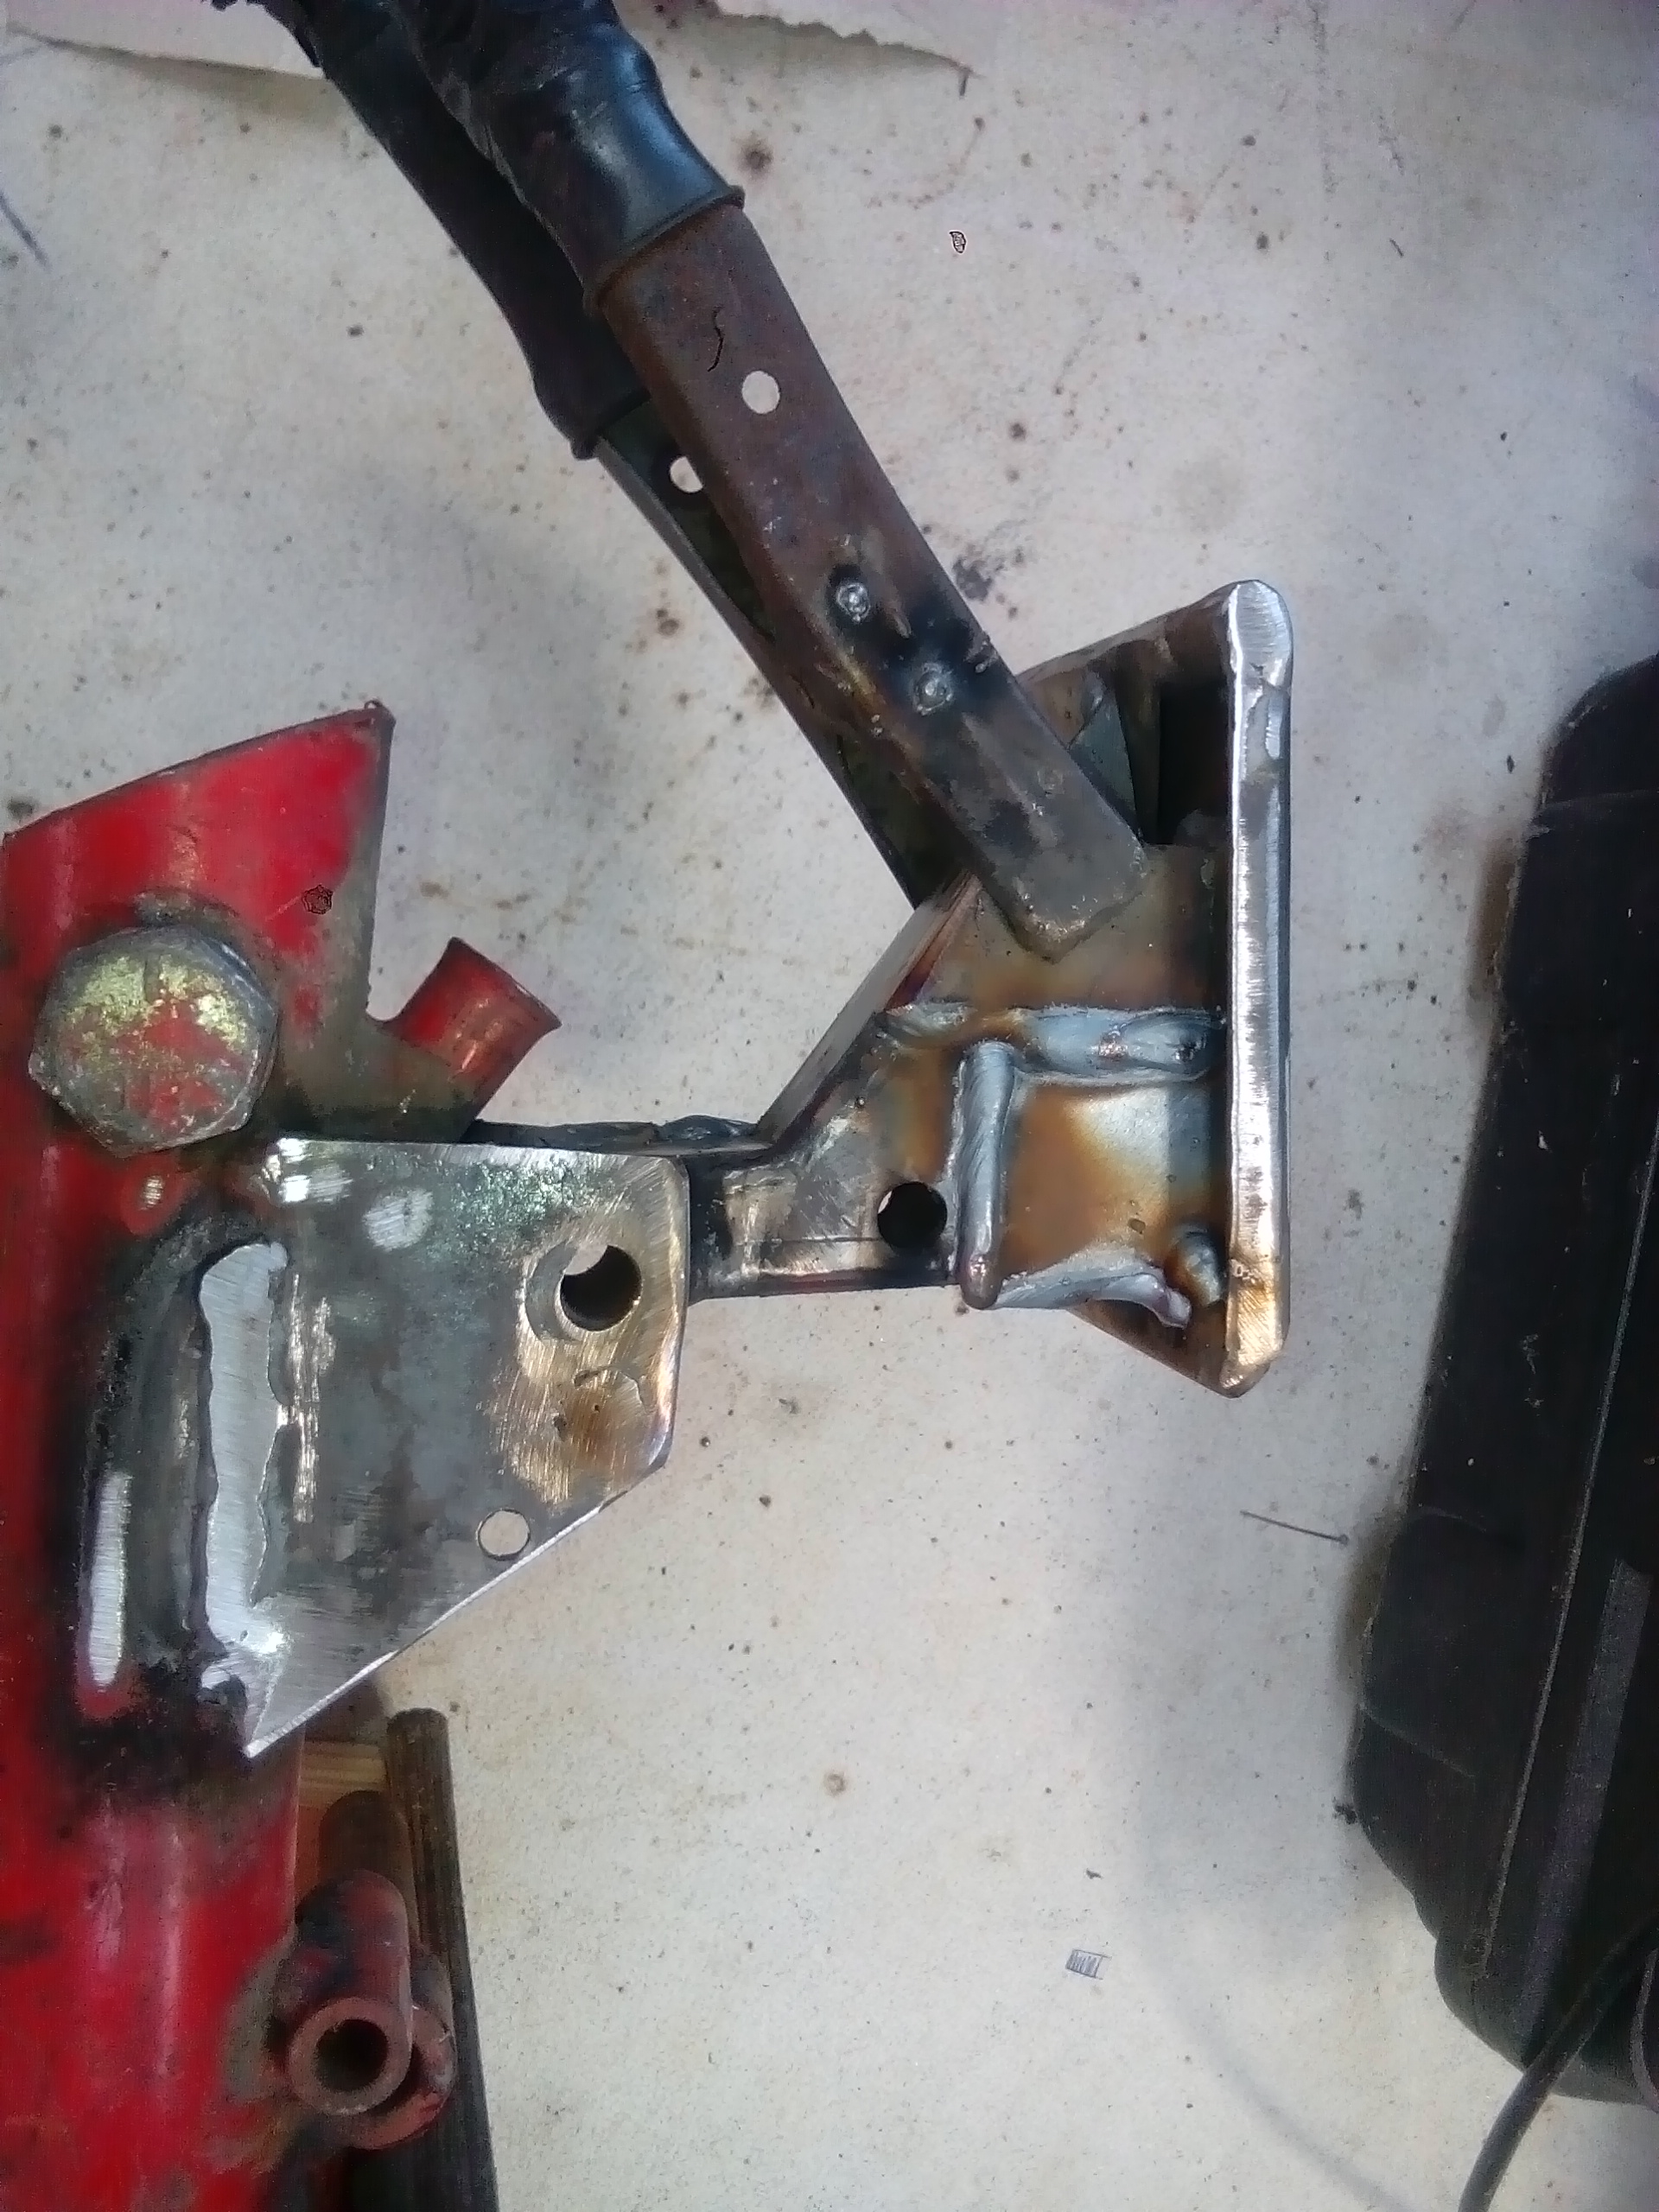
I welded up a few ugly holes, added some more bracing for strength.
-
Kimjon's not as cool or epic as Muncie's off-road goped Bigfoot scooter thingy
Kimjon replied to Kimjon's topic in Two Wheels
On to the front end. This gem was left outside for many years. I know, hard to tell...but you'll have to take my word for it I'm sure it'll buff out, no seriously...fuck it, let's give it a go and see? Boom!!! Not to bad.
-
Kimjon's not as cool or epic as Muncie's off-road goped Bigfoot scooter thingy
Kimjon replied to Kimjon's topic in Two Wheels
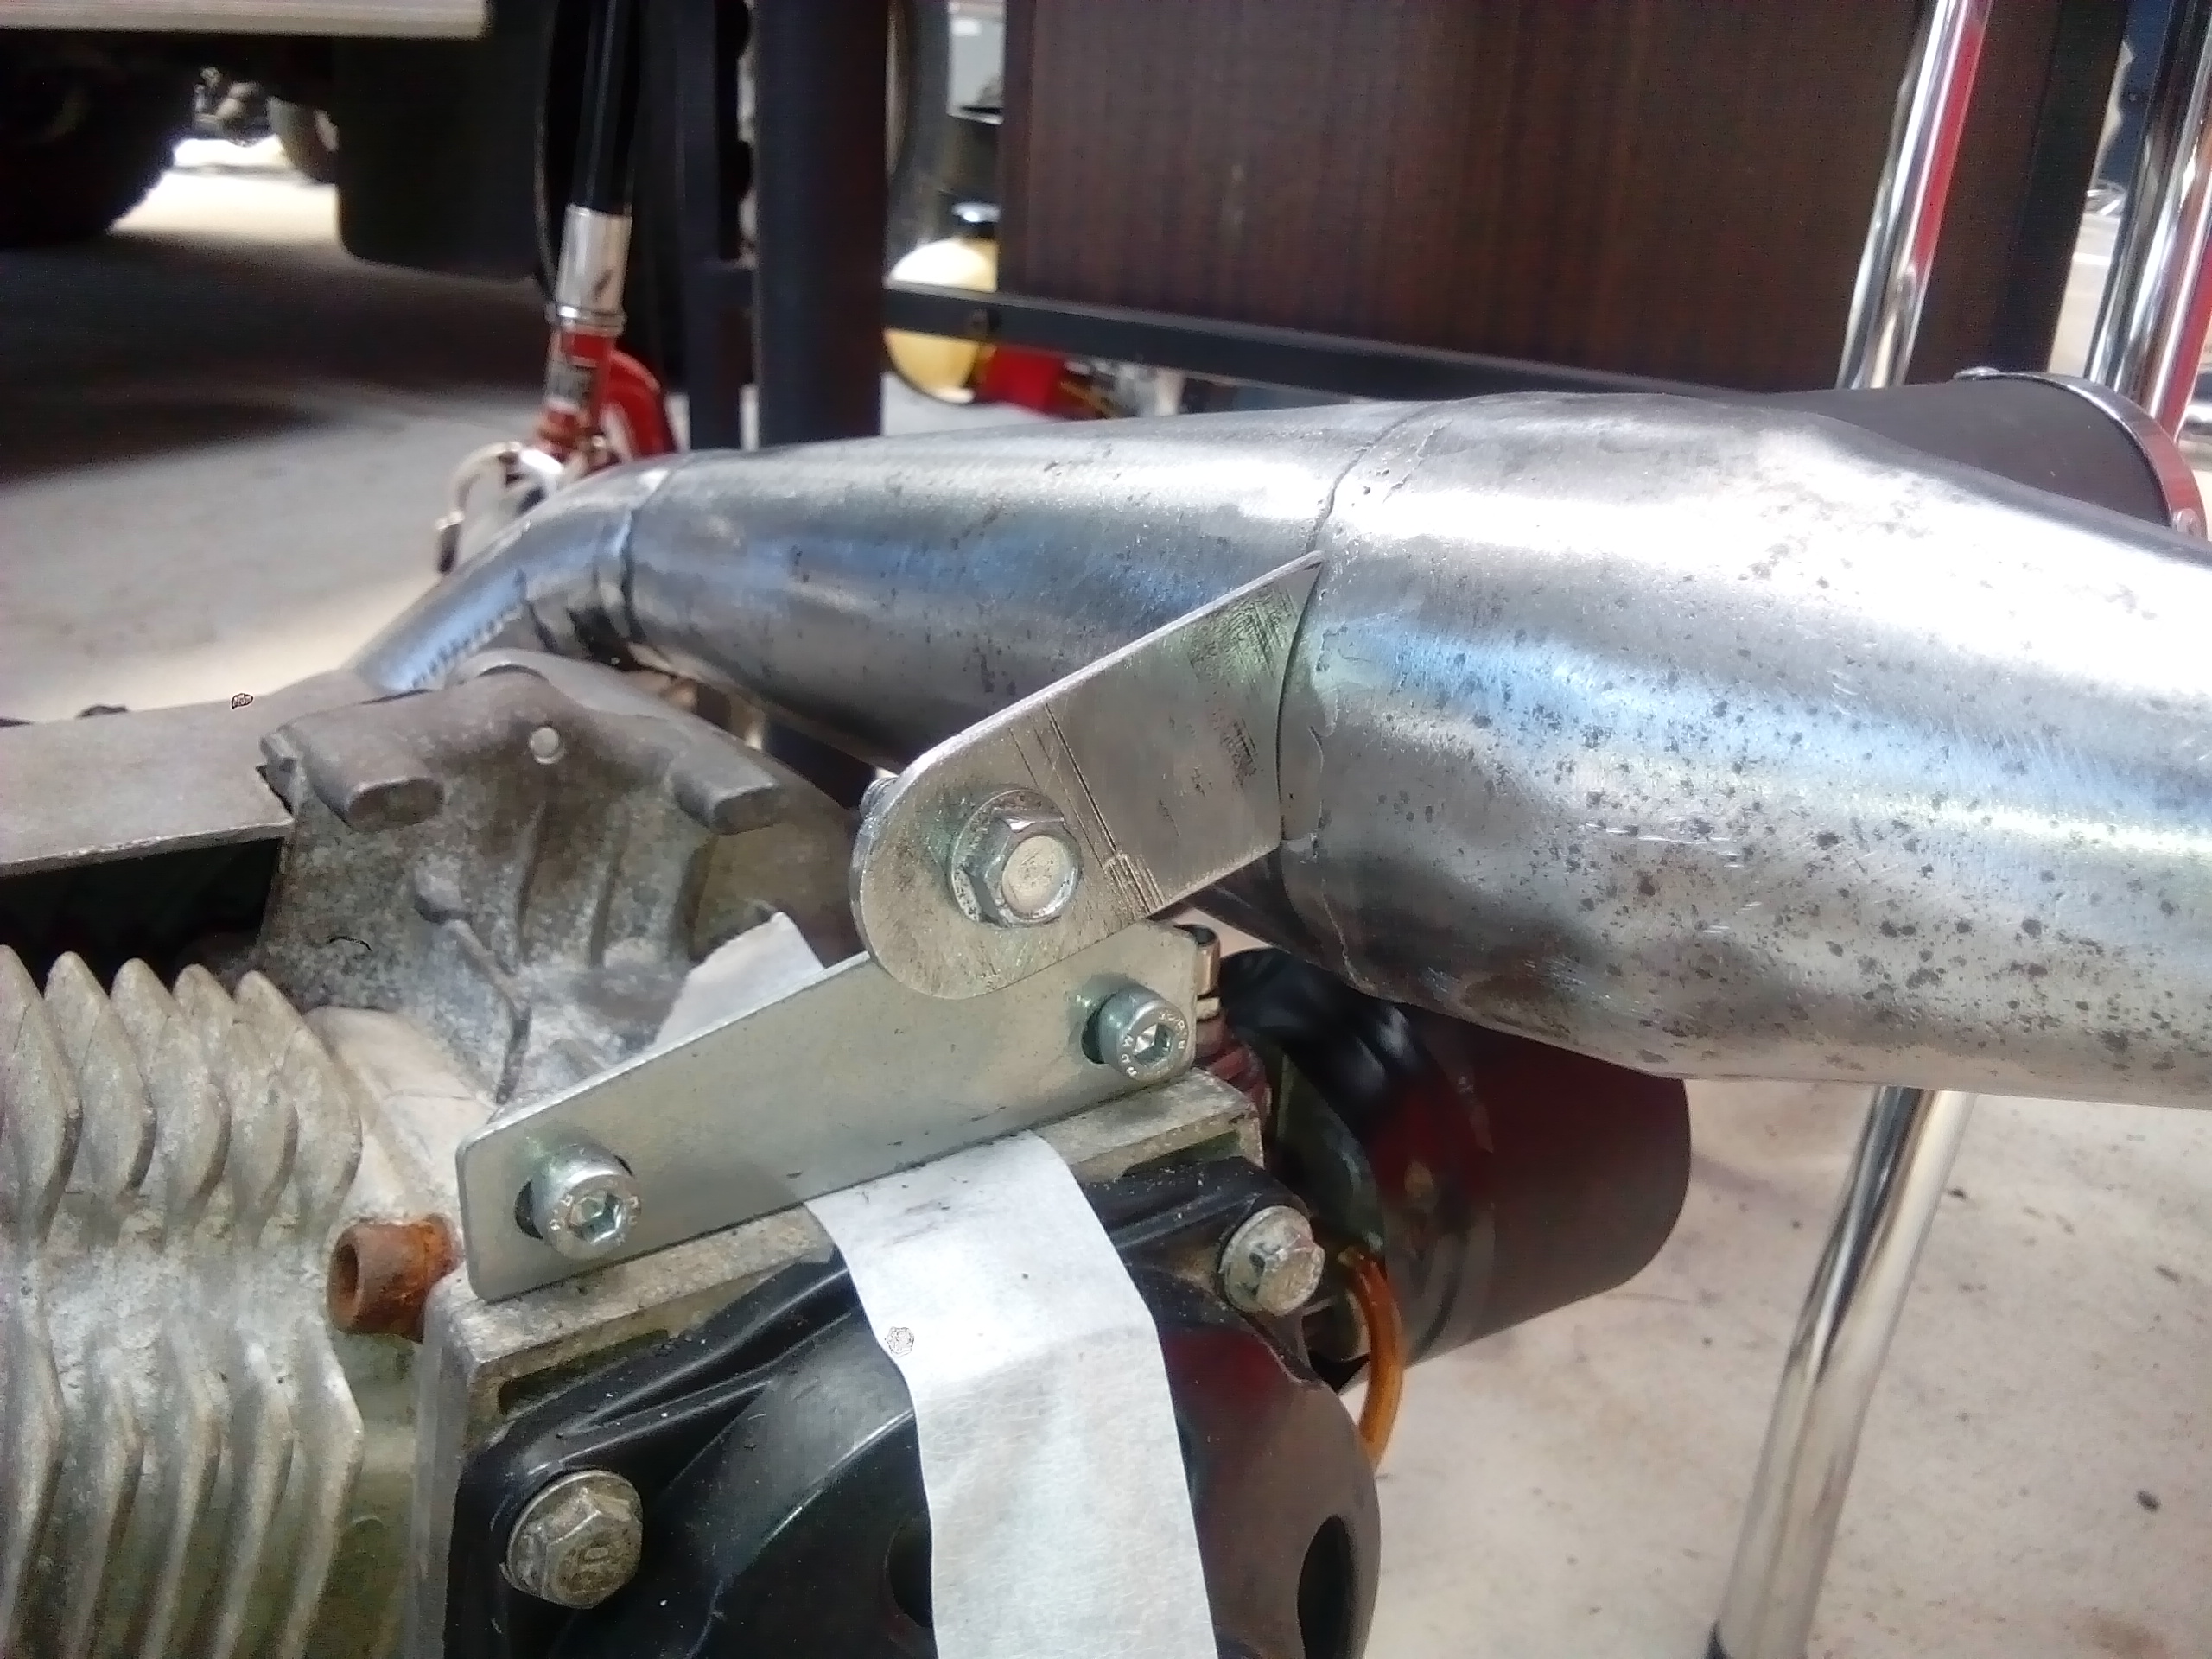
These chambers vibrate like hell, and eventually this will fatigue the metal. I added a support bracket, and a little tab to the muffler as well. Here's how I made the support bracket. All welded, and the muffler tab added too. This metal is super thin and a challenge to mig weld. You'll be going good like a welding God, then it blows a huge hole...but that's the game we play.
-
Ouch!
-
Kimjon's not as cool or epic as Muncie's off-road goped Bigfoot scooter thingy
Kimjon replied to Kimjon's topic in Two Wheels
Waiting around isn't one of my strong points, so to move this project forwards, I welded it straight this morning. I think it looks the part
-
Kimjon's not as cool or epic as Muncie's off-road goped Bigfoot scooter thingy
Kimjon replied to Kimjon's topic in Two Wheels
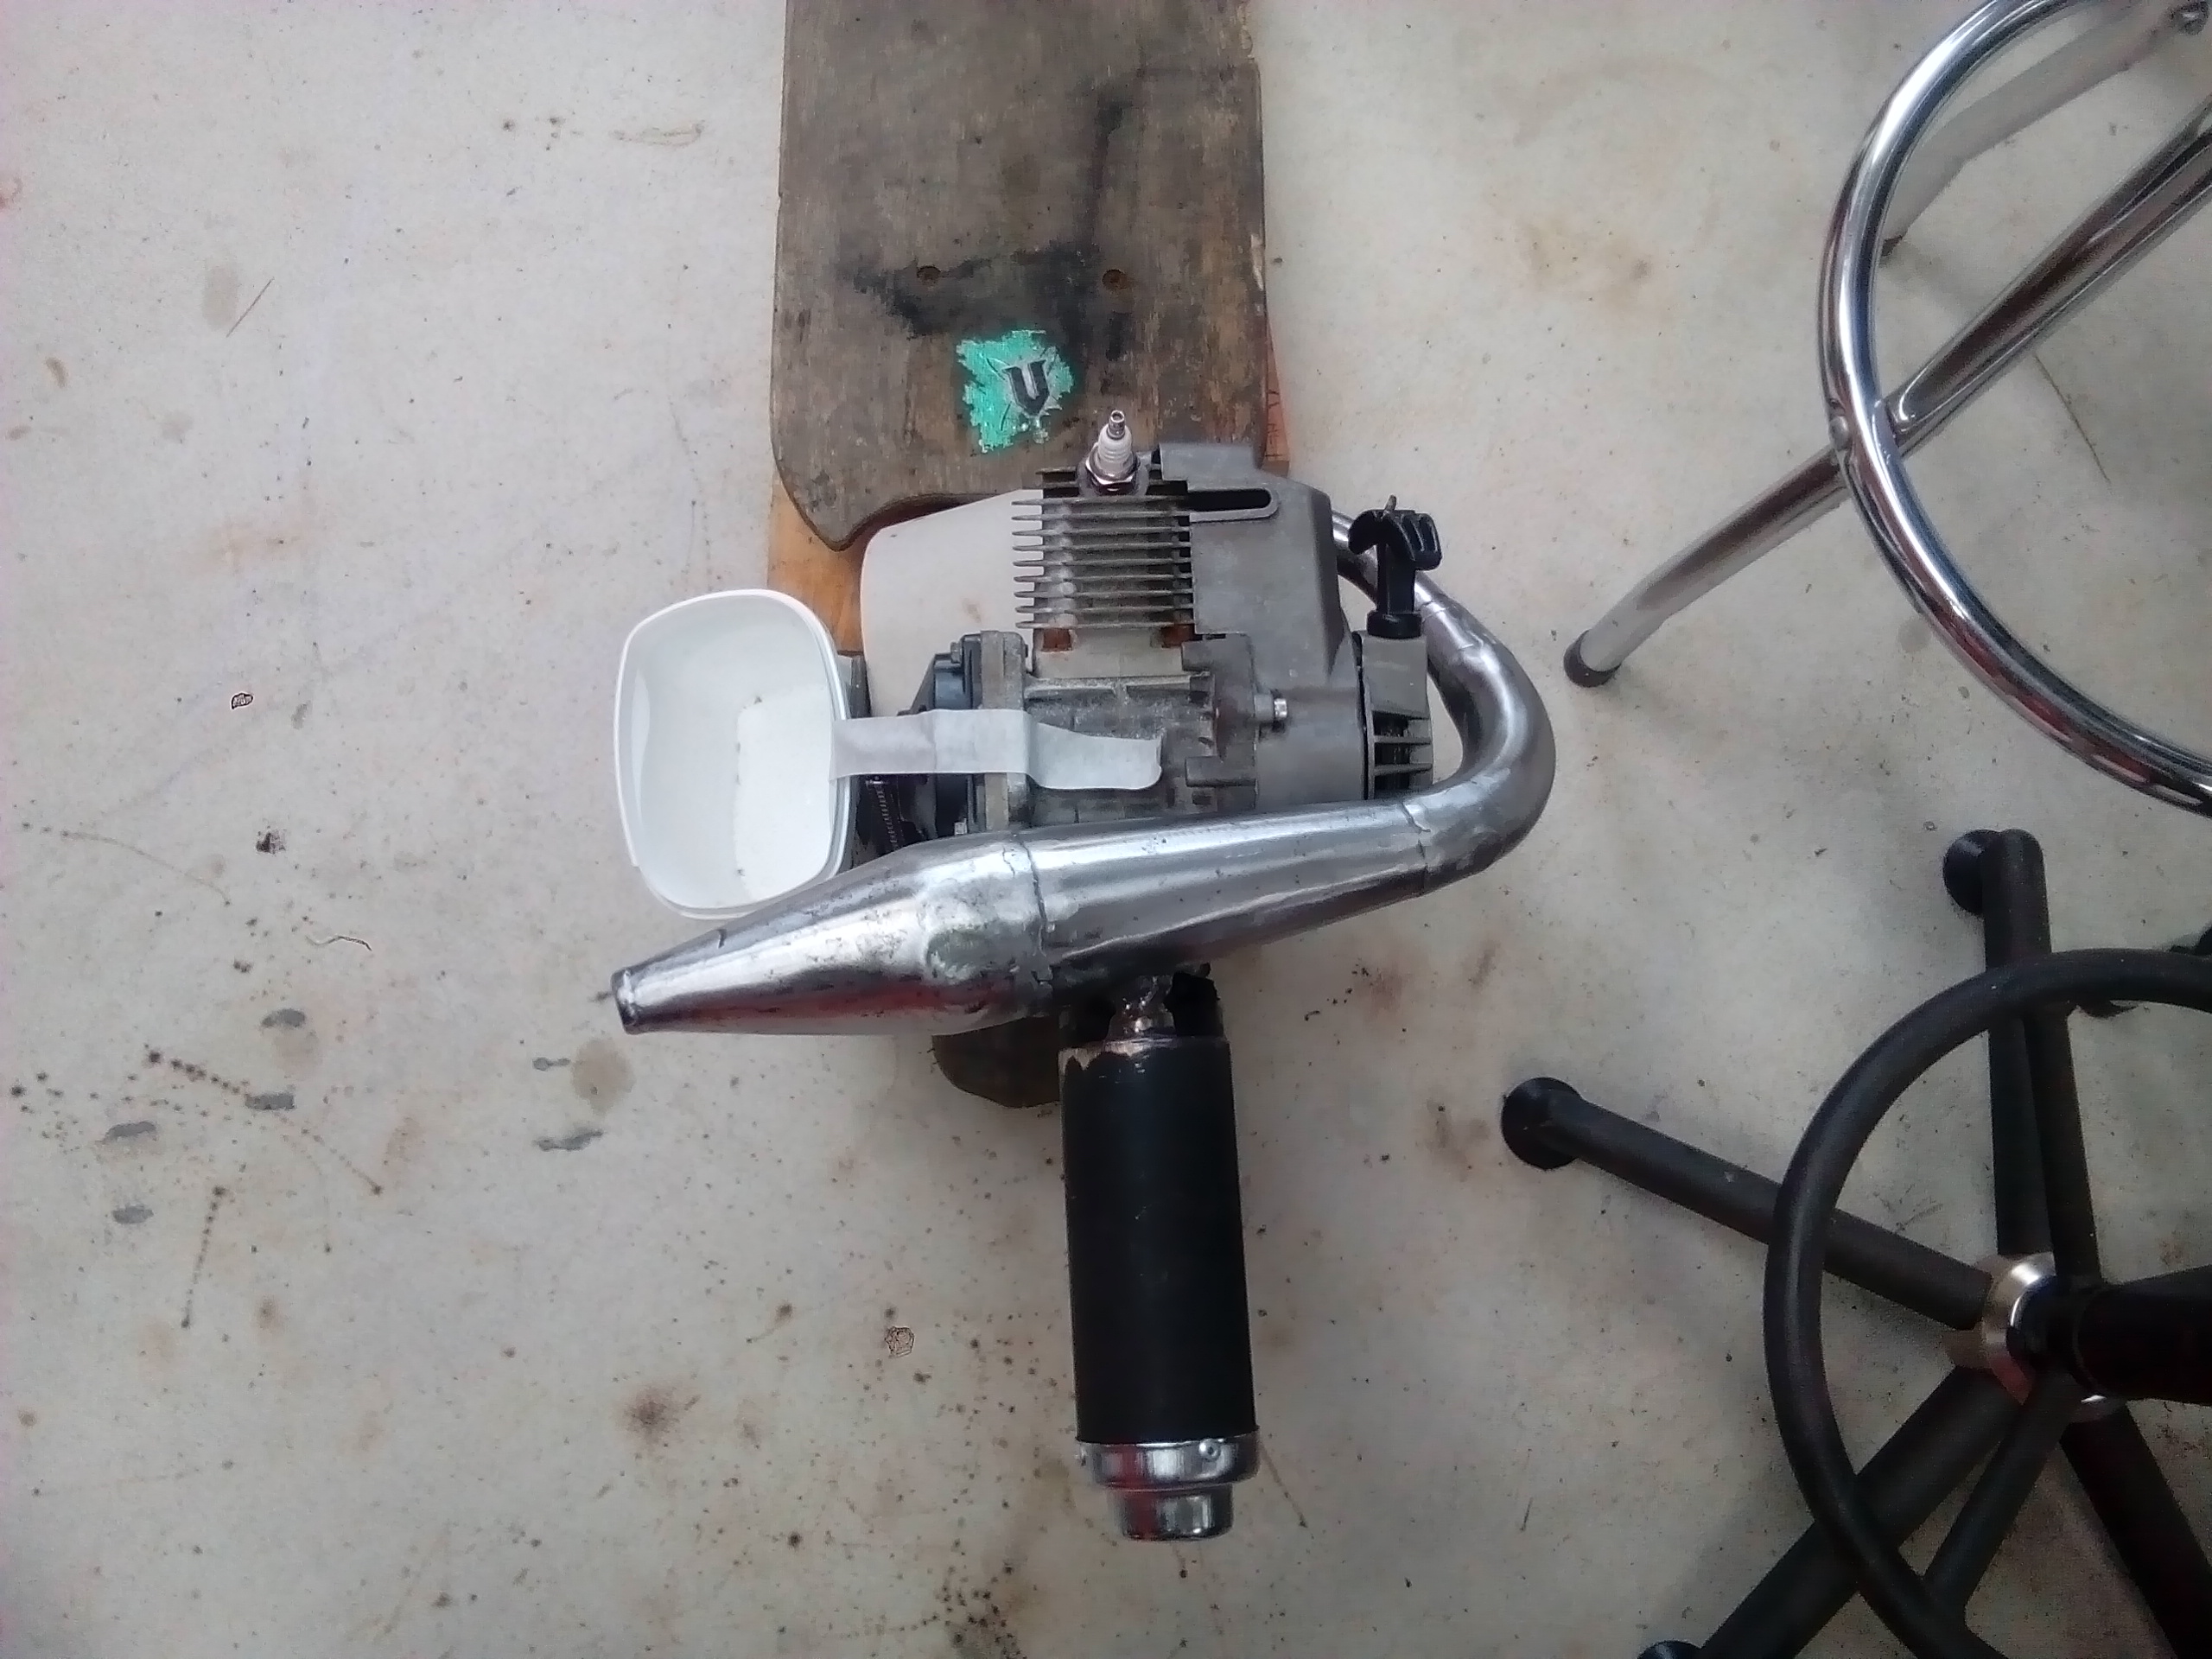
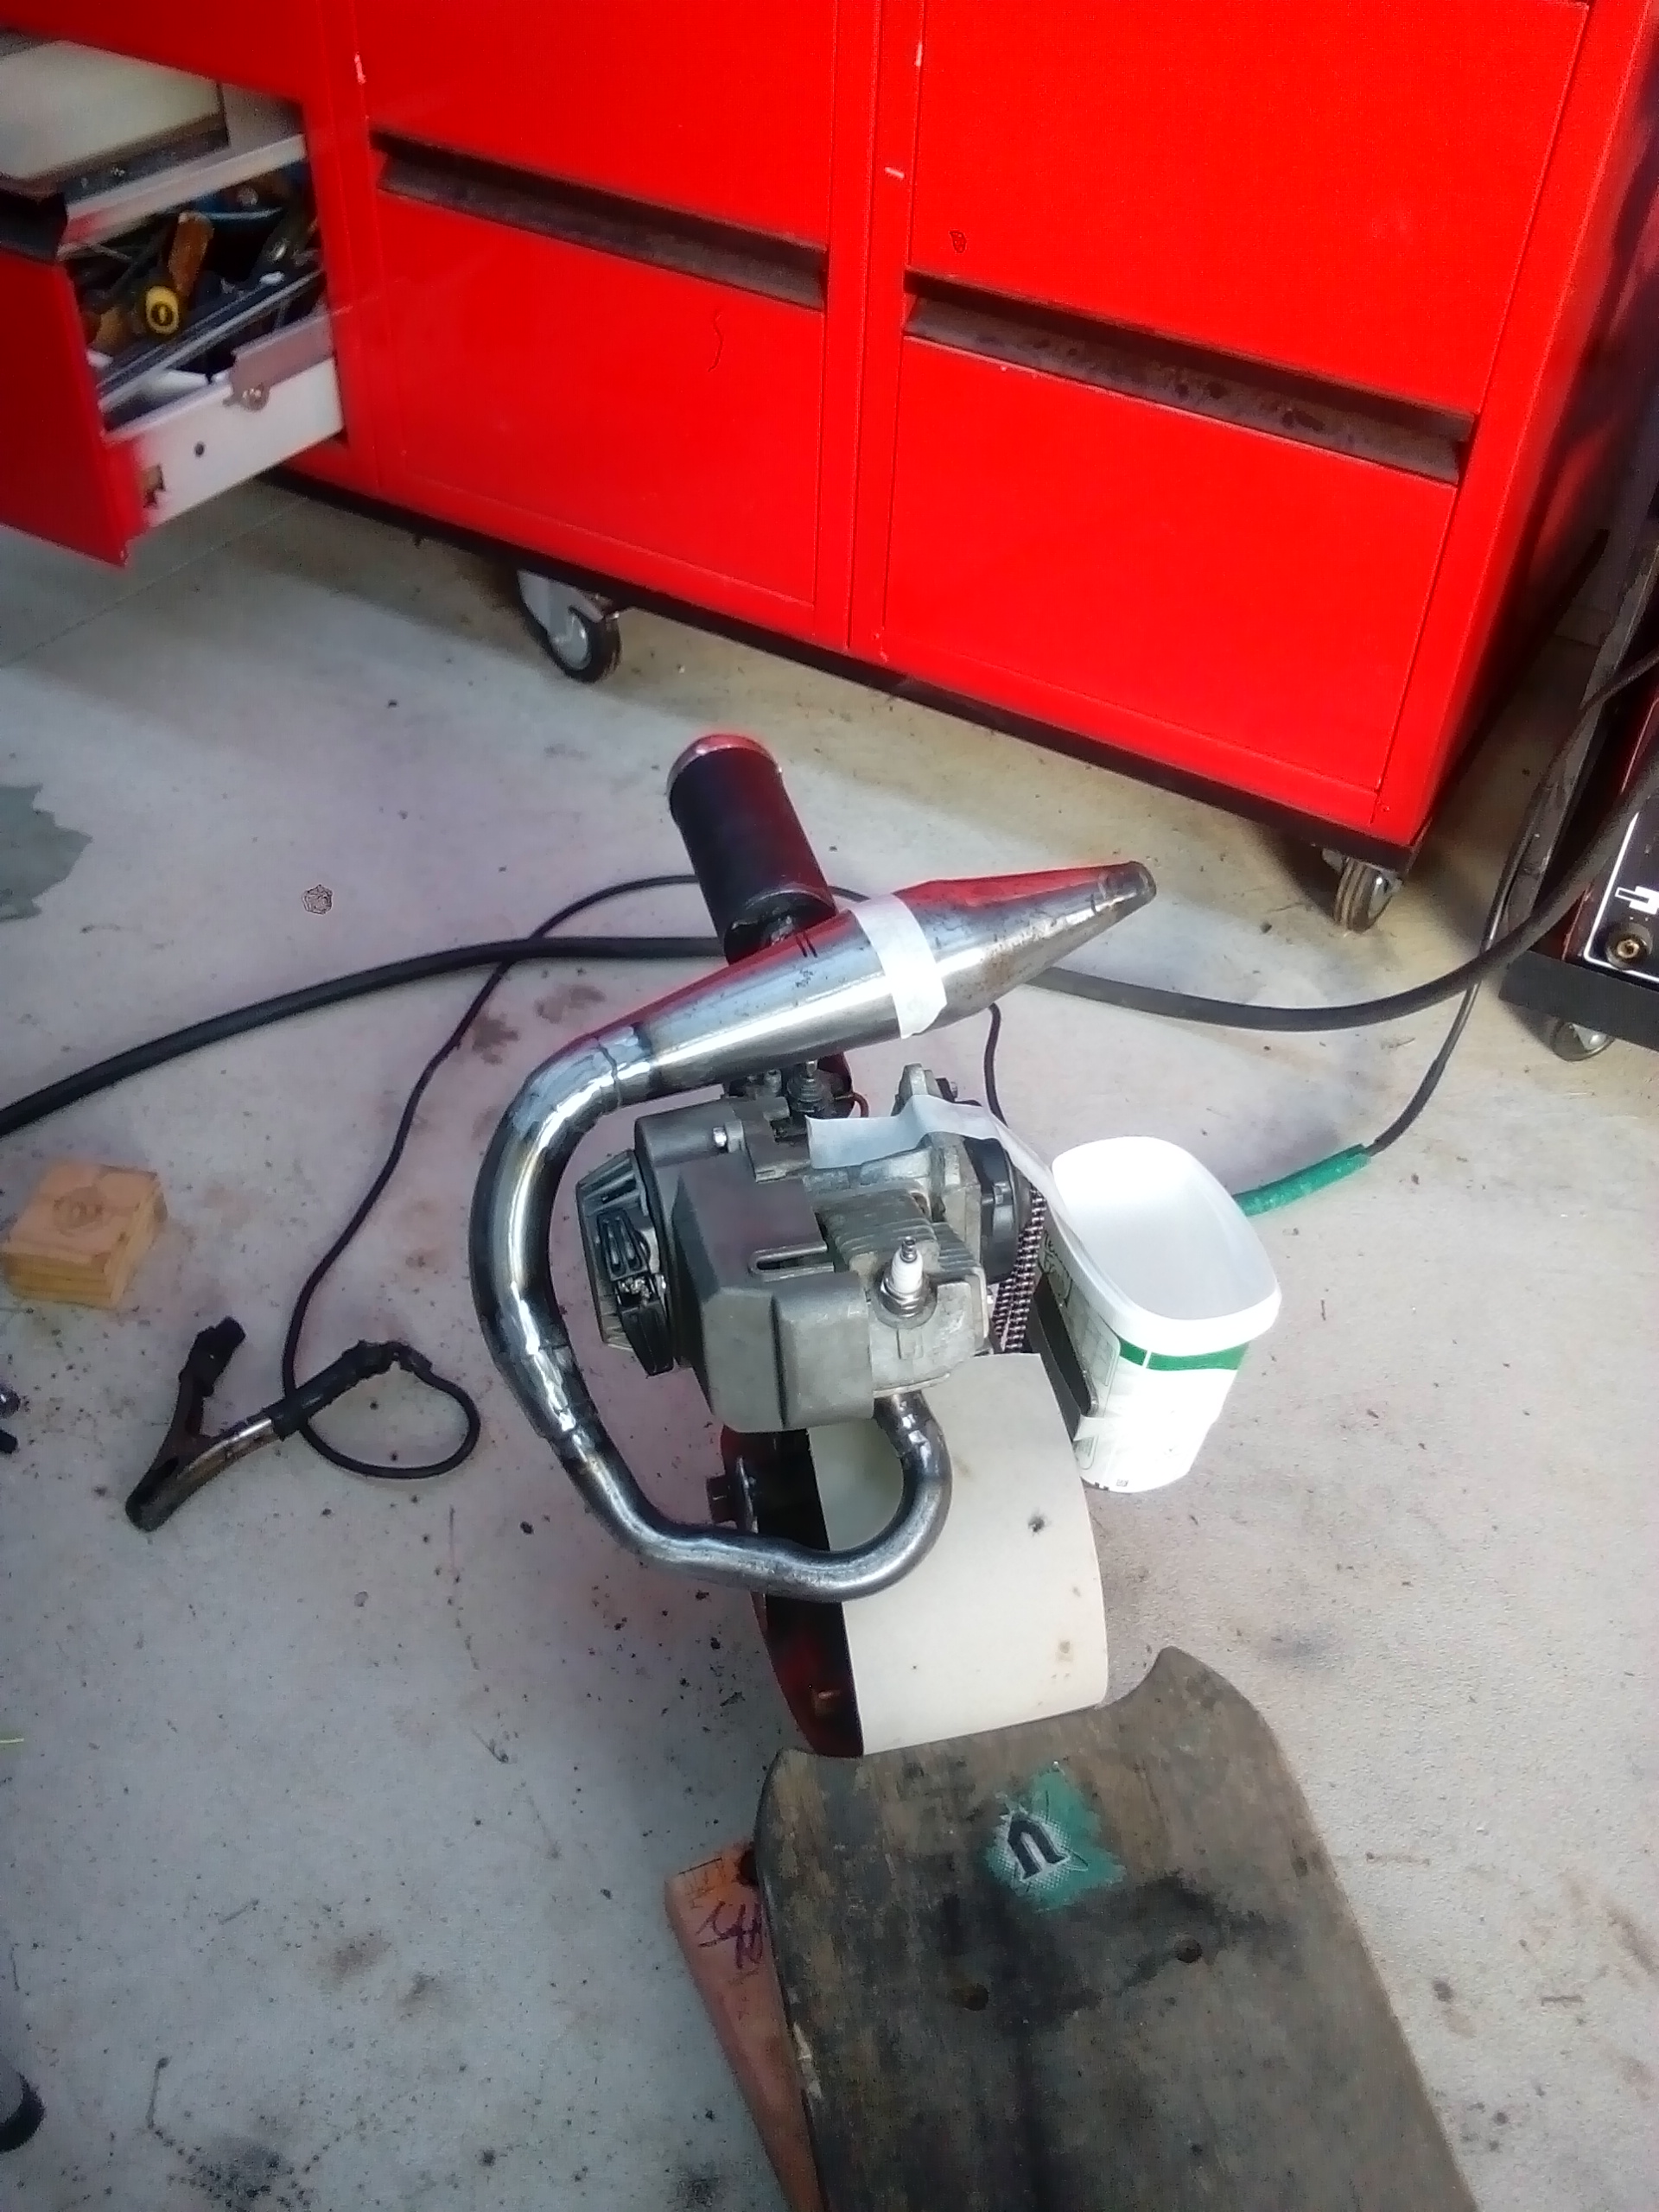
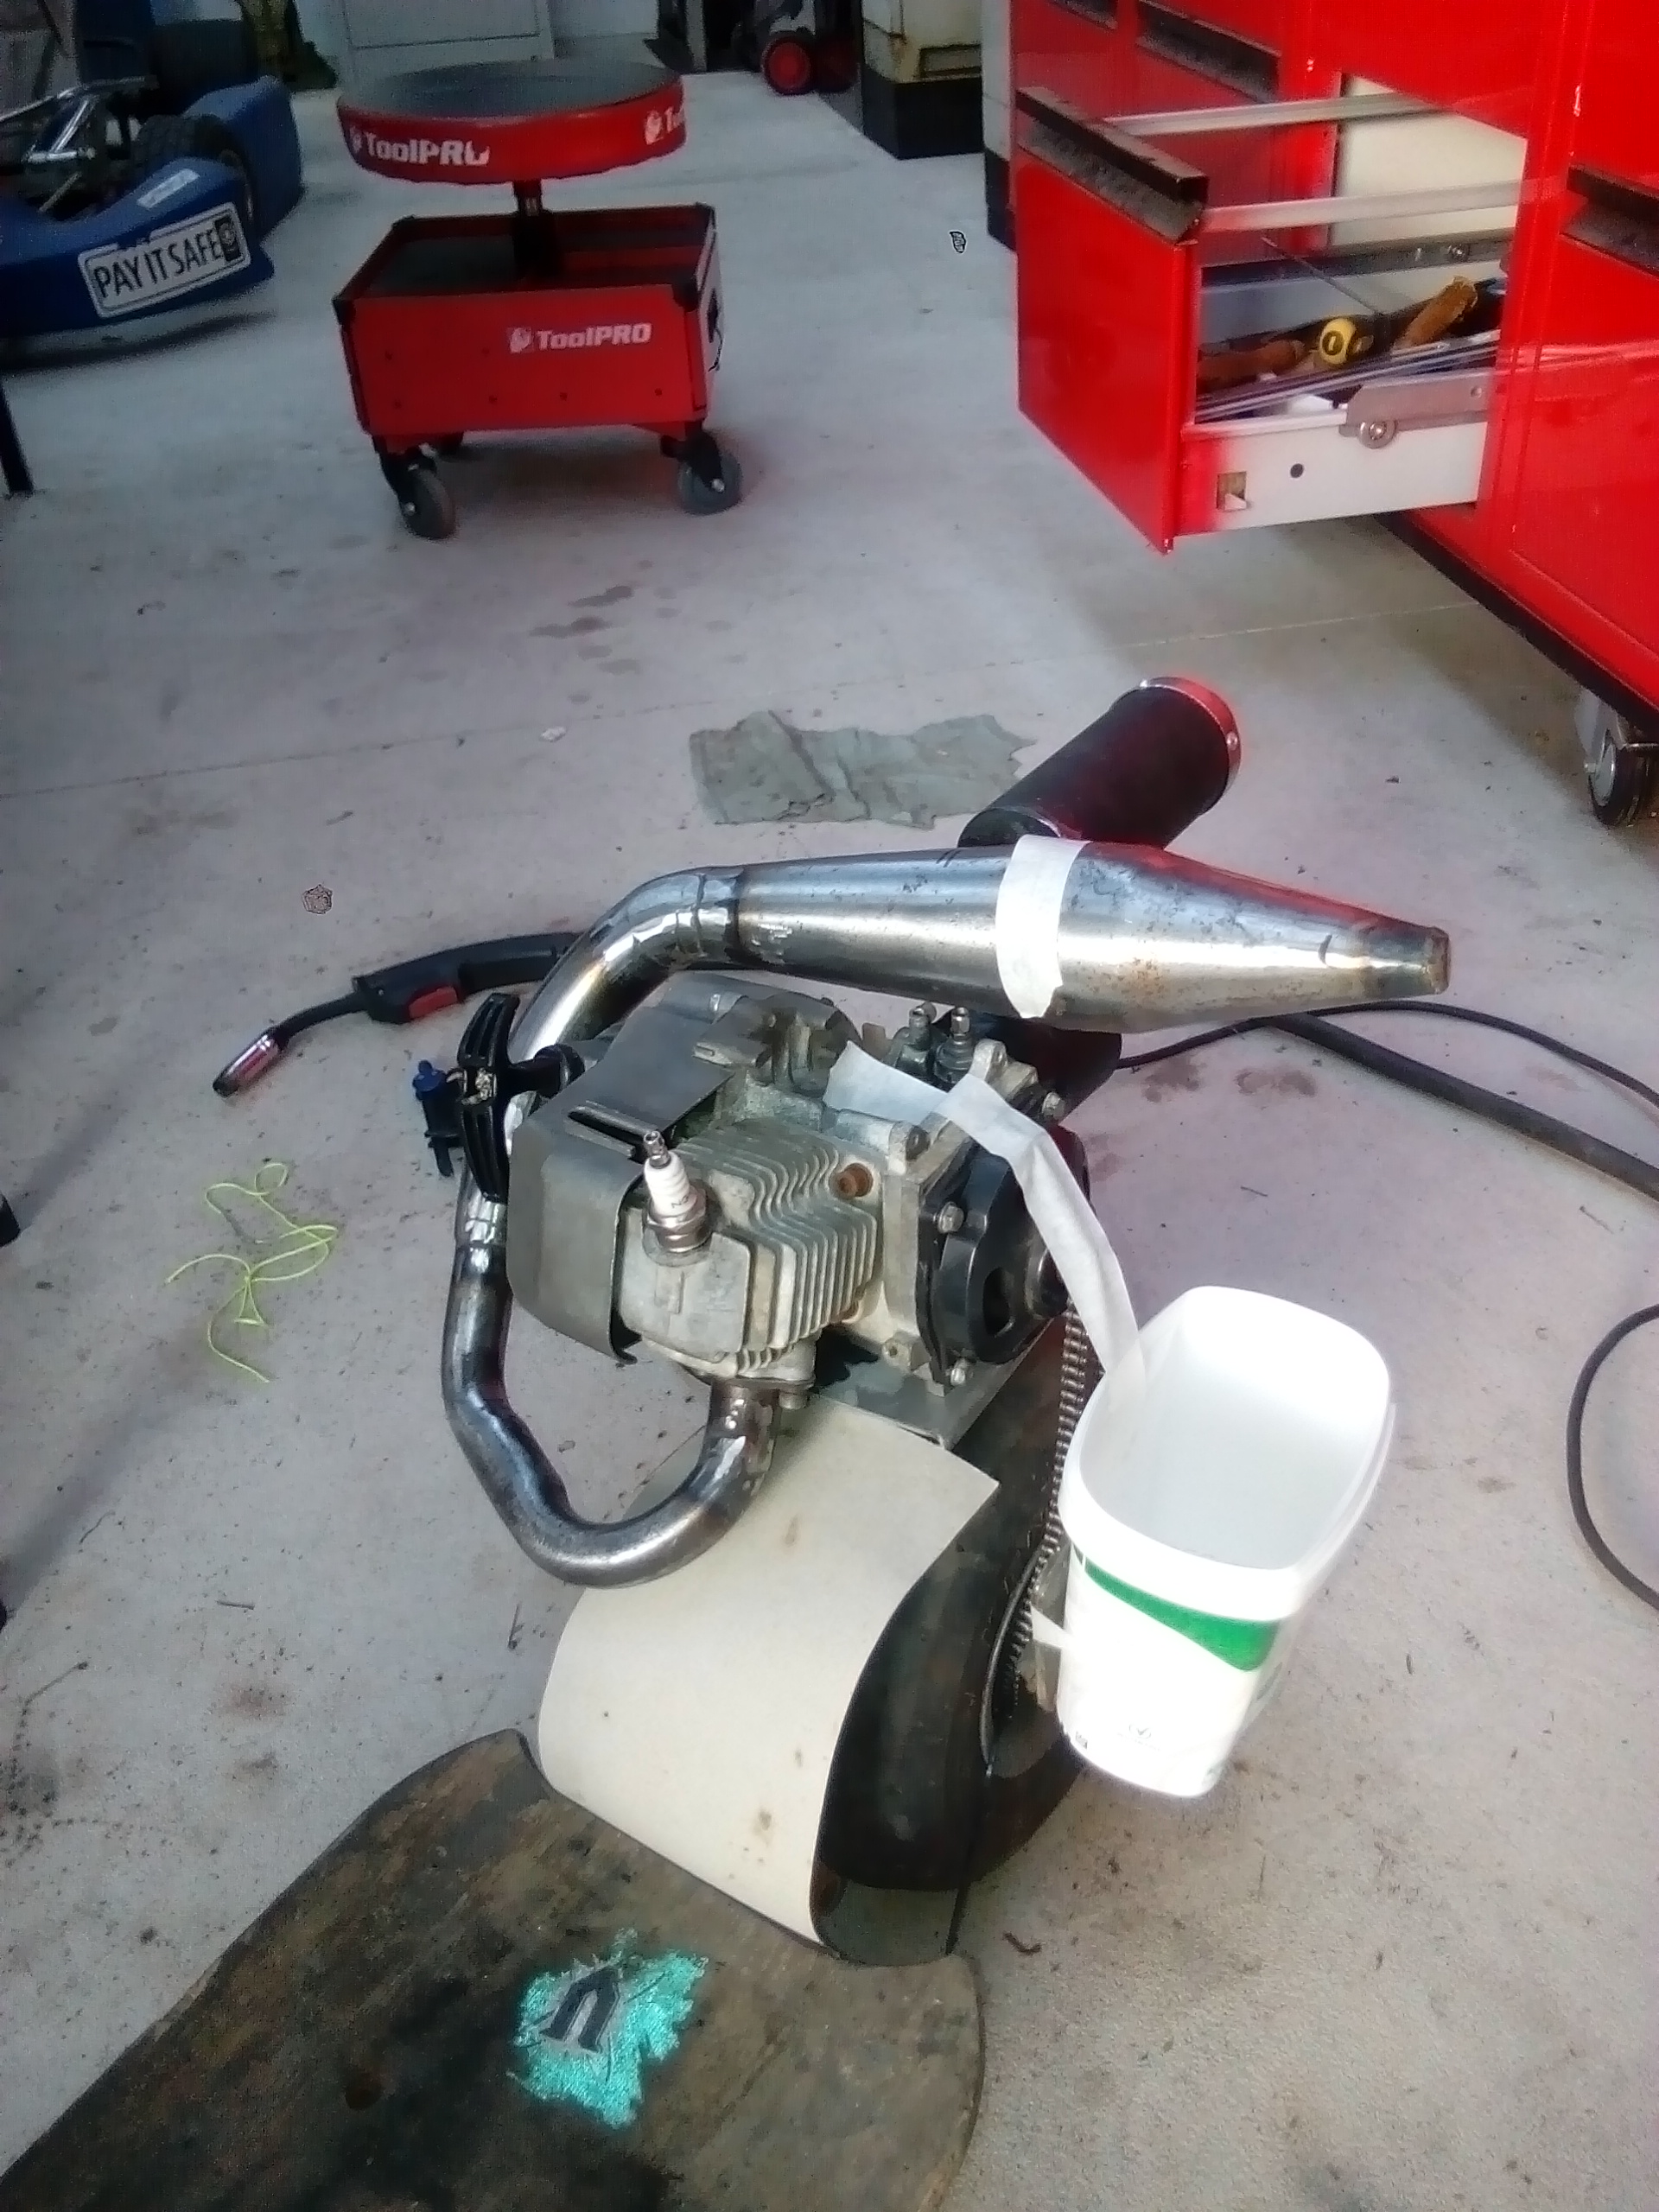
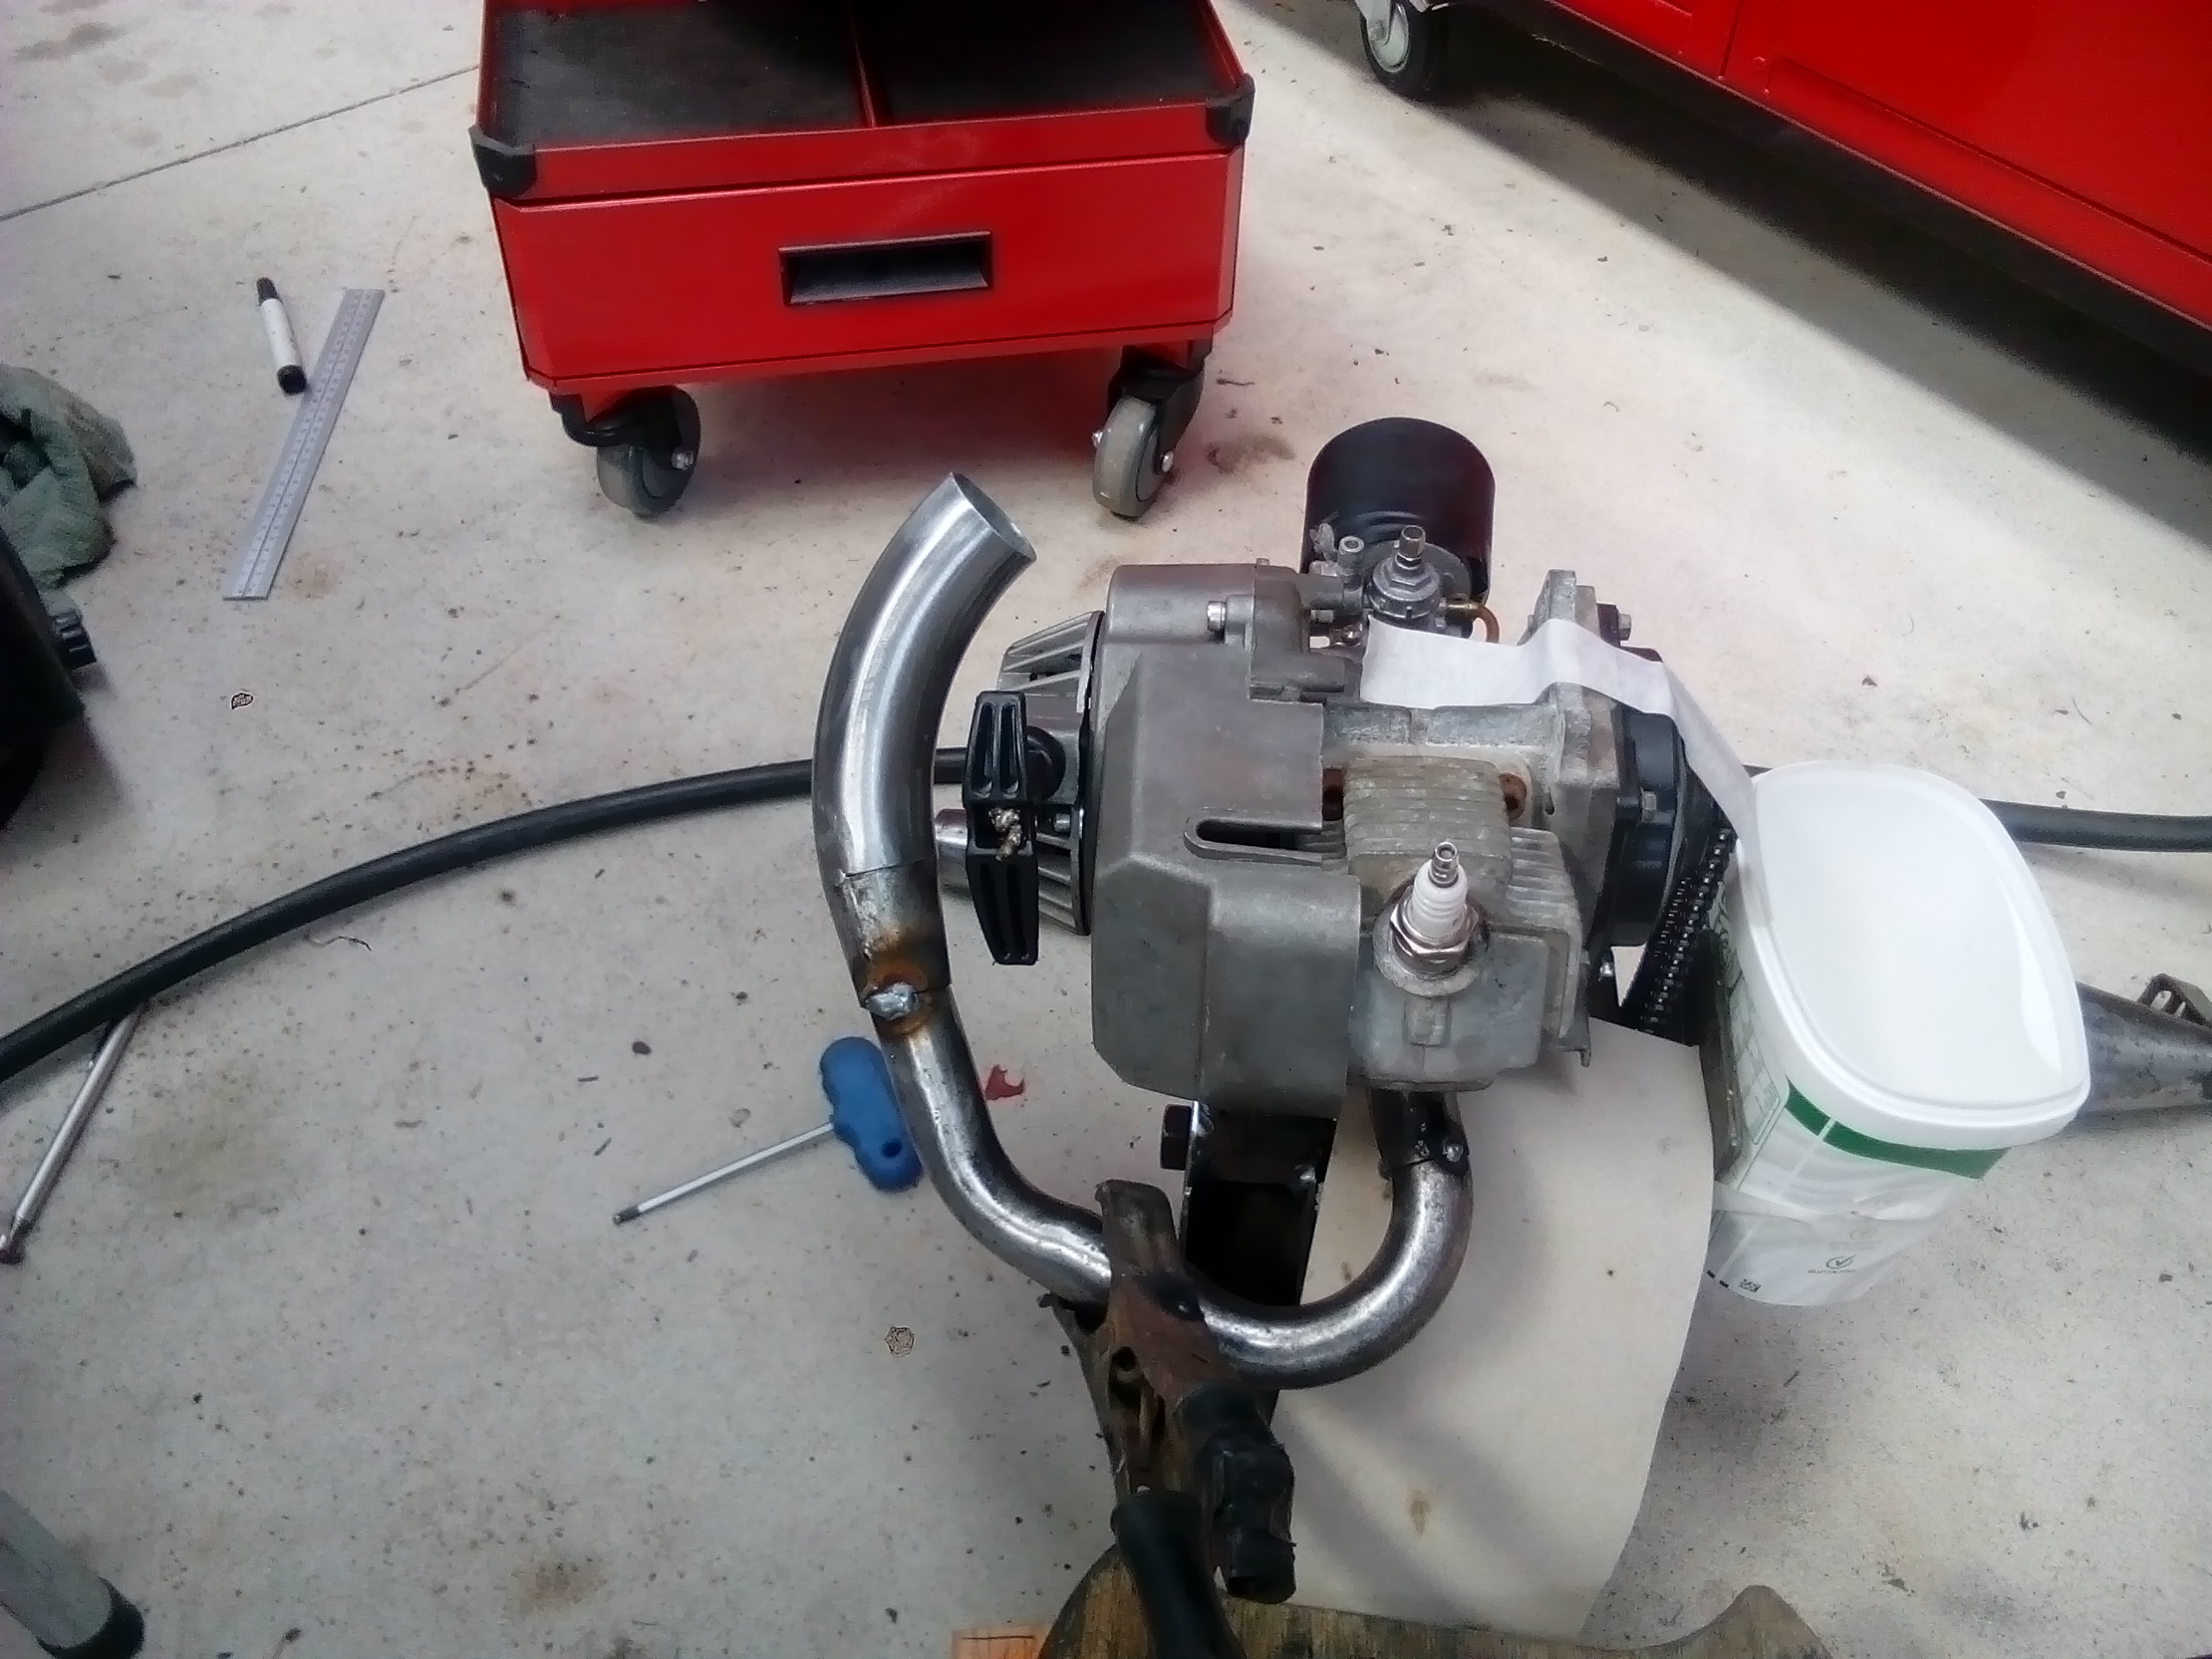
A couple more pics. the cardboard is a mockup of a rear fender I'll make/add. And the yogurt container is there to help me visualise a gas tank. Next up: I'm going to port the motor and add a larger carburetor with a diaphragm pump, so I don't have to mount the tank higher than the motor, then tidy it all up.
-
Kimjon's not as cool or epic as Muncie's off-road goped Bigfoot scooter thingy
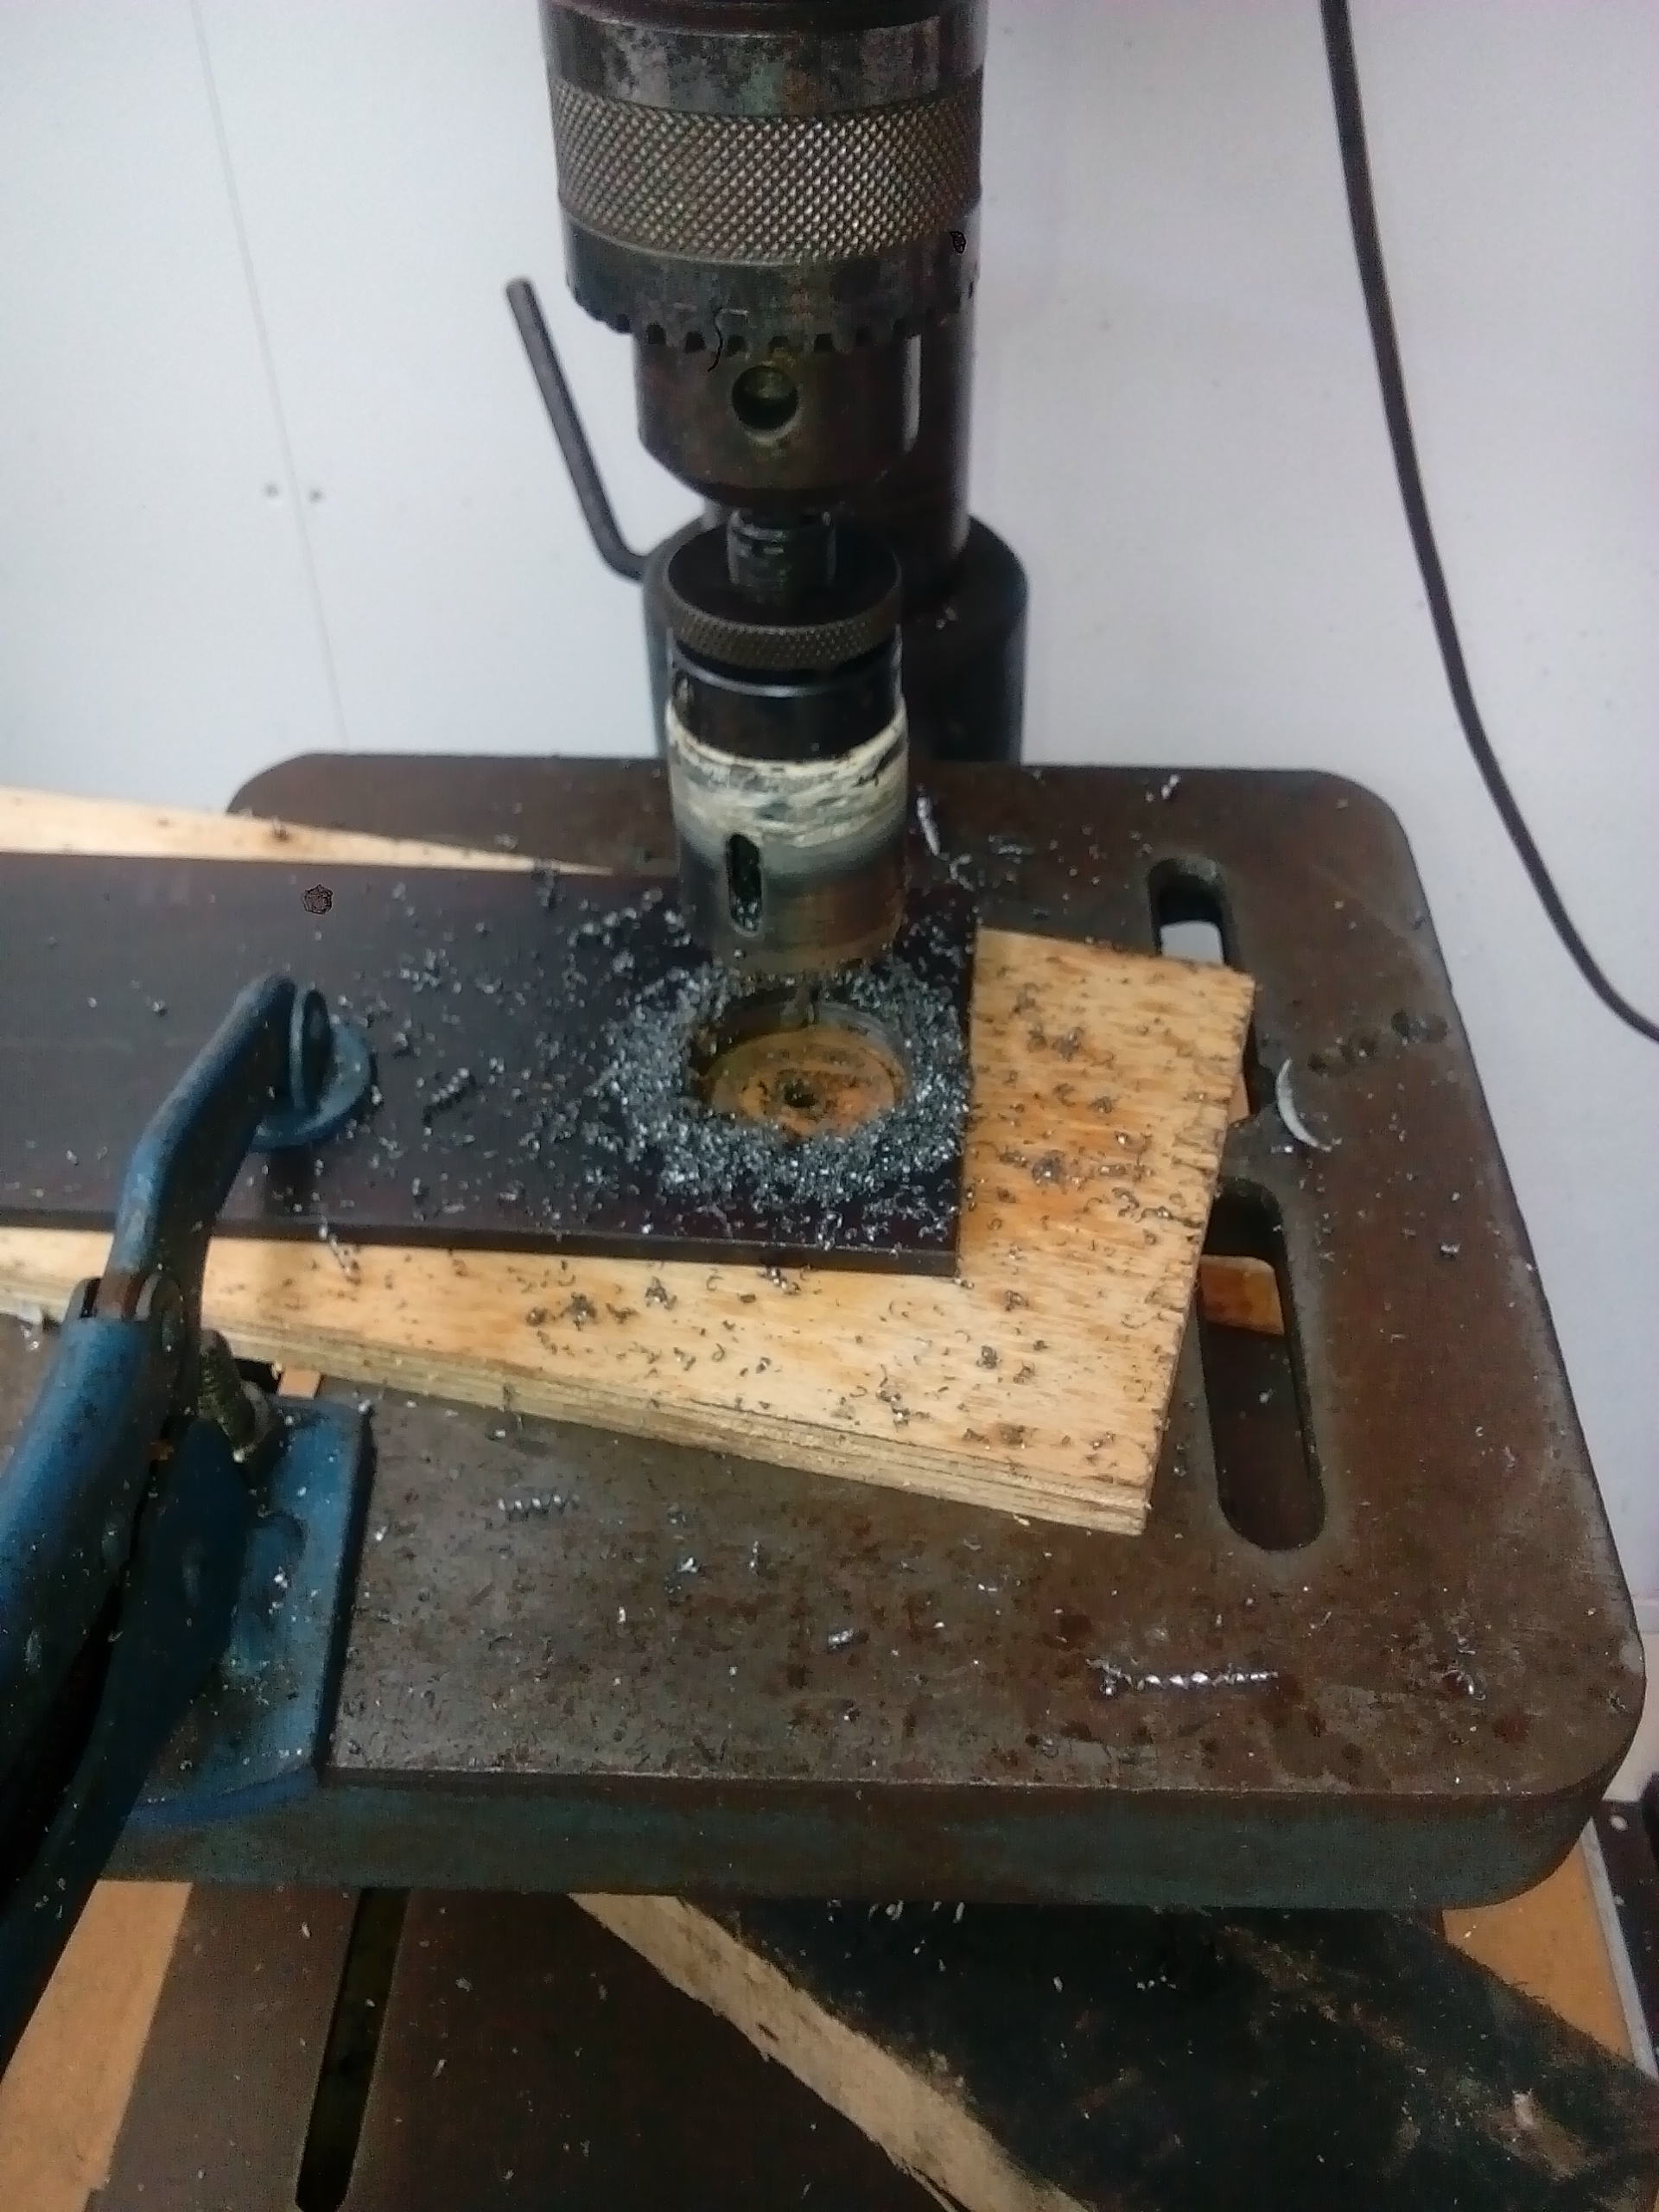
Kimjon replied to Kimjon's topic in Two Wheels
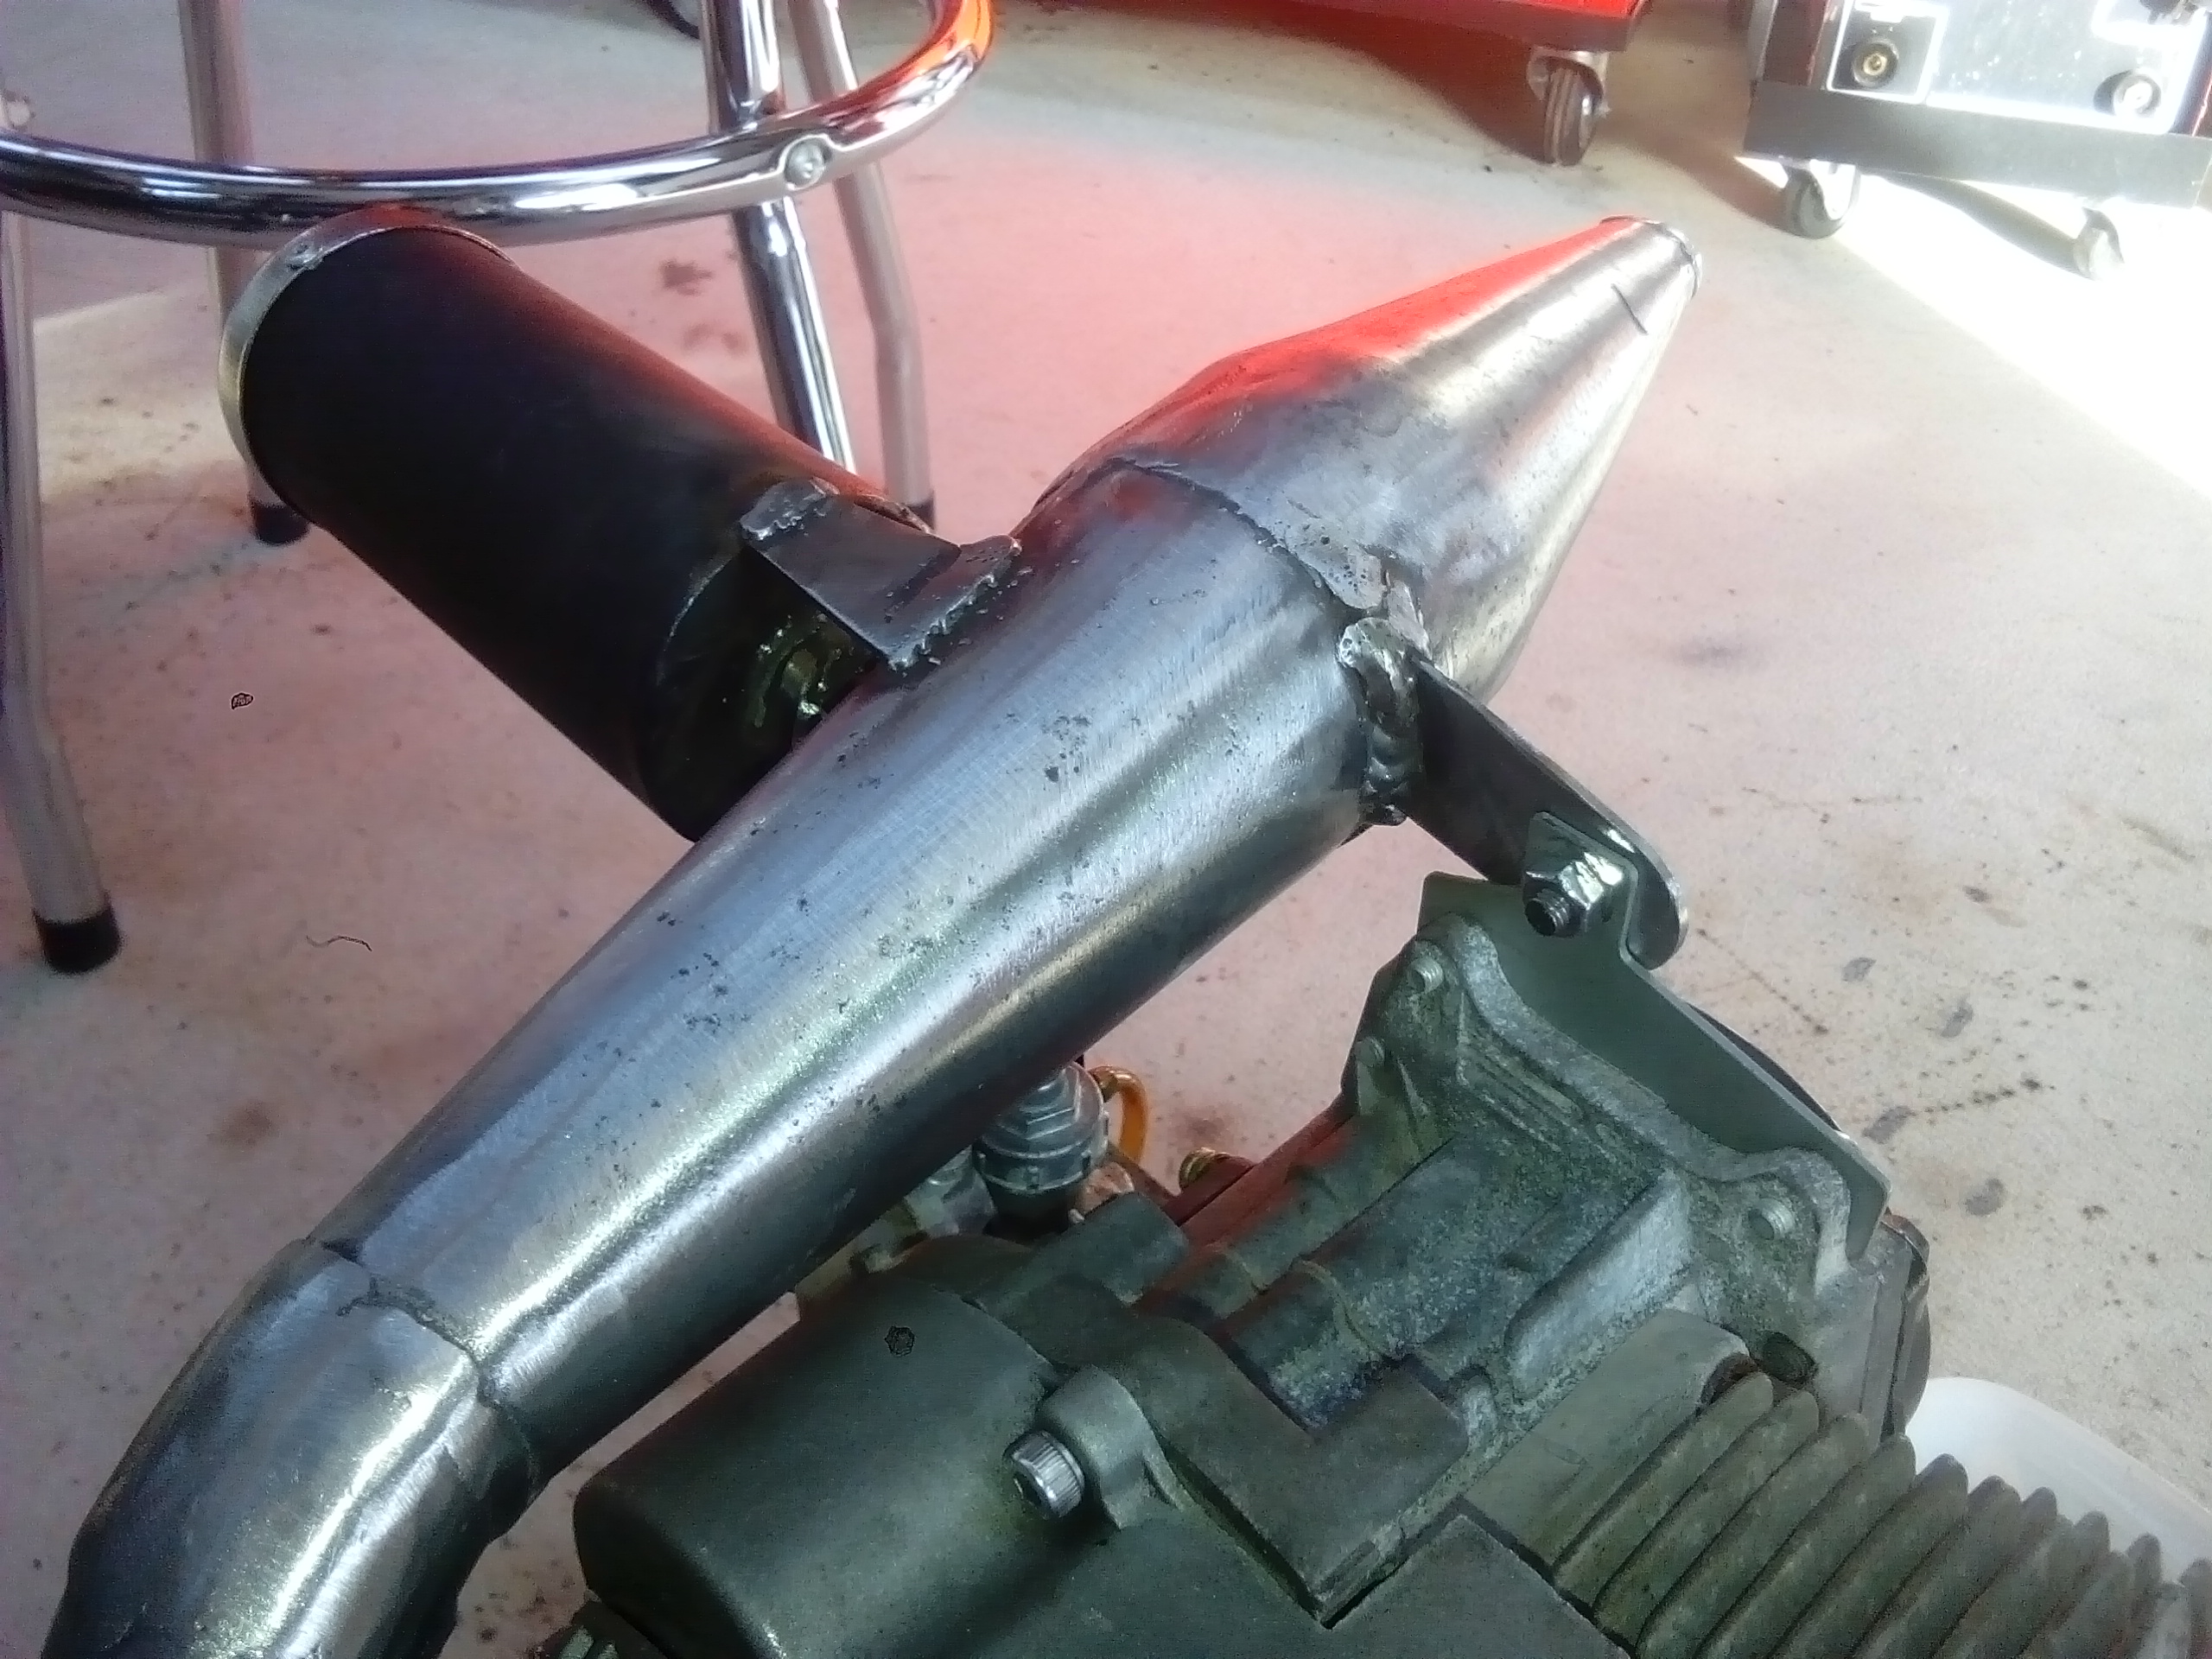
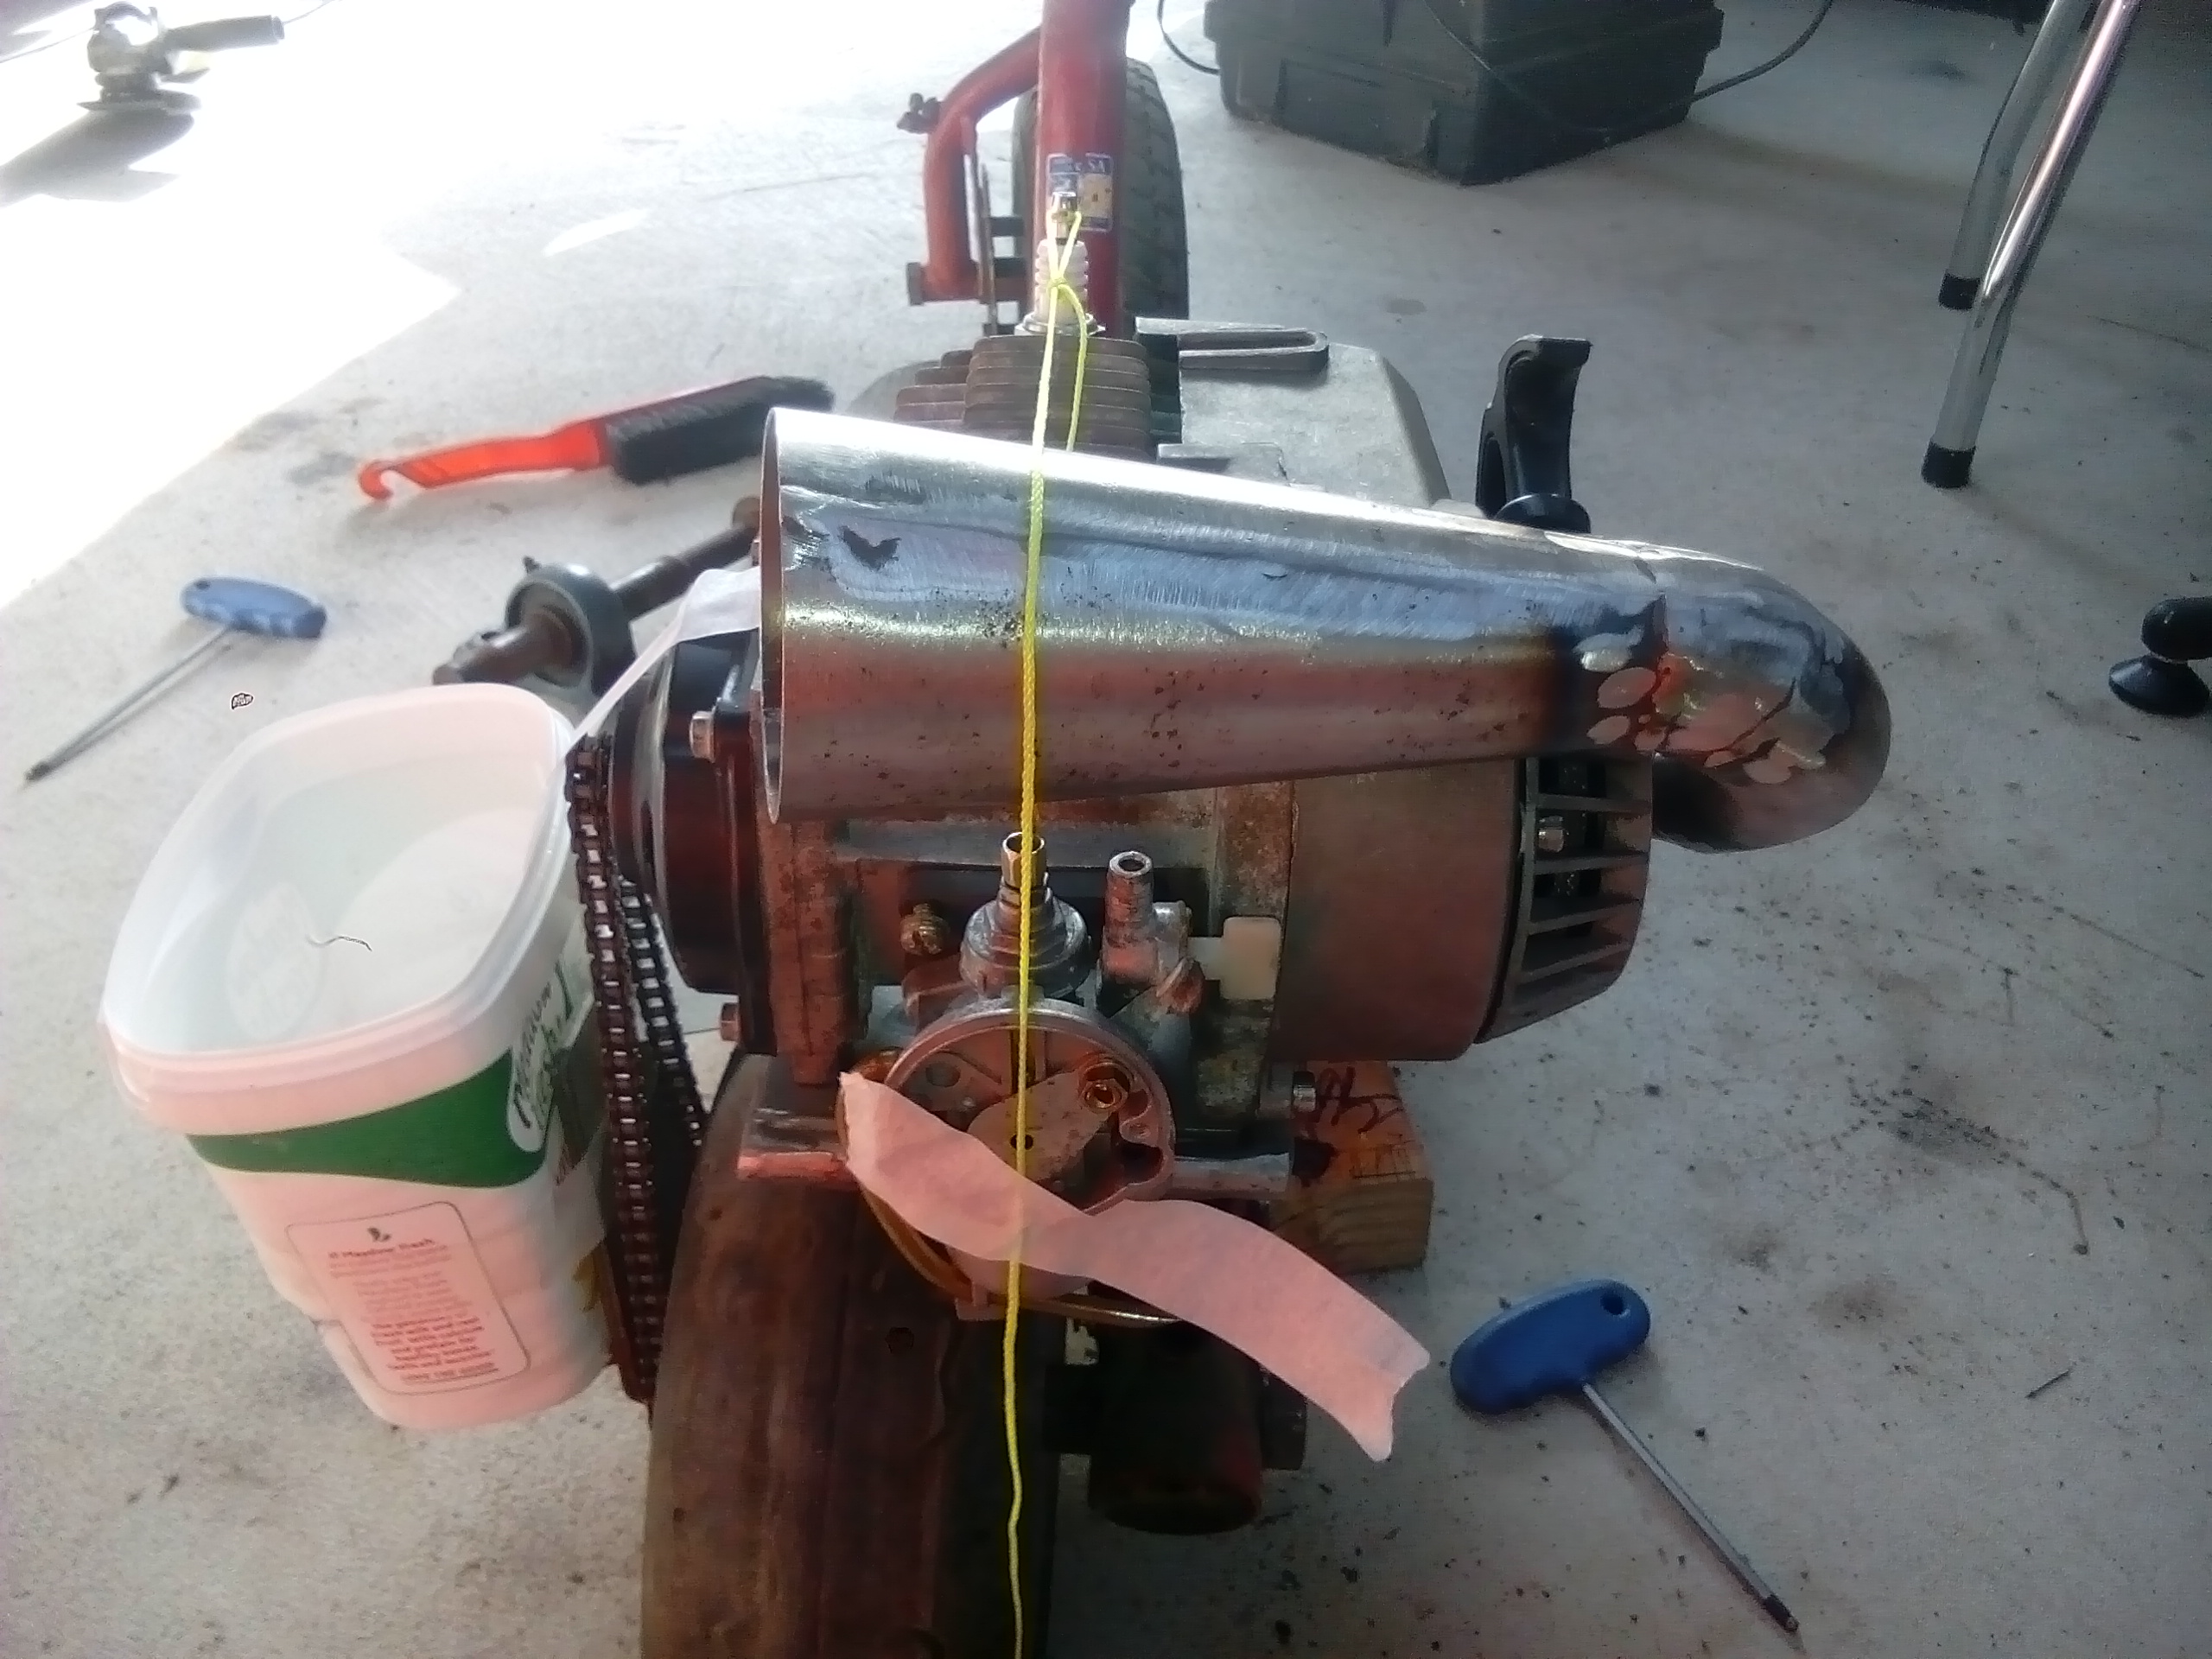
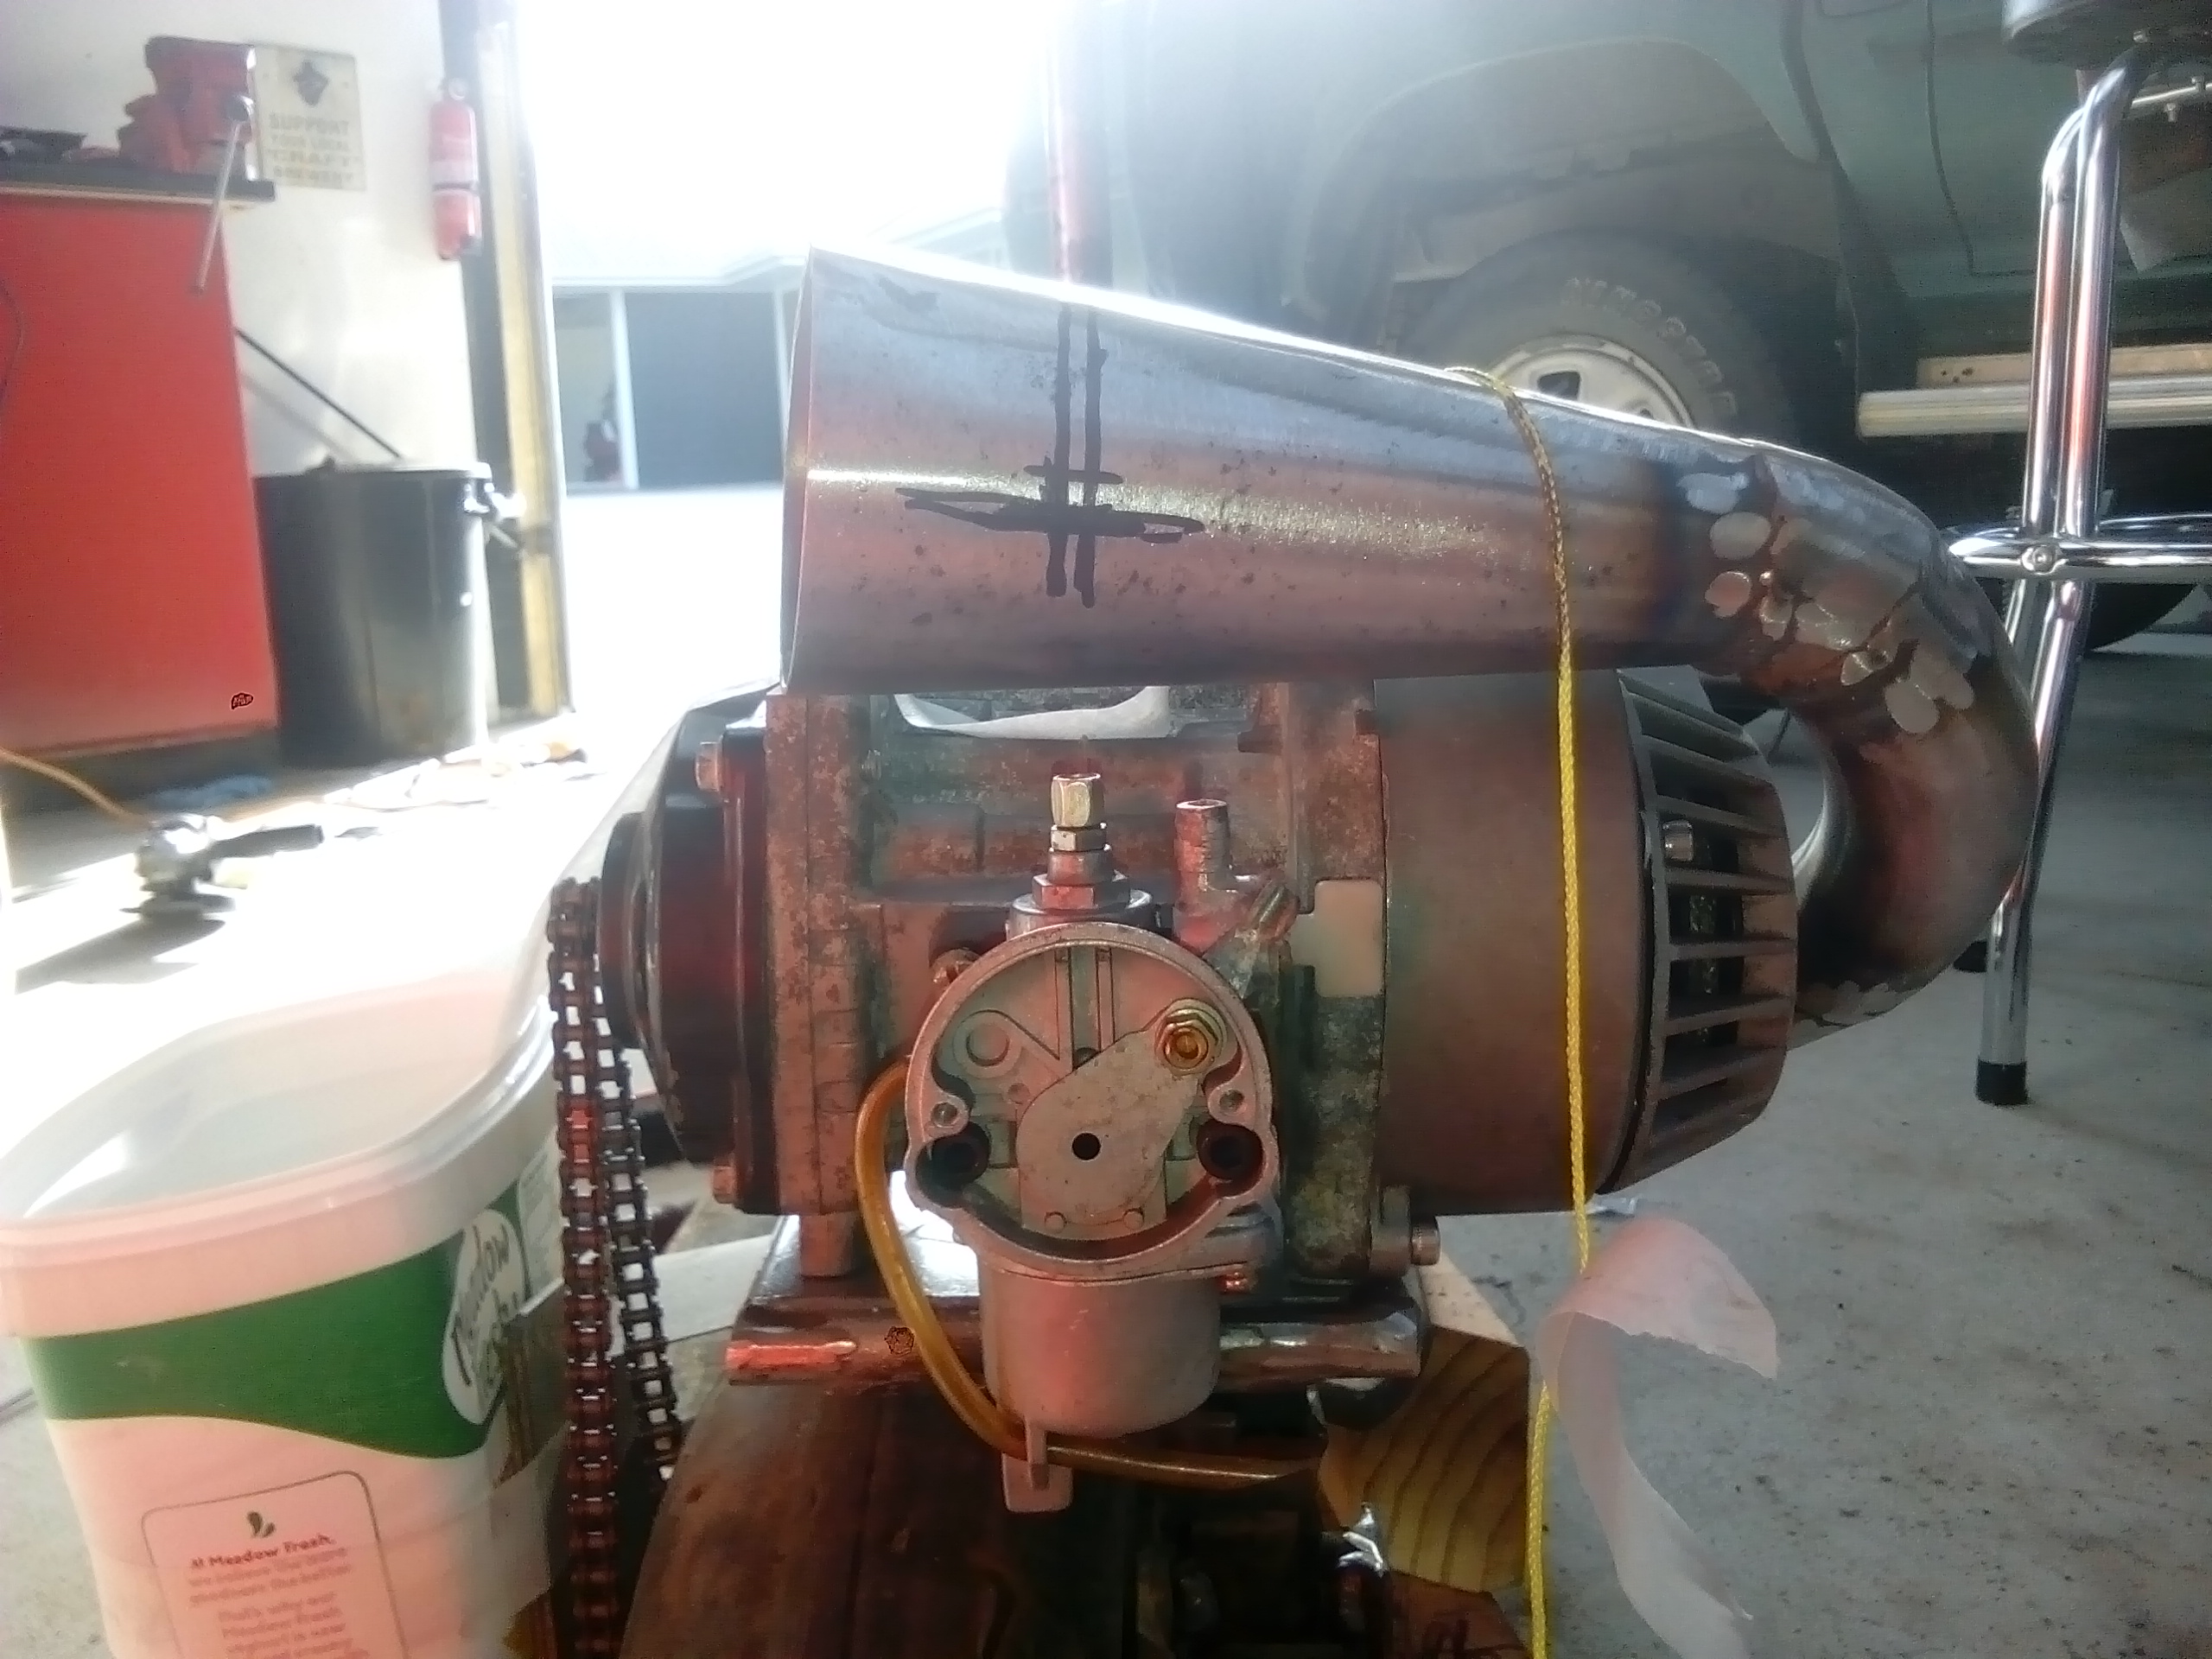
I cut a port in the main pipe with a step drill to match, and welded it in place. Once again using a string line to centre it. Then I closed of the tip of the cone where the old muffler was, as the exhaust will no longer exit there. I'm going to curve it around and point it down towards the ground...but I couldn't help taping it on just to get a feel for how its going to look. I'll give it more time, as this look is growing on me. I may just weld it up like this?
-
Kimjon's not as cool or epic as Muncie's off-road goped Bigfoot scooter thingy
Kimjon replied to Kimjon's topic in Two Wheels
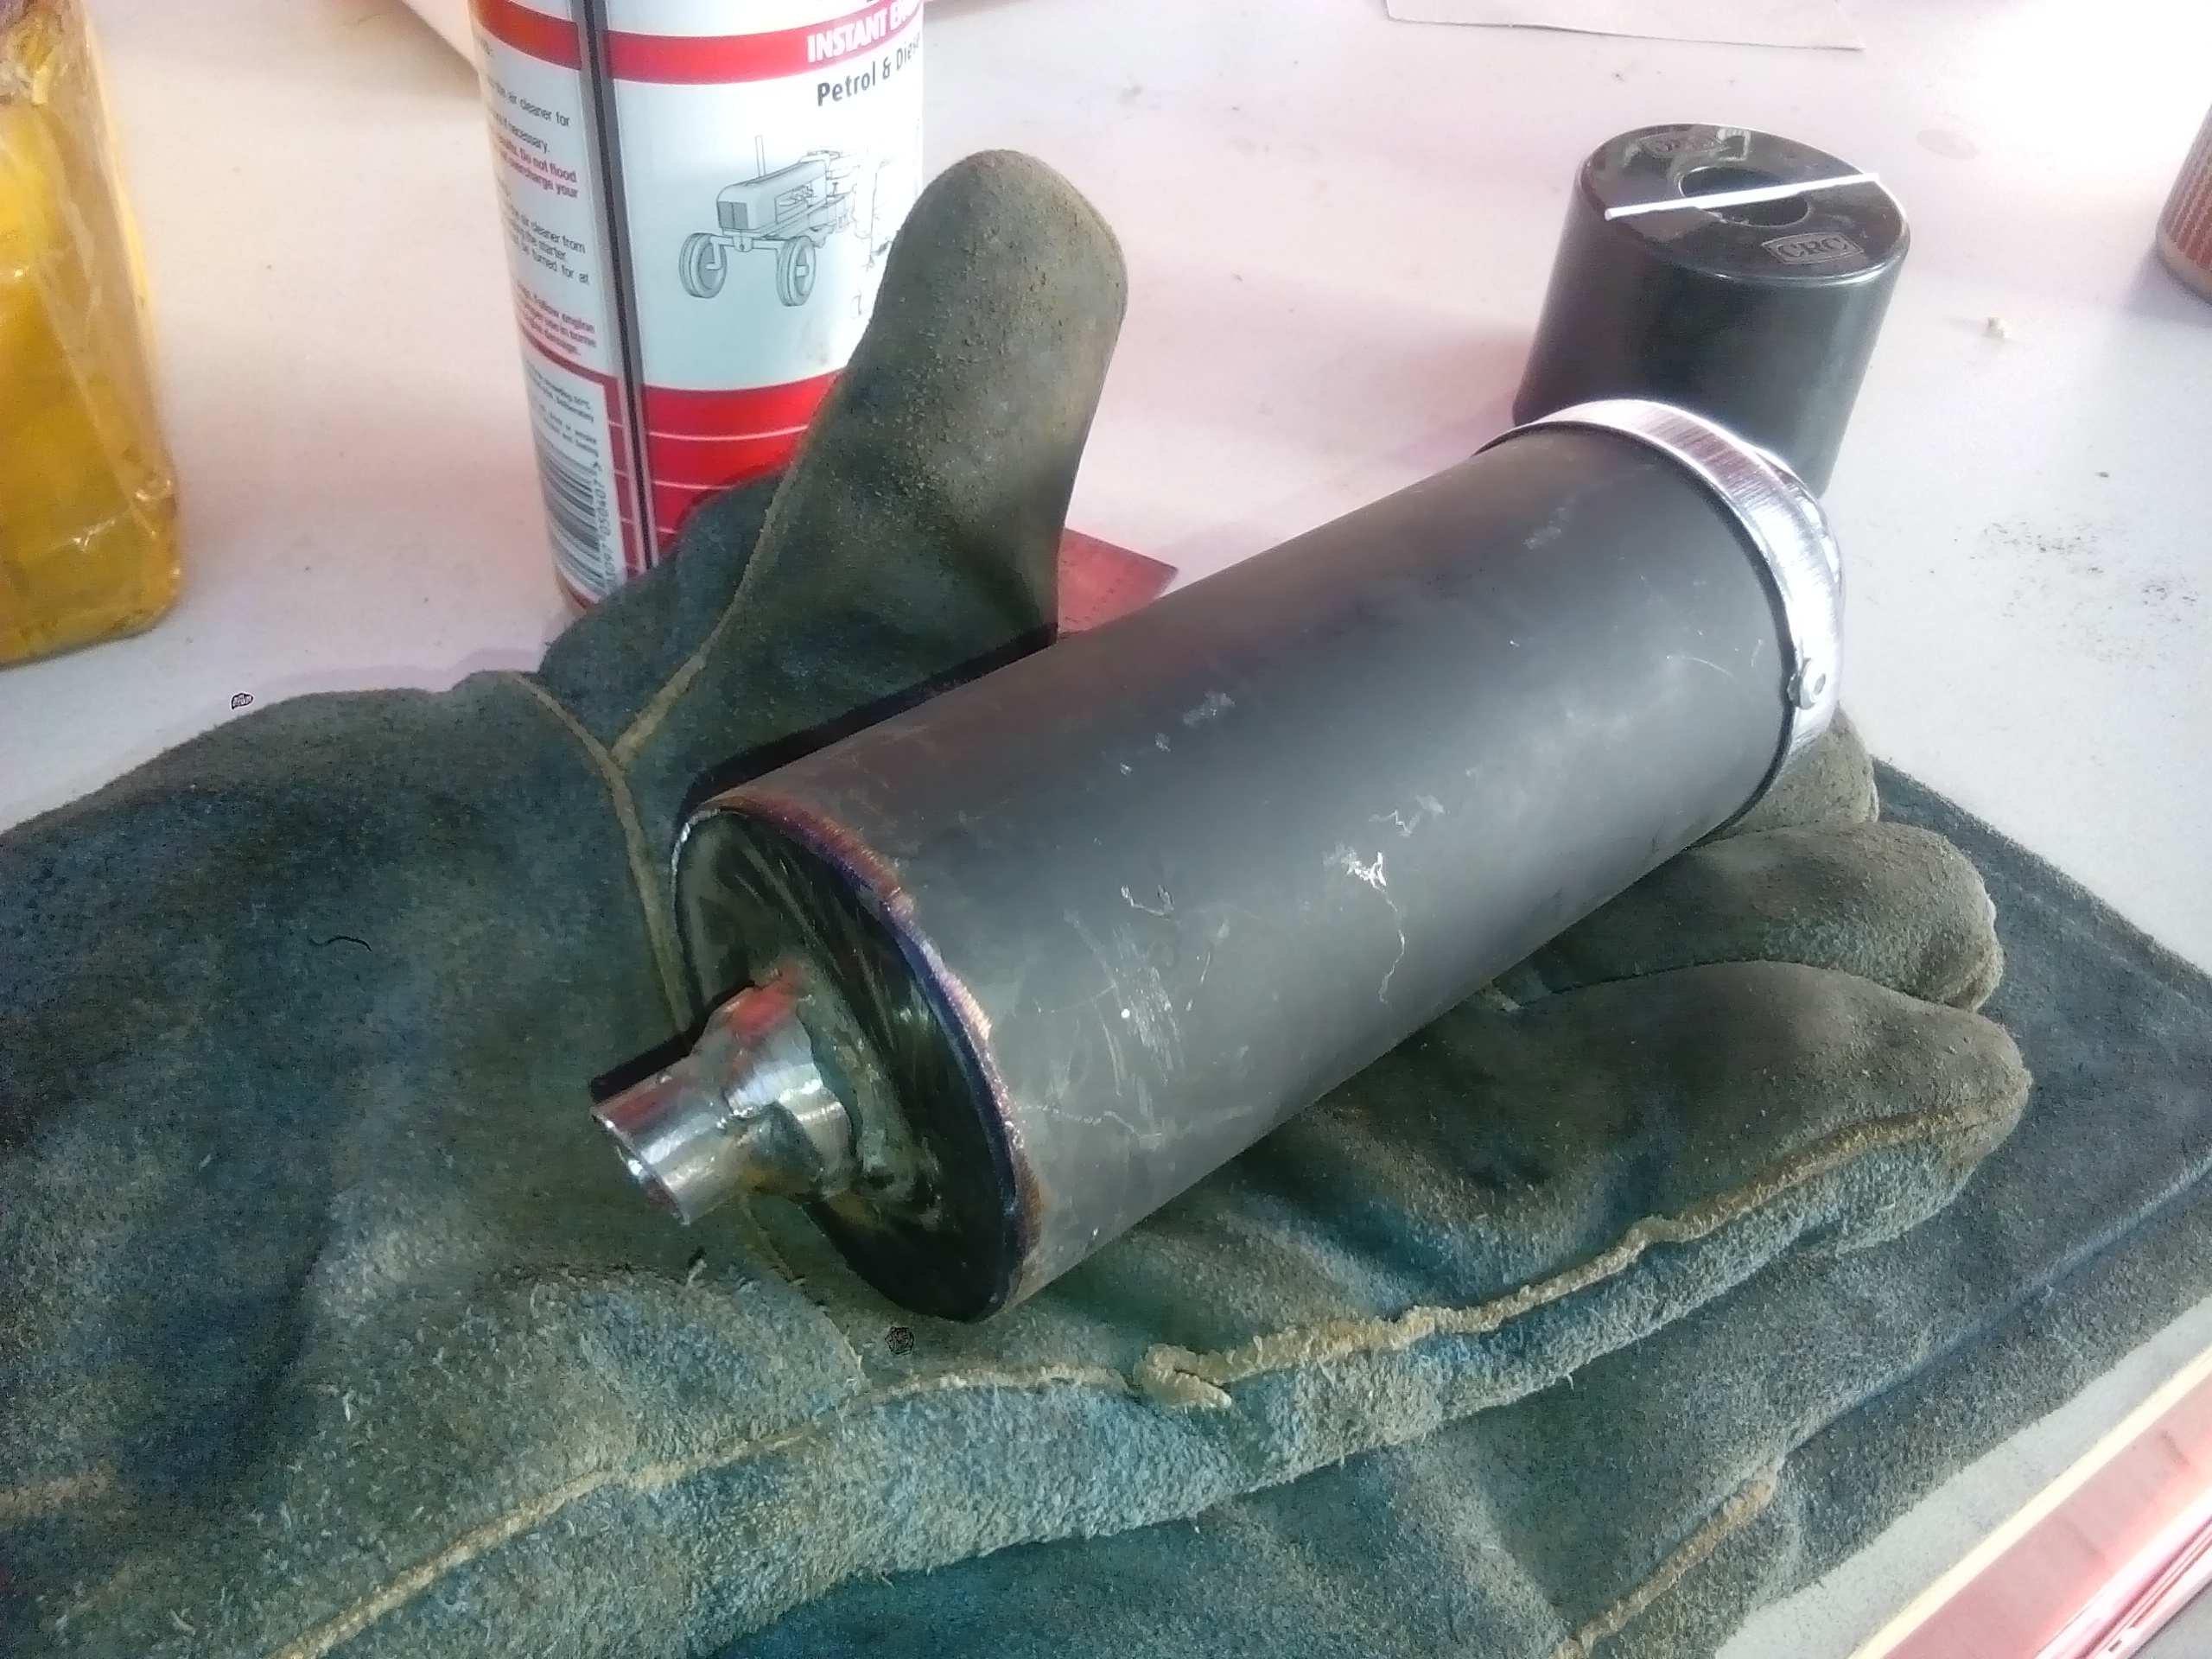
Then I fitted the muffler. I cut this off another pocket bike, welded an extension that was approximately 60% the size of the header pipe diameter to restrict exhaust flow.
-
Kimjon's not as cool or epic as Muncie's off-road goped Bigfoot scooter thingy
Kimjon replied to Kimjon's topic in Two Wheels
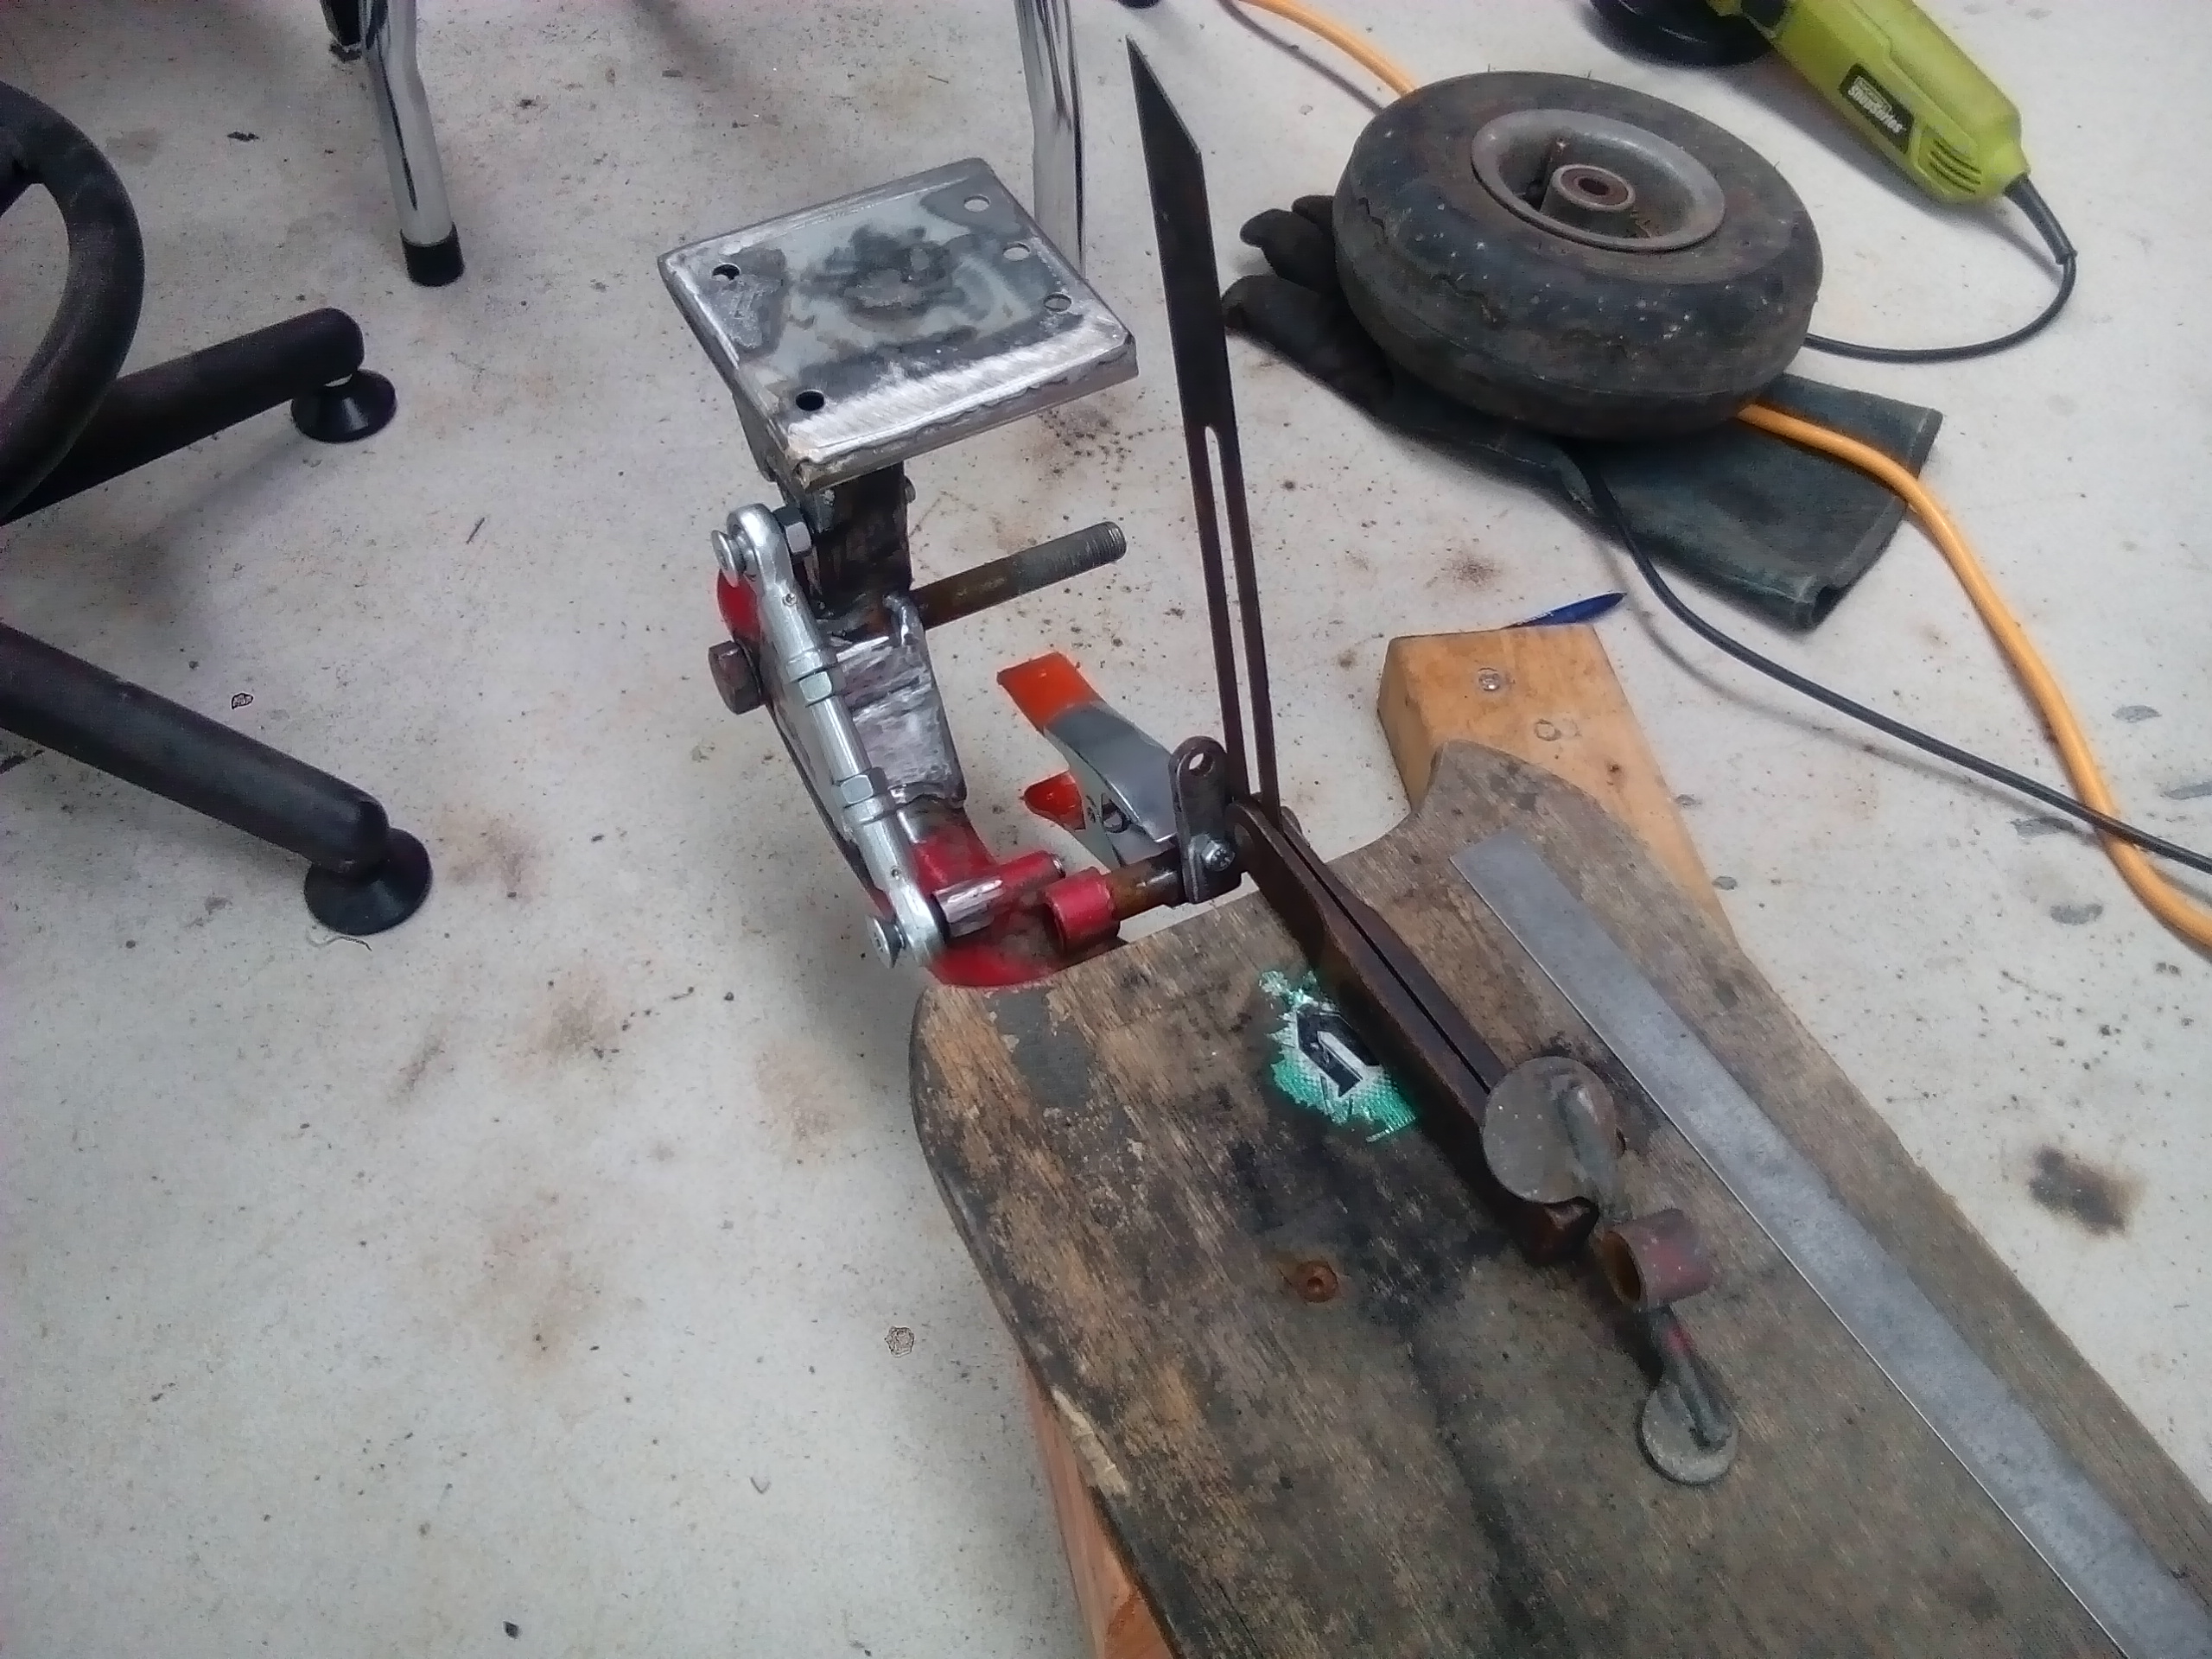
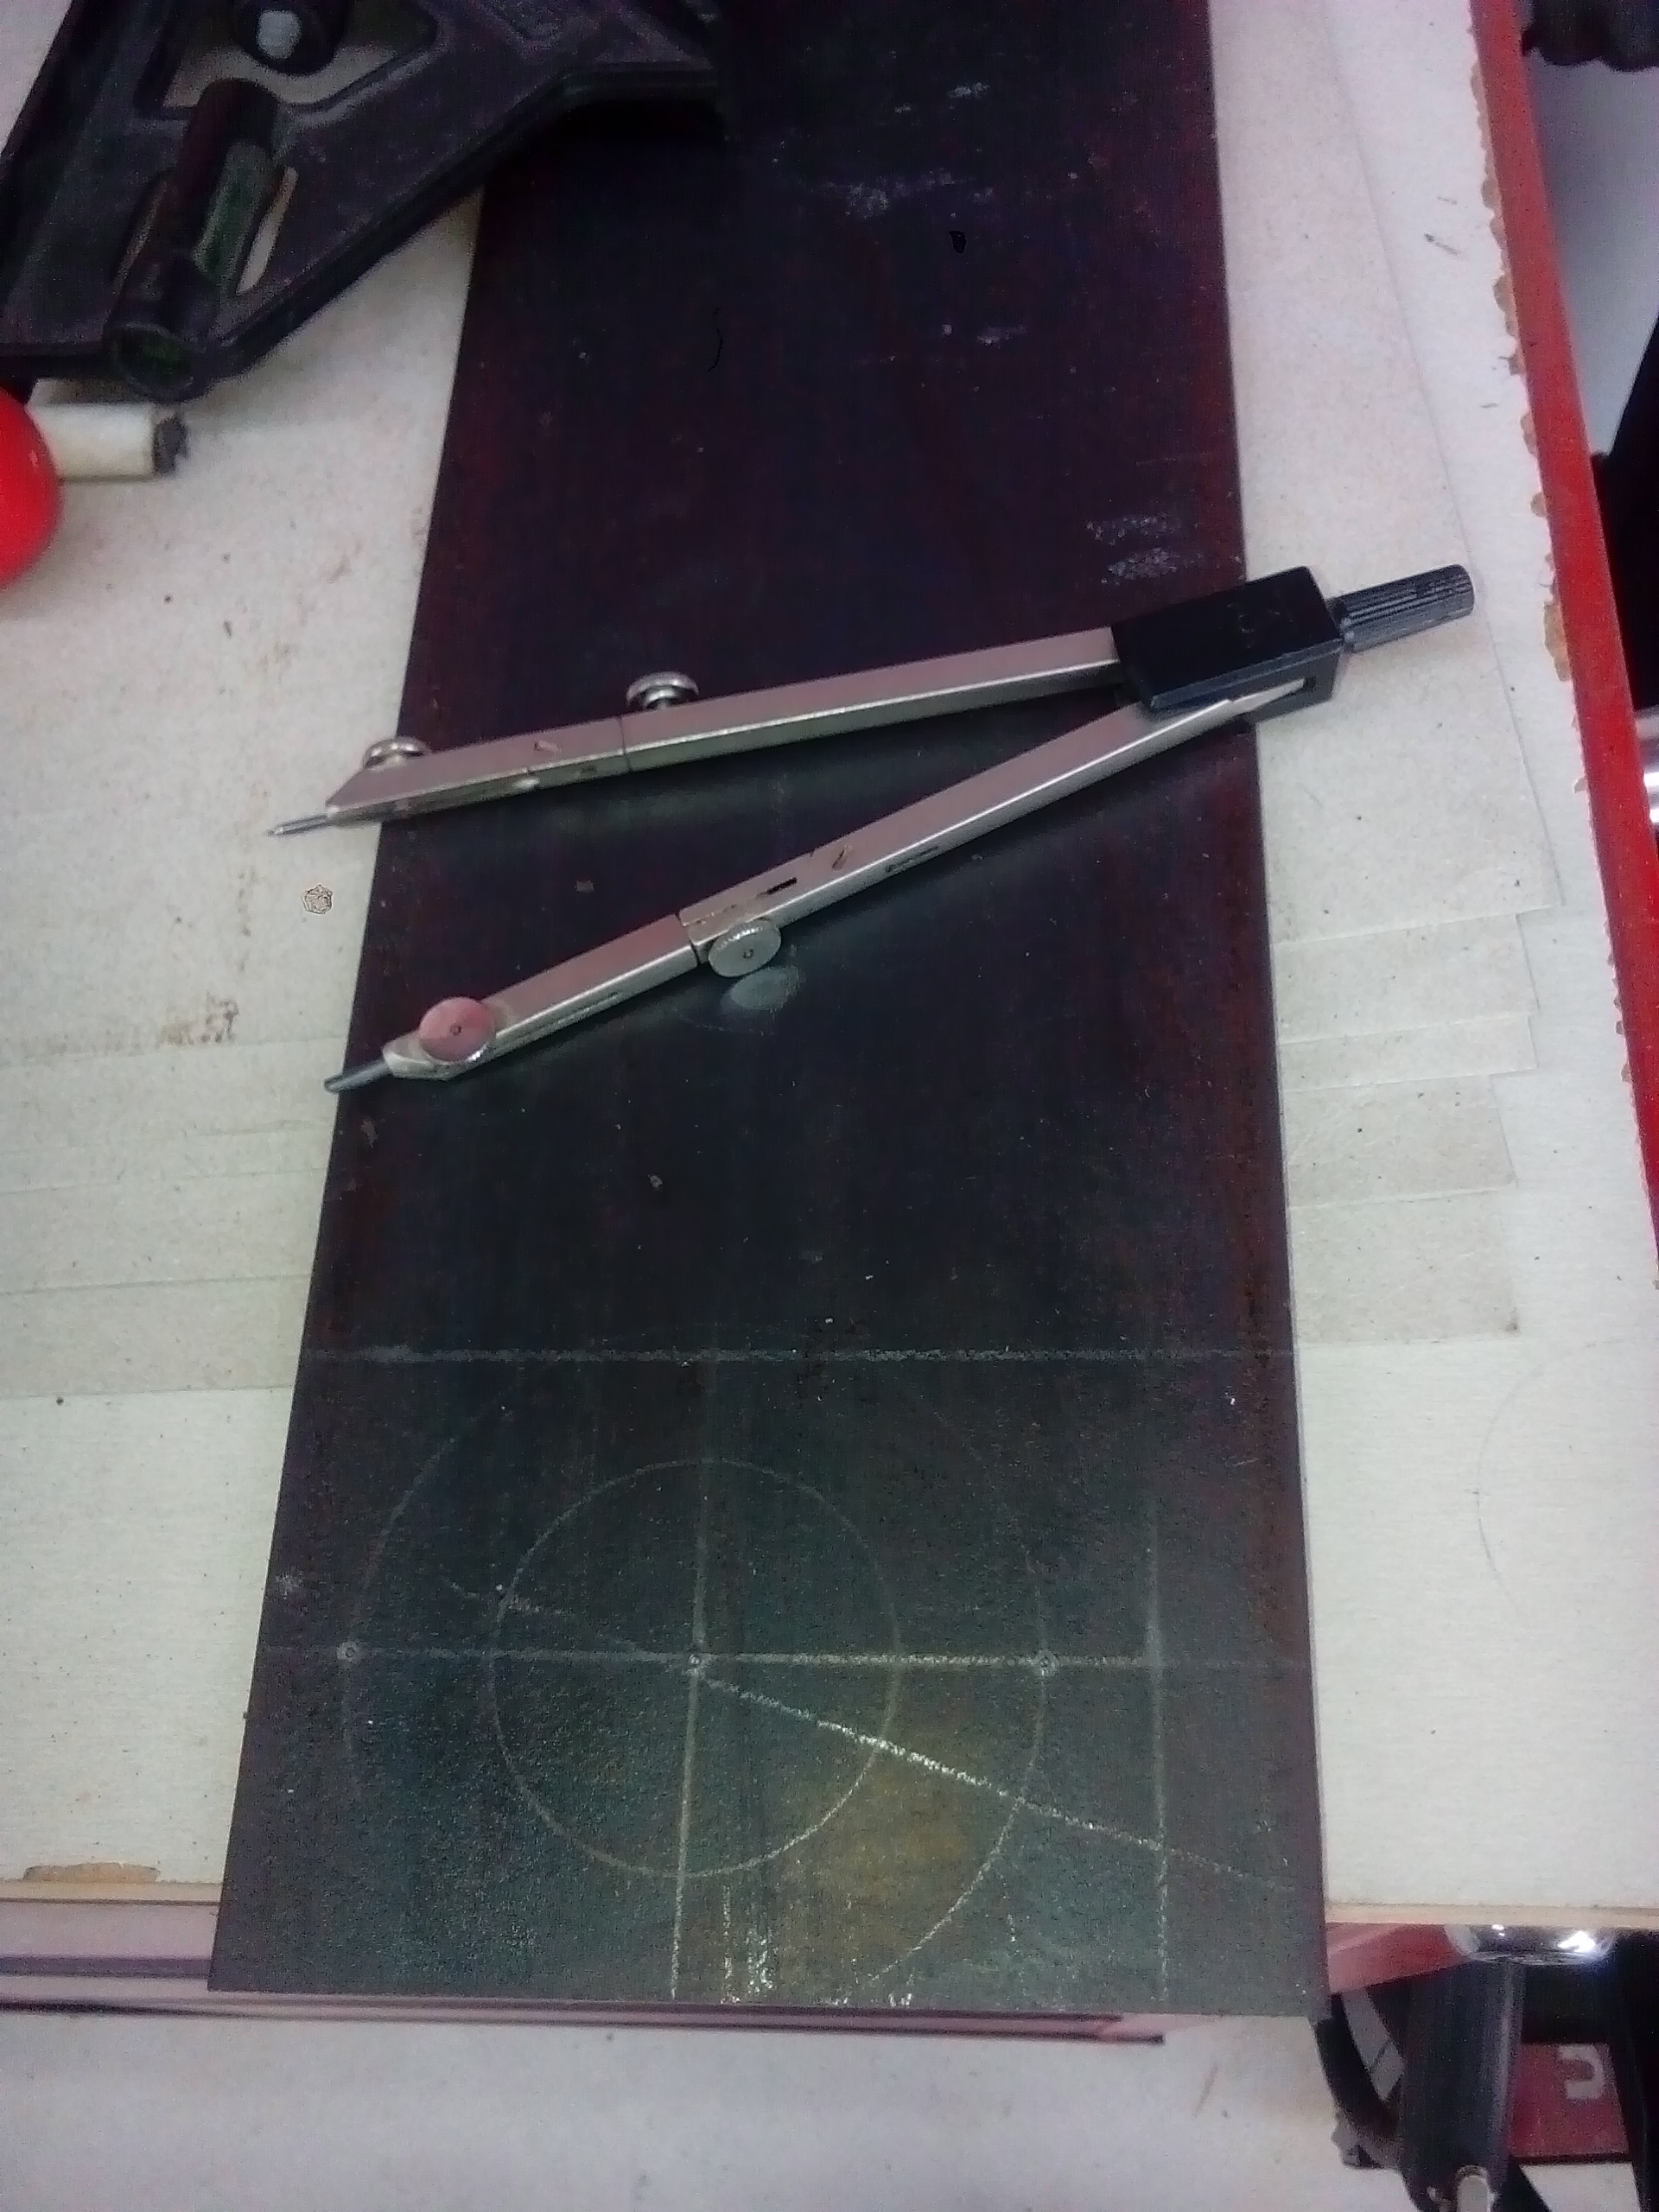
Going for a centrebleed pipe, so marked out location of bleed port. String line gives a centerline, just mark each side of the string. then find the tangent and mark that.
-
Kimjon's not as cool or epic as Muncie's off-road goped Bigfoot scooter thingy
Kimjon replied to Kimjon's topic in Two Wheels
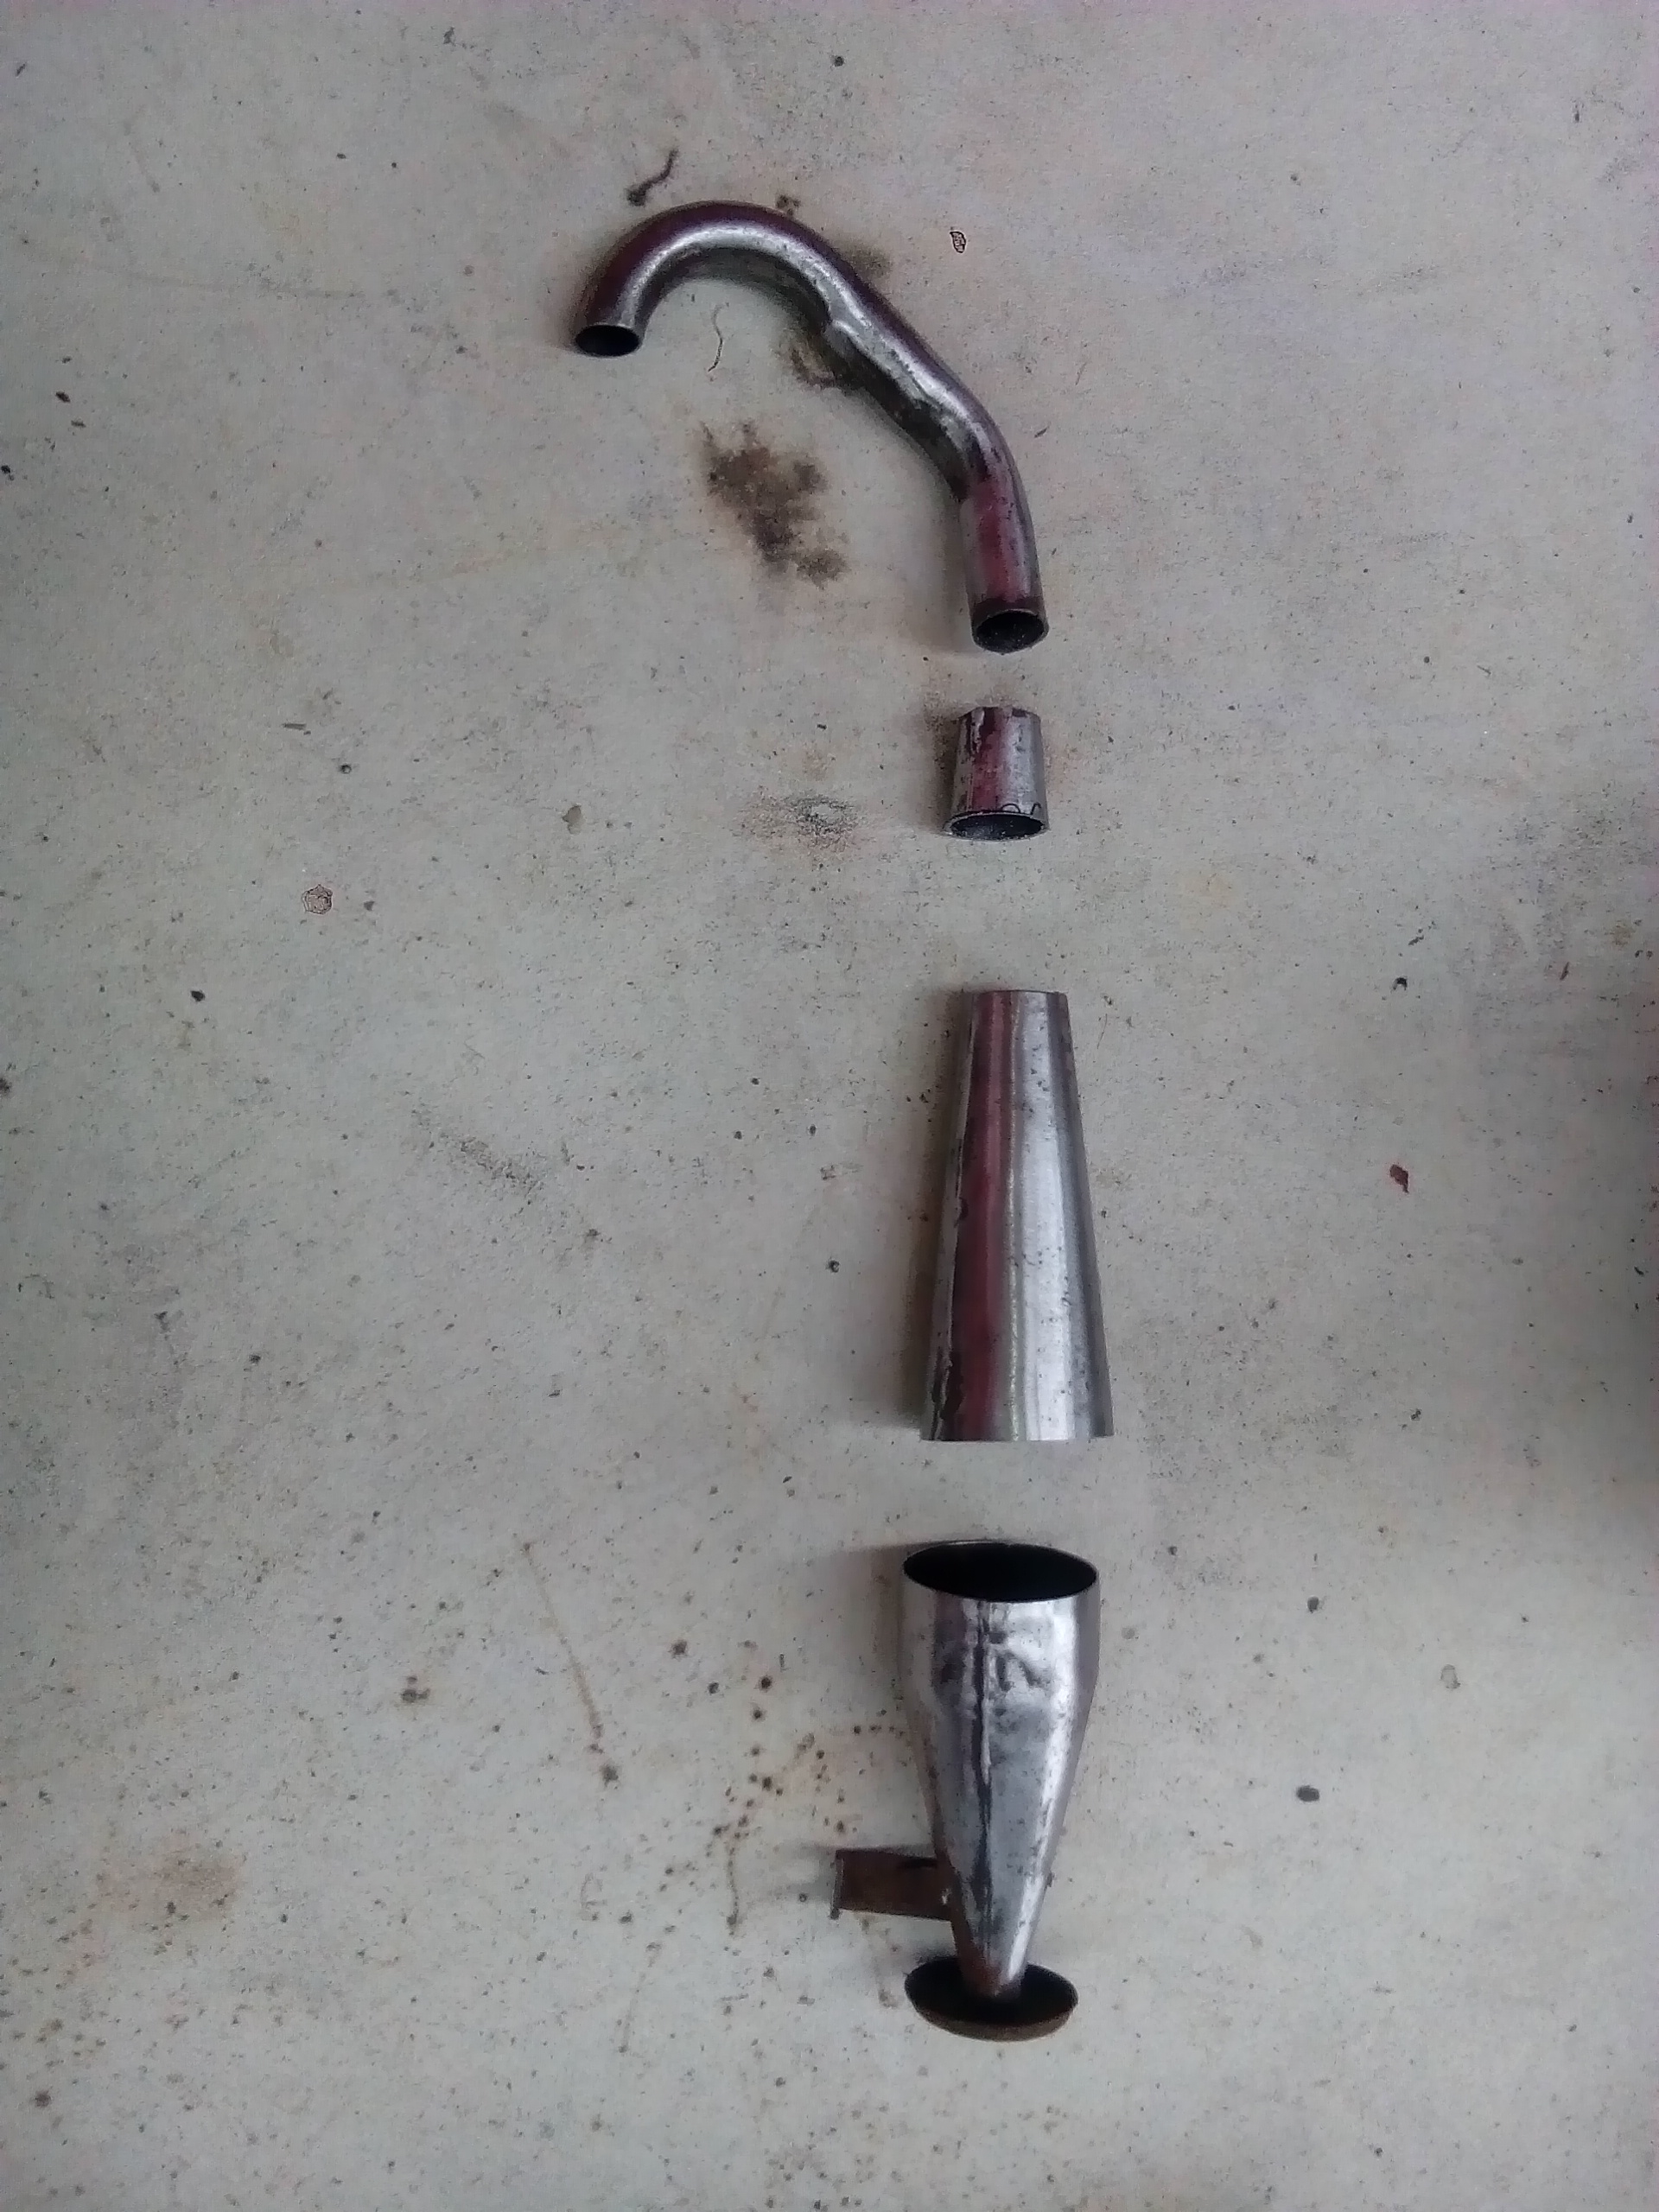
So, some rules of thumb. The longer the header, cone/s and barrel length are the broader the power band will be over the useable rpm range, but less intense. Inversely: a shorter header, cone/s and barrel length gives a much sharper and more aggressive power band, but this only happens at a higher rpm. For this project running a centrifugal clutch, I'm keen to have a broad softer starting power band with a wide midrange. Well that's the theory...reality check to come. -
Kimjon's not as cool or epic as Muncie's off-road goped Bigfoot scooter thingy
Kimjon replied to Kimjon's topic in Two Wheels
I feel like I'm winning on this one now, as the expansion chamber starts to take shape around the rear end. Cut, shape and tack: And then welded: I need to pick up a large bend to tie it to the other cone, but I have a plan (mates scrap bin)
-
Kimjon's not as cool or epic as Muncie's off-road goped Bigfoot scooter thingy
Kimjon replied to Kimjon's topic in Two Wheels
Struggling to get the shape I want, but nothing a hacksaw, welder and some more thinking time can't solve.