Kimjon
-
Posts
2,350 -
Joined
-
Last visited
-
Days Won
2
Everything posted by Kimjon
-

Kimjon's 110cc 4 speed pit bike motorised drift trike build
Kimjon replied to Kimjon's topic in Other Projects
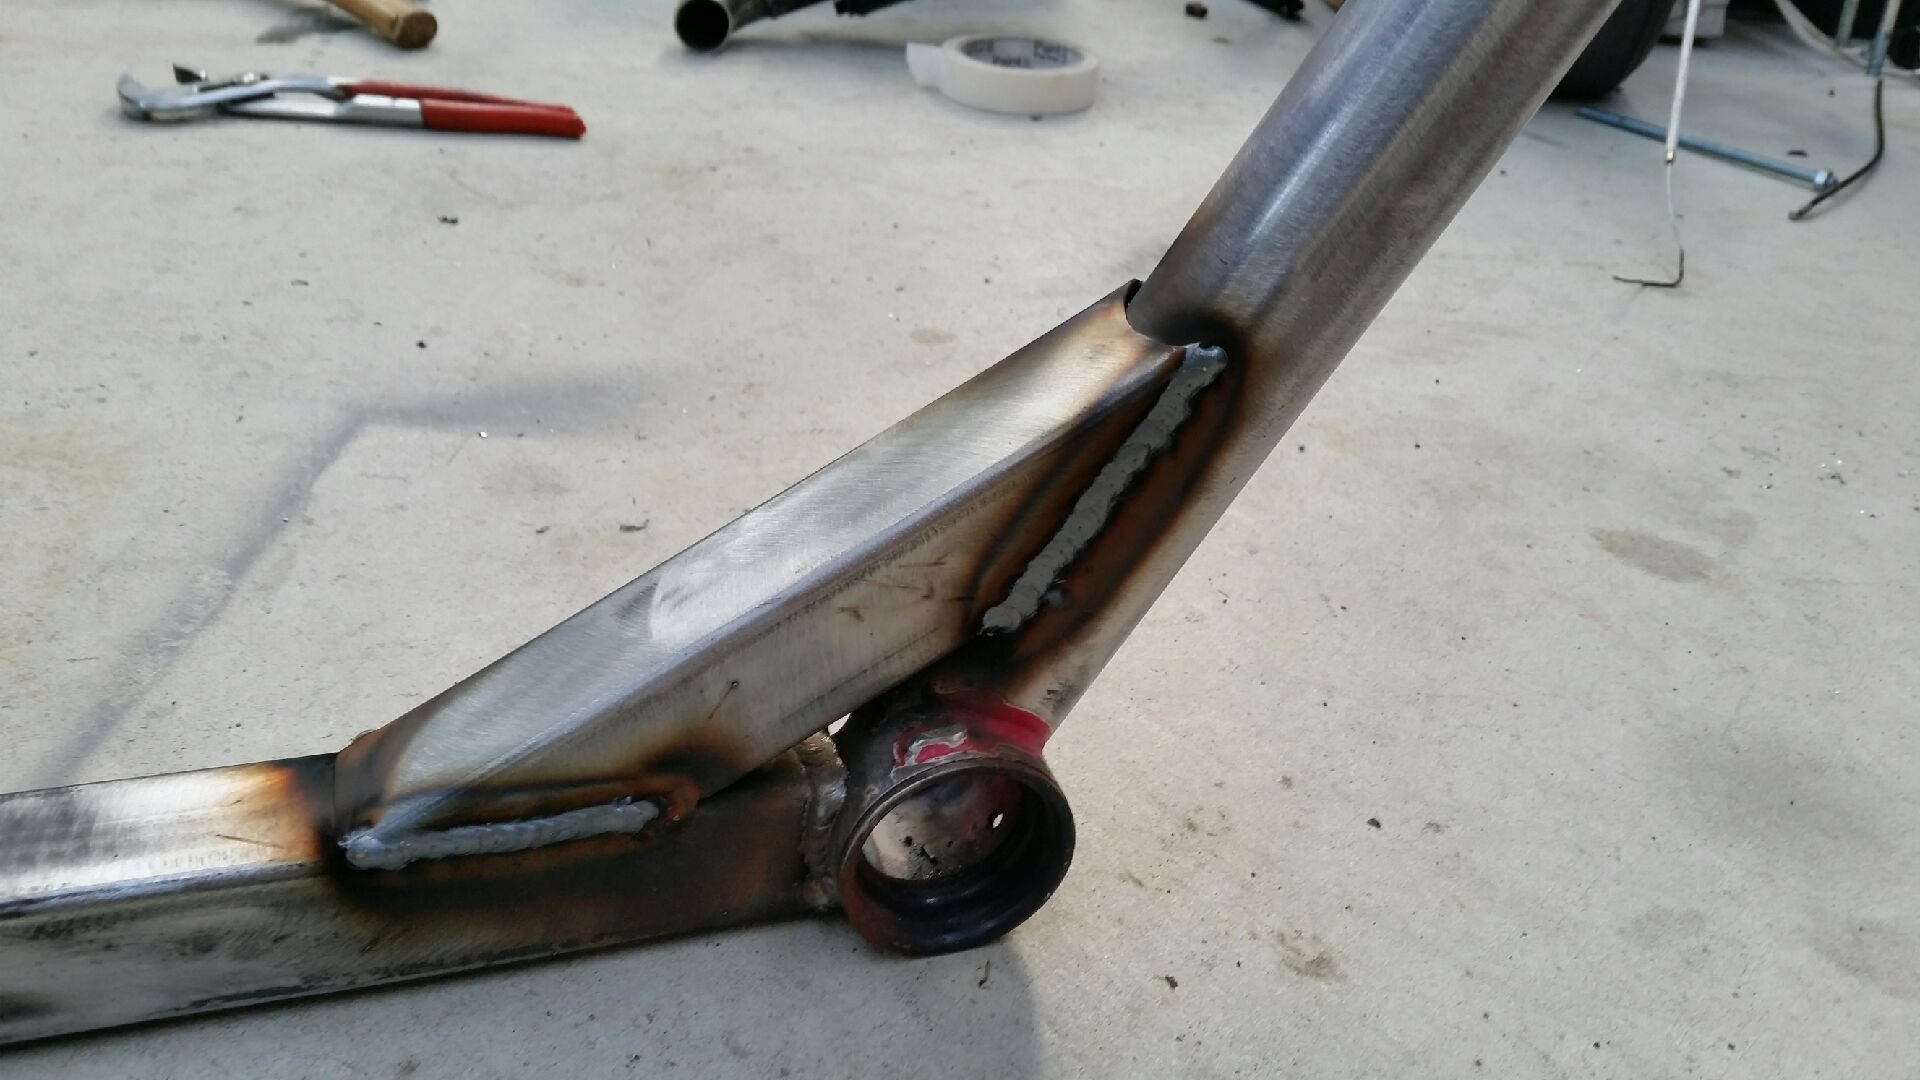
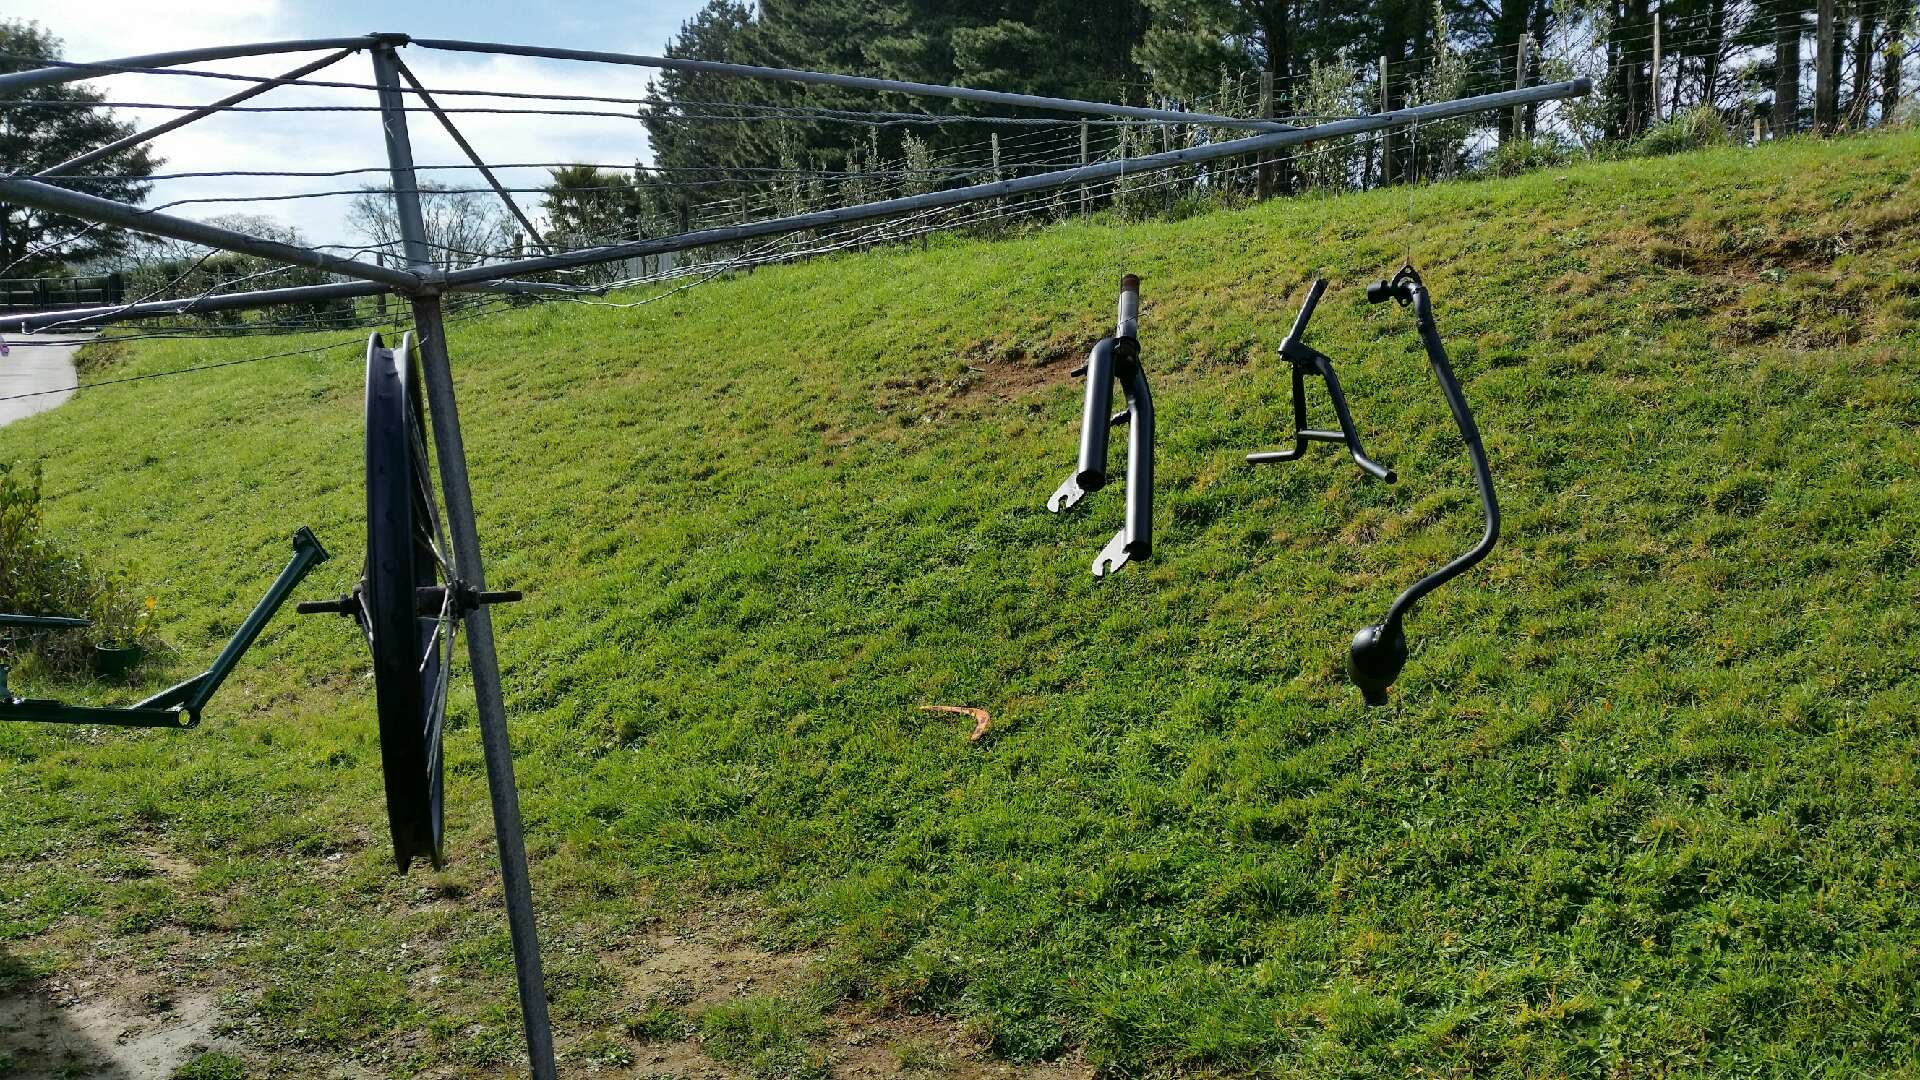
And finally drift trike number 9 all fabricated and ready for painting. I paint outside to avoid any over spray issues in my shed...so it will have to wait for a fine day before I can get that done. And that completes the set. 9 out of 9 done.
-
Kimjon's 110cc 4 speed pit bike motorised drift trike build
Kimjon replied to Kimjon's topic in Other Projects
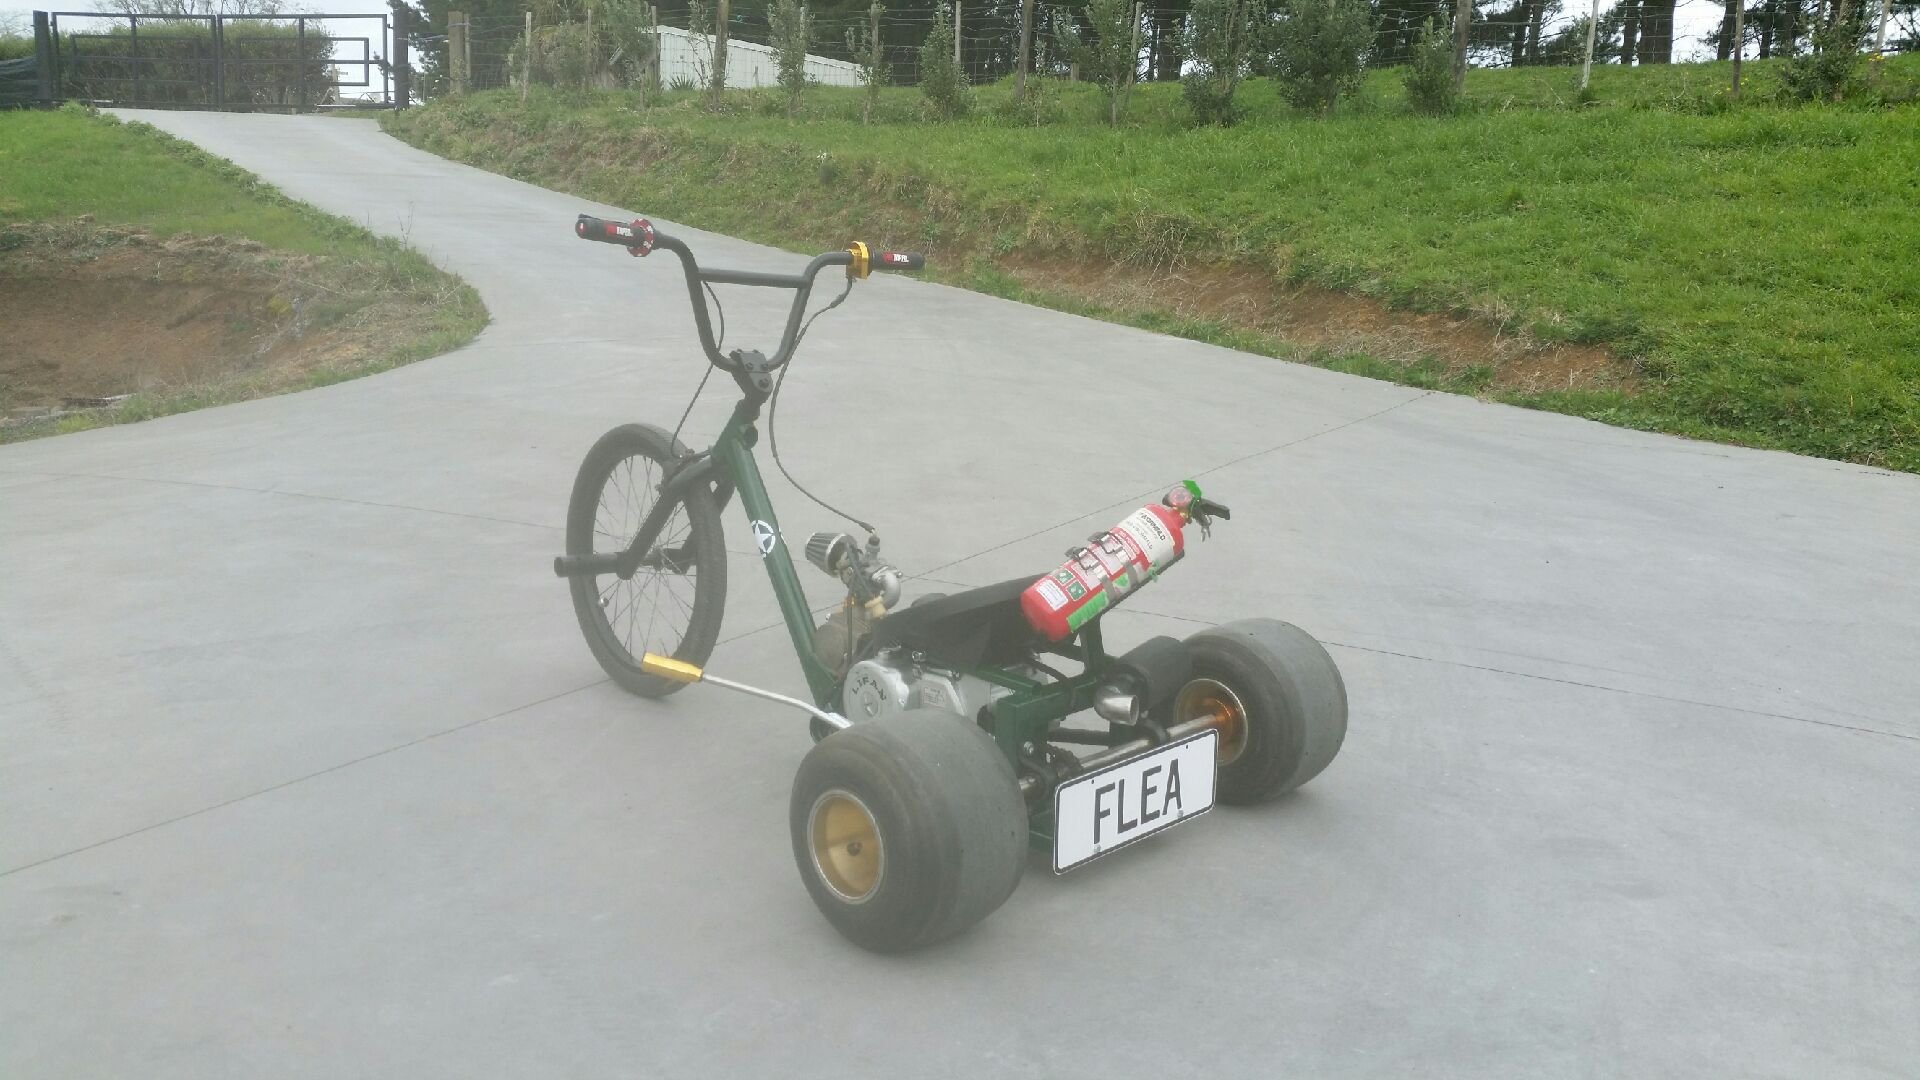
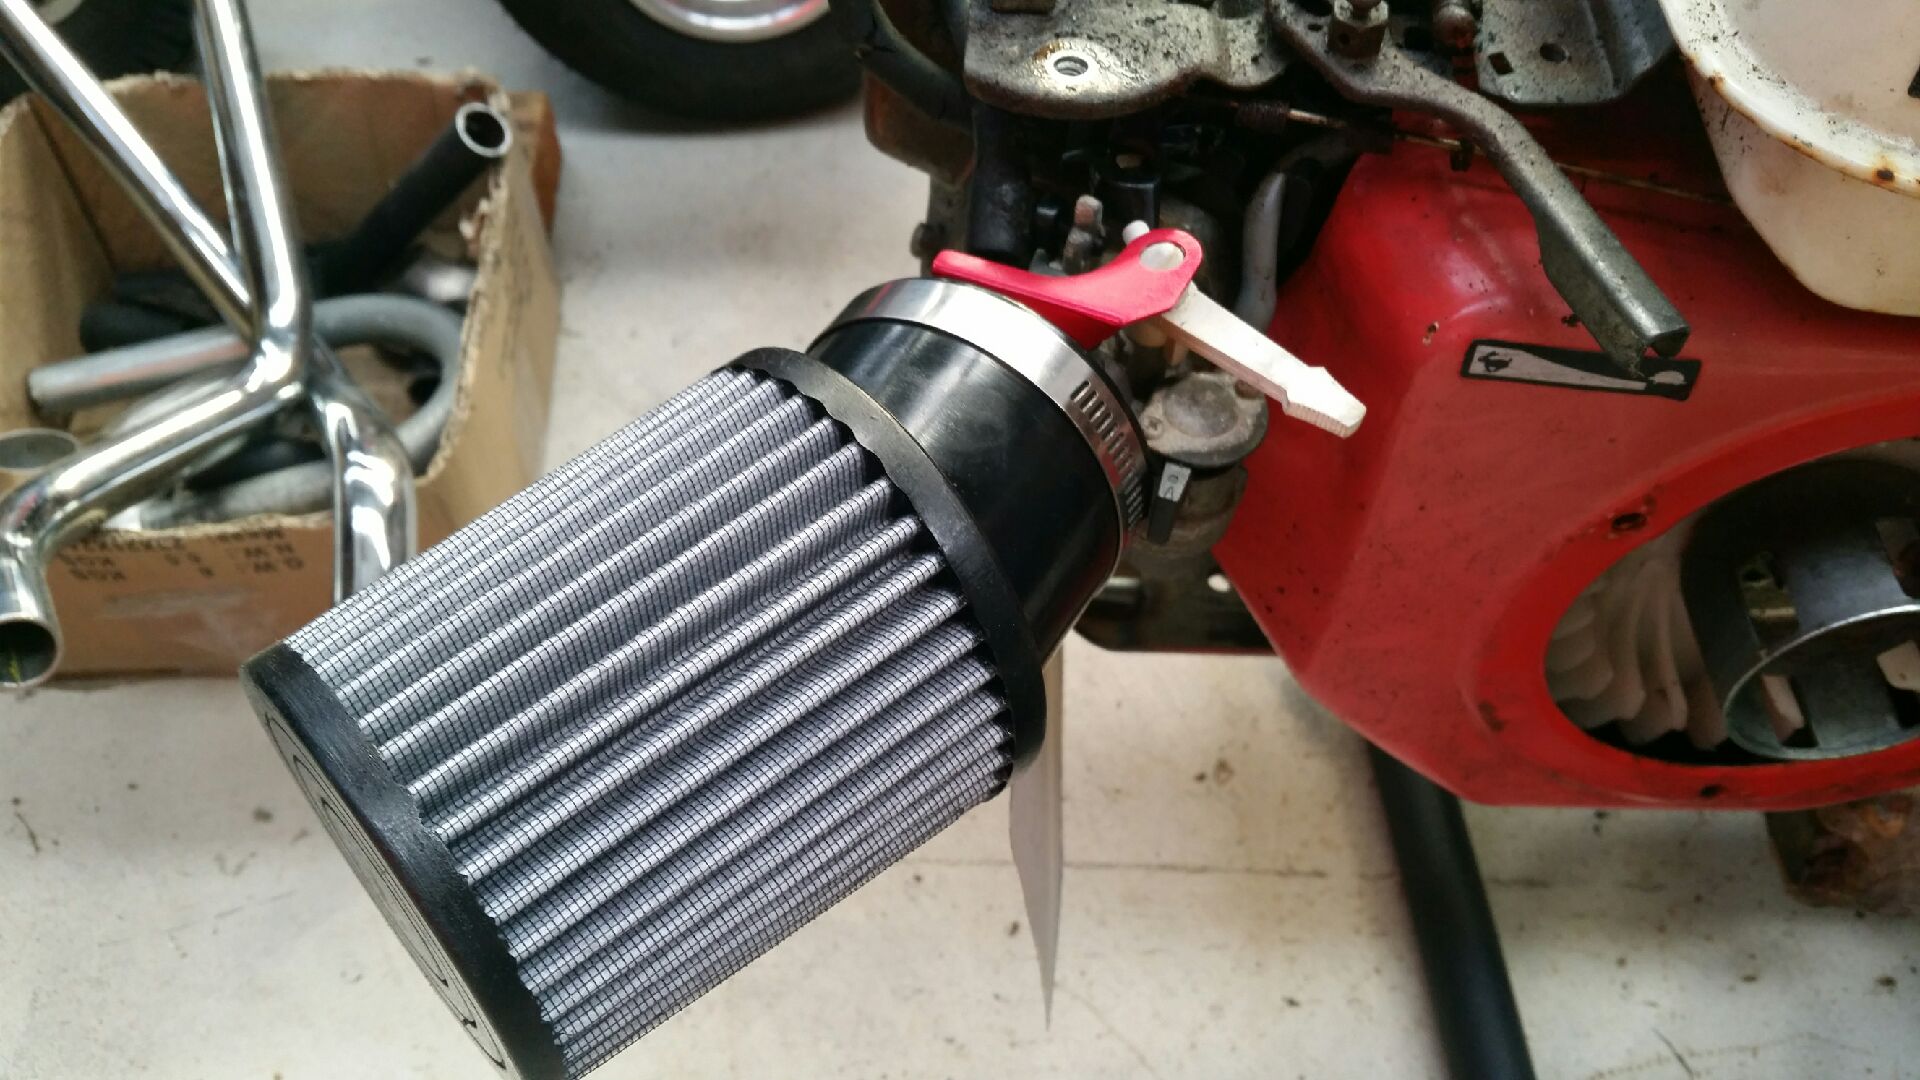
Got it running today:
-
Kimjon's 110cc 4 speed pit bike motorised drift trike build
Kimjon replied to Kimjon's topic in Other Projects
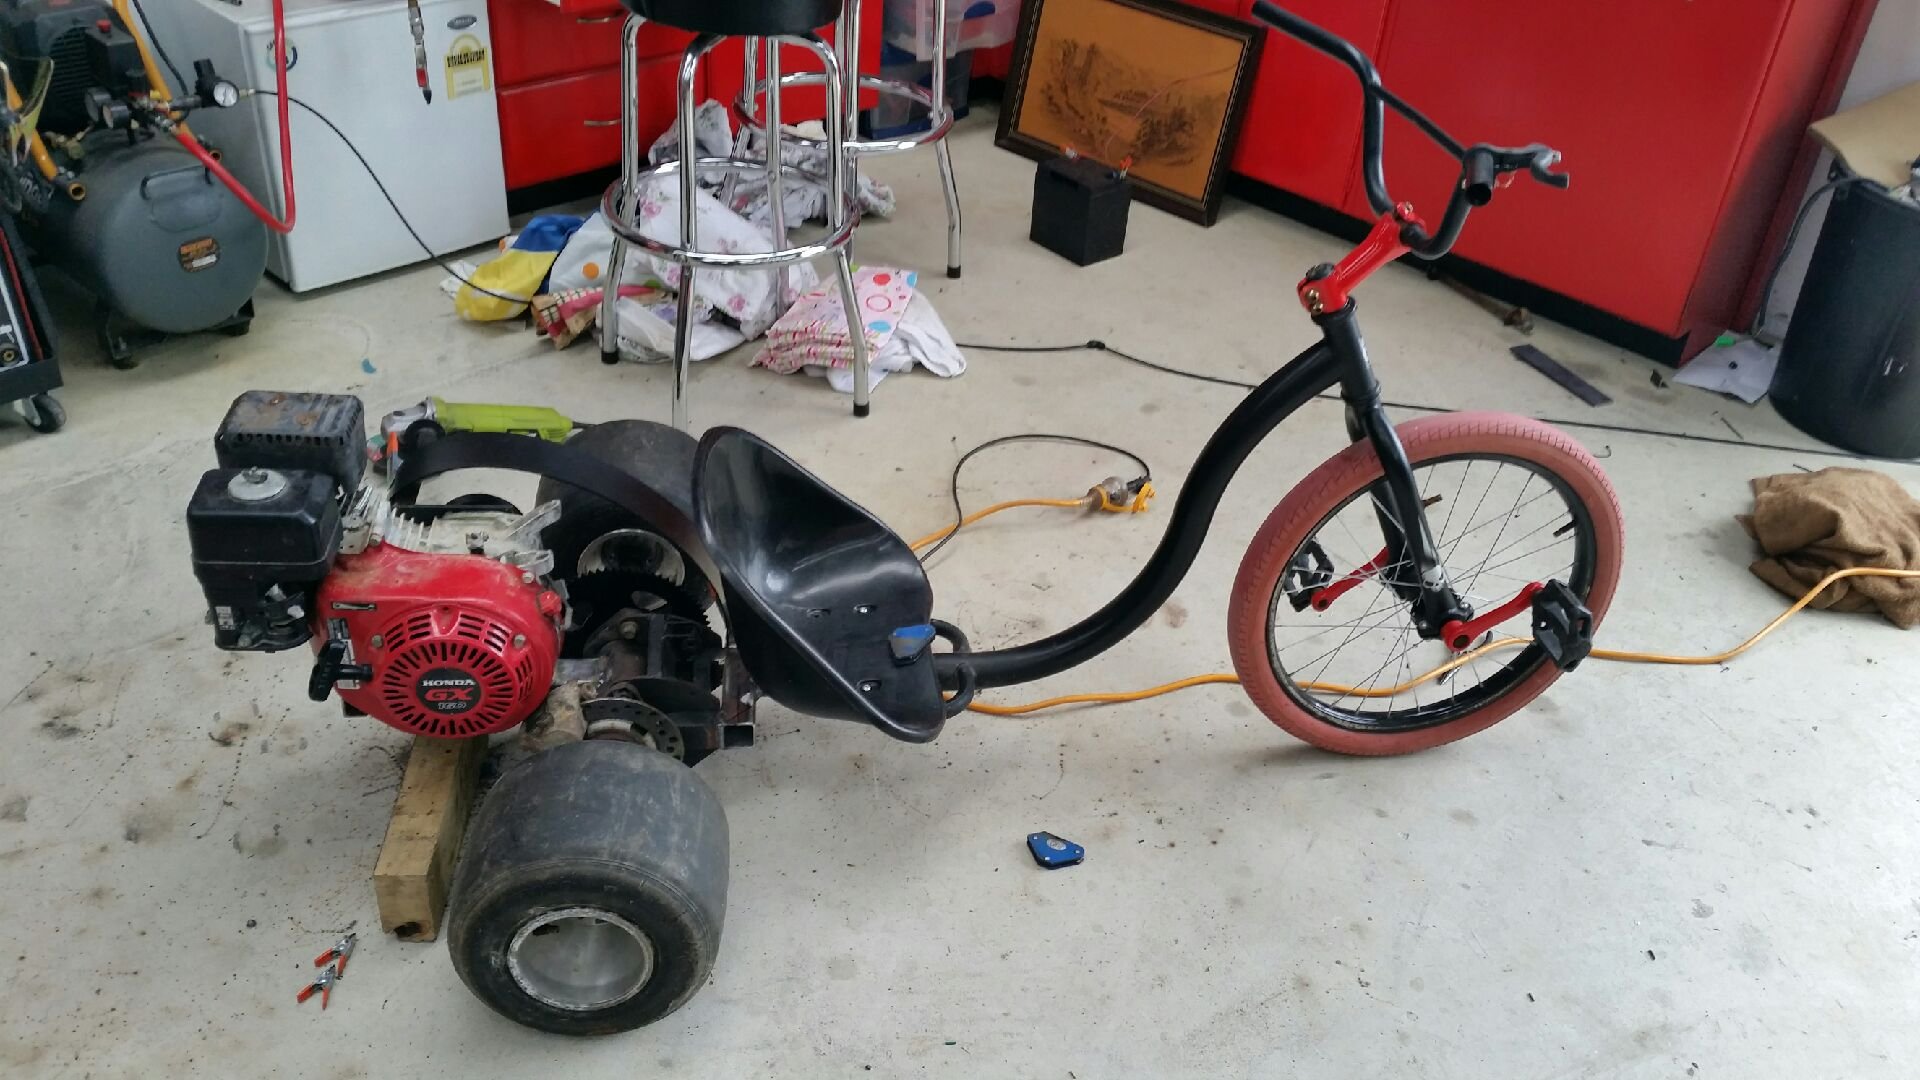
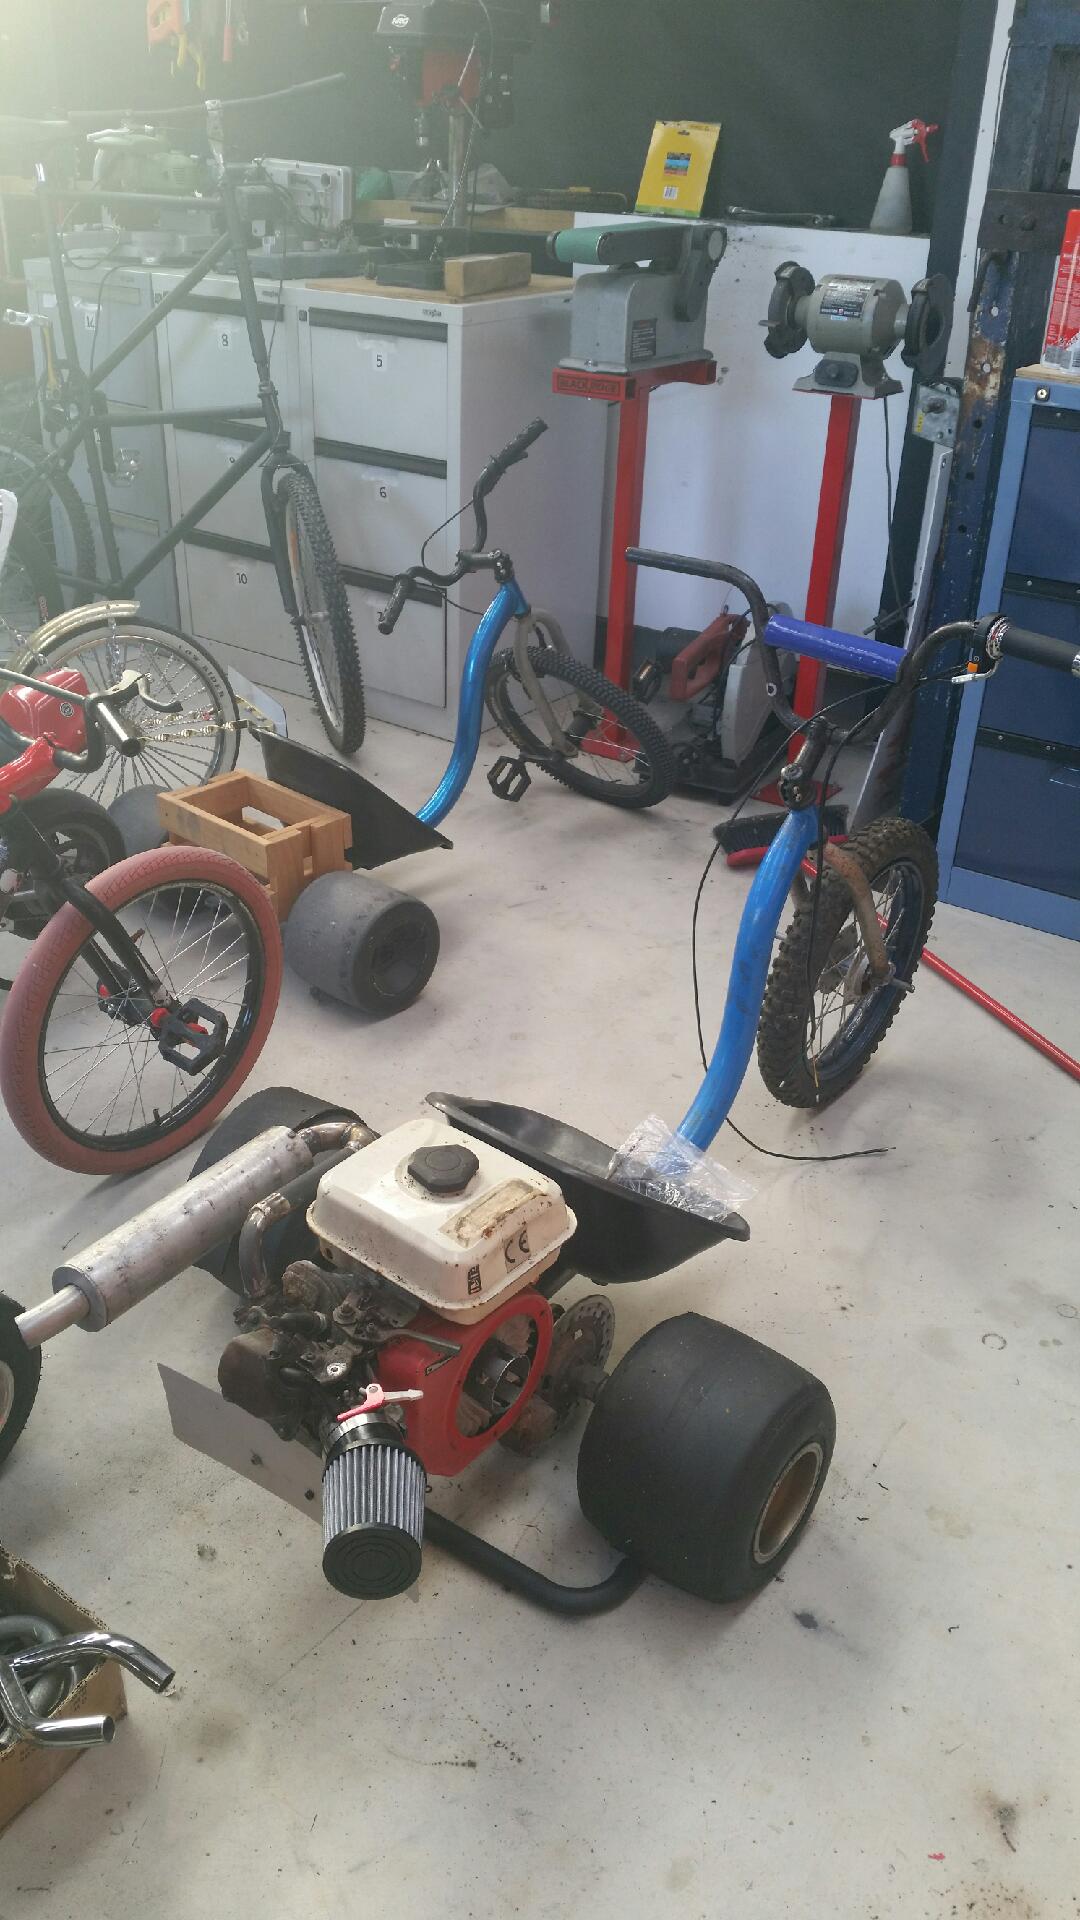
So...sick child sent home from school equals opportunity to stay home too:) So close. Needs pvc pipe on tires, fuel lines and wiring to finish.
-
Kimjon's 110cc 4 speed pit bike motorised drift trike build
Kimjon replied to Kimjon's topic in Other Projects
Should get that one nearly done this weekend all going to plan? -
Kimjon's 110cc 4 speed pit bike motorised drift trike build
Kimjon replied to Kimjon's topic in Other Projects
Or this off ebay. https://m.ebay.com/itm/Rear-Axle-Complete-Assembly-Carrier-Hub-50-70-110cc-ATV-Quad-Bike-Buggy-Go-Kart-/111789342017?_trkparms=aid%3D222007%26algo%3DSIM.MBE%26ao%3D2%26asc%3D20150519202348%26meid%3D9fa2950af2b84695a1a382da85868efb%26pid%3D100408%26rk%3D3%26rkt%3D5%26mehot%3Dpp%26sd%3D281750687459%26itm%3D111789342017&_trksid=p2056116.c100408.m2460 -
Kimjon's 110cc 4 speed pit bike motorised drift trike build
Kimjon replied to Kimjon's topic in Other Projects
This may (?) Work. https://touch.trademe.co.nz/motors/listing/view/1741817427 Unsure on spacing and how butchered it is? I've got some bigger pvc pipe that could or maybe could fit those tyres? It's not mine...just saw it the other day on trademe and thought it might be worth $50? -
Kimjon's 110cc 4 speed pit bike motorised drift trike build
Kimjon replied to Kimjon's topic in Other Projects
Yup...you've got it. Simple as that -
Kimjon's 110cc 4 speed pit bike motorised drift trike build
Kimjon replied to Kimjon's topic in Other Projects
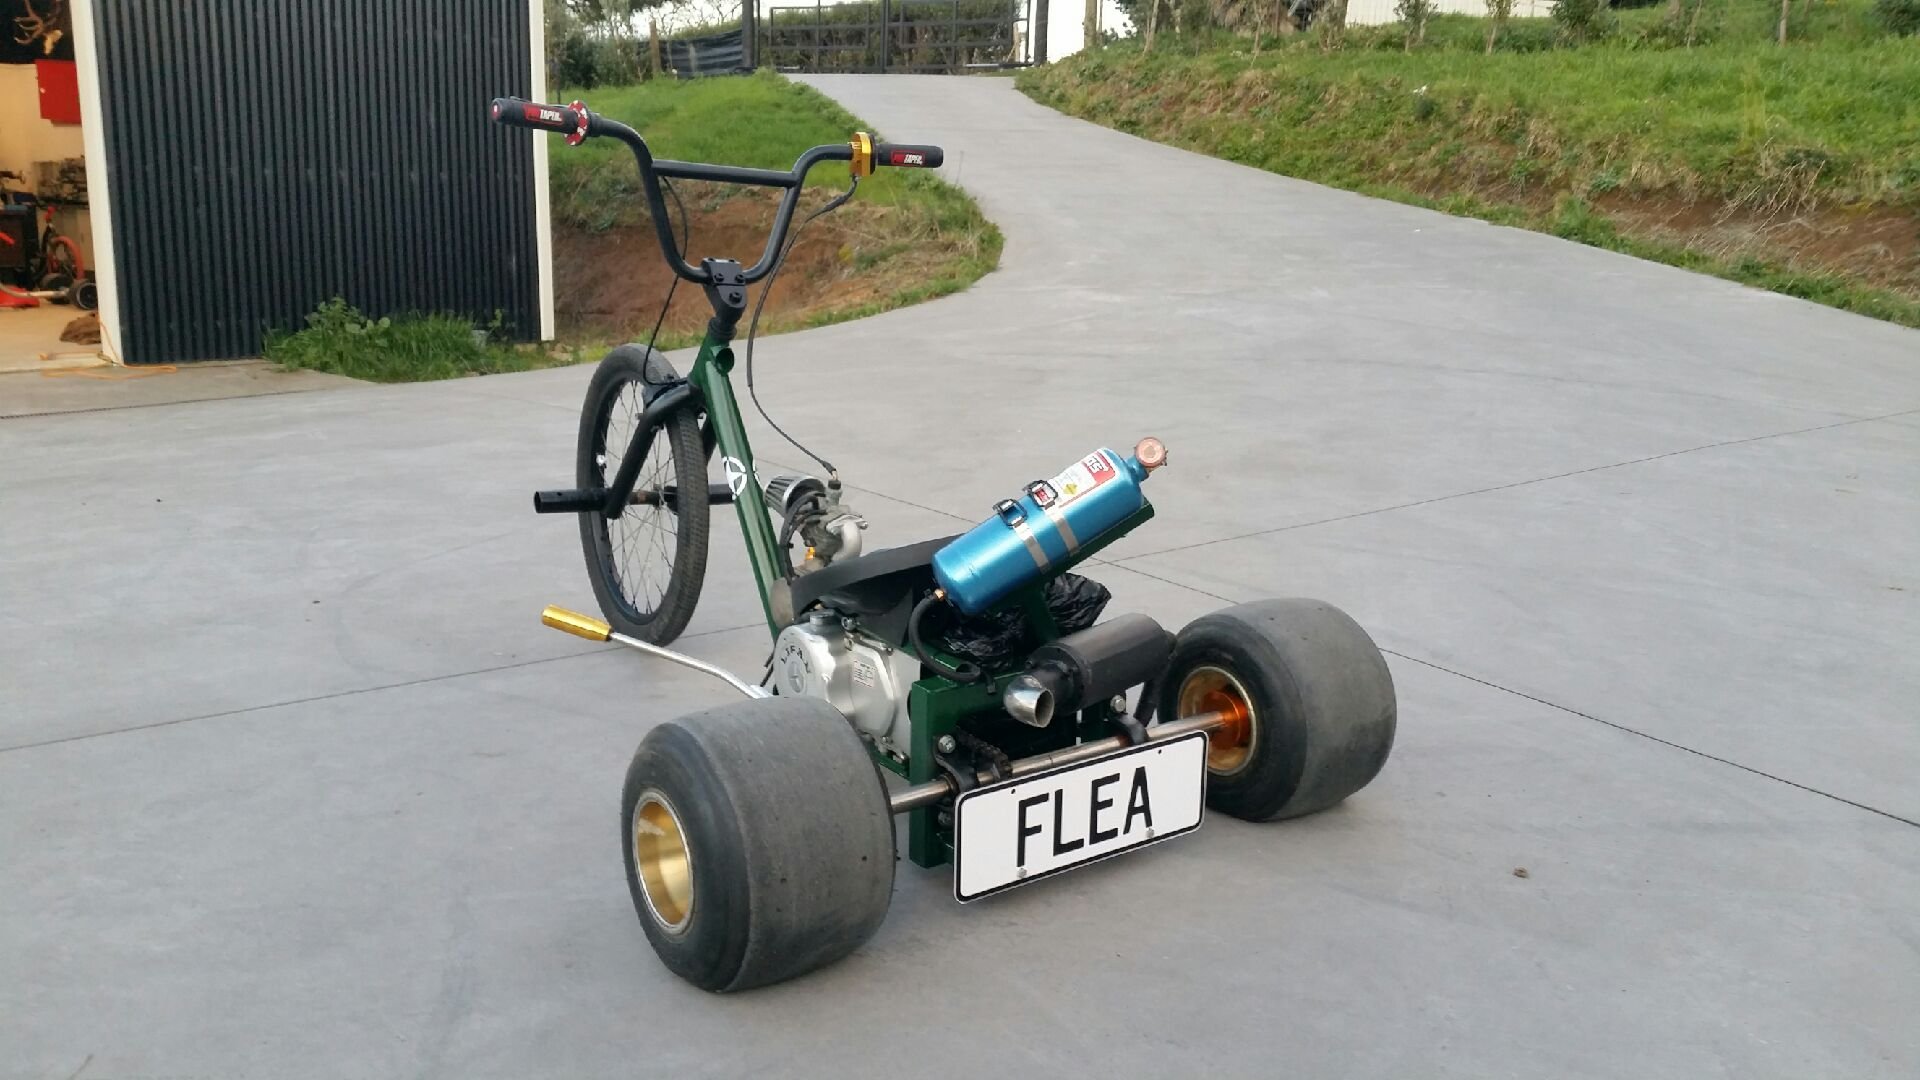
And video...this thing is crazy fast! Best one yet. Certain death is almost guaranteed... -
Kimjon's 110cc 4 speed pit bike motorised drift trike build
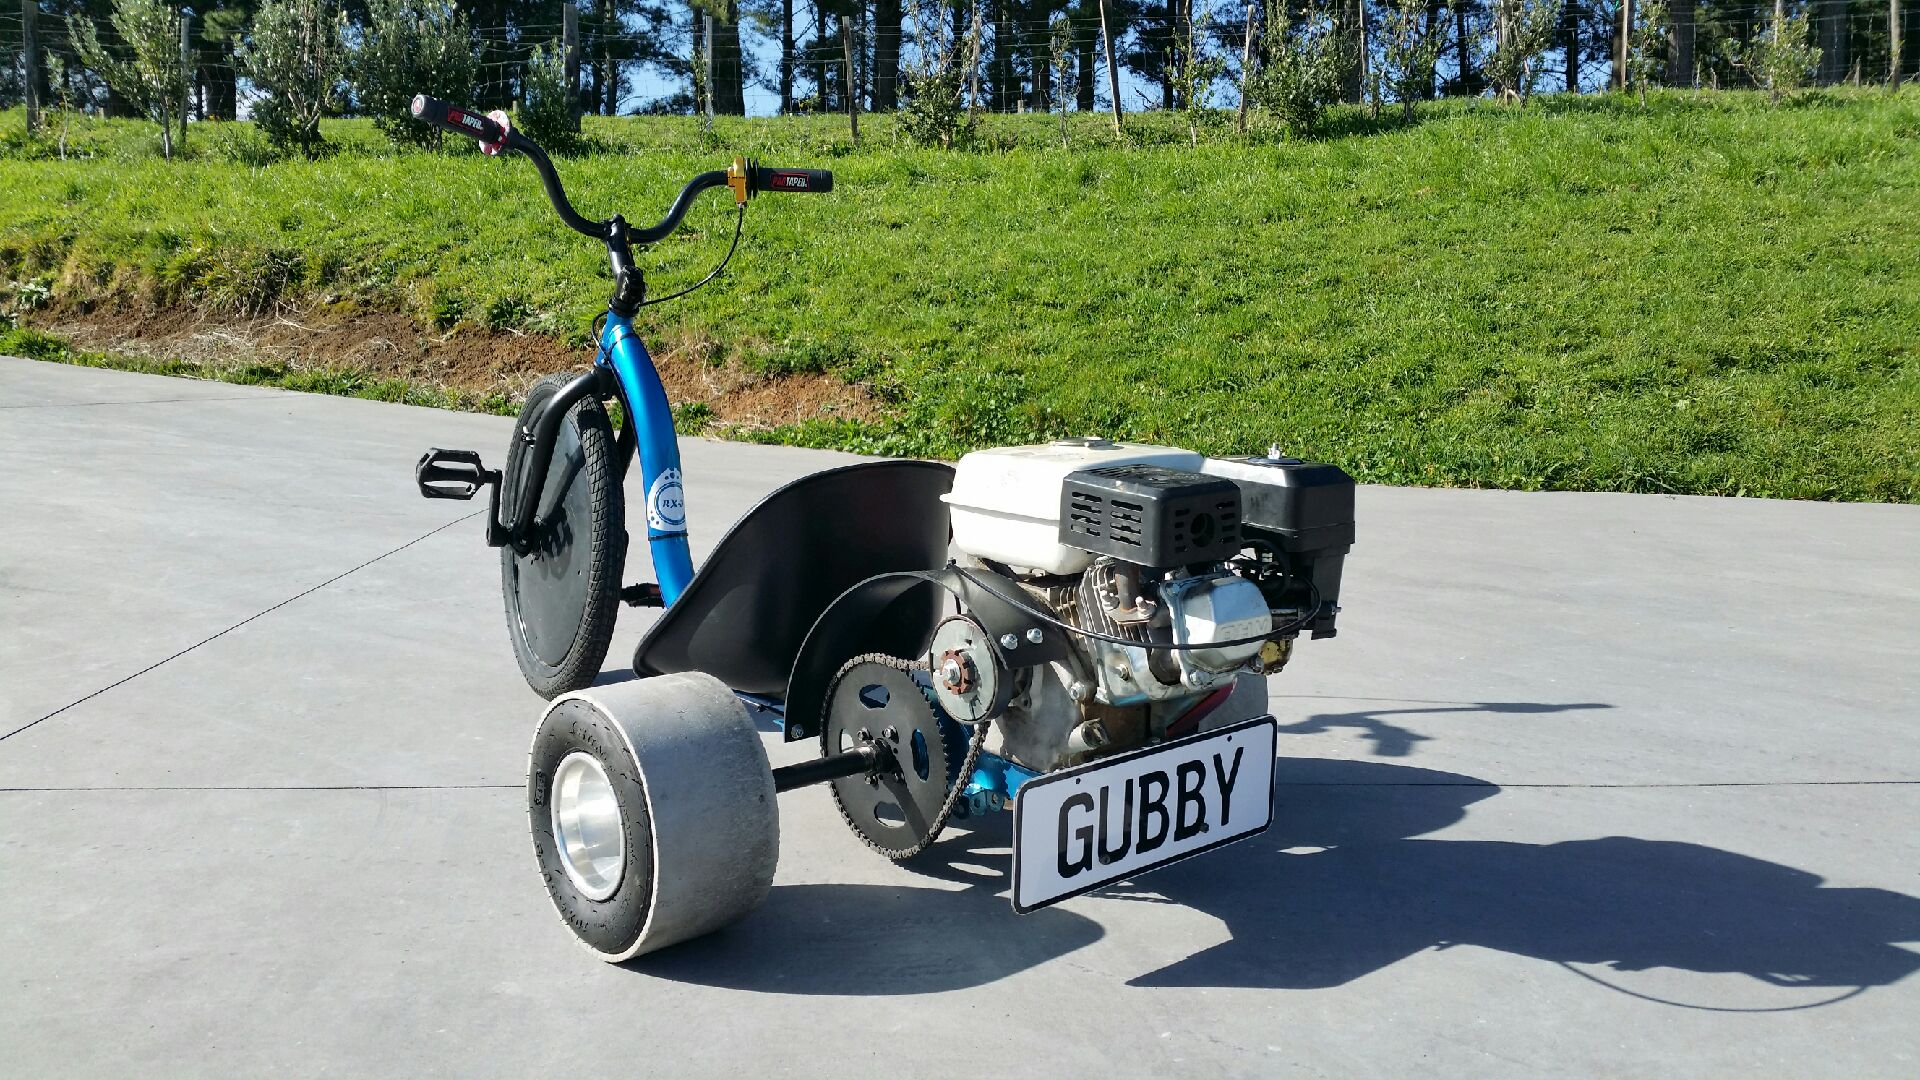
Kimjon replied to Kimjon's topic in Other Projects
And GUBBY trike also finished. Though he was rude to me...so I've accessorised it for him L.
-
Kimjon's 110cc 4 speed pit bike motorised drift trike build
Kimjon replied to Kimjon's topic in Other Projects
And done! Three more to finish... Then race day!
-
Kimjon's 110cc 4 speed pit bike motorised drift trike build
Kimjon replied to Kimjon's topic in Other Projects
So close
-
Yes...yes...YES! An absolute labour of love...well done you!
-
Kimjon's 110cc 4 speed pit bike motorised drift trike build
Kimjon replied to Kimjon's topic in Other Projects
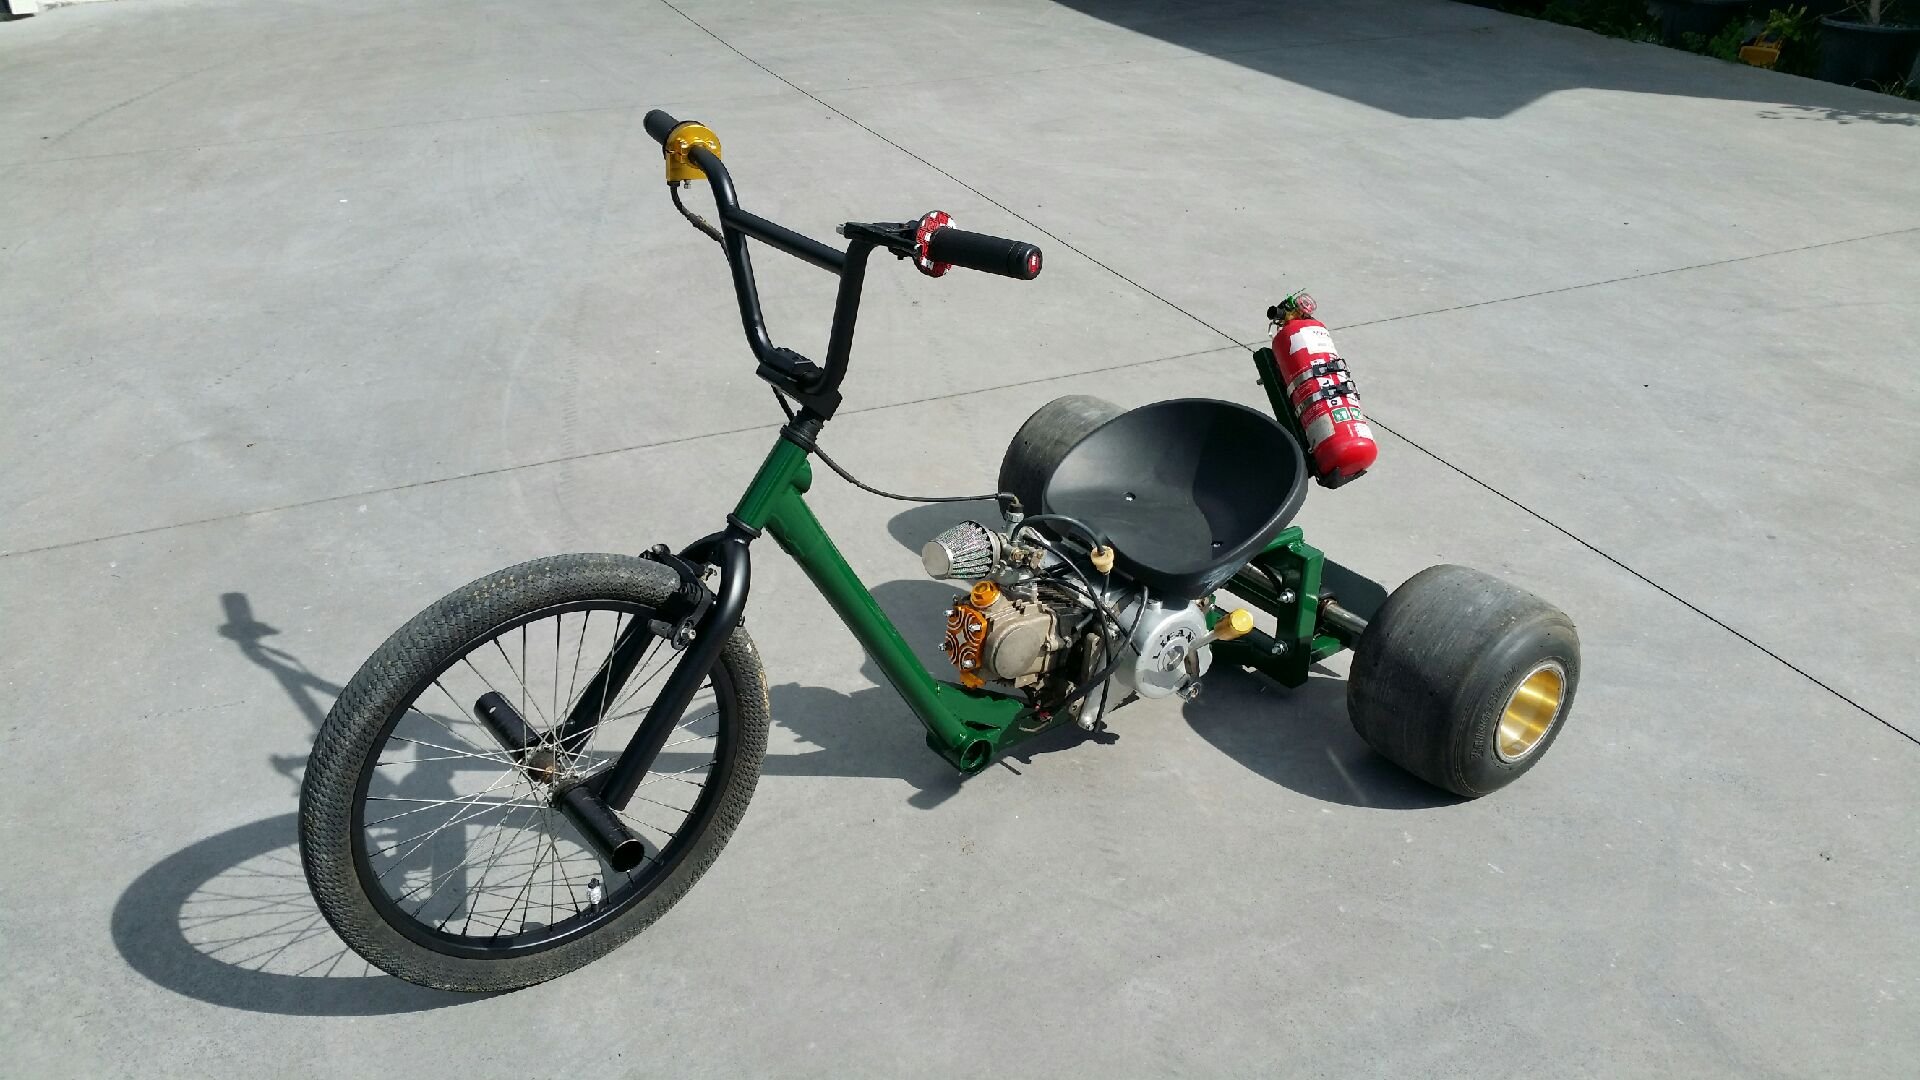
And again...more bits dry enough to slap on:
-
Kimjon's 110cc 4 speed pit bike motorised drift trike build
Kimjon replied to Kimjon's topic in Other Projects
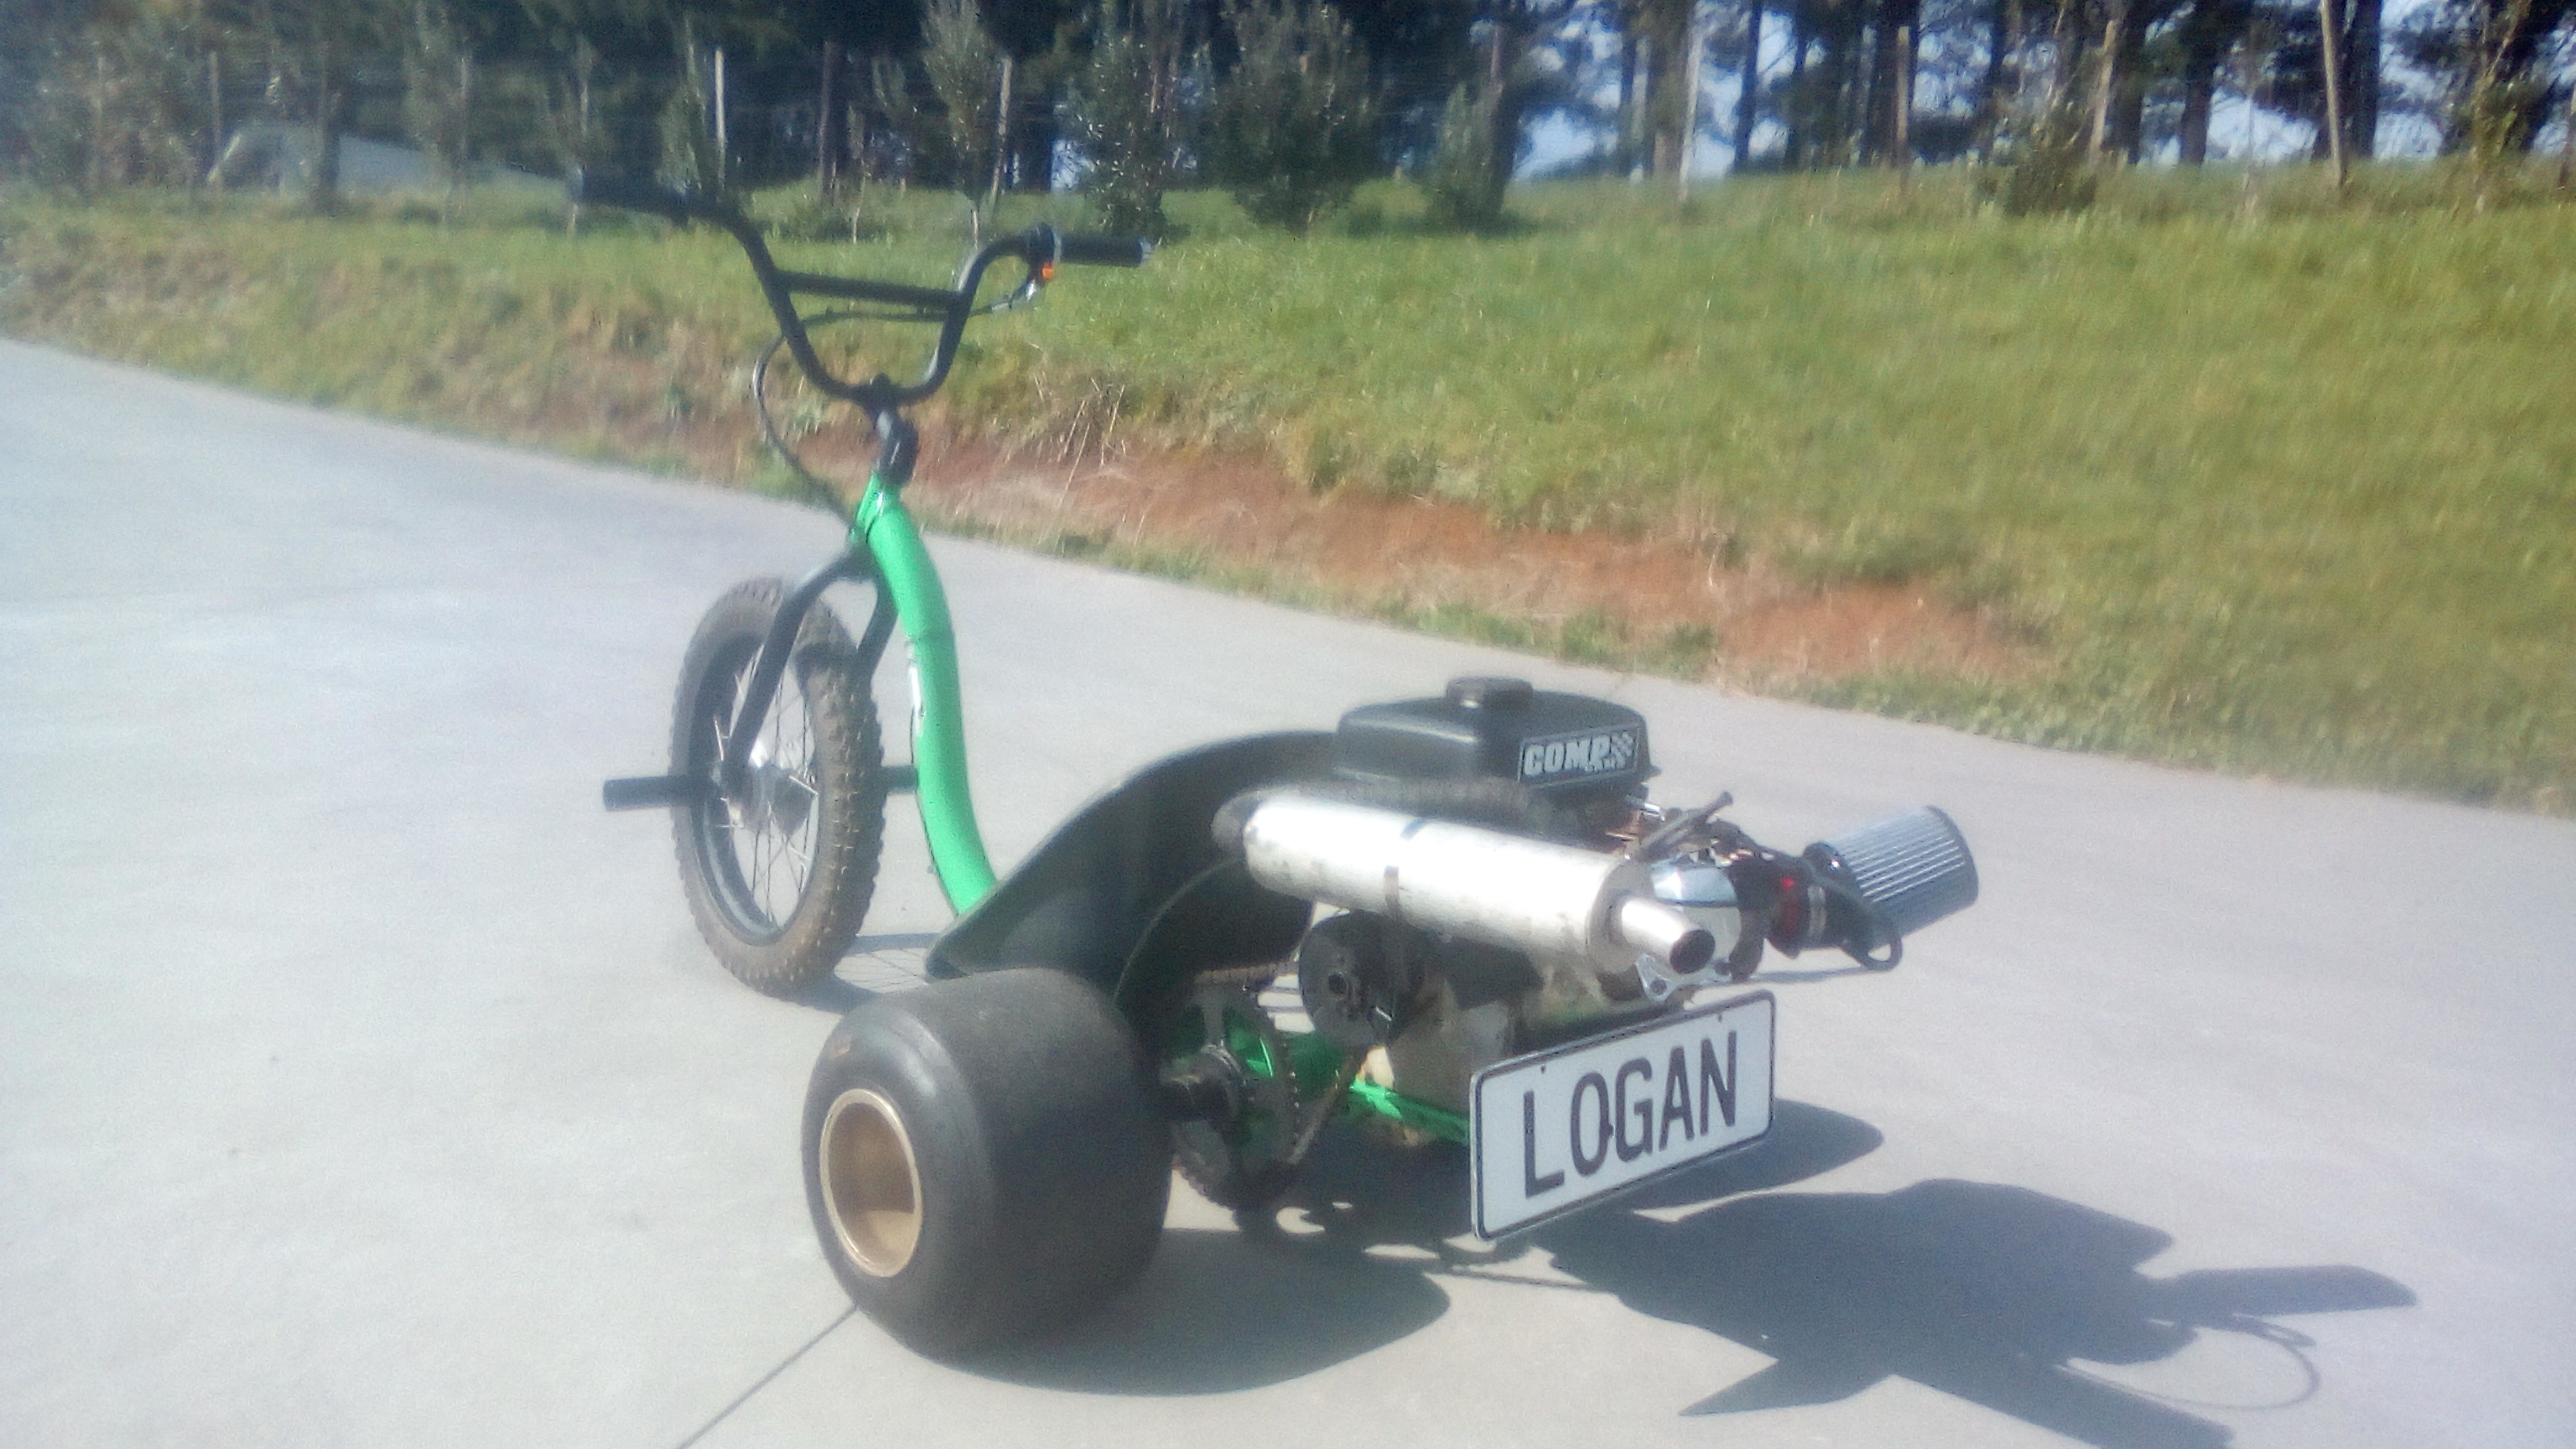
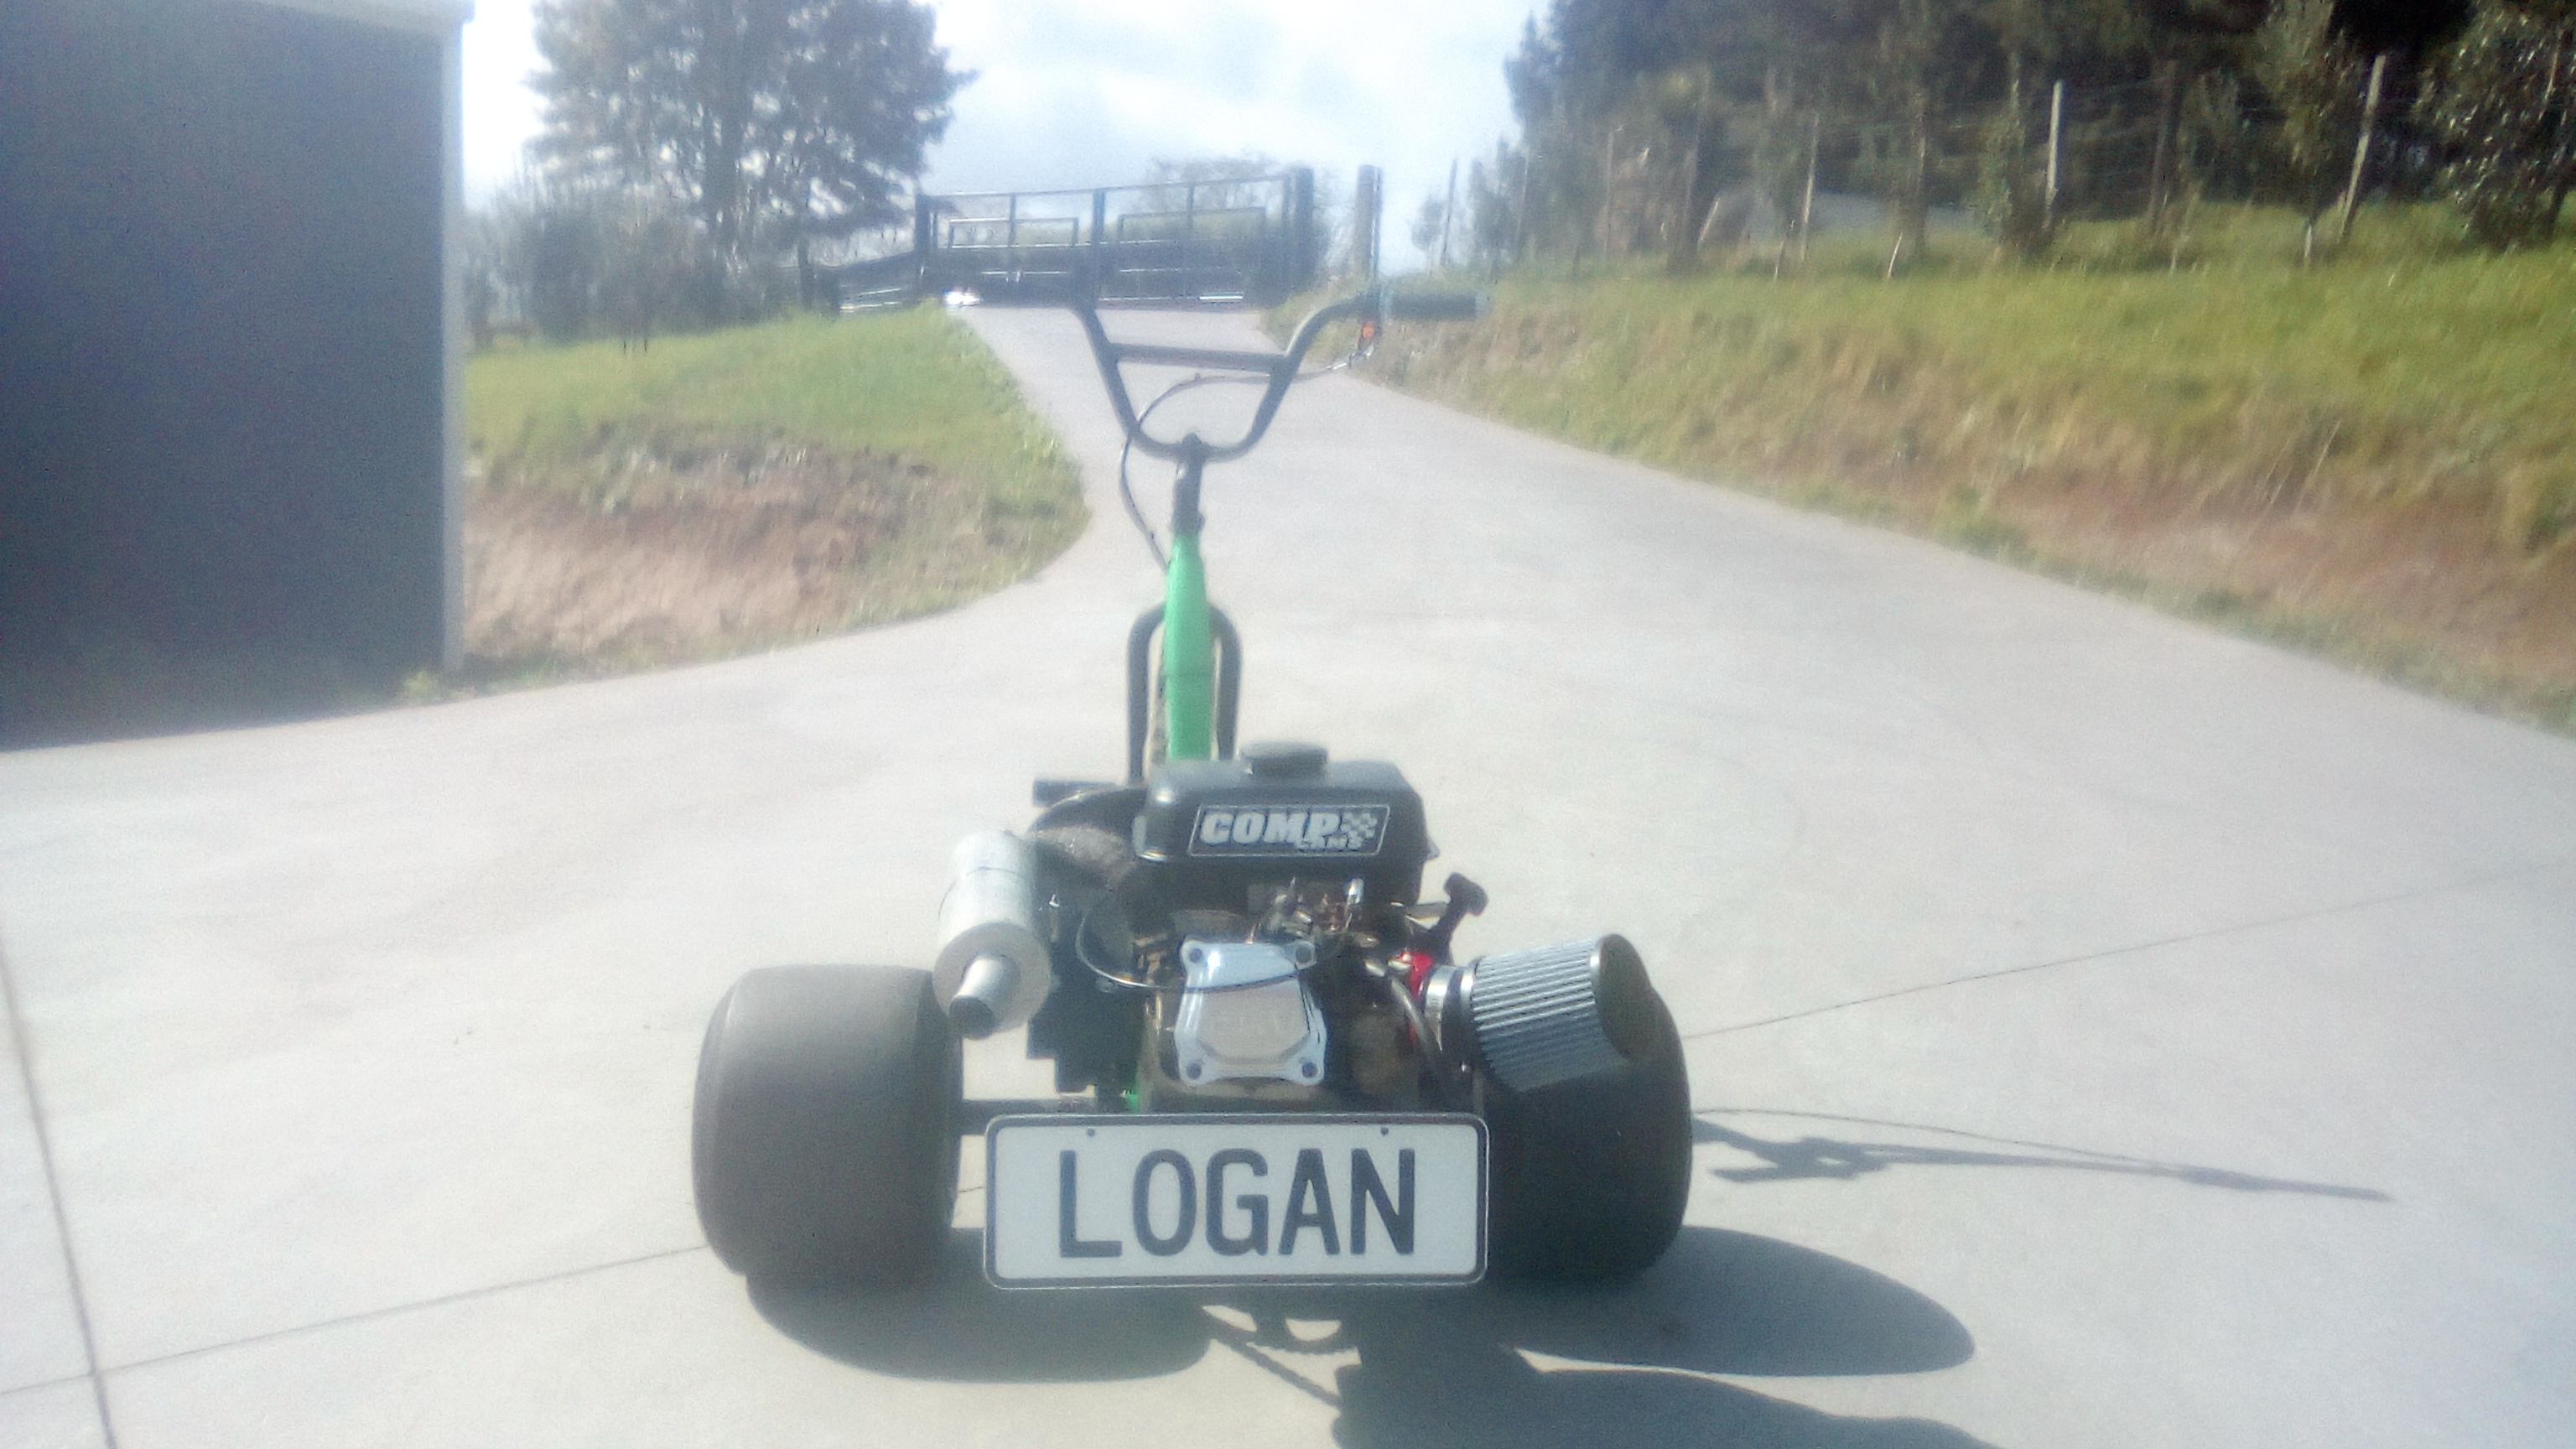
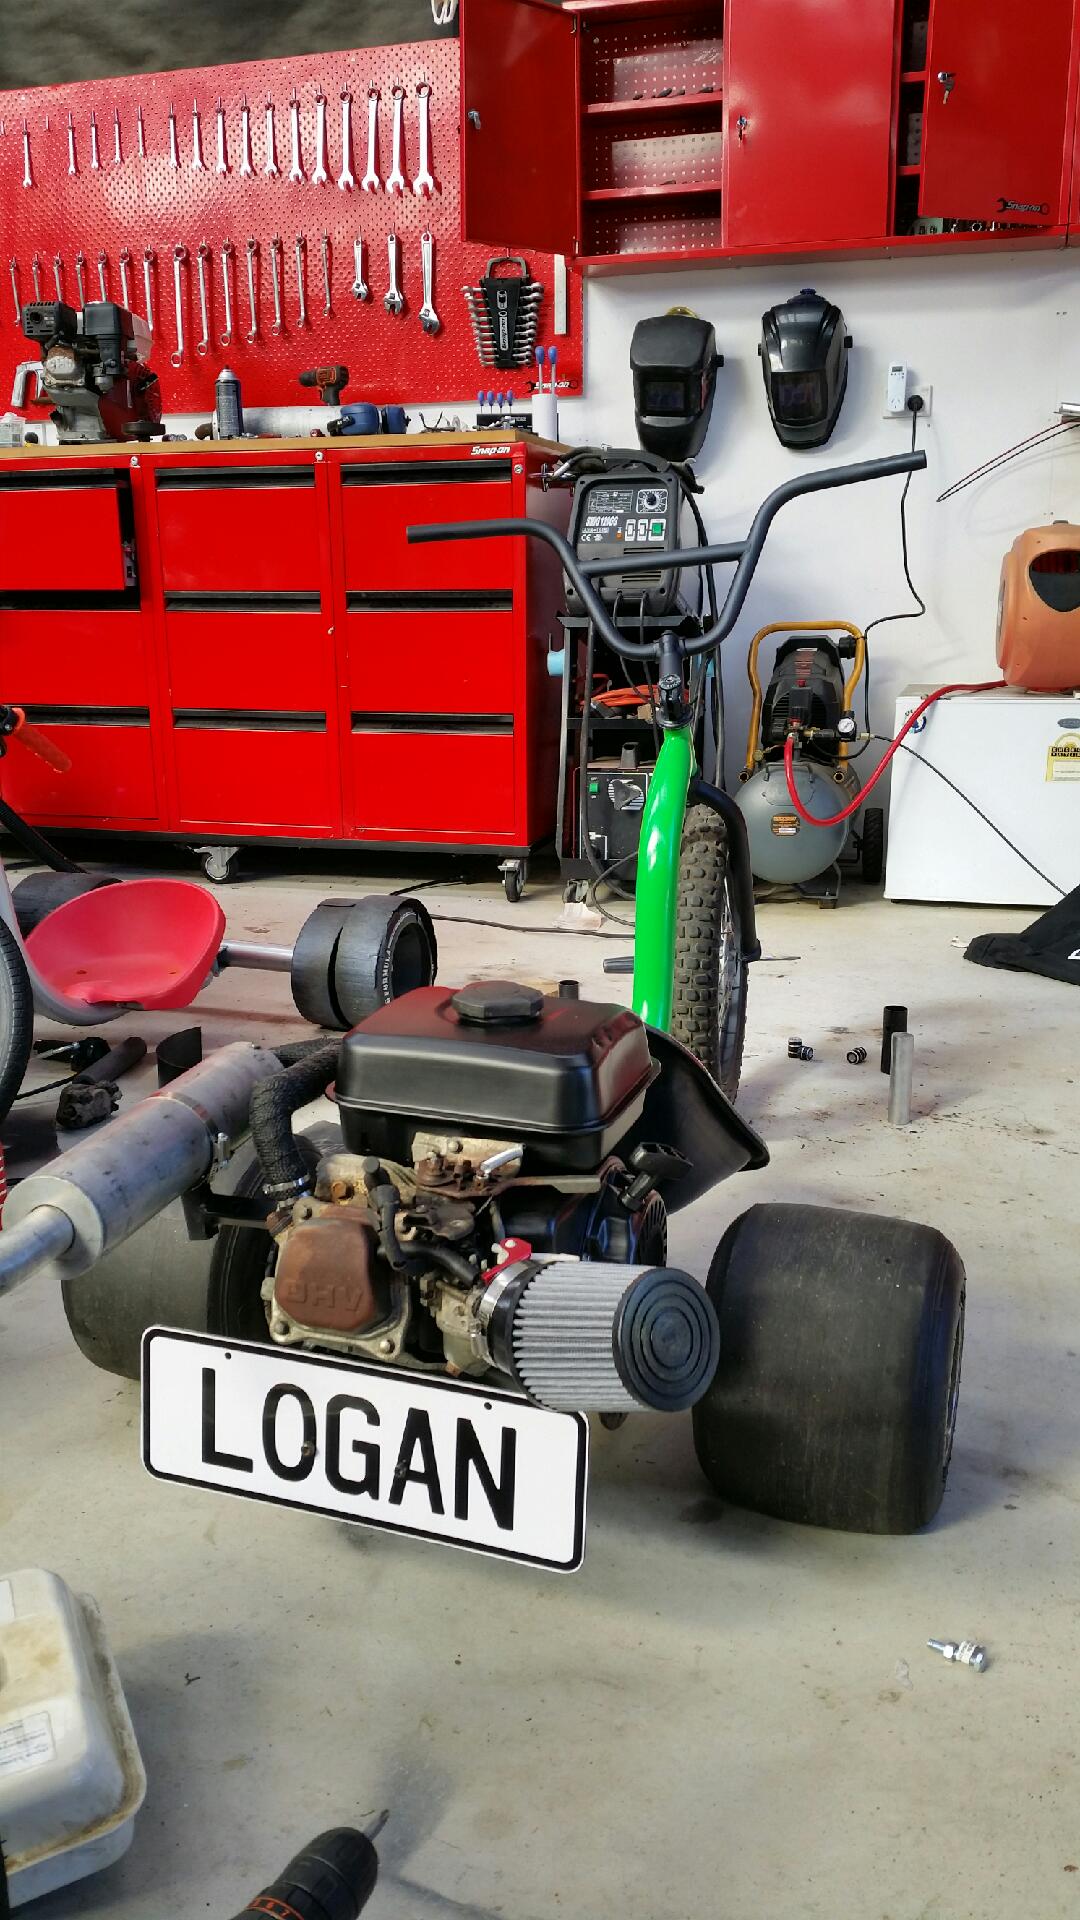
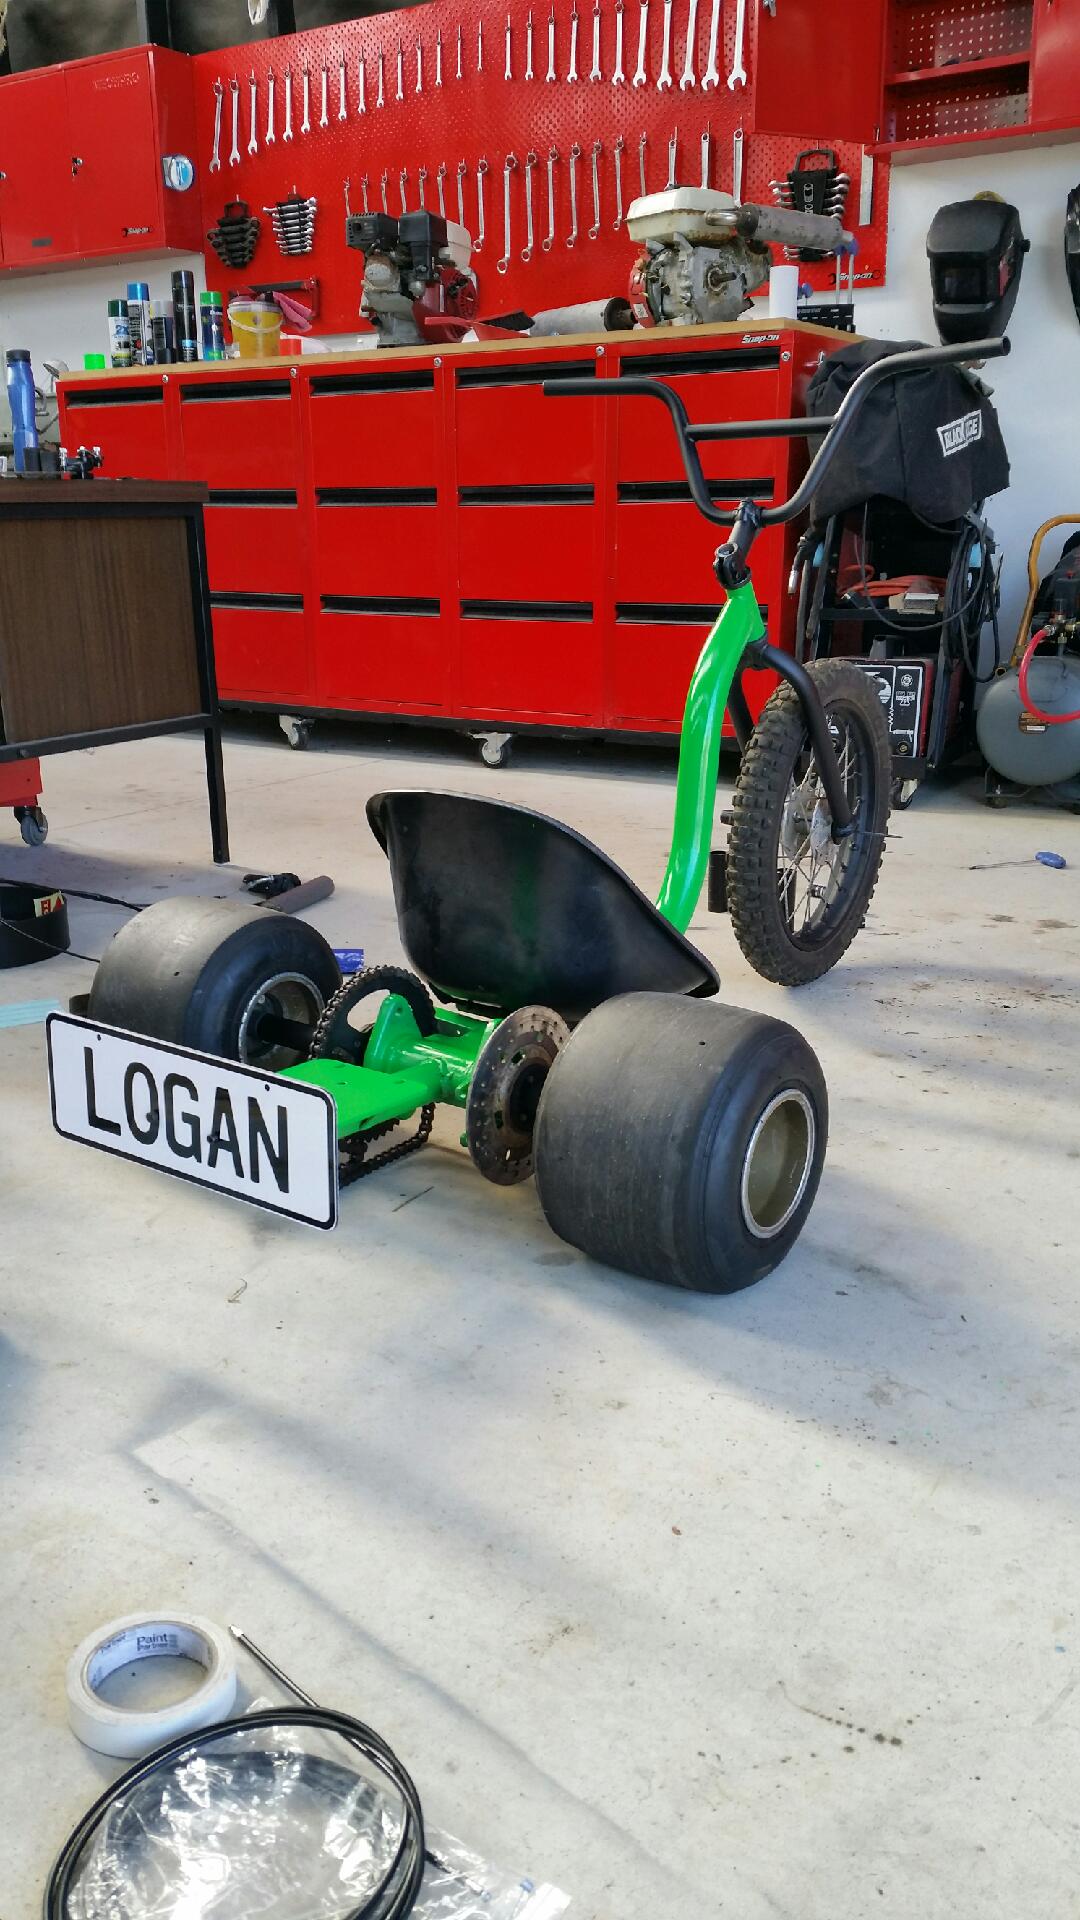
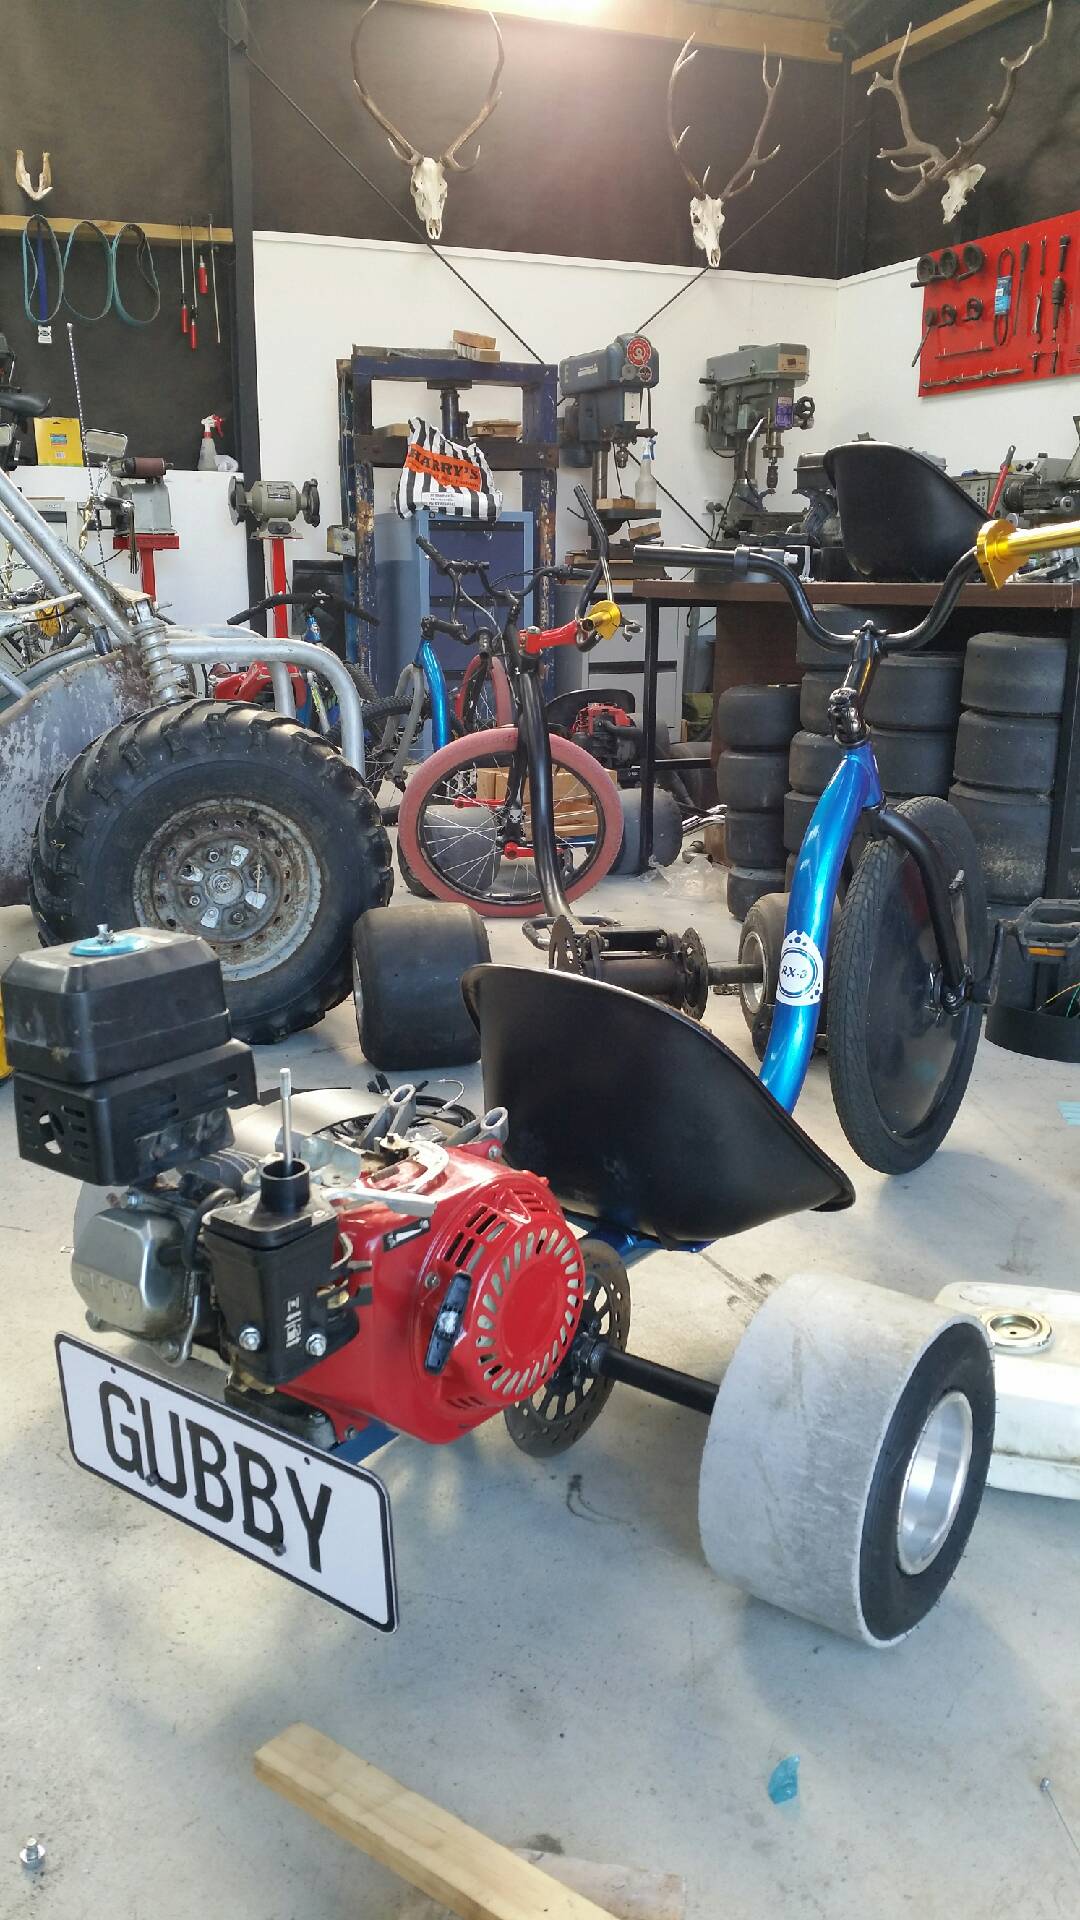
And GUBBY nearing final completion: And LOGAN starting to come together:
-
Kimjon's 110cc 4 speed pit bike motorised drift trike build
Kimjon replied to Kimjon's topic in Other Projects
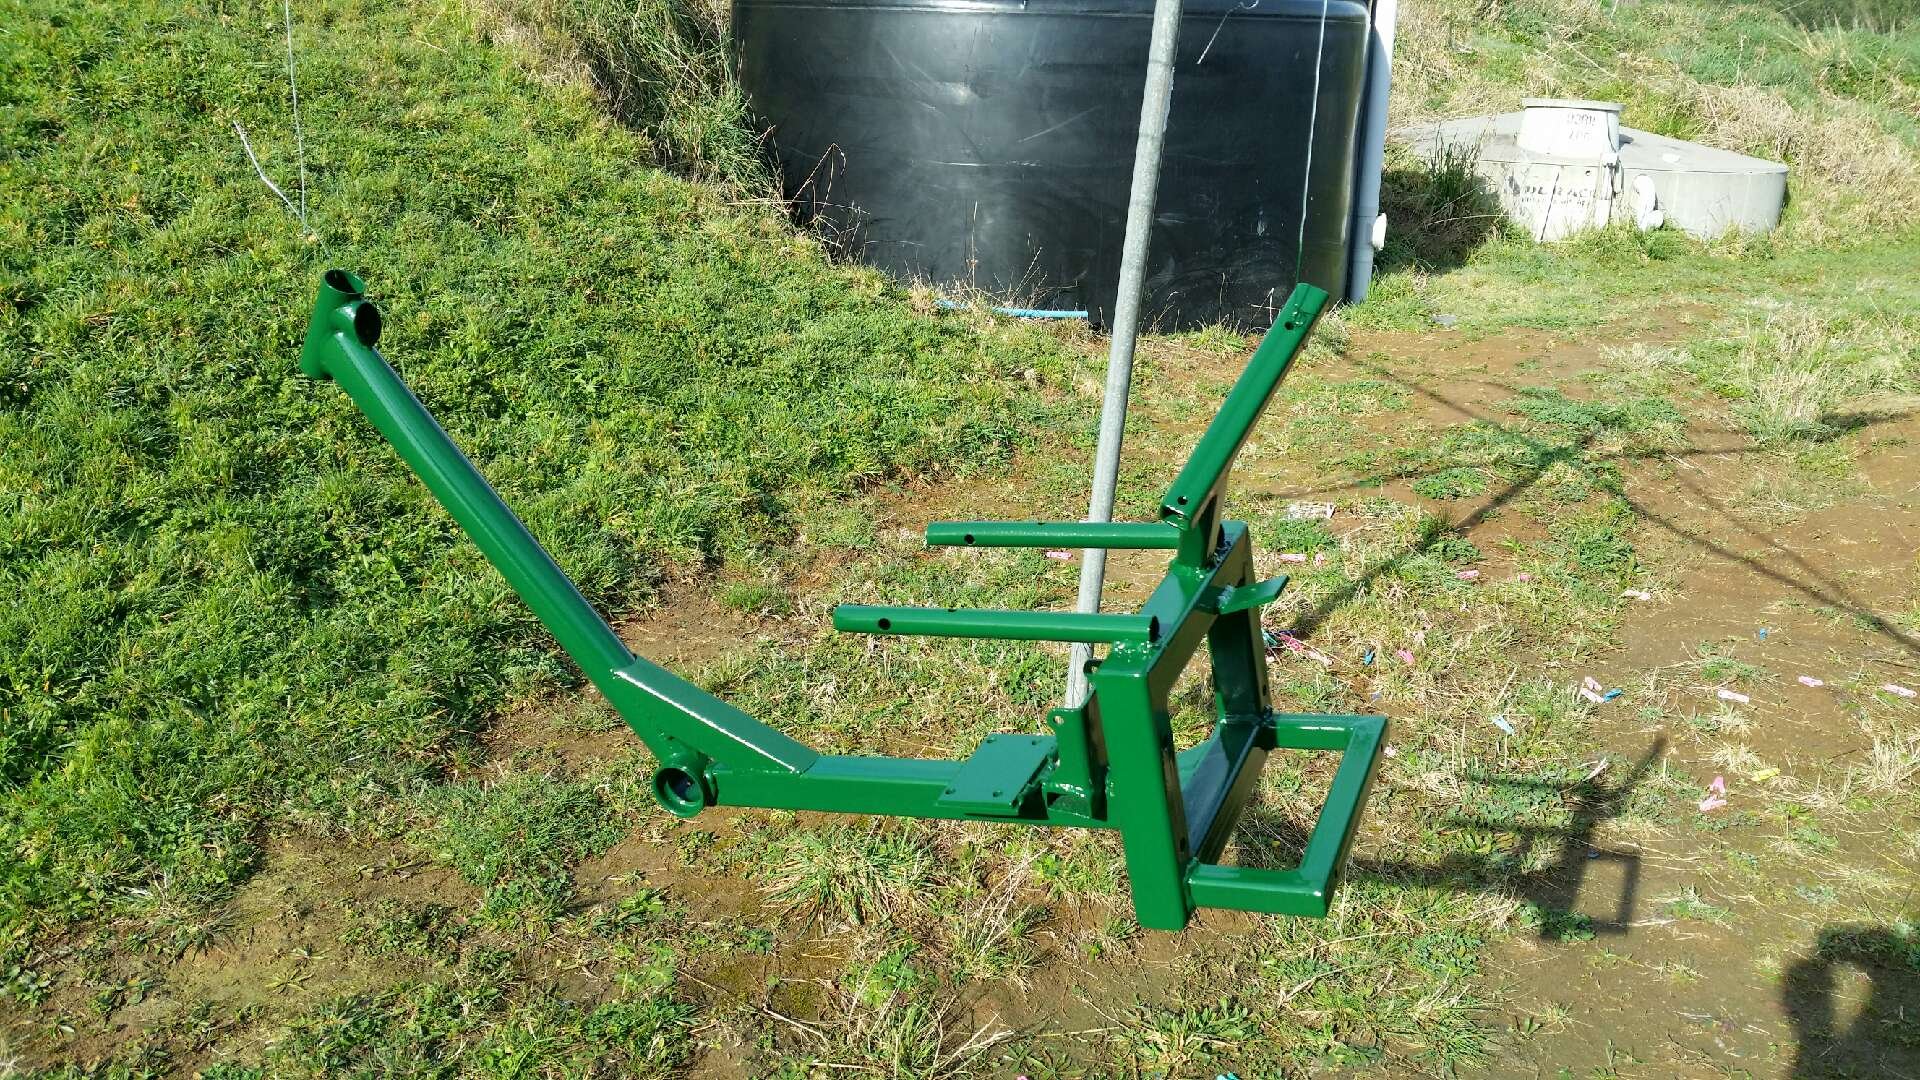
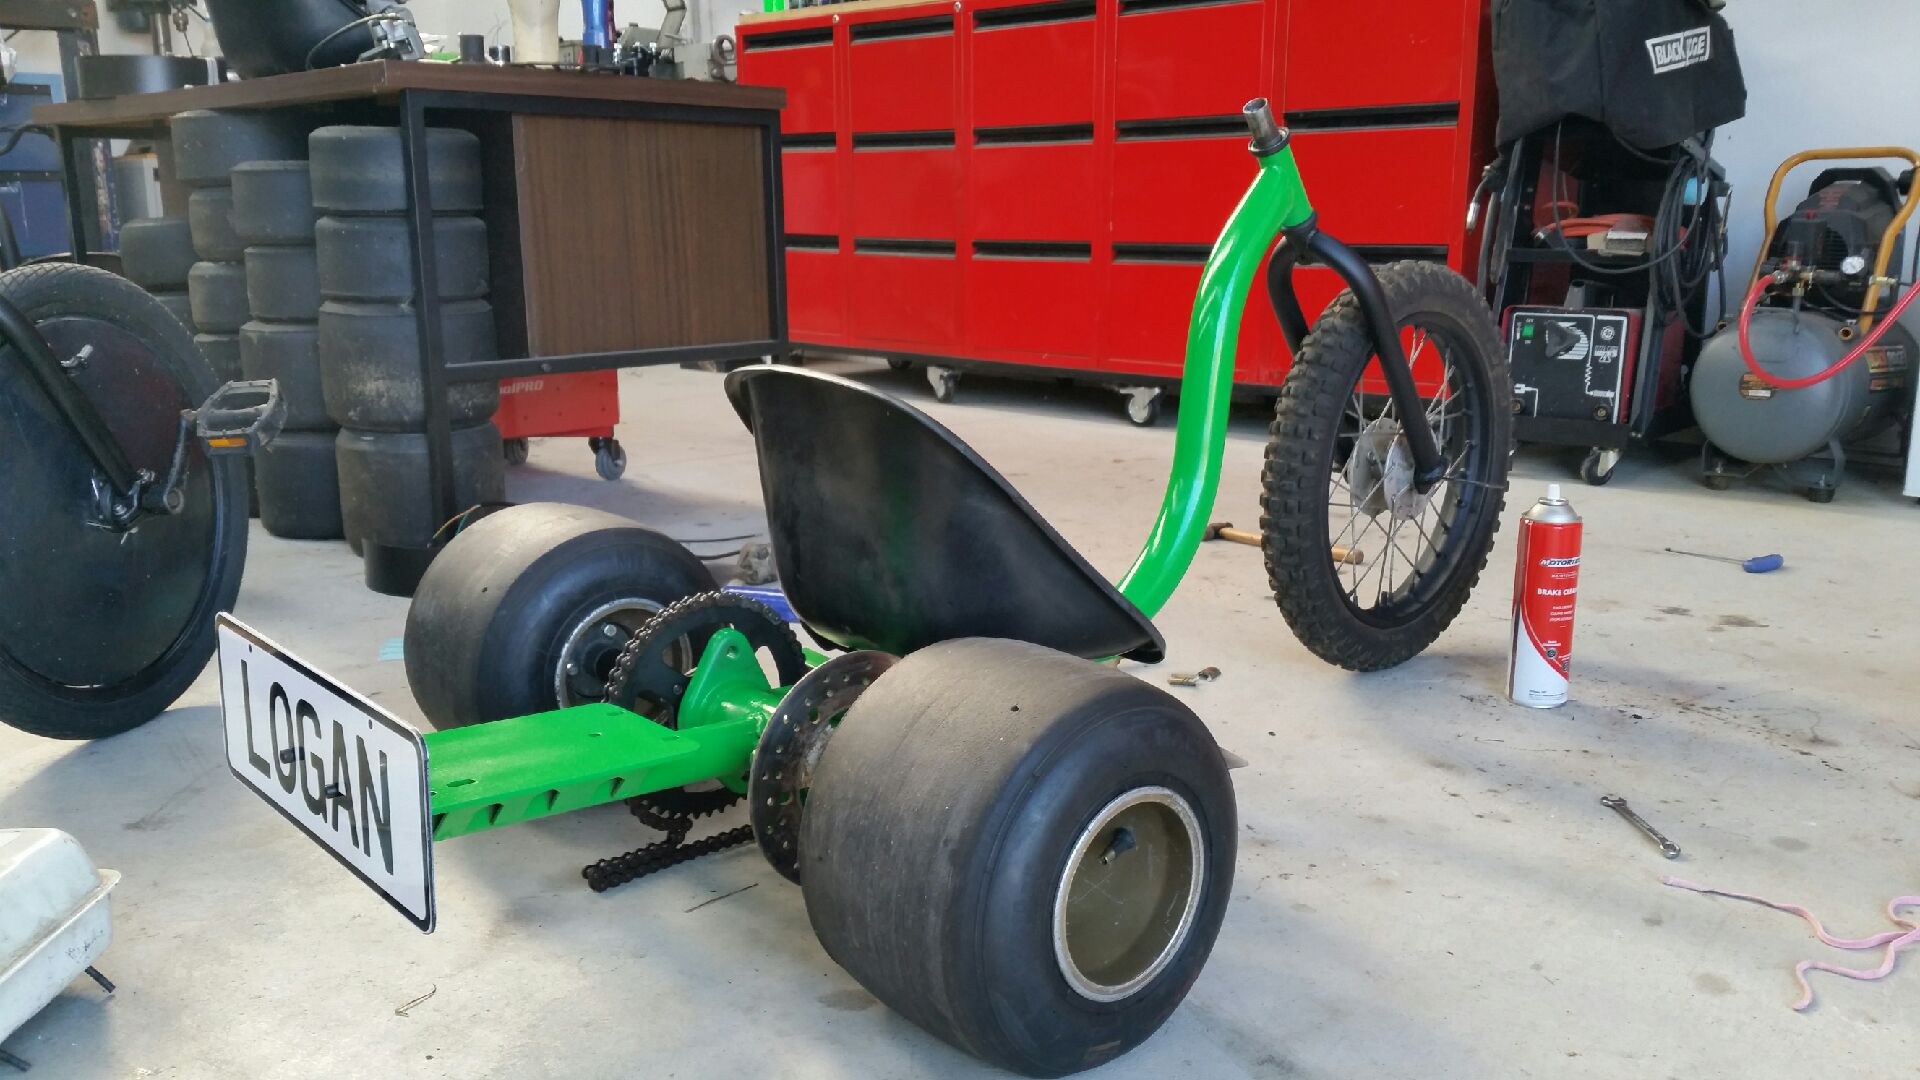
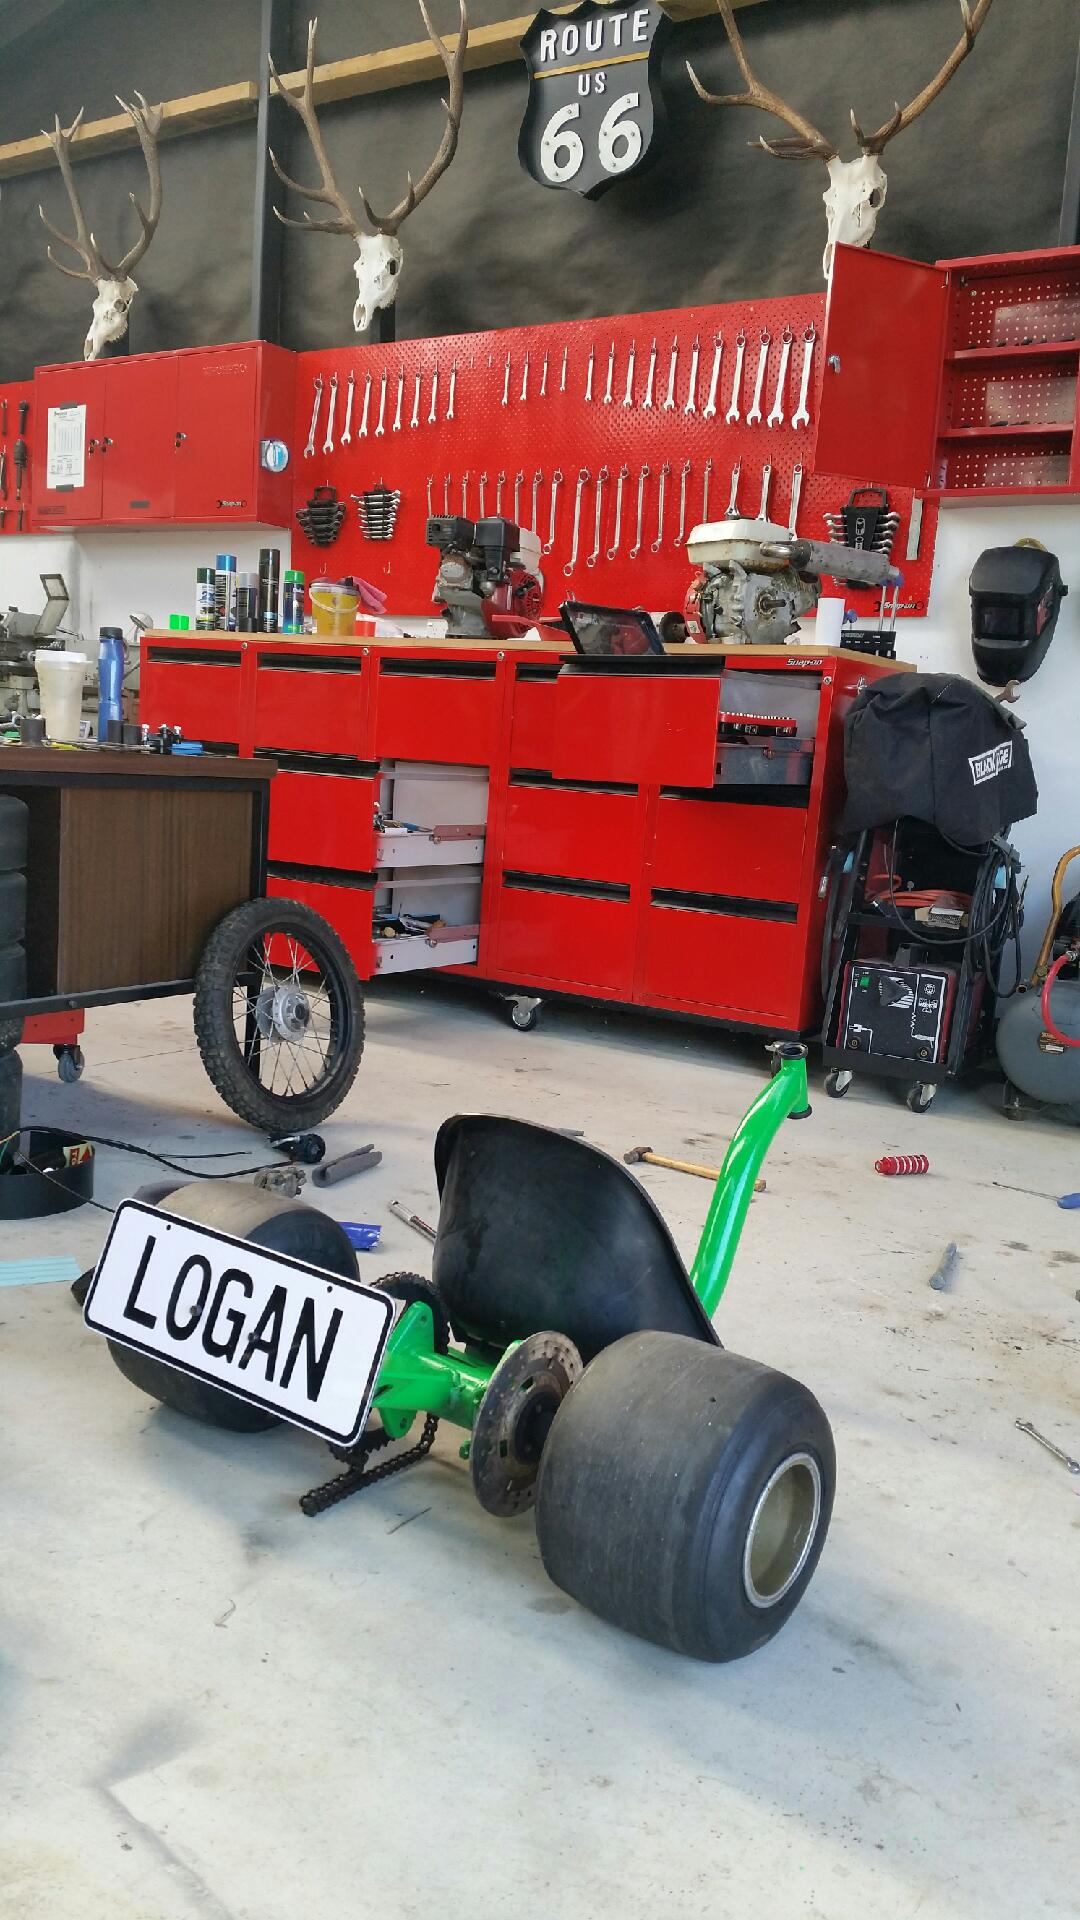
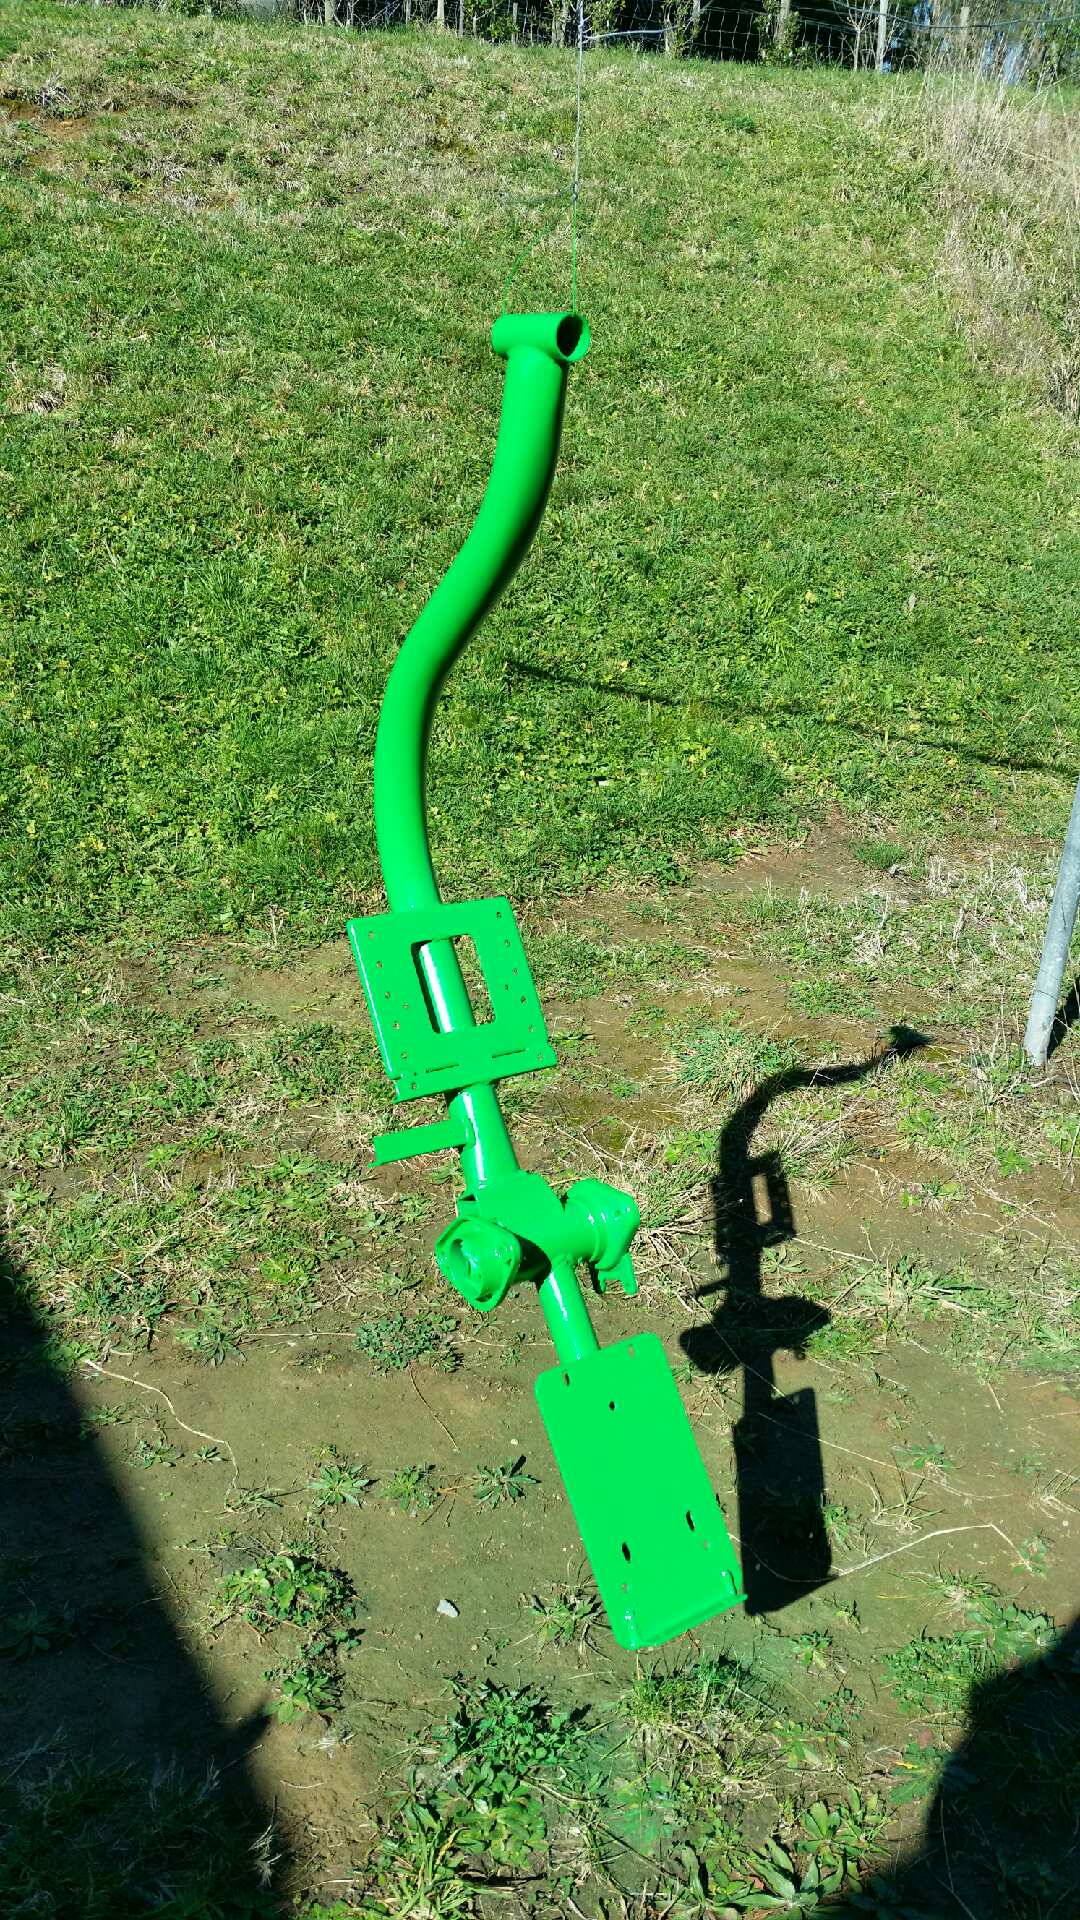
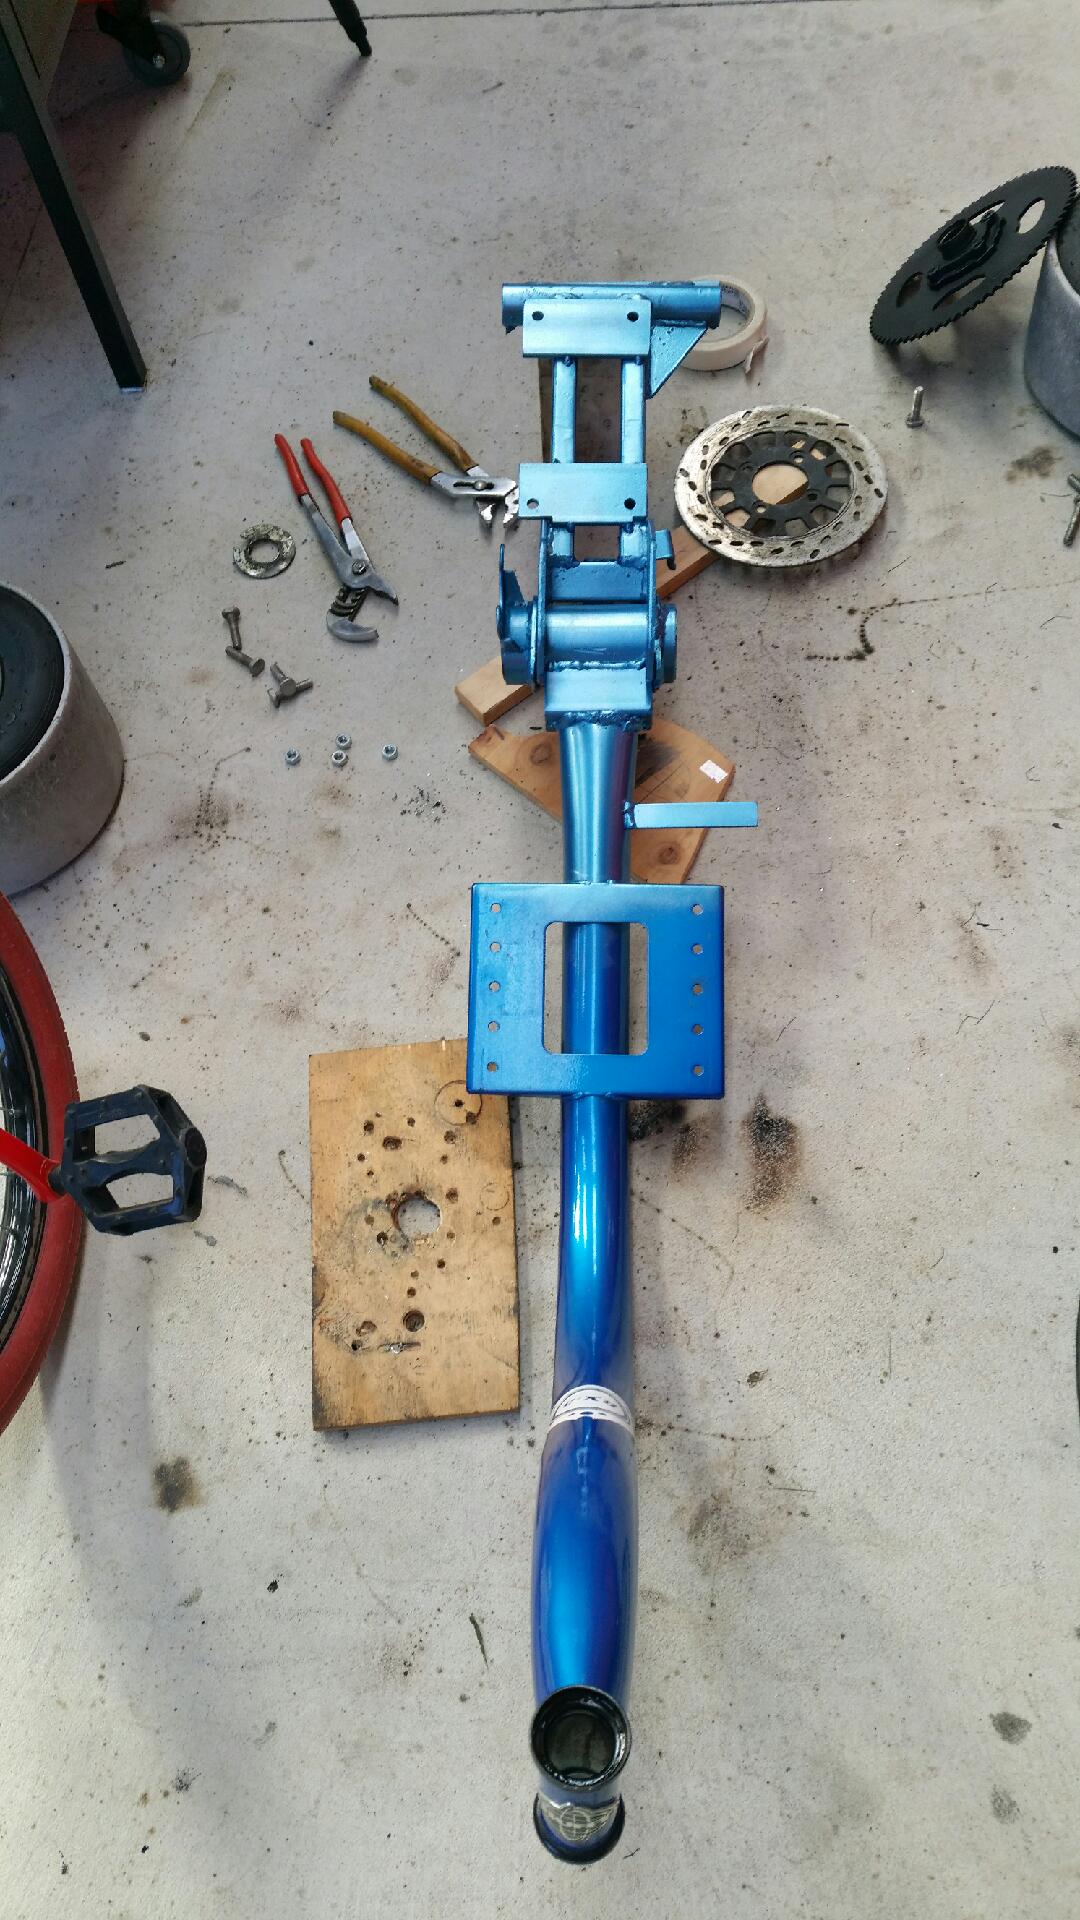
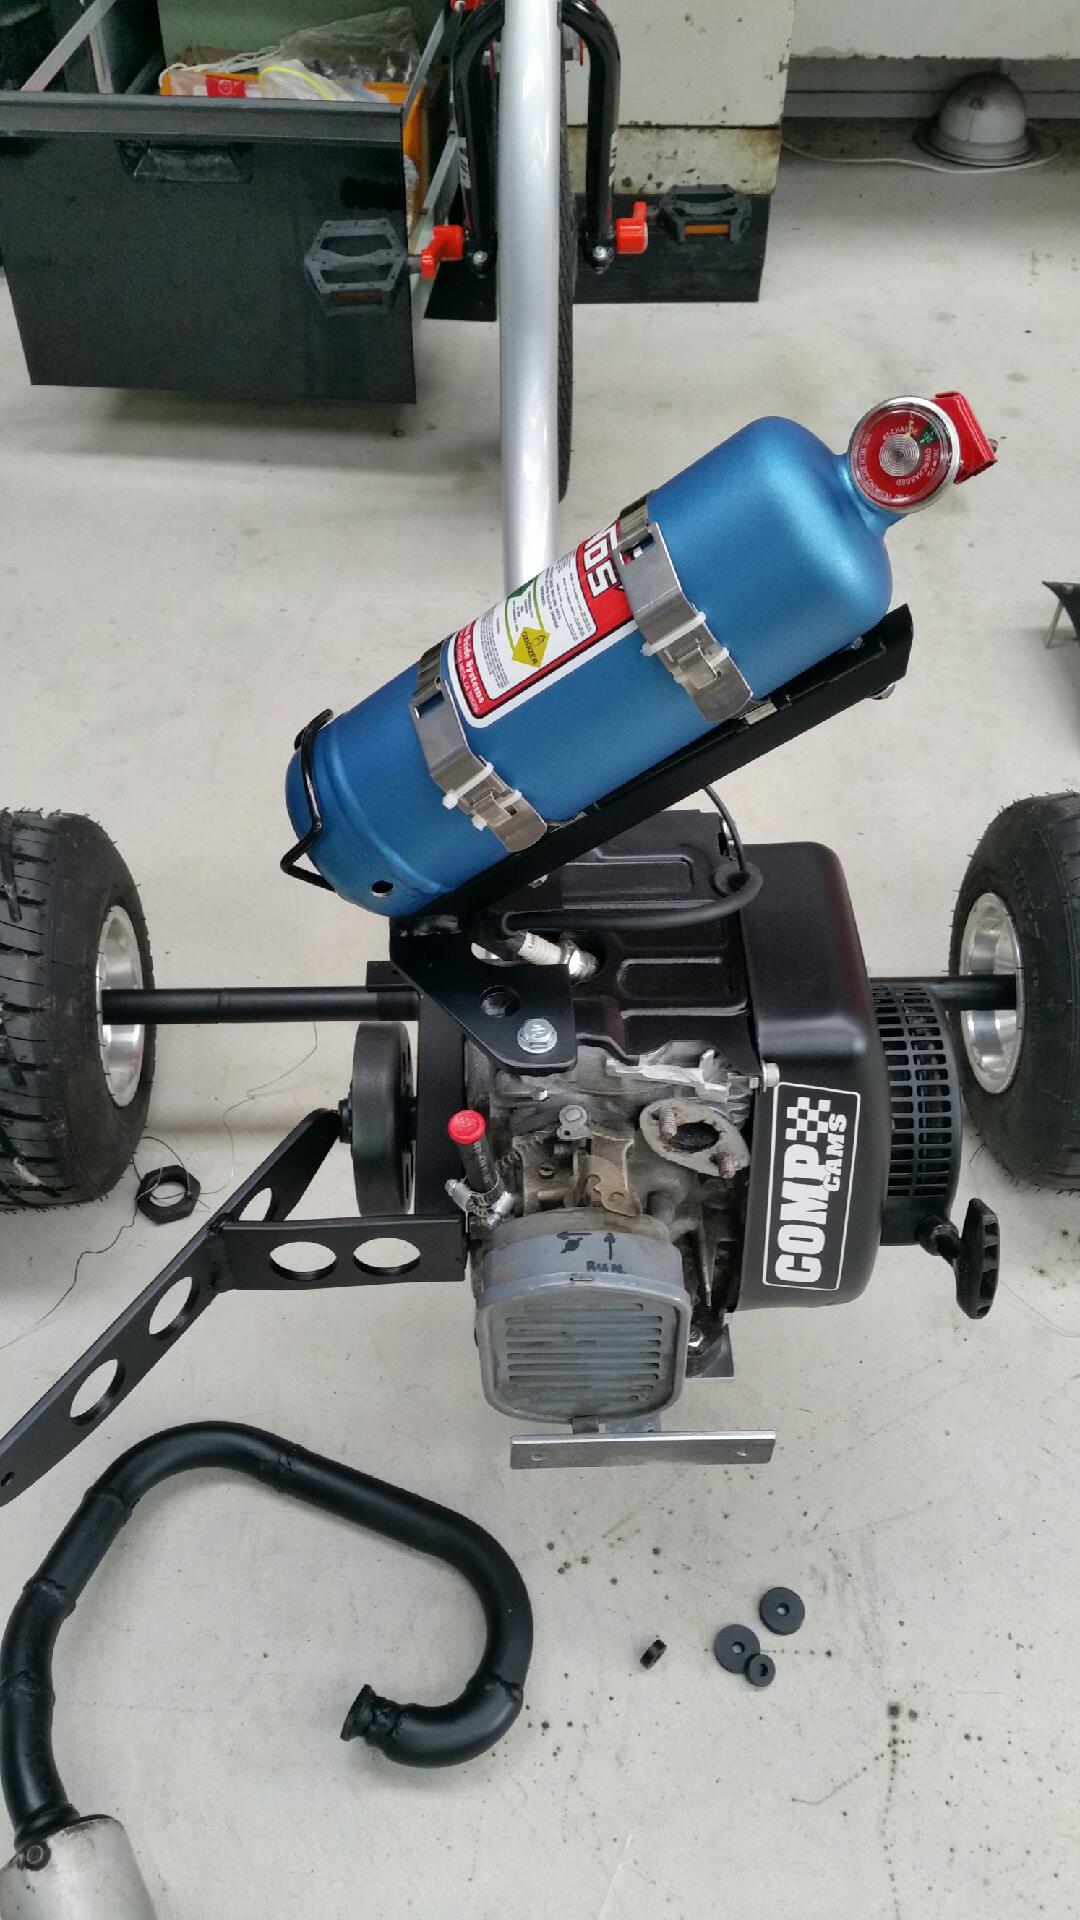
No rest on these things...got a self imposed deadline to meet. LOGAN trike: Happy with it all mocked up, and with the pit bike MX front wheel grafted into place...it's then time to paint it a colour that won't go unnoticed: I've always had a real crush on this colour...but never been brave enough to paint a car or motorbike in it. That's what's cool about these things as you can experiment and do really tacky things to them (fully "Repco" it out with accessories from the catalogue ) the end of the day it just adds to the fun of it all.
-
Kimjon's 110cc 4 speed pit bike motorised drift trike build
Kimjon replied to Kimjon's topic in Other Projects
And done...booyah!!! -
Kimjon's 110cc 4 speed pit bike motorised drift trike build
Kimjon replied to Kimjon's topic in Other Projects
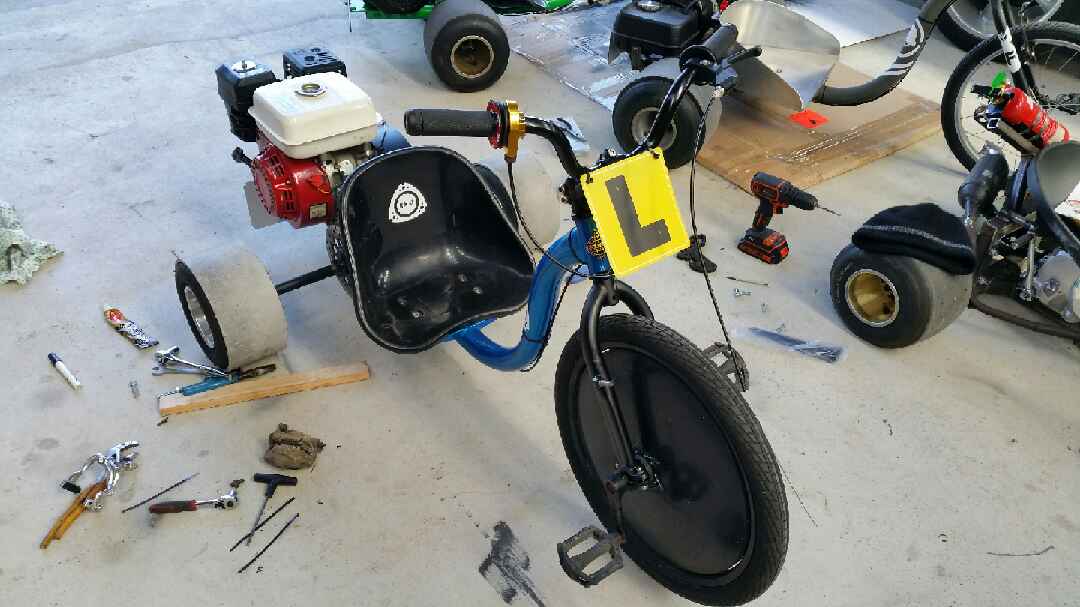
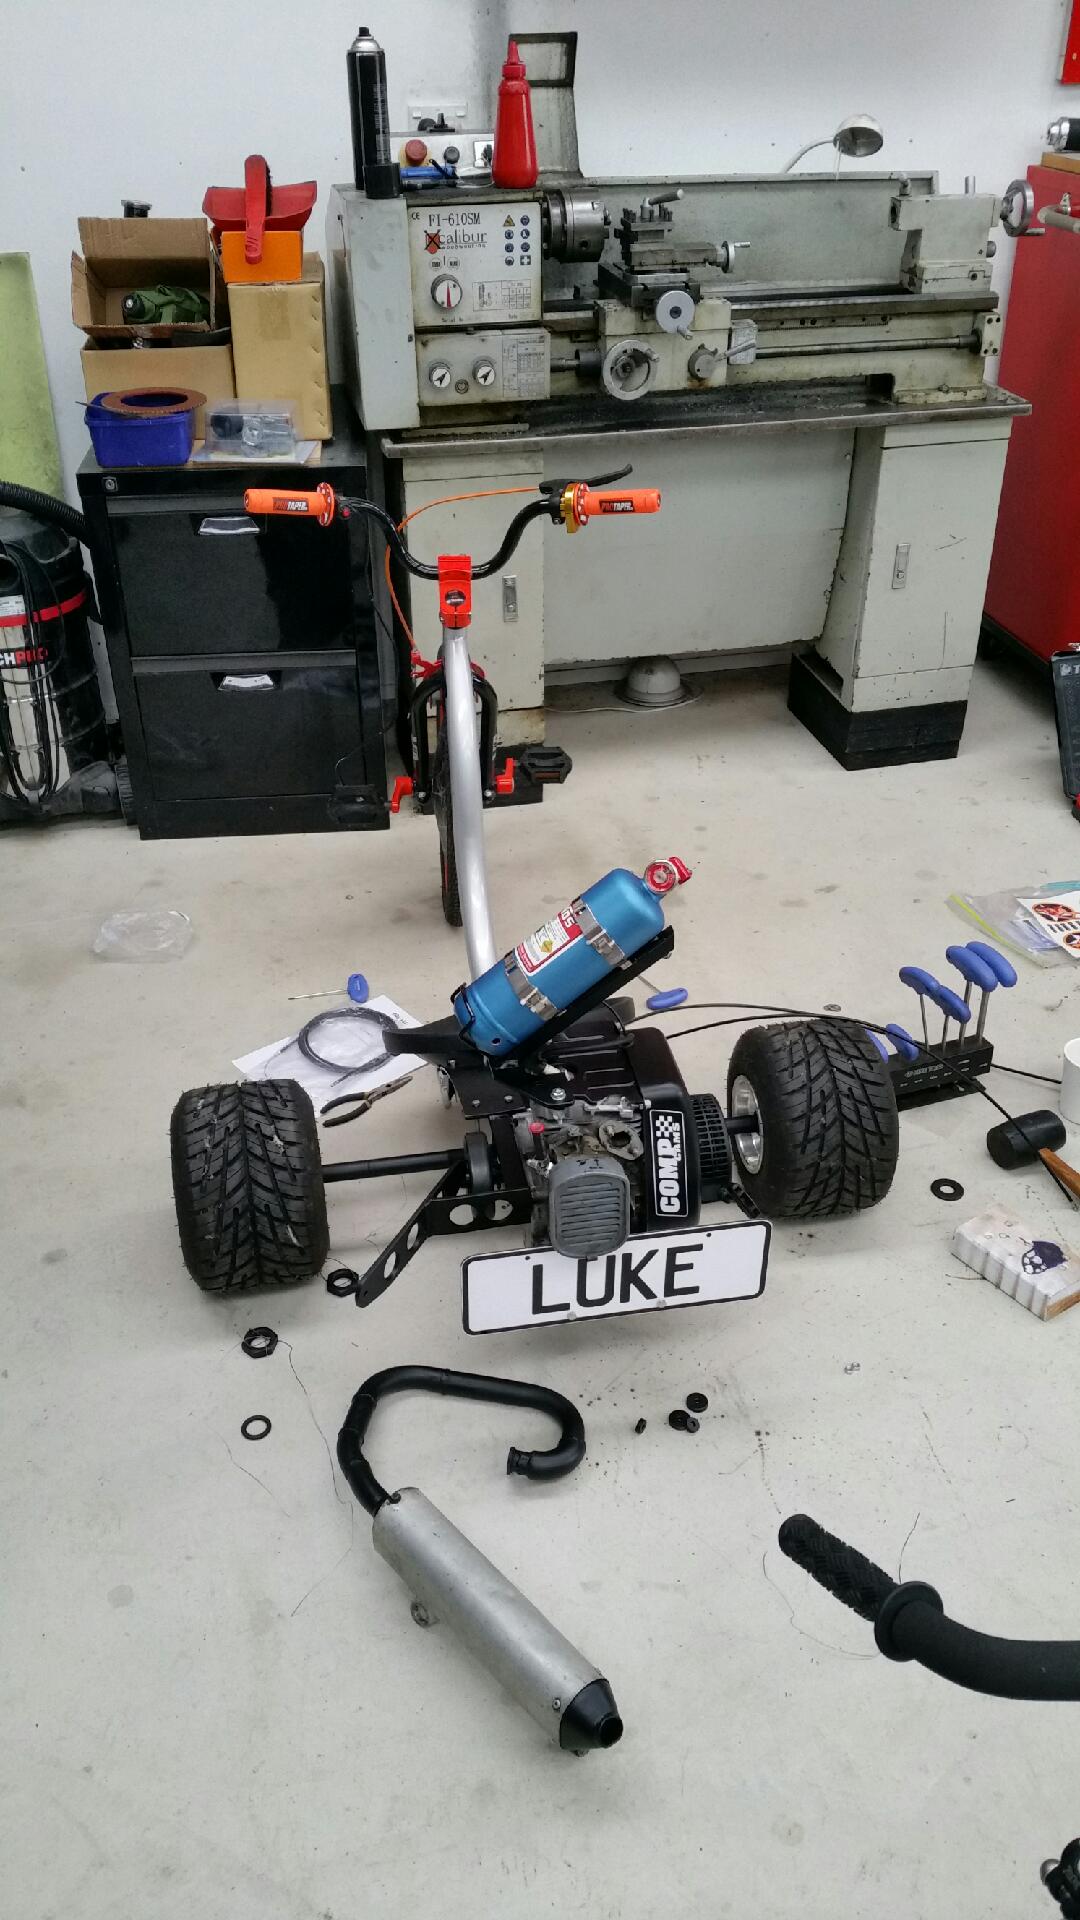
Jumping back to the LUKE trike...Here's a video of its first start up. One pull and broom mmmm put put put.... Pretty trouble free project. Needs pvc sleeves to finish...but that's all. Everything else works as it should. I've been up and down my driveway about 10 times without it missing a beat. -
Kimjon's 110cc 4 speed pit bike motorised drift trike build
Kimjon replied to Kimjon's topic in Other Projects
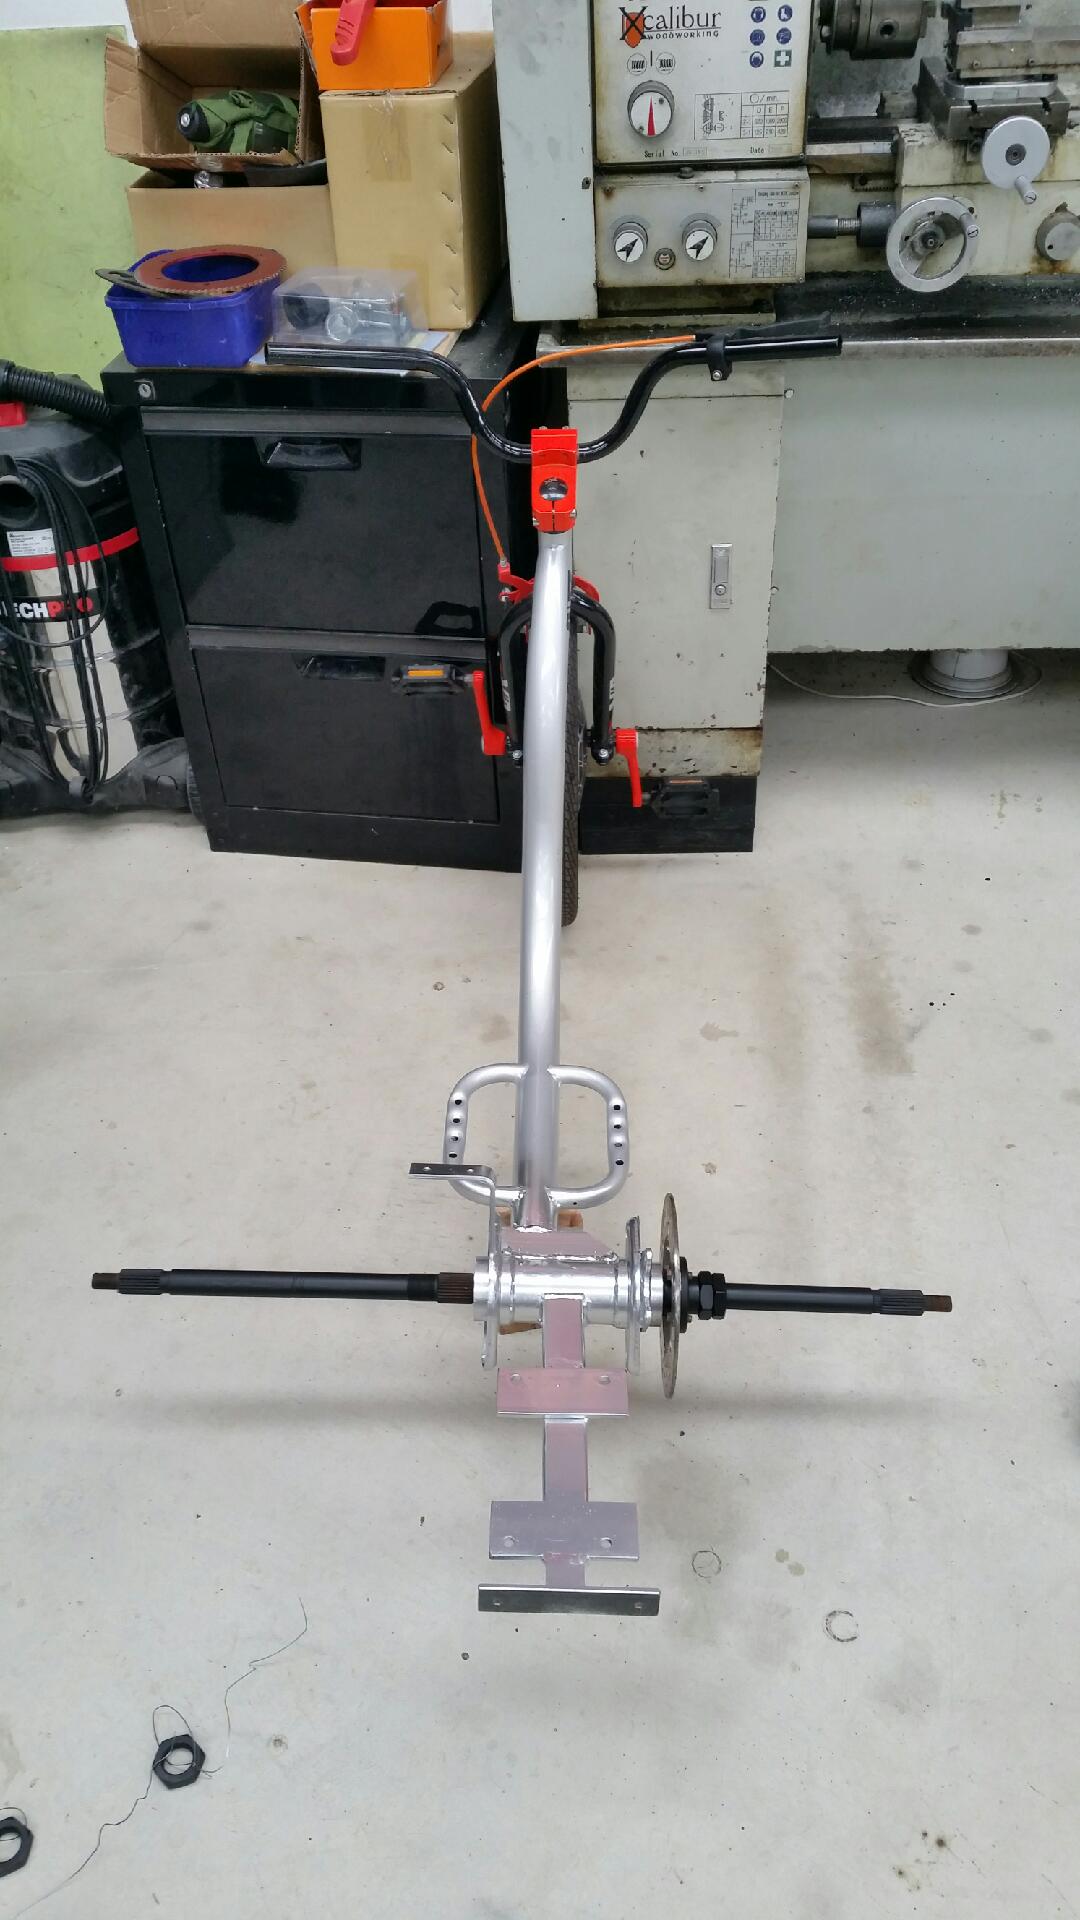
Next up...GUBBY trike. As you can tell by my pro colour matched paint job, I have no qualifications...in well...anything really...but especially not painting! By the time it all comes back together hopefully it doesn't stick out like dogs balls. I've painted all the other fiddly bits and will hopefully assemble it tomorrow all going well.
-
Kimjon's 110cc 4 speed pit bike motorised drift trike build
Kimjon replied to Kimjon's topic in Other Projects
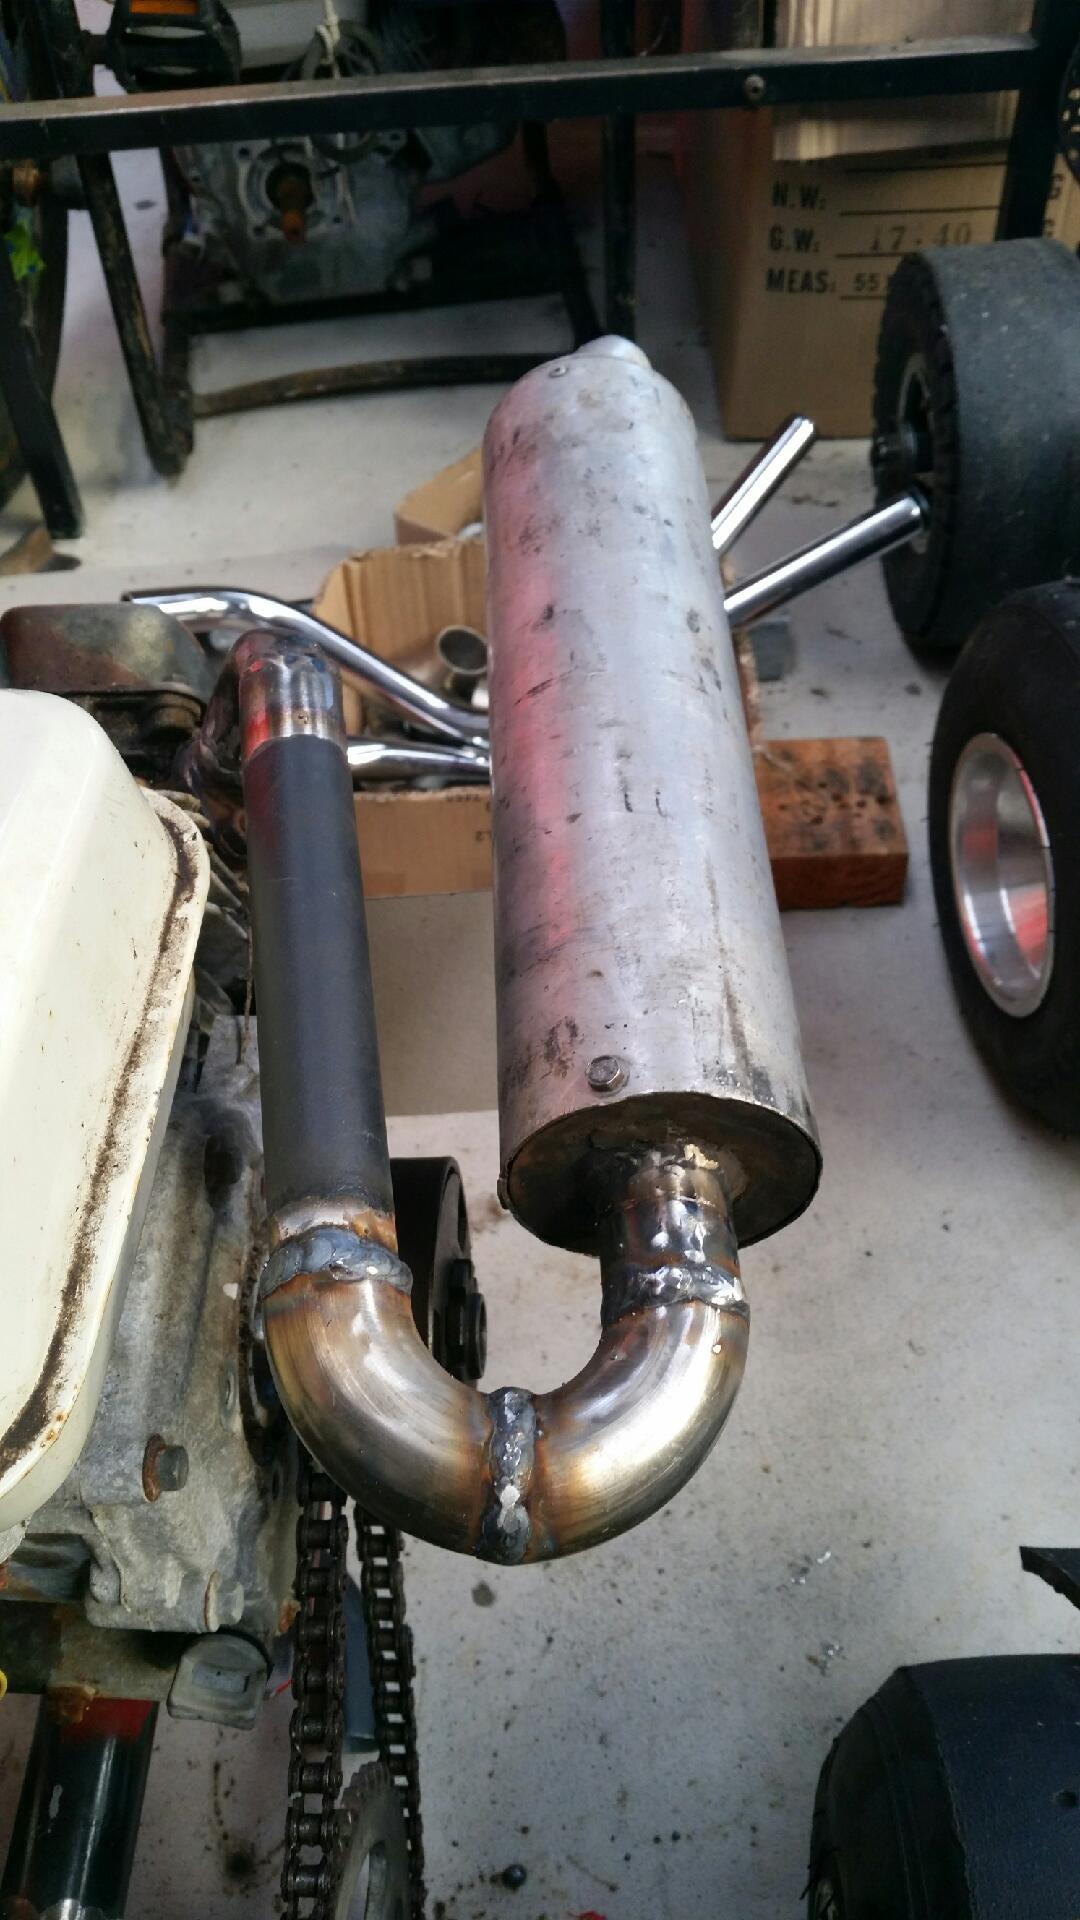
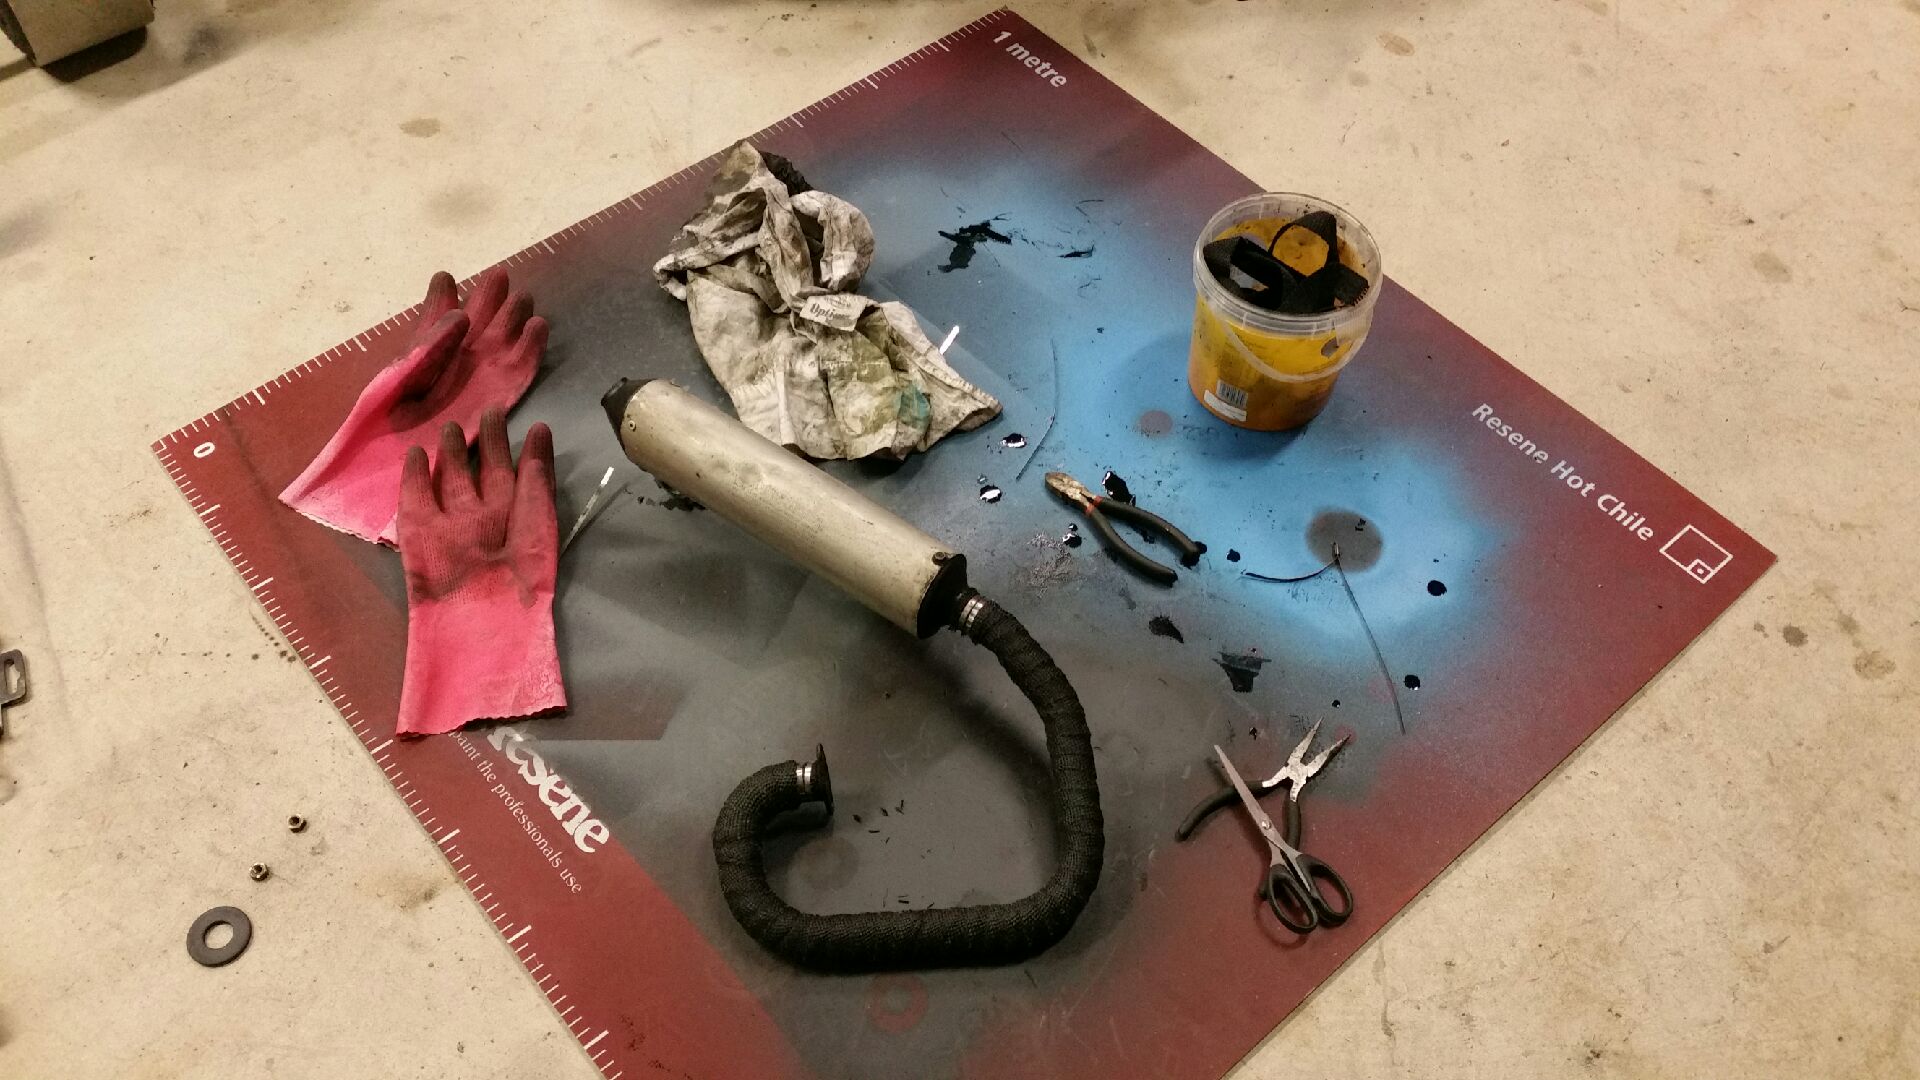
Mmmmmm sexy exhaust wrap....mmmmmm Tasty!!!
-
Kimjon's 110cc 4 speed pit bike motorised drift trike build
Kimjon replied to Kimjon's topic in Other Projects
They go hard out! Just remove governor and away you go. -
Kimjon's 110cc 4 speed pit bike motorised drift trike build
Kimjon replied to Kimjon's topic in Other Projects
Nearly finished the LUKE trike today. Just a few cables to hook up and other minor details. But pretty much done. Now just 4 more to finish this week...no panic!!!
-
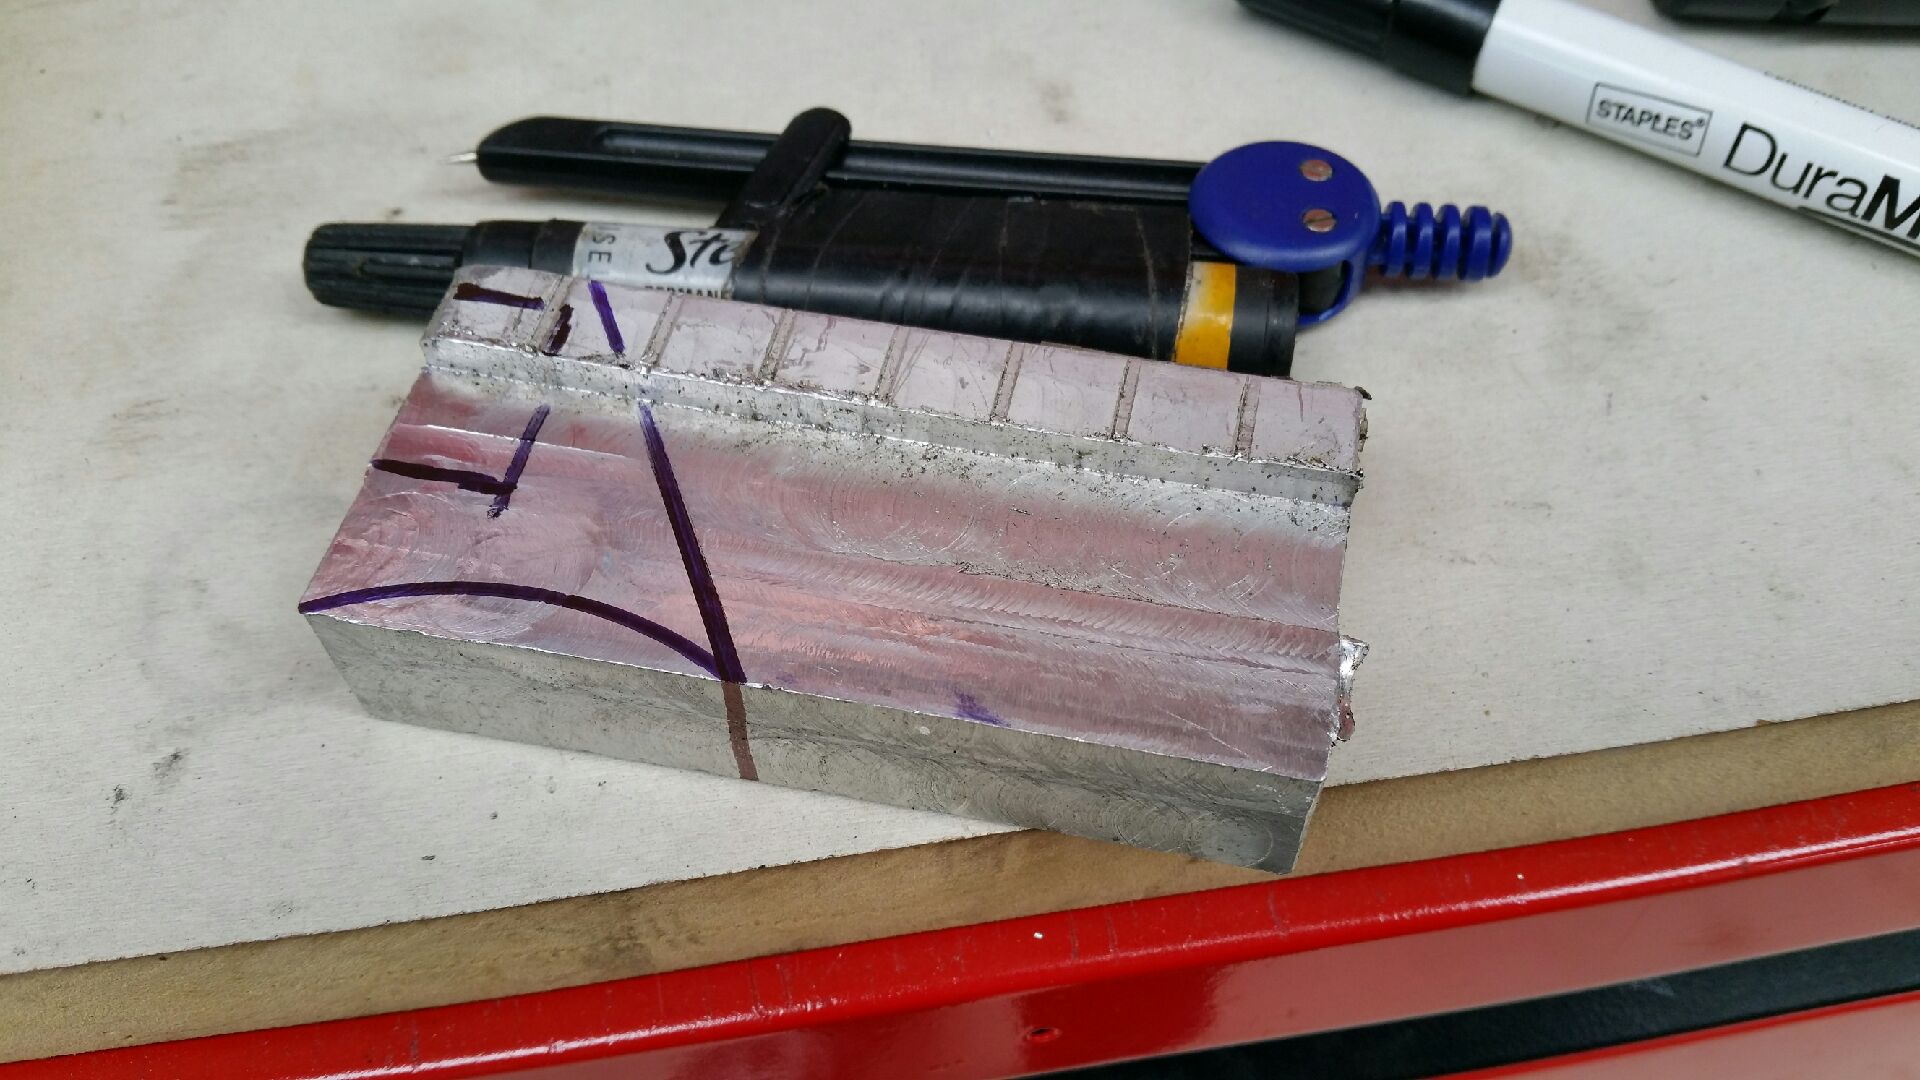
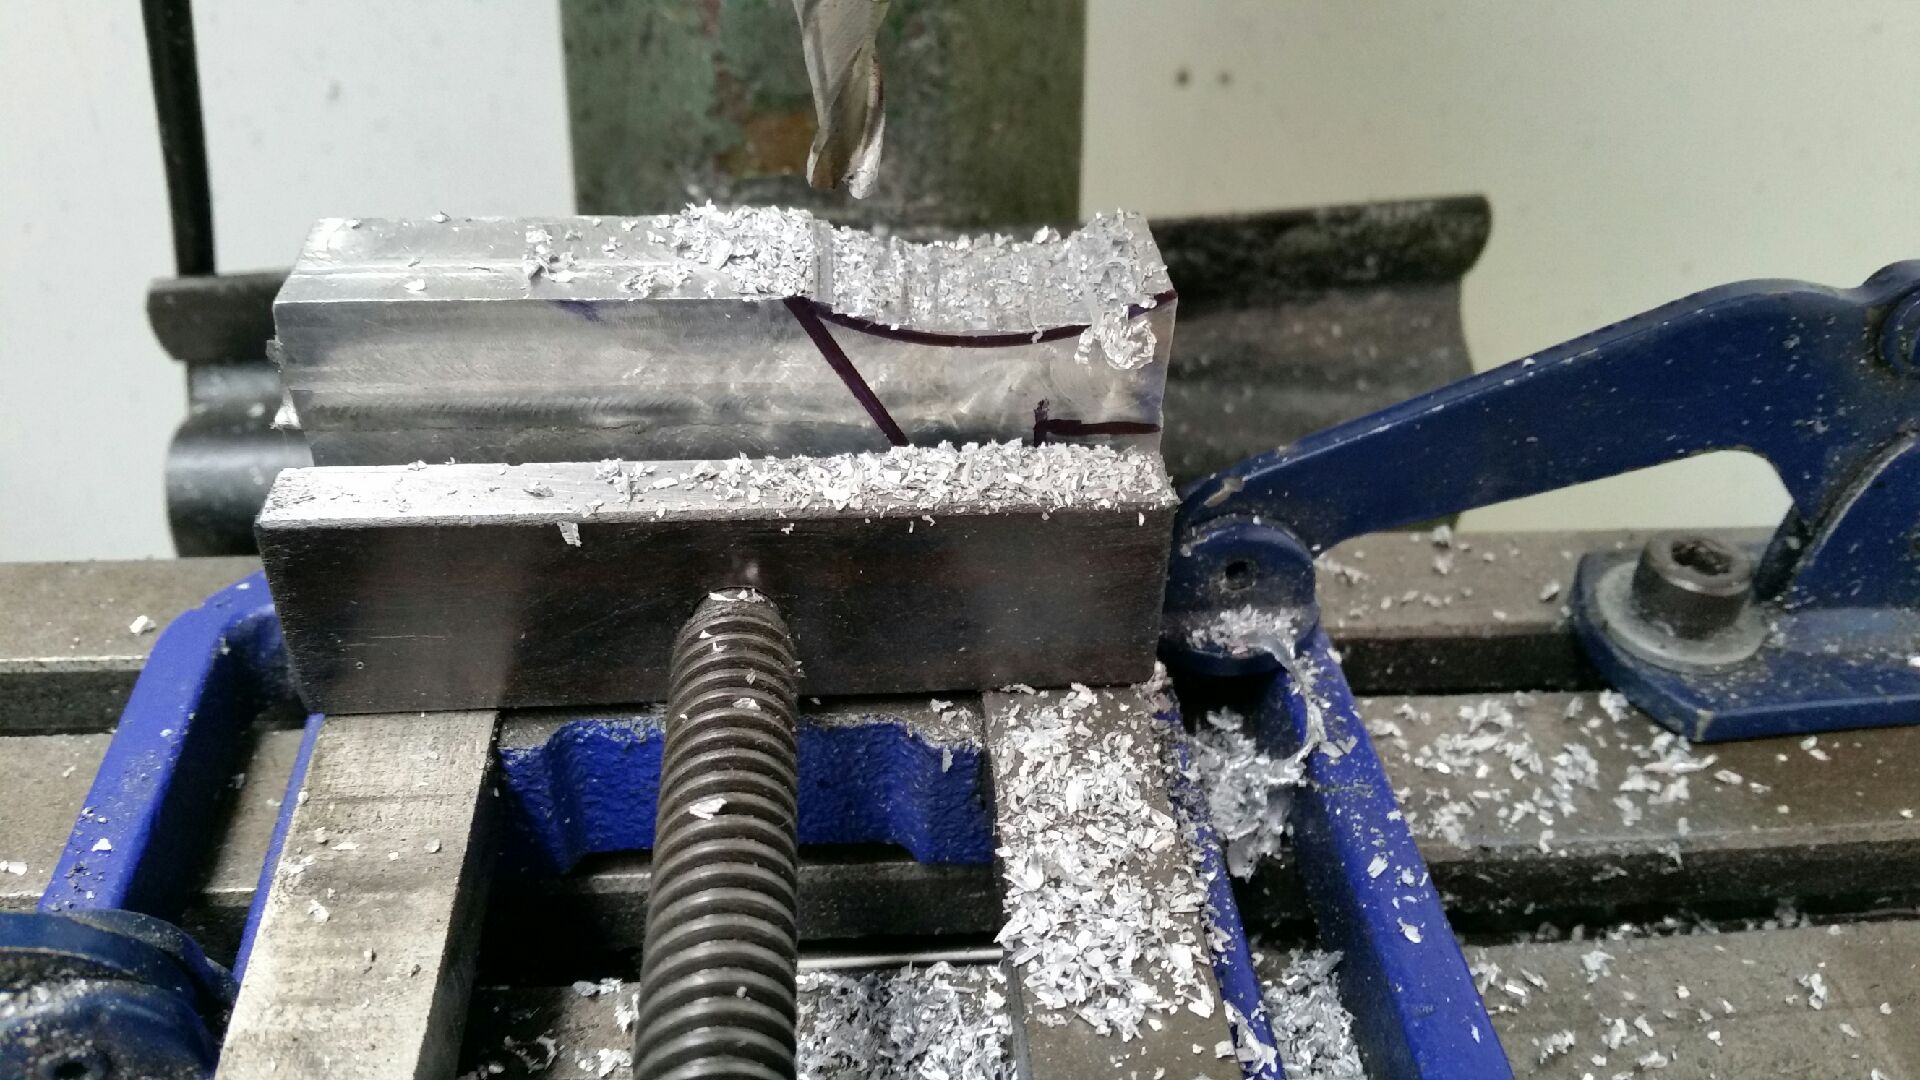
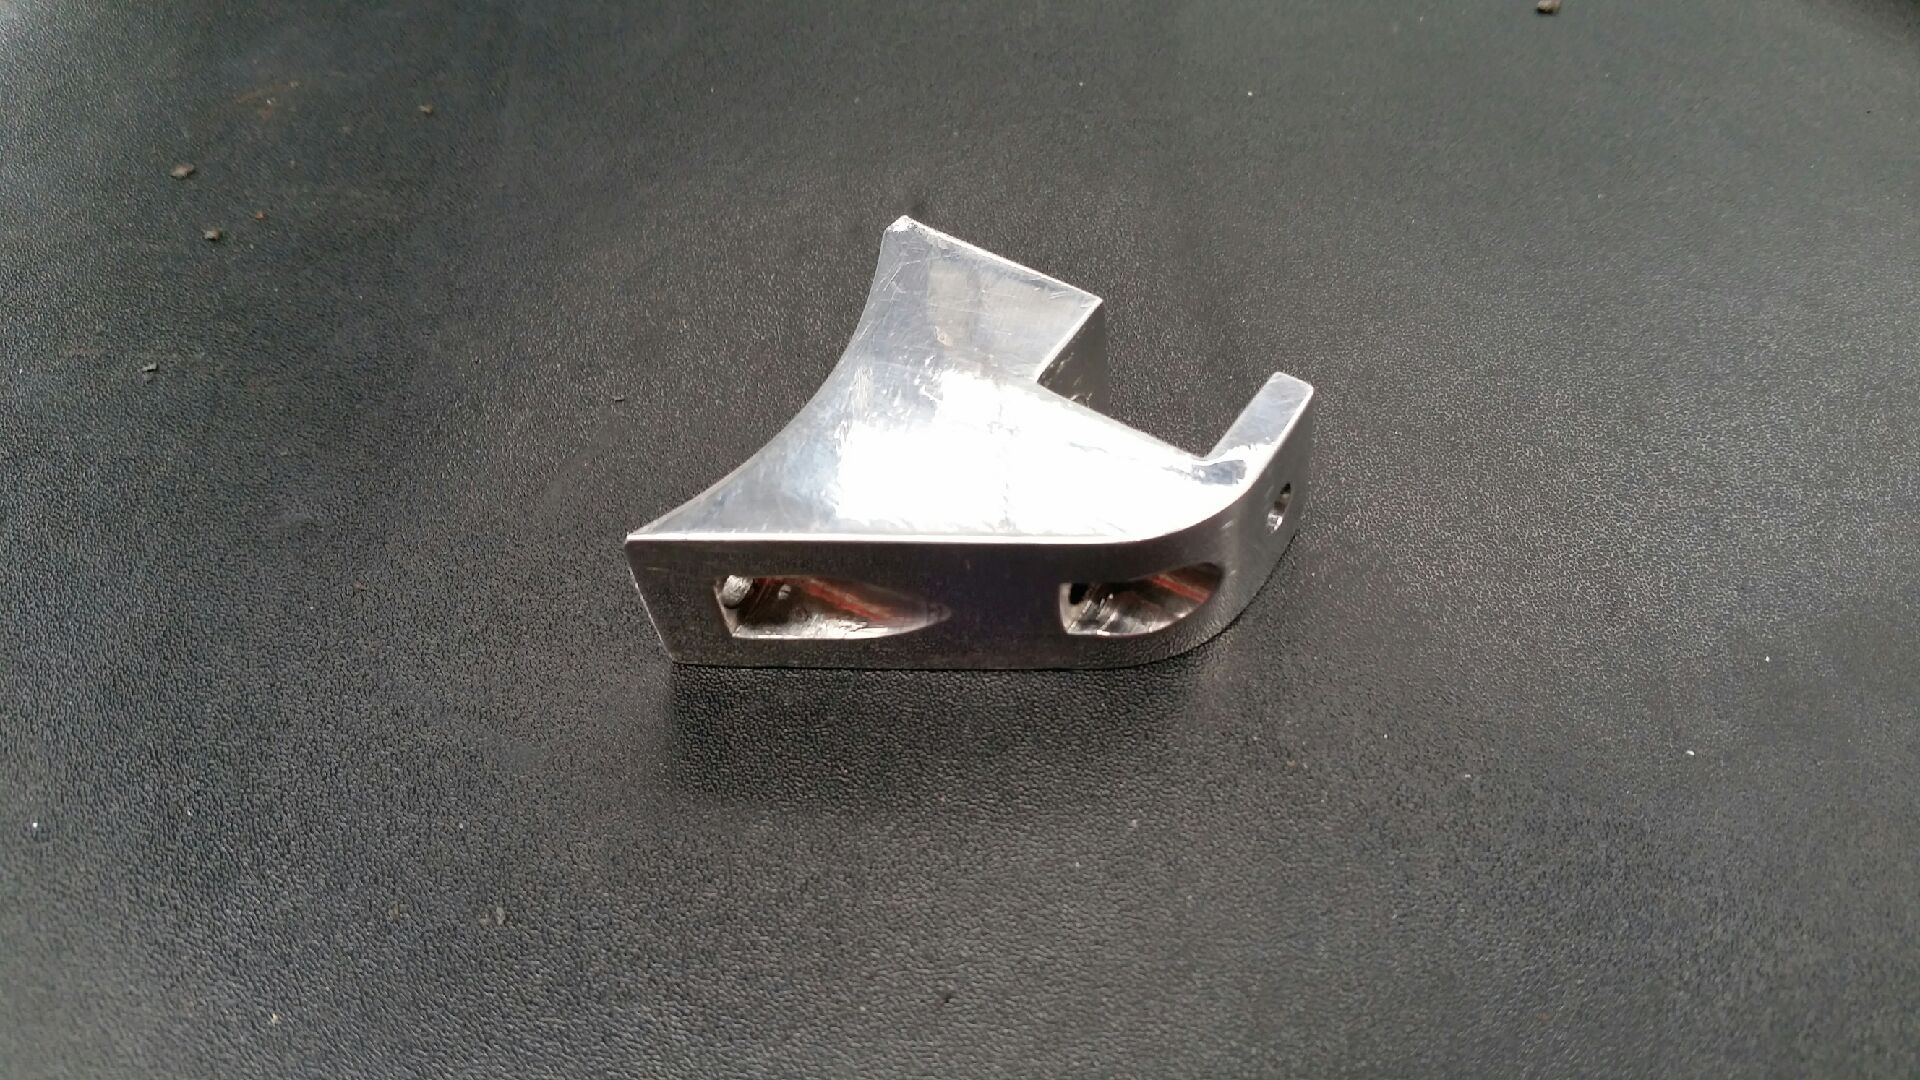
Cheers. Go on do it...it wasn't that much effort to achieve. I sanded the radius/curve into it. I used the mill to speed up the process...but it could have been done easily enough without it. I found the ideal mounting spot by sticking it to the column using a giant blob of putty first, then took measurements from there to determine the final shape of the bracket. Here's a slightly different angle. I had to still be able to access the switches behind. The gear selector also has to rotate freely as the column is split into 3 segments...but blob of putty allows you to trial and error the fit until it's where you need it to be.
-
I once mounted a 4" grinder in a similar way. Then bolted a sump off a 350 chev to a bit of MDF...and used the grinder to cut the sump off about 50mm up from the flange the entire way around. I turned the sump 180° around on itself and then welded it back together. This worked out perfectly and the motor could then go into a commodore with the sump now clearing the front cross member.
-
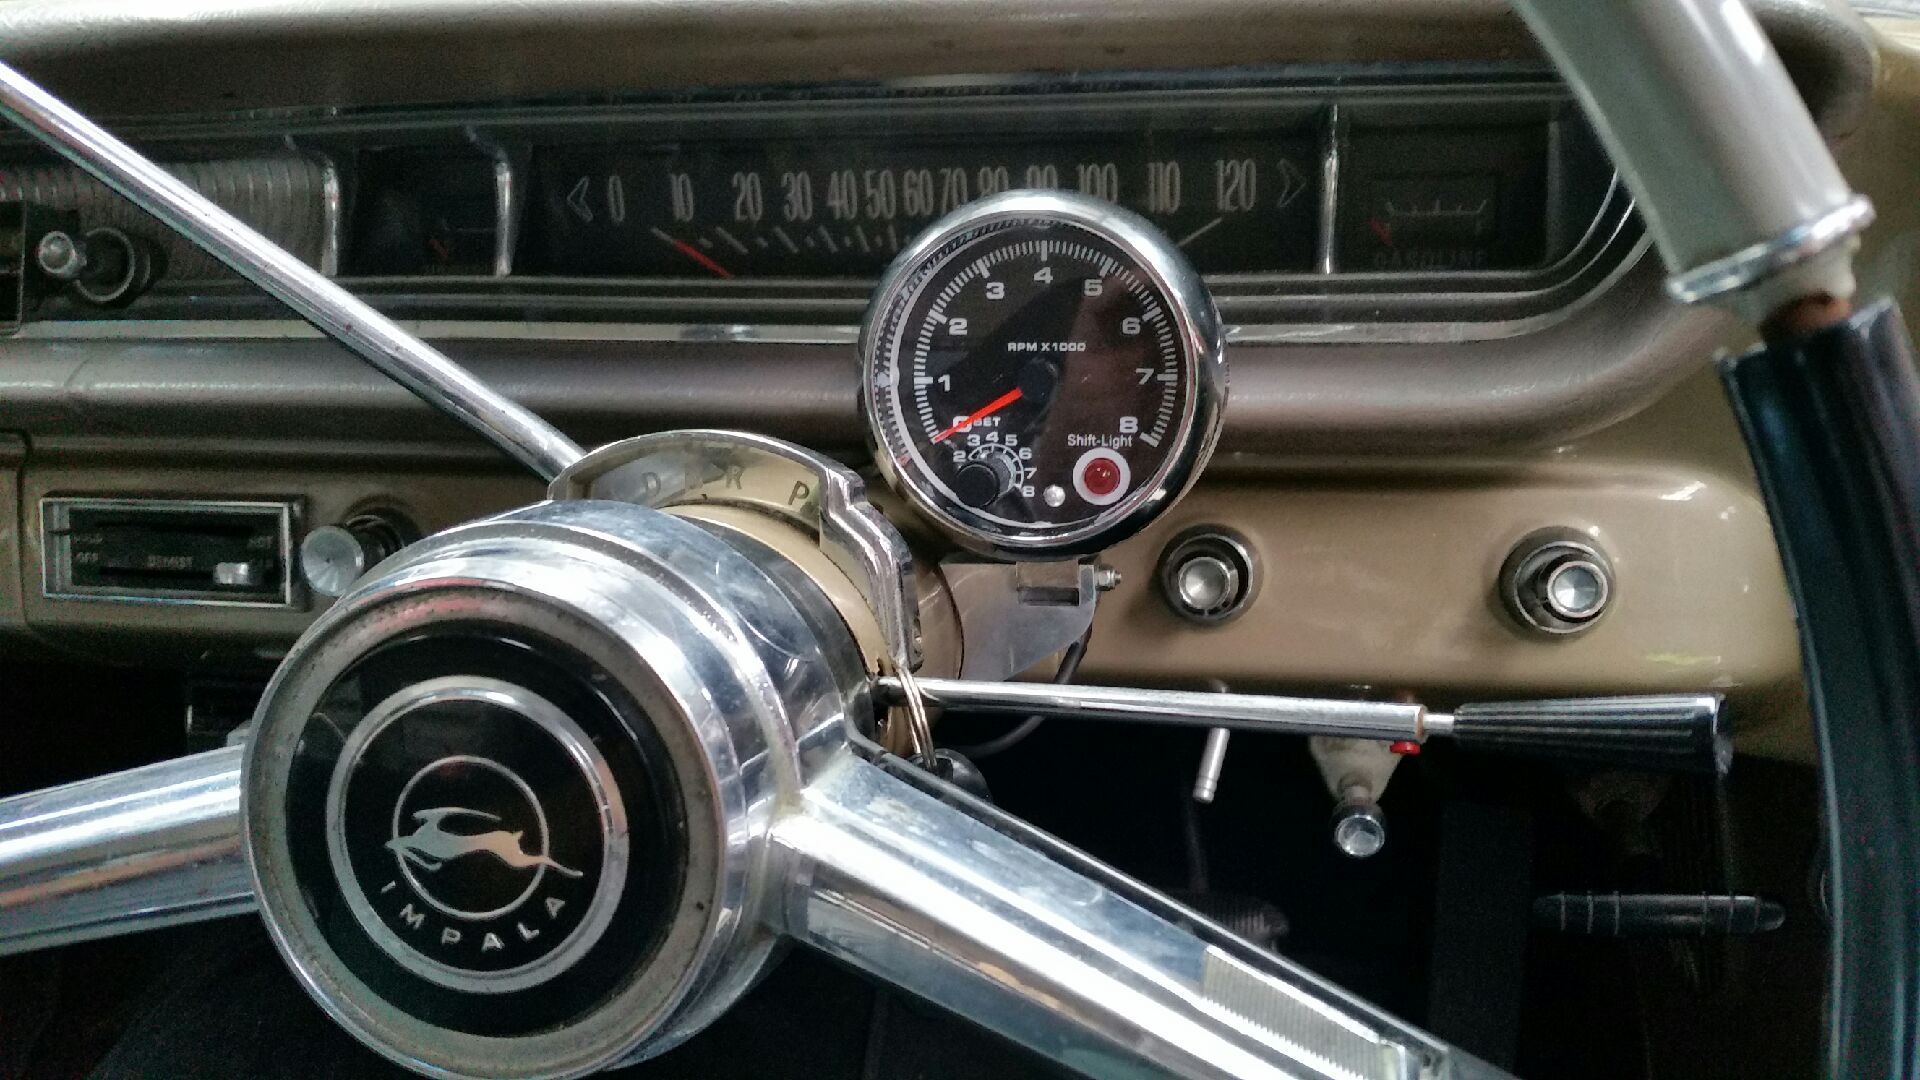
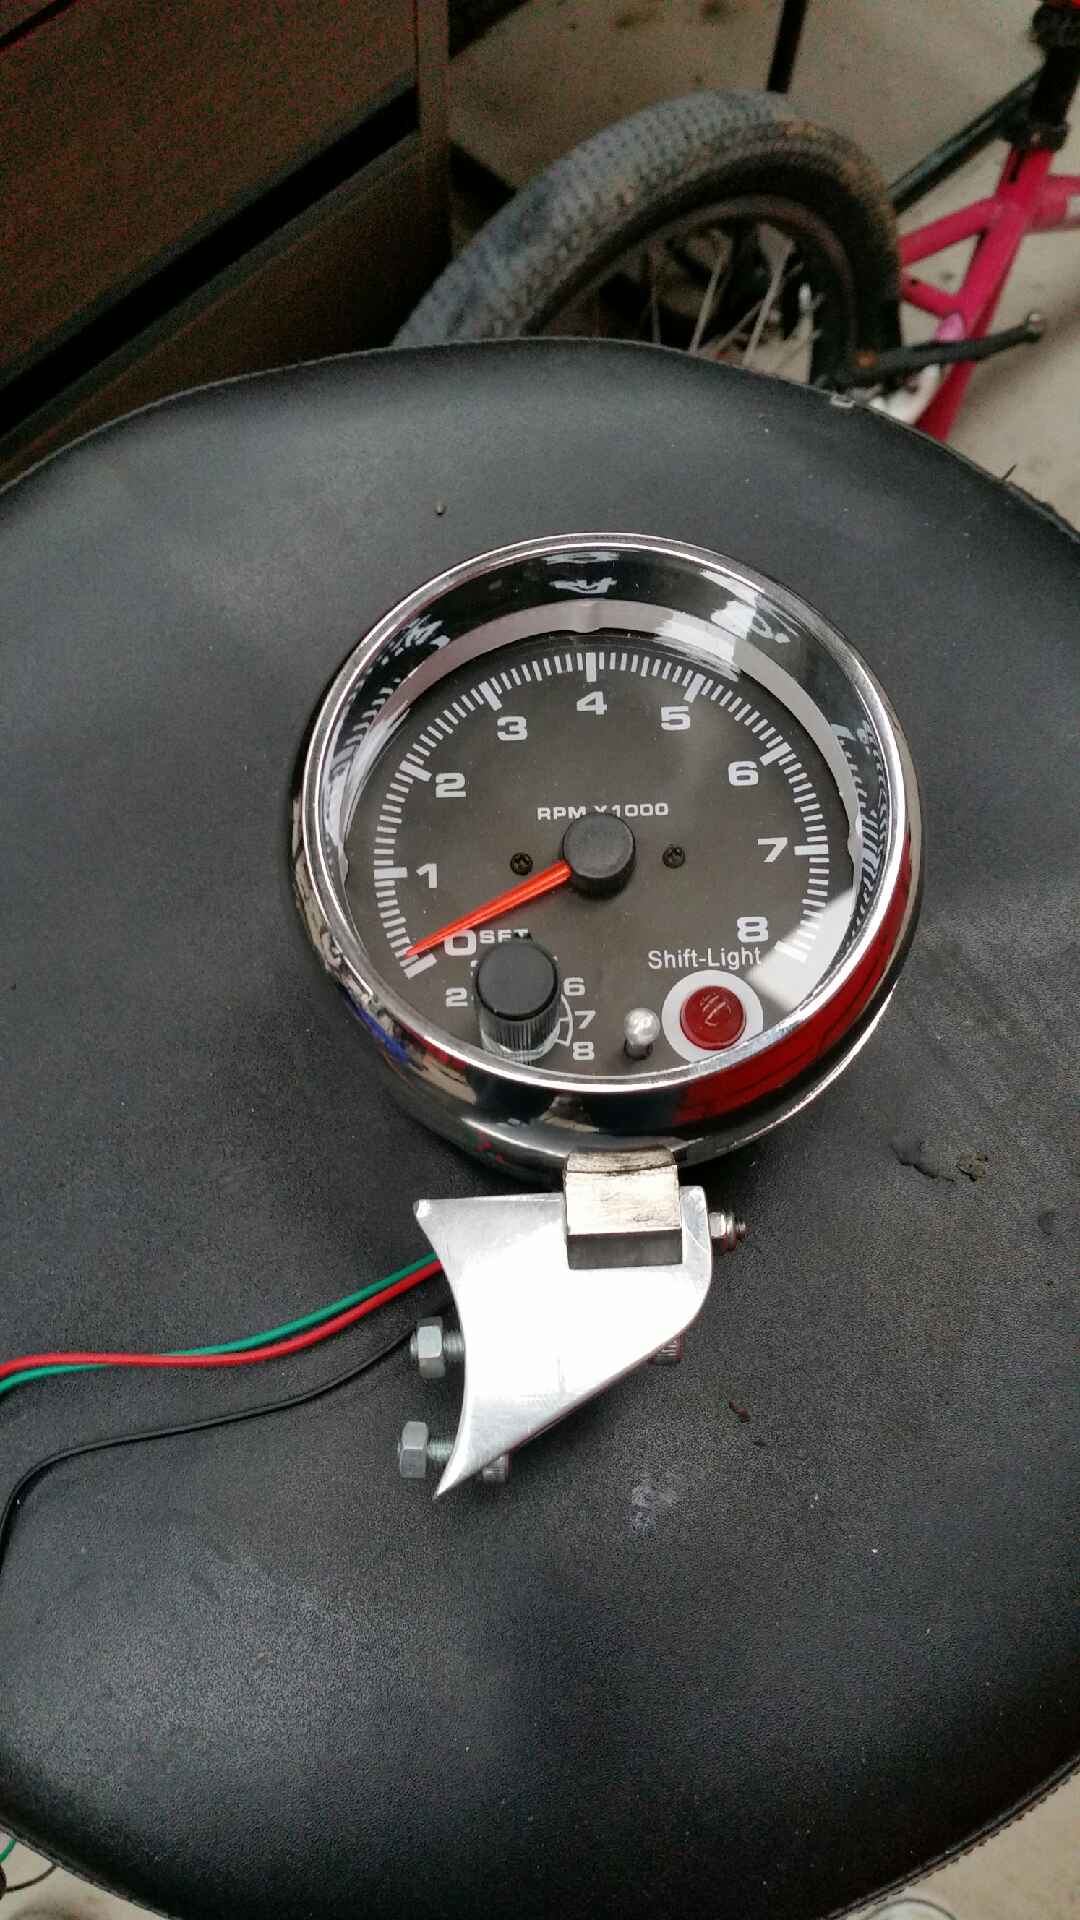
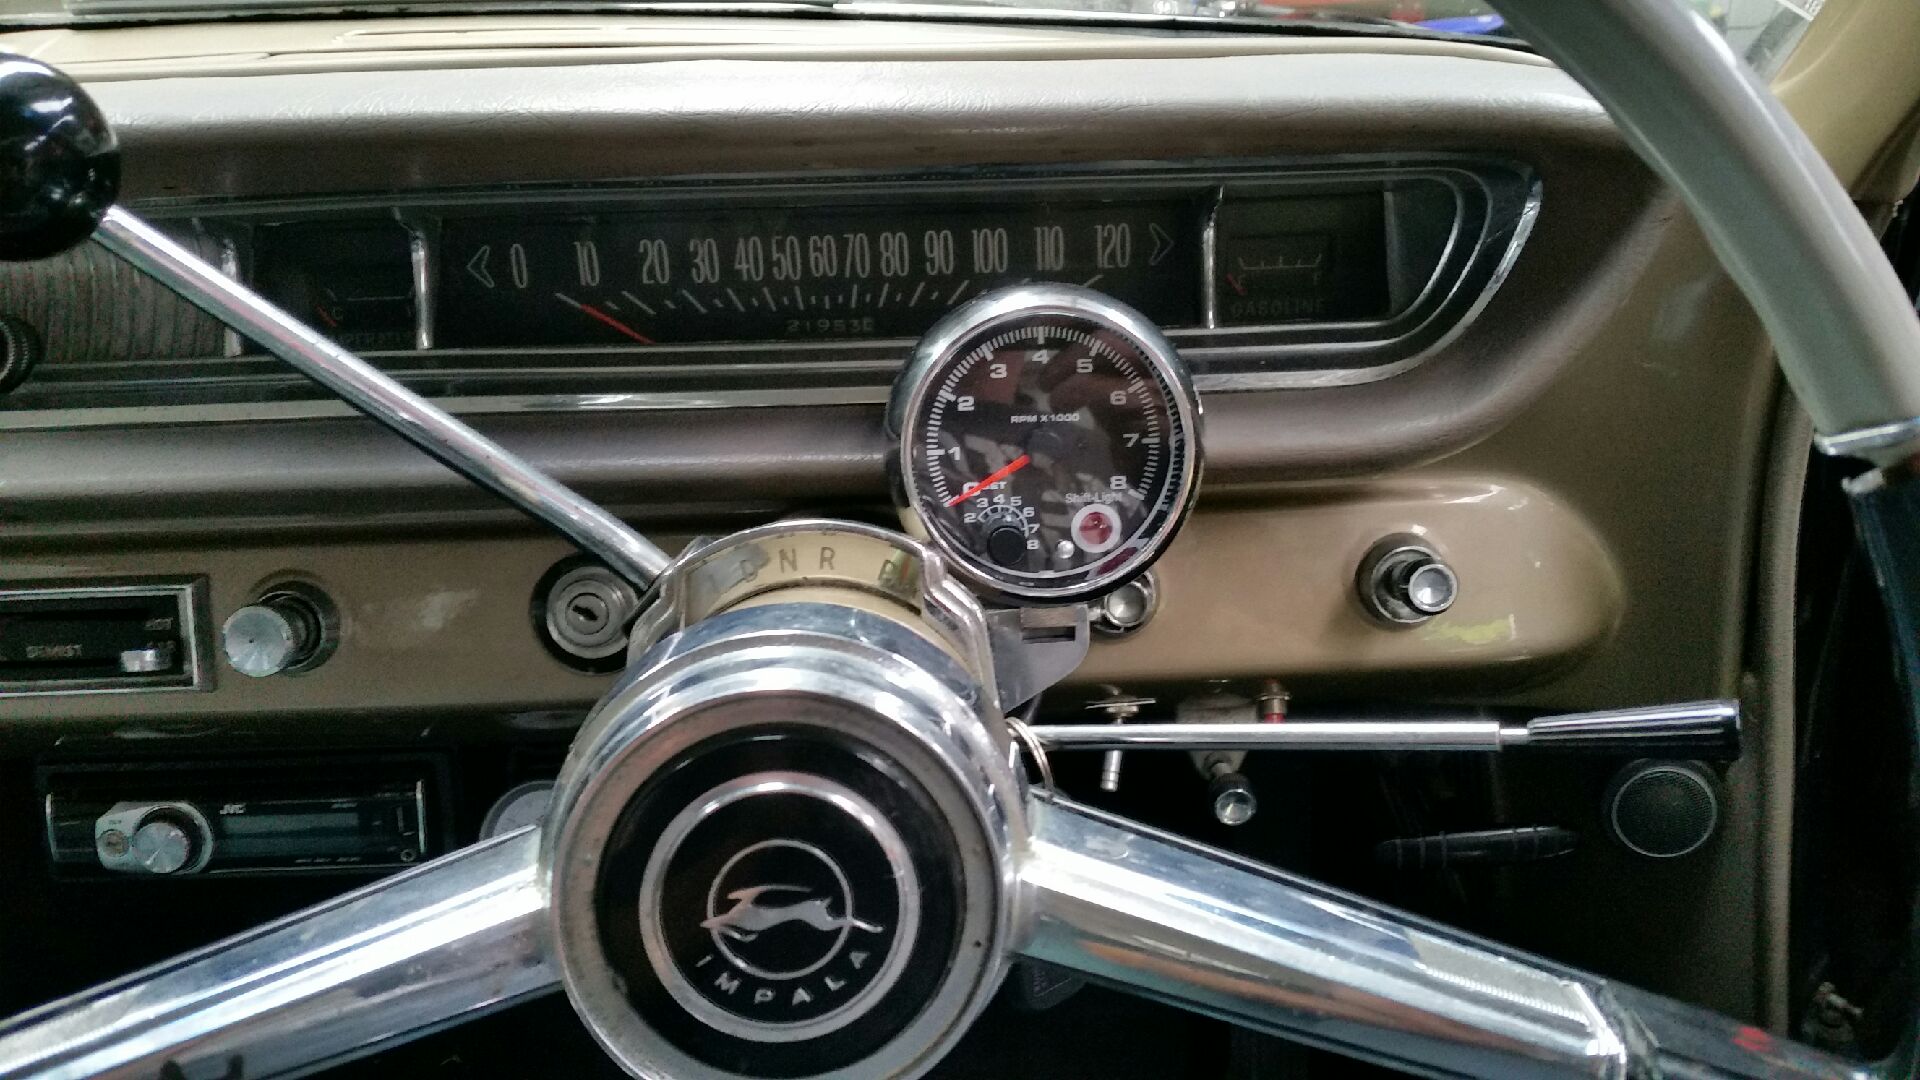
I found a tacho that suited the cars interior. Problem was this particular tacho couldn't be rotated in its cup like most other ones. If I mounted it straight above the steering column it would have obscured the view of the speedo from 20-80mph (which is pretty much exactly where you don't want to block out of view). So solution was to make a side mount, that would locate it lower down so I could see the speedo and fuel gauge, plus retain access to the headlight and wiper knobs etc. Then the not so little job of totally disassembling the steering column to gain access to the inside of the column so I could bolt the bracket in place. But we'll worth the effort! Almost looks factory, which is the look I was going for. Kj
- 4 replies
-
- 16
-

-
98cc's Resurrection Of The "Smith Spider" 2 stroke race car--Now with SOUND
Kimjon replied to 98cc's topic in Other Projects
So very well done. Fantastic effort and grwat results