Flash
-
Posts
1615 -
Joined
-
Last visited
-
Days Won
2
Everything posted by Flash
-
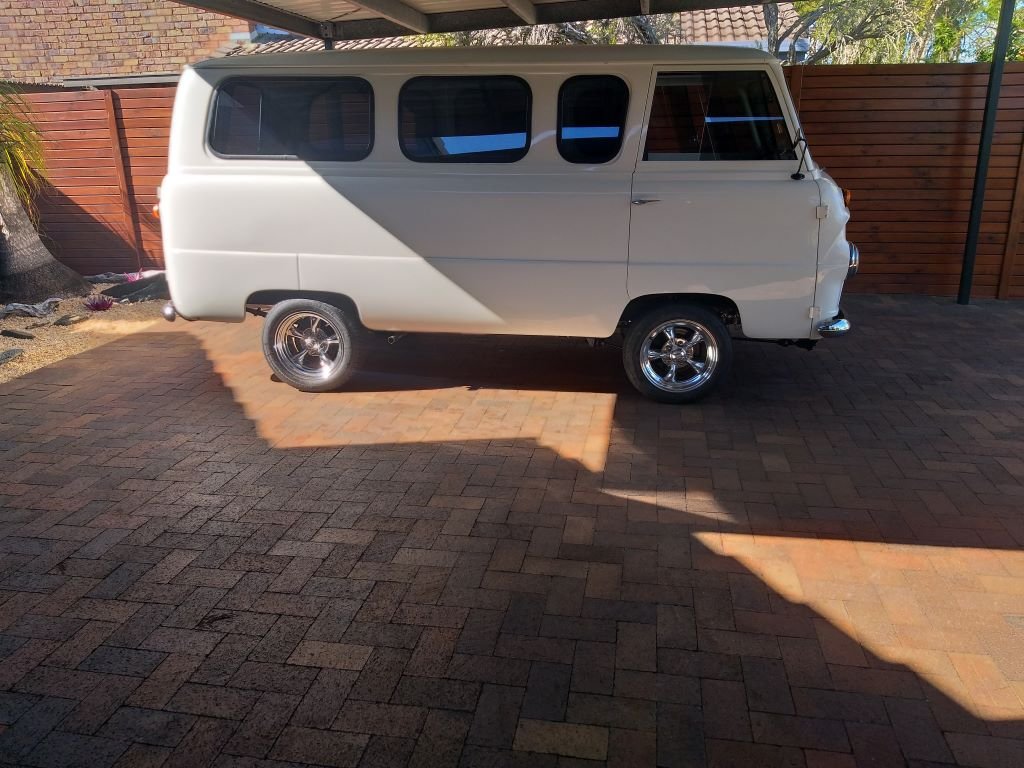
@tortron, yep typical brit look. I bet that Morrie smells of fish and chips or maybe mushy peas. Only issue with mine is that I keep sitting on my white driver's seat while I'm wearing my dirty work jeans. Gives me the mutters I tell ya.
-
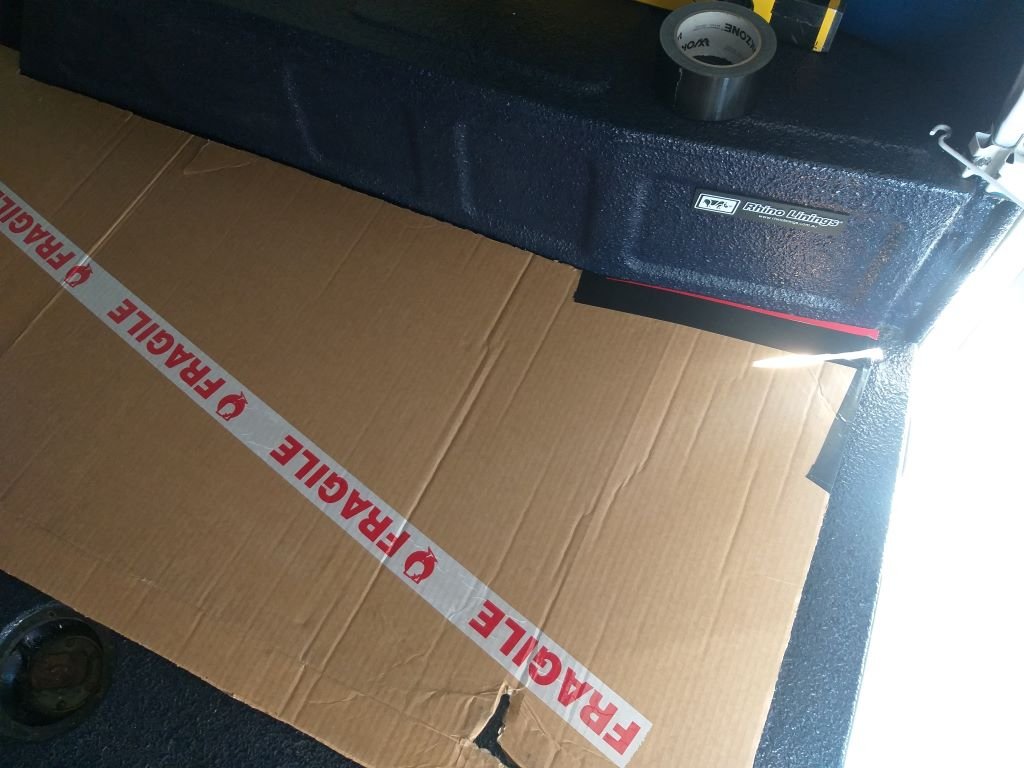
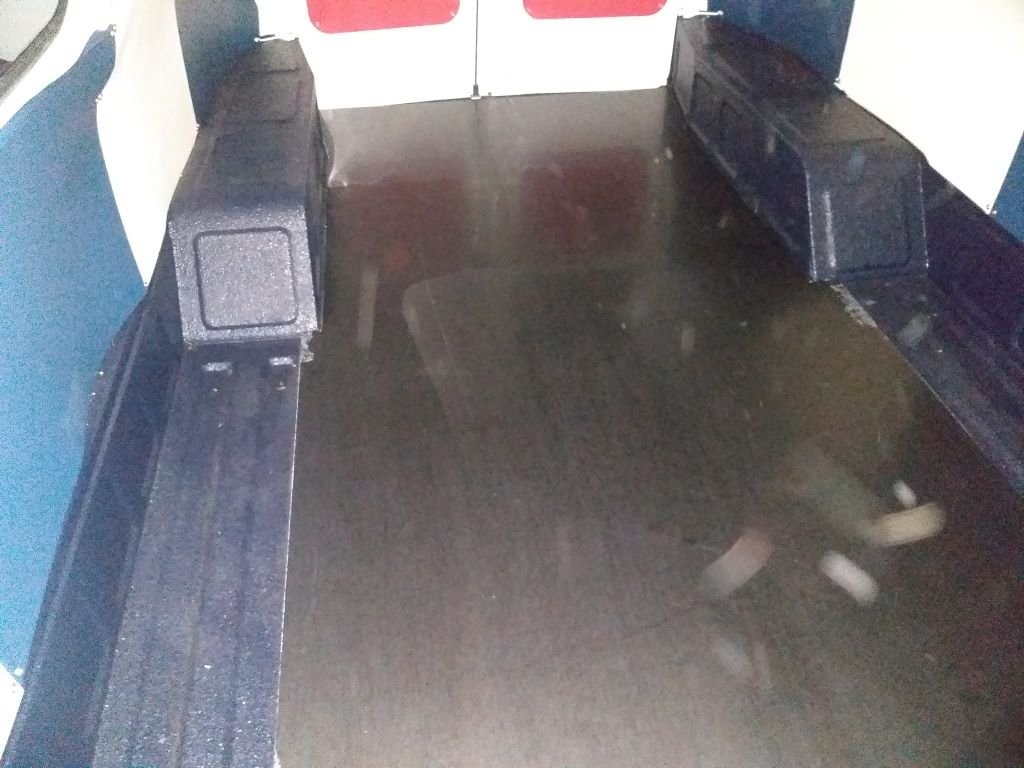
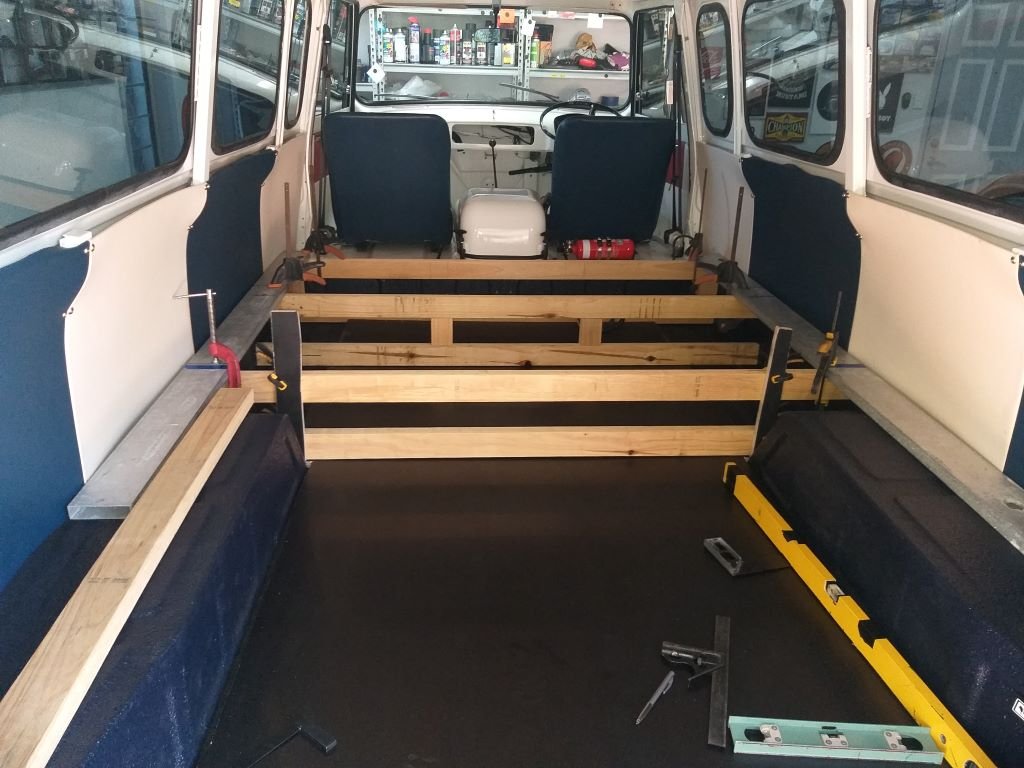
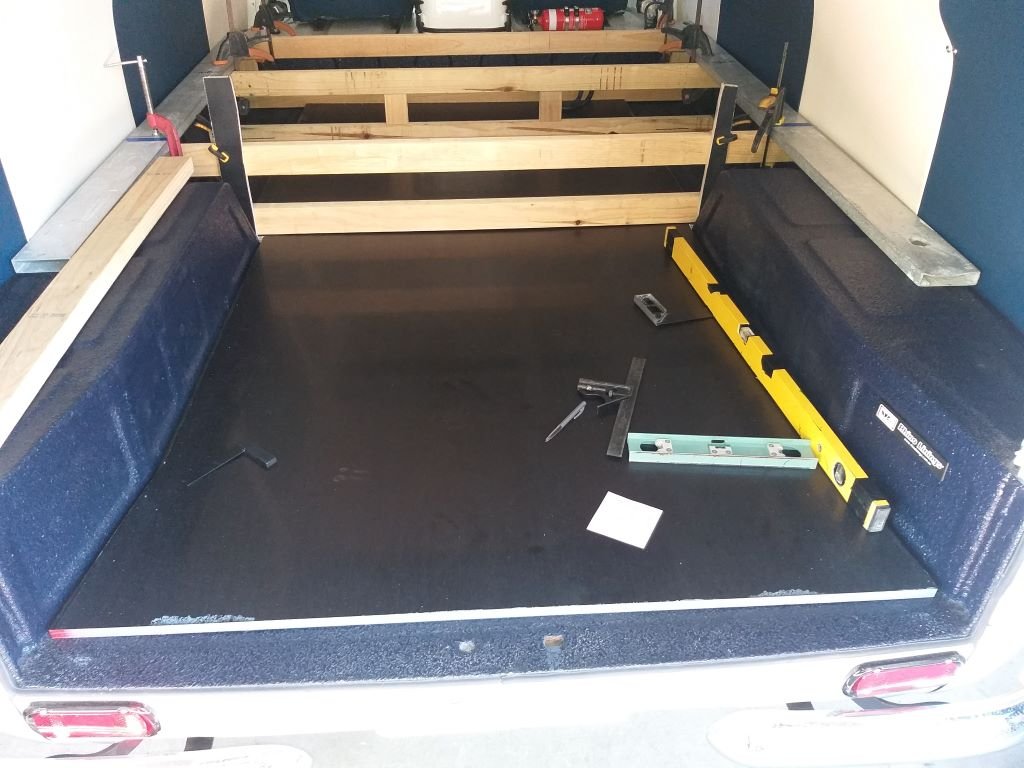
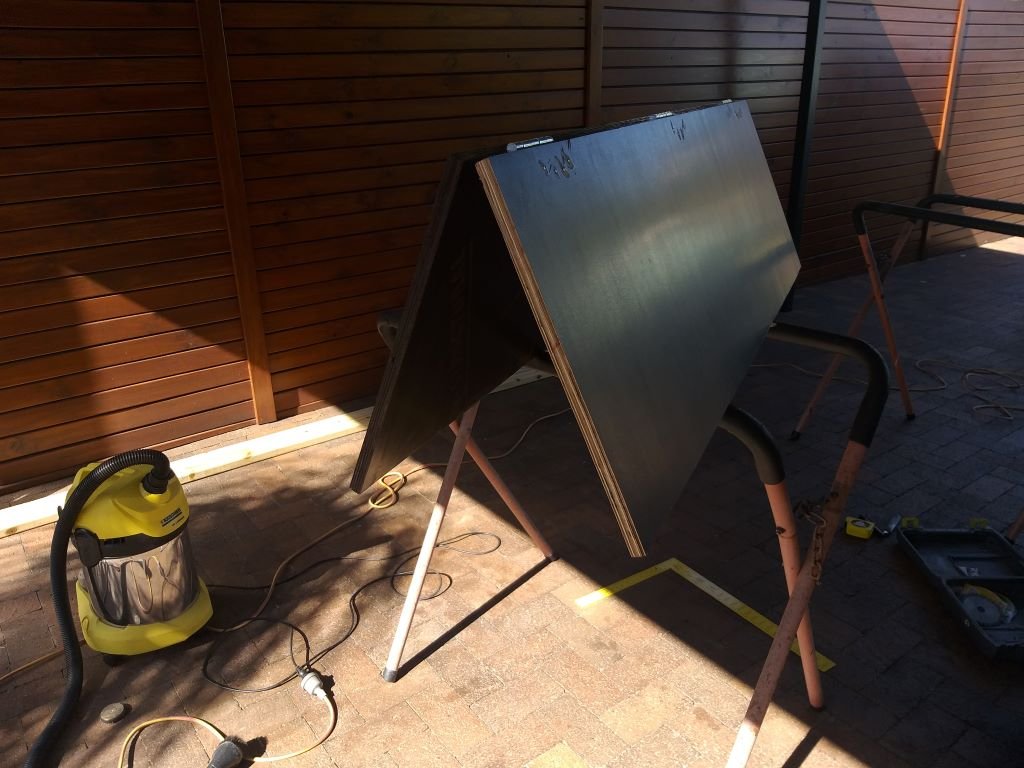
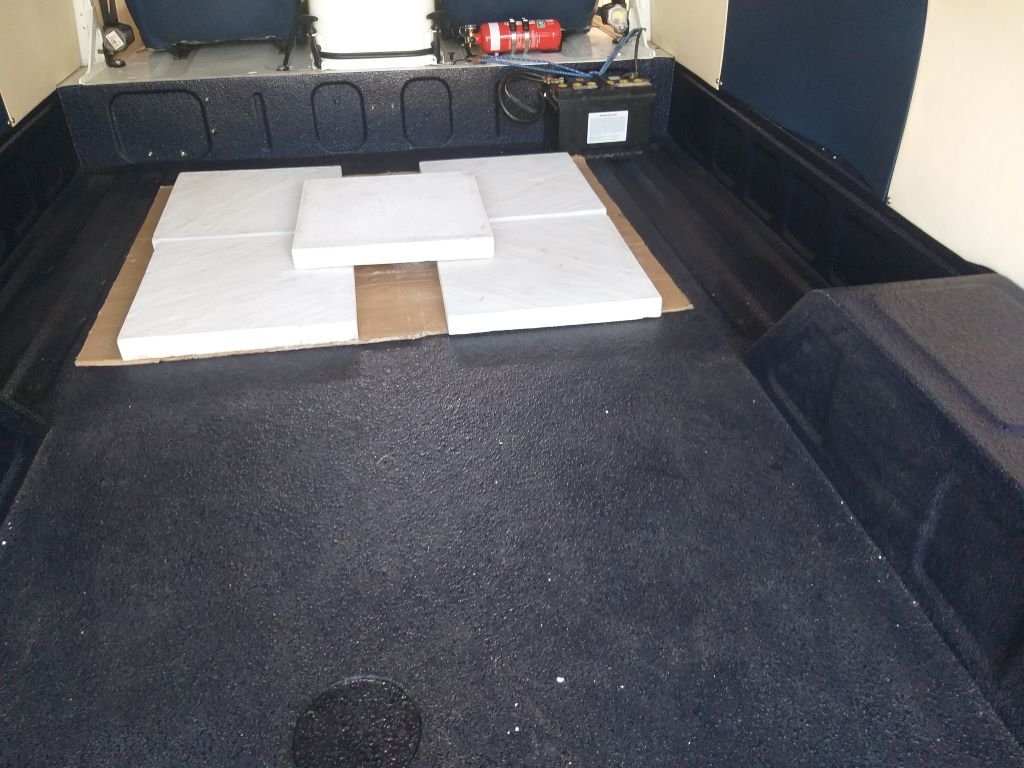
Interior - Chapter 5 On Friday nights we usually go for a cruise in the Mustang followed by a burger and chips down at the beach. But this Friday we decided to take the Bongo for a run into town to fetch some extra floor tiles and the timber we need to build the sleeper couch. Burgers and chips in the Macca's carpark aren't a patch on the beach, but sometimes you just have to make sacrifices for the greater good. Anyway, the plan is to use 17mm form ply for the floorboards and also for the bed base as its much smoother than standard ply. For the structure I'm using standard interior framing timber. So that's what we loaded up with at Bunnings together with some batten screws and a handful of hinges. First step on Saturday morning after unloading the Bongo was to create a cardboard template for the floor which I then replicated in formply. I've started off with a single 2.4m x 1.2m board which is a bit cumbersome, but I'll eventually cut this in two once I know exactly where the couch will start. I'll then slide the portion under the storage box to the left and fill in the gap on the right. The reason for going modular is easier removal of the structure in future if needed. Next step was to begin planning the layout of the supporting timber for the bed base / storage boxes. The cross braces are temporarily clamped in place. Their final positions will be fine-tuned as the couch takes shape. Today I started cutting the rest of the formply sheets into the required sizes and I finished off the morning by fixing the two backrests together. I've used 3 fairly meaty butt hinges which should be up to the task. More tomorrow.

-
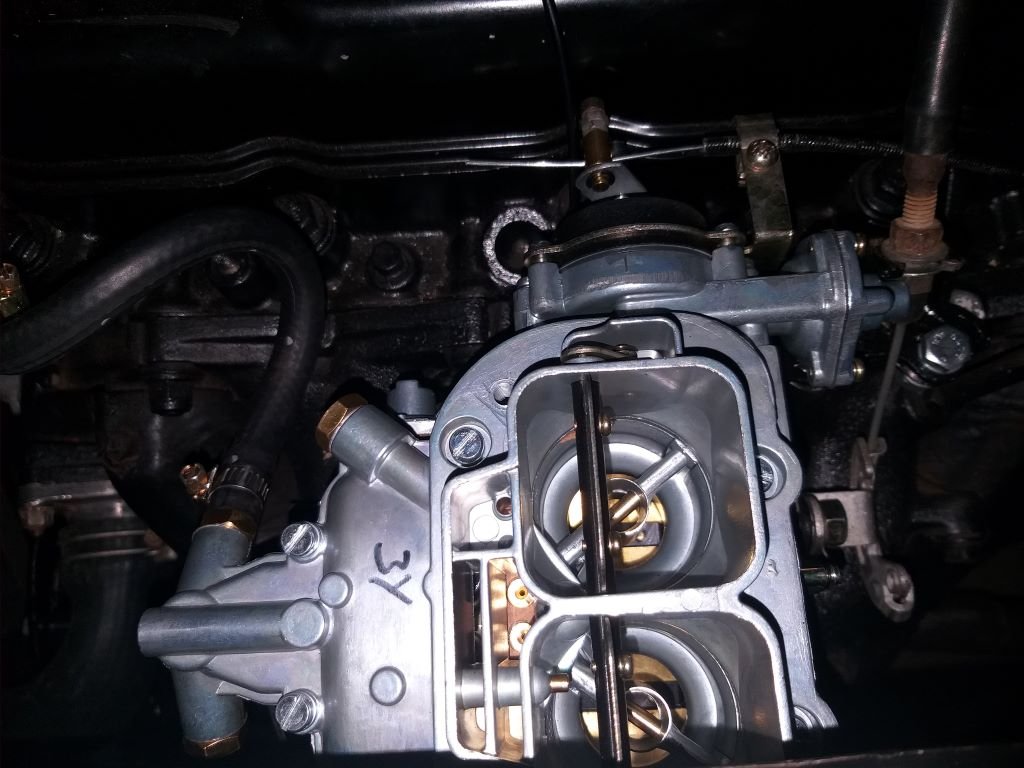
Thanks heaps for sharing @yoeddynz. Great job Alex ! I'll take function over fashion any day of the week. Please make my day and tell me that the new carby hat has got rid of the fuel fumes that those performance air filters seem to suffer from on the HiAces. The advantage of the HiAce is that with the engine cover raised you have clear access to the top of the carby, so it's easy enough to drop your newly fabricated hat onto the base plate that you have made. Unfortunately, with the Thames I have a portion of the cabin floor in the way that gives me a paltry 35mm gap between the top of the venturis and the floor so I have to make the box in two halves and slide them in on either side.
-
Hey @igor, clearly your daughter has impeccable taste. Thanks heaps for the feedback. We took a drive into town late yesterday and picked up the timber and the rest of the floor tiles that we need. I was wide awake by 5 am and spent an hour plotting and scheming. It looks good in my head. Hopefully it will look just as good in practice. Stay tuned.
-
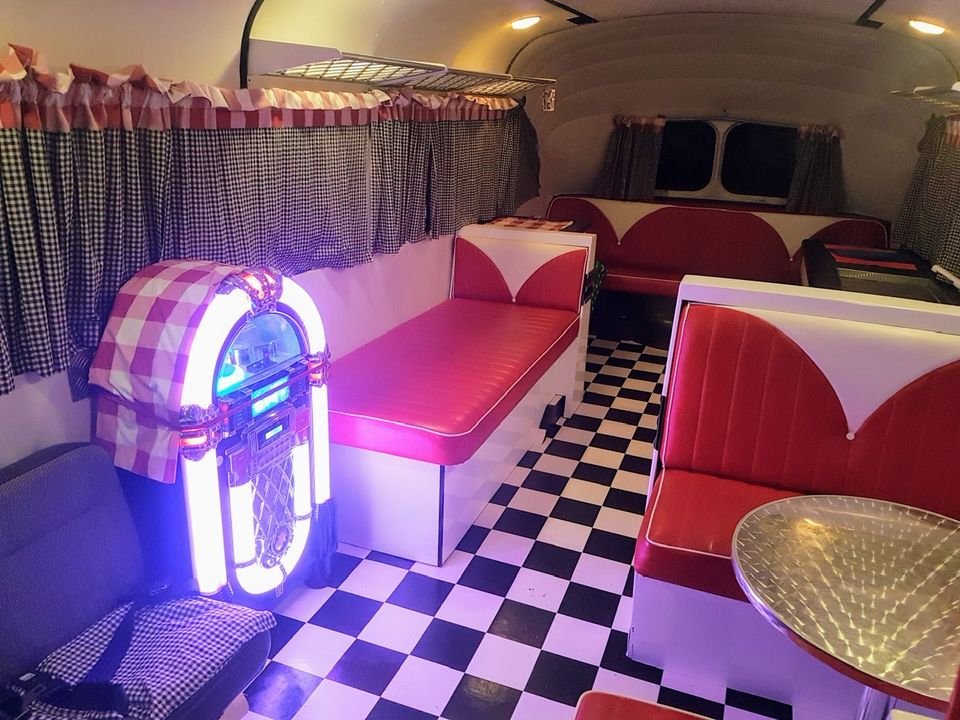
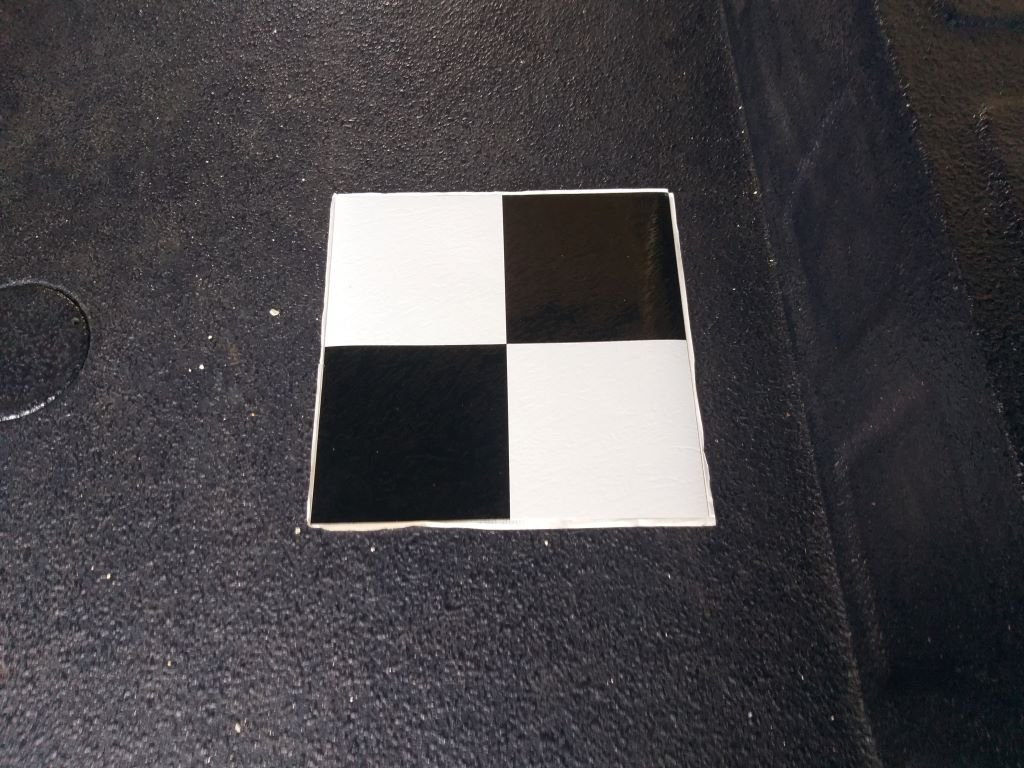
Interior - Chapter 4 Expanding on the overall colour scheme and style as outlined above, we are thinking of incorporating some touches from a typical mid last century American diner and with that in mind you can't really go past the typical checked vinyl floor. Trolling around on the net we couldn't find anyone who supplies the white and black floor tiles in anything smaller than about 300mm x 300mm. At these dimensions our concern was that the checkered pattern would make the inside look absolutely cramped. Then yesterday while I was in Bunnings getting some more resin for the carby hat I happened to stroll down their flooring aisle and stumbled upon nirvana. Its 305mm x 305mm sticky backed vinyl tile but each tile consists of 4 smaller black and white checks. I immediately grabbed one to take home to show Mrs Flash. This morning we laid the sample tile loose in the back of the Thames, just to get the feel. Much excite! So, it's off to Bunnings to grab two dozen more.
-
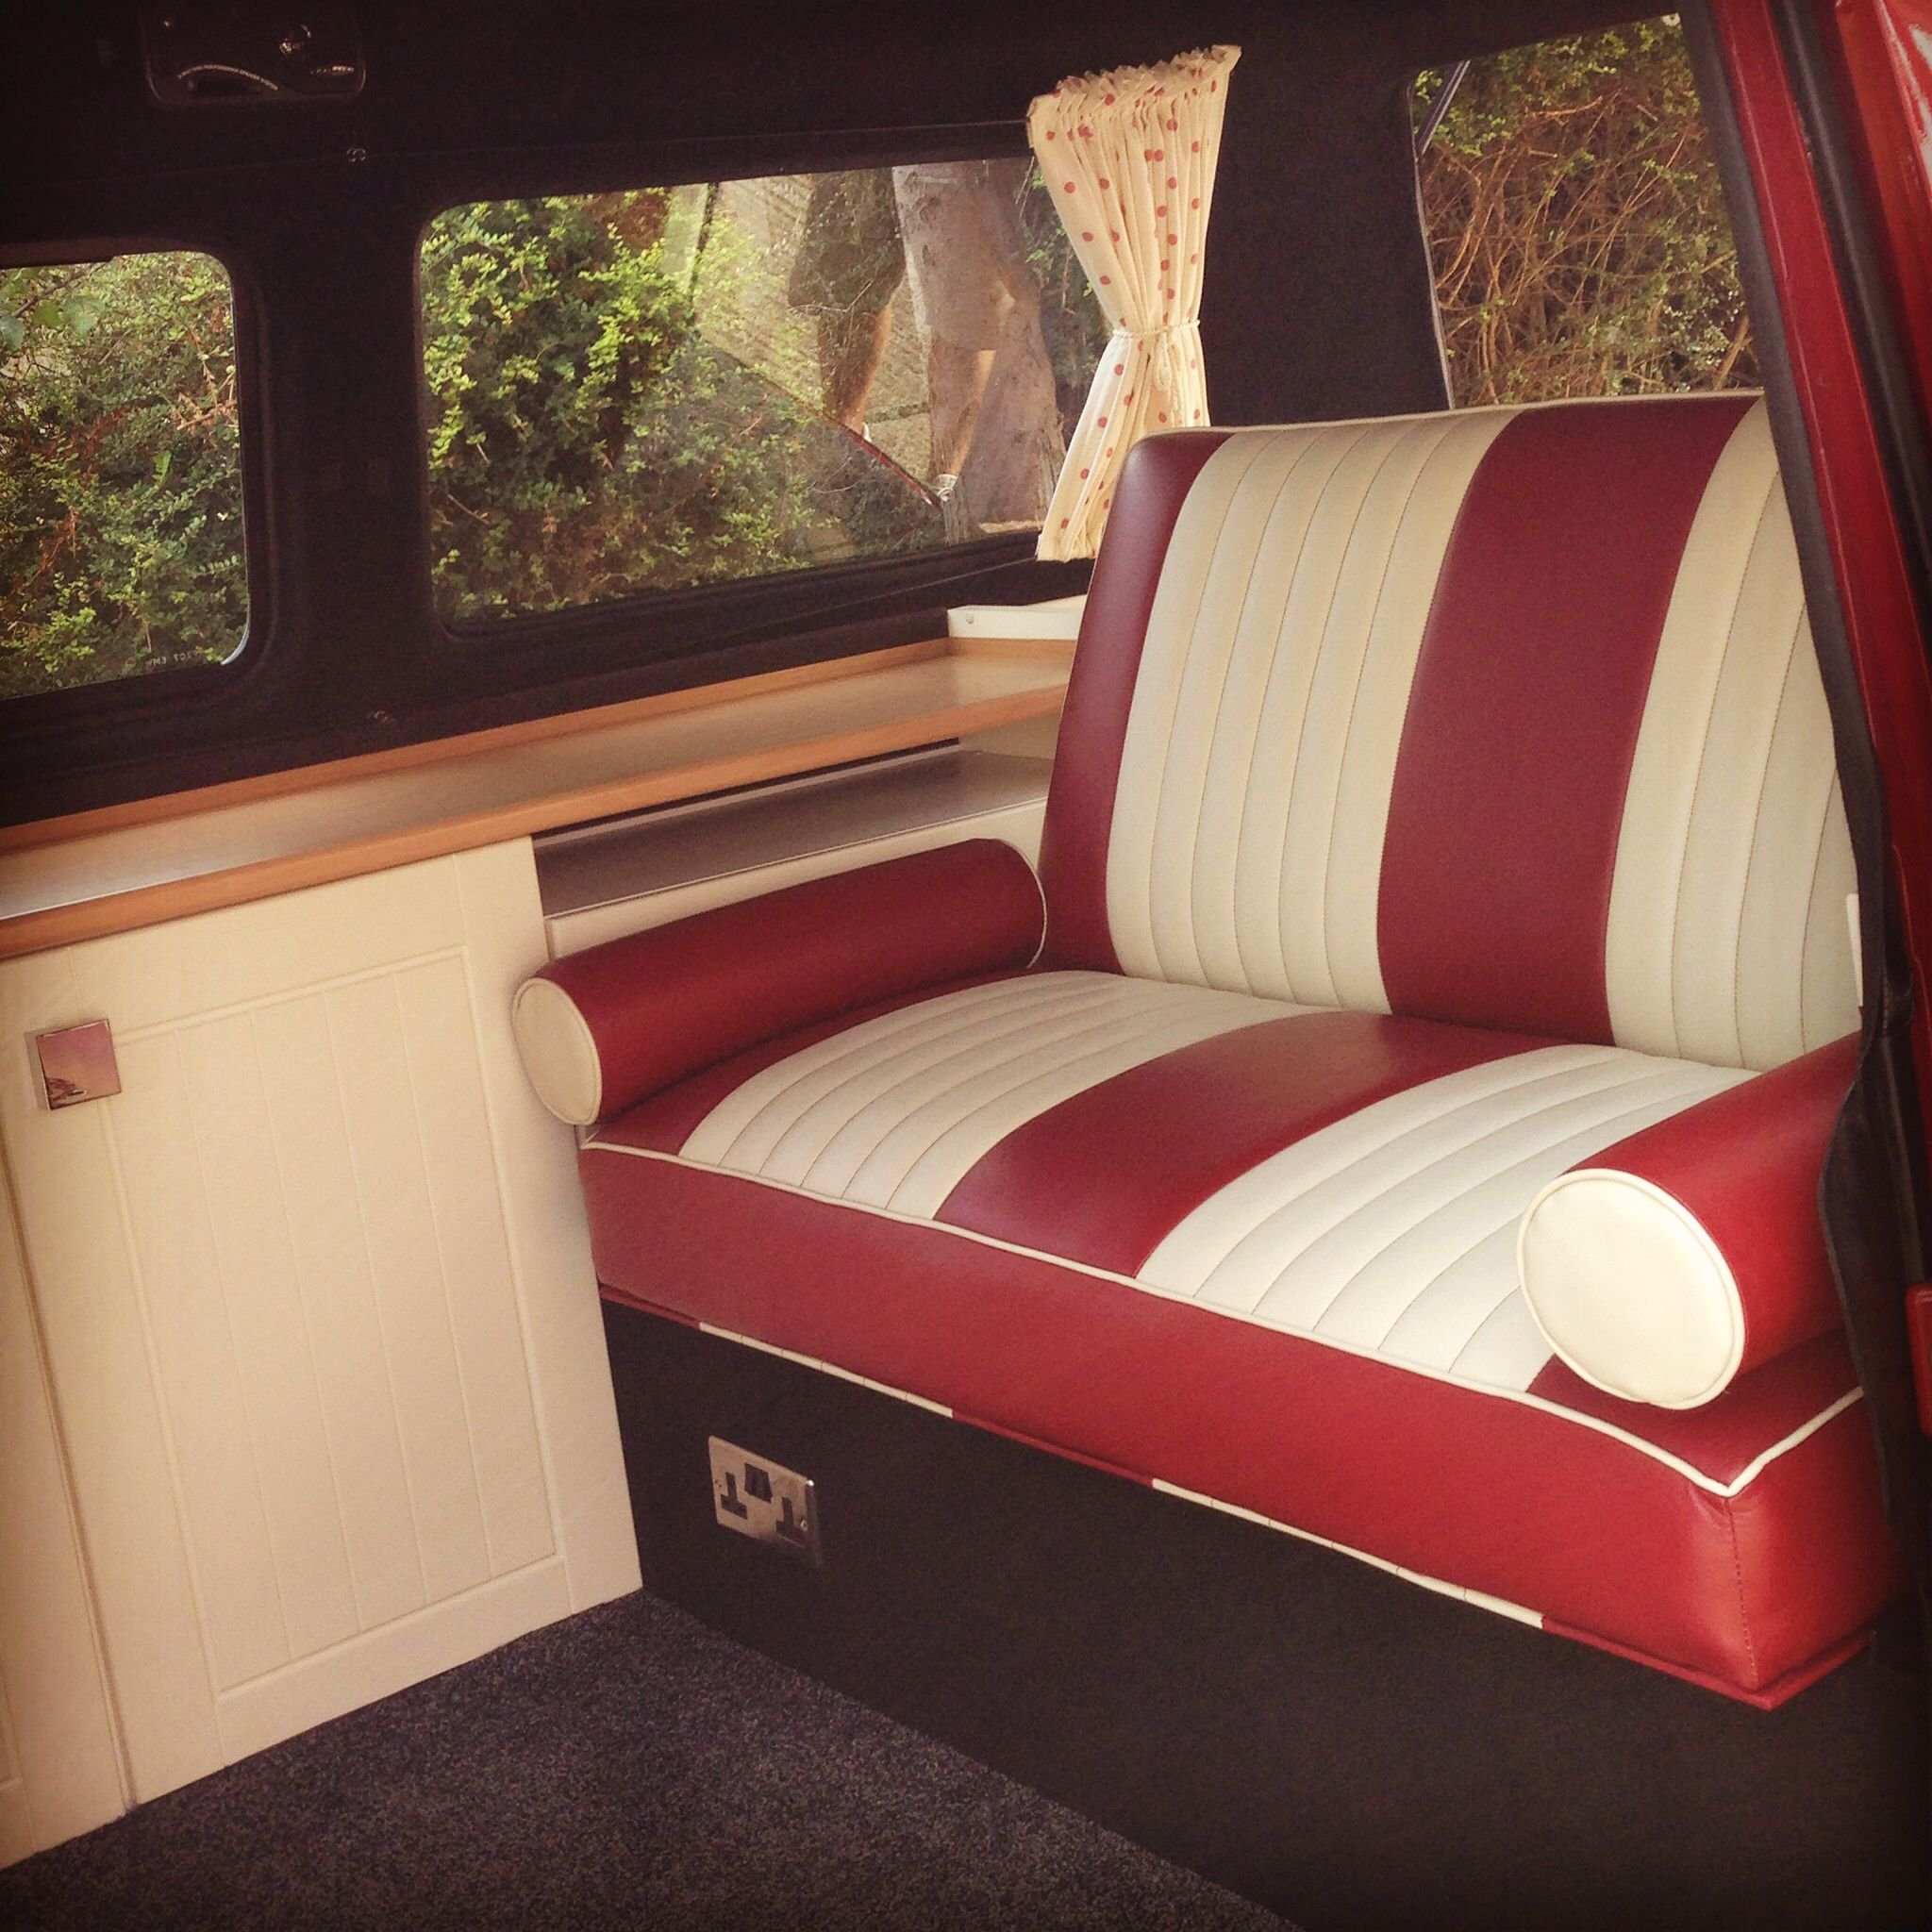
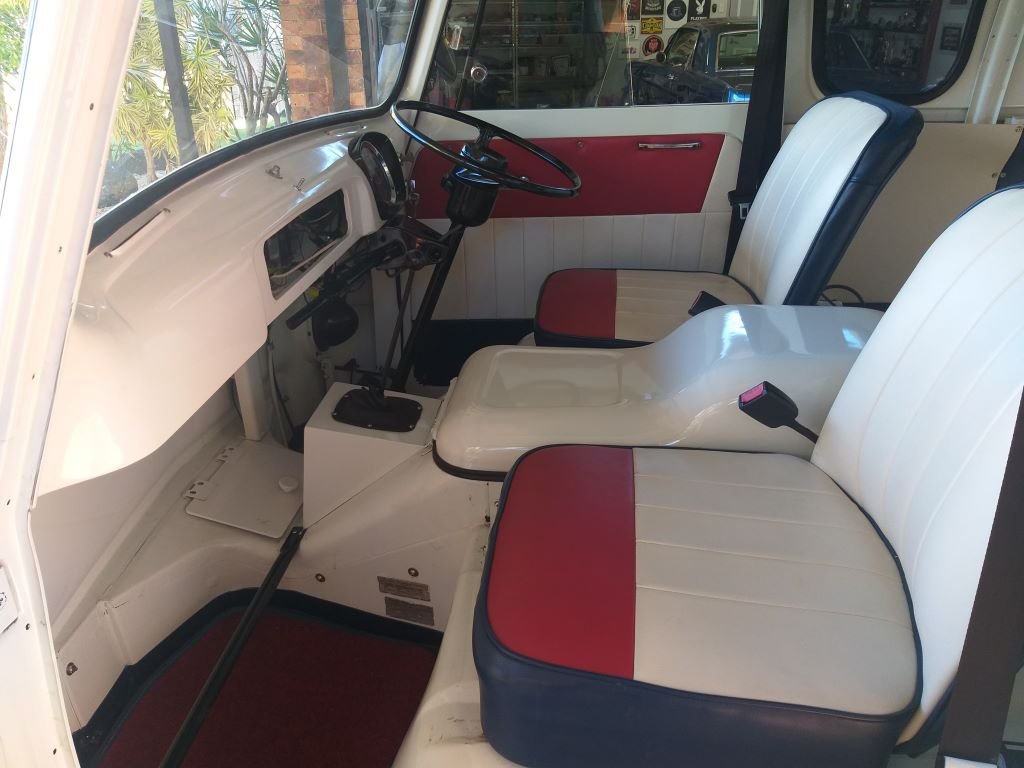
Interior - Chapter 3 So now that we have outlined the general plan layout wise, our focus has turned to aeshetics and the overall theme of the interior. The previous owners chose an internal colour scheme to go with the British heritage of the Thames, hence the red, white and blue. As I've mentioned before I wasn't a fan of the colour scheme, but over time its grown on me and the plan is to continue with this theme. Here is a little sample picture that I stole off the net showing the colour and style of the vinyl coverings for the squabs.
-
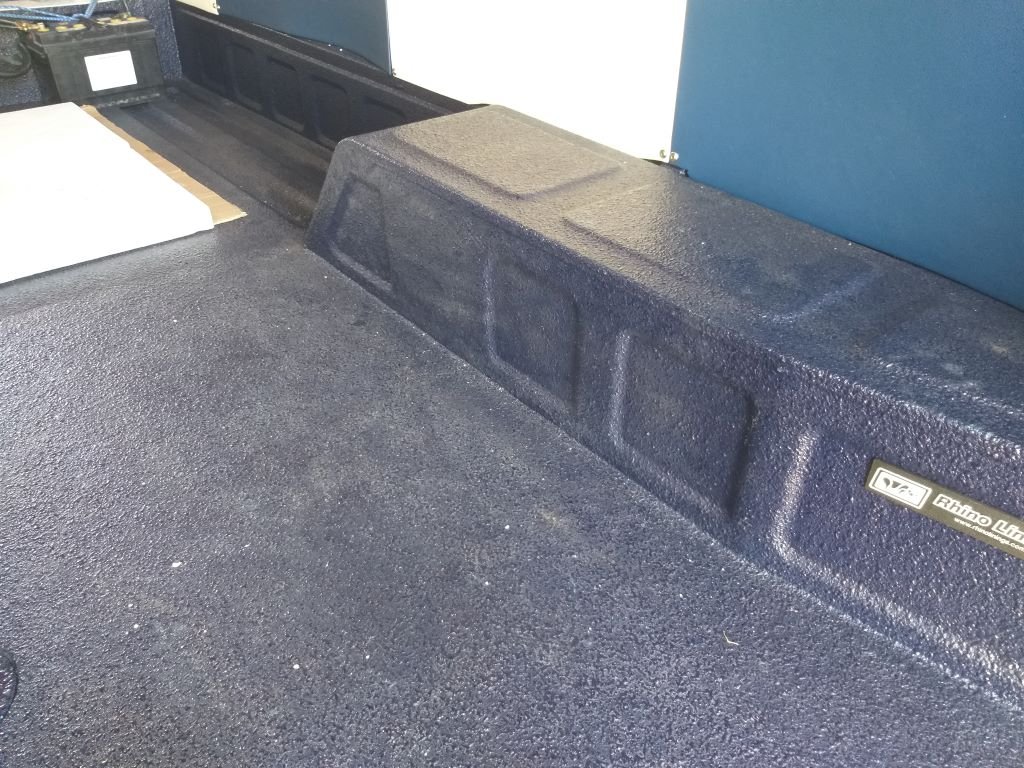
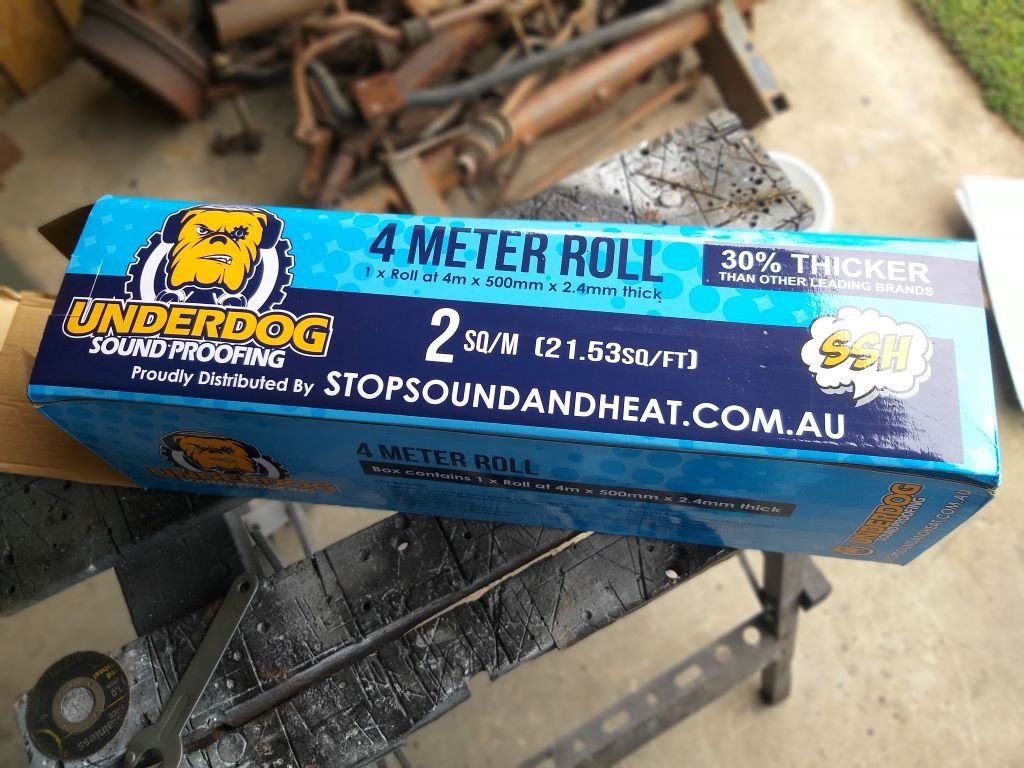
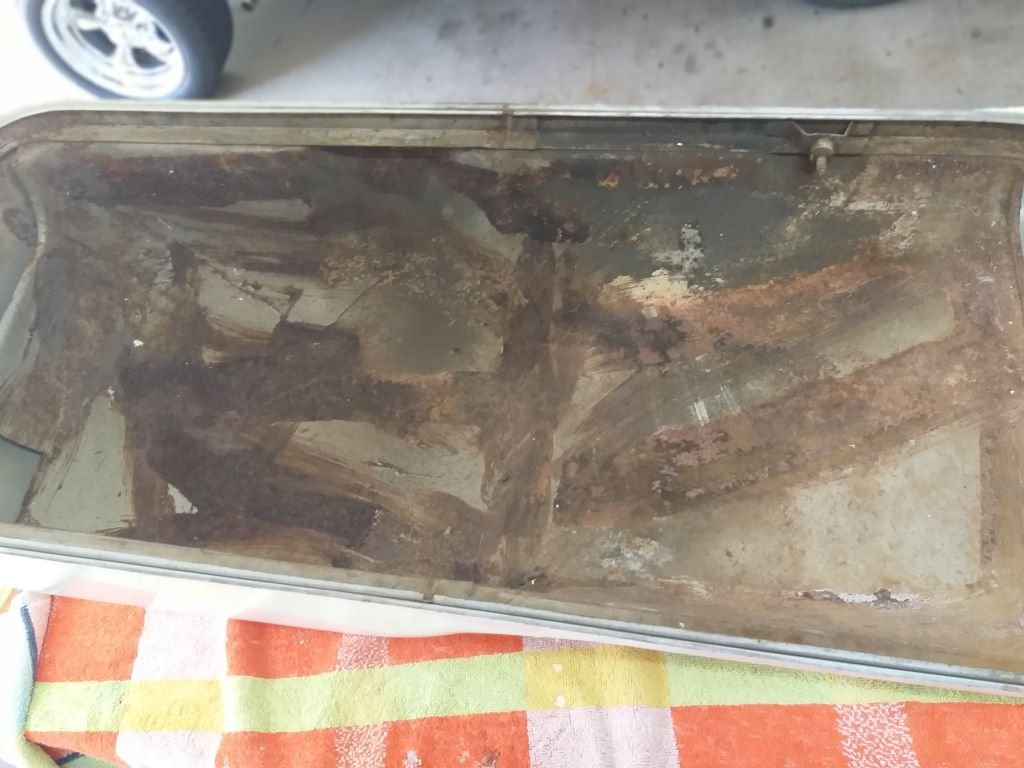
Interior - Chapter 2 As part of the interior fit out, I'm hoping to add some weight so I can get rid of the concrete pavers that I am currently carting around in the back and at the same time give the van a feeling of substance as it currently feels a bit like driving around in a coke can. I'm not sure if I've mentioned this before, but the previous owners restored the van to use as a promotional / delivery vehicle for their florist shop. As they were planning to transport flowers in buckets of water, they wisely had the factory original wooden floor in the rear cargo area professionally waterproofed. It was a good idea, but unfortunately, they gave no thought to any form of insulation or sound deadener. Much as it breaks my heart to cover up the rhino line, our plan is to start off by laying down a second plywood floor with some acoustic material sandwiched between the two floors. I'll stick the sound deadener to the underside of the new ply so that we leave the rhino liner unmolested. I can then fix the timber structure for the couch bases to the new floor thus leaving the original floor untouched.
-
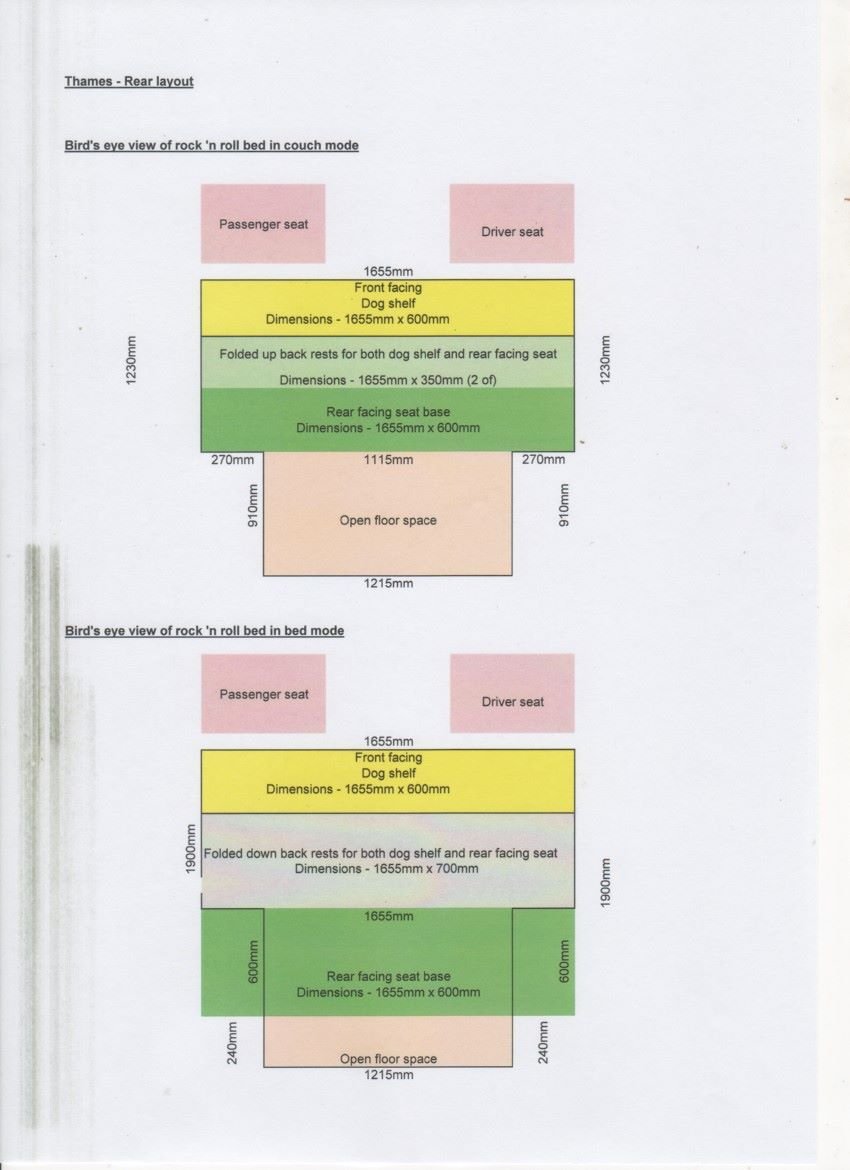
Interior - Chapter 1 I'm still plugging away at my fibreglass carby hat. It's slow going with just a little bit of glass work each morning followed by long periods whilst I wait for things to cure. In between that Mrs Flash and I have commenced the planning of the interior. I've probably mentioned this already, but the plan is to build a double sided couch that will fold down into a queen size bed for overnighting. Something along the lines of the rock 'n roll beds that were popular in the splitty window Kombis back in the day. The forward facing couch will be located directly behind the front seats and will provide a convenient place for our dog to relax during road trips. The storage compartment under the front couch will contain the engine battery, a second house battery, a voltage sensitive relay and a fuse box with associated wiring for all of the ancillaries that will run off the house battery. With a bit of luck I can squeeze in the jack, wheel brace, jumper leads and an emergency tool roll as well. The rearward facing couch will provide a convenient seating place when we pull over for a morning cuppa or a lunch break as well as a chilled-out spot to enjoy sundowners at the end of each day's travel. The storage compartment under this couch will contain folding chairs, our little gas cooker, a jerry can of water and place for towels and togs and a few changes of clothes. As a starting point I've taken some measurements and put together a rough schematic showing a bird's eye view of the layout. Hope the drawing makes sense.
-
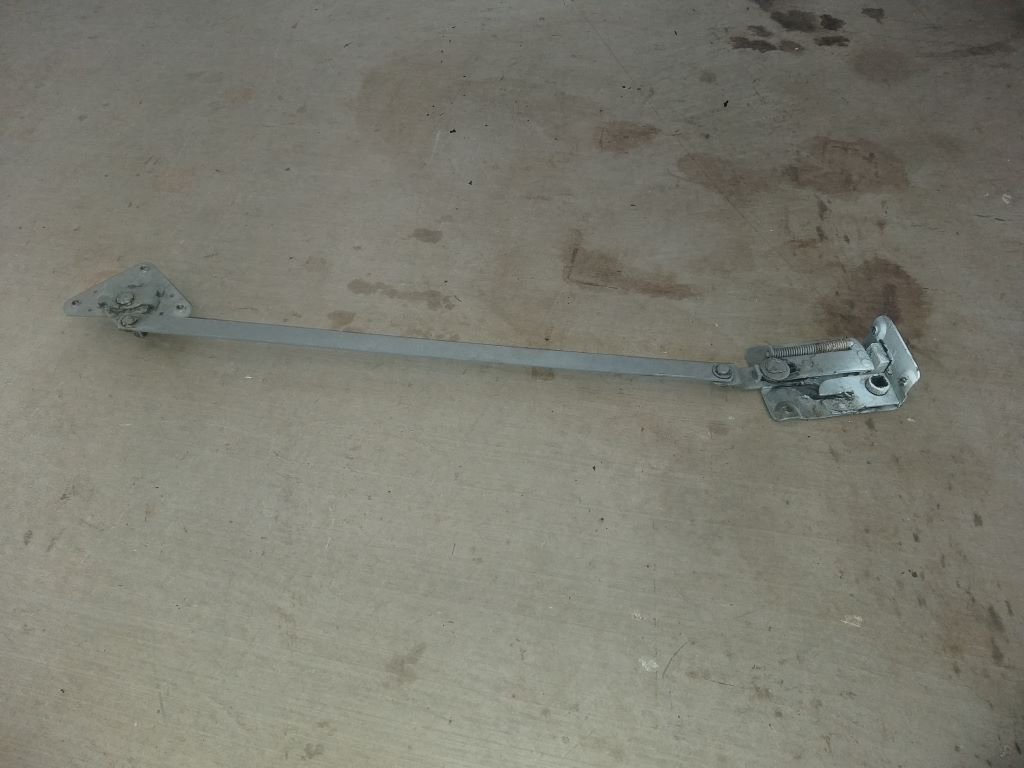
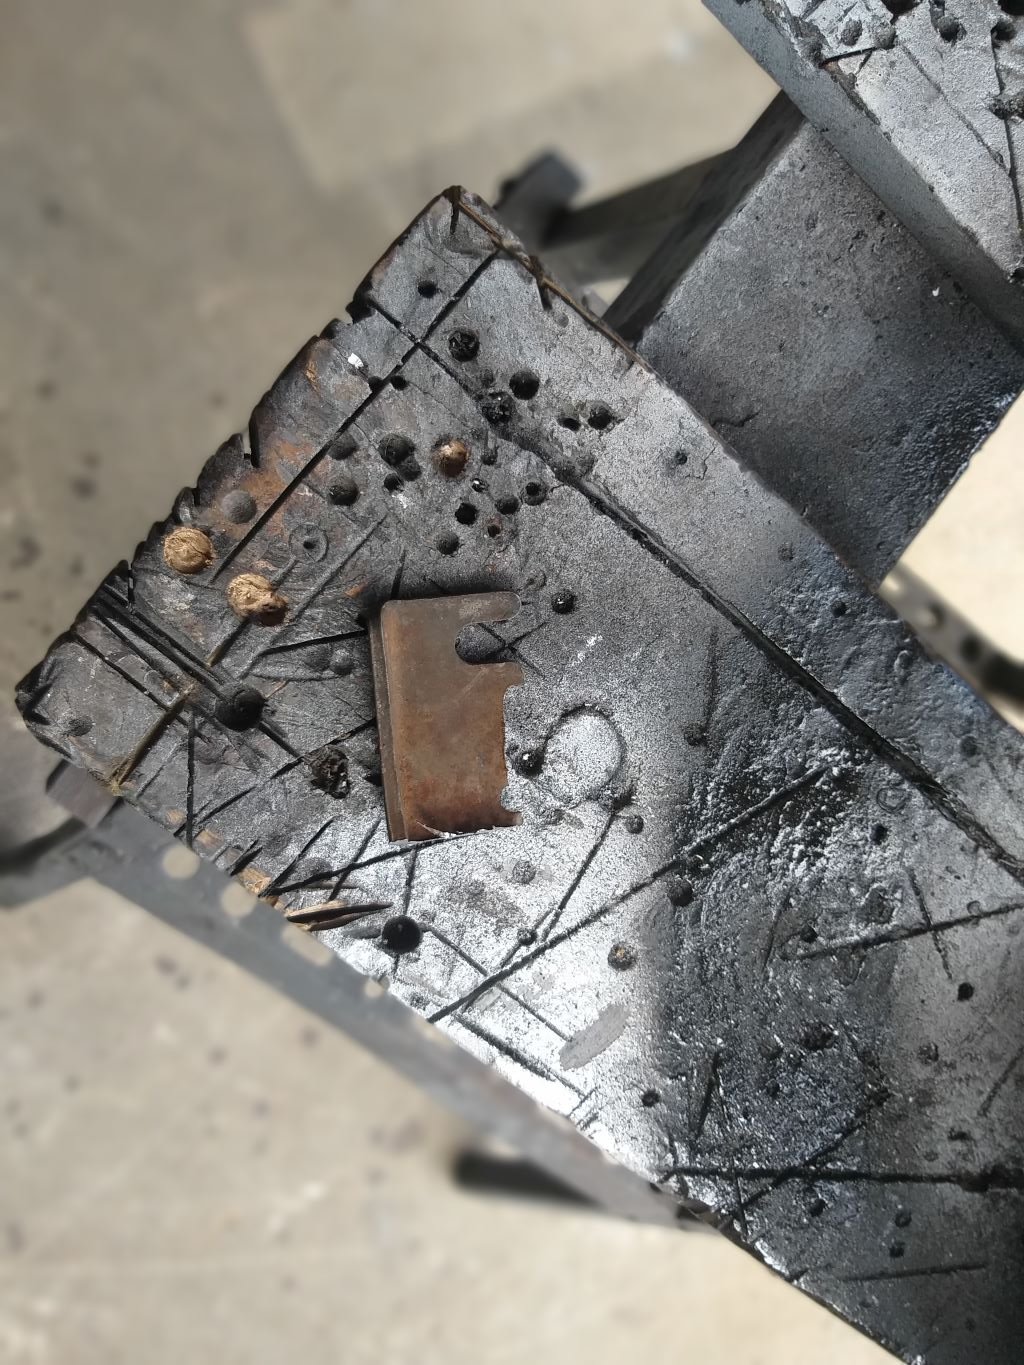
I then removed the passenger side door latch and gave it a bit of a birthday. The latch is spring loaded but was sticking open which was bloody annoying when trying to close the door again. Pulled the mechanism apart, gave it a good degrease and a liberal coating of lithium grease. It's not perfect, but it's better than it was. While I was at it, I took a photo of the interior just to show off the fresh paintwork on my new gear stick surround. When I first purchased the van, I wasn't a big fan of the upholstery colour scheme, but its slowly growing on me.
- 715 replies
-
- 11
-

-
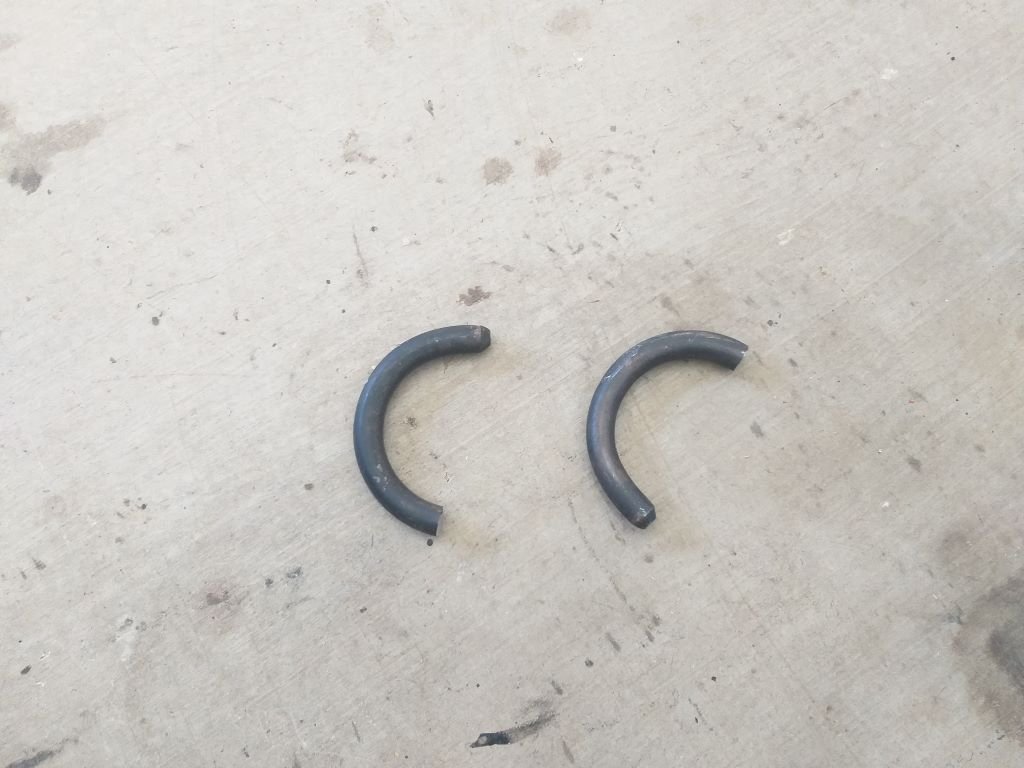
Ticked off a few more small jobs today. First up, I wasn't 100% happy with the King Springs currently fitted to the front of the van. Can't really describe the issue, but the ride just didn't feel right. It's almost as if the front felt a bit loose every time I hit a small bump. So, first thing this morning I took half a coil off the original Mitsi springs and chucked them in. Front now sits slightly higher than with the Kings, but it's still got a bit of a rake going on, so I dig it. Took it for a squirt around my local test track and it feels great. I was expecting to have to take the springs out for a second round of trimming, so unfortunately didn't take any photos of the trimmed ones, but I did shape the coil end as per the originals and also spritzed a bit of satin black on the bare steel before putting them in. Sunlight made for a crappy photo, but hopefully you get the idea.
-
Good to know. Thanks heaps for sharing @Raizer
-
No need to apologise at all @Tiger Tamer I've got no mechanical background whatsoever and this coupled with the fairly insular existence that I lead means that I rely heavily on my fellow Old Schoolers to bounce ideas off or seek advice from. So, I really appreciate and value your feedback and suggestions. Concerns raised are also greatly appreciated as it makes me question some of the decisions I am making along the way.
-
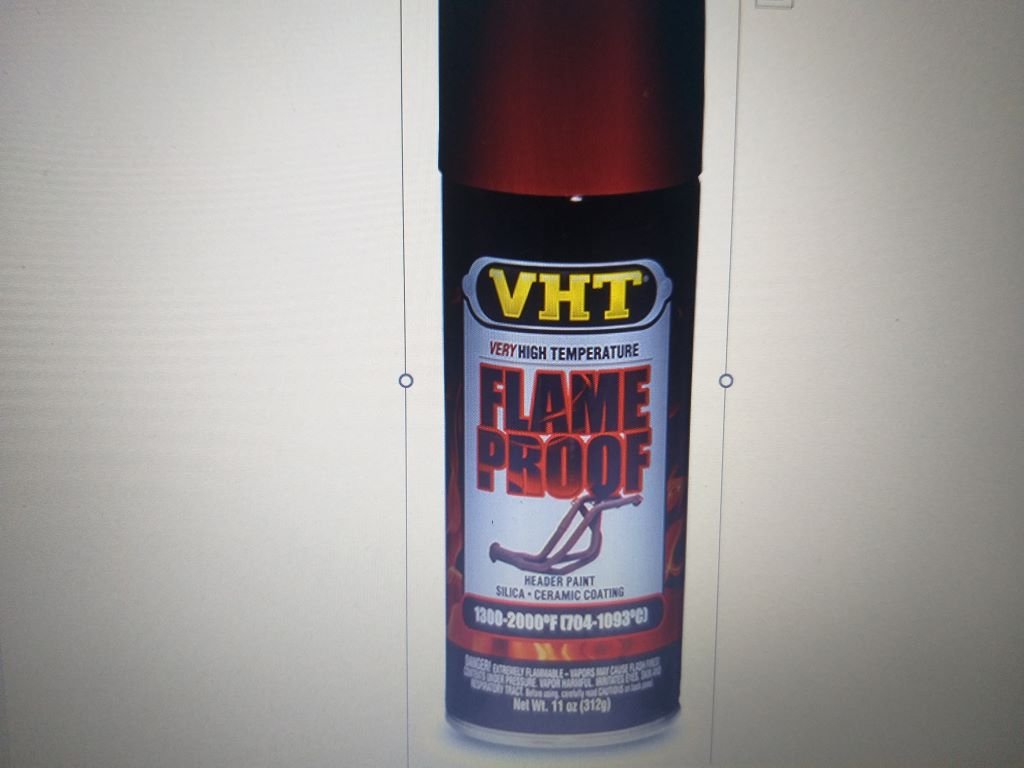
Maybe a liberal coating of something like this might do the trick @Tiger Tamer
-
I do appreciate your concern and do share some of your misgivings @Tiger Tamer. But the way that I look at it is that in the case of a backfire I'd be more likely to start a small bonfire if I was running a paper element filter no matter what the filter housing was made of. Back in the early 80s some of the English Fords that ran carbs (Escorts and Cortinas come to mind) were equipped with plastic air filter housings and those plastic housings would have had similar disadvantages. Having said this the resin I've used is particularly flammable so I guess that is something that I should be wary of. Let me do a bit more homework. There may be some kind of flame retardant that I can coat the inside of the housing with.
-
Thanks Alex. Yep, I had to use a reamer to open up a few of the holes in the adapter plate too. I'm keen to hear how you get on with the carb hat modification.
-
Thanks for the ply suggestion @KKtrips. Not only would it add weight but if I sandwiched a layer of sound deadening between the floor and the ply, I'm sure it would make the van feel less "tinny". It's a bit like driving around in a Coke can at the moment.
-
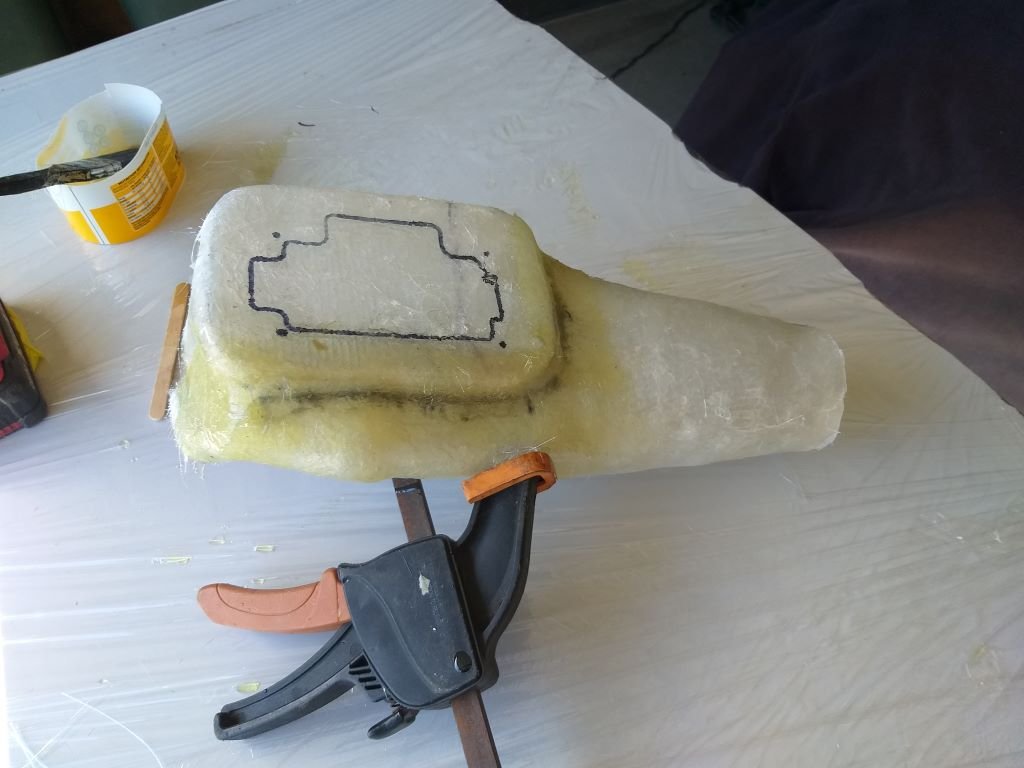
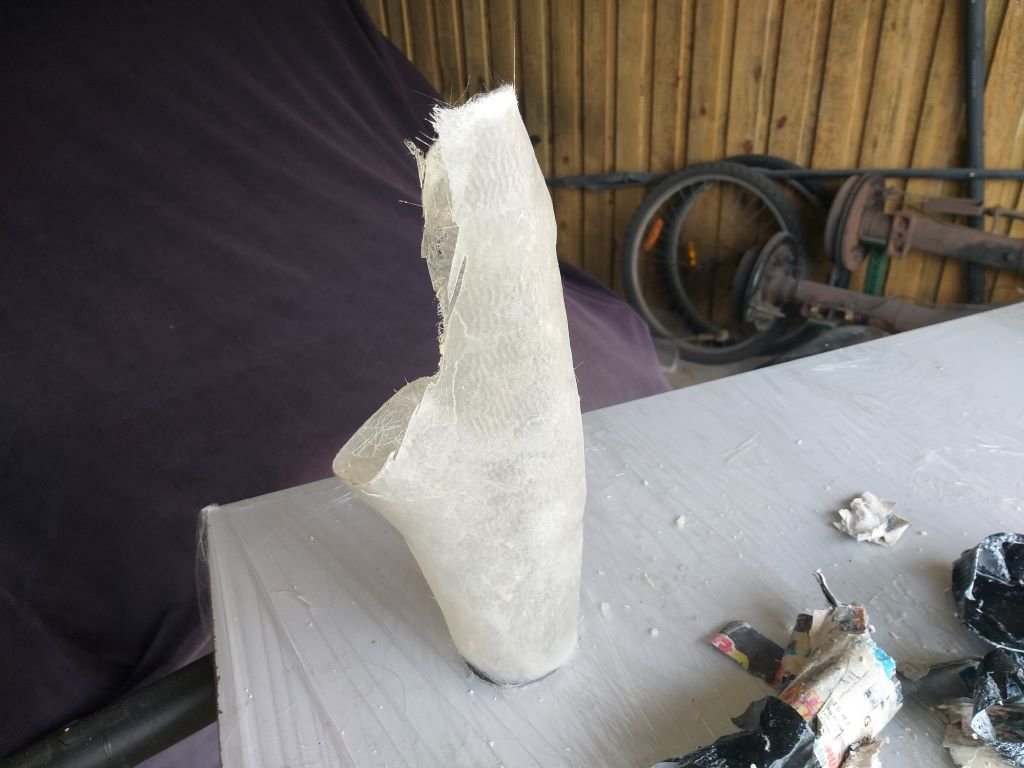
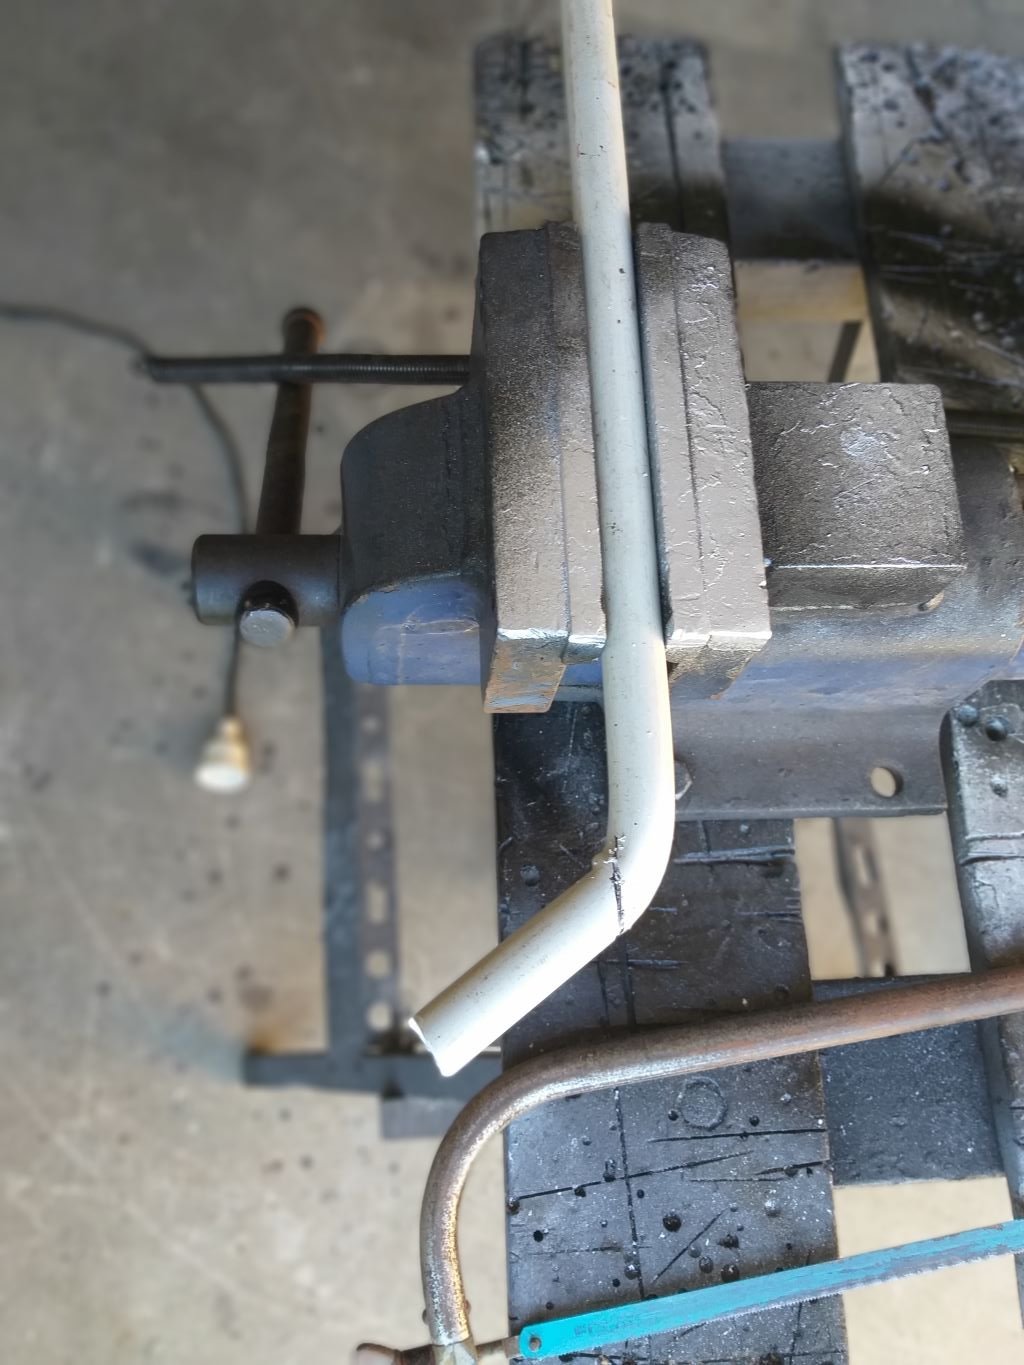
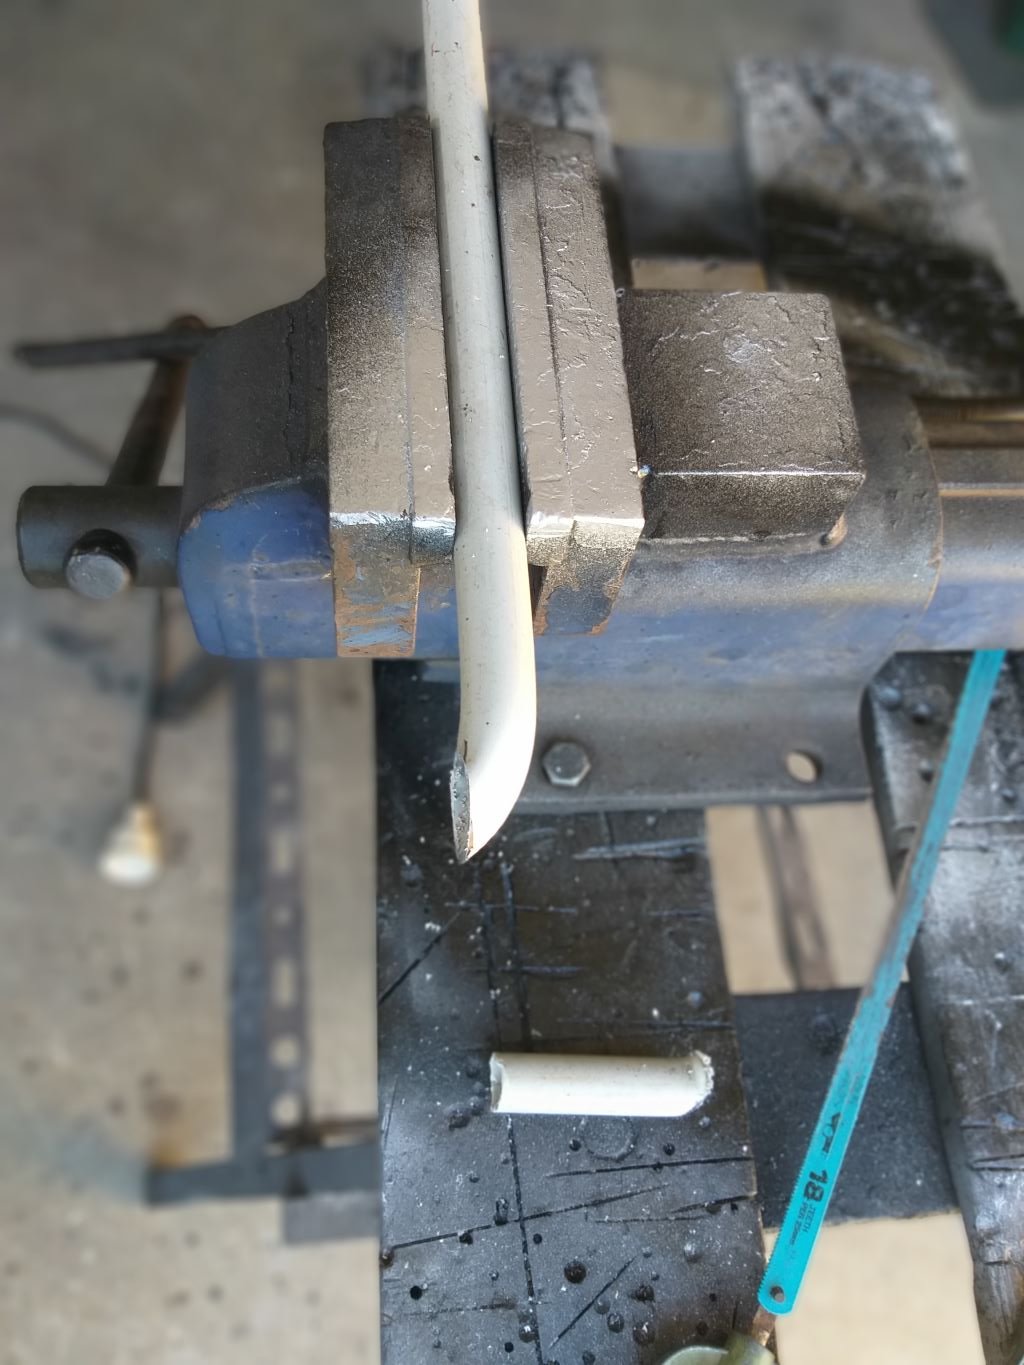
Carby Hat - Chapter 6 Fine-tuned the top section of the tube and also made a start on the lid. I need to head into town to get some more resin so I can mate the lid to the main body. May as well get some more mat too, so I can lay down the second layer.
-
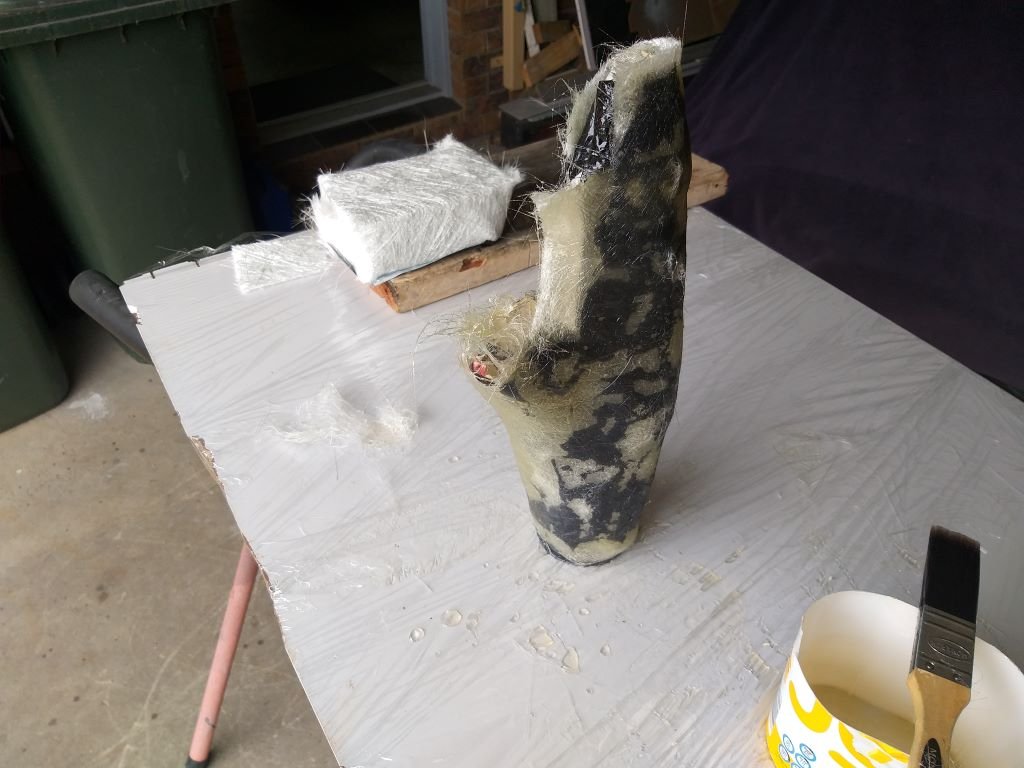
Carby hat - Chapter 5 Gave the tubular bit a haircut and then chucked a wee bit of fibreglass about the place to fix the two parts together. I'll give it the rest of the day to dry and will crack into the next stage tomorrow.
- 715 replies
-
- 11
-
-
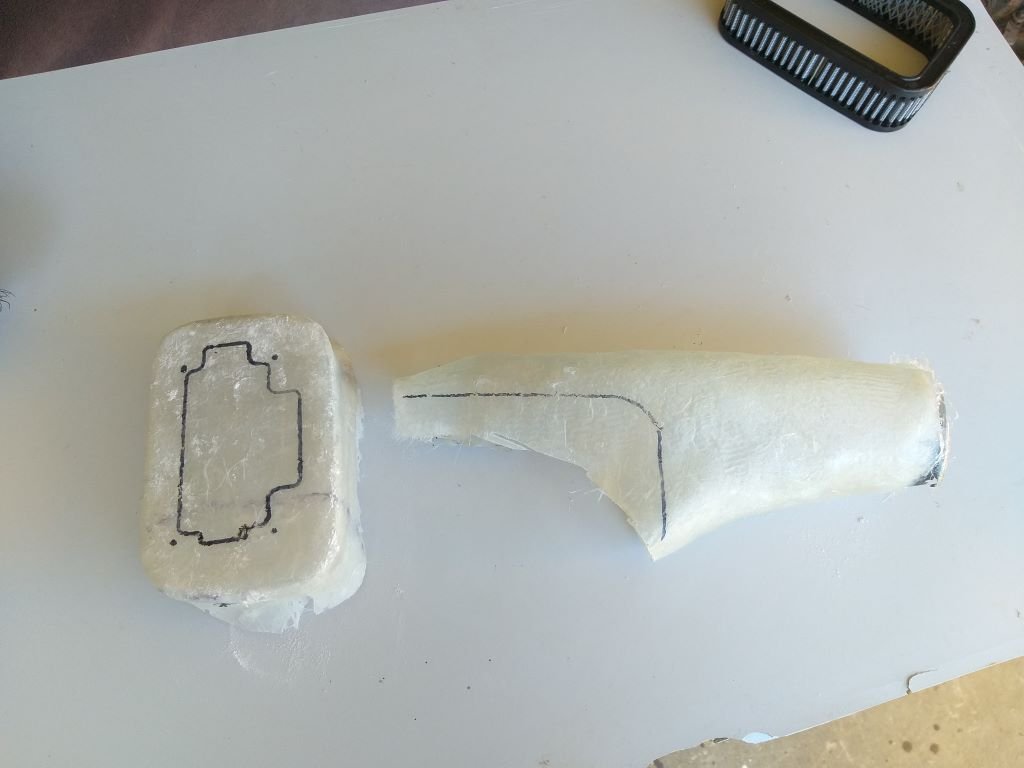
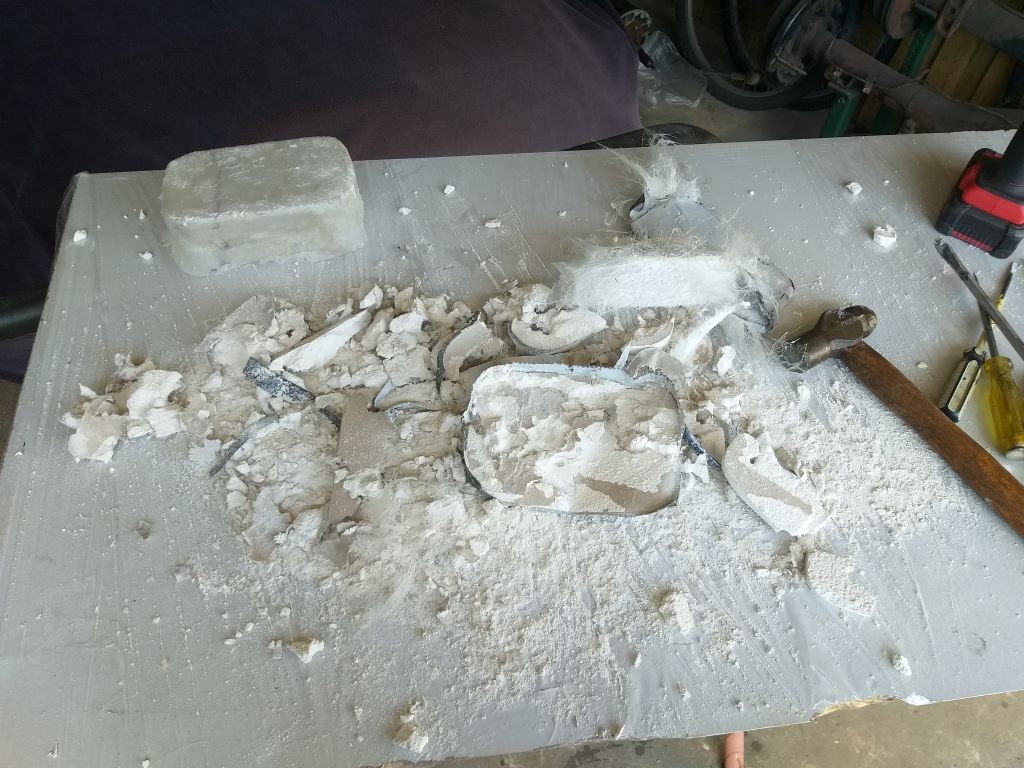
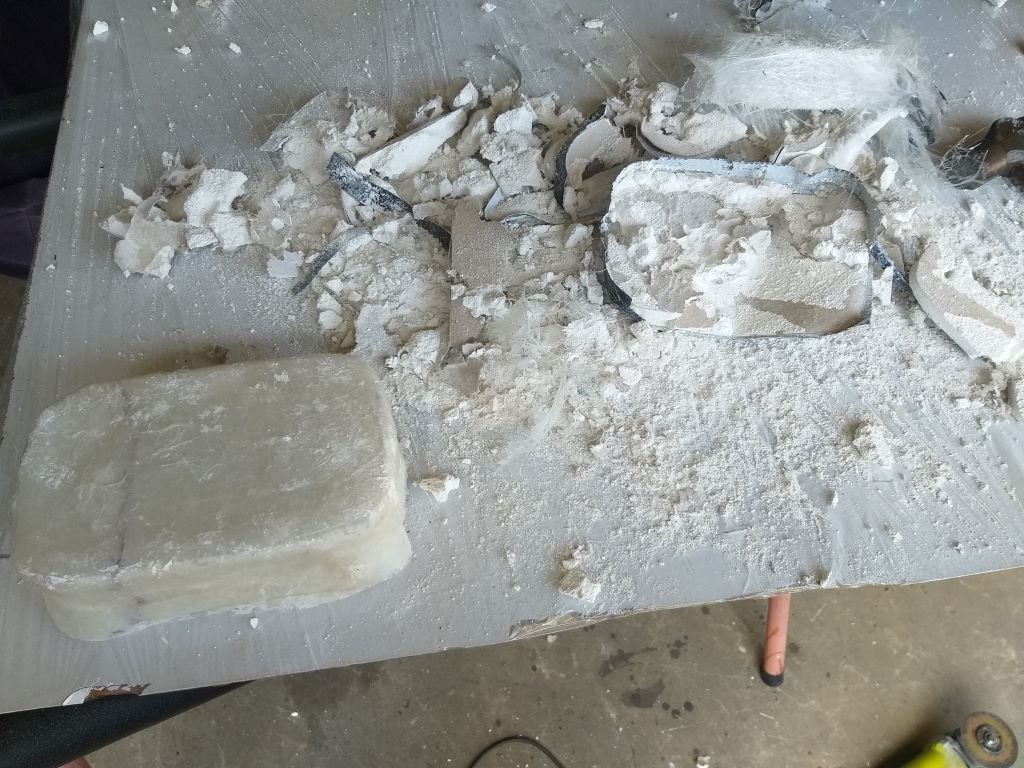
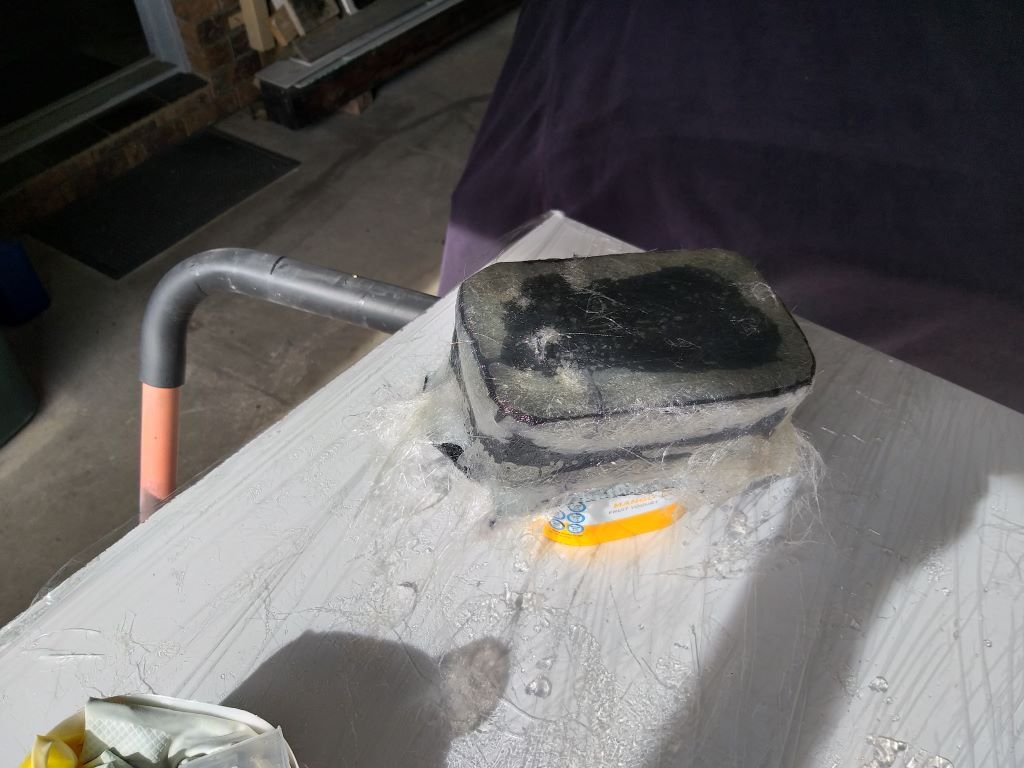
Carby hat - Chapter 4 Checked the status first thing this morning and the fibreglass had gone nice and hard overnight. Time to break out the bucks. Pulling out the paper mâché buck that I used on the tubular bit was a piece of piss. Not so much with the plasterboard sandwich that I used for the main body. That one took a bit of effort. If I had to do this again, I'd use a modified margarine tub instead of the GYB. Time for a cuppa and then I'll crack into the next stage.
-

SR2’s 1947 Vauxhall “Rigamortice” Discussion thread.
Flash replied to sr2's topic in Project Discussion
Great outcome Simon. You just can't beat that feeling of euphoria after the first start up. Well done mate ! -
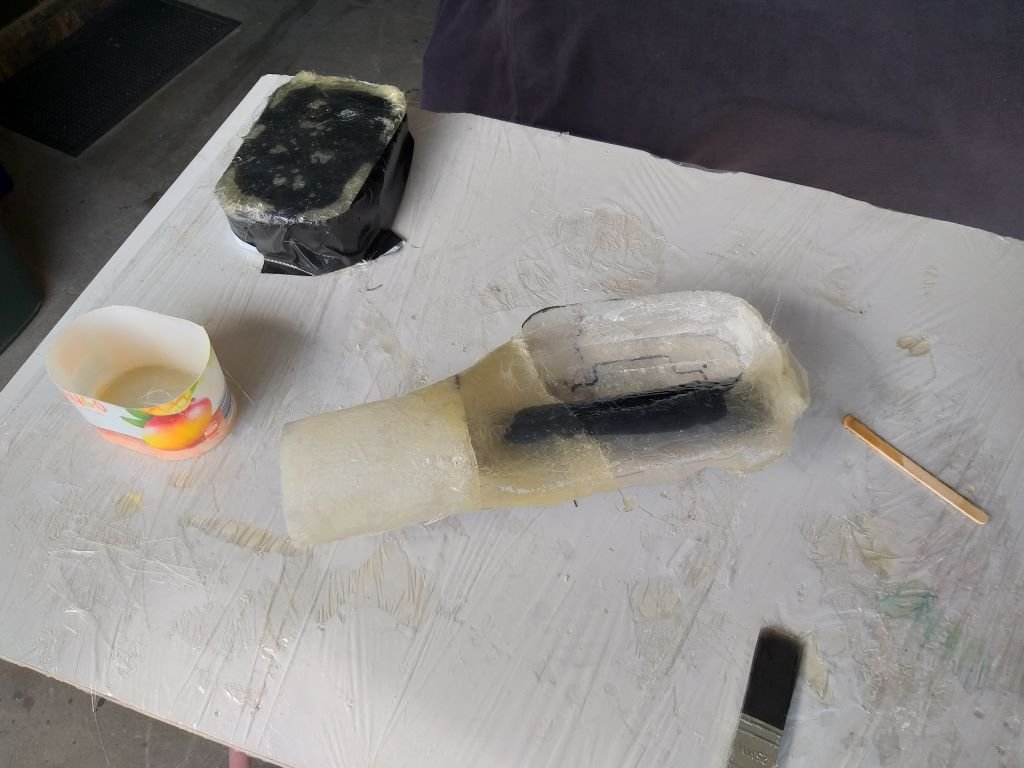
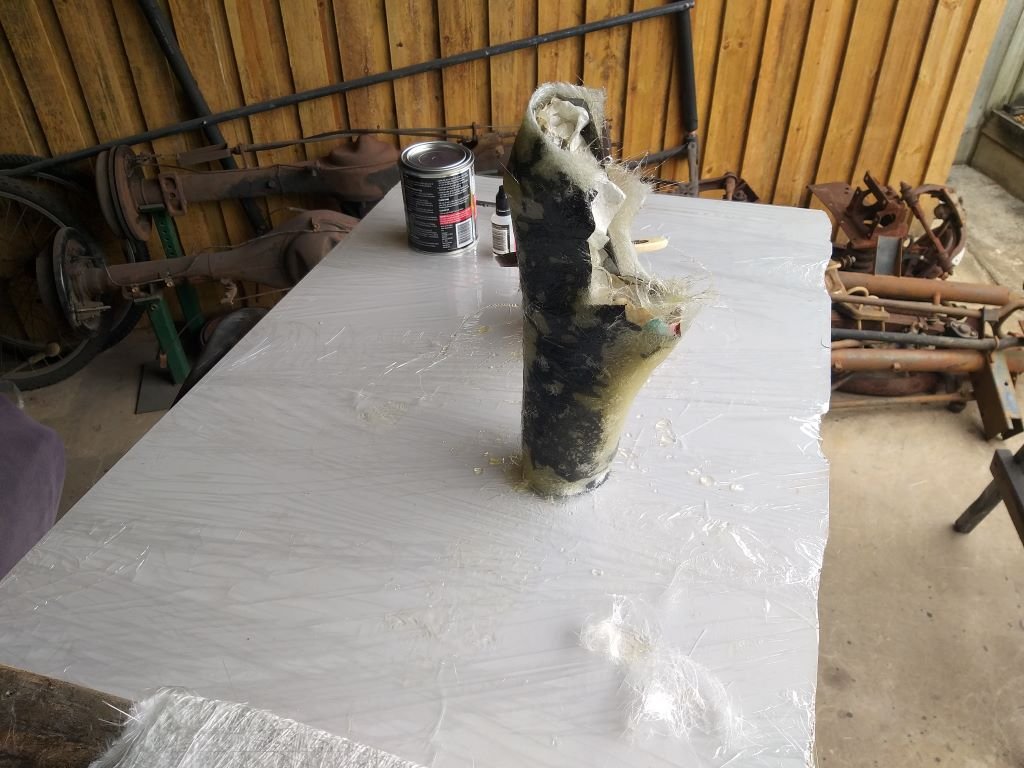
Carby Hat - Chapter 3 I've been chipping away at the carby hat in between other jobs. I wasn't happy with my original buck for the rounded part, so ended up building a mark 2 version out of a block of wood, a bit of electrical conduit and some rattle can lids. Next step was to cover the new version in paper mâché which took a few days to go off. I was then able to split the paper mâché creation in half and peel it off the wood and plastic bits. Then I used some additional paper mâché to glue the two halves back together. That took another 2 days to air dry. Final step was to cover the paper mâché and plaster board creations with a layer of gaffer tape and then earlier today I laid down my first layer of fibreglass on both parts. This is all a bit of an experiment, so it's going to be interesting to see how things turn out.
-
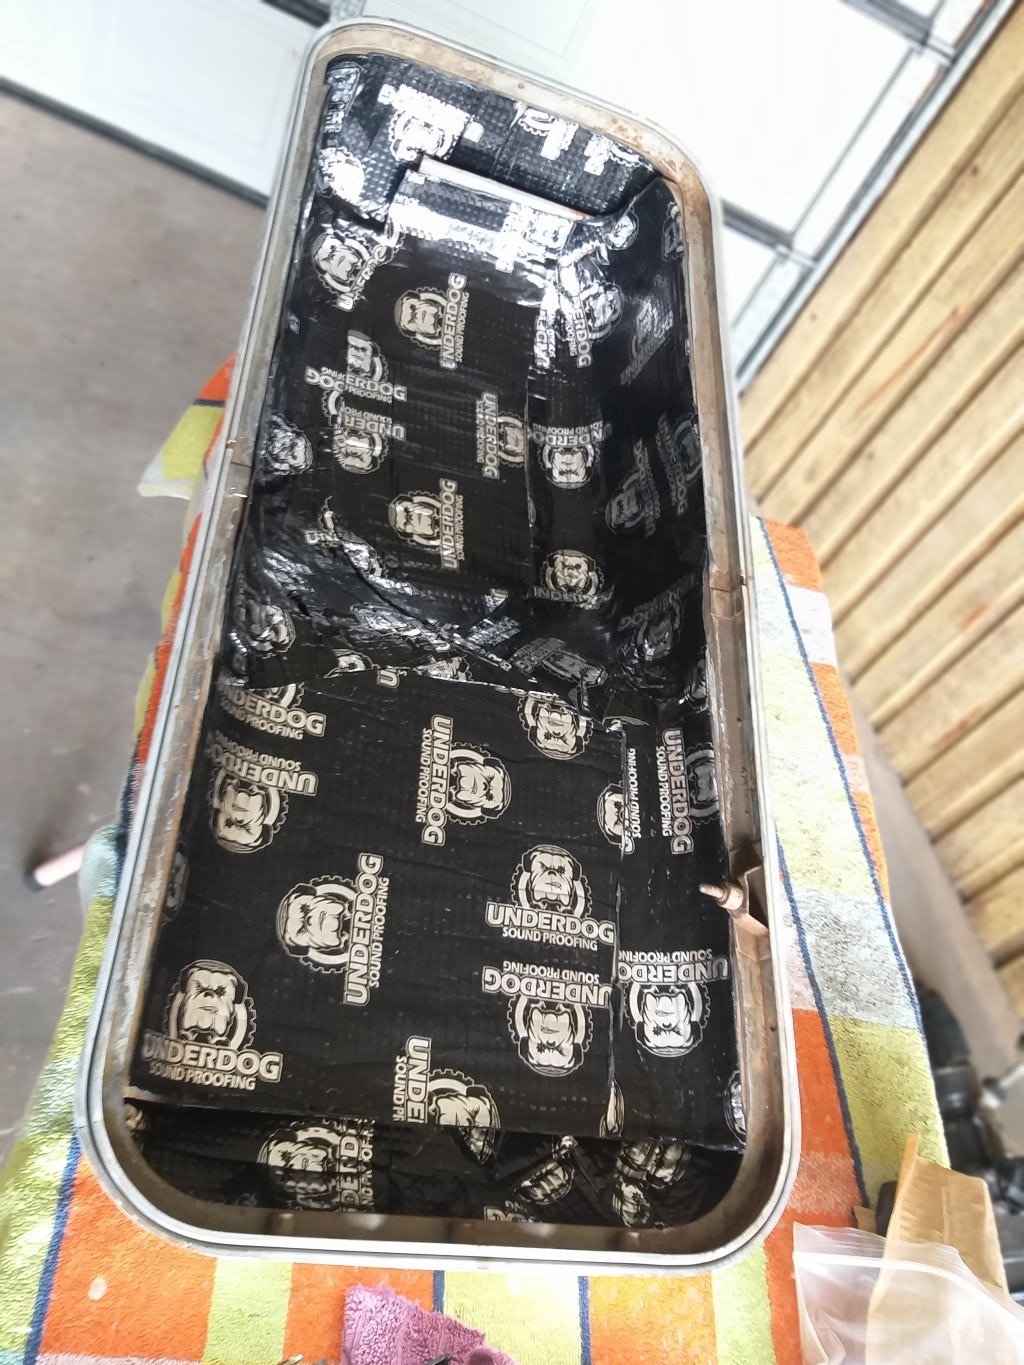
Another little job ticked off the list today. Whatever sound deadening the Ford factory put on the inside of the engine box lid is long gone with just a smattering of crusty old adhesive left. I had a bit of that butyl-based stuff left over from when I did the floor of the Mustang so after a quick clean with my wire wheel, I stuck the stuff down. Not the easiest job with all of the curves, but it should do the trick. I've ordered some of that silver heat reflective mat that will go over the top of the butyl stuff just to finish it off.
- 715 replies
-
- 10
-
-
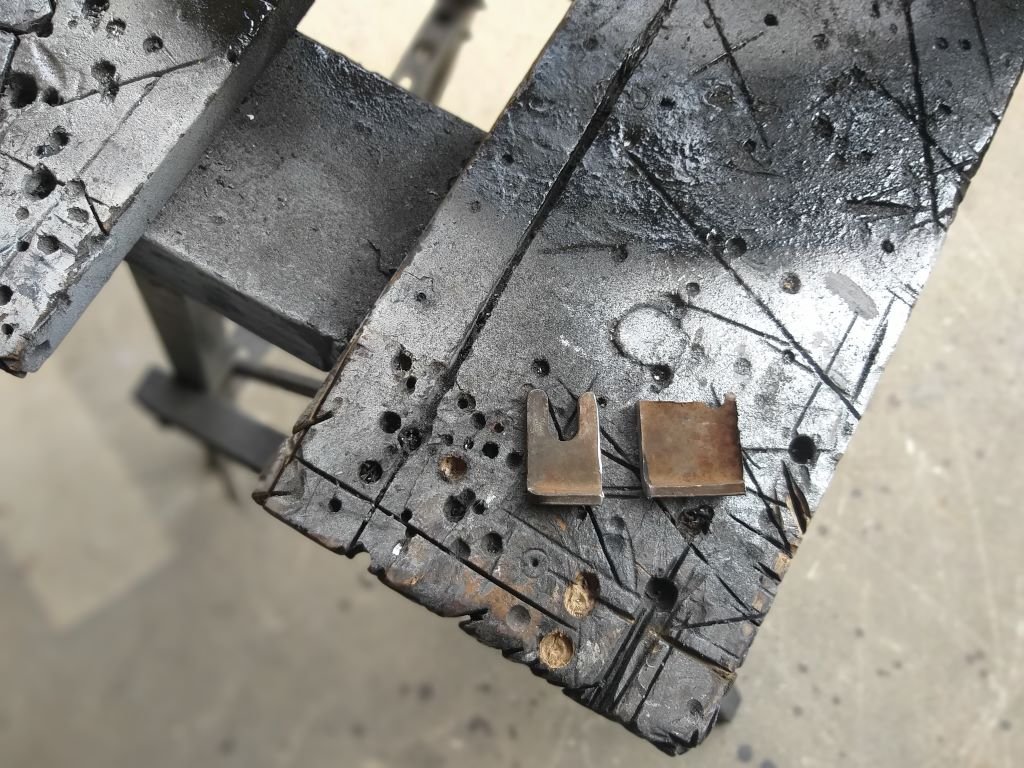
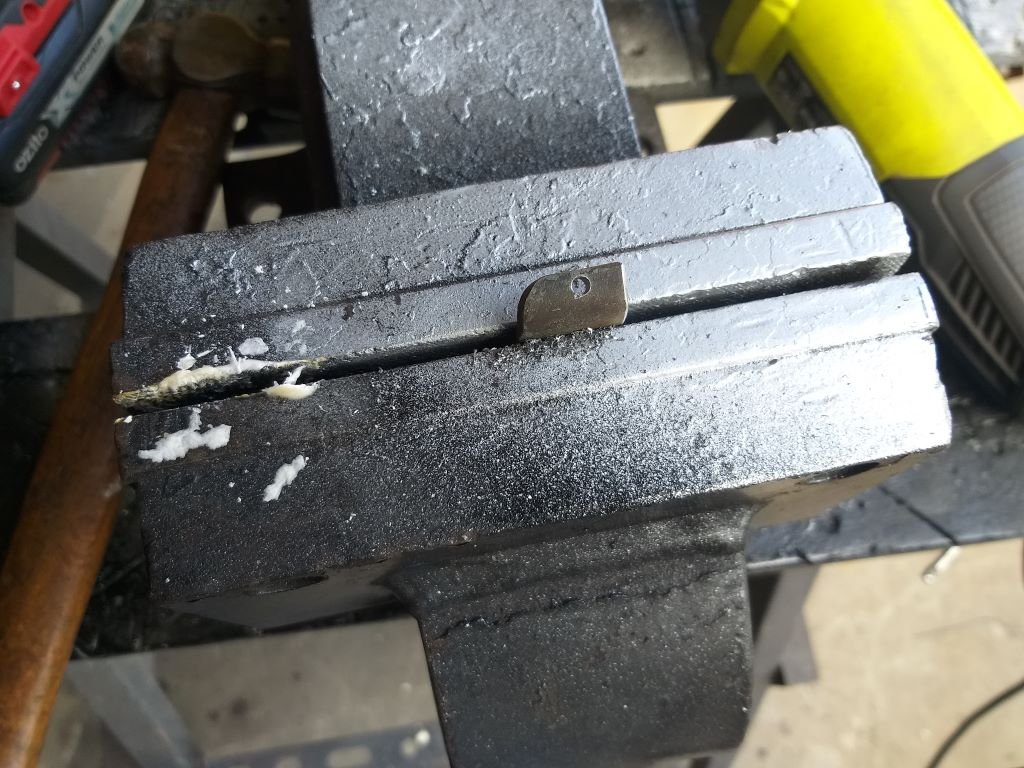
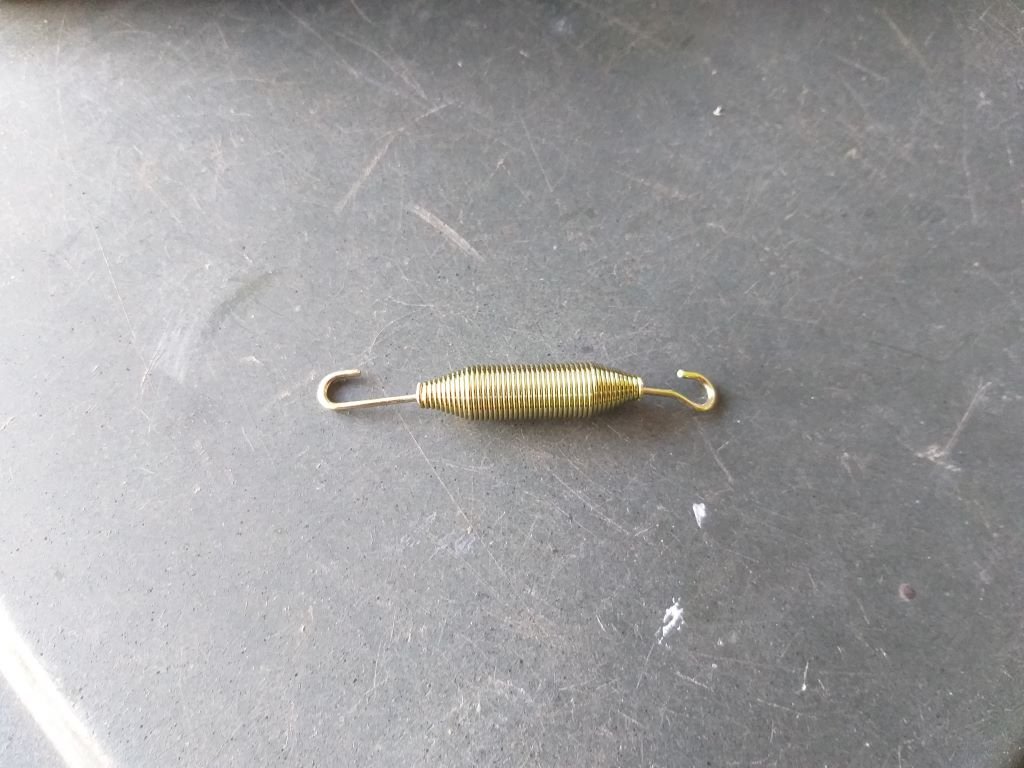
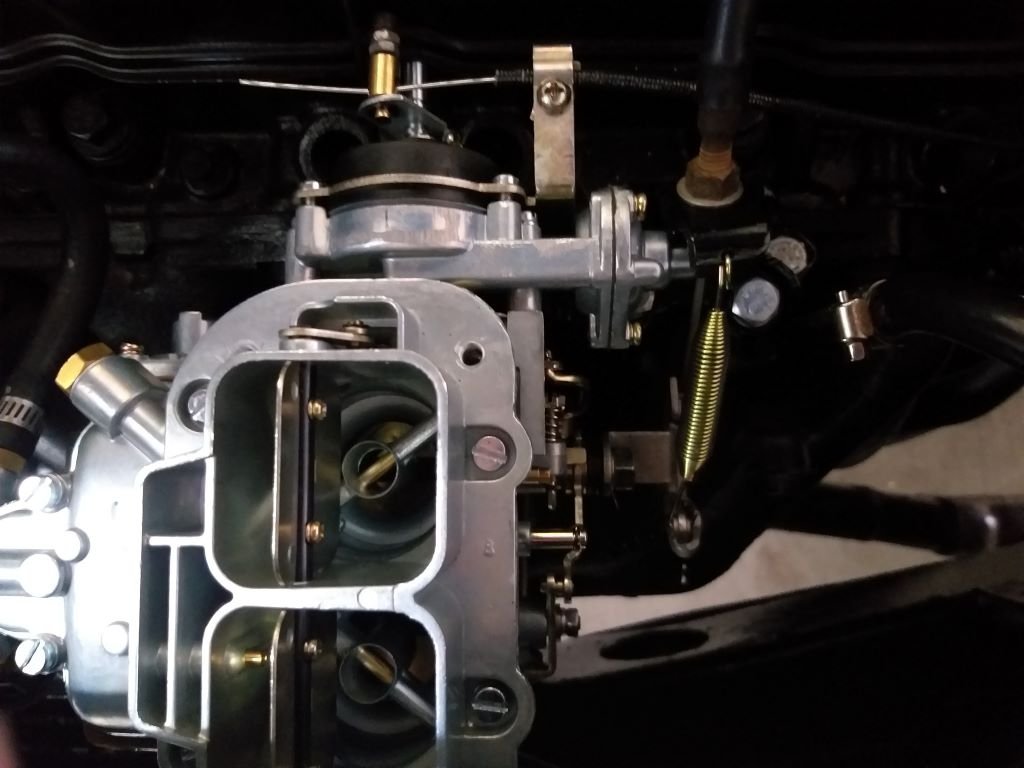
While taking my cement pavers for a scoot around the village, I noticed that my idling was all over the place. Back at base camp I lifted the engine box lid for a bit of a nosey and noticed that the built in return spring on the carby wasn't always returning the throttle mechanism back to rest. Checked out the accelerator linkage blister pack that came with the carby conversion and noticed a neat looking little spring included in the pack. That will do the trick, I thought. Scratched my head a bit working out an option for a holding bracket, then remembered the little auto kick down cable that I cut off the main cable bracket last week. Luckily it was still sitting on my work bench, so a bit of cutty, cutty and drilly, drilly followed by a spritz of satin black and I was able to sandwich it under the locking nut on the accelerator cable. The result looks just like a bought one.
-
Jeez I don't know if it's just my poor old eyes, but the colour of your new carpet looks pretty good to me. Goes nicely with the rest of the interior I reckon.
-
Yep, what you are saying makes a lot of sense @Otodat. Now that I think back on the Bedford CF that I built about 10 years back I'd forgotten just how bouncy it was at first. Then I built a fixed bed with storage underneath, chucked in a fridge, spare wheel, tools and a little trolley jack and it was amazing how well she handled with that extra weight.