Flash
-
Posts
1615 -
Joined
-
Last visited
-
Days Won
2
Everything posted by Flash
-
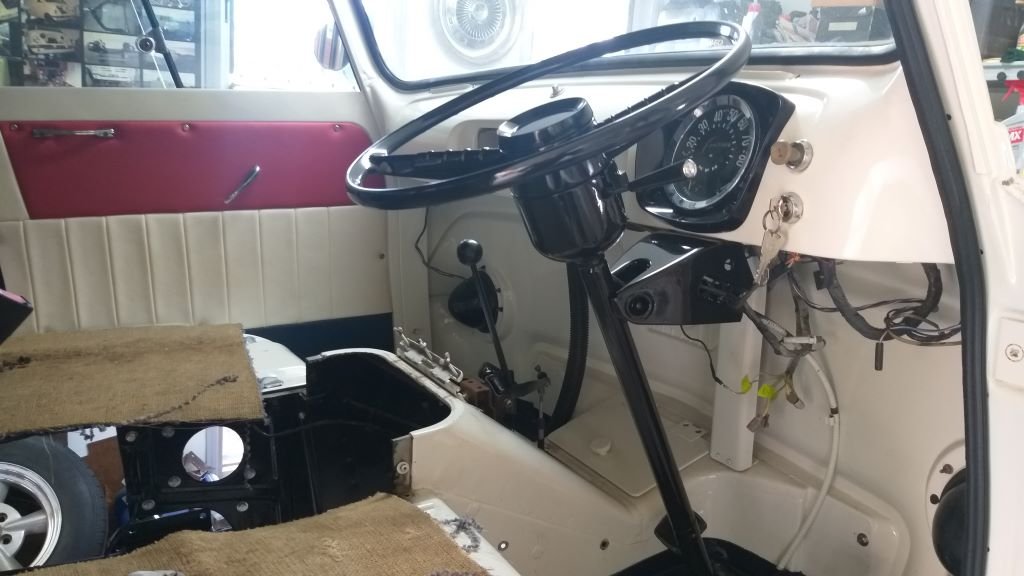
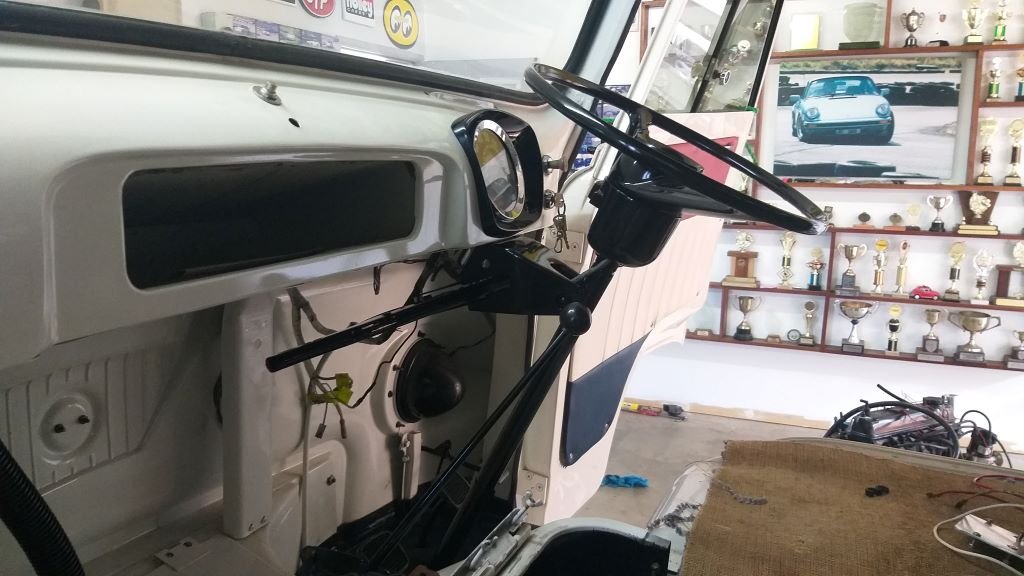
I spent the morning putting in the freshly painted steering column and wheel for the very last time. Fitted my NOS indicator mechanism at the same time so everything is nice and fresh. With the column firmly bolted in place I was finally able to connect up the handbrake mechanism and give it a go for the very first time. Works like an absolute charm which is a relief as it's a real mishmash of Thames and Toyota bits, so I had my doubts about it. Anyhoo, pictures of the fresh install looking rather bling:

- 715 replies
-
- 13
-

-

SR2’s 1947 Vauxhall “Rigamortice” Discussion thread.
Flash replied to sr2's topic in Project Discussion
Pity I didn't know about your trip to Bundy, Simon. You could have dropped around for a bevy and a yarn. I'm just down the road in Bargara. -
Well it was a toasty 33 degrees Celsius under the shade of the back carport today. The perfect weather for donning my onesy and face mask so I could fling a bit of 2K satin black about the place. Came out noice.
- 715 replies
-
- 12
-
-
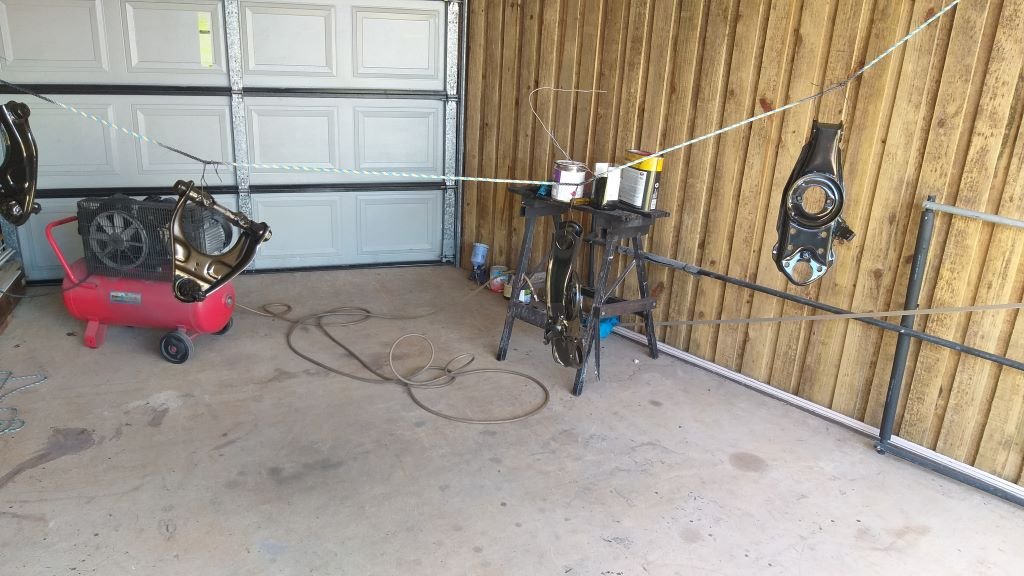
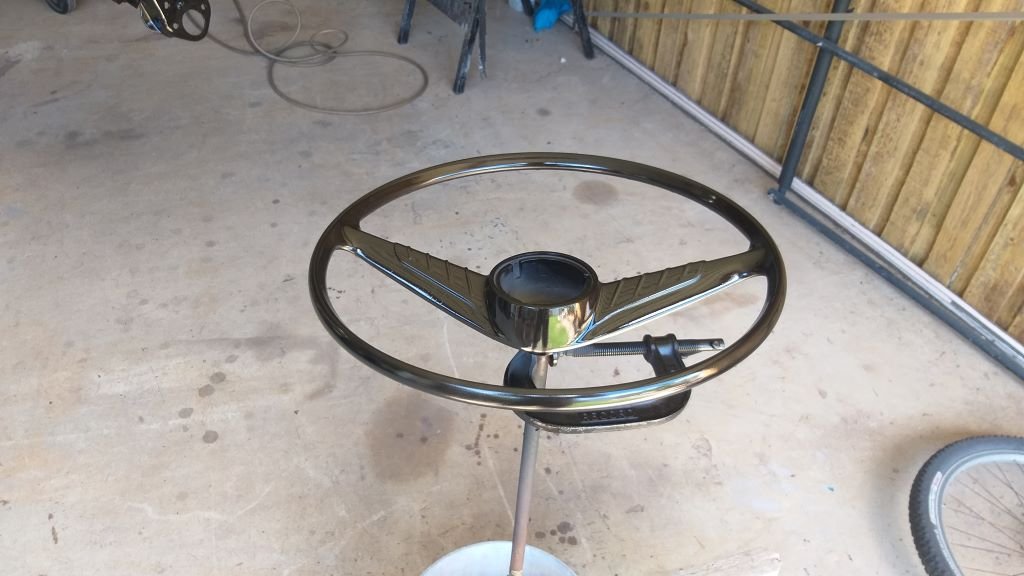
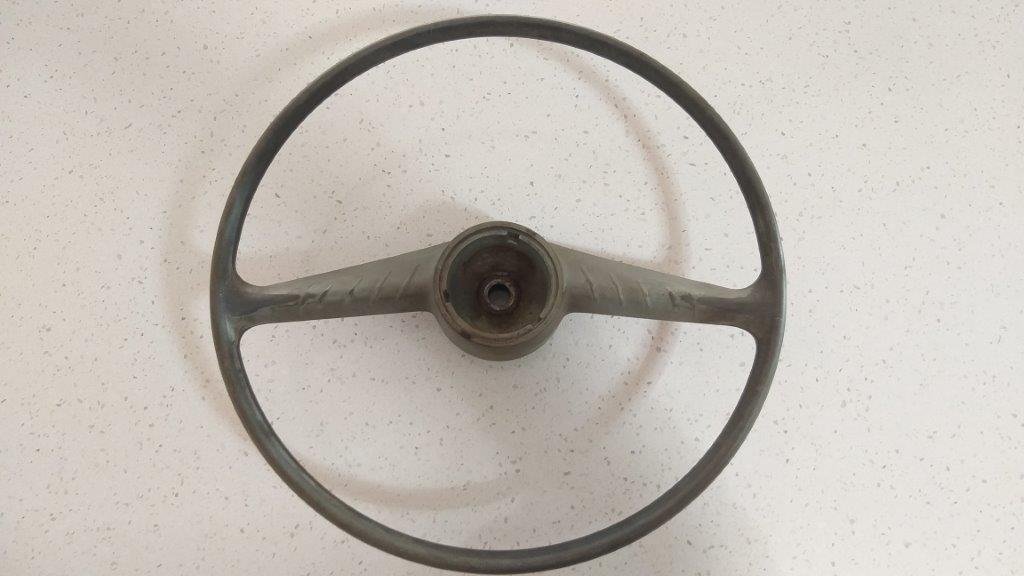
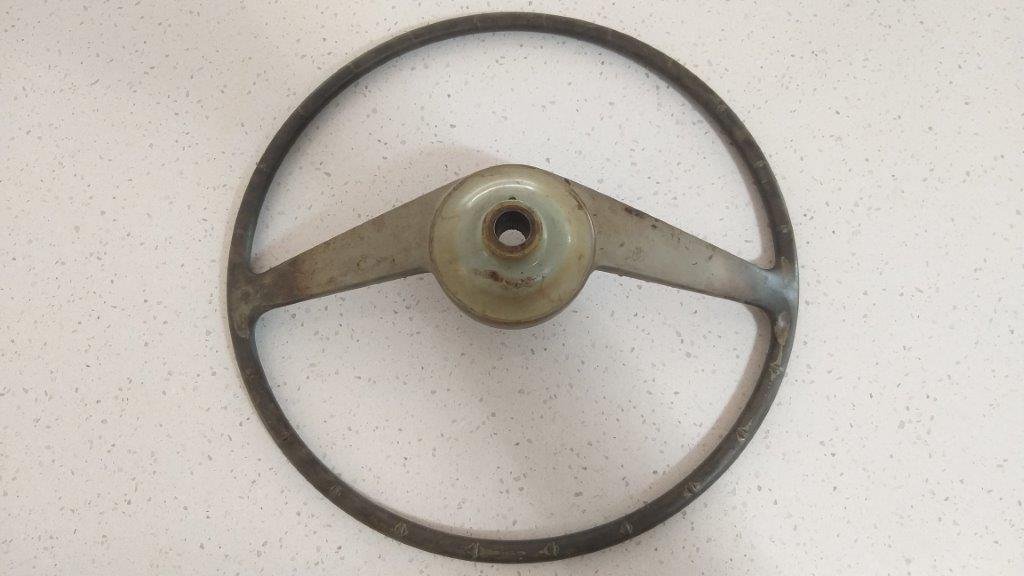
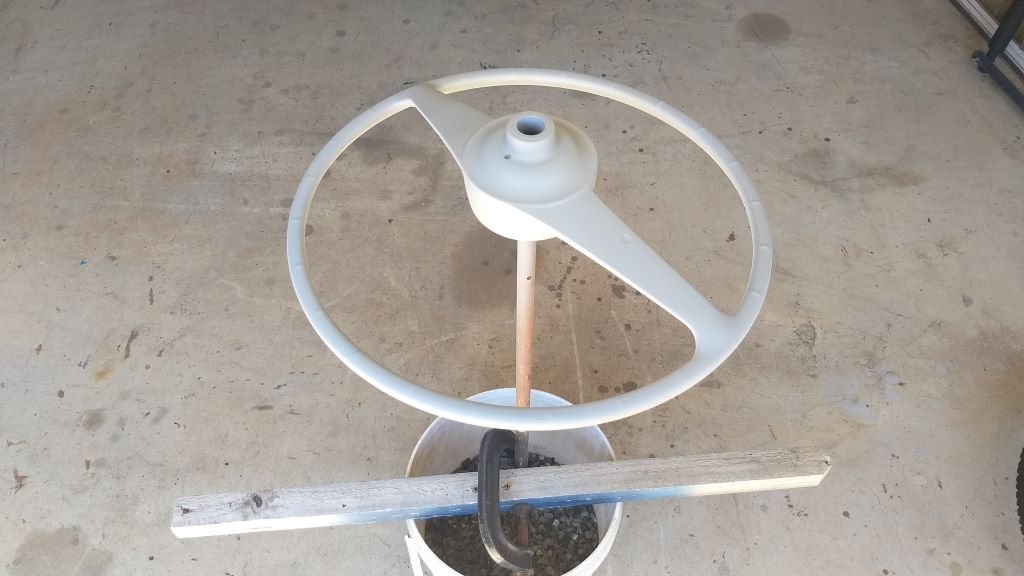
While I had a gun full of primer I decided to give the old steering wheel a birthday as she was looking pretty grot. Tickled her down with some 600 grit and gave her a shot of undercoat too. Next up is a few coats of satin black. Thanks for looking.
-
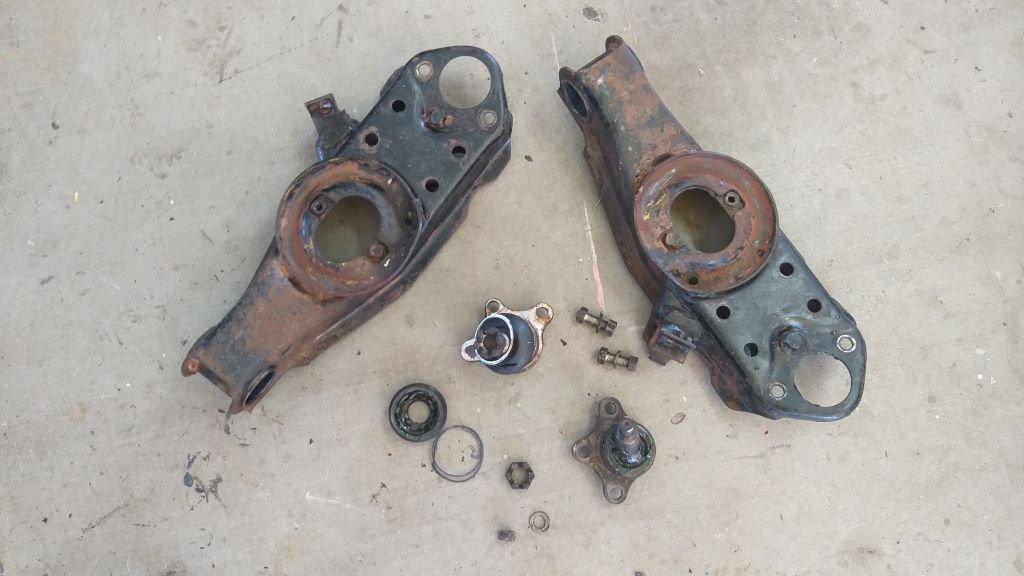
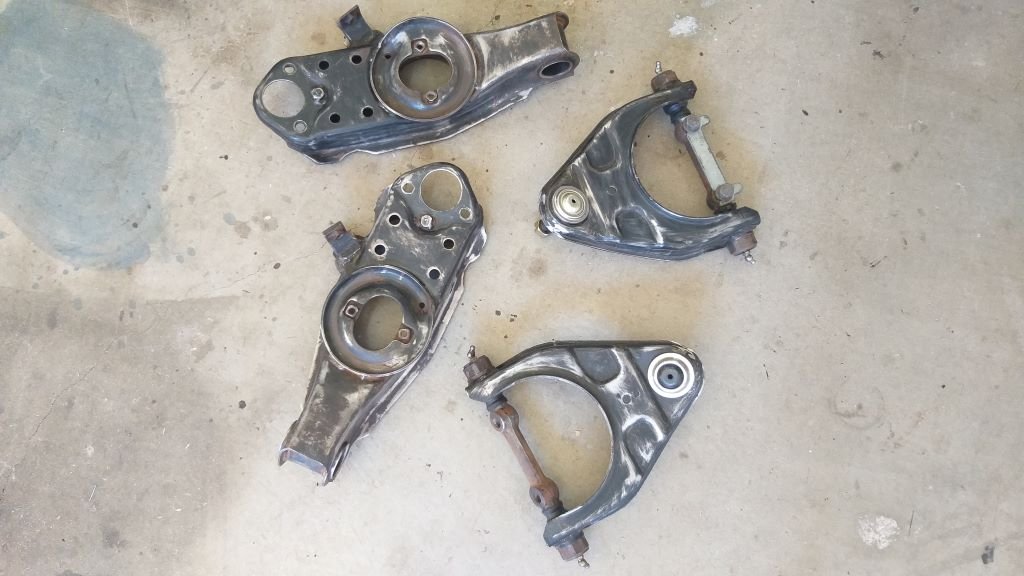
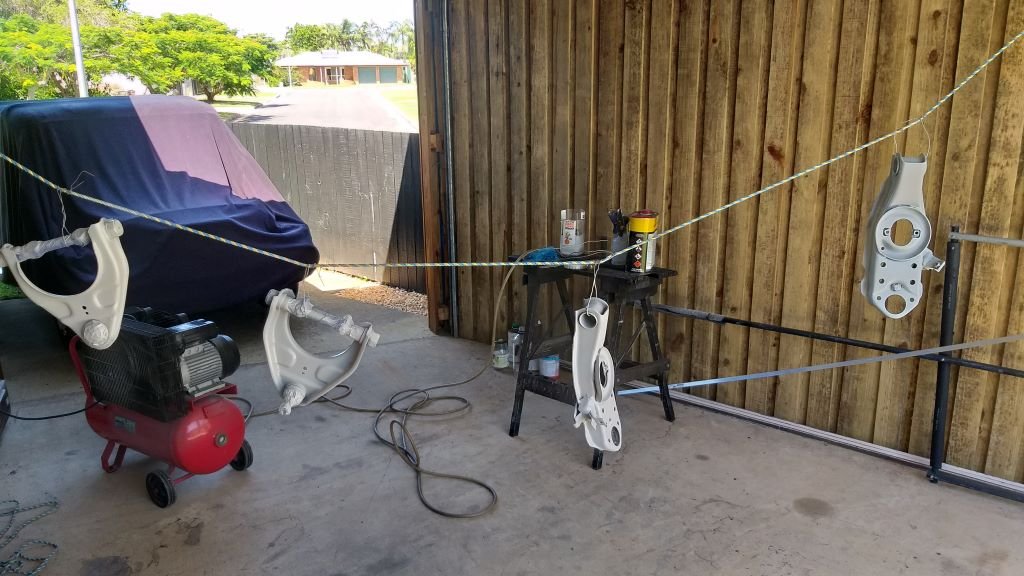
Thought I'd give the lower control arms a bit of loving at the same time, so stripped them down and gave them a quick spank with the "wire wheel of death" Pushed the Moke out of its nest, strung up my washing line and spritzed a bit of primer about the place.
-
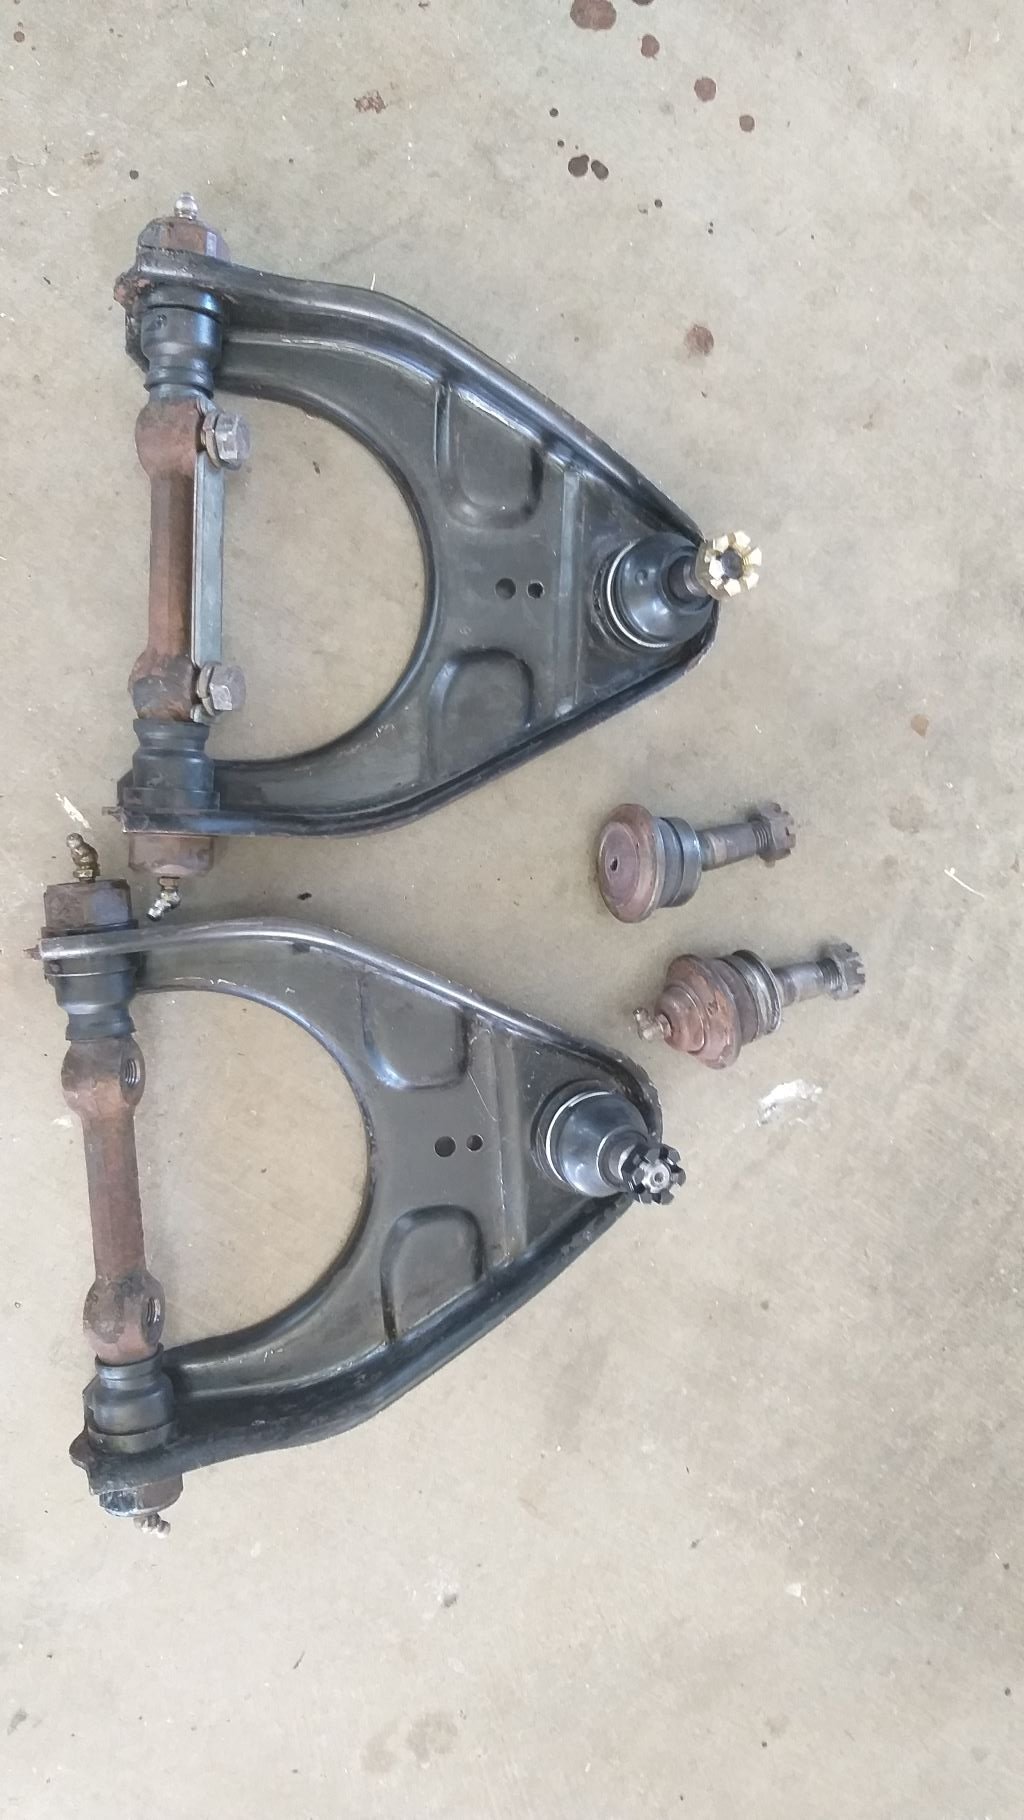
Yesterday I took a drive to my good mate Grant's place and used his hydraulic press to swap in a pair of fresh upper control arm ball joints. I'll give the arms a rub and spritz on a bit of satin black before I call them done.
-
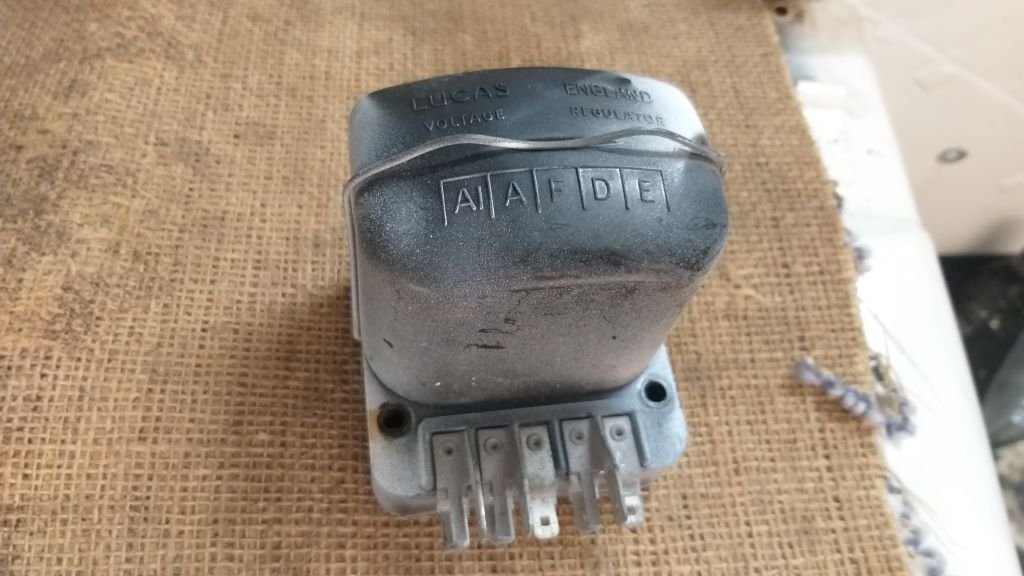
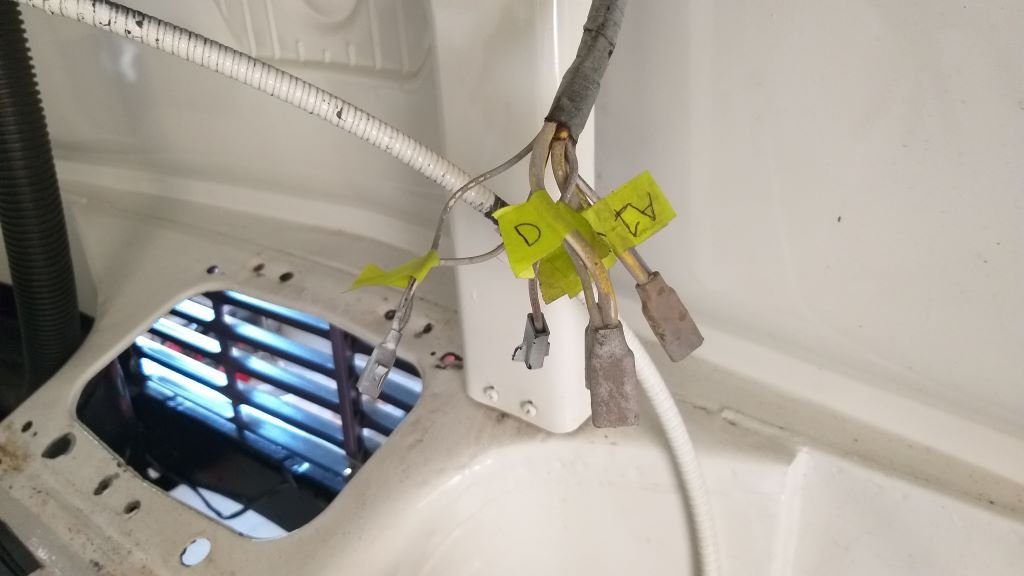
Thought I'd spend a bit of time tidying up some wiring. Since my planned replacement alternator is internally regulated, I'm able to send the original external regulator to the parts bin. Pulled the unit out and spent a bit of time working through the Thames wiring diagram to figure out what is what. Bridged the A1 and A wires together and put things through a bit of a test. Ignition switch, starter, indicators, headlights, tail lights, dash lights and hooter all working as expected. Coil wire is getting power when the ignition switch is on so that also looks positive .... excuse the pun. Brake lights are staying on which seems a bit strange as they are activated by a pressure switch located in the front brake line and the brake lines are empty at the moment. So, I may have a dicky switch. I'll need to check that out.
-
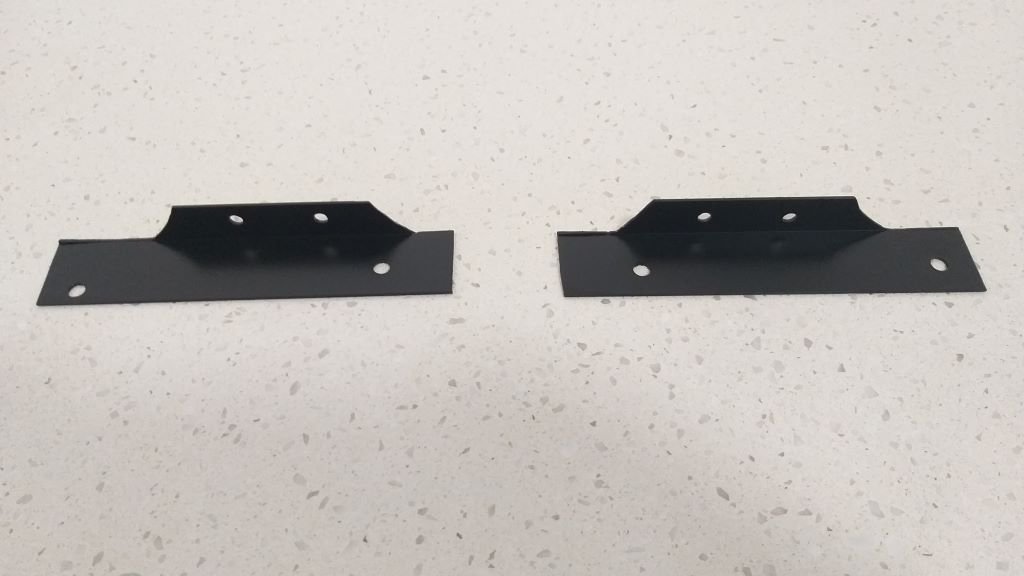
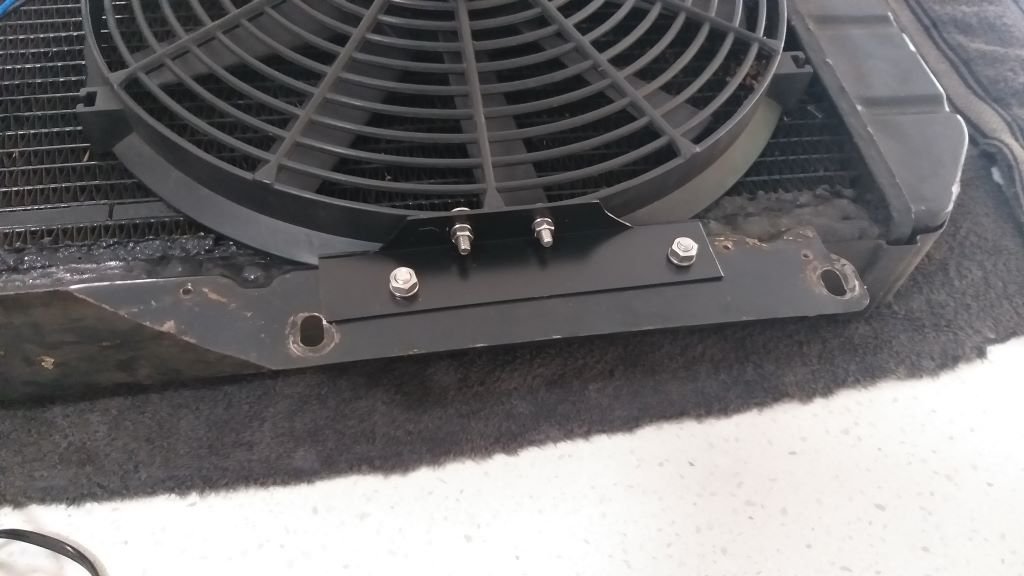
Bit of a lazy day yesterday. I've been painting the front suspension beam which is now fully welded up and in between coats I carved up some aluminium angle to make two little mounting brackets for the radiator thermo fan.
-
@anglia4just standard old shop bought white vinegar. Cheap as chips and works bloody amazing. I've used that batch over and over, just skim all the crap out of it when it gets pretty gunky.
-
In other news I've triple checked all of my front suspension measurements, so it's time to fully weld the new mounts. Stripped it down to the bare beam yesterday and I'll give it a quick fizz today.
-
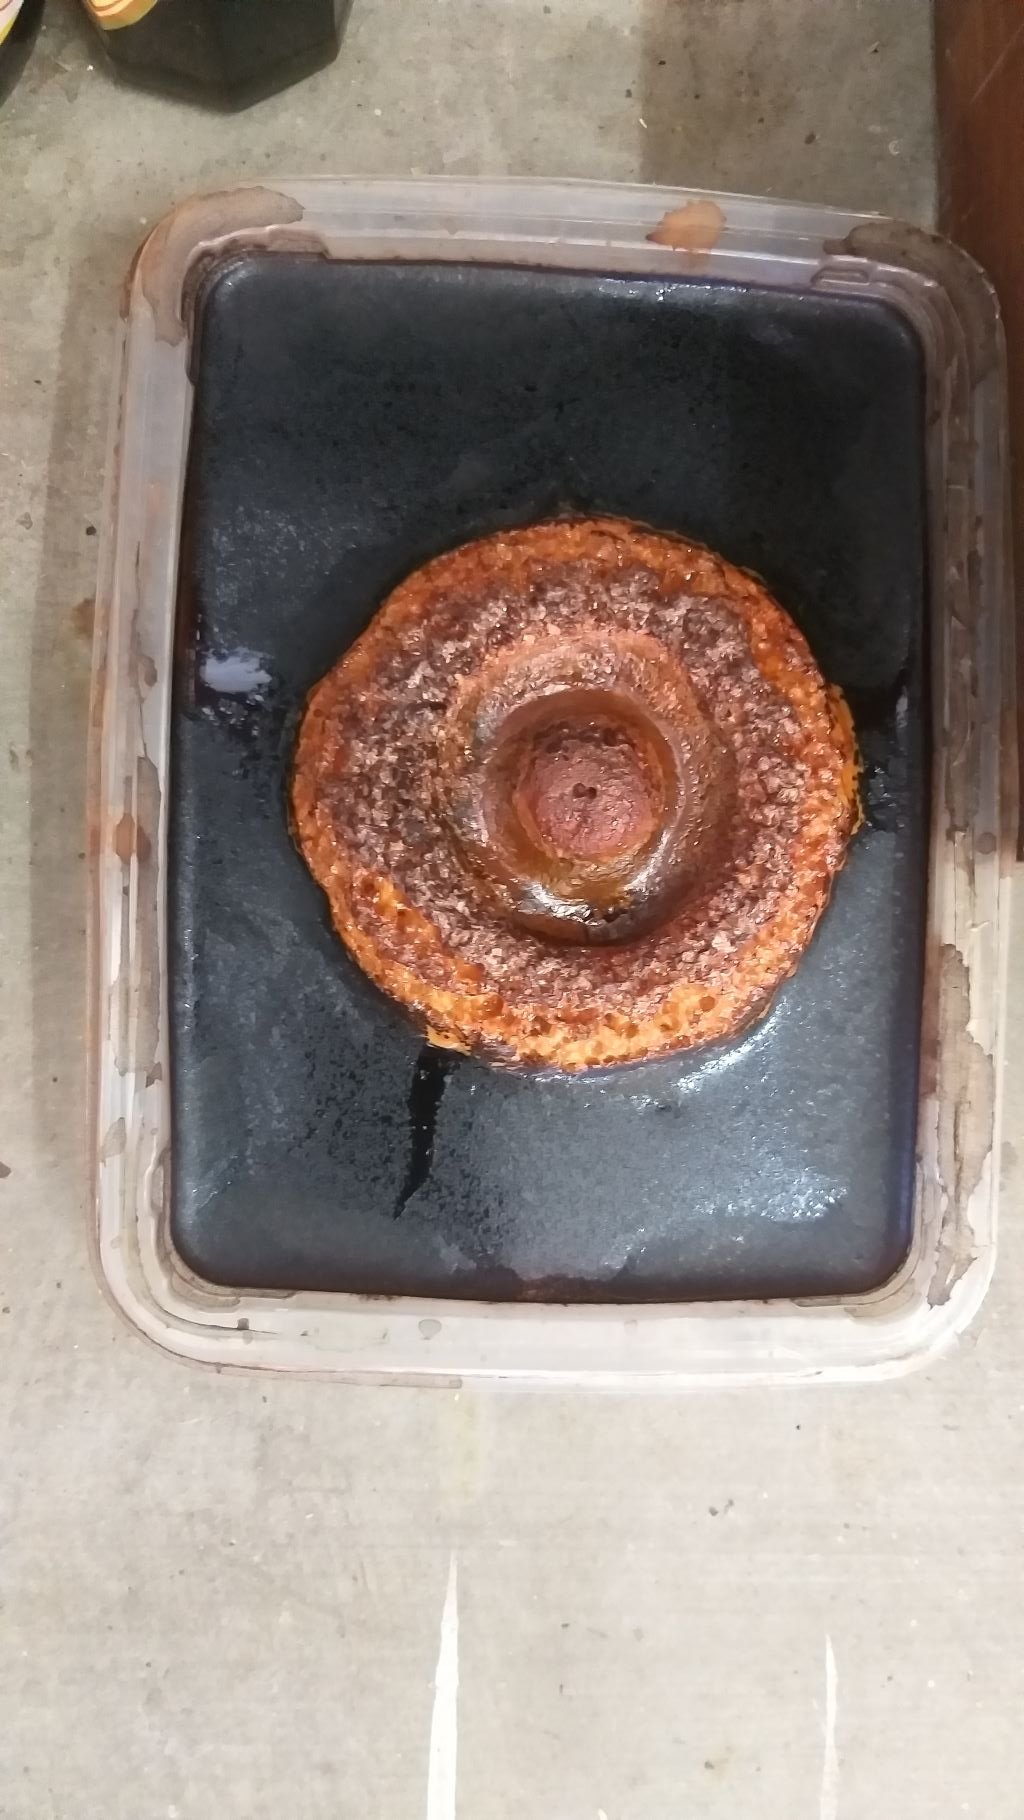
I'm always amazed by how well the old vinegar bath works. I chucked the manky looking alternator pulley in for a soak and a day later a crusty donut had formed on the surface of the vinegar right above the pulley.... yummy. Gave it a quick scrub but it still had a few rust patches so I chucked it back in for another soak.
-
Yep, plan is to replace the PCV which could well be gunked up. Interesting to hear about your Bosch alternator. I fitted a 140 amp unit marketed by Aeroflow which starts charging straight from idle according to my Fitech hand held. Was your Bosch a single wire jobbie ?
-
No difference to the fumes between the carby and the Fitech which is a bugger as I thought that might solve the issue. Sounds like you won with the PCV install. I'm guessing you had the PCV on one bank only with a breather cap on the other bank ?
-
Thanks for checking in @Gee I've been keeping an eye on your Mustang updates. I was sorry to see your recent mishap with your work bench. I guess it's a good excuse to get some paintwork touched up. Yep, I've heard a few reports about some of the Fitech kit not being the best quality. It's still early days for me, but so far so good. Touch wood. I'm still struggling with fumes, but it's really weird. Only seems to happen when I stop at an intersection or drop down to a slow crawl and is most prevalent when the engine temp is up. It's almost like a wave of fumes that enters through the open windows. I can't feel any leaks around the engine since I fitted the new manifold gaskets, but as you know there isn't much space around the headers to get your hands real close so there may still be some slight leaks. Thanks for the tip on the high temp gasket goo. Yep, my current headers look to be real poor quality, so that could well be a contributing factor. I'm about to borrow my mate's compression tester as I'm wondering if the rings might be a bit tired and maybe the PCV valve isn't able to cope. Talking about the PCV valve it is one of those chrome ones that are usually fitted to the aftermarket rocker covers. Anyway, the other day I pulled the little one-way thingy out of the PCV valve and have just temporarily fitted the elbow on its own. It seems to have improved things quite a bit. My lumpy cam only pulls about -7 vac at idle, so that may be another contributing factor. I checked the spark plugs out last weekend just to see how the engine is burning and the plugs look really good, a light brown colour so my fuelling looks to be spot on, but I did notice that they are a hotter plug (NGK AP5FS) so I'm wondering if I should try a set of colder plugs just to see if that makes a difference. Am thinking about going to the AP6FS. The fumes are a real pity as apart from that I'm really enjoying the car.
-
Spent the morning fine tuning the pulley alignment on the Mitsi Express power steering pump. I'd previously used a dirty old flat plate off-cut to create an adapter between the Express mounting bracket and the mounting holes on the mighty 3Y engine block, but the pulleys were slightly out of alignment. So, I figured while the engine was out I'd see if I could improve things. Chucked the plate in the vice and gave it a tentative tap with my BFH. Reassembled everything for a look see, but still not perfect. Took three goes before I got the angle perfect. Once I was happy that the belt now runs true, I trimmed the plate a wee bit and hit it with a splash of paint just to make it look less out of place. And that's another item ticked off the list.
- 715 replies
-
- 13
-
-
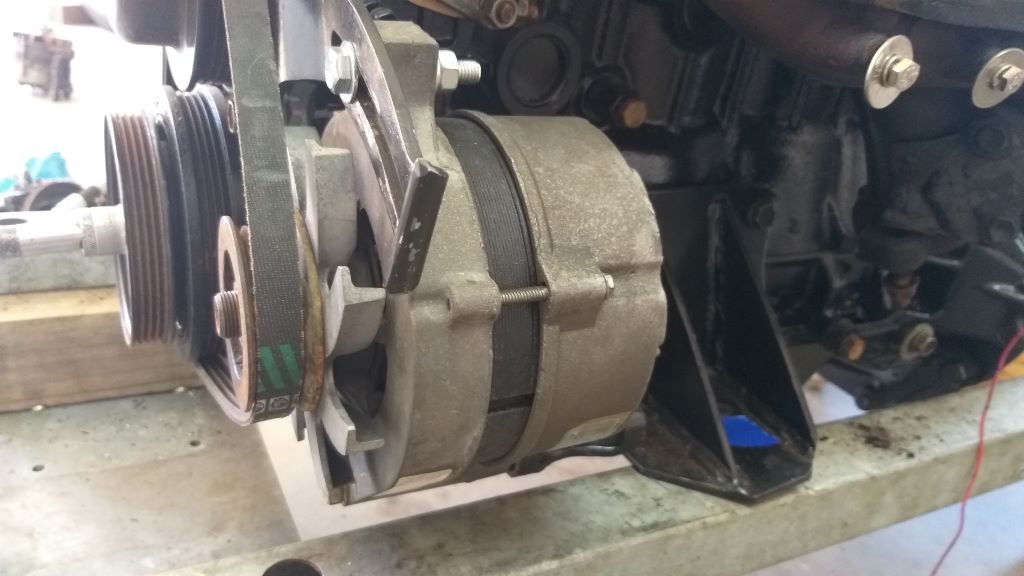
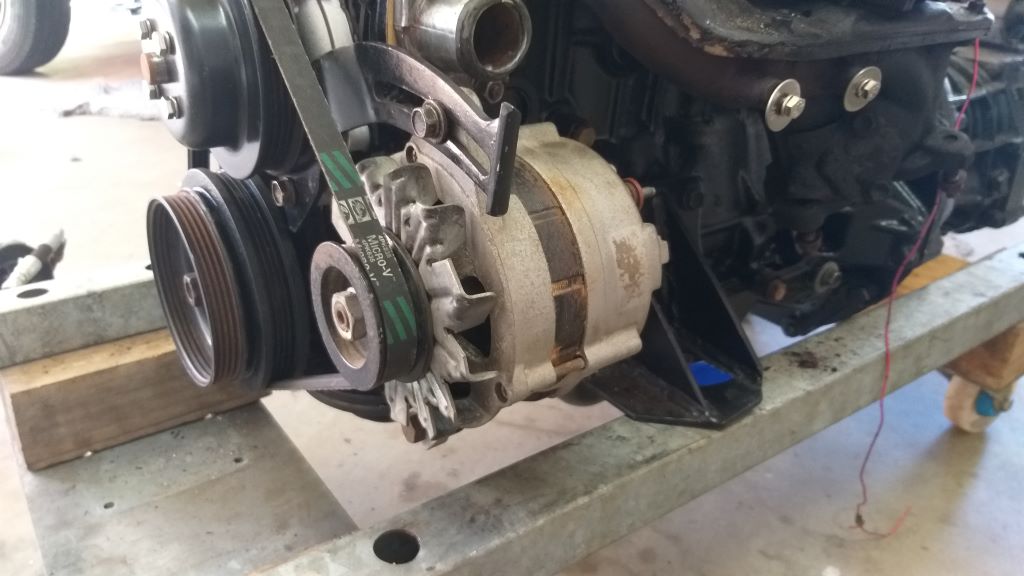
Offered up the Muzzy alternator to my backwards mounting bracket and the alignment looked good. Quickly chucked on a belt and turned the engine over with a socket wrench and as luck would have it the bloody belt runs true. How often does that happen. What a jammy bastard! All I need to do is scratch around for some appropriate length bolts for the final fit. I've stripped off the pulley and chucked it into the vinegar bath for a bit of a soak and I'll order the new 140amp unit tomorrow. The new unit will be internally regulated, which saves me from having to wire in the external regulator that I originally scavenged from my donor HiAce, so that's another win. Thanks for reading.
- 715 replies
-
- 12
-
-
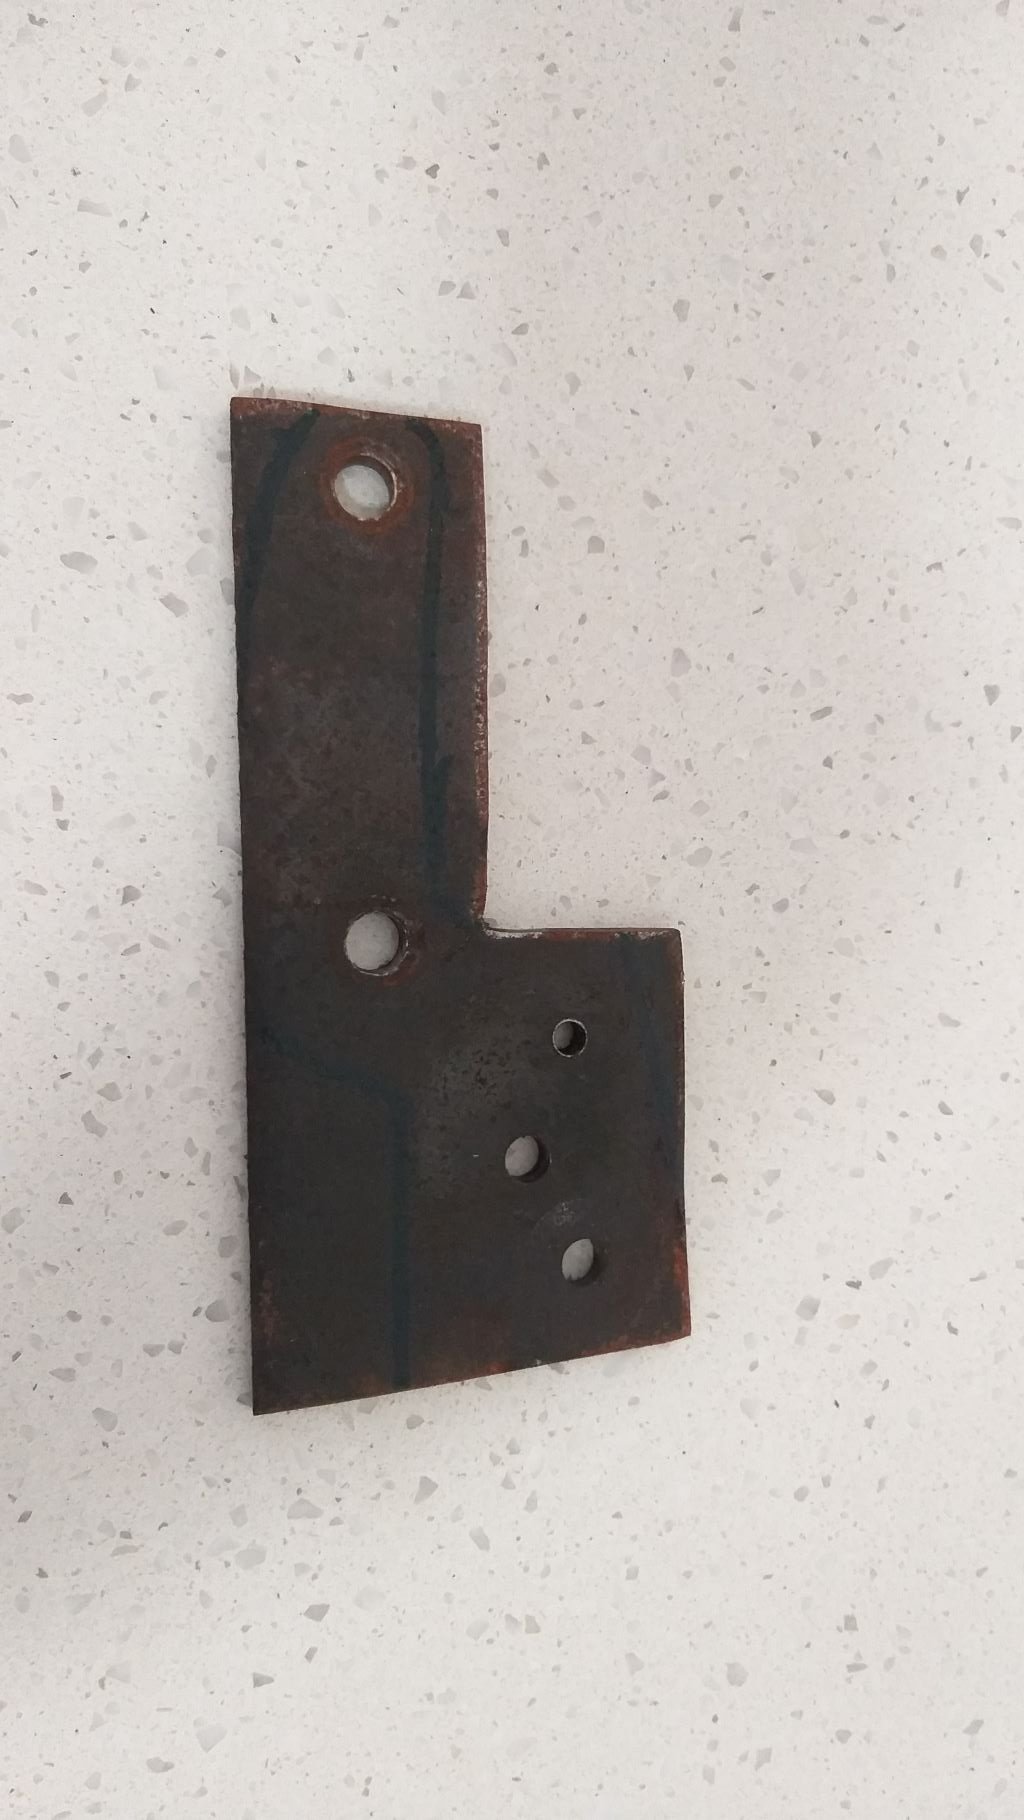
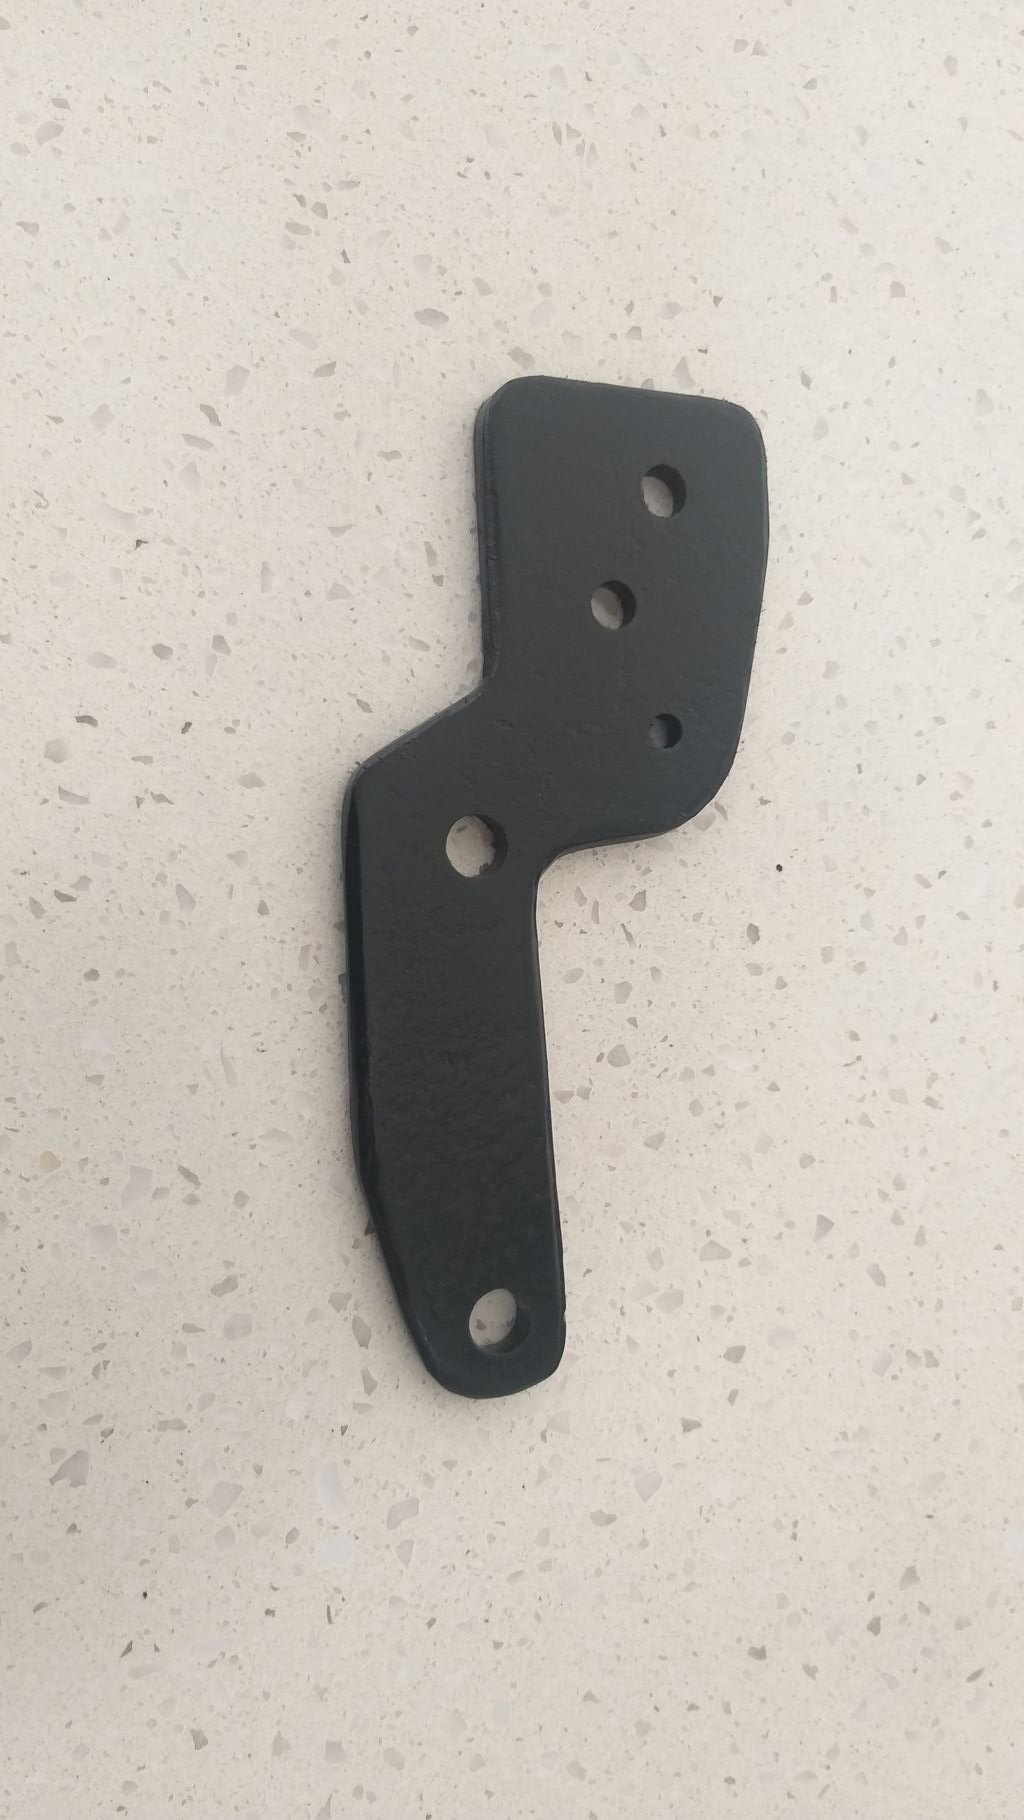
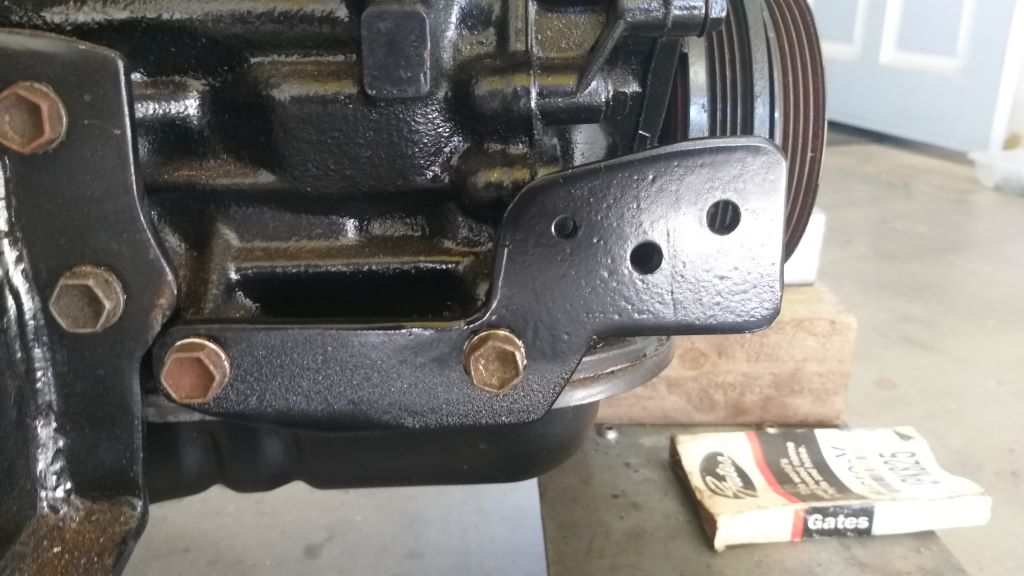
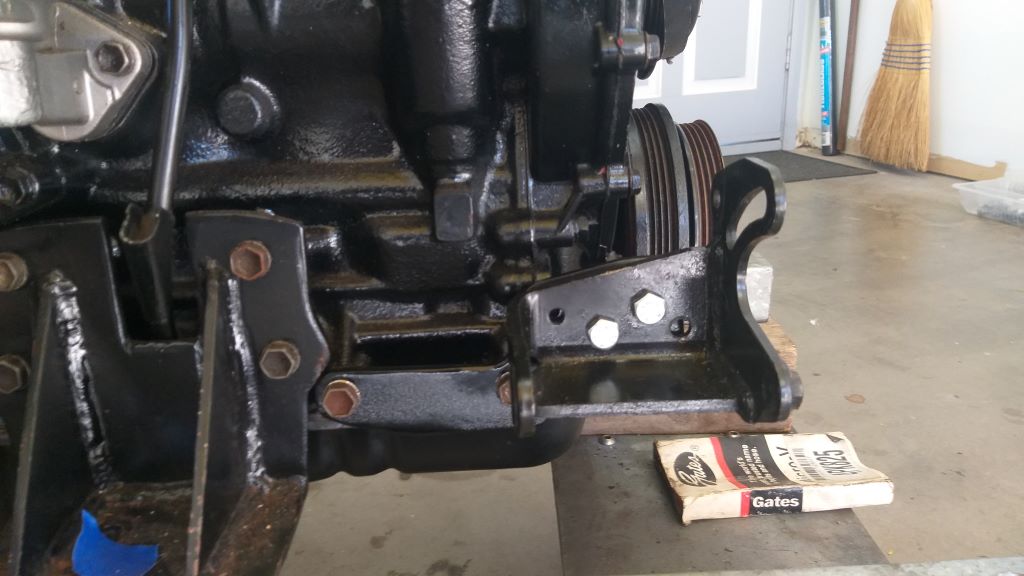
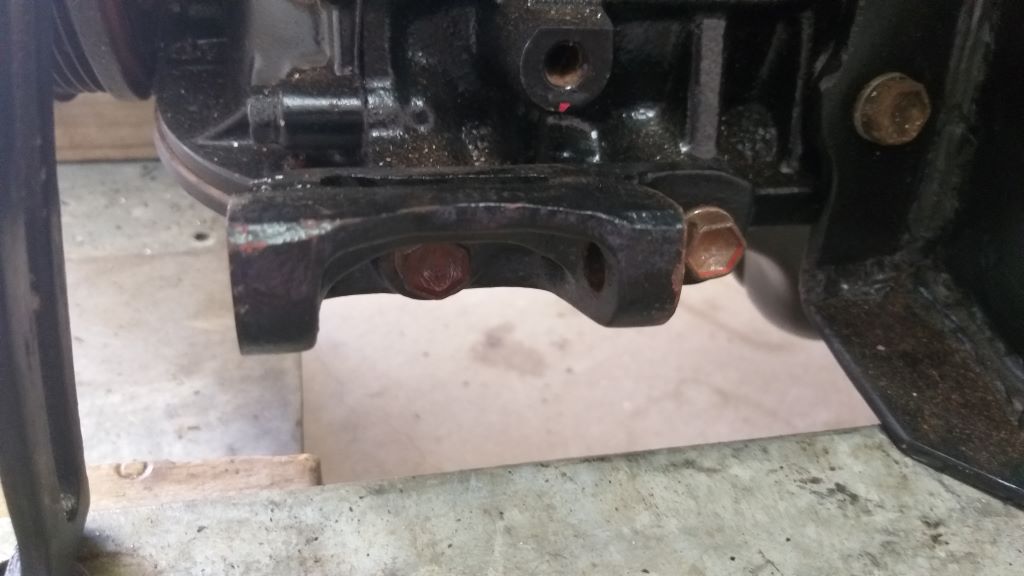
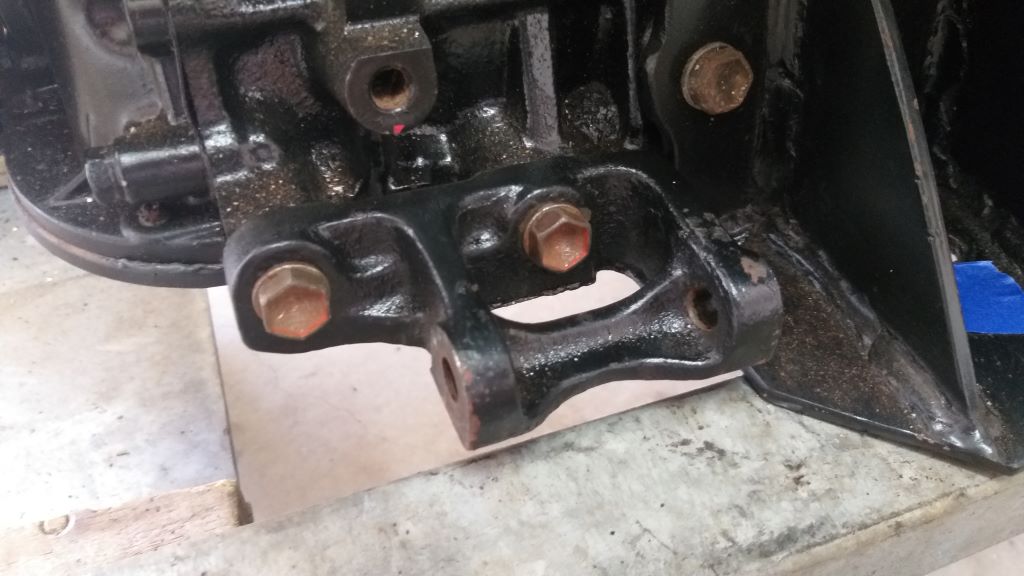
With the alternator pulleys swapped around, I moseyed on over to the 3Y and quickly pulled off its alternator. Offered the Mustang unit up to the Toyota mounting bracket and yeah, nah ..... alignment is way out. Didn't fancy having to fabricate a new mounting bracket so thought I'd take a punt at spinning the Toyota bracket around. First photo is of the bracket in its standard position. Second photo is of the bracket mounted backwards.
-
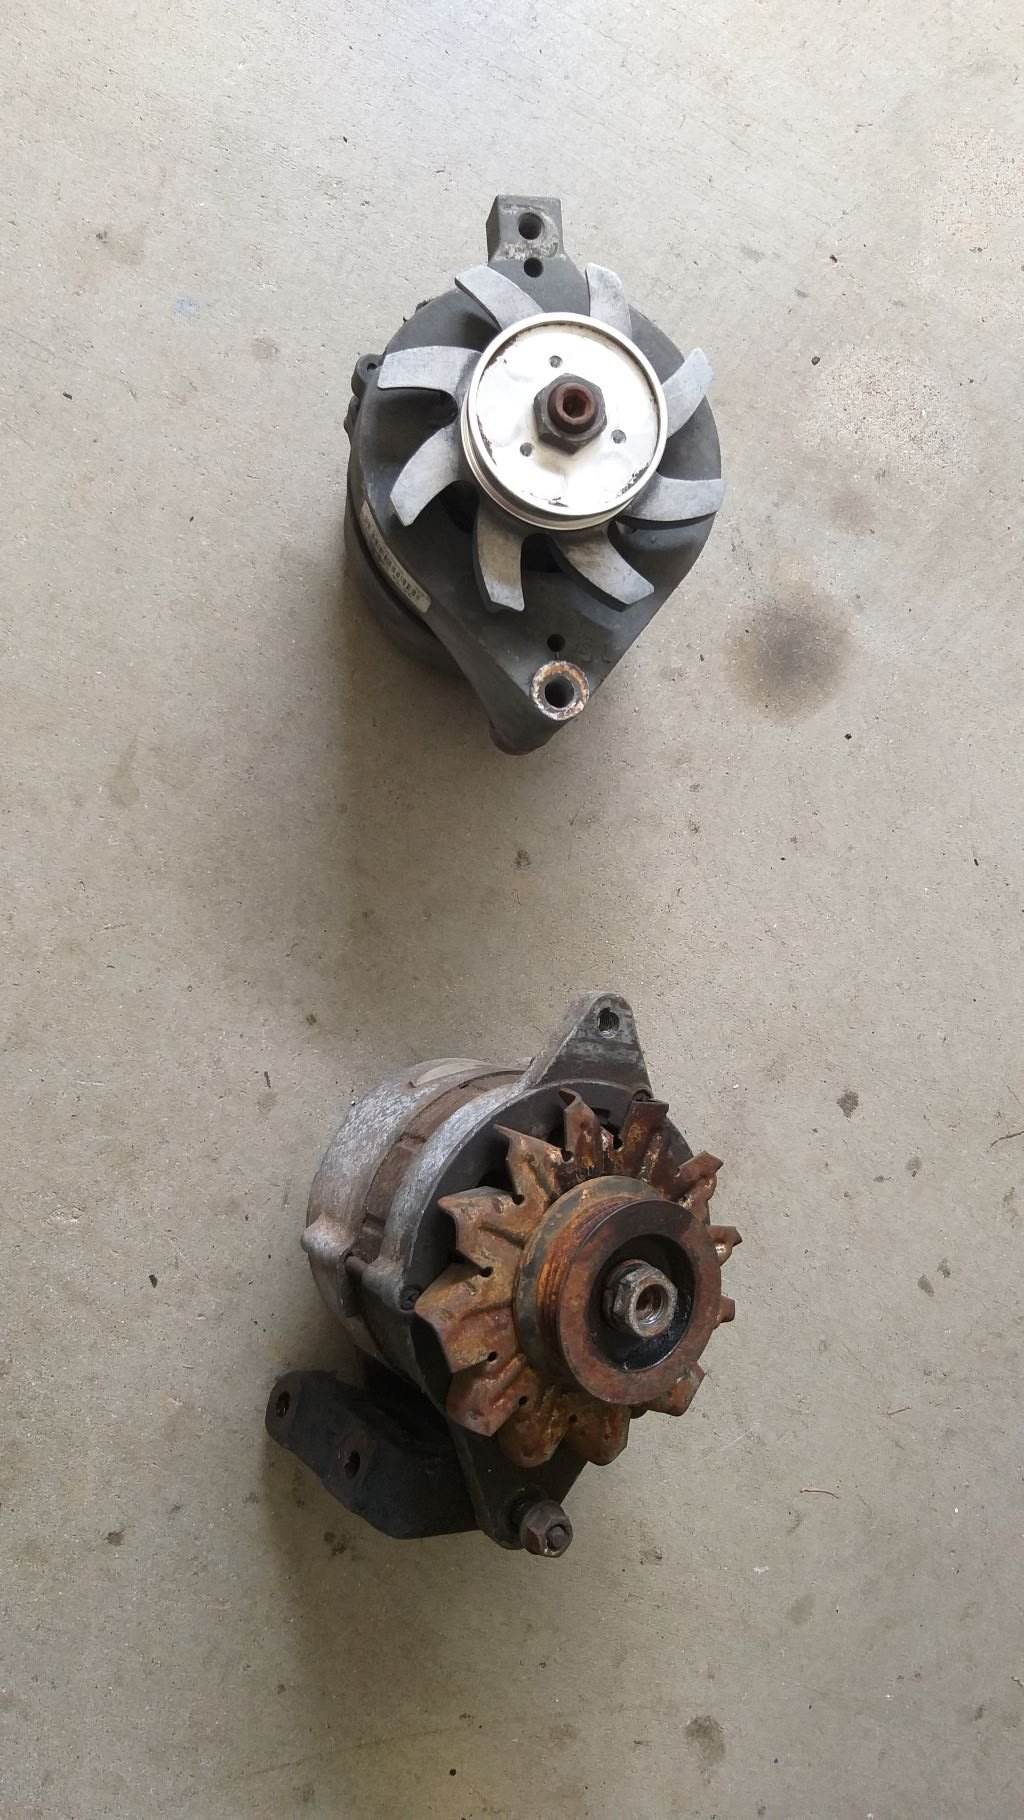
As previously mentioned, I want to replace the standard Toyota 3Y alternator with a higher amperage unit that I can use to power a 12-volt a/c compressor as I don't have enough real estate around the mighty 3Y to run a belt driven a/c compressor. I've just recently upgraded the Mustang to a 140-amp single wire unit and I'm very happy with how that alternator is performing. It was also a fairly decent price, so I thought I'd see what I could do in terms of fitting the same alternator to the Thames. I grabbed my old Mustang unit and sat it next to the Toyota one for a quick eyeball. Comparing the outer dimensions of both units they look pretty close so that is something positive. All that I need to bear in mind is that the new 140-amp unit is slightly longer than the mock up one, but I've checked that out already and I should have plenty of clearance. Next thing to address is the pulley. The Mustang pulley is a single V whereas the Toyota unit is a multi V. Scrounged around in my spare parts pile and found a spare alternator with the correct pulley. It's a bit crusty but nothing a little quality time in my vinegar bath won't sort out. Quickly, swapped the pulleys over and I'm all ready for a test fit. First photo below is of the existing Toyota alternator all bolted up. Second photo is of the Mustang and Toyota units before the pulley swap. The Mustang unit is the top one.
-
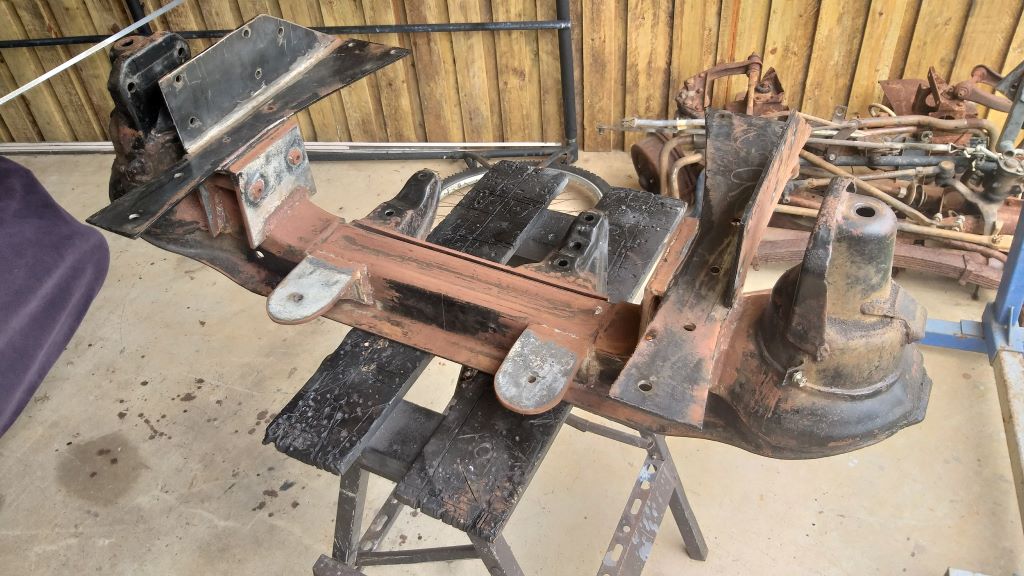
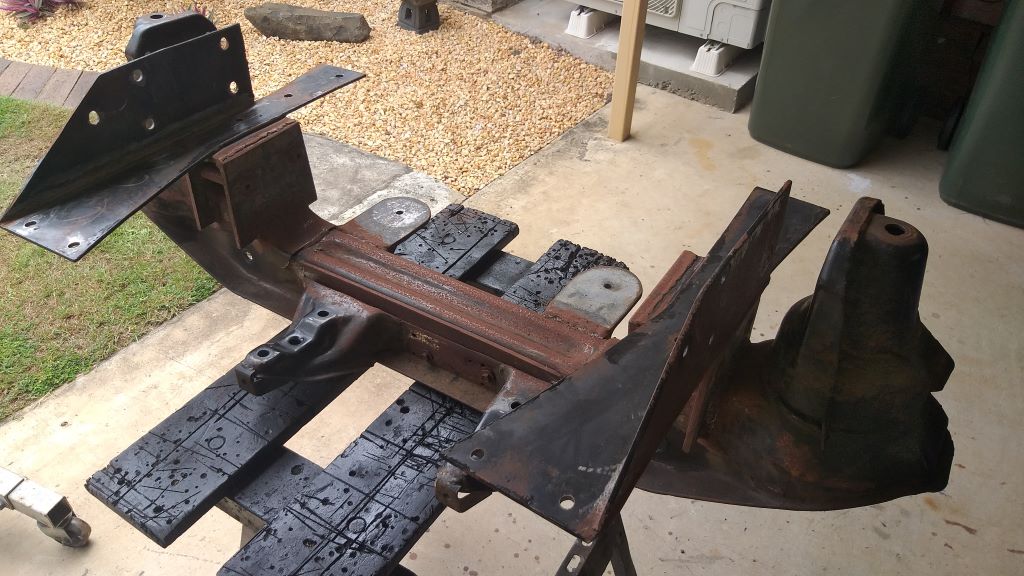
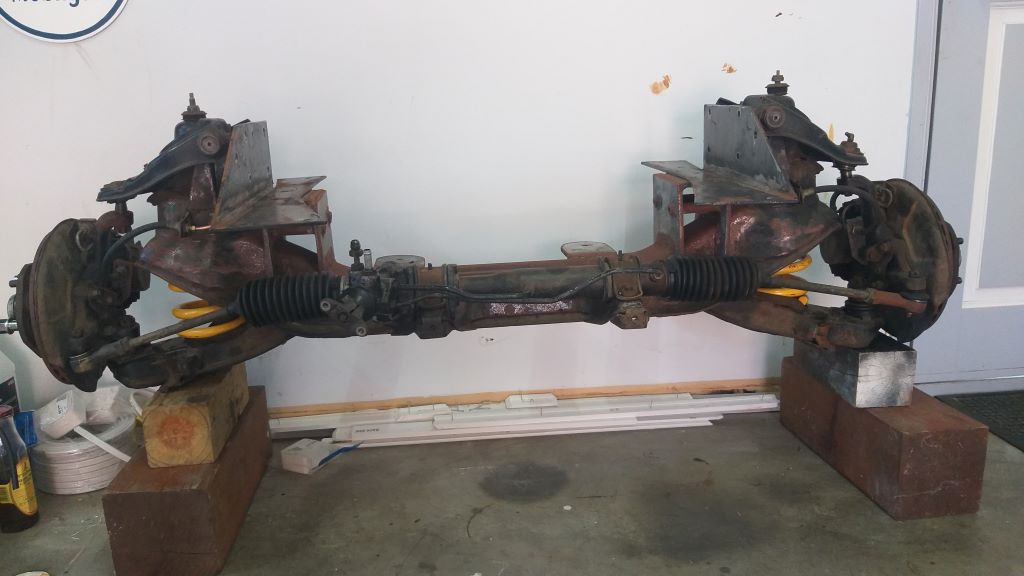
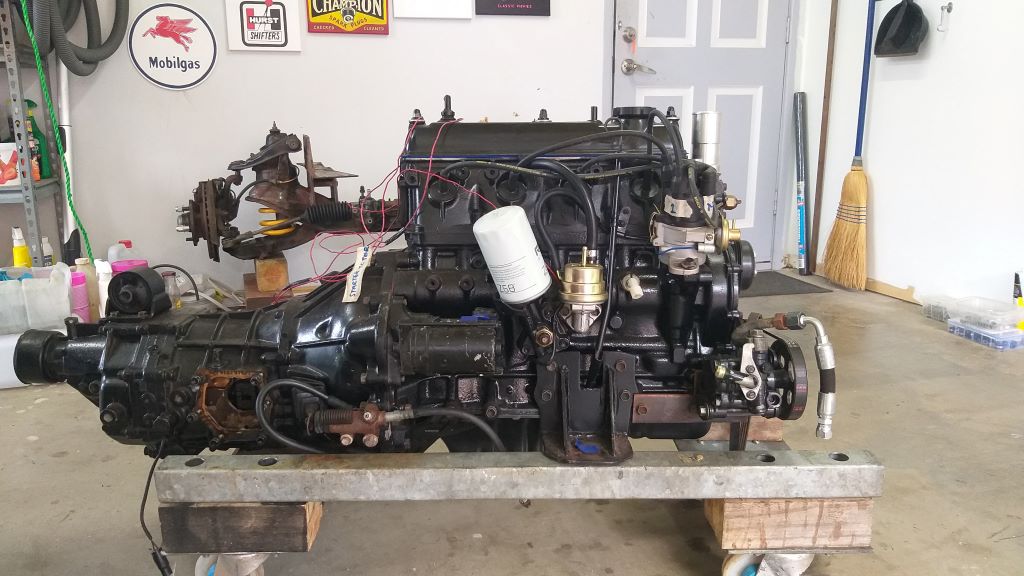
The Captain's Log tells me its day 410 on the Thames van here at Rough & Ready Restos and the engine, gearbox and front suspension are out once again for a few final tweaks. My power steering pump pulley is not running perfectly true, so my fabricated mounting bracket needs a bit of tweaking. At the same time I want to fab up some mounting brackets for a 140-amp alternator as I'm going to need heaps of extra power for the 12-volt air-conditioning compressor that I'm planning to run. The little engine box is pretty cozy so it's a lot easier to work on things out in the floor. The front suspension needs final welding before I can pretty everything up with a lick of paint, but I can't do that until I've had the van on a wheel alignment machine to double check that the front is true, so that's going to need dropping again after the first road test.
- 715 replies
-
- 10
-
-
Go on @yoeddynztreat yourself. Imagine ... no more uneven flares and pipe slippage. I did another half dozen flares yesterday and not one failure.
-
Thanks for sharing. That is really good value for a quality product.
-
Yep, the pipe is copper nickel which can be used here in OZ. I'm assuming from the comment by @nominal that it is a legit option in NZ too. @CUL8R, the new flaring tool is a no name brand jobbie off eBay. Was $46.75 Aus including postage. @yoeddynz, yep with the old tool I suffered quite a bit of pipe slippage. Even tried resurfacing the face of the clamping bit to try to get the tube to hold better, but was still getting mixed results. The clamping power of the new one is heaps better. I've probably done a dozen flares so far and not one failure. On the old tool you had to eyeball the height of the tube sticking above using the little die as a reference. Not always precise especially for an old set of eyes like mine. The new tool has a die that you screw in and then you insert the tube till it touches the die which makes the length absolutely precise every time. I've been holding the tool in a vice rather than using the little handle as I just find it more convenient to have two hands free for the process. I'm definitely sold on the new kit. Only issue is it will only do 3/16 so I'd have to buy a separate tool if I wanted to do other sizes, but I reckon for the money it's a really good option over the other style.
-
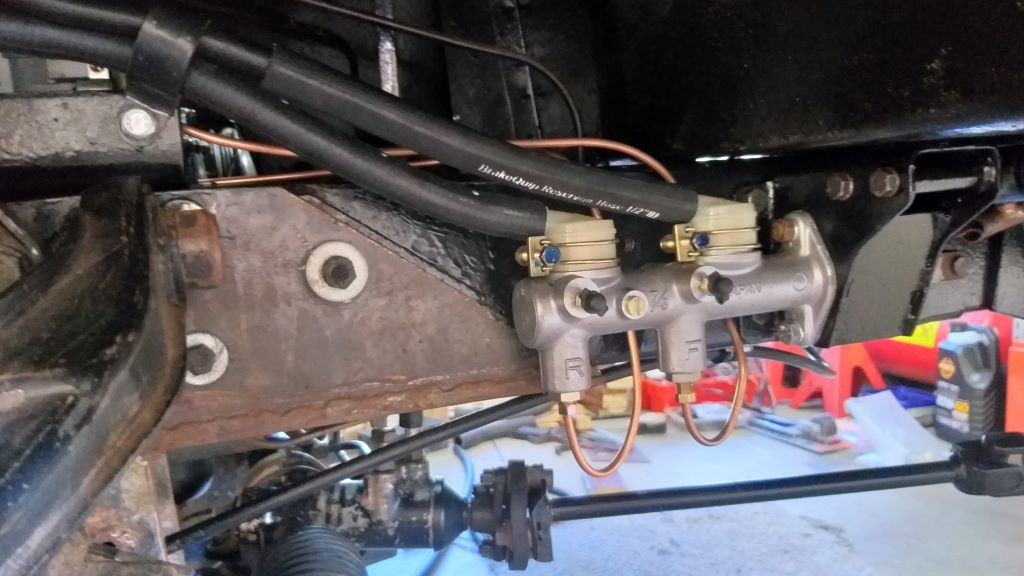
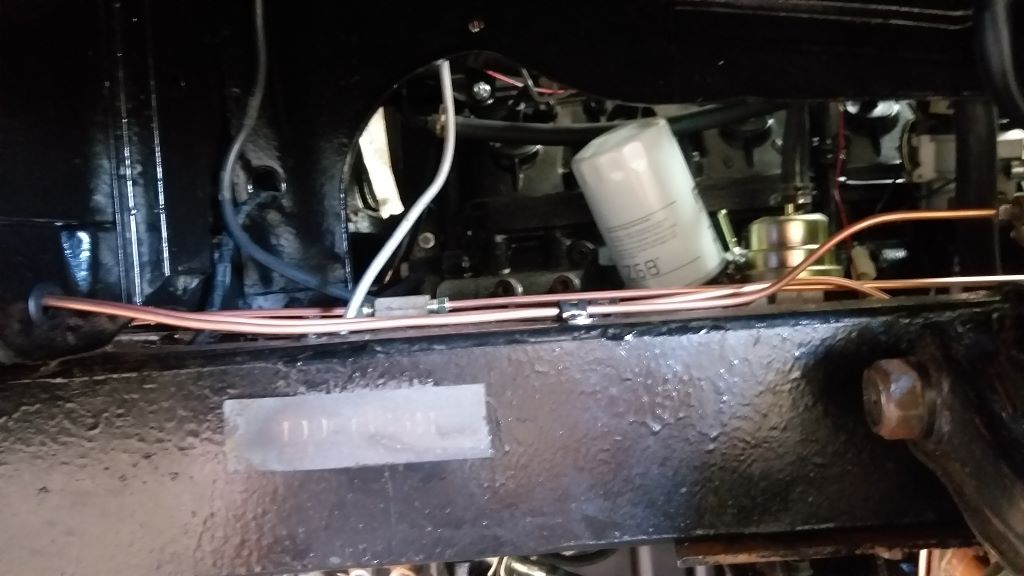
Some candid shots of my new hard brake lines that I whipped up earlier today. Should finish off the rest tomorrow.
- 715 replies
-
- 12
-
-
Yesterday my new brake pipe flaring tool pitched up and I've got to say that this tool is a vast improvement over my old one. My old tool was the one with the small push in flare die that uses the horseshoe shaped screw press. The new tool is a hollowed-out block style with the double ended screw in die. I always found the old tool a bit "hit or miss" but with the new tool I'm consistently getting perfect flares so it's obviously idiot proof. AAA+++ would happily trade again. Old tool is the one in the black box:
-
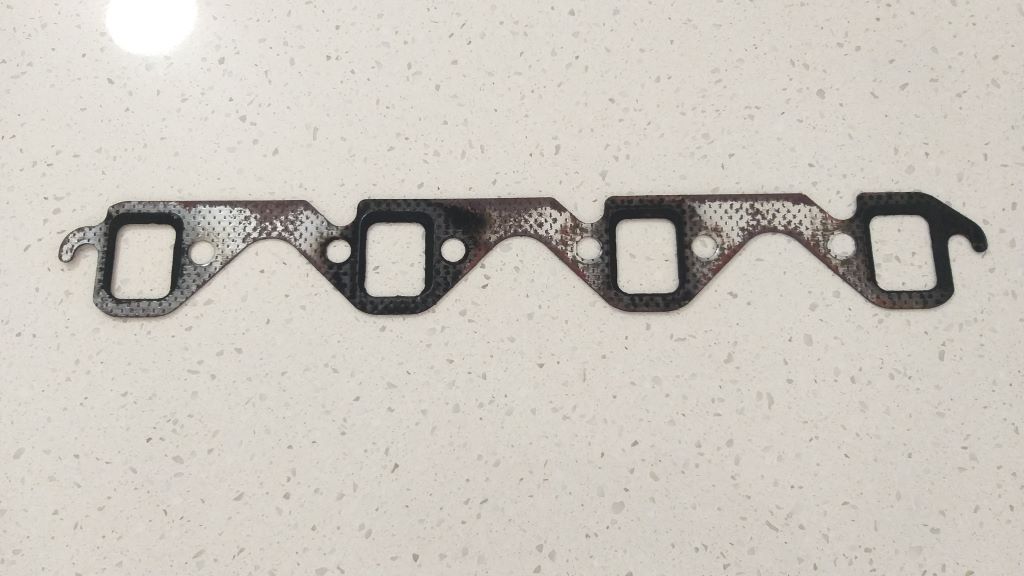
I've spent the last couple of weeks driving the tits off the Mustang. The Fitech EFI has performed flawlessly so far and I'm consistently getting AFR readings in the mid 14s during cruising. Pulled the spark plugs for a gander and some are a lovely "cooked chook" colour with some of the plugs showing up slightly leaner. It's still too early to tell what the fuel consumption is like, but judging by the condition of the plugs it's got to be way better than it was. However, I'm still experiencing sporadic fumes inside the cabin which is annoying. So back to the drawing board to track down the cause. Thought I'd focus on the exhaust system, or at least the parts that I haven't touched thus far. Started off by pulling the driver's side exhaust header. Some of the bolts were not that tight which got me excited. Looking at the gasket once I got it out showed definite signs of blow by, so I was pretty confident that I had maybe found the culprit. Chucked in a new gasket and tightened up the bolts properly. I did the other header gasket as part of the O2 sensor install so I knew that side was good. Replaced the flange gasket too. Took the car out for a quick squirt and it's definitely a lot better than it was, but you can still get a good whiff of fumes now and again especially when she is up to operating temp. I've checked my PCV valve and hose and they are all good, so I'm a bit stumped at the moment. Suggestions on the back of a sealed envelope will be gladly accepted. Thanks for reading.