


Flash
-
Posts
1615 -
Joined
-
Last visited
-
Days Won
2
Posts posted by Flash
-
-
1 hour ago, Tiger Tamer said:
Me again. My 2c
I would think it would be the shocks as it's their job to dampen the springs to stop the bounce of the springs.
I see the King springs are 25mm shorter and probably depending on the suspension type can lower the front by twice the amount compared to the longer springs. Double A arm suspension seems to do this ( GM US cars do this).
I cut the Hillman springs 25mm and got a less than 50mm drop but more than the 25mm, but like you say cutting can increase the stiffness.
The spring rate of the two spring types you have is much the same, as they are very similar in coil dia, then perhaps that is why you have got a bit more than 50mm.
With the Tiger I went from the stock springs which I can't remember the spring rate, to a much stiffer 450lb springs. They were quite a bit shorter but compressed a lot less. Strangely the Hillman springs have a larger dia wire than the Tiger. Probably why they sit so high in the front.
If the Kings are giving you the correct ride height then maybe just some good shocks will fix it.
I am no suspension tech so I would be asking them but would be interested in what they say if you do.
Thanks for this @Tiger Tameras always I really appreciate you taking the time to share your experiences, thoughts and suggestions. As they say a problem shared is a problem halved and being a team of one, I sure am grateful for your input. I'm probably showing my vintage here, but it has been almost 40 years since I last trimmed a set of coil springs (out of a Consul 315 if you can believe it) so I put a "how to" question to my good mate Google and in one of the Youtube clips that came up the chap mentioned that if you want a two inch drop then cut the coil down by an inch, so your result when you did your Hillman sounds about right.
I think your suggestion regarding a new set of shocks is a sound one and will be a worthwhile investment whether if fixes the bounce or not.
By the way I've spent a good bit of time looking at the build thread on your Tiger on the UK Tiger forum and the quality of your restoration looks absolutely amazing. Your award was certainly well deserved.
Thanks again for the input.
-
 1
1
-
-
I'm still fiddling away with the carby hat and will provide a further update on that subject once I have something reasonable to share, but in between I've been playing around with front coil springs.
Yet another thing that I noticed during my drives around the neighbourhood is that the suspension feels really bouncy, well a lot more bouncy than I was expecting. The front shocks are the original units from the Starwagon donor van and they test okay so my current focus is on the front coil springs and my initial thoughts are that they may be a tad weak. The coils currently in use are a set of King Springs out of a Holden HR ute.
I've still got the original Mitsi front coils tucked away in the shed, so I figured I'd swap the King Springs out for these just to see if the ride improved.
First step was to give the old springs a bit of a clean-up just so that they are nicer to handle.
Took to them with a wire wheel and they look and feel a lot better.
Chucked them in and let things settle overnight.
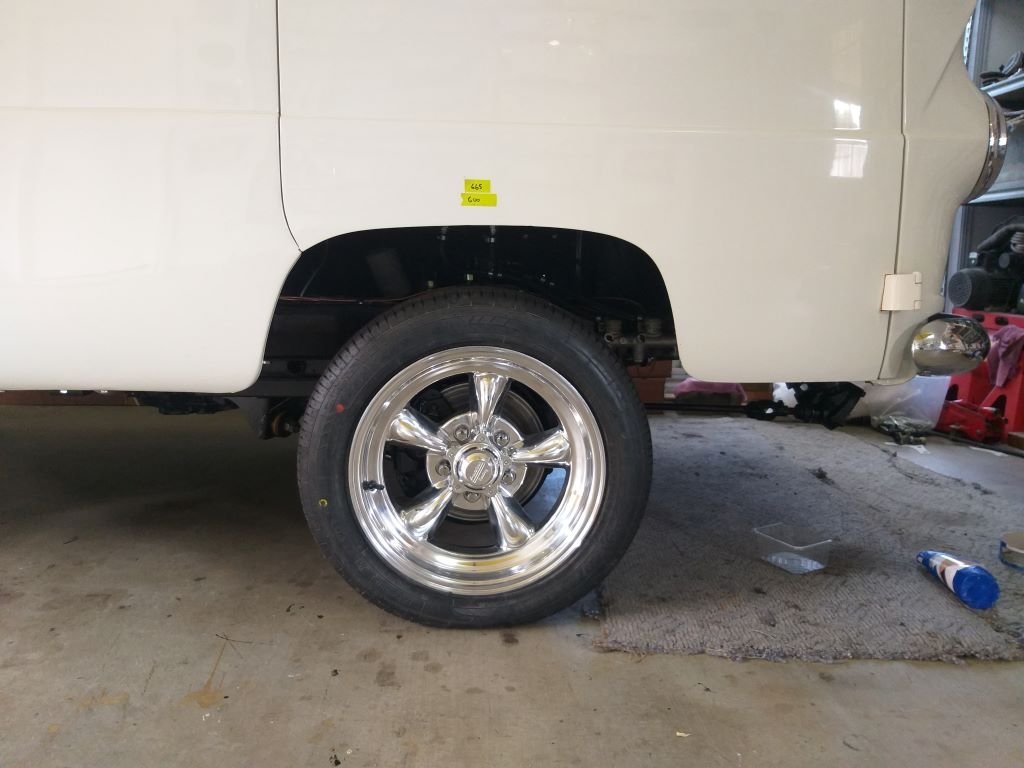
First thing I noticed is that the front ride height is absolutely nasty with huge fender gaps up front. Overall look now resembles a gasser.
Anyway, looks aside I took the van for a run around my usual test track and the suspension bounce is no better.
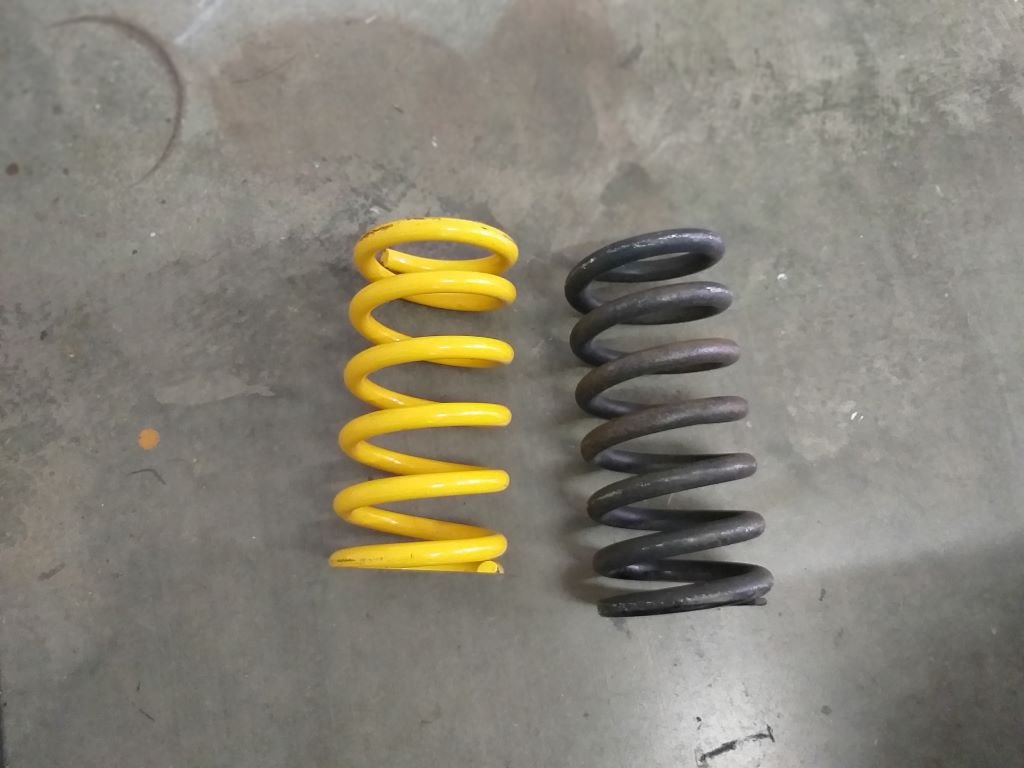
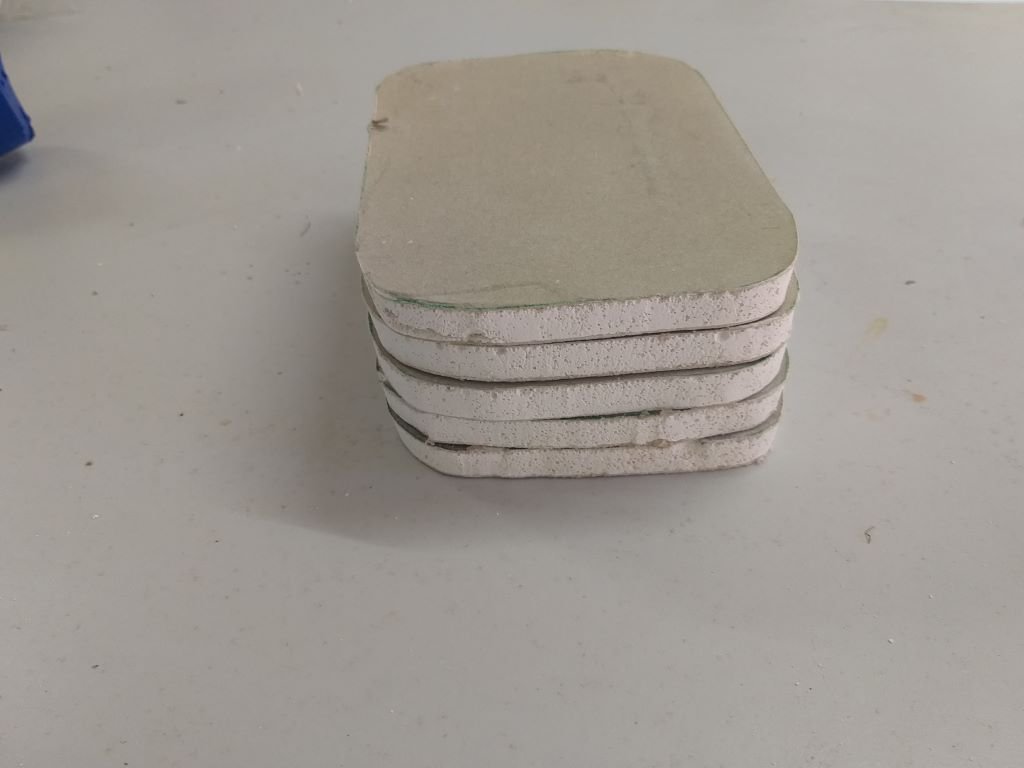
Whilst I had both loose springs side by side I took some measurements and the results are quite interesting.
Overall spring height (loose) - King 250mm, Mitsi 278mm
Wire diameter - King 16mm, Misti 17mm
Coil o/d - King 125mm, Mitsi 125mm
Coil i/d - King 93mm, Mitsi 92mm
So pretty comparable sizes between the two, but what is interesting is the difference in ride height between the two:
Measurement from floor to top of fender gap: King 600mm, Mitsi 665mm
Since the difference in overall loose spring height is only 28mm, the height difference under full van weight is 65mm which tells me that the King Springs are compressing heaps more than the original Mitsi springs under load.
So, where to go here.
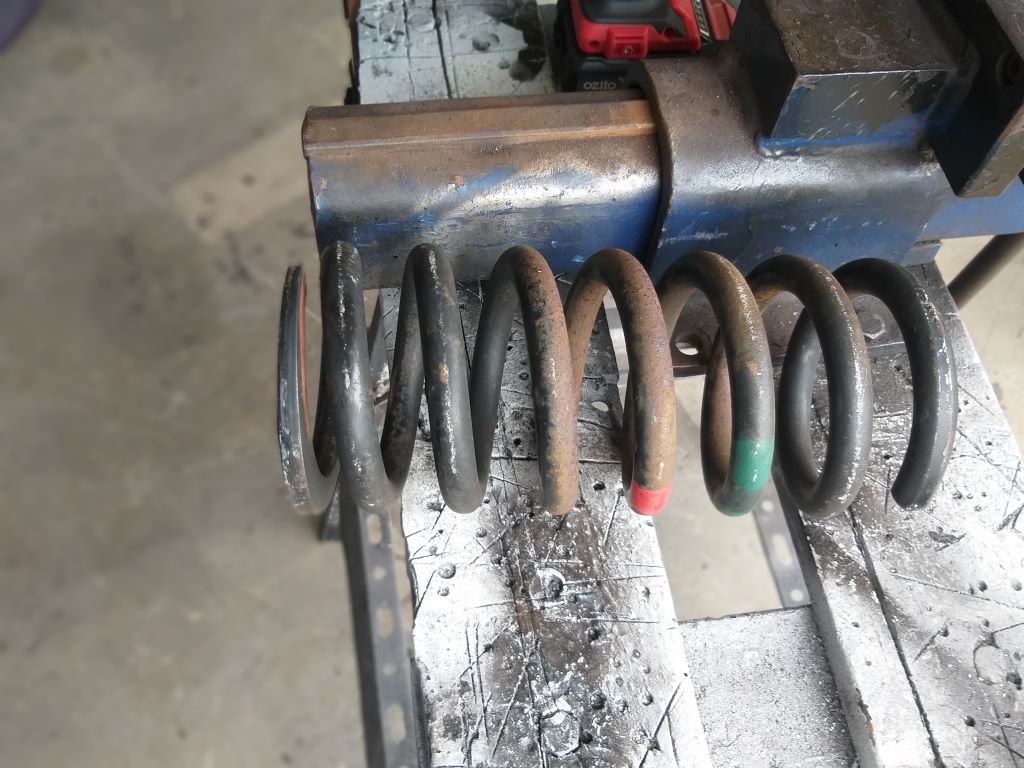
Well, I'm not exactly sure. I could chuck the Kings back in or I could give the Mitsi units a Makita hair cut to get the van down to the same ride height, the theory being that cutting out a coil or two might make the Mitsi units stiffer.
Whether that will sort out the bouncy feeling I'm not sure.
Perhaps some stiffer front shocks are required.
I'm really just guessing at this stage.
Would love to hear the opinion of others on this subject, so feel free to share your thoughts.
Thanks for reading.

-
6
-
-
2 hours ago, Tiger Tamer said:
Would a top hat for a blow through Weber turbo set up work for you.
DGV Turbo Plenum (turbogemini.com)

Thanks for the suggestion @Tiger Tamer. I did look at this but unfortunately not. There just isn't enough headroom available to get the "pot" section over the choke tubes without a bit of butchering.
I'm going to have to make the sides in two halves (picture a U shape lying on its side) that I can slide in on either side of the choke tubes. I'll use two of the mounting screws on either side of the carby to hold the sides to the carby and then the existing lid of the performance air filter to hold the top of each section together. Hope this makes sense. It kinda makes sense in my head, but only time will tell whether I can get it to seal properly
-
2
-
-
Carby top hat - Chapter 2
Some of you may be wondering why I don't just run the performance air filter as is.
Two reasons really.
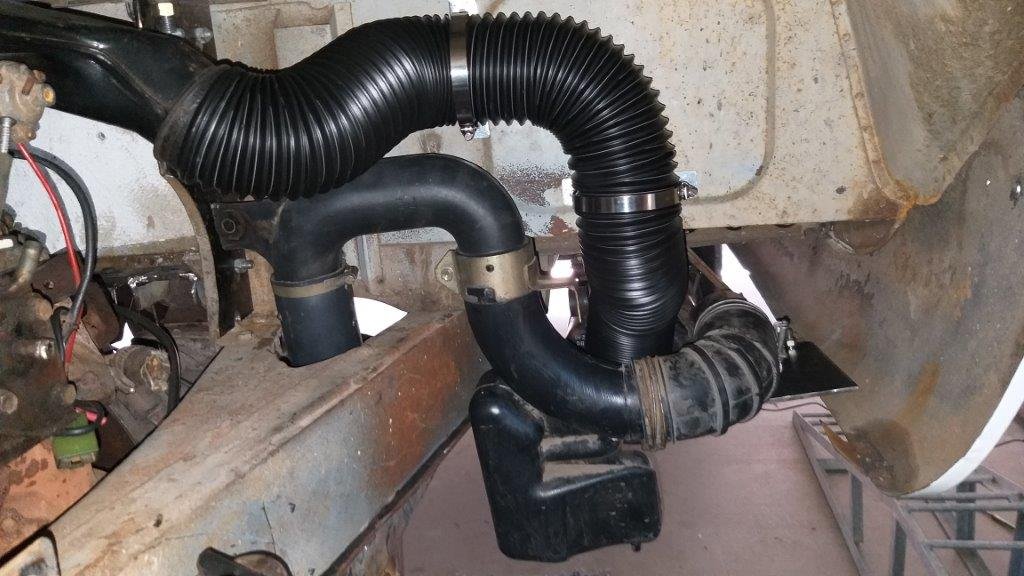
First up I want to keep the Hi-Ace factory setup that has a remote air box with an under-floor air intake as I'm keen to get as much cool air into the carby as I can.
Secondly although there is enough space between the top of the carby and the cabin floor to accommodate the performance jobbie, this really is a myth as there isn't enough clearance to get the filter cartridge over the choke tubes. I'd have to remove the whole carby from the manifold every time I wanted to swap out the filter. Not practical at all.
Anyway, getting back to how I'm going about making a new top hat:
Due to its complex form there is no way that my rather mediocre metal fabrication skills are up to the task of replicating the Toyota top hat. Further to that there is just no fun in outsourcing the task, so I'm currently leaning towards making something myself using fibre glass.
First step is to make a buck .... jeez look at me coming up with the correct technical term. One would almost think I know what I am doing.
Both bucks will end up on the inside of the moulded fibreglass, so they need to be soft enough to break out afterwards.
Started off with a few offcuts of plaster board and some liquid nails and made myself a little GYB sandwich.... yummy.
I'll let the glue go off overnight and then smooth out the edges.
A rattle can lid is the perfect diameter for my flex tube once I've chucked a few layers of fibre over it, so I ended up rolling a thin piece of cardboard around the lid and shaped it into roughly what I need.
Both efforts look as rough as guts at the moment, but it's still early days in the process.
I've got enough cloth, but I need to head into town for some fresh resin as my tin has gone hard. So that is the plan for tomorrow.
Thanks for looking.
-
9
-
-
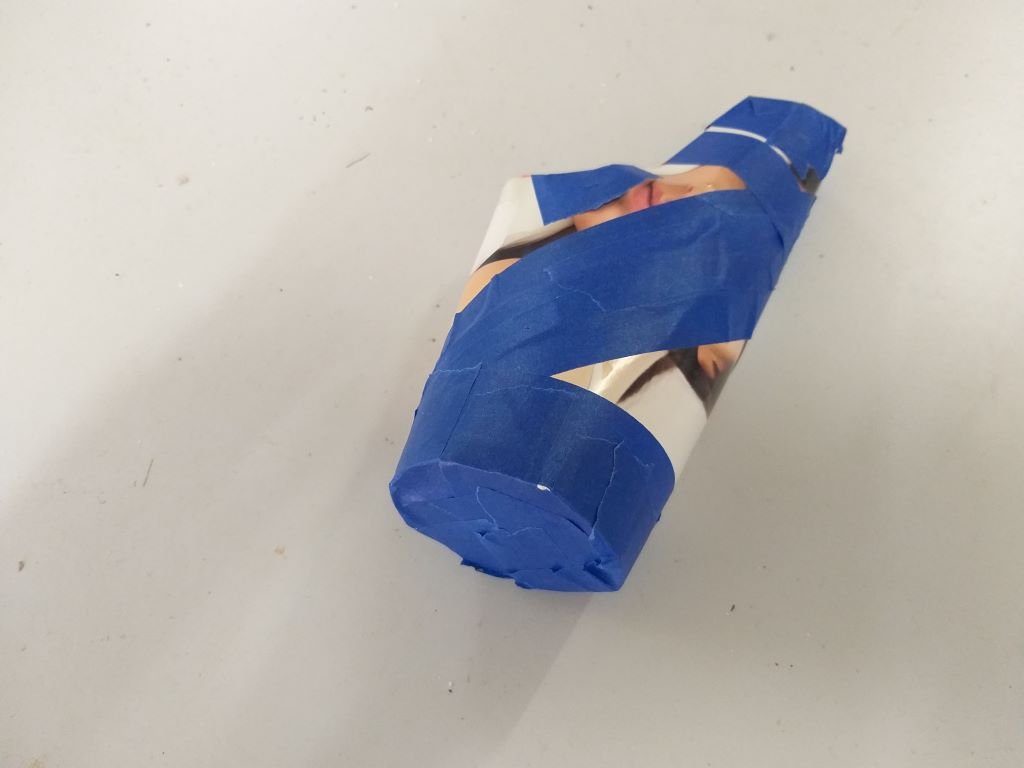
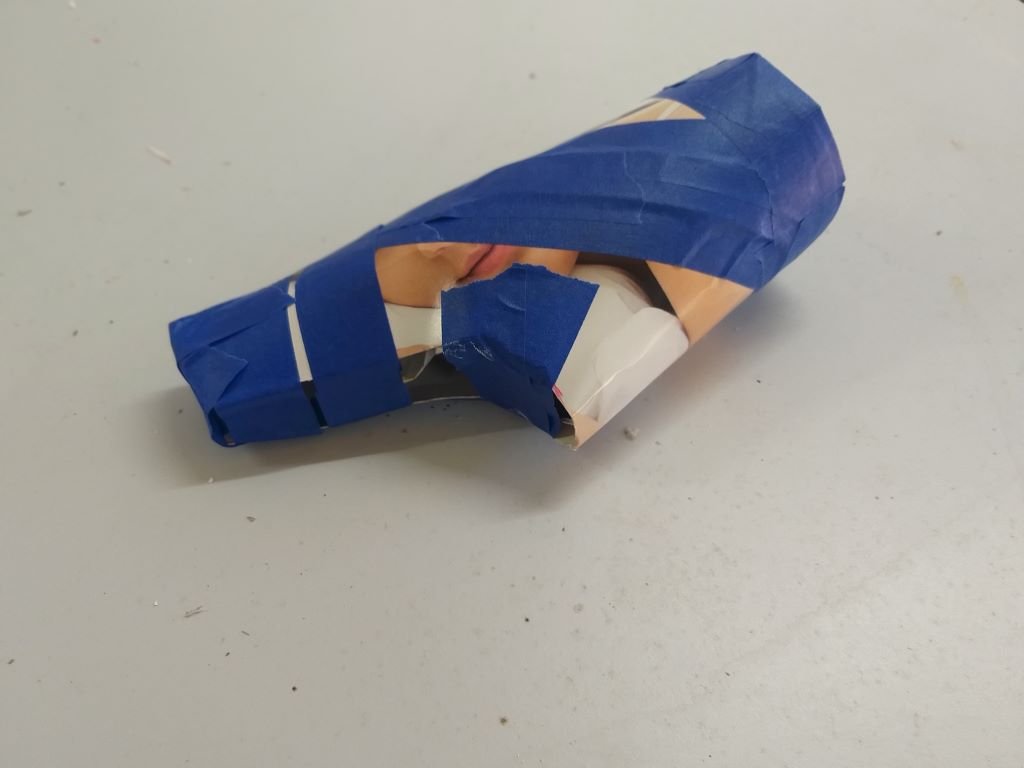
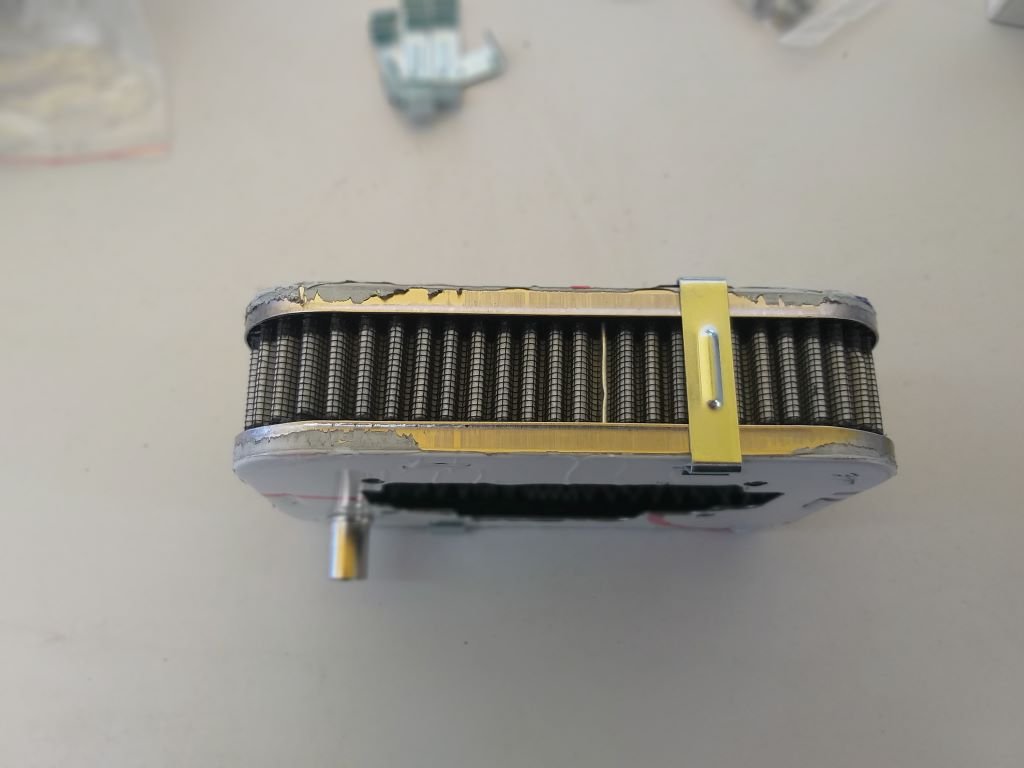
Carby top hat - Chapter 1
Time to crack into an air filter setup for the new carby.
The kit from Pro-Carb included one of those "bolt on" performance air filters which I knew I wasn't going to use.
Looking closely at the factory top hat that worked with the original Aisin carby I realised that due to the height of the choke tubes on the FAJS its way to big a job to modify this to fit.
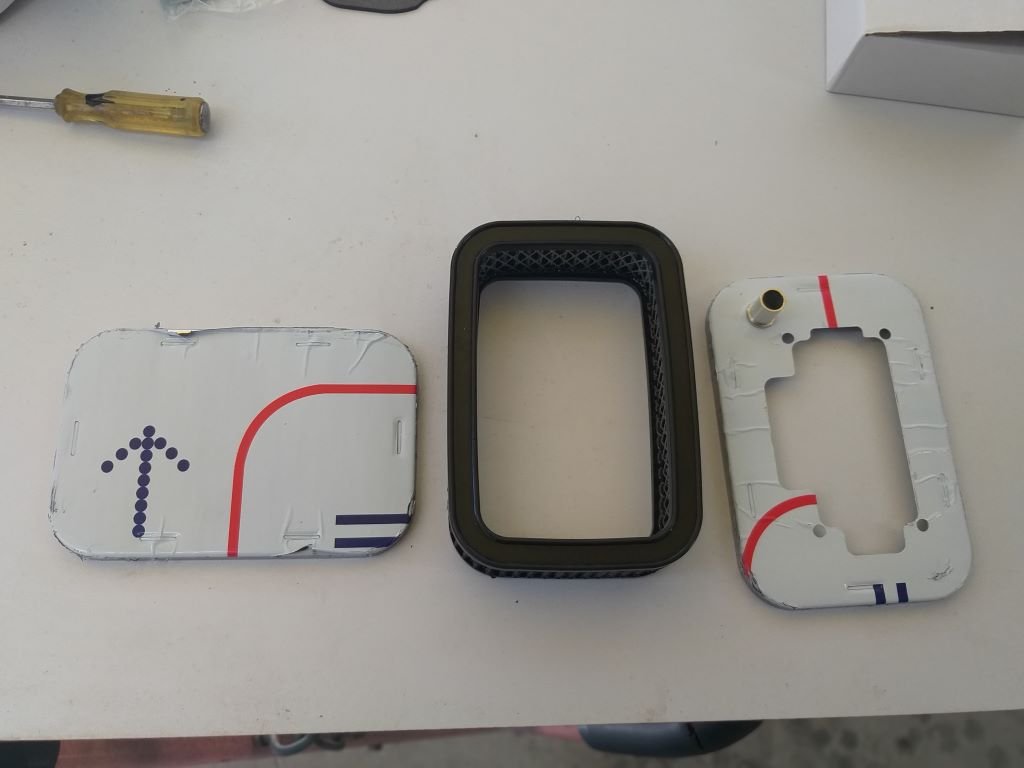
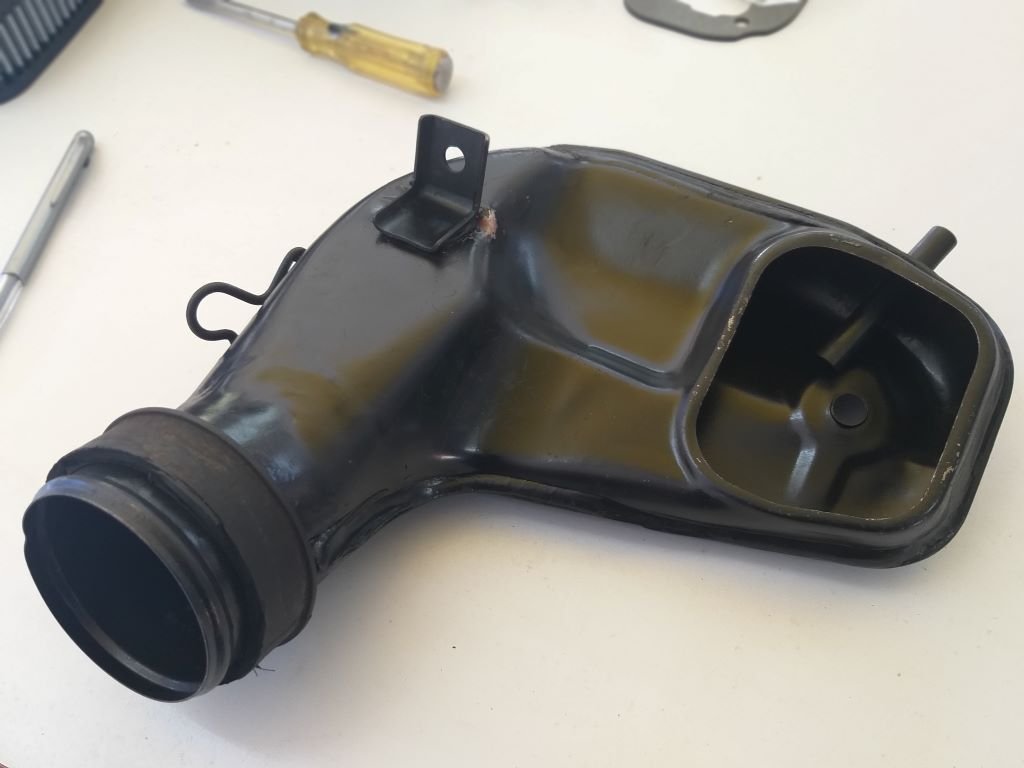
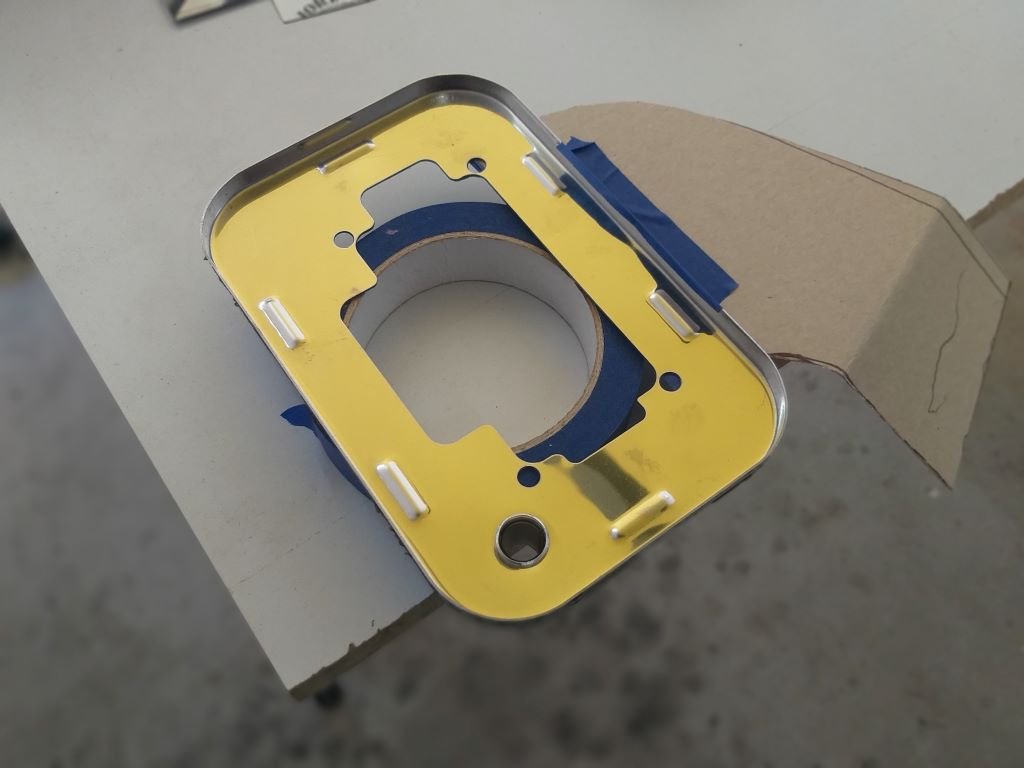
So, my current thought is to modify the supplied performance air filter to act as a top hat. The loose plan being to substitute the filter portion with a sealed surround and then hang a round outlet off the side of the housing that I can attach my flex tube to.
A few photos of the parts involved plus an old photo of my current "under floor" setup for reference purposes:
-
6
-
-
- Popular Post
- Popular Post
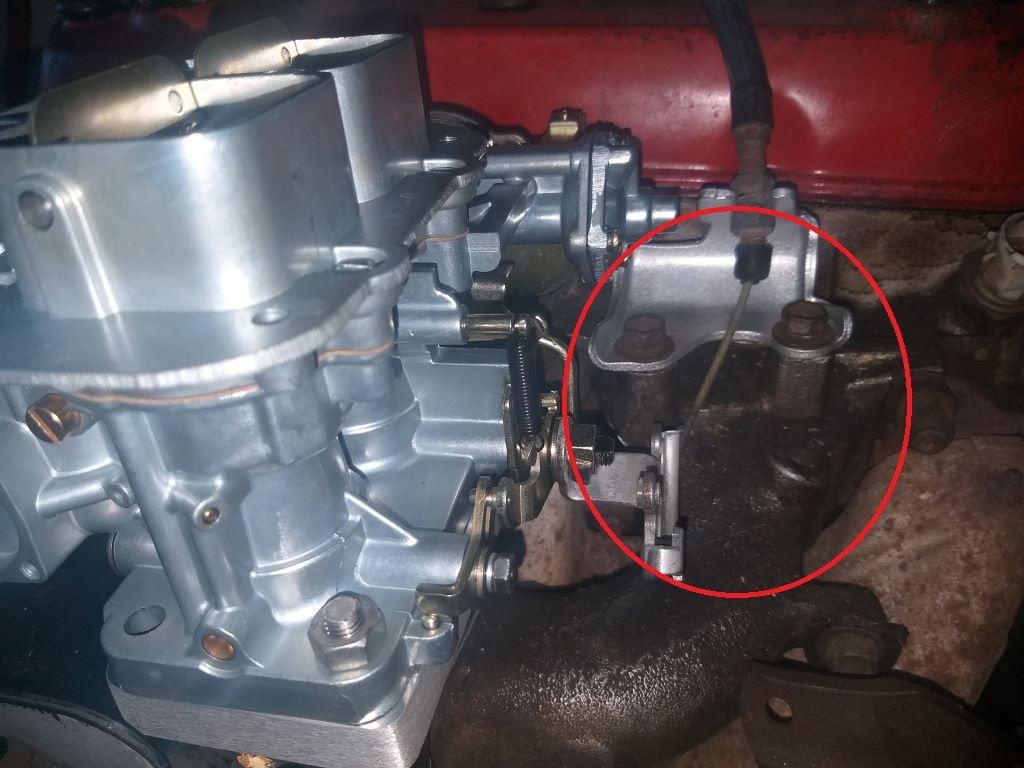
Carby Replacement - Chapter 7
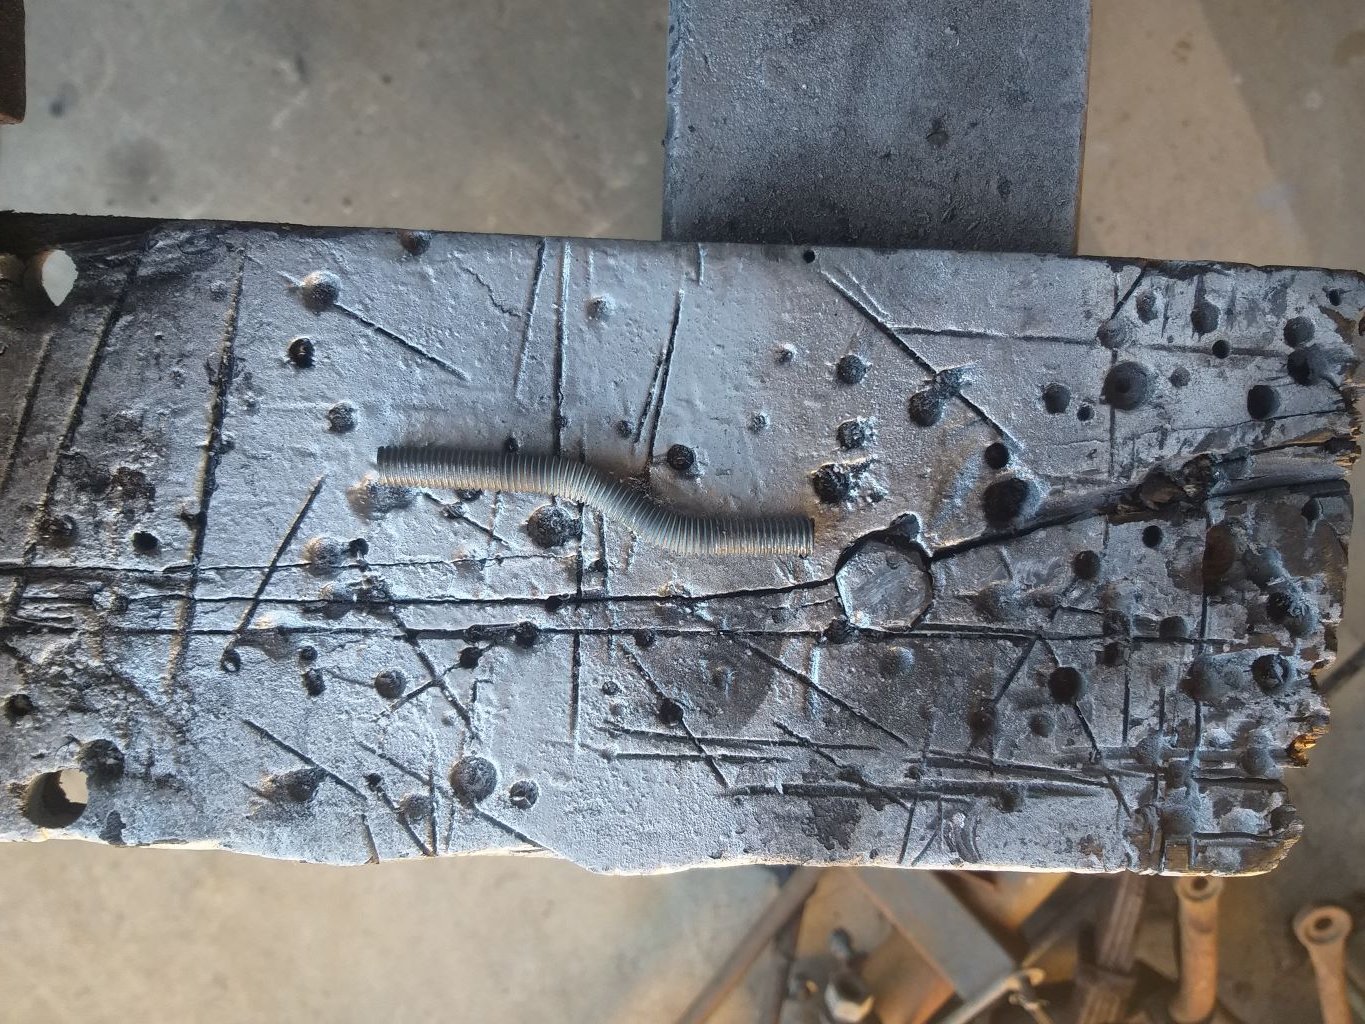
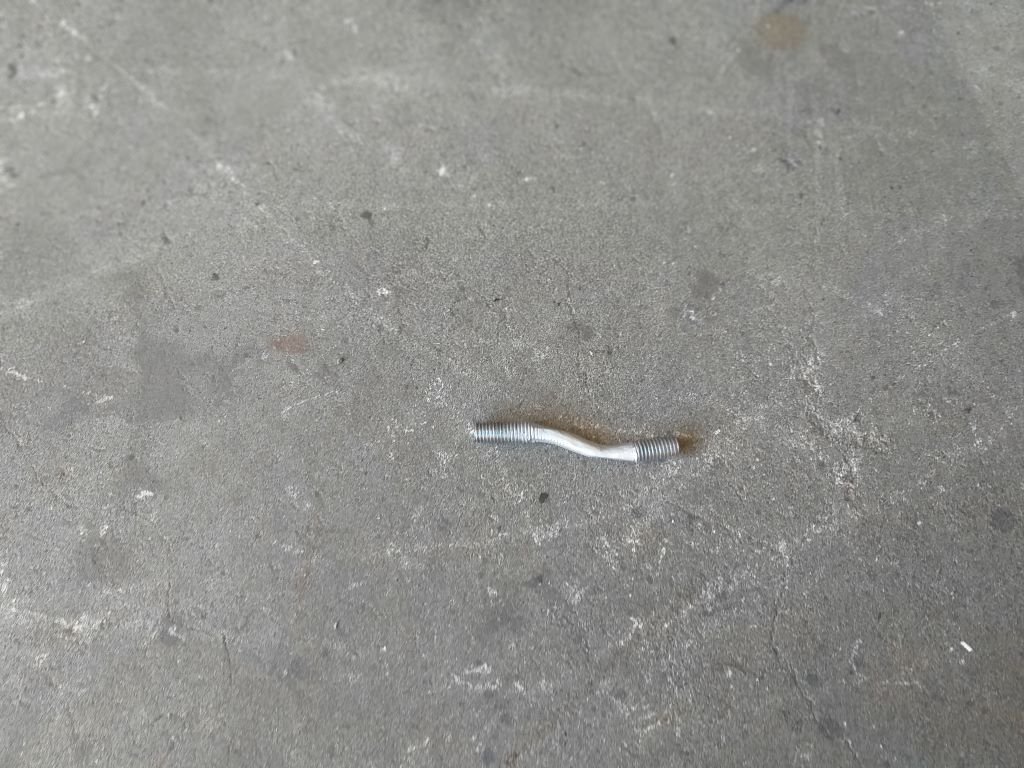
Time for me to put on my big boy pants and tackle that offset mounting stud.
Rummaged through my box of spare bolts and found a nice long fella with the correct thread. Snipped the head off, chucked two nuts on either end and locked them up. With one end fixed in my vice I then applied a bit of heat to the centre of the thread. When it got nice and toasty, I put a socket on the pair of nuts at the loose end and gave my breaker bar a bit of a shove until I ended up with a bit of spaghetti that looked something like the original offset stud.
Let everything cool off and then took to the squiggly bit of thread with my angle grinder as it wouldn't fit through the adapter plate as is.
Took a few goes till I got it right.
Not the prettiest looking thing, but it is functional, and all of the ugliness gets hidden away.
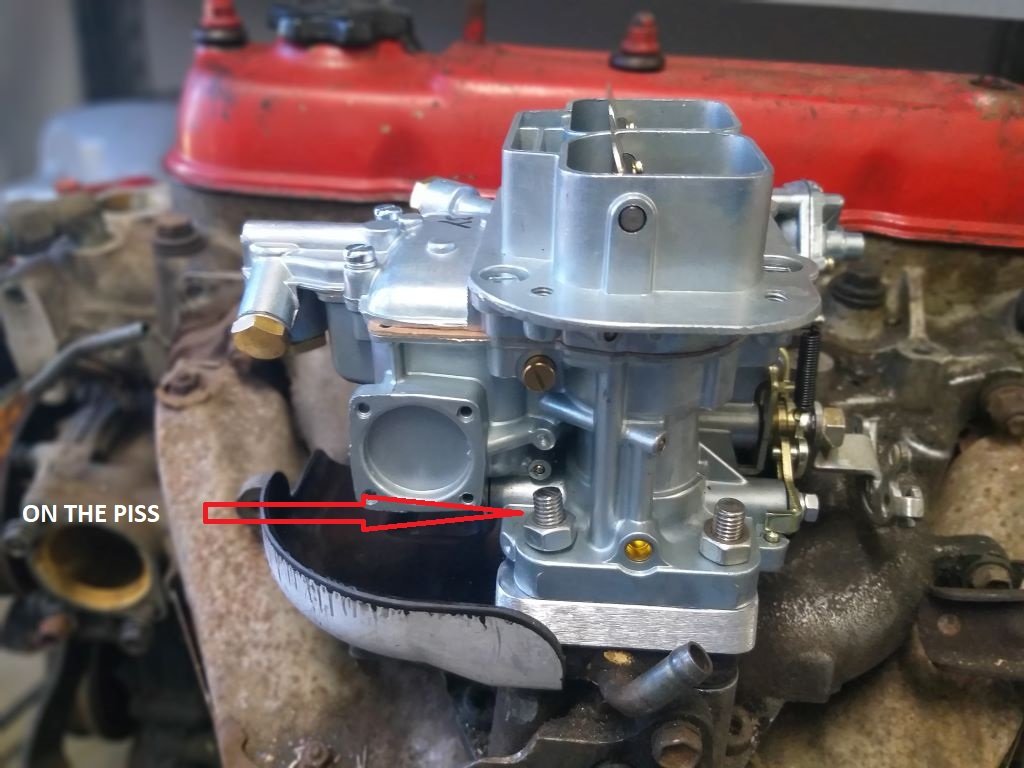
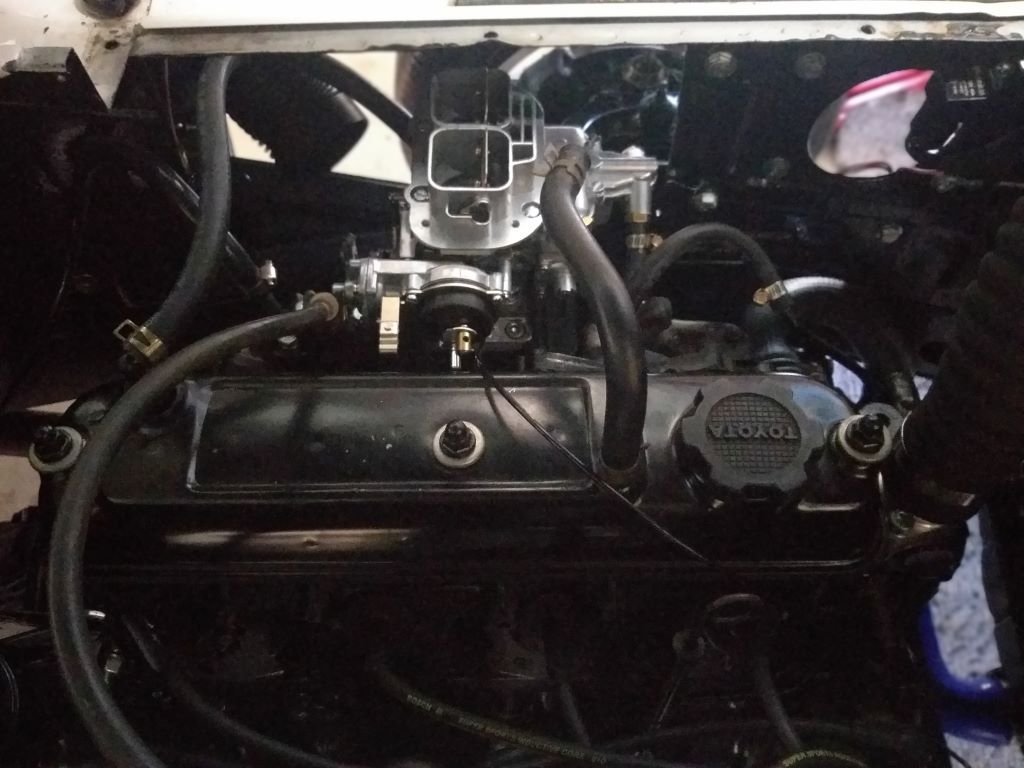
Final test fit showed the fixing nut slightly on the piss, but thankfully I was able to tweak that without breaking the thing. Gave it a spritz of galv paint and then transferred the whole setup across to the Thames.
With everything connected up I gave her a crank to suck through some juice and after a few cycles she fired straight up. Idles nicely and no longer smells of unburnt fuel, so I'm a very happy chappy.
I'll chuck in the choke cable first thing tomorrow and then the next job on the list is to fabricate a top hat so I can plumb in my remote air filter.
Thanks for looking.
-
10
-
- Popular Post
- Popular Post
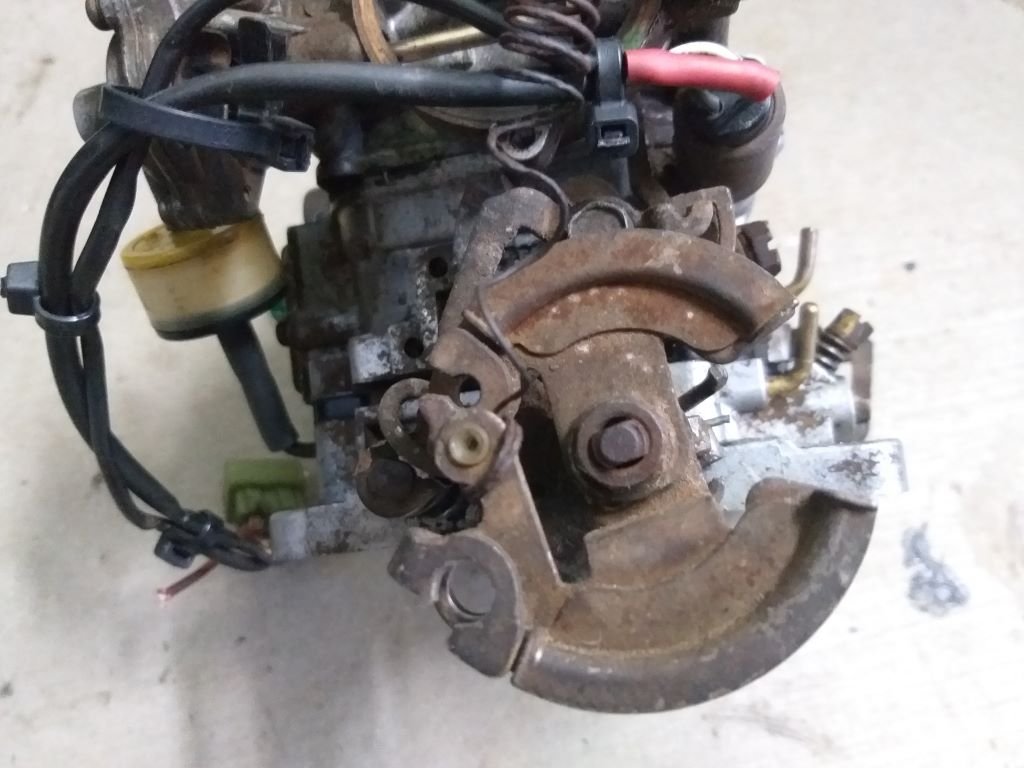
Carby Replacement - Chapter 6
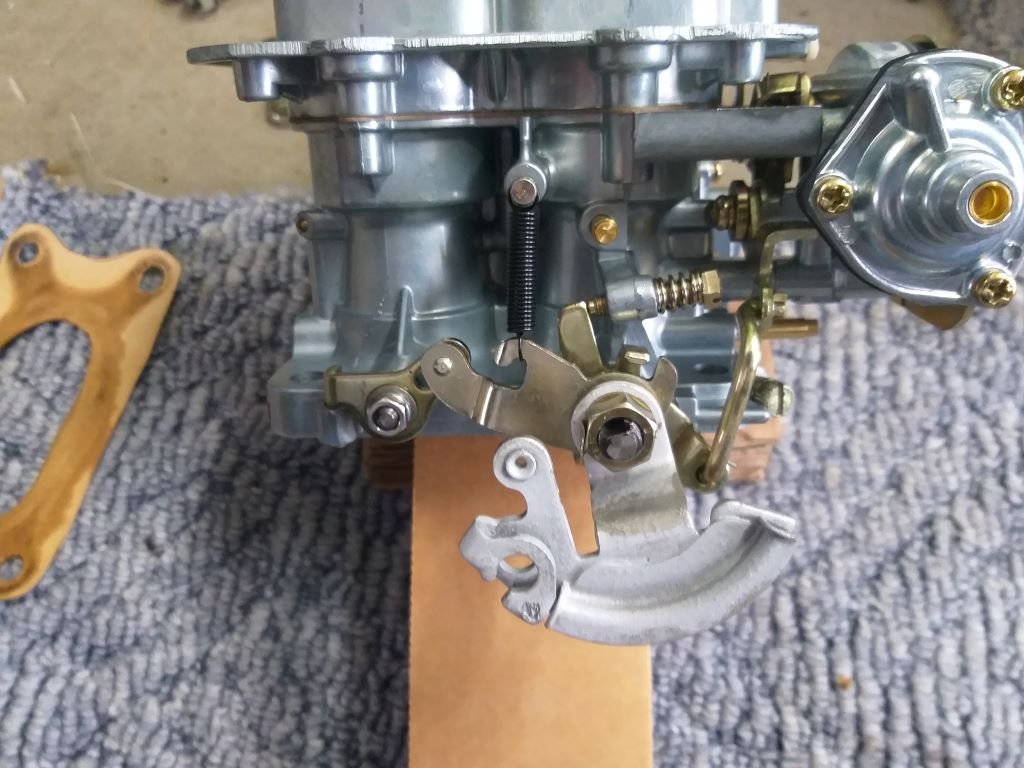
It only took me two goes to fabricate a functional offset bracket to sort out my accelerator cable alignment issue.
Gave it a lick of paint yesterday and let it dry overnight before bolting it on.
Photo of the successful candidate in situ:
-
11
-
6 hours ago, 87creepin said:
I did the mechanic course there about 7 years ago. Also total noob level, mums who just wanted to do their own servicing rather than get shafted by mechanics. I lasted maybe three sessions.
Yep, I can relate to your experience. Most of the guys on my course were just there to make use of the equipment to do their own welding projects. I got to play around with a plasma cutter and an oxy acetylene setup which I hadn't tried before, so it wasn't a total waste, but I wouldn't trade again.
-
4 hours ago, locost_bryan said:
Onehunga High School do an 8 week WELDING AND METAL SCULPTURE course.
https://www.adultlearn.co.nz/course-details.php?cid=302
Rutherford College also do welding courses, 3 week beginners
https://www.rutherfordcomed.co.nz/course-details.php?cid=200&cat_id=7
I attended the Onehunga one about 6 years ago. Okay for total noobs who have never tried welding.
-
Carby Replacement - Chapter 5
Tried fitting the new carby to the spare engine, but it catches on the kick down cable holder incorporated in the accelerator cable mounting bracket.
Luckily, we don't need that, so I lopped it off and chucked a bit of galv paint on the bracket.
Gave it another go.
The good news is that the carby now fits.
The bad news is that the accelerator cable doesn't line up.
But fear not as I have a plan that I will crack into tomorrow.
-
8
-
-
- Popular Post
- Popular Post
Carby Replacement - Chapter 4
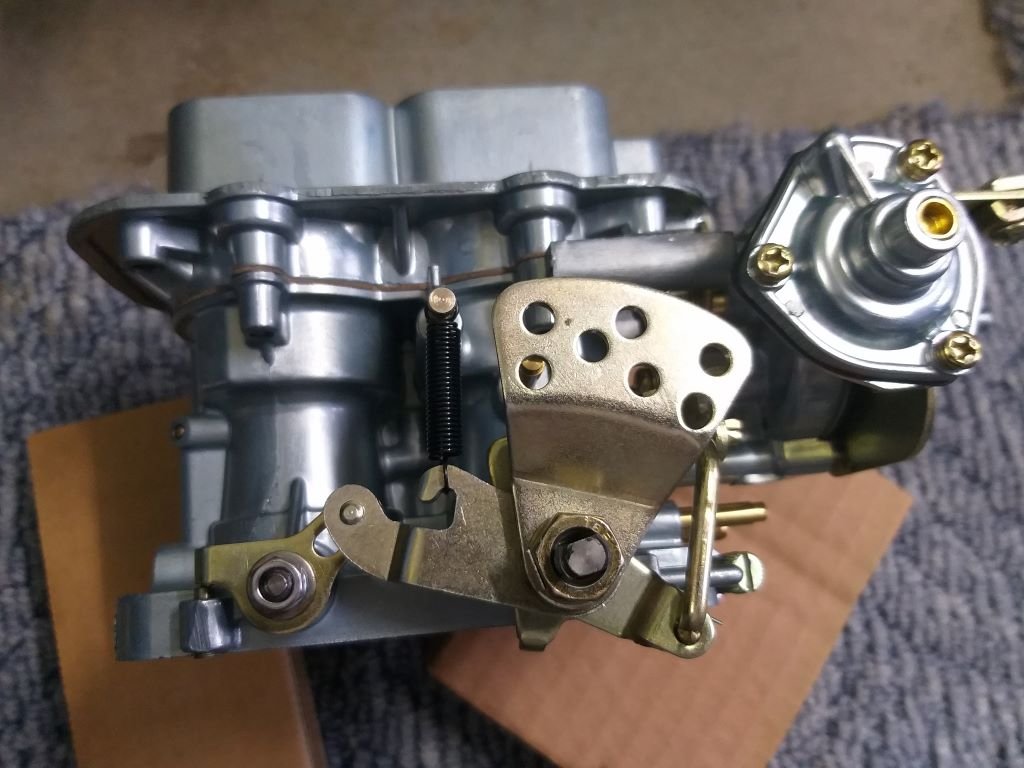
Anyway, getting back to the task at hand, the next thing that I needed to work out was the accelerator linkage.
Comparing the old Aisin carby to my new FAJS I figured out that I may be able to reuse the original accelerator cable gubbins. Pulled it off the Aisin, gave it a quick clean and a spritz of galv and chucked it on the FAJS.
Looks like it may work out.
-
12
-
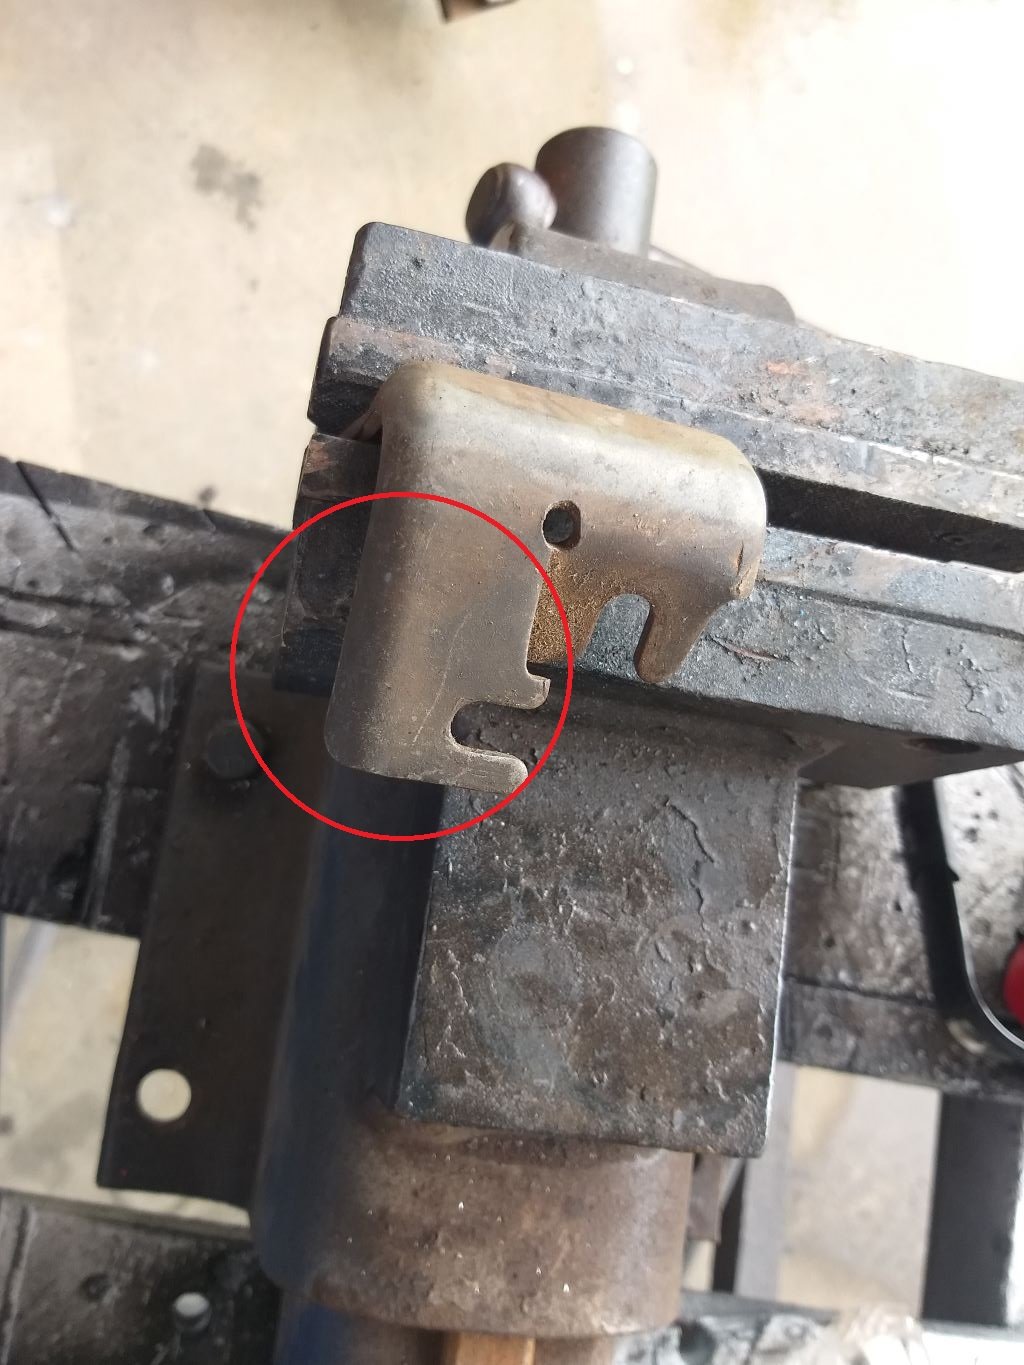
Carby Replacement - Chapter 3
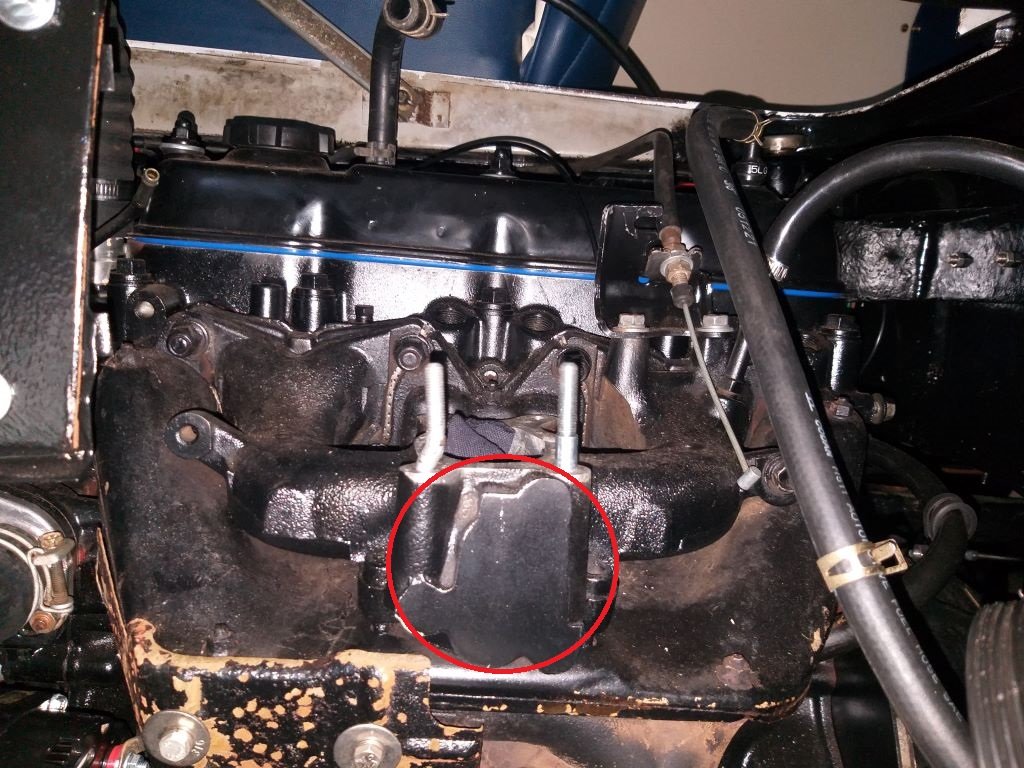
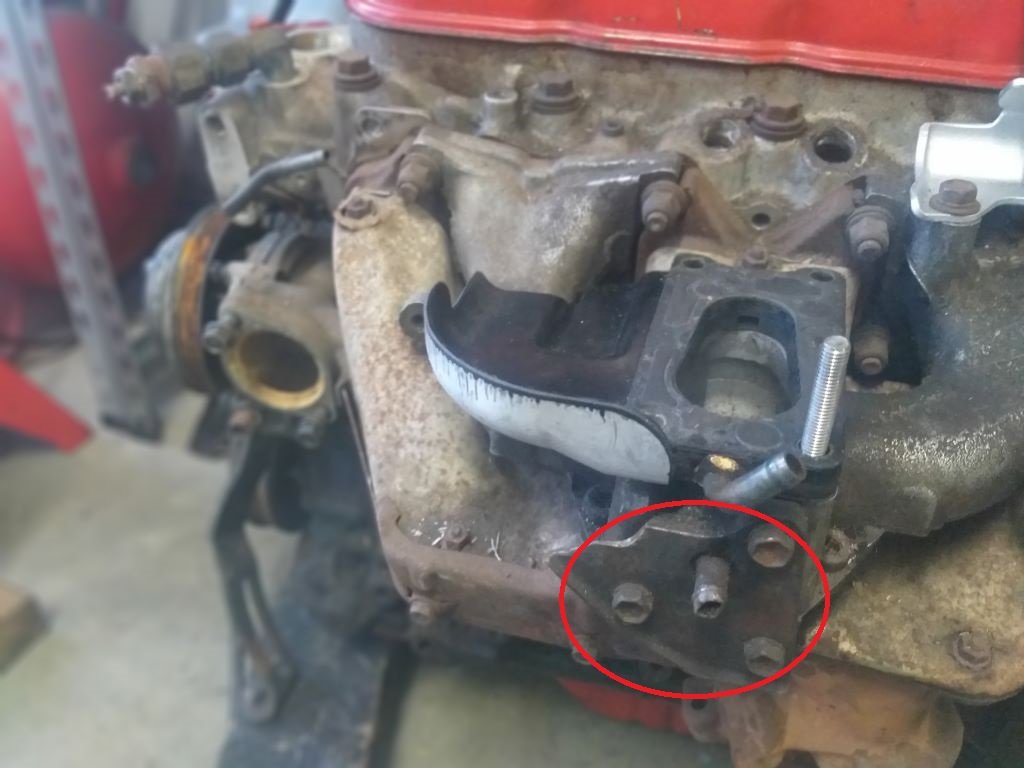
The eagle eyed amongst you would have noticed an interesting looking inlet circled in red on the last photo in my previous post.
There is a difference between the two inlet manifolds that I currently possess. The one fitted to my working engine has a blank off plate whilst the one fitted to my spare engine has an inlet incorporated. I guess the one with the inlet uses a plain phenolic spacer rather than the one I am currently using.
I toyed with the idea of swapping the spare manifold across to the van, but I'd have to source a new gasket and also a plain spacer without the inlet, so I discounted that idea.
Photos of the two manifolds to compare:
-
1
-
-
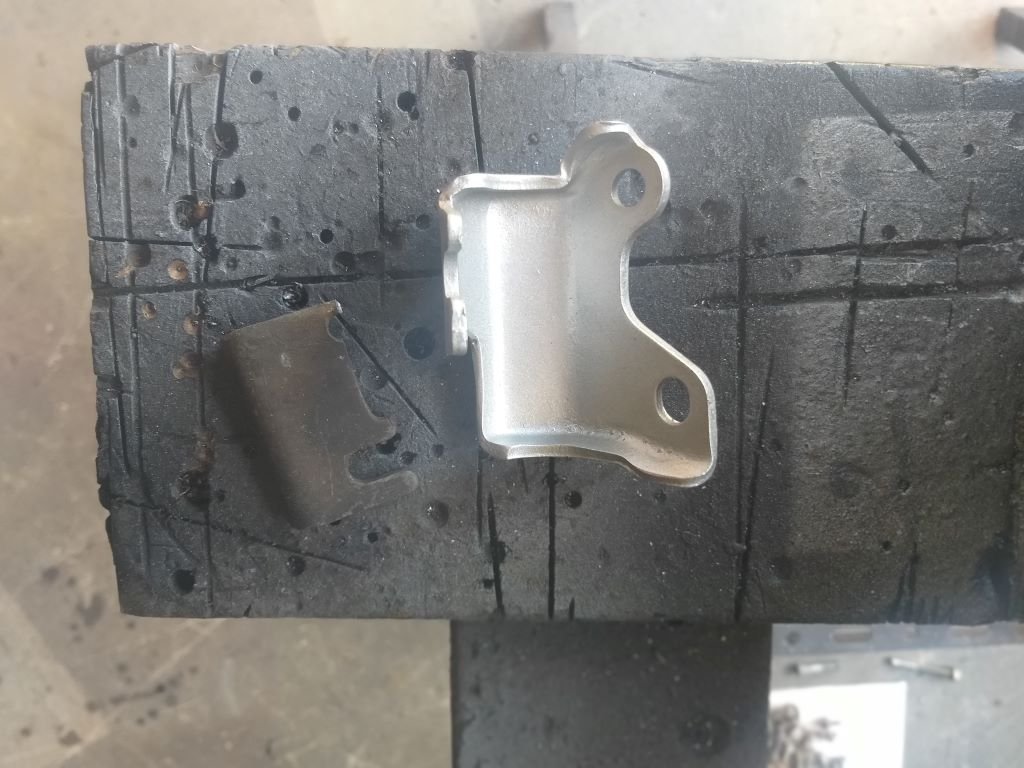
Carby Replacement - Chapter 2
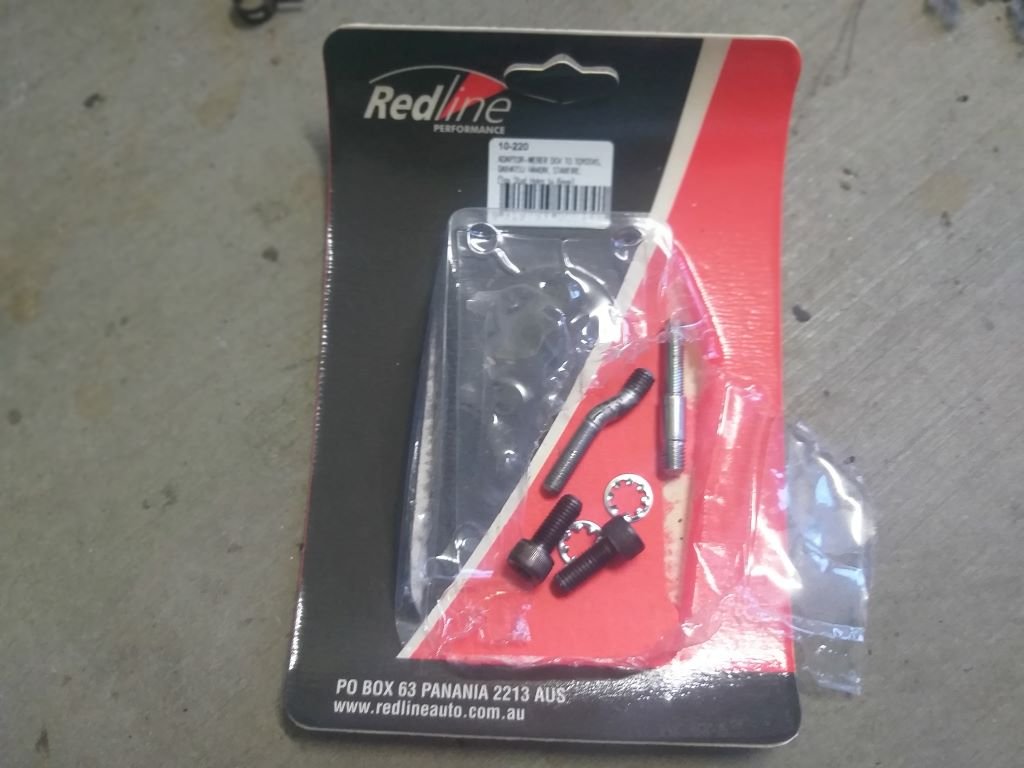
Breaking open the bubble pack containing the Redline adapter plate the first thing that I noticed was that - apart from a funky shaped new stud - the fixings for the adapter plate looked pretty short. Gave Chris at Pro-Carb a quick call and he confirmed that the adapter plate is meant to replace the factory phenolic spacer.
Now this doesn't sit right with me for two reasons:
First up you lose the engine breather pipe connection that is incorporated into the factory spacer.
Secondly, I would be removing what little protection the carby has from engine heat and this is of particular concern on the 3Y engine where the exhaust manifold sits directly under the inlet manifold.
So, I made an executive decision to retain the phenolic spacer which means that I need to source/fabricate longer bolts and studs.
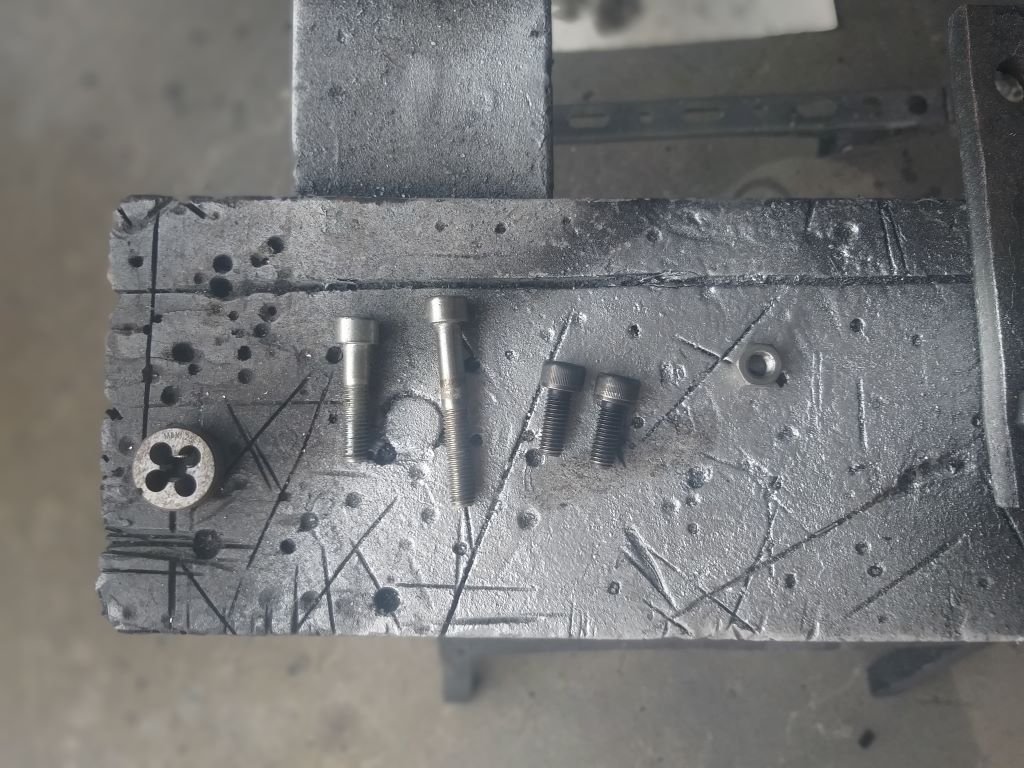
I rummaged around in my box of spare bolts and found two Allen key headed jobbies that had the correct threads. One was a perfect length but the other needed slight modification. Cracked into it with my dye set and angle grinder and in next to no time I had two suitable replacements.
In true Rough & Ready Restos style I substituted the straight stud with a longer bolt of similar thread that I just cut the head off.
The funky shaped stud is going to be an interesting one to replicate, so I've put that aside for now as I'm able to mock everything up just using the 3 mounting points in the meantime.
With that done I headed over to my spare engine currently languishing in the naughty corner and began putting things together.
-
2
-
-
- Popular Post
- Popular Post
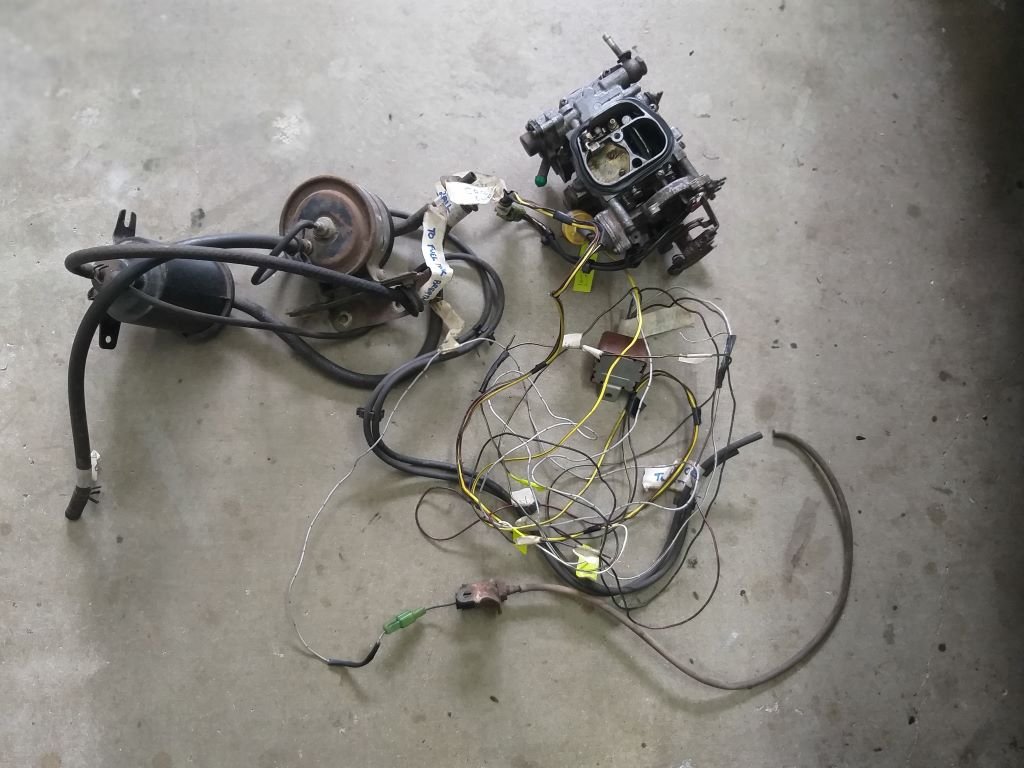
Carby Replacement - Chapter 1
Those of you following my journey will have heard me bitching about the existing Aisin carby. I'm not necessarily bagging then all, but my one has definitely seen better days and I've been quietly doing my homework on alternative options for a while now.
The most popular conversion out there for the 3Ys seems to be the 32/36 Weber upgrade and I was keen to go down this path too for the following reasons:
- These carbys are popular due to their relatively simplicity and the fact that they are almost infinitely tuneable.
- Parts and knowledge are plentiful.
- It allows me to get rid of the electrically operated shut off valve and the little computer gubbins that controls it.
- It also allows me to bin the two carbon canisters and the associated spaghetti like tangle of vacuum pipes that the HiAce was blessed with.
So, with my sights firmly set my first call was to my cert guy who confirmed that since my engine is originally from a 1984 model all that is required across here from a cert point of view is a PCV valve and a carbon canister on the fuel tank vent pipe. Easily done.
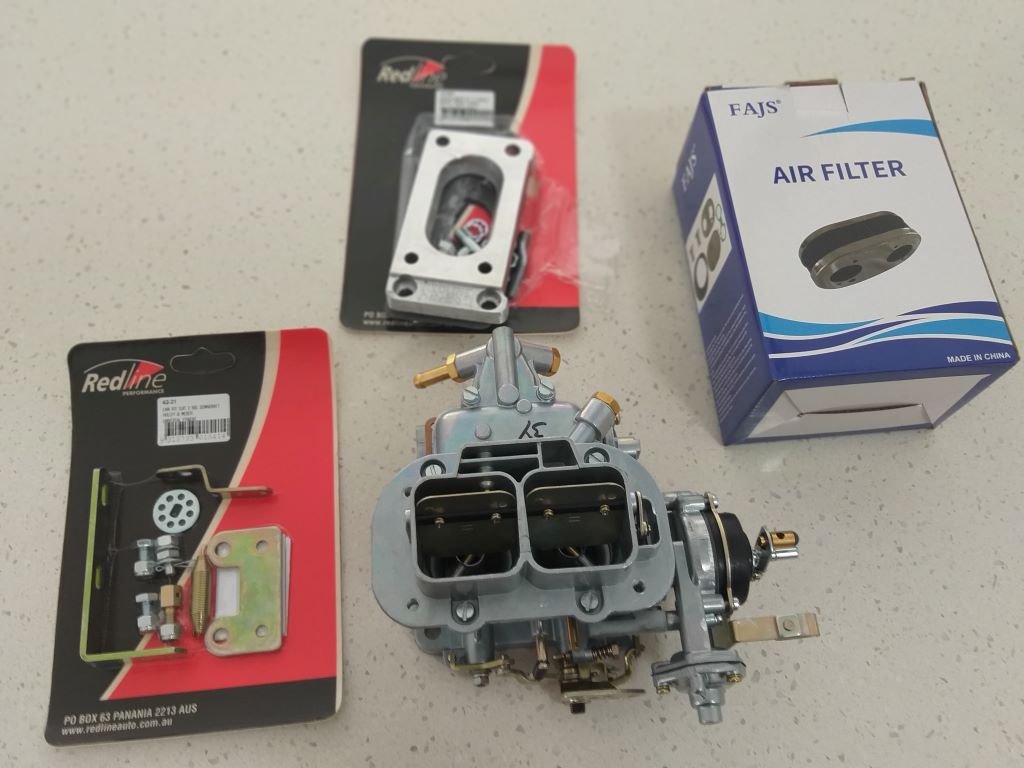
My next challenge was to confirm that the carby together with its adapter plate and some form of air filter would fit into the small gap that I have under my cabin floor, so I made a call to the good guys at Procarb in NSW and Chris kindly measured everything up for me. Overall height of the new setup looked to be about 5mm less than my existing setup. So that was another tick.
Chris stocks the FAJS Weber lookalikes and whilst I had heard some horror stories associated with the quality of these repros he assured me that his stock goes through some rigorous inhouse quality checks and are fully tested before shipping, so I decided to take the plunge and ended up ordering one with the manual choke option. Keep it simple I say.
Anyhoo earlier this morning my parcel arrived. Much excite.
The kit comes with a standard pancake type air filter, but I've got a cunning plan to modify it so that it will connect up to my existing remote air box.
I've also got to sort out the accelerator linkage and as per Chris' warning it looks like I'm going to have to elongate one of the holes on the adapter plate.
I'll keep you all updated on progress, but as a "starter for ten" here is a photo of the new kit and also a photo of the old stuff that I'll be banishing to the naughty corner.
-
12
-
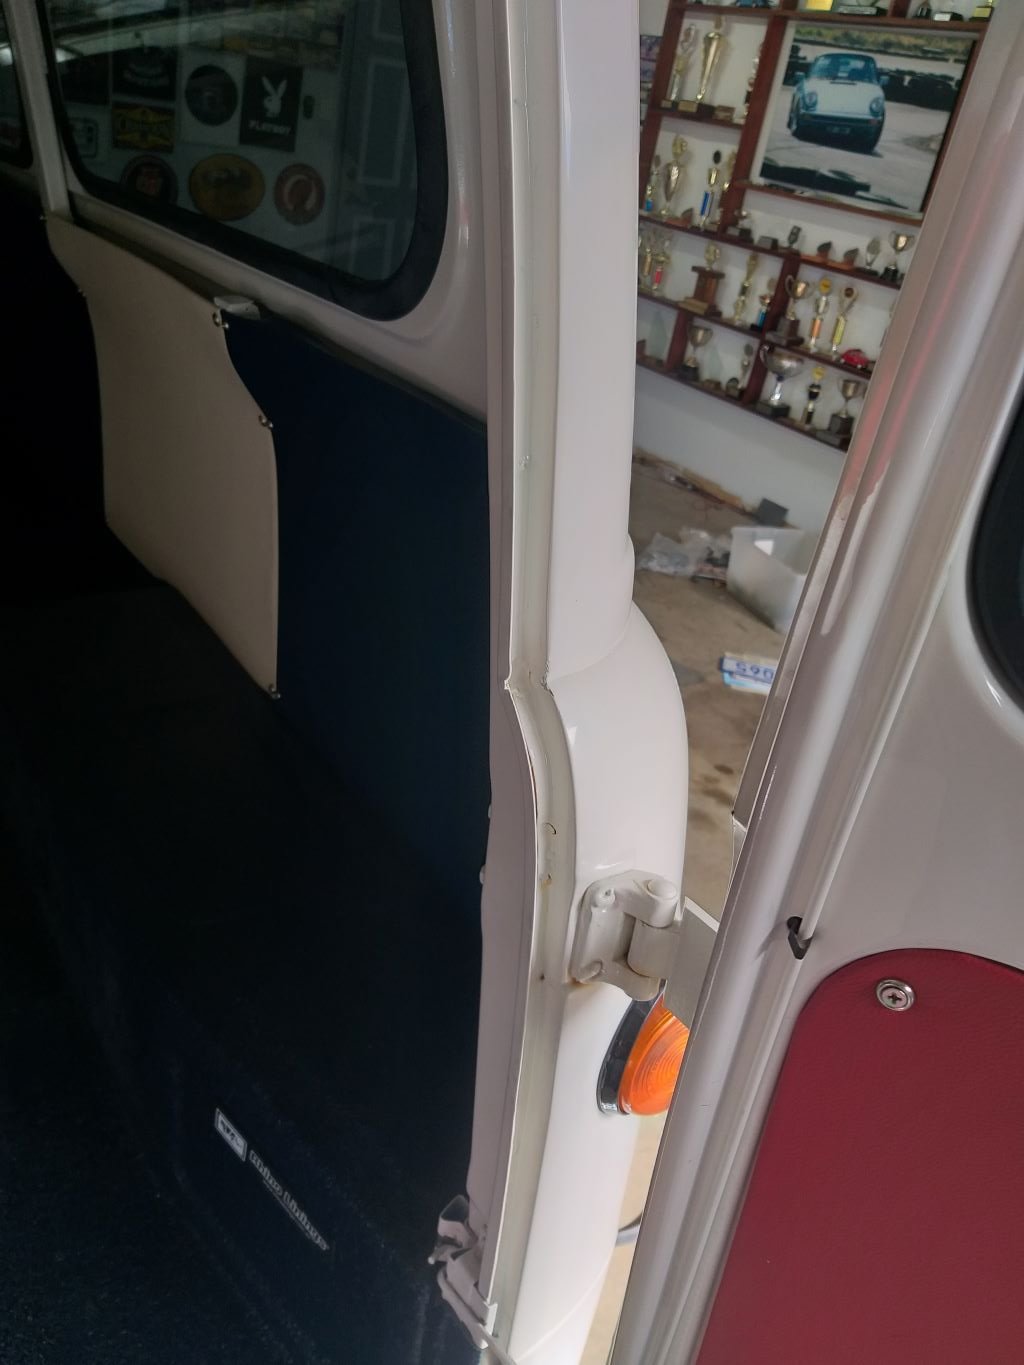
Thanks for the feedback @Tiger Tamer Yep, it was a bit fiddly and I did have to rope in Mrs Flash to help me push against the seal while I climbed inside to tighten the nuts on the back of the hinge. Would have been a much easier task if I had done it before fitting the new seals, but I always seem to do things arse about face.
Around 12 years ago the previous owner commissioned a well know Brisbane based outfit to do a bare metal restoration and whilst the paintwork has held up really well, I've found a few paint related things that I can't believe a professional place would do. The worst one was the original rubber grommet around the fuel filler neck that not only survived the sand blasting process but got painted over too. I couldn't believe my eyes.
-
7
-
-
- Popular Post
- Popular Post
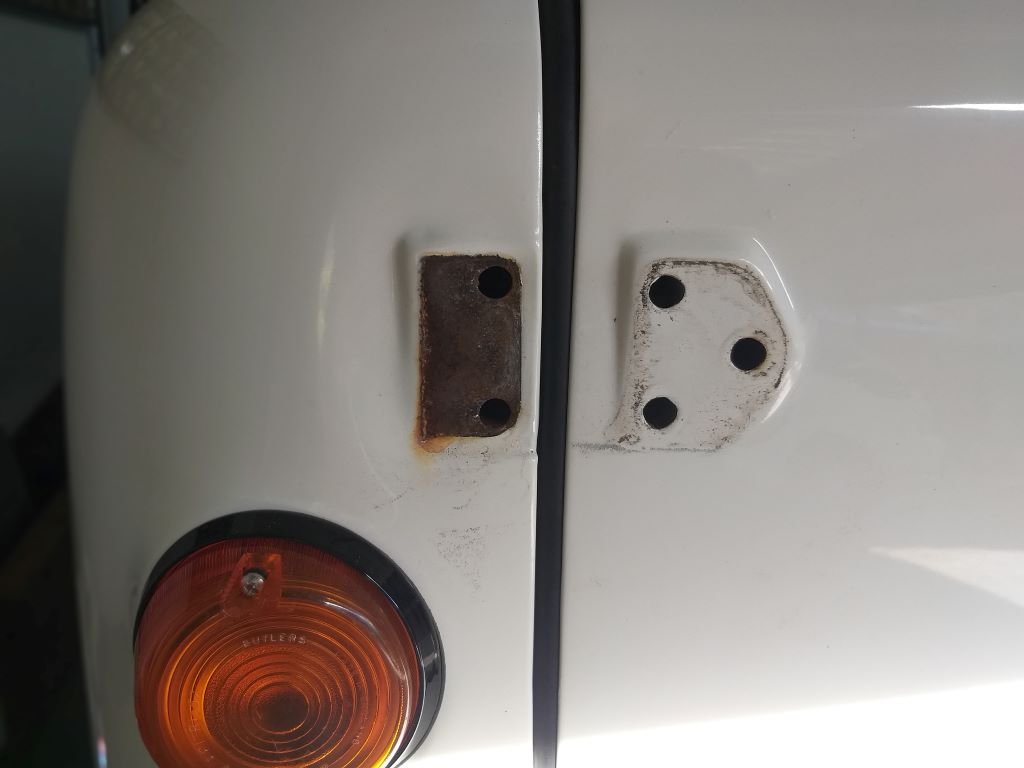
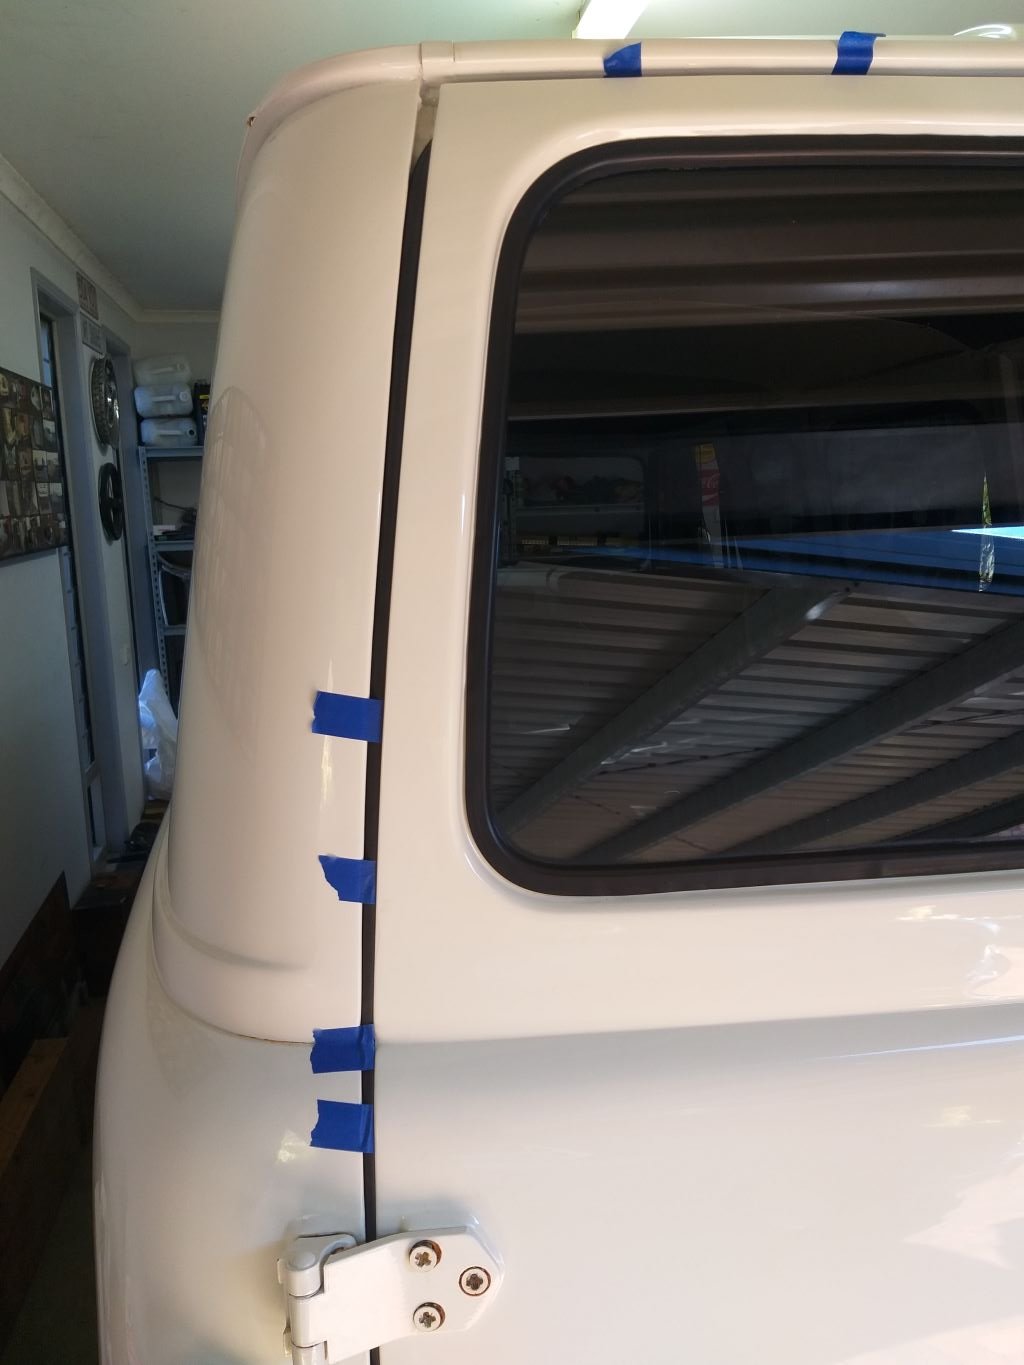
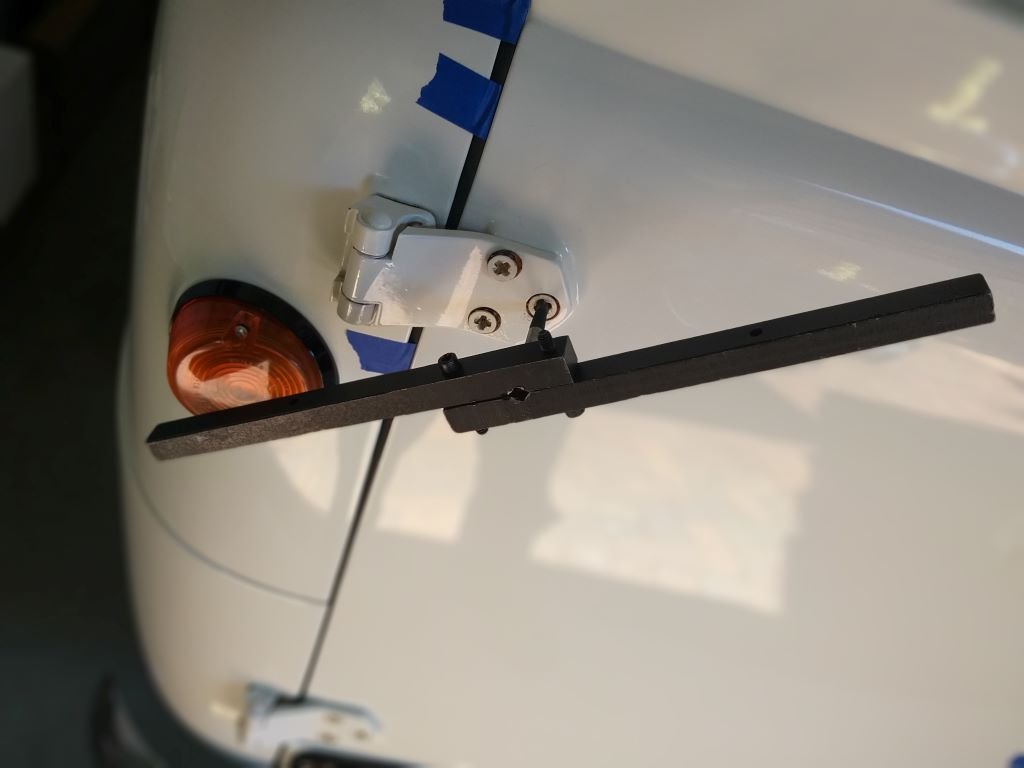
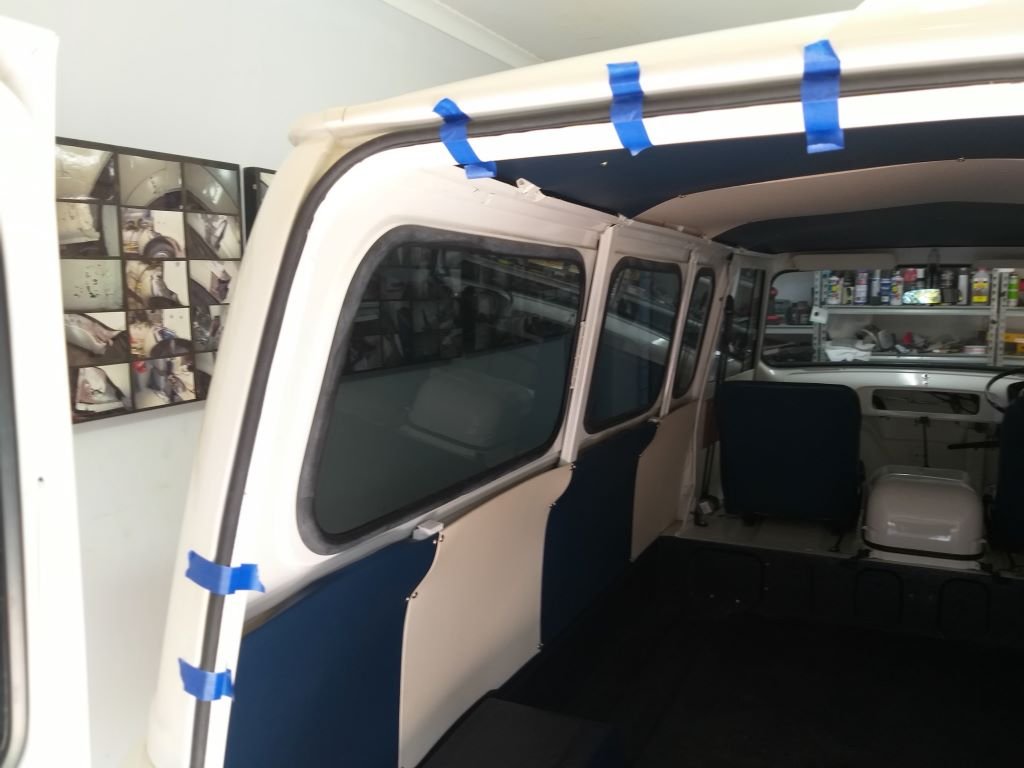
Rear door alignment - Chapter 3
I had to elongate the mounting holes in the body in order to move both top hinges out slightly.
But after a bit of fiddling about I'm much happier with the door gaps and the top corners no longer touch, so I'll take the win.
Luckily, I've got some touch up paint, so I'll give the grazed corners a go, but that's for another day.
Thanks for looking.
-
15
-
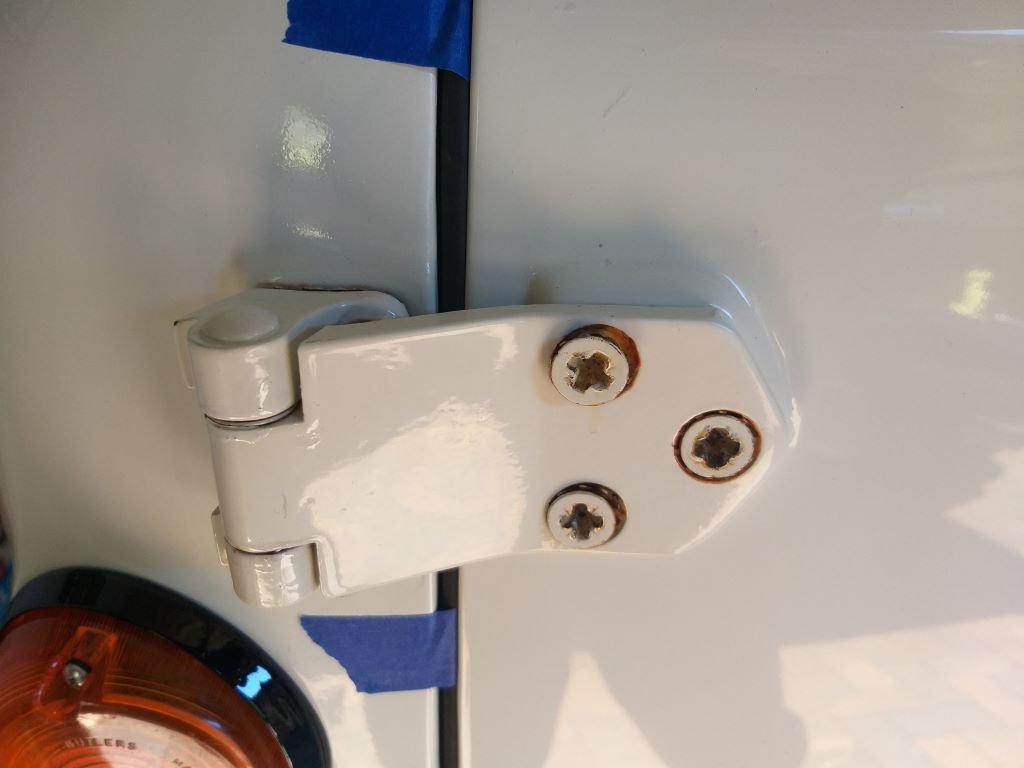
Rear door alignment - Chapter 2
Removing the hinges revealed that the painters had left bare steel under the mounting surfaces ... nice.
Gave it a bit of a scuff and a splash of rust converter and did the same to the back of the hinges.
-
5
-
 3
3
-
-
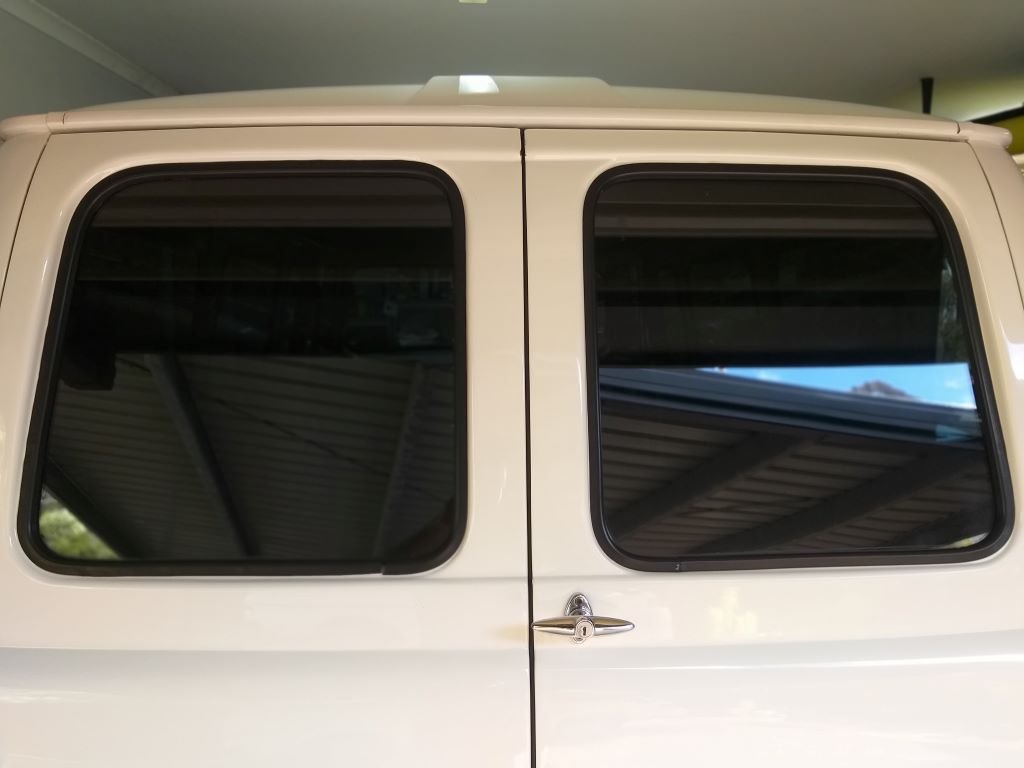
Rear door alignment - Chapter 1
While I'm focusing on the rear barn doors, I figured it was time to see if I could sort out the door gaps. From day one they have been all over the show with signs of rubbing on the two top corners where the doors meet.
Now in hindsight this job would have been much easier without having to fight against new rubber seals that still need to bed in, but it's too late for that now, so I just had to crack into it.
First step was to loosen off the old door bolts. I hate these things with a passion as they always look crap with bits of flaking paint and weeping rust and the star heads make them a real bugger to get out if they haven't been moved in a while. Long term I'm thinking I'll do the same as I did on my Bedford van and replace them with stainless steel machine screws, but that's for another day.
So as is typical with these things all but one of the bolts backed off okay. Ended up having to use an easy out for the last bolt. Did I mention how much I hate these bastards.
-
6
-
-
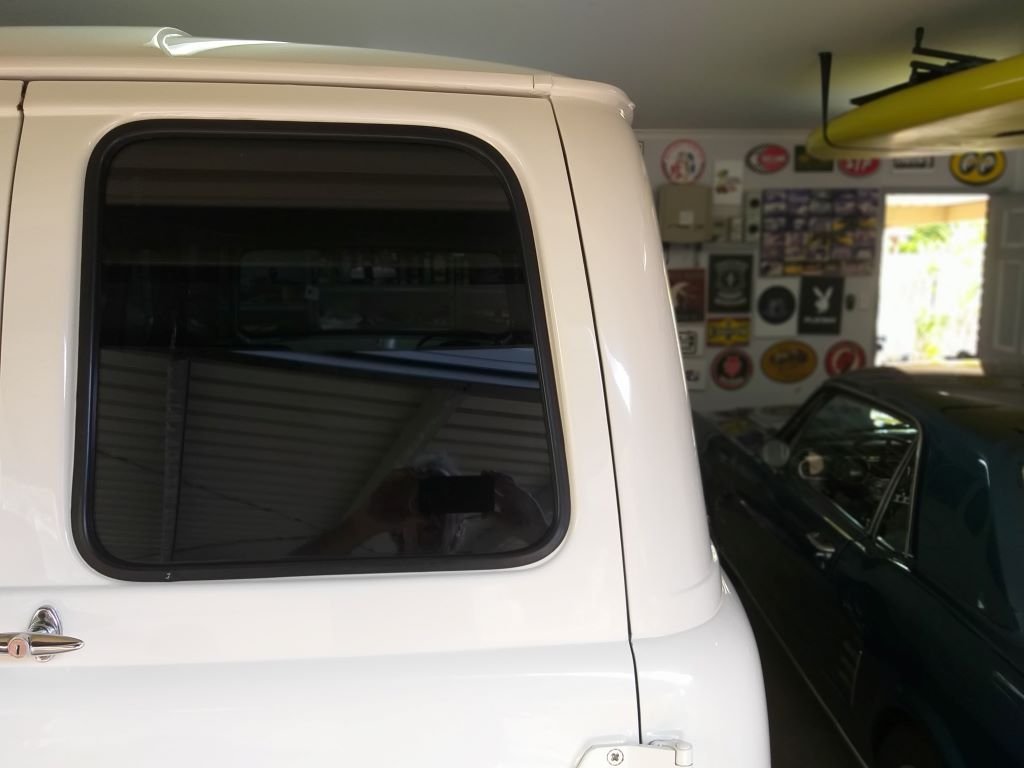
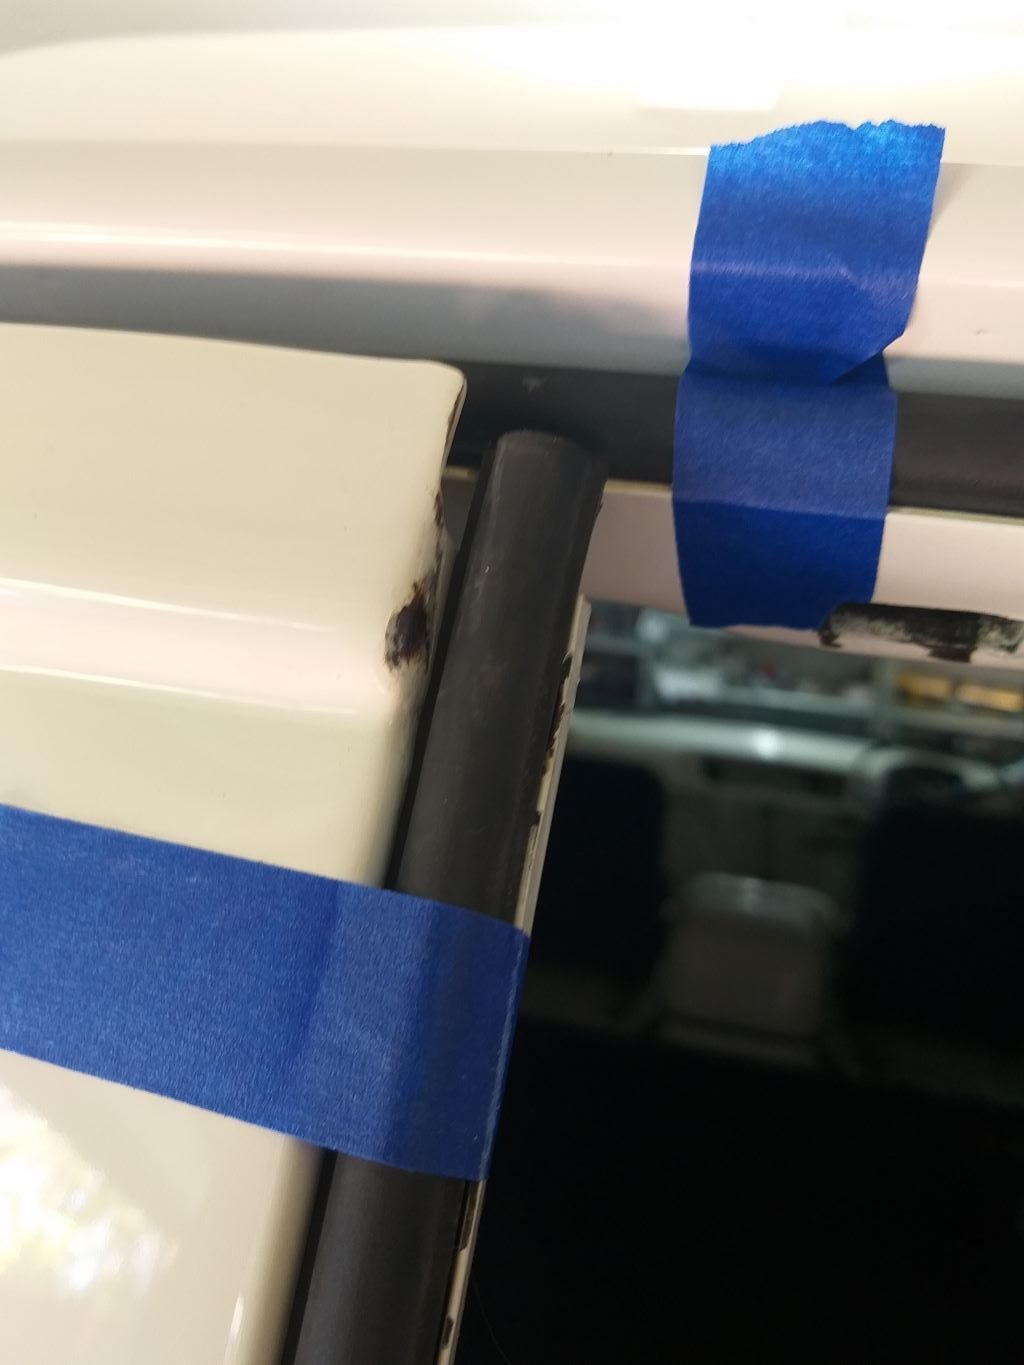
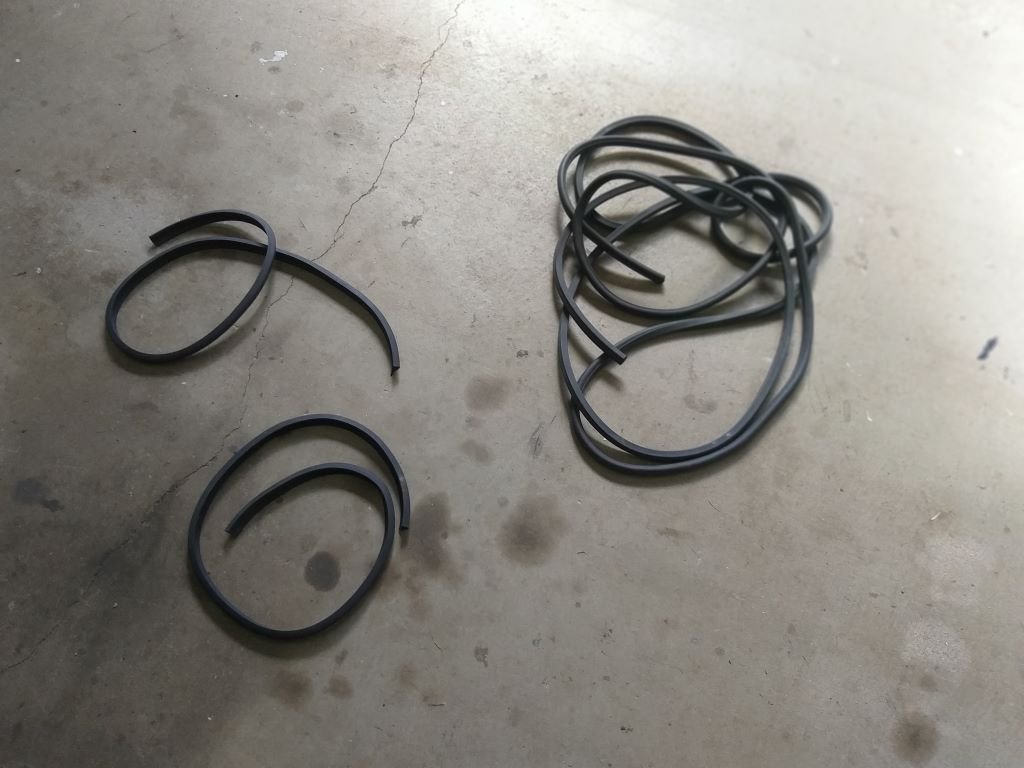
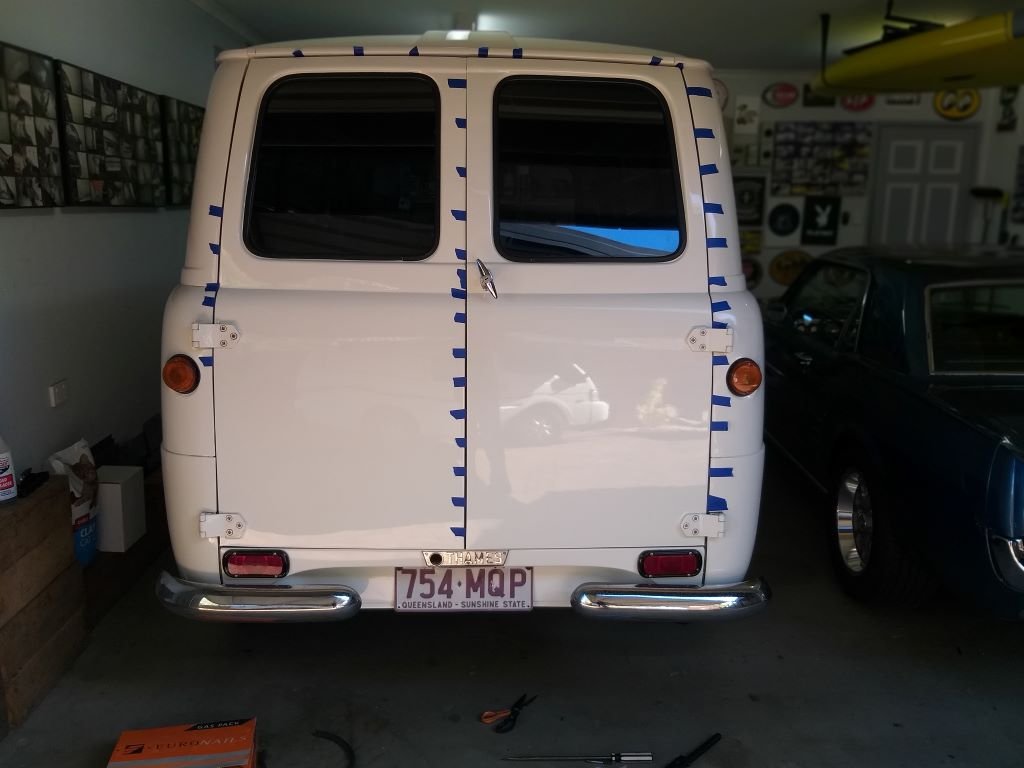
While cruising around the neighbourhood I couldn't help but notice how rattly the rear barn doors are. Then when I gave the old Thames a bath the other day the back was absolutely saturated, so I figured it was about time that I fitted some rubber seals. that will hopefully solve both issues.
I rummaged around in the box of spares that came with the van when I bought it and sure enough there was a length of seal with what looked like the perfect profile for the job. Offered it up to the door surround channel and it was perfect. Only downside being that it needed gluing into the channel. Yuk, not my favorite job.
Anyway, took the bull by the balls and armed with a tube of contact adhesive and a few other bits and bobs, I cracked straight in.
I'll let the glue go off overnight and can then strip the bits of masking tape that I used to hold the seal in place.
Thanks for looking.
-
8
-
-
- Popular Post
- Popular Post
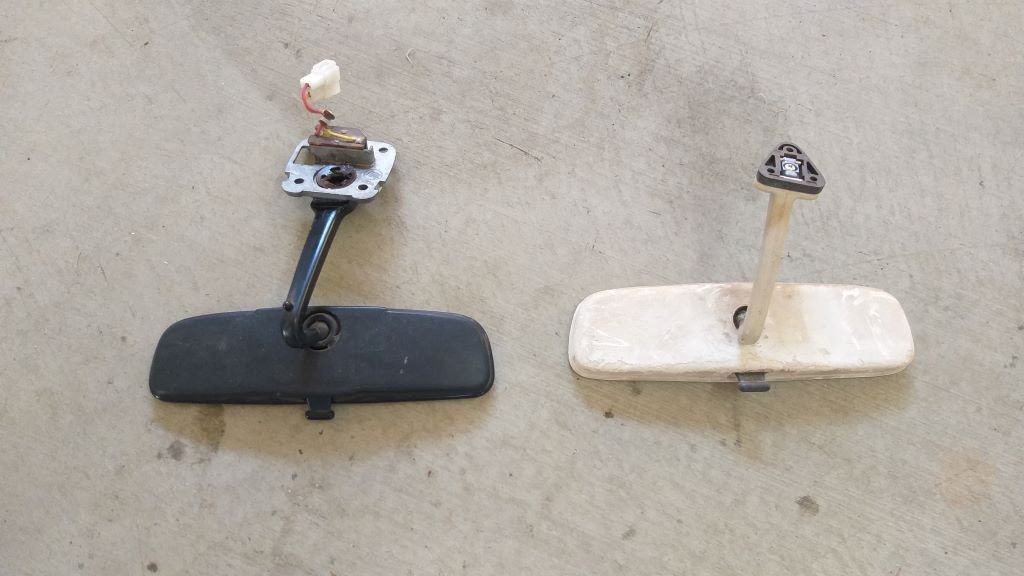
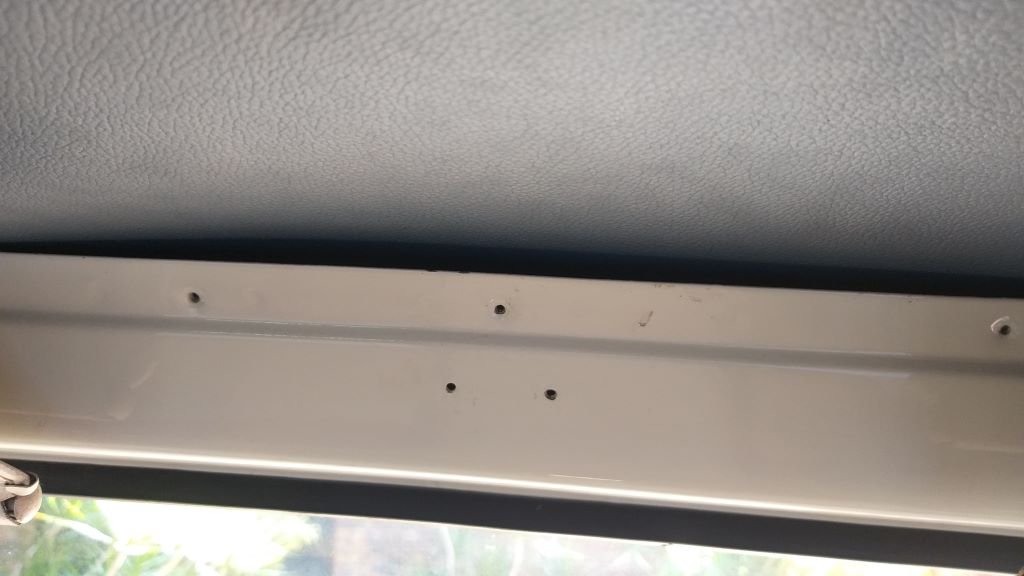
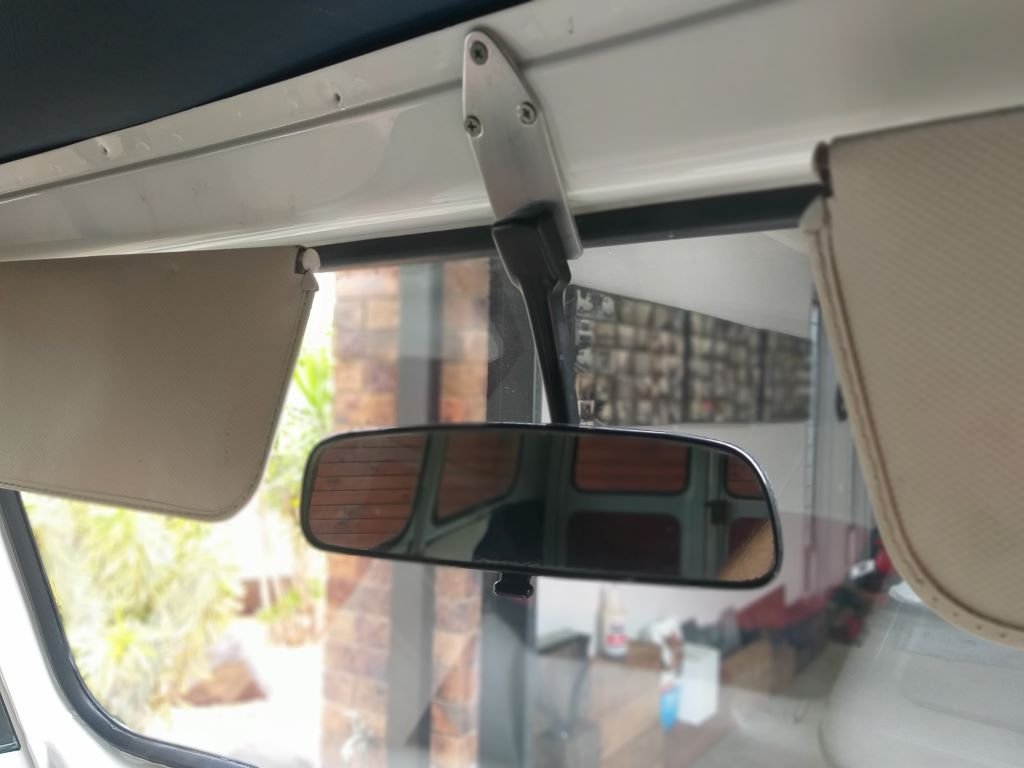
It's a bit disconcerting driving around without an internal rear-view mirror, so I dug through my spares pile and found two likely looking candidates.
I chose the black backed one as it is in better condition than the flaky looking brown one.
First step was to remove the little interior light from the mirror stalk as it won't work for my setup, and I then offered up the mirror to check fit.
Drats, the stalk is too short so I'm not getting a view through the rear windows.
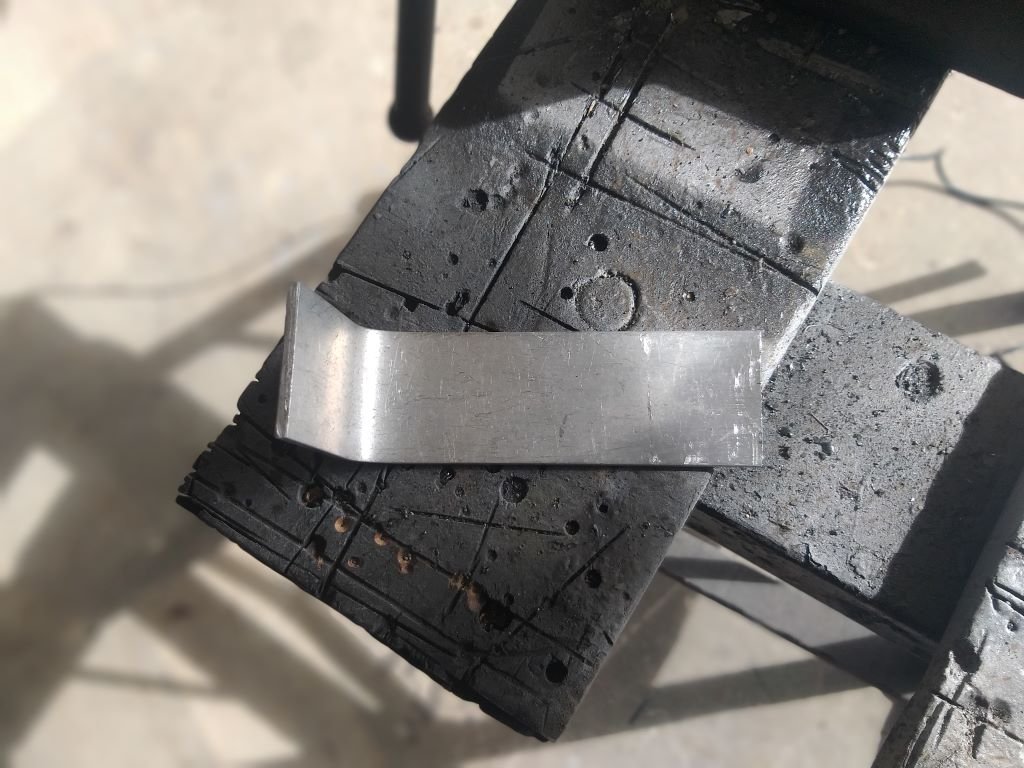
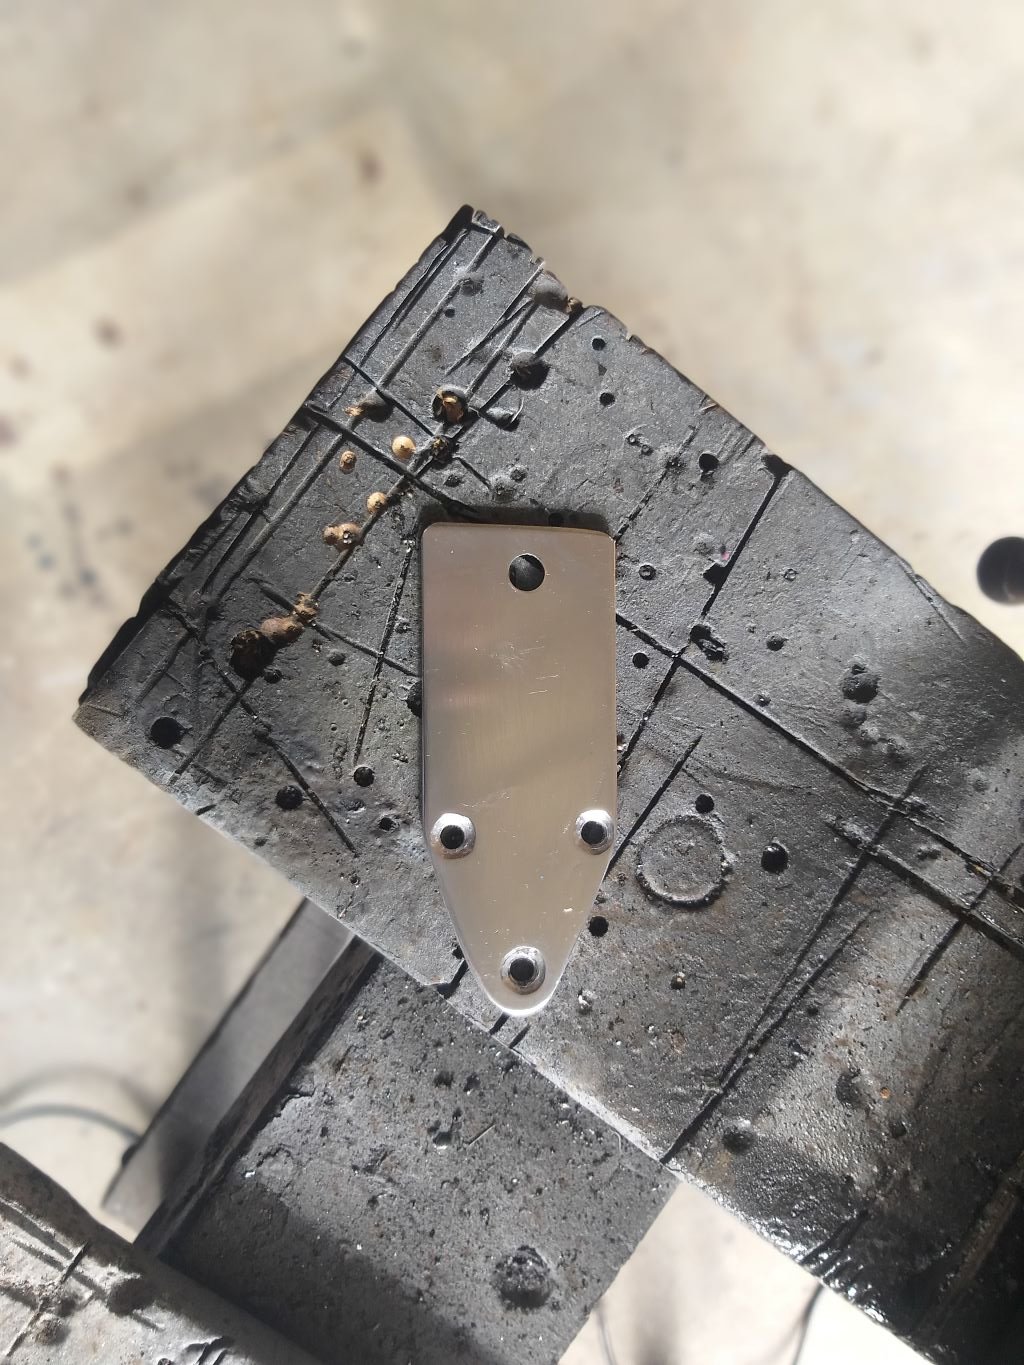
Dug around in my scrap pile to see if I could find something suitable to extend the mount. Found a little aluminium offcut that looked like it would work.
Managed to poke some holes in the offcut that lined up with the Thames' existing mounting holes, then shaped the offcut so it is more pleasing to the eye.
Was going to give it a splash of satin black, but then decided to polish it up instead.
Works well and doesn't look too out of place.
Bonus is that the extended mount gives me heaps of room to build an overhead console which is planned for further down the track.
-
16
-
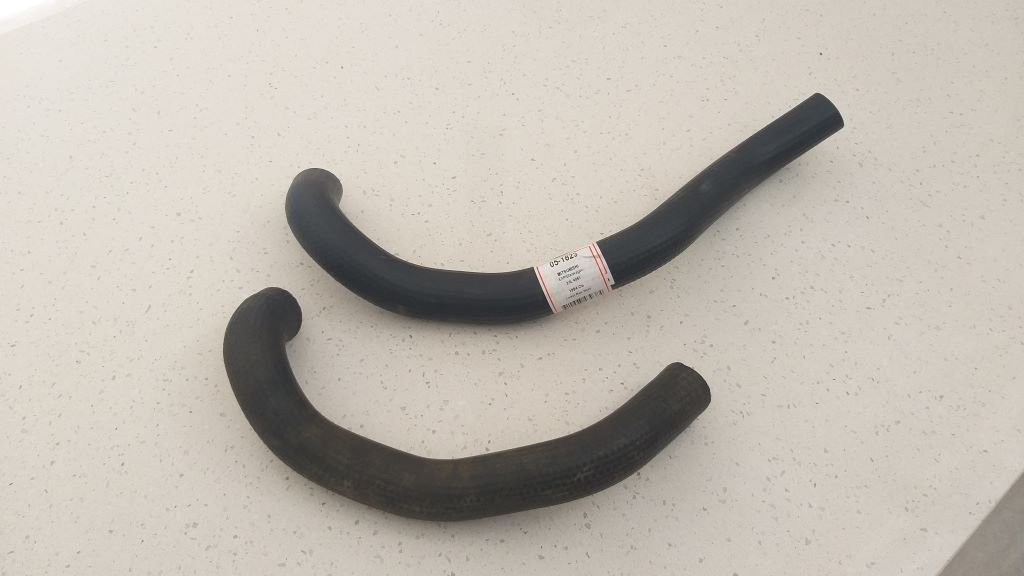
Now that I've cured my water leaks it's time to drain the water and fill the system with coolant.
Thought I'd best replace the second-hand radiator hose that I was using for mock up purposes with a fresh one. Only problem is I couldn't remember which donor van this hose came from. I had a suspicion that it was from the newer Express van, so yesterday while I was in town to fetch the new wheels, I did the tour of my local parts shops with my sample in hand.
Turns out my suspicions were correct. It's a slightly butchered lower radiator hose off a 4G63 powered Mitsi van.
Trimmed it down this morning and clamped it up before adding some liberal splashes of coolant to the system and it looks like I'm good to go.
-
8
-
-
Thanks fellas, I'm pretty chuffed with the new look.
-
- Popular Post
- Popular Post
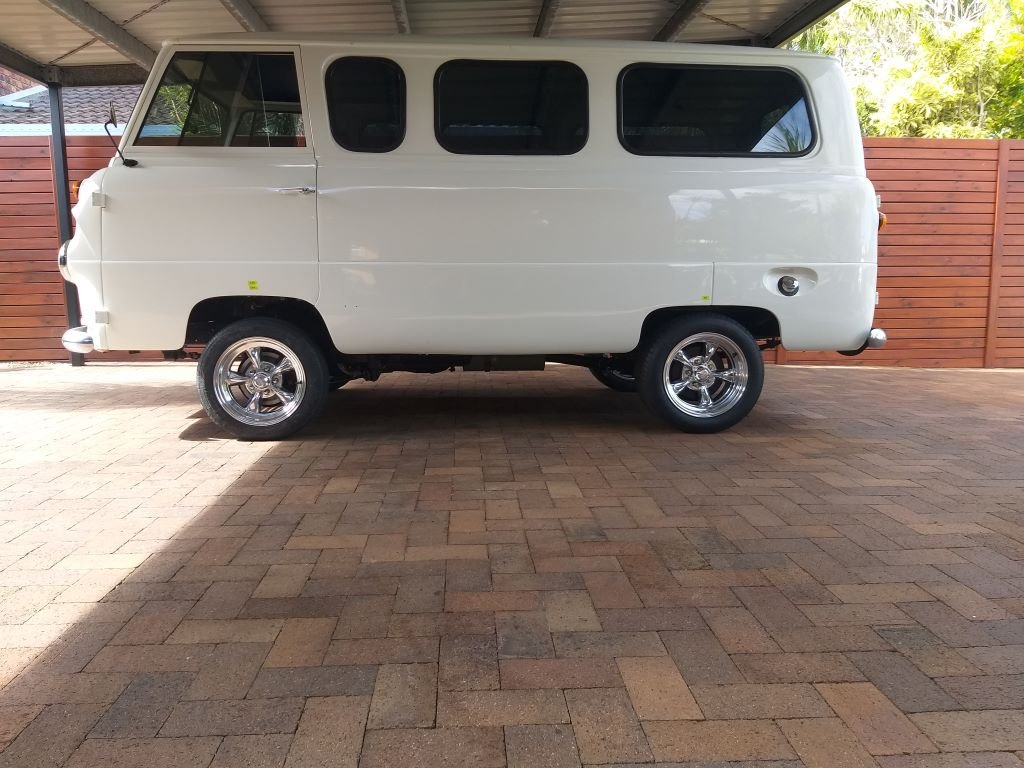
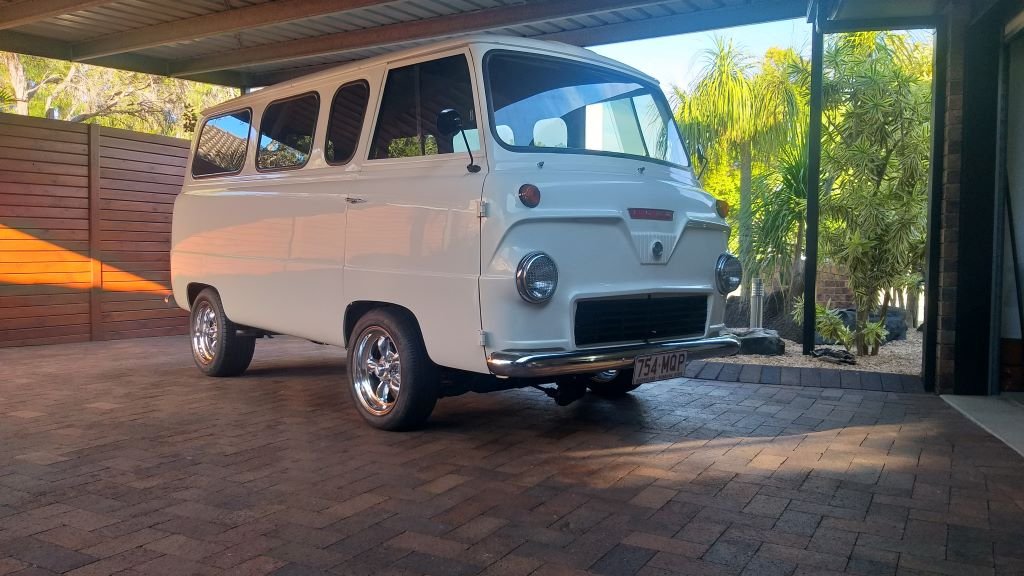
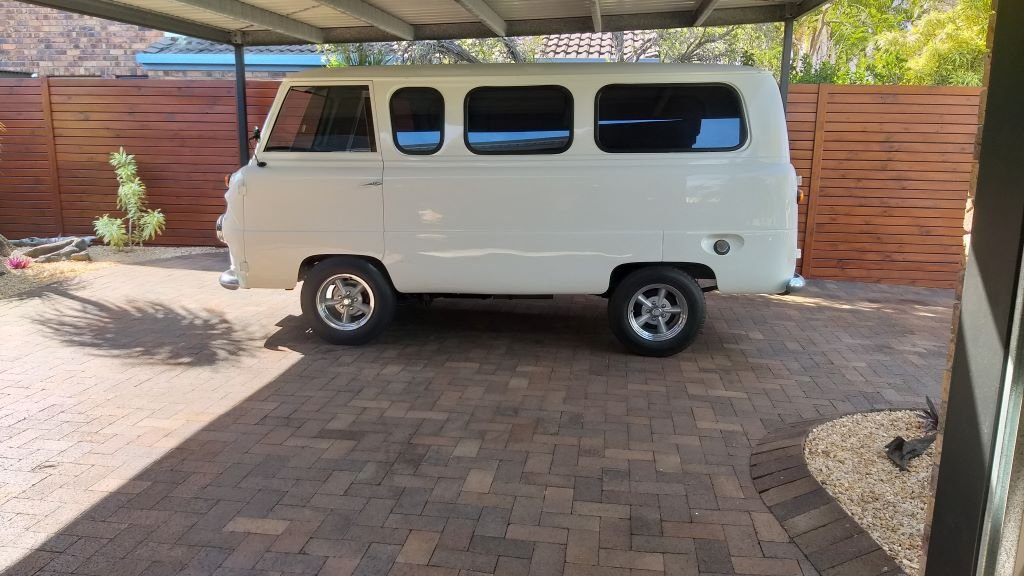
Mama's got some new shoes !
-
19
-
And we are back on the road.
New wheels must be taking the scenic route from Perth as it's been two weeks since we ordered them.
Hopefully this is the last photo of the Thames with his old shoes on.
-
8
-


Flash's 1965 Ford Thames
in Project Discussion
Posted
Thanks @Otodat. That's a bloody good suggestion.