Sunbeam
-
Posts
969 -
Joined
-
Last visited
-
Days Won
1
Everything posted by Sunbeam
-
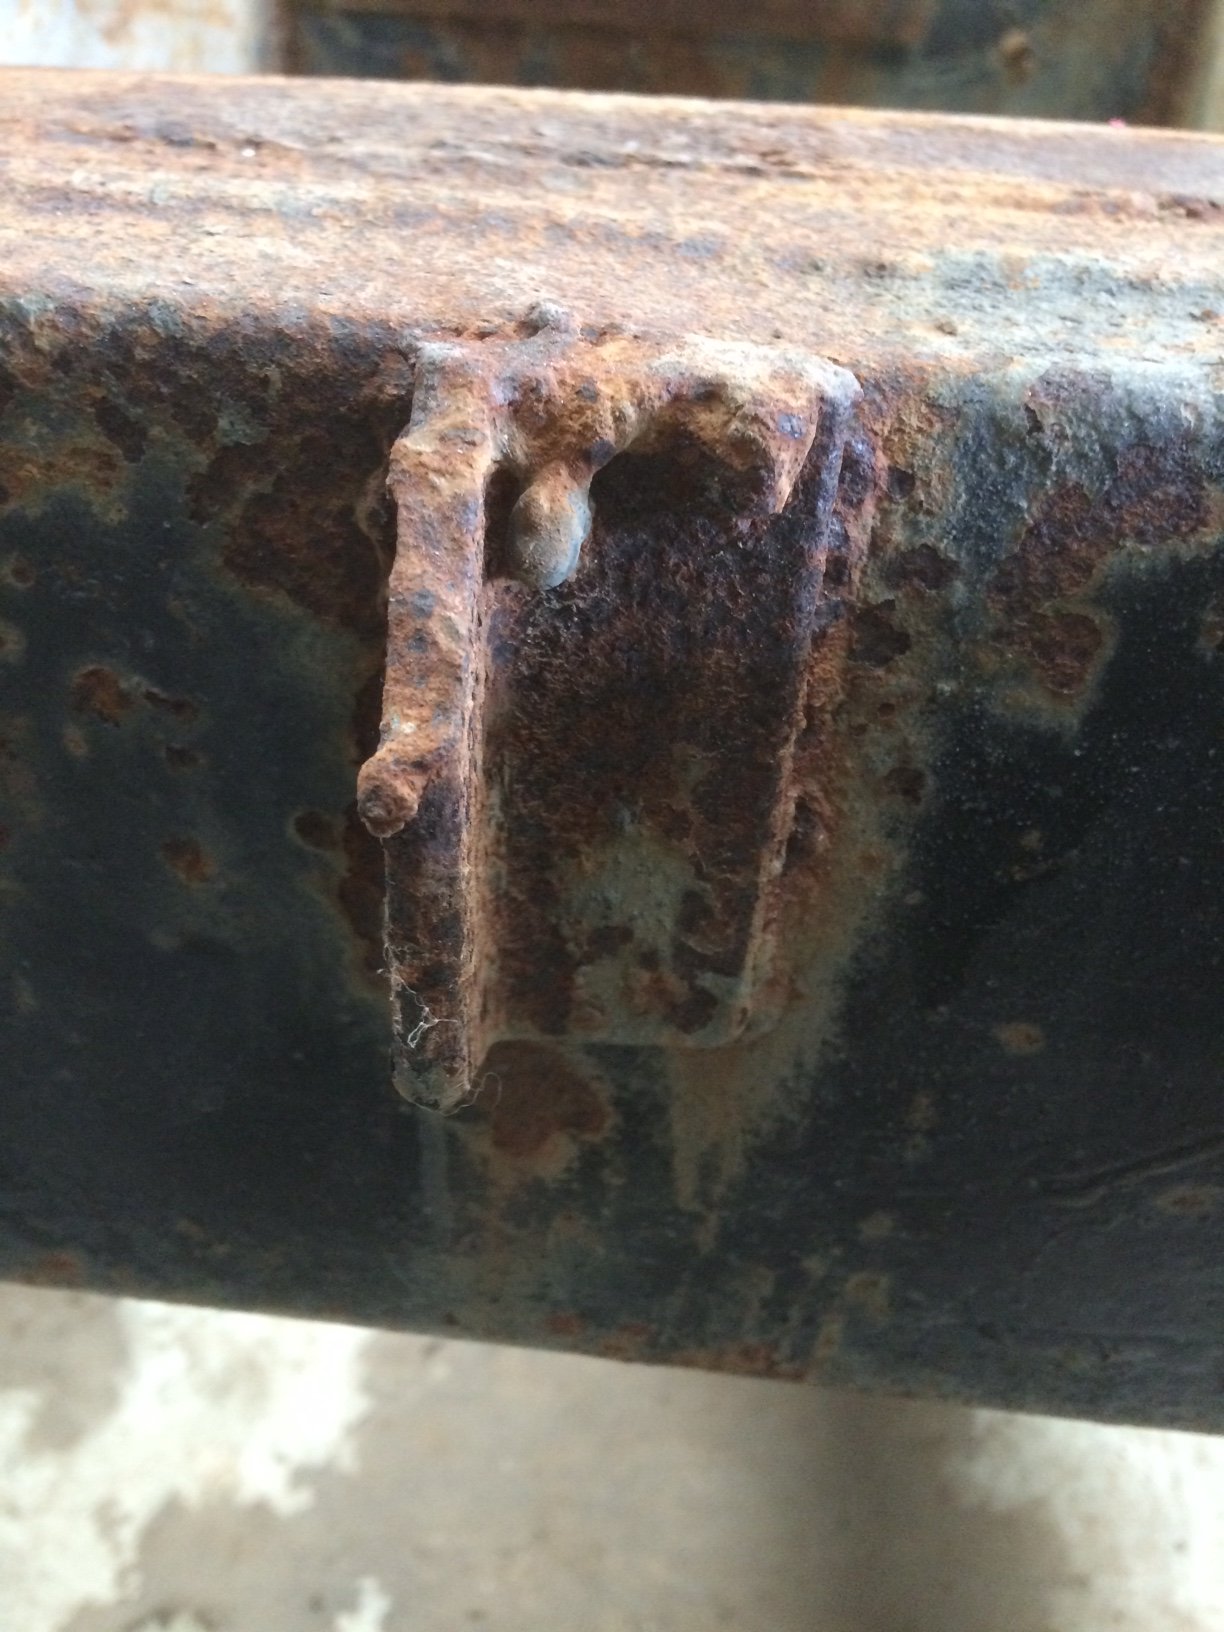
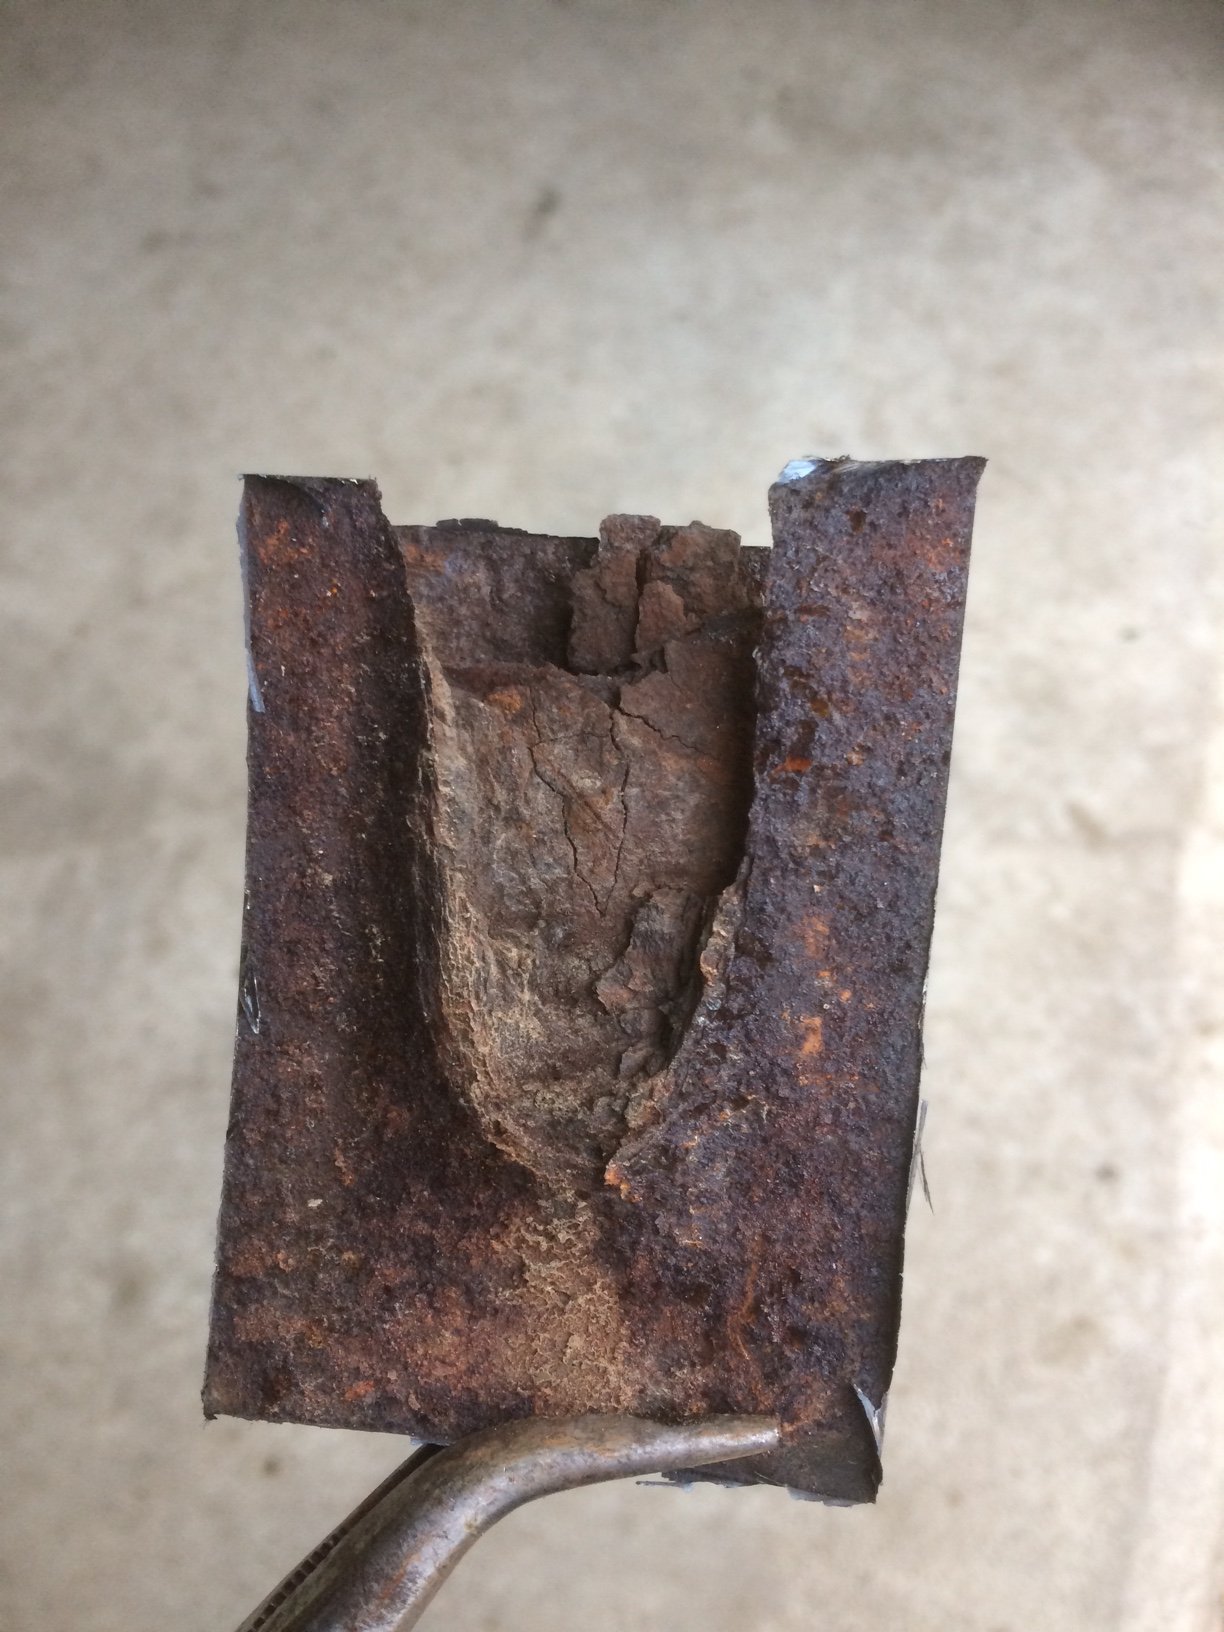
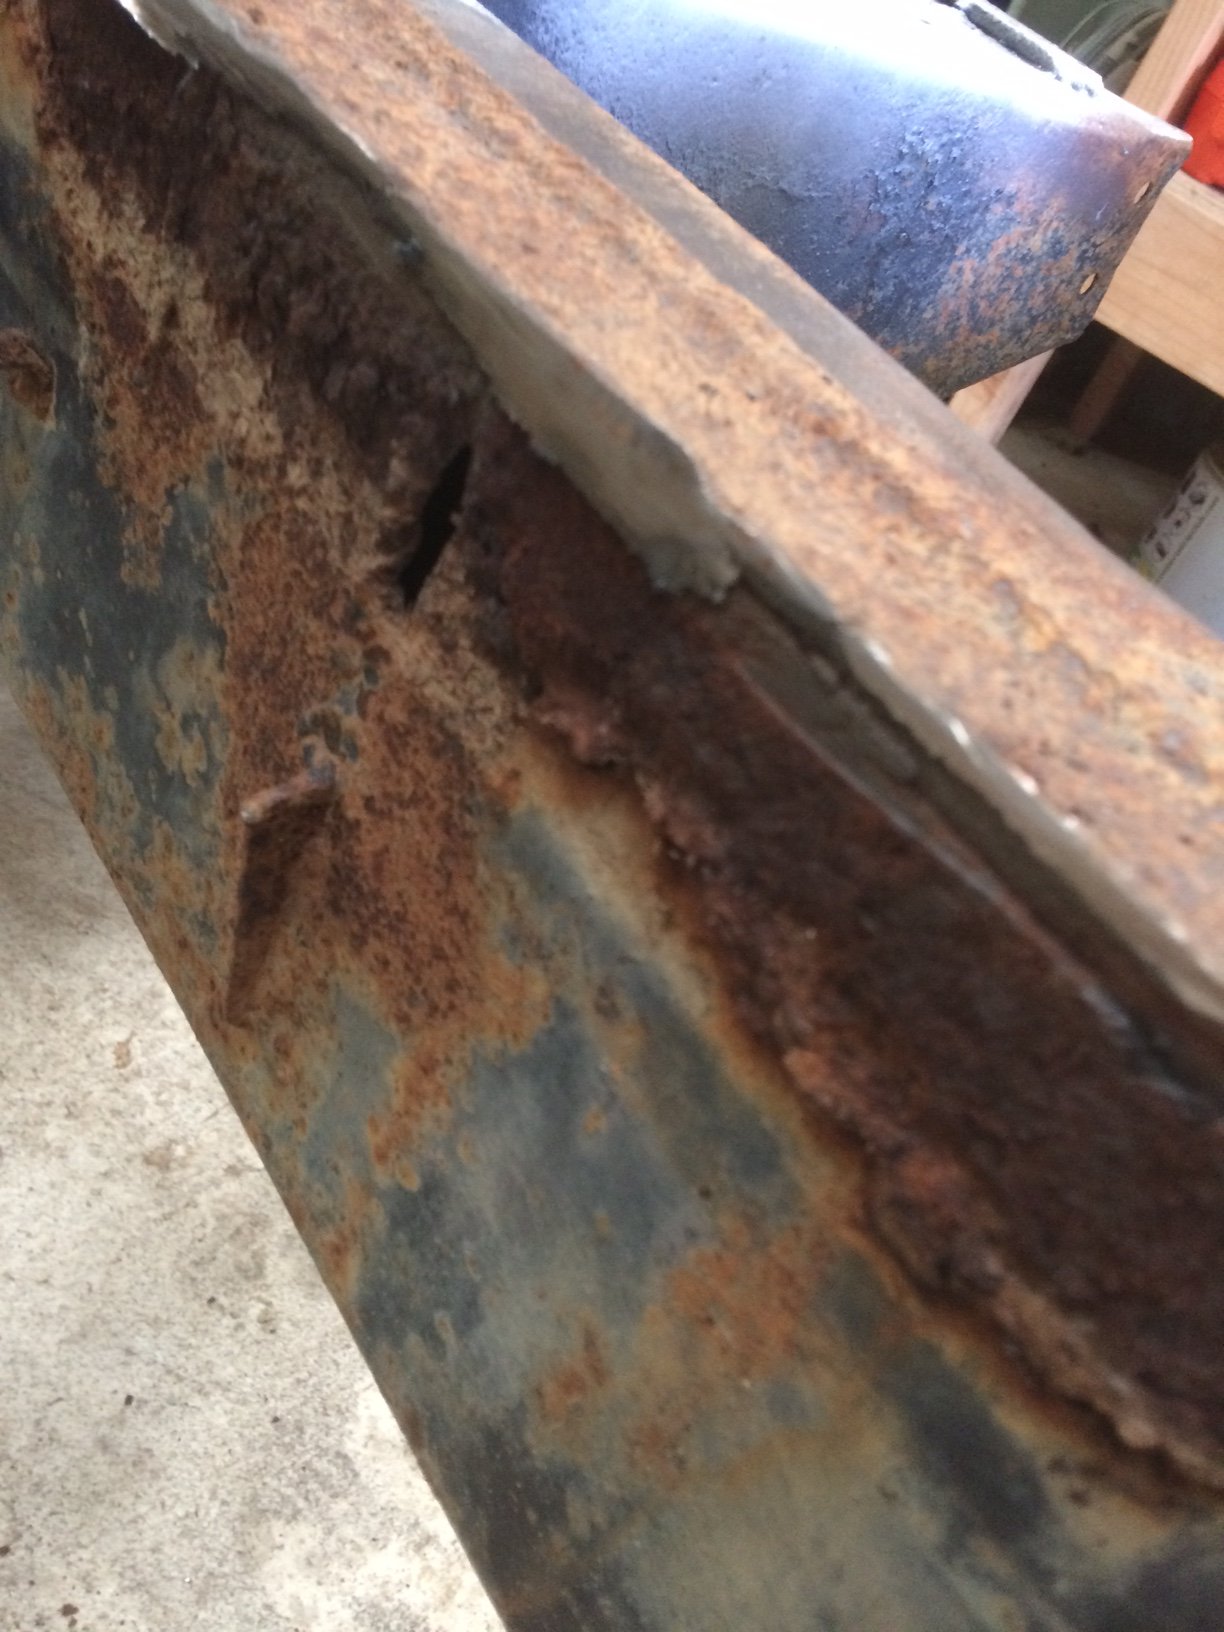
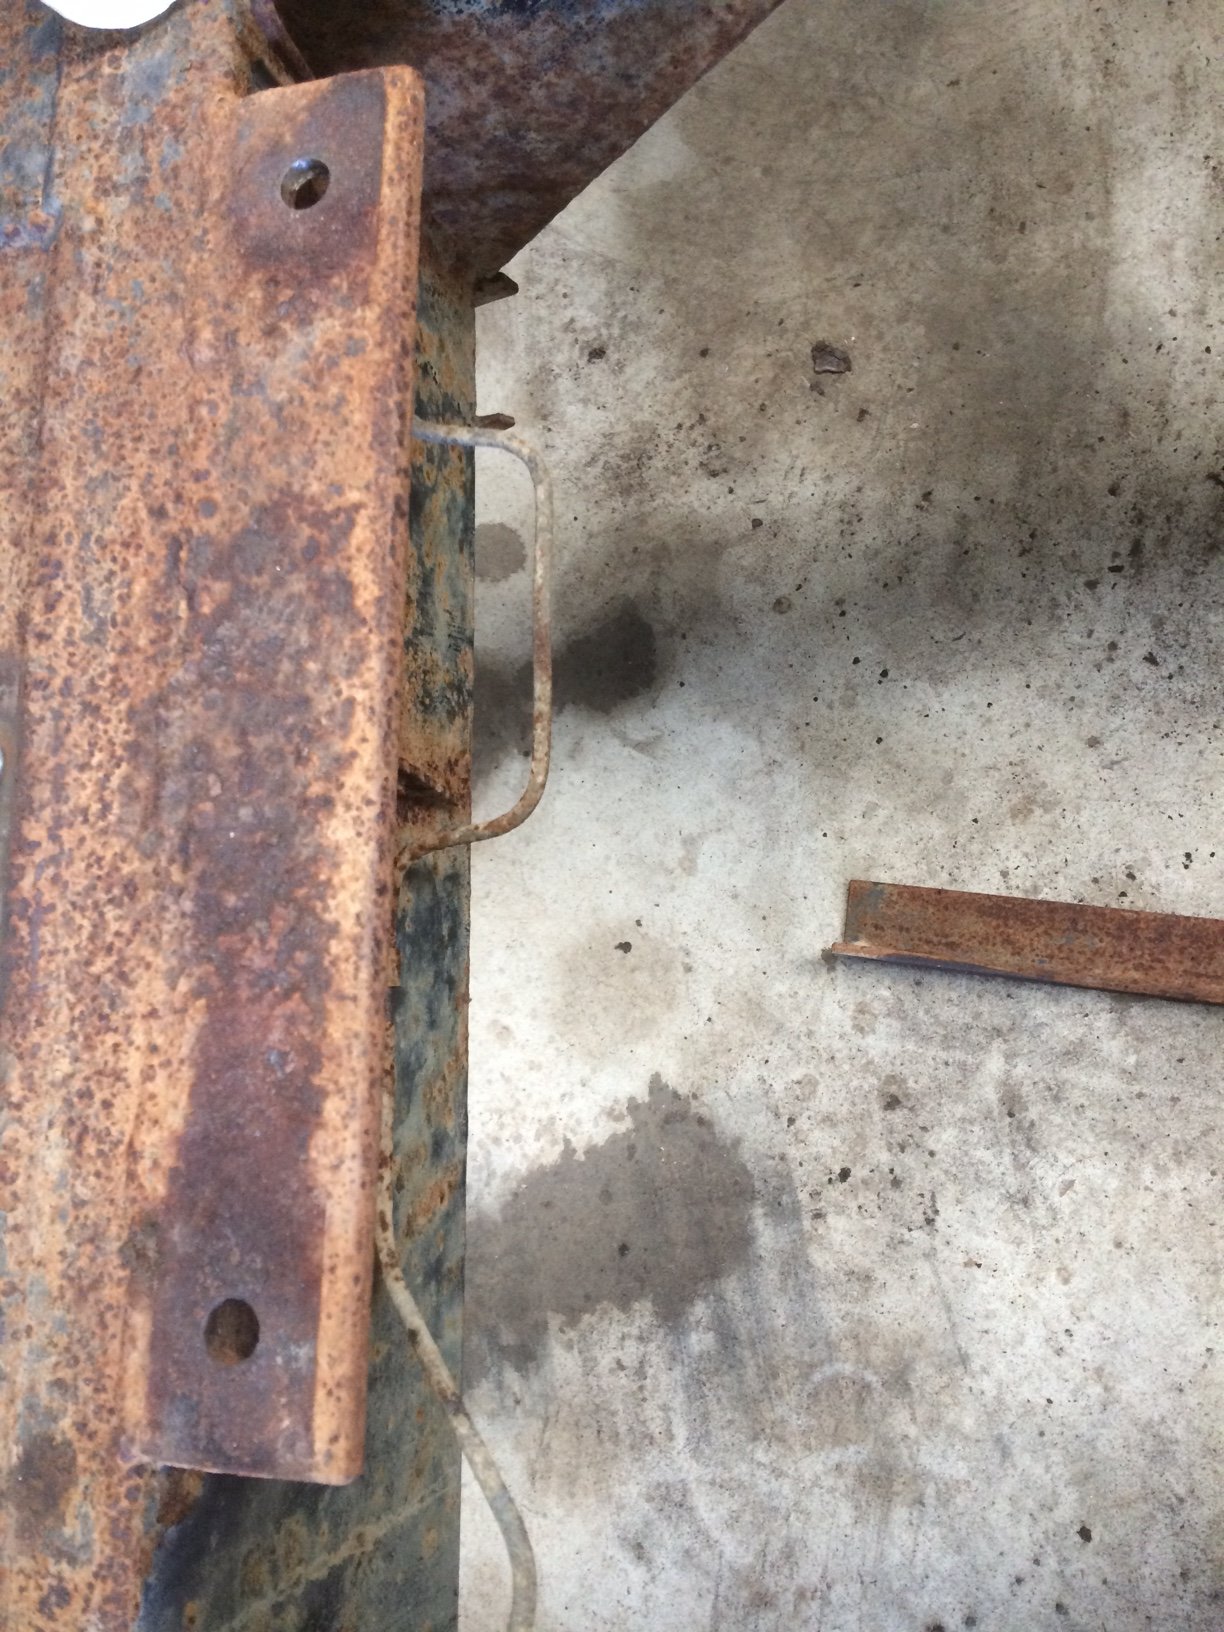
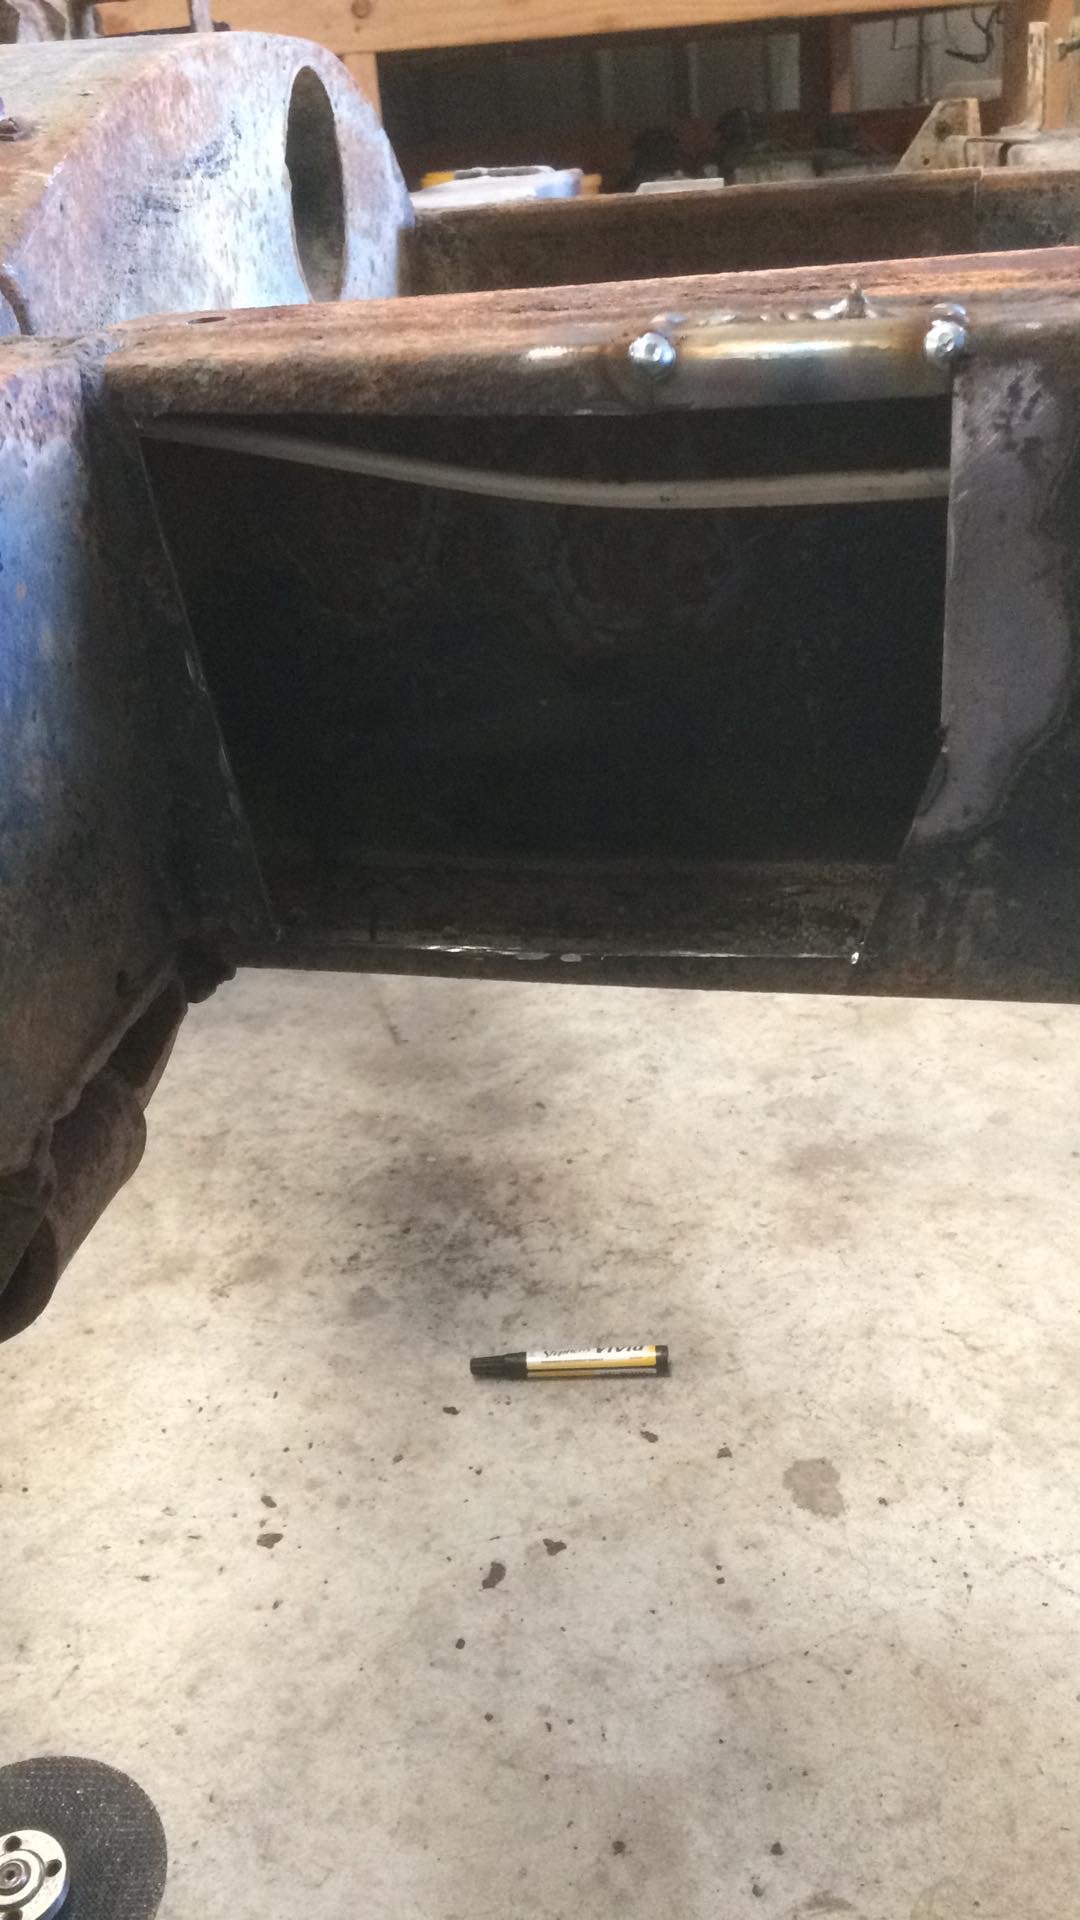
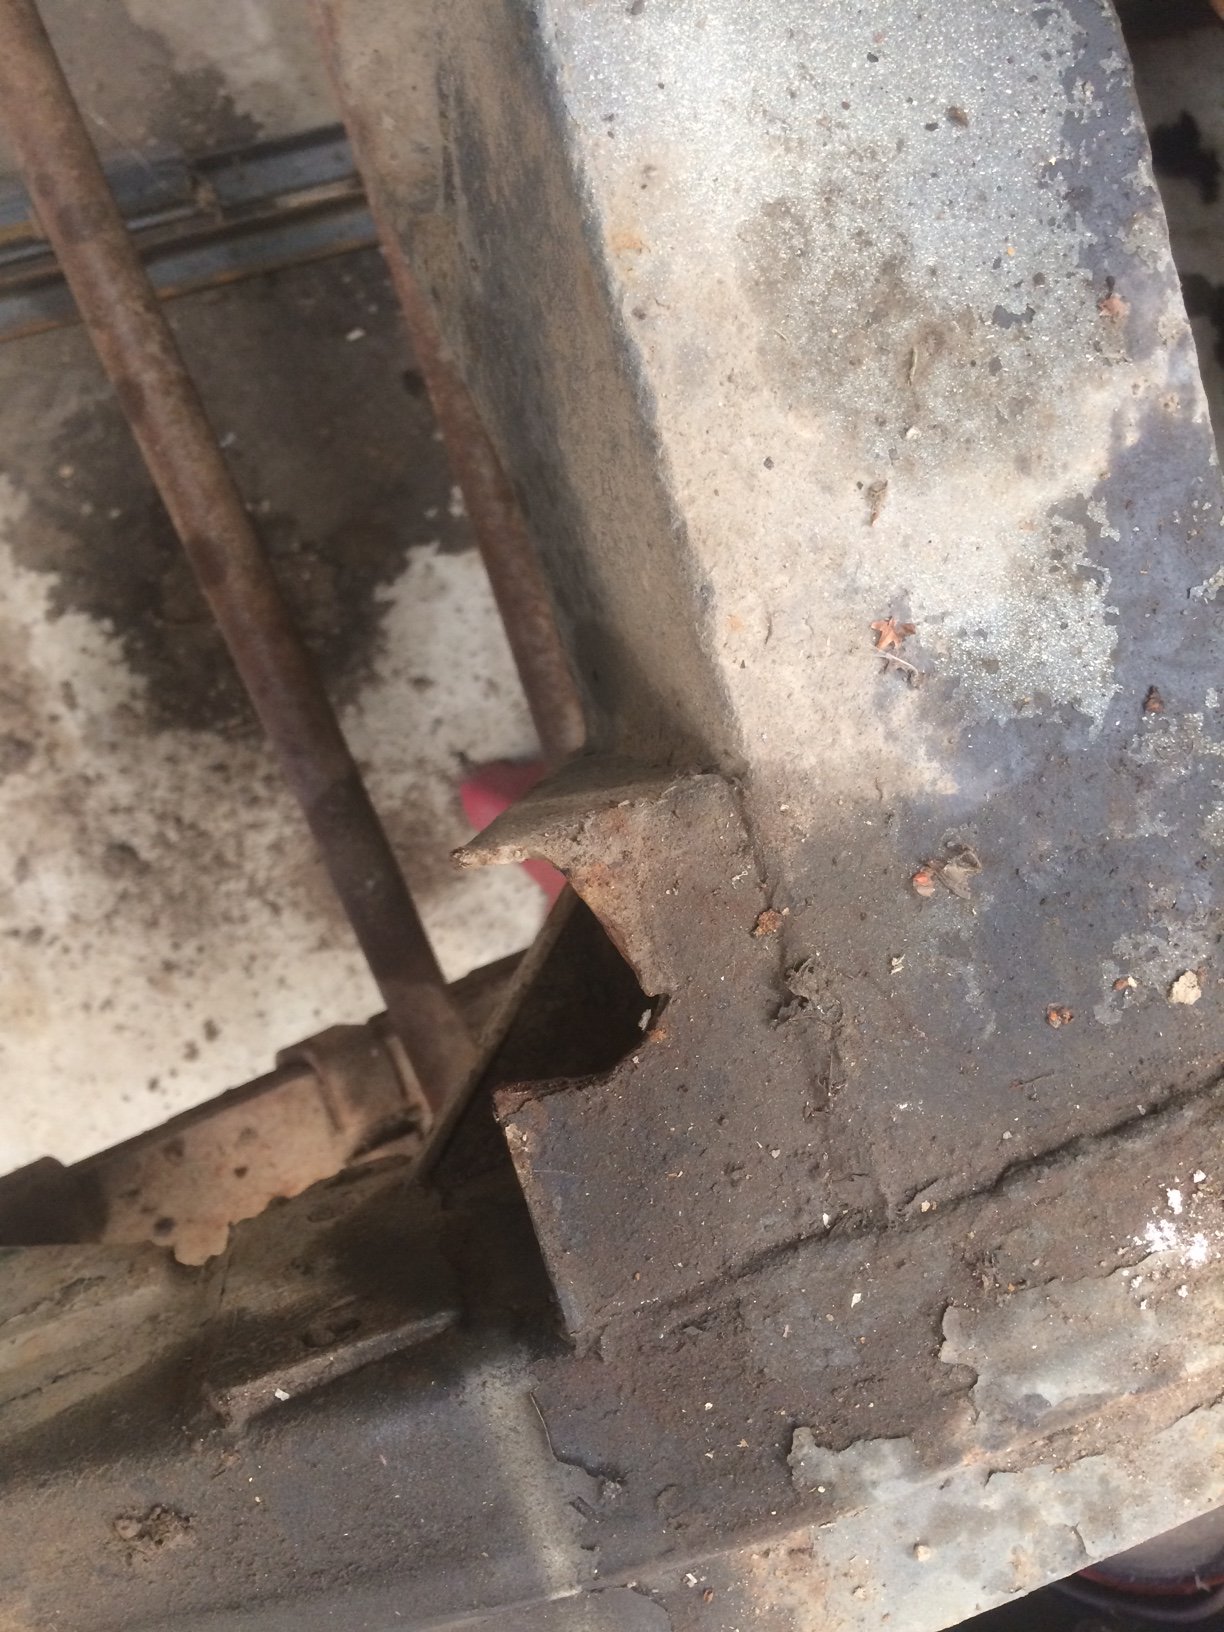
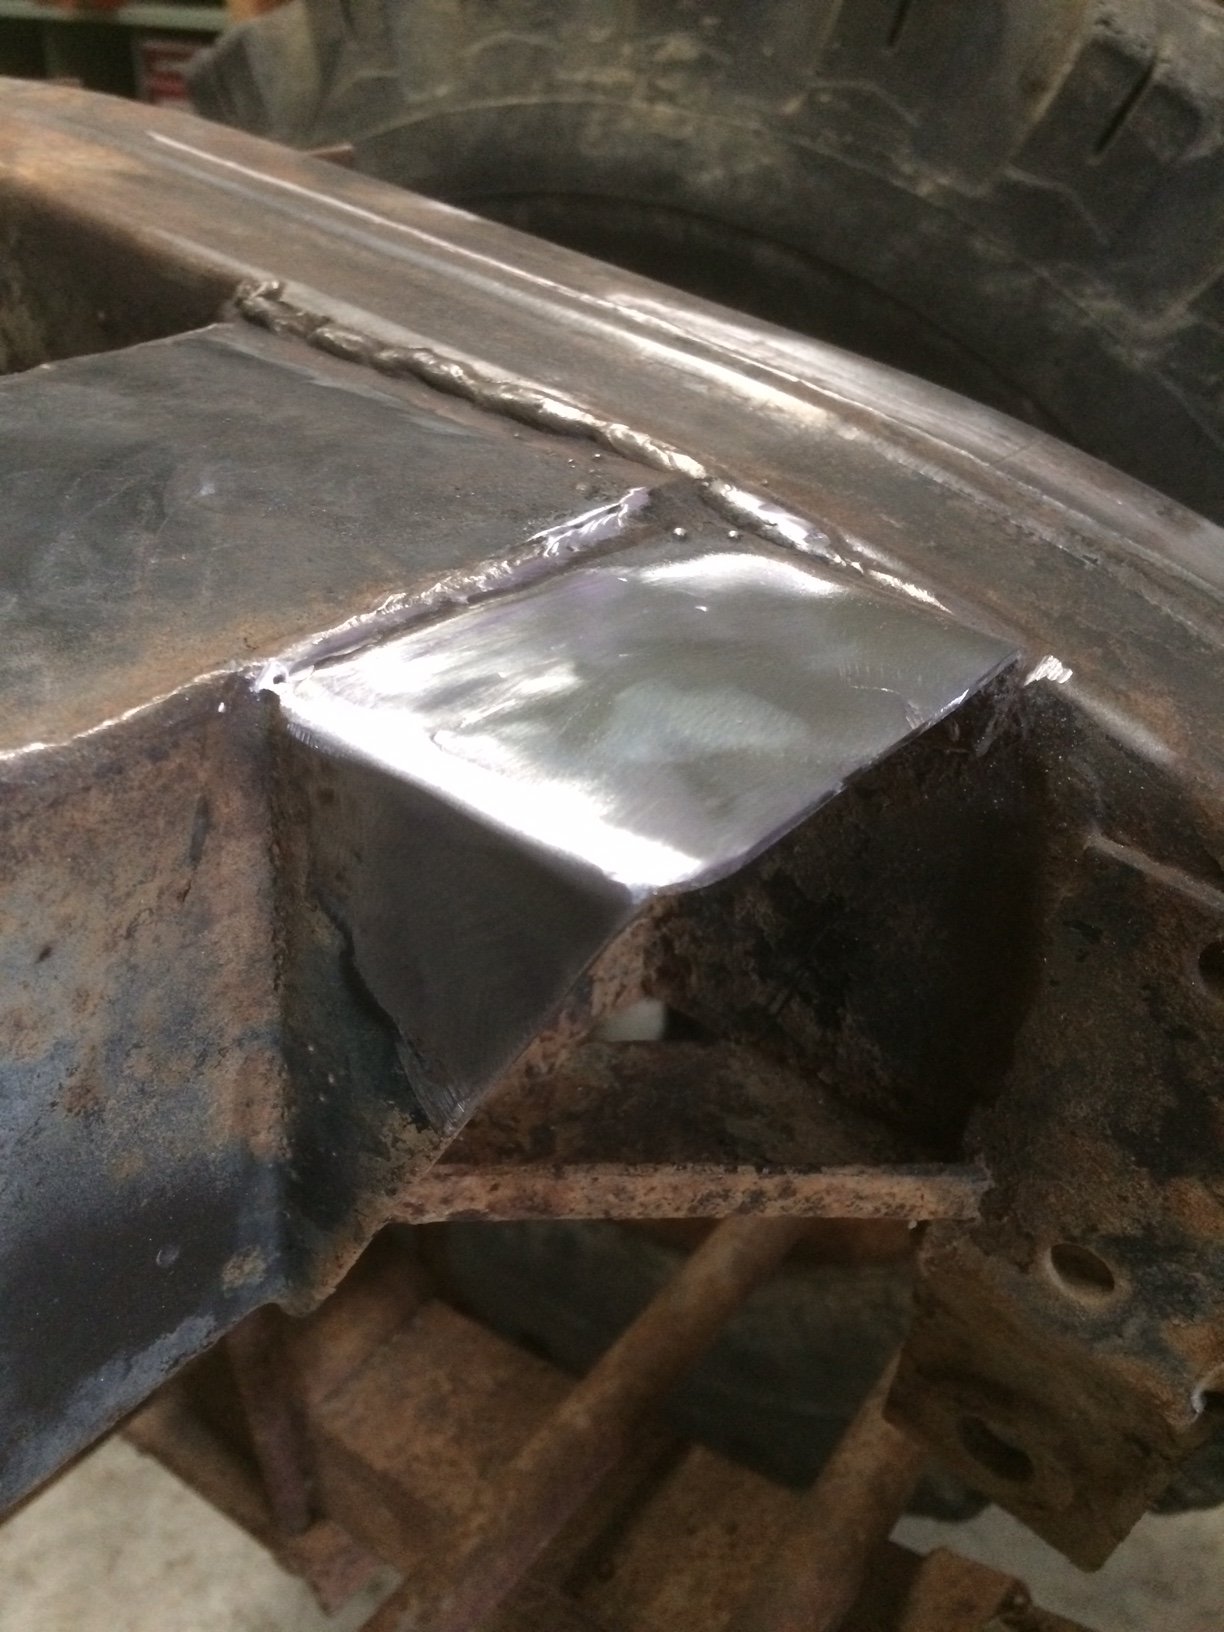
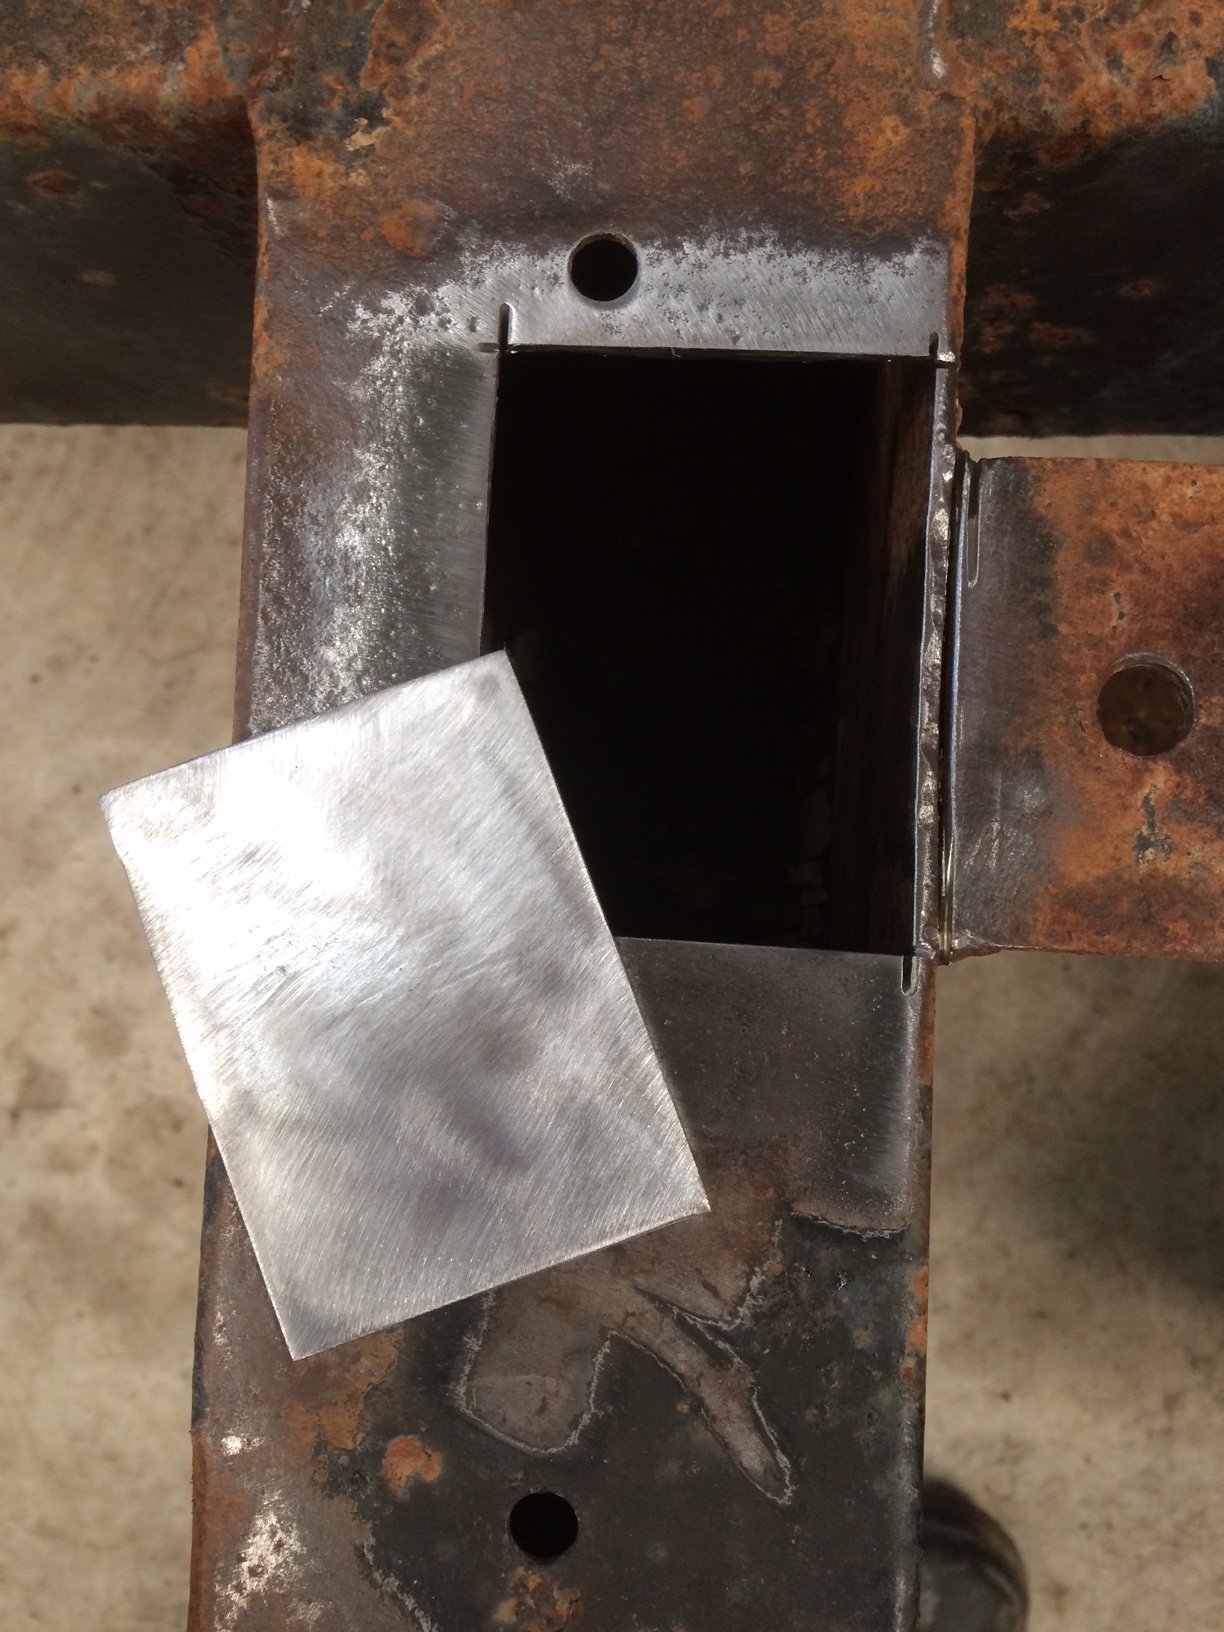
I have decided to start removing all the bracketry from the chassis that doesn’t belong. I’m doing this for several reasons, firstly because it looks untidy, and probably more importantly I think they are all hiding bad rust. Most of these tabs and brackets were only welded along one edge with probably no prep, and certainly no protection applied afterwards. Here is a random something on the outside of the chassis just behind the cab. which looks like this on the backside...Oh dear. As I suspected, massive rust heave between layers. By the time I cut out all the rusted and dented bits, I now have quite a large hole to fill up. I already let a small patch in where the rot went around the corner onto the top section of the chassis. Then I cut the LPG tank mounts off. They are made of 6mm angle, and again only welded along the top. To reveal more goodies A hole and nice flaky Weetbix. Same on both sides. It took a fair bit of careful cutting to get through these without taking away any of the original chassis steel. The rot will need to be cut out around the corner because the tank brackets trapped a lot of crap and rust has eaten into the top of the chassis. I might need to get some big rhs offcuts to cut up for patches, because I have tried and failed to put a tight enough radius in 2.5mm sheet to match the chassis profile.

- 27 replies
-
- 2
-

-
- land rover
- 109
- (and 1 more)
-
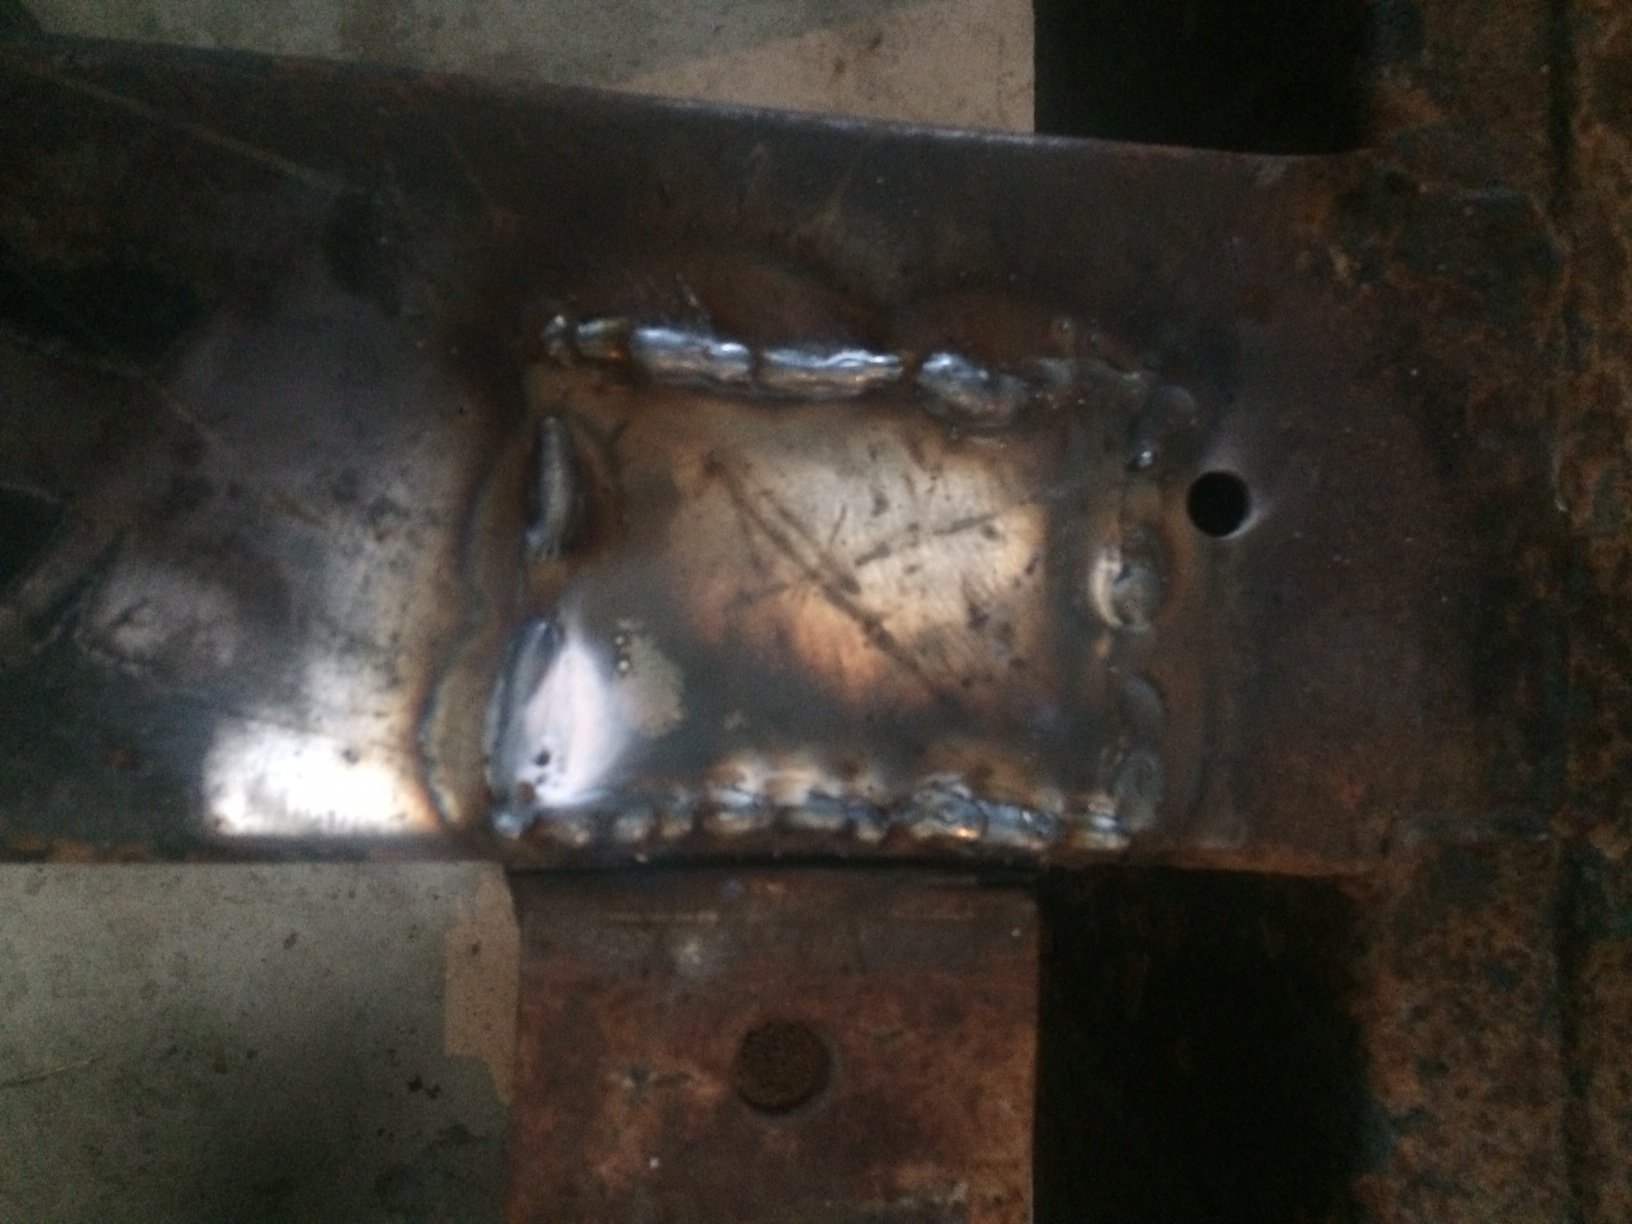
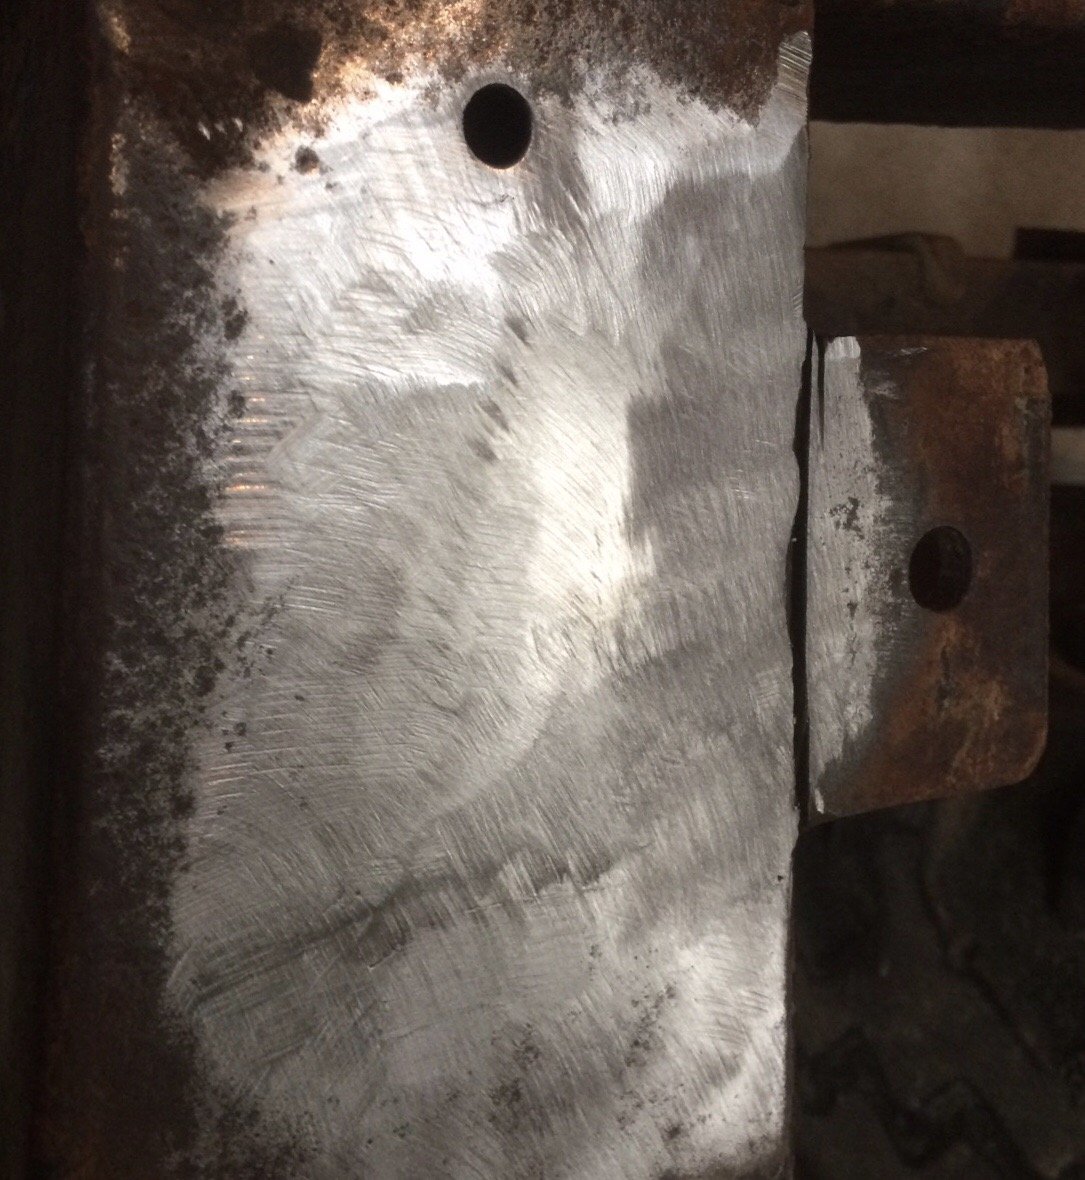
Practicing some more welding. Before: After: Right now I’m keen on investing in some flap discs to make a final finish, as I’m a bit chicken about going too far with the grinder. Also built up the end of the triangular gusset with weld as there was a chunk missing. That went fairly well and you almost can’t tell. Now I have to drill an oval hole to finish it. The bit you’re looking at is the left side radiator panel mount, which was torn out when it got crashed into a fence or something.
- 27 replies
-
- 5
-
-
- land rover
- 109
- (and 1 more)
-
After 5 minutes practice on some scrap steel I decided to do a patch on a fairly no jeopardy part of the chassis. The outrigger in front of the left rear wheel had a rust hole in the top. It so happens that the steel thickness of the front bumper is the same as the chassis so I cut the patch out of the bumper (bumper is bent badly at one end) and ground the galv off with a strip disc. Bear in mind this is the first thing I have ever welded onto a car... Welded it in. Grind down And blast some zinc primer on it. Can I just say grinding sucks. It seems to get good penetration I end up with a fairly thick bead on the top. Operator error, no doubt. Also, a quick run over with a flap disc at the end would make it look nicer too, but hey, it’s only a Land Rover chassis. Then I thought I would try out my new twist knot cup wire brush on a crusty piece. The bottom part of the photo is a minutes work after which I had to undress in the workshop, and pull a piece of wire out of my leg that had gone through my overalls and 2 layers of clothing. I am inclined to dislike the wirebrush. Anyone else get stabbed by these? In contrast the top half of the photo is 10 seconds with a 3M strip disc and zero injuries:
- 27 replies
-
- 5
-
-
- land rover
- 109
- (and 1 more)
-
Pretty boring, but since I like before and after pics, and I hate working on filth: In other news, I spent the last of my pocket money on a metal gluing thing. Now I have to figure out how to drive it.
- 27 replies
-
- 15
-
-
- land rover
- 109
- (and 1 more)
-
The red one is better? Show us how bad the blue one really is!
-
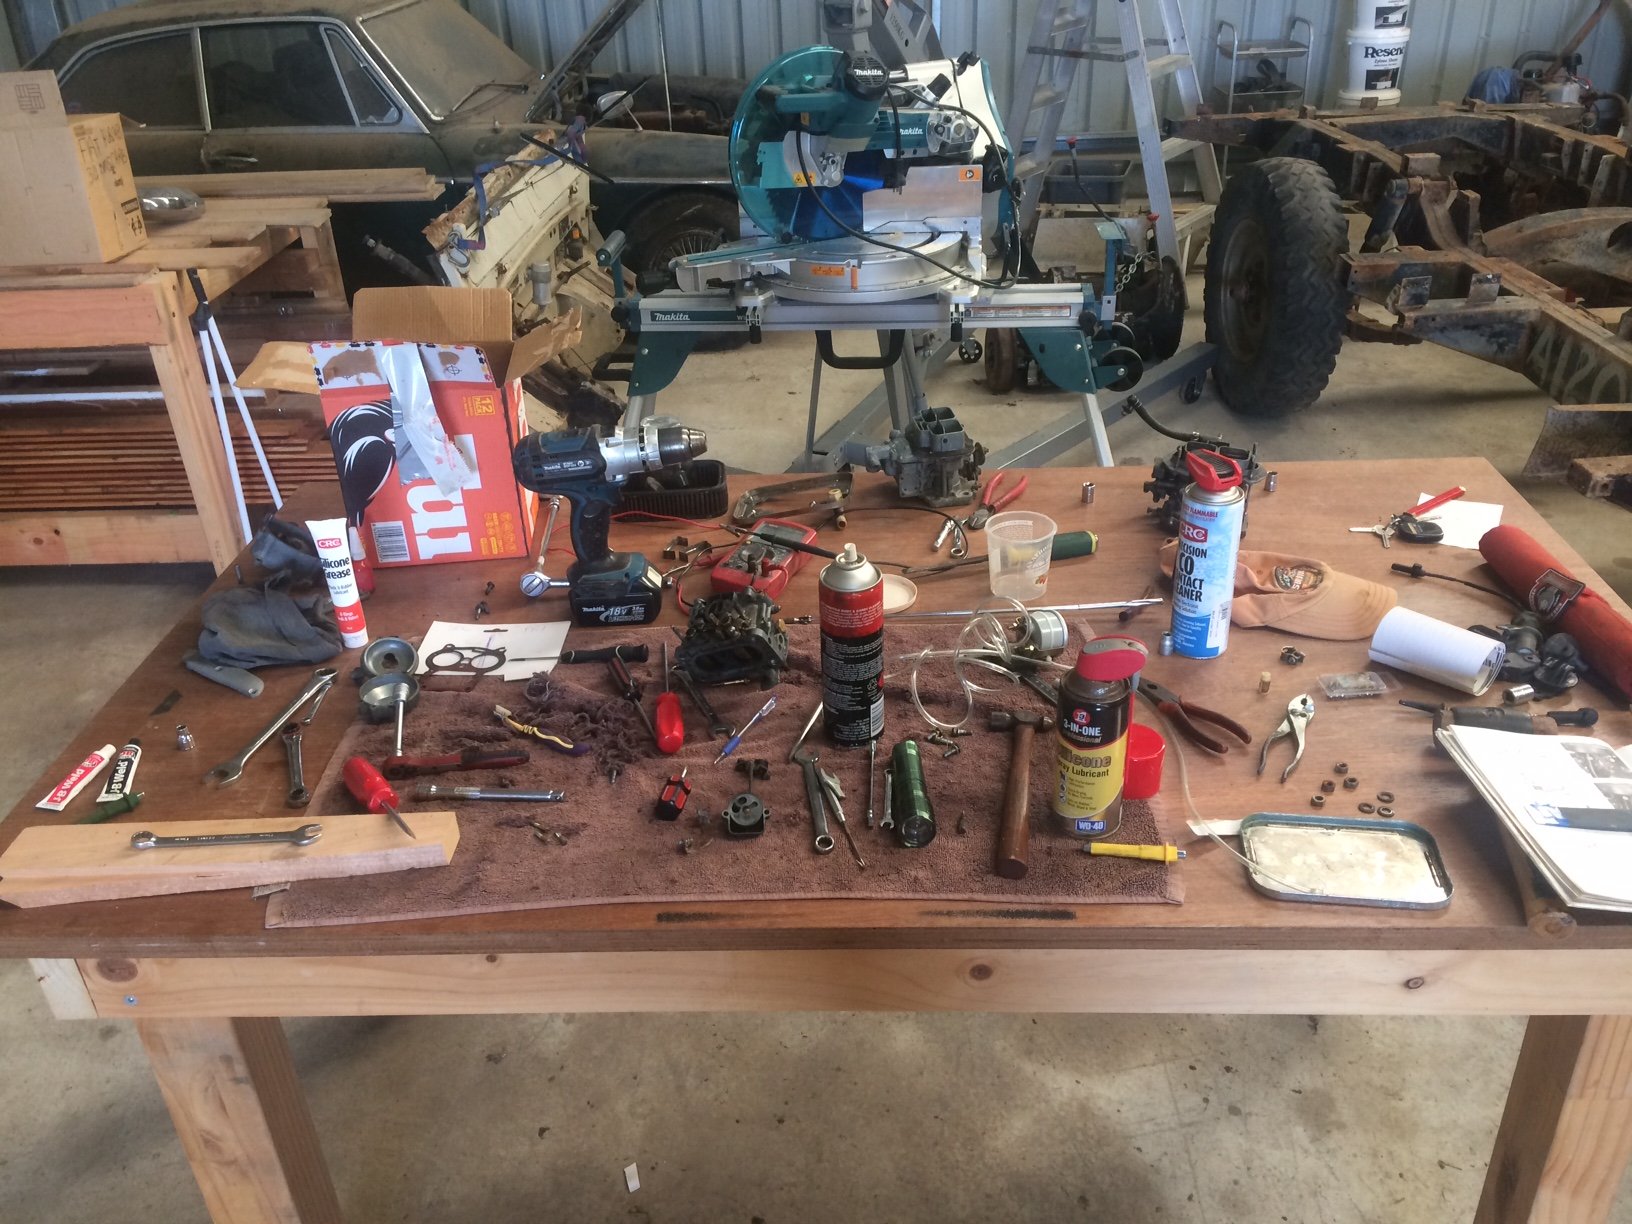
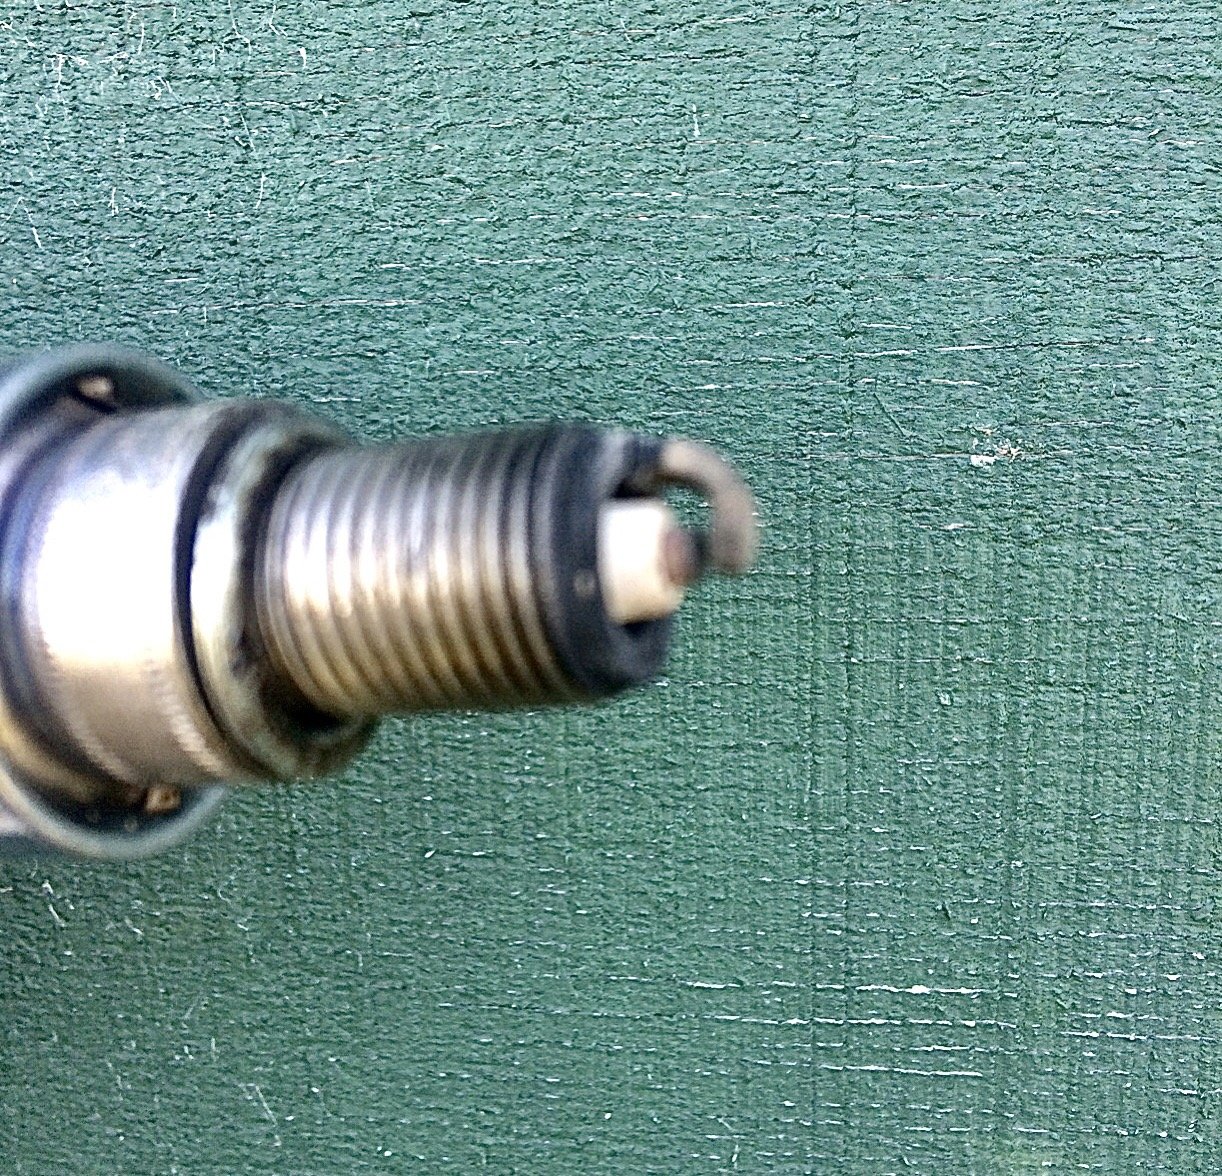
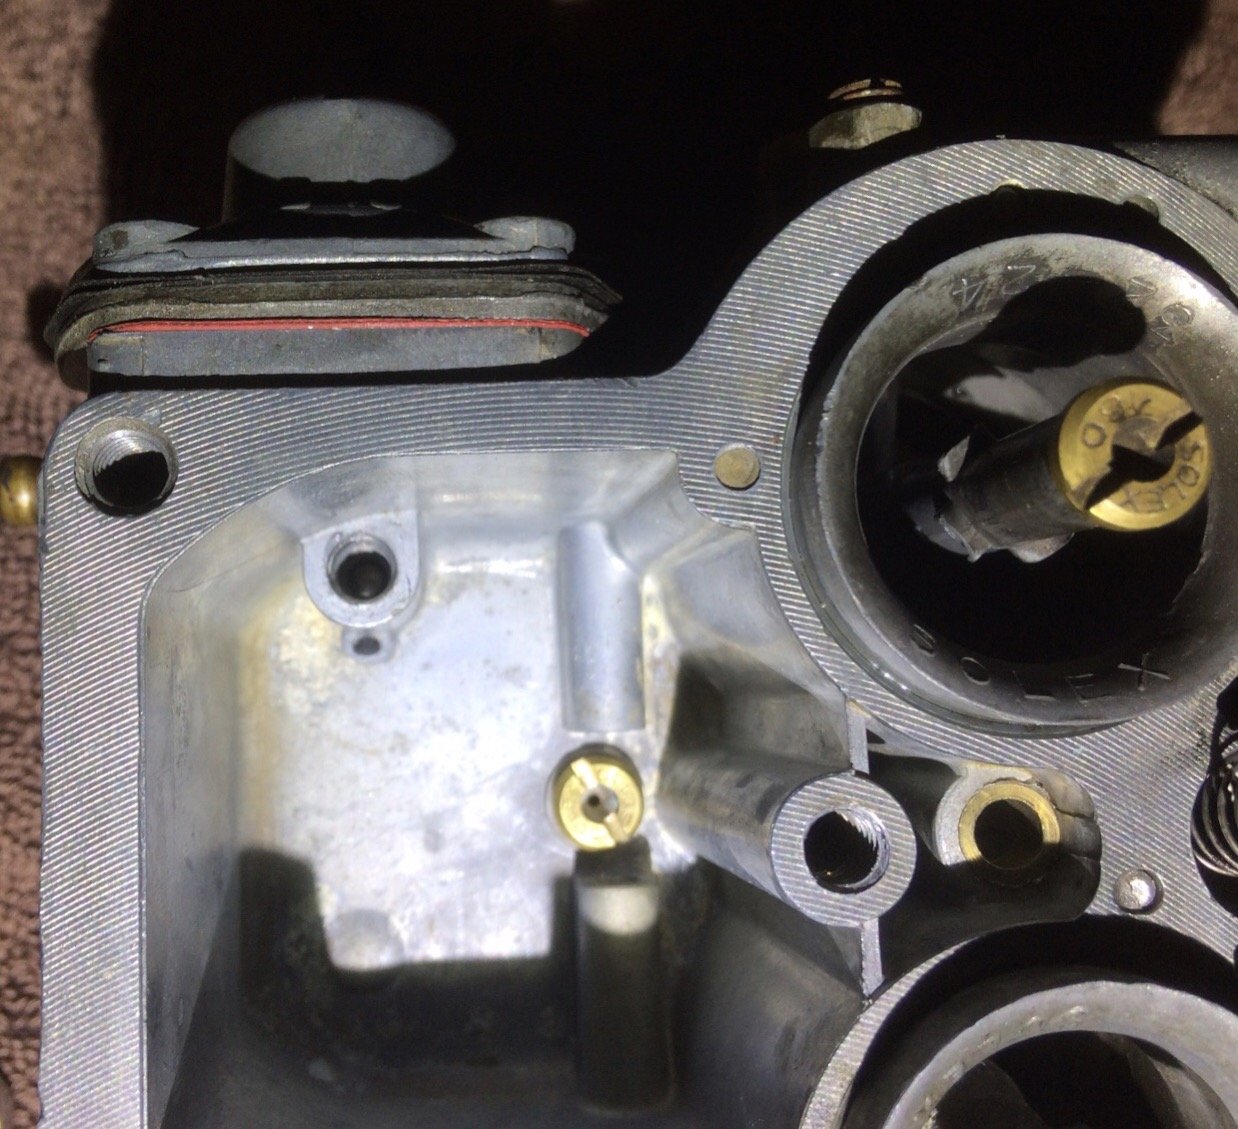
It’s a good thing I have so much time on my hands. I decided to remove and strip the Weber 32/36DGV from the MG. For a carb that hasn’t had fuel through it for 20 years, it didn’t look too bad. Just some reddish dust through it. I just methodically pulled it apart and took all the jets, aux venturis, emulsion tubes, basically everything that unscrews or can be extracted and then got busy with carb cleaner and compressed air. Researching the way it is jetted, it’s basically exactly the same as a Capri 1600gt and a host of other 100ish hp stuff, so it should work pretty well. It has the same base mount bolt spacing as the Solex carb. It’s a pretty wide thing compared to the stock carb though, so I had to remove the throttle link rod and unbolt the mount on the cam box to get it to fit. Shame it doesn’t fit well, because it’s a really nice carb. Simple, well made, and still available new. Despite having 20+ year old gaskets etc, the car fired right up and I could immediately tell things were 1000% better. If I had the gear to improvise a throttle linkage for it (would also need a longer choke cable) I would love to run this carb for a while, as I think it could work quite well with this engine. Anyway, this confirms the (original to the car) Solex carb body has something wrong with it. More investigation reveals another leak here: The casting is compromised. Then I decided to drag the other carb body out again and repeat the stripping process and put all the best bits in the other one. I’m a bit messy when I’m in the middle of a job. Refitted to the car, and straight away I could tell the rich idle was gone. I made some idle adjustments, and I thought it could use a bit more advance. I just set the timing with a vacuum gauge because the engine doesn’t have the timing cover on (has the marks on it). Got it to sit at 18” which is very healthy. Went for a thrash down the road and did a plug chop. Excuse focus or lack of... looks good to me. I did feel like the secondary wasn’t opening. If you try and open the secondary throat with the lever that the diaphragm works on, I found it had a significant stiction, so I suspect the vacuum diaphragm is not strong enough to overcome it. There is an adjustment screw in a prick of a place under the float bowl that works like an idle speed adjuster on the secondary butterfly, so I nipped that up until it just stops the butterfly from jamming when it shuts. Another quick thrash reveals it has done the trick. Personally, I still don’t like vacuum secondaries. So there we are. Days of pottering around, I think the stock Solex is running as well as it’s ever going to. It will have to do, because Covid-19 has taken a dump on my earnings. Twin Dellortos, I haven’t forgotten about you, promise.
-
Good news, bad news. Good news is it starts and runs, and the accelerator pump works, and it definitely feels like the secondary is opening. Bad news, it’s very rich at idle and low rpm. Even with the mixture screw tight on its seat, nothing changes and I’m roosting black smoke and petrol fumes. I’m eyeing up the weber 32/36 DGV on the MG. It has the correct orientation. The fuel inlet is on the wrong side but the hose should reach. It’s set up for a cable linkage but at least the rotation is correct for the Fiat. Might strip it today and give it a cleanout (not run for 20 years) and give it a whirl.
-
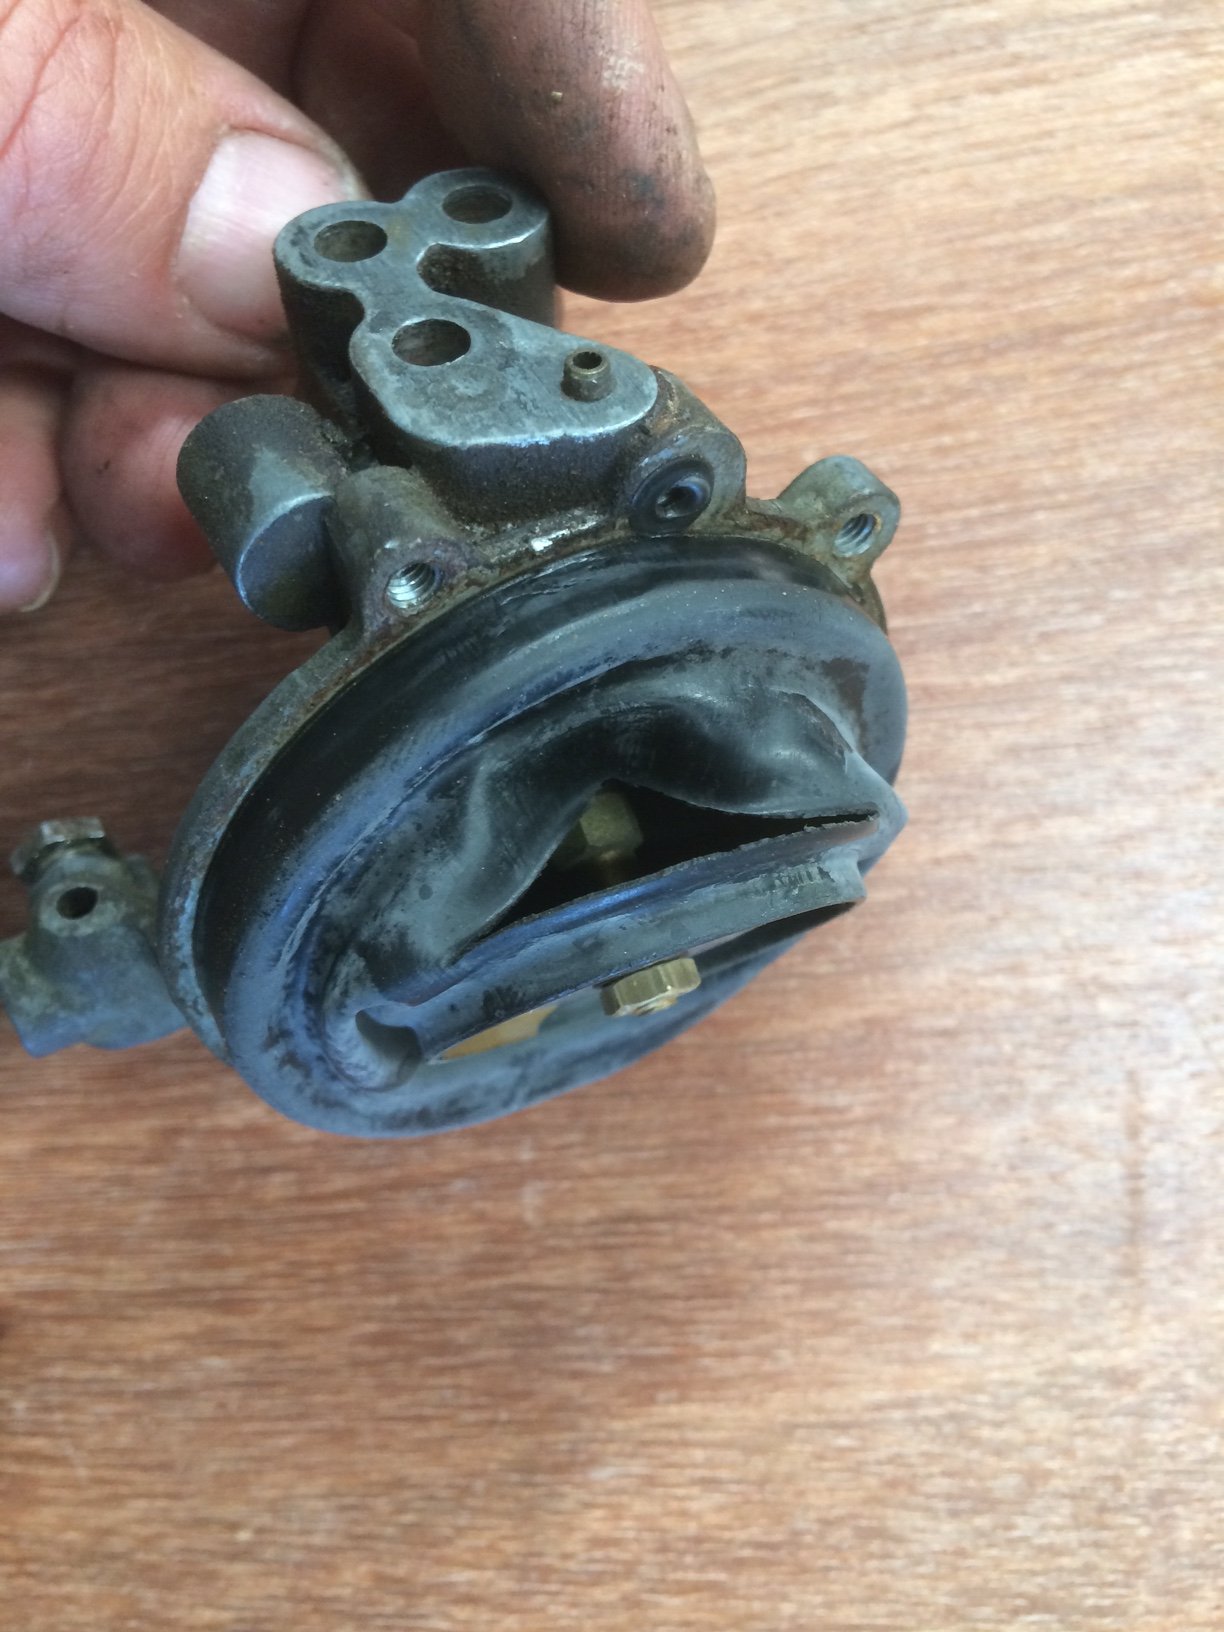
I really want to get to the bottom of why the accelerator pump won’t work. I tipped some fuel into the float chamber and operated the pump lever. Lightbulb moment! It’s pushing fuel back out through the inlet port, which means it must need some sort of check valve, right? Maybe it’s not working... Time to consult the manual again. It’s item 37 in the pic below Which belongs in the hole on the side of the float chamber as below There’s a grubscrew that goes in there too to stop the ball falling out. Thing is, there’s no ball in there. There’s not one in the spare carb either! Lucky my neighbour is an engineer/hoarder and he said he would drop a container of ball bearings in my mailbox, which he did. I have selected a 3.17mm ball, dropped it in the hole, applied grubscrew and tested. We have squirts!
- 127 replies
-
- 10
-
-
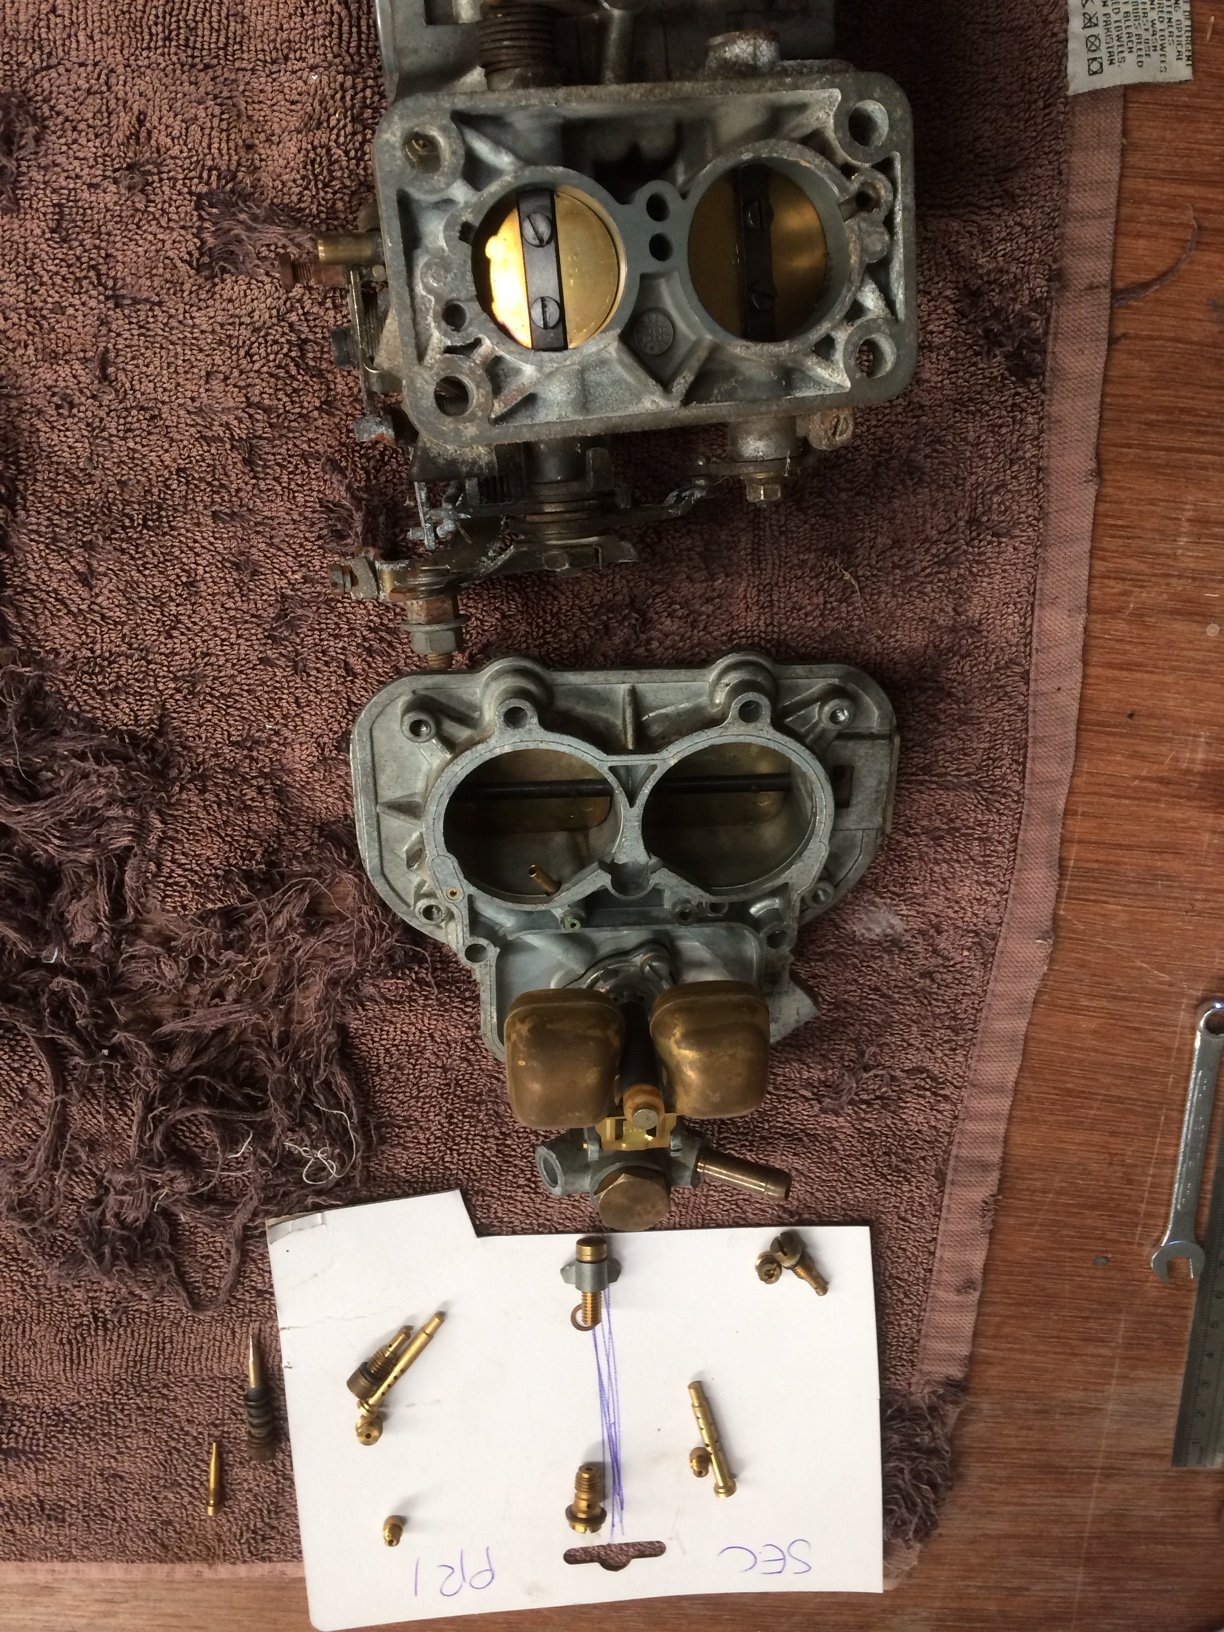
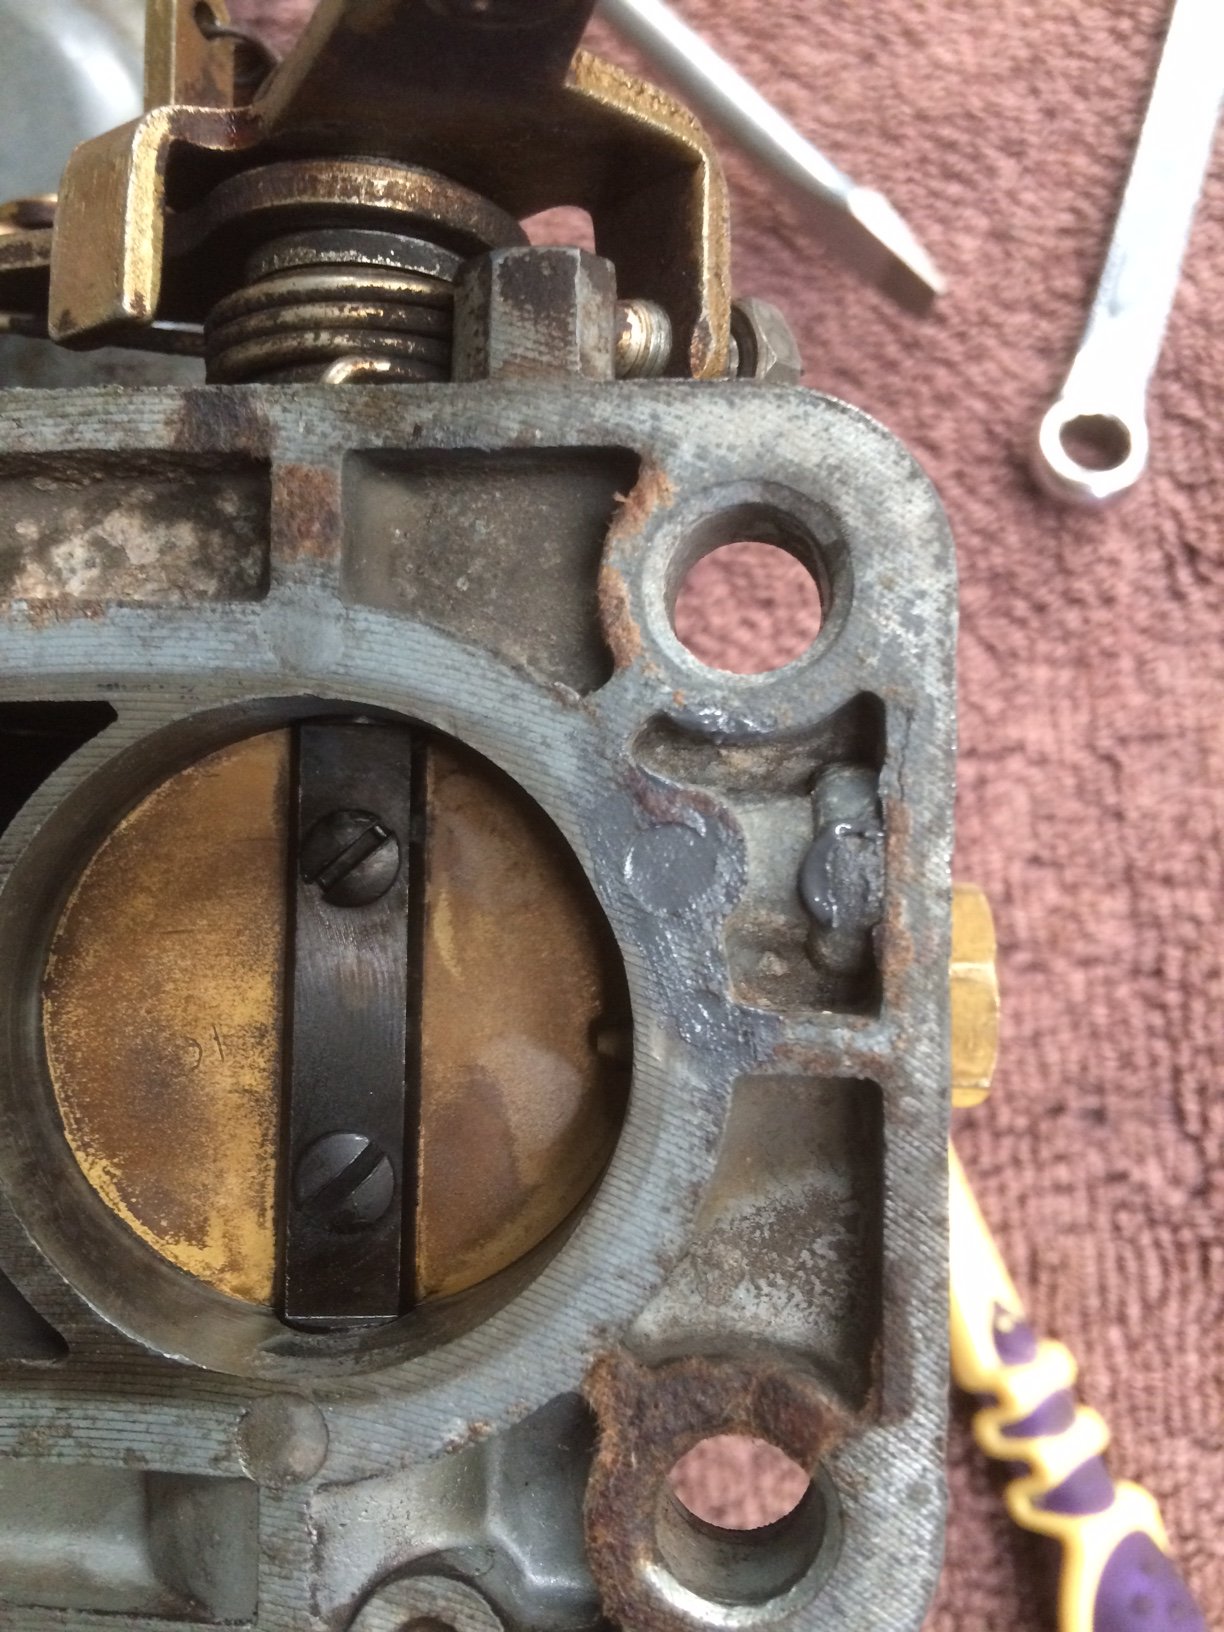
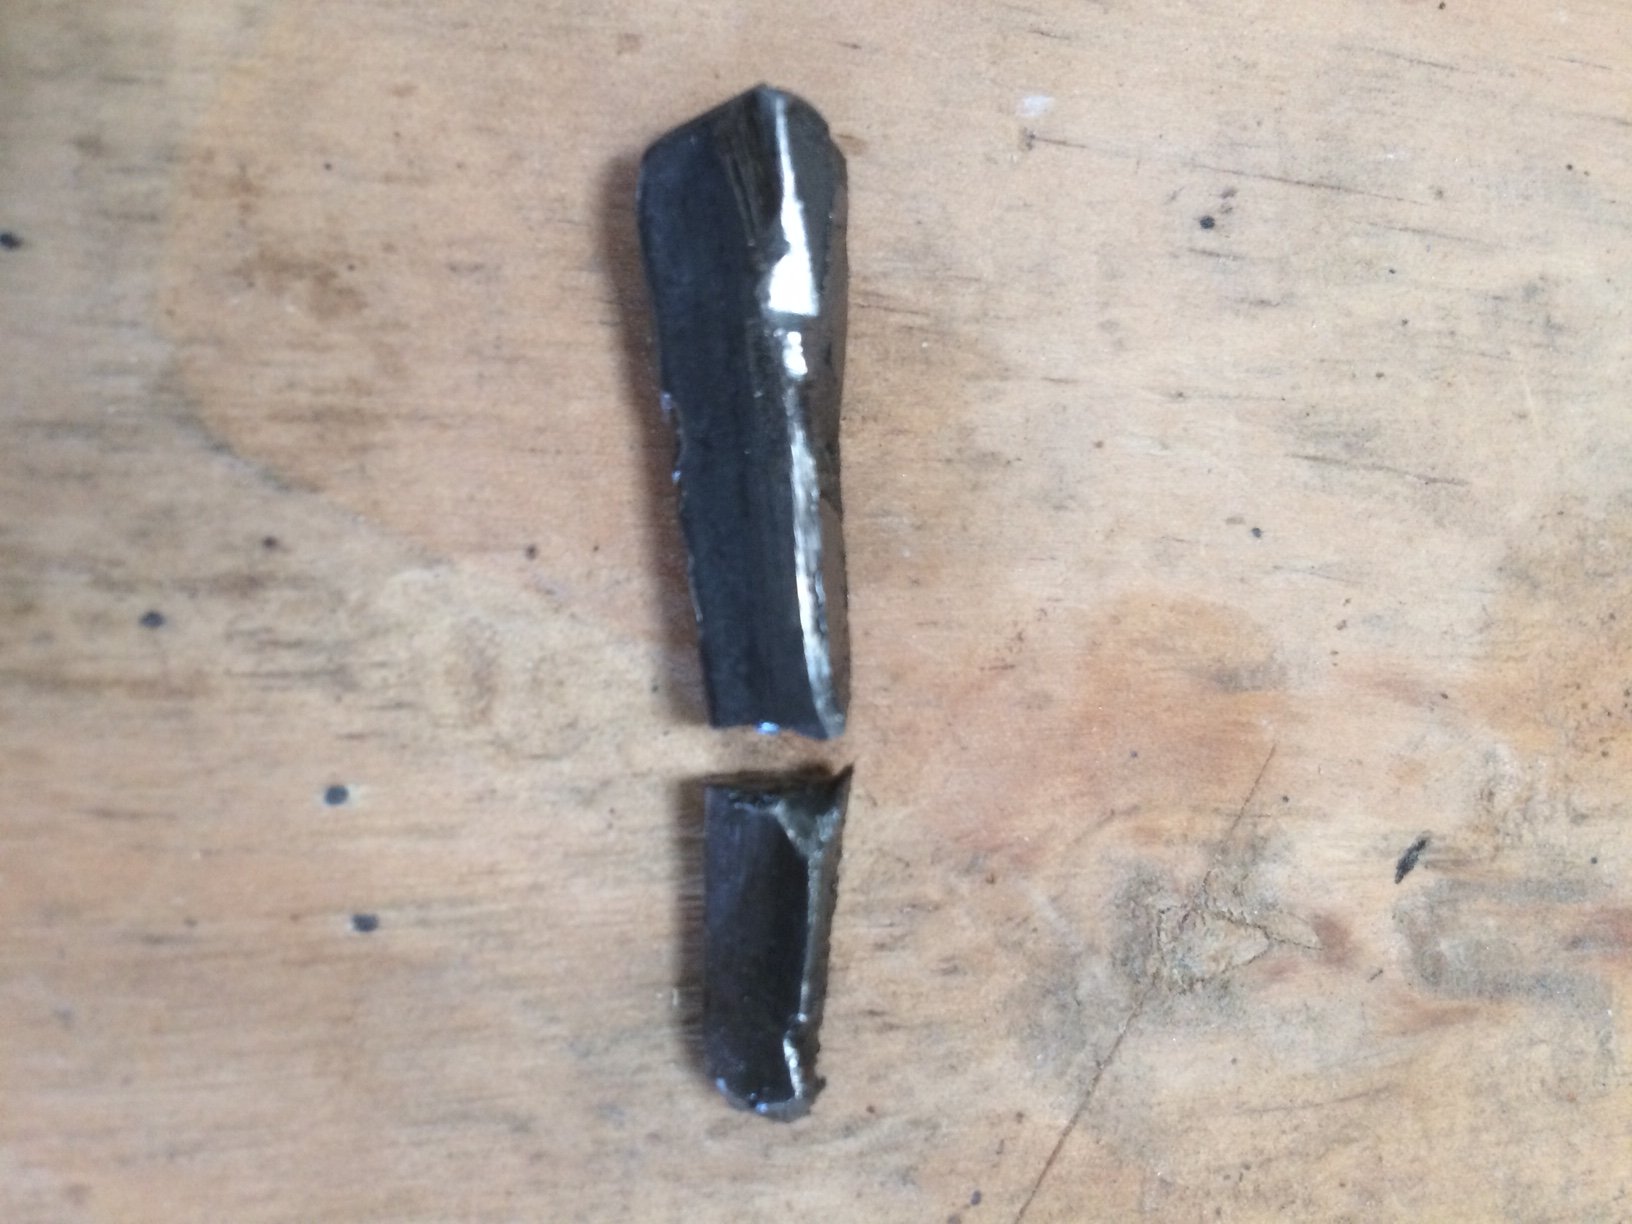
I have not been able to get this thing dialled in properly. Ages ago I swapped out the carb for one I got from @azzurro. It seemed to go well, with heaps more top end, but I never could get it to idle. On the weekend I swapped my old carb back in to have another play. This one had a kit thrown at it be me more ages ago. It’s still rubbish. For some reason the accelerator pump does not want to work, despite new diaphragm and seals. Also, it now keeps spitting back through the carb off idle. Plus, it only shows 12 inches of vacuum at idle, so I have an air leak somewhere I think. I have nothing better to do so I stripped them both and am trying to build one out of the best bits of both. I am using my original carb because it’s kitted, has all the correct factory jet sizes (and the other one has been bastardised in a couple of places so I can’t swap a couple of items), and it’s presumably only got 72,000 miles of wear. The first thing I was suspicious about was the diaphragm for the vacuum secondary, since it never had much top end with this carb. Eureka moment number 1. Ripped as. Swapped it for the diaphragm out of the other which was sound but covered in rusty coloured dust. Gave it a quick clean and fitted. Next, all the jets etc got taken out again and every orifice got a good blast of compressed air, which showed up another problem. When I blew through the idle mixture screw orifice, I could see bubbling leakage through the base of the carb body. Closer inspection reveals some micro cracking stemming from some corrosion. JB weld to the rescue (the dark grey in this pic) Now I have to wait 24 hrs before I can use it. Pretty keen to see if any difference has been made.
-
This thing is not easy to roll around on the tractor grips, so I fitted some low rolling resistance tyres I had on a spare set of rims. I also wanted to drain the diffs. Rear diff will have to be done off the car, because some animal managed to shear off the square head on the drain plug. Front diff was easy, but this came out: Probably not supposed to be there.
- 27 replies
-
- 7
-
-

-

-
- land rover
- 109
- (and 1 more)
-
They still do weldsmart. Seems like a sort of 2 tier thing. The weldsmart has 12 month warranty, the weldpro 24 months. Good to hear of your experience.
-
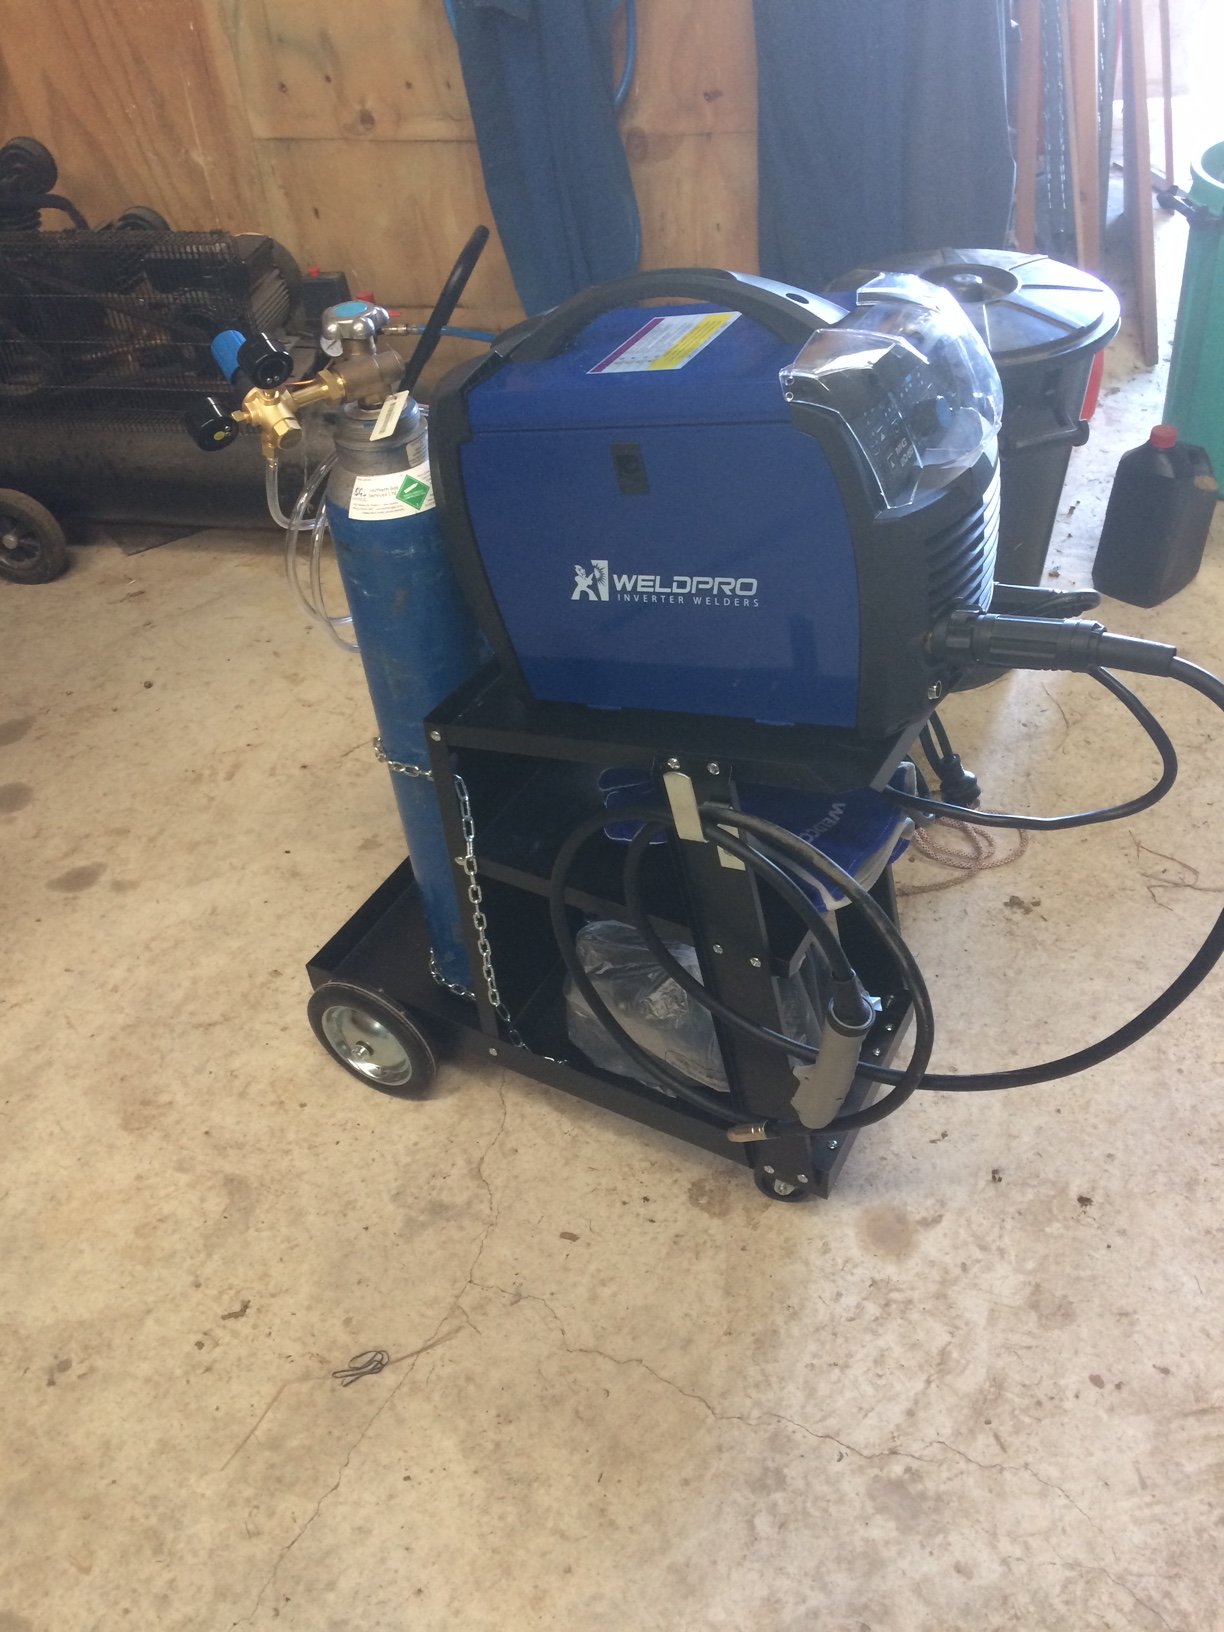
Anyone had anything to do with Weldpro? Been eyeing up a Weldtech as some of you are running, then I stumbled on this one from an outfit in Nelson. Seems good value https://www.onlinetools.co.nz/products/weldpro-digital-mig-205-migarctig-gasgasless-spool-gun-ready or a combo deal mig and plasma cutter for under $1k https://www.onlinetools.co.nz/collections/welders-1/products/weldsmart-combo-mig-200-inverterplasma-40-two-machines-freight-free
-
Still happy with your purchase?
-
If you end up with a complete gearbox/t. Case and don’t want the main gearbox let me know. My transfer box is fine, but the gearbox sounded like a coffee grinder with rocks in it.
-
If it were me, I’d risk a second hand transfer box, even if you need to throw seals and bearings at it. They usually last better than the main gearbox, particularly if you get one that was behind an original Land Rover engine.
-
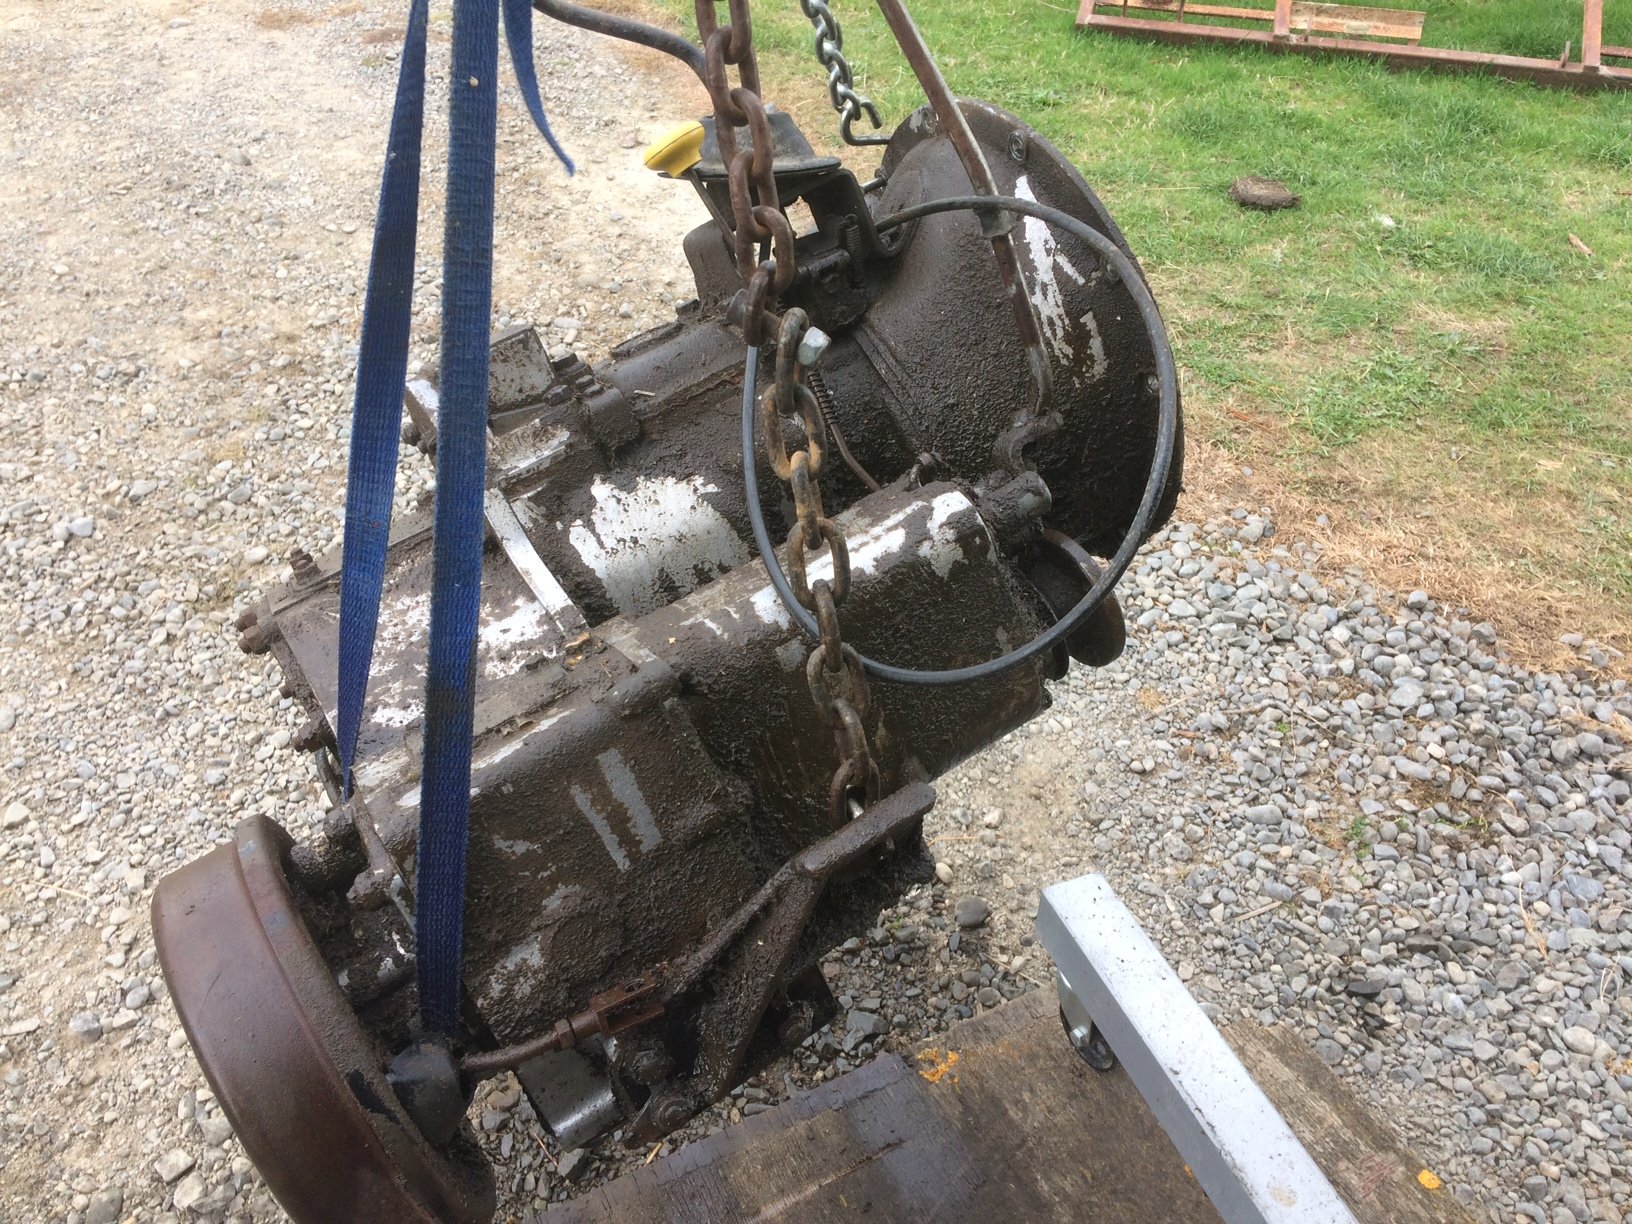
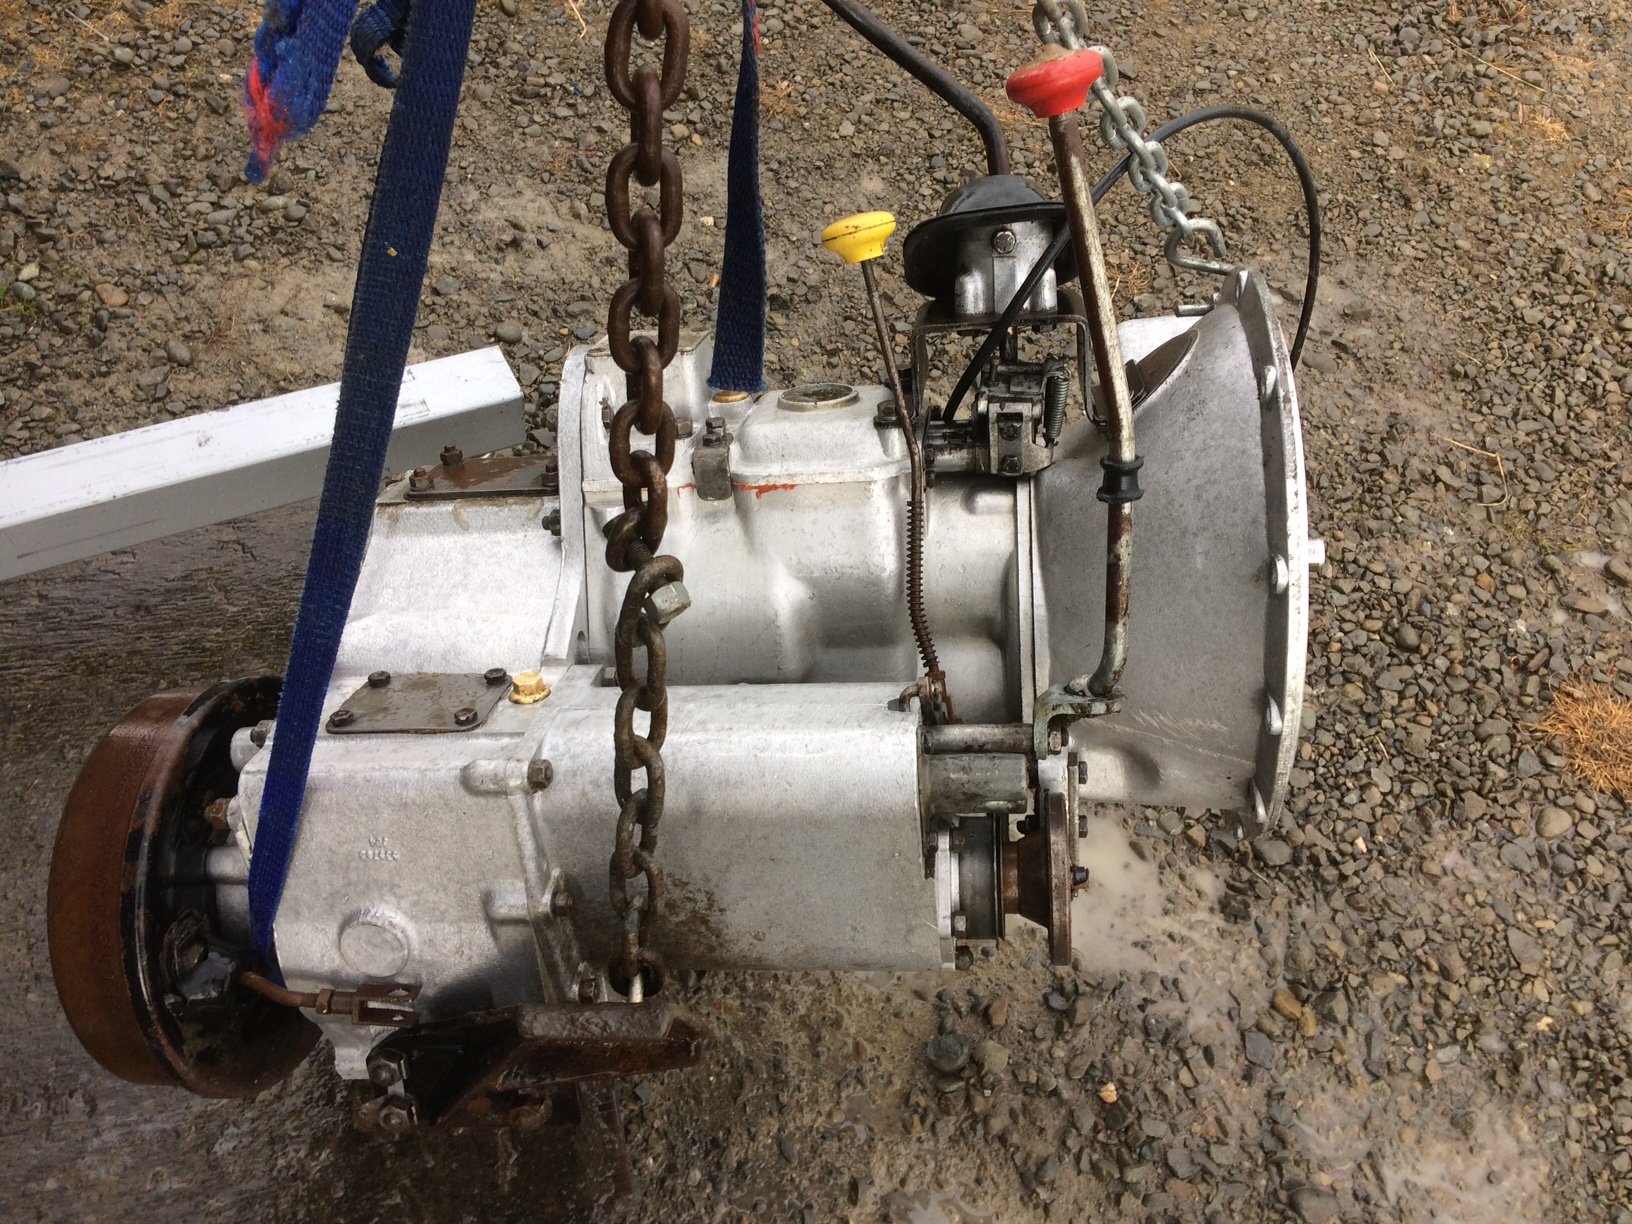
Not much actual work done today, but a massive cleanup of the workshop. I spent a few hours going through my shelving unit, having a purge and a re-pack and managed to get enough space to store bits of Land Rover in some semblance of order. Also drained the fluids from the engine and tucked it in the corner. Then I did the same with the gearbox/transfer case. This is how much oil came out of the gearbox: This goes some way towards explaining the horrendous noises it made. Anyway, that’s a problem for later. A good half litre came out of the transfer case (still a long way shy of a proper fill) and it was very black indeed. It will be interesting to see inside it when I eventually get around to cracking it open. Plenty of work to do before worrying about the gearbox.
- 27 replies
-
- 4
-
-
- land rover
- 109
- (and 1 more)
-
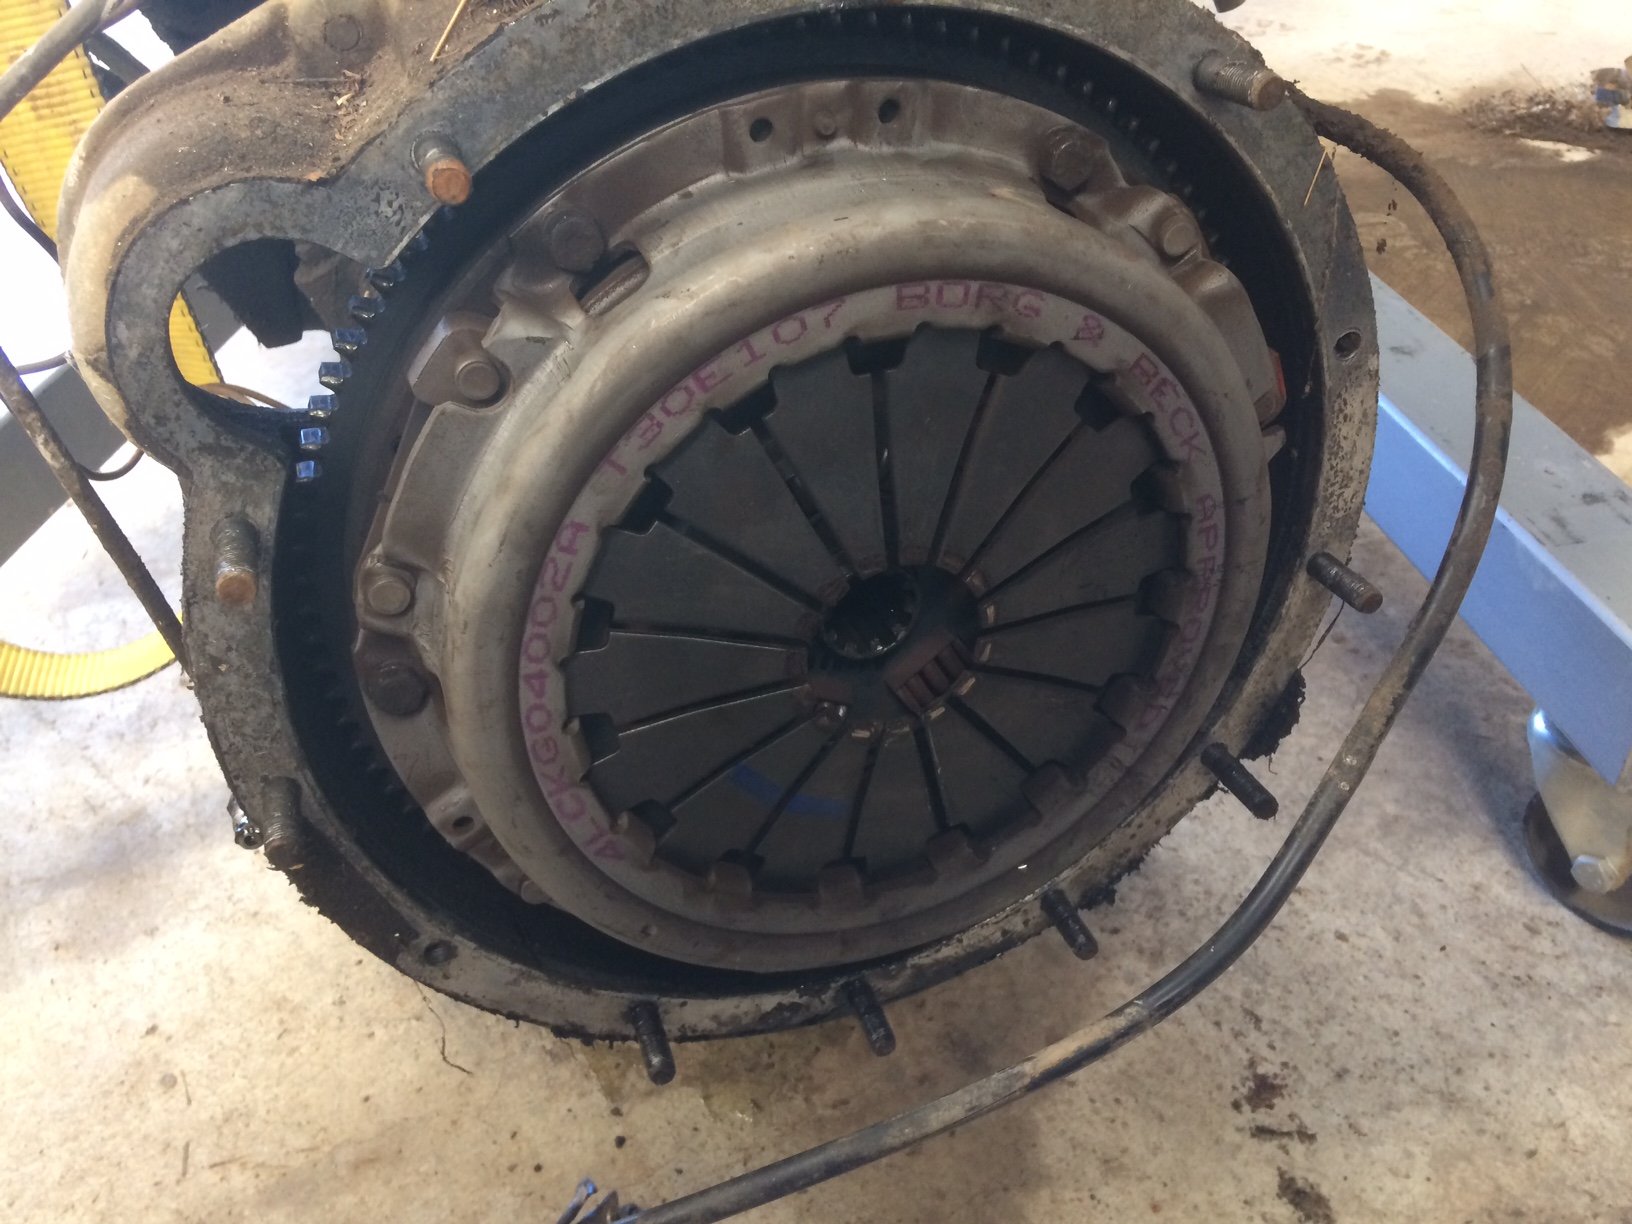
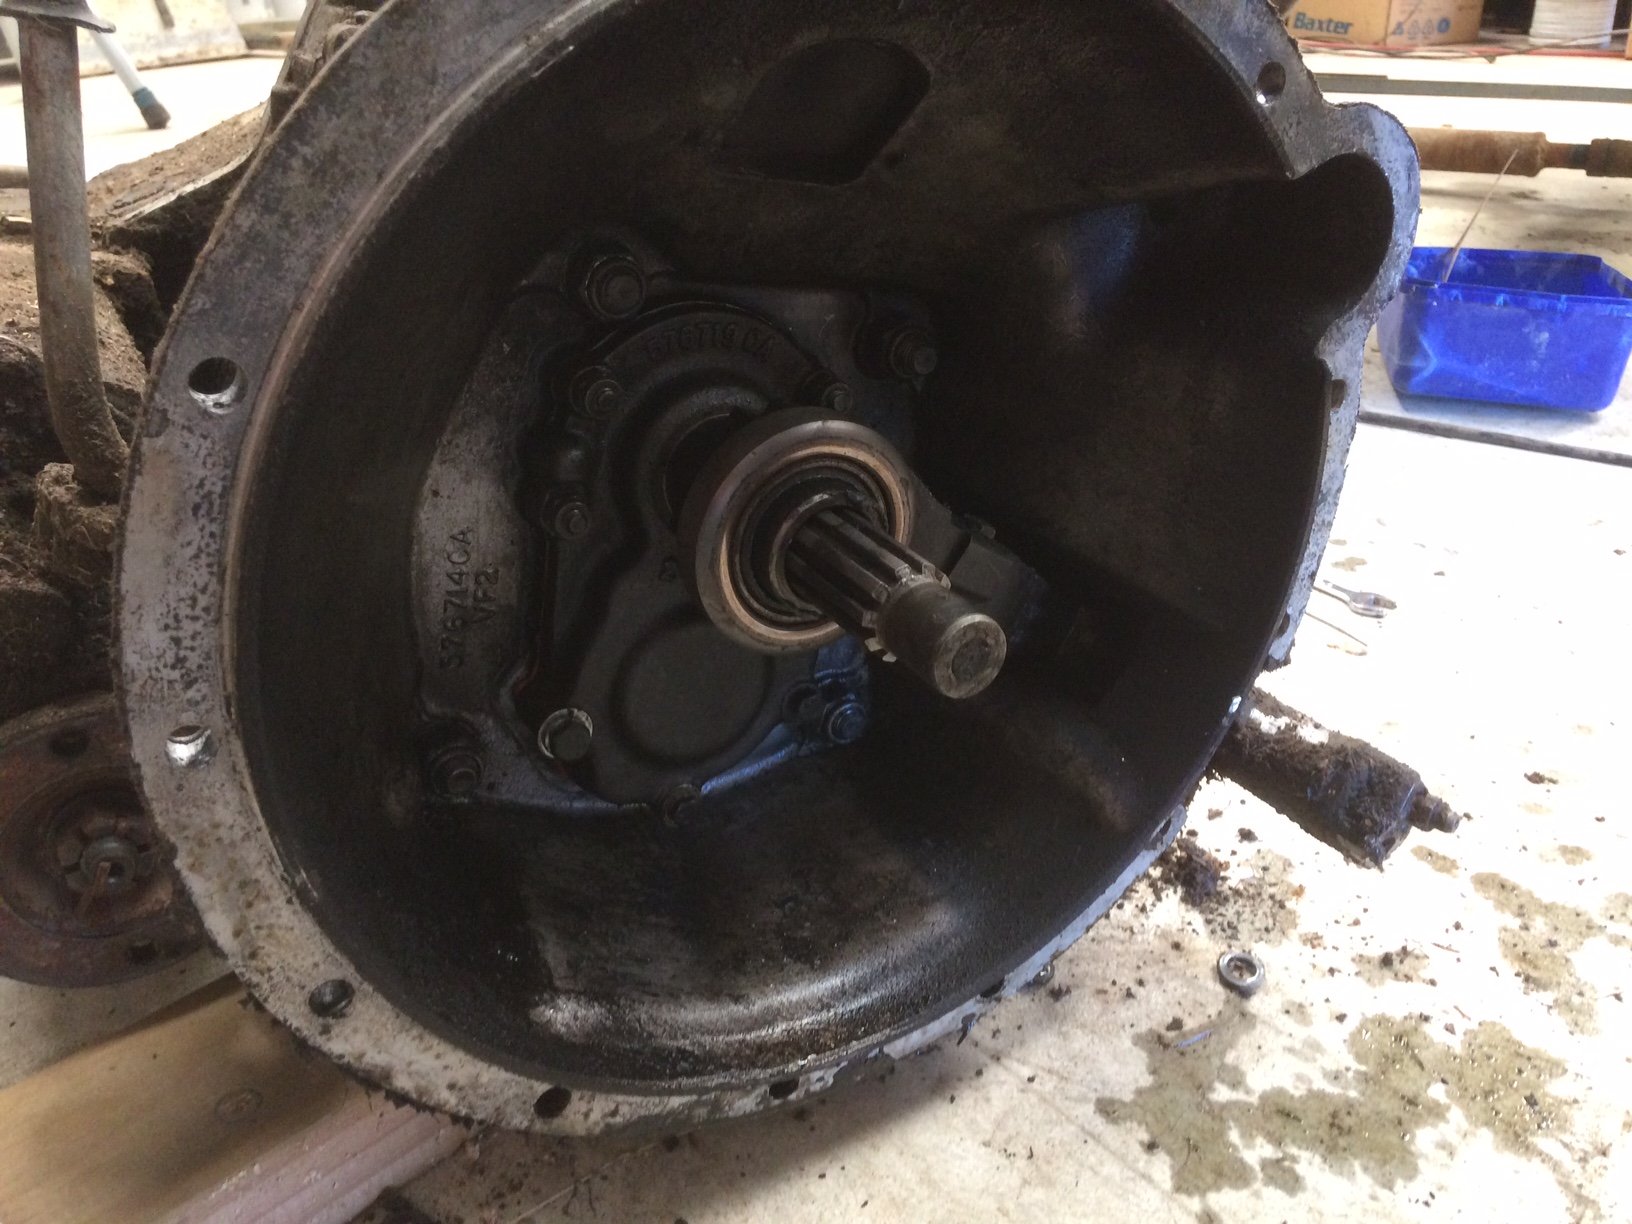
This morning I arranged a divorce There are no rivers of oil etc, so just normal Imperial seepage. The clutch looks quite new, a Borg&Beck. The release bearing also feels new. I think they can go another round. Winning!
- 27 replies
-
- 4
-
-
- land rover
- 109
- (and 1 more)
-
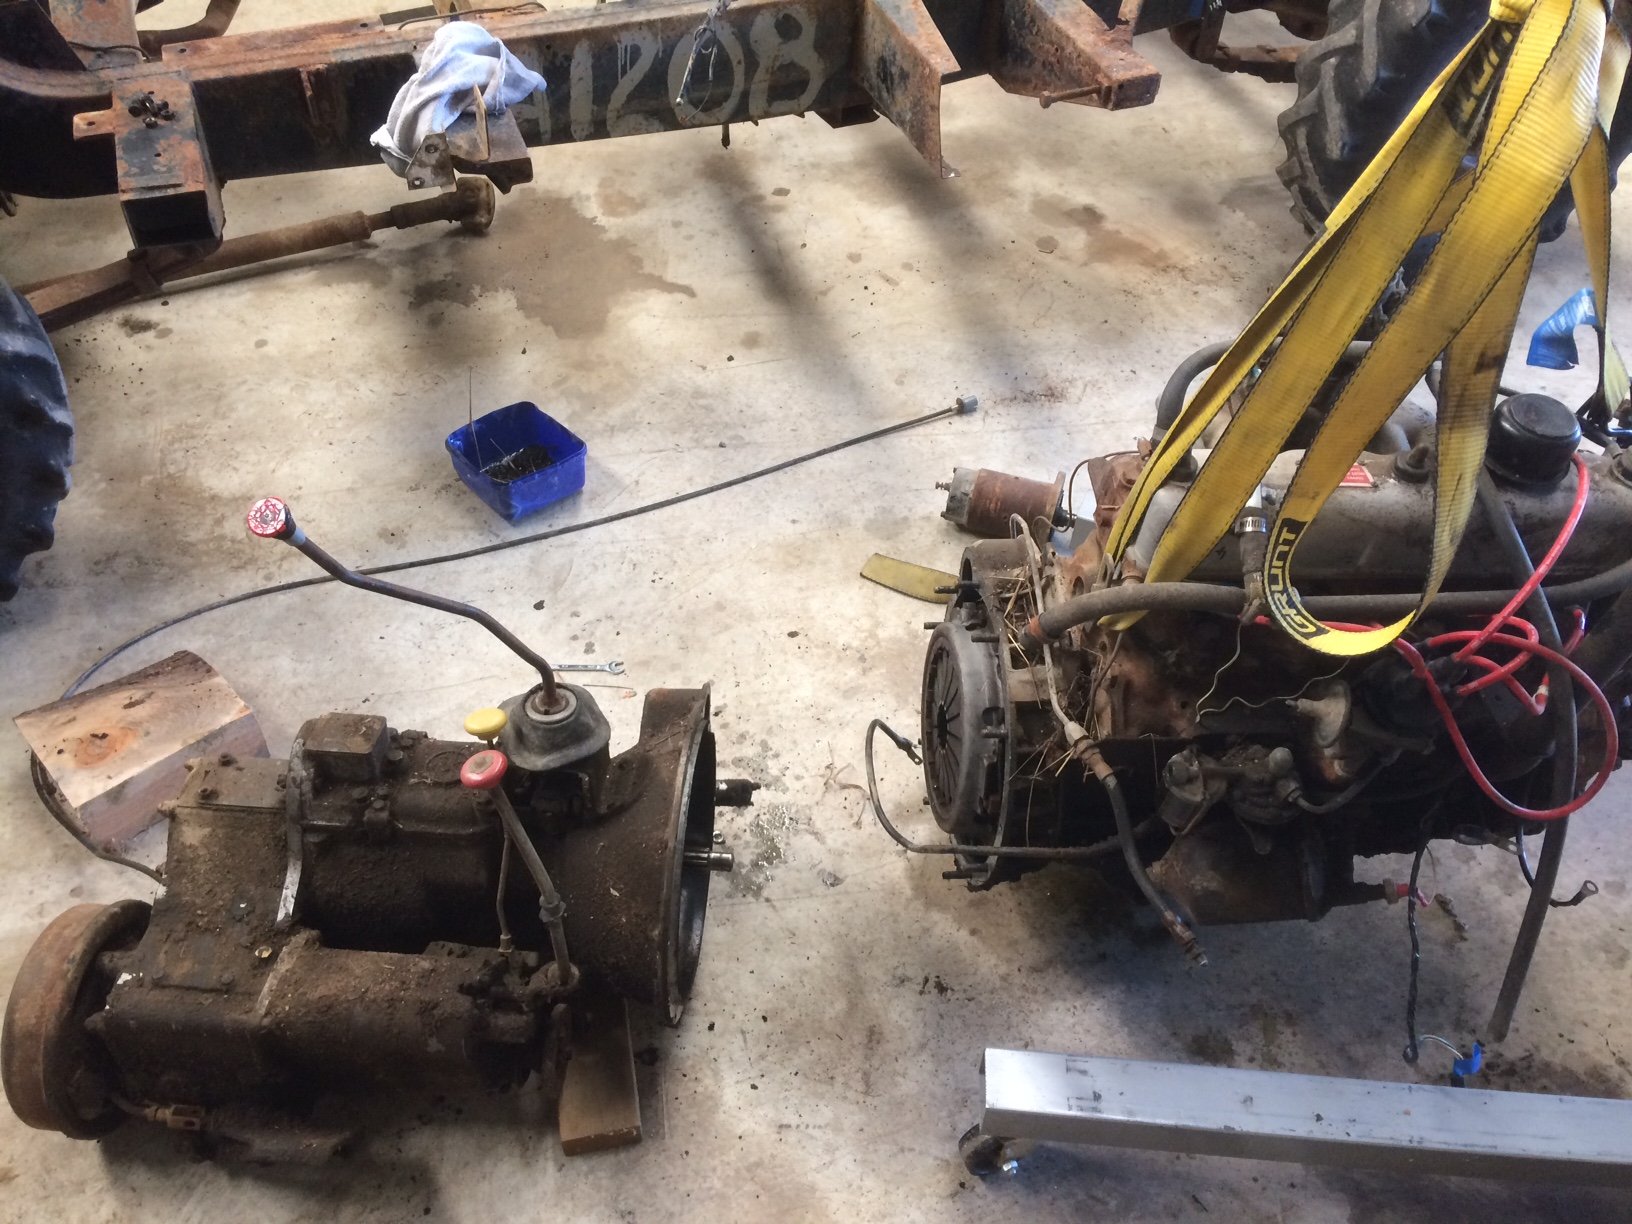
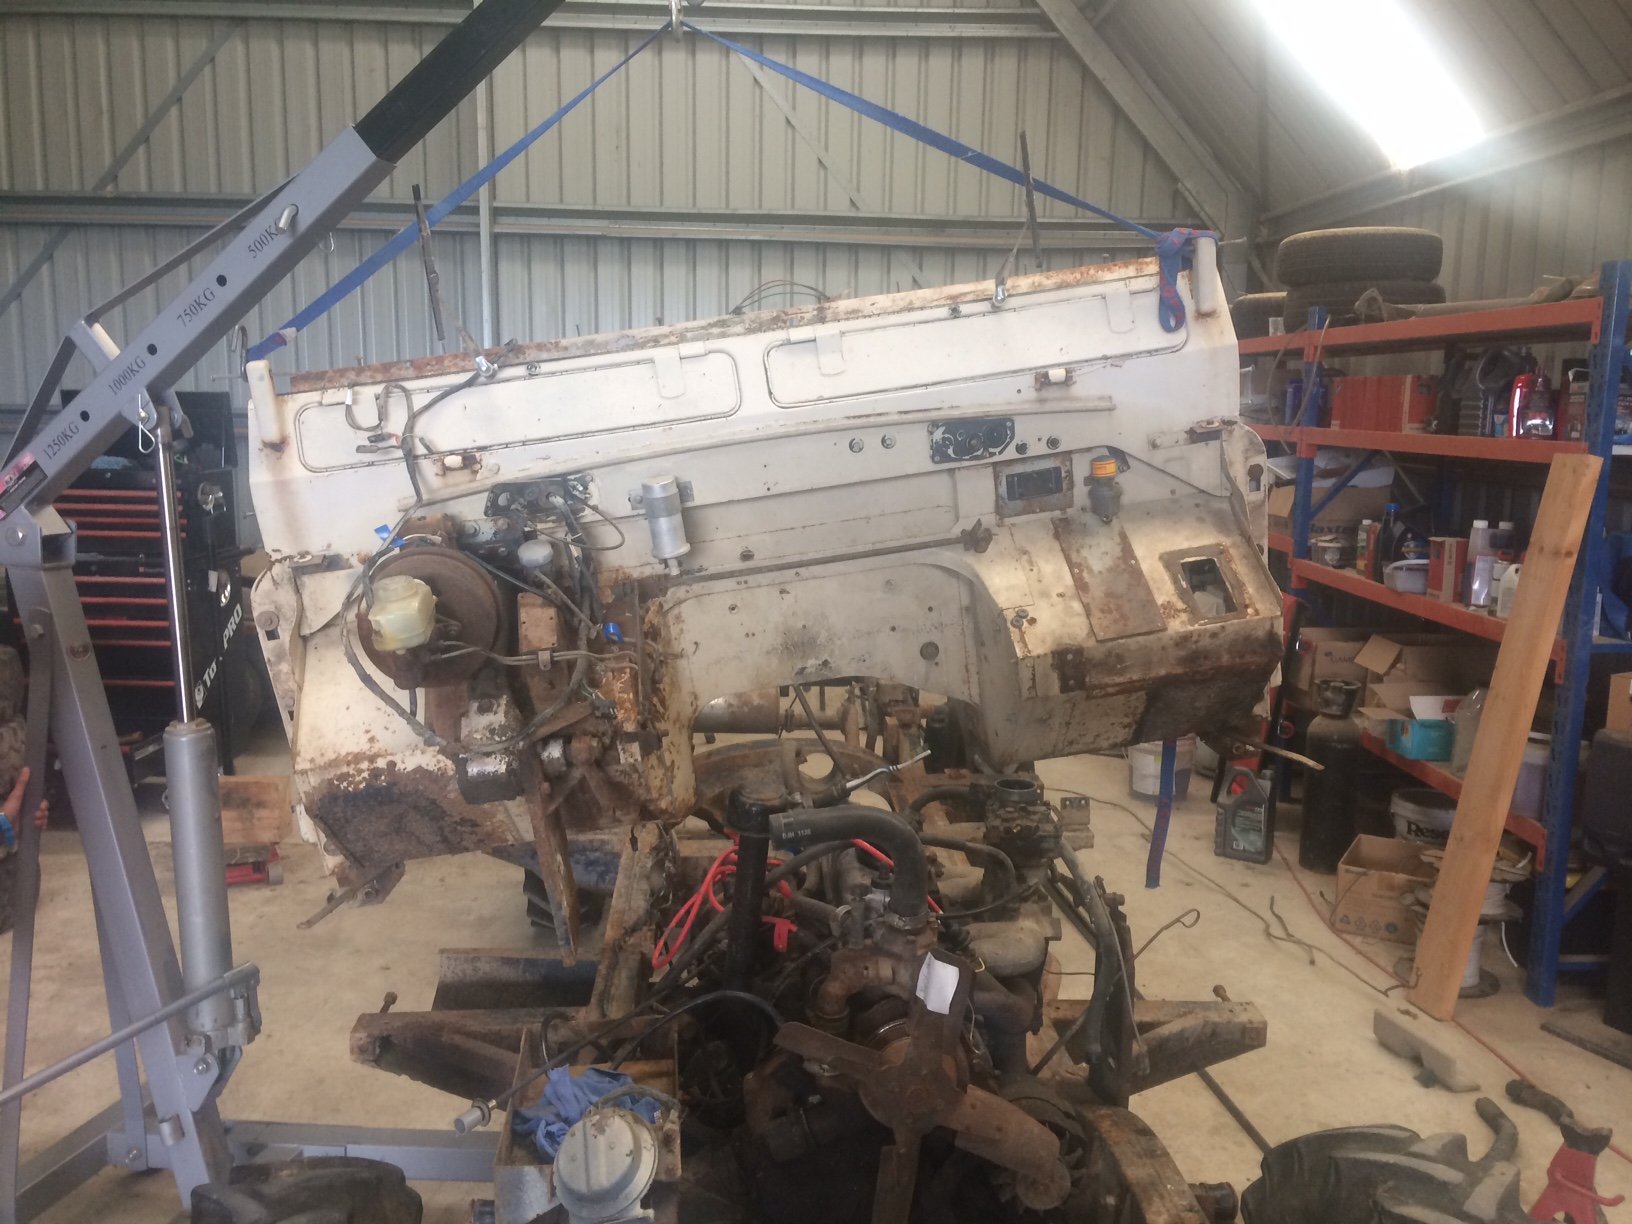
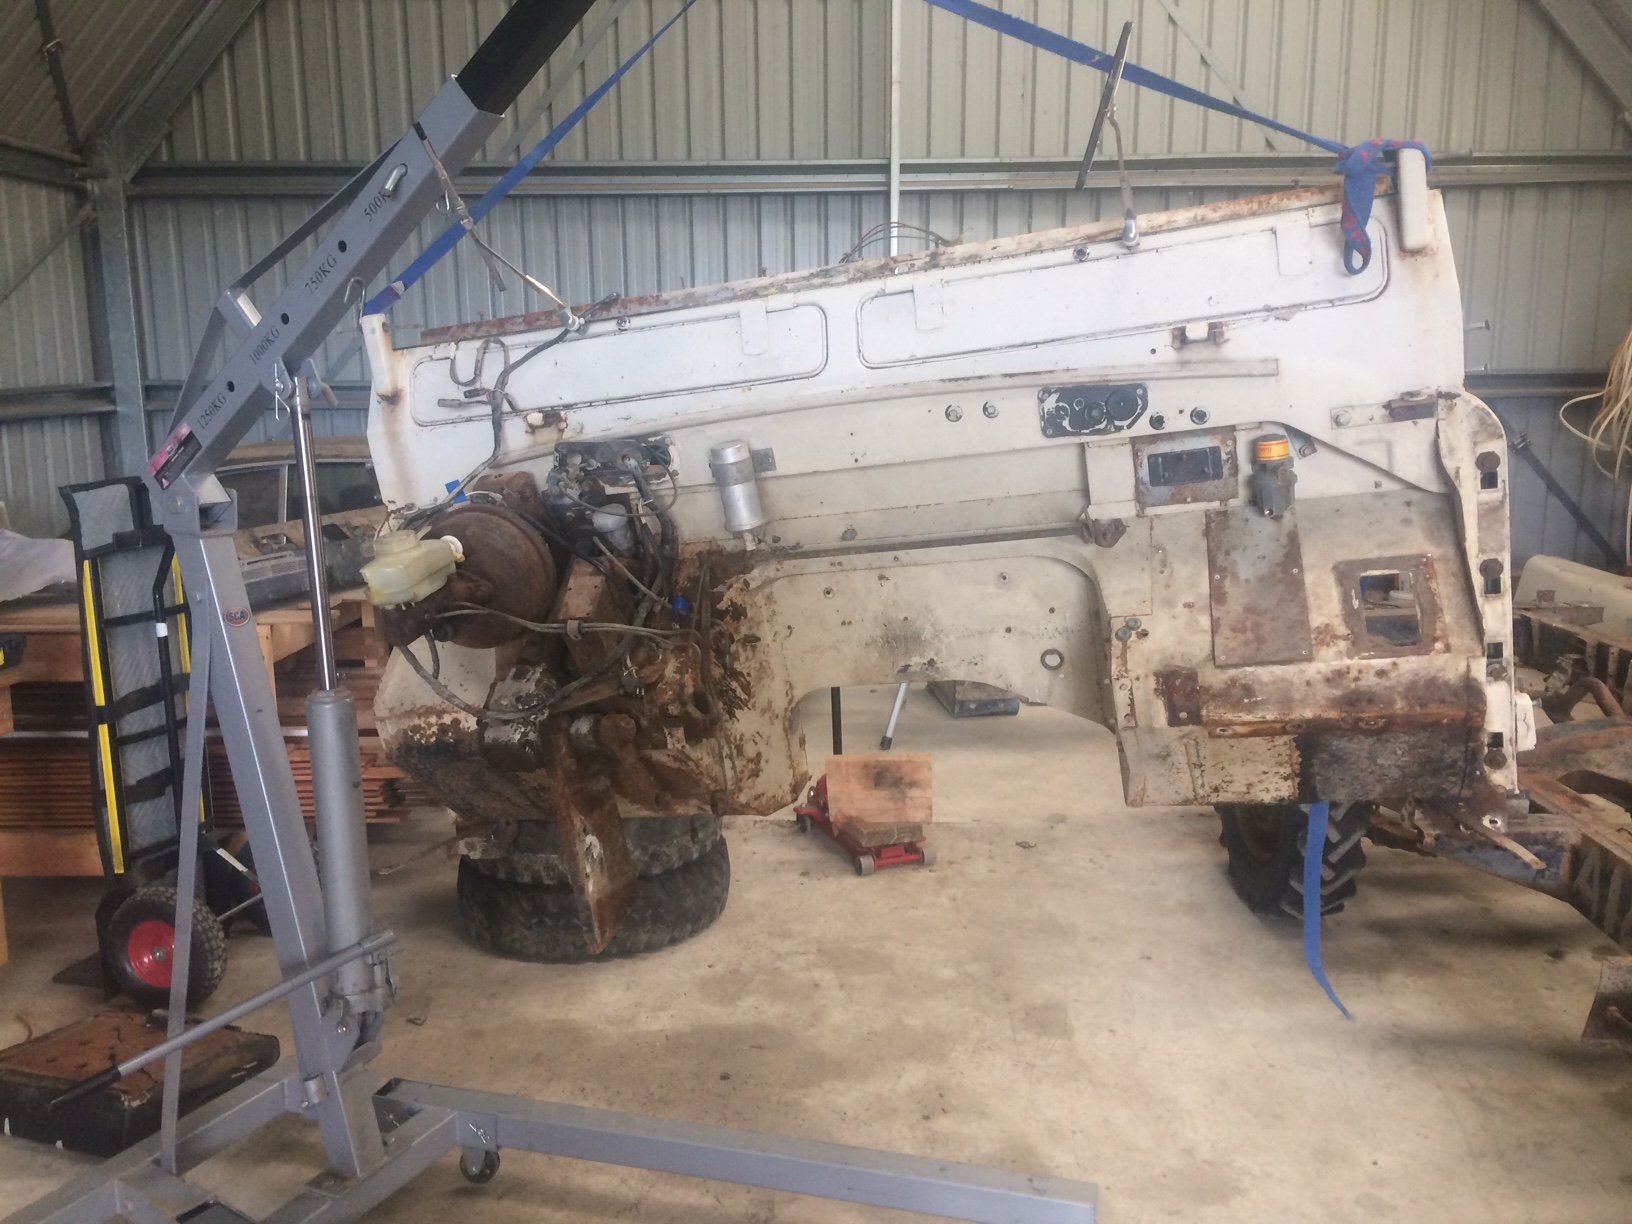
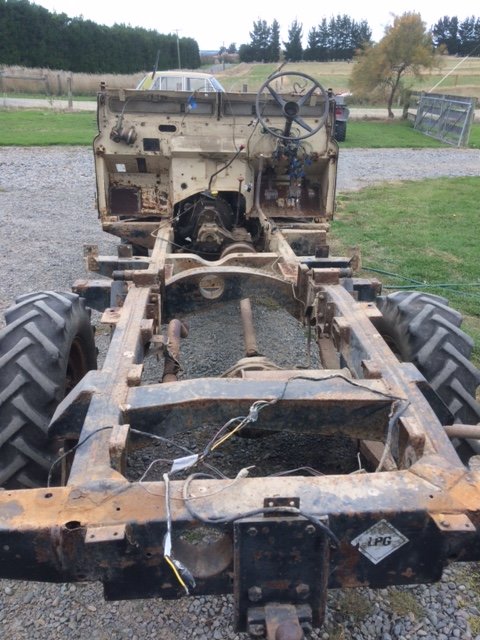
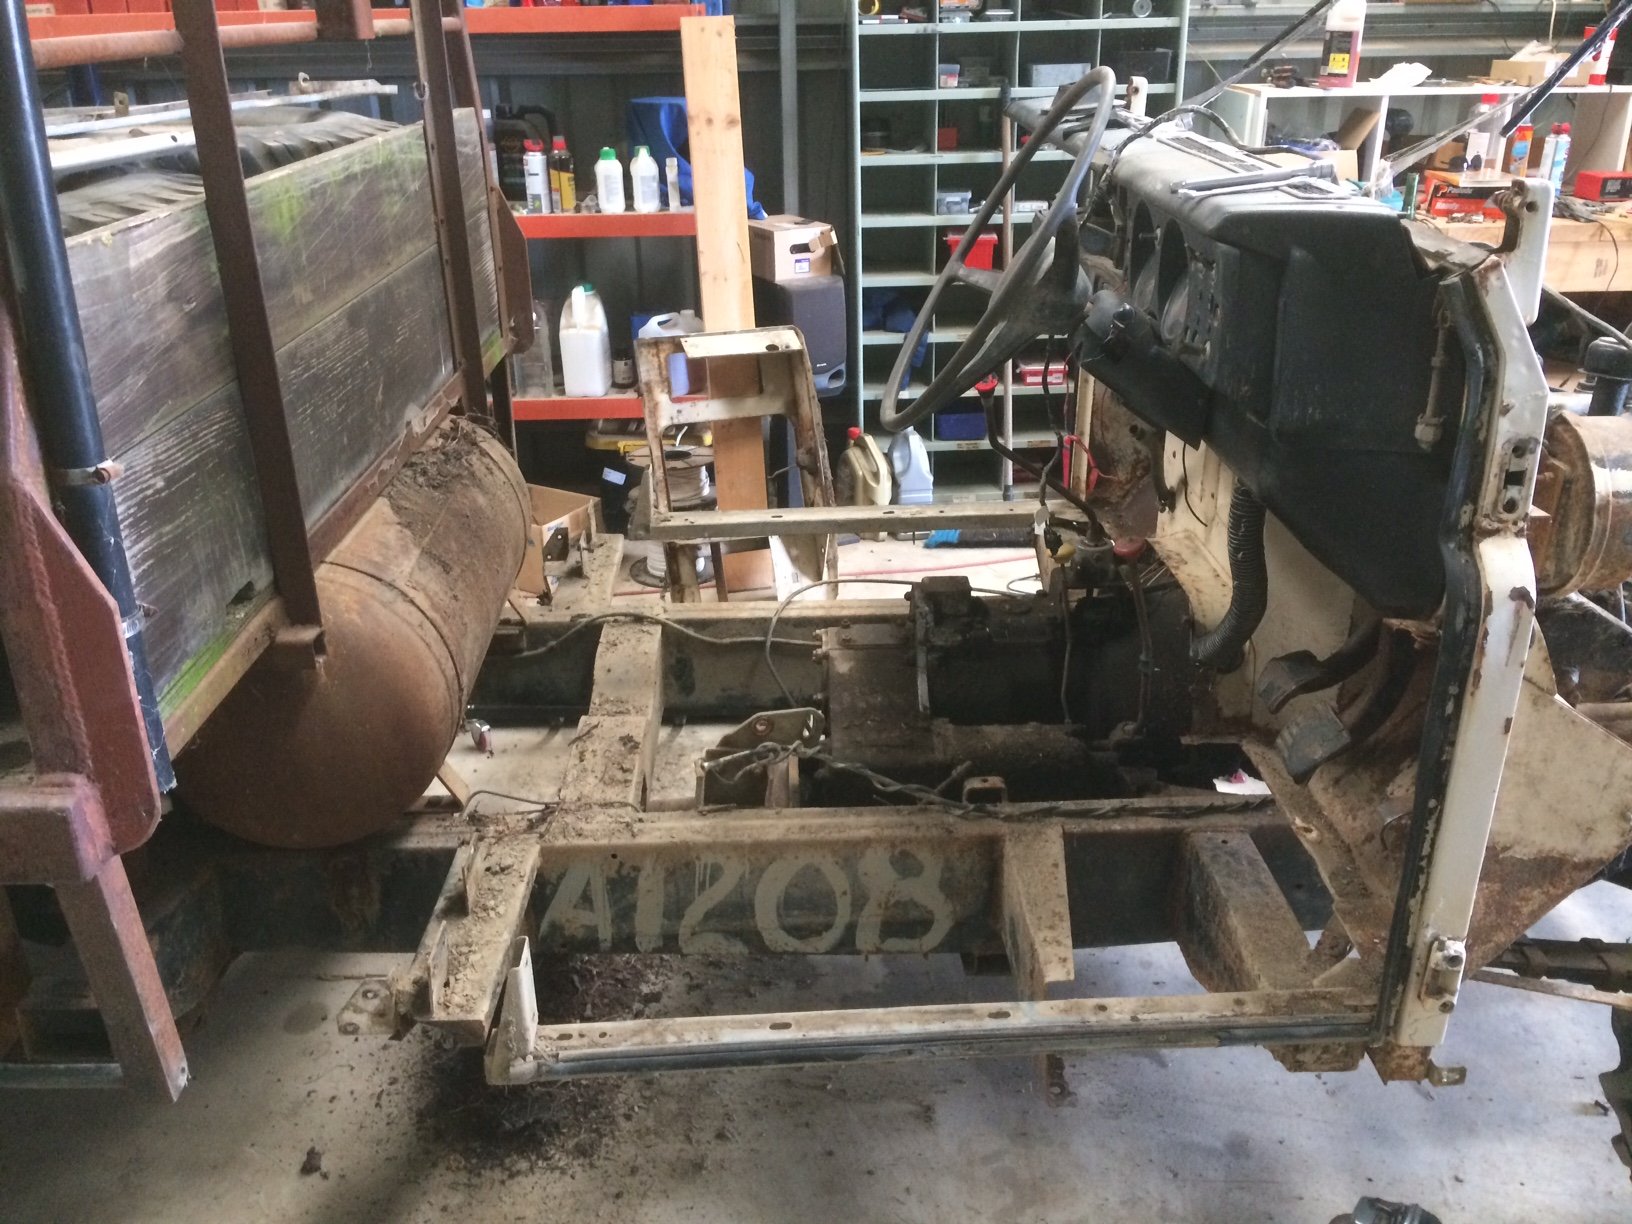
I managed to get hold of an engine crane today, observing social distances etc. This happened so I thought I may as well take the engine and box out. Finally some bolts that were easy to undo, as they are all coated in liberal quantities of various lubricants. A couple of disturbing revelations, which made me very glad I never drove it faster than about 30km/h. The bolts connecting the driveshaft flange to the diff were less than finger tight. Also the left engine mount wasn’t bolted to the chassis. Definitely a bit of weight in this lot Voila. One nekkid Land Rover
- 27 replies
-
- 14
-
-
- land rover
- 109
- (and 1 more)
-
LOL. I think it’s a sheep remedy. I’ll keep it in mind, but the kids may veto.
-
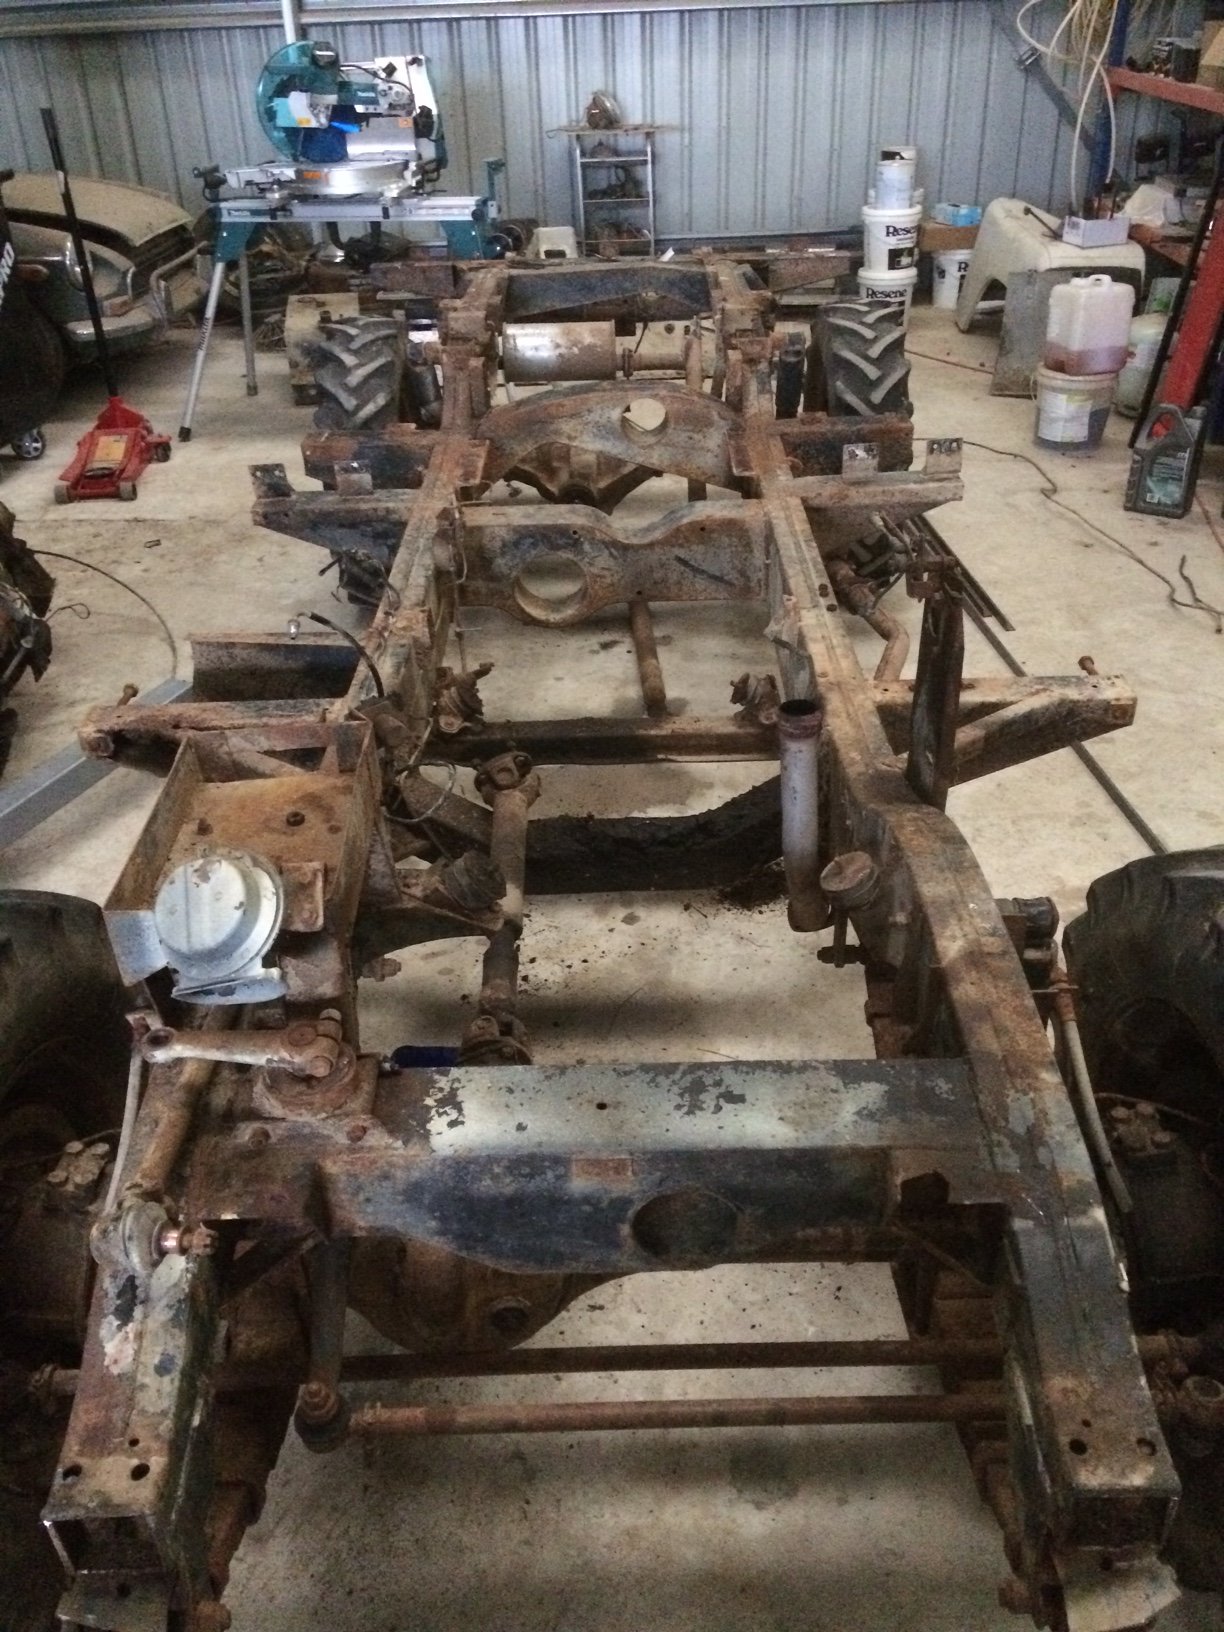
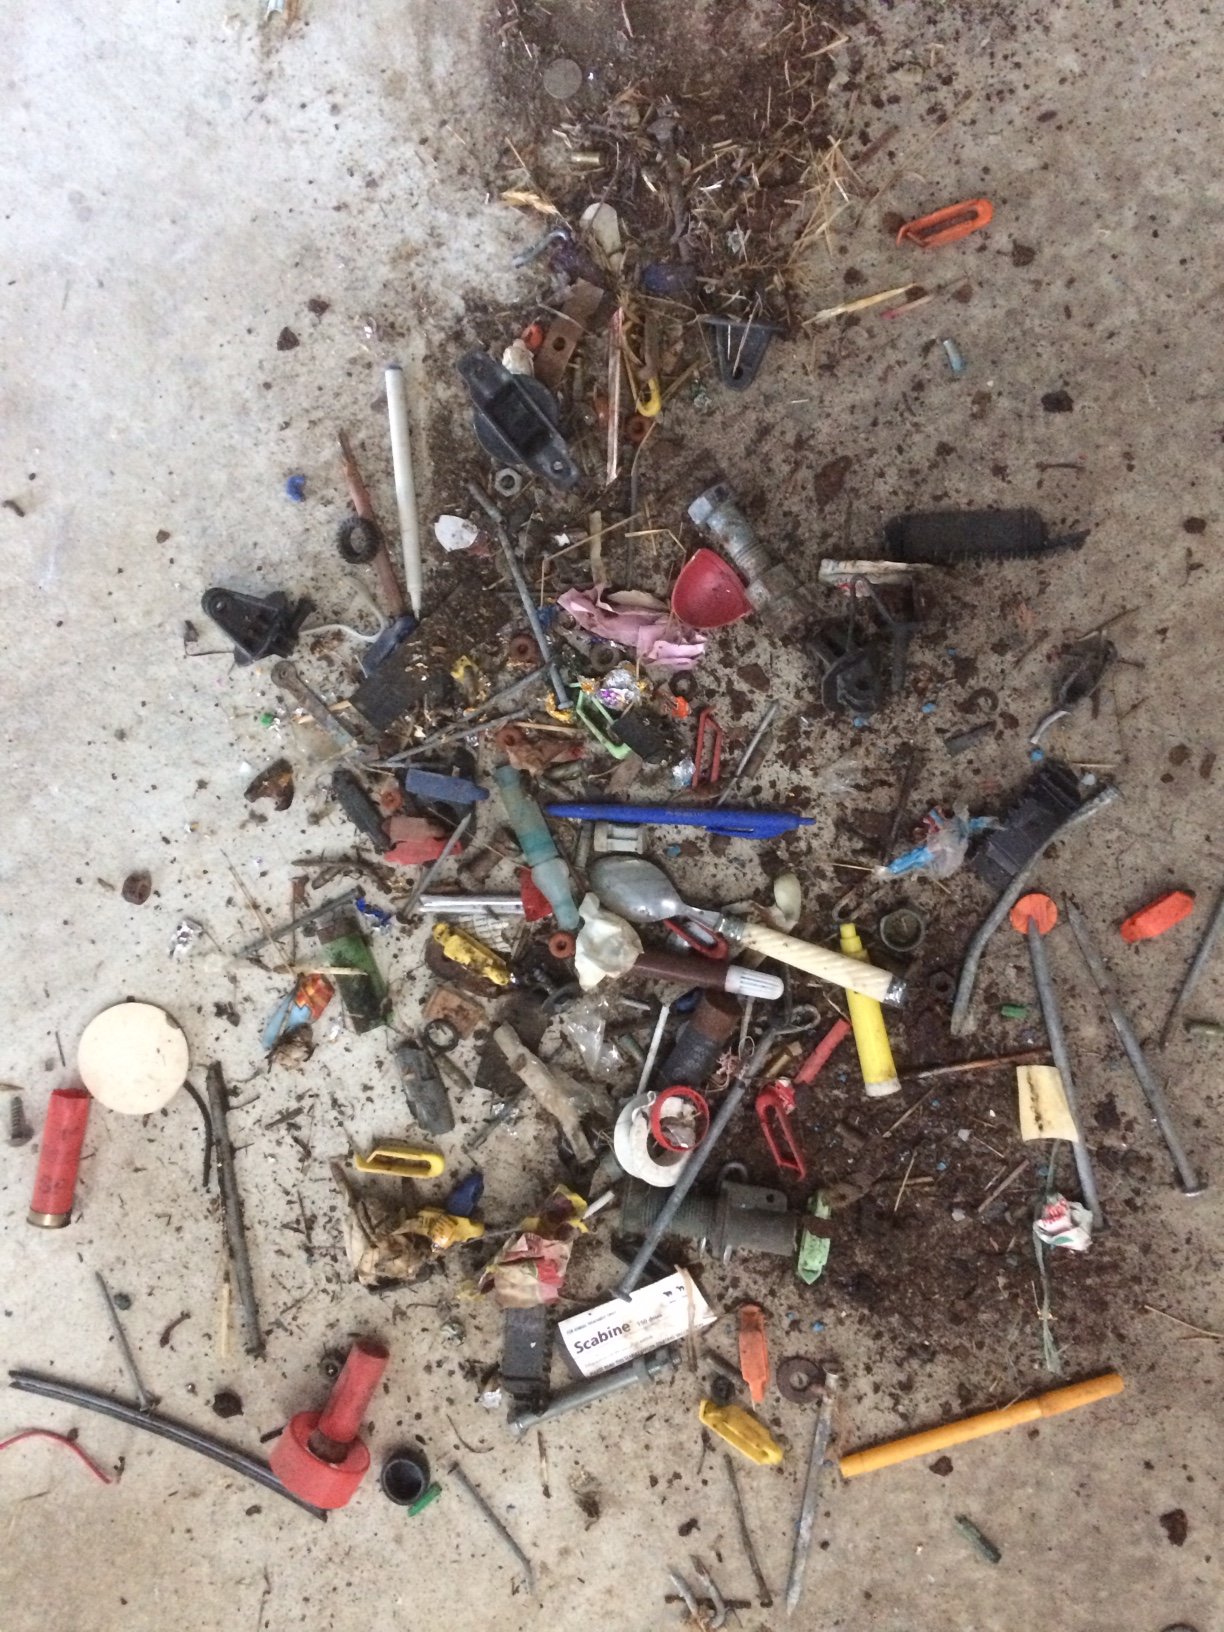
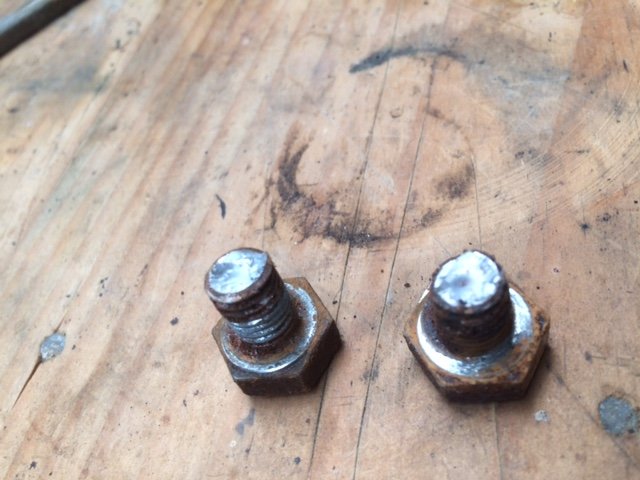
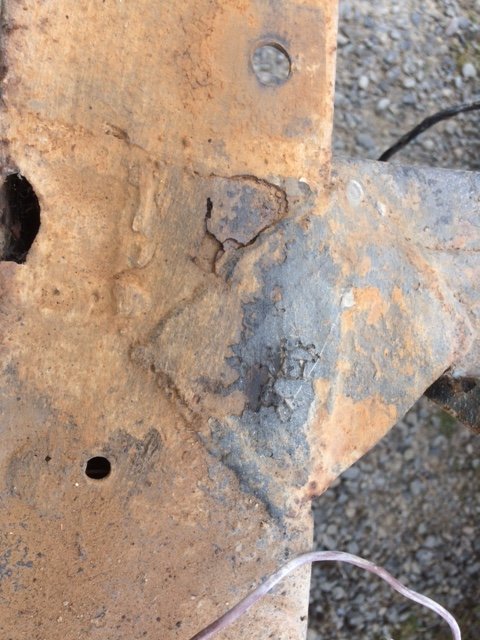
I took the dash off yesterday too. Pretty straightforward really, though some of the screws are in awkward places. Also, slotted screws are of the devil, and should not be allowed in any automotive application. The lower dash panel obviously contained a lot of detritus, so I shook it out on the workshop floor... Actually a bit comical really. More live ammo too. .22, .22 magnum, and 12 gauge shot gun. The whole lower dash is rotten. It’s made of thin steel, lightly painted, covered in foam and vinyl. This could be a challenge as this is not a spare part that is made by anyone, and second hand ones can be hard to come by/expensive/worse than what you’ve got. I’ll put it aside and when I get creative I might try to rebuild it. I think the rat piss from aforementioned nest accelerated the corrosion, and also a corresponding bit of rust where the lower dash touches the bulkhead. Land Rover also did torque to yield way before it was cool. But of course they screwed it up and got it backwards. These ones yielded pretty good, if a bit suddenly. Next, The chassis got dragged outside for a waterblast so I can find the rest of the nuts and bolts I’ll need to undo later. The chassis is covered in bits of steel that I’m pretty sure aren’t supposed to be there, like this bit where the rear crossmember is The crossmember needs a lot of work anyway because it’s both bent and rusty, probably save up for a new one with extensions, then it’s just a case of choppy chop, weld. Pics Also, I have finished preparations for bulkhead removal. Those two main bolts were seized in there good and proper, but I won. It turns out 21mm is the perfect fitment for whatever shithouse Whitworth size that bolt is.
- 27 replies
-
- 11
-
-
- land rover
- 109
- (and 1 more)
-
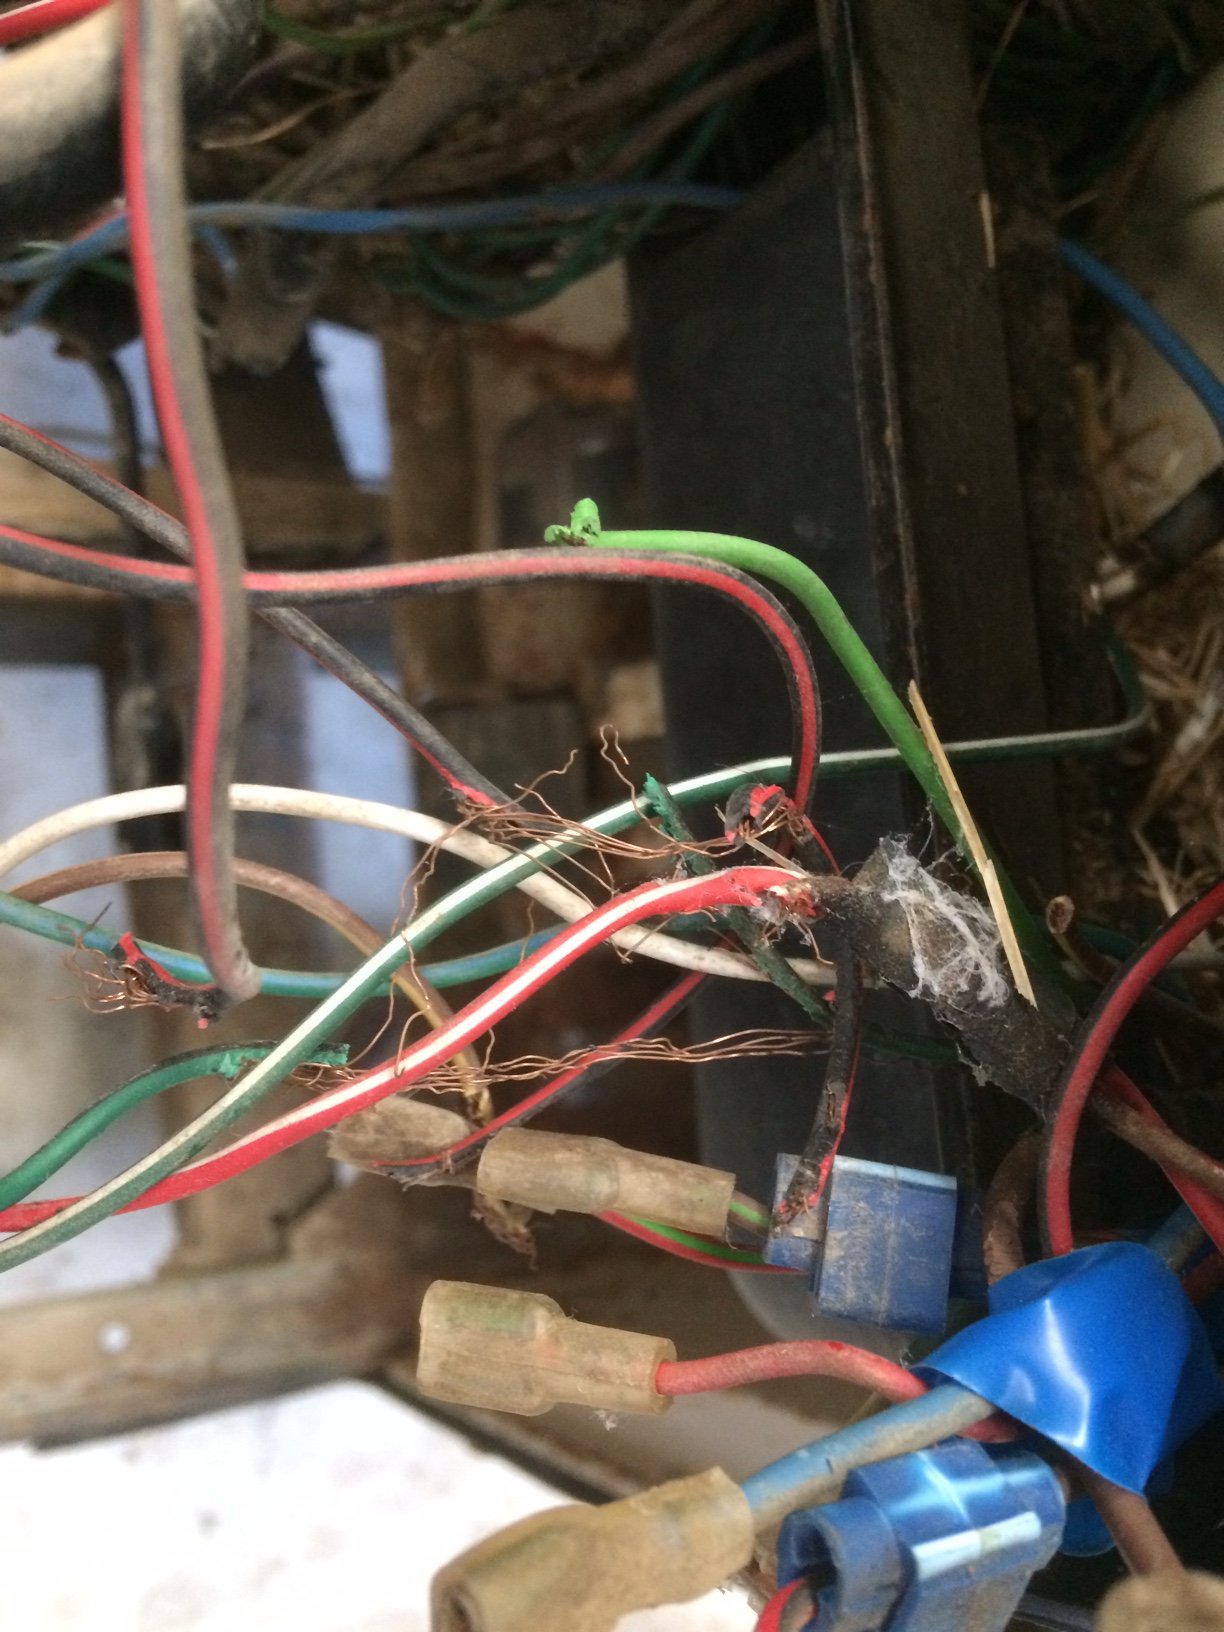
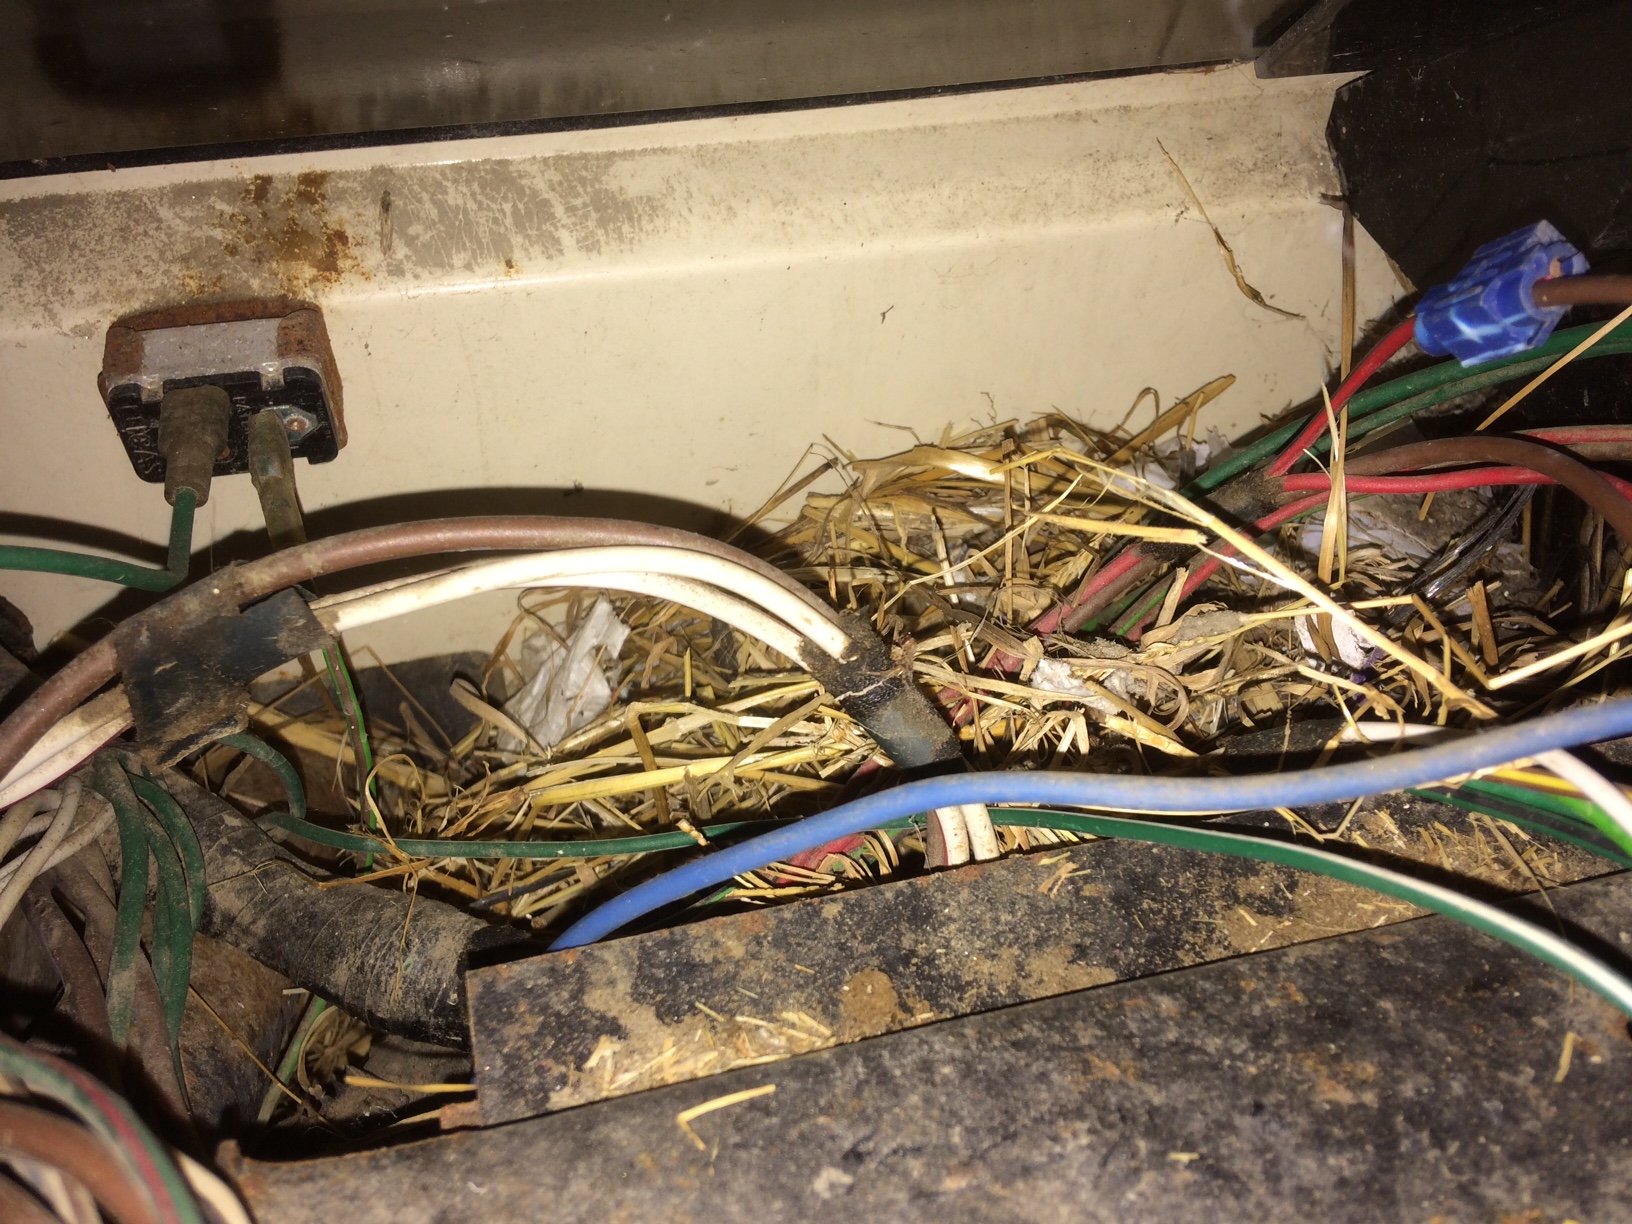
Also pulled the instrument cluster in prep for removing the dashboard. Uh oh... Rat’s nest. Dammit.
- 27 replies
-
- 6
-
-
- land rover
- 109
- (and 1 more)
-
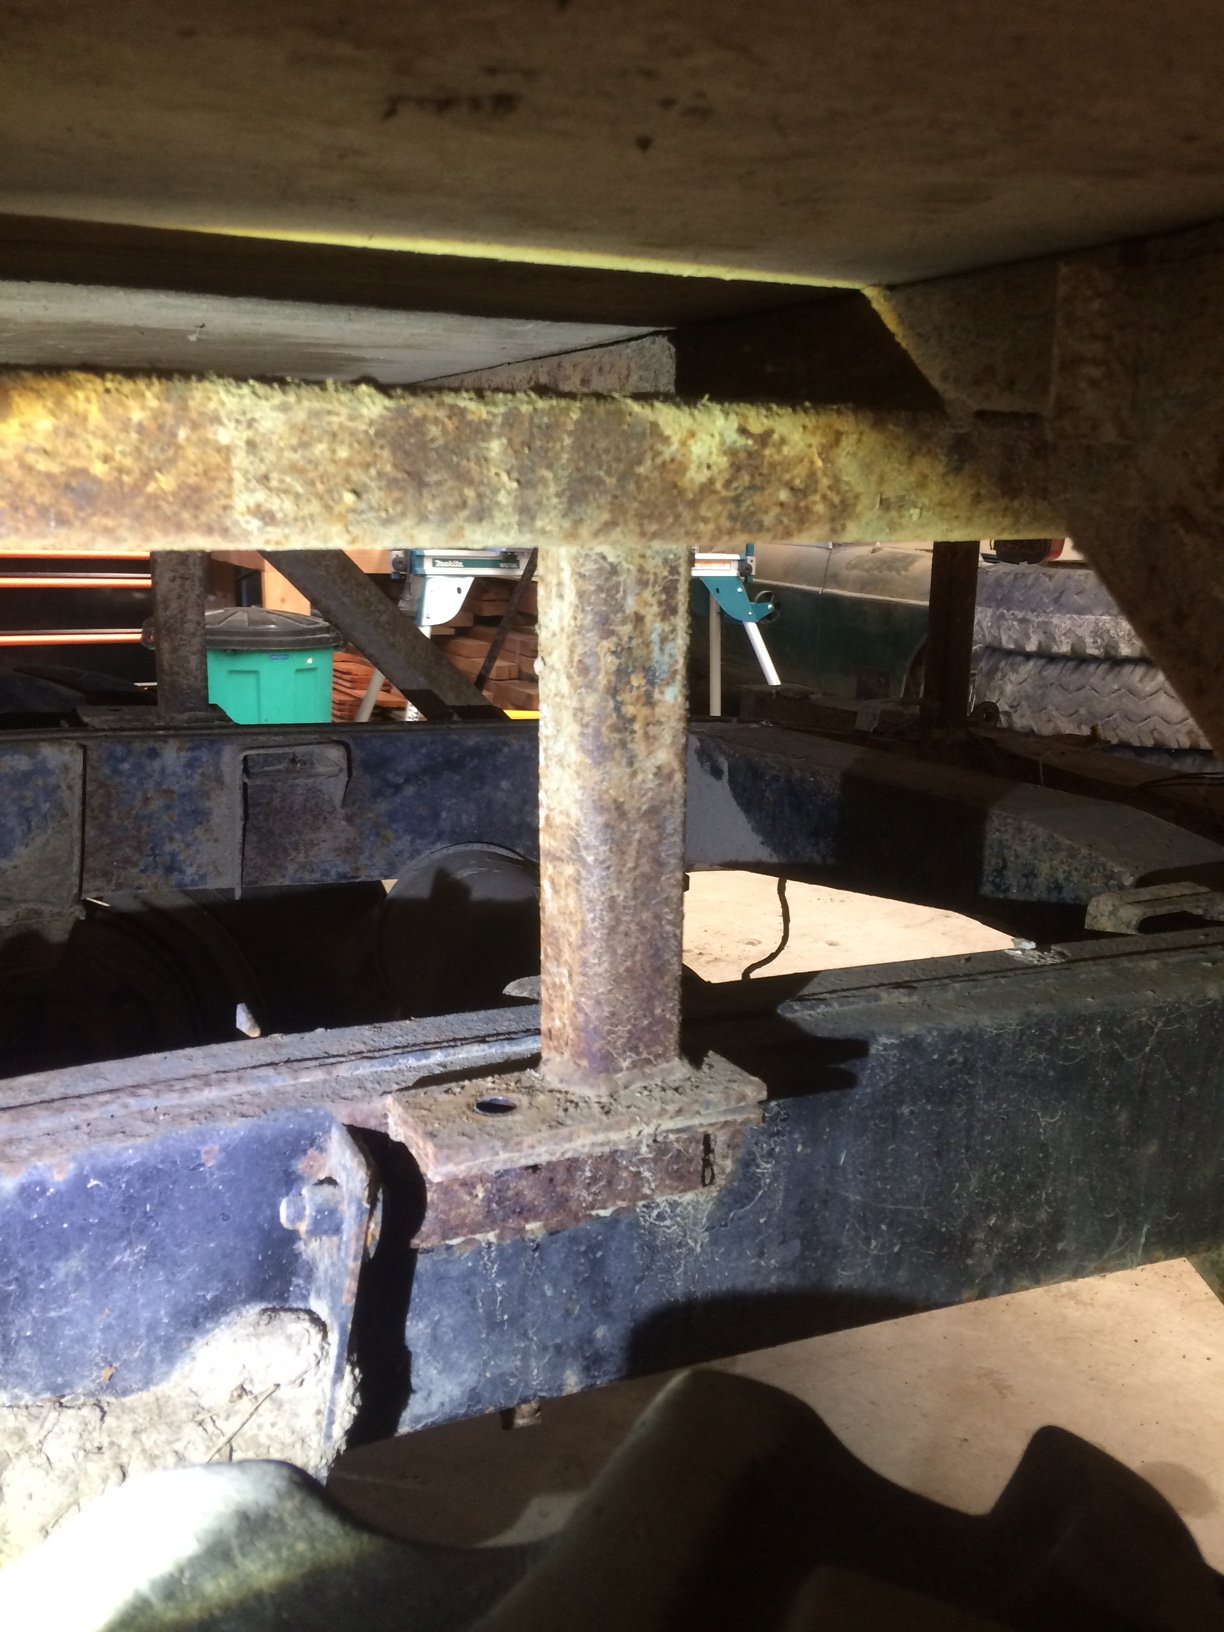
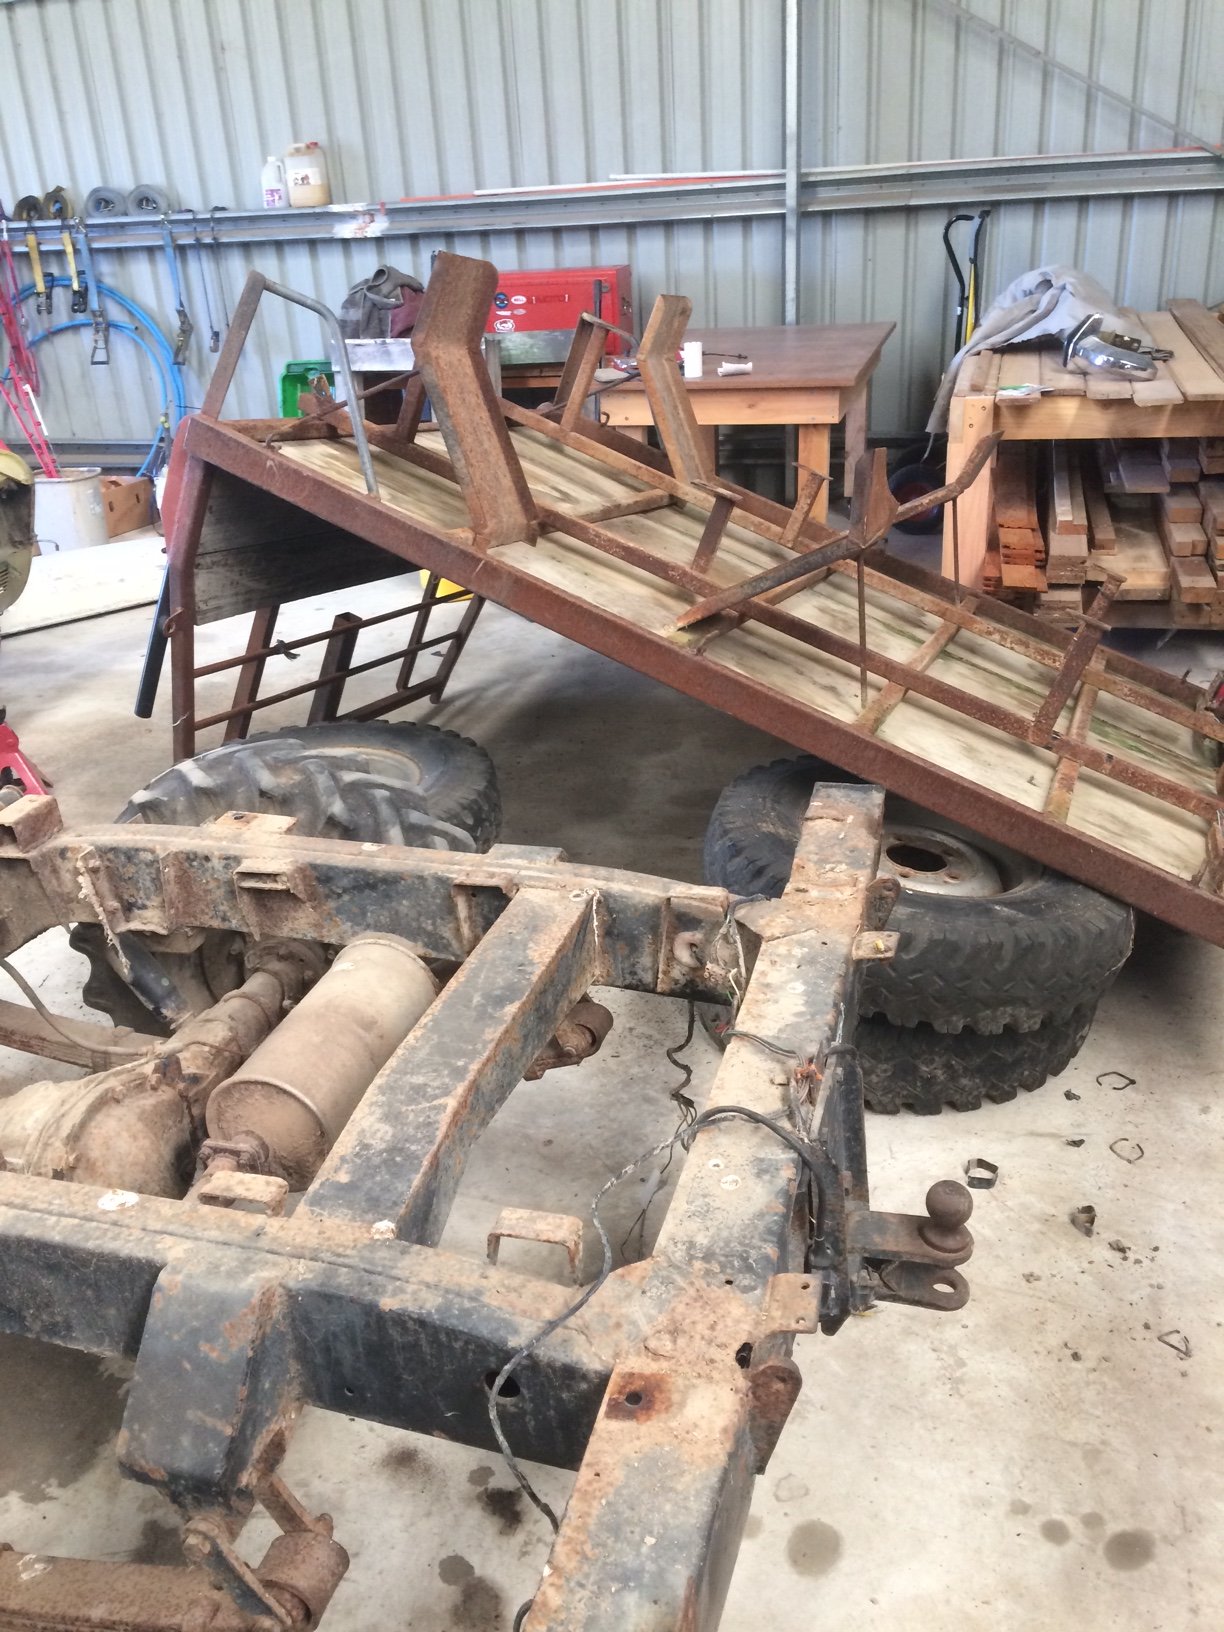
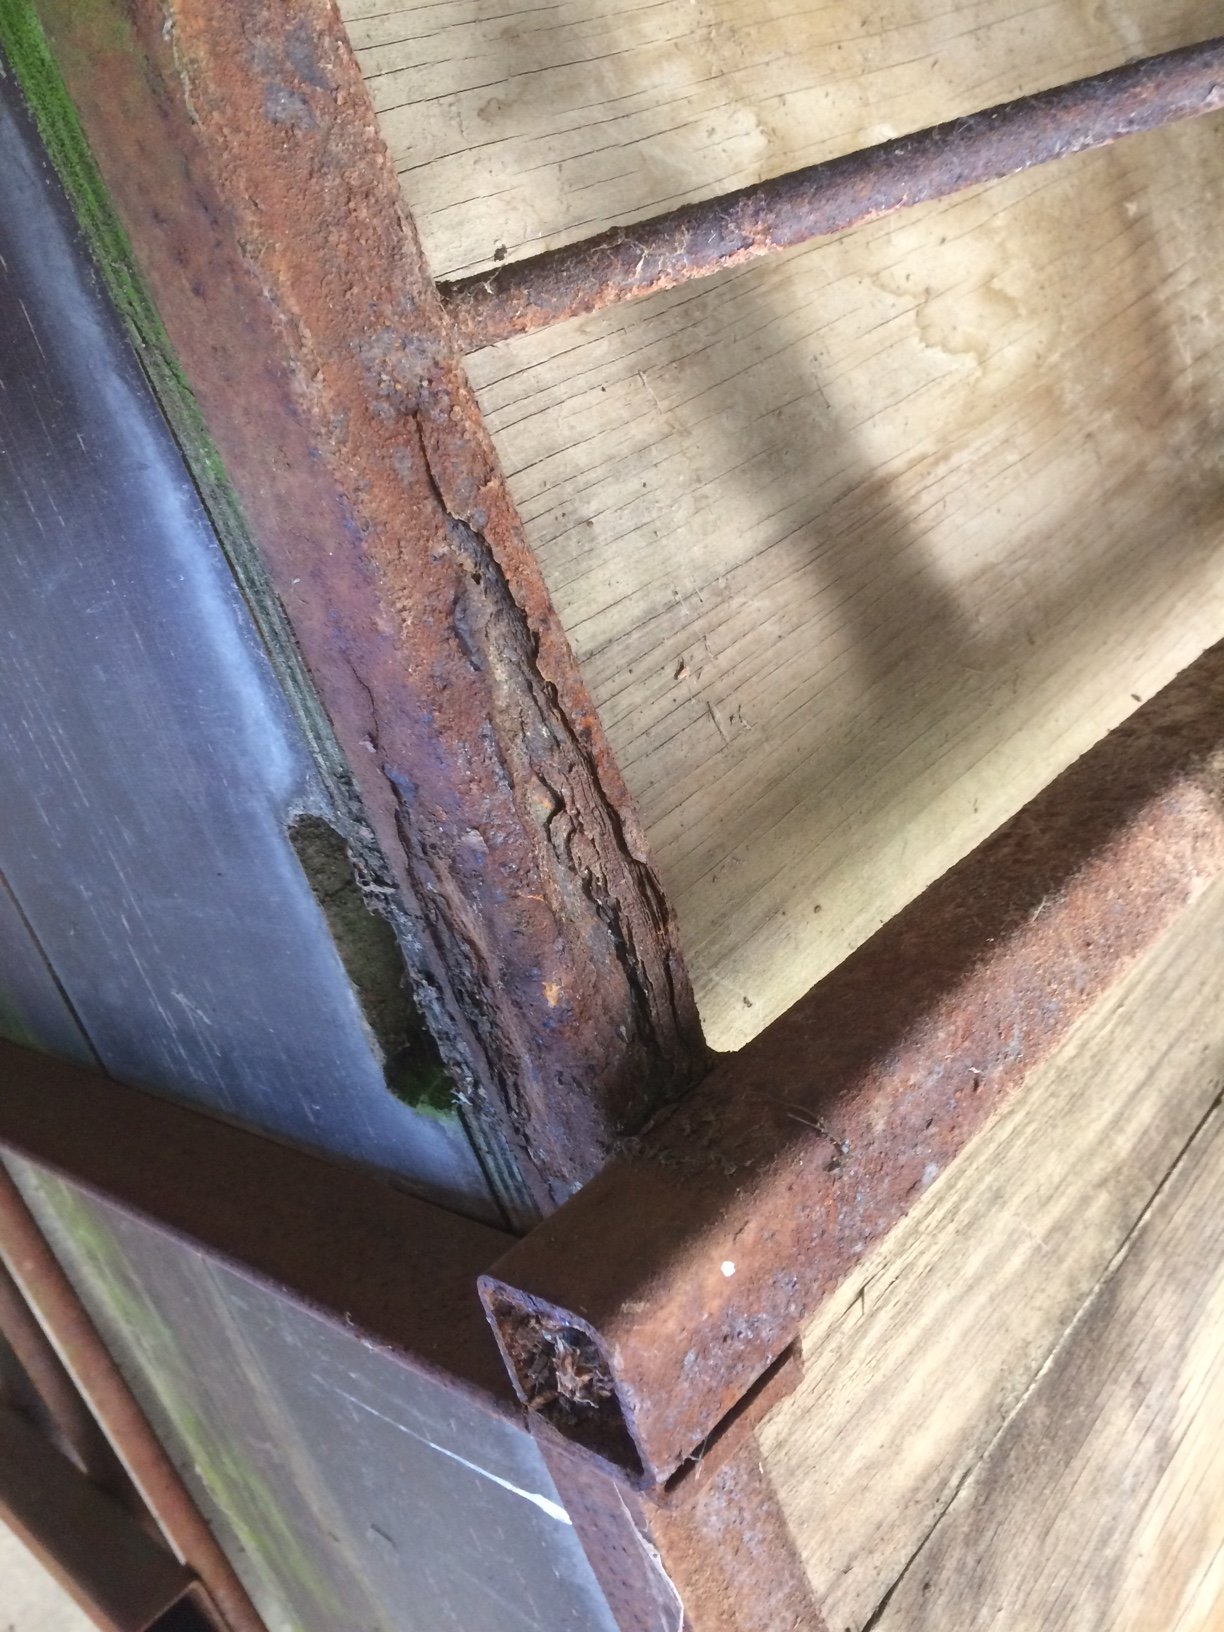
I decided today would be a good day to pull some more bits off the Landy, rather than doing gardening. The deck looks easy to remove. Only 6 bolts, and some tail light wiring. The wiring was carefully disconnected with a pair of side cutters. On the subject of the deck, its big. 2300x1800 big. This seems great, however it puts the tow ball a long way under the deck, and I forsee high head injury risk. Also, the deck is high. It’s been lifted to clear the LPG tank. I would love to see pictures of a properly mounted flat deck, as I don’t think British Leyland had 6 tall stilts bolted through tabs arc welded to the chassis in mind. Anyway, I digress. The bolts are METRIC!! And galvanised, and undid very easily. At this point I gave the deck a test lift and thought yeah, that’s not too heavy. So I stacked some spare wheels on the floor next to the deck, and tipped it off the side. Easy peasy. But then it suddenly got very heavy and not well balanced. Luckily the children were playing in the shed, so while I held on for dear life brewing up an aneurysm, I got the kids to move the cab roof, toolbox, some trestles, and my drop saw out of the way so I could finally lay it on the floor upside down. Stupid idea to do this by myself in hindsight, but here it lays. It is also rotten and not very well made, so maybe I will build one from scratch.
-
What did you use to strip the chassis? Looks pretty good now. I’m going through this exercise (although a lot more slowly) at the moment. I’m planning on doing the absolute minimum to the bodywork, and concentrate on the chassis, brakes and running gear.
-
Rockauto is epic and really good shipping rates. Do you remember the alternator application? I’ve seen Midwest Bayliss, do you remember what the shipping was like? I once put together an order from Autoricambi for a driveshaft guibo, some shims and a couple other small nick nacks, would have fit in half a shoebox and shipping was over $100USD. Cancelled that one real quick.
-
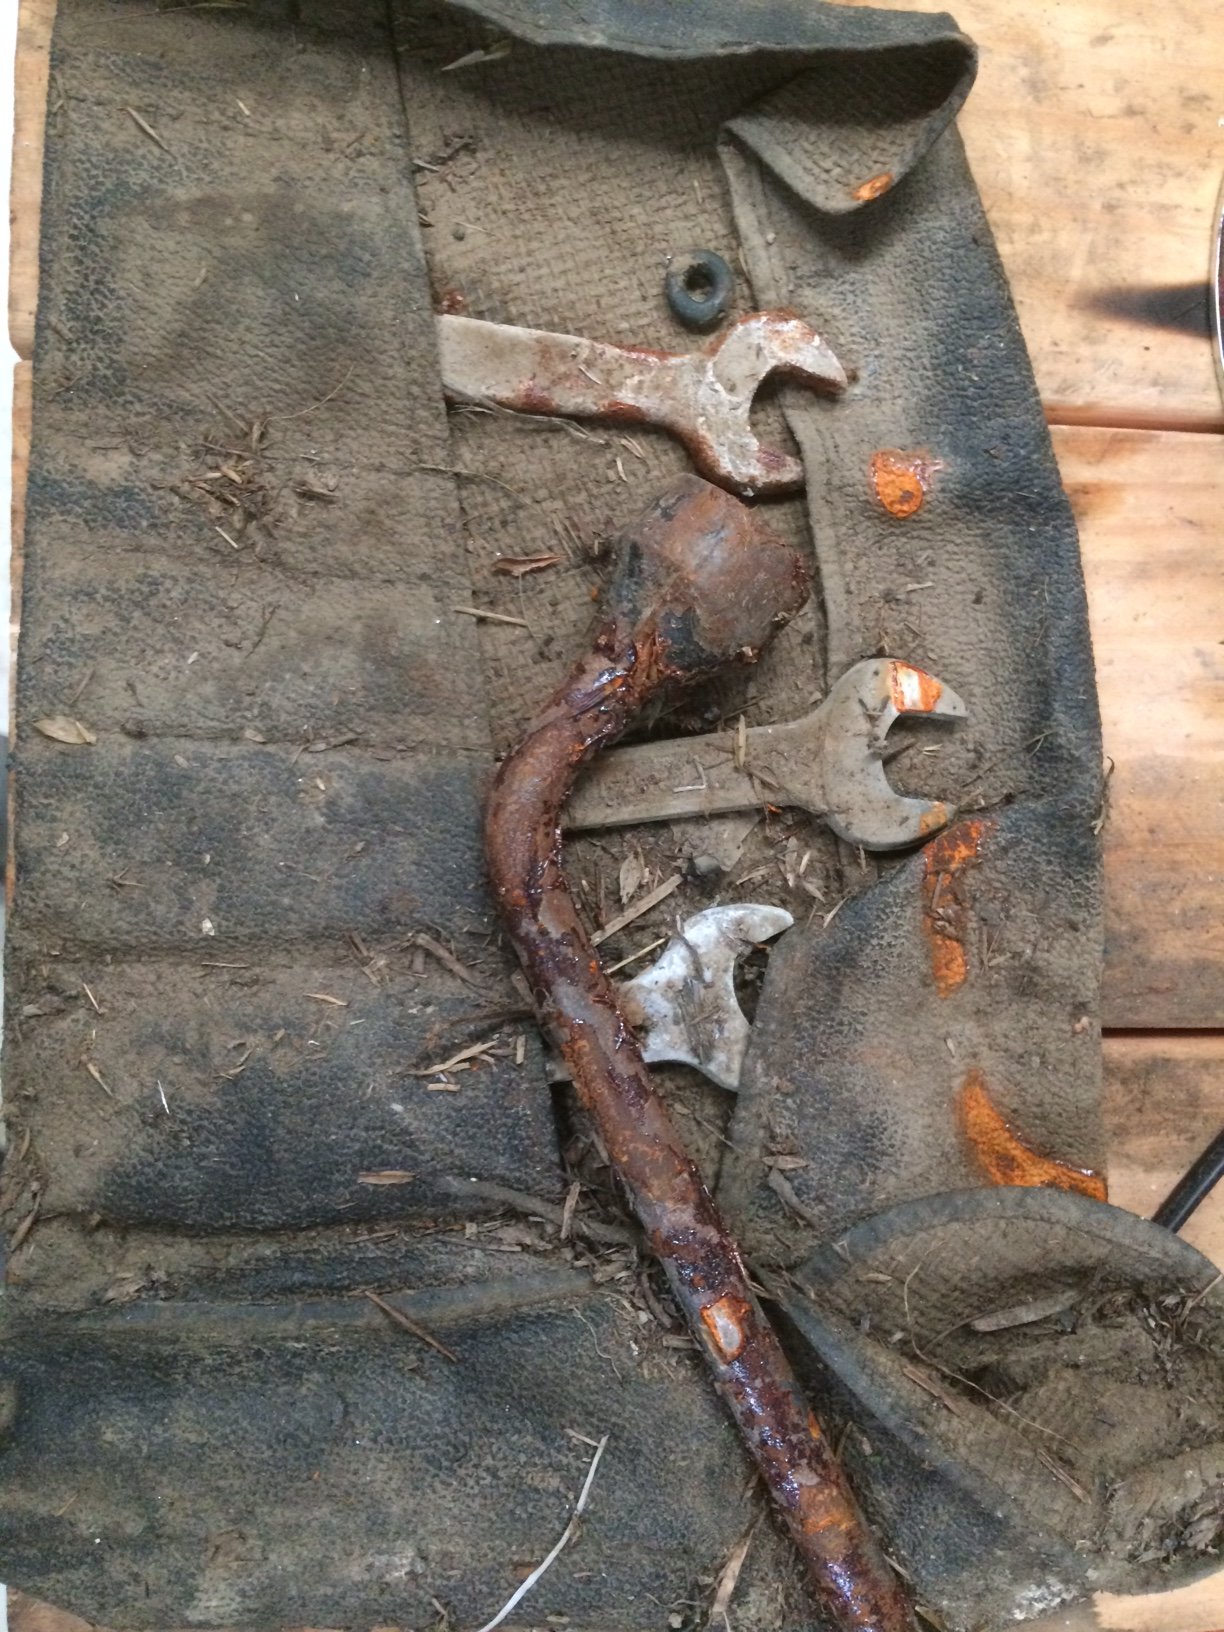
Continued from previous. Another protracted battle then followed with more nuts and bolts. There is a sill trim that runs along the bottom of the cab that is in two sections. A short section attached to the lower rear cab and a long section that runs along under the door, and ends at the rear of the front wheel arch. These trims are thin aluminium and were already quite wrinkly. Removing them has destroyed them. They would be quite easy to remove if the bolts weren’t rusty and seized, but the brackets are quite flimsy and will not stand up to high torque situations. Finally, having extracted all the bolts, the rear cab lower half lifts away, and is a bit awkward to remove without a helper, as it is a decent weight, and the galvanised sill frame now has no rear support, so you can’t put weight on them. It’s a good thing Land Rovers are not fast, the seat belt mounts don’t look like much. But hey, there’s a sticker that says they are approved by Her Majesty so they must be OK. Factory toolkit: Exploratory choppy-chop. To be fair the end caps were just about weet bix anyway Til next time
- 27 replies
-
- 7
-
-
- land rover
- 109
- (and 1 more)