sr2
-
Posts
760 -
Joined
-
Last visited
-
Days Won
1
Everything posted by sr2
-
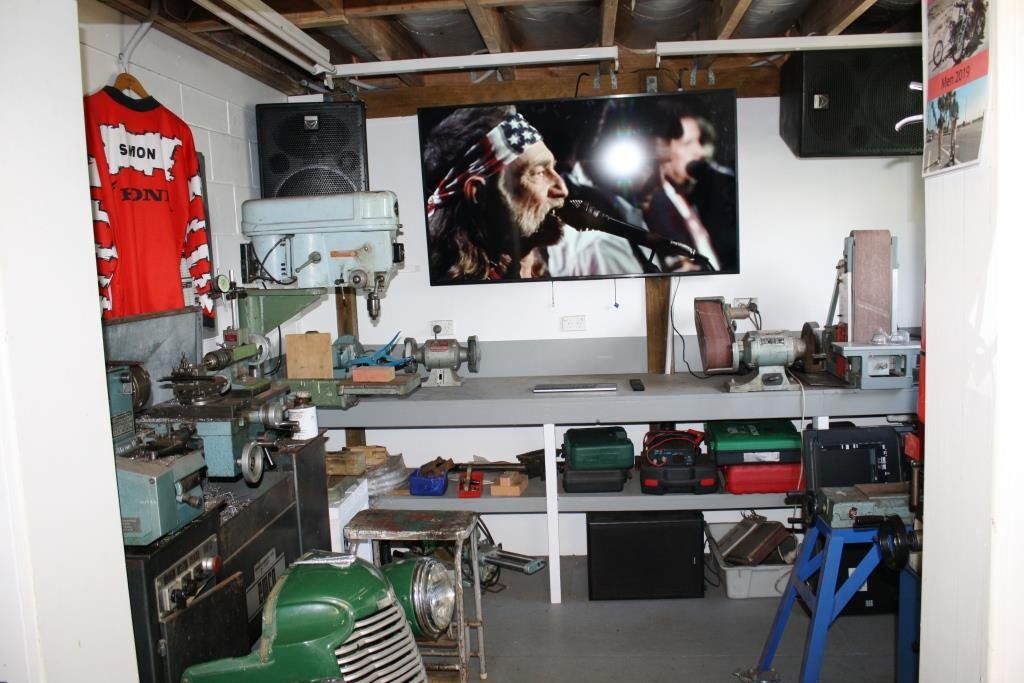
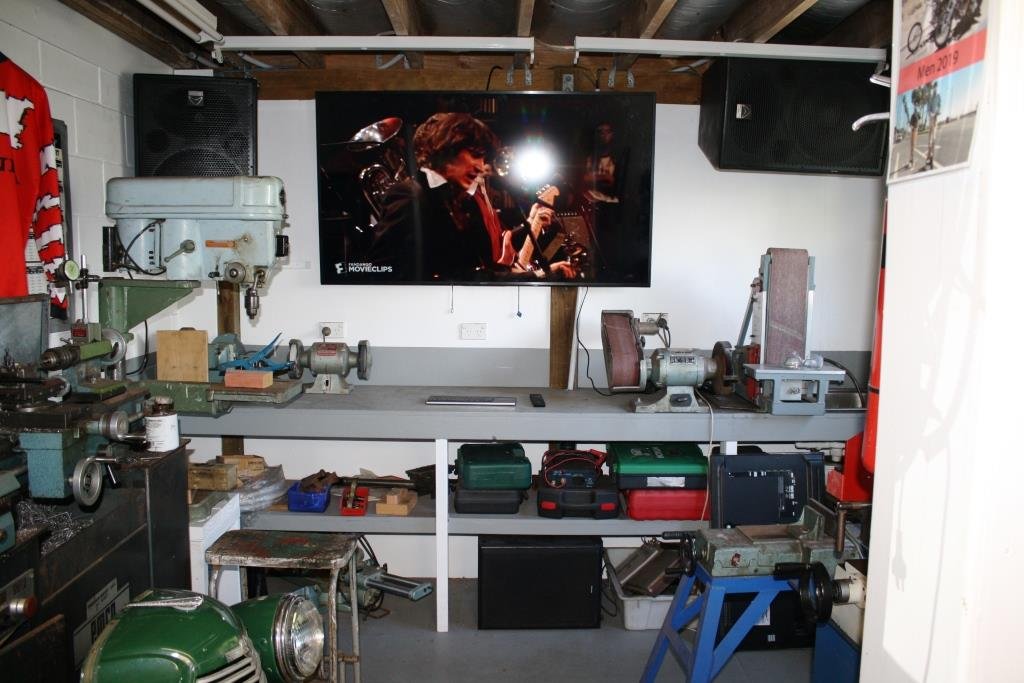
Breaking news from the “Galactically acclaimed” sr2 man-cave…….. We have a big screen upgrade to match the new sound system….

-

SR2’s 1947 Vauxhall “Rigamortice” Discussion thread.
sr2 replied to sr2's topic in Project Discussion
Ouch! I'd be looking at stainless for a turbo system, usually higher temperatures involved. I've found with the correct wire stainless is easy to mig with your usual co2/argon mig gas. -
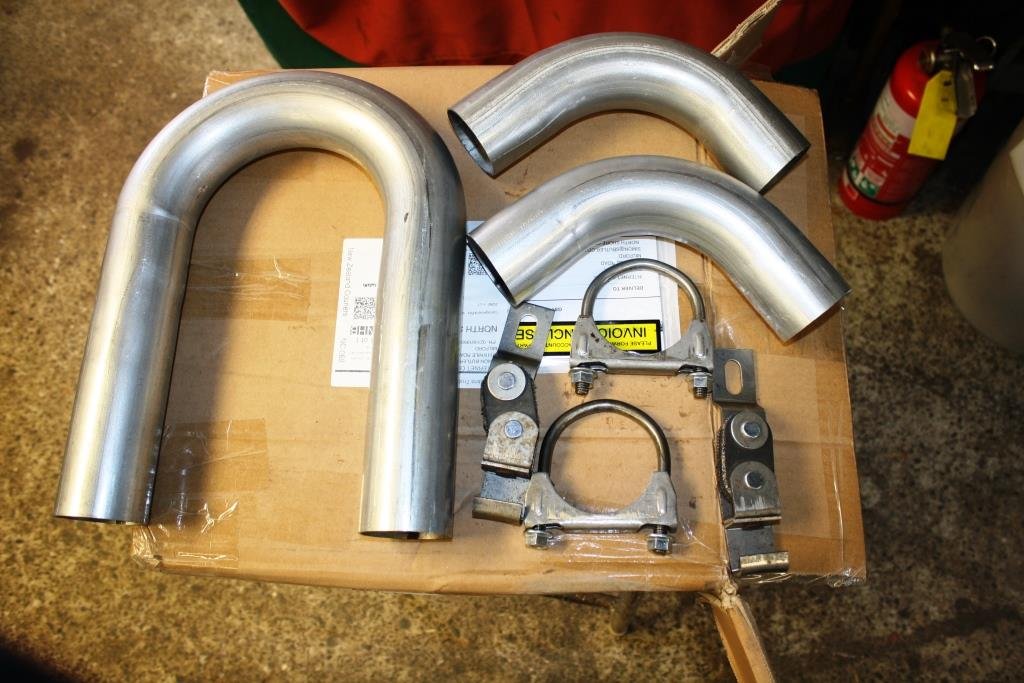
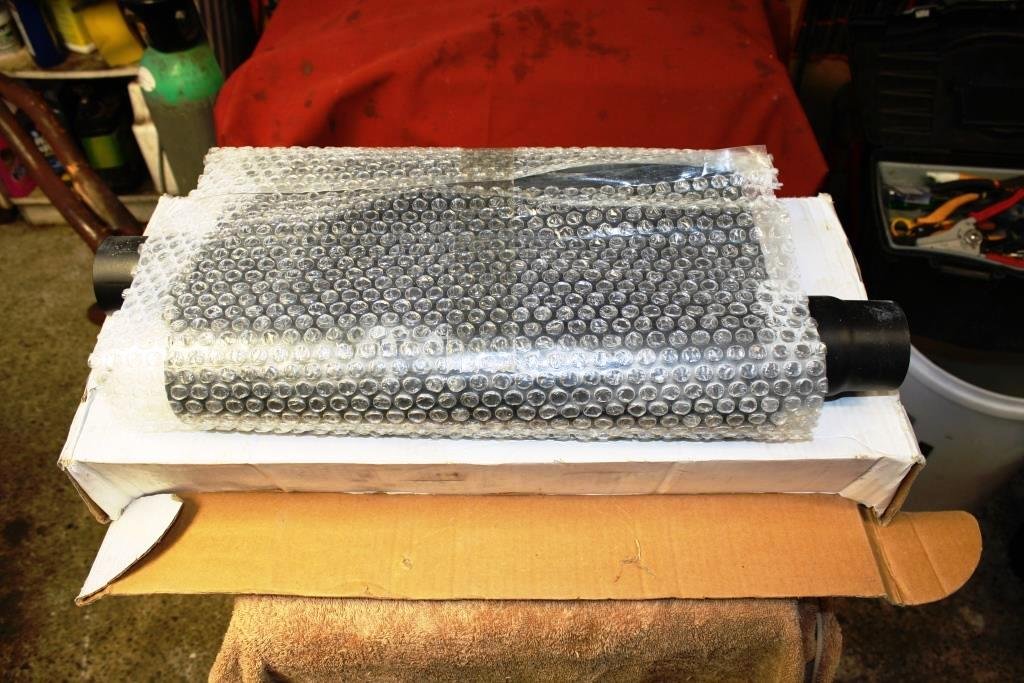
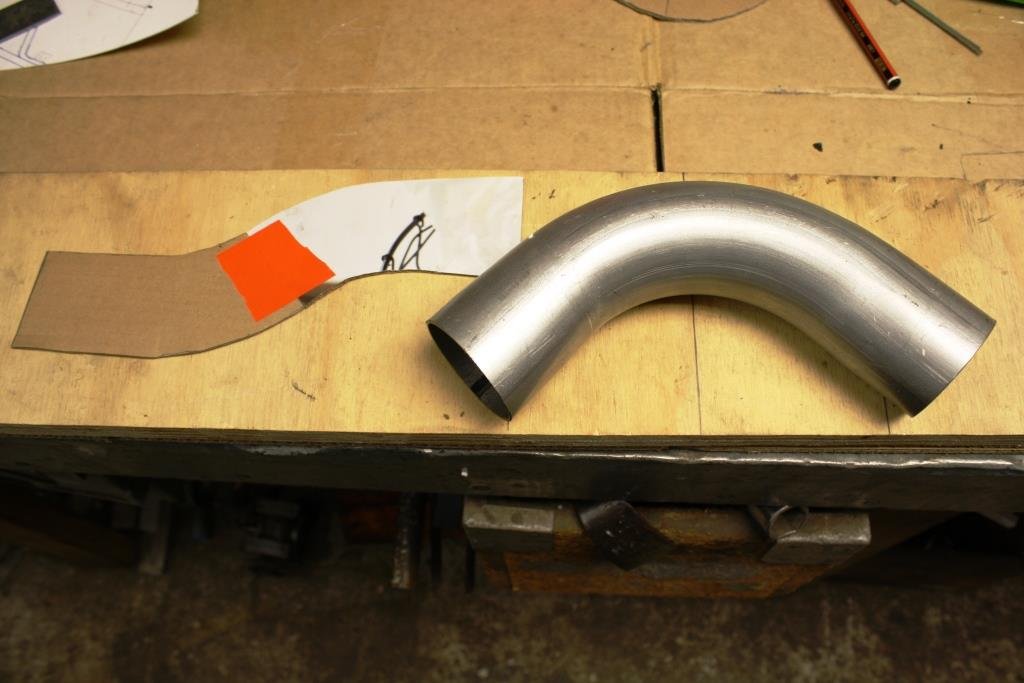
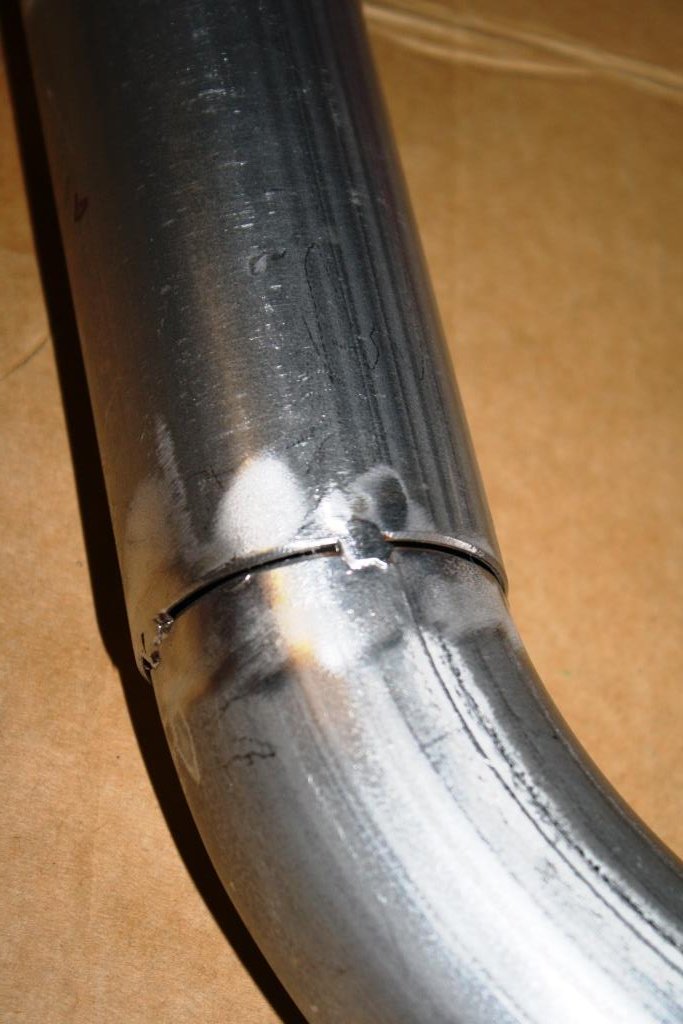
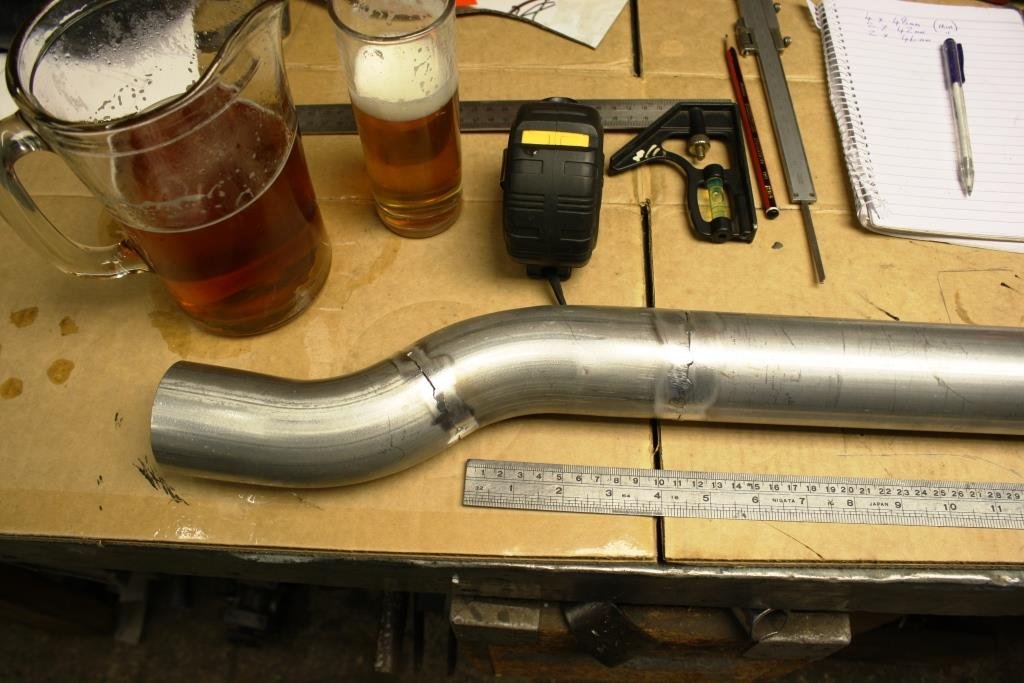
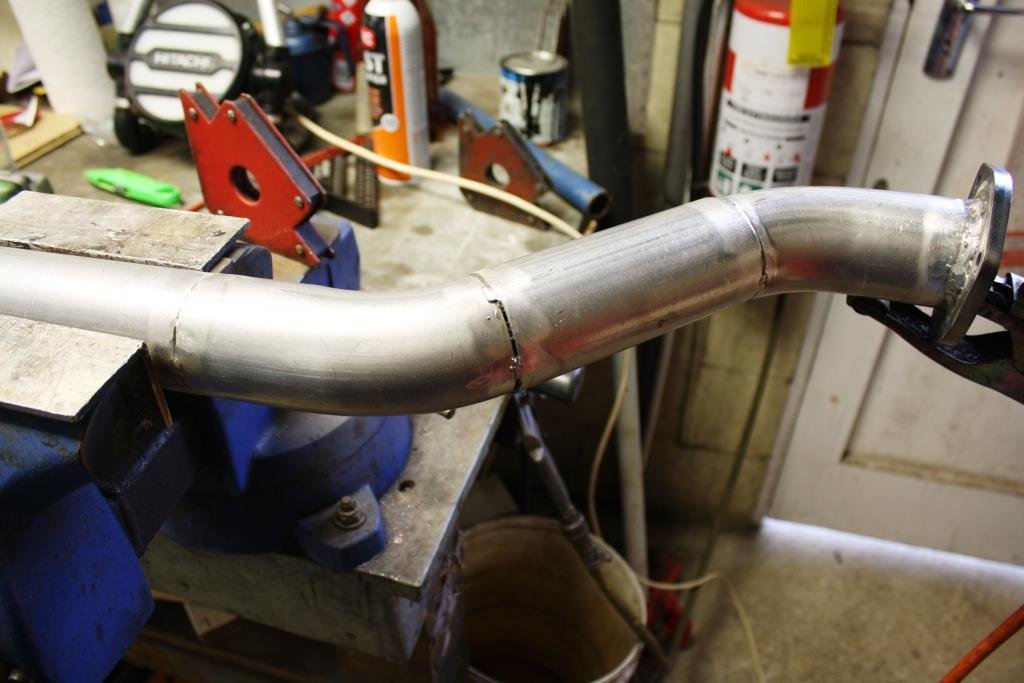
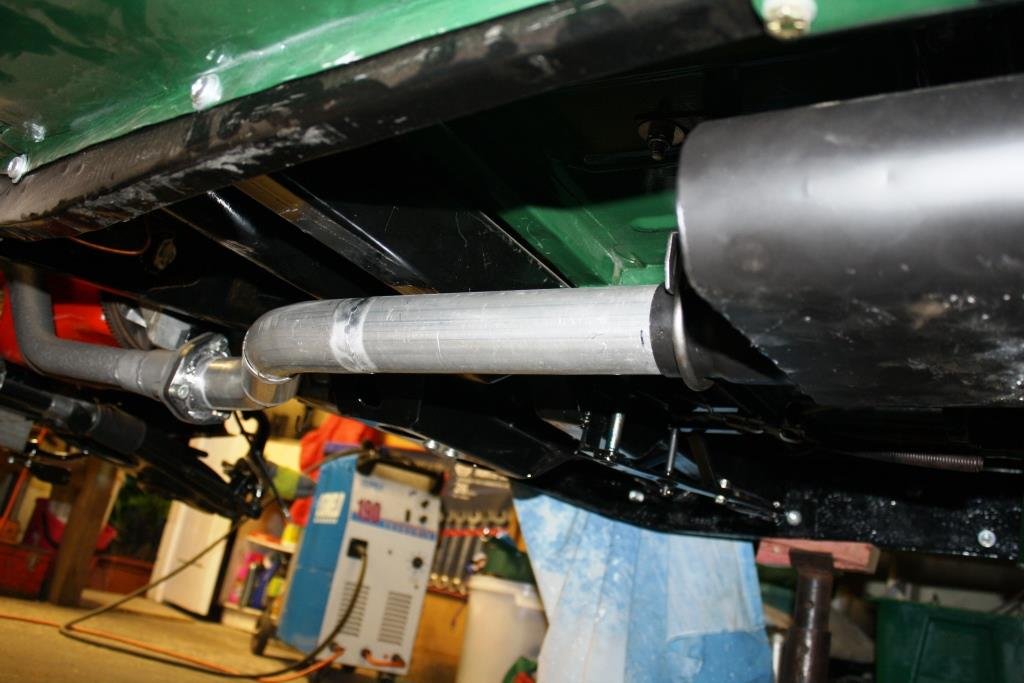
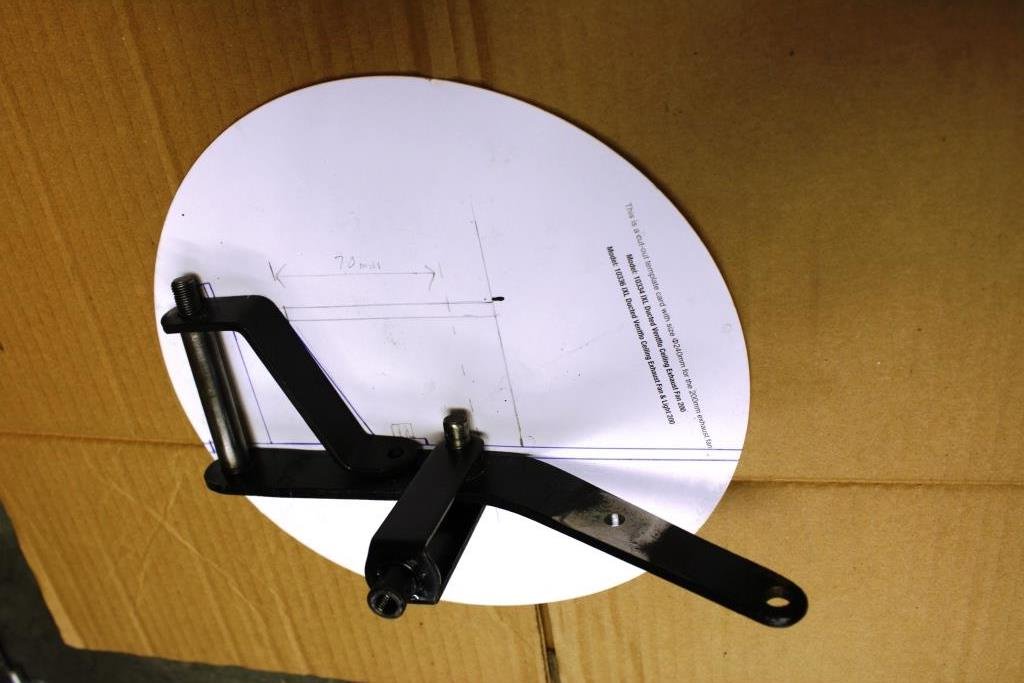
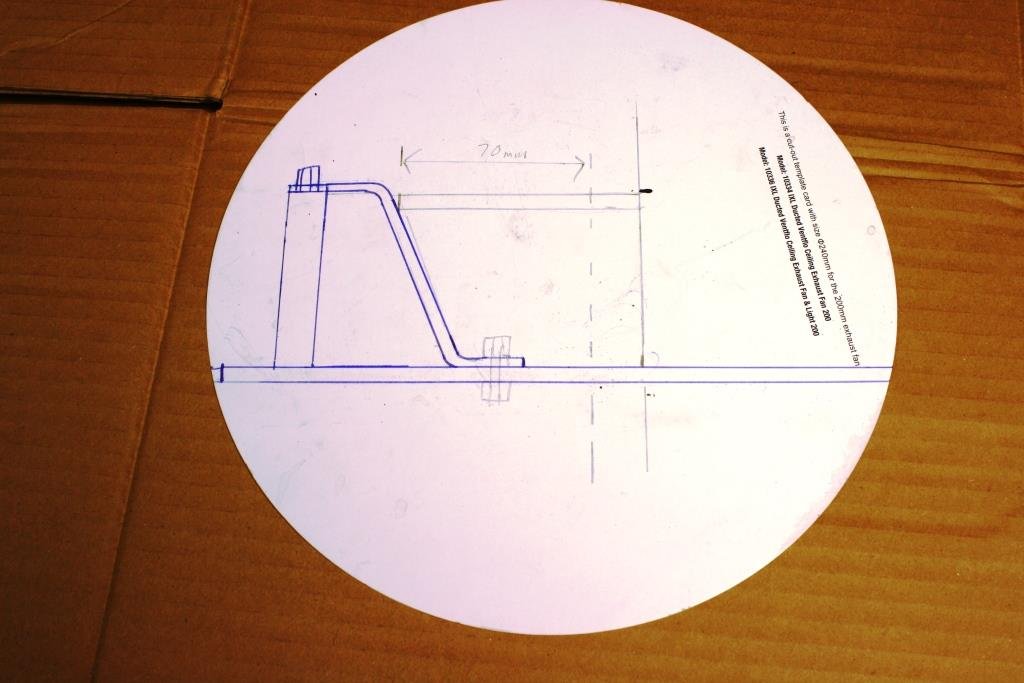
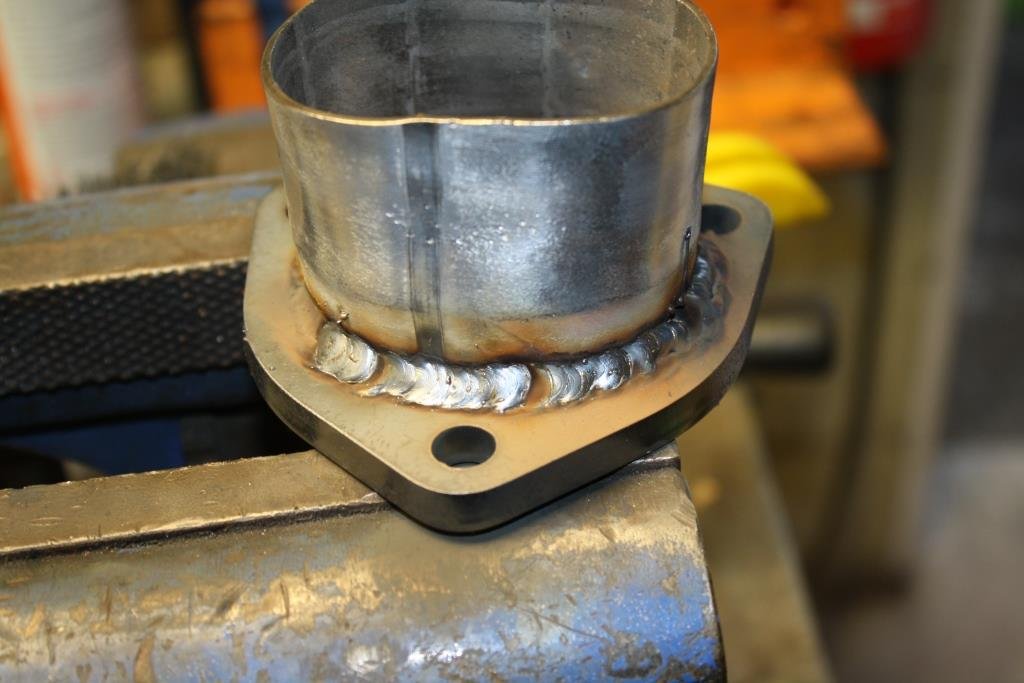
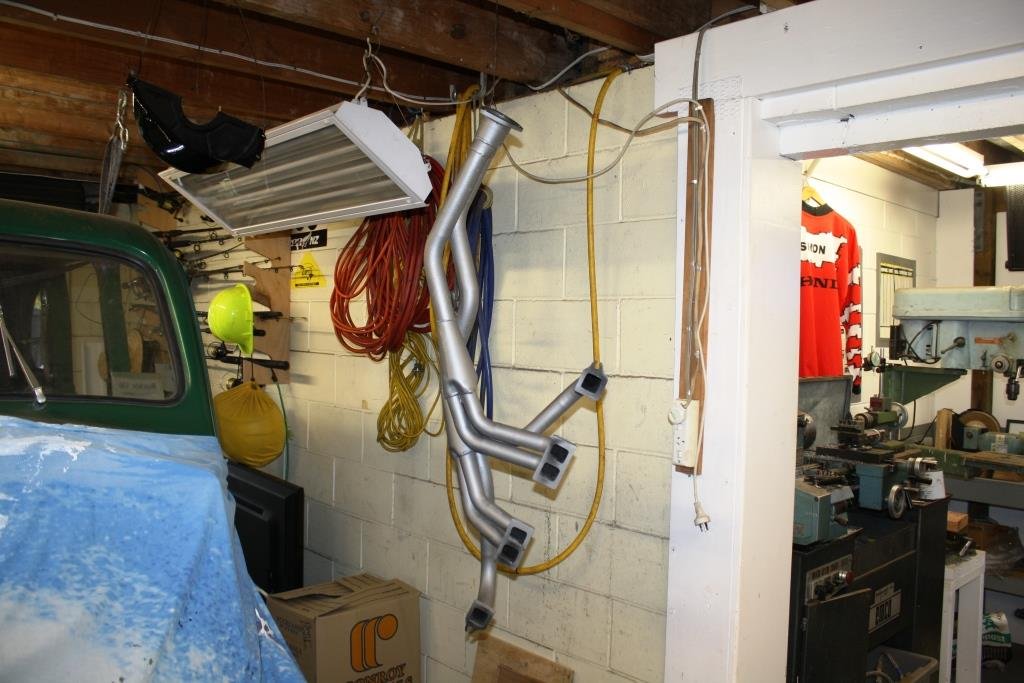
A Bunch of cool exhaust stuff arrived from STA parts at a great price. After considerable deliberation and Wild Turkey Rigamortice I had made the decision to settle on a 2 ¼ inch exhaust. The old Holden 6’s don’t get much past 6 grand in street trim and going bigger risks sacrificing mid-range for that little extra top end. Plan is for the old girl to become my daily driver once again (I have a passion for totally impractical solutions for problems that never existed in the first place) and I need a drivable engine in a state of tune I can live with. Although wait until I build the stroked 208! Ordered some straight tube and found a muffler on Trademe… And it’s back into using CAD (cardboard aided design). Have to say some of these cheap Chinese “mandrel bends” are a little out of round. But the price is right. Beer is always important when working late in the “universally renowned” sr2 man-cave. Happy with the front pipe - time to weld it up. And check one more time it all fits.
- 184 replies
-
- 21
-

-
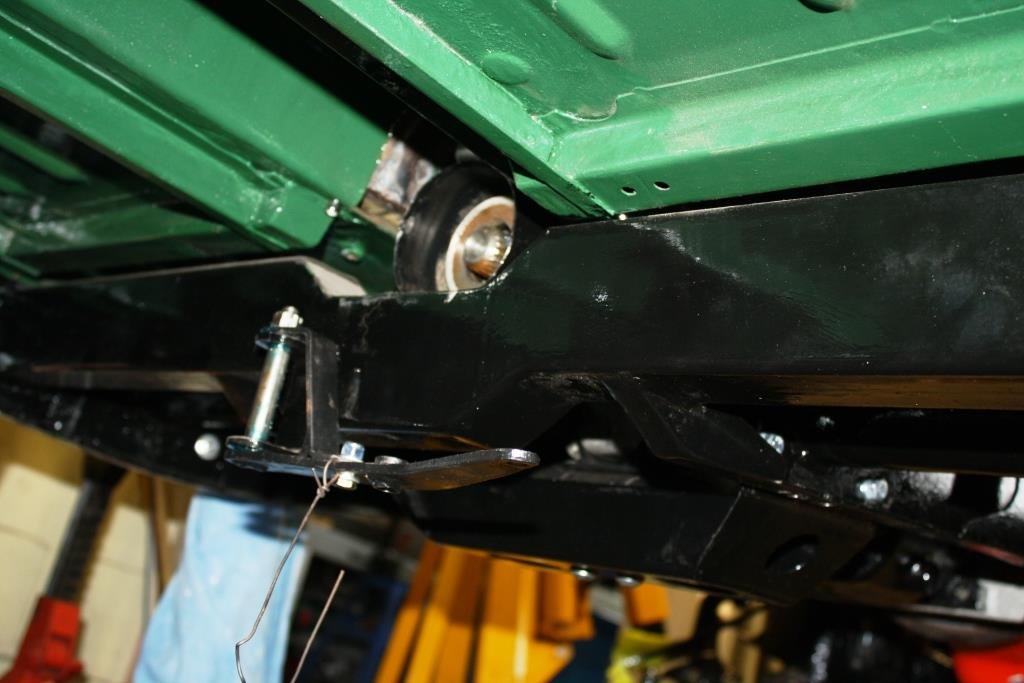
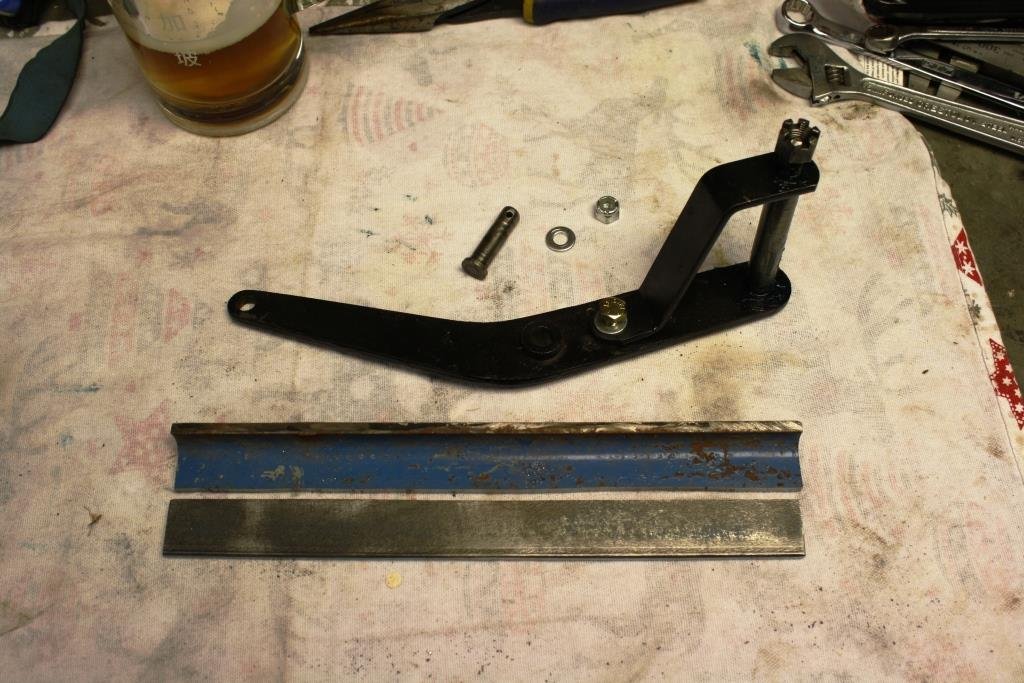
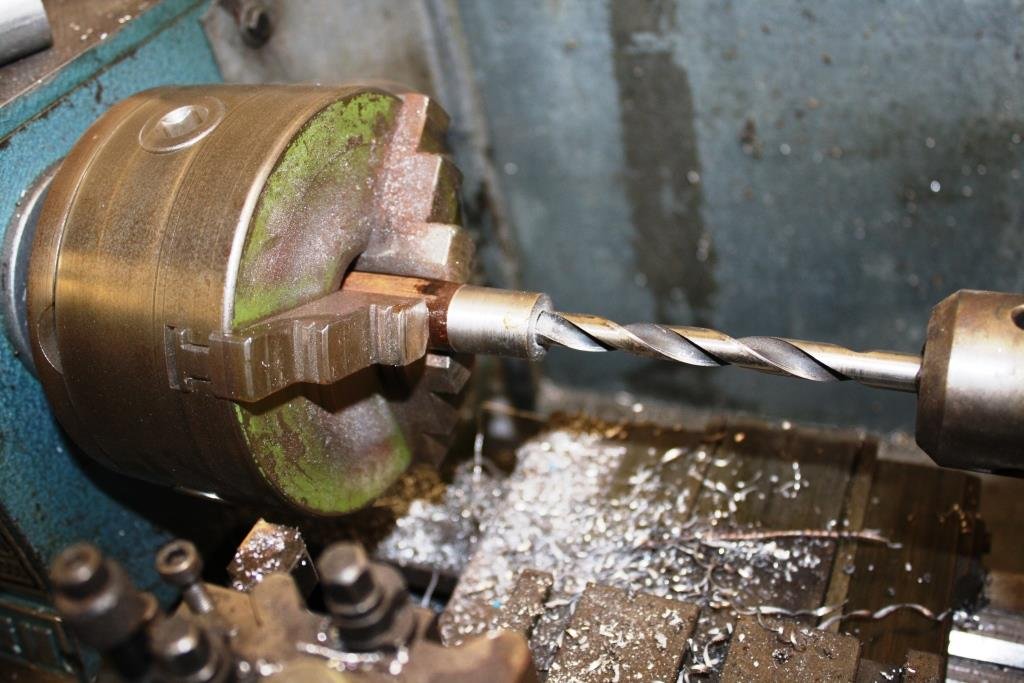
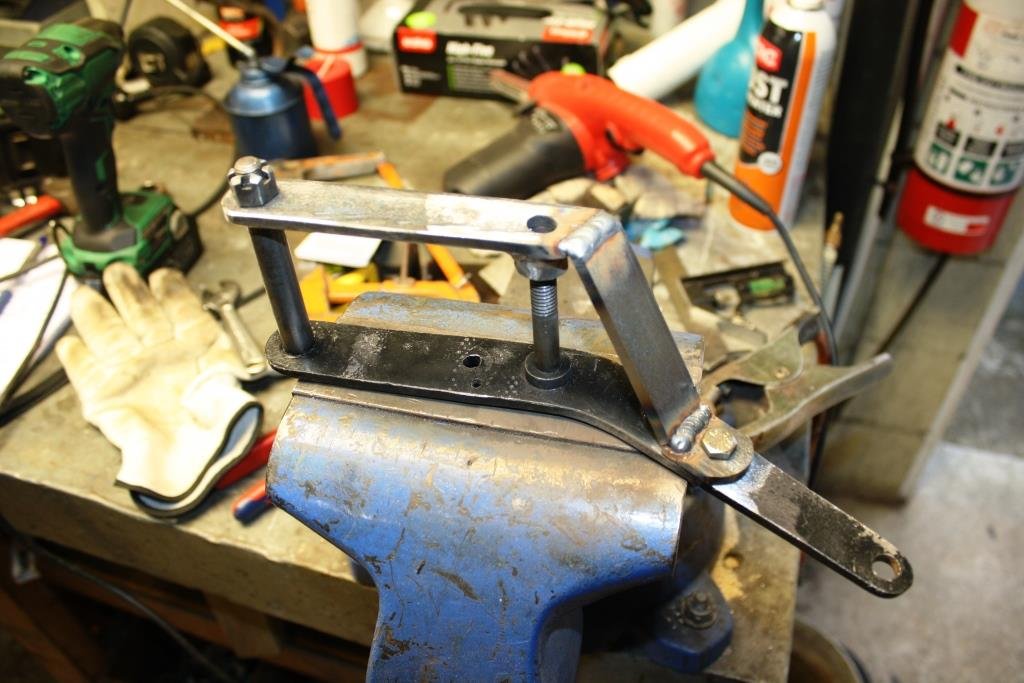
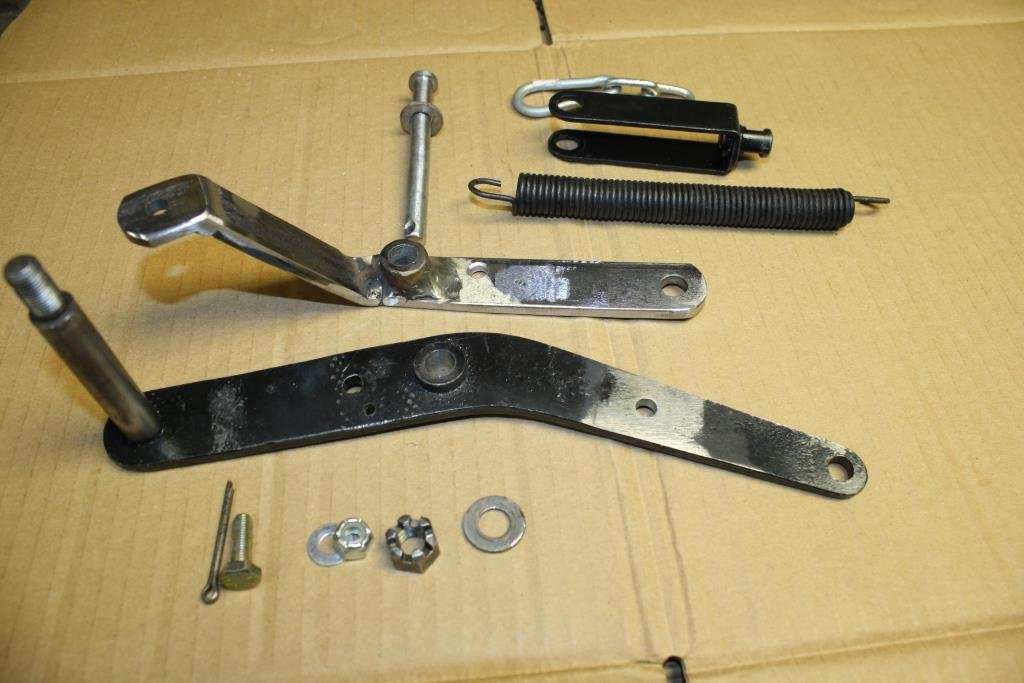
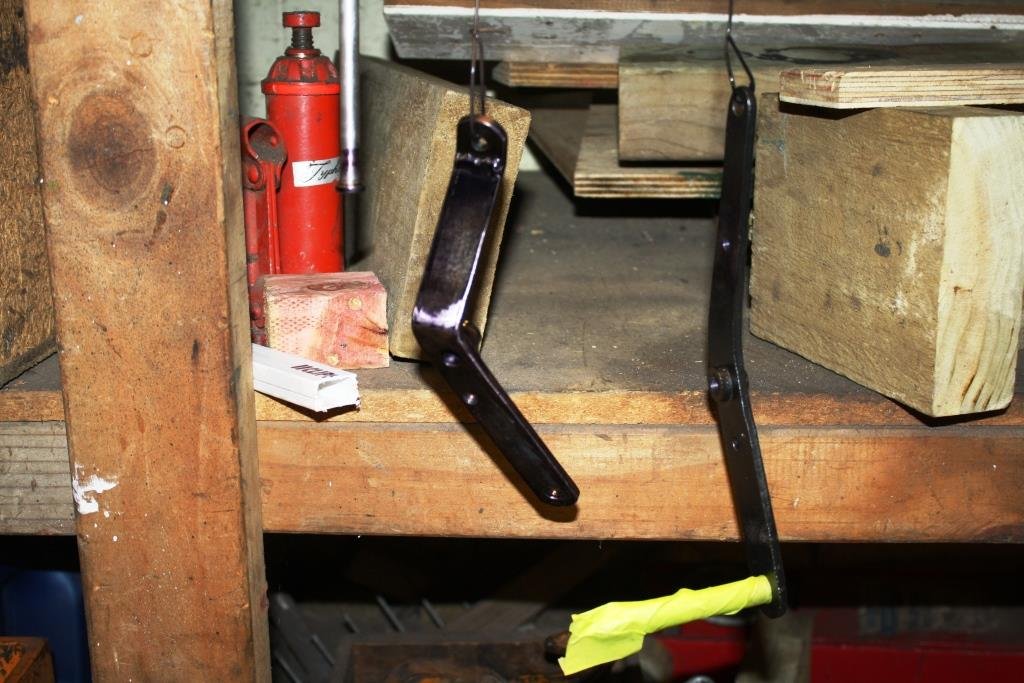
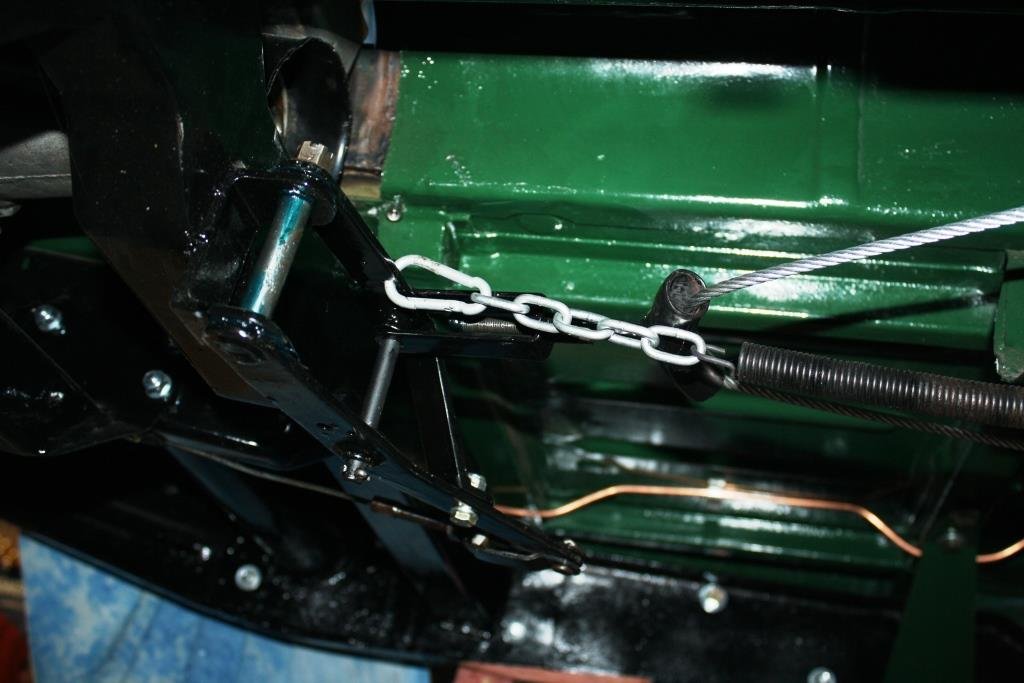
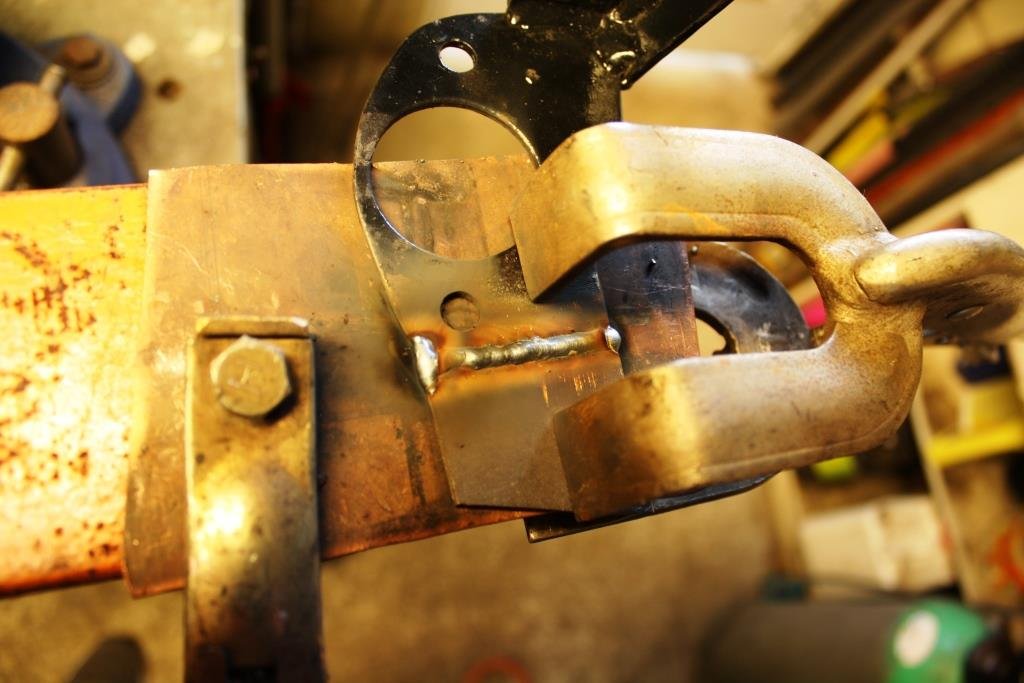
While groveling around underneath the old girl trying to figure out how to get a bloody 2 ¼ inch exhaust to fit where a 1 1/8” had no issues I fell seriously out of love with my handbrake quadrant and decided it could be improved on.. Remaining true to the tradition of this build I removed a “finished” component to butcher it up and change it. First a little CAD (cardboard aided design) work. Hacked up some scrap steel……. Turned up some scrap steel…… Welded up some scrap steel…… And ended up with this lot……… That needed some paint……… It’s a little hard to see under the car but the result is a lot more tidy and satisfies Rigamortice’s obsessive-compulsive personality disorder!
- 184 replies
-
- 13
-
-
For older cars there's a user on Trademe named shieldz who sells refurbished Smiths gauges, I've heard good reports about him. He's got some really cool retro stuff. https://www.trademe.co.nz/a/search?member_listing=935977&bof=FcsYJDZ9
-
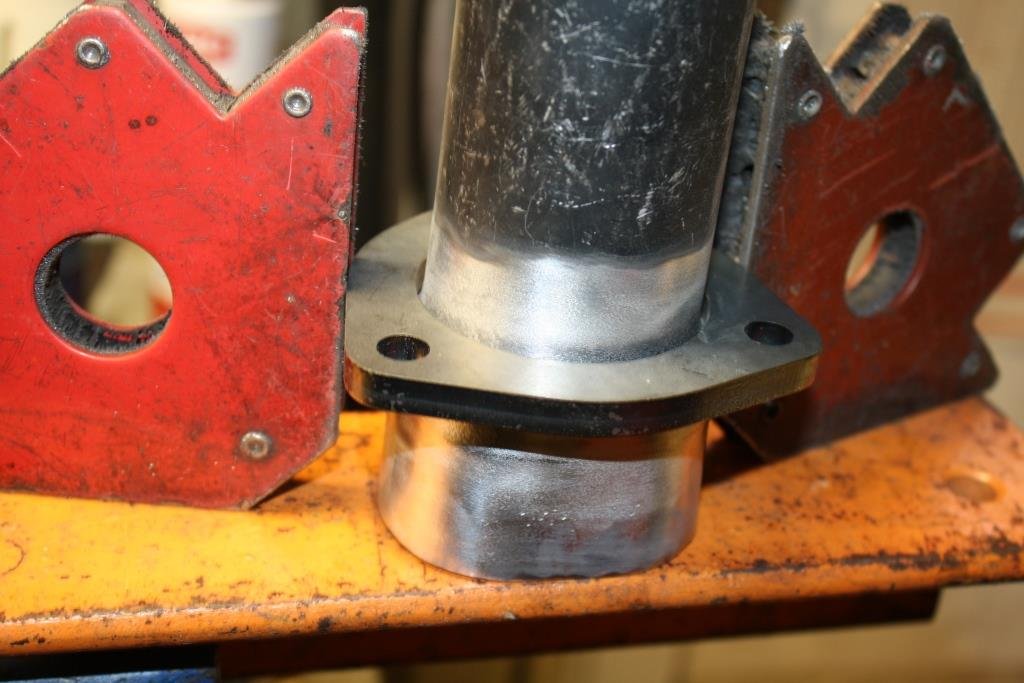
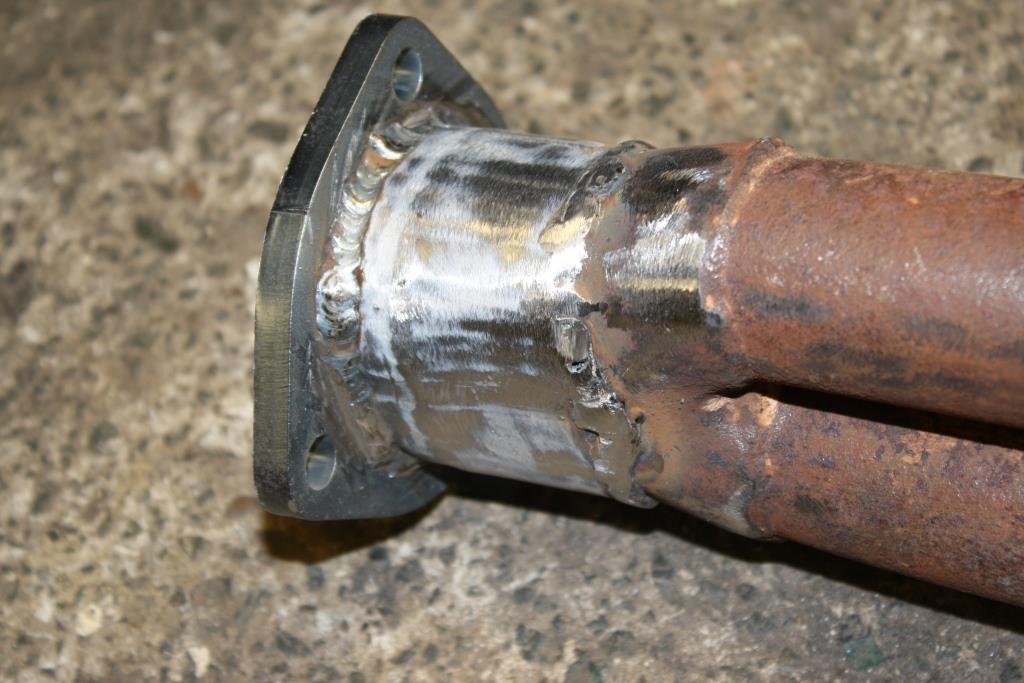
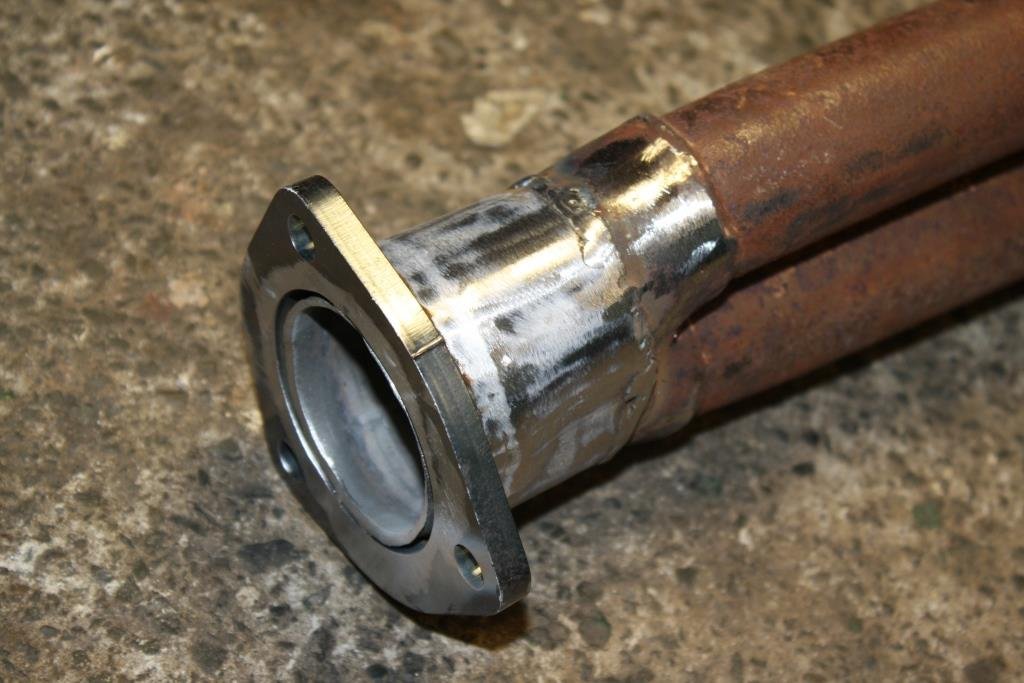
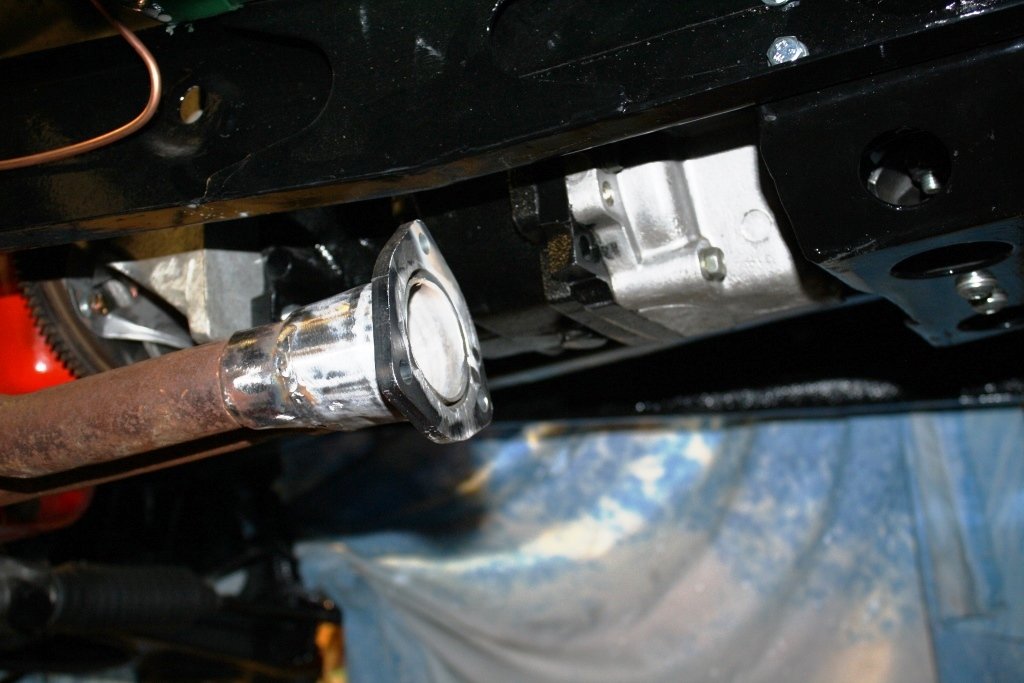
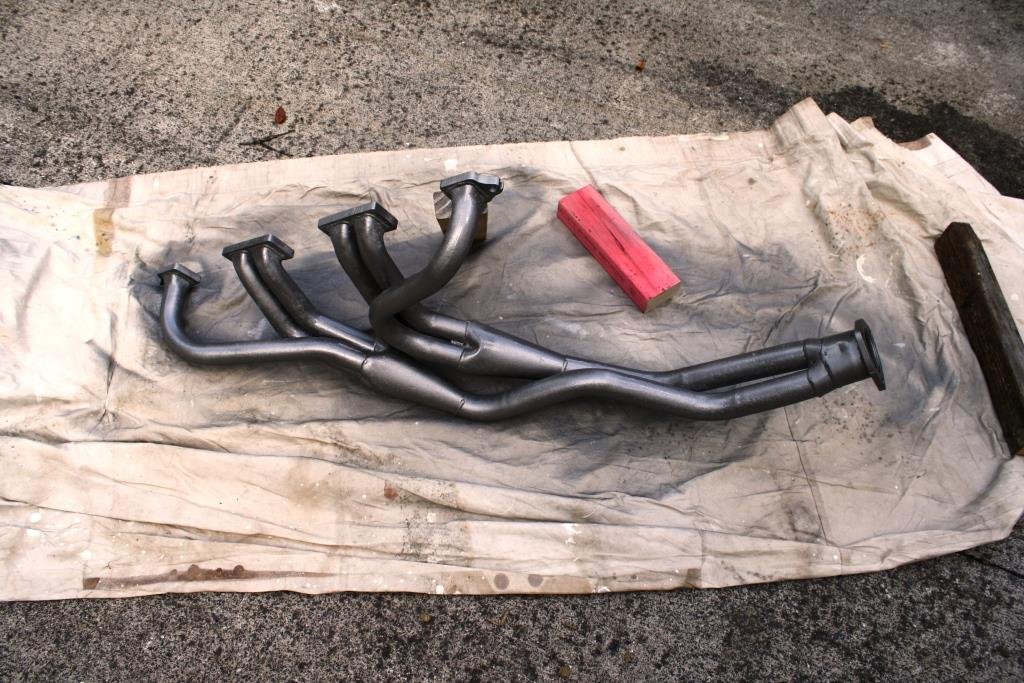
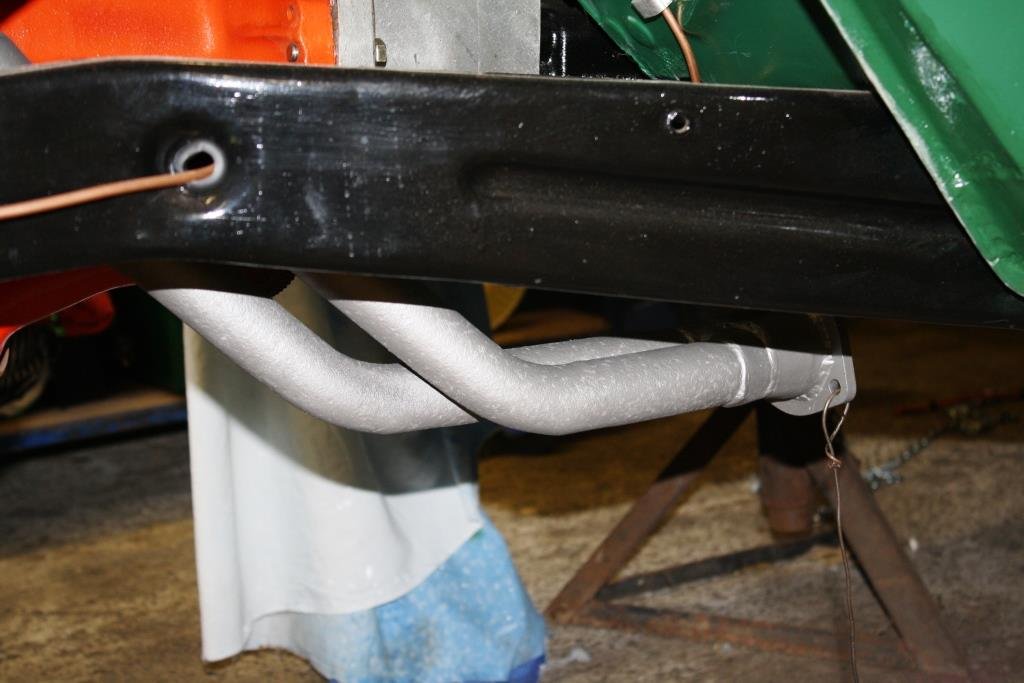
Dug out an old set of HR? headers I had laying around, they looked like a good fit. Cut the old exhaust pipe….. Started fabricating a collector to go from the two into one join into a 2 ¼ inch exhaust. Found some scrap that fitted the “Sticky Flanges” flange…… Pictures are often better than words……… Sits alongside the gearbox in the right place……… Decided sand blasting and ceramic coating was to bigger expense as I plan to build a custom set when I build the stroked motor. Spent some time sanding and rust killing…….. All painted with high temp VHT and ready to fit….. Happy with the result.
- 184 replies
-
- 20
-
-
SR2’s 1947 Vauxhall “Rigamortice” Discussion thread.
sr2 replied to sr2's topic in Project Discussion
What a cool car, it's not a J14 it's a DX which was the previous model. I would be interested to know what suspension & brakes are fitted. -
SR2’s 1947 Vauxhall “Rigamortice” Discussion thread.
sr2 replied to sr2's topic in Project Discussion
Thanks mate, sadly for some reason F/B won't let me look at the marketplace outside nz? -
SR2’s 1947 Vauxhall “Rigamortice” Discussion thread.
sr2 replied to sr2's topic in Project Discussion
Cool car. The Aussie J14 had a full chassis and a single back window. Any chance of posting a link to the add? -
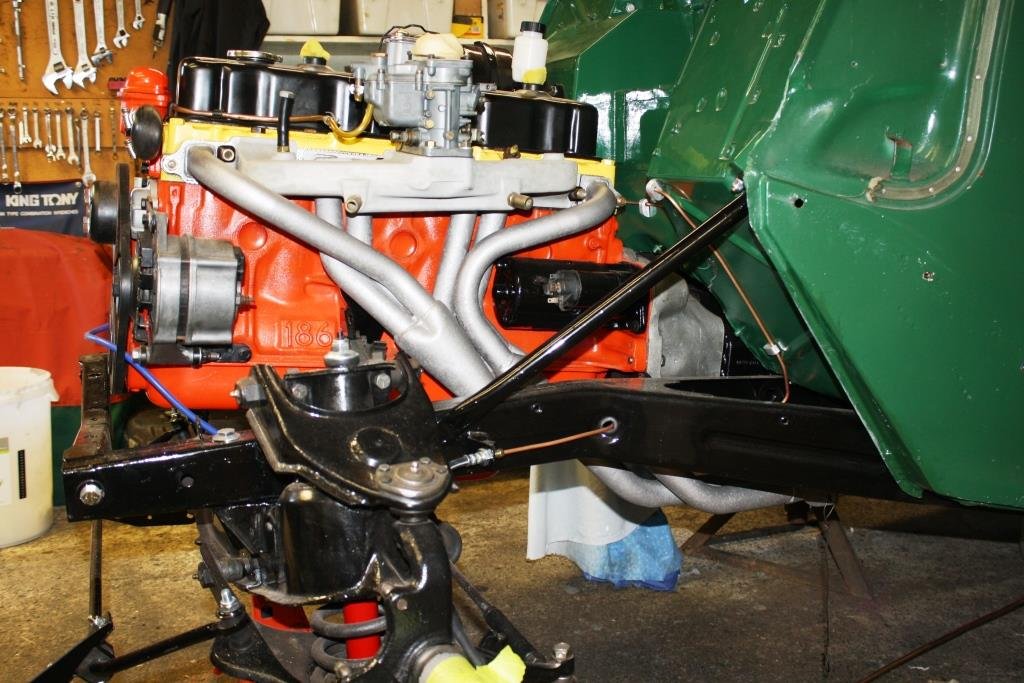
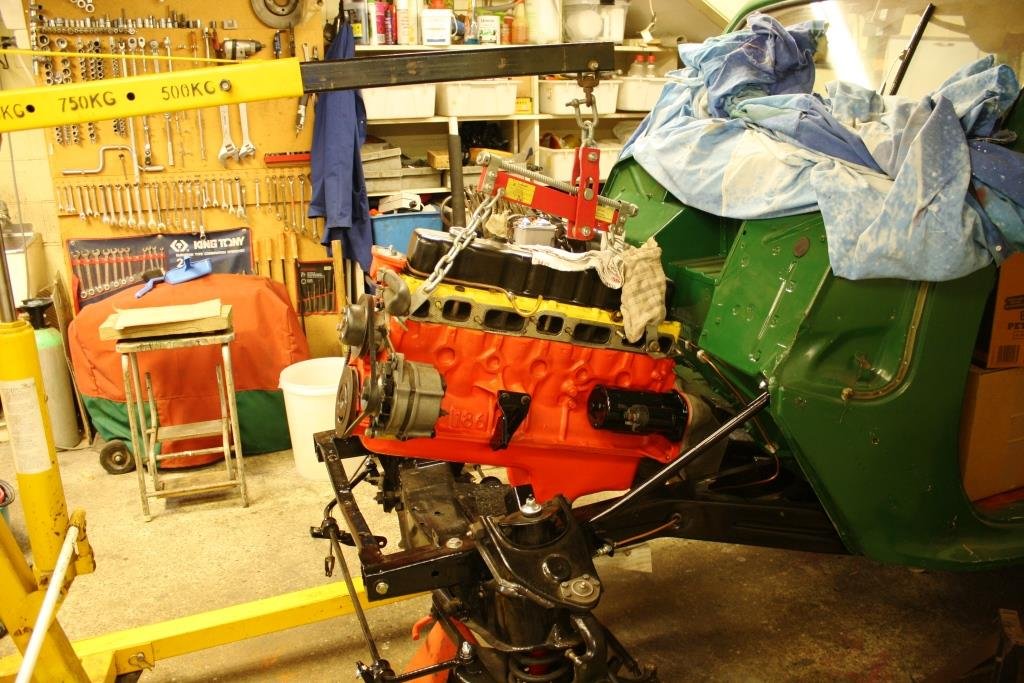
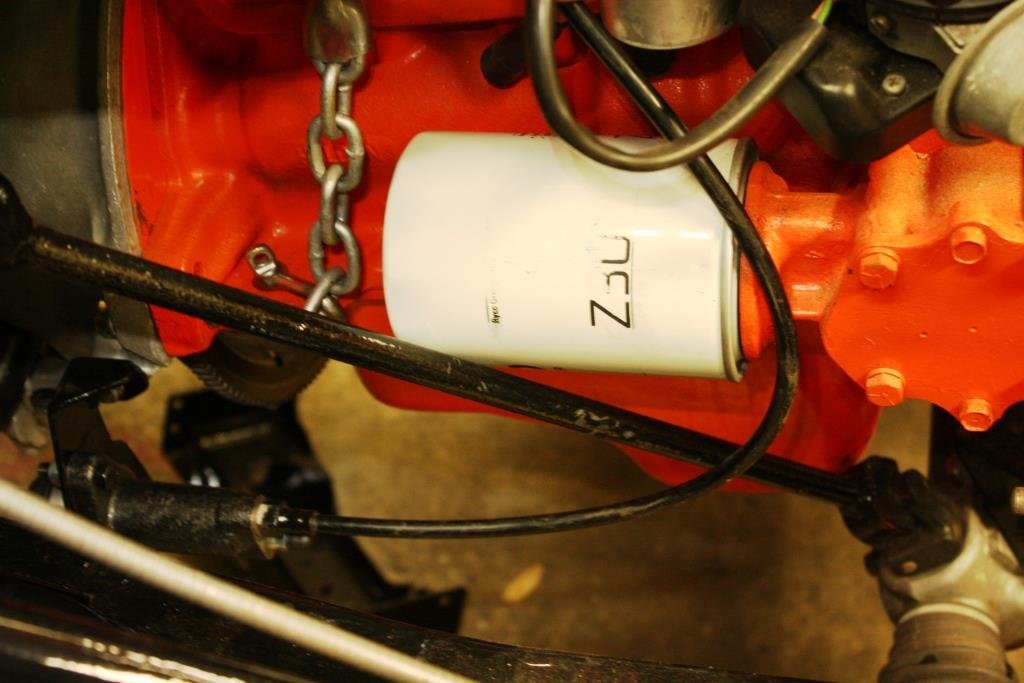
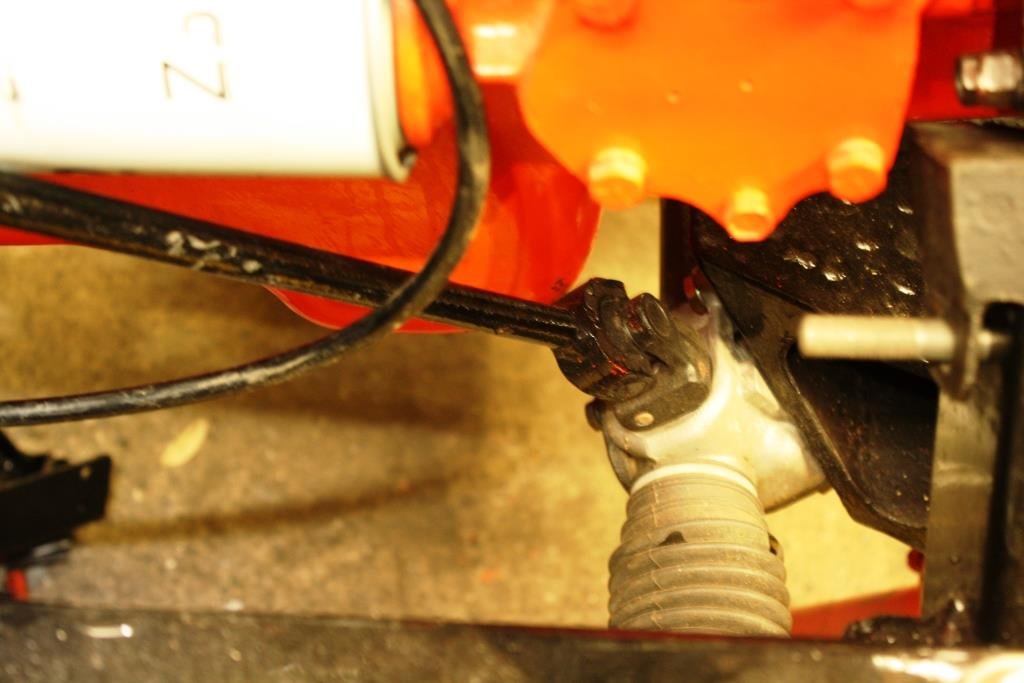
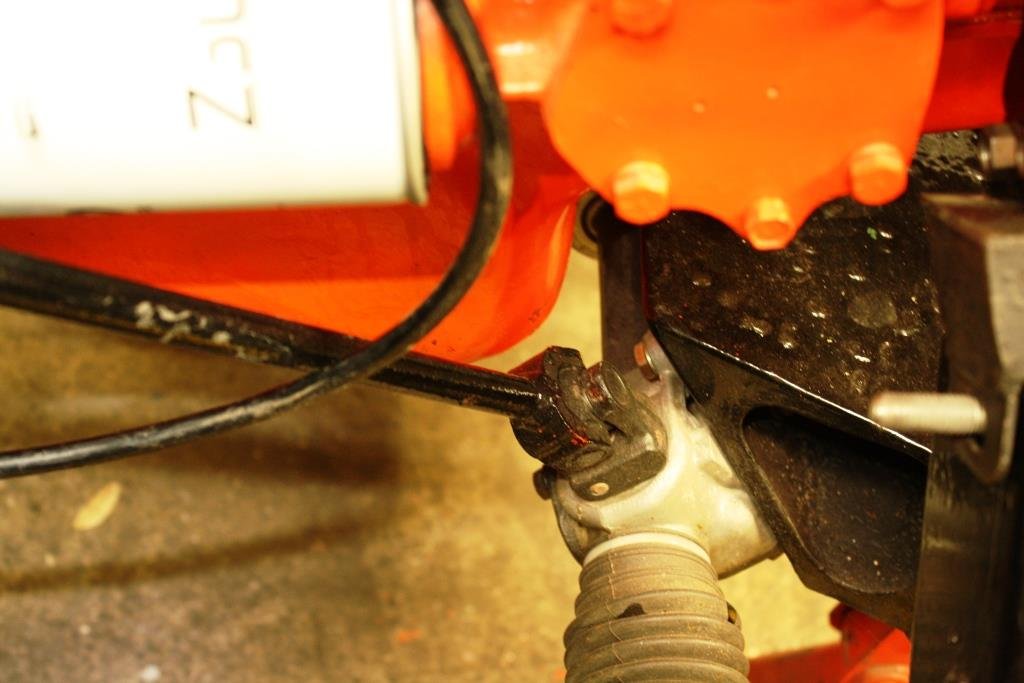
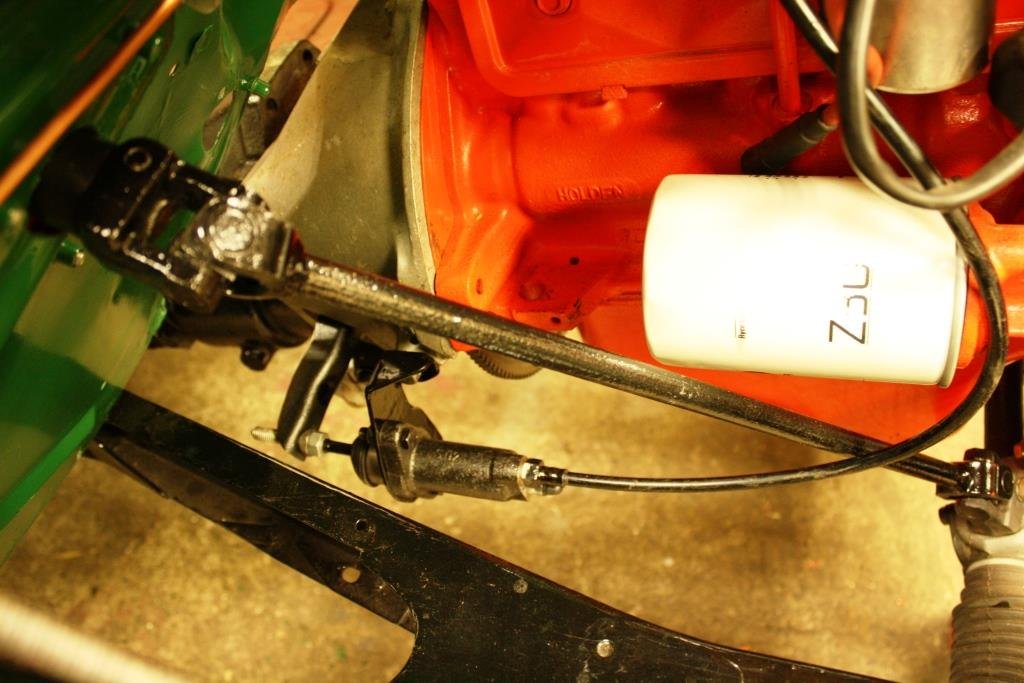
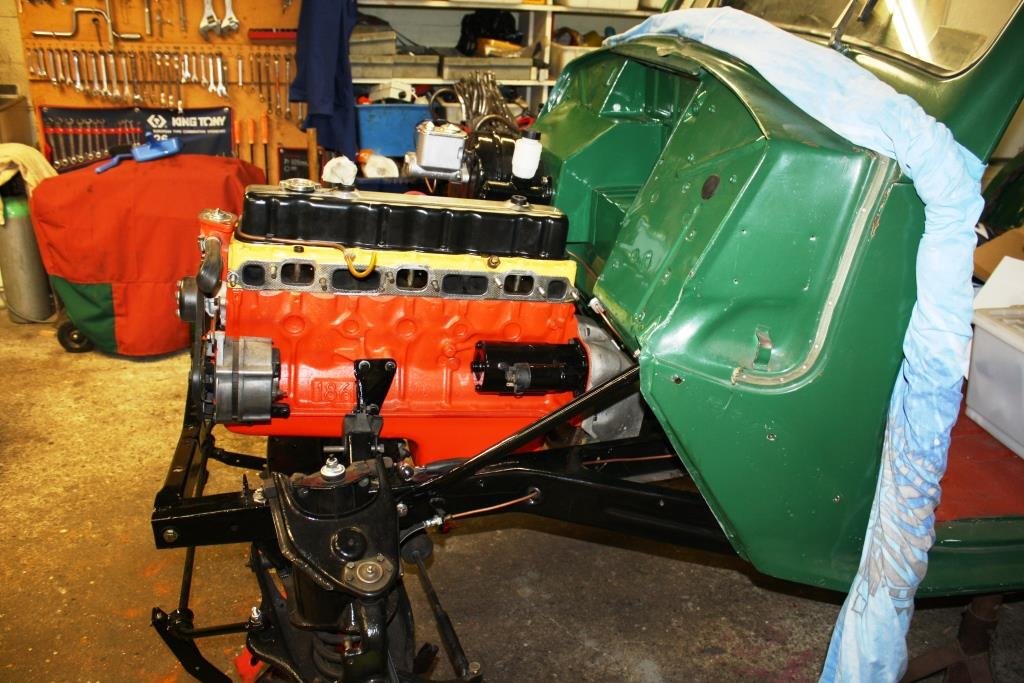
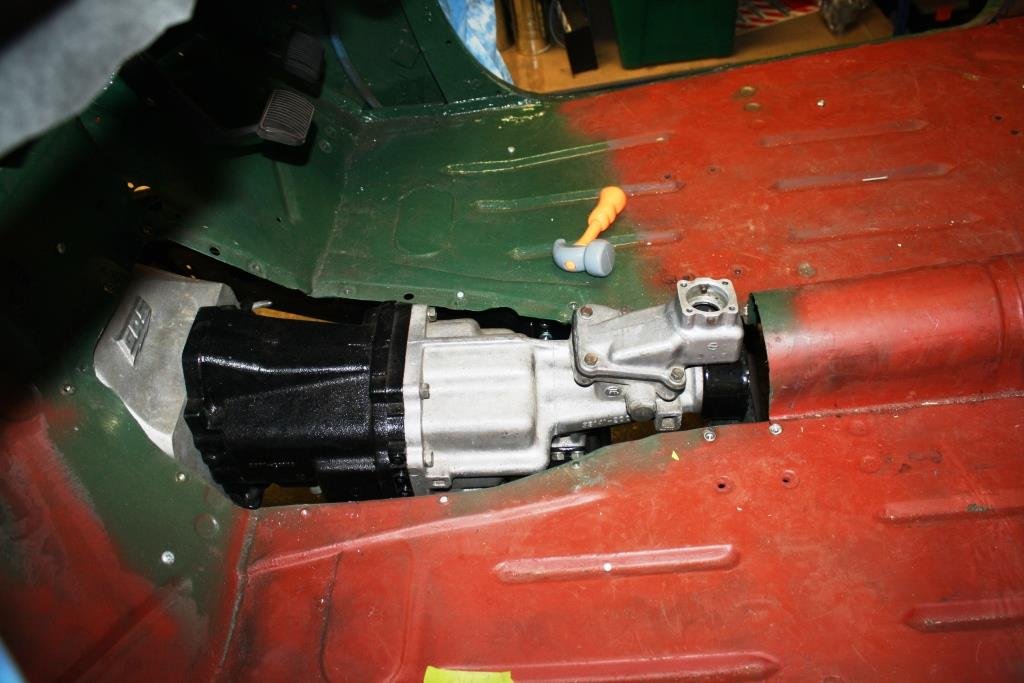
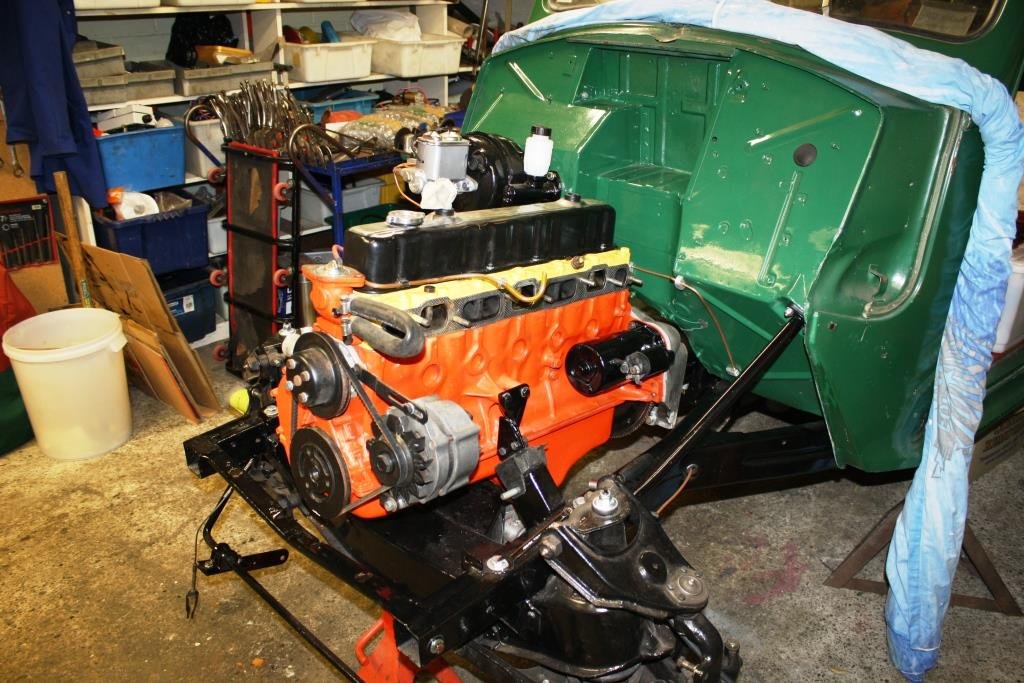
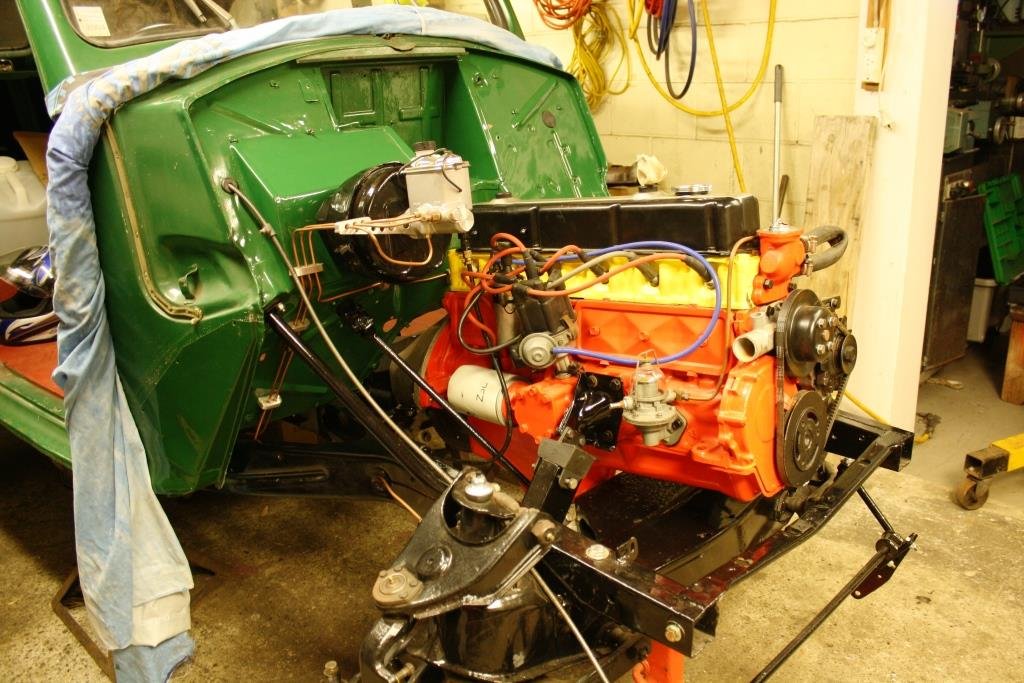
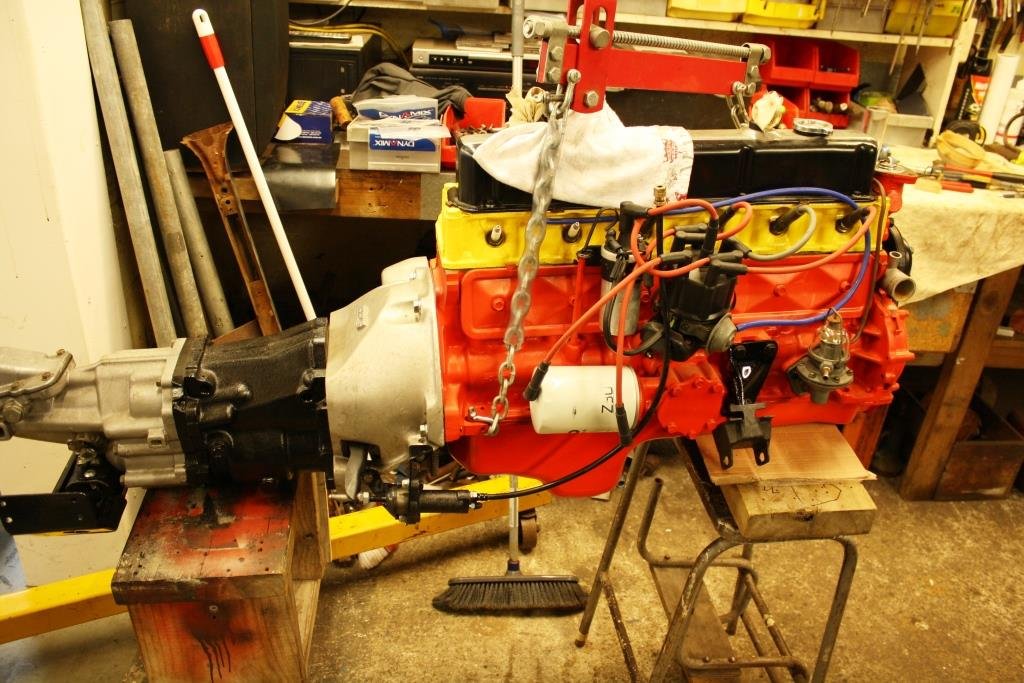
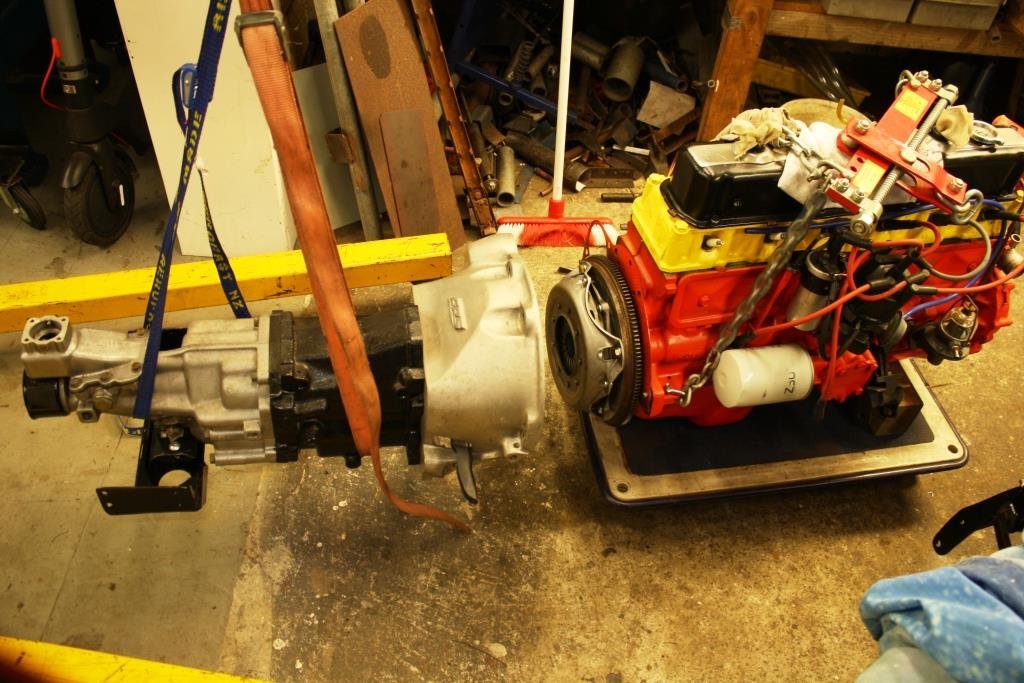
Time to stick the little 186 where it belongs…. Had a big issue with lining up engine mounts…. Discovered the oil filter was in the way of the steering…… And the steering rack U/J was hitting the sump ....????? After a Wild Turkey or two and some head & bollocks scratching I remembered that the left and right engine mounts were different sizes……duh….! Swapped them over and everything fitted like a glove. Even the clutch slave has room to breathe…. Looking good. Our 4 year old racing driver/grandson hit the g/box with his plastic hammer and it fits…….. Finally after 5 years, motor back in place………
- 184 replies
-
- 27
-
-

-
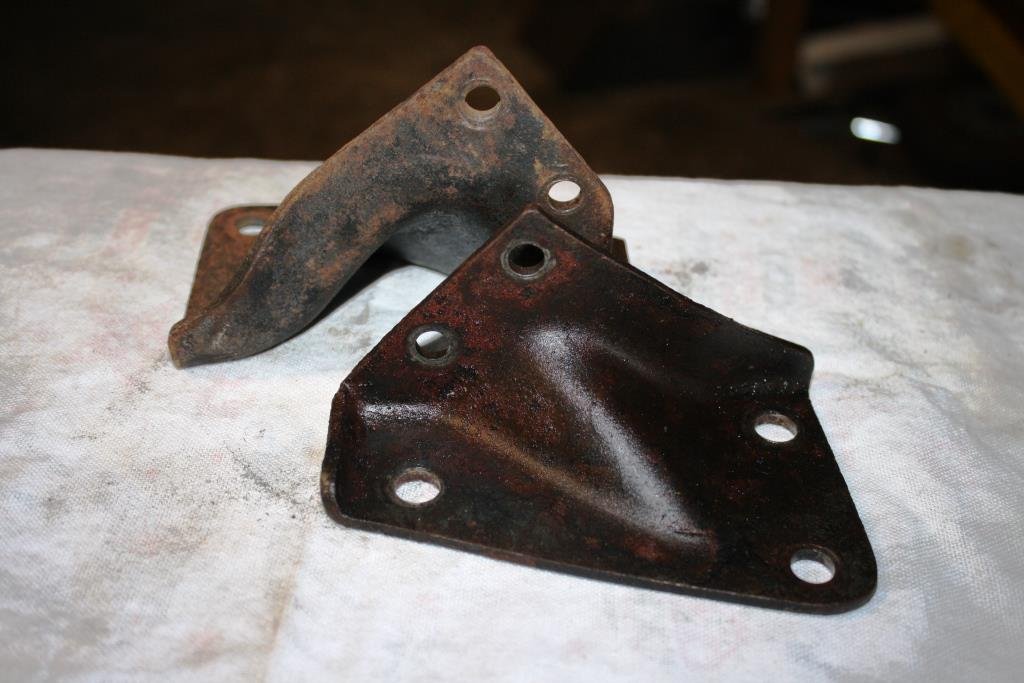
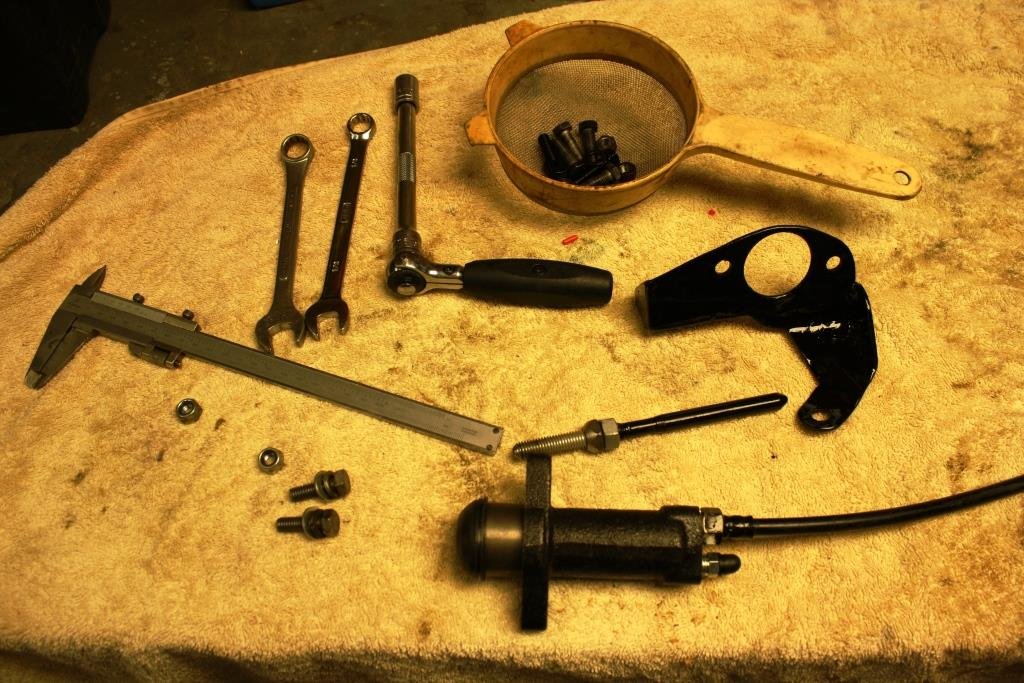
My OCD kicked in and I decided the clutch slave alignment could be improved on so I attacked a finished and painted bracket with and angle grinder and my ever-faithful Mig. Turned up an adjustable push rod and applied some paint. Looking good, all this combo needs is a pair of chassis rails to slide between. (Gawd- I may need to get a life!).
- 184 replies
-
- 15
-
-
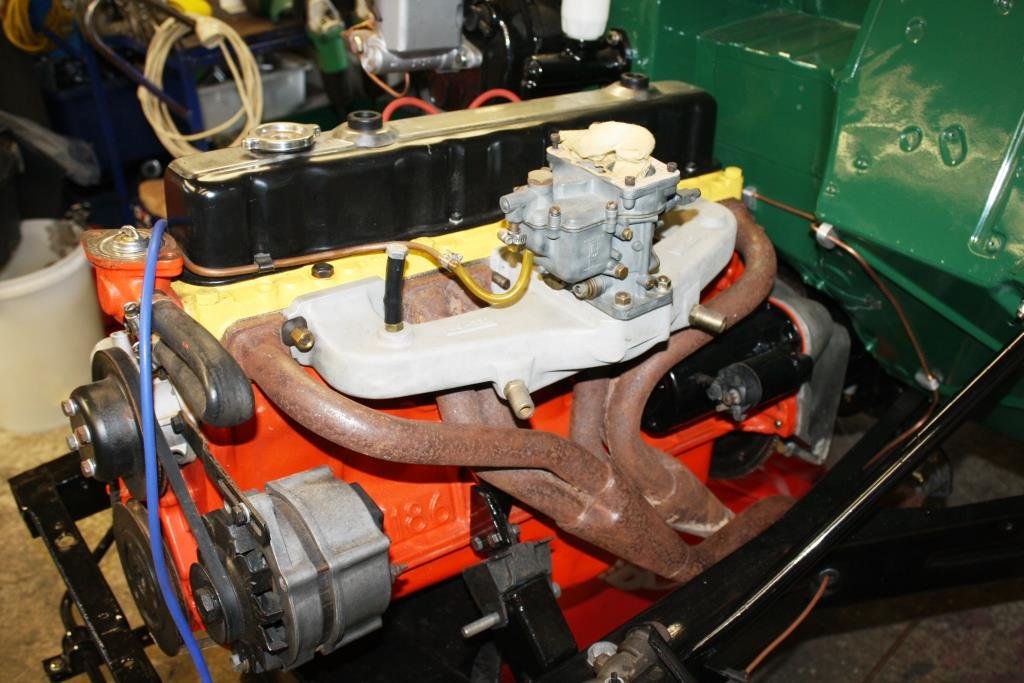
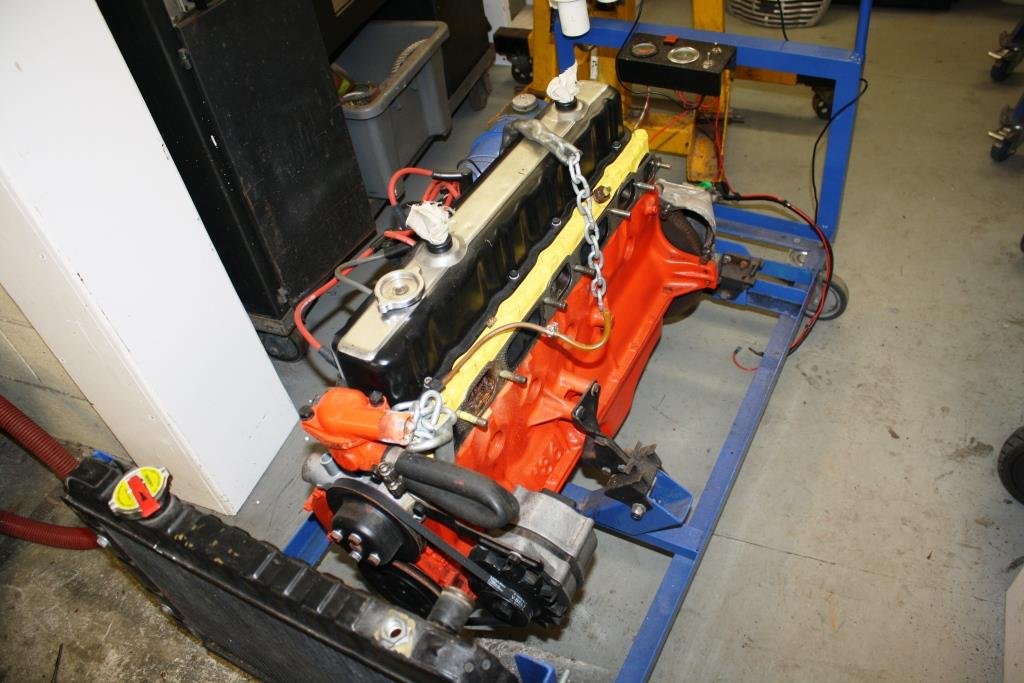
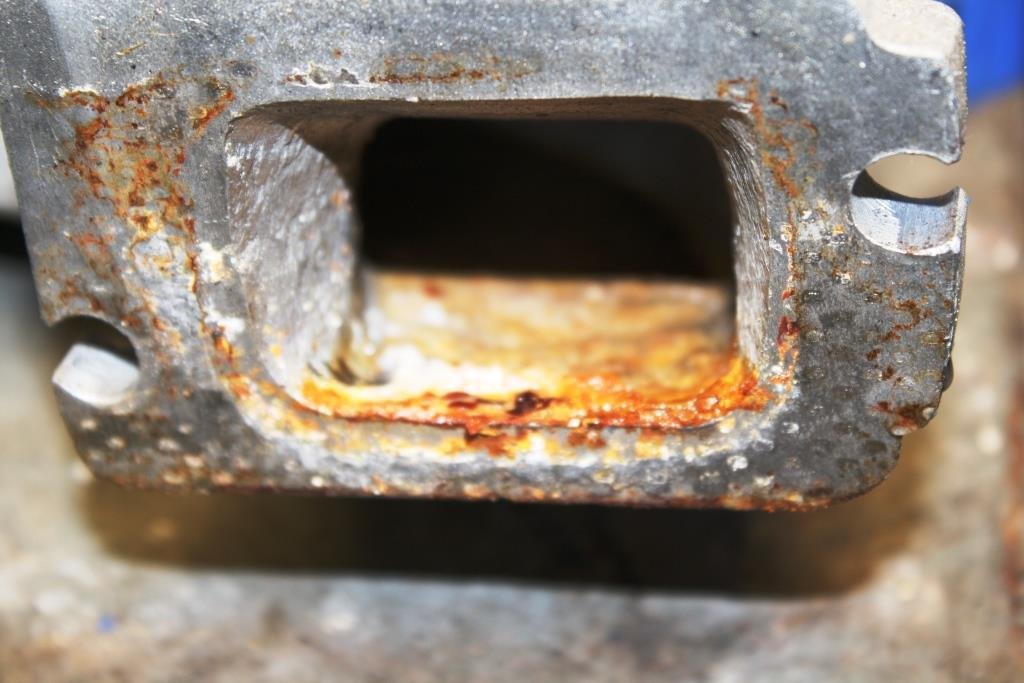
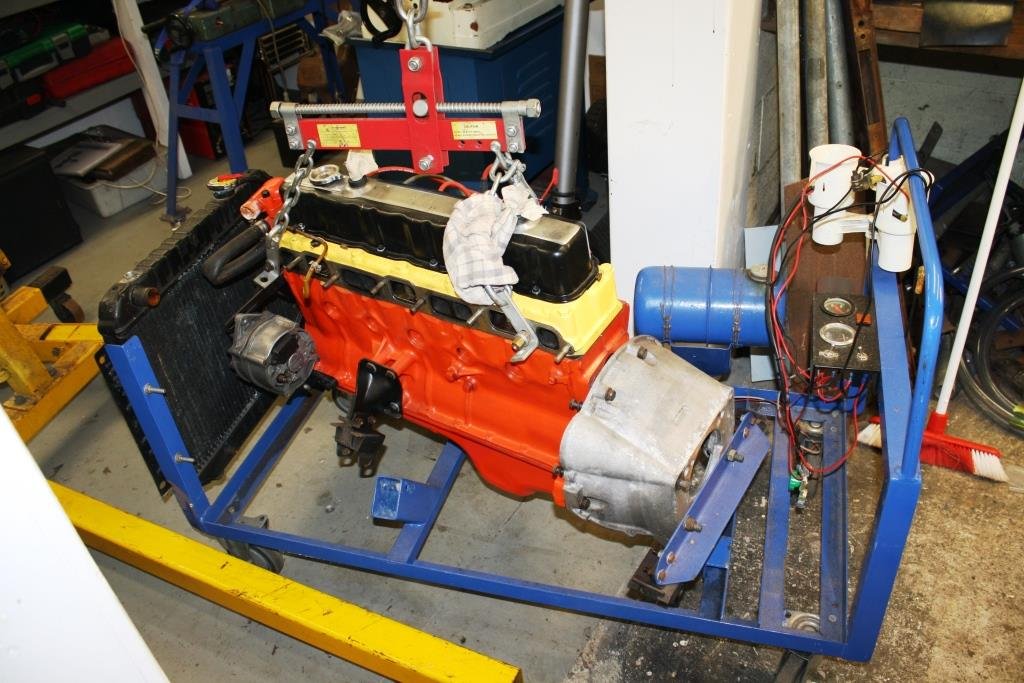
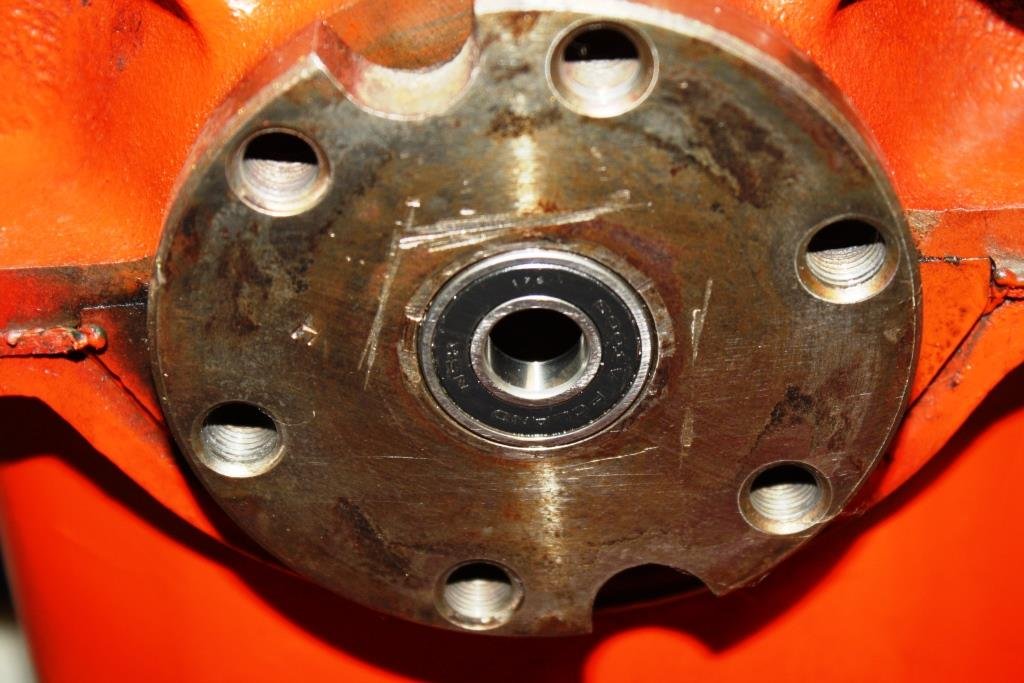
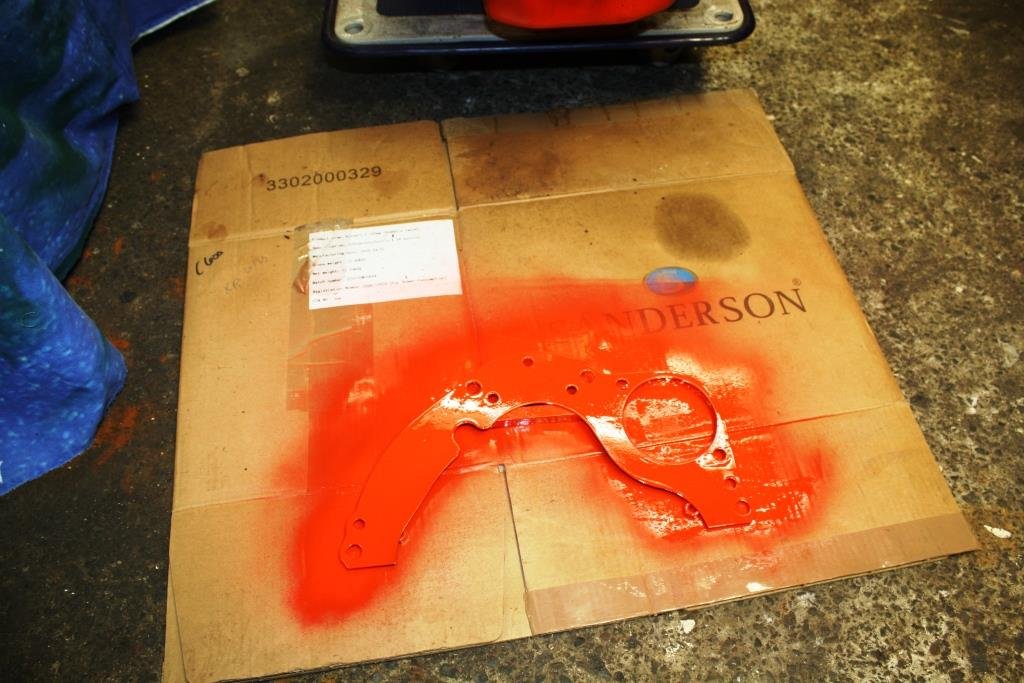
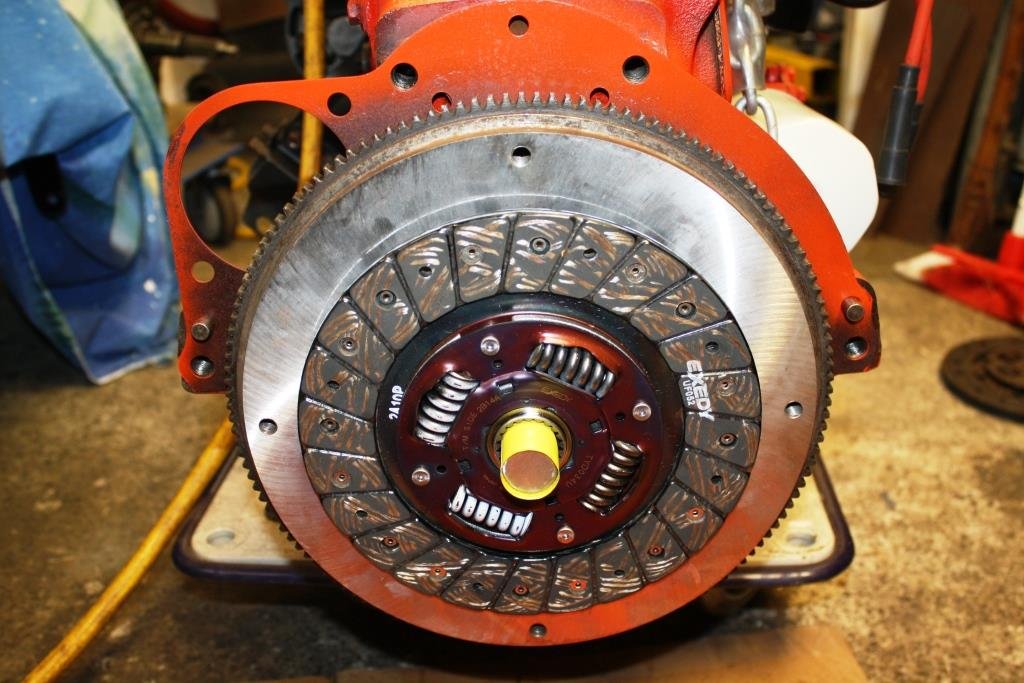
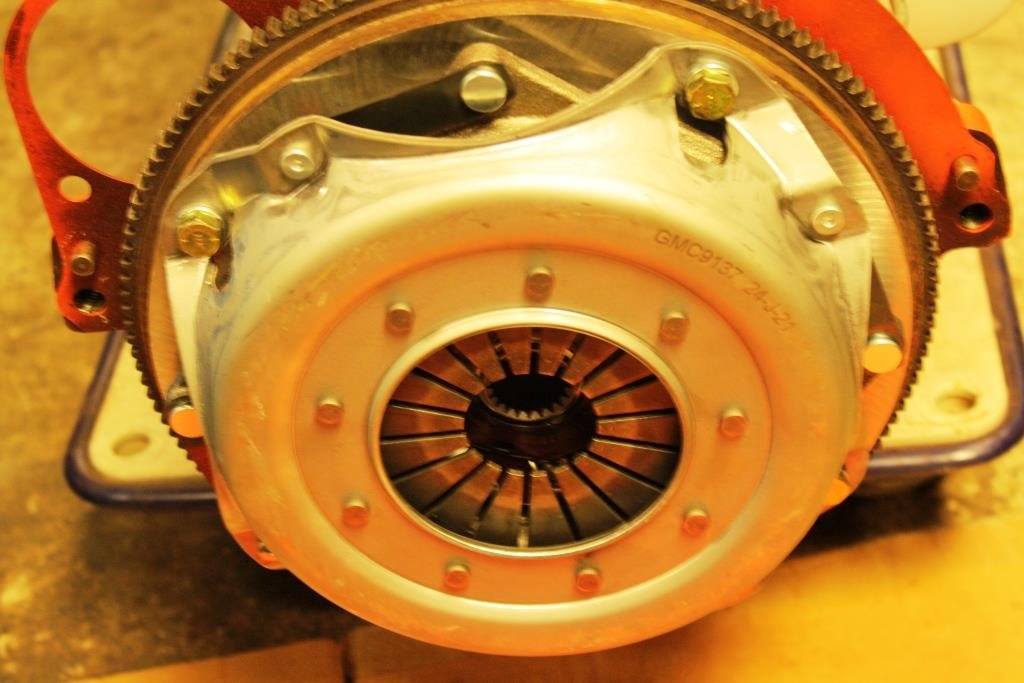
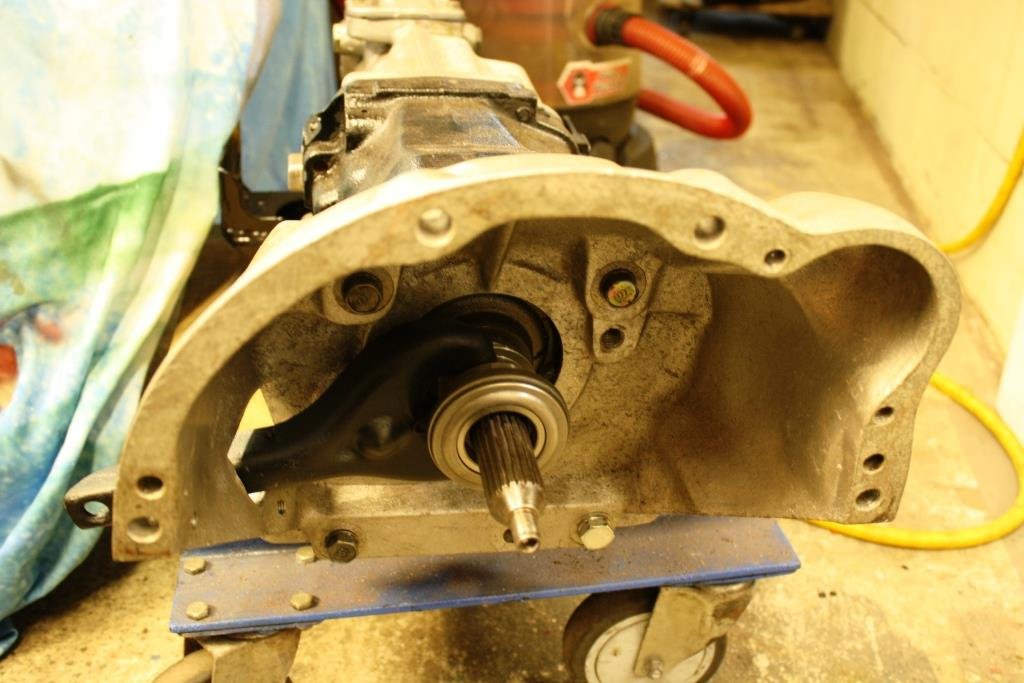
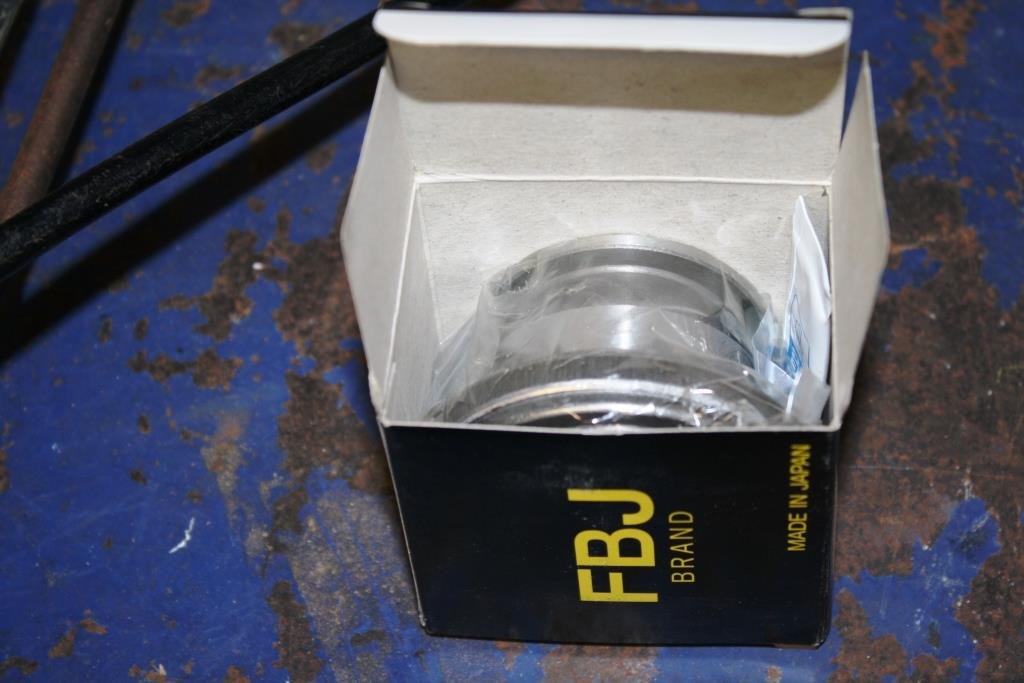
Pulled the inlet manifold off the engine in the test bed…… F*** it; shock, horror, dismay!...... Discovered one of the head bolts had been leaking water into the inlet. Luckily the damage was localized and an easy cleanup/buff-up with no damage done. I pulled the offending bolt and reapplied some thread seal. Leaking head bolts is a relatively common problem with Holden red 6’s as some of the head bolts go into the water jacket. Time to get the motor on the hoist and fit the politically correct “Gender Neutral Tranny”. Because this motor had an auto behind it, (I’m rebuilding Rigamortice’s original motor with a lot more cubes and a lot more power- watch this space) my next challenge was to get the flex plate bush out of the crank. It looked as if someone had already had a crack at it and failed miserably!). With the judicious application of various blunt instruments, strong language and old age & treachery I managed to extract it. I then used the old trick of tickling the outside race of a metric bearing on the grinder so it fitted the imperial crank. (Note the gougers weren’t mine!). Threw some paint on the sandwich plate…… Torqued up the flywheel, turned up an alignment tool,….. Torqued up the pressure plate,….. And fitted the CRS Bellhousing to the W50 Toyota box with the clutch bearing and fork installed. Bit of a mission with swearing and cursing to get the box onto the engine. Rigamortice commented that it would have gone in a lot easier if it had hair around it. I chose to rise above such “lavatory humor” (as my dead Granny used to call it – when she wasn’t dead) and refrained from commenting further, (or even going there!).
- 184 replies
-
- 20
-
-
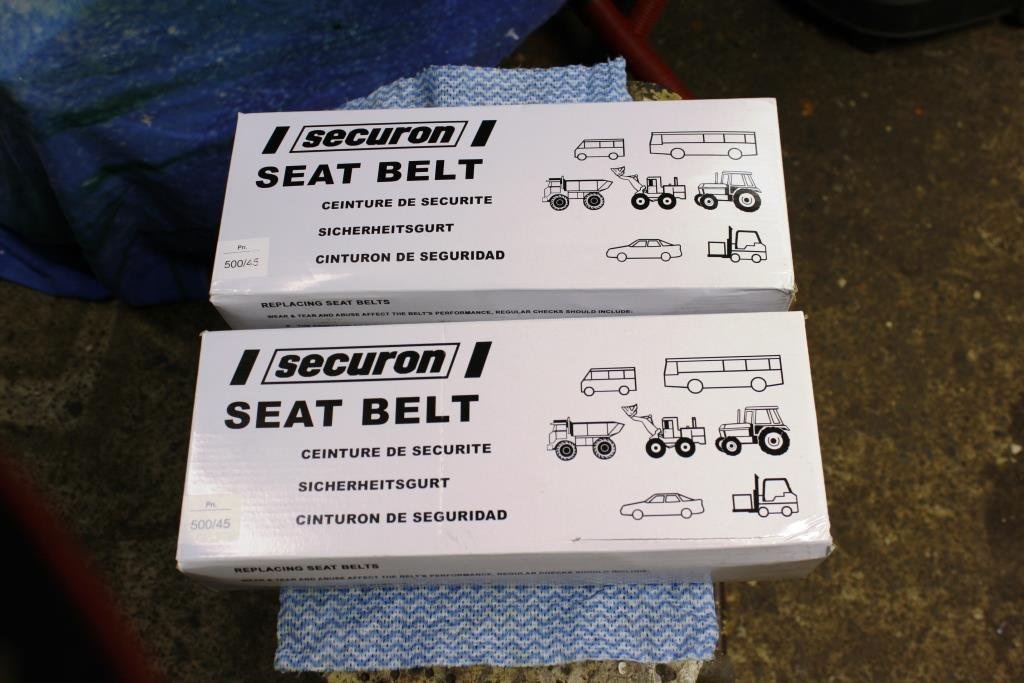
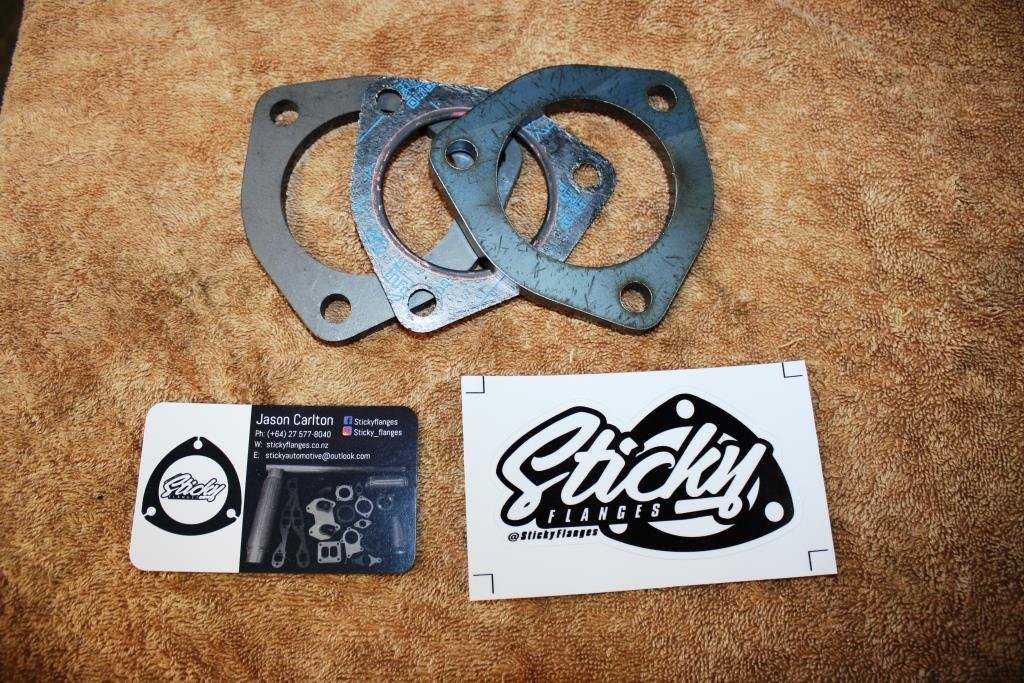
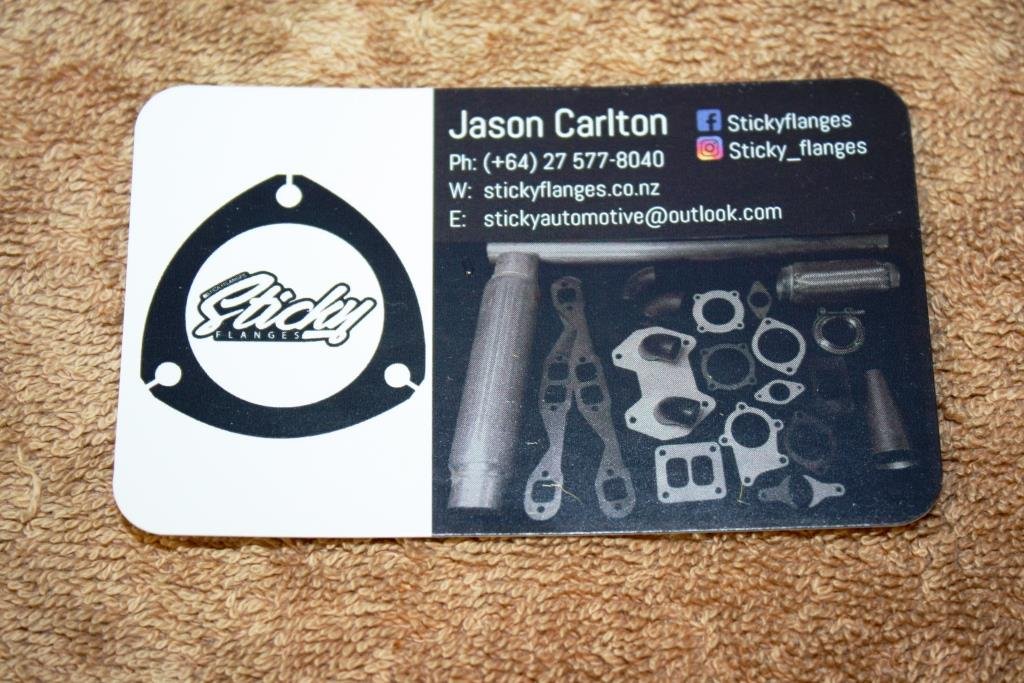
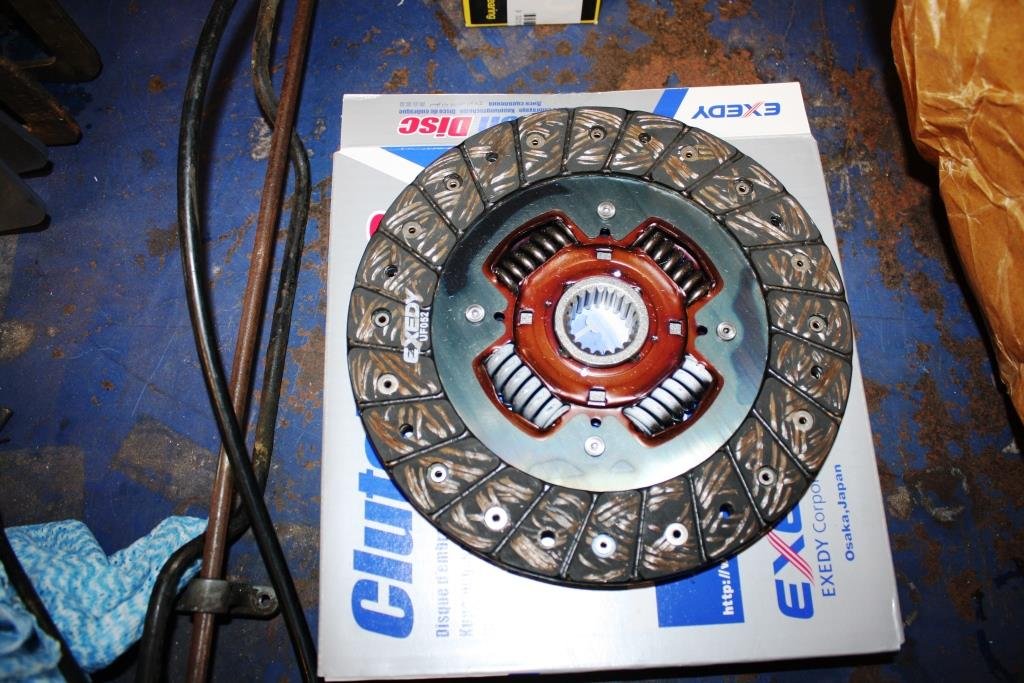
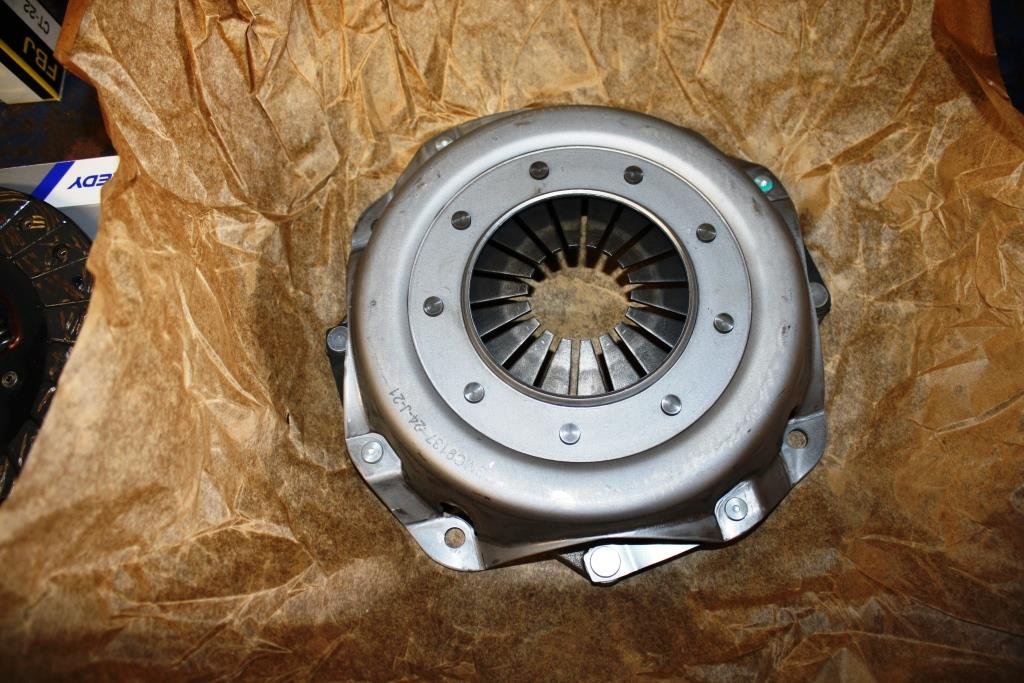
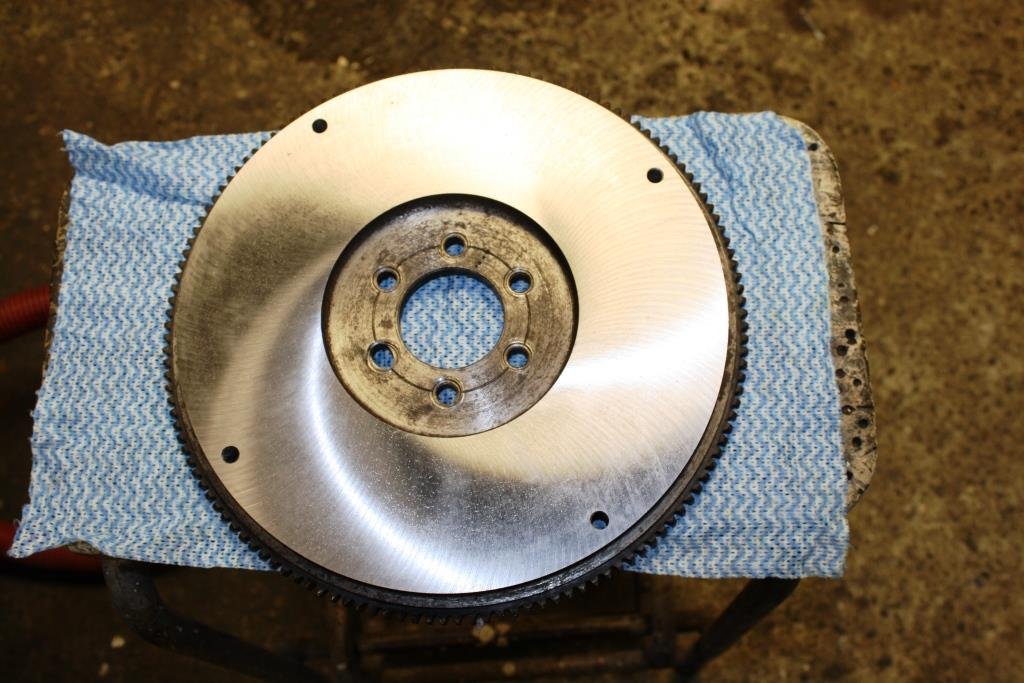
Very yummy goodies arrived by courier today. (Feels like I’m 5 years old and it’s Xmas). Seat belts… 2 ¼” exhaust flanges and gasket. Big thanks to “Sticky Flanges” in Taupo. Great company, great name, great service and quick delivery. Toyota Dyna clutch plate (same spline as the W50 Toyota gearstack)… Holden HD pressure plate…. And a new thrust bearing. The good guys at Exeedy machined the flywheel for me I’d forgotten how much I’d machined off the back of it! Standard 10.6 Kg flywheel………. Rigamortice’s flywheel 6.4 Kg…….
- 184 replies
-
- 16
-
-
Hi, sounds like a great project – a few words of advice from a boring old fart if I may. Dropping from 38mm x2 floating to 35.1mm x4 fixed will reduce the clamping figure on your front callipers. Swept volume being πR squared (remember your old mate Pascal). Your standard configuration (π x 38/2 squared x2 x2 –i.e. floating) is 4,536 square mm. For the Willwoods we have (π x 35.1 /2 squared x4 – i.e. fixed) giving a figure of 3,870 square mm. This equates to a loss of front wheel clamping of around 14.7 %. How this reduction in front calliper clamping equates to the effect it will have on your cars braking is also dependent on pad composition & area, suspension design, and a myriad of other factors; braking systems have a bad habit of getting f***ing complicated quick! Over decades of playing with brakes on standard cars, modified street cars and all out race cars I’ve learnt one basic rule; unless you can quantify the pre and post braking performance of any modification you make you will always be floundering in the dark (if not farting against thunder!). Step one is easy and a shit load of fun. Set your car up with the right tyre pressures, the average load (gas, passengers, firearms, blow up sex dolls, accumulated junk,…. etc.) and find an empty carpark to do some very, very hard stops to zero from 60K. Have a mate spot for wheel lockups (front, rear, left right?) and get a feel for how she pulls and how controllable it feels. Next hit the open road and see what happens with at least 3 consecutive hard stops from 120K to 50; (look for brake fade, directional stability, wheel lockup and most importantly look in your rear vision mirror!). The next thing to try is even more fun – repeat the above in the wet! If you can achieve these simple before and after tests you’ll be streets ahead of the average car nut who tries to modify their brakes. Sorry for the long reply (i.e. rant) feel free to contact me if there’s anything else I can contribute.
-
The main 2 reasons manufacturers introduce sliding calipers was ease of manufacture (i.e. Price) and that floating calipers show less tendency to convert rotor runout ( both lateral and thickness variation) into pedal pulsing; the reason being is that a sliding design uses mechanical movement to compensate for runout whereas a fixed design will use fluid movement. That said a fixed multi piston design will allow for more consistent pressure control over far larger pad area and will also enable more pressure to be applied to the pads leading edge with the use of varying piston diameters; there is also better heat dissipation with increased pad/piston contact. The science behind the relationship between piston size and clamping force (with both fixed and floating calipers and all hydraulics) is based around Pascals Law. The result is that for a fixed caliper to have the same clamping force as a floating caliper it will need X2 pistons of the same size for each single piston in the floating caliper.
-
SR2’s 1947 Vauxhall “Rigamortice” Discussion thread.
sr2 replied to sr2's topic in Project Discussion
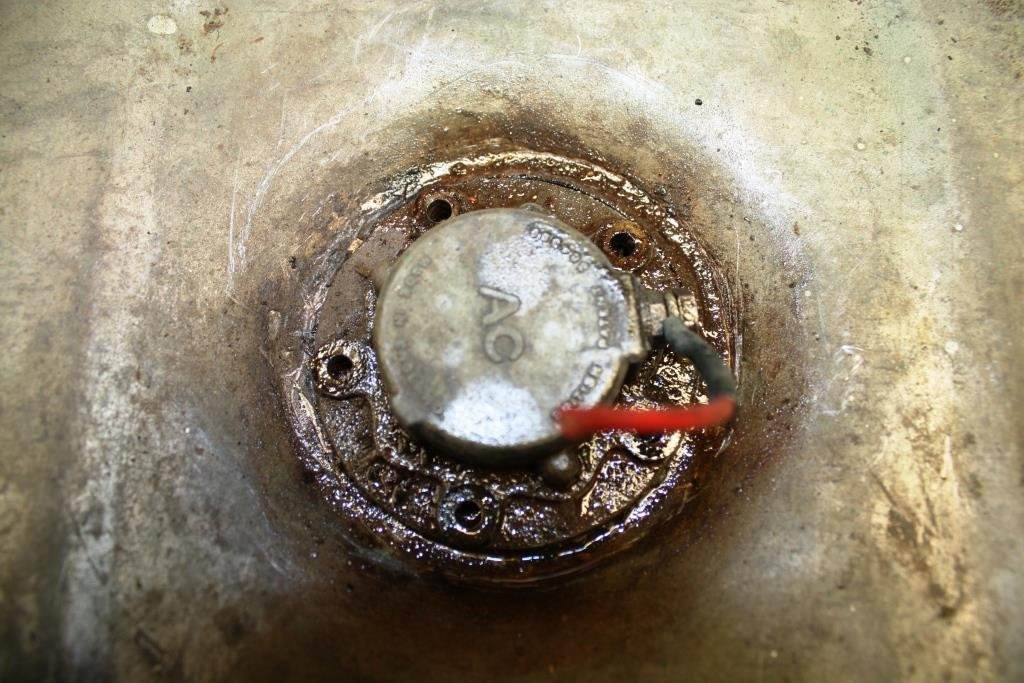
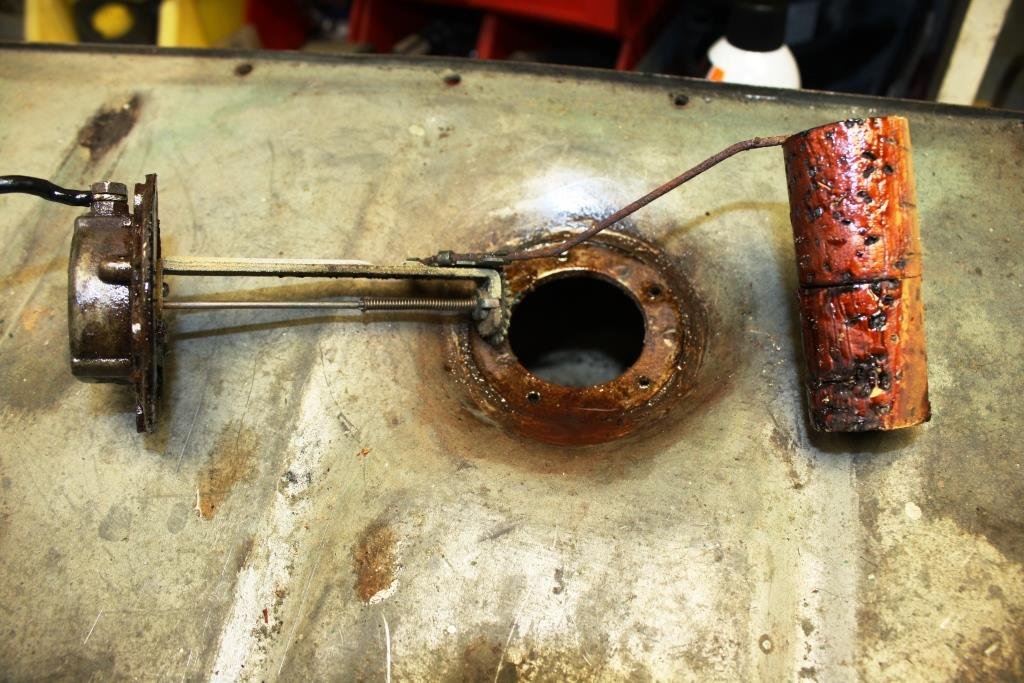
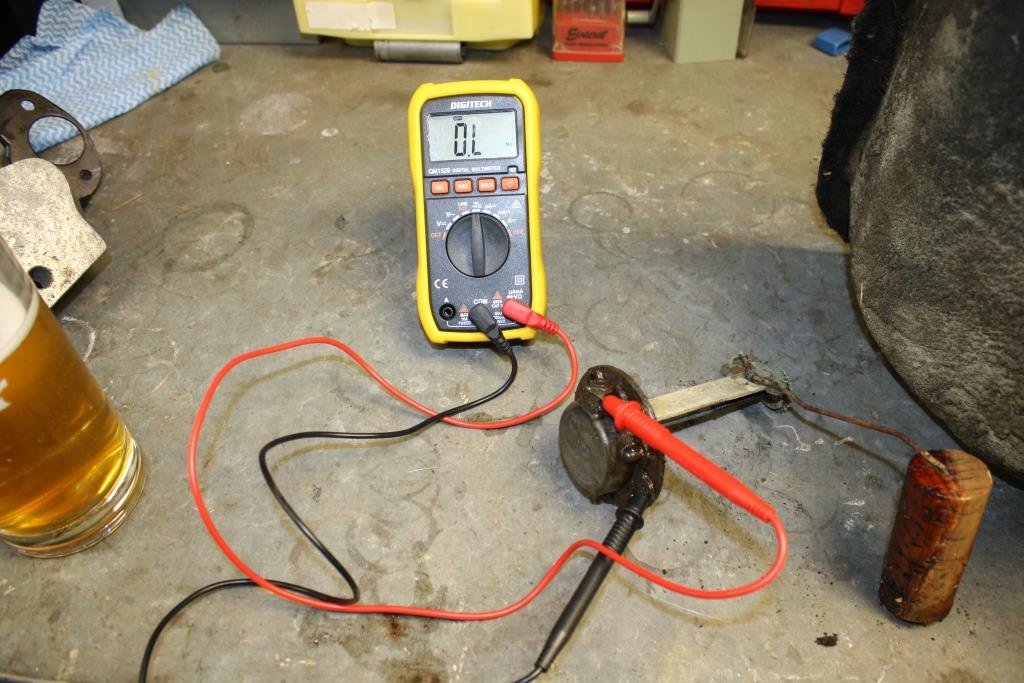
Thanks for that mate. By my rough & ready calc's the cork float is 64 cc whereas the hollow scooter float is 17 cc. Love the idea but I'll need to find a larger float, might visit my local Auto Sparky after the weekend otherwise a trip to Pickapart will be called for. -
SR2’s 1947 Vauxhall “Rigamortice” Discussion thread.
sr2 replied to sr2's topic in Project Discussion
Cheers mate. -
SR2’s 1947 Vauxhall “Rigamortice” Discussion thread.
sr2 replied to sr2's topic in Project Discussion
Yes the arm does go through the cork, at a guess that float would be ideal. -
SR2’s 1947 Vauxhall “Rigamortice” Discussion thread.
sr2 replied to sr2's topic in Project Discussion
Thanks for the suggestion, I'm a great fan of Basis myself. The lever on the original sender is bent at right angles and goes all the way through the cork float. -
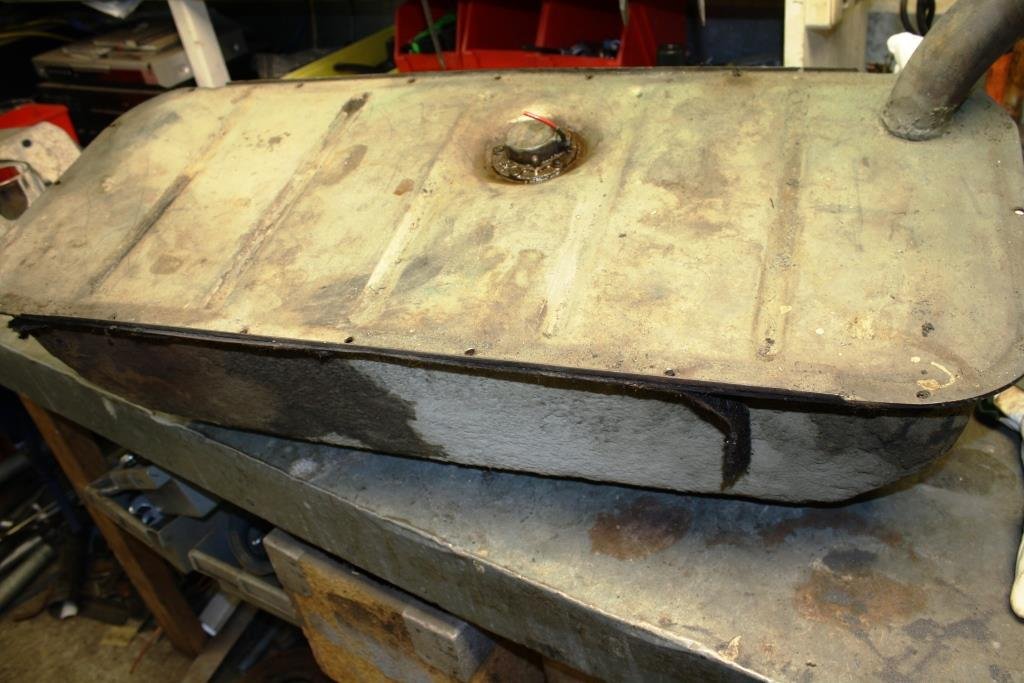
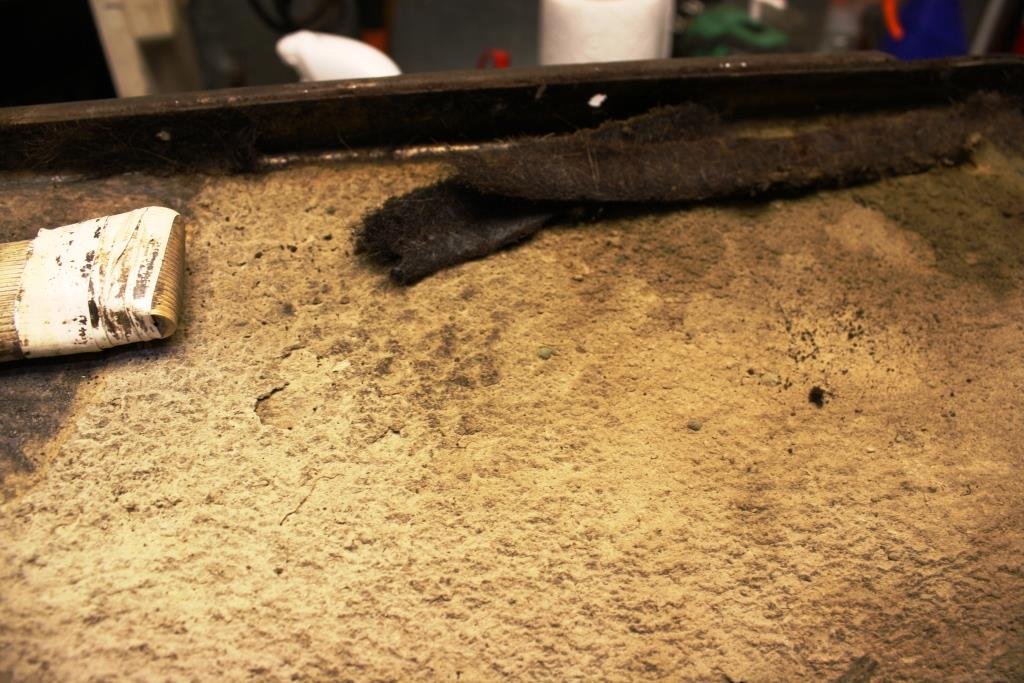
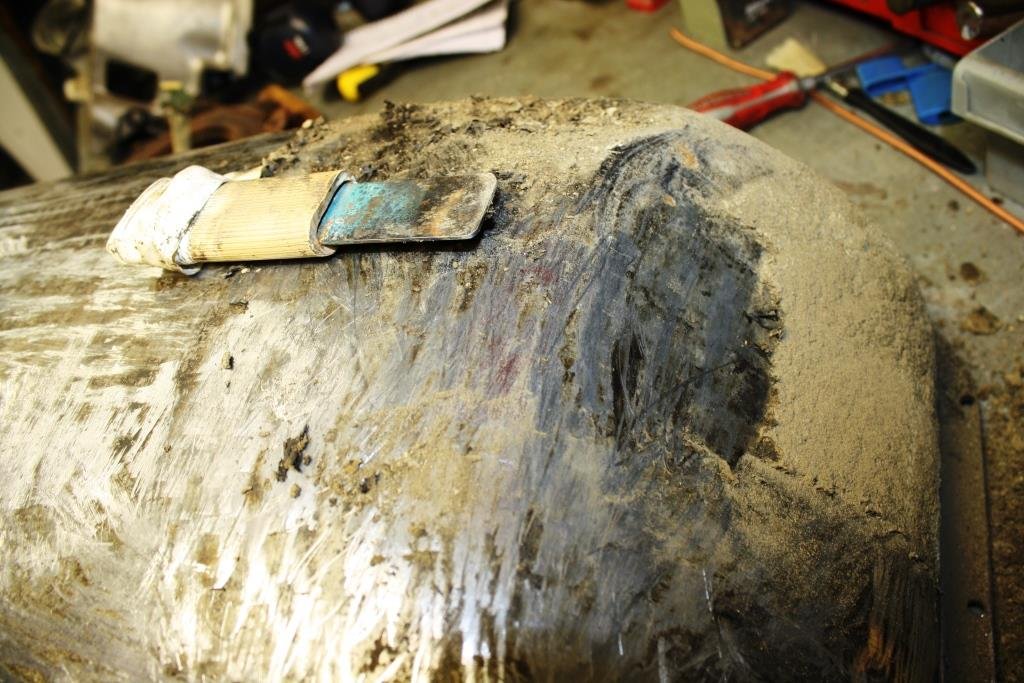
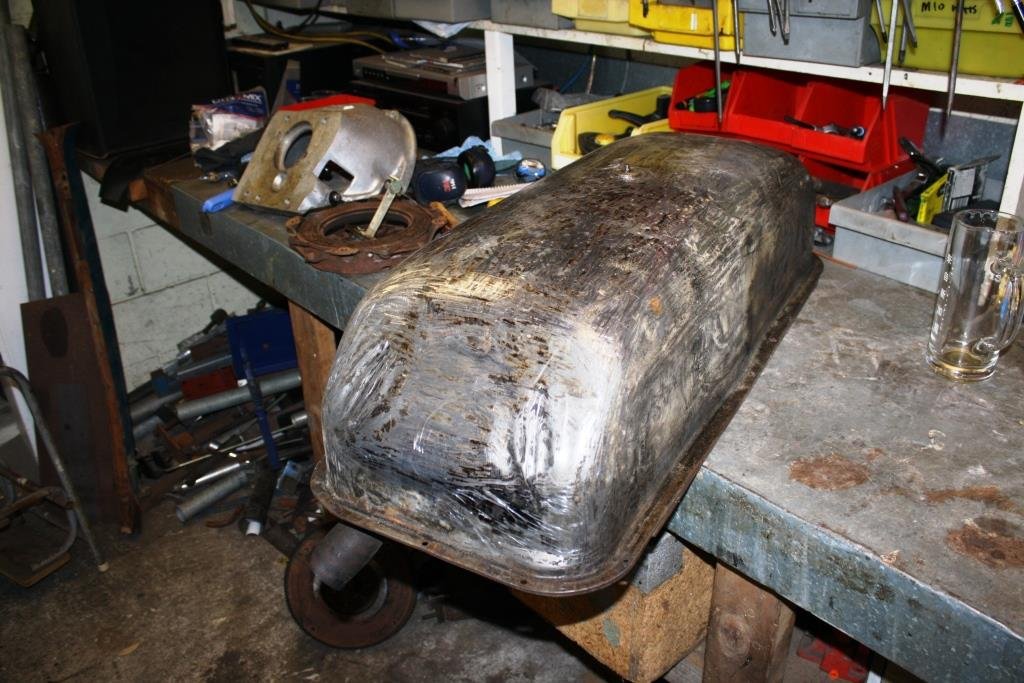
Time to take on a job I’ve been putting off for ages; the CRUDDY, F’ING GAS TANK. (My grandfather always said “never put off for tomorrow what you can put off for the day after…….!”). As I mentioned previously “The smell of the gas left in the tank is akin to the aromas emitted from a rope sandal worn by an Arab swineherd who had been previously roaming the desert for the last year or two”. On closer inspection I’d like to revise the afore mentioned quote by substituting ‘rope sandal’ with ‘leather jockstrap’ (apologies to the Arab swineherd). You would not believe how bad that old gas smells; horses panic, birds fall out of the sky, children run screaming, brave men shudder, women swoon… etc. ! Only one bolt sheared off removing the sender. The float wasn’t pretty… Any advice on where I can find another piece of cork (approx. 80mm x 32mm diameter) or even a modern style sender float please let me know. https://oldschool.co.nz/index.php?/topic/49843-sr2%E2%80%99s-1947-vauxhall-%E2%80%9Crigamortice%E2%80%9D-discussion-thread/ And there was no one home but I can fix that bit…. I didn’t have the heart to send it to the old boy at Kiwistrip in that condition…… So I started scraping…. And scraping………. And more bloody scraping …… Until finally ready to be dropped it off at Kiwistrip for a dip in the stripper bath and a soak in phosphoric acid.
- 184 replies
-
- 20
-
-
Bit confused with your comment. All steel structures flex, they don't have to be "designed to flex"? (Enjoying the discussion by the way).
-
+1 re adding a cage. Just a reminder that if you do so you're trading crush zones for structural integrity, 6 point harnesses are a must!
-
From an engineer’s point of view I’d argue that seam welding a monocoque shell unnecessarily strengthens small areas of a structure that is designed to flex when under load. The result adds both stress raisers and excessive localised flexing increasing the chance of structural failure. Short answer is sorry no, don’t seam weld.
-
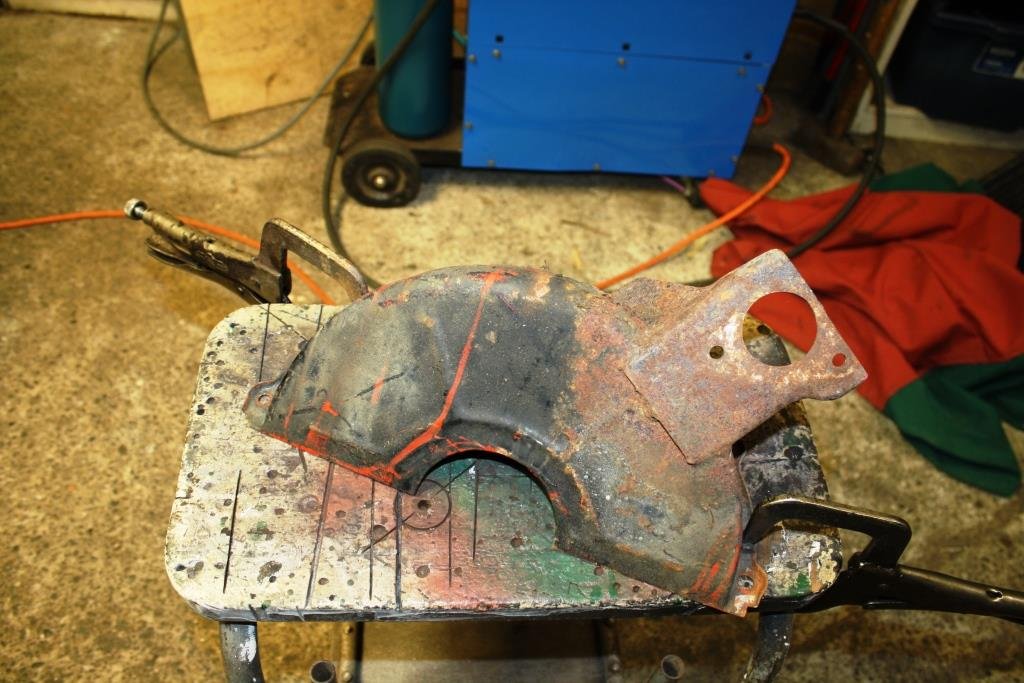
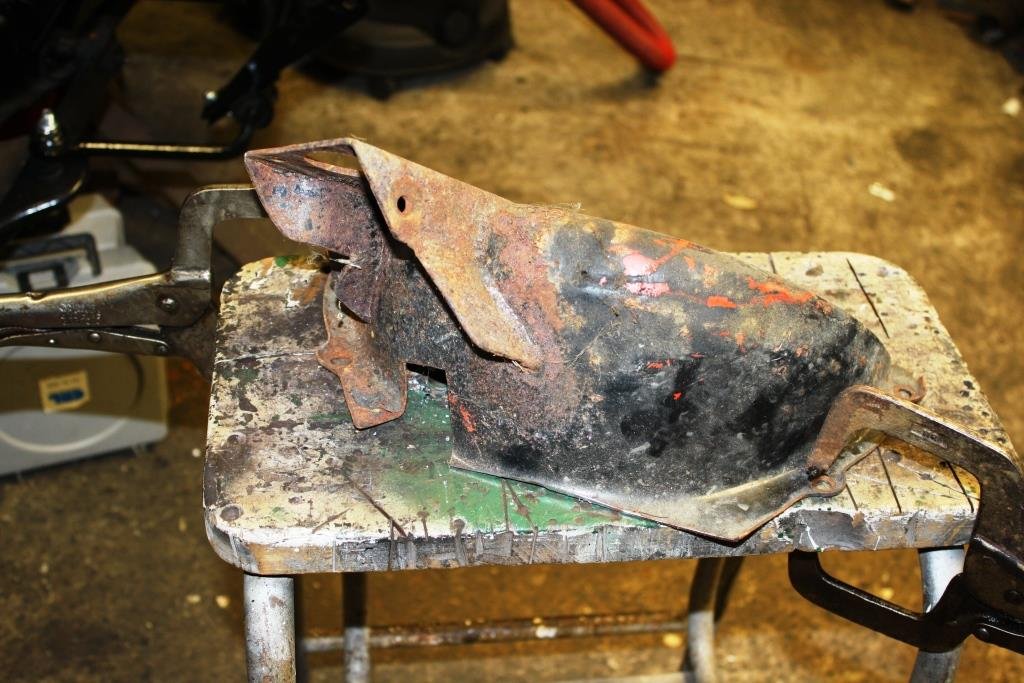
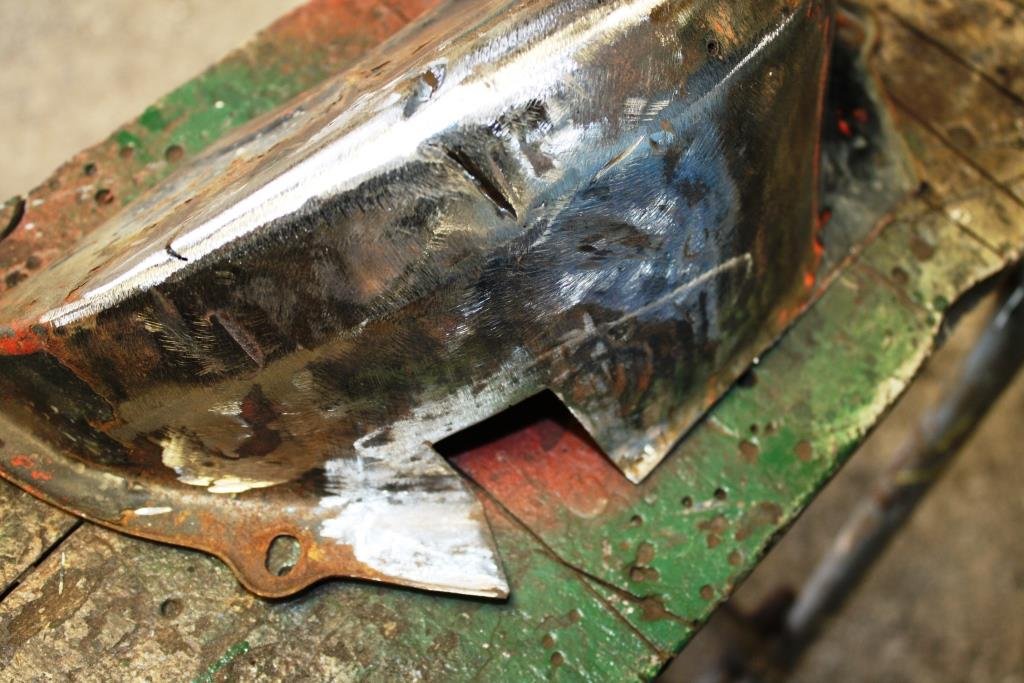
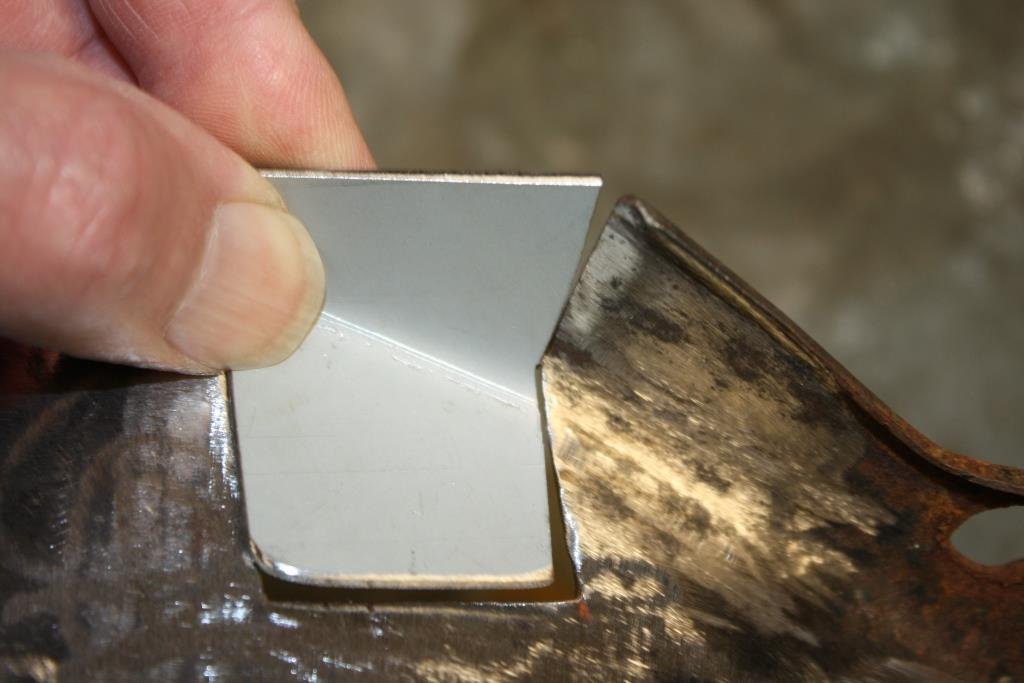
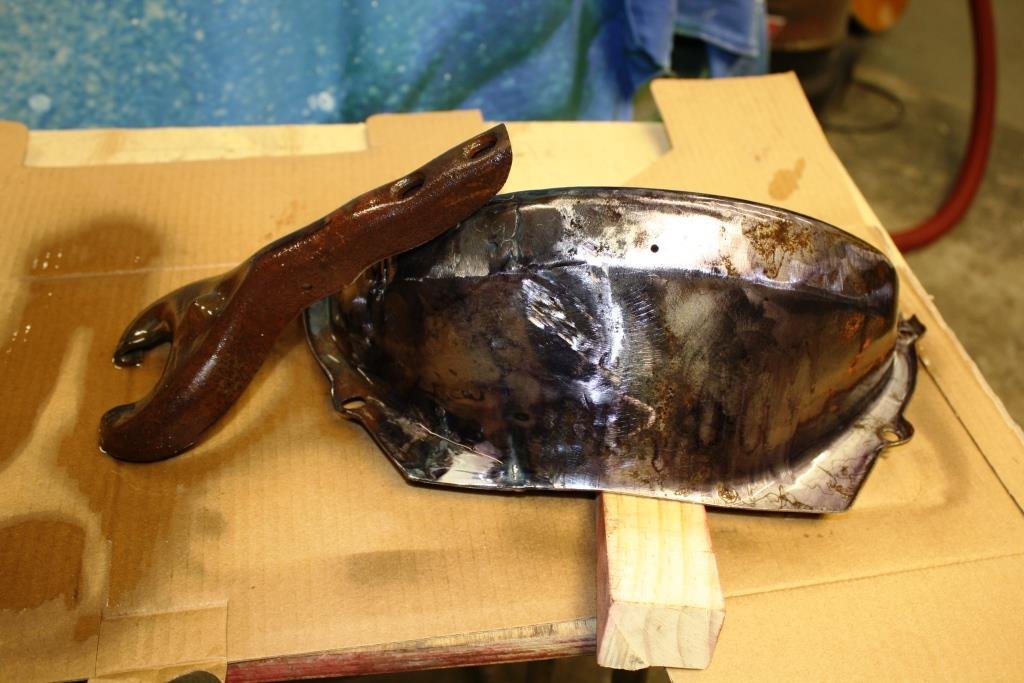
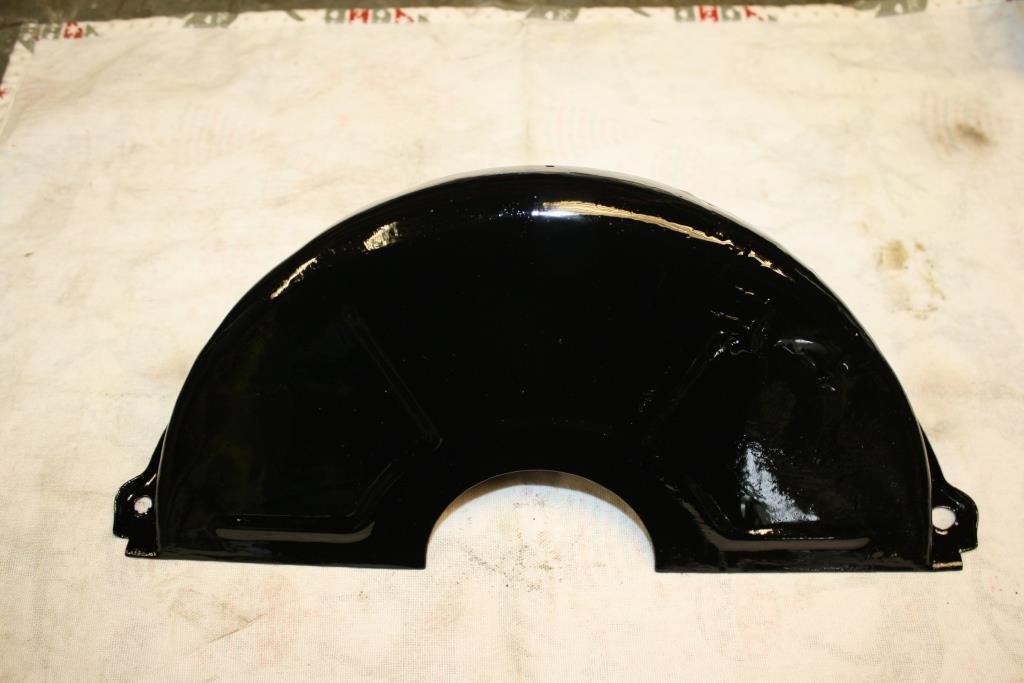
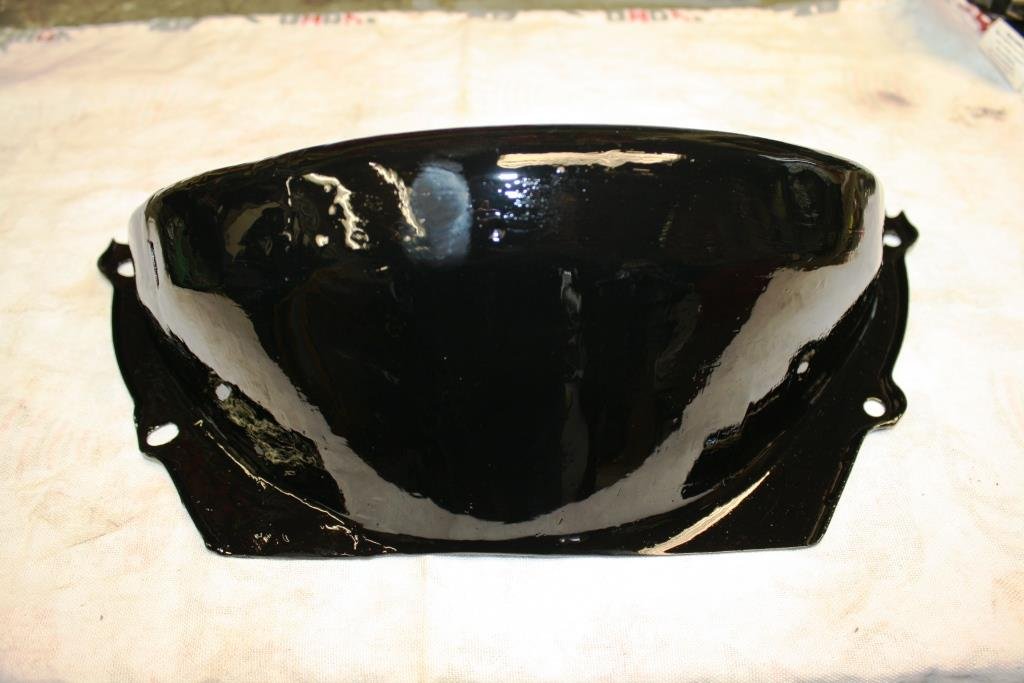
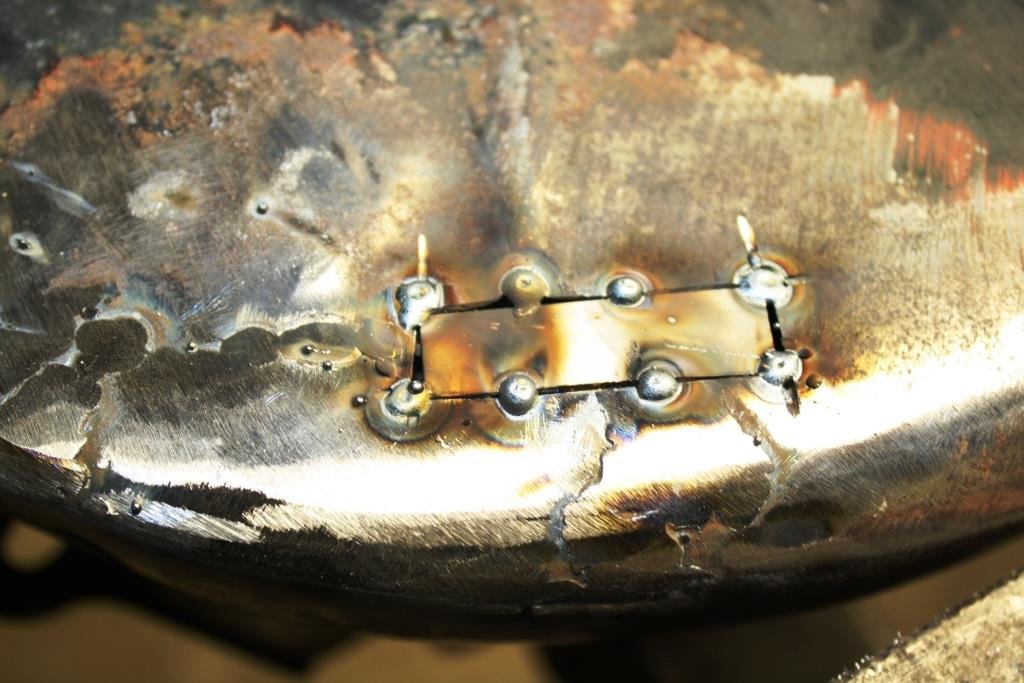
The only clutch cover I had that fitted was one hell of a mess - to say the least! Fired up the angle grinder and ended up with some panel beating needed. Started cutting out patches……… Great to be able to bolt it to the bellhousing on the bench to keep things straight while welding. The obligatory coat of rust converter…. Some black paint and one more job ticked off the list.
- 184 replies
-
- 14
-
-
SR2’s 1947 Vauxhall “Rigamortice” Discussion thread.
sr2 replied to sr2's topic in Project Discussion
Just saw that Key West in Henderson have the same copper nickel tube in stock if you're after some.