bmxnz11
-
Posts
1157 -
Joined
-
Last visited
Everything posted by bmxnz11
-
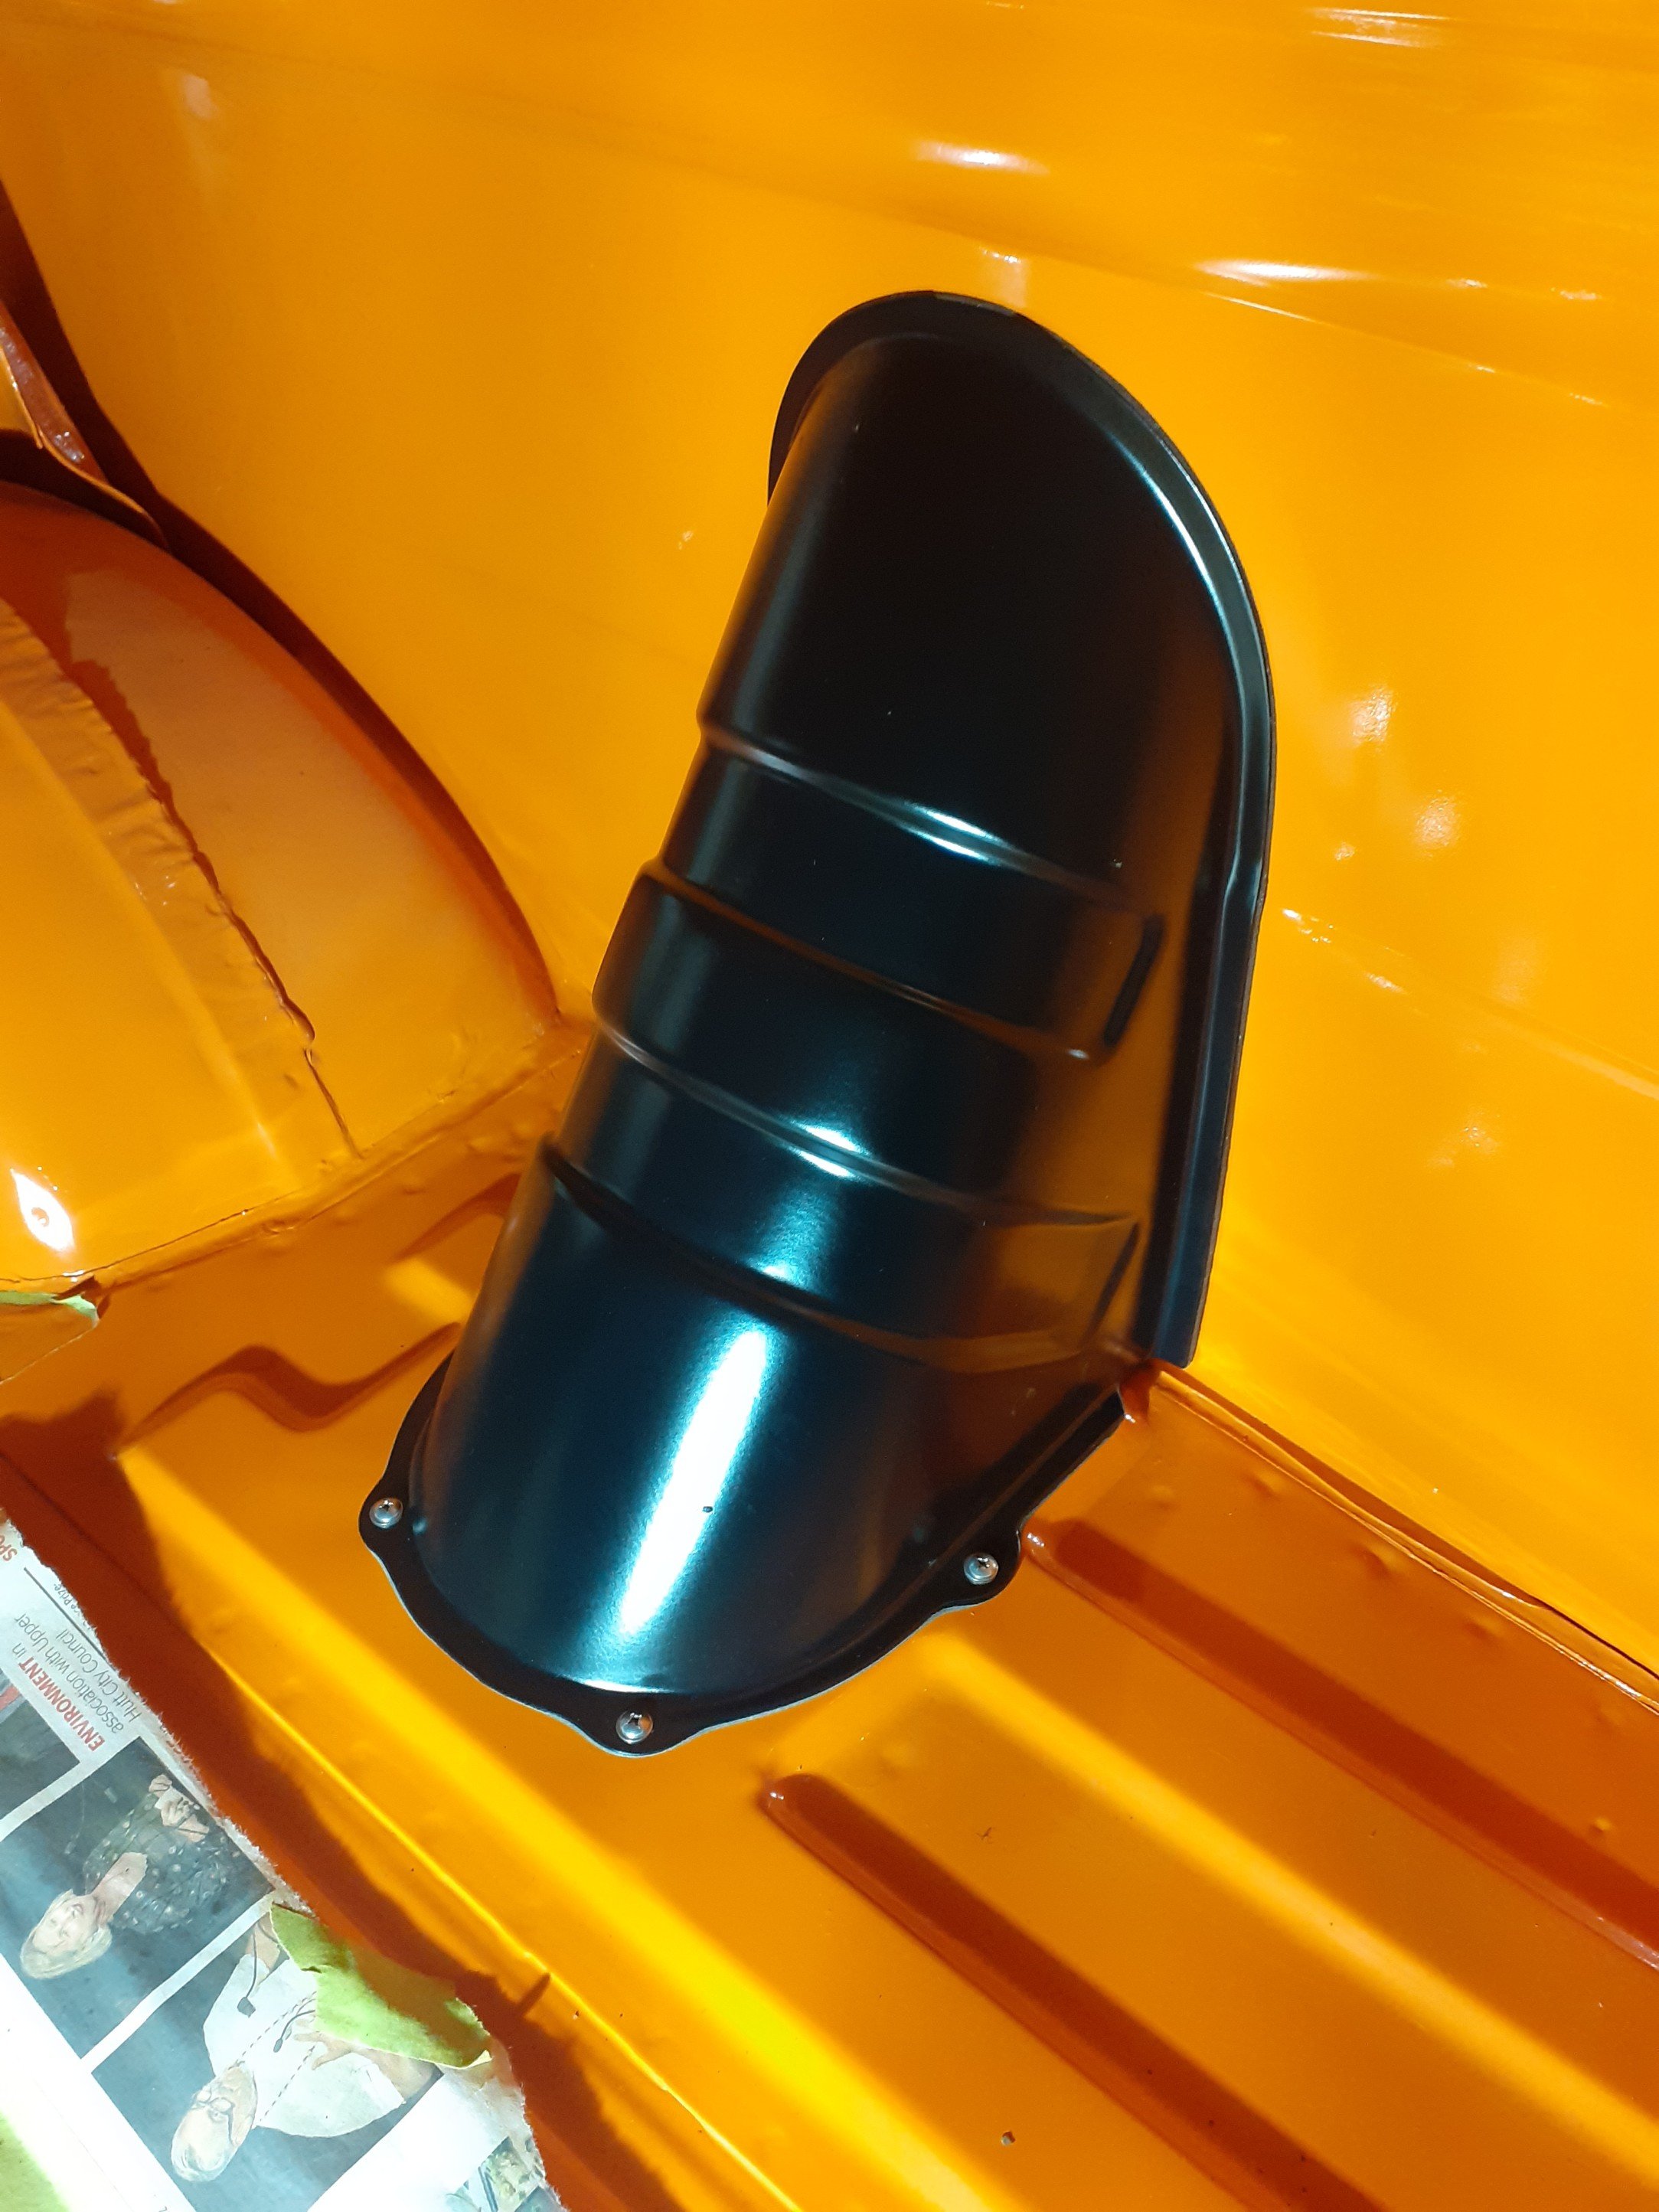
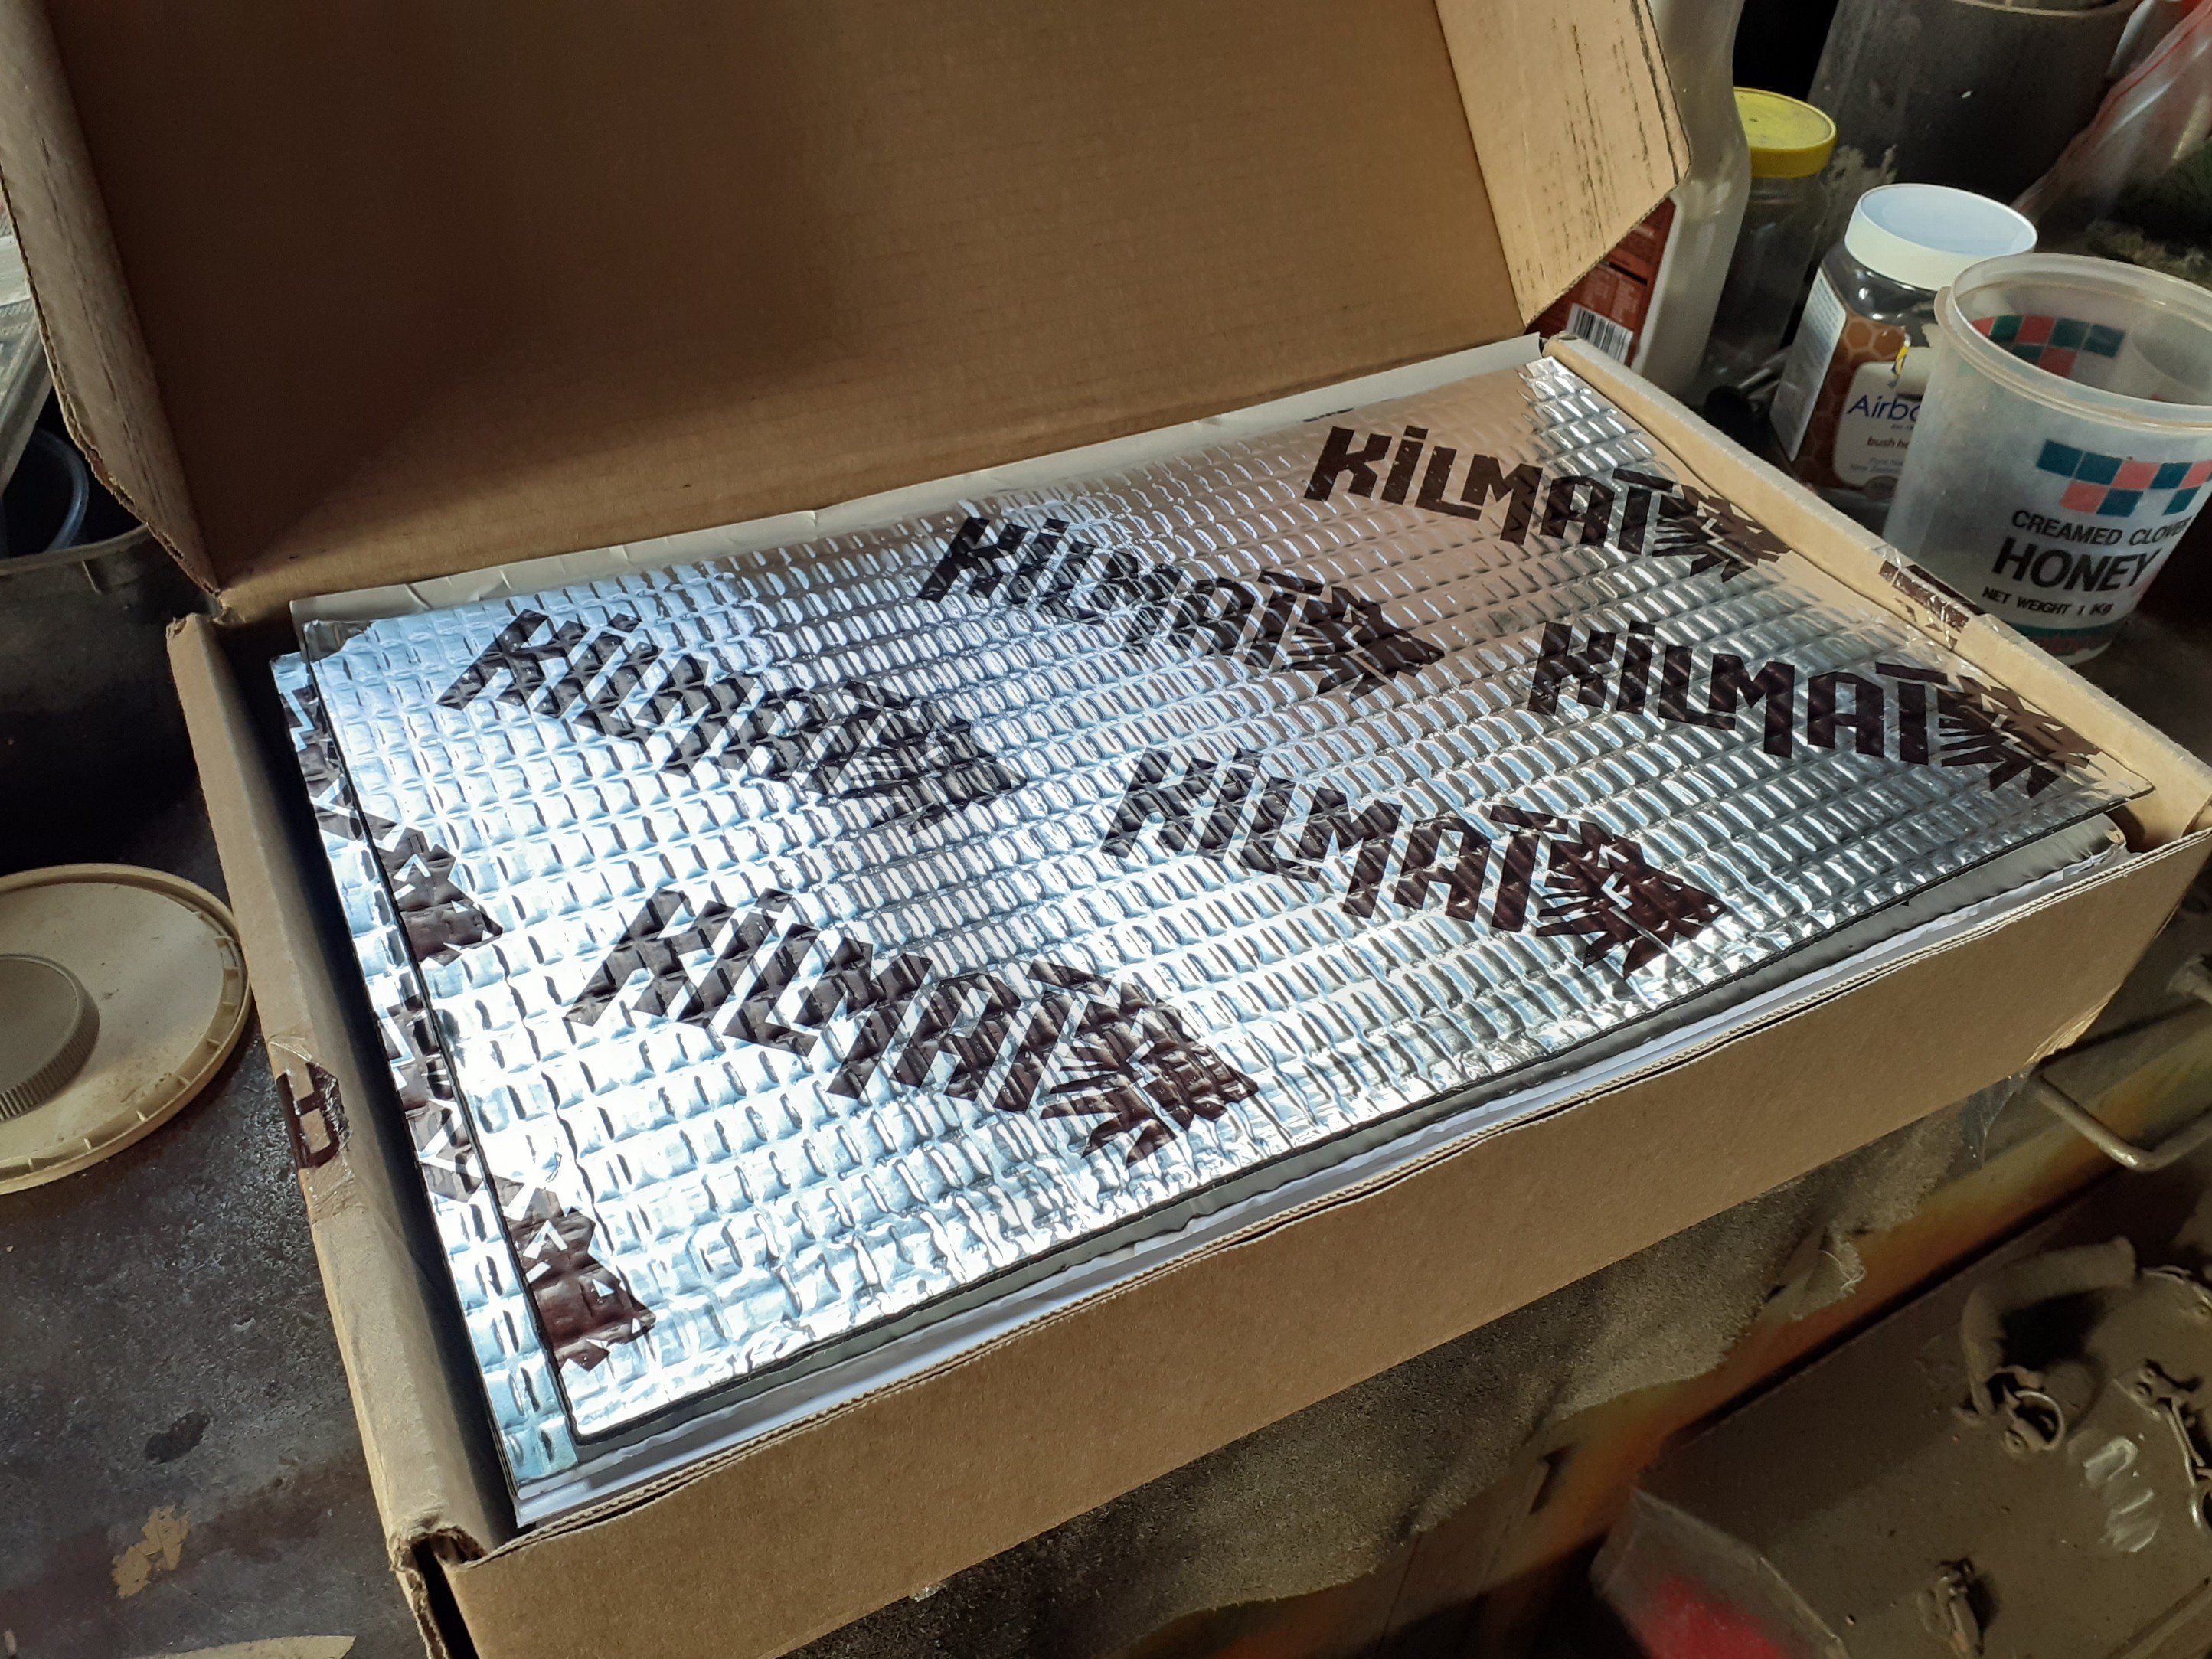
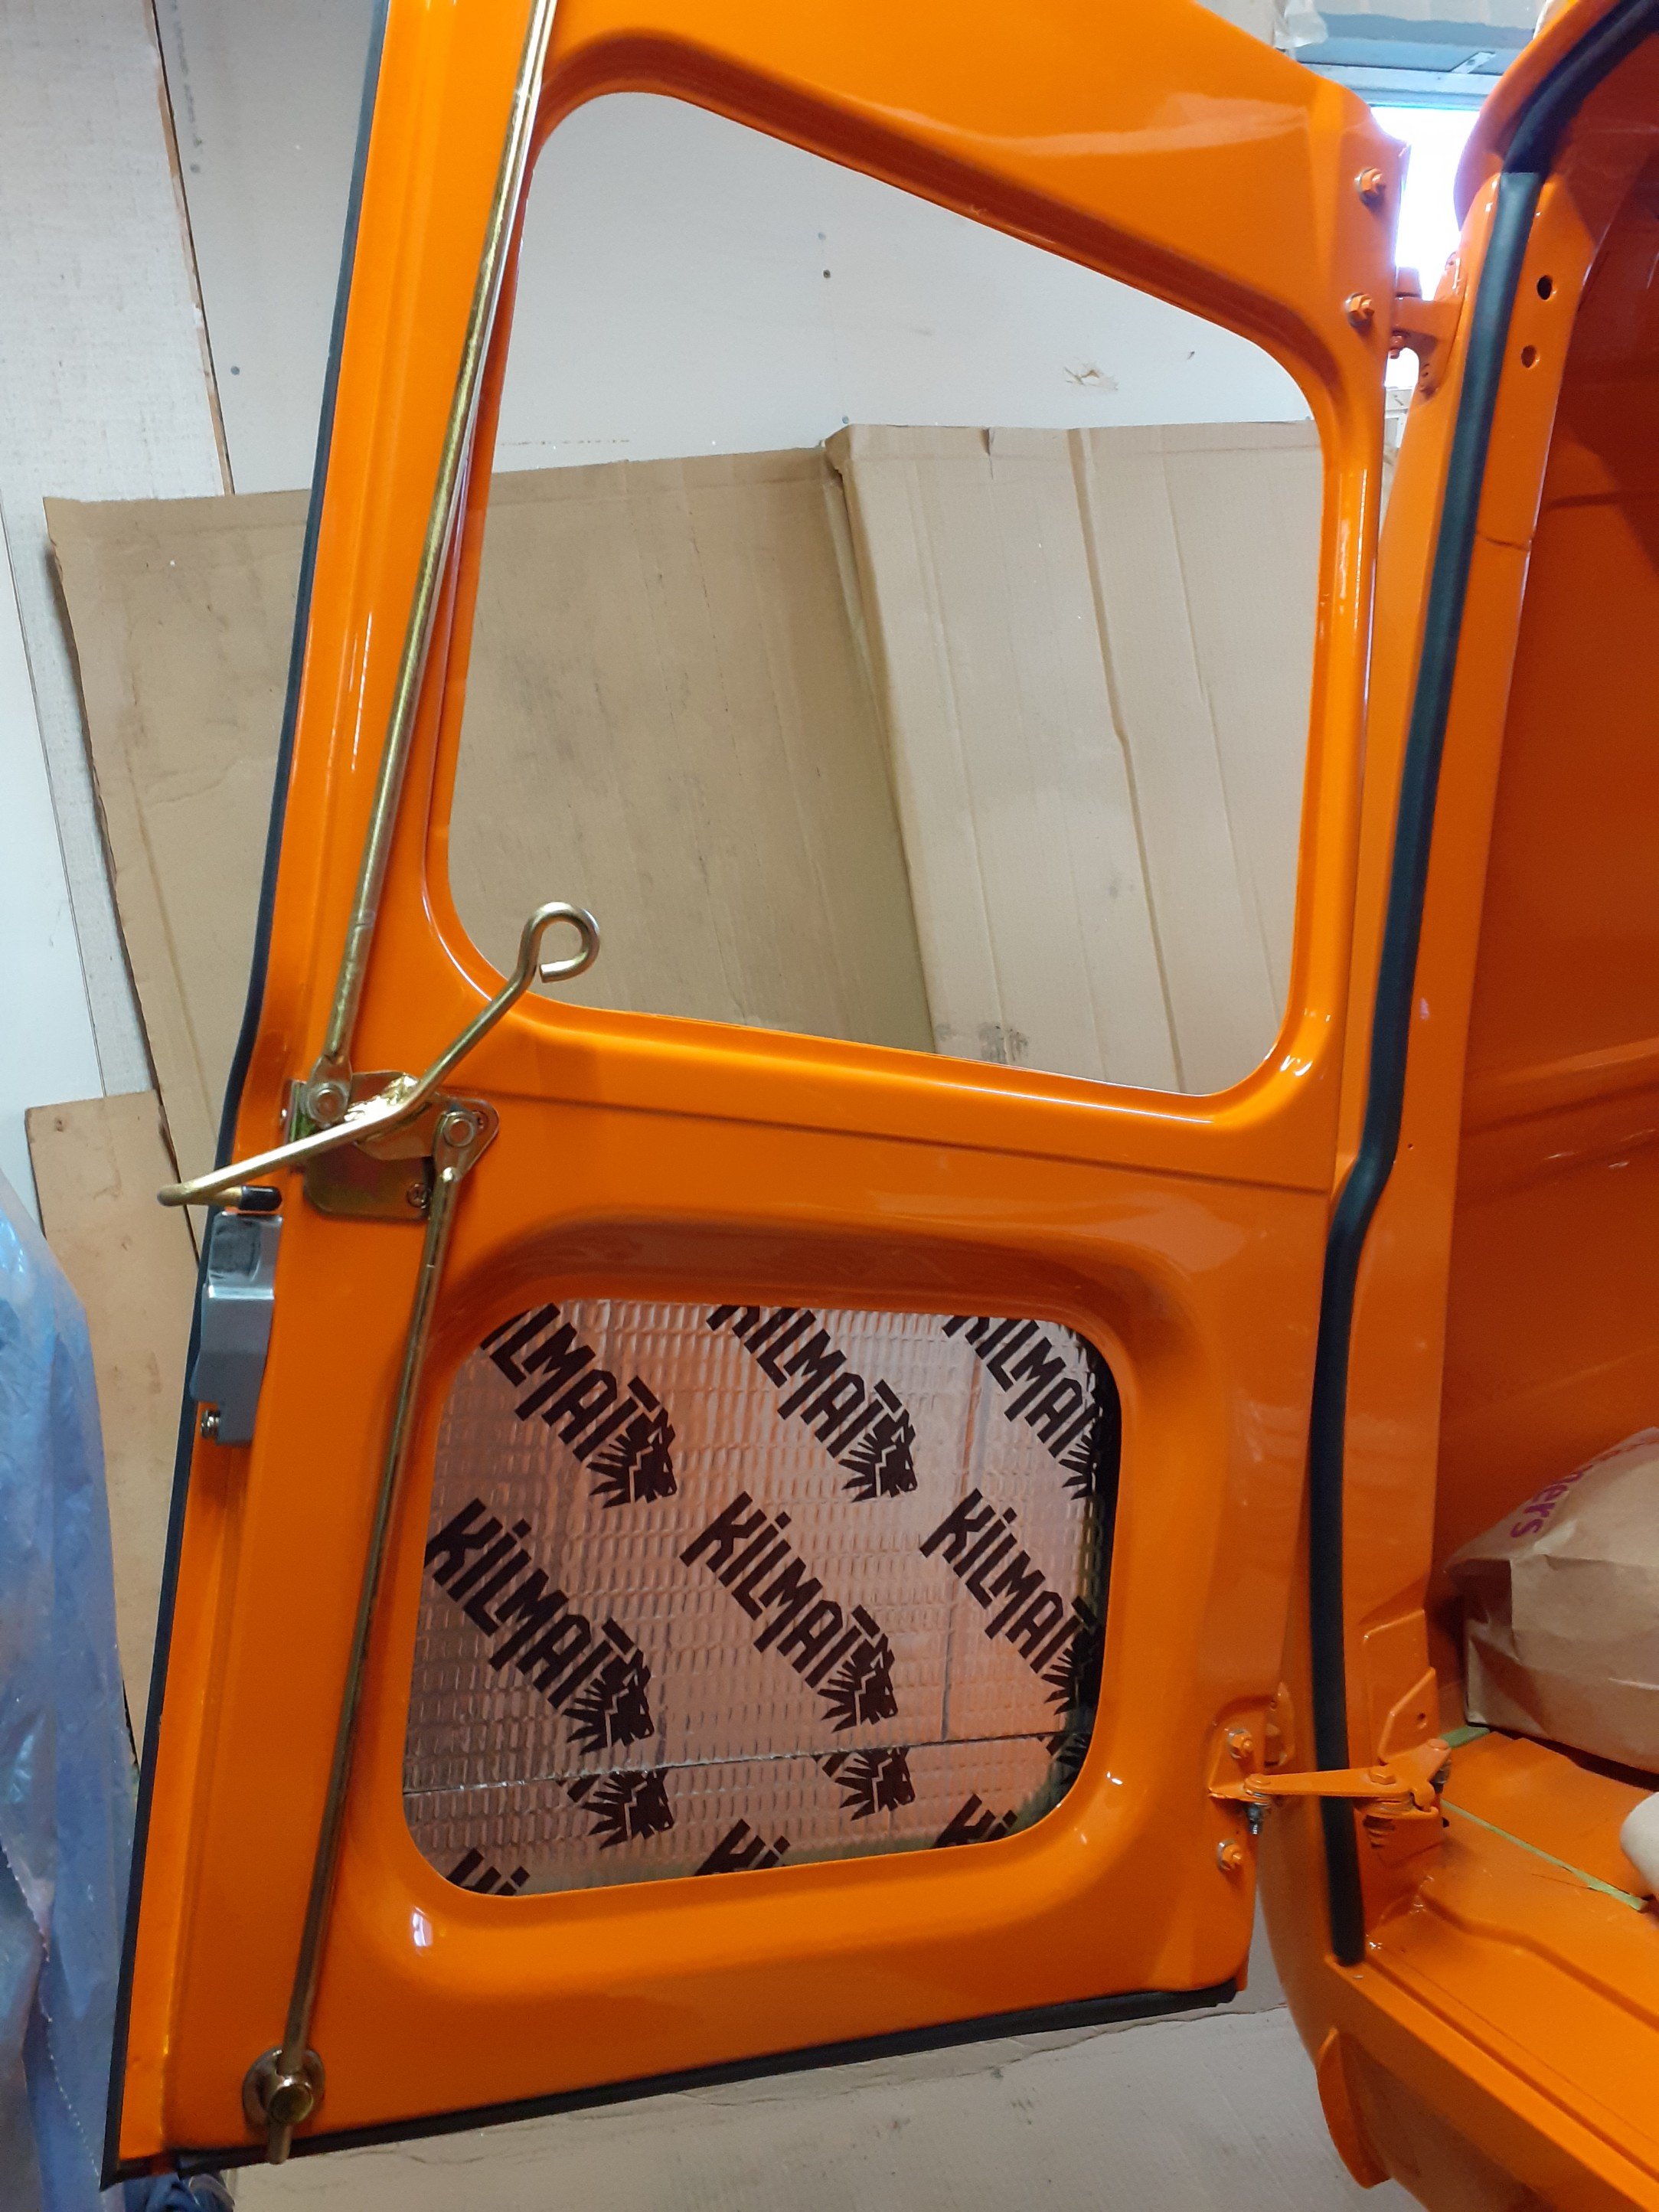
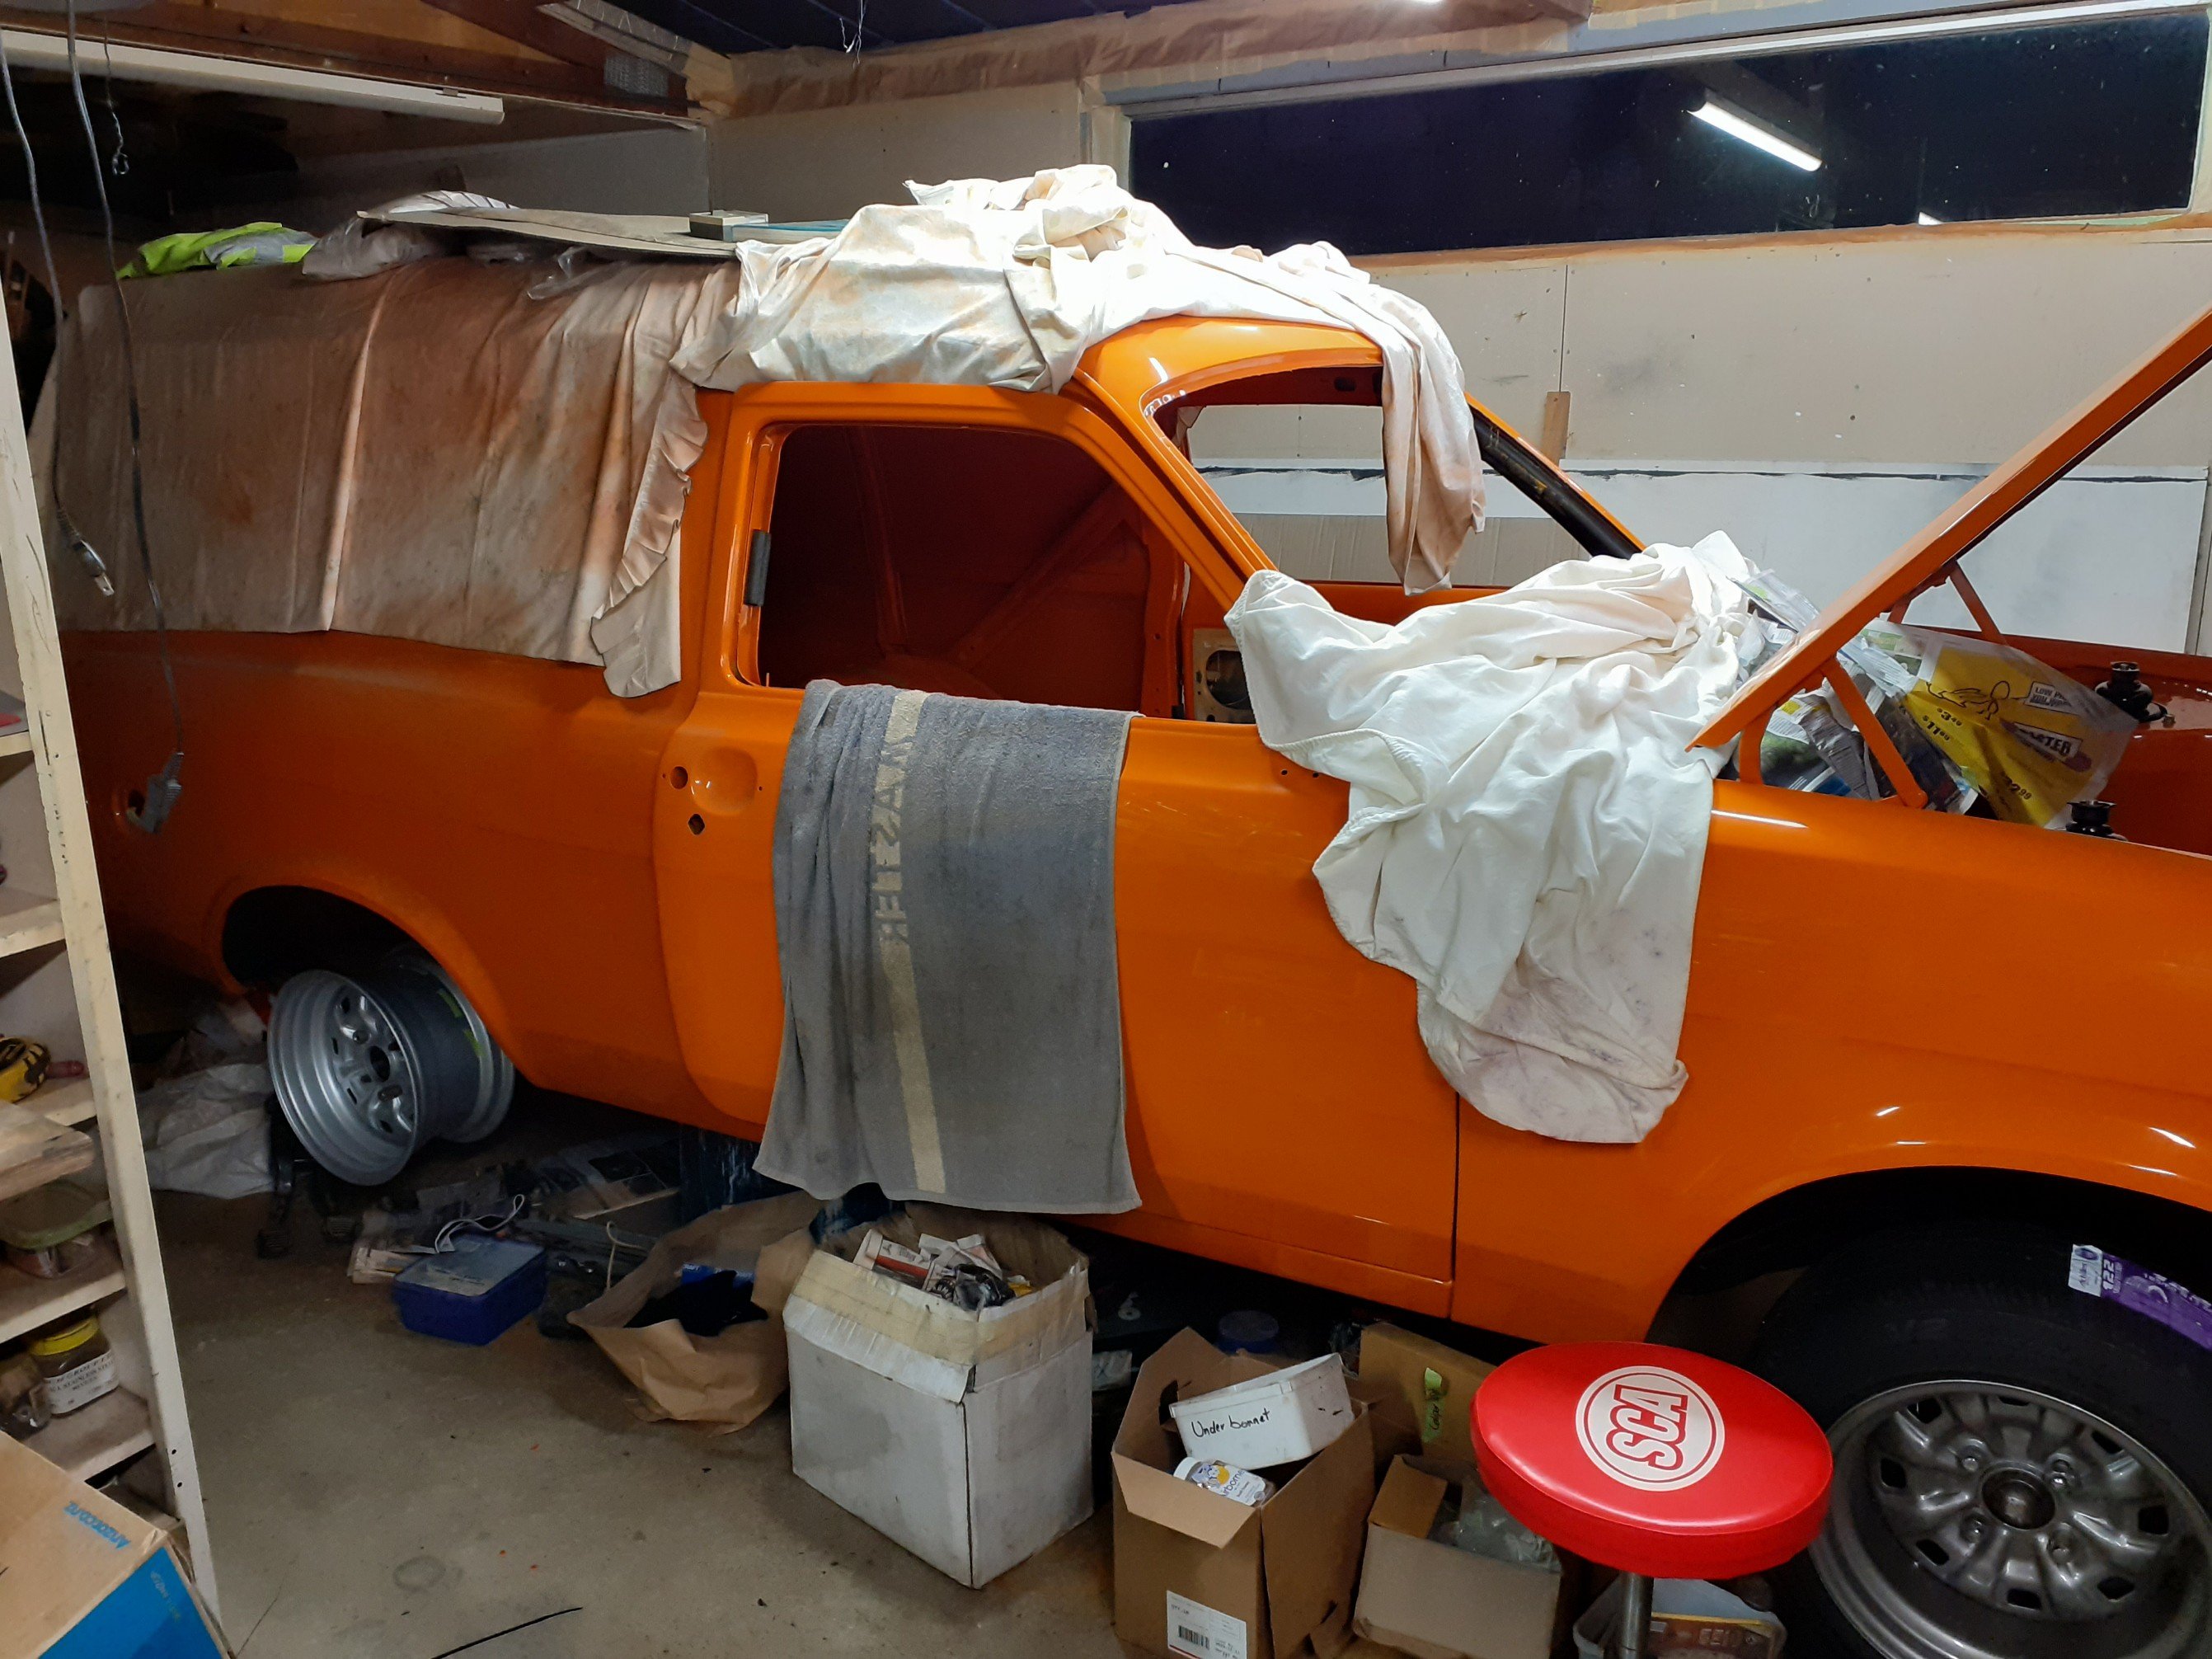
A couple small jobs finished and a few more started. Went through all my spare glass and have selected the best. Rear doors are pretty good but unfortunately the front are all scratched from winding up and down. Escorts have a poor external door seal design which eventually damages the glass. I'll polish the bests one up and just deal with it. Added the petrol tank breather pipe and cover. Added a thin strip of foam backing to fill in any gaps and avoid any movement. Finally ordered some sound deadening. Was quoted about $400 for dynamat so decided to look into the os approved kilmat. I chose the thicker 80 mil sheets because I wanted to give it the best chance. 34 sheets, 35sq ft total, $250nzd landed and arrived within a week. Added sections to rear doors as an early test and so far so good. Looks like decent adhesive and its easy to work with. The 2x inner door sections took almost 3 sheets total. Gave it the before and after curled knuckle tap tap test and it's noticeably less tinny. Will apply it to the usual cabin places next week.

- 104 replies
-
- 16
-

-
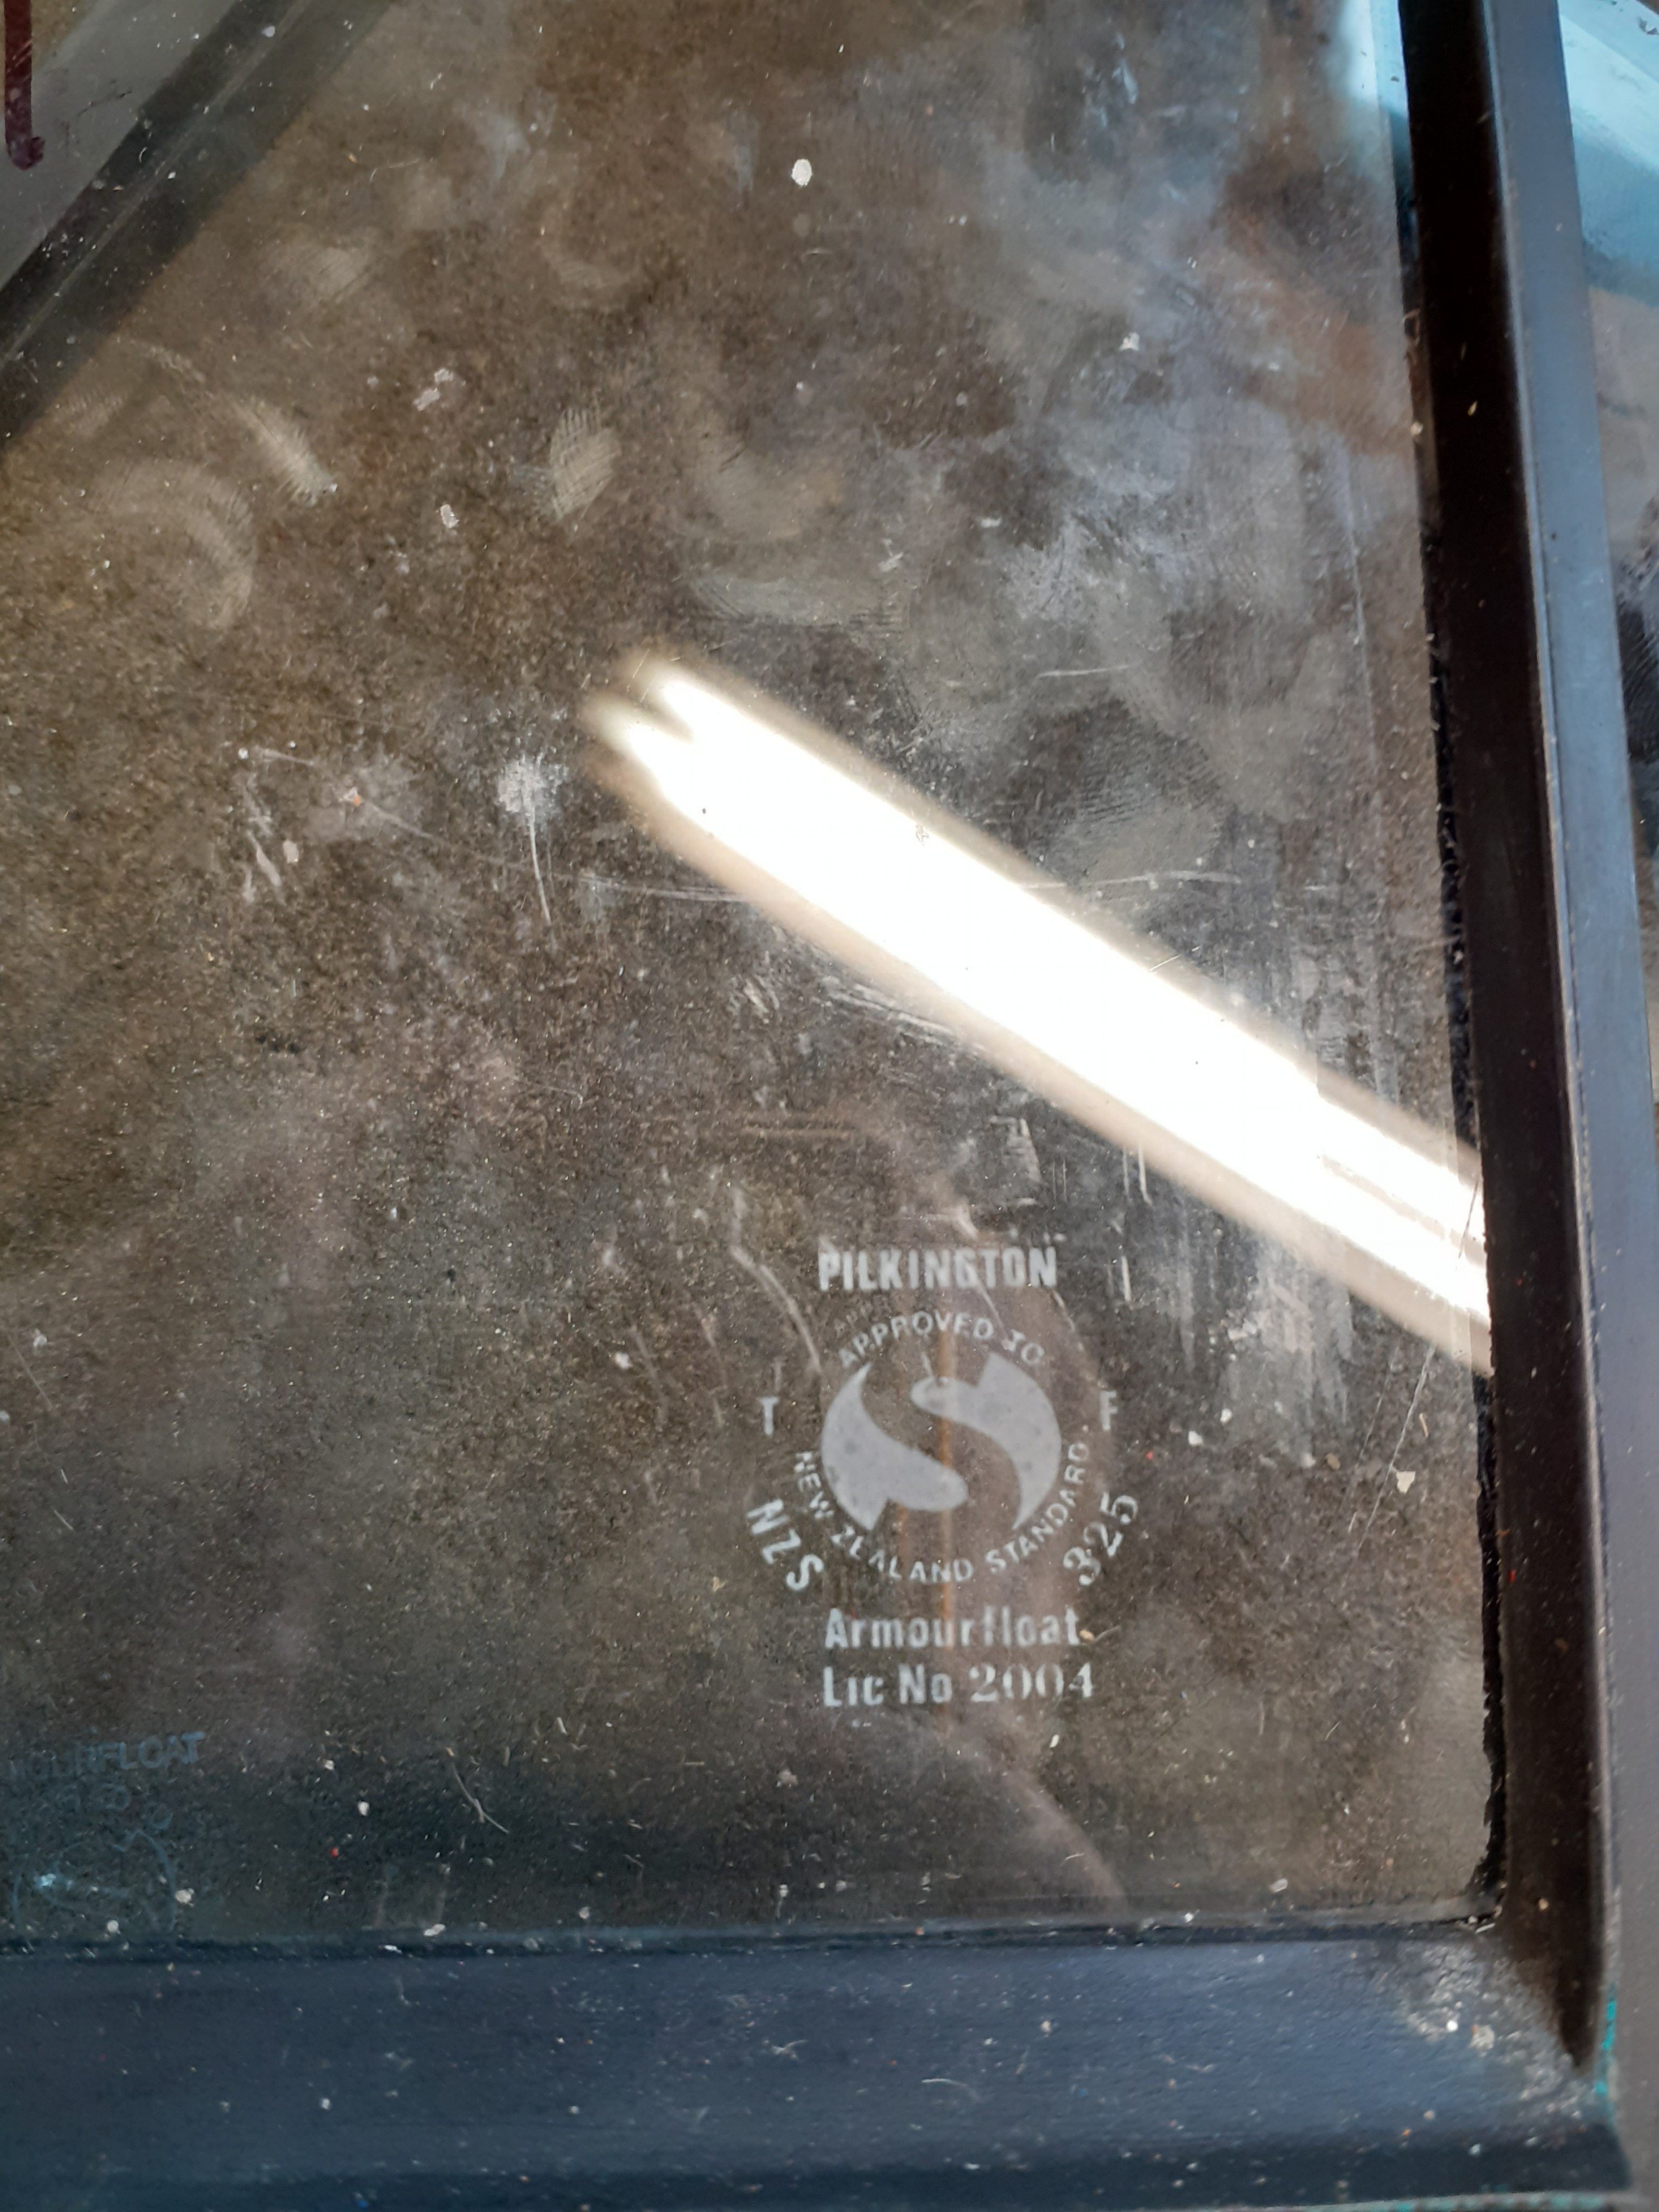
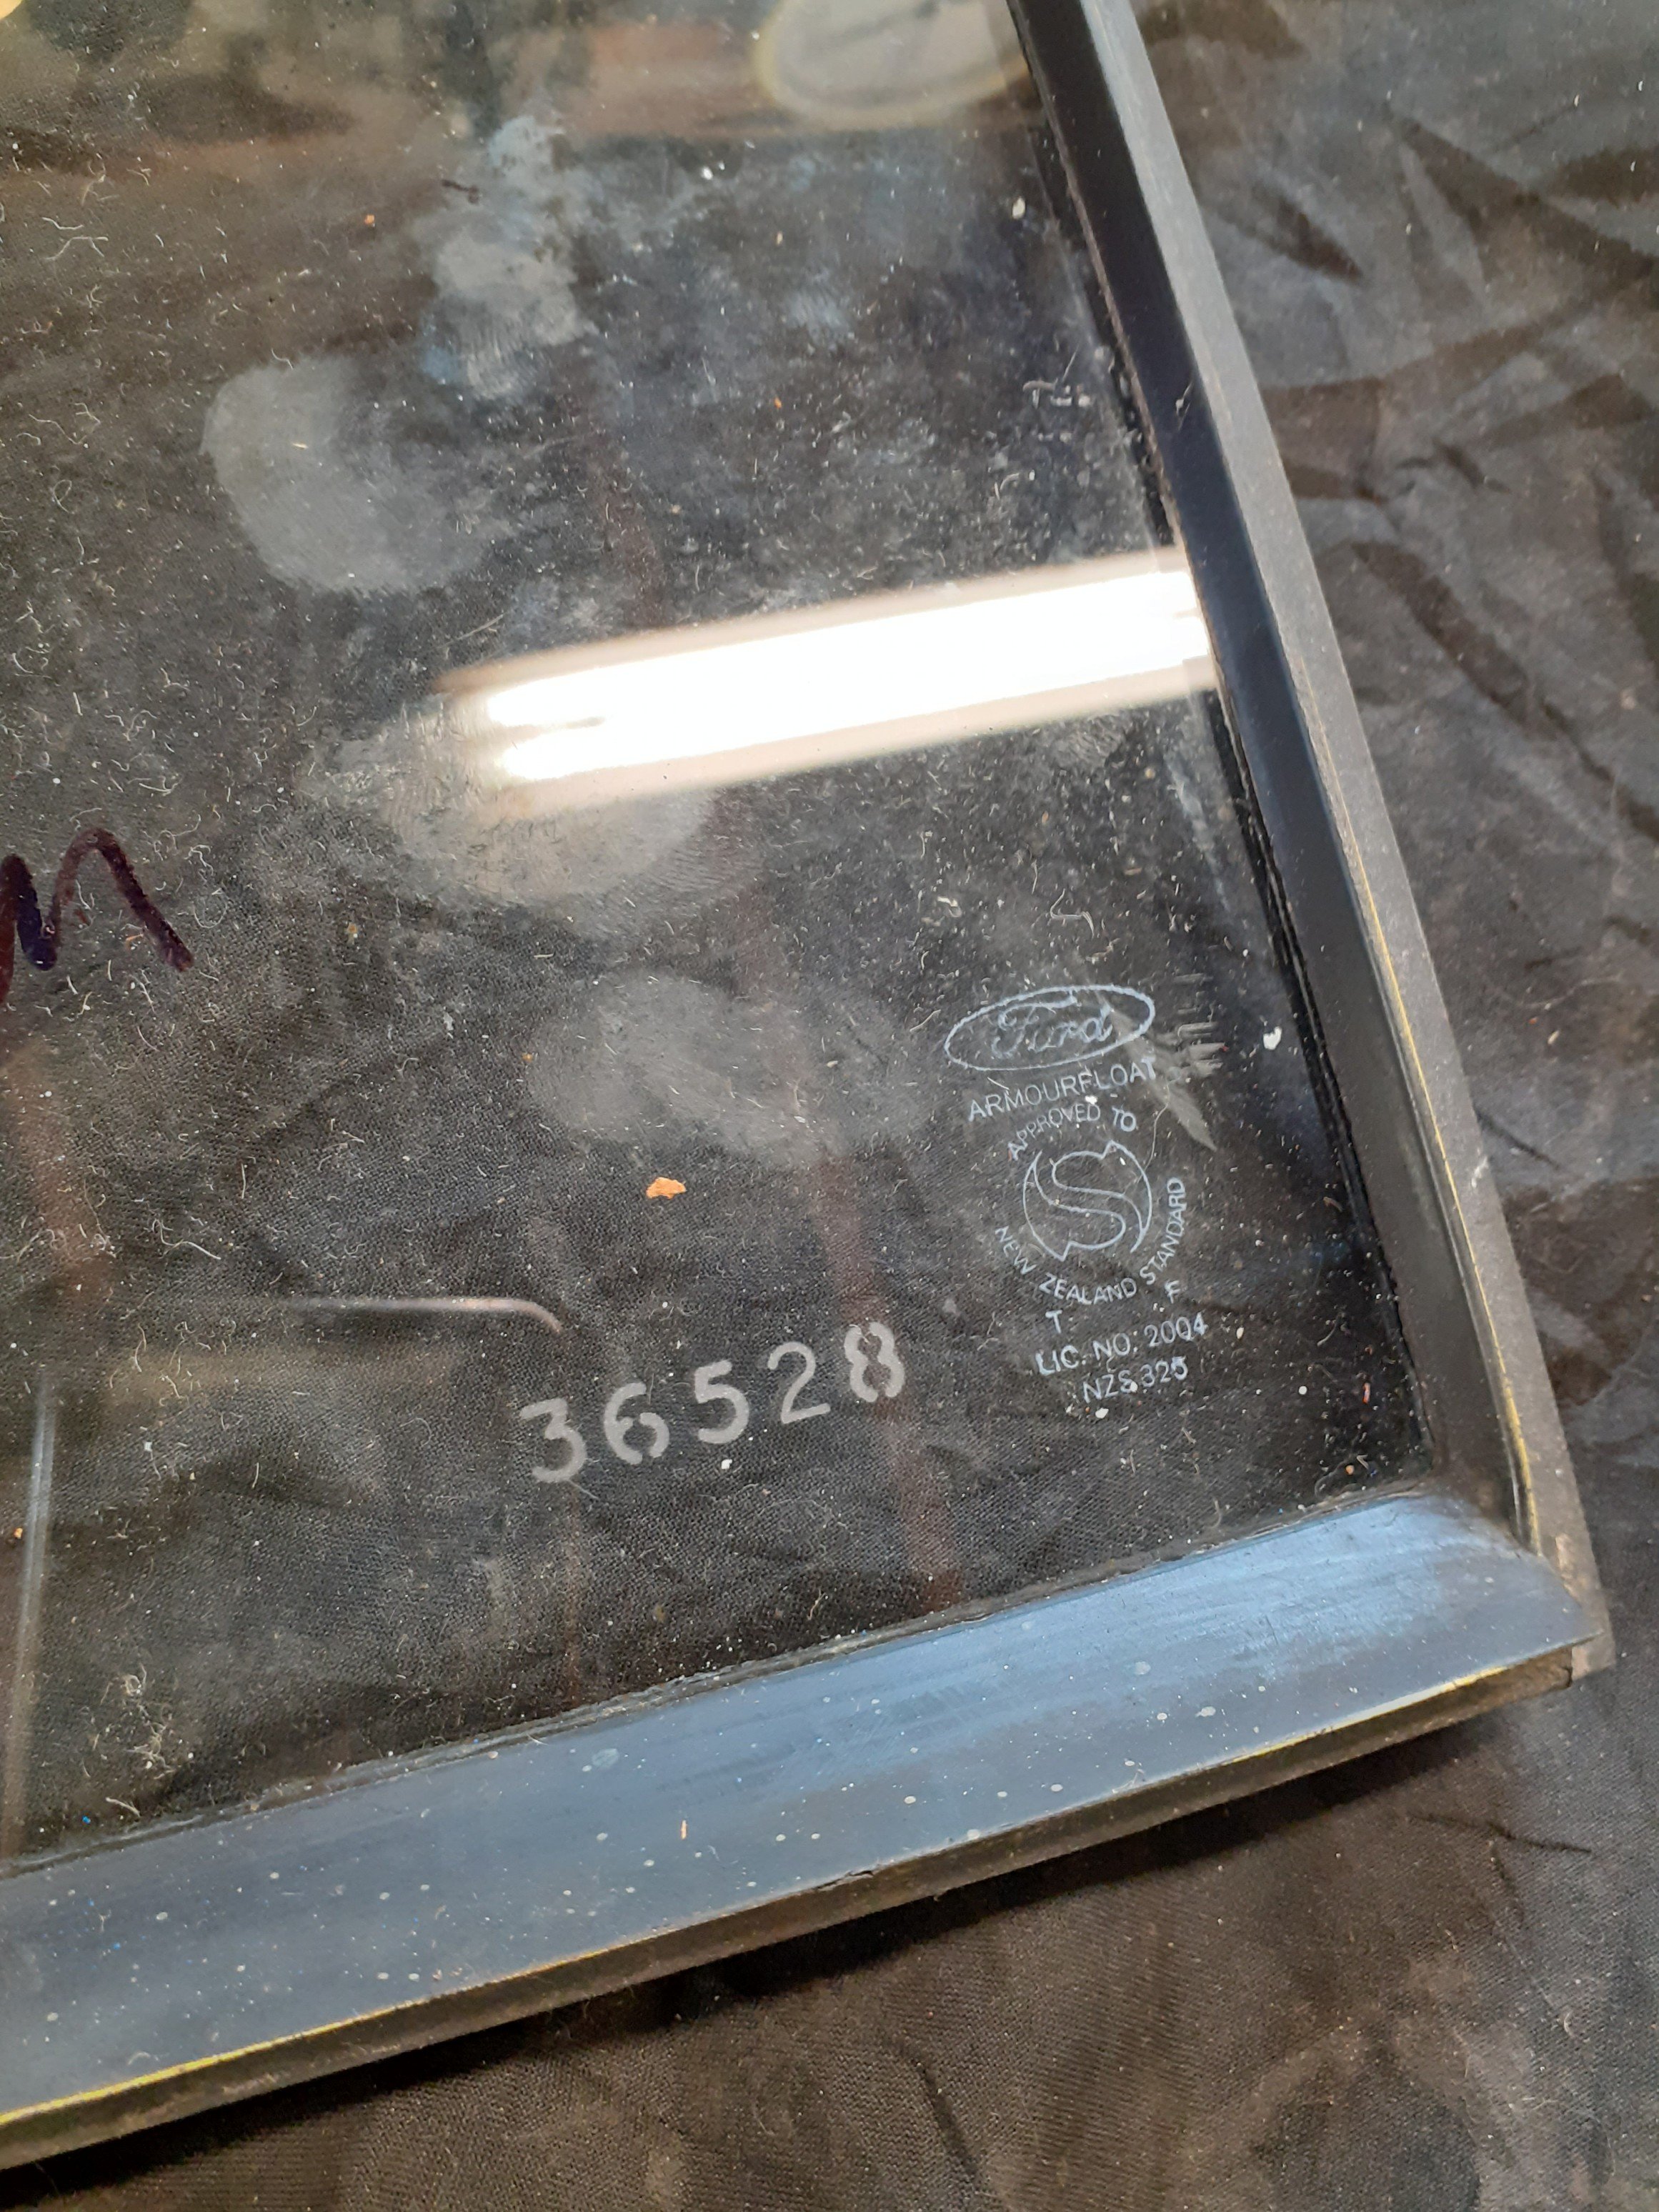
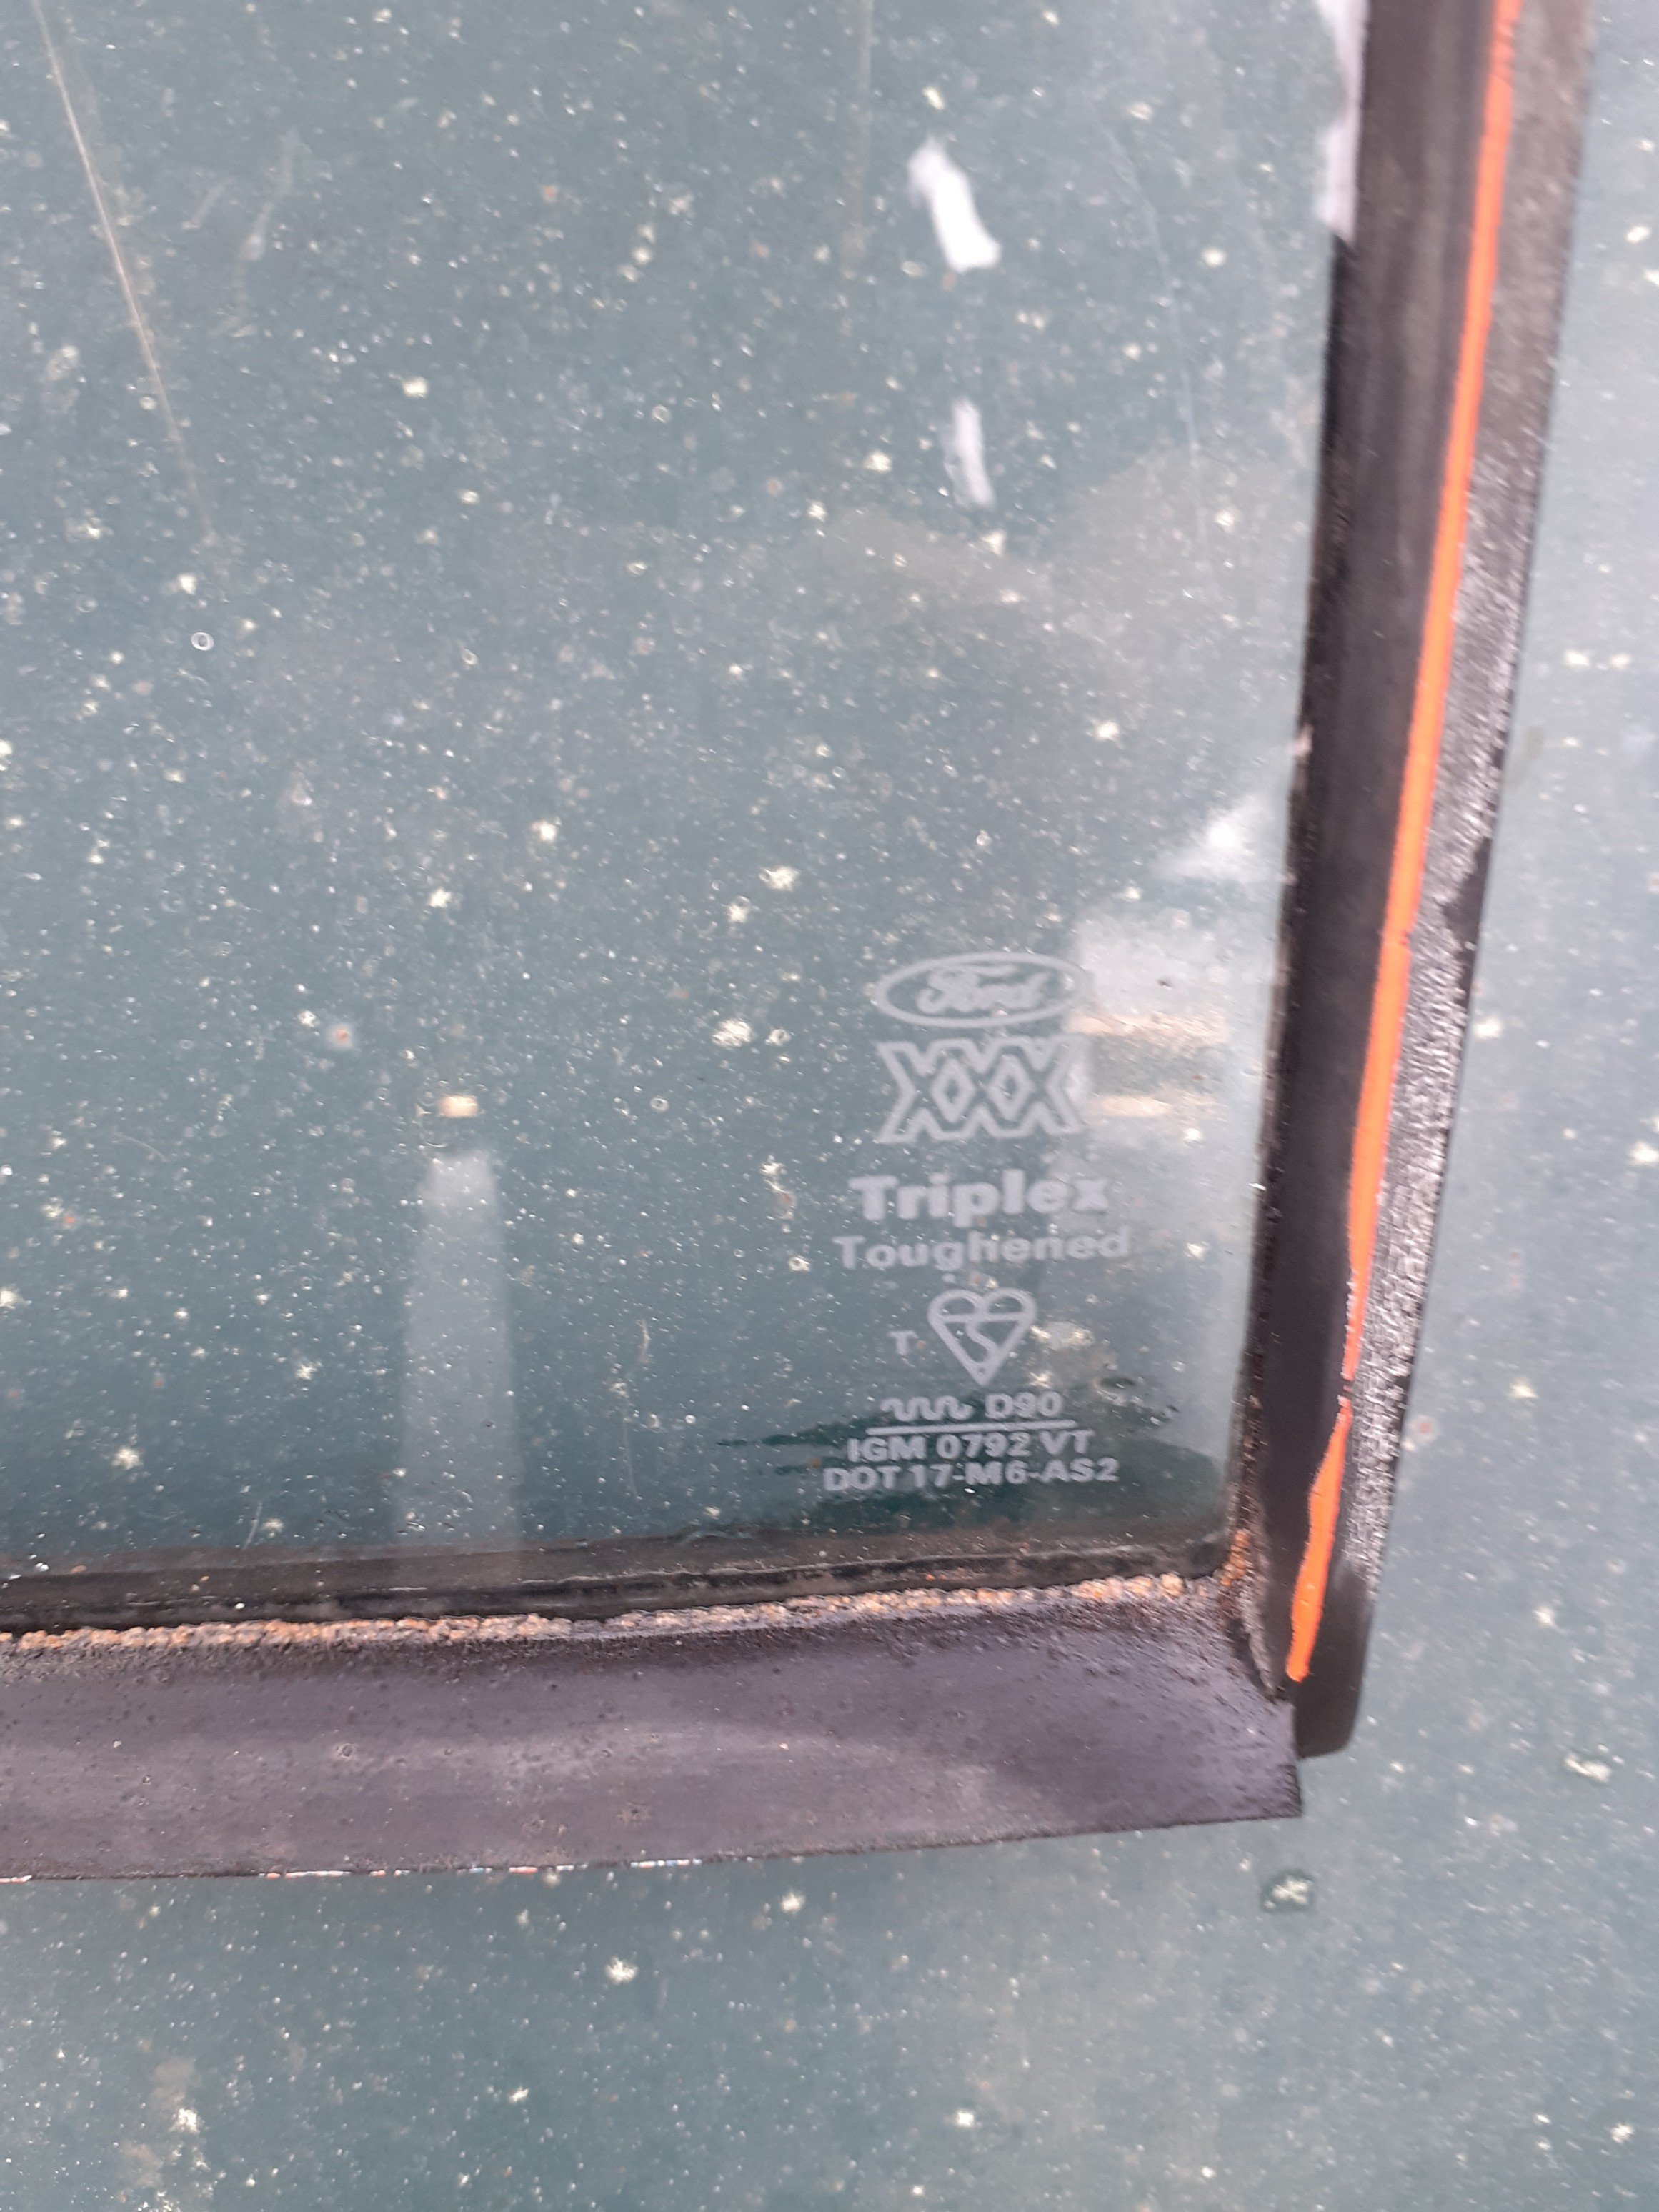
Hey I'm about to assemble my doors and I've going through all my spares to select the best glass. Are there any issues at the wof or cert stage with having different etch markings between drivers and passengers glass? Do they have to match?Same question with the rear doors. Cheers
-
Cheers. Just ordered the 80mil pack, seems pretty reasonably priced. Will report back with findings.
-
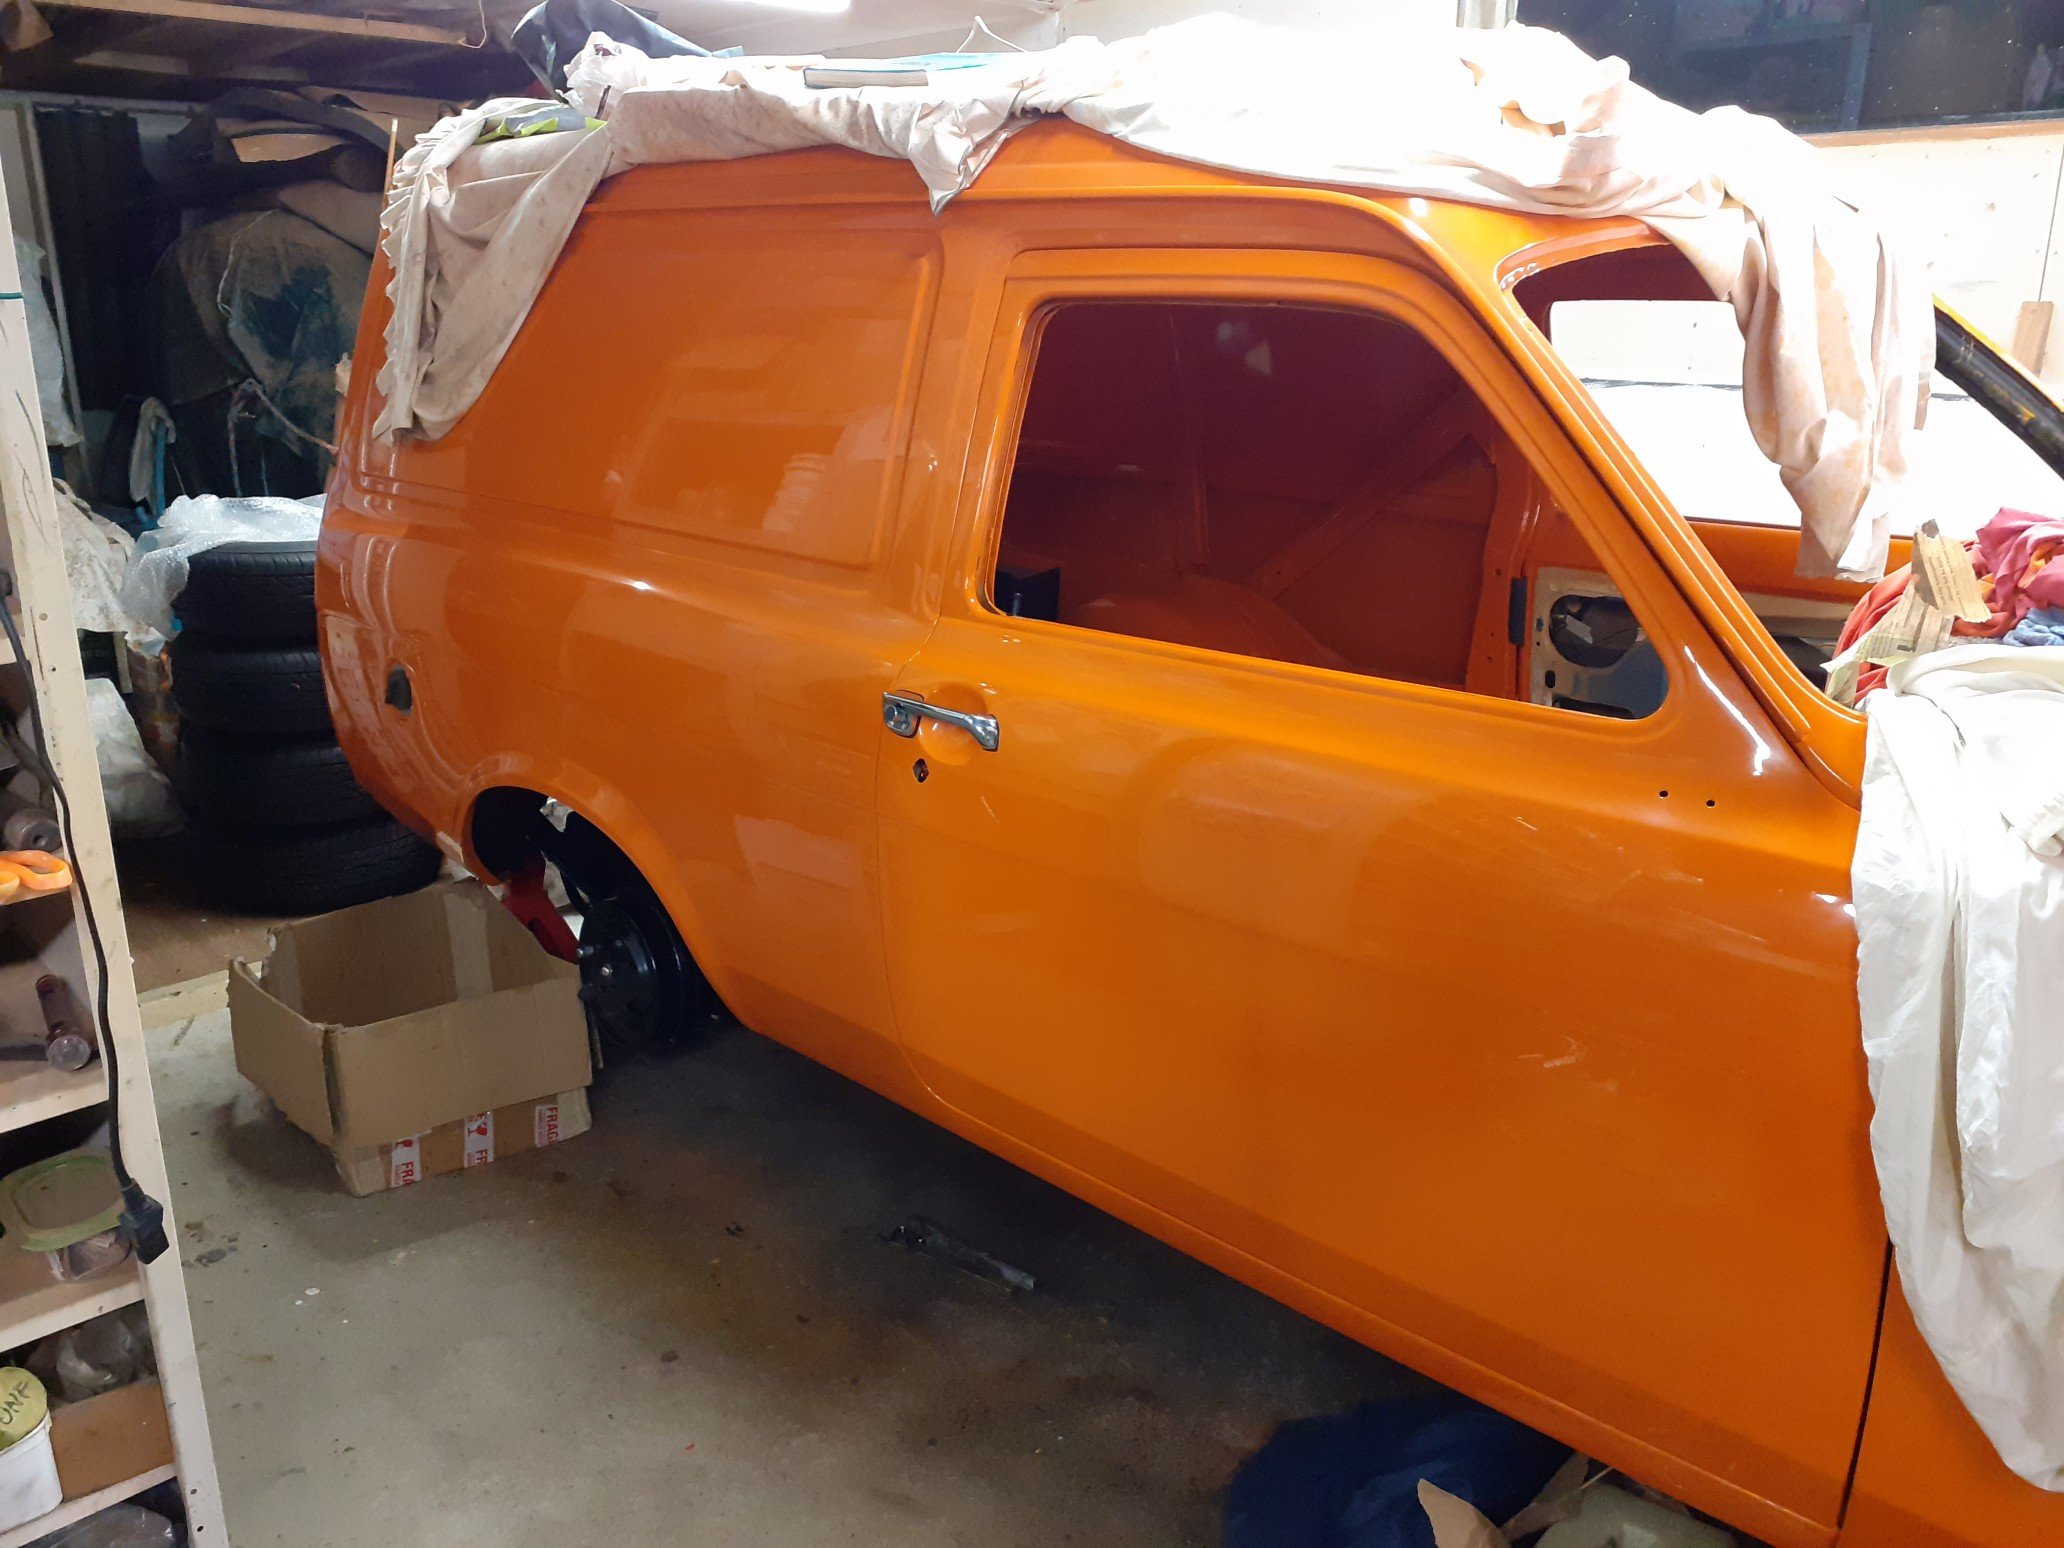
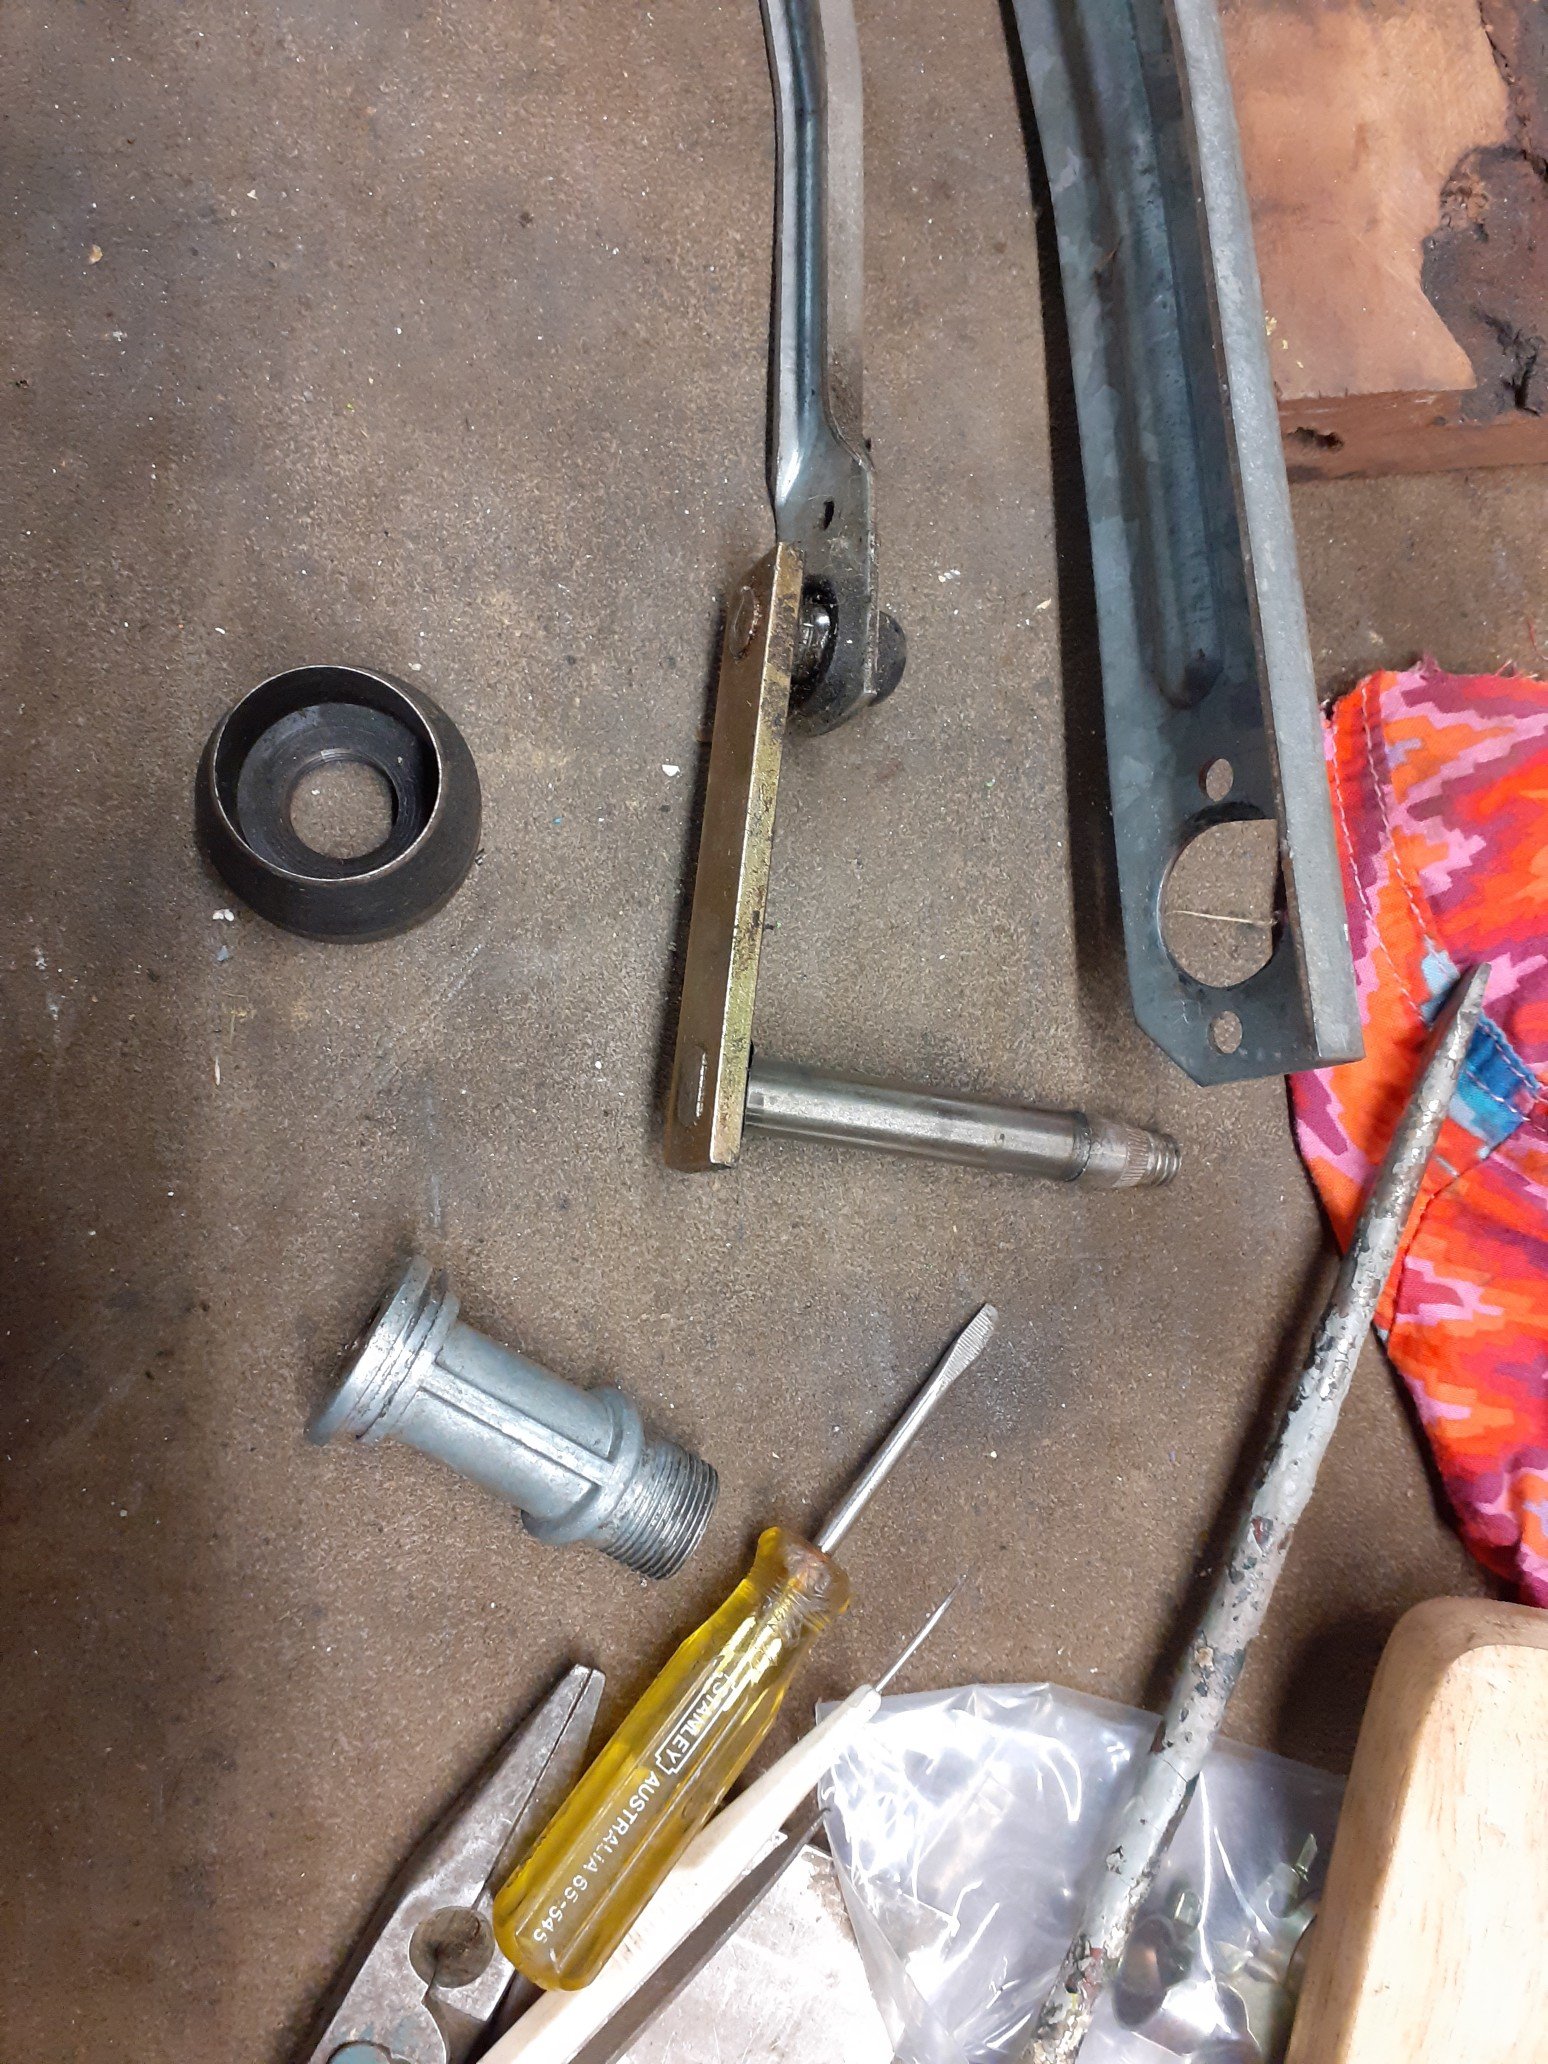
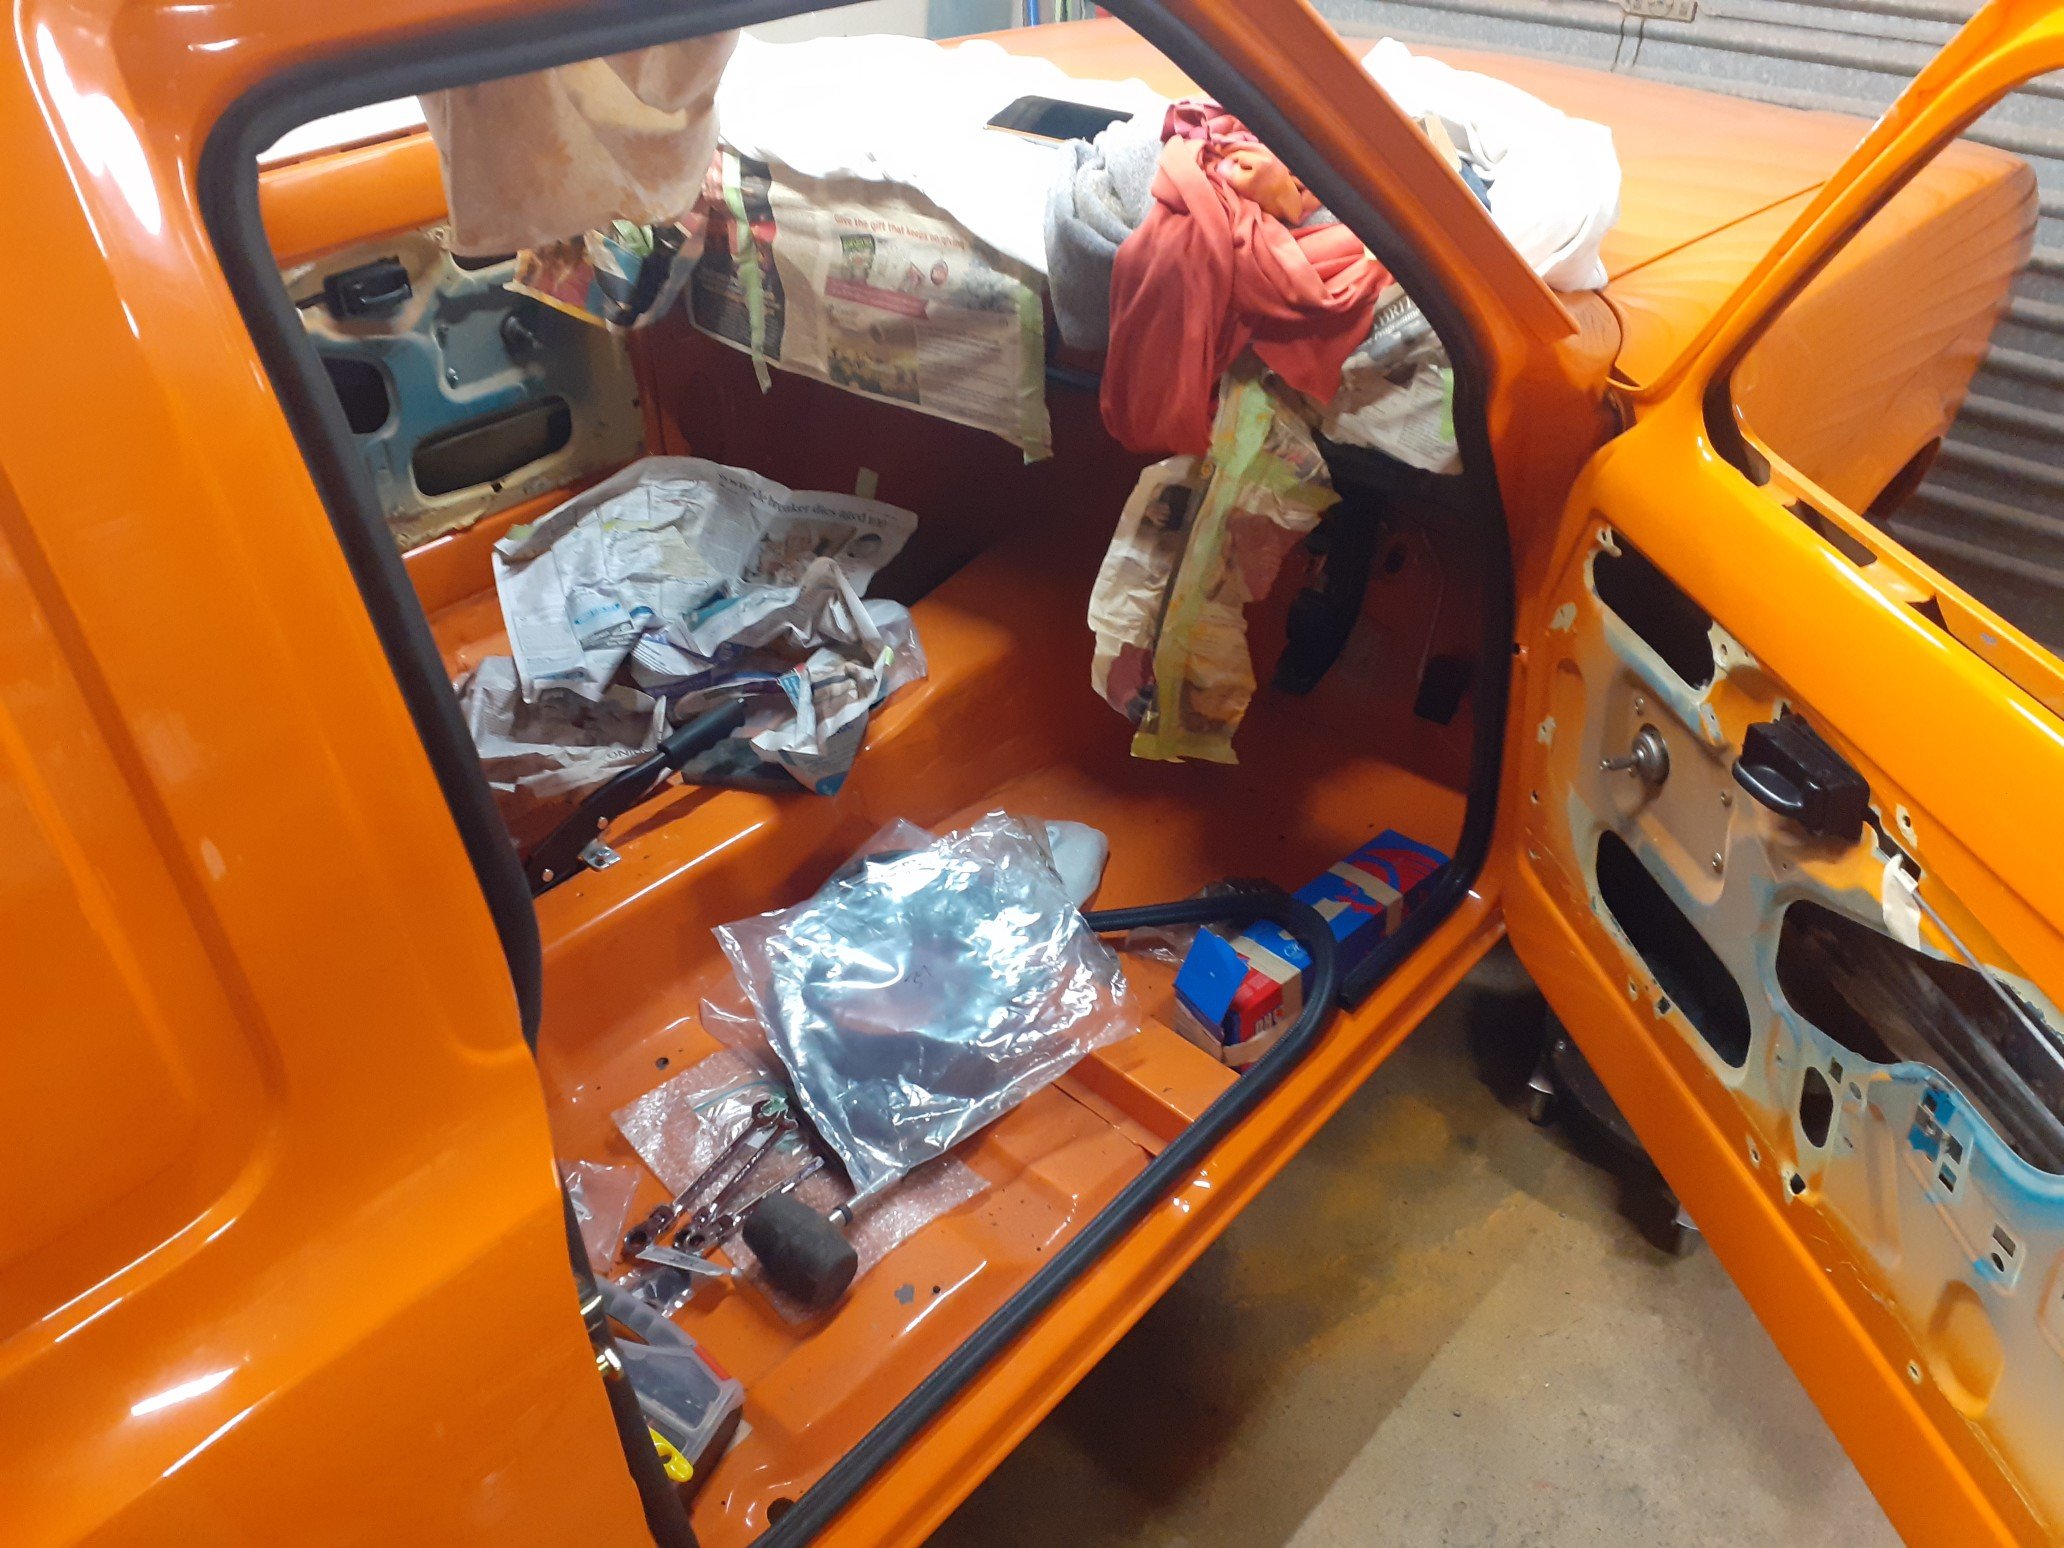
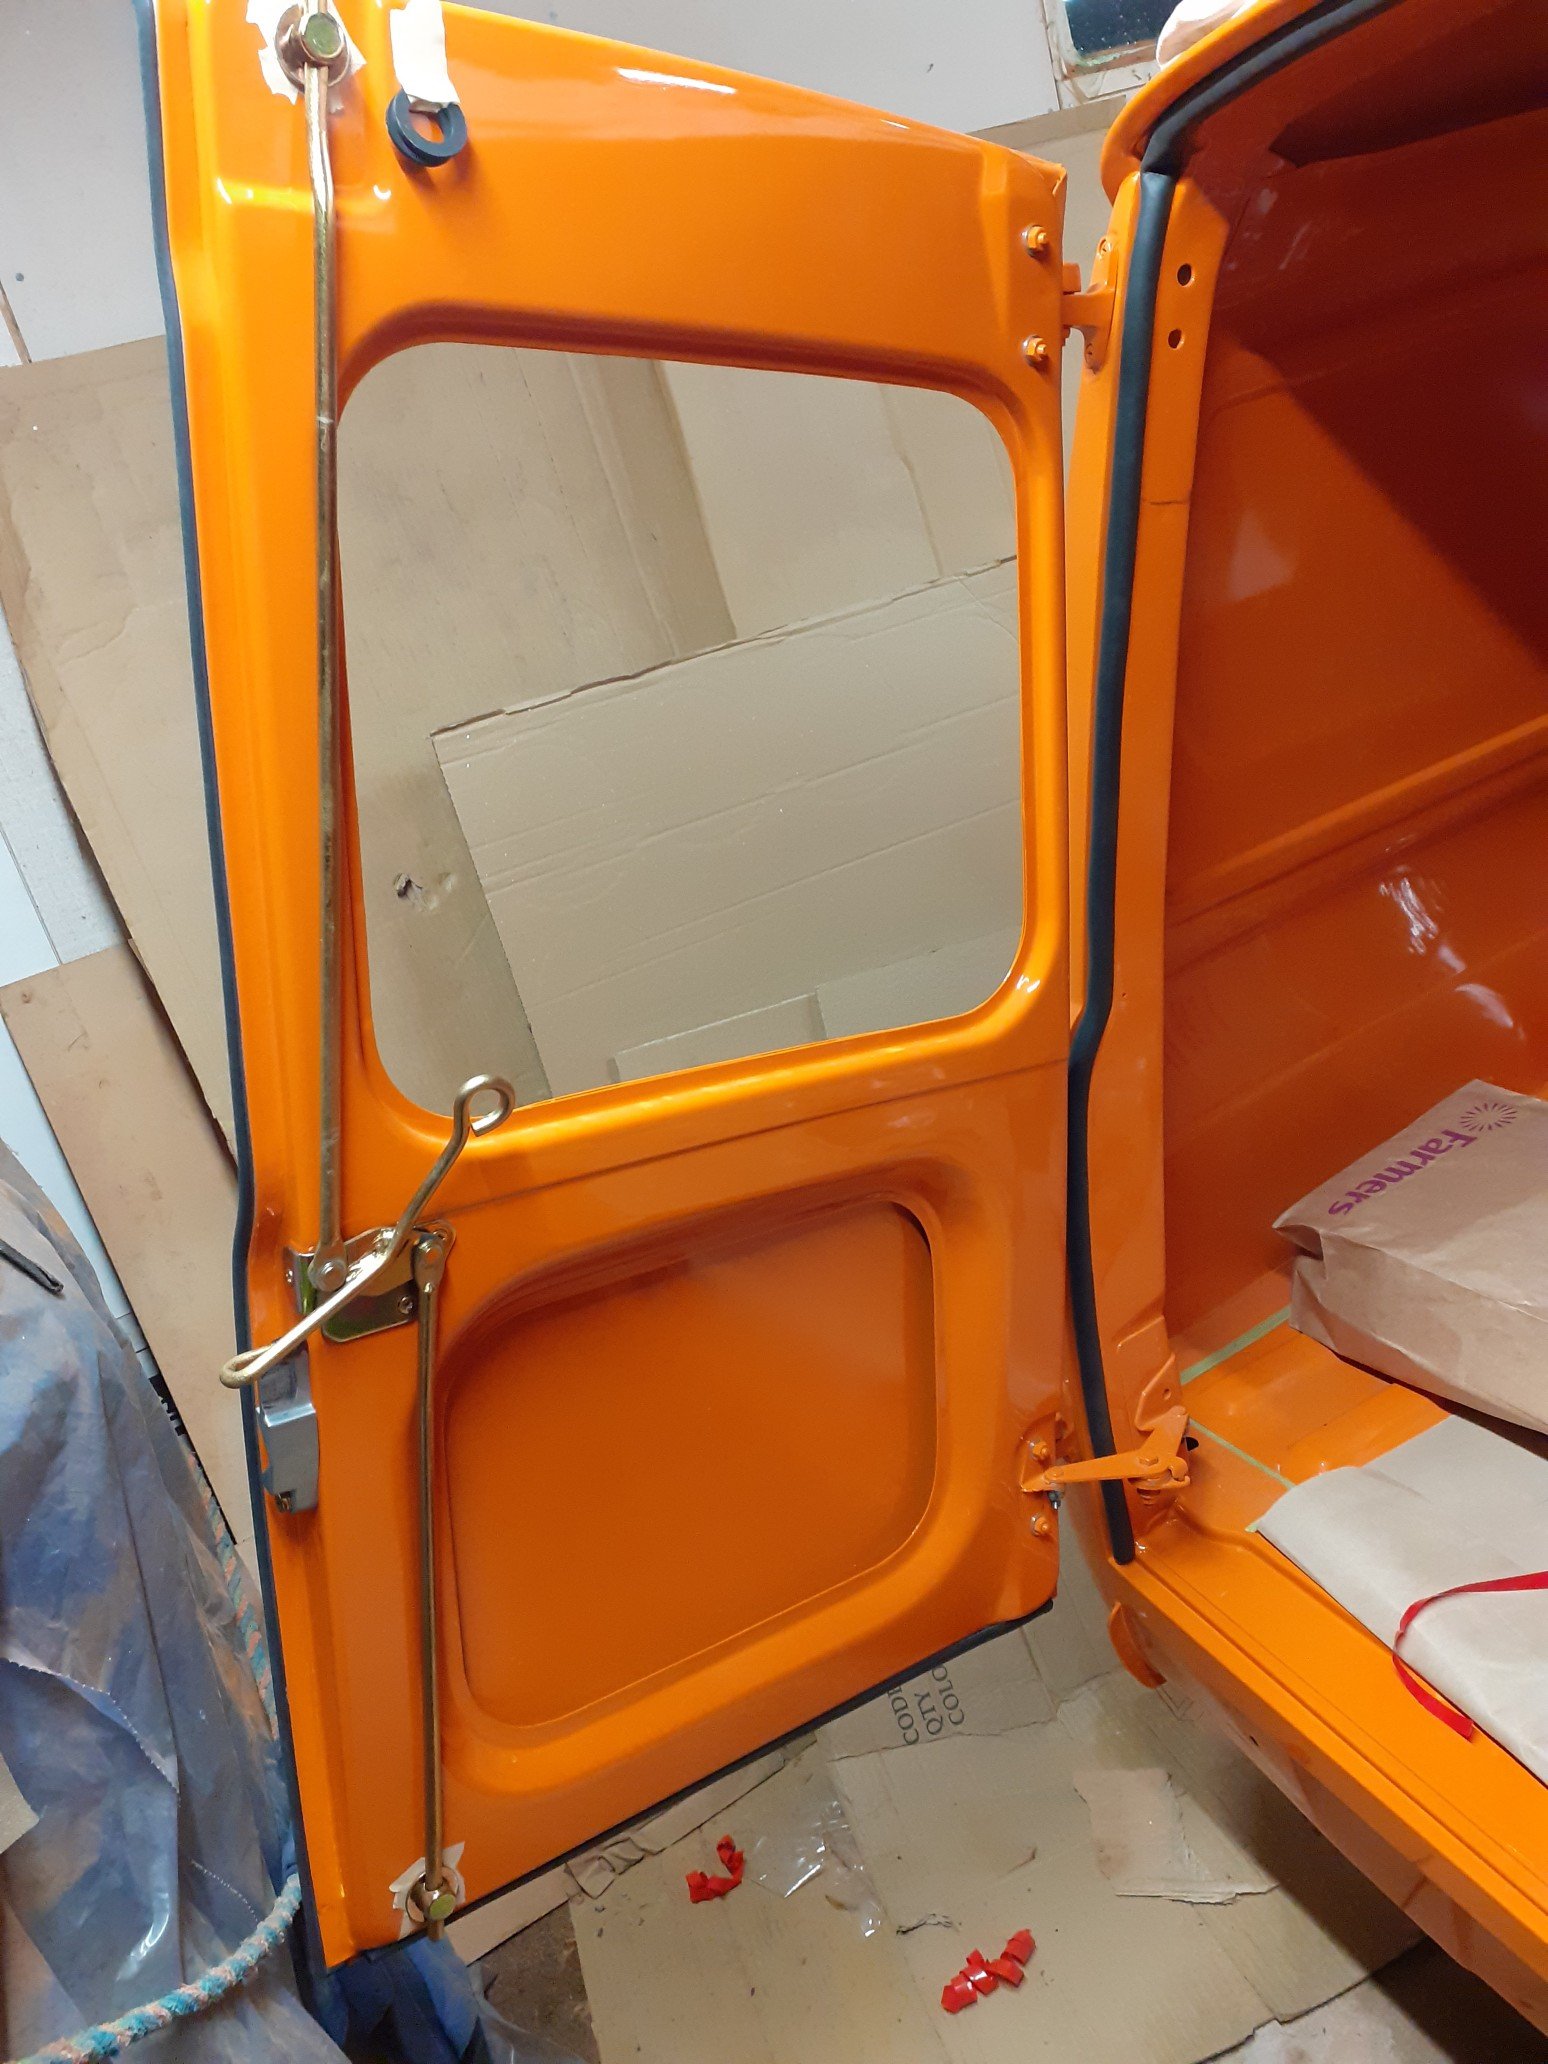
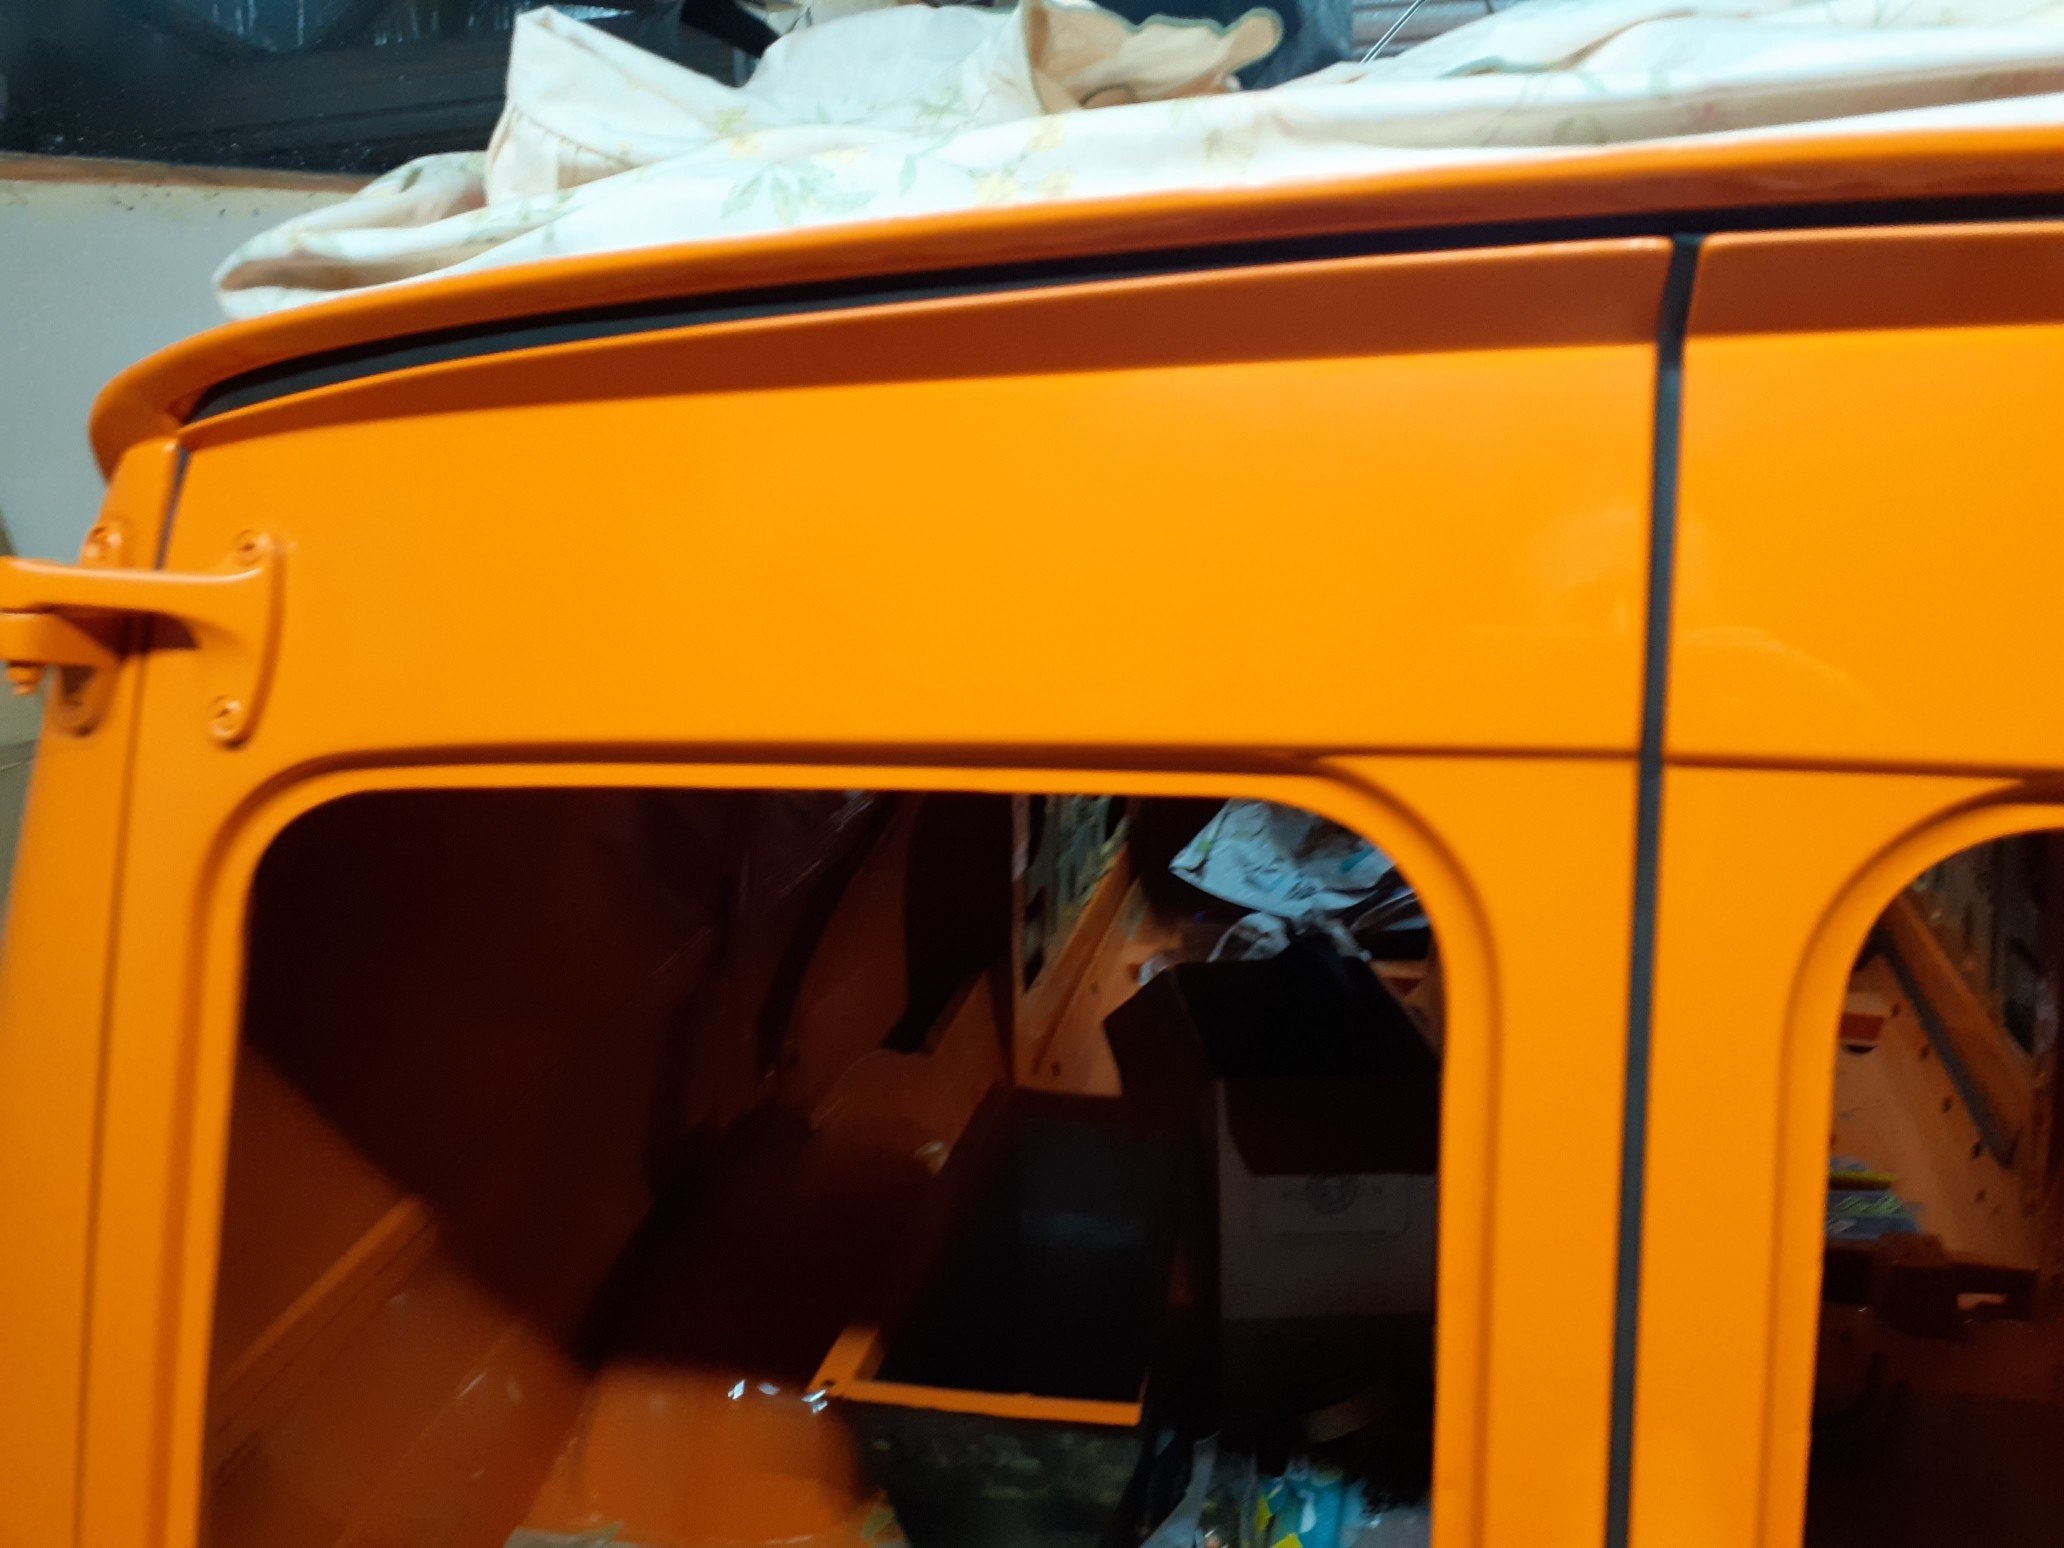
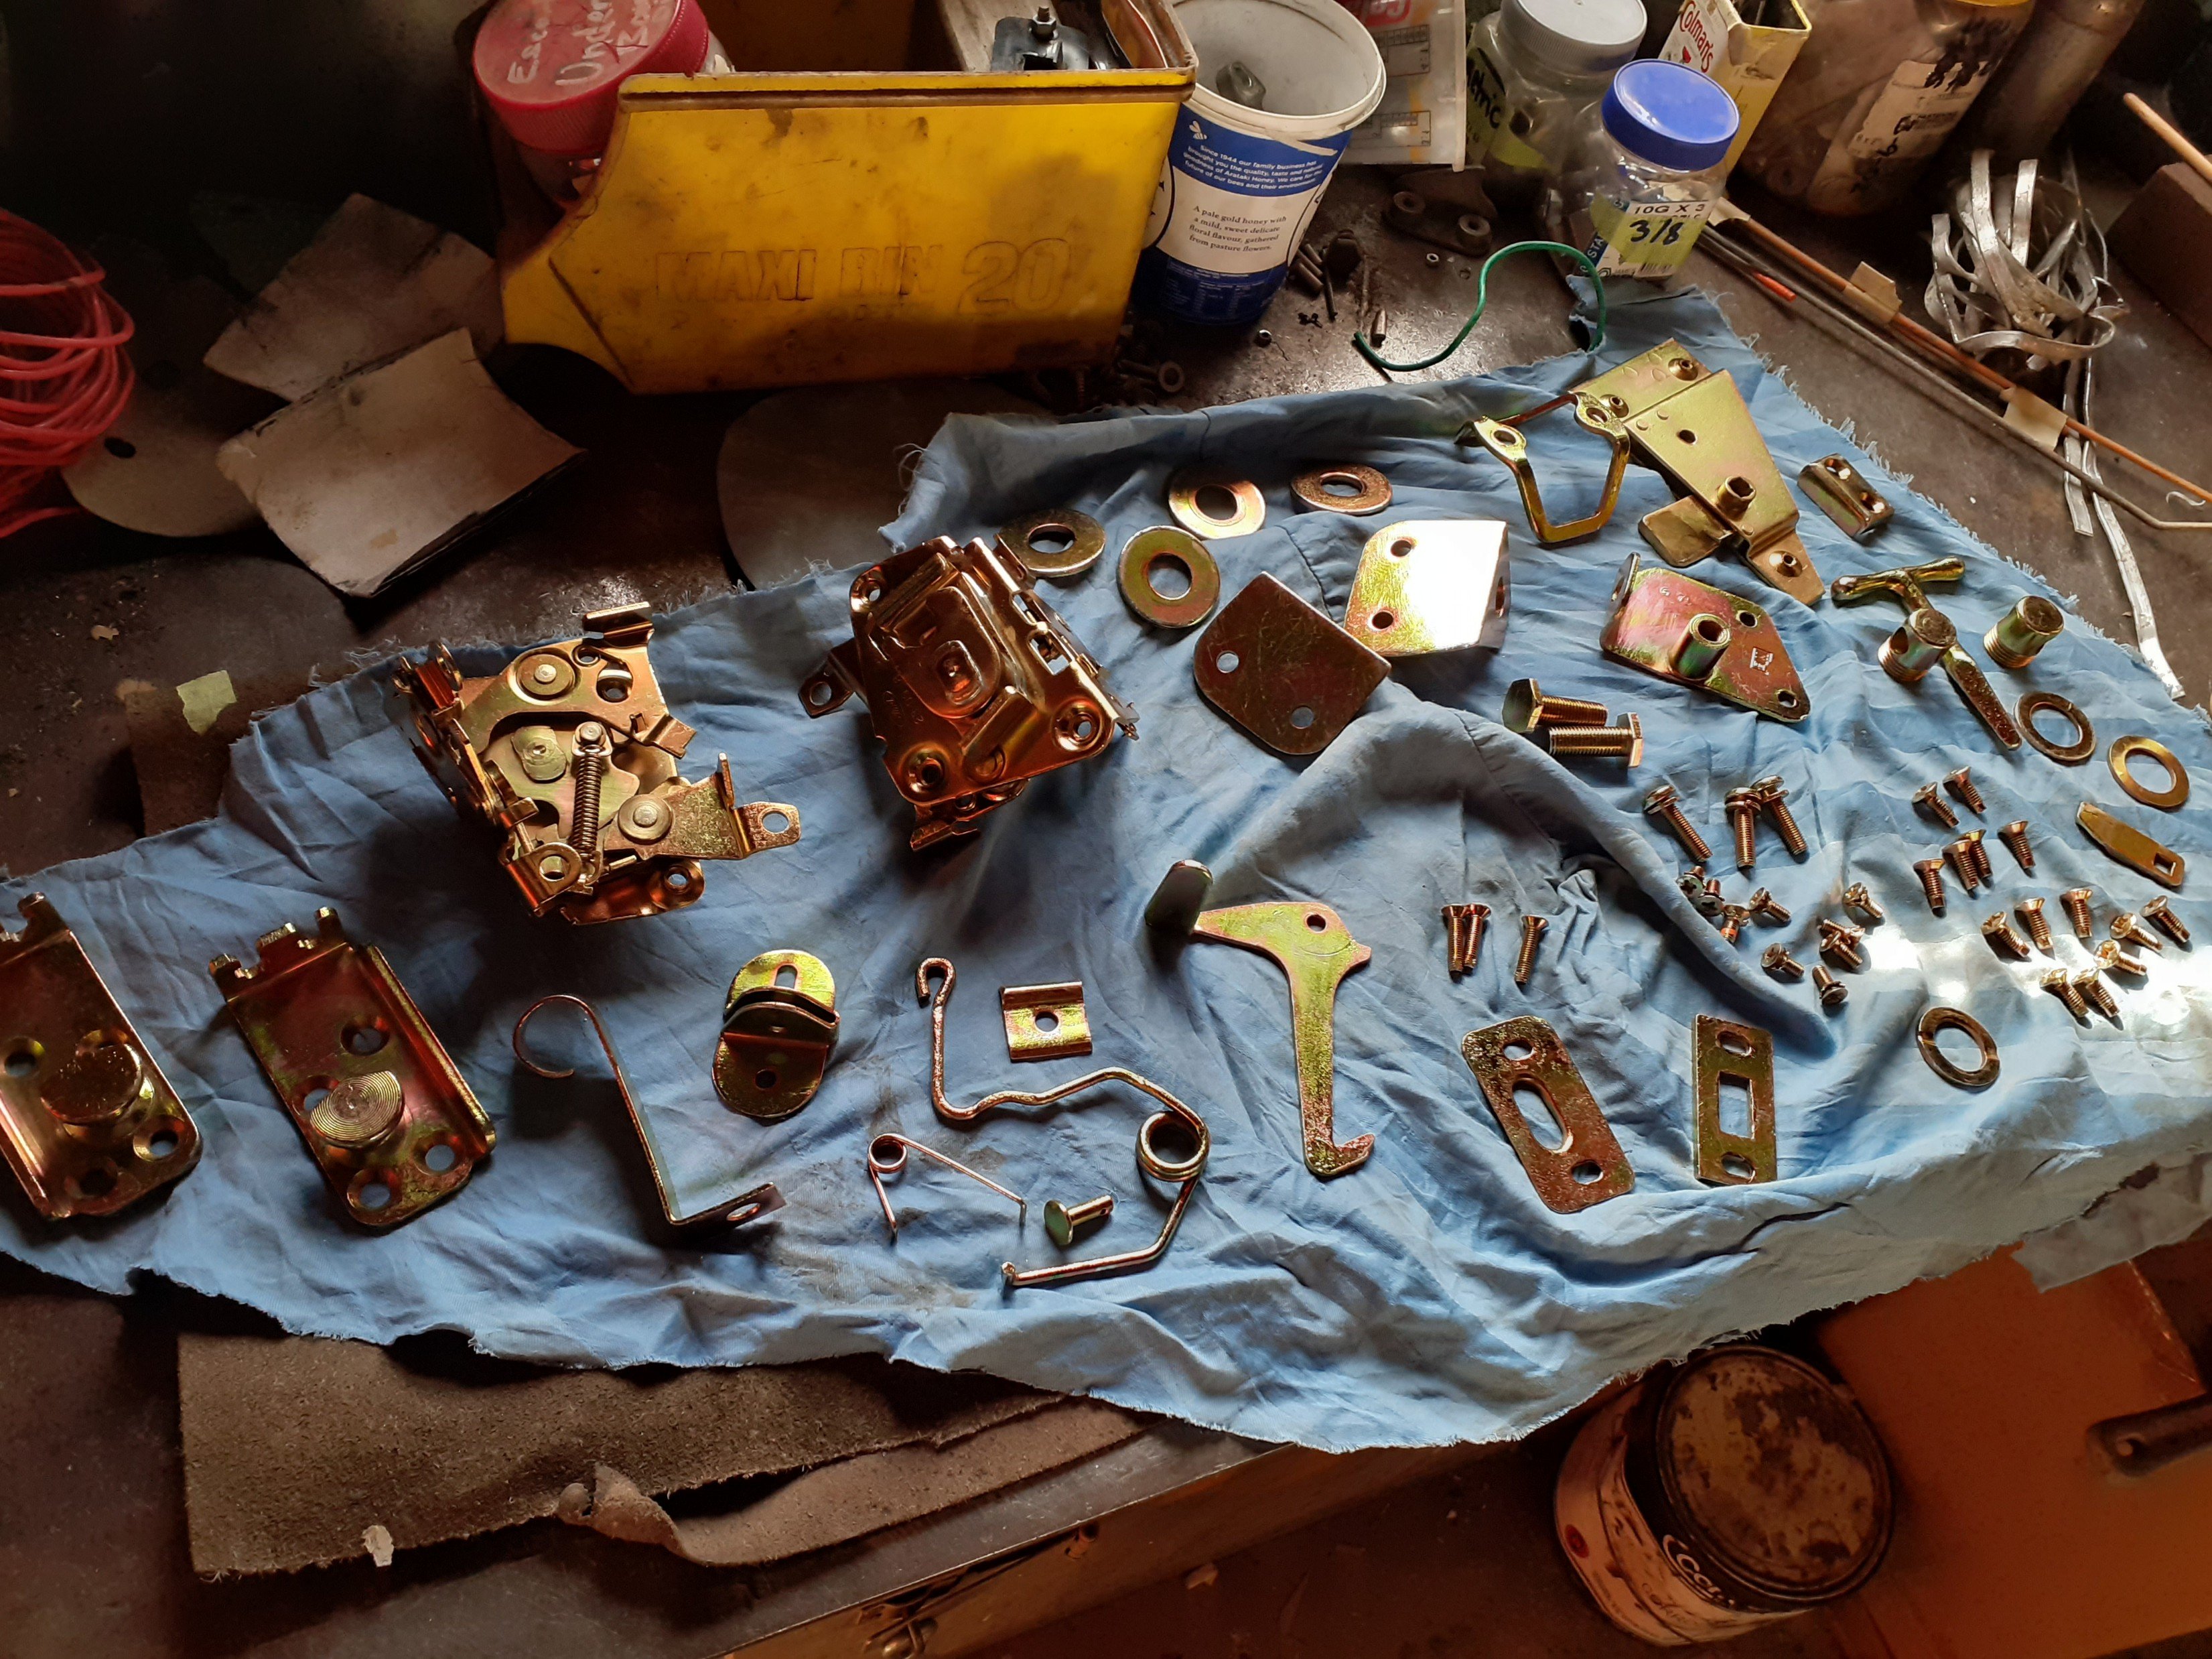
Door handles assembled and reinstalled with the best of all my spares. Added a second return spring on the thumb push button to support the movement. The wiper assembleys in these always get flogged. The rod/lever arms slowly elongate the bottom of cast posts to the point they end up with excessive rotating and vertical play. Checked my spares for the best set, pulled apart and the brass inserts looked good. I made 2 shims out of some very thin brass sheet to take up any vertical slack, cleaned everything up, regreased and reassembled. Purchased some front door rubber awhile ago from burton then heard some stories on fb that the rubbers too fat. Installed my set and yeah, you really have to slam the door extremely hard to get it to shut. Found some other type of rubber which looks more appropriate so will address this next week. The original rear door rubbers were a ford item and actually riveted on by little straps. These same doors fit an anglia van so it must have been the method in the 60s. I looked at my options and decided on a D shape rubber with a decent backing adhesive. I applied this to the bottom of the doors, and the sides and top of the body. The reason for applying the bottom section on the doors, and not the body, is just so it doesn't get hacked by things being dragged in and out of the back, plus it looks neater/hidden away. From the outside you don't see any excessive rubber poking through the gaps, just a solid black line. Reassembled the rest of the rear doors and now they all function. And ofcourse it threw me another curve ball. The top of the door locking rod didn't line up with the hole on the body. A little massage, file and the adjusting bracket that guides it into place all helped though.
- 104 replies
-
- 23
-
-
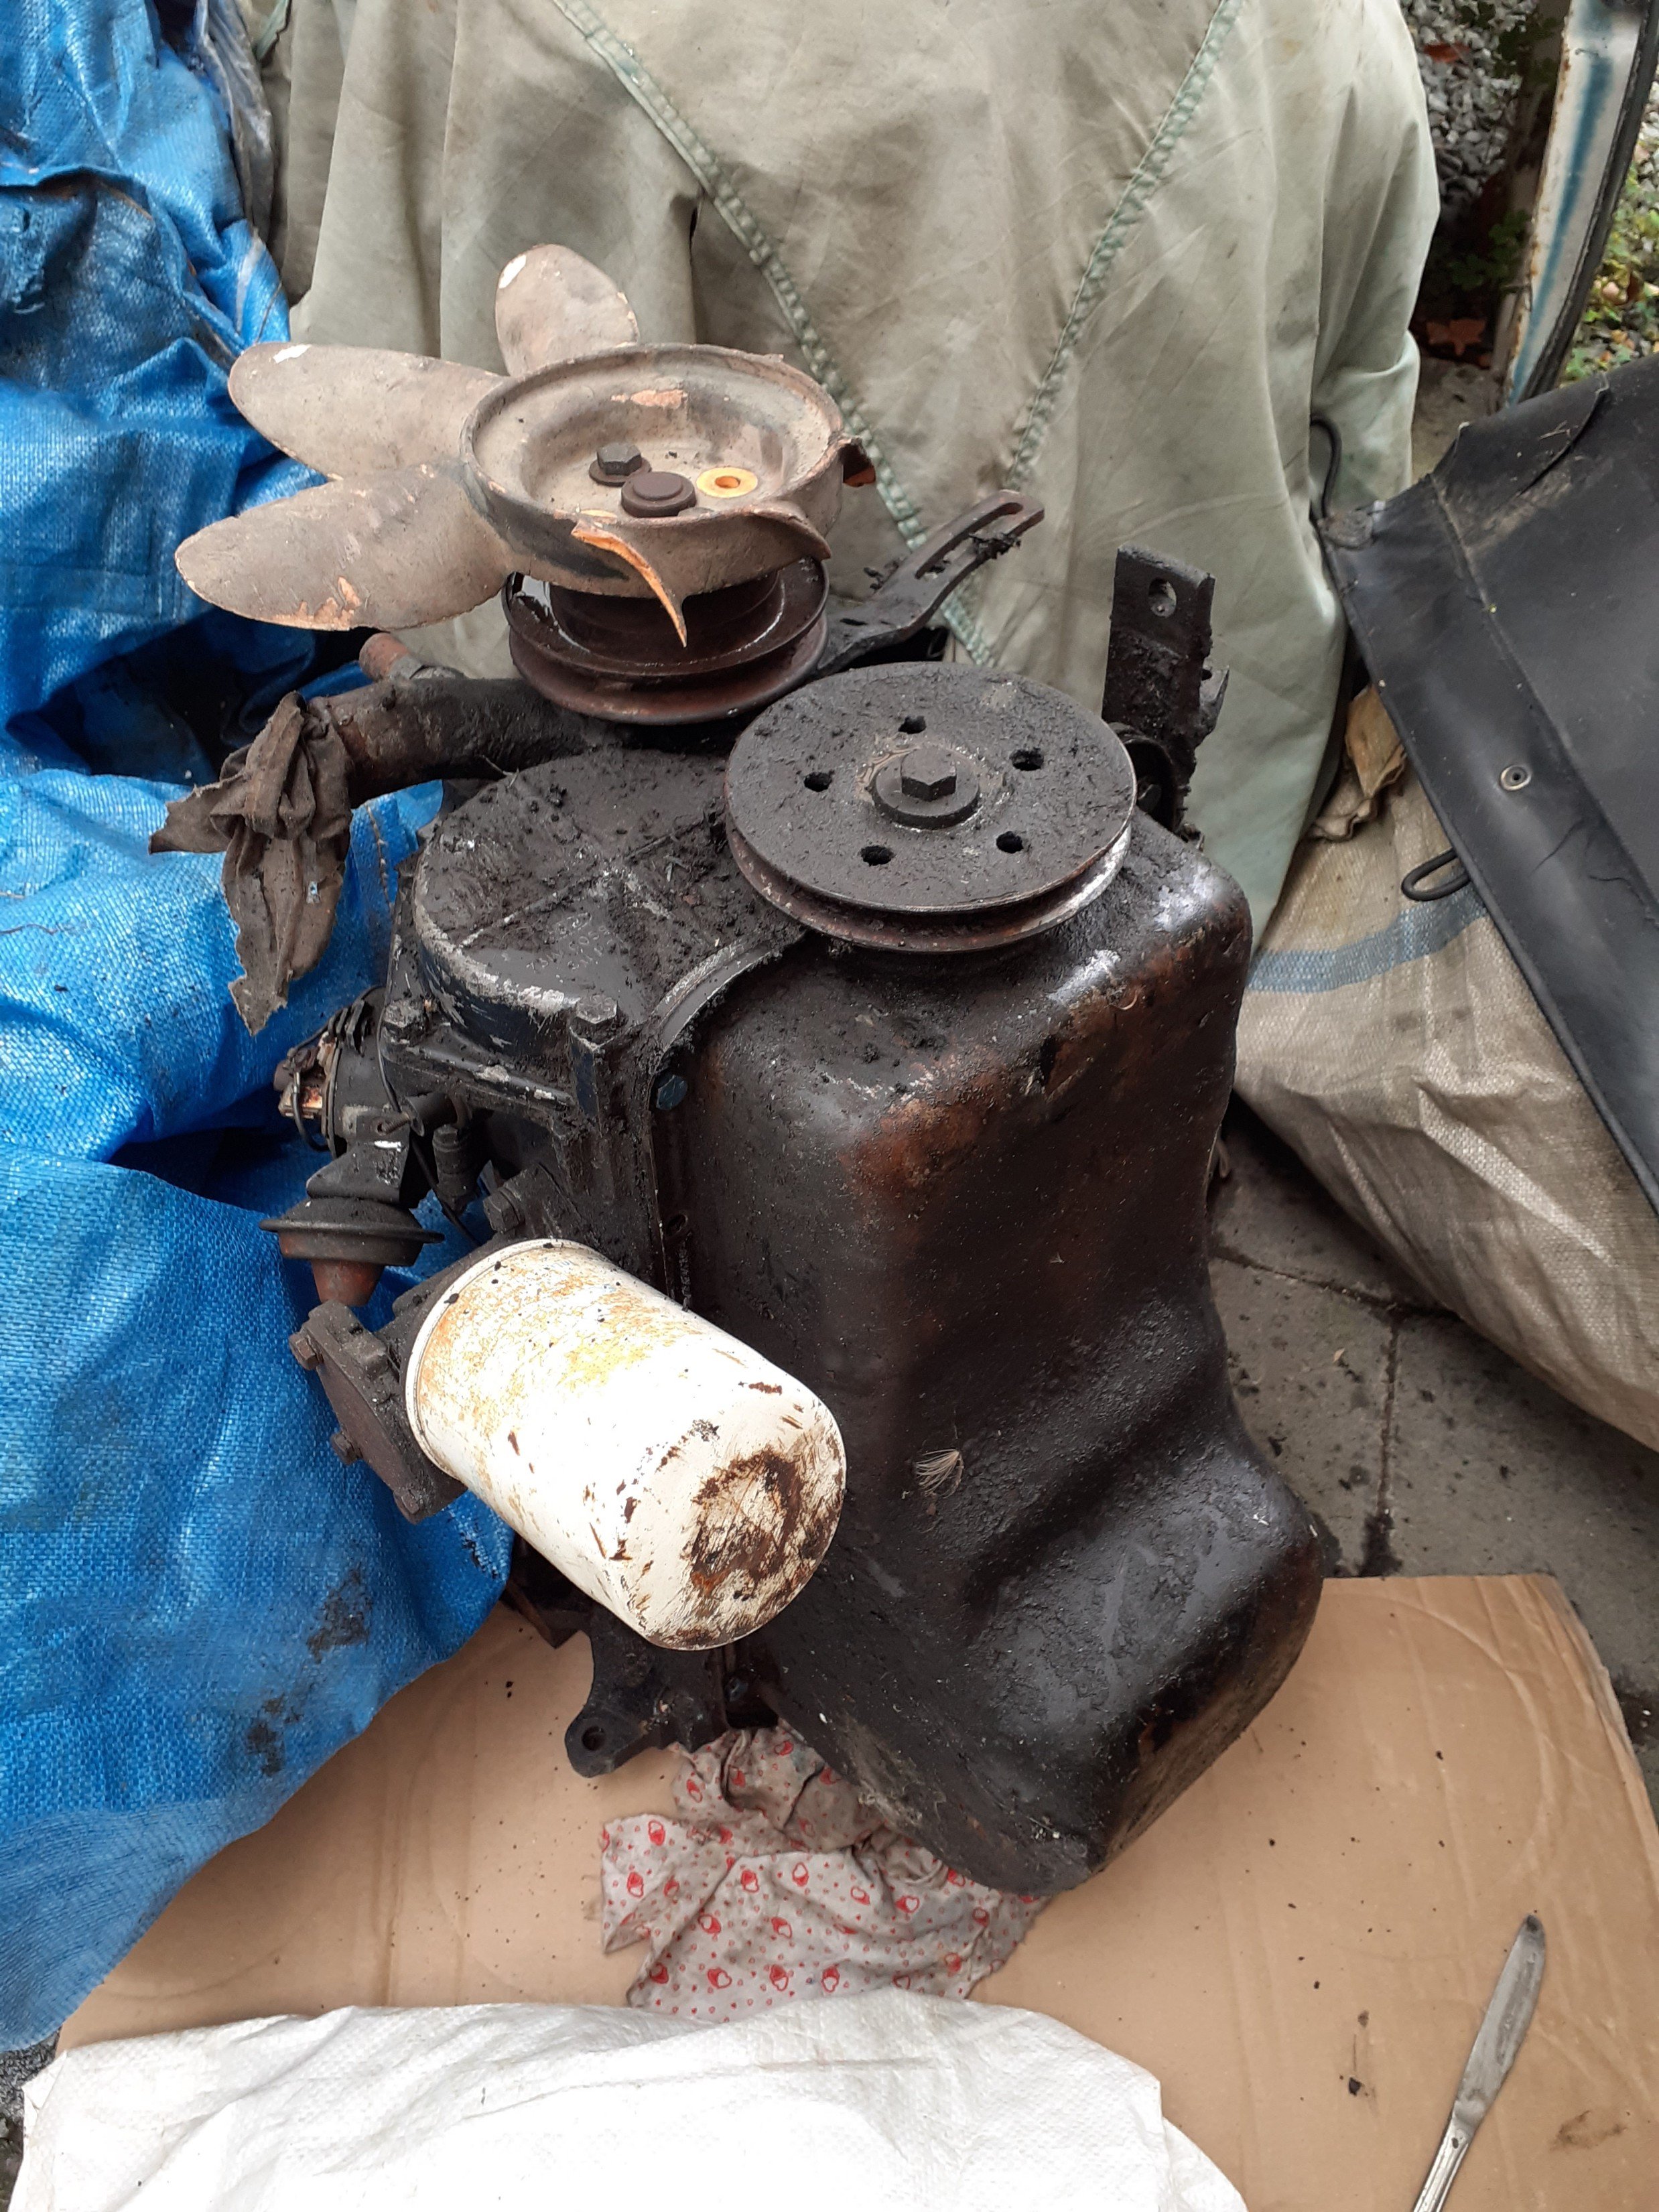
Bag and tag people, bag and tag. I took my motor apart almost a decade ago and now I'm struggling to figure out where each bolt goes. Luckily I'm a hoarder and have a rooted motor to take apart for comparison. Have been slowly gathering my goodies for the engine build. Pretty much brought burtons catalog worth of parts. Currently the motor (711 1600) has been bored out and hone matched to the pistons at +40. Small ends have had the bearings pressed in and machined out for the gudgeon pins. I've also been tidying up parts for the door mechanisms. I've got through my spares, selected and tidied the best parts. I rebuilt the exterior door handles with new uprated springs. The thumb push button always feel a bit soft on escorts so I upgraded mine with thicker springs. Feels so much more satisfying.
- 104 replies
-
- 13
-
-

Wellington Monthly Meet - Discussion thread
bmxnz11 replied to KKtrips's topic in Lower North Island Region
Count me in for the Jackson stroll -
Anywhere local to buy kilmat or is Amazon the only way?
-
Something something gold. Few dress up pieces.
- 104 replies
-
- 15
-
-
Wellington Monthly Meet - Discussion thread
bmxnz11 replied to KKtrips's topic in Lower North Island Region
Out. Will try and get to the next one. -
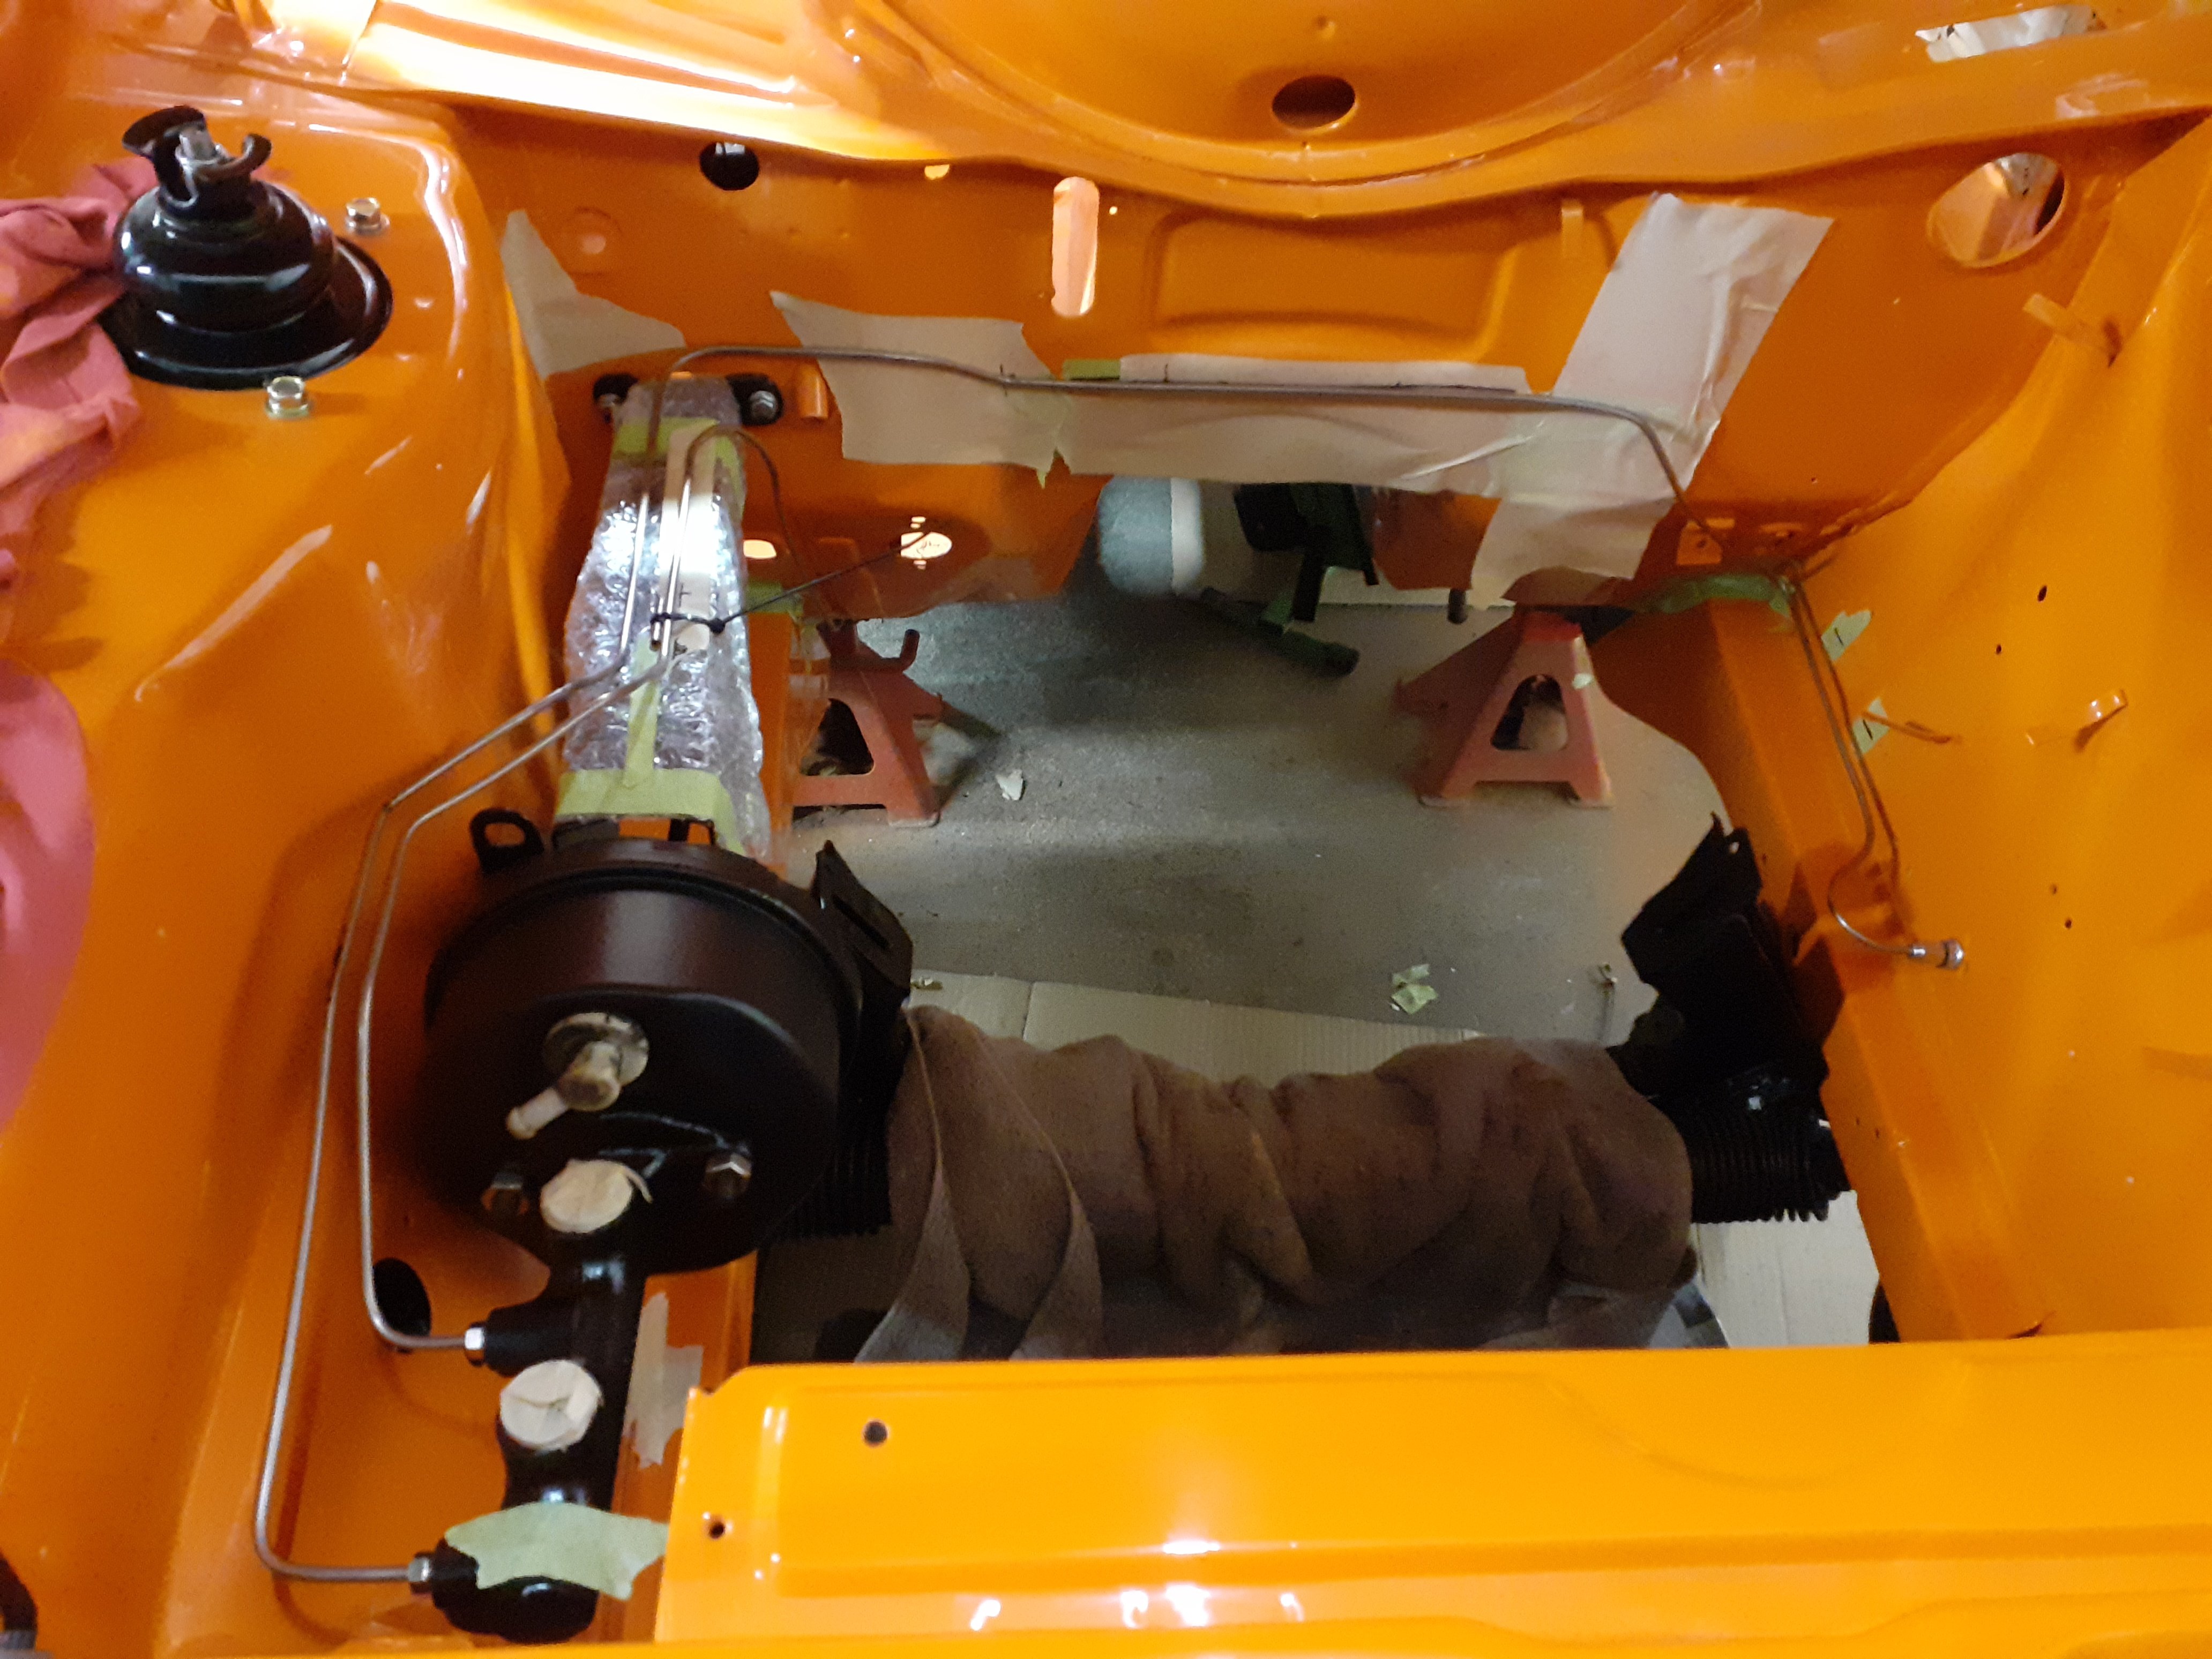
6/7 brake lines made. I had to buy a new brake master slave which had the brake fittings facing the drives gaurd instead of my original one which had them facing the engine. With my lowered brake booster set up, to run side drafts, the old brake lines were fouling on the fan shroud.
- 104 replies
-
- 11
-
-
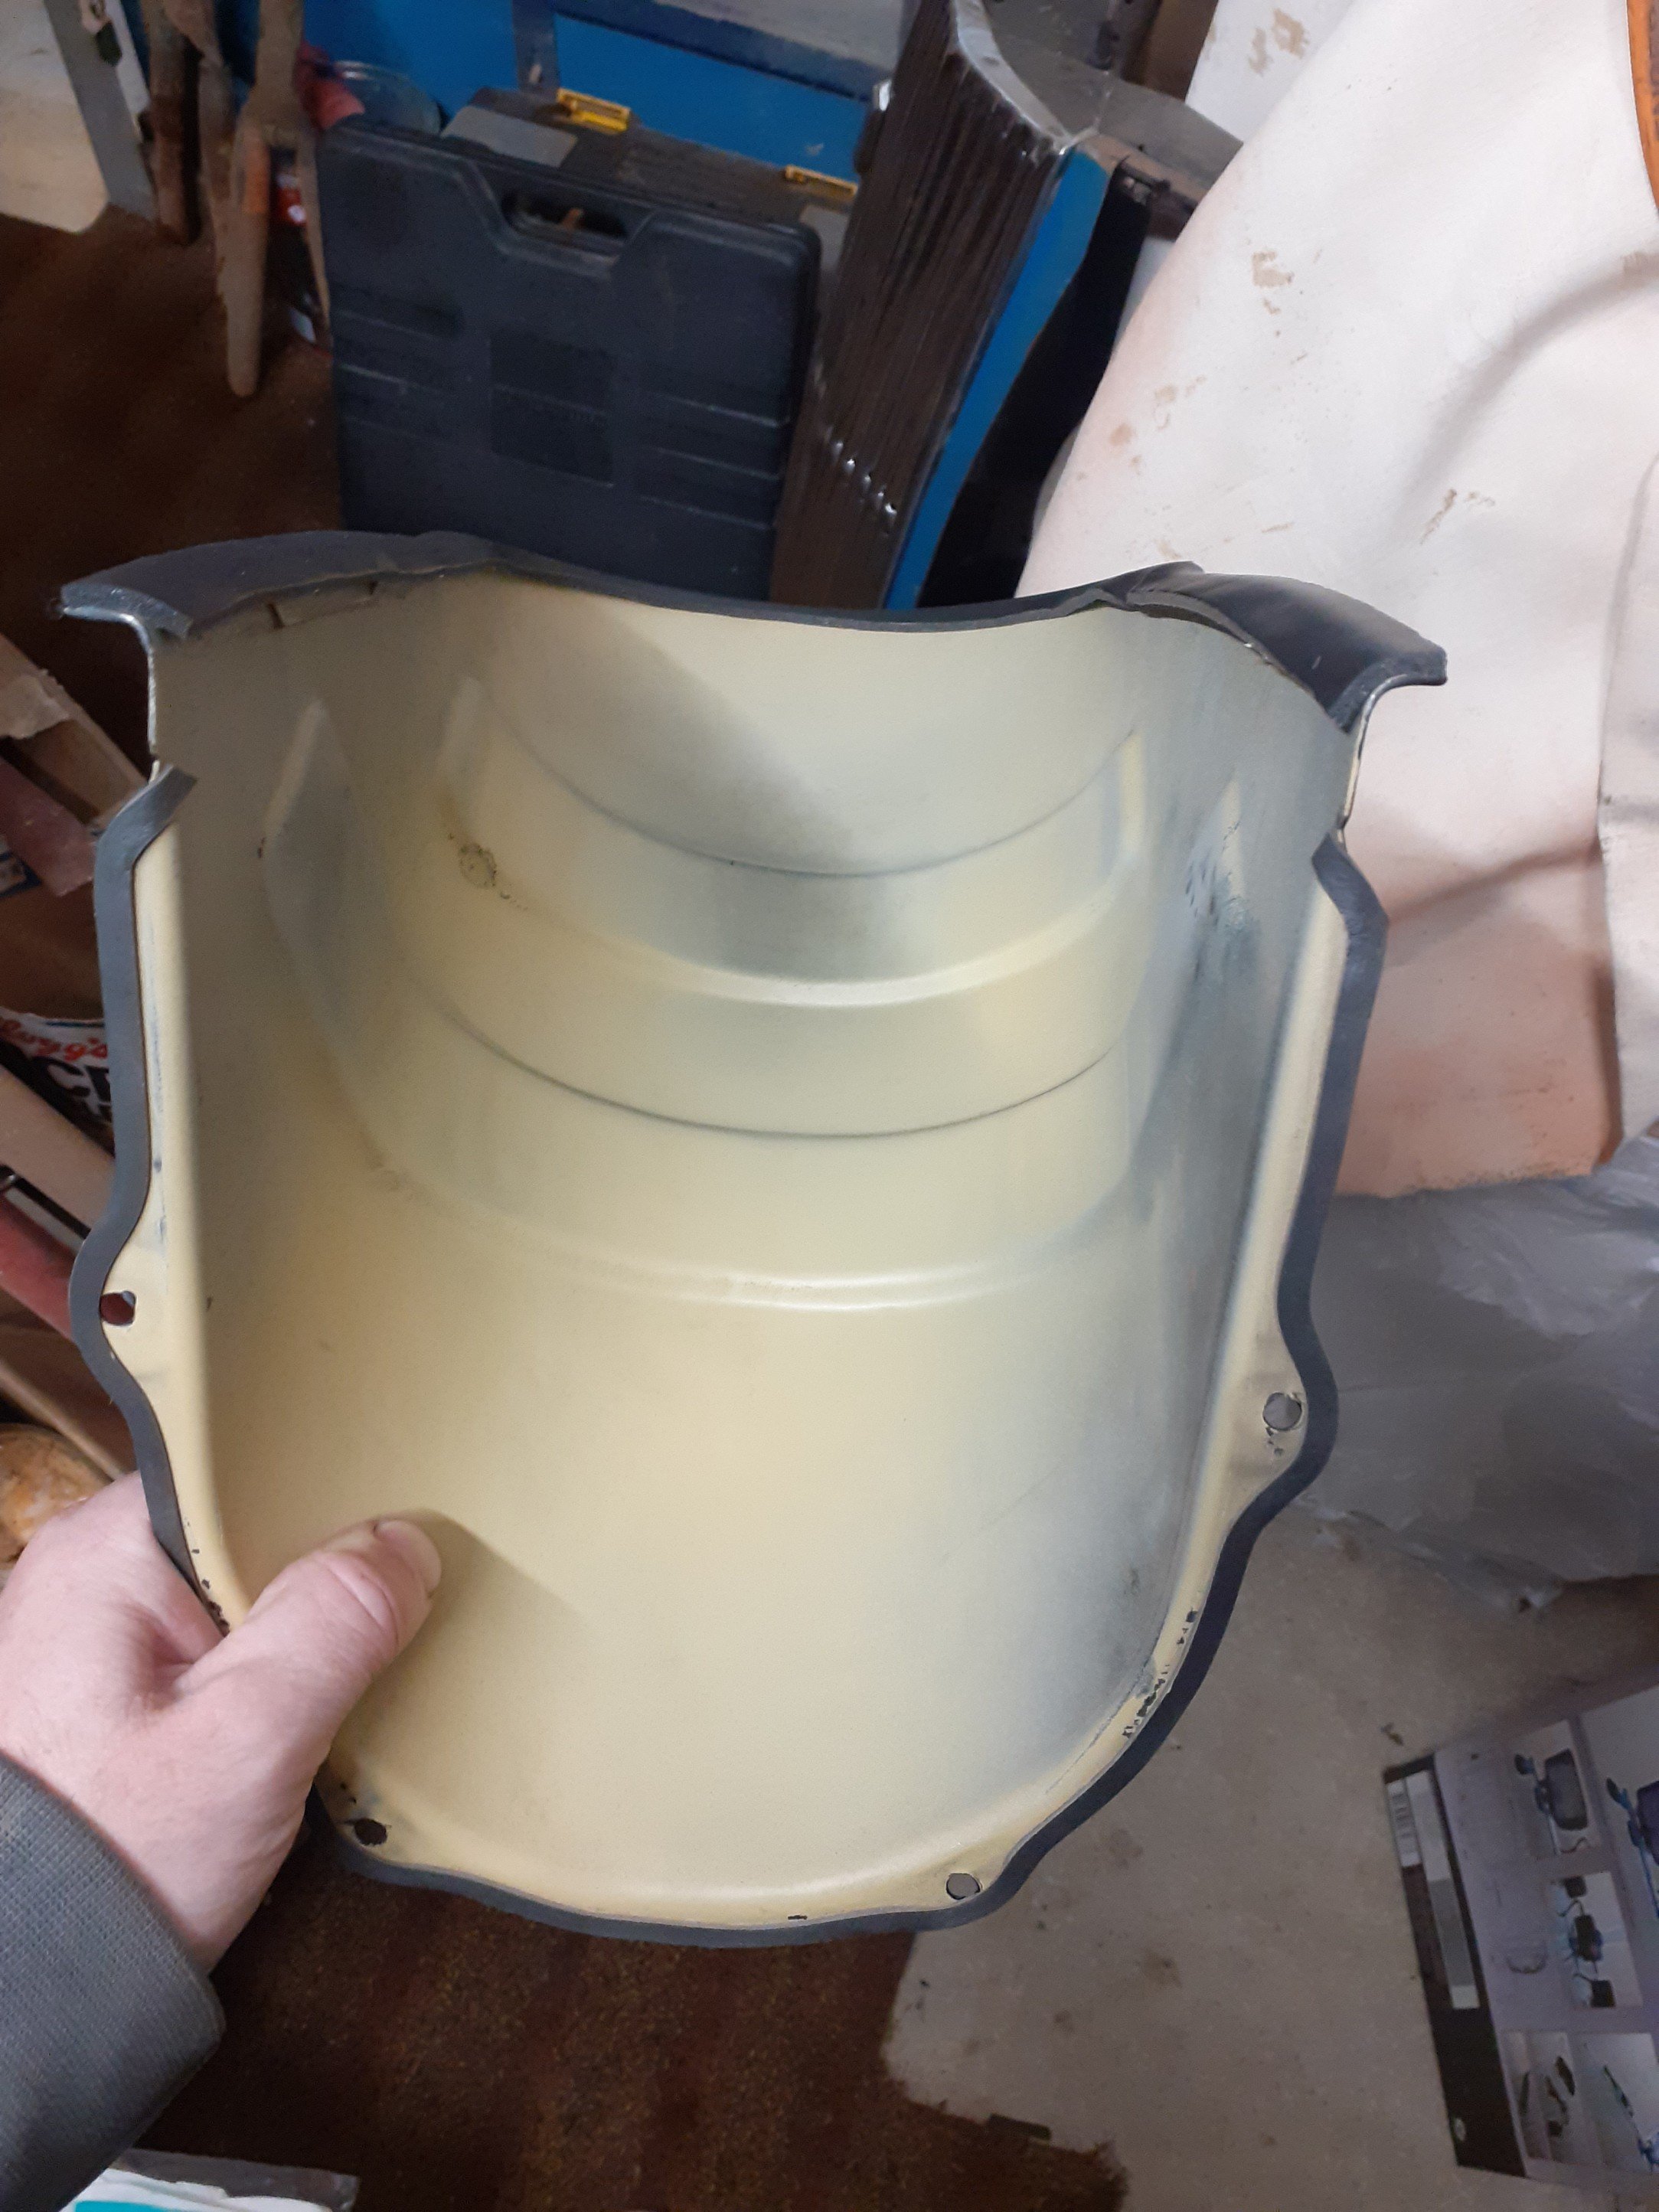
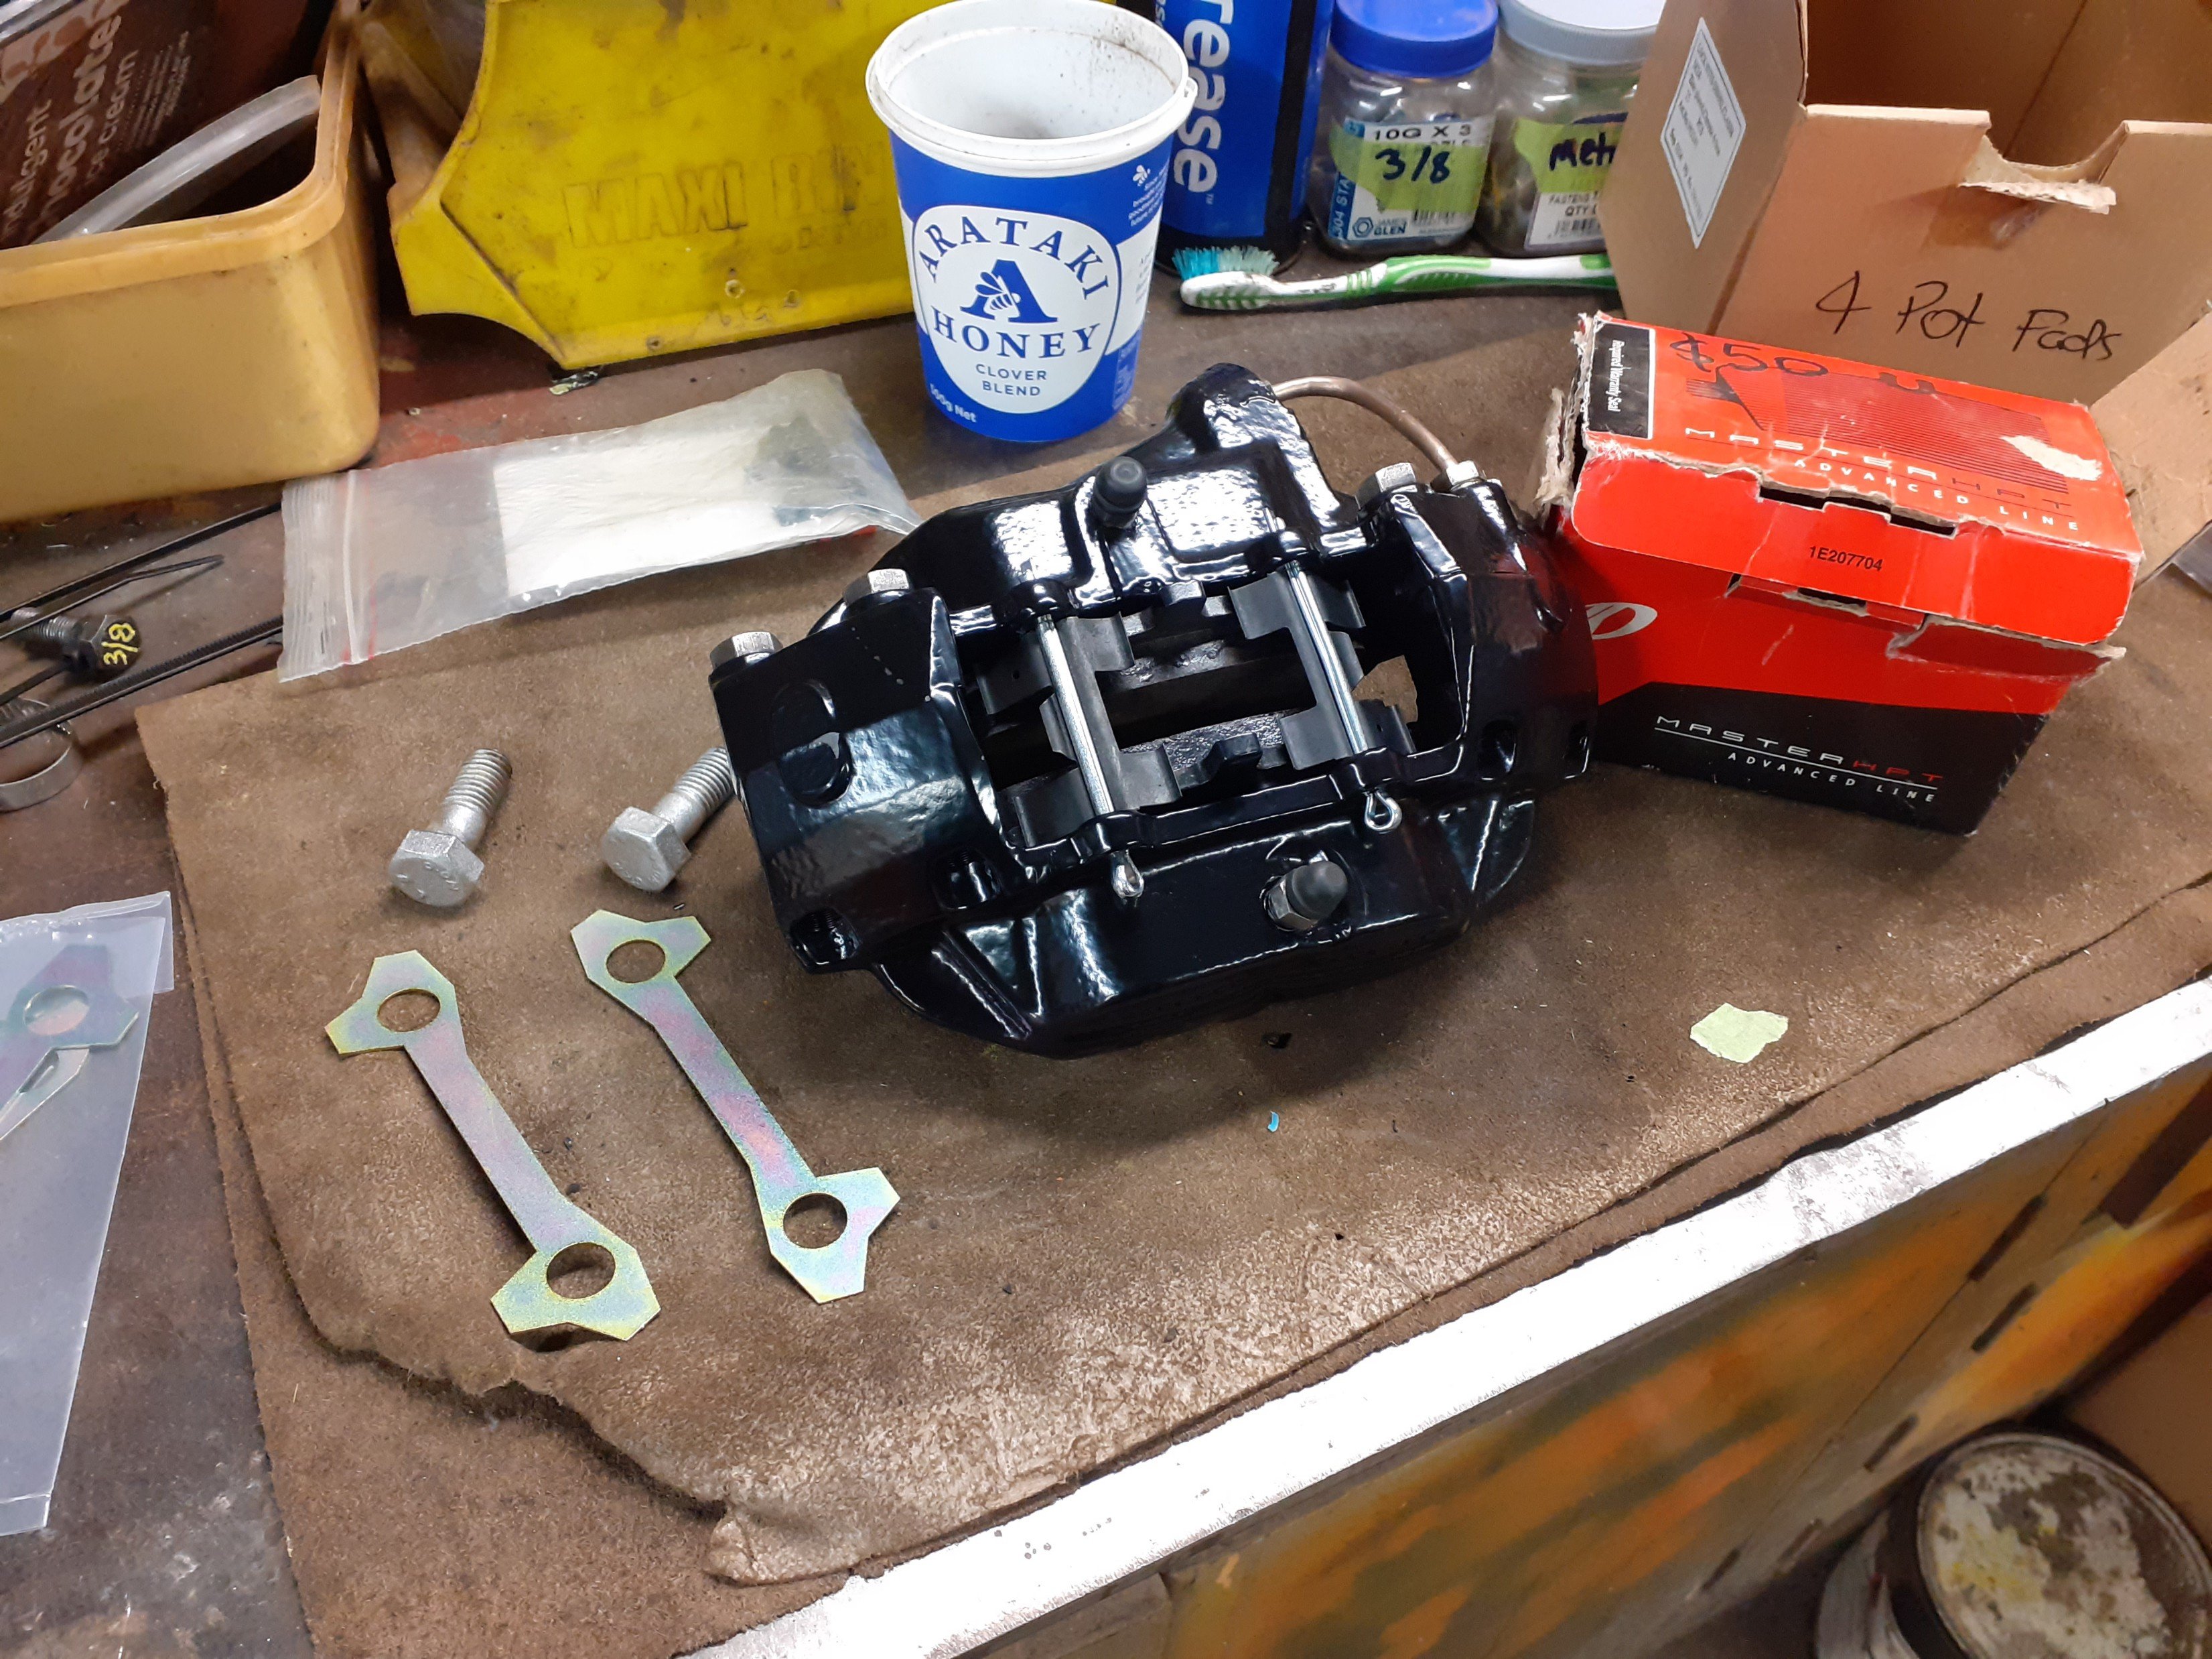
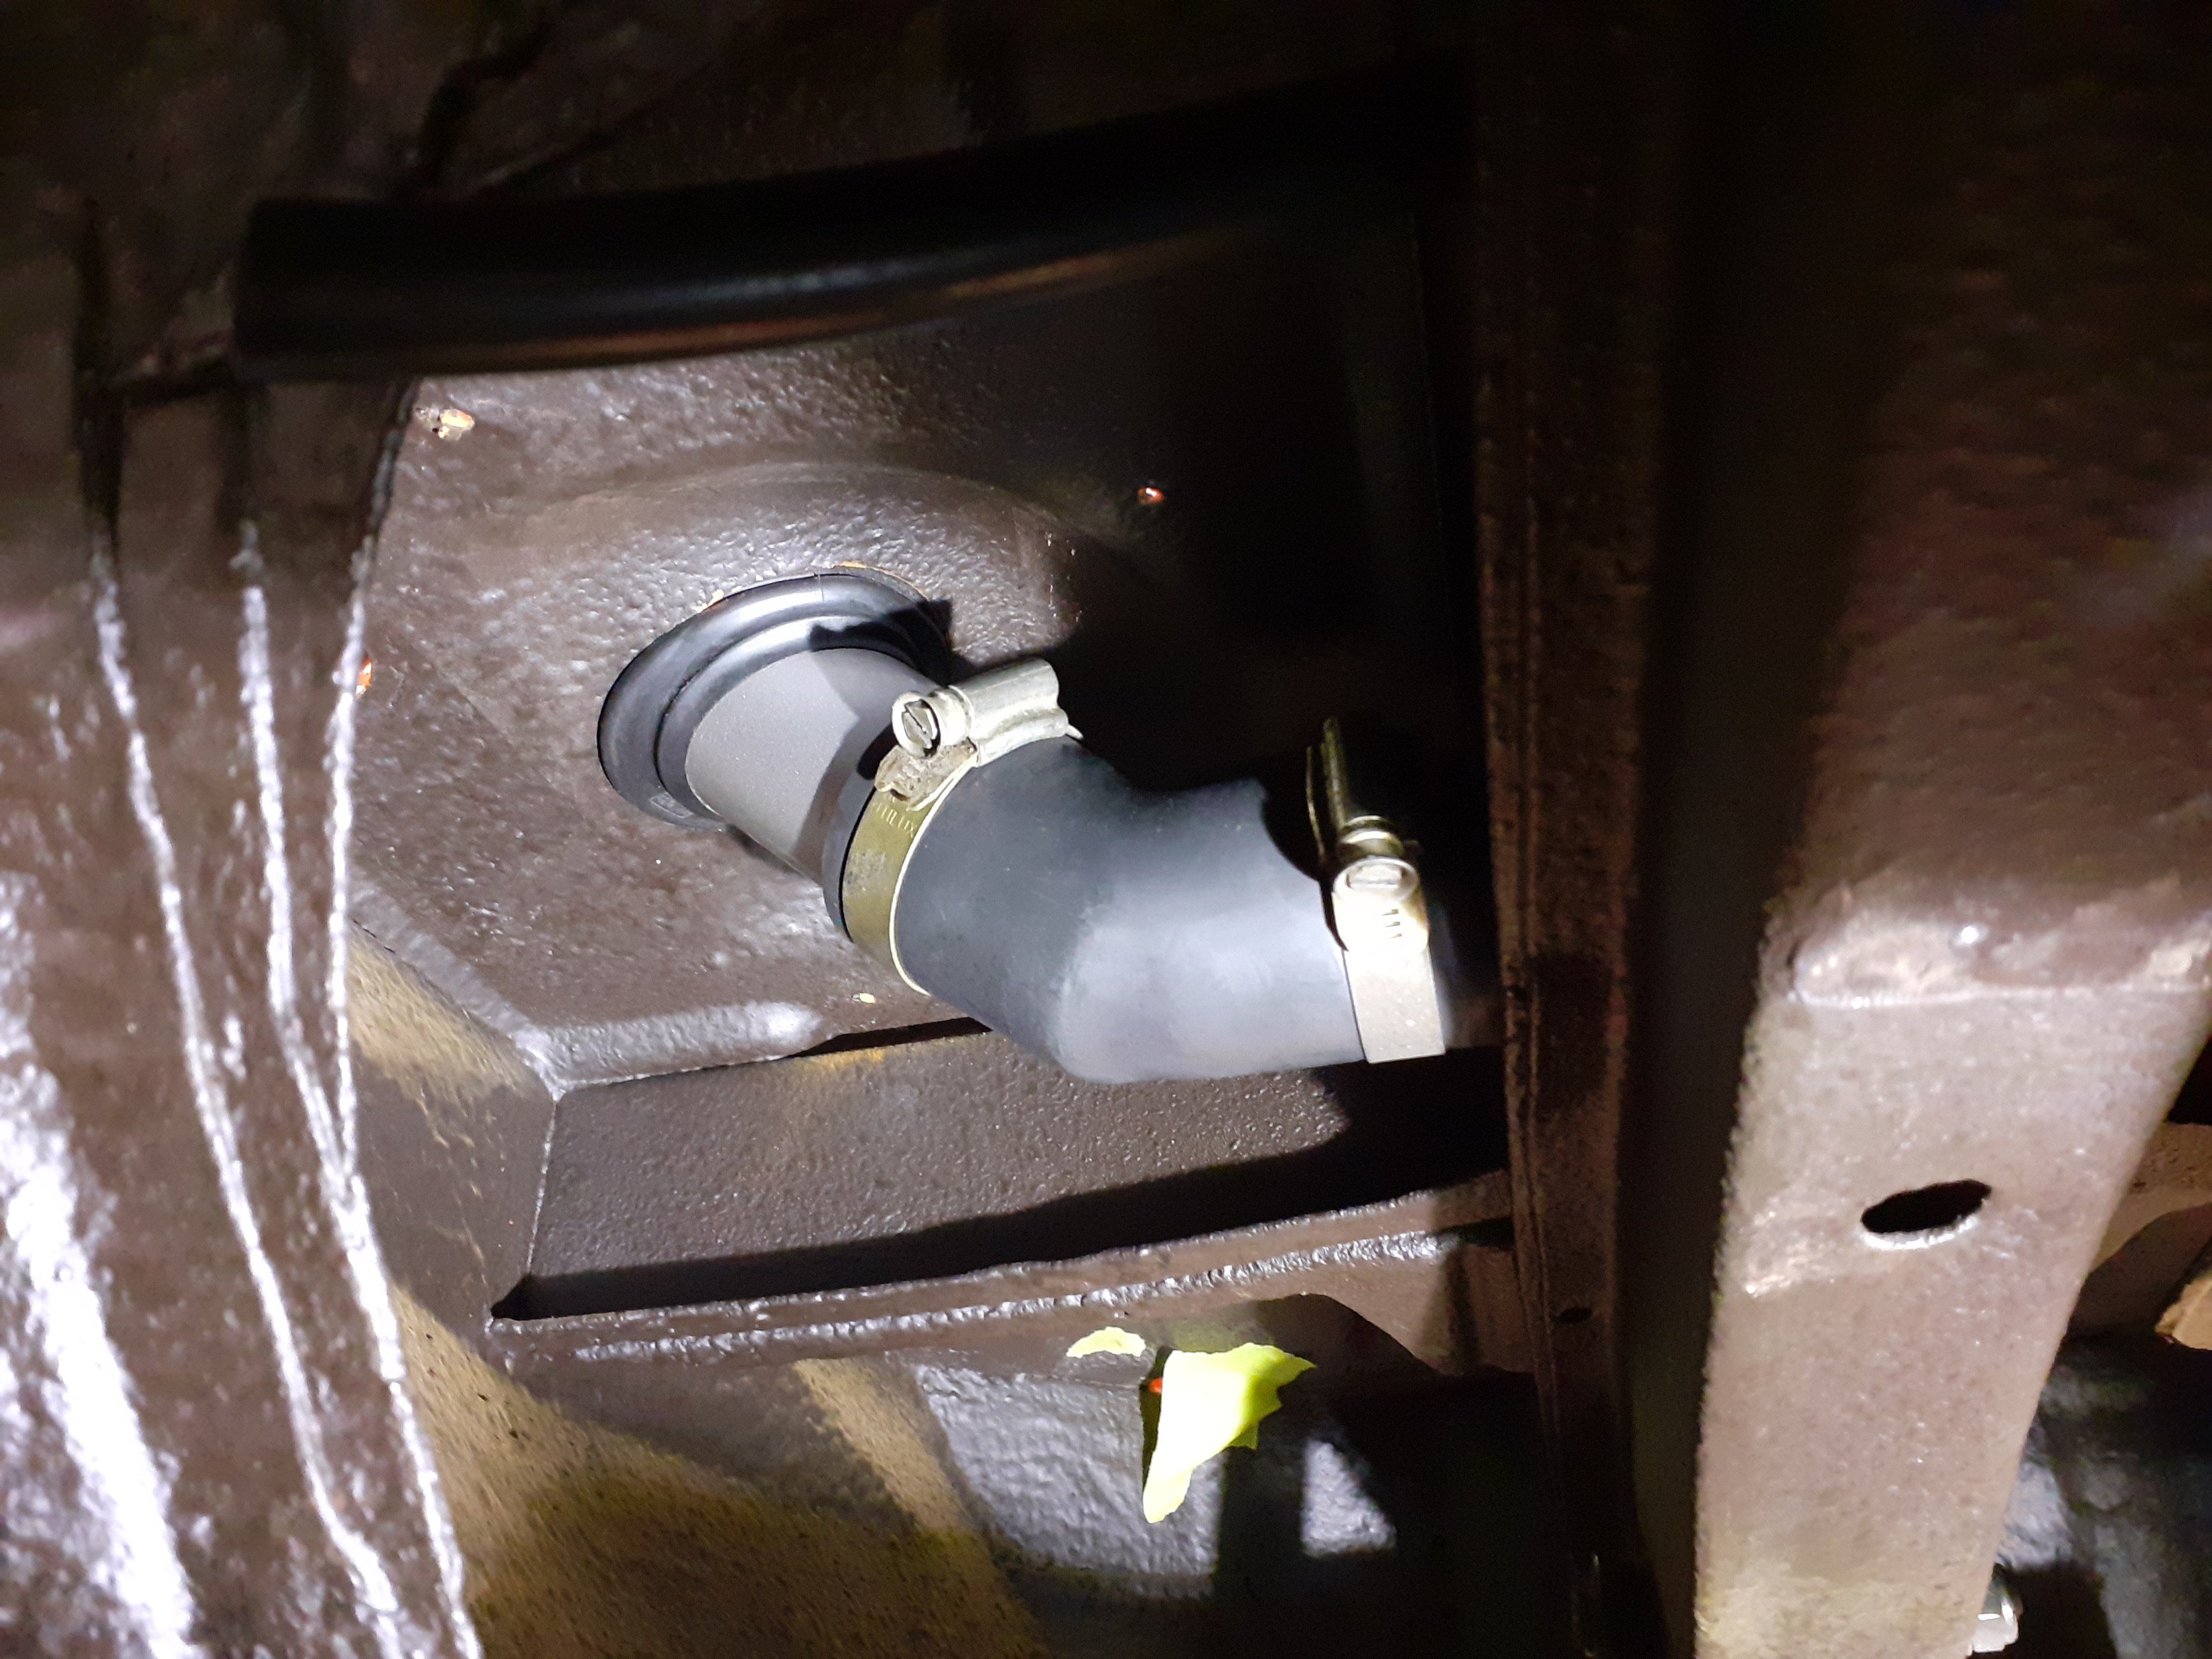
Calipers assembled and installed Attached the fuel filler. Had to remove and giggle everything around just to get the floor rubber grommet to fit correctly. Happy with the final fitment though. There's a shield that covers all this from the inside.
- 104 replies
-
- 14
-
-
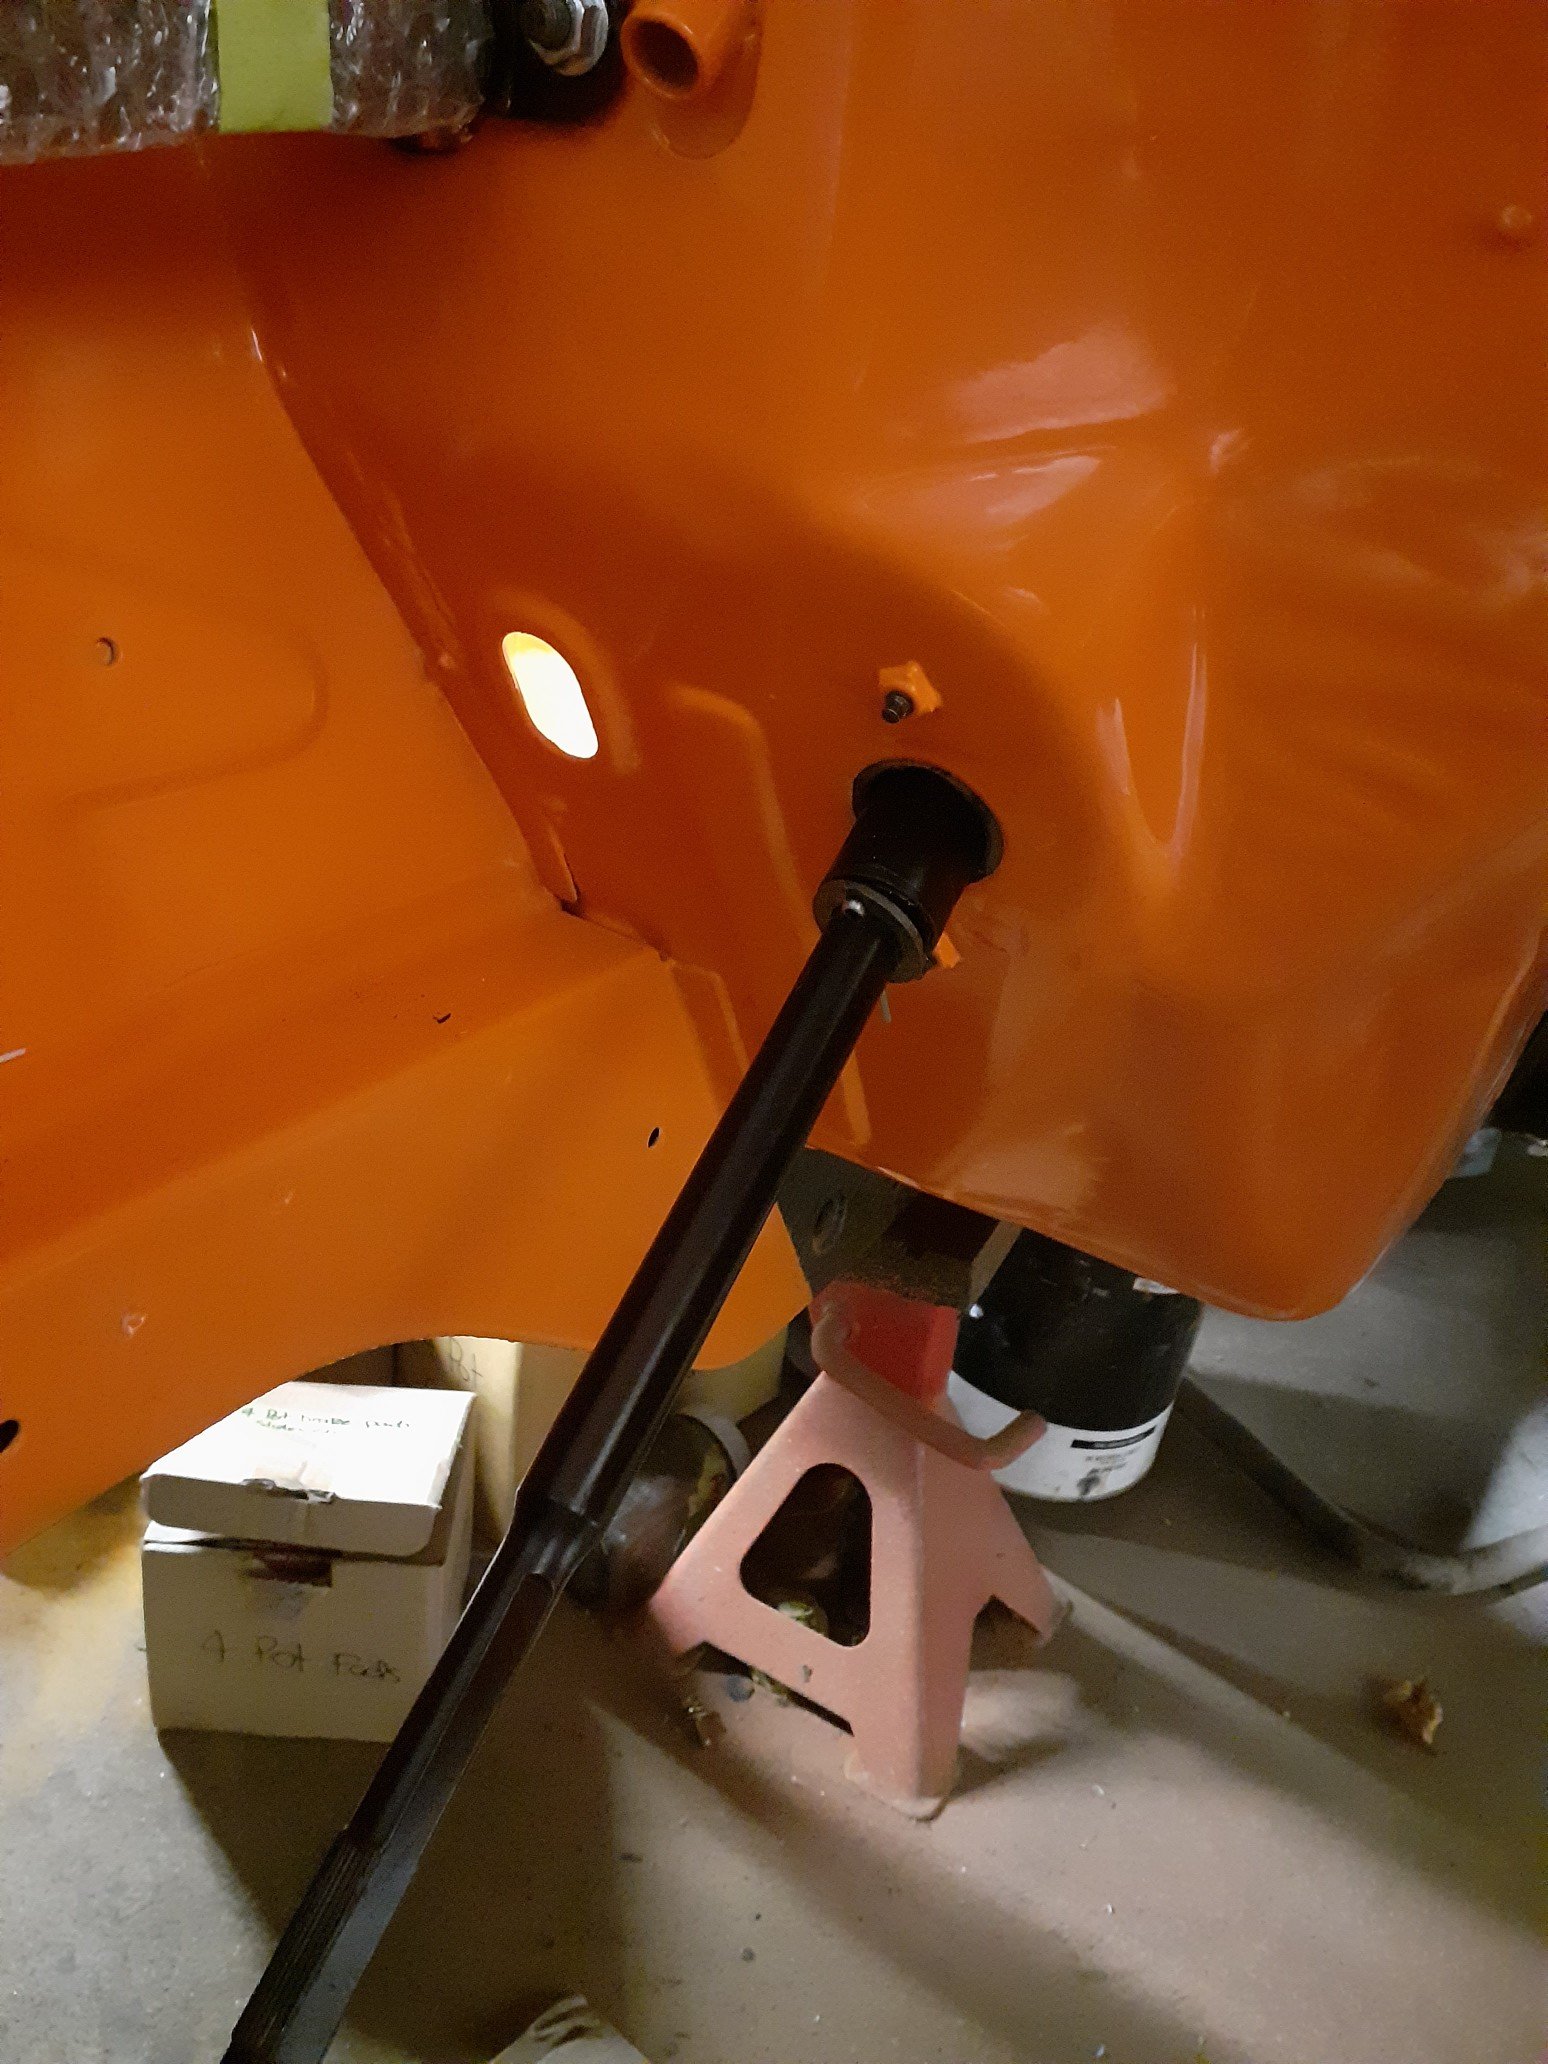
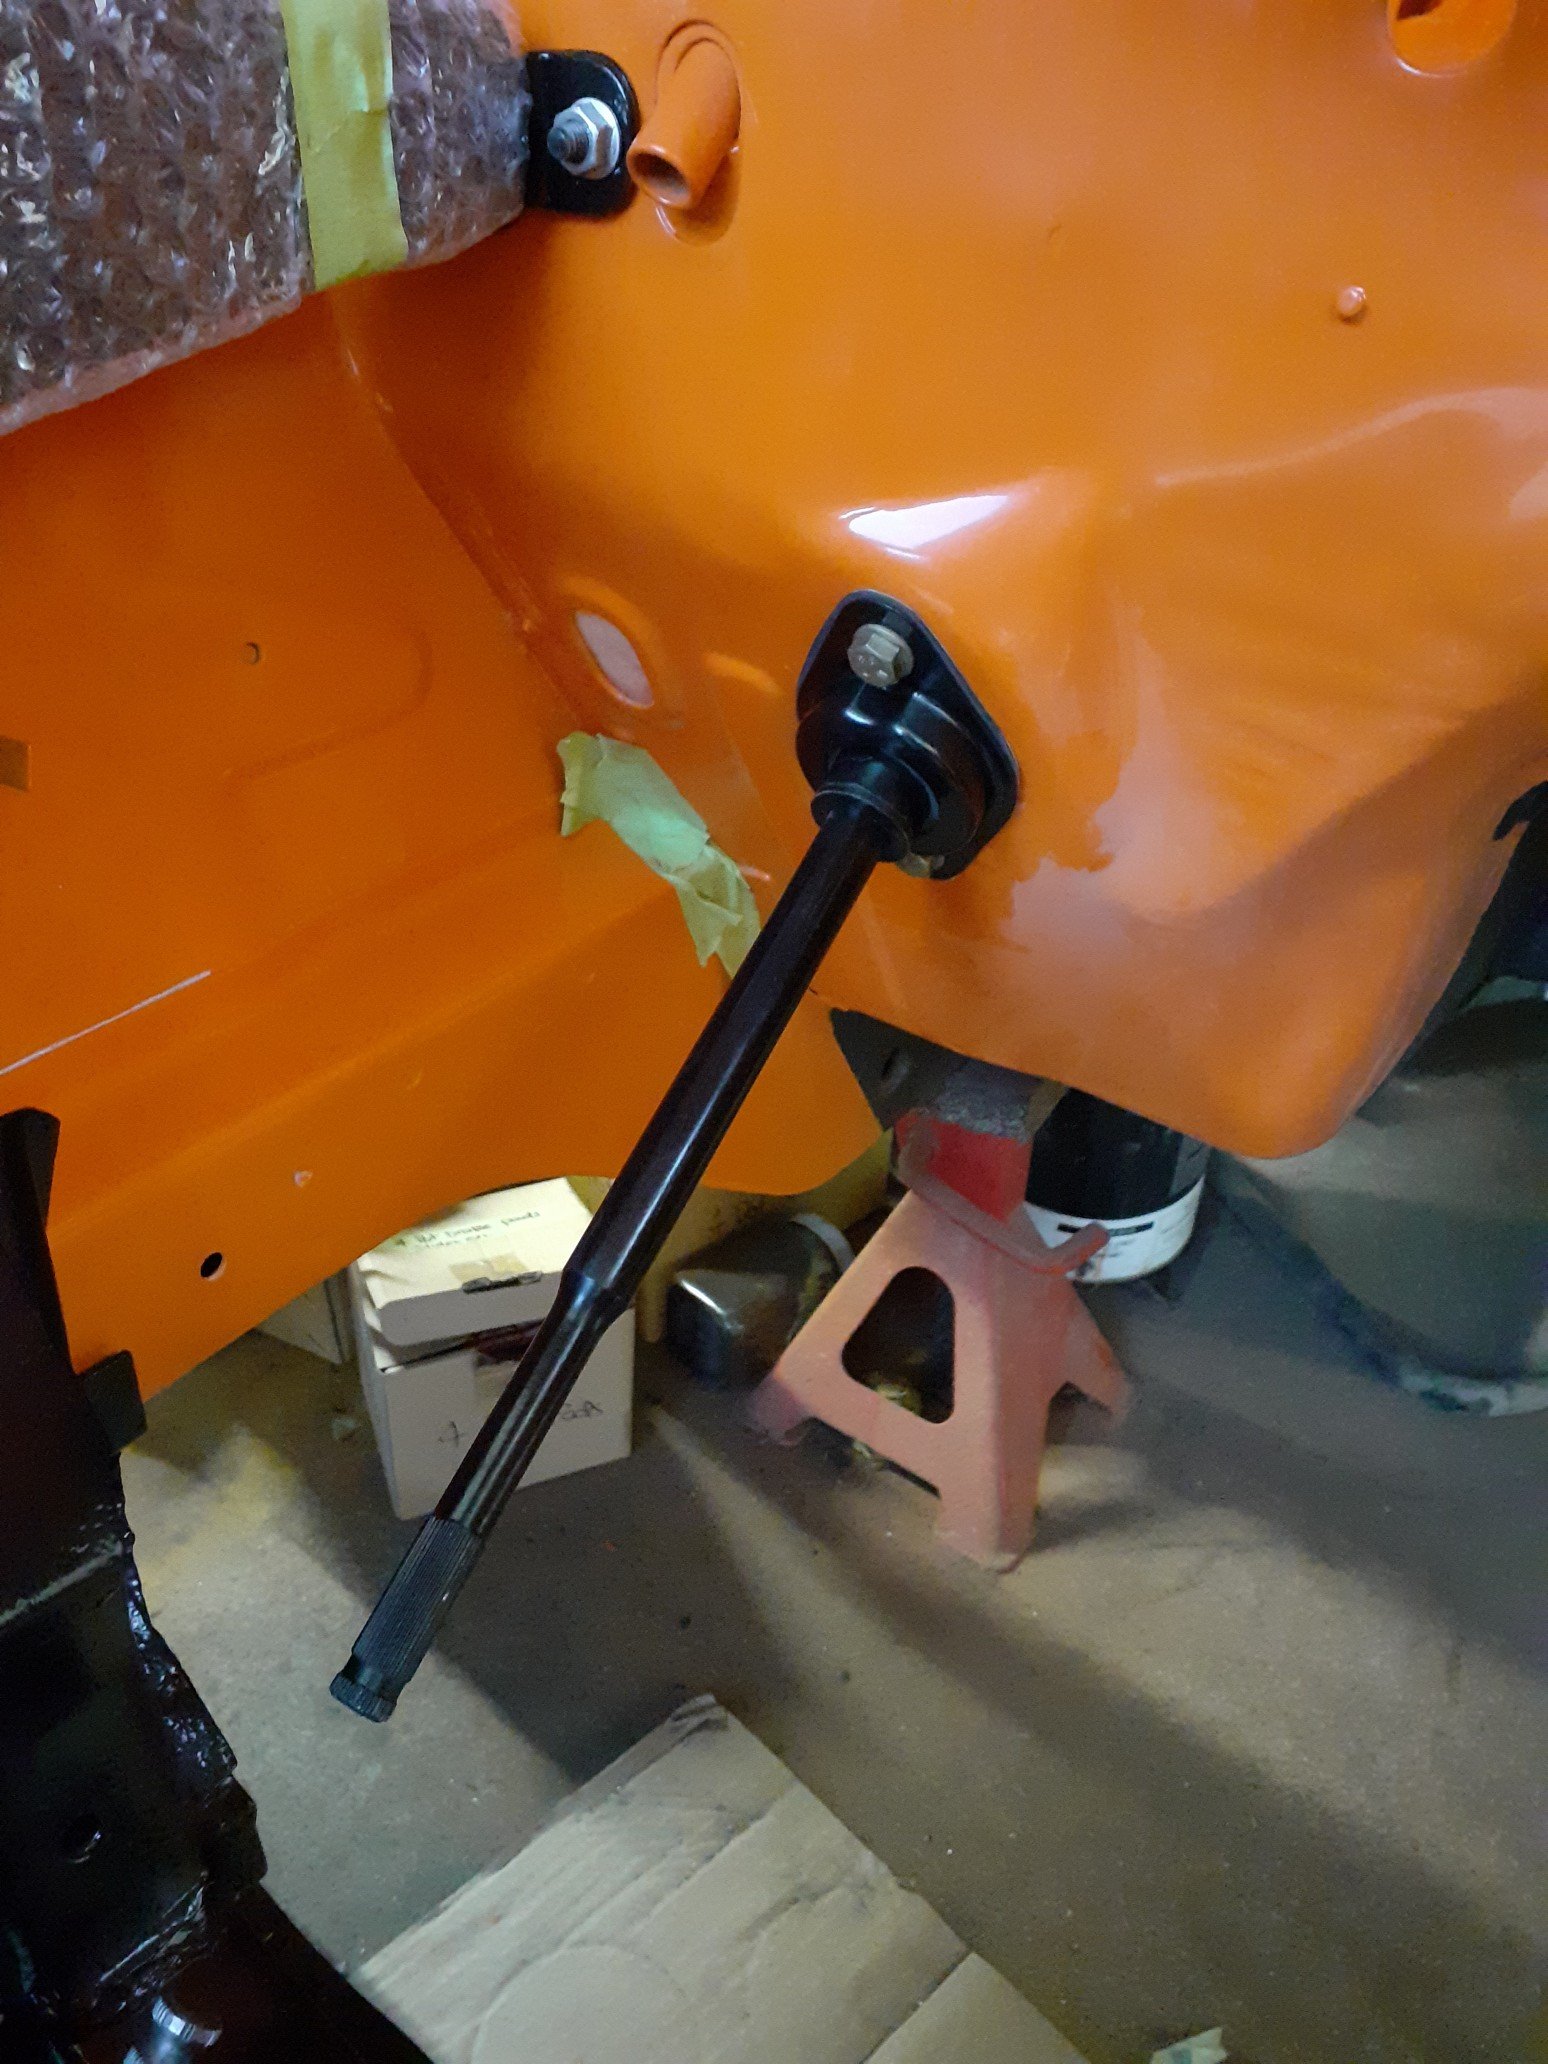
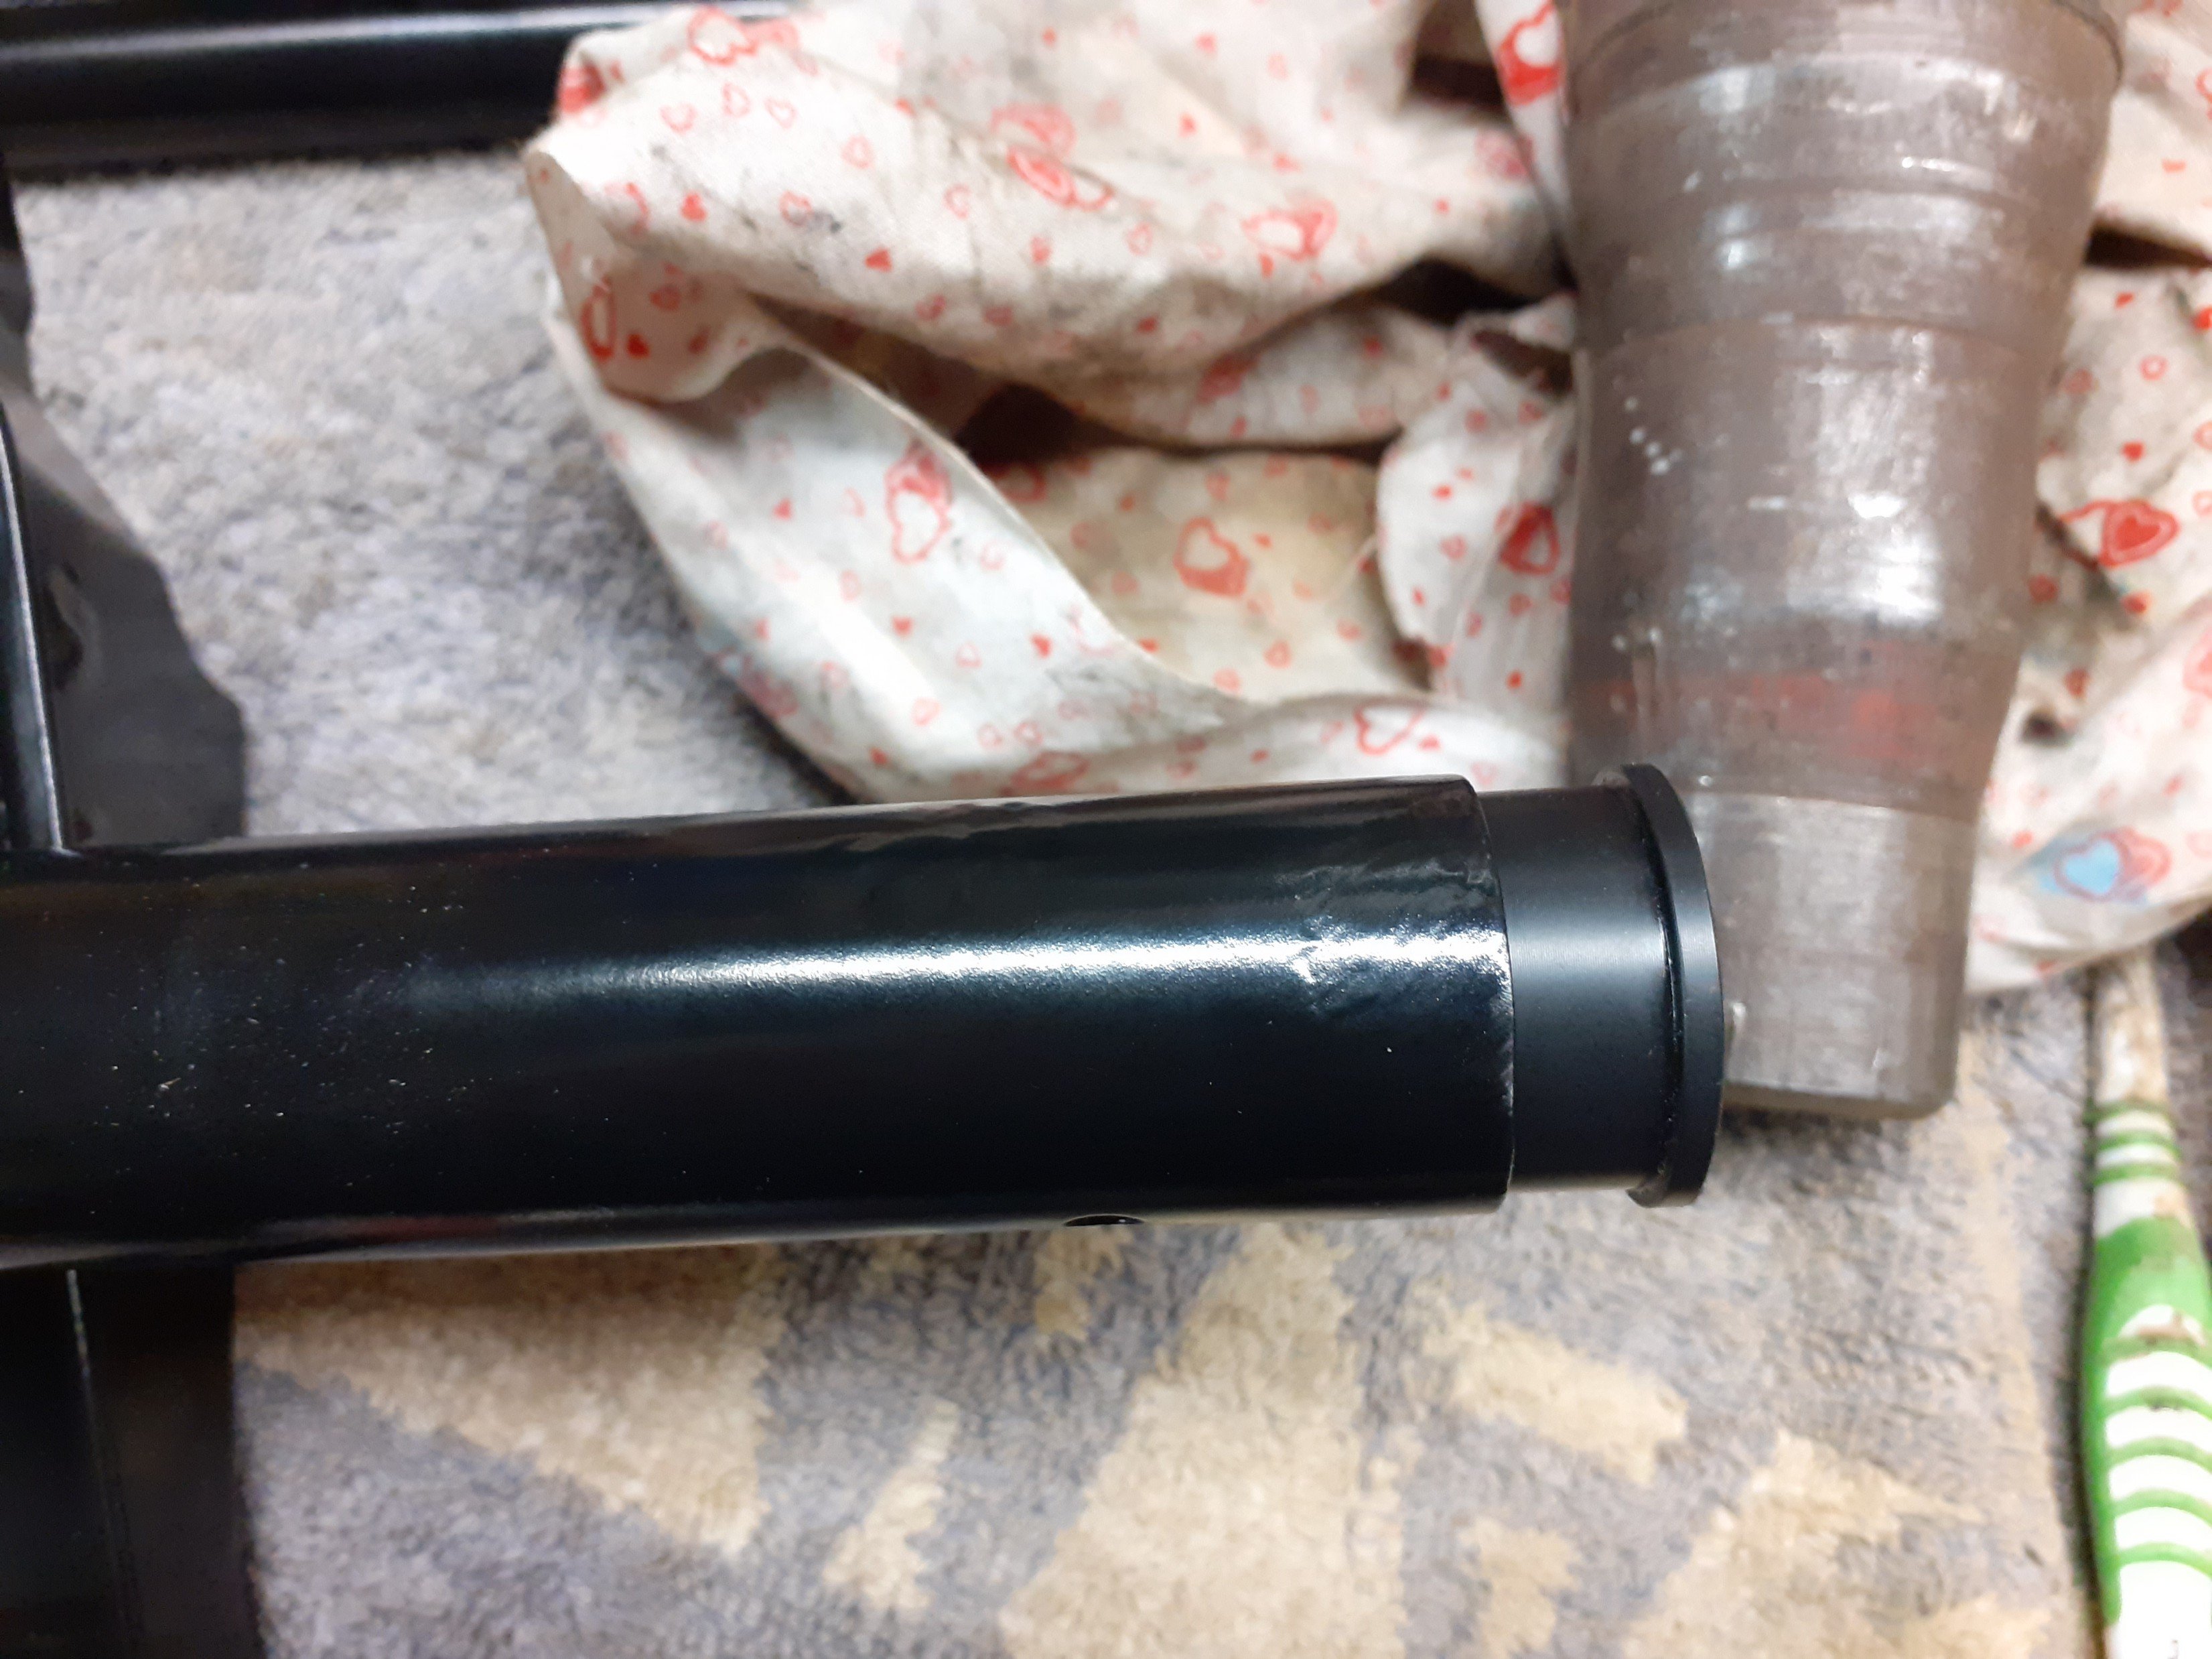
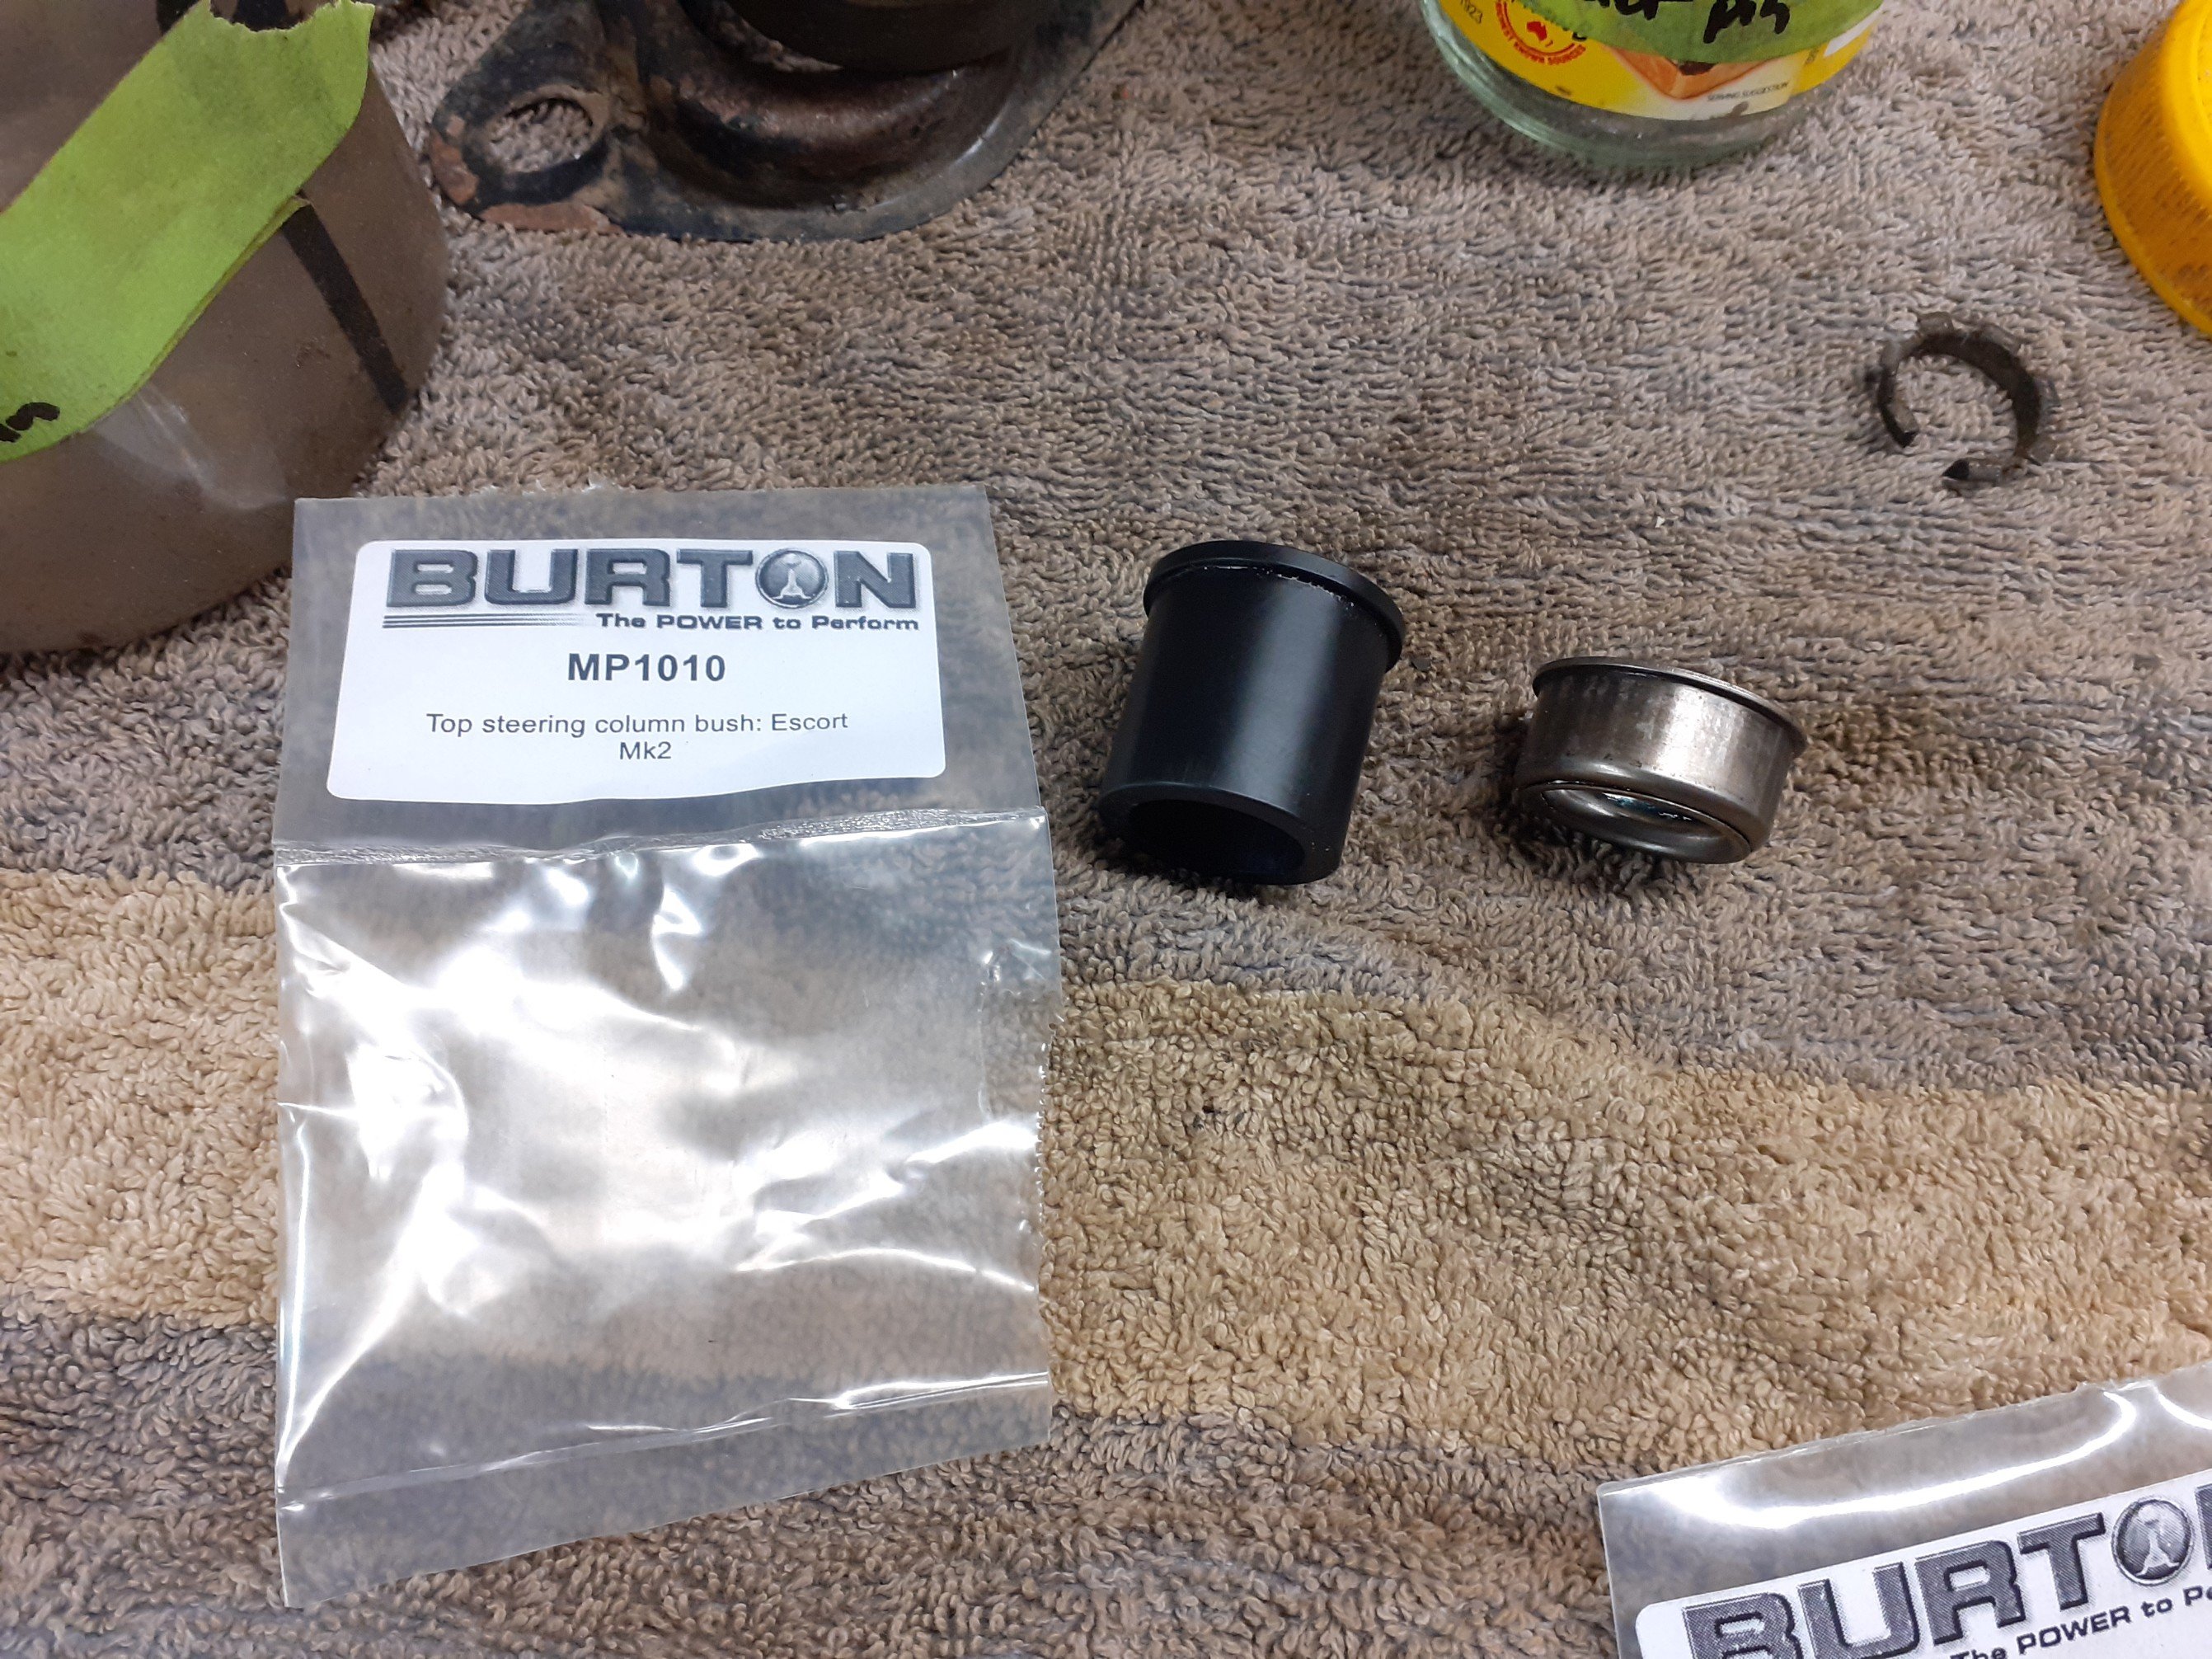
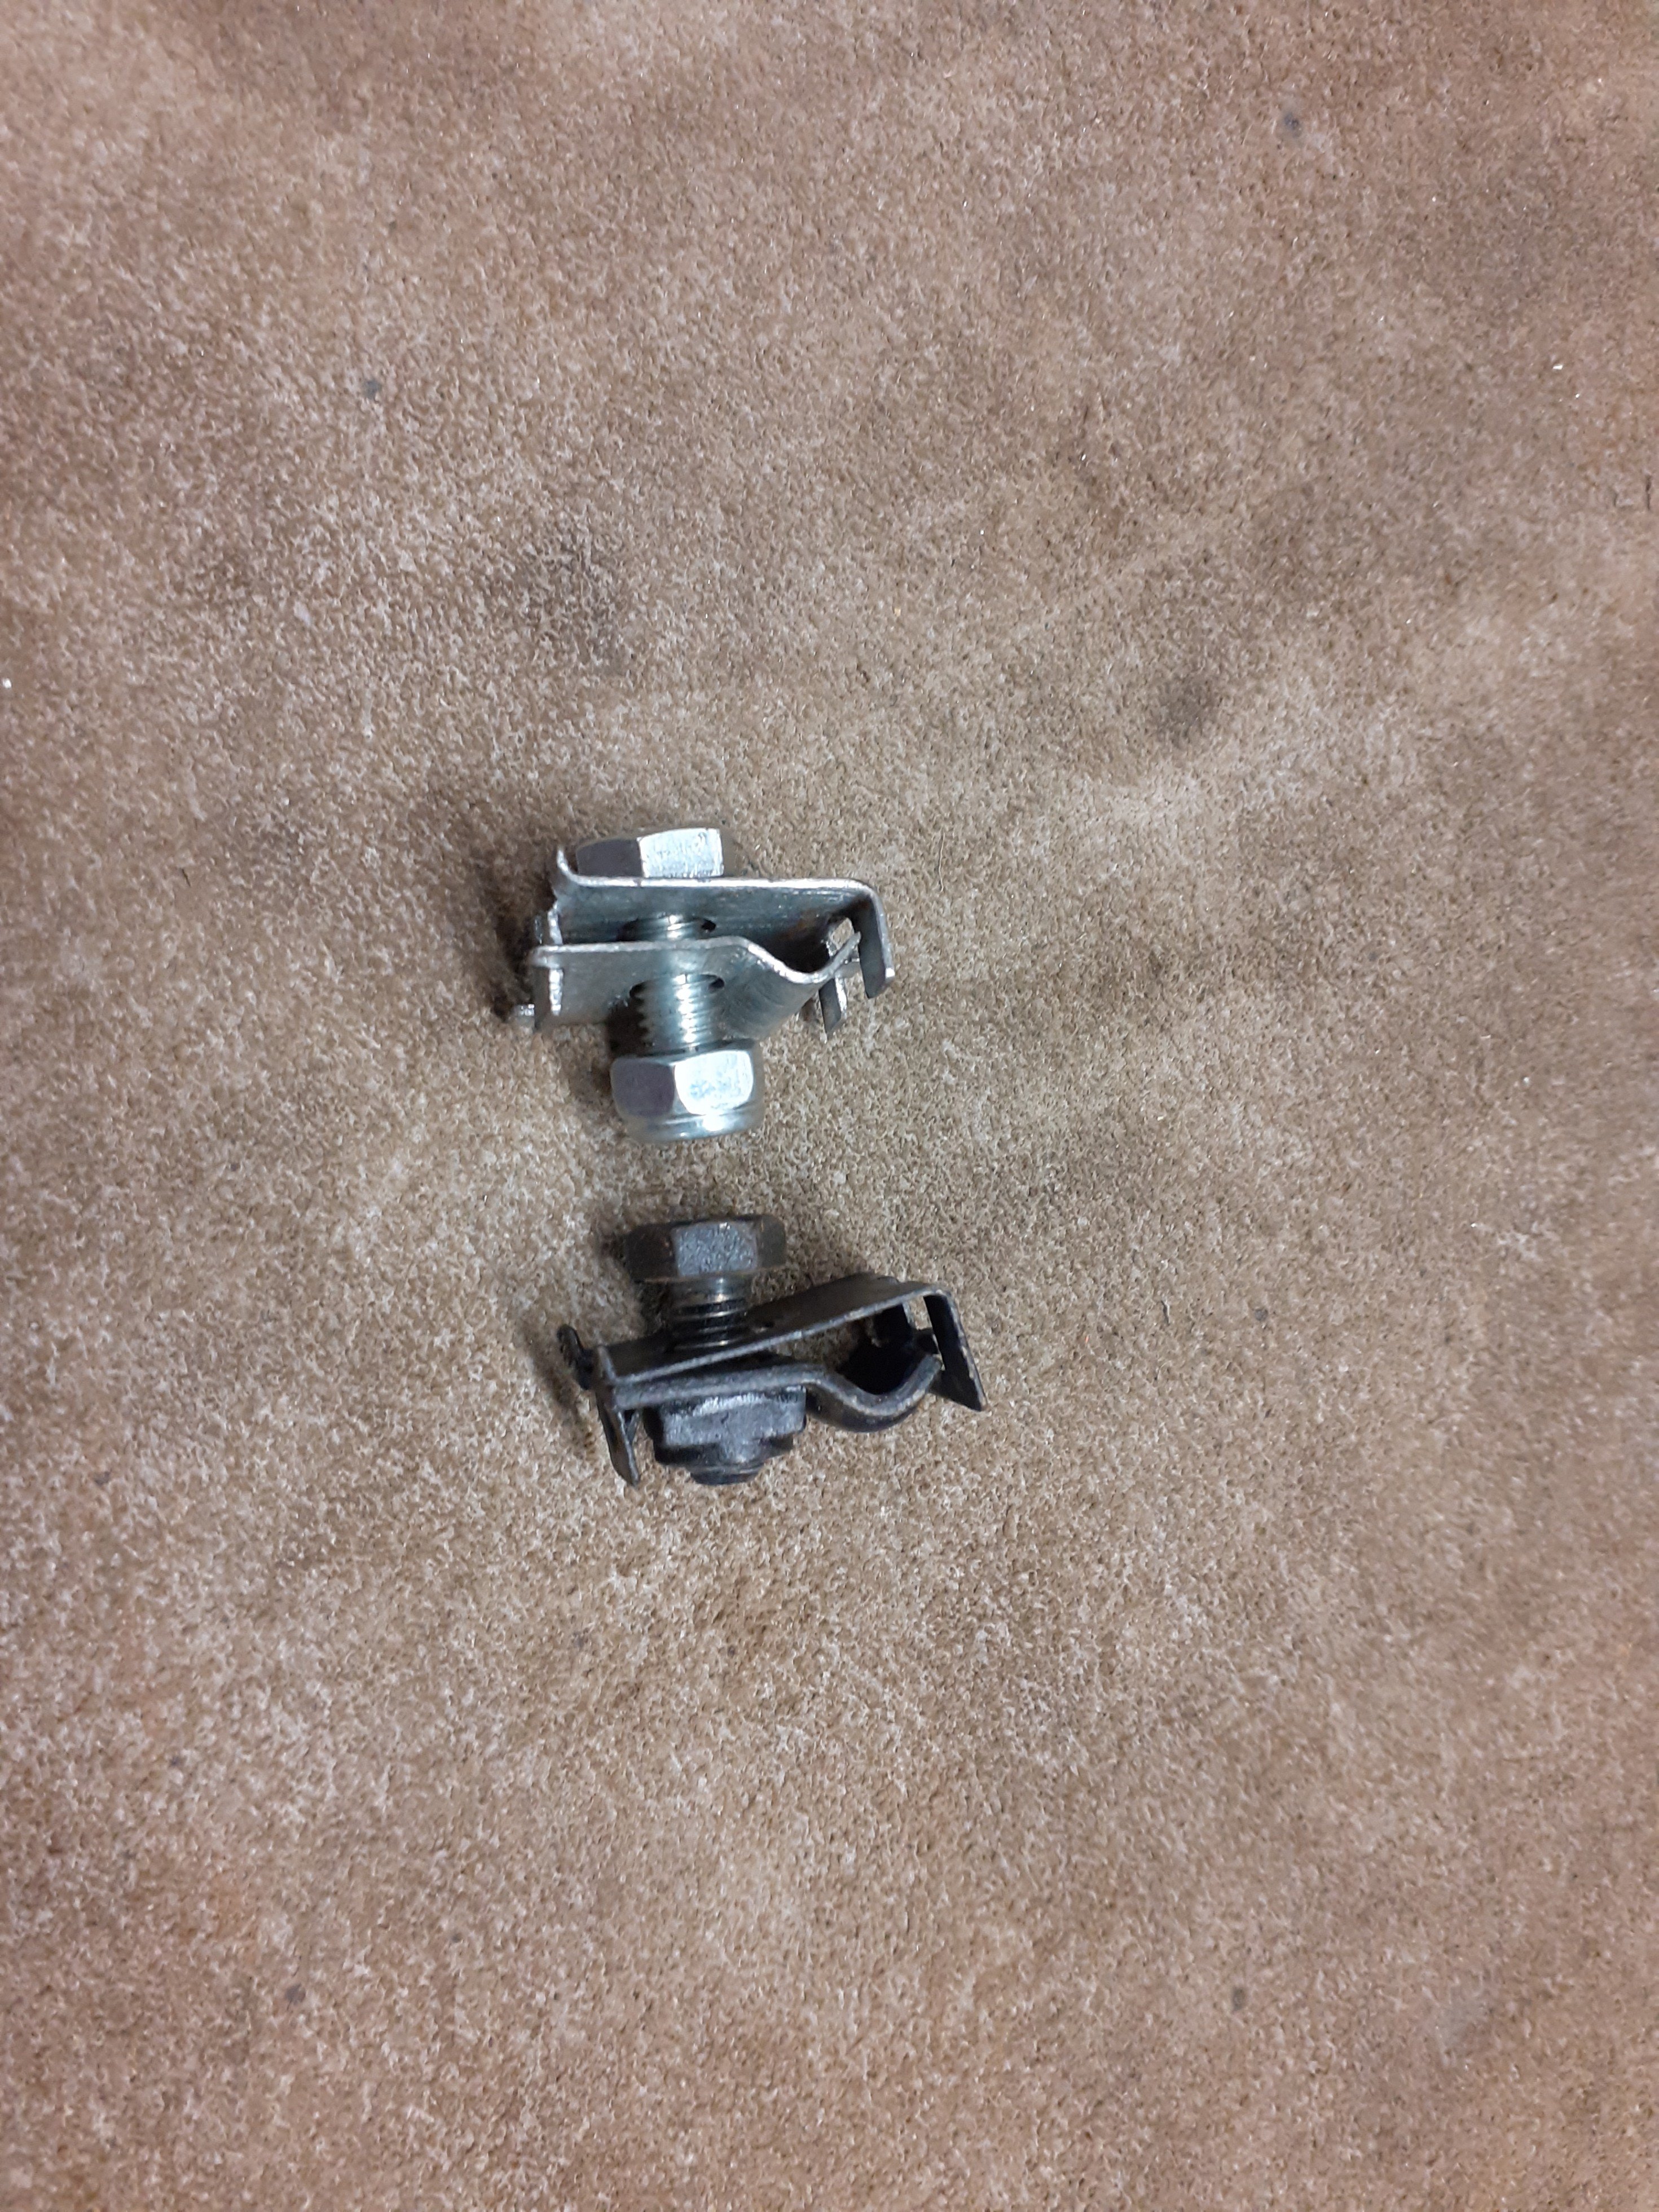
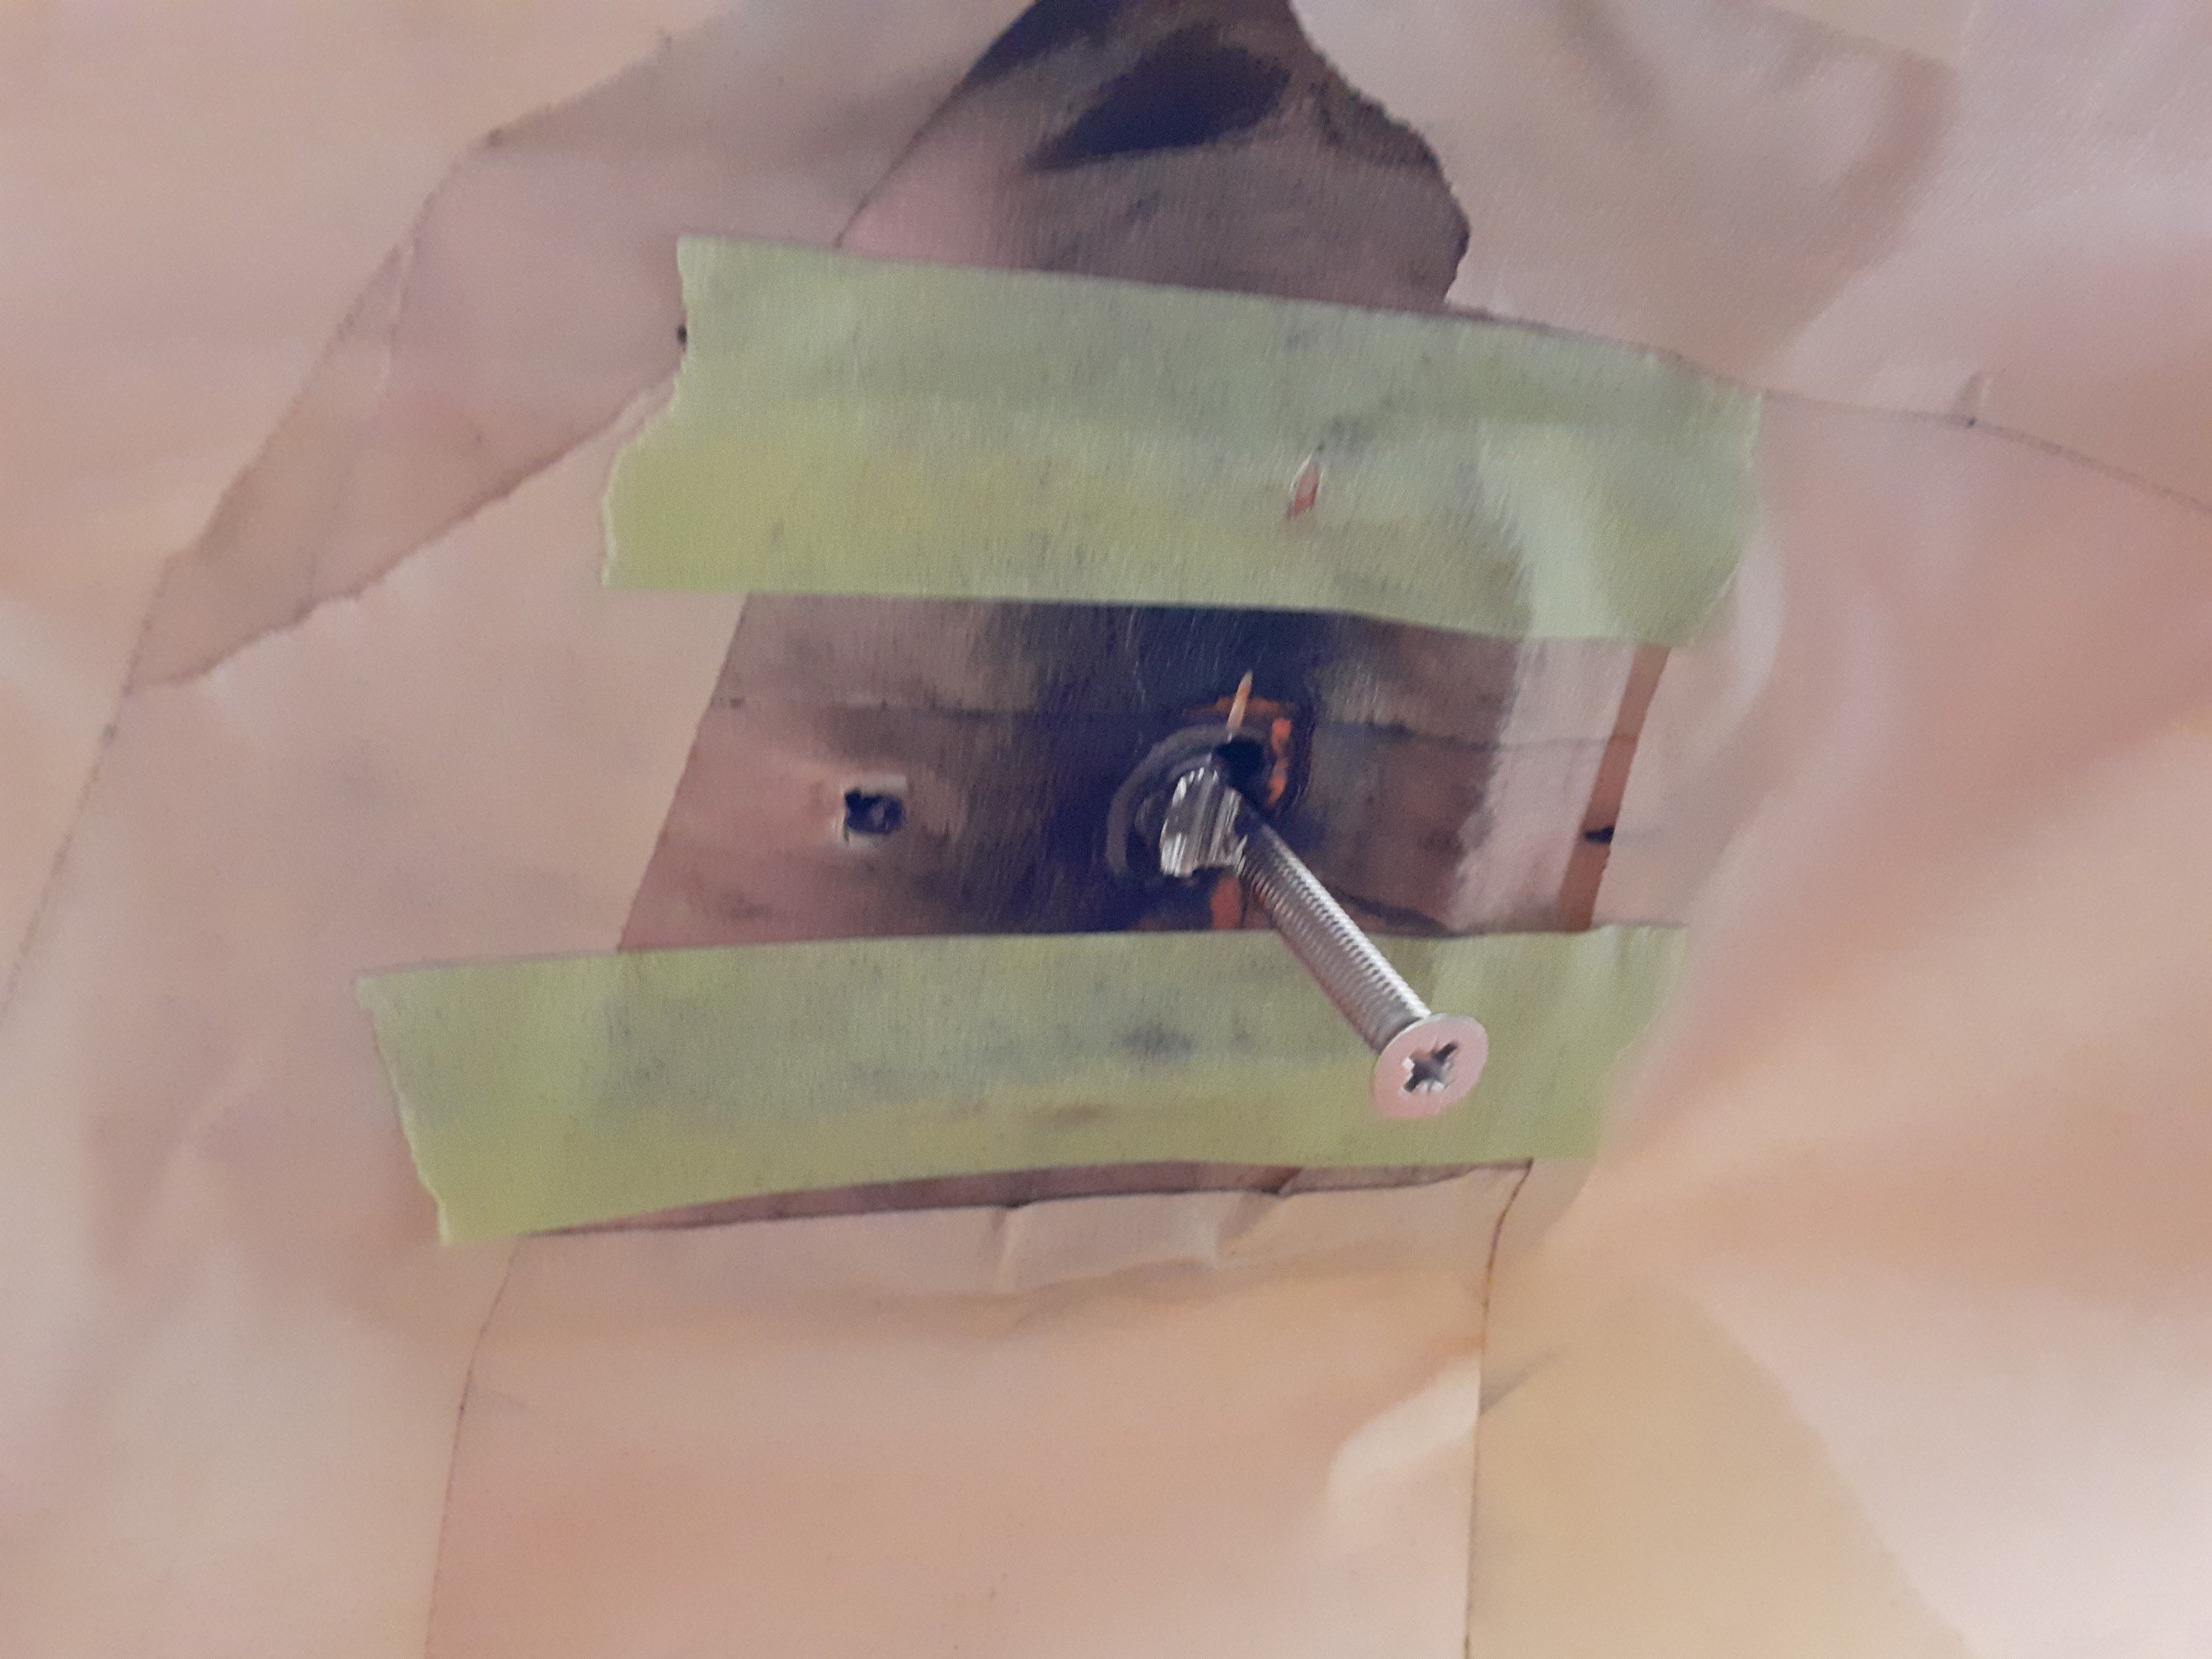
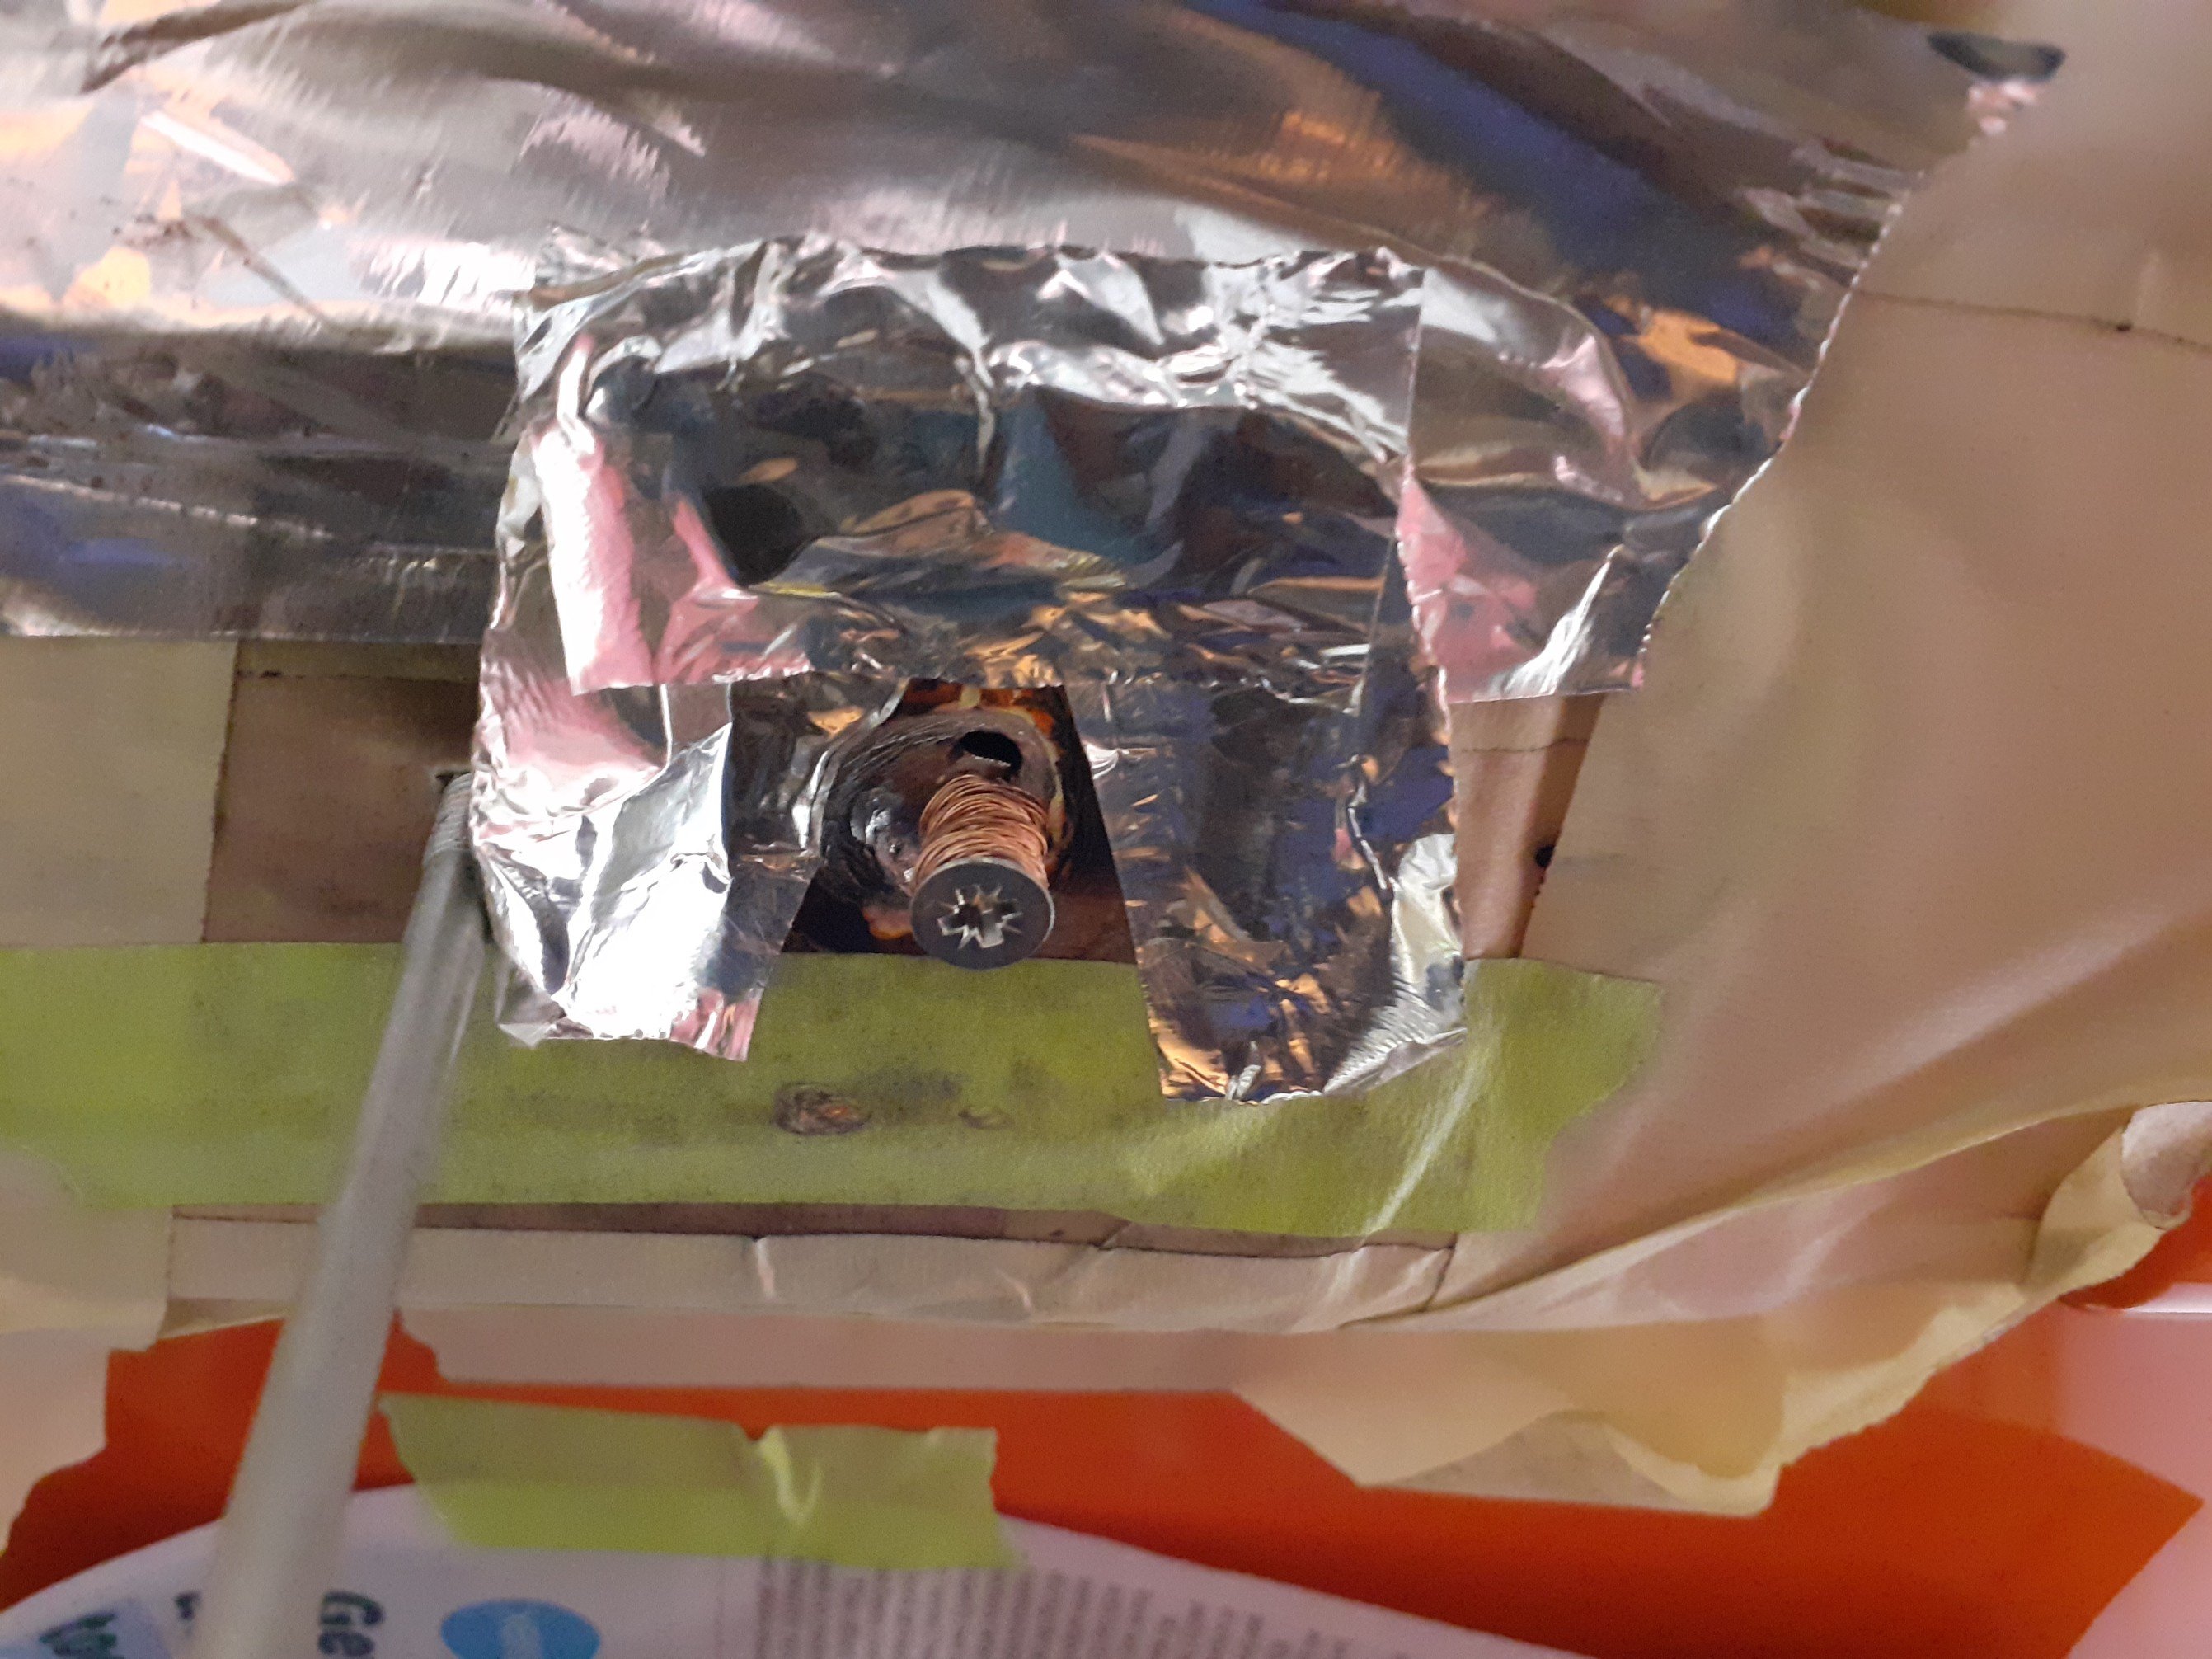
I couldn't see anything obvious with why the steering shafts weren't lining up so I ended up enlongating the hole in the firewall. This also gave me a chance to change the mounting design. The steering column is mounted to the firewall via a round bush housed in a bracket and bolted to the firewall on the cabin side via 2x 5mm screws, nuts welded on the firewall on the engine bay side. The engine bay side looks bare and had no real seal. I had a spare bracket and bush, so I cut the welded nuts off and attached the spare bracket and bush up the column from the engine bay side and bolted it all together, including the standard bracket on the inside, with 8mm bolts. Original Bracket added to the firewall Old vs new steering uni bush And I've started on making new brake lines. Austin princess calipers and rear cylinders are metric, flexi lines and brake booster are imperial.
- 104 replies
-
- 12
-
-
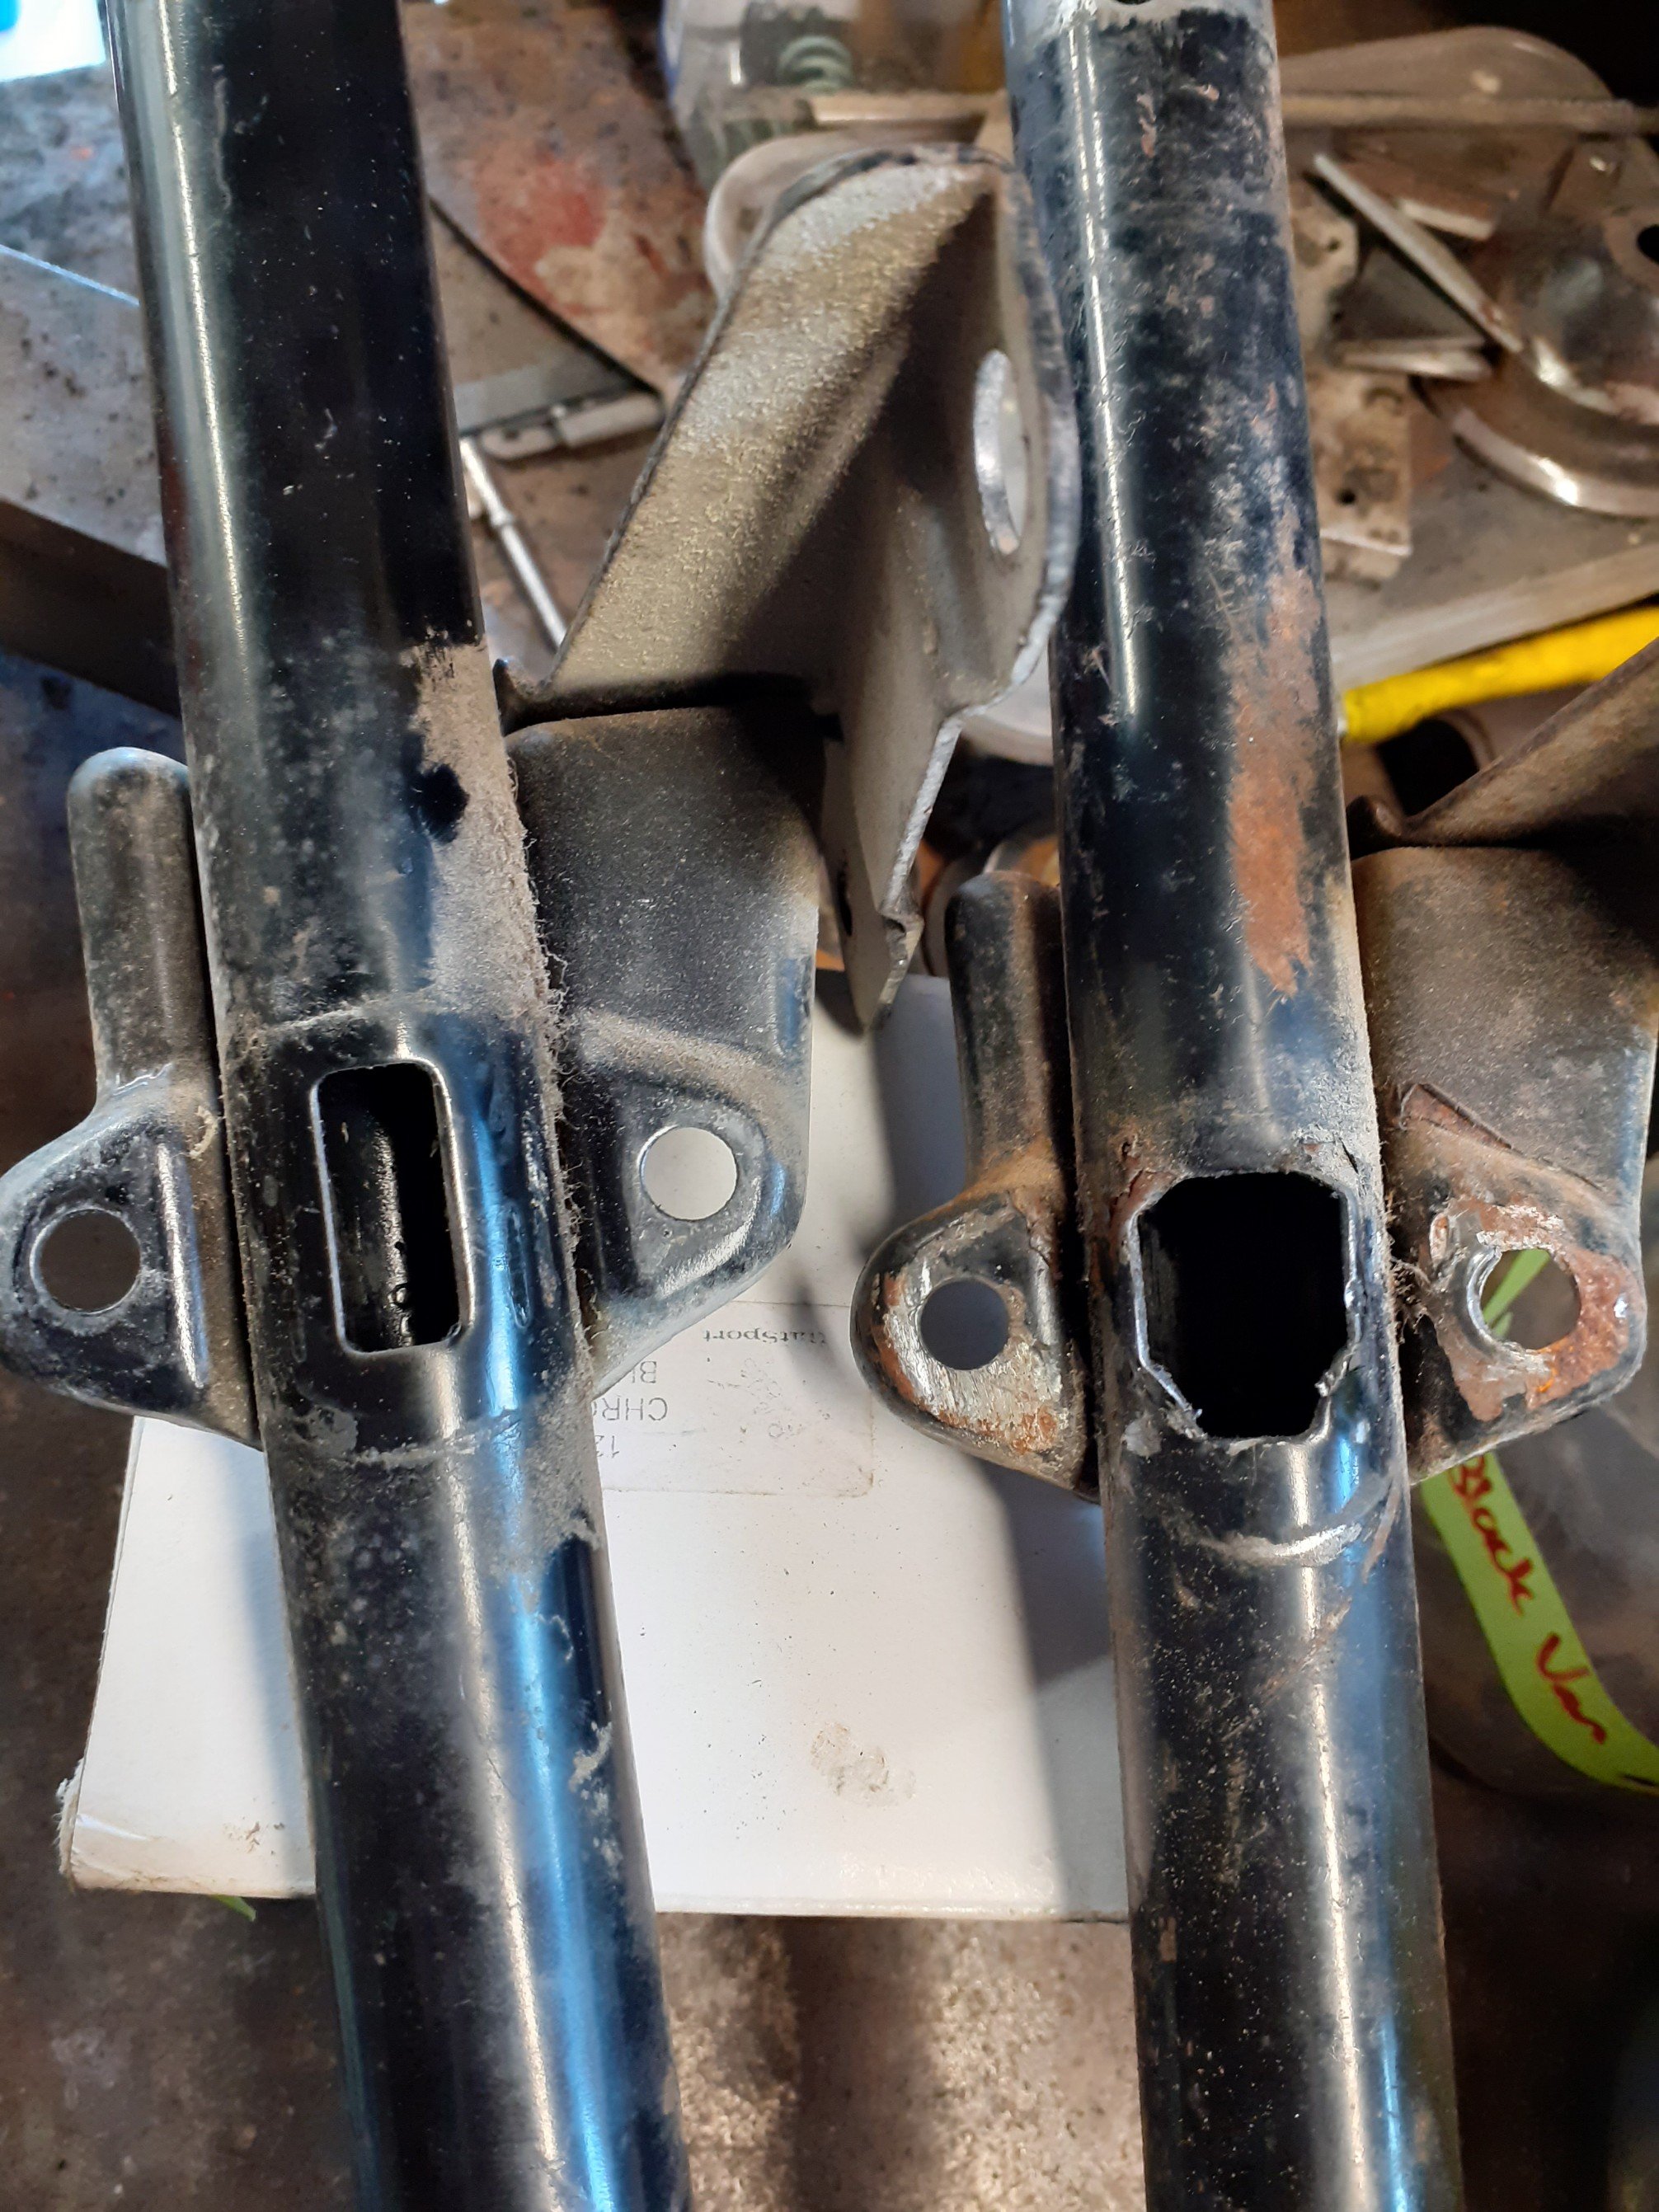
I don't have a lathe so I carefully cleaned up the shaft using using die grinder and a flap wheel, checking it as I went. I had removed enough material that the bush would snuggly fit over the shaft and move. Success. Then I couldnt work out why it was such as effort to fit into the steering colum. It would only go half way down. It's hard to see but the end of the shaft is slightly tappered. 39mm tappered down to 38.5mm. Out came the die grinder and flap wheel again. I enlarged the internal shaft to accept the new bush and we were away laughing. Until... ...I installed it all in the van and the ends of the steering shafts don't line up. Faaaaark. I will need to enlarge the hole on the firewall and move the shaft up. I thought the assembly was supposed to be the easy part.
-
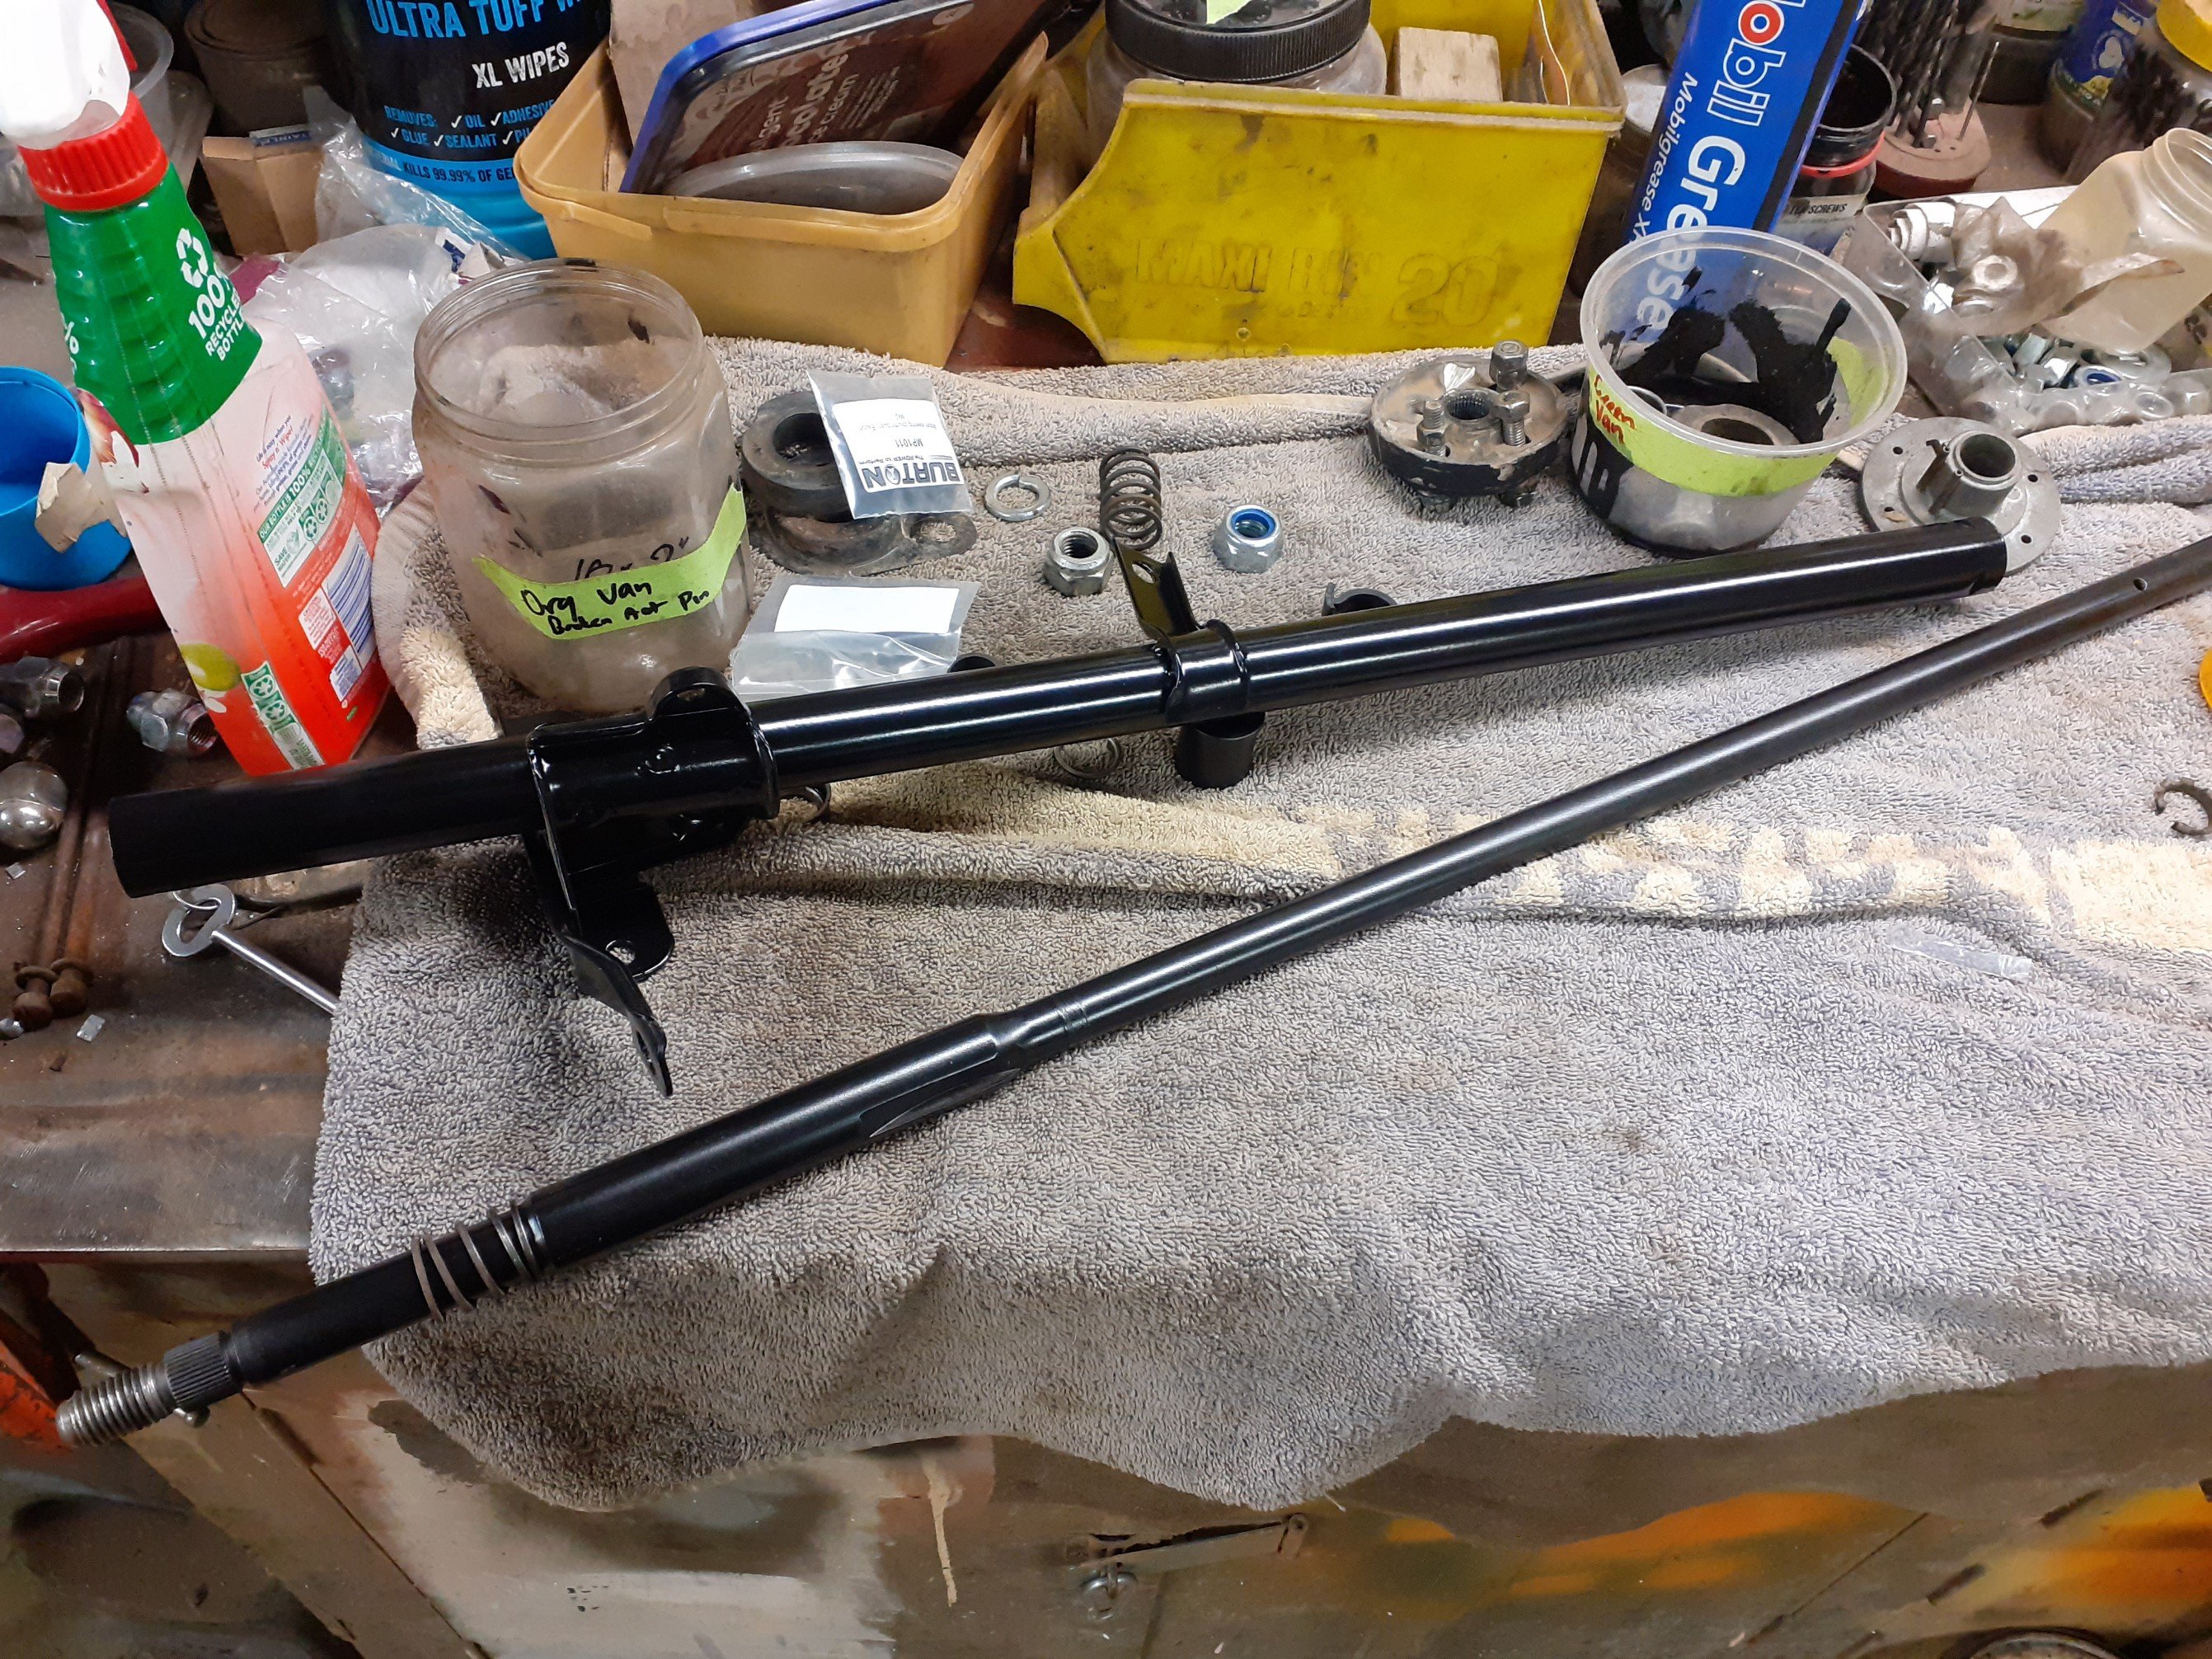
Much like the steering rack, I had disassembled 3 steering columns all in various states and all slightly different. One column shaft was longer then the others, one column and housing has absolutely been munched by the steering lock mechanism and none really shared the exact same internals, with different springs and spacers etc. I used a good short column and the best housing and had them painted. I started to reassemble it last night but hit a road bump. The new top bush, which replaces the older style bearing, is too narrow in the ID to turn freely on the column shaft. The bottom replacement works fine. I'll need to trim down the OD of the shaft or increase the ID in the bush. Even with grease and vice grips it didn't want to turn. old bearing and new bush
-
I couldn't find my bonnet cable clip so pinched it off the blue van and made a replacement. Could have used a cable tie or p clip but because it's visible I didn't want it to look too out of place. I'll have the old black one stripped and anodized.
-
Thanks to the great ideas here I had a new plan of attack. I drilled a hole beside the tap and cleaned the area. I could see through the new hole that the nut had 3 factory welds holding it on. Must have been very fatigued/rusted because it didnt require much force for it break away. Tried to plug weld/tac the nut on and managed to get a strong enough tac to take the tap out. I decided I wanted two different spots of weld on the nut. Unfortunately the first weld broke off when drilling the second hole but thankfully I had a screw in place just in case. New hole, new weld. Accidently welded too much of the screw so it required quite a bit of cutting and grinding to remove it in one piece. Required a lot of concentration to avoid the raised stamped areas in the panel. Ended up nicking the top coat once. Cleaned the area again with the die grinder, put in another screw but this time insulated it with copper wiring which worked a treat. Ground it all flat and this time it looked much better. The weld had penetrated and filled in the holes. Best part yet, the bracket covers the entire worked area. Easy for these small jobs to chew up time. Just need to keep looking at the big picture.
- 104 replies
-
- 21
-
-

-
Cheers. Yeah feeling much better after hearing the suggestions here. The tap will make a nice earth strap too....
-
Makes perfect sense thanks. I was thinking of elongating the hole on the bonnet catch to fit over the riv nut if there's enough meat. This way it'll sit flat and the washer on the screw should cover it. As beens suggested here, I'll try drilling a couple of small holes and welding the existing nut in place first.
-
Didn't think of this. The hook brackets large enough to hide any of the working so could get away with a touch up job.
-
Looks the goods and the bonnet hook would hide it. Trouble is the tap was halfway through the nut when it let go so I haven't been able to separate the tap from the nut. Might be able to make something to get behind and lock it in place/thin bent spanner.
-
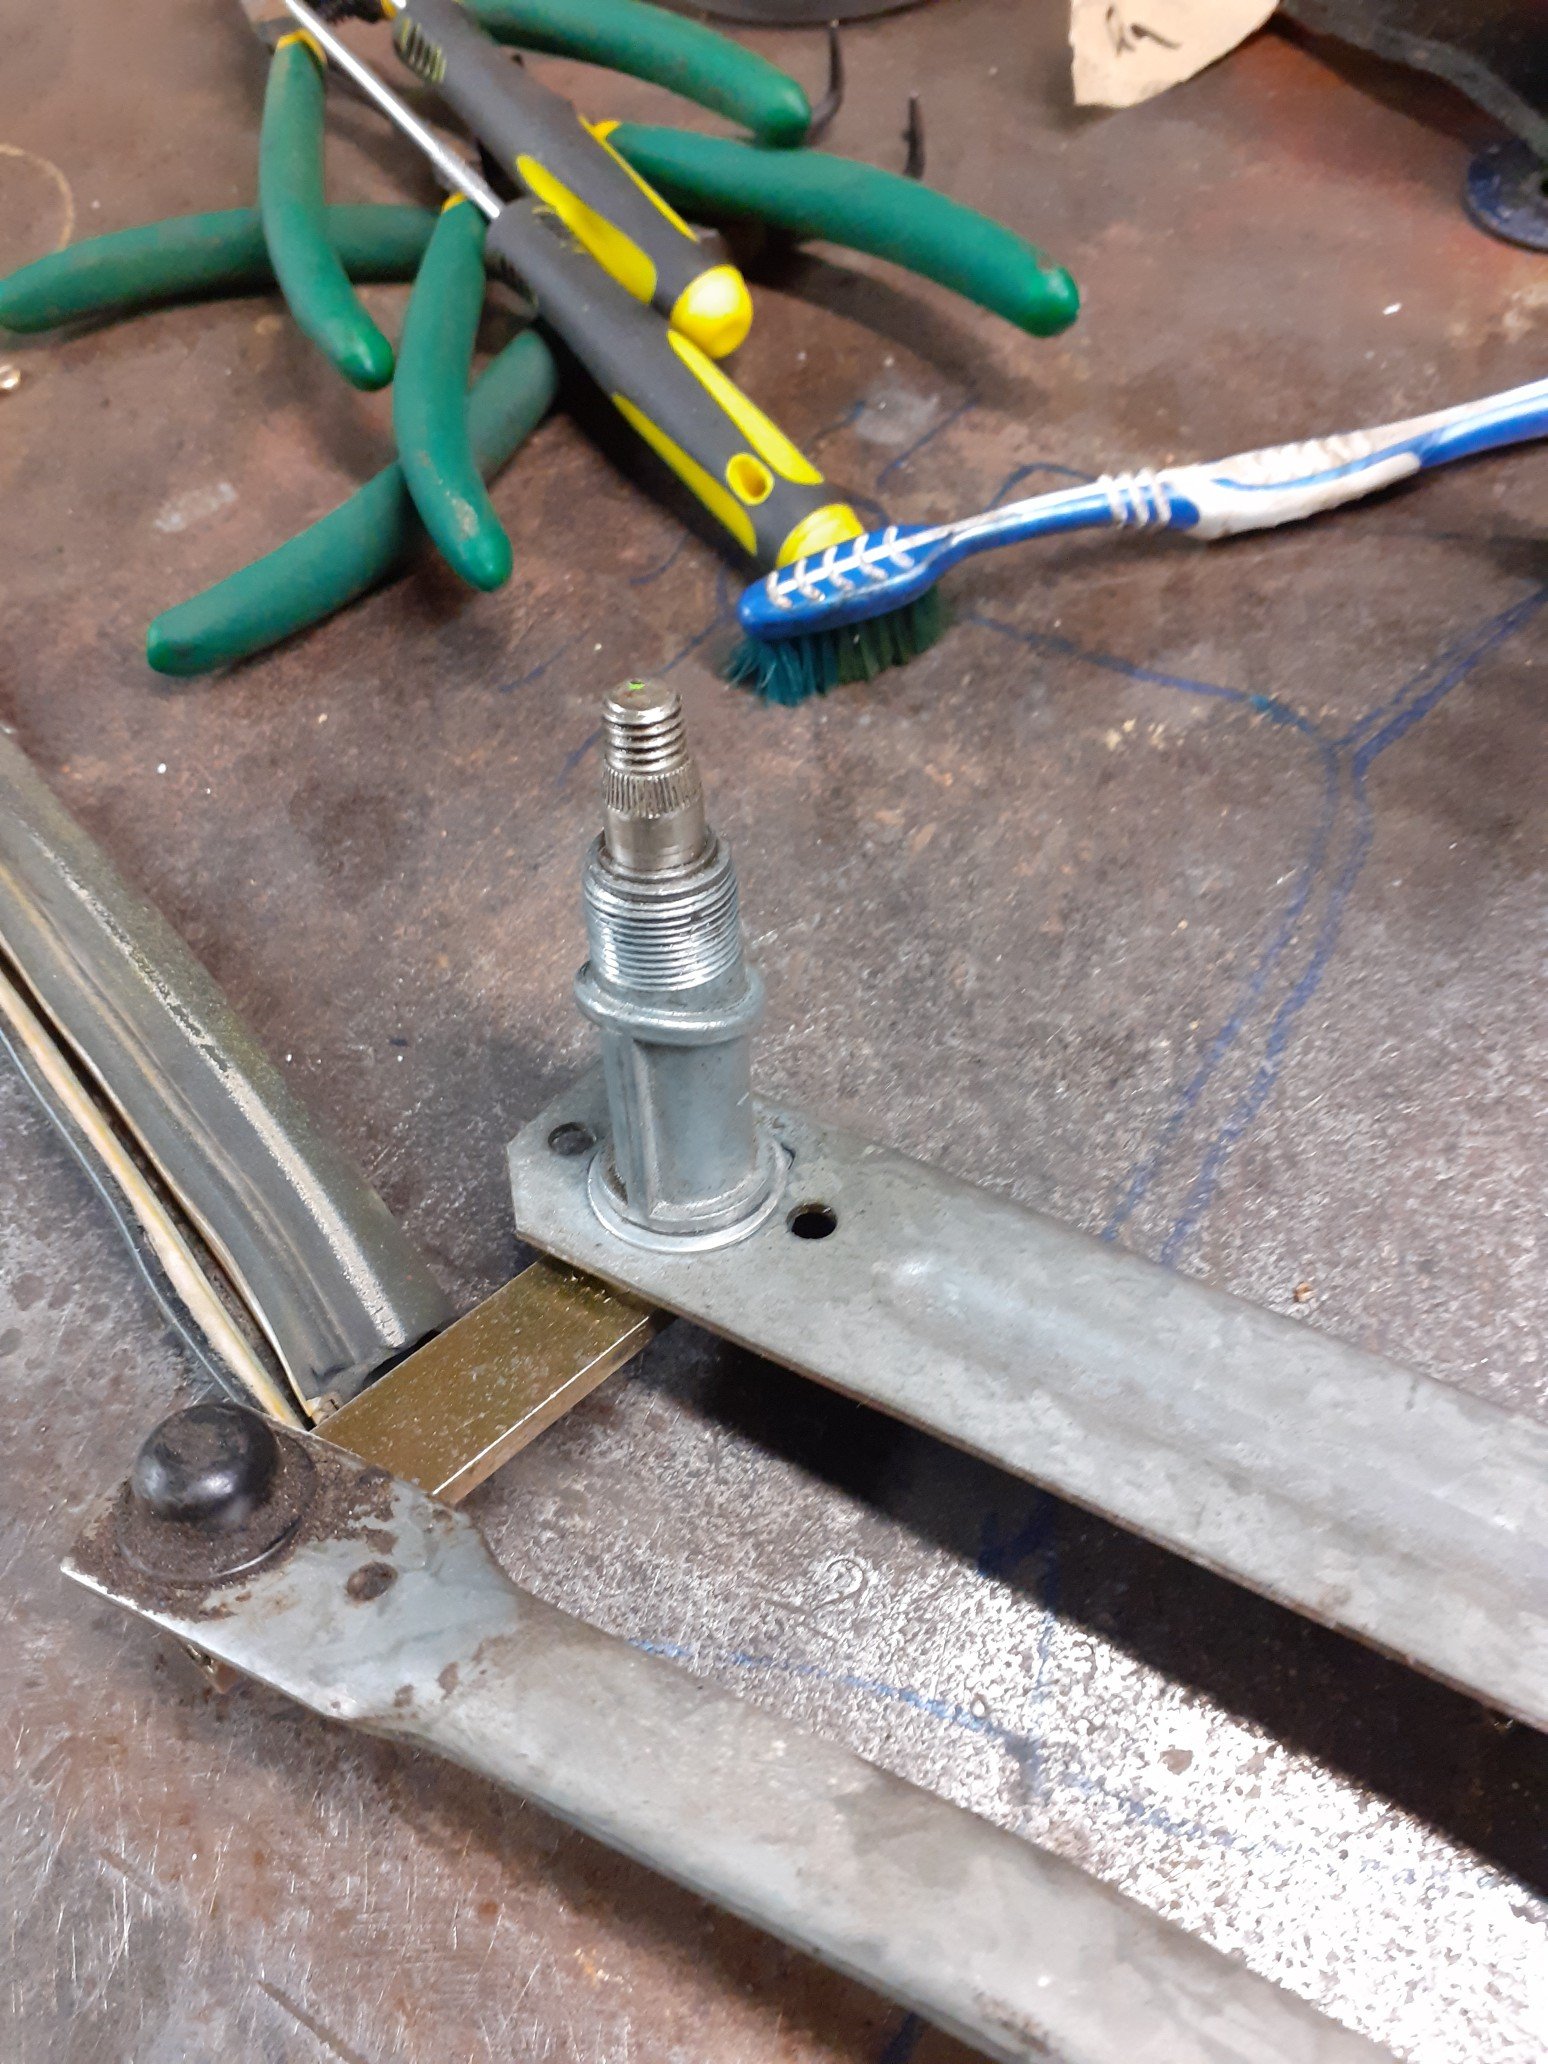
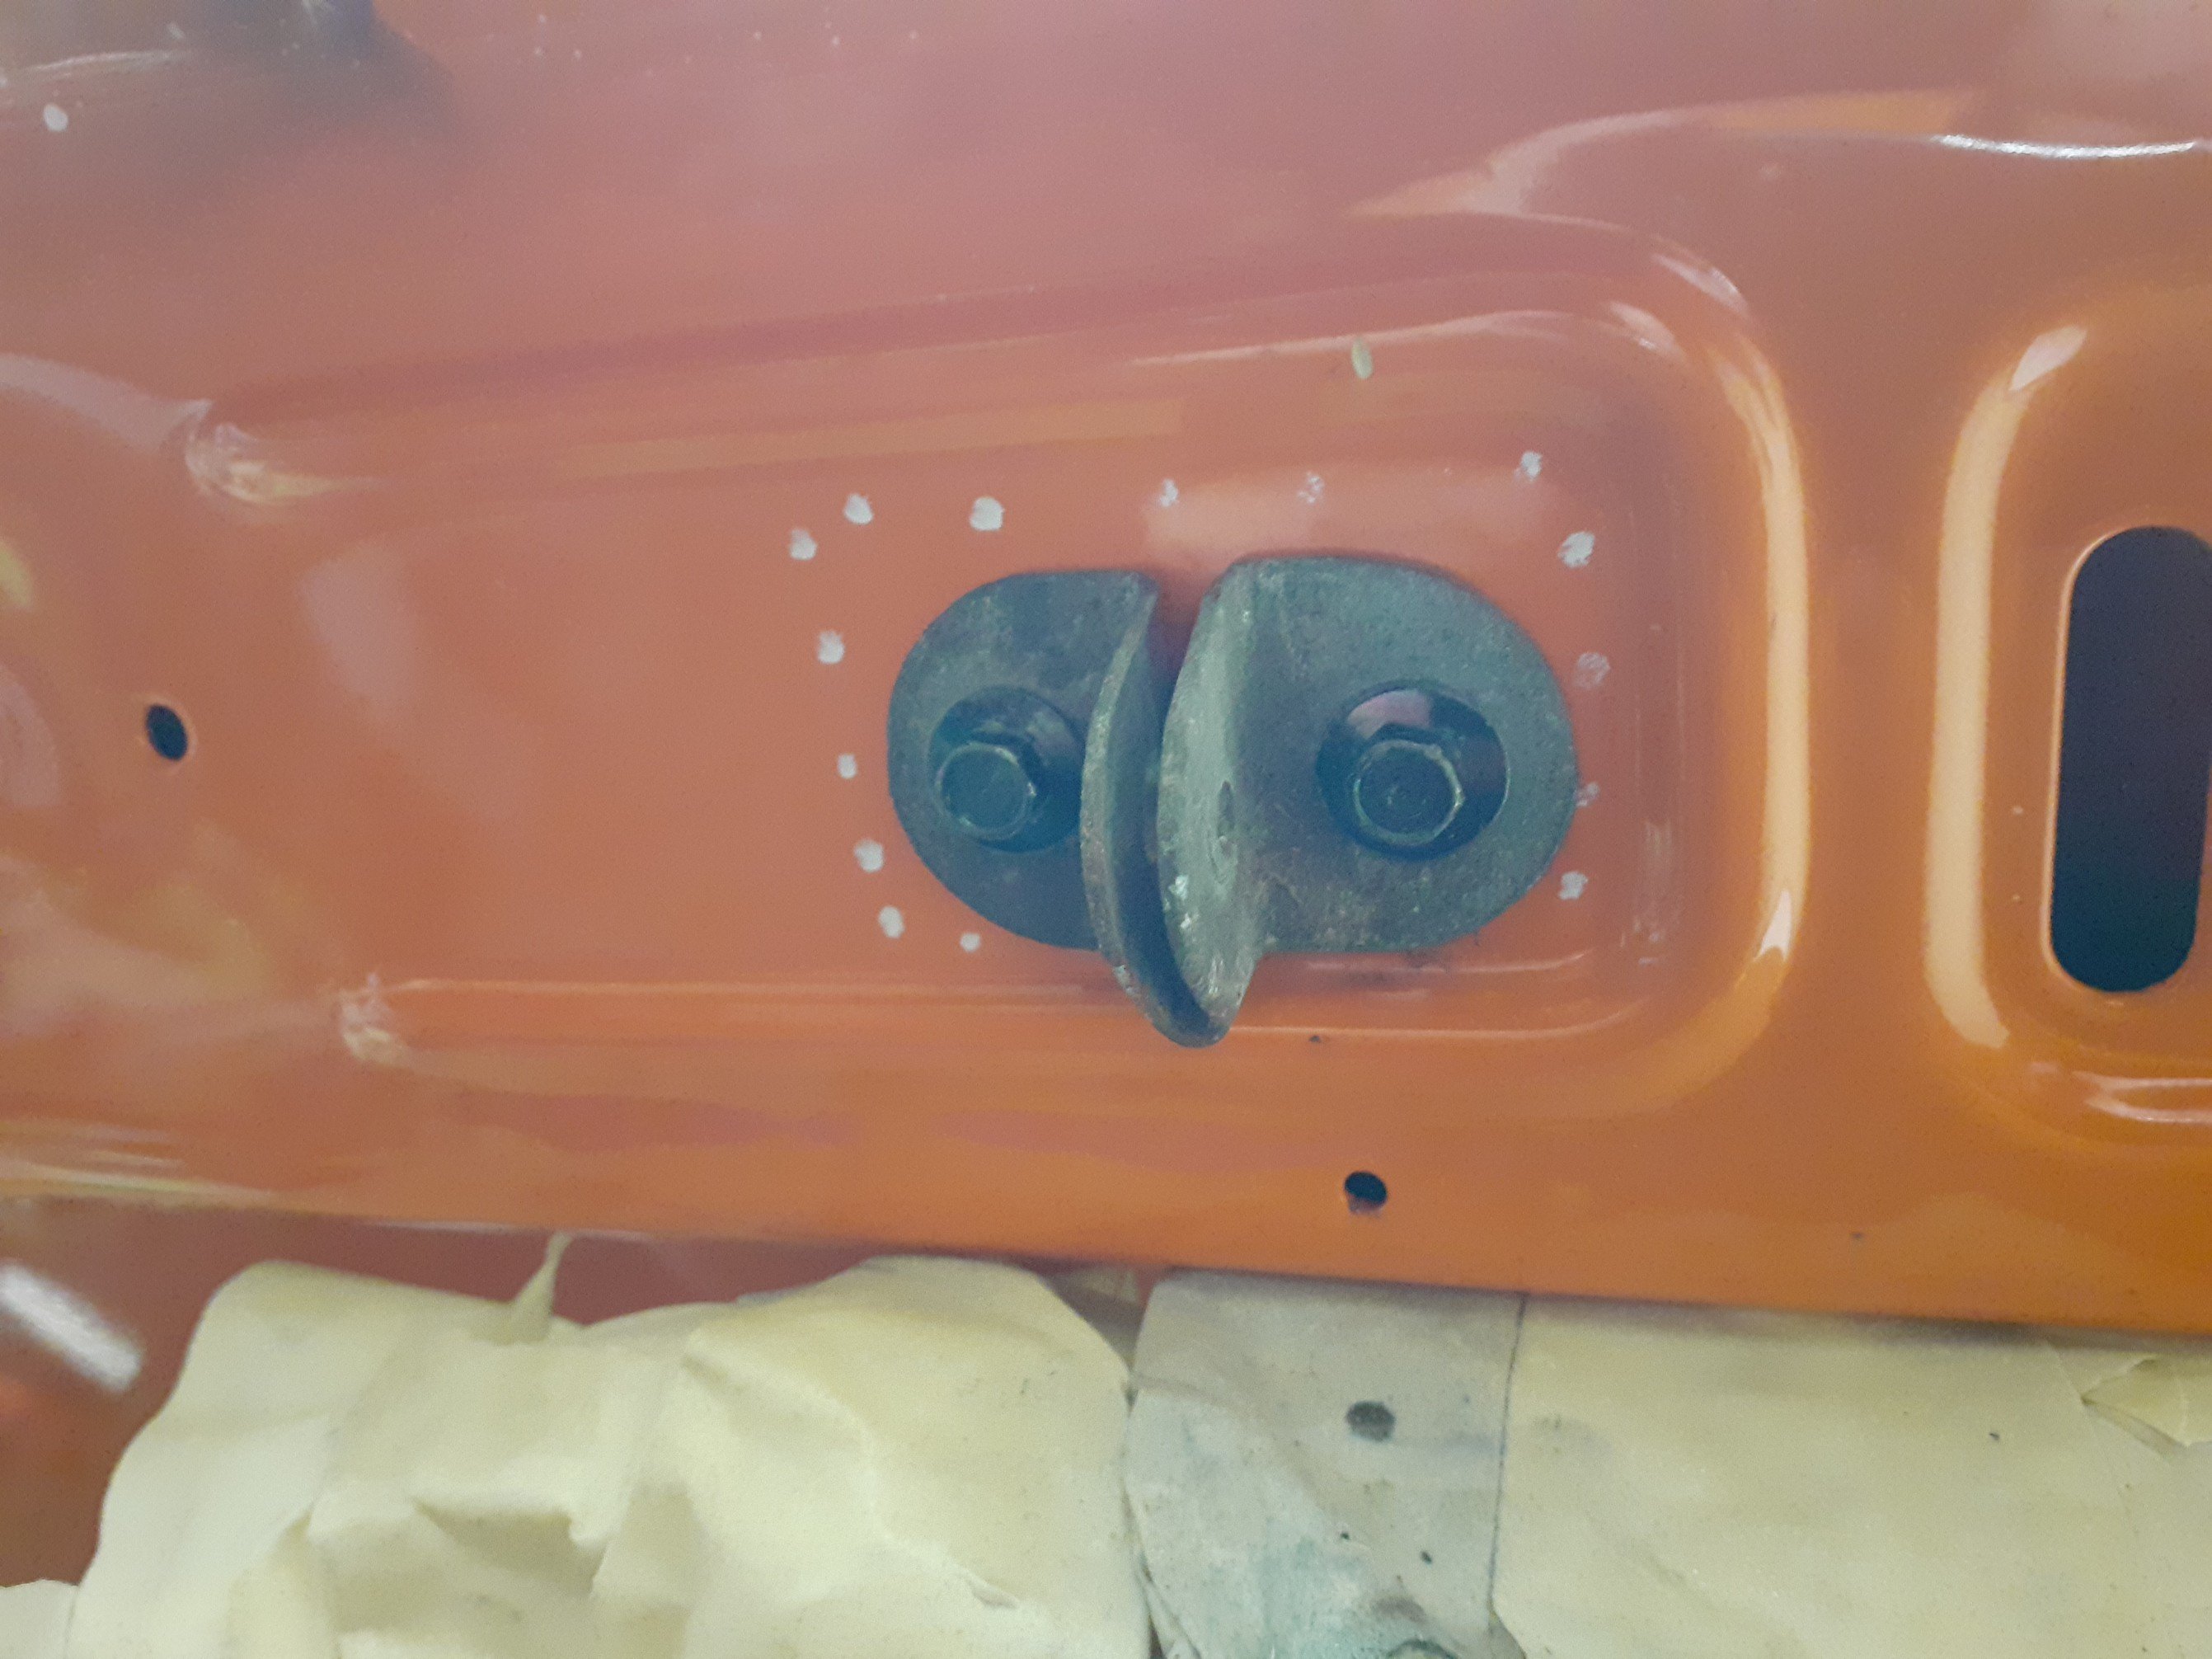
I was tapping some threads in the engine bay, getting it ready for fittings, then this happened. It's the under side of the bonnet where the hook is attached. Nuts welded on the inside but this one decided it had had enough and decided to spin. Fuck. There's no access to the cavity behind to access to the nut so I'm going to have to cut it open, peel it back, weld the nut back on, stitch weld the panel back on and re paint the entire front section of the underside. Hard to see but agin the nut didn't line up with the hole very well when it was "welded" on in the factory and when I was cutting the thread it was hard up against the bonnet panel which probably caused it to break.
-
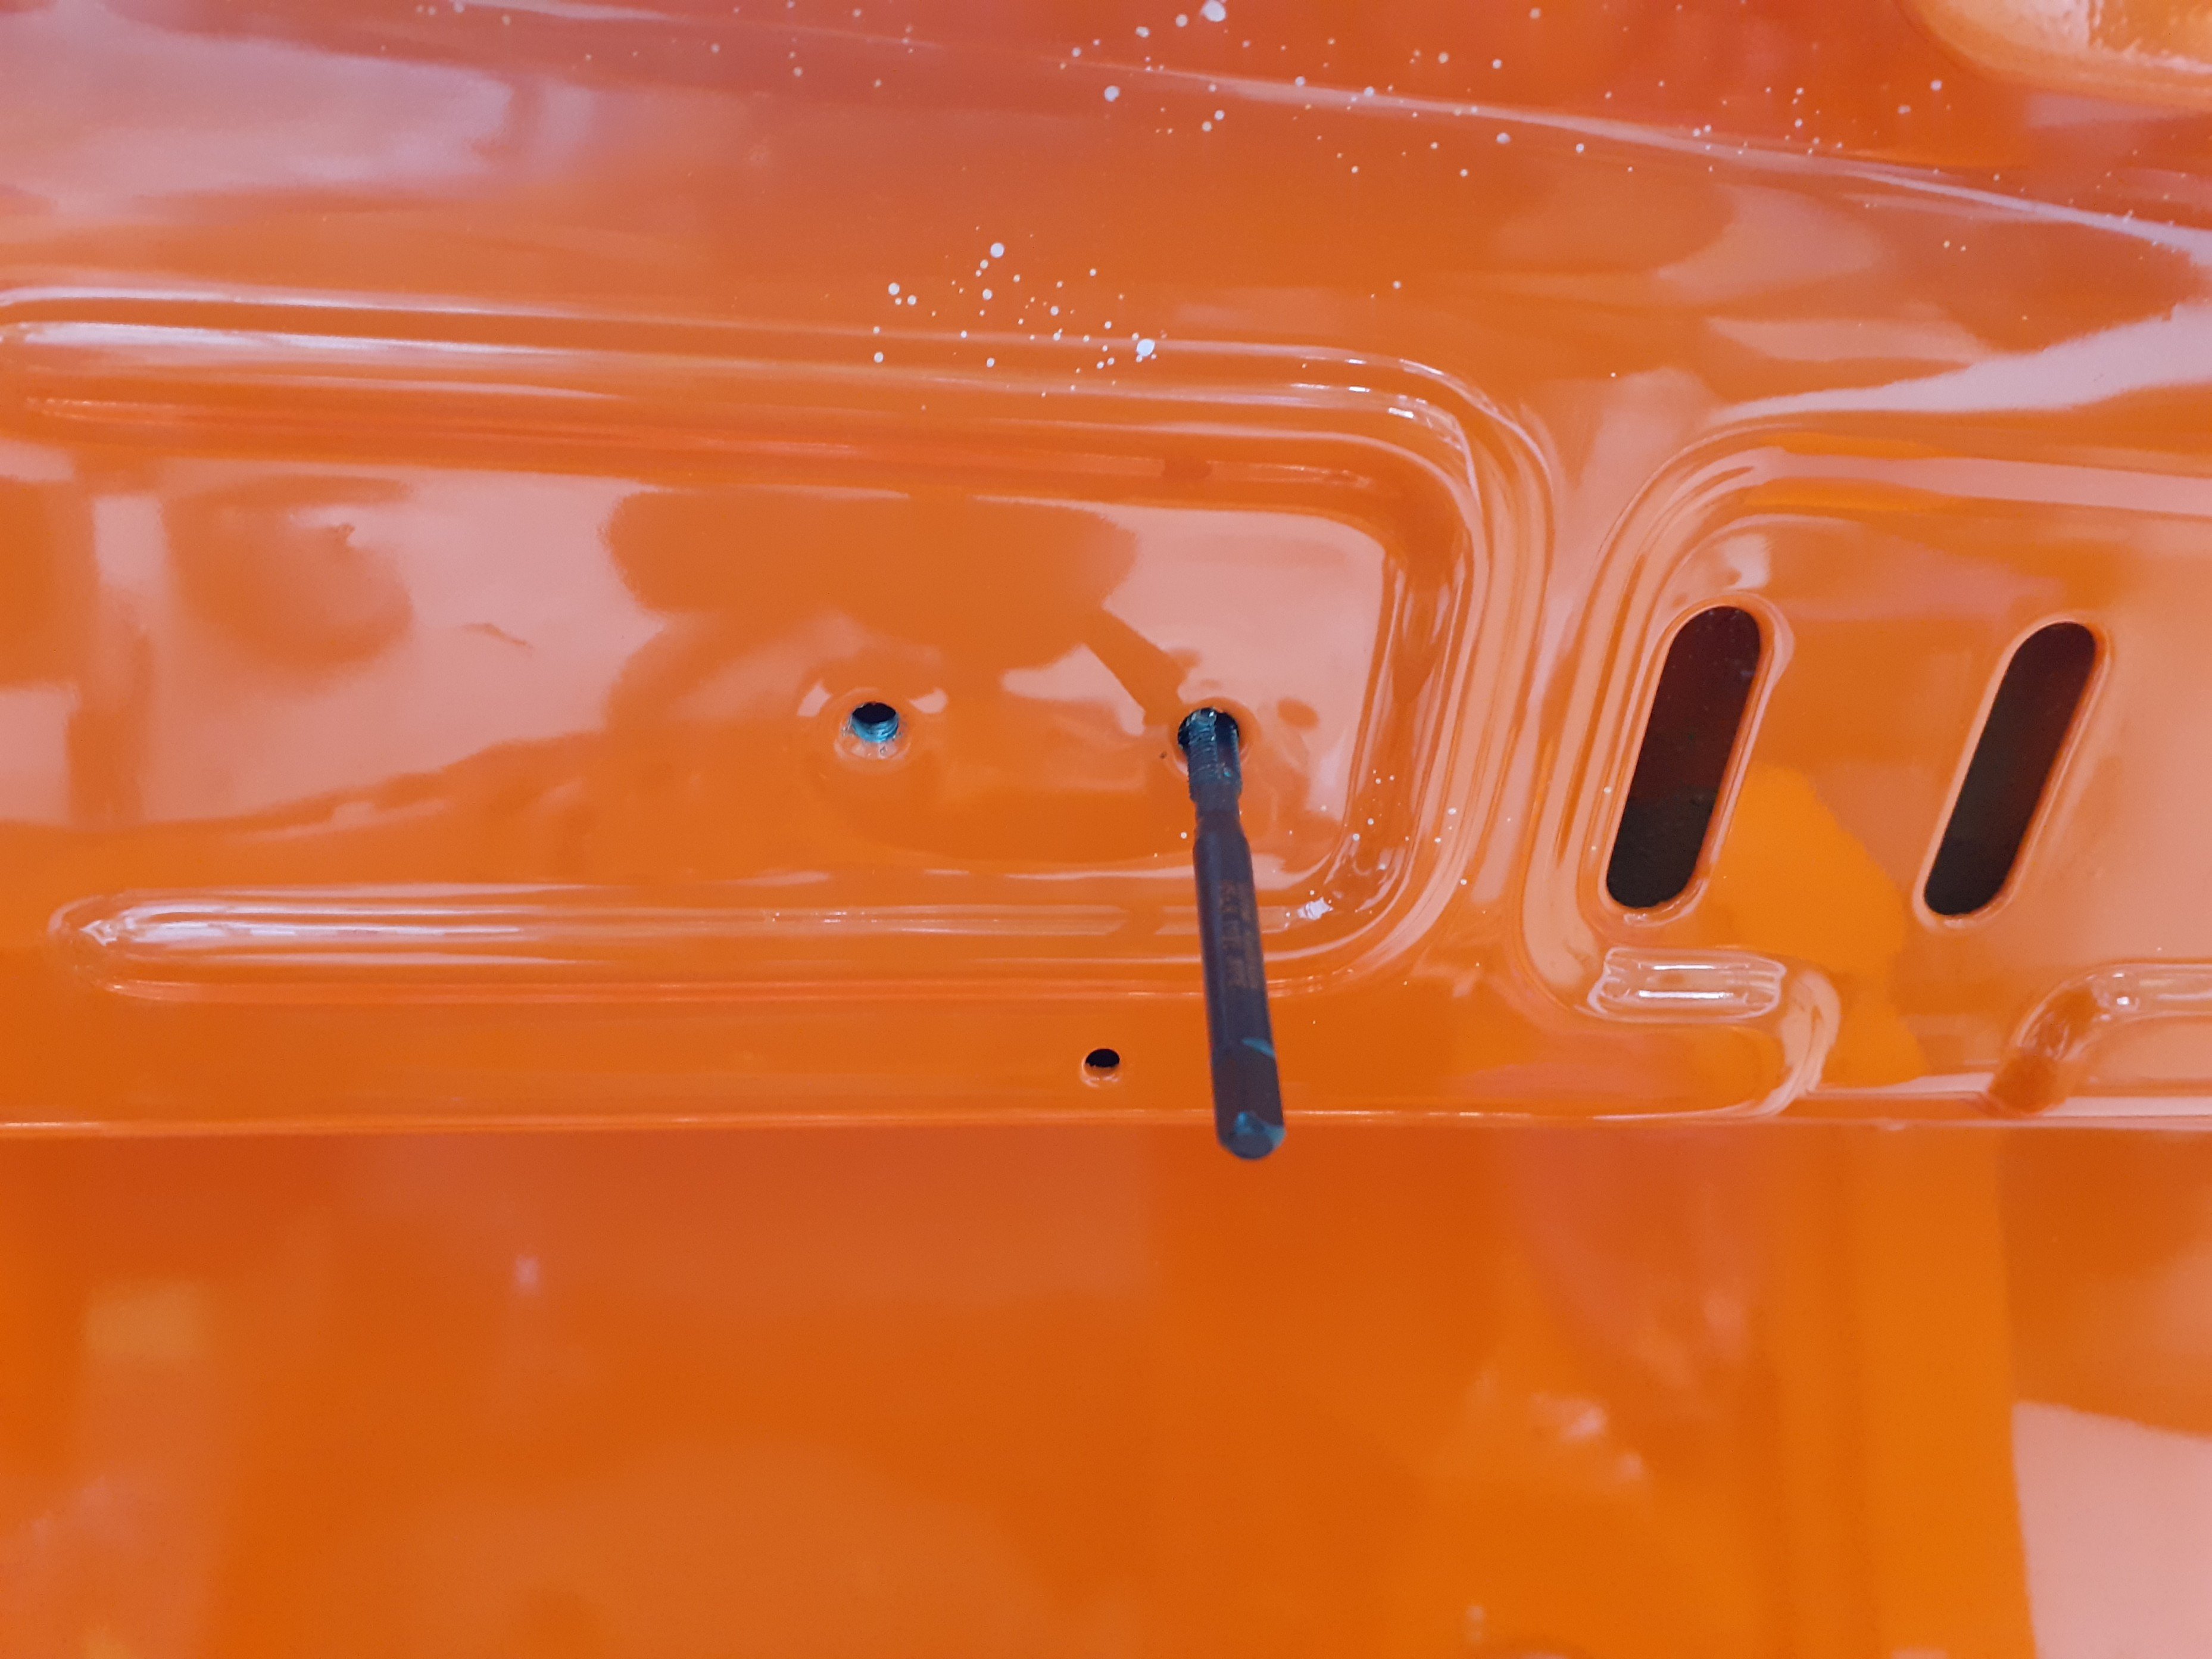
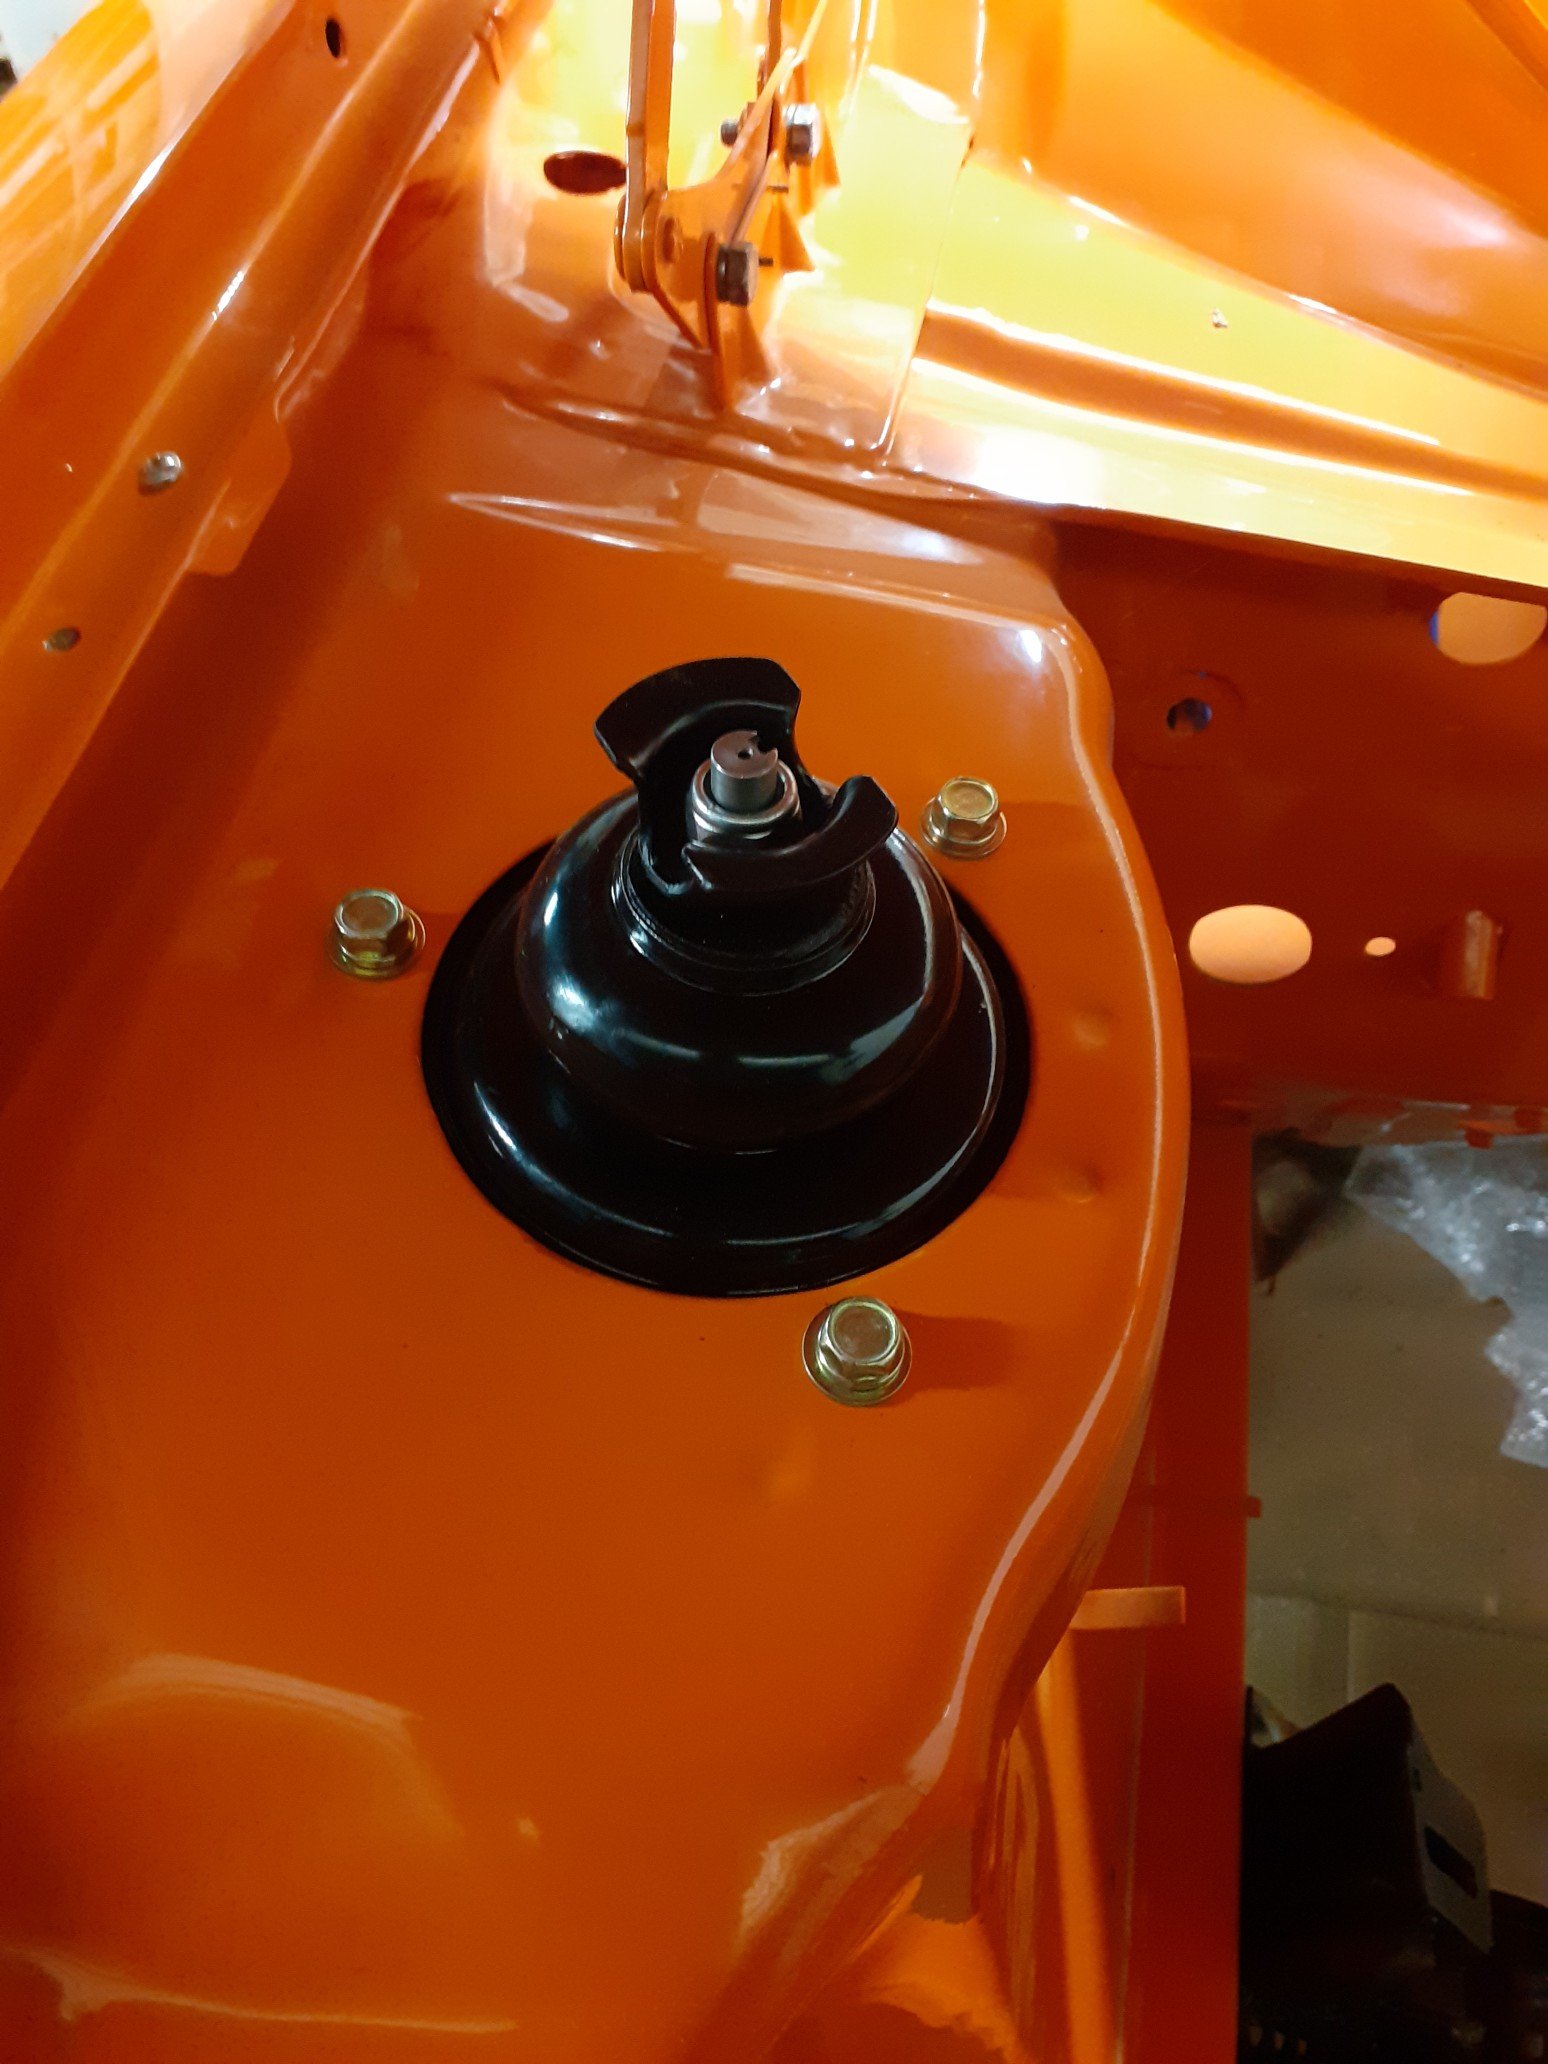
I don't know if it's a ford, late 70s or a commercial vehicle thing but I get the impression this van was thrown together quickly in the factory. Everytime I attach something to the van, it has to be slightly modified to fit. A bit of filing here, a shim there. These are the holes for the brake booster bracket to attach to the engine bay wheel guard. There's a plate welded on the outside which is supposed to line up with the hole. This is typical with alot of the double skin holes. I even had to modify the bonnet stay so it would work in both upright and tucked away positions.
-
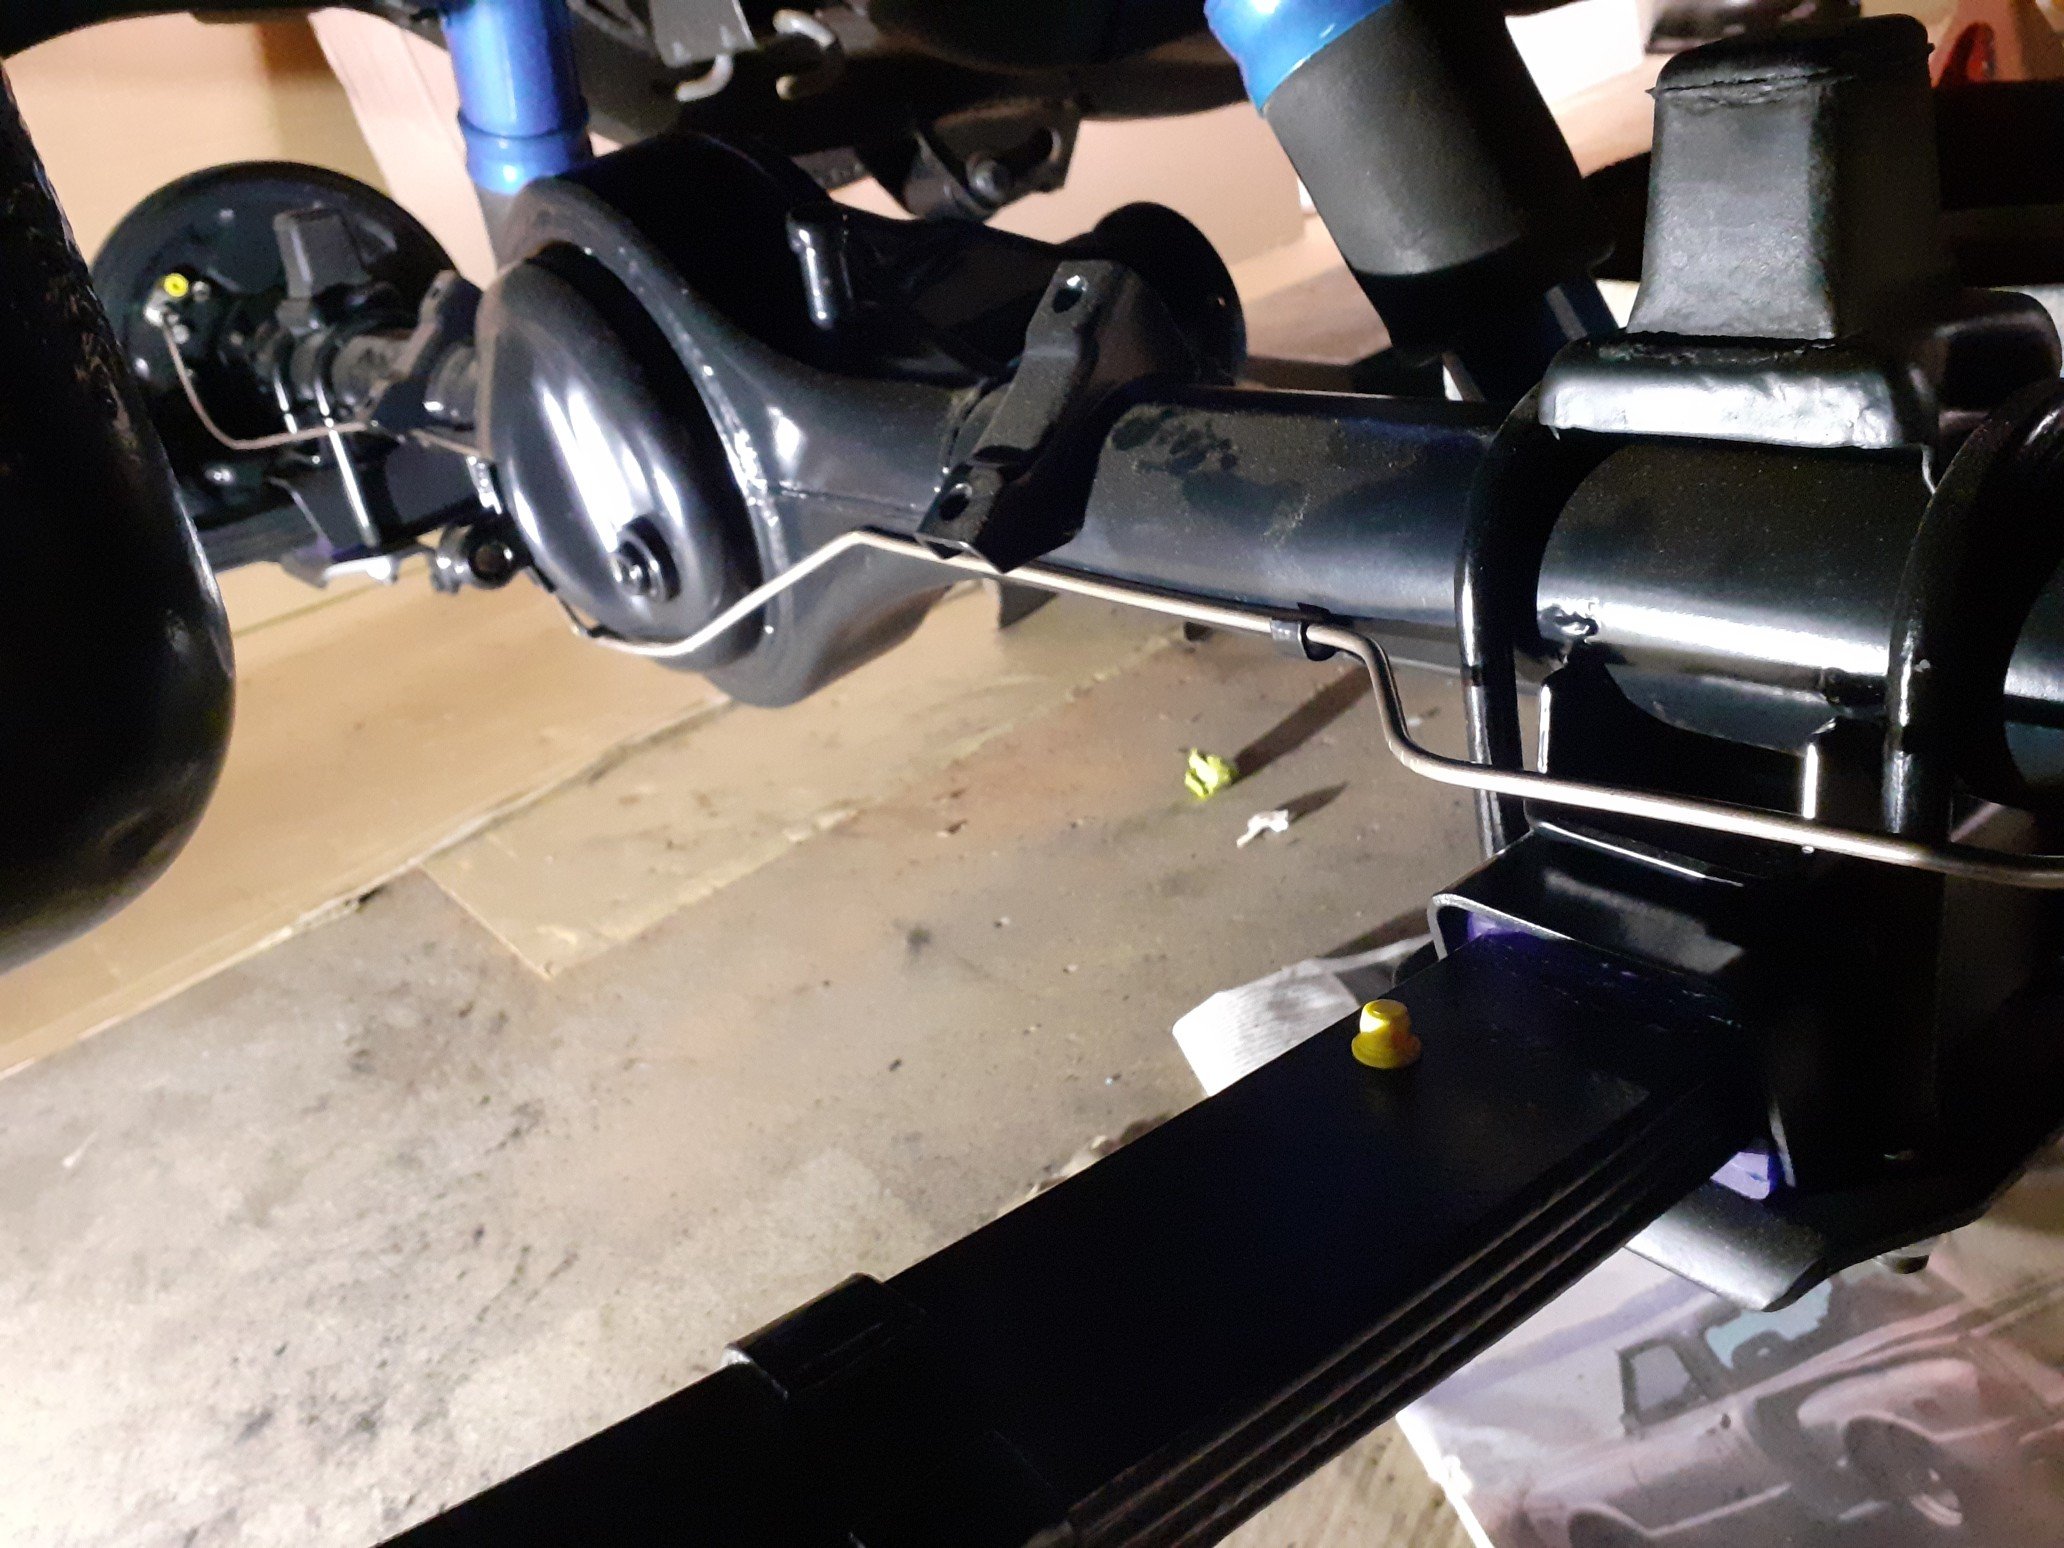
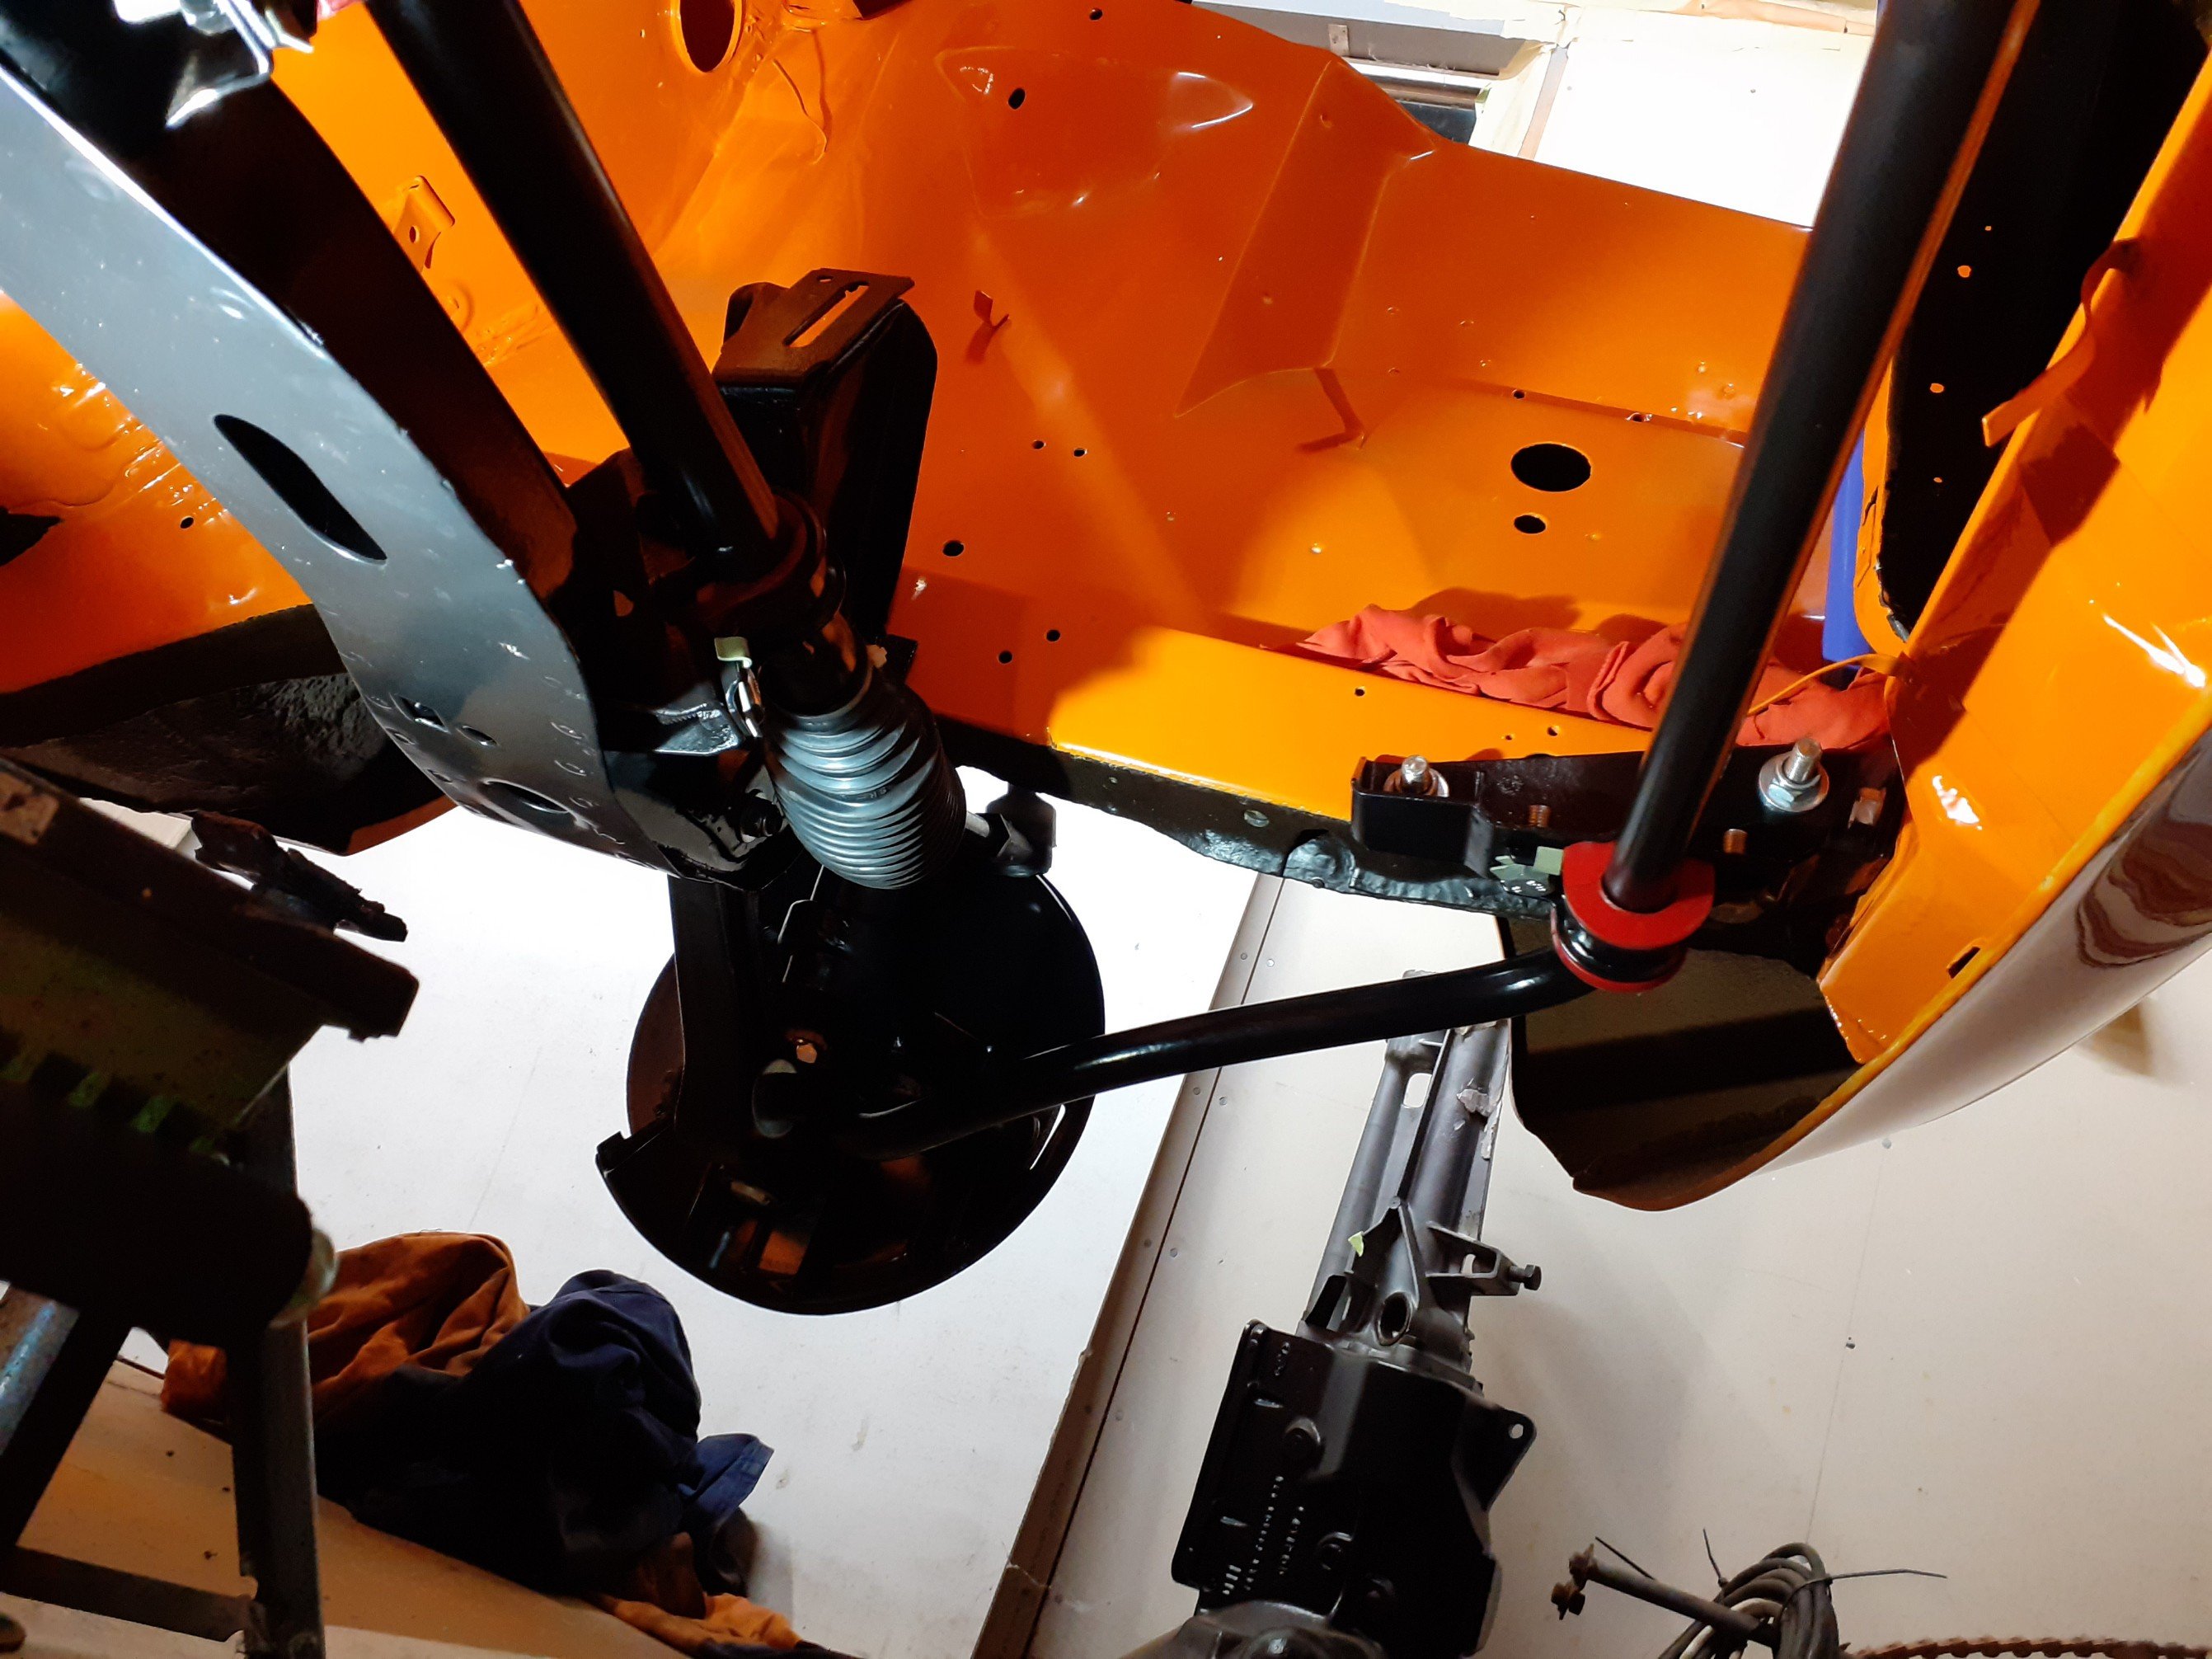
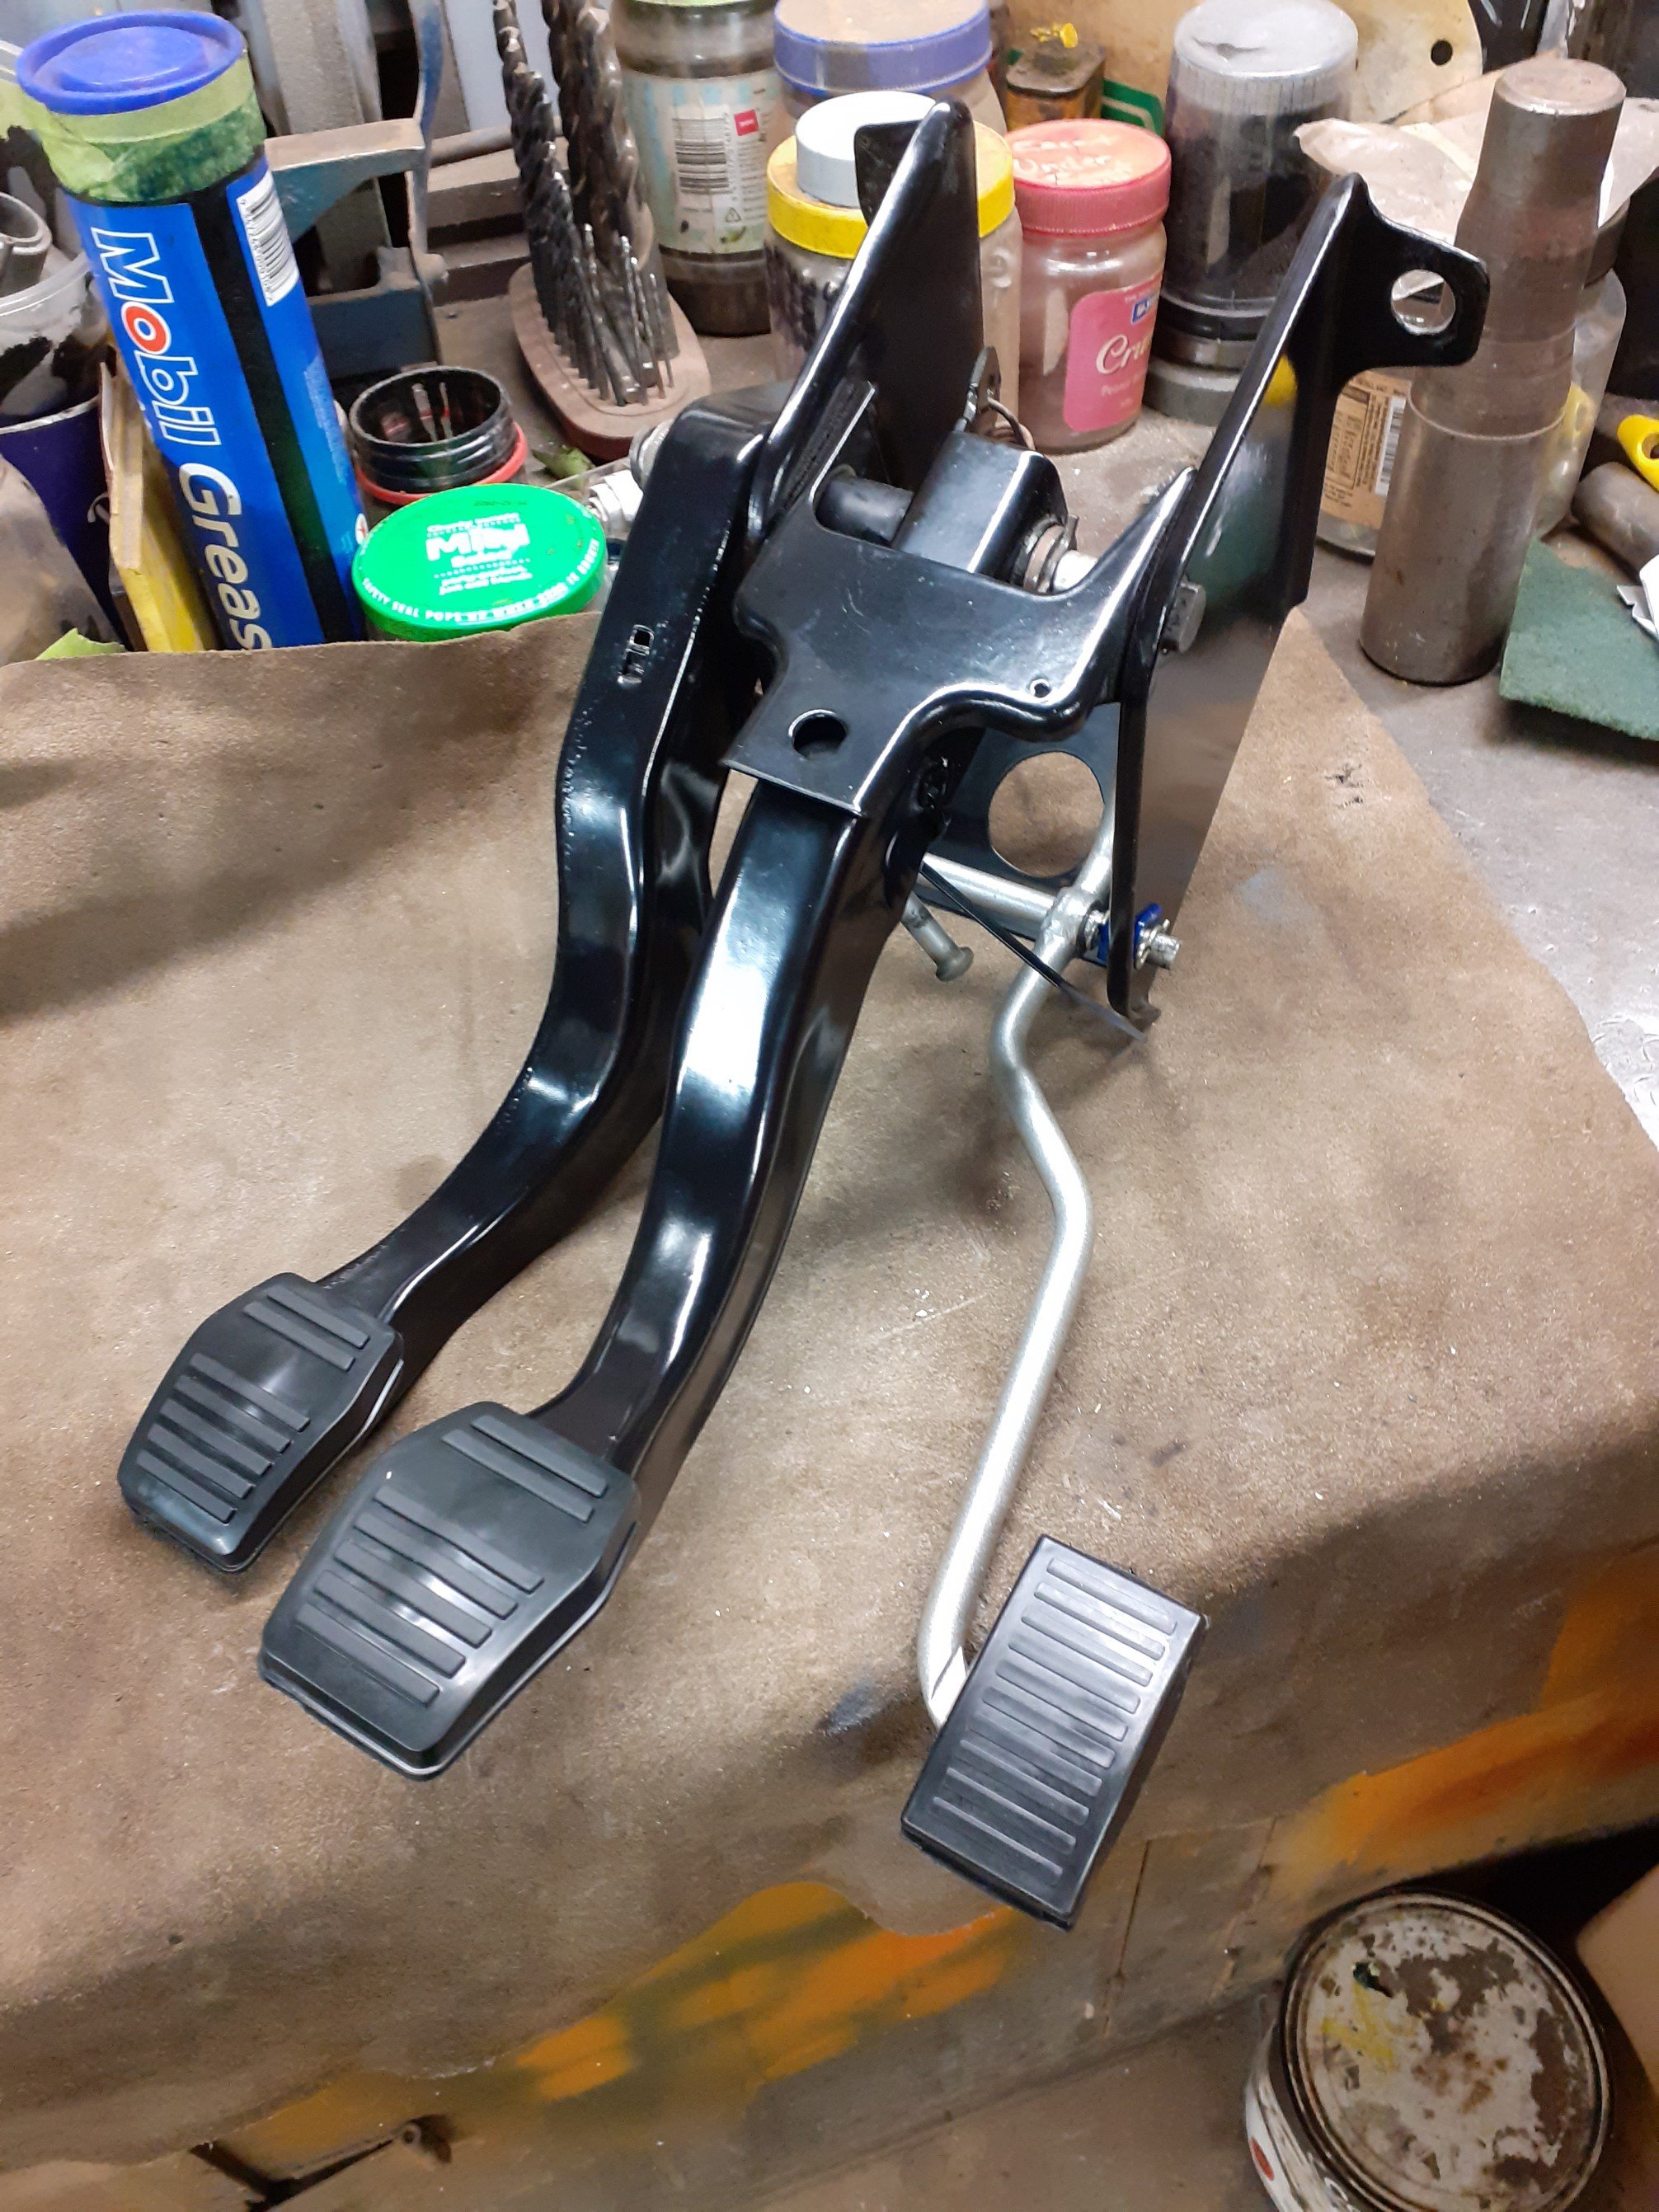
Sway bar and new control arms assembled. Poly bushes and new fittings. Even went so far as making my own tab washers years ago. Really getting picky on certain parts on this now, including all the different types of fittings. Have chosen to go with mostly anodized gear. Have offered up calipers and the brake booster gear in preparation of making all new lines. I'll remove the booster at a later date and repaint as it's quite flat compared it's surrounding parts. Also assembled the pedal box which I stripped down and painted some time ago. New bushes and pads etc. Feels like xmas unboxing parts all these refurbished parts.
- 104 replies
-
- 14
-
-
Wellington Monthly Meet - Discussion thread
bmxnz11 replied to KKtrips's topic in Lower North Island Region
I wont be able to make it tomorrow -
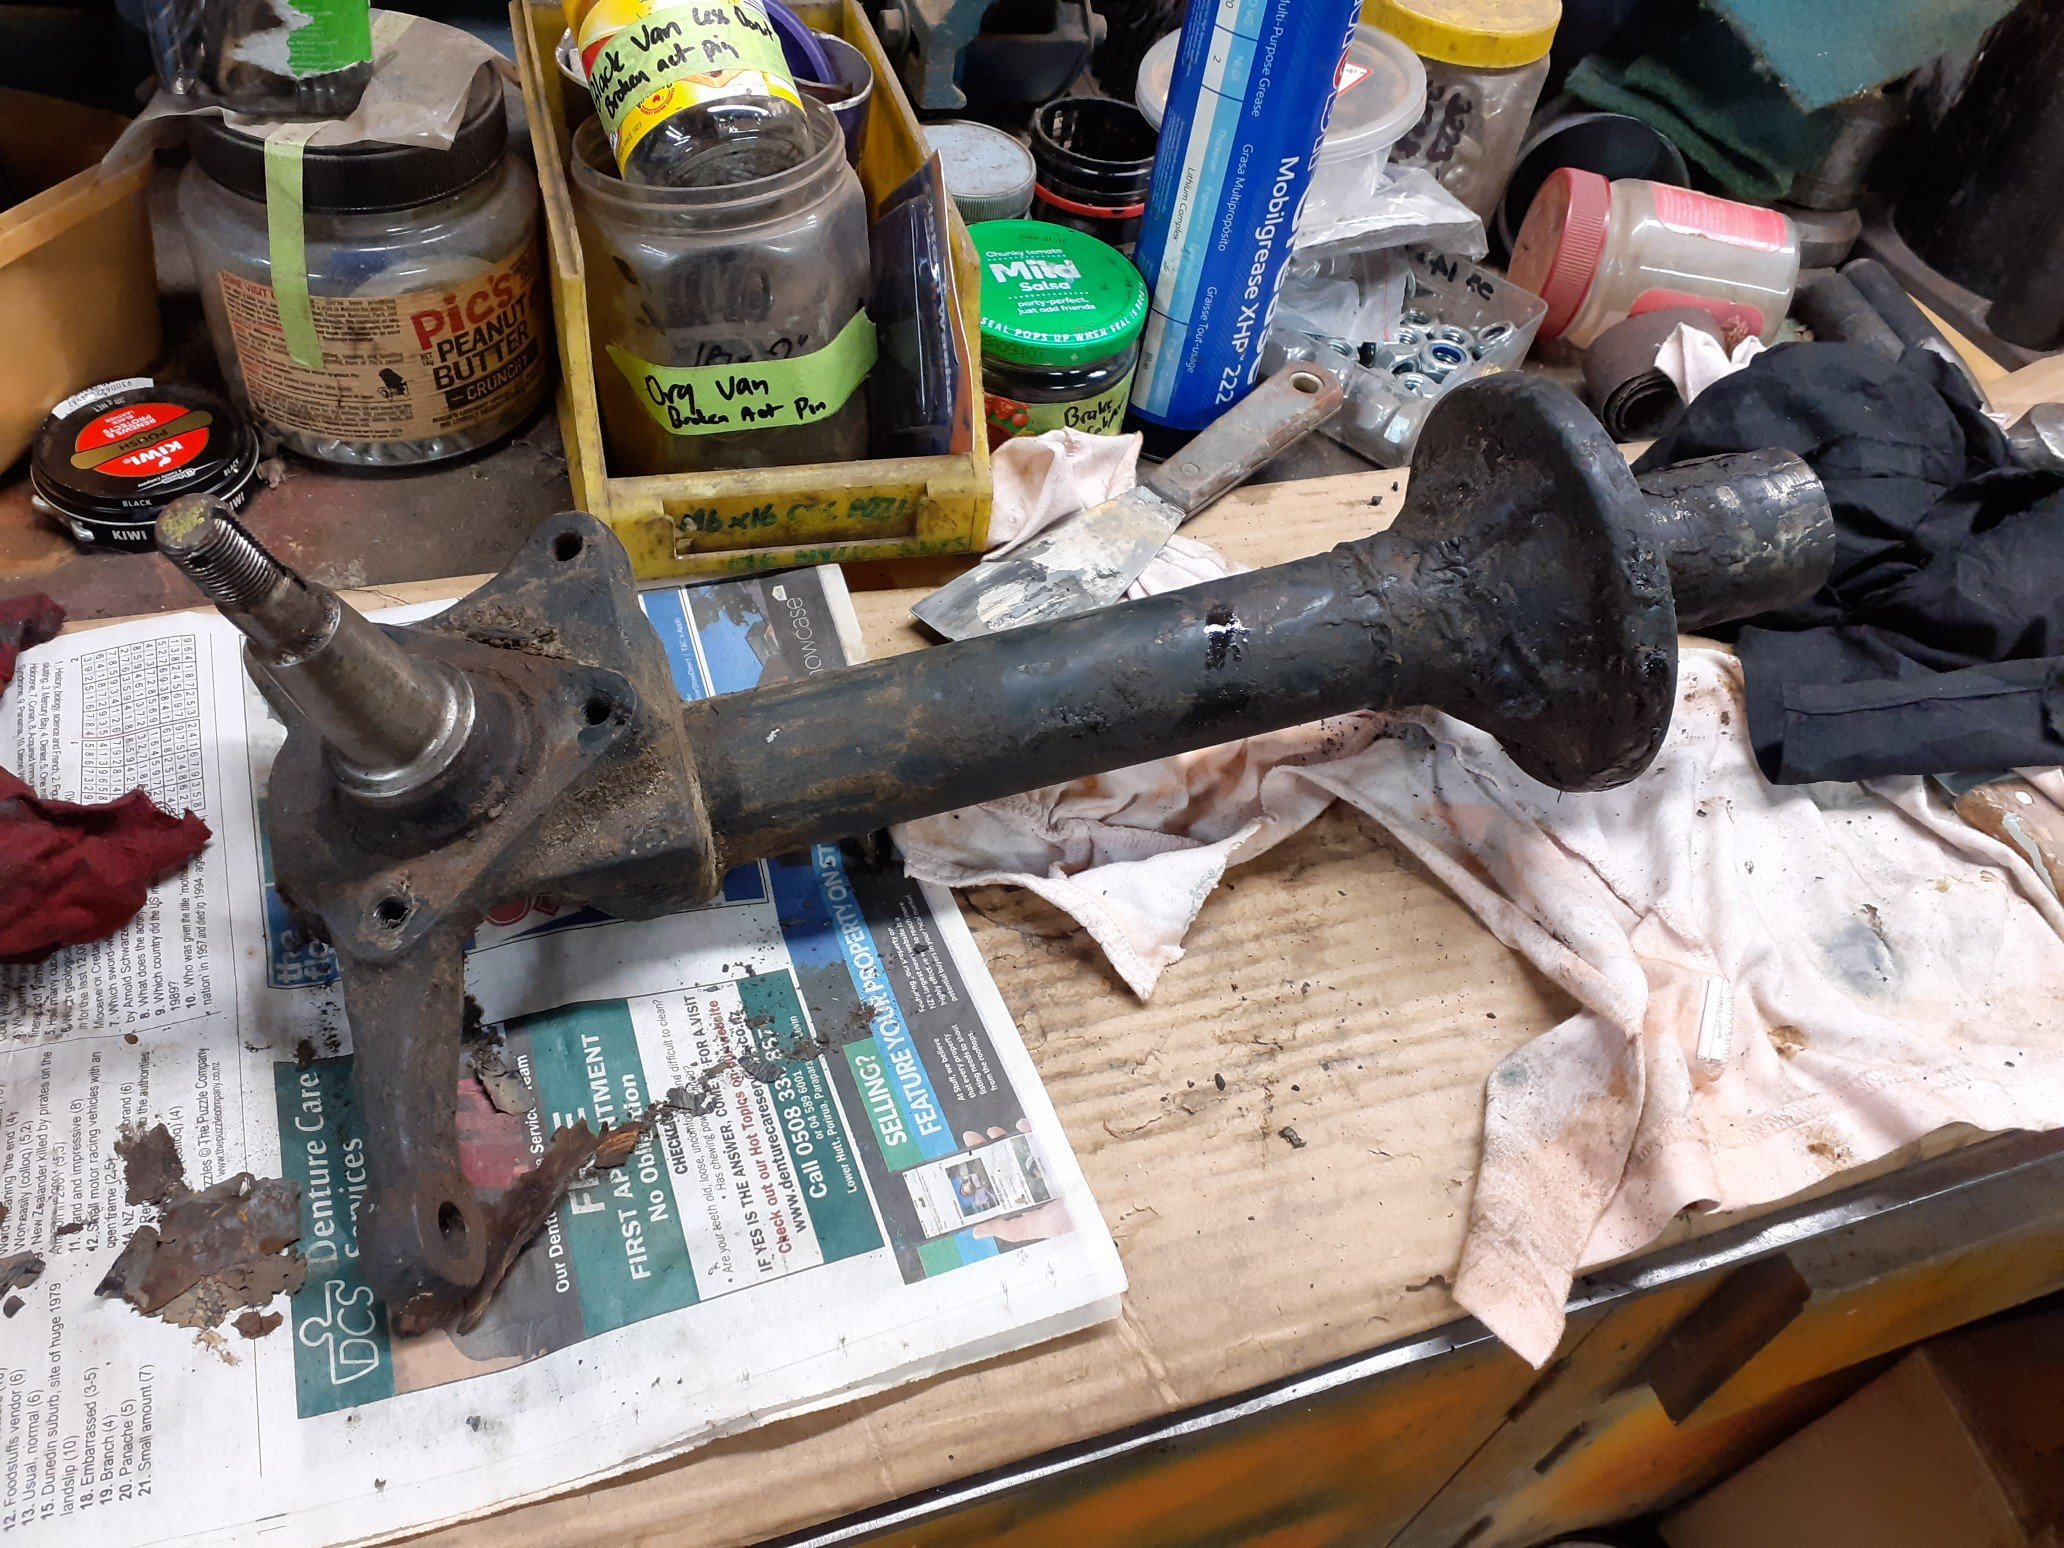
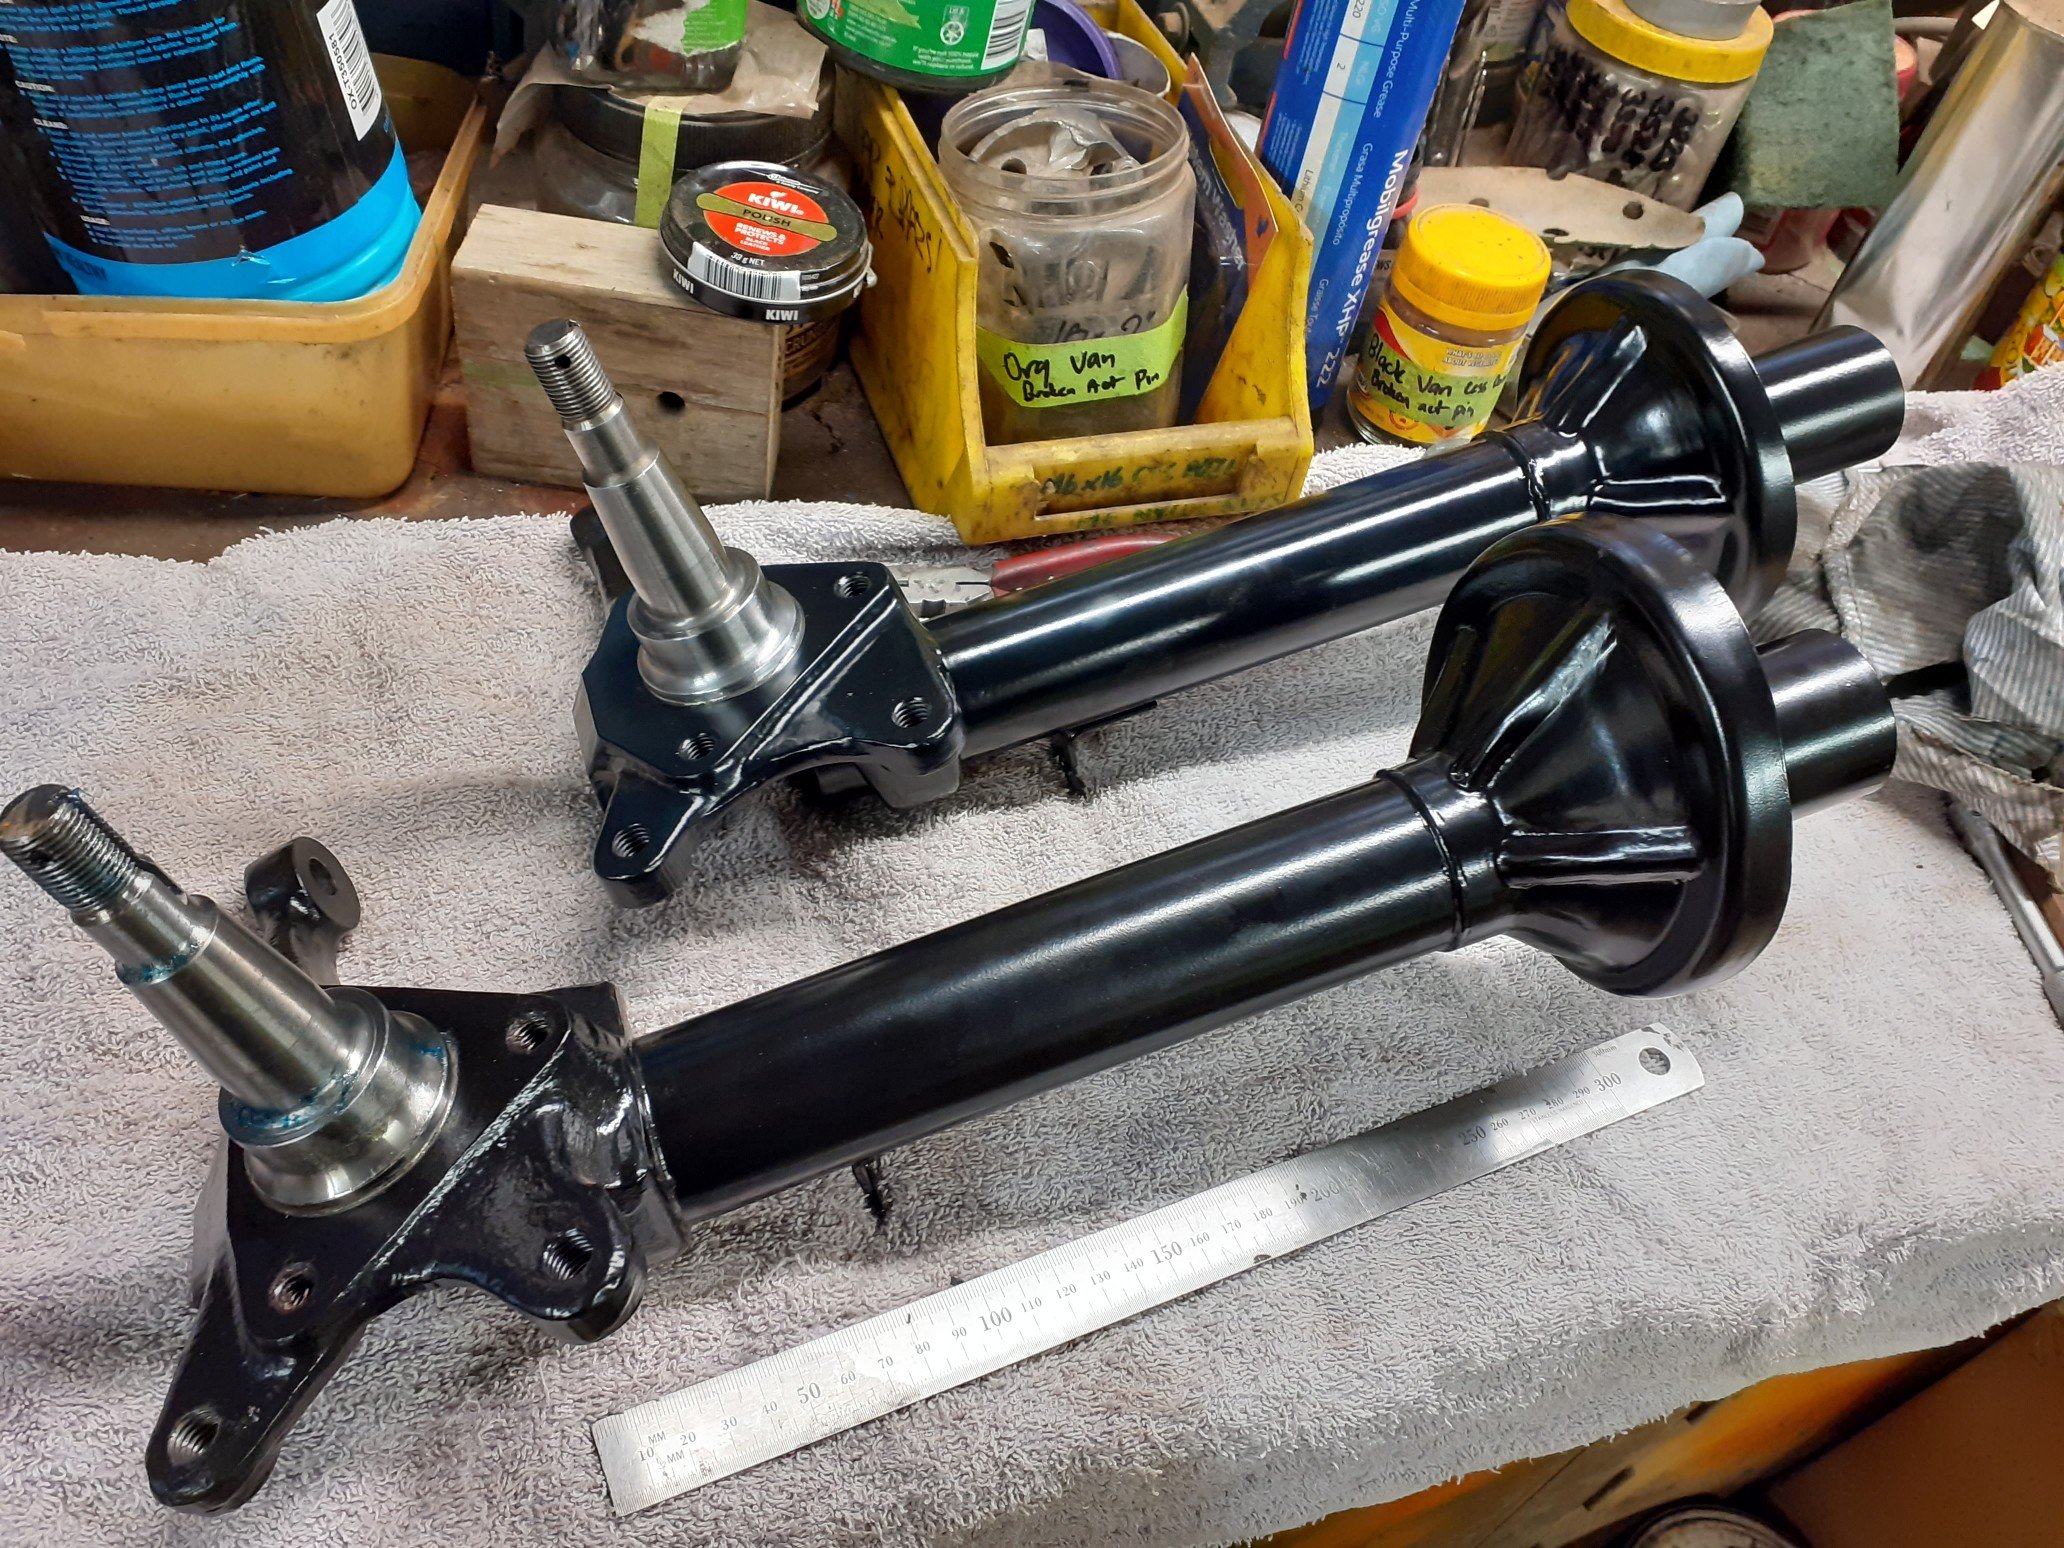
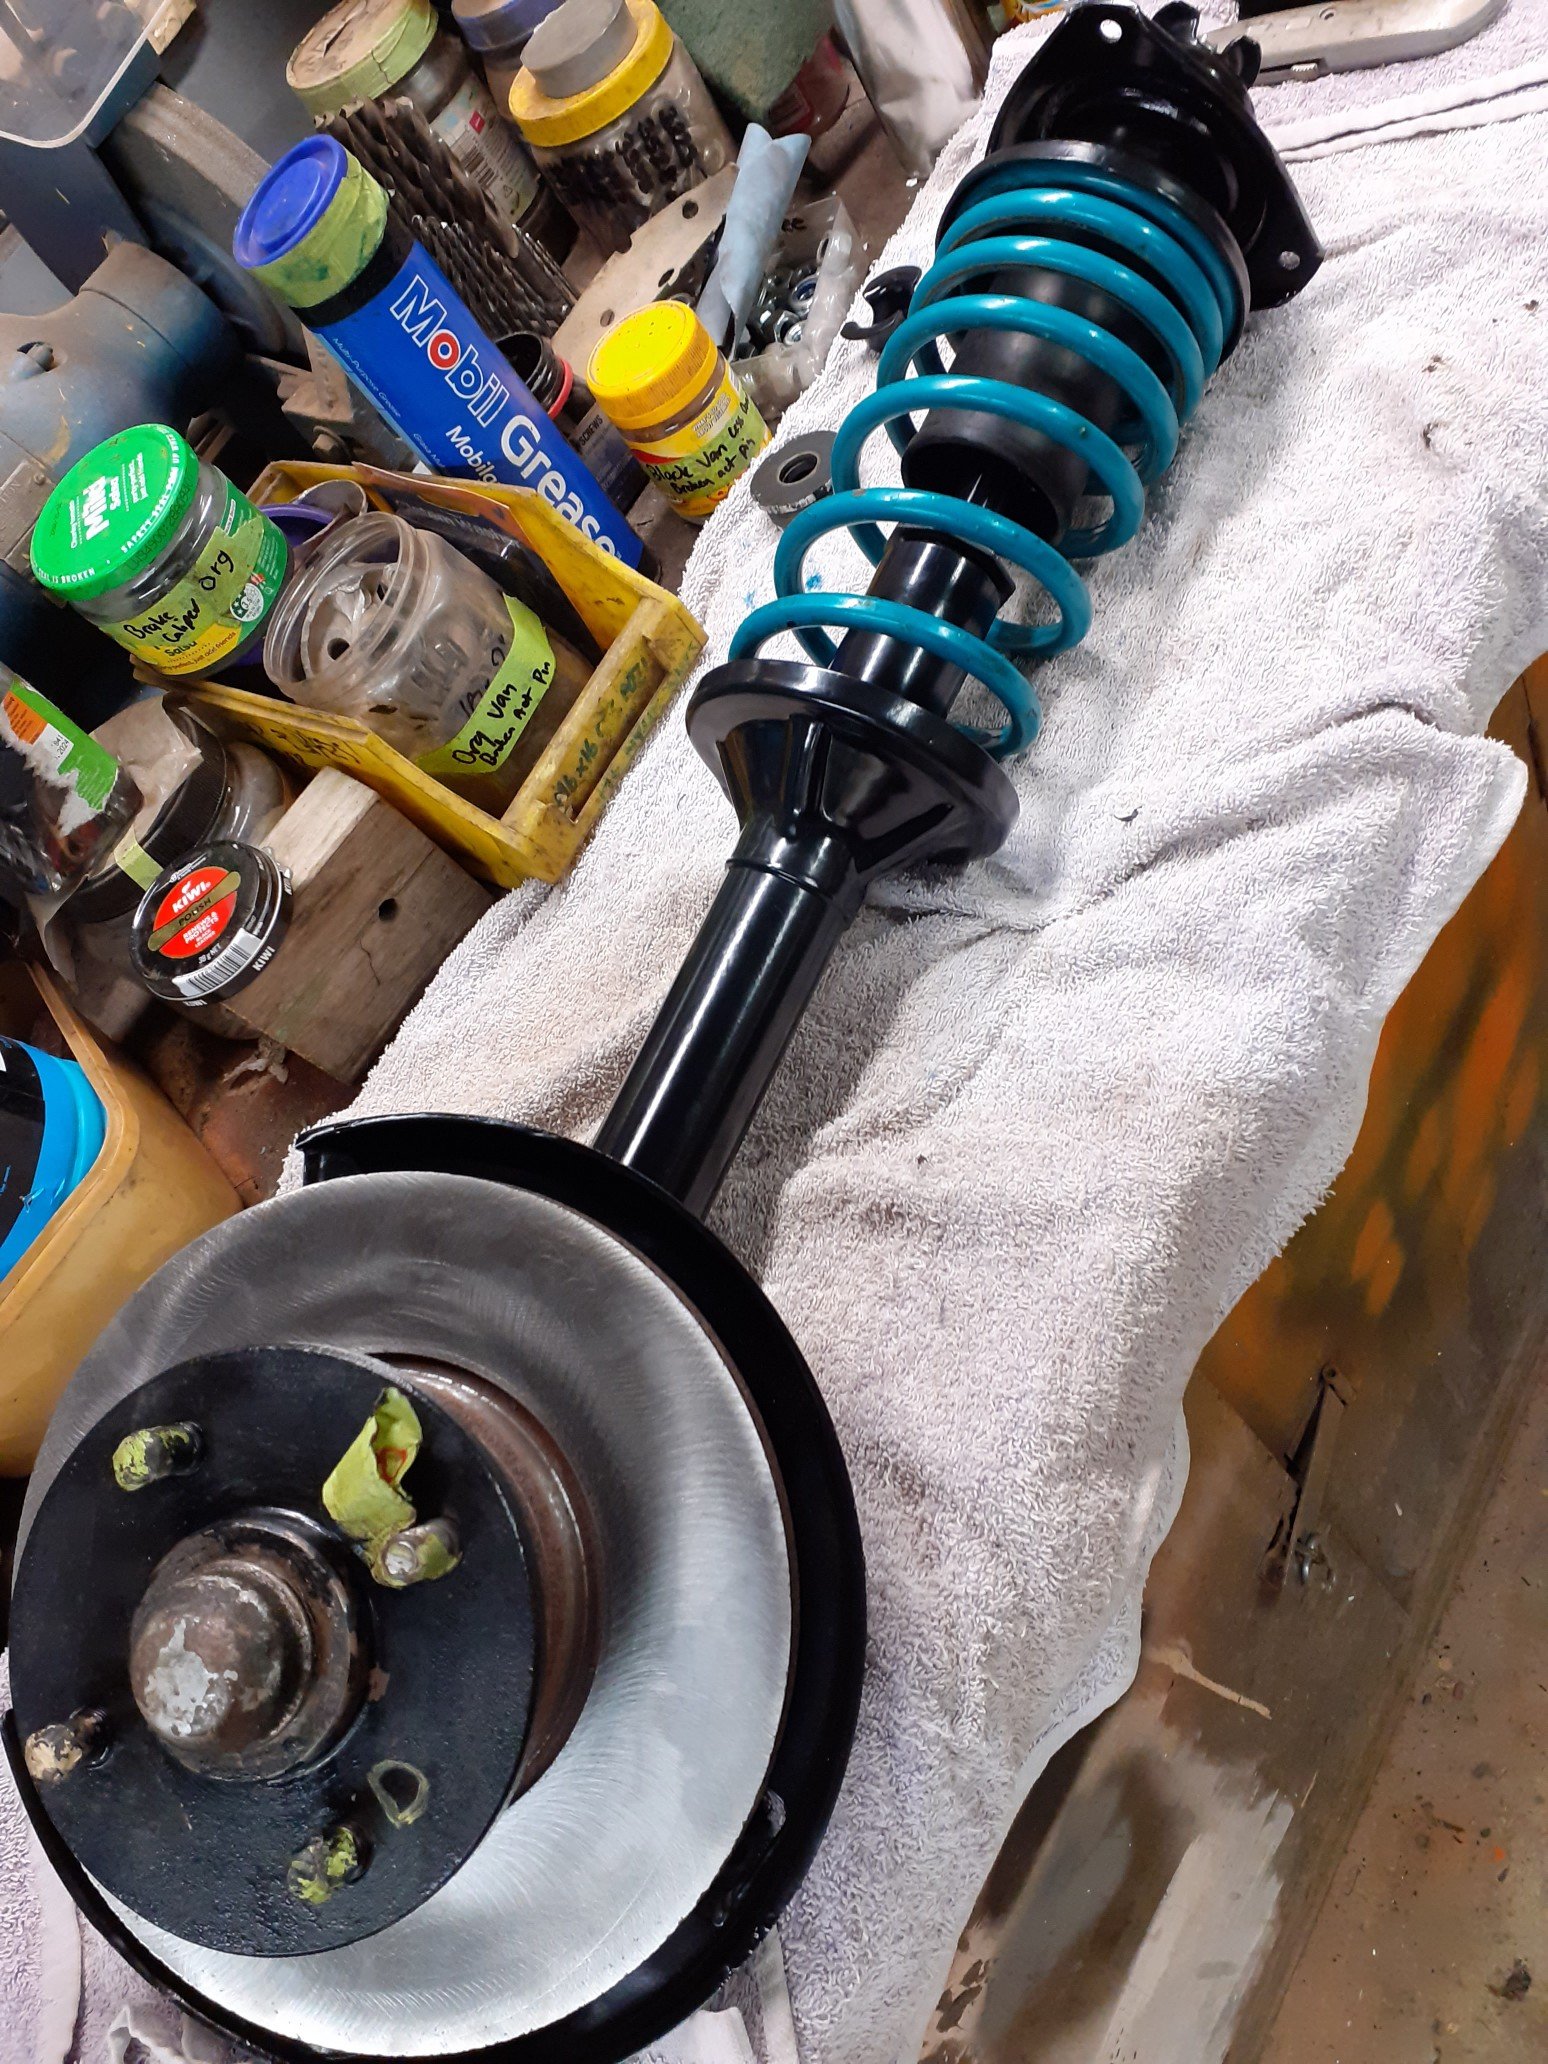
V2. Find an unbent pair of the correct struts, strip, paint and reassemble. New shocks and fittings. The original rubber from the strut tops have been removed and replaced with poly. The 2 different strut bodies but look very similar. The correct mk2 escort in the foreground and the unknown in front. The tube diameter, caliper spacing, disk shield spacing, stub axles and heights all measures exactly the same.
- 104 replies
-
- 17
-