
- Popular Post


piazzanoob
-
Posts
1247 -
Joined
-
Last visited
-
Days Won
1
Posts posted by piazzanoob
-
-
oh sweet score.
good luck doing the rear wheel bearings. requires the removal of the rear arms unless you have a tool to do them in place. but the bearings have to have the correct amount of preload set otherwise they have play.
have also fitted a different rear leaf spring to a single one over the factory one. didn't get the car much lower even with adjusting but i guess that would come down to which spring you have.
the one i did used vansteel products being a US company
-
 1
1
-
 1
1
-
-
-
-
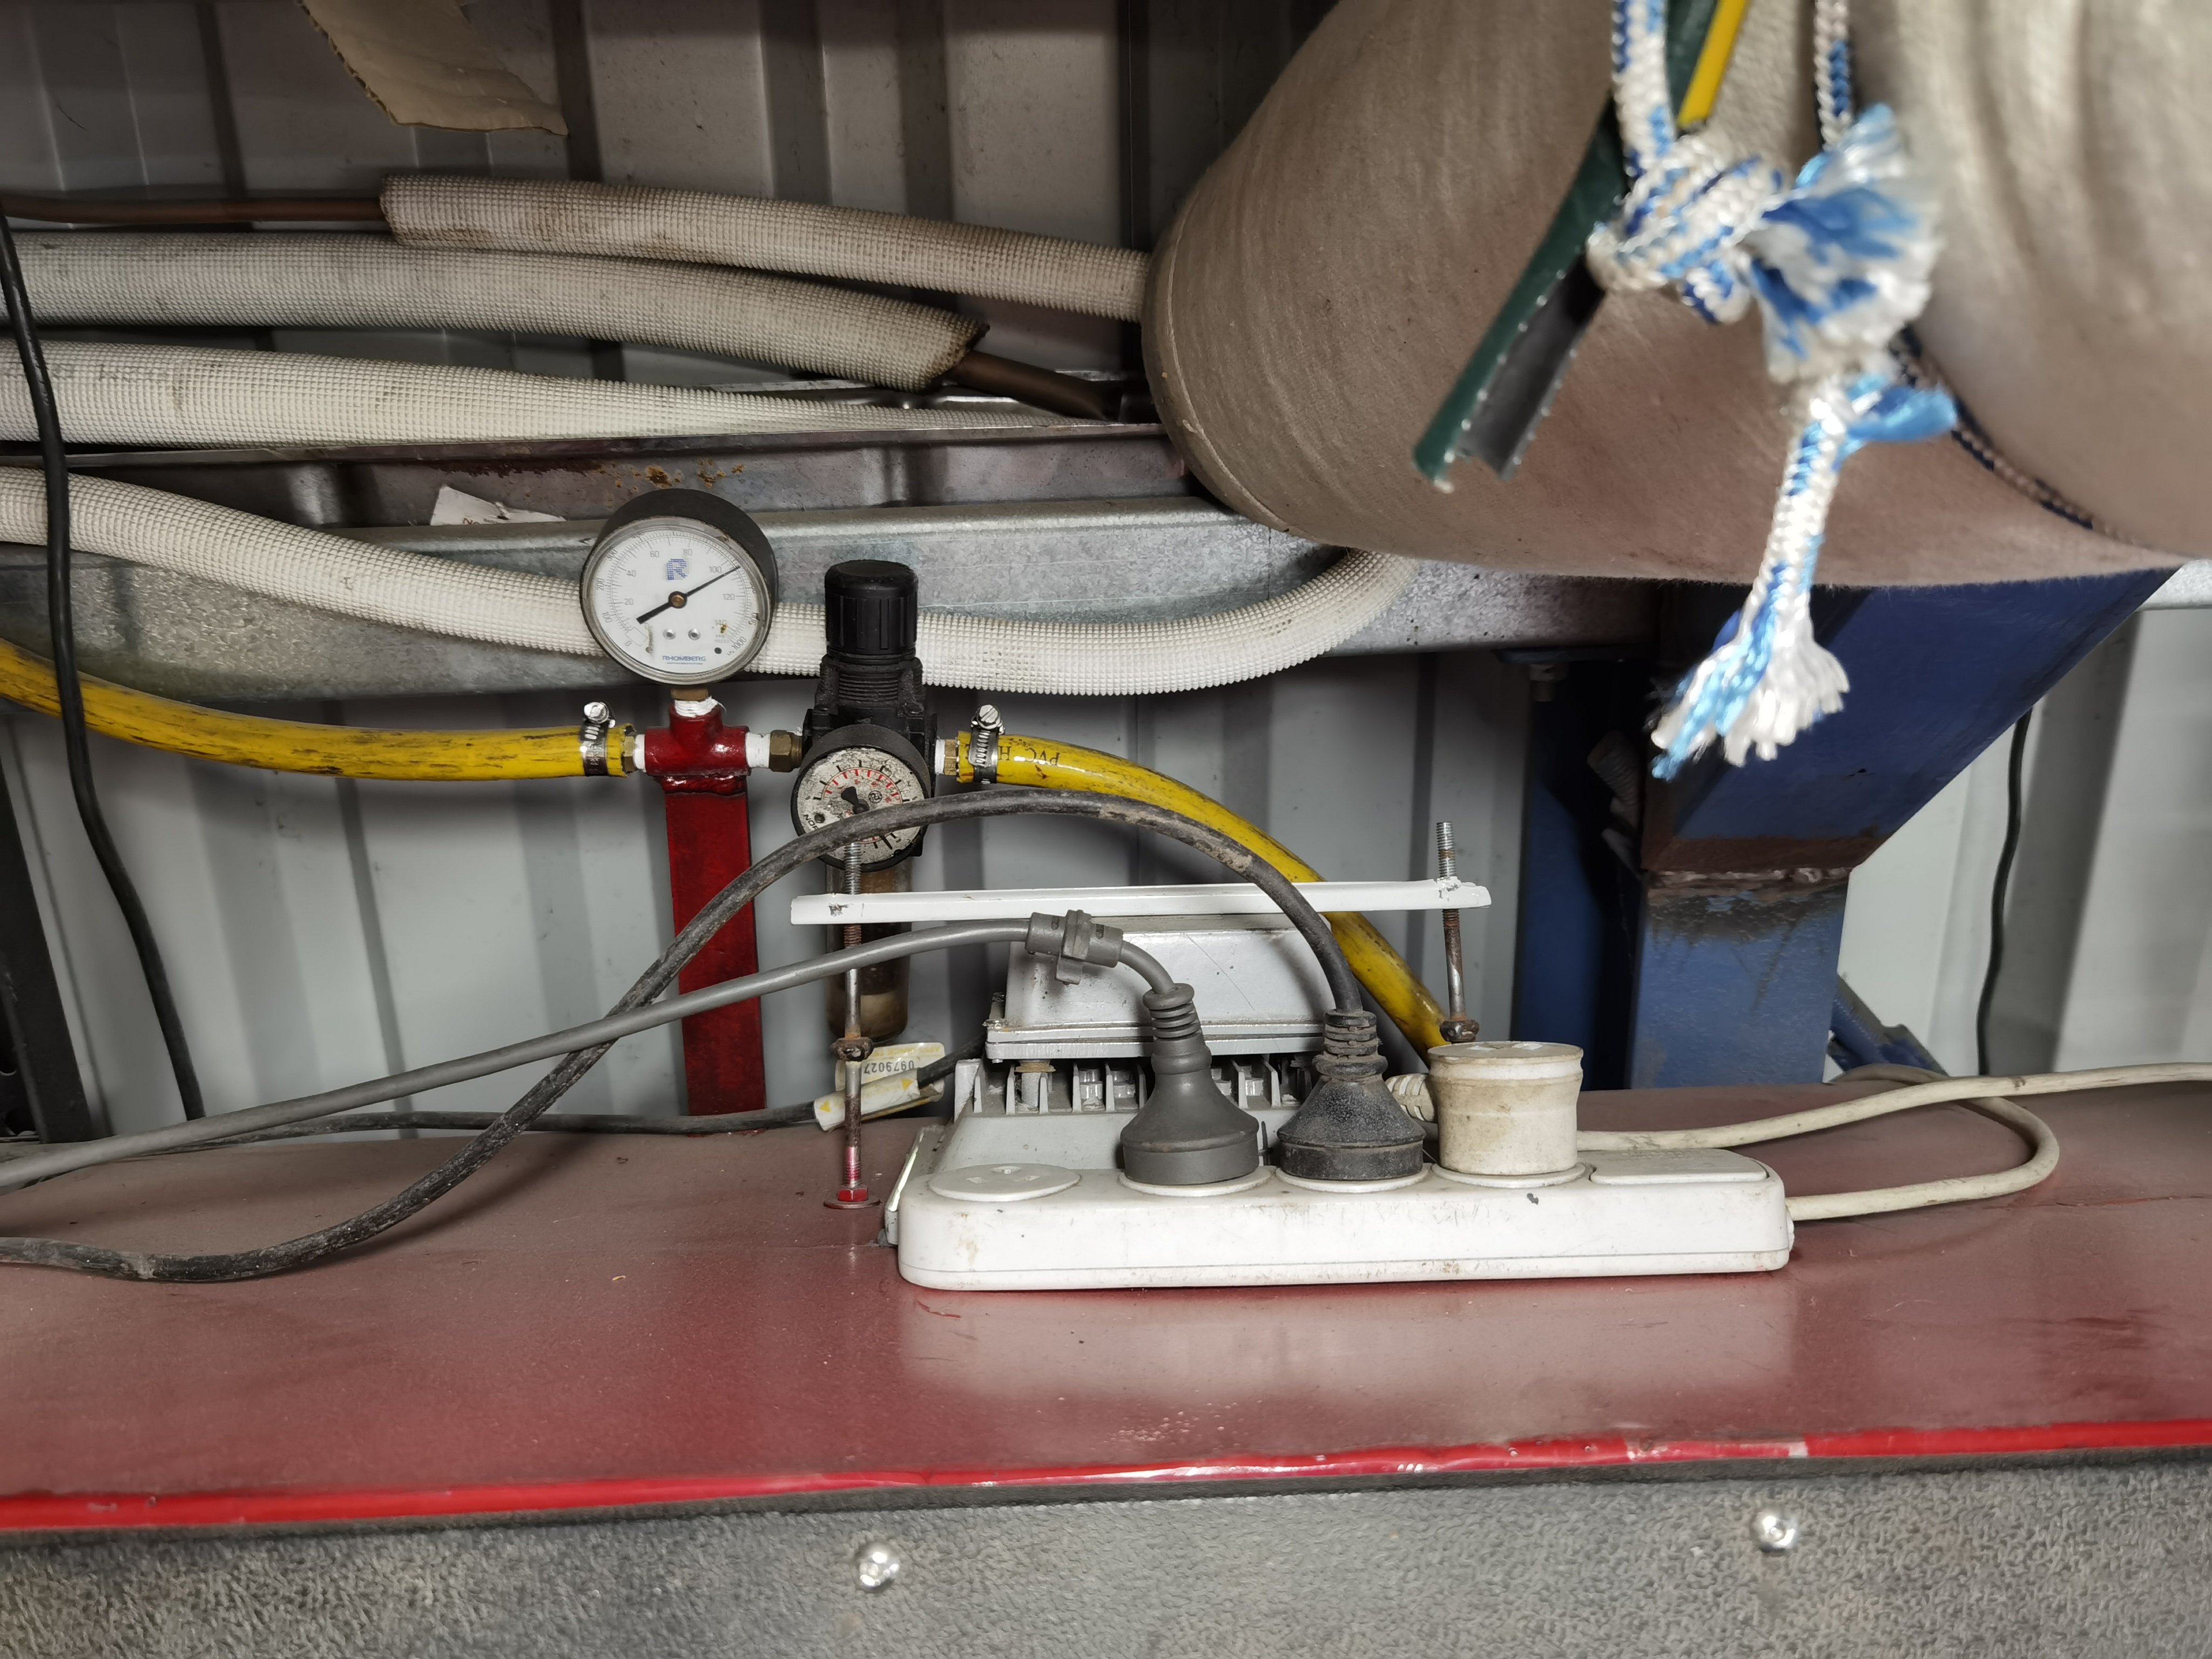
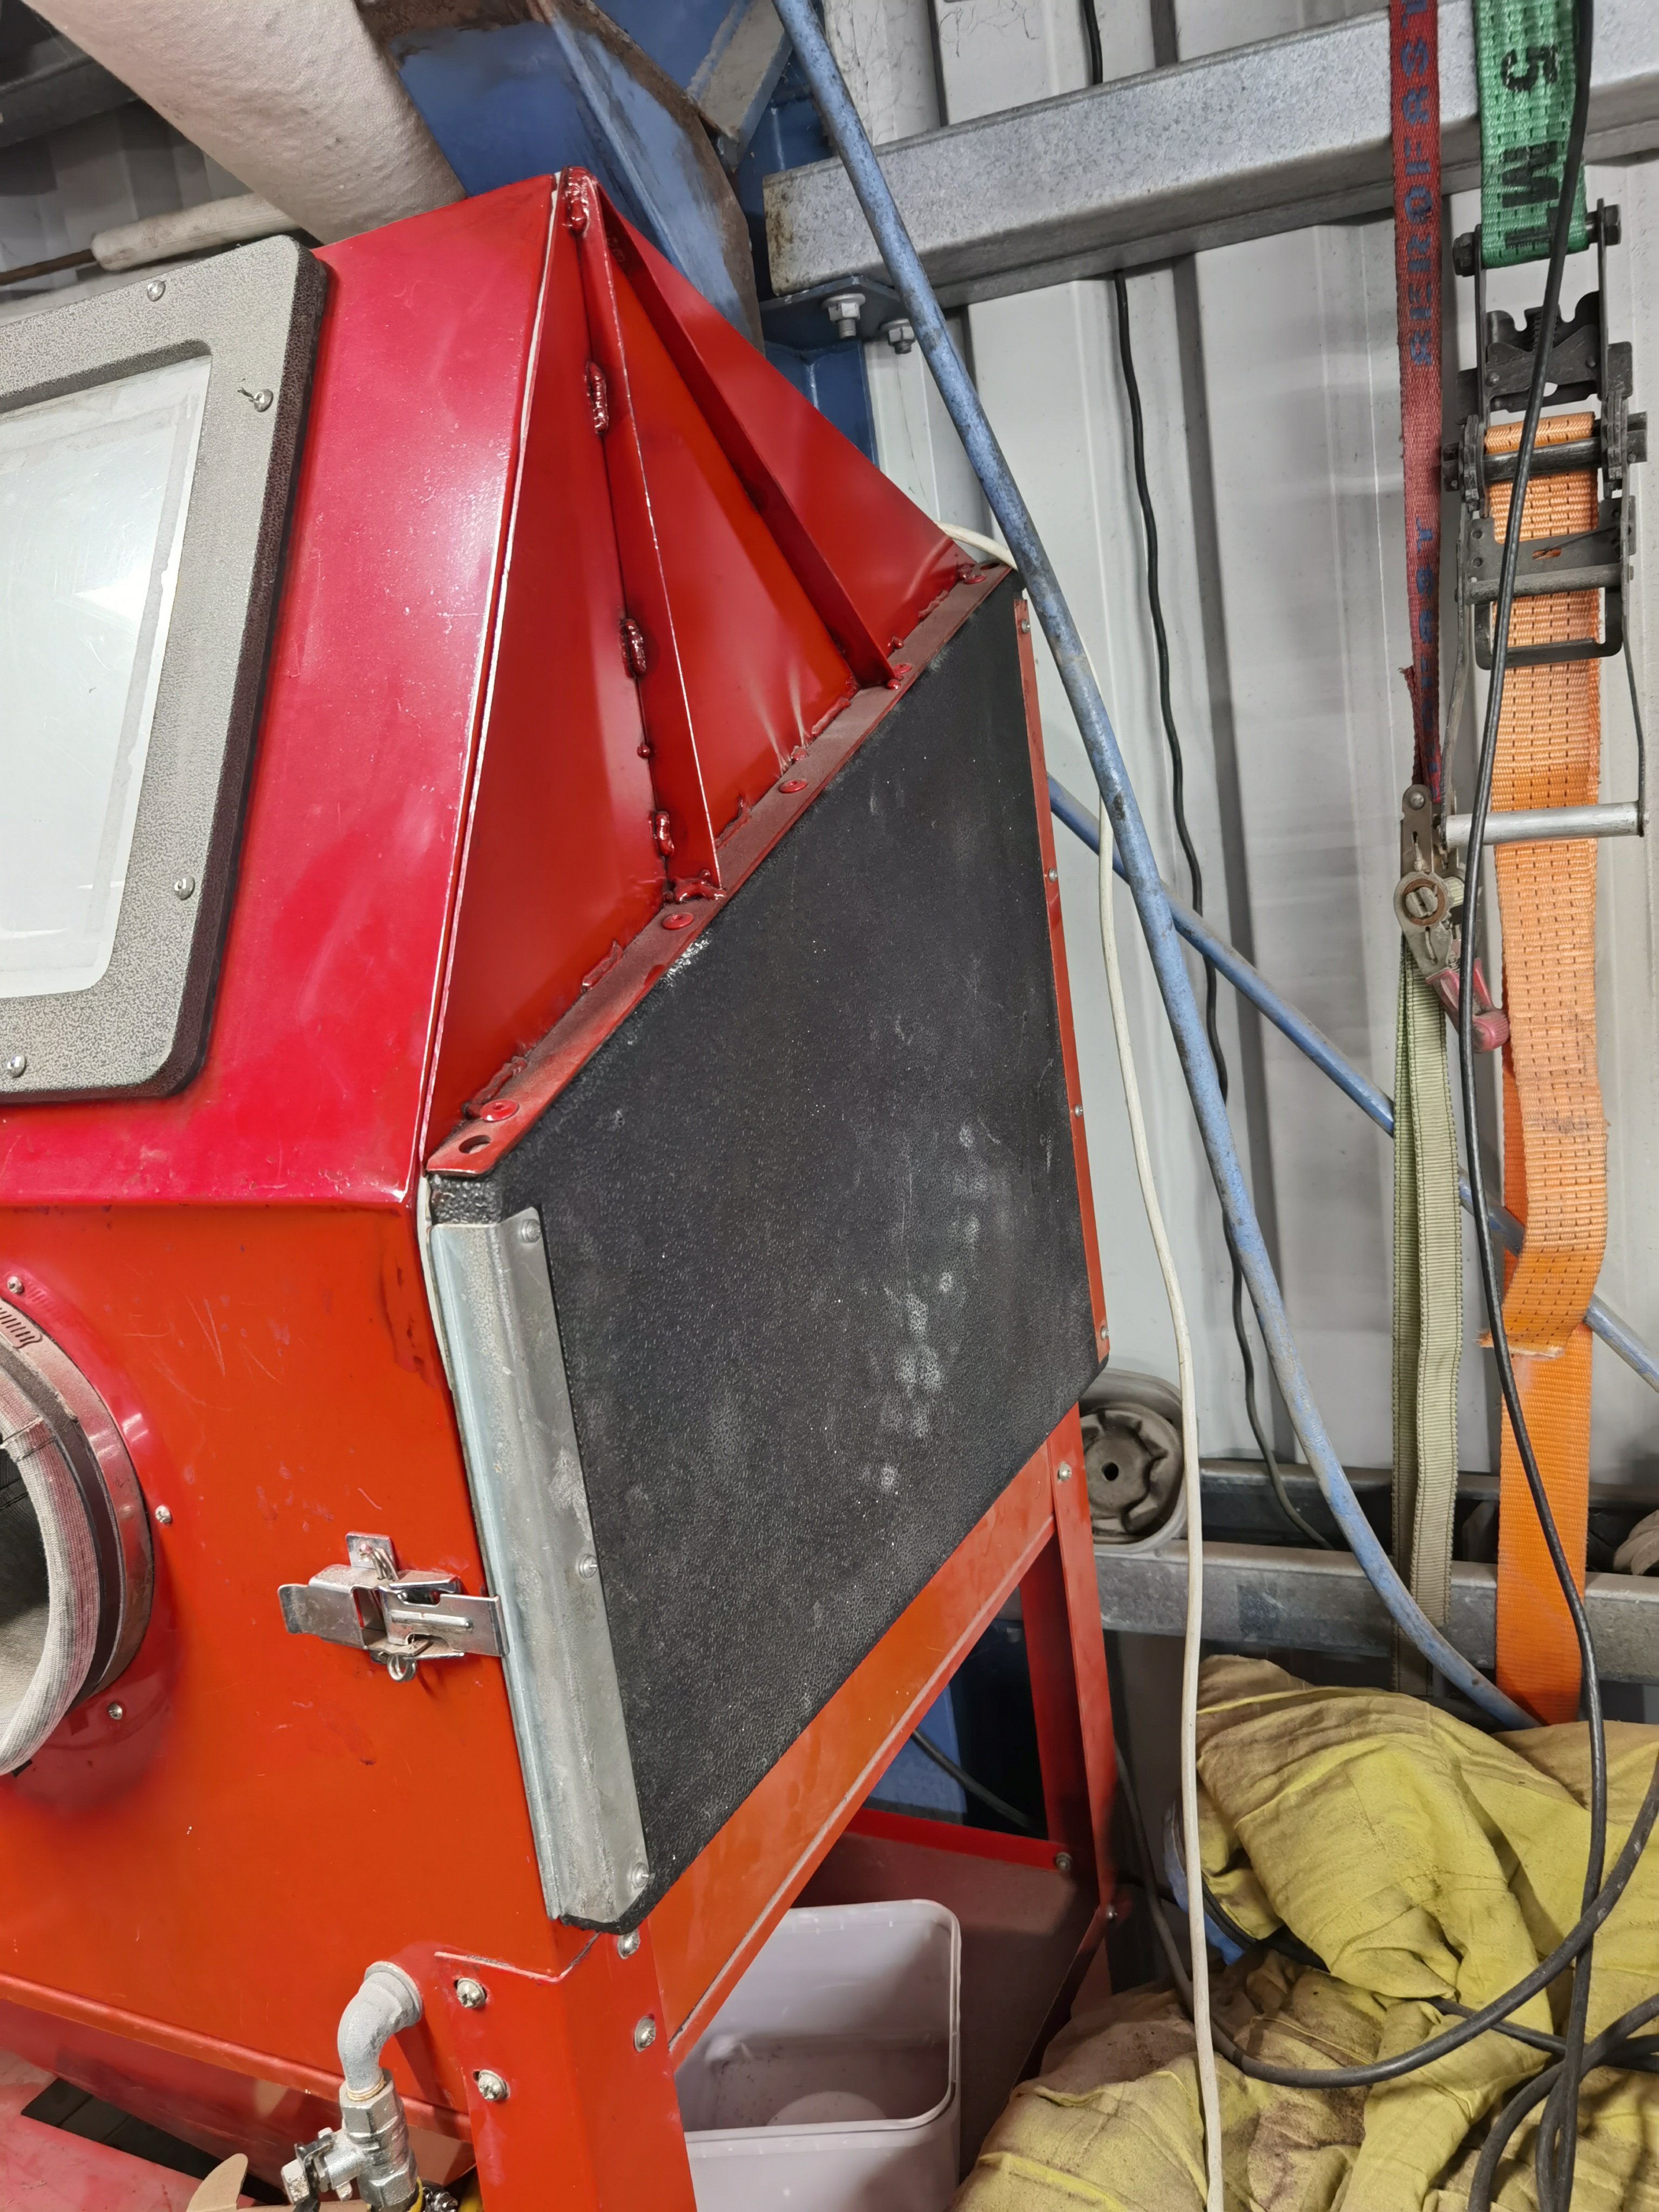
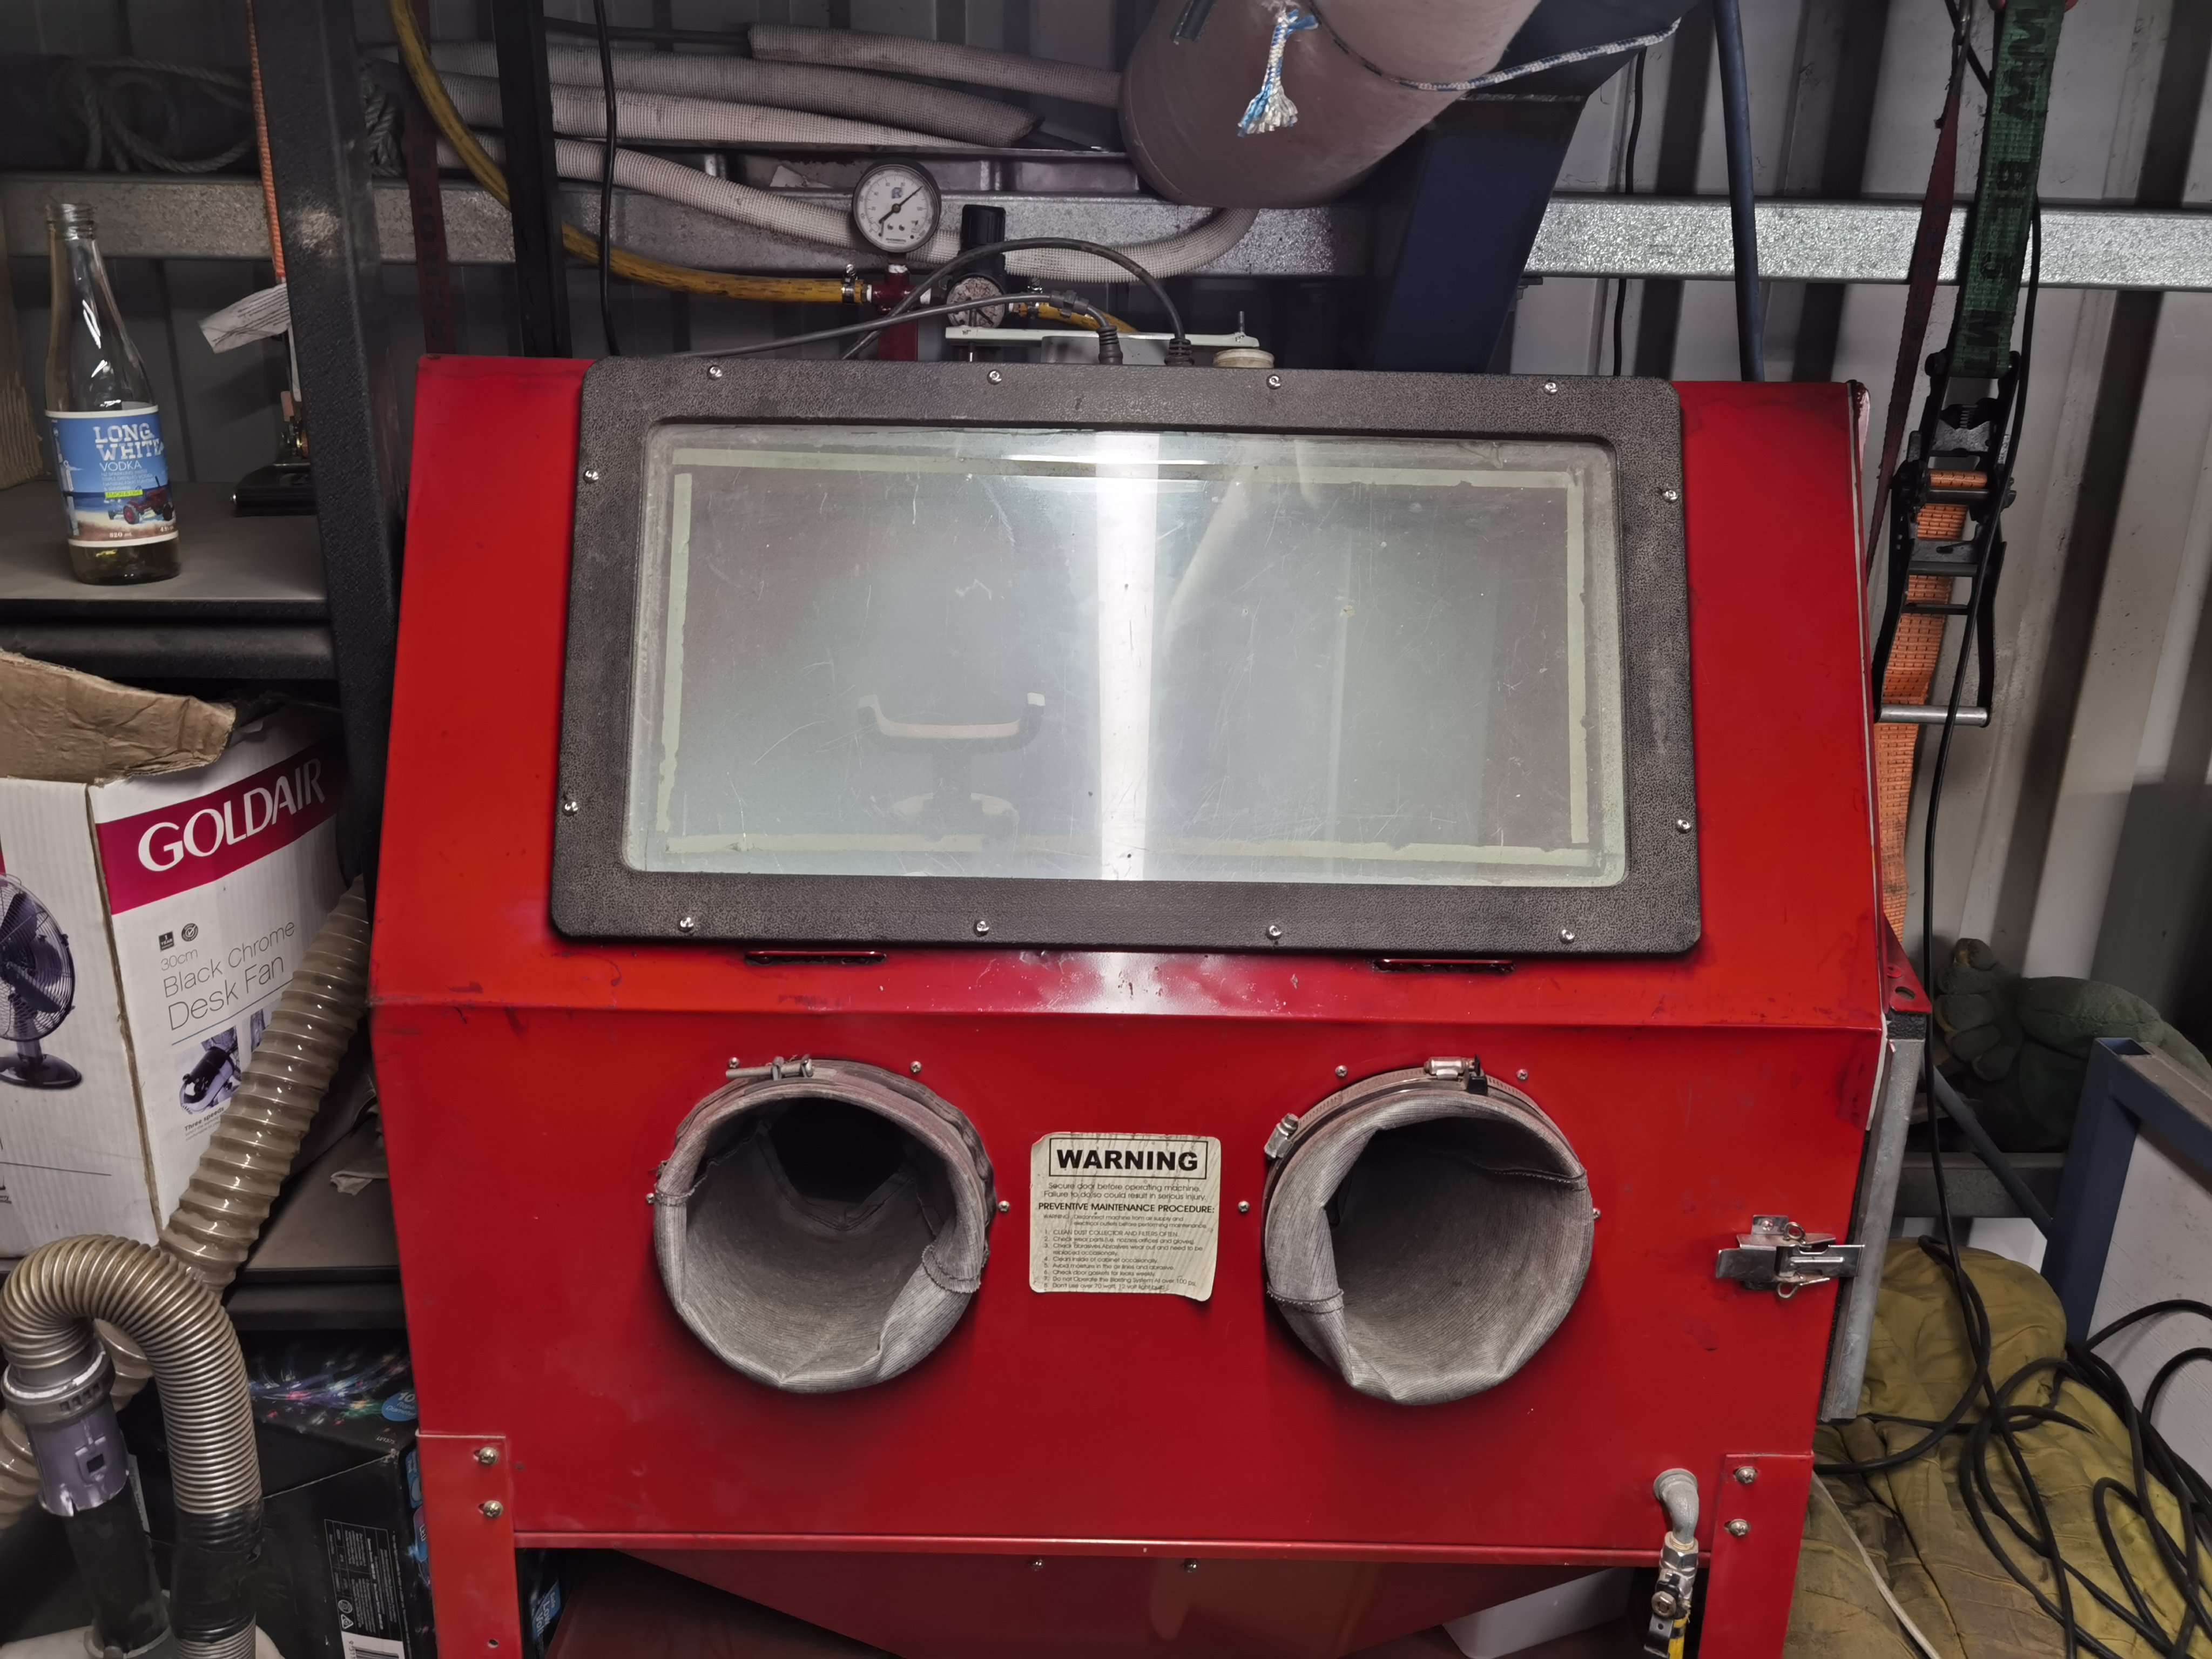
Figure this might help some people.
Had this blaster for some time but got sick of not being able to see anything and being abit shit.
Found cabinet is abit small and angle of vision screen ends up getting hit from garnet and end up with a sore back from leaning over.
For dust extraction I run a hose from side to a cyclone dust extractor from Aliexpress as same item here double price into bucket then vacuum from there. Vacuum for the job could be better but does the job as used another one but found filter gets clogged then when you use vacuum for car you end up with dust over and through the car. So now vaccum is only for blaster.
Also with air side I've got a marquip 13cfm compressor with an extra air tank. Seems to be about the biggest you can have on single fase power.
So modded the blaster for better angle and use.

Have also upgraded line size to 1/2. And added psi gauge to see what's going on and a water trap before it goes in the gun
Current air supply also runs out of extra air tank as that way you get dry air
Light wise as factory one are rubbish we cut a hole on top and added led unit in that is 240v
Also when running this setup air pressure seems to start well at about 120psi then after some time drops to 60psi where blasting is painful. So run two 13cfm compressors with extra one connecting into storage tank and blasting is great and psi stays around 80 to 90psi. Works great
Basically more air the better. And also find placing a panel on the bottom helps with the dust getting kicked up while blasting but not too big to stop sand going to the bottom to the pickup.
Better blasting everyone
-
6
-
-
toyota 1GZ-FE V12
1KZ
GR SERIES V6'S
-
12 hours ago, ul9601 said:
what's up with the back of the car there?
paint touch up done in black
-
1
-
-
- Popular Post
- Popular Post
-
14
-
-
4 minutes ago, cletus said:
What a saga on the trans. Bloody hell m8
yup
unfortunately the trans shop owner had too much work and not enough skilled people to get it done. both trans tech that damaged the seal and the shop manager left during the process it was there to be fixed.
in hindsight i shouldve just pulled it out myself and took a day off work to get it to beachhop
-
3 minutes ago, Nominal said:
Man, what a trial.
I'm casually looking out for a FE C6 for future upgrades.
did think about upgrading to a c4 or c6 also but its just a cruiser and already spent the money.
plus modding crossmember and linkages and driveshaft.
also just a used c6 is spendy that will probably need rebuilding
-
1
-
-
- Popular Post
- Popular Post
well well well
Drag day was good did some skids and average times and got a warning for static burnouts aswell as getting it abit warm a few times otherwise ran mint
after drag day i went to a friends Christmas do thing had a beer and left and did a skid.
Take my advice and don't listen to drunk people wanting you to do skids
trans slipped and wouldn't skid on 17x9s on tarseal
lost reverse and top gear
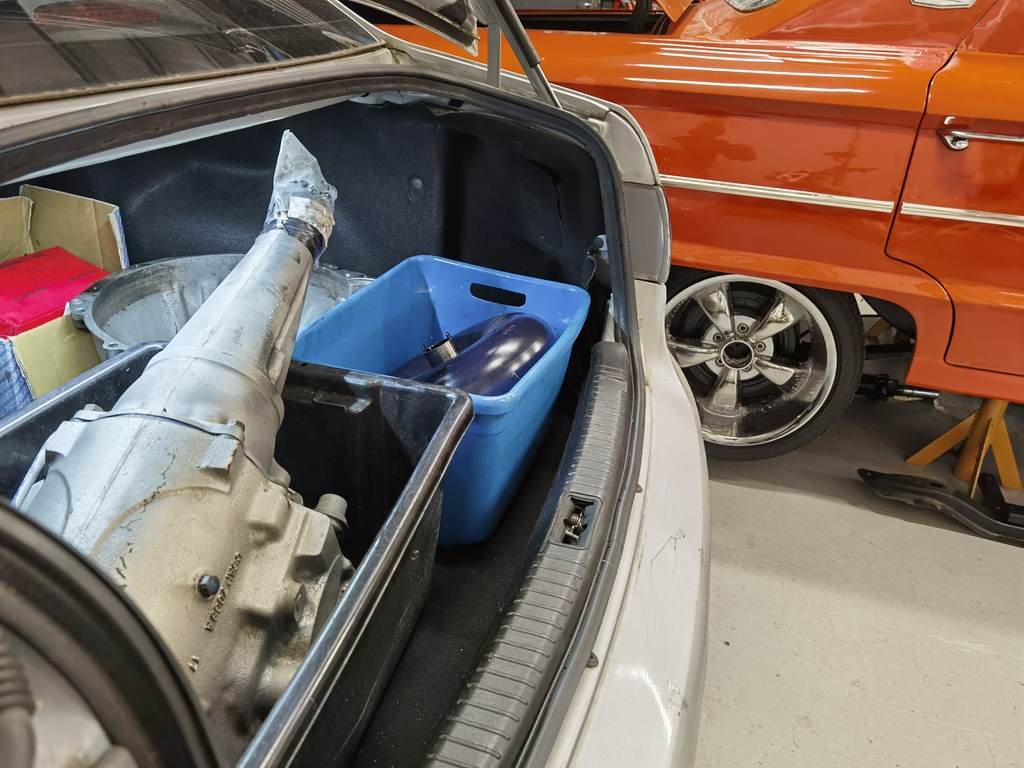
time for round 2 rebuild unfortunately trans shop was also too busy so had to wait till 2021 before they could make a start on it.
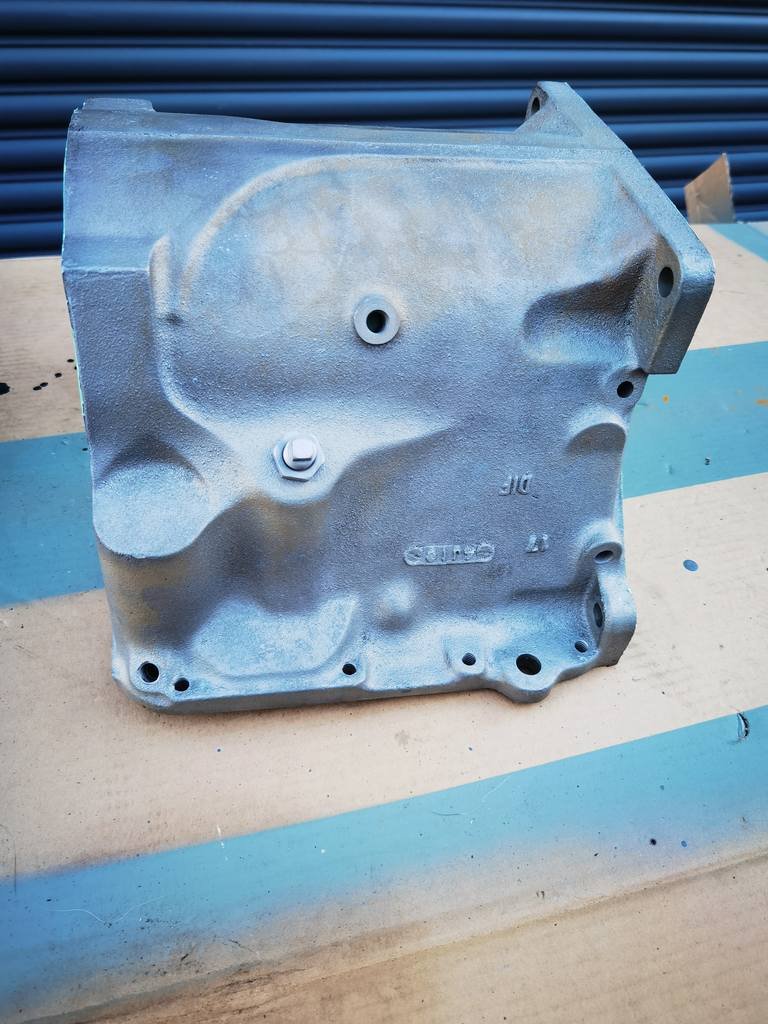
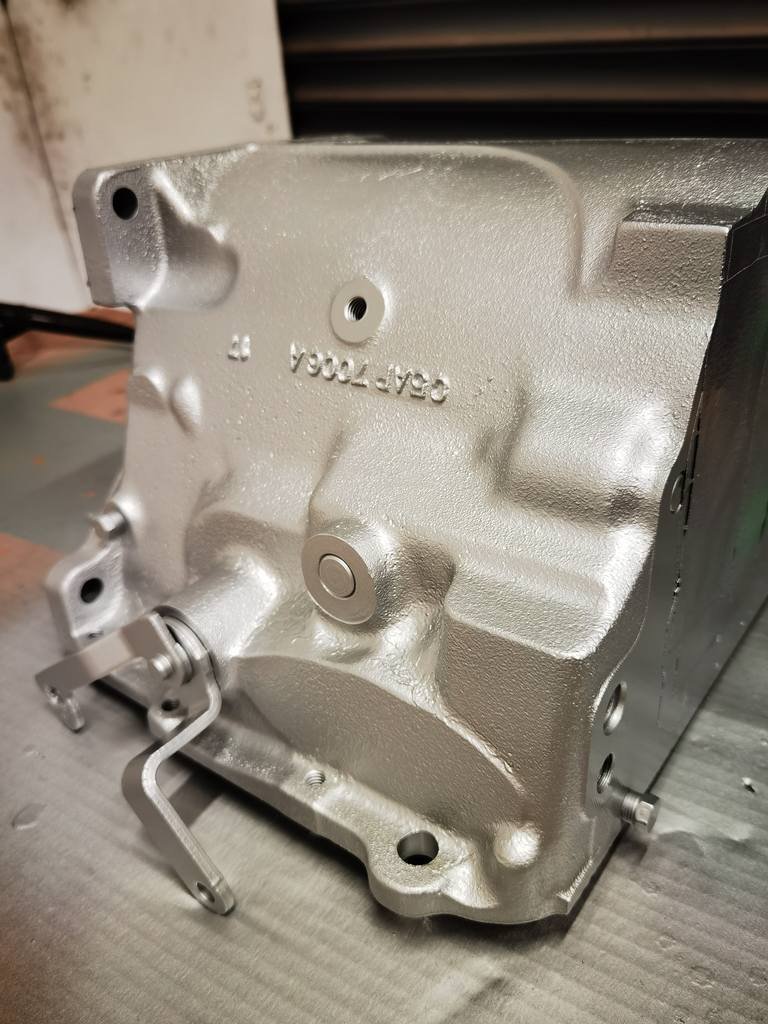
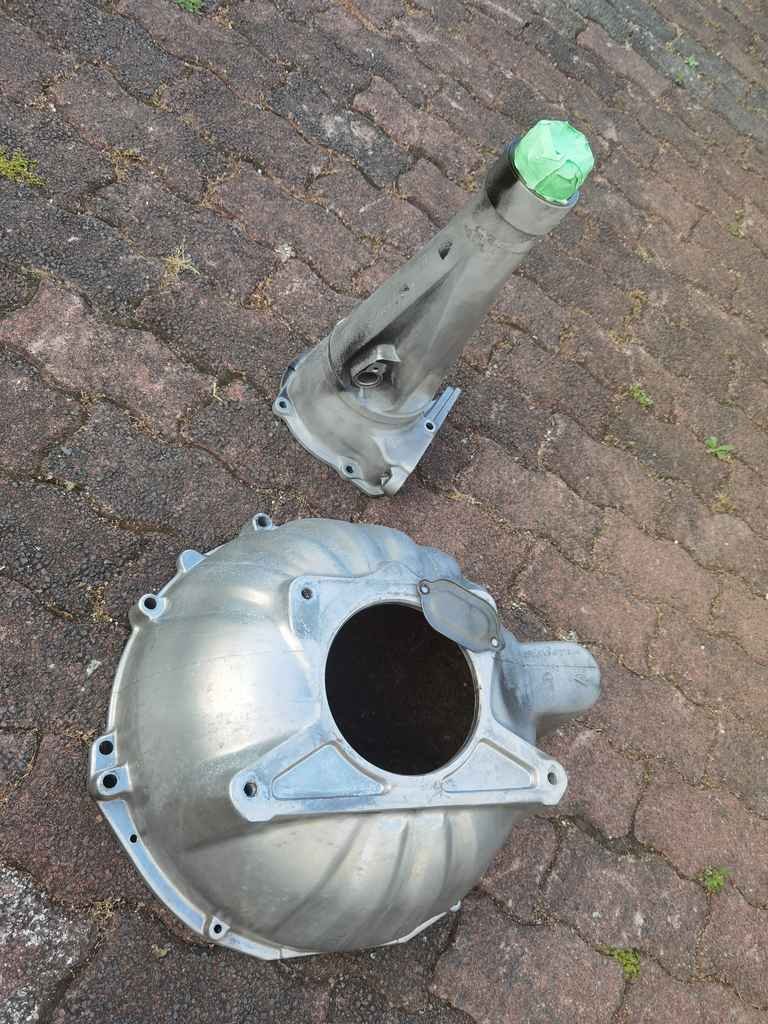
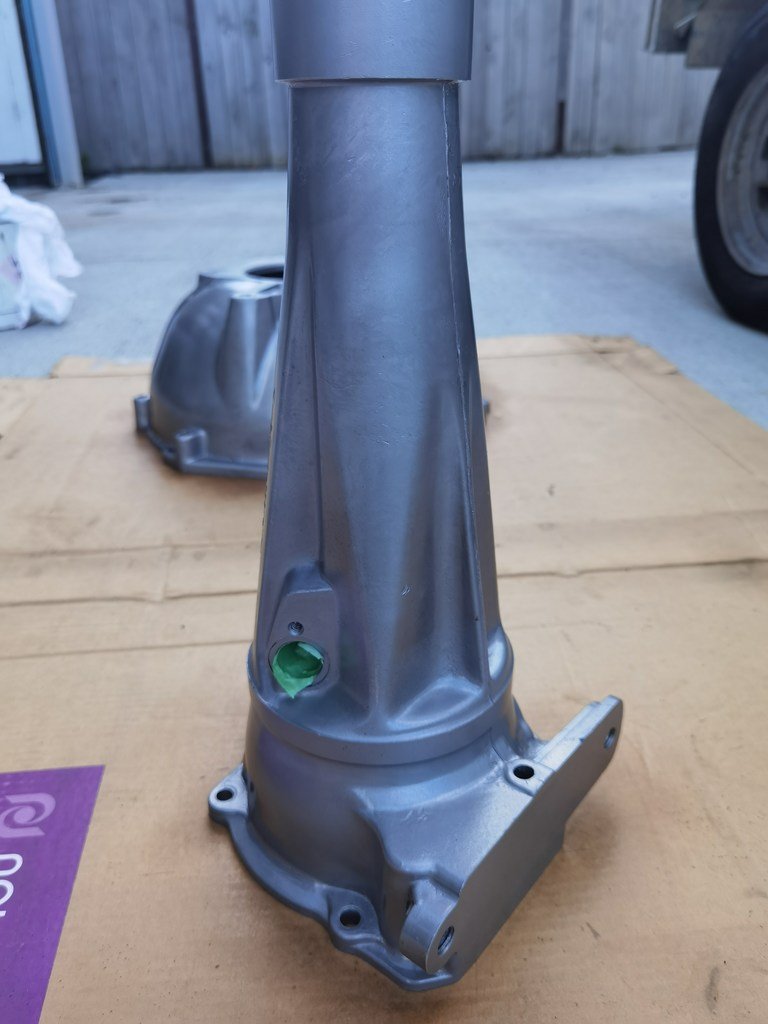
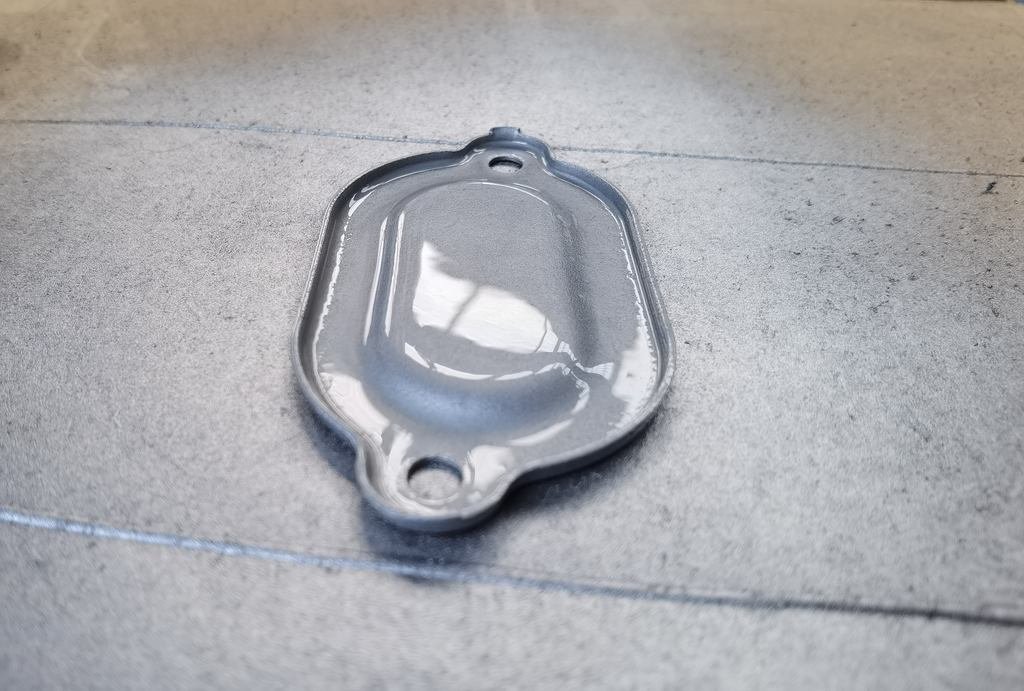
had trans shop strip it down and i blasted and painted the housing
also used @Mr Vapour vapour blaster and blasted the bell housing and tailshaft housing
then gave them a coat of clear coat to pervent them from getting oxidized
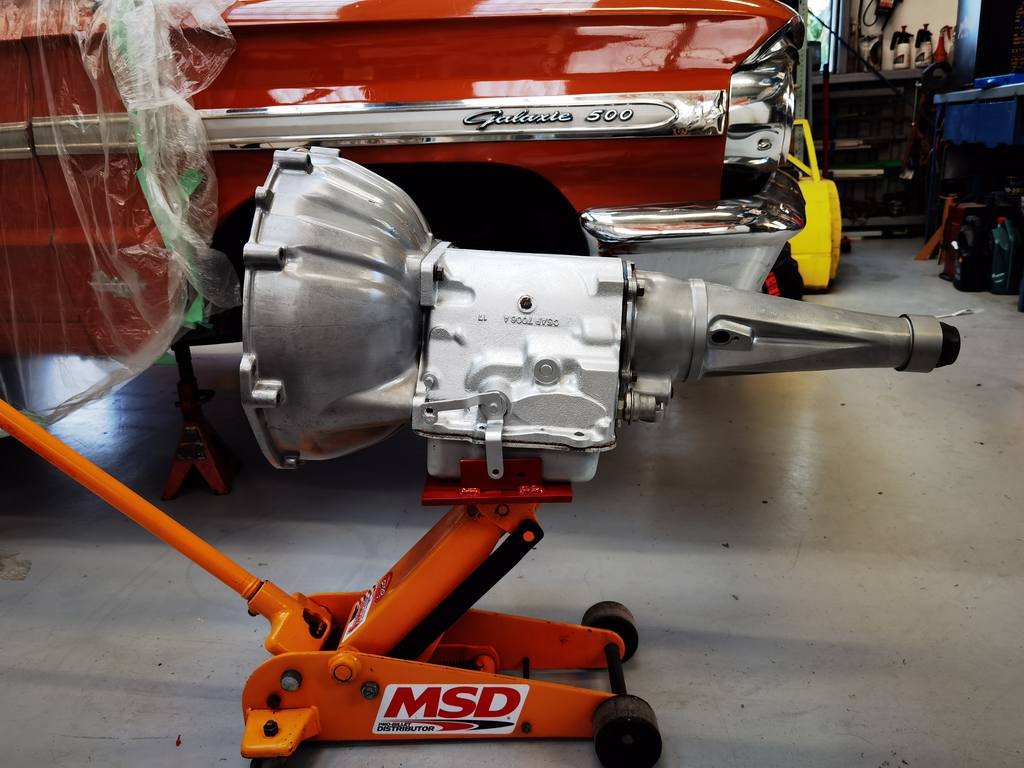
then after an extensive wait i got the trans back done.
i also made a attachment for the trolley jack to hold the trans and not fall off or damage the pan
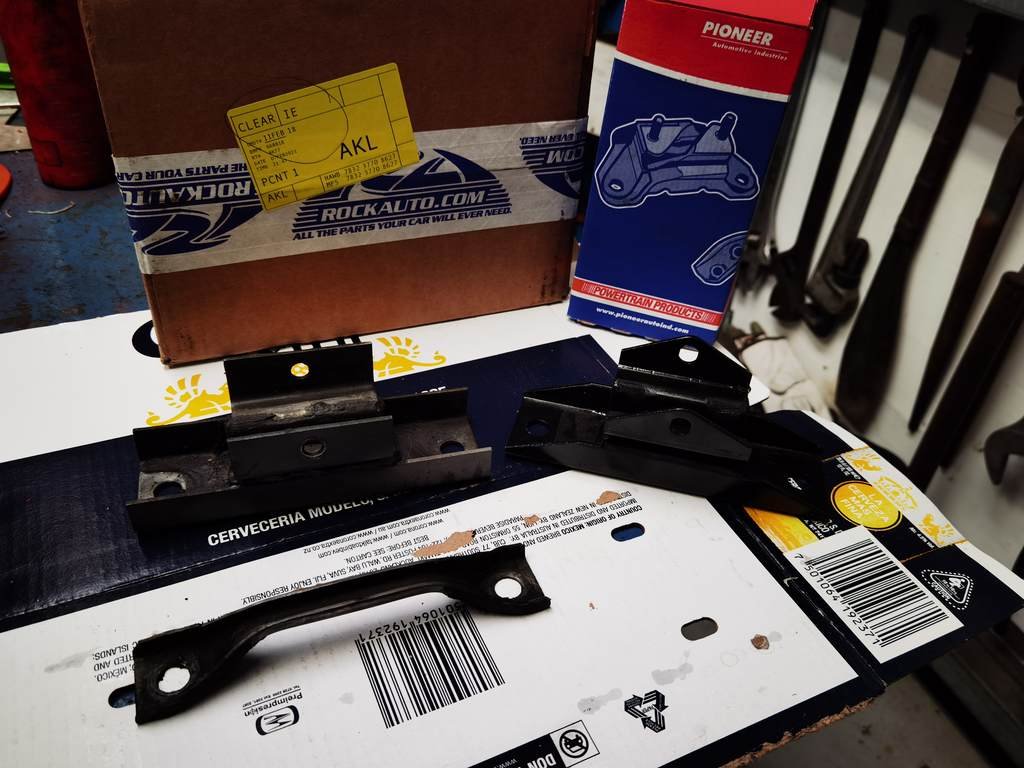
and got a new trans mount from rockauto
then unfortunately the weekend before beach hop i gave it a test drive to buy rego and trans had an issue where when it was warm it wouldn't select forward gears. so monday morning had the vehicle towed to the trans shop to have the issue fixed. they found a seal had been nicked when being installed which is a easy mistake to make. but unfortunately when they put the trans back they didn't make sure the convertor was all the way in and damaged the front pump so trans had to stay out while they found another pump and go through the trans again to make sure there was no metal fillings present. then they couldn't find the same size pump so convertor had to be changed to suit different pump.
so car didn't go to beach hop ended up just going for a look anyway. but during the time my trans was being sorted they had staff leave and other people fill in so took them 3 months to get it sorted. unfortunately the car has to go back still because the trans fluid put in wasn't what i had requested and was lost in translation due to staff leaving.
better living everyone
-
12
-
 8
8
-
Rob at f40 developments will be able to do it.
plenty of automotive stuff they do.
86-88 Shaw Road, Oratia, Auckland 0604, New Zealand
big black building on R/H side down the driveway
-
-
- Popular Post
- Popular Post
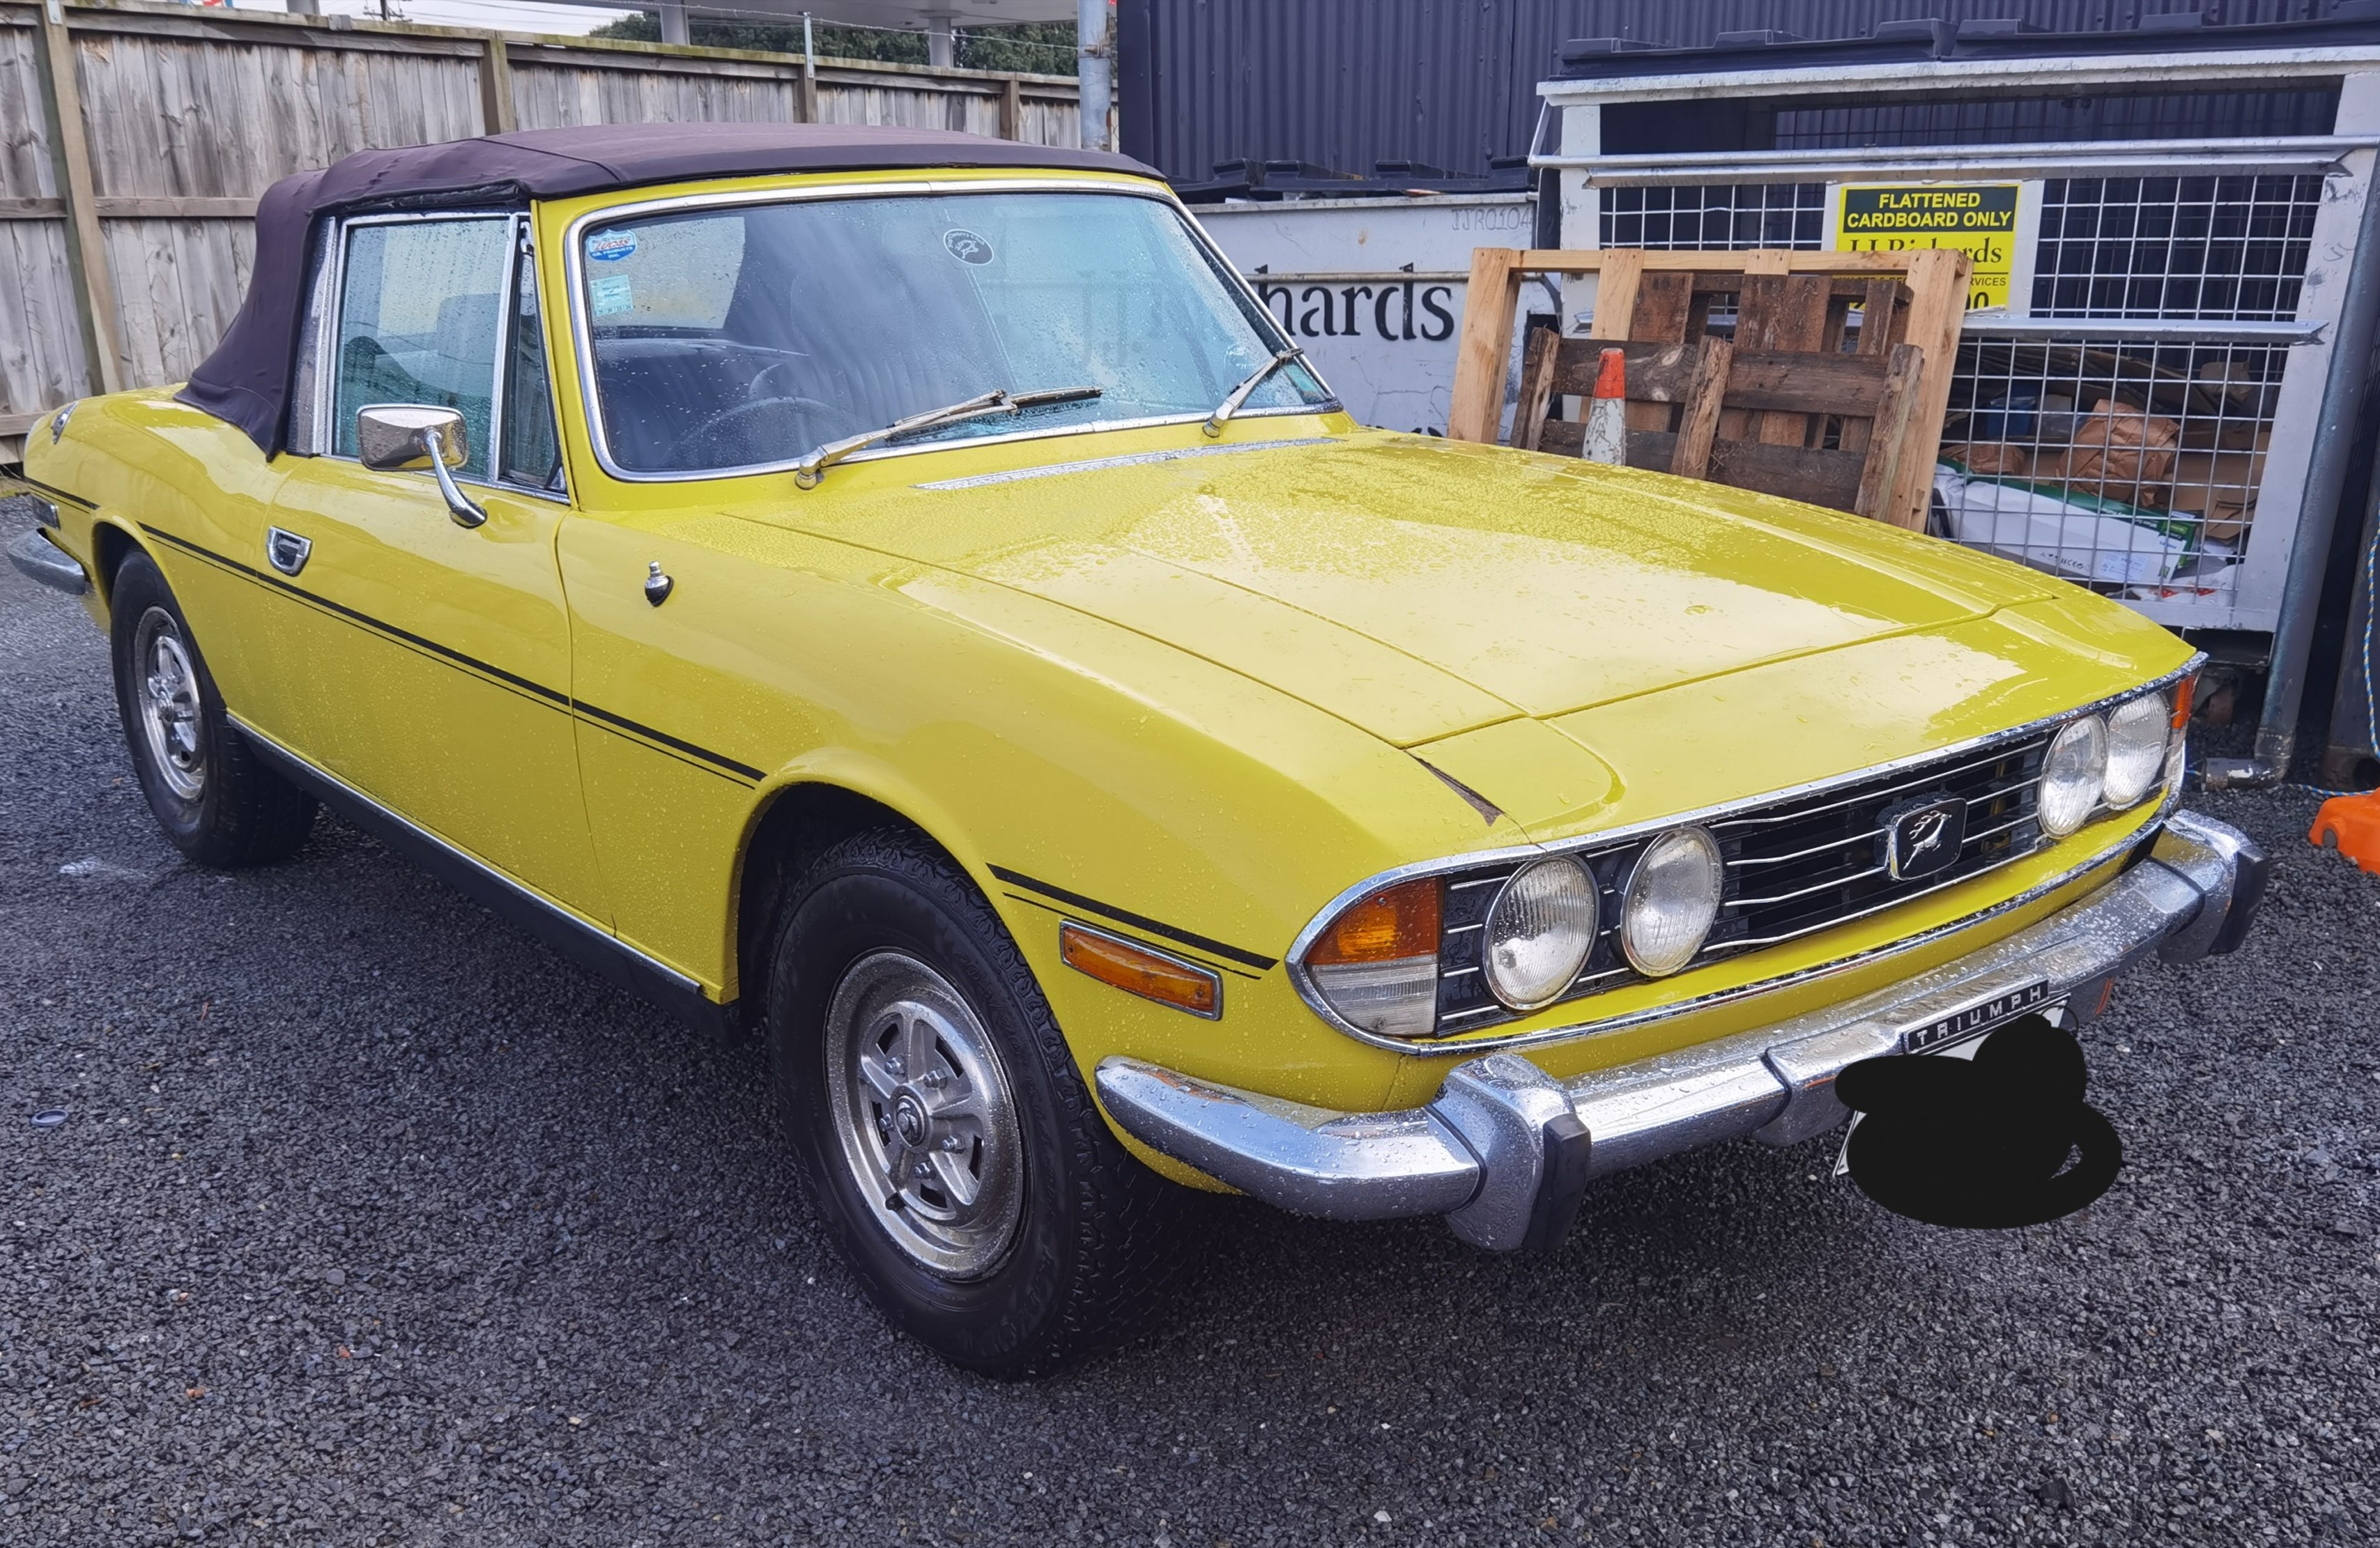
Yellow car!
Also being worked on
-
10
-
cheers guys
ended up having a nice yarn and drink with @- i5oogt -
-
2 hours ago, DoBro Jesus said:
Thursday and Friday as in yesterday and today?
Yes correct
-
Hey guys
I'm currently going to be in Christchurch this Thursday and Friday and would like to catch up with any OS folks who would like to catch up with a Sharn and beer.
Also recommend me places I should visit while in quake city
Cheers
-
1
-
-
plenty of different ways to do this job.
ive seen many trailers and leaf sprung vehicles the same setup as your photo. but always good to have a precaution of it not coming loose.
you can use the following nuts
nylock nut
cone nut which are great but not suited to items coming apart often
castle nut and drill a hole and use a split pin
myself would use a nylock or cone nut with no loctite.
-
good work on the rust work so far!
i personally wouldn't of started with a car that bad so hats off to you.
i would make sure the car is well braced while doing the rust work as no full chassis.
also adding full chassis connectors is a good thing on these old mopars
i also would get the car put on a chassis machine and measured up. as anything done in the states wouldn't have been done properly.
as we all know trying to get good panel gaps on a twisted car isn't that easy
good luck mate
-
1
-
-
first of all get the battery load tested when its charged. i find the carbon pile style ones the best. if no good replace it.
check the charge rate at the battery with the motor running with and without electrical loads lights radio etc. should be 13.5volts or over. if hits 17 volts regulator could be no good or if too low.
also check all your battery cables and starter and earth cables. may have a rusty earth connection. its common issues on old stuff
also check what amp alternator it is and if internal or external regulator. may be too small if running better ignition and aftermarket radio.
also if alternator is no good i wouldn't buy another second hand unit as who knows what its like. and some of the units from v8 part shops are hit and miss just cheap china stuff. unless paying more for proper branded stuff
and chevy style stuff is common too. i would recommend trying pan pacific for a new better quality unit.
-
4
-
1
-
-
Saw a k11 march wagon today
first time ever
-
1
-
2
-
-
15 hours ago, Dudley said:
Yea I have a truck project with running gear
12R and 4 speed manual?
If so would you be willing to part with it? have someone who is currently looking for factory 12R and 4 speed for a early hiace. or know where one is in running condition
-
10 hours ago, Dudley said:
I got bits and access to a parts van up whangsrei
have you got any factory engine and running gear?
-
if you have a lpg bottle and fittings and hose and gauge you could make one


piazzanoob's 1964 Ford Galaxie 500 seeeedaaan
in Projects and Build Ups
Posted
So while i had the trans out as i couldn't use the car i decided to tackle some rust the car had. My wof inspector had mentioned it a few times and thought i better fix it after him being nice and giving it two prior wofs as it was. 2nd inspection i put some insolation tape over the holes after i had poked around with a screwdriver haha. I was also lucky that this rust was never noticed while the car was complied or had the repair cert done. I knew it was there but kept my mouth shut.
Ah no bondo bob has been in here.
I cleaned up the bottom pieces with a portable sandblaster and applied a few layers of crc zinc it
well that would be why its rusty. full of dust and dirt that at some point has been wet or had moisture in it.
also cut a piece out of the inner wheel well. i had previously when the car had been blasted and painted of the underside i applied a small layer of bog over the pinholes and blended it back in with black paint.
I firstly made the curved bit to keep a guide of the shape and location and welded that in. I then cut the outer piece out and made a replacement. This piece was made with 5 different bits all welded into one patch.
Also made a new piece for here with 2 bits and curving it to suit the wheel well shape.
Then applied a small layer of bog to keep it looking nice. sanded and painted area black to hide all the sins.
Then i became bondo bobs brother
The reason why this got bogged back up is because at some point the car has had a hit in the passengers rear quarter one big enough that had required the chassis to be repaired when i got the car. im not keen on removing the rear quarter of the car to get the body lines good as the rest of the car isn't that perfect either. So body filler was used to get the door and quarter lines looking good.
Sanding and shaping the bog actually took me more time than the metalwork that was done.
Gave it a shot of primer. You will also notice that i have prepared and primered a wheel also. Will get into detail with that in next post.
Gave the primer a sand and shot of paint.
Ended up happy with the result. i knew i was never with my skillset able to blend it in without being noticeable but once the sill trim and door is closed its not too noticeable.
better living everyone