piazzanoob
-
Posts
1247 -
Joined
-
Last visited
-
Days Won
1
Everything posted by piazzanoob
-

piazzanoob's 1964 ford Galaxie 500 seeedaan
piazzanoob replied to piazzanoob's topic in Project Discussion
Sorry wasn't sure what you were talking about. yes they are Toyota Tundra's they look like the earlier model to the current ones -
piazzanoob's 1964 ford Galaxie 500 seeedaan
piazzanoob replied to piazzanoob's topic in Project Discussion
I suspect the carb is playing up. it did it once before when leaving the road. Just cranking it just flattened the battery. And eventually it would go. it has some no name carb on it that I cannot get to run mint. most likely just a 50$ napa auto parts piece of shit. when funds allow I will be putting a new manifold and carb which will set me back around 1500$ but I will be going through the wiring again to make sure it's all working properly. -
piazzanoob's 1964 ford Galaxie 500 seeedaan
piazzanoob replied to piazzanoob's topic in Project Discussion
No this one is a mahindra india special -
piazzanoob's 1964 Ford Galaxie 500 seeeedaaan
piazzanoob replied to piazzanoob's topic in Projects and Build Ups
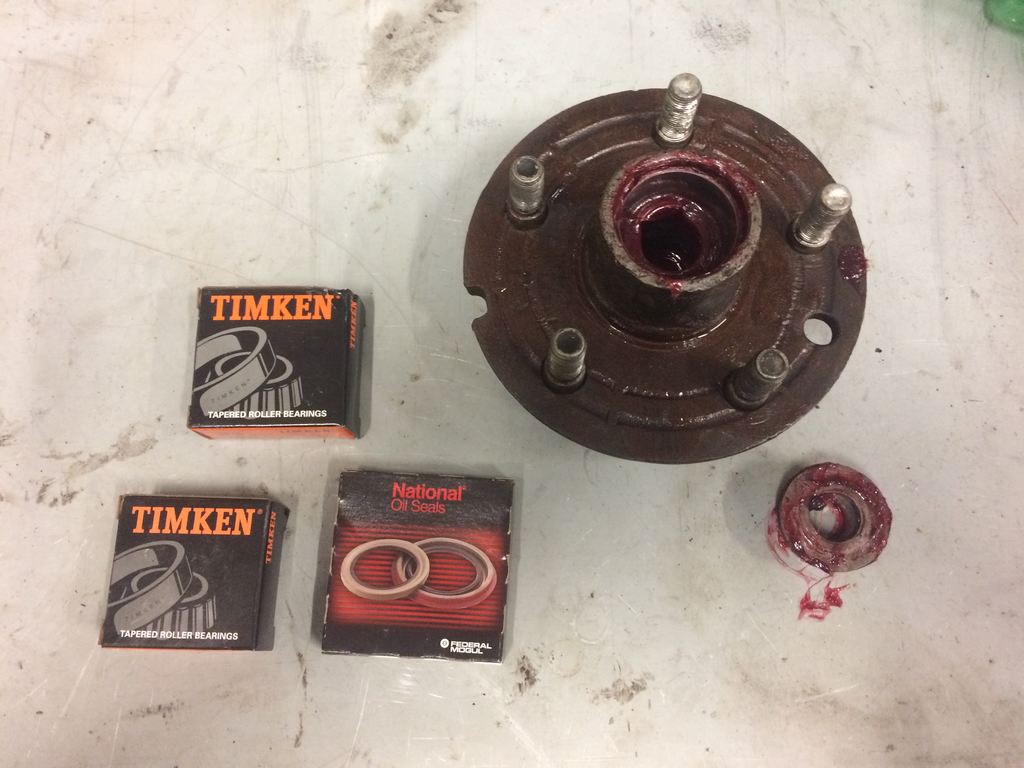
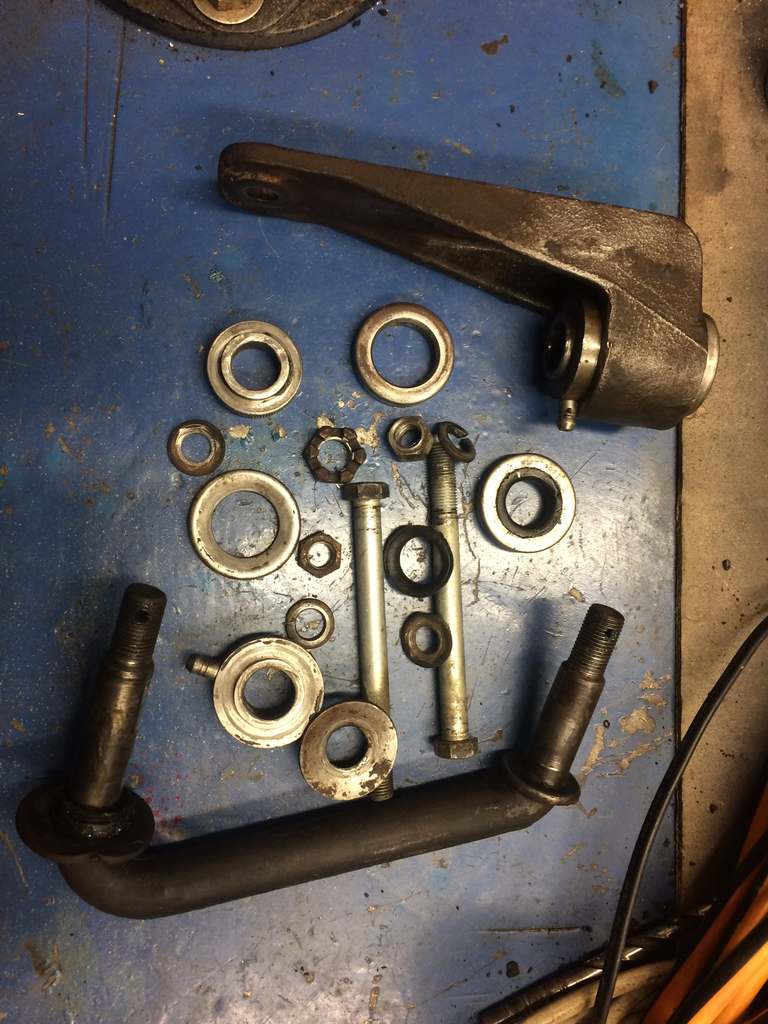
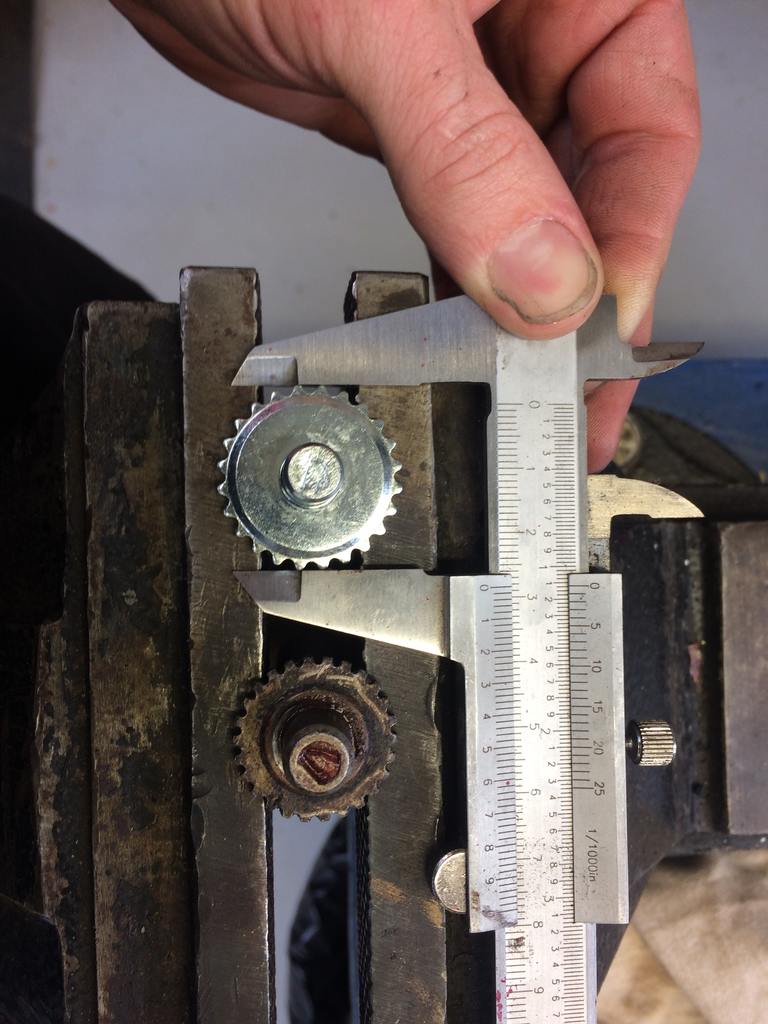
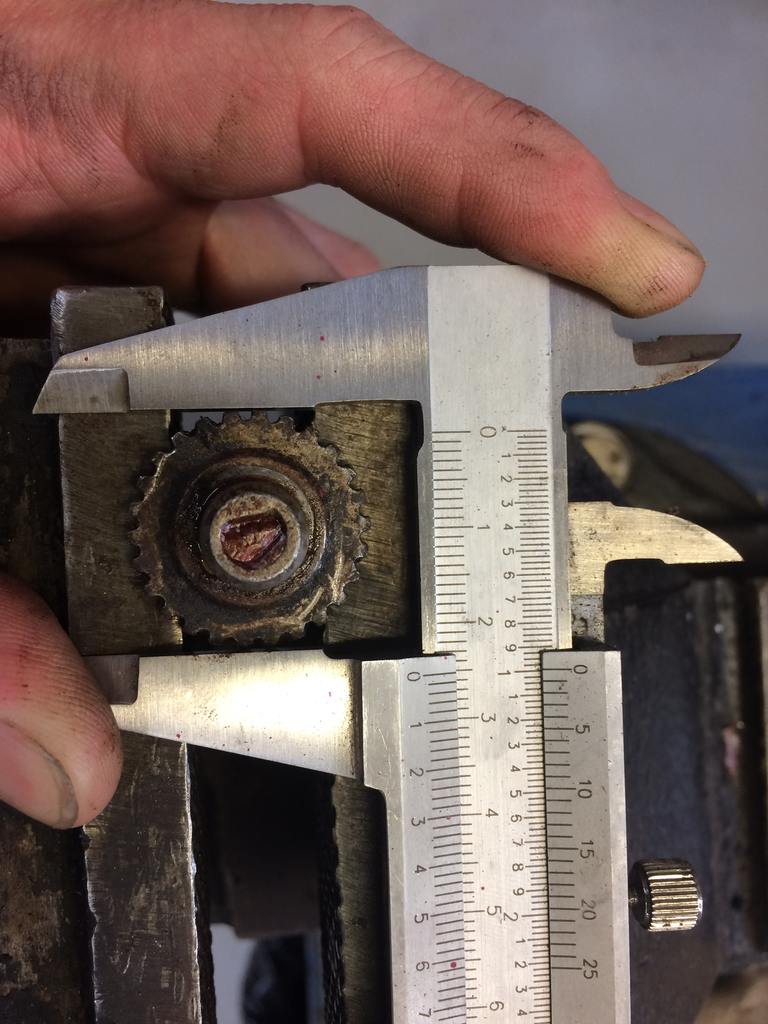
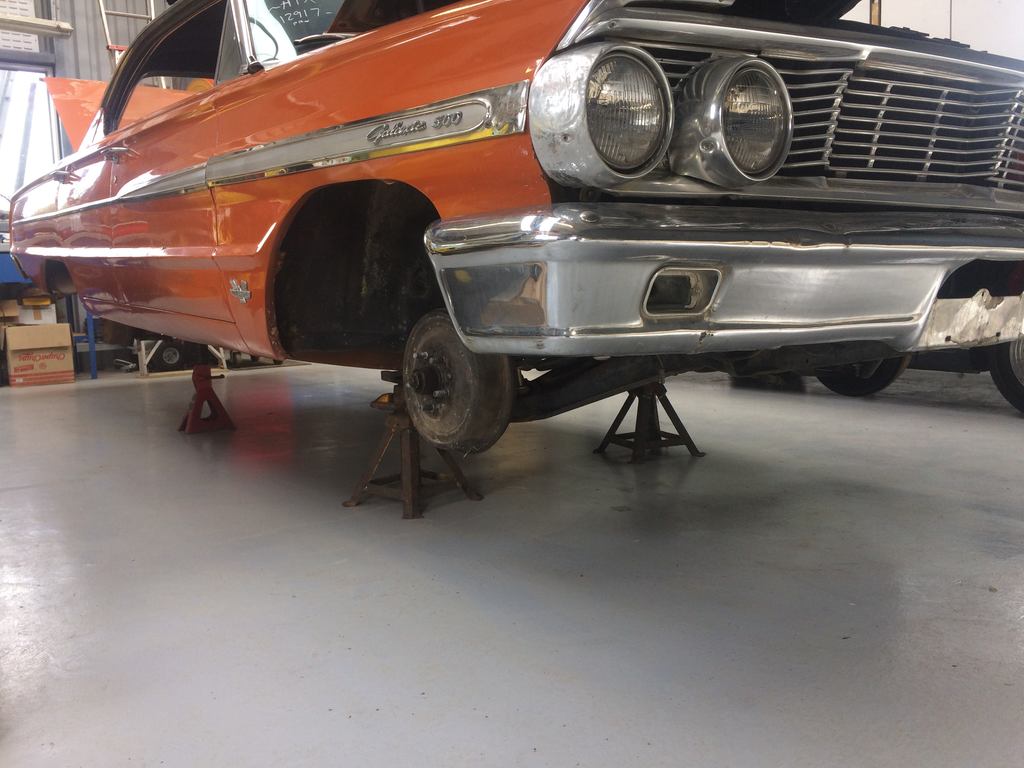
been abit slack with updates on this thing. just been super busy trying to get it ready for compliance. had to sort the play in the idler arm. so i removed it and cleaned up all the bearings and parts then refitted it and regreased it. now have minimal play in the steering. i also replaced the front wheel bearings as i found one was ruff. so i ordered them from rockauto as they were super cheap. also cleaned and refitted with new grease after doing this for the second time as i did this when i did the front brakes but didn't realize one bearing was no good. also had to put another new wheel stud in as i had hit one out when doing the wheel bearings and when i put in back in the spline had stripped. this was a much easier way than using a jack and axle stands.
- 77 replies
-
- 10
-

-
piazzanoob's 1964 Ford Galaxie 500 seeeedaaan
piazzanoob replied to piazzanoob's topic in Projects and Build Ups
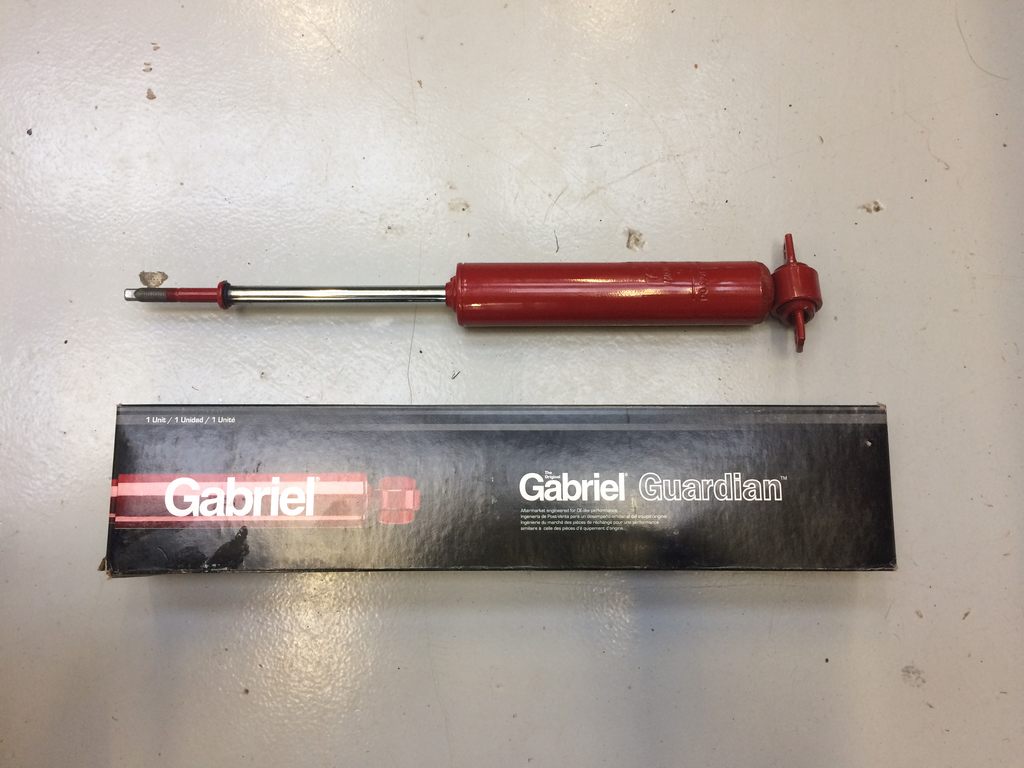
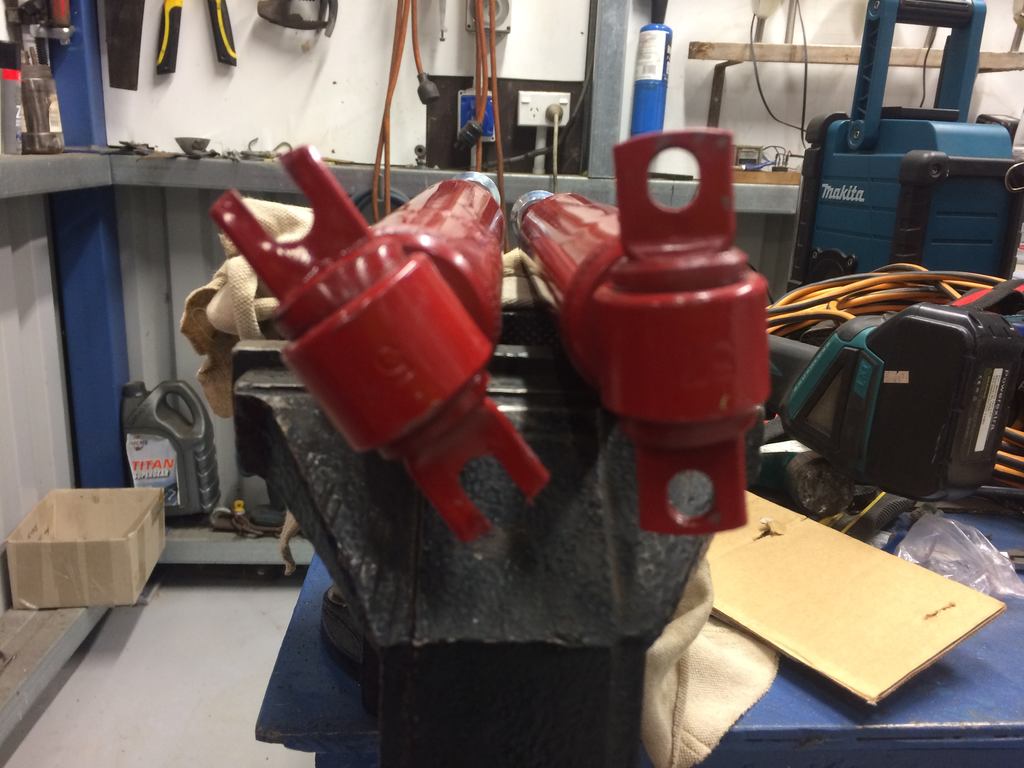
Also put some shocks in the front too As it had none nice bouncy ride it was. these were a bargain at only 15 USD each but they required some modifying to fit on the bottom. cut that bit out and fitted them with a flat washer and spring washer on the bottom. another job done.
-
piazzanoob's 1964 Ford Galaxie 500 seeeedaaan
piazzanoob replied to piazzanoob's topic in Projects and Build Ups
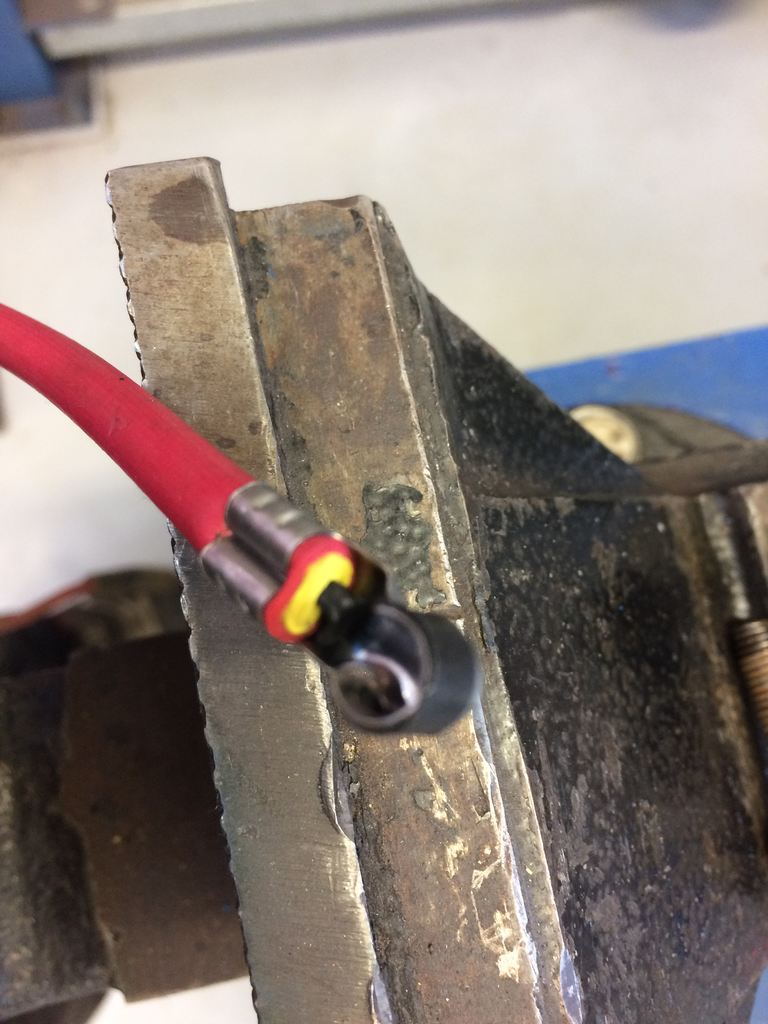
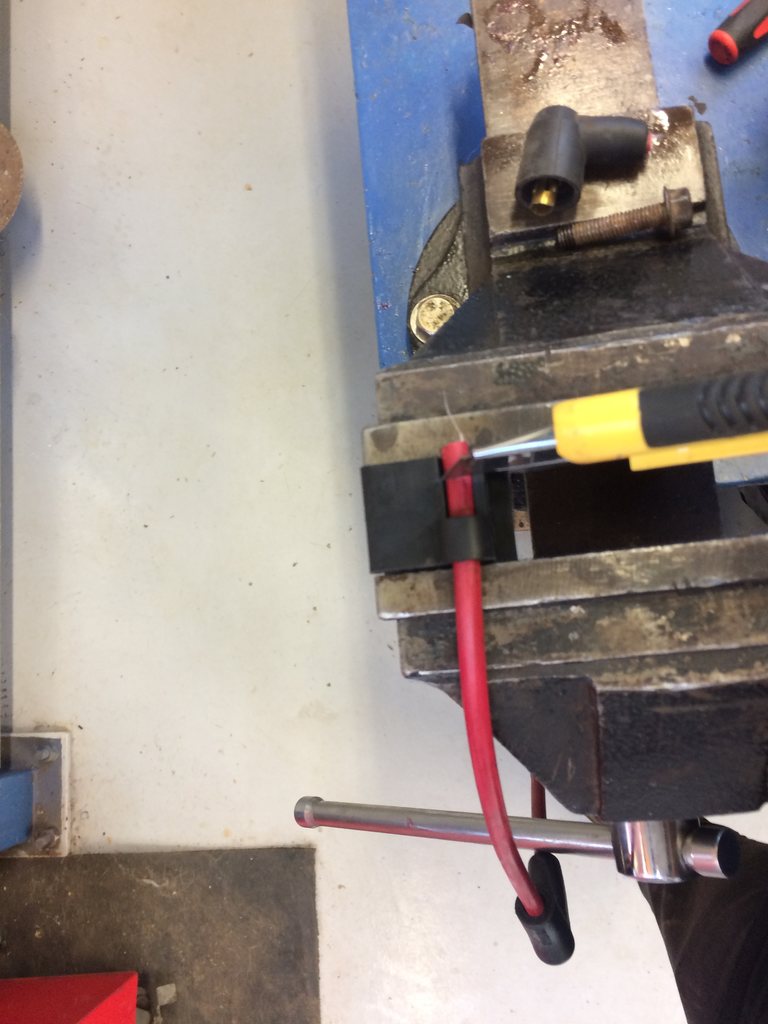
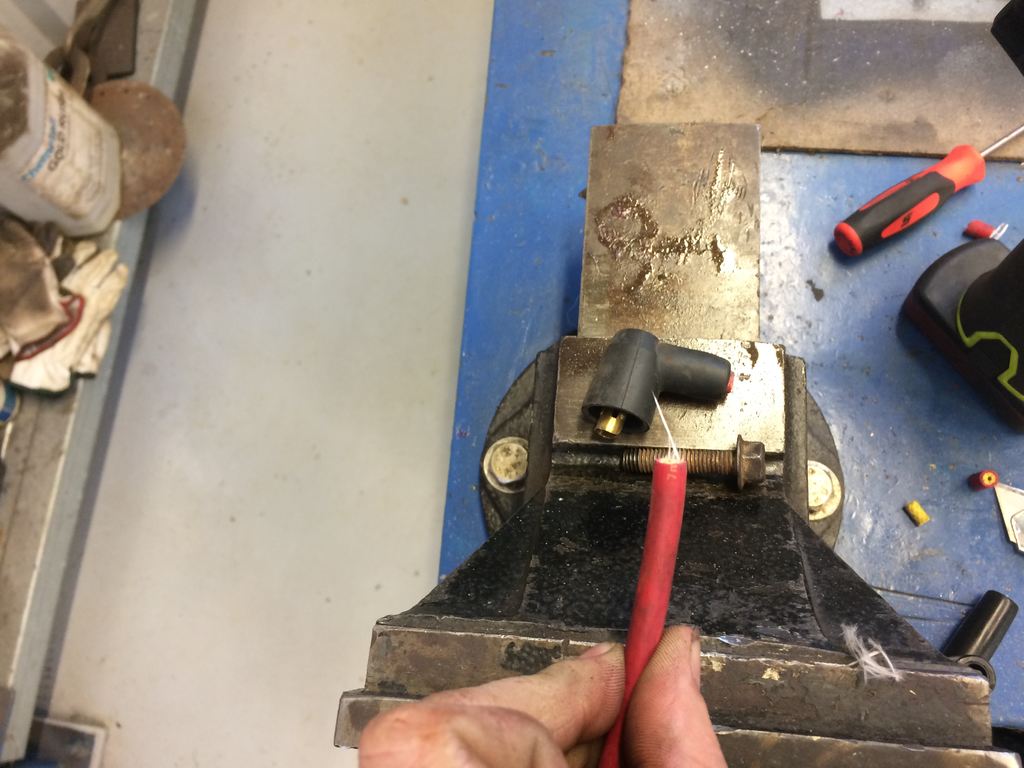
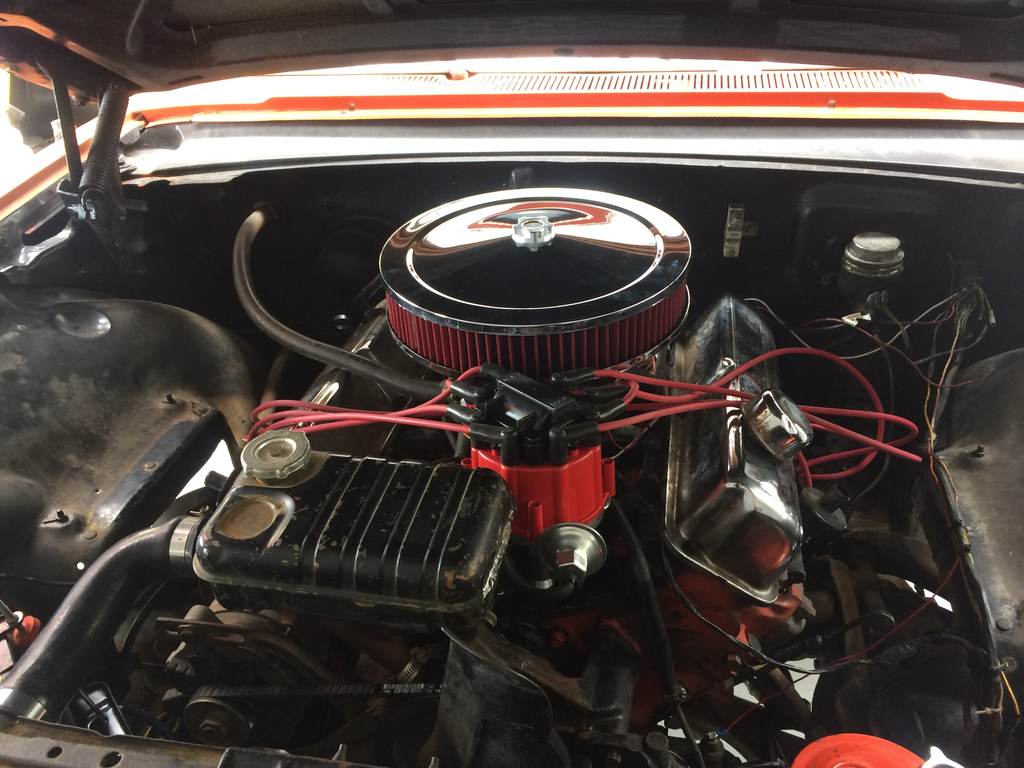
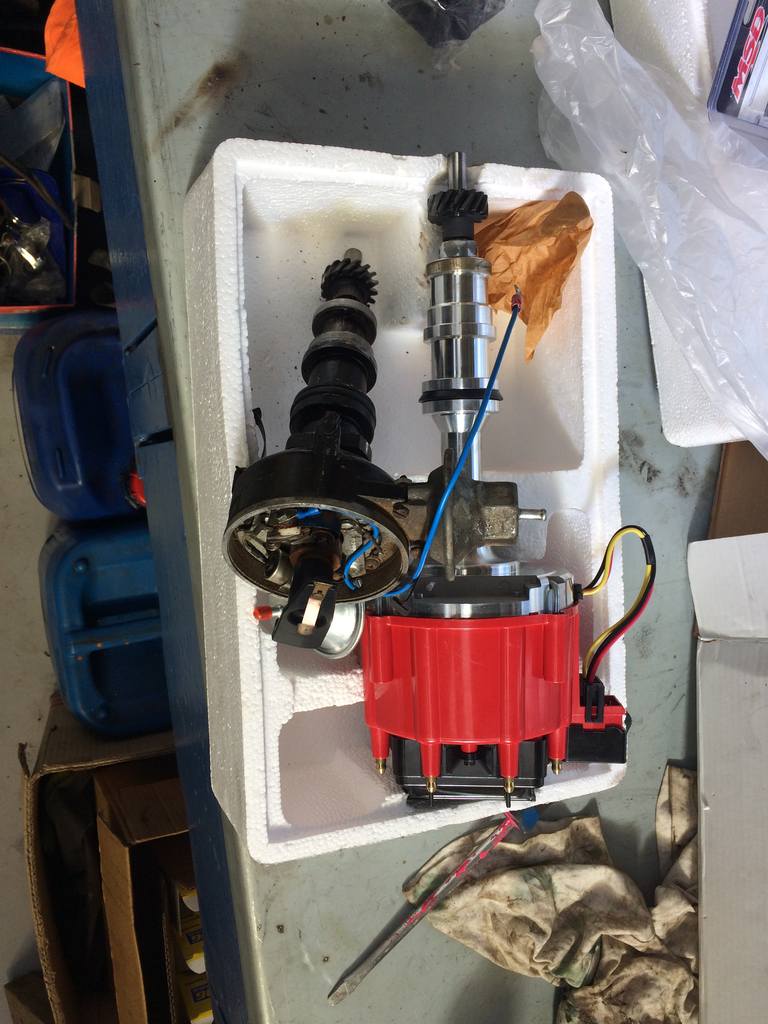
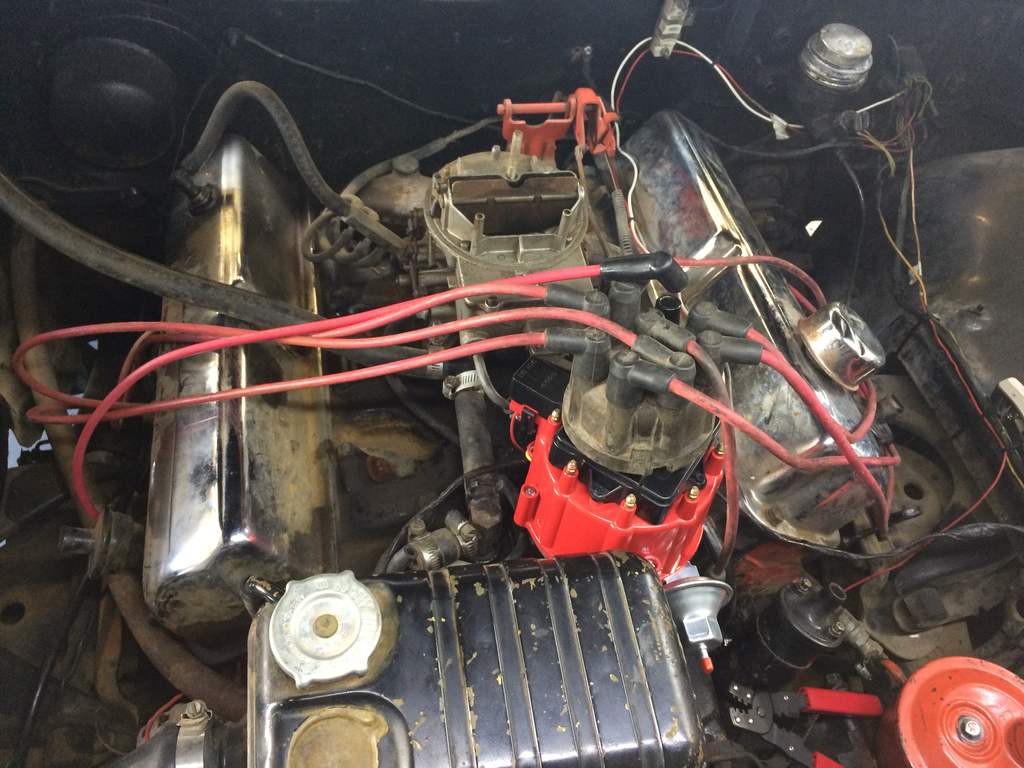
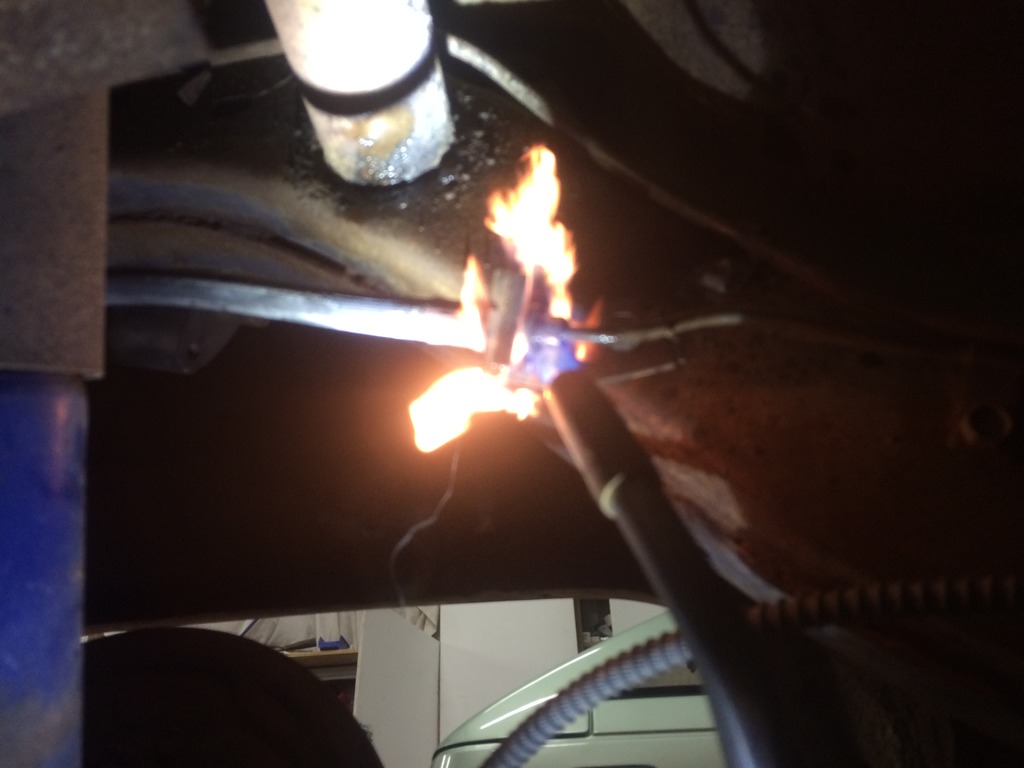
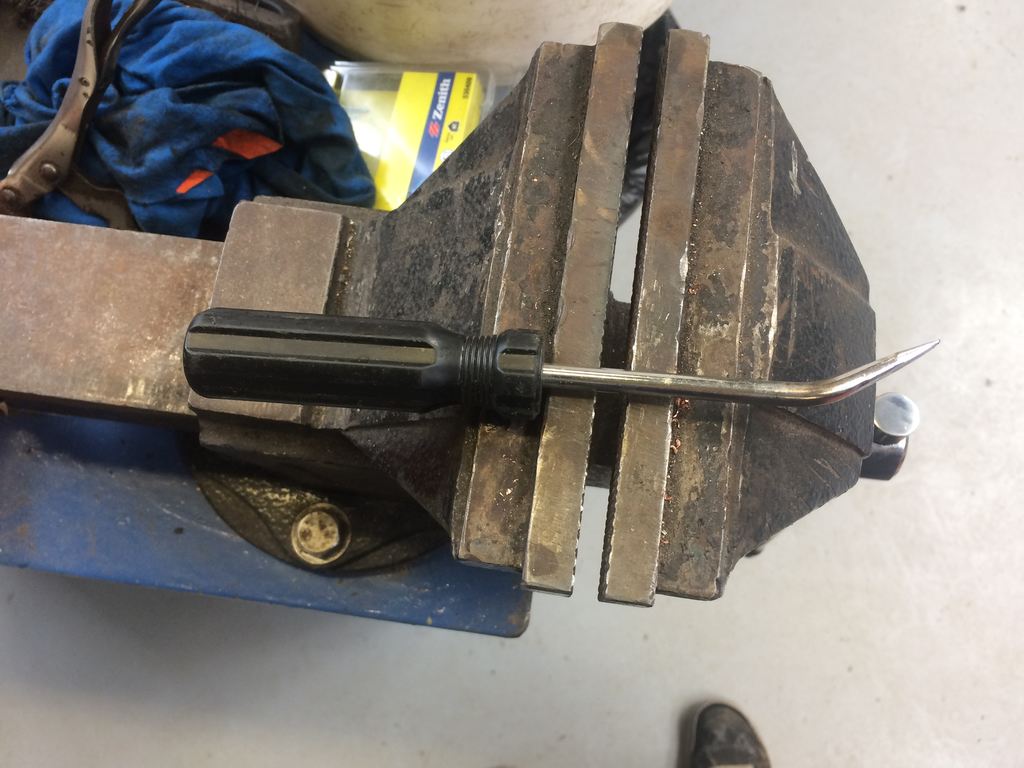
So this old girl still had its old points ignition system so out came the old distributor to get a pertronix kit to suit. went to my local v8 parts shop being STA parts. walked out with a brand new electronic dizzy for 135incl gst and this was still cheaper than the pertronix kits i had seen advertised online. but the only problem being with this new electronic dizzy is it is much bigger than the old one. so i had to get my map torch and heat the coolant expansion tank then give it a massage with a panel hammer to clear adjustment for timing the distributor. Also these distributors only have a one wire hookup being a 12v supply with a coil built inside the cap which is why the cap is soo big And one terminal to hookup if you are running a tachometer. which i will put one in one day. also another different thing with these distributors is the cap style lead terminals. so i bought the right terminals and boots And a crimp tool. cut old lead end off cut some of the insulation off the lead by placing a knife and spinning the lead. then before you do this^^ place the boot on! makes it quite hard to put on once the terminal is on. so for fitting the terminal you need to flip the wire underneath so it is resting on the metal terminal. then place the terminal and crimp tool like the photo above and close them together using a vice. and this is the end result. this is a lengthy process but saves max $$ this way. and at the end of it test all of your leads using an ohm meter to make sure they are all within range. Also another thing with that bigger distributor was the air filter was no longer able to fit due to it being a low mount base type filter. so out again to STA parts to sort this. unfortunately they were out of stock of the high mount base, so a complete new air filter base was purchased. still is quite close to the leads and cap but i did not like the look of the smaller diameter filters so same size but high base mount type. but looks much better than old setup i think. just need to polish the rocker covers to help with a cleaner look.
-
fairly tidy car for the kms good luck with the build. where are you getting your parts from?
-
piazzanoob's 1964 Ford Galaxie 500 seeeedaaan
piazzanoob replied to piazzanoob's topic in Projects and Build Ups
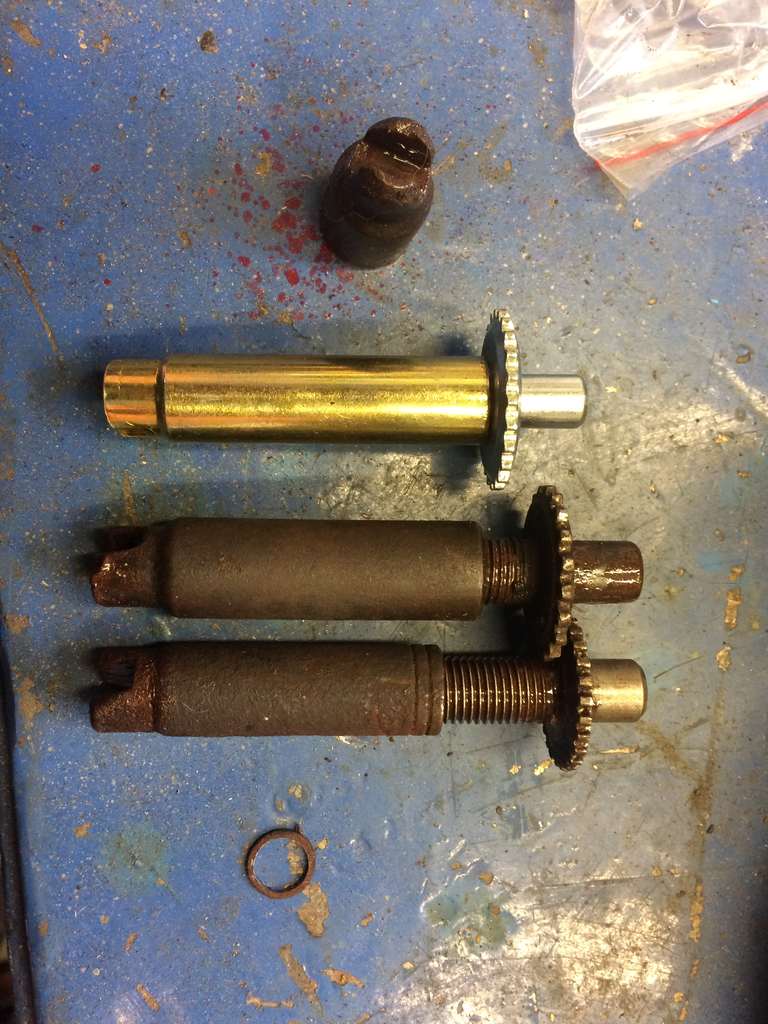
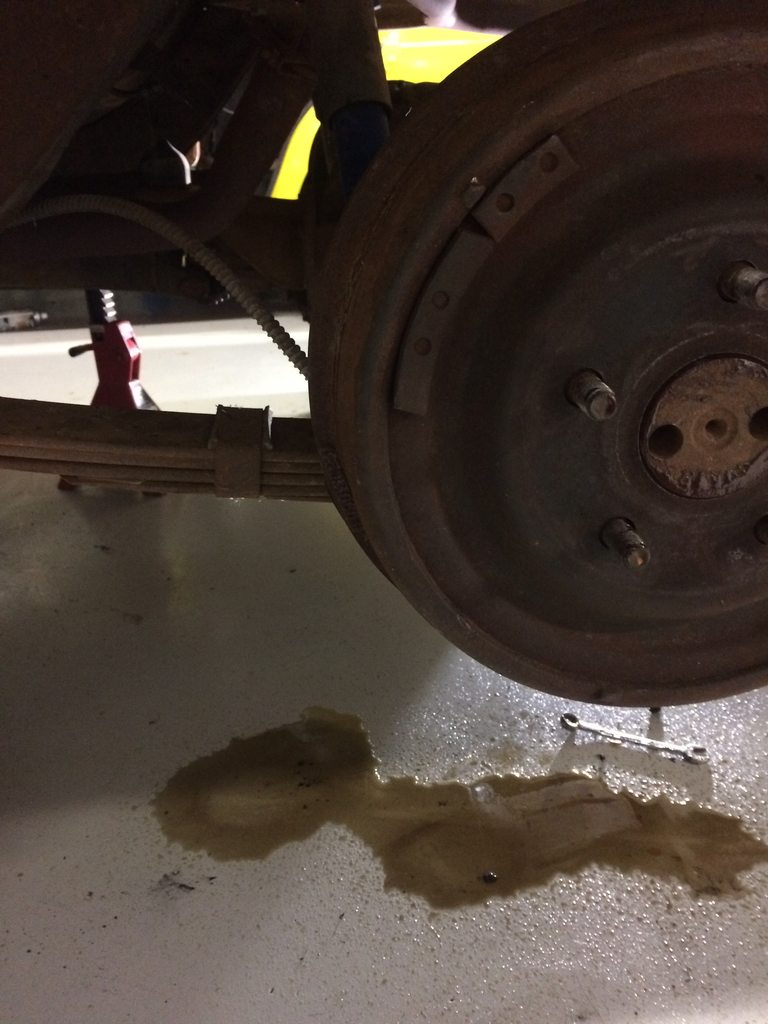
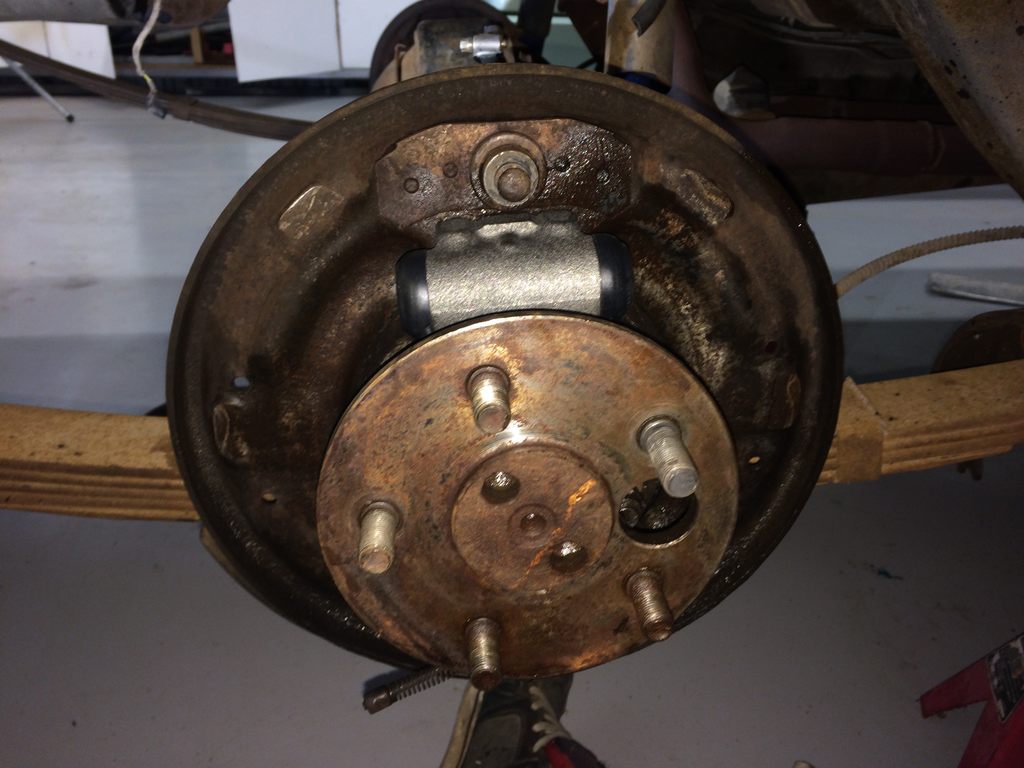
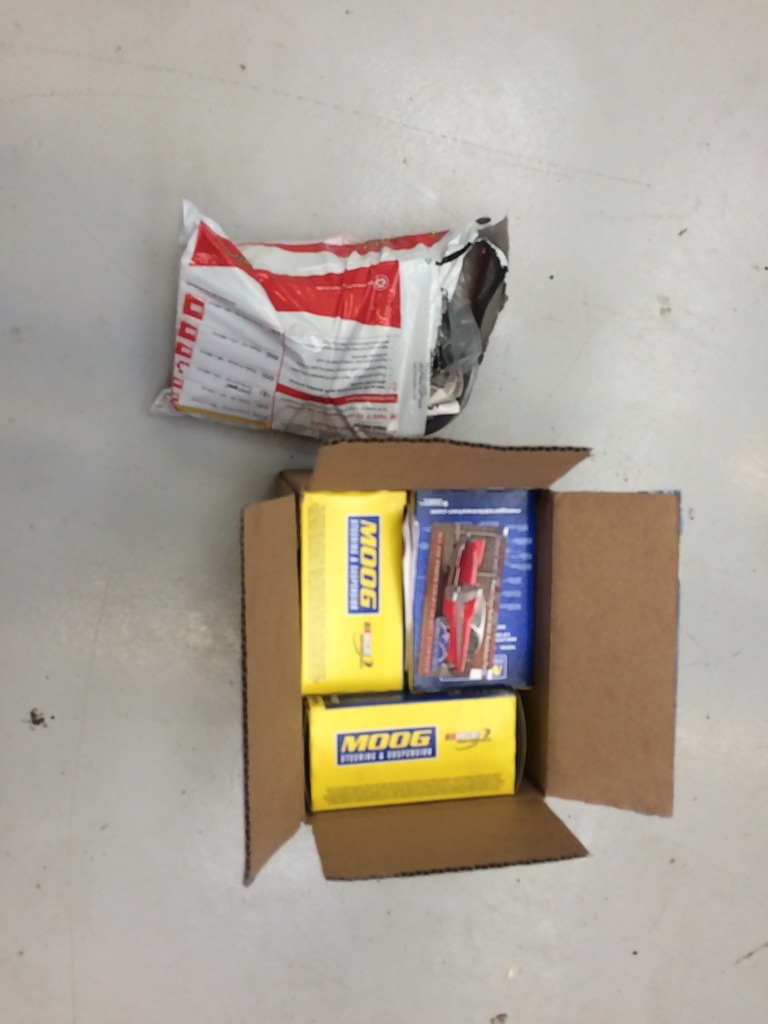
So the parts for the brakes ended up taking just over a week to get sorted. ended up getting the brake hoses and spring kit from http://www.northwesternford.co.nz/ who just deals in old ford stuff. pricing also seems to be reasonable rate. which is a bonus And the wheel cylinders and shoes got sourced from sterling clutch and brake. also the car came with two new brake drums so they ended up on the front while the best two of the old four went onto the rear. although they are all way worn out past there service limit. also removed all the brake assemblies off all the wheels and gave all the brake parts and backing plates a good scrub down. then fitted the front with new shoes and wheel cylinders and a couple of new springs. also put on the new front brake hoses and pumped through some of the old brake fluid through to the back. man that brake fluid was dirty. then put on the new rear brake hose and gave the brake system a bleed And ended up having to teach my mum the brake bleeding procedure which slowed the process down abit. then took the car off the stands to give the brakes a good bed in. Drive went okay apart from a grinding noise under braking on the R/F. So up on stands again with the wheels off to diagnose that. And some smart person in america decided they would put the wrong size brake adjuster on the car which let it to grind a mark in my new drums. This is the L/h one which was the one i needed. And this one was one that i had ordered from http://www.northwesternford.co.nz/ but is the same size as the one on the R/F thats grinding on the drum. so that one will be going back to them as it will not work. so i stopped into sterling clutch and brake to find an adjuster and walked out with a free one in my back pocket. cheers mayte otherwise the plan was to run the big one on the lathe at work down to the right size then grind some notches so the adjuster retainer will hold it. so now the brakes do not make any noises it shouldn't. And now stops the old slug after you get a dead leg.
-
piazzanoob's 1964 ford Galaxie 500 seeedaan
piazzanoob replied to piazzanoob's topic in Project Discussion
should hopefully have it all legal by the end of the year all going to plan -
Another one of the members here told me about this site. send your old seatbelts back and get some from here. http://www.seatbeltsplus.com/ cheap as chips mate will be ordering some for my galaxie from them you will end up paying double here for them here if not more
-
piazzanoob's 1964 ford Galaxie 500 seeedaan
piazzanoob replied to piazzanoob's topic in Project Discussion
haha The trans makes up for the no power steer leaks -
piazzanoob's 1964 Ford Galaxie 500 seeeedaaan
piazzanoob replied to piazzanoob's topic in Projects and Build Ups
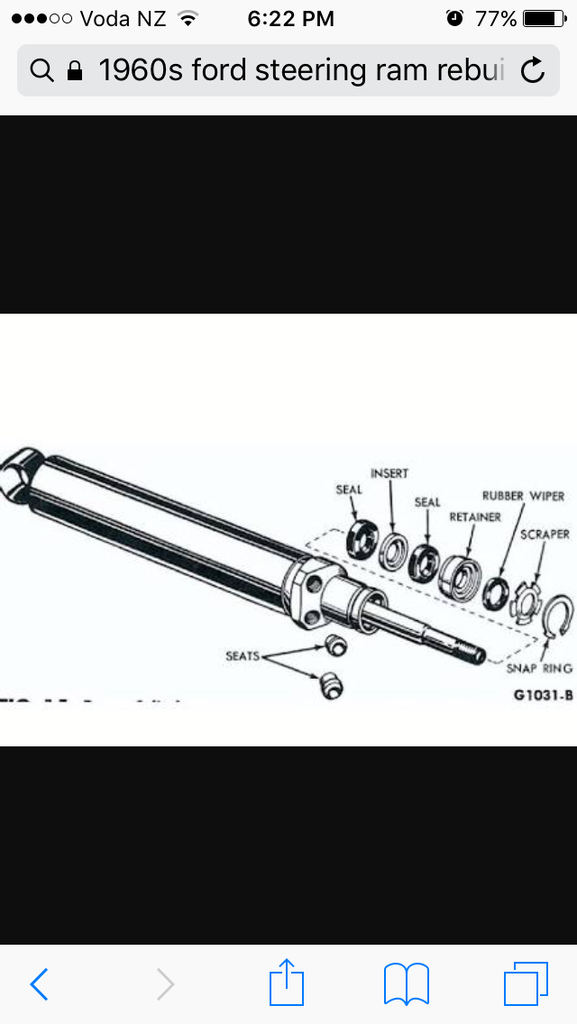
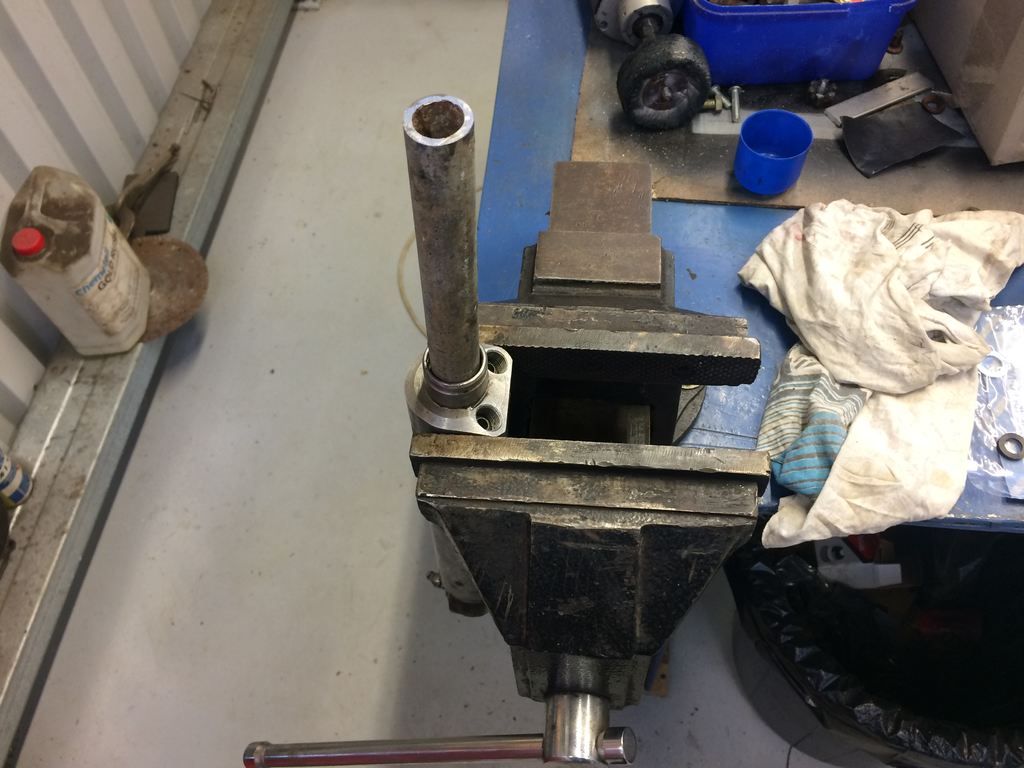
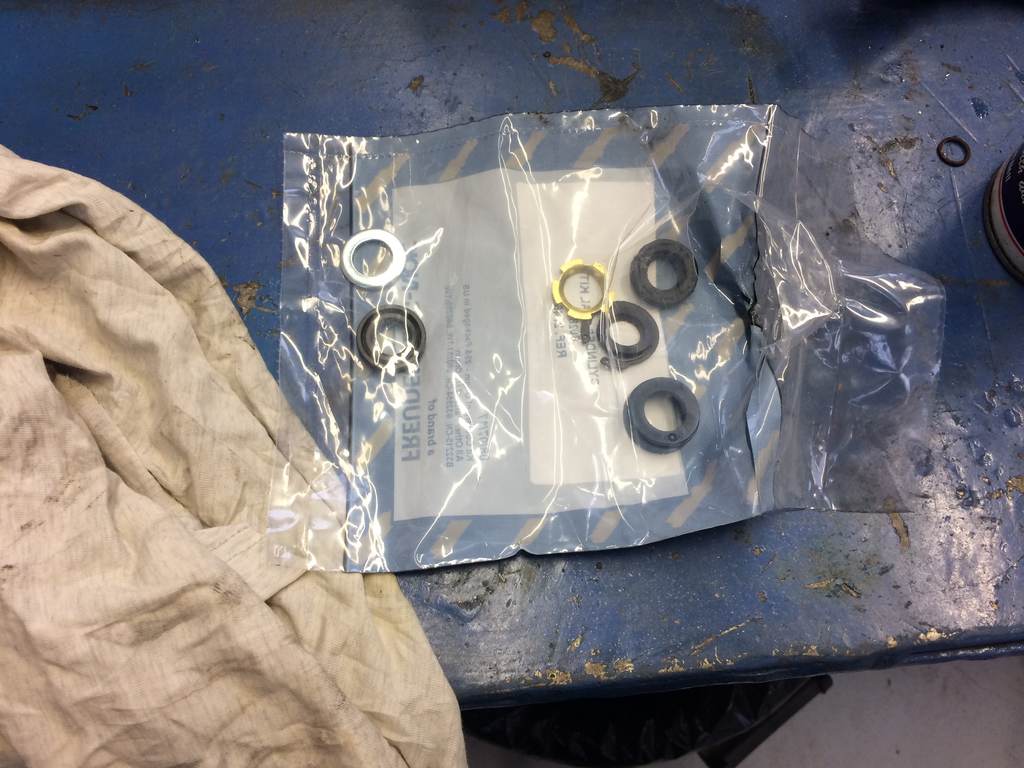
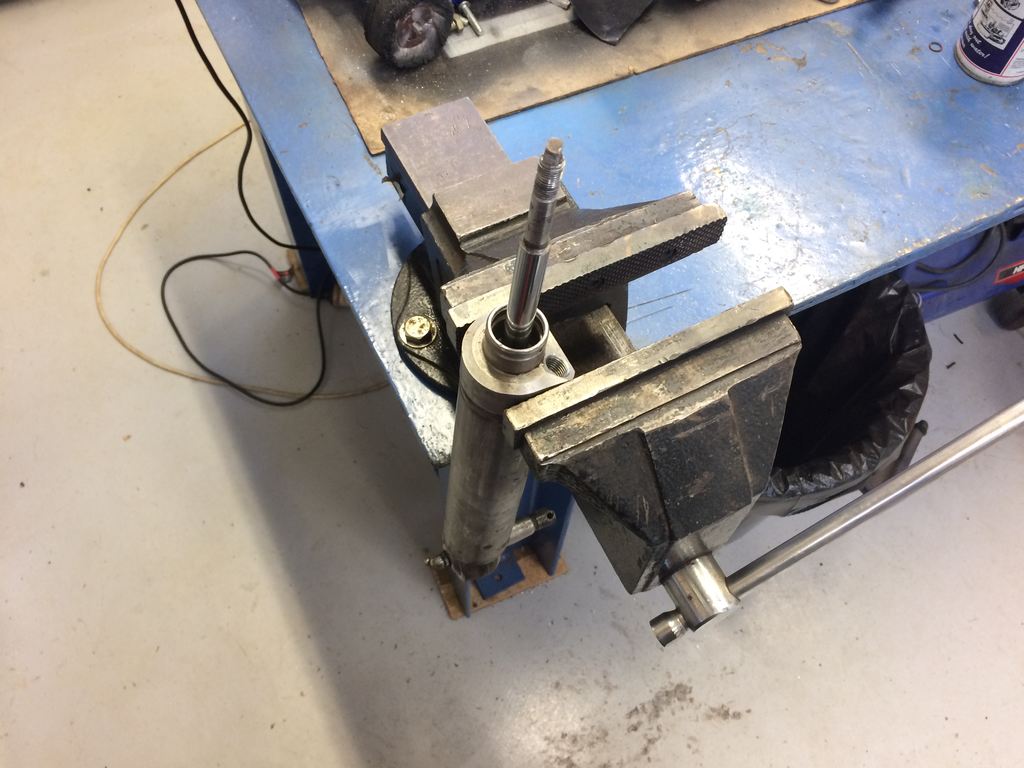
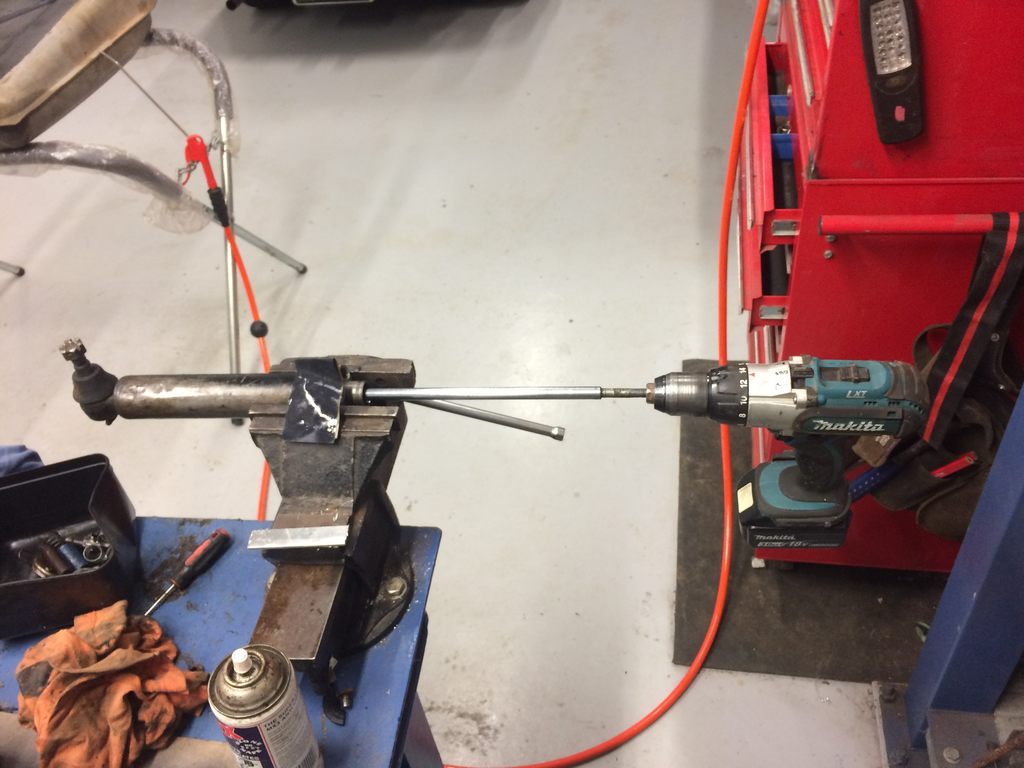
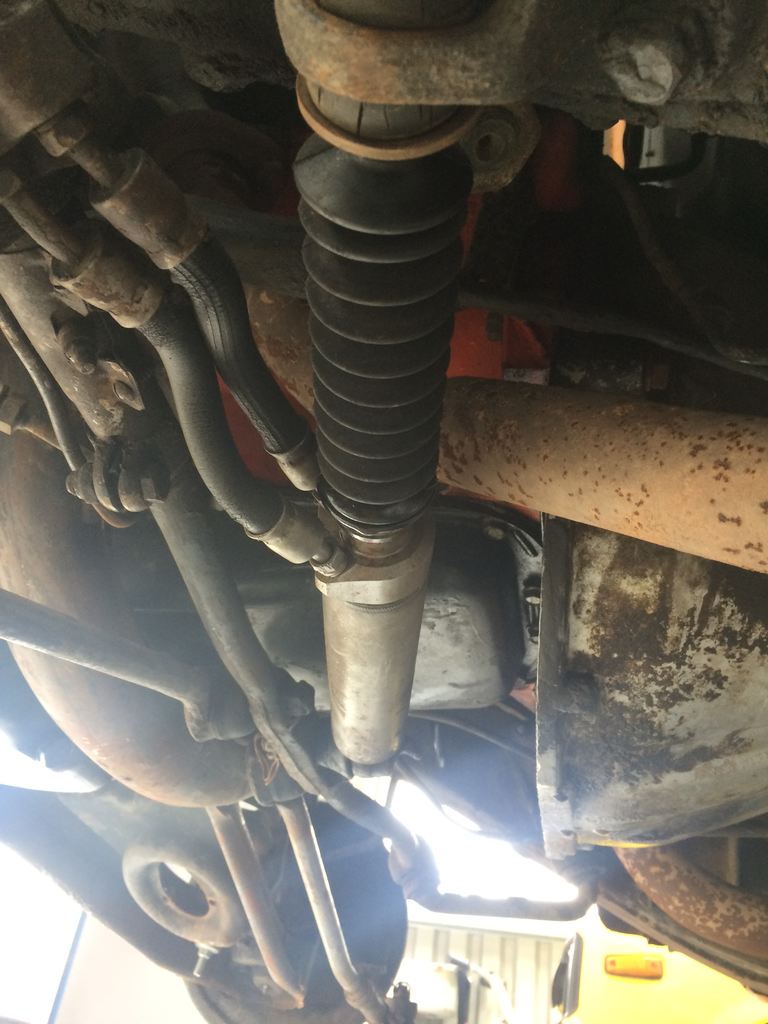
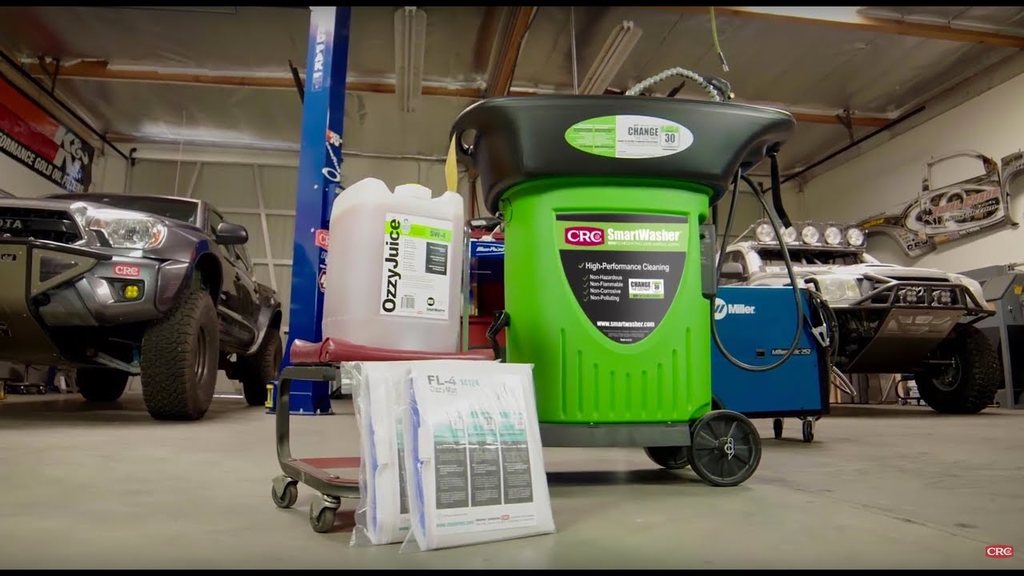
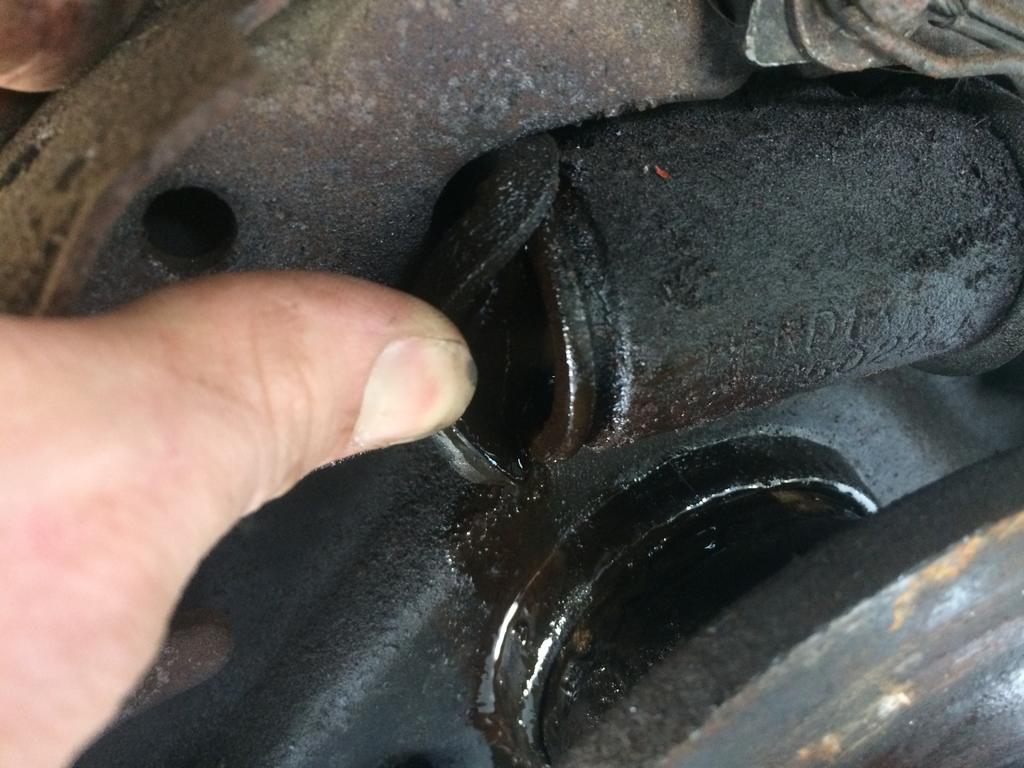
One of many jobs that can be ticked off the list now this car had a power steering leak (Yes it does have it) which happen to be the power steer ram so off she went removed all of the seals and the circlip etc then bought this rebuild kit from my local transmission parts wholesaler Then gave the shaft a good clean up so no burrs could rip the new seal 1000 grit wet & Dry sandpaper and spun the shaft up on the drill while resting the sandpaper on the shaft. works mint then for the assembly time i found abit of pipe the right size and cut the length to suit the application this was used to carefully install the new seals without damage by hitting them in with a hammer and all the new seals were applied with rubber grease for assembly purposes and done in this order. Also take note that before i assembled the new seal kit i made sure that i flushed out the ram of any remaining debris / dirty fluid using a eco friendly parts cleaner which is safe on all materials incl hands. Not that really matters. I used this ^^ ozzyjuice stuff along with the machine which heats the fluid up to warm temperature to help with cleaning. good machine and all just super spendy with the fluid and filters and the machine by itself. with that all done i put the power steer ram back on the car and bleed the steering system of any air. now no leaks and works as it should.
- 77 replies
-
- 11
-
-
piazzanoob's 1964 Ford Galaxie 500 seeeedaaan
piazzanoob replied to piazzanoob's topic in Projects and Build Ups
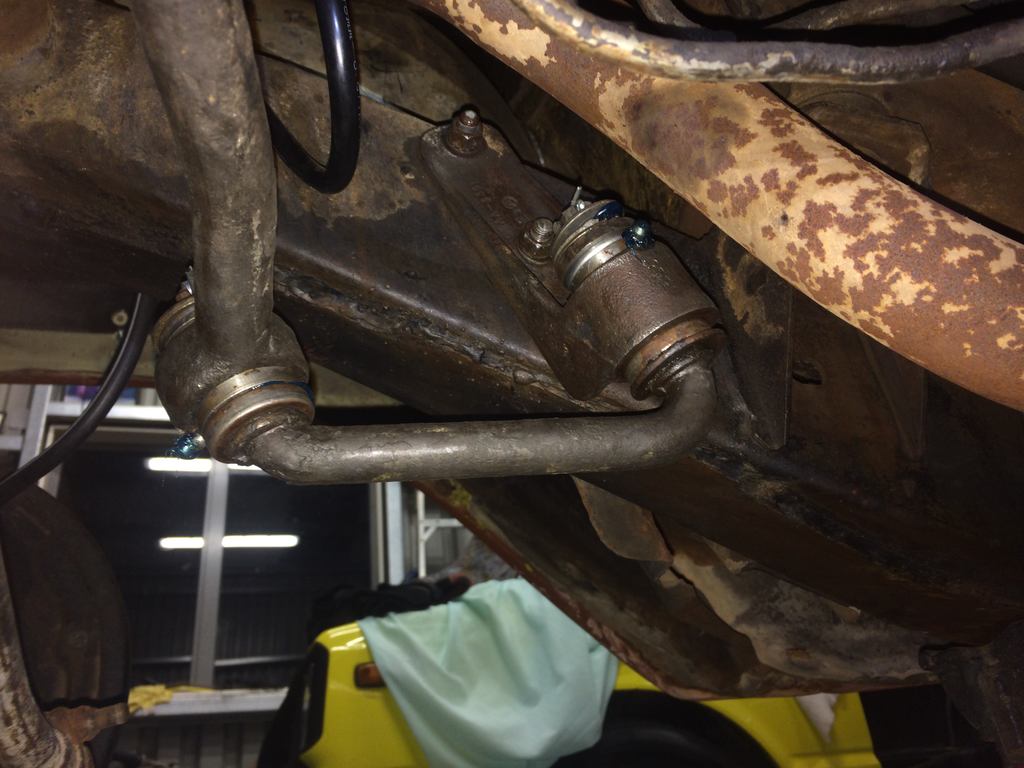
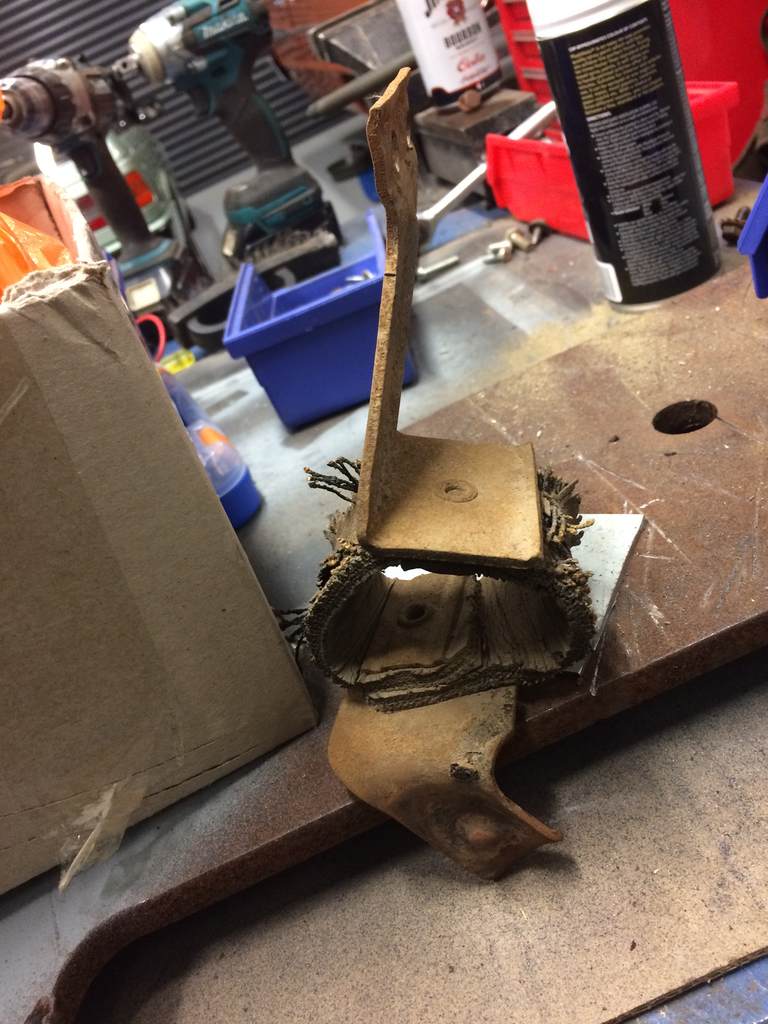
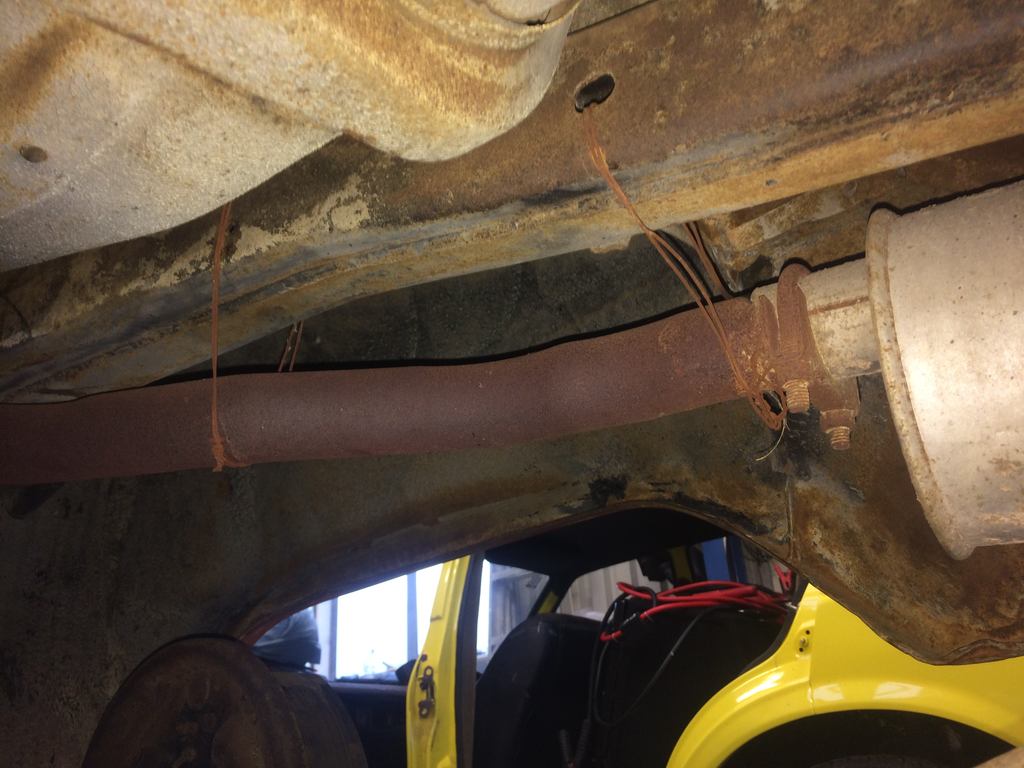
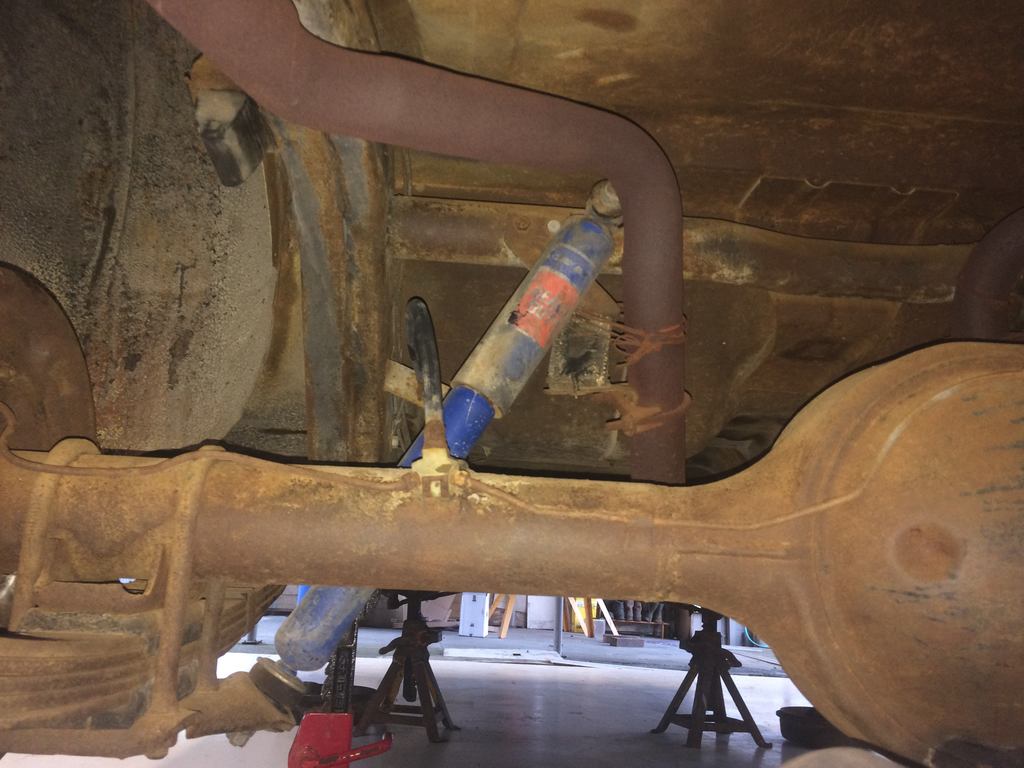
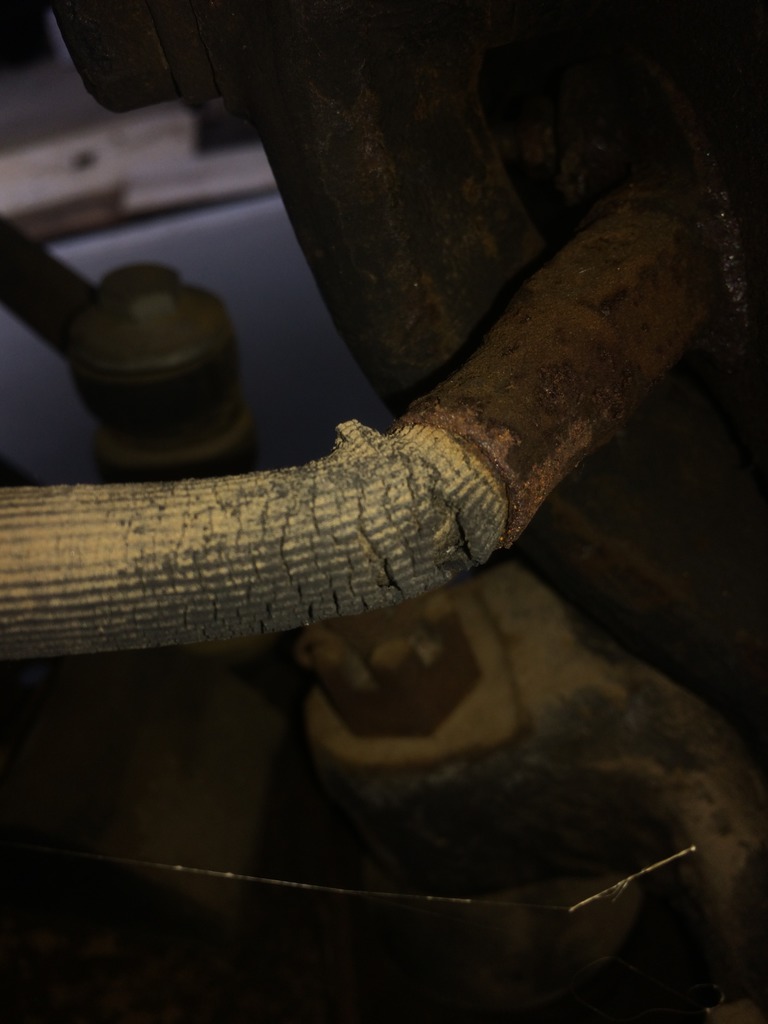
Alot of the exhaust on this car was currently being held up with a bit of wire in multiple places along with it rubbing on the leaf springs and rear shocks along with this mount and many of the other rubber belt mounts that had broken or snapped. I cut them or modified them to suit again other than needing some bolts so have really just hori up what it already had as eventually it will get a full need exhaust system done but that can be done after compliance.
-
piazzanoob's 1964 Ford Galaxie 500 seeeedaaan
piazzanoob replied to piazzanoob's topic in Projects and Build Ups
Have also been waiting on my rockauto parts too. and to my surprise i had ordered it on the friday evening here and it arrived on Monday at work if only all my rock auto parts were in that quick...
-
piazzanoob's 1964 Ford Galaxie 500 seeeedaaan
piazzanoob replied to piazzanoob's topic in Projects and Build Ups
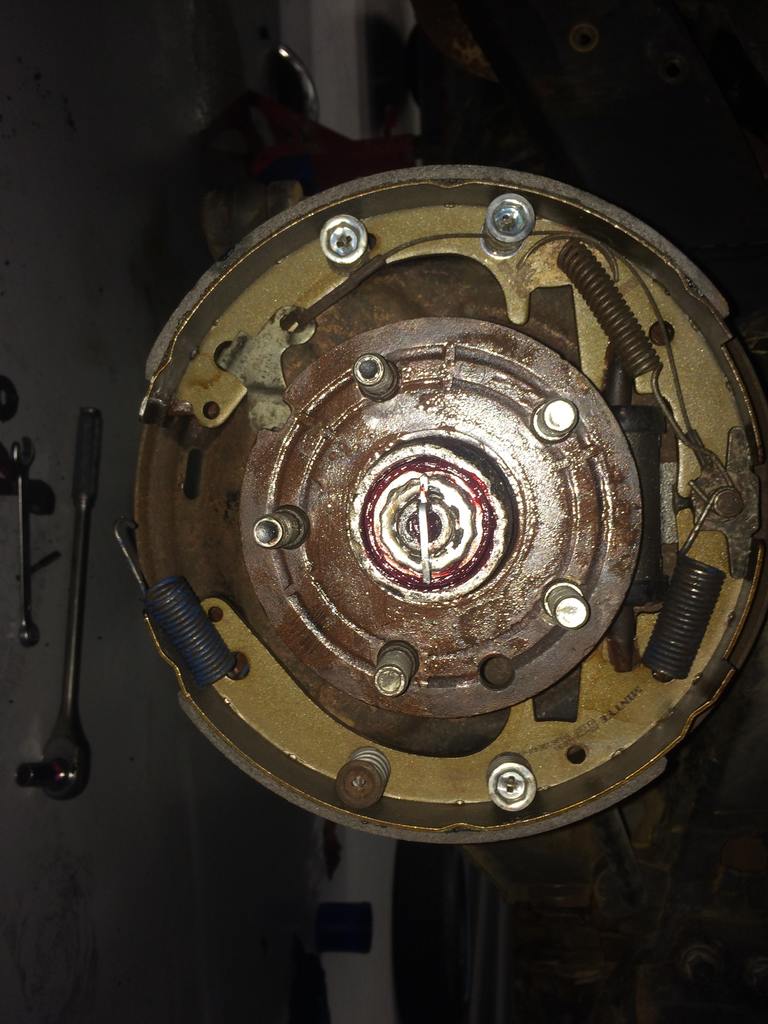
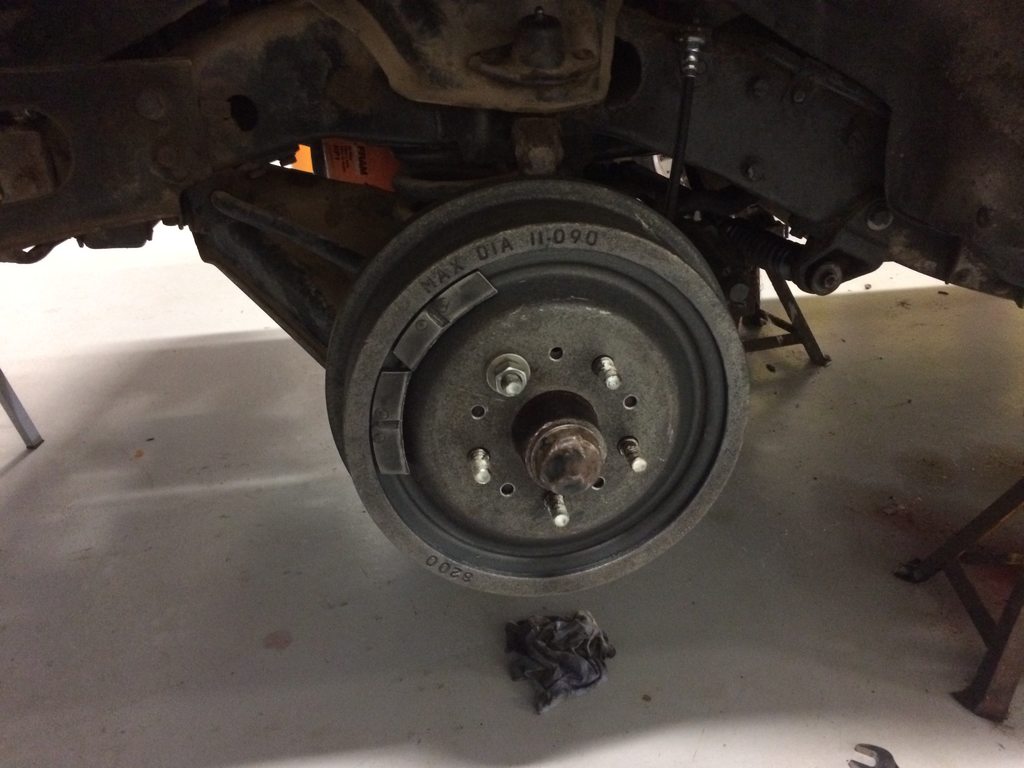
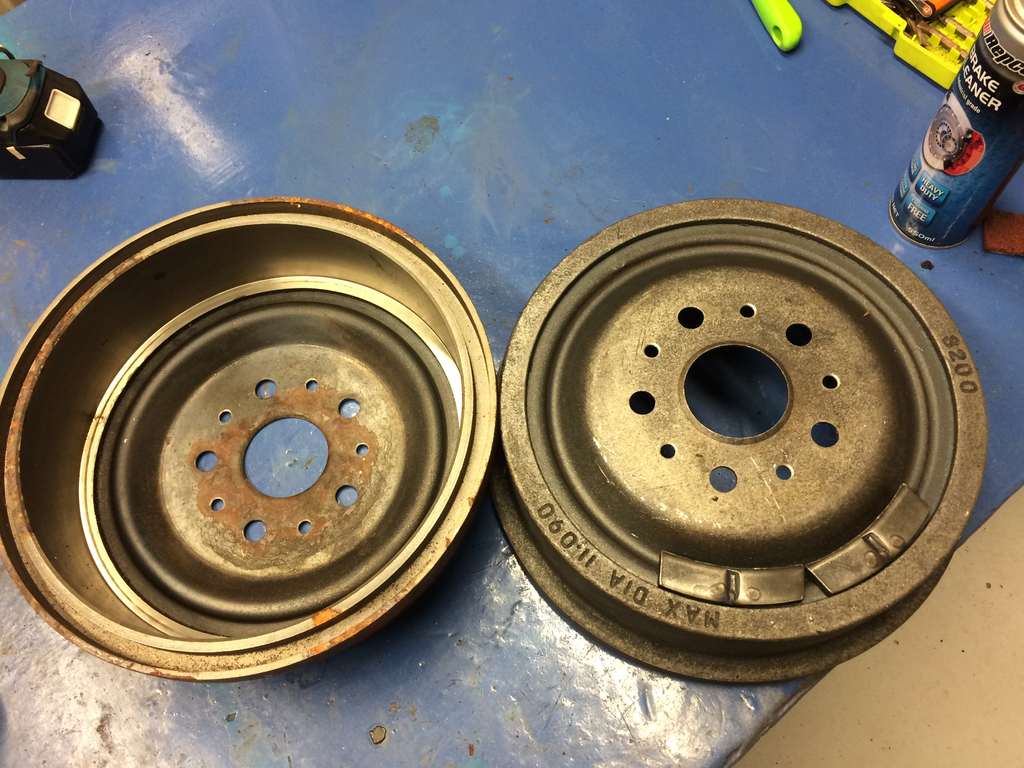
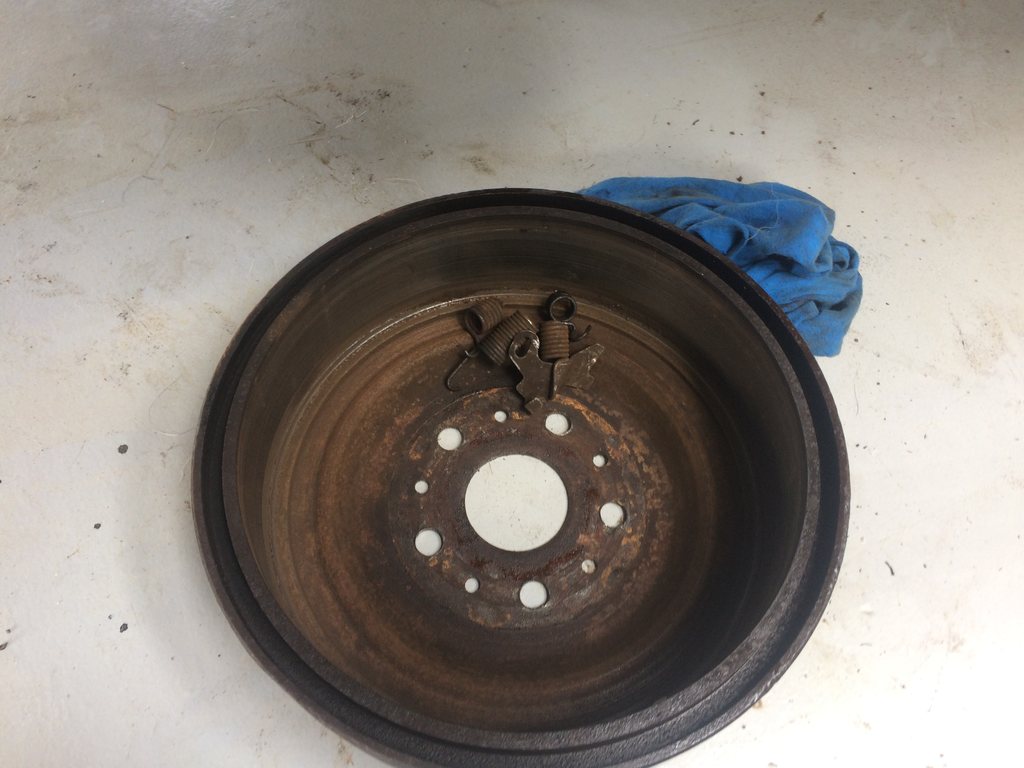
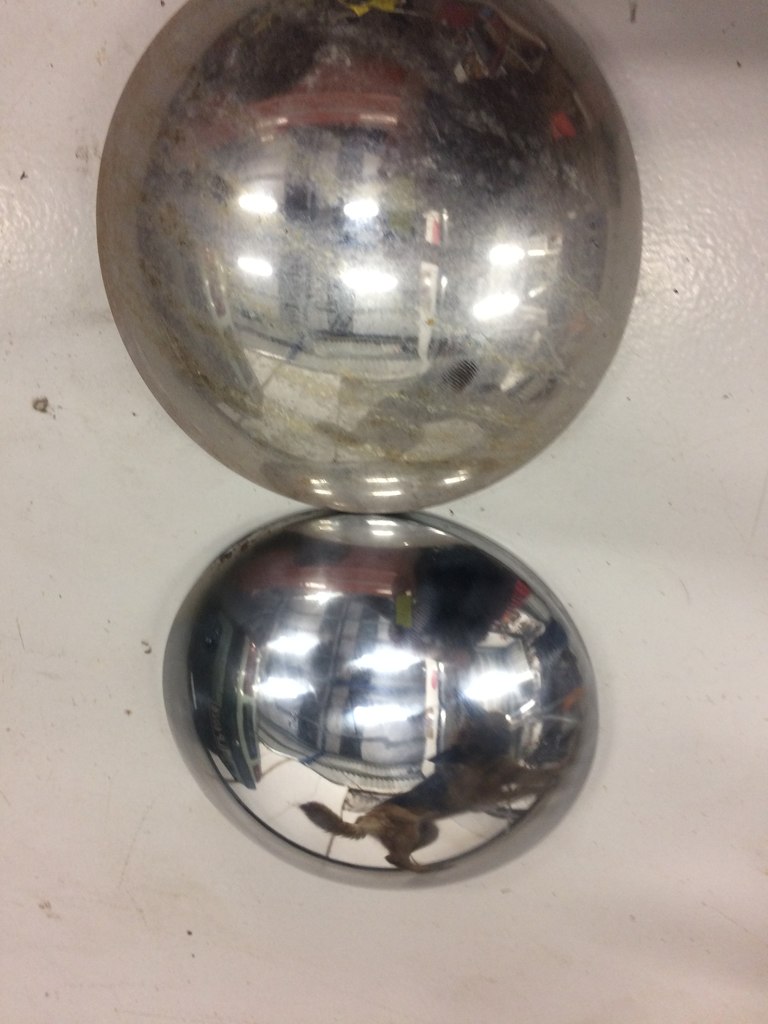
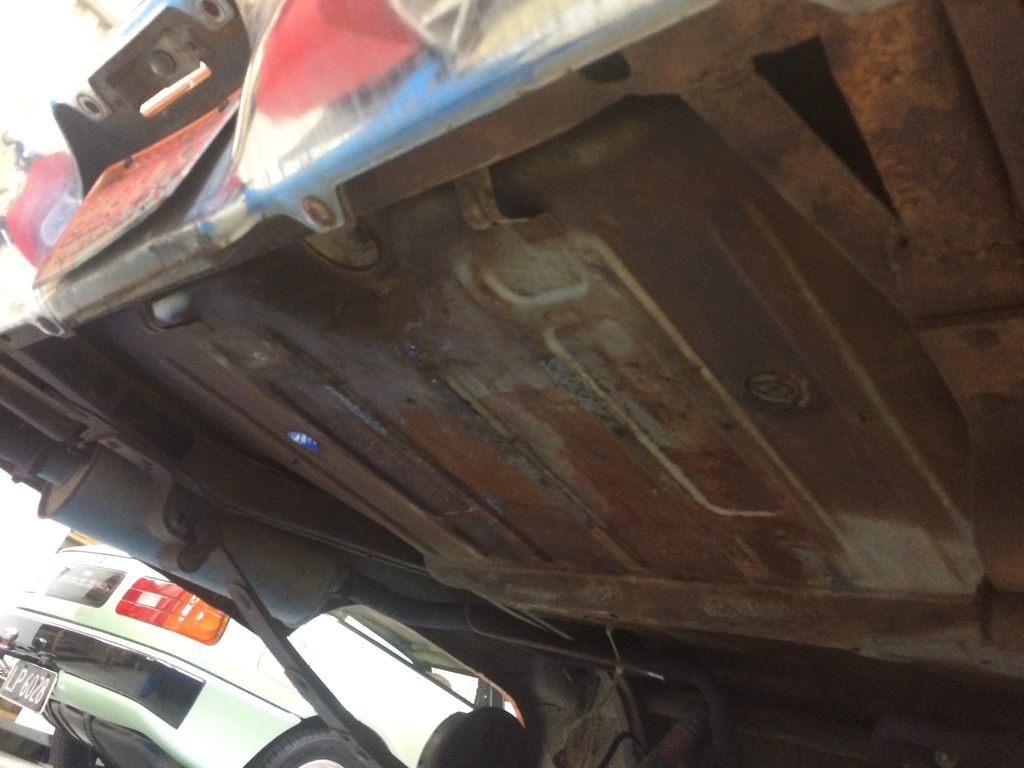
so while i was doing the fuel tank i had all the brakes disassembled to see what was the go there. turns out quite abit of the parts were fucked. A couple of broken springs in two of the four wheels All the brake hoses were no good. And all the wheel cylinders were leaking. the front ones however had leaked on the shoes and drums so they needed to be replaced. also disassembly required some heat to remove some of the parts and alter some made myself a brake adjuster tool. so it sat here for a week while i got the parts. new brake hoses / wheel cylinders / spring hardware kit / brake shoes / And 2x new brake drums which came with the car. All the old brake drums were way out of there maximum thickness. so while i was waiting for parts i gave the hubcaps a polish too And after
- 77 replies
-
- 15
-
-
piazzanoob's 1964 Ford Galaxie 500 seeeedaaan
piazzanoob replied to piazzanoob's topic in Projects and Build Ups
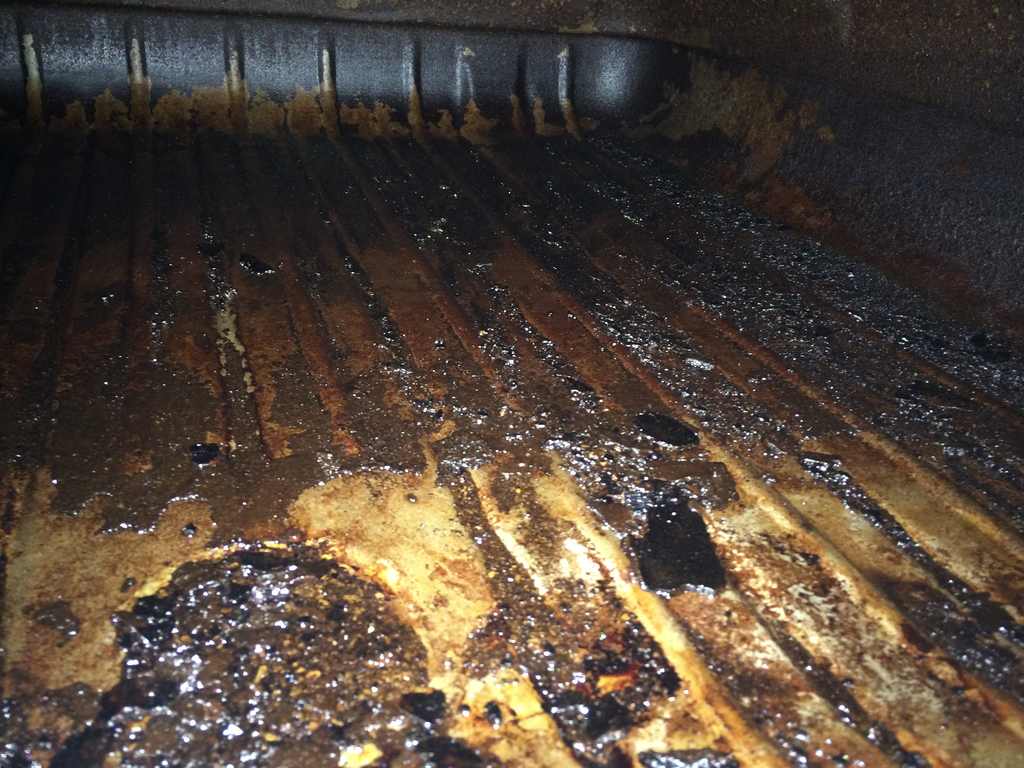
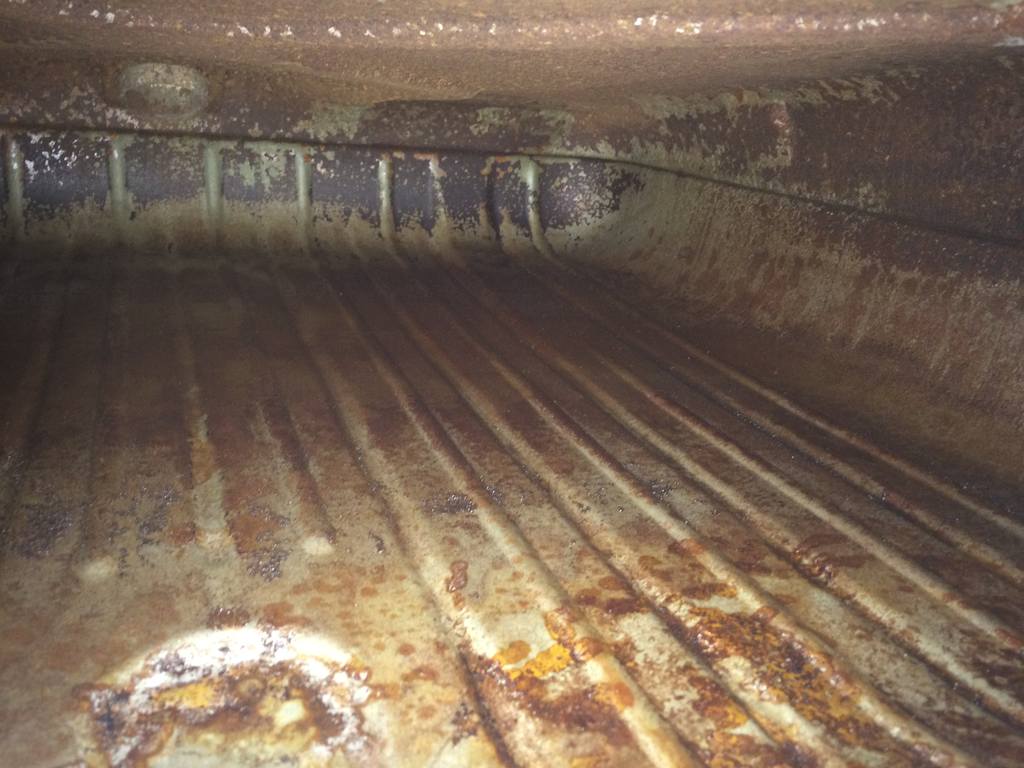
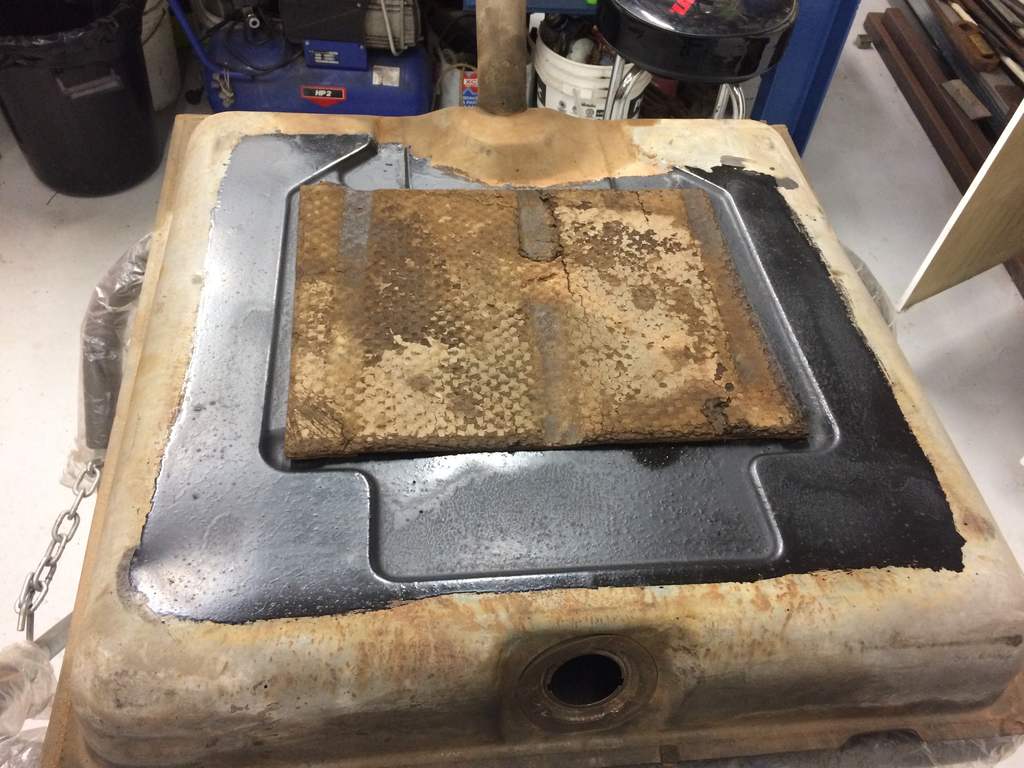
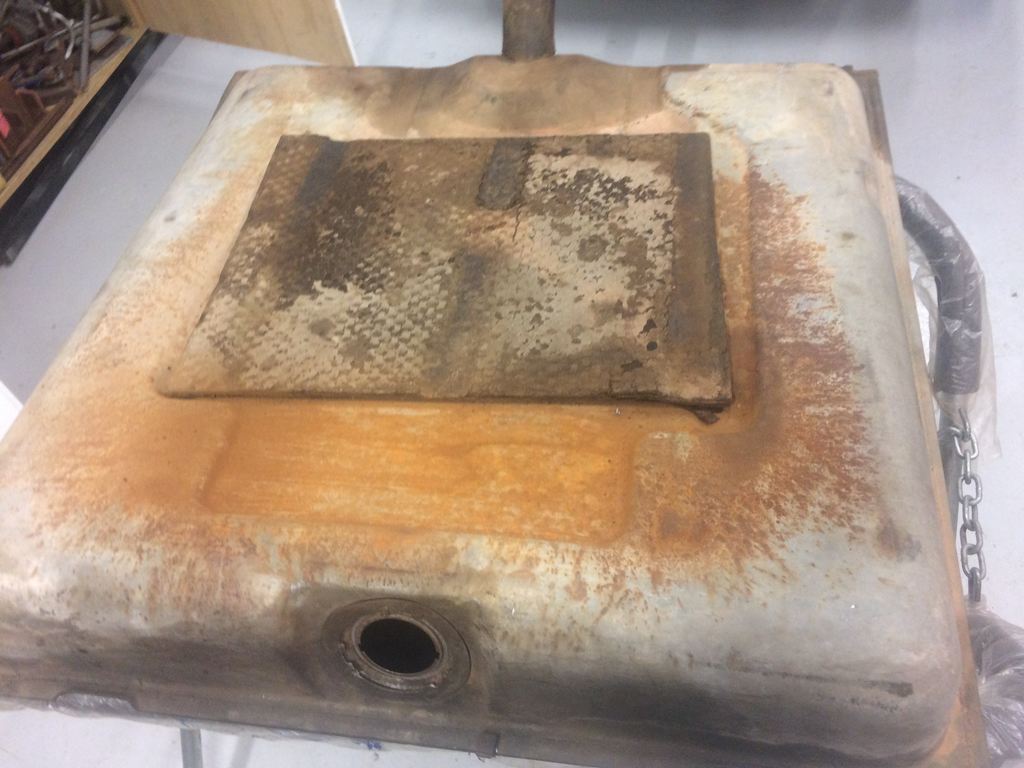
so seen as i already broke this car getting it out of the driveway i may aswell fix it some more. seen as the fuel strap come off i figured i would pull the other one off too and clean up the thread so out came the tank too And drained all of the petrol out of it too had about 30 litres in it. so i also pulled the sender out of the tank to test and check its condition and to check the inside of the tank. well it has quite alot of shit in it. but seen as the last rego tag on the car says 2013 its been doing some sitting around causing the fuel to turn into a solid form. so whipped in some rocks while the tank was dry and shook them around. then shook all of that out I then added some smaller rocks with water and spend about 20 minutes shaking it all around. Ended up getting alot of the crap out of there but the remaining surface rust was left. But at some point in the future i will be pulling the tank out again and giving it the por15 tank treatment to seal up all the rust. but after the 20 minutes of shaking it i must of spent the next hour trying to get all the rocks and crap out by shaking it and flushing it with water and some shitty old petrol i had lying around. was not a fun experience at all. so a bit more cleaner. but i will need to add a filter somewhere in the line to stop it getting to the carb. also gave the top of the tank some por15 to treat some of the rust it had on it. and removed the rubber pad off it too and did underneath as well. so now your asking why i didn't do the whole tank? i did it as the compliance inspectors don't like new paint as it tend to to show its hiding something underneath. so just did that piece as you shouldn't be able to see it when the tank is in place. but again will do the whole thing in por15 and respray over that in silver like the factory to prevent any further rust.
- 77 replies
-
- 12
-
-
piazzanoob's 1964 Ford Galaxie 500 seeeedaaan
piazzanoob replied to piazzanoob's topic in Projects and Build Ups
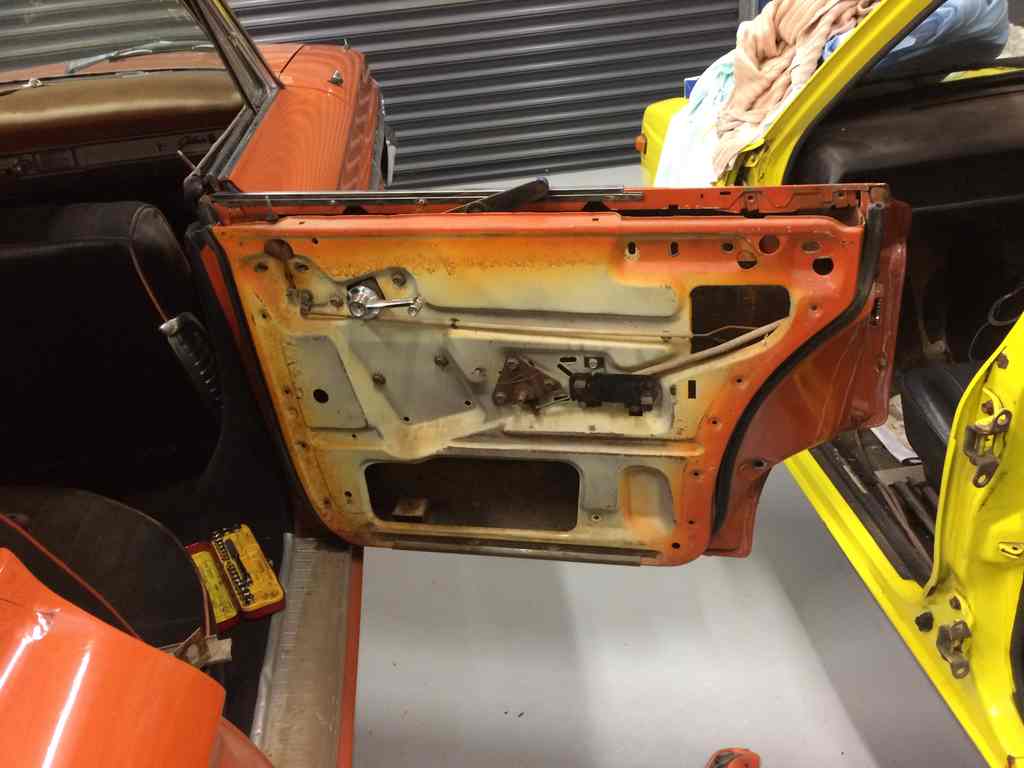
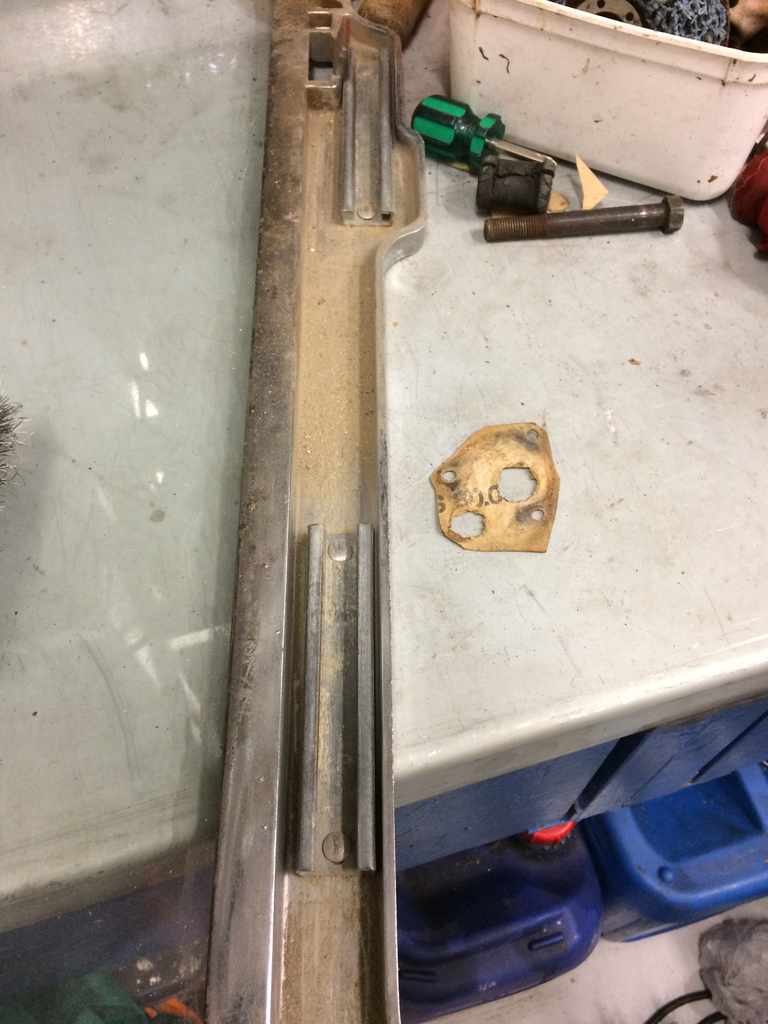
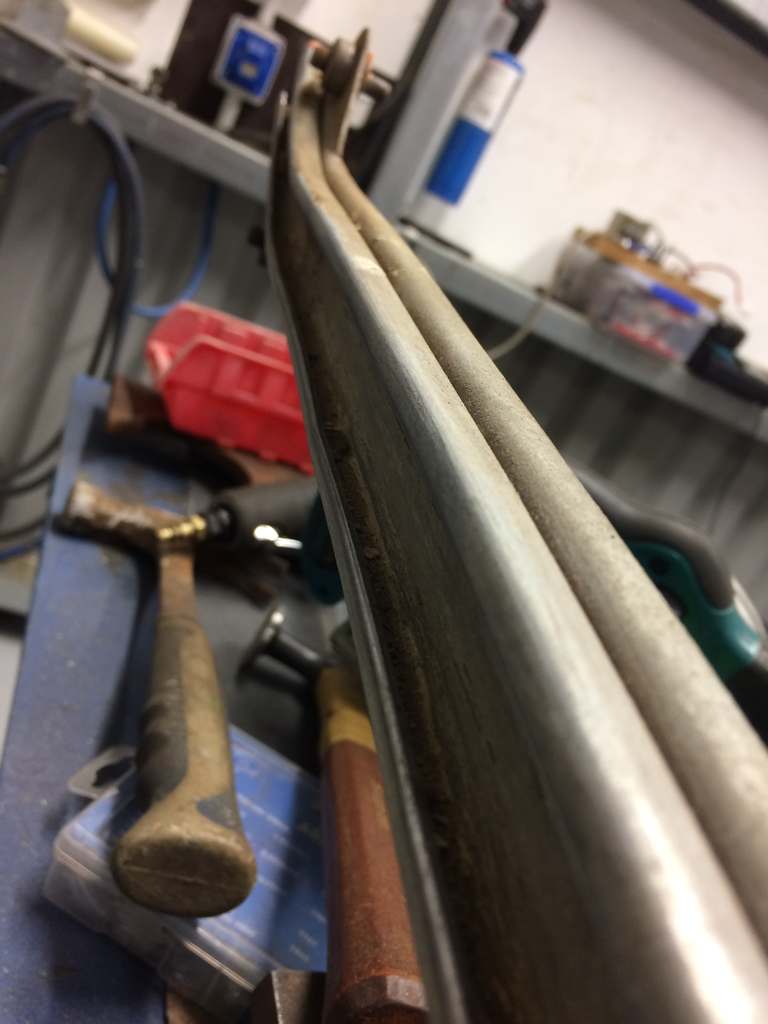
So after flushing the cooling system and placing it back into the shed i set about fixing the R/R door not opening or the window rolling down. for some reason the door card was rubbing on the body of the car so i suspect its too big and needs trimming. so i pry'd the door card off to one side to get the door open. then removed the door card also did remove the window and its tracks. but man that glass is thick! The two guides were also seized so free them up and applied rubber grease on them. And as you can see that the Arizona dust has settle itself on the tracks. so spend some time with a wire brush and cleaned it all off. then applied Rubber grease on all the tracks. reinstalled and now rolls up and down fairly smoothly. but now just need to get an imperial tap and die and clean up the thread on the limit stop and trim some of the door card off so while its on the door can open and close. also gave the fuel flap some alignment. bolts weren't even tight just need to buy some rubber bump stops for the flap now but will get that some other time after compliance.
- 77 replies
-
- 13
-
-
piazzanoob's 1964 Ford Galaxie 500 seeeedaaan
piazzanoob replied to piazzanoob's topic in Projects and Build Ups
also took the ol girl out of the shed before disassembly of the brakes. gave the cooling system a good flush out with the hose. also didn't realize at the time that it also had a tap on the block to drain out of. but have added some coolant into the system and will run that for abit then give it another flush out. but more importantly i need to get the temp and fuel gauge going. so have ran a wire to the temp sensor as it had nothing. and just need to wait for my dash cluster voltage regulator to arrive to also help with the non working gauges
-
piazzanoob's 1964 Ford Galaxie 500 seeeedaaan
piazzanoob replied to piazzanoob's topic in Projects and Build Ups
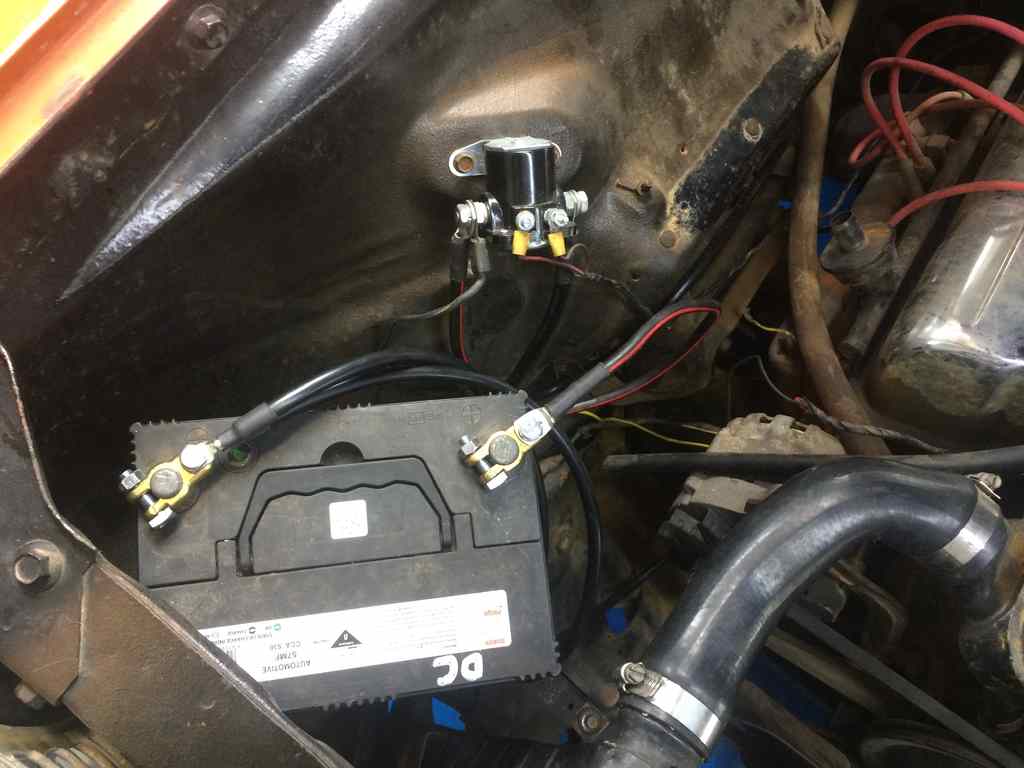
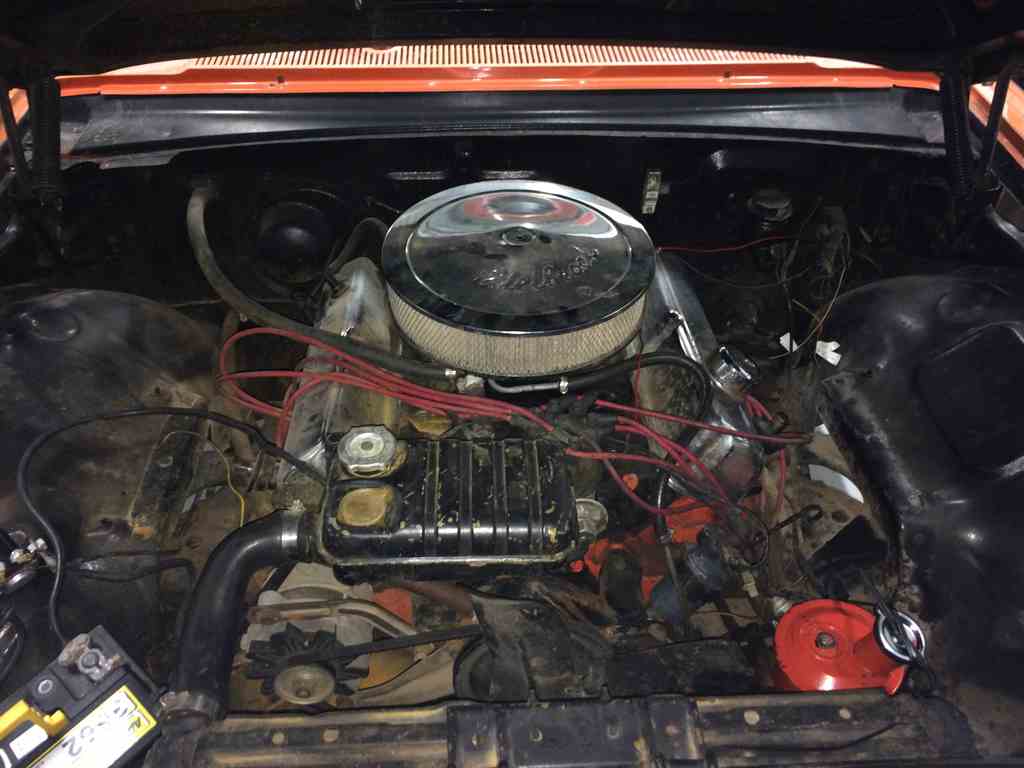
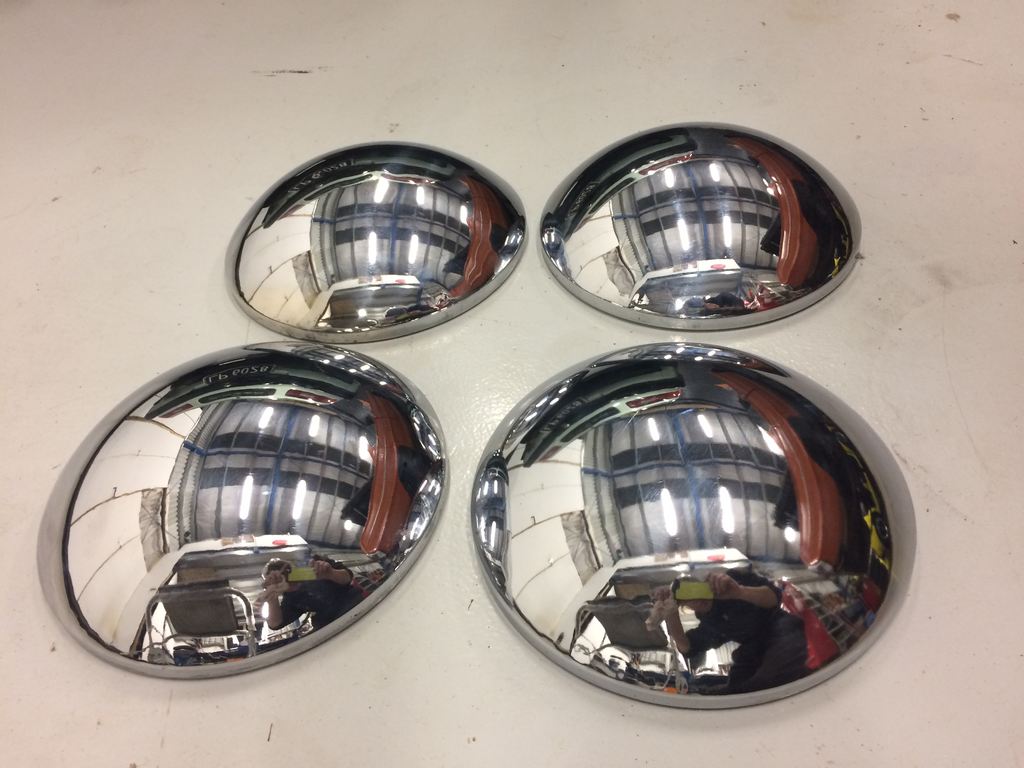
so seen as it was a long weekend last weekend @chris r come round on the monday and gave me a hand with the wiring side of things dam american's and there twist and tape method or just don't plug it in or run a wire. got some new wire for the battery leads and new terminals too help with starting. so out with this hori wiring so now has nice new cables running from the starter and earth leads along with some new battery terminals so heres a photo of the ol 390fe big block she's running. and if you look not very close you can see how shit the battery leads were along with all the other wiring witch needs a good tidy up.
-
piazzanoob's 1964 ford Galaxie 500 seeedaan
piazzanoob replied to piazzanoob's topic in Project Discussion
i do suspect all of those parts are interchangeable. but will see how my local brake supplier gets on. so if i have trouble i will let you know cheers -
piazzanoob's 1964 ford Galaxie 500 seeedaan
piazzanoob replied to piazzanoob's topic in Project Discussion
all of the brake listings run from 60-64 so they should be right. but i suspect there are some brake shoe width differences in some of them -
piazzanoob's 1964 ford Galaxie 500 seeedaan
piazzanoob replied to piazzanoob's topic in Project Discussion
Currently getting the brake side of things sorted. yet to get some RHD headlamps too many parts to get just lack of time to sort it -
piazzanoob's 1964 ford Galaxie 500 seeedaan
piazzanoob replied to piazzanoob's topic in Project Discussion
-
piazzanoob's 1964 ford Galaxie 500 seeedaan
piazzanoob replied to piazzanoob's topic in Project Discussion
sweet done deal -
piazzanoob's 1964 ford Galaxie 500 seeedaan
piazzanoob replied to piazzanoob's topic in Project Discussion
but does it actually seal?


.jpg.373408aab08c2e2349fa232a93684fe1.jpg)


.jpg.f81a87feb972bdb98d8867aab5ebd42e.jpg)
.jpg.7b26f038a7acda0ad61362f488b8145d.jpg)