


Guypie
-
Posts
856 -
Joined
-
Last visited
Content Type
Forums
Downloads
Events
Gallery
Posts posted by Guypie
-
-
I had a friend who used to do the recycled engine oil thing. He would settle it for a few months and then run it through a centrifuge and a filter. He had a 1kz prado and did some 180,000km or so on it if I remmeber correctly.
He originally used transformer oil as he was a industrial electrician, I mentioned this to someone once and they said something about that stuff being super carcinogenic.
I heard some nightmare stories from him too though, hoses popping off the centrifuge and staying up until 4am on a work night to clean up the mess. I always kind of thought it was in the too hard basket really.
-
 5
5
-
-
Dang that is a sweet power hammer. VFD might be just the ticket for getting it moving without popping a circuit breaker, mine has a soft start which would probably work well for getting that moving. I presume it only hammers when you stomp on the ring round the base?
-
- Popular Post
- Popular Post

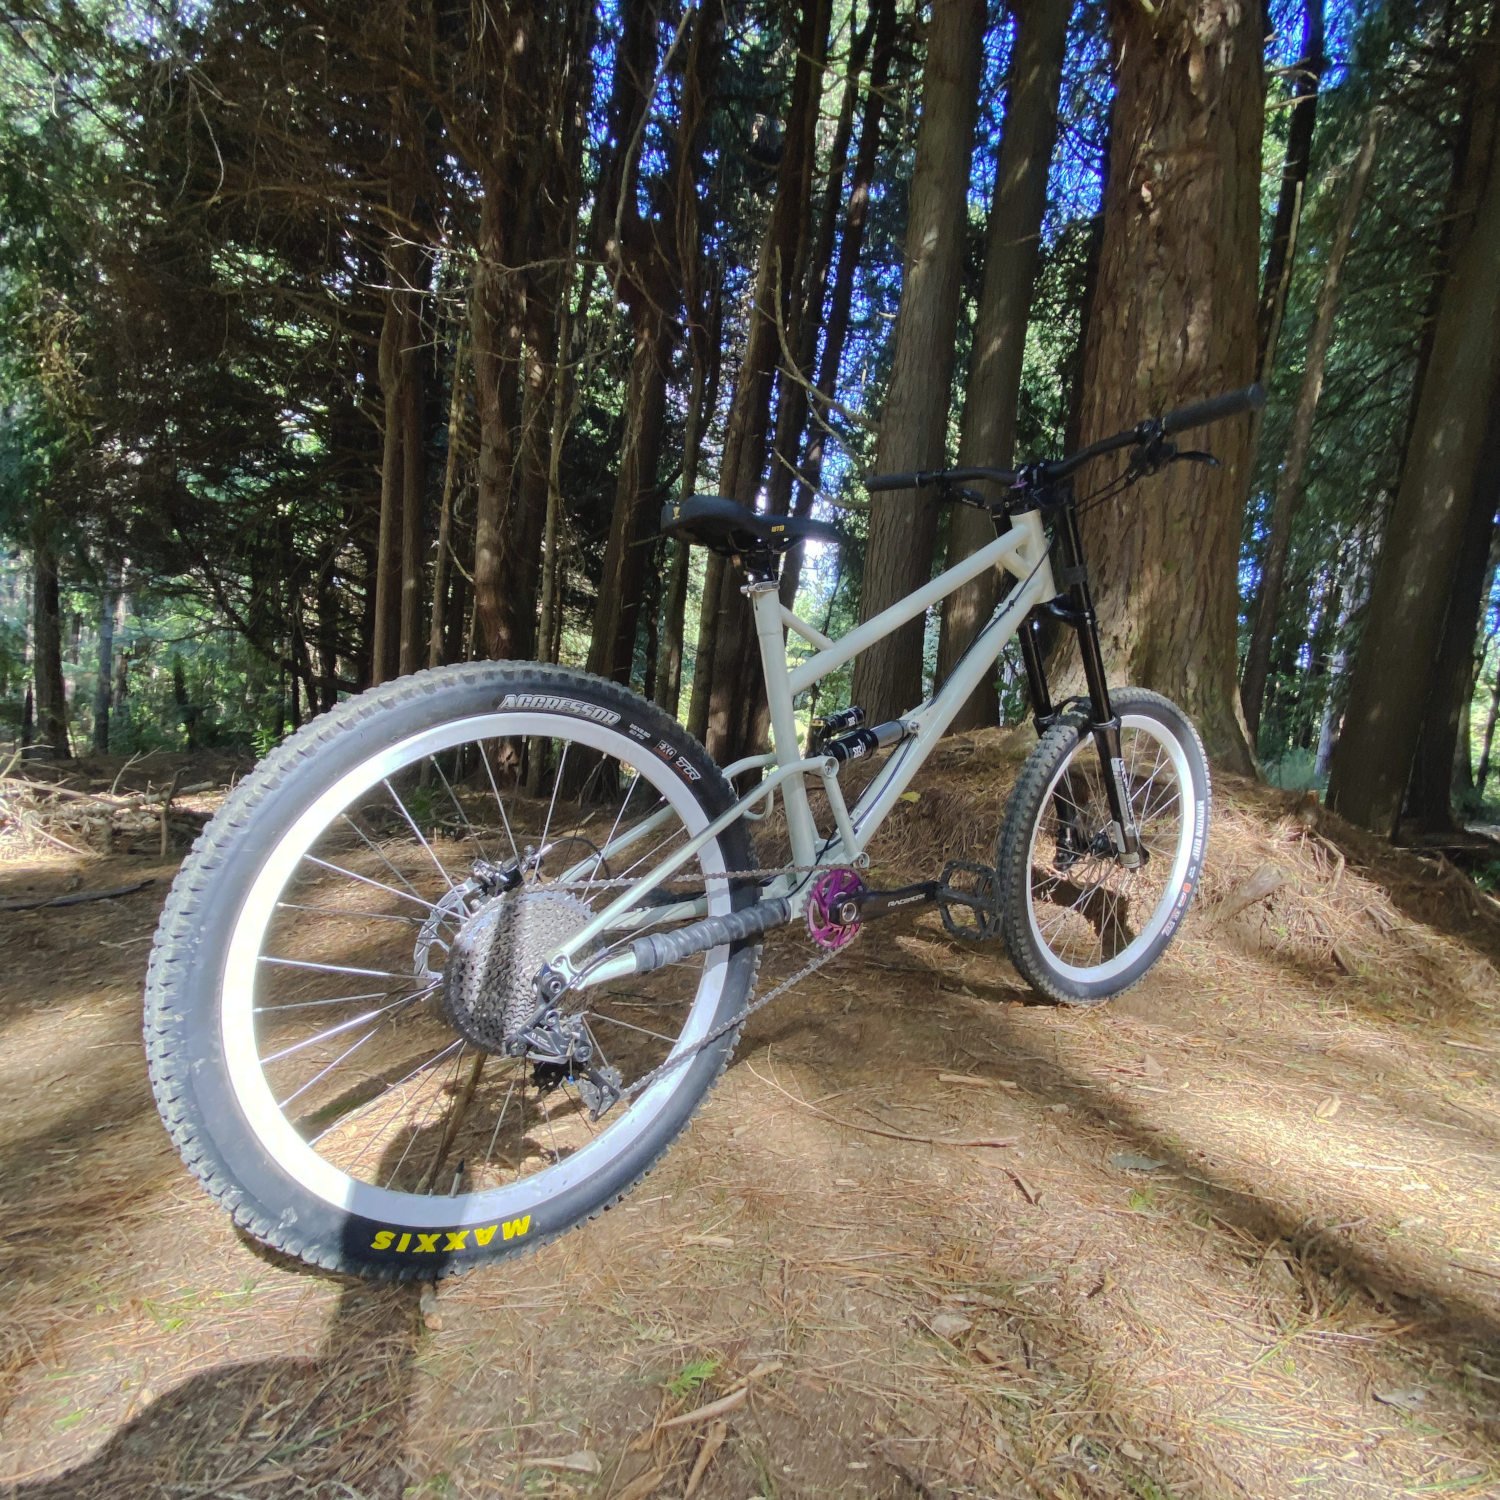
Slapped a coat of primer on this and took it up to the top of Pirongia on sunday for a couple of laps. What a machine! it's better than I expected.
I was worried about the pedal kickback but it really isn't noticeable when decending. On the flow trails it pops really well and soaks up the larger chunky stuff and the big hits very well. Pirongia is pretty smooth so its hard to tell but I think its weakness will be high frequency chattery braking bumps and that kinda stuff. The other issue that might be able to be resolved by adjusting the shock damping settings/air chamber volume is it is lacking a bit of mid stroke support. Probably due to the linear nature of the single pivot so there's no ramp up at the end, though the bottom out is super smooth due to the position sensitive damping. It also pedals up pretty well, but it was hard work mostly due to the seat post being too short to get full leg extension. Though it does weigh in around 17kg so not super light, though it is certainly in the ballpark for a DH bike.
On the whole, super stoked with how it rides.
Will take it for a few more preliminary runs before giving it a proper paint job as there is a good chance I will figure out I need to change something in the mean time. It also needs a few parts swapped out as there are a few issues, not to mention I robbed 2 other bikes to scrounge enough parts to put it together.
-
14
-
 3
3
-
- Popular Post
- Popular Post
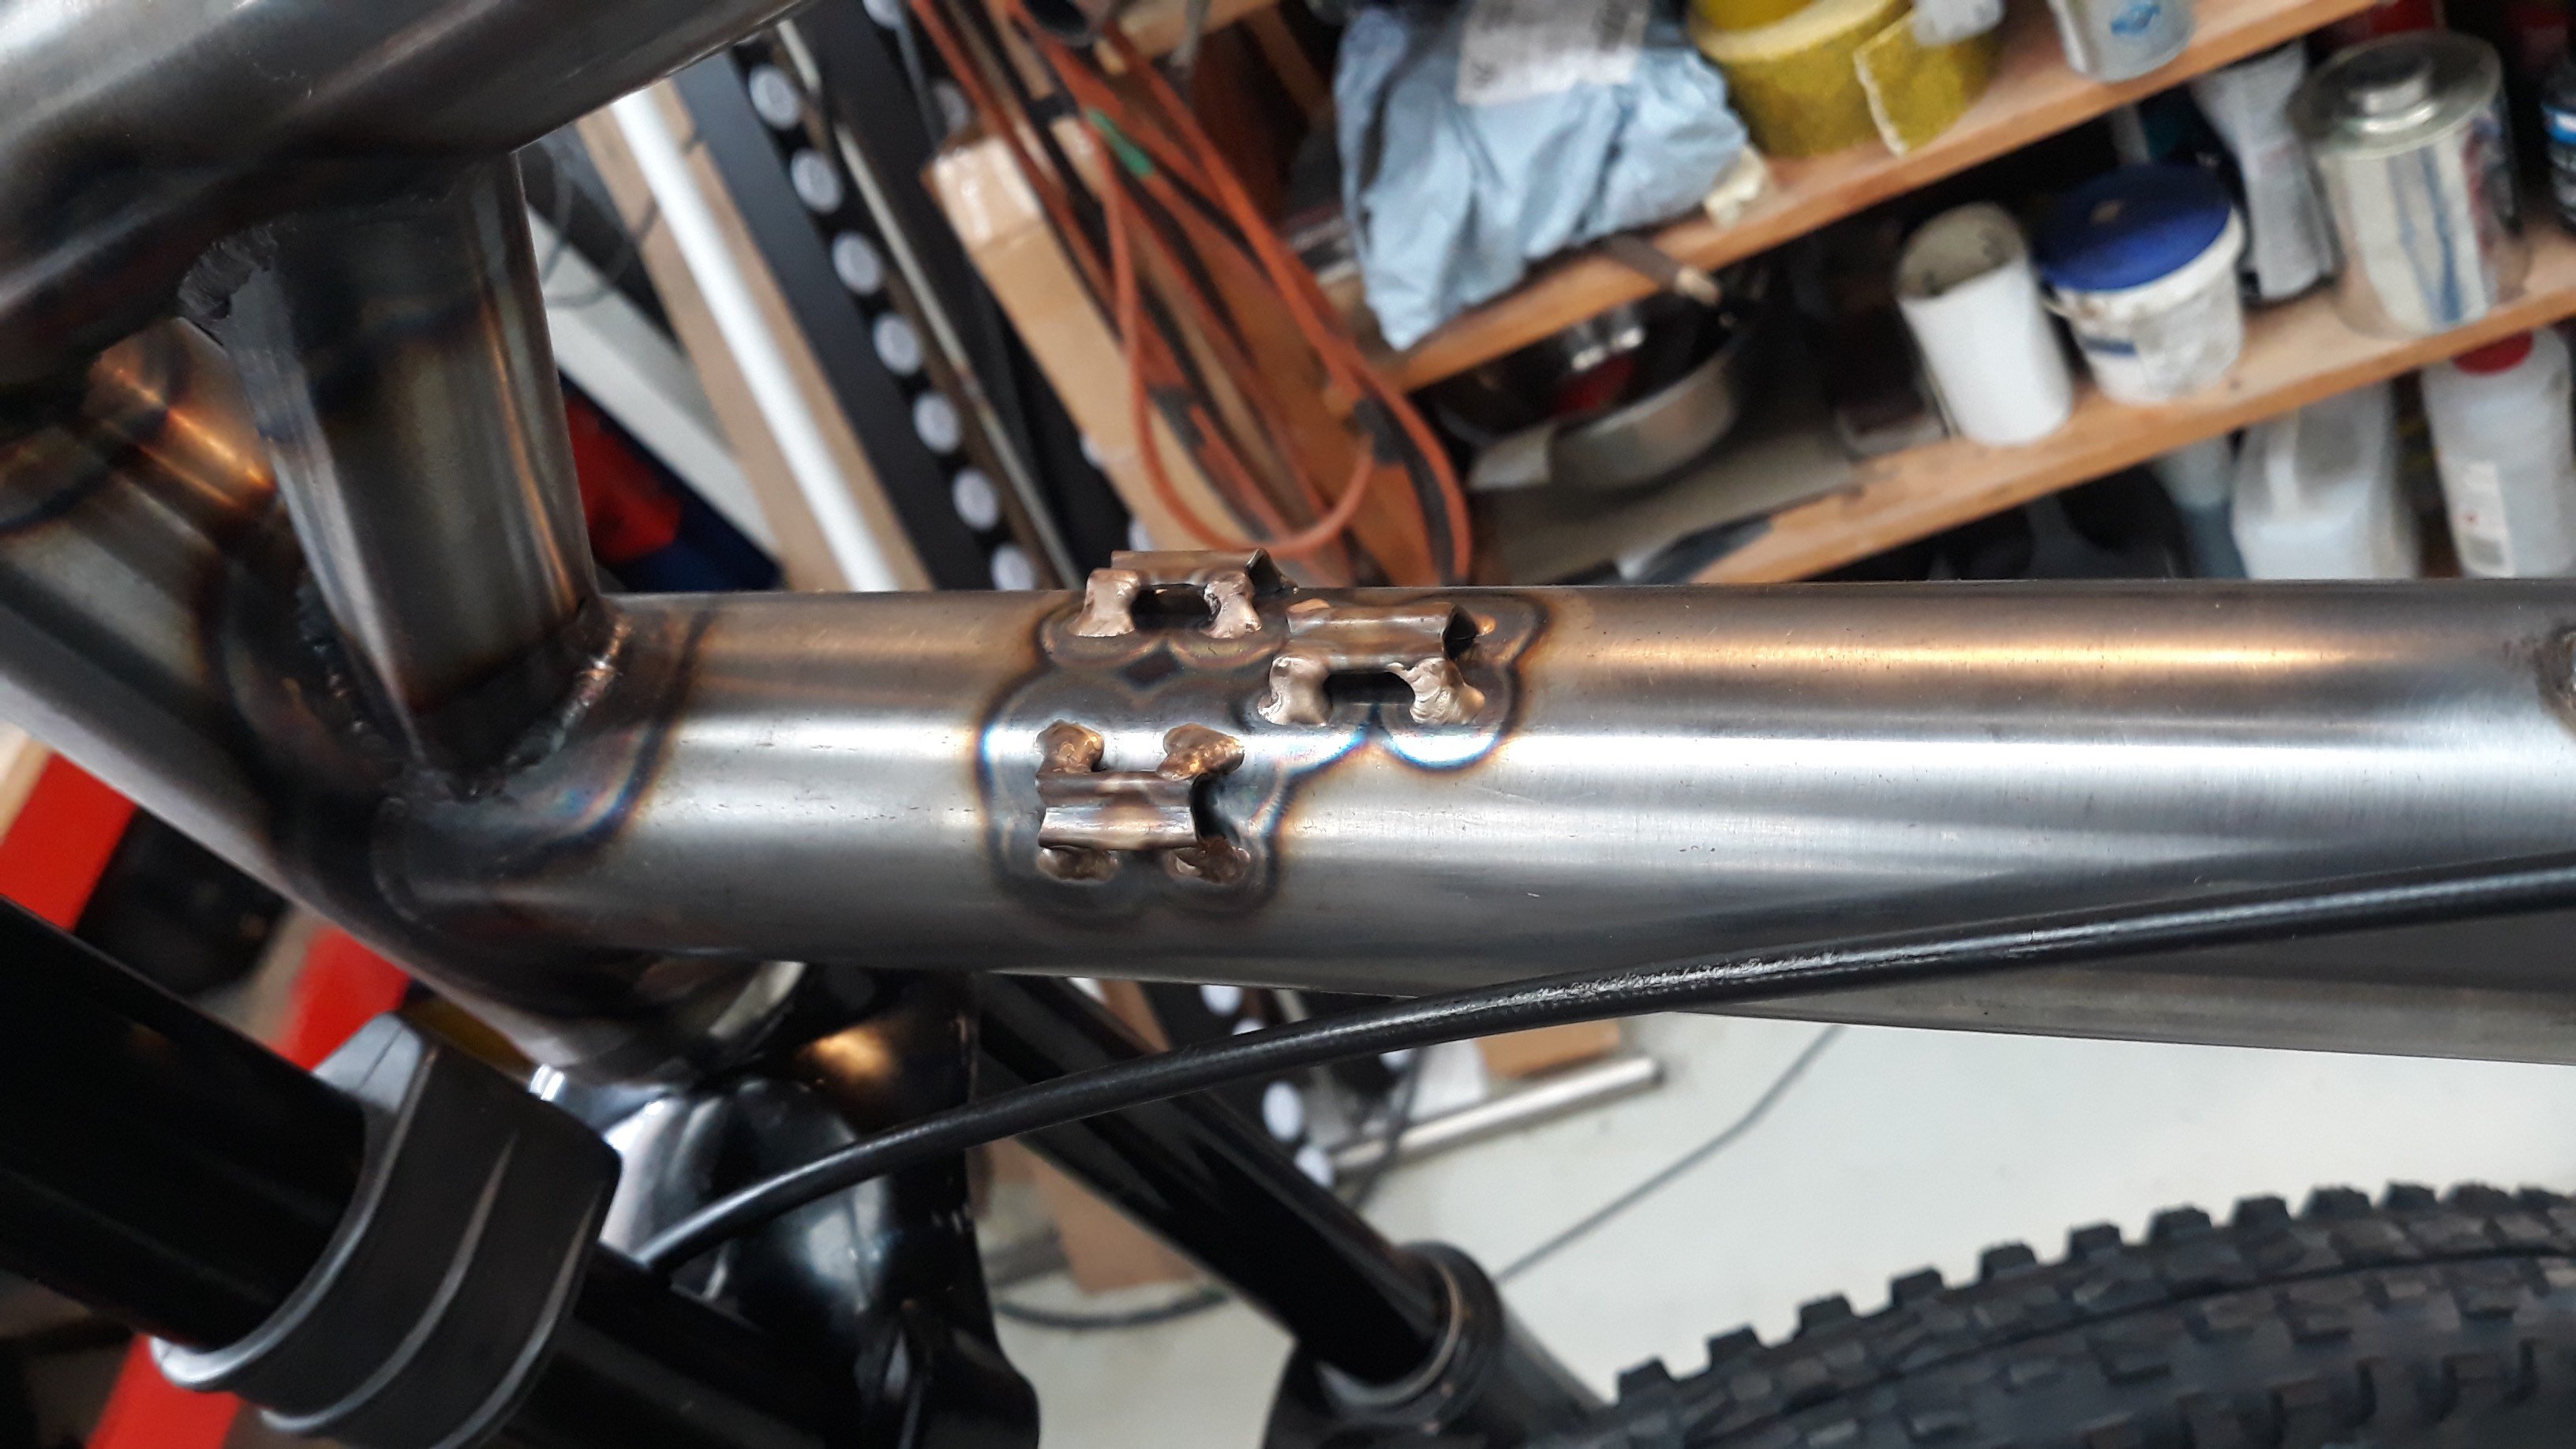
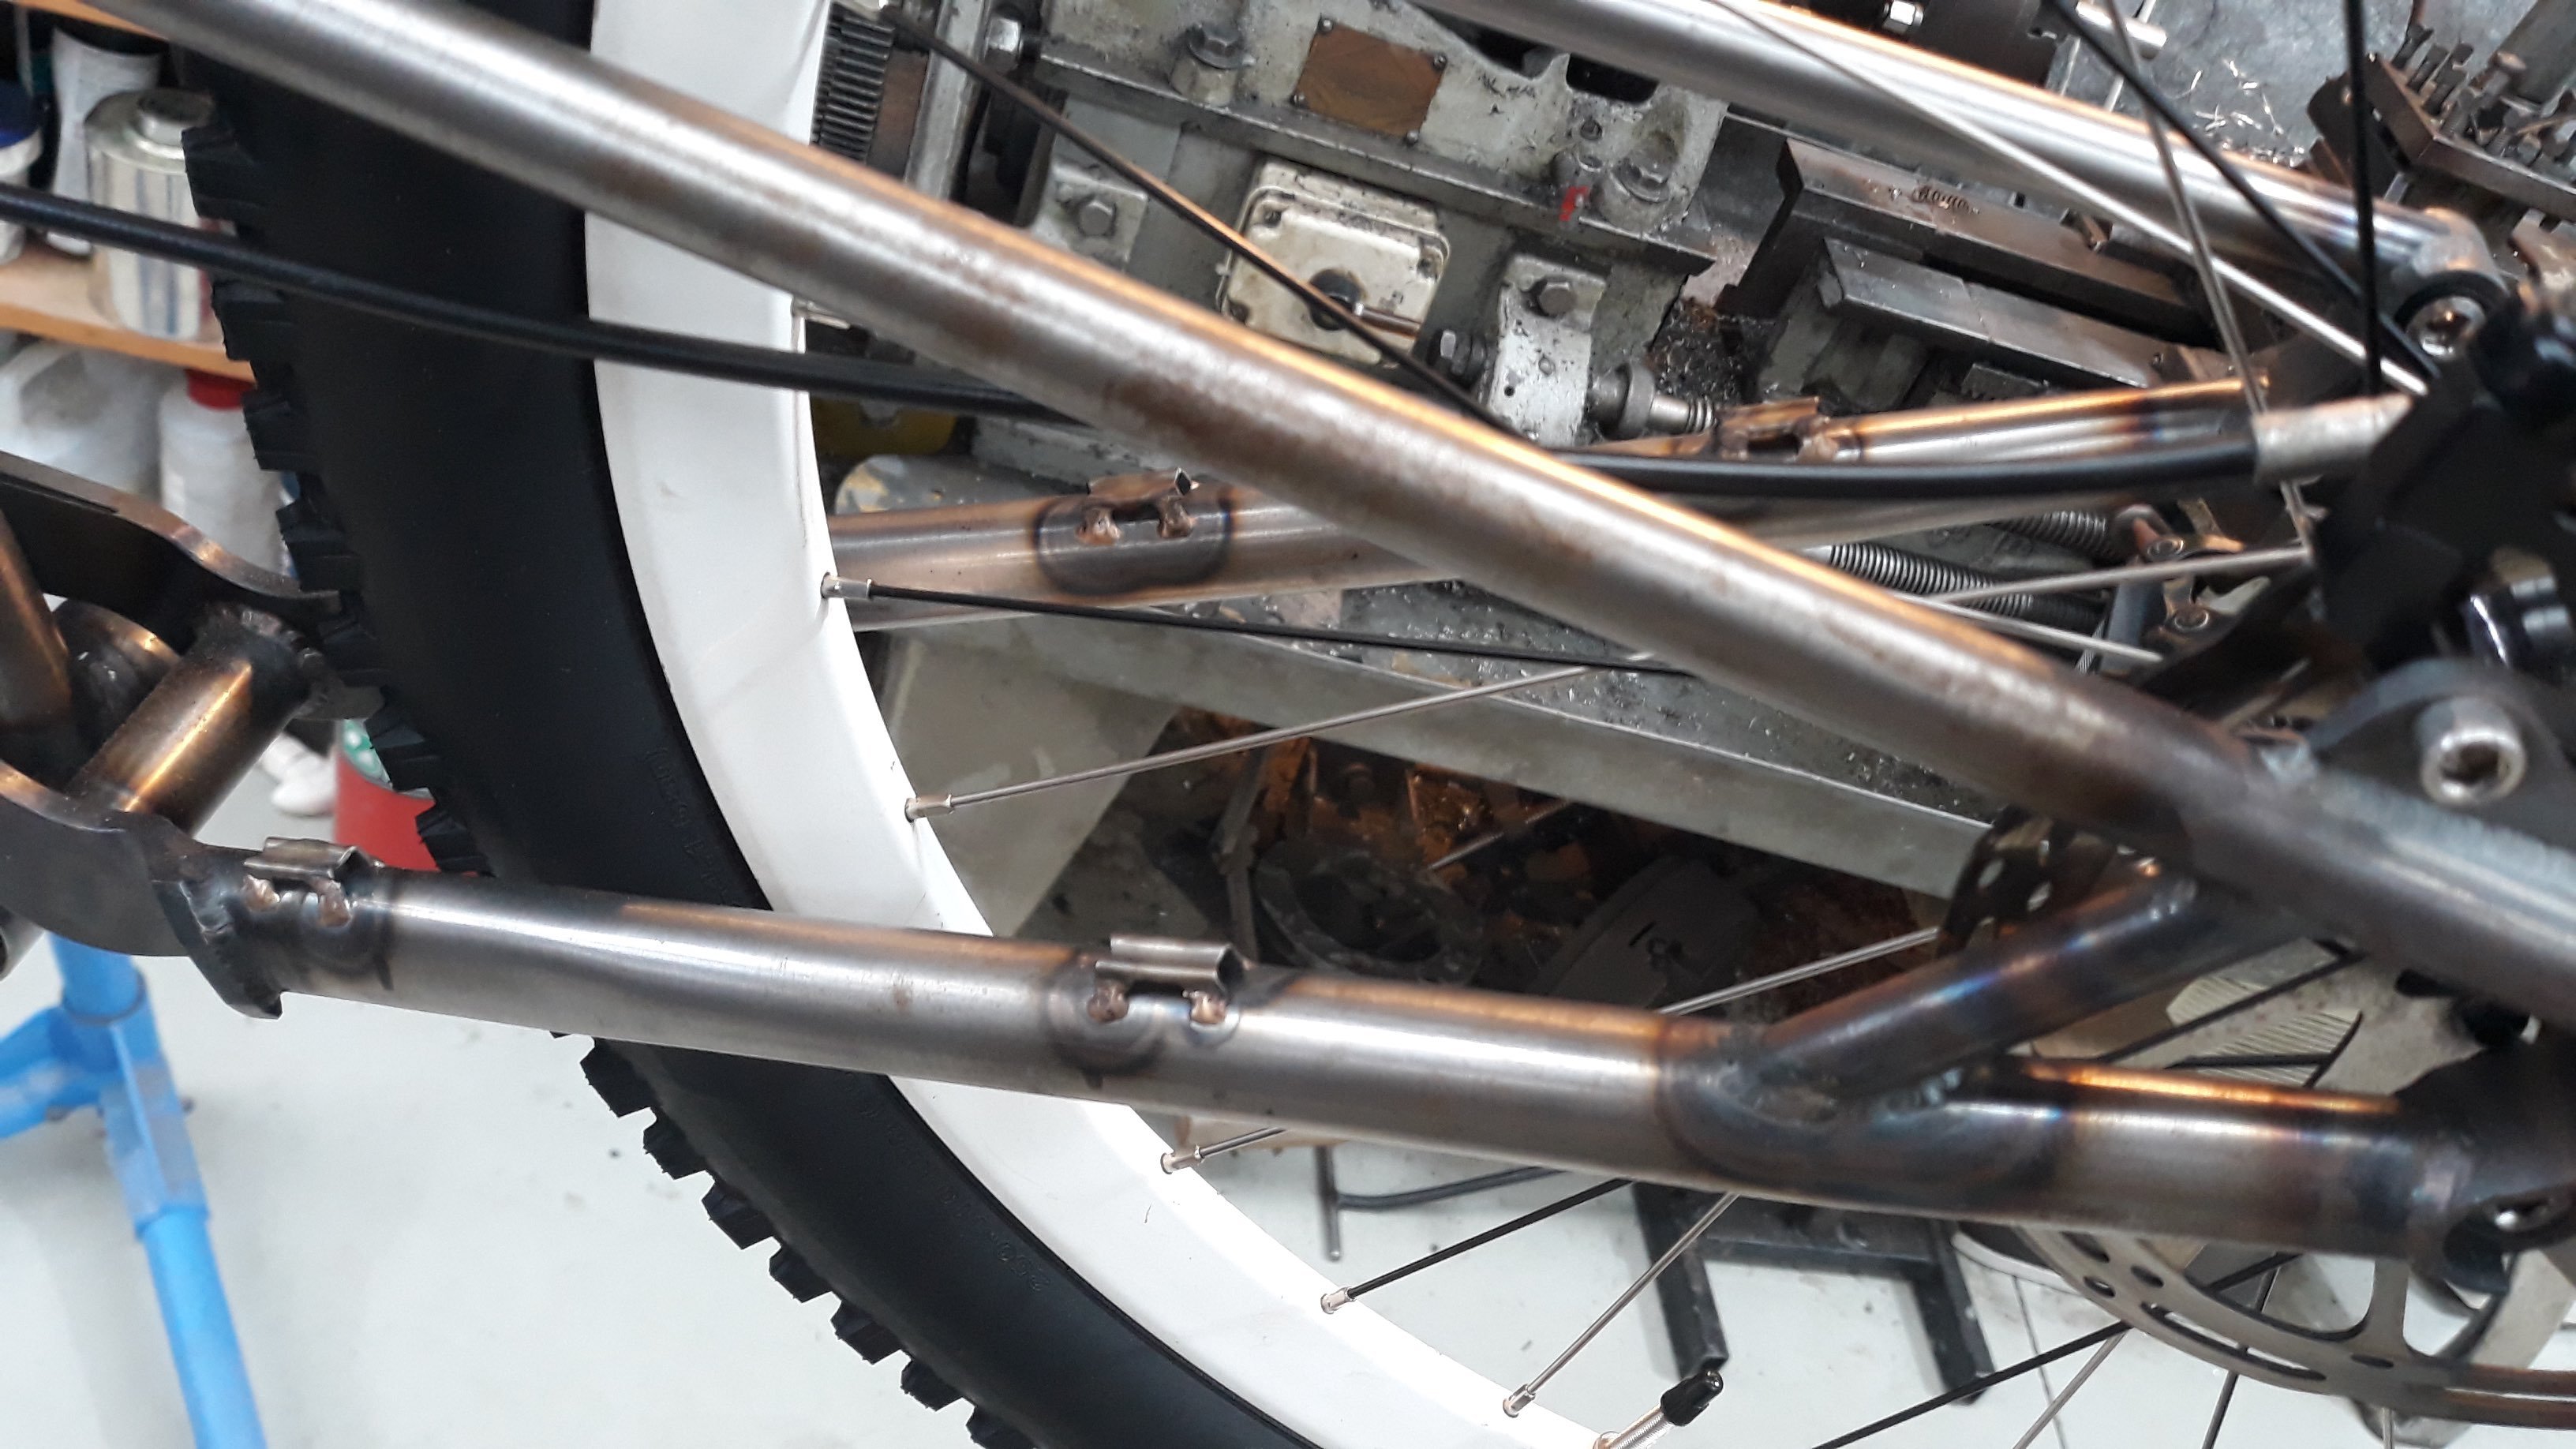
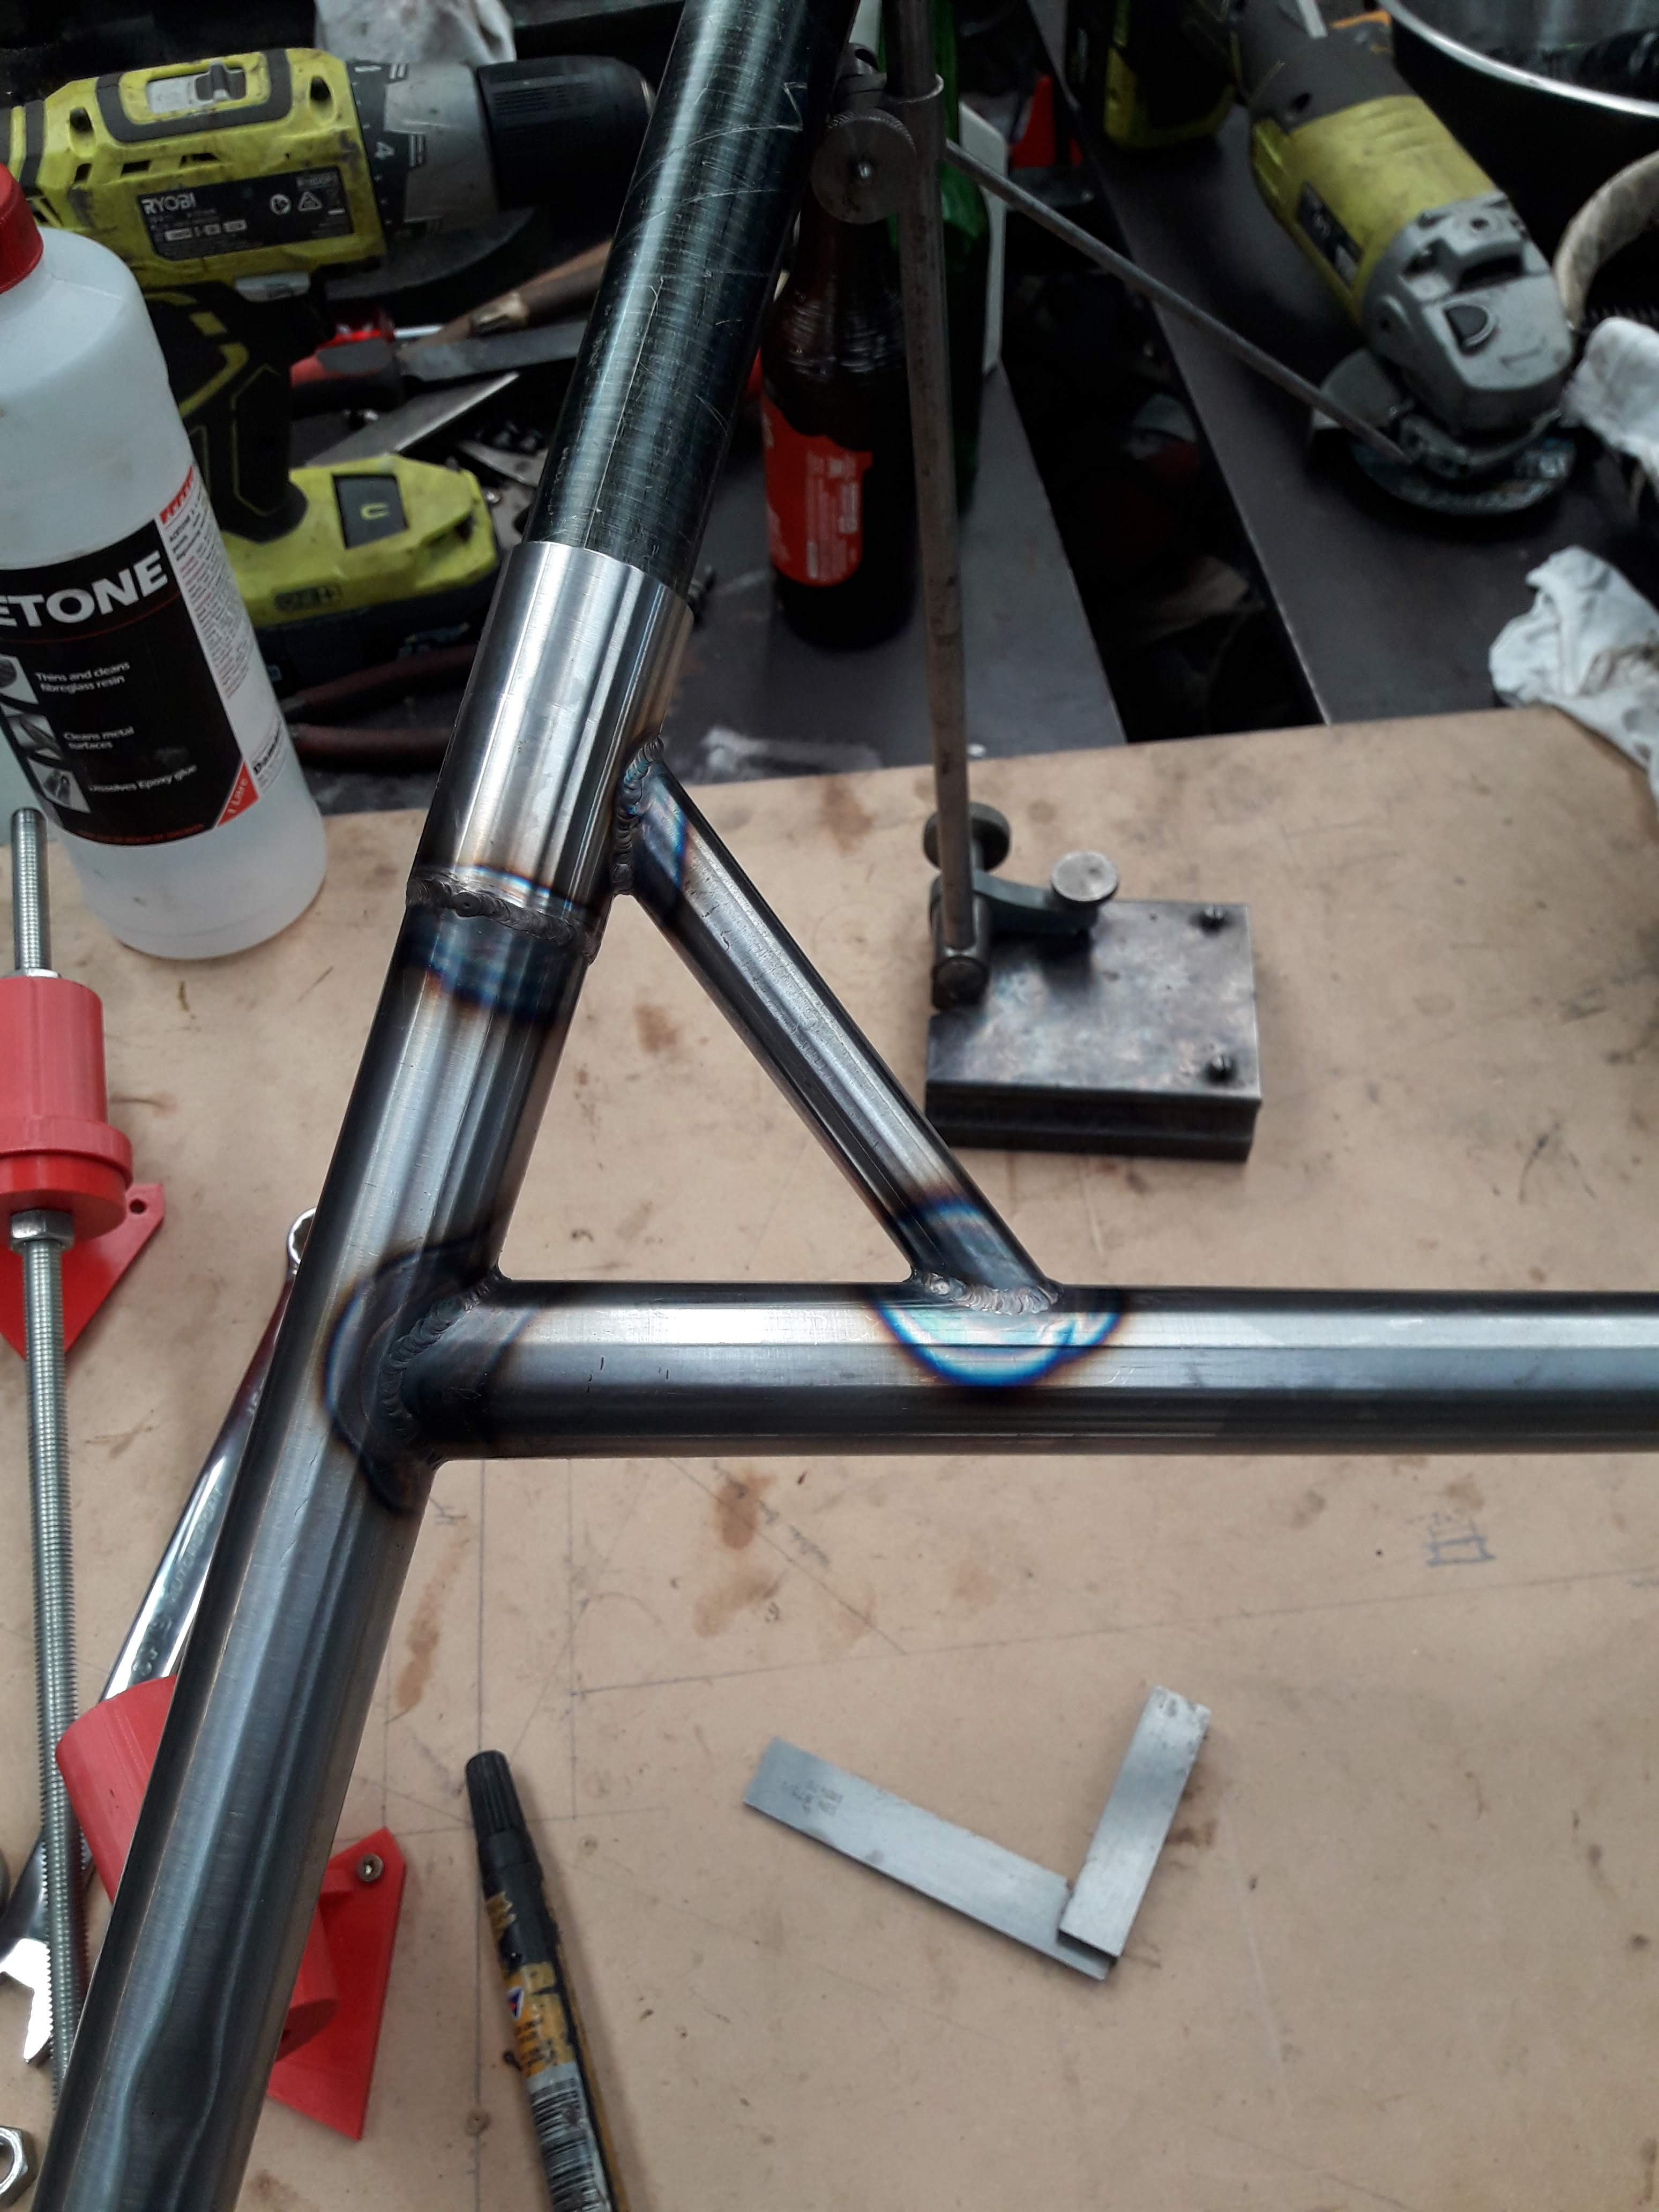
More tig brazed cable guides
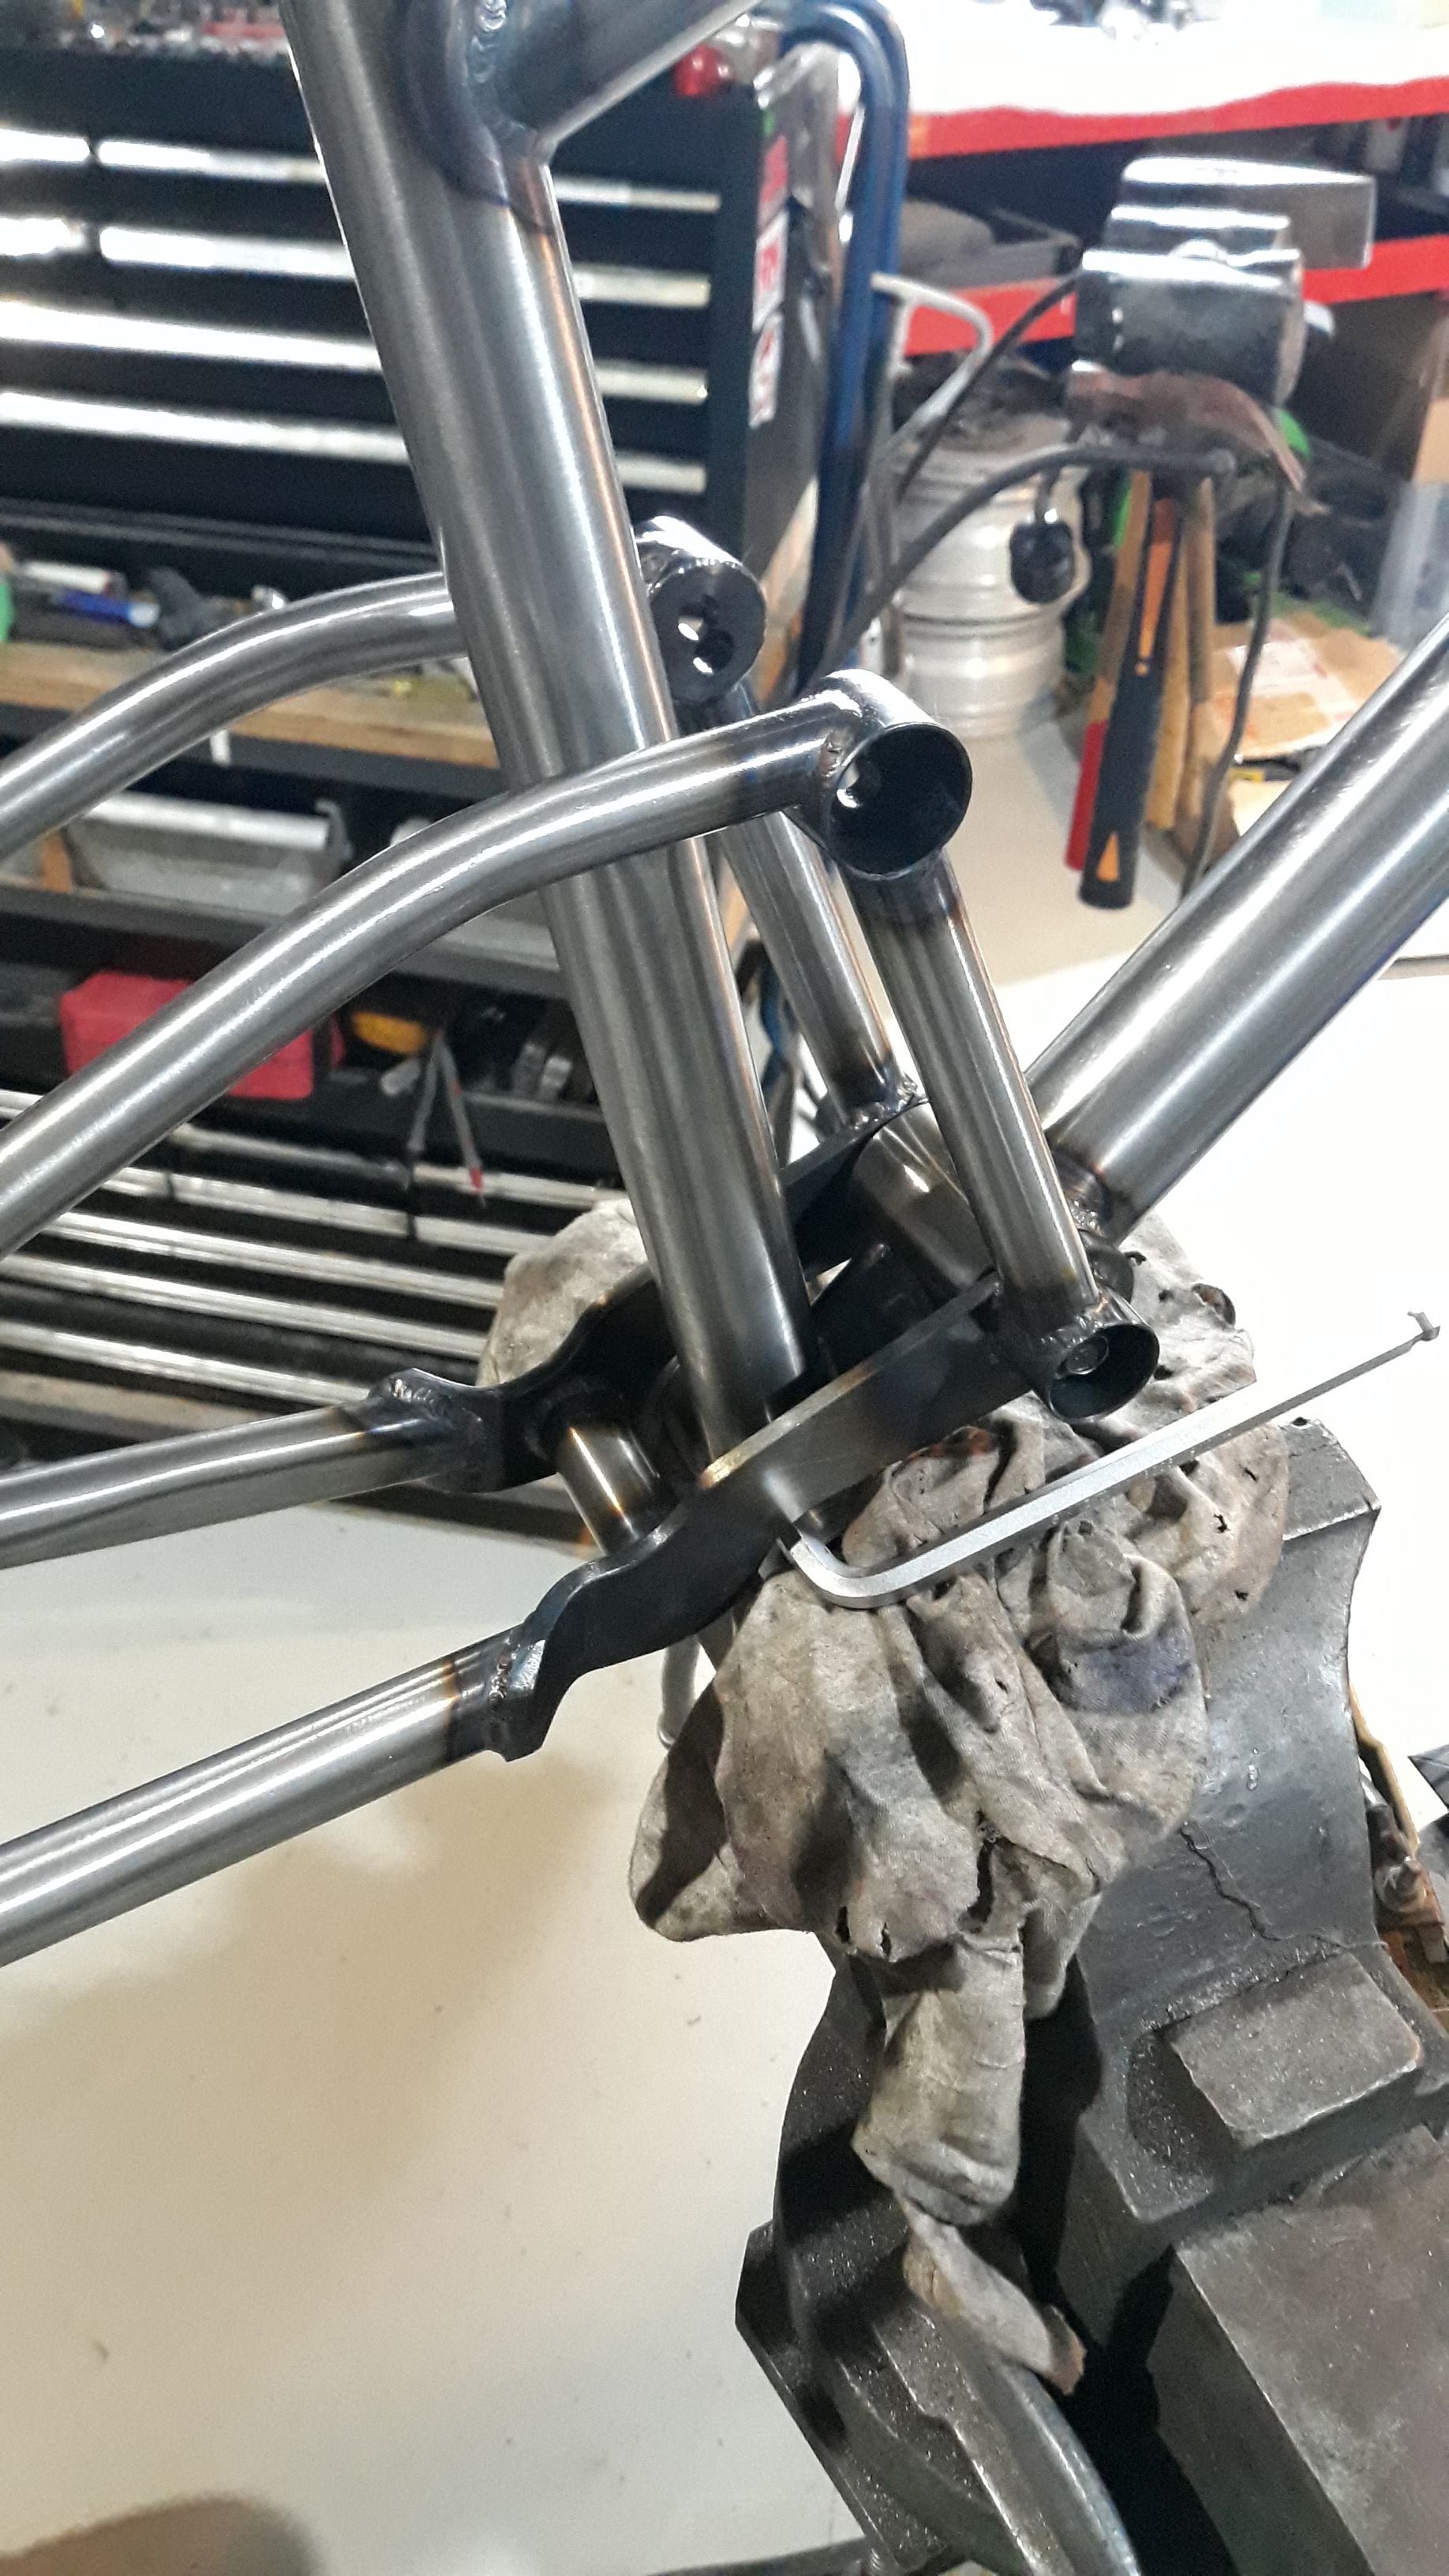
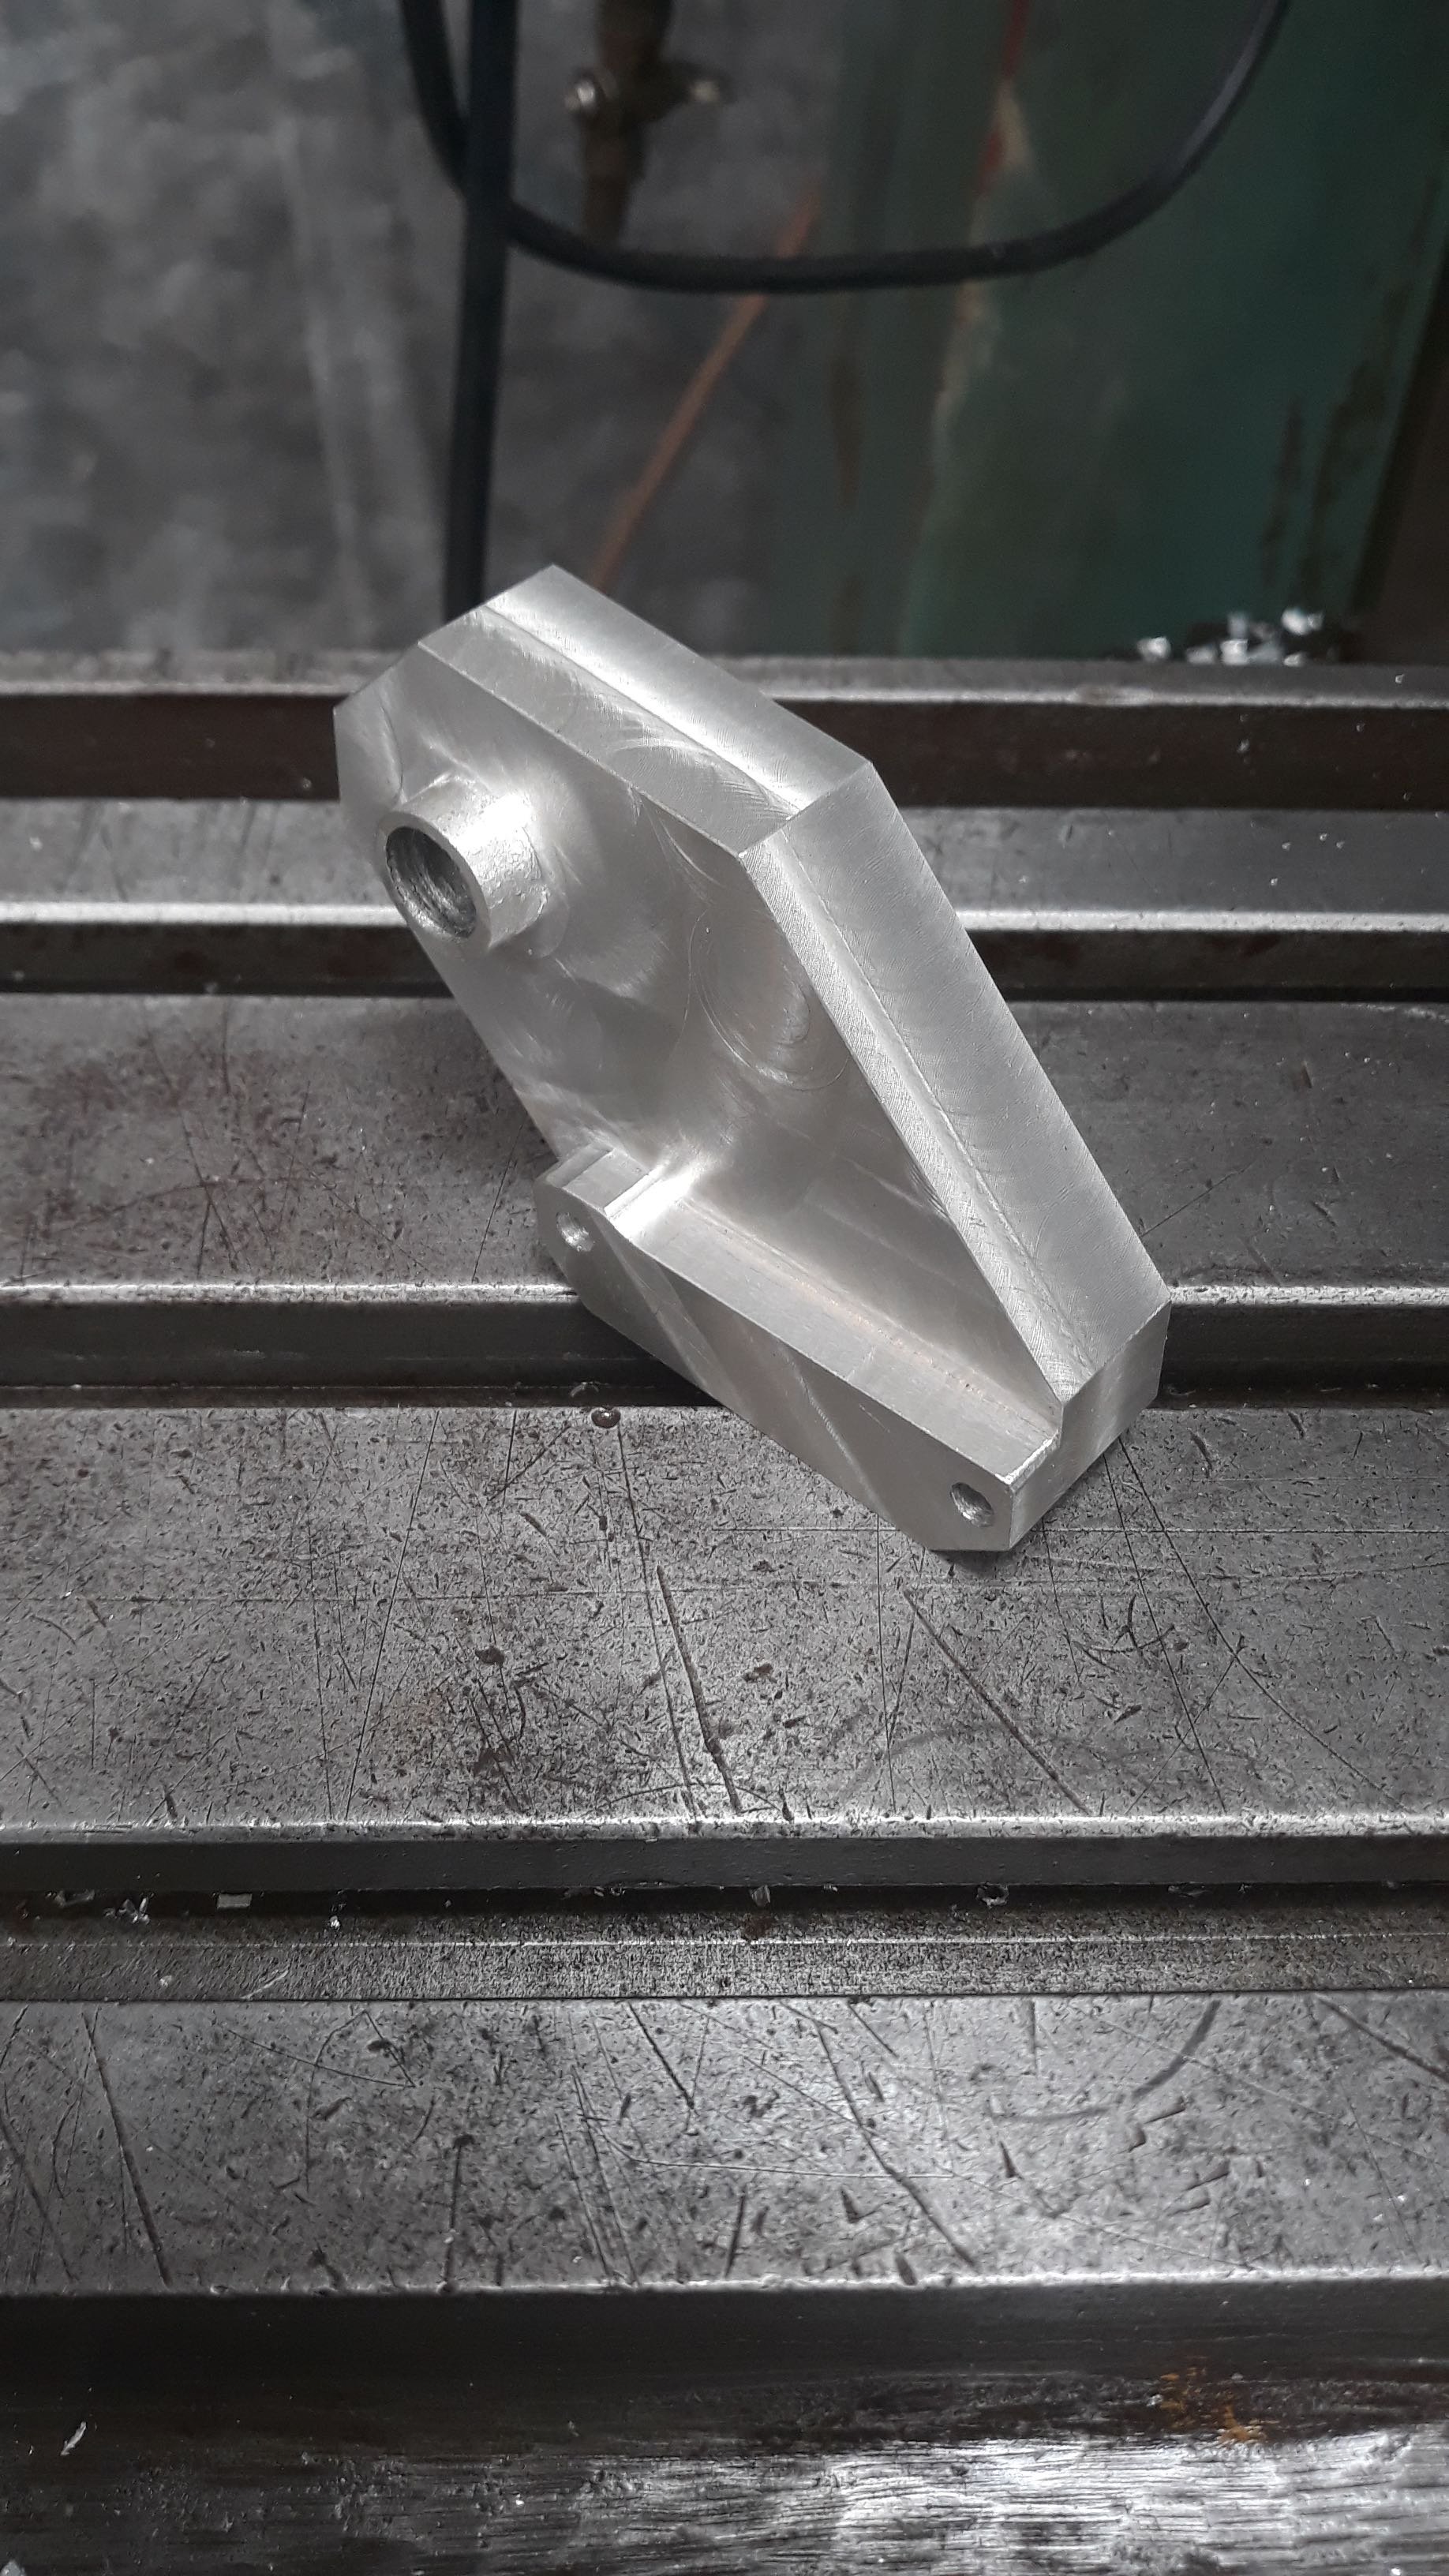
I drew up a little design for the shock mount on the down tube and got it sent away to a waterjet place. This is something that I would do again in future, but only if I had drawn them up right at the start of the project because the lead times on small jobs at industrial place is a bit painful. So I sat around for a few weeks waiting for my bits to come back and when the eventually did I finally got to see what the end product might be...
(drumroll please)
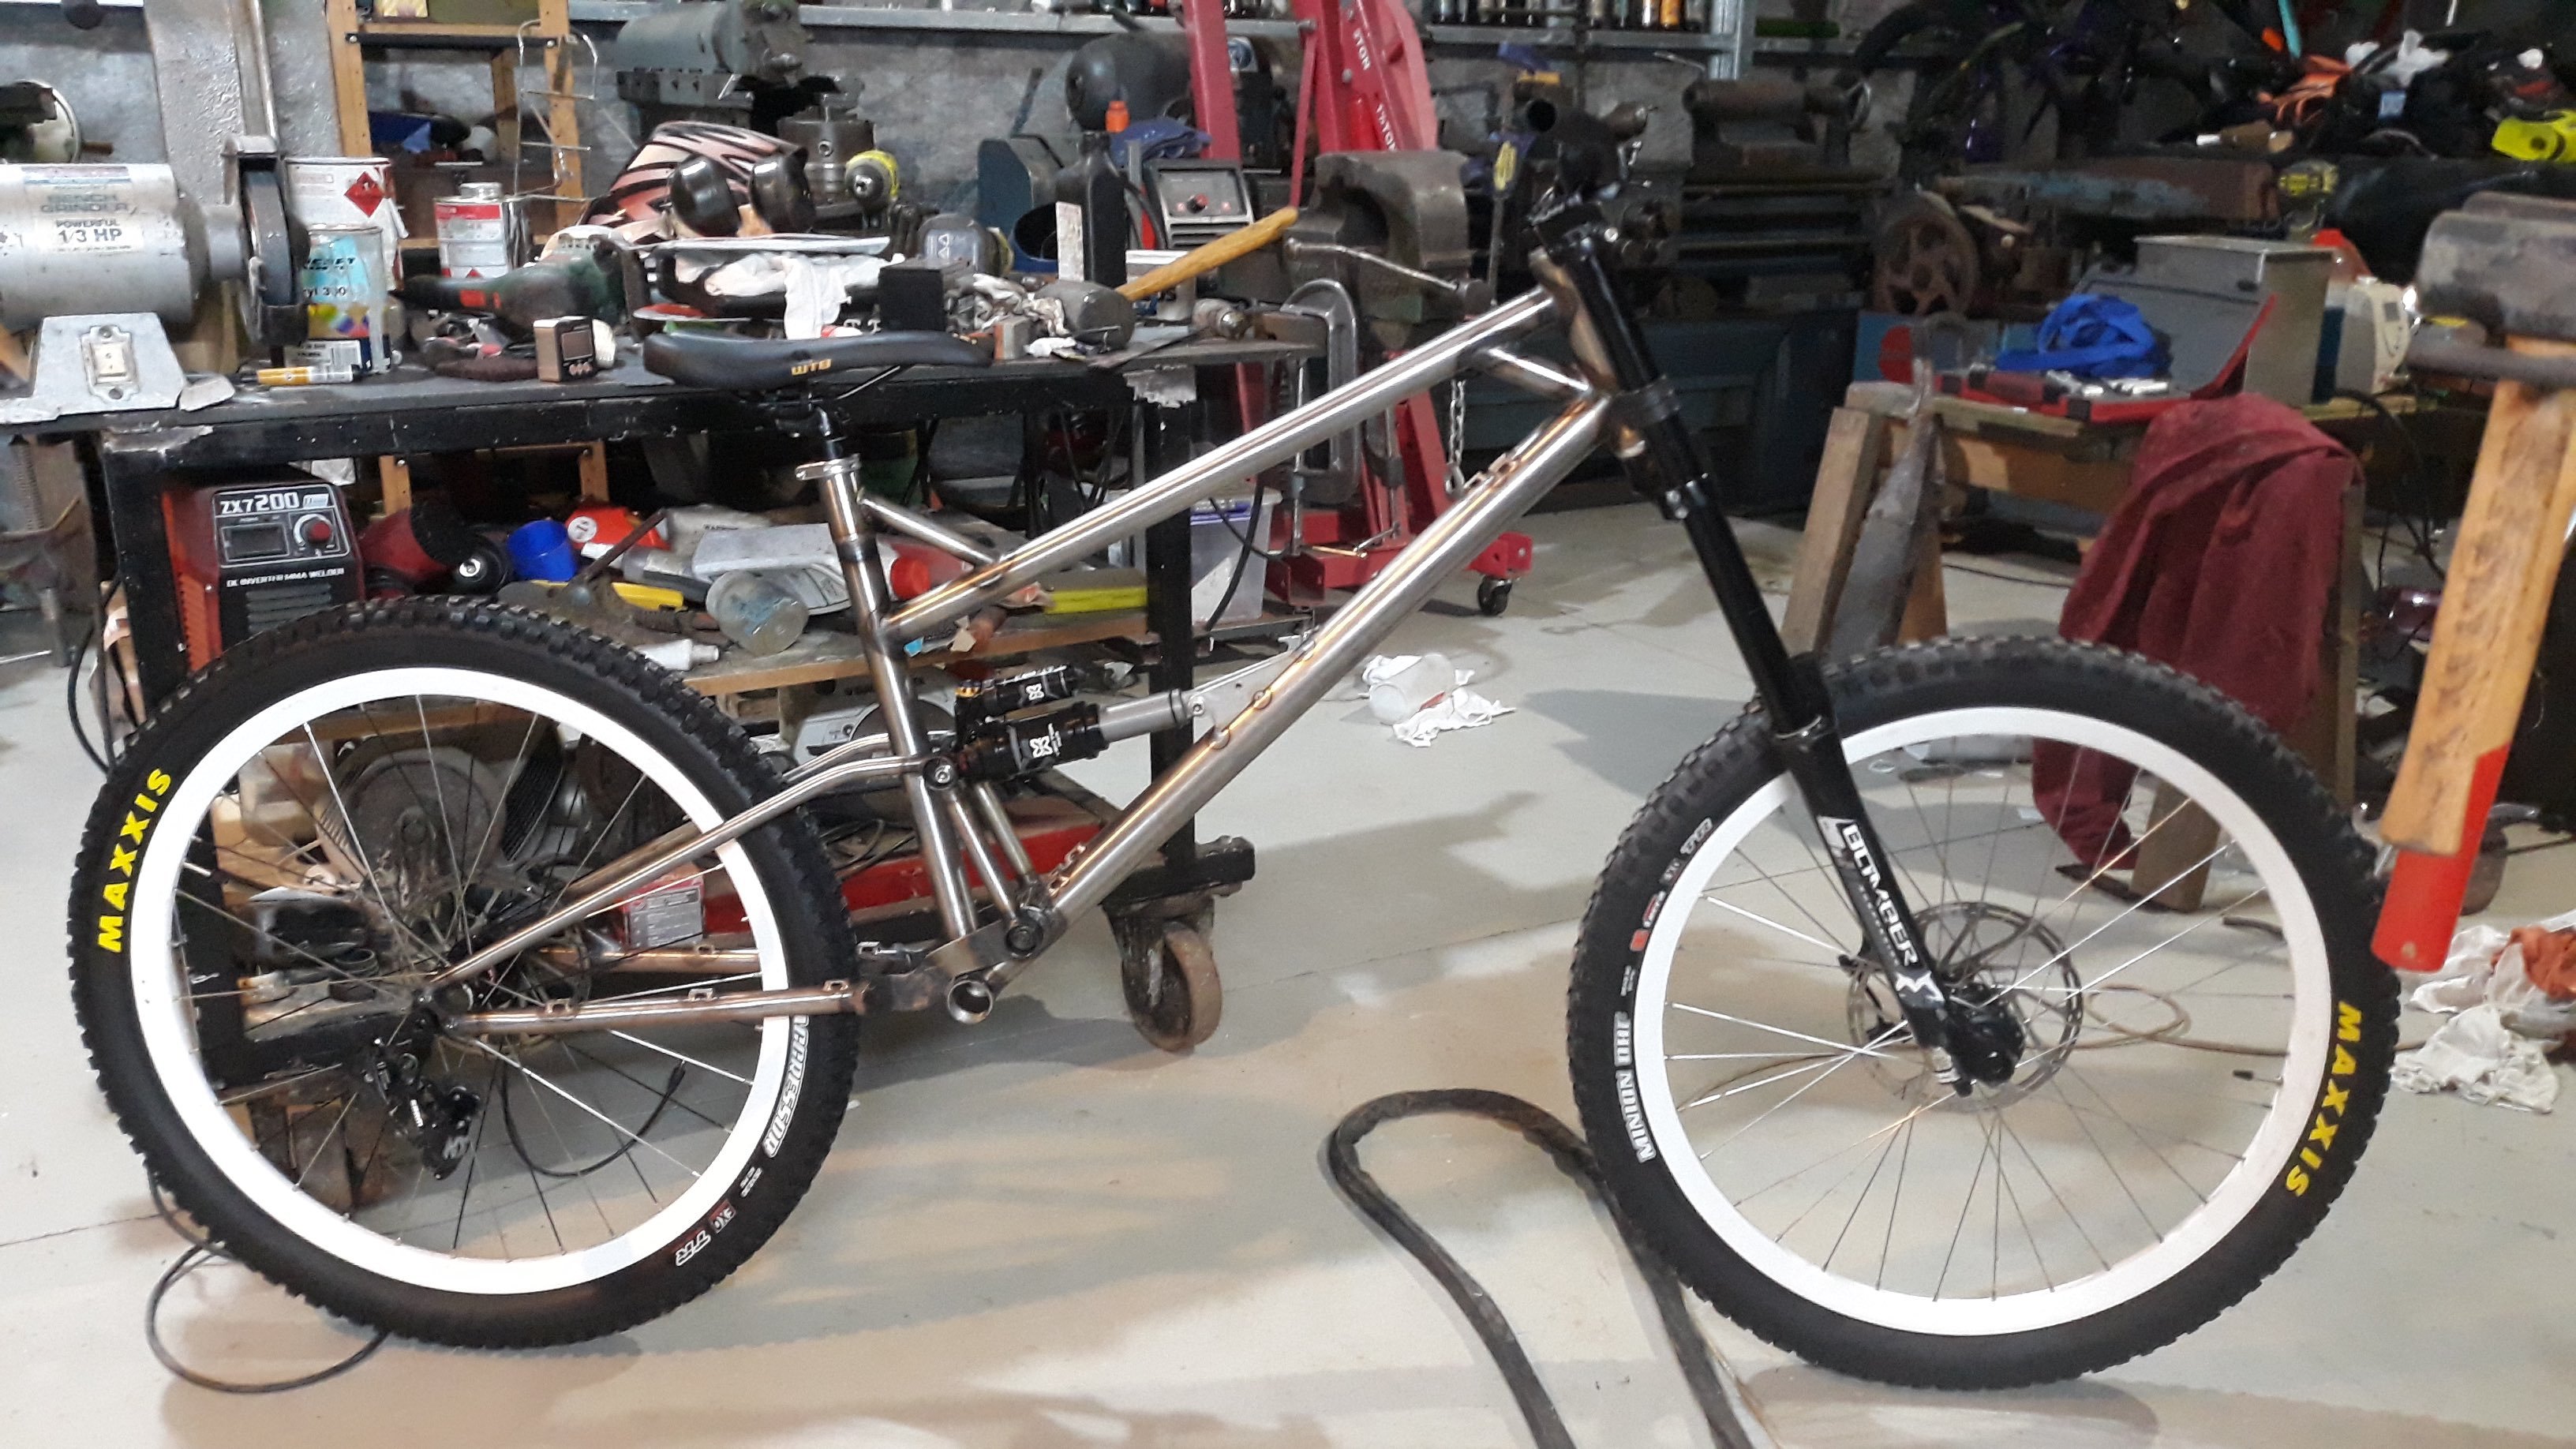
I finished welding the shock mount today, gave the front triangle a coat of primer and spun up a few spacers for the shock mounting today. I want to put one more brace in the rear triangle and then off to the bike shop to use their head tube reamer and assemble it for a shakedown ride.
-
25
-
1
-
- Popular Post
- Popular Post
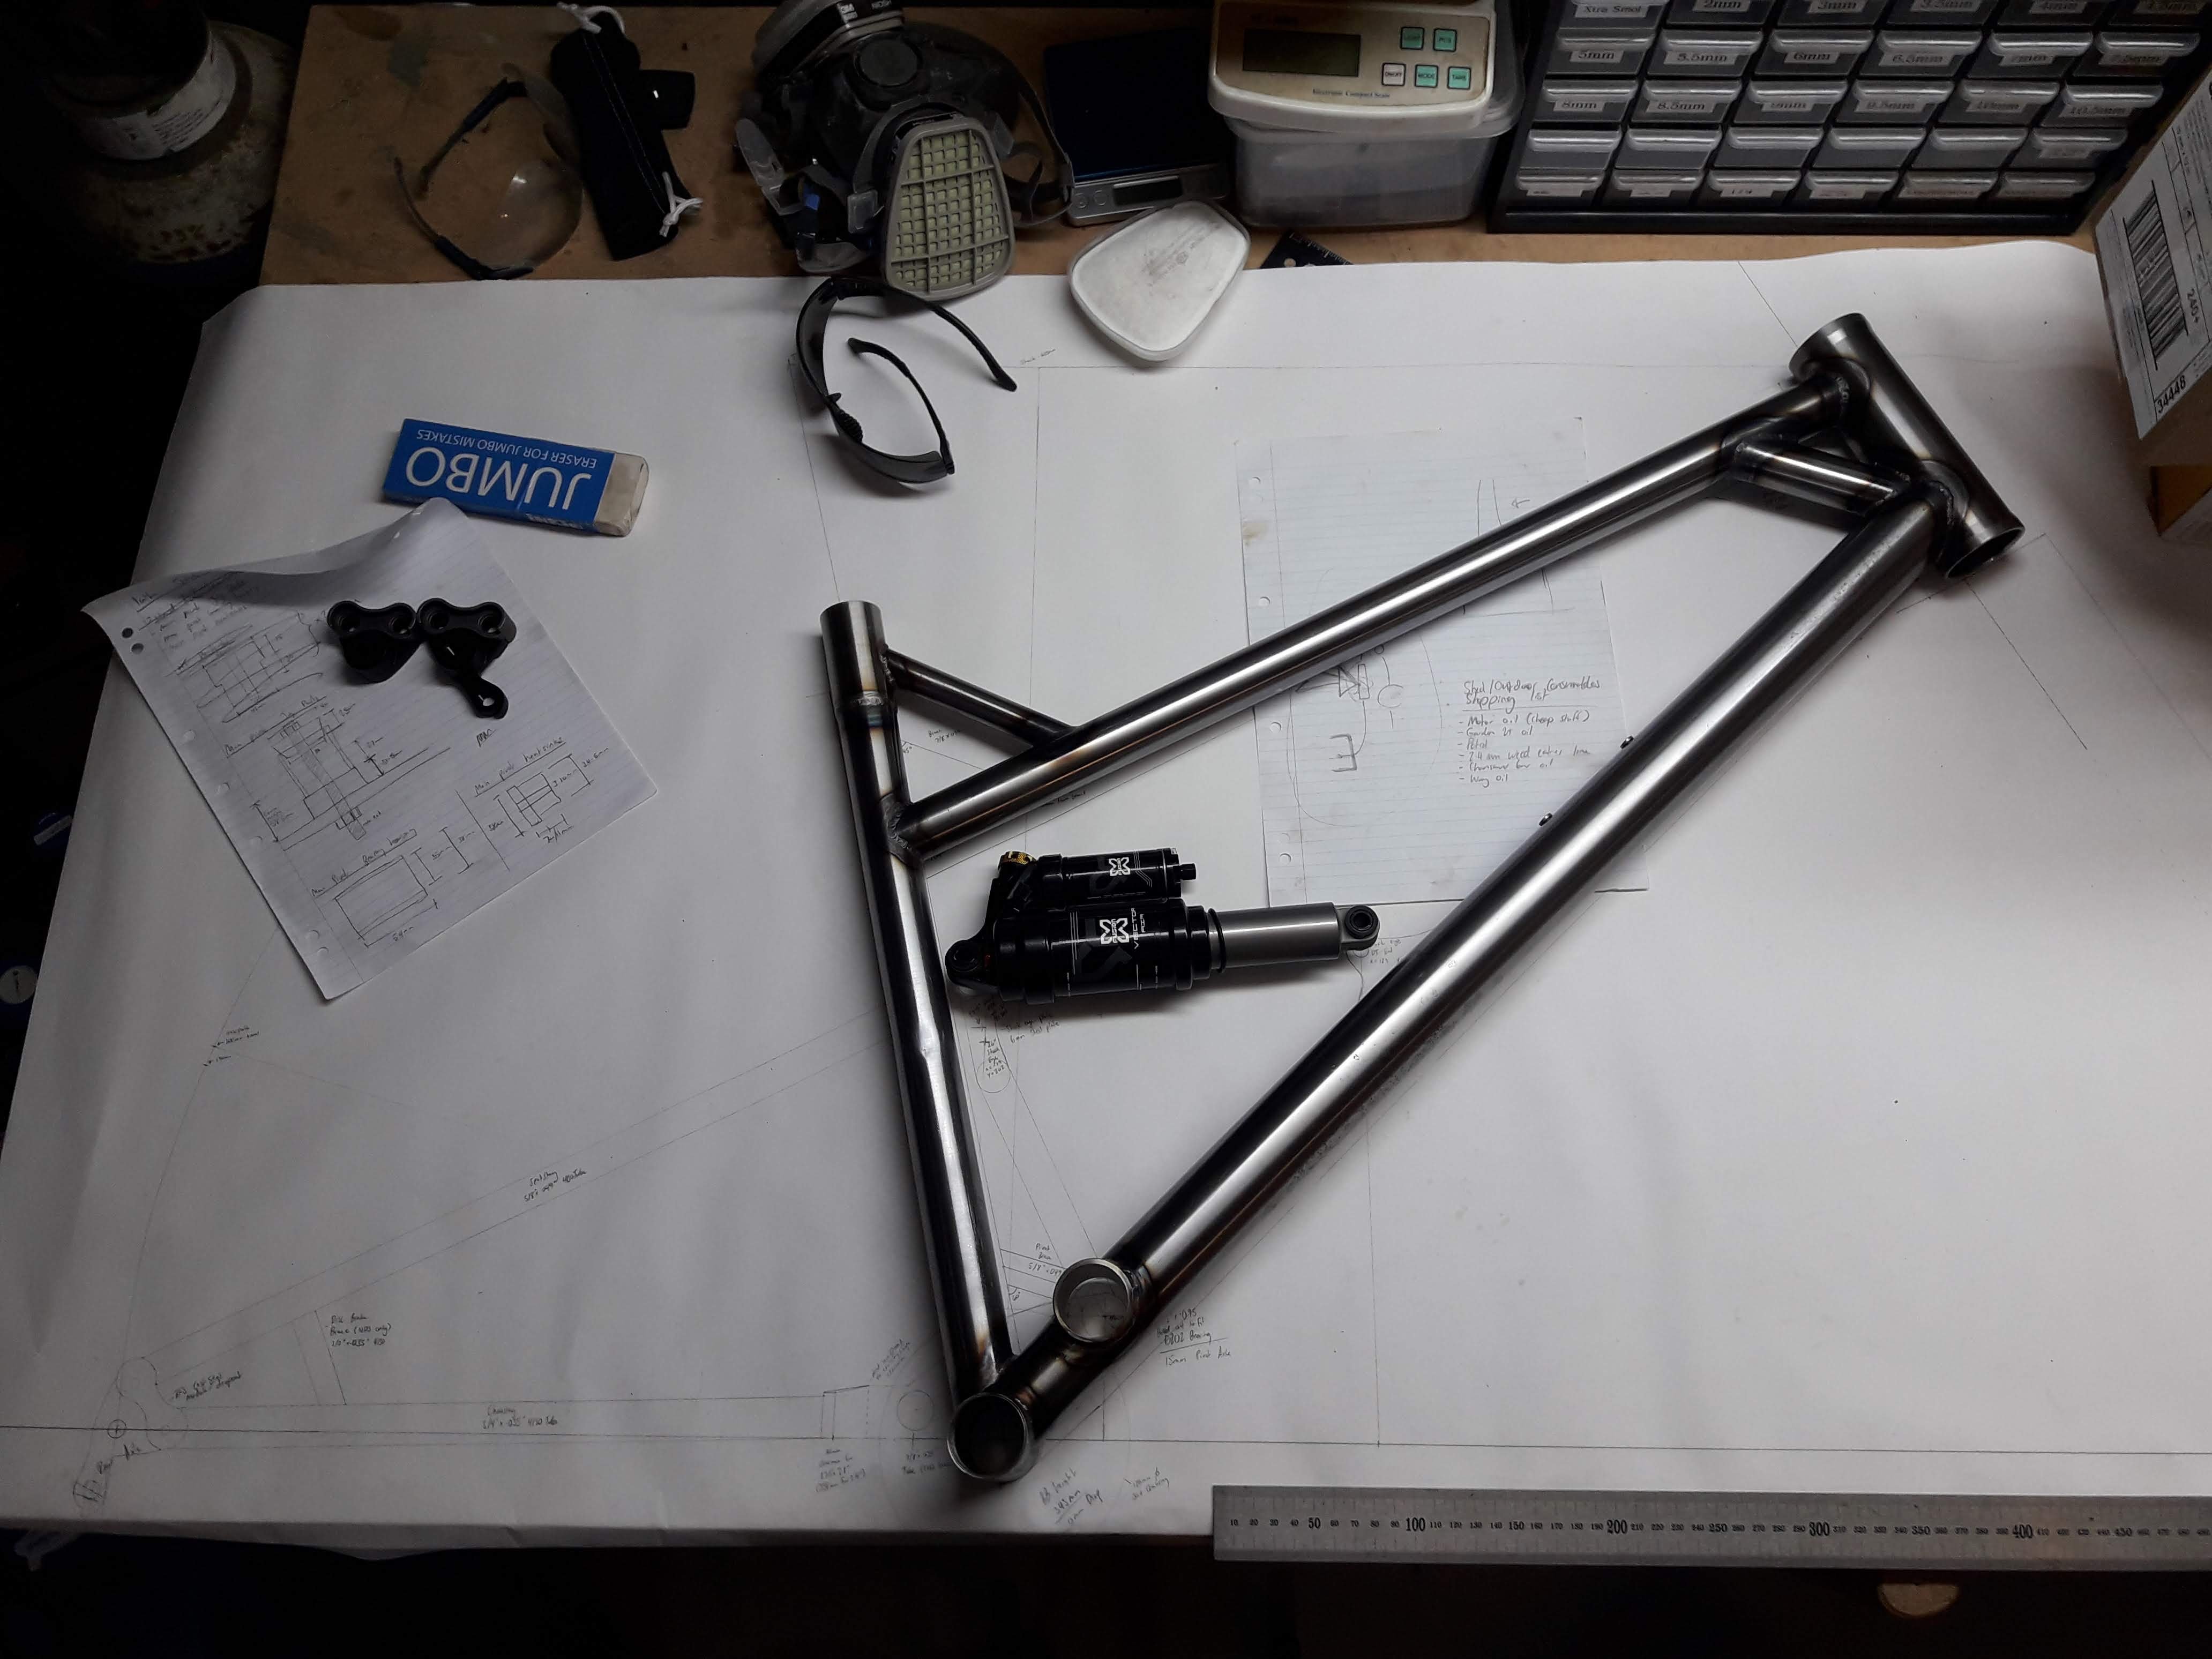
First thing I did once I got to this stage was to attach the front to the rear, mostly just to see how it looked.
Looking good to me
Pivot detail
Next I made a little jig to attach the disc brake tab to the rear triangle
Good bit of practice on the mill
And it did the job, doesn't seem to rub and looks straight
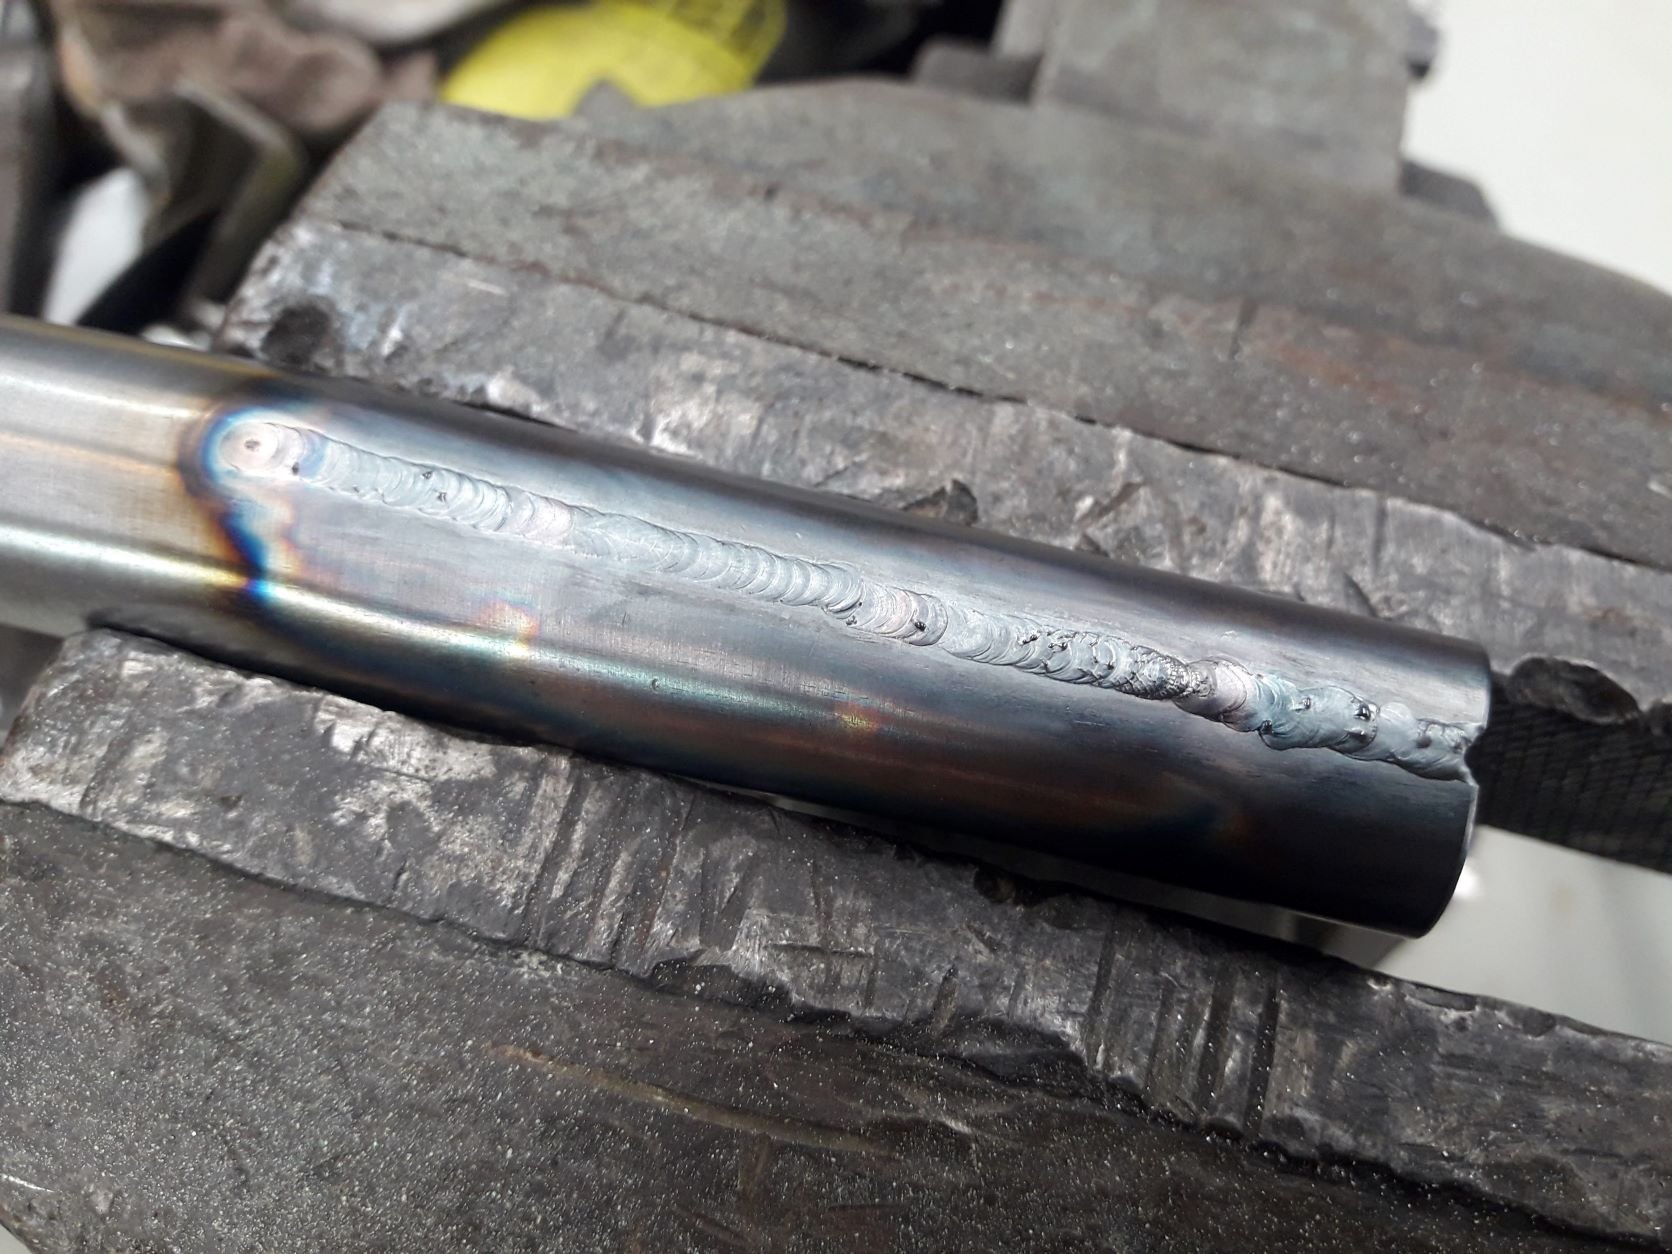
This time I bought cable guides ahead of time because the ones on bike #1 took an eternity to make. I tig brazed them on and was pretty happy with how they worked out. Got into a bit of a routine after the first couple of guides.
Added a little brace there for the reinforcement below the disc tab
-
11
-
- Popular Post
- Popular Post
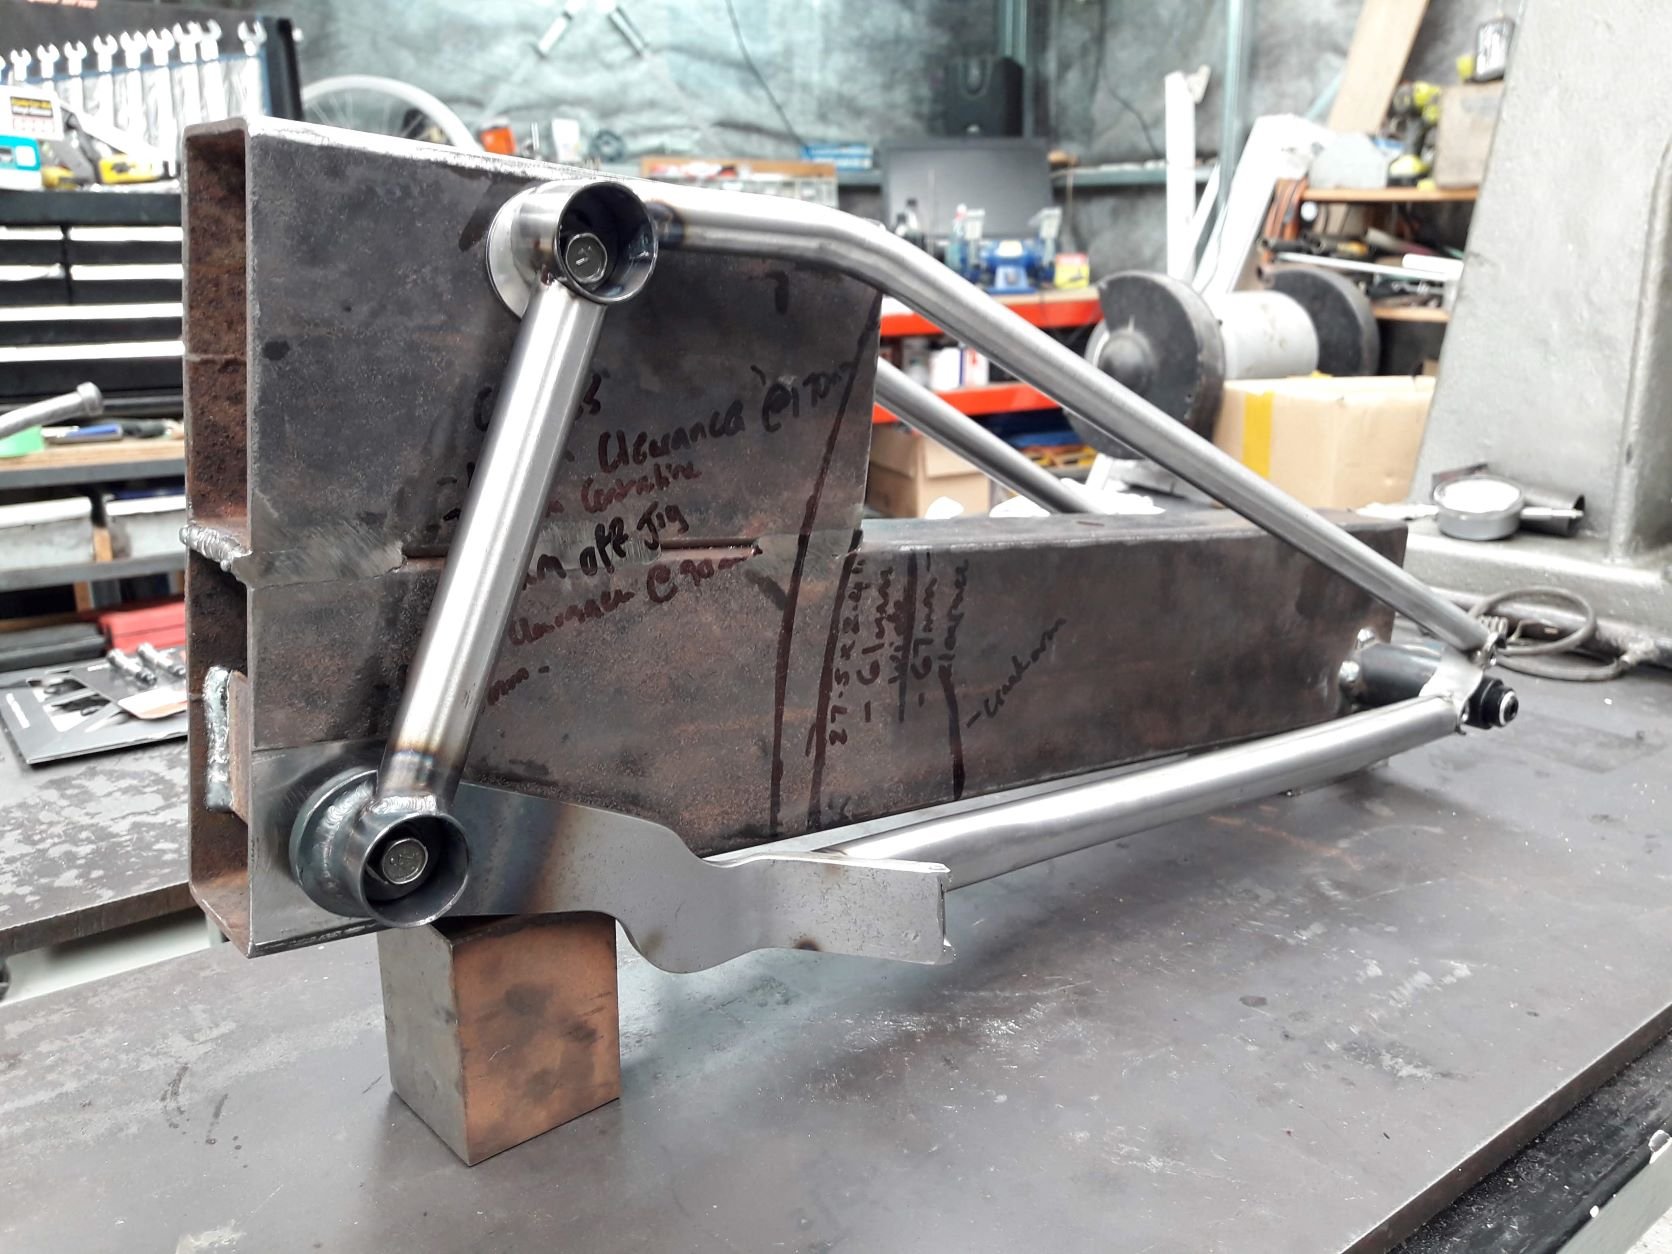
The rear triangle felt like it took forever to come together, mostly because each node point needed to be designed and fabricated and usually took a fair few hours. Especially because I stuff things up on a fairly regular basis.
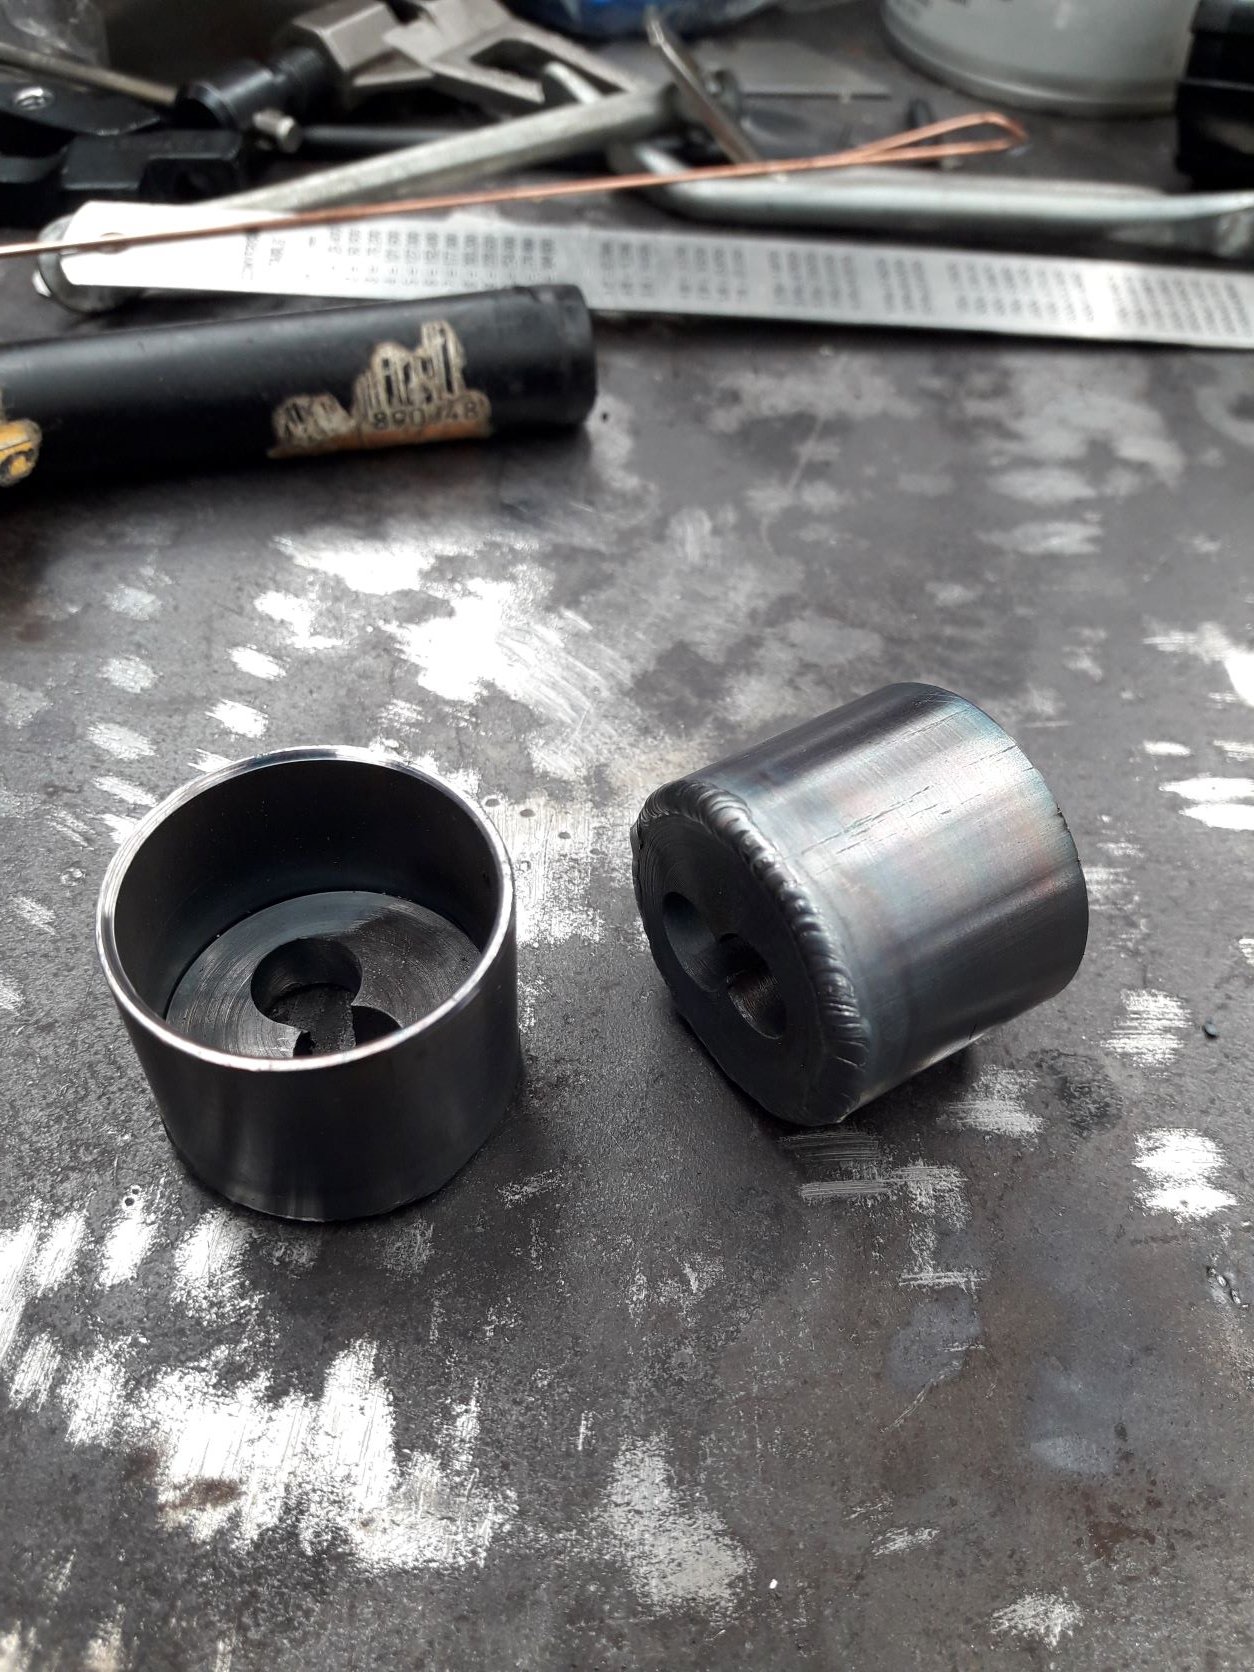
I started with the shock pivot points, there's 2 holes so you can go between 200mm travel and 190mm. This is futureproofing in case I decide I want to go to 27.5" wheels, it will rub the seat tube at full compression on 200mm setting otherwise.
Some wiggly dog leg things for the chainstays
Added some roundy things to the holes for attaching tubes and to preload the swingarm bearings
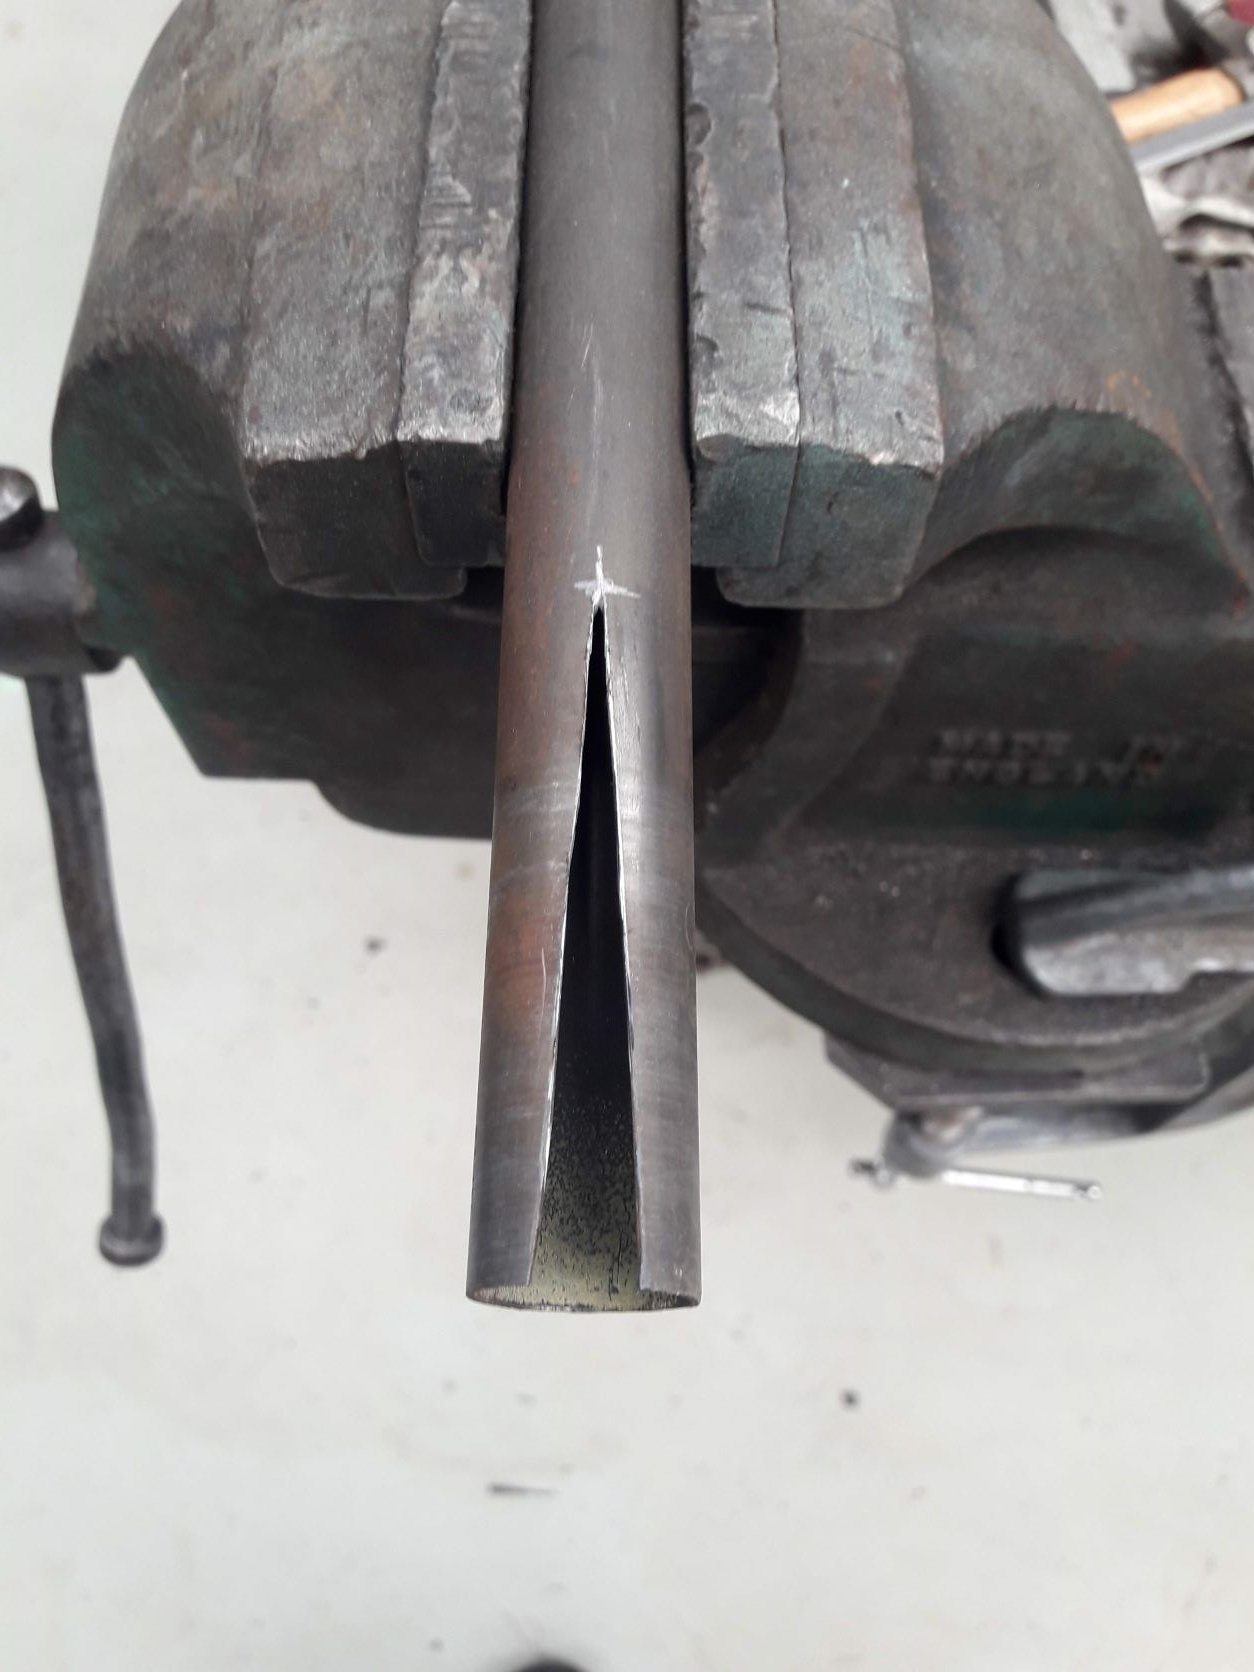
The tubing for the Chainstays is 22mm and the dropouts are designed for 19mm max, so I pie sliced the end and welded it back together to get it to fit nicely
Then started putting it all together
I like this picture cause it looks like cthulu or a sea beast or something
Lots of notes on the jig so I don't smack the cranks on the chainstay like last time hahaha
And that's a mostly complete swingarm!
-
13
-
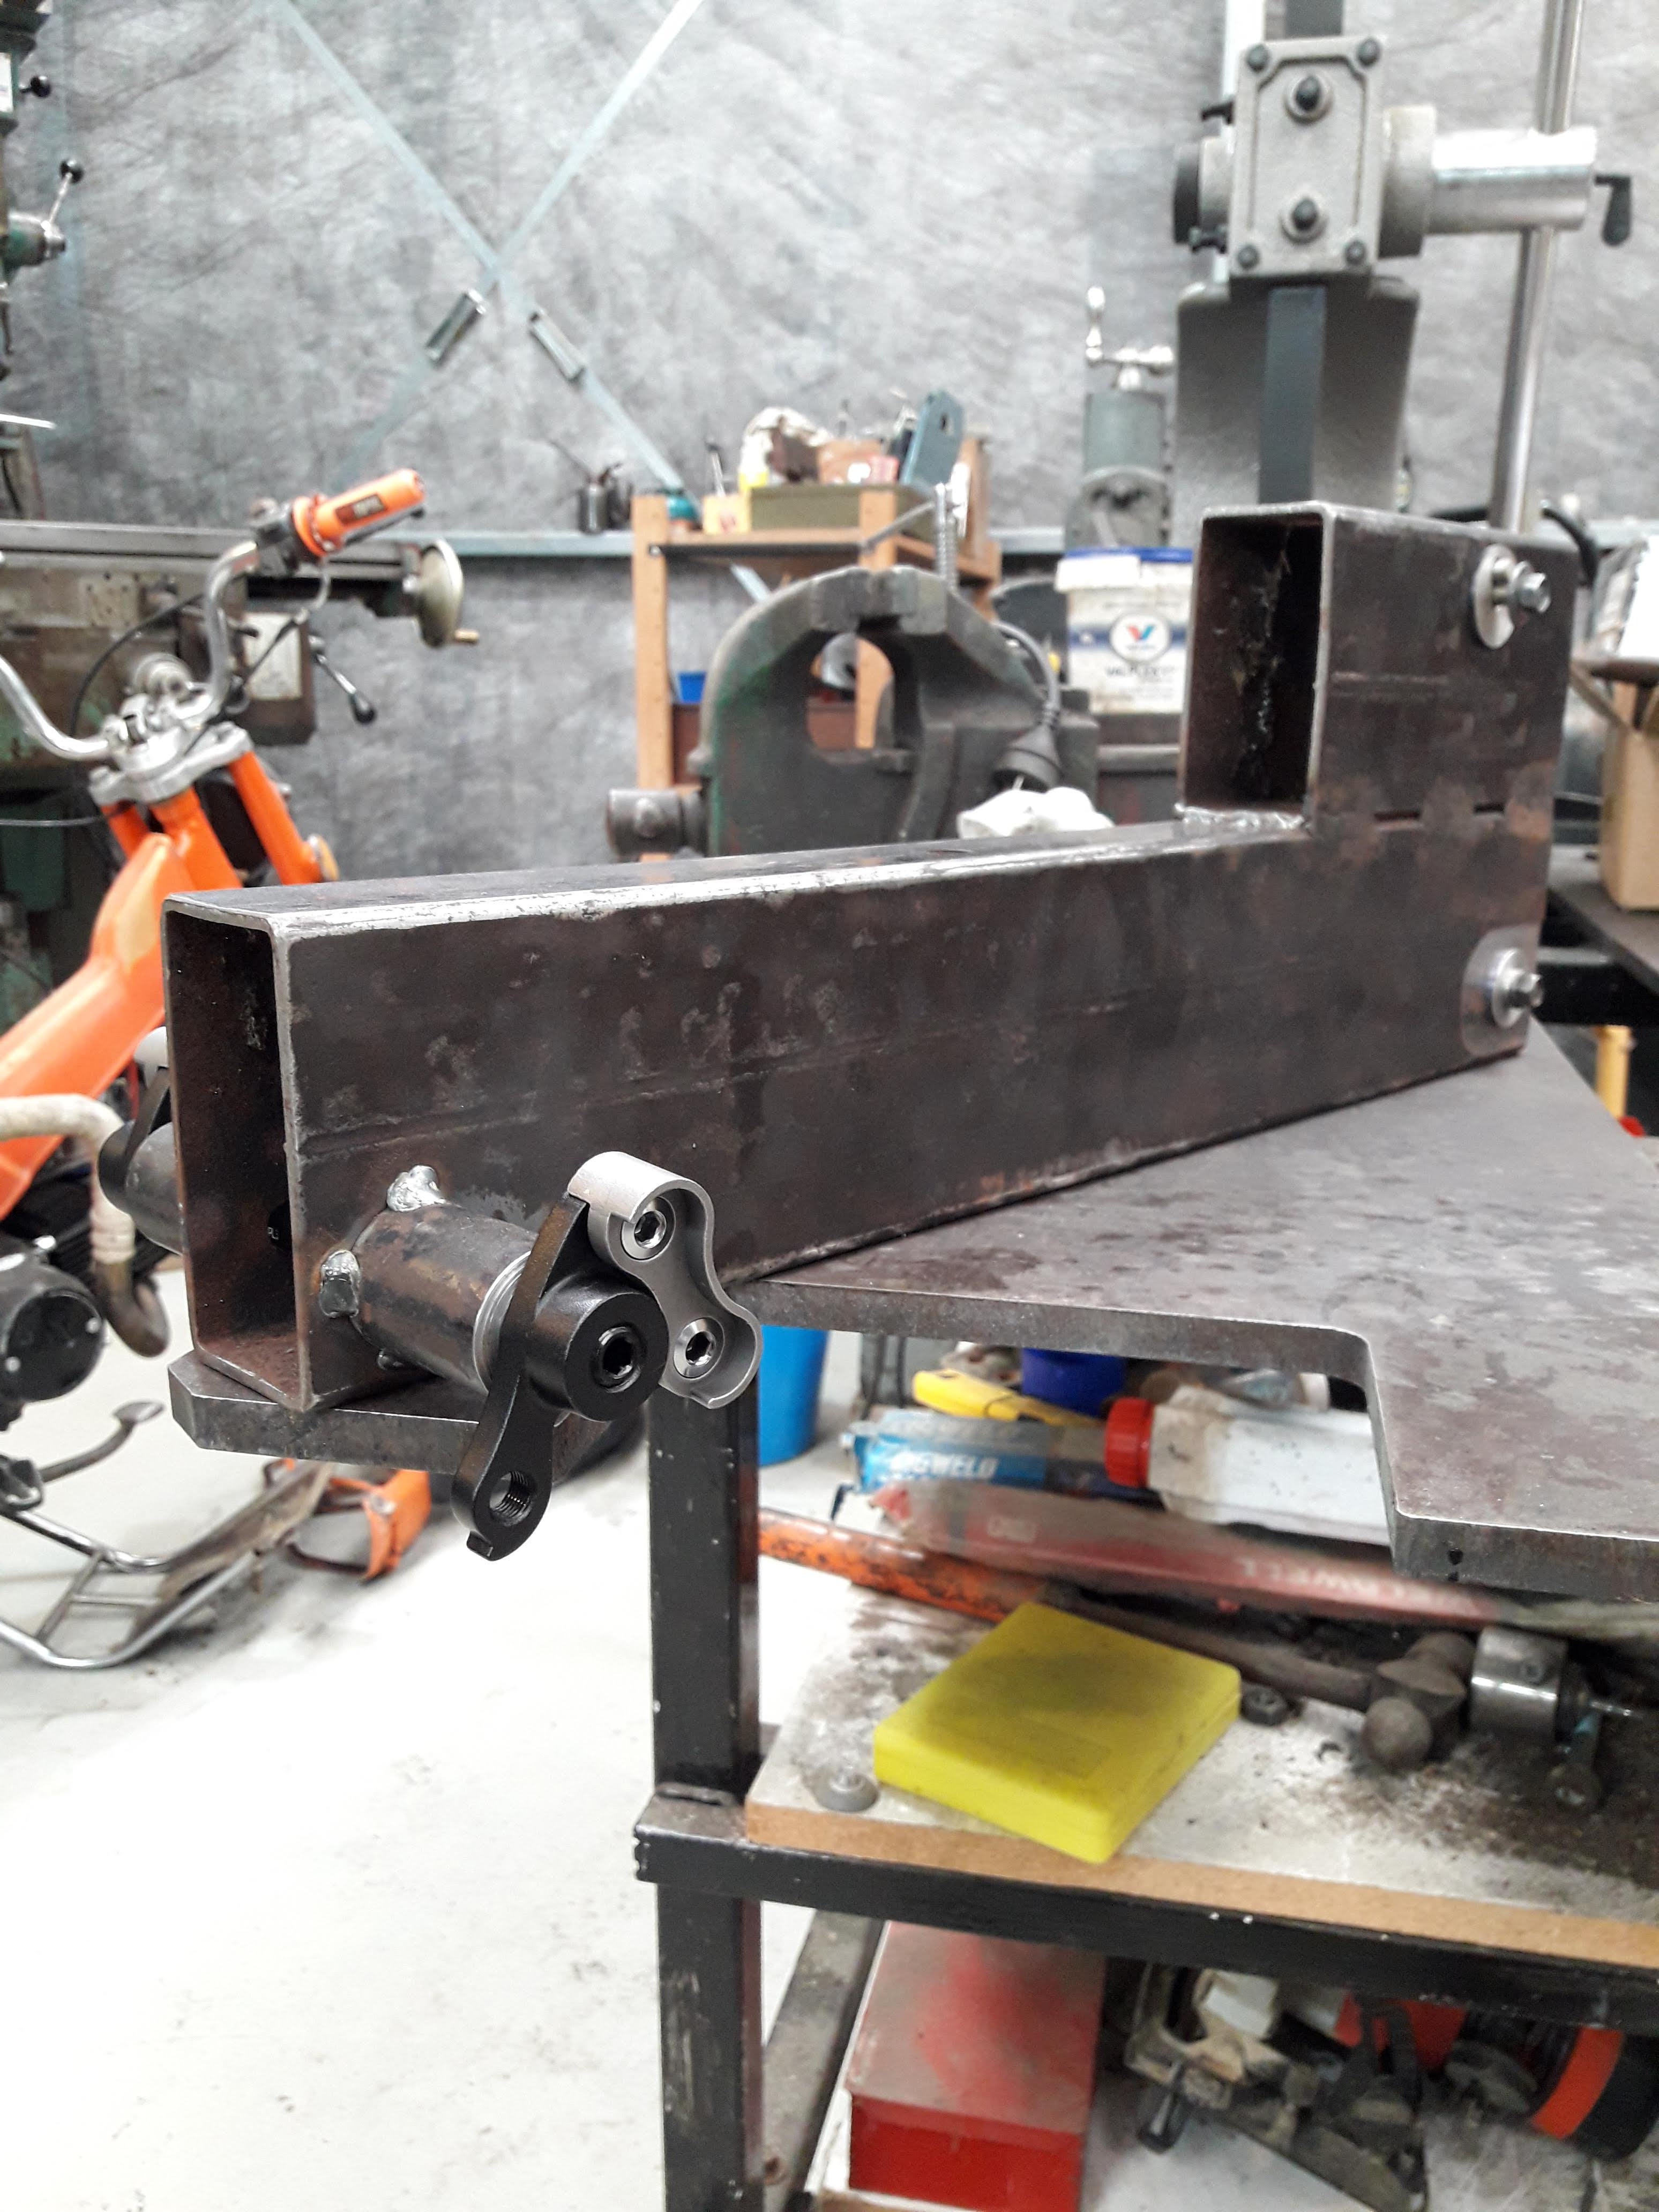
So once the mill had a VFD bolted to the side I welded in a sleeve for the main pivot and bored out the bearing pockets. I very nearly stuffed it up by trying to take to light a cut but with some advice from @Geophy I managed to get an acceptable surface finish and clearance for the bearings.
Mocked it up on the drawing and it was looking pretty good! The pivot location had moved a little bit from the original design but I changed my linkage x3 save to match and it didn't look like it will cause any issues. This is why next time I will bore the pivot hole after welding the triangle together. Though I didn't have the mill running at the time either so not sure how I would have done it anyway.
I didn't want to invest too heavily in this bike so its mostly made of stuff I had already. When I ordered the tube for bike #1 I ordered extra so I already had the top tube , seat stays, chain stays and seat tube. I ordered a length of 44x.9mm 4130 for the down tube. The wheels are an old 26" set that I already had, the fork is one we got free off facebook ages ago. The shock is also one I already had. I will probably be looking to upgrade the fork once I finish the bike as it is a damper rod/ orifice style which doesn't have speed sensitive damping. So if anyone has a boxxer/fox 40/rcv888/dorado or prettymuch any 200mm double crown fork with shimmed damper you want rid of let me know.
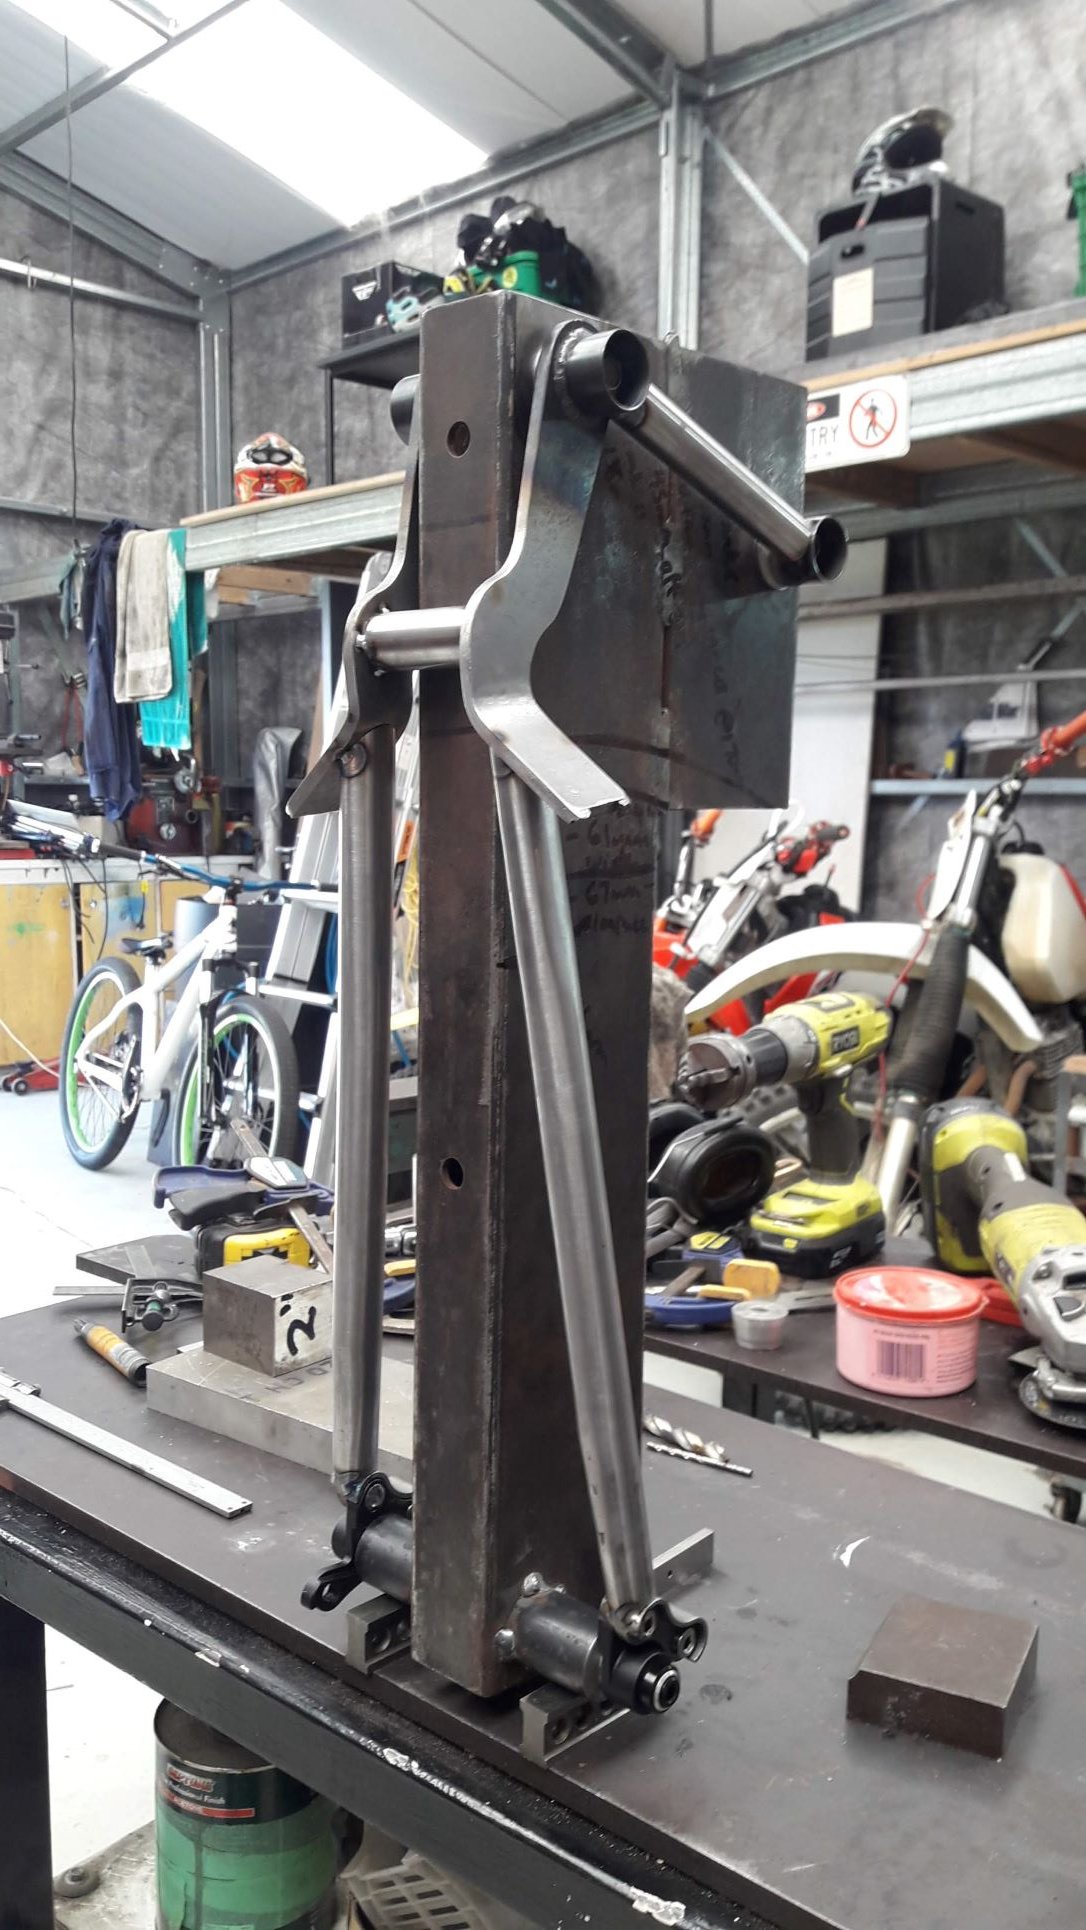
Next up I needed to make a jig for the rear triangle. This is what I came up with:
The dropouts are from bike fab supply because making my own last time took way too long and these were pretty cheap
-
7
-
-
- Popular Post
- Popular Post
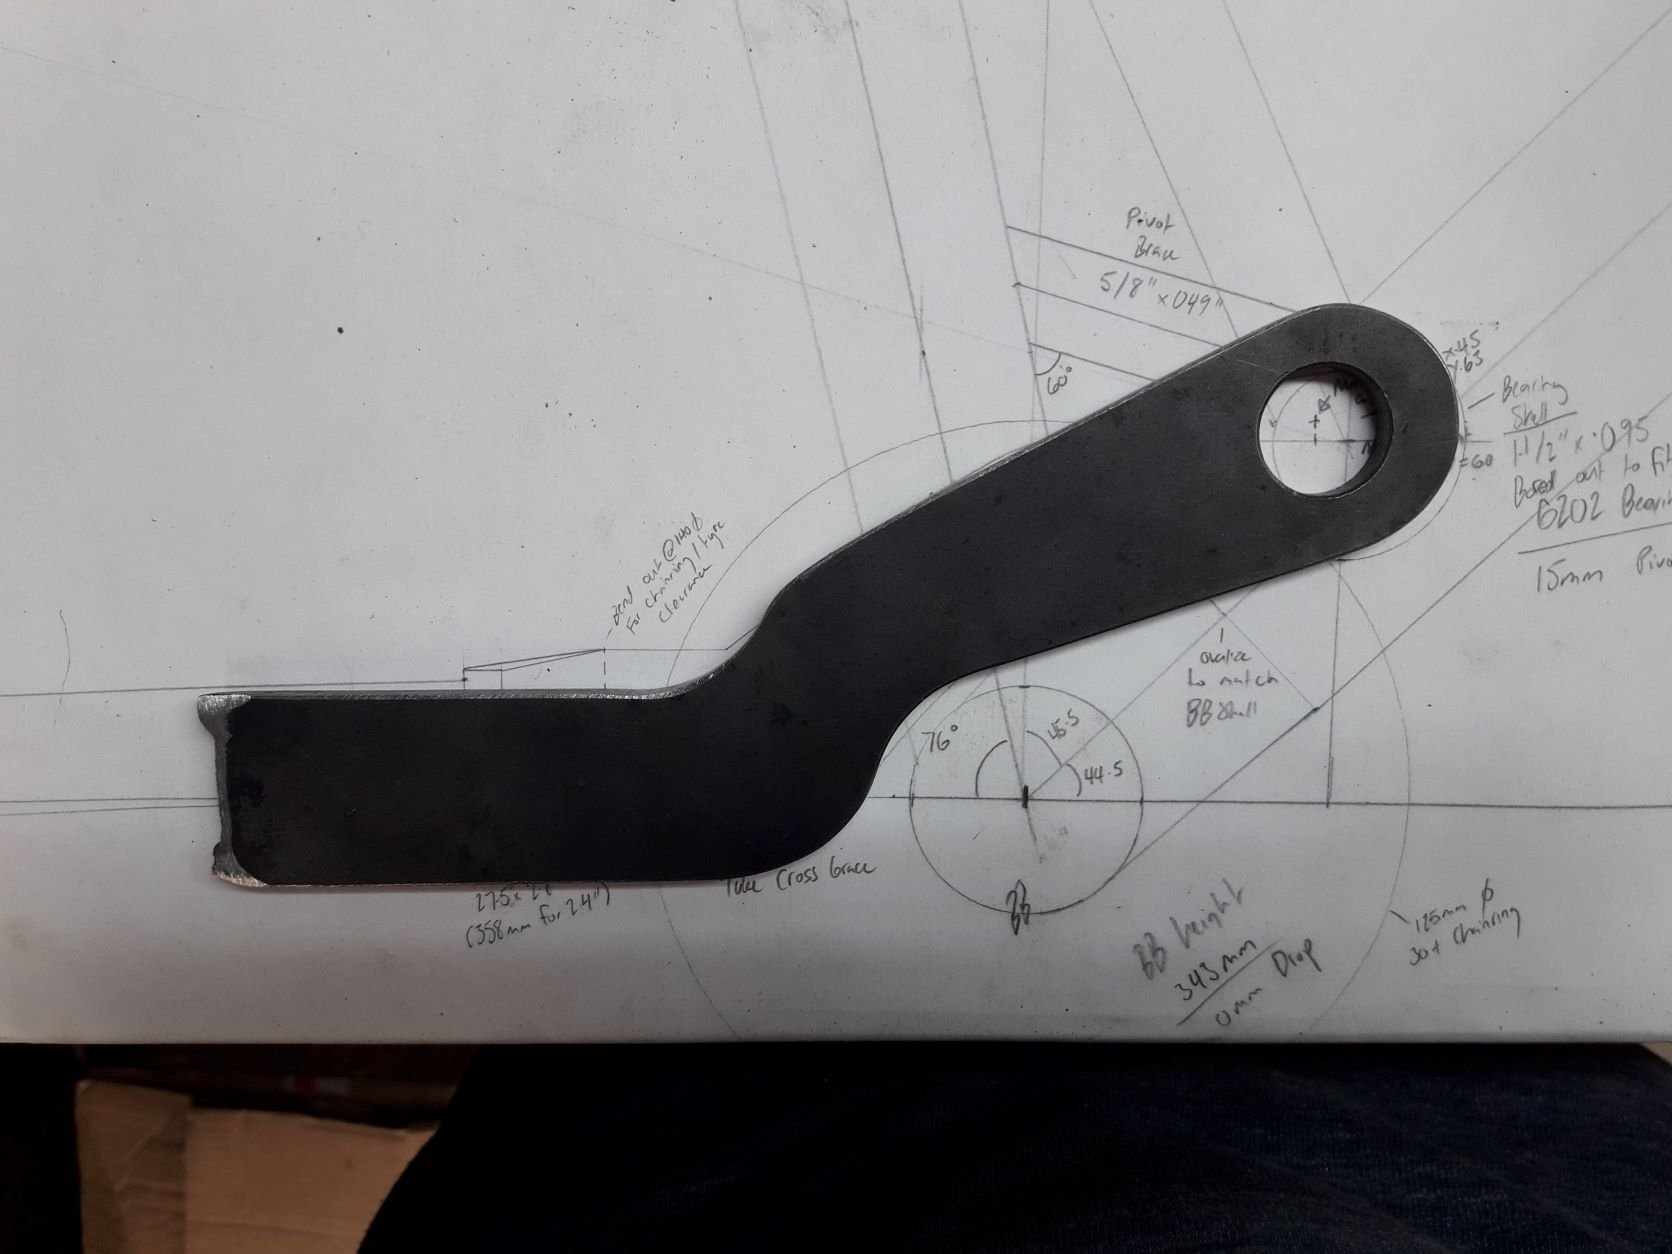
Well I let the cat out of the bag a little bit in the show us your shed thread so its time to share round 2. Bike number 1 is still working magnificently, but it is lacking something. A rigid bike is great fun, but boy does it beat you up on a rough trail. So I decided to start building bike number 2 with some suspension travel. I figured I would go right to the other extreme of mountain biking and make a 200mm travel DH bike. There's a couple of reasons for this number 1 - I have never had a downhill bike they seem like fun and looks sweet. Number 2 - I figured I would make a single pivot bike (for simplicity reasons) and wasn't sure if the suspension kinematics would be any good. So just make it have lots of travel to compensate for any flaws and don't worry too much about pedaling efficiency.
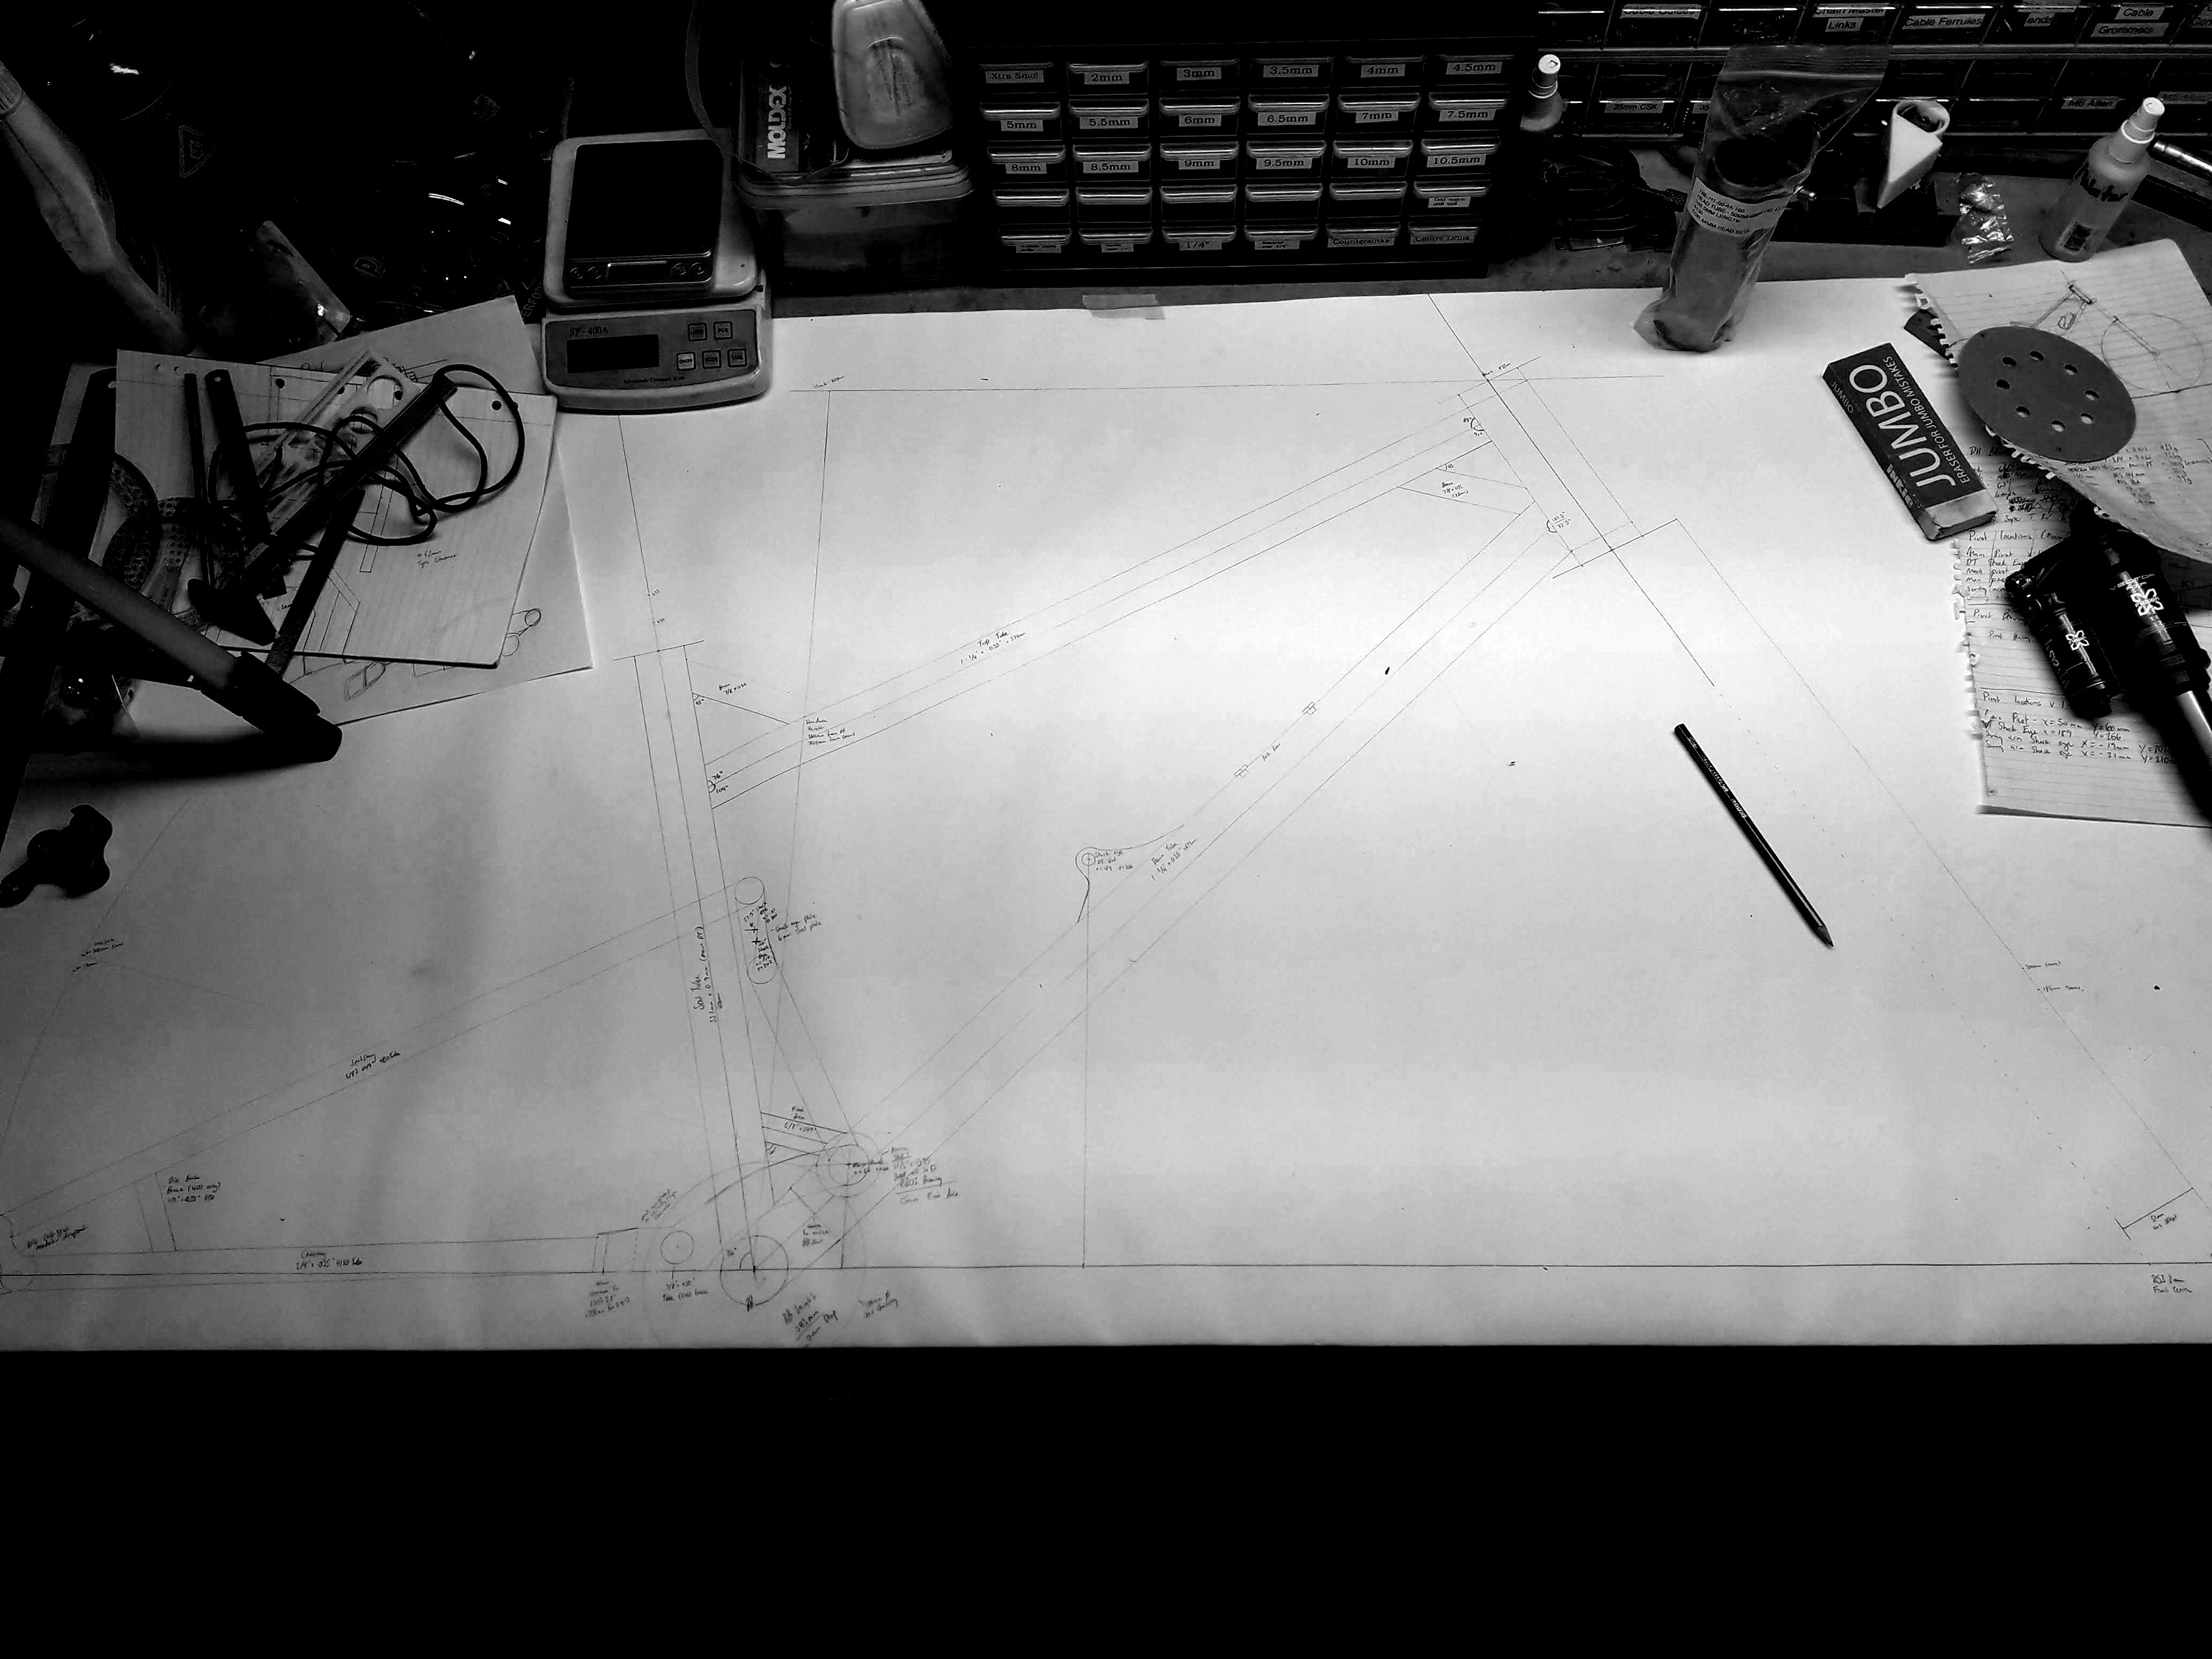
I started out by figuring out what I wanted the geometry to be, its mostly very standard DH bike stuff. 63*hta, 450mm chainstays etc. I cant remember what the reach was but it was as long as I could go and still be comfortable. I bought a copy of linkage x3 (mtb suspension design program) and chose the pivot locations and all that kind of jazz, then when and drew a 1:1 scale drawing on paper. That has been super useful and I think I will be doing that for all builds in future.
I had to mess around with the brightness/contrast to get it to show up in a photo but that gets you a rough idea. Next I copied that onto my "jig" that I used last time. It's a piece of MDF with 3d printed standoffs if you didn't follow my previous build. I had to print some bigger standoffs because this has a 44mm headtube vs the 34mm one on the previous frame.
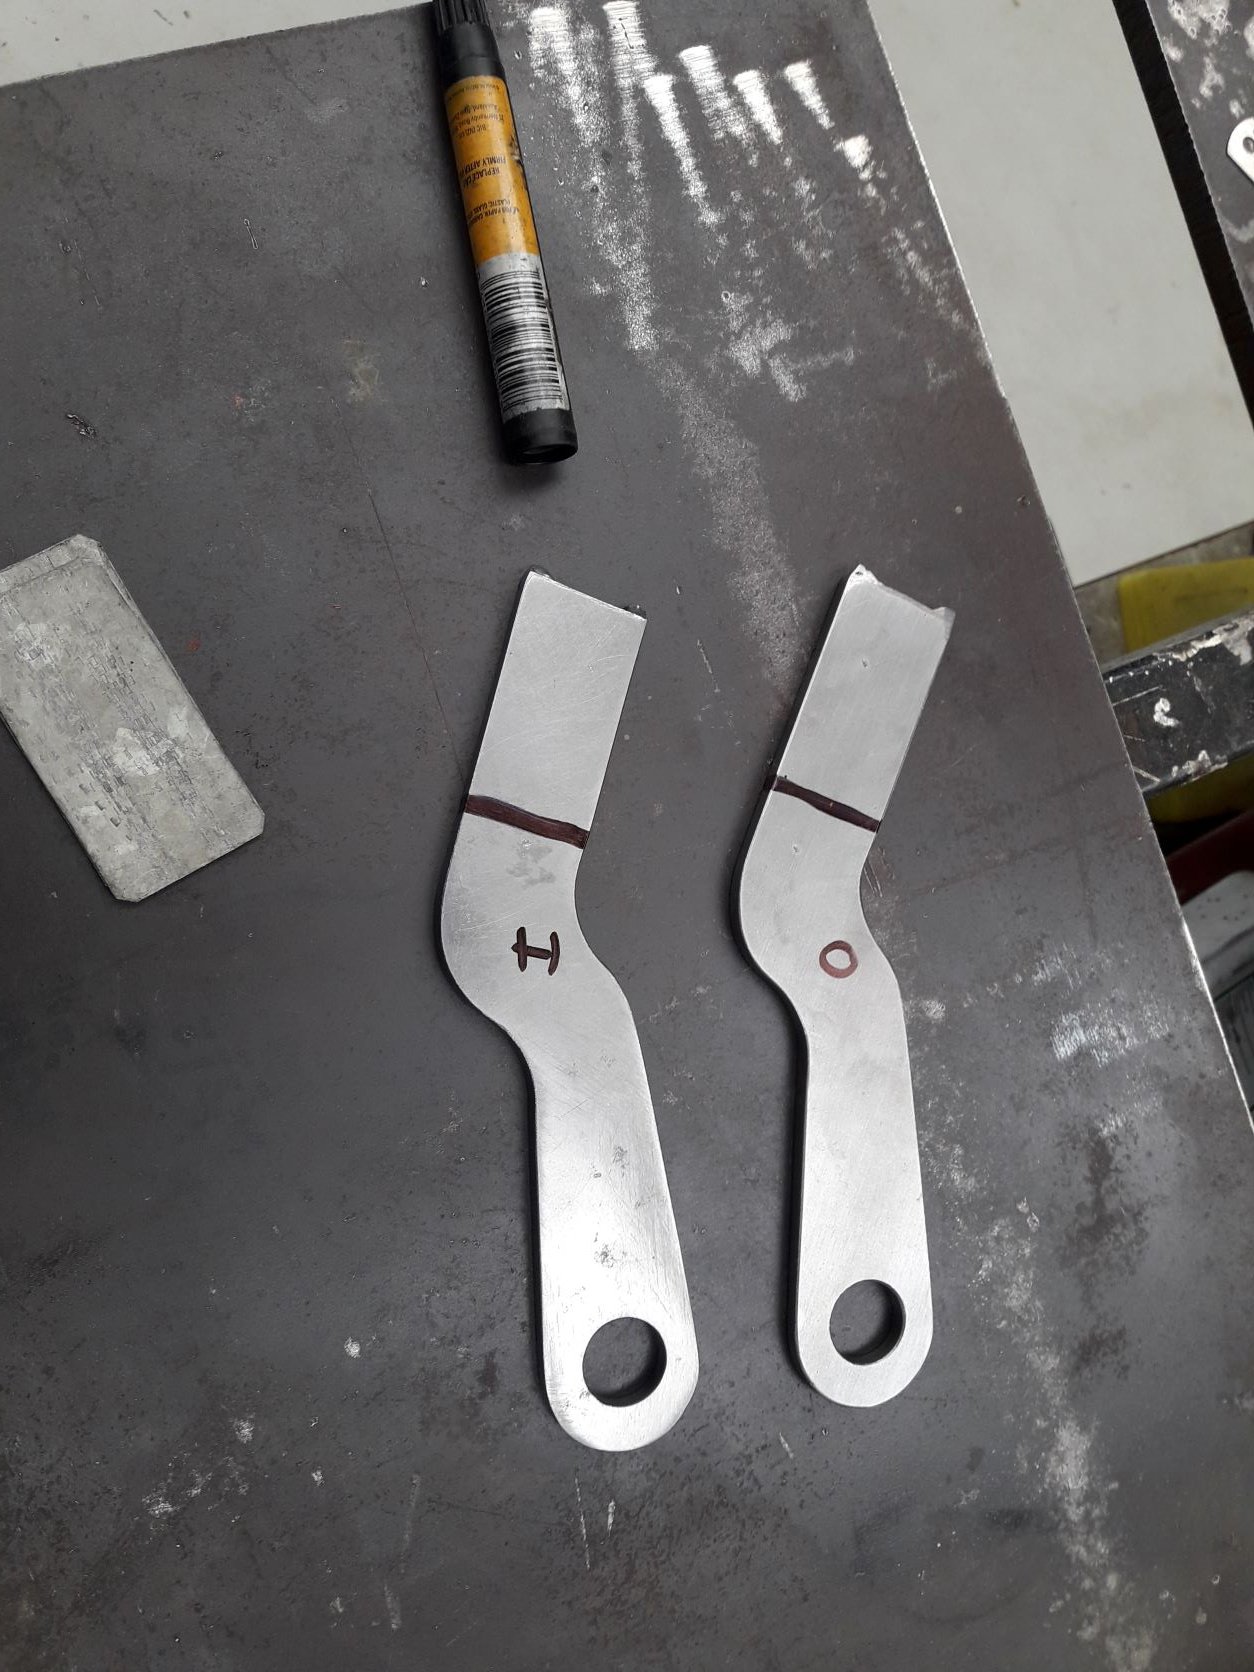
I did the cutty cutty thing with the holesaws and got to this stage:
The seat tube is a recycled down tube from the old marin that donated its head tube and bottom bracket to bike number 1, hence the dent. it also has bottle bosses on the other side near the bottom haha. I cut the pivot hole at the same time as coping the bottom bracket but in future I would do that after welding the main triangle.
I also added some bracing to the head tube and seat tube
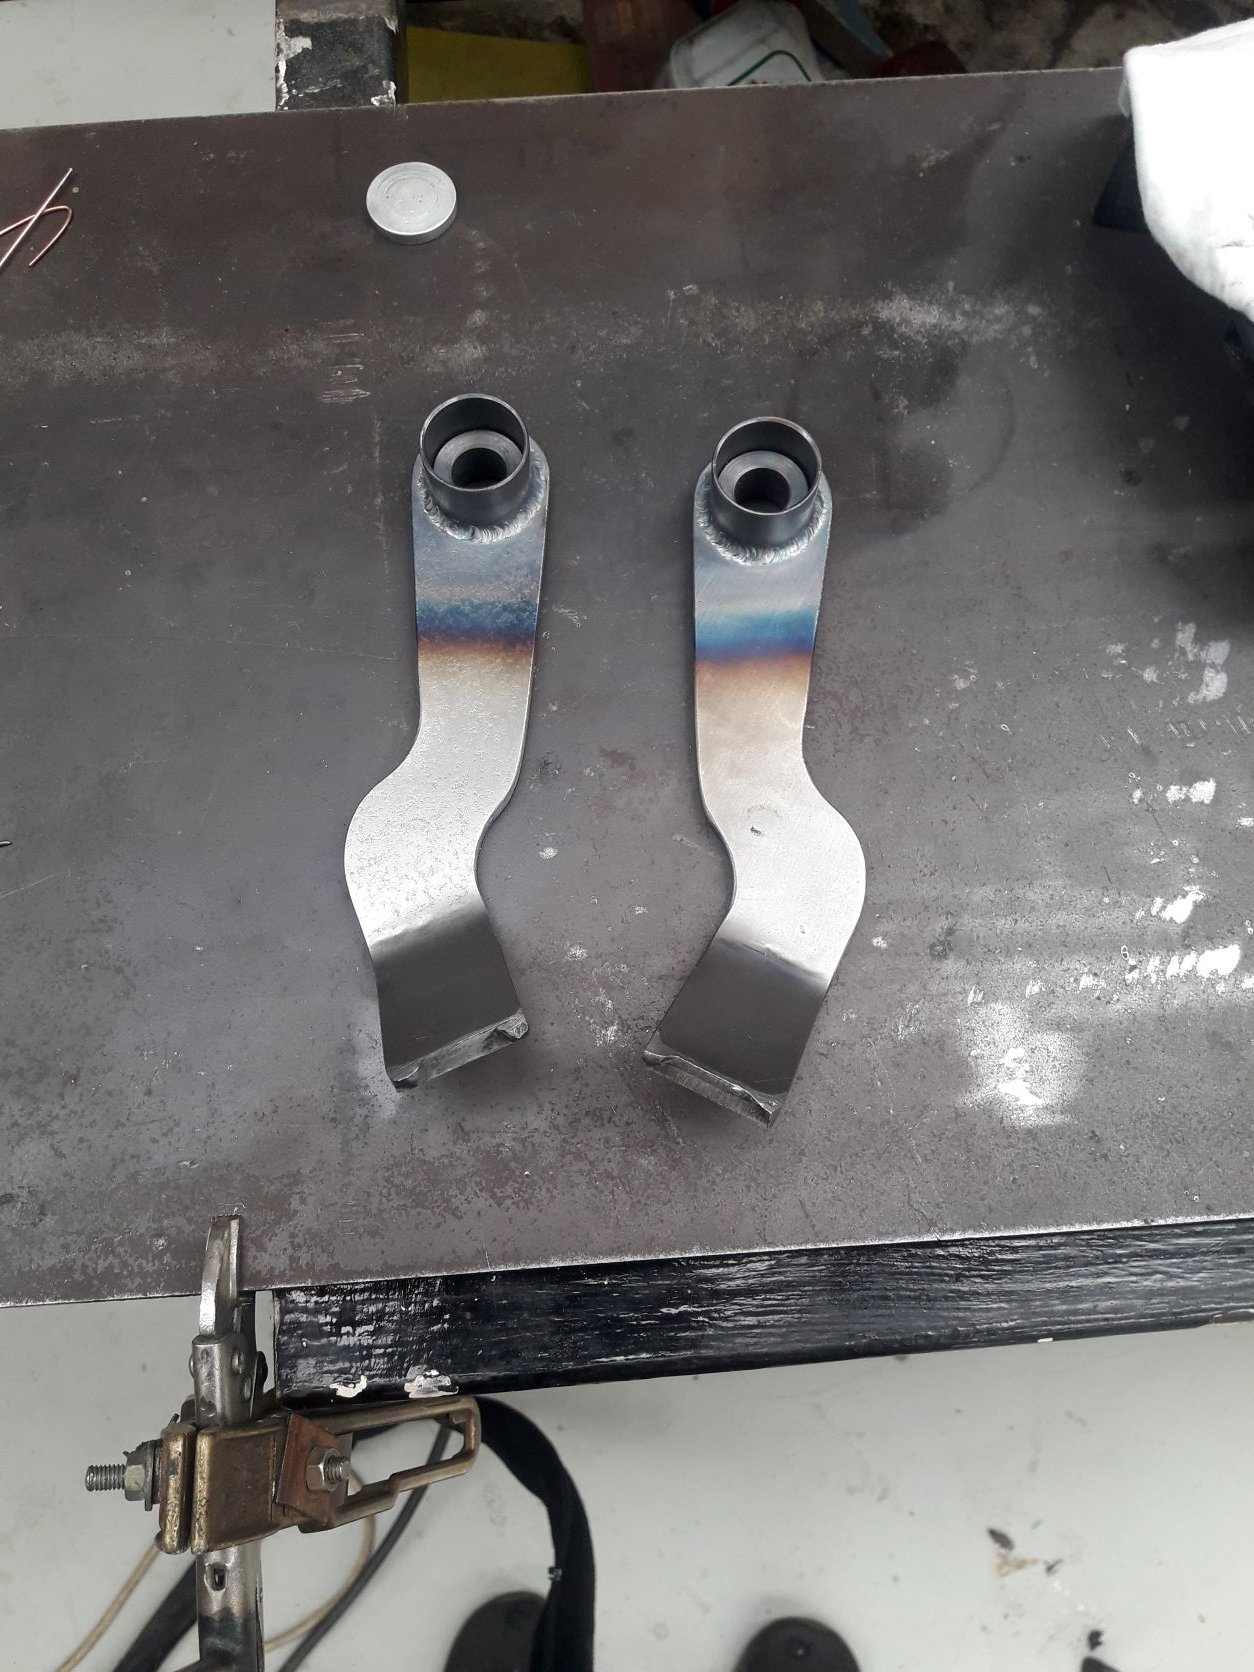
It was very difficult getting into the corners with the tig, lots of regrinding tungstens etc.
After that I had to decide how I was going to make a nice bearing pocket welded into the frame. I decided the best way would involve a vertical mill and a boring bar. I happened to have a mill but no power for it or boring bar so I ordered some lovely aliexpress goodies and waited for them to turn up...
-
12
-
- Popular Post
- Popular Post
that nflixn 9100 looks an awful lot like my ecogoo 9100...
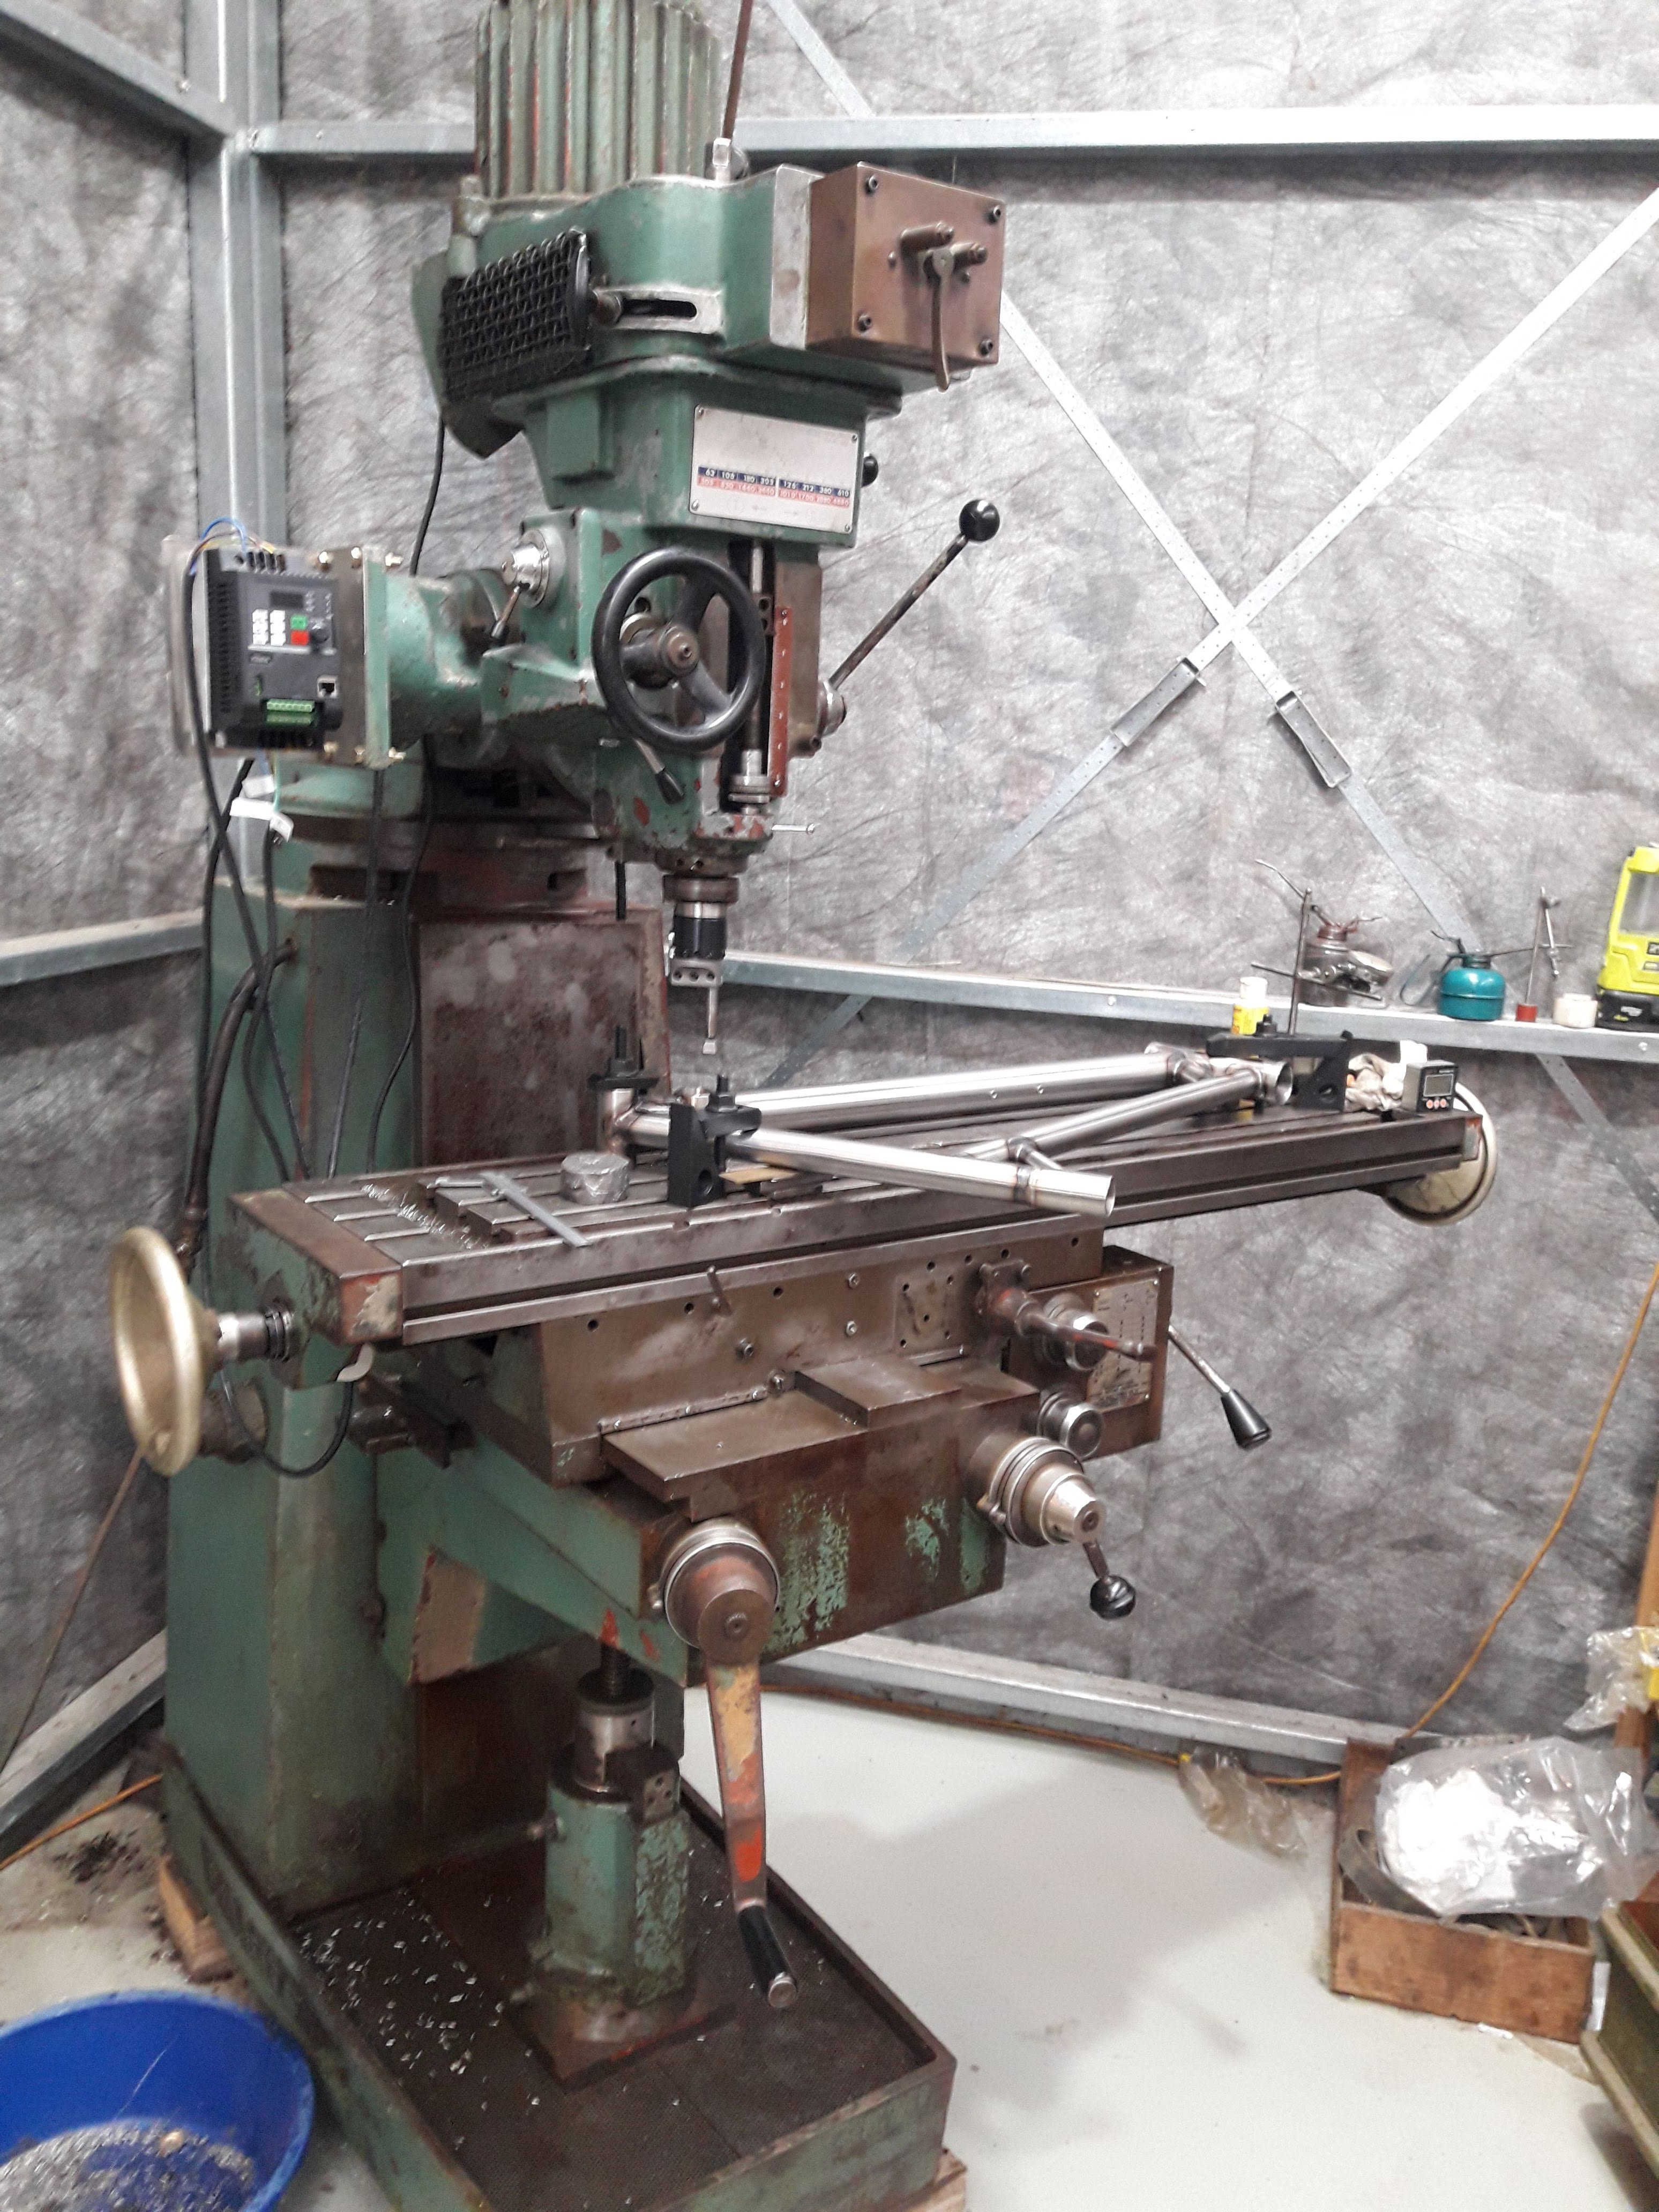
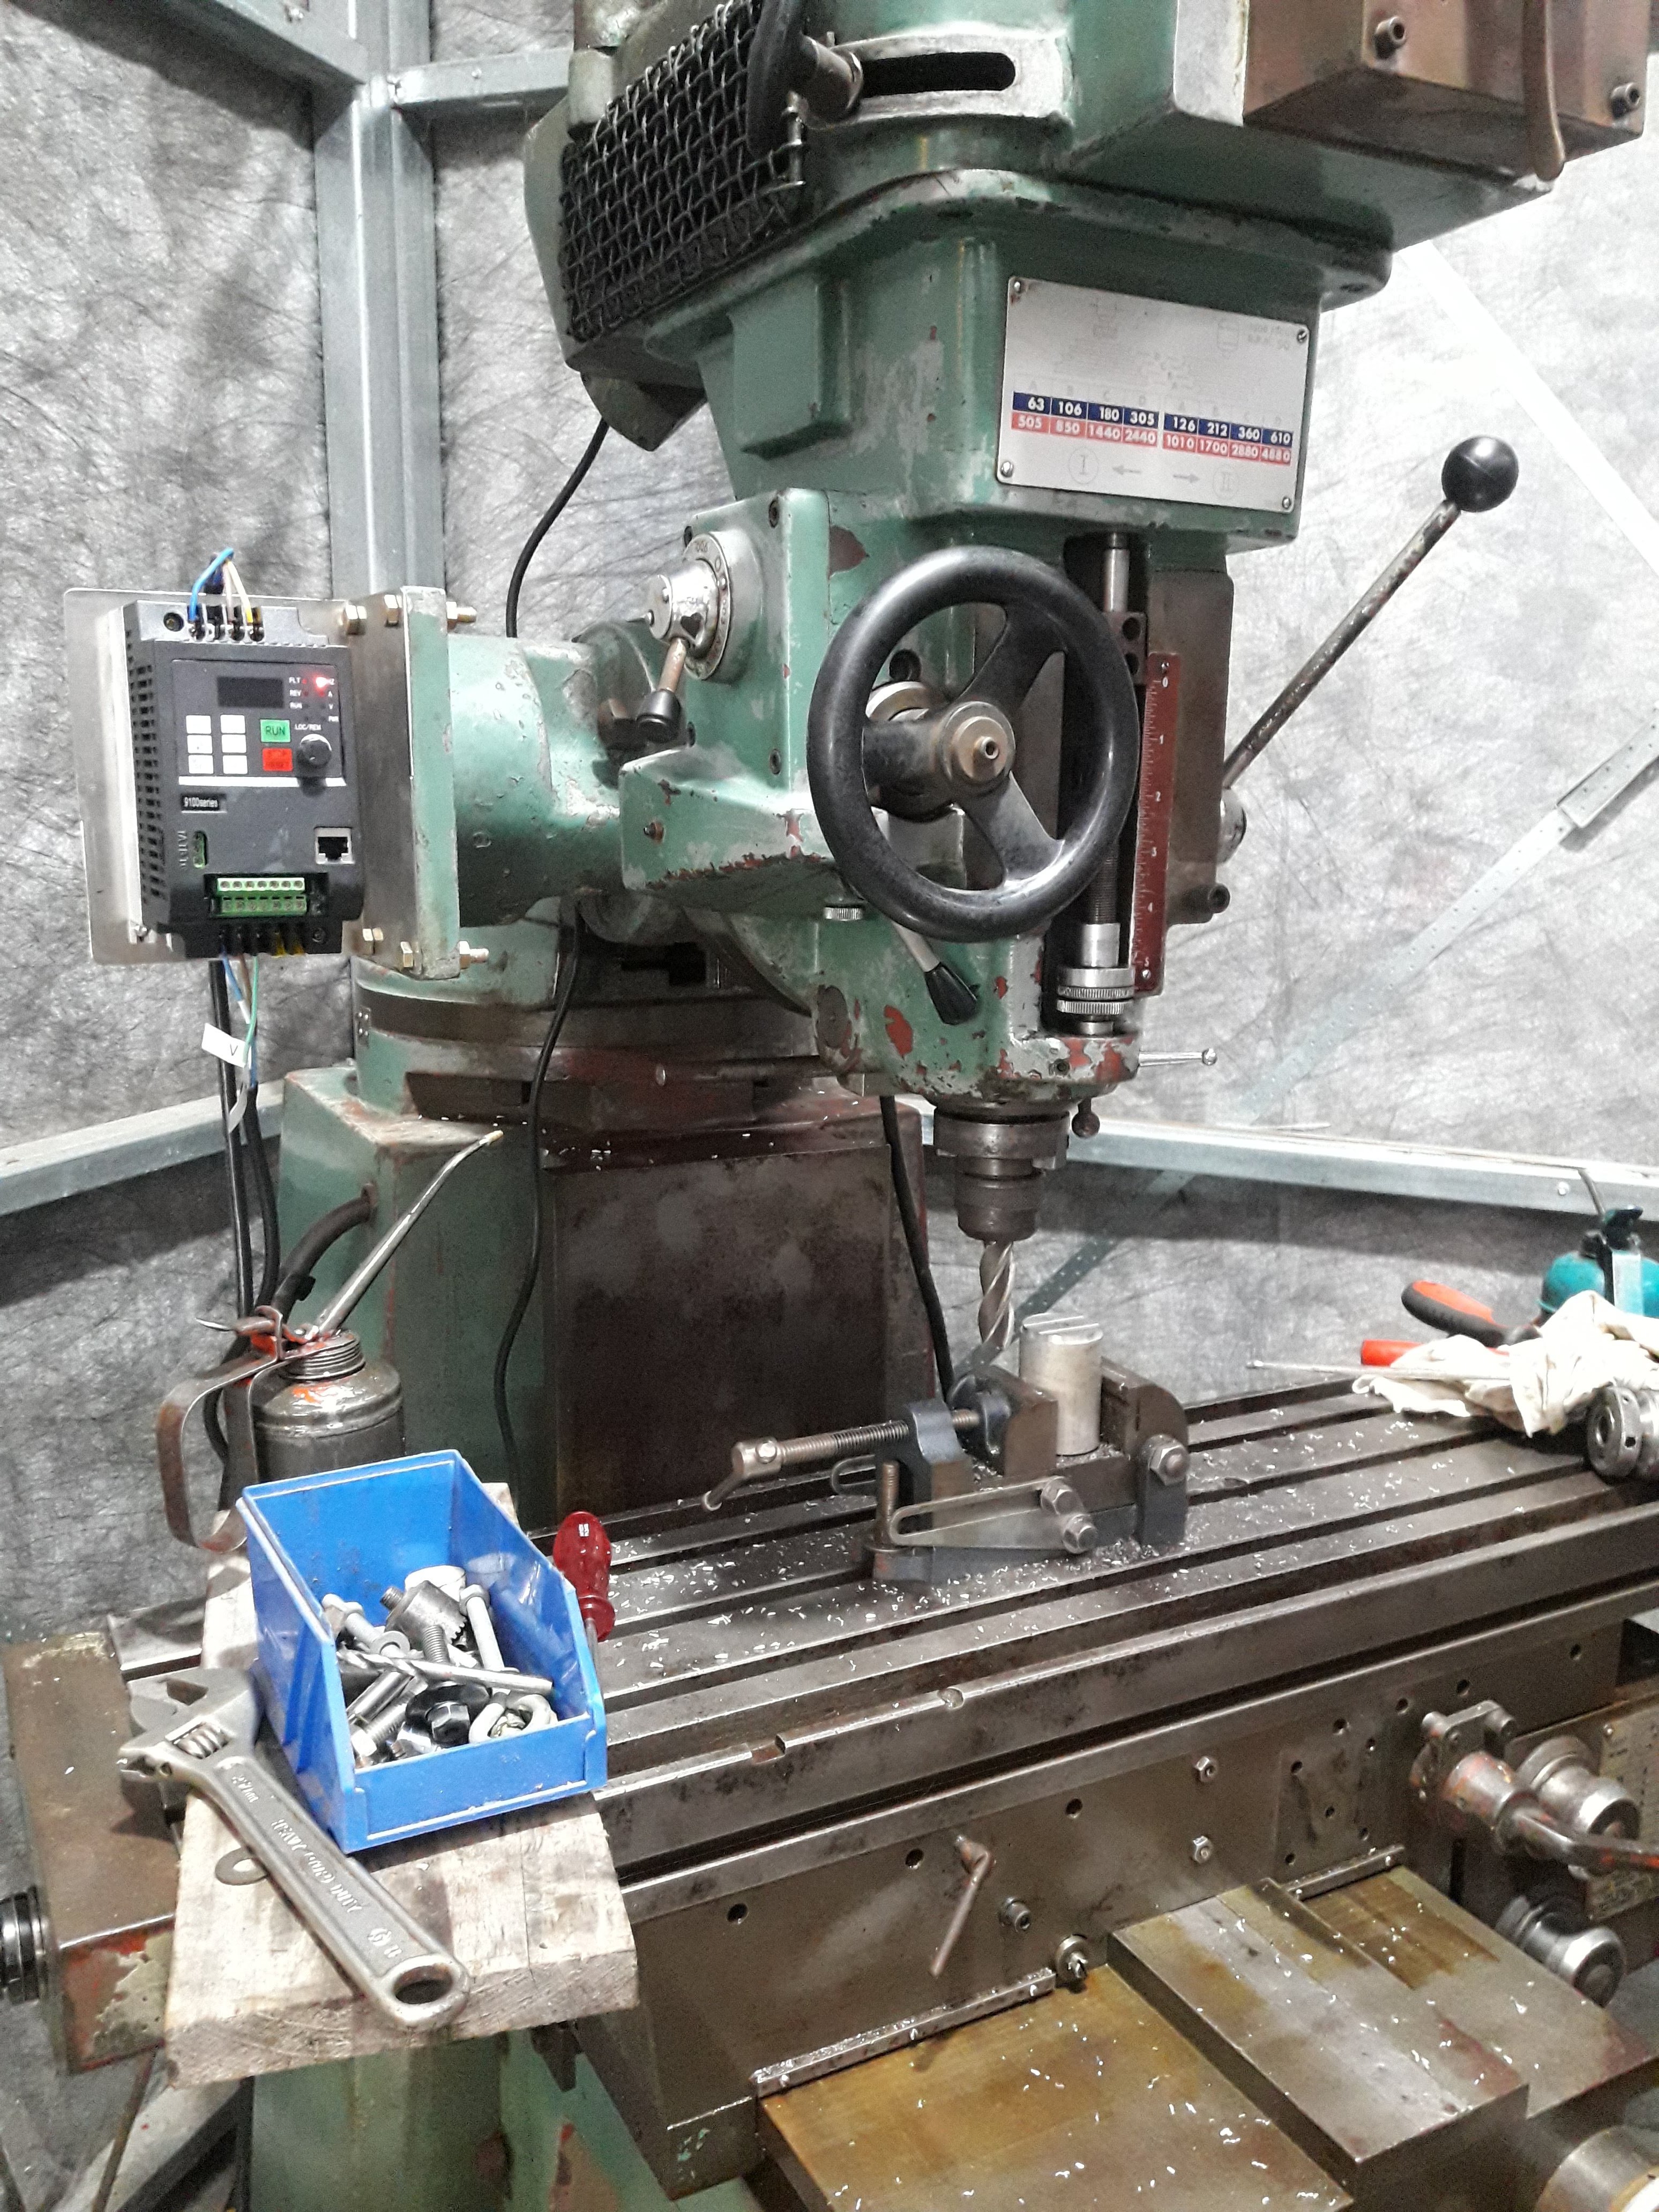
I am going to get 3 phase in my shed at some point, but the variable speed on the mill is worth its weight in gold. Even in terms of dialing in a cutting speed you can just turn the dial until the cut feels/sounds about right. Mine has a belt drive head with a backgear for slow speed so a speed change without the VFD would involve stopping the cut and changing belt position unless you are out by a factor of 5x or howevermuch the backgear does. I also dont really want to use the backgear until I have done a bit more investigation, not sure if it has an oil bath or not and the head has been weeping a little bit of oil so need to address that.
I put the vice off my shaper on it the other day, its actually too big for it and I had to rotate the base to the 45 degree mark so the bolt holes would be on the table. I am just loving this machine though, its so nice to use. I was drilling some holes the other day and the difference between the mill and a drill press is like the difference between a drill press and a hand drill. So smooth and nothing moves, I bet the drill bit life would be significantly improved judging by how smooth the cut is.
It is also slowly getting cleaner, I have a couple of bits of scotch brite and after each job I clean off the chips and scotch brite the rust stains in the t slots etc.
As it stands now:
-
11
-
Gaspro have always been excellent in my experience. One day I turned up with my CO2 and they filled it on the spot, I'm glad to hear they can sort out my argon bottle when it runs out.
-
10 hours ago, NickJ said:
Buy a bit of this for old leather, works a treat on boots.
https://www.saddlerywarehouse.co.nz/index.php?route=product/product&product_id=1050
I second this movement, neatsfoot oil is excellent.
Also, when we ordered it last we got it under @hampie's name and they kept sending saddlery warehouse advertising stuff to her. Got to tease her about being a horse lady whenever it turned up til we moved house.
-
3
-
 1
1
-
-
17 minutes ago, johnny.race said:
Those threaded cutters sound like the ones a Clarkson Auto Lock (chuck system) uses. My take on things - depending on what you are doing, I wouldn't waste my time using HSS anything ... I'd be setting myself up to use tungsten carbide indexable cutters. This is my personal experience, but then again I have a pretty narrow scope of what I use mills and lathe to do, plus I've never had any formal training.
I dont disagree with you on carbide vs hss, but I have a bunch of hss and no experience so I think will crash all my hss lerning before spending the money on carbide.
I mostly just need a 5/8" collet cause theres quite a few endmills and ball mills in that size.
I will probably replace what I have with carbide when I run out of sharp cutters in a given size. I have a 20mm capacity jacobs chuck that is stuck in a mt2 arbor at the moment that should hold an endmill ok, I just need to go get some dry ice from a lab that I have friends at to try and shrink it out. By the time I need it I might even be able to splash out on a chinese er32 setup.
-
1
-
-
51 minutes ago, yoeddynz said:
Yeah I have that collet system on our little drill mill. Its called posi-lock. Was all the rage when I was learning my trade and works really well. Nelson polytech had it, as did all the machine shops.
But..
Everything to do with it is kind of expensive now and from what I know most firms have moved away from them, now using the more standard ER setups etc.
You can still get the bits and if you have a collection then just keep using it.
https://www.warco.co.uk/collets/303196-individual-collet.html
I'm missing one collet from my set. You might have a spare?
I'm so jealous of your mill. When I grow up I want to own a big boys mill like that
")
Cool, it seems like its a pretty good system. I am just missing a few common sizes and I have a decent collection of threaded shank cutters so I will probably go through my cutters and figure out what sizes I'm missing. Well once my wallet recovers from the beating the milling machine has already given it! Its not a cheap hobby but at least most of the stuff I need to get for it a re buy once/cry once type deals
-
2
-
-
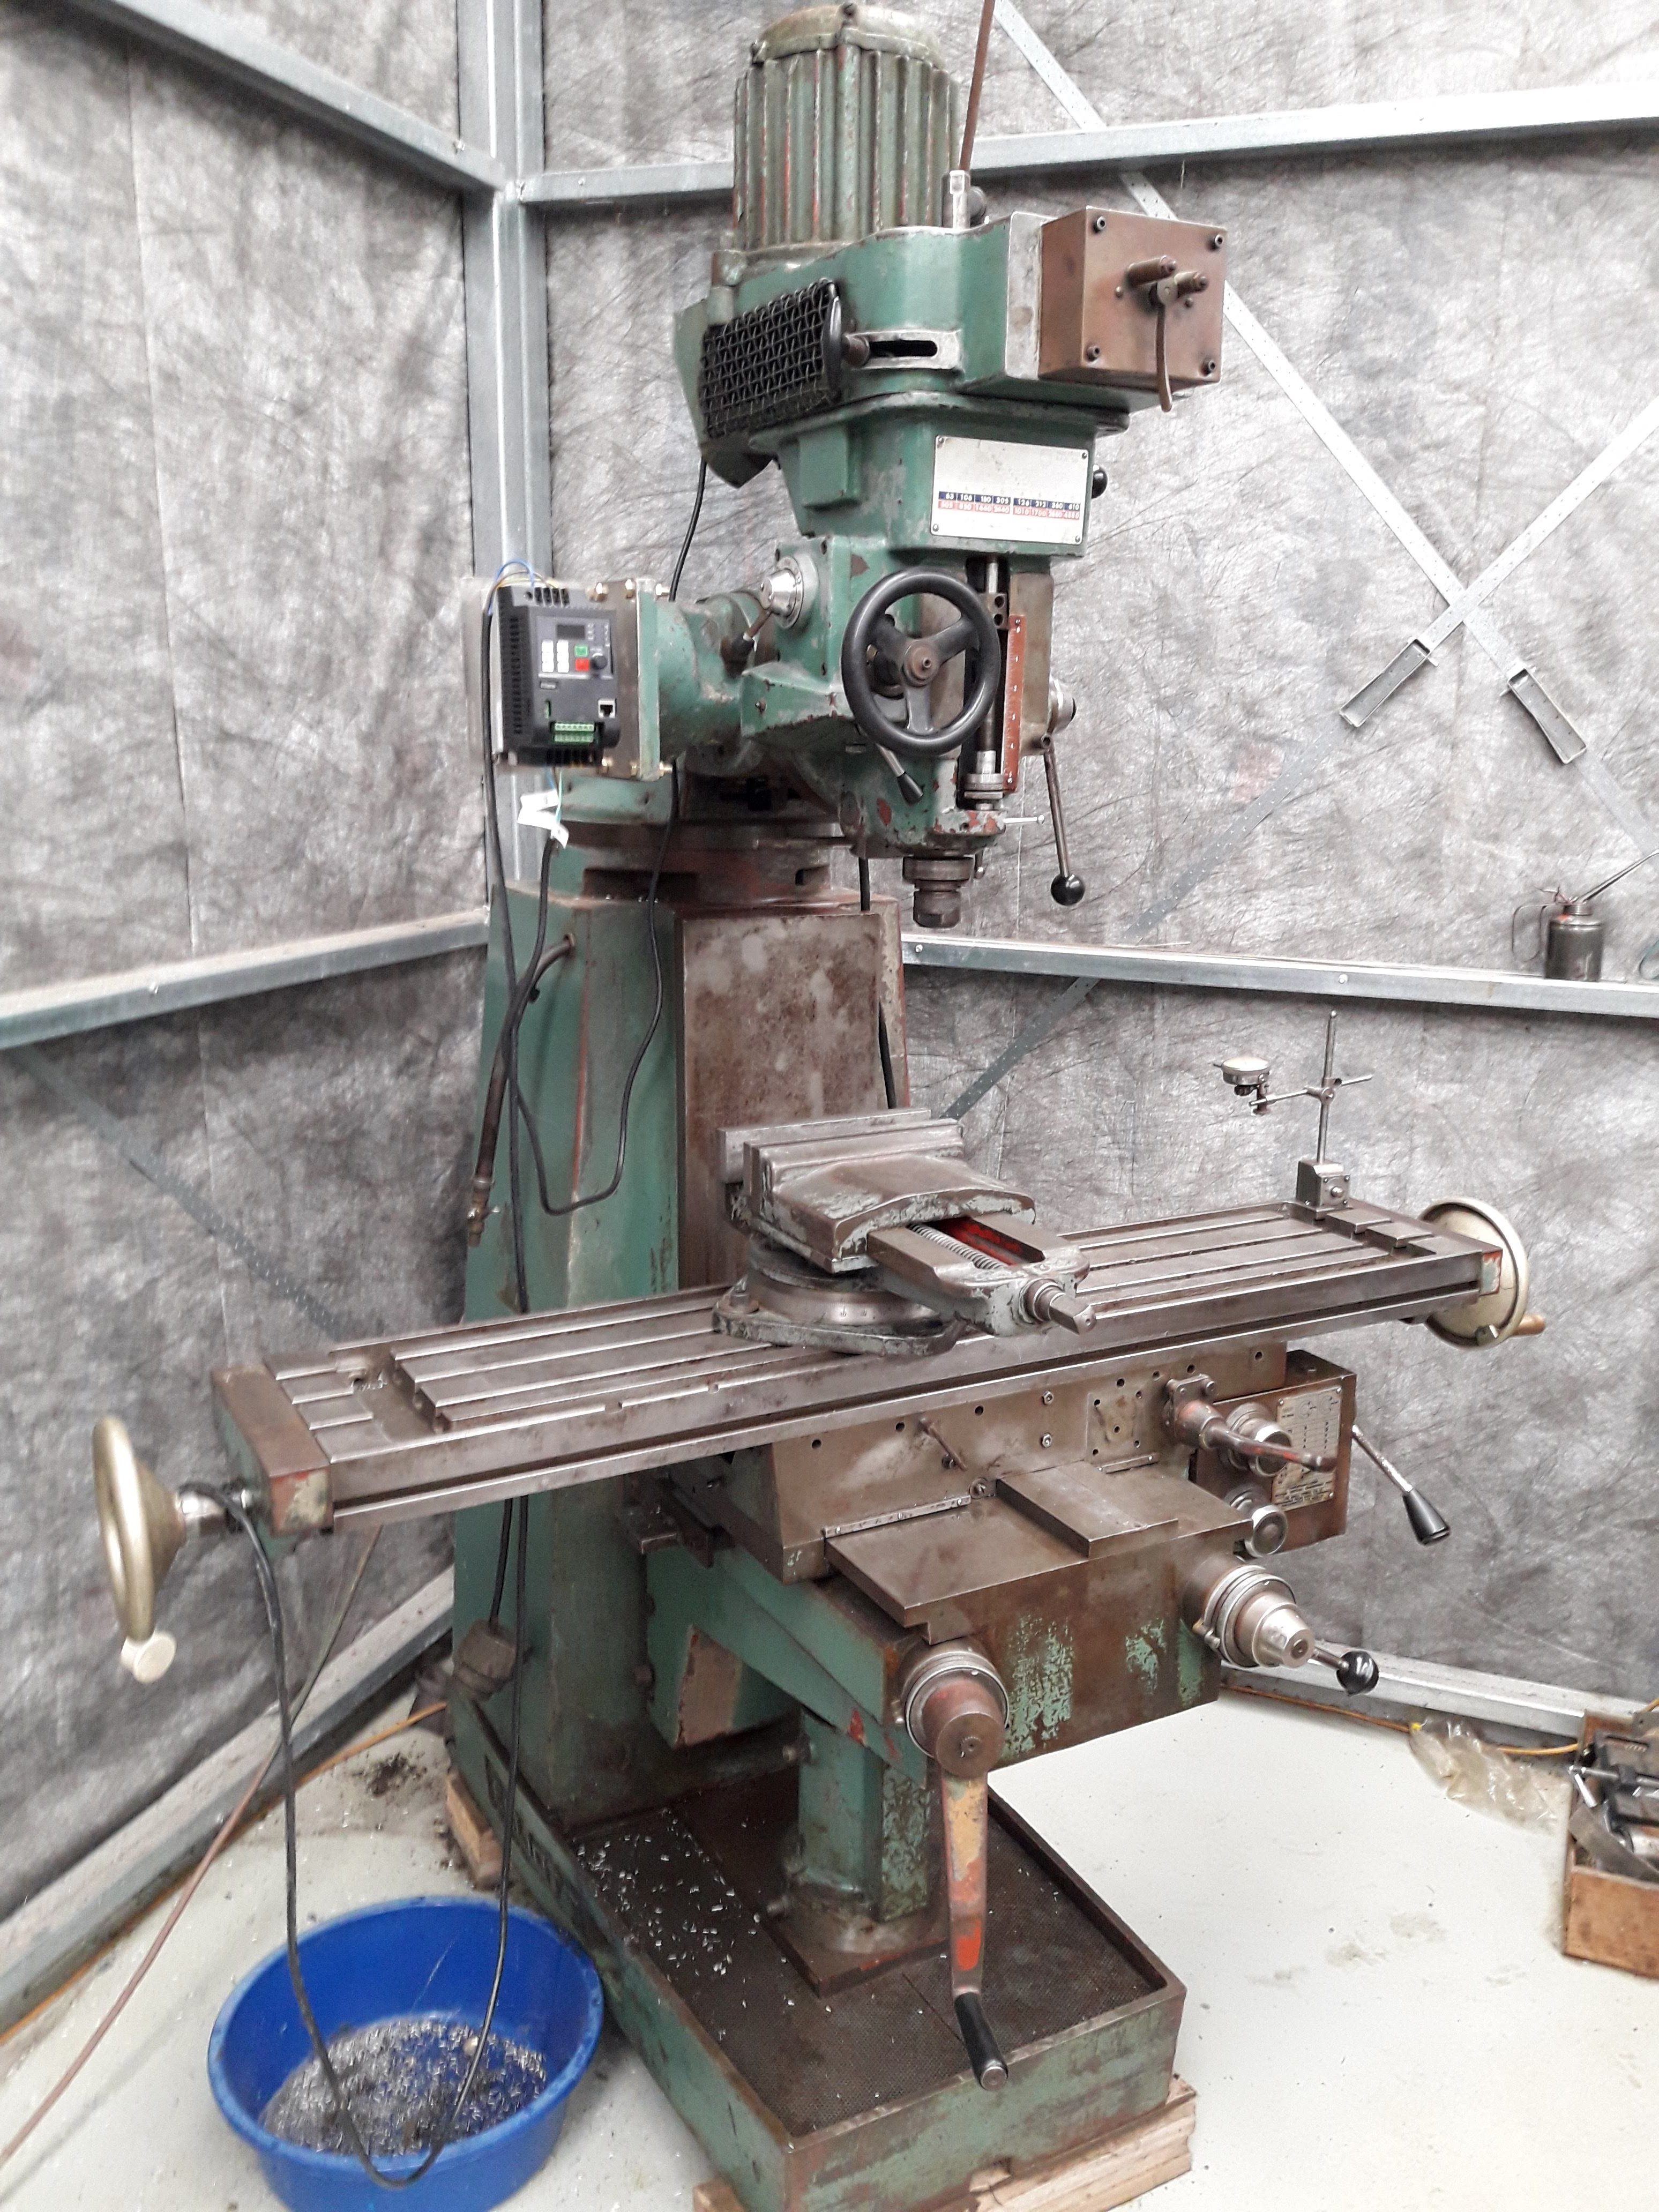
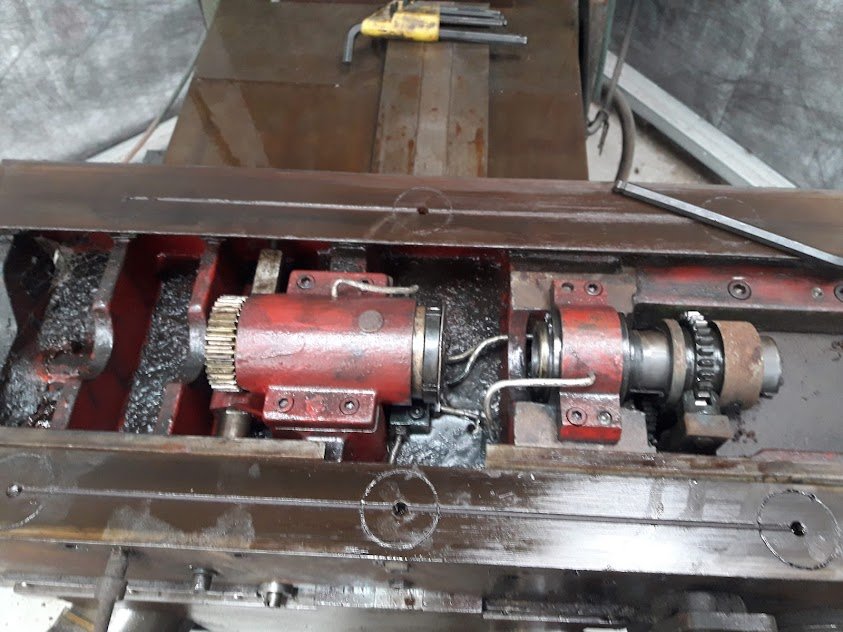
I got my mill up all back together and its running. I didn't end up getting the gearbox off. I wasn't willing to commit any more time to it so I cleaned everything up and threw it all back together, which in itself is a massive improvement. Long term plan is to get one of those bridgeport style power cross feeds that goes on the end of the table and modify it to fit my machine. Anyway, everything moves much more smoothly with clean fresh oil now so thats nice. I fitted a vfd to the spindle and made a little bracket out of some stainless sheet from a commercial coffee machine (recycling!)
Still needs enclosure/strain relief/cable glands for saftey reasons so thats pretty high on the agenda. Next question is this:
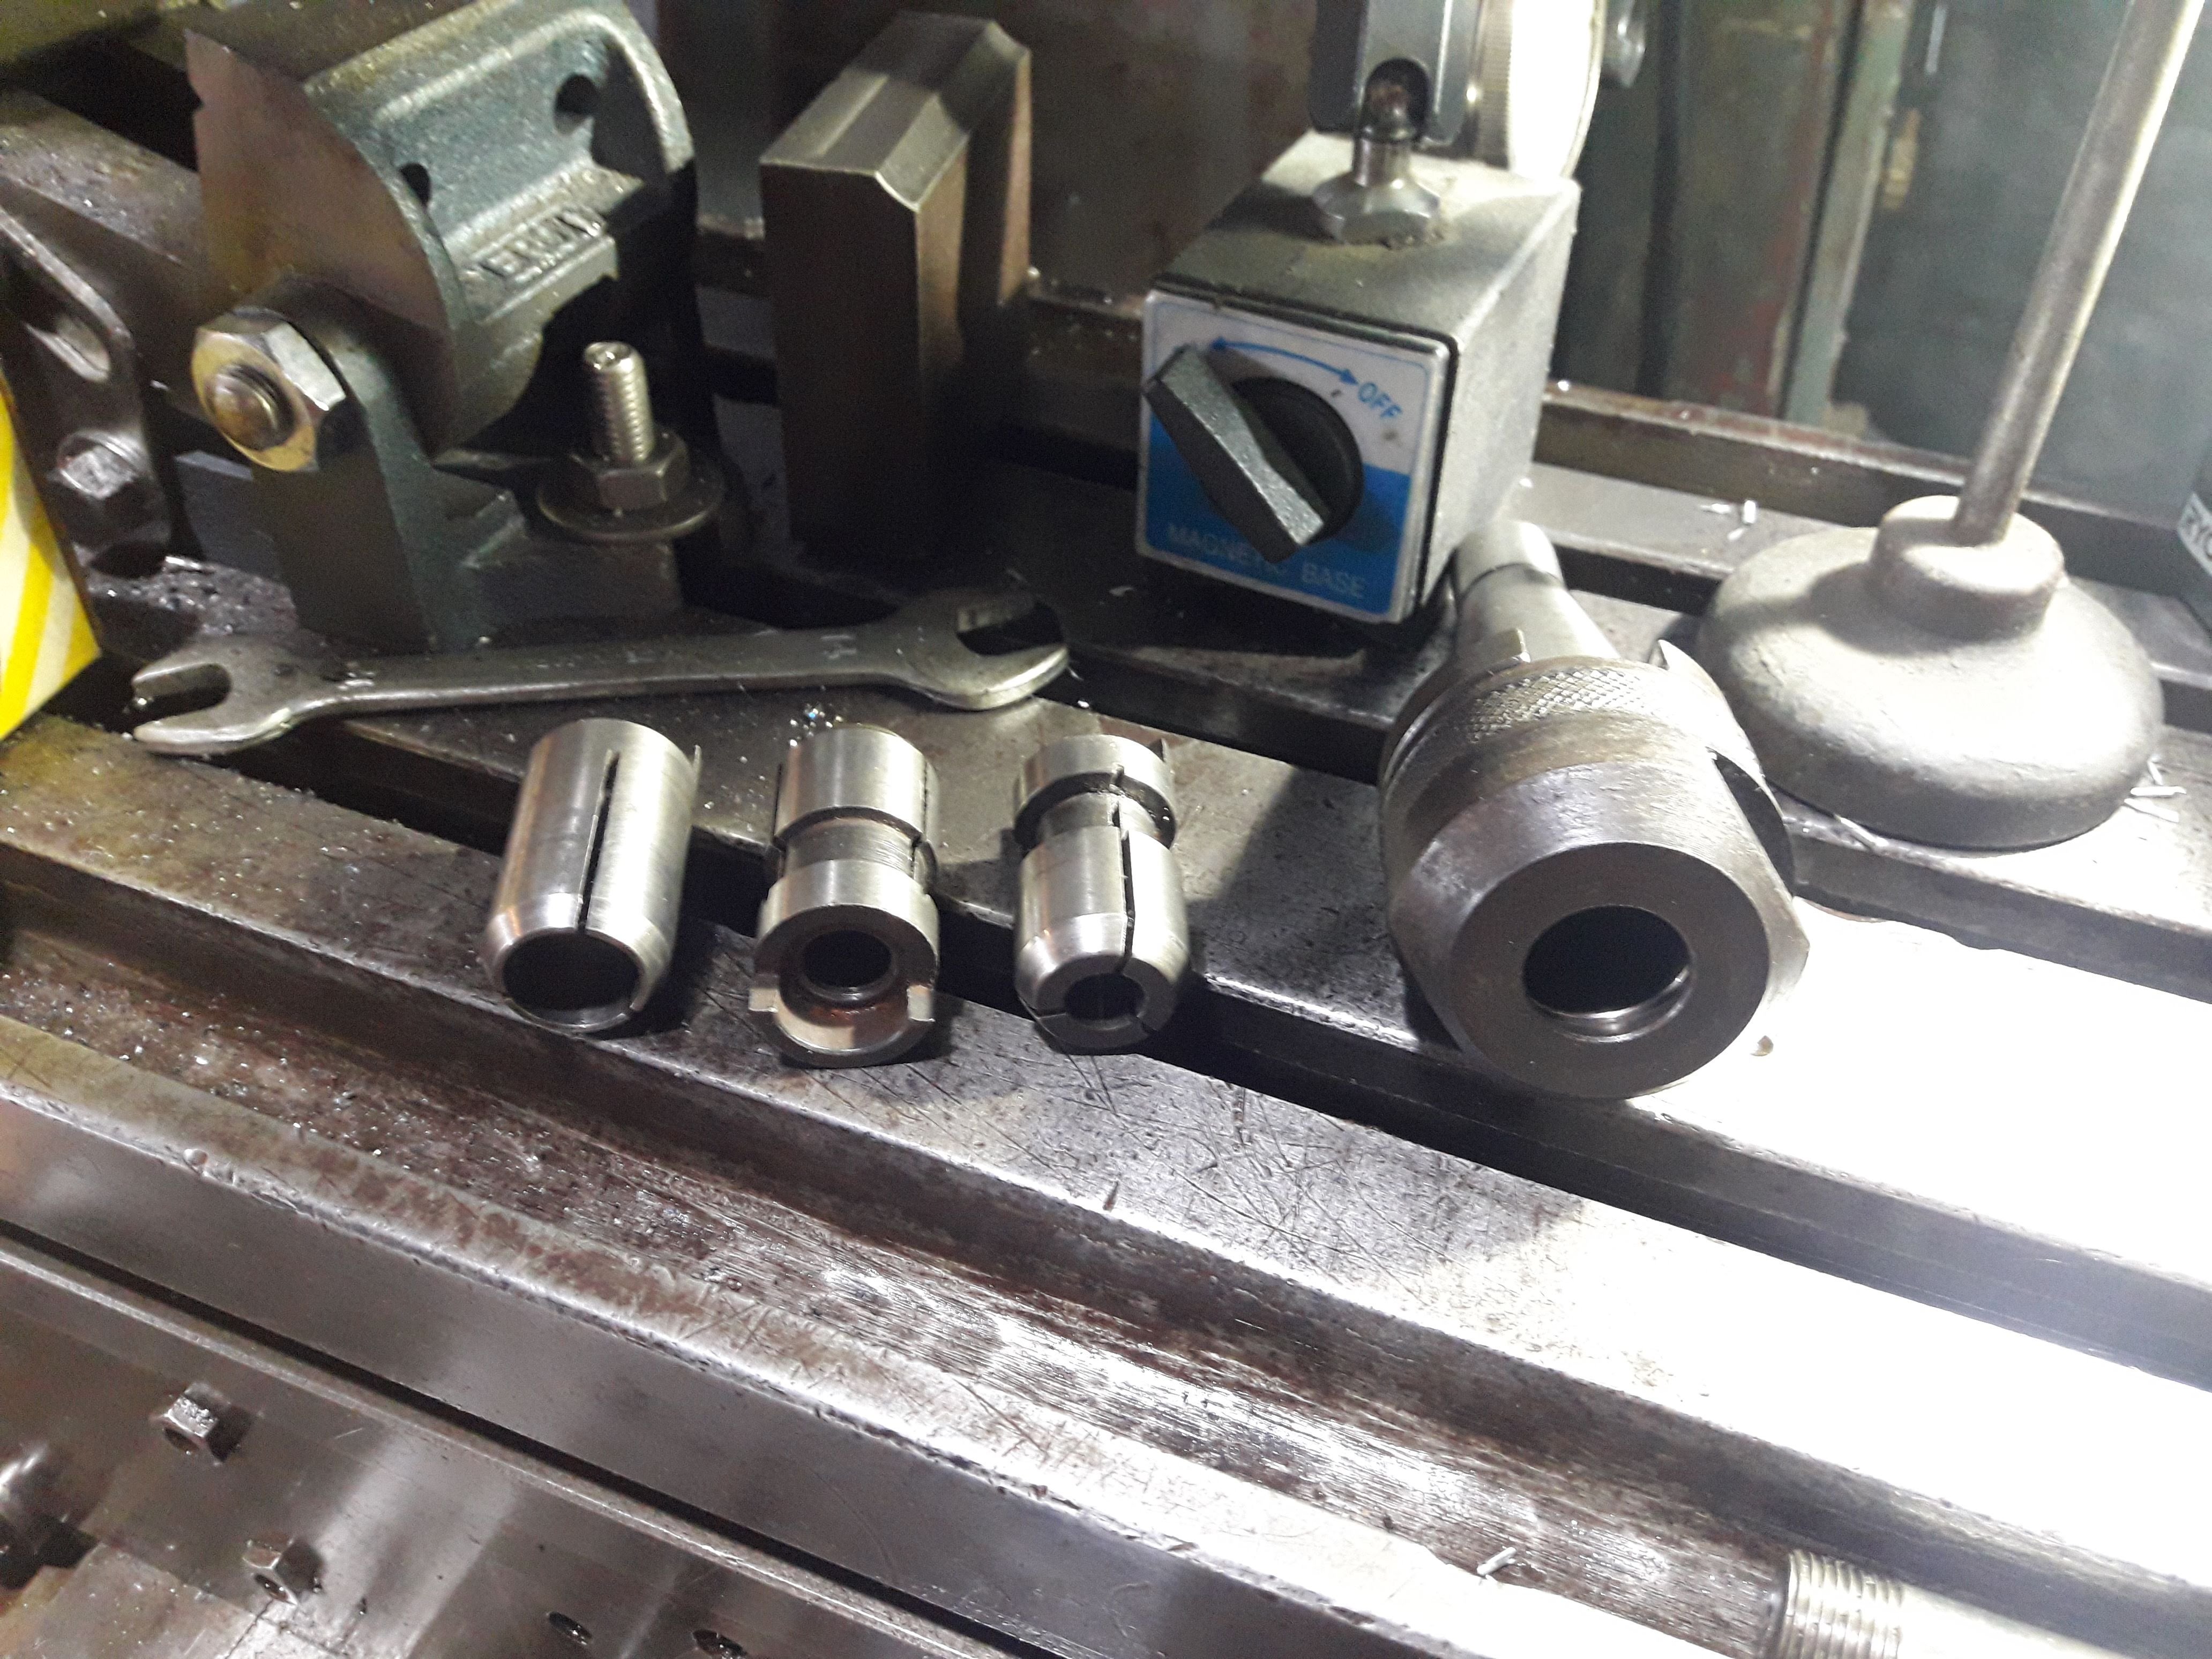
This is the collet chuck that came with the machine. I have 5 collets for it but I really need a few more sizes. I have no idea what kind of collets these are and theres no markings on the chuck, the collets or the box they came in to indicate what they are. Anyone know what they are? And if you are familiar with them are they worth buying more of or should I look at getting a different collet chuck setup (ER** collets?)
-
3
-
-
my 2c - for the home handyman type stuff straight co2 is the best.
Downsides:
-It has its limitations in that it wont spray transfer, most little welders probably won't get there anyway.
-about 5-10% more splatter (in my limited experience)
-Probably other things, I'm not an expert
Upsides:
-owner bottles in the form of fire extinguisher bottles are cheap, usually around the $300 mark full.
-it stores as a liquid unlike argoshield mixes. this means that you fit a whole lot more in the bottle. This is a massive upside in my book, when I want to run mig I want it to be cheap.
-Last fill I got was at gaspro, cost $45, a lot better than the $130 swappa bottles for argosheild. The chap there said its $10 per kg, its a 5kg cylinder but it was a bit too warm to get the whole 5kg in one hit that day.
-Apparently runs a bit hotter than argosheild mixes would for the same amperage on short circuit mig. For little machines this might be handy. In saying that I haven't had any issues welding panel steel either so not an issue for rust repairs.
I have put a good number of hours on the mig over the last few years, built a couple of trailers and lots of random crap with co2 and haven't had any cracks/breakages or weld related issues. I guess the caveat is that I also have a tig so if I want a fancy weld I can use the tig but generally I use mig for most fabrication type things.
Also, I'm just a guy in a shed sticking stuff together for fun so I don't really know what I'm talking about hahaha.
-
1
-
1
-
-
Not sure about the FB but on the F series with a little bit of work you can fit MG b gt front hubs. Combined with lowering springs it corrects the camber due to the angle of the spindle and adds extra low cause the spindle is higher on the hub. win win!
Edit: Scrap that got confused between a couple of old cars I used to have, that was a morris oxford. duh.
-
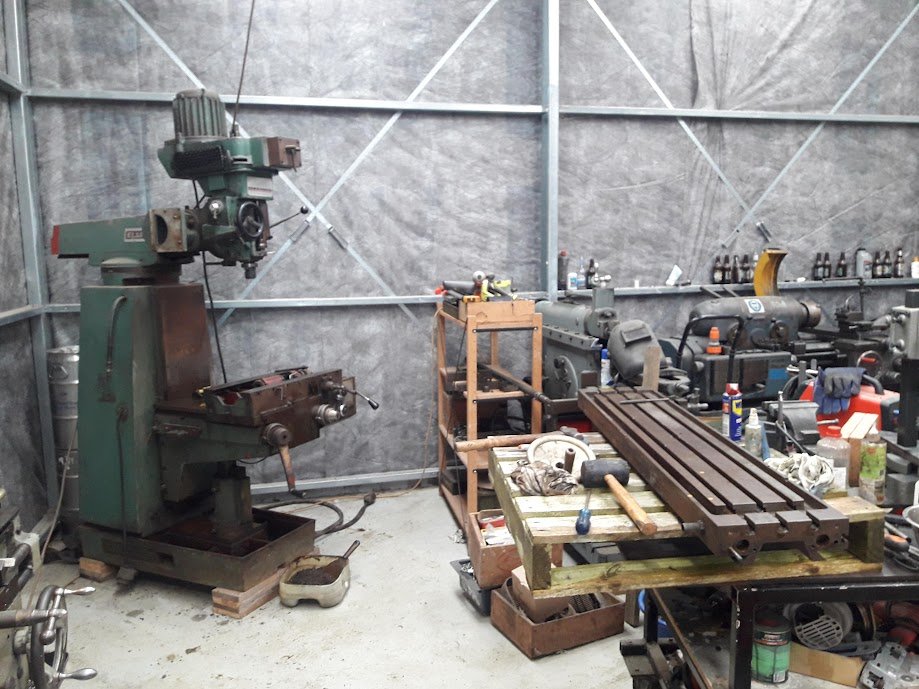
I started stripping down the table and saddle on my vertical mill today but I have gotten stuck. It was all fairly smooth until I got to the point of needing to remove the cross slide power feed gearbox. It sits on the right hand side under the saddle and appears to be held on by 4 cap screws down though the saddle, and theres a shaft that crosses under the cross feed drive nut. Cannot find anything else holding it on, it will drop down a little with the screws removed but I can't get it to slide to the right to get the shaft out of the saddle casting. super annoying, Will probably end up just cleaning what I can with it in place and chucking it back together. If anyone has any bright ideas please share. It is an Elliot Milmor super 16.
Annoyingly its a rare machine and is its own design, not a bridgeport clone. There's many videos on youtube how to pull down a bridgeport, it seems a lot simpler than this machine. The gearbox doesn't want to come apart either and one of the feed speed selectors is stuck so it really needs a service or to be removed altogether. The good news is that I managed to clear out all the congealed oil and goo out of the galleries and ways for the cross slide, and will be able to reassemble the backlash adjuster correctly so that it works. I am going to order some turcite sheet off aliexpress and shim the y axis gib because it is out of adjustment. it has a fair bit of wear and tear on it. Long term I would love to have a go a scraping the ways back in, but realistically I will probably never do that because I have found I am more of an object oriented shed dweller and I really don't need much in the way of accuracy to make the things I want to make.
Anyways, pics because no one likes a picless post:
-
8
-
-
I was watching a machine shop tour and they were showing a dude around their machine rebuilding facility. They were talking about those big magnetic chucks on blanchard grinders and they have to be rebuild every so often because the coils in them flog out over time. Wonder if the electromagnetic clutch in your old lathe is suffering the same kind of issues?
Somewhat irrelevant now anyway, new machine looks good.
That video was really interesting (if you are a weirdo who likes machines), here's a link if anyone wants to have a look:
-
3
-
-
- Popular Post
- Popular Post
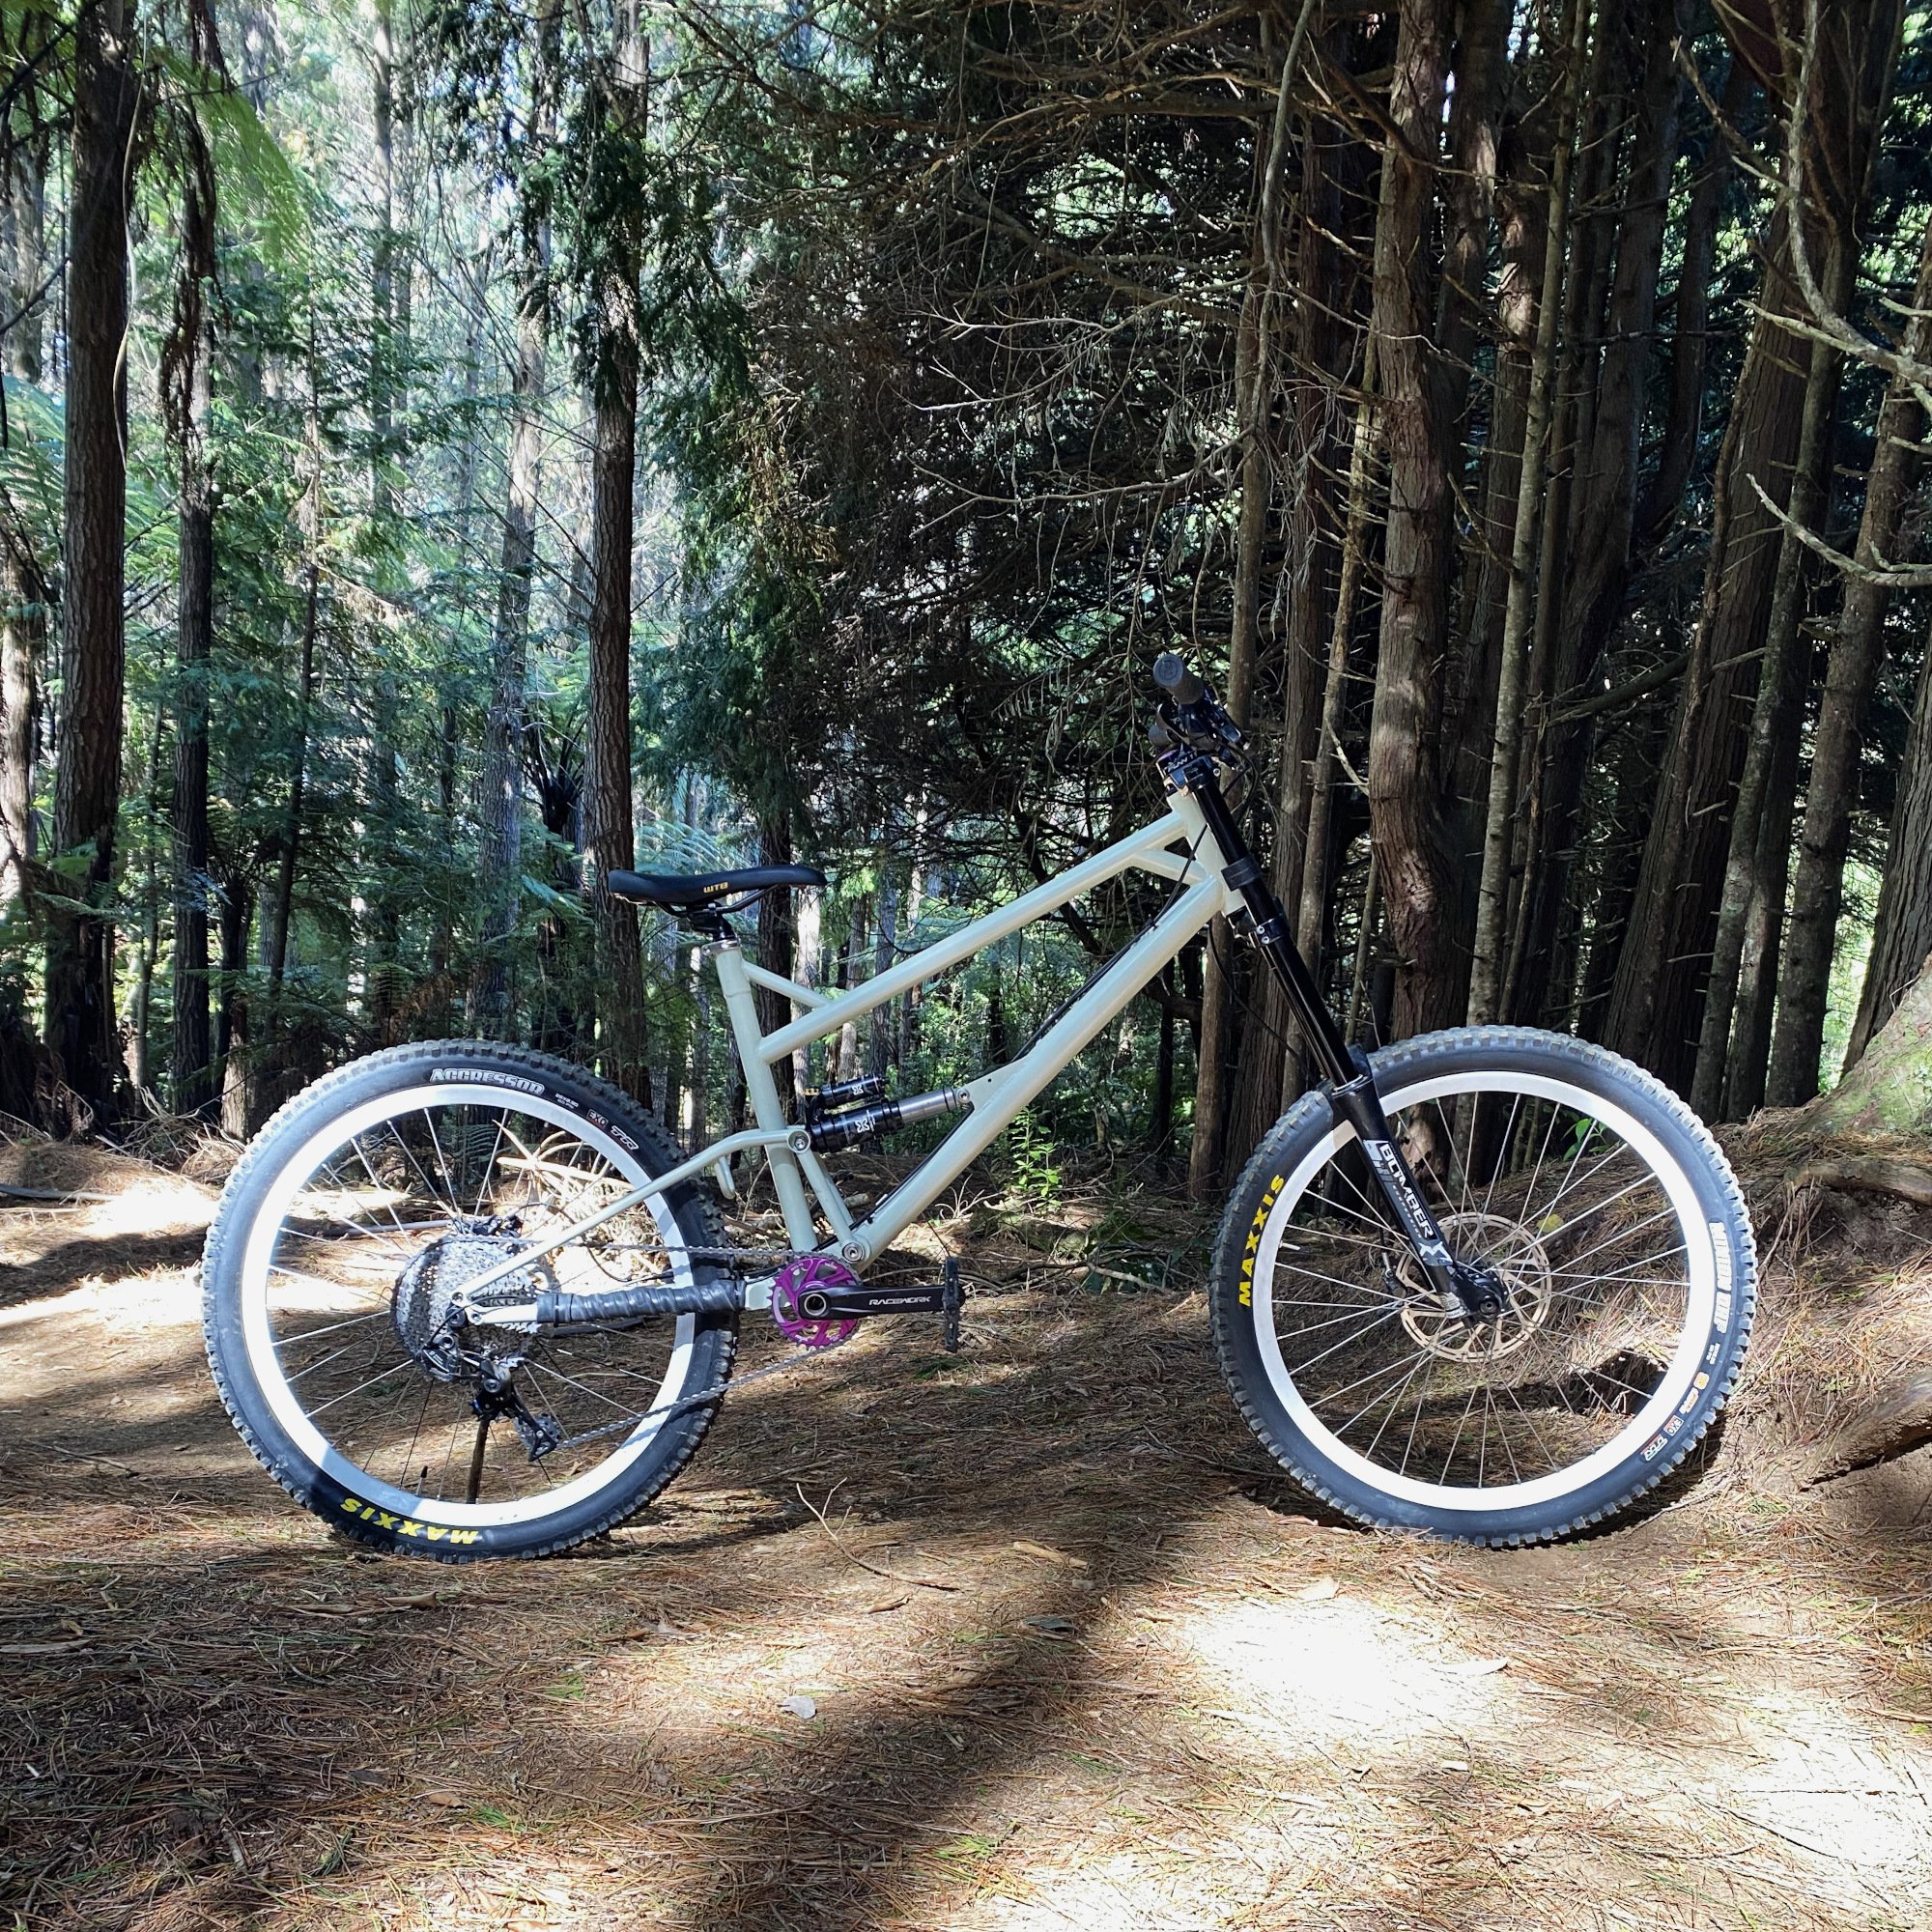
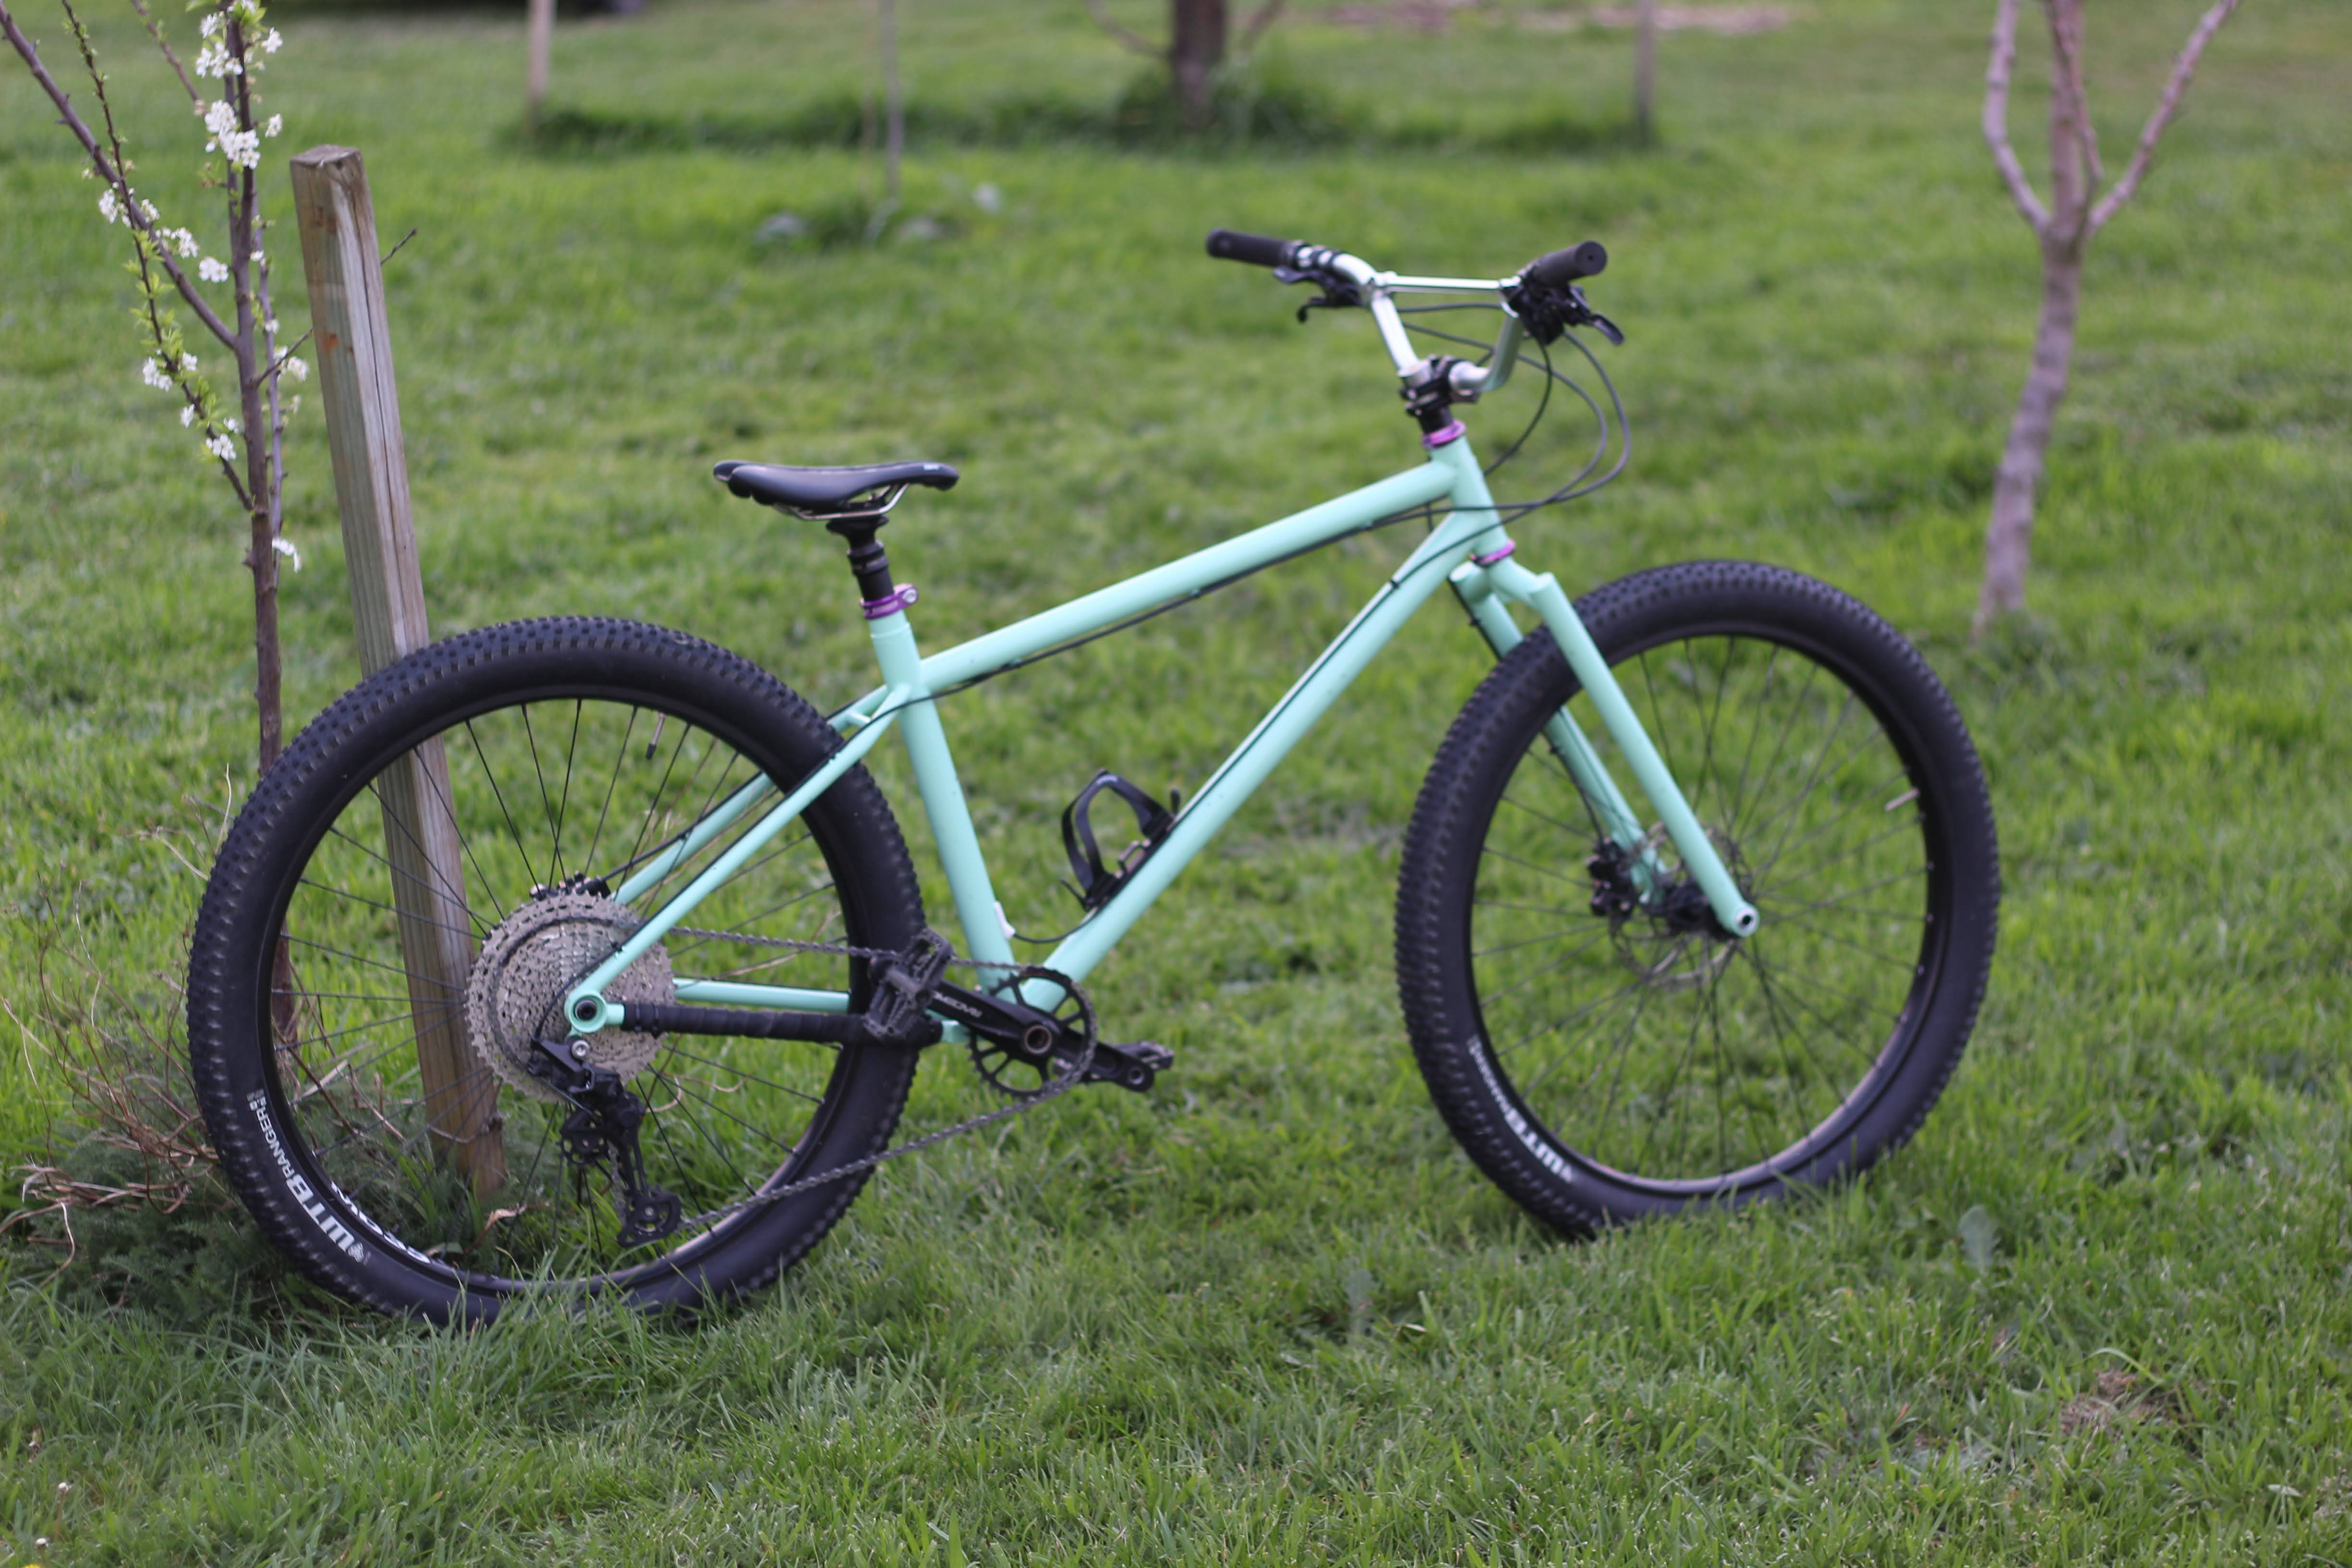
It's done!
I found myself rooting for this particular colour on the poll and figured that was a strong indicator it was the right colour. Anodised purple accents for maximum 90's mtb style points. Will probably get some purple valve caps just to finish it off. On my computer the images look a bit more blue than the bike does in real life, probably because auto white balance on the camera or something.
Side sharn, my first mountain bike was a 1995 marin rocky ridge. It was a chrome plated ali frame and when I got it second hand it had a purple anodised so it feels a bit like a throwback to that. I still have the frame hanging in one of my sheds, it has cracks in the headtube. Probably becuase of all the horrendous abuse I gave it.
The bars are some aliexpress mx/pitbike bars that may or may not stay, they are way too flexy without the cross brace and the fasteners/holes for the cross brace are a bit sloppy so you can feel a bit of a clunk in the bars when you pull/push on them that is reminiscent of a loose headset. I could probably turn up some little bushings but I'm undecided.
The paint is PPG deltron DG and it is by far the nicest paint to apply that I have ever used. So easy to tell when you have the right amount applied and not a single sag or run on the bike. Theres a couple of less than perfect spots but nothing anyone will notice. I put on some braap wrap to keep it tidy, would recommend so far in terms of application, went on really easily. Currently has the old tyre tube on the chain stay jobbie for protection from chain slap, will probably get some vhs tape when it comes back in stock.
Now all I need to do is go get it dirty!
-
18
-
Yeah the chain was pretty low and the wheels rolled over it luckily!
-
1
-
-
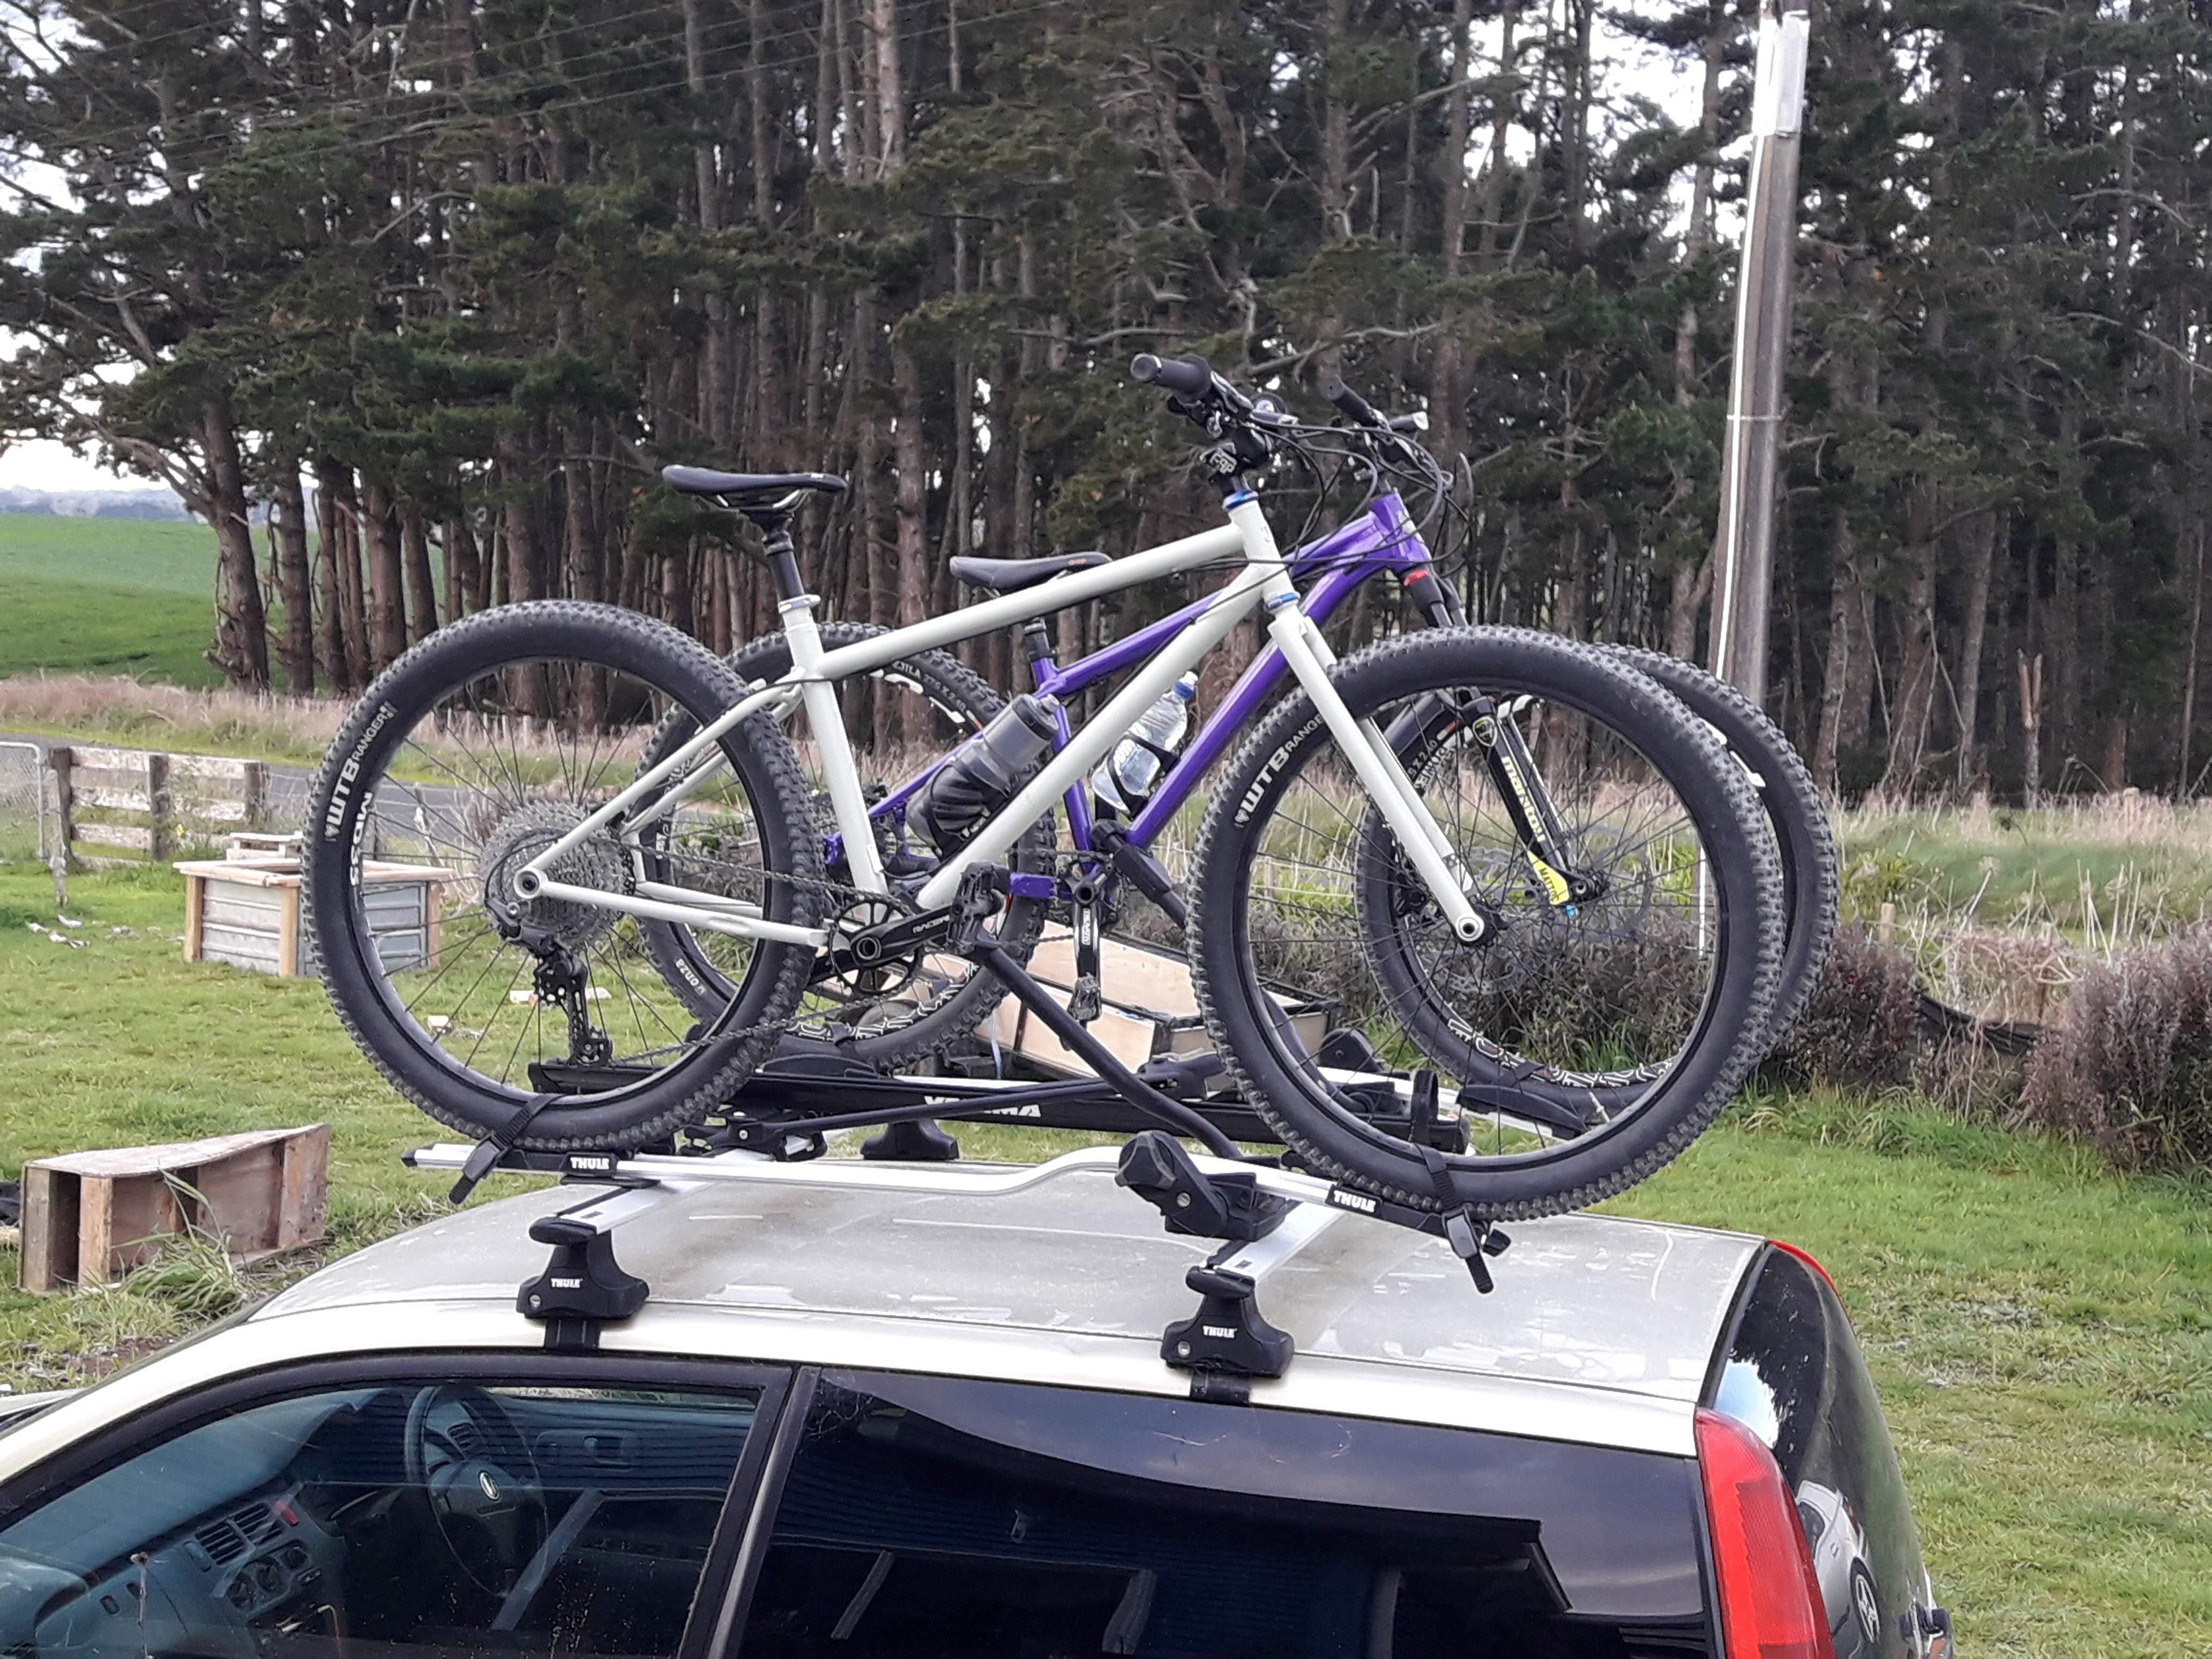
Ride stats:
Here's a picture of the new bike next to Heather's Ragley on the bike carriers, quite cool to see the comparison
-
8
-
-
- Popular Post
- Popular Post
I was thinking about how this bike might compare to @yoeddynz's bike and managed to find this sales catalogue for the 1990 fat chance range:
https://www.mtb-kataloge.de/Bikekataloge/PDF/Fat_Chance/1990.pdf
It lists a 71 degree head tube angle, 1.5" fork offset. If anyone is interested in trail measurements theres a very nice calculator here:
http://yojimg.net/bike/web_tools/trailcalc.php
the yo eddy works out to 79mm of trail. That must make for a very lively ride! It also lists the fork weight as 1lb 12oz, which in non retard units is 793 grams. My fork weighs 1200g~ish so there must be something to the whole butting thing, very impressive! Though mine easily clears a 29" wheel and has clearance for a 4" tyre so theres probably a bit of weight there too.
Anyways, after my inaugural ride and celebration beersies @hampie came home from work and I was still fizzing to ride my bike more. So we popped into town with some lights to ride around Hamilton gardens and for a little jaunt down the river trails. We started out at the south end and rode up to the cemetery and went for a little hill bomb down the grass into the gardens carpark.
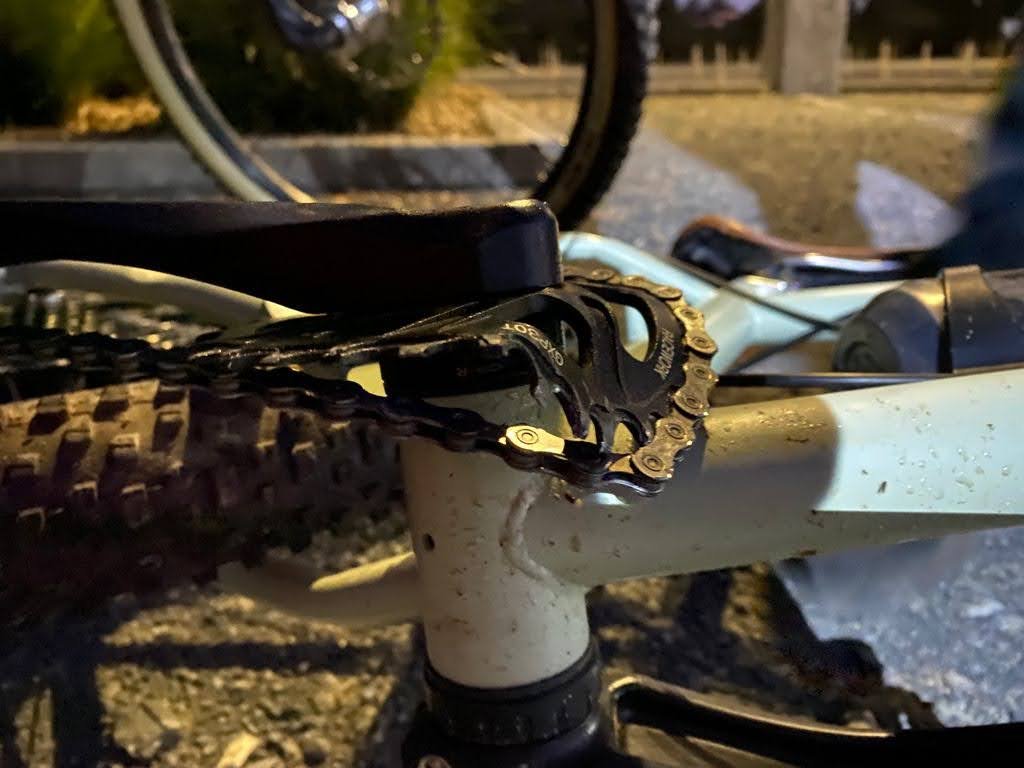
So me being the speedy speedster I was out in front and @hampie was following me down the hill, it was twilight at this point. So coming up to the carpark there are bollards around so I pick a gap just as I get in torch range I notice a chain between the bollards...
uh oh, no time to even bunnyhop, just gotta plow on through!
I stayed on the bike, but the chainring did not fare so well! The chain between the bollards must have been poorly attached because it came detached on one end clearing the way for @hampie to sail through uneventfully, phew!
So in order to limp back home we found a convenient non-marring anvil (top of a wooden bollard) and large conical orange mallet (roadcone) and bashed the chainring around until it was somewhat rideable and limped back to the car. No damage to the frame, not even a scratch in the paint! Many lols were had at the time.
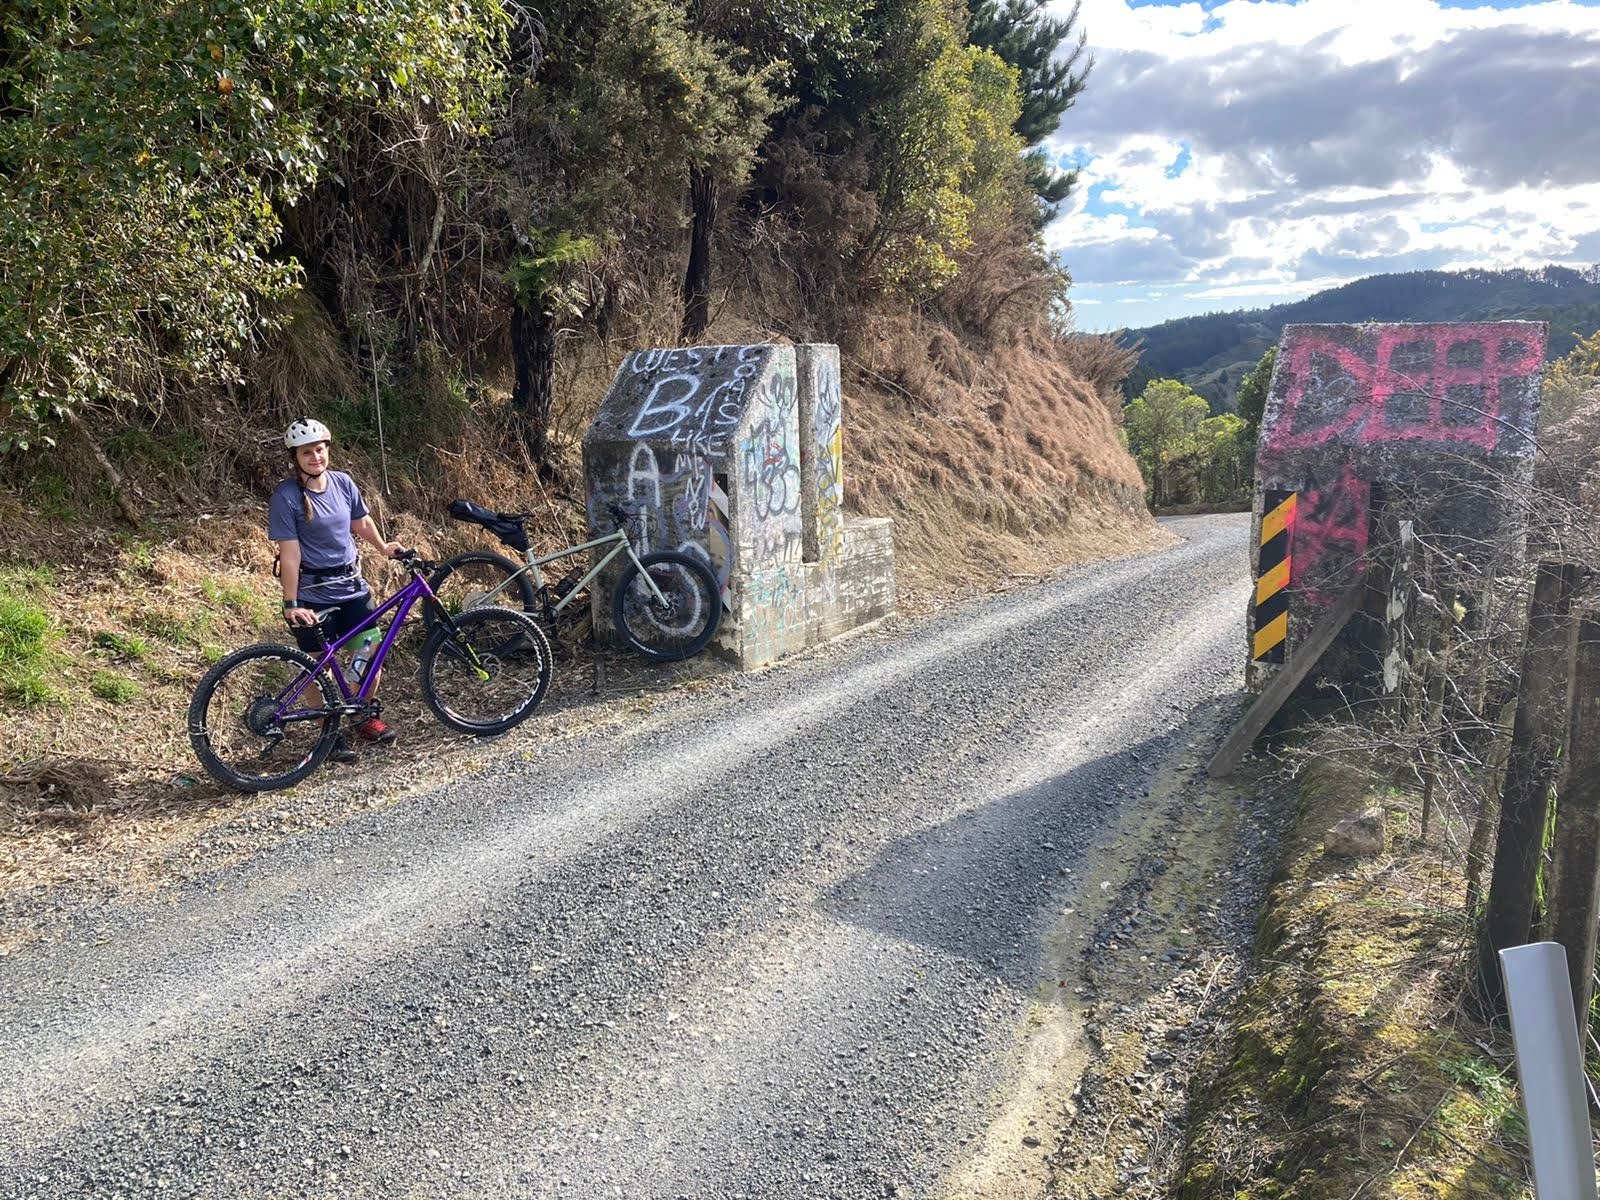
Anyway, next day I changed the chainring as I had a 32 tooth one in my parts bin and after a bit of fettling we went out for another ride. This time we started from Kaniwhaniwha and did a road/gravel loop 40km which encompassed the old road to raglan (old mountain road) through Waitetuna and back to kaniwhaniwha. We are slowly upping our mileage because early next year we are planing on doing the Kopiko Aotearoa which is 1100km from cape Egmont lighthouse to East cape lighthouse and we want to average 100km per day.
Some highlights from the loop:
This is a tank trap that was put in during world war 2 as this was at the time the only road through from the west coast to Hamilton and they thought that the Japanese army might invade from that direction.
And this is the top of the hill on Waitetuna valley road. I spent the entire climb up whistling little wing to myself and zoning out. You can see the wind farm on the hill behind which is the same one visible from Te Uku on the way to Raglan.
-
12
-
 1
1
-
- Popular Post
- Popular Post
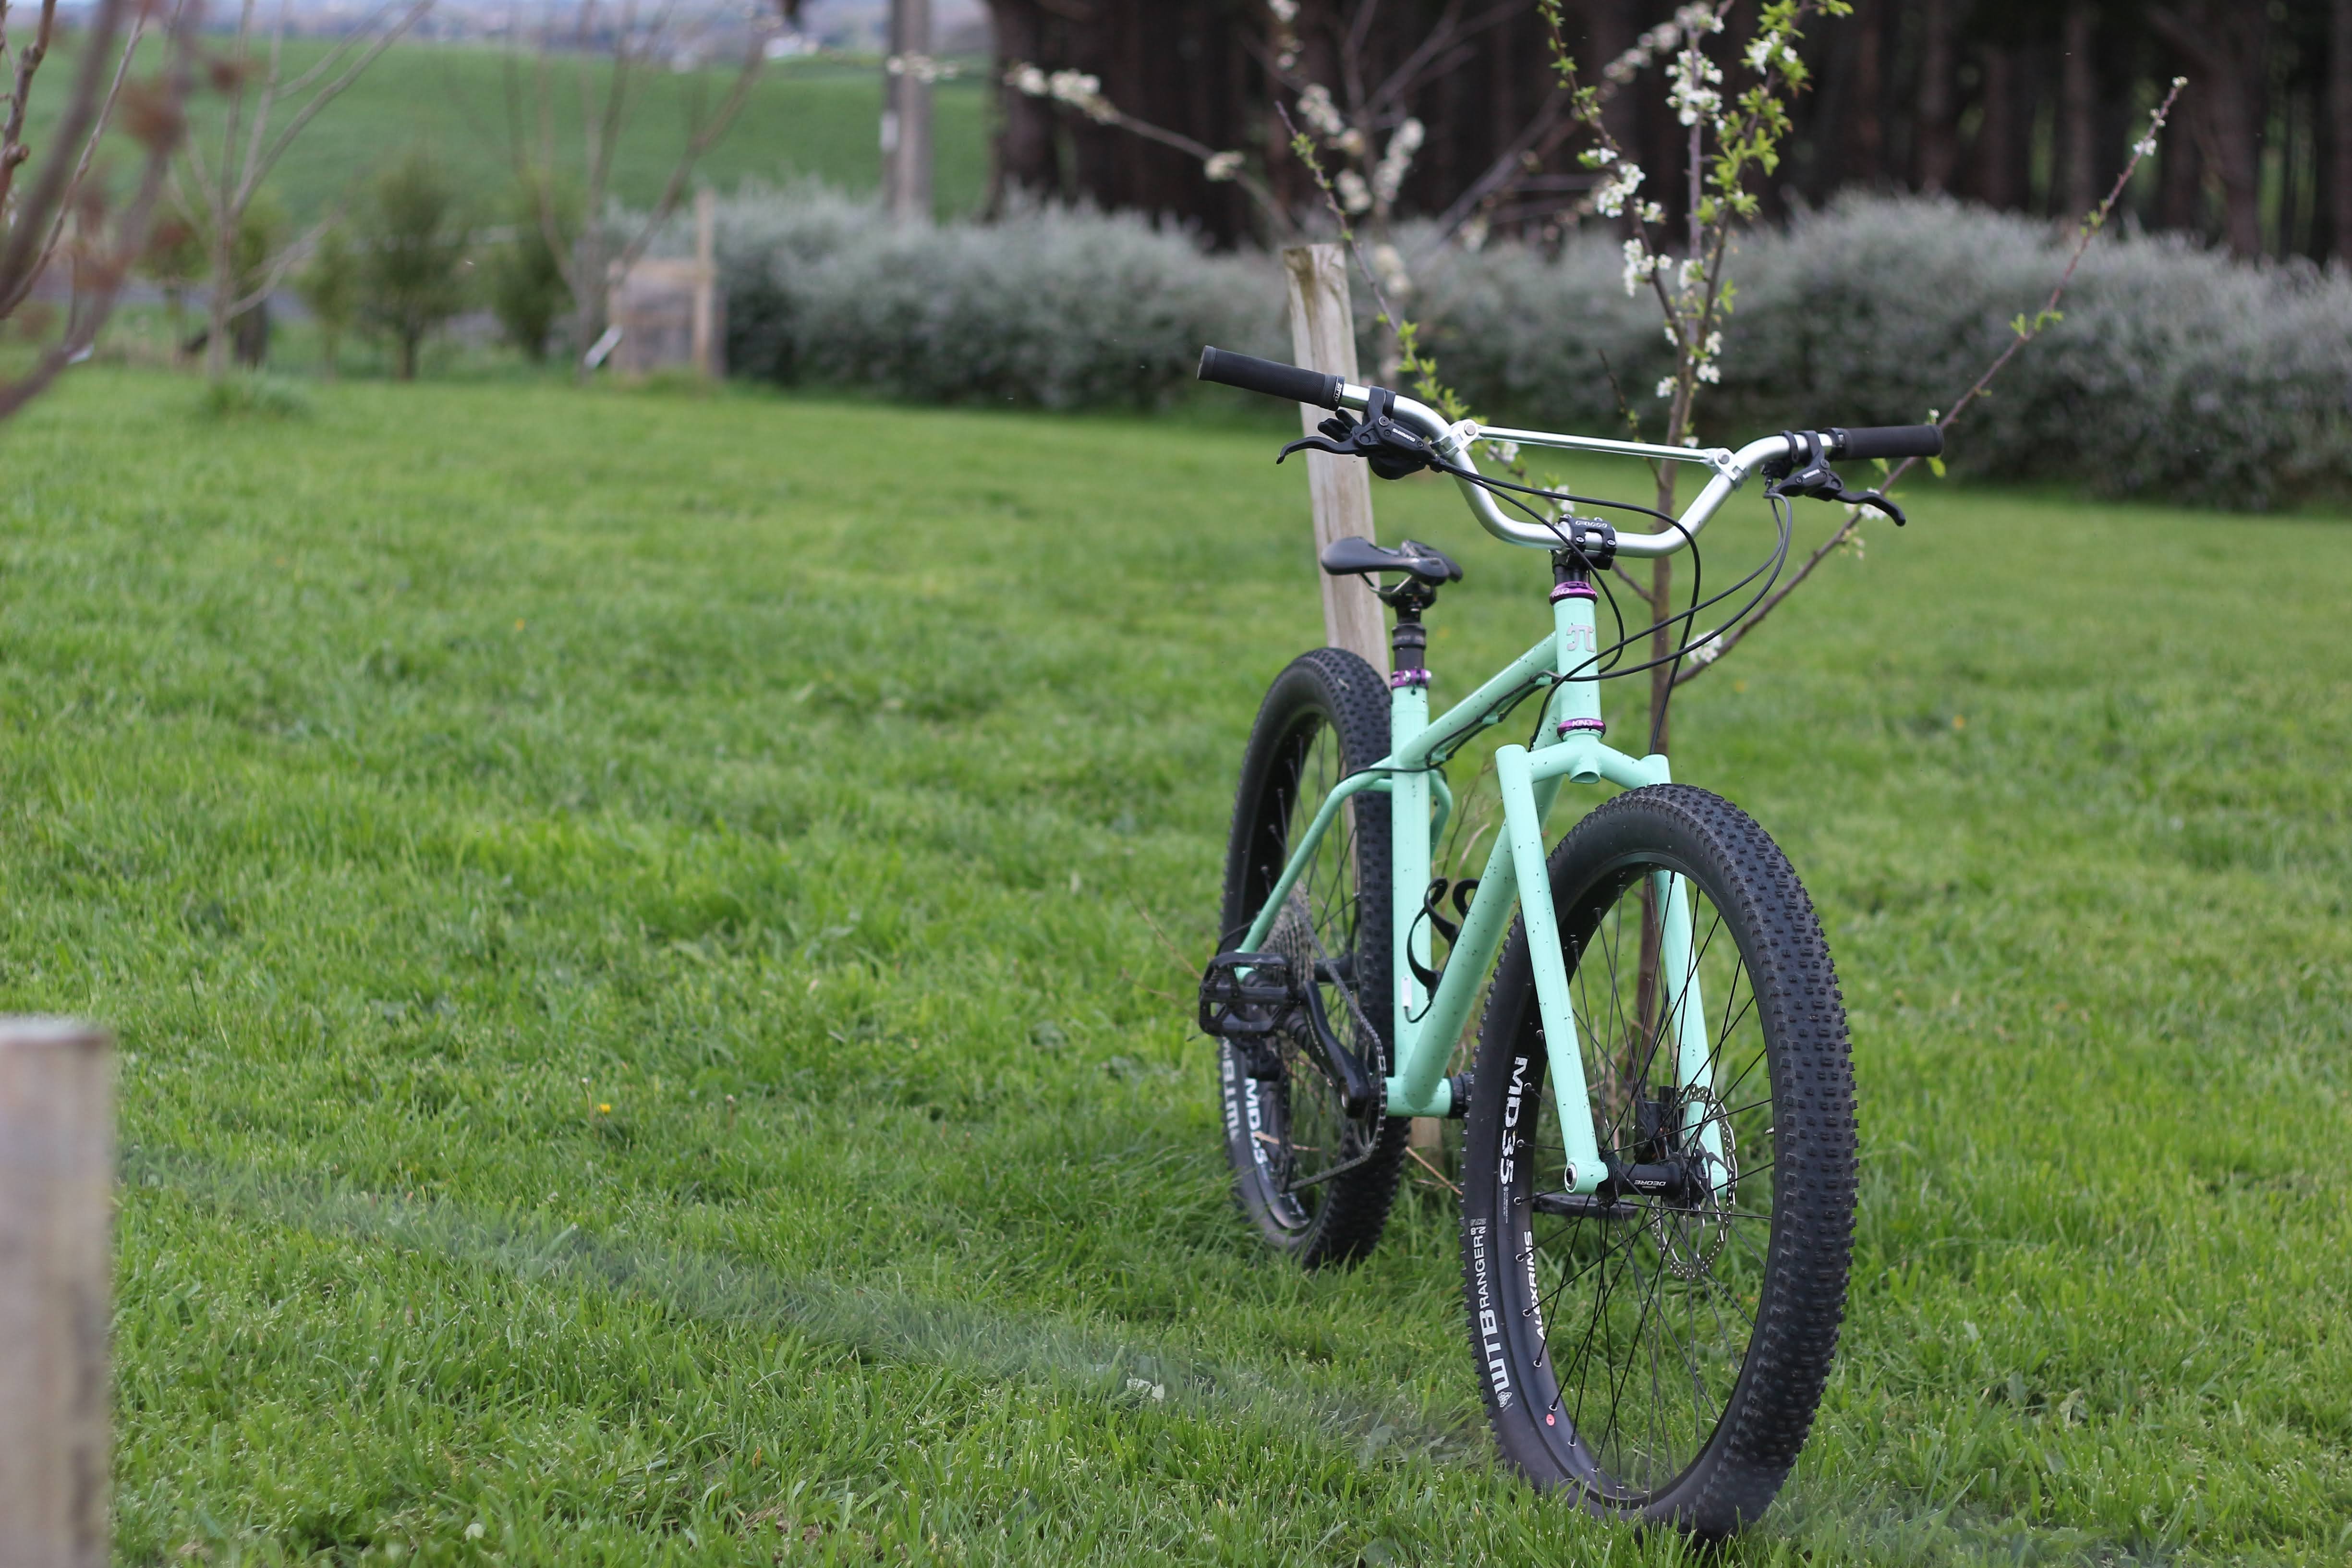
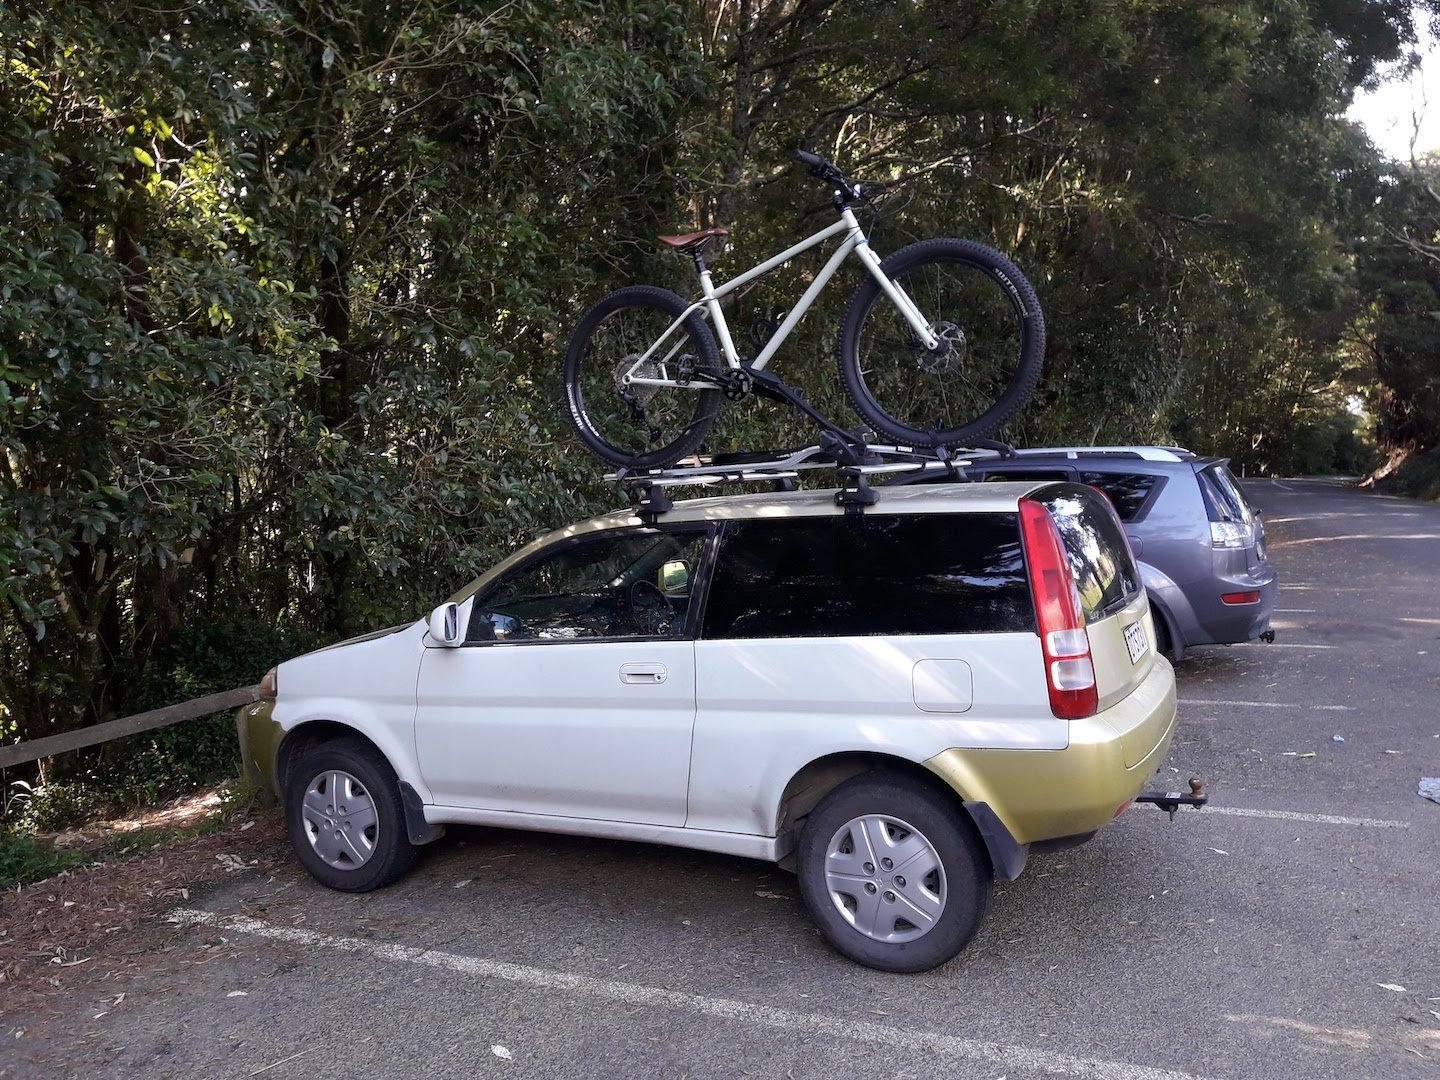
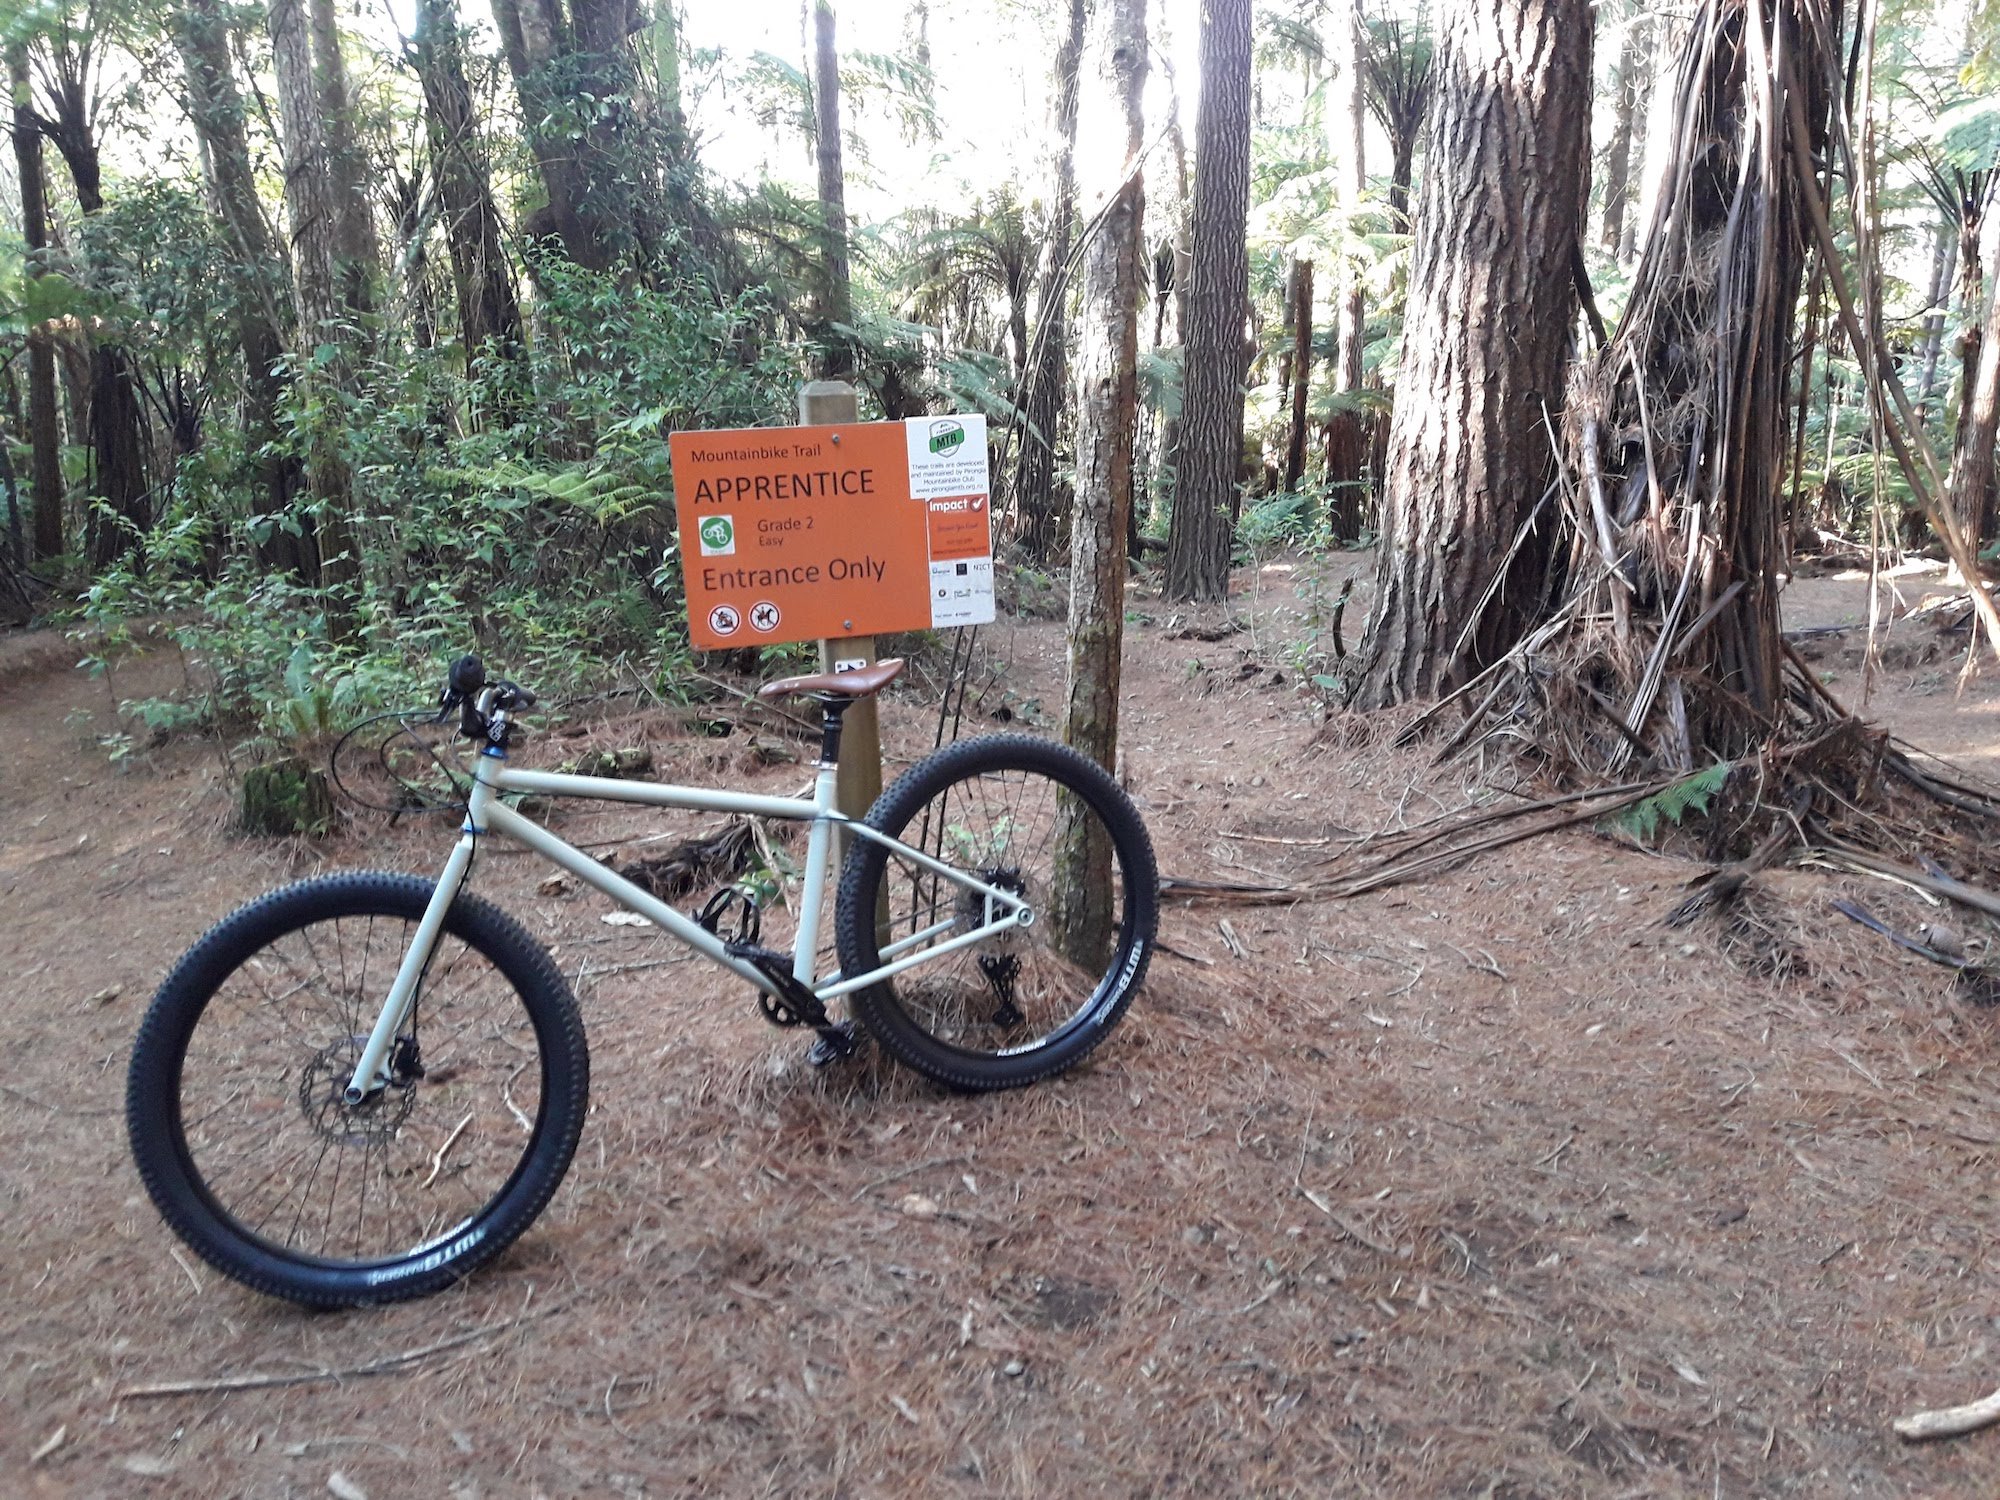
So I chucked the bike on the roof of the trusty ol' honda (with matching primer!) and took off to the local mtb trails
(for yarns about the crappy honda click below)
I figured I would start on something pretty chill to get the feel for things so I went on Apprentice, a nice grade 2 that gently winds down the mountain. The first thing I notice is that the brakes are terrible, underpowered and needing bedding in so I had to adjust my braking distances to suit. But after I got used to that and started flowing I found that the bike handles fantastically! it loves to dart into the corner but doesn't feel skittish. I think this is a product of a long wheelbase for a rigid bike (1195mm) giving it stability but the 65mm offset fork reducing the mechanical trail. As a point of reference I figured out that my full suspension 29er trail bike has just under 100mm of mechanical trail, but the Pi bike has about 89mm. It feels a little odd in a carpark test but on trail it just works.
I did have some misgivings about the long chain stays, wondering if they were going to be an issue/make the ride boring. Turns out its not a problem, they do make it harder to wheelie and I can't manual it (I can manual my full sus bike but haven't really managed it on other bikes for some reason. I think a bit more practice is needed). But when you get it up on a wheelie, it wants to stay there and I think it would be the same with manuals. On trail I think it it probably not so much of a is it better or worse having long/short stays but a personal preference. It isn't what makes the ride thats for sure, it just feels like you have a bit less leverage over the rear wheel if you are chucking the rear end into a slippery berm.
After taking it down Apprentice for a shakedown run I climbed back up and took a brave pill and went down the jump trail to see if I was going to have a catastrophic failure of the fork. The bike jumps nicely, I didn't clear as many jumps as I usually do as I wanted to be conservative with my speed in the event of a breakage, but casing a jump is usually harder on the landing than clearing so you could say it was a torture test. Some of the rutted out sections were fairly horrific on the rigid, but all in all it was awesome, and I am not writing this from a hospital be with a severe concussion.
In terms of climbing, it climbs as well as the next bike, the 2.8" tyres are nice on the bumpy track up Pirongia. I would probably go a degree or 2 steeper on the seat tube angle next time around, because then I could get away with a slightly longer reach/front centre with the same distance from saddle to handlebars.
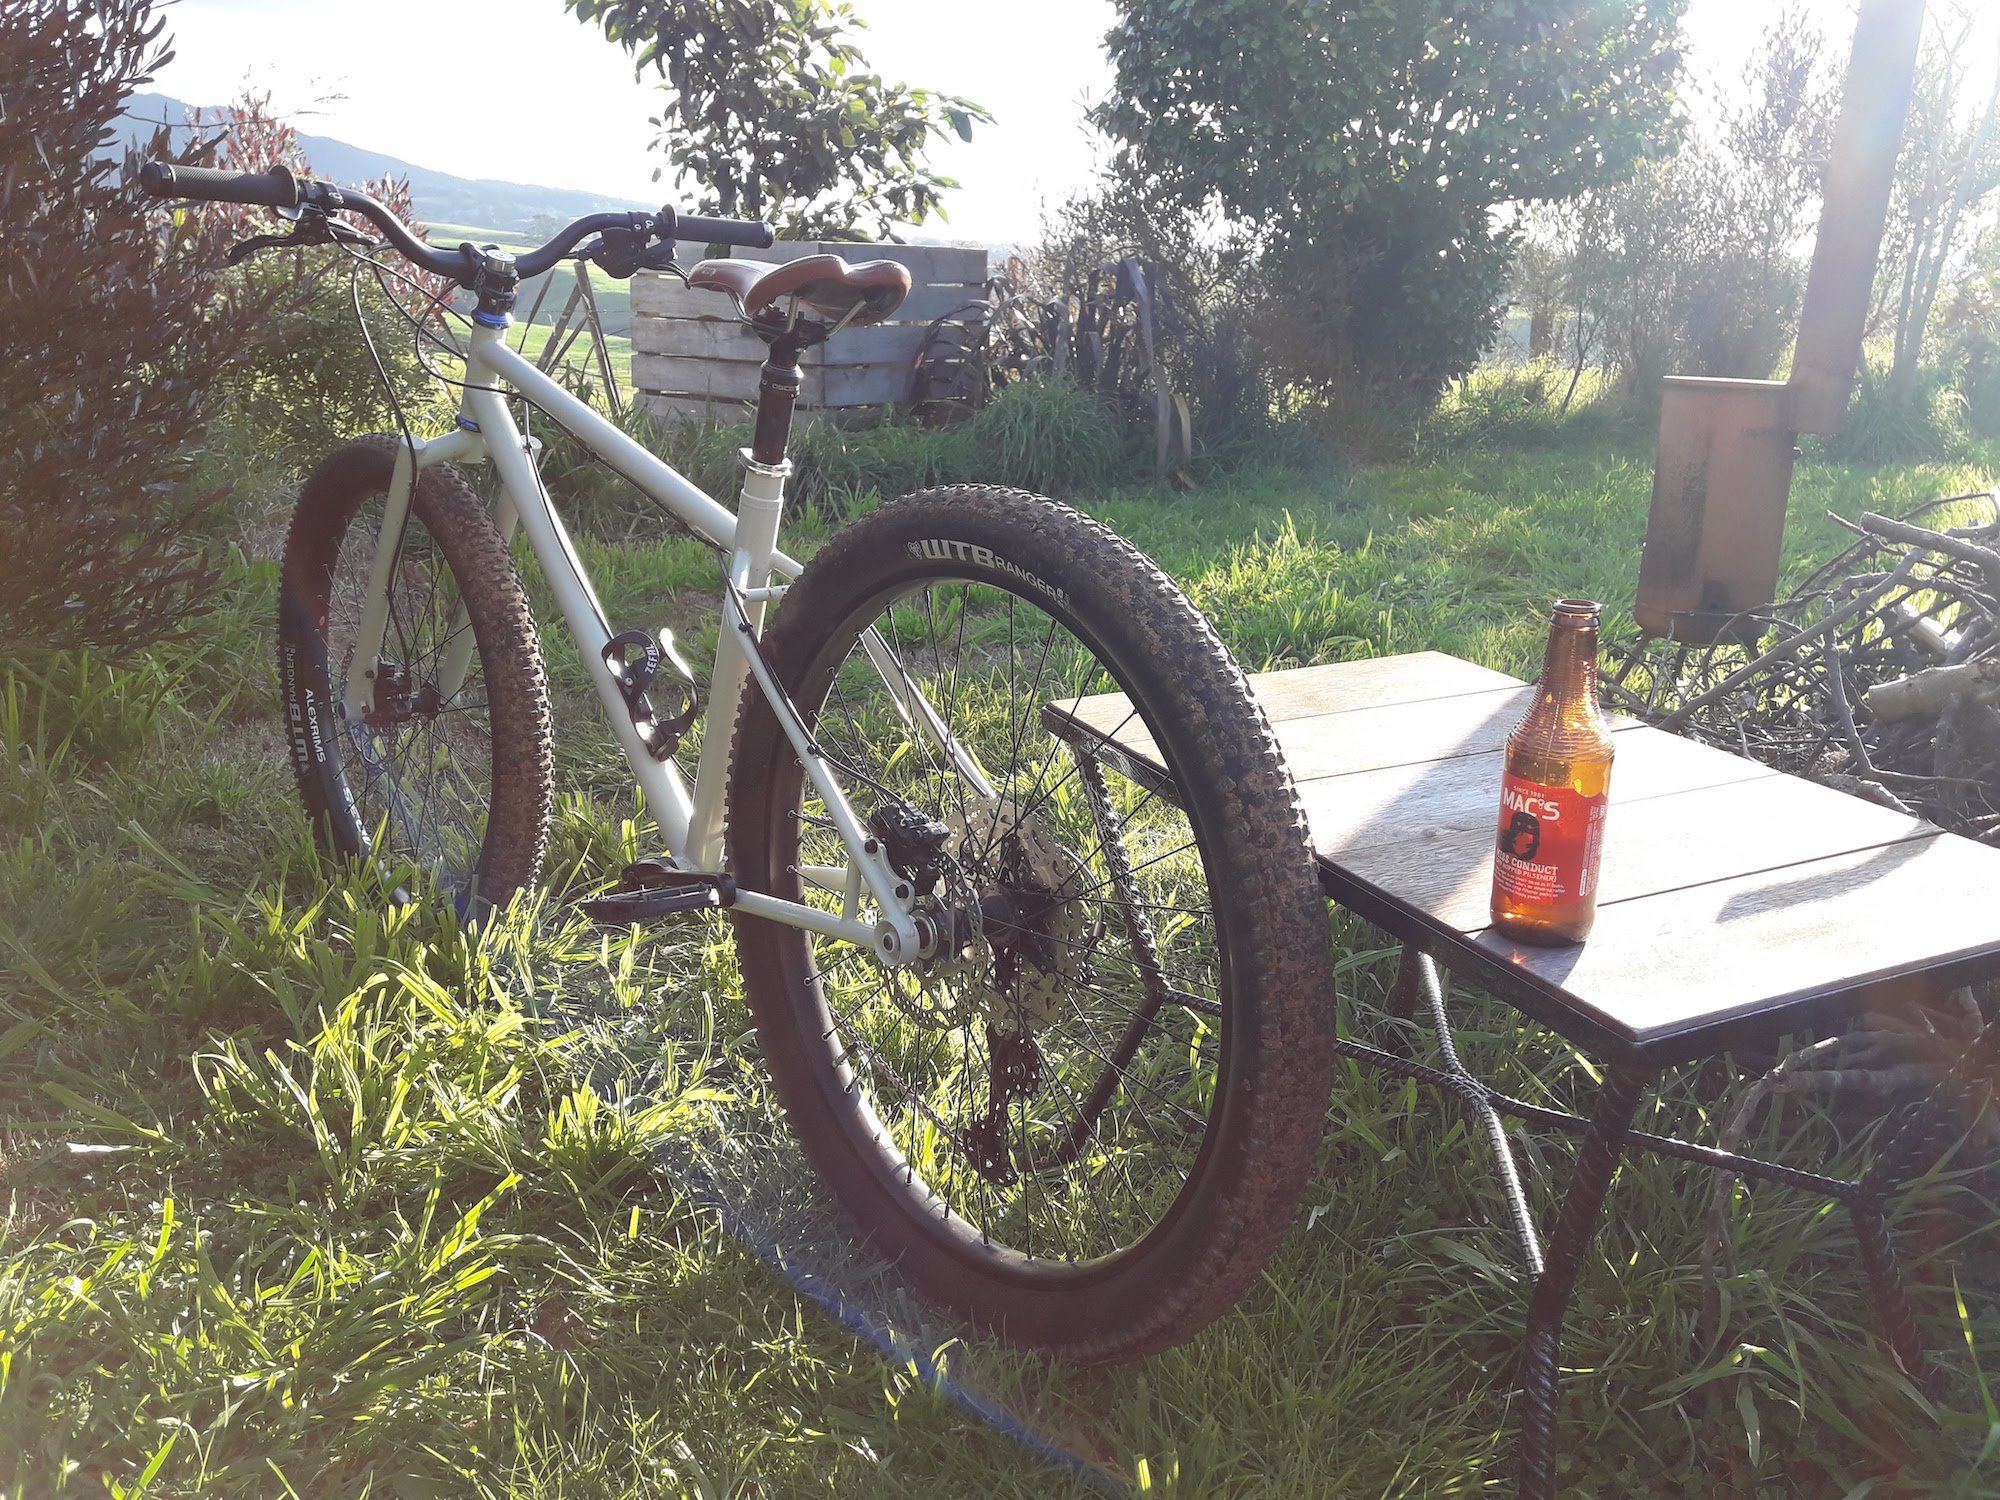
Anyways After this I went home for a beersie in the sun.
I am absolutely stoked on how well this bike rides. I made some odd design choices cause I don't see the point in making something that could just be bought off the shelf and I am really glad to see that they all came together to make a great ride.
Oh, and I measured the wheelbase again after the ride, it was the same. Woo, no bent forks!
-
20
-
3
-
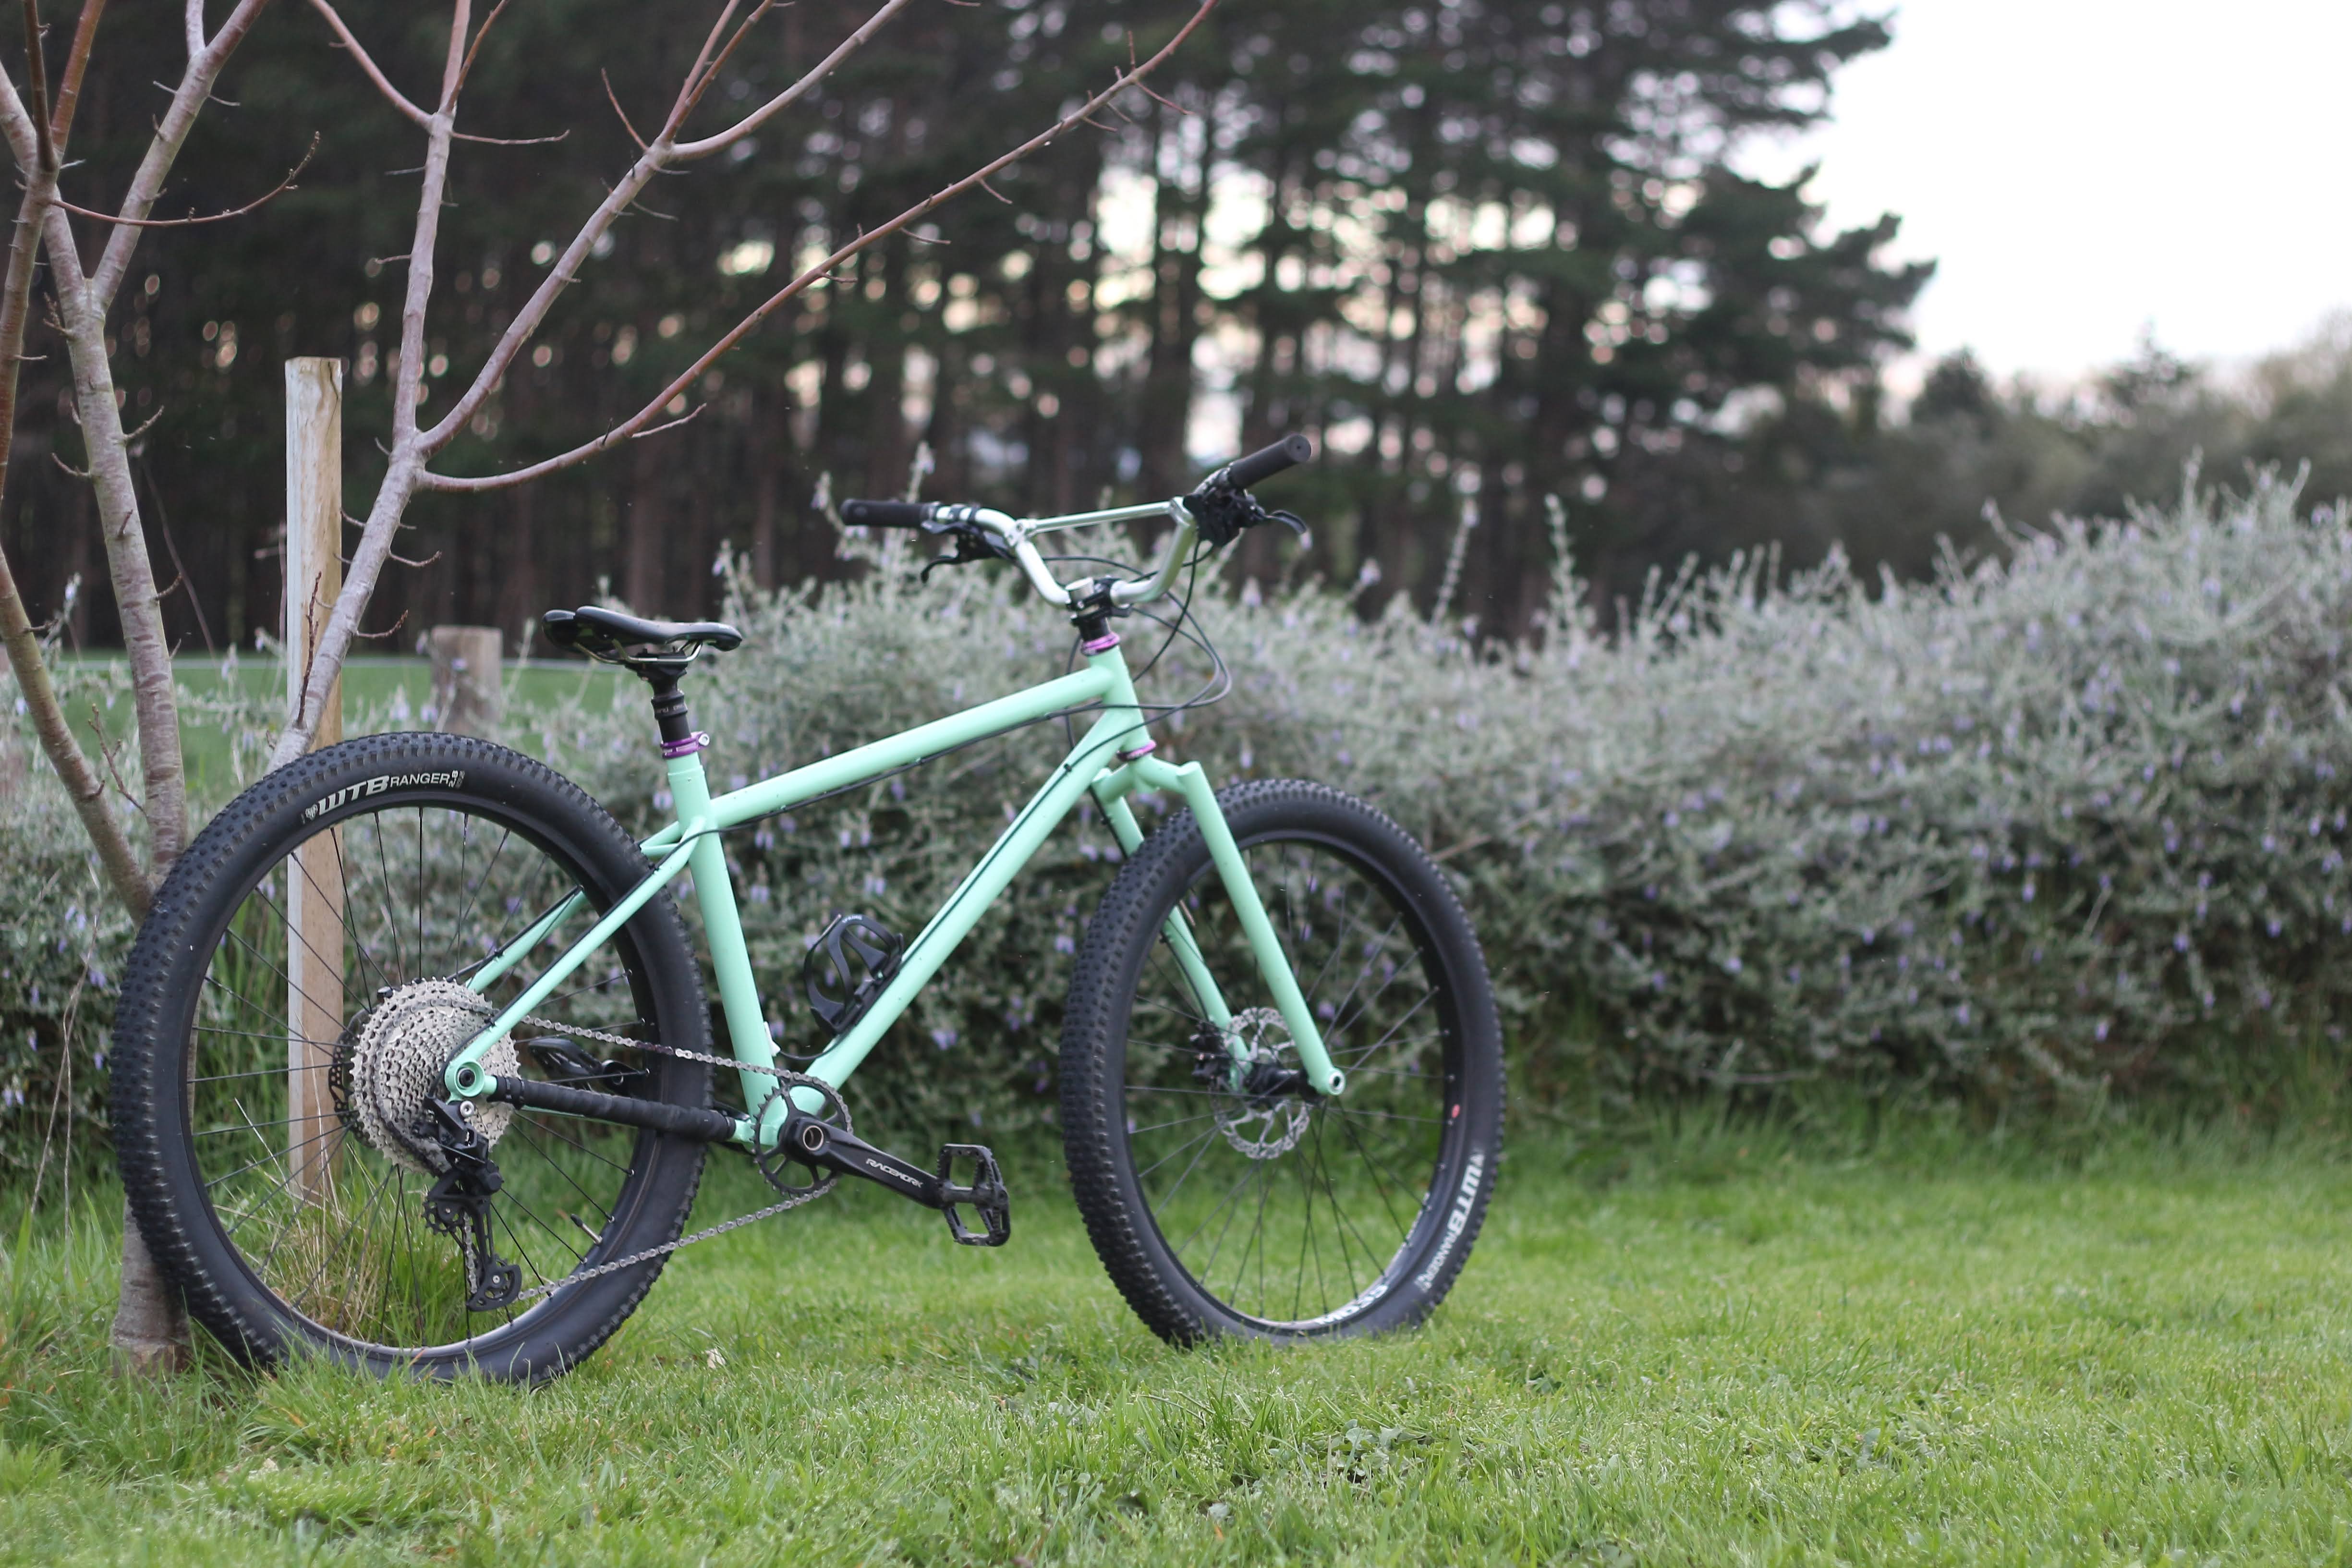
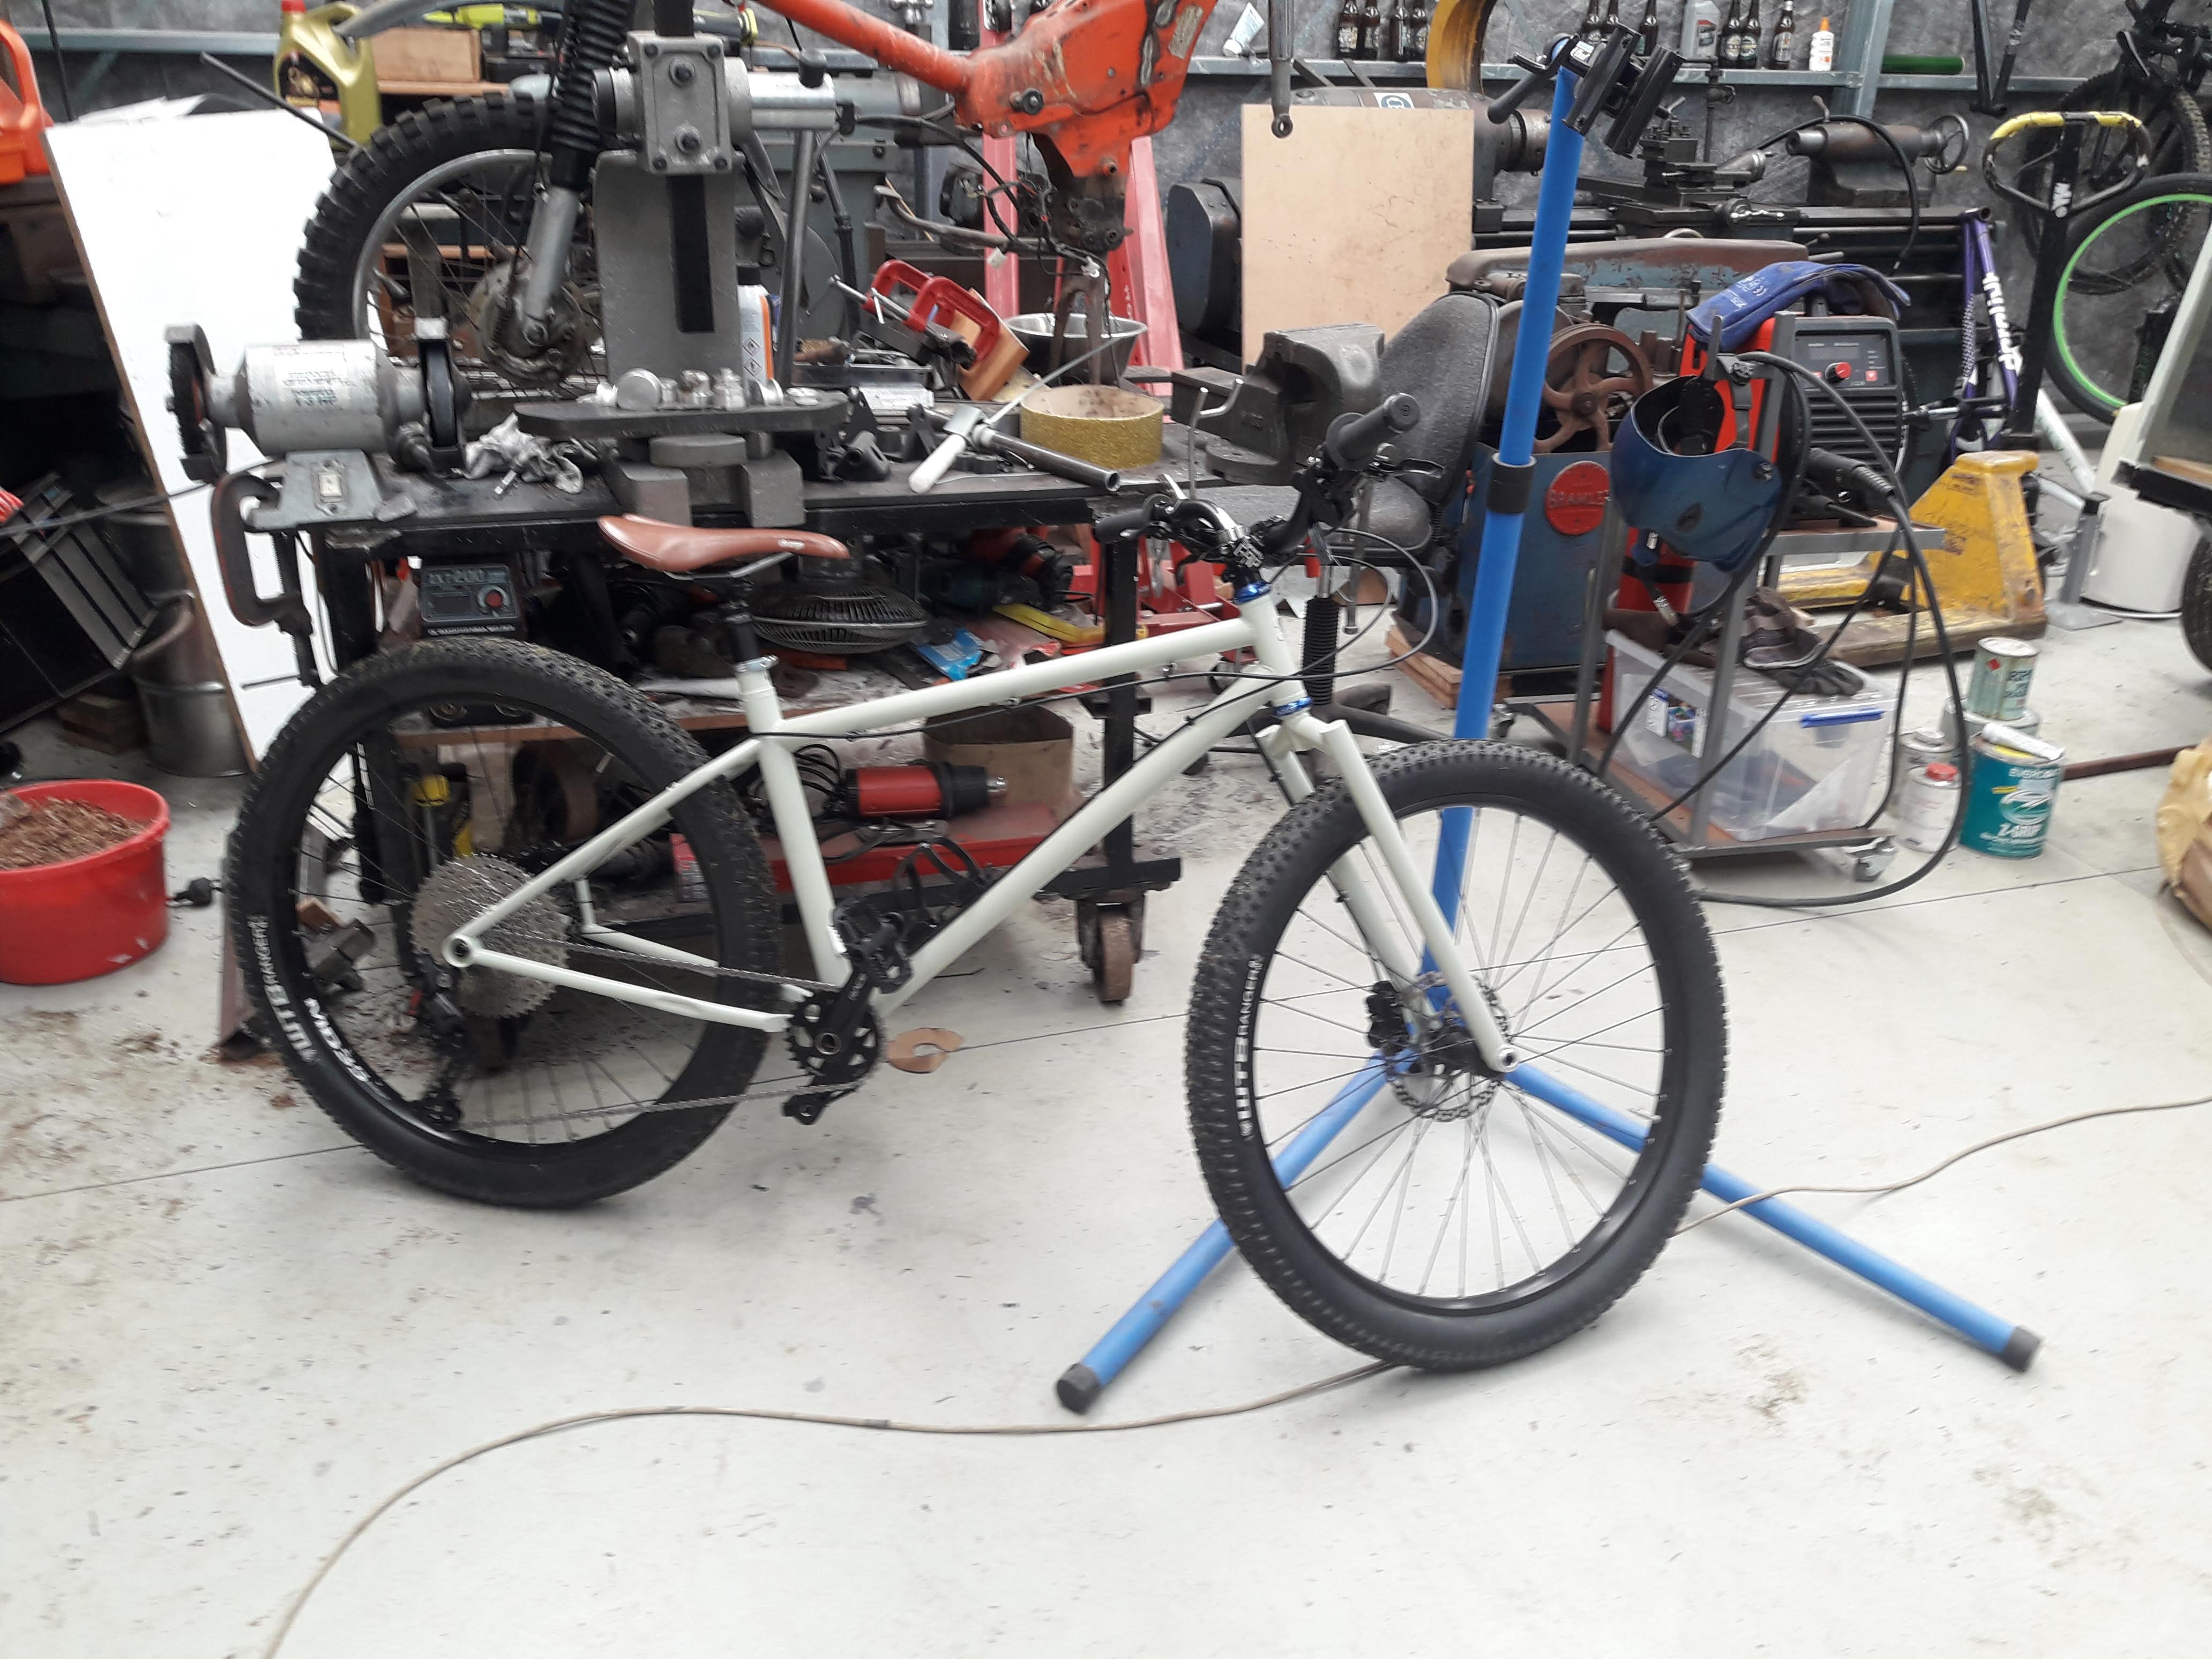
I put couple of coats of 2k primer on the frame (no colour coat yet) and after looking at it sitting in the corner of the lounge for the working week dreaming and pretending to ride it much to the amusement of @hampie, Friday came around. I don't work Fridays so I was free for the day, so I took stock of what I needed to get the bike all together and all that was left was a length of shift cable. So I made a click and collect order and popped down to Te Awamutu and came back and got everything all assembled.
Sorry pics are fuzzy, crappy cellphone life.
The drivetrain is a deore 11 speed, it's actually destined for a different bike but for now it can go on this one. There are some issues around shifting I think partially due to the B screw end point pawl on the hanger being too far to the rear of the bike. I have shortened it a bit since my first ride and it has improved a bit, I think I probably need to check the hanger alignment again as well. Also, there's a weird combination of boost standards with a 68mm bb shell so I think the chain line needs a bit of attention.
In the next exciting instalment: how does it ride?
-
6
-

.jpg.3f0d70b84fe642f7cf9e59212df93b2c.jpg)
.jpg.8c577ad49d40d8009c8cd552328451ce.jpg)
.jpg.86b32e059ec00cfb6b61110d14aeca92.jpg)
.jpg.1eaae9be6e76e6ec0fe558ed5ec3ef43.jpg)
.jpg.dfb8cec2f2a13068340c20832589fb51.jpg)

.jpg.2561aaf5e8ba115cdf280cc629db06e0.jpg)


Engine problems shit to start wont start when warm.
in General Bike Chat
Posted
Problem number 1 sounds like its too lean, problem number 2 sounds like its too rich. The mods would tend to make it run lean.
My normal way of dealing with mixture issues like this are to make it richer and see if it improves, but I'm a moderately sucky mechanic.