-
Posts
985 -
Joined
-
Last visited
Everything posted by shrike
-
That's a good tip, I used the galv pipe as it was what I had on hand and was more to practice my welding, fully agree its garbage lol. Might have to go get a map torch and some silver solder then will have to see where I can get a length of stainless/copper in 1.25" (32mm).
-
Appreciate the support, im not very good at some stuff but building the skills up. This is mainly getting it running and tidying it up as I go, somethings will get redone later on. Im also slowly rebuying tools, annoyed that I may have lost some gas though but ill sum it up as a learning experience. Also having a crack at pie cuts on galv pipe from Bunnings to do rad piping what was I thinking lol Will start to get more interesting when its running on one of the factory ecus I have for it as ill then swap to the teensy powered speeduino and see now that goes. Ive had to some questionable wiring repairs that ill sort properly once I know they work, im also limited until I get it registered on what I can do. Not after big power but the current turbo will go at some point, thinking a Steve Murch HRC something (35r maybe) but see what he says, need to get an hrc40rs for my nz track car as well. Considering getting a 3d printer as well, so if I can get my cad skills up might be able to make some things for it. Need to work out how to use a virtual dyno as im limited to road tuning untill I find a dyno to use (but thats all when its running haha)
-
Think my welding is slowly getting better (also seem to have almost chewed through a bottle of gas, might have a leak or left it on or something) remade the top pipe and the new one only have a couple of small pinhole leaks, ordered a 90 degree silicon join so may see if that works If I feel motivated ill pull the pipe out and go over it with the mig again, really need to get a bench grinder so I can sharpen the tig electrodes and give that ago 3" to 2.5" adapter has now arrived so can have a go at making the up pipe, might do the rest of the exhaust for practice first and do it with a new gas bottle if I run out Cranked it over the other night to start bleeding the power-steering fluid and to get some water through it, will put coolant in once I sort the top rad hose (will drain the water out tomorrow) wanted to let it sit with water in it to see if it had any other leaks. Waiting on fitting for the rad overflow, think I may have ordered the wrong size 1/4" is too big so ordered a 1/16" which is probably to small, will take the broken fitting into supercheap/repco/autobarn and see if I can get something similar over the weekend Will do a pic update this weekend, considering going to the wreckers tomorrow as well, partners birthday on sunday so this weekend has a little on
-
Not sure why im surprised but plumbed up the cooling system and Leaking drain plug (hoping its just the rubber washer) Snapped the expansion hose nipple off so need to replace that (will just get a brass one once I measure the hole) The 90 degree pie cut pipe leaks in multiple places so going to redo that :s may have to buy a metal cut off saw. Will also look at what off the shelf options I have Bottom hose seems to be ok and hold water but that's all off the shelf with some trimming This pipe seems to not leak though, its still not super pretty however Also my Autogauges arrived however they probably aren't going to fit with the din slot cover I have so may need to get something else or finally buy a 3d printer
-
So mucked around with the grinder and welder after work. Also yes my welding is terrible, this was done with my mig, probably shout have pulled the tig torch out but haven't sharpened the electrode Also its Galvanised pipe and I didn't get the angles super amazing or tolerances between the cuts perfect but it should work. Will redo it at some point once I get a metal cut of saw and have had more welding practice. Will clean the welds up and paint them black, pretty sure they are all sealed. My new gauges should be here this week. Things to do before I can start it Reattach steering column Powersteering fluid refill Coolant Wire up rad fan Finish repairs to the fuel pump wiring Petrol and bleed fuel lines Finish inter-cooler piping Build front pipe Finish exhaust Then before I drive it Headlights, Indicators, front bumper attach rear bumper better (maybe put the tow bar back on), carpet and put the rest of the interior back together
-
Had the 45 degree silicon bends arrive for the radiator, after some cutting down I now have a lower rad hose. just waiting on some tclamps to arrive (might get some temp ones from bunnings) Still need to do the top rad hose ( probably have to do some pie cuts) and then I can have coolant in the engine Then intercooler piping and exhaust to sort before I put some fuel in to give it a start
-
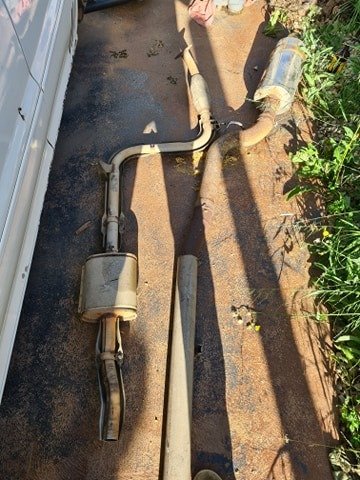
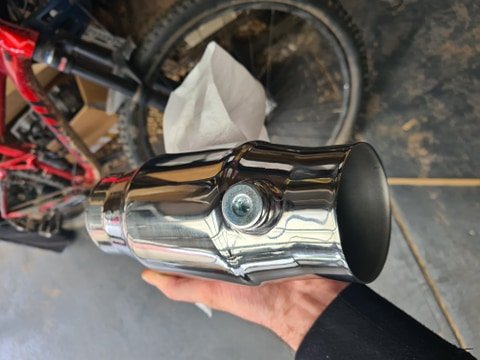
Did some more on the exhaust, still weld terribly, all miged (I have a tig torch but haven't bothered yet) Muffler is done will put some reflective heat shielding on the bumper as well My functional but ugly mounts Heaps of space from this mount to the tyre You will also see my attempt at pie cuts to get the angle for the exhaust right, doesn't leak so no F**ks given Will probably cut the angle back and get another straighter pipe in to join these two, I also have a little resonator so I may see if that fits there or at the other end of the pipe that is just hanging Having trouble finding space for the center muffler so going to have to think about how I mount it
-
So few things happened today Intercooler pipe kit arrived, so started to mock it up Ordered 2 more 45 degree silicon joiners, also going to get another 2 90degree joiners, also waiting on 1.75-2.5" connector for the turbo Ill need to cut the straight in half for both from pieces (need to check bumper clearance too ) need to buy a metal cutoff saw as I cant cut straight for shit with a grinder (see the exhaust post under this)
-
Transfer case is now full of fluid and so is the gearbox, went to drain the gearbox and it had nothing in it so hoping that its ok :s If anyones interested Penrite 85w140 800ml in the diff Castrol limited slip 90 500ml in the transfercase Castrol VMX 75w-85 2.2-2.4L in the gearbox We ordered a new carrier bearing for the propshaft and then realised its just the boot gone on the other side, so ordered one of them too Had to flip the muffler mount I made as I realized it was too close to the rear tyre, one more mount to weld on and the itll be in place. Will need to cut the back half of the exhaust off and redo it. Will try keep it looking as factory as I can, will also paint it black when im done Waiting on reducers for the front pipe before I can start that
-
Rear abs sensors bolted up Diff fluid changed Transfer case drained (bolts don't look the best) Propshaft in except the centre bearing looks questionable so ordered a new one, I also don't have the hanger mount bushings/bolts so will go to the wrecker this weekend and grab some off an outlander. Haven't tightened the bolts to the diff yet either. Will fill the Transfer case up tonight and might do the gearbox fluid as well. Ordered some 52mm guages direct from Autoguage so will see how long they take to arrive Boost, oil pressure, oil temp, water temp. I've got a dinslot cover with 52mm holes so will mount 3 there. And I've got two 52mm brackets ill put on the steering surround. Already have a wideband to go in once I sort the exhaust. Probably need to go out and get a metal cut-off saw as I am not the best at cutting a straight line with the grinder haha
-
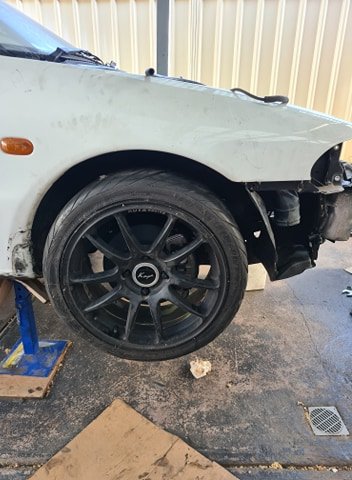
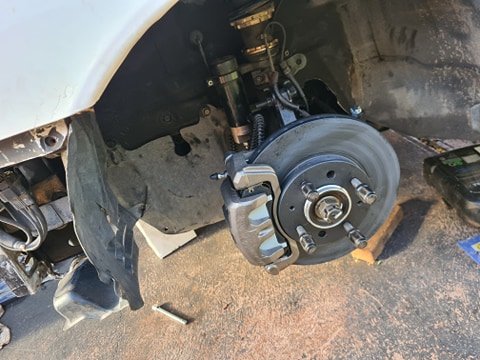
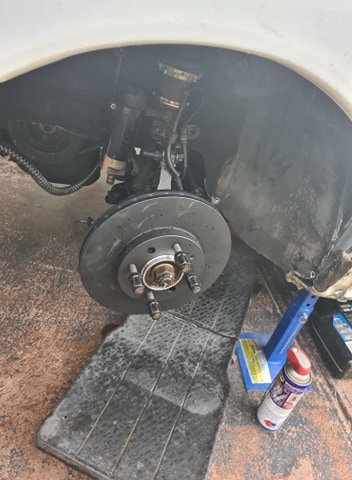
Really need to take some pics I have started to fit up the lancer wagon muffler, didn't fit at all but not surprised. Have cut off and then re welded one of the factory mounts. Cut the 2nd factory mount off and replaced it with a bended piece of rod from bunnings. Still got to either extend the last mount or replace it, then cut some more of the inlet pipe to the muffler and the pipe to the flange to get the angles I want. Also need more rubber exhaust hangers and to see how the rest of the exhaust fits up (need to put the prop-shaft in first) pretty sure itll need to be modded Still waiting on a 2.5-3" adapter and my 2.5" flange before I can start the front up pipe Going to get the 2" to bolt up to the front pipe in the same place as the 3" exhaust all going well, once I get it legal ill put the 3" back on and then start to change it to suit what I want. Probably a new rear muffler and an added center muffler to get it to a more reasonable noise level Front splash guards back on, also managed to get the lower ones from pickapart, need to finish mounting and put the wheel on (the front calipers I got from rock auto) Other side done with the new center cap on So much room for brake activities (need to get the ap racing ones back on) New wiper blades (windscreen needs a clean) Mounted the resistor pack for the injectors on a bracket I got for the emissions from pickapart as no idea where the factory evo one goes Got some new return line that I need to hook up-to the hard line (will prime the fuel lines first however)
-
So quick update, spent 3 hours and a 2hour round trip last Saturday to get some parts Grabbed fuel lines out of a CC lancer wagon, they aren't identical but with some gentle bending and some new fuel hose I have all the fuel lines in with the fuel tank, just need to hook the return from the engine to the hard-line and its all done. Managed to keep the diff in (lowered the rear sub-frame) and get the fuel tank in Need to bolt the rear abs sensor cables in but otherwise they are hooked up Bled all the brakes, rear passenger side took ages Clutch clevis and pin are all in with the clutch all bled, might need to adjust the rod to the master cylinder once I get it running but feels good so far Have also put a charcoal canister in from the lancer, will have to play with the vac lines and solenoids I have. Not sure if I am keen on having one between the fuel reg and intake manifold :s Also got one for the Turbo but I may not hook that up at this stage (need to get a t piece anyway. Will take pics later Need to put the steering column back in, the passenger side inner guard liner and front passenger wheel (with center cap), put the rear wheels back on Gearbox, diff and transfer case fluid replacement. Prop-shaft between the diff and transfer case. Exhaust (I grabbed the 2" one of f the lancer wagon that ill modify for now) Front up pipe and cat Inter-cooler piping Radiator piping Front lights, bumper etc Finish the rust repairs in the back and paint Fuel (prime the fuel lines), Coolant Then I think I can start it, bled the cooling system, put a permit on it and take it up the road for a proper wheel alignment as the one it has atm I eyeballed :p it may also need the suspension raising as well Might need smaller rims/new tyres for a rwc as well but will see what the tester says, still need to put all the interior (Carpet) back in as well Getting some progress
-
So in the bung on the cat before it goes through the cat material? I can add another bung before the flexi or further up the pipe if need be, its a 200 cell cat so hopefully not to much restriction
-
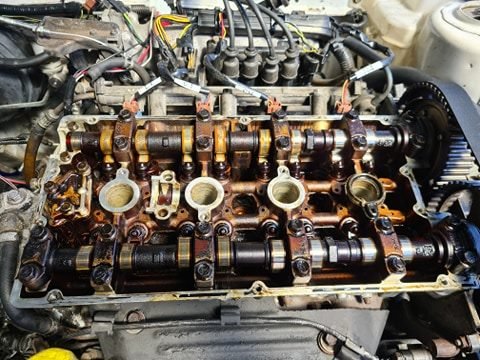
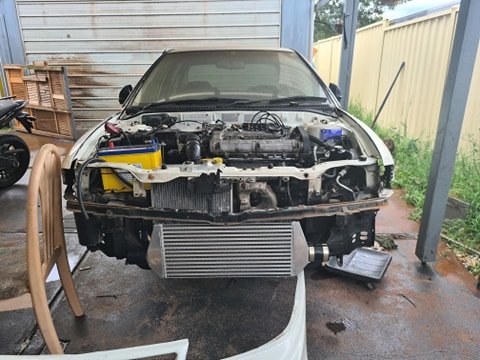
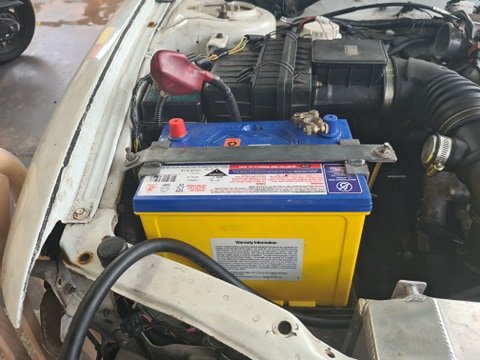
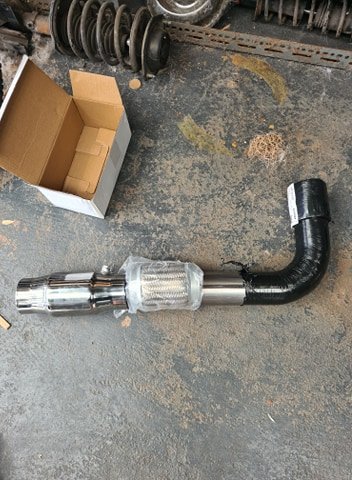
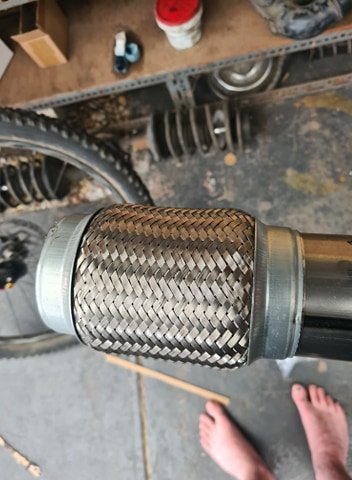
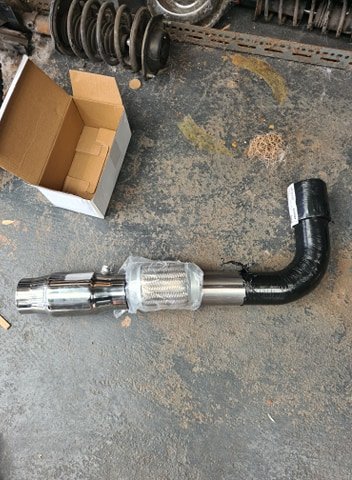
Few updates, will do more after the weekend Installed the Evo Cas I had, head looks a little varnished :s also need to get a new cam cover gasket but that's a job for another day also need to glue the cambelt cover back together (also going to order a new one) New inter-cooler turned up its a 530x233x70mm and fits fine with a Lancer rad support, still not sure if evos don't have a support bar there or not (ive got the cut-down ones to use later if I want) just waiting on a piping kit to turn up for it, should do fine with factory TD04HL power Battery mount all done and installed, need to check bonnet clearance however Front brake rotors on, Tie rods on (need to tighten the inner nuts) all ready for calipers when I get the bolts Exhaust gear is slowly arriving, waiting on flanges to arrive before I start mocking it up 200 Cell 3" cat will probably put a 3" flange on the opposite side to the O2 bung 3" flexi to help prevent cracking of my dodgy welds :p (ignore the feet) Probably do something similar to the below config, will shorten the 90 degree pipe to suit, will have a 2.5" to 3" adapter at the top to suit the factory turbo dump pipe So will weld the flexi to the cat and the exhaust pipe, have a 3" tri flange on the cat and that will bolt upto my 3" exhaust, I also may get a factory 2" lancer exhaust and put a 2-3" adapter on the end so I can get RWC but will see how I go Need to order some silicon joiners and alloy pipe to make the radiator pipes Not sure if I mentioned but I sprayed some start ya bastard down the throttle the other day and it wanted to start when cranking so thats a good sign Pretty sure it just needs fuel to go, coil has power, injectors have power, MPI seems to be working, can get power to fuel pump when cranking Once I get it going with the cas thats in it ill see if I can get it going with the other two sensors, also need to see if I can get it running on the Teensy powered Speeduino I have
-
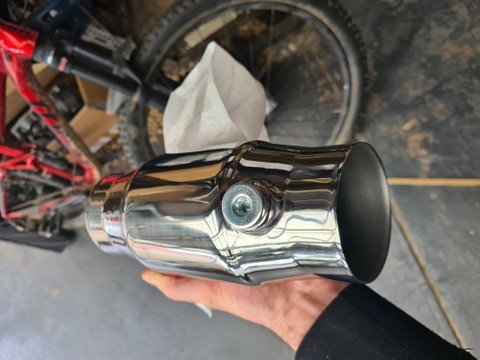
Anyone know if putting a wide-band just before the cat will be an issue? trying to keep the factory O2 in the dump pipe at this stage Something like this, will be shortening the 90 degree pipe however
-
Hey guys been years since ive played with fibre glass, keen to extend part of my fibreglass front bumper so it mounts to the support bar and also help alittle with guiding airflow airflow Will post some pics tomorrow, thinking ill make a cardboard template in the shape I want and then just fibreglass over that? Open to better ideas
-
Quick update Replaced the low pressure power-steering return hose (brought a roll of the stuff as I couldn't get a short amount) so I can now replace the power-steering fluid when I get some Motivated to do some more welding after seeing updates of the FC on @rotorhoe instagram and the rust repairs. I brought a tig torch for my Unimig 185 only to discover it didn't fit so will go return it tomorrow. So I had a go at making a battery clamp as the one I have doesn't fit the battery, still need to clean it up, drill some holes and paint it but itll do the job Welds are pretty shit but they are solid, worked out I can mig poorly if I actually use the recommended settings for the material I am welding Due to being encouraged by the above attempt I finished welding up the boot holes, upped the amps and wire speed to match the settings my welder recommended for the thickness of the boot and had greater success. No pics as I need to clean it up with the die grinder and a file first Realized part of the reason I was blowing holes was due to not getting enough wire in to fill up the hole (was using the lowest power setting and the lowest wire setting previously) Still need more practice, I'll be welding base plates to fence posts in the next few weeks so should give me some more time on the welder, hoping Ill be able to do an ok job on the front pipe of the exhaust when the parts arrive
-
Had another 30mins under the car, if I barely thread in the bolts on the rear gearbox mount and tilt the engine forward with the jack etc I can just get it all to line up Missing a few bolts so will have to wait until I can go to the wreckers to do much more (hopefully on the 15th) and then once I get every thing in place I can start tightening it all up
-
So tidied up some more wiring today, also give it another crank and it spins over all good. Still unsure if ill use the Evo Cas or keep with the RVR setup (guess it depends what I can get to work) cant hook up fuel till I get fuel lines, and I need to test if its sparking. Ordered a whole heap of silicon joiners and the parts to start making a front pipe, the exhaust I have for it needs to have a center muffler added and maybe a resonator but will sort those out later. Exhaust 2.5" flanges 2.5" to 3" 3" 90 degree 3" by 6" flex joint 3" 200 cell cat (with 02 bung) 3" triangle flanges Might need some more straight pipe or a 45 but will work it out once I do the first bit Intake 2.75" T clamp 2" T clamp 2.5" T clamps 2.75" to 2.5" straight 2.75" to 2.5" 90 degree 2" to 2.5" straight x 2 Will start mapping out what inter-cooler piping I need Inter-cooler I have won't fit with a factory Lancer bumper support so may need to look at another option
-
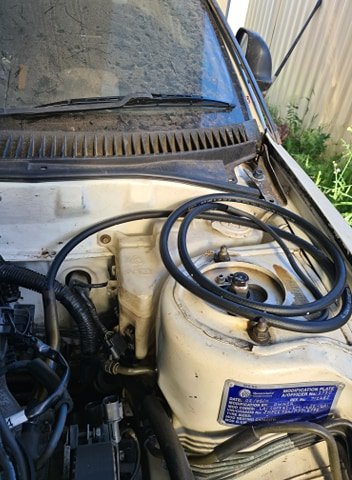
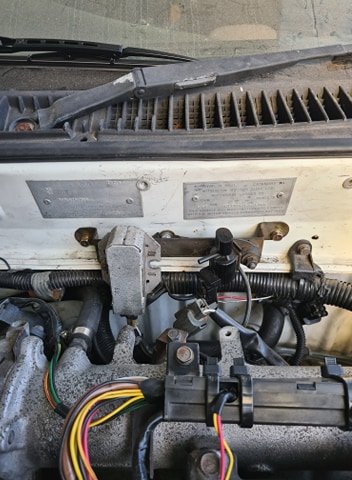
So started doing some wiring Plugged every thing in that I could, removed the plastic injector cover and some tape so that I could get wires to go where I needed (ill re tape/sleeve and put the cover back on once everything works) Went looking for the starter motor wire which had been cut and was a fair way up the loom, grabbed the cable off the dodgy loom that came with the aftermarket ecu, temp join to make sure it worked. Managed to get the car to crank on the 2nd try, first try hadn't grounded the starter properly and it just clicked. Which lead me to pull it out and manually test it. Loom was also missing the reverse light plug, stole a knock sensor plug off the spare auto 1.8 GLXI lancer engine loom I have and wired that in, again just temp to make sure they worked, will get some proper connectors to join them later on Seemed to work fine when I put the car in reverse ( I also put the selectors and clips onto the gearbox cables so can change gear etc missing a few split pins that I need to buy) need to replace the drive-train fluids though Not sure what this plug is for (suspect its for aircon) its next to the washer bottle, need to do some research Also no idea what this one is for it comes off next to the reverse switch
-
Ok few more updates Got the front coil-overs back in, replaced the last boot on the inner front right cv and put both cvs back in. Not sure if I put the abs sensor wires back in properly so need to check that Went to put the tie rod ends on and seems I have been sent the wrong ones Messaged the seller on ebay so hoping I can get a refund, have ordered another set from another supplier The evo loom I brought from NZ that was meant to be uncut has a few minor issues, the spare RVR loom I got with 3 factory ecus is going to be a lot of effort to get to work and as my evo loom has already been cut I will repair/mod that. Have a new Cas plug to go on as the cas plug is broken but I may just rewire it to run the RVR 2G style crank and cam sensor on the other side of the engine. I have an evo cas but not sure I want to take the rocker cover off at this stage.
-
Once I get it all running and rwc/rego ill be building a 4G69 Bottom end for it to swap the head onto (or getting another head/motor) so will clean it up properly before it goes on the new motor Thought the Diesel oil would be ok and hopefully it cleans the engine abit, was going to run 10w40 but 15w40 should be fine for now
-
No oil showing on the dipstick however this is what came out of it So sweet f**k all, will put some Diesel oil in it for now (put the whole 5L as ill see if any leaks out) turned it over by hand and engine turns over and feels like it has compression so all good Also dropped the front CVs and a set of evo 4 abs rings to my fab guy hes going to heat the rings/freeze the cv stub axles to get them on, he may need to take some material of the rings ID as well Evo 4 abs rings 43 teeth(Reluctors) are 65.95mm ID and my cv joints are about 67mm OD im using RVR axles/cvs and the model RVR it come from didnt have abs. I could get the next gen RVR (1997-2003)cvs with abs rings as they are the same measurements but trying to keep with the parts I currently have as they are in ok condition Need to replace one inner boot when they come back and then I can reinstall
-
So as posted in the spam thread How dodgy is using Diesel oil in a 4g63t? Currently has no oil in it, unsure if its leaked out or if my mate took it out. Don't want to put good oil in it until I go to run it but not sure if I want it to have nothing in it/want to see if I can find the leak. Looks pretty clean in the head through the oil cap other then the varnish Also have some Oil came with the house lol Heard diesel oil just has more detergent so might help clean any shit out Plan is to run 10w40 in it when I get it running.
-
Surely someone has a broken C series box that can have the diff be donated to the cause and get locked :p actually wonder if any pickapart has a box I've only got E series boxes these days


.thumb.jpg.98dc314f1c909235f7349ba9a48e2a66.jpg)


