mikey
-
Posts
552 -
Joined
-
Last visited
Everything posted by mikey
-
100% Would certainly bug me if it was my car!
-
Yeah.... you're right. Damn it. My friend has decided to cut it out and do it properly. SIGH Thanks guys
-
I like your sage advice Cletus P.S You really know your Broncos!
-
I'll steer clear of POR15 I think and stick to epoxy.
-
Hi Internet frens. I have a pal who's respraying a Ford Bronco. He's fixed all the rust in the floors, sills & pillars etc, and will do a tidy job on the respray. There's no rust in the car left, but while investigating the scuttle panel found some rust which needs repairing. But he cbf. 1. Is it possible to seal this with epoxy primer, seam-sealer & urethane and have it last for 15 years? 2. Is it morally okay in the eyes of the car gods, to draw the line here, decide not to remove the engine, drill out the multiple layers of rusted scuttle panel and spend many days fixing it properly? His thinking is, he didn't get into this to do a restoration, just wants a nice tidy Bronco. This job doesn't _have_ to be solved now, it could be solved in the future when someone can be fucked doing a proper resto on it. I agree with him. Thoughts? Any good product recommendations? This is it after phosphoric acid:
-
One. Two. Miss a few. 99. Paint! Came out good enough. Satin black for the pillars. PPG 2K epoxy primer, seam sealed & Deltron single stage. The previous repairs stand out quite a bit. There's a bit of dust in these photos from removing the masking.
- 4 replies
-
- 28
-

-
I had a poke around at the passenger B-pillar. Yikes! These are the last bad bits of rust done. I had a peek under the car and was amazed at how mint it all was, seems like most of the rust was caused by wet carpets and the rest of the body is good. I'm not totally chuffed with that b-pillar repair, it's solid, but could be tidier. The rest I'm happy with.
- 4 replies
-
- 18
-
-
Did some CAD. Happy days! This gap looks quite big, but it pulled away when I cut this panel, so attempting to put in the same gap.
- 4 replies
-
- 16
-
-
I love a build thread full of rust repairs, so satisfying. But not something I want to spend my weekend doing... Oh well... I attacked what I thought was the worst. Years of wet carpet has caused this. The sill was sweet inside, lots of wax in there. I removed the rear seats to find this.... Eeeeep. At least the bottom of the tailgate is mint. The top is fucko'd... It really could be better / worse
- 4 replies
-
- 21
-
-
Oh true! I'll have a bit more of think about what could be useful. Most the stuff on my list so far is cosmetic and I don't think interchangeable with the D1: Range Rover Classic Front Air Intake Grille Assembly Black 390607 Range Rover Classic Door Upper / Rear Headlining Speaker Cover All Colors PRC8552RUN / PRC7444RUN Range Rover Classic Replacement Auto Gearbox Decal Sticker Range Rover Interior Fusebox Cover All Color BTR3486RUN Range Rover Classic Exterior Rear D pillar trim panel left or right RTC6698 Or RTC6699 (Air vent extractor) Door lock bezel Drivers door hinge Front grille Upper Tailgate Struts MXC7833 For Range Rover Classic Front turn lights Front Bumper Bumper End Cap Genuine Air Dam Spoiler Dome Light Lens PRC1634, Clear Transfer case shift knob
-
Yeah I love it more than I thought I would! It's probably getting close to rusted thru the sills around the B pillar, so that definitely needs to be cut out. Then there's surface rust in the boot corners. Hopefully when I start pulling it apart I don't find too much more, but I probably will.
-
I just bought this. It's got "some rust", but it's not terrible ... I think. Pretty much every interior panel is broken and most switches don't work. It's lovely to drive, even thou it's a bit knackered it still feels fancy. My plans are to sort the rust out, DIY respray, fix all the broken things and enjoy it. Discuss here
- 4 replies
-
- 30
-
-
Hi Project thread
-
Perfect! Amazing. Thanks @GregT I'll order one now
-
Oh thanks @GregT they seem super simple. I'll definitely follow that up, some of the poor performance is down to the timing variations. Just need to work out which model will work best.
-
Hey @Reid I've had two DVR2s, the first one I cooked somehow. It was my fault but can't exactly remember what I did, some sort of short. The second one has been mint, no problems and so much better that the OEM setup. The Dynastart itself has been a bit of a pain, i've pulled it apart and replaced bushes a few times. Main issue is getting any oil in there will quickly screw it up. I'd love to have found an electronic ignition for it but never worked out what I could use there as they all seem to be CDI style, rather than run off the battery. So I'm just running points, which seem fine. The biggest problem with the bike is it's so gutless it struggles up some hills, would be interested to see if yours runs better.
-
Rust aye? Am I right?! I found this little bubble of rust making party on the firewall next to the fuel reg. Awww noes The bit betwixt the firewall and this heater duct was chock full of factory seam sealer, it's pretty tricky to get to, so fair enough I guess. But all that seam sealer trapped water, leaves etc. So I cut it out and made a new duct by beating the living bejeezers out of it around some wood. Welded some more bits to it Removed all the old seam sealer & rust along the length of the scuttle. Welded and ground in the new duct. Seam sealed and painted. So lovely.
- 78 replies
-
- 53
-
-
Congrats man! Epic work
-
Got some new axles made by Gearcutting Services and she's all go.

- 78 replies
-
- 27
-
-
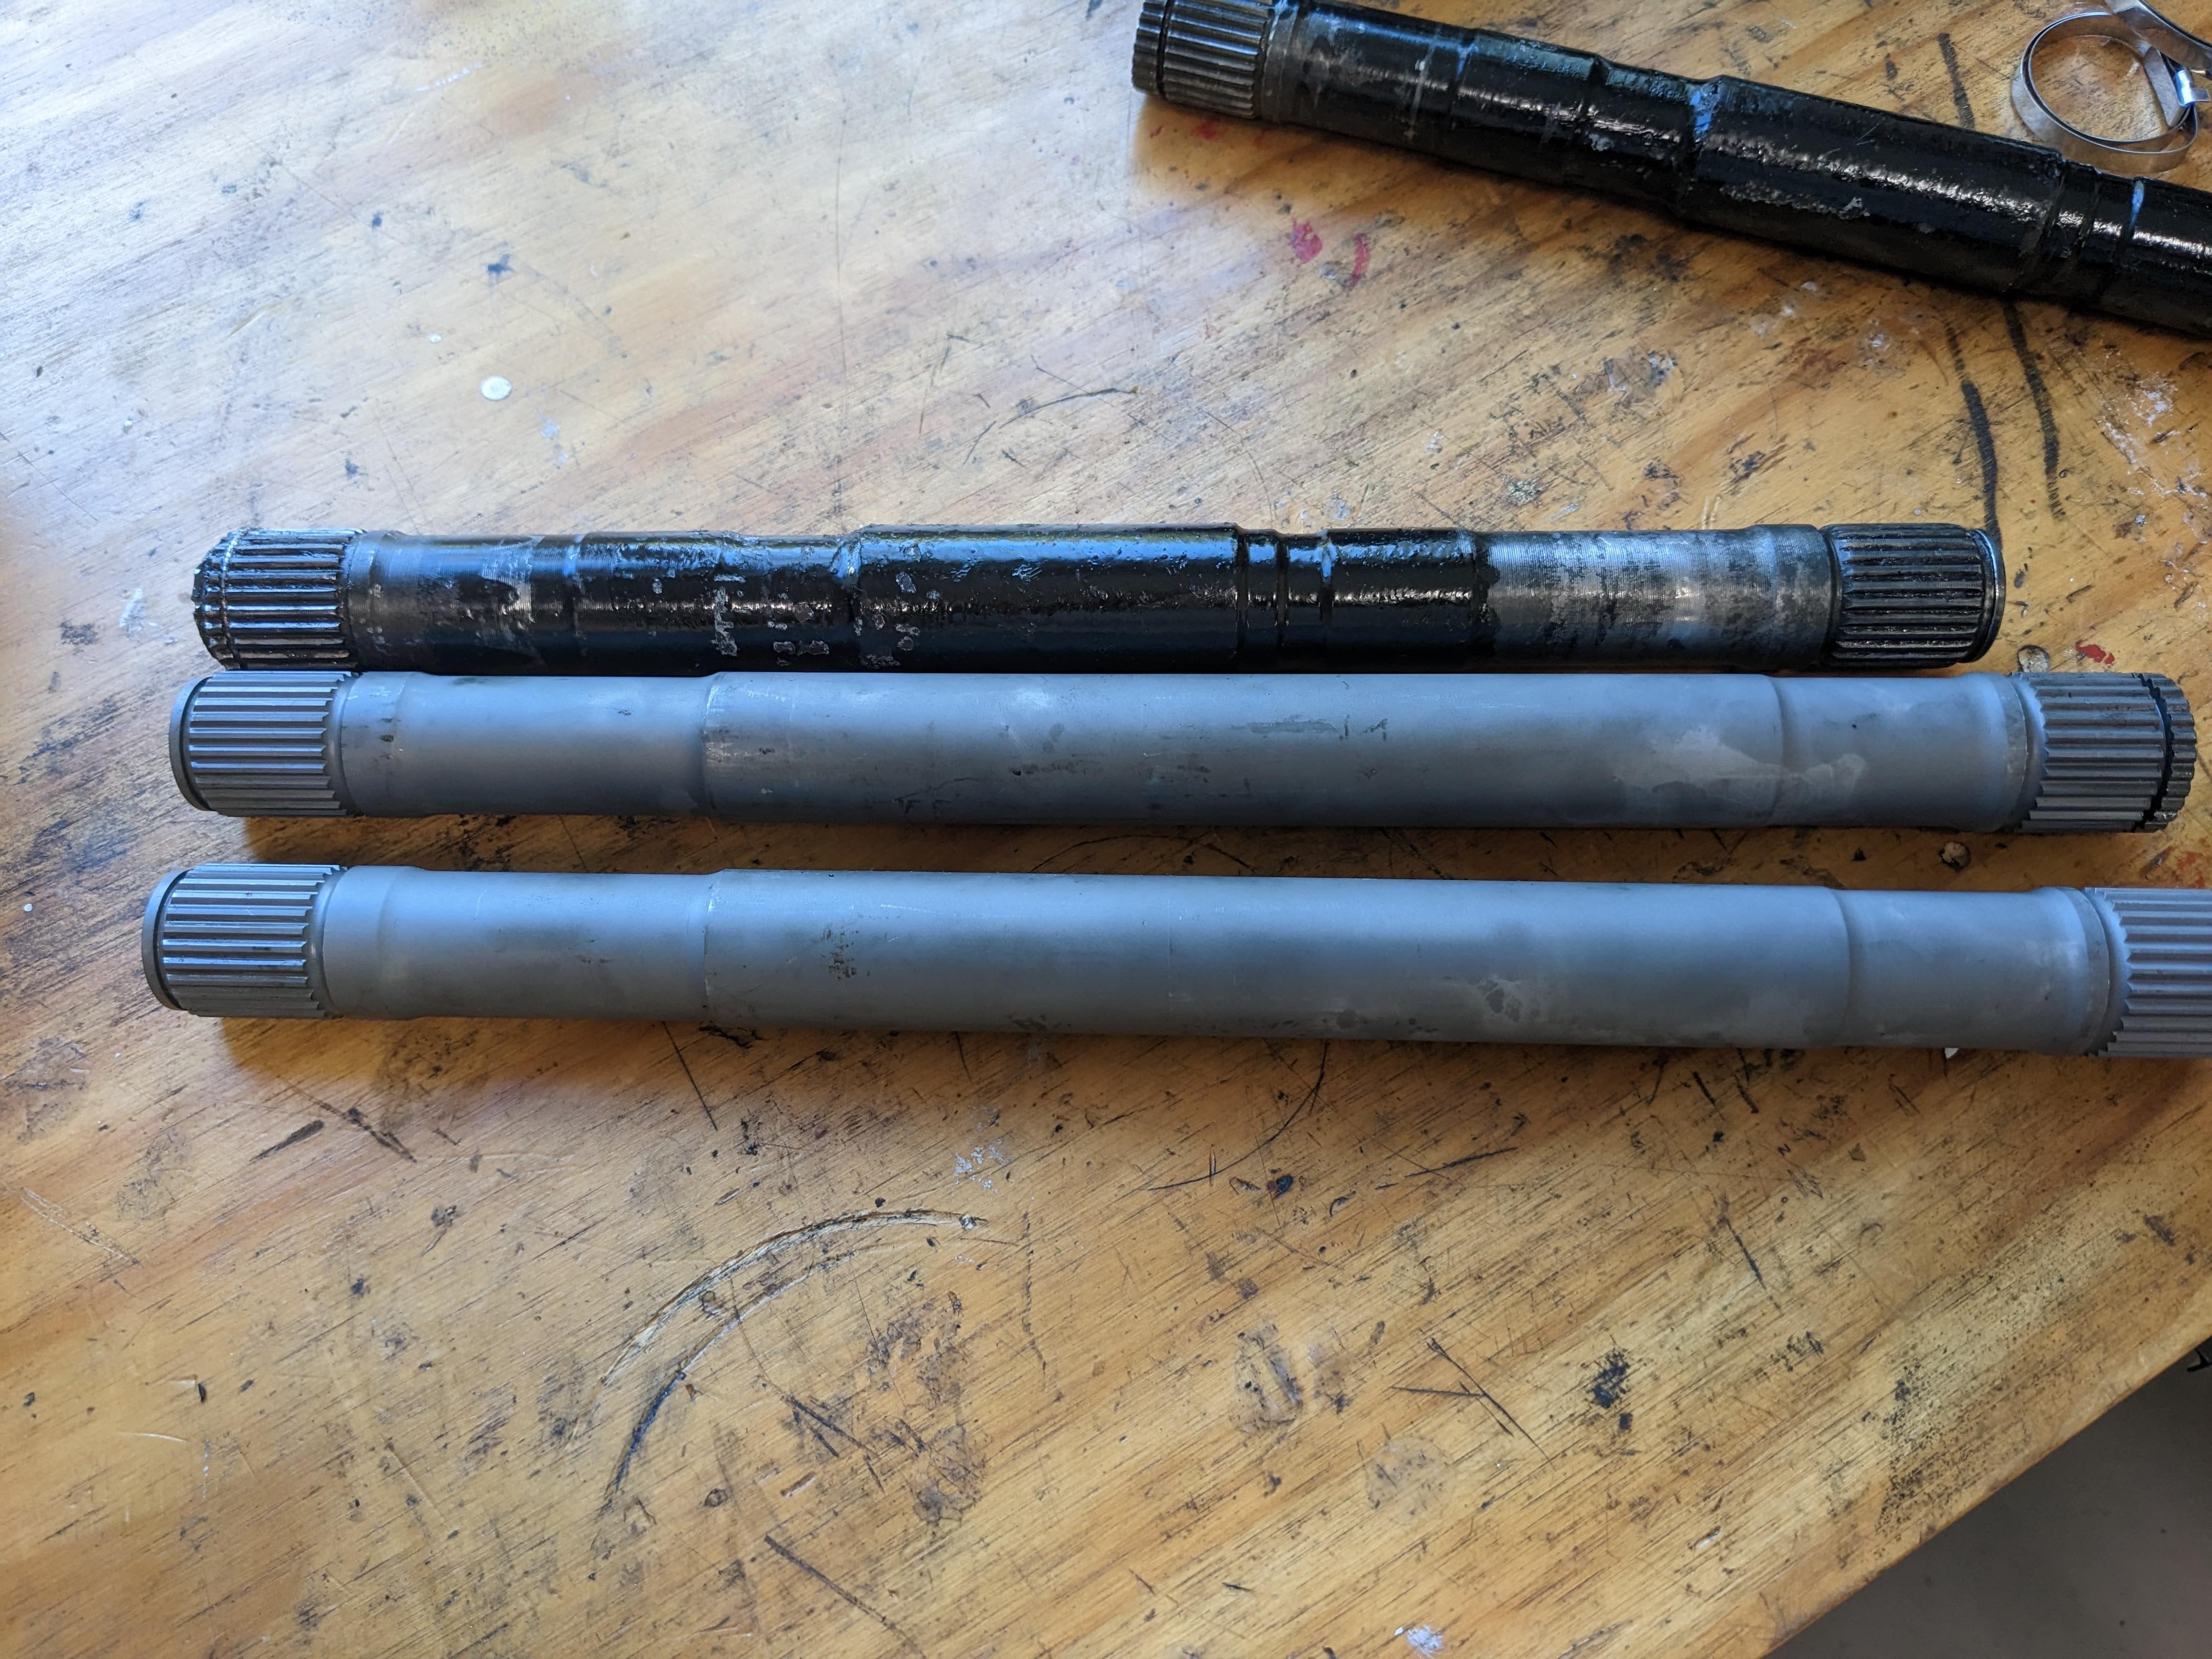
I've had a tiny amount of play in my rear wheel bearings so decided to rebuild my whole rear-end New CVs, bearings, aftermarket stub axles & companion flanges to take a 108mm CV. Old vs new stub axles. They have a larger splined diameter and are beefier at the wheel flange. This now shifts the weakest point in the driveline to my r180 diff, but it should be good enough for my engine. I also replaced all diff seals & o-rings so hopefully it stops leaving little puddles on the floor now. I couldn't get a micrometer inside the hubs to confirm, but I've assumed the play was from the bearing spacers getting overtightened and mushrooming slightly. So I cut some 0.05mm shims and torqued the hubs up and things feel right now. The left hub required two shims. Everything seems to measure up correctly and there's no play anymore. Rad! However. At this point I realised I have a problem. Since my new companion flange accepts a 108mm CV directly, I no longer need to run the CV adapter plate I used to use. This means my axles are now 25mm too short. FML. Cars aye!
- 78 replies
-
- 35
-
-
Simples!
-
Never mind, I used my neighbours press. Thanks guys.
-
Anyone near Mount Eden able to lend me 5 mins of your press? Don't make me resort to whacking them on
-
Good ideas guys. After flicking thru that Muff thread, I'm guessing the advice is stick to 3"? If so I could possibly keep my current muffler and just try a two-into-one in the tunnel. If no good upgrade the final muffler. Starting to sound like a plan
-
Yeah, just been going through their catalogue. They look pretty good. I'm just not sure if I should have a resonator in the tunnel or a muffler. I'm fine if the car is pretty quiet, so am leaning towards a proper muffler. But not if that'll mean it's "drone-y"?