


azzurro
-
Posts
2744 -
Joined
-
Last visited
-
Days Won
3
Posts posted by azzurro
-
-
Agreed, if its outside, rain isn't something it needs protection from.
Far better to wash, and if possible, drive it regularly than put a cover on it.
Ideally dont park it on grass or under a tree.
-
 1
1
-
-
-
3 hours ago, Sunbeam said:
Got a call from the engine shop, bore wear is 6 thou which is the trigger for a rebore. New pistons on the way$$$$$!
can you even find genuine oversize 1608 pistons? I guess thats why they are spendy
May be worth exploring other more common alternatives, i think there are much more common Mazda and Honda piston alternatives with very similar dimensions and details that have been used commonly before - the pistons in my 1500cc van engine for eg whcih have the same bore and dims (will have to check my notes for the details).
that should save you a few bucks to spend on underfloor neons, 22's and some mad ICE
-
1
-
-
Yeah, i was pretty worried it was going to be terminal, but glad to figure out it was just an assembly error.
I managed to convince my chief pedal pumper that i didnt make the van squirt brake fluid on her on purpose and definitely, under no circumstances, never ever, will that happen again*.
*on porpoise
So yeah, shes a goodun XOXO
-
3
-
-
- Popular Post
- Popular Post
Adding brake fluid went ok, only had to remake 1 flare.
Got the mrs to work the pedal we started bleeding ok front went great, but couldnt get any pressure in the rear circuit then noticed the rear reservoir was overflowing and the front was low even tho we aren't bleeding that circuit. Any leaks? No. Weird.
Drained a bit off and left the top off this time and tried again, still not really clamping the rear brakes i told the pedal master to give it a good push and it squirted the boss lady and her favourite t-shirt with brake fluid (they are mounted behind the drivers seat). She did not like that!
Anyway after much enforced alone time head scratching and pondering figured the rear circuit maybe wasn't sealing the pressure off from the inlet port i pulled the master out and did some research.
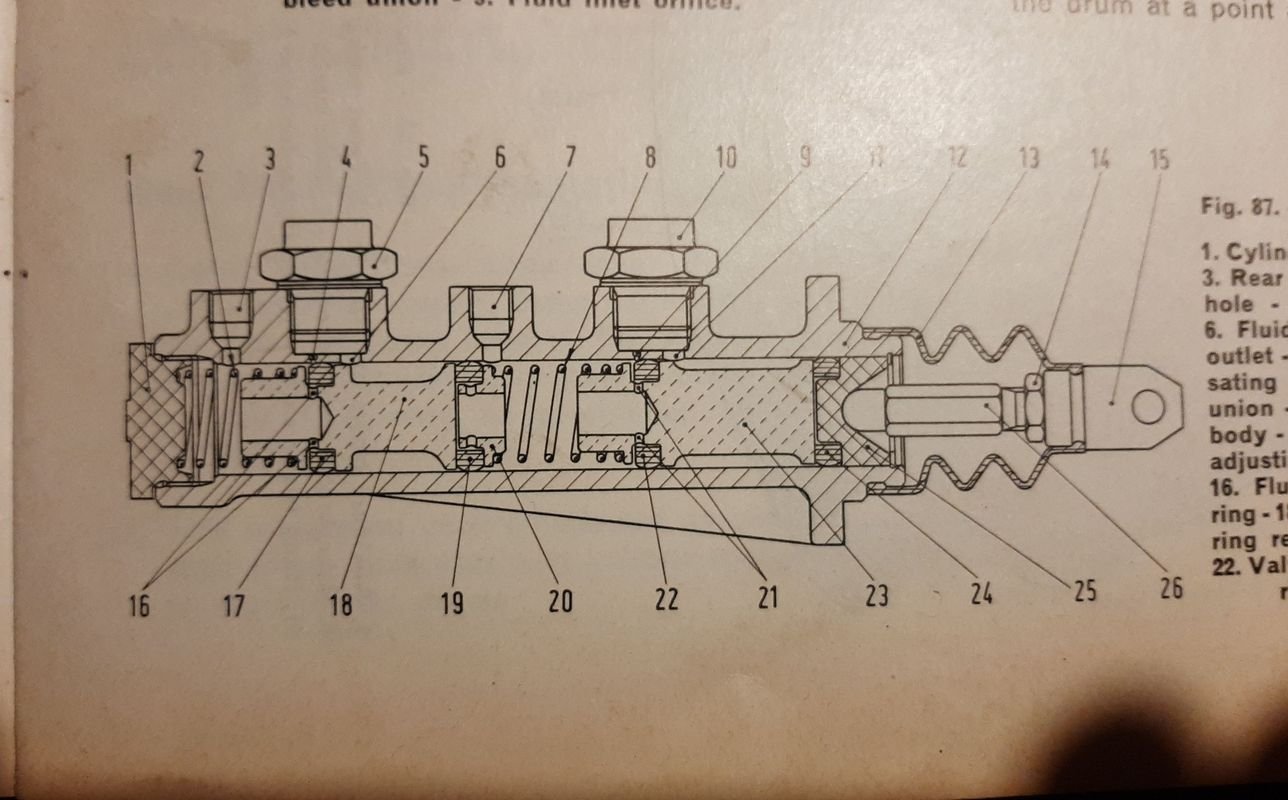
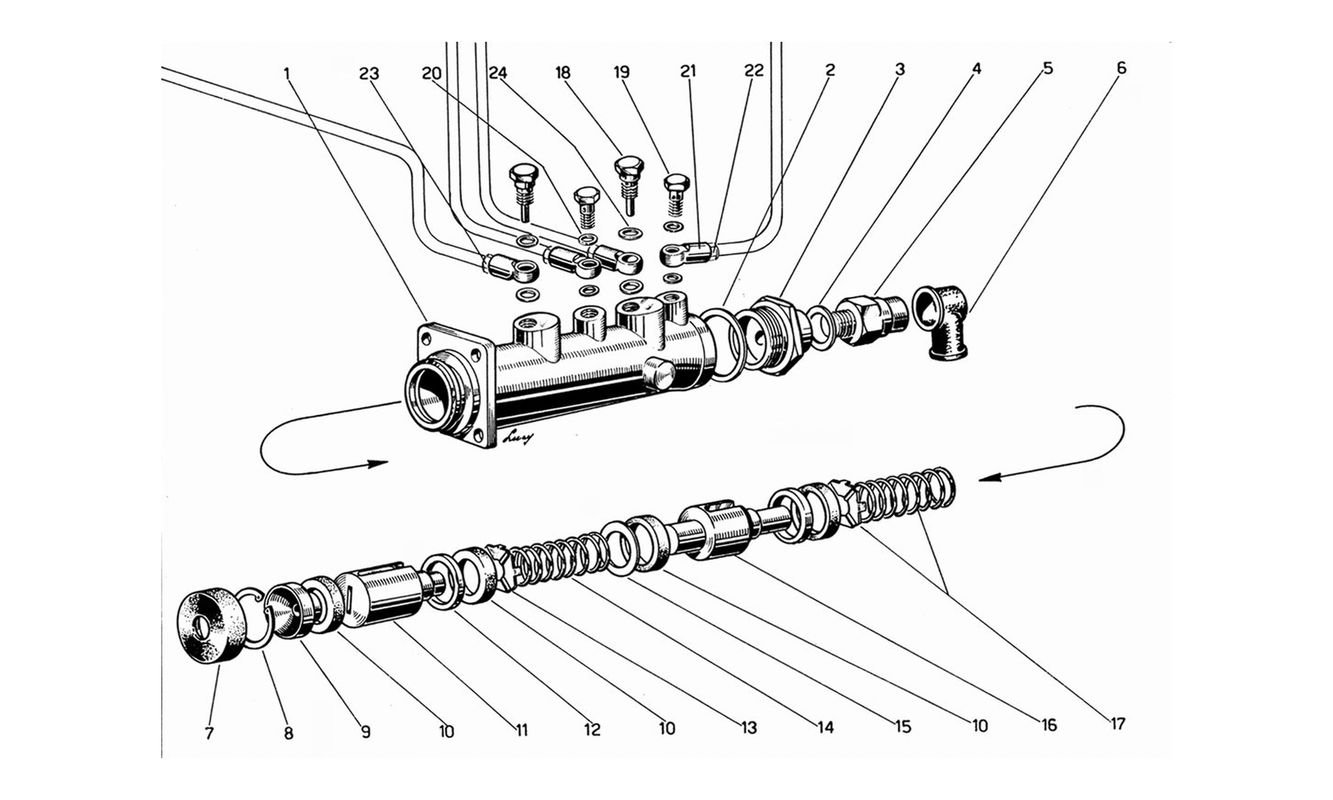
This is the master cylinder diagram i have in my parts book, which is mostly fine but its for the 217C model ('59 to to about '64) so not everything matches what's actually installed in my late model/runout '66+ NZ assembled 217D.

The part number on the master is shared with these bad boys:
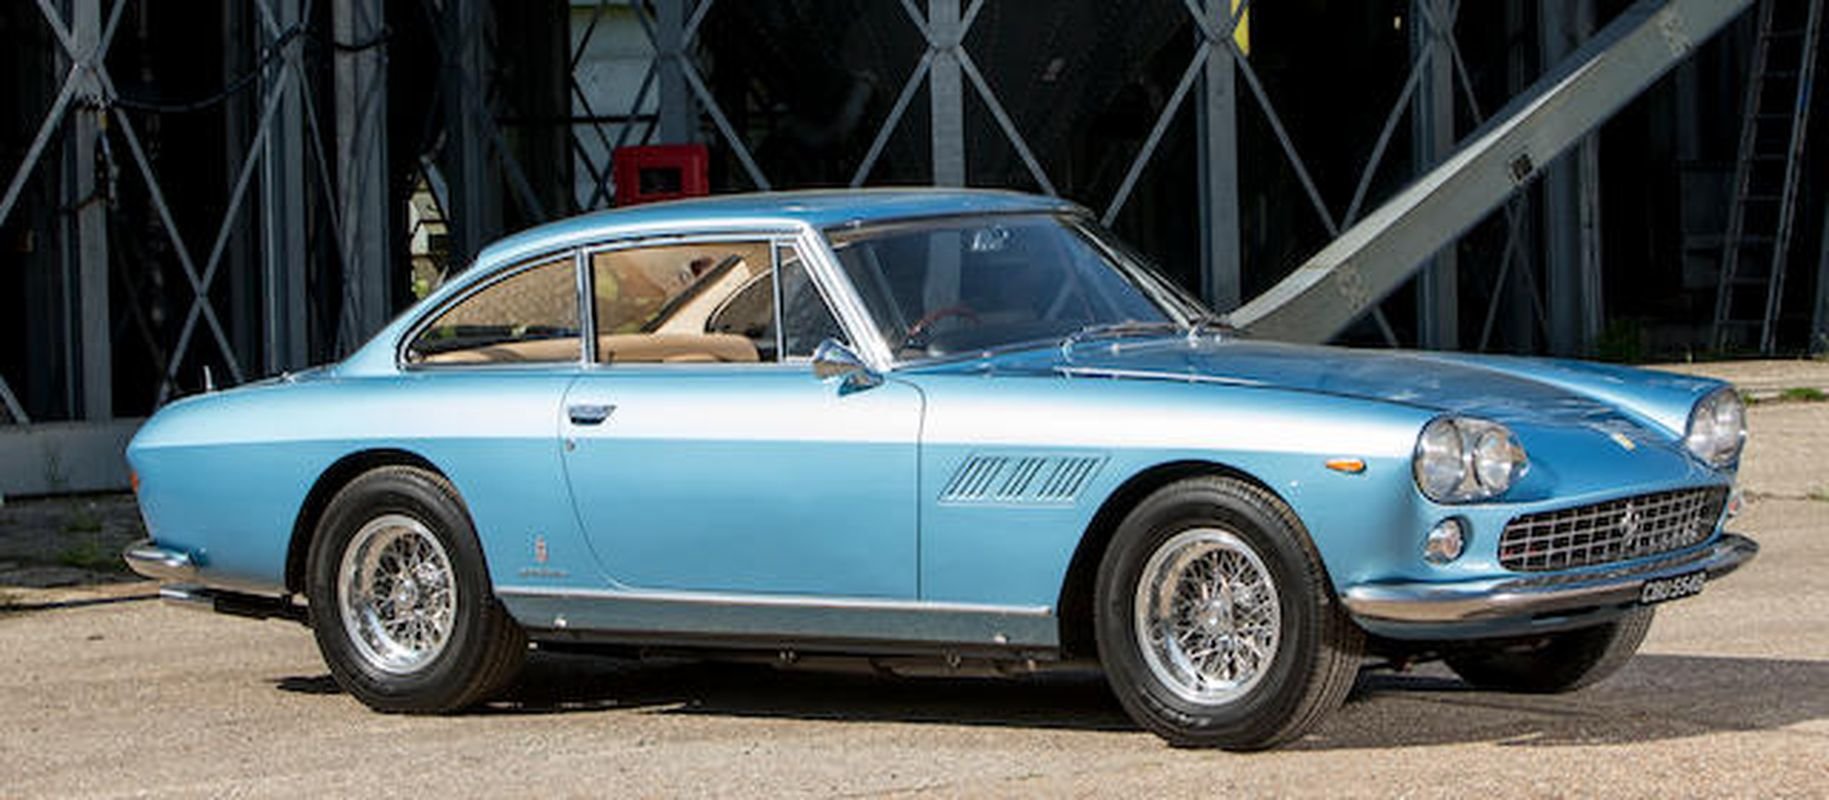
Ferrari 330GT Serie 1 (the Serie 2 has single headlights and is much prettier, but also has a different master cylinder)
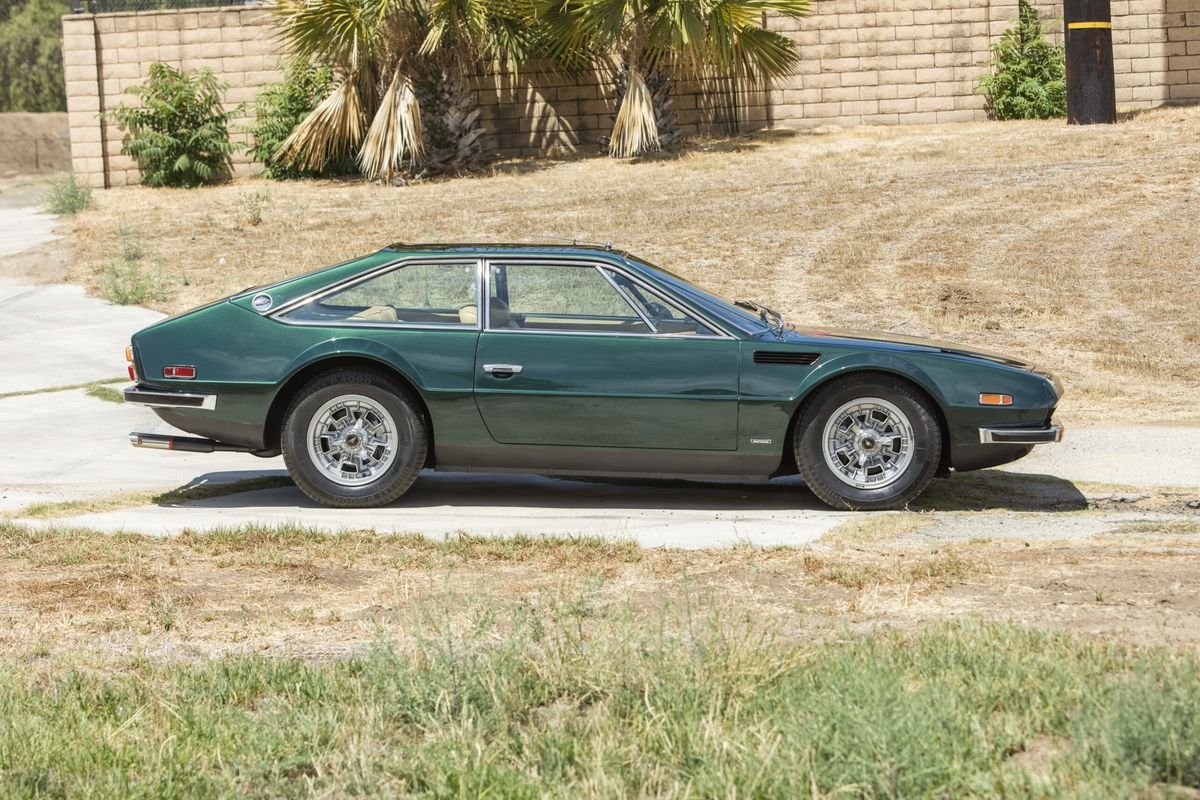
Lamborghini Jarama, yes please!
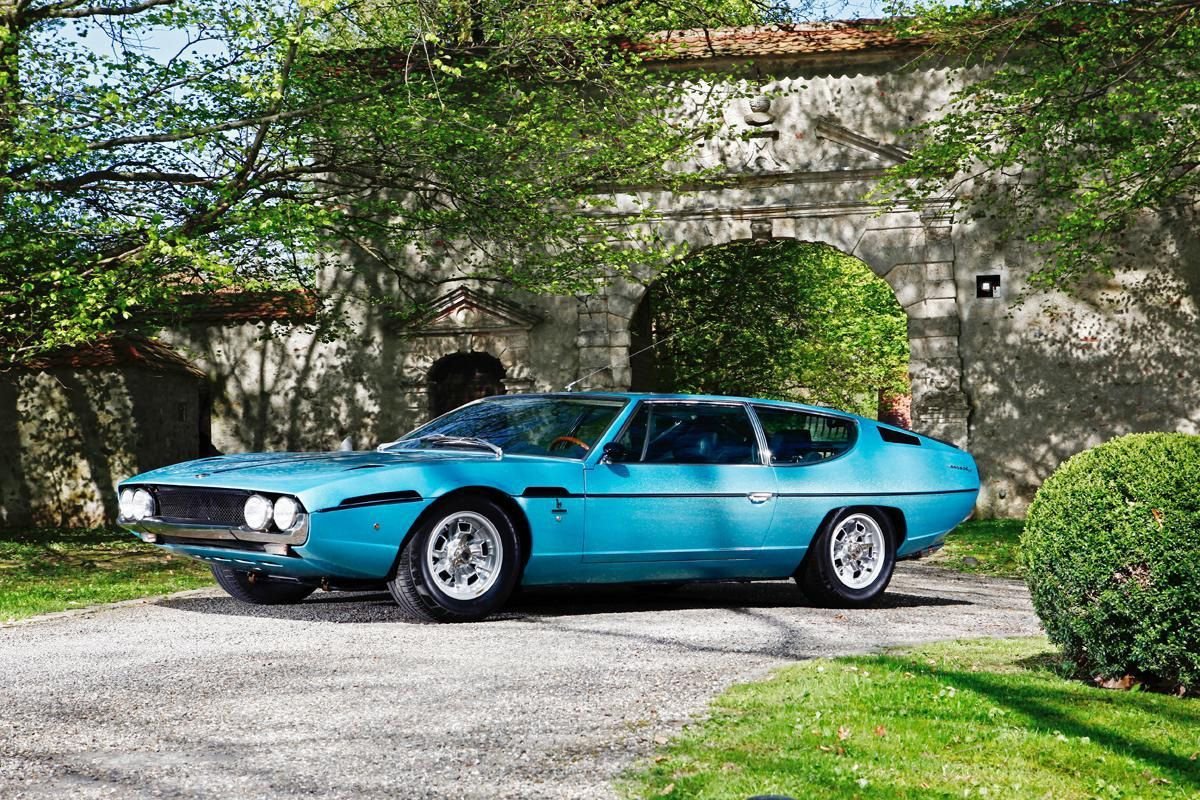
Lamborghini Espada, which is probably my favourite, and would be my dream car for driving a rusty dusty example while renovating a rundown italian villa on the coast while using that fat booty as a station wagon/farm truck
Aaaaaanyway, because these cars share parts, they are avaliable should one have the appropriate amount of liquidity in euros, but also seems the owners & parts retailers are really into publishing diagrams and stuff, which is useful for people who have a far more modest budget for restoring fine italian automobiles, so i was able to track this down.
Note the slots in the pistons and long inlet fittings.
My cylinder is pretty much half of both my 1100T book (front piston) and the Ferrari/Lamborghini diagram (rear piston)
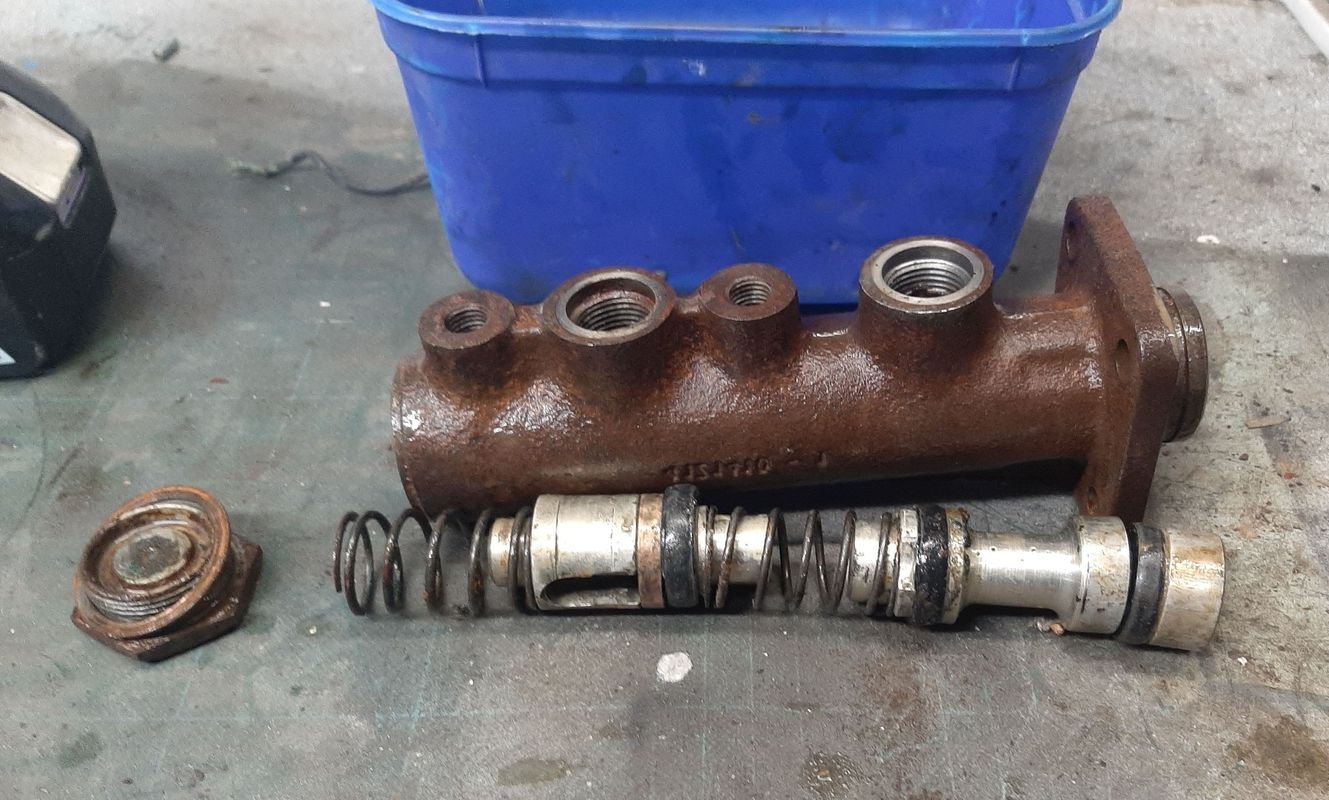
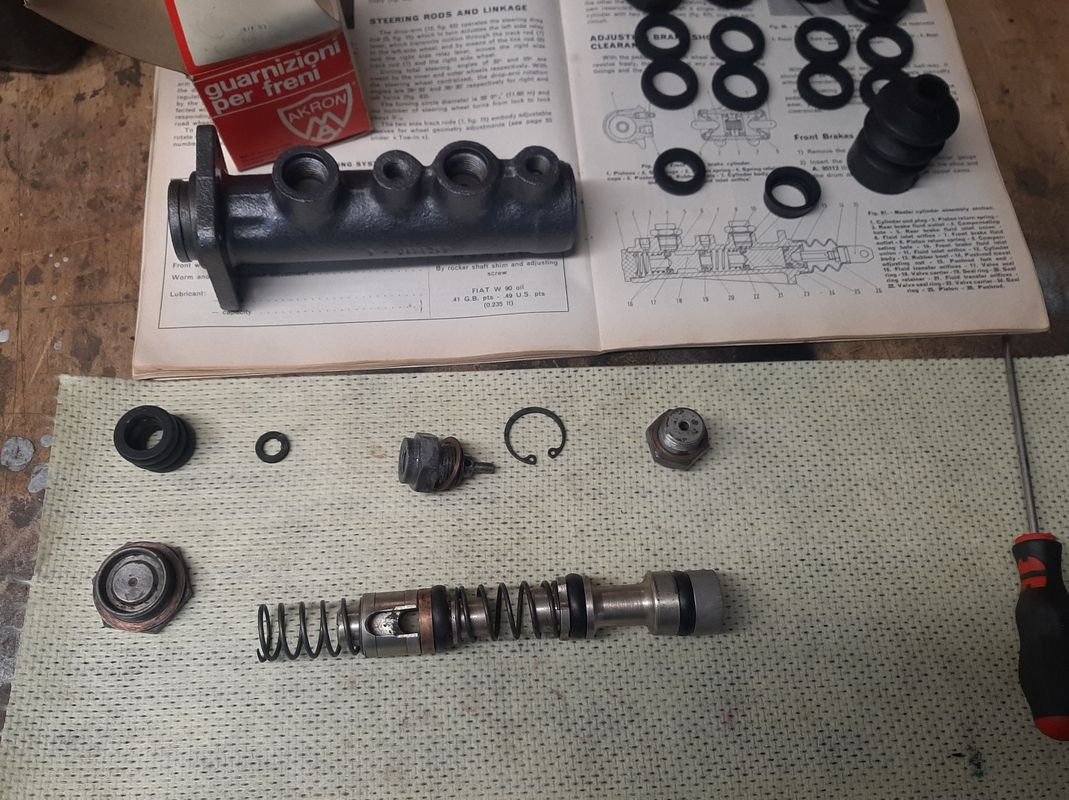
I also had a closer look at the pics i took while taking it apart
And putting it back together:
Comparing all that, and having a play with it on the bench i eventually figured out that
a/ it was originally missing the rearmost sealing ring,
b/ the rear piston was also facing the wrong way
c/ I replicated both of these errors
This install would also mean pressure from the front cylinder pushing on the rear would just backfeed the rear reservoir as it would never be sealed off.
This may also explain why one of the rear brakes was disassembled, and i guessing someone may have put a kit in the master or disassembled it previously and was chasing why the rear brakes didn't work after? Maybe why it seems to be otherwise good nick and low milage, as it was just parked up after a failed but presumably fairly expensive brake job?
Anyway, added the missing seal and put the piston in correctly, reinstalled everything, refilled the juice, and NOW everything is bled up nice, with no unpleasant squirts for the driver.
Adjusted the handbrake too.
A small test roll between the special safety logs shows she stops on a dime now
")
-
30
-
 1
1
-
- Popular Post
- Popular Post
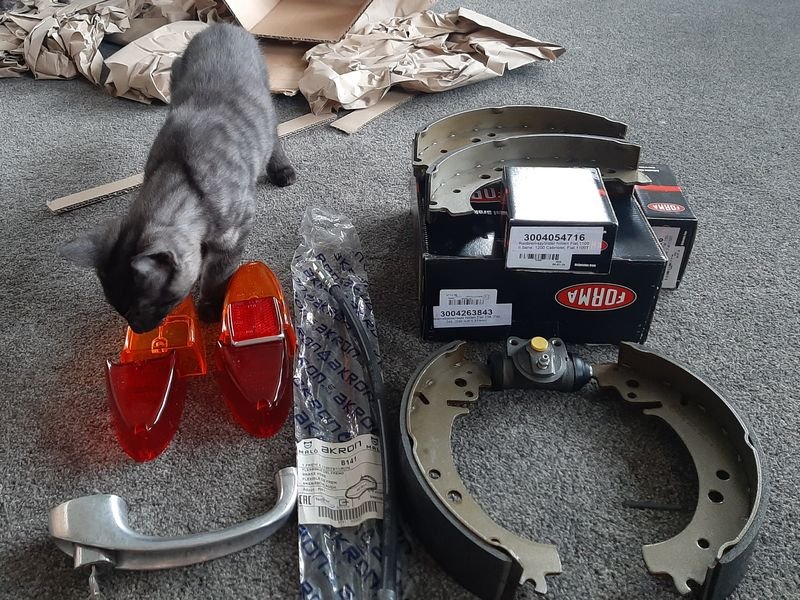
My order from ze germans showed up:
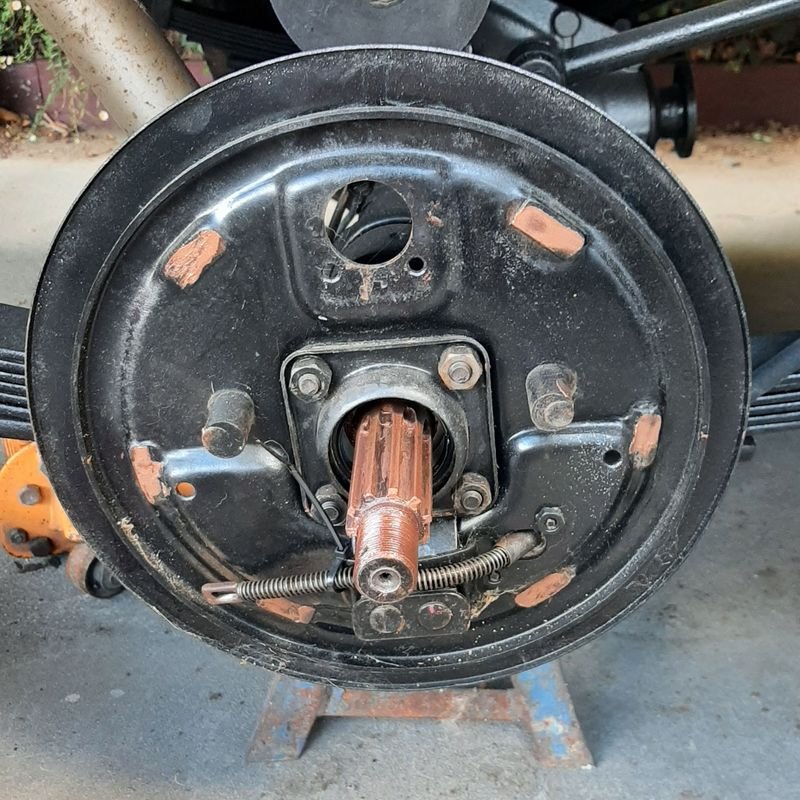
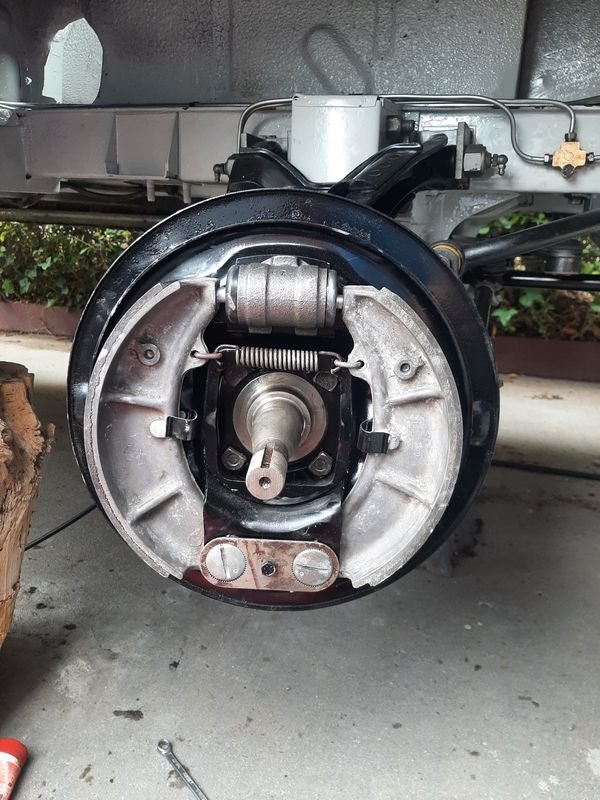
Mostly brake parts, rear brake cylinders and shoes and some front brake soft lines, a door handle and some rear light lenses as they were cheap too
(bonus new kitteh pic - one of two!)
Finally could button up the rear brakes which i had left like this:
Mostly new hotness, i have more small hardware coming from Ladapower-Europe.com (they run a parallel site as the ladapower.com main site is in Ukraine
 ) so im not sure when that will turn up.
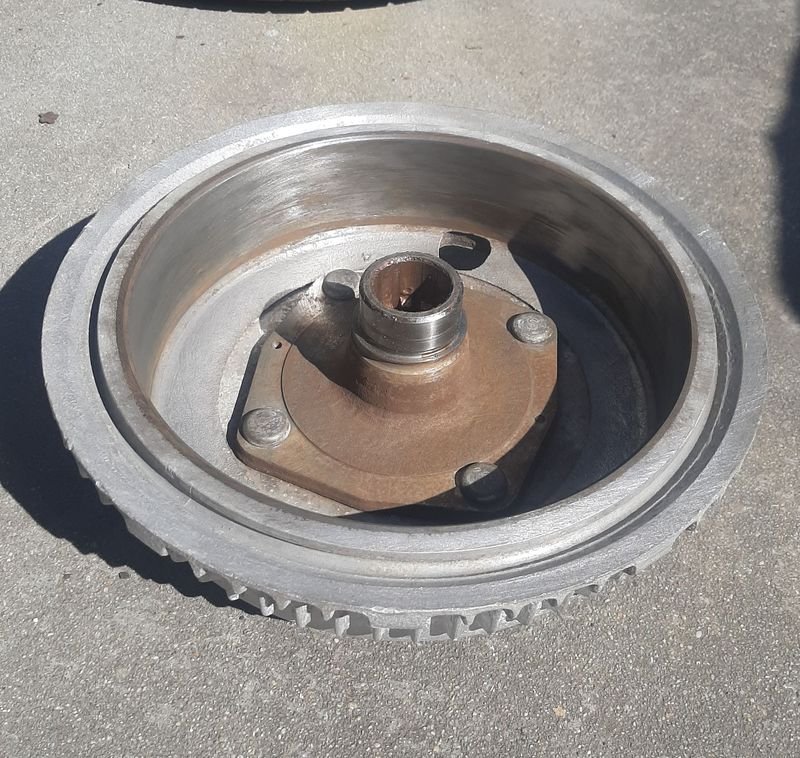
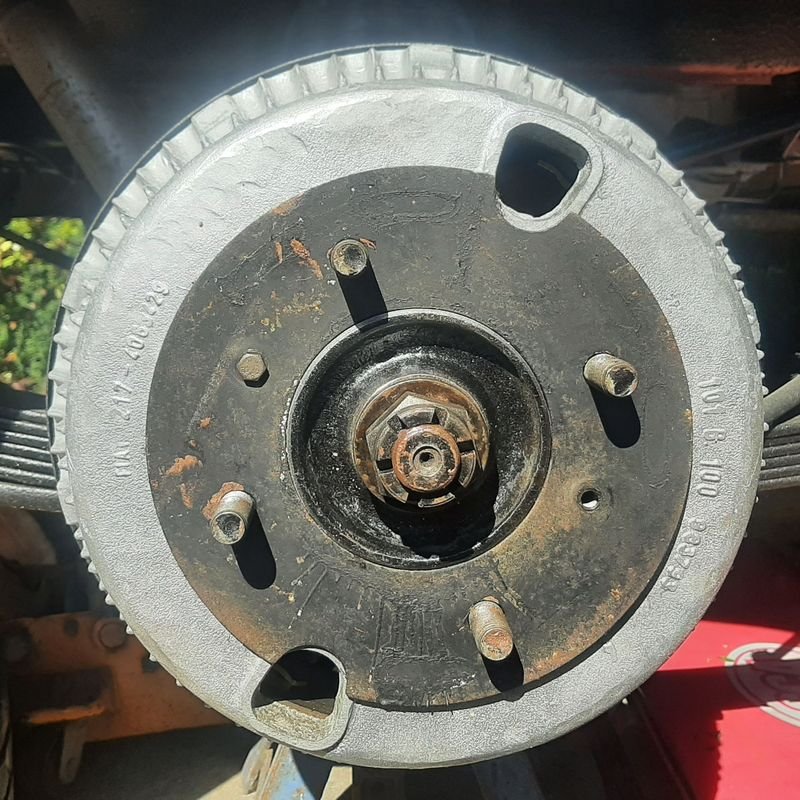
The shoes and mechanism is shared with Lada rears, but the plate, drum, cylinder and handbrake are Fiat 1100T or 1200 Cabrio
Cleanup up the drums
Done!
Front brakes are already assembled, so i just need to chuck the new lines on, right?
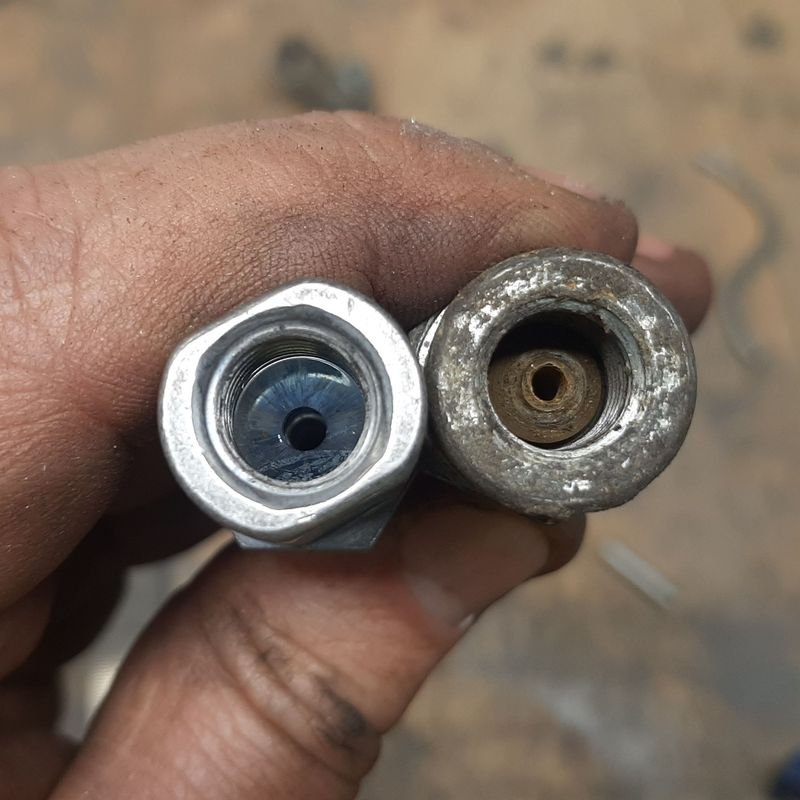
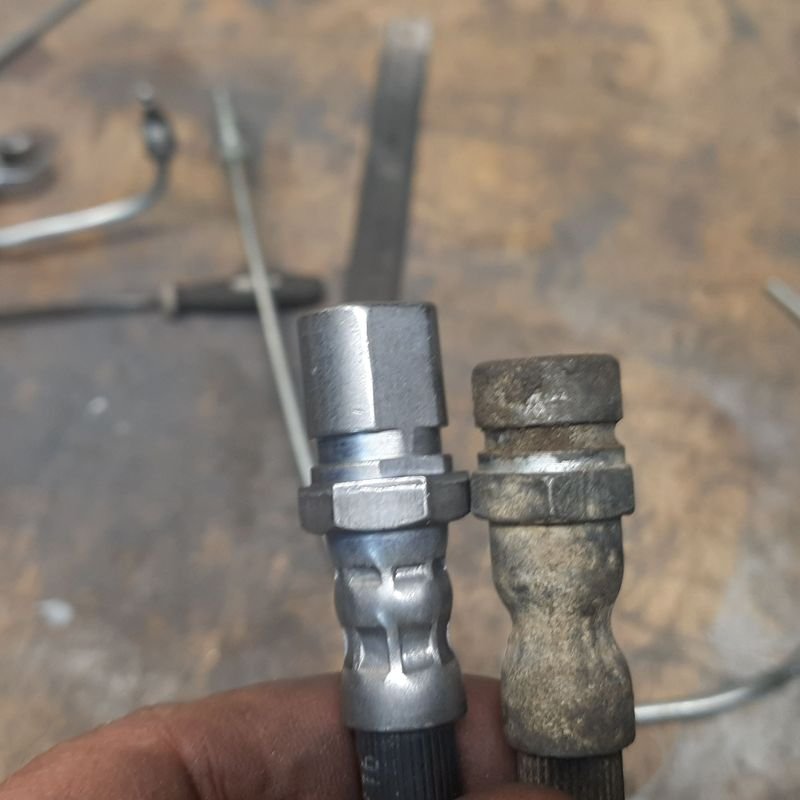
Err, no, new ones take a bubble flare vs original double flare
The ends are also different length necessitating a different pipe nut
So that was good fun cutting off my freshly made flares and nuts and redoing them with the lines installed on the van rather than in the vice!
When i got the master cylinder resleeved and the brake line a also bought more line nuts, but they didnt work on the original fittings, but were perfect for the new lines, so not wasted afterall.
Once that was all plumed in, i installed the old rear soft line (need to get a HEL one made up eventually) so time to put some brake fluid in and try bleed these suckers.
-
21
-
Green Island 4 Life
-
2
-
 1
1
-
-
Plate says SIKWAG
DX wag, 17" lensos, Harlequin paint?
Plate checks out!
-
7
-
-
-
- Popular Post
- Popular Post

-
11
-
On 22/03/2022 at 21:54, kws said:
Man that sounds great. Love that strip speedo too, was kinda hoping it was a tacho when i first saw it move

That would be cool!
Kinda is working as a tacho at the mo with the gbox free-wheeling.
41 minutes ago, yoeddynz said:Sweet. So cool. Stoked for you. The engine sounds great!
So what's up with the starter? Is it an old inertia type rather than pre-engaged.
Pretty happy with how the engine sounds/runs for sure.
I suspect the carb may be a bit dicky under load tho. Well see.
Starter, not sure about type, but its not working so good. The 'solenoid' has a lever in it (electro magnet?) that pushes the teeth on the starter motor shaft forward onto the flywheel. That part also has a clutch/ratchet in it. Im wondering if the magnet is weak, poor electricalconnection internally making the magnet weak, or maybe some mechanical issue (or a little bit of all three) is stopping it engaging reliably.
Im gonna push on with other stuff for now (my brake stuff arrived!) as it works well enough for the odd motivational crank up. I have a lead on a spare engine that will hopefully include a starter too so ill swap it out then.
Still waiting for a ladapower order which has the special driveshaft bolts in it which is on its way but delayed for obvious reasons
-
3
-
-
- Popular Post
- Popular Post
Got some more gas, and gave it some jandal!
-
24
-
1
-
- Popular Post
- Popular Post
Mrs mentioned it was pretty rowdy when it ran.
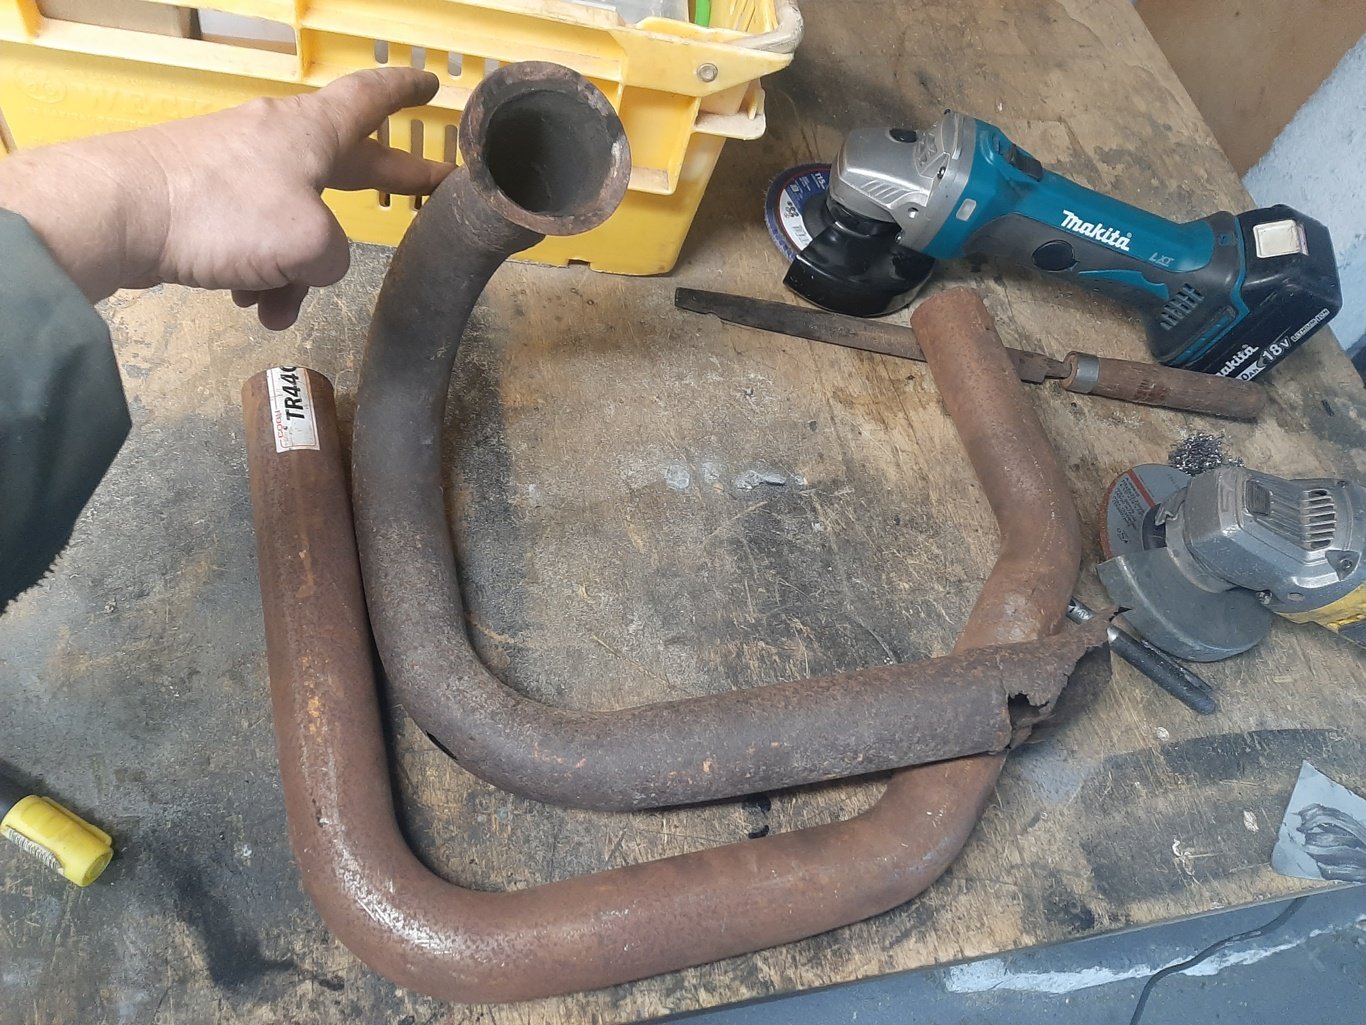
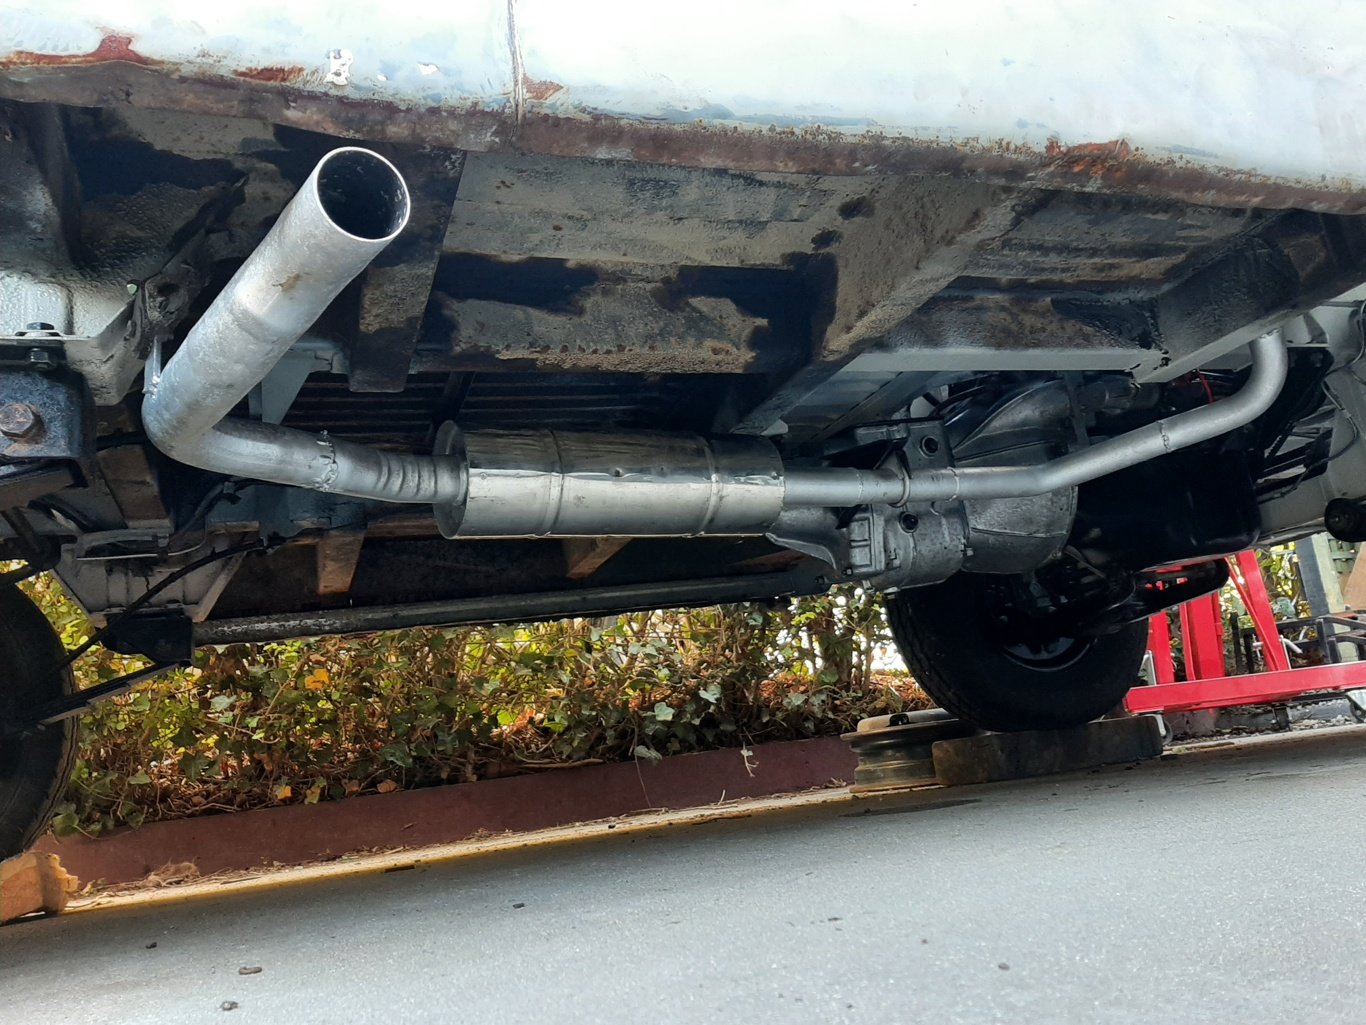
Time for exhaust.
No surprise its noisy, this was the 2ft of curly blunderbus it had. It had a hole in the elbow of the second bend, so not much got reused
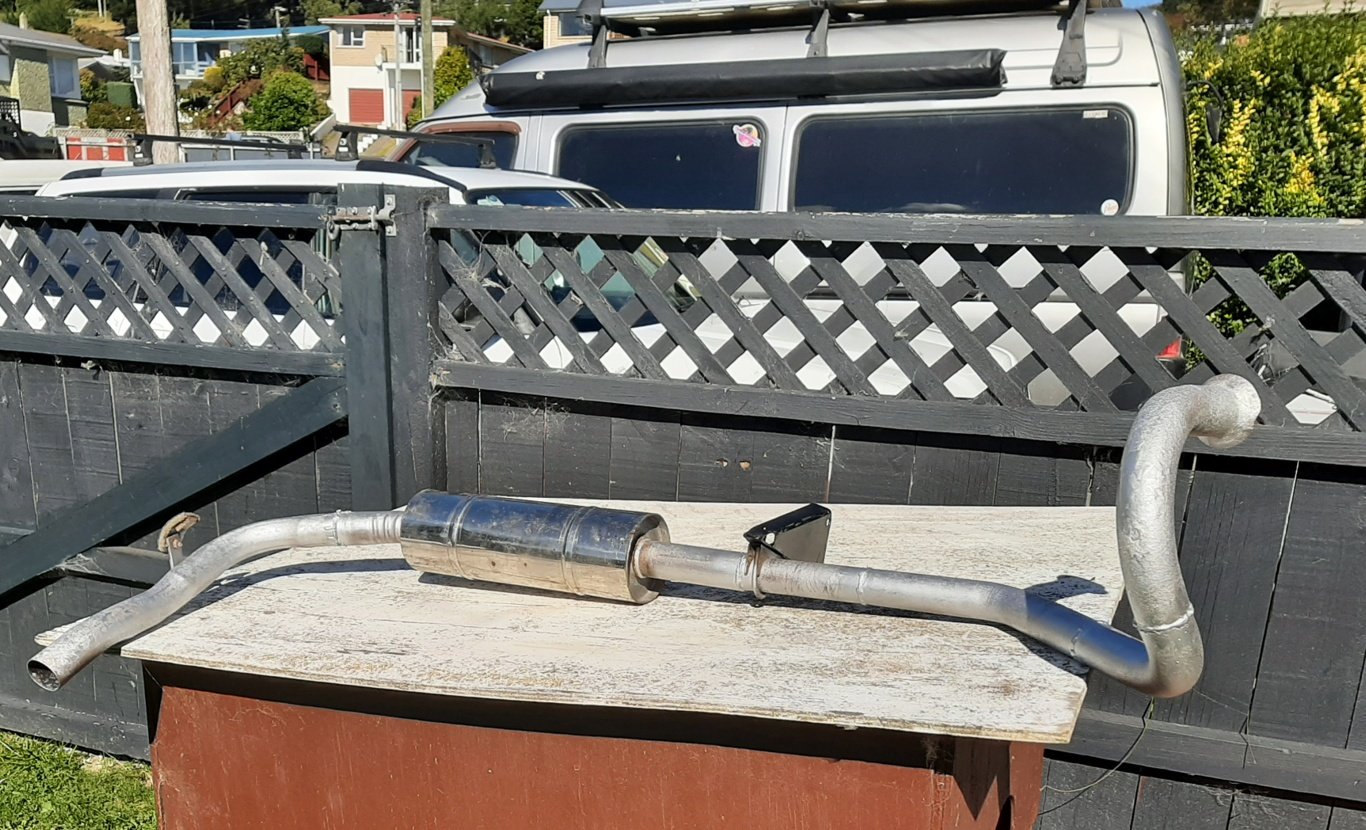
From the original manifold (that happened to be 44mm) its about 1/3rd 44mm universal bend left over from the 2300 exhaust, into 1/3 maybe 50mm stainless straight through that was on the Croma Turbo and 1/3rd another bit of scrap bend that also happened to be 50mm from the stash. Even managed to reuse the hangers, so zero (extra) dollars spent on the exhaust.
Turned out so nice i polished the muffler and put some silver paint on the rest.
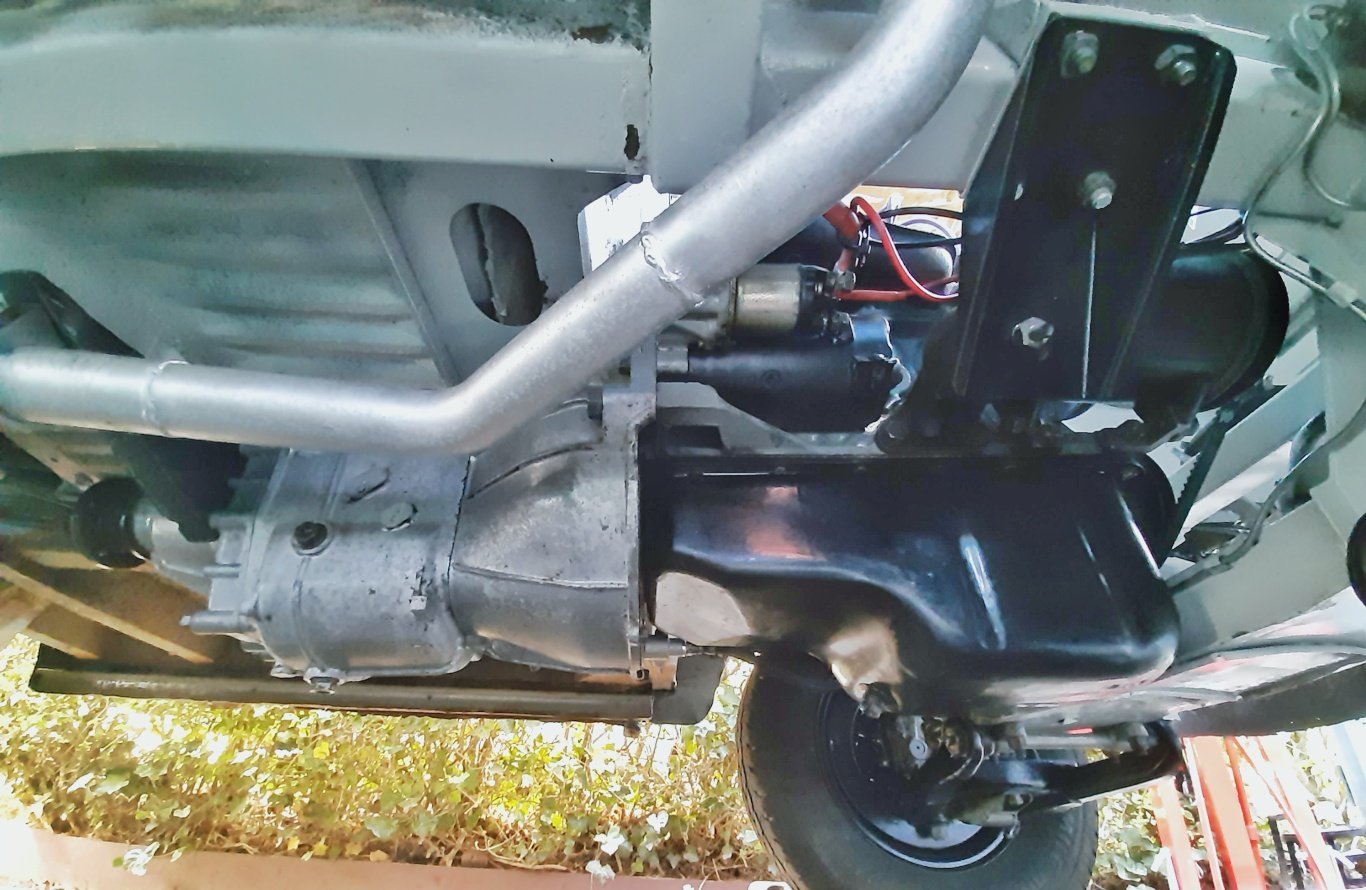
Tucked up pretty good
Side exit like a dragster/old exhaust. Factory would be over the diff and out the back corner, but dont have enough material and i quite like how it looks.
No test blast yet as i used the last of the gas for the mower, but i dont think it will be too much quieter than before
-
25
-
- Popular Post
- Popular Post
Bit more wombling.
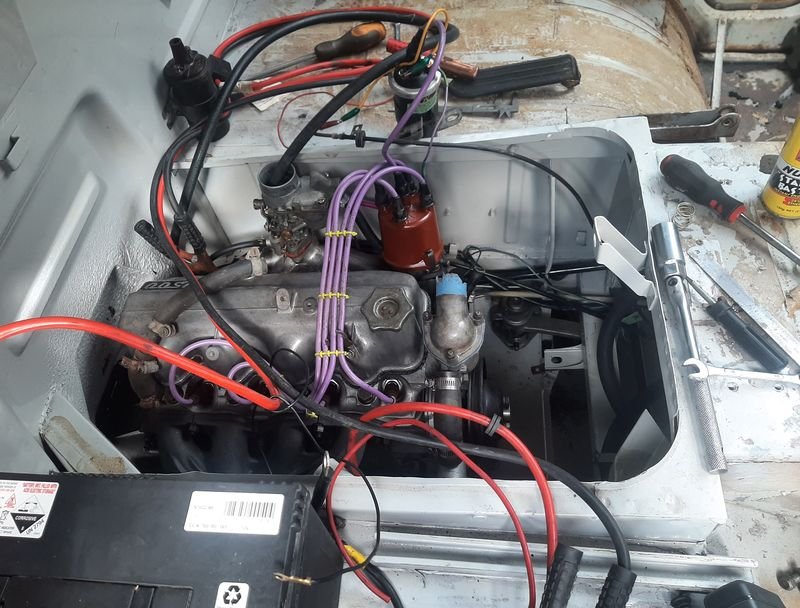
Previous starting setup was basically jumper leads and hotwires so wanted to get it wired to run off the key.
Done a lot of work already, so i knew everything worked individually but not necessarily all together.
Plugged in all the engine bay loom, hooked up the starter and put the alternator in. Chased a few odd faults (back feeding with the key off) to the extent of pulling the dash (nope) and disconnecting things one by one (nope?) and seems to be working now.
Ive installed a relay for the headlights and tidied a lot of wiring, this was the state of the (po replaced) flasher unit
Looking pretty snazzy under here now
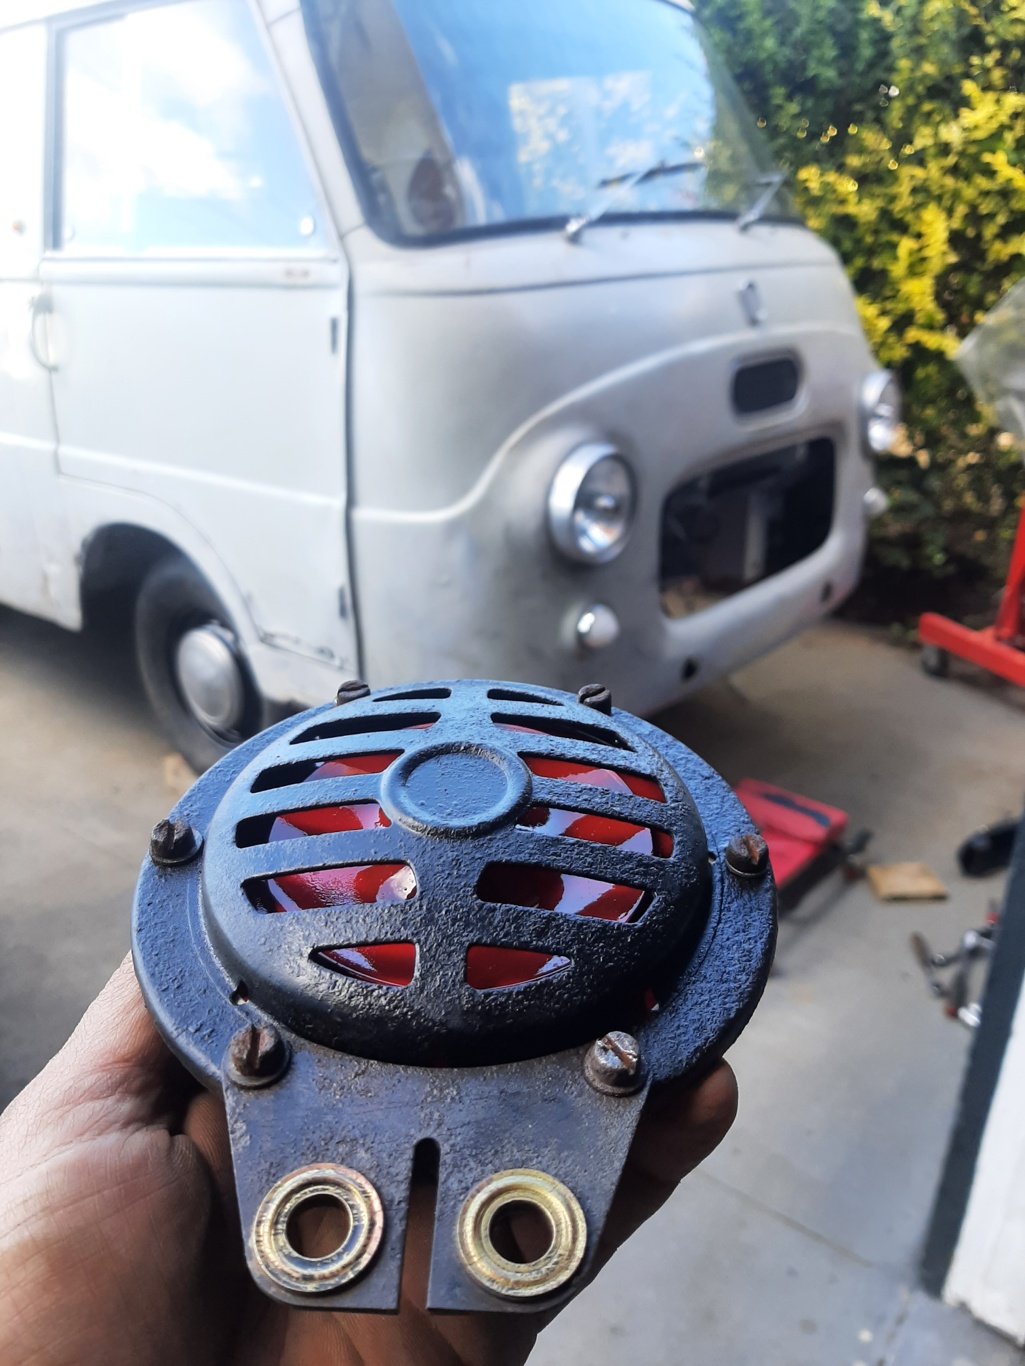
Tidied up the horn i got from the Invergargill 127, even the bolt holes lined up
worked before and after but now just gets hot. Probably should have just sent it.
-
10
-
- Popular Post
- Popular Post
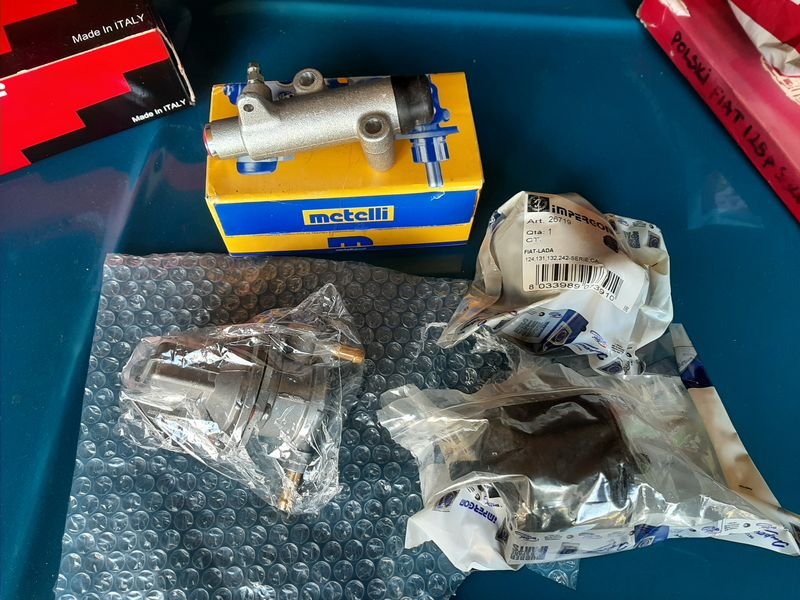
Some parts finally showed.
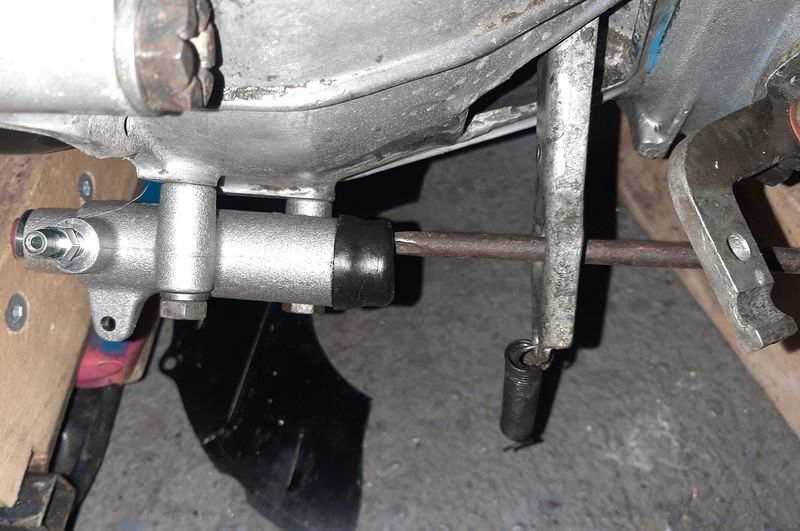
Clutch slave, fuel pump and some engine mounts. Ive been hanging out for the engine mounts so i can get this thing back in the van, the old mounts are split in half.
Clutch slave is a Lada and X1/9 fitment, and a bit cheaper and more common than the 1500/2300 one.
Only difference is the mounting tabs need about 4mm trimmed off them to snug it up against the gearbox a bit more, so hit the brand new parts with a slitting disc
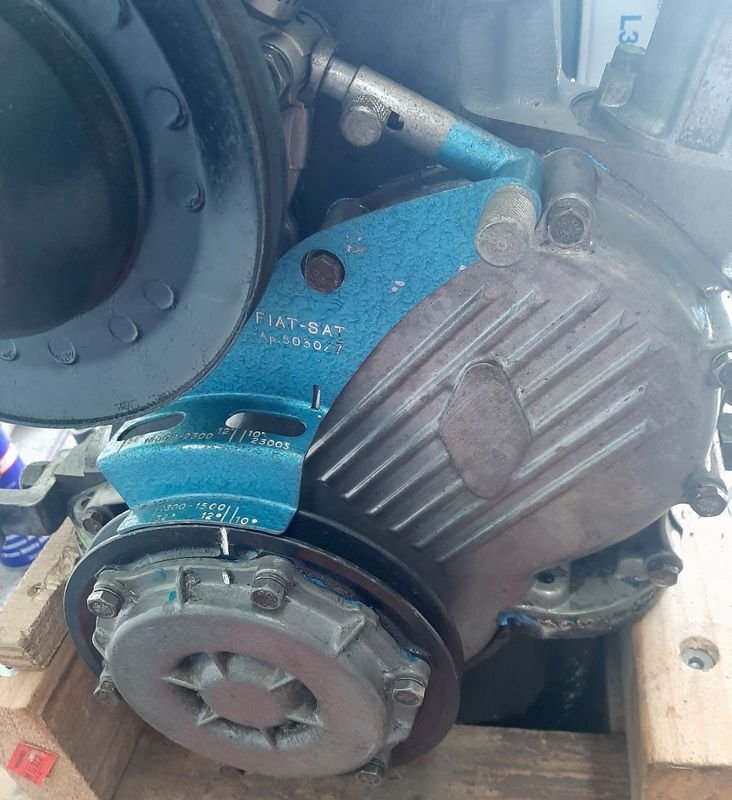
Chucked the fuel pump on as well, and timed it up with my special tool Ap.503027, which is needed because there are no factory timing marks on these engines, other than TDC. Good one FIAT.
Tried to fire it up in its cradle on the ground but just wouldn't crank fast enough off the jump pack and jumper leads and the starter got pretty hot too.
Check out that sweet exhaust
A couple weeks later...
Ol' mate @EURON8 was in town for the weekend and popped over and gave me a hand to bung it in the hole
No photos of during as it was pretty sketchy,
- pull out the dizzy so it doesn't get smashed, but forget to set engine to tdc while it easy to access (there is no external crank nut)
- jack the front of the van up high enough to slide the engine on its cradle on the creeper under the chassis rail (at least 750mm which is pretty dang high)
- once kind lined up yoink the creeper out from under the engine
- drop the van back down step by step while sliding/kicking the engine on its cradle forward under the hole as far forward as it will go and centered.
- set van on the wood chopping block under the master cylinder box, so the legs of the engine crane can go under the cross member (where it would normally be jacked)
- lift engine up into hole with engine crane through drivers door, with only the normal amount of fresh paint scratching
- line up the rear transmission mount and then install the fount handed mounts the right way round,
- set engine to tdc using a crain wrench on the crank pully, install the dizzy to roundabouts 10 deg btdc, set up a fuel squirty bottle and lash up a temp battery set up to see if we can get it to run.
- fiddle with timing and checking spark etc, swap wires,, fix carb leaks etc cranking on and off with a few back fires and pops till starter motor gets real hot.
- have lunch
- Swap dizzy 180 deg, fires straight up, idles long enough to dial in the timing with the timing light and then runs out of gas in the bowl.
Unfortunately it seems the issue is the starter is pretty weak, and got pretty hot again, and the solenoid isnt the best and will 'clutch off' just as the engine seems to cough, so couldnt get it to pop off again, but it did run for about 20 seconds, twice.
Starter definitely needs to come out for a check, when i cleaned it up, i just pulled it apart cleaned it and put new brushes in but i think it may need new field winding's or something.
Anyway, the first time this thing has made any noise of its own for at least 20 years i would say and it ran well when it ran.
Sounded good, and feels really good to be getting closer to nearly driving this old bus.
Serendipitously, a fellow Fiat tickler from Chch texted me the other day saying a mate of his has just bought a 125p Ute (!) and will be dropping the good running 1500 out of that to twin cam it, and did i want the engine? Well, yes, yes i do, especially the starter motor (given the twin cam swap will need at a min the bell housing and starter from the engine donor car as its on the opposite side to these earlier engines), so ill probably take my 125p twin cam swapped ute up aloing with my special engine cradle and grab it at some stage.
Meanwhile buttoned a few more things up, now has a working gear linkage and plumbed and bled the clutch.
Update: charged the battery i was using and the jumper pack overnight, and it fired up after about 20 seconds of cranking and idled till it ran out of gas. Wooooo!
-
30
-
- Popular Post
- Popular Post
Been waiting on parts for a while so progress has sort of stalled. Still scratching away at it here and there.
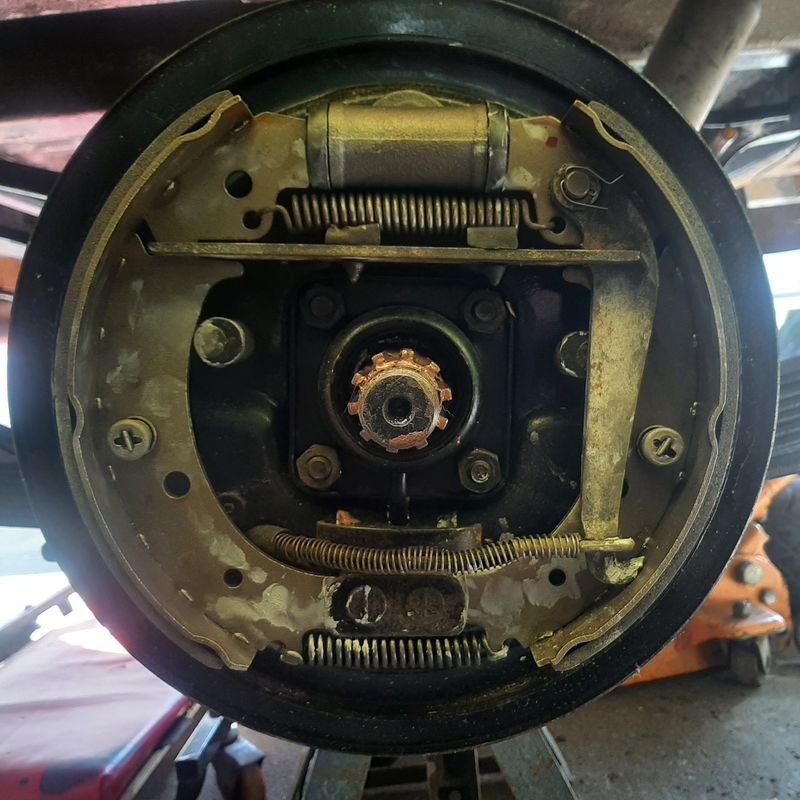
Cleaned up and installed the front brakes,
The shoes still have plenty of meat on them, but ive swapped them around from left to right so the old leading shoe which were slightly more worn are now the trailing shoe on the other side.
All the bits and bobs are original and in excellent condition, apart from brand new brake cylinders which were pretty cheap. (+ shipping, lol)
Bit of a faff to adjust, as the big slotted screw things are cammed adjustment bolts for the bottom pivot point, that can rotate 360deg (so will push the pivot point up, down left or right) with tiny teeth on the outside that the silver plate fits over and lock them, then from the back there are two cammed adjusters closer to the cylinder to set the backstop, and so there is heaps of adjustment, but you cant see what any of them are doing.
Have finally found and ordered some front flex lines coming to connect the cylinders with the hard lines, along with some rear brake shoes and cylinders, but the the single rear flex (body to diff) are NLA.
Ill probably end up getting one made up and re use the old on in the meantime.
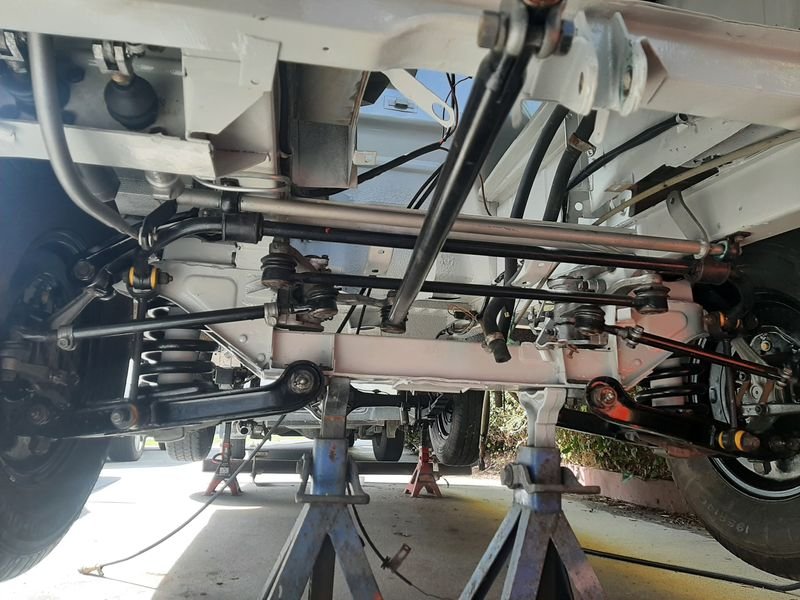
All the steering is back in as well, 8 tie rod ends as well as the steering box to really ensure tight, precise steering, to take advantage of the thick sway bars front and rear.
Ive ordered some tie rod caps as they are all perished but the joints seem good. They are fiat/lada innner tie rod ends so pretty easy to find, and about $25 each, but i dont really want to splash out on 8 right now.
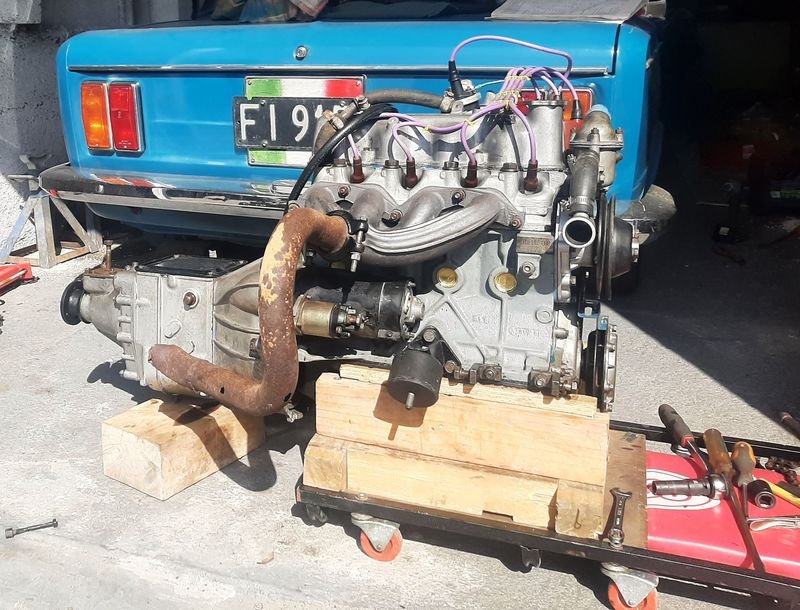
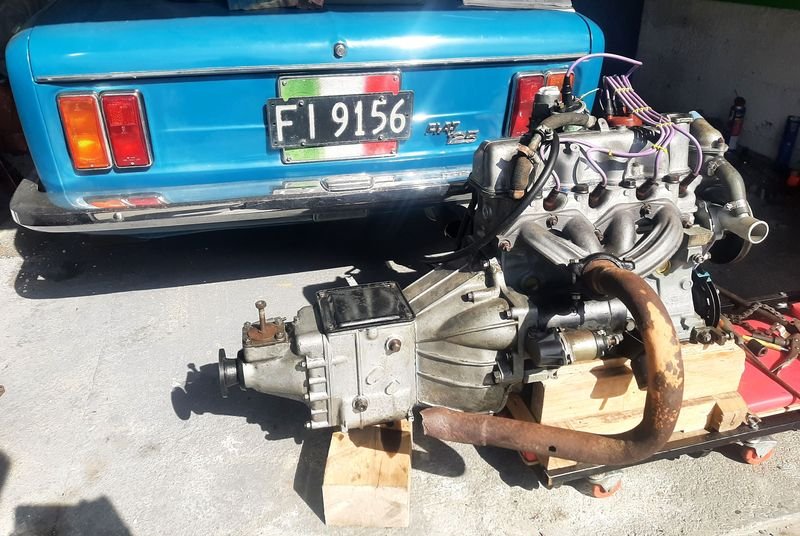
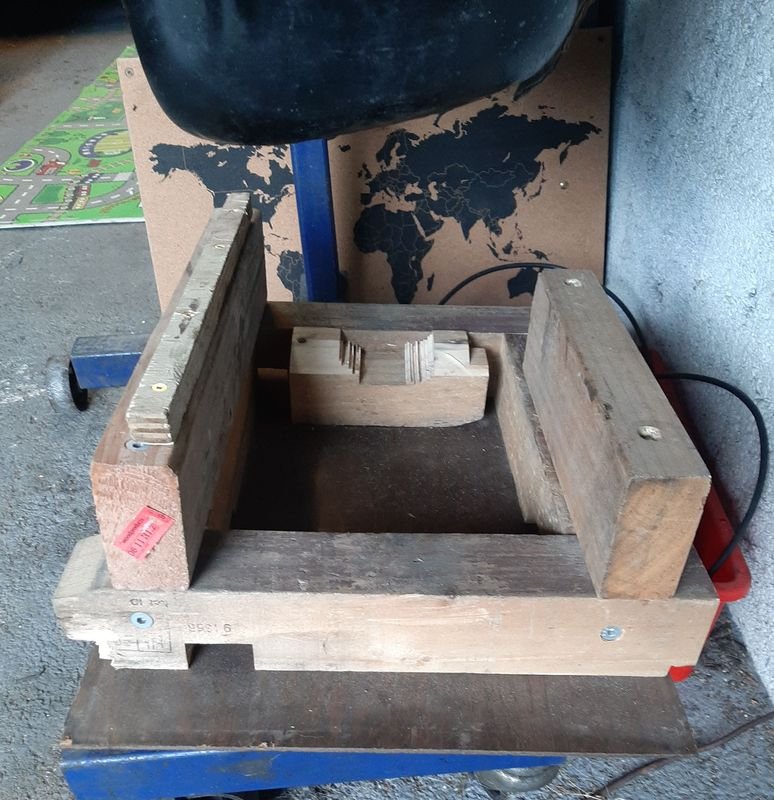
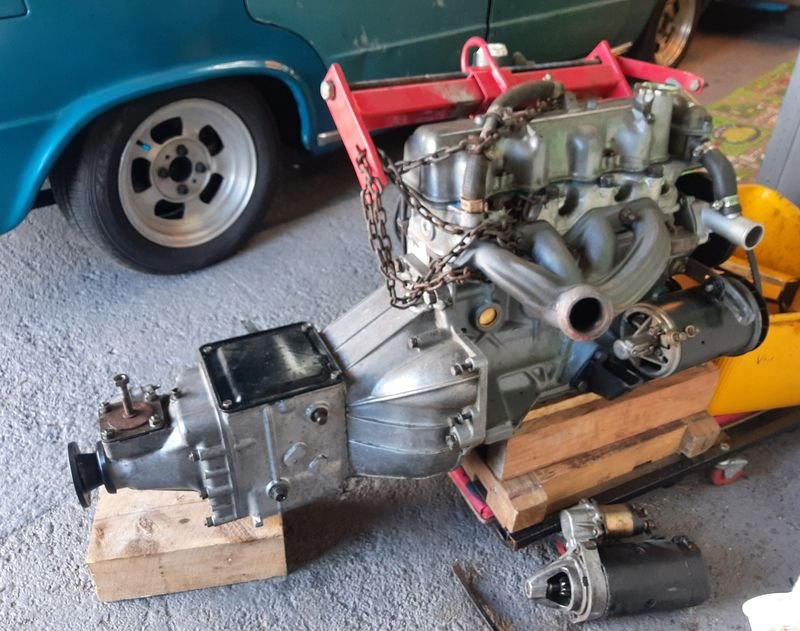
Made an engine cradle thing so i could get the engine off the stand and install the flywheel and box and button up the front crank nut (to 140Nm).
The engine tilts to the side a wee bit in the van as you can tell from the sump angle so it was a bit more complex than i thought. The saw cut bit at the back is actually precision machined for this specific application.
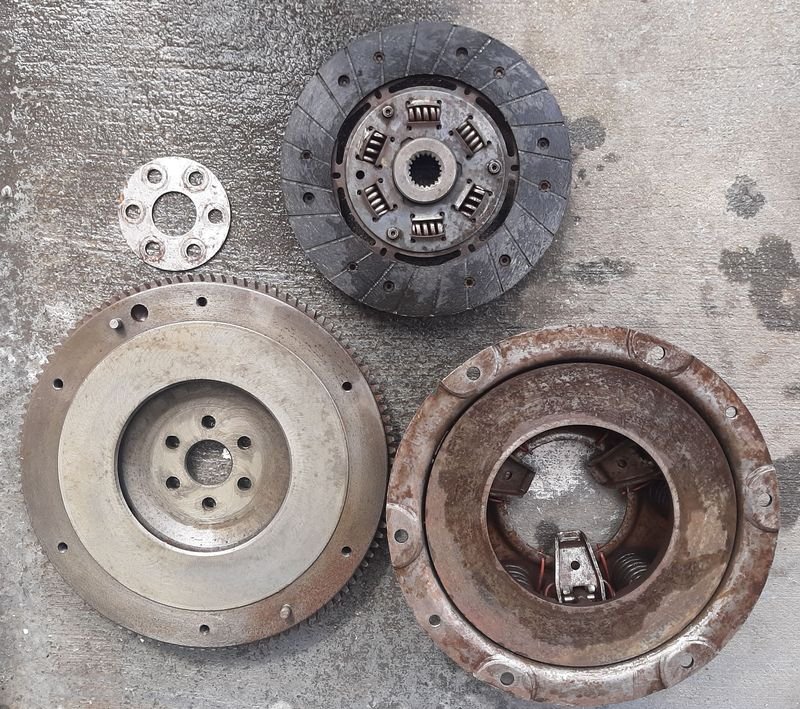
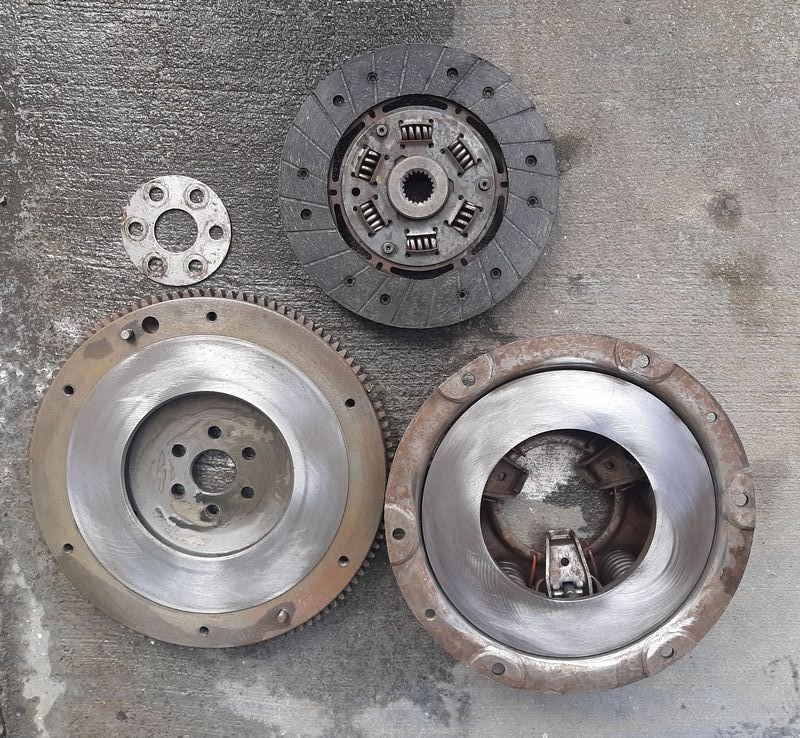
Clutch bits were degreased a while ago, but got 'rebuilt' with the stripper disc before putting the box on.
Original (?) clutch has plenty of meat left and there is no discernible wear on the clamping plate or flywheel.
Mostly back together and nearly ready to go back in the hole.
Turns out cant install (or remove) the starter with the generator in the way.
-
16
-
re fuel pump stuff, i run a cheapo electric fuel pump/Facet on all my Fiats, no problems to report, they have mechanical diaphragm pumps factory and replacement ones are trash and when they fail they leak fuel right onto the oil pump and into the sump.
The two twin cams (ute and sedan) are solely electric, but the Wagon i still run the mechanical and just have it as an inline primer to save cranking the poor old starter for 5 minutes, and only when its been sitting for a while and the fuel lines have drained back into the tank or whatever. Once the tictictic tone changes to toctoctoc its made pressure, and good to go.
Its just one of the cheap generic ones ( the sub $20 trademe canister style ) and once its running just turn it off and the mechanical one seems to suck though it fine.
Buy two at a time, just in case and leave it in the onboard spares collection, and then the one you install will never fail. The cube facet ones are probably more reliable but also more expensive.
I understand they are pushers rather than pullers so best to mount them low if you can, idelaly by the tank, and you want low pressure for the needle valve to keep working, i think they are 2-6ish psi which is fine for carbs.
-
2
-
-
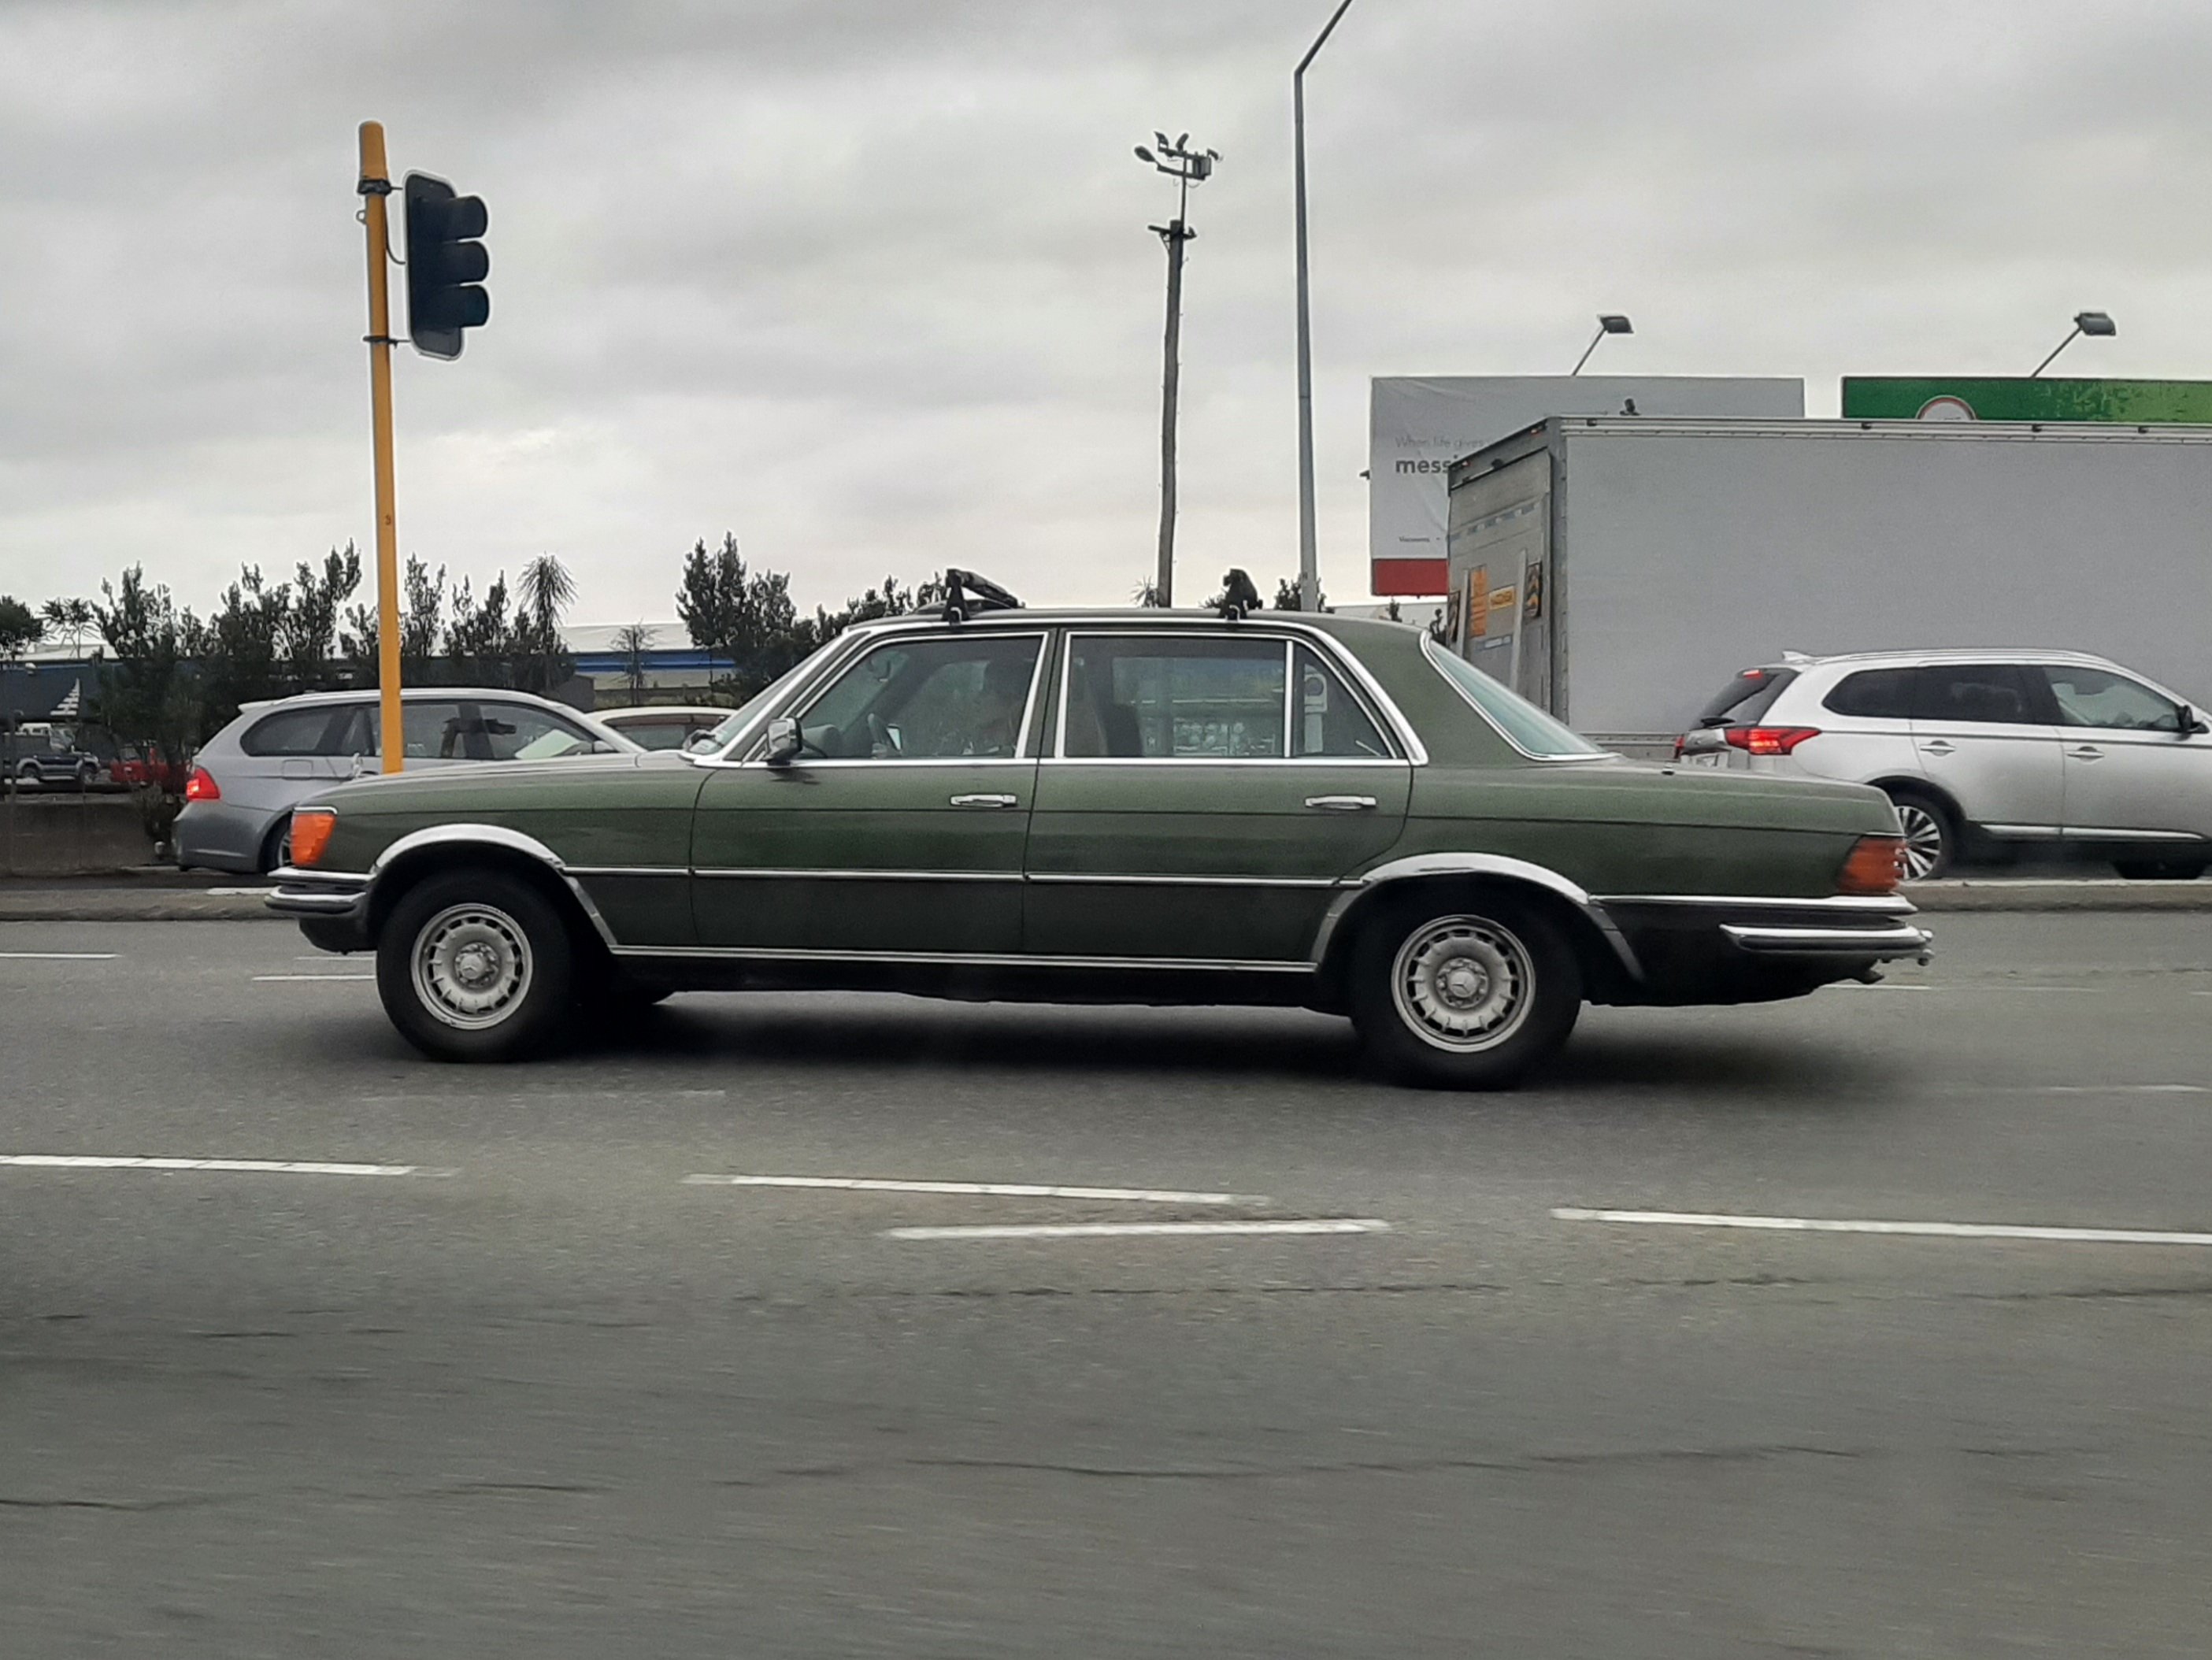
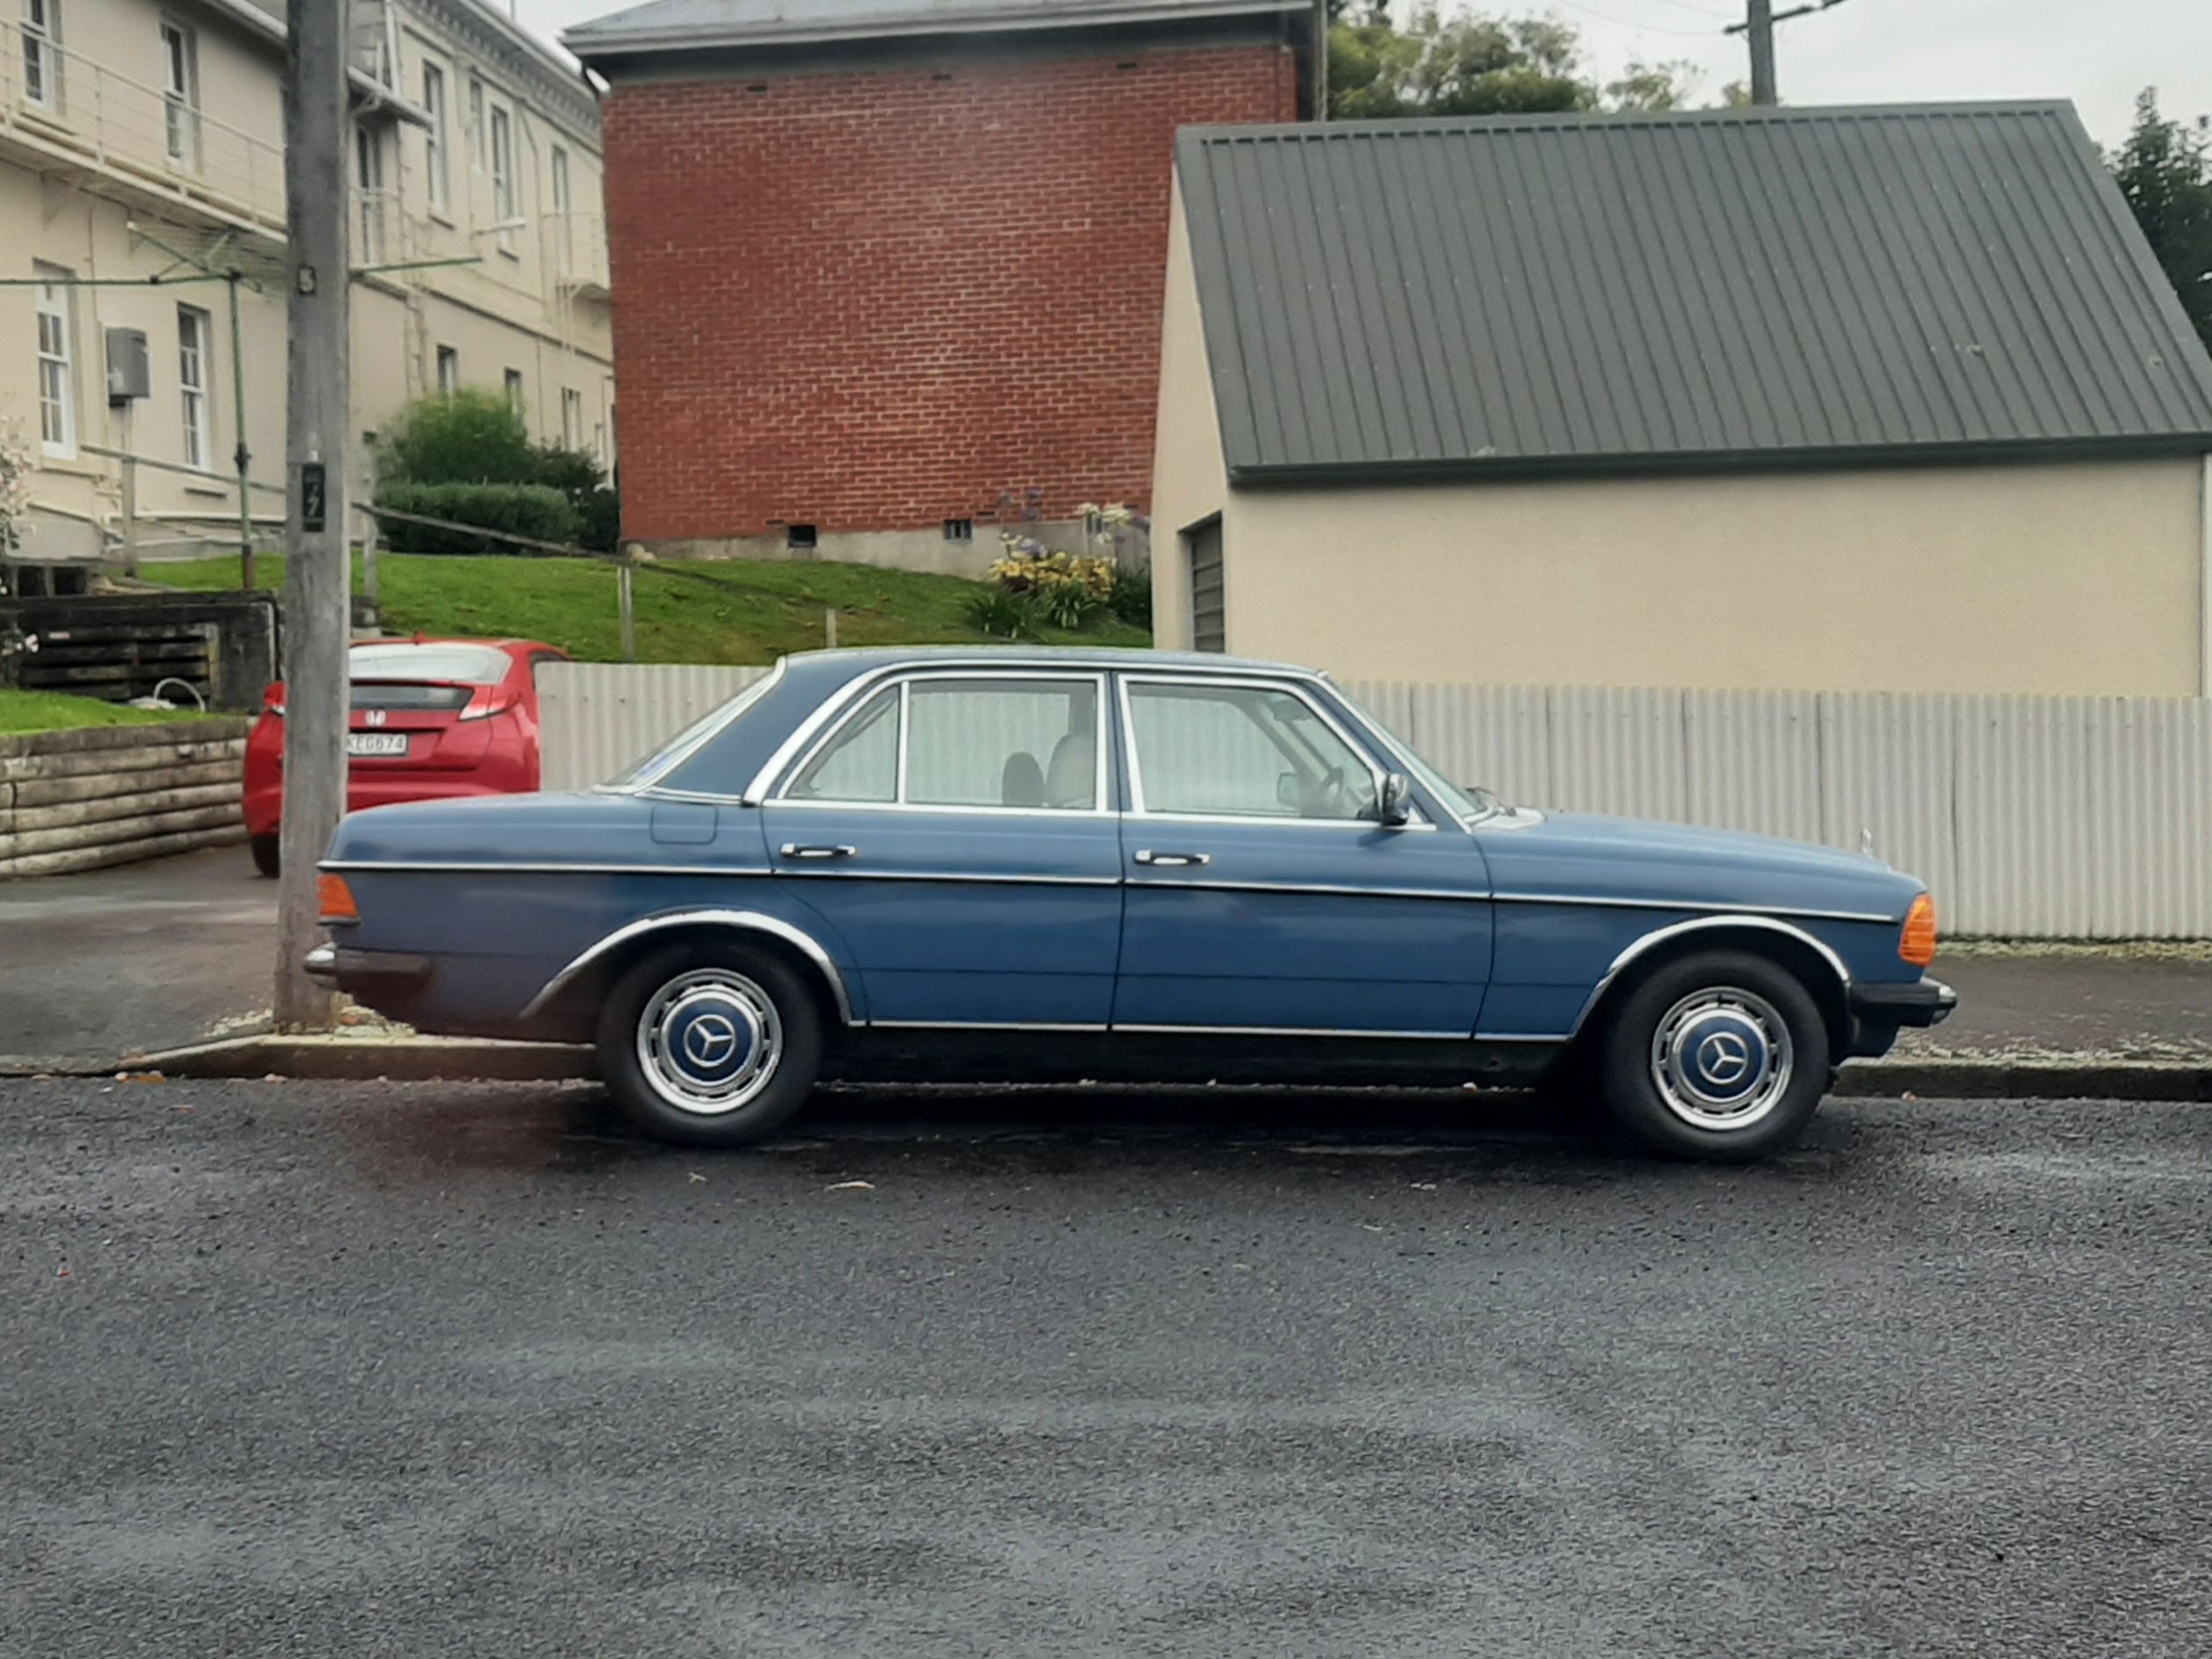
Double Benzes, dulls my senses*
*only one big body
-
7
-
-
Double yellow car
-
2
-
1
-
 1
1
-
-
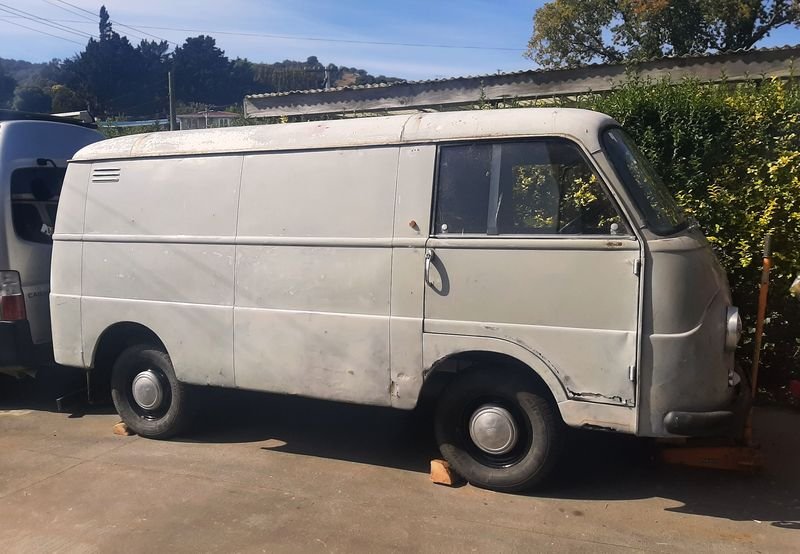
not able to assist but that looks boss.
without any 'but i want it' goggles on, that looks pretty rusty , which is a concern as these are notorious rust boxes as im sure you will know if you have the yearn.
Also, just flippin buy it already, and three wheel no-wof no-reg no-worries yolo through any traffic stops and down any palm lined boulevards, please and thank you
-
1
-
-
No advice to give, other than it looks sweet especially nice colour and the tow bar shroud should save you at least 0.01 l/km on those long summer drives.
those rims look like base model ford escort rims (4x10⁸?) so chuck some turbos on there asap,
oh and giz that single fin!
-
1
-
-
And something from Balclutha, hard
Big wang to lift the front at speed and big rims at the back for getting the powa down in the give way sign drags
-
4
-
 1
1
-
-
- Popular Post
- Popular Post
Another Ferd
-
11
-
- Popular Post
- Popular Post
-
19


Stu's 1985 Liteweight Tracker Caravan
in Other Projects
Posted
^ This! Make the bolt size same as the wheel nuts
Speaking of...not seeing any sik nasty rim updates!