Adoom
-
Posts
2,279 -
Joined
-
Last visited
Everything posted by Adoom
-
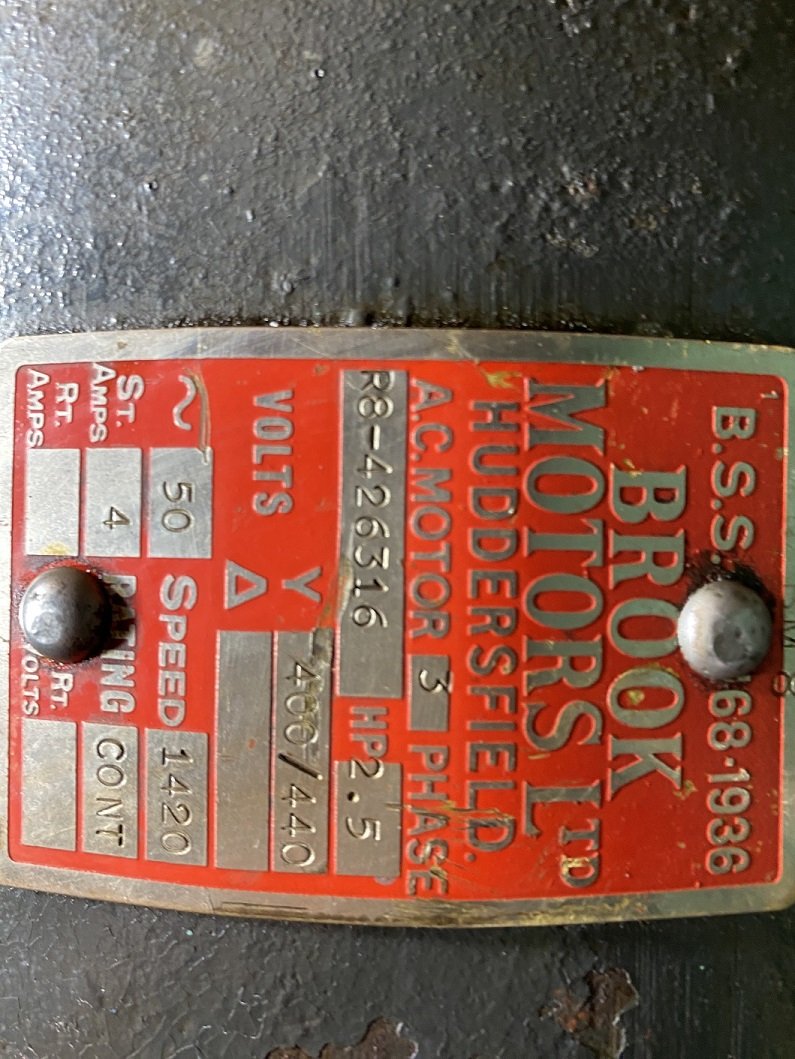
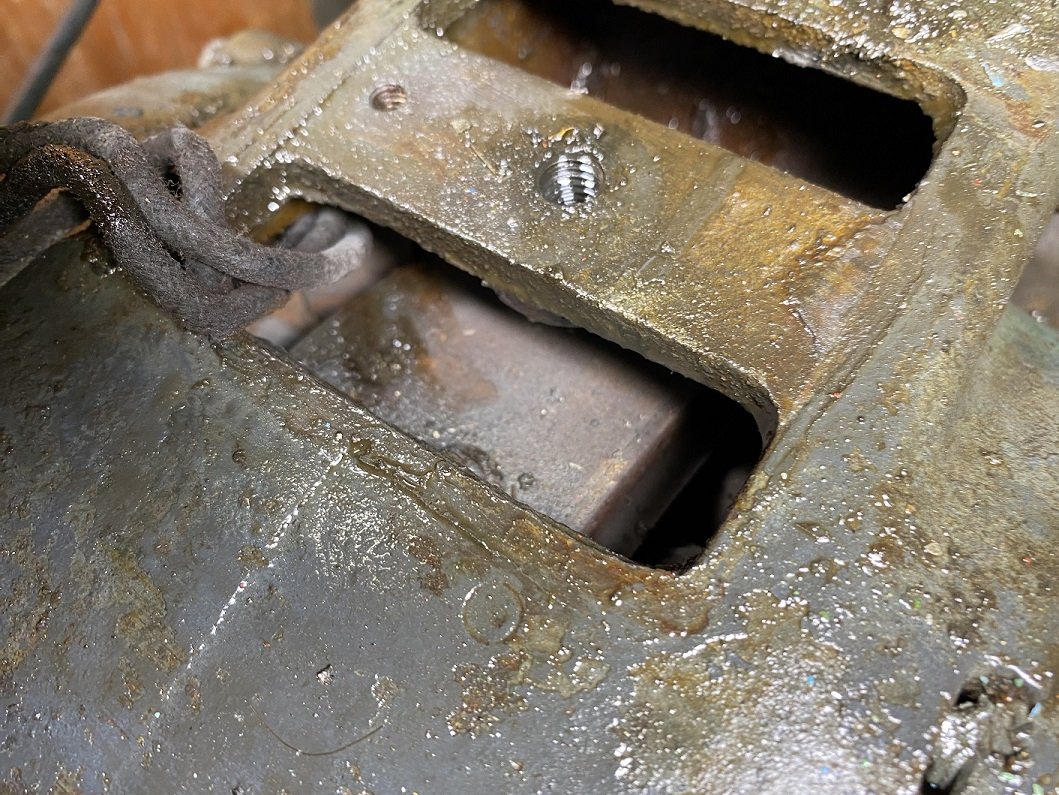
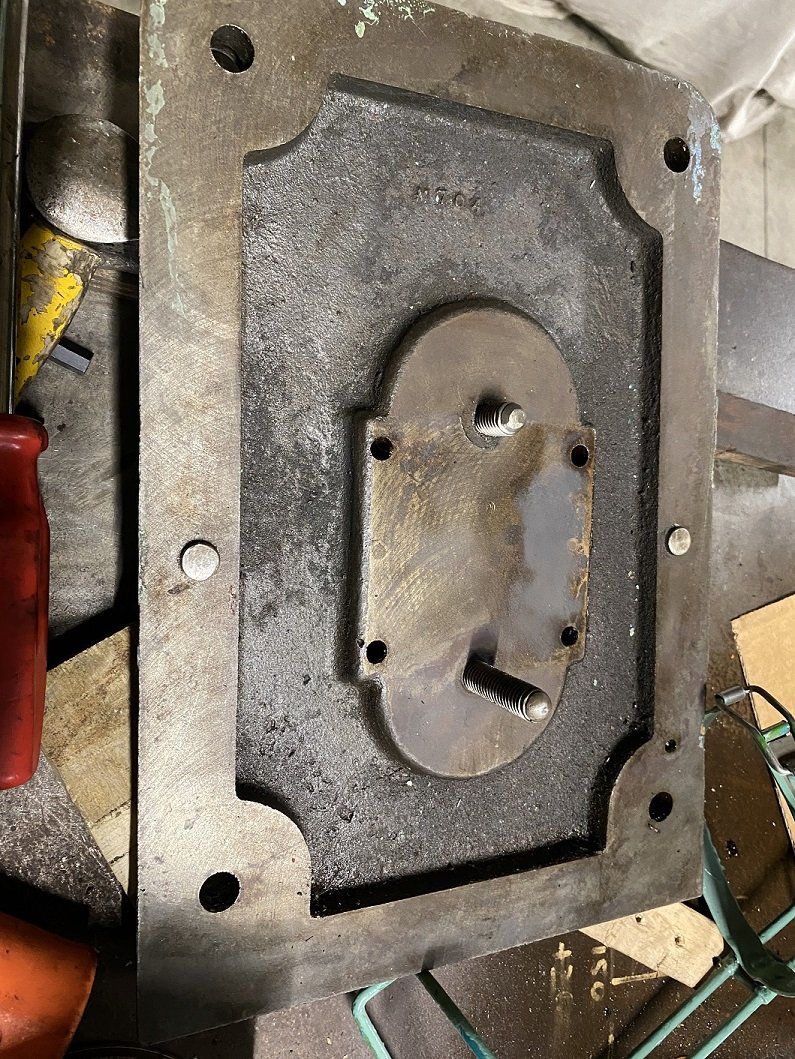
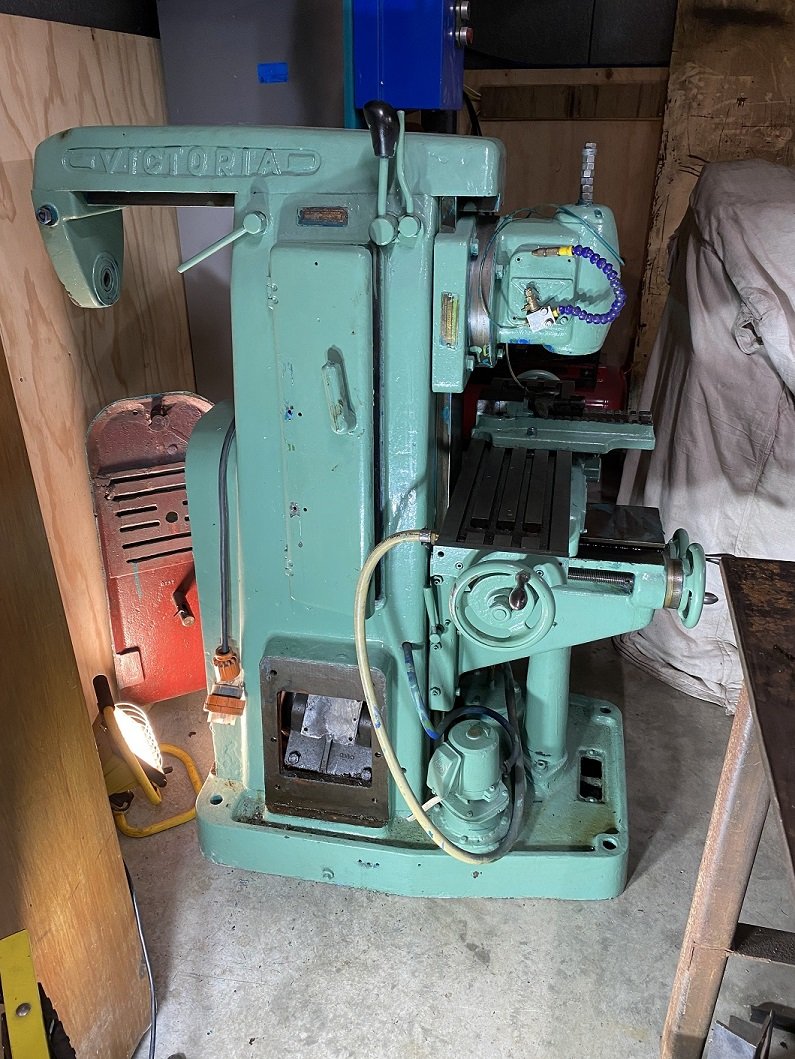
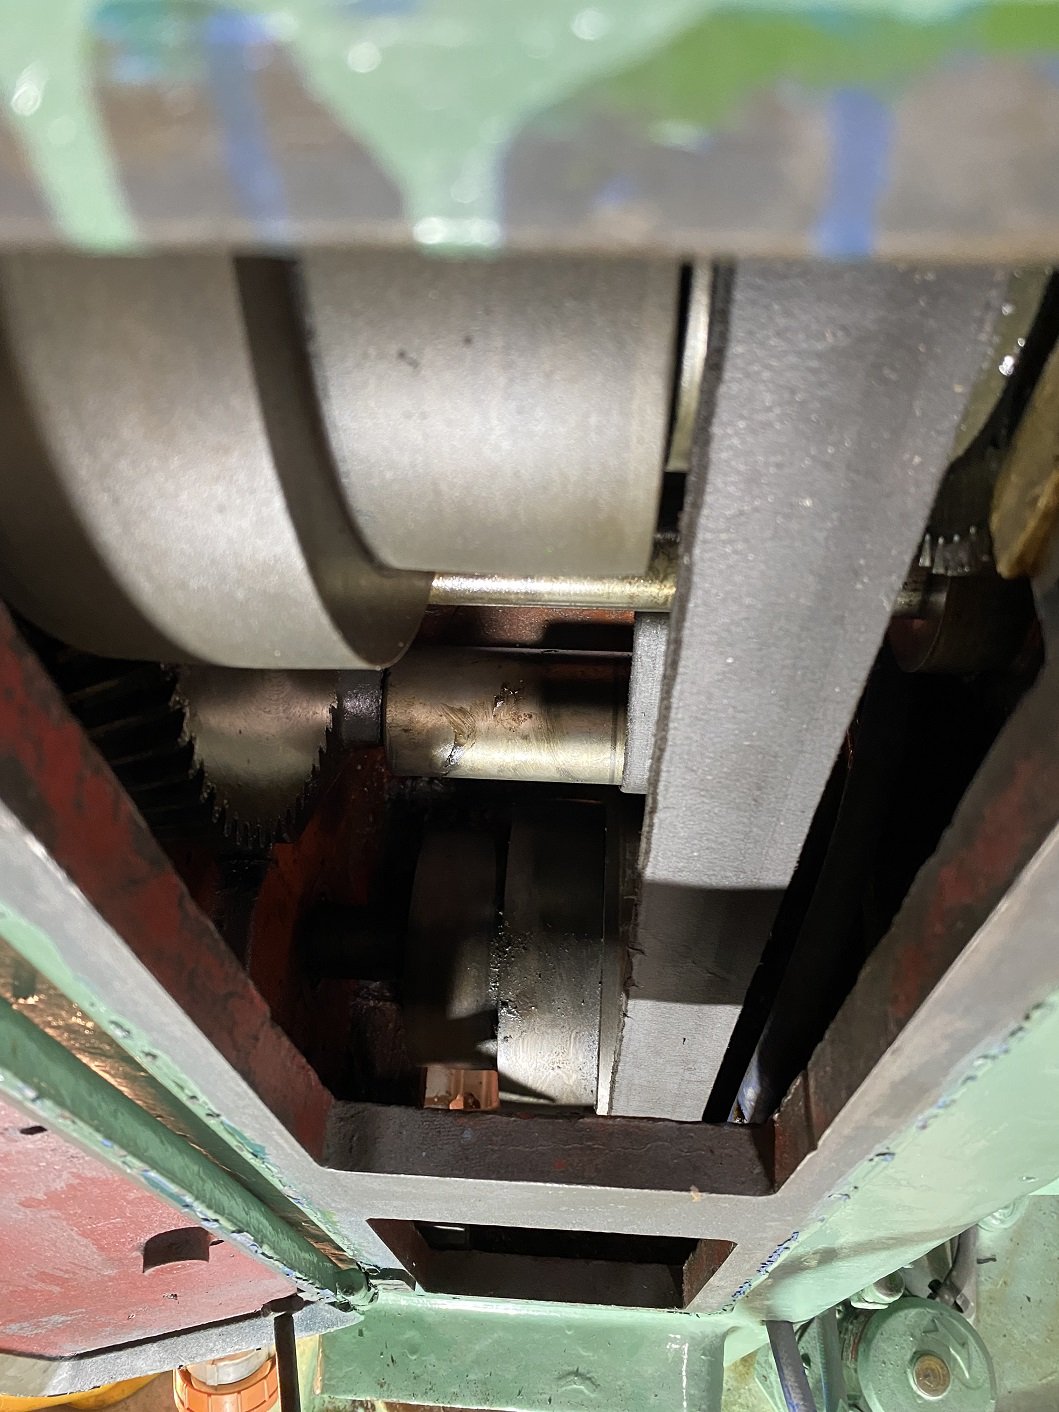
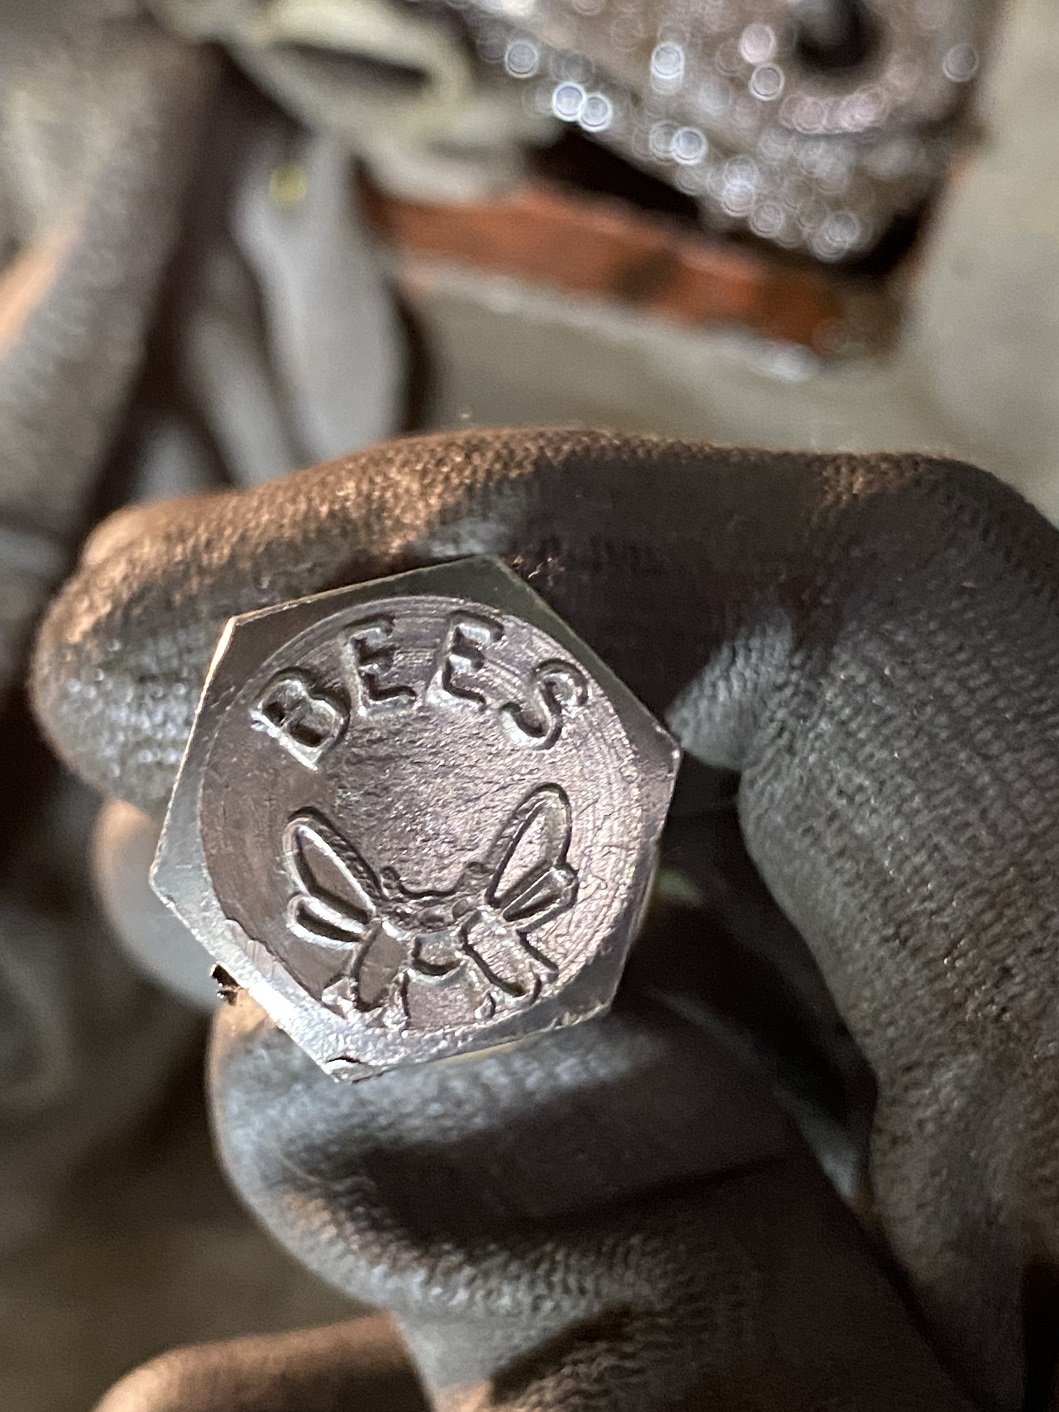
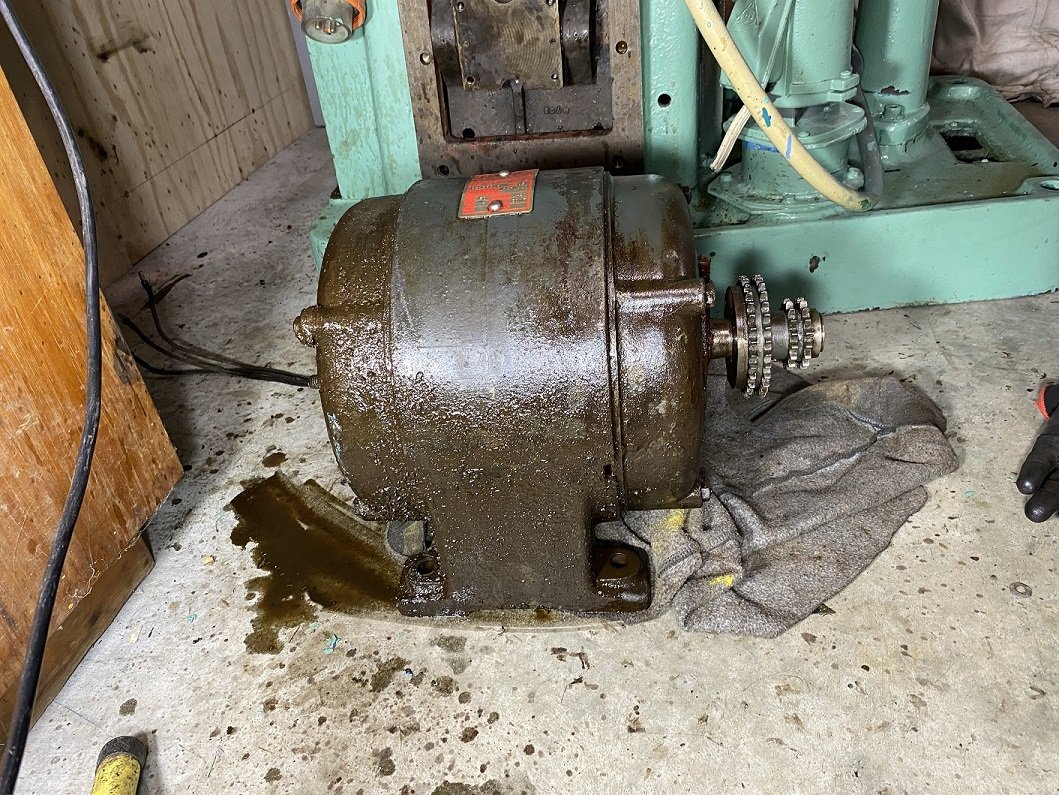
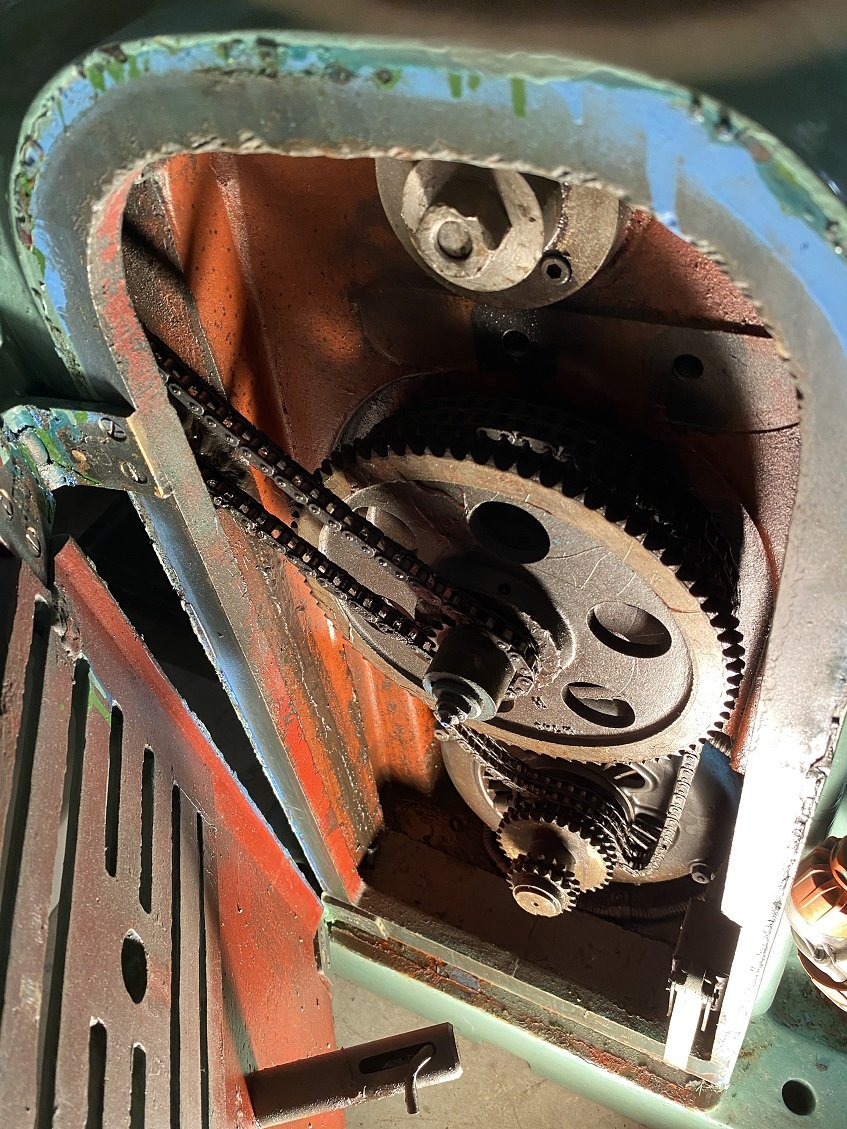
I just picked this up last weekend from one photo on Trademe from a guy who took 9 days to respond to my emails. It seems to be in okay condition. But there seems to be grease where I would expect oil, so the wheels are a work out to turn. And all the oiling nipples have been painted over. The inside is full of old oil and grease and dirt. So I guess I'll pull it apart enough to clean the grease out. First step. Get the motor out to find the info plate so I know what VFD to get. The motor is mounted to a rocking mount. That's bolted to this cover with a couple of threaded adjusters to adjust the tension on the drive chain. Yeh, CHAIN... The chain going off to the left is for the axis power feed gearbox. The motor BARELY fits through that hole, and it has to be at the right angle too. That big gear then goes into the column to some flat belt pulleys. I assume Everything has to come out of here to replace that flat belt. NFI how this is supposed to come apart, the manual I have is for the MK2 and 3, which are quite a bit different to my MK1. They changed to V pulleys instead of chain, and a gearbox instead of those flat belts. But I managed to get the motor out. It seems real big for 2.5HP. But it's short maybe? And after cleaning the filth off the info plate. I'll need a 400V 3 Phase VFD, it can't be wired to use 230v 3 Phase. Because the motor doesn't have separate terminals for the coils. It does have these cool looking BEES bolts.

- 10 replies
-
- 16
-

-

Random slightly cool stuff you built but not worth its own thread, thread
Adoom replied to h4nd's topic in Other Projects
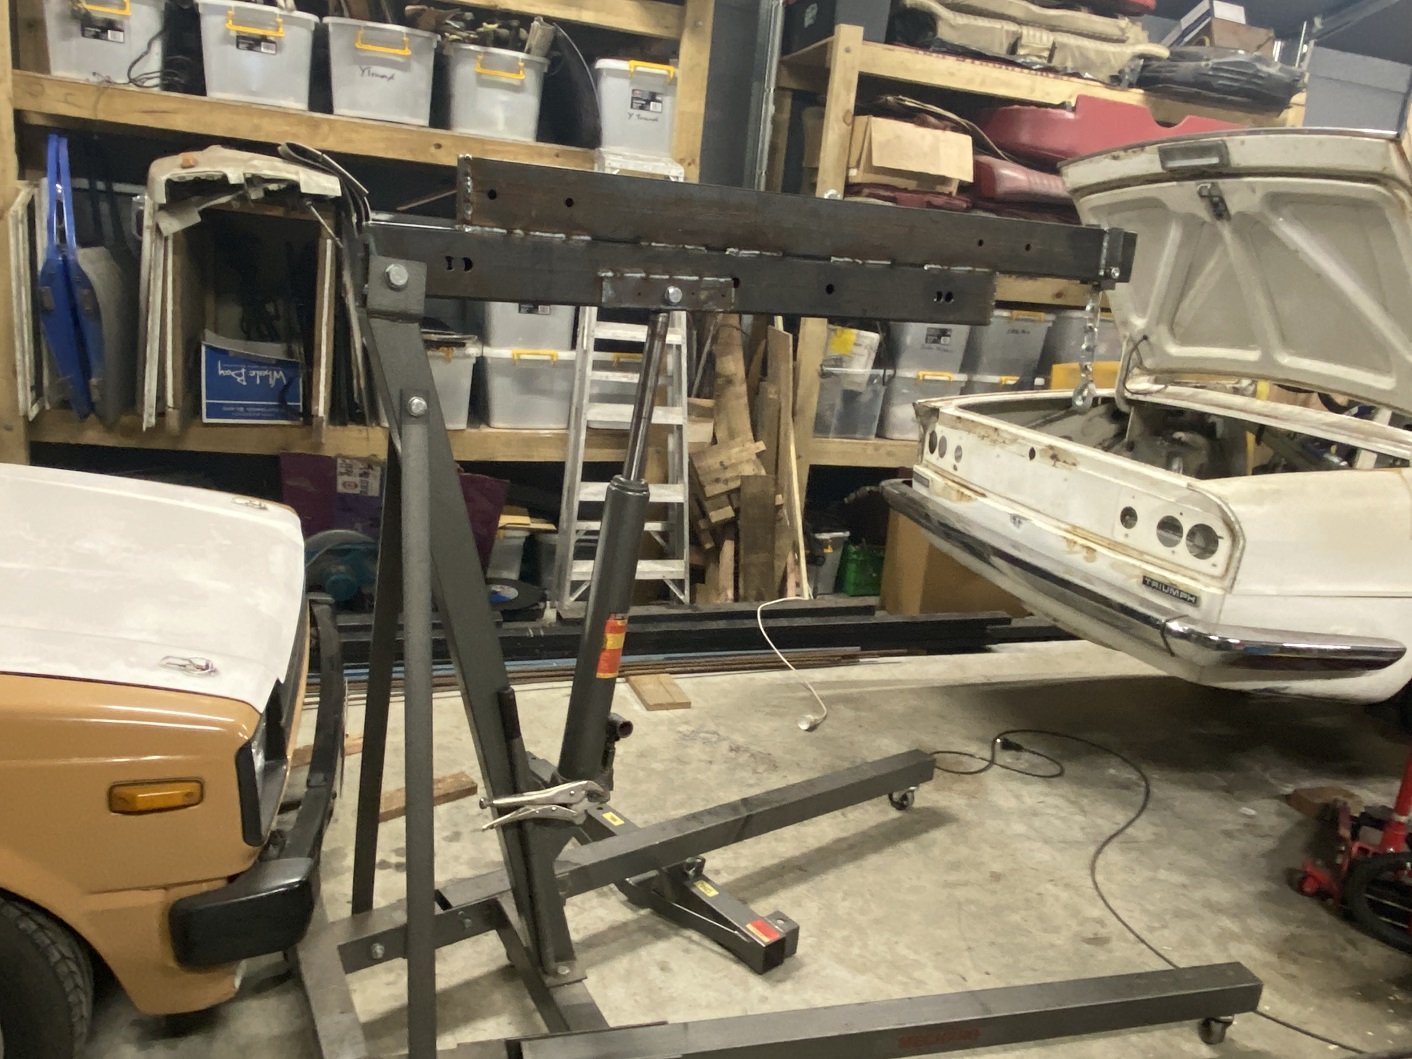
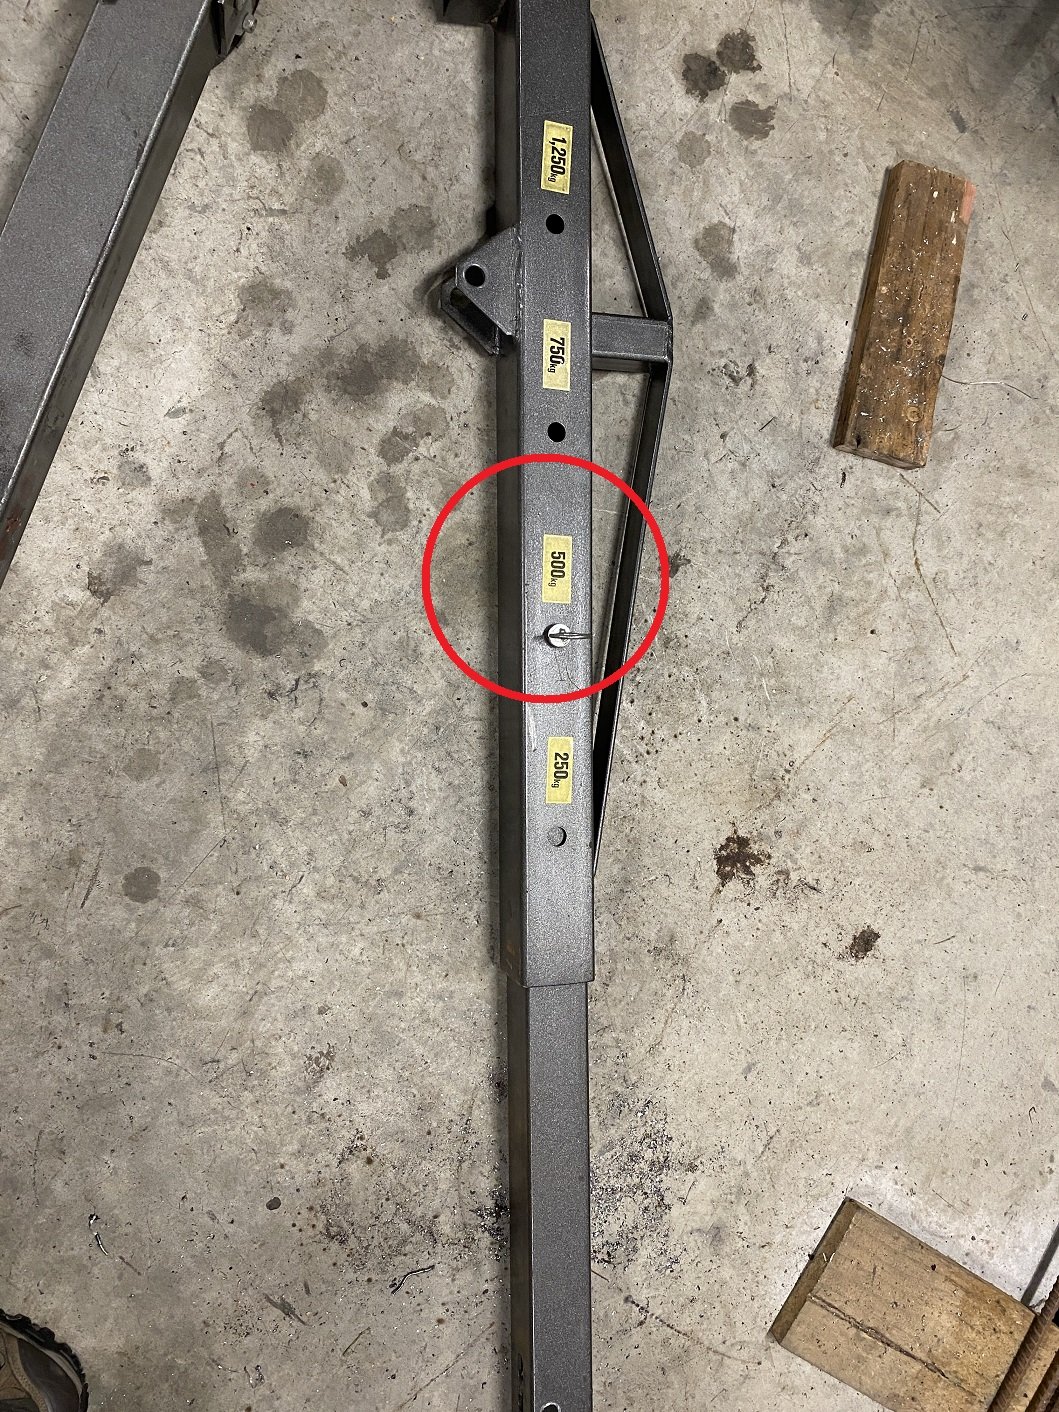
I have a requirement to unload a 1000kg milling machine off a trailer onto my garage floor this Sunday. But at the boom extension required for clearance, my engine crane is only rated to 500kg. Here is my solution. I've also moved the pickup point for the ram forward 150mm. According to online lever calculator, this would need only half the rams 7500kg capacity to lift 1200kg. I've added spacers to tighten up the legs where the locking pins are, so they are not all wobbly anymore. I'll probably also use a few g-clamps to clamp some more rectangular section over where the legs pivot. I'll put wooden blocks under it so I don't have to worry about the wheels collapsing. I'll I need to do is lift the mill high enough to drive the trailer out from under it, then lower it onto 25mm roundbars as rollers.
-
I like this idea more than chopping up the top of the strut tower. But it sure will be a whole lot of whittlin'.
-
I'm not sure what's going on there. How is the top hat mounted?
-
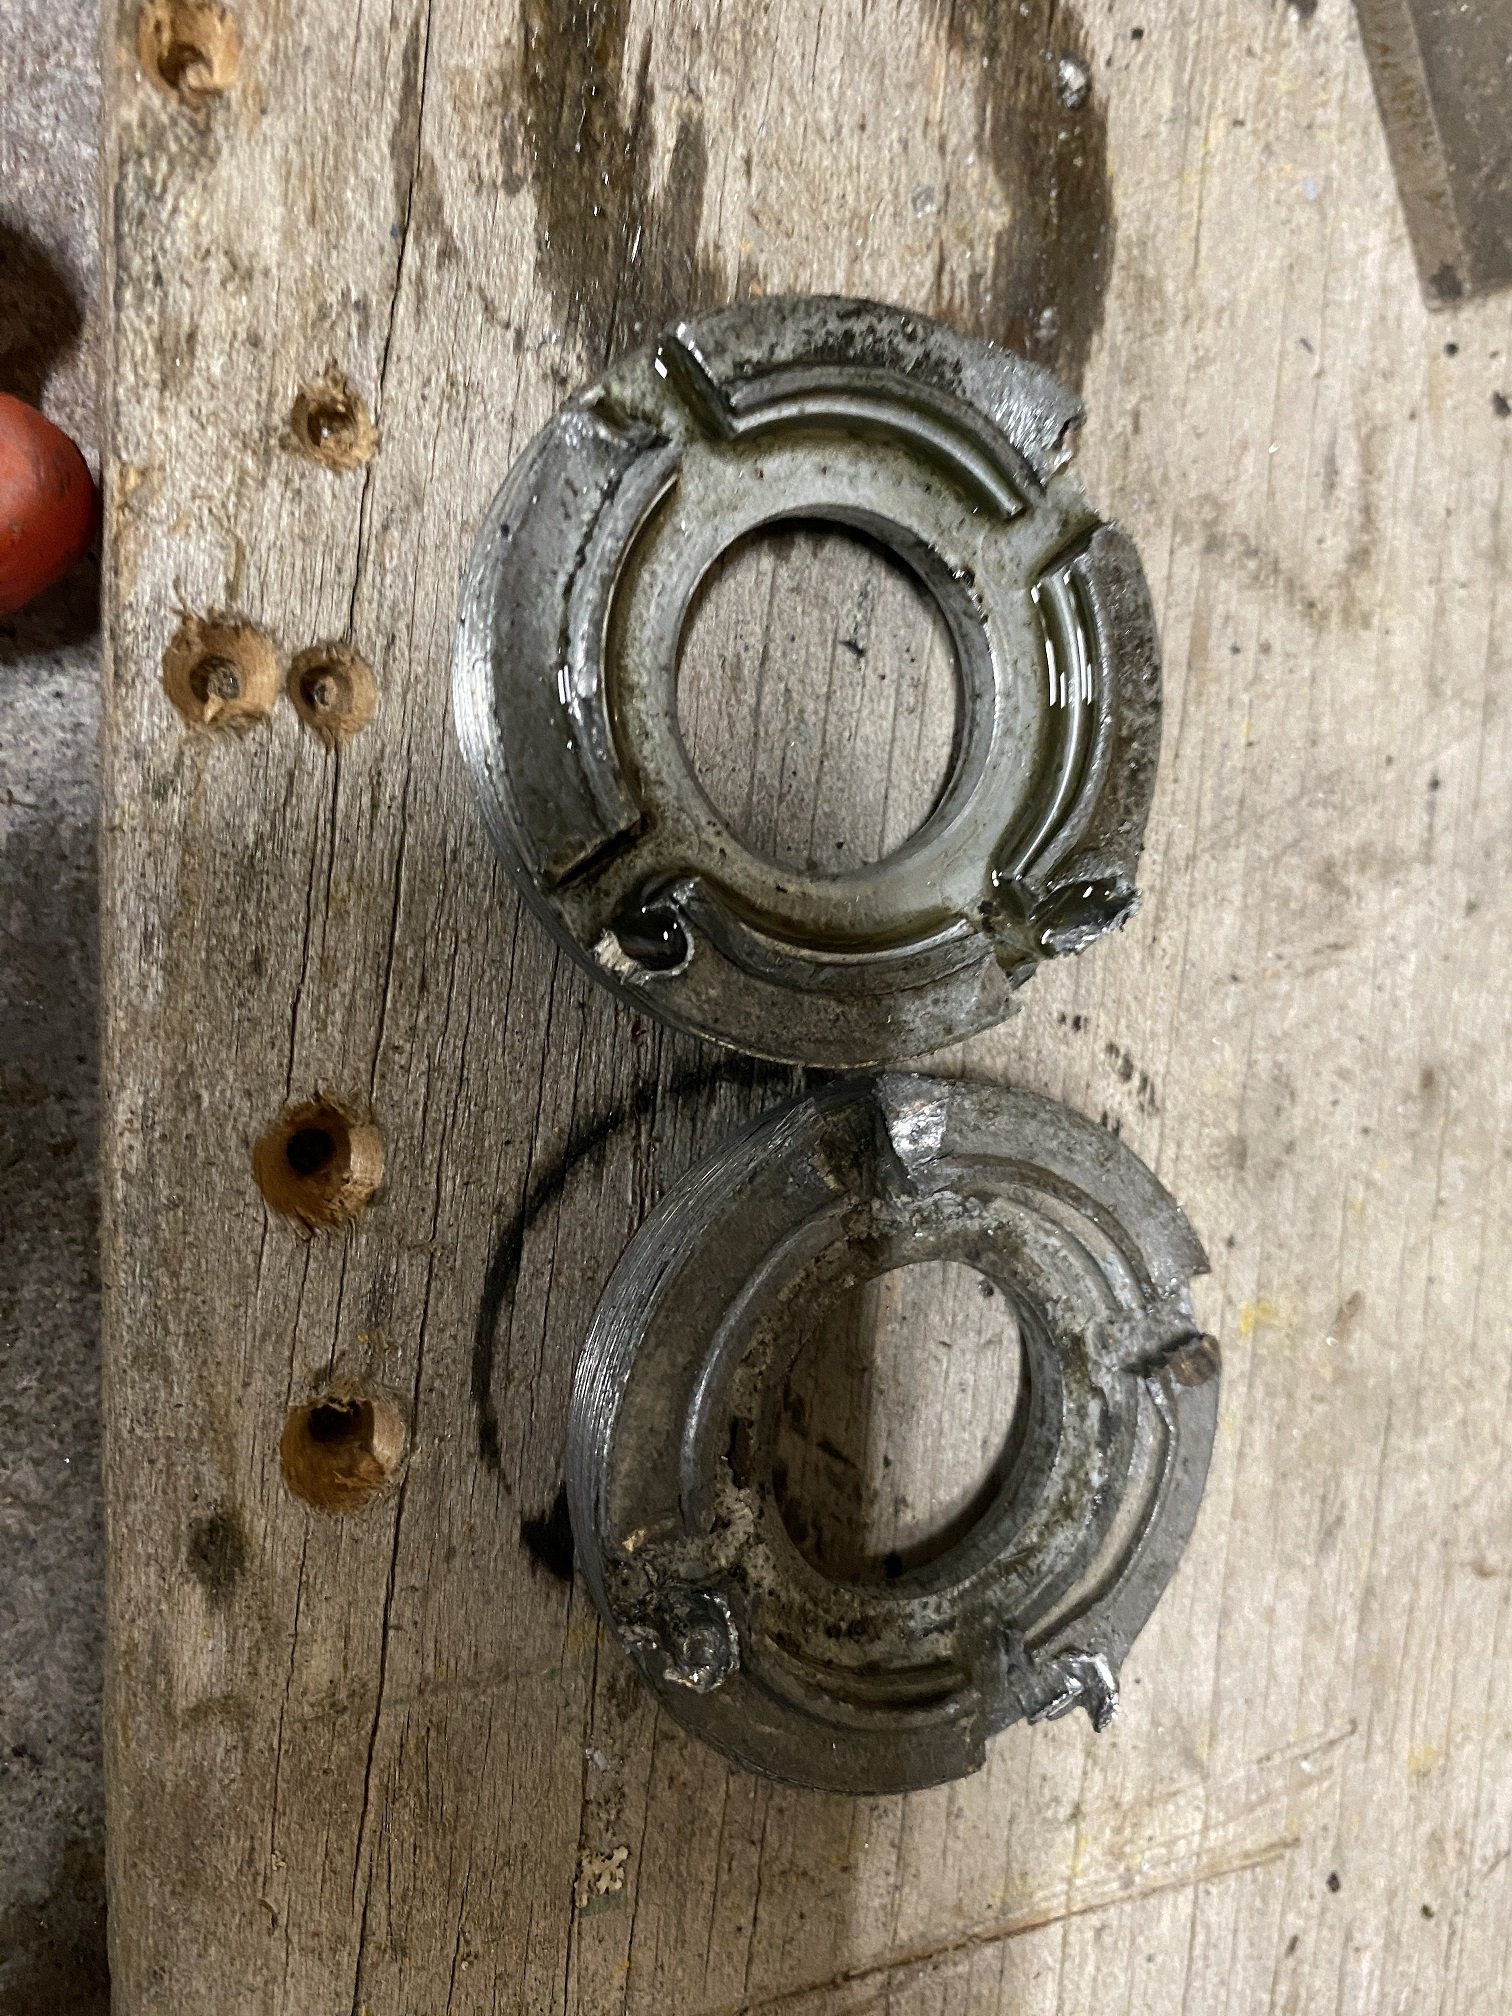
I stripped the spare set of front struts so I can get them ready for welding. I suspect these last turned in 1971. They were EXTREMELY reluctant to turn. I had to use a punch and hit it really hard with the hammer.
-
I made the 7mm spacer and tacked it in so it stays there.
- 52 replies
-
- 11
-
-
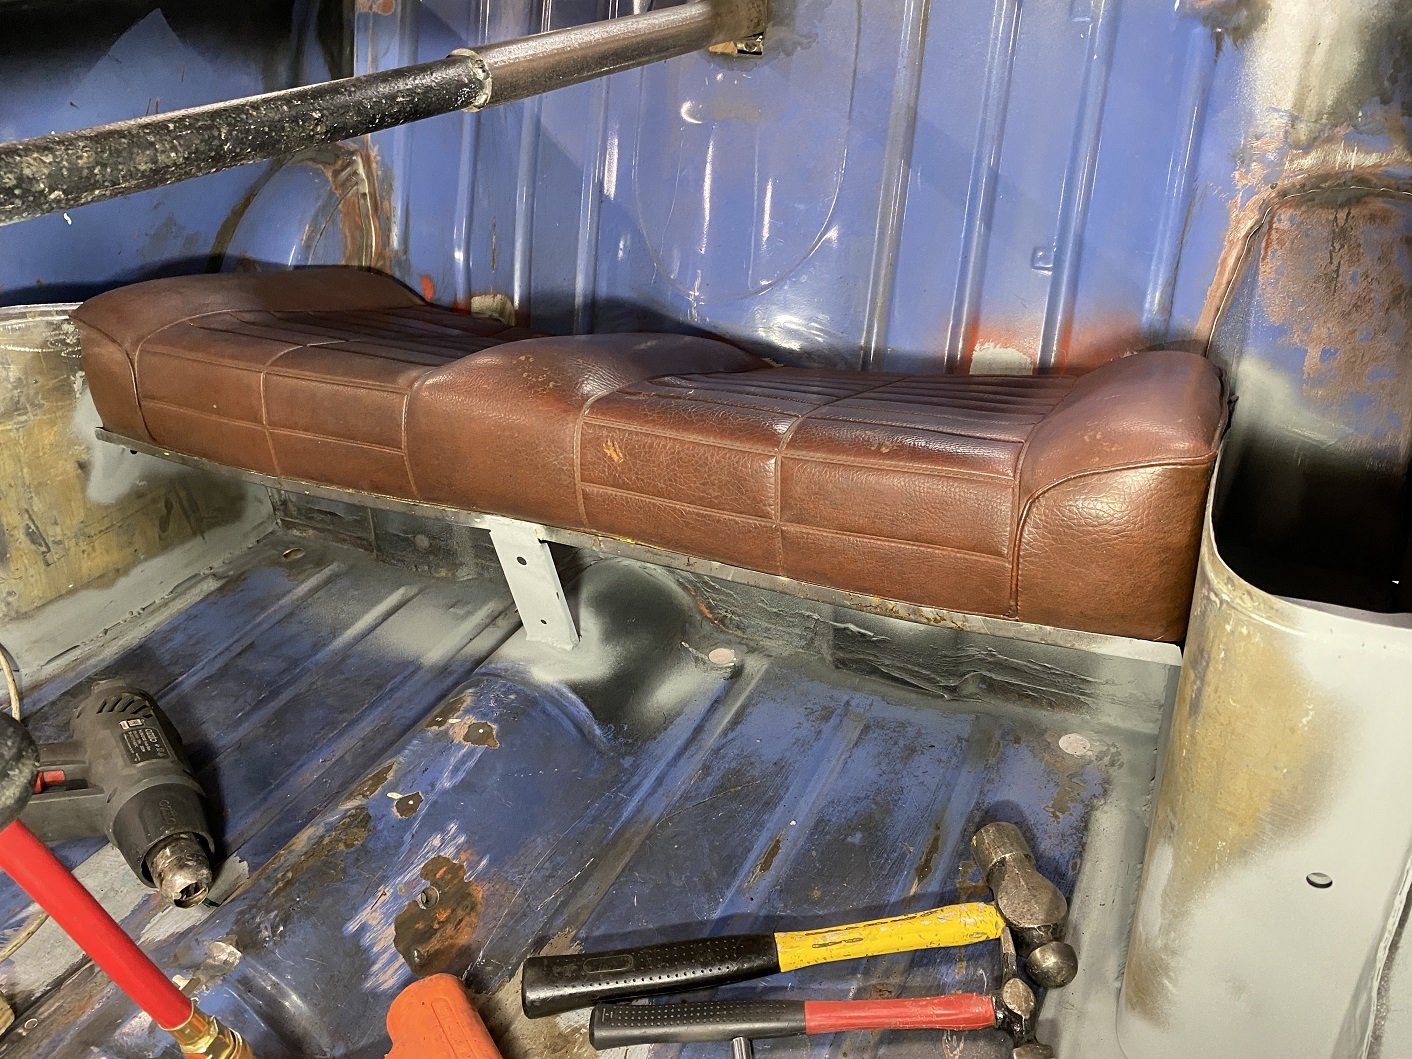
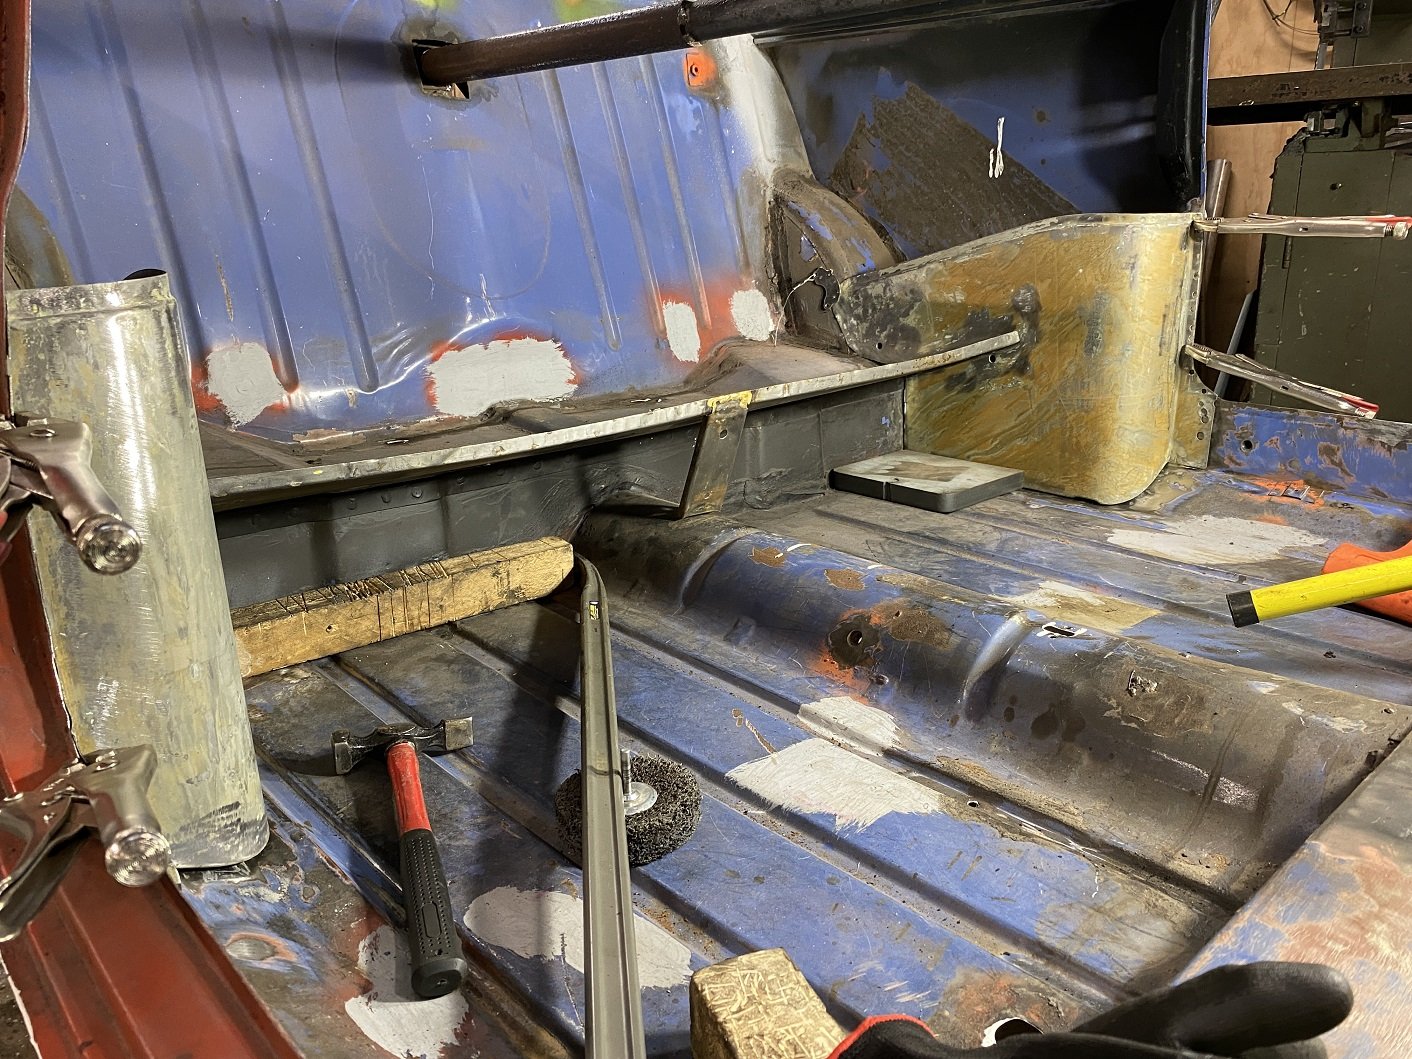
It has a rear seat again. Like a REAL car! And a seat base still fits!
- 52 replies
-
- 14
-
-
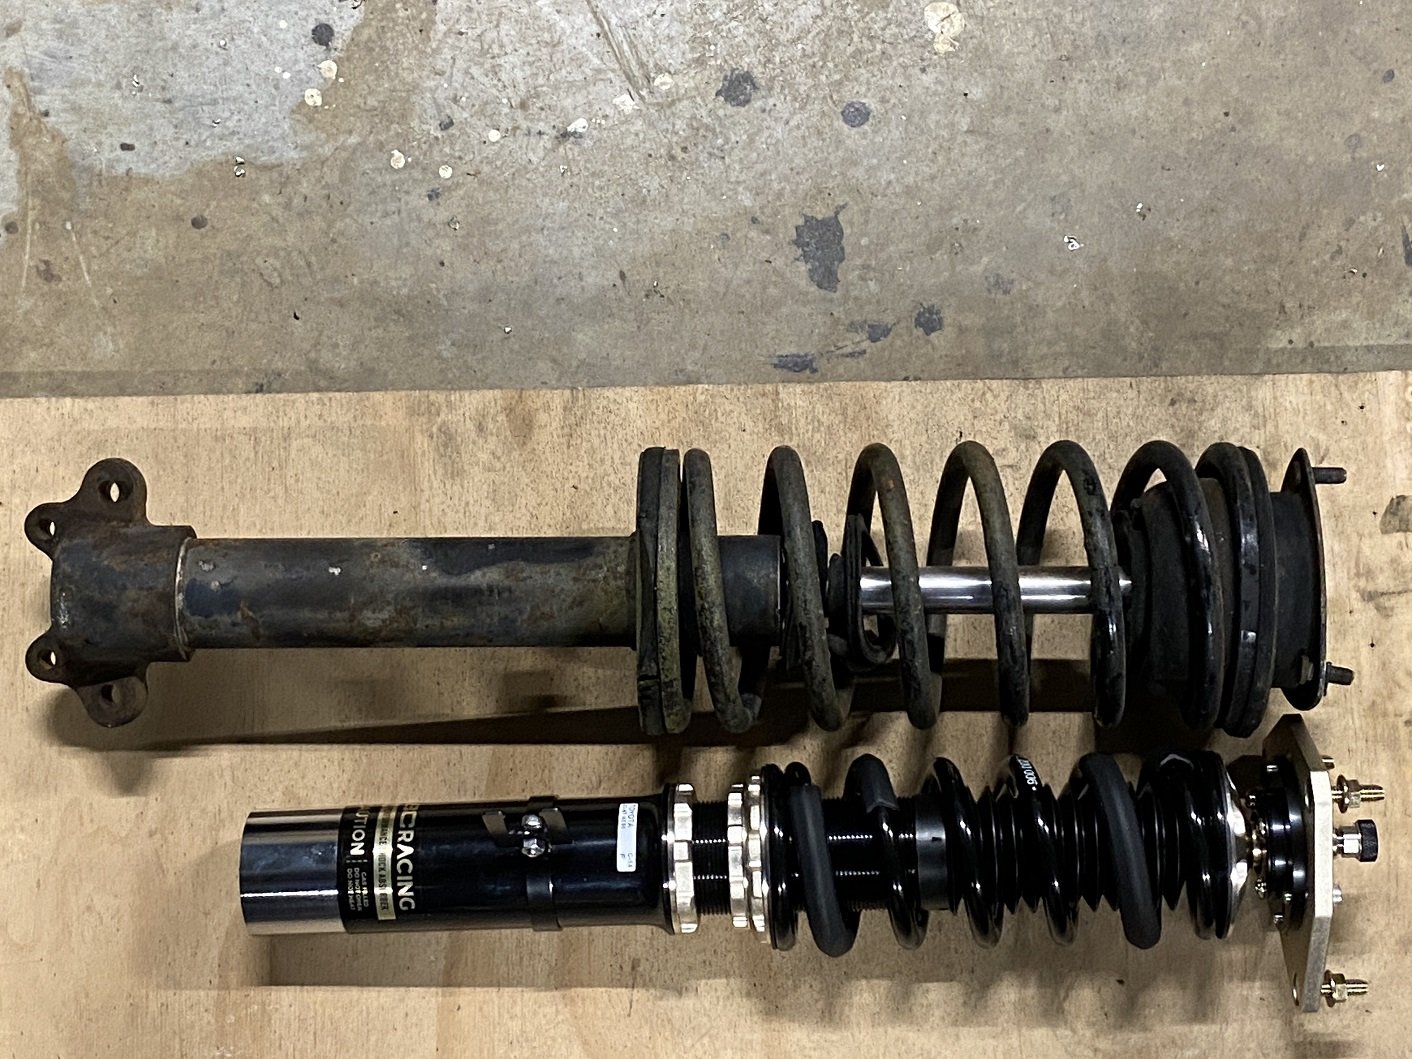
I split this up because I couldn't fit all the photos in one post. I also thought I'd get some weld-on coilovers or the front struts. Through pure random guessing, the first strut I looked at was for an AE86, I found out the od of the AE86 strut is 51mm. I measured the od of the Triumph strut with a micrometer and got 50.85mm. So the weld-on coilovers should fit my strut tubes. So I asked the supplier if they could get the id of the weld-on bit and the length from the top of the mounting plate to the bottom of the weld on bit when the body is adjusted as short as possible. "I need to to be no longer than 460mm". They emailed the supplier, BC in Taiwan I guess. The id is 51.1mm, so that's all good. And the shortest length was 459mm. Not stocked, order from Taiwan. But something must have been lost in the translation. The shortest length was 480. There's no way to make it any shorter. Where it welds to the original strut tube, the weld must be at least 10mm from the casting and at least one diameter length of the original strut tube must be up inside the weld-on bit. That's ~51mm, but with the damper screwed all the way into the weld-on bit, there's 55mm left for the original strut tube. I thought I could maybe turn the thread off the bottom of the damper, so it would fit down past the threaded section and into the original strut tube. But on inspection of the damper, that's not an option. Here it is with the original strut. Like this, it's actually 10mm shorter than the original strut at full droop, but on the car the original strut needs to be 30mm shorter to prevent the inner tie rod on the rack from binding. So it's 20mm too long. I thought I could probably use the same solution for the front as the rear. I'll have to modify the top plate of the strut tower to allow for the camber adjustment to clear anyway. So I chucked the bonnet back on to see how much room there is. 40mm is how much higher I could go before those nuts hit the bonnet. Will that be enough?
- 201 replies
-
- 15
-
-
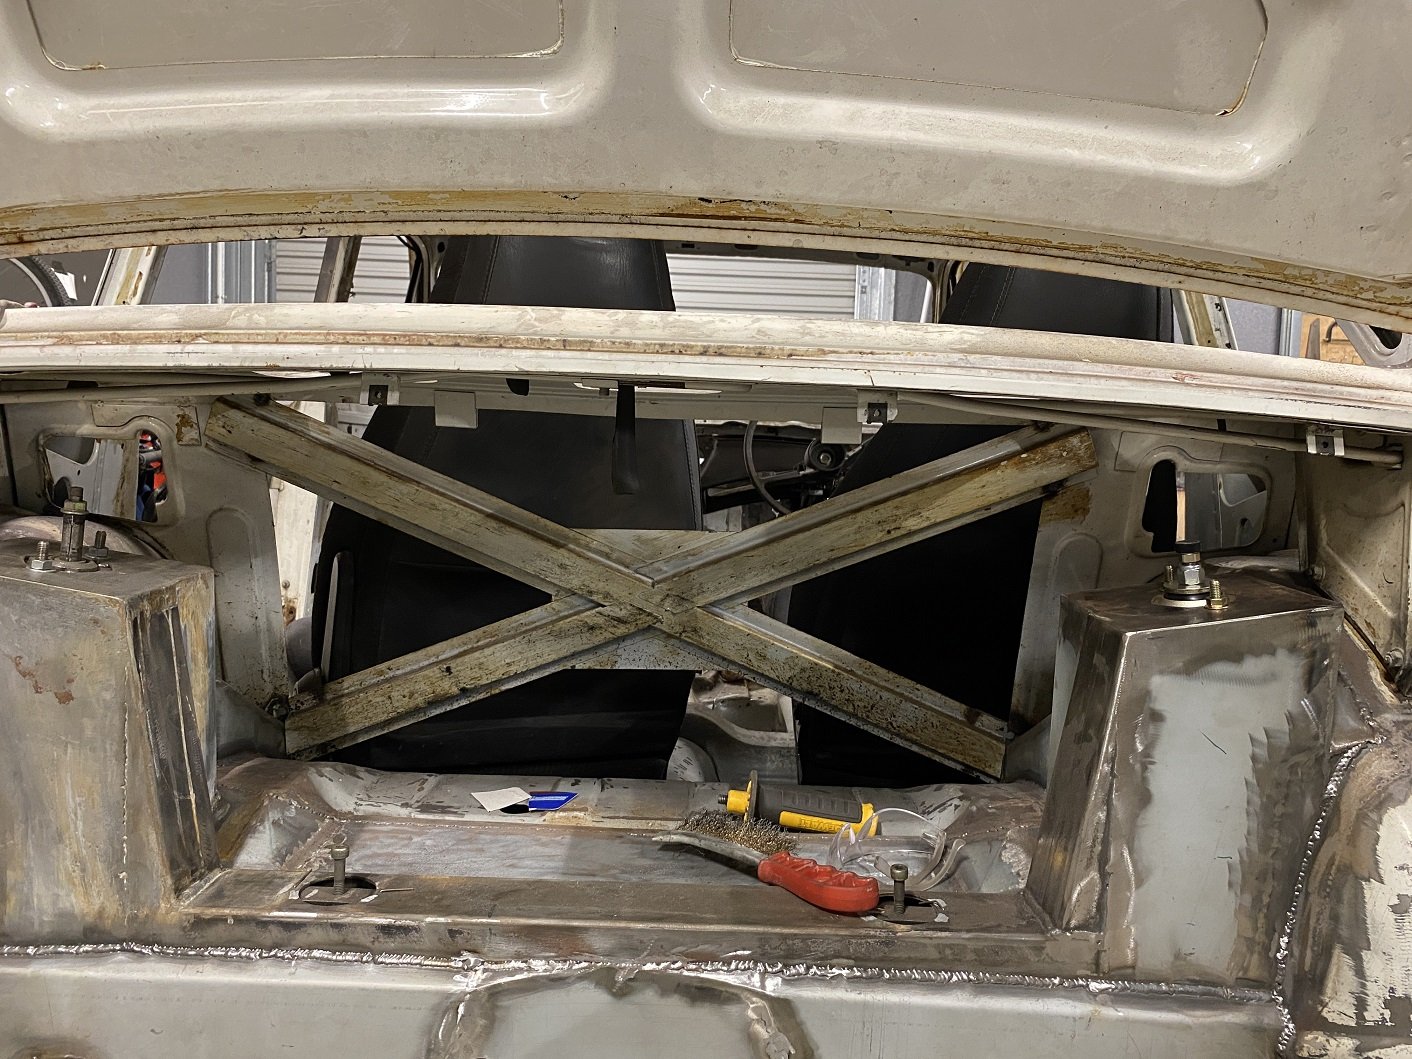
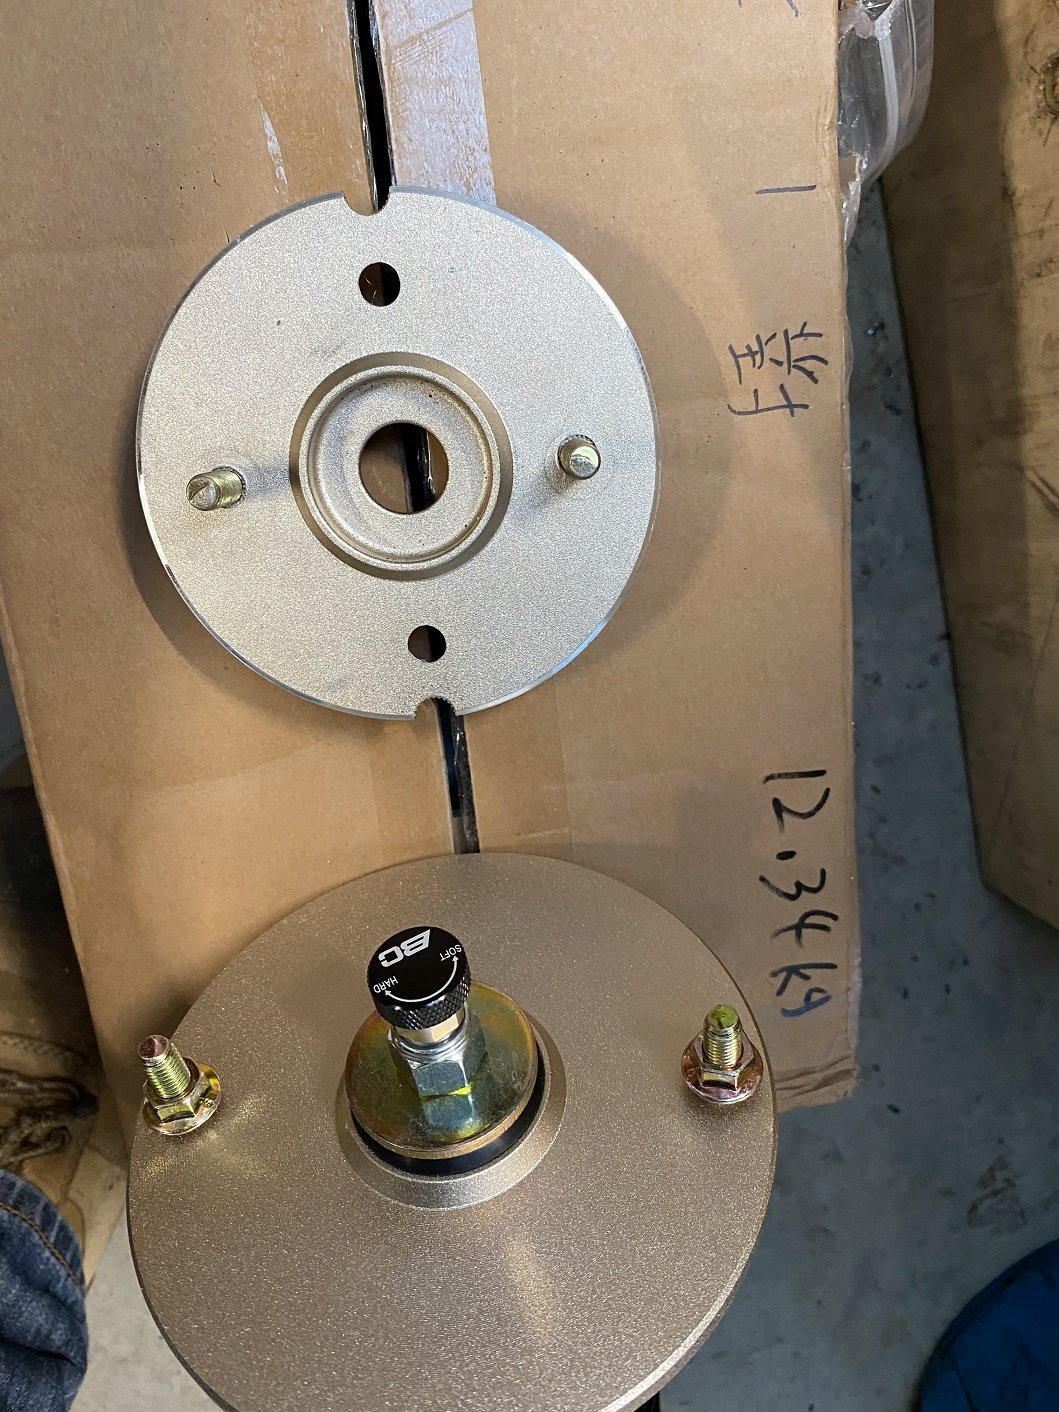
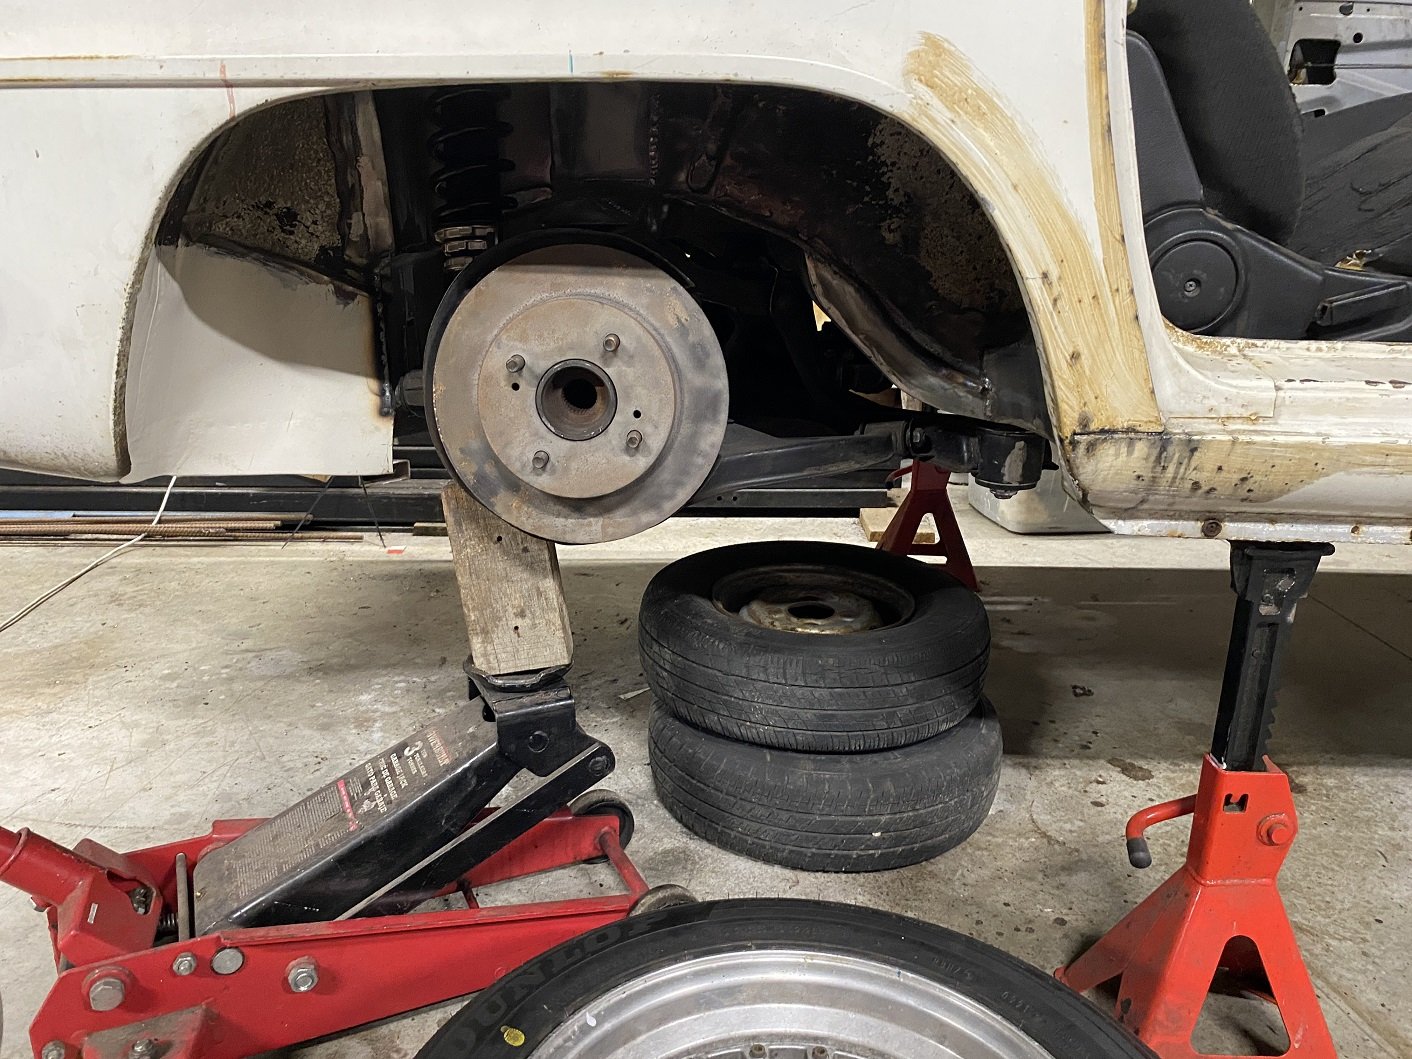
So I thought I'd look into getting two new coilovers for the rear because the Teins I mocked up with were old and knackerd. I went with BC racing because they would sell me only the rears and they were just barely affordable but still decent quality. The subframe is from an S14 Silvia, so I'm like "sell me S14 Silvia rear coilovers", assuming, these fit, so those will fit. Not stocked, order from Taiwan. "I'll put them in today. these will be the easy ones". They were a little longer than mine when the strut body was adjusted as short as it would go. "It'll be fine, a little more droop is not a problem". Oh, damn, maybe the teins were from an S13.... The Teins are 79mm pcd and the BC are 116mm. Those big top plates also don't fit in the strut towers I made. "No worries, I'll just make new stud holes and turn down the plate". The extra holes are because I didn't notice my 11mm drill was bent and because I had to clamped down in the mill, it made a 12mm hole. Well, that problem's fixed. Now to install the coilover. This is where I plan for ride height to be. The wheel center is actually the same height as the top of the sill, but the photo angle..... Buuuuuuut, to get to that ride height, I had to wind the spring platform right down...... and the coilover is basically out of travel and on its bumpstop. Fuuuuuuuuuuuuuuuuuuuuuuuu. So I was thinking that I'd have to look into different BC dampers that are shorter. The damper body is LONG, more than twice the travel. How much was this mistake going to cost me??? After working on the mini instead, so I could feel I had achieved something on the weekend. I realised.... my strut towers are totally custom fabricated, I could just make them taller! There's at least 80mm there that I can raise it and still get to the adjuster knob. The idea I had so I don't lose the reference of the strut tower top plate is to bolt spacers to the existing bolt holes, then build a new top plate off the top of the spacers as well as the top portion of the strut tower that would slide over the top and overlap the existing strut tower top. I'd then use tek screws or something to attach the new top to the old top. Then I can cut the old top off, refit the new top, using the tek screws for alignment, then weld it inside and out. Wheew! I supposed I should work out if 80mm is going to be enough.....
- 201 replies
-
- 13
-
-
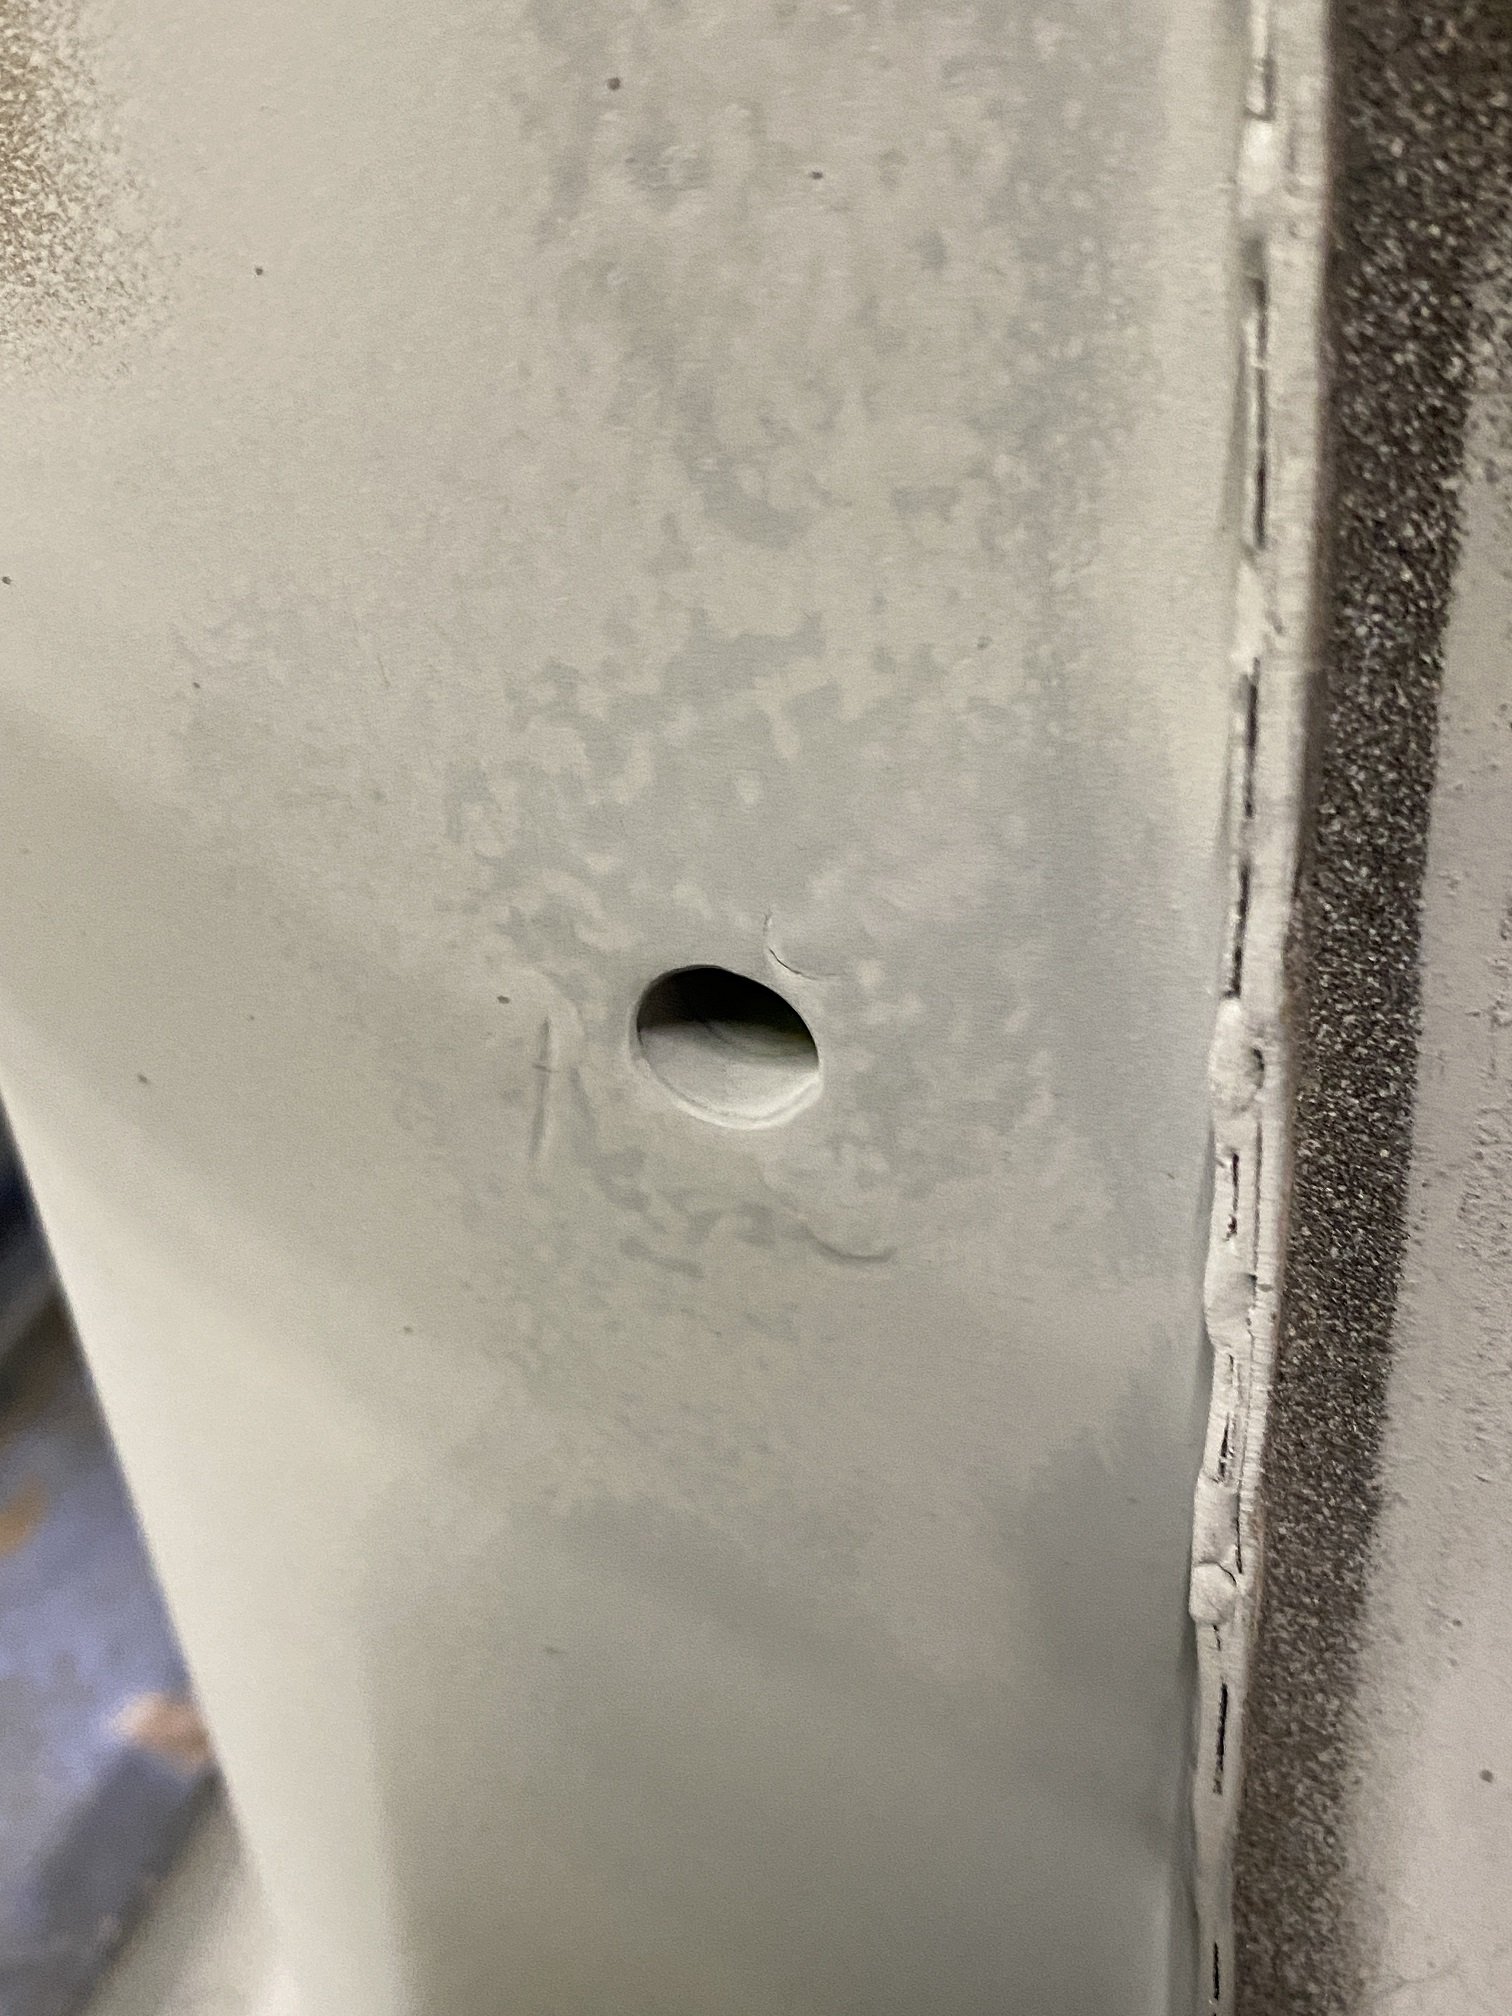
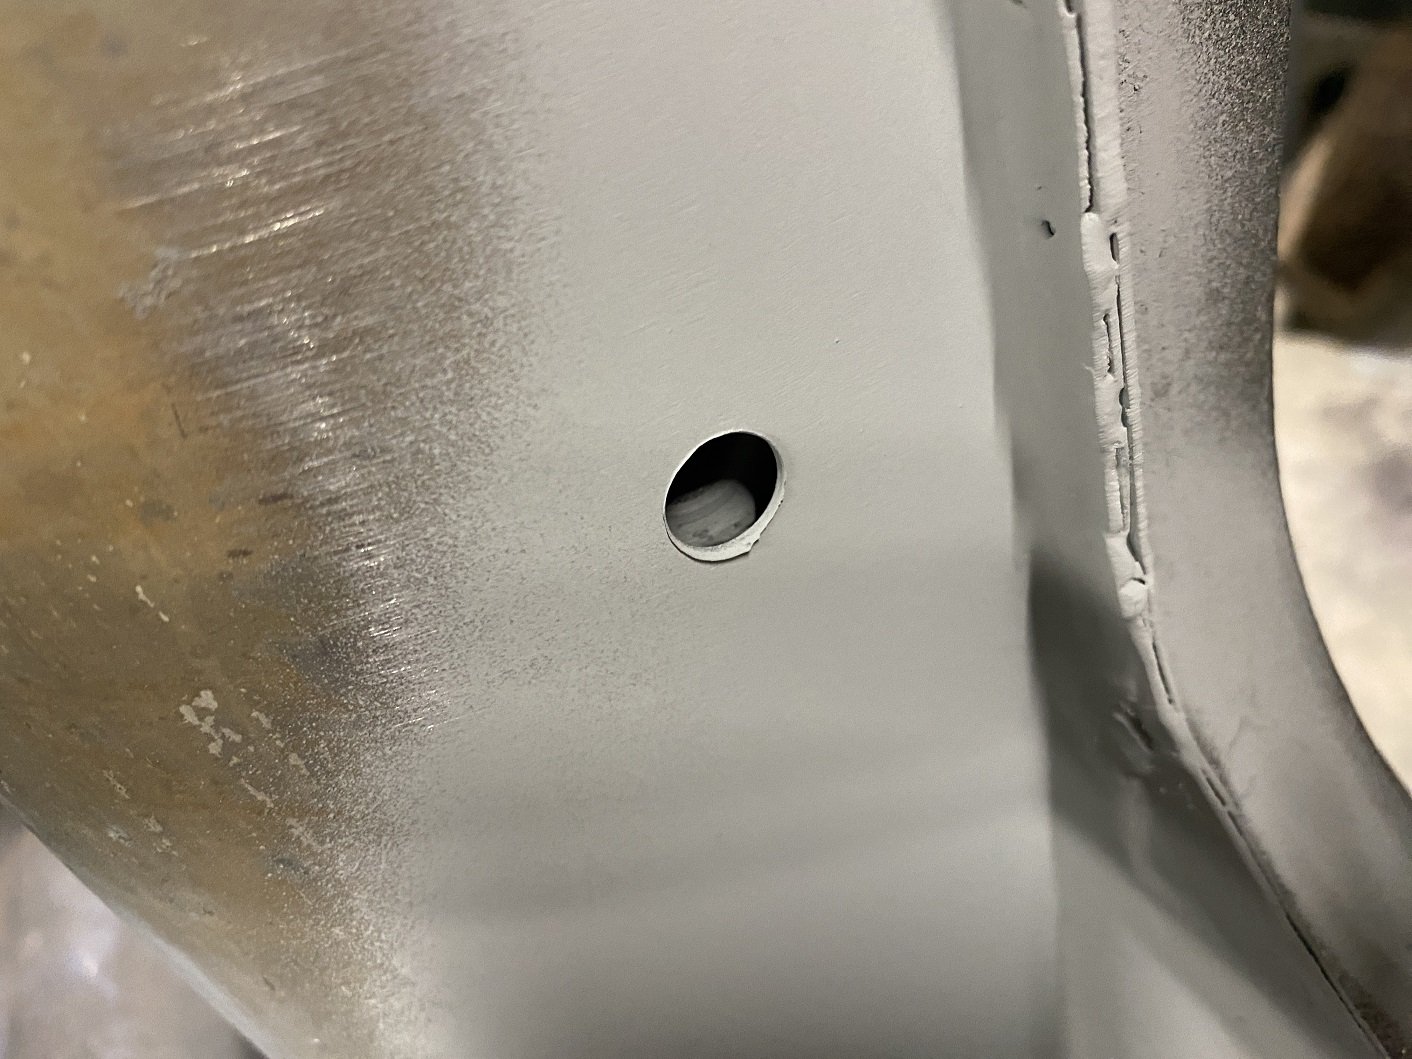
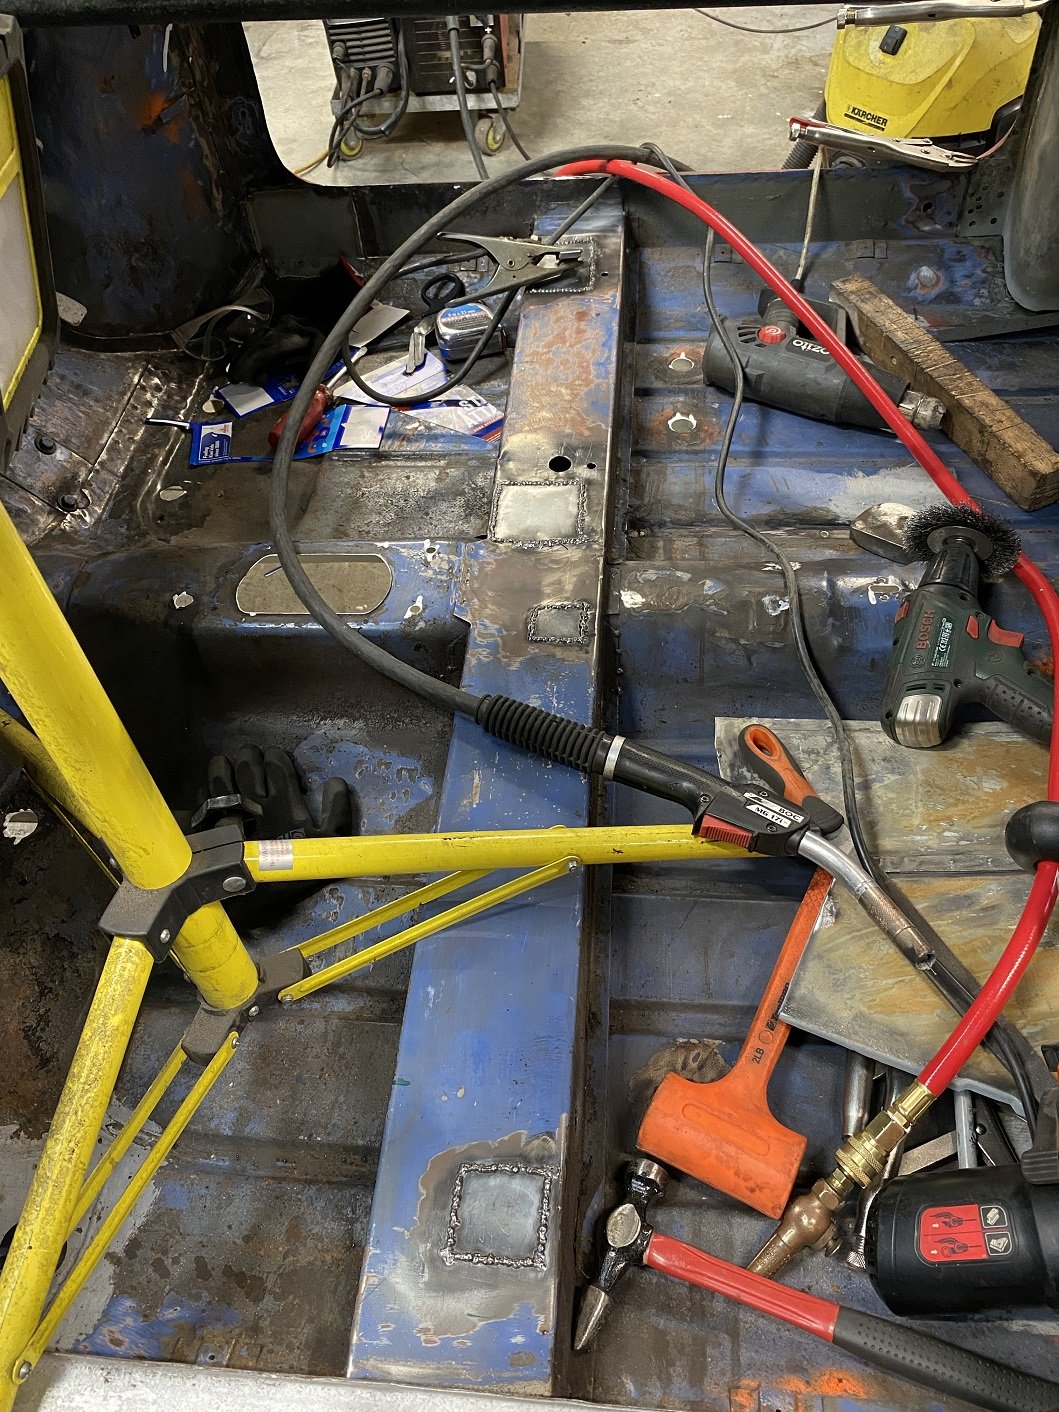
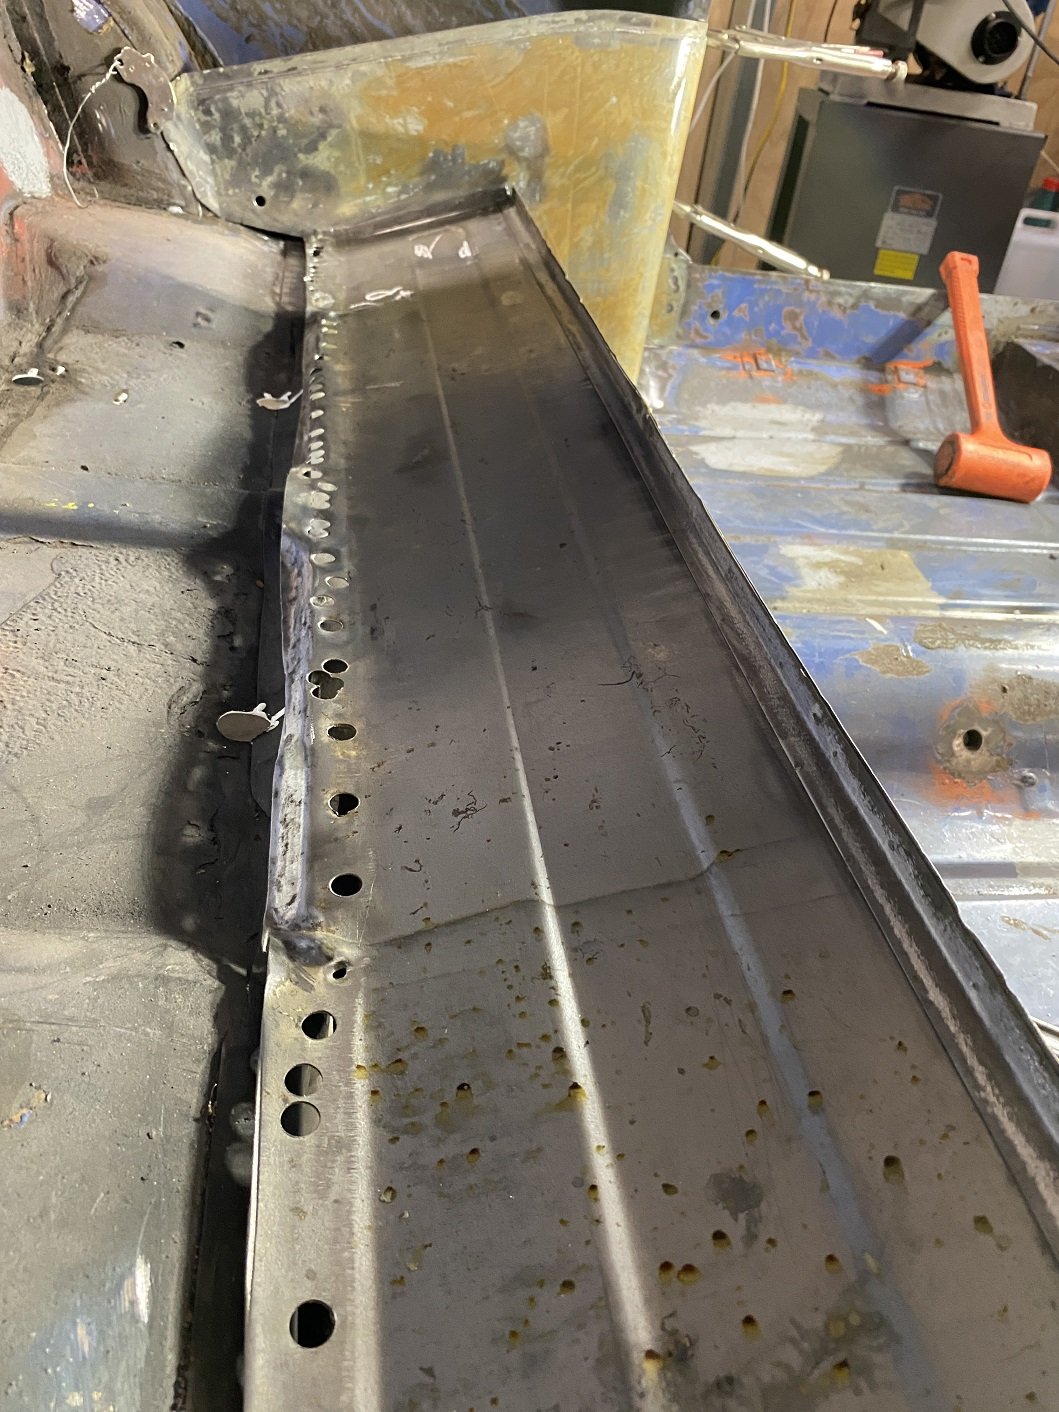
And done the other side. Also stripped off some more glue and tar seam sealer off the seat panel with turps and the brass wirewheel. Buuuuuut, when I drilled the hole from the inside using the boss in the seatbelt bracket to align the drill..... I discovered that the boss is not flush with the panel like the other side. There's a 7mm gap Le sigh. Well, I'm not cutting all those welds off, I don't think the panel will survive the operation. I think I'll try slide a washer of the appropriate thickness into the gap and drill a couple small holes in the panel so I can spot the washer to it. The bolt just needs to be a little longer.
-
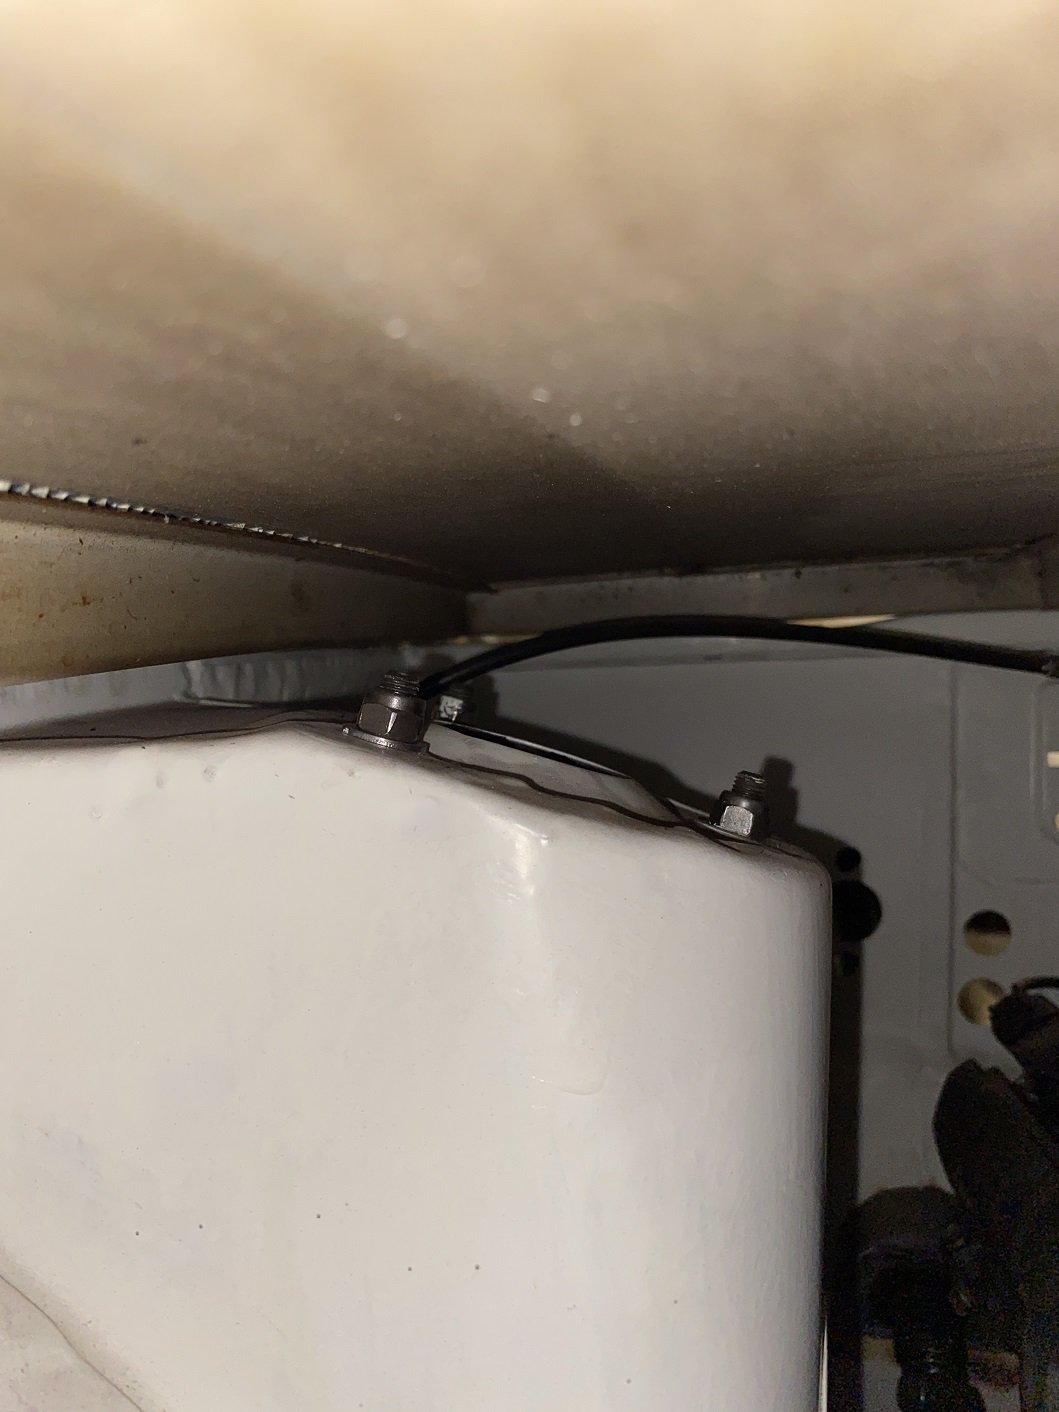
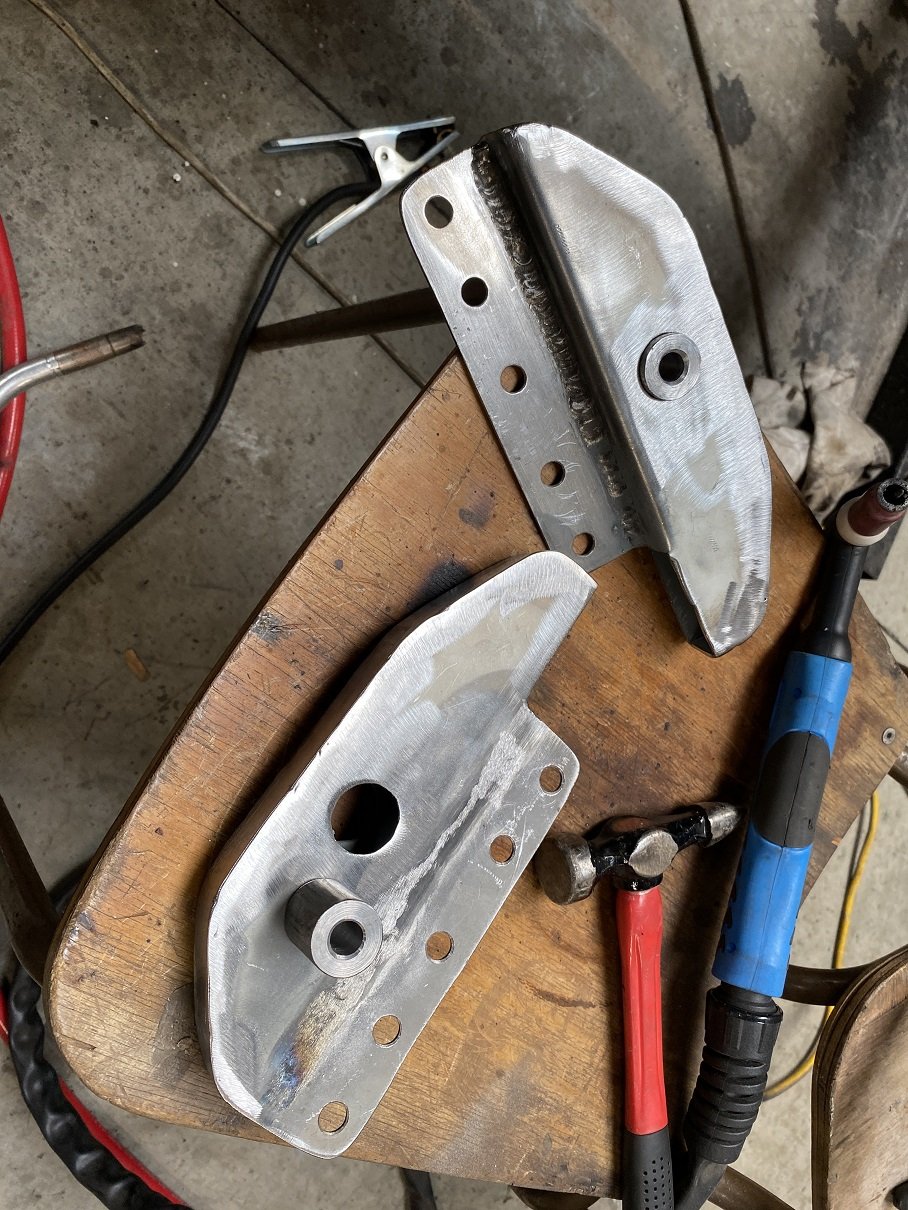
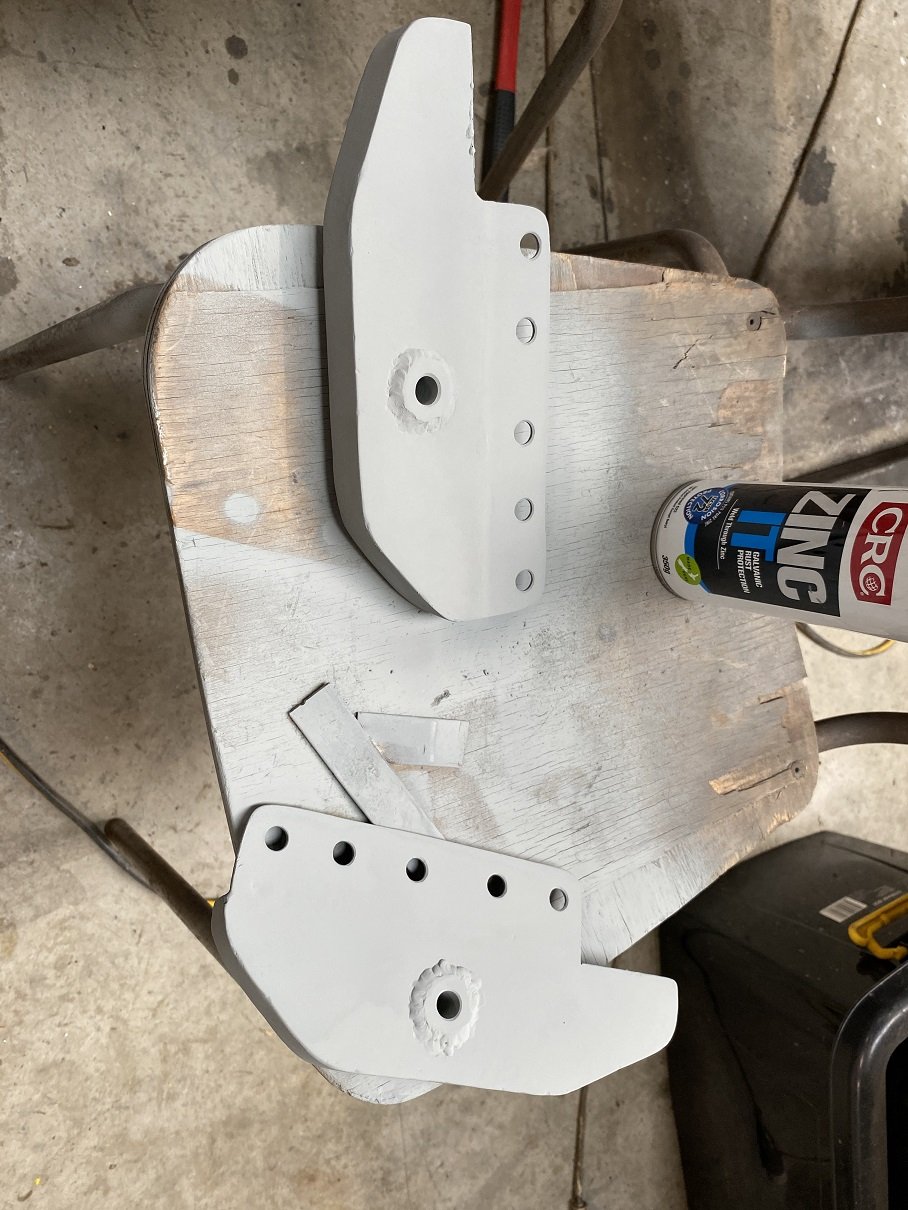
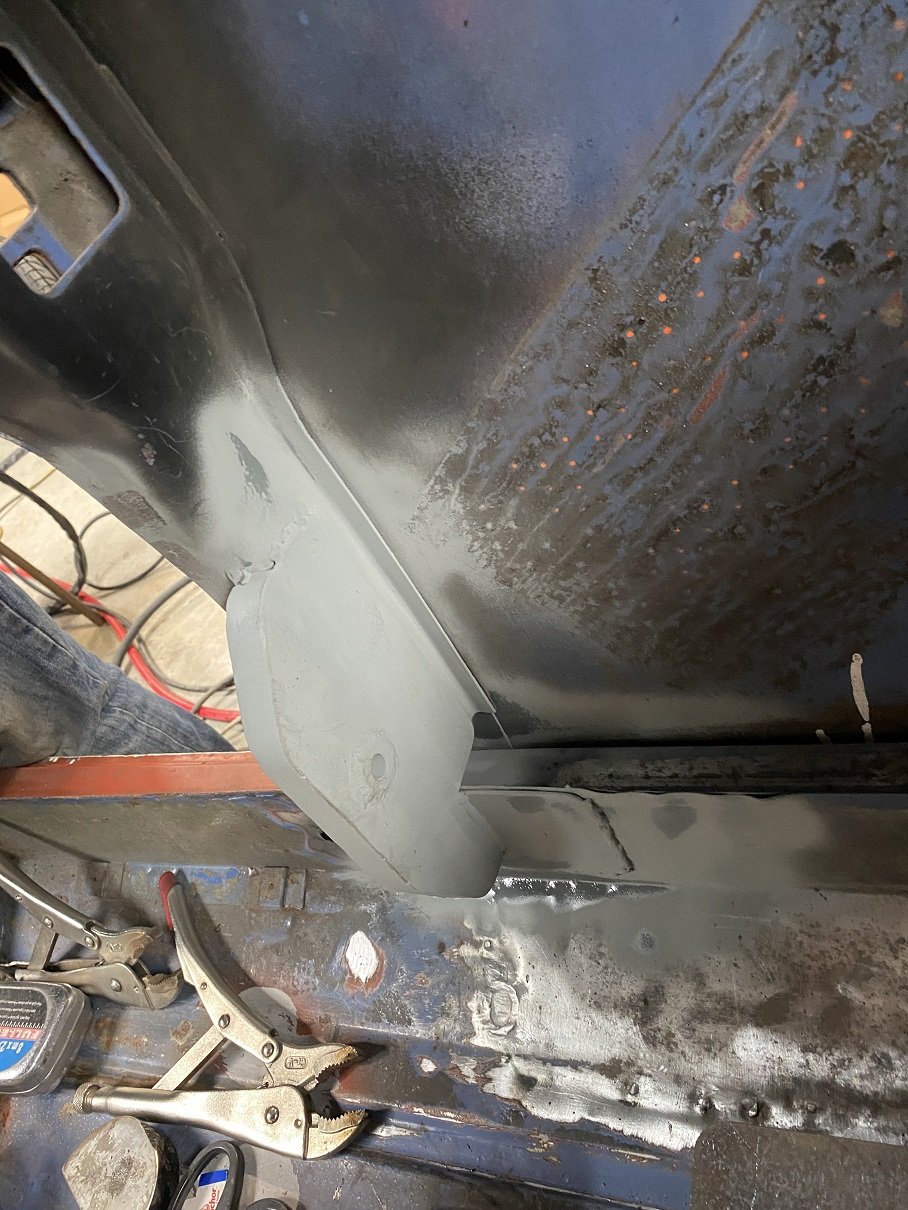
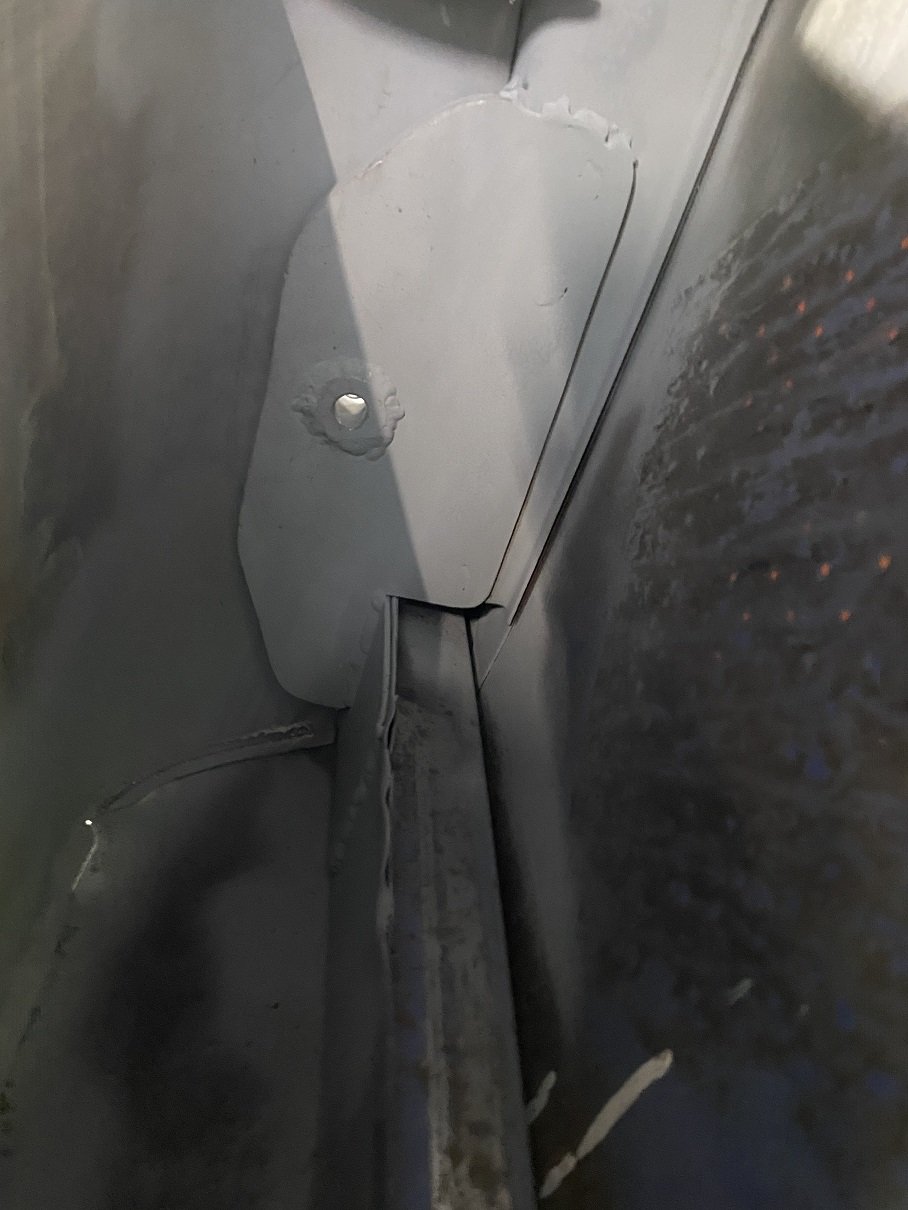
Before I could weld the companion boxes in I needed to sort out a mount for the seatbelt reel. The companion boxes came from a MK3 which had static belts so there is no mount for the reel. MK4 onwards had a mount like an inverted bathtub that was spot welded only to the sheet metal of the companion box. It always seemed a bit weak to me. My mounts might be a bit over-engineered. 2.5mm thick, the crush "tube" is 25mm round bar. It's spot welded to the b-pillar and welded to the inner sill with a reinforcing plate.
- 52 replies
-
- 18
-
-
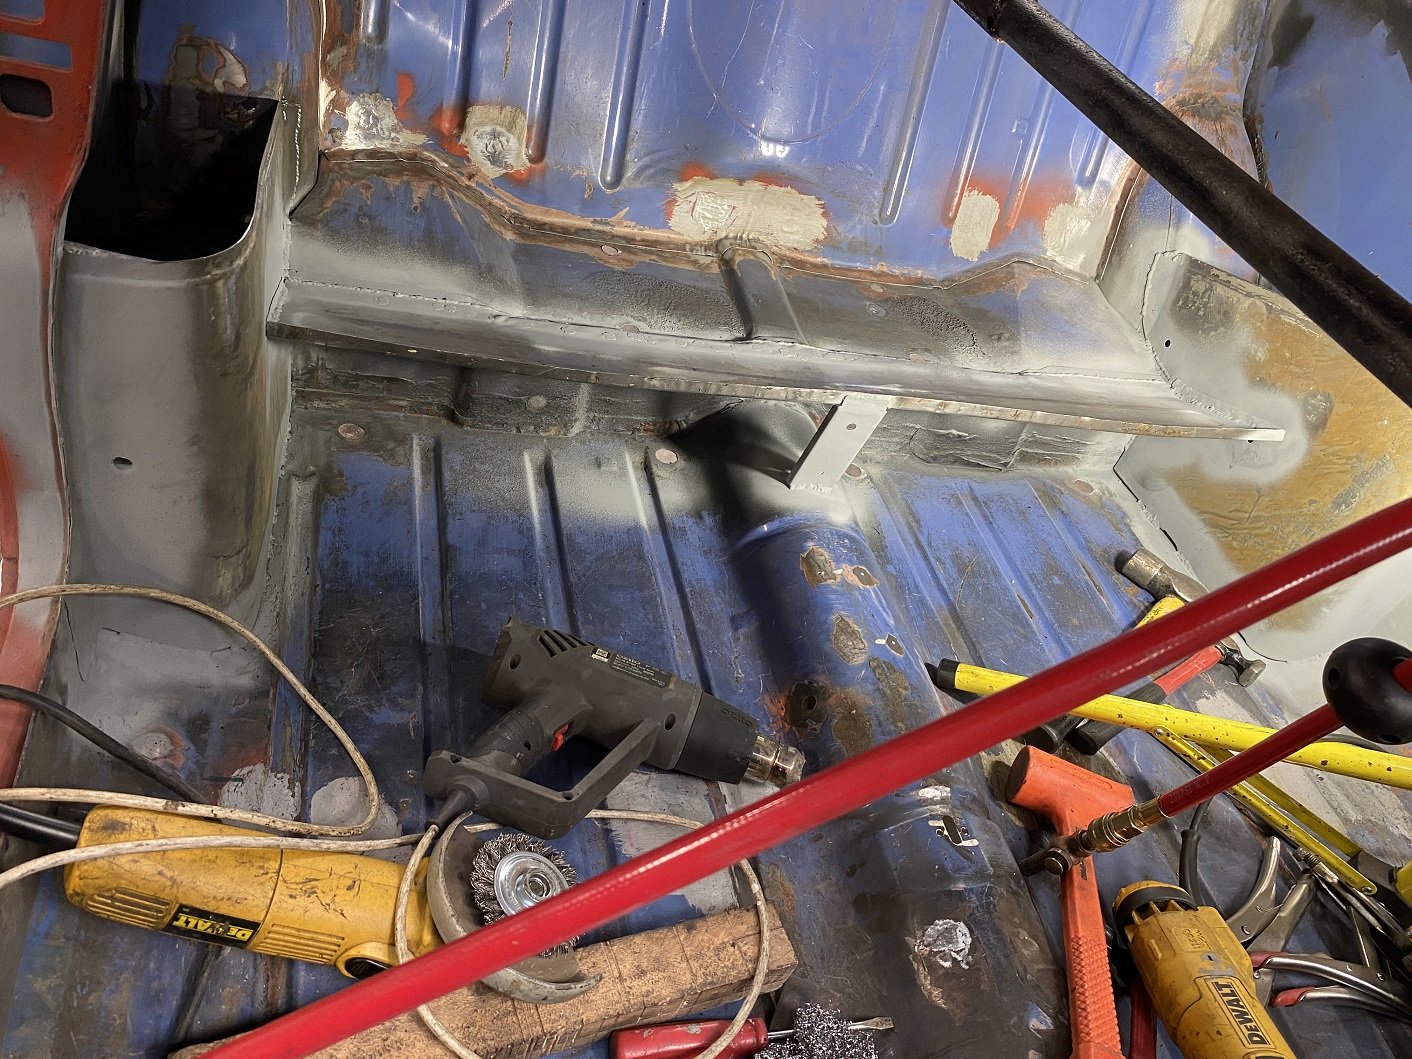
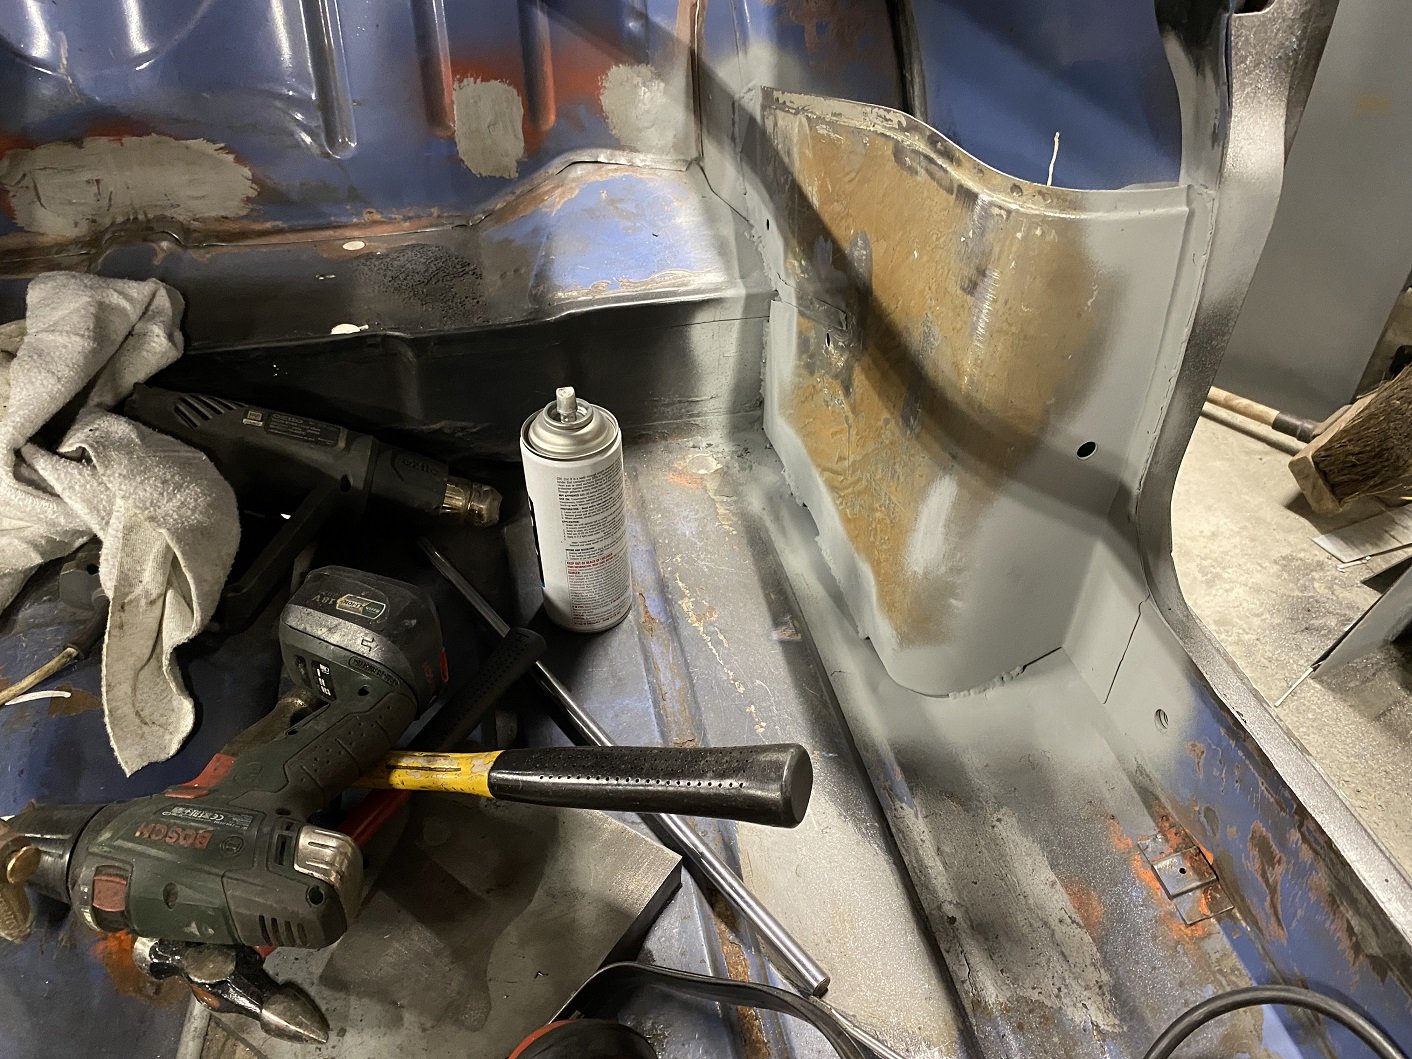
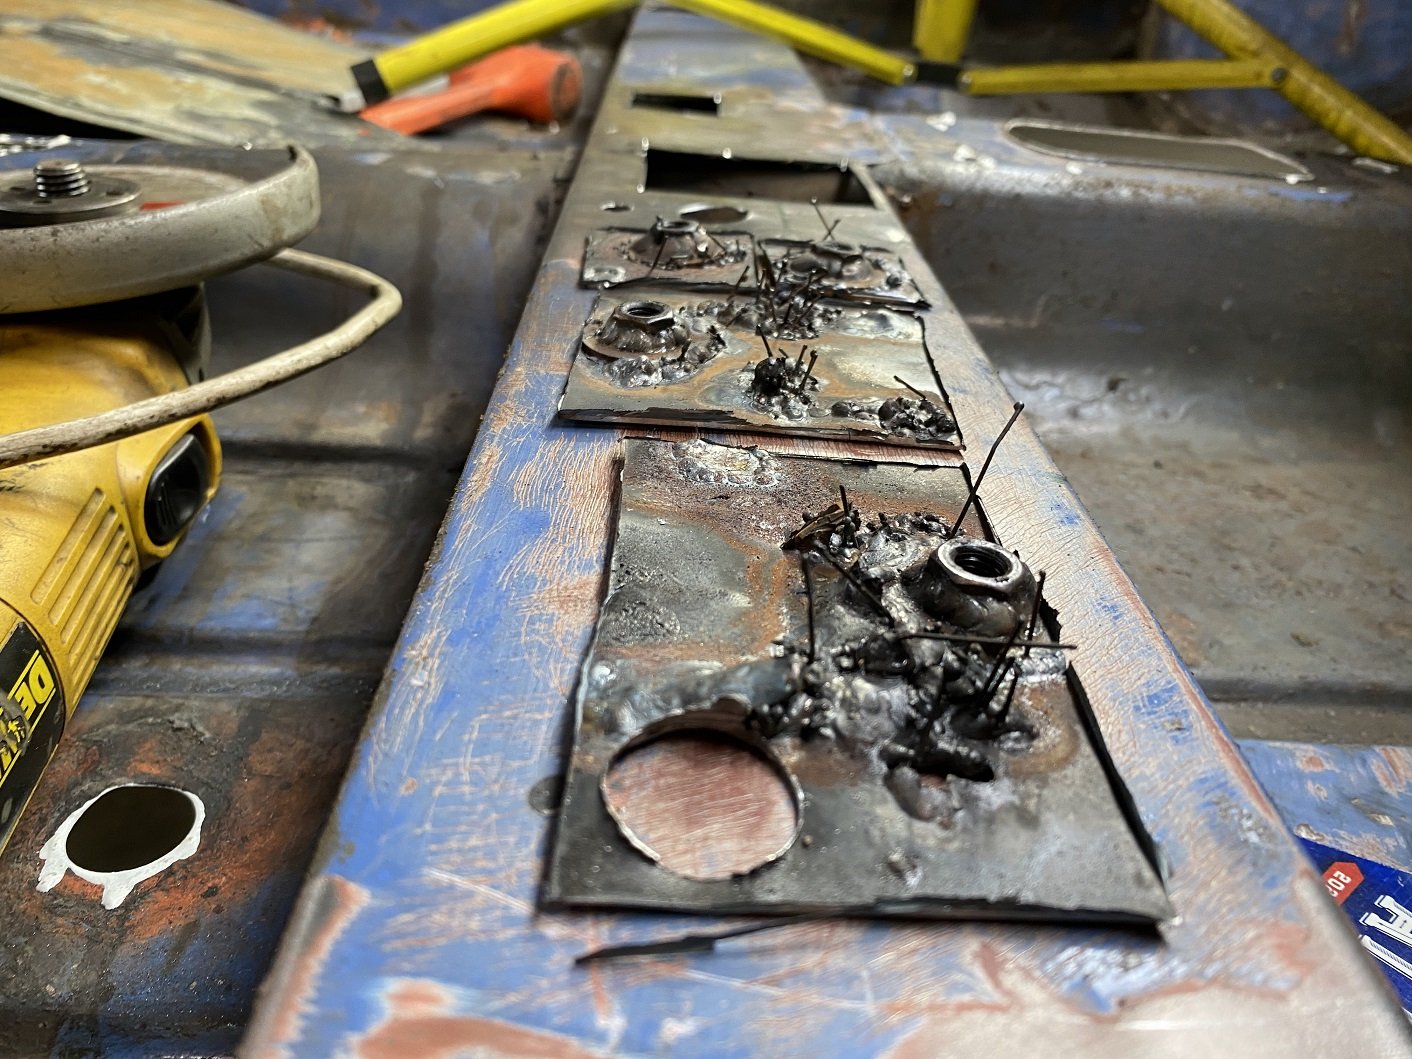
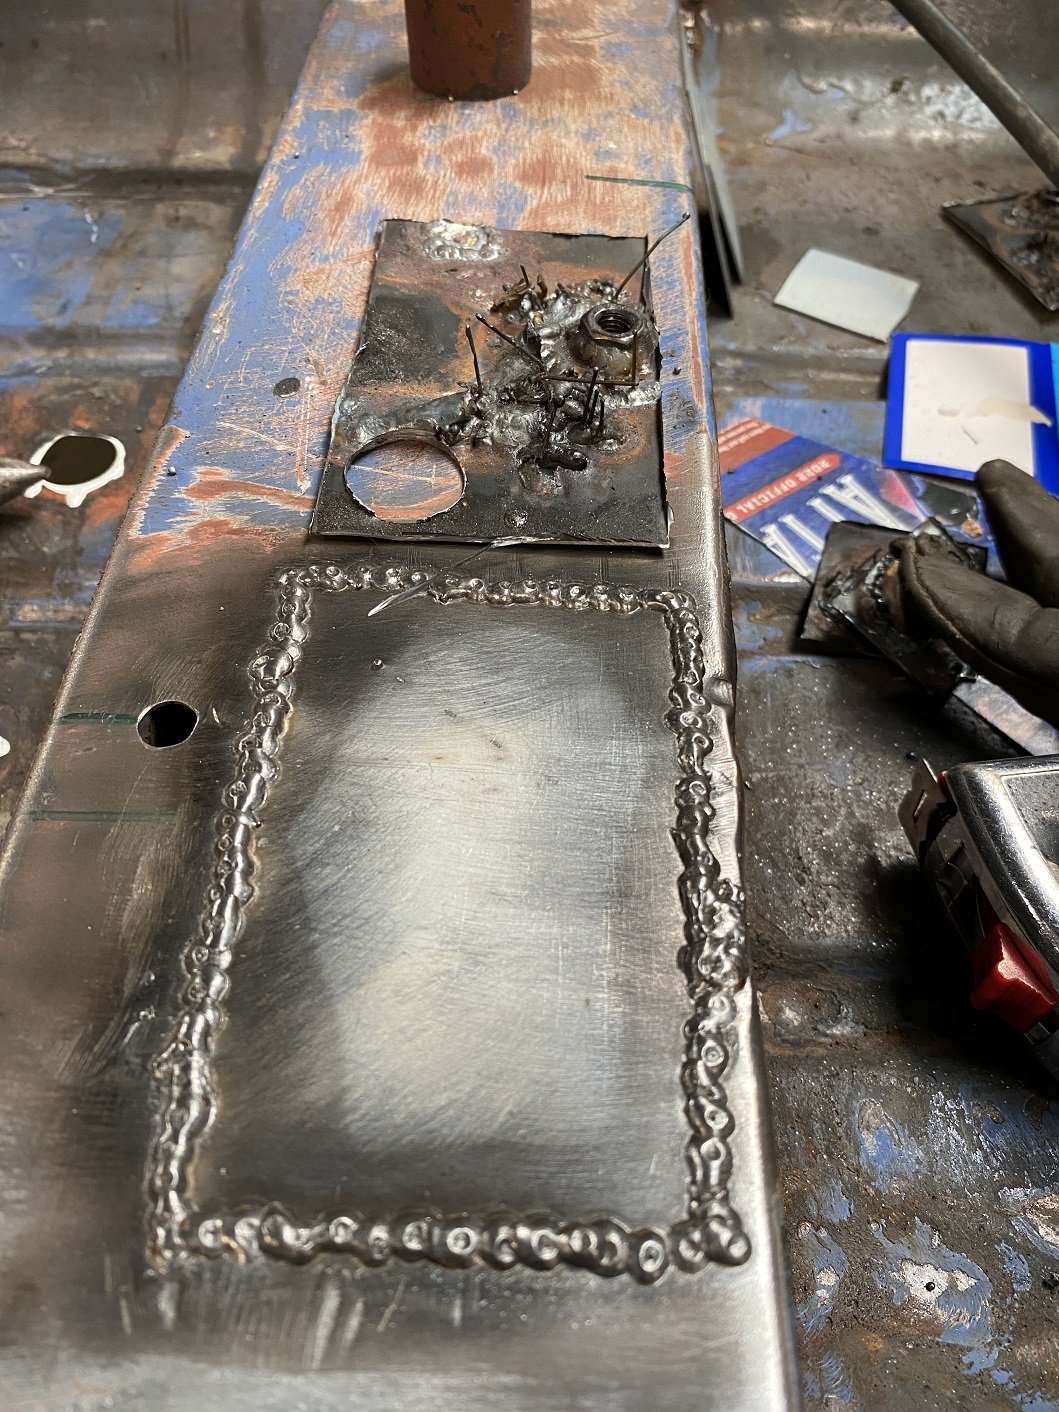
I'm glad I decided to cut out the lumpy bits where someone had welded in captive nuts. OMG! Much better.
- 52 replies
-
- 22
-
-

-
My steering rack tie rods are slightly bent, right where the thread ends. They are now no longer available. Can I use heat and a long pipe to bend them less bent?
-
Spent like 3 hours making two seat brackets. But didn't like them. I guess I'll start again.
-
Well, that took fucking ages. I welded on the underside, so I don't have to do much grinding.
- 52 replies
-
- 15
-
-
Not done the cube challenge. But it's a good idea to practice on different joint types and metal thicknesses at different angles. Your car is rarely flat. I usually just weld random bits from the scrap bin for practice.
-
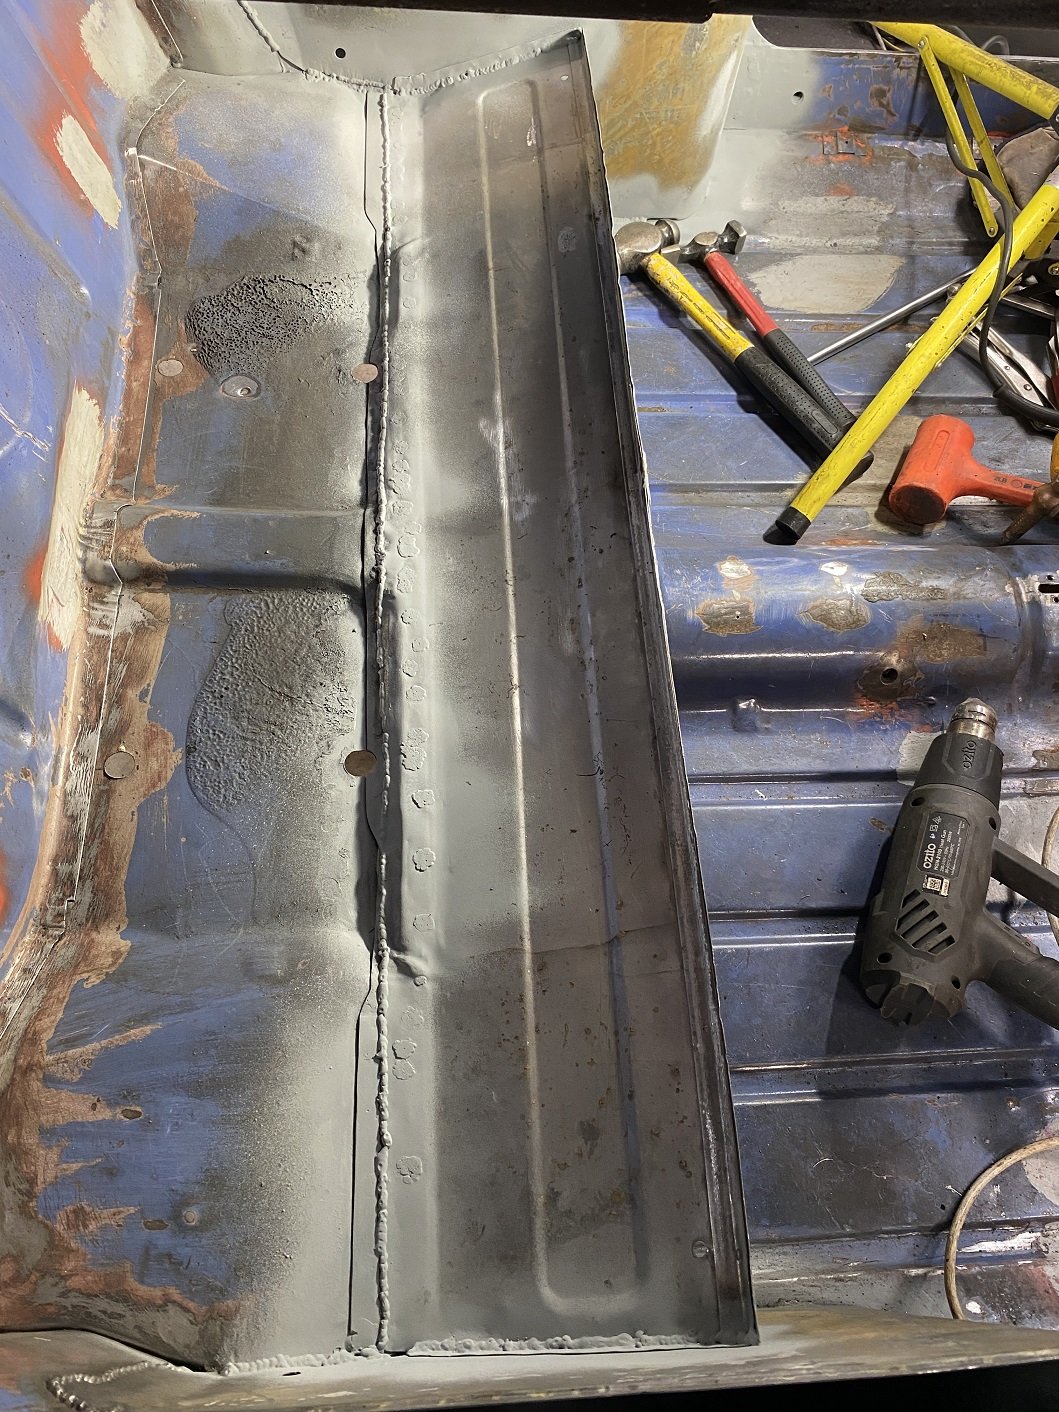
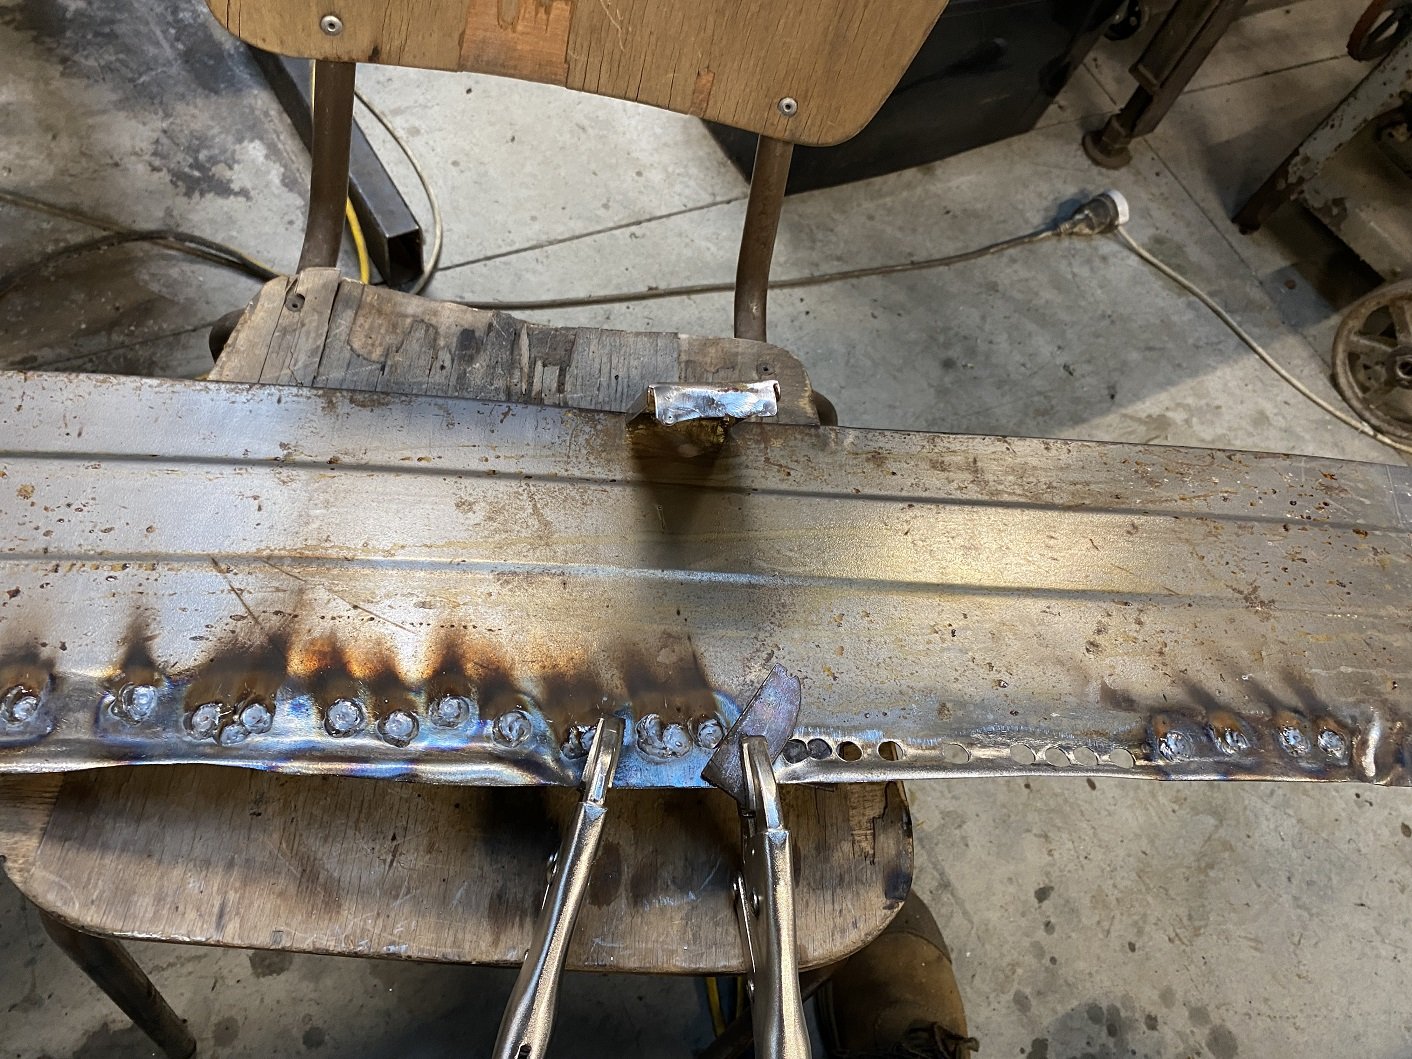
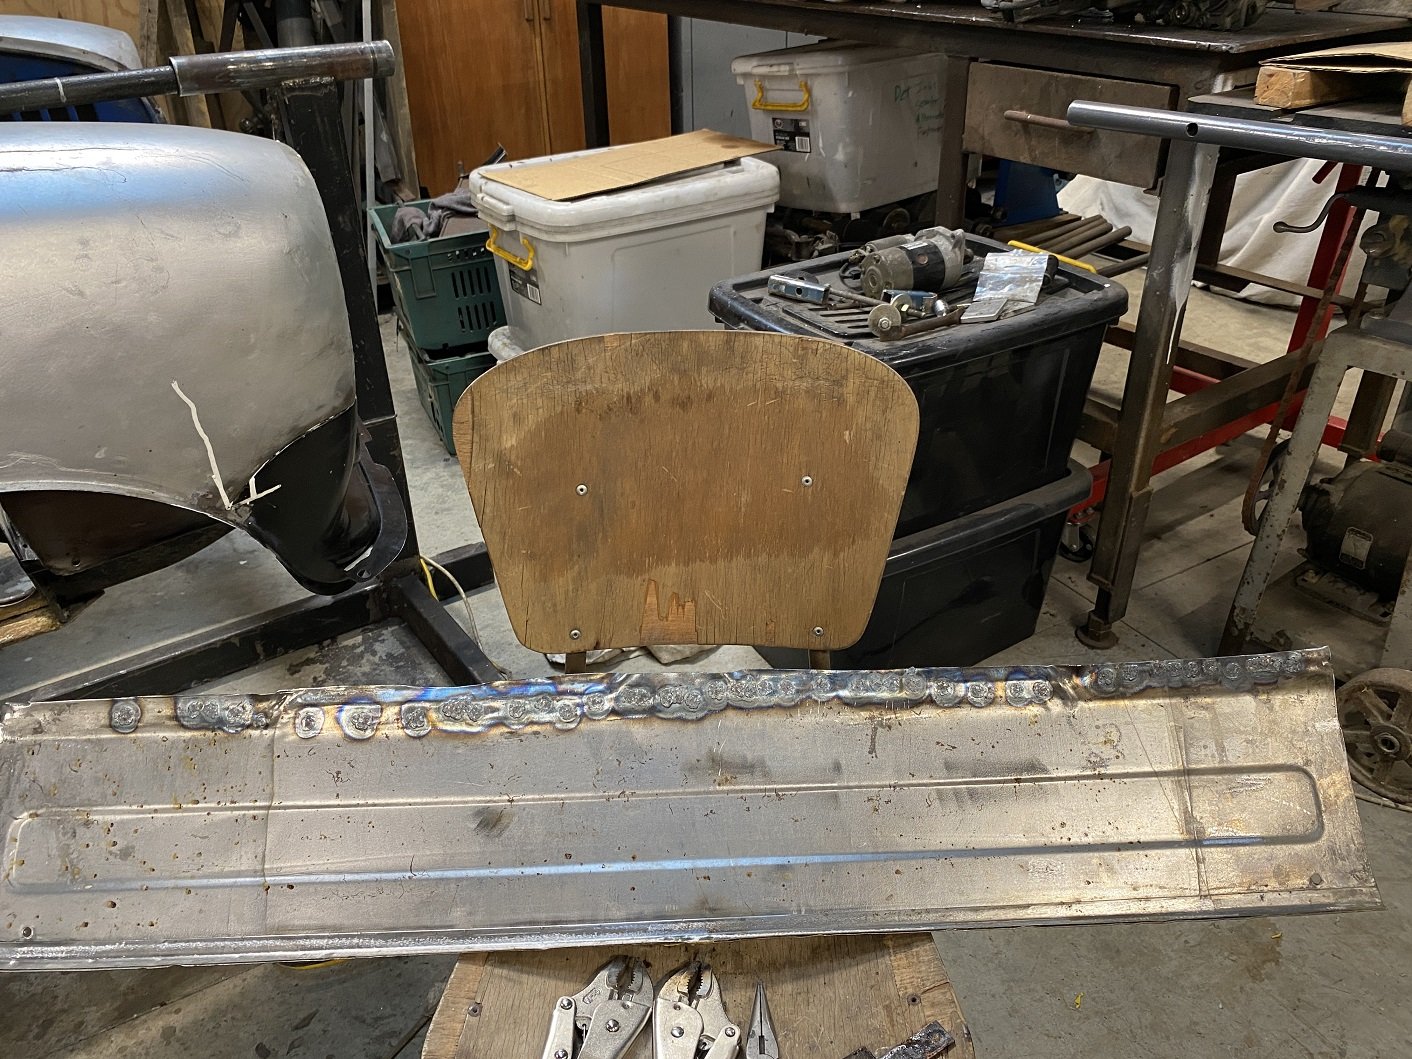
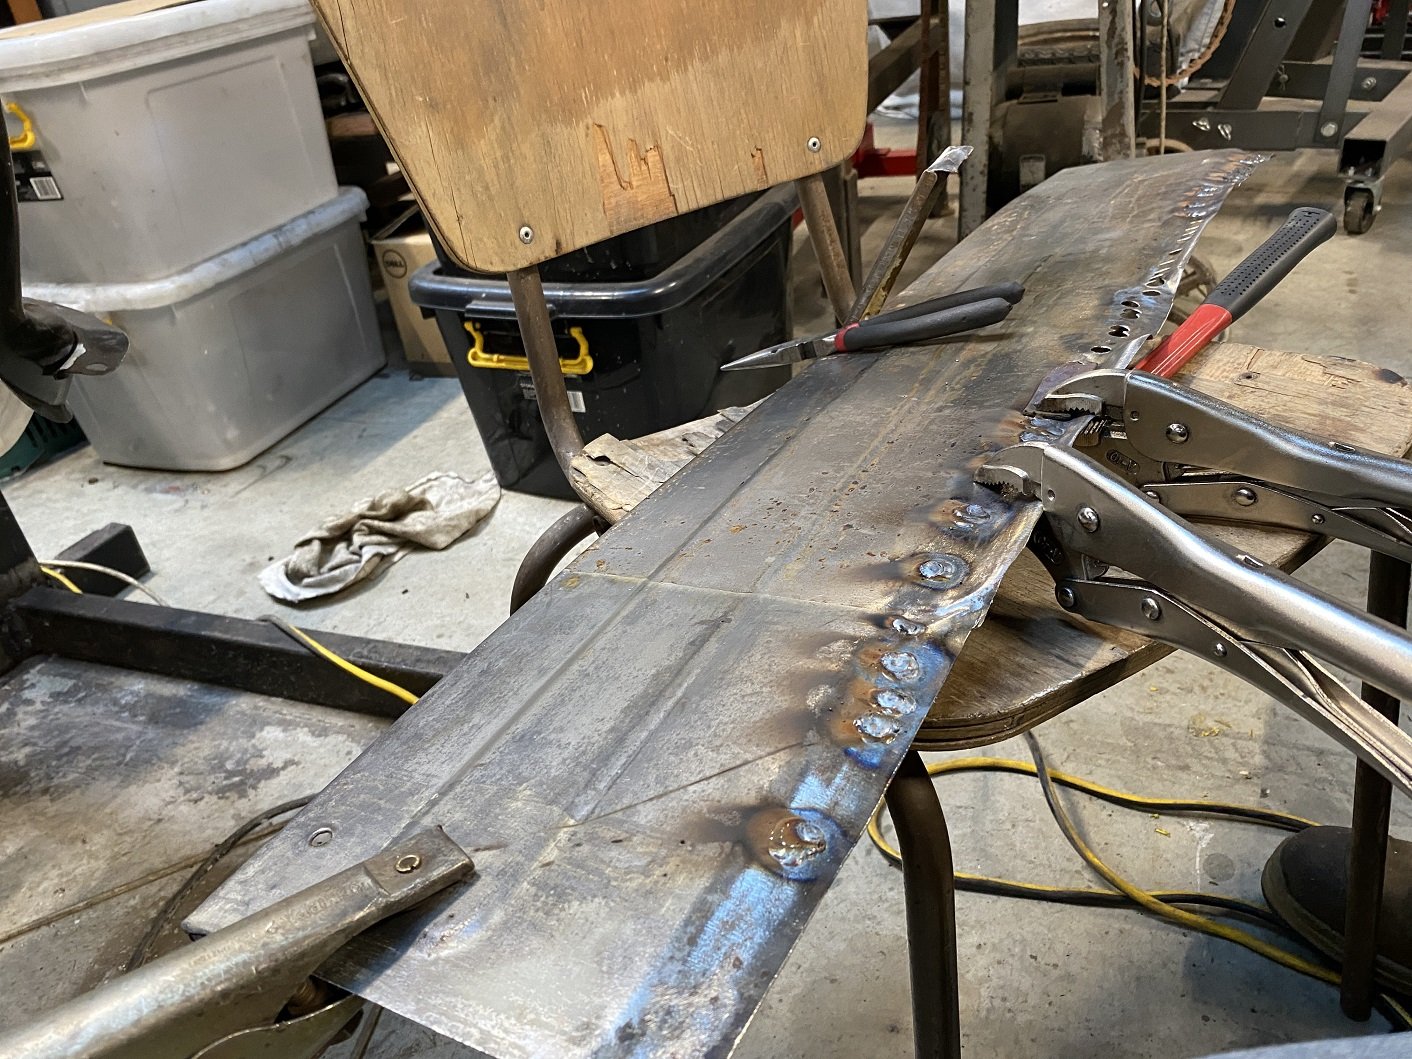
SO MANY HOLES to fill. The seat base originally is one big panel that includes the boot floor and it would join to a forward facing flange on that vertical panel. When the seat was deleted, the forward facing flange was cut off and the join was reinforced by wrapping a long strip of steel over it down the whole length. But that leaves me with something like 30 spot weld holes with nothing under them. So what's going to be less work, filling all those holes, or welding on a new flange(which isn't straight at all) so I can weld through those holes into the new flange? It looks much more complete with the seat bits in there.
-
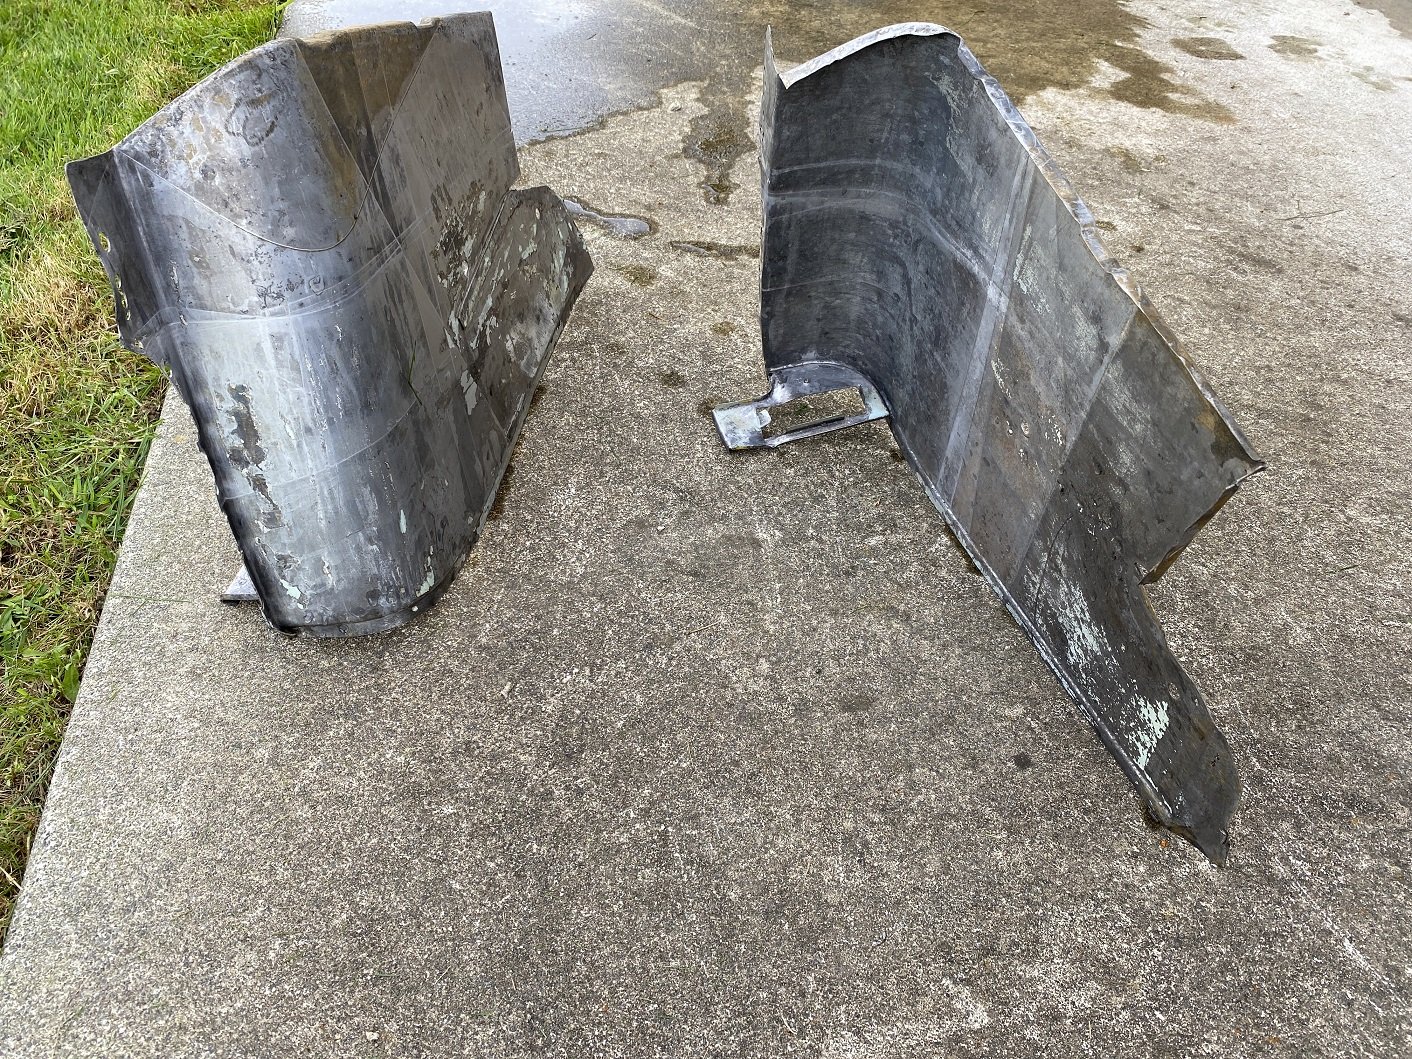
I've been stripping and derusting the donor rear seat pockets. I've also done the seat base panel, but it's basically just a flat panel. I used paint stripper and KBS rust blast, same stuff as metal rescue but it's a powder that you mix with water. You can see from all the tide lines, my tub wasn't big enough. They are just drying after I rinsed them with my outside hot tap. There's a little bit of paint left to sand off and some panel beating to do. These don't have the mount for the front seatbelt reel, so I'll have to make something.
-
The S300 stud is the only one that looks like it might work. I'd need to measure for the shank length, might be too long. It's also 12X1.5 so I'd have to change the rear to match. I'd prefer to buy just one to test if the taper is correct. It seems no one in NZ who sells NICE has the S300. I'd need to get it from Aus I guess, but it says I must contact them for a shipping price.
-
So the Triumph has 12X1.25 wheel studs from the nissan IRS. And 7/16th UNF on the factory front suspension. To avoid cross threading when the nuts inevitably get mixed up, I want to change the front studs to metric. But the triumph has a tapered countersink for the head of the stud. All the aftermarket studs I've come across so far have no countersink with a flat head. What are my options? Can I turn a taper on a flat head stud?(I'm guessing not). Or can I just use a flat head stud as long as the knurled section is long enough to fully engage? Also, if I need to drill out the holes in the hub for a larger knurl, they are just straight holes right, the knurls on the stud "cut" the spline?
-
Tried a 5mm spacer under the rack. I think I'll leave it there, the rack tube is about 5-6mm away from the sump now.
- 201 replies
-
- 13
-
-
I emailed LVVTA with my bump steer results and Greg the Technical Advisor replied that it looks good with or without the spacer under the rack. Milestone passed!
- 201 replies
-
- 13
-
-
Damn, that's a good outcome for yours. I'm going to try space the rack up further to see if it makes much difference.
-
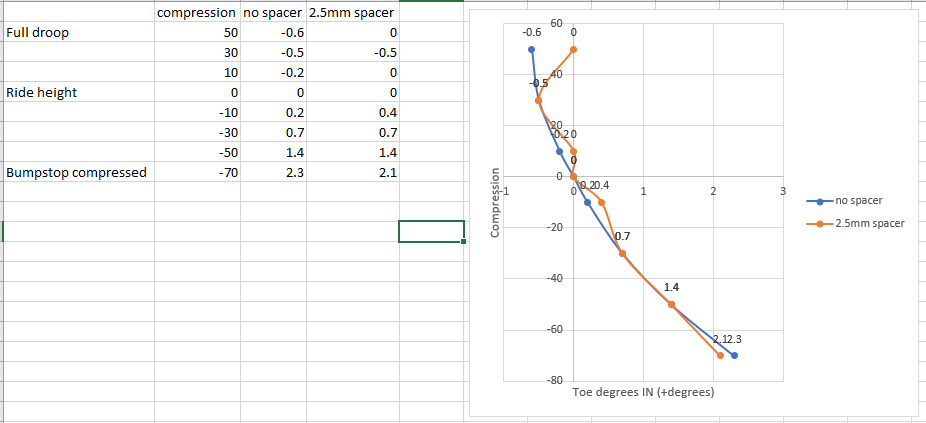
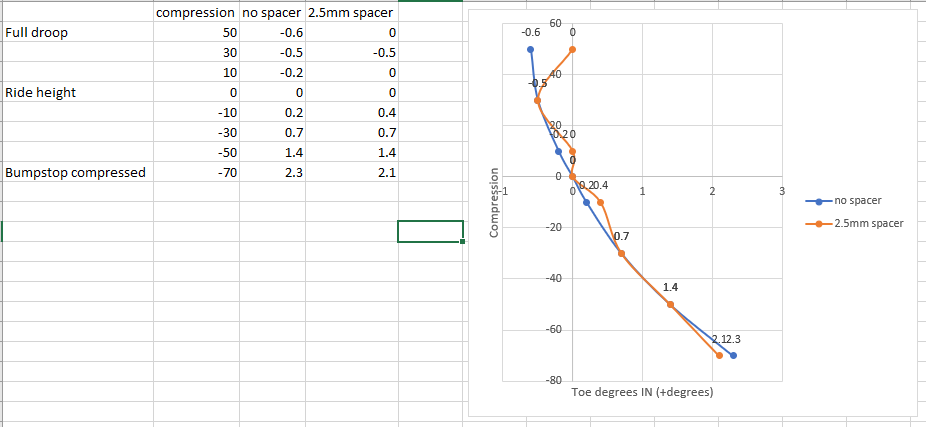
Is that 8mm based on their hypothetical 575mm diameter wheel? They use that size because it makes the conversion from mm to degrees super easy. Eg 10mm is 1 degree. According to the LVVTA infosheets there's no fixed maximum amount of toe change that is acceptable. It depends on the vehicle. It's supposed to be "the same or better than factory". I think that 8mm was a measuring error due to the awkward way I'd previously been measuring it. This is what I've got so far. Spacing the rack up by 2.5mm seems to have made little difference. I could possibly go another 4mm before I have clearance issues.
-
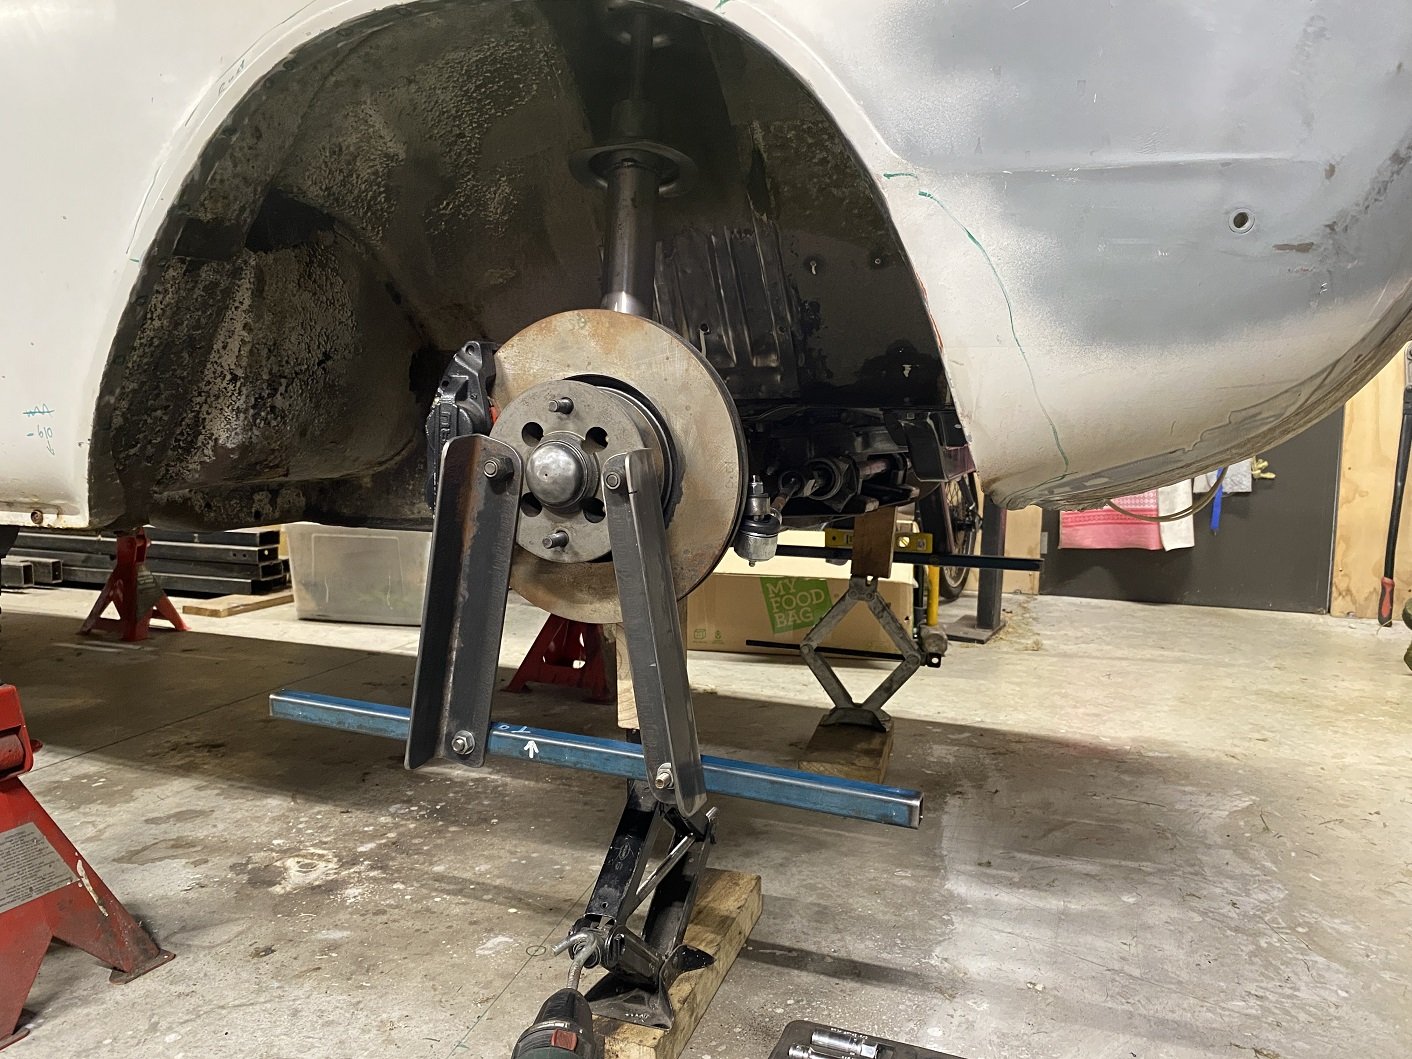
Using stuff I already had, I made some bump steer testing arm things. They are based on the LVVTA ones, but due to a lack of material, I made mine shorter, so you have to measure in front and behind the wheel rather than way out in front of the car. I have 2mm holes drilled 575mm apart on the blue rods, this gives 1 degree per 10mm of toe. You measure the distance in front and behind the wheel and the difference between those numbers is the toe. The blue bars must be horizontal, you can see my spirit level on the other side. You start off at ride height, adjust the toe until the front and rear measurements are the same, so you have zero toe. This is the stage I am up to now. Then you move the suspension through its full travel(both sides evenly) and every 20mm, you record the distances for the toe measurement. With my prototype welded arm and single sided bump steer gauge(which was quite hard to use) I got no worse than 8mm/0.8 degrees right at the end of travel. Unfortunately, I don't know what the factory bump was, but I suspect it was quite bad.
- 201 replies
-
- 13
-