


Taistorm
-
Posts
2056 -
Joined
-
Last visited
-
Days Won
1
Posts posted by Taistorm
-
-
Yeah, more accurate I guess as more increments haha
-
 1
1
-
-
- Popular Post
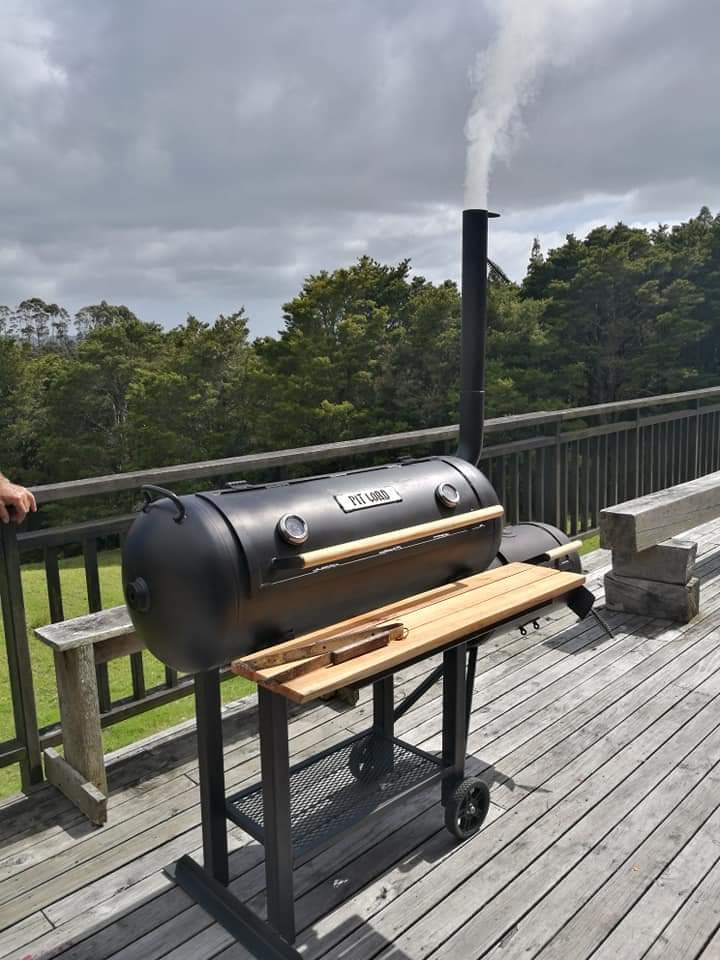
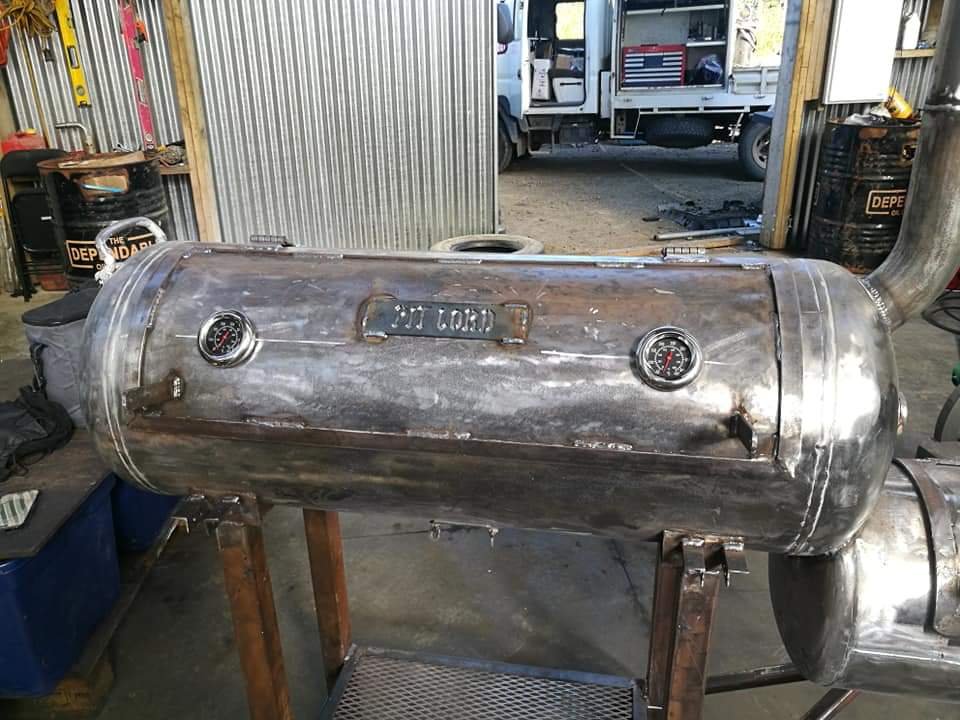
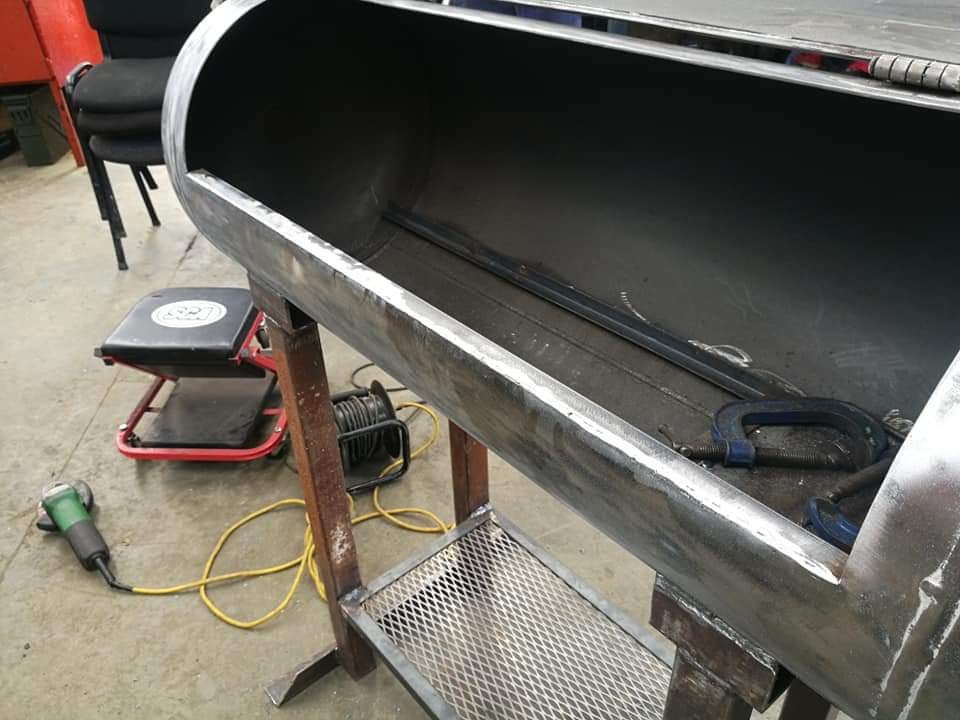
We have used the flat fibreglass heat gasket (that I got from bbqs and more) around most of the lid edges, we can't do the all the edges as it creates gaps in other areas. It actually seals quite well.
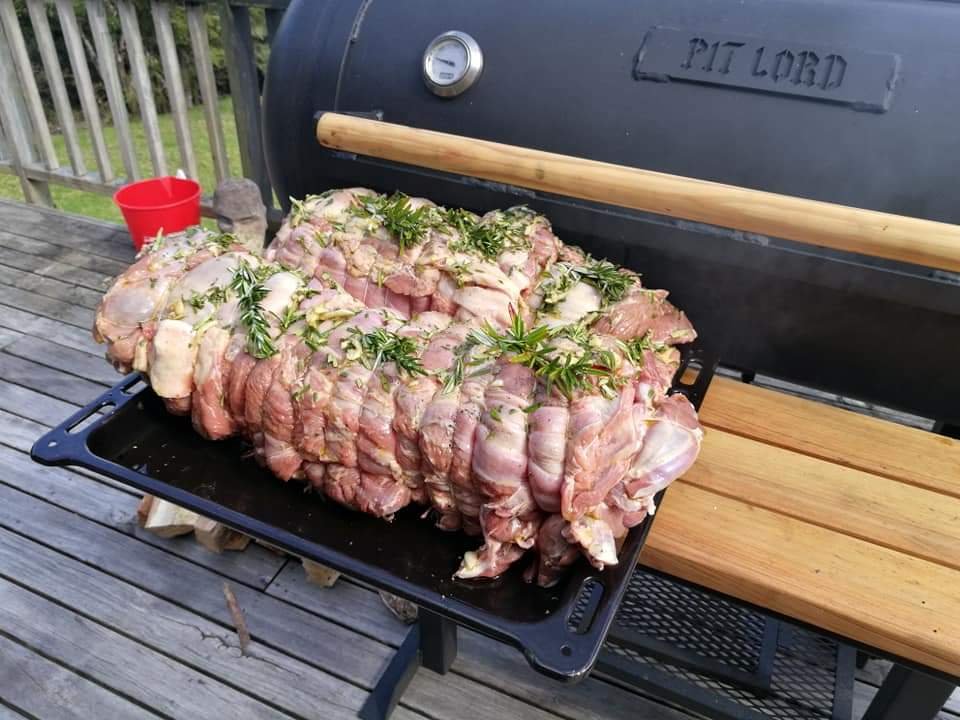
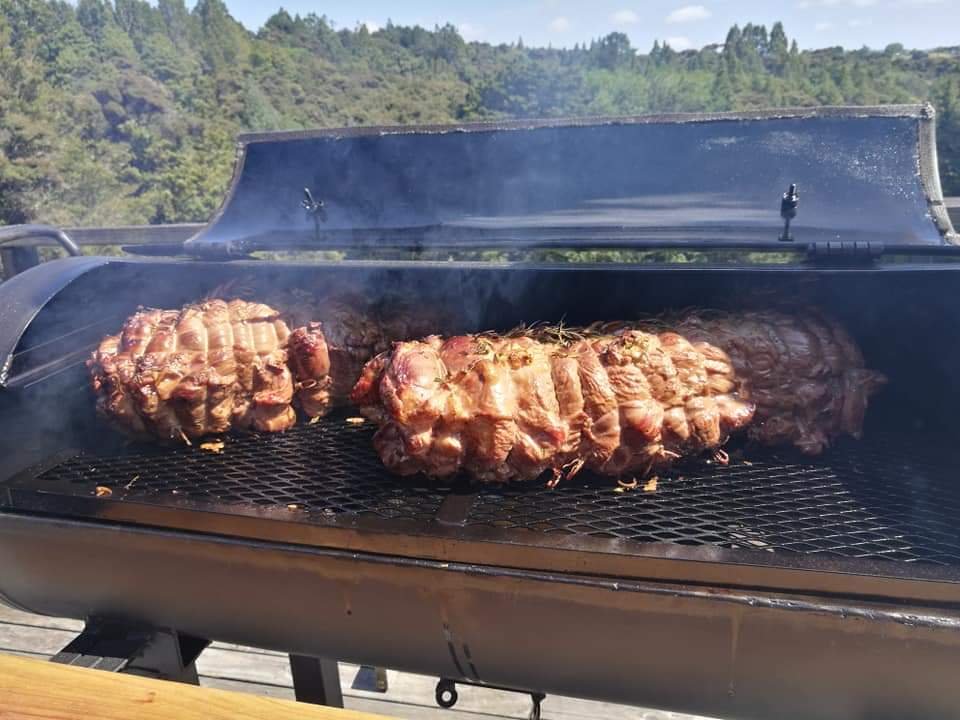
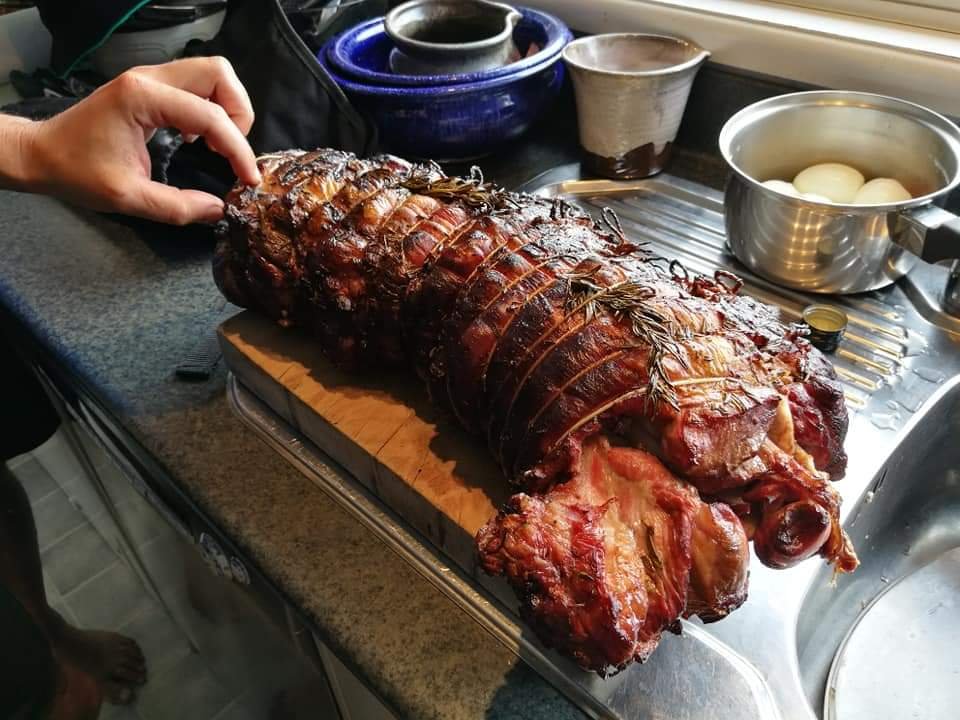
Also forgot to mention we got a whole lamb boned and rolled. Bit of salt and pepper, rosemary, thyme and garlic. Cooked in the smoker at around 240°F for about 6 hours then rested for about an hour. Fuelled with kingsford briquettes and gum wood, with Manuka for smoke. The Smokeyness on the outside was nice but a bit overpowering but the inside was cooked mint! Moist as and tasty.

I swapped over the weber temp gauge for the left gauge on the pitlord. The original gauge was showing about 10-15°F lower than the right, however with the weber gauge it was showing about 20°F above the right. Will look at investing in a proper internal probe, temp gauge.
-
12
-
The Mrs has a 2018 Seat Ateca for her work car, I think they are equivalent to the Volkswagen Tiguan. The thing is awesome, 2L diesel turbo which hauls ass super comfortably and quietly. 45-50L diesel gets about 800-850km. Have to fill approx 8L of adblue every 10,000kms. 30,000kms deep and the only issue is one of the tyre pressure sensors is playing up. I think new they are about 70k and unsure on how they compare to other makes but we've been loving it as it's probably the flashest car we will ever have haha. Has heaps of unnecessary functions like external door down lights, automatic boot etc.
-
1
-
-
- Popular Post
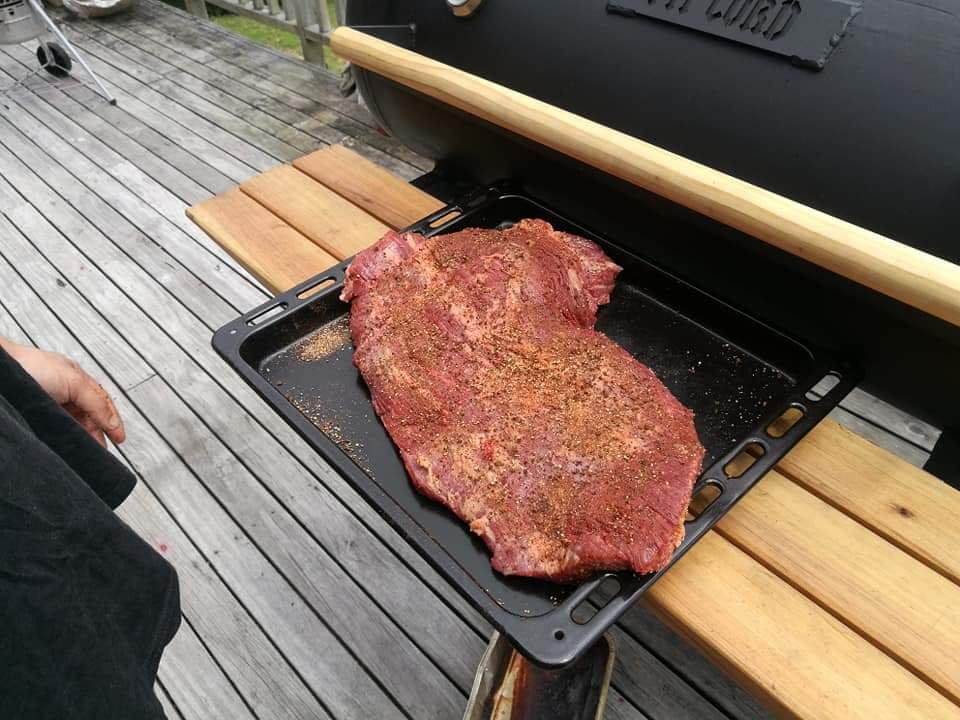
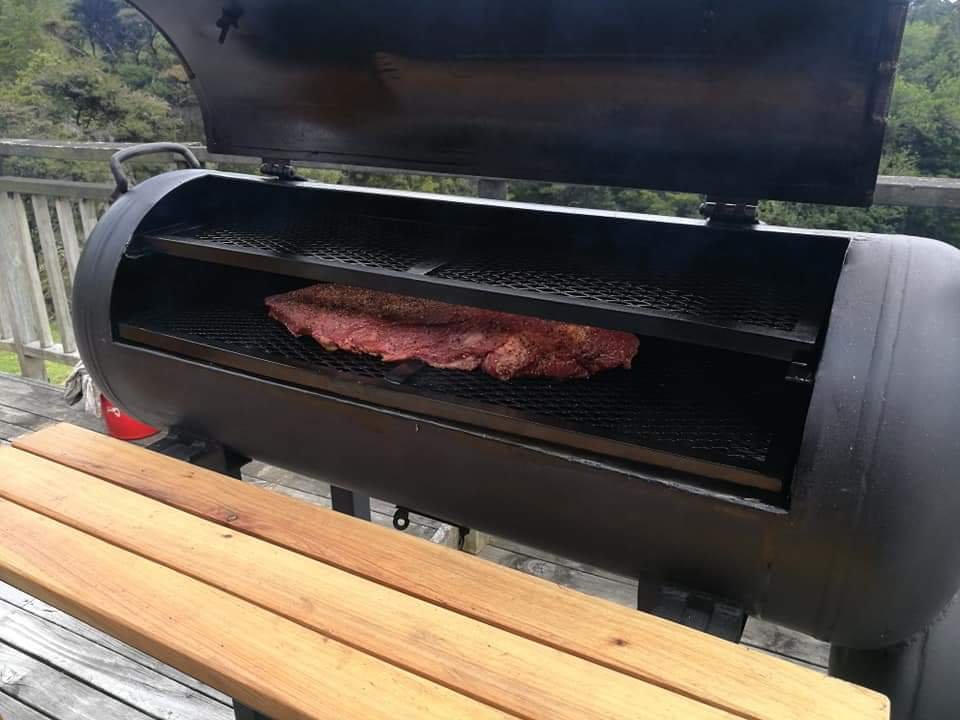
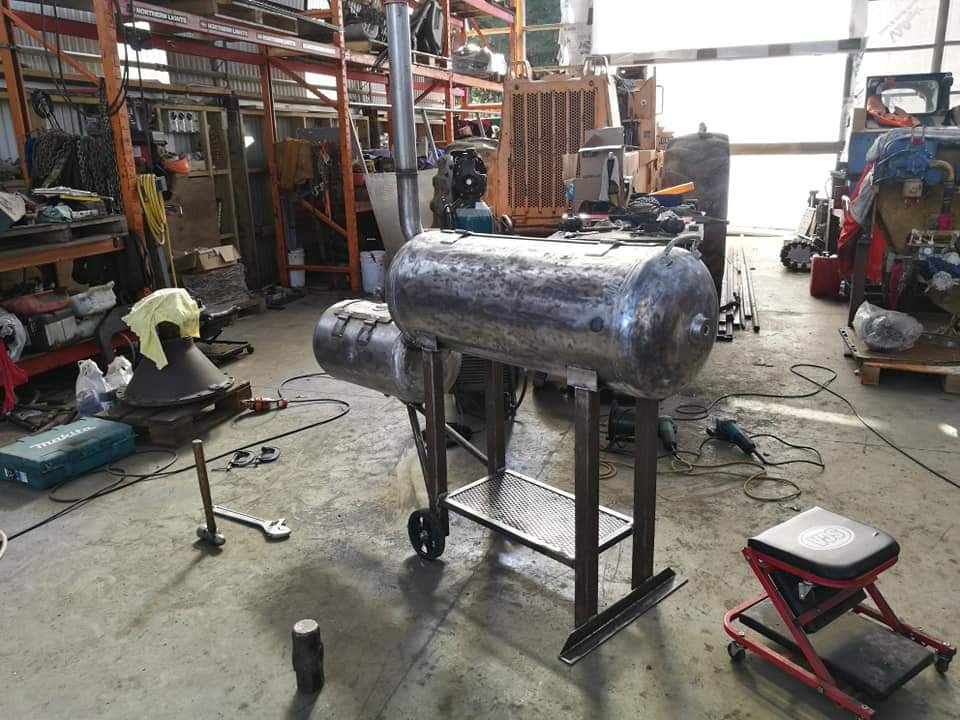
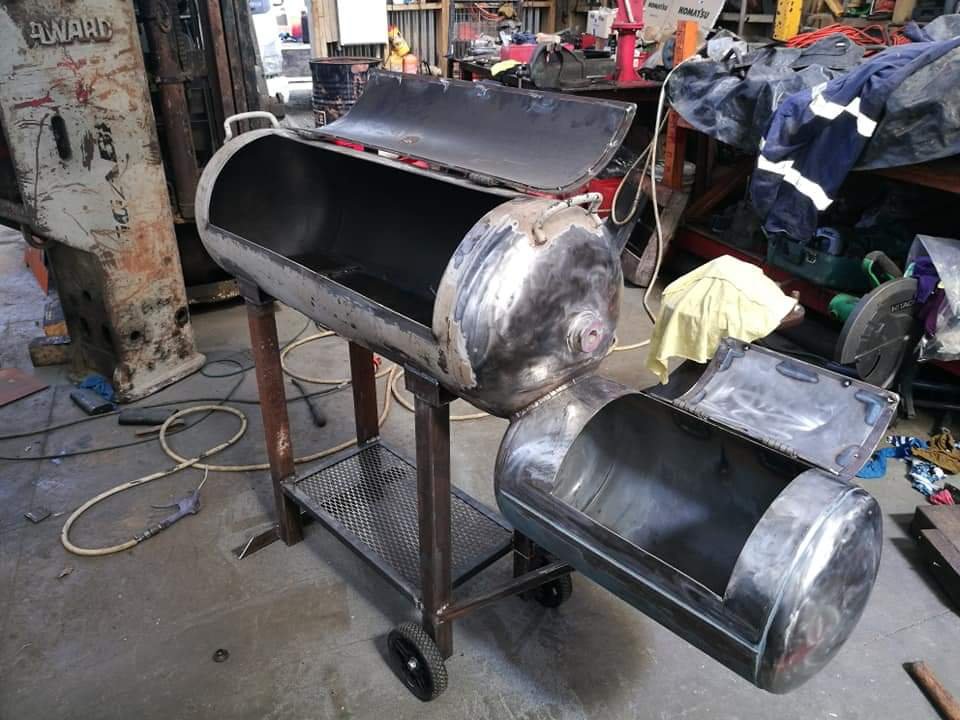
Ok so we gave the girl it's first cook today. What a way to start, 7kg brisket the bro sorted out, the thing is a bloody unit.
First we swapped out the left gauge for one off the weber to see what discrepancies there were with the budget ones I got from bunnings. We got the firebox going first of all with mostly kingsford Apple wood coals. Got the firebox up to about 700° and the cooking chamber right gauge was showing about 200 and the left weber gauge about 240 so I think the internal temp is really around 220ish, really need to get more accurate probes to get an accurate reading.
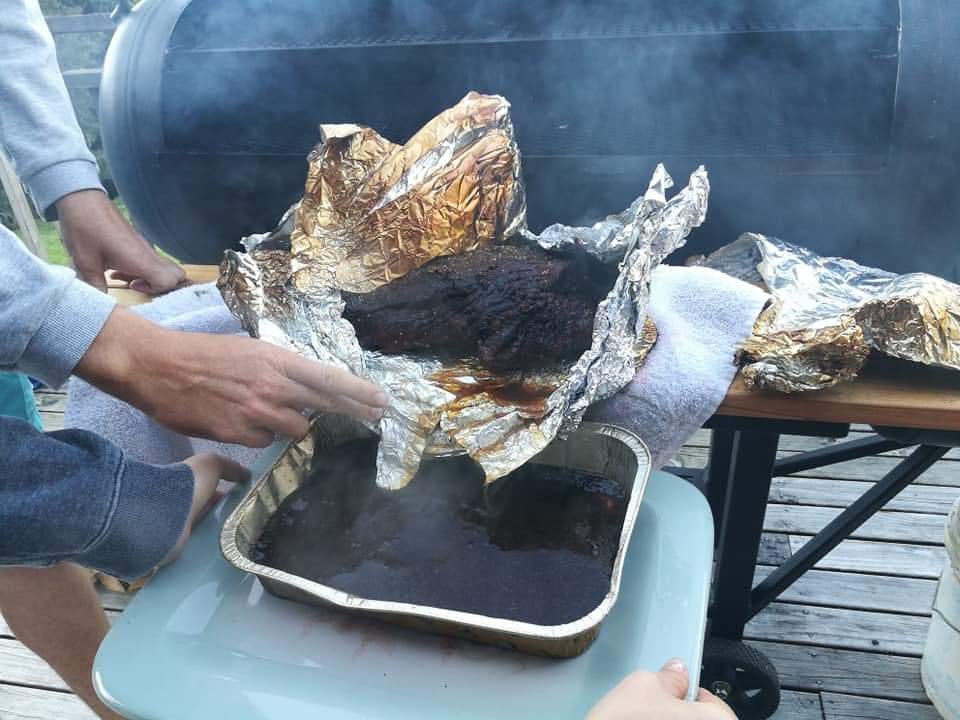
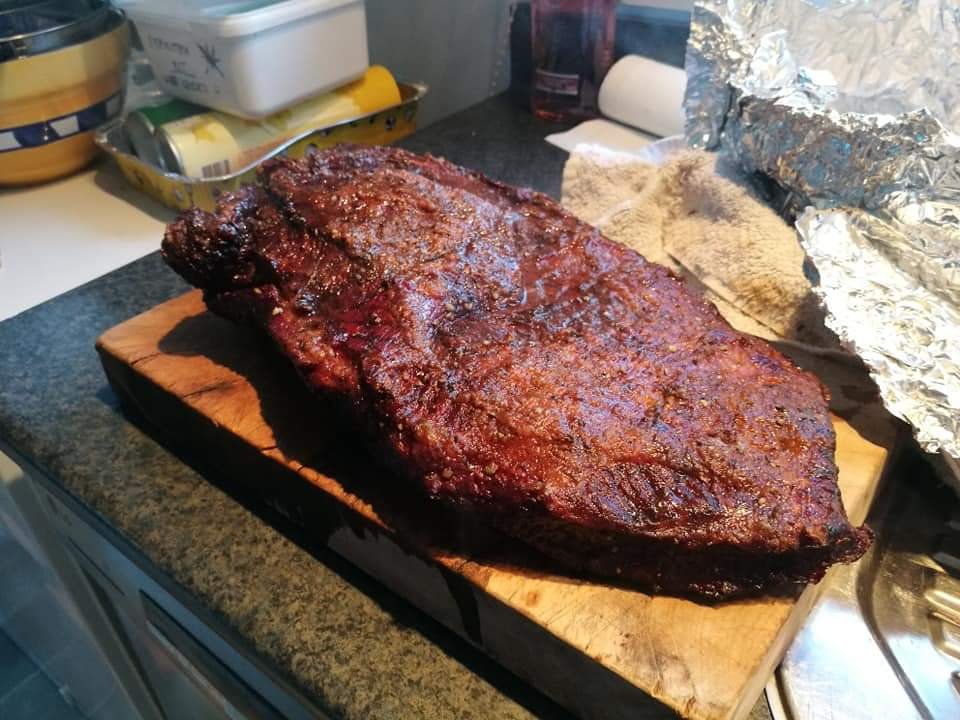
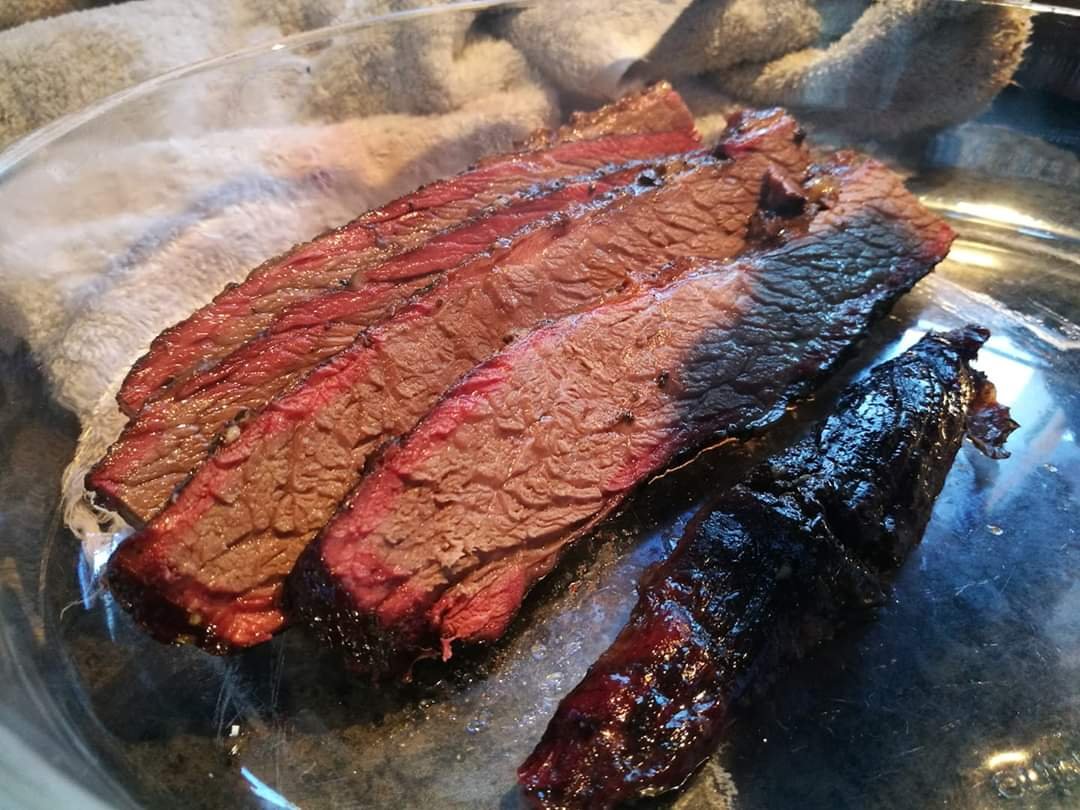
This is what we ended up with. We had it on the smoker for about 7.5 hours, had a lot of problems trying to maintain heat. We ended up resorting to feeding it pohutakawa, manuka and gum wood to keep it up(we have no shortage of wood as the olds do firewood/tree felling). The brisket was removed after being wrapped for the last few hours with an internal temp of around 200-209 and let it rest for about 45minutes before serving. Slightly over cooked and not the ideal smoke ring but was still delicious and nice and moist. Pretty stoked to be honest, we still need to work out easier ways to maintain the temps, may look at grinding the opening between the firebox and cooking chamber to help draw more heat. Will see how it goes anyway.
Cheers
-
11
-
35 minutes ago, jakesae101 said:
Try running lump, kingsford run great doing snakes ect in my kettle but ash up too hard and have had coals get ashbound when doing long cooks in my offset. I use commodities nz lump 24-25$ 10kg nice big pieces I normally start with a big chimney of it then switch to running wood and may alternate between the two depending how much wood I have I use alot of Pohutakawa.
Yeah bro we kind of had a run of this today. Trying out different techniques to get it right.
-
Cheers man!
We had another play around with the temps on this today. modified the firebox and removed the coal basket locator so we could push it right against the side by the cooking chamber. Half filled it with the Kingsford heat beads and a few bits of Manuka which worked a treat. Firebox was around 700 Fahrenheit and the cooking chamber got up to around 220 on the gauges. The heat gun was showing around 210-230 external heat across the chamber and we checked the grill plates later and they were showing approx 270. Realistically I think the internal/smoke heat might be around 230-250 which is perfect, might be worth in getting some other probes or upgrading the temp gauges down the track. Will be doing it's first proper cook tomorrow.
-
5
-
-
- Popular Post
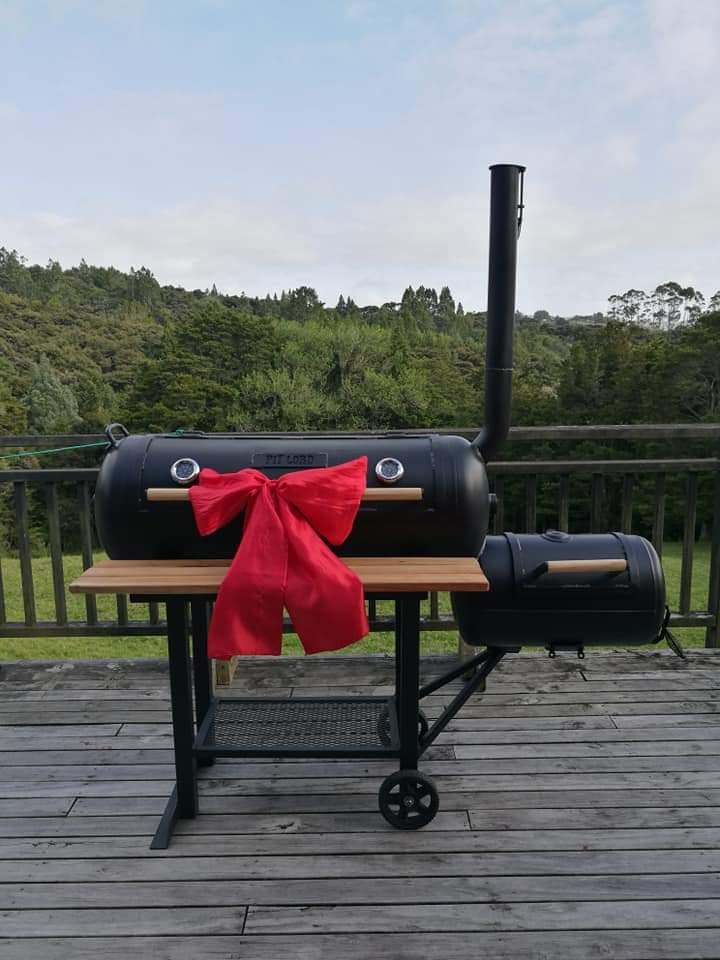
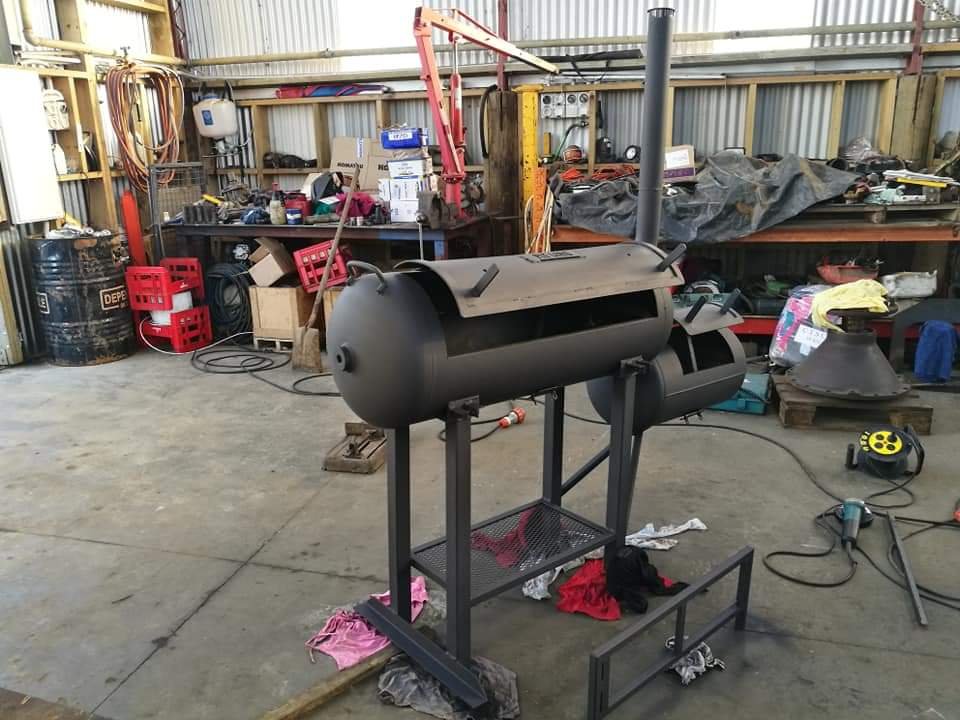
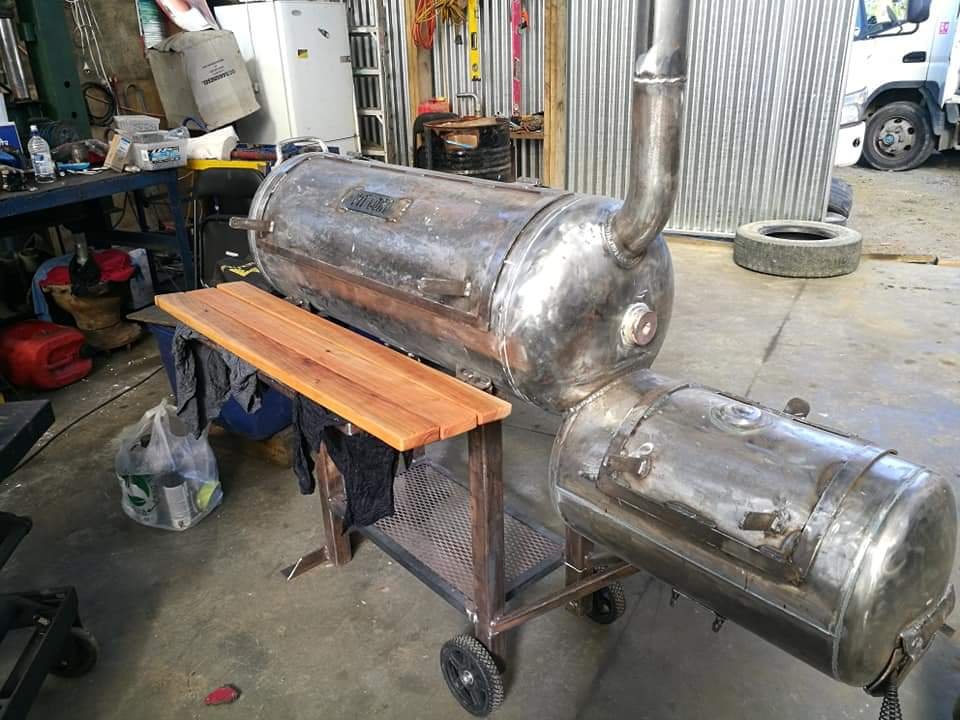
Merry xmas people.
Got the old man to come down with his truck and bring the pit up to theirs as we were heading up for Christmas, and present it to my brother there.
Threw on a bit more paint as it got a little scratched up in transit and gave it a clean out on the inside.
My brother was pretty Fucking stoked and all my family were pretty impressed with it so was pretty happy with that.
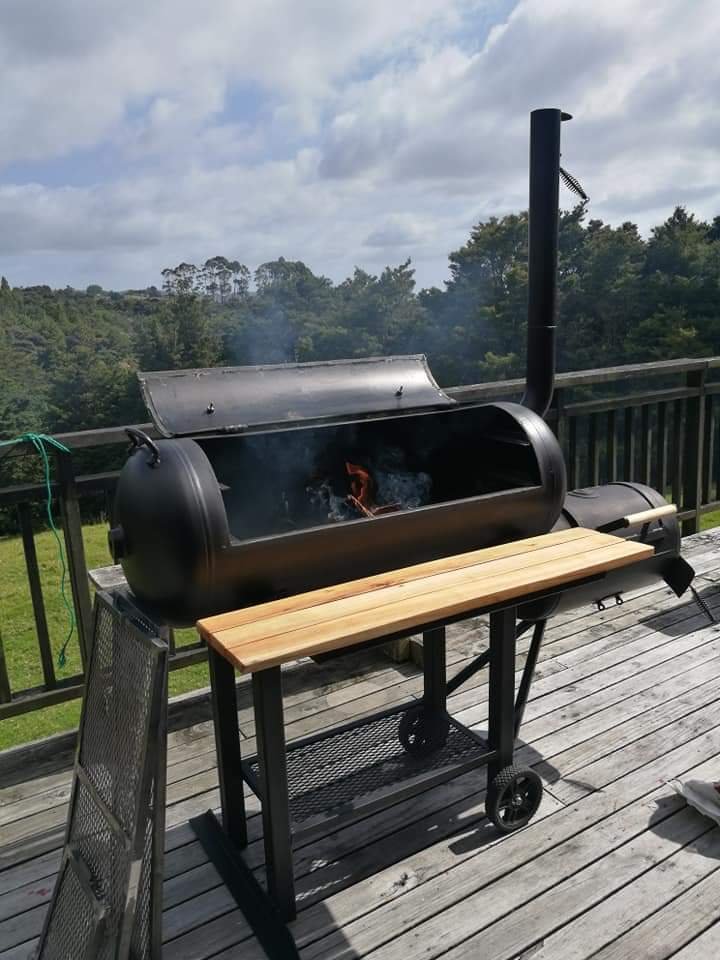
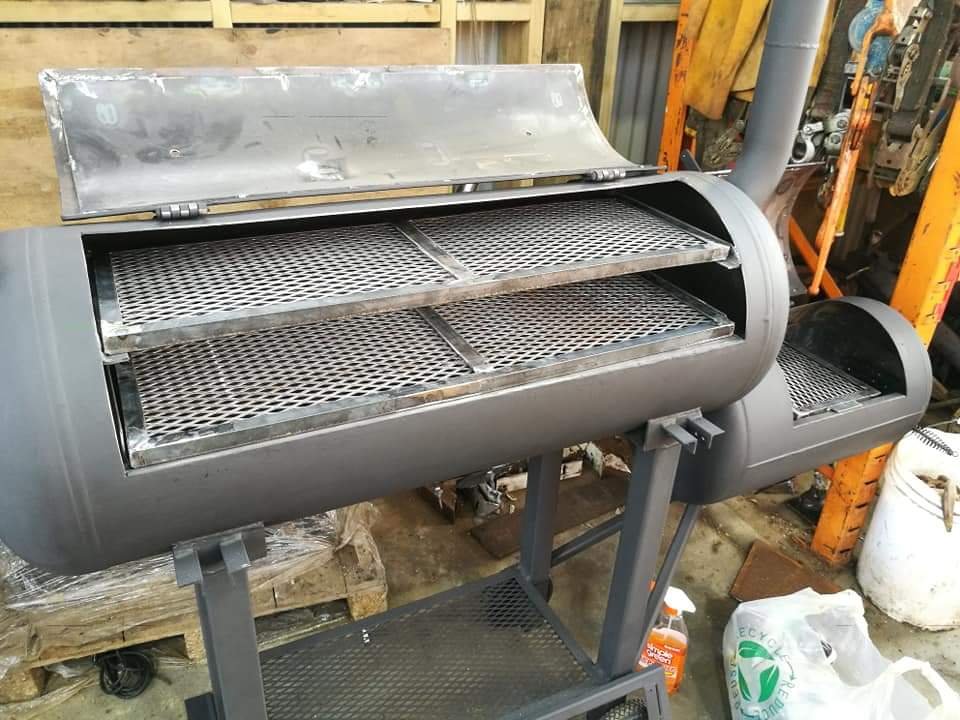
I gave him a hand throughout the day and we got it roaring to burn it out. We created a fire in both the firebox and the cooking chamber as well. Got the firebox up to about 650 Fahrenheit for a bit and the cooking chamber up to about 400 for about 3 hours. Cleaned it out again then sprayed canola oil throughout and got it going via the firebox for another 3hours to season it with a drip tray and primarily Manuka to season it.
It seals up pretty well once the exhaust starts extracting but it takes a little while to get it going. We also struggled to get the cooking chamber above 200 Fahrenheit when we seasoned it so we need to learn how to get it going hotter. Will try different brickettes and heat beads as we primarily just used wood when we seasoned it.
Pretty stoked nonetheless. Will get some meat on it tomorrow hopefully and see what we can come up with.
Cheers
-
41
-
 1
1
-
- Popular Post
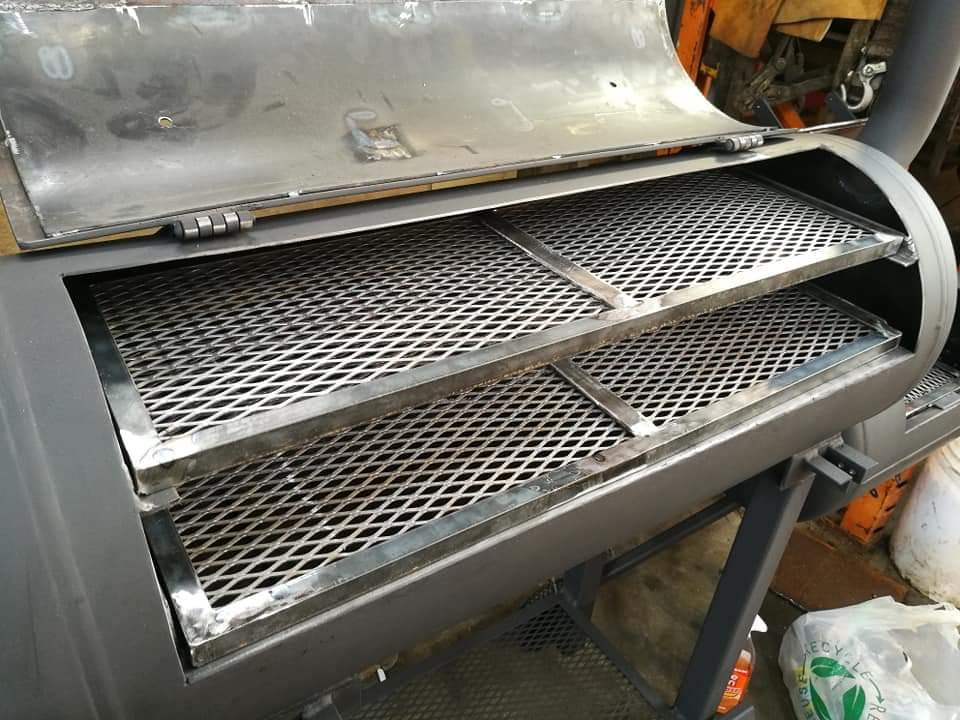
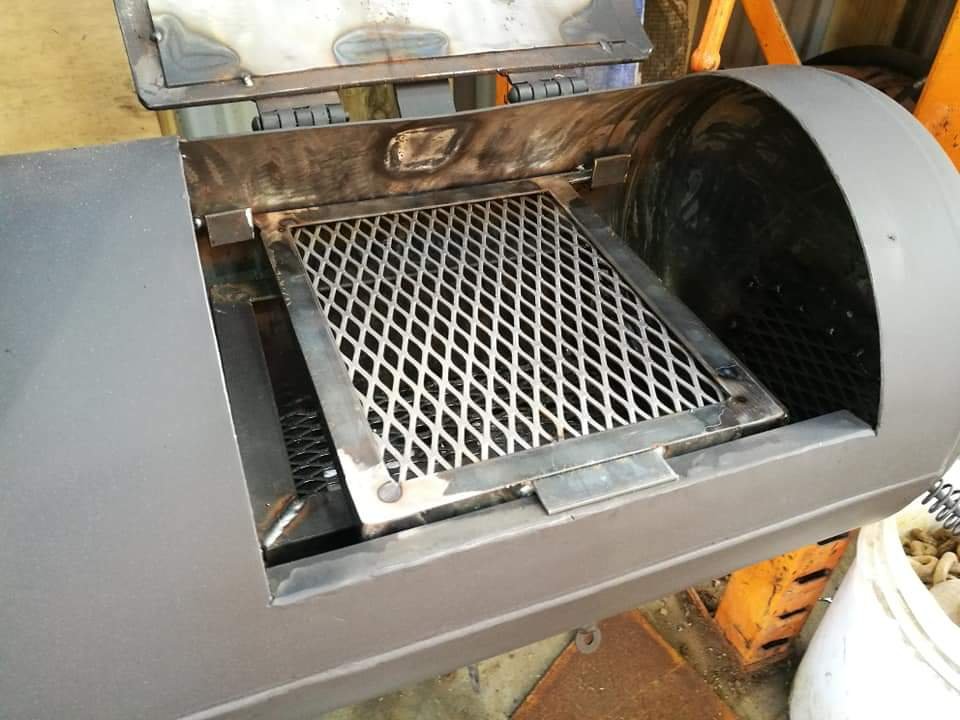
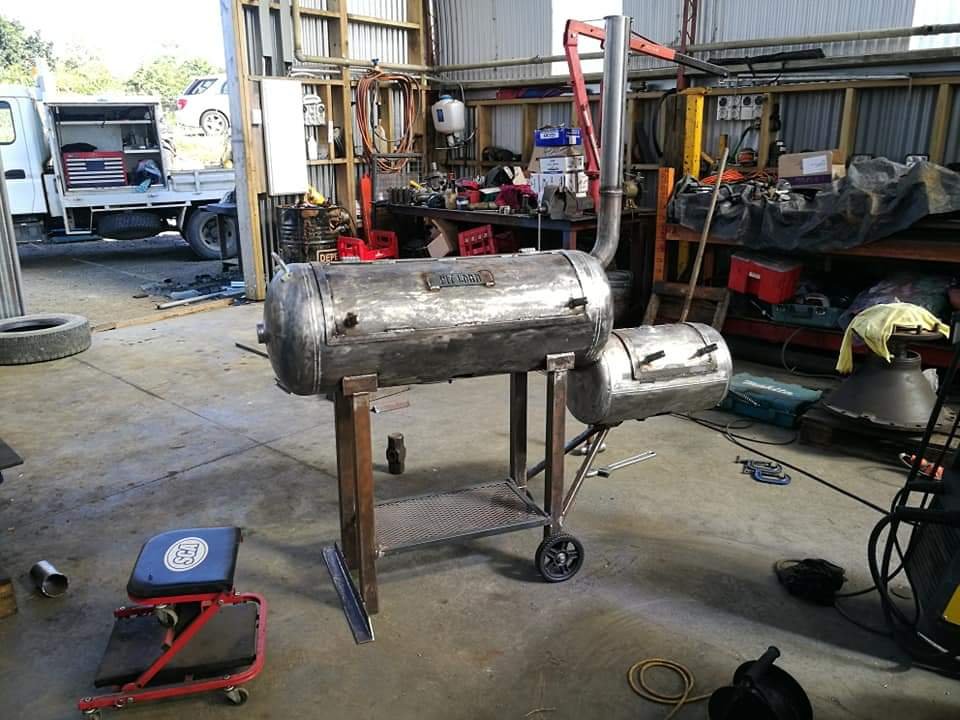
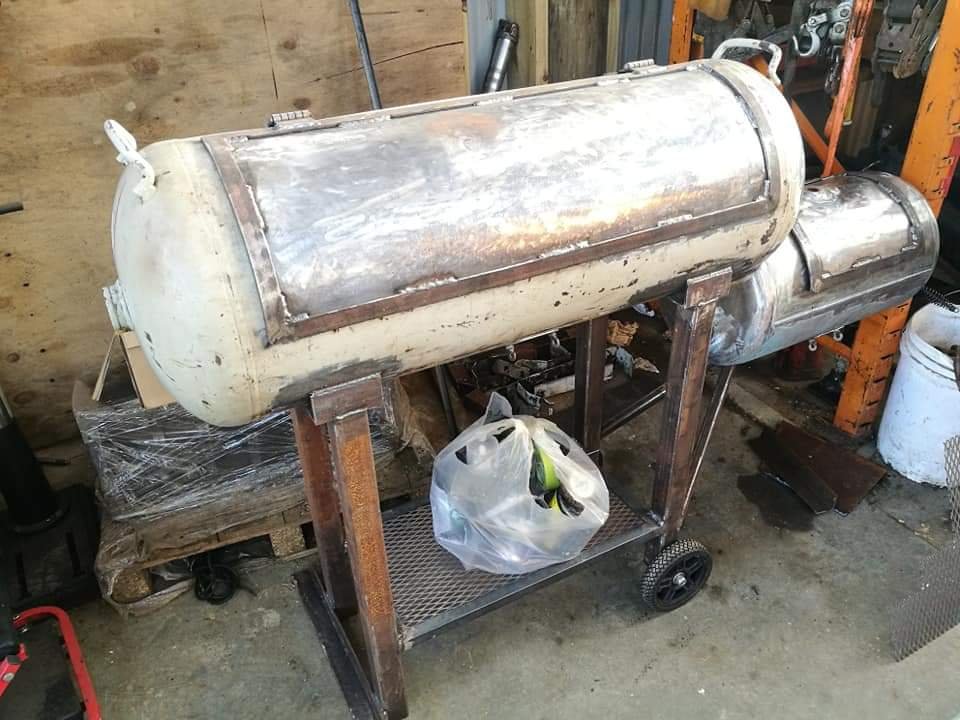
So got the last bits sorted today.
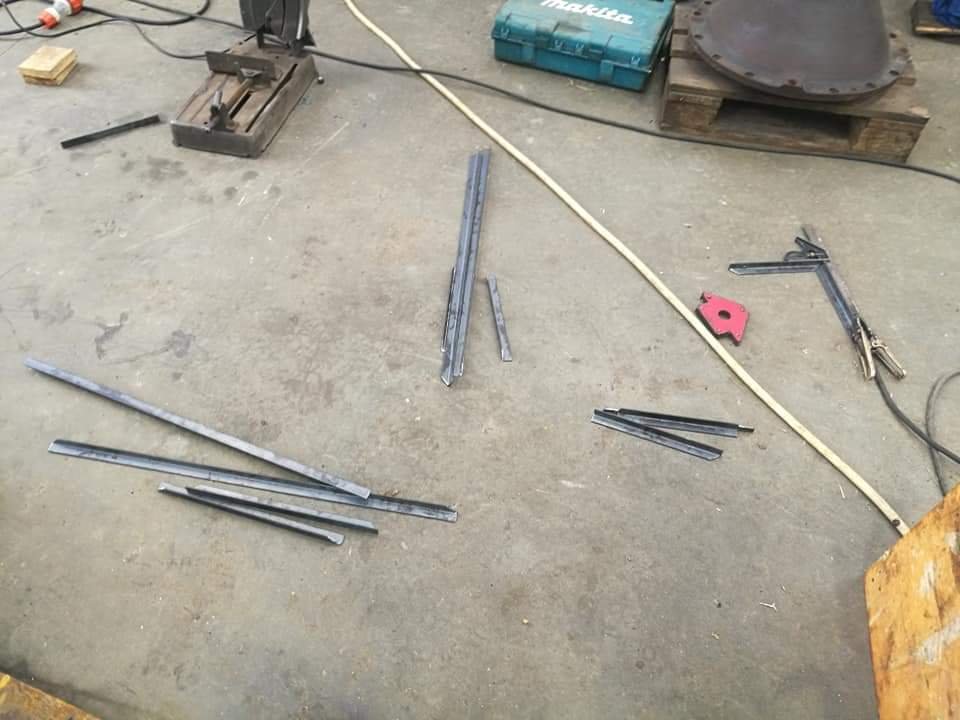
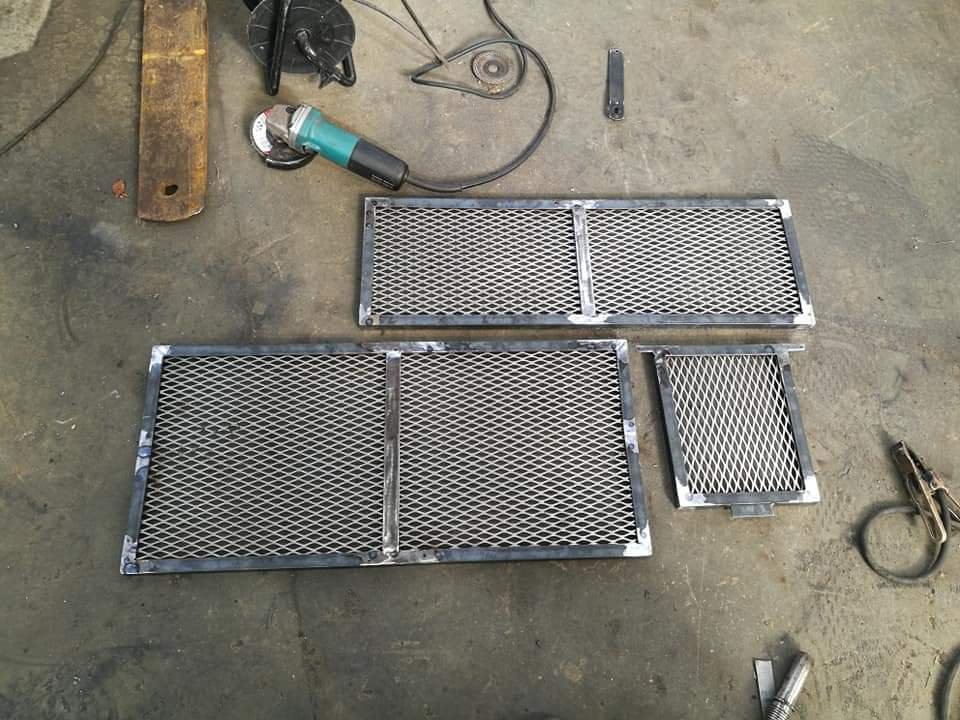
Cut some steel and made some grilles.
Had to stuff around with the firebox grille to get it functional as the setup was different to the cooking chamber. Also because the rails I fitted to the cooking chamber weren't square I had problems getting the lower one to look right. Everything is kind of shortly but it is functional and looks pretty awesome.
I've actually finished this and got it all together but we shall wait til xmas to get some better photos. Hopefully my brother is as stoked as I am with it haha.
-
10
-
1
-
Cheers guys.
Yeah will be sparking it up on Wednesday and season it for the bro so hopefully it will cure the paint at the the same time and burn out any oils and toxins inside.
-
1
-
-
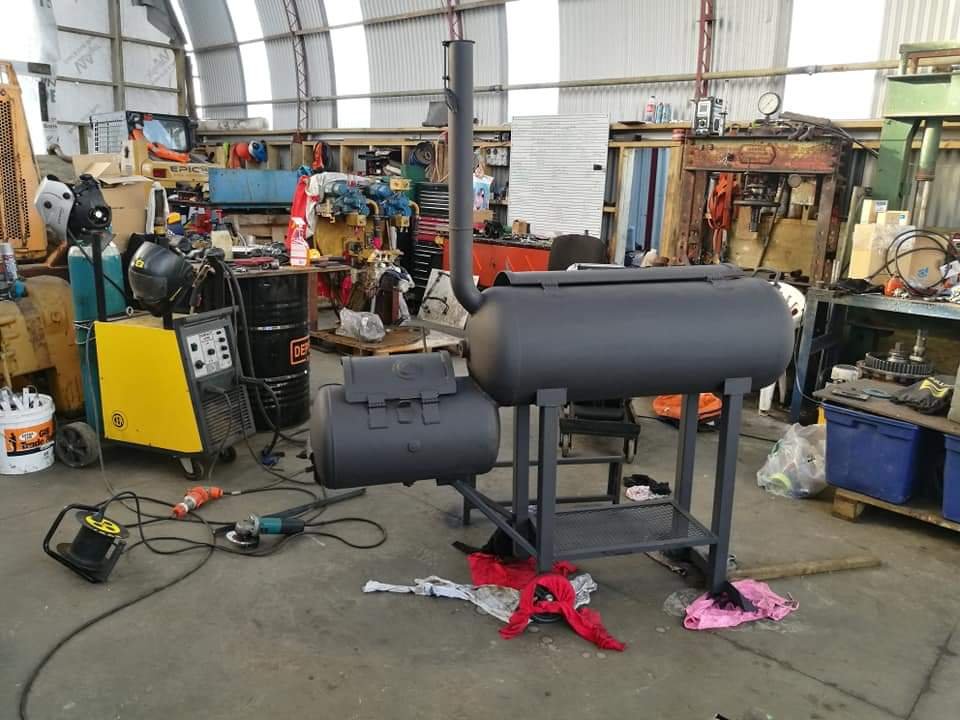
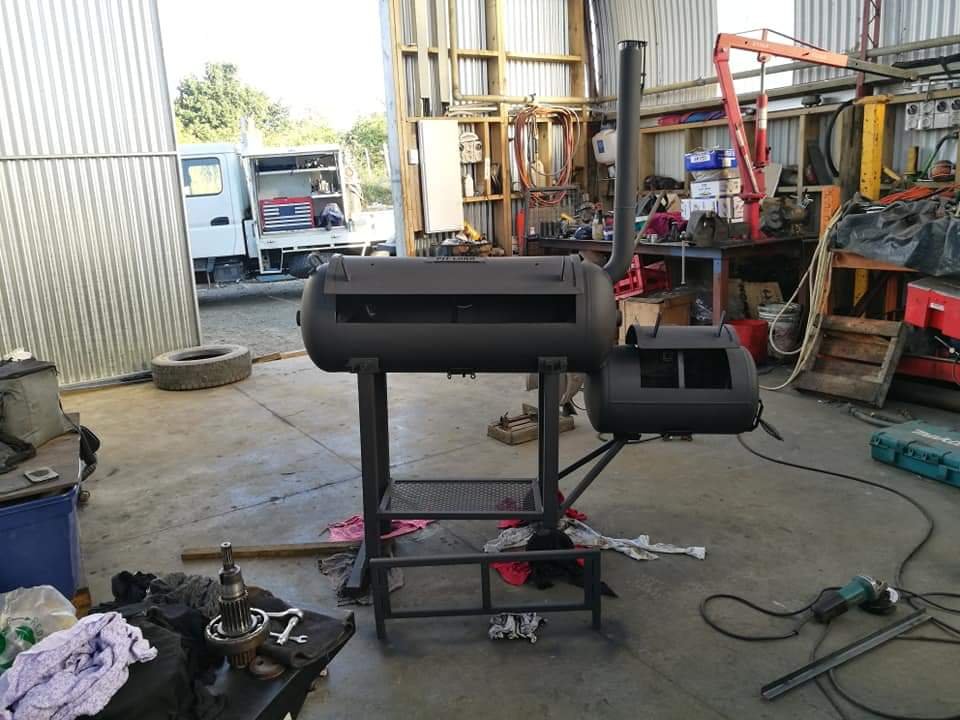
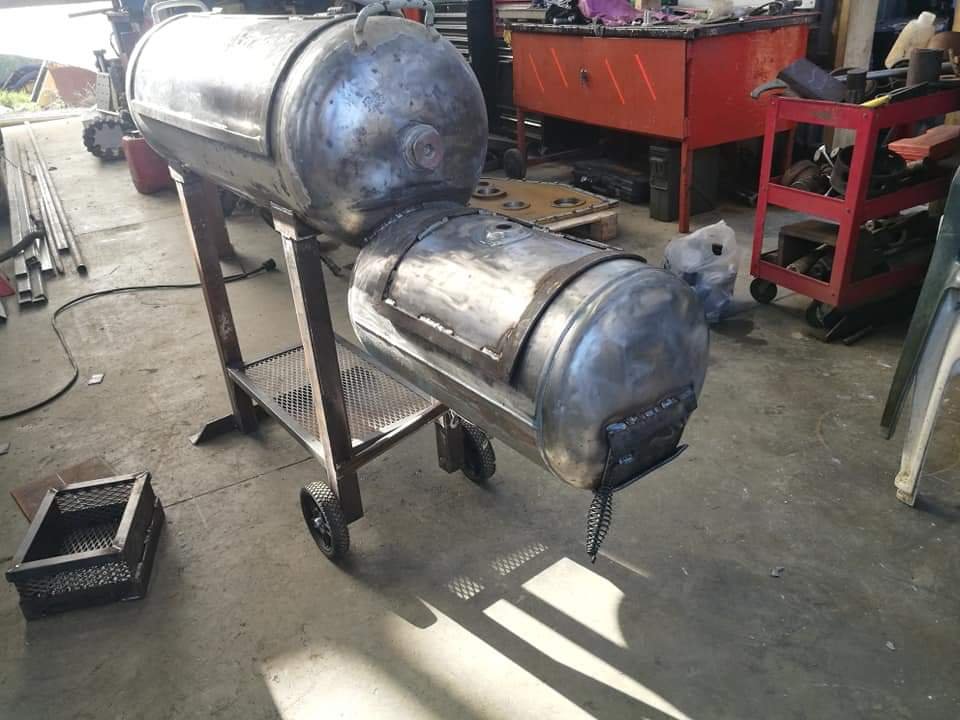
- Popular Post
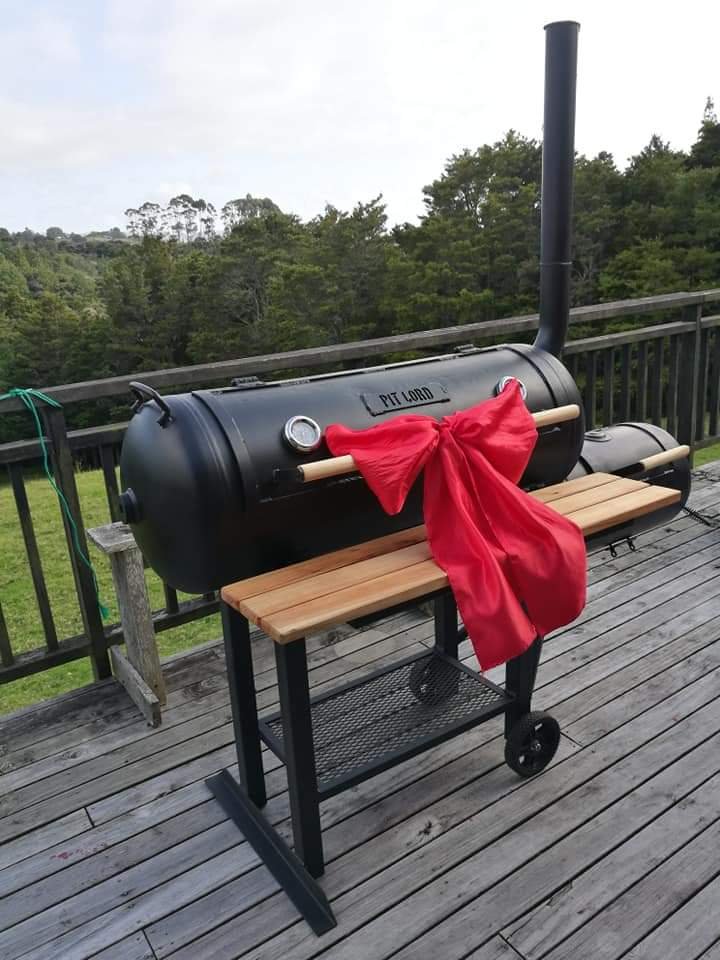
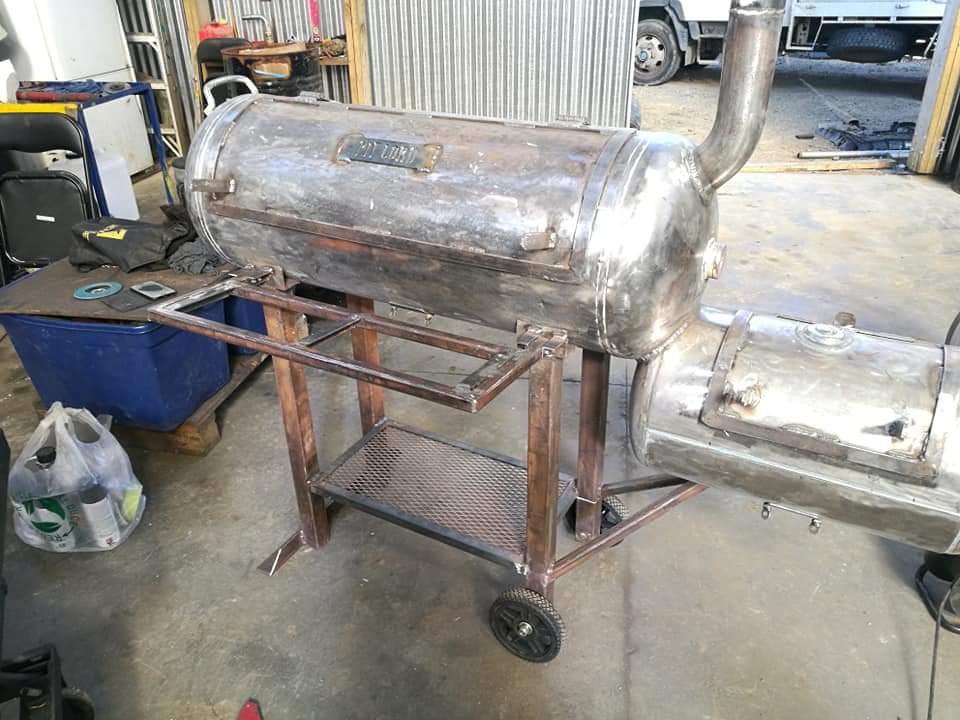
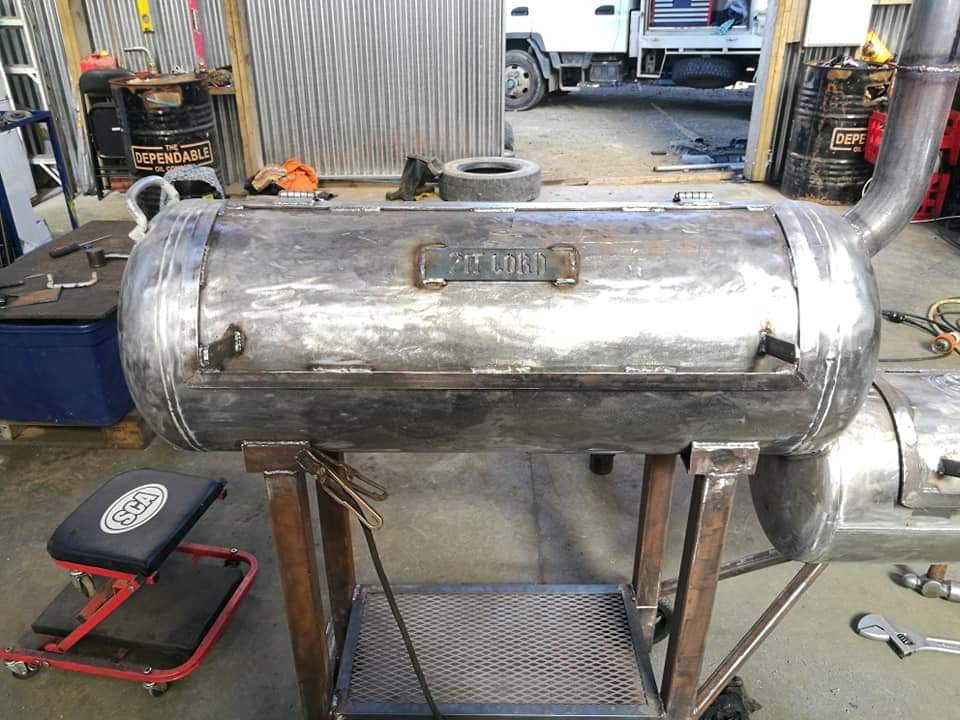
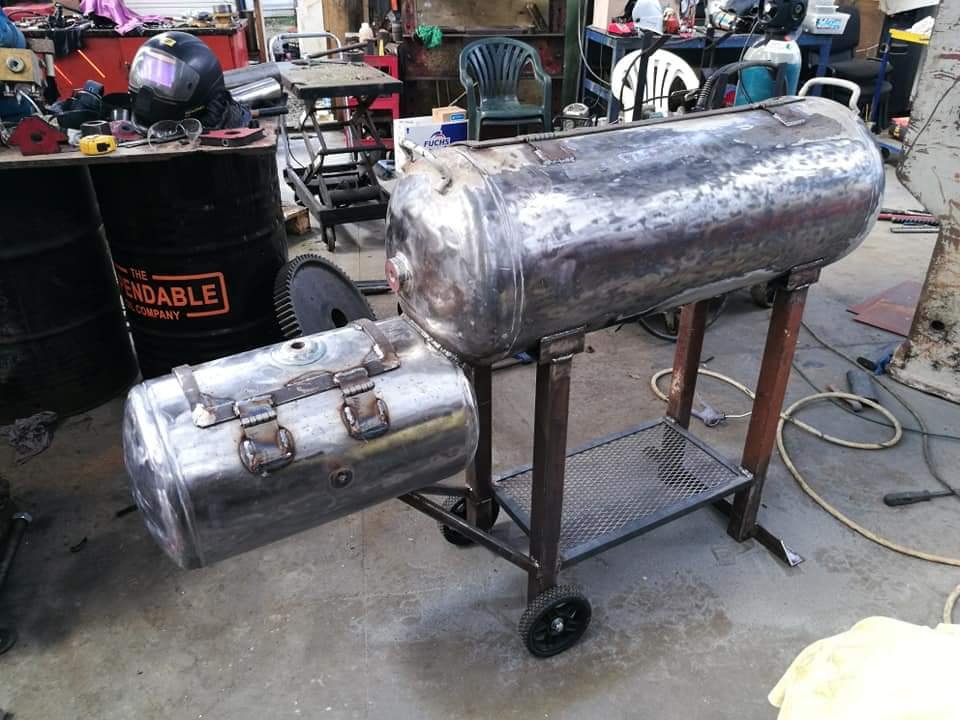
Couldn't stop there, went into overdrive and cleaned it with some simple green degreaser then a few go's with the wax and grease remover. Then finally got this in one colour, just used the rustoleum high temp paint from bunnings. It had a picture of a bbq on it so it must be legit.
Looking pretty swish, almost like a brought one haha. I only had a few cans of paint and it didn't go very far so only got about 2.5 coats on it. It will be interesting to see if it lasts or not.
All that remains is fitting the wood and making the grills. This will be tomorrow's job if all goes well.
Chur
-
14
-
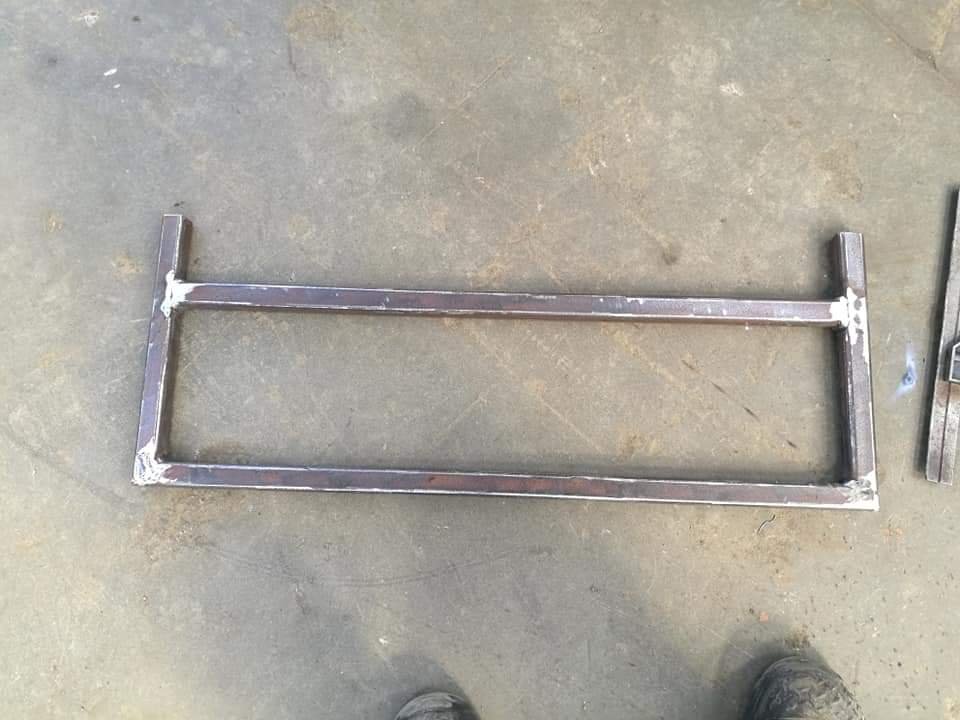
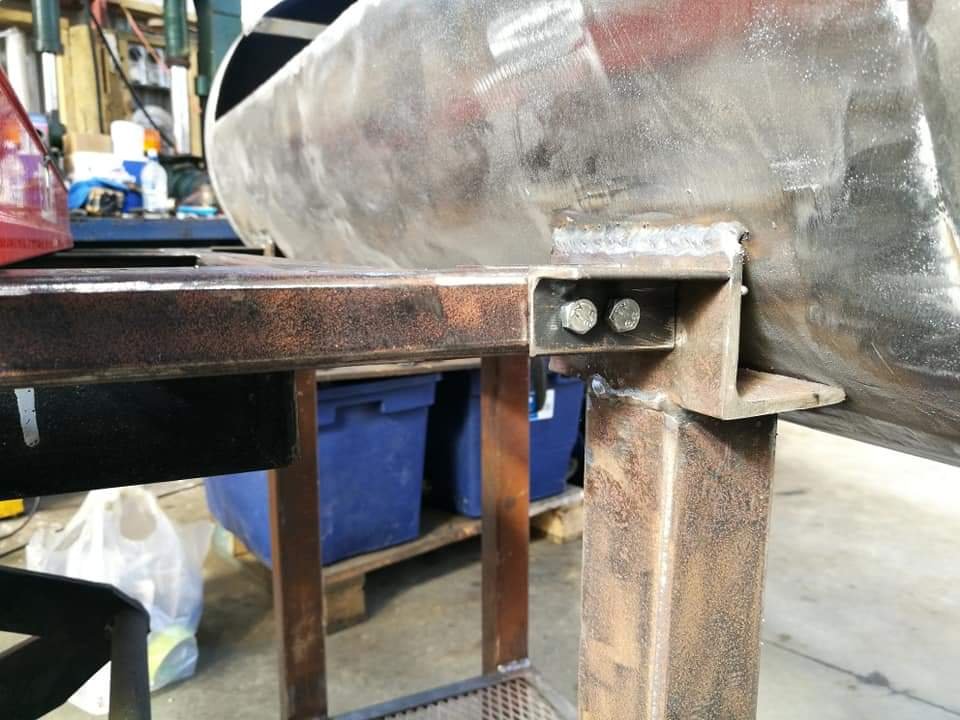
Sorted out the front bench. Cut up some 25x3 box and some 25x3 angle and welded up a frame (forgot to take a pic with the angle fitted). Drilled some holes and tested fitted with the mounts in place.
Then placed the macrocarpa on top to have a skeeze.
-
6
-
-
Been going hard at work leading up to xmas but also managed to squeeze in more time on this.
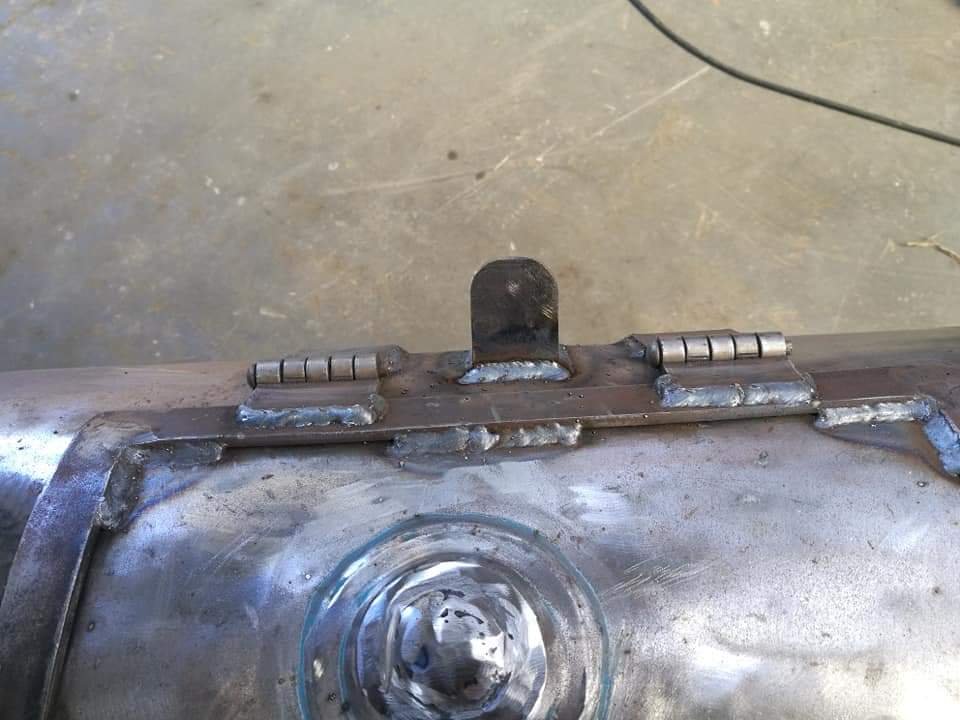
Made a stopper for the Fire box door.
Sits pretty nicely now.
Also drilled some holes and mocked up the gauges. Wanted to put them higher but there would be clearance issues with the top rack.
I also welded in a little rack thing for the firebox grill to sit on and cleaned up the damper but forgot to take a pic.
-
2
-
-
Cheers bro, stoked as with it haha.
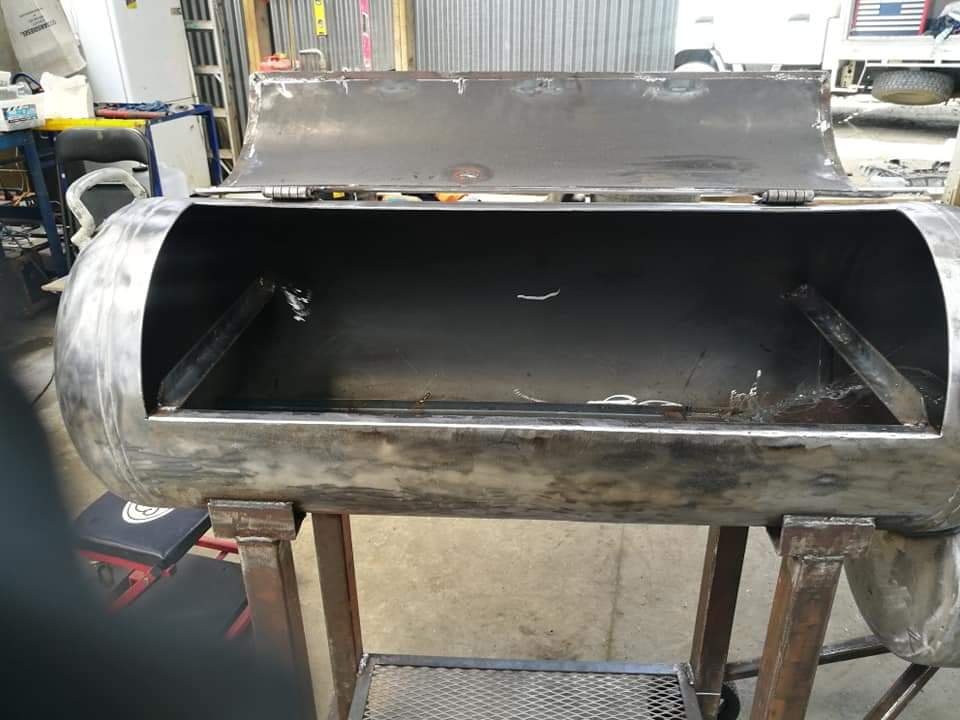
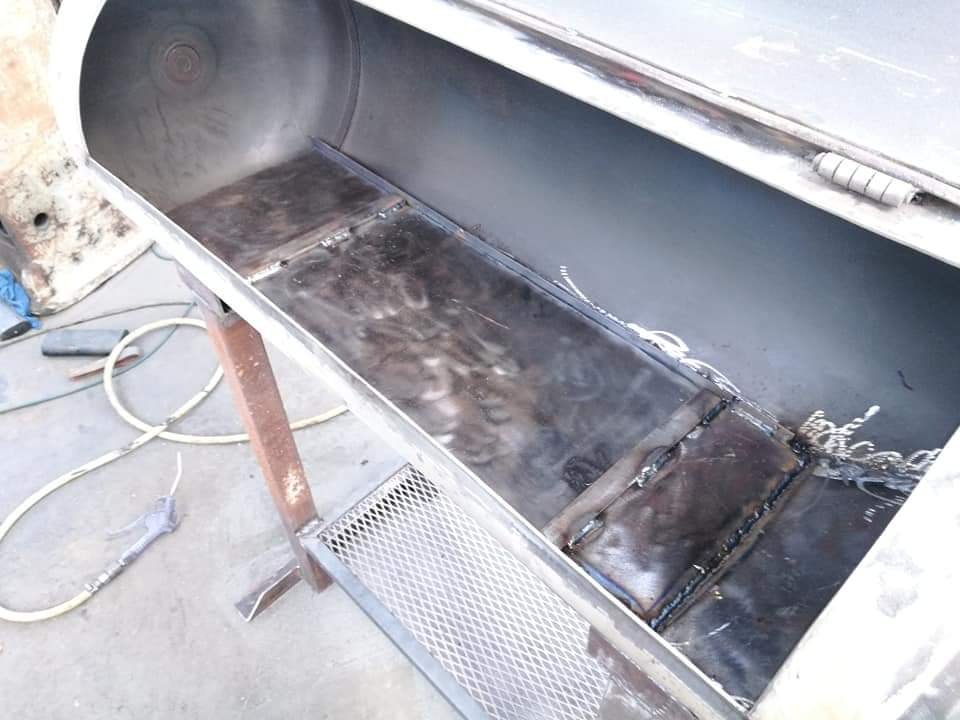
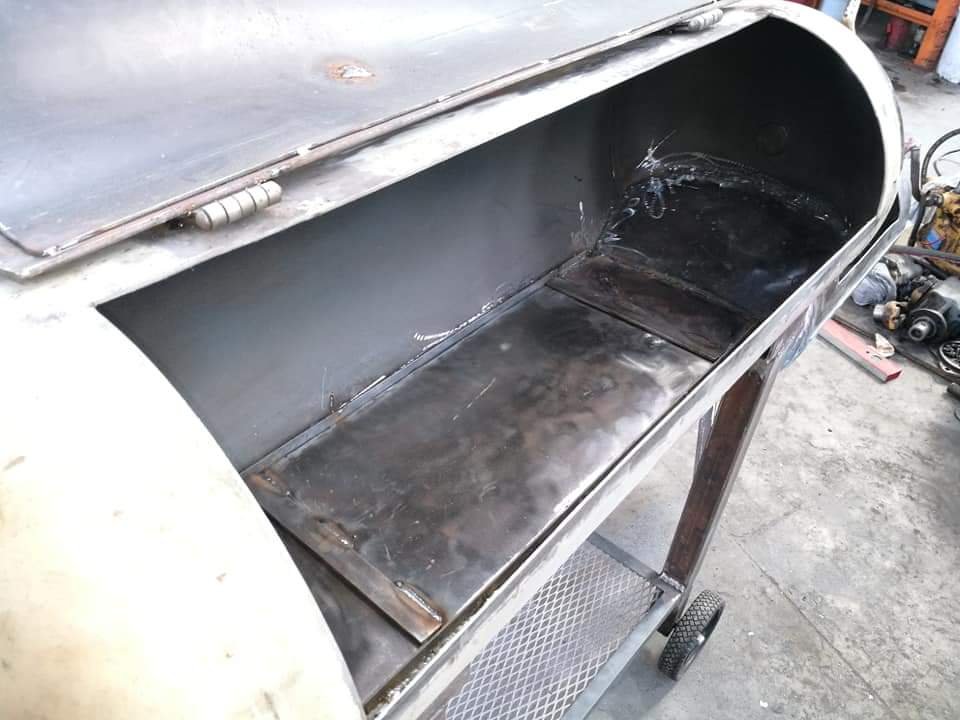
Yeah bro, put some removable baffles in for the reverse flow setup. Will wait and see how effective it is, if need be can change out for a different sized opening and run thicker steel plates for different temps.
And yeah that's a great idea. I actually picked up some fibreglass heat seal strips from bbq and more the other day to help with the doors.
-
1
-
-
- Popular Post
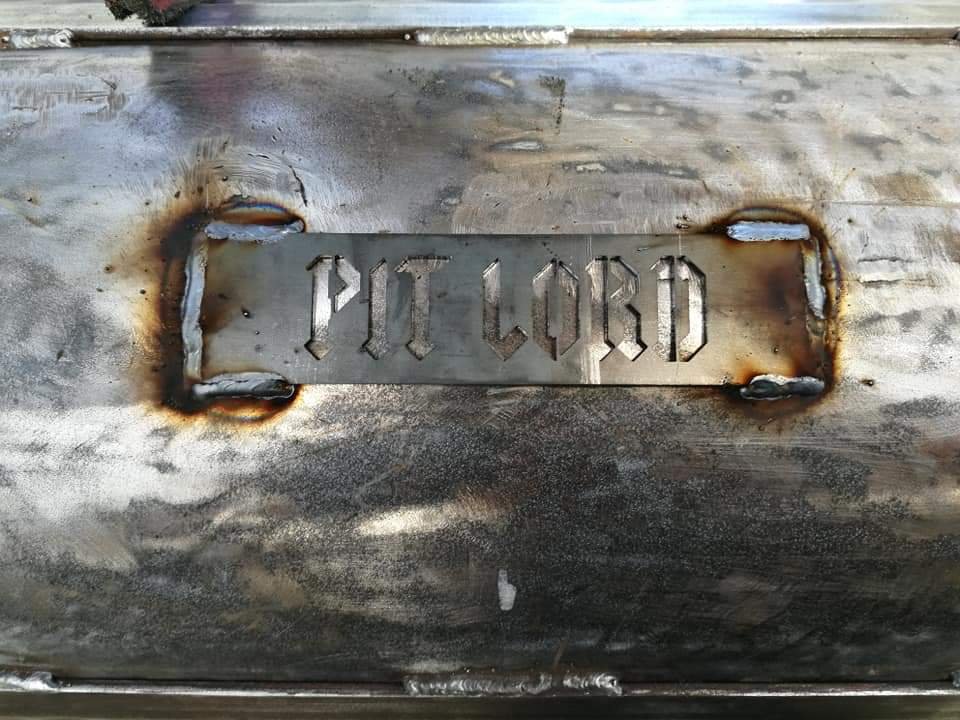
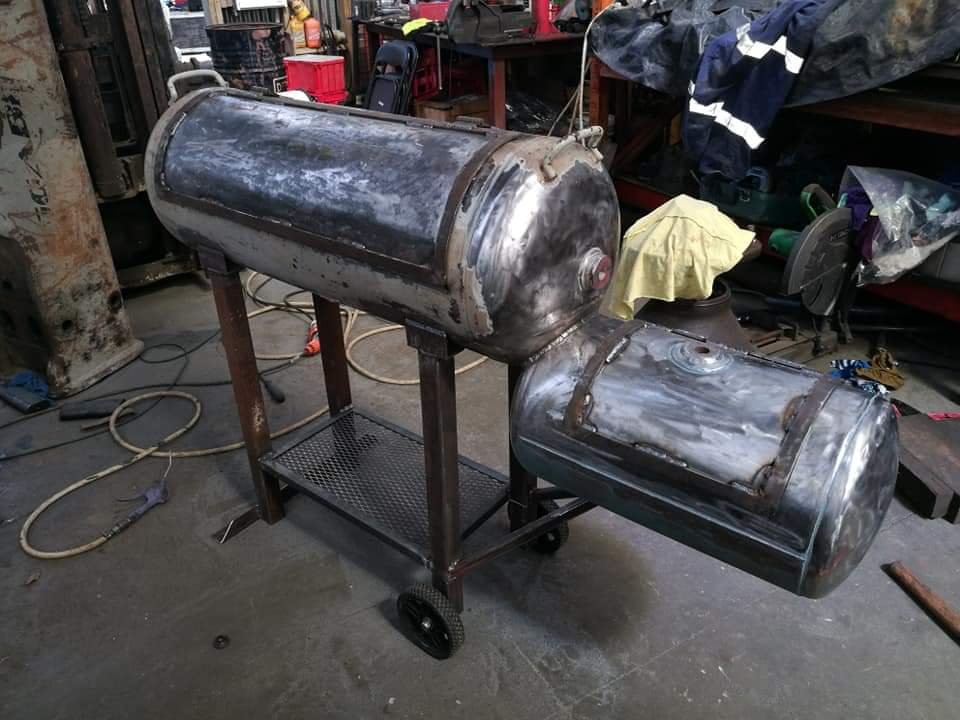
And the creme de la creme.
Had a mate at one stop cutting shop sus this out. Did an awesome job and it adds that finishing touch.
So happy with how it's looking now. Had also welded up the remaining holes and bent the firebox lid so it sits a bit better and tried to sand back the paint on the inside of the firebox.
All that's left now is to sort the front bench, drill some mounts for the thermometers/temp gauges and paint!
Home stretch!
Chur
-
19
-
Made some rails out of 25x5 angle to sit the grills on. Also put some steel at the front to straighten it out and reinforce it.
-
3
-
-
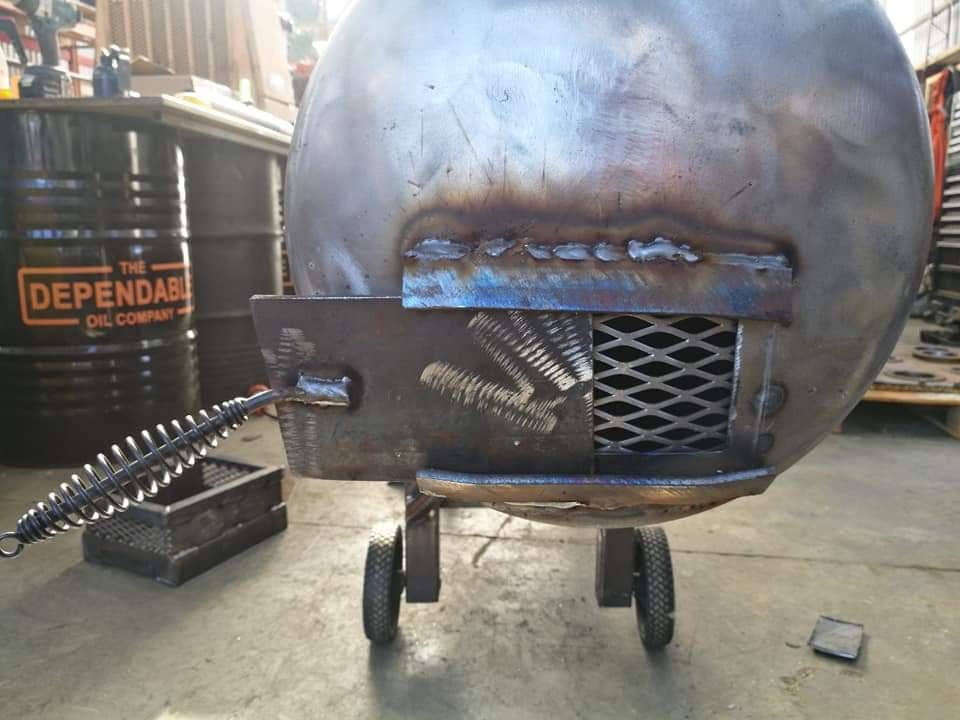
Added some more to the damper. Fitted a vertical bit of plate and some angle to act as a stopper. I'll dress it up a bit more so it looks a bit tidier before it's painted.
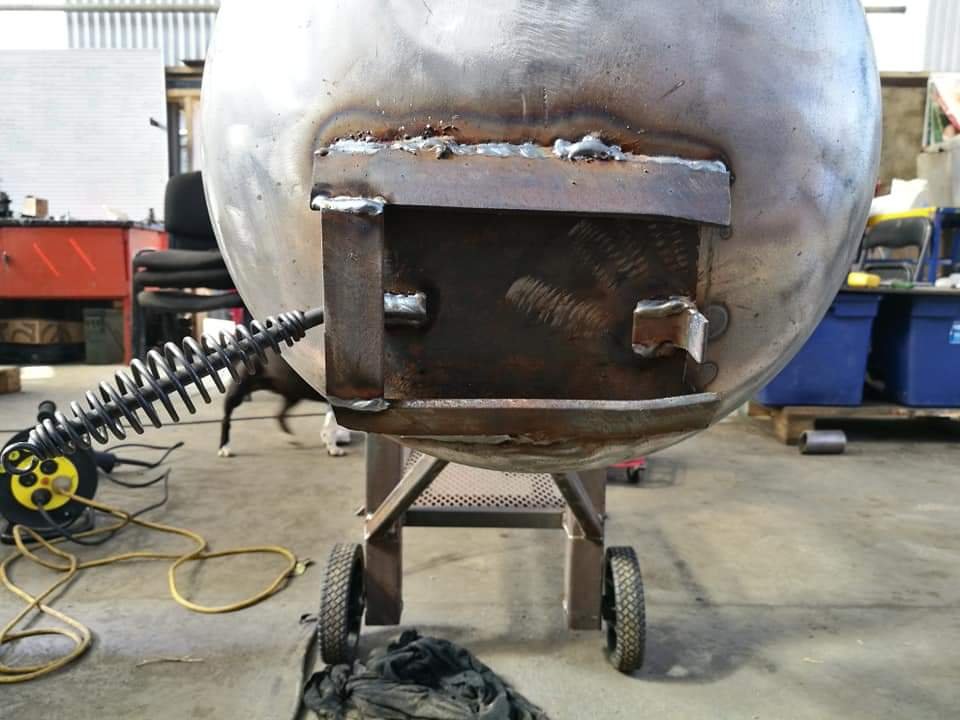
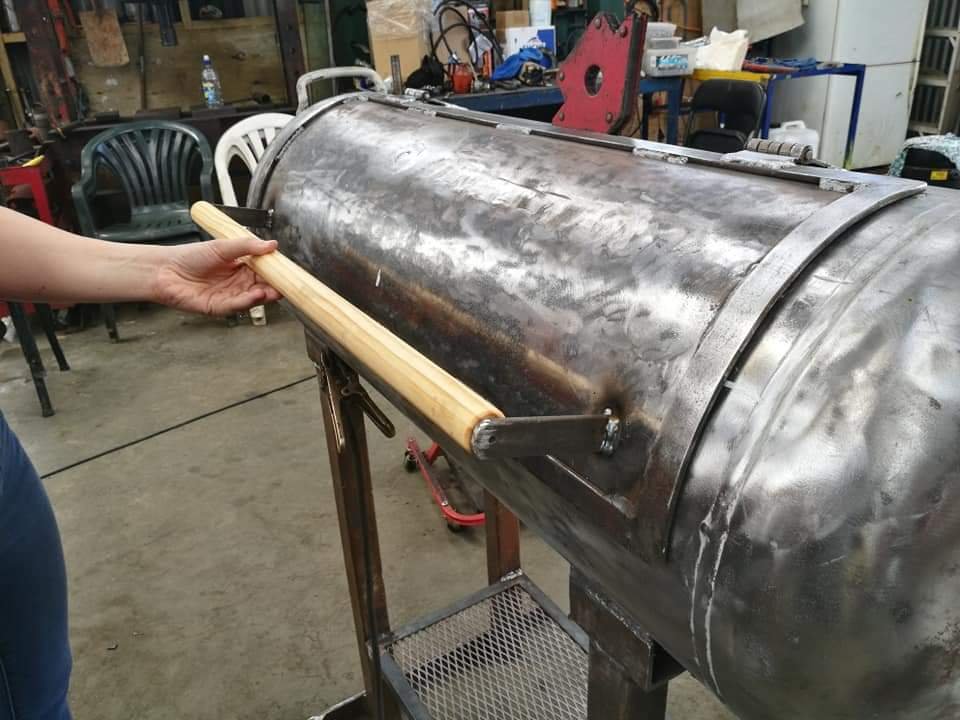
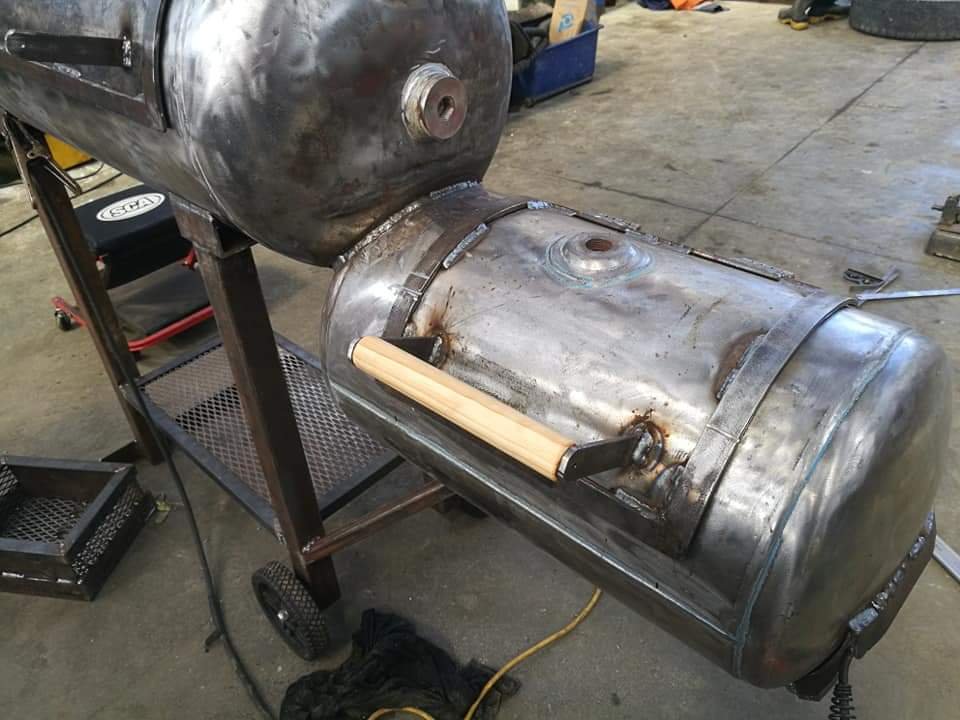
Then made some handle mounts for the doors. Pretty straight forward.
And fitted with the pine mocked up.
And some 50x5 angle for stoppers for the charcoal basket. Also I welded in some angle at the front to increase rigidity and pull it a bit straighter. Have since cleaned up the welds so it's nice and flat.
-
1
-
-
Alright, got a half day in on this today with the help of the mrs and I'm Fucking stoked with where I'm at. Can finally see the finish line.
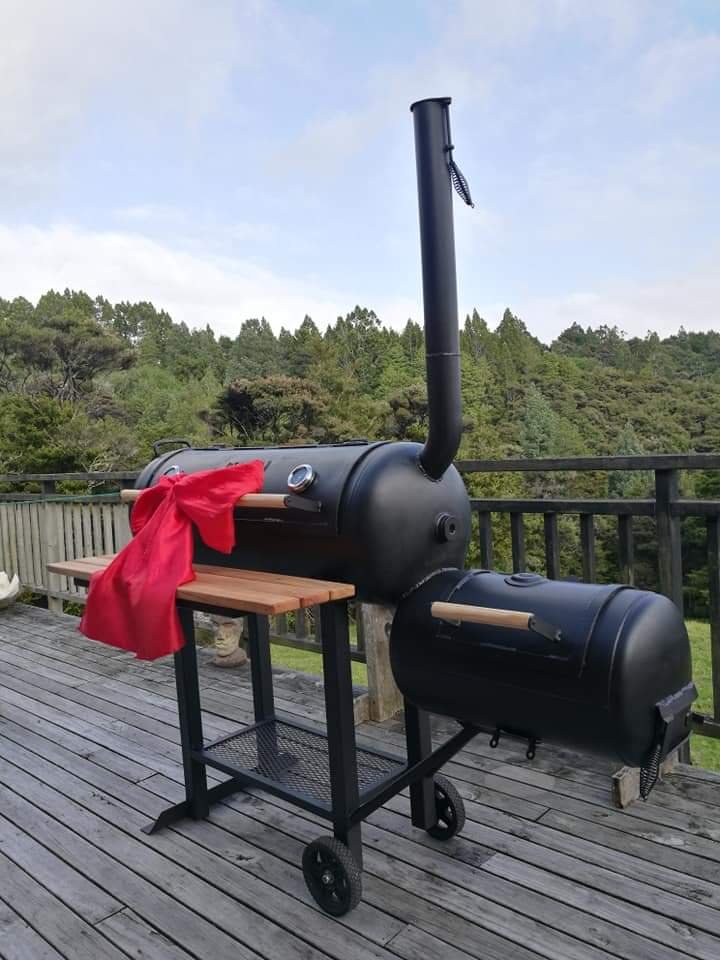
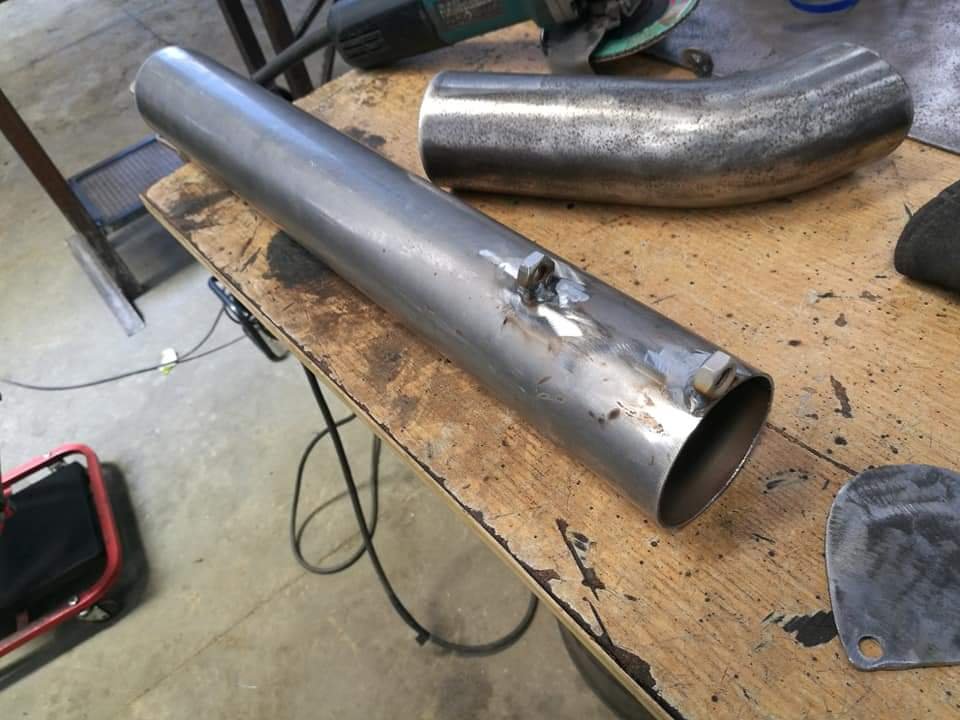
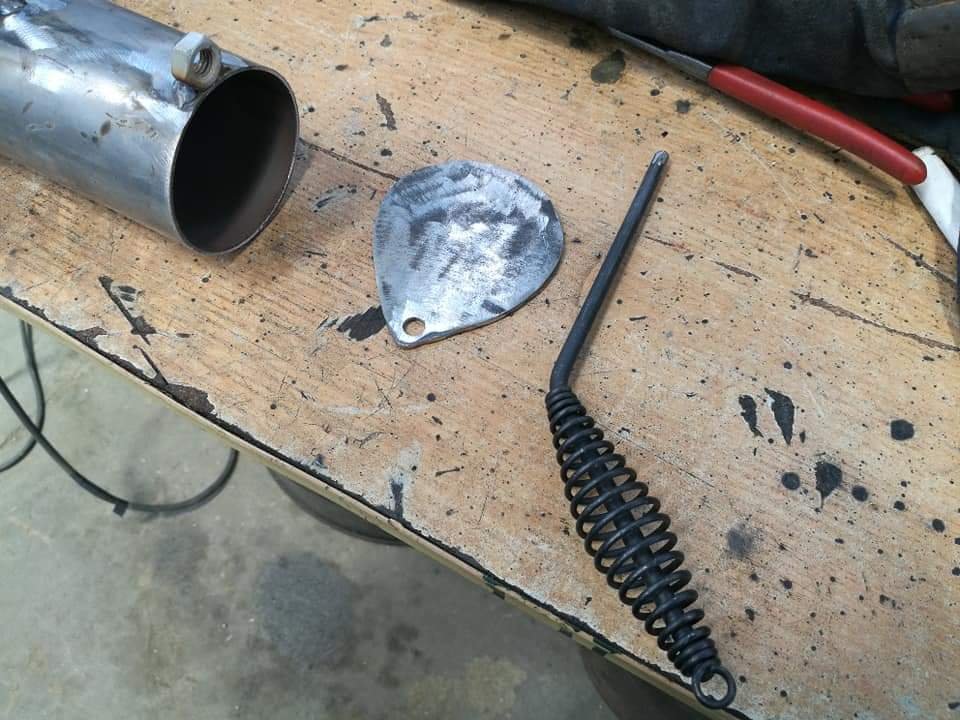
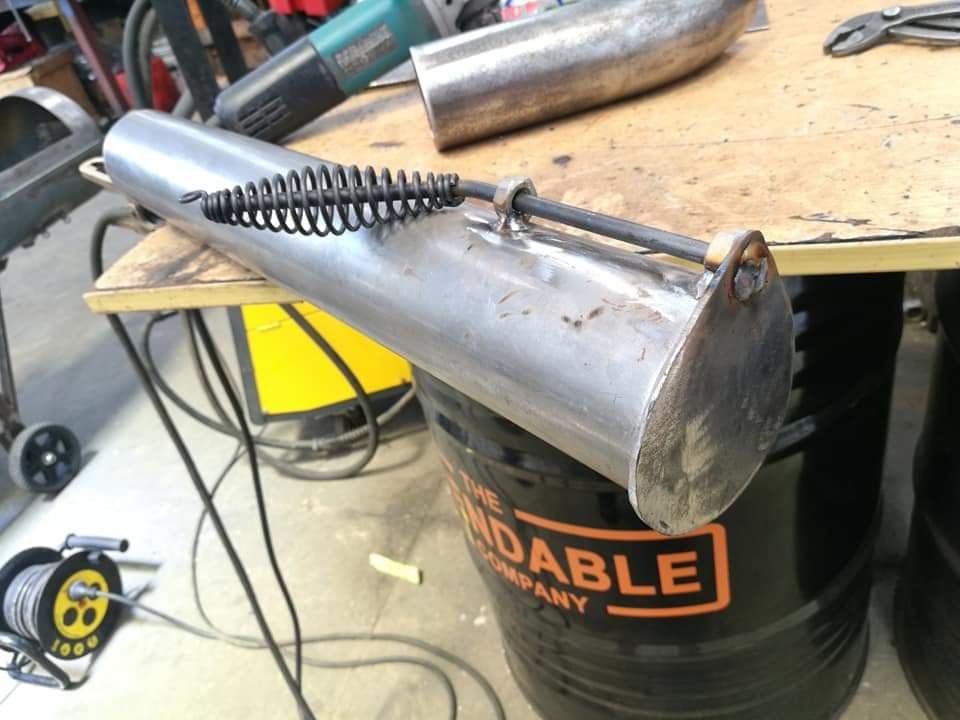
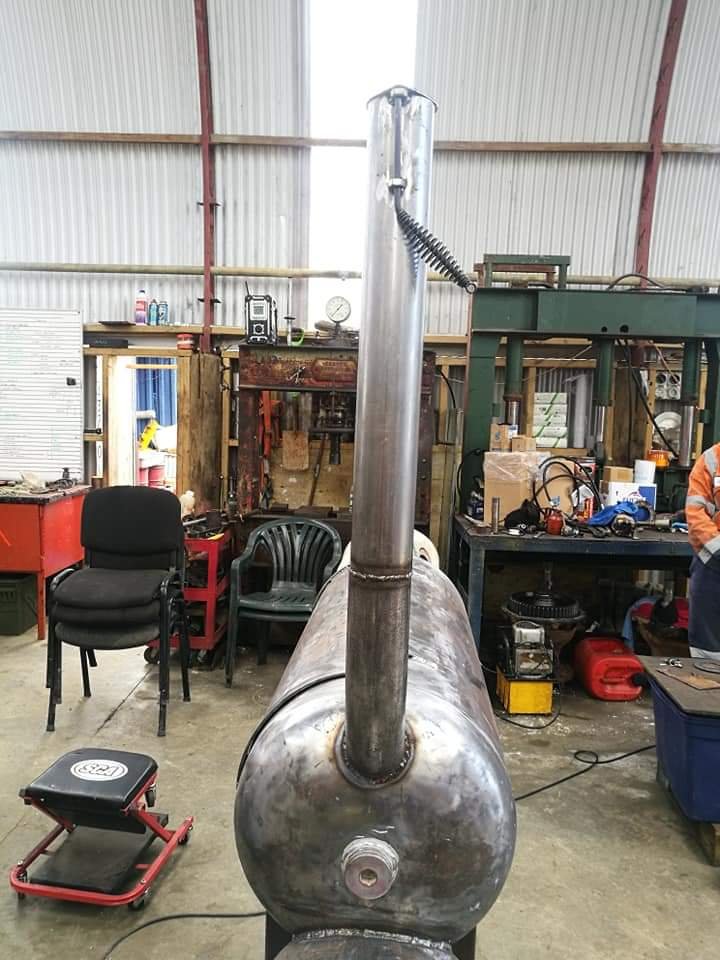
Started off with sorting the chimney and flue. Cut a length and a bend, welded in some locators for the adjuster and made a top hat that's fixed to a chipping hammer as the adjuster.
I positioned the handle offset so the flue can be fully opened for max heat. Pretty tall stack, mounted it about 3 inches above the main grilling plate and high enough so people don't have to try and dodge smoke all day.
-
5
-
-
- Popular Post
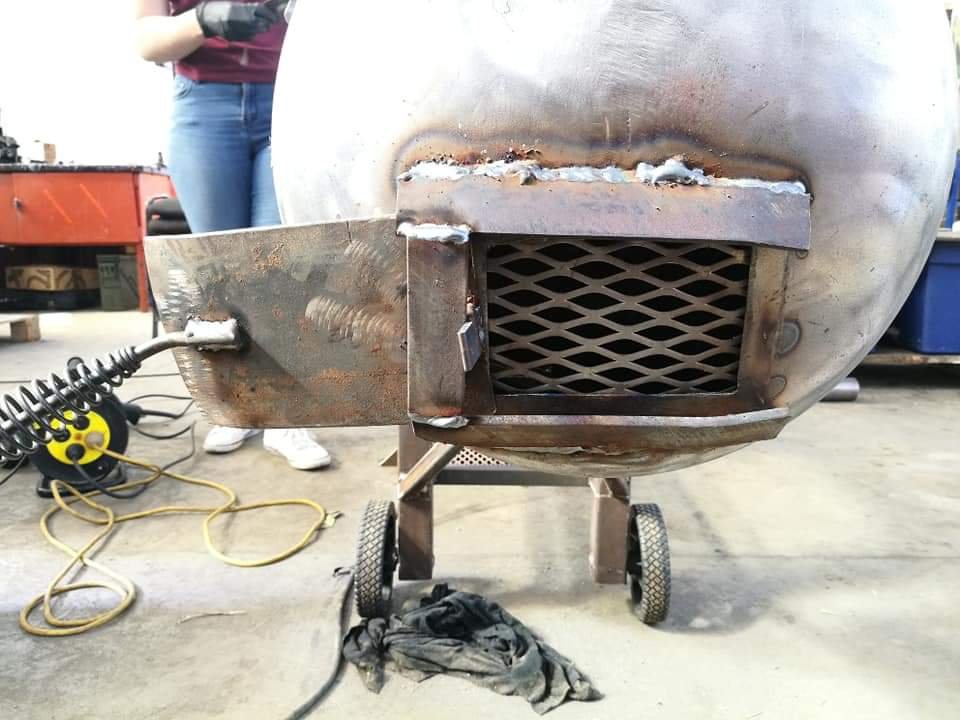
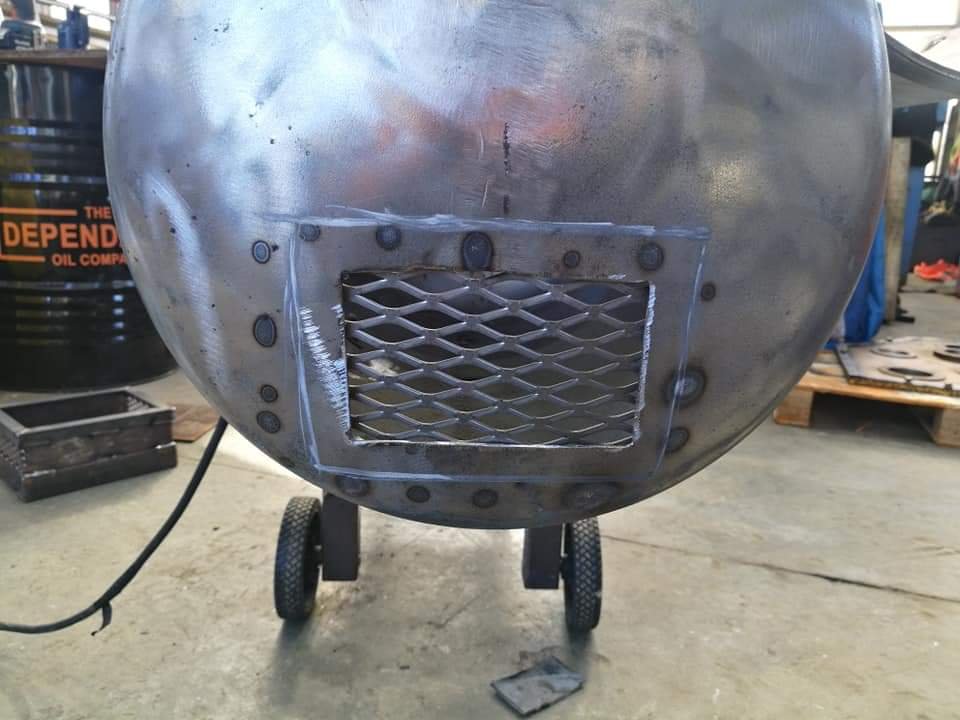
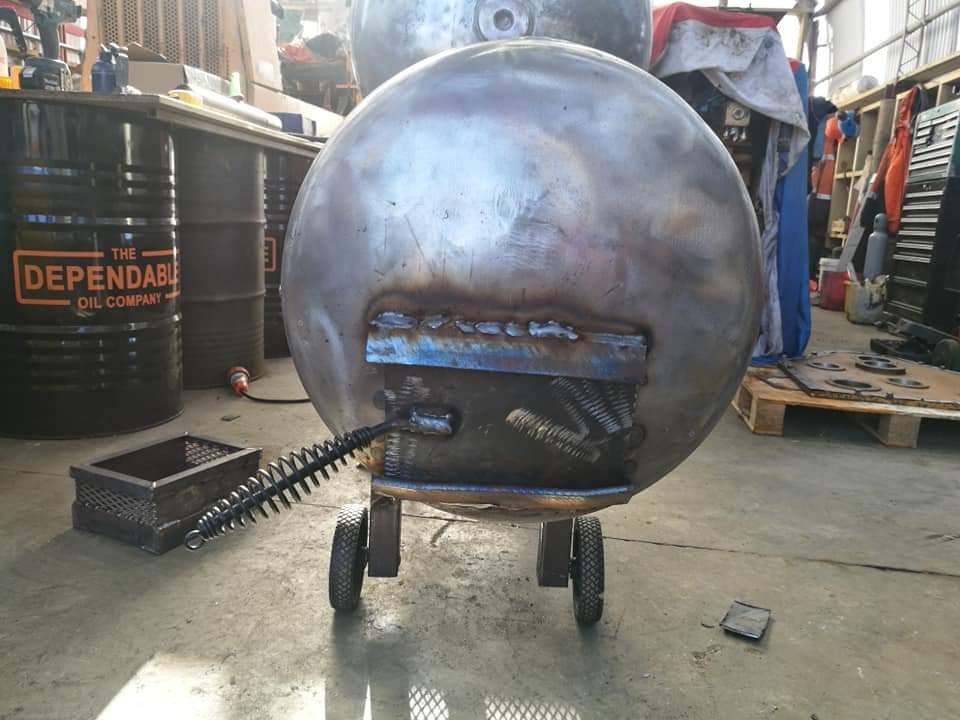
Also threw together a damper/lower vent. I was unsure on how to go about this as the tank has various curves. I initially cut out an opening then welded in some mesh behind it.
I played around with bending some steel for rails and also bending the slide door. Stuffed around trying to get the rails to work and managed to get it functional. I brought a cheap chipping hammer for $6 to use the handle for the door. Not 100% with the damper overall, but it works. I'll add on a stopper as well and clean it up a bit.
Hopefully get another hour or 2 in tomorrow.
-
13
-
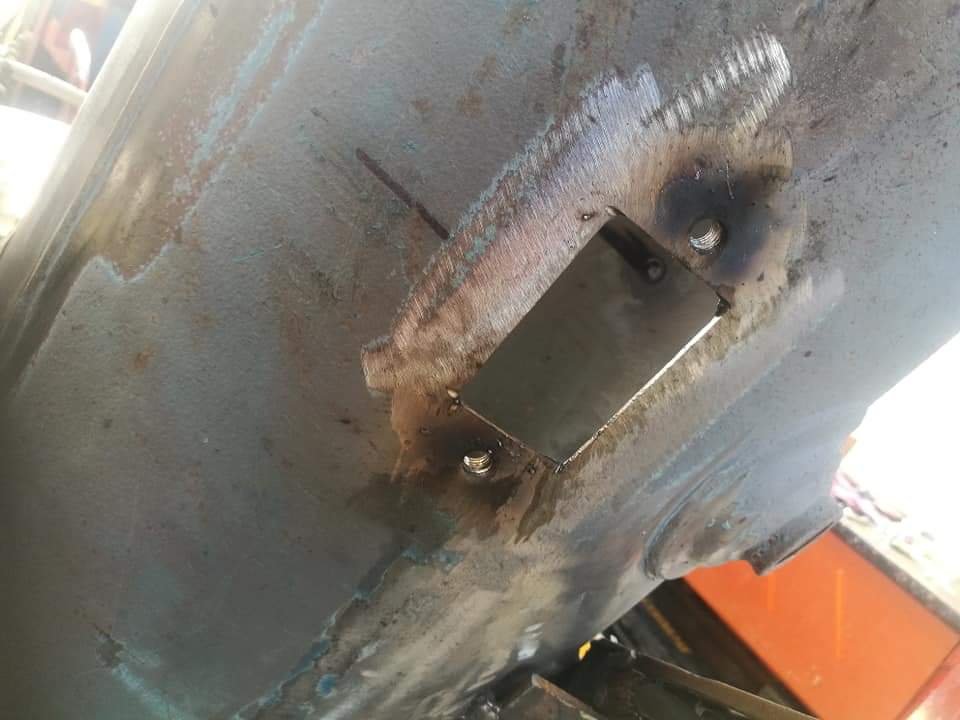
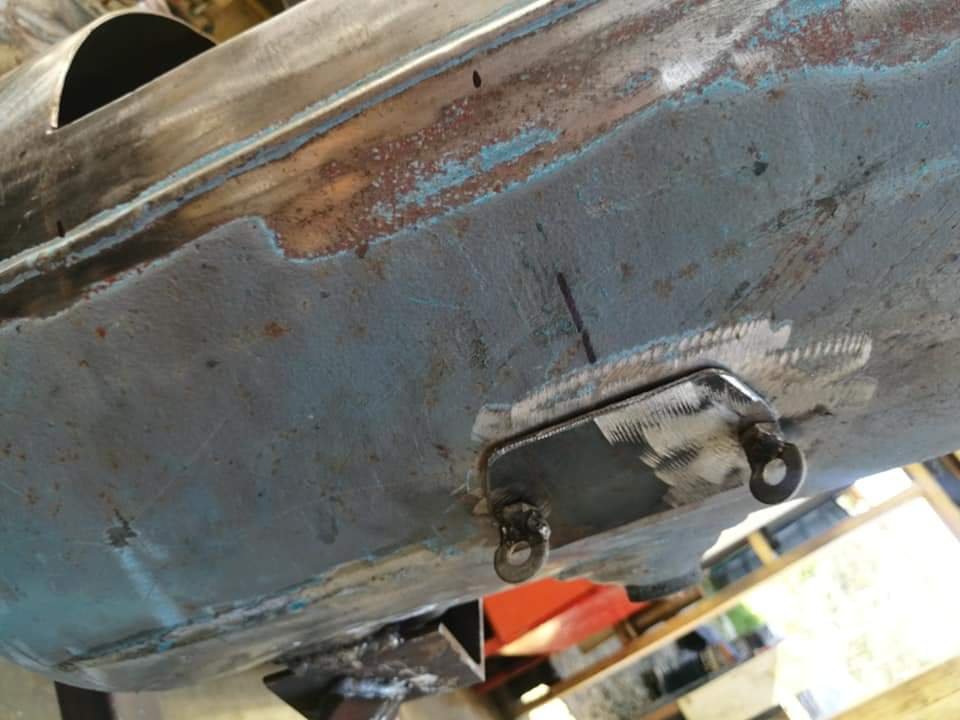
Cut some holes towards the bottom of the cooking chamber and fire box, drilled some holes and made some nuts captive.
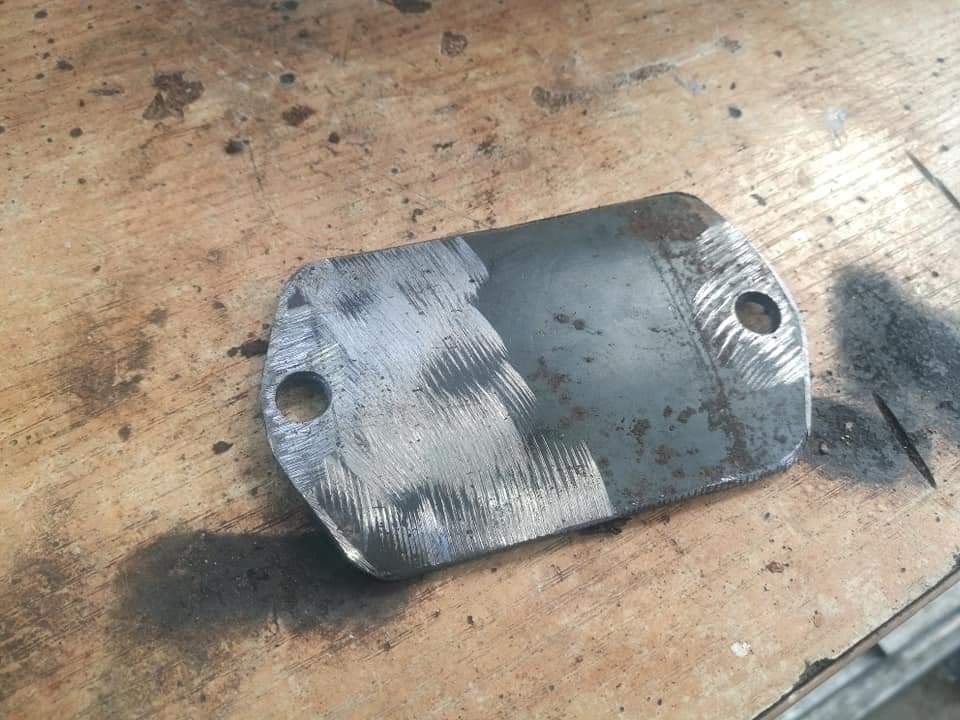
Cut some tabs.
And made some fully hectic wingnuts.
These really are just cleaning/drain ports. I was going to utilise the bungs already in the tanks but they are quite small and also would require a lot of cutting and Fucking around to make them suitable so decided on an easier alternative. Should be easy for clearing ash and grease etc. Can kind of see where they sit below.
-
Missed the original deadline as the bros birthday was on Monday but it doubles up as an xmas present as well so he can wait.
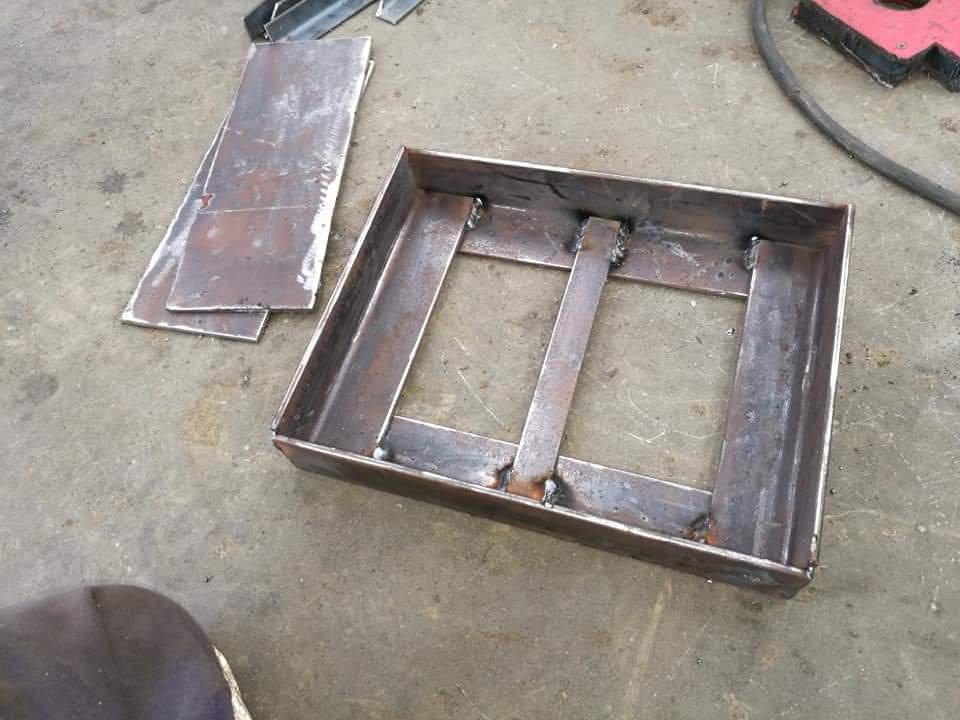
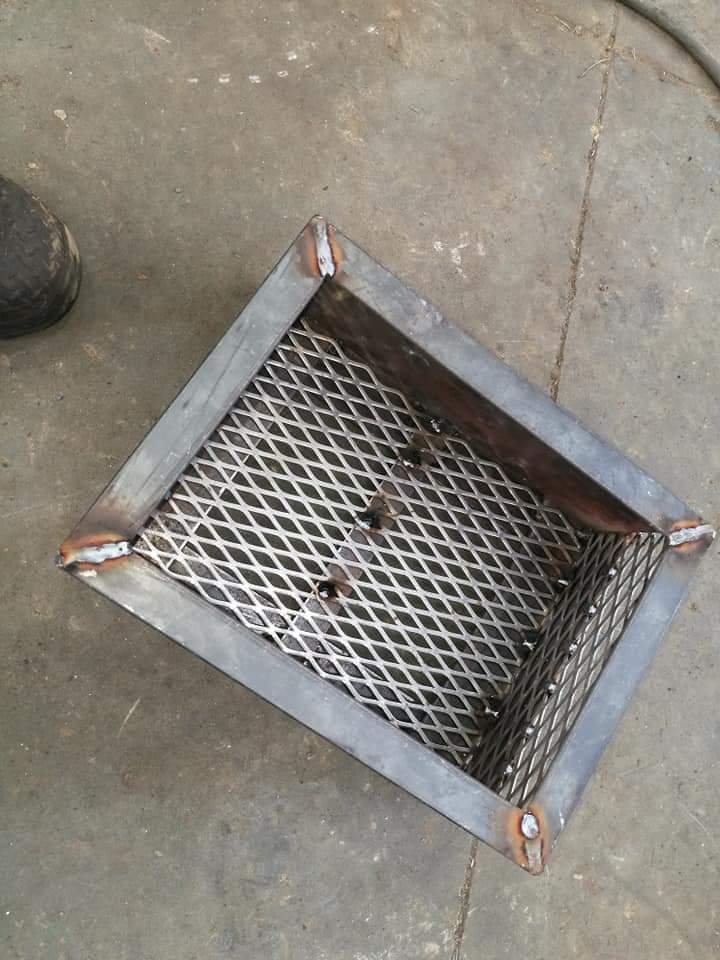
Did some more work yesterday and smashed out the inner firebox/coal cradle thingy.
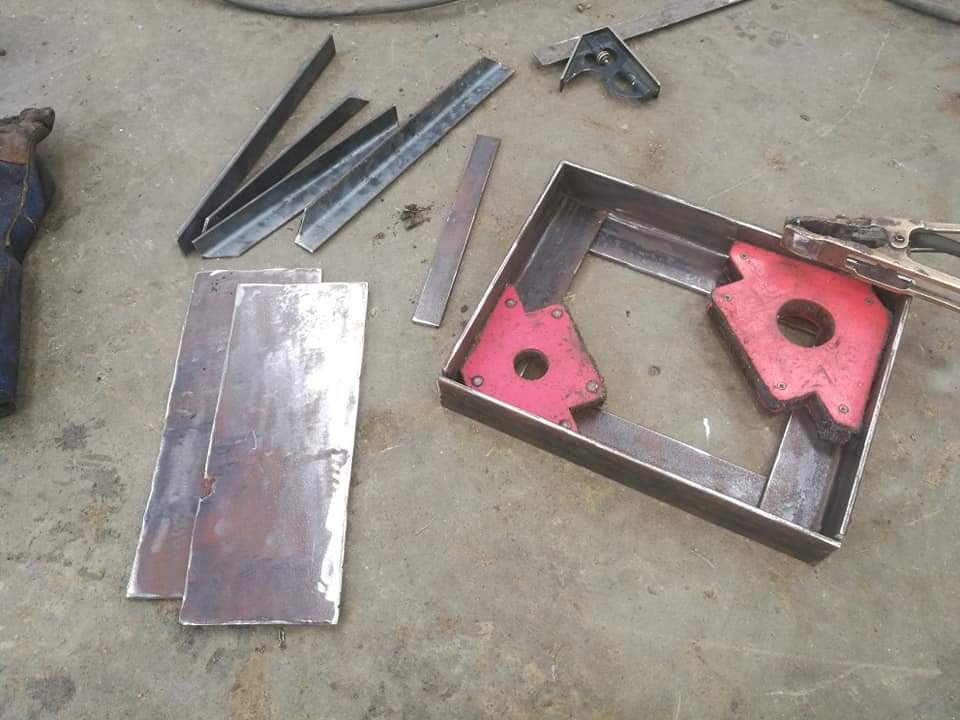
Cut some steel, mostly being 5mm angle and plate.
Put it together with some of the expanded mesh.
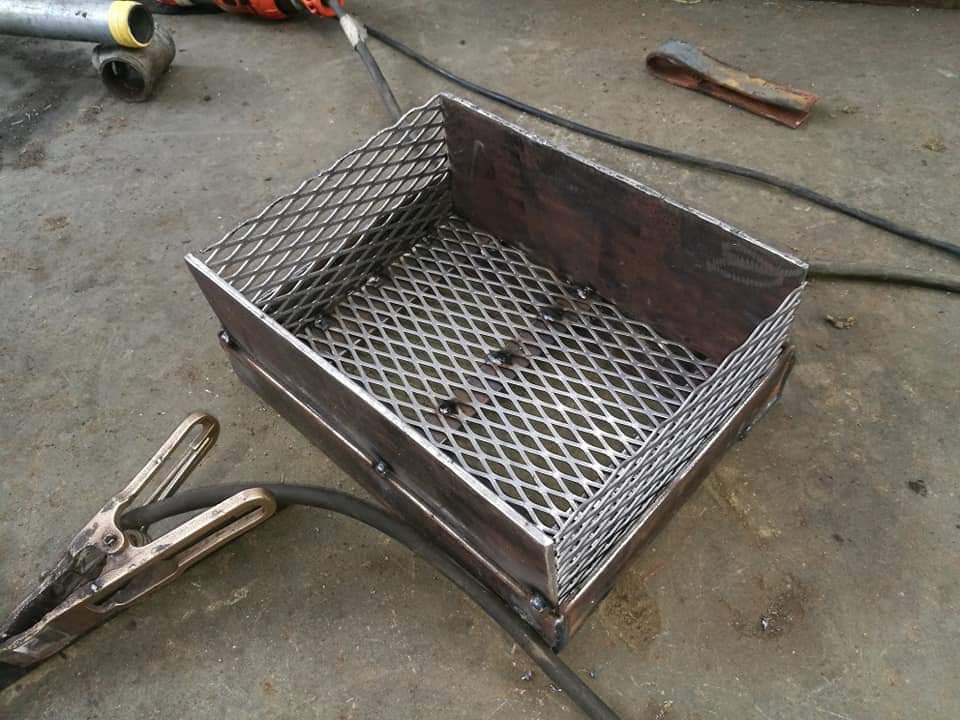
Then did a top frame thing with some left over 3mm angle.
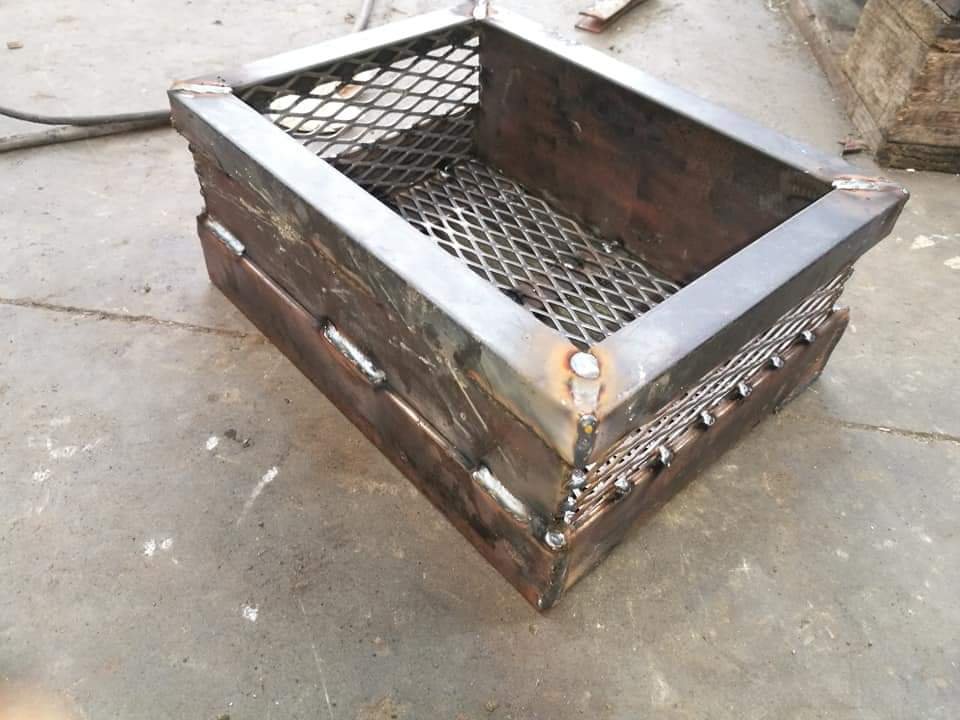
It actually looks pretty good once it's sitting in place.
There's a decent amount of weight to this so it should help with heat retention and it's easily removable to help with cleaning out the old ashes. All that's left on the firebox now is the damper vent, a grill and the handle.
Cheers
-
7
-
-
- Popular Post
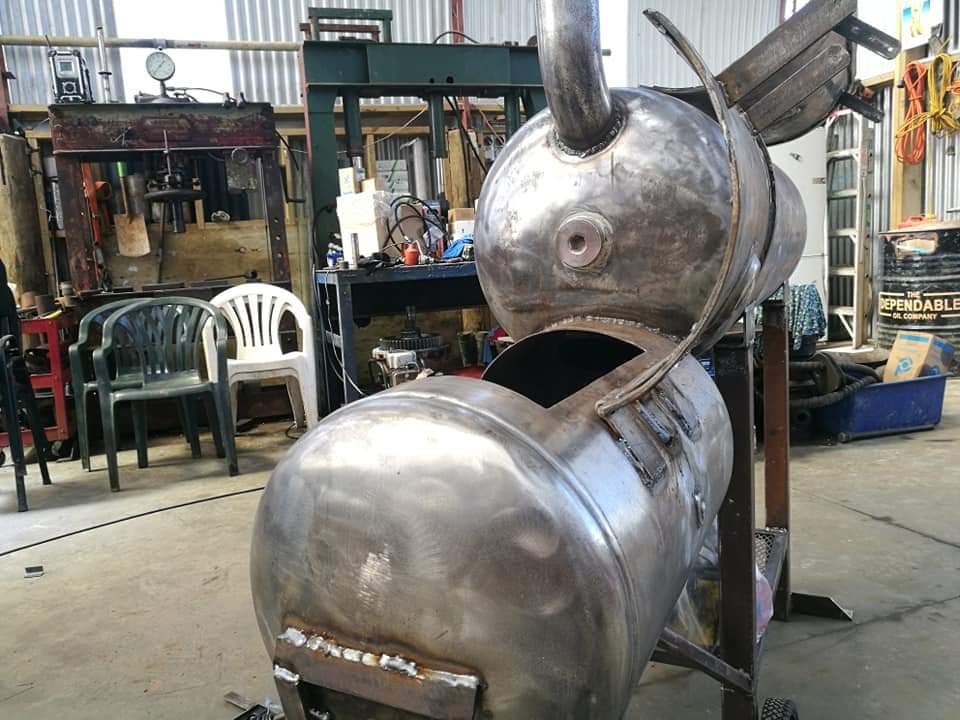
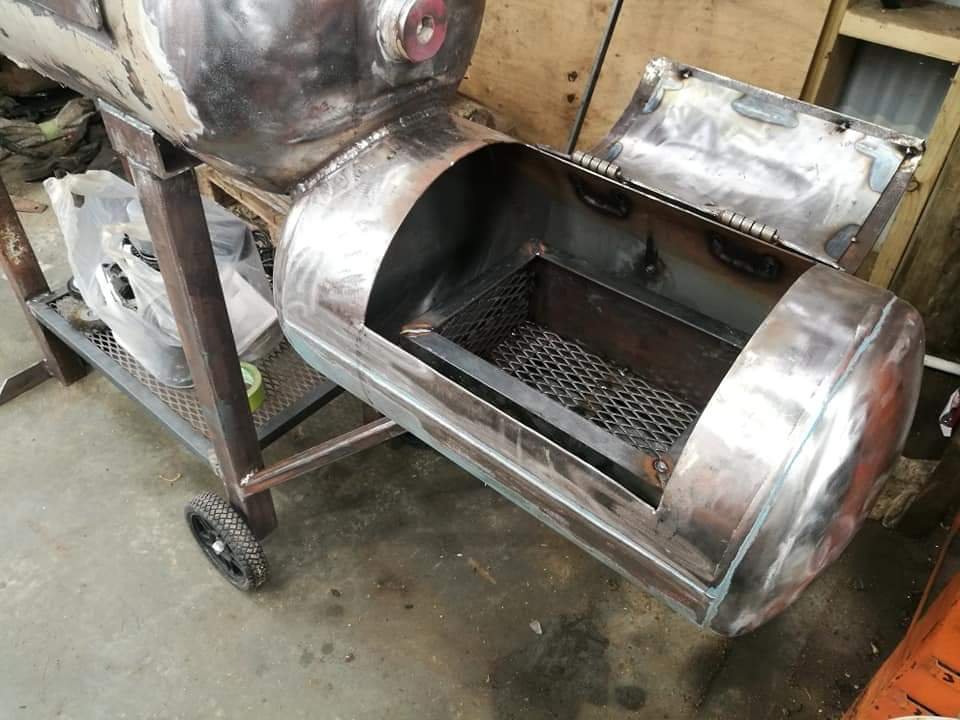
And lastly we got the firebox door sussed. I had a harder time getting this one kind of right, and the bends close enough to work. Forgot to take pics mid build but it was pretty much the same as the other. The main difference is that the door opens further back, this is to allow for more room for grilling/searing.
Pretty happy with how it's all looking right now.
List of things remaining are the mount for inner firebox, inner/removable fire box. Grill rails for both chambers, grills for both chambers, front bench frame, chimney with vent and firebox vent. These plus mounting up the gauges, doing the lid handles and paint. Also hopefully get this done throughout the week. Man this is a lot more work than expected haha. Ahh well.
Chur
-
16
-
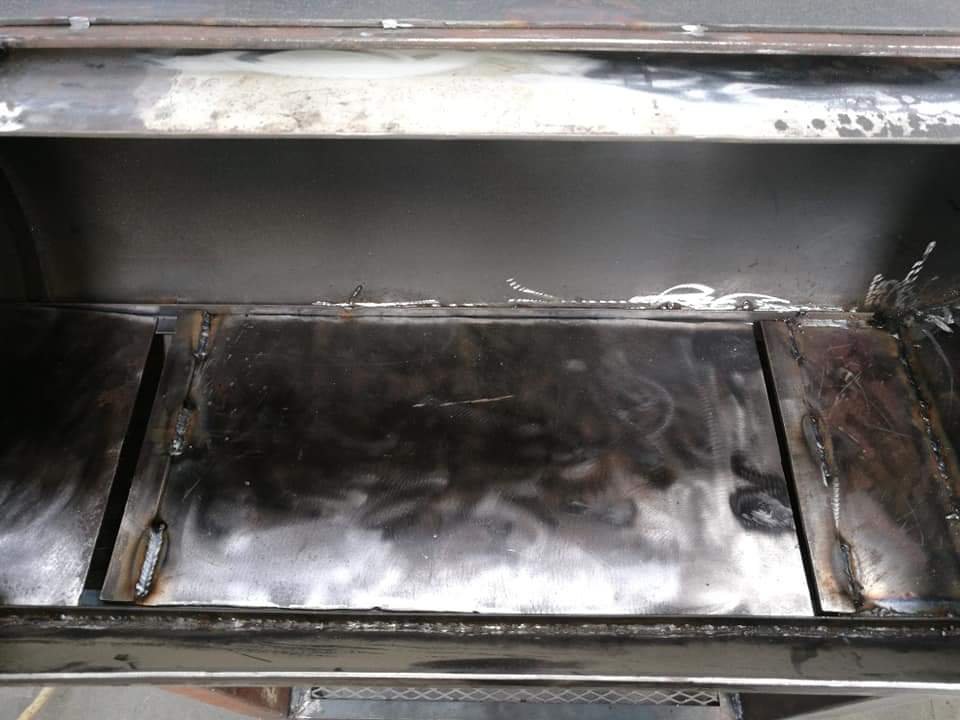
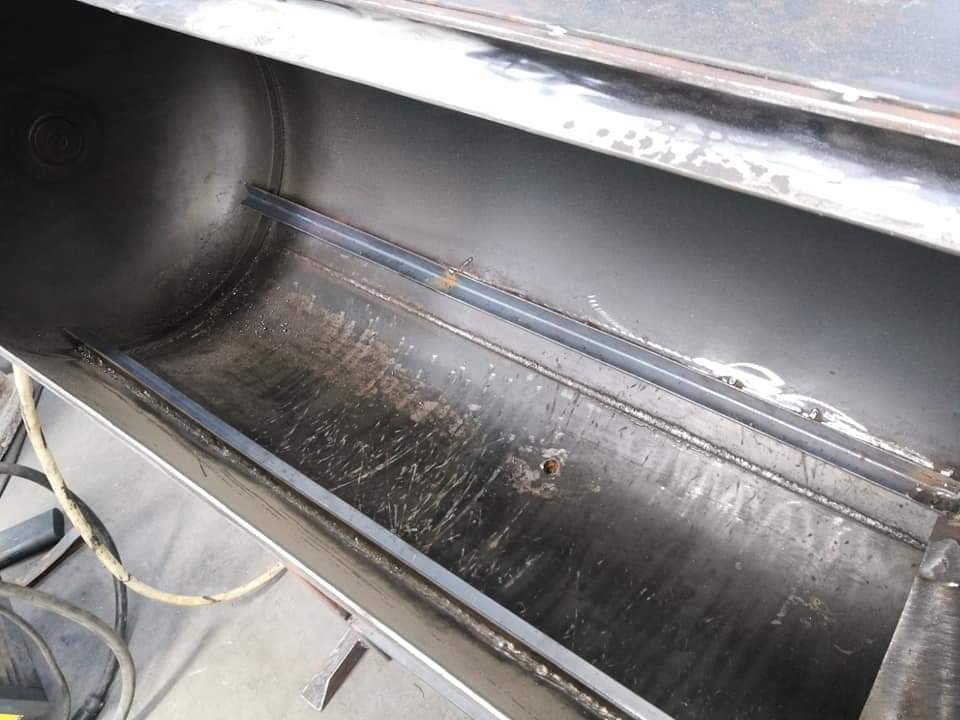
Here's the baffle/tuning plate setup. Used 3mm plate with an overlapping step to try and keep everything sealed half decent. Might look at changing to 5mm plate later and possible more plates to help with different heats. It's all removable for easy cleaning. It's not the tidiest but it should be functional, keep in mind a lot of this has been rushed as I don't have much time left and I'm not a precision engineer haha.
And my minion/fiance gave me a hand with the sanding and metal prep which helped a lot! Gotta love the Samoan safety boots.
-
5
-
-
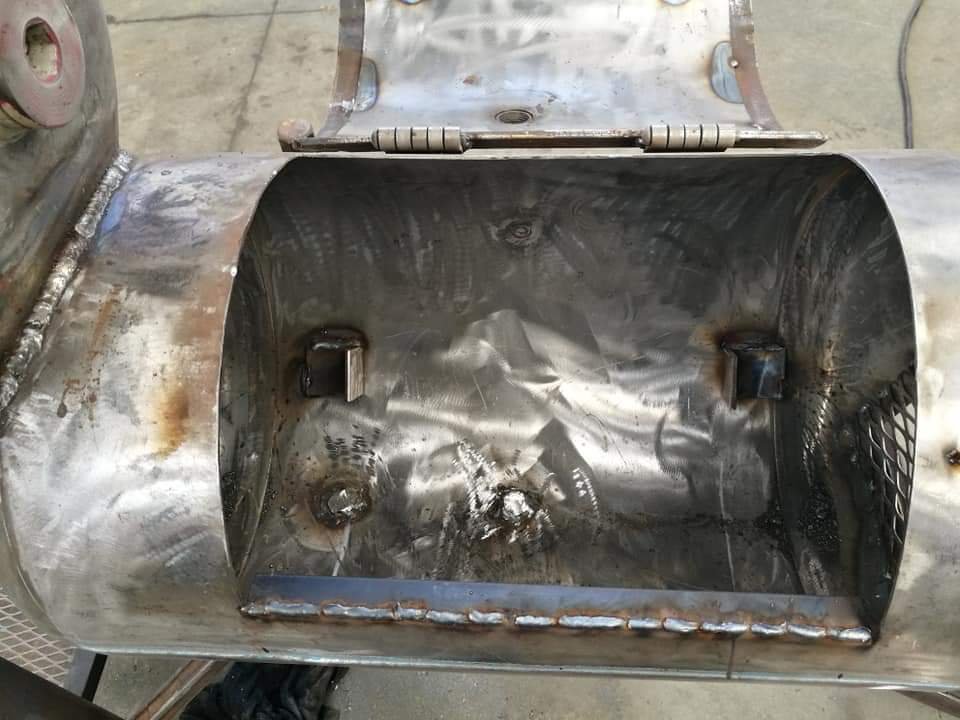
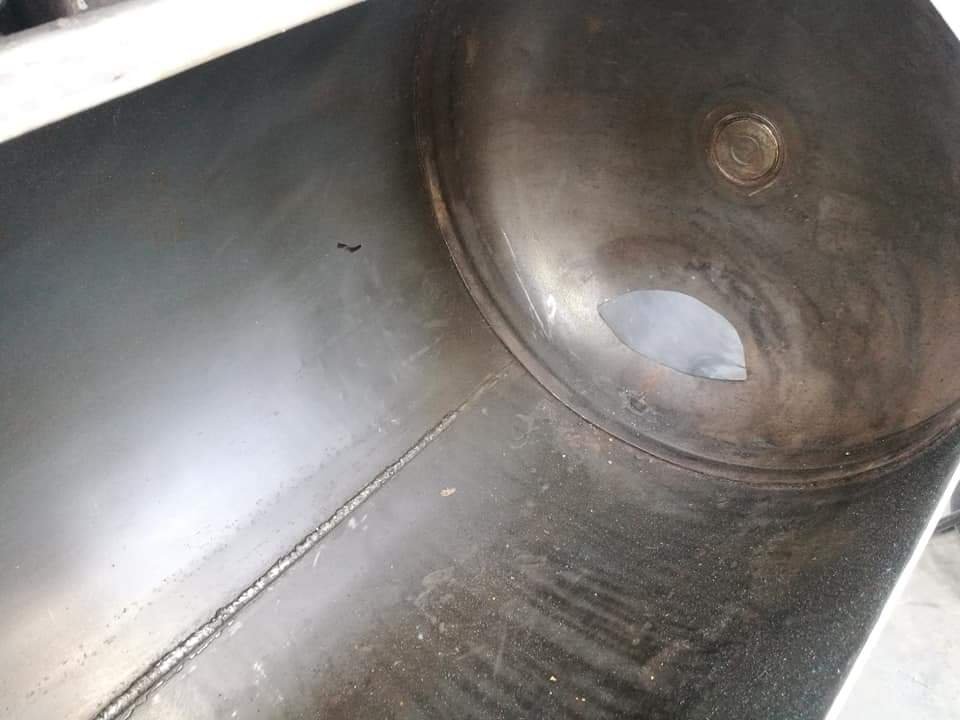
After that I tried to clean out the tanks and ran the torch throughout to try and cook out any toxins and oils but it wasn't too effective so we will just got it really hot when we season it.
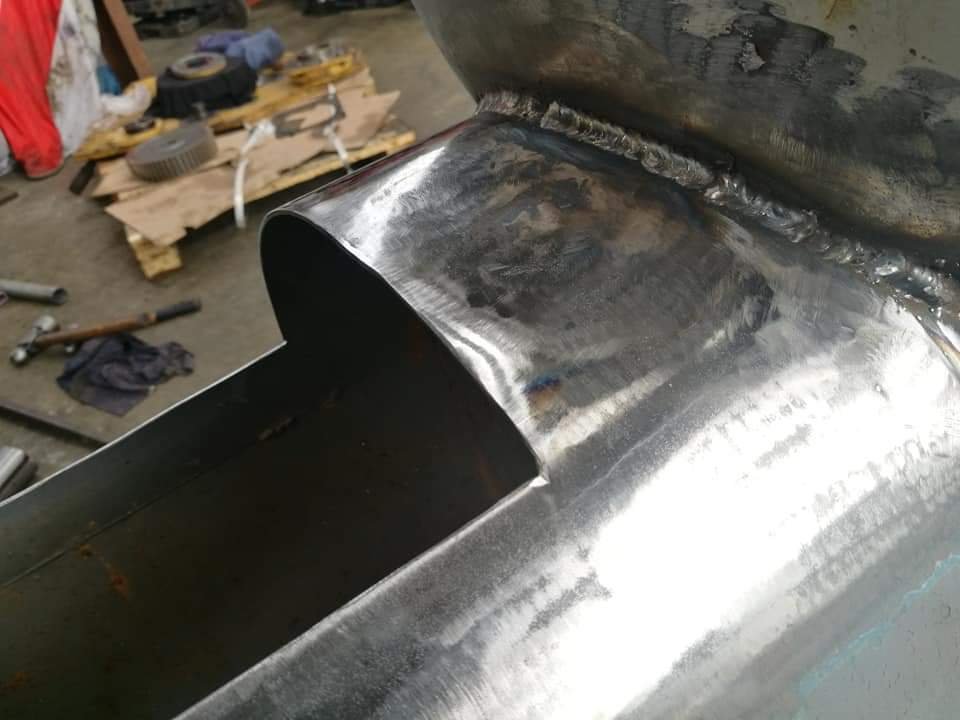
Here's a pic of the firebox to main chamber inlet.
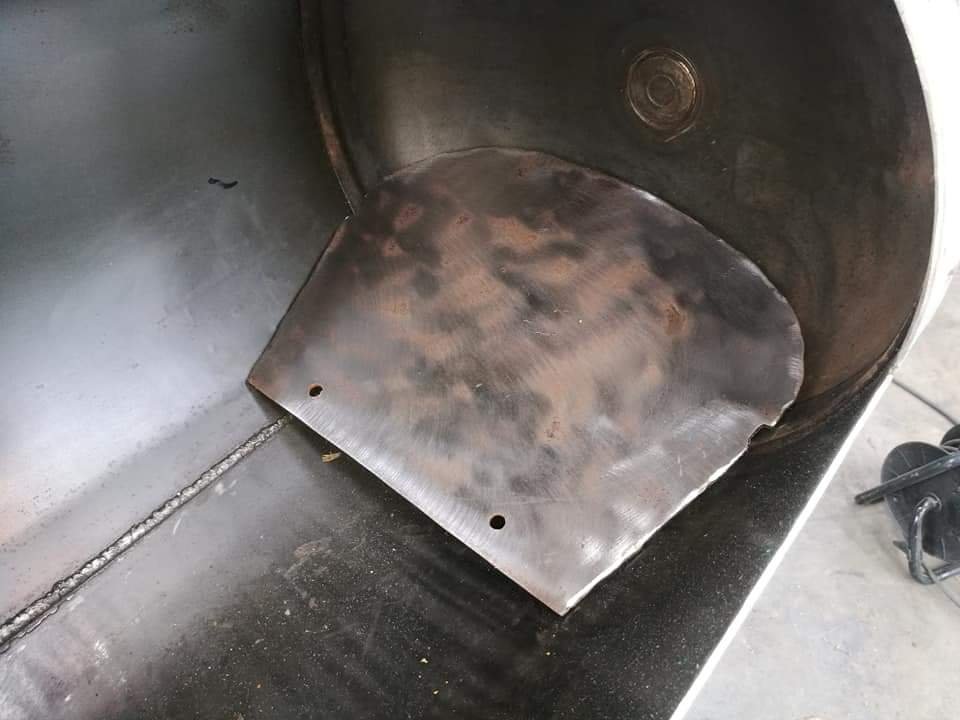
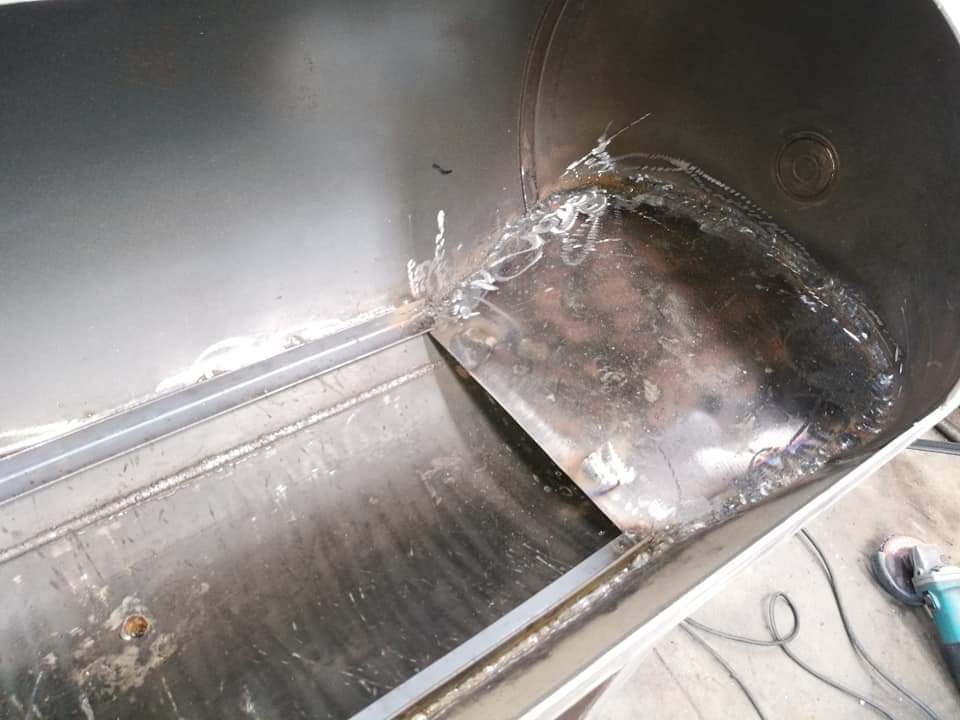
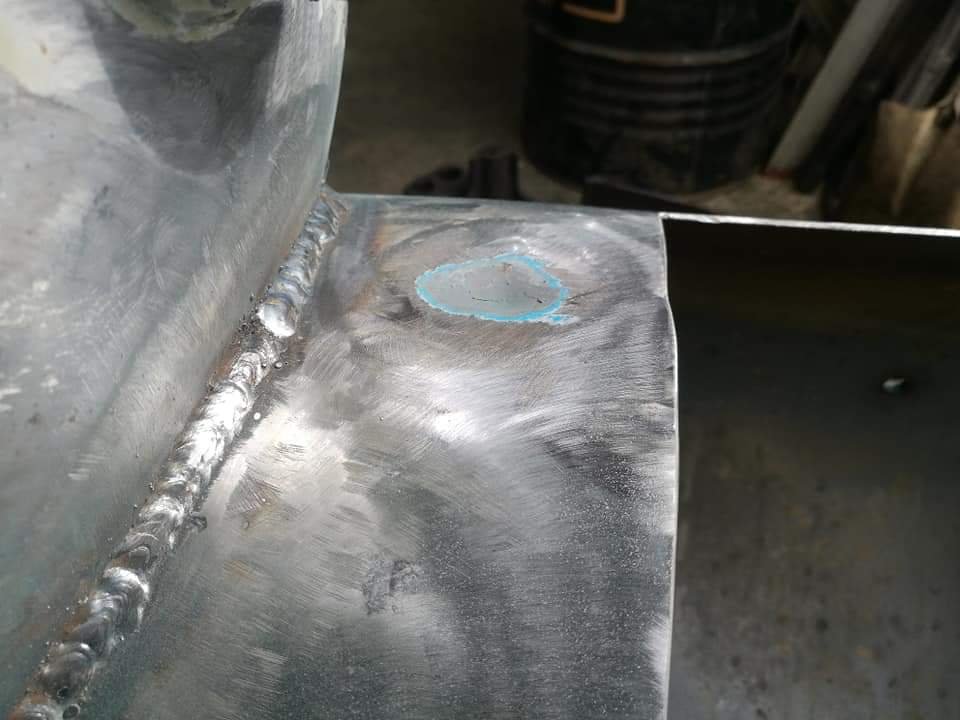
Making up the baffle was a Fuck around (seemed easier in my head). I ended up gassing out some 3mm plate for the opening then welded in some angle to act as a rail.
I'm not proud of the welding haha. It's shit, the cutting was shit and couldn't re do it so had a bit of filling to do. This as well as not being able to get the mig tip in close enough and at poor angles for the most of it made for a shit time but ahh well, most of it will be hidden.
-
2
-
-
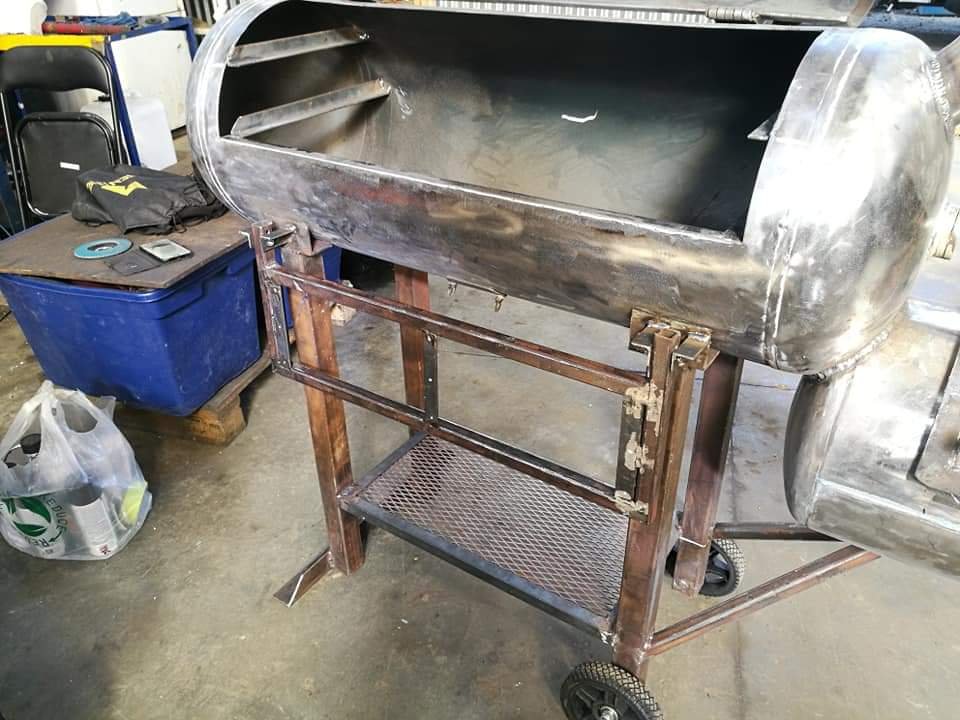
Spent most of today trying to crash this out. Got a lot done still have heaps to do.
First off I trimmed the front foot and welded it on.
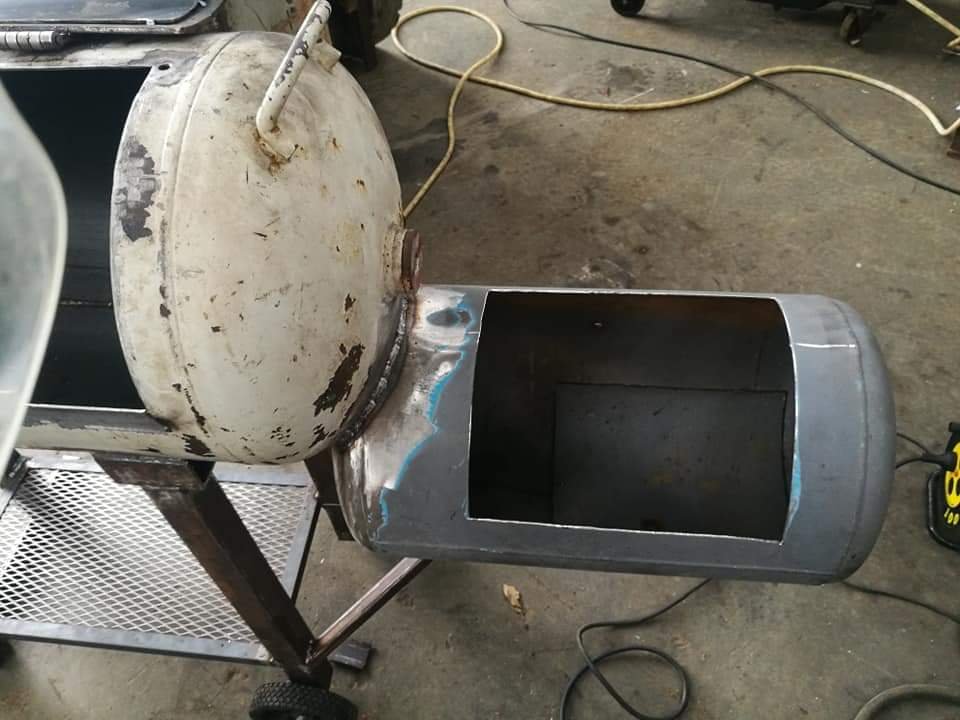
Then I cut out the door/lid for the Fire box. It looks a bit wonky, and it was hard to get it looking right as the Fire box was a little off level.
Next I heated up the dent and tried to bash it out a bit. It's not mint but a lot better now.
-
2
-


04 Hyundai elantra - starting issue
in Tech Talk
Posted
Might be an idea to check all the terminals and the relay.