mlracing.co.nz
-
Posts
528 -
Joined
-
Last visited
Content Type
Forums
Downloads
Events
Gallery
Everything posted by mlracing.co.nz
-
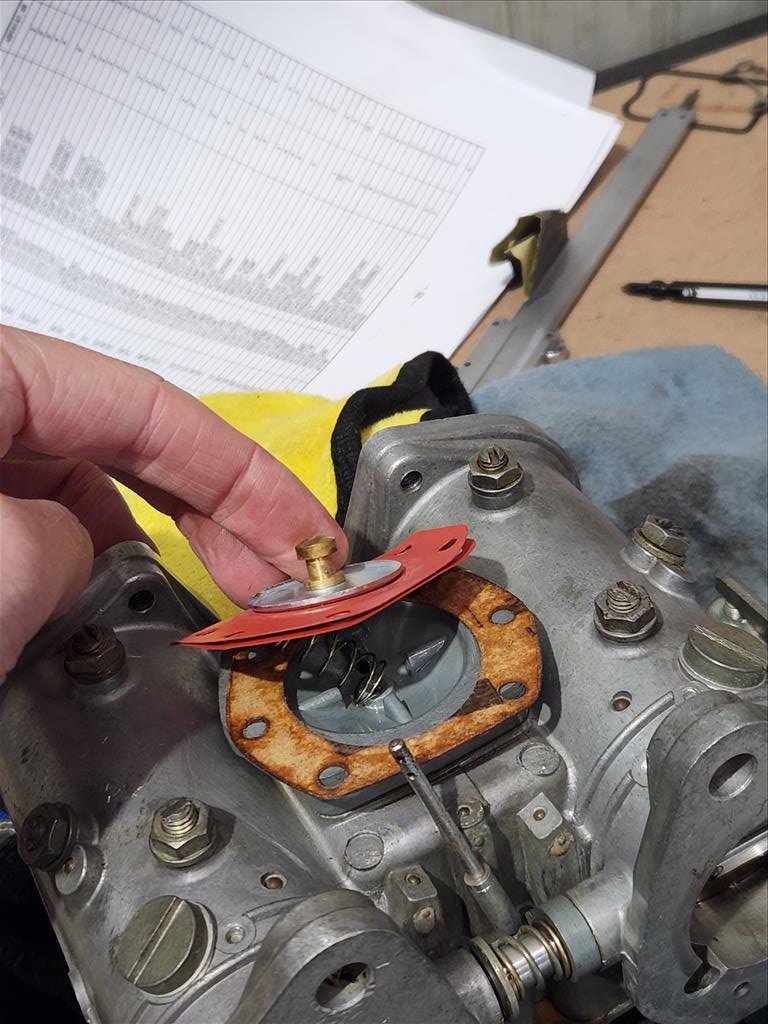
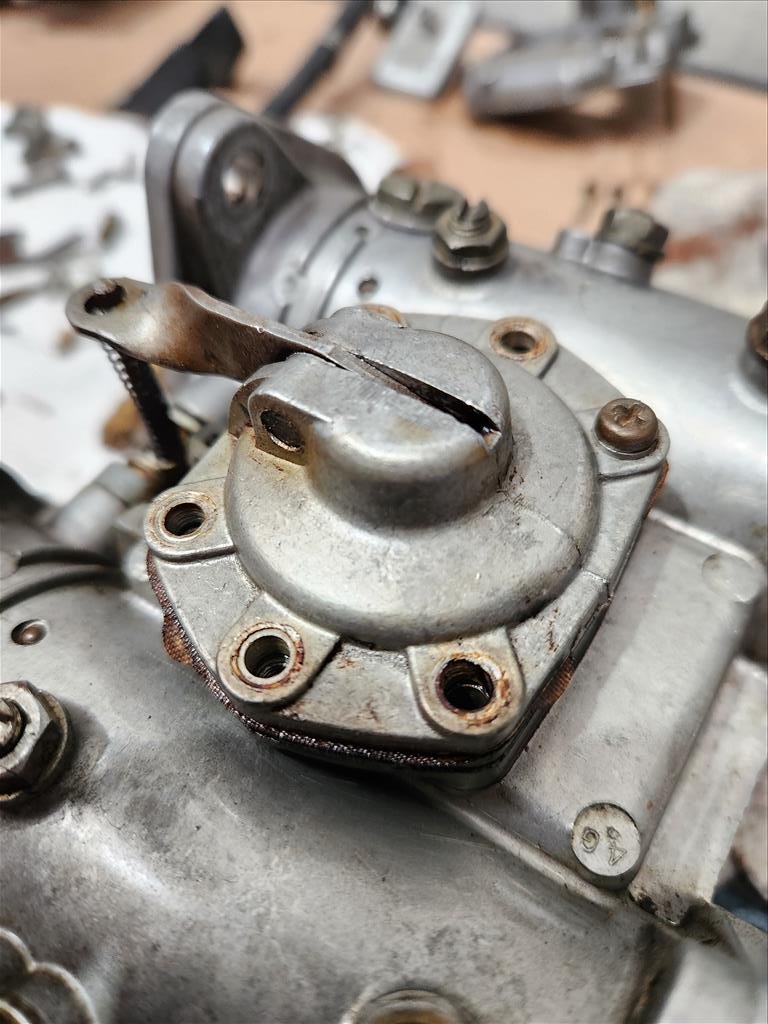
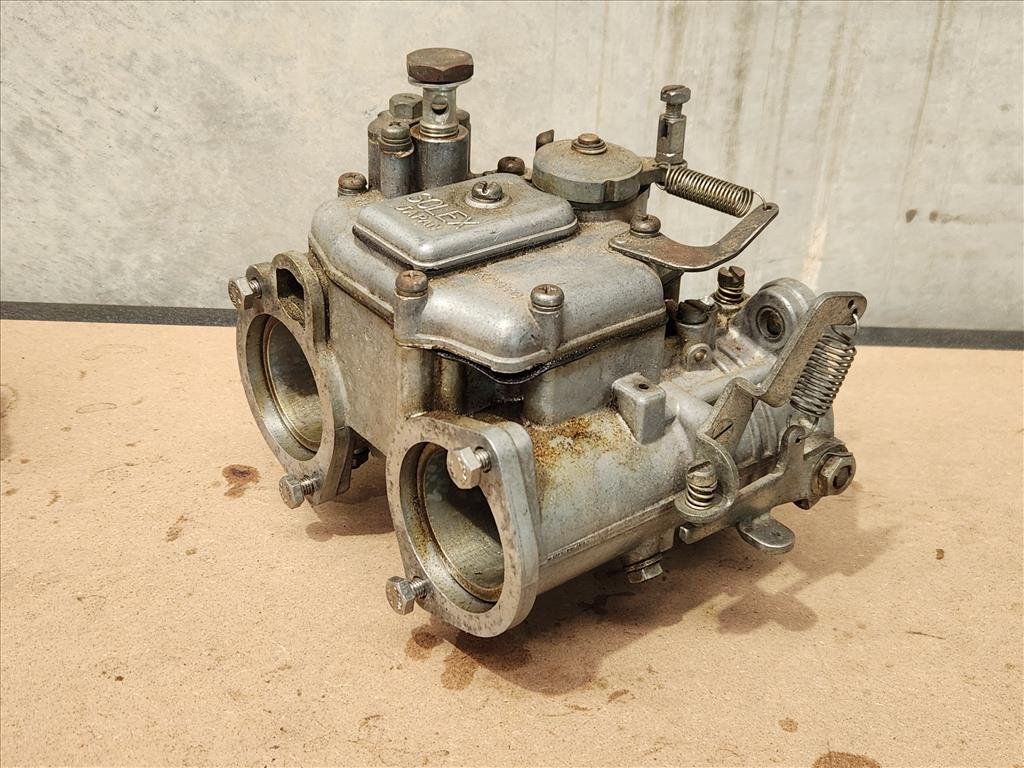
I'd like to introduce you to the smartest man alive, me. I believe I resolved the accelerator pump problem that (would you believe it) I caused. Apparently when I took the stuff apart and took photos I didn't actually take photos of the correct orientation of the diaphragm for the accelerator pump. I did think it was a little weird that the pump arm didn't really do anything. So this is how I had it.. And this is how it was meant to be. Obviously the spring is straight when it's screwed down. People smarter than me would have worked this out immediately but hey, live and learn. A free lesson that I'll remember. So yeah, I'm a dumbass but seems to be working again on the bench. Yet to run the car, still have that whole cooling thing to work through.

-
More thinking about cleaning it out that way but I'll push it outside and blast a hose through it
-
lol true, the sensor is after the thermostat so would have read nothing haha didn't think about that. Maybe I should run without thermostat and see what happens. I did look into EFI stuff.. probably need about 5-7k to get it going. I'm willing to struggle more before that. The car isn't overheating.. that I know of. No steam coming out of the exhaust which might indicate head gasket, I haven't checked the oil so don't know if it's mush but also there wouldn't be water in there if there's no water in the engine so probably doesn't help. Haven't done compression test. True I think it's not pulling as much vac, I need to order a proper vac tester and try get idle working so I can confirm it
-
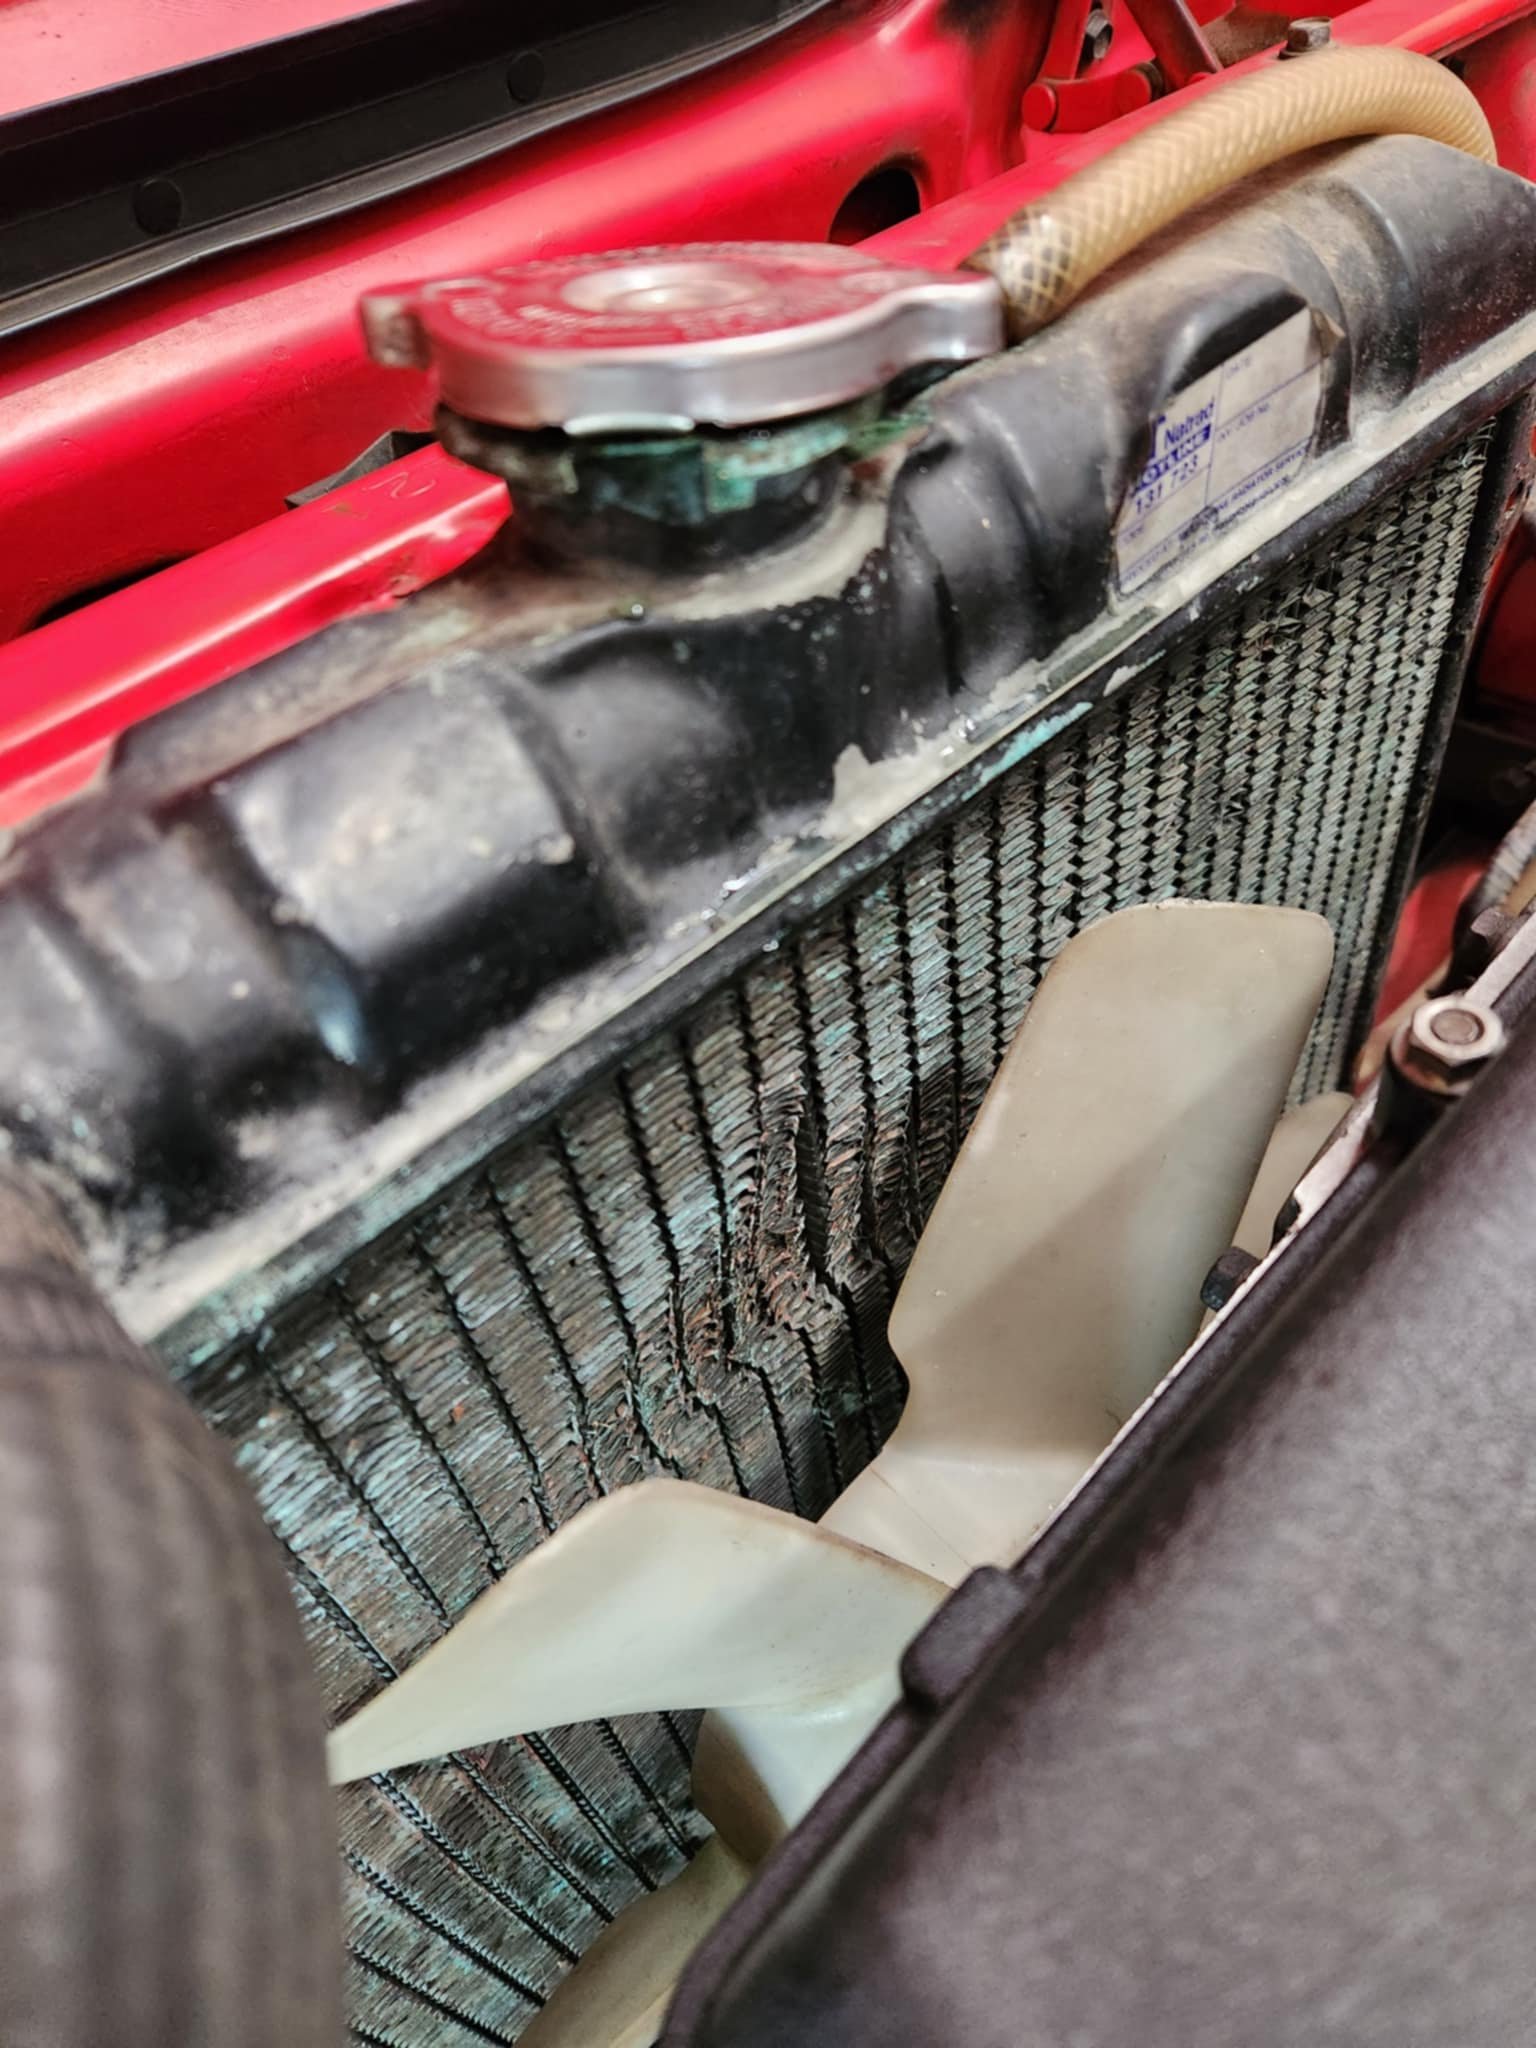
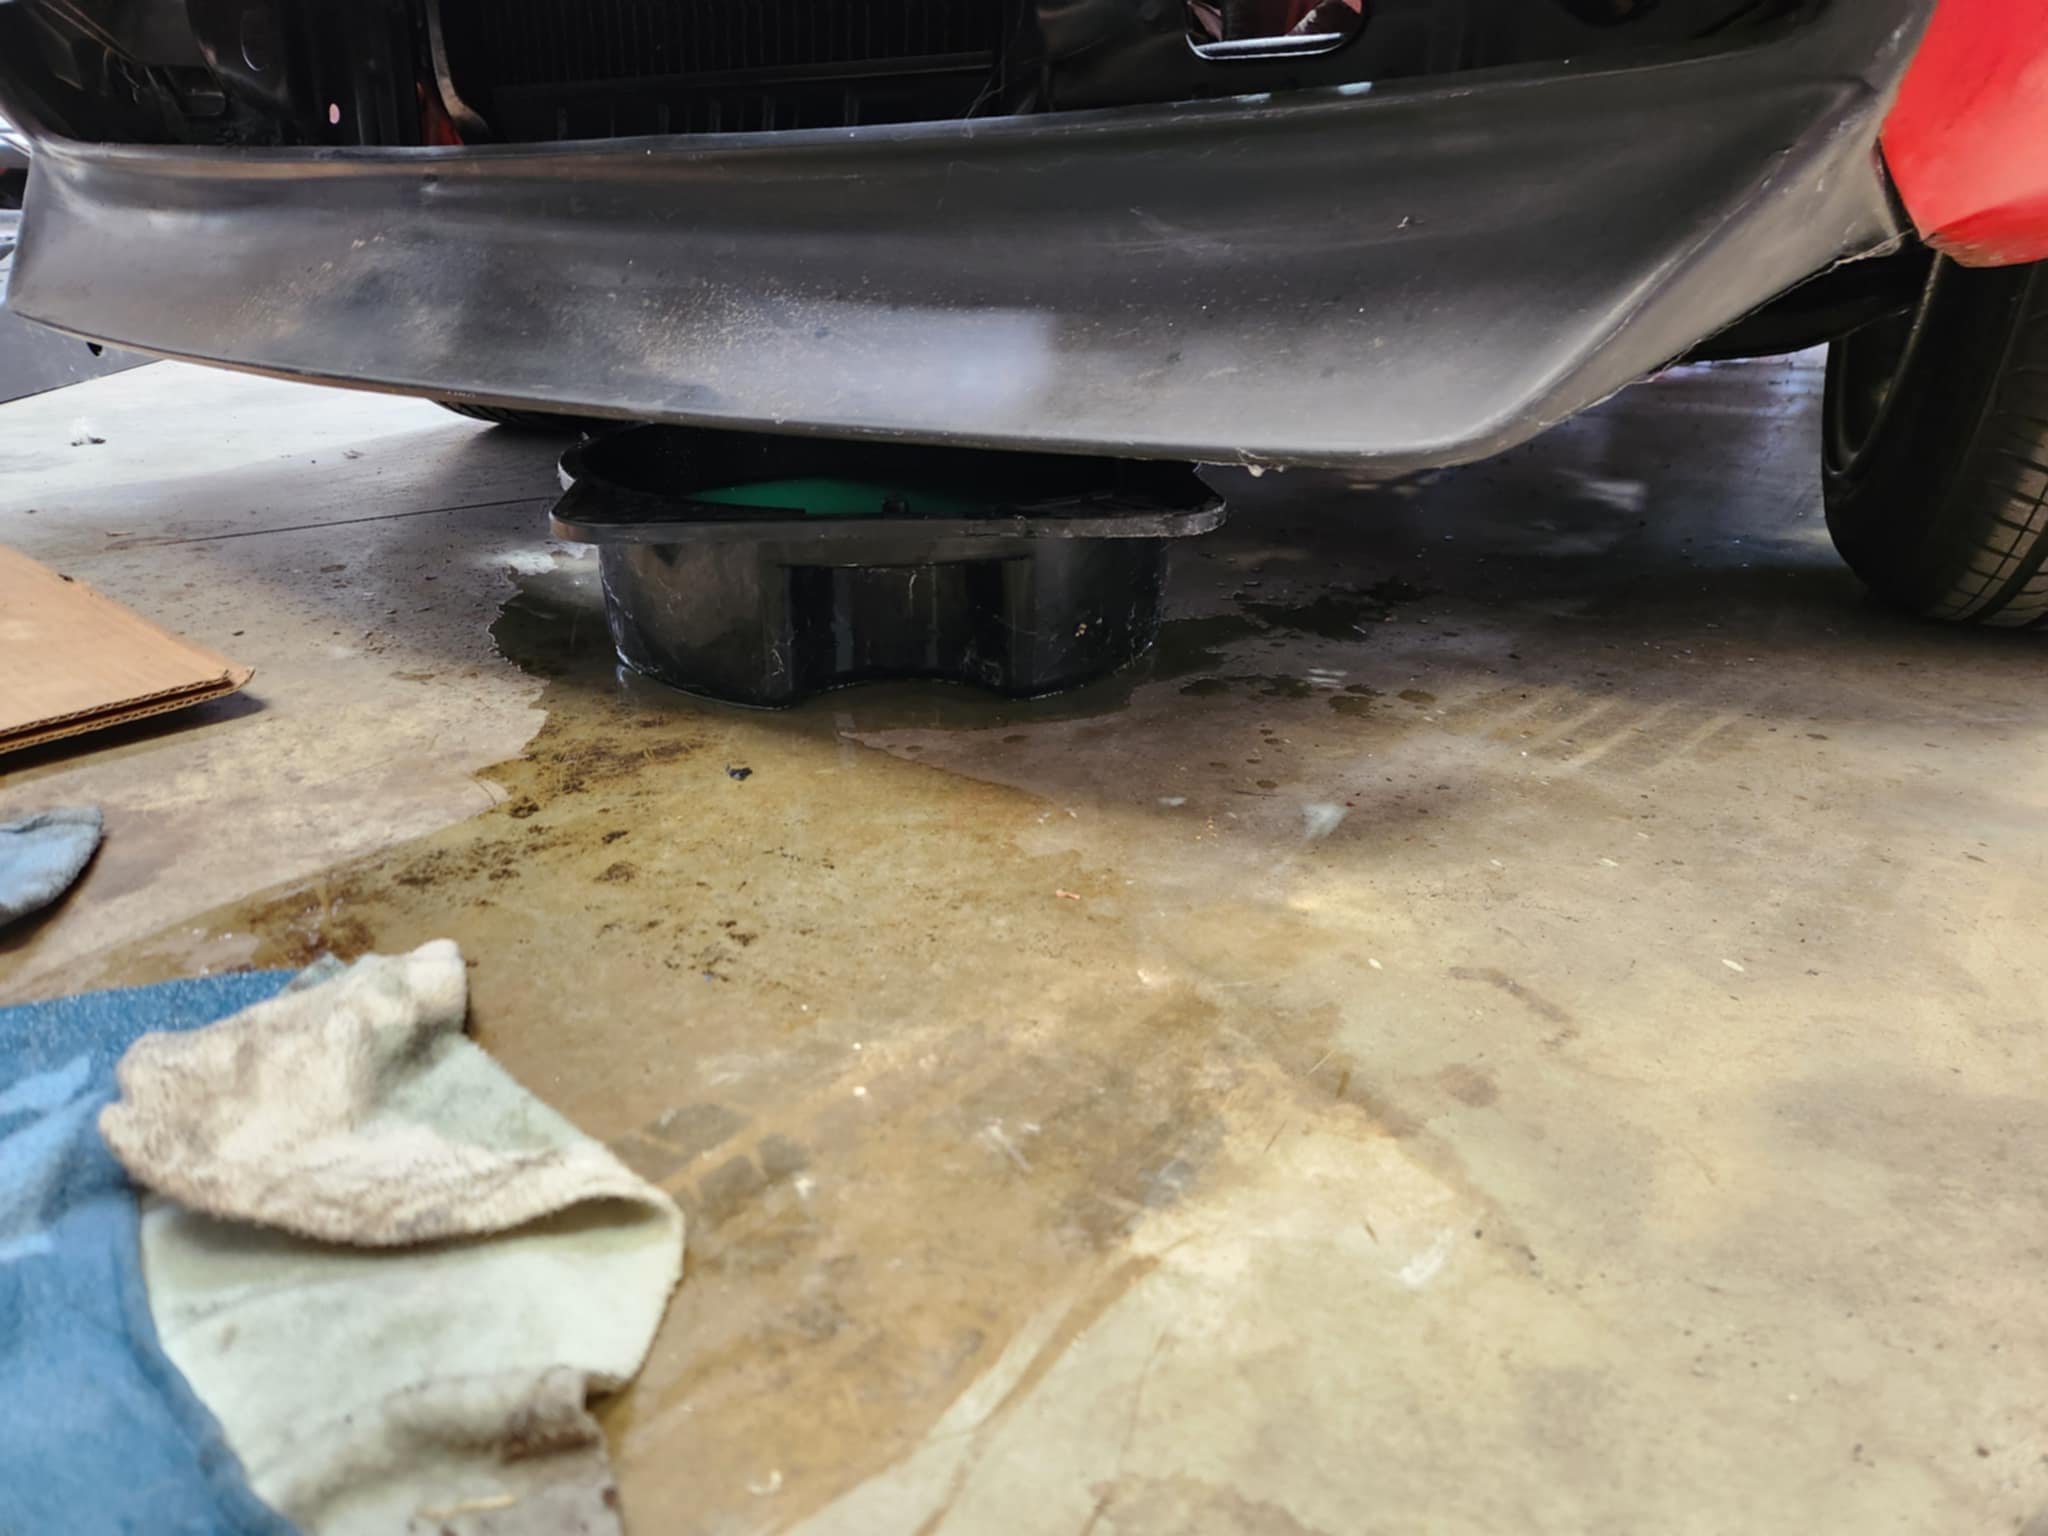
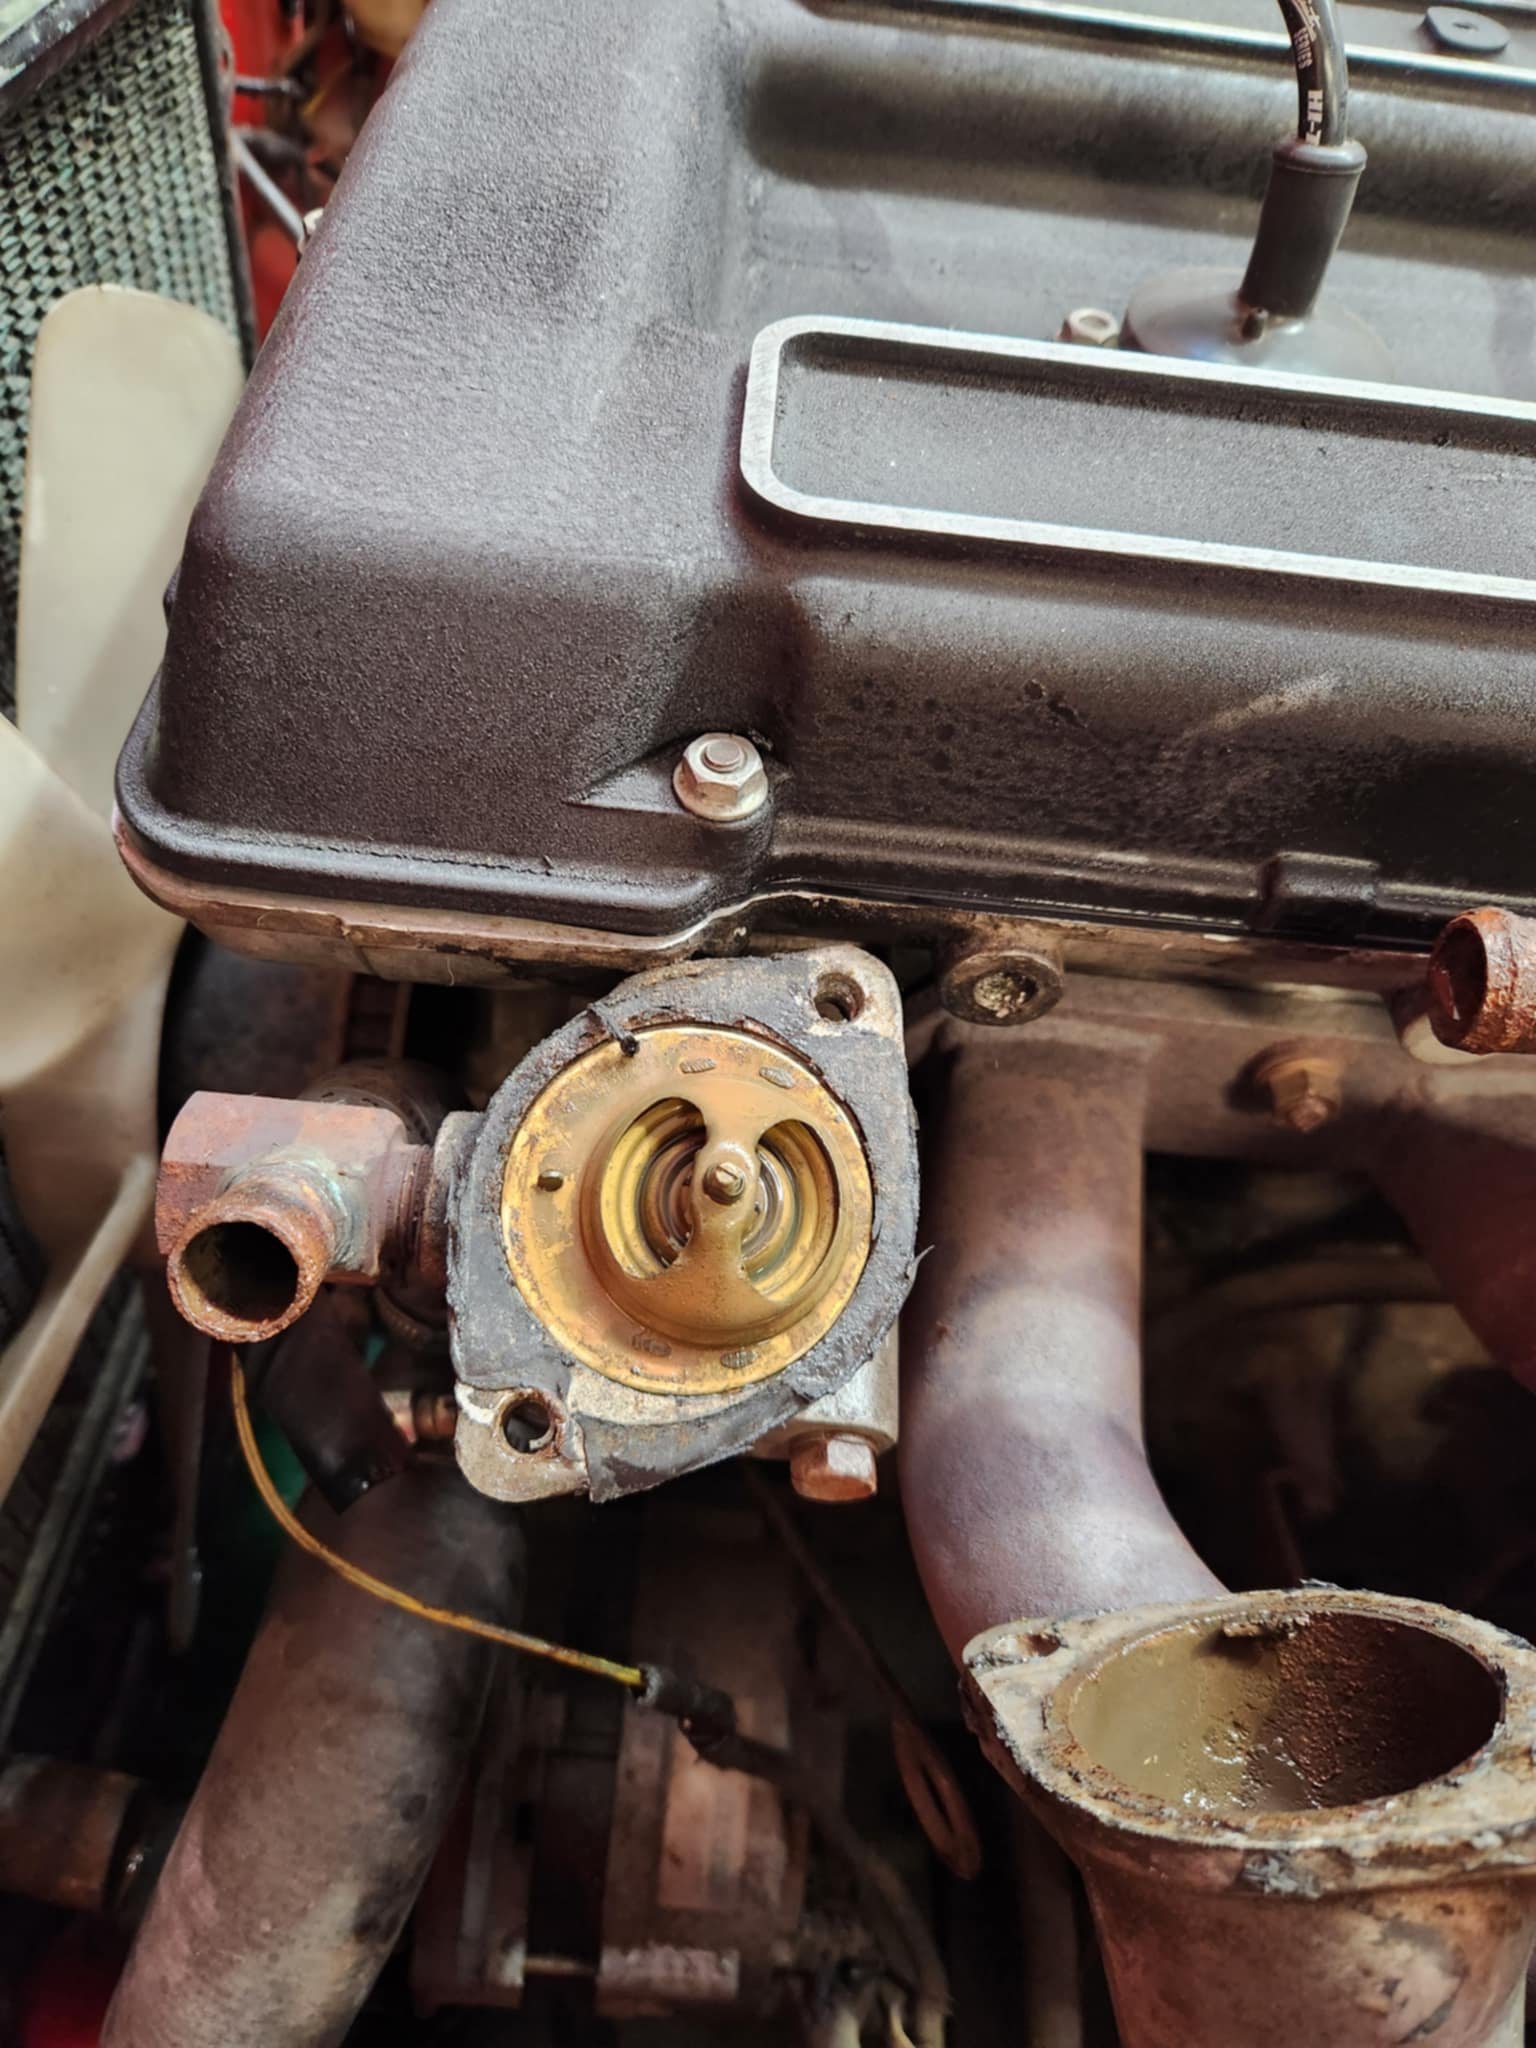
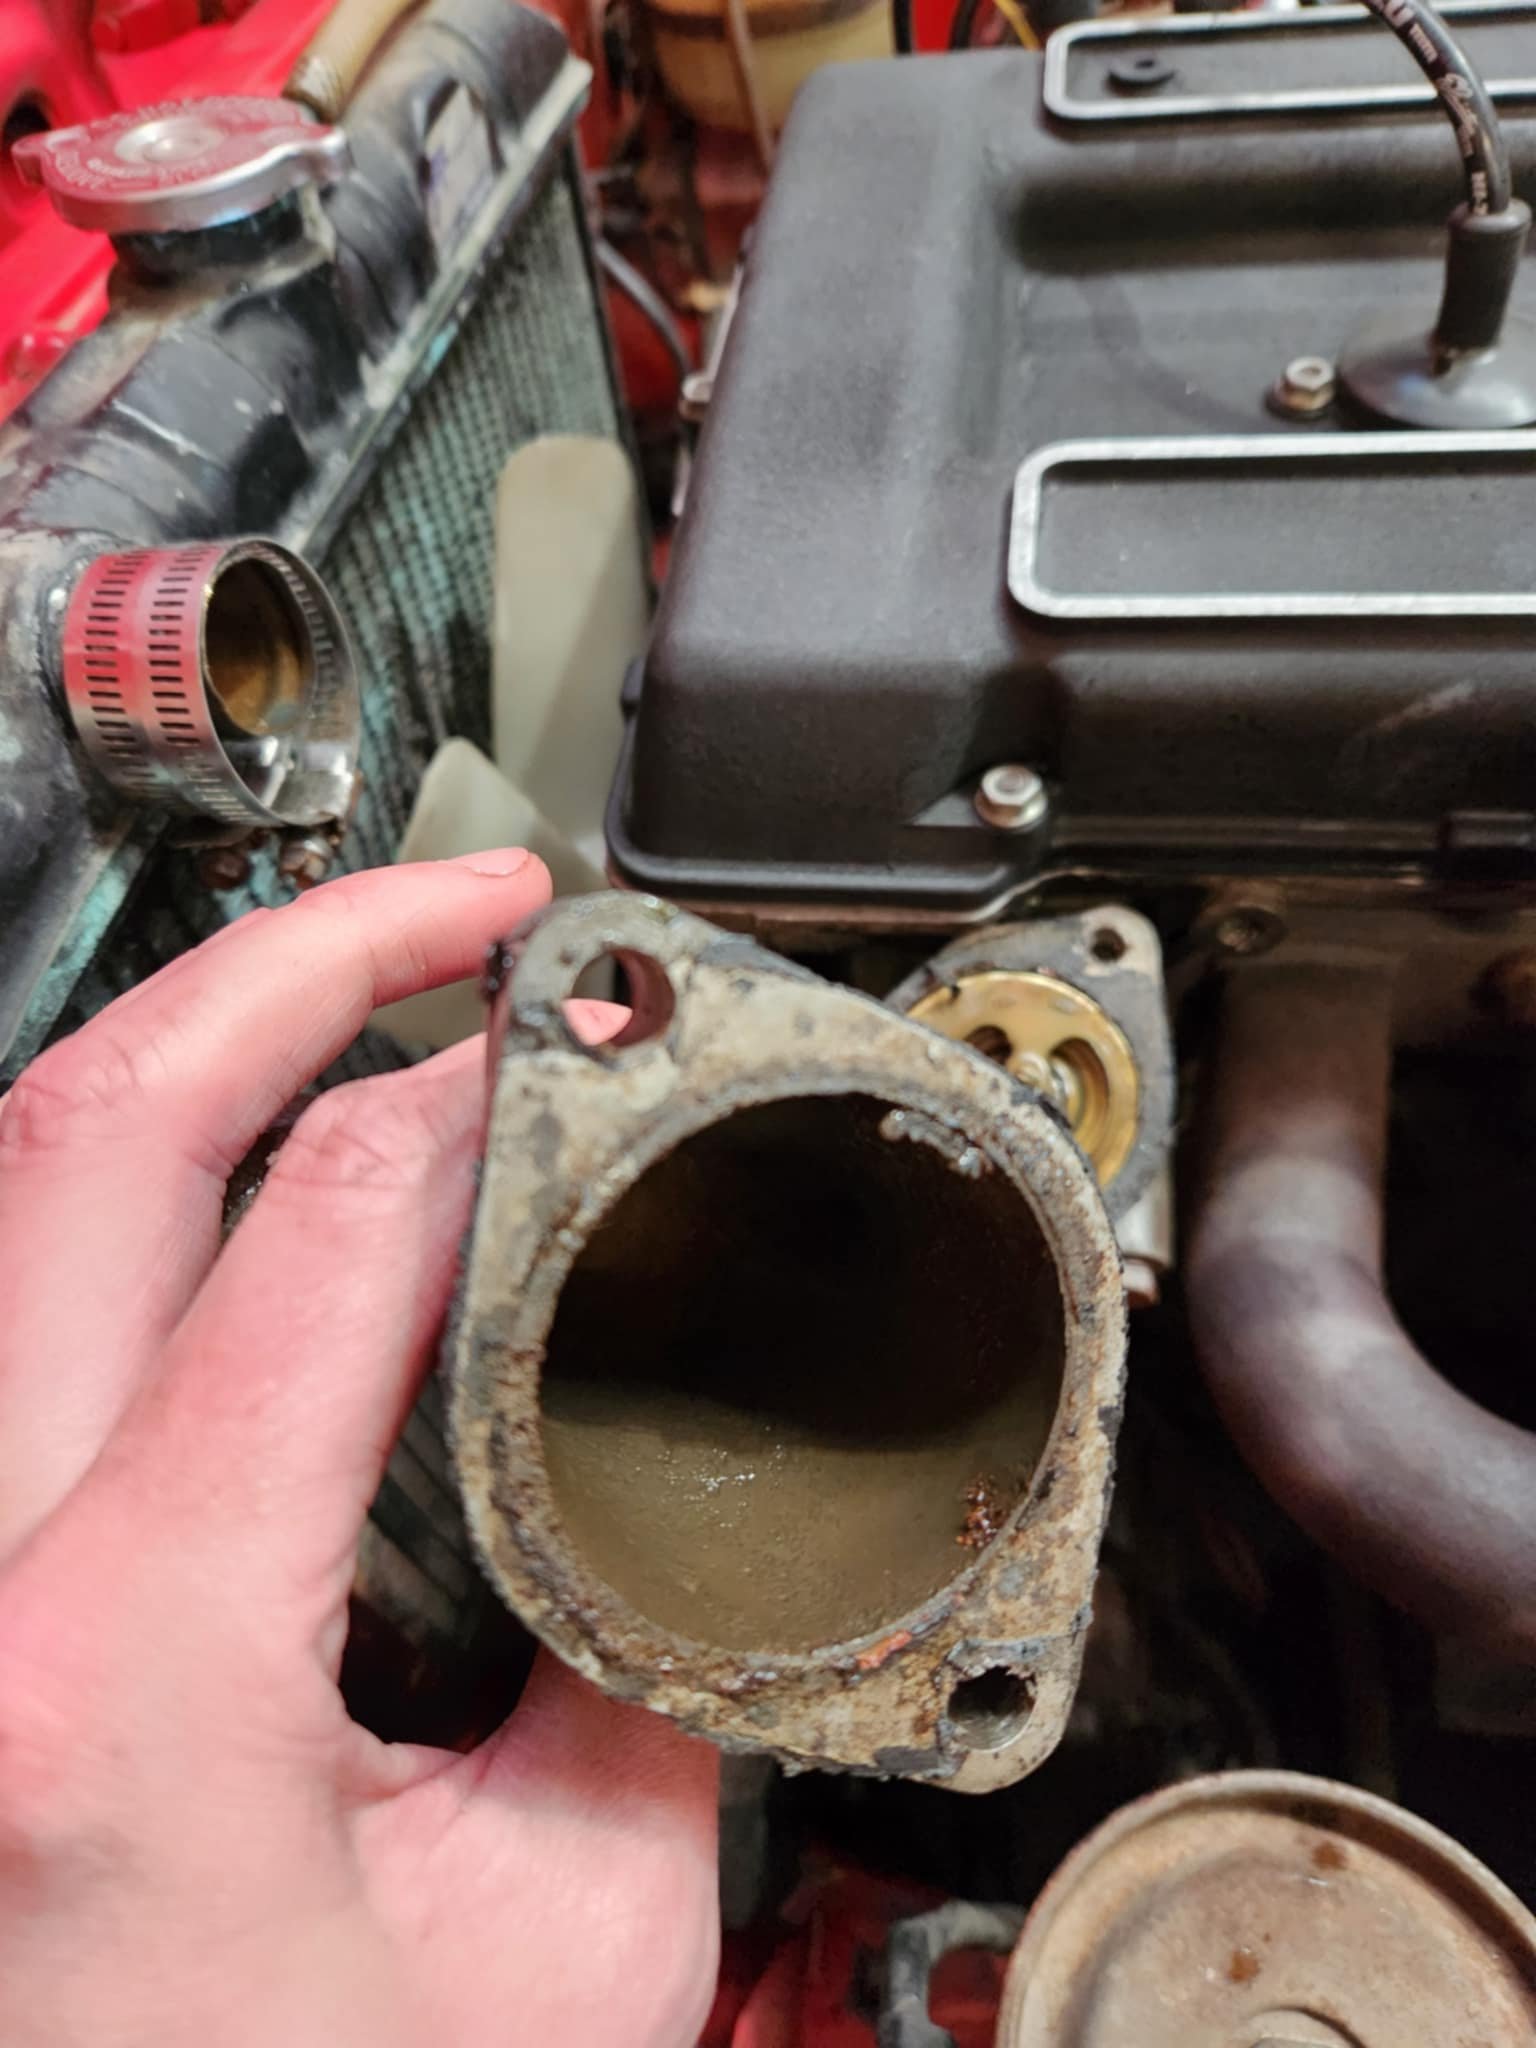
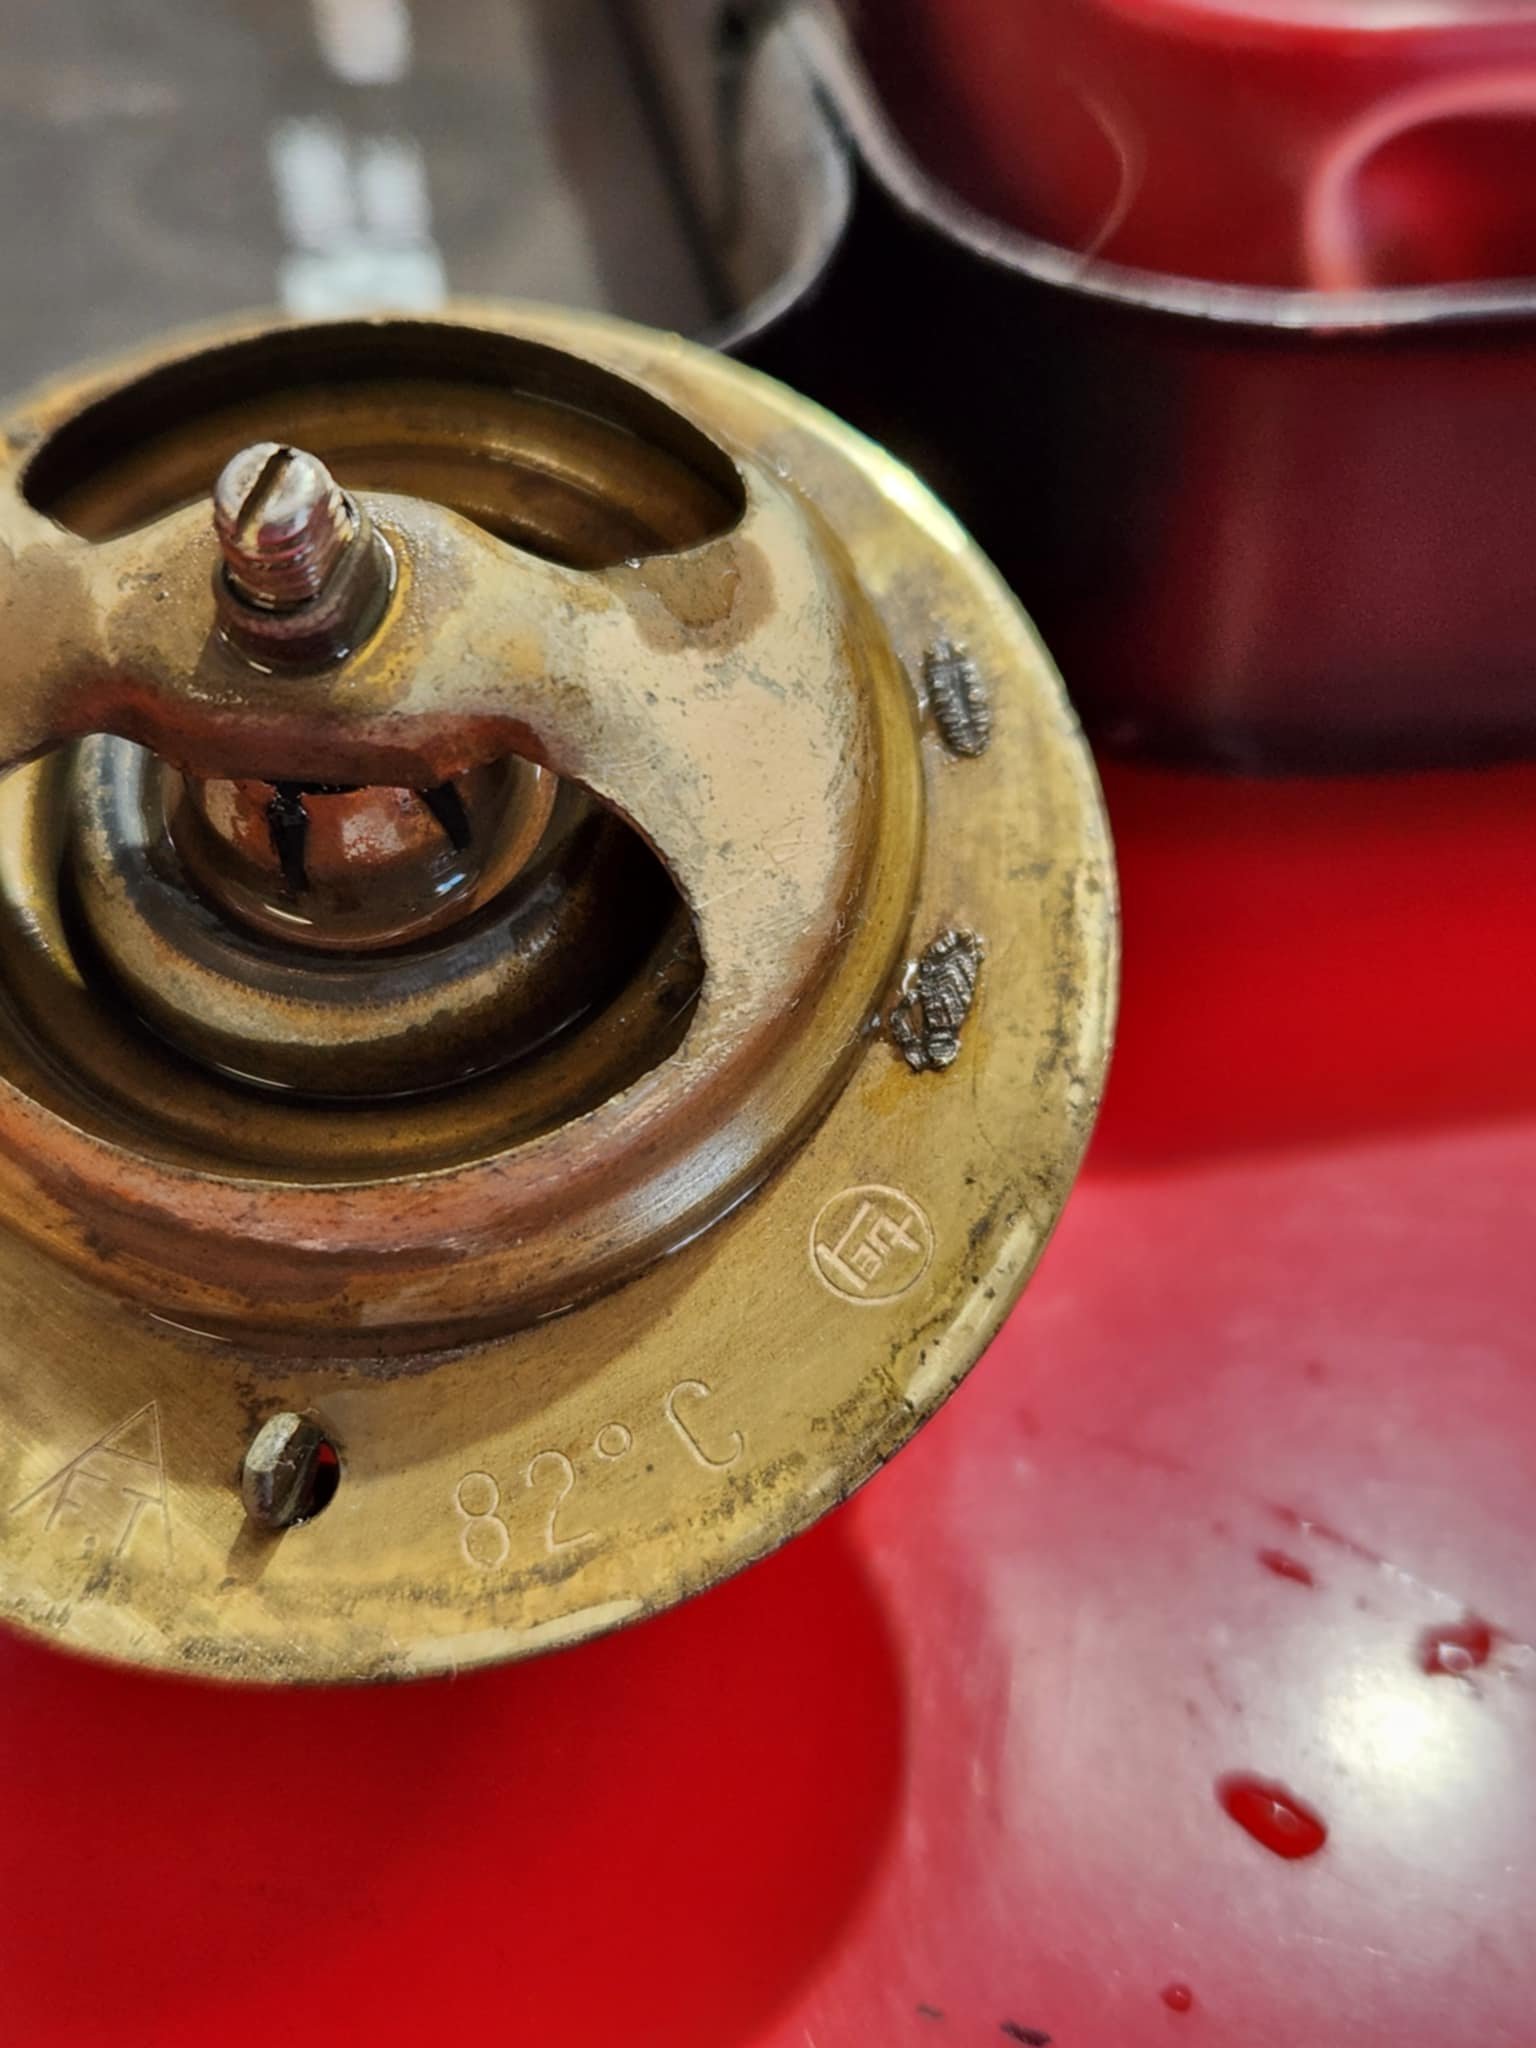
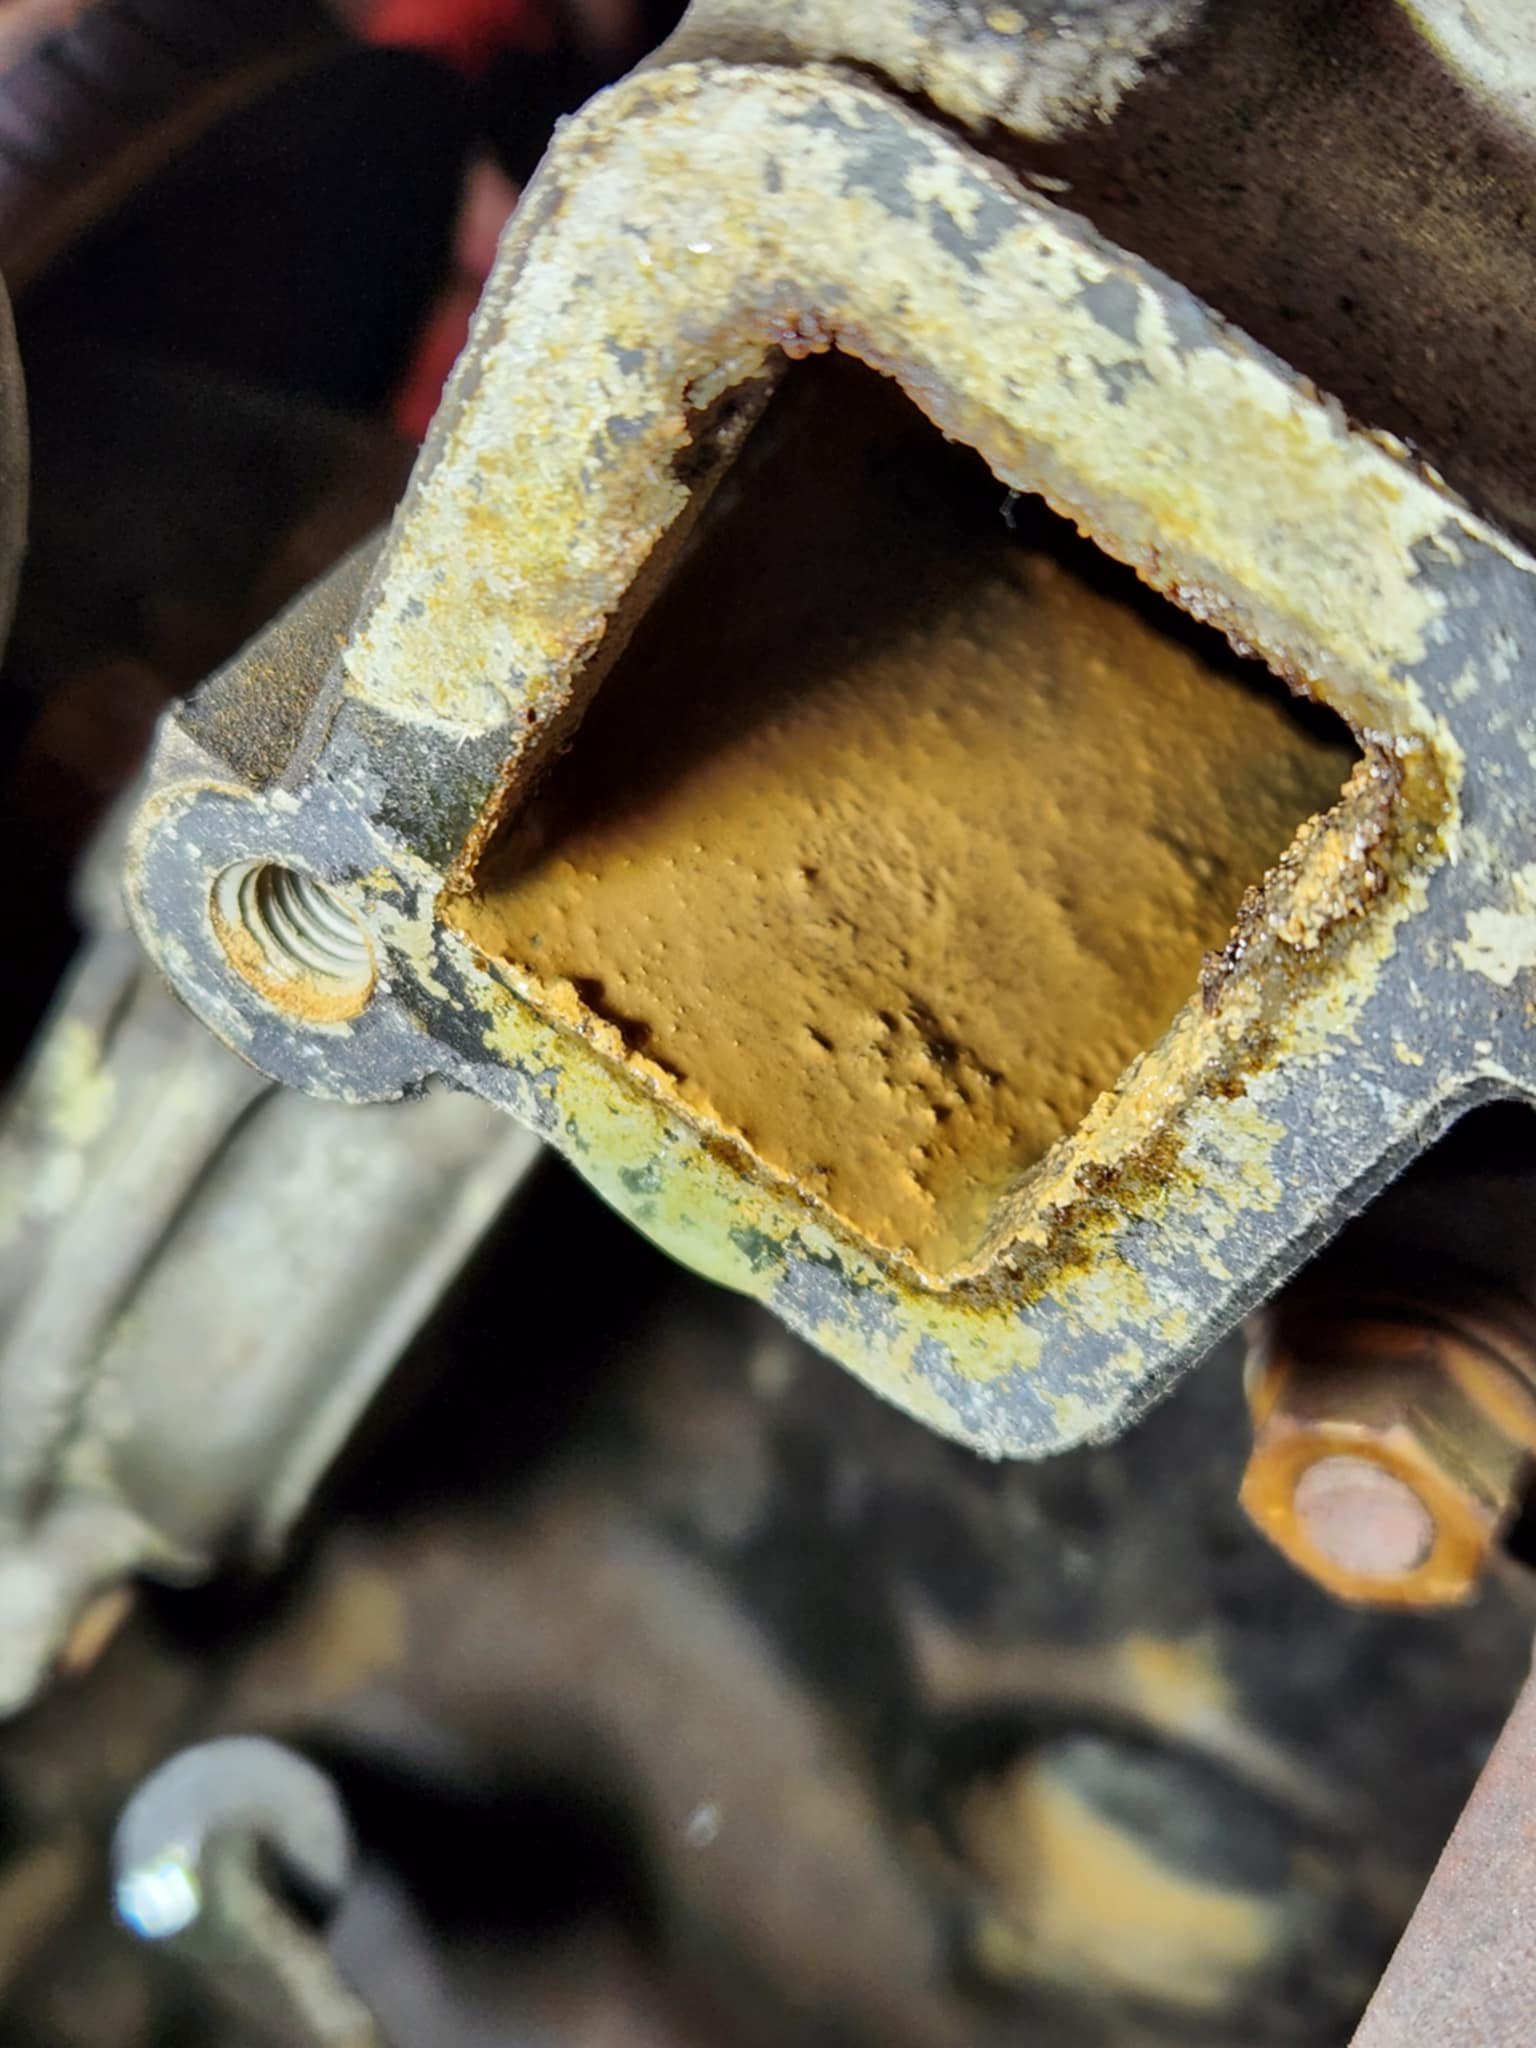
To distance my brain from carb life for a while I decided to look into another thing that's been bugging me. The weird thing about this car is it's never got up to temperature, well at least it never seemed to get past the first little line on the gauge. Because of this I've always wondered if the thermostat was working properly and today I took apart some of the system to check it all. Once I took the hoses off it became clear that there was a thermostat problem, however it was the opposite to what I was expecting. This thing is jammed shut. I was expecting one to either be jammed open or not there at all. This might be the original (or very old at any case) thermostat, so definitely due for replacement. Also abundantly clear that there's been no water circulating in the engine for some time as the coolant that came out of the radiator was green, not mud. This got me wondering.. has there ever been any in there since I've owned it? How long has there not been water circulating ? I have actually taken this car to some events in the not so distance past and the temperature never moved then either. Does this engine somehow have the power to never overheat? This radiator has seen better days but it never leaked from memory so I don't think it was blocked and stopping flow. That said I might get it reconditioned or replace it anyway for peace of mind. As well as replace the radiator hoses as they looked pretty second hand. I'll also be bypassing the heater core so the hoses along the top here are being removed. So now I'm thinking I need to get new thermostat, pipes, some block off caps, a few gaskets and perhaps I should check the water pump as well.. it's probably not been doing a whole lot.
-
Rant update I'm afraid. Accelerator pumps still not working on either carb which means idle doesn't work properly and any throttle coming off idle at all just stalls the car. Additionally the balance of the carbs is now way off and the ignition timing has gone super weird. At one point the car wouldn't even crank over at all which made me think did I somehow cause some catastrophic damage while messing around with the disitributor but that doesn't make sense as it was just changing ignition timing. So basically I was just getting frustrated and turning screws and fucking about without a proper plan which is not good and not helping. Taking a step back I really can't proceed without working accelerator pumps so this needs to be resolved first. If the car cannot even idle then I can't do anything else. I'm tossing up getting the next size up idle jets too, 50/50 on it. If I can't fix them somehow then perhaps I will need to send them out to get checked over by someone who knows a thing or two about a thing or two. Another option is to get some other carbs like webers or something but we'll see, not at that point yet.
-
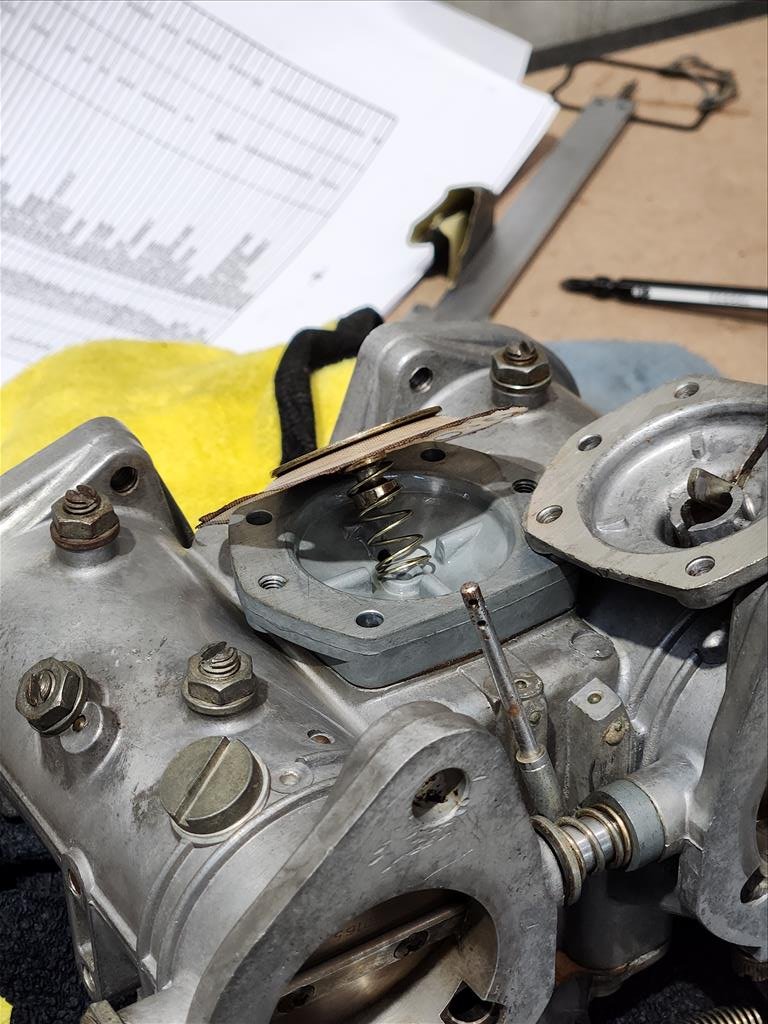
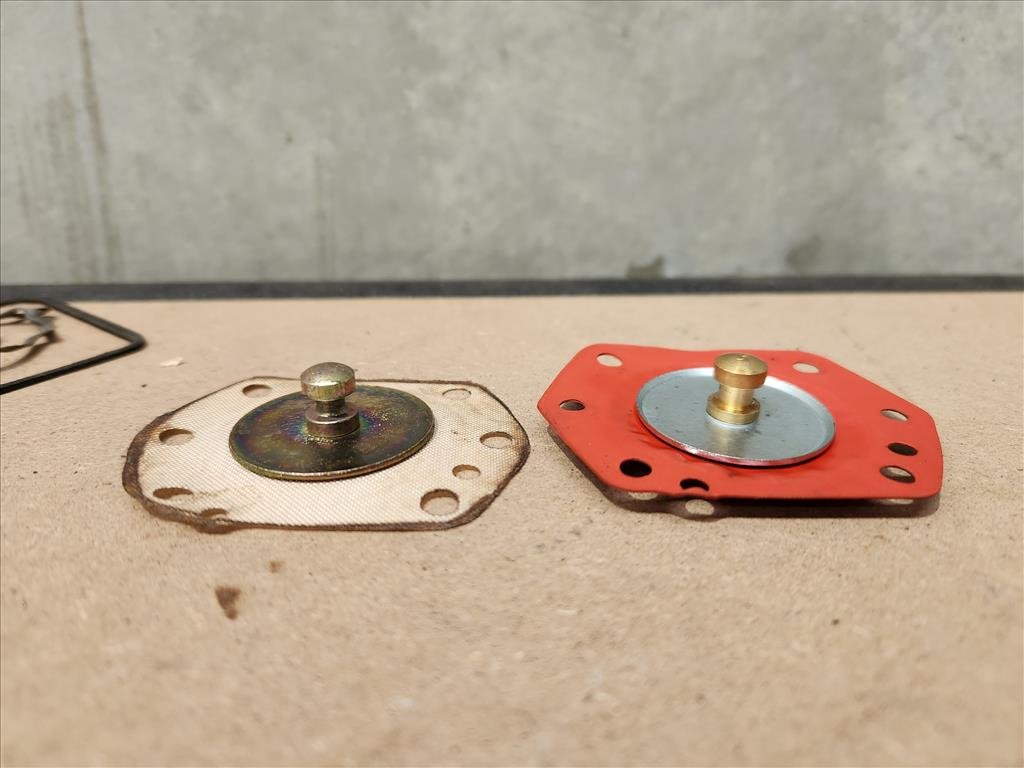
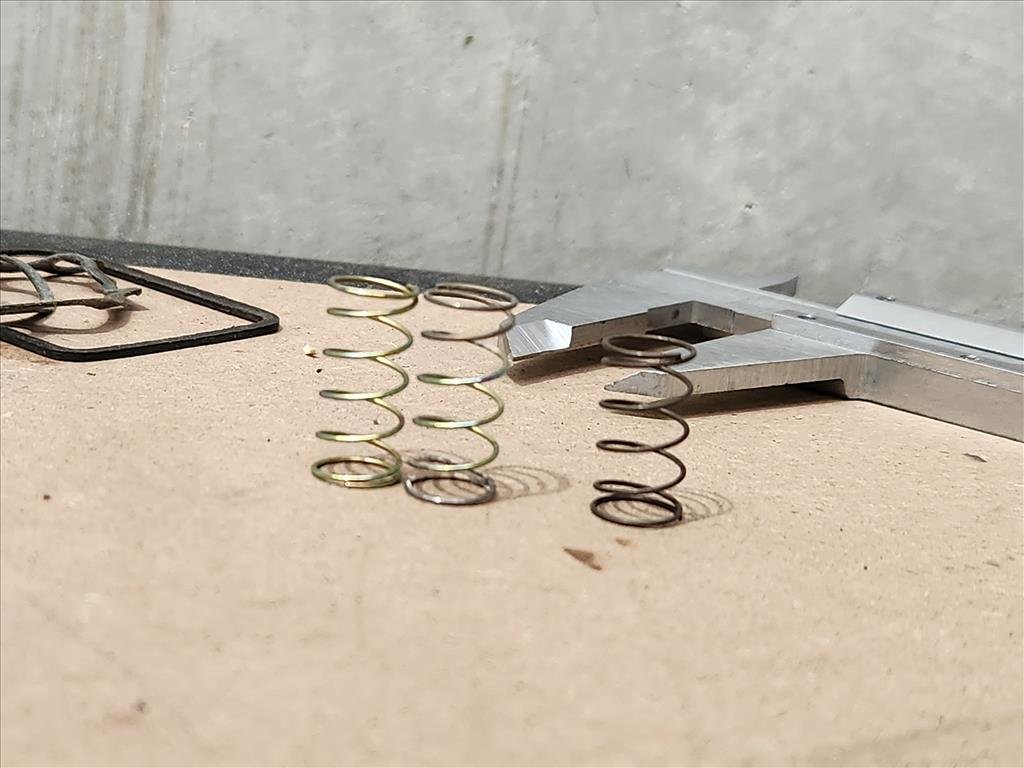
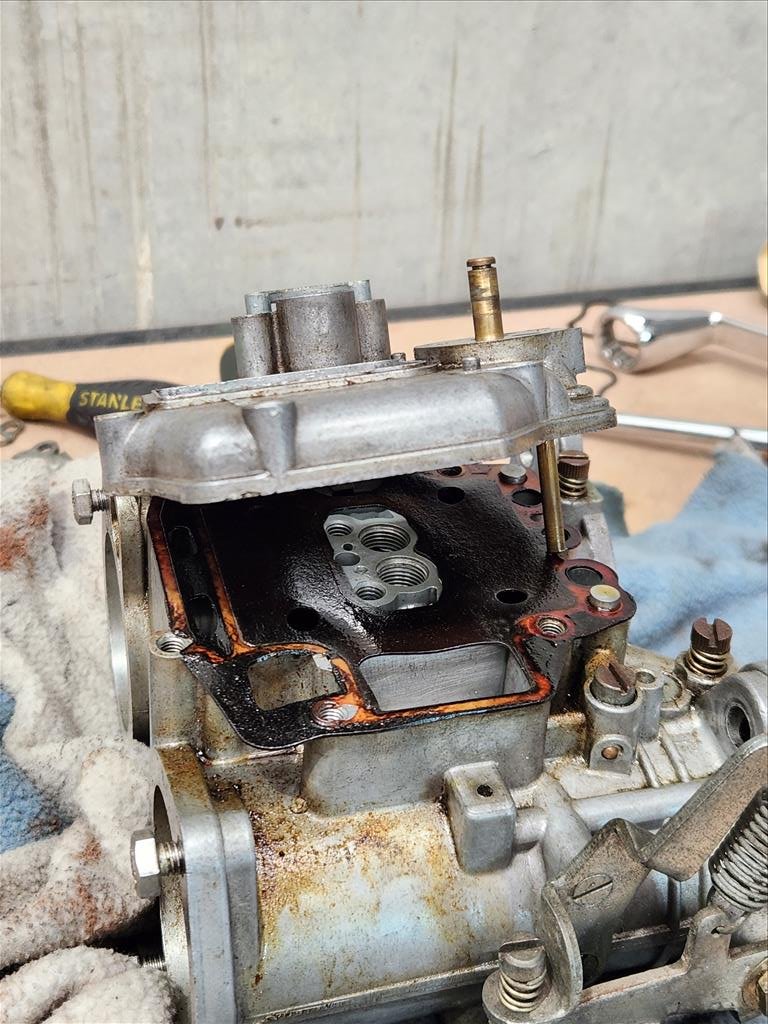
So this is the diaphragm situation. As you can see the new ones (red) are a bit different to the old ones. The height is a little different, the diameter of the metal bit is a few mm different and the spring that goes with it was different. I presume all of these things together mean no bueno. Reluctantly I have reinstalled the old ones as they didn't seem damaged, just crusty. No tears or anything. Yet to test, too many sook businesses around during the week so I'll have a go on the weekend and see if it made any difference. One thing I did notice is there is a little bit of moisture that appears after running the cold start circuit for a little bit, not entirely sure what that is and it goes away but there's no gasket or anything there so I guess that's just how it is. Also something I learnt is there is different timing between the "early" 2T-G and "late". Mine is an early build (remember the engine is not from this car so it's been a bit of a puzzle to put together what came from where) so I have to get that back in spec again too.
-
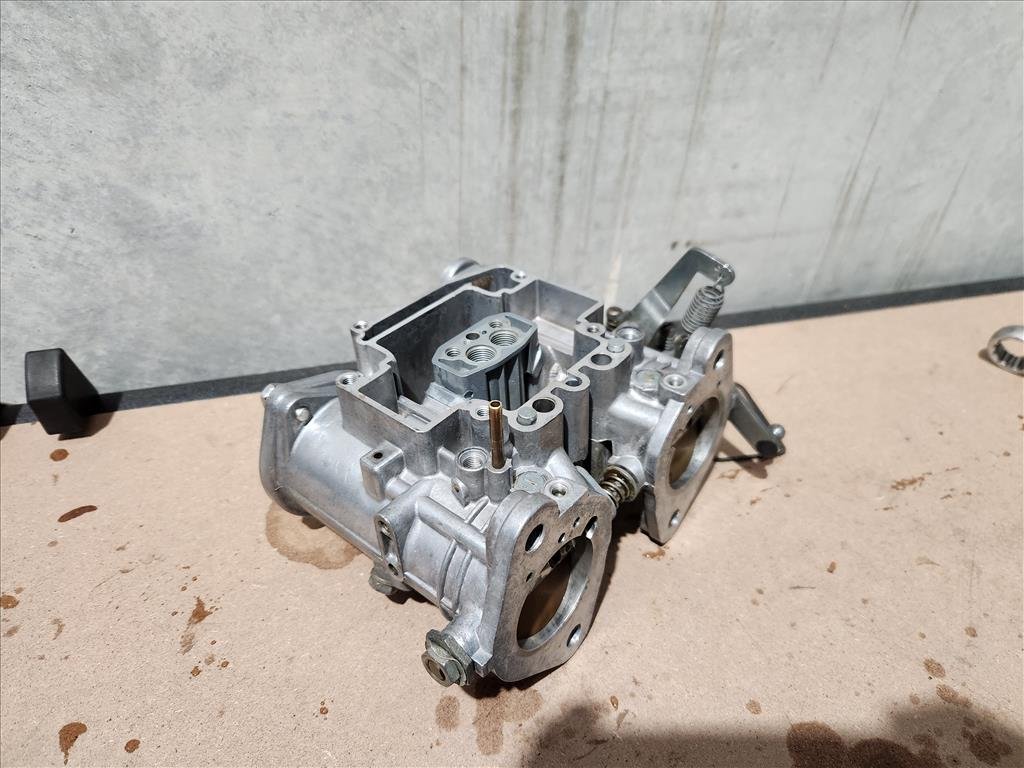
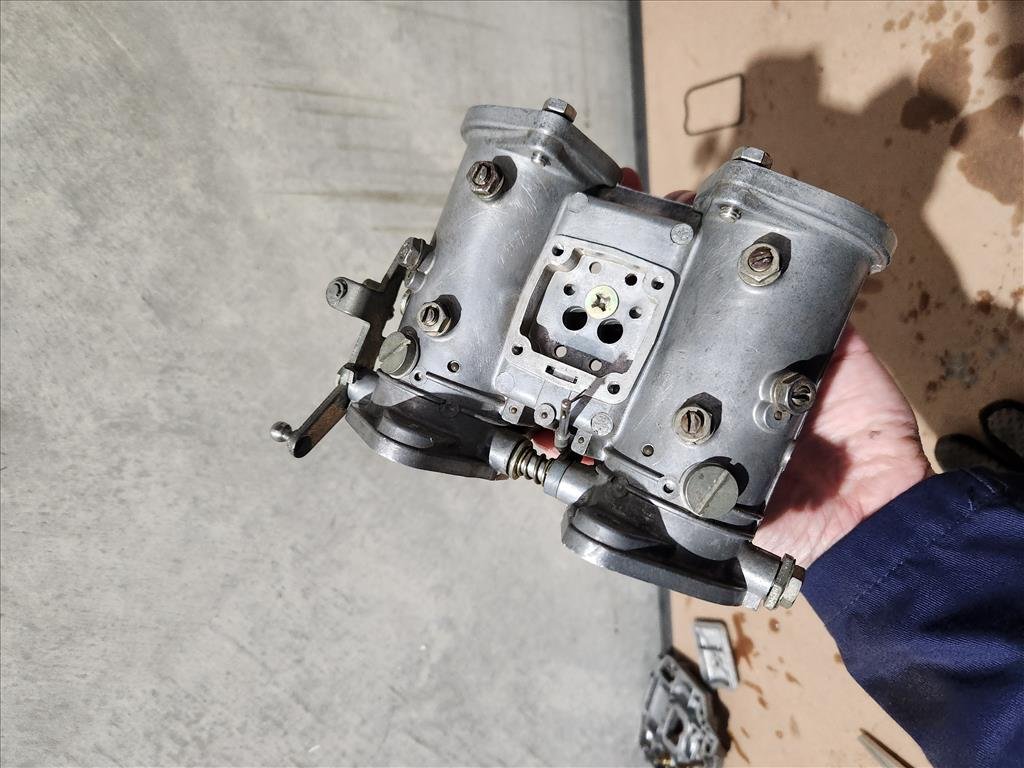
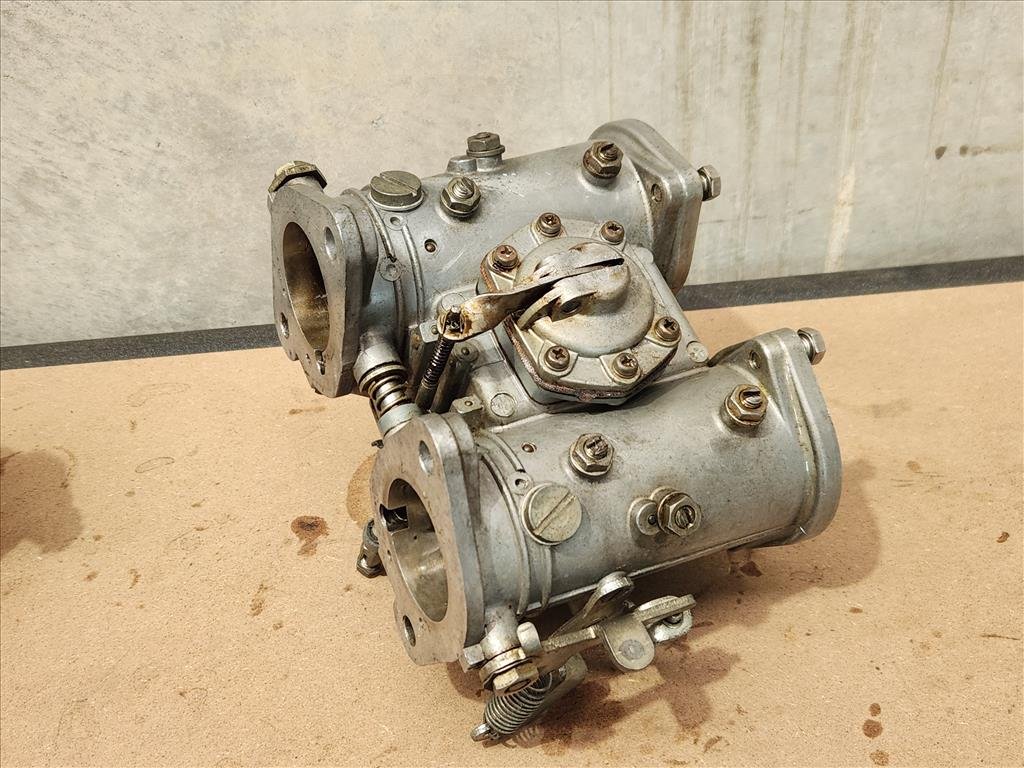
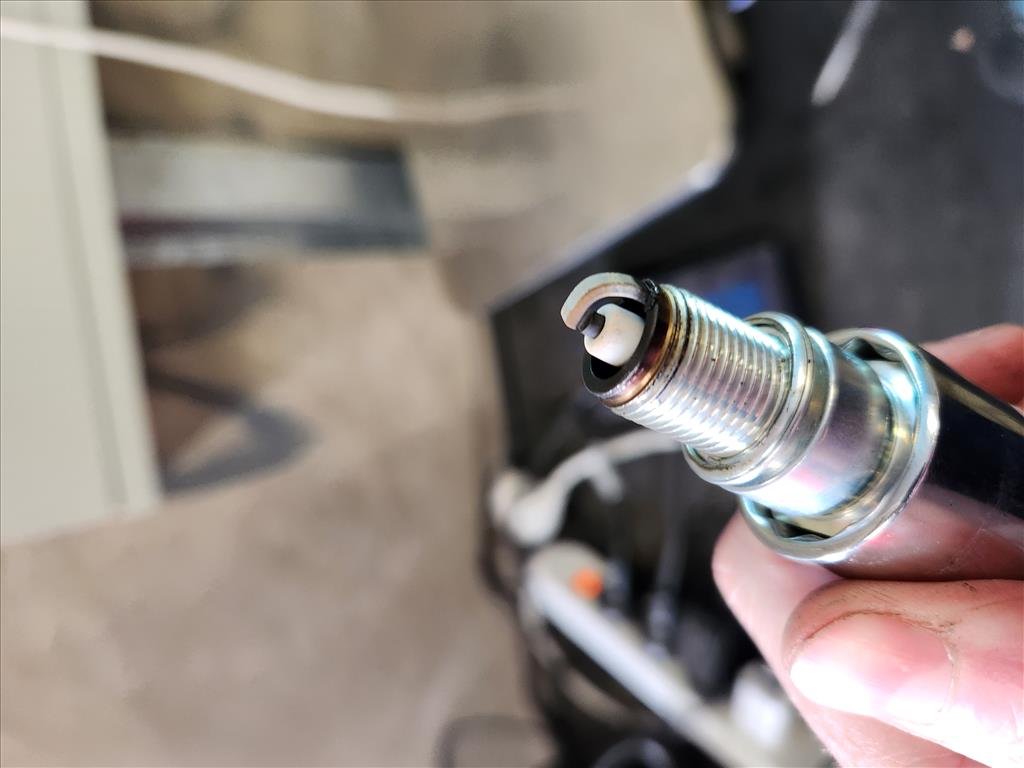
First time I've taken apart carbs before and given them a proper clean with new gaskets and inspection. Actually they don't seem too difficult but there are a large number of tiny little parts that easily go missing. This is the actual reason I purchased an ultrasonic cleaner about 2 years ago and it does an awesome job. I was just using a splash of dishwashing liquid in there, nothing fancy. I only worked on one at a time which was good because I found a few errors along the way on the first one after dismantling the second one and ended up losing one of the tiniest washers I've ever seen. Thankfully my hoard delivered and I had a rebuild kit for a slightly different Mikuni which also used the same washer so was able to salvage a replacement from there. Once reinstalled they look great but I had to do some re-setup as I'd fiddled around with the screws and what not. After some time it seems like maybe the rear carb is not pumping enough fuel compared to the front carb, and the car may be running basically on one carb at idle. Rear plugs looked like this.. seems lean. Front actually didn't look too bad. Also there's a hesitation problem coming off idle when there's a bit of throttle applied. This is annoying and causes stalling sometimes. It seems to be a new issue and the only thing I can think of that has been changed during the rebuild that might do something is the spring for accelerator pump diaphragm under this cover. In the rebuild kit I was using there was a spring included which was a different height to the one that came out. I didn't really think anything of it, just figured a new one would be better but perhaps that's the issue. Once it gets past that little bump she revs no problem. I'll get the spring changed out next week and see if that makes any difference. Also may look into getting a proper vacuum tester as the unisync doesn't really seem to tell me much aside from front carb is pulling vacuum, rear carb isn't nearly as much. Aand despite gooping the exhaust up, there are still some leaks so suppose I'll have to break out the welder again and try fix it properly. If anyone has additional ideas feel free to post them in yarns thread.
-
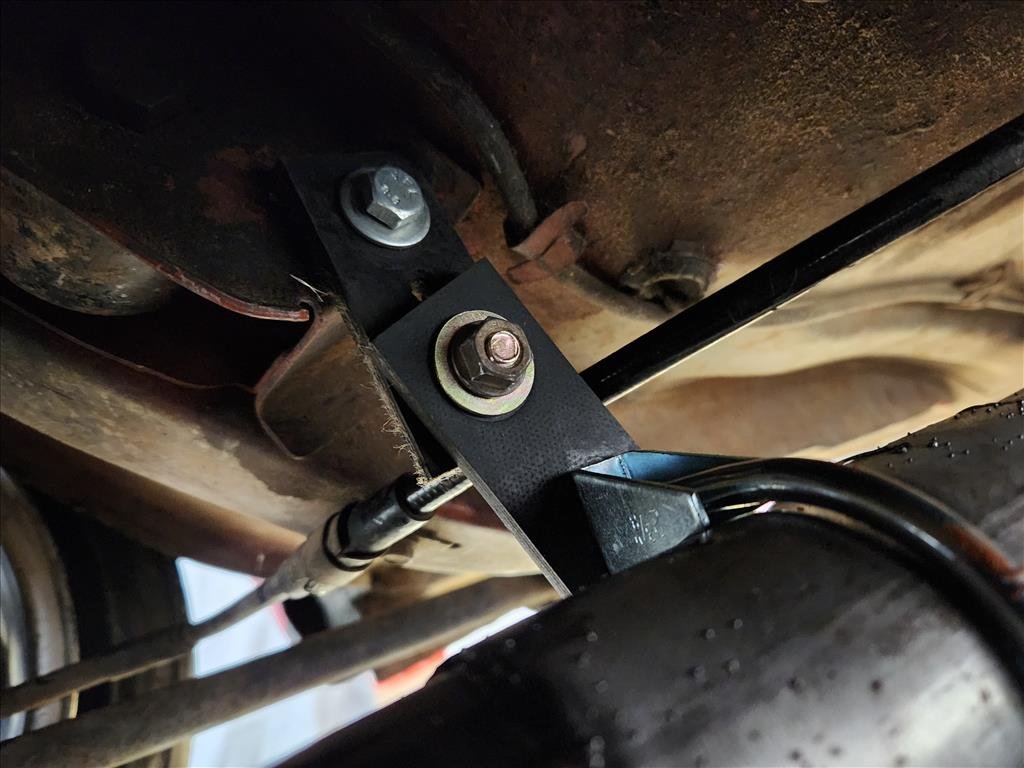
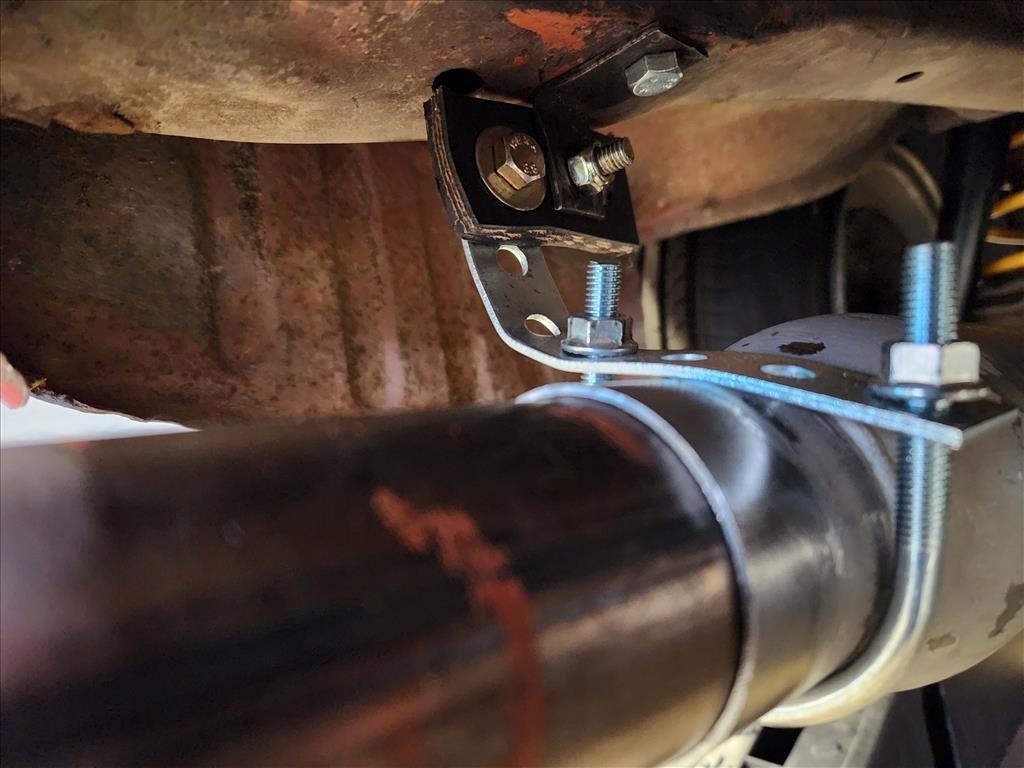
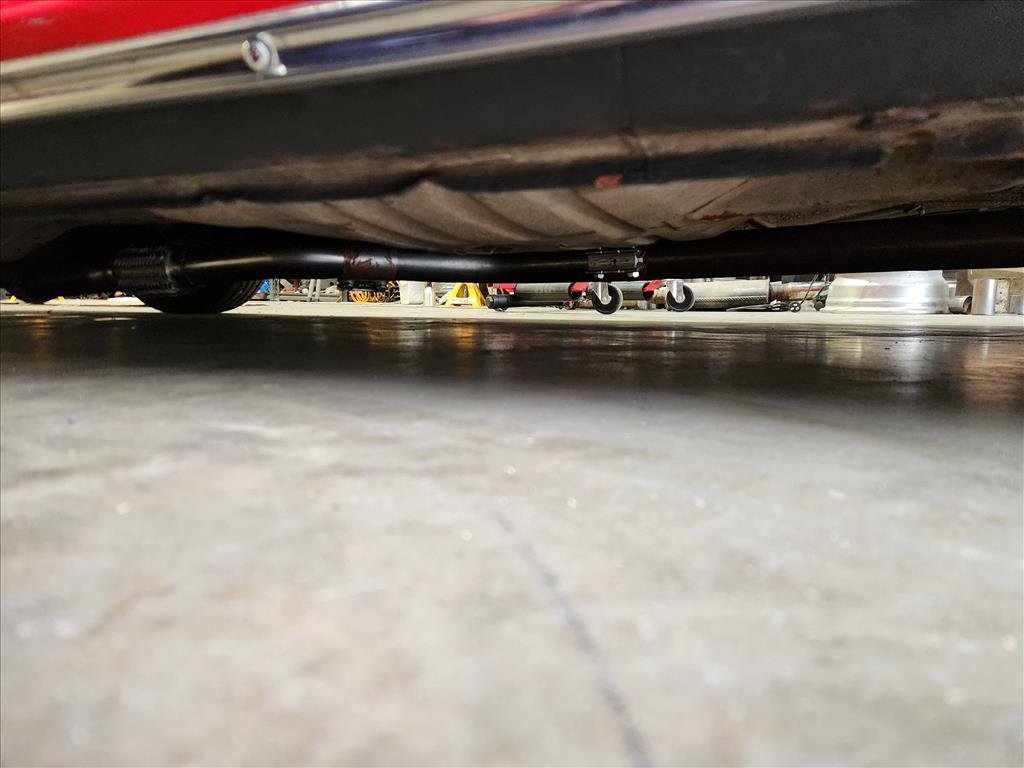
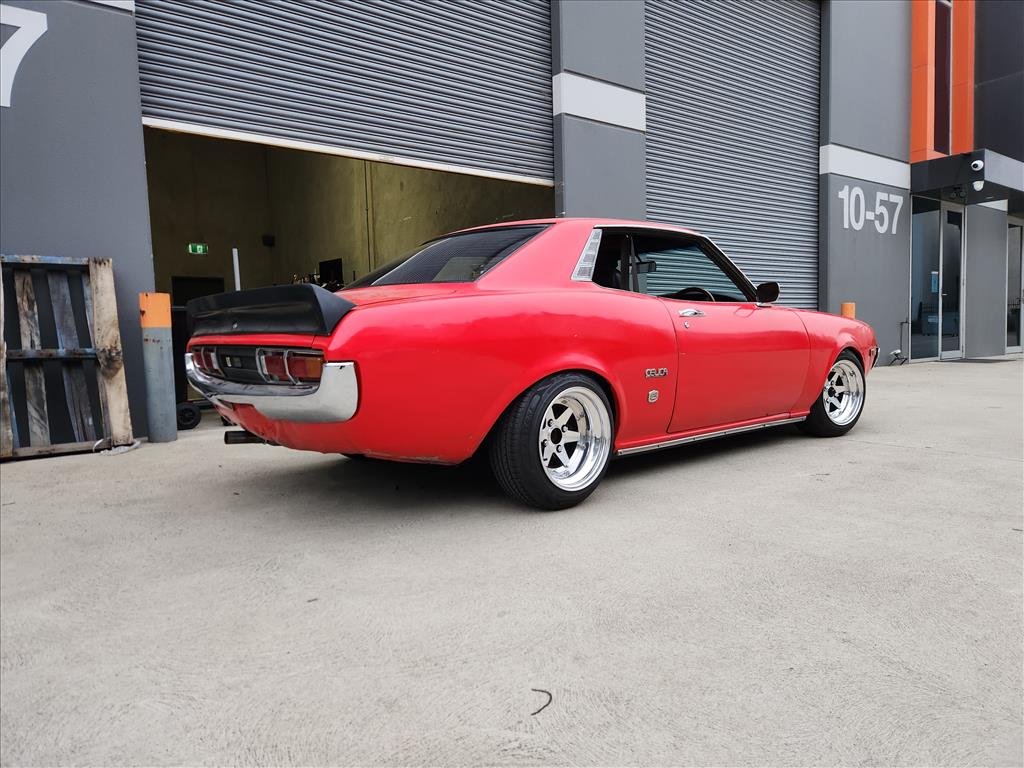
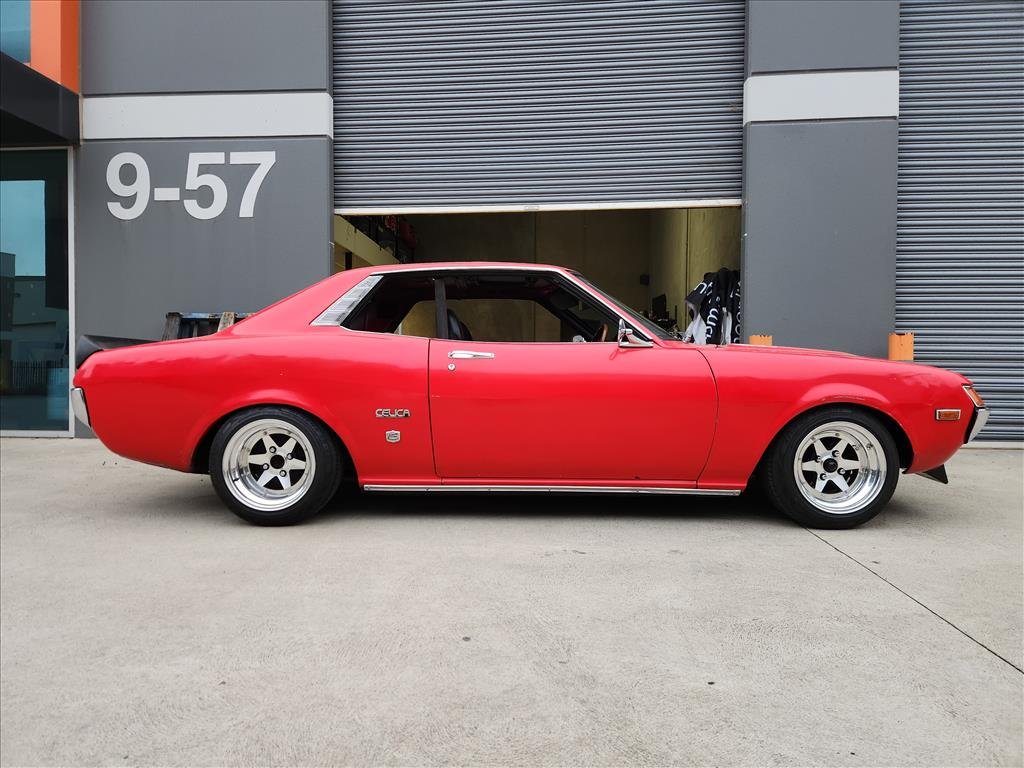
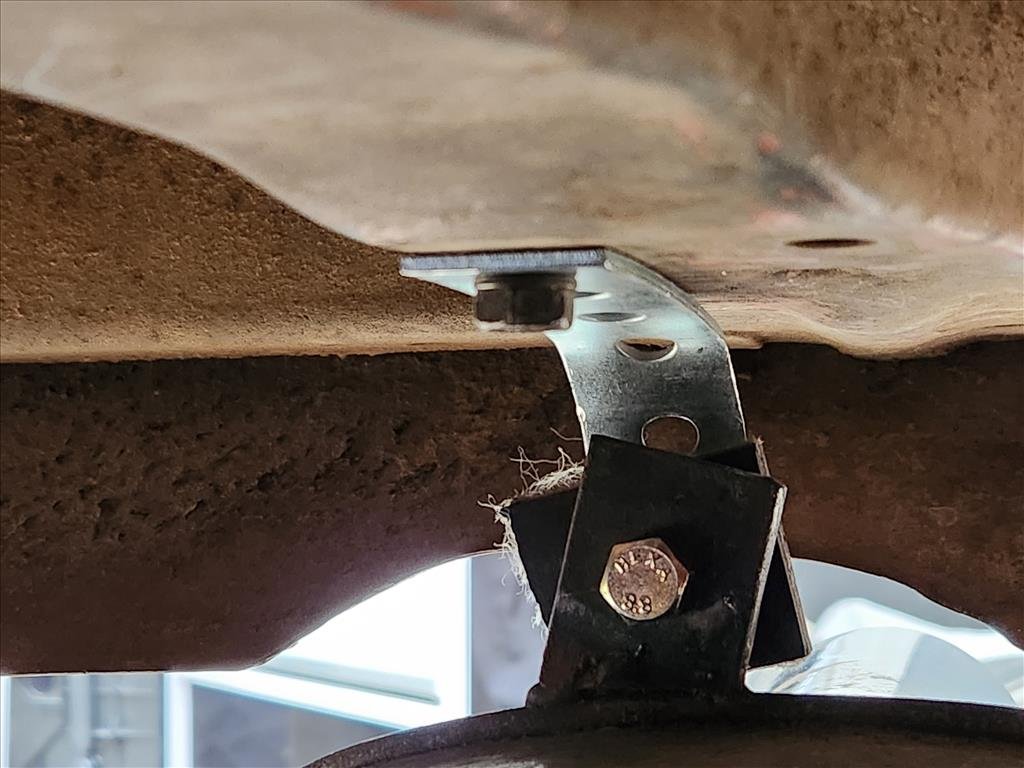
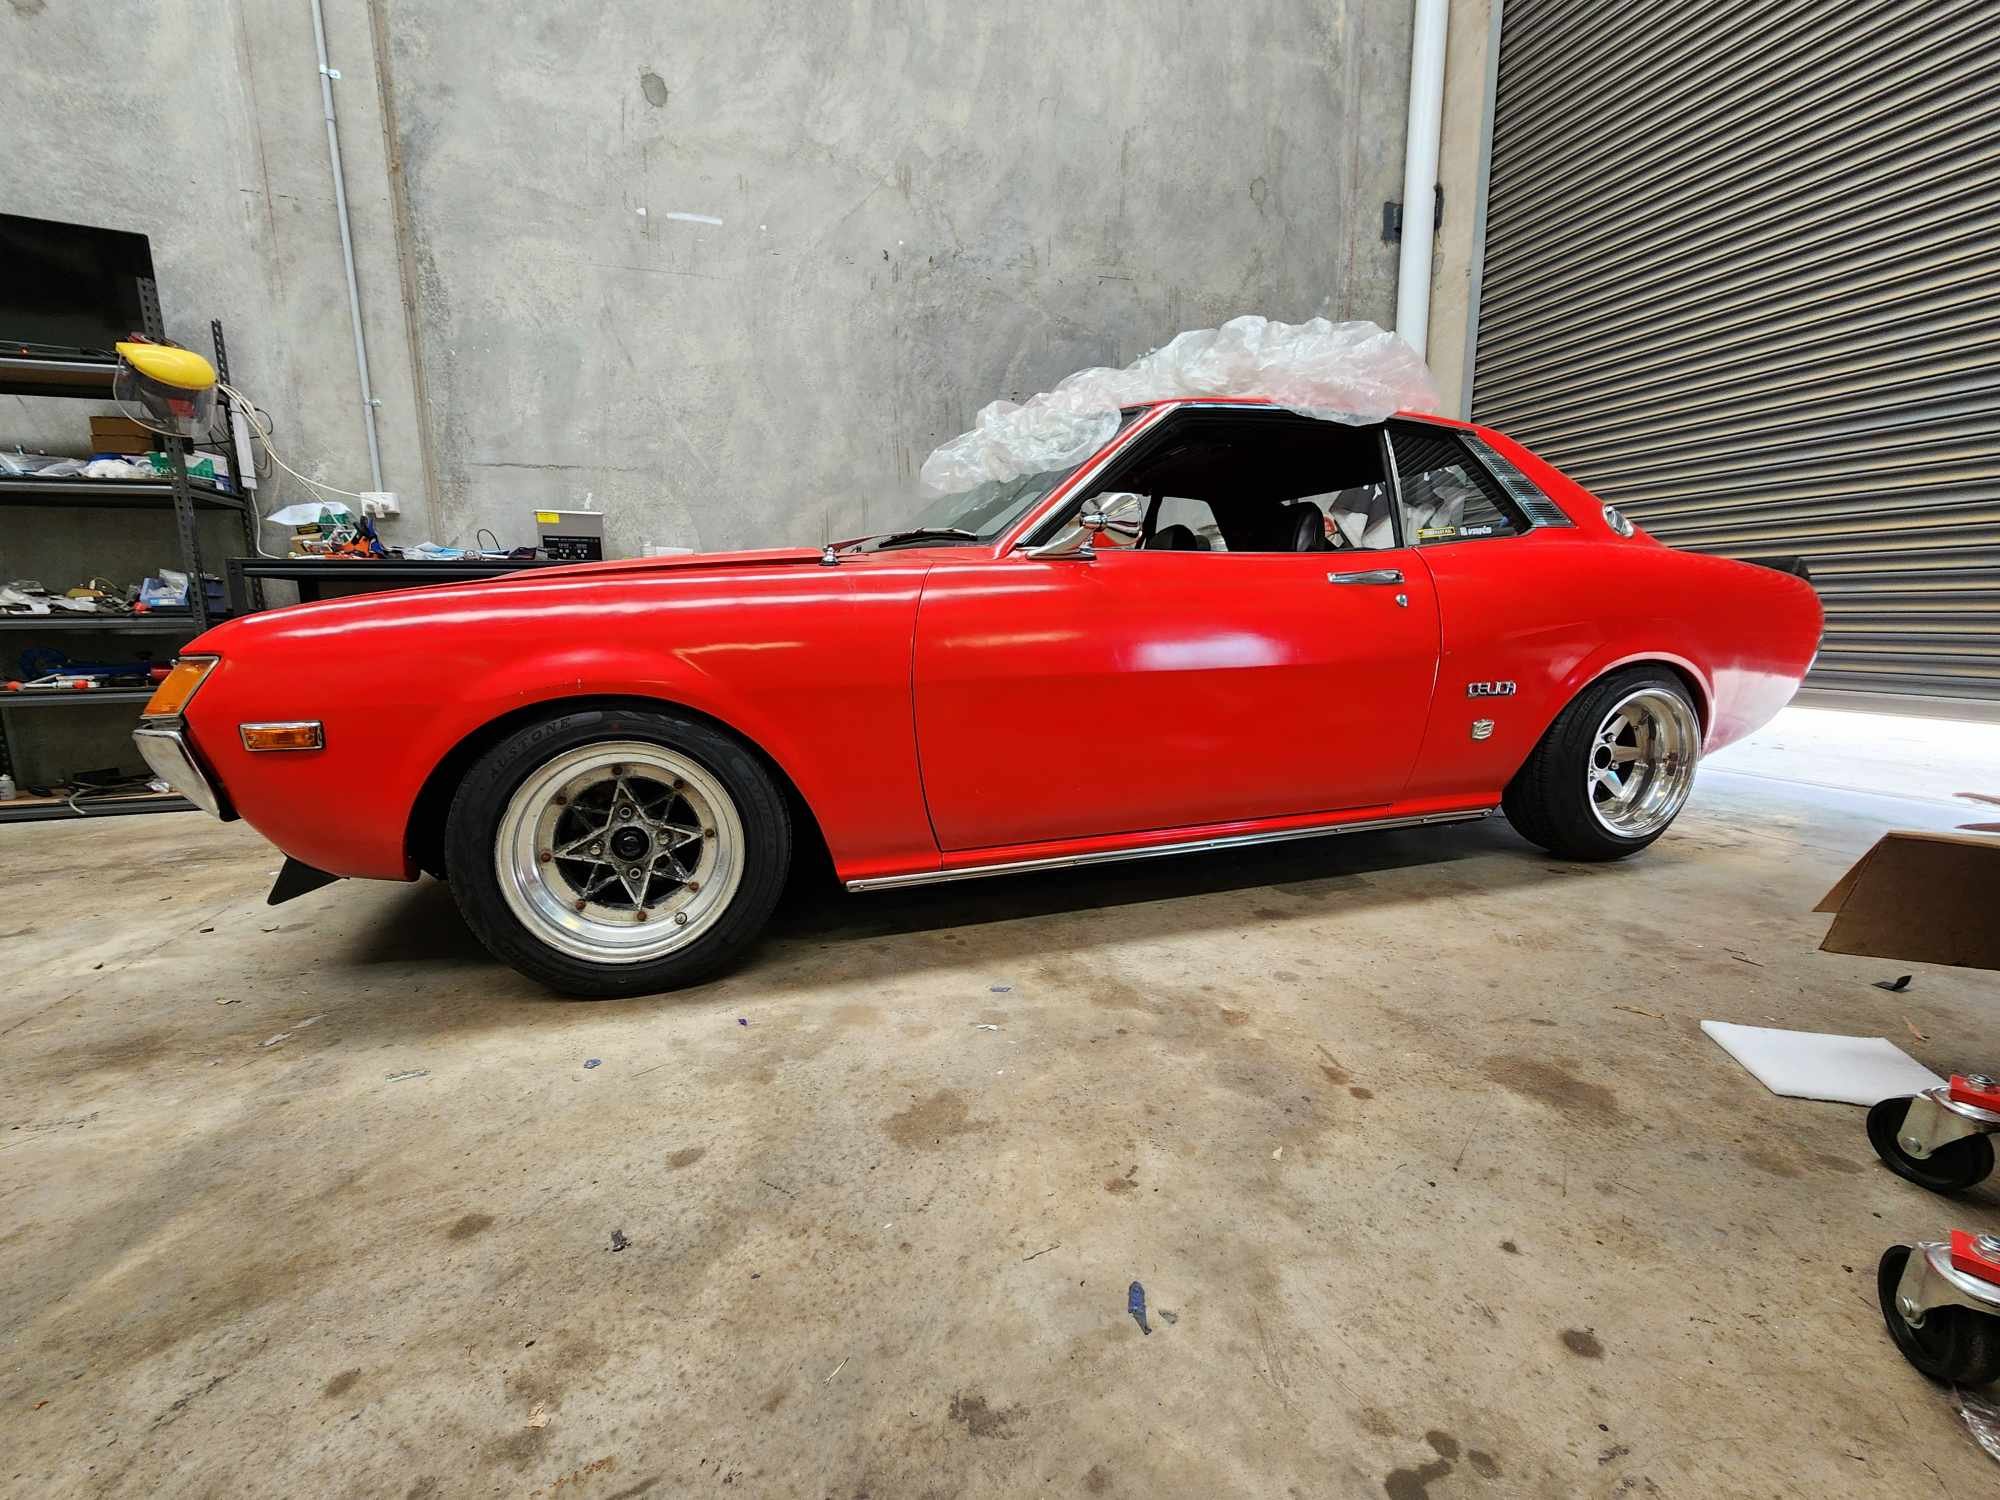
Finished up (pretty much) the exhaust today, ground clearance is much better. The front flange which was there from previous is still a bit low but seems to be a minimal issue. I might have to rotate one of my slip joins around but otherwise I'm most impressed because there are less leaks than I was expecting. I worked out a couple of questionable but working hangers and took it for a blast around the block. Does it look good? Not really. Does it sound good? Questionable. Quite raspy. I have a small cat converter I might put in to see if that does anything. Anyway, considering I'd never welded before this I'm happy with the result. This is also the first time I'd actually had the car on the road with the front "coilover" sleeves installed and while it's no Rolls Royce it could definitely be worse. Not sure I'm in love with the middle mount touching the handbrake cable but it's rubber on rubber so not super worried. It definitely looks the part now I've finally got the front pair of Longchamps widened and fitted. Could even run a small spacer on the front to get it sitting a bit more flush. I can run full lock to lock without rubbing though so maybe I'll leave it for now. Onto the next task - The carbs.
- 79 replies
-
- 18
-

-
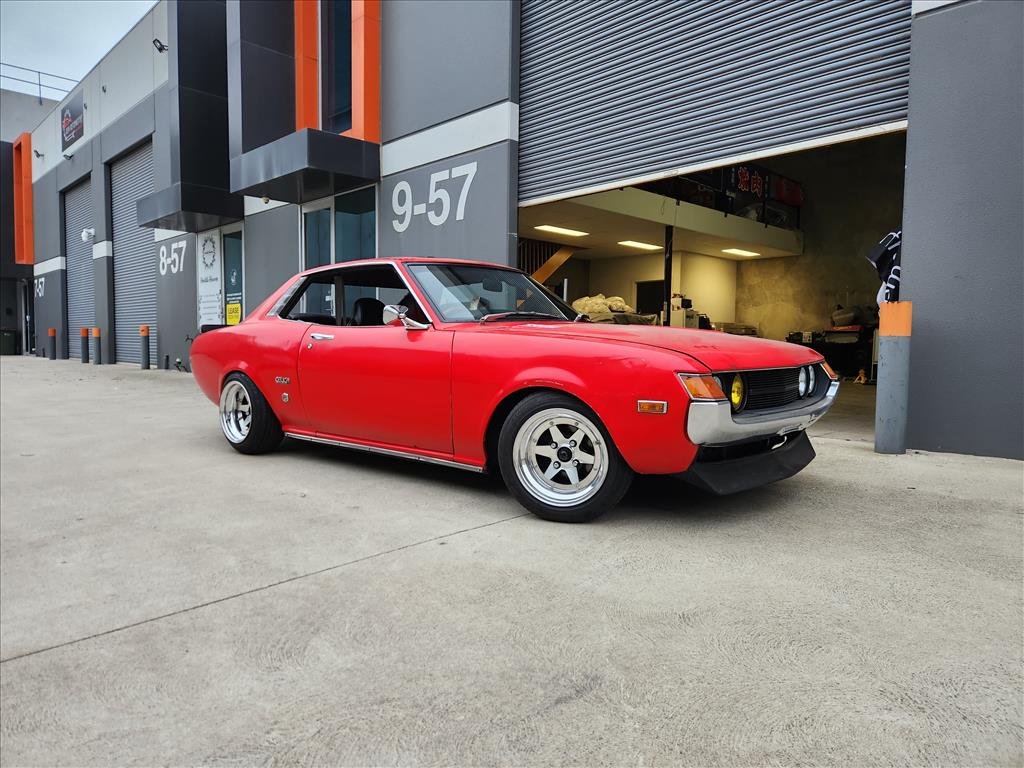
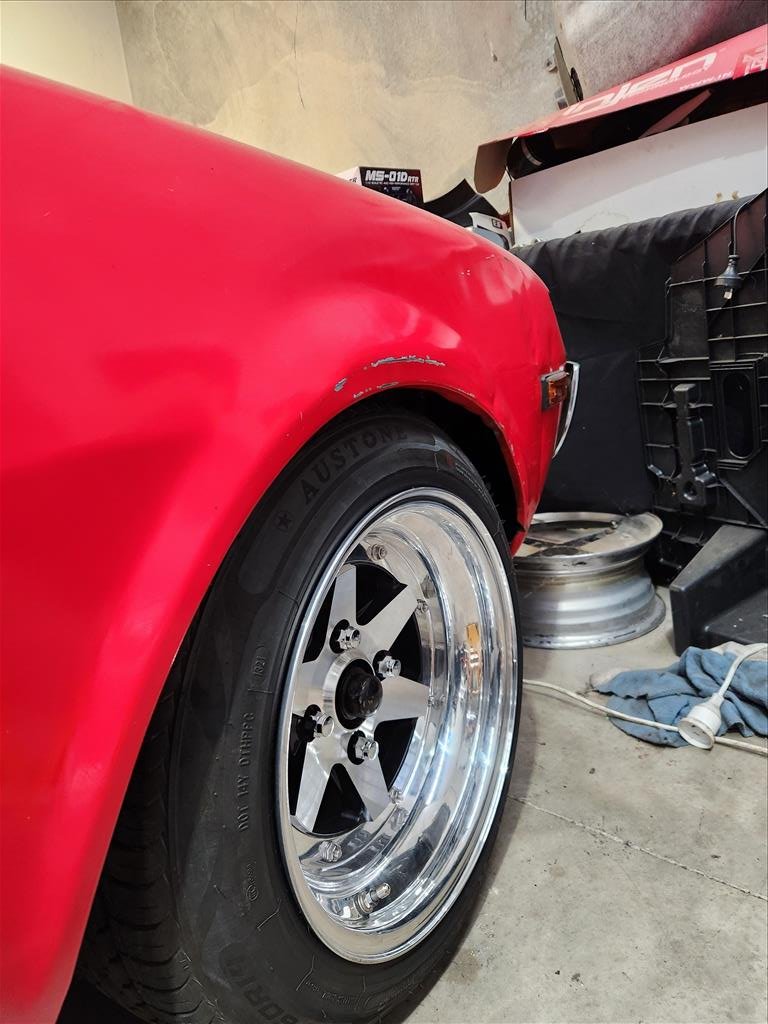
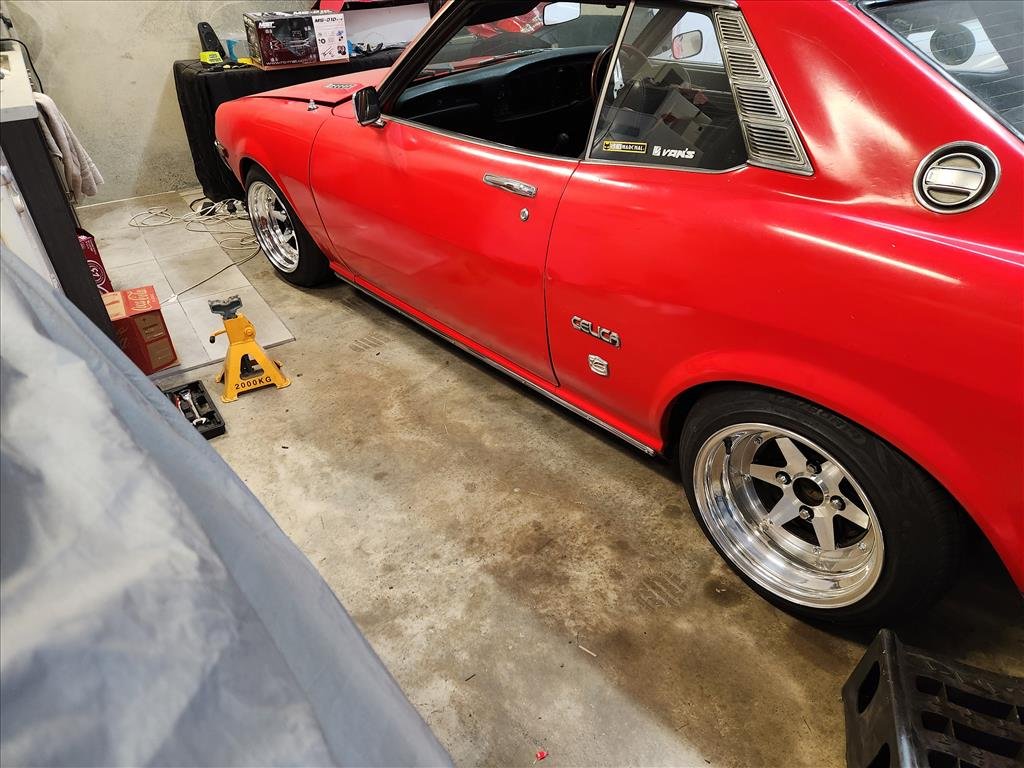
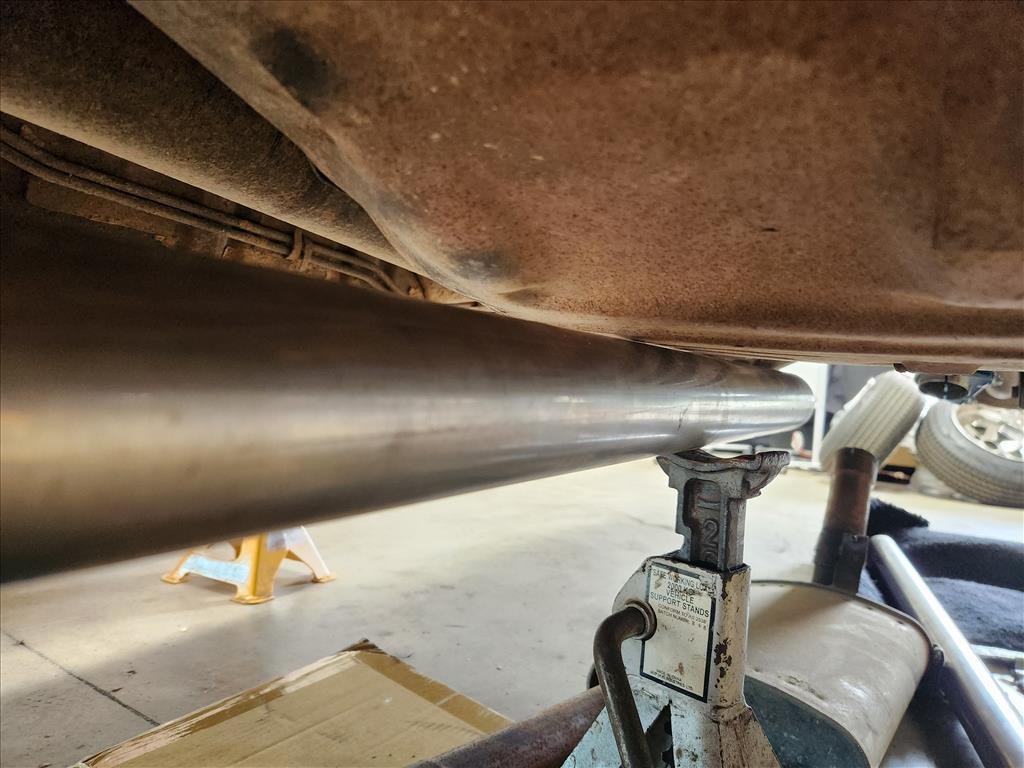
Back to Celica coverage now with the ongoing self-inflicted exhaust program. I decided to drop it on the ground because there's no point welding it all up if it's no good right? Sort of to be expected.. the giant muffler is basically the exact same as it was before so that's gotta go! Onto the good news now, the front pair of longchamps are finished! They fit up great and I can probably even run a small slip on spacer to get them to sit out slightly more but I reckon they're not half bad. Once the exhaust is finished I'll be able to move it from it's corner location for better view.
- 79 replies
-
- 12
-
-
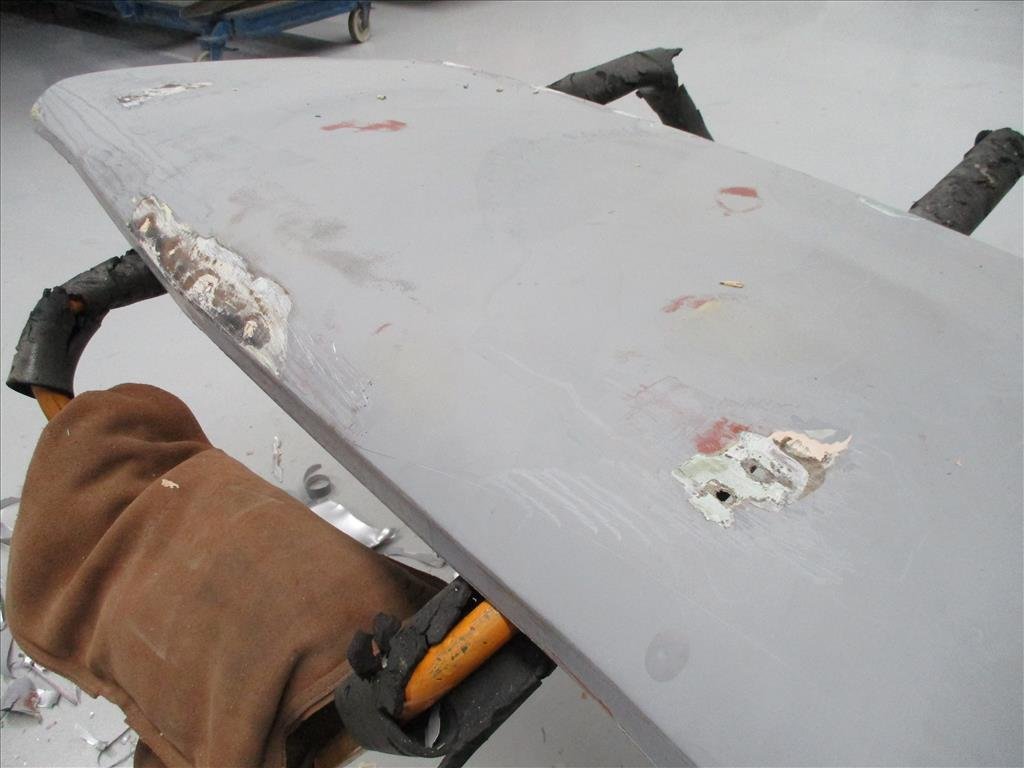
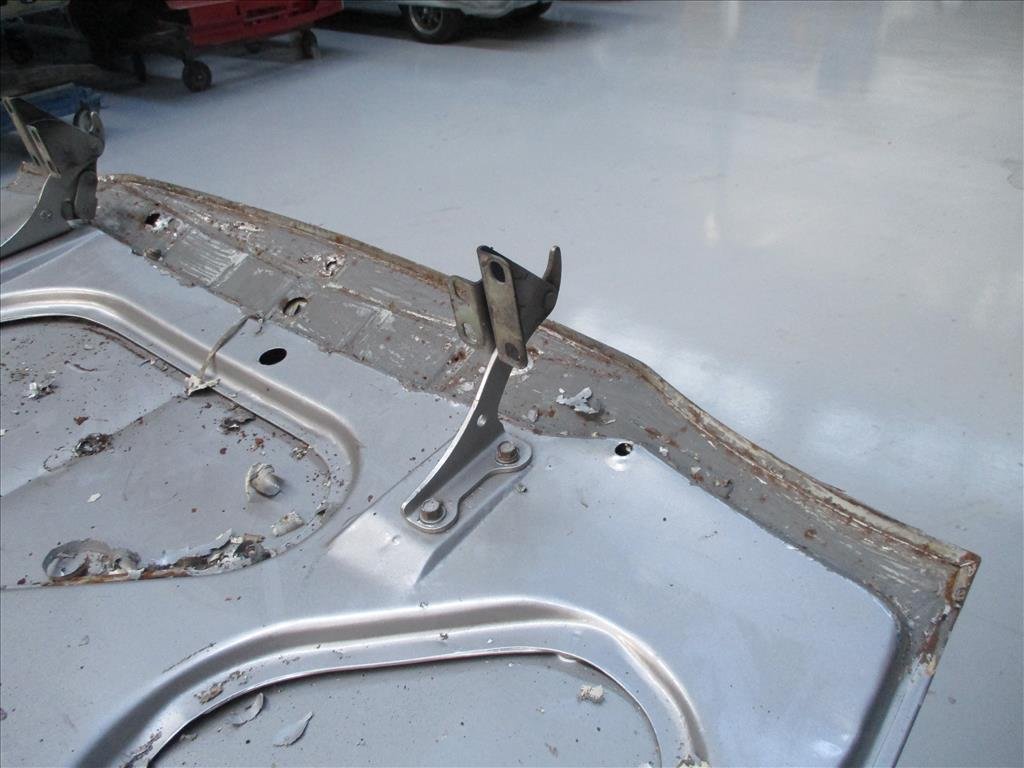
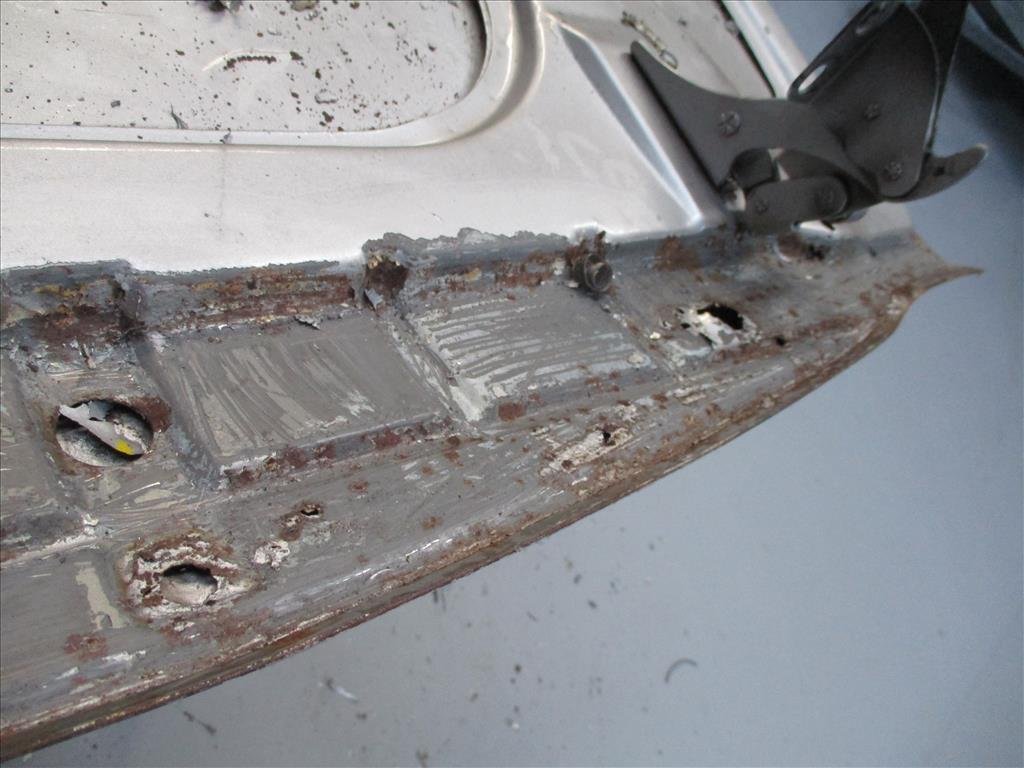
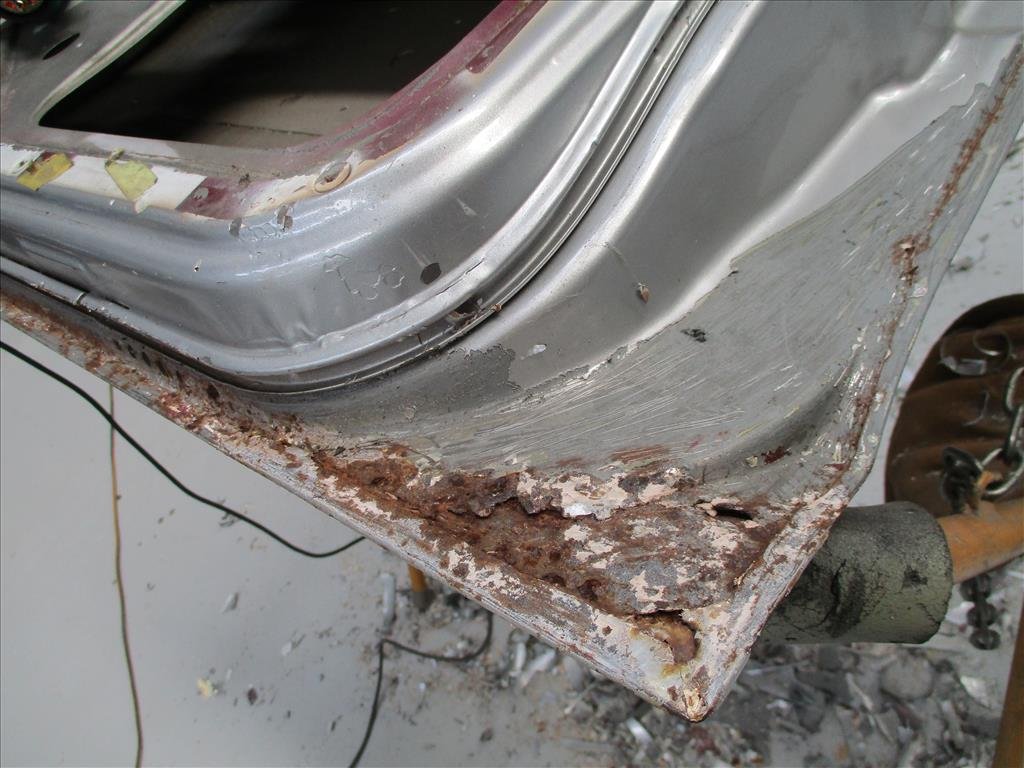
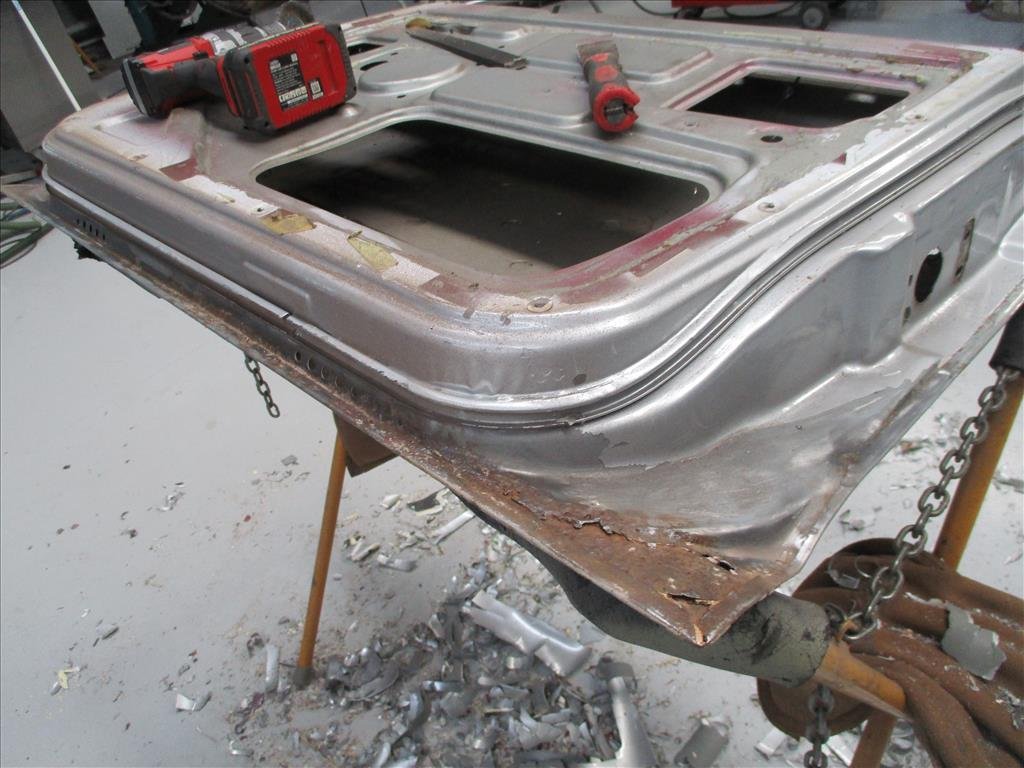
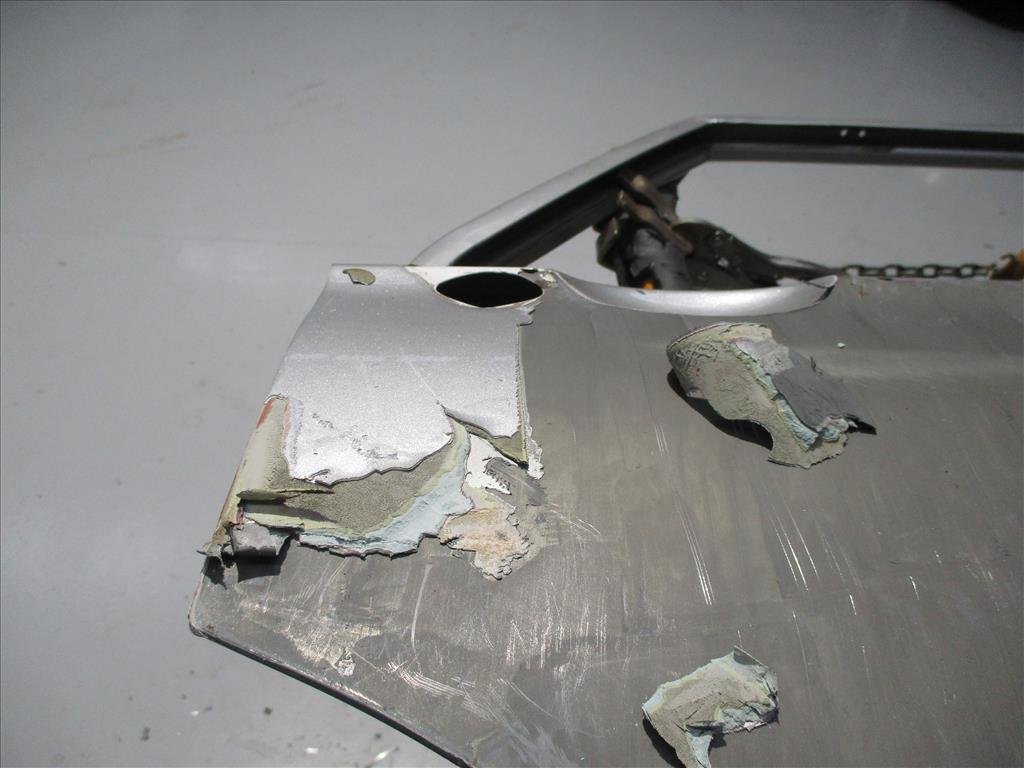
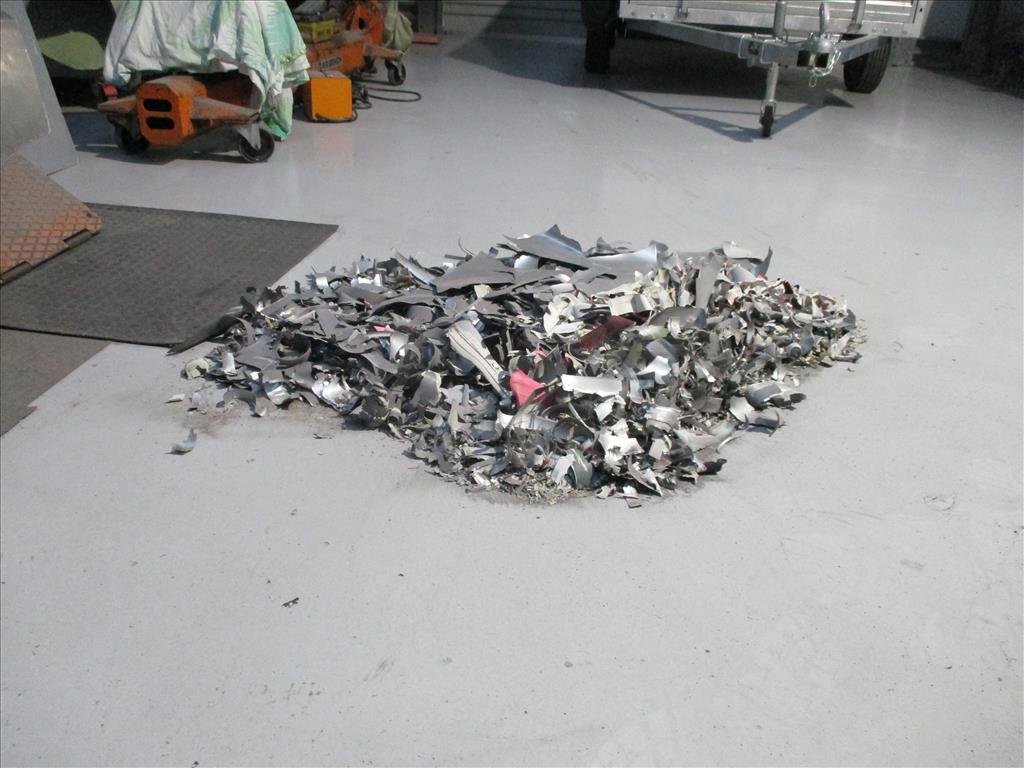
Oh it's been a while since an update from panel Barry as he's been doing some other work while we've been deliberating how to proceed. He's spent a lot of time stripping down the bolt ons. Interestingly the front guards have bolt holes that were bogged up from flares in the past, as well as some other repairs. The guards themselves are fine, they'll easily work. The bonnet has rust inside the frame so a little tricky. I may look for a fibreglass bonnet to replace it as those are easily available, but then it comes down to cost vs having it fully repaired. It might not work out better either way. Depends what shipping might cost as the bonnets are around $5-600. The doors are a bit of a larger issue as in order to completely fix this 100% properly they would need to be split. Something that you would do if it were a Ferrari or something but for this it's not going to be cost effective. I don't think I'll be able to quickly find better doors in Japan as they're probably all cactus so the other option that was proposed is to patch them up best as possible and think of it as something to approach again in a few years time. Panel Barry is confident with proper sealing and decent patching they'll last a long while before they become an issue again. The boot also has some spoiler holes which were bogged up so they'll just get filled as I don't want a GT-R type spoiler, it's not a GT-R. You know that scene in The Joker where he lights the money on fire, that's what this reminds me of. I must say bog artists should be celebrated sometimes, master of sculpting.
- 79 replies
-
- 14
-
-
Well it's taken like 6 months to get this far but I think this will be the layout for the first (no doubt there will be many revisions) iteration of this new exhaust. Basic layout is header flange>flexi>s-pipe with a weird slightly up angle>straight pipe>muffler with offset ends>some fuckery>hotdog>end. Haven't yet worked out the tip but I feel like thats fairly low priority. The giant muffler is wonky on purpose, it looks a little more exaggerated there but once I tighten things up and do some welding hopefully I can get it in about the right place. Seems like nobody makes an off the shelf muffler in the size/style I want so have to make do. That giant muffler might still hit the ground which would mean I'm really no better off than 6 months ago but we'll see. From occasional cursory glance from the sides it looks like it hangs down less overall. I also need to work out how to do hangers too.. oh and figure out butt welding properly without blowing through everything as well as order in a couple of 2 bolt flanges to make separations.
- 79 replies
-
- 12
-
-
As someone who has a Nismo note, those wheels look way better on the cube !
-
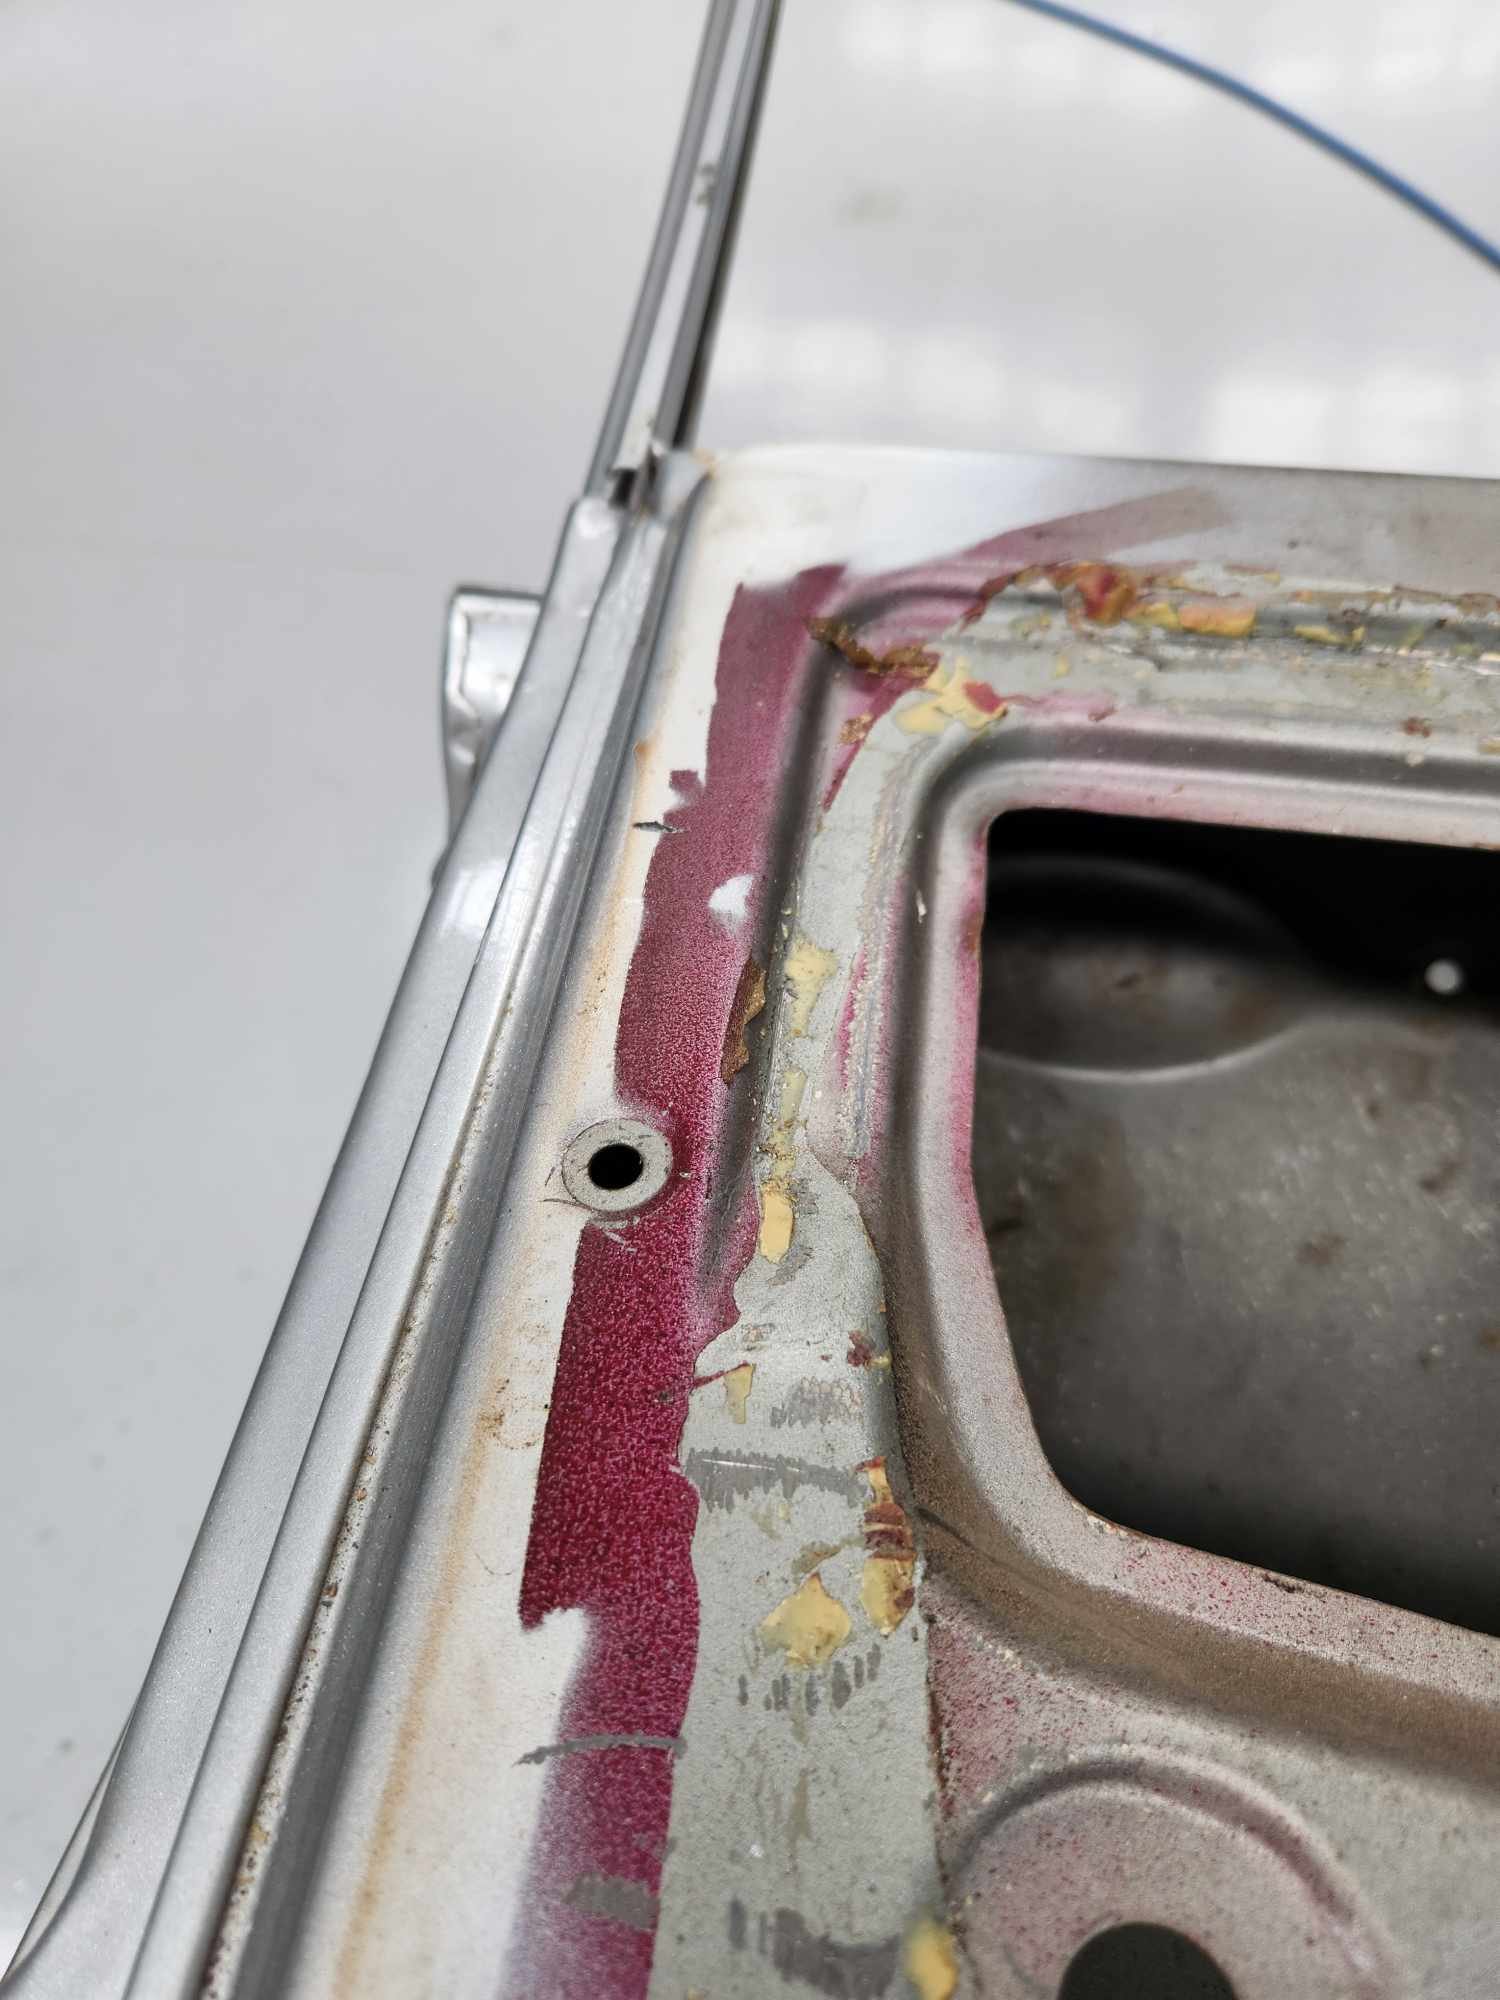
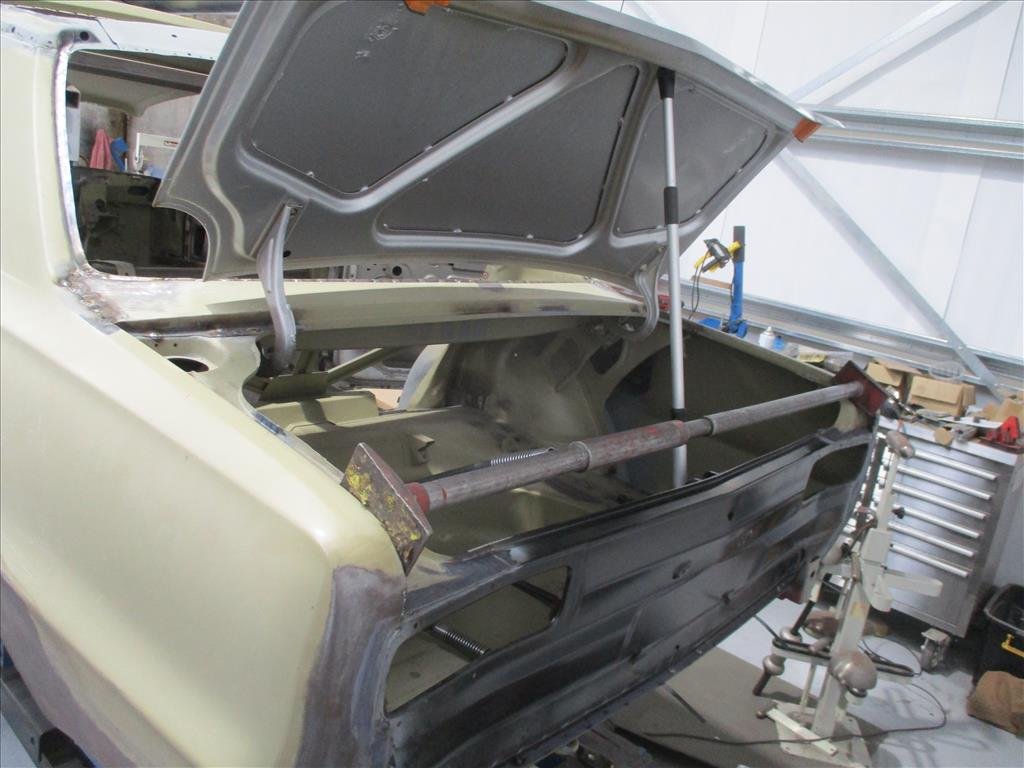
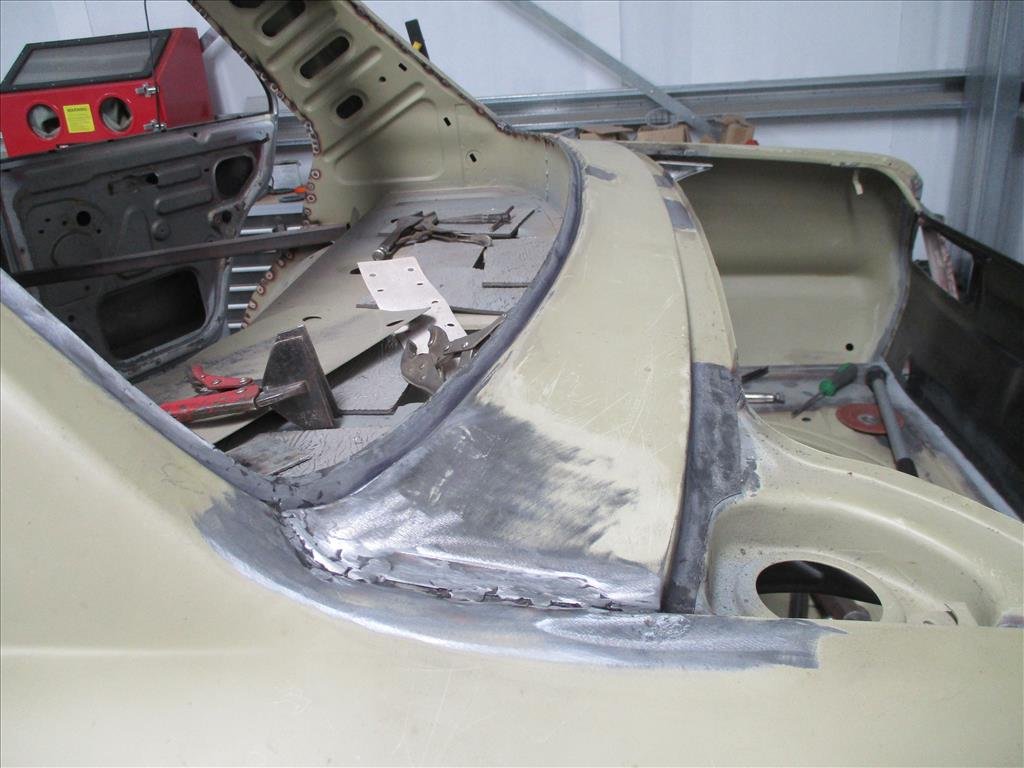
Back in NZ briefly so managed to head out and see the Skyline progress and talk shop with panel Barry. It was great to see up close all the work that’s been done as well as he was able to tell me in more detail about what's been done and what's still to come. As has been mentioned earlier the main welding has been done but the roof still needs to be completed. A huge amount of work went into fully rebuilding/recreating the drip rails as they were all mangled and drilled out as part of the process years ago. A little more finishing of the actual roof attachment and then we are onto the paint preparation panel work. Good news is he can also do most of this so various primer/blocking stages and final fit will be done here as well then for the actual paint application it will go elsewhere but that was something I wasn't not sure about so I'm happy that blank in my knowledge was filled. So for now the boot is OK, the bonnet front edge has some rust and corrosion so will be fixed up but the doors are going to be the next ballache. The most likely strategy will be to dip them but due to them being multi-layered there is strategy required to get the best result. All of this I did not know before today. Still probably at least 6 months before actual paint yarns are on but it's going to be next year for sure. Speaking of paint it's not quite sure if this car was purple originally or white as both colours are showing underneath.
- 79 replies
-
- 12
-
-
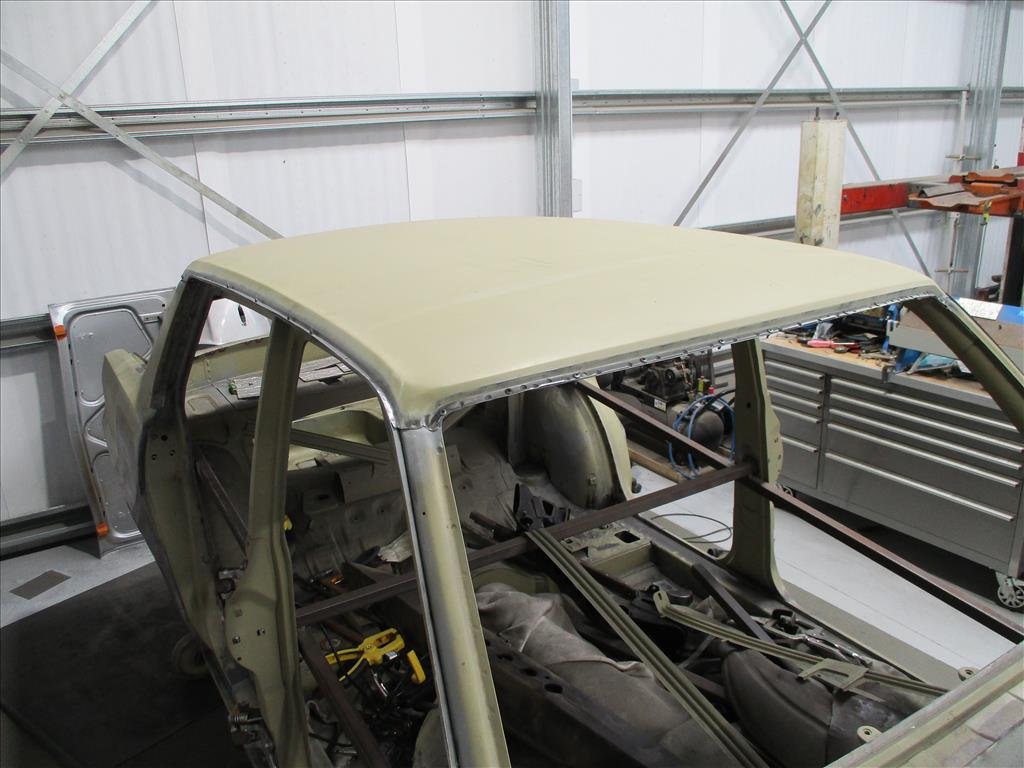
Roof being lined up to get stuck together. Looks like it's coming along nicely. Panel Barry said he was impressed with the reproduction panels for the rear so far which is good to know. Also mentioned car should be all welded up within next couple weeks. We've decided to paint strip the bonnet and doors to see what's hiding underneath. Originally was thinking to dip the whole doors and bonnet and boot but we decided maybe not necessary as the boot is pretty much all good and bonnet isn't super terrible (just around the front edge). Doors have some bog in but cross that bridge when we get there.
- 79 replies
-
- 12
-
-
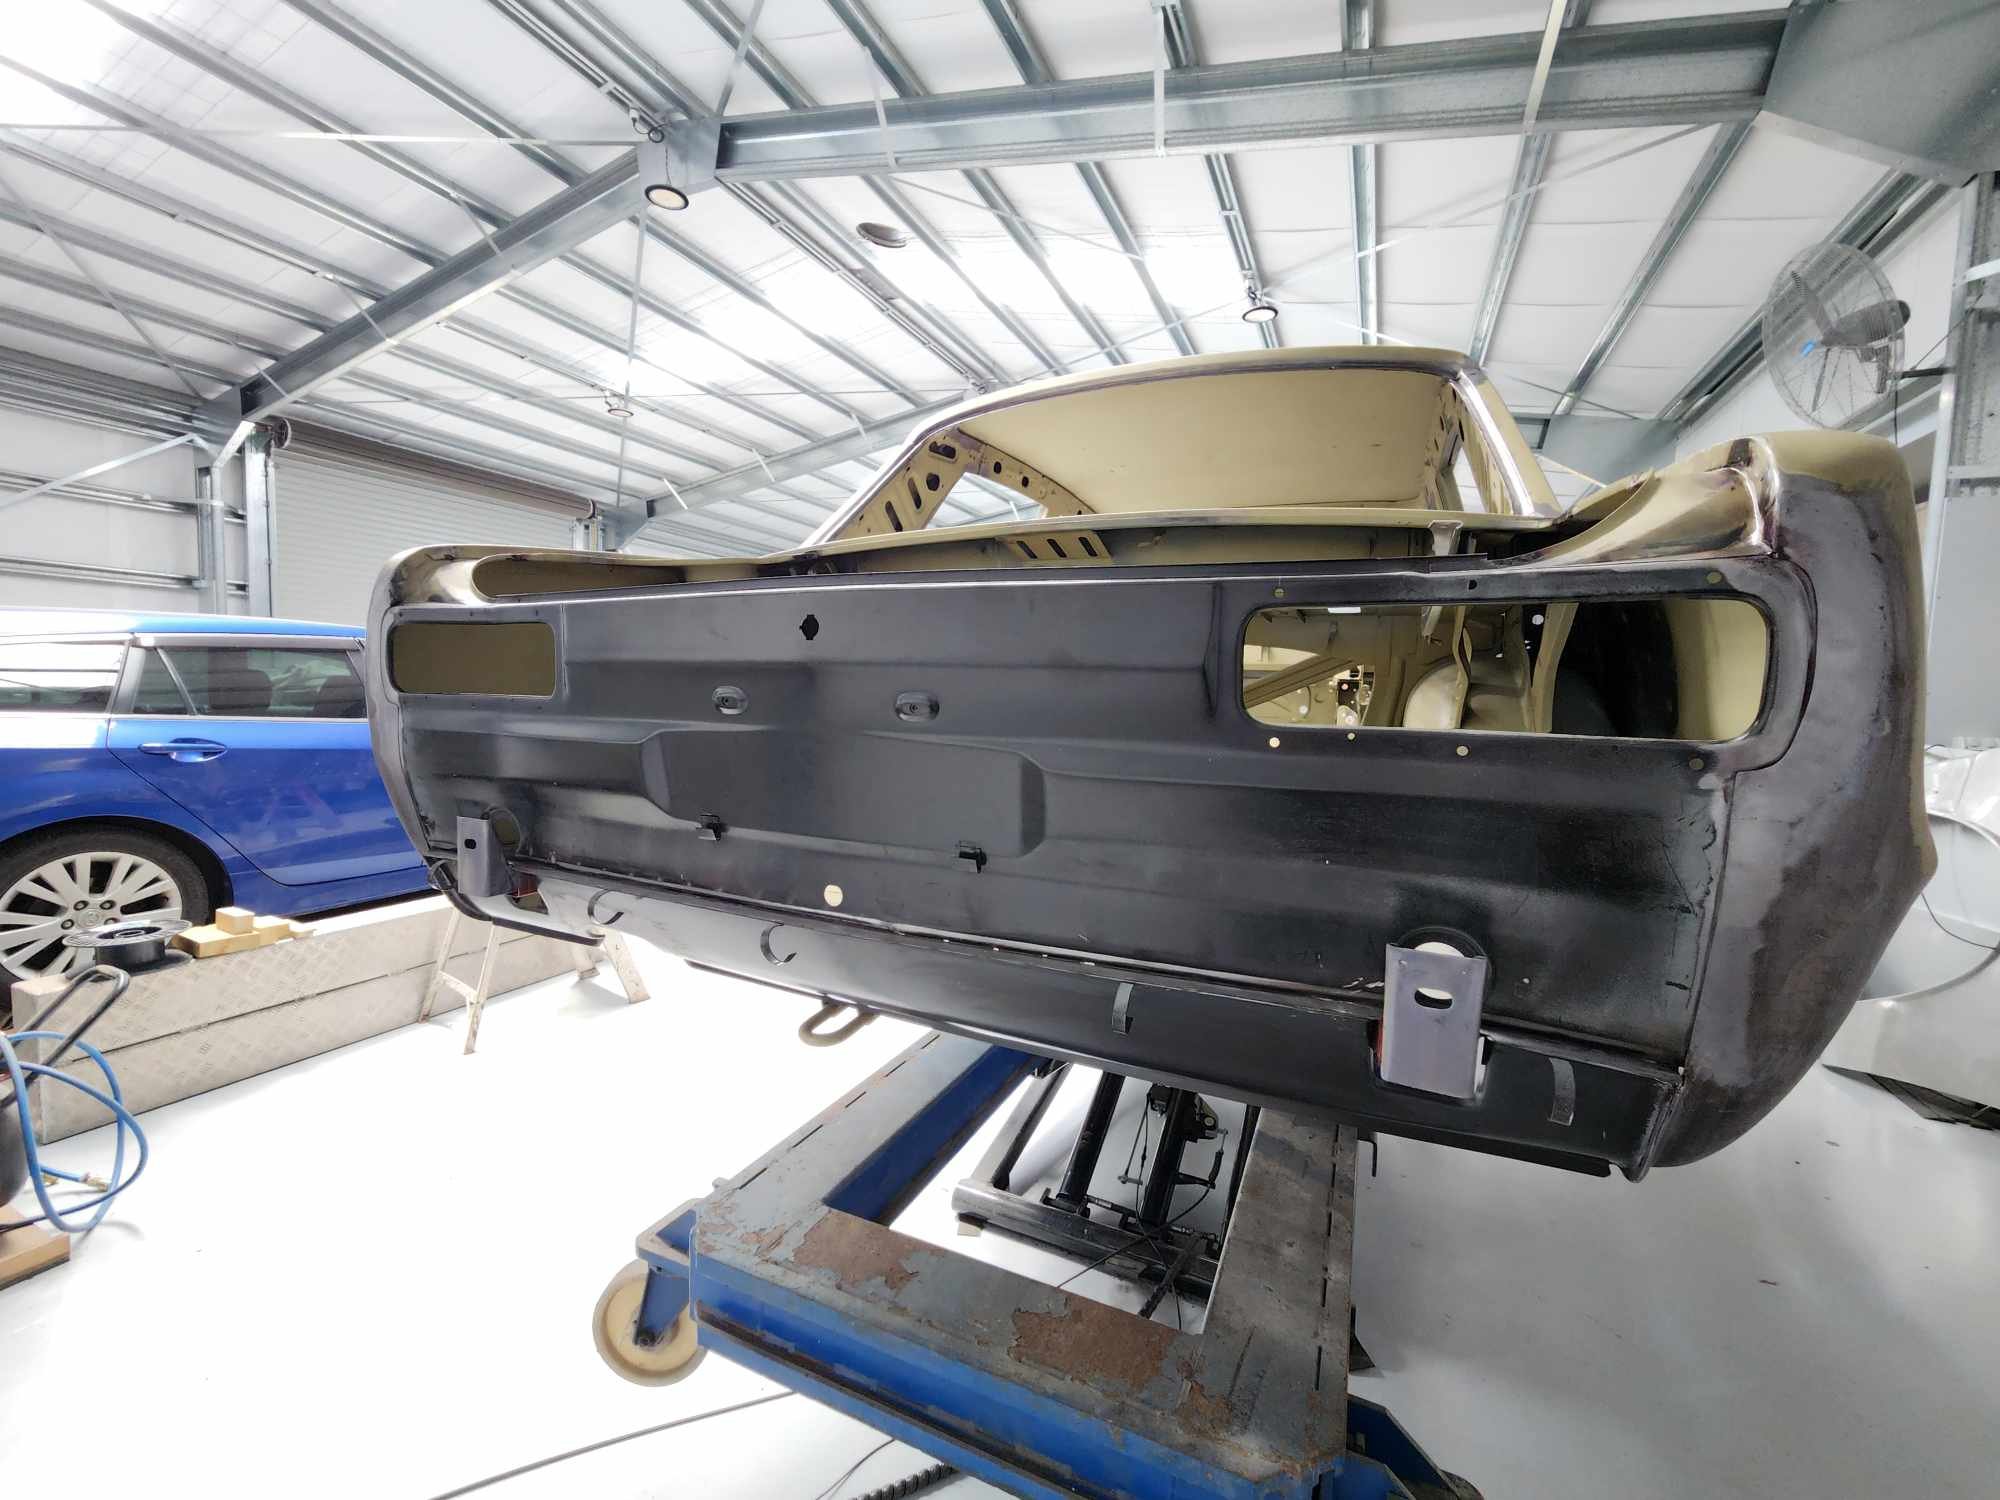
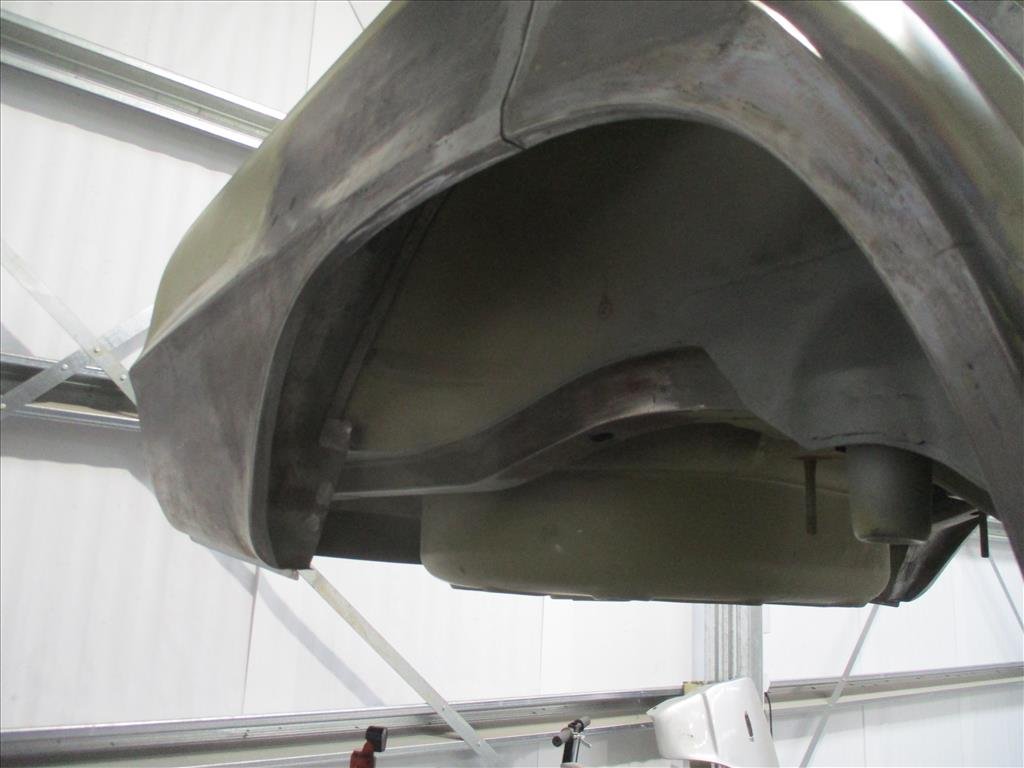
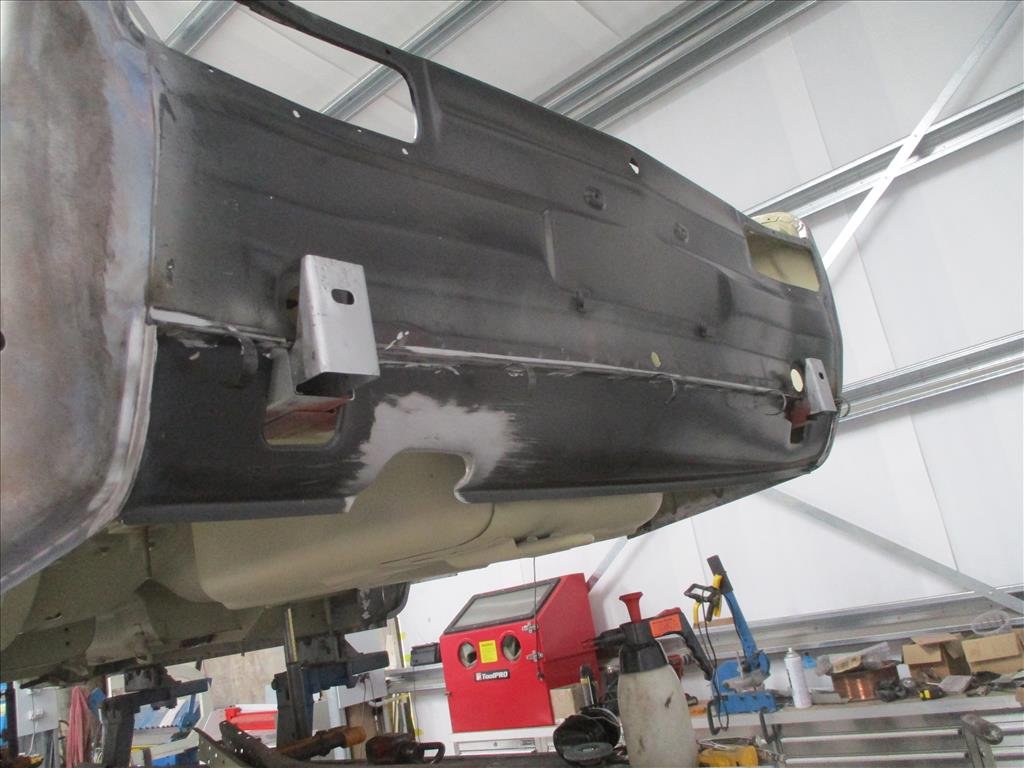
Another update from panel Barry, more awesome news. The rear has had the replacement back and bottom panel welded on, that's looking excellent. Never know with the repop parts how they'll fit but seems to be good. Rear arches are all done. Front is all aligned and the bumper mounts are welded on. Next up is to finish up the drip rails and drains and get the roof on. Also need to see why the bonnet is rattling and do some fix ups on the doors. Boot I think is OK and doesn't need anything extra (but I'm usually wrong).
- 79 replies
-
- 10
-
-
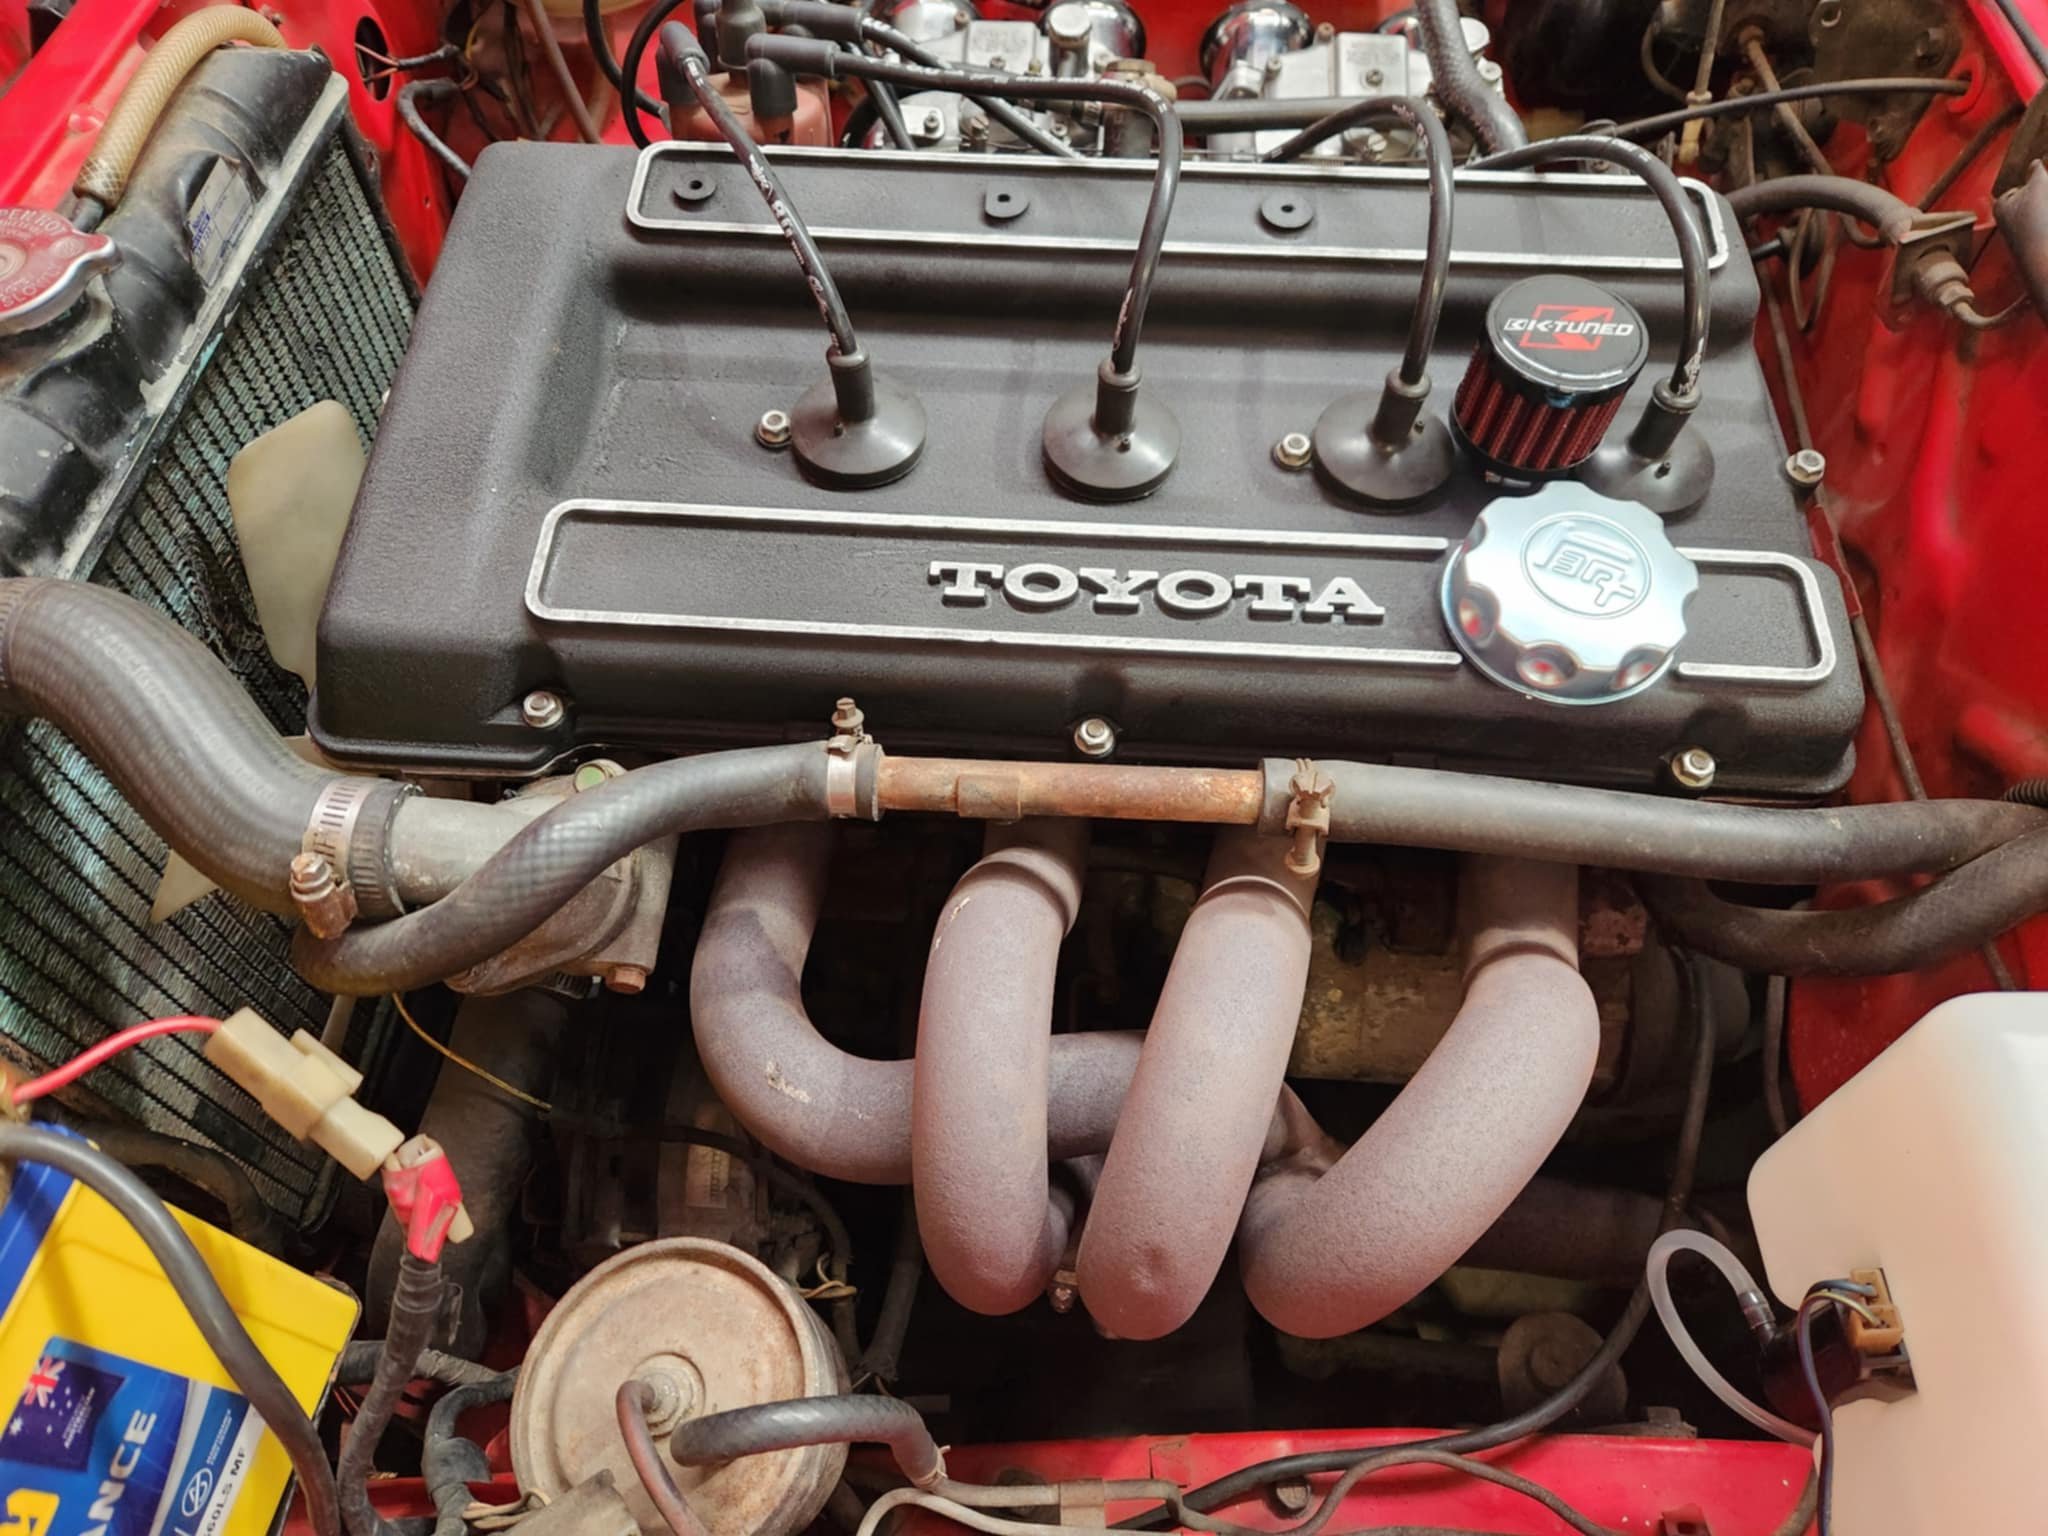
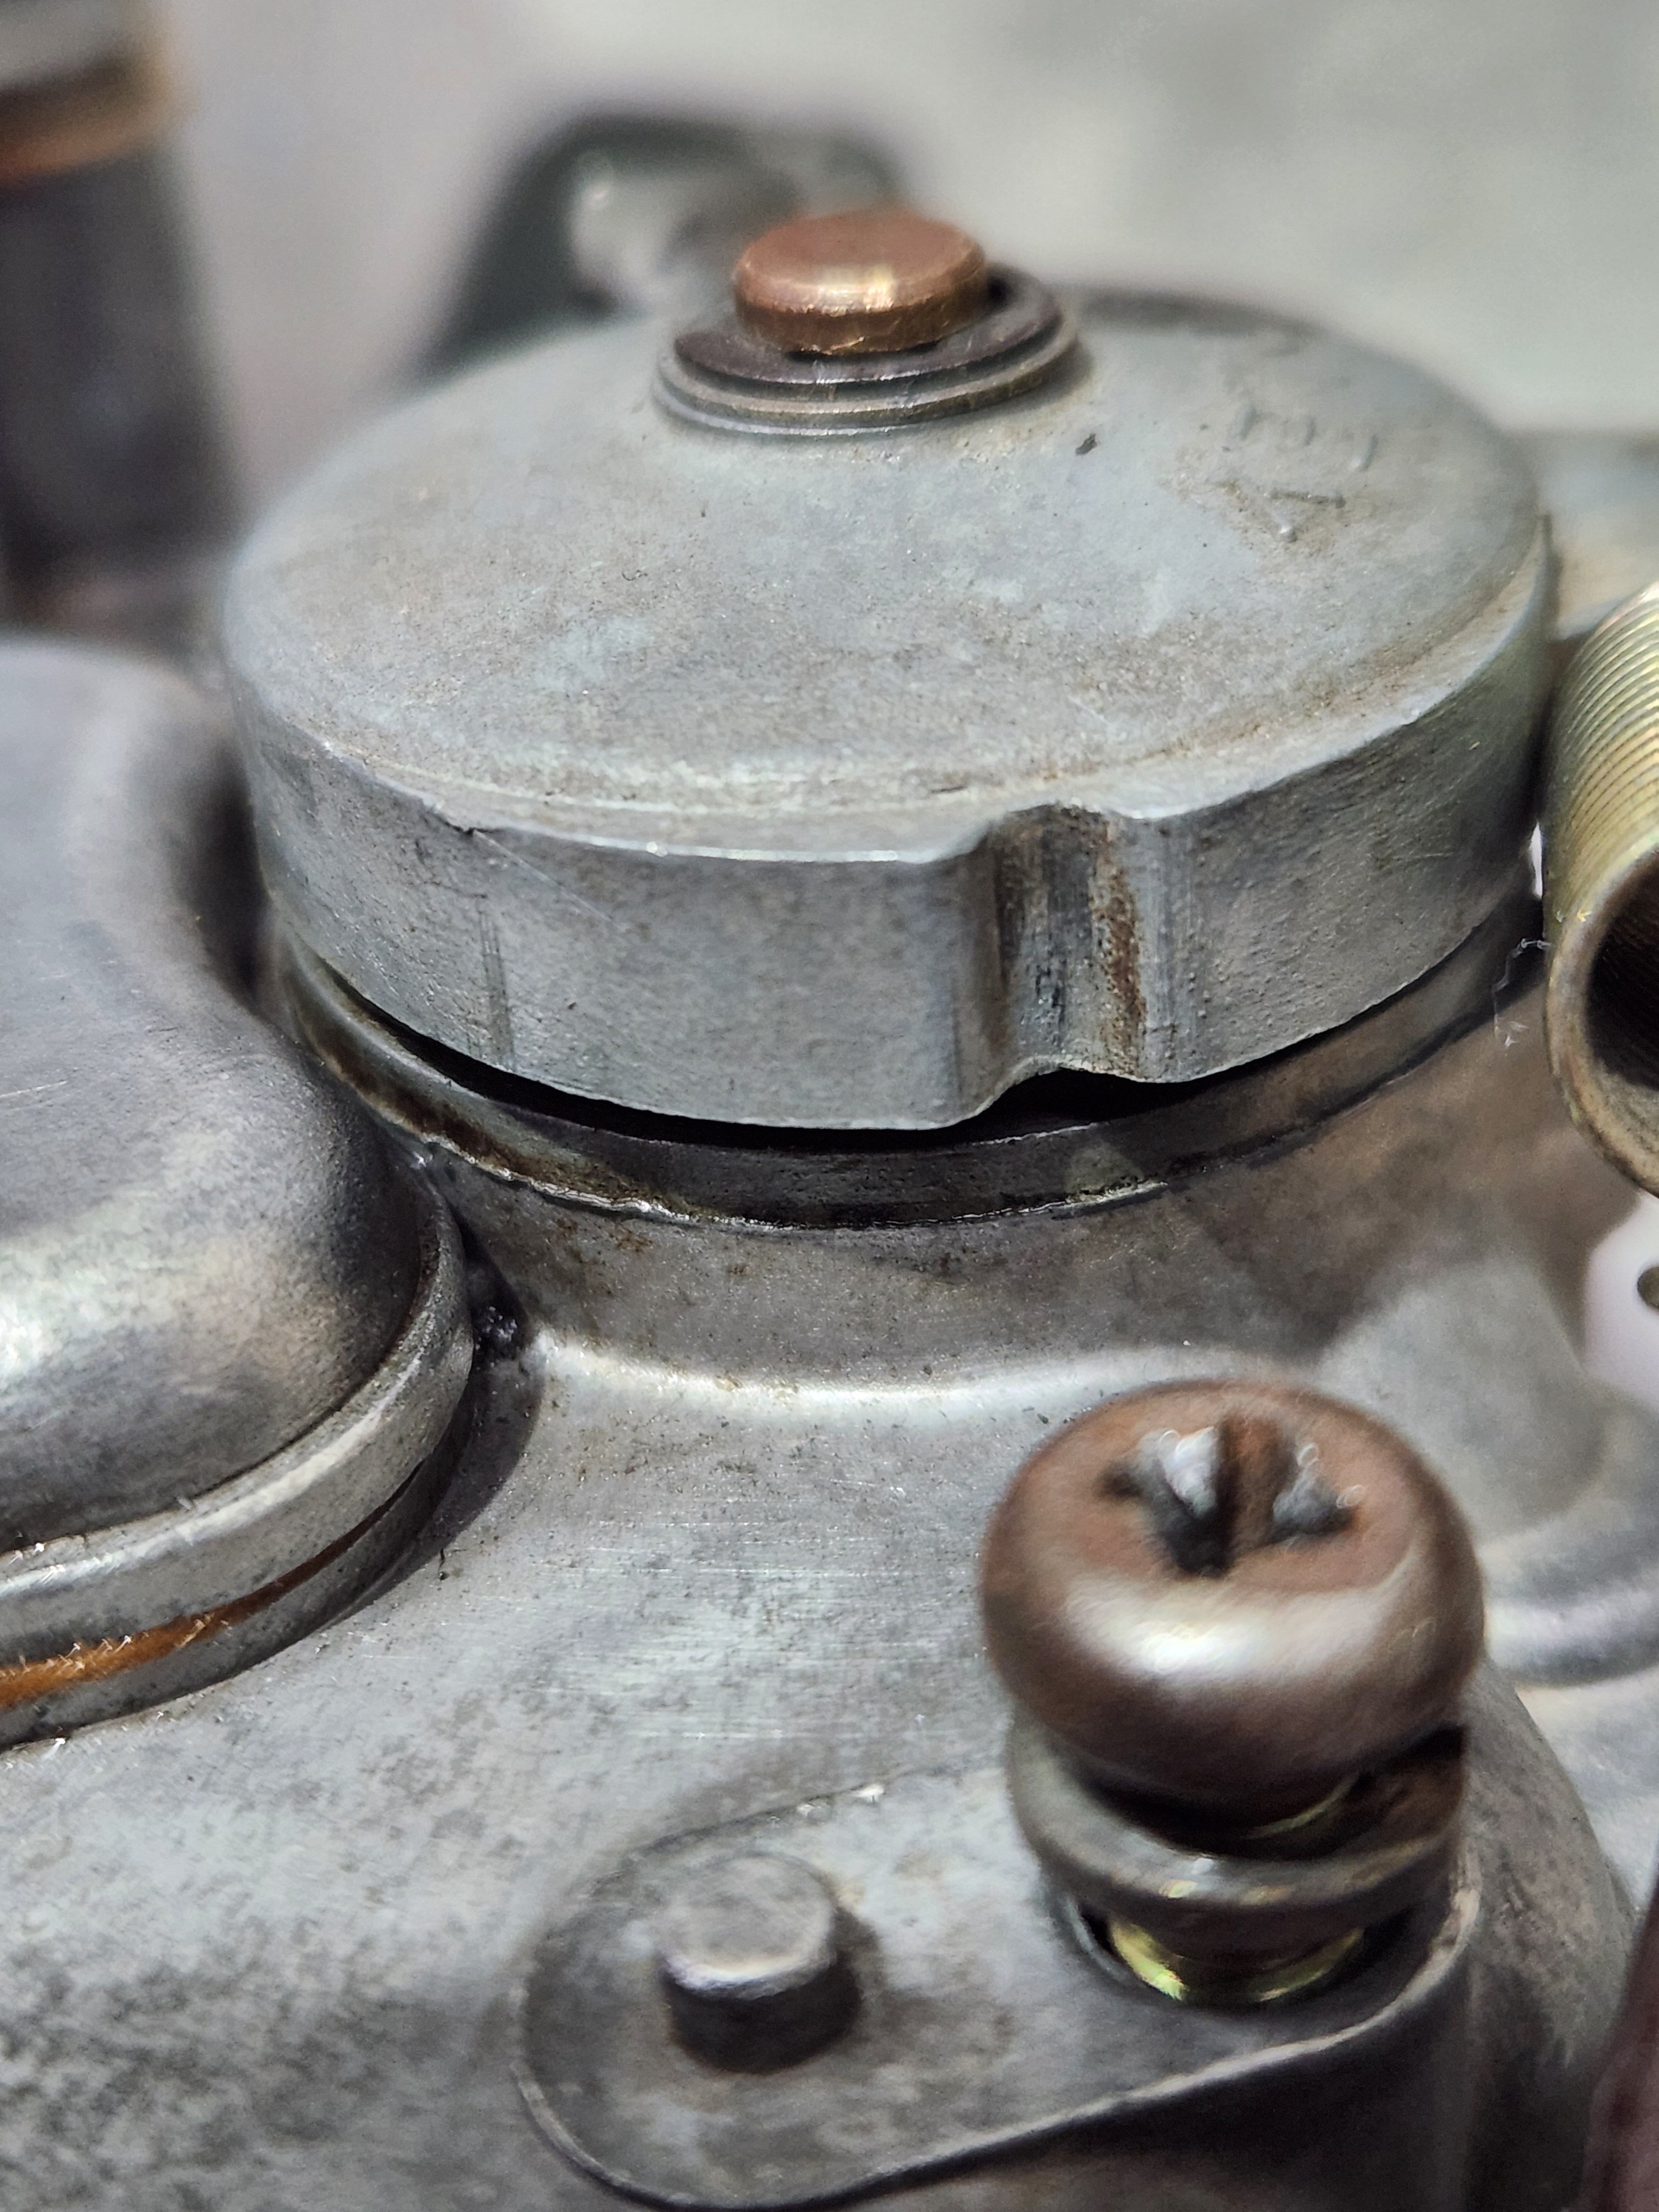
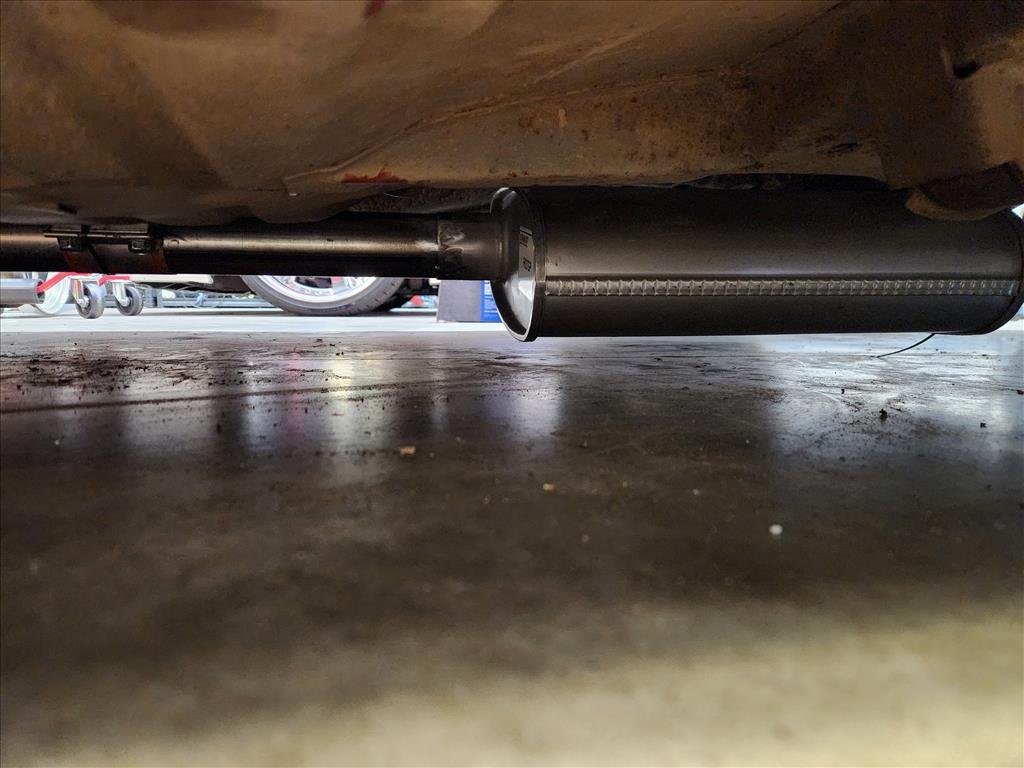
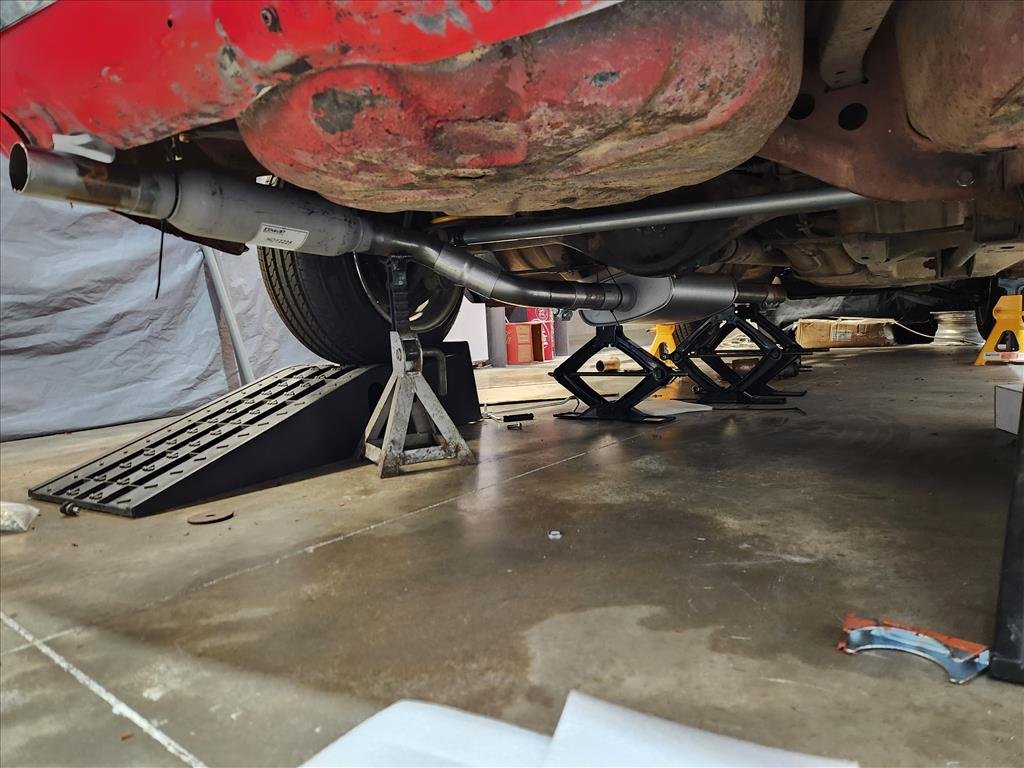
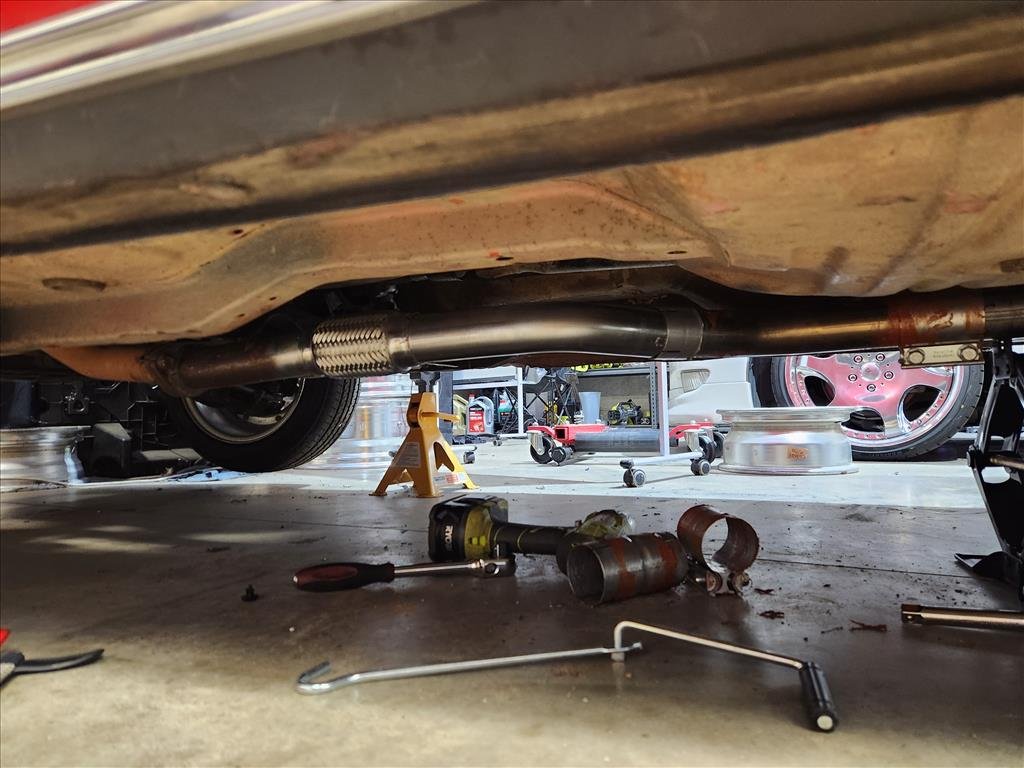
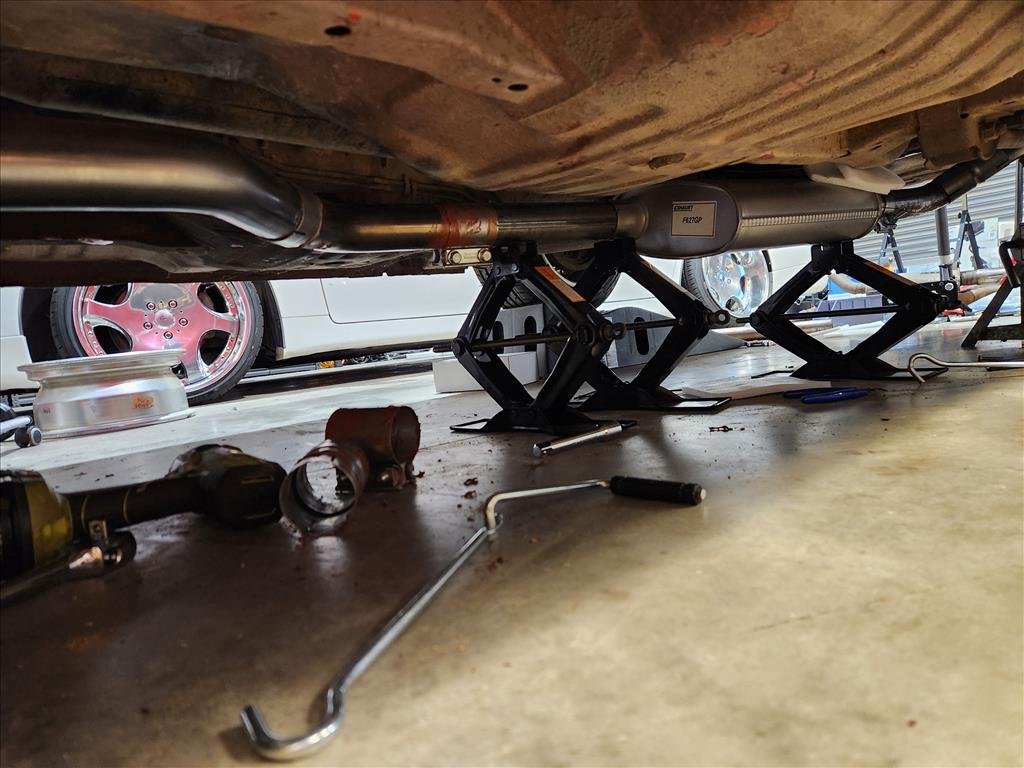
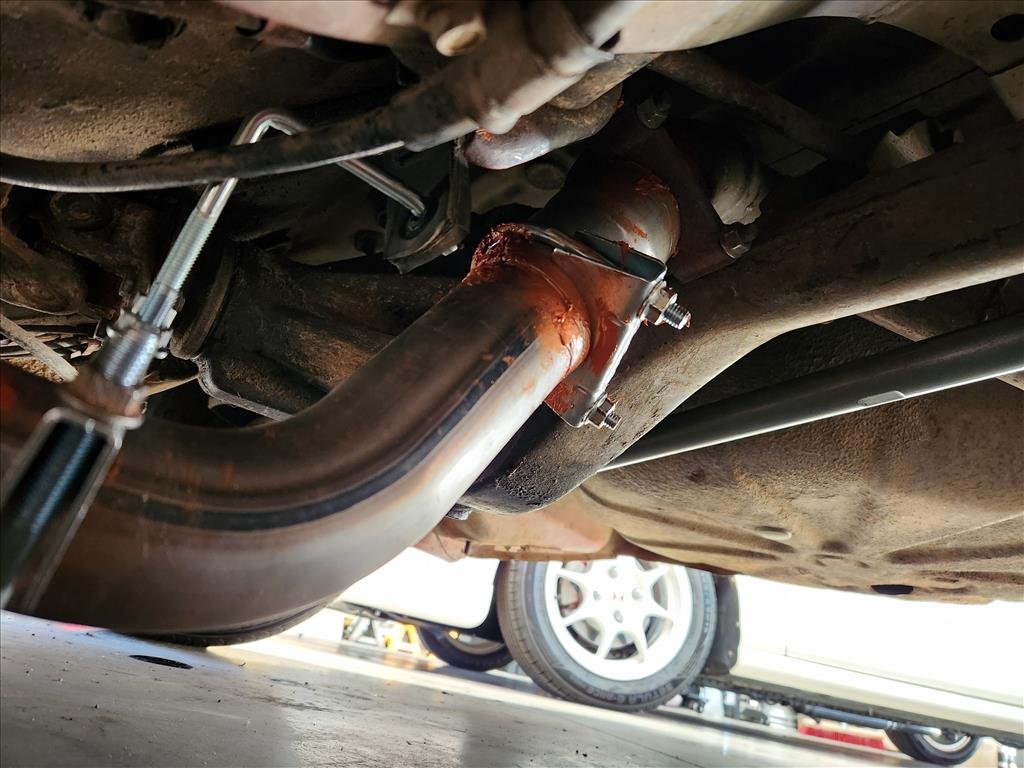
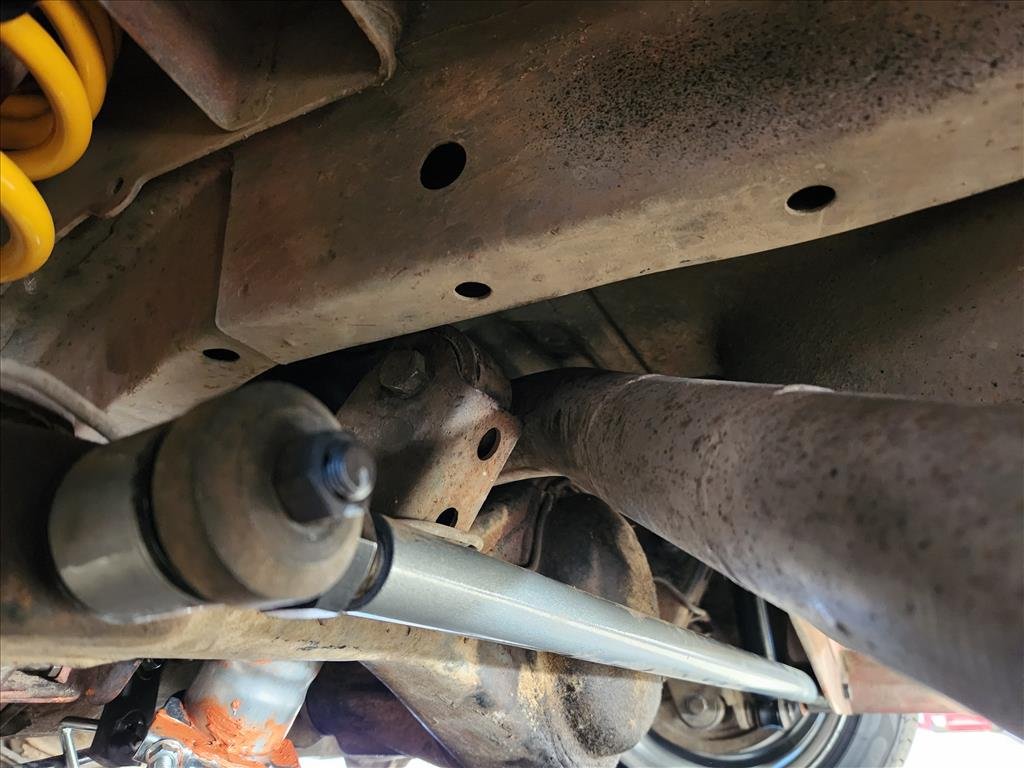
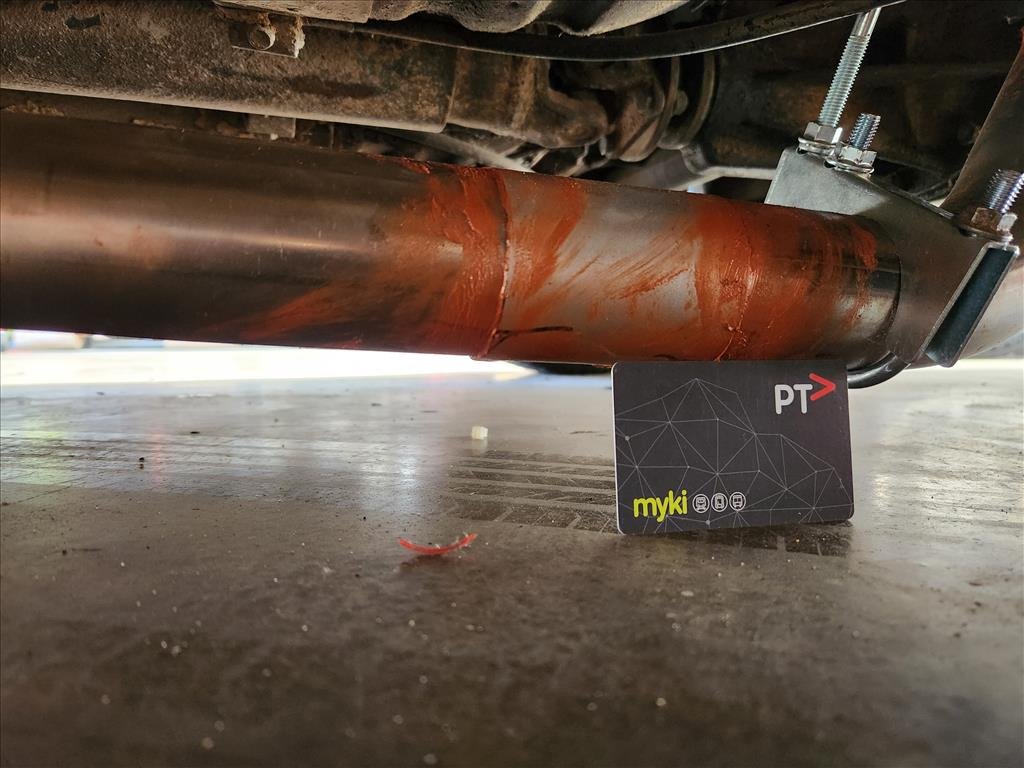
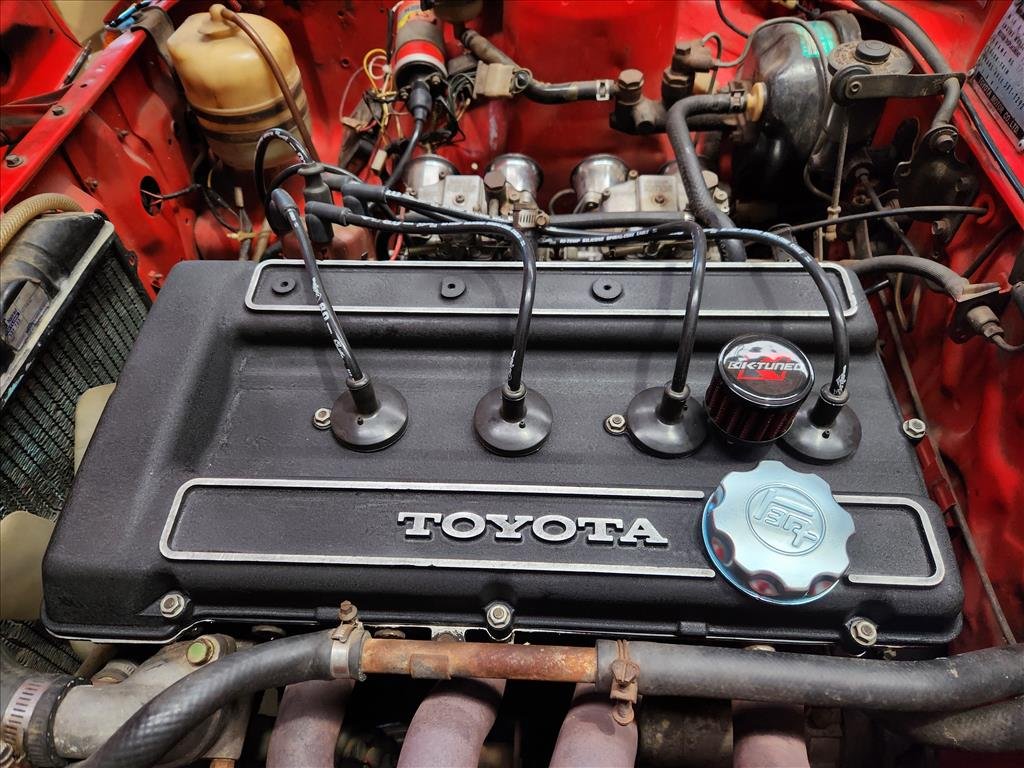
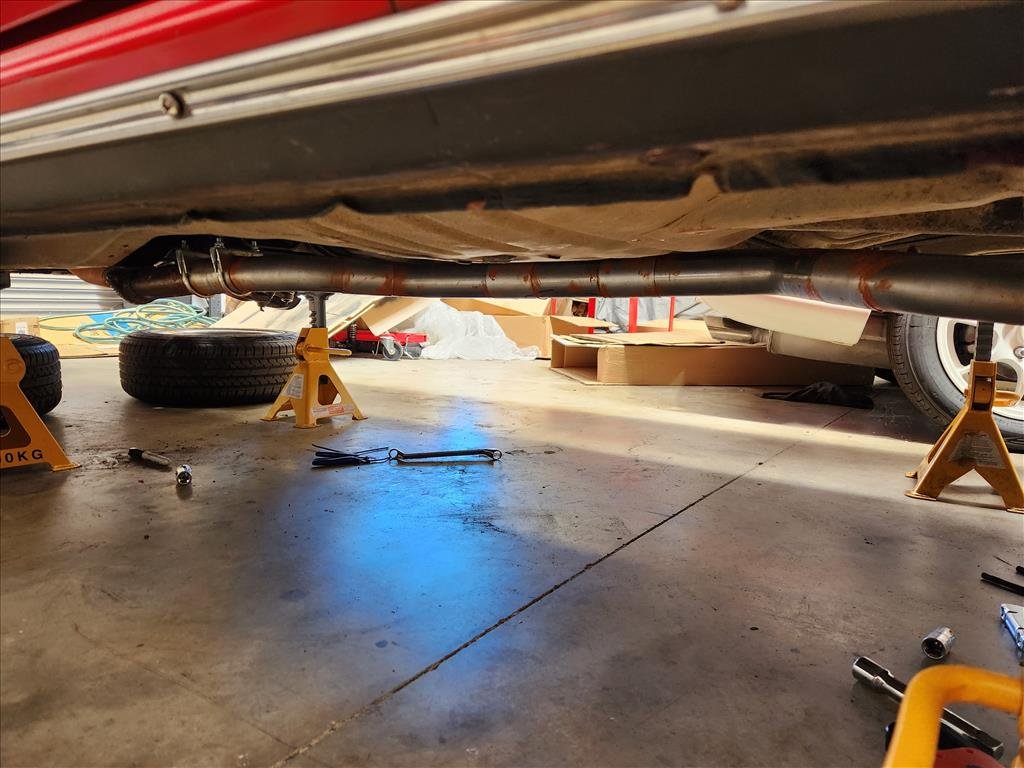
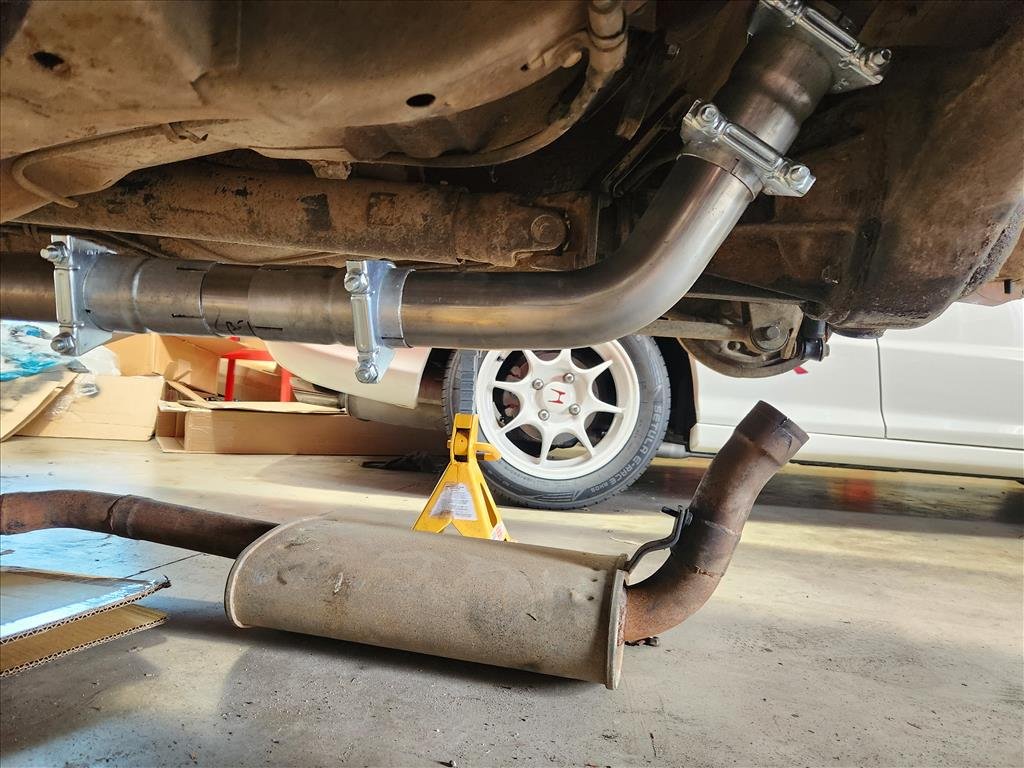
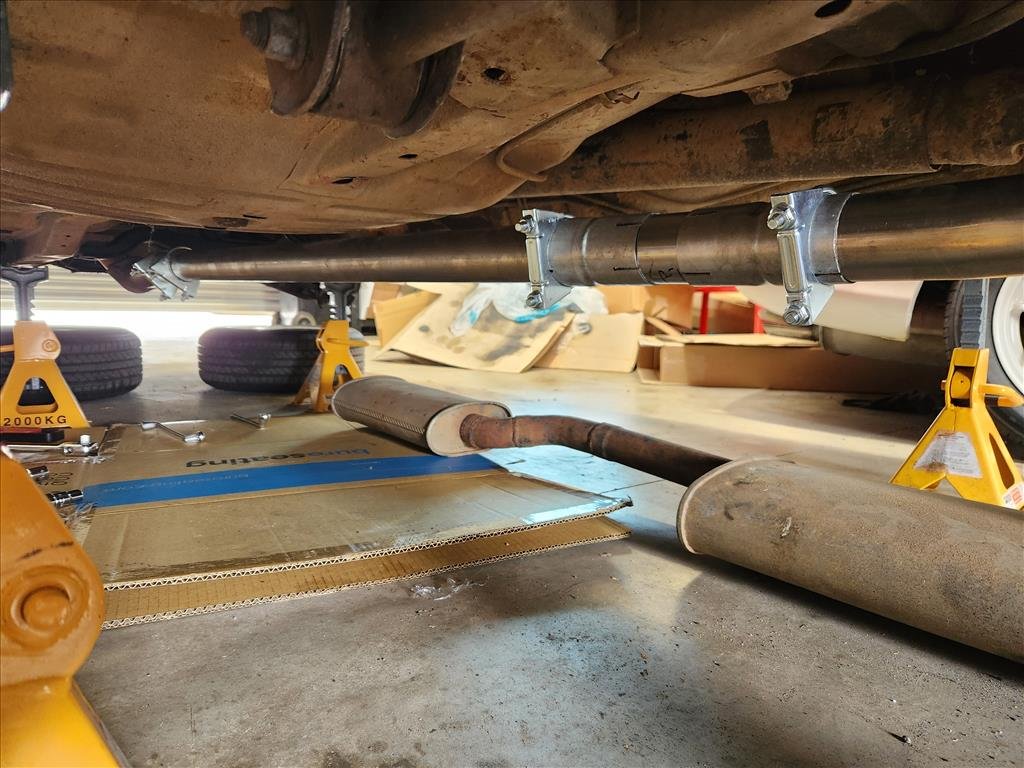
Well my exhaust making lesson comes to an end, but not the way I'd hoped. So after last time's episode about the pipe hitting the floor I decided to get some more bends and put it out the way in the path that the other exhaust took, just without the giant mufflers. So far so good. I also used Australia's entire supply of copper goop which generally worked ok except for the parts where it linked from the old and the new, seemed to leak most there. Turns out the solution was just add more goop. Then I ran the car a bit more on the stands after putting together a slightly better muffler hanging system. All was well so far; even got it to idle a bit better. Once I dropped the car down and.. well not so good. The portion that goes over the diff no longer goes over the diff but now into the diff, and as a result snapped the bolt holding my muffler on so it went on the piss. Additionally the car does not go low on the passenger side because it's stuck on the exhaust. I did also notice when looking at other people's exhausts that mine was routed weirdly over the diff so it's just a disaster all around. I did have an inkling that would happen but I wanted to use that route for two reasons. 1) Had that muffler so tried to reuse it and 2) research suggested people were not keen on the under diff due to the potential difficulty when jacking the car up. It just occurred to me I'm putting the exhaust together with the car already jacked up which means it's already at max droop so point 2 basically moot. There was some legality issue about it as well but clearly that's not really something I'm worried about. So after all this fucking about did I get anything out of it? Maybe 10mm more ground clearance and a lot of noise. I think what I'll do is just pull off that muffler and basically end it at the diff for the time being, just so I can move it around for some sweet instagram photos and then park it forever. I was going to try get this ready for a classic meet in early December but I'm actually going to be in Japan so no need to rush on it. Oh, one good thing though I found a brand new oil cap, so that's nice. Now that crusty water pipe and the K-Tuned filter does my nut in.
- 79 replies
-
- 11
-
-
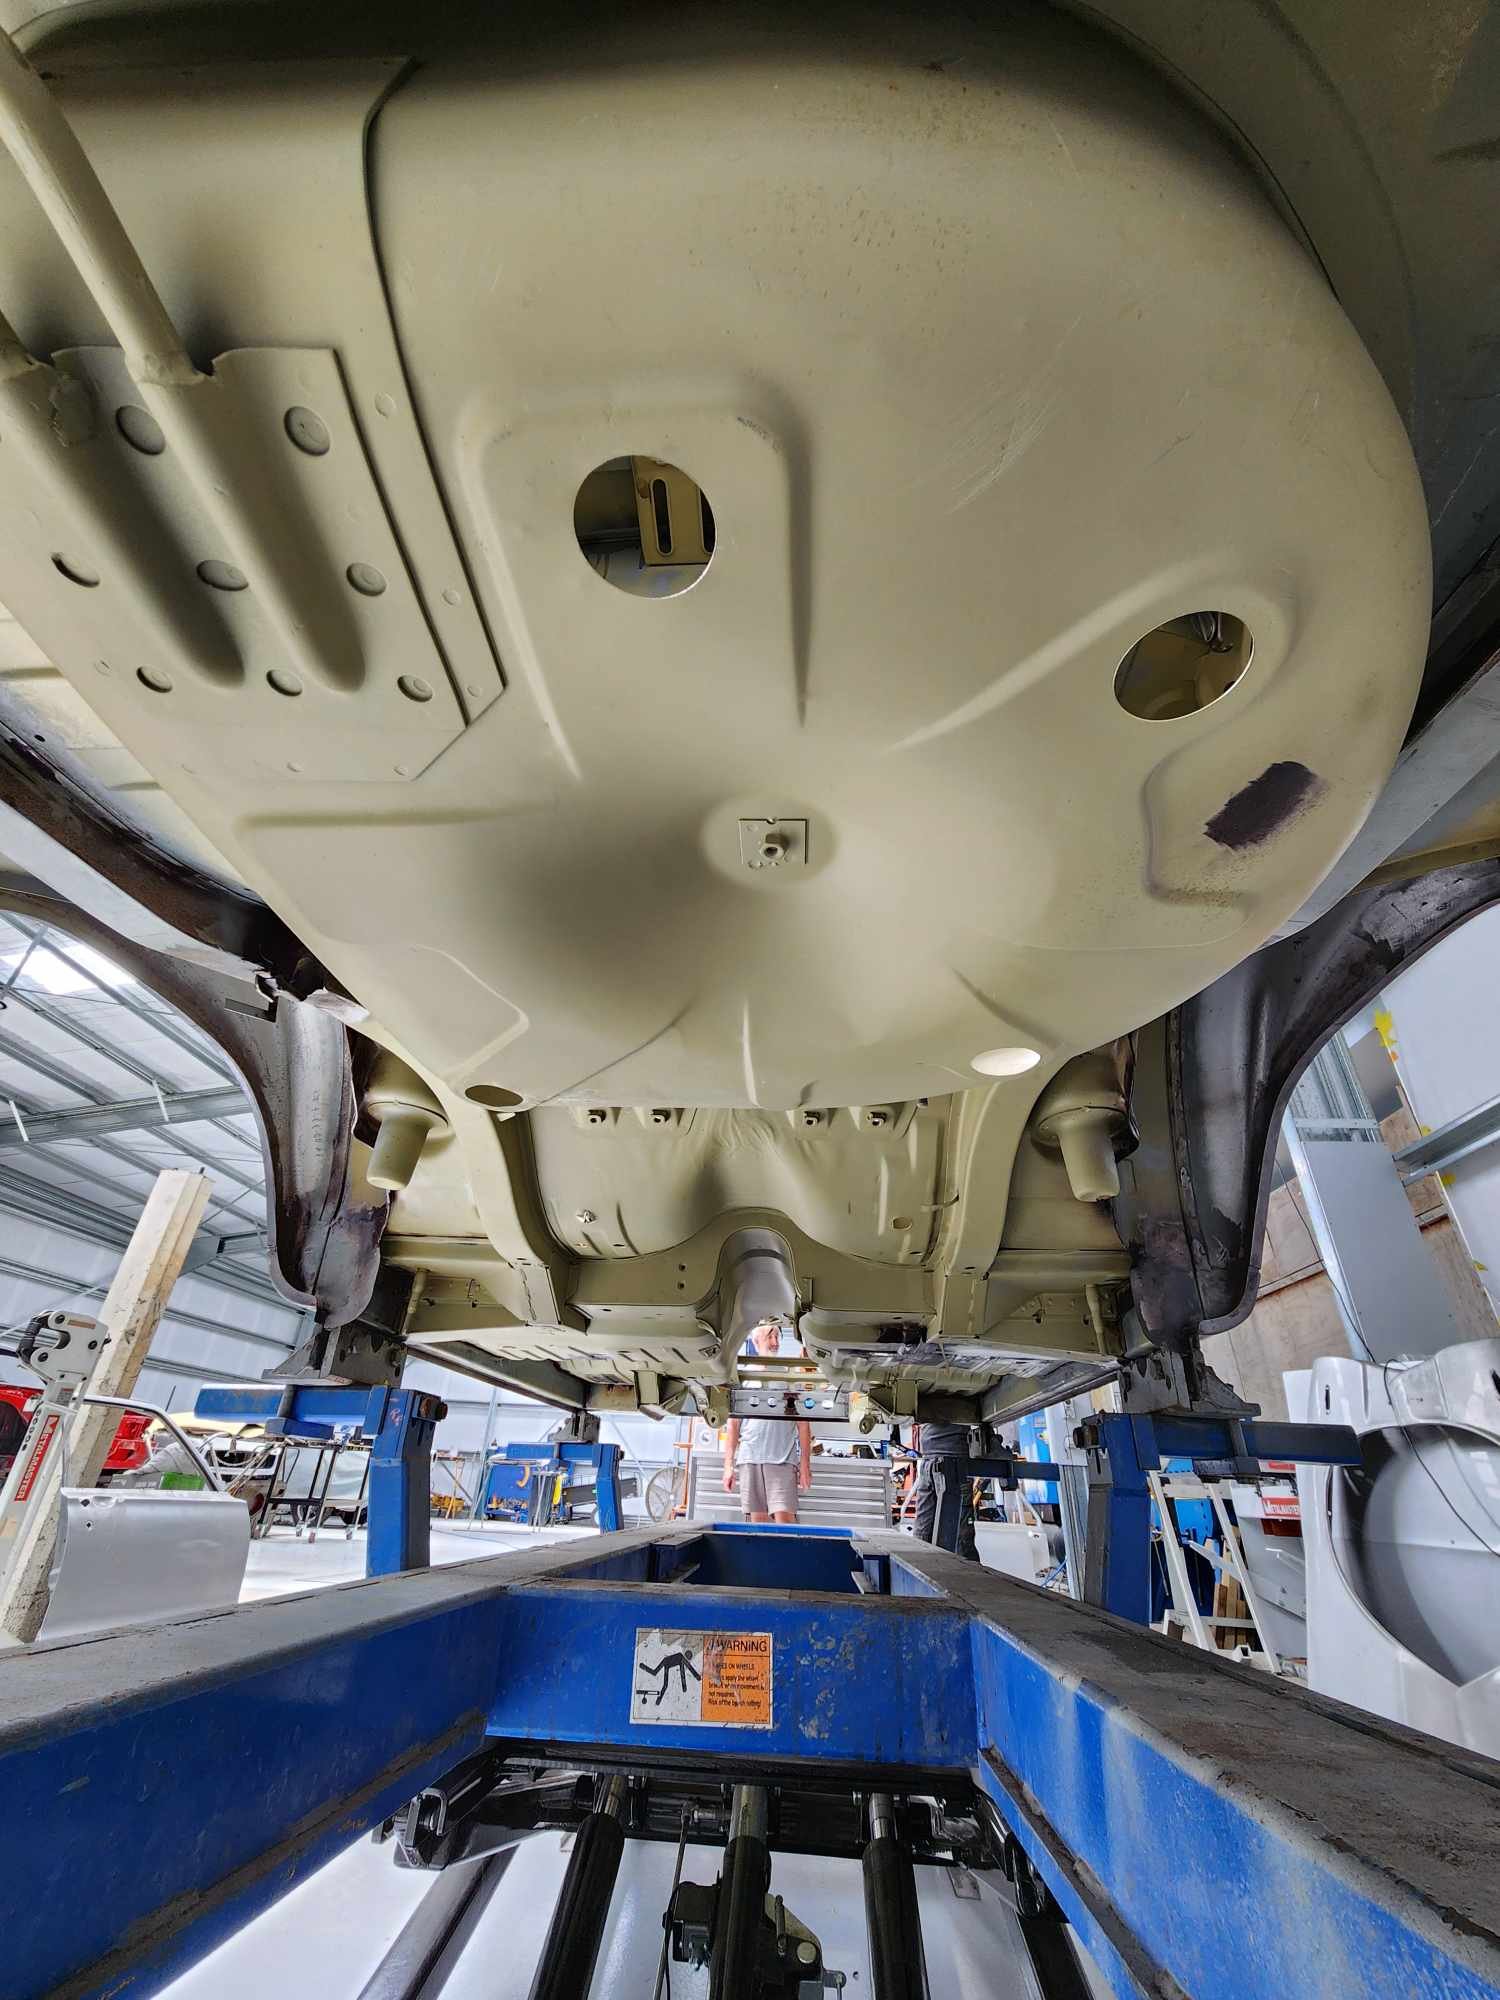
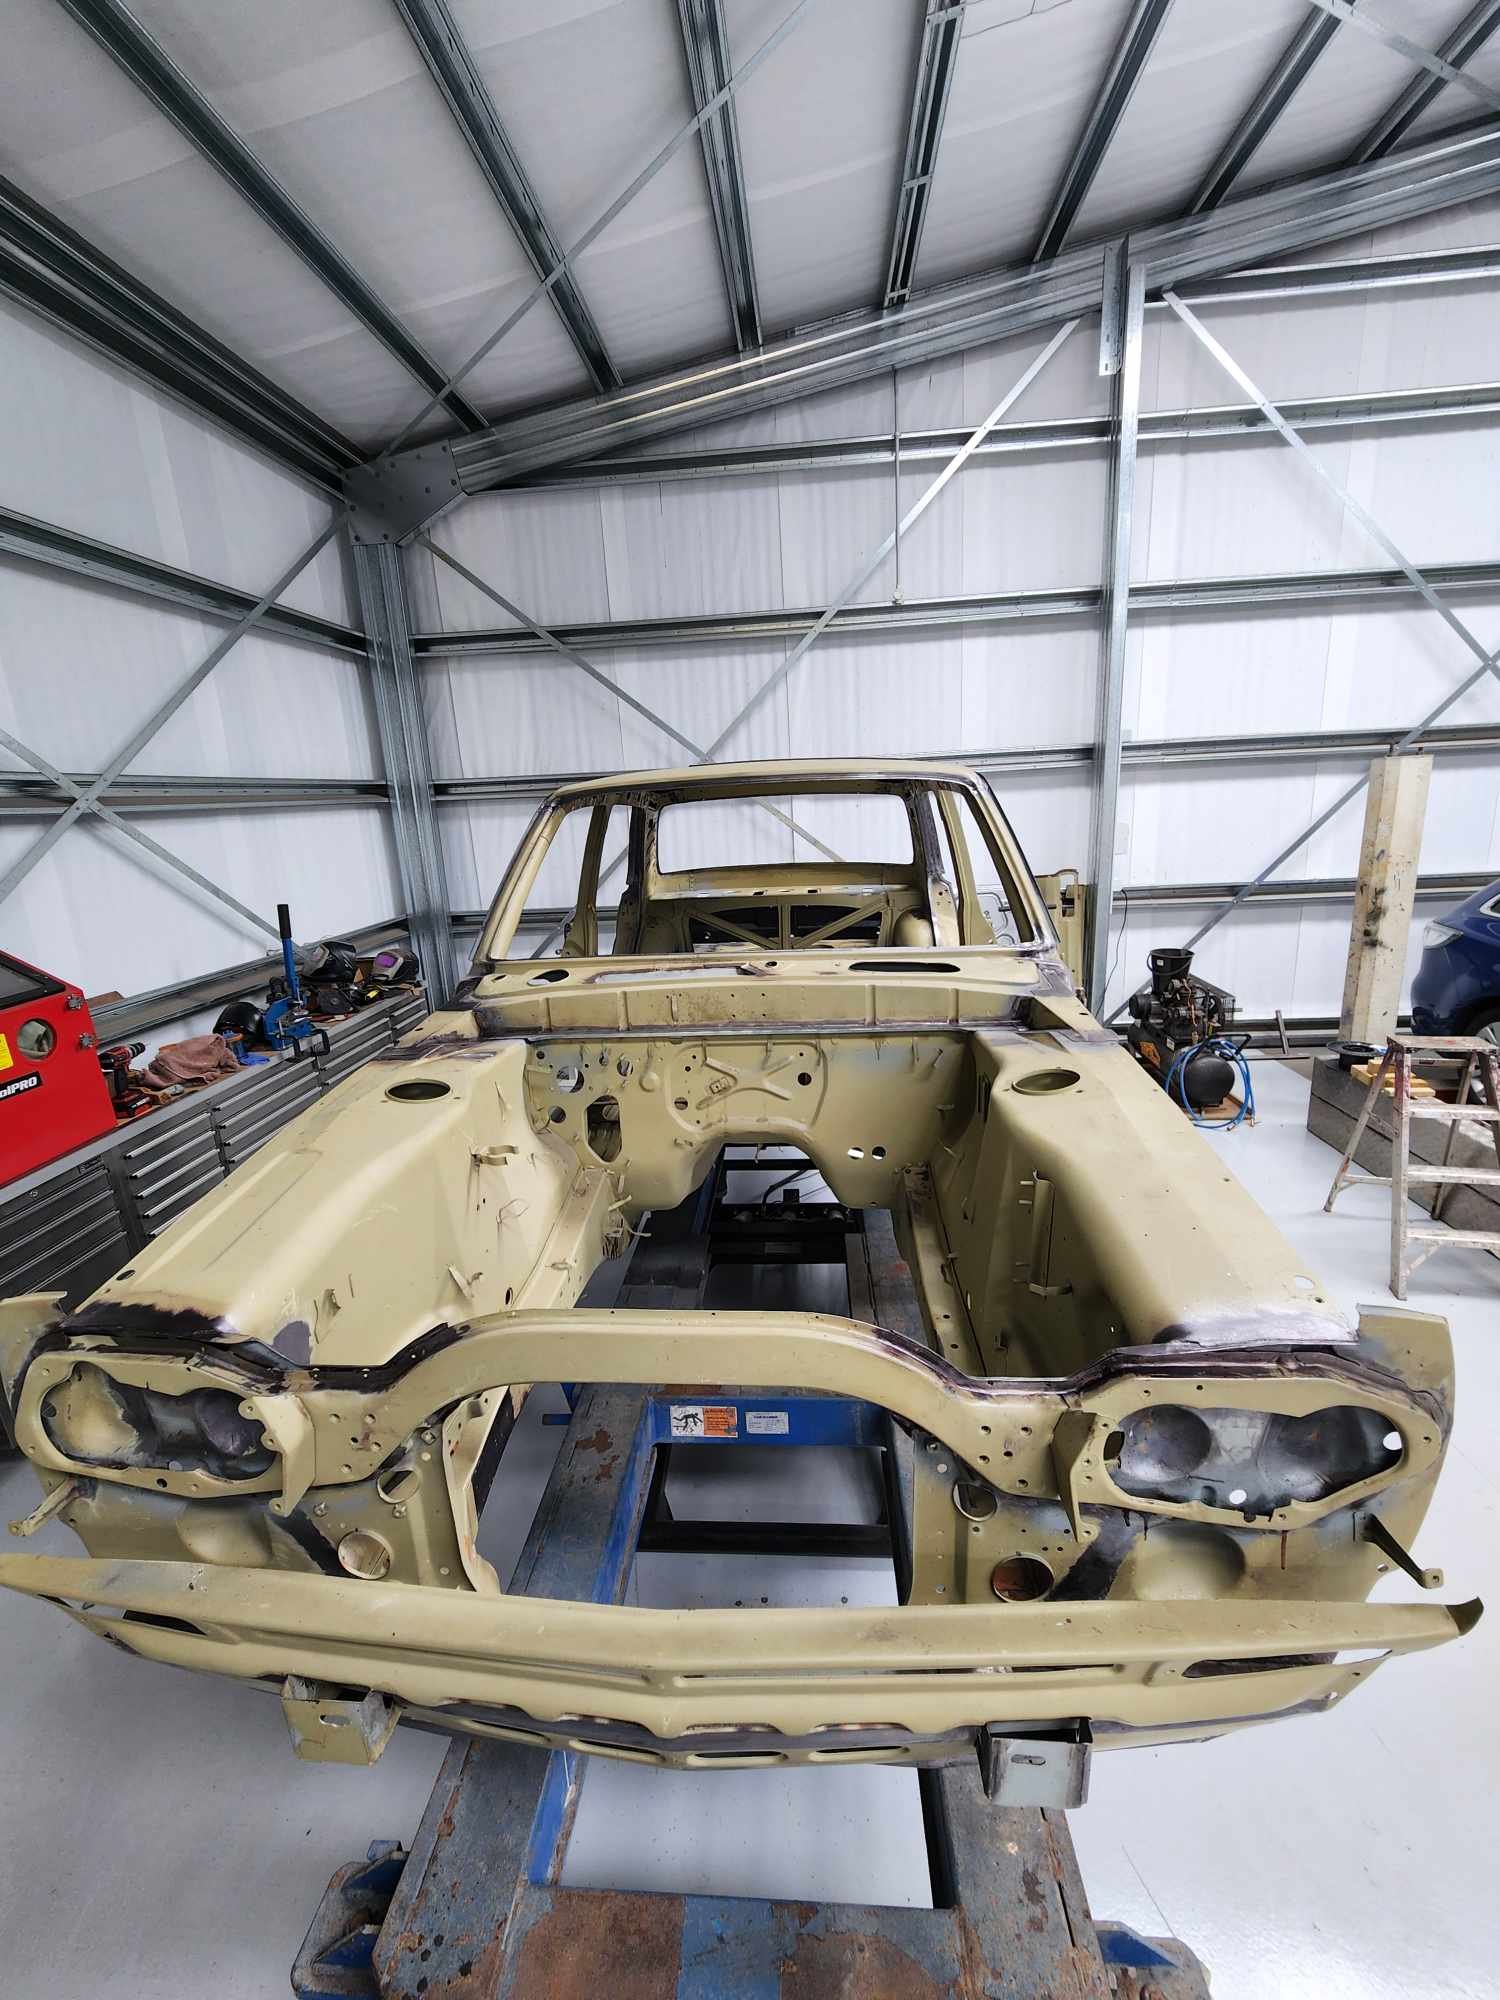
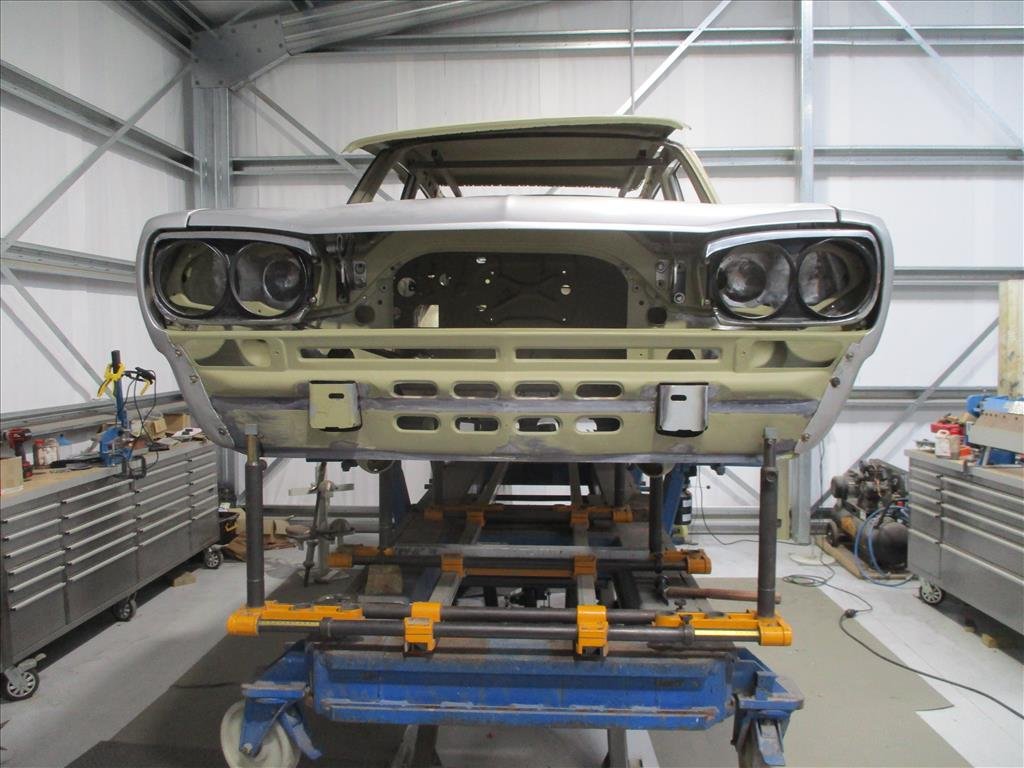
It has a face again! 5 years maybe since it's had these bits fitted up, exciting! Great news is the car has measured up nicely with the engine cradle fitting up perfectly so panel Barry got his measurements done well; as expected. Once again thanks to Jon @ Strange Workshop for facilitating the delivery of those bits needed. Now the big weld up is on, he's started on the rear area plugging up lots of the drill holes, it's gonna be a long and tedious process. In between doing the rear arches and that section he's also been starting on prepping the roof panels and underneath all that for sticking back together. He said he's just finished up with a MK1 Escort race car which was taking away time from mine (which is fine, I'm not in a rush) but reckons will be able to smash a heap of welding out on it in the coming weeks.
- 79 replies
-
- 14
-
-
Just been tinkering away with the exhaust for the Celica, collecting bits and pieces and making up some kind of a plan. Today I finally committed and cut the front portion of the exhaust that was on there so I could reuse the flanged bit to join on my new exhaust. In my plan to straight pipe the centre portion I didn't take into consideration the floor being in the way. Might still work but I've ordered some 45s to bypass it down near the driveshaft which is where it was going with the mufflers, this would also probably allow me to run it even more tucked up. I have to work out a better way to hang the muffler because it's a bit shit at the moment, needs some kind of interesting metal bending to be done, think I have enough bits to make something work by now but I'd like to get at least the rest completed without leaks. It leaks basically at every seal hahah. That said, I haven't actually got enough clamps for all the joins so I've ordered more again, and some different style ones as well as some copper rtv grease. Then after that I have to work out why it runs so shit and sounds really lumpy at idle. Goes good on song still but not happy with the idle and low throttle. I did try the old spray brake cleaner while it's running to listen for engine change but it didn't seem to change. I can see there's heaps of fuel seeping out from various seals on the carbs which means air is no doubt getting in as well so they'll be my next task after I finish barrying up this exhaust.
-
Did you wash and scrub it down with normal water straight after? I hear sometimes that can happen.
-
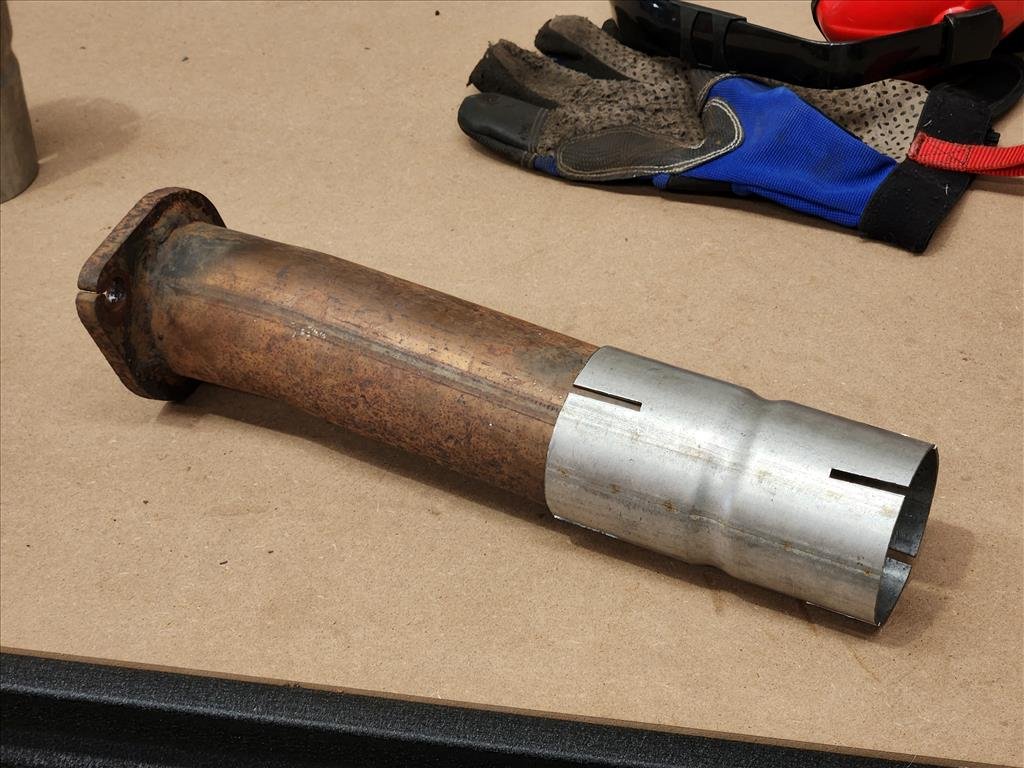
So I only really had one task for the Celica today and that was get the exhaust off. As you would have seen in earlier posts it's a problem now that those huge mufflers are literally about 2cm from the ground. I picked up 1m of 2.25" pipe just to see how that would fit into the equation as I was thinking OK I could replace one of the mufflers at least with that. I was fully prepared to cut this exhaust up as at a cursory glance it looked to be entirely one piece but once I got under the car I found a slip join hidden above the axle which made life considerably easier. Once out I could see what I was dealing with and interestingly parts of the exhaust are 60mm, I was expecting smaller. Kind of moot seeing as there are so many joins and size changes anyway. My initial plan of removing just one muffler looked like it wouldn't really work due to some angles however in a stroke of luck if I removed both of them and run a pipe across it looks like it might just work. I will try to reuse the muffler that's on there as I don't entirely hate it and it already has a somewhat complicated bend but I'll try give it a bit of a spruce up. Then I'll have to see what kind of bend I can use to make it match to the straight pipe up to the front. It looks like the exhaust takes the route it does due to the mufflers so if the mufflers are removed then I'm thinking I can just go straight across and it may be OK.
-
Today's the first time I've had it outside since I started messing around with the front suspension. I only drove it around the estate parking because not convinced it can actually get out of the driveway as it sits. This is just getting out of my unit. I will say the front suspension is bouncy as fuck, my titties were goin flying everywhere. Might have to tone down the spring a bit more. Love being able to even out the height though, very useful. Didn't notice any immediate rubbing at that height but I didn't take it on the road. I did get some measuring done and have confirmed the new lips for front pair of Longchamps so now they'll be built to match the rears. I think what I'll try to do is cut this muffler out and run a straight pipe slightly larger and clamp it either end like slip joints. See if that works or not. I figure the exhaust can't really get any worse than it is at the moment; looks like 30 muffler shop Barrys have fingered this one. Next problem I have is trying to get it to idle properly. I reckon these carbs are so cooked that air is leaking in from everywhere so it pretty much only idles when it's on choke. I get some new gaskets and give refreshing them sometime in the future. Good news is the gas pedal works well but I think I'll install that other spring back in.
-
I'm not a fan of floor mounted pedals at all. I can kind of see why they exist in luxury car situations as the idea is it generally smooths out the pedal movement for a nicer acceleration. Why they put it in Celica I'll not know as this is not really marketed as a grand touring-type cruiser, or is it? I don't know, maybe it was the fashion at the time. I read some years ago maybe on Toymods about how someone used an RA40 Celica pedal in their TA22 and I haven't stopped thinking about it since. Perhaps it was that supermoon but while I was having lunch yesterday I just had a quick google and amazingly on Ebay an RA40 pedal was for sale just up the road from my shop. Hit buy now and old mate dropped it off this morning. Here you can see my original on the left and the RA40 on the right. The other reason for me wanting to change it out is the original one was broken anyway, the pedal pad mounting bits on the back were all busted so actually the pedal would slip under the hanger when I floored it, not ideal. First thing I did was just bolt it into the original holes because that all lined up. As you can see the pedal is too close to the brake, this I knew about but was curious anyway. There were suggestions about heating and bending the pedal stalk? (lets just call it that) so that the pedal was further to the right but I didn't have any way to heat it. I did give it 20 fuckn whacks but probably made it worse actually. So then I just bolted the top up and rotated it until it was in a position that looked like it would work; marked and drilled. Much better placement although you can see the pedal now looks a bit weird but I assure you it performs well. The linkage at the top I just had to rotate it around so the ball went in the other side. However I did not mount it so the spring on the pedal stalk was being utilised so I may experiment with that too but the floor mounted one didn't have an additional resistance spring. Problem is now maybe it performs too well, which leads back to the original point about the smoothing of the throttle. It's ultra responsive now! I have to have a look to see about adjusting the rods perhaps because I don't think the range of movement will be correct now with the different pedal but its nice not to have that floor mounted garbage anymore.
-
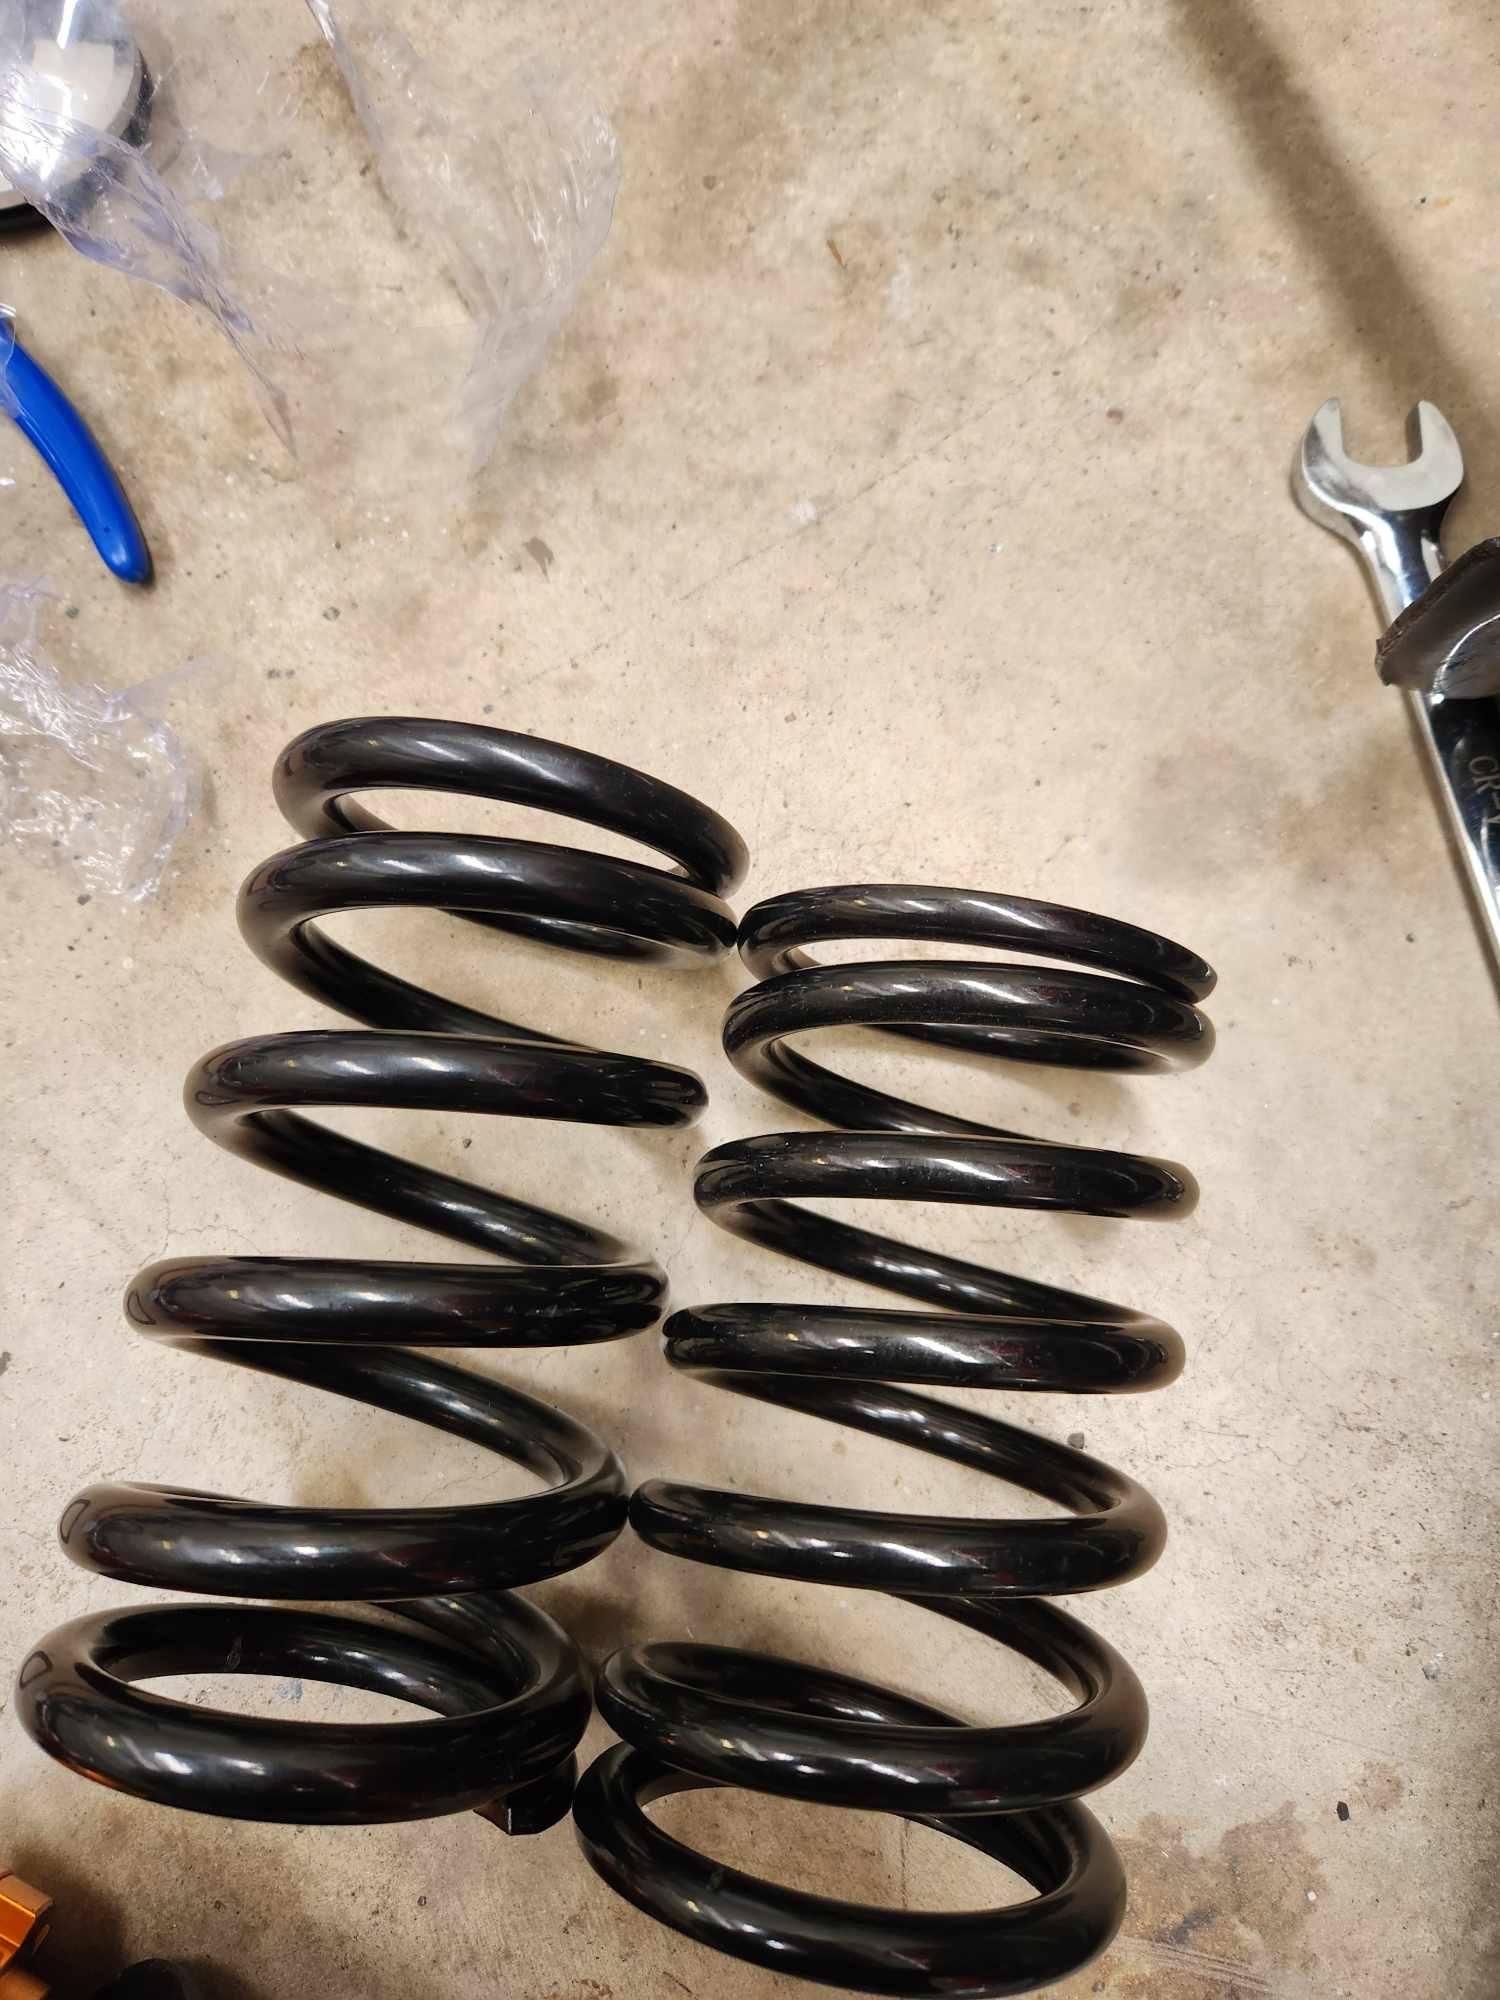
My experiment has been successful! As expected (after I got in touch with the company that made the coilover sleeves) the front spring rate was 9kg, and rear 4kg so I've swapped out the front and rear springs. You can see there is a height difference as well as thinner spring. Additionally I removed the bottom collar from the adjuster as it wasn't doing anything anyway. I'm getting quite fast at removing the suspension. Worked a charm. There is some spring in the spring now and it's at an acceptable height. This is wound all the way down as well, I think I need to wind up the driver side maybe 3-4mm to even it out but it's hard to know because the guards are probably both bent so difficult to compare. Thing is now is the exhaust is an actual problem. That stupid middle muffler is only around an inch from the ground now so I'll have to actually do something about it. At least I can wind the front up to drive it to an exhaust shop now.
-
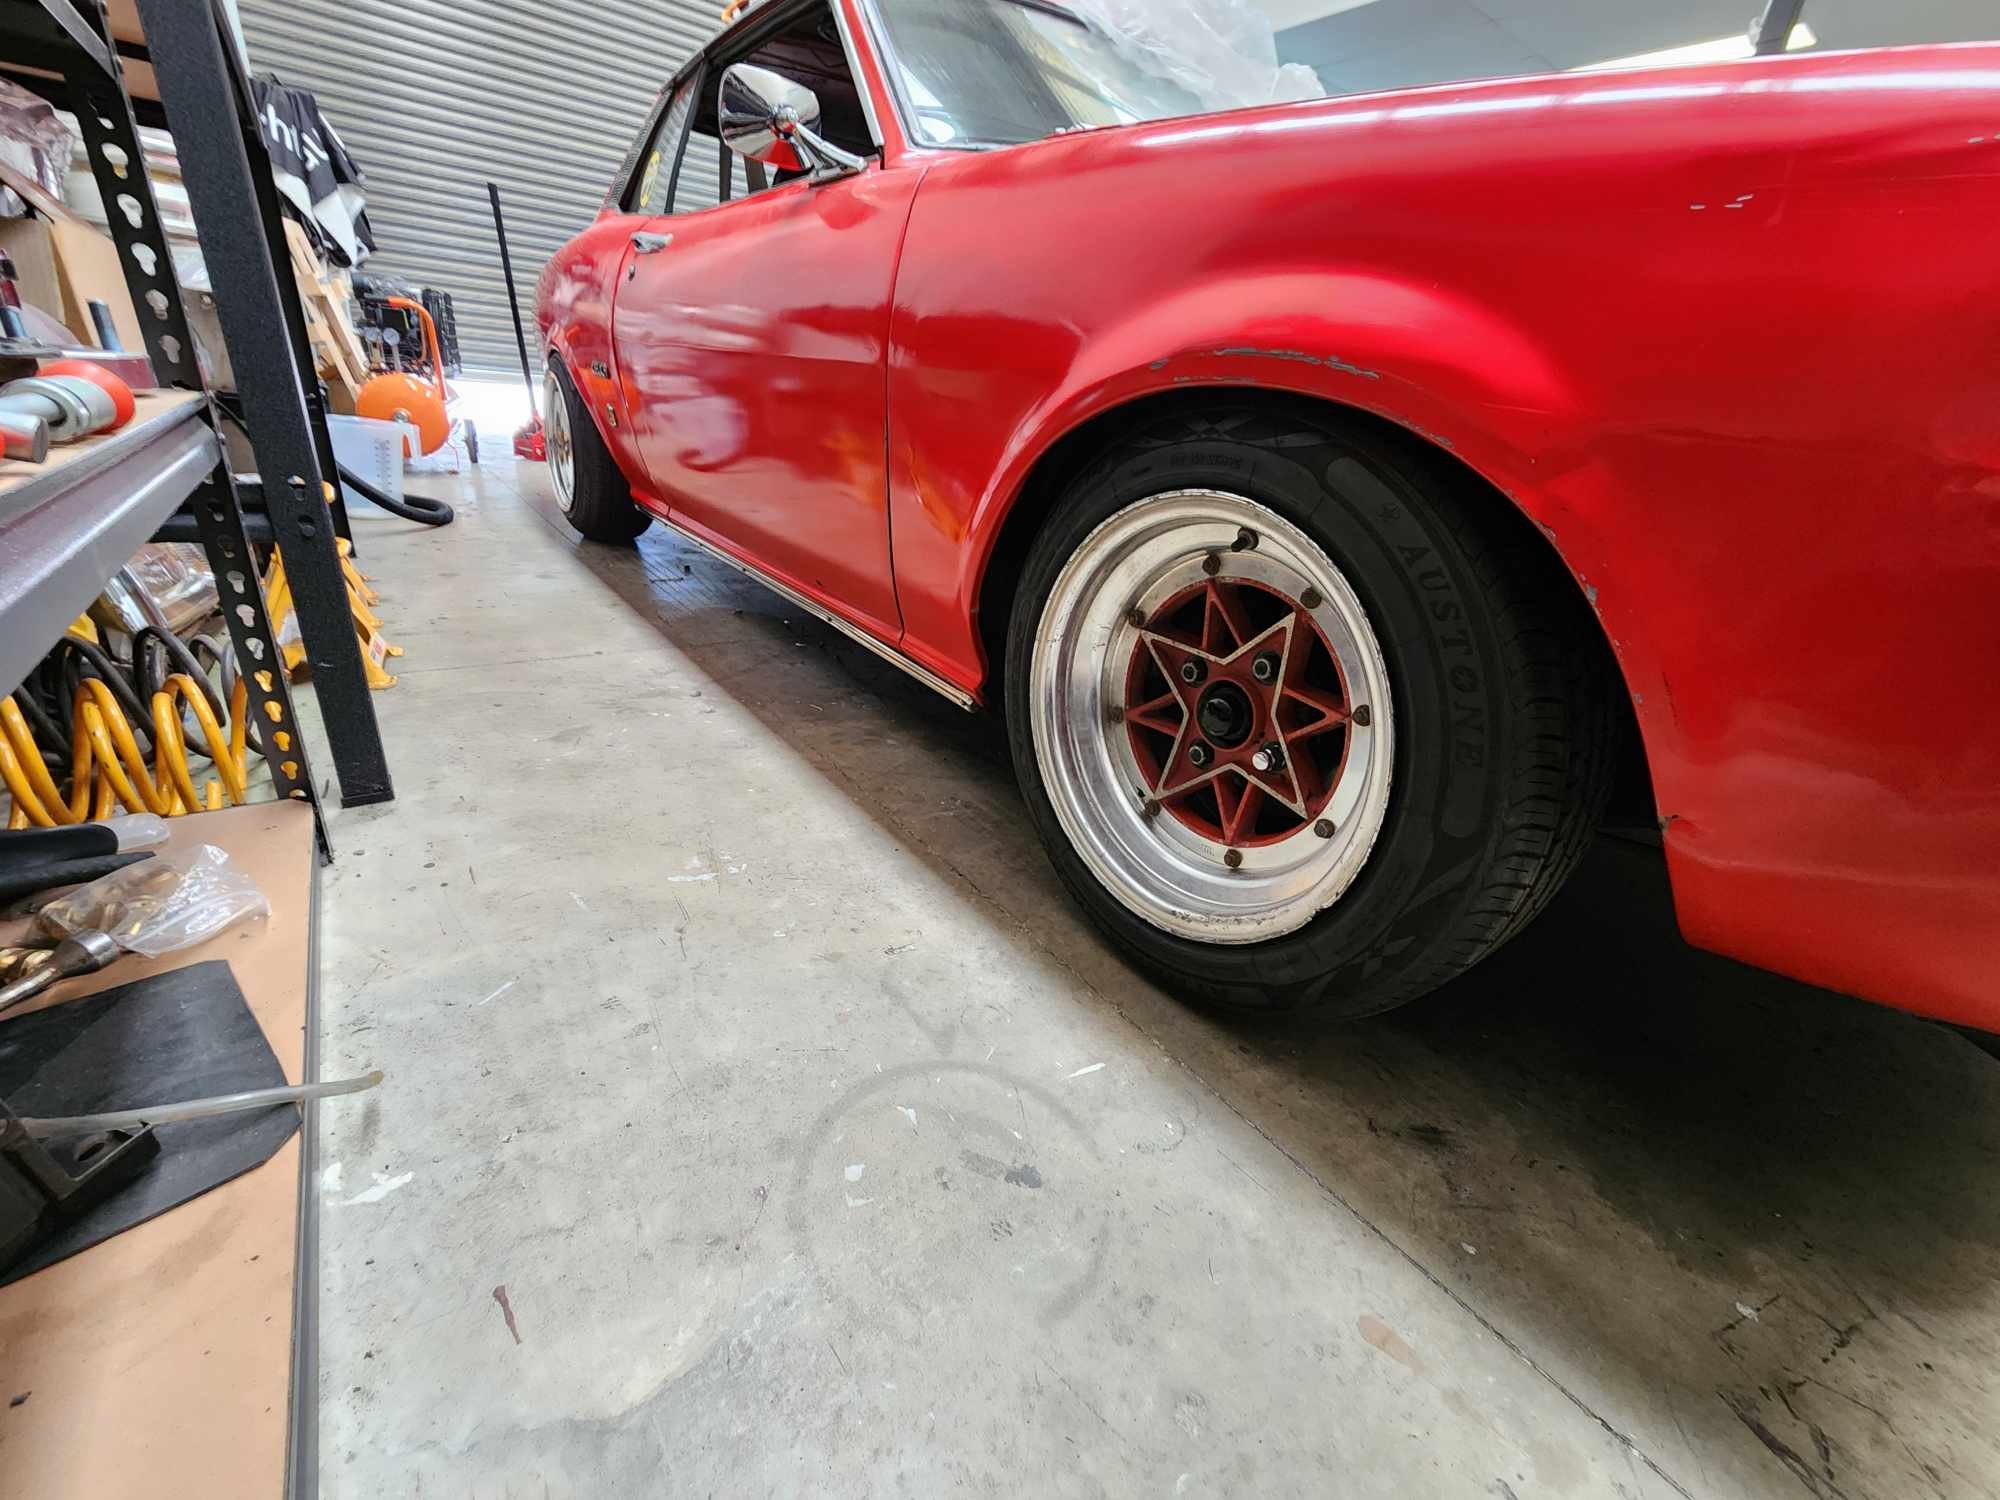
Facebook is mostly filled with garbage but sometimes you see something that makes you wonder why didn't I think of that? I saw a post of a guy one some Celica page with his build, usual update stuff like you see on here but of particular interest was his front suspension. If you've been around a while (in particular in Honda world) you may have heard of a brand called Ground Control. They probably pioneered using an adjustable sleeve and spring that replaces your OEM spring but kept OEM shocks. For old cars like Celica actually using this kind of sleeve and then welding it is how you generally make coilovers however I never thought you could use a smaller sleeve and keep the original spring perch in tact, no welding! Turns out a friend of mine tried to use one of these made for EG Civic to get his 70s Accord adjustable but the Accord strut was too large. I thought why not try it on Celica and guess what? The sleeve fits perfectly! Well, it only works upside down but it'll work. I set the height to about the same as what the other spring was that I pulled out (a basically cut in half King spring for a TA23) and it was way too high. Then I set it full low and it's still too high, in fact higher than the springs I removed. Not only that but there doesn't seem to be any spring in the spring. At first I thought perhaps the shock was bottoming out but if that were the case then the spring should be flopping around when it's on the ground but it's not moving at all. Then I thought OK probably the spring rate is way too high which seems more likely as Civic coilovers are usually around 8-10kg front and go up from there typically whereas the springs I removed are probably 2-3. The internet suggests 3-5kg is the sweet spot and I actually really liked how the other springs felt so I'll see if I can find a spring of similar dimensions but much softer. However before I do that there was also another pair of springs in the package (came as a front/rear set) which are smaller in thickness and also a bit less height so I'll try those and maybe see what happens with that before going out to try and find some other springs.
-
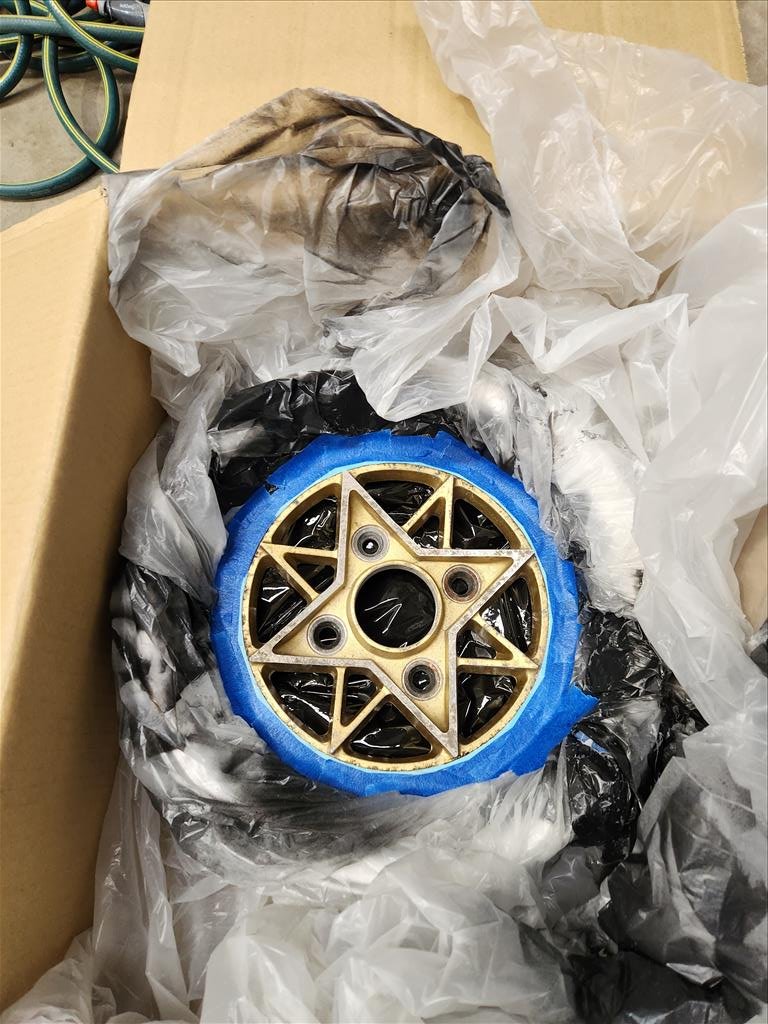
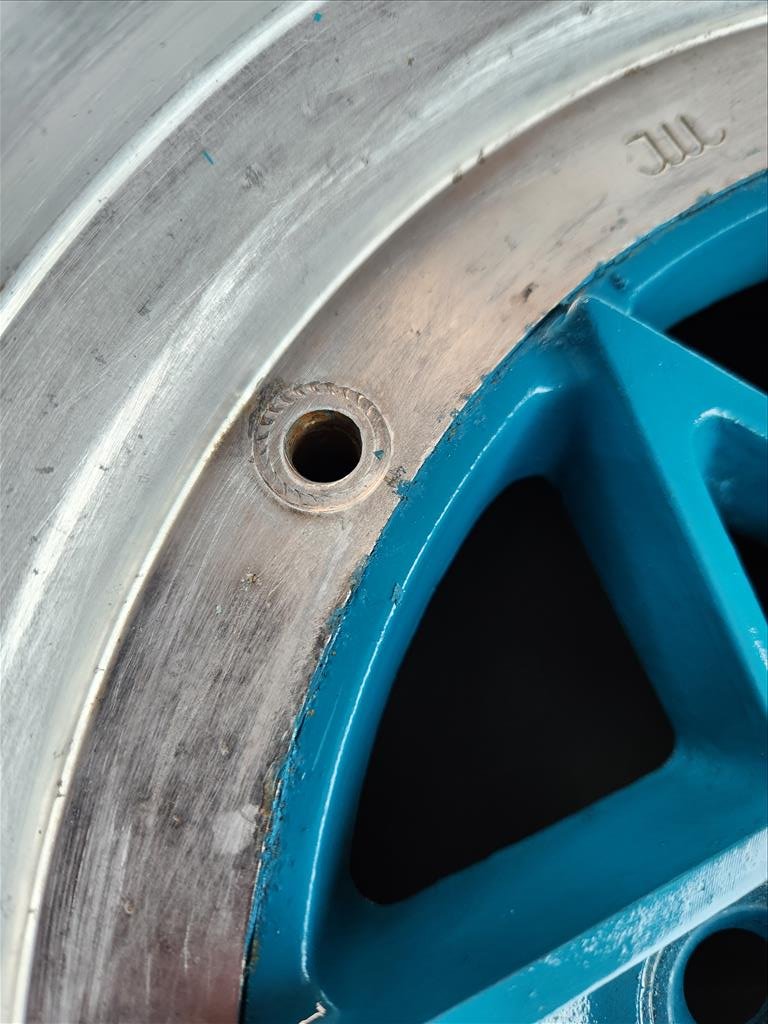
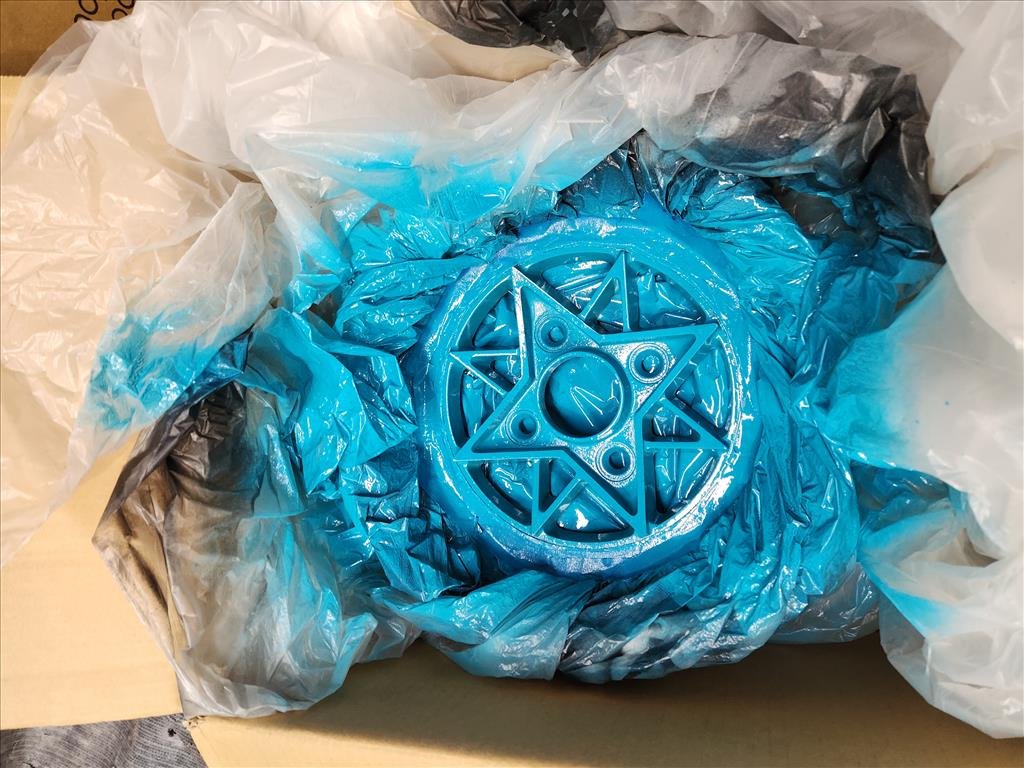
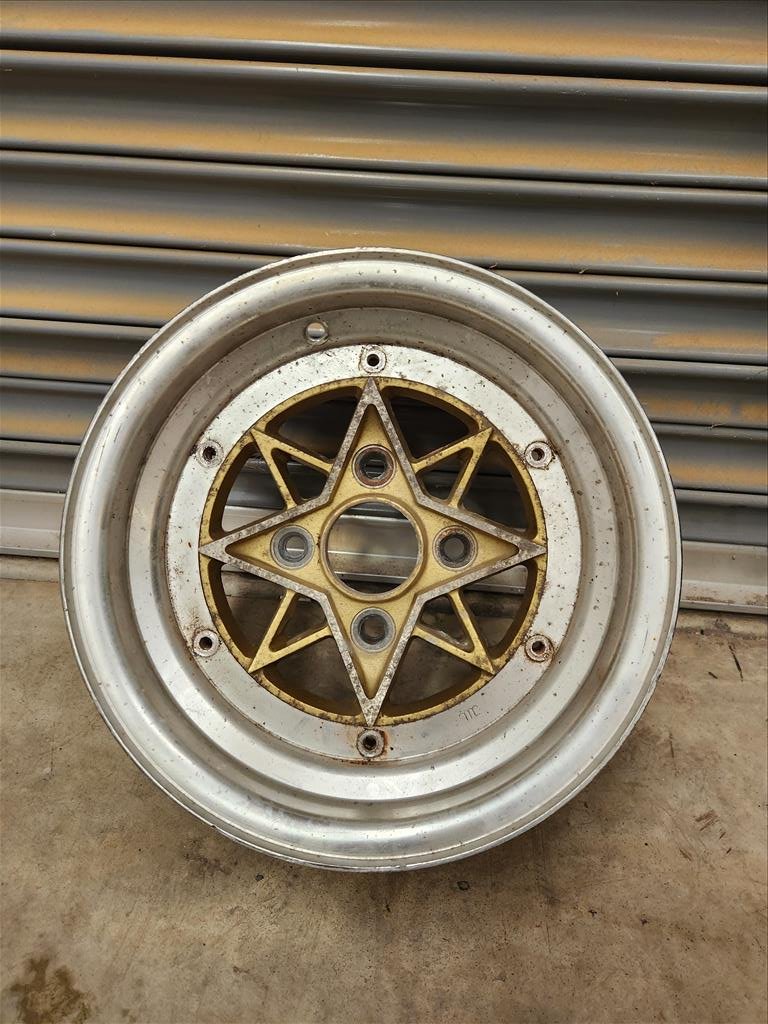
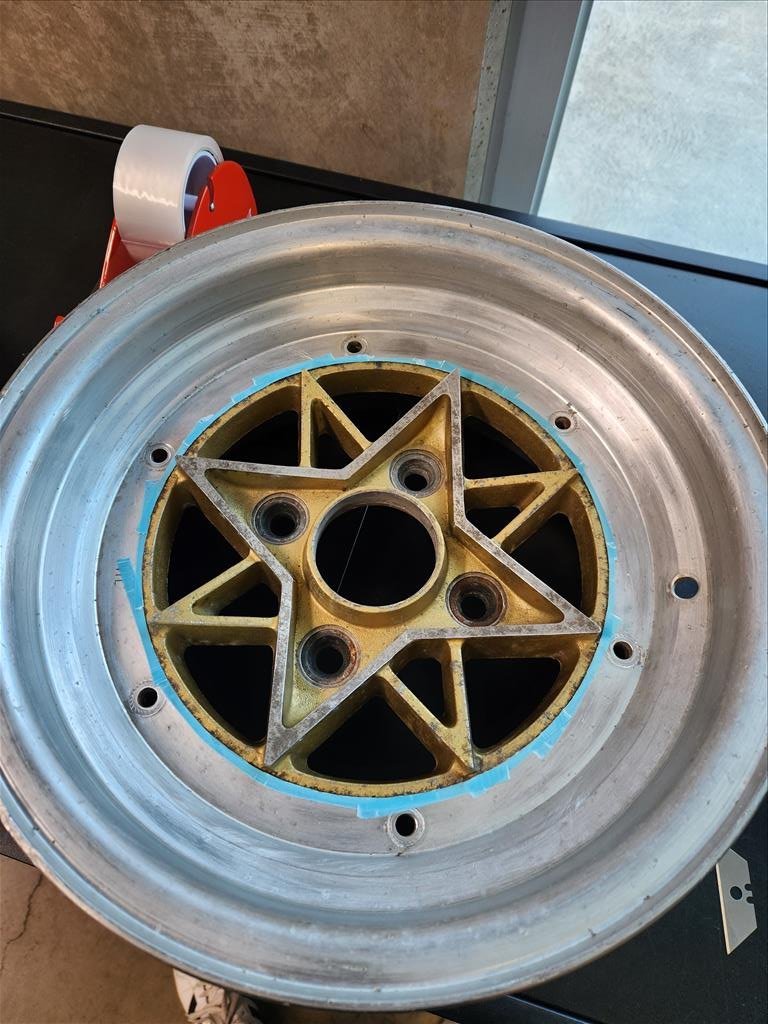
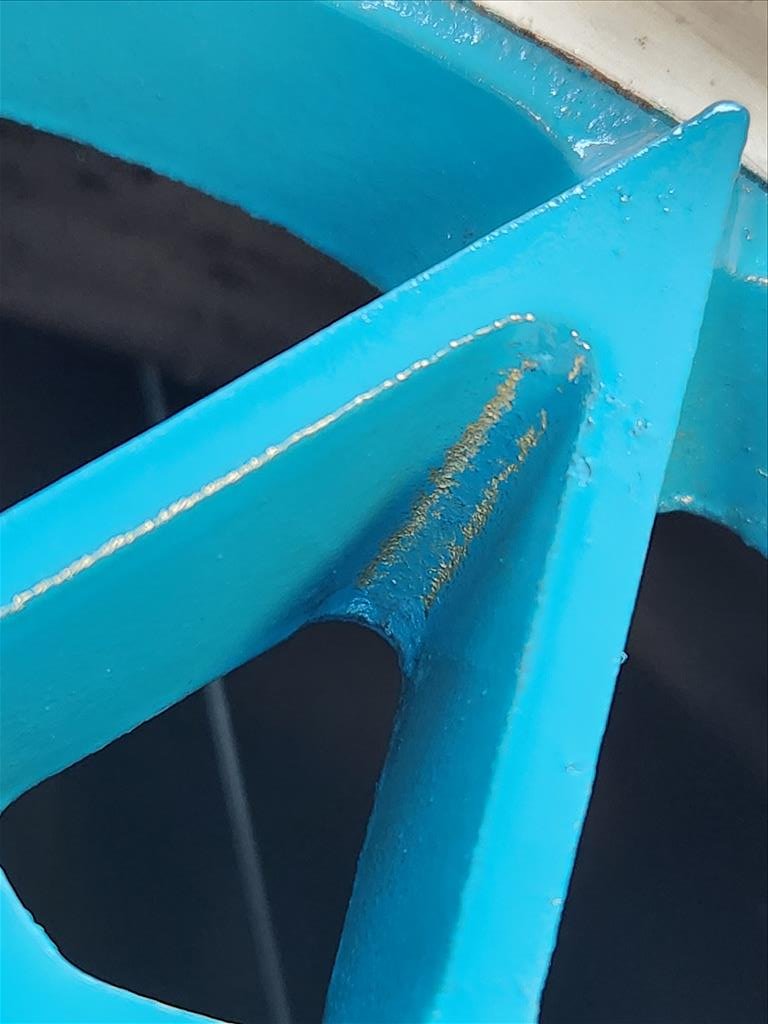
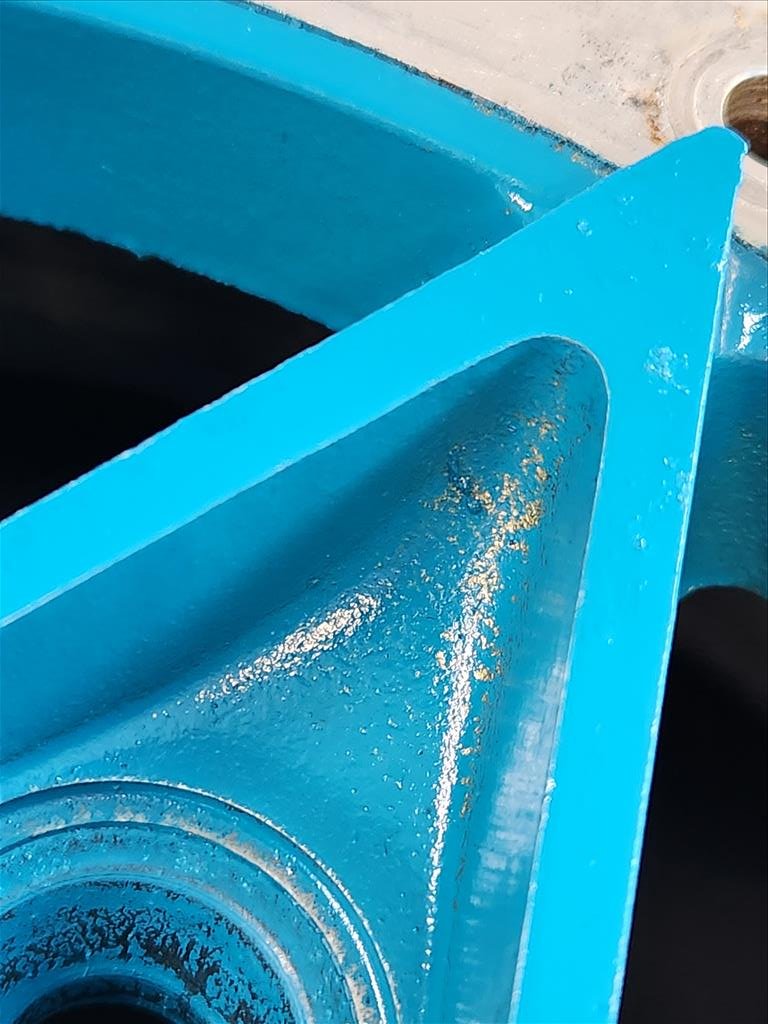
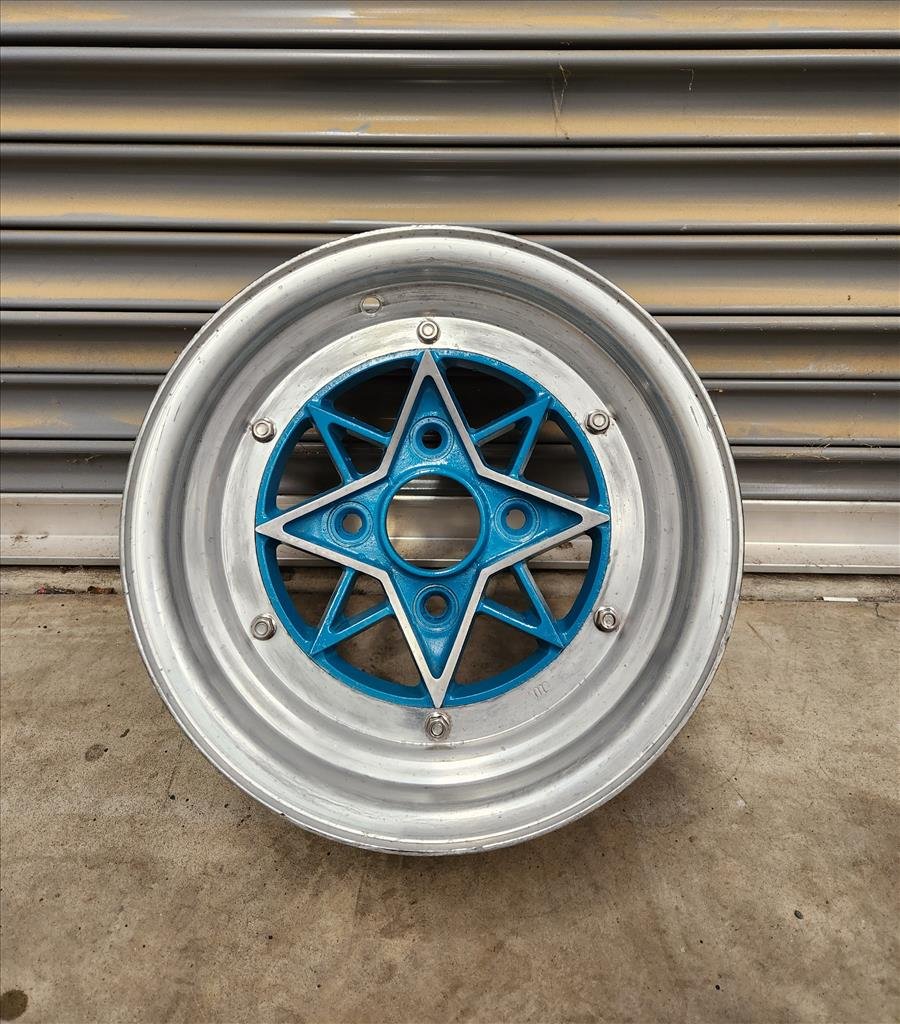
The next sacrifice for my wheel tomfoolery is this 13" starshark. I don't know why I have a 13" starshark. I suspect some whisky was involved in that one as I'm 14" for life. Anyway as you can see it's pretty old and crusty as per everything in my life so I figured why not try a new Rustoleum colour and learn about some new tape as well. Previously on this adventure I mentioned about bleed from the cheap ebay tape I was using so I ordered some fancy 3M edging tape. This tape seems more plastic than the other paper-based tape which is probably excellent for stopping bleed but makes it much more difficult to cut cleanly, at least that's what I found. I did a quick scuff over for the old yellow and also ruined the lip in the process by trying to get out as much of the old pitted crust as possible so now it looks matte and uneven. As you can see I taped around the edge and there's a little gap between the face and the lip which I could (for the most part) slip the blade into in order to get a clean cut. Then after that some more masking and the usual plastic around the outside treatment and into the paint booth. Couple coats of this blue (which actually looks a bit more tiffany blue in real life) and then some gloss clear coat which I've also never tried using before. Once the paint was dried and tape pulled off you can see some bleed still but this is actually not from the tape. The reason this happened is the lip is so pitted the paint actually went underneath the tape as there was a gap. Also to the surprise of nobody, paint doesn't stick well when the prep is poor. Anyway perhaps the finished product is better than the start product? Learnt some more things along the way. I think in my head the best way to approach this type of wheel would go like this: 1) dip or soda blast it first to get the old shit off 2) Cut the lip off 3) Paint what you want 4) Diamond cut the one star as sanding for an hour for an average finish was not fun 5) Weld new lip on That way you'd get a clean paint job. I may still do that just for kicks.