Sorensin
-
Posts
699 -
Joined
-
Last visited
Everything posted by Sorensin
-
Sorensin's 1972 mk1 estate of the escort type
Sorensin replied to Sorensin's topic in Projects and Build Ups
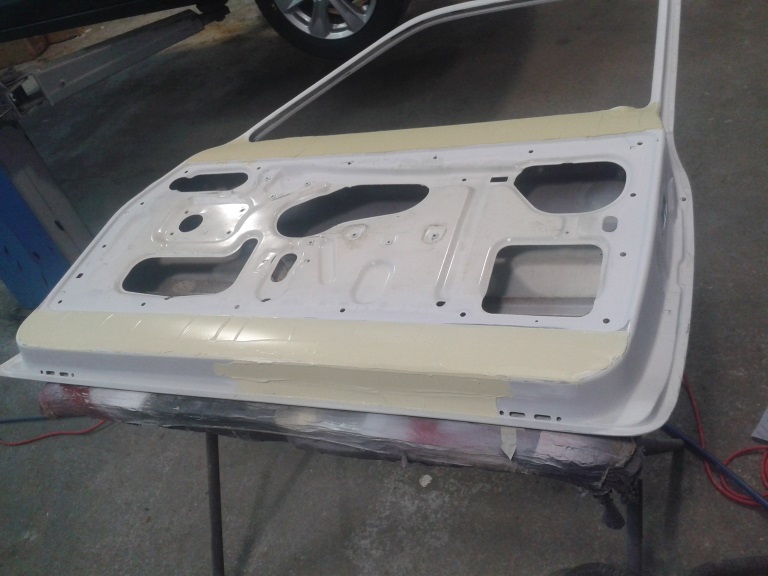
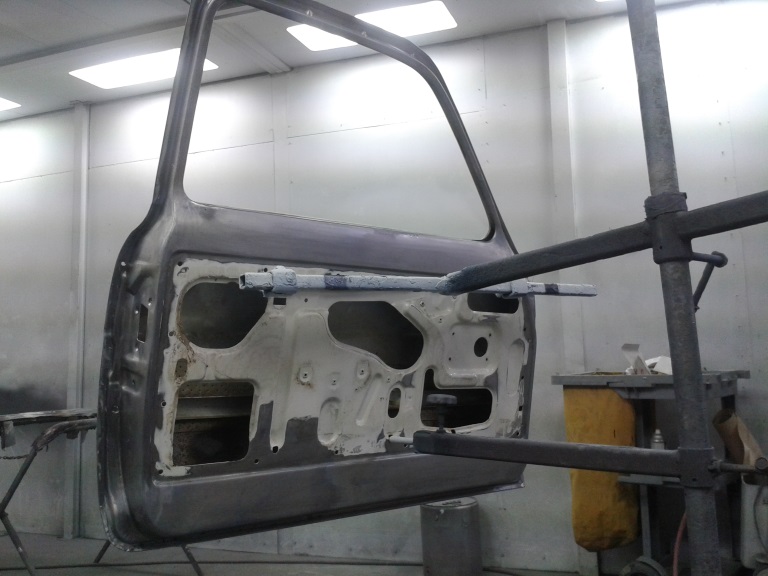
I also worked a little more on the doors. Nice big skim to cover rust the rust repair and the dents on the top and bottom faces of the inner door. The Skim all sanded back and reprimed Prepping the door for applying a seam sealer over the joins(this wasn't done in the factory back then but is common practice now days) The finished result of the sealer
-
Sorensin's 1972 mk1 estate of the escort type
Sorensin replied to Sorensin's topic in Projects and Build Ups
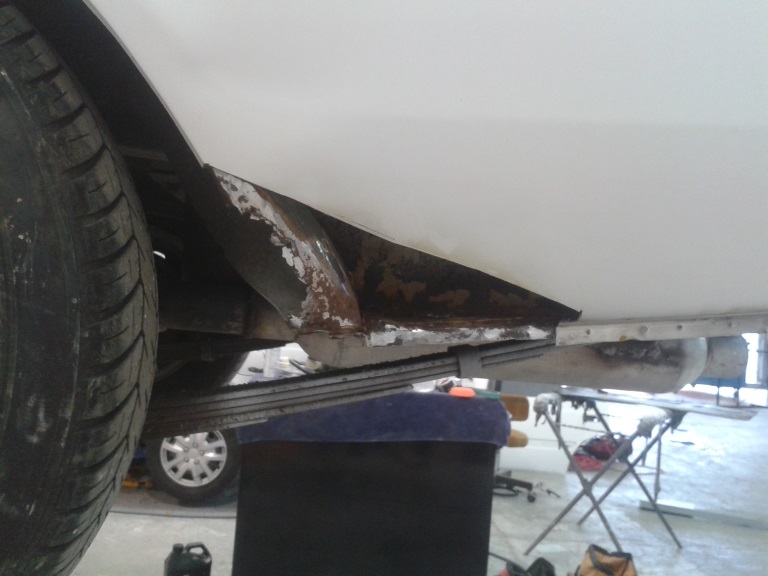
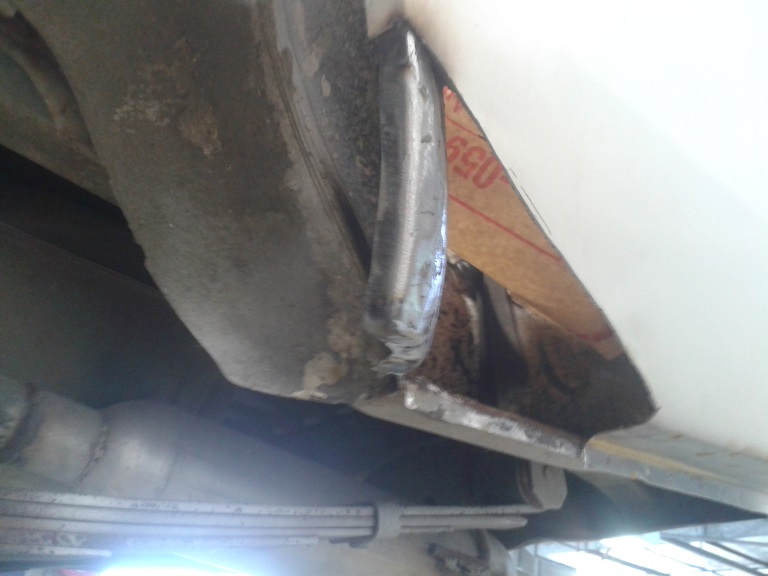
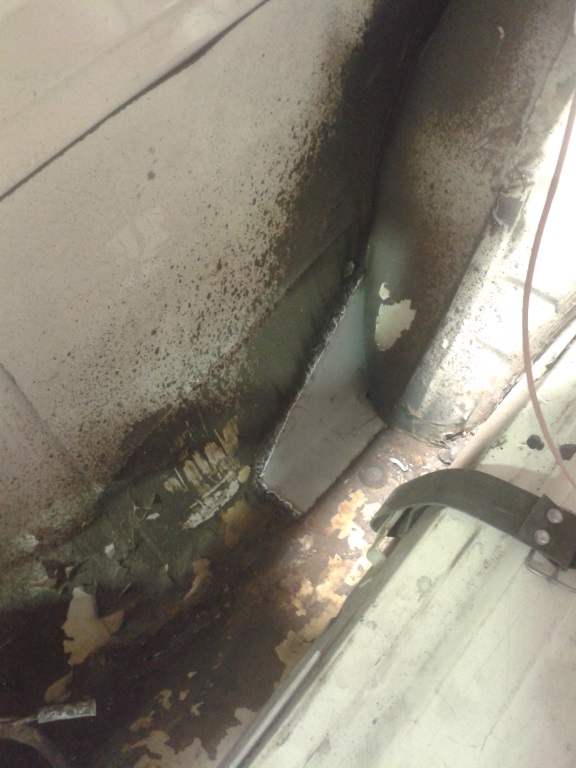
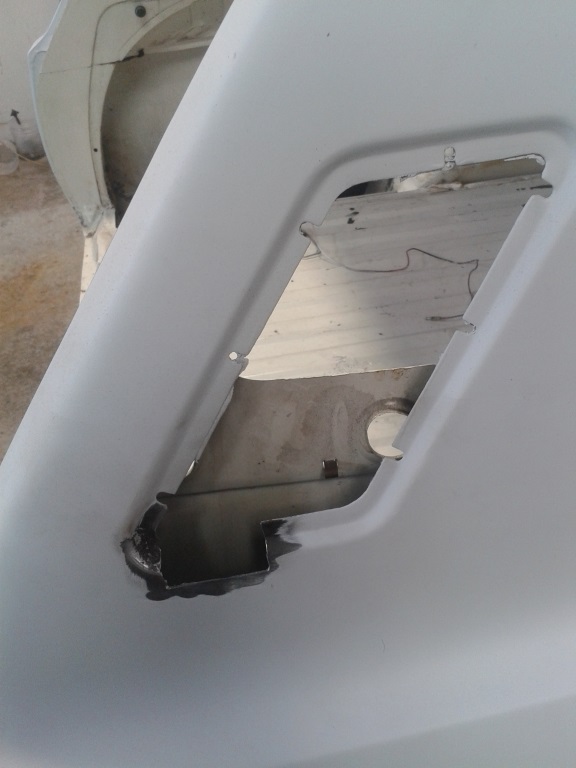
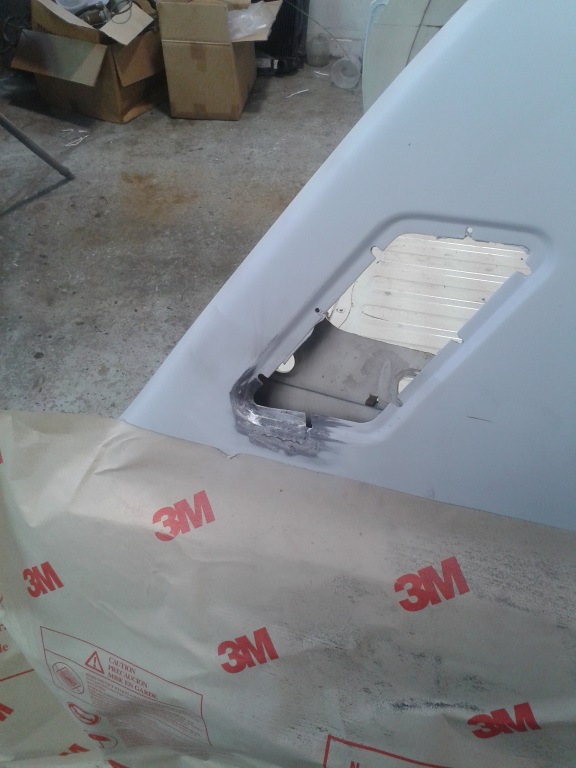
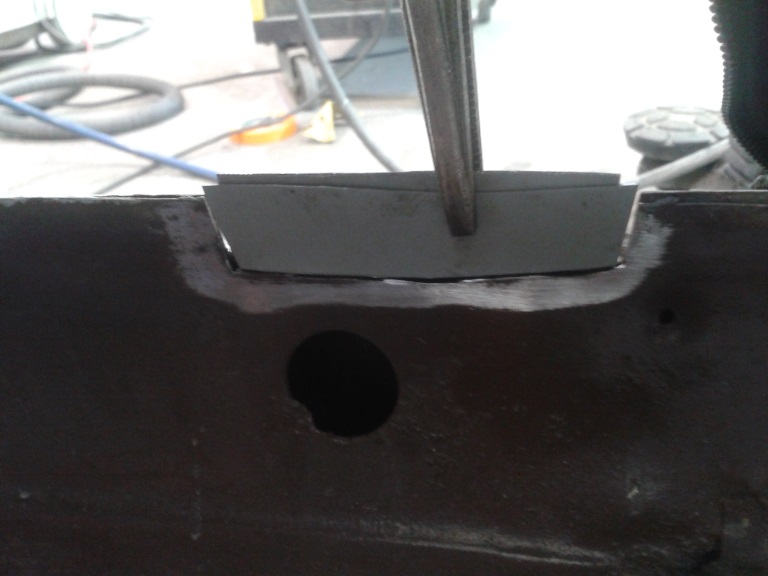
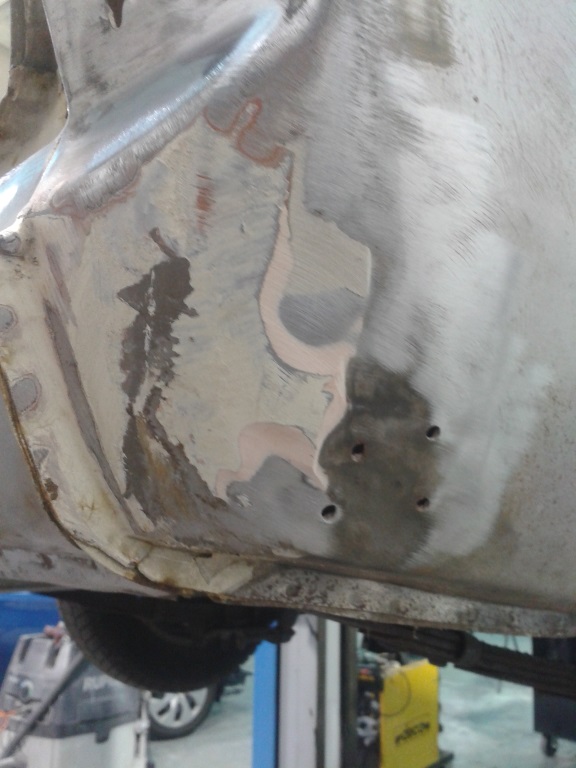
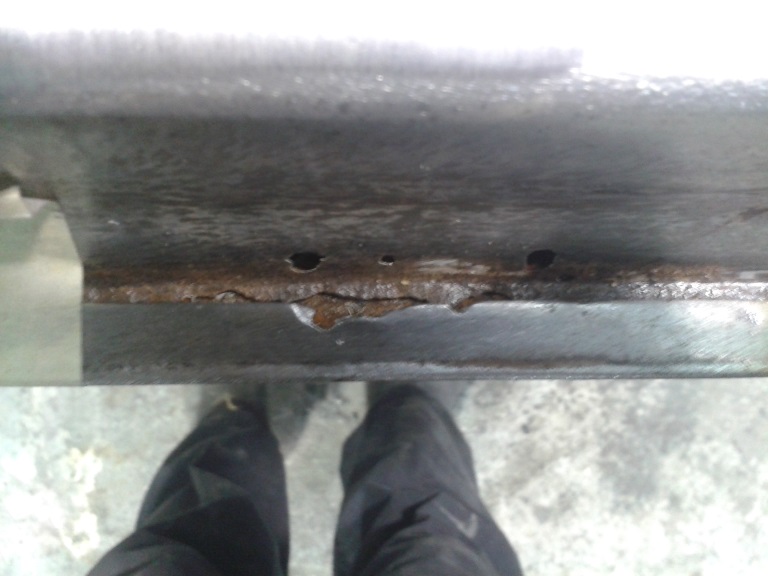
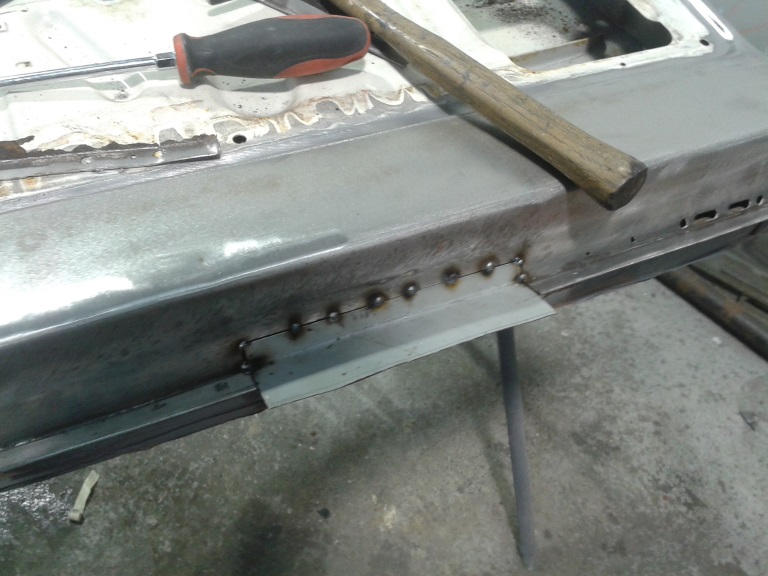
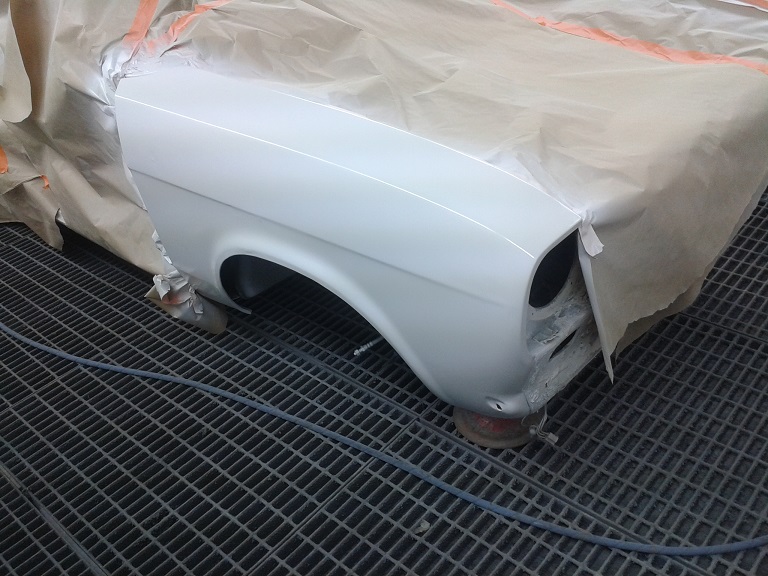
Worst ptach I made to make there is a inner wheel arch(photo4) and a outer skin.
-
Sorensin's 1972 mk1 estate of the escort type
Sorensin replied to Sorensin's topic in Projects and Build Ups
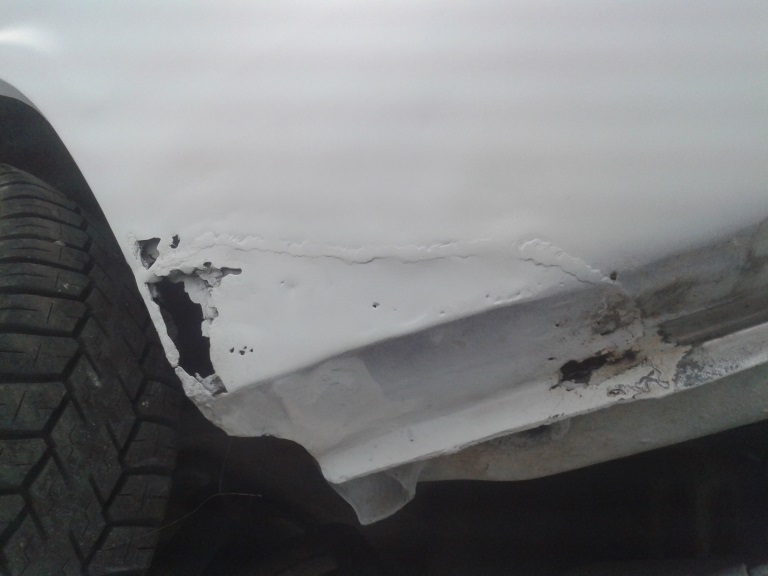
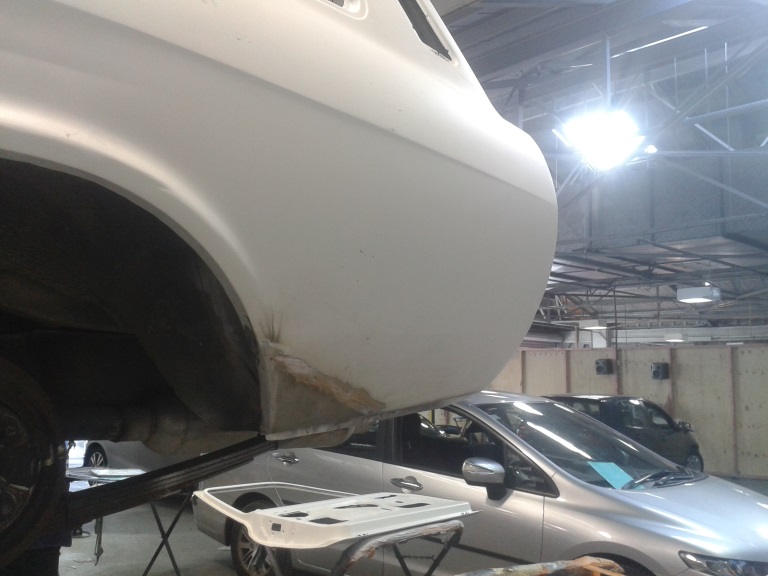
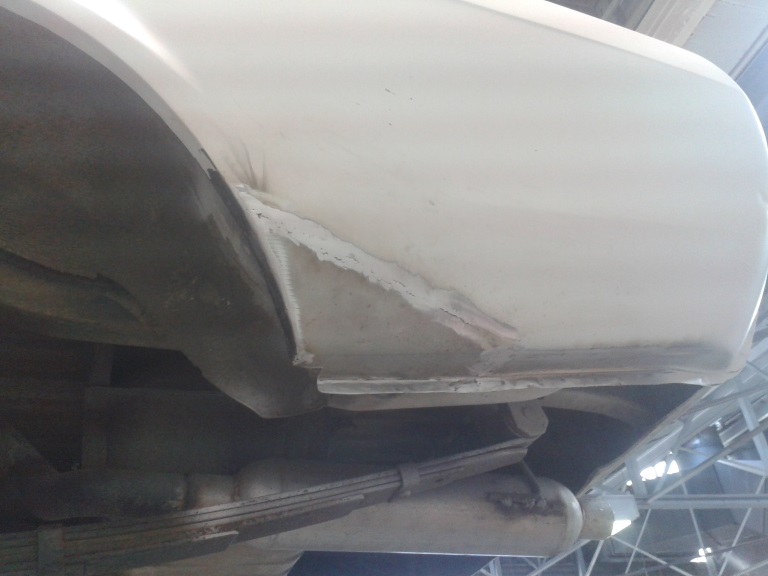
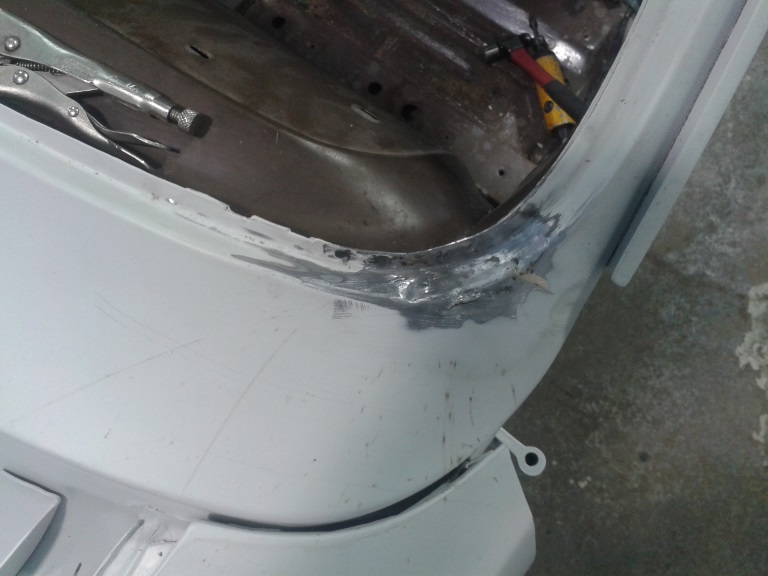
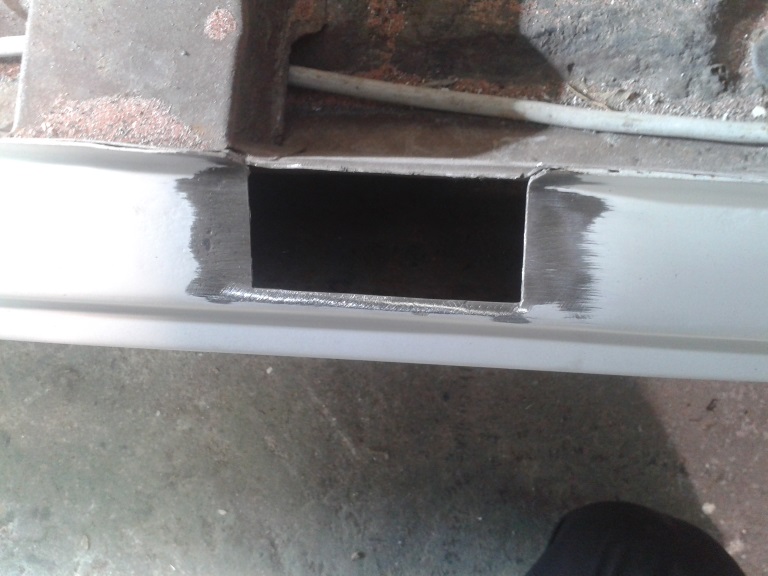
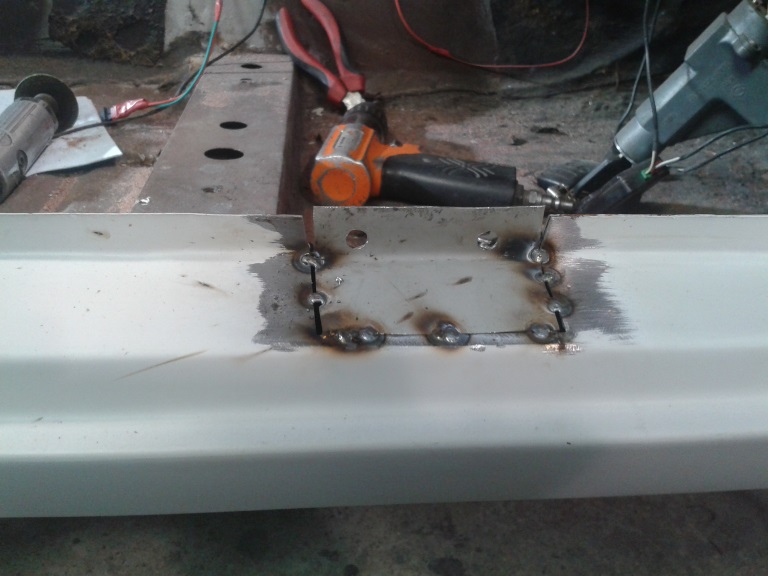
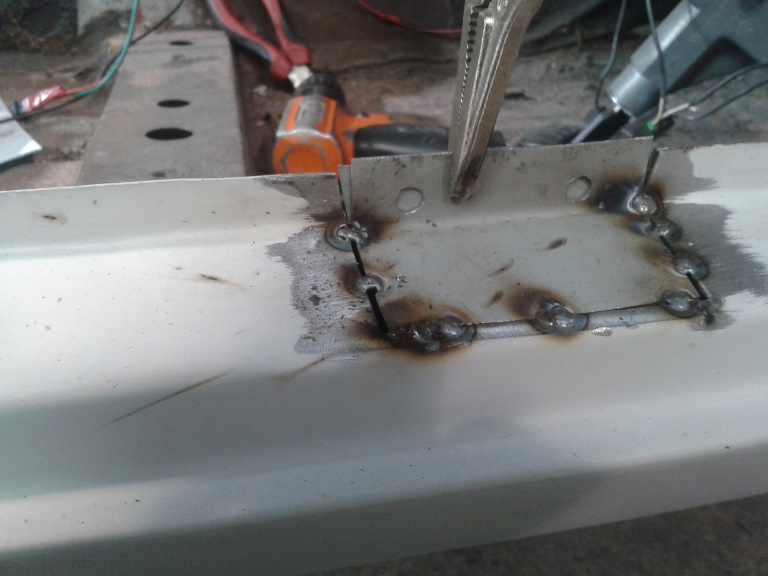
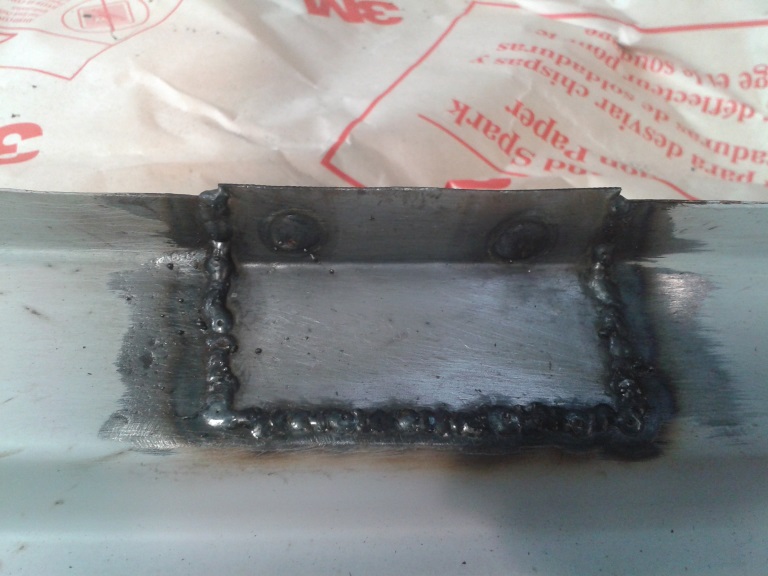
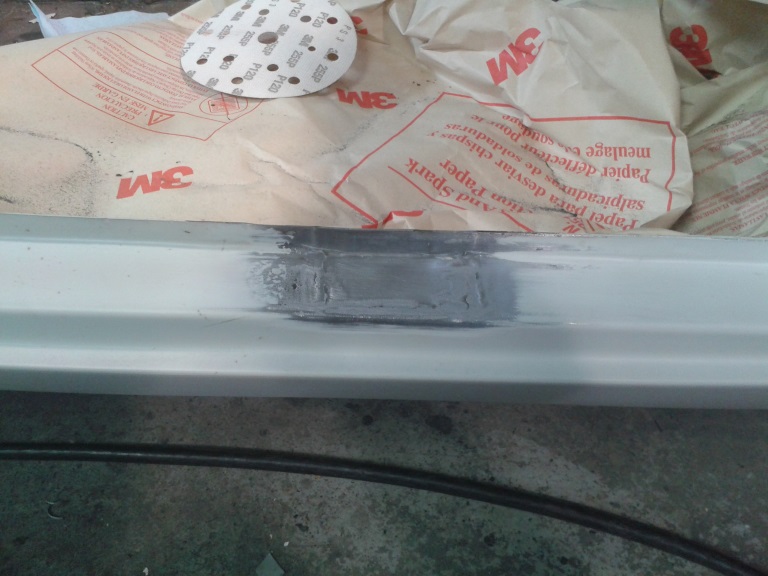
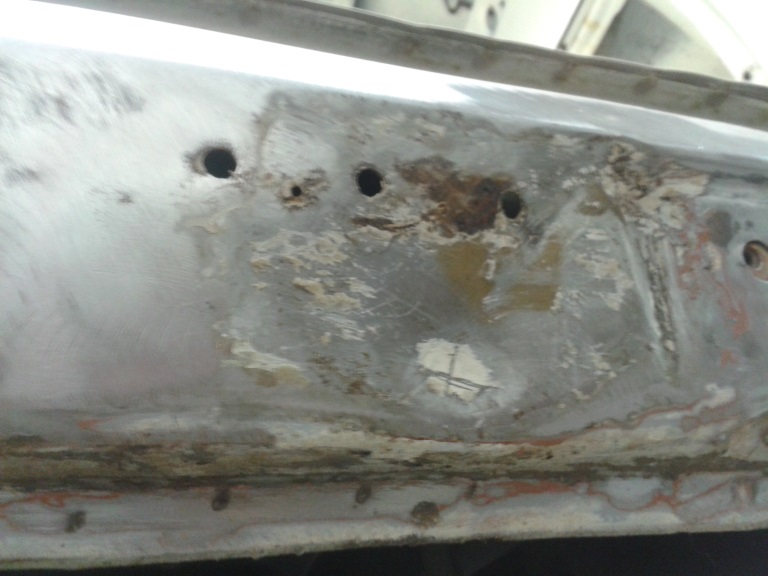
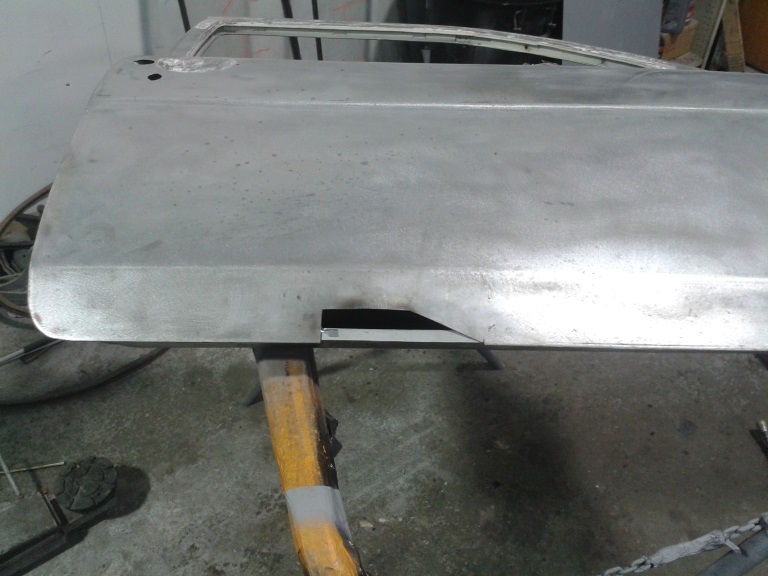
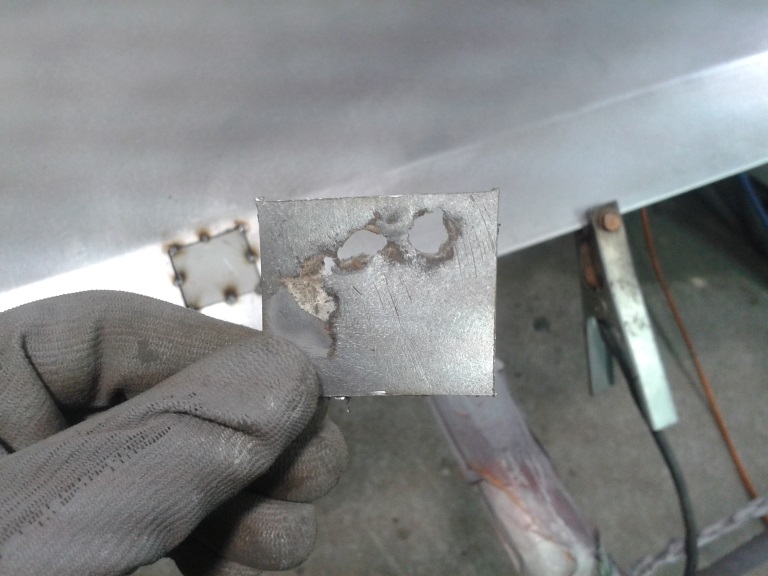
More rust repairs and just plain hole repairs in one case. The last photo is of two holes I beleave a previous panel beater made and used to leaver out the guard a bit but only ever bogged over them so I patched them properly.
-
Sorensin's 1972 mk1 estate of the escort type
Sorensin replied to Sorensin's topic in Projects and Build Ups
OK so super busy with extra work and birthday shenanigans so hadn't got round to sorting photos and doing a update, there isn't too much progress due to massive amount of extra work done over the last week or so but there's basically a rust patching montage.
-
Hey I need a bit of workshop space for about 2-3 weeks, enough space to fit two considerable sized trailers which I need to do some work on(pretty much bolt on/off type work). If anyone has some space they could rent out that would be wicked or if anyone know of anywhere that would also be great. I would prefer the space in the CBD but I could go to porirua or the hutt if I have to. I do need the space ASAP so maybe give me a txt 0220382563 if you can help out? Thanks in advance!
-
Sorensin's 1972 mk1 estate of the escort type
Sorensin replied to Sorensin's topic in Projects and Build Ups
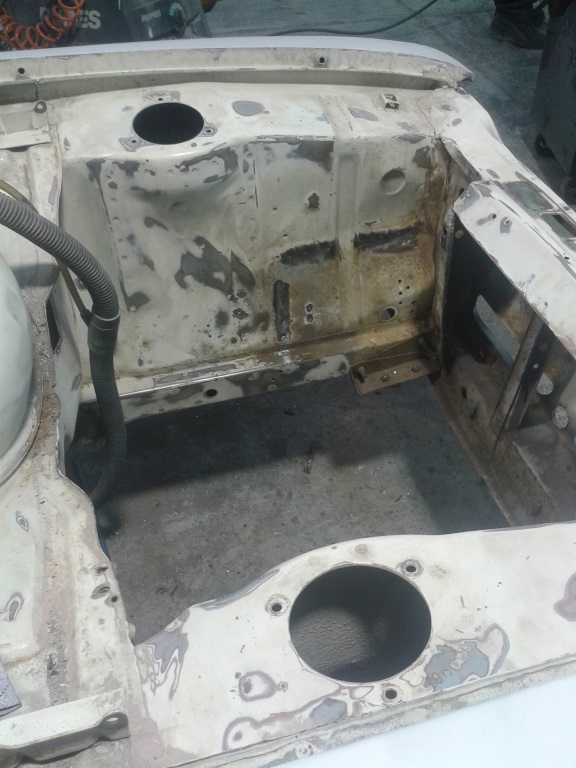
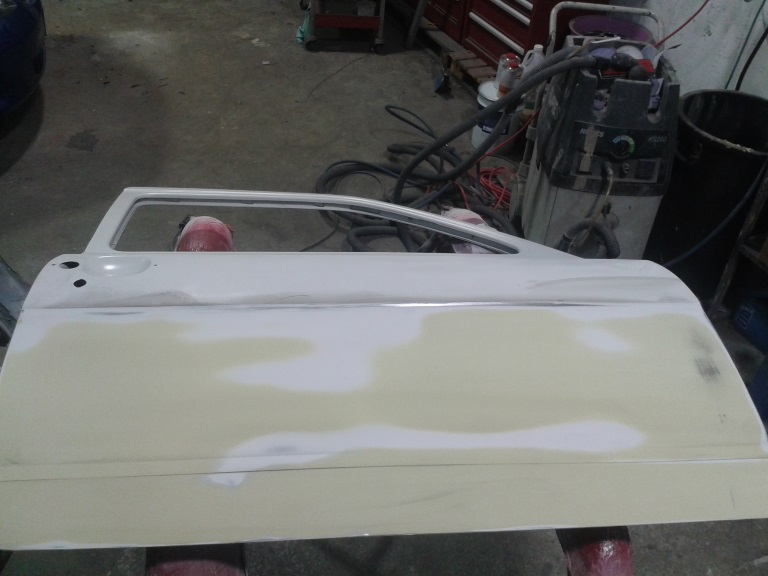
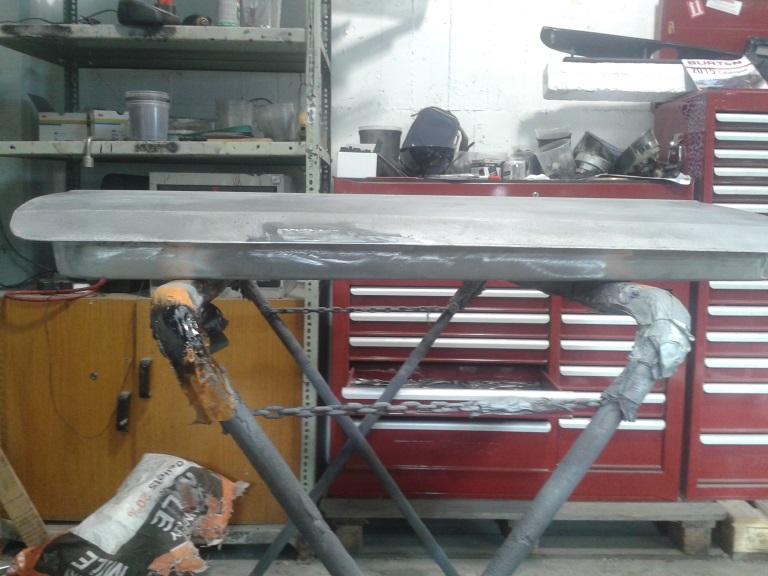
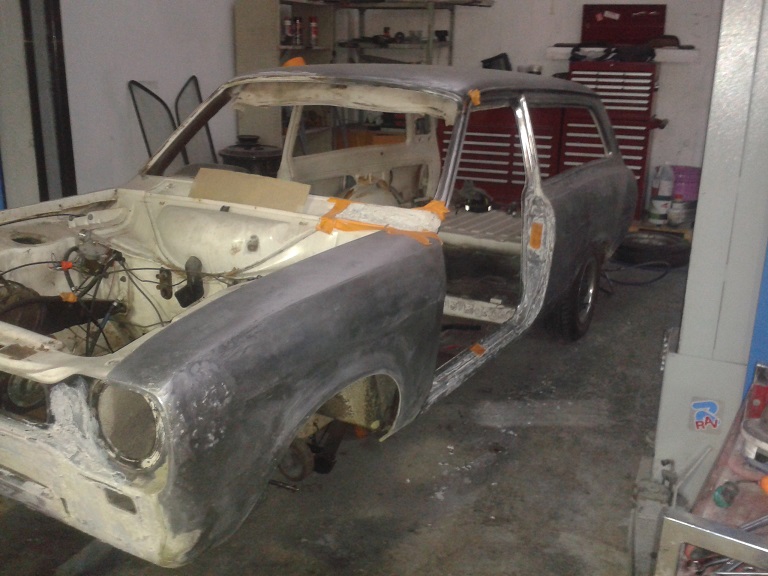
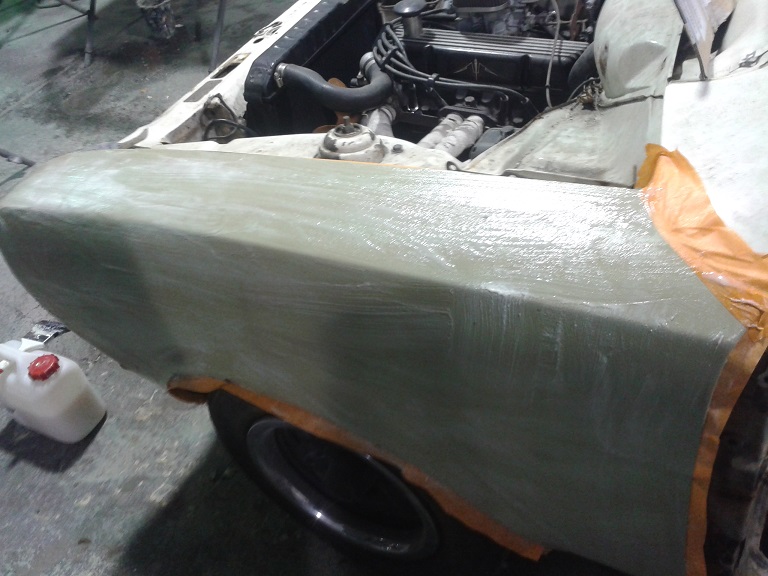
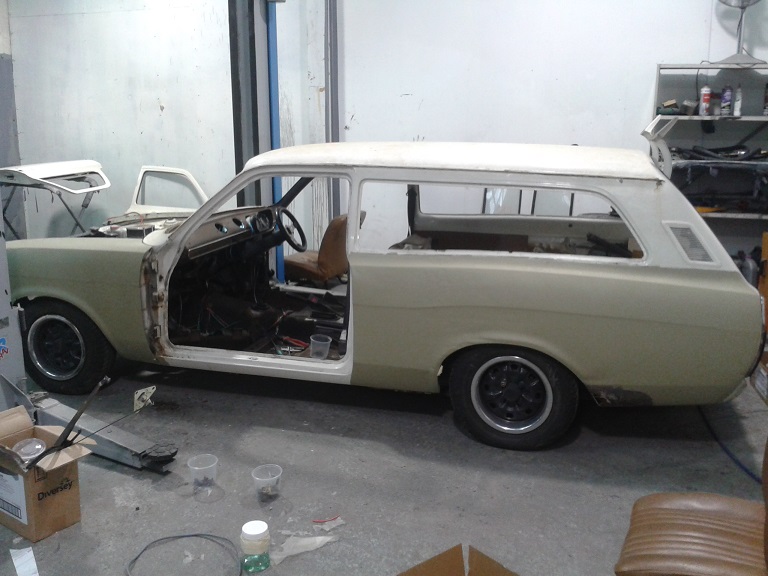
So the complete outside of the car is now in epoxy etch(sorry no photo of this), I've also been working in the engine bay. I've removed the original battery tray as I'm going to relocate the battery and I also welded up probably more that 30 holes in the firewall and inner guards in the engine bay(hopefully you can drive without dying of fumes now). I will be running new brake, fuel and electrical lines/wires and trying to avoid running as many as possible in the engine bay. I'm not completely stripping all the paint from the engine bay like the car exterior but any sign of rust or cracking in the paint I've stripped in back to steel in that area(havn't finished all of this yet). I've also continued with filling the doors Even though the doors appeared pretty straight and were in pretty good condition they still needed a fill, you can see I almost got a away with a single skim on this door but there is still a slight low at the front of the door and a couple small low spots on the bottom aswell as the bottom body line isn't quite right here(but isn't as bad as photo makes it look). I will also need to skim the top section of the door aswell. Just for fun after work while rushing home to work on my house this happens bish rear ends me, tops it off by saying I stopped too far back... WTF - anyway contacted insurance about it but just don't have time or patience for it right now.
-
Sorensin's 1972 mk1 estate of the escort type
Sorensin replied to Sorensin's topic in Projects and Build Ups
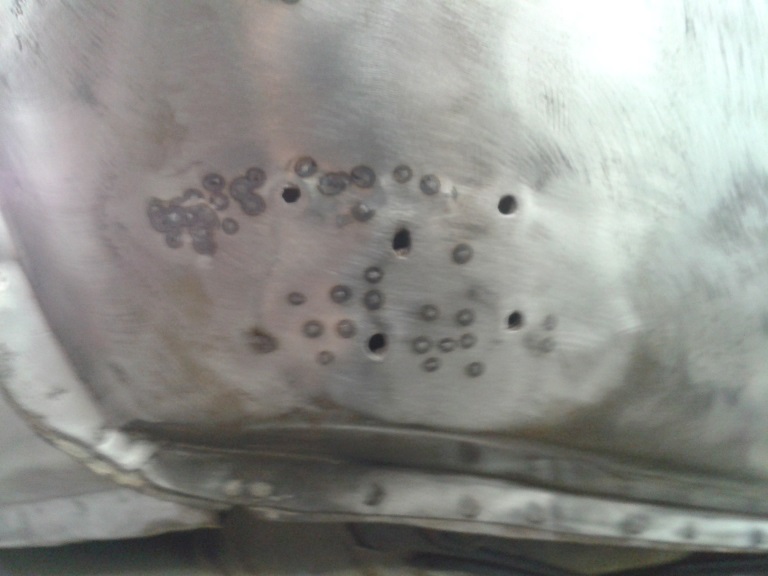
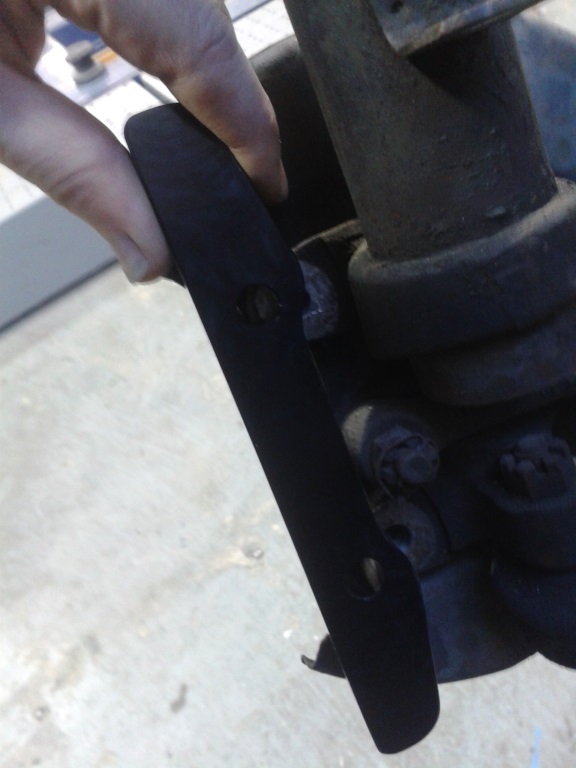
Hey Sorry complete lack of updates as I've been supidly busy. I now have quite a bit done on the car and the bathroom(I have a floor and stuffs)! So both the front and the back of the car needed a bit of panel beating, turns out I didnt take any pics of the front :/ wasn't too bad just need a tap around, this is the back though. Some old school dent pulling was done here were they screwed a screw into the body and pulled the panel (very poorly)out. I got out our pin puller and pulled it out quite a lot further and pulled out other dents on the back panel, then welded up the old repair holes. I also welded up the three holes on each side of the rear, I don't actually know what these holes were for...? I'm also still chasing up burton about my brake upgrade(they are horrible at replying), here are the mounts they supplied you can see they foul on where the steering arm mounts on you can see with the steering arm removed the holes are the correct space apart so th bracket just needs a curve in it to go around the steering mount.
-
Sorensin's 1972 mk1 estate of the escort type
Sorensin replied to Sorensin's topic in Projects and Build Ups
Again was a work day so didn't get much done, I finished of the skin patch on the second door and got the inside of the door metal preped and epoxied. I also heard back from burton power, looks like I can get the bracket i need to mount my calipers and if I change over to RS hubs I can use the rotors I want sooo hopefully that all works out and I'll get those items orderd asap it's all confirmed. Sorry still no pic of this just some more boring rust repair photos I also have next week off so I will be trying to fit the five speed gear box before painting the engine bay and much more. I also have now booked the last week of July off aswell but currently fitting a new bathroom which needs to be finished before the end of July as we have friends coming to stay from the 31st of July so this may soak up some of my time
-
It's not that strange I worked at the surgery before my current job and worked at the late classic car restoration in auckland before that. It's more frustrating than crash repair I forgot how slow some of it can be. The whole work thing is a interesting situation which I'll leave off the interwebs but yes it is good. Really, only problem I've heard of people having with POR15 is the product not sticking to the steel(which is usually because the steel is to clean and not scuffed/scratched enough)? I have used it before and not had issues, I did feather mine out and scuff it all, I guess if it goes wrong it will be an expensive lesson for me :/
-
Sorensin's 1972 mk1 estate of the escort type
Sorensin replied to Sorensin's topic in Projects and Build Ups
I also started on the next door which needs a little more work than the last You can see the skin has a couple holes which did have braze filling them and you can see the frame is quite rusty in this spot. Sweet shot with a repco screw driver in the pic Replacing inner frame before working on the skin There is only 3 more spots of rust repair left on teh car to do after the doors but I'll try cut down on the patch photos as I'm sure they are pretty boring.
-
Sorensin's 1972 mk1 estate of the escort type
Sorensin replied to Sorensin's topic in Projects and Build Ups
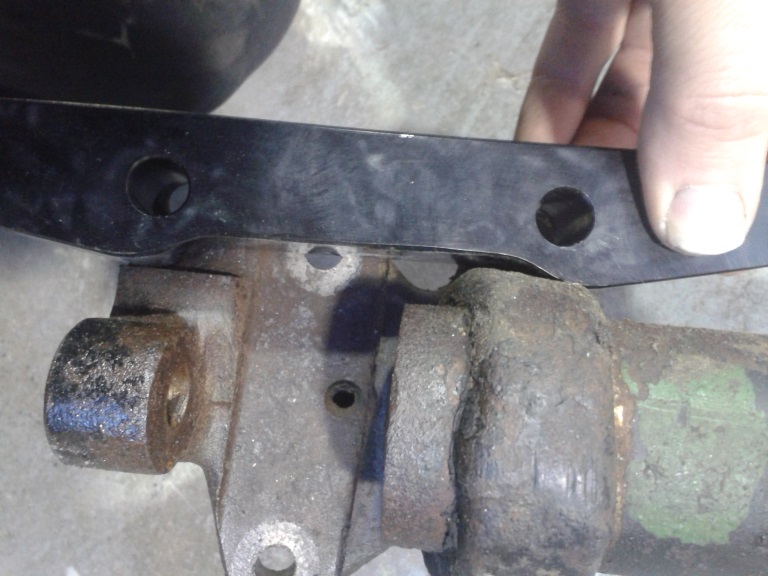
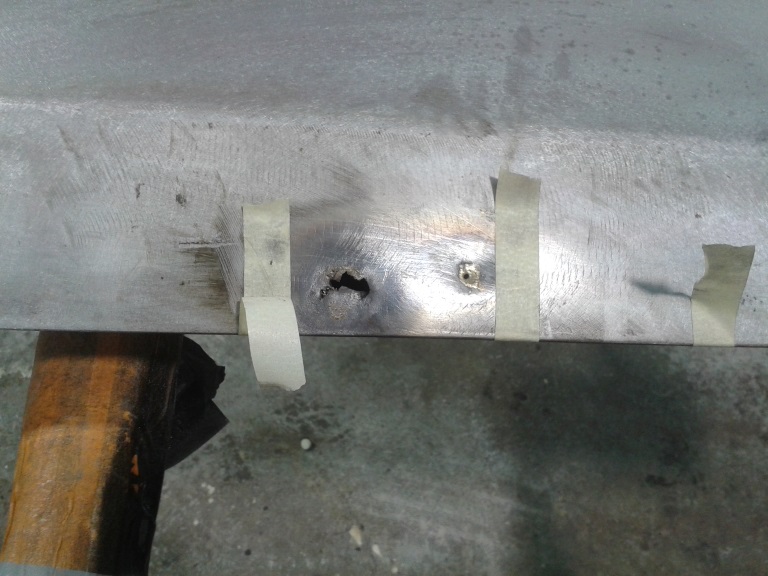
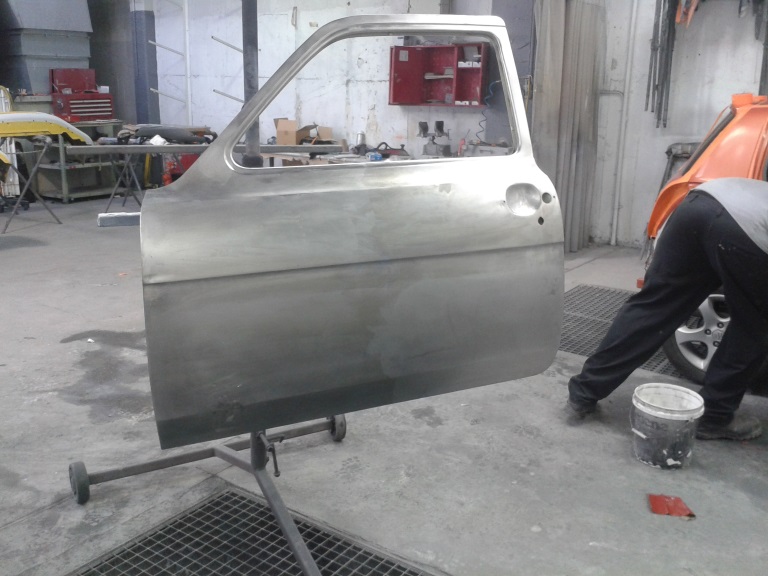
Hey so another day were I was actually working but got a little done in my spare time I tried test fitting the new brakes to my old struts/hubs. Found I have a couple issues, I need capri/RS hubs and my brake mounting bracket also fouls where the steering attaches on the strut... problems! Got the door where I did the rust repair metal preped and primed. you can see the repair of the face of the door, there is a little distortion but it's pretty good still.
-
Sorensin's 1972 mk1 estate of the escort type
Sorensin replied to Sorensin's topic in Projects and Build Ups
I also removed the roof lining, this was a terrible job, I wanted to save the original for a template for a new one, the way the roof lining was held in at the sides and the fact the material was quite dry and almost brittle made this another slow and painful job. Eventually got it all out and above where the metal rods used to hold the lining up was a length of fabric which I assume was to stop the rods touching the roof, the problem with this was the fabric caused the roof to rust(not too badly). I used a wire brush and just hand scrubbed at the rust I then coated it with three coats of POR15 I feel this should seal up what is there pretty well and I think it would also be safe to use a fabric strip between the roof lining rods and roof again with the POR15 there now. I also have quickly cleaned up my spare pair of struts and removed the inserts. I'm going to test fit the brake upgrade to them, assuming everything is good I'm going to try find a shorter insert have the struts cut down and have a adjustable sleeve welded on to them. Sorry no photo of any of this yet.
-
Sorensin's 1972 mk1 estate of the escort type
Sorensin replied to Sorensin's topic in Projects and Build Ups
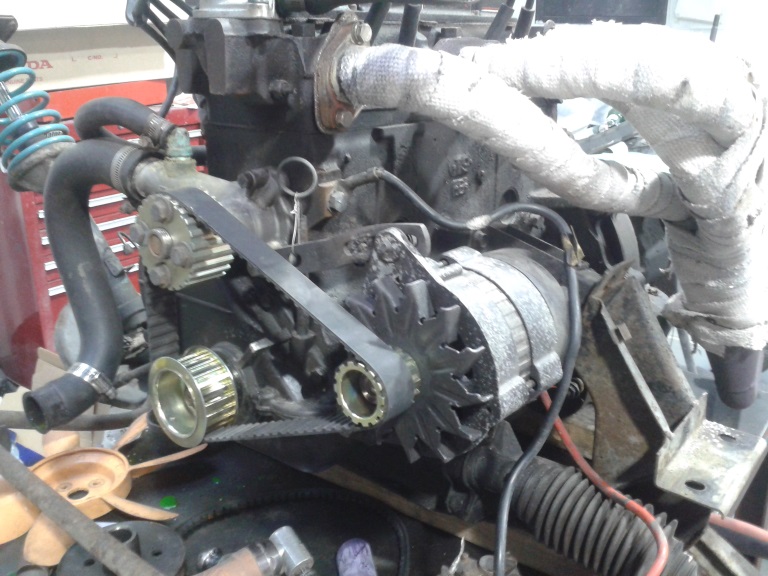
So I've been back at work this week so I havn't got much done but her's what I've been up to I metal finished out a couple dents on the first door I was working on, havn't done this in a long time, picked it back up quite quickly and was pretty happy with how quickly I removed the dents. Unfortunantly this doesn't make a good photo. Small Rust repair Hard to know what happened here but it looked like someone actually stabed those holes in the door, the rest of the door was pretty rust free and the door was dented in a filled over where those two holes were... I went pretty Mad Max here, fitted the new drive belt pulleys and belt. Like everything on a old car it couldn't just bolt straight on. The pulley for the water pump was to tight to fit over the water pump four mounting holes so I had to grind a little off the water pump, then the center hole wouldn't fit over the thread in the center, luckily that thread is apparntly not doing anything on a escort because the pulley and the fan use the four bolt holes to mount on so the center thread is fine missing half the thread depth. Both of these were very quick fixes but the main pulley wouldn't fit onto the crank, It was soooo close but just too tight, I spent quite a while playing around with it try to make it work I ended up sanding the inside the the pulley but I was a bit of a nancy trying not to over sand it and try to sand evenly so I spent far to long doing this.
-
Sorensin's 1972 mk1 estate of the escort type
Sorensin replied to Sorensin's topic in Projects and Build Ups
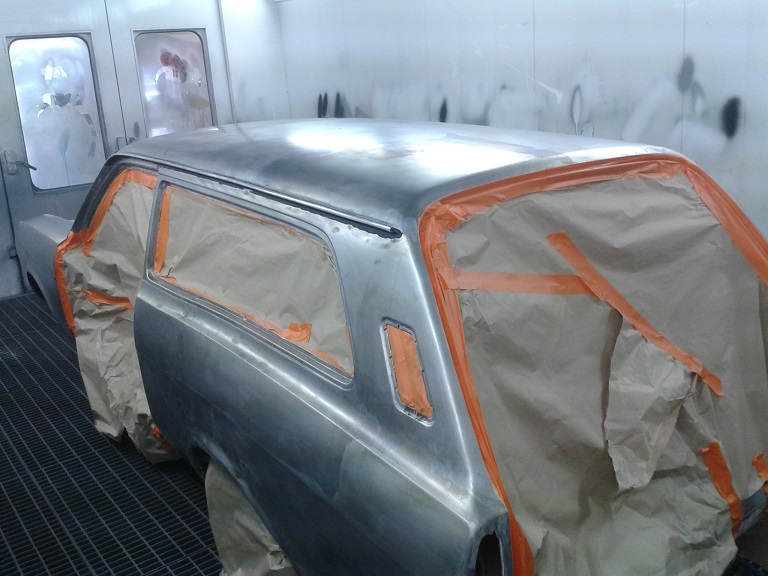
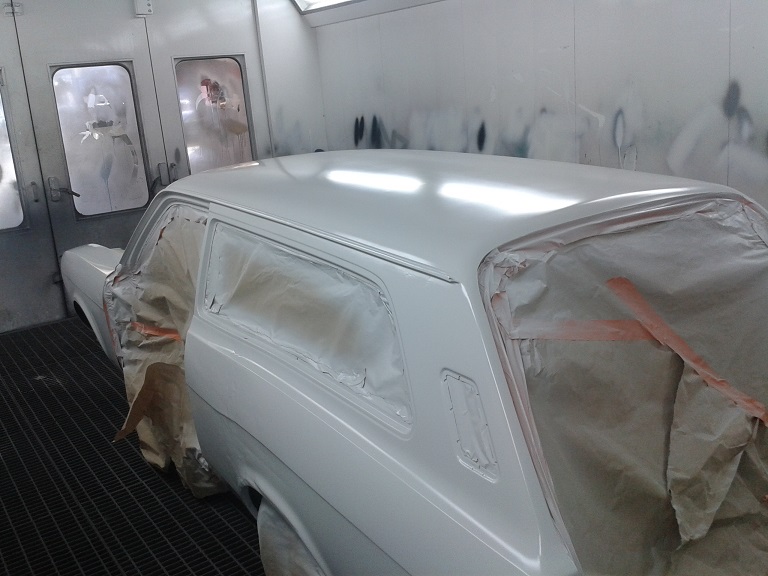
So finished off spring some areas today, hit any sign of rust with the wire wheel and gave everything a good metal prep. Here it is all masked up in the booth ready to go and here it is in a couple coats of primer After I got that done spend the last part of the afternoon striping the two doors, they are almost ready for a metal prep so hopefully might get them done on monday. Didn't get anywhere near as far as I hoped but glad to have a good chunk in primer before the weekend.
-
Sorensin's 1972 mk1 estate of the escort type
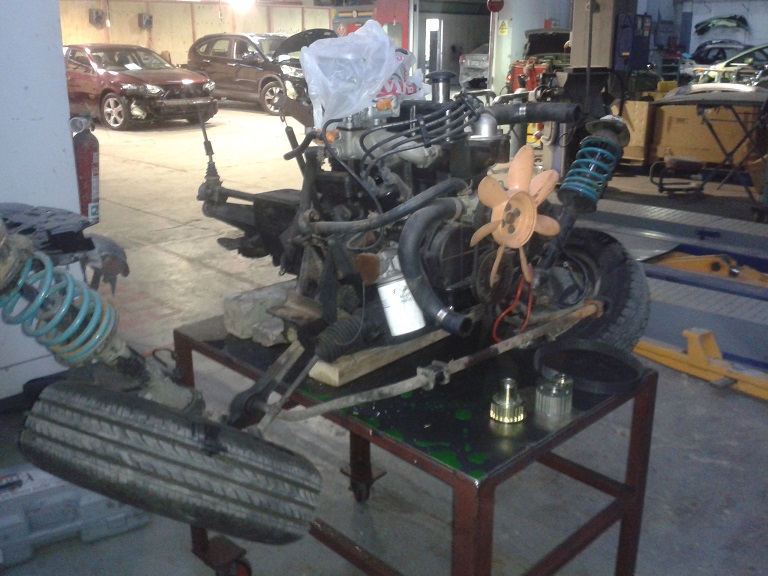
Sorensin replied to Sorensin's topic in Projects and Build Ups
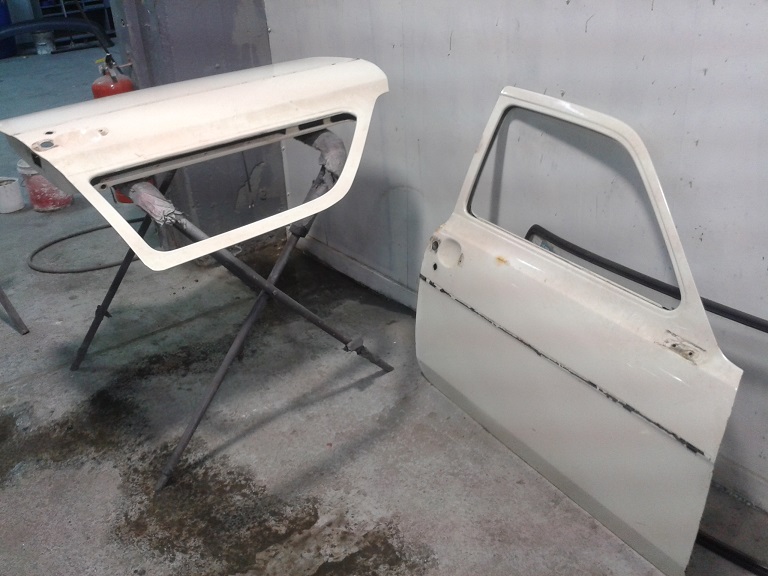
A picture of the engine being dropped out A picture of the engine all the way out note on the table there's a new drive belt kit to be fitted One of the doors almost ready for metal prep and priming Panel wise this is probably the worst panel on the car which really I have to be pretty happy about, is fairly dented but fixable. So I'll do some panel beating(little bit of metal finishing) here a small rust repair at the bottom and this panel is ready for metal prep and priming.
-
Sorensin's 1972 mk1 estate of the escort type
Sorensin replied to Sorensin's topic in Projects and Build Ups
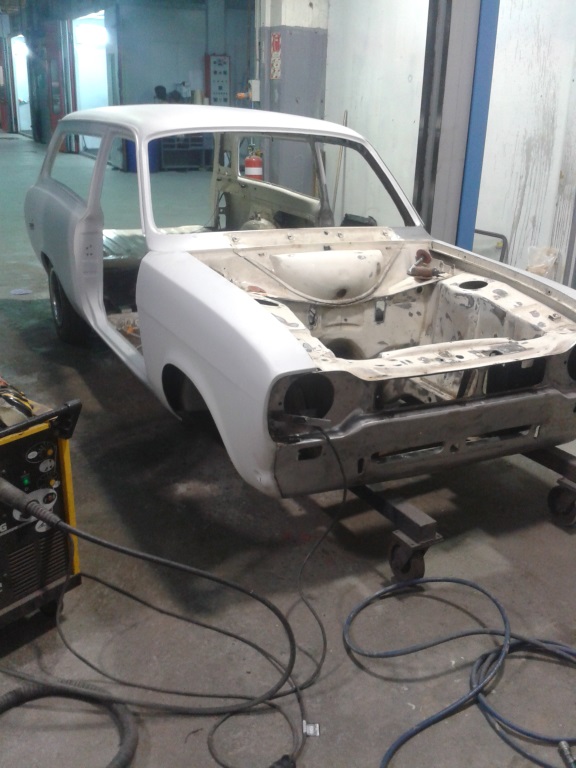
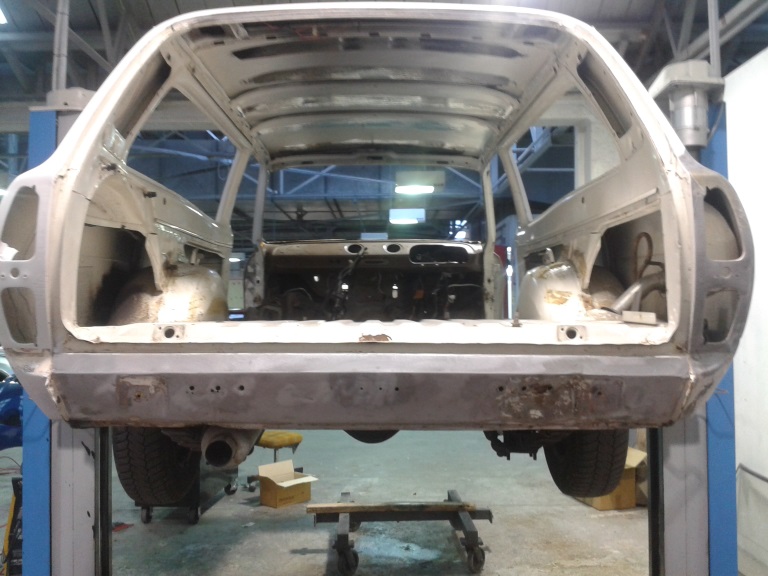
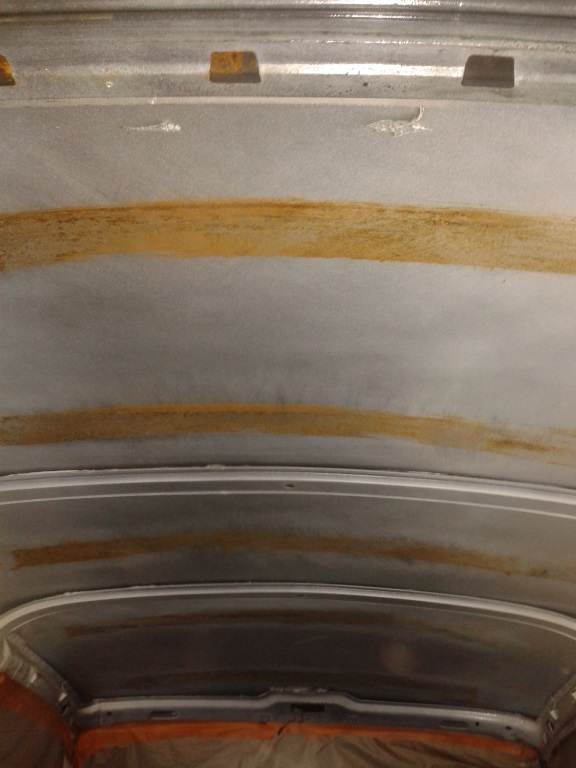
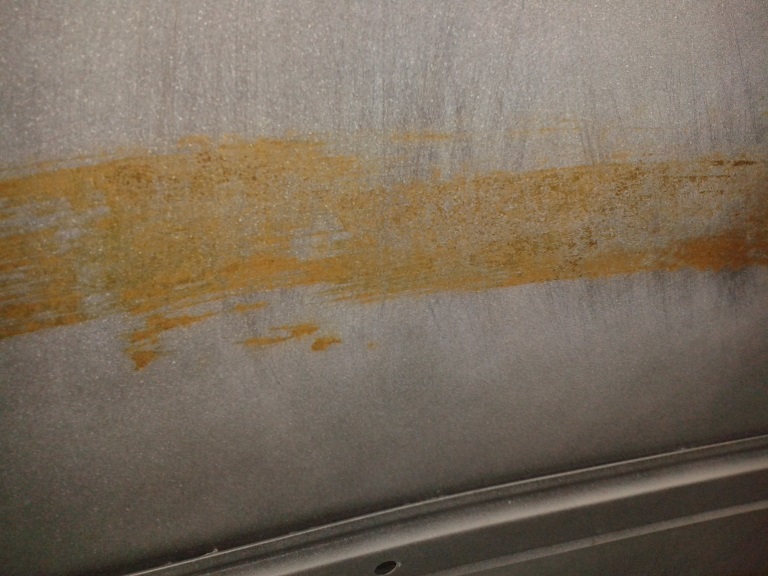
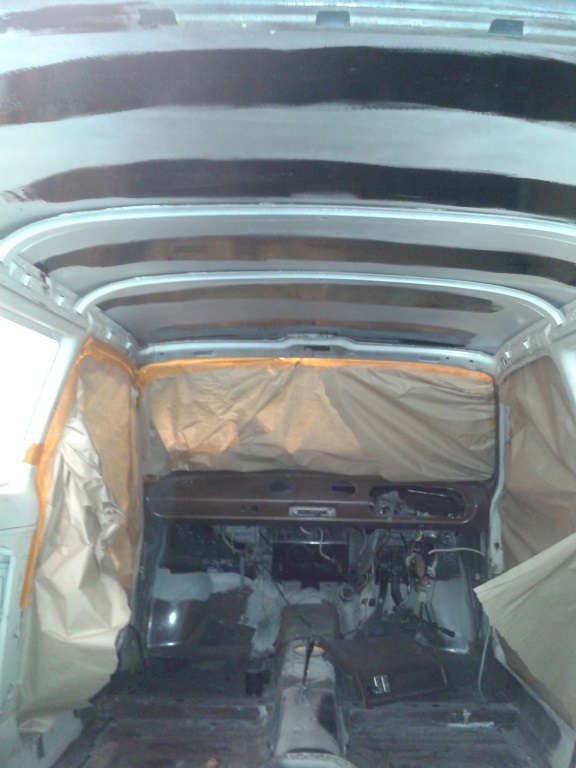
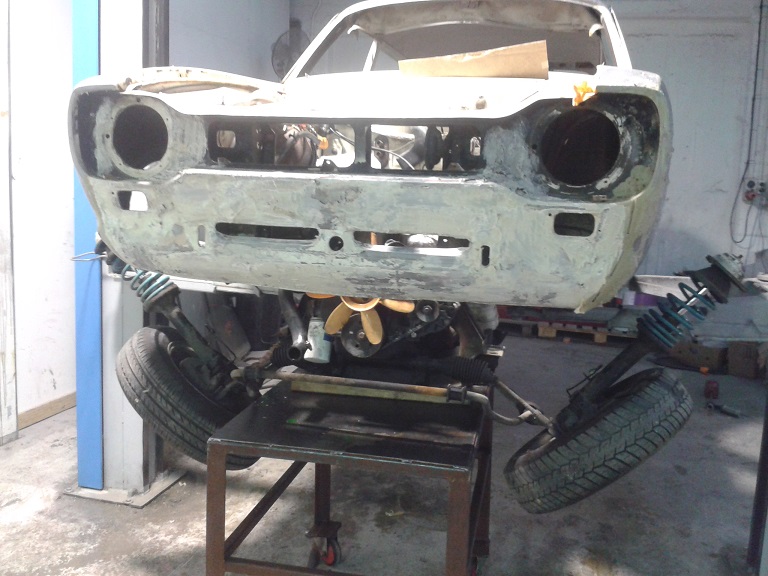
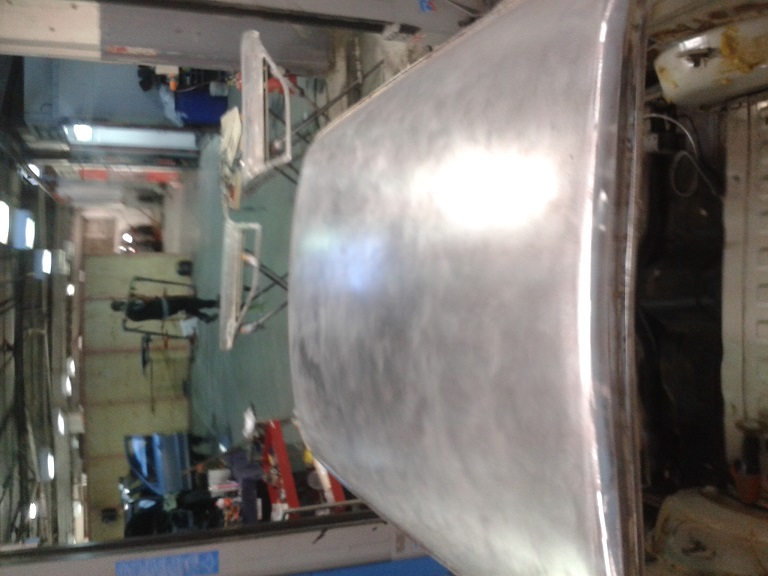
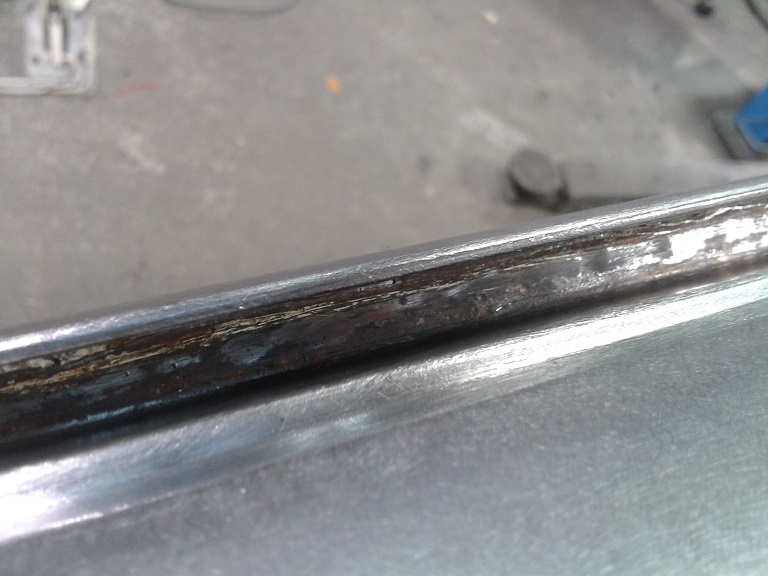
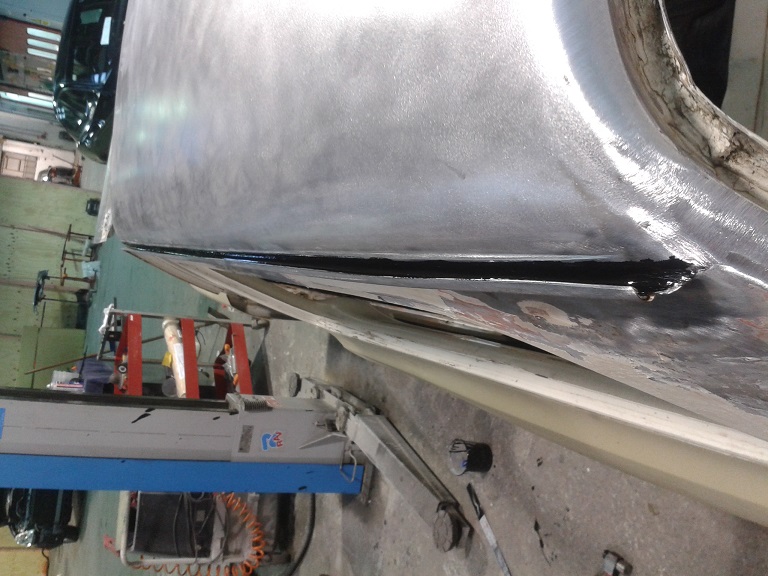
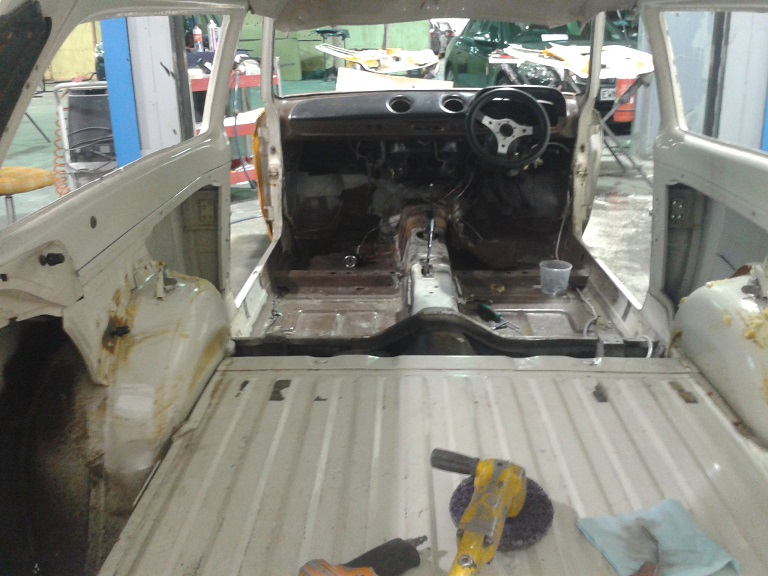
The roof fully cleaned up, sorry the photo is from my phone and pretty shietty It's a super close up because it was to hard to get a photo where you could make it out any further awat but some areas in the drip rail had some pitting from rust, gave both entire drip rails a massive wire wheel and then three coats of POR15 above and below Will have to try feather out the POR edge before priming and will also use a seam sealer once the car has been primed to give the drip rail another 43+ years. Pretty much everything out of the car now Have since removed the steering rack and wheel, just have the pedal box, hand brake, heater box and roof lining yet to remove.
-
Sorensin's 1972 mk1 estate of the escort type
Sorensin replied to Sorensin's topic in Projects and Build Ups
Hey so it's been a couple slow day days of not too much progress mainly removed pretty much everything you can imagine from the car and just done a whole lot of paint stripping. Plan is get most of the body metal prep'd and epoxied tomorrow(Friday) before the weekend. This makes paint stripping look so easy and fast It isn't!! Me being to wussy to go anywhere near a seam means i can't paint strip off much of the doors so lots of strip disc, wire wheel and sanding required. Because you can never have too many paint stripping photos?
-
Sorensin's 1972 mk1 estate of the escort type
Sorensin replied to Sorensin's topic in Projects and Build Ups
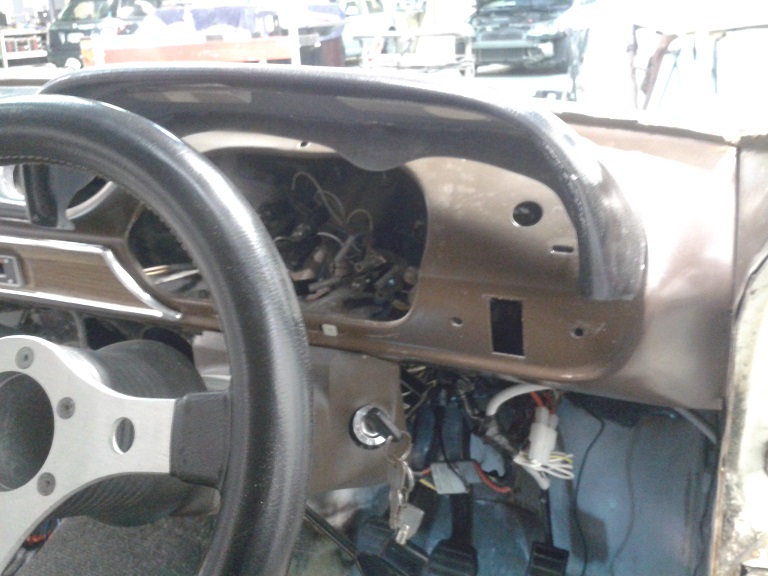
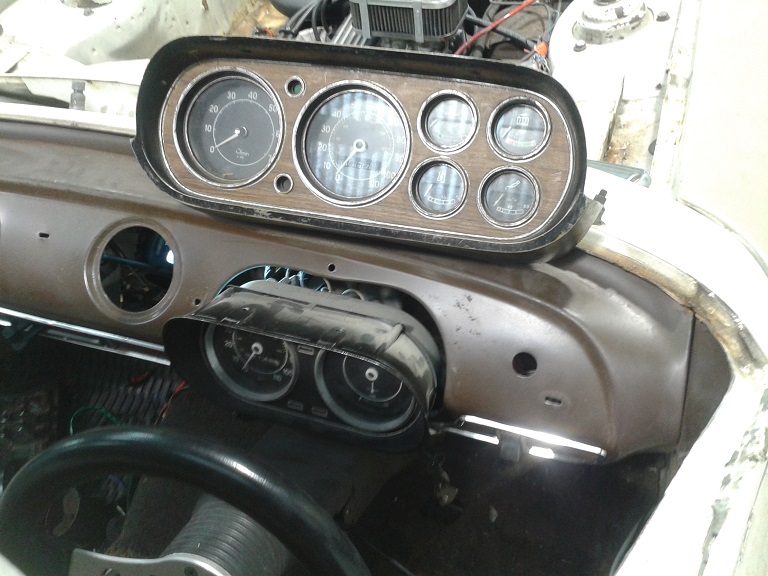
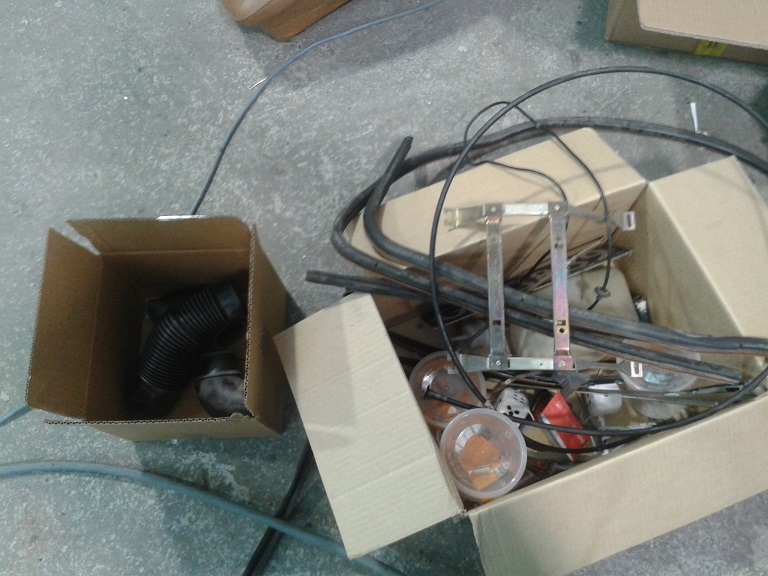
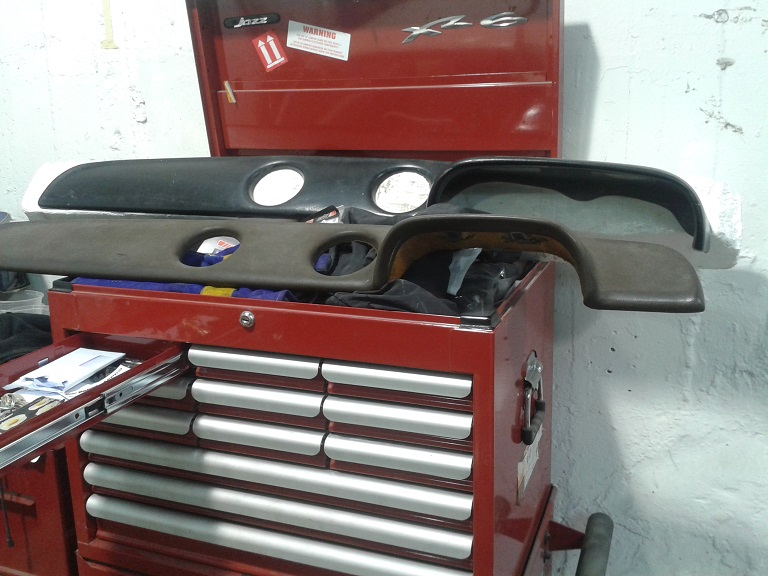
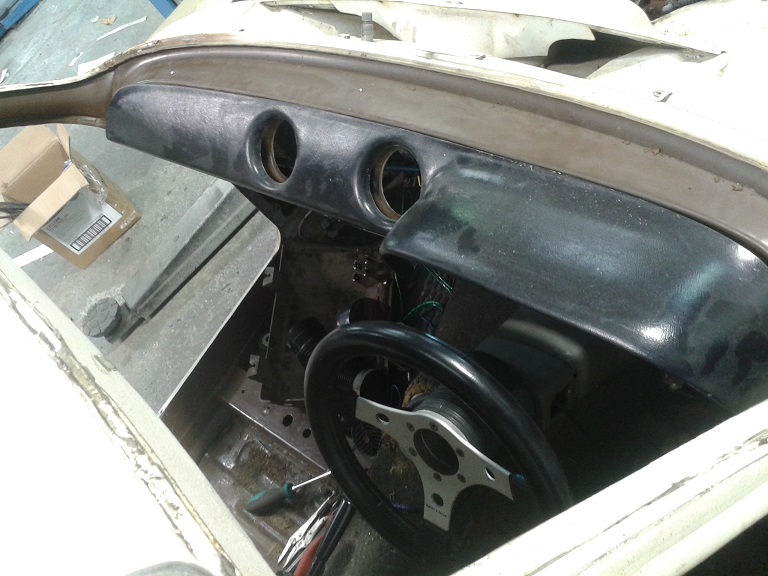
So today was a little disappointing, didn't achieve as much as I would've liked. I spent quite a while trying to get the doors off as the roll pins weren't the easiest things to remove, will also be getting new roll pins. I also had to run out to Petone because I needed more paint striper and our rep wasn't going to be coming in till Wednesday and it can no longer be shipped so that wasted some of my precious time I did manage to get a good amount of the car striped though and labelled nearly everything and put into containers or boxes. I also removed the old dash and crash pad in preparation for the new one. I'm changing over to a GT dash, have included picture for those who don't know what the difference is. I drilled the new mounting holes and had the crash pad put in place, I have marked where I need to cut out behind the dash to fit the new dash but couldn't find my googles so skipped that and continued on with the pulling apart of the car as time was stressing me out. So things I got done Removed heaps of stuff windows: doors, most of the interior, moldings, vents, start of enginge bay, mocked up new dash, put paint striper on car roof and door, ordered new gear reduction starter.
-
Sorensin's 1972 mk1 estate of the escort type
Sorensin replied to Sorensin's topic in Projects and Build Ups
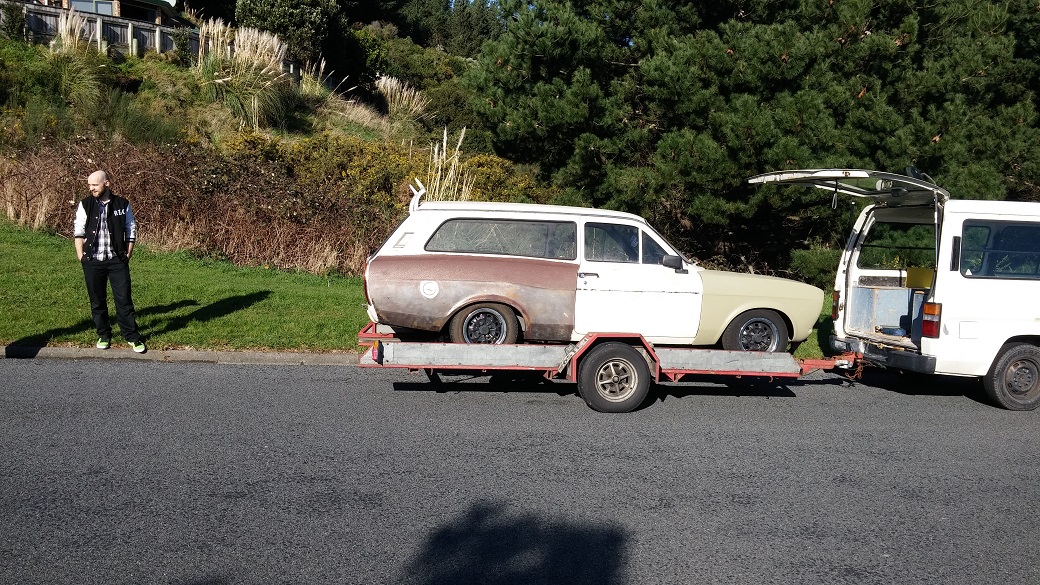
OK so took the car to work today big thanks to viva speed for the car trailer hire and a huge thanks CDL for taking the car in on the trailer and putting up with the crash start issues that came with it. So went to start the car today, started by cleaning the spark plugs to discover one was damage so I had to go buy a replacement, then the battery was super flat and even jumping off a running car wasn't turning it over properly, eventually after charging the battery and jumping it I managed to start the car. I let it warm up then shifted out of the garage. Soon after leaving the garage I managed to stall it, now you think it would be easy to restart now it was warm..? HAH the starter decided to give up, didn't turn over at all! Had to get the GF to help crash start it, eventually got it going again but manage to stall it a couple times trying to load onto trailer, crash start every time to get it going again. After that CDL trailered it into my work where we had to crash start it again and then a couple more times again after stalling some more. Anyway it's now waiting at work for me Monday morning. Here's some pictures of the car on a trailer. As you cabn see some of the car is in expoy from when I started trying to fix the boday last time and one panel is still in bare steel. Metal prep worked fairly well as the rust isn't that bare considering it's been bare steel for years! So some more things to add to the list of things I want to get done: get new starter(hopefully a gear reduction one) fix hand brake put oldschool sticker on window
-
Sorensin's 1972 mk1 estate of the escort type
Sorensin replied to Sorensin's topic in Projects and Build Ups
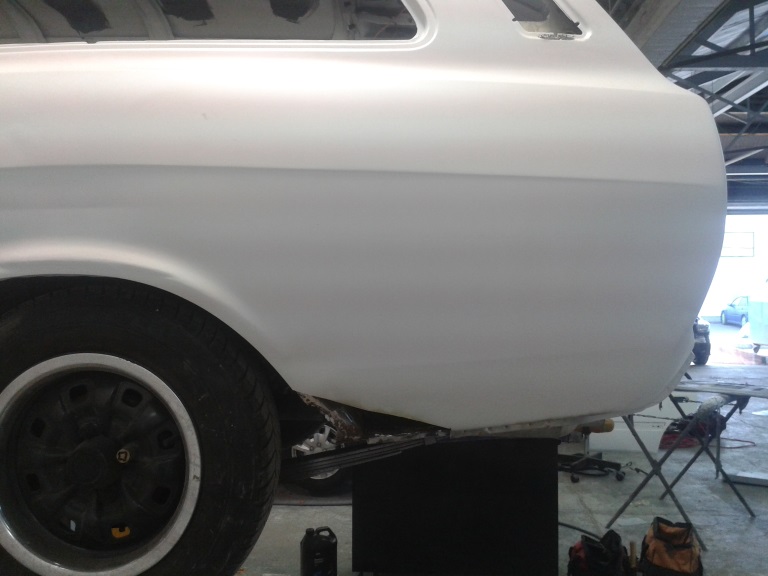
The plan/s ok so some things I hope to get done... Full bare Metal strip of the outside of the car Rust Repairs (so far known are left door, left front and left right guard, the RHS looks pretty good atm) Other panel repairs (serious known so far left front guard and front panel, lots of other smaller repairs aswell) Epoxy car Fill car paint car Other repairs find out why the car is always tilted and why the gap between the rear wheels and guards is differnt on each side(this scares me) Install 5 speed gearbox Convert brake booster over to a remote booster Install brake upgrade Sort wheels tidy up engine bay possibly look at getting a new starter/sort out battery cca issue Fix passengers seat Fit GT dash and crash pad Fit more/better sway bar system Sort out interior of car update: get new starter(hopefully a gear reduction one) fix hand brake put oldschool sticker on window -
Sorensin's 1972 mk1 estate of the escort type
Sorensin replied to Sorensin's topic in Projects and Build Ups
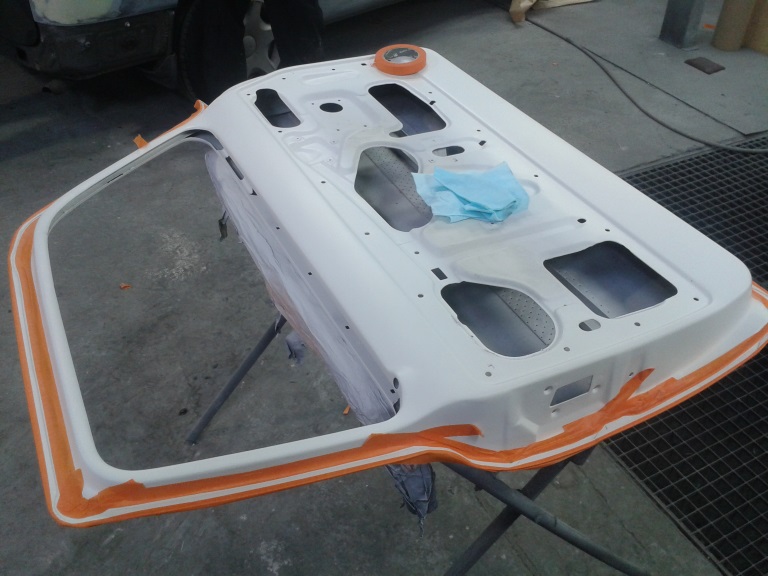
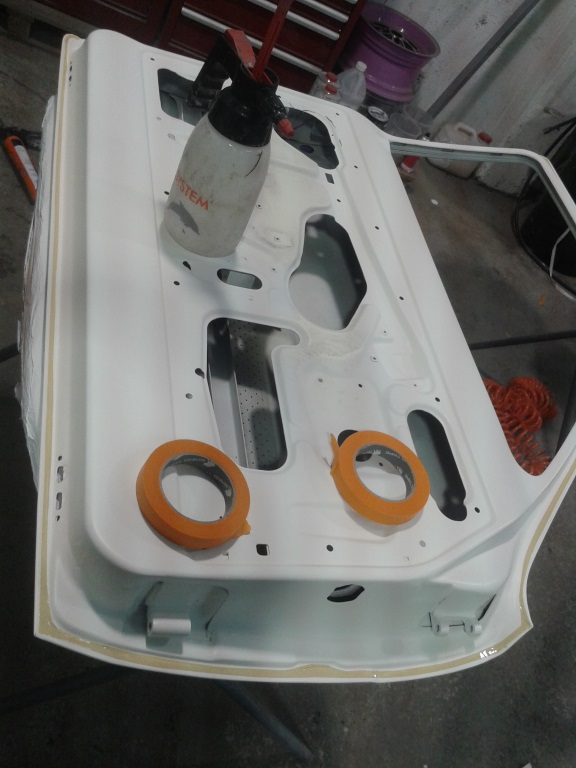
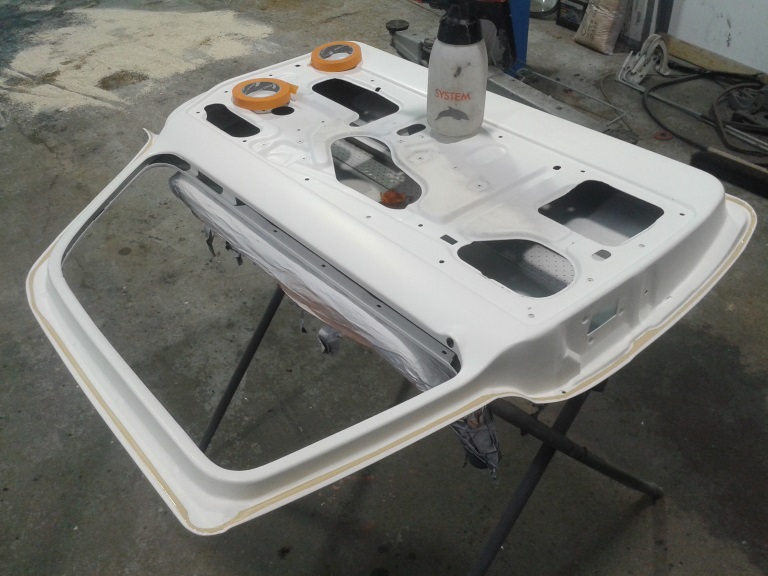
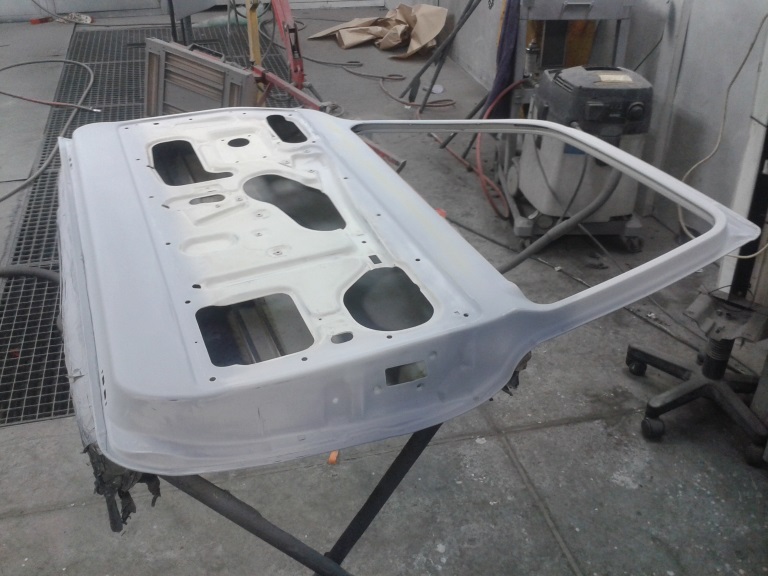
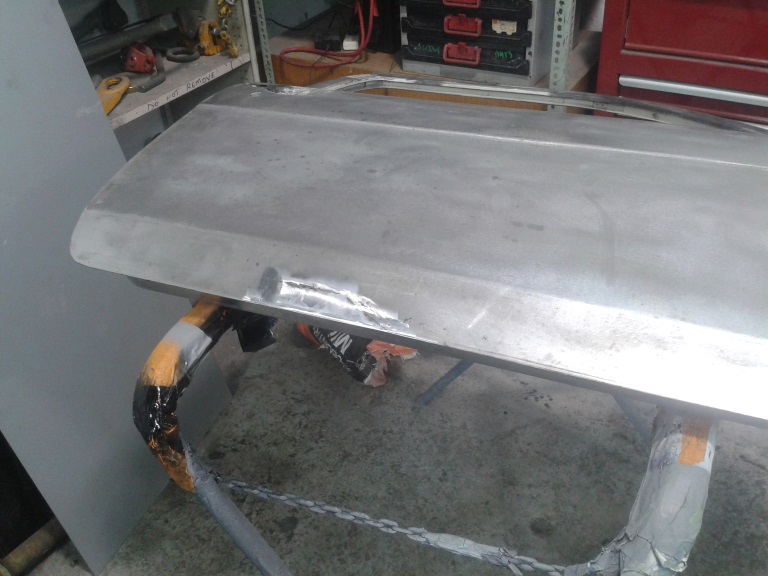
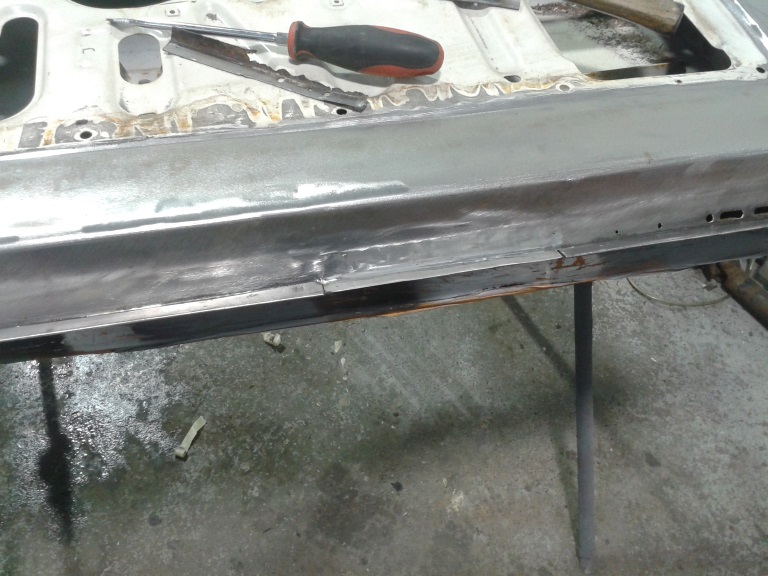
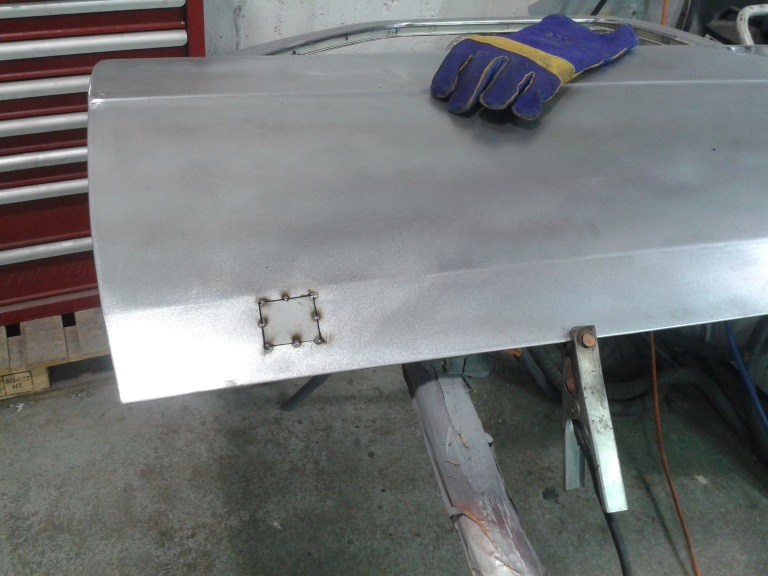
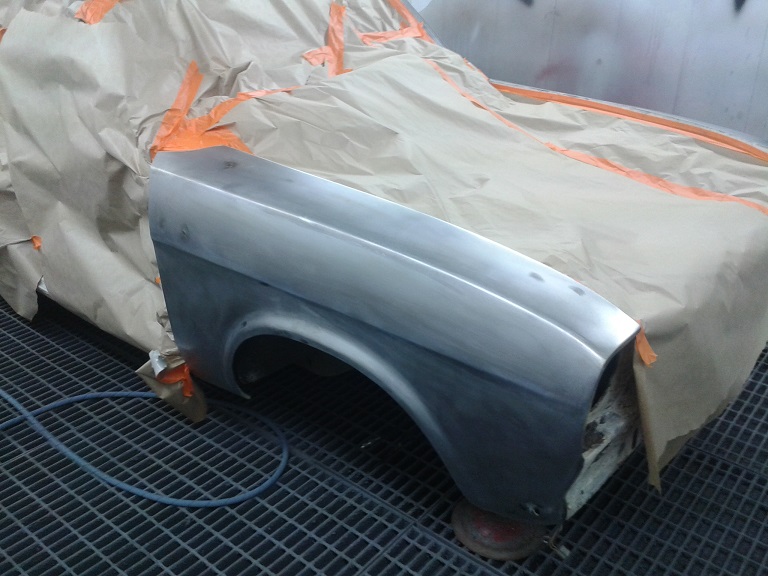
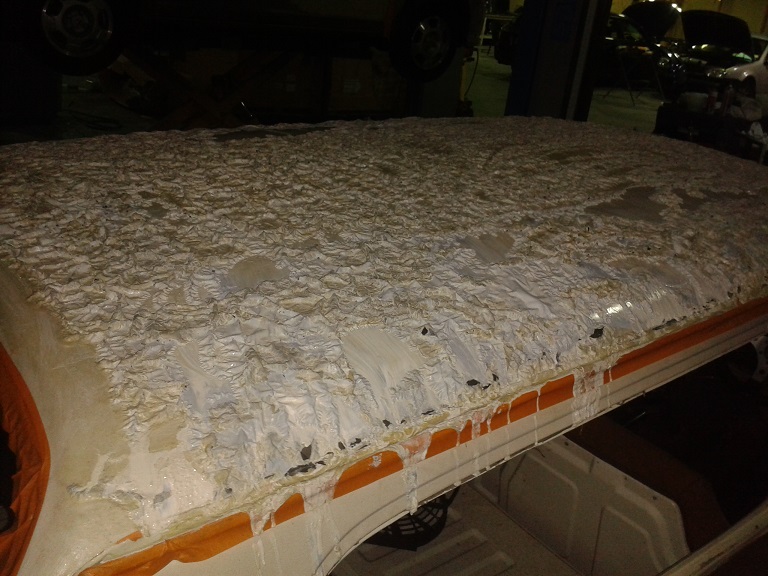
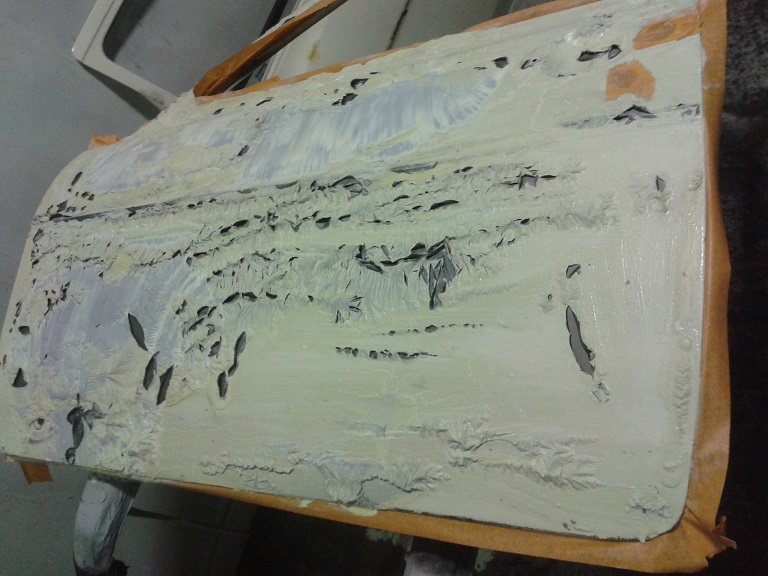
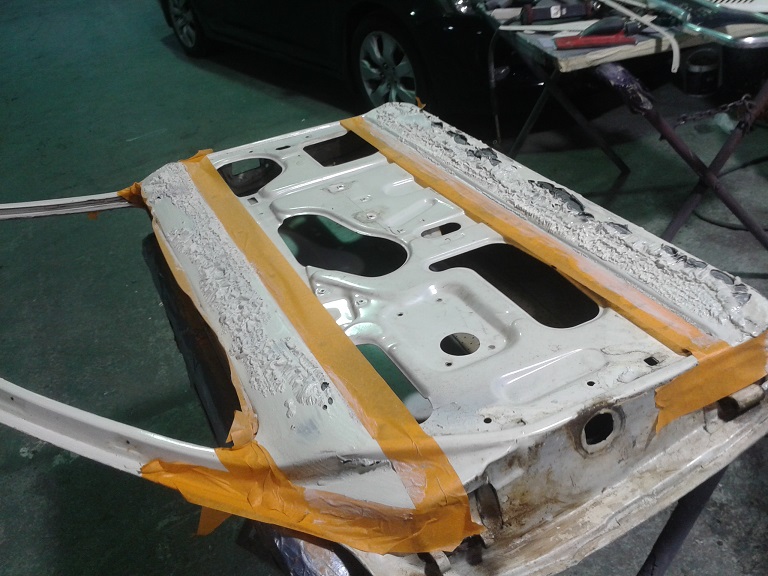
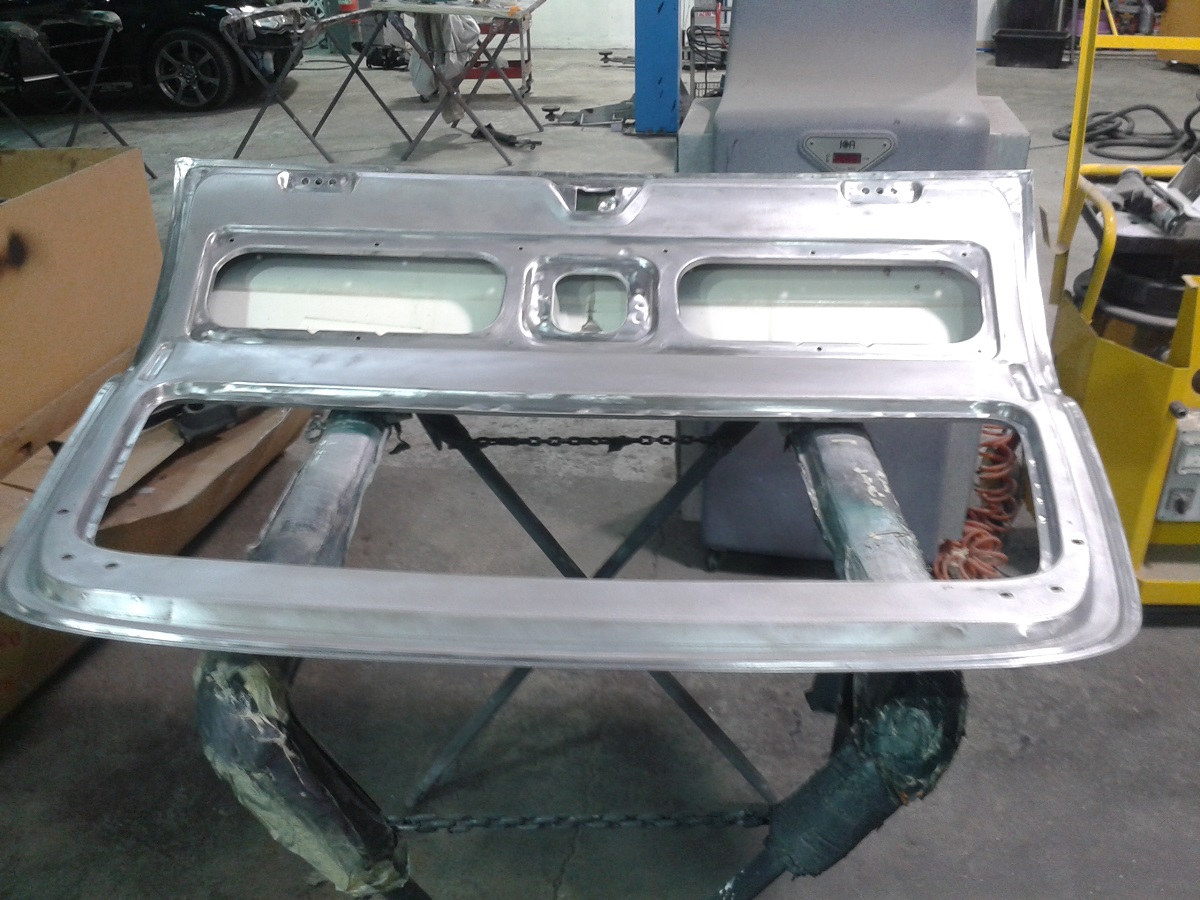
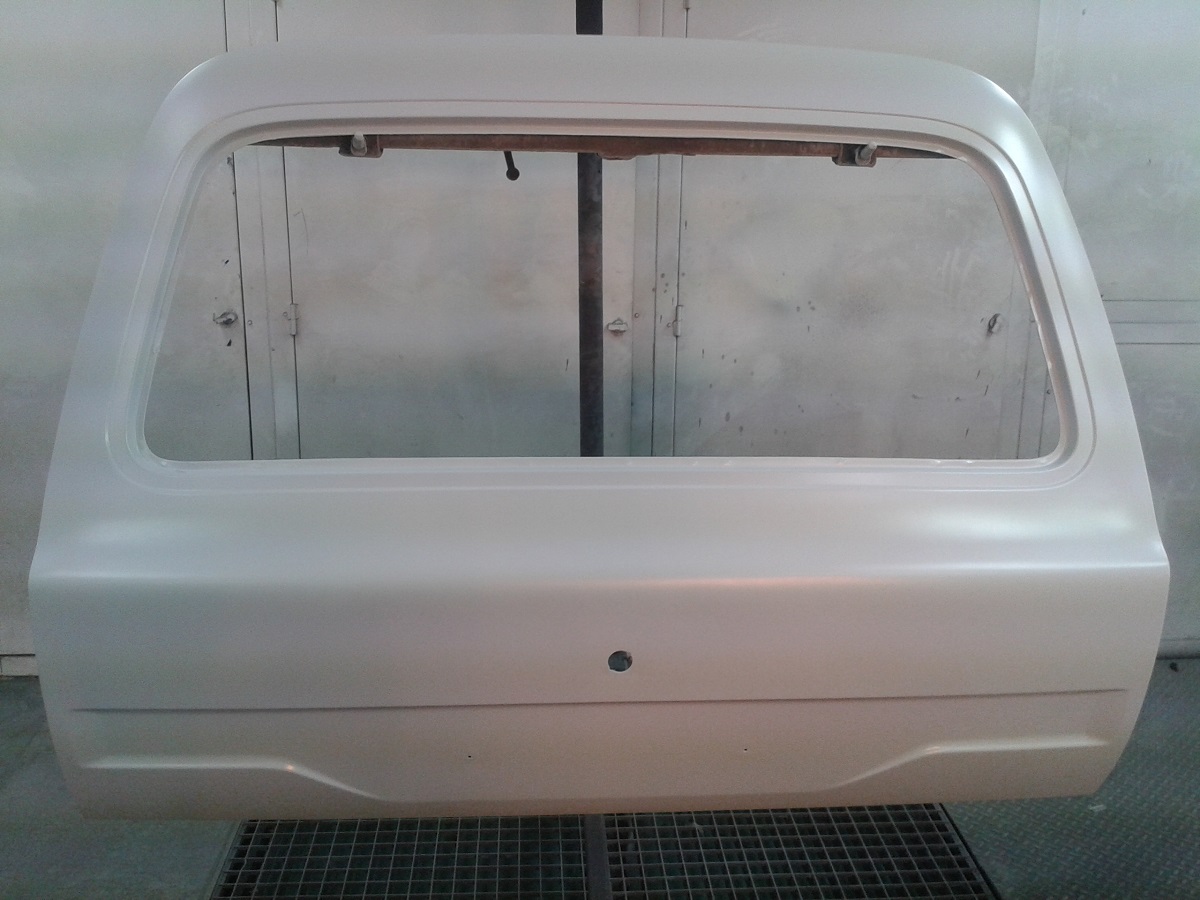
Also the tail gate got the same treatment at the same time I rounded the top edges of the tail gate with a body file and file to remove some of the sharper edges which were there from factory where the edges had been folded over. I also welded up the badge holes of the tail gate just like the bonnet. Paint Strip While the main surfaces I used paint striper on I was careful not to use or get any around any seams just incase some made its way into the seam and didn't come out till after the paint had been put on, I used sand paper, a small wire wheel and a strip disc to do all the areas I wasn't happy using the the paint striper. Then the metal prep (close up this time) again very happy with this result, I think the key was just keeping everything clean (throwing away well used water, rags and scotches etc) Here it is in Epoxy A big thanks to Hayden who actually primed this for me as he's the man at painting!
-
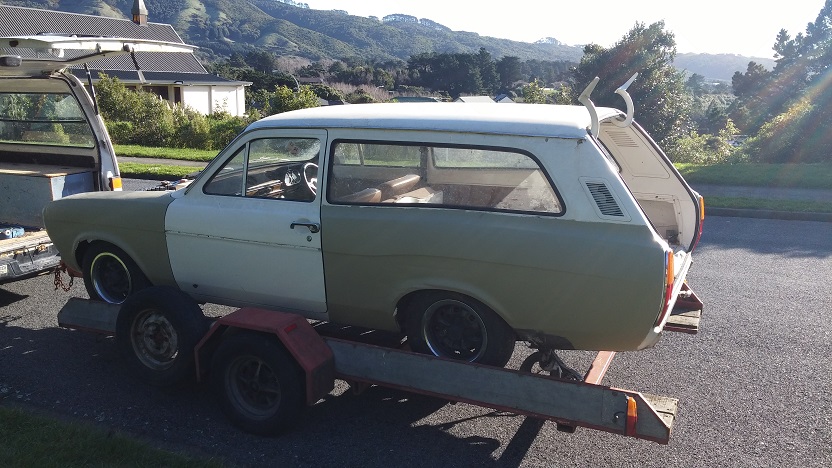
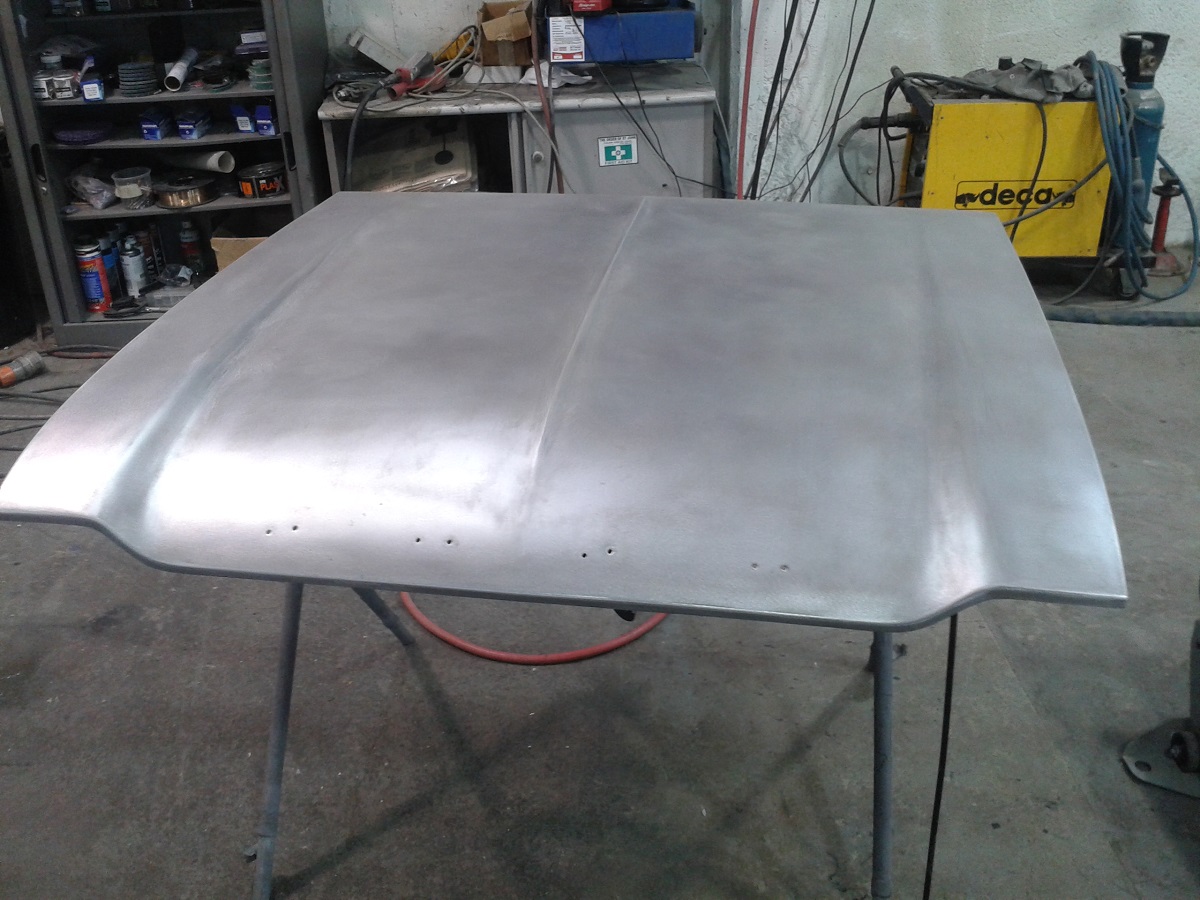
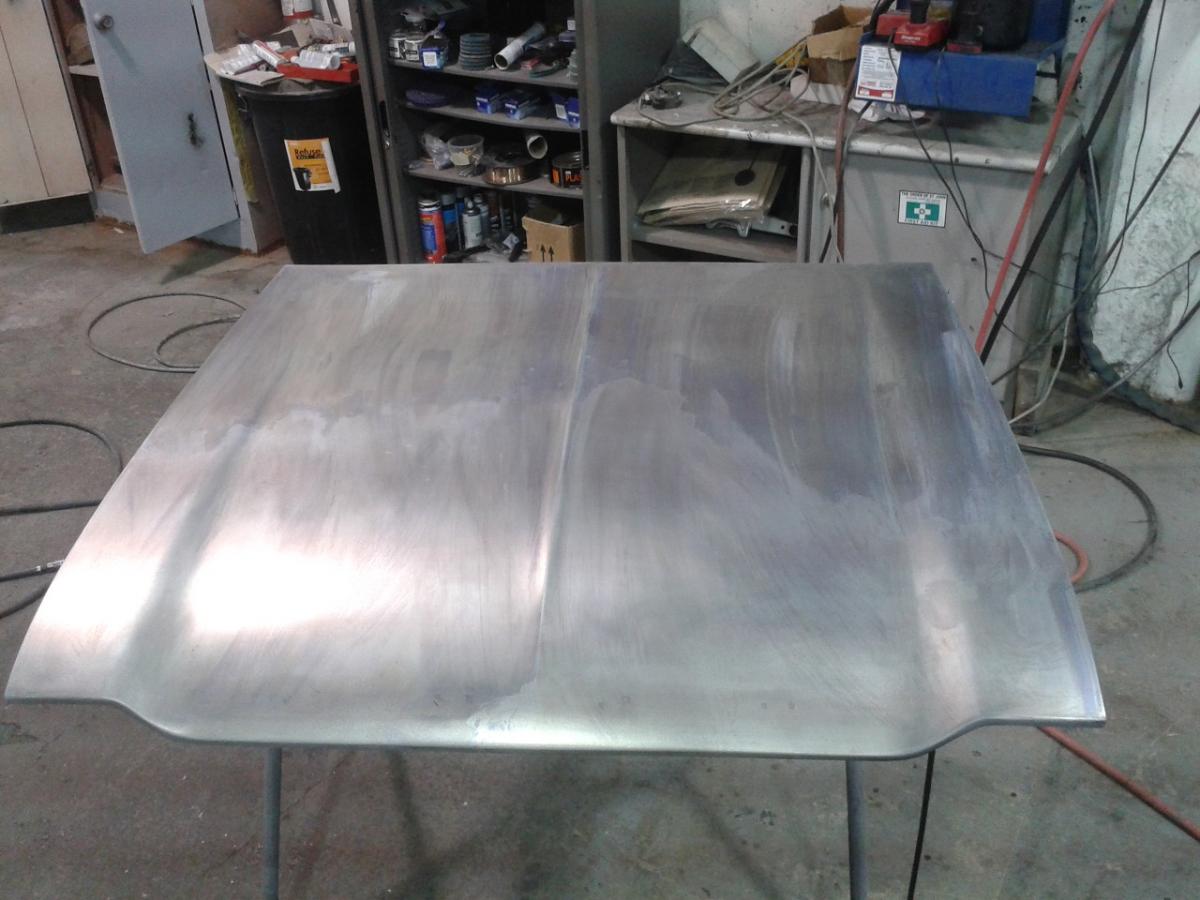
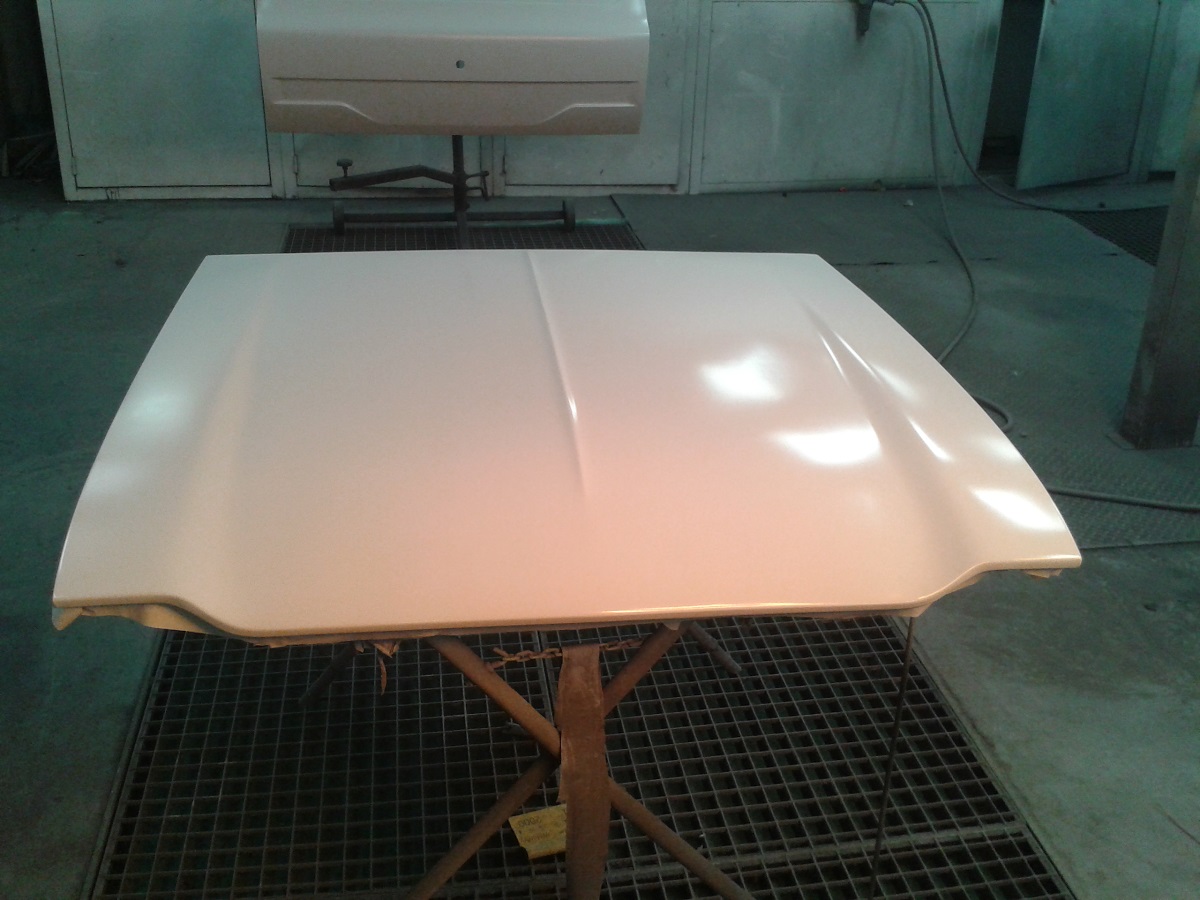
Hey guys Welcome to my escort build thread. So I've finally got my A into G and I'm going to get my escort back on the road(It's been a few years). I have purchased all sorts of new goodies for her which I hope to show you over the next few weeks as things progress. I'm a panel beater by trade and have take two weeks off work to get some serious work done on her. during those two weeks I have permission to have my car at work which makes things a little easier for me. I also have a week in between my two weeks off where I will have the car at work and will trying to spend some extra time there to get some more hours on her. So with the two weeks and any overtime hours I can sneak in I'm hoping to get a good 100hours to spend on her. So lets start with some not so exciting images of my bare metaled bonnet and tailgate. Bonnet after being paint Striped. Super Lucky to have a bonnet this straight, there are a couple minor imperfections that will require a small skimds but over I'm stoked with it, you may have also noticed, I welded up the badge holes. Don't get to angry at me please, I kept the badges so If later I decide I want to run them I can but at the moment I'm not planning to, I also keep the heat right down while welding so there is almost no distortion, also please note behind the badge holes is where the worst rust of the panel was in both cases of tail gate and bonnet. Bonnet after Metal Prep First time metal prepping in years, so careful to keen everything uber clean and pretty happy with the result. Bonnet in Epoxy primer Discission Thread
-
Wellington Monthly Meet - Discussion thread
Sorensin replied to KKtrips's topic in Lower North Island Region
Hey, totally late but I would have been keen to attend but alas I also have the sickness hopefully see you peoples next month -
Just too popular!