
- Popular Post


Abarth
-
Posts
885 -
Joined
-
Last visited
Posts posted by Abarth
-
-
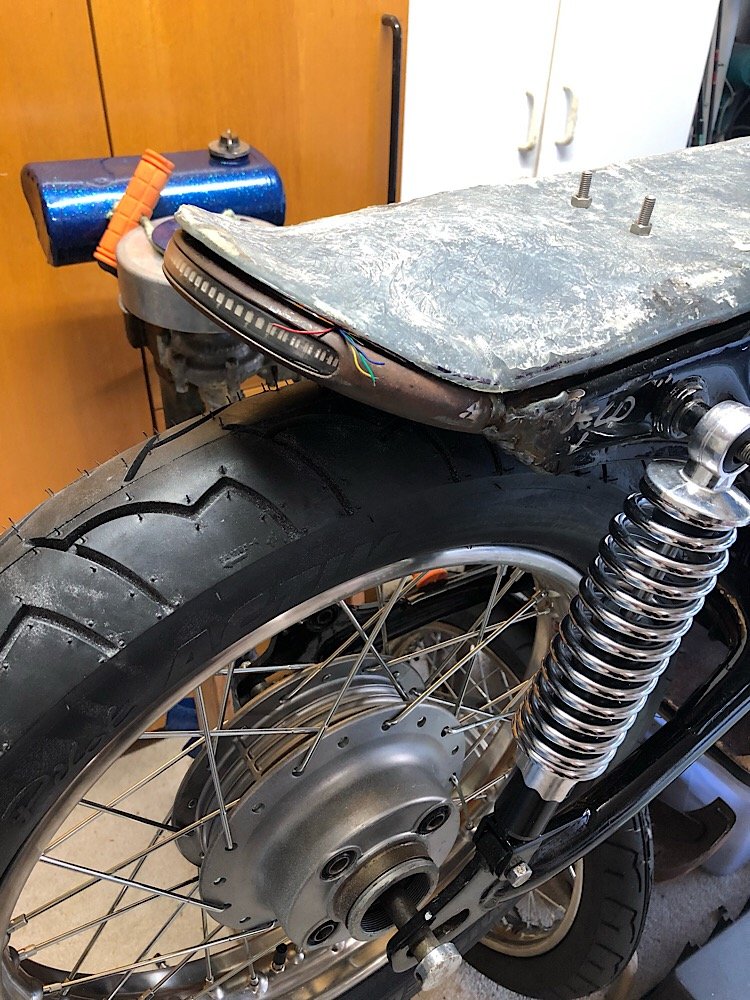
Had a play with the headlight. Managed to order the wrong size so it’s huge haha but was keen to see how it looked with a yellow tint.
Once the smaller one arrives I think we’ll keep the yellow as it pops against the blue.
Next is the wiring, so much to do before the Distinguished Gentlemen's ride in Sept!!
Edit: man that rear tyre looks huge, thinking of down sizing as it looks a big out of proportion in the profile shot.

-
 6
6
-
-
- Popular Post
- Popular Post
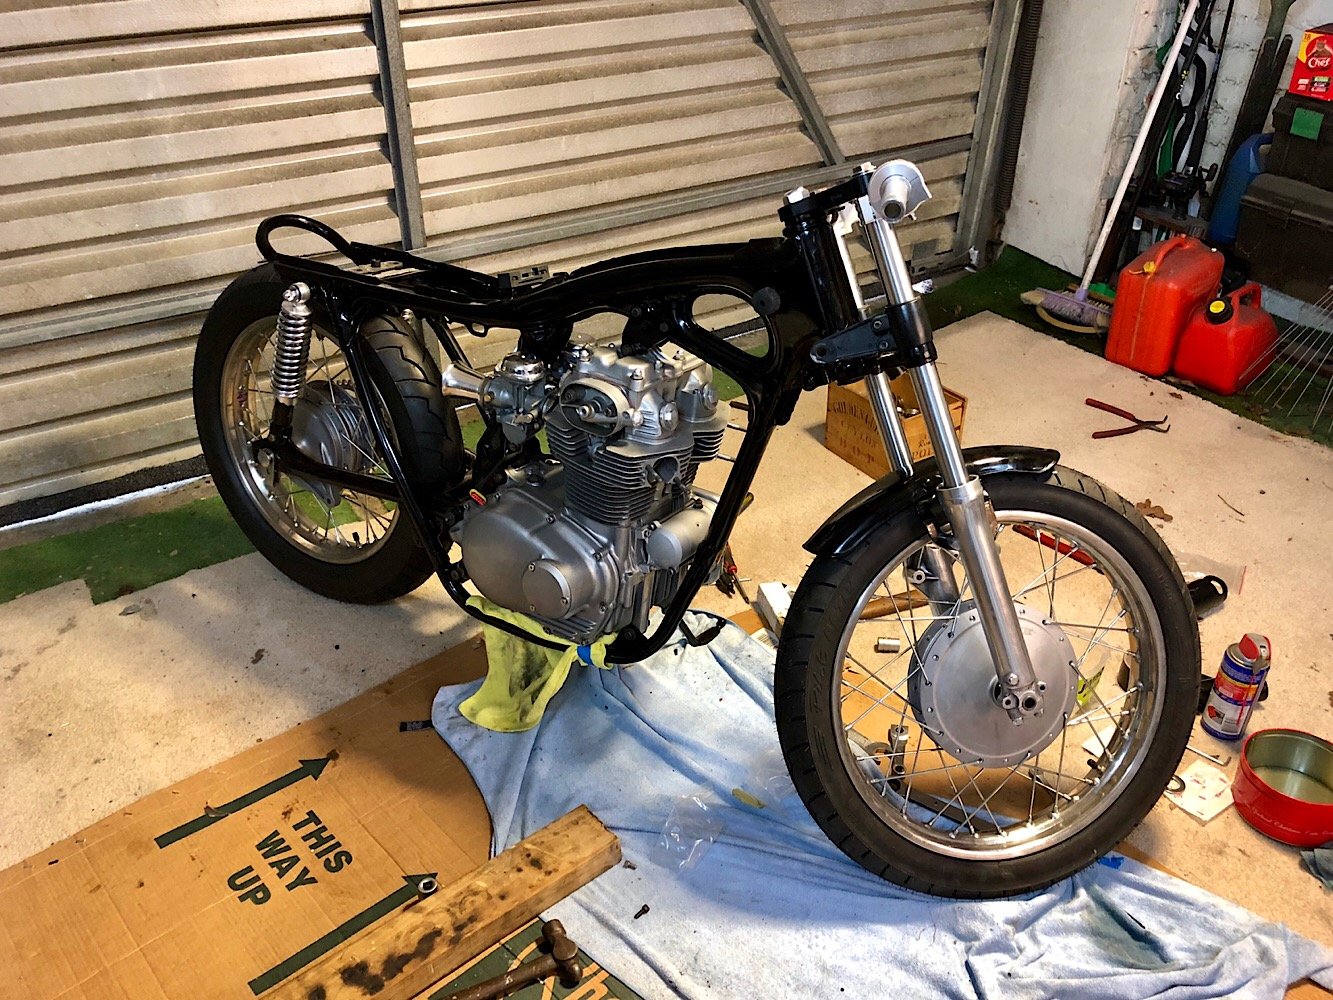
Painted the frame and got the motor back in the frame today. Lots of figuring out where all the bolts went as most of them were sitting in a bucket before buying.
Front guard turned out perfect, so many hours spent to keep the rolled steel edge on the front. Stoked with how it turned out.
On its feet for the first time!
Placed all the pieces to see how it looks all together..
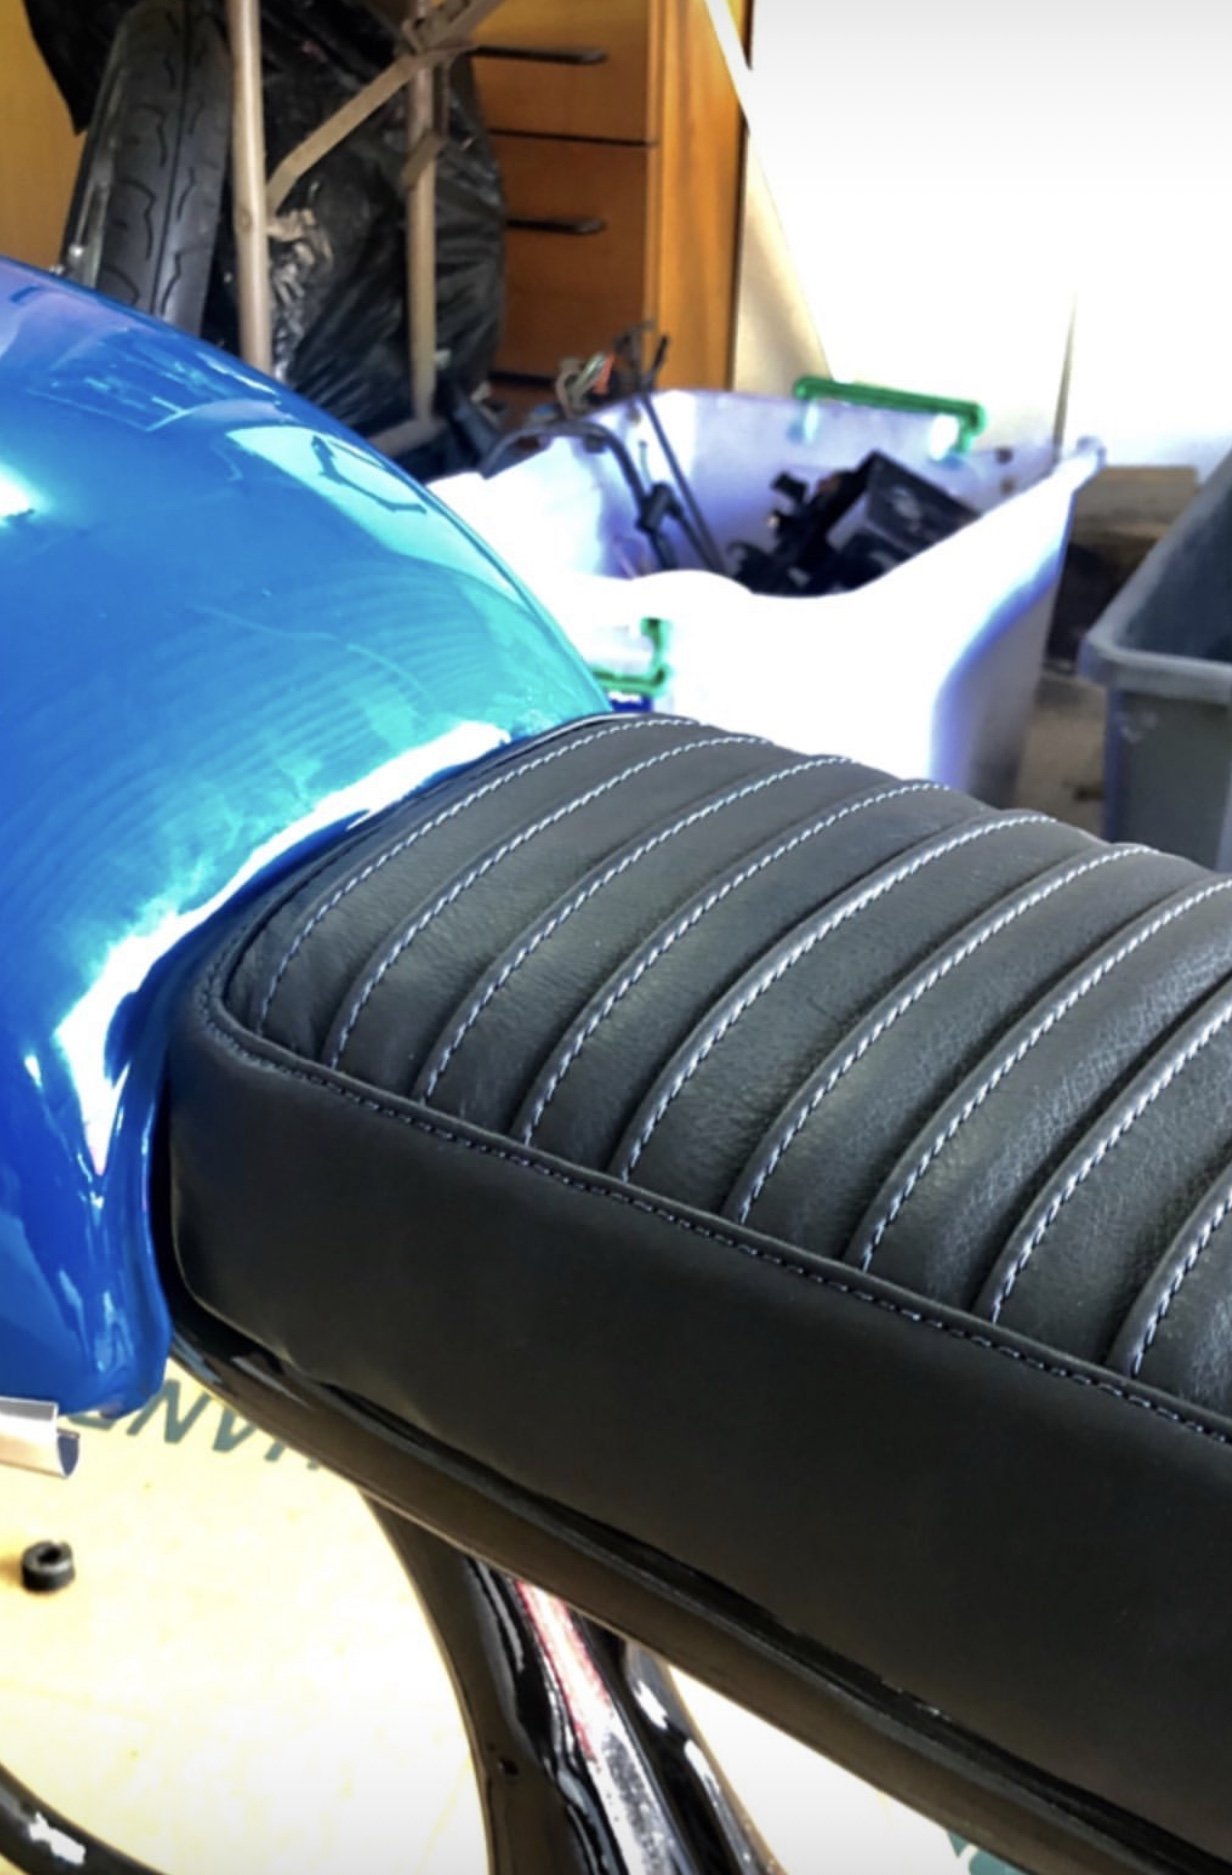
Big shout out to Eliav for doing the upholstery, leather with the dark blue stitching looks mint!
-
11
-
- Popular Post
- Popular Post
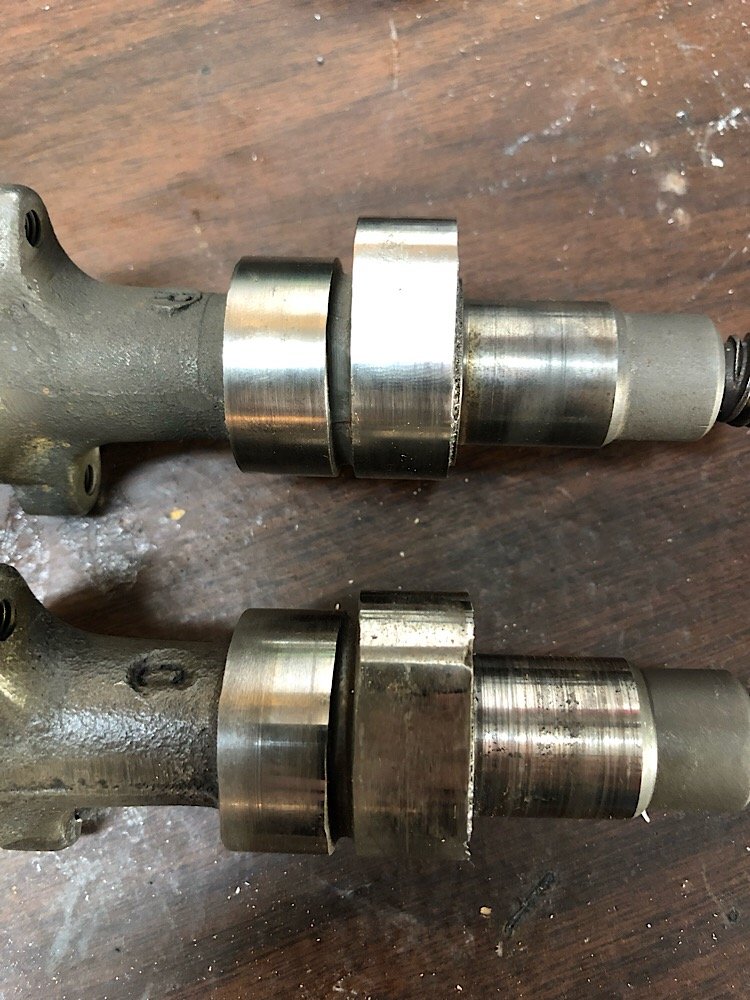
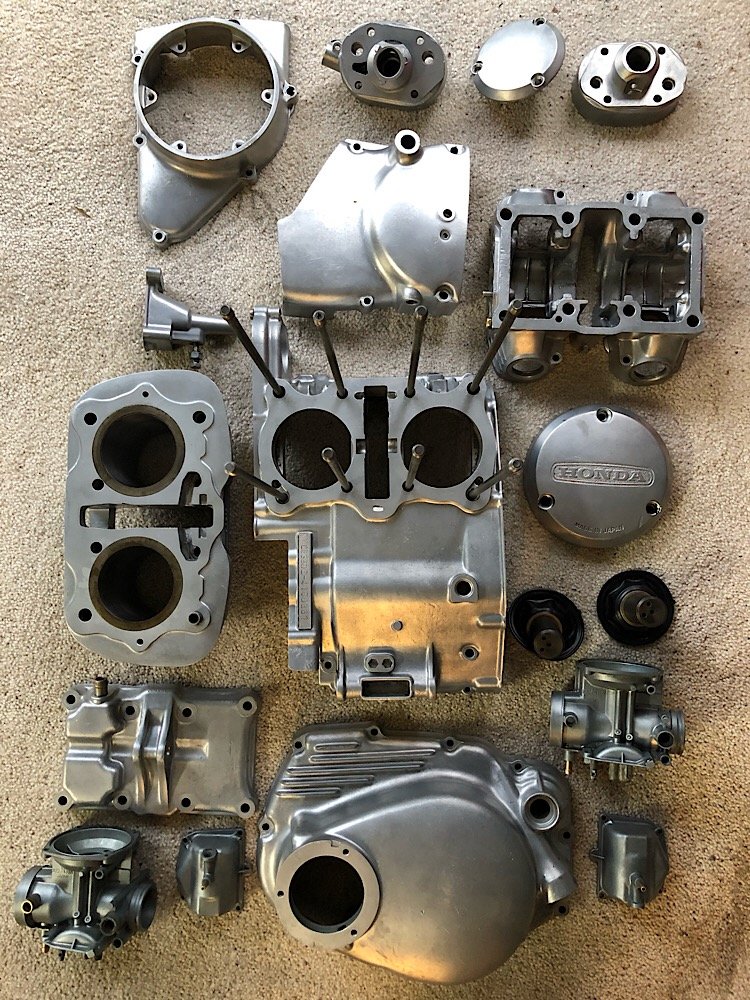
Engine build has been a bit more of a mission than expected.
Found a replacement for the cam, new second hand one is mint compared to the old one. Can see the old cam on the bottom with chunks missing from the lobe and grooves ground into the surfaces. Also found some good replacement rockers as those surfaces were equally as worn. Pretty much all the internals are either new or as new in the engine, pistons, gudgeon pins, rings, cam chain, tensioner, cam, rockers, etc... hopefully this thing isn’t rattley when it fires up.
-
10
-
Thanks mate, I’ll get in contact
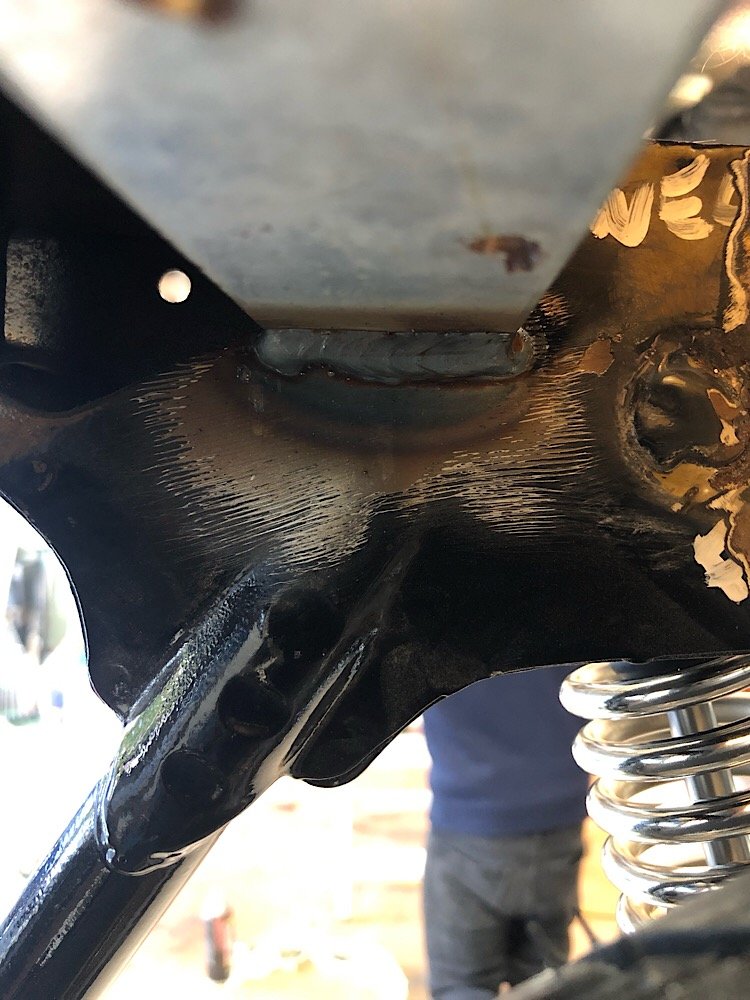
Frame is back from the welders, stoked with how it’s turned out.
Fitted the rear wheel and took some measurements, fitment clears the frame even with the big tyre.
Added in a bracket to mount the seat latch mechanism too, also doubles as frame strength.
Continued on with the engine build today, got the piston and rings in, everything was going great until we noticed small cracks on the camshaft where the timing chain cog fits on. Turned out to be cracked right through on both sides. Yip that’s game over for that cam.
-
4
-
-
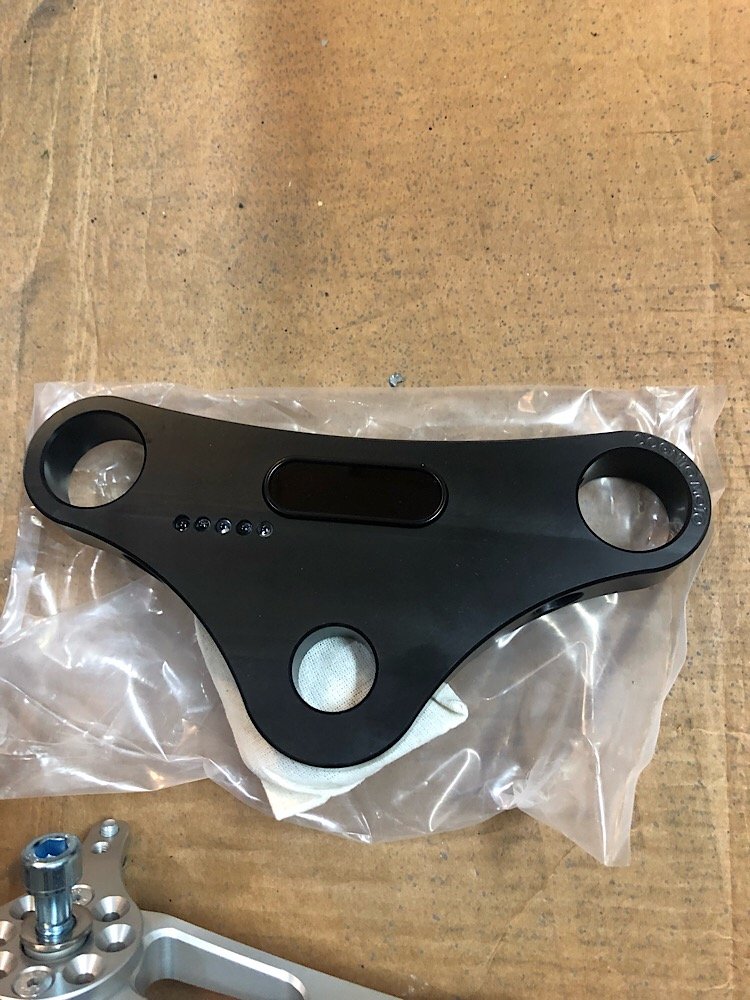
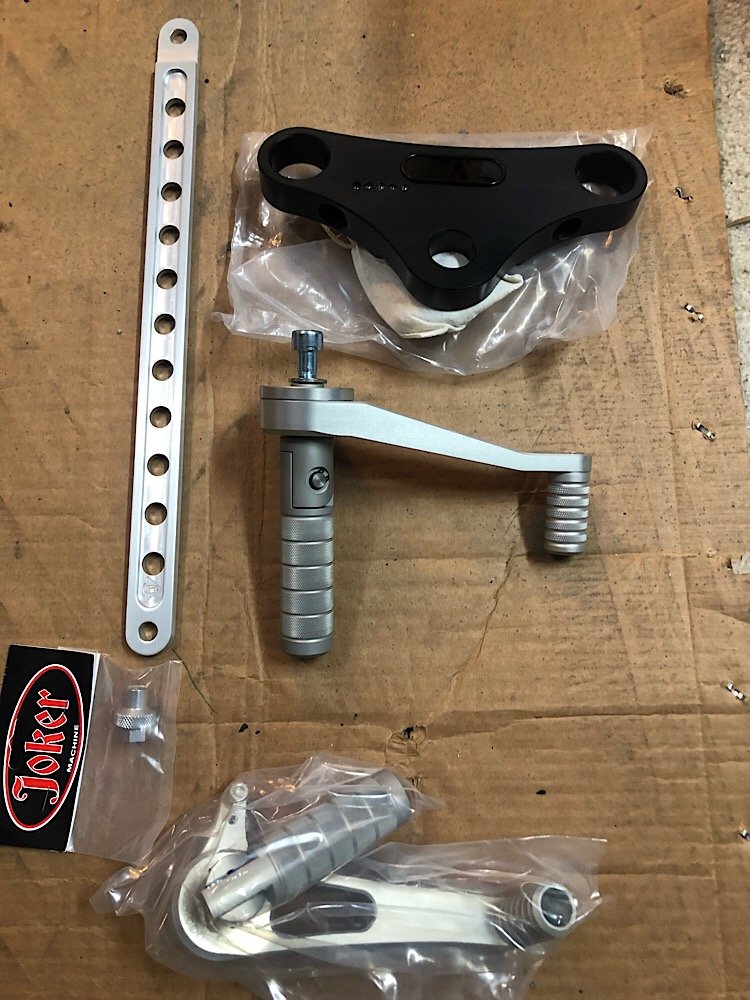
How to blow your CB350 build budget
CNC cognito tree with Motogadget Mini and warning lights built in.
A few Joker Machine parts, rear brake strap, tachometer cable plug, rear wheel and brake adjusters.
Then cognito rearsets, these are beautifully engineered.
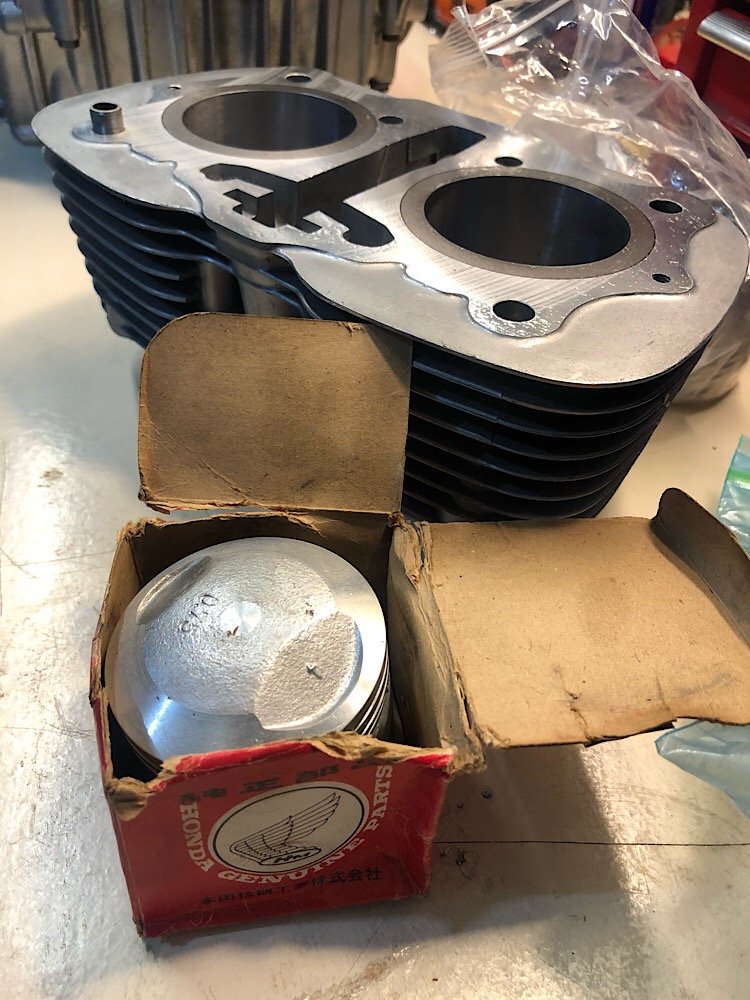
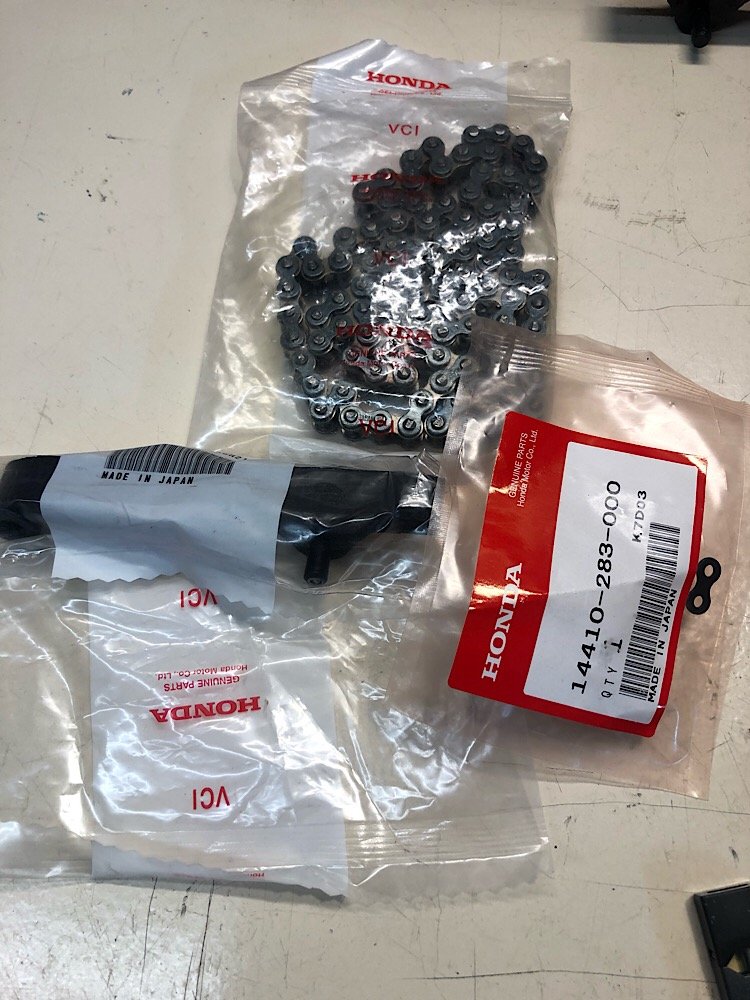
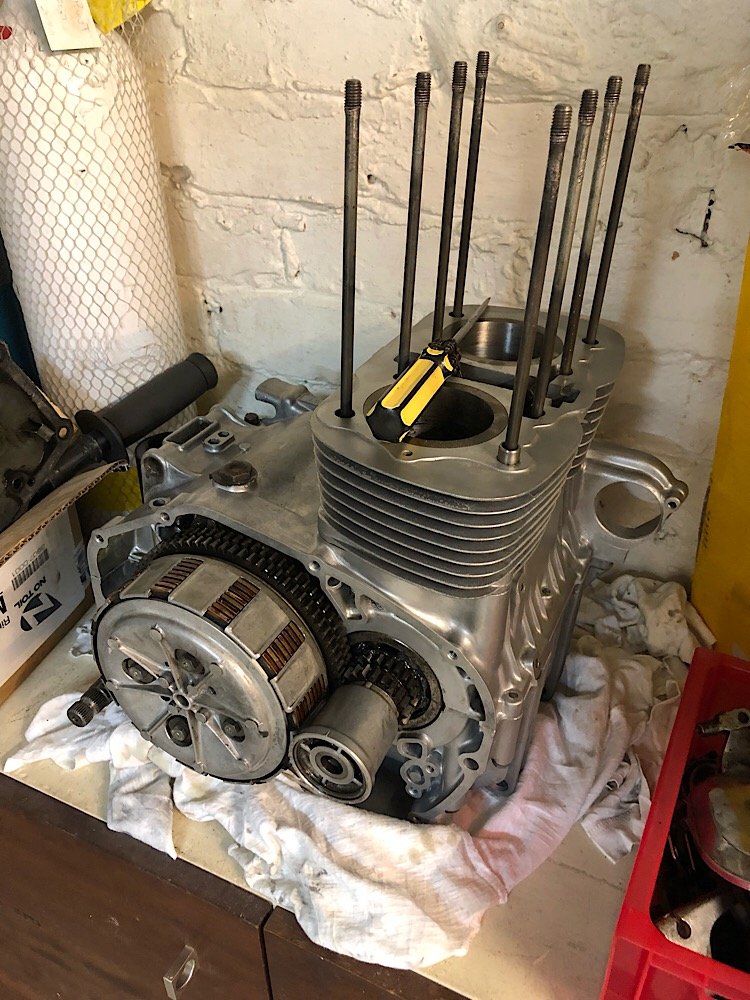
Anyways, pistons arrived so got started with the engine build. Added in all new cam chain and tensioner.
Had the pistons matched to the bores by Taylor’s Engineering, they also gave the head and cylinder faces a skim.
Checked the piston ring gap clearance at 0.010, well within spec. All was going well till we got to the gudgeon pins; in short these are rooted. So back to waiting for new ones to arrive.
-
2
-
-
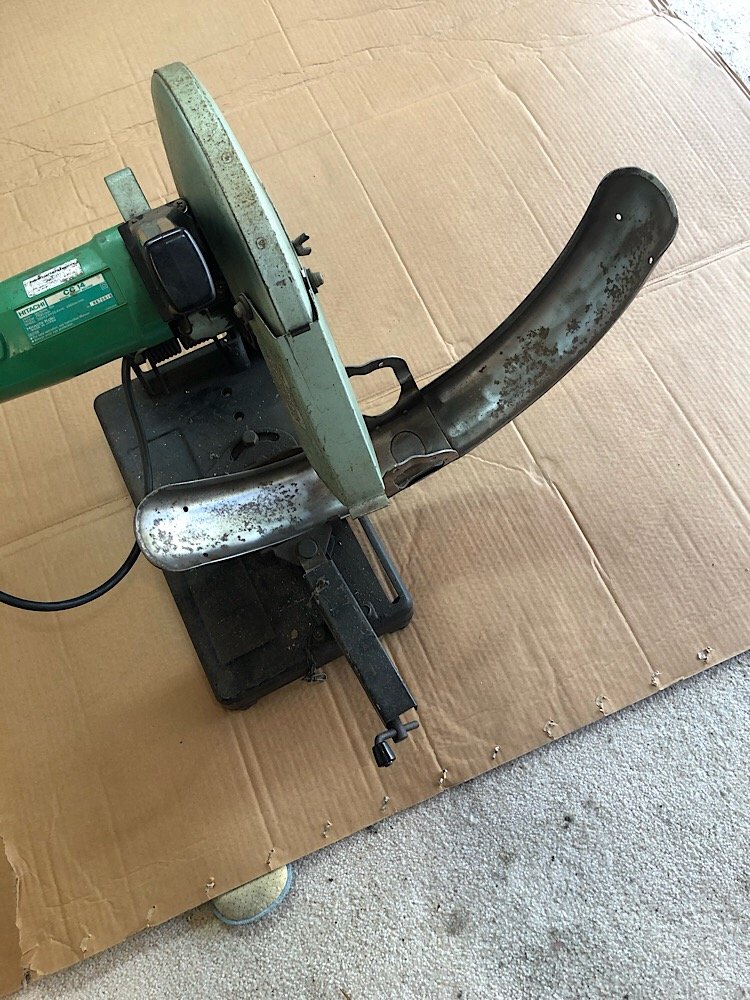
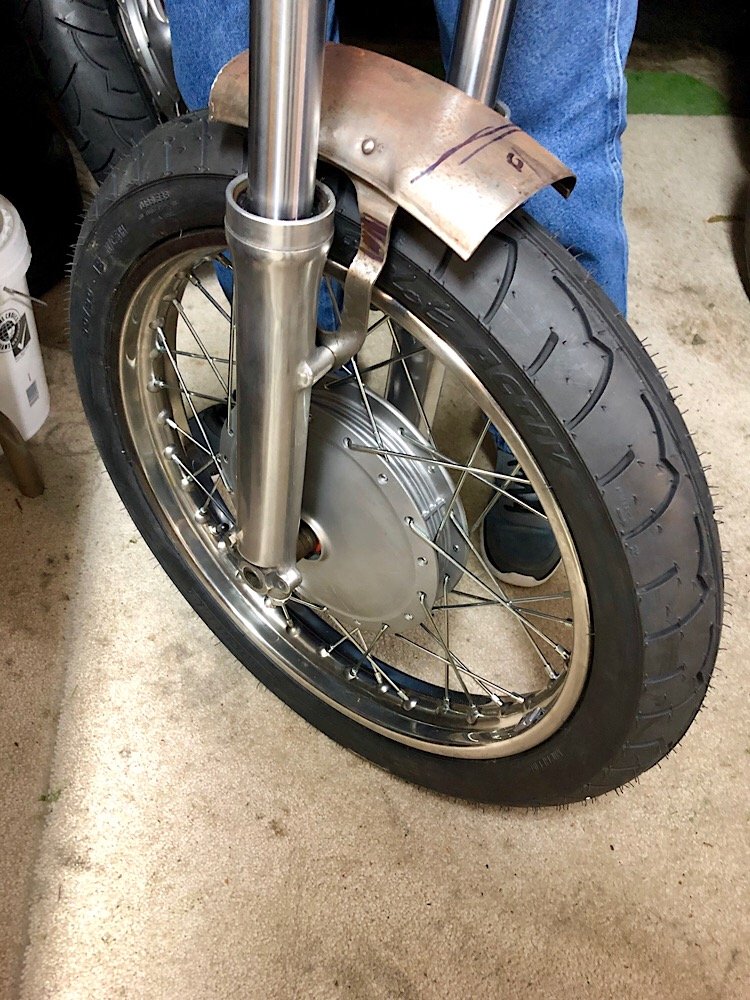
Spent the arvo shaping the mudguard after cutting it.
Spot welded the ends back on and filled in the holes from the guard supports.
Then cut 15mm out of the mounts to get the guard sitting closer to the tyre. Had to pre heat the metal before welding to get the MIGs weld to fully penetrate into the steel.
Happy with how it’s all sitting now
-
6
-
-
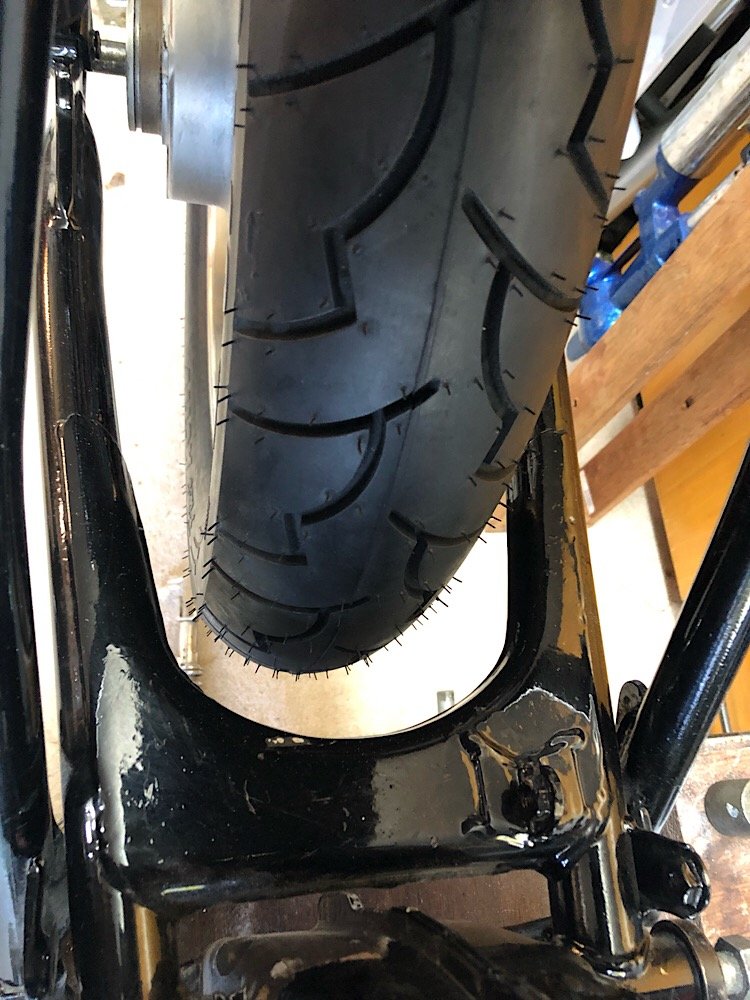
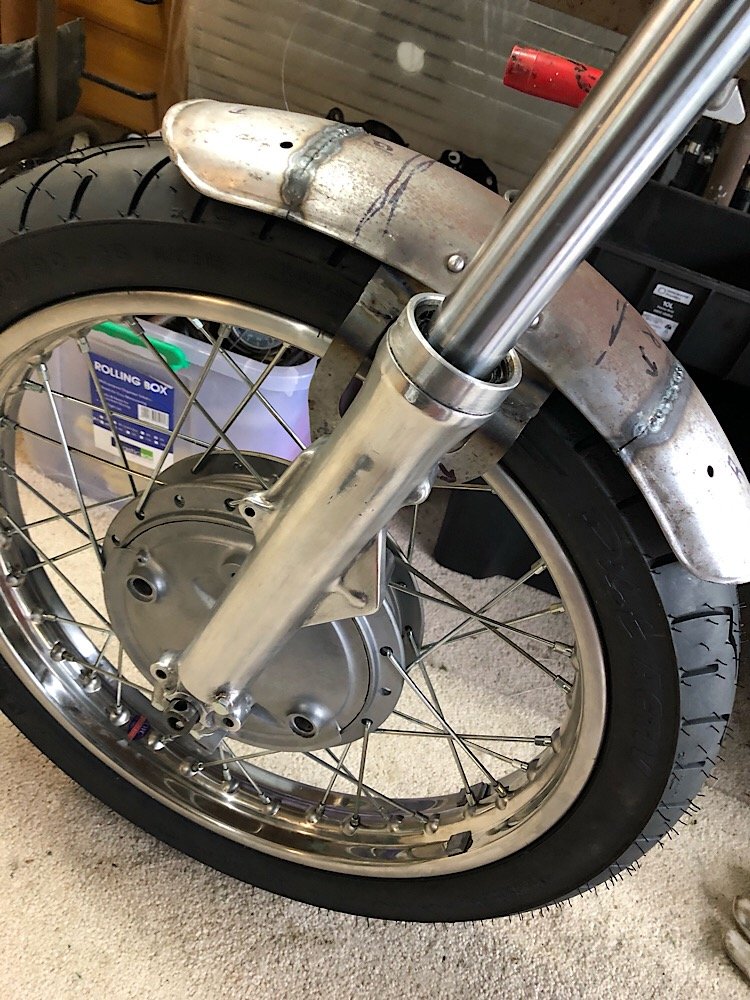
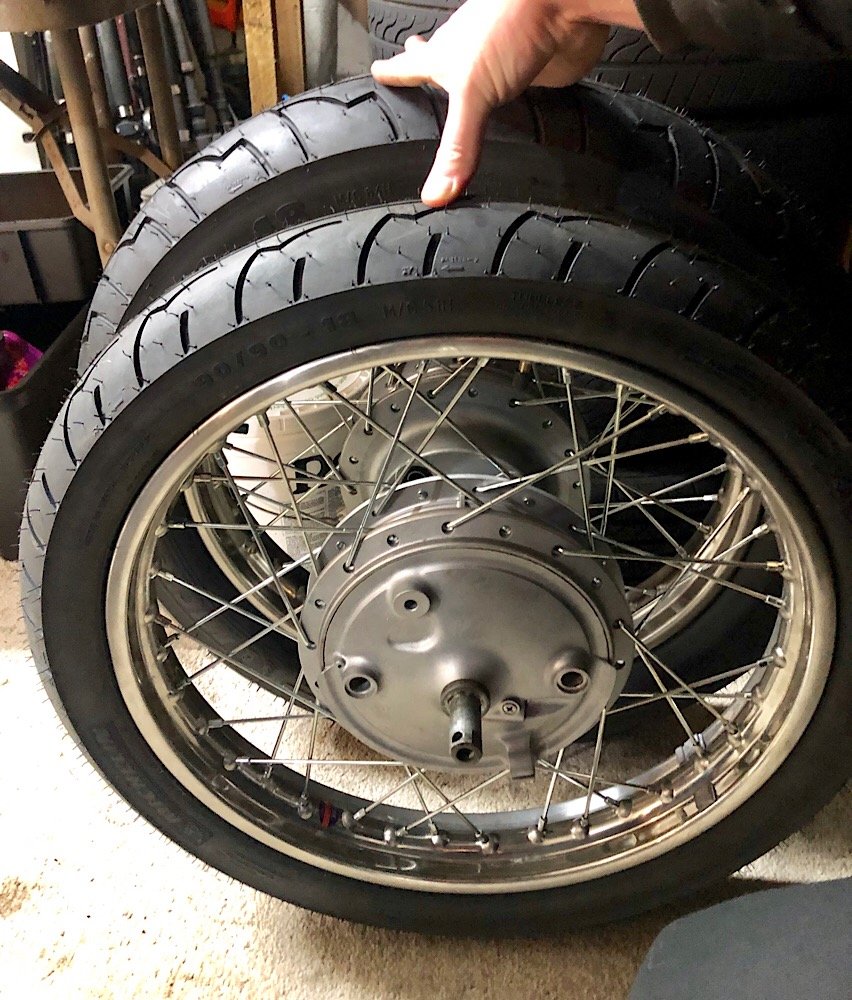
Got the tyres fitted to the rims.
Went with Michelin Pilot Activ, 90/90r18 on the front and a big ol 4.00 on the back.
Remember the 90/90r18 is pretty much the factory rear size which is now on the front. Looks tiny compared to the 4.00. The 4.00 has a 102mm tyre wall height while the factory 81mm.
May swap out the rear for a Michelin Sirac as they have a 110/80r18 rear size which may suit the frame clearances better. Plus they have a sweet semi trail blocky tread pattern.
With the 90 on the front it’s a squeeze to fit them under the factory guard but it’ll go. Got chopping with a drop saw, almost felt guilty as it was a mint guard. Will re weld on the ends to keep the nice factory curves. and lower the mounting brackets so it’s more flush with the tyre.
-
3
-
-
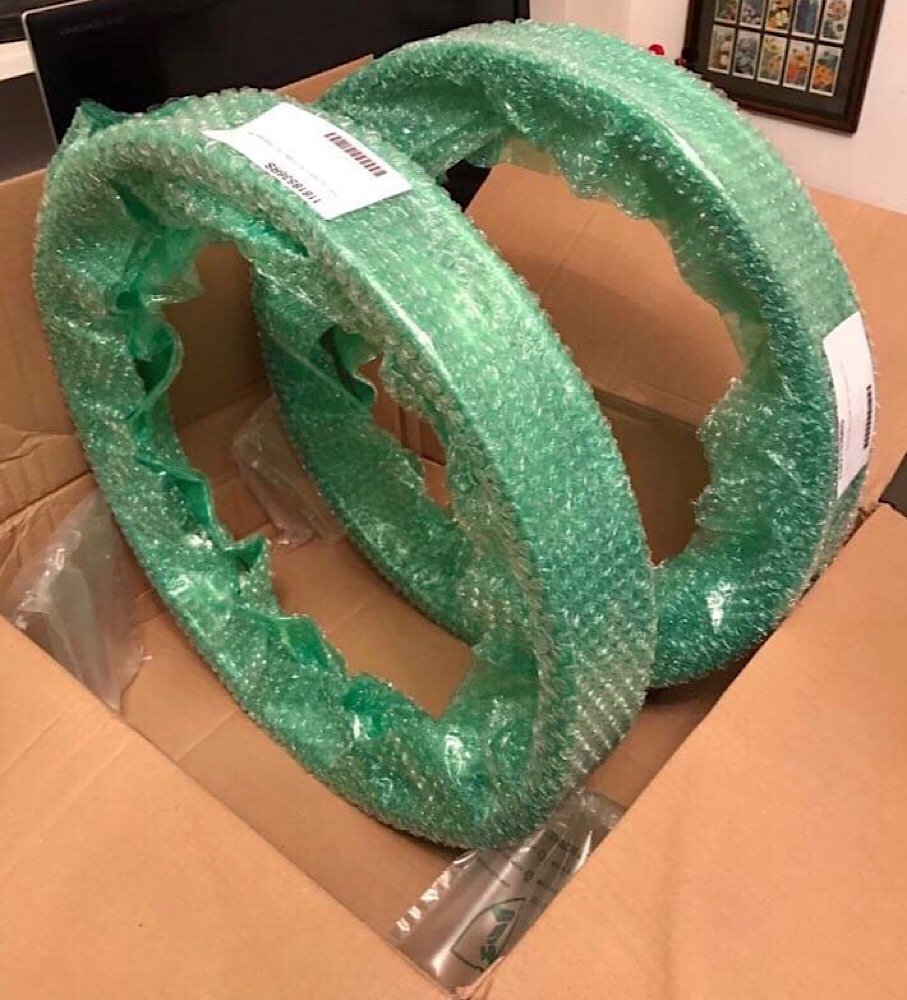
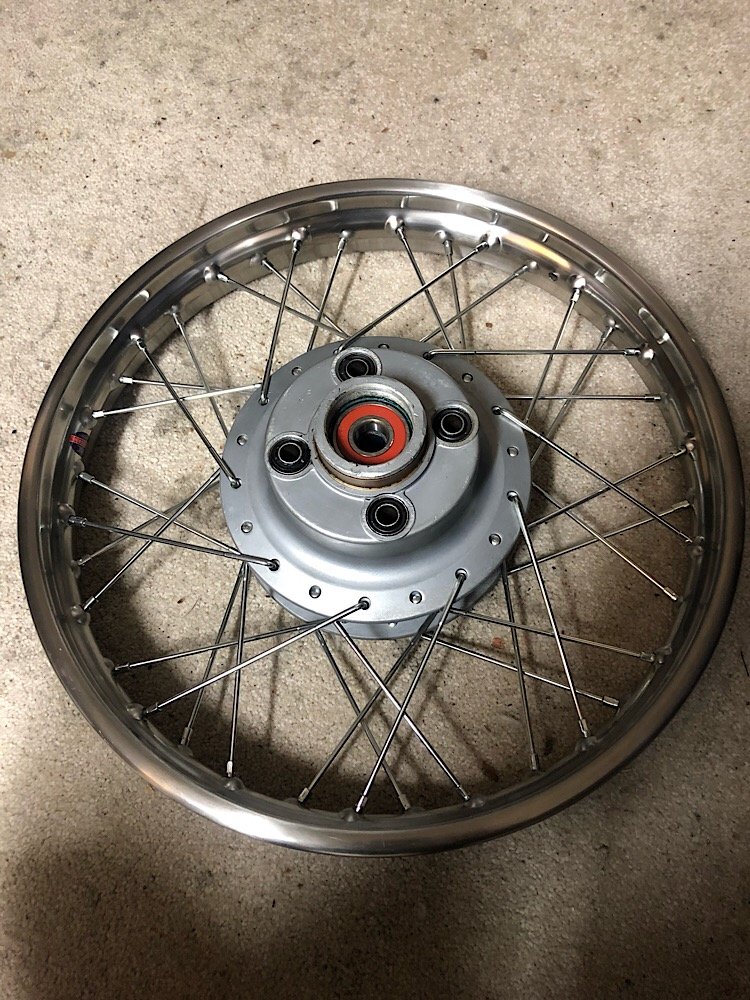
Rim’s arrived from Birmingham, England this week. Stainless steel WM2 and WM3, one size wider than factory.
Got stuck into lacing them up to the hubs, stoked with how they turned out. Cycle Treads did the final truing and torquing of the spokes.
Going to run a 3 inch wide tyre on the front and a 4 on the back.
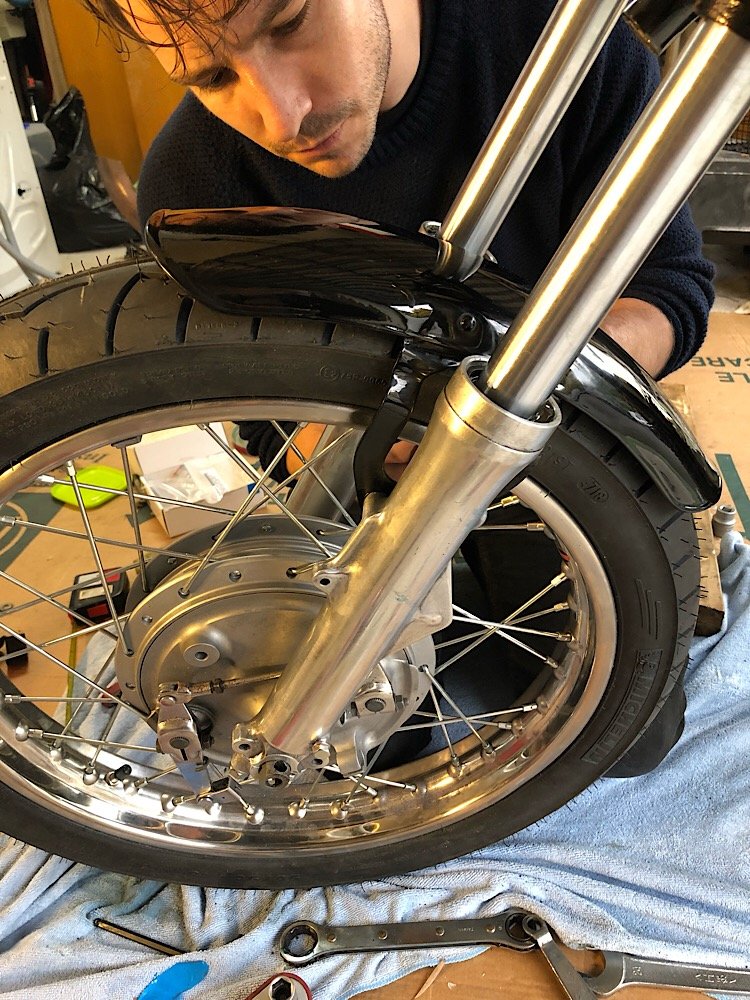
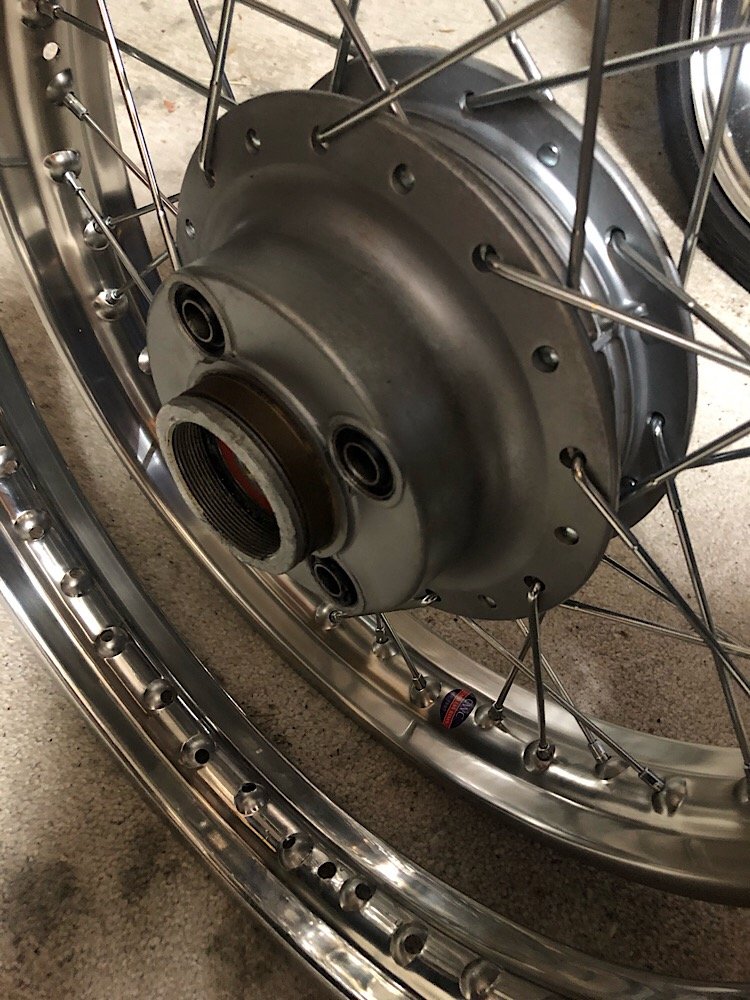
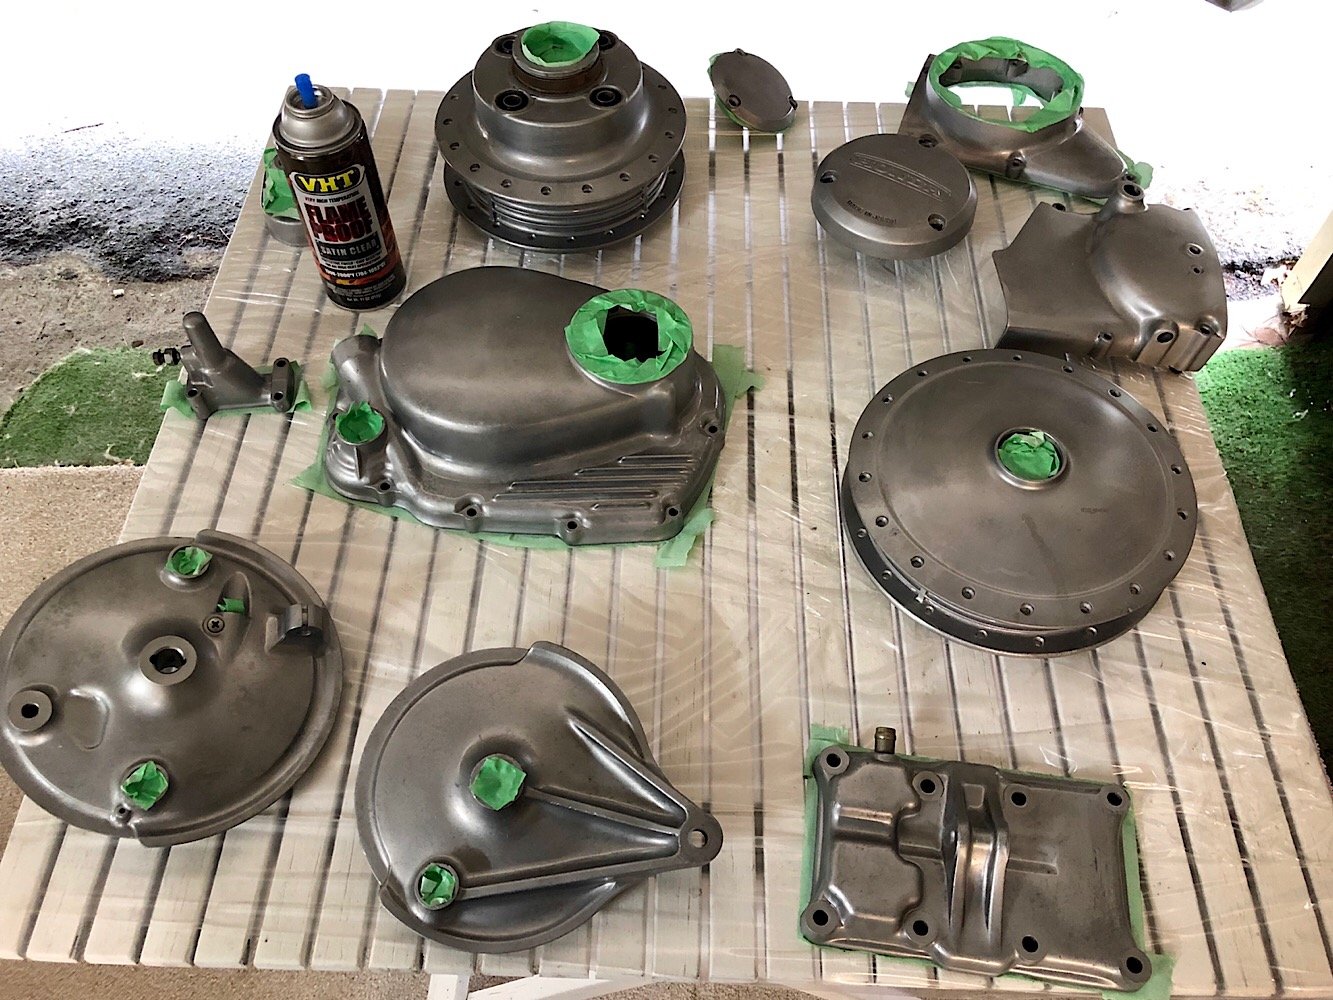
Gave all the vapour blasted parts a couple coats of VHT satin clear to keep them looking crisp.
Also added all new wheel bearing to the hubs, stripped the front forks and cleaned them up. Added genuine Honda fork seals and fresh oil ready to go.
Motor is still waiting for the pistons which is on the way and the frame is down at the engineers getting the hoop welded in fully.
-
8
-
-
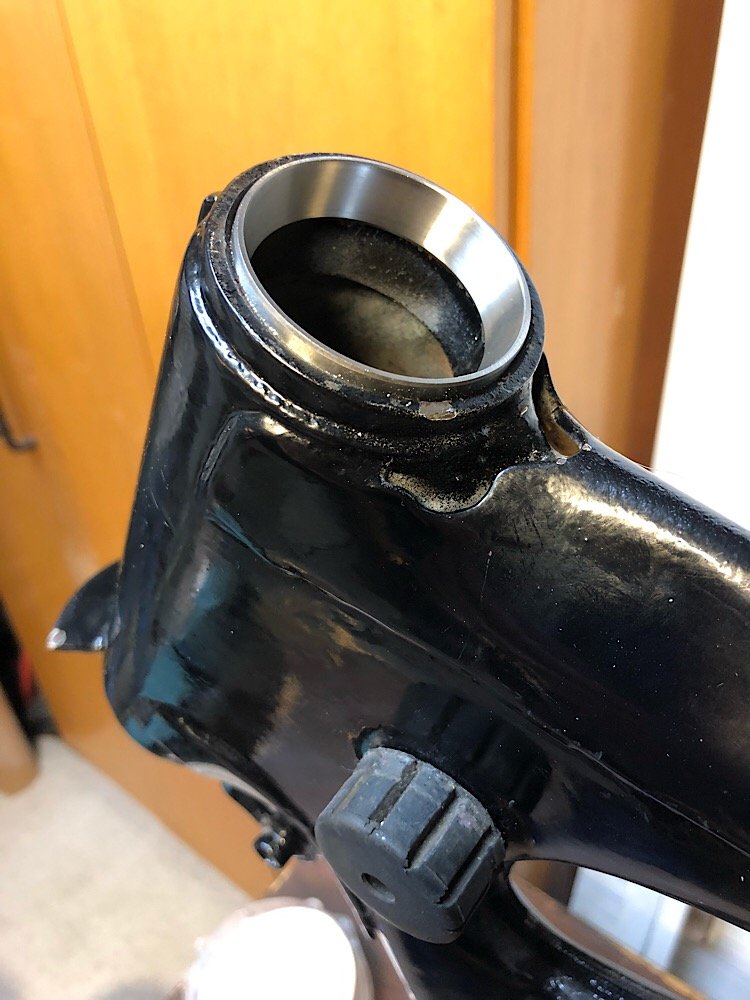
Threw in all new wheel bearings into the hubs. Converted the steering bearings to tapered bearing with a kit from 4 into 1.
Then made a start on assembling the motor. Reassemble the gearbox first, cleaned everything and check it ran through the gears before closing the cases with Yamabond.
We’ve noticed that one of the pistons has stuck rings, looks like it got hot at some point. Which is probably the reason it got parked up in the first place. Will have to order new rings and pistons. It was already on 0.5 so will probably go 0.75 oversized this time.
Looks like the oil pump plunger has a lot of scoring on it, so will be rebuilding it to make sure oil pressure is good.
Thinking that we will give the freshly vapour blasted alloy a coat of 2k matt clear keep it fresh.
-
6
-
-
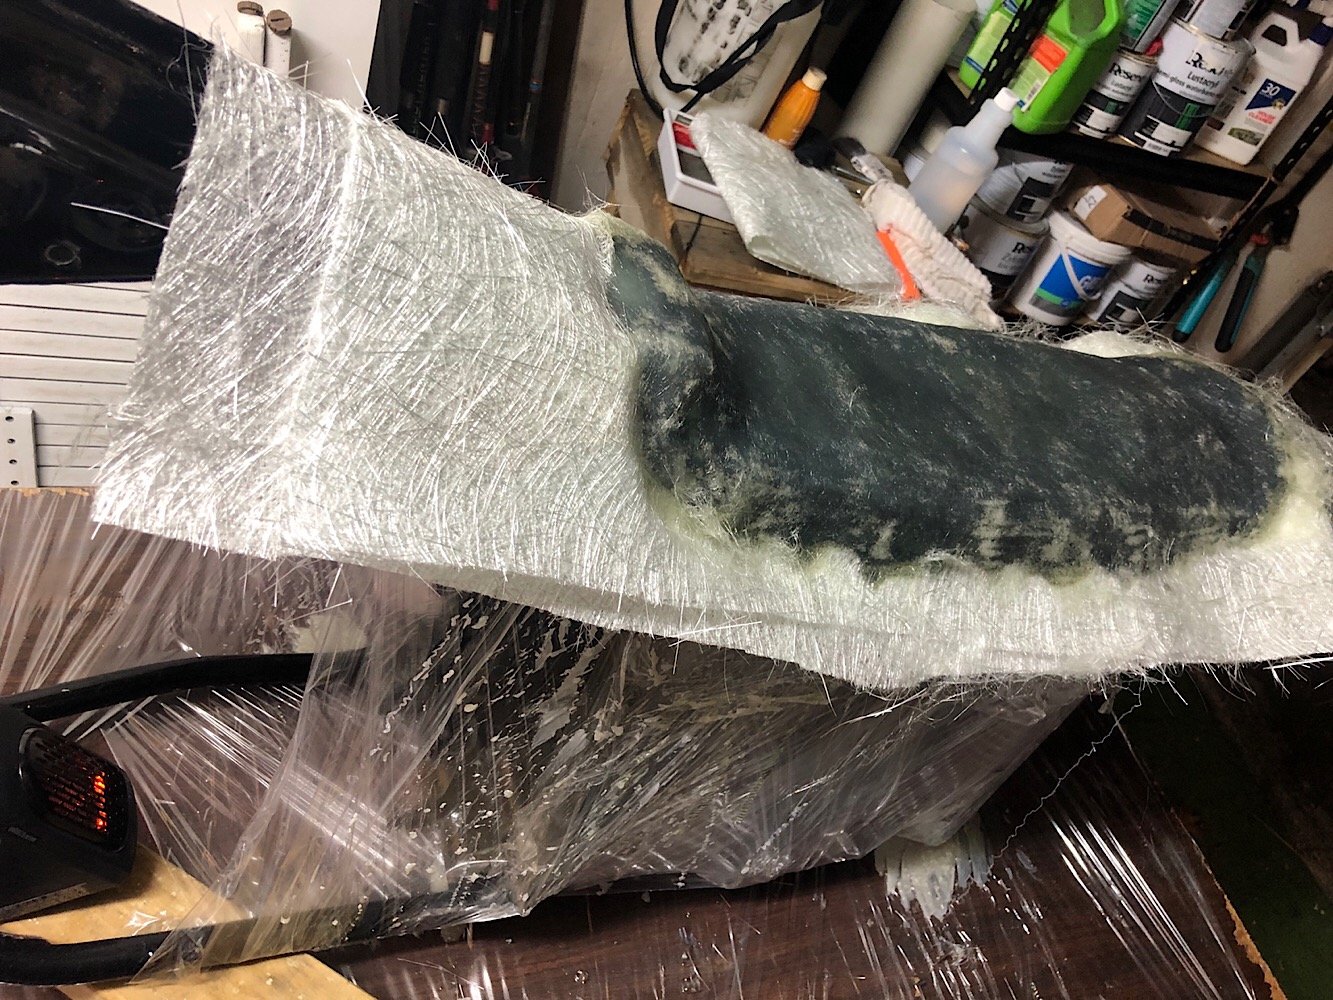
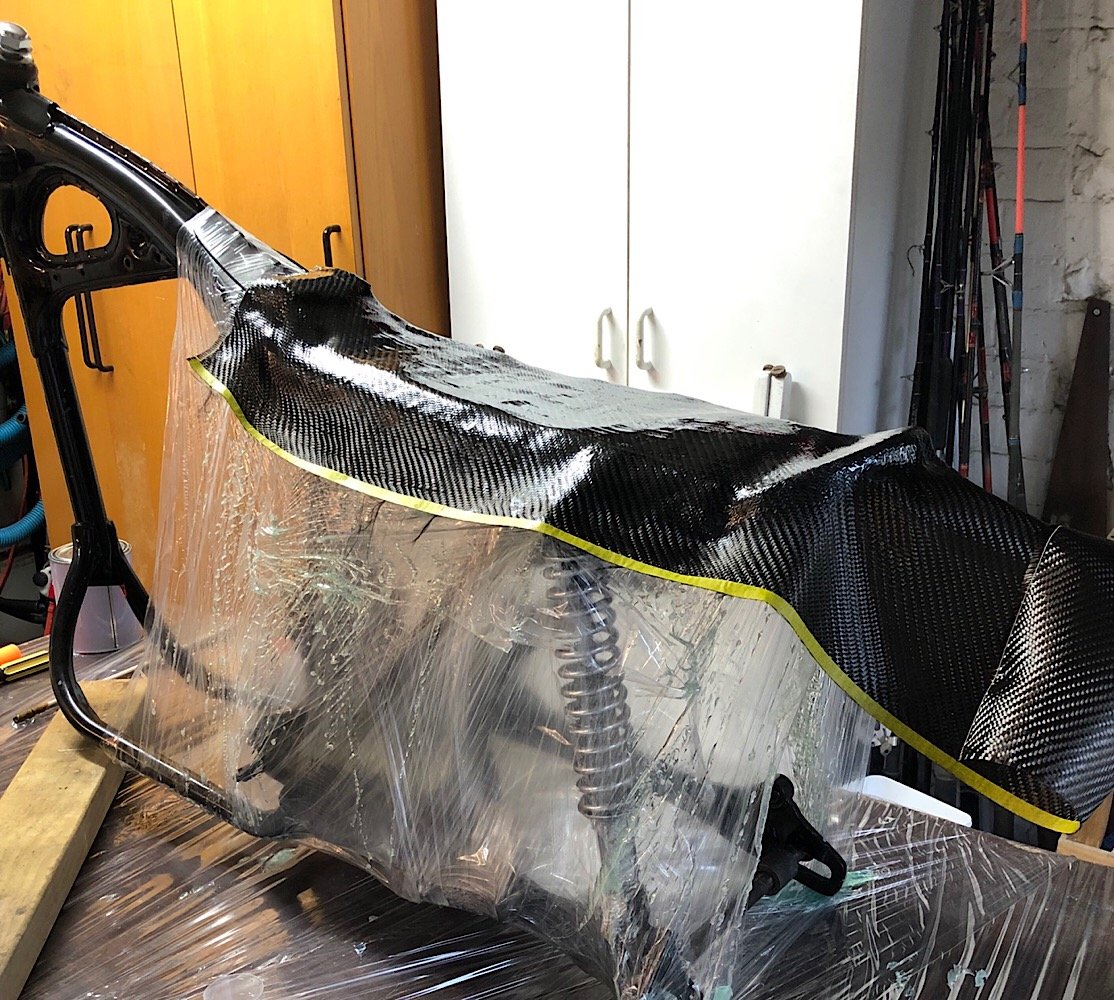
Added 4 layers of 1mm thick fibreglass doing two layers per night. Used a roller to push the resin into the matting driving out air bubbles.
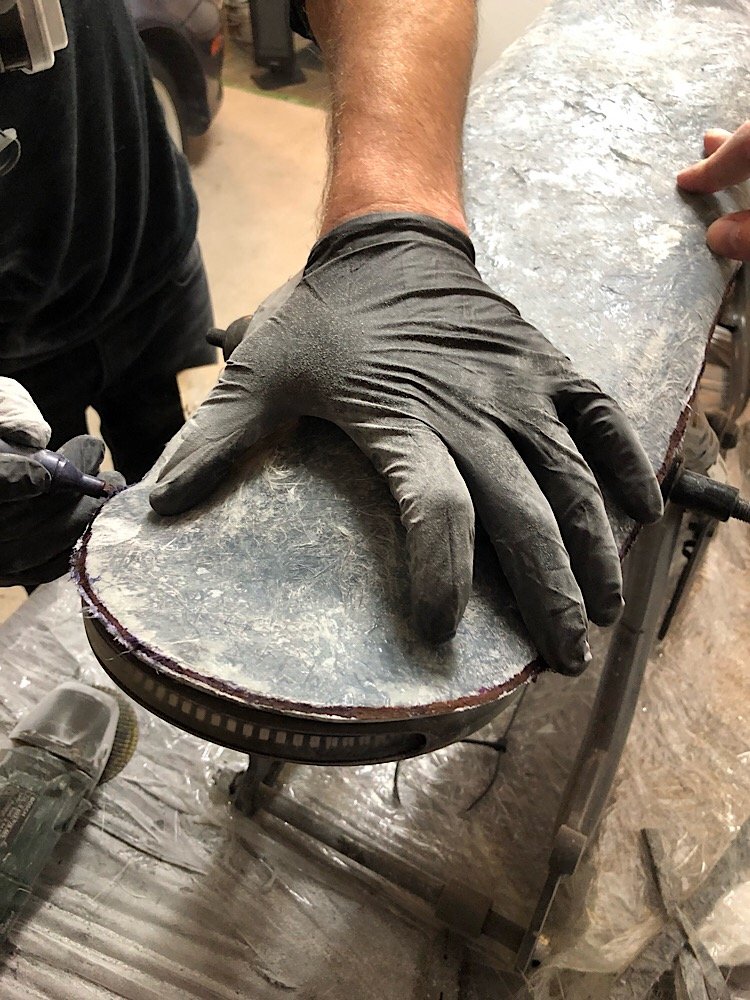
One it all set we popped the seat off the frame. The carbon fibre looks epic but the white lithium grease added so many ripples in the resin. To fix this we’ll give it a layer of resin let it dry and sand it flat. A quick polish after that should have the carbon popping.
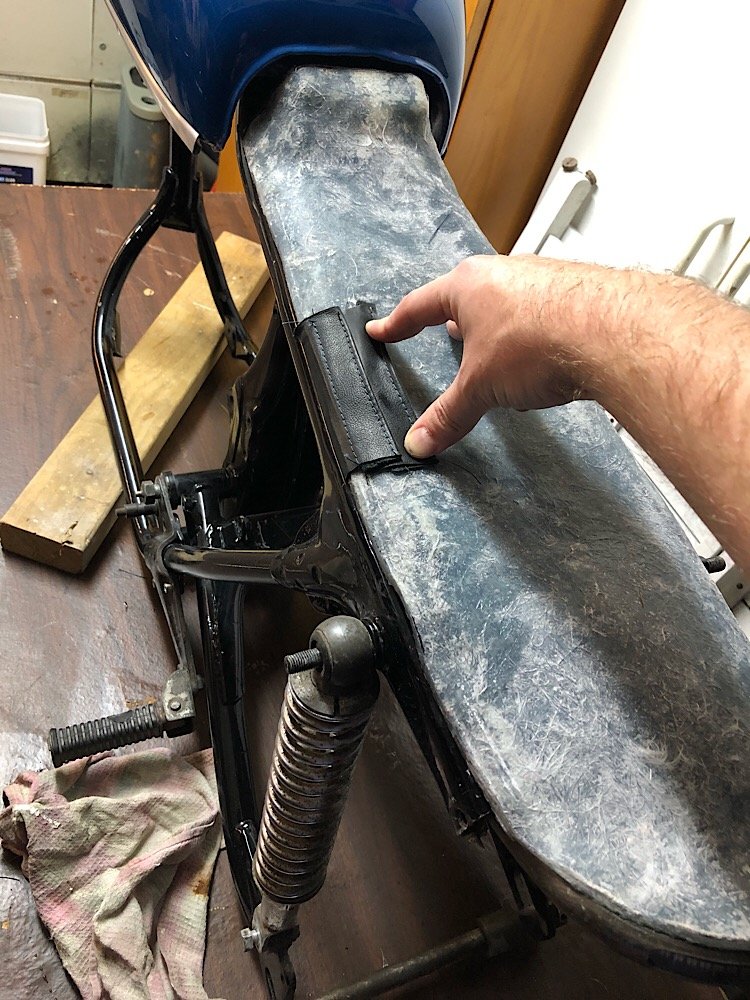
Pretty much just cut to shape with an angle grinder, stoked with how well it fits. Just need to find a latch mechanism. Seen one off a Suzuki Bandit that’s perfect. Is Pick a Part for bikes a thing?
Mocked up the upholstery too, black faux leather with dark blue stitching.
-
6
-
 1
1
-
-
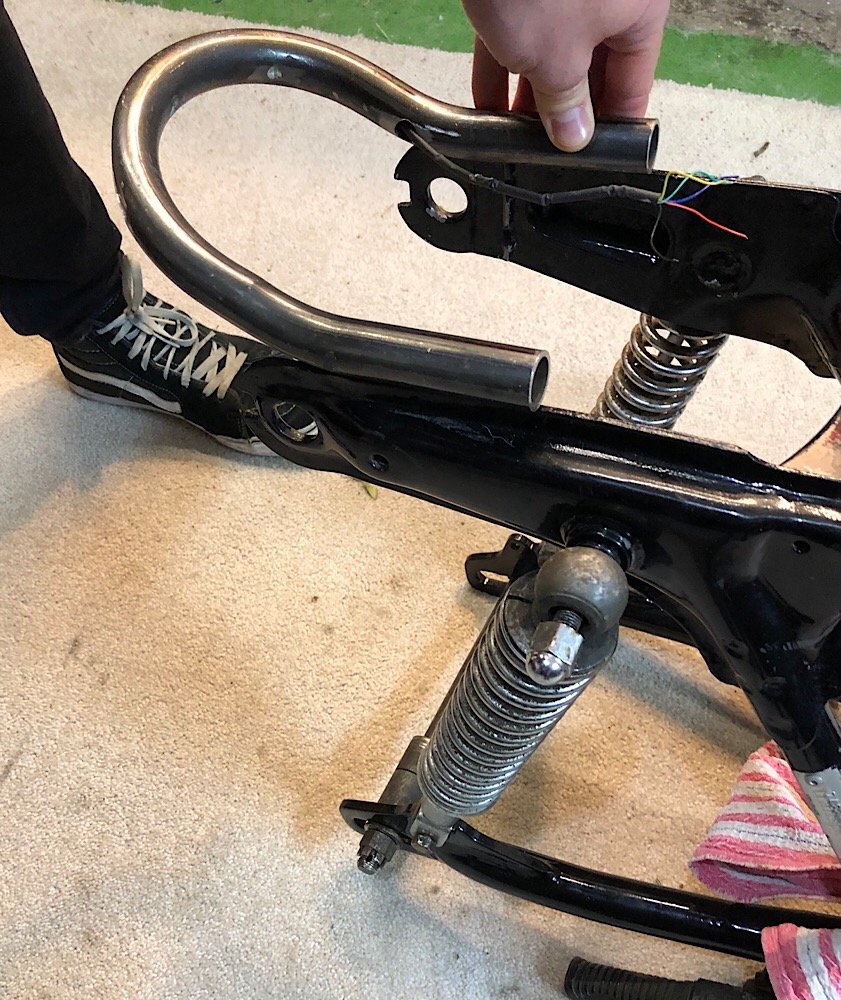
Carried on fitting the rear hoop, chucked on the rear wheel and measured clearances as the new shocks are 3cm shorter than factory.
The rear of the hoop now sits just over an inch past the rear wheel centre point. IMO anything shorter and the bike looks stumpy.
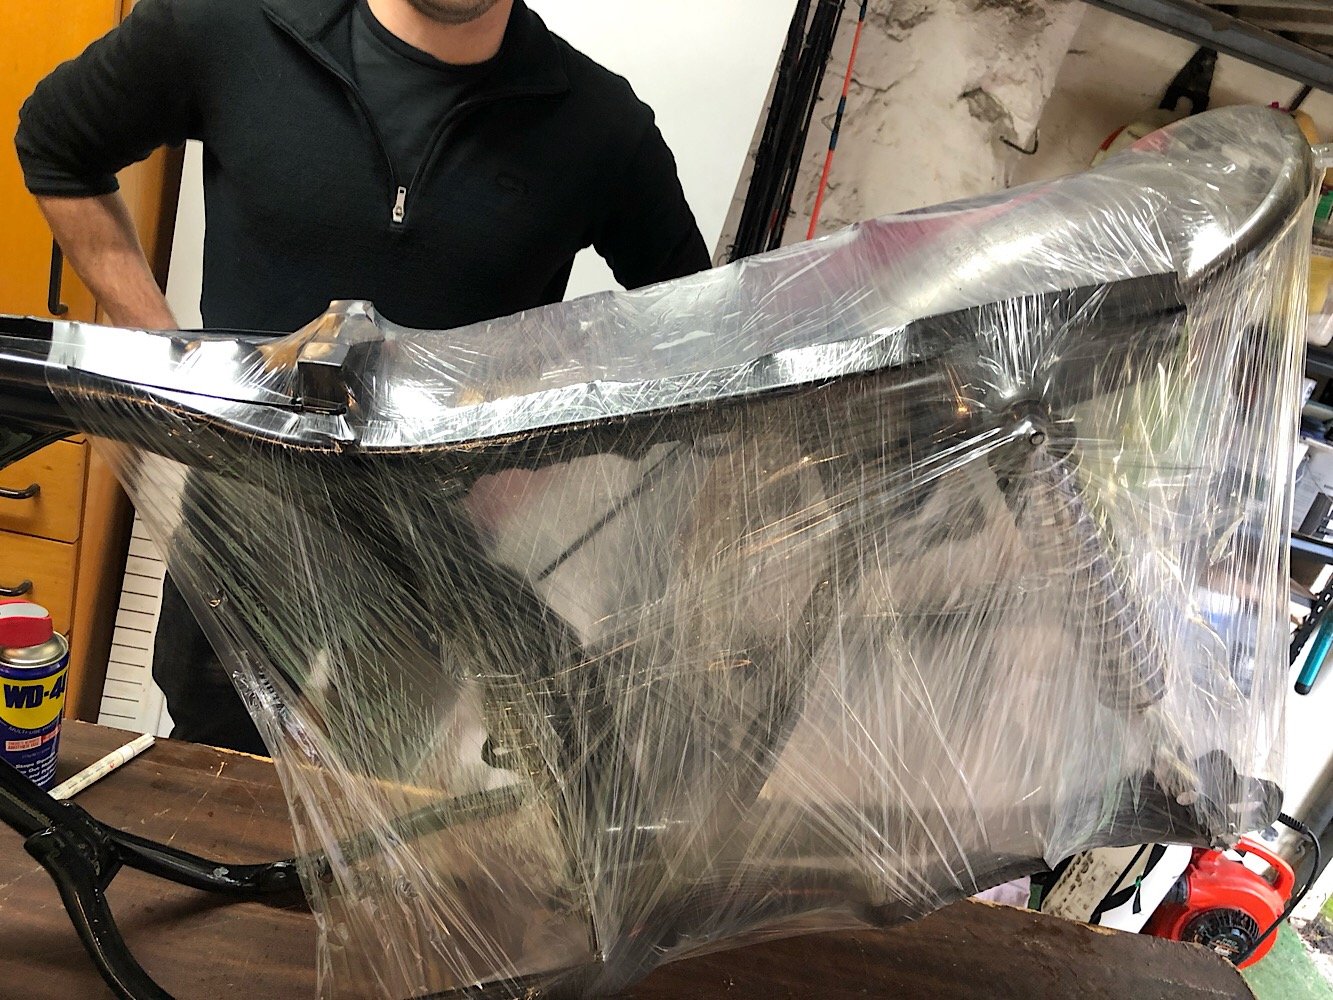
Once that was tack welded in we got started with the seat. Decided to create a mould out of pallet wrap. Layed down Polyester resin and rolled carbon fibre into the resin to set.
Dream result is to have a nice carbon fibre look under the seat. We used white lithium grease as a release agent which may have left white streaks through the resin. So it could look shit house but we’ll see after it hardens off.
-
3
-
-
NZ$ 287.95 6% Off | motorcycle Motorbike ATV scooter pit bike buggy UAV moped EFI small engine Electronic Fuel Injection kit GY6 Lifan microsquirt
https://s.click.aliexpress.com/e/c8UtvZ3SSo cheap!
-
- Popular Post
- Popular Post
Work continues....
Got the motor back and it’s looking mint! Thanks @Mr Vapour!!
Chopped the rear end to fit the rear hoop, just need to smooth off round where the steel pressed frame meets the tube steel.
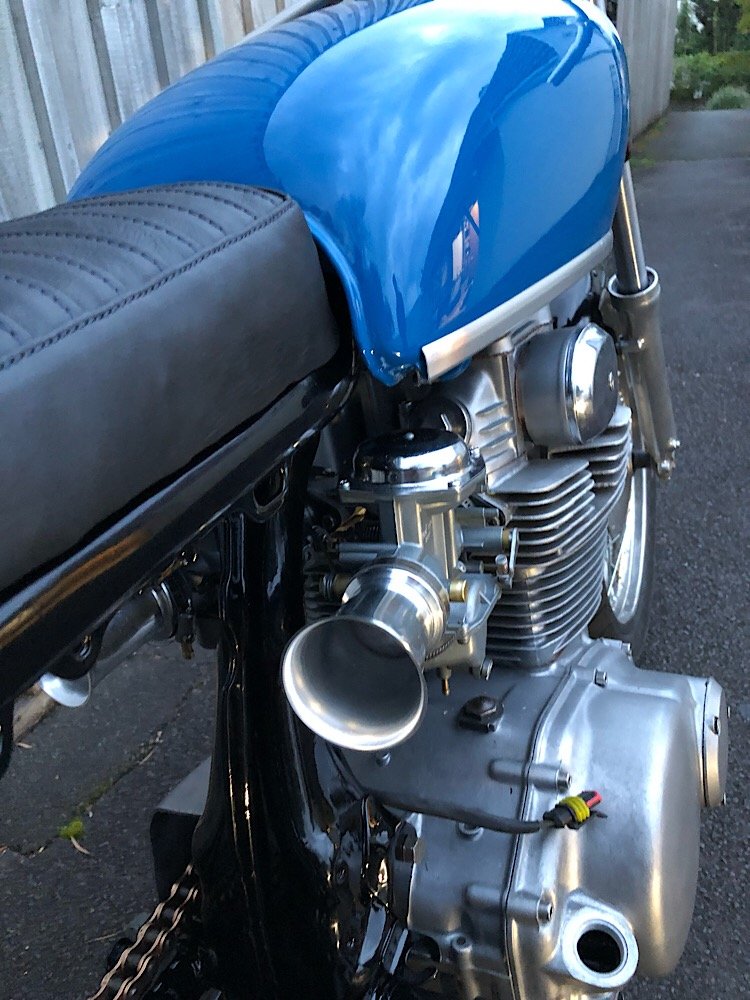
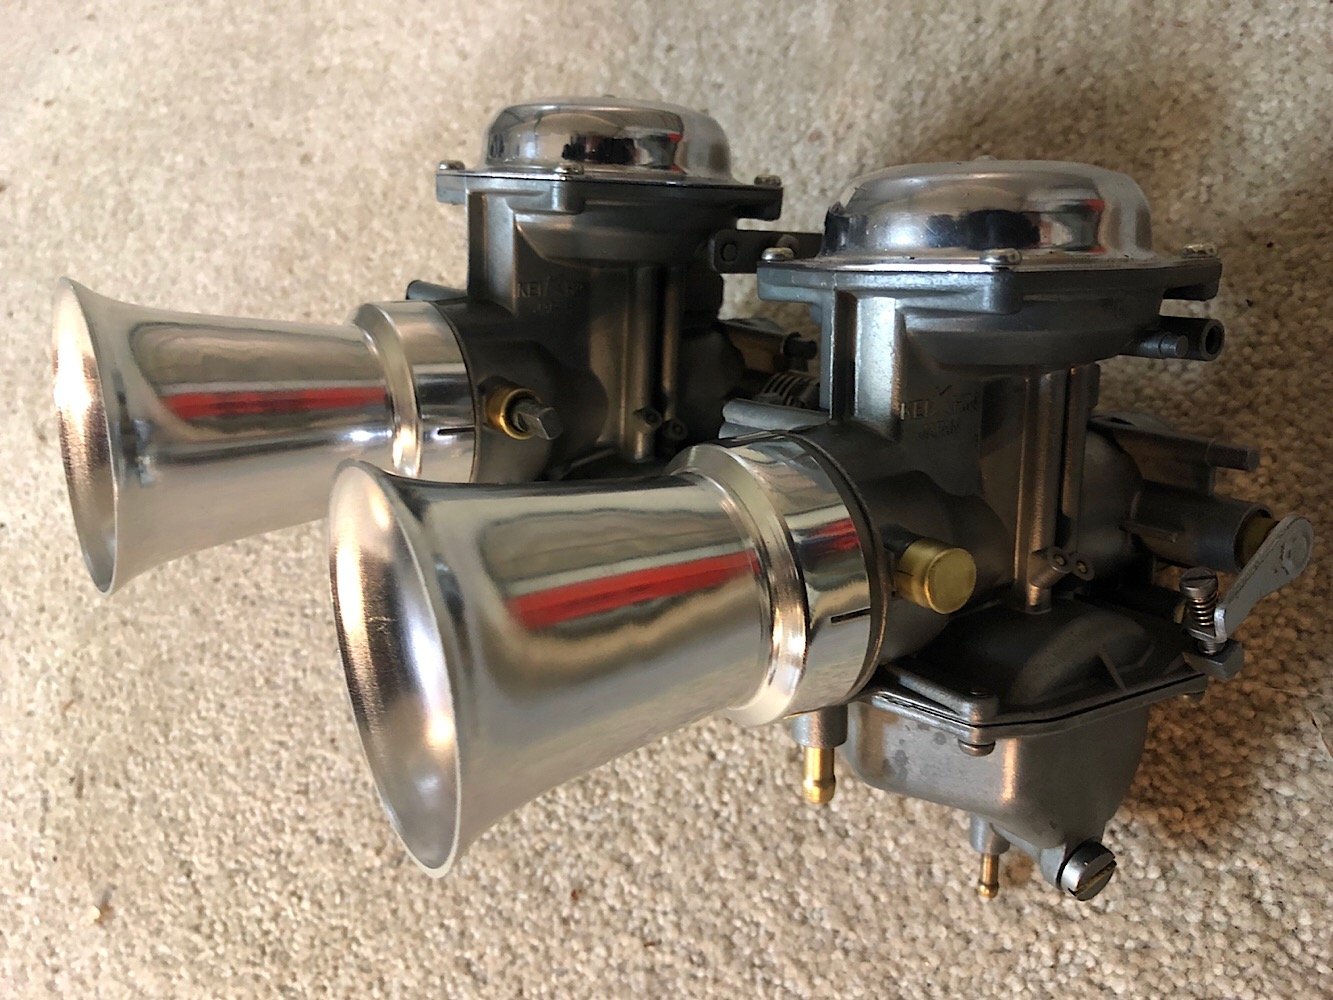
An order from 4 into 1 arrived which meant we could crack on with the carbs. Wicked rebuild kit which literally had everything, even included larger jets for the trumpets.
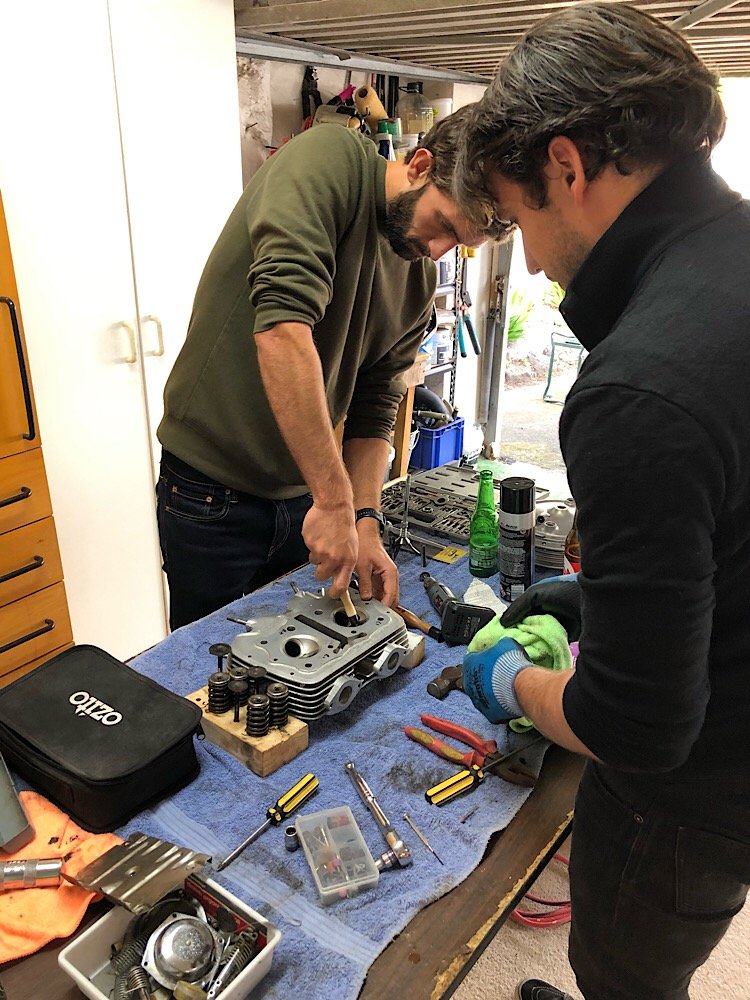
Also made a start on the motor, had the bros round help lap the valves and reassemble the head.
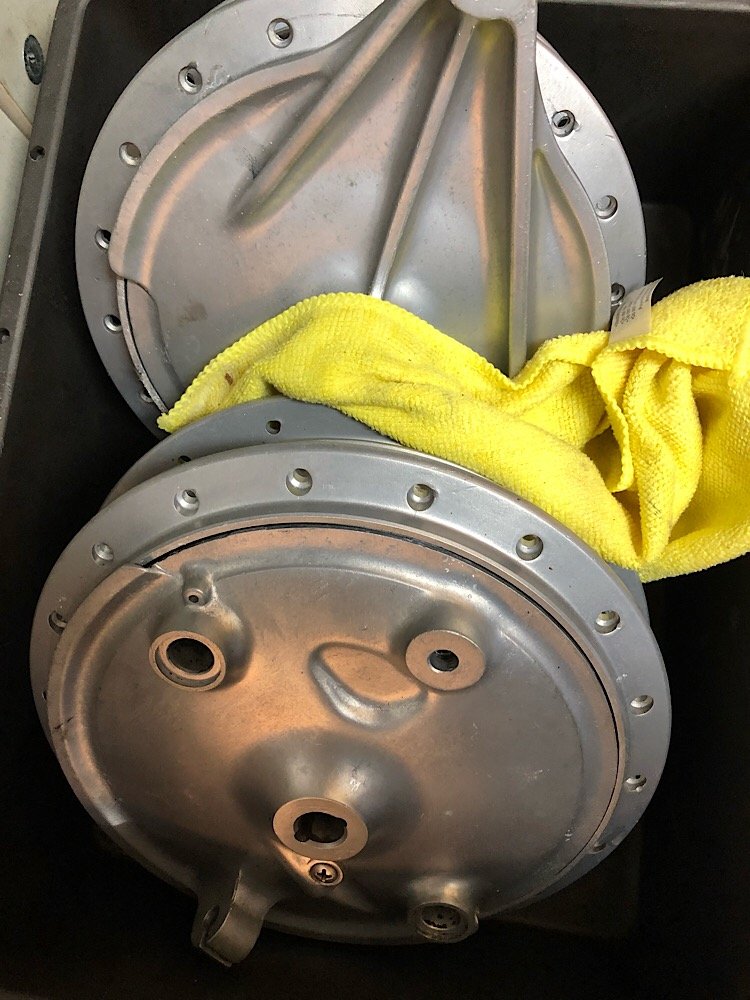
The lower casing had a oil pan fitted in the bottom which weirdly had two screws and three rivets holding it in. Had to drill out the rivets to remove it and clean the sump properly.
Then drilled the holes and tapped a thread in each to add proper screws in.
-
9
-
2
-
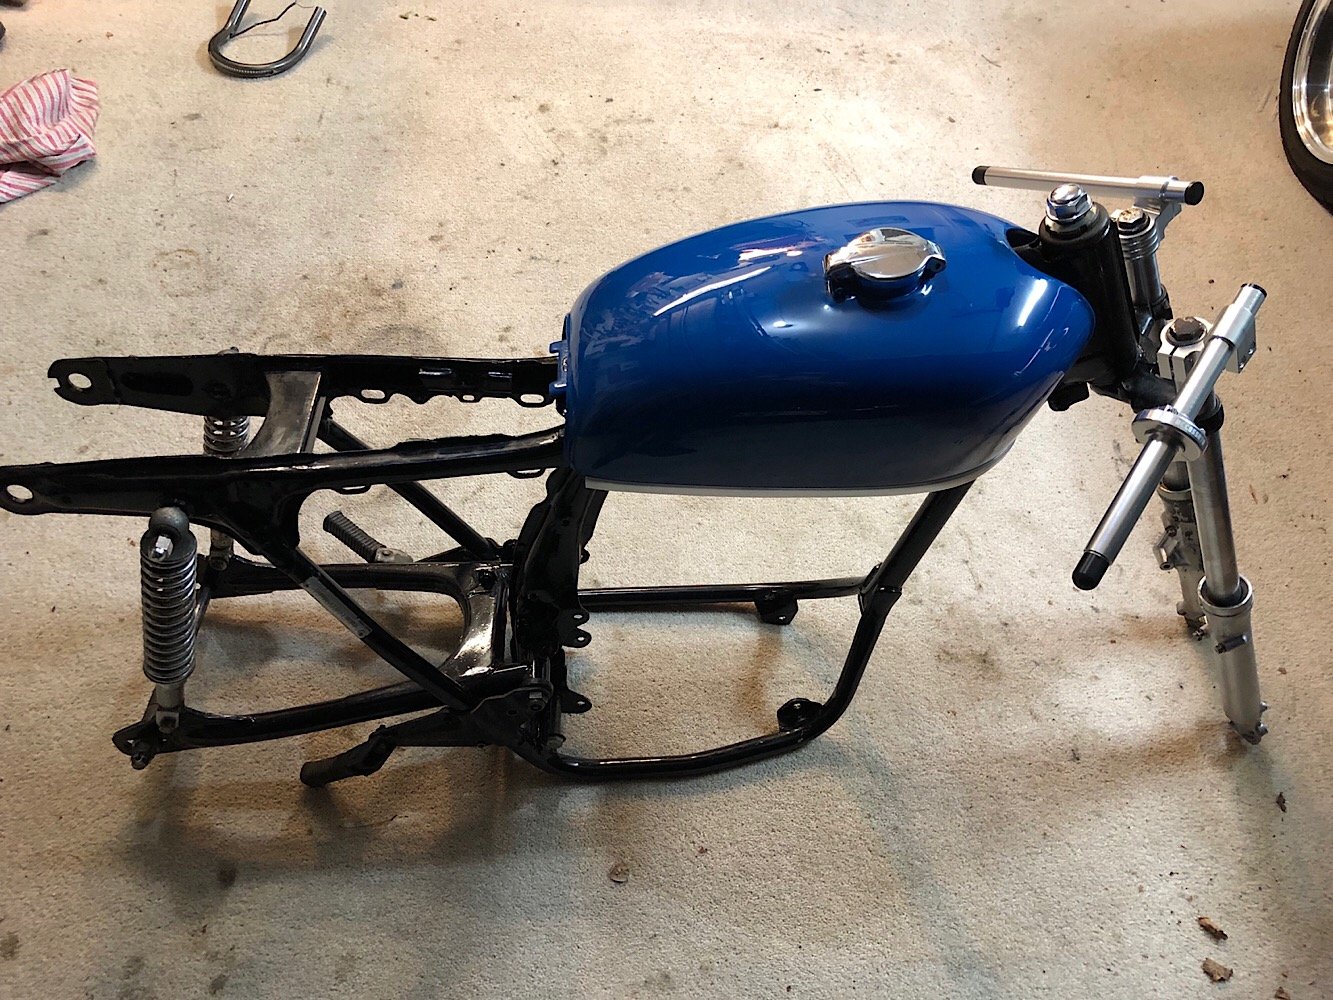
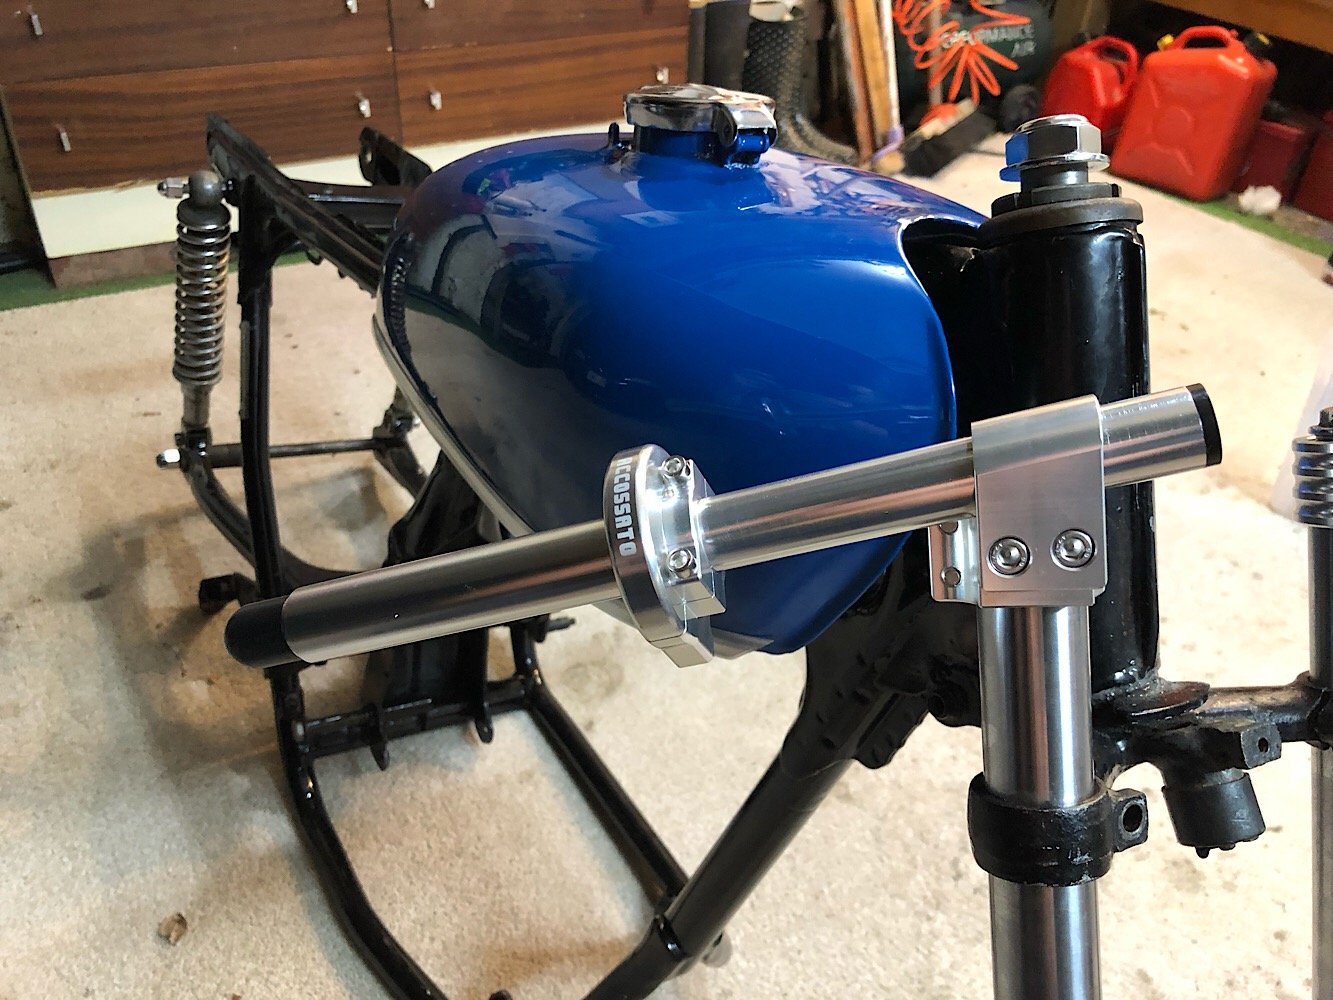
How’s progress? Mocked up the frame with some of the parts this evening and were pretty stoked with how it’s all looking.
The blue tank pops against the raw alloy silver finish on the fuel tank strips and clipons.
Test fitted the rear hoop and it’s bang on the right width so we’re figuring out the best way to attach it to the frame.
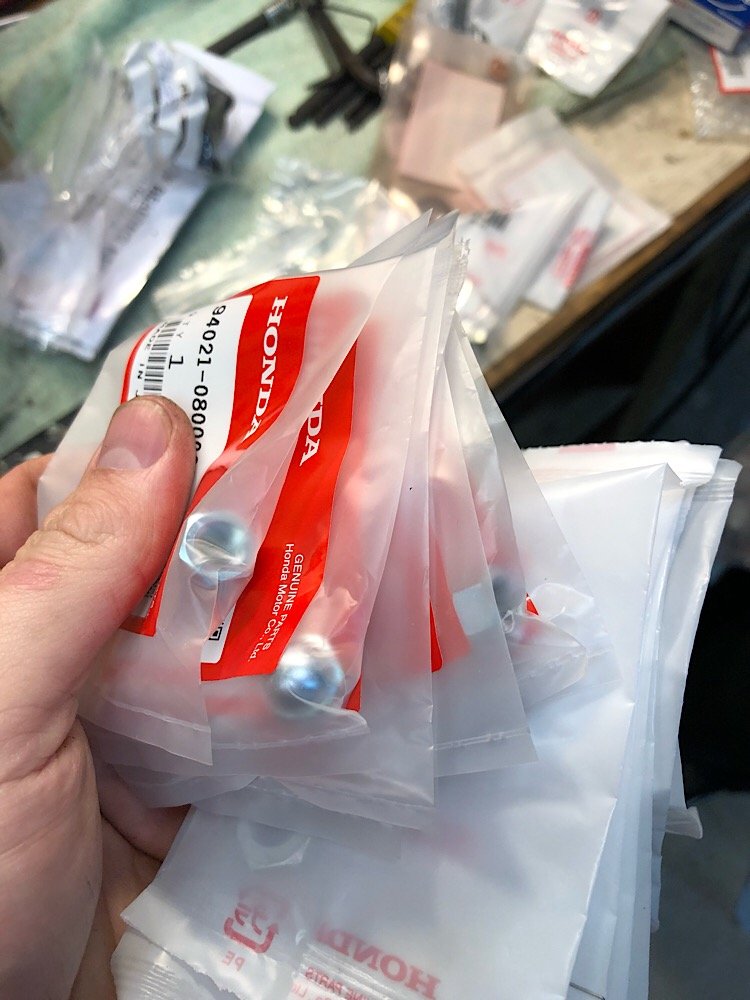
And all those part number lists = genuine Honda parts for days! Even the washers come in their own Honda bags.
Rims are on their way from the UK, ordered 1.85 x 18 fronts which are up from the standard 1.6 and got 2.15 x 18 for the rear up from standard 1.85 in stainless steel, be nice to have slightly bigger feet on this for looks mostly.
Hopefully we get the engine back together this weekend.
-
4
-
-
Electric fuel pump and a boost referencing fuel pressure regulator so the fuel doesn’t get pumped back out the carb by the pressurised air.
Ideally EFI would be best but seems to be a few guys going carby turbo with success. Be a fun project either way.
-
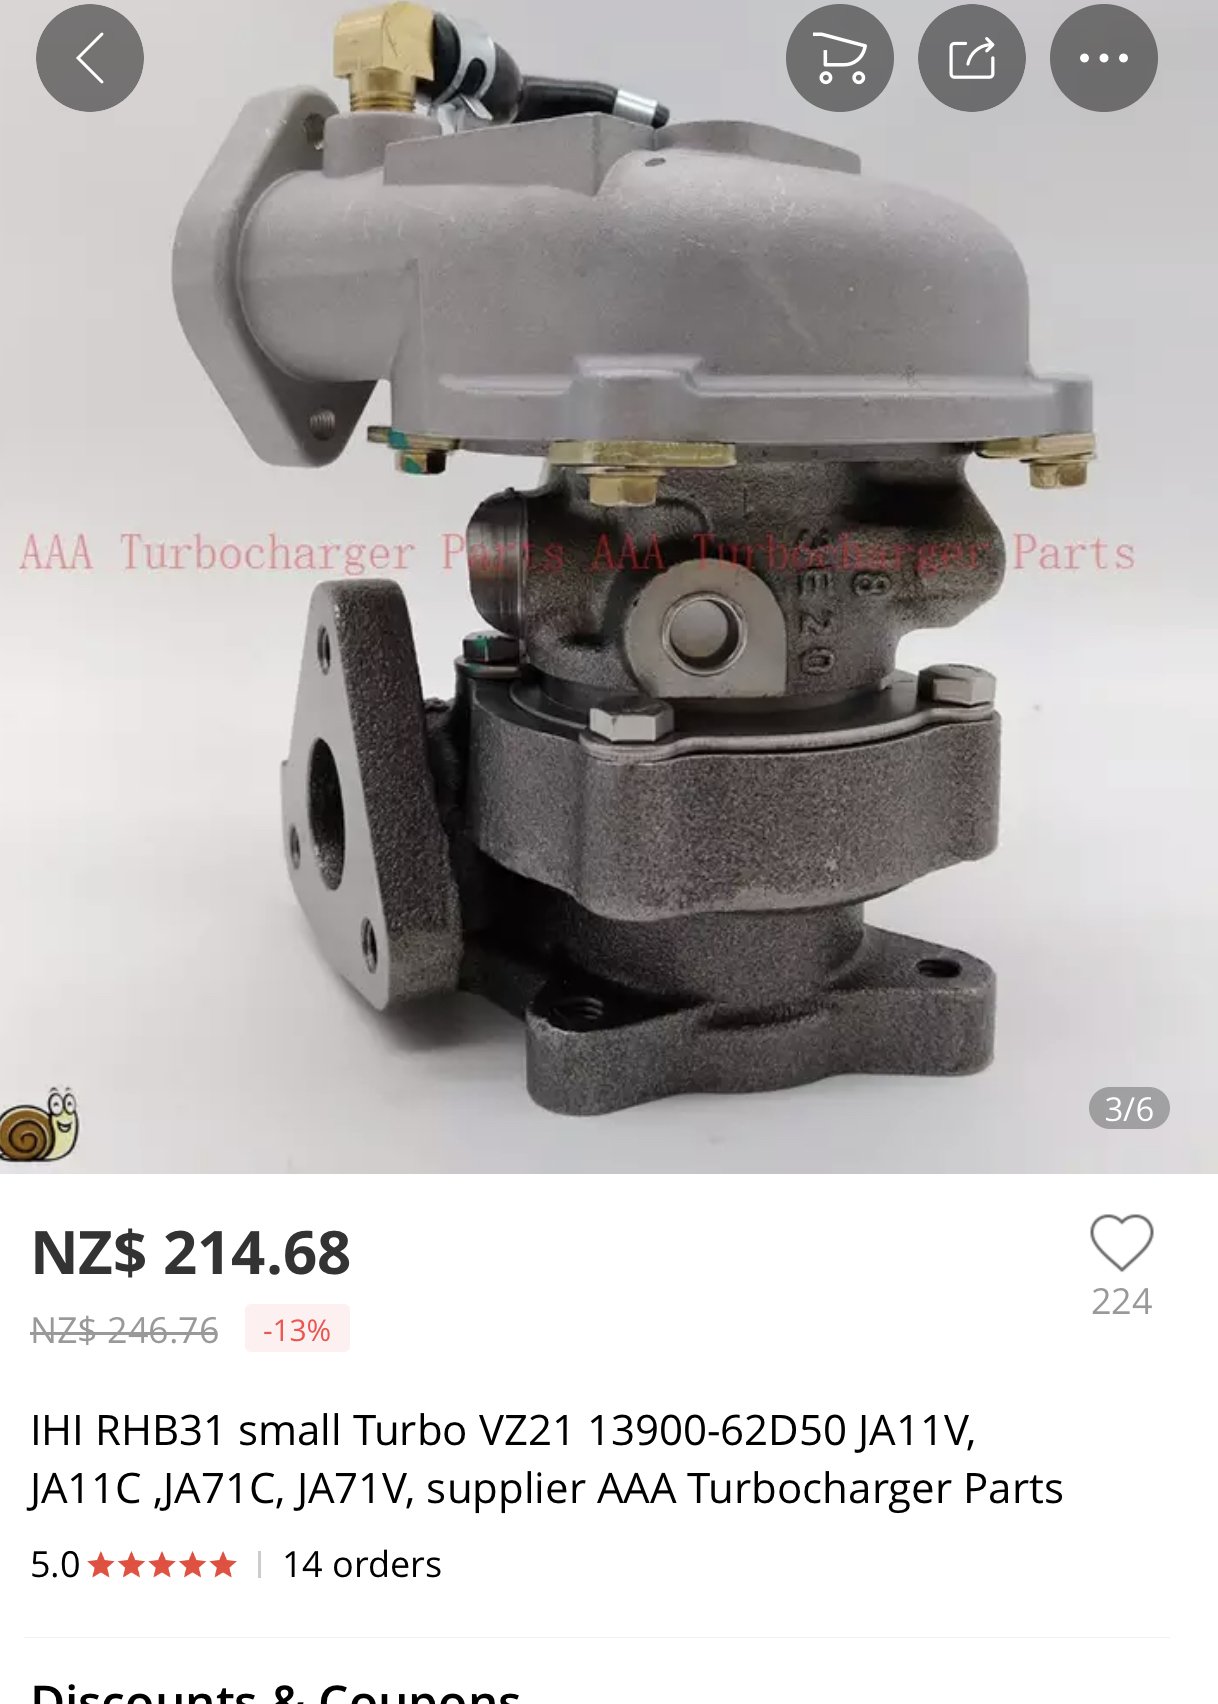
RHB31; temptation to turbo the 350 is strong!
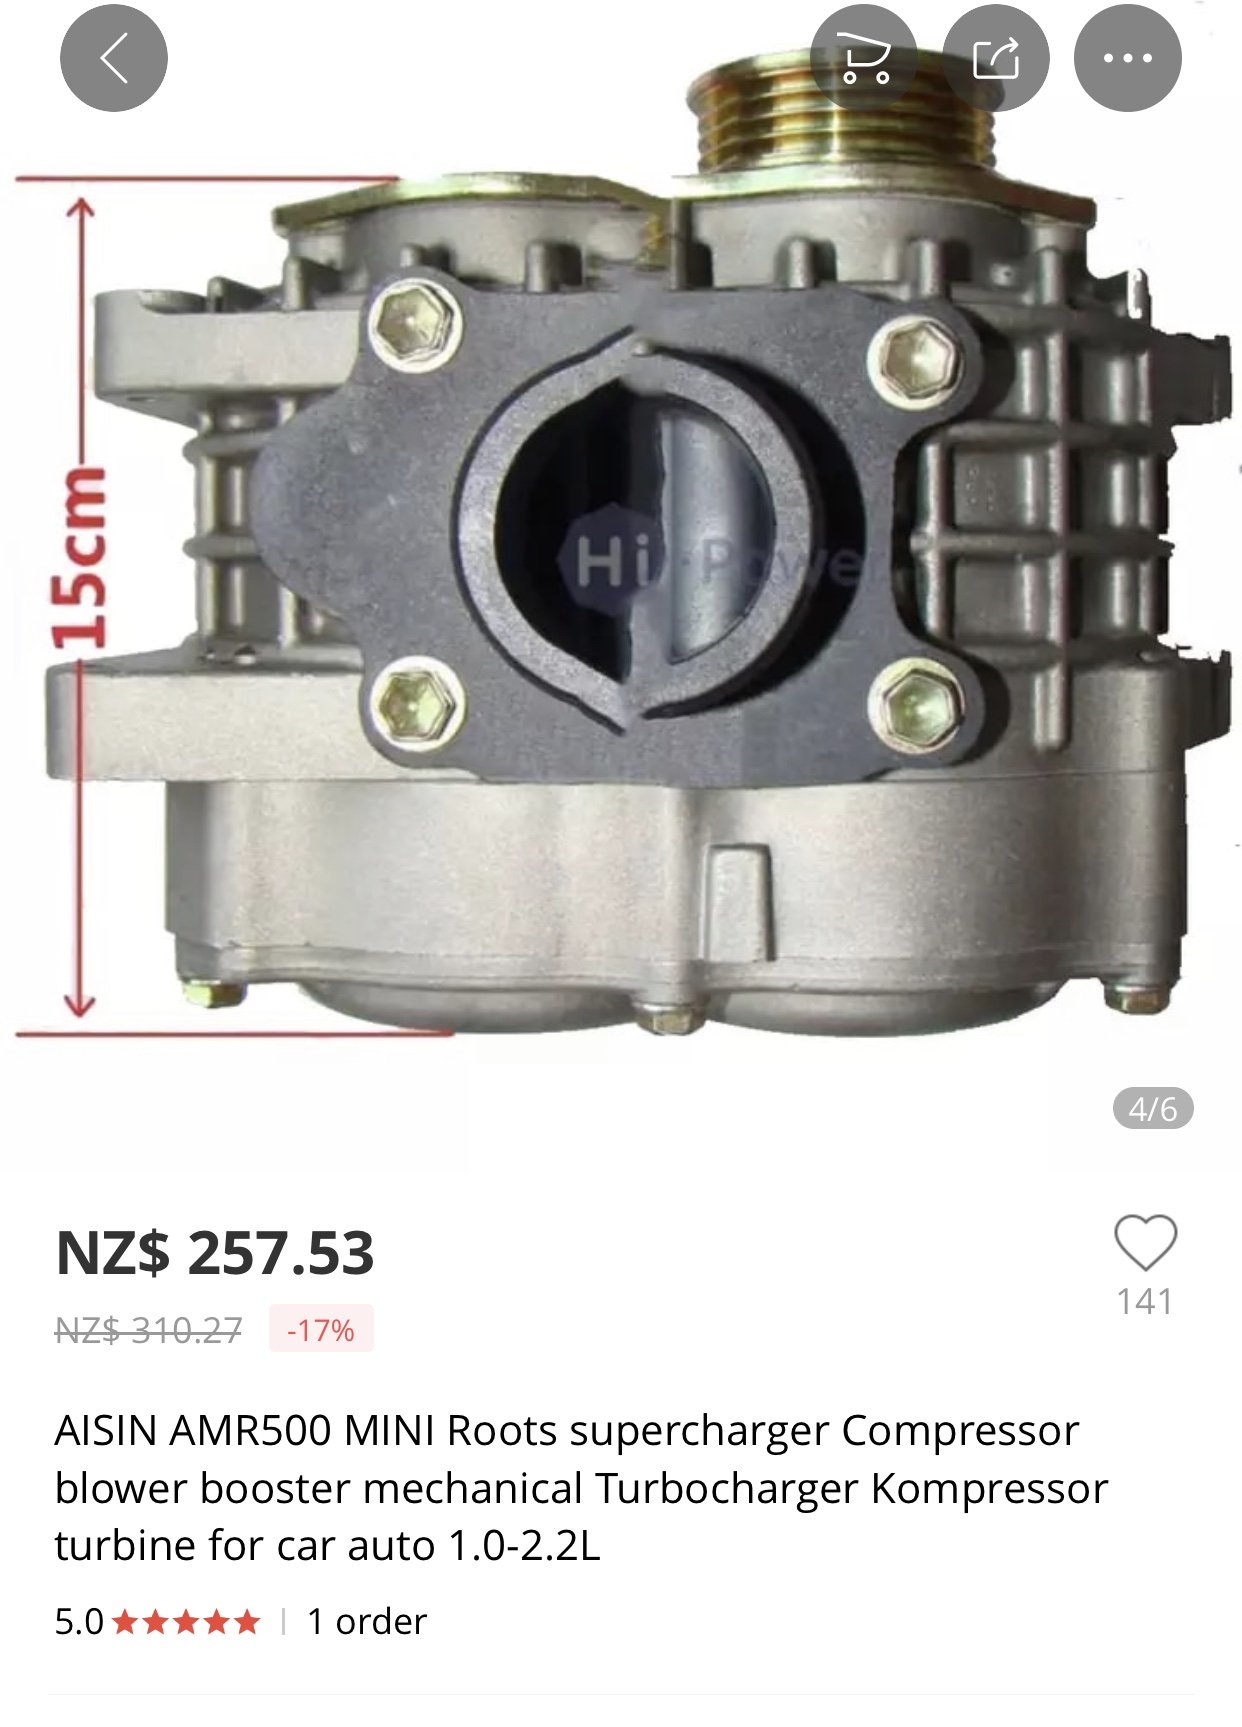
Or supercharge
-
8
-
-
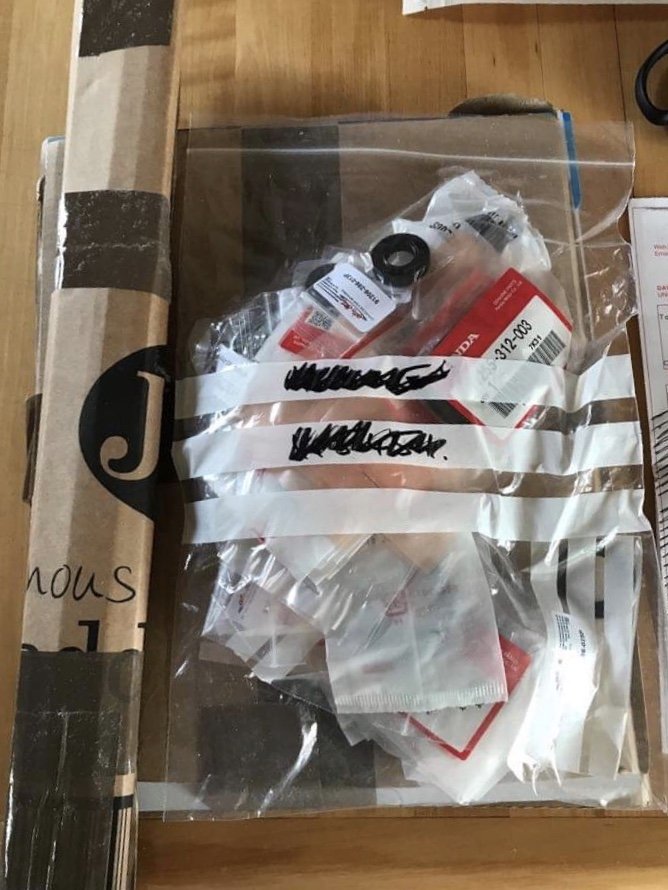
Parts are slowly trickling in, stoked to receive the package from David Silver Spares UK
Building up my CB250 meant I still had a list of part numbers for all the small detail parts like dome bolts, dust washers, OEM seals. Took hours of looking through old Honda schematics to find those part numbers the first time
So to used them a second time when doing the David Silver order on this CB350 build made it a lot easier.
AliExpress stuff arrived too, looks great so far! Haven’t had a chance to test it out yet but I’ll report back later.
-
3
-
-
Sweet as, cheers!
-
While a bunch of parts are inbound from the US, U.K. and China we decided to get busy on the jobs that can be done locally.
Currently all the hubs and engine parts are with the vapour blaster after stripping it all down.
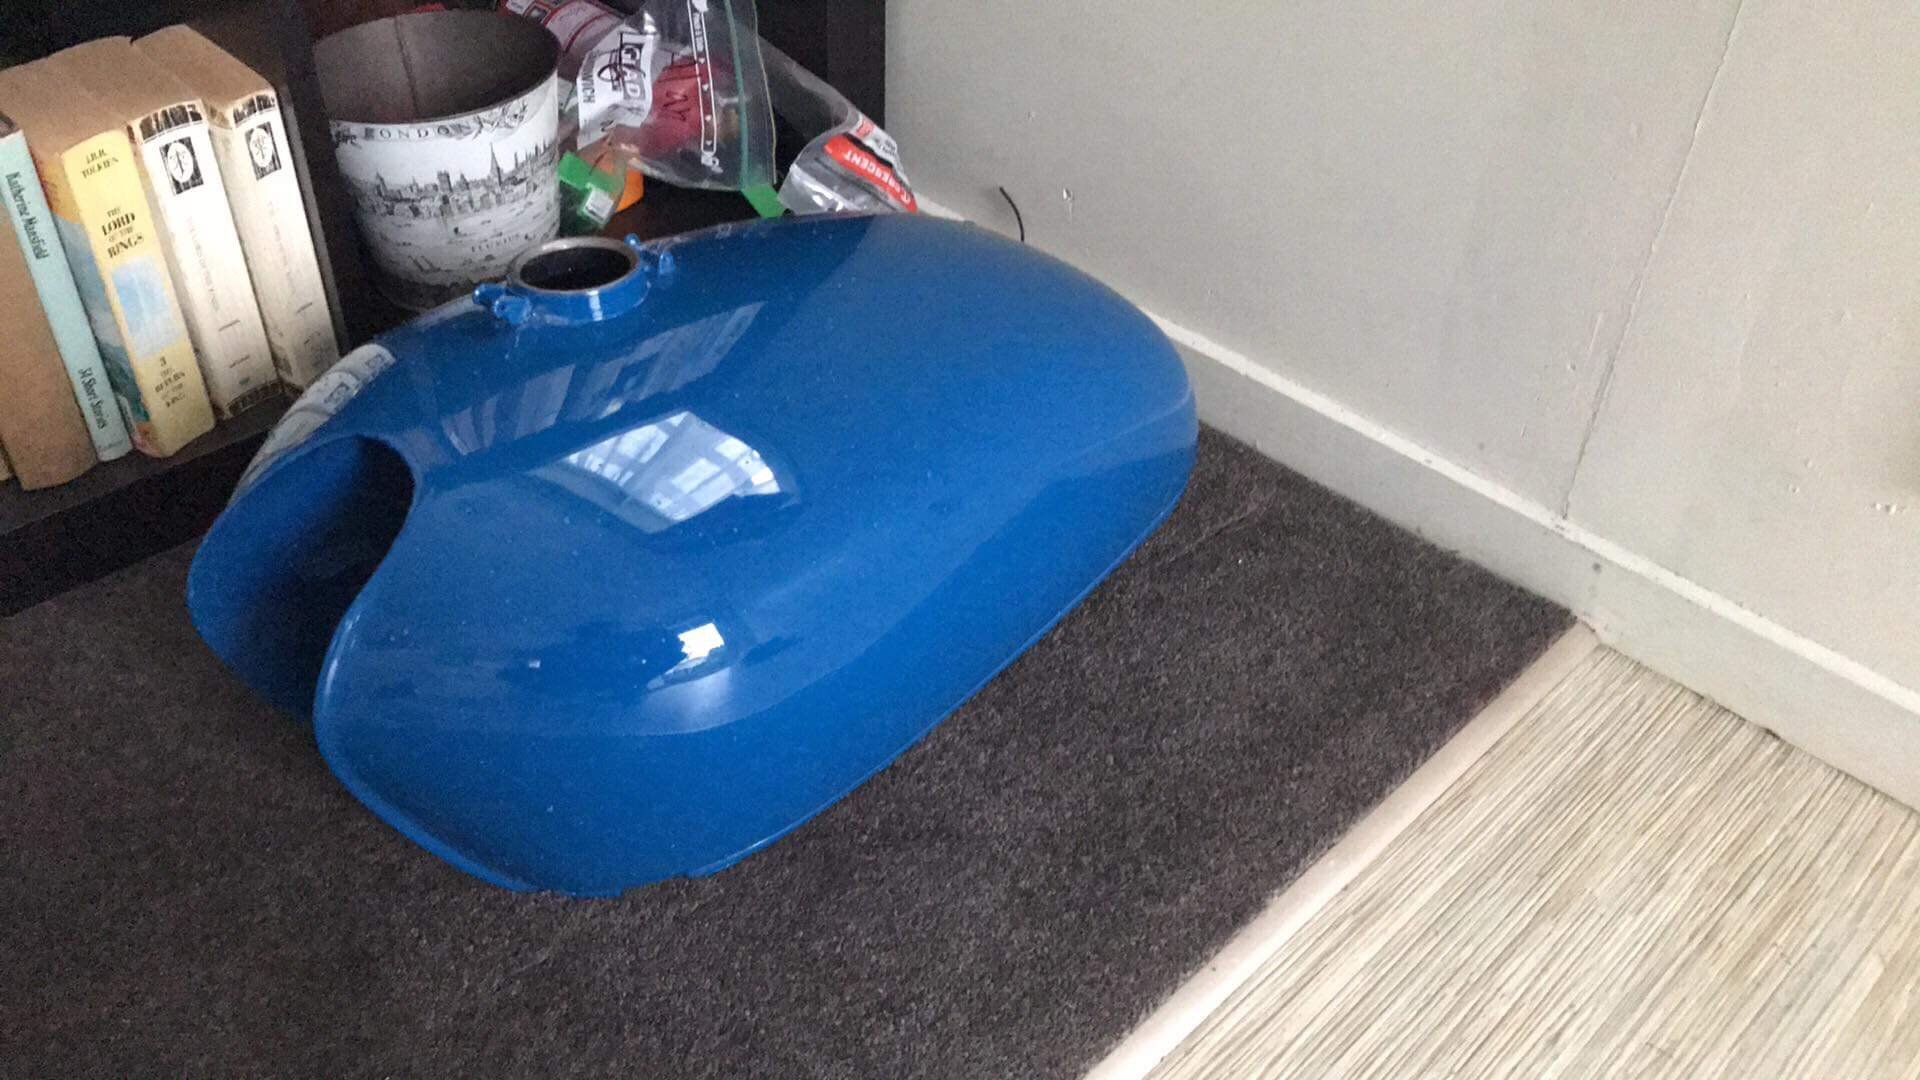
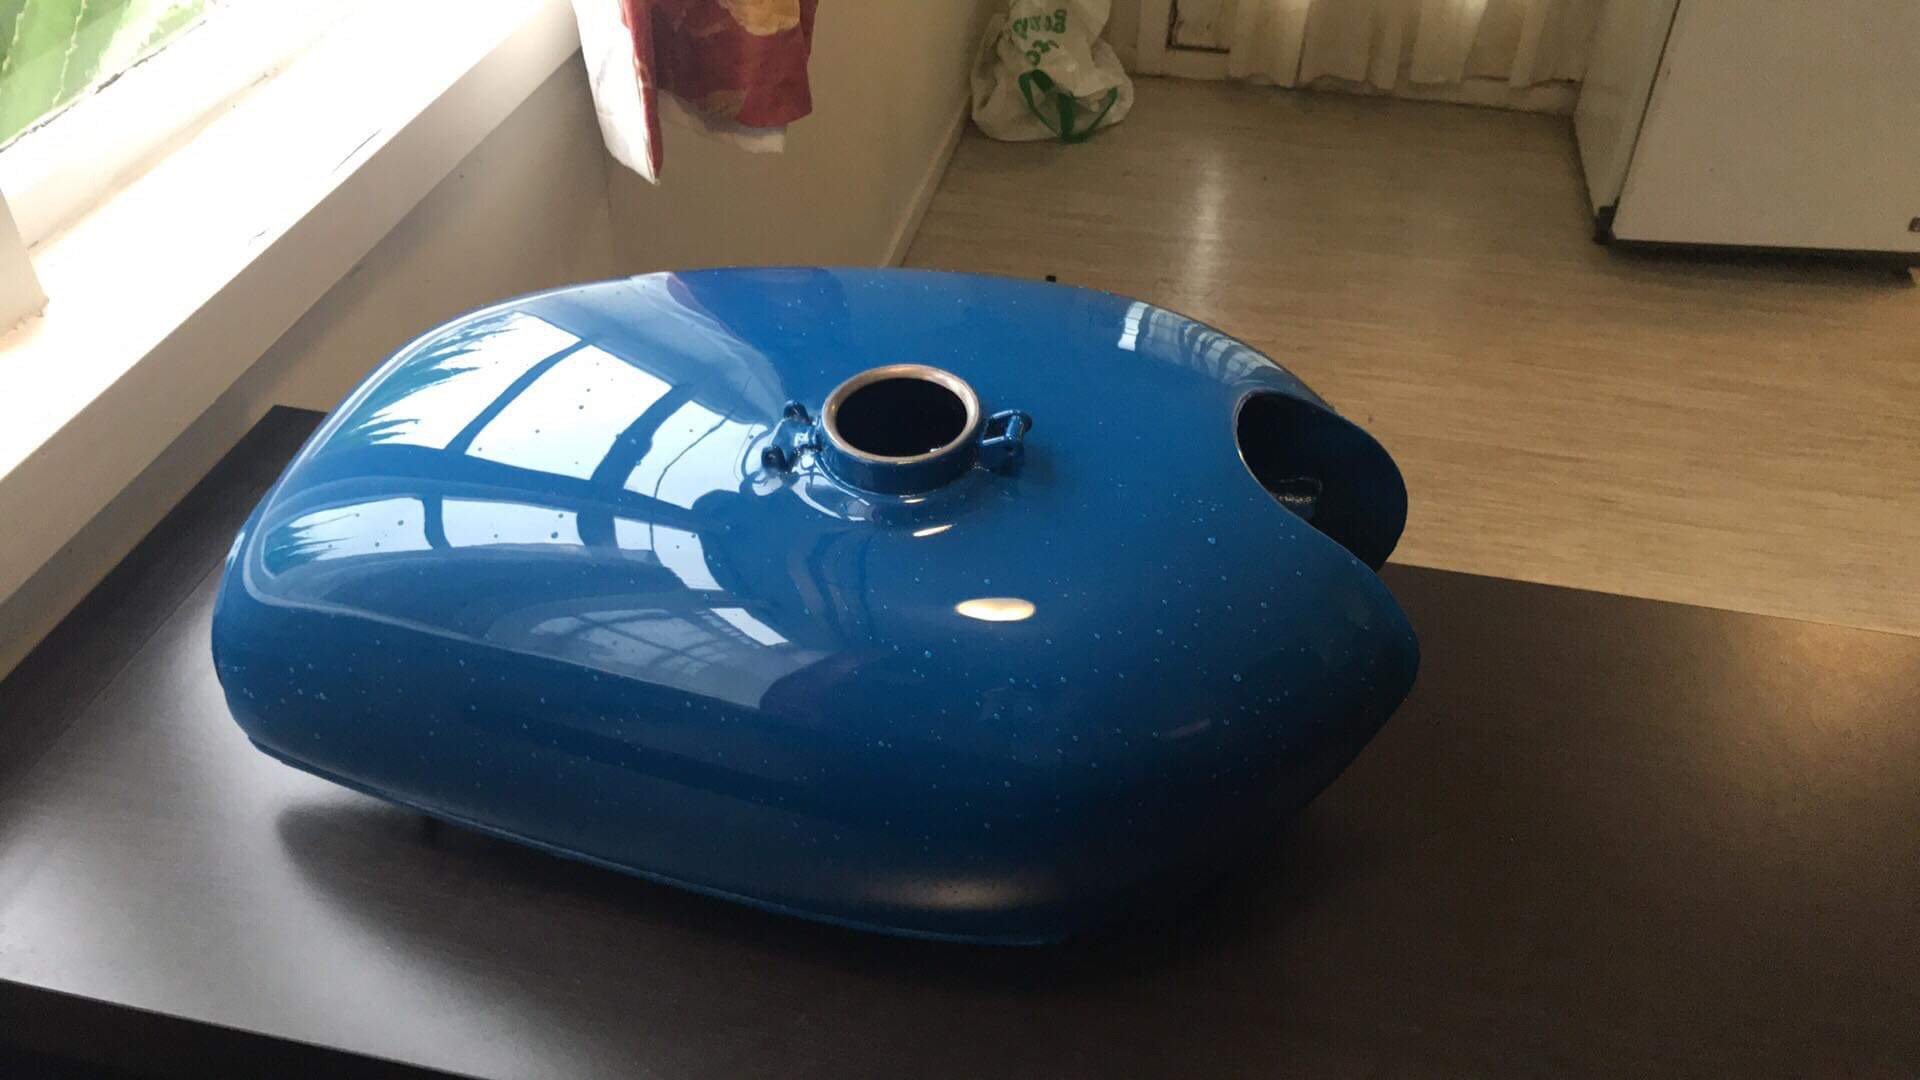
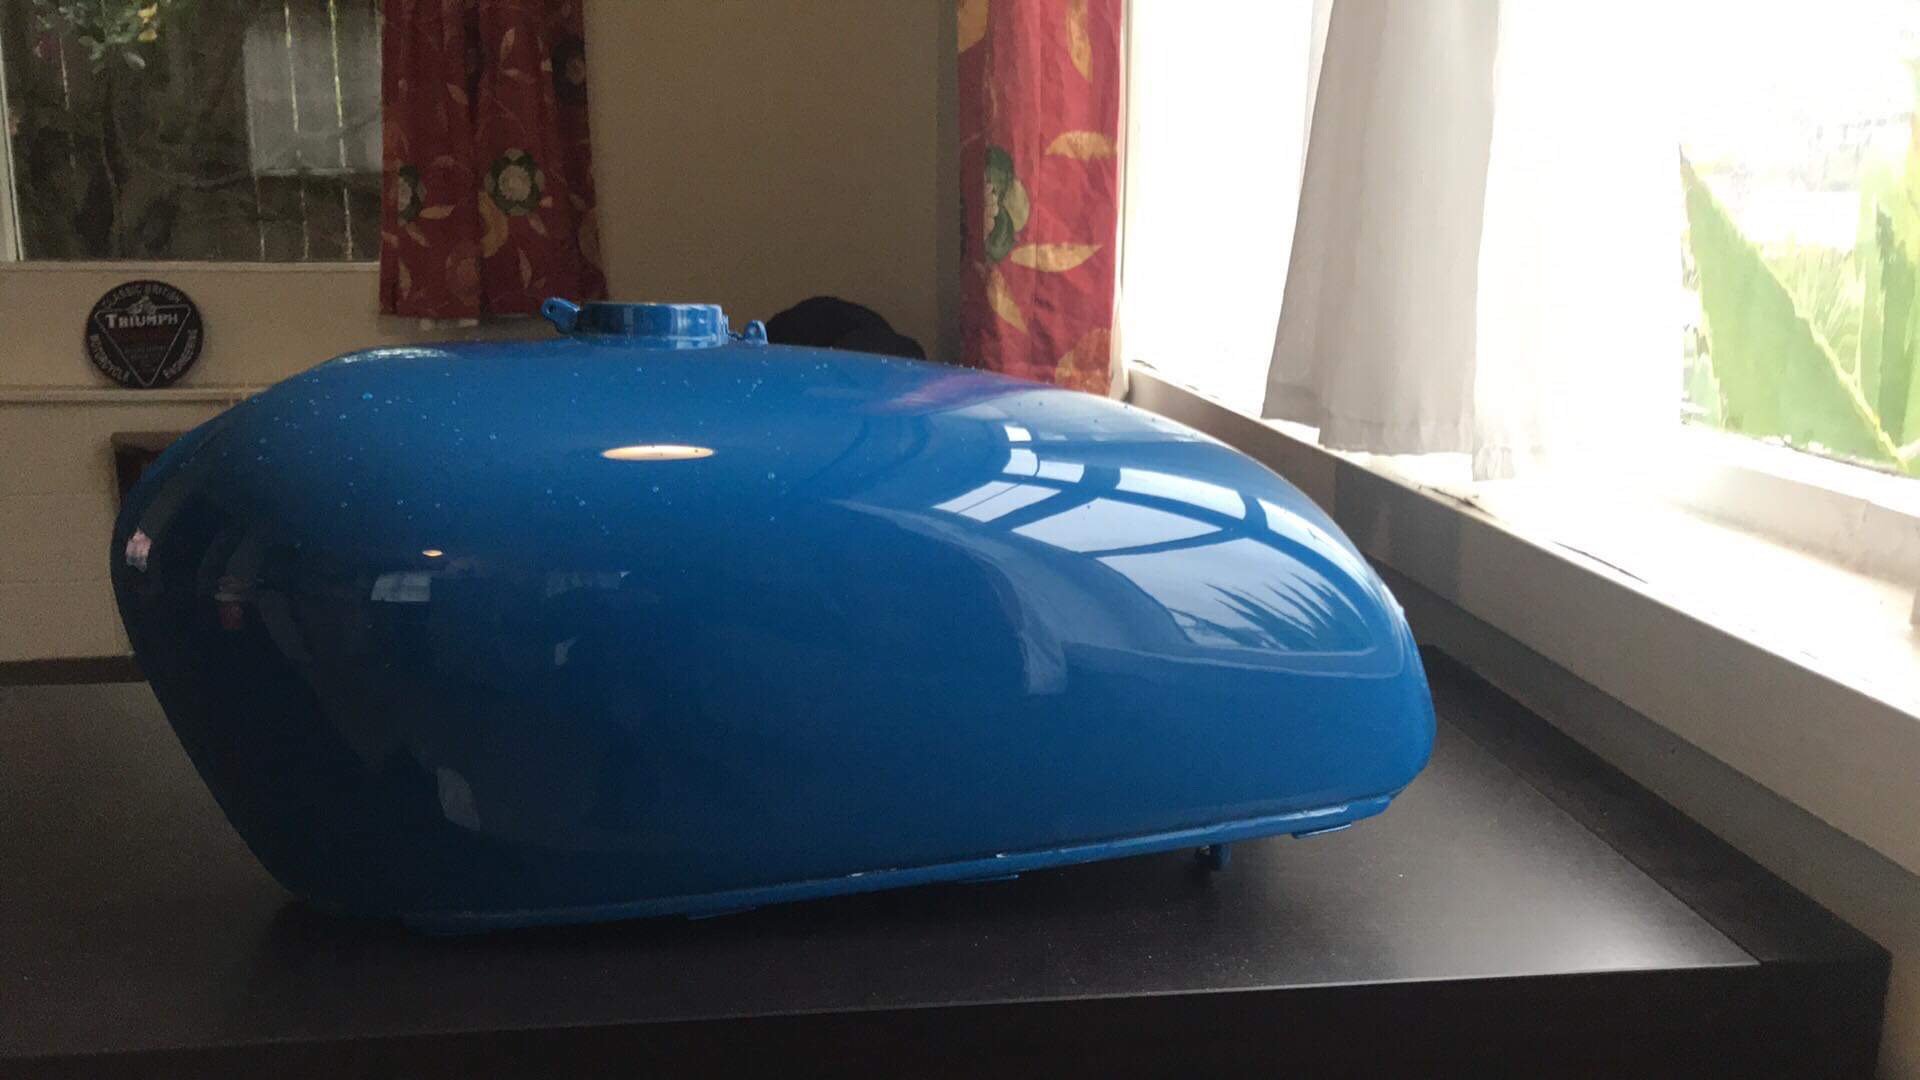
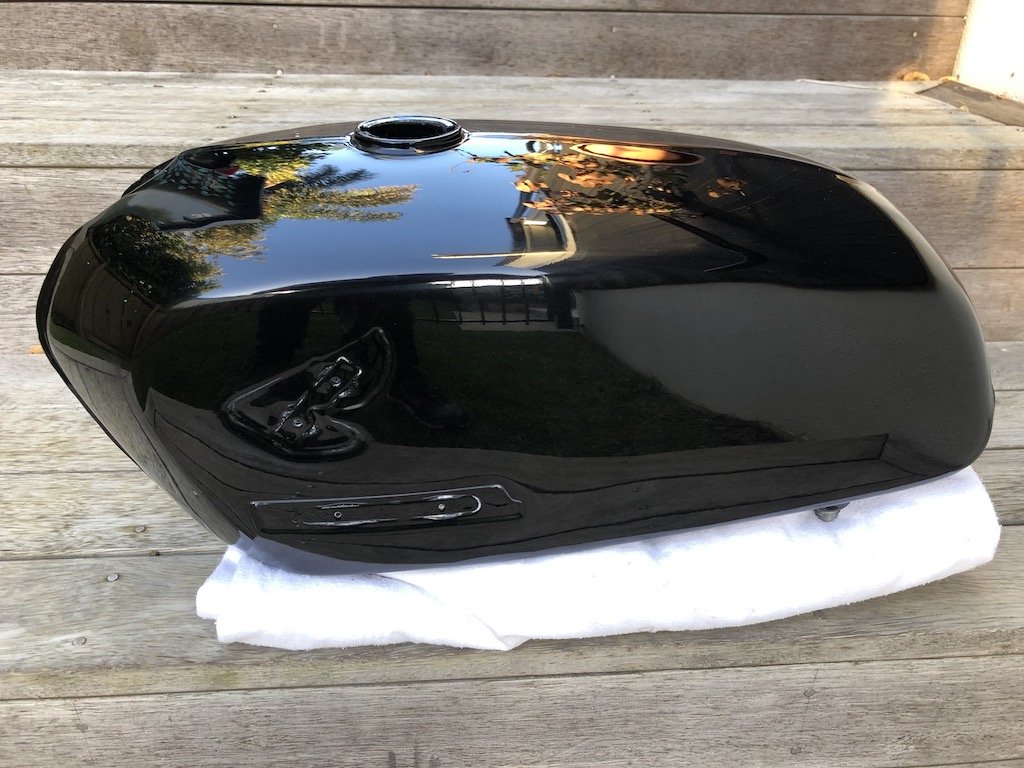
Got the tank back from the painter, stoked with how it turned out, tried to keep as close to the original colour as possible but with high gloss.
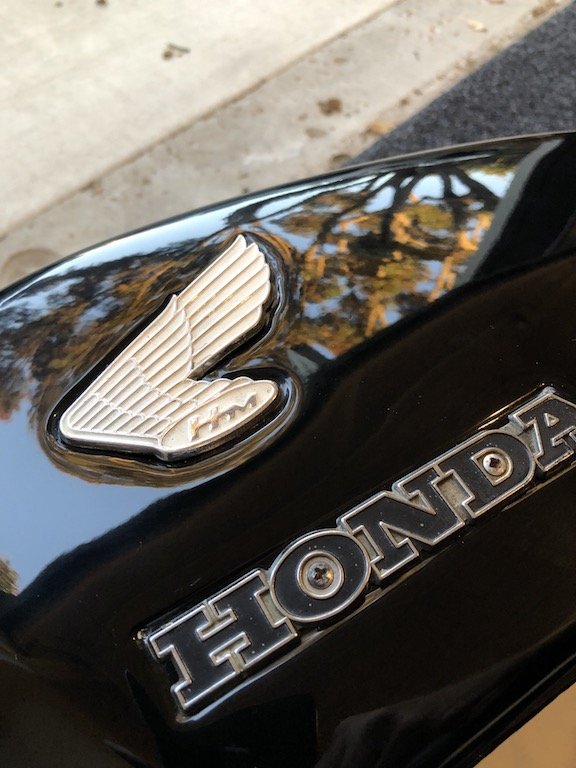
Gonna look mint with the new chrome strips and chrome fuel cap fitted. Also going to add the Honda wings logo to the sides.
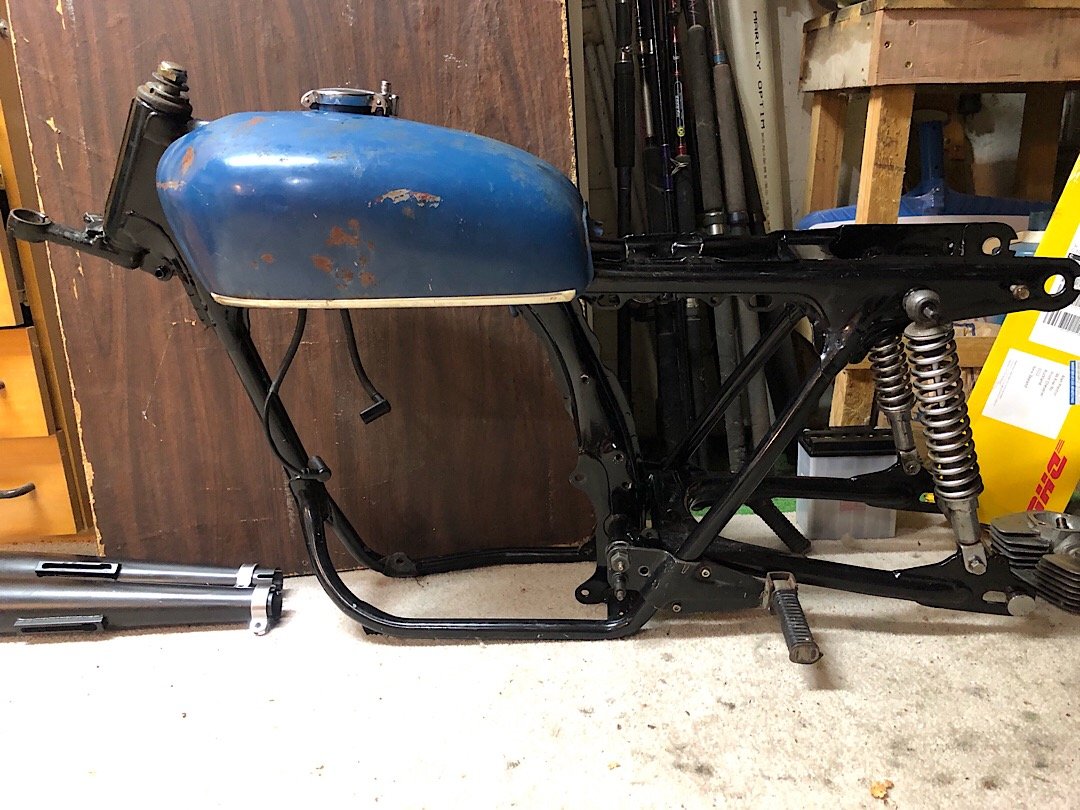
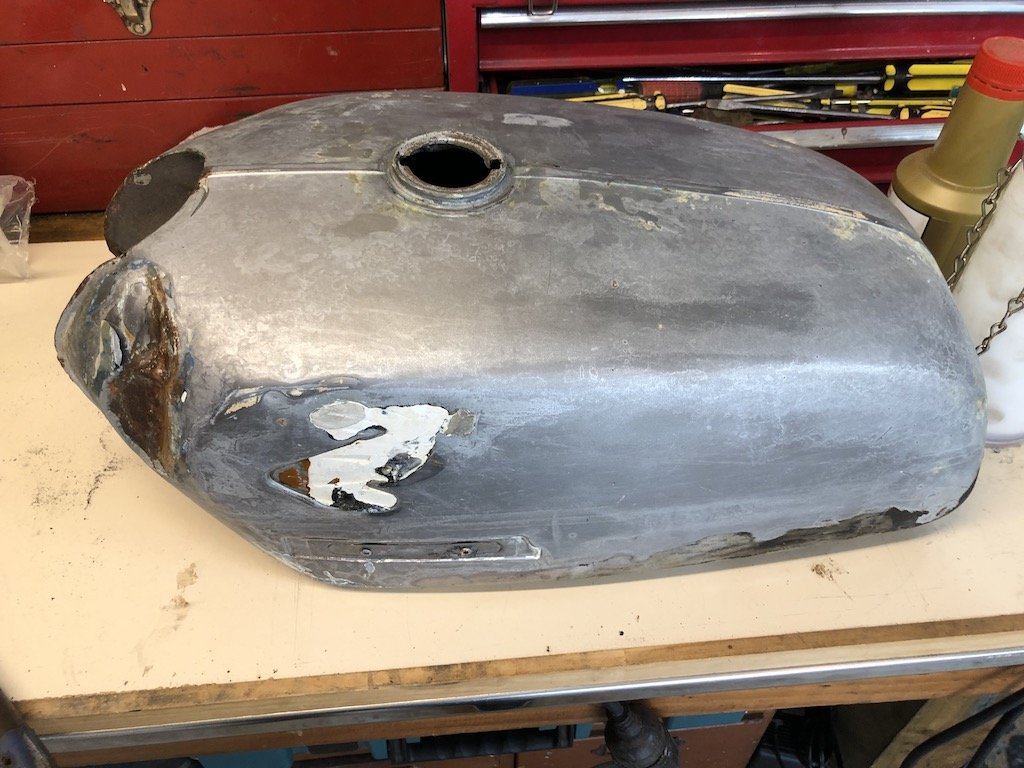
Quick compare to the old paint, about a million times glossier than before and maybe a shade lighter because of it but stoked with how it turned out!
-
3
-
-
That tank looks awesome!
-
1
-
-
Good to know, I ordered spares of each so if you break one let me know.
-
- Popular Post
- Popular Post
Seems like there is an awesome array of cafe racer parts available through AliExpress, trouble is they get mixed in with all the other motorcycle parts for modern bikes which makes good parts harder to find.
This threads for adding Ali finds and discussing quality purchases for bike parts.
Right now the CB350 has a decent shopping list:
- Clip Ons https://www.aliexpress.com/item/Clipons-31MM-33MM-35MM-36MM-37MM-38MM-41MM-43MM-45-52MM-Silver-CNC-Motorcycle-Clip-Ons/32969701701.html?spm=2114.search0104.3.10.5328e1baSWadAW&ws_ab_test=searchweb0_0,searchweb201602_6_10065_10068_10547_319_10059_10884_317_10548_10887_10696_321_322_10084_453_10083_454_10103_10618_10307_537_536,searchweb201603_52,ppcSwitch_0&algo_expid=1ee871bf-b98c-457a-afc0-0659f3de74e5-1&algo_pvid=1ee871bf-b98c-457a-afc0-0659f3de74e5
- Mufflers - sweet super traps https://www.aliexpress.com/item/Super-Trap-Silencer-Exhaust-Pipe-Retro-Motorcycle-Modified-Stainless-Steel-Vintage/33007535031.html?spm=2114.search0104.3.1.2a427fd3YLJ8K2&ws_ab_test=searchweb0_0,searchweb201602_6_10065_10068_10547_319_10059_10884_317_10548_10887_10696_321_322_10084_453_10083_454_10103_10618_10307_537_536,searchweb201603_52,ppcSwitch_0&algo_expid=432eeb94-1d98-43ea-b655-2538f39f5171-0&algo_pvid=432eeb94-1d98-43ea-b655-2538f39f5171
- Controls - https://www.aliexpress.com/item/CNC-Momentary-Latching-Switch-Aluminium-Alloy-Switch-Motorcycle-Cafe-Race-Handle-Grips-Reset-Buttons-For-Honda/32844235133.html?spm=a2g0s.9042311.0.0.5fb84c4dskXaG1
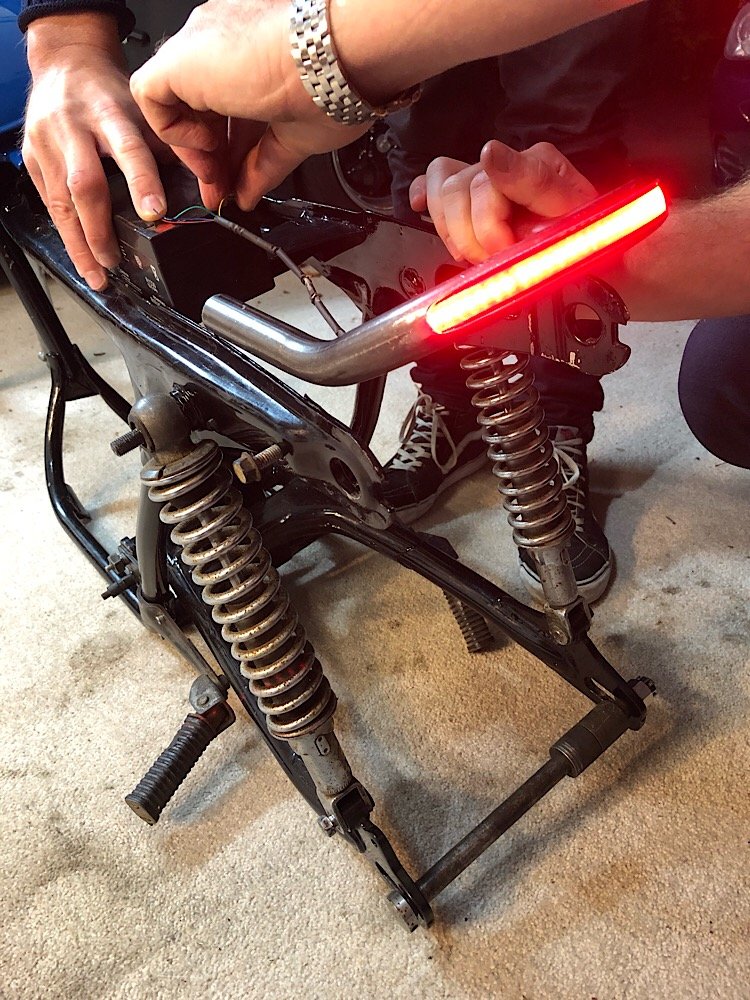
- Rear hoop with built in LED tail light - https://www.aliexpress.com/item/175mm-Motorcycle-Racer-Frame-Hoop-Tracker-End-Upswept-Seat-Loop-LED-Turn-Brake-Light/32976230833.html?spm=2114.search0104.3.85.46f0f0f5lEuycI&ws_ab_test=searchweb0_0,searchweb201602_7_10065_10068_10547_319_10059_10884_317_10548_10887_10696_321_322_10084_453_10083_454_10103_10618_10307_537_536,searchweb201603_52,ppcSwitch_0&algo_expid=fd15aa64-82a4-4c79-9470-1f502a13af8c-12&algo_pvid=fd15aa64-82a4-4c79-9470-1f502a13af8c
- Indicators - https://www.aliexpress.com/item/1x-LED-Motorcycle-Handlebar-End-Turn-Signal-Light-Yellow-Universal-22mm-Indicator-Flasher-Handle-Bar-Blinker/32969005348.html?spm=2114.search0104.3.2.43683927KSAtst&ws_ab_test=searchweb0_0,searchweb201602_6_10065_10068_10547_319_10059_10884_317_10548_10887_10696_321_322_10084_453_10083_454_10103_10618_10307_537_536,searchweb201603_52,ppcSwitch_0&algo_expid=58e1409a-fd85-4f74-8246-1941fecd7edc-0&algo_pvid=58e1409a-fd85-4f74-8246-1941fecd7edc
- Number plate lights - https://www.aliexpress.com/item/Onever-2pcs-Aluminum-Car-LED-License-Plate-Light-Screw-Bolt-Lamp-Rear-Tail-Lights-for-Motorcycle/32877487949.html?spm=2114.search0104.3.106.5bc941ccSyYKHb&ws_ab_test=searchweb0_0,searchweb201602_6_10065_10068_10547_319_10059_10884_317_10548_10887_10696_321_322_10084_453_10083_454_10103_10618_10307_537_536,searchweb201603_52,ppcSwitch_0&algo_expid=f20aa6d3-4959-4e2a-b398-3752fc9c5eab-18&algo_pvid=f20aa6d3-4959-4e2a-b398-3752fc9c5eab
-
7
-
3
-
Where's the best place to get new chrome 18inch 36 hole Honda wheels from?
Been quoted £80 each wheel in the UK which sounds all good but before I pull the trigger are there any local?
-
So after a whole lot of work by an extremely talented motorcycle refinisher in west Auckland the tank went from this:
To this:
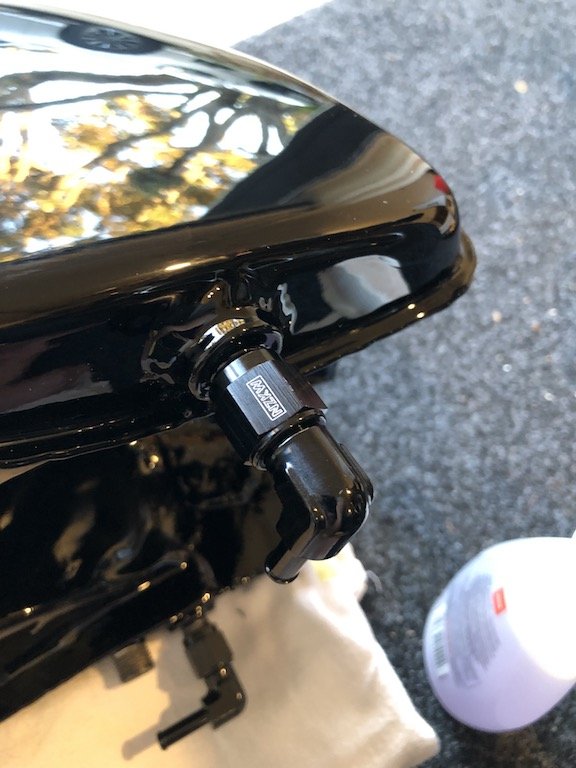
Super stoked with the outcome, the black paint is perfect and now has nice black AN fittings for the fuel sharing. I'll chuck it on tomorrow as the paint was still a bit fresh.
-
8
-


Abarth’s 1972 Honda CB350k Cafe Racer
in Two Wheels
Posted
Been putting the front together.
Added in heated elements inside the clip on tubes for those cold days.
Indicators are now bar end indicators, they have a white LED and orange LED in them so we’ll hook the white to the headlights and the orange to the indicator relay.
Connected all the cables up, we used short versions which were perfect with the clip ons.
Found that the headlight bracket we fitted made the headlight stick out too much. On the hunt for brackets with shorter arms. May even use the factory ones as they are short. Ordering some gaiters to fit over the fork too.
Anyways this is as it stands at the end of the evening.