~Slideways~
-
Posts
1513 -
Joined
-
Last visited
Everything posted by ~Slideways~
-
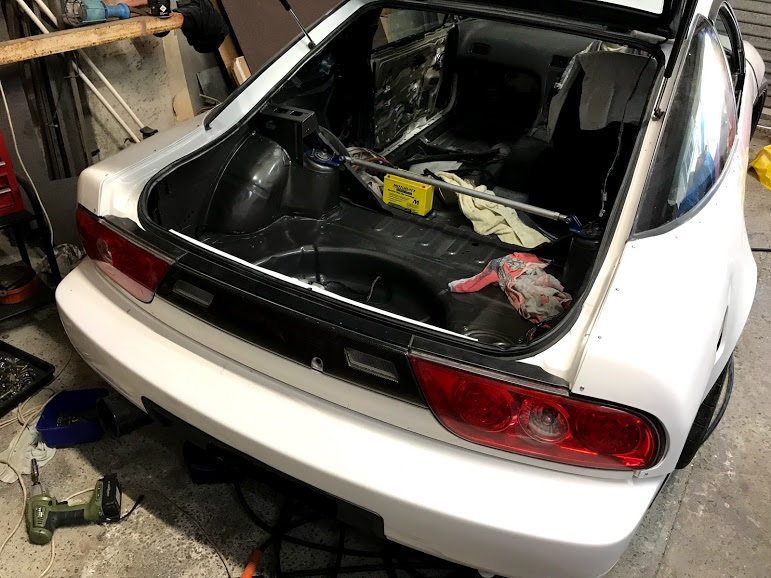
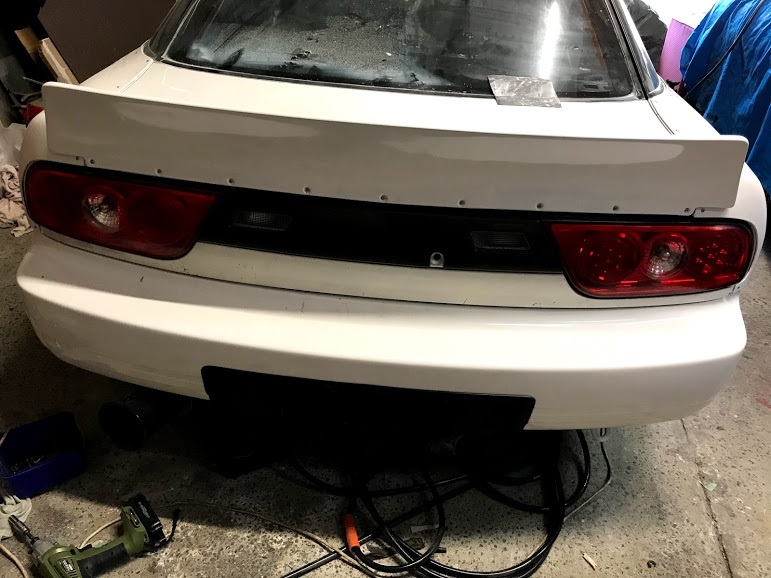
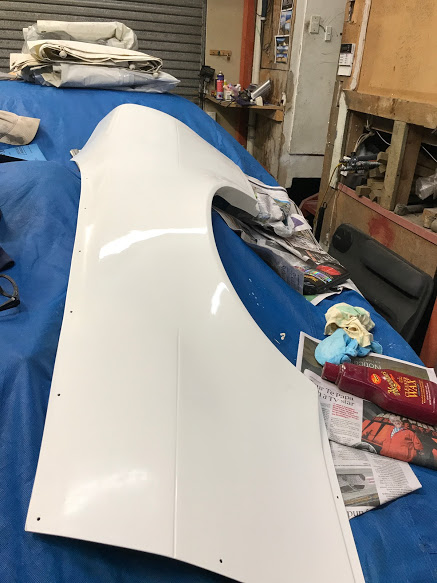
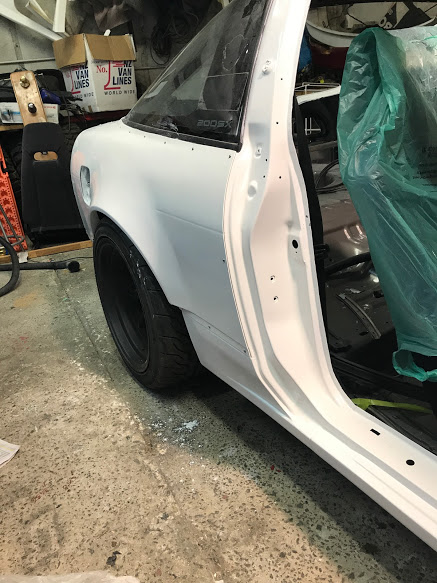
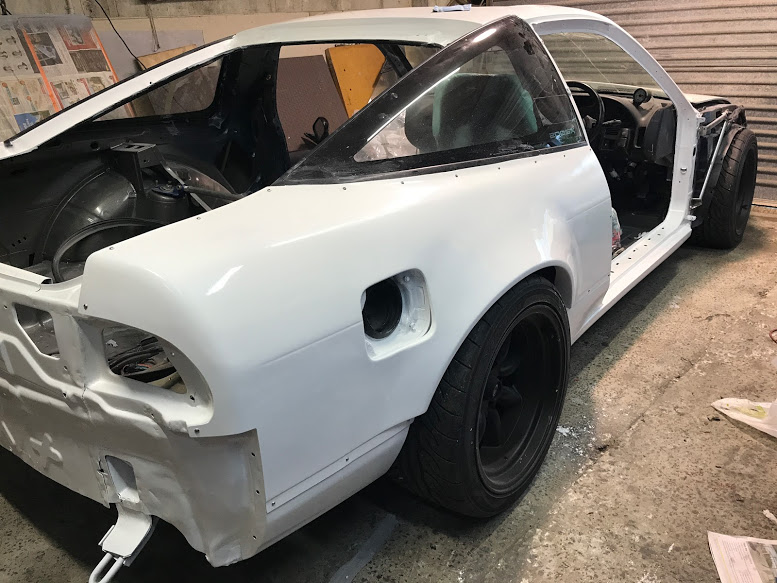
Wet sanded and polished the front drivers side guard, came out nice. Fitted rear lights, I decided to try some aftermarket lights that came on the 180sx I imported. They are type x 'style' LED things, I don't really like them (they look OK... I hate aftermarket lights though)... but I'll leave them on until I get some genuine ones since I do have the genuine Type X centre and lower panel (I haven't painted this yet). Alternatively I could use some non-type x ones with the different centre and lower panel, I had intended to use those on the other project 200sx.

-
Yep my thoughts too, I'm looking for a 24v fan to suit so I don't have to stuff around with 12v things like I have before (i.e. the water to air setup which drained batteries due to inverters etc).
-
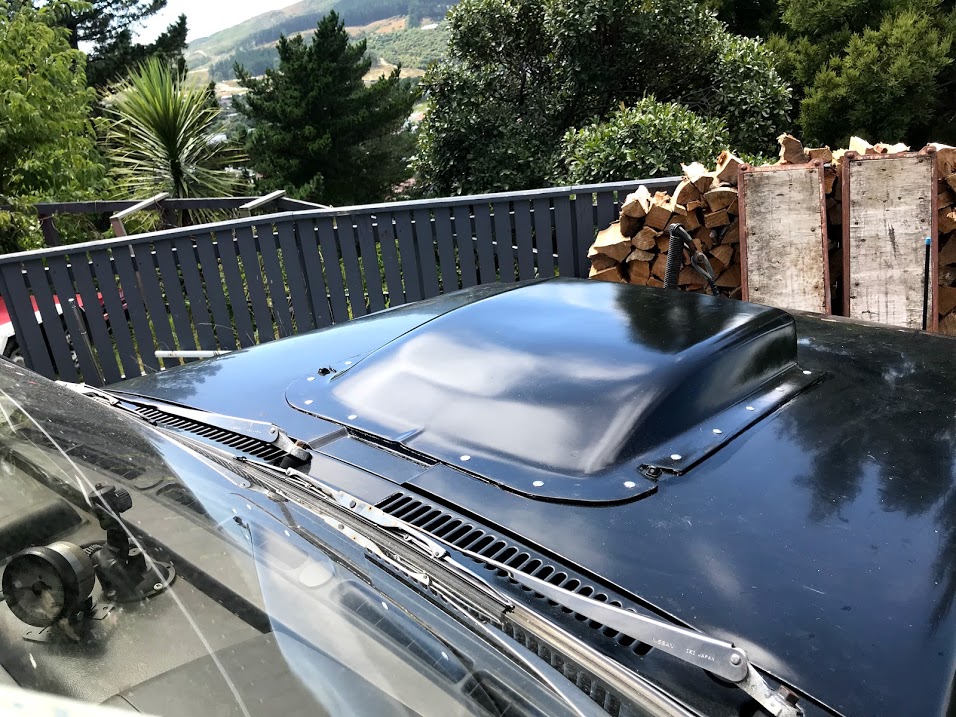
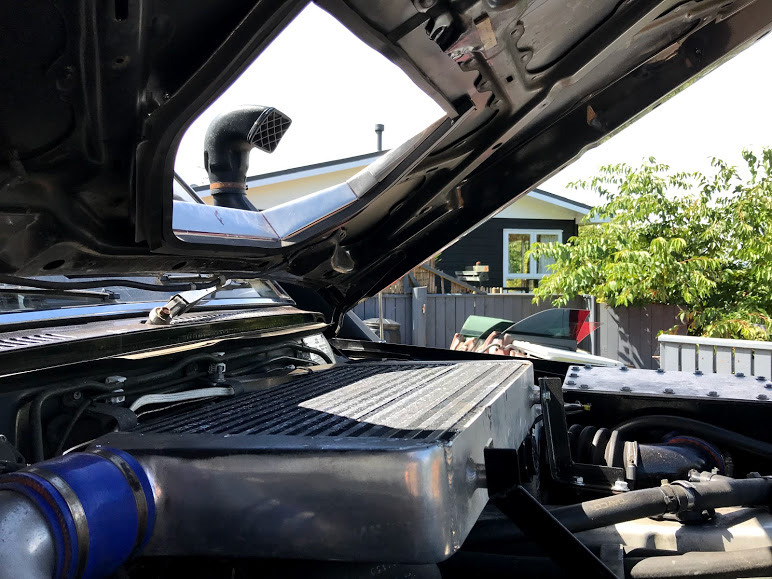
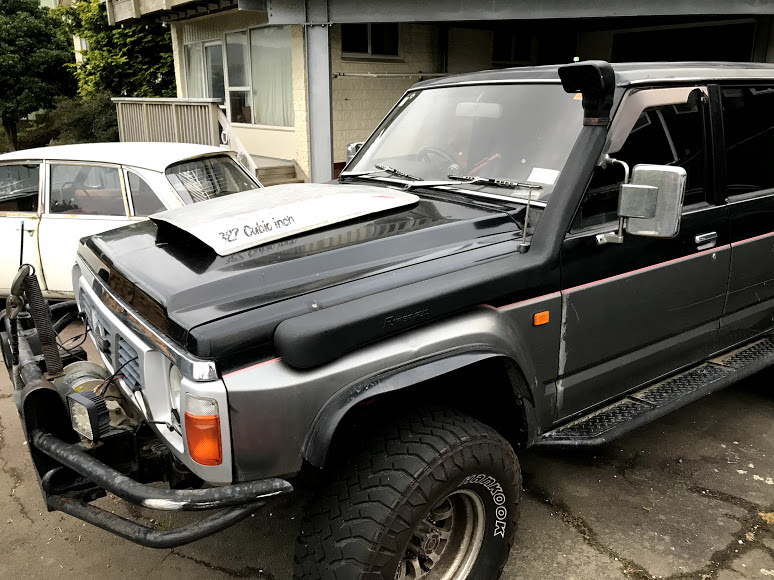
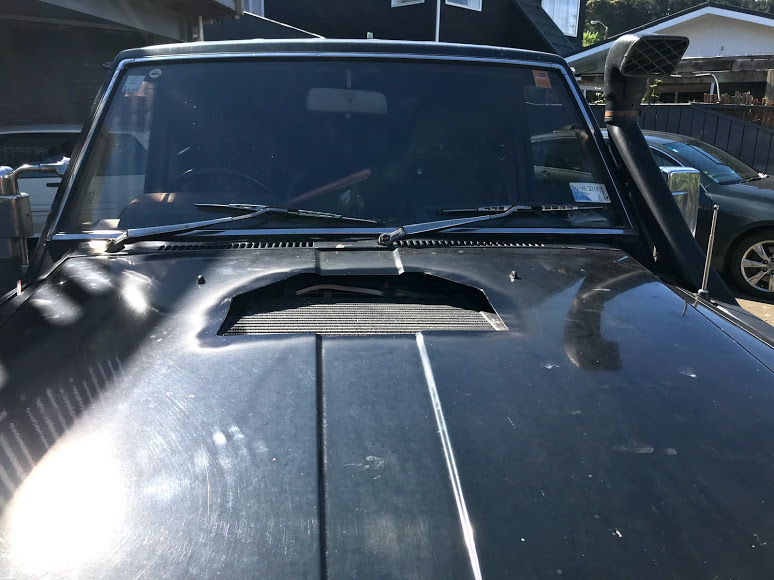
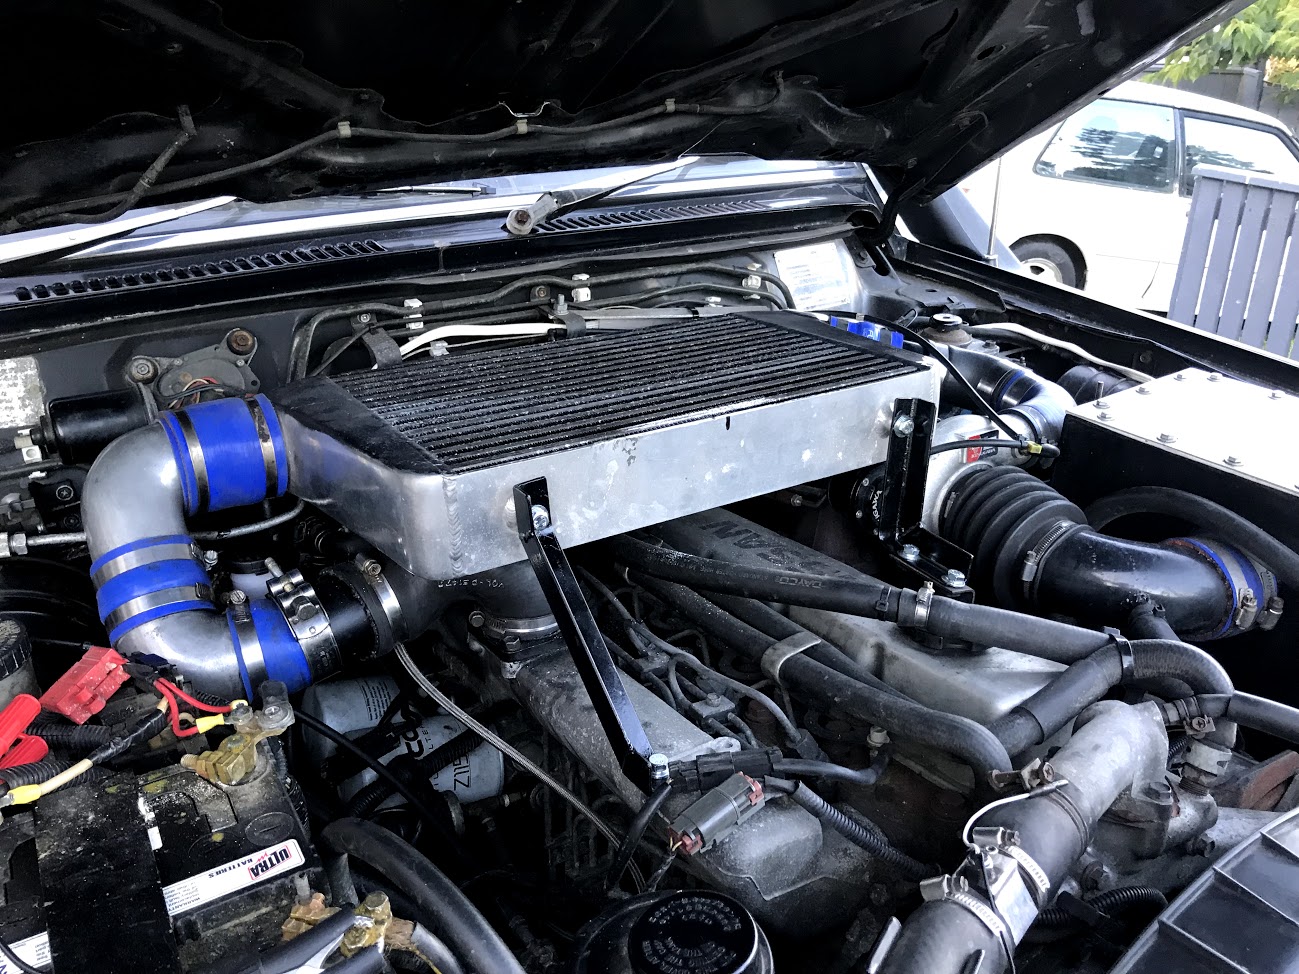
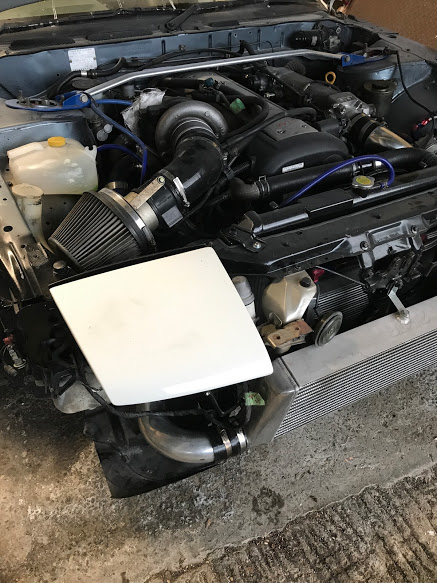
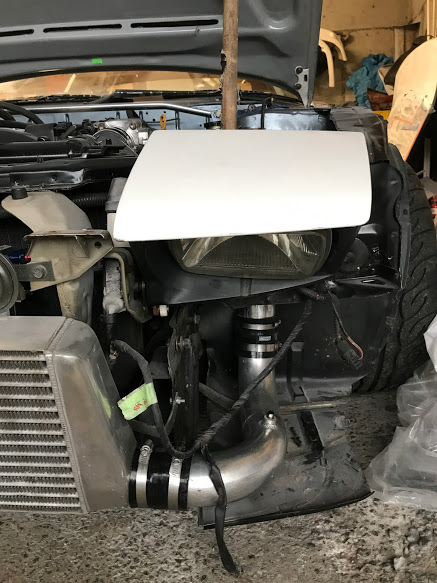
Scoop fitted! I used silicon glue UV and heat resistant stuff, and some big rivets. I sealed the back in the centre with the same sealer, want as much pressure as possible to stop under bonnet hot air trying to push out (from radiator and below engine). I went for a quick test drive, it was hot as fck the thermometer read 28deg in the shade. But I took it for a drive, running over 1 bar of boost previously (pre scoop but with bonnet hole) made the whole intercooler hot. Now I can put my arm right in the scoop and feel the inlet side is hot (easy to touch) and the outlet side is cool! Might still fit a fan below it for slow moving 4wding.
-
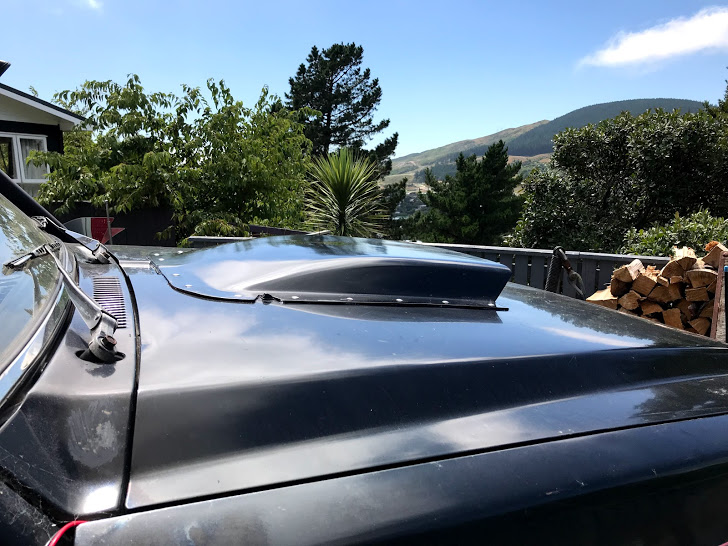
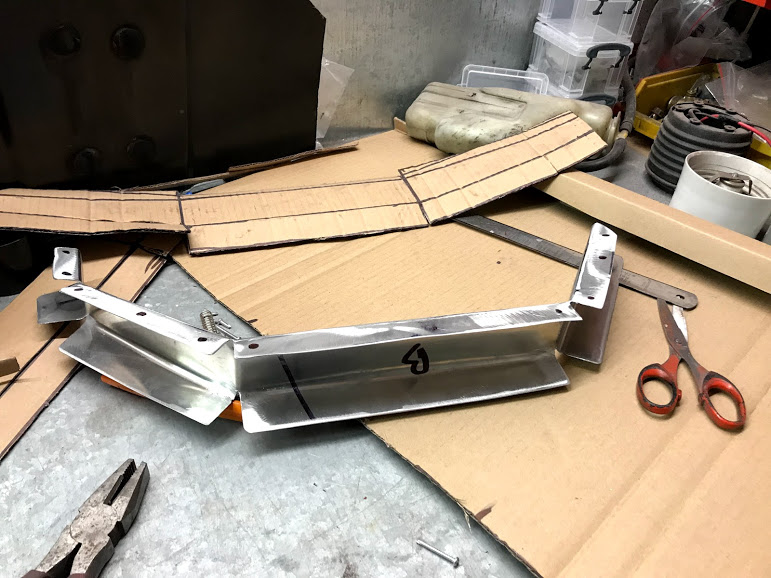
Aluminium air blocker thing finished and riveted on: Top view, because I was on the deck. Inside view with rubber foam tape to seal the frame with the intercooler surface: Scoop sanded and painted. I am reminded of why rattle can spraying sucks...but it turned out ok. When the paint is dry I'll silicon glue and rivet it on:
-
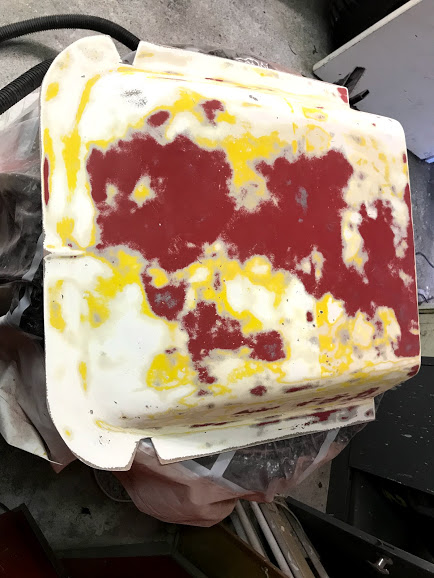
Then I cut the Torana scoop a bit shorter: It's a bit rough with cracked paint etc: Sanded a bunch: High fill primered: Filler because I love sanding:
-
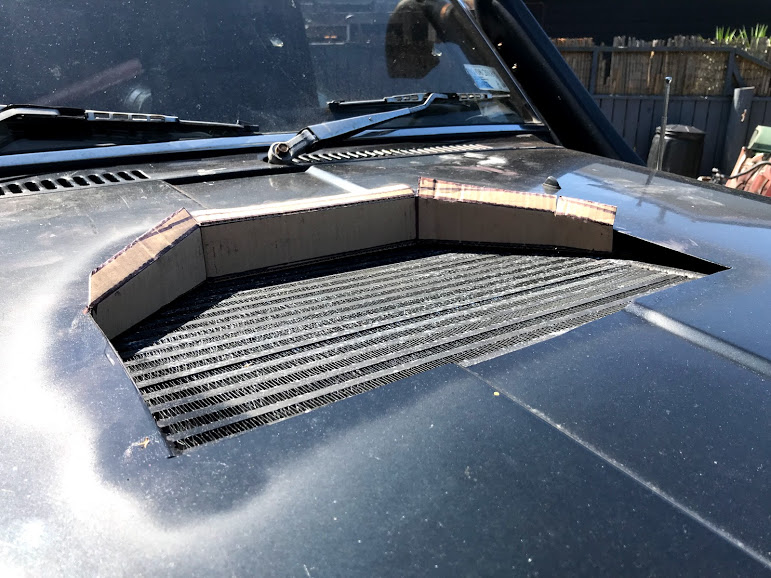
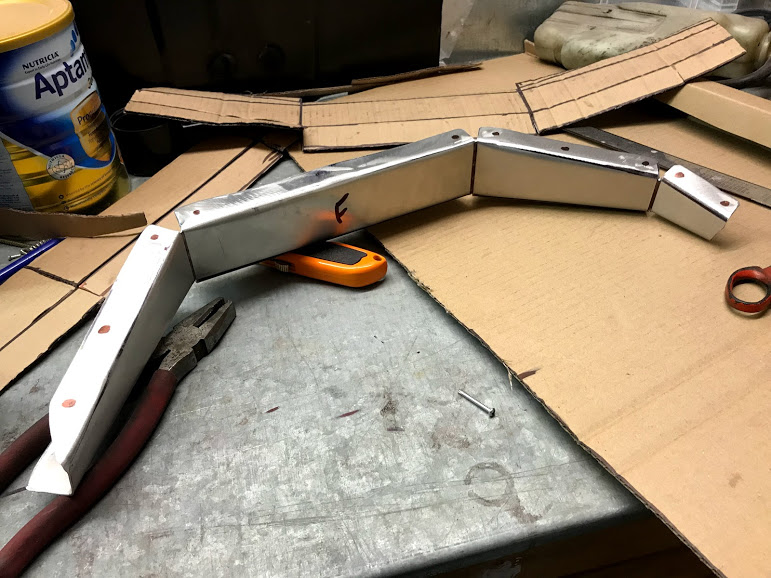
Time for a bit of CAD work to close up that gap. Template: Test fit: Cut out in aluminium sheet: I'll rivet it on, then make the side bits to enclose it then some thick rubber foam tape to seal with the intercooler.
-
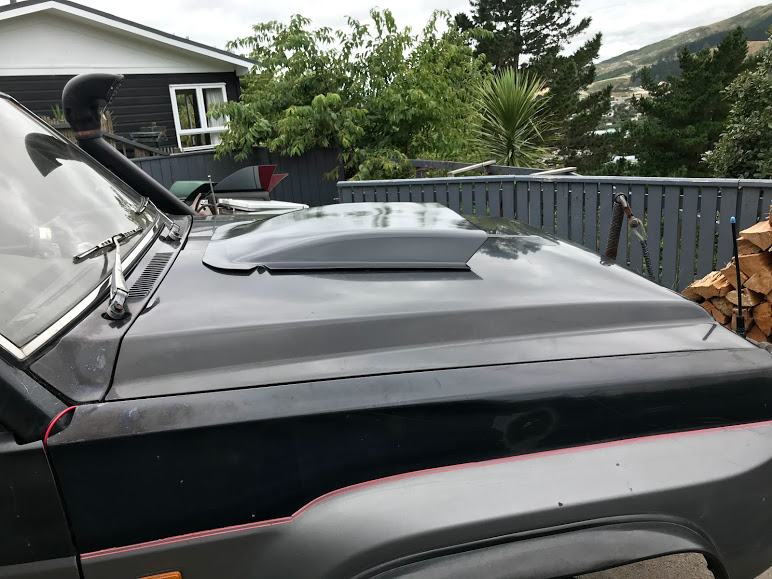
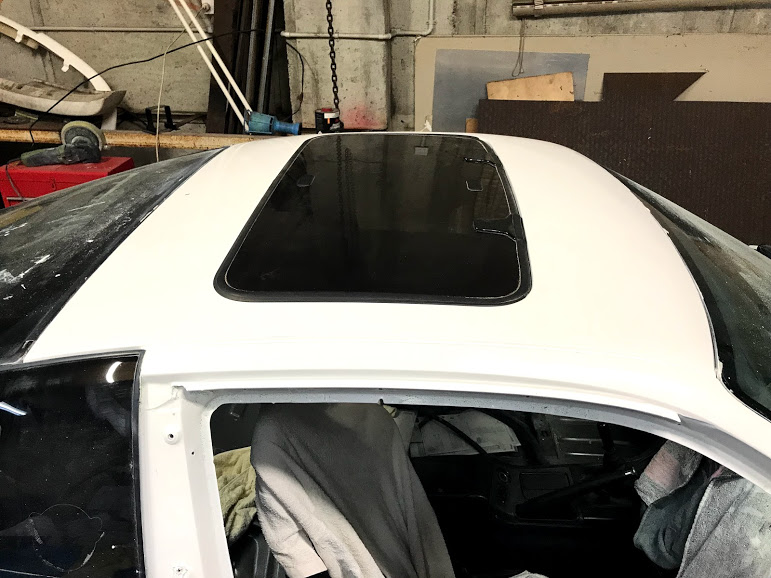
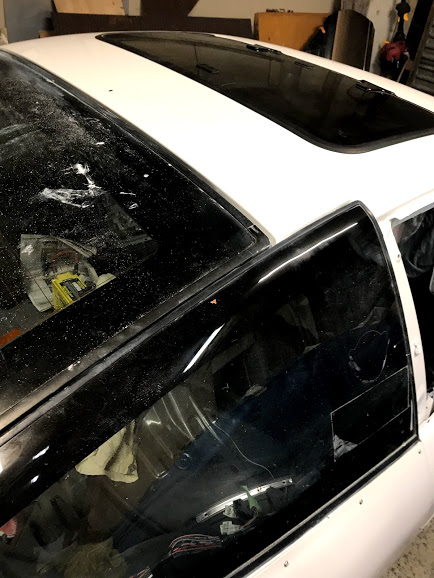
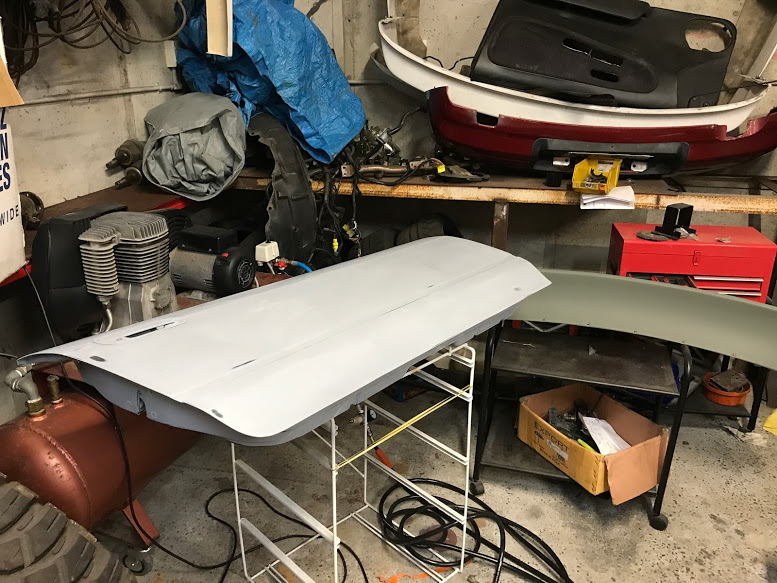
Best update yet: Sun roof installed, it's a simple lift up type so I plan to try make a fibreglass or carbonfibre mould of the glass to reduce weight. The glass is pretty heavy but I just put it back in for now so I can get it going and ready for certification, still heaps more to do before then. Phwoooarrr....sunroof, being all...sun roofy.
-
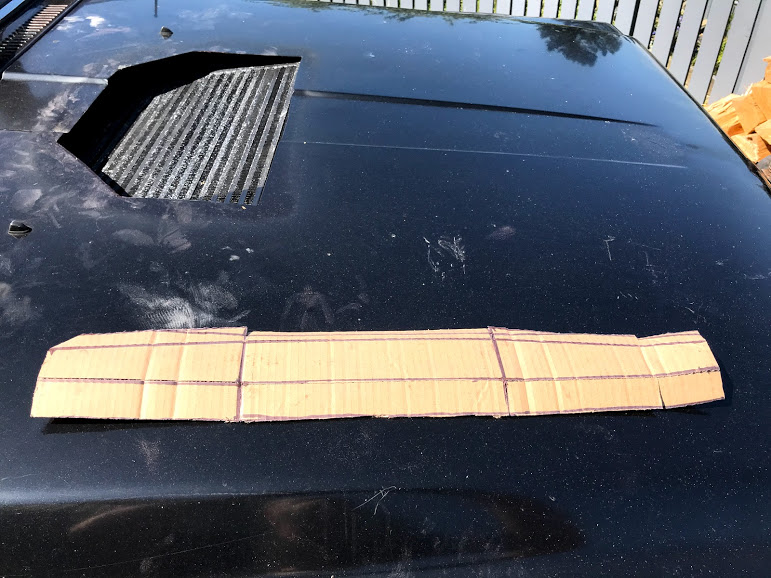
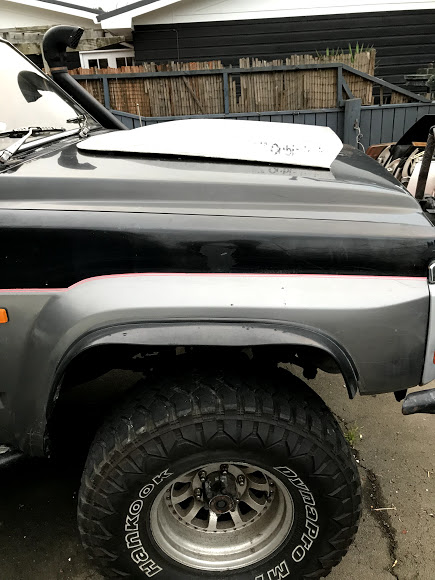
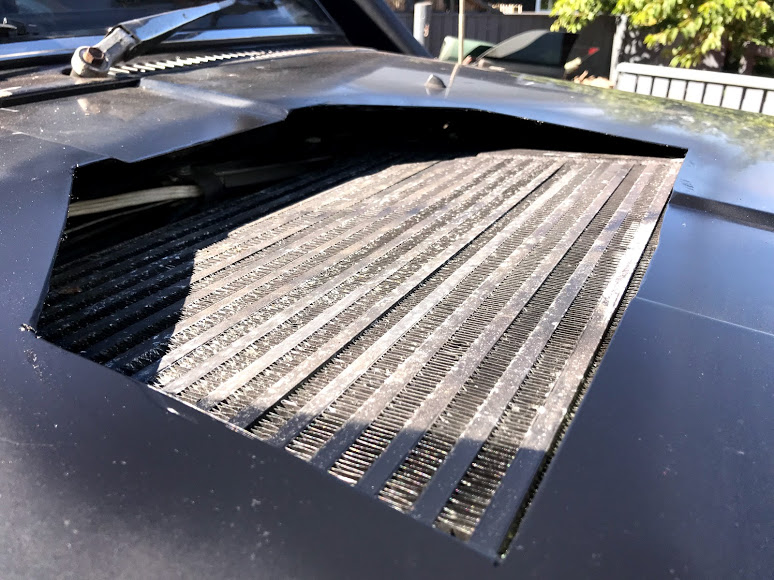
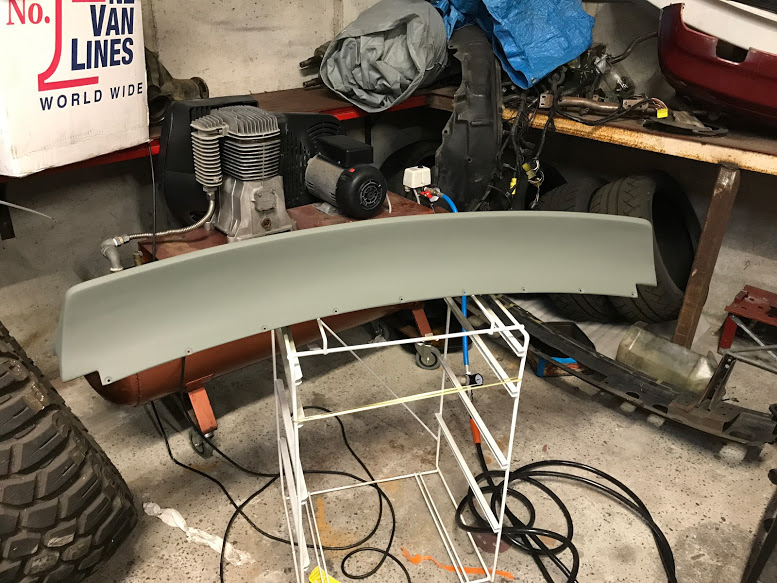
I was going to try find a Version 8 wrx scoop but then I found a Torana fibreglass scoop which is wide enough. It's way too long but if I shorten it by maybe 1/3 it'll work. Dummy fit and a rusty Triumph: After a little thought, I cut a big hole in the bonnet. Not a rectangle because I didn't want to cut too much of the frame: Now I need to figure out a way to seal the gap so the air doesn't just go straight through.
-
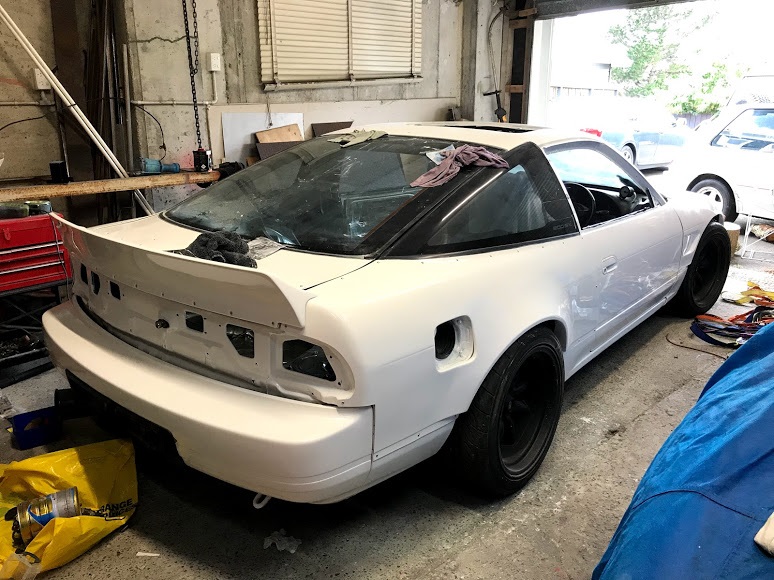
Had another baby, so progress is super slow. Bumper painted and fitted: Guards and front bumper painted but still need wet sand then polish. Bonnet and headlight covers were already painted white so they are the wrong shade. Will do them at some stage.
-
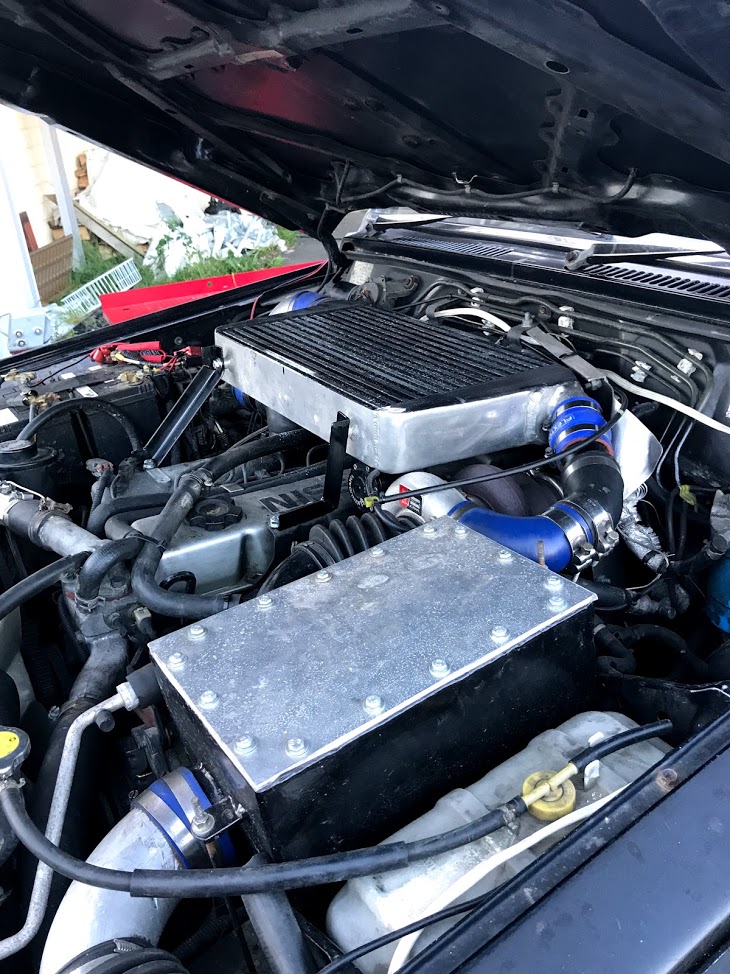
Had some issues which I suspected was the intercooler leaking water into the intake, confirmed it was the case, got annoyed at the thing. It was using too much power with the big 24v to 12v inverter as well as driving the water pump all of the time too, so decided it wasn't for me and ripped it all out. I still had a modified front mount intercooler from an old car so I played around with some ideas and came up with this: It's currently an interheater because I haven't cut a hole in the bonnet yet. Plan is to try find a Version 8 wrx scoop since they are the tallest and less rounded than other wrx designs which would look silly on a big square box of a 4wd. Currently in for a WOF, brakes need some work and for once I'm not doing the stuff myself because I don't have time with a 1month old girl and a 3 year old boy and a 16 year old dog, so I asked the wof guy to do the work. Anyone know a good Subaru wrecker?
-
HA! yeah that does cross my mind a lot. I actually like the painting bit, the body work, prep and sanding fcking sucks though. If only I didn't have another one to paint...
-
SO much work. I've definitely learned a lot though.
-
Thanks man, feels like its taking for ever haha
-
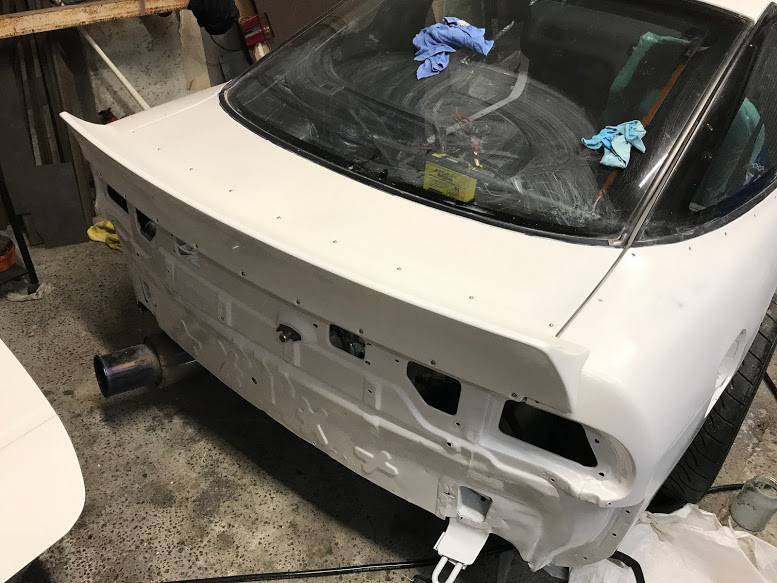
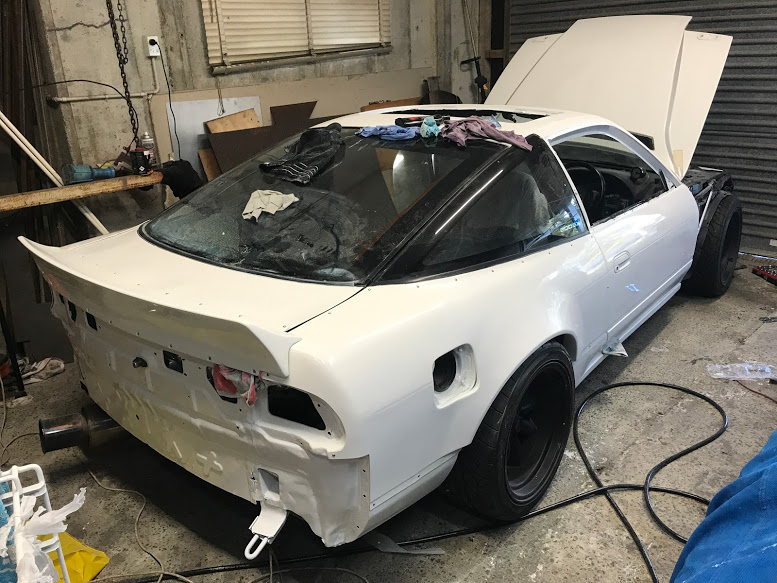
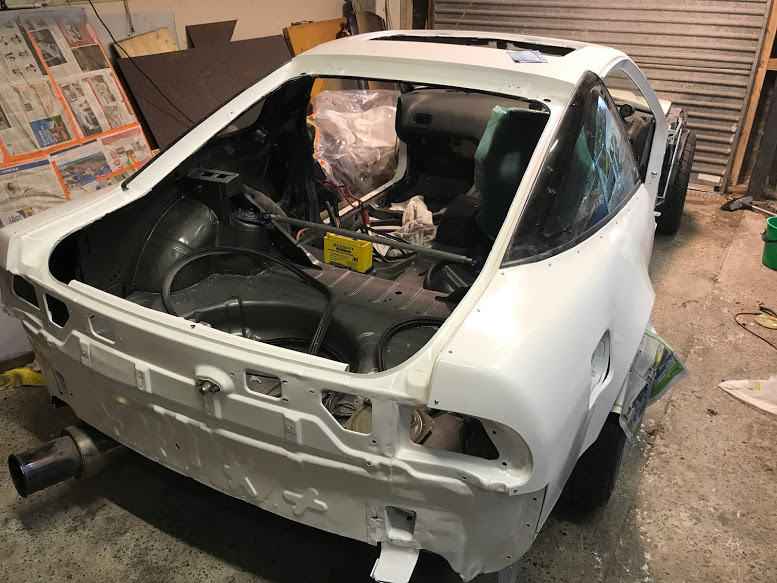
Progress, slow... but progress. - Hatch seal fitted - Wing fitted to hatch - Hatch fitted. - Drivers door fitted. - Rear quarters fitted. - Wet sanded and cut n polished all of above. Rear quarters on after fixing a couple of paint issues:
-
Stormtrooper emergency room?
-
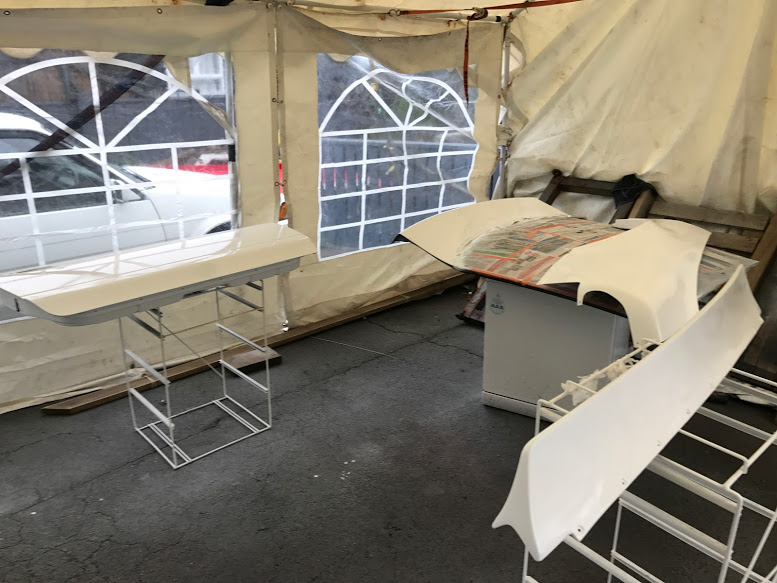
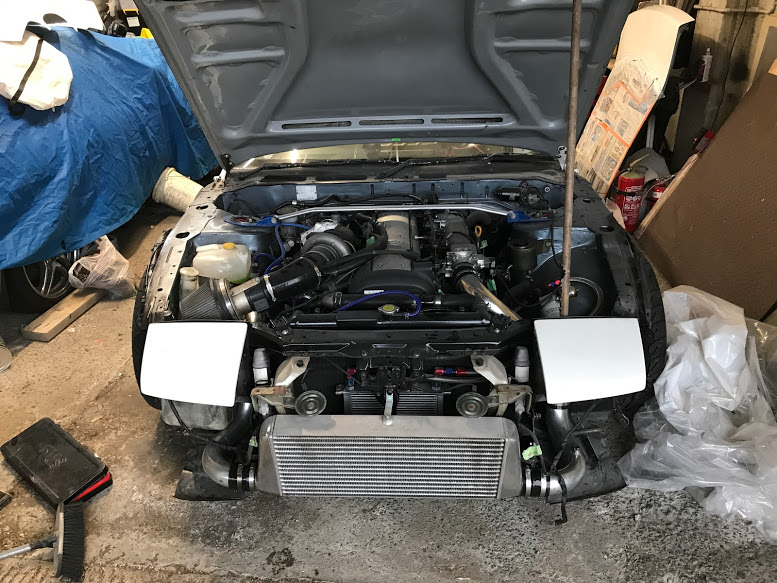
Old dishwashers make good paint table things. Did some more painting, it was cold so I made a higher thinners to paint ratio it seemed to work but got a couple of bad runs which is annoying. Will let it dry for a few days and see if it will sand out. On the duck tail wing I got a reaction in a couple of spots, maybe it was because there was more thinners...maybe that Rustoleum fibreglass primer was a bit thin after sanding it back. I'll sand those spots back again and respray. Also replaced the silicon joiners on the intercooler piping with better ones, the old blue ones that came on the SR20 donor were super thin walled so decided to change now before getting the bumper painted and fitted. Black joiners: More black joiners: Black joiners as seen from a standing perspective:
-
Just discovered your build thread, god damn photobucket though... fcknfckers.
-
Good point re: being charged via the alternator anyway. Thanks for the link, I'll have a look at some options.
-
Thanks, I had a quick look at prices just now and they aren't much more that an AGM one which is good, what about charging? Do they need a special one?
-
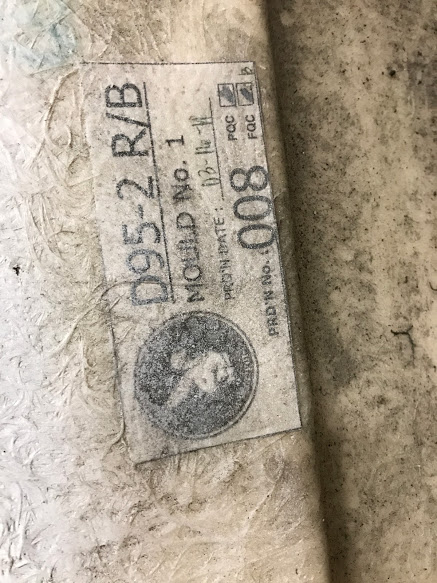
Some more prep progress on other stuff. Filled some scratches and imperfections in the duck tail wing, then primed with this Rustoleum stuff the paint shop recommended for fibreglass: Sanded back the drivers door, filled some shallow dents and high fill primed then blocked back again: 2000grit wet sanded the rest of the fibreglass rear quarters, came up pretty decent for fibreglass but I think next time I will spend more time getting the FG smoother. All part of practicing though: That looks dull because its before cut and polish. Stupid SCA primer gun broke on me, there is a swivel joint that but snapped in half. Piece of crap, such cheap metal. But not too fused since it was just a 'free' one which came with a kit along with my old small compressor many years ago. Guess I'll need to buy a better one, my iwata w400 won't work with primer. Deciding if to use the aftermarket rear bumper or not. It a genuine Origin Labo jobby that came on the parts car from Japan. I do have a standard rear bumper but I was planning on using that on the other 200sx.
-
Awesome, that makes it easier for me too being on this side of the hill.
-
Sweet, so I guess he must plan to use someone else's hoist etc. But good either way.
-
This is of interest to me.
-
Thanks re: paint, definitely satisfying. I can see where the cost comes from in a professional job. For the AGM batteries, they are great but yeah it does appear to be a slight drain. It's my second one now, the first one was great but was cooked by a faulty alternator in the previous car. I parted that car out in order to build this one and I kept the battery plus bracket, its a couple of years old now with very little use. It was fine not that long ago, but left too long when I should have had it on a trickle charge. Live and learn...again.
-
Fitted rear quarter jobby tested wet sanding to clean up some of the orange peel. Wet sanded 2000 grit on the fibreglass and it came out nice without too much effort, but unfortunately sanded a bit too much in one spot so will need to spray that bit again. I haven't done the whole fibreglass quarter, only above the wheel and the upper rear bit to test, but it looks like this: Then I moved onto the roof and this turned out really nice! But again one small bit will need to be sprayed again... I guess that's all part of learning how to do stuff though. Trial and error. Shiny roof!