~Slideways~
-
Posts
1,607 -
Joined
-
Last visited
Everything posted by ~Slideways~
-
A few options for a motorbike engined car 1. Either an MX5 rear subframe narrowed (but keeping stock suspension components/dimensions) and using mx5 diff converted to sprocket drive (mid engine chain drive) and shortened half shafts (hoping to just cut and respline if possible) 2. The same subframe using an IRS holden diff (normal prop shaft to front) and modified half shafts to mx5 rear brakes (maybe respline would work, maybe weld...dont like idea of welding) . 3. Civic diff and brakes converted to sprocket using in fwd format but need to shorten shafts. If that makes sense?
-
I have a Td27 pump now, not sure if the compensator can fit the td42 pump or if you change the internals of the td27 pump for 6 injectors. Guess I'll find out when I get to that stage.
-
Thats a cool idea, I would prefer a more fail safe thing than adding a 3rd fuel supply system. Maybe if I wasn't already using the water injection. Building a bigger injector pump makes sense. I ran out of water/meth the other day, so had to unplug it (no low level cut off switch). I immediately missed it.
-
The main goal is having a very light car with a high reving motorbike motor/gearbox. It won't be a track car, I have another car for that but I'd want it to not be a pig to drive and be fun on twisty roads. I originally thought about building a Lotus 7 replica for a similar weight. For a leaf sprung live axle, its the most simple to start off with except for making it 4 stud. But there is fabrication in mounts and custom making a sway bar etc versus going IRS. The MX5 rear subframe would be perfect since it is a flat floor area, they quite commonly used in kit cars now that I look into it. The guy who built the VFR800 N600 used an mx5 rear but had to modify suspension arms to move the shock mount so I don't know if this could be certified here. A live axle would need the floor cut for diff centre clearance but that'd be easy enough. I've got to think about the front end as well, the current location of the steering rack on the firewall leaves lots of room for another engine but it is a very basic steering to strut setup. So ideally I'd want to do something there too. I like the idea of using something more modern like a civic maybe, using the strut, subframe, steering rack, brakes etc etc. It would probably mean less room for an engine... which leads me to mid mounting. Edit, maybe the front from Honda City?
-
Interesting point about the side load, alternatively I could try the idea of changing the crown wheel to a sprocket like the fwd version.
-
Try change the battery in your multimeter, when they get low they read wrong. I had this once and google told me its because the internal battery voltage is used as a reference, or something like that. I had that with an old 4age alternator, read 18v. Changed Alternator, same thing. Turned out to be the multimeter battery even though the low voltage wasn't indicated.
-
I actually had a similar idea with a rear/mid mounted engine using a sprocket directly on an unmodified IRS diff. Such as using a complete MX5 rear end with shortened half shafts. It would be ideal with a vfr800 if I can fit it in there. Interesting idea having a sprocket on the driveshaft... hmmm. Packaging is always an issue in a small space but it open up some options.
-
Yep tiny hole saw, guess I'll see how they go. I do need to keep both sides in some places.
-
It would be pretty hard to get it to do as low as 4000rpm without running big diameter tyres, its more of a not going crazy doing a million revs while doing 100kph than matching what the bike engine donor would have done. I've started cutting out rust on this thing now and have bought some spot weld drill bits.
-
I'm pretty sure I check this a few years ago after reading about this being a thing, but I'm not 100% sure. A 'few years ago' was chaotic time with the first born so maybe I need to double check it.
-
Thoughts on leaf spring live axles?
-
I mean Escorts and Rx's can handle well with leaf springs...
-
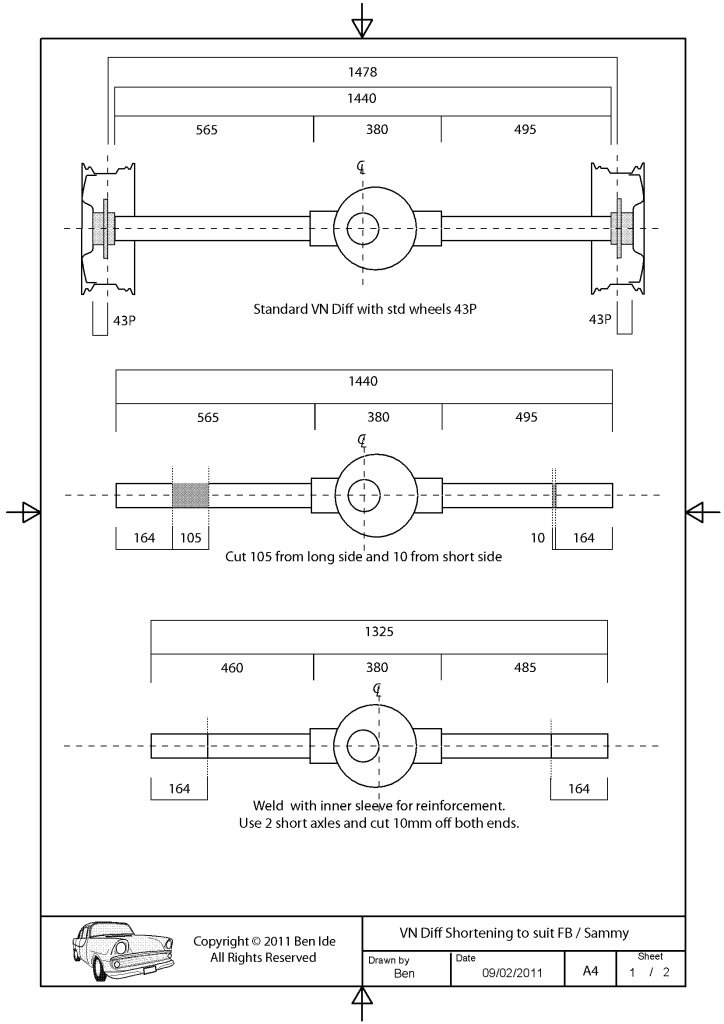
I went to Pick a Part and had a look at some live axles, the wheel base of the N360 is 1295 according to Wikipedia I'm sure that is with the skinny wheels though. Since it has leaf spring rear it's the easiest option for rwd if I go that direction. Its also the most horse and cart option handling wise but it's still be a rwd Kei car. The 4 stud makes it easier wheel wise. Suzuki Carry: Found a 1999 Suzuki Carry with coil spring rear live axle, its was about 1385mm. Could work width wise, but the diff ratio is going to be in the 5:1 range I'd bet. I need around 3:1 due to the small wheels, even then it'll be doing 5-6000rpm at 100kph. But it'll be able to rev to 13000rpm depending on the bike engine. Sounds bad but my old standard AE86 used to do almost 4000rpm at 100kph. VN Commodore: 3:08:1 is common, its a straight tube type so is easier to shorten. According to this diagram you can get it down to 1325mm without custom half shafts. But then I have 5x120 to deal with. Maybe I could redrill the stub axles and use 4 stud discs. Holden IRS diff in a MX5 subframe. Use a 3.08:1 Holden diff, cut up mx5 subframe. This would make it easier to fit a starter motor reverse since the diff doesn't move. This is much more complicated though, cutting floor, coil spring mounting points etc. That guy did similar with the VFR800 one, using some other diff that wouldn't be common in NZ. --------------------------------- Leaf spring rear is by far the easiest, also solves the problem of the probably stuffed standard rear drums and hard to get bits. How 'bad' is a leaf spring rear going to be for handling though? It's not going to be a race car 10/10ths thing, its mainly going to be a fun road car.

-
Update on the 50/50 water meth injection, it LOVES it, man what a difference. It revs out freely like a totally different engine, not something I ever expected and on the motorway it pulls way better in 5th. I'd heard that diesel turbo's love water/meth injection but man it really does! It really feels like a different engine. I'm looking at getting a TD27 turbo injection pump for the boost compensator bits, so later on I can get that built into a bigger TD42 pump since I am still on the standard NA pump with the max fuel screw turned up (might be a bit more in it still). But in saying that, it's going so much better that maybe I won't need it I mean the 50% meth is like an extra injector anyway. I'll need to tow a heavy weight and see how it goes.
-
I've read conflicting information, is it acceptable to modify/shorten/weld half shafts? EDIT: Looking into it, I don't think welding is an option but shortening and resplining could work.
-
While I was under there I finally found the speed sensor plug I got from a generic fwd Toyota at Pick a Part since my gearbox didn't have one. I was going to run the wire through the bung/hole for the AFR sensor but I ended up putting it through the gearlever hole since there is a small gap now after the short shifter install. The plug fits perfectly, I assume Toyota just have a generic 3 wire plug. Googled the pinout and found one with different colour wires, but I assume it should still be: 1- IGN power 2 - Ground 3 - Speed pulse output Now I need to wire in the Yellow Box speed correction and see if I can get a reading on the dash.
-
Loops in, I used the offcuts as the backing plates since the surface area is enough. Yup, the subframe is bright green. It was like that when I bought it as a rolling body it has grown on me now.
-
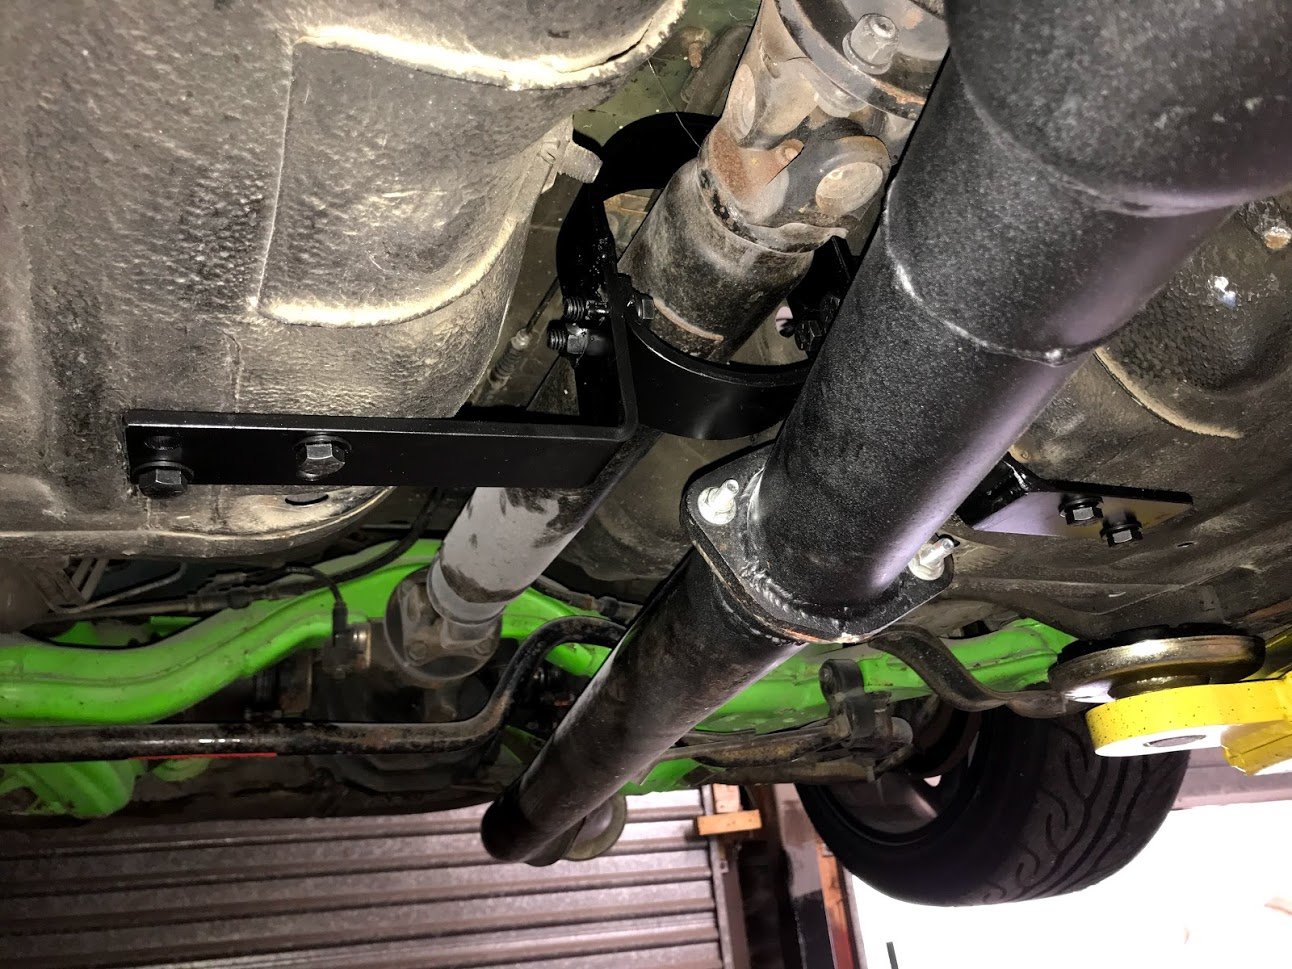
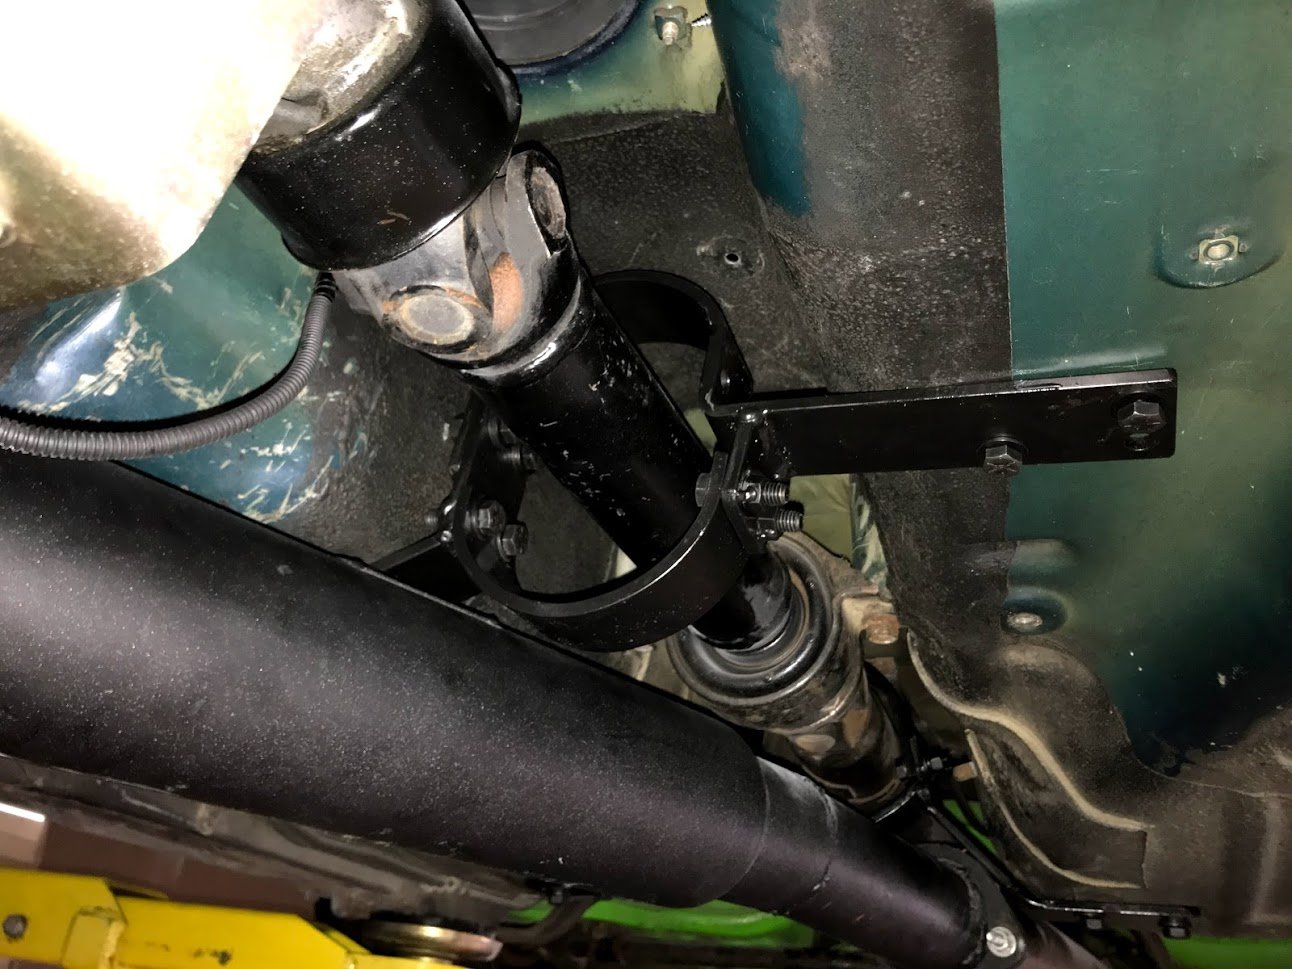
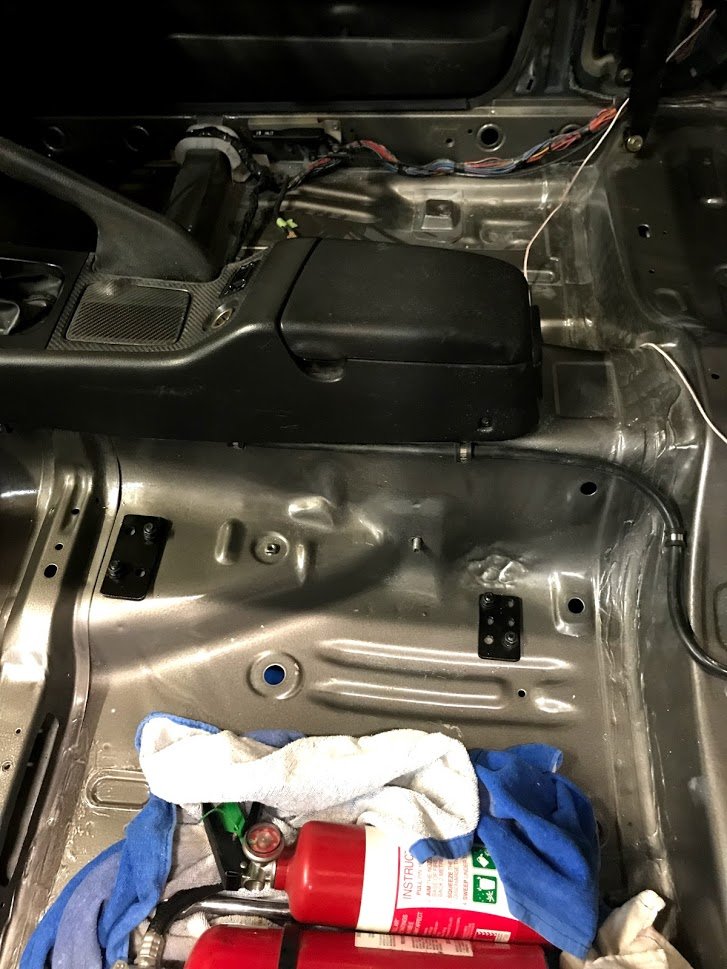
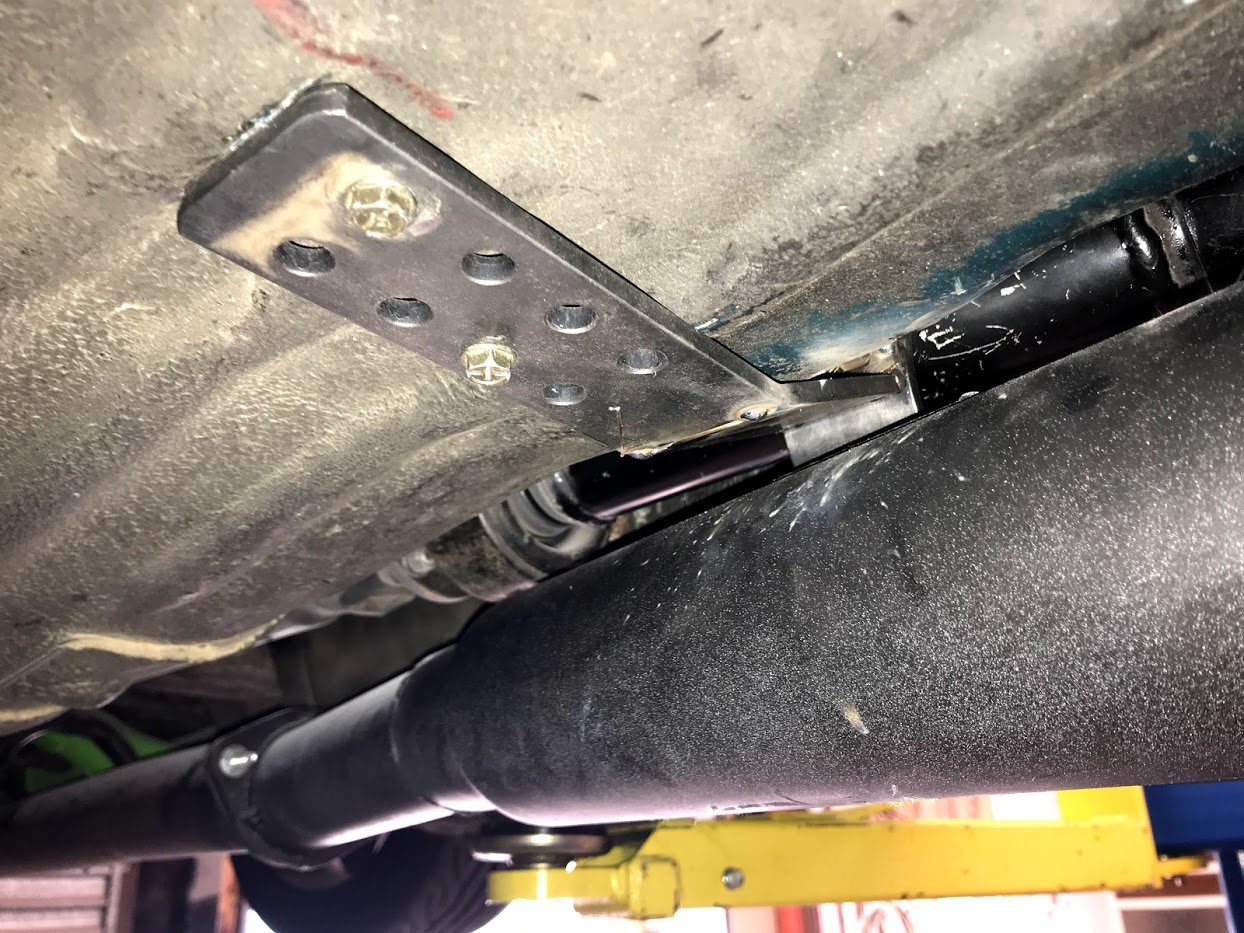
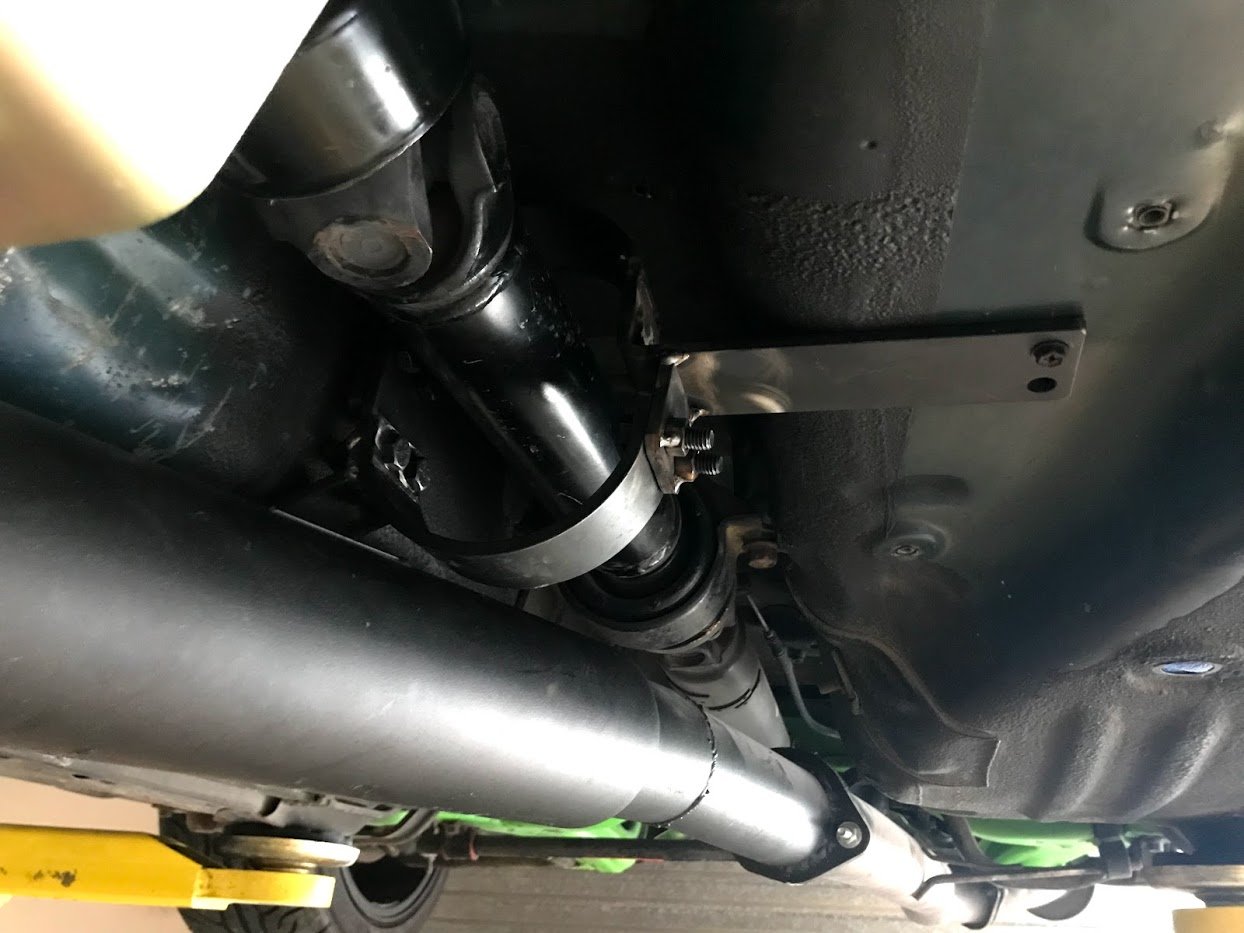
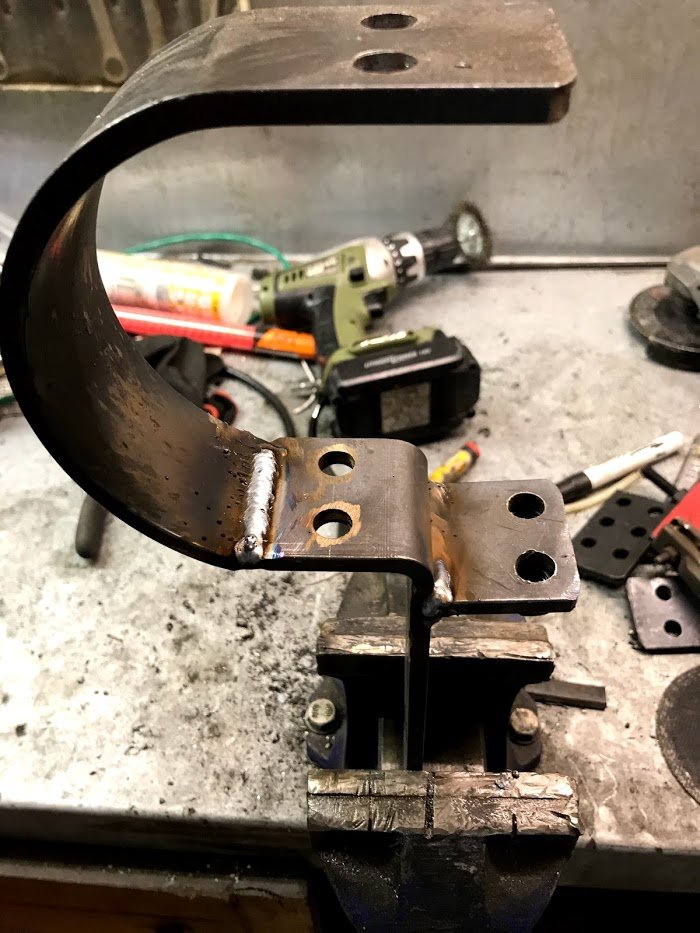
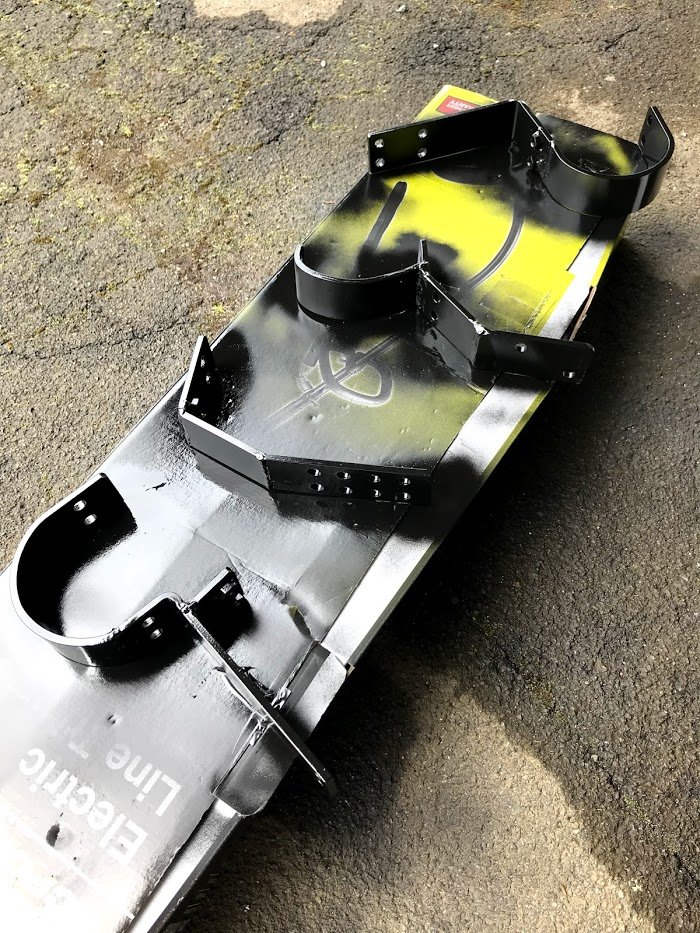
Driveshaft hoops, I used the factory 200sx two piece so I need two hoops so I bought two universal hoop kits to LVVTA specs. With the exhaust crossing over it is was a bit of a pain to work around, the 'universal kits' are good quality but I ended up cutting and welding them so much I might as well have started with some flat bar. Oh well. Love these magnet jobbies.
-
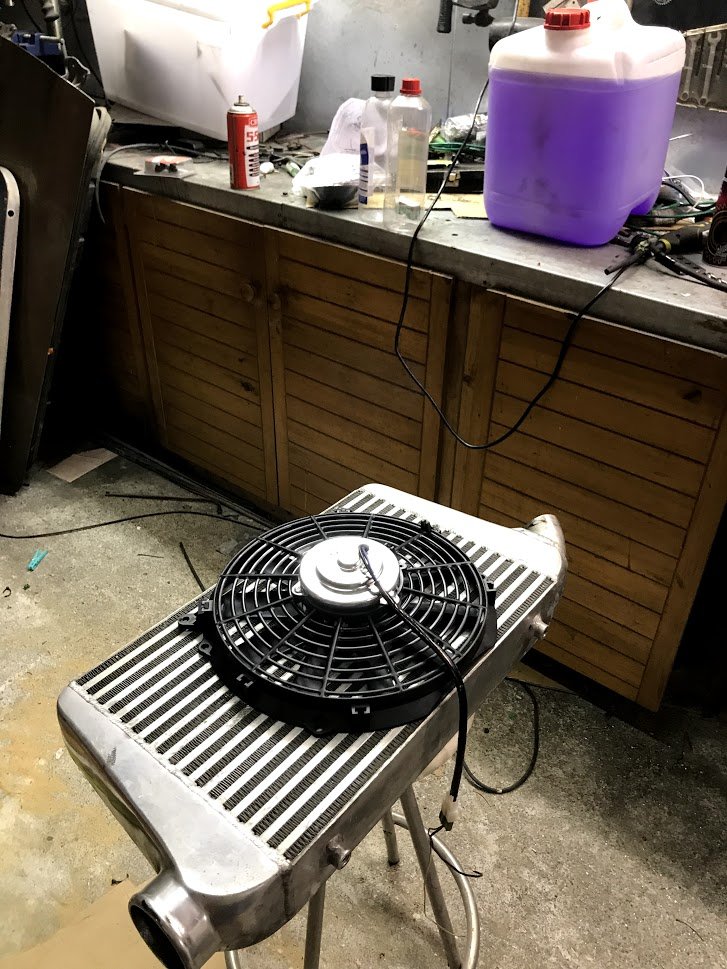
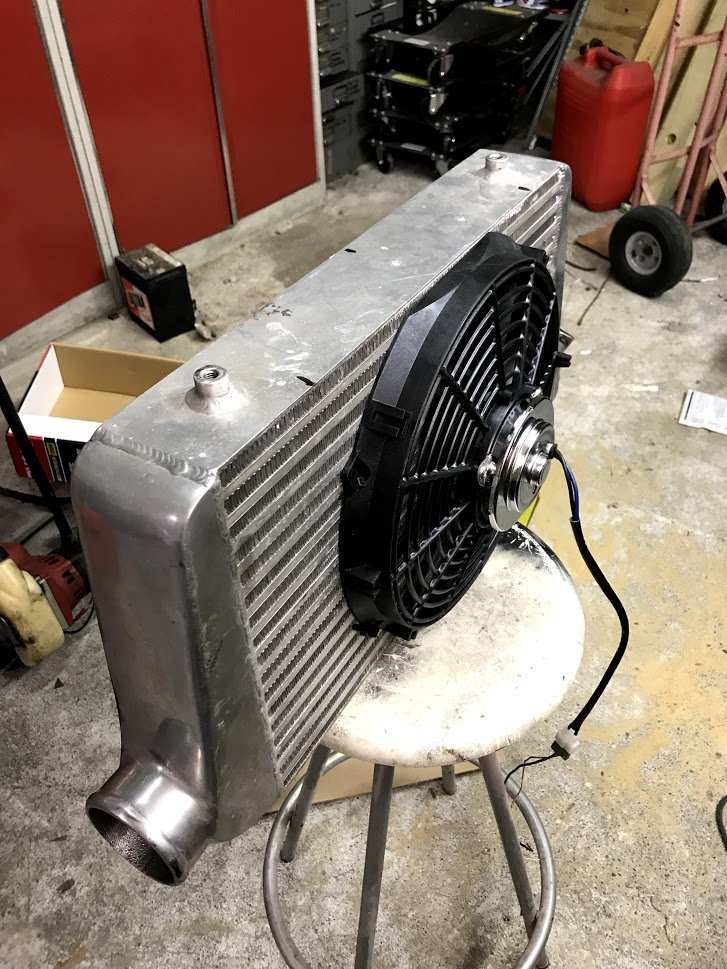
The fan fit nicely in there. I've wired it up with a 24v relay and a manual switch on the dash, probably only useful off roading though really.
-
24v radiator fan arrived. So I took the intercooler off, sprayed some degreaser through it, then covered the ends and poured some kerosene inside and left it in the sun. Poured out looking oily. Sprayed more degreaser through and it looks clean. Filled with hot water and car wash a couple of times. FIlled and rinsed with hose. Super clean inside. Fan is the perfect size (yay meth): Its back in and with manual wiring to batteries it really pulls the air through! Need a 24v relay to wire it in with a switch on the dash.
-
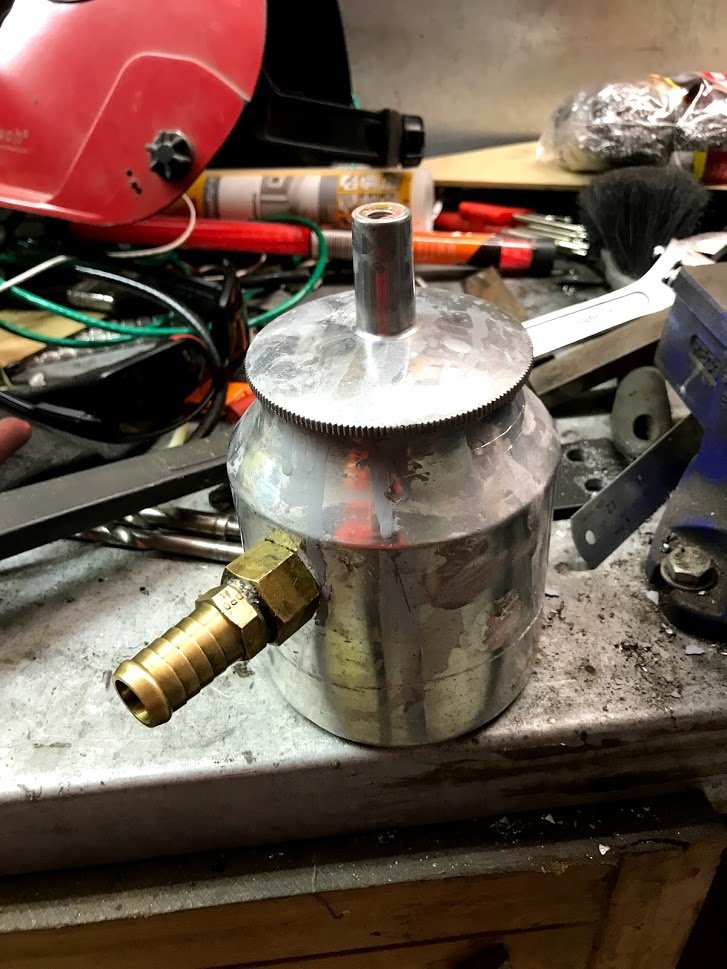
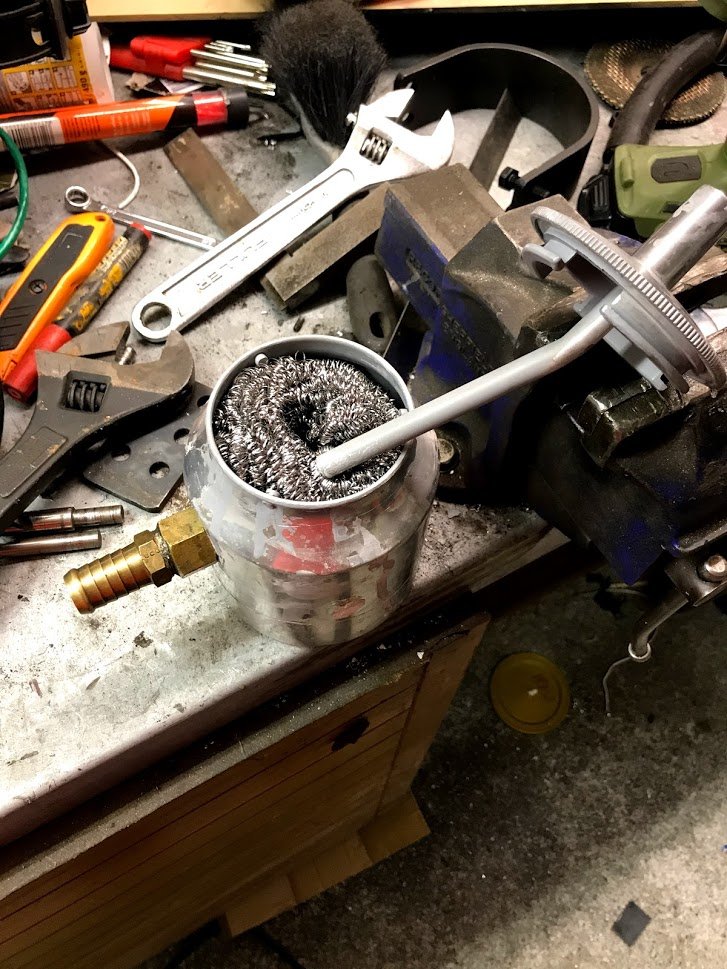
The crank case breather is plumbed into the turbo intake which has put a decent amount of oil into the intercooler so I found some bits and pieces in the garage to make a cheap ass catch can to put inline. - Aluminium tank from broken primer gun - Random brass fitting from something or other - Bought some stainless scourers - Left over oil resistant rubber hose It'll probably work better than the Ebay stuff that has nothing inside. ...Better than nothing at least.
-
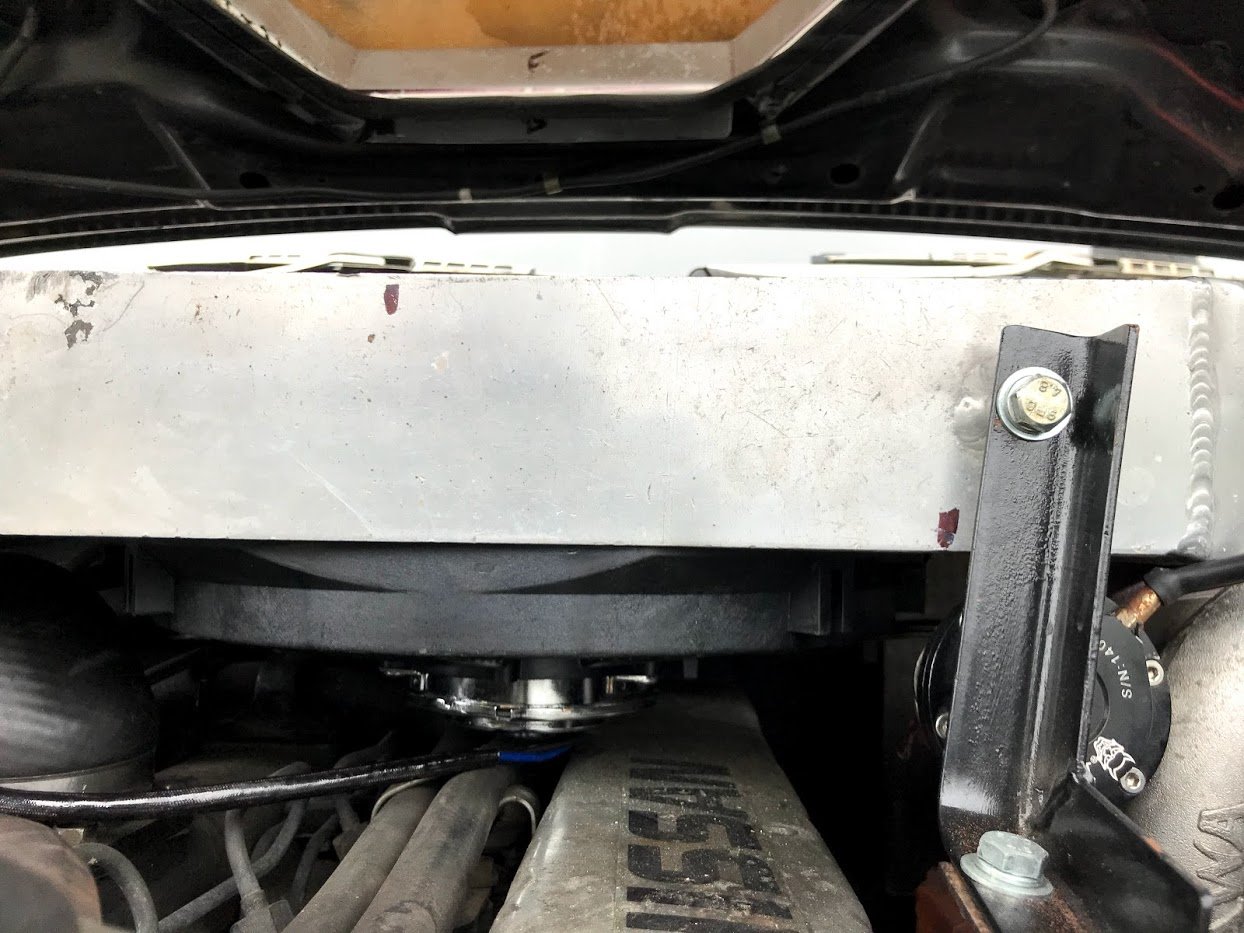
I was surprised it didn't seem to make a difference to the EGT's, but the ass dyno tells me it definitely pulls better. Plus the steam cleaning it'll be getting is nice. Oh and I set it to come on at 7psi, the wastegate is set to 14psi. Have ordered a 24v radiator fan to fit under the intercooler too.
-
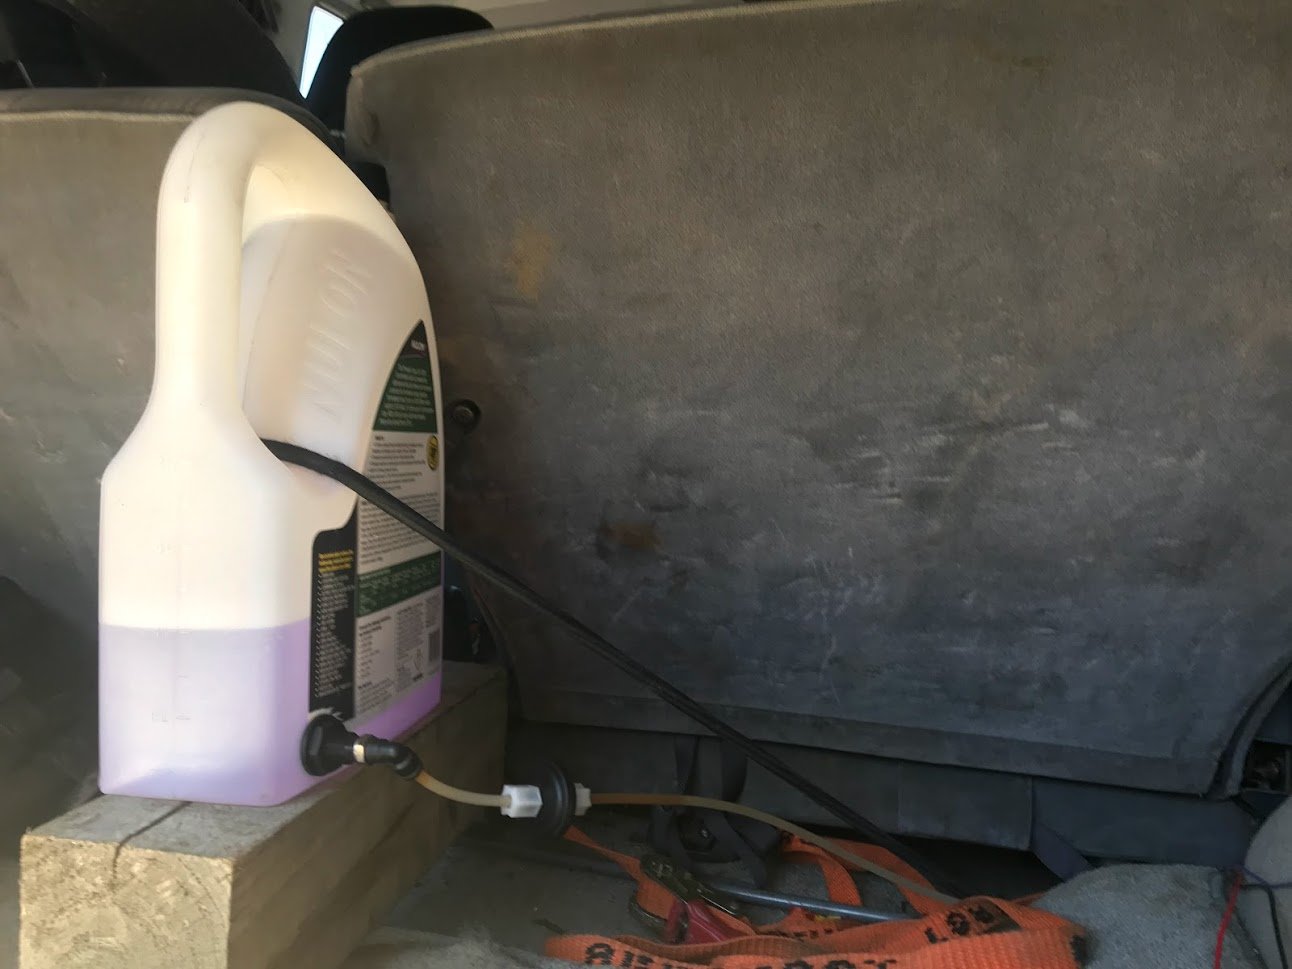
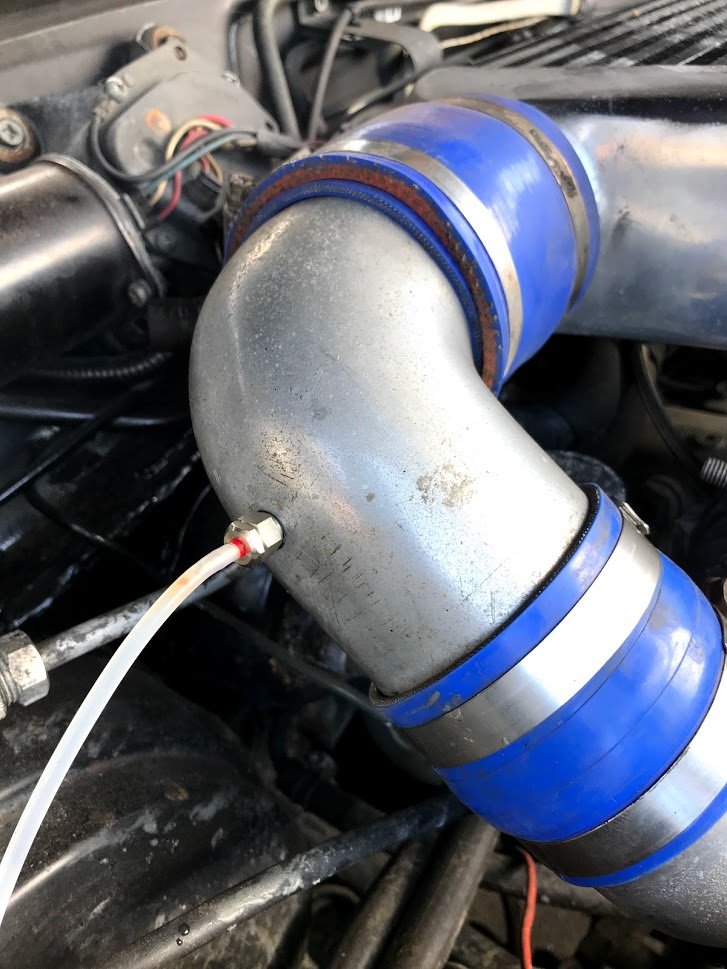
Temporarily installed this old Aquamist set up I got off Adoom ages ago, receipt says he bought it 10 years ago so is the older type pump. I just wanted to see what kind of effect it would have, the kit came with 0.5mm, 0.6mm and 0.7mm jets which looks to be about 160cc - 375cc. Since it just temporary I just used an old antifreeze bottle to hold the fluid and ran the pump etc under the drivers seat, I plan to mount it all in the back but I need to get some more 4mm ptfe hose. With the smallest jet and straight water it didn't seem to make much difference, so I went straight to the 0.7mm jet and about 30% meth. It really makes a difference, it pulls much better in the top end when previously it felt like it wasn't getting enough fuel. So I'll find a supplier of the tube and install it properly, I'm wondering about getting a t-piece and seeing if it would work with two jets maybe pre-turbo with the really small jet. You can get up to 1.2mm which will flow 700cc's but why not just run two of the current jets?
-
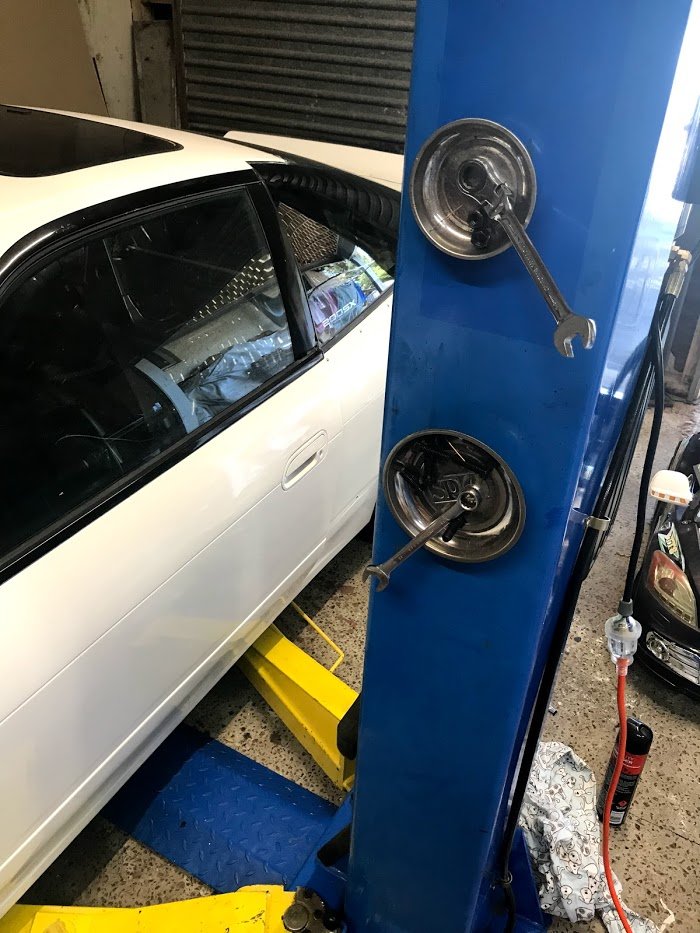
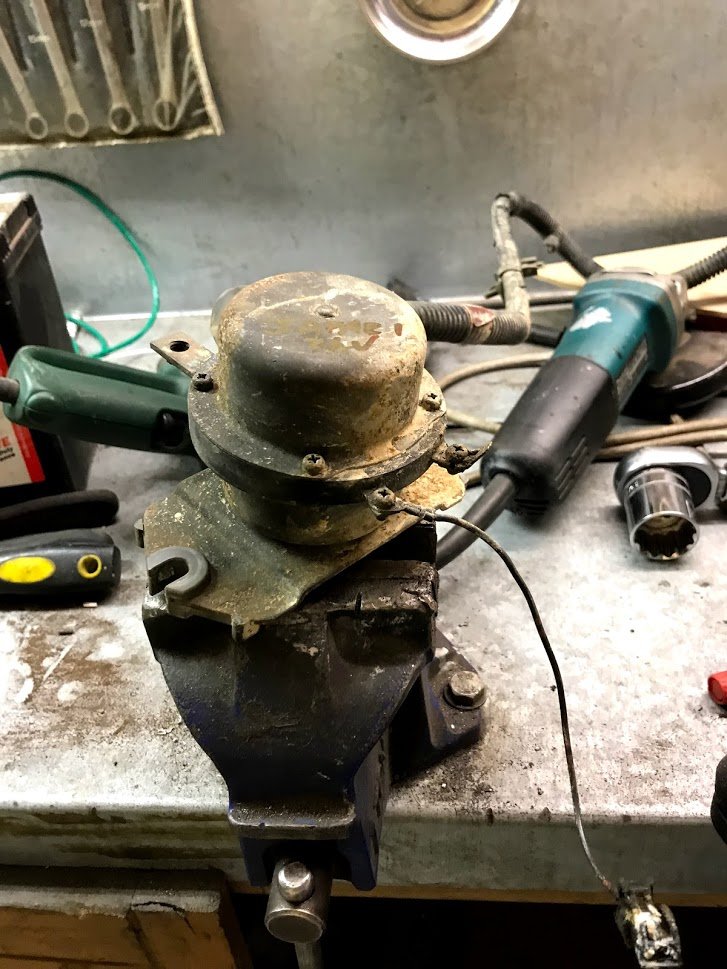
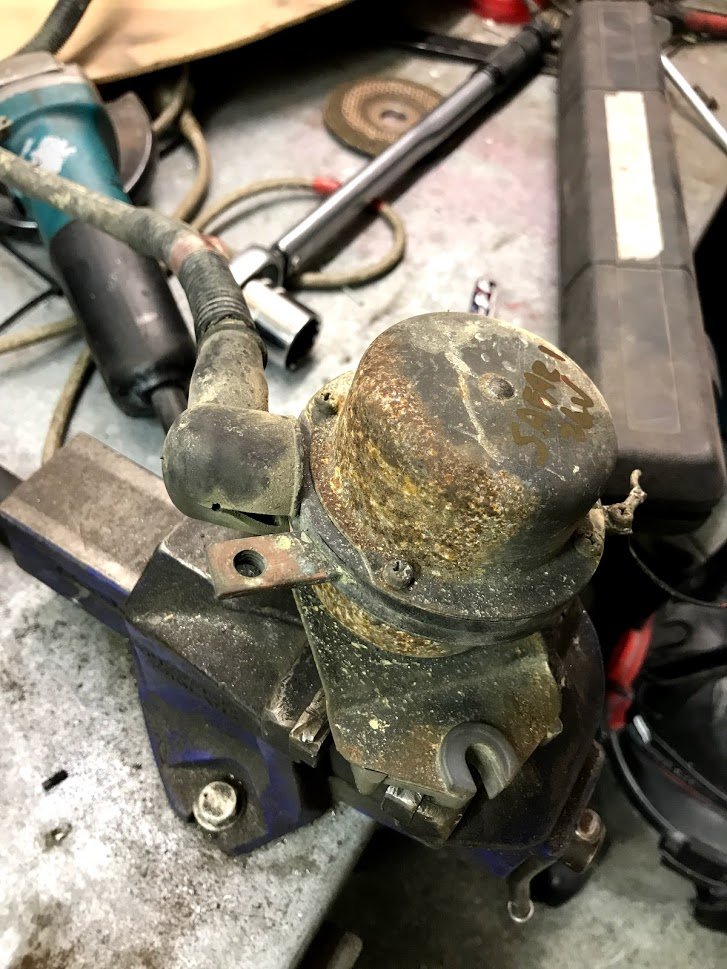
It could be a VSR? It must be factory due to the way it was mounted, I wonder why it was there.
-
Looking at installing water meth and while I was in the engine bay I wondered what this was and found it had a huge earth or positive cable tucked up under the battery tray going nowhere and an opposite terminal not connected to anything either (with no cable at all). Then one small wire going to the loom and a small spade terminal next to it with nothing connected. In my 5-6years of owning it, it won't have been doing anything. No part number on it....so WTF is it? Some kind of 24v power reducer? The writing on the top is just me so I remember which vehicle it came from in 10 years haha.