


d.p.n.s
-
Posts
3118 -
Joined
-
Last visited
Posts posted by d.p.n.s
-
-
- Popular Post
- Popular Post
seen a pic of a mk3 with the rectangle lights today(my favorite)... and thought.....maybe I should steel them off the 6 cylinder mk3 aswell...
and that's the look I wanted ....there was a reason I had these lights and chin spoiler for 6 cylinder.....think it's the same reason why I like to swap out the rounds for rectangle on my old.mk1 escorts......
just looks lower and fatter ..air filter still fits aswell

-
 10
10
-
I need to get a couple of small bits made at safe R brakes and then I'll be able to put the calipers on.
but very had a chin spoiler sitting on the shelf that I was going to make try and fit the other mk3.... but thought I see how it looks on the black mk3....
Glad I did .... it needed some trimming to fit and is solid and held on by 5 bolts... great fit .it's not for everyone ... I like it.
-
6
-
-
made a start on the brakes this morning.
* got the rears drums all assembled
*diff mounted brake lines blown out and mounted.
*handbrake cables in and handbrake adjusted.
*chassis rail brake line blown out and mounted.
*new rear rubber section to diff mounted.
*mk5 master cylinder bolted in .( had to use the mk3 booster as the mk5 wouldn't fit with turbo manifold) will need to male a heat sheld......I did think about going remote booster but a heat sheld seems easier and cheaper.
* rear line from master to chassis line done..(that's full rear brakes in now).
* front calipers rebuilt with spacer kit for vented discs.
*new 2.8i vented discs all mounted ( a massive that to my mate Bogan for the discs it is greatly appreciated mate......thanks you).just need to sort out the little lines from calipers to brackets.... they fucking suck and I'm sure I can make it simpler setup..
then bolt them on and make front lines.-
5
-
-
my nephew has gone away for a couple off weeks so I got him to drop the old mk5 off 1st .. so I can give ut a full service after motor build.
also new battary , new cool ,new points ,new oil filter , oil and plugs gapped them more on the hot side ).
old girl starts first turn of the key now and probably goes better than she ever has..
wof booked infor tomorrow... only did 34k from.last wof to him killing motor.
-
4
-
-
another small but messy job done.
pulled the calipers apart to clean before rebuild..
the pistons were stuck sold....air would even make them twitch..
so pulled the apart soaked them in wd40 and slowly used the socket truck with FBB.cleaned up nicely..all galleries cleaned out and a quick paint.
perfect.
on a side note good job the piston look newish. and will clean up well as the rebuild kit I bought last year from ebay....( should have bought in nz like I dud last time)..... is completely wrong.
so just need to find some seal kits.
-
5
-
-
the rear drums are in a bit of a state but are also the only ones I've got..
I did consider vapor blasting but thought fuck it a few hours with a wire wheel and some 80grit sand paper and it should be fine..also crawled under the back of the white mk3 and stoke the brake lines from the diff ... and cleaned them up as well.
-
6
-
-
so here is the brake situation..
I have handbrake and cables in the car .
I have a brake pedal in the car.
I have a mk3 booster with no master cylinder.
I have an aussie diff with drum backing plates...
that all that's in the car at the moment.I have a mk5 master cylinder and booster.(pulled from a car that was being used.).
I have front calipers (pulled from the white mk3 ...but in actual fact that sub frame was originally on the black car ). and some hoses and pipes.. ( the pads look brand new but I don't think the calipers have been rebuilt).
I have aussie drums (way bigger than the standard ones).
I have new aussie shoes.
I have new aussie rear cylinders
I have caliper rebuild kit.
I have caliper spacer kit (for 2.8i vented discs.... don't have them yet).but that's it so far.
-
6
-
-
SHIT
when you realize the car jammed in the corner of the garage covered in crap and doesn't move easy........ has all the brake parts you may need and have been looking for ......for an hour now.-
4
-
-
ok..... got the rest of the engine bay loom done and tested..
*headlights , park ,low and high beam.
*fan
*electric waterpimp
*waterpump sensor.
*wipers
*new relays for starter, fan ,low beam ,high beam.
... then I taped some bits together and tested again... then wrapped in loom tape and ...um tested again..
then put it where it needed to go and tested once more... I'm happy with that....so I started to put things back together...
one of the first things is the oilcooler ..I had some old hoses joined together so I replaced with new hoses..
then put shut back together. .
is is actually starting to look like a car and is more complete than it has ever been I'm over a decade..
brakes next I think.
-
5
-
-
little update.
dug out some starter motors and got 1 of them to work ....( and work every time I tried).
I also did wiring wise....
*bulk head power connector to starter
*trigger to starter
*heater
*cortina oil pressure
*cortina temp.
*bulk head power connector to ALT.
*ALT light.
*passenger indicator
*passenger headlight connector
*passenger park light
*engine bay light switch
*horn.and if I'm 100% honest those who know me know I Claim be a wiring retard .....but I have got me head around it and I actually find it quite therapeutic.... .. must be the whole puzzle solving thing.
cheers
-
8
-
-
famous last word...ay
" put the dash back together for the last time".1 fucking wire ......1 fucking wire !!!!.
was testing all the wires off the bulk head plugs in the engine bay ... and the starter wire ...
I forgot to plug one end in... so out it came.but on the + side I've made a start on the enginbay harness ... i am getting my head around it and I am integrating the water pump wiring into it aswell as new relays for starter , fan , low and high beam..
cheers
-
8
-
-
my mate Nismo-Capri has been playing with 3d printers and made some very cool things... 3d printed all of his brake mounts and adapter to try before have them machined up.....its pretty bloody cool.
he has also been making center caps for the lads .... I did have some original Cheviot center caps but I sold them as people have a tendency to steel them any way....
so I had a simple design in mind and after about a dozen trues for fitment .... we went pushed in from that back and nice and simple design.quick paint and they look perfect for what I need..
once again tha ks Nismo-capri...
-
8
-
-
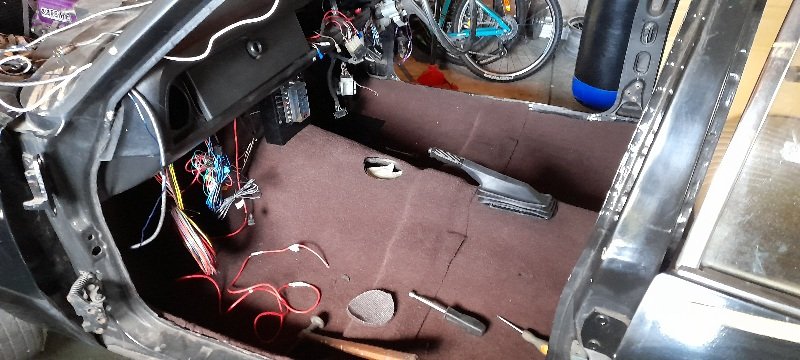
I managed to get the wiring in the boit sorted (apart from fuel pimp ...do that when I wire up the ecu).. but thats all the main car stuff done....from rear lights to bulk head connectors...
cut some wood to cover the wheel well (still needs to settle a bit). sub and amp mounted and wired....rear speakers/lights wired... battary box mounted (just need to get some new terminals then can add amp power and boot light power to them).
and new carpet in...
I was hopping to be onto engine bay main wiring by February and it looks like I'm a few days ahead....been a lot of work and hous so far but I'm stoked...this is the most complete this car has been in 27 years (as far back as I could trace it)...
also some evening shots ...rear lights working . oldschool carrozzeria speker lights and dash with LED bulbs..
cheers
-
8
-
-
- Popular Post
- Popular Post
got another few hours in on the mk3..
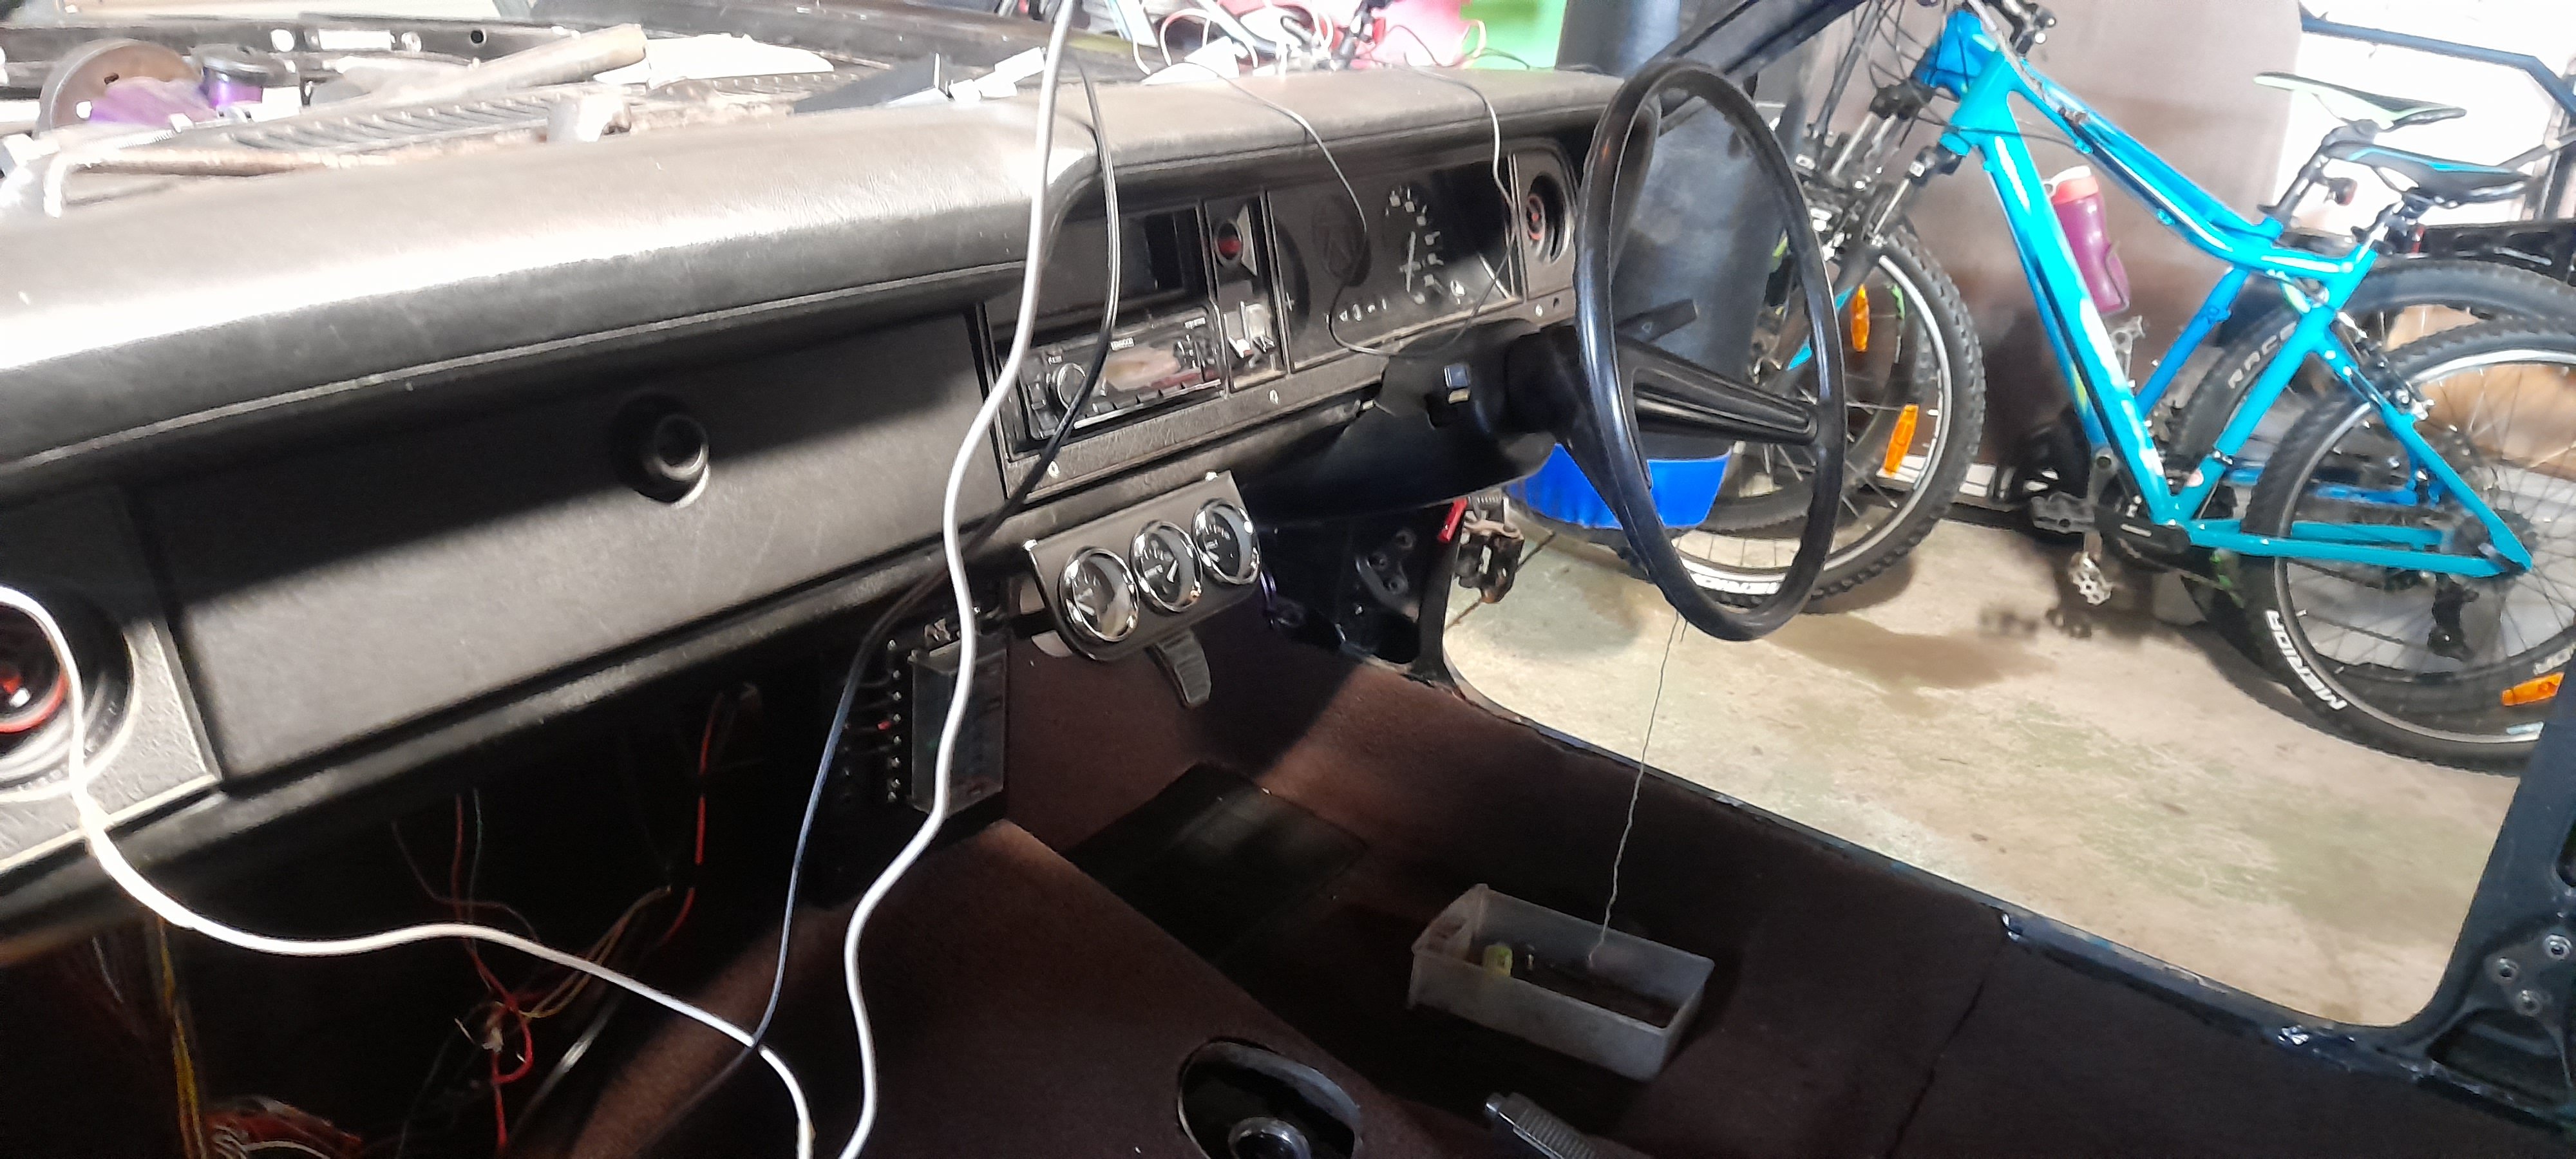
to be honest I'm enjoying it as at the moment it's not hours and hours of cutting and welding and making shit from scratch..But I got the front speakers mounted .. went for cerwin vega 3.5" as I planned on putting them where the vents use to be at each end of the dash (only have demist now)..... they fit perfectly..and the covers for the vents still fit.
ran all the speaker wires ..wired stereo ( ended up going with kenwood reserver.....no cd just radio ,Bluetooth, USB, ect ect).
ran aerial and hands free wires ..
and started putting dash together....
it's starting to look good...all works well ..stereo sounds good just on front speakers and all dash lights working
no the normal way to do things... full preface lift GT/GLX slope dash ....
to full on poverty spec facelift dash.
-
12
-
7 hours ago, RUNAMUCK said:
I dunno if that link mentions it or not,
But you need to remove the dynamat between the doubler plate, and the floor too.
yeah done that and removed underseal in that area.
-
1
-
-
after @Raizer pointed out that the cert man will want plates ontop of the floor as sandwich for the driveshaft loops I changed both front and rear ...
and then got the rear part of the carpet down for good.
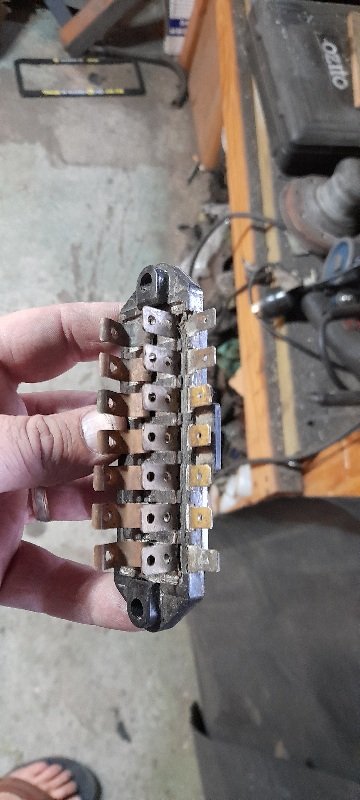
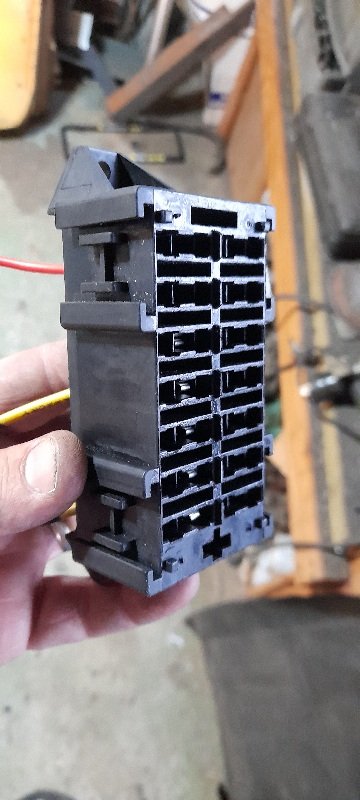
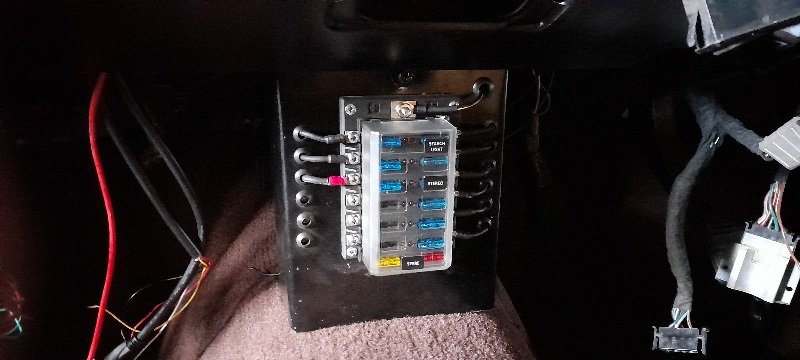
then I moved my attention to the fuse box....
I had already got shot of the factory one when I reworked all the wiring ..
I also had moved the wiring around a few time and blown some and while I was changing them I couldn't help buy notice that the wire in the back were becoming lose and sometimes getting pushed out all together and I can't be fucked with that.
so I bought one for a boat/race car.
way more sturdy and even has LED to let you know what one is blown...
also easy to add wires when needed.
so I mad a panel for it.....and finally hot the front section of carpet in for good.
and the fuse panel you can see in the center under the dash.......and my miss 11 calls the Flux capacitor
-
8
-
-
6 minutes ago, Beaver said:
Just a heads up, not sure that washer arrangement on the top side will pass cert. From memory there needs to be a plate that's 3000mm2 (e.g. 50x60mm) that the bolts pass through. There is a lvvta driveshaft loops fact sheet thingy that spells it out.
oh true I should look into that.i do remember reading seing that ....but they arnt in there for good yet ....
the rear should be easy as....
the front will be another story.
-
before I can get the carpet down for ever...
the last thing to get in place are driveshaft hoops.....
so I bought 2 kits .
then cut them up as no matter how much you play with them they would drag on the ground...and I would like to get them mounted and done.....and just remove a section be able to get the driveshaft out.
front
rear ...even tho it's like 500mm from the other one...
front mounted right by the boxing inside .....got 2 holes lined up with factory holes and had to make 2.
the rear was fine and on the floor....just had to remove sound deadening for bolts
and both inplace....
-
4
-
-
- Popular Post
- Popular Post
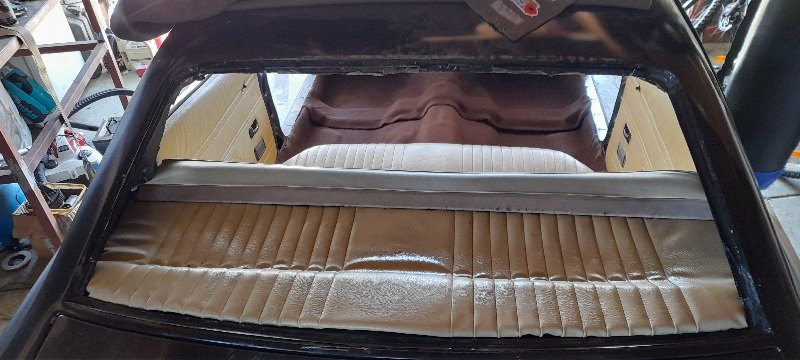
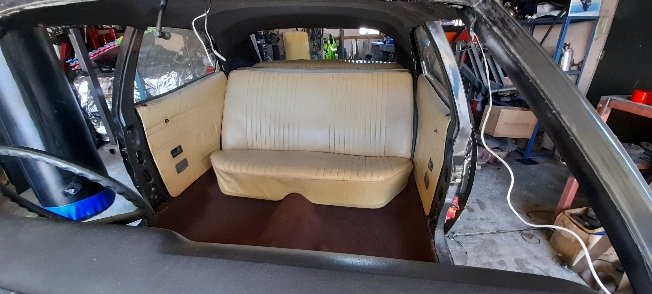
I've got some mk5 Giha seatbelts for the old girl.
and doing the rears ..there are holes in the Parcel shelf . but I made top plates and doubler plates. I went 80mmx800m and 5mm thick .
I put them in with 2 rivets in opposite corners.
cut out a section of the Parcel shelf tray and mounted them..the top plates helped space them up a wee bit as well so they work smoothly.
even git the factory mk5 covers so they got cleaned and went in.... only held in but 1 screw ...but look cleaner.
all the lower mounts for the seatbelts and buckles are all there and just have bungs to remove.
al the rear seat base is held in with 2 PK screw
so I drilled it out and waked some rivnuts in there.
got the rear speakers mounted...some more clips for the Parcel shelf.. the seat back and base properly mounted and the seatbelts in place......I'm very happy with how it's coming along.
-
11
-
- Popular Post
- Popular Post
when digging through the bucket of bits that came with the black car ...
found a set of badges with tabs and nuts still attached. .
found a the full set +1 extra of the Jesus handles.
got them in ..
found all the hardware for the doors and earned the rear cards and got them all back together
-
13
-
20 minutes ago, Corbie said:
@d.p.n.s Where'd you get the carpet? happy with the fit?
need to get some for my wagon.
hay man.
I got if from autodec in Auckland.
was about $320 delivered (that's just the carpet no underlay).
I used them about a decade ago for an escort and it was shit ....but I thought I would try again and I'm very happy mate.....its a great fit
-
 1
1
-
-
- Popular Post
- Popular Post
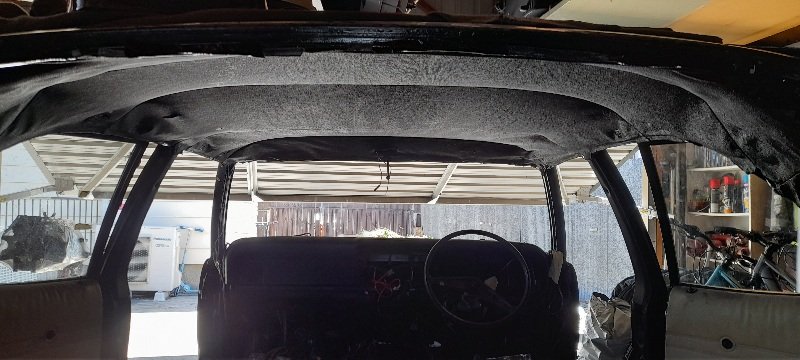
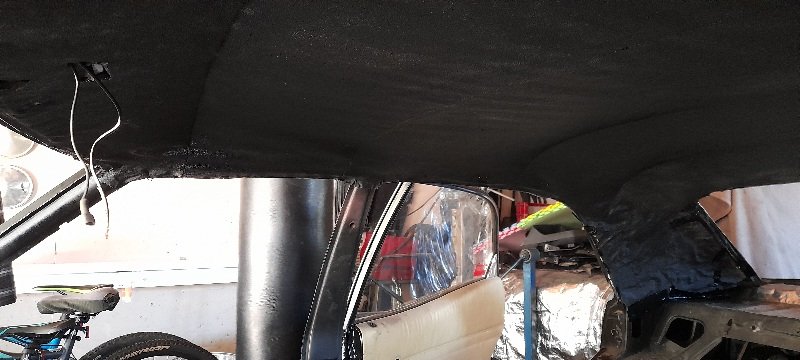
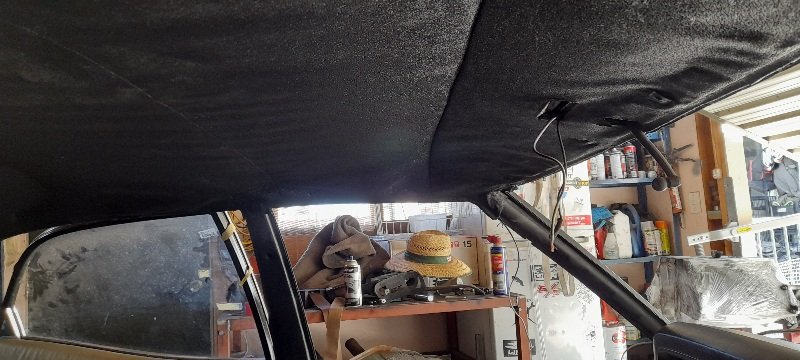
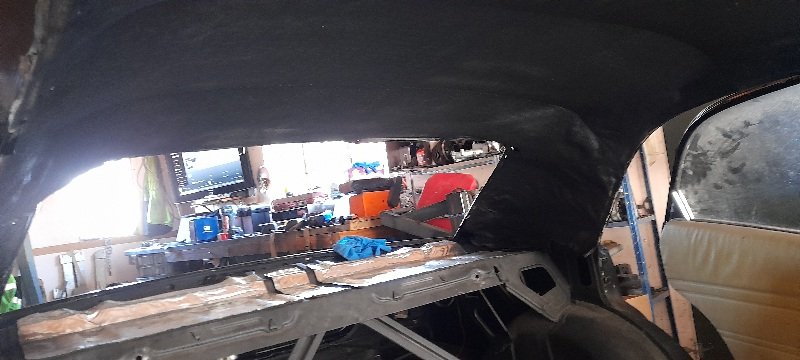
maaaaaaaan what a mission sorting the roof lining out .the edges are all ripped and brittle.
but I got there in the end ...shit loads of spray adhesive.. and then a coat of black to make it all one colour.
it's not mint but is is so much better.
then thought I would put the carpet back in and rear seat as well as parcel shelf....looks good with all the cream on cream action and some chocolate brown.....even got the neat lines and parishes lined up.
-
10
-
waiting on some parts to finish the wiring on the inside and under dash..
so thought I would get a few things done elsewhere.
had some old carrozzeria speakers with ......stuffed speakers
so I fitted some cerwin vega 4" speakers. with some sound deadening..gave them a clean and even got the carrozzeria lights to work.
that led me to that parcel shelf trim....its stuffed and in a few bits .
but bloody hard to find another one so with some thick card and duct tape I remade it.
I had a spare rear seat back in the same colour as the actual seats I have for the car
so I covered the parcel shelf
cleaned it
test fitted the new carpet
but I still have driveshaft hoops to do so that will have to wait for now.
but next I think ut will be the roof lining....have no idea what I'm doing here but what's new... it does feel very brittle
-
4
-
-
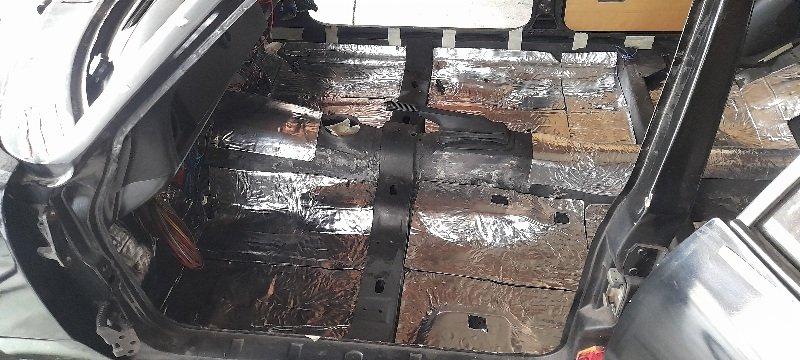
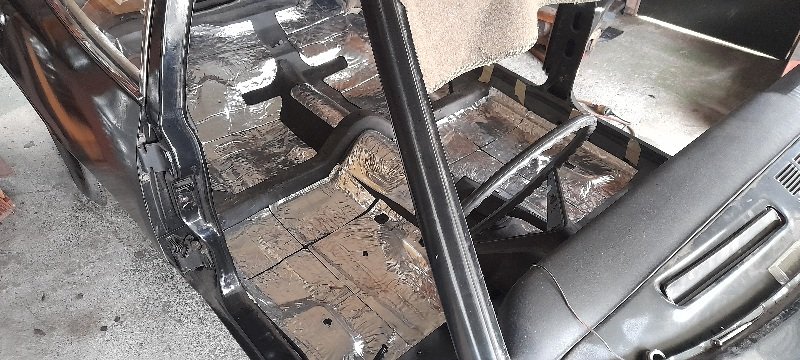
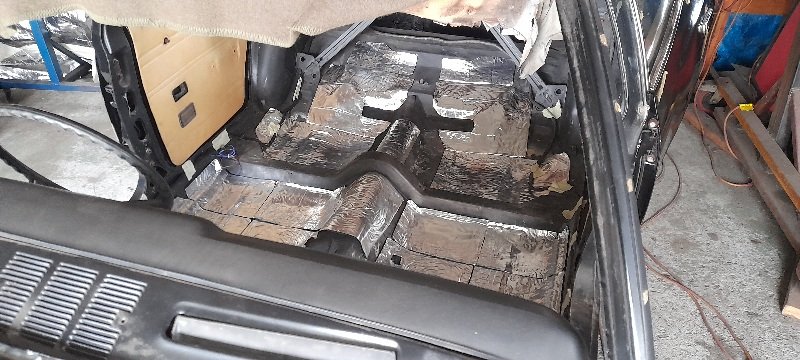
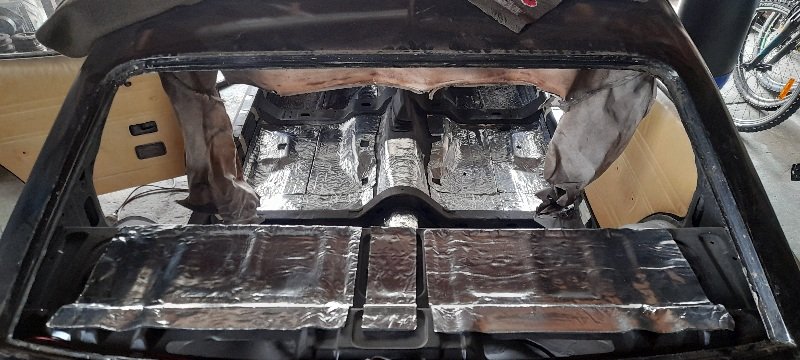
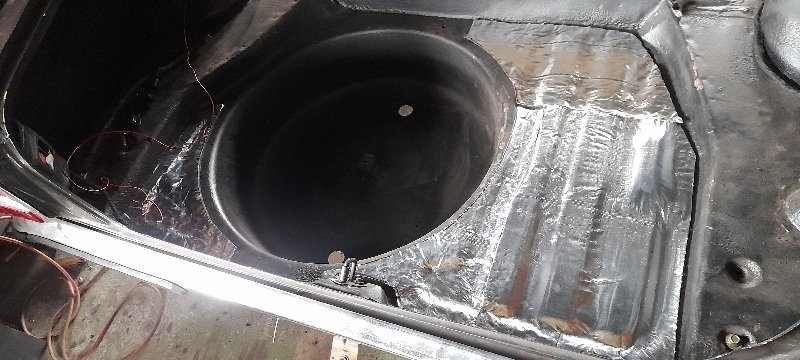
my alliexpress sound deadening turned up after 9 years .....so I vacuumed the car out and slapped it all in
-
6
-


 but bloody hard to find another one so with some thick card and duct tape I remade it.


D.P.N.S the other mk3
in Projects and Build Ups
Posted
the small jobs done are still jobs done of the big list of shit to do...
*boot rubber done ( strange enough I found what looks like a new one that's maybe sat around a while.... so if you have left your car at mine and arr
e missing a boot rubber...... try bunnings or Para rubber.)
*LED number plate light on and wired up
*rear valance sufficiently bodged (body work is not on the list till car is running,reliable and carted.)
*bumper irons straightened and bumper bolted on.
*number plate cleaned and on...for the 1st time in what I presume to be a very long time