d.p.n.s
-
Posts
3118 -
Joined
-
Last visited
Everything posted by d.p.n.s
-

my new problematic daily....its a mk1 focus st170
d.p.n.s replied to d.p.n.s's topic in Other Projects
ist tume ever for me... bet you couldn't do it again if you tried -
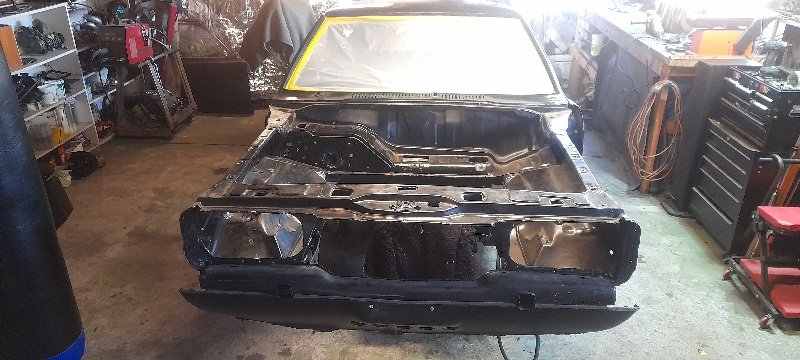
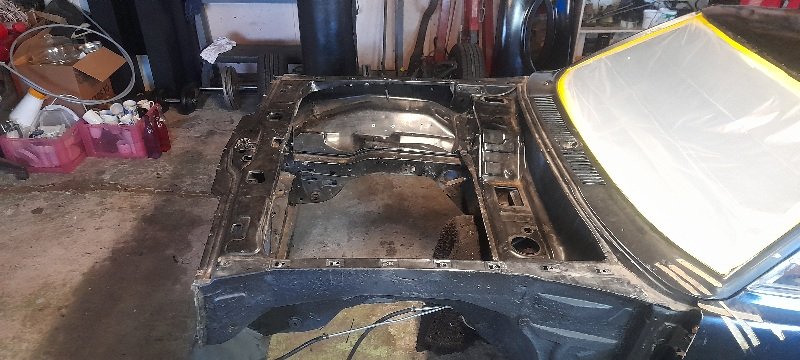
Got the engine bay stripped out this evening.. Bunch of holes I would like to weld up ... and maybe paint strip it. Not removing any interior so try and keep it all masked up and as clean as I can... once doors are removed.

-
my new problematic daily....its a mk1 focus st170
d.p.n.s replied to d.p.n.s's topic in Other Projects
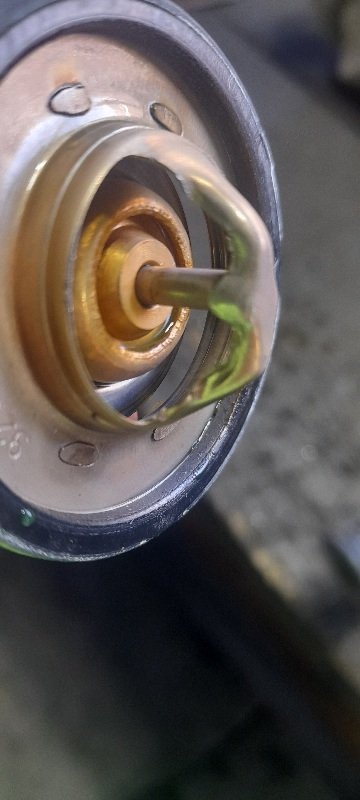
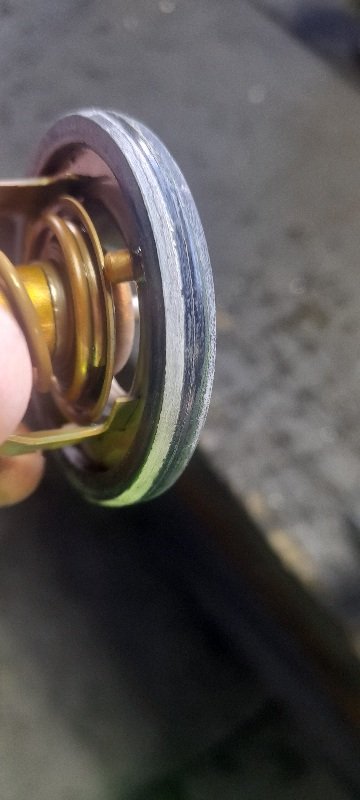
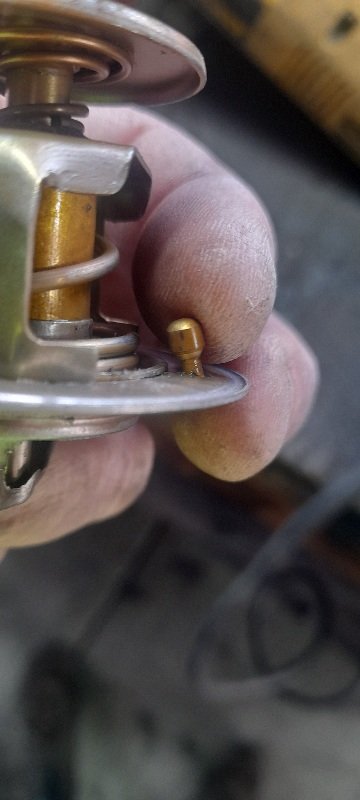
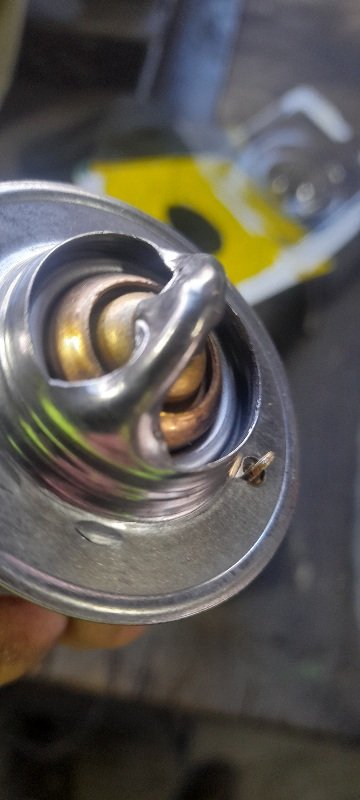
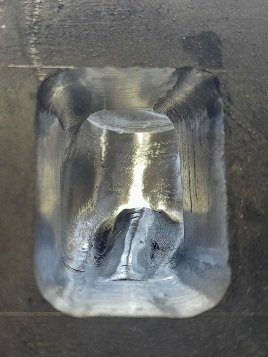
3rd thermostat in 2 years. 1st was the shitty ebay one that came with the thermostat housing (great housing though). 2nd was from ford.. last year but seemed to stick open as of a few weeks ago... the st170 runs like shit cold and premature wear on the motor... so ordered a tridon one and it turned up today.. swapped it over (easiest thermostat swap ever). but this is what I found with the one from Ford... how unlucky was that .. opened hot and couldn't close as it hit the little thingy.
-
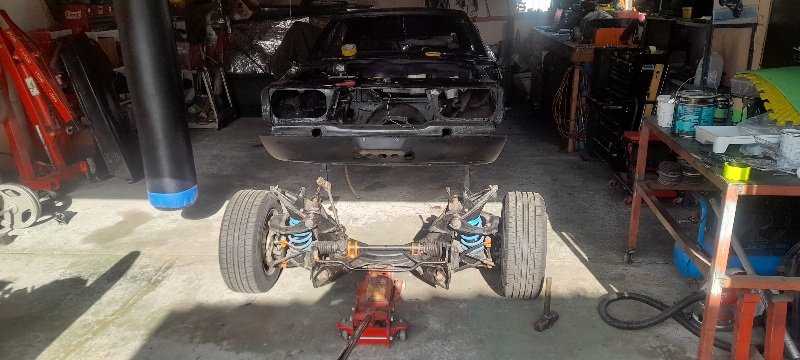
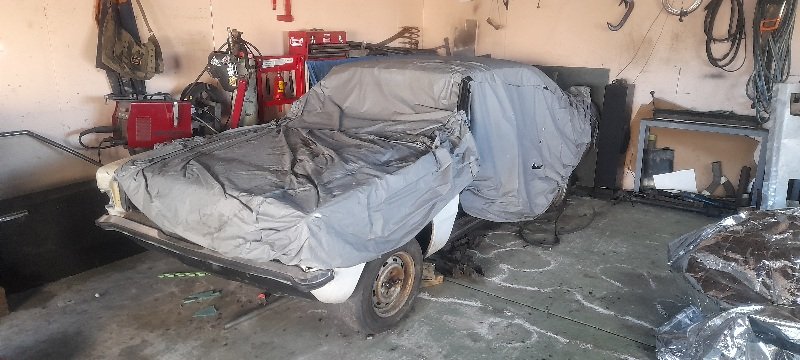
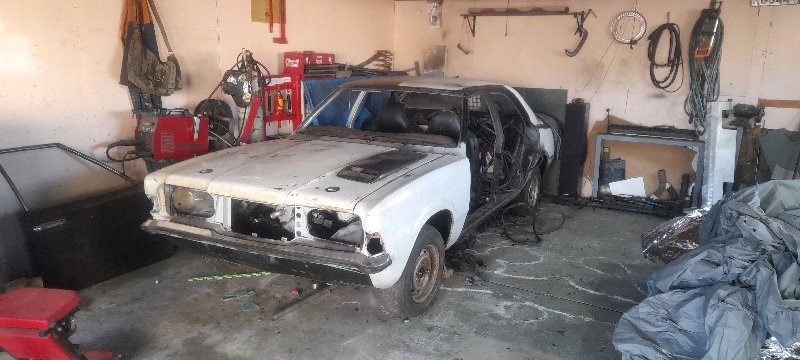
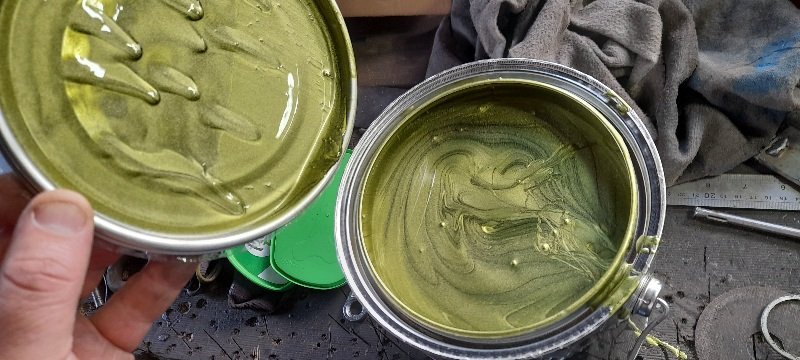
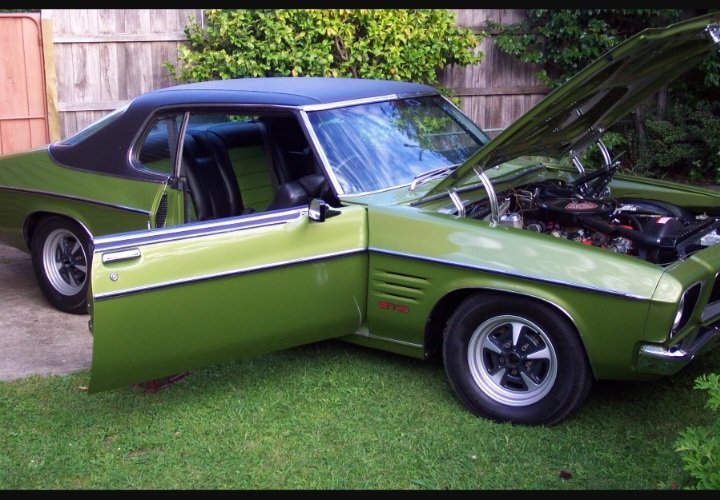
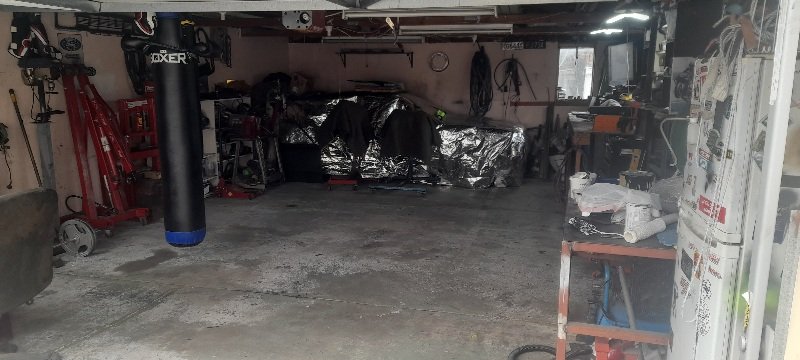
well dues to postage issues and time delays I'm not going to have this running and tuned but end of next month.. so I have decided to pull her apart and paint her now instead of next year sometime.. just do it now and once she is all together and running she's all done just need to get legal.. as for colour I allways wanted green like ford furniture green .. but then started looking at dark metallic browns ... and yhe fucking bang just like that ..a xu1 torana pulled out of a petrol station last week and sat behind me .... and I instantly thought that's a stunning green.. so I got the paint and supplies to start the job.. 1970s holden lime green metallic I also decided I need more room in the garage to be able to start doing body work and pull all the panels off the car. moving the white to the back of the garage was the best way... been years since a cover was pulled off this one. and after a shit load of hours this weekend I'm almost trade to start pulling panels off. body does need a fair amount of work but I won't be digging to deep.
-
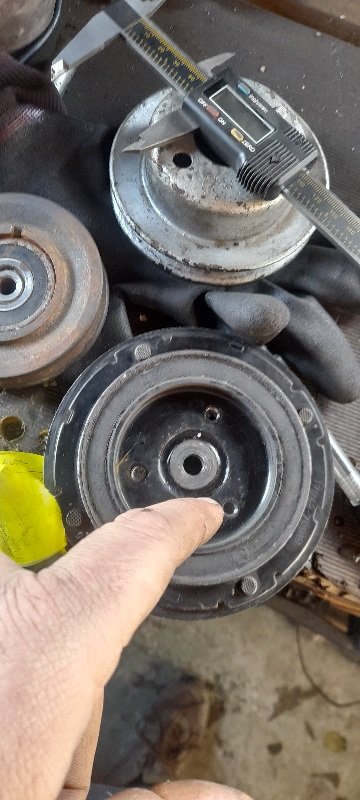
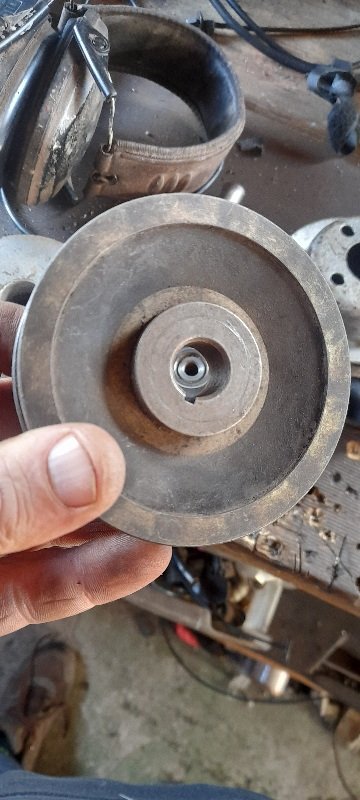
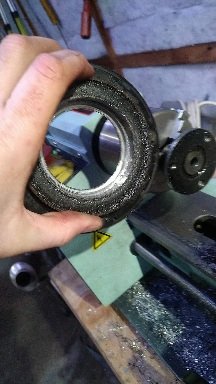
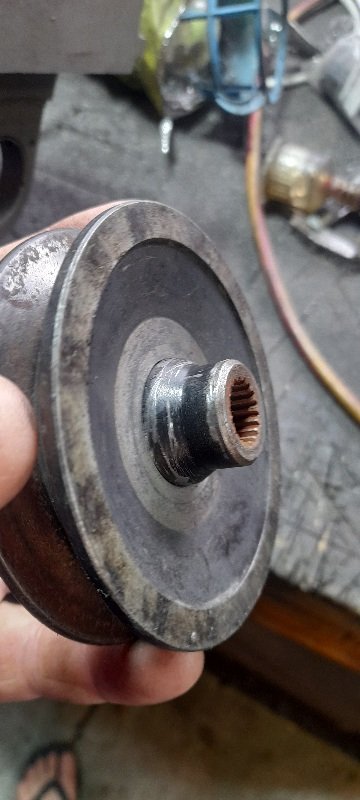
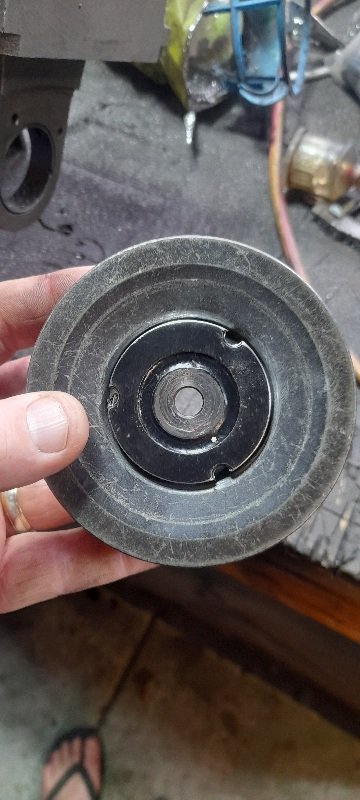
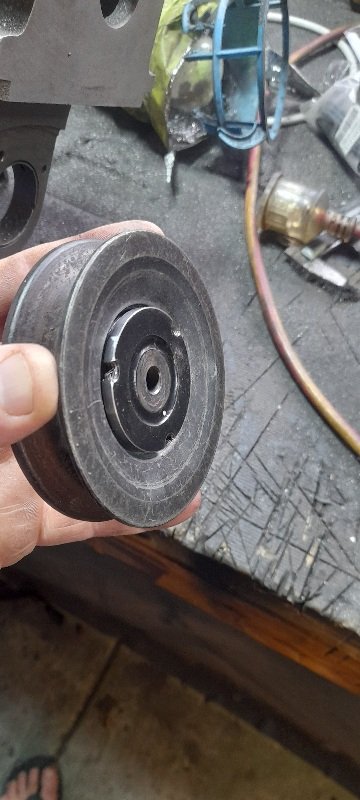
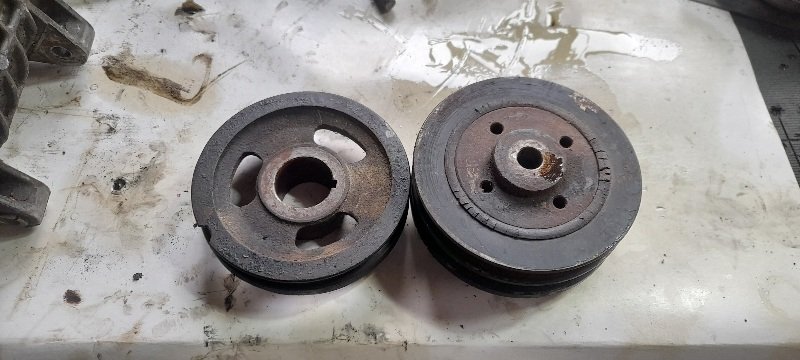
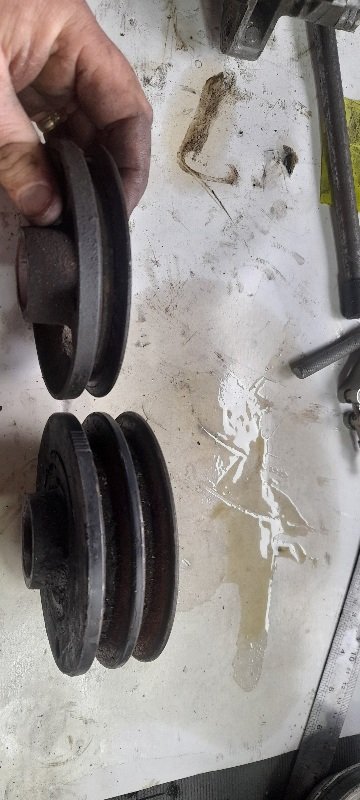
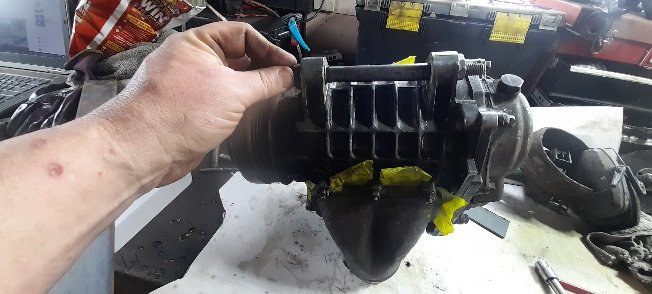
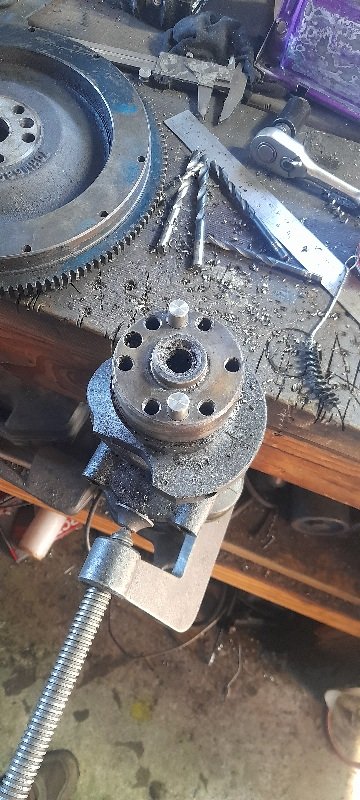
on the nephew's mk5.. I wanted to change the Sc14 pulley to v belt .. just for ease as the crank pulley is also V belt... and it looks more oldschool..I had a pulley the perfect size so I too the sc14 main pulley shaft and the v belt pulley over to a mate. ha him lathe down the sc14 pulley to 46mm. and make the hole in the v belt 28mm.. so that the v belt pulley can go on from the back and the 46mm on the sc14 would fit into the front of the v belt...... I know what I mean made them super tight fit ... so had to press them together will throw a tack weld in the 3 old bolt holes still got to remove some of the IL magnet stuff of the sc14 ... but that should work... and the crank pulley and SC pulley now should see the sc14 hit 10,000rpm when the motor hits 6200rpm.
-
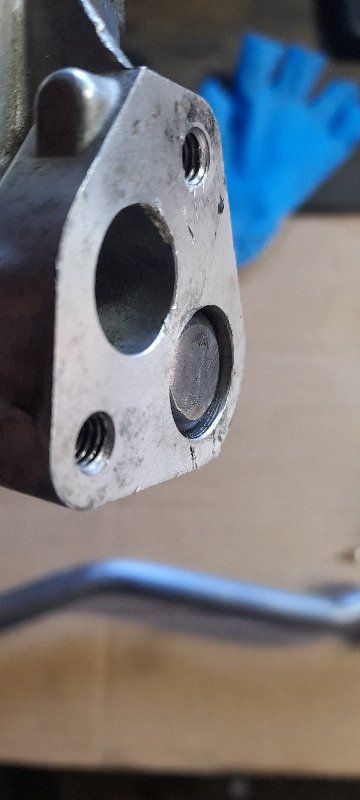
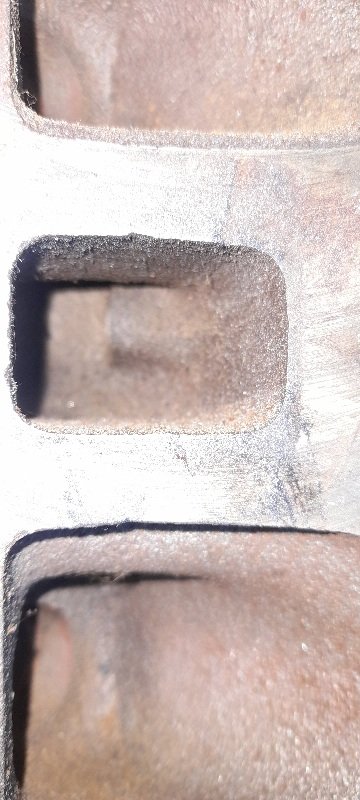
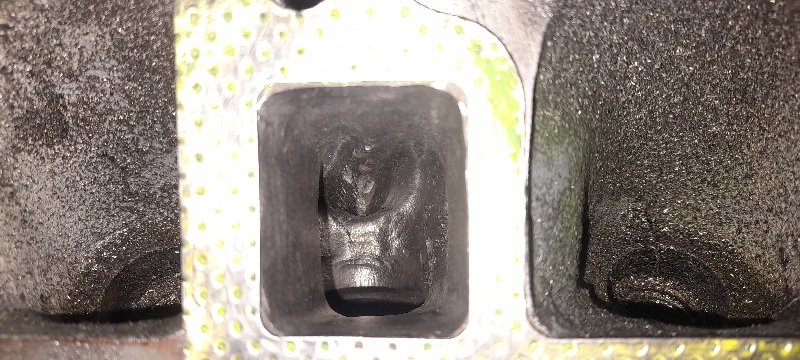
so far so good... thats about as far as I'm going with the exhaust ports.. no holes so that's a win for me.
-
yesssssssssssssssssssssss
-
my new problematic daily....its a mk1 focus st170
d.p.n.s replied to d.p.n.s's topic in Other Projects
I'll just leave this here. -
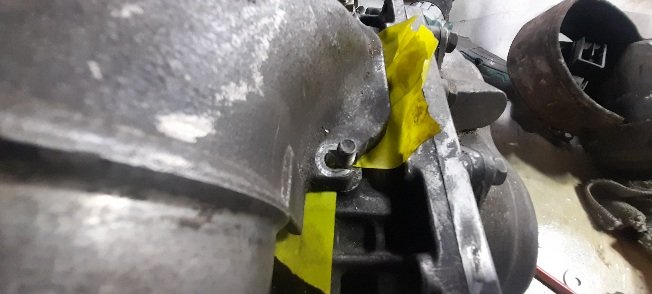
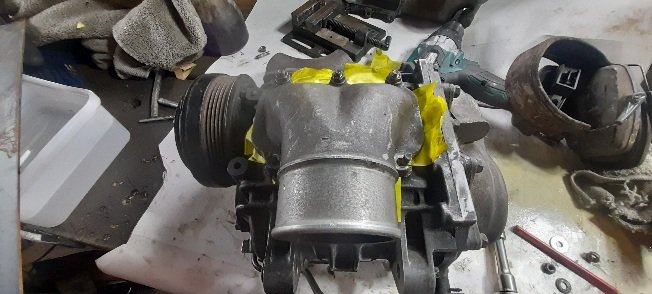
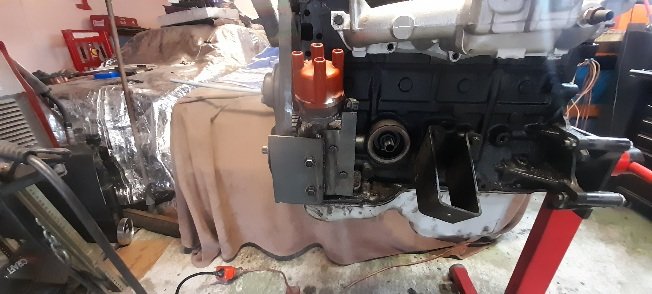
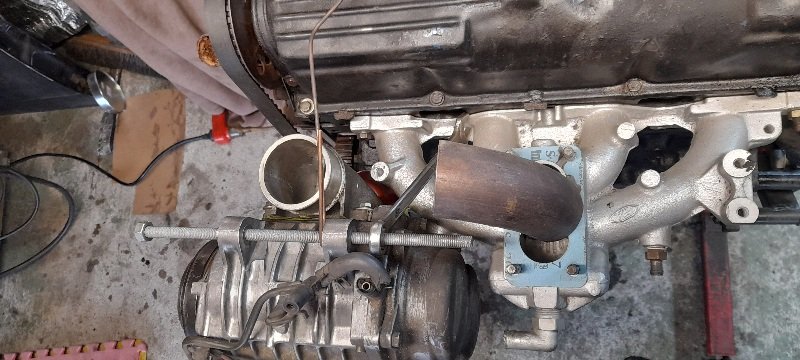
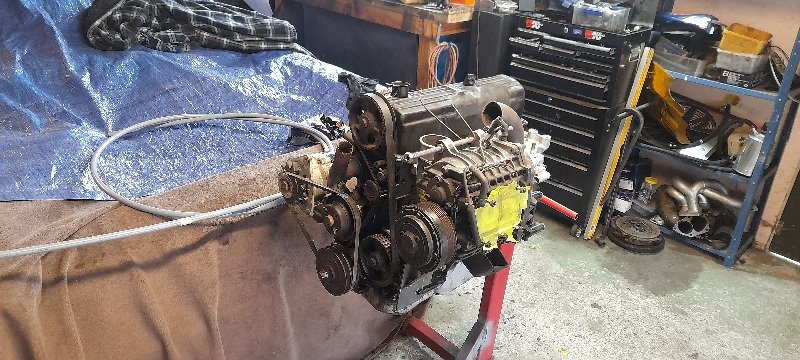
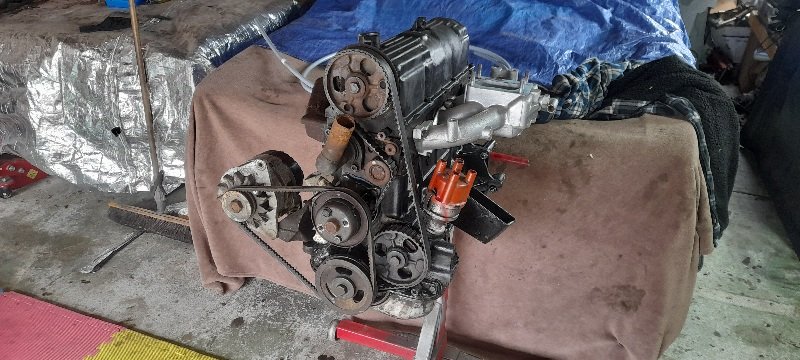
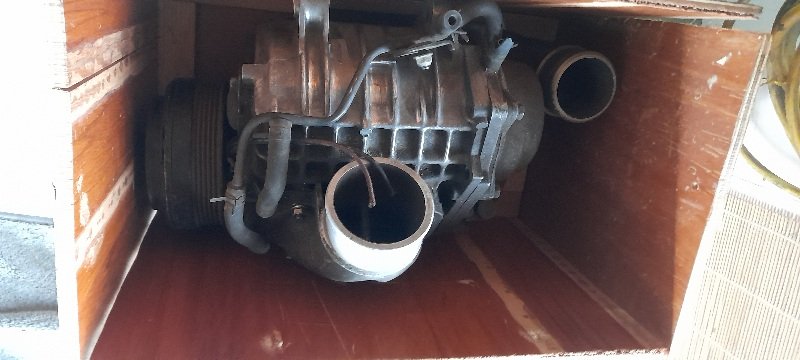
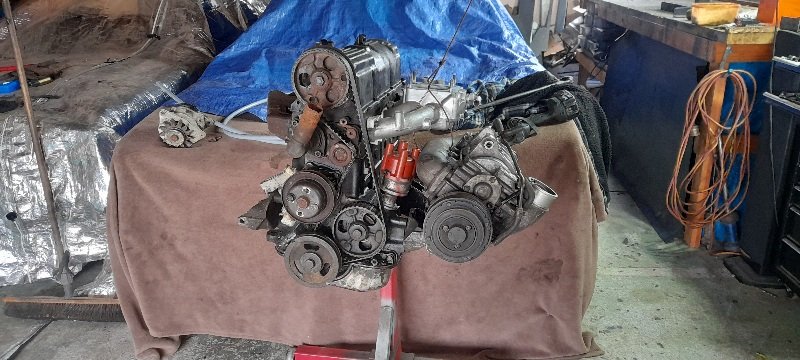
so some stuff I ordered for my motor has now been lost somewhere in the world ...so I'm a tad over it now.. so decided to play around with the supercharger (for my nephew)on a spare motor.. 1st thing was to take the inlet side pipe and put it on the outlet side (just slotted some holes and removed a stud for that). made some basic mounts and plates to be able to weld to. sorted a location infront of the inlet manifold and above the dizzy.(will need to go a little higher).. now the outlet can just go to pipe straight onto the inlet manifold (where carb was). join them with a silicone joiner. Going to run a side draft on the intake side of the sc14 (actually thinking SU carbs). found a twin belt crank pulley from a sierra (timing marks are the same ). going to run a v belt so on the hunt for a late 80s early 90s sigma/magna aircon pulley.. and will make a tensioner. as for my motor .. parts I ordered are now lost somewhere....so I'm a tad over it. cheers
-
that's ok mate .. going to run V belt
-
is it muilty ribbed (Pk I think) pulley?. not sure if I'm going to put a fixed V belt pulley on yet.. just need to work out a decent pulley size.. cheers
-
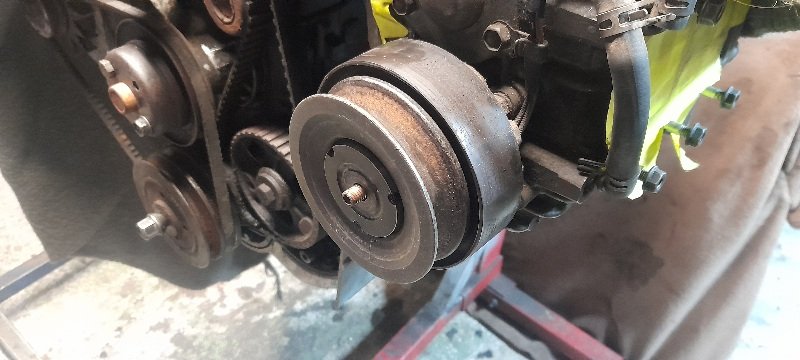
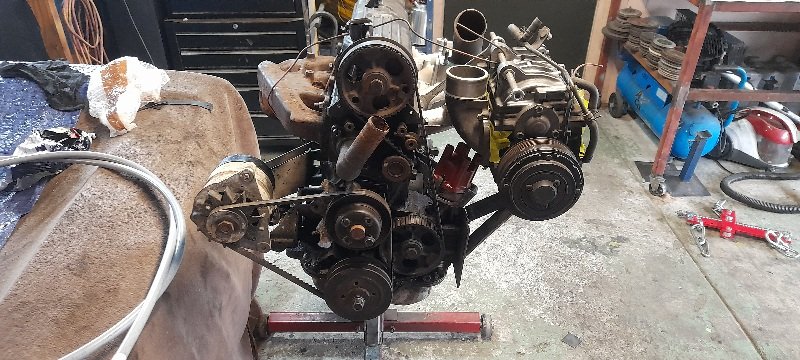
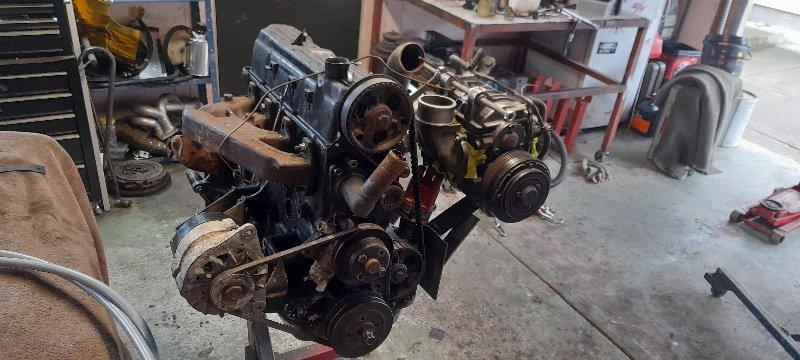
also dug out some bits and mocked another motor up as my nephew asked me to have a play with a sc14 he bought .. (also something I've been die to play with for years now). just slapped a alternator bracket on the intake side and put a bolt in to hold the SC .... all ways looks bigger on the motor.. I'm thinking .. mounted on the intake side , fixed vbelt pulley (not sure on size yet). side draft carburetor and pipe into factory manifold..
-
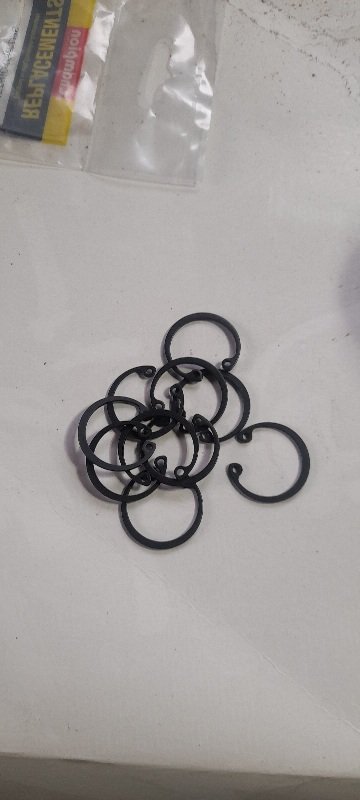
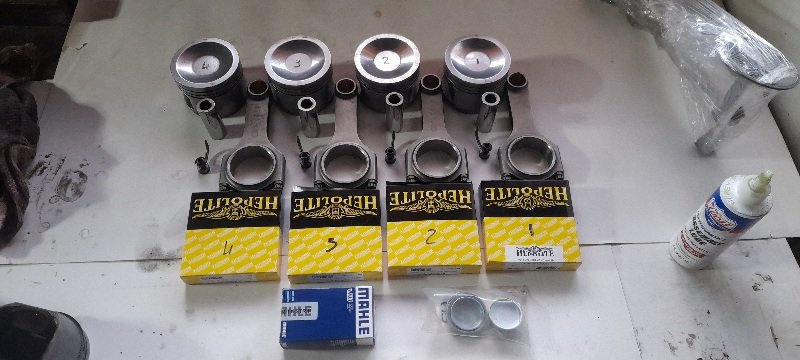
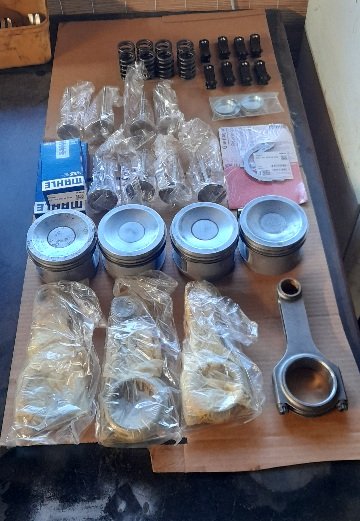
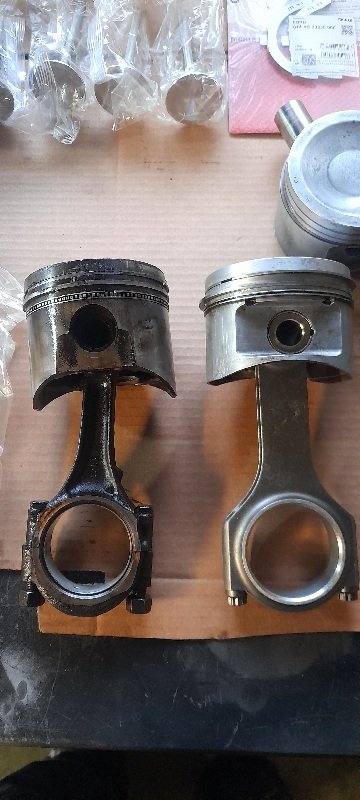
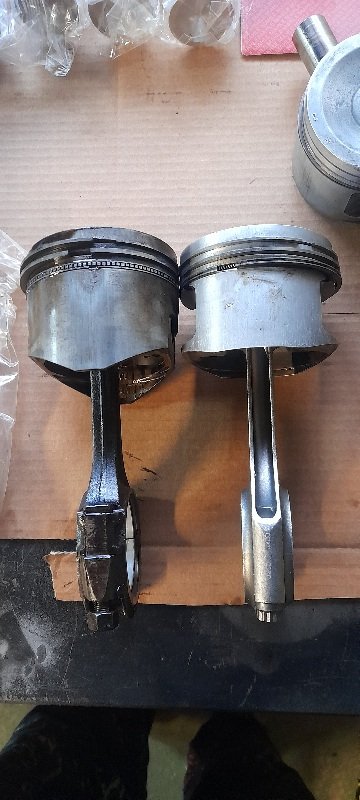
wrist pin circlips turned up the other day. I then managed to put the rods and pistons together. and just using the old bearing I put the piston in and marked where and how much I need to clearance the piston skirts for the oil squirters... once that was all done I put new rings and bearing in.... lubed her up and put them in for good ..as well as the squirters. I then did some more measuring and just just using a 1mm (compressed) head gasket with 92mm bore (might be able to find something else). and working off what the internet says the head combustion chamber is(haven't actually measured mine yet).. that put the compression ratio at 8.622-1 .. so will take what I need off the head to bump that up to 9-1 or 9.5-1. cheers
-
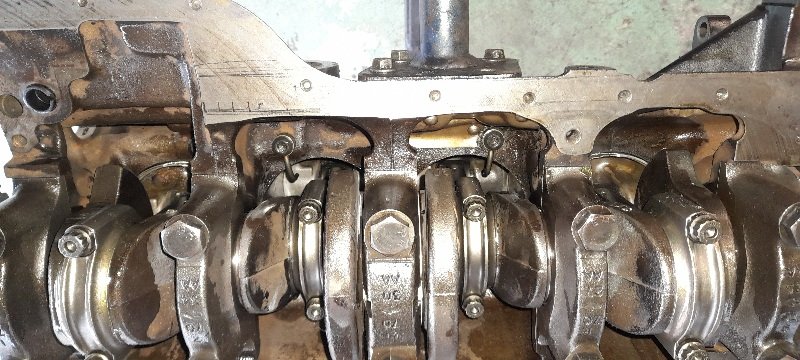
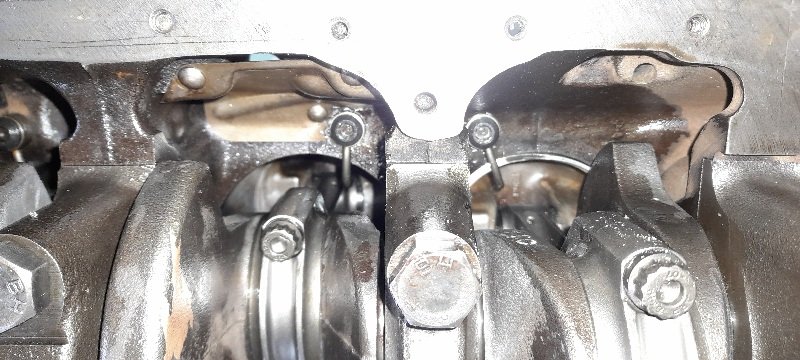
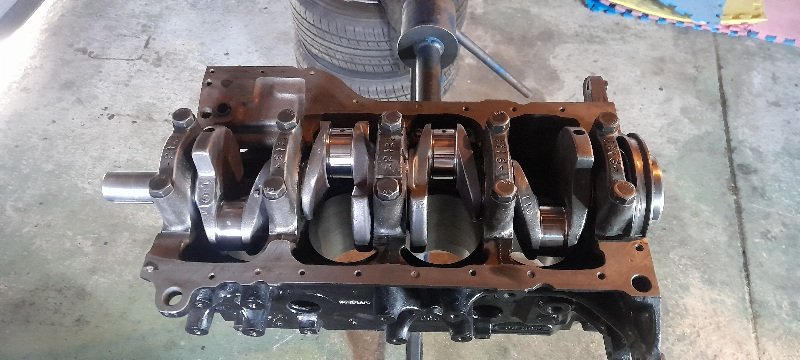
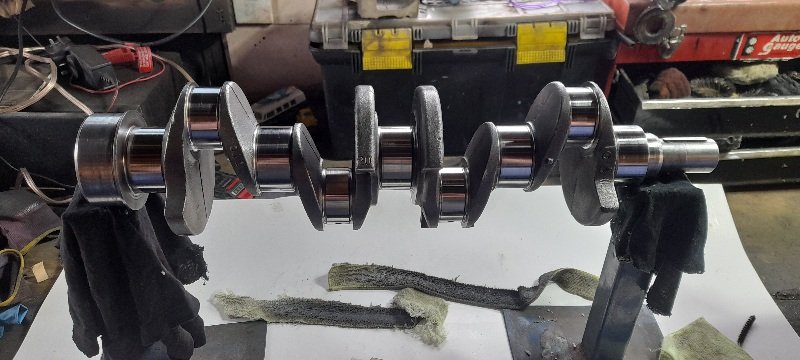
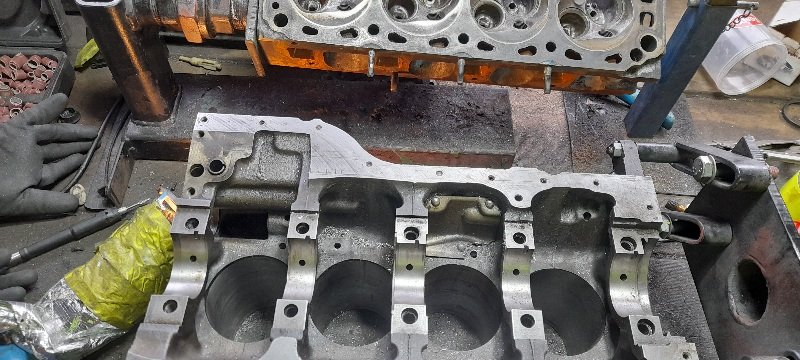
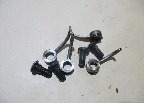
just waiting on some wristpin circlips .. then I'll be able to put the test of the bottom end together. pistons cleaned up , all rings gapped ,oil squirters cleaned and pressure valves checked. the crank is all in now and turns nicely (that's a relief)
-
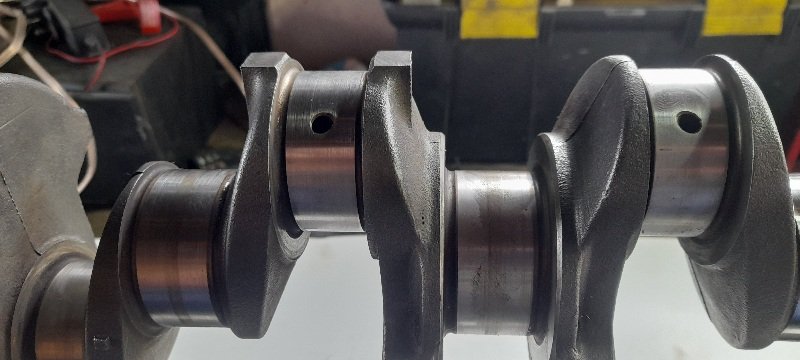
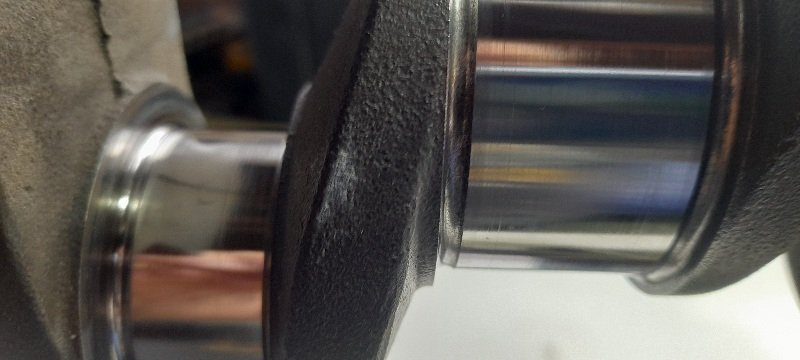
cleaned up the crank it was pretty dirty and had a clear stain from the center of the bearings on mains and bug ends. but it cleaned up very well and I'm more than happy with it
-
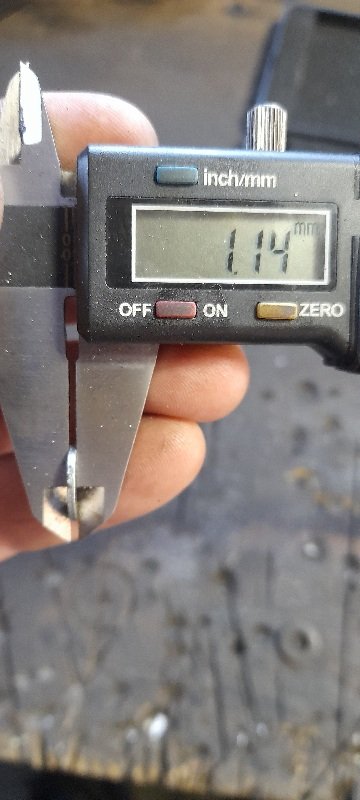
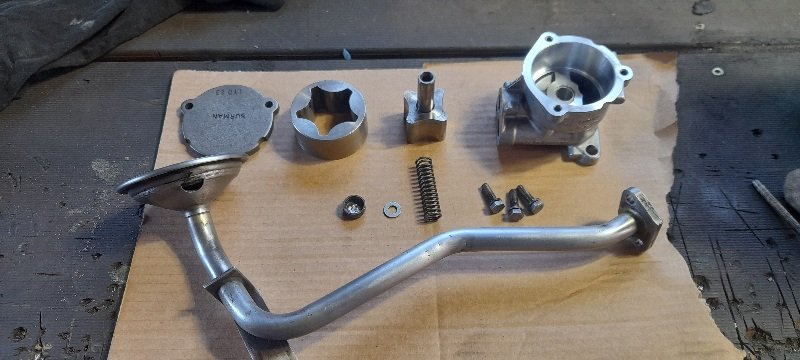
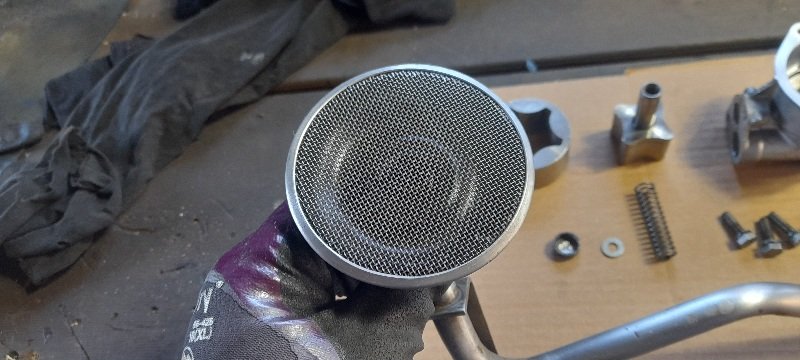
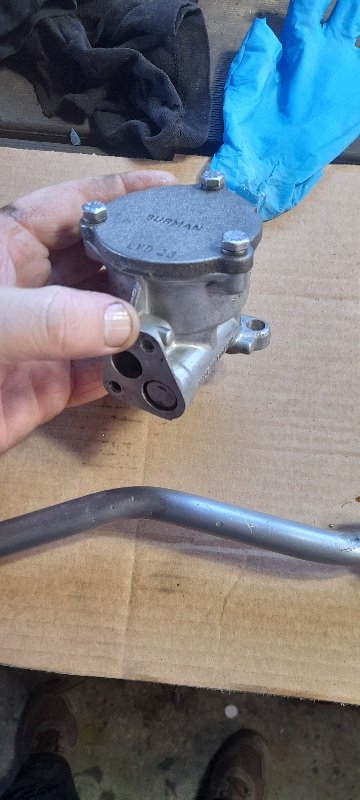
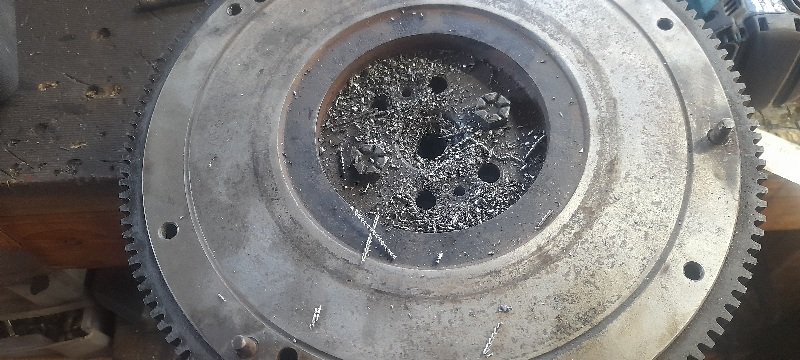
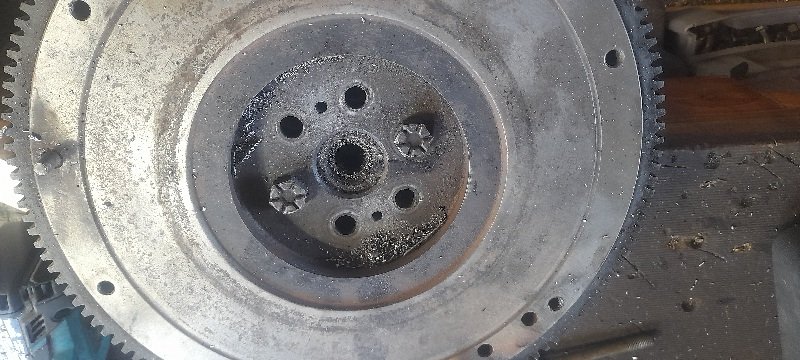
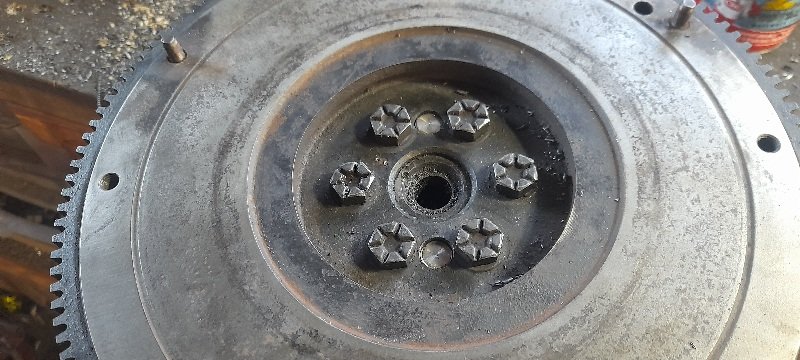
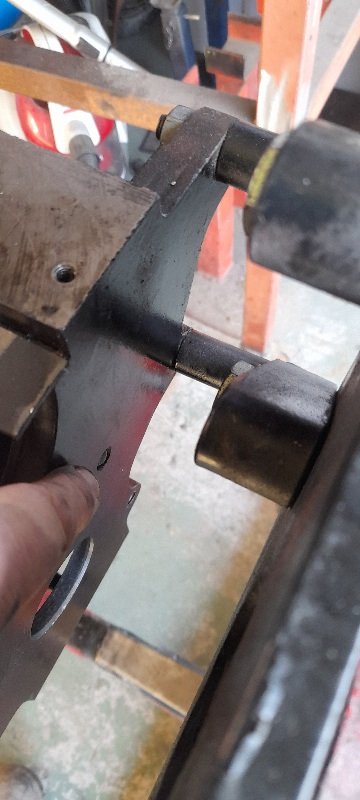
couple of other jobs done. turns out the best condition oil pump I have is the one off the motor I'm rebuilding.. pulled it apart to inspect it and there's no scoring in the housing or lid at all. I have done a lot of research into the oil pump situation and the standard pump seems to be the best bet and just up the pressure for the fact uts feeding a rural and oil squirters.. so I drilled a hole in the pressure spring cap and popped it out and then welded the hole back up. it seem to be the go to put 2mm -3.5mm washer under the cap to put a bit more pressure on the spring.... 3.5mm is more for people wanting to race them and rev out to 8000+rpm. so I found a washer just under 1.2mm to go under the cap and will then add another 1mm to the out side of the cap. all stripped and cleaned... I then added some assembly lube and rebuild it . I pushed the pressure spring in as far as I could and this is where I'll add another 1mm washer (once I get a gasket set and put the pick up pipe back on). other job was to put some dowels in the flywheel for peace of mind. marked out and drilled some pilot holes then drilled them out to just under 10mm and tapped for 10mm high tensile lugs in that should do the job
-
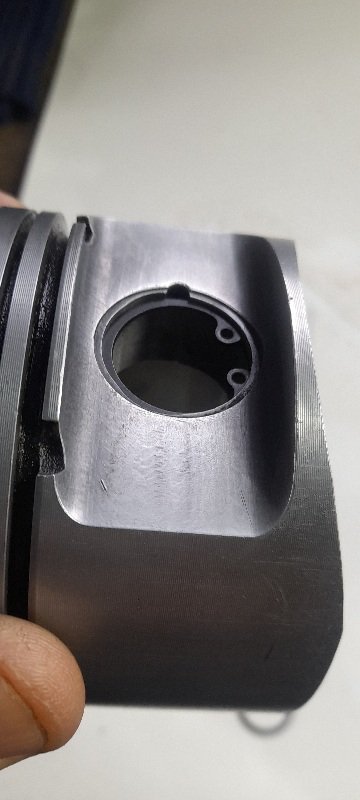
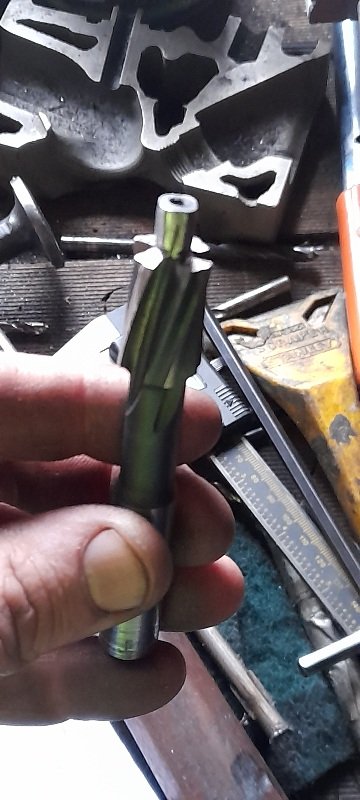
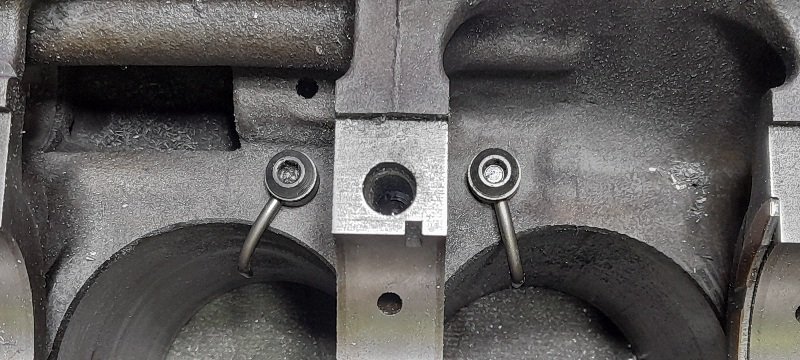
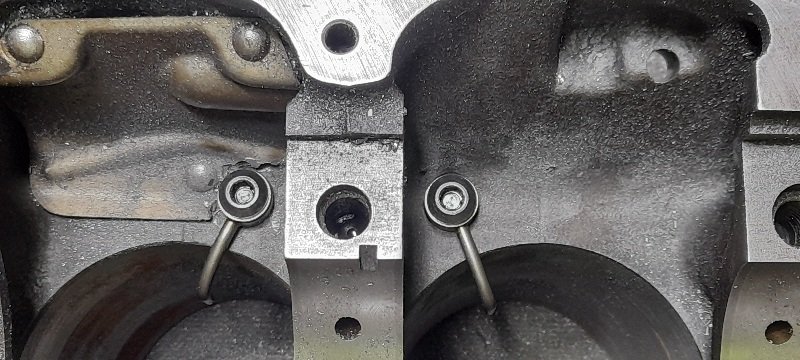
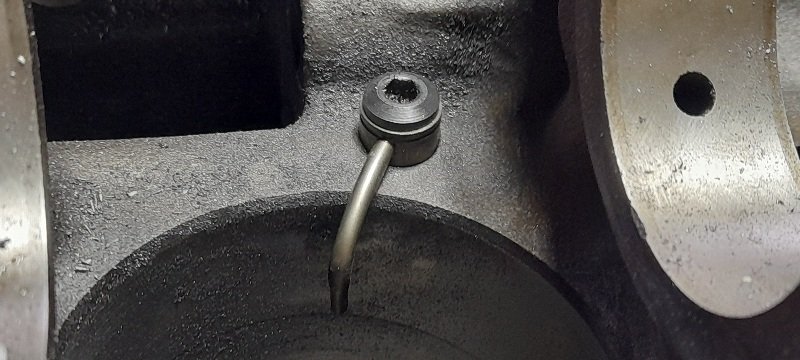
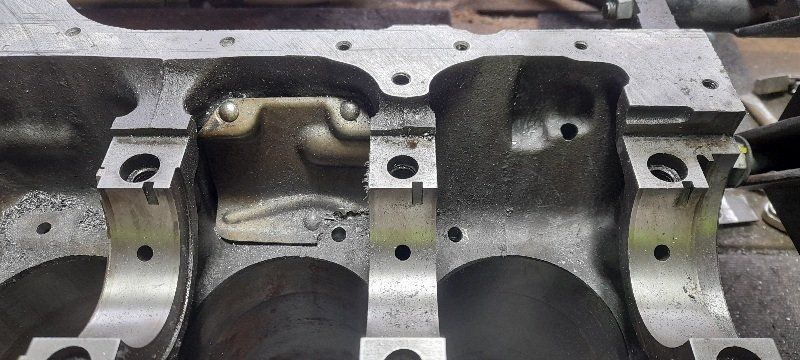
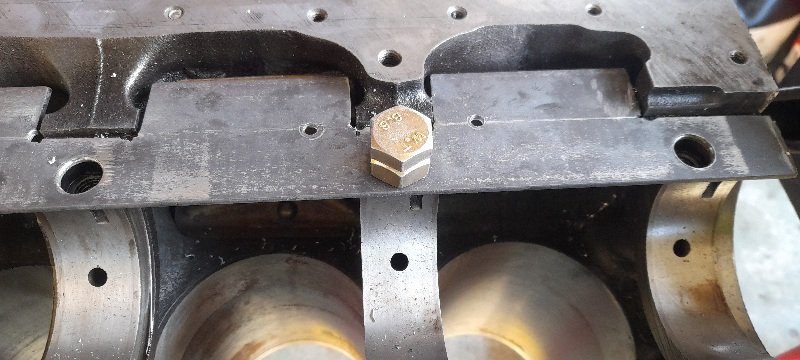
some more buts arrived... the counterbore and tap... so I could finish the oil squirters. the only counterbore I could find was 15mm (slightly bigger than the squirter) but with a 8.4mm center .. so I just chucked it on the bench sanderbtill it was under 7mm I then done the surface of the holes. and tapped them to M8 x 1mm then test fitted the mini cooper s squirters I'm fucking stocked..and it cost a fraction of the cost of the cossy spray bar.. just need to test a rod and piston so it doesn't hit and then the orientation.
-
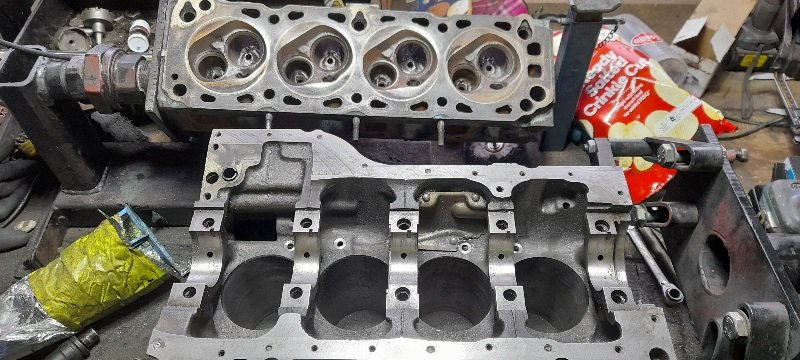
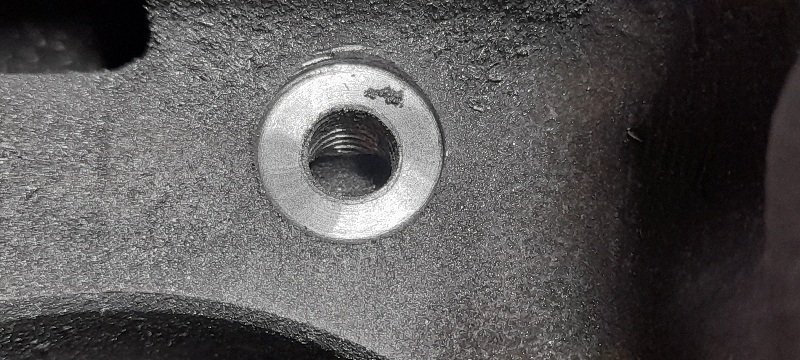
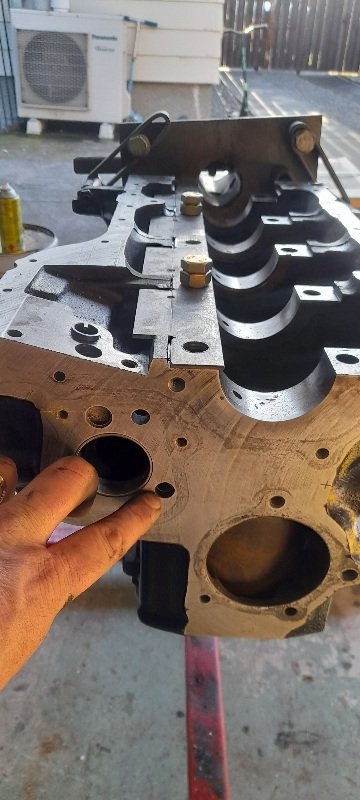
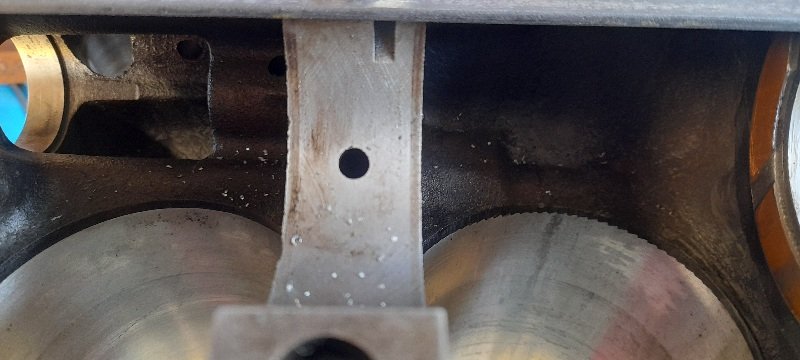
was thinking about it all day ...so when I got home I thought fuck it... and drilled the holes in the block.. thankfully all 4 hit the main oil gallery... Just need to cut the surface flat for the oil squirters.. ( thinking about buying a drill slightly bigger than the squirter diameter and putting it in a mates lathe ..make it glate with a 7mm tip). and then tap the holes..
-
yeah won't be binning the head.. I'll just put it away
-
I think I could .. but I don't know if I'm want to run the risk of having an issue. it was the 1st time I've done this and don't actually mind having another go..
-
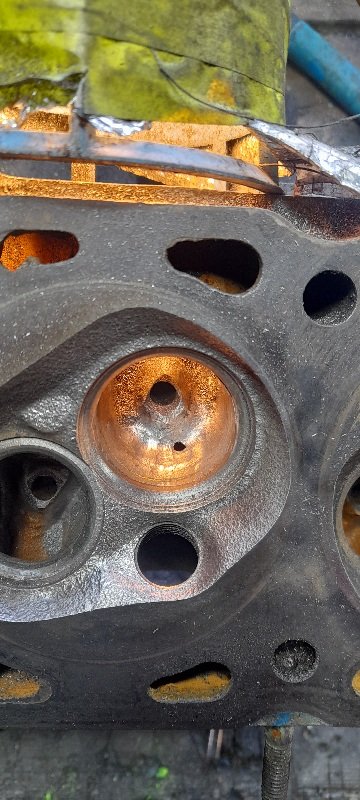
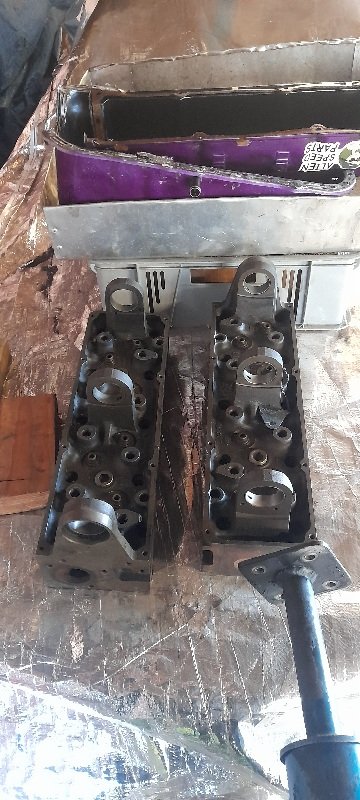
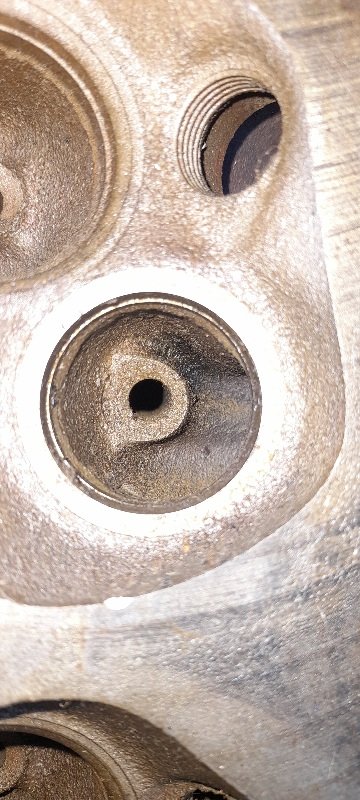
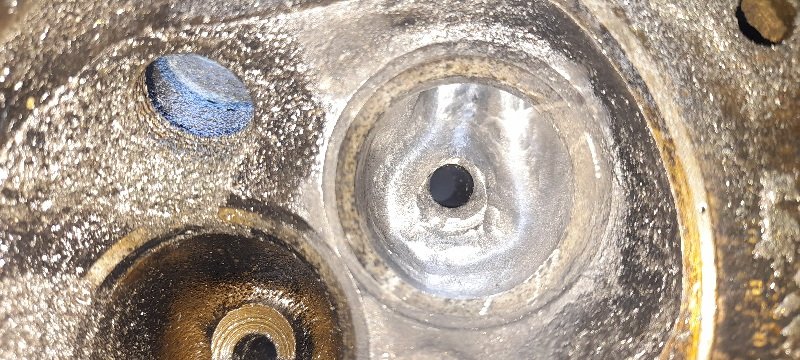
well I hadn't done much in the past week .. thought I would finish up some cleaning on the head .... and this happened ateast I know how much is tooooo much now. good news is I have 2 other heads ..stripped ,cleaned, and Crack tested . bad news is I have to start again also my oil squirters have arrived in nz ....I wonder how long they will take to get to chch from Auckland
-
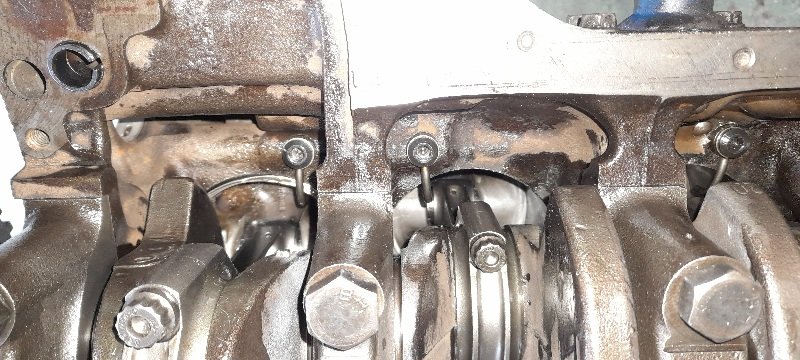
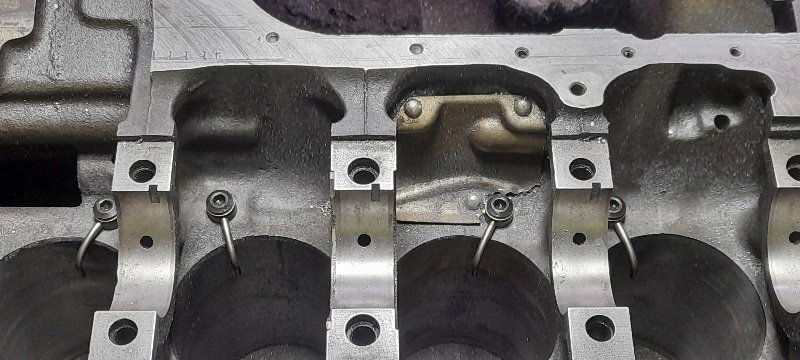
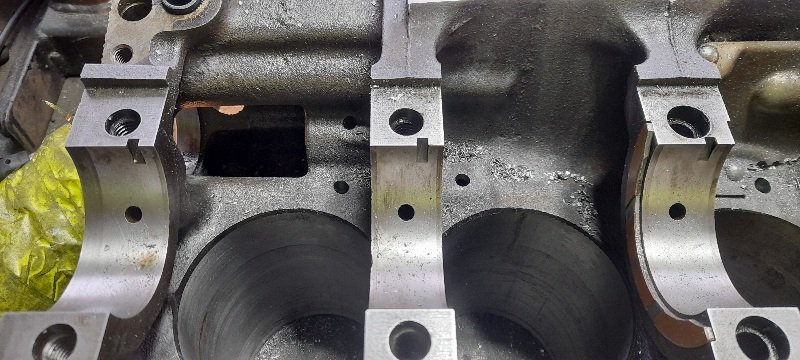
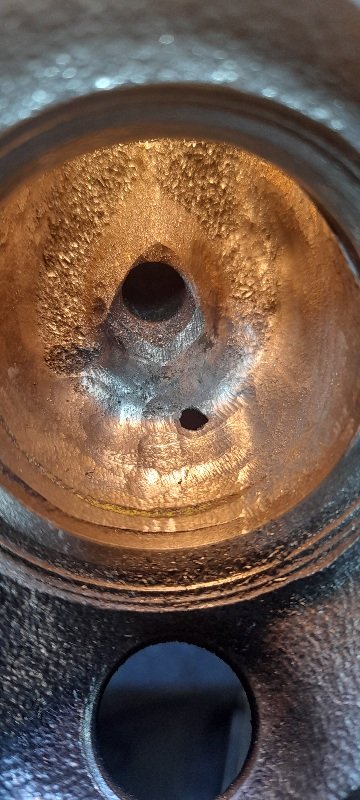
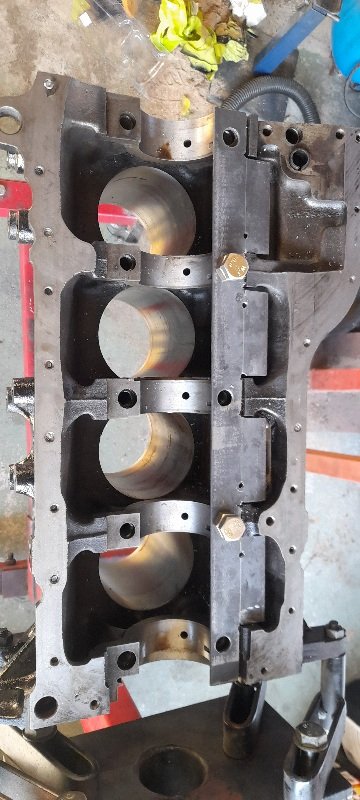
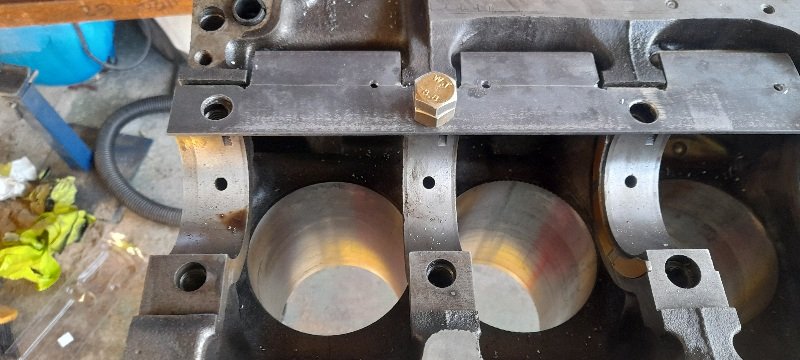
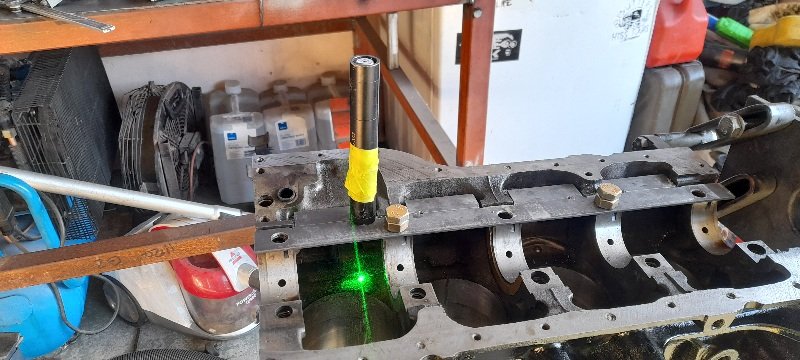
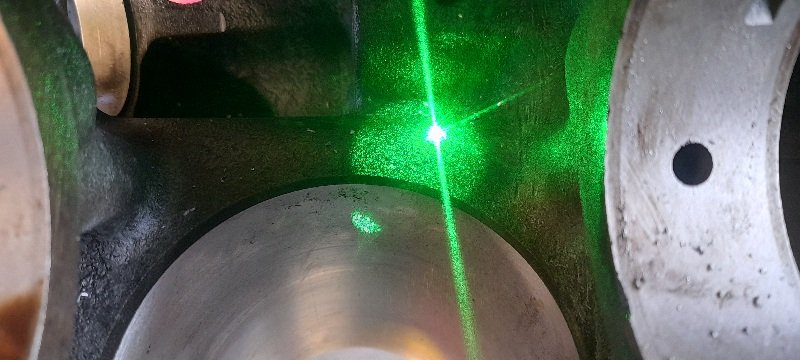
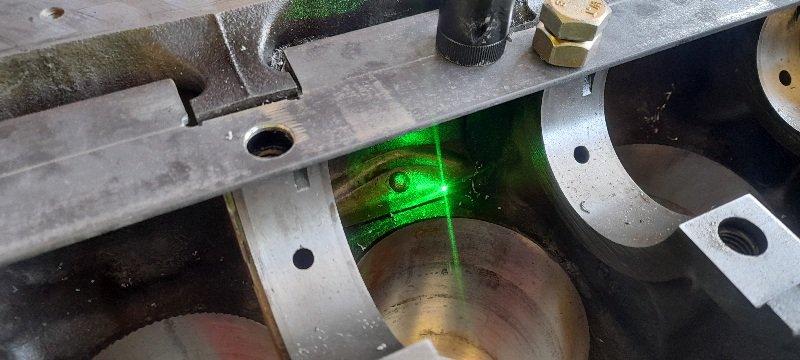
so I'm still waiting for parts to arrive and while I waiting I'm still working on the head and I got a notification that some bits should be here soon ish so I made a start on that job..... oil squiters. so the yb cosworth pistons don't have oil holes around the oil ring on the pistions and use a spray bat... I would have been Allright if i had used the pinto rods and they have an oil feed at the small end ...but I'm not so I need oil squiters. I was just going to use a yb cossy oil pump and pickup with spray bar . but they are getting hard to find now and the cheapest I found (just the spray bar no oil pump ) Landed in nz was $750 and I'm not doing that... so I placed an add on a cossy page for just the top/cap of the cossy oil pump and I'll just make my own spray bar as the pumps the same as the pinto.....but I got contacted by a guy in Sweden who said I should just put squiters in the block ..he explained to me how he does it in his shed in about 45min with a battery drill and pics and a write up on turbobrick forum.. he said it should work ....as the cossy had them as well. so I did some searching and it turns out the last of the escort cosworths had oil squirter in the block .... and then that let me to a bunch of videos of people rebuild cossy motors till I ground a short section in 1 video that explains how he machines them I to cossy blocks with some measurements (cossy block pinto block same same ish). so with my new found knowledge and the last works the crazy sweet said (have balls.....drill holes.....900hp). I thought I would have a go my self. I found some oil squiters from a 05 mini cooper s so the pinto has a main pil gallery running from front of motor (small frost plug) to the ball bearing in the back you can actually feel the tube shape so I made a plate that bolts to main cap bolt holes marked the center of the main gallery tube and then moved the line 1mm to the outside of the block...then marked 28mm each side from the center of the main cap bolt holes and drilled some pilot holes then I got a Lazer pen from a mate and stood it up pointing through the hole to mark on the inside of the block where I need to die grinder a bit to be able to drill. so ones the squiters arrive and some other bits ..I'll strap the pen to a square and stand it up straight...dies grind a section flat and put a small dent in it where the drill needs to be.... then using longer drill I'll drill through the top plate and marked hole in the block (only needs to drill about 7mm) then I'll drill the hole out to 7mm and find a spot face cutter and do the surface...then tap the hole out to m8.... should be sweet ay lol
-
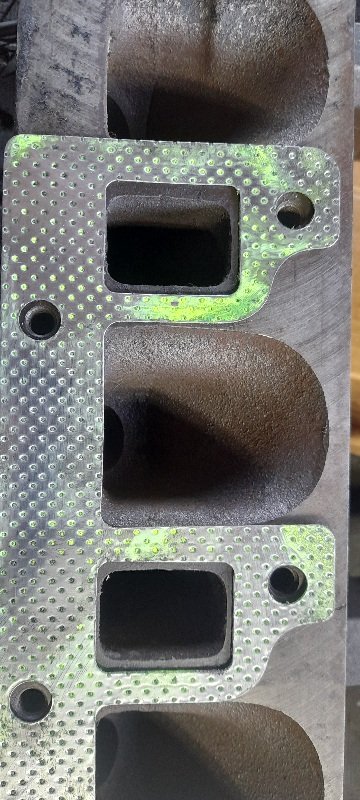
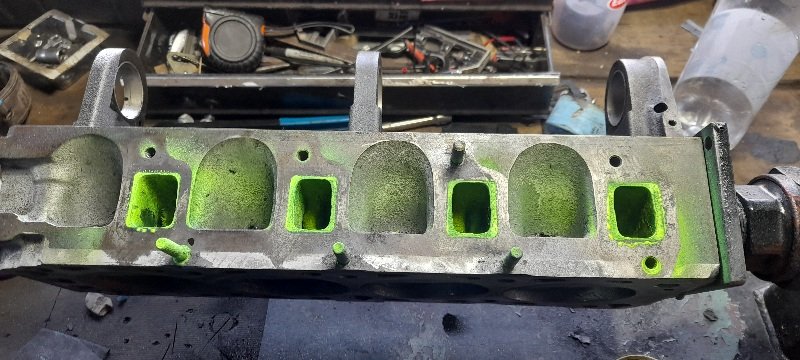
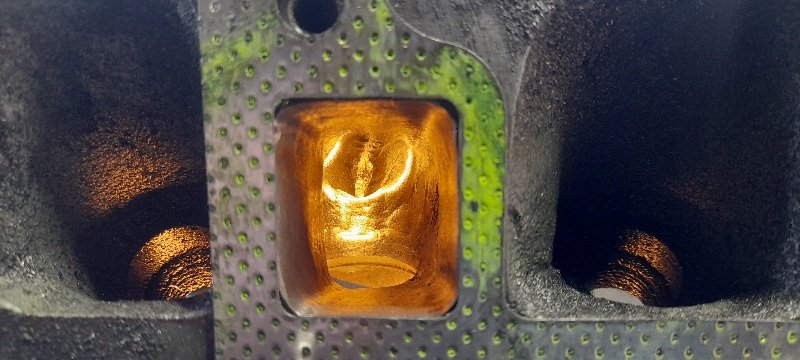
I made a start on the head today ( bit of work ). the exhaust ports are going to be opened up being a turbo so I started with that side .. might just do a bit in the evenings after work.. this is a standard pinto exhaust port. the manifold is allready matched to the gasket so I just put the gasket on the head and painted it to give me some guide lines. and here's what I've done so far ... I'm paranoid about going through in one side where it is thin so I didn't do that much that side ... just opened it all up.. still only roughed at this point.
-
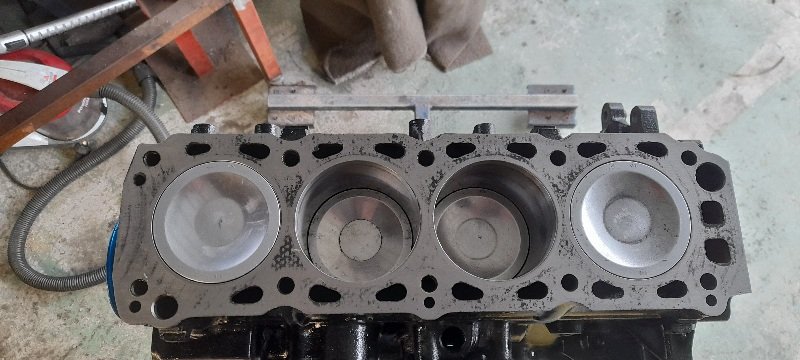
bits and pieces have arrived for the motor (still bits to come) but most importantly the pistons have ..so I can putva rod and pistion together and check the compression ratio to see if I need to deck the block.. turns out it's 8.263 -1 .. I'm pretty happy happy with that to run boost.. also huge thanks to nismo-Capri for rods... and info on porting heads... that will be next on the list . while I wait for some bit to turn up.
-
na it's all good thank mate as I would have to do a gasket set and still swap the heads... and I eventually wanted to build a motor for this setup ... so ill just do it now mate... might get done by end of October but will be done this year and then try and have it all legal for 2023