d.p.n.s
-
Posts
3118 -
Joined
-
Last visited
Everything posted by d.p.n.s
-
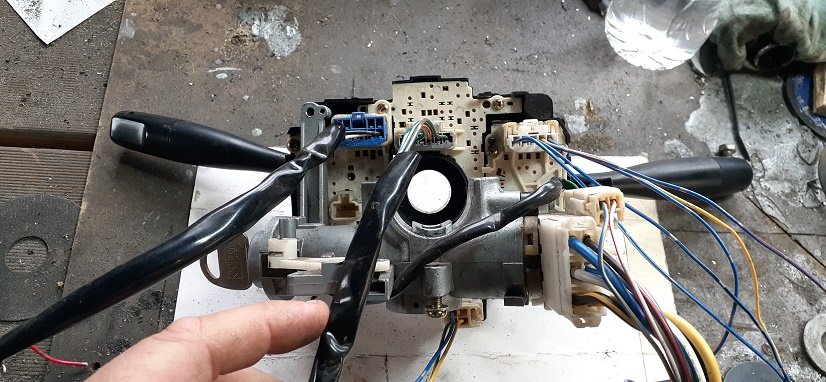
Been plsyng with the suzuki combination switched. figured out where the indicators are..and the lights (just need to test them) but got the 2003 controls to work with 70s cortina motor. got intermittent ( car never had it) slow speed and fast. Aswell as when you pull the stalk for window wash and the wiper kicks in.....got that ...lol ( never had it before)
-
Cheers it is hard man... All I know is it's a 2003 Suzuki swift. So it would have to be HT51S or HTB1S I also believe it may have been a golden Cruze in aussie and they were HR51S or HR81S.
-
cheers man. true....it feels good when i sit in it making engine noises ...feels even better than the one i bought off the shelf for my mk5....about the same throw but much nicer..and seleect reverse very well.
-
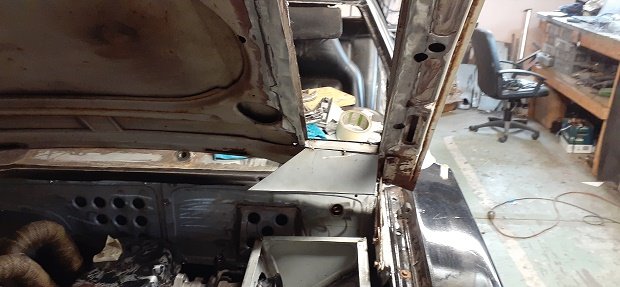
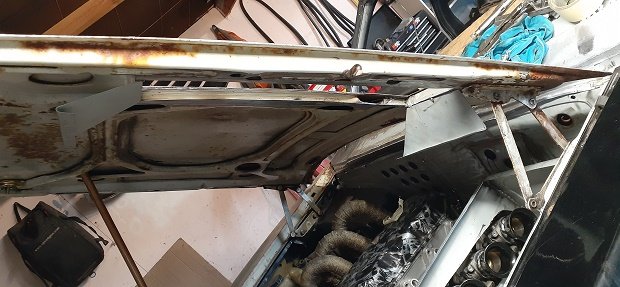
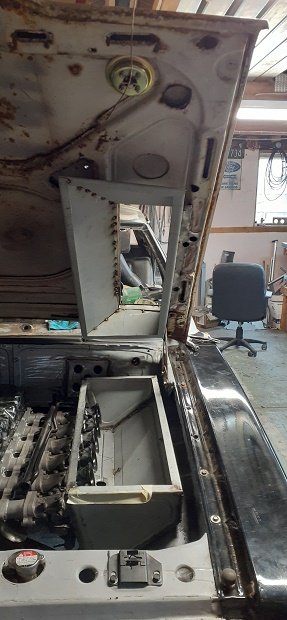
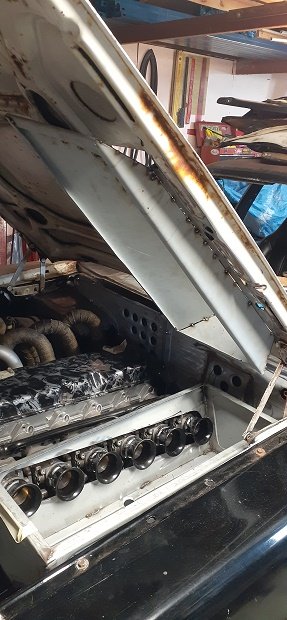
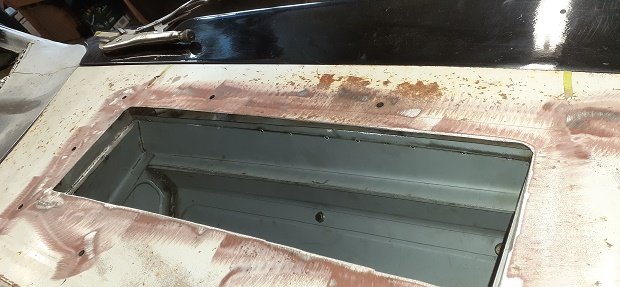
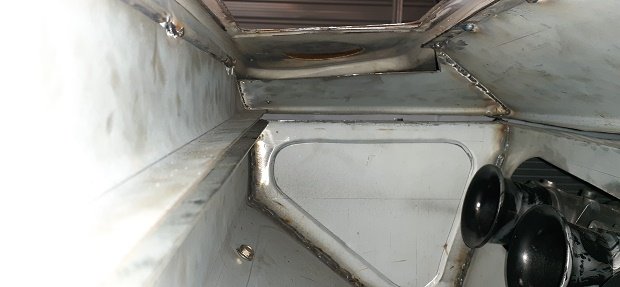
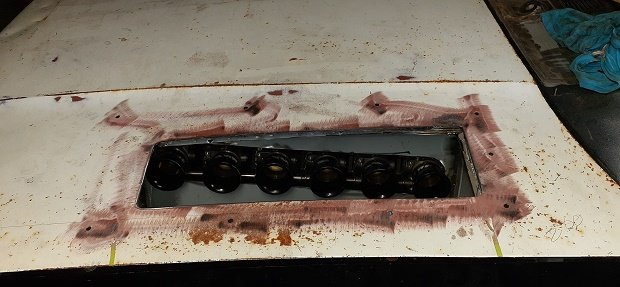
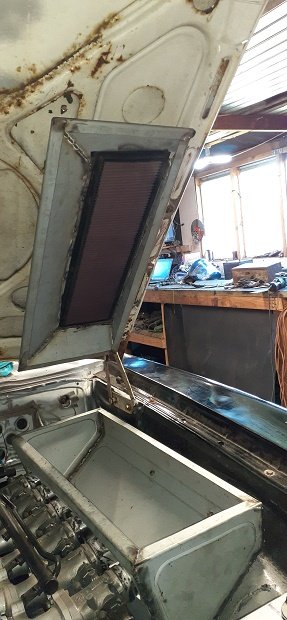
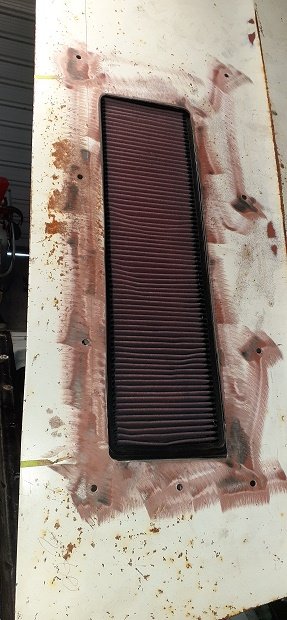
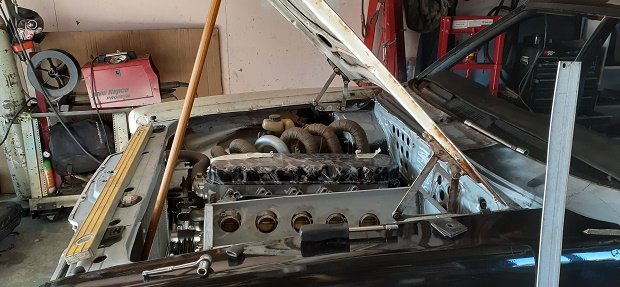
i think this may have been the last bit to make from scratch ..and finish off the airbox. i started by started but cutting 1 bigger hole instead of the 6 holes...i will add some neoprene type material to the box around them so they can move up and down frely and still be mostly sealed off....but for now i mounting the bottom section in...i moved it to the end of the ITBs so that theres room for all the hardware and the linkages can move freely.. now the bottom is solidly mounted i can start making the top half... i could have done it nice any easy but ive had an image in my head for so long now of how i want it and i couldn't stop till i had it right...the problem i had was the bonnet curves to the side and curves to the front and the bottom half of the box wasn't 100% level...so i had to shut the bonnet and make the front and rear ends threw the hole for the filter. once i had them tacked in place i opened the bonnet and made the sides. i plan on using some stick on rubber strips to seal the top to the bottom .....but all in all its not a bad fit. i broke all the tacks pulled it off and welded it up then welded it back on and put it all back together. im pretty happy with that

-
Nice work mate........rust ay...just when you think it's all done. I ran out of welding gas on tuesday and didnt know what to do with myself....had to make a run to a mate's lock up and steal his.
-
possibly mate
-
yup did cross my mind.....even bending the rear off the bonnet up bit like a little bonnet spoiler (trend setter)
-
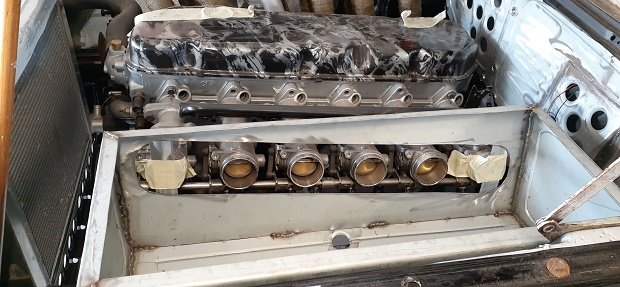
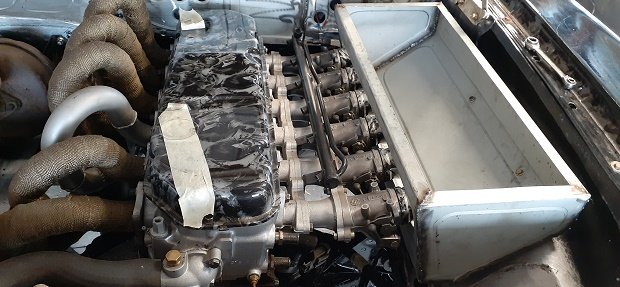
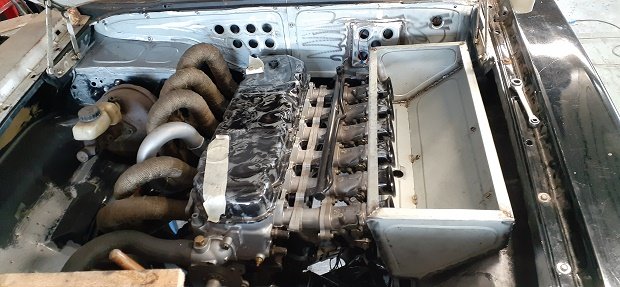
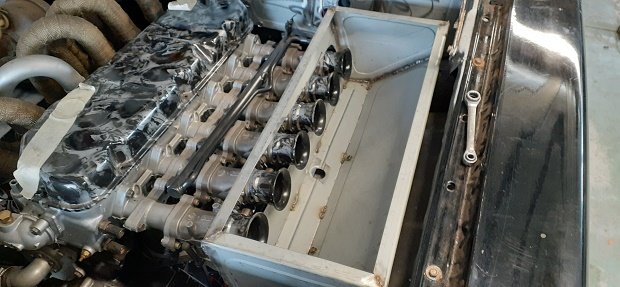
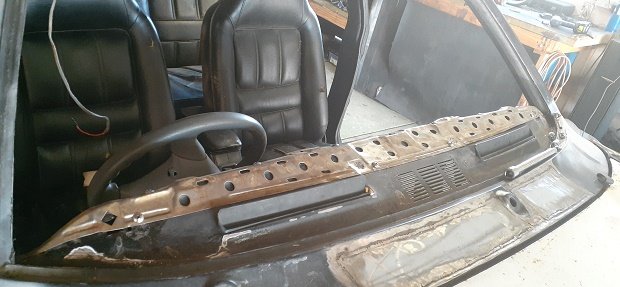
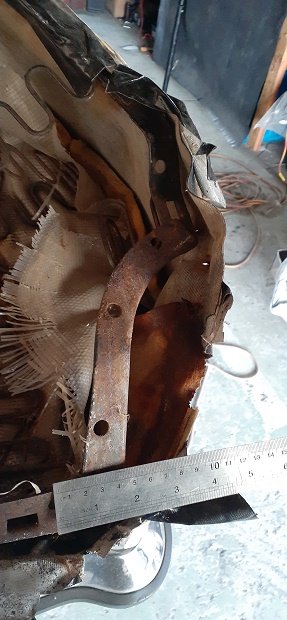
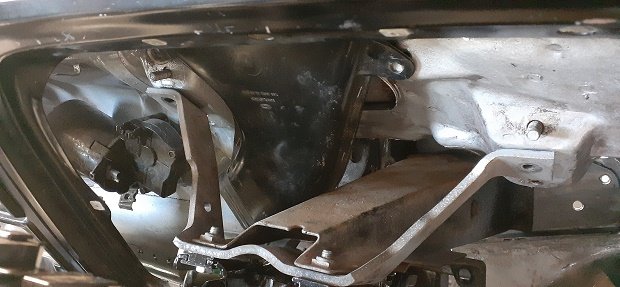
morning all. im on the hunt ( and failing) for wiring diagram or pin out for all of the pugs in the pic...if up close pics of each plug is needed just let me know. any help would be greatly appreciated
-
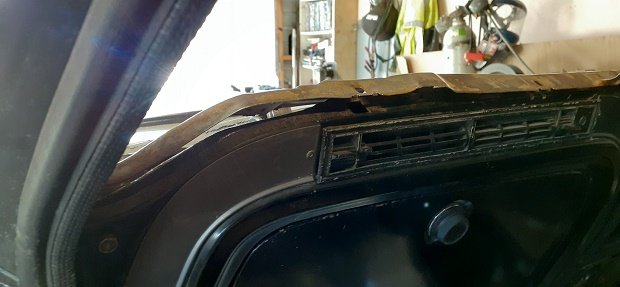
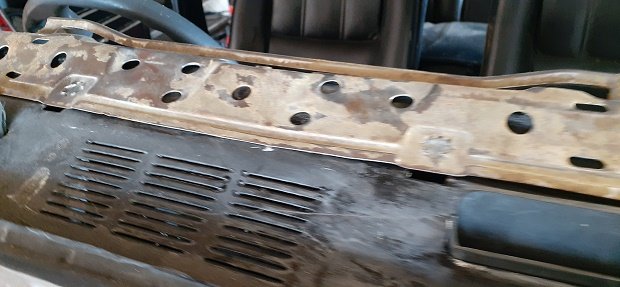
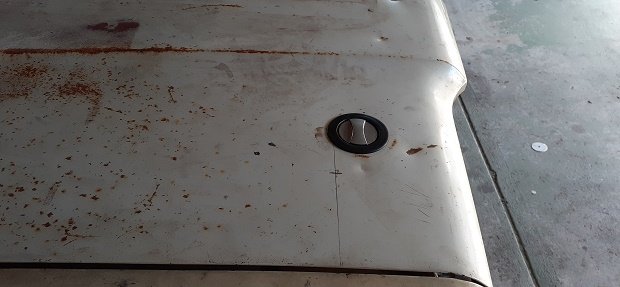
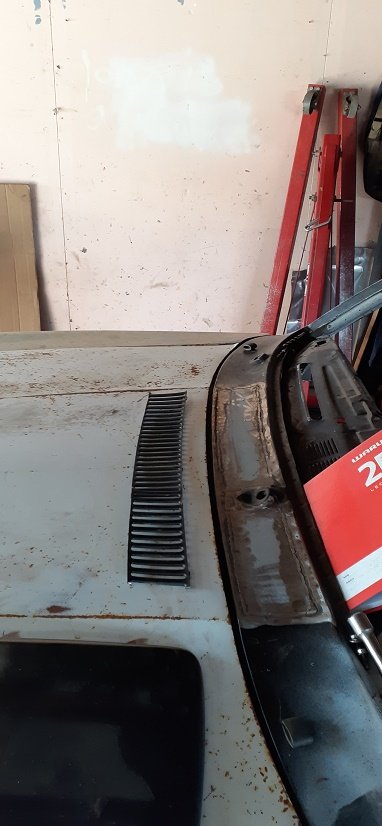
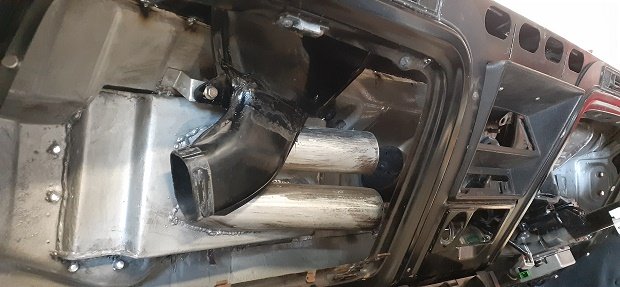
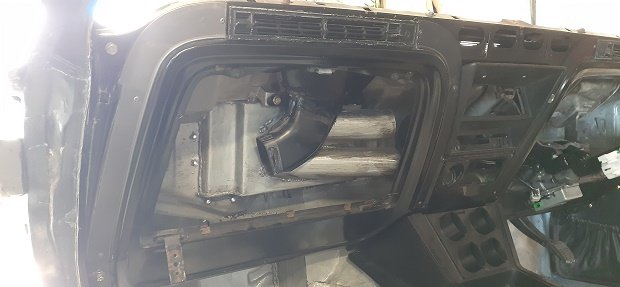
Yes reverse vowl has a purpose and work well at speed.. The small vents buy the wipers do get air pushing into them but it's not that much at road speed.....push those vents 6" further away from the screen and the get less air... My thinking is that the vents will help with engine bay temps (as my exhaust is high up by the bonnet) and I'm thinking more about road spend and sitting at lights/traffic ( as there's only a few places in chch that you can get up to motorway speed.. I'm still sold on the idea and I'm thinking of other ways....but I've never had a cortina that didnt leak ..and I've spent way to long looking for leaks and thinking I've fixed it .....for it to leak again . And that area is a rust trap so welding them up has been on my mind since the beginning. I do have a small question regarding heaters if you guys have some thoughts... Is it best to take air from outside ...or can be air be taking from inside ( like a recirculating)?
-
I'm very reluctant to do that man. See if we can come up with another way
-
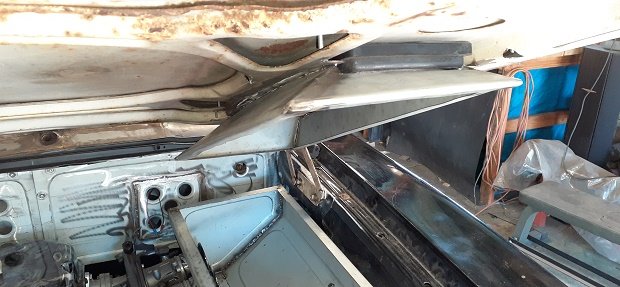
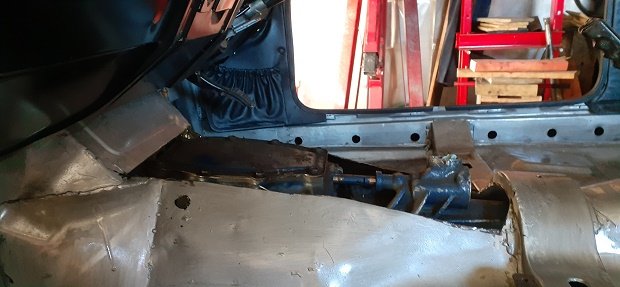
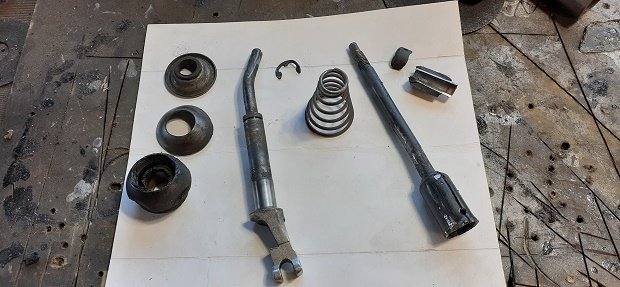
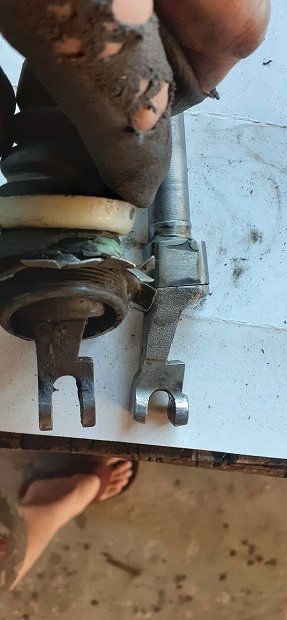
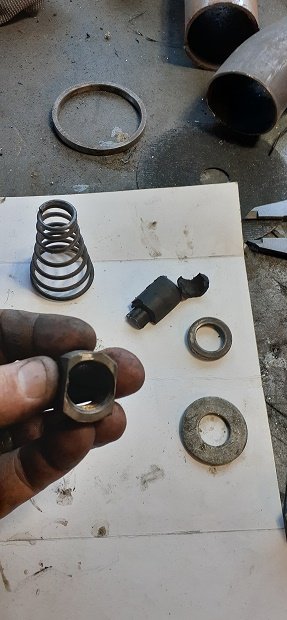
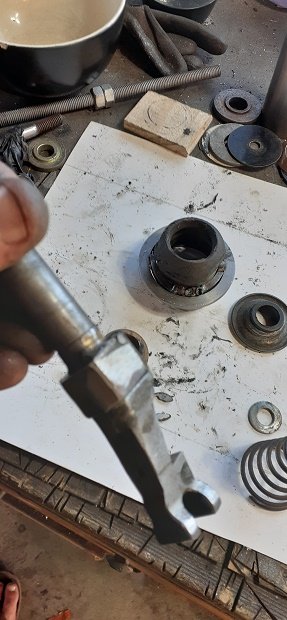
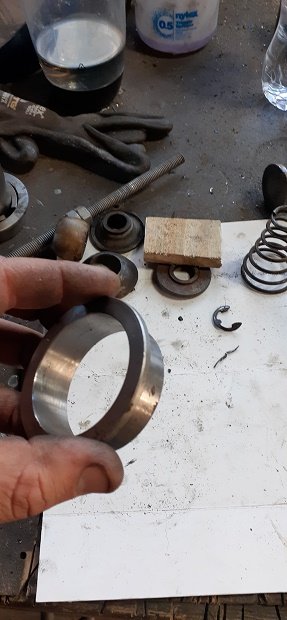
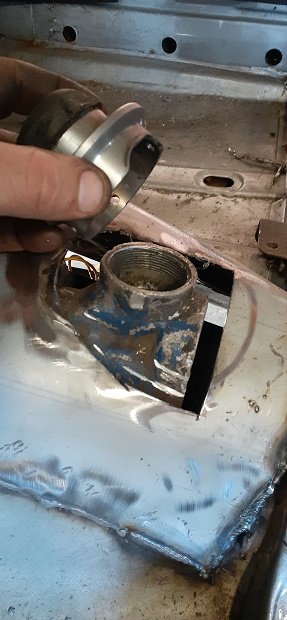
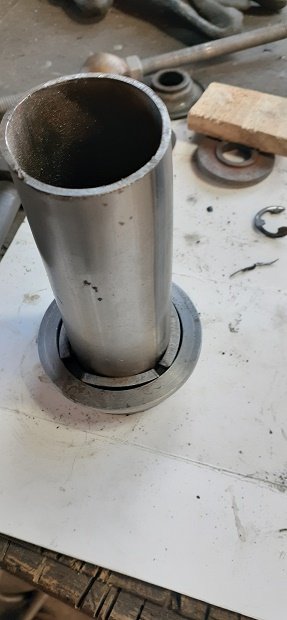
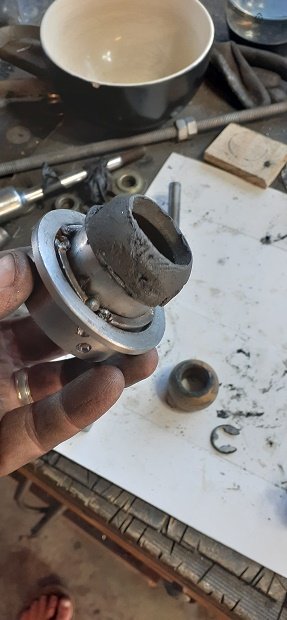
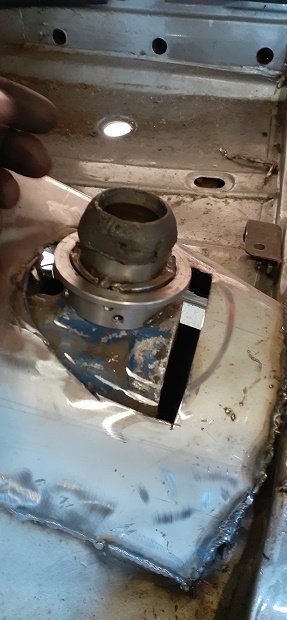
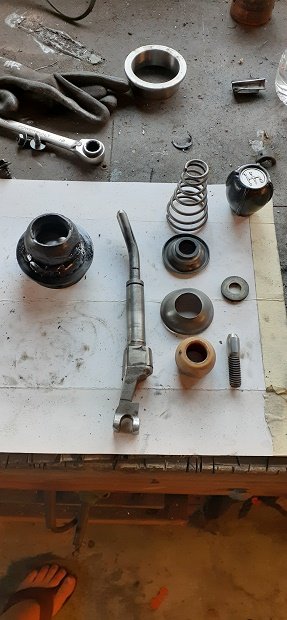
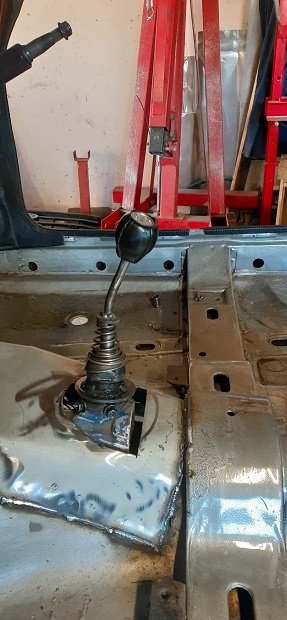
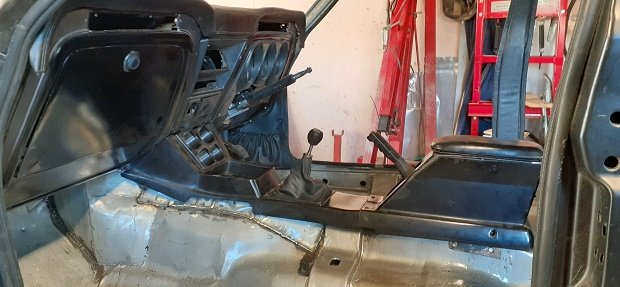
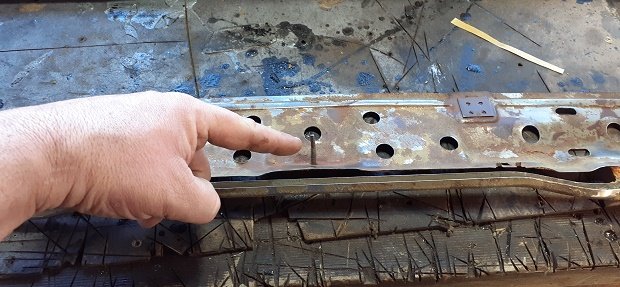
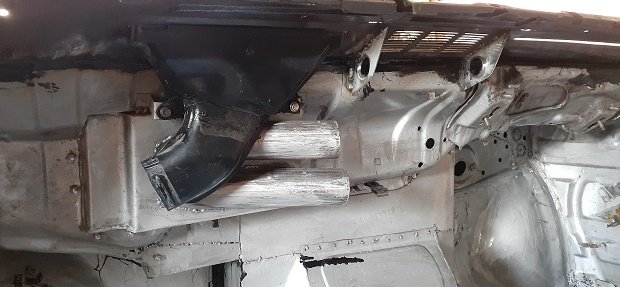
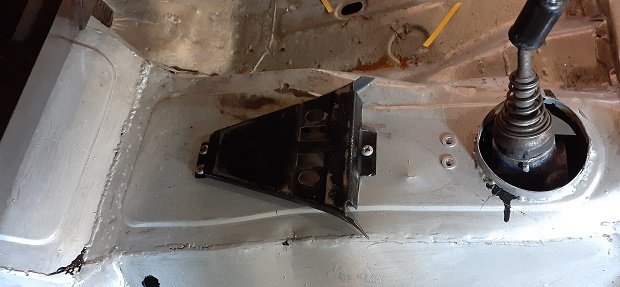
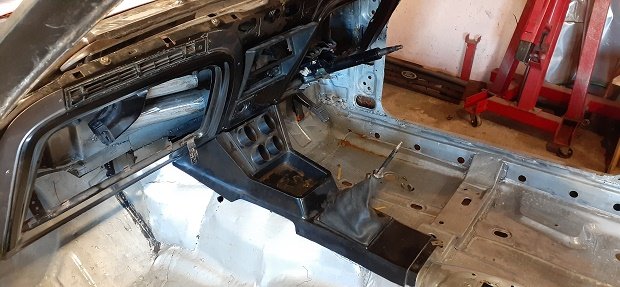
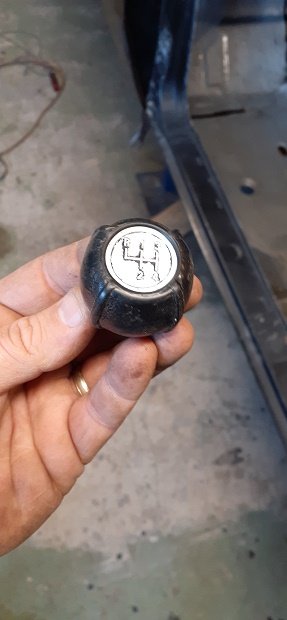
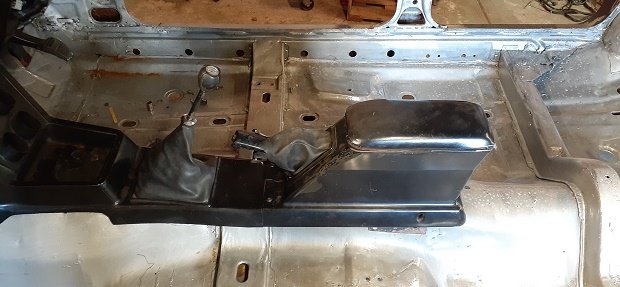
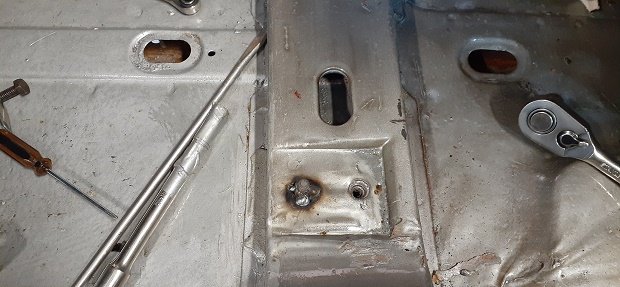
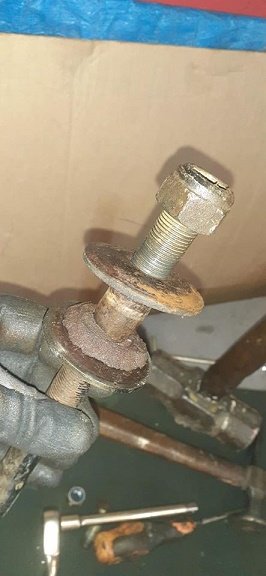
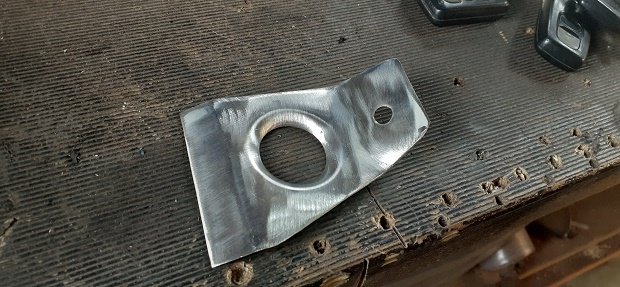
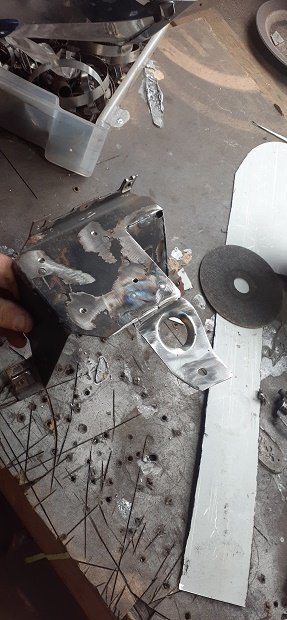
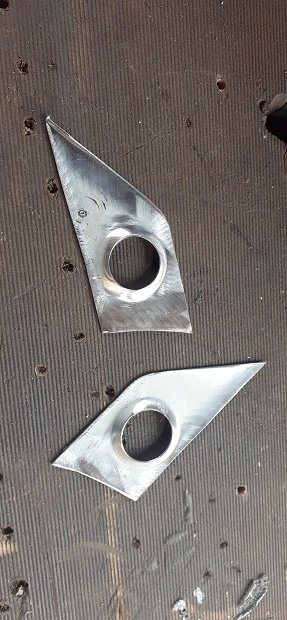
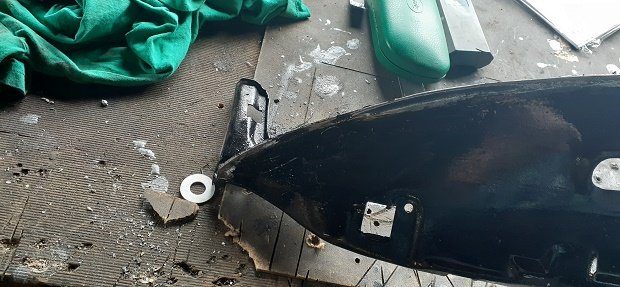
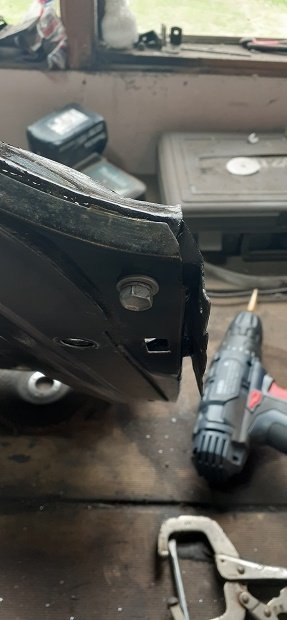
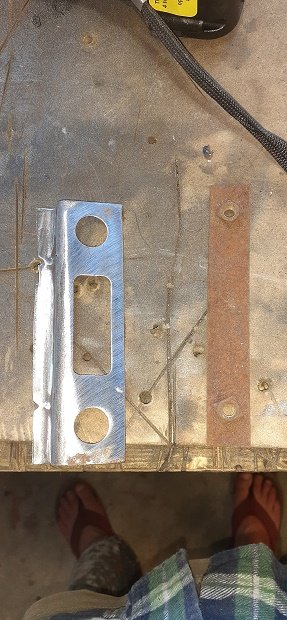
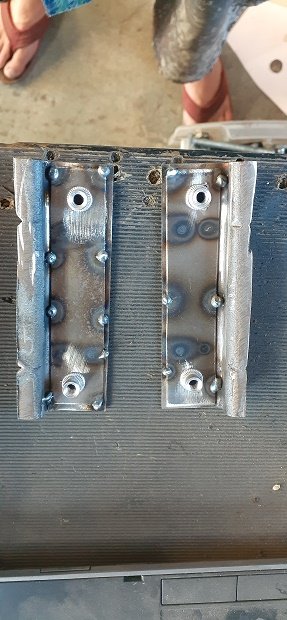
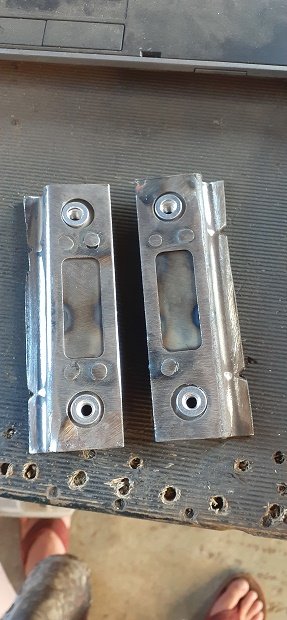
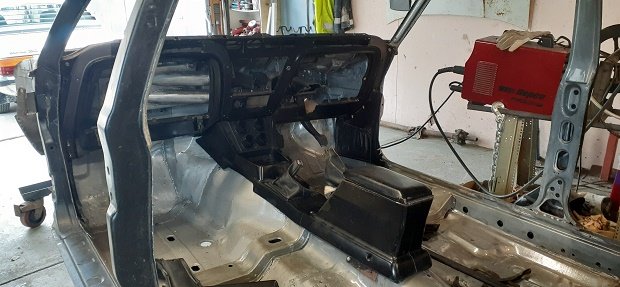
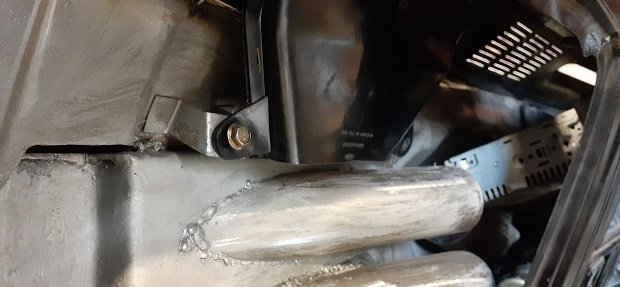
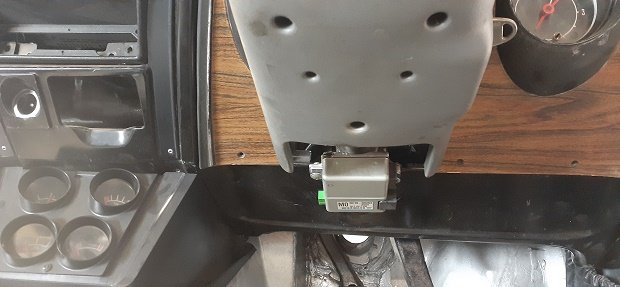
Well i went to finish fitting the airbox and for some reason it no longer fitted as it should (motor has been in and out a few time since then.) So this led to me redoing something i wasn't 100%happy with.... The way the motor sits so i lowered the mounts as far down as i could and cut the top of the tunnel off and made some 20mm spacers to lift the gear box up.. Now it sits so much better and the gearbox to driveshaft to diff is a better angle ..... As for the airbox not fitting as it use to (had an idea i was planning on doing to this anyway as the box is solid mounted and the trumpets will move inside it) Sooooooo seats out..center console out..top of tunnel cut off. Engine lower down on the mounts and gearbox spaced up 20mm New top made (it sits alot higher than factory so i had to make it to the shape of the center console ) So that led to me thinking about the shifter .. It was tall sloppy and the throw was ridiculous.. I have searched in the past and then spent somemore time yesterday searching for a short/quick shifter for it but there arnt any. .you can rebush them and that helps ..there was a guy on ebay selling home made ones years ago for stupid money and not anymore.. So i thought i would have ago at making one....so i pulled it apart I did also look at escort shifters as the thread is the same and you can get them off the shelf....but the ends are to different. So the throw factory is 120mm from 1st to 2nd and 60mm across the gate to 3rd and 4th.. I found a 20mm thick nut that fit perfectly over the shaft and cut it down to the same as the shifter base and i put a weld ontop of it as well The plastic thread on the shifter are crap (much like all ford ones) and wear out... i had some 40mm mild steel tube and it was a close size to the plastic threw...But i coulnt thread the bottom of the tube to fit the gearbox hole.... so i had a v clamp sitting on the self That was a nice fit over the outside of the shifter hole so i drilled 4 holes and its held in nice and tight with 4 grub screws. The vband was a lot bigger than the 400mm tube so i cut up a huge washer i had and used bits to center the tube and make welding easier It was at this point i ran out of welding gas yesterday...got some from a mate last night.. so its got some shitty gasless tacks holding it together and i pressed the plastic shifter base into the tube after cutting it to the size needed and stopped taking pics .but last night i welded it up cleaned it up and gave it a paint... cut the top of the escort shift off so the gearknob was a good fit. all together and mounted. throw from 1st to 2nd is now just under 60mm and sidewas to 3rd and 4th is now 30mm so i halfed the throw and it feels so much better and at a better hight. Center consoles back in and they sit a lot higher but you cant really notice it My heater ducting also turned up and i got the wrong size but a trial fit lets me know it will work perfectly. all back together .. and now i can get back to the airbox
-
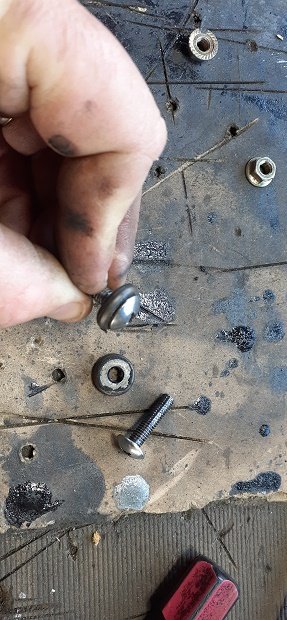
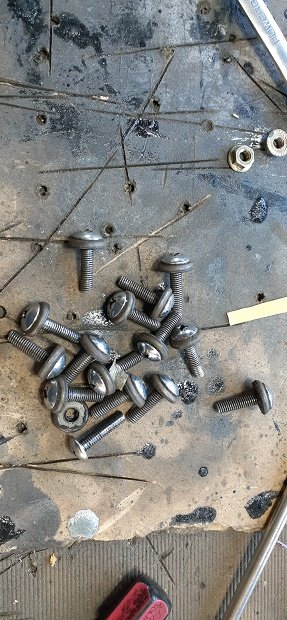
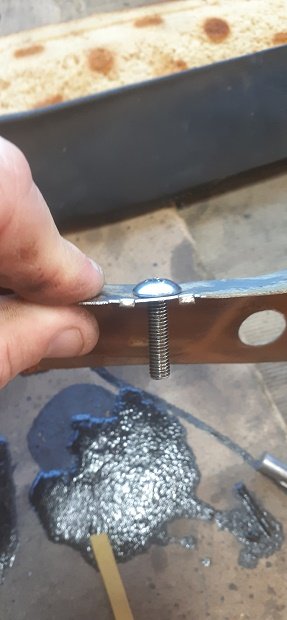
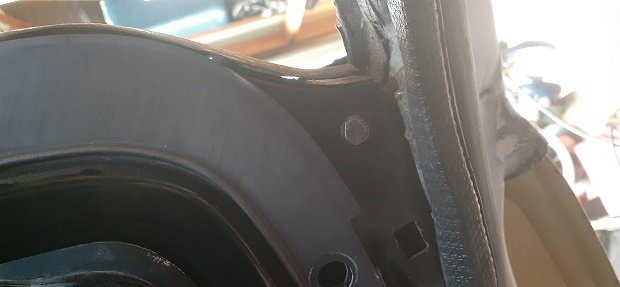
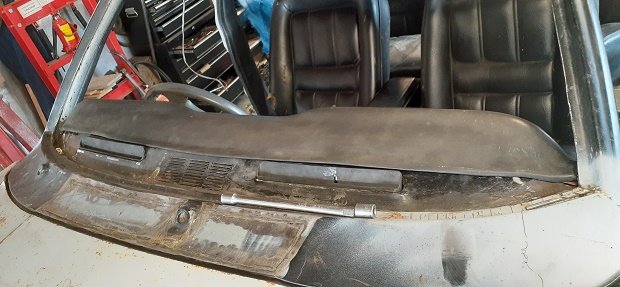
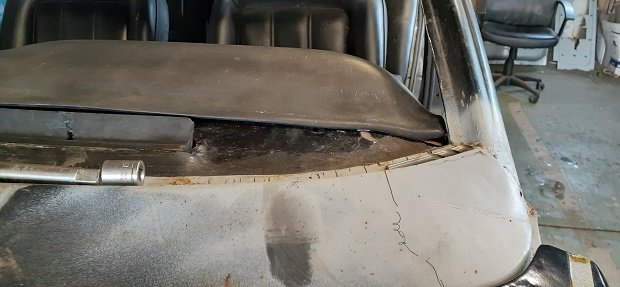
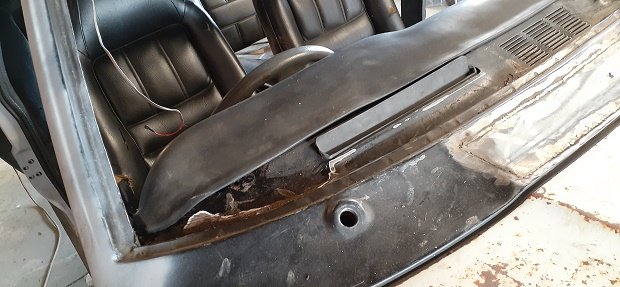
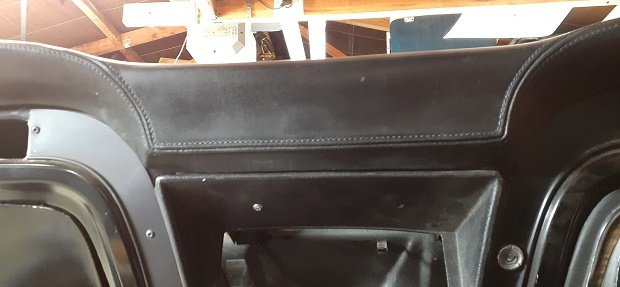
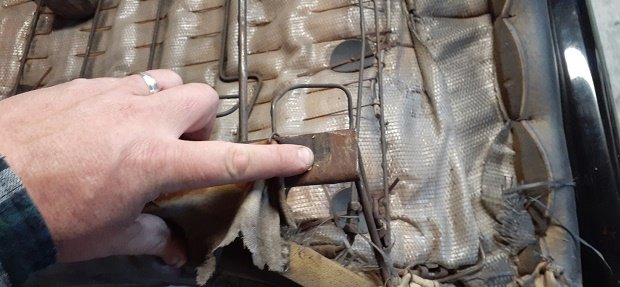
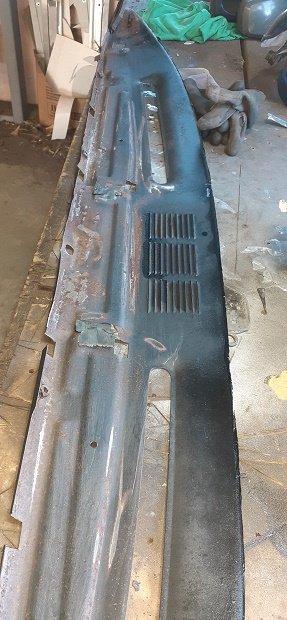
im not an upholsterer and have never done any thing with upholstery so this may not be the professional way to do things but its my way.. i decided to have a play with the dash pad....(new ones cost are pretty bloody expensive as are good second hand ones ....if you can find them) the dash pad cover is in pretty good condition ..not cracks at all..it just a bad fit ...so i peeled the cover off. i cleaned the steel base up with the wire wheel. this is the fitment i have ....if not good. so it turns out that this rusty little bugger is the only thing holding the dash on. so i went on the hunt for some screws...turns out i had a few cam cover screws from a 1ggte sitting around that once you remove the rubber washer are very flat....and the washers got drilled out to use as....well washers on the dash pad. so after a bit of hammer and dolly time and another 10 screws it started to fit better. now the front of the dash pad sits down against the front of the panel and has 2 small tabs to hold it in place...theres a small steel bar in it that i believe holds it in place but its not attached and when i try to fold the front down and use the 2 tabs it just pulls back out ..so i made a thing. so after a heap of gluing ....clamping...welding this is what i have. its starting to look much better and i might just save myself the hassle/cost of another one...just need to do a bit more with the top front lip and the little bits on the side....but im pretty happy with it so far.
-
Yup
-
Yes live plates...all on hold.
-
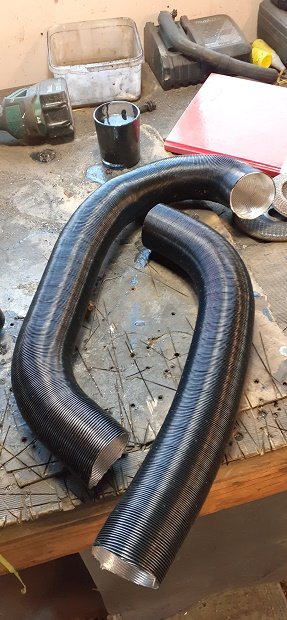
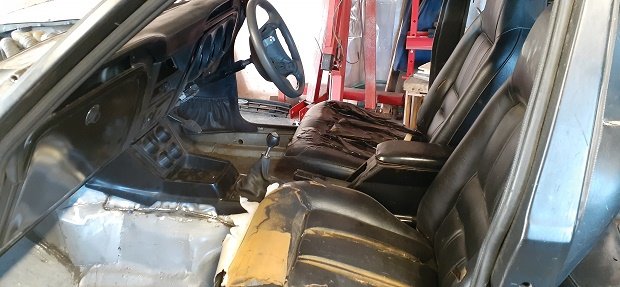
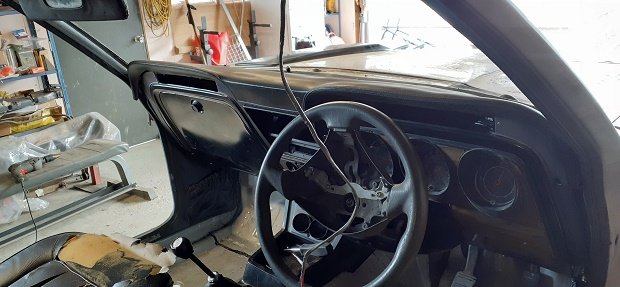
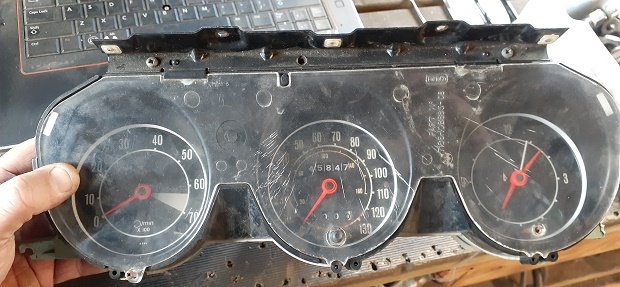
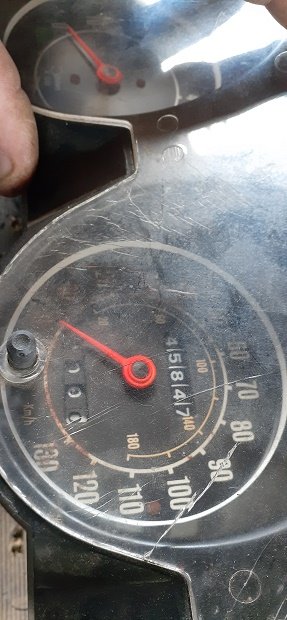
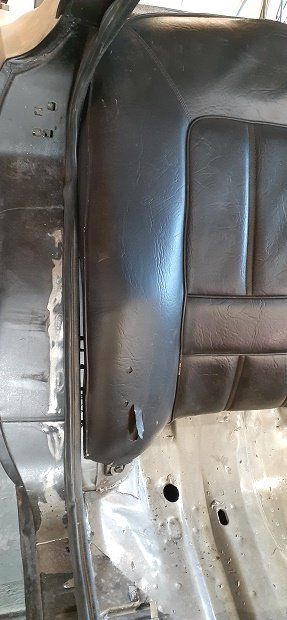
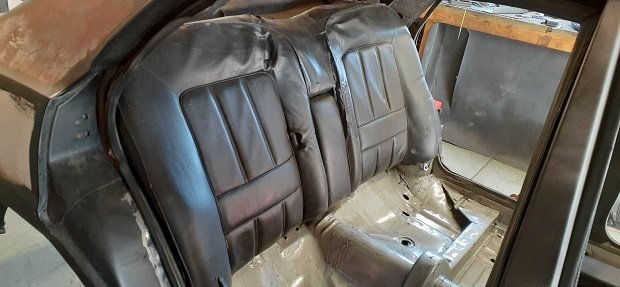
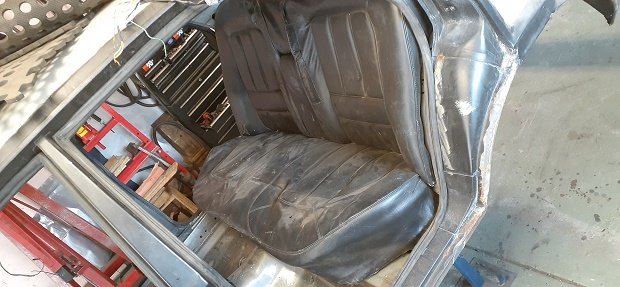
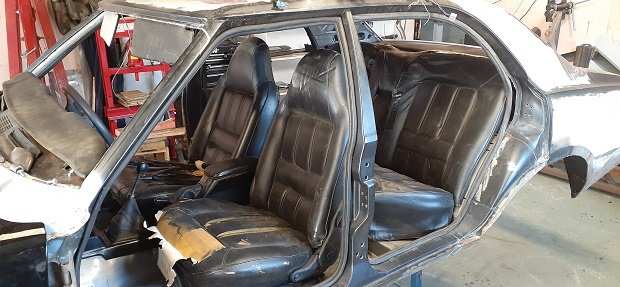
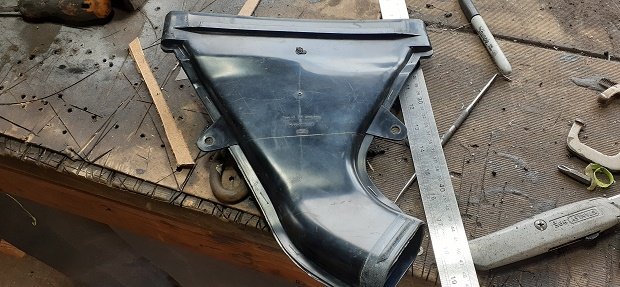
the past few days ive been working threw the interior to see what i have and dont have...make sure it all fits and bolts in and out with ease . starting with the vents...passenger side (still waiting on some ducting to turn up) drivers side pedal box,EPS and braces all in dash panel bolted in very easy now all mounts have been made. center dash brace,panel and cut down ashtray center gauge console and gear knob (found it in the parts ..think its a GT one ) hand brake console glove box (well door anyway ) dash pad...its a bit stuffed and doesn't fit very well at all will try and get another one (or even pull it apart and see if i can do something with it. same with the gauge cluster ..might try and find another or some parts maybe ..(some mounts are broken .screen is cracked and the speedo looks like its has rust lol) kick panels trimmed to fit B pillar covers ...found some in good condition the rear seat upper wouldn't fit because of the mini tubs ..( i had read people had issues with them after tubing..makes sense really ) so i cut 20mm out of each end and welded the springs back on.....fits perfectly now. same with the base ...trimmed 15mm out of the back brace and bent it in and welded it back up.. as for the front seats there is about 6 million holes for them and the 1 i needed........no captive nut. so i had to use a bit of wire to pull a bolt threw and weld it captive. found the best 2 sun visors i had and an interior light
-
Good point... Not a 100% sure on the vents in the bonnet...bug was 100% sure about removing them from the bottom of the screen. Will think about it tho
-
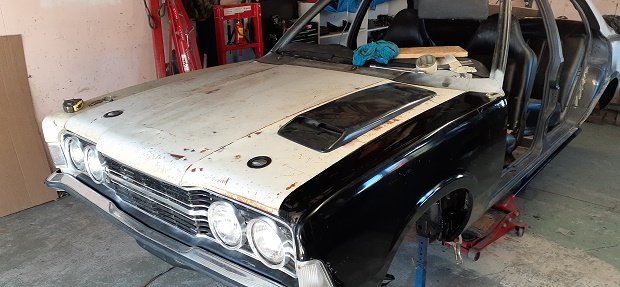
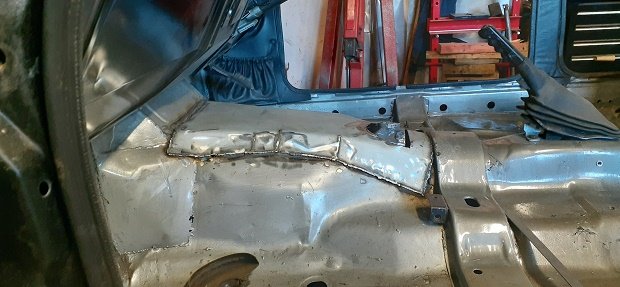
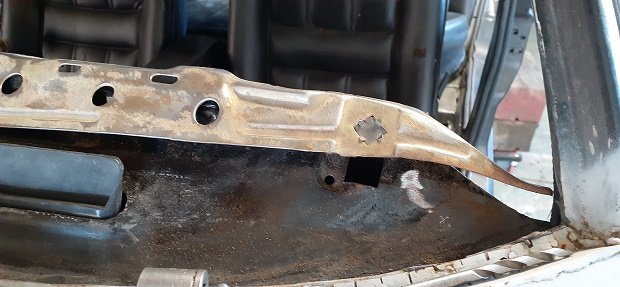
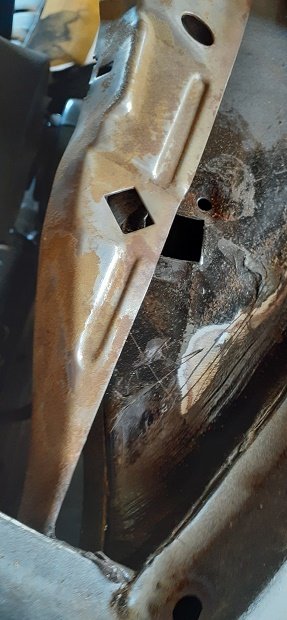
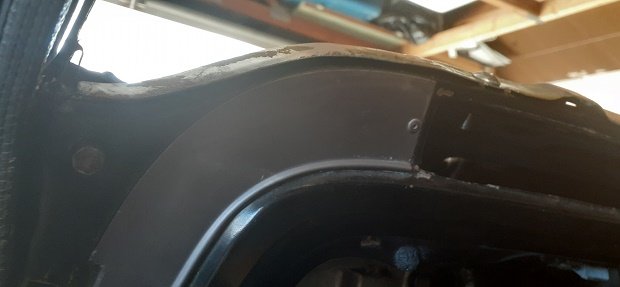
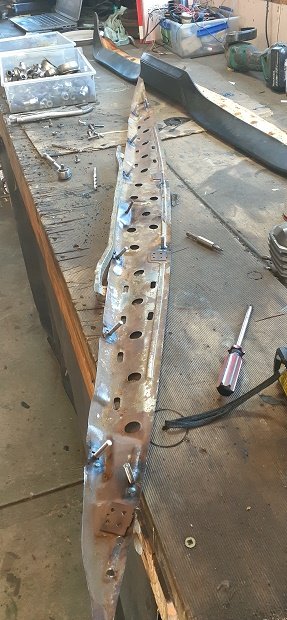
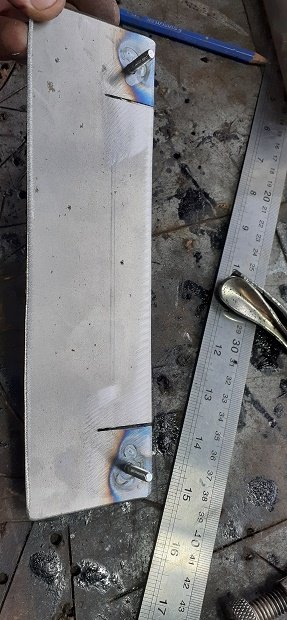
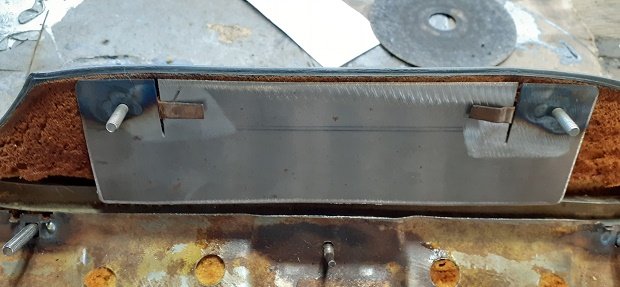
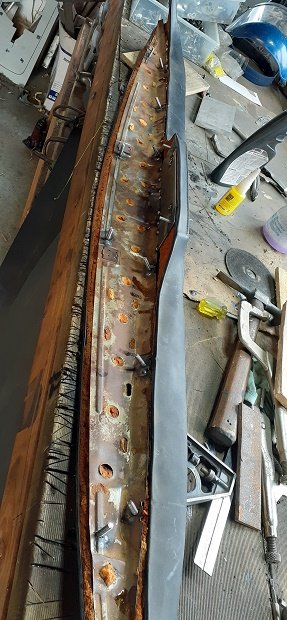
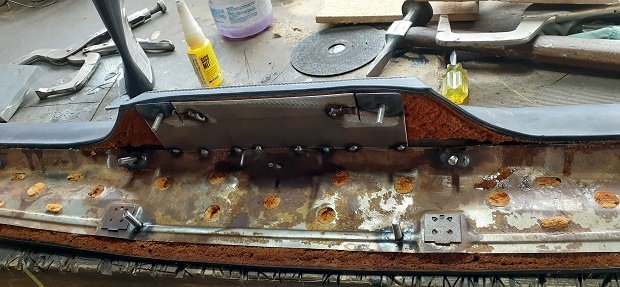
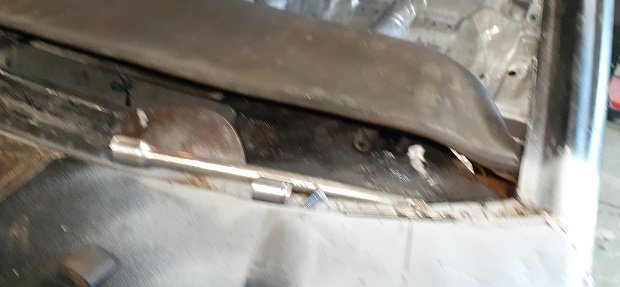
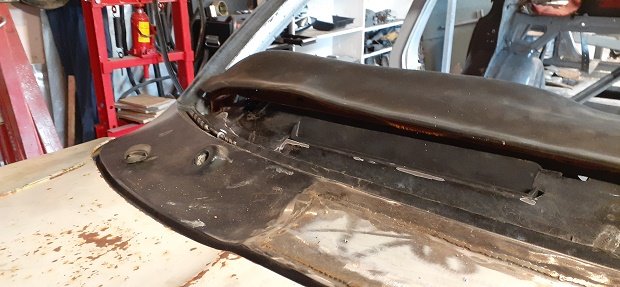
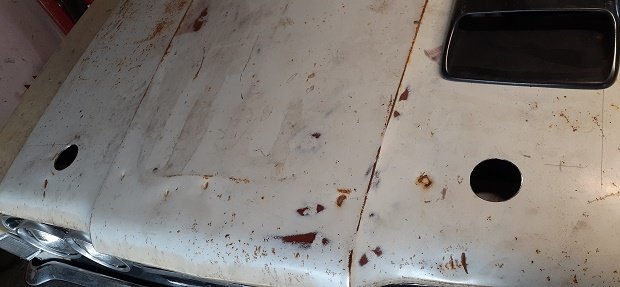
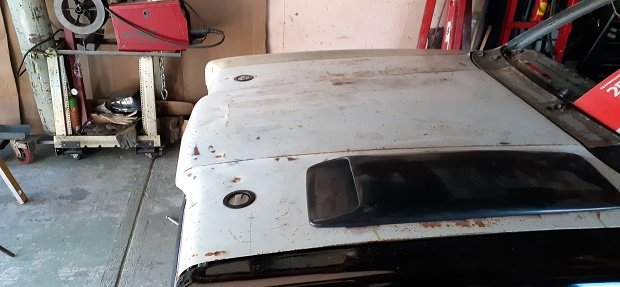
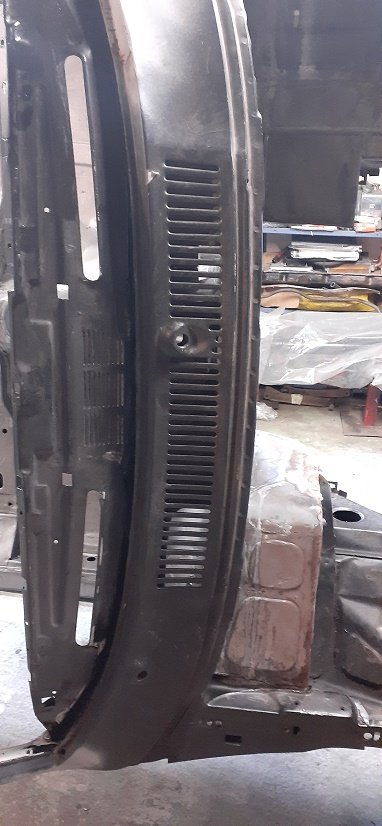
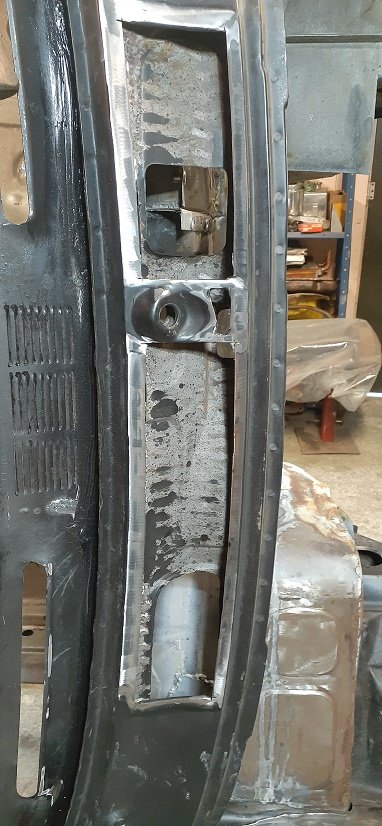
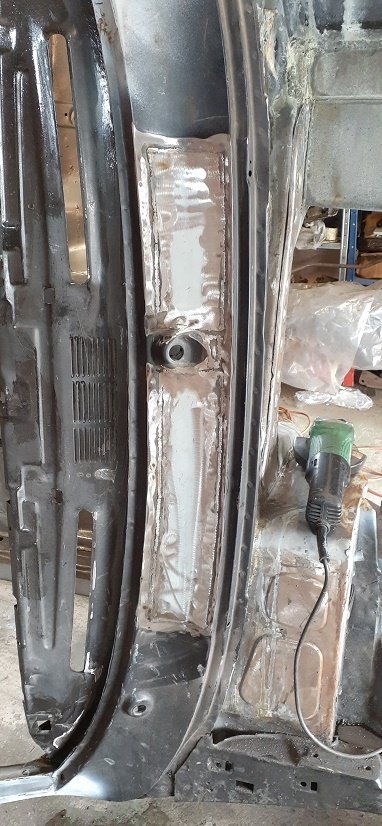
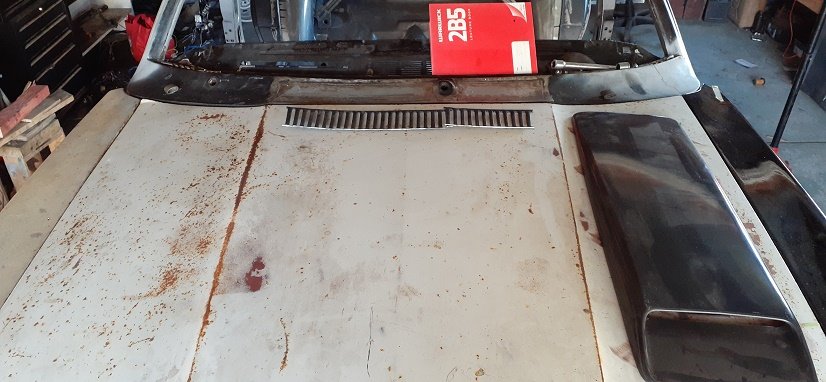
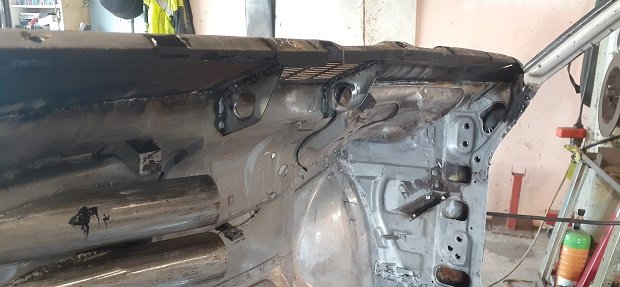
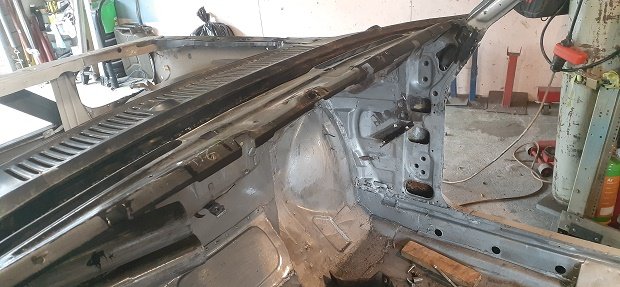
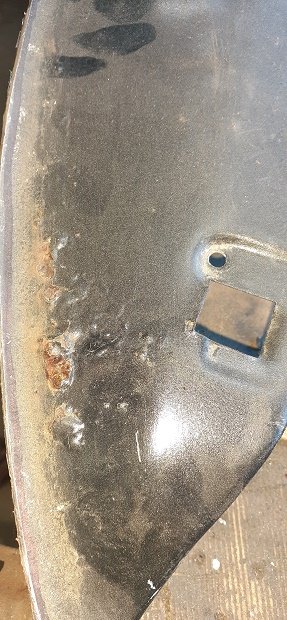
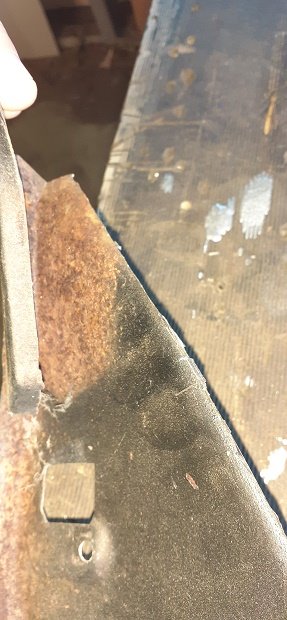
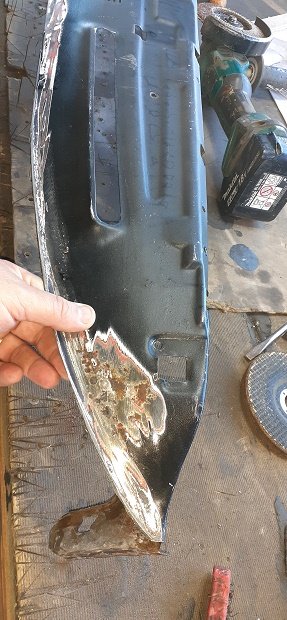
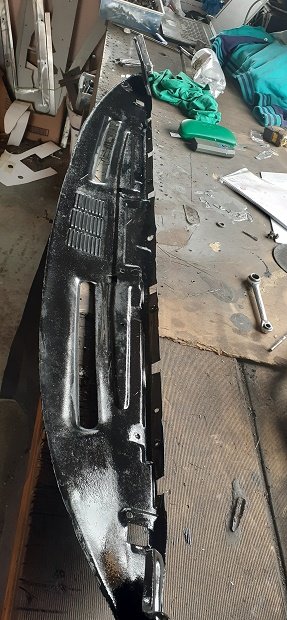
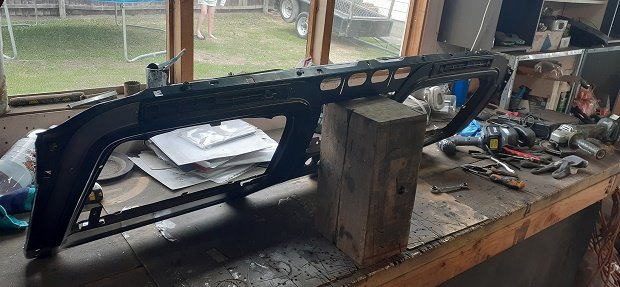
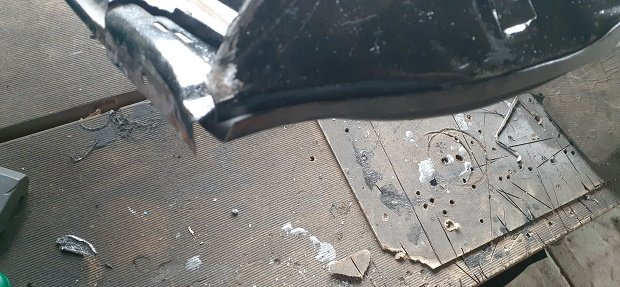
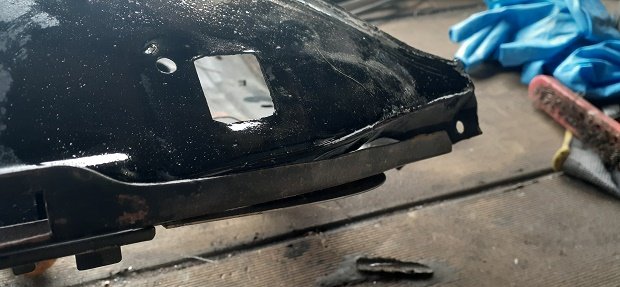
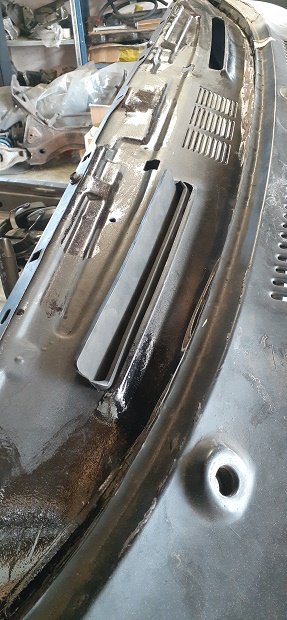
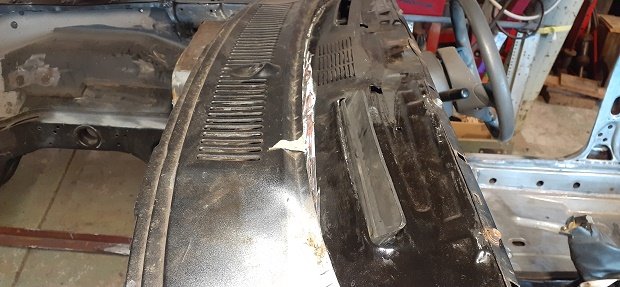
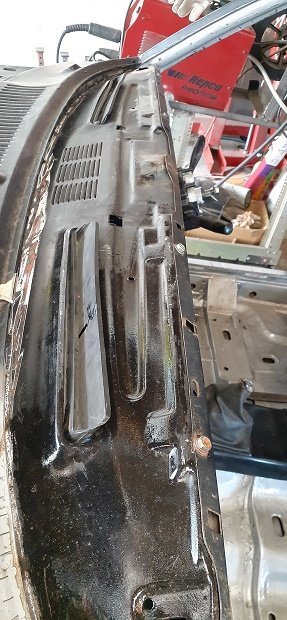
i cut out the vents ..mainly as the water that gets in there is the main cause of leaks ive found and the other reason is its almost blanked off from the engine bay any way. i then welded them up im thinking about moving the vents to the rear of the bonnet so the heat escapes better i then got around to cutting some holes in the bonnet and fitting the falcon GT bonnet locks. and after having to straighten the slam panel (wood and a FBH) ..straightening the bumper and mounts..physically straightening the front of the black guard ..making mounts for the grill...thats the front almost all sorted.
-
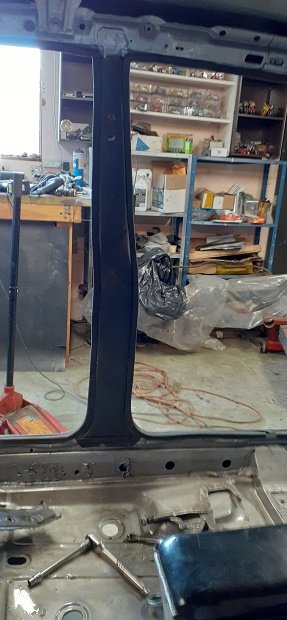
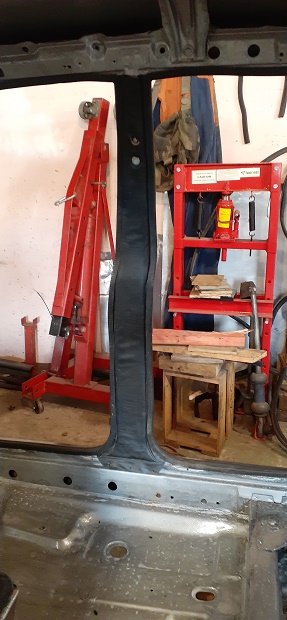
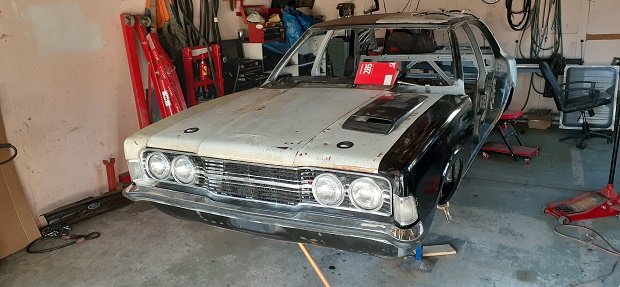
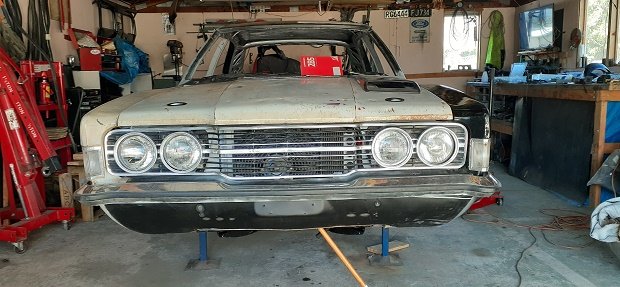
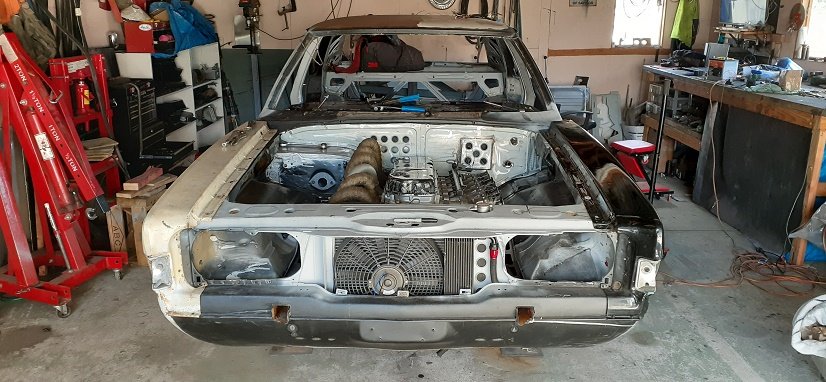
so im starting to run out of parts and things to do....so i thought i would put the car in the middle of the garage on axle stands and start putting it together and make a list of things i need and need to do... i cant bolt the doors on and gap them as its best to have the car sitting on its wheels to let it settle ...then gap them all (normally drill 2 small holes in the hinges so when i put at back together after paint i can put 2 small rivet heads in and its a good starting place for gap) but i can start doing the front .. .....and its way out.lol who would have thought cutting all of this out would have warped it to hell.(as much as i tired my best to not let it warp it did) doesn't help that i went from rectangle lights and plastic grill to GT. so after way more hours than i thought i have the guards on and lined up at the front....now i can work on the slam panel to grill fitment.
-
Space is awesome...I did build an esvort van in a single car garage that you had to move to one wall to get down one side......so this is nice now. And I just have the basic tools man....still bend most things over my bench. Lol
-
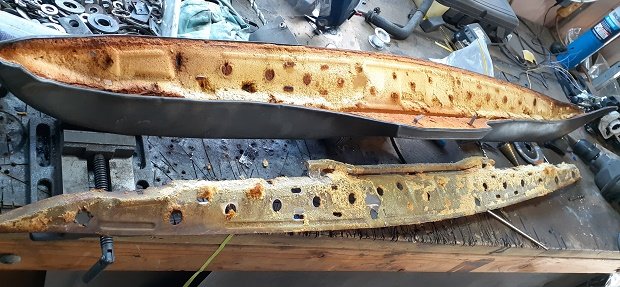
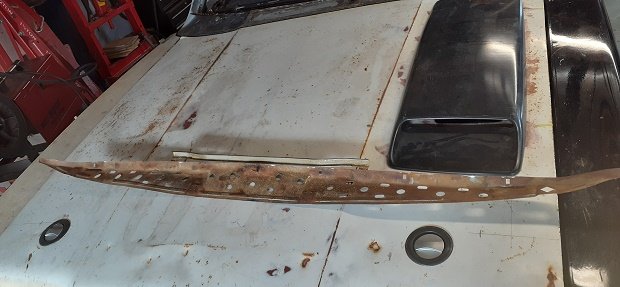
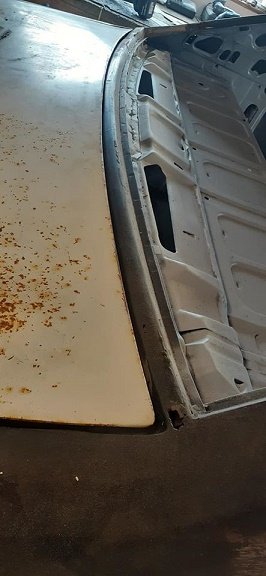
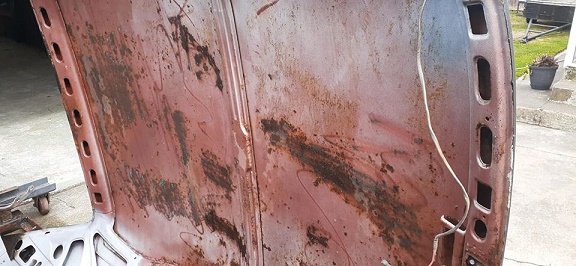
Fixed the few bits of rust in the boot ..straightened the are the boot lock bolts to..straightened the boot rubber lip and aligned the boot itself... Degresed the boot...metal prepped and coated in POR15.. While aligning the boot I found that strip between the bottom of the window and the top of the boot isn't very good...so once the world goes back to normal I'll have to find one....( cant get rust repair panels for that) so will have to come off another shell
-
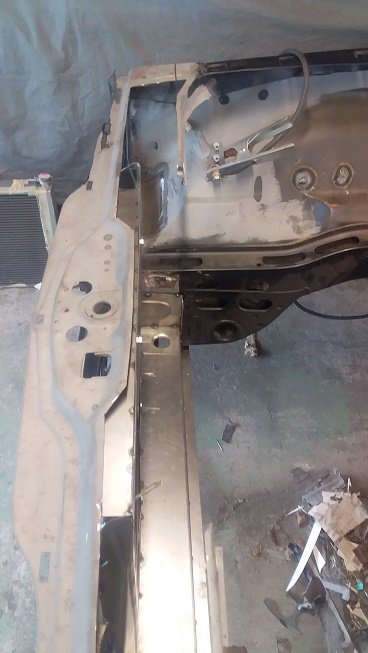
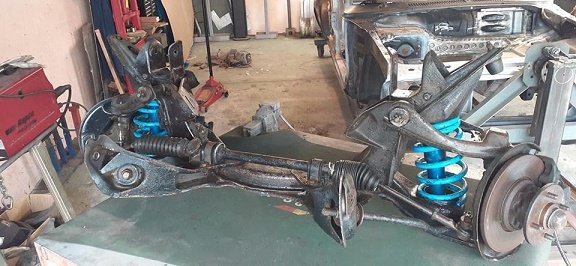
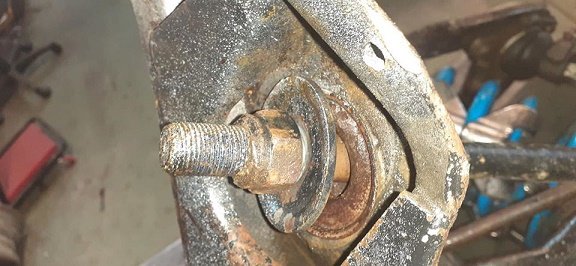
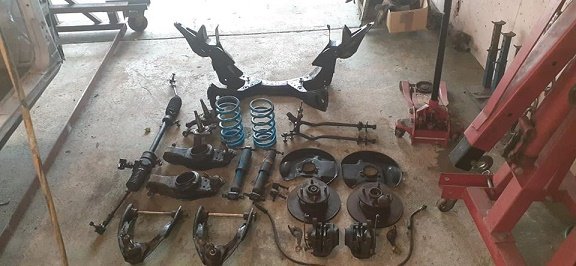
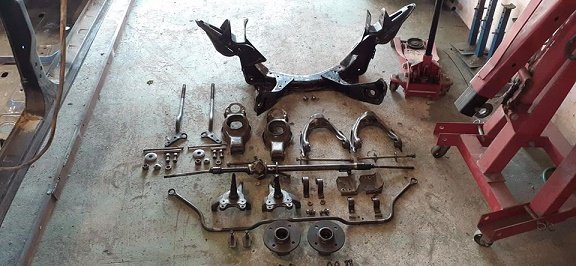
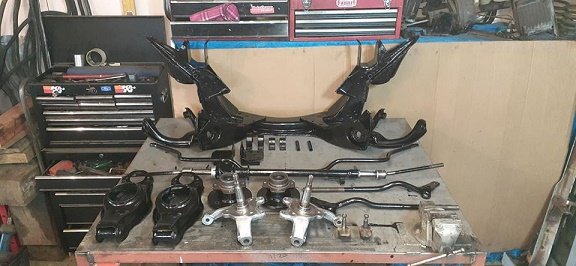
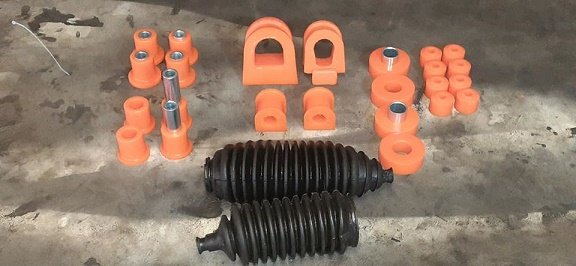
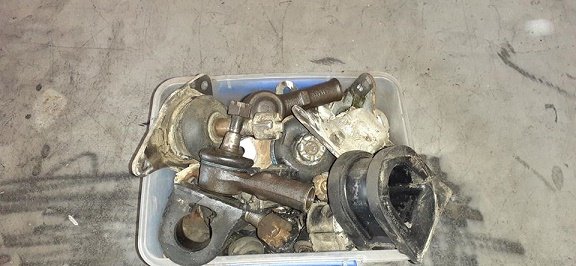
decided to have a play with something other than rust /welding/cutting/making.......turns out pulling a 44 year old front end isn't as easy as undoing some nuts. the front end most of the bolts had to be cut and studs pressed out..most of the bushes were none existent .(i have a set of bolts front another front end ) all stripped down after a couple of days with wire wheels on my drill press and some de greaser and a wipe down and coated in POR15. i bought a full bush kit last year and found 2 good condition steering boots in my parts shelfs and all rebuilt with what i have ...still need to get some new tie rod ends upper and lower ball joints and decide on discs and what calipers to use......and some split pins and thats the front end completely done.........once the world returns to normal. and the crap left over.
-
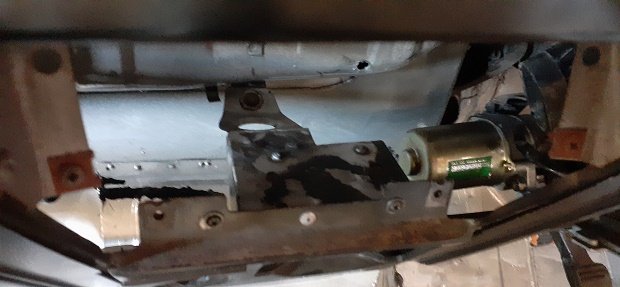
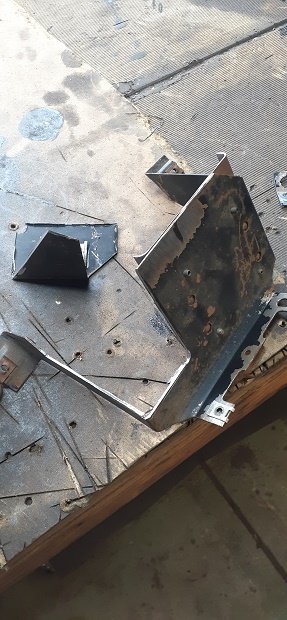
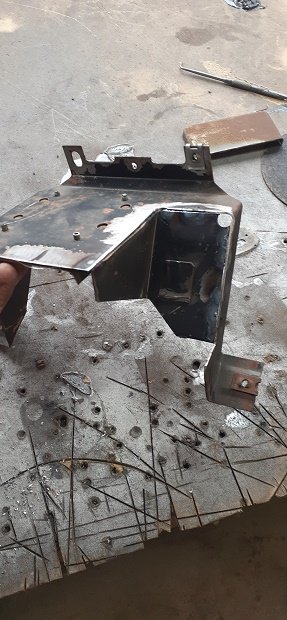
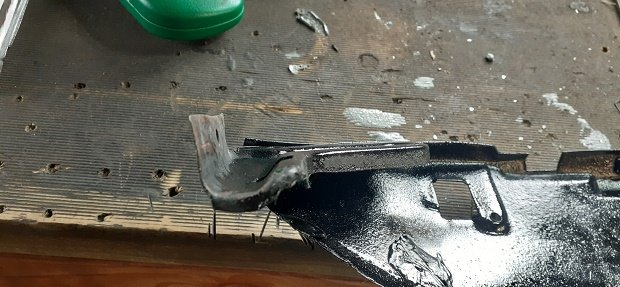
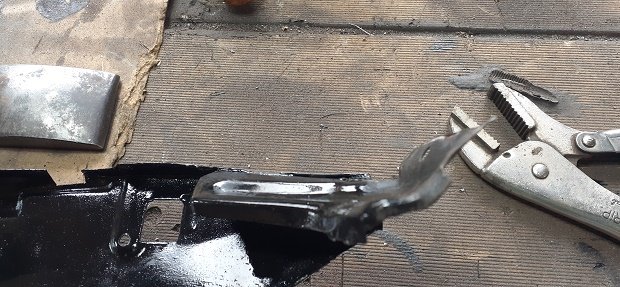
just had to finish a few things for the dash off.. 1st was the bracket/brace behind the ashtray ciggy lighter..also where i put the wiper motor...so needless to say it doesn't fit anymore i had to cut it up a bit so that i can fit the wipermotor, and heater ducting .not to worried as i plan on putting a usb socket whet the ciggy lighter is and a dock for my phone in the asstray, . made a small bit to weld to it and screw to factory mount on firewall made 2 more for the brace the dash top sorted the mounting points for the pedalbox steering column brace. all stripped back out and tomorrow on to another job .....but that was a big one for me to get all sorted.
-
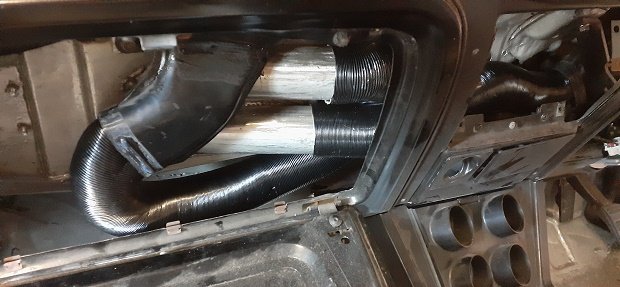
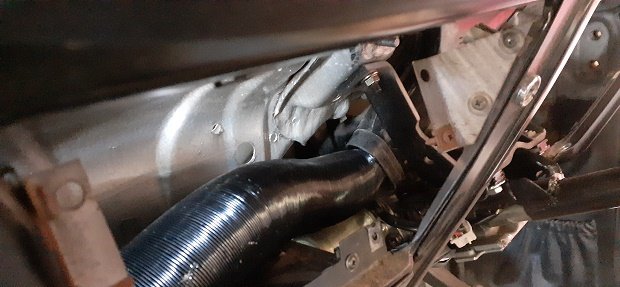
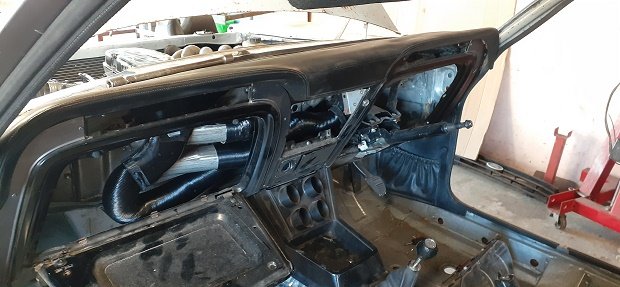
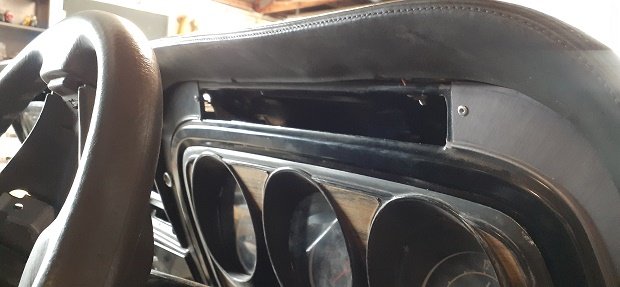
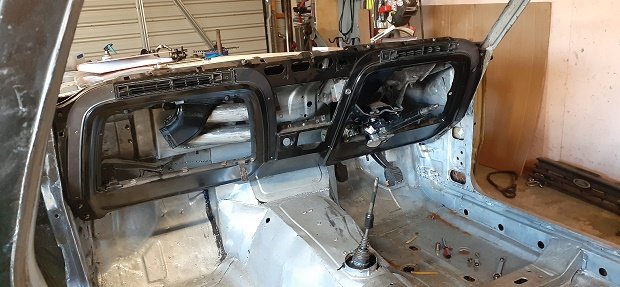
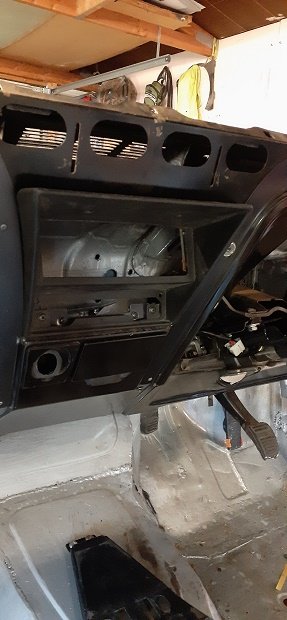
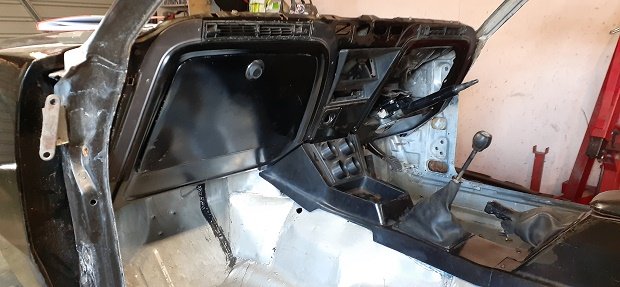
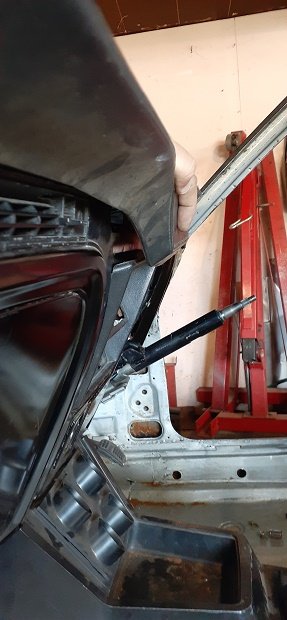
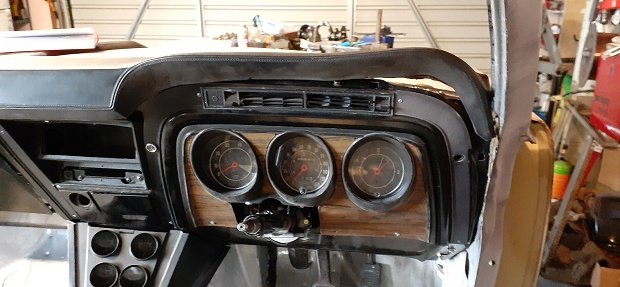
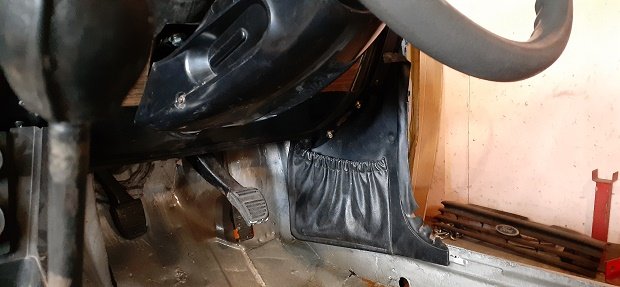
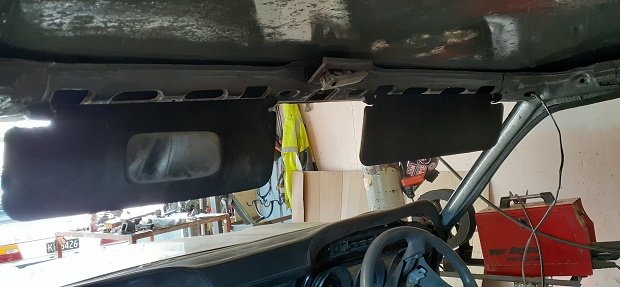
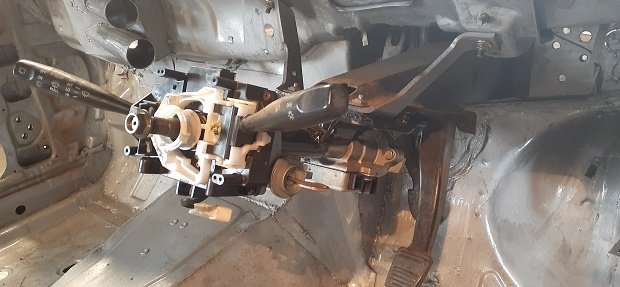
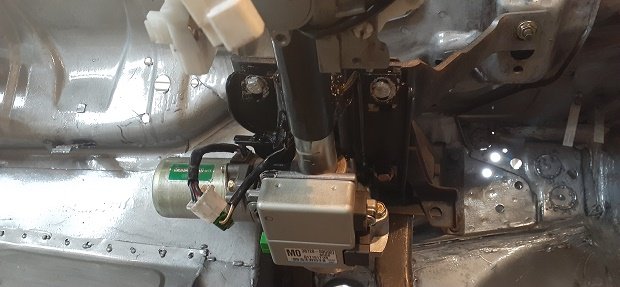
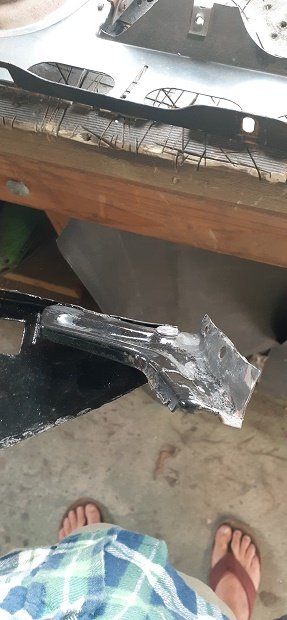
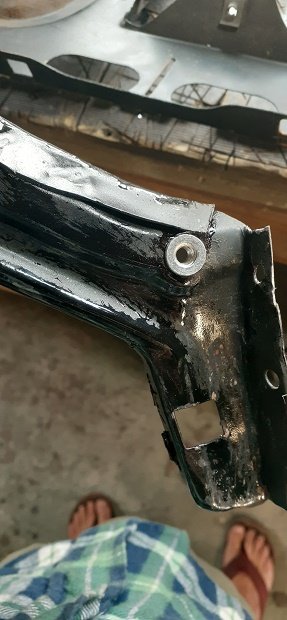
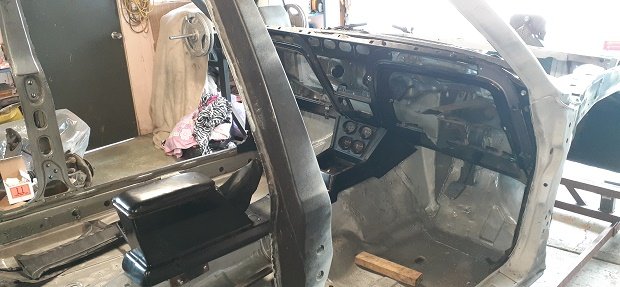
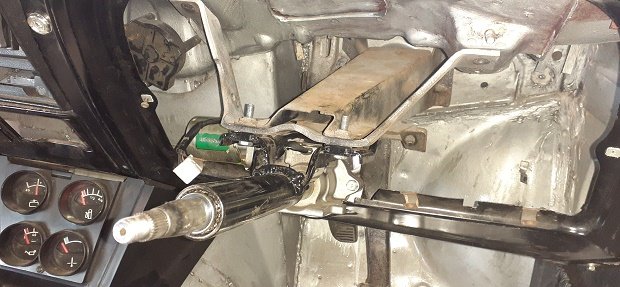
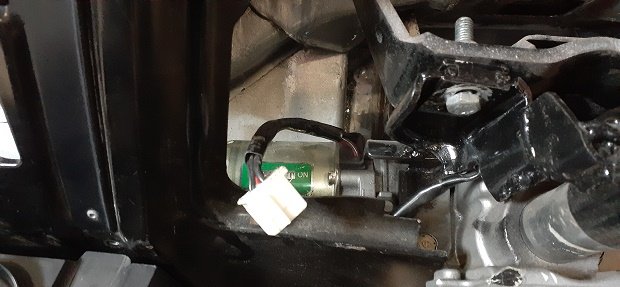
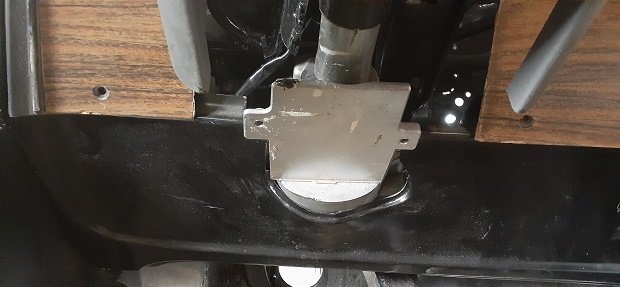
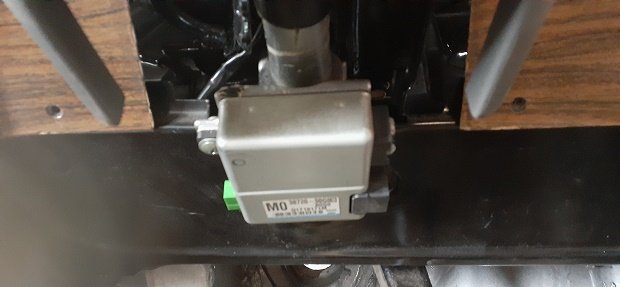
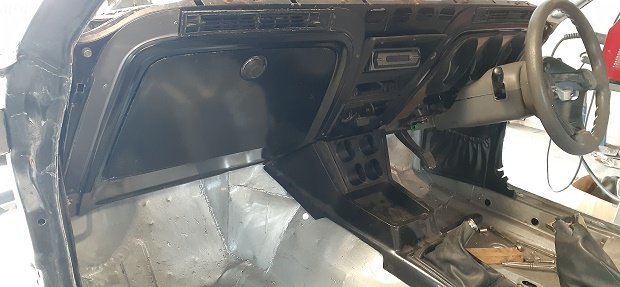
so for day 2 and 3 of the lock down ive been playing with fitting the pre-facelift dash to be 100% honest i was starting to wish i had never taken the old dash out... i had made the heater box,moved the wiper motor to a position under the dash and made the power steering column all for the face lift dash (way more room) and it was doing my head in thinking i might have to make it all from scratch again. but its almost all done now and i love it....still got to take it apart again to weld up and add 2 brackets to top dash panel support.......but you would never know its not in factory position. so i started having to remove the 2 brackets from the dash panel top support..clean it up , wire wheel the rust,metel prep and the POR15. then i had to get the dash panel ready but when i went to bolt the top support on (wanted to bolt it all up and then put it in the car) i noticed that one side was way out (last week i found it on the floor so at some point it must have fallen off the shelf and bashed 1 end around) the good end the bad end so once i straightened the best i could..i added a rivnut each side to add 1 more bolt each side for support. now the base of the dash panel bolts up to a bracket where the kick panel sits on the side...the brackets are old and rusty and i lost one of them ....so i cleaned up what i had and made new brackets ..bolted them on before it went back in the car. i put the wiper motor back in so when i put the dash back i can see if its going to clear everything. i had to bolt the center console in as the gearbox tunnel has been modified and shifter hole move back a bit..so i bolted that in place then mounted the read handbrake section .. then tacked the top of the dash support around the window edge in..and pulled the bottom of the dash out to meet the center console....so it all looks factory. next i had to mount the pedal box and brace so that i could mount the power steering column (talk about that a wee bit down the page.)..so i can start sorting the screen vents(only have demisters no other heating...) drivers side vent went in pretty easy and should work well. passenger side....not so much (didnt think it would with the heater box in there aswell.).so i had to cut it up and swap it around and move it out a bit.(glued and seam sealed as well) once the world get back to normal ill be able to get some duction and try them out. next electric power steering...honestly thought i was going to have to cut the dash panel for this.but its a bloody good fit...the motor is hidden...the column sits in the factory cortina hasd recess ...and even the controller can bolt back in factory spot then i fitted the gauges to check clearance and glove box to check that side.....(the glove box does shut but i had to remove the inner..i did think that would be the case .but im just going to have access to ecu , wideband and water pump controller behind it. im very happy with it and big job ticked off the list.. i just need to take it all apart and finish welding it up and make to support brackets .
-
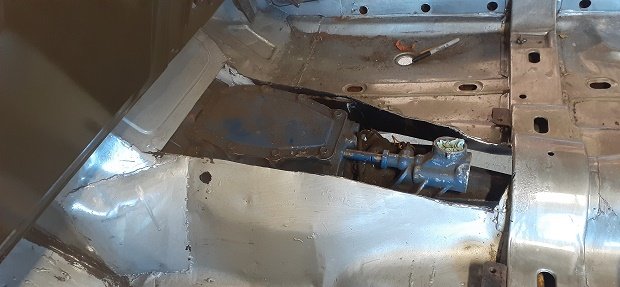
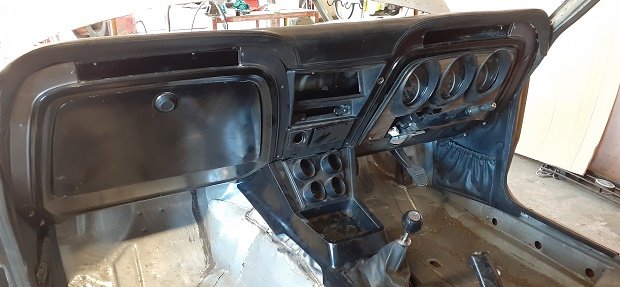
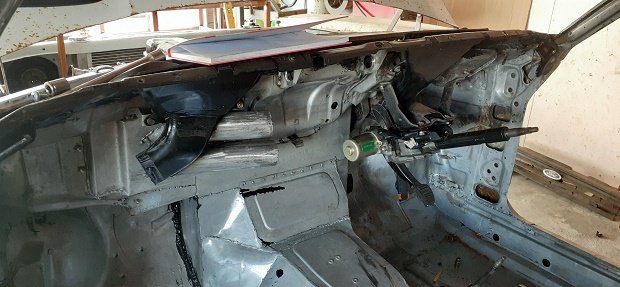
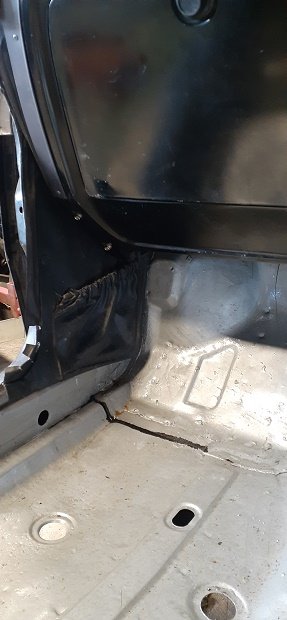
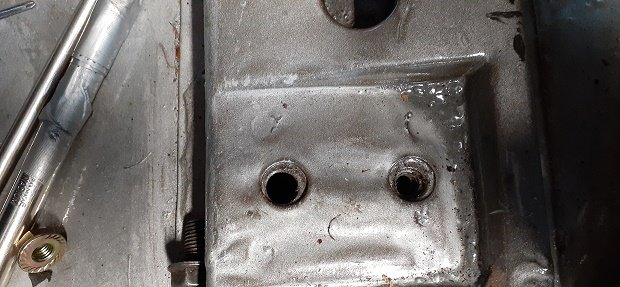
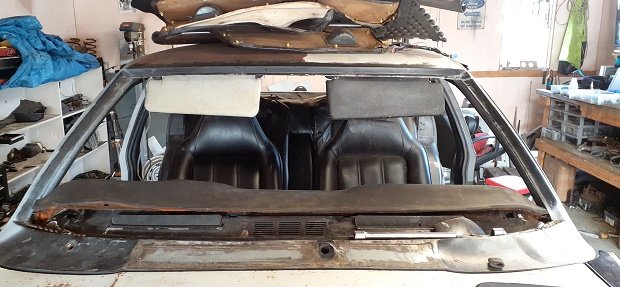
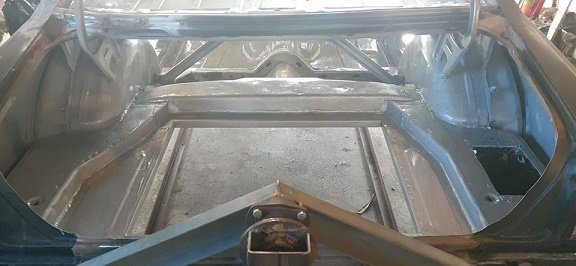
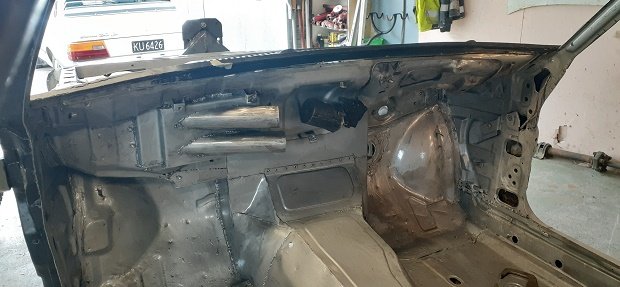
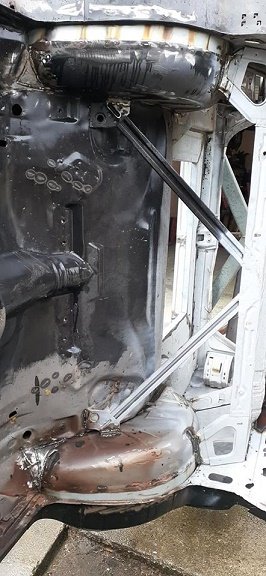
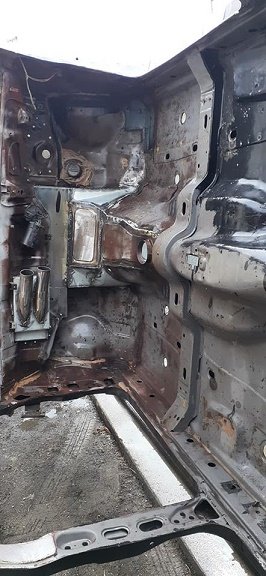
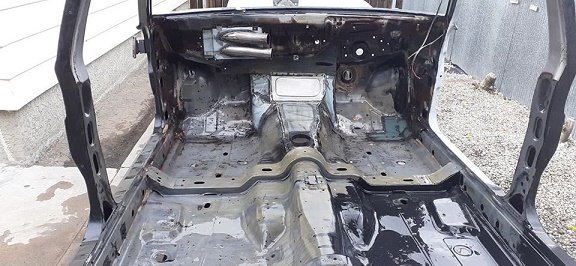
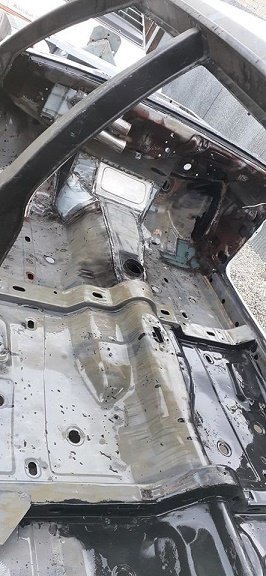
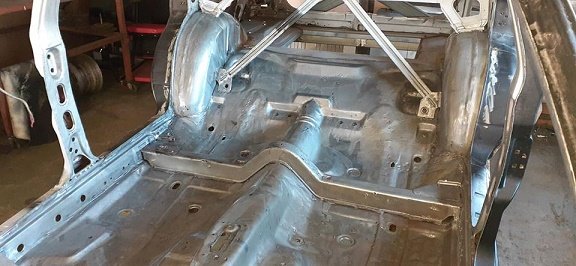
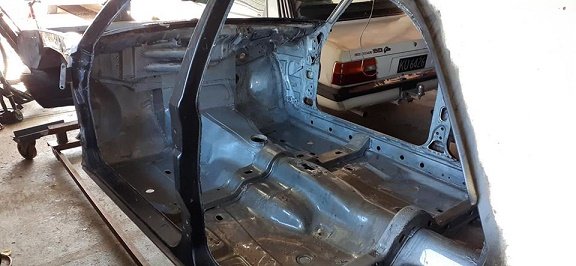
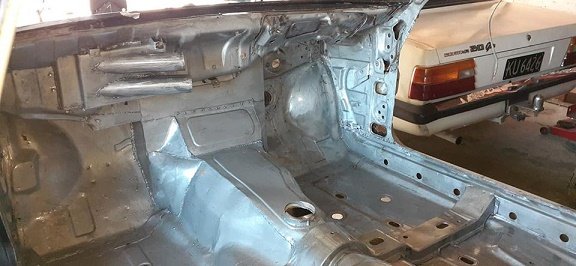
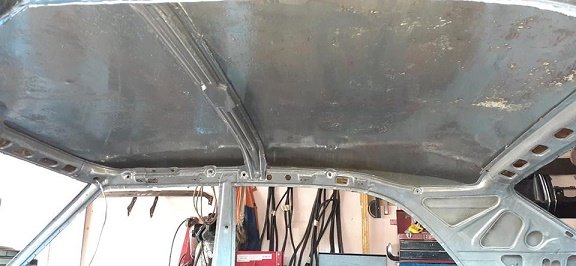
soooooo it looks like im going to have time on my hands...being in lockdown for a month. so i started getting somethings done......like the cabin area ..i wanted it all painted in the dash are so i can start fitting the dash back in. so i started with pushing it outside and washing it down with degreeser . after the metal prep and another wash down. and then a coat of POR15 in silver.....had some left over from a few i bought a while ago. nice and clean...
-
Some absolute fuckwhits are putting the starter in the bell housing now.....