
Thousand Dollar Supercar
-
Posts
2,030 -
Joined
-
Last visited
-
Days Won
3
Everything posted by Thousand Dollar Supercar
-

Thousand Dollar Supercar's old piano
Thousand Dollar Supercar replied to Thousand Dollar Supercar's topic in Other Projects
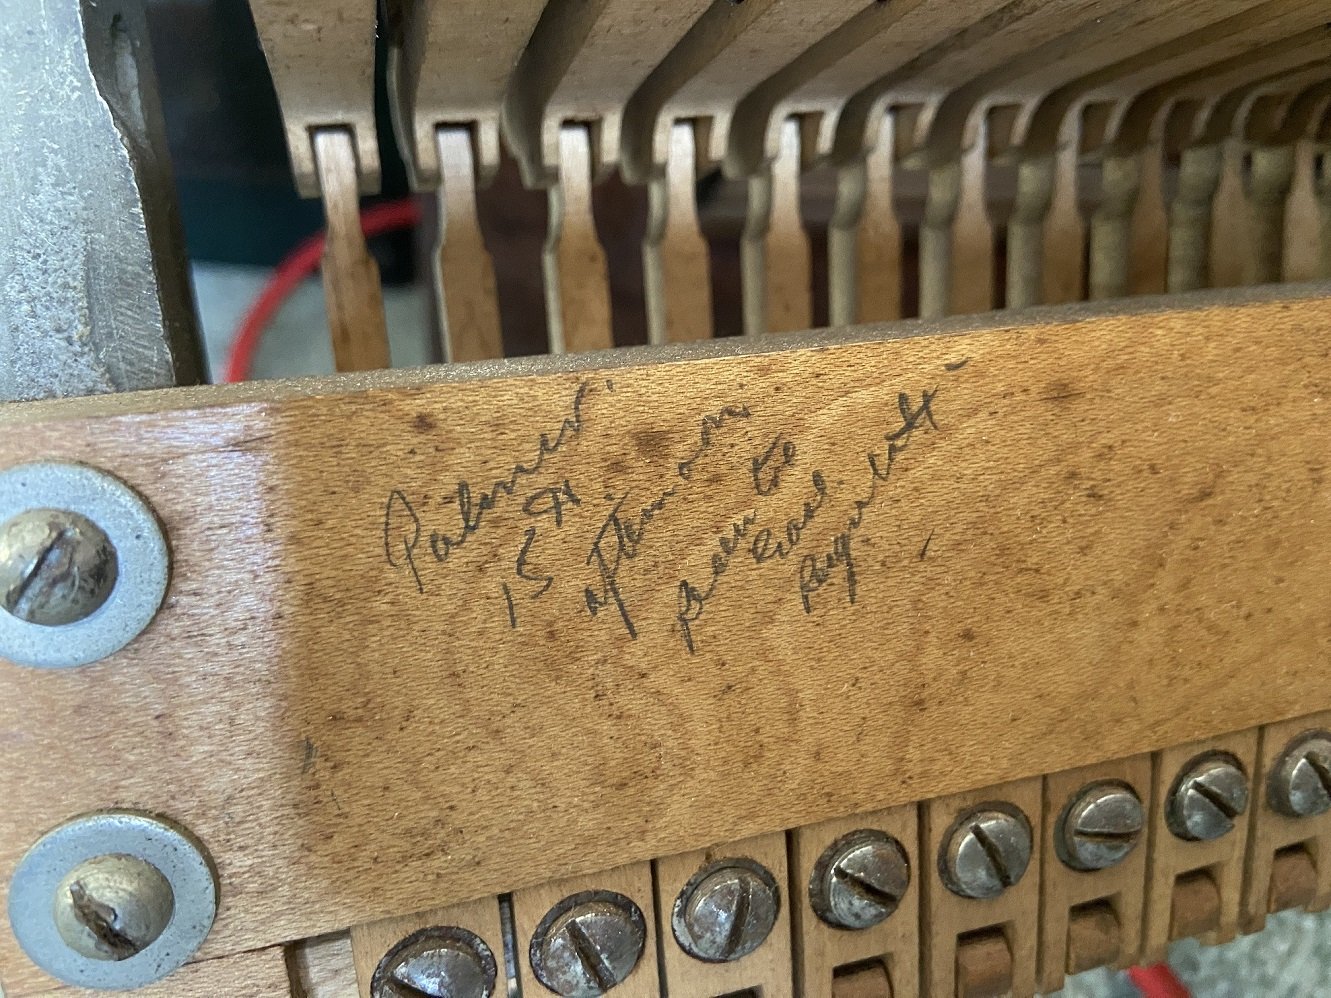
Interesting. A guy from my industry randomly decided to retrain as a primary school teacher, but he didn't last long in the field. I used to flat with a primary teacher years ago, and I remember her making strong vodka jellies to take to school and share around the staffroom at lunchtime - presumably those helped the teachers get through the day. I had David Jenkin assess my piano years ago. I found it interesting and I was sorely tempted to throw money away on a rebuild, but instead I bought a new piano for some reason. Now I have two pianos, because of course I can't get rid of the old one. More than a decade ago I was already finding it difficult to book piano tuners - they were busy, which meant they would tell me their one and only available time slot a month or two in the future, and I'd have to make that work. Then they'd decide to specialise in tuning expensive Steinway grands and stop accepting jobs for old British uprights. The piano tuner I use now is someone I was forcibly transferred to when my previous tuner basically said he was too busy. She's not the norm for the industry as she's about a decade younger than me. She was able to bring forward her return visit to finish the hammer bushing replacement to earlier this week. So that work is mostly done now, but it has an annoying short-term downside - as Tim Finn would say, what I need is a positive action, but there's a fraction too much friction. Ooo, and I noticed this written on the back of the action: I think it says "Palmer. 15th afternoon Recentre Ease Regulate". Palmer was my great grandfather's last name, and ironically he must have been getting the same work done to the action as I've just had done.
-
Thousand Dollar Supercar's old piano
Thousand Dollar Supercar replied to Thousand Dollar Supercar's topic in Other Projects
"If ye don't tek yer meat, ye can't tune any piano! How can ye tune yer piano if ye don't tek yer meat?" I have a tuning hammer that I bought online, and I could probably do an OK job with the aid of an app, but I'll save that for when I move out of Auckland to where there aren't any tuners. Until then, I know I cannae match fahrty yeers of expeerience in any wee, shepe or farrim. Barglaralarrum. -
Thousand Dollar Supercar's old piano
Thousand Dollar Supercar replied to Thousand Dollar Supercar's topic in Other Projects
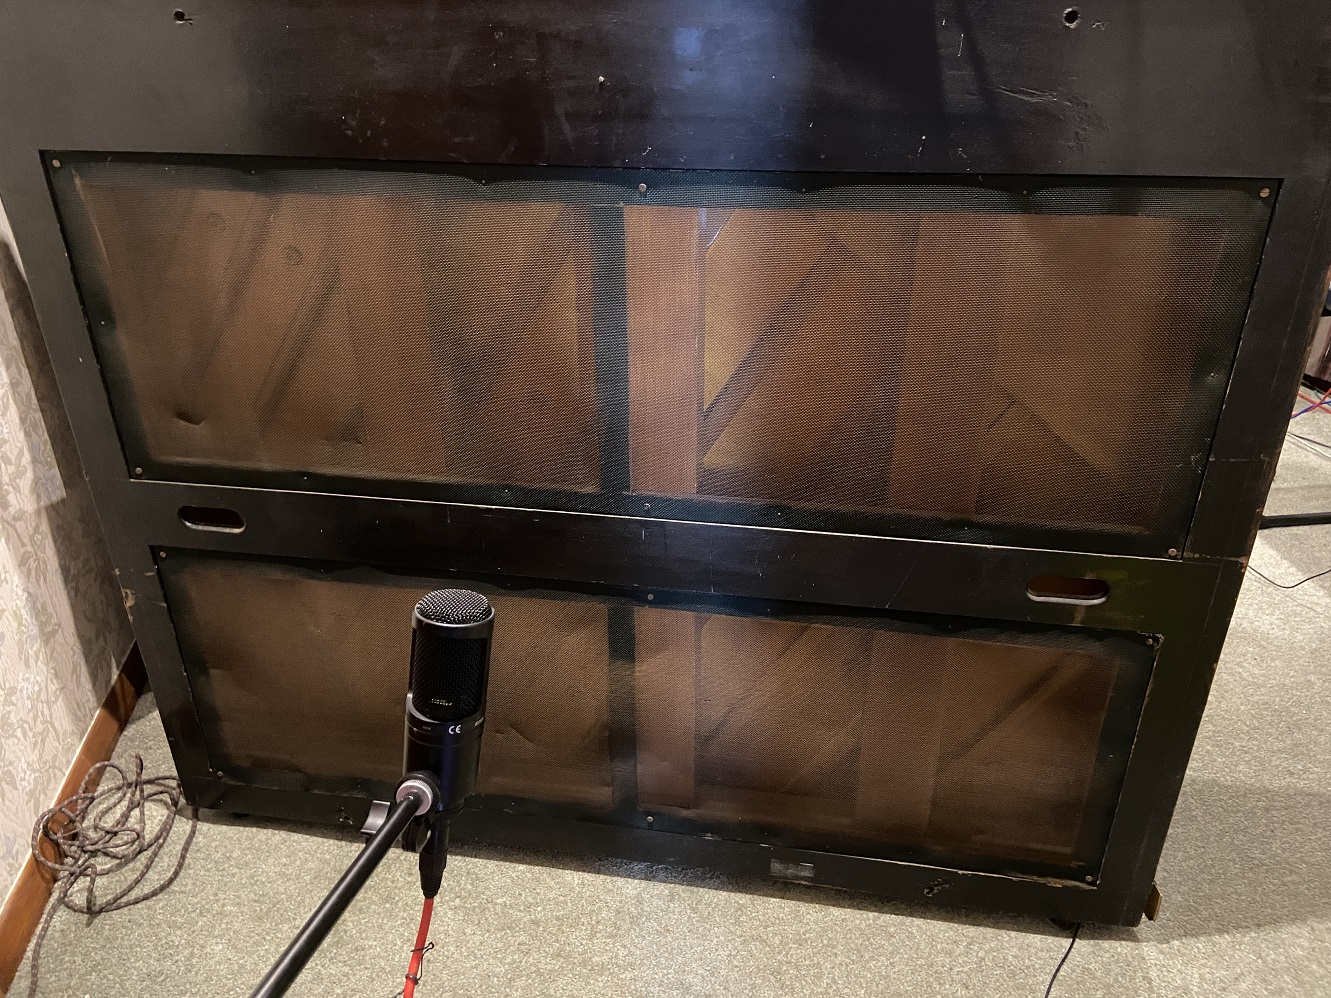
I'm behind schedule on this and I haven't posted anything because of no progress. I put the piano in the middle of the room and set up some microphones. I found that you could hear the rattling of these wire screens on the rear of the piano: I took them off. The next problem was too much typewriter clatter from the piano's action when recording with the upper front panel removed. I know I should expect unwanted noise from something ancient, British and worn out, but the level of rattling was a bit much to be excused as character. With the upper front panel back in place, the mic doesn't pick up the clatter as much but I lose a bit of clarity. So the technician took the whole action away to replace the bushings responsible for some of the clatter, and to reshape the hammer felt to remove the grooves and compacted areas. I got the action back last week, but now it's a matter of working through which new bushings are too tight or too loose, fixing the already-broken bits we found, and fixing the newly-broken bits which resulted from working on something so old. So far the tone and the dynamic range are a bit better. An old piano like this is never going to set the world on fire, but I encountered four other old pianos over the course of Nats and they were all miles worse than mine. The bar is low. I have been tasked with playing the piano and making notes on what's still not right for the technician's next visit in April.
- 14 replies
-
- 13
-

-

-
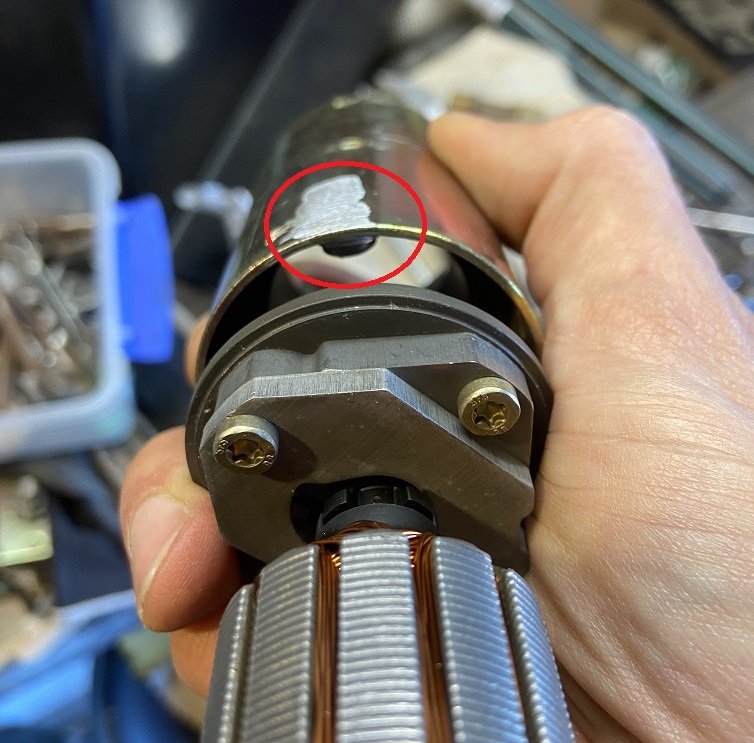
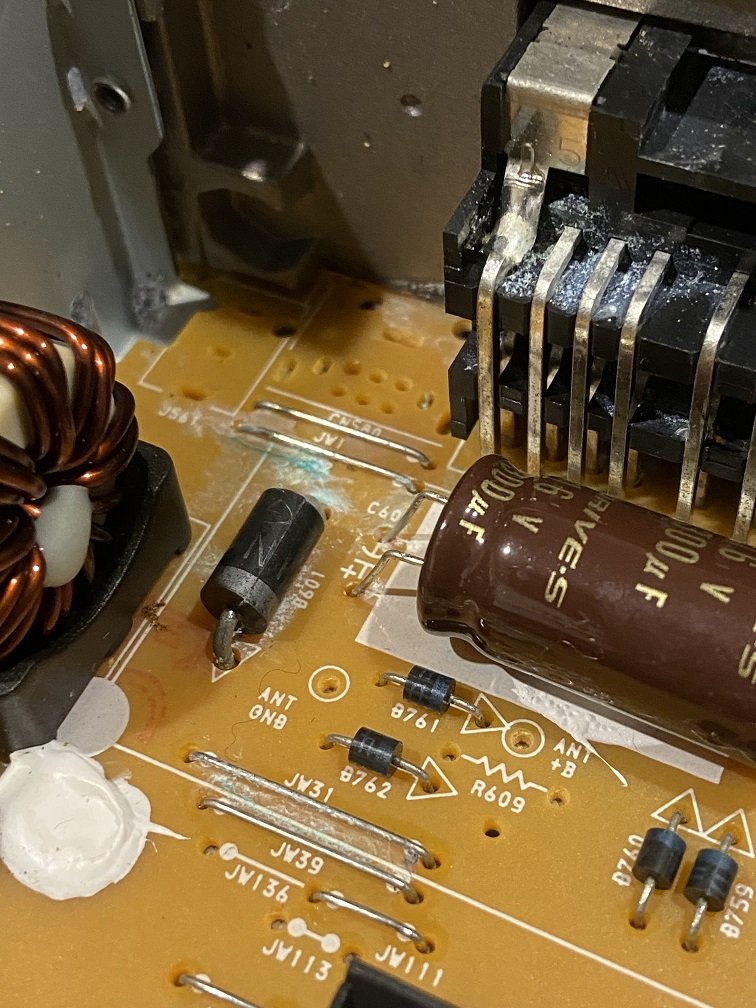
Hmmm… I did notice the commutator was worn but I didn’t notice that bit. I’ll have a look at higher-res photos when I get back from Nats.
-
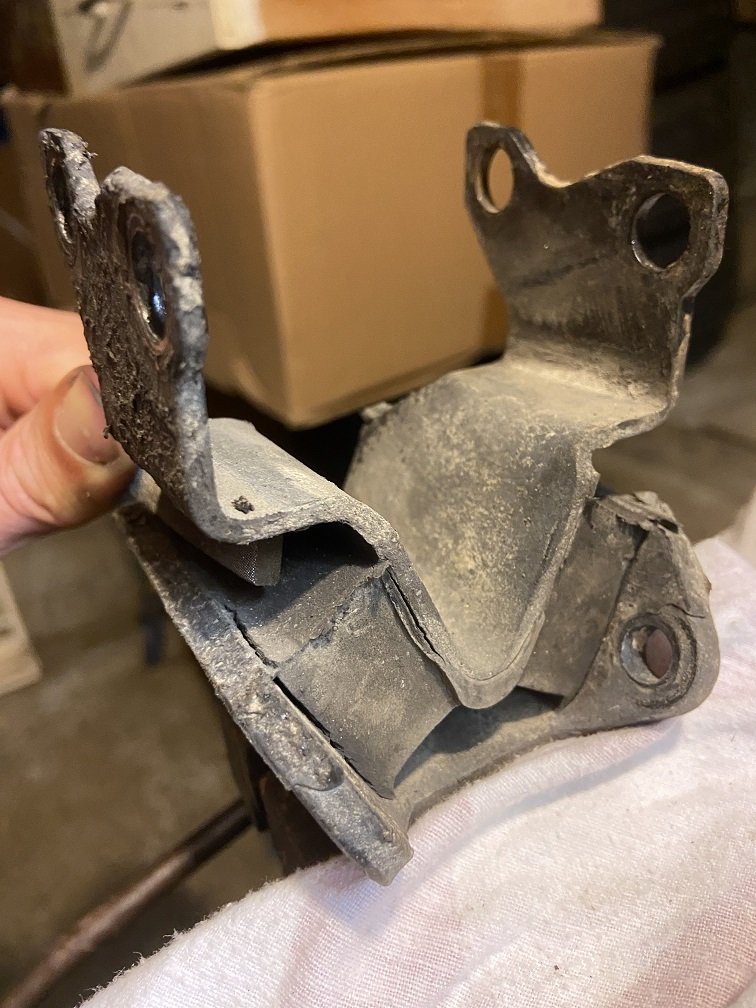
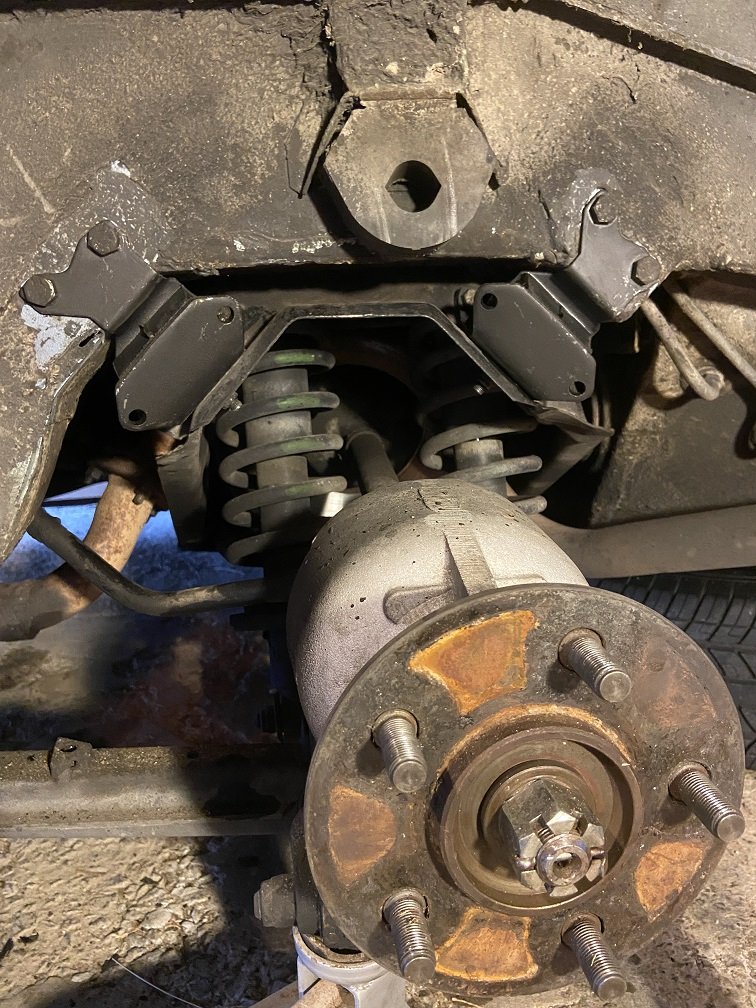
Boring update: I finally changed the rear subframe mounts. Here's the one I had been most concerned about. I had expected to find it in worse shape once it was off the car. Hardly worth worrying about really. This rubber-to-metal bond is the only thing that seems to keep the IRS assembly attached to the car. There is a radius arm connected near each rear hub which twists the whole IRS assembly in its mounts as the car leans in the corners, creating a passive rear wheel steering drunken snake effect. Wikipedia says this "...may result in significantly improved handling". May? Anyway, the mounts can fail from age or too many burnouts, and then you definitely won't have significantly improved handling. In this shot, the two subframe mounts have been removed: You can see the IRS cage thing, the tricky double shocks and springs, the light reflecting off the inboard rear brake disc, the skinny anti-roll bar terminating at the base of the RH spring (not present on all XJSs).... You can also see that I managed to change the mounts without disconnecting anything such as the exhaust, brake lines, roll bar, driveshaft, radius arm etc. I did one side of the car at a time, using a jack and an axle stand. New mounts fitted (this is on the opposite side of the car, to mess with your head): Now that these mounts are done, I'm not gonna be THAT guy:
- 37 replies
-
- 24
-
-
Oooo.. I built a couple of model cars as a kid, and an aerosol of colour-matched paint came with my XJ-S.. But if I can't get around to working on my real car, what business do I have building a model of its V12 sibling? @fuel here's one for you: https://www.trademe.co.nz/a/marketplace/toys-models/models/cars-trucks/classic-cars/listing/4575944007
-
Ford Model T carriage lantern: (hopefully those images allow remote linking) Looks pretty similar. There seem to have been a few variations. Looking at the NZ Model T club photos, often the lanterns don't seem to have that red side light. http://modeltford.co.nz/media/1588/img_4080-copy.jpg http://modeltford.co.nz/media/1574/img_4066-copy.jpg http://modeltford.co.nz/media/1578/img_4070-copy.jpg
-
Welcome to the forum. There can be some weird humour here because many of us know each other from the real world - 20 years of sporadic club events. If you're likely to be doing much of your own maintenance on your Jag, you'll have picked up that I've found Kirby Palm's "Experience In A Book: Help For The Jaguar XJ-S Owner" (a.k.a. The Barry Bible) to be useful. It's a free PDF you can download online. @dmulally sent me a 1992 XJS electrical system PDF too. Be careful treating my build thread as 'useful stuff'.. I'm a dodgy and not-very-enthusiastic amateur, this is my first Jag and I've been finding things out the hard way. This thread is just a diary for entertainment purposes and should not be considered mechanical advice. No doubt someone well versed in these cars would have a hit list of proactive replacements they would immediately perform on an under-maintained, high mileage XJS, and they wouldn't get stranded out of town, stumped by known issues etc the way I have been. FYI we run a system on oldschool.co.nz where only the car owner posts in their build thread. This prevents discussions cluttering the threads. Each car has a corresponding discussion thread, and the discussion thread for my Jag is here:
-
I'm running Nankang N729 235/60R15 on the Jag, which is barely on the right side of half the power and twice the weight of your Gemini. I was going to get them reverse-fitted to hide the raised white lettering if it said 'PRESTIGE' instead of 'RADIAL' - apparently this was the case for certain sizes of N729s at certain times. For a standard classic car, I guess how a tyre handles power is irrelevant - the tyres will always age out before they wear out. In a classic which does low mileage and doesn't have stability control, it would seem to make sense to sacrifice treadwear / noise / efficiency etc for grip, but for whatever reason, that doesn't happen. Treadwear on my N729s is 400.
-
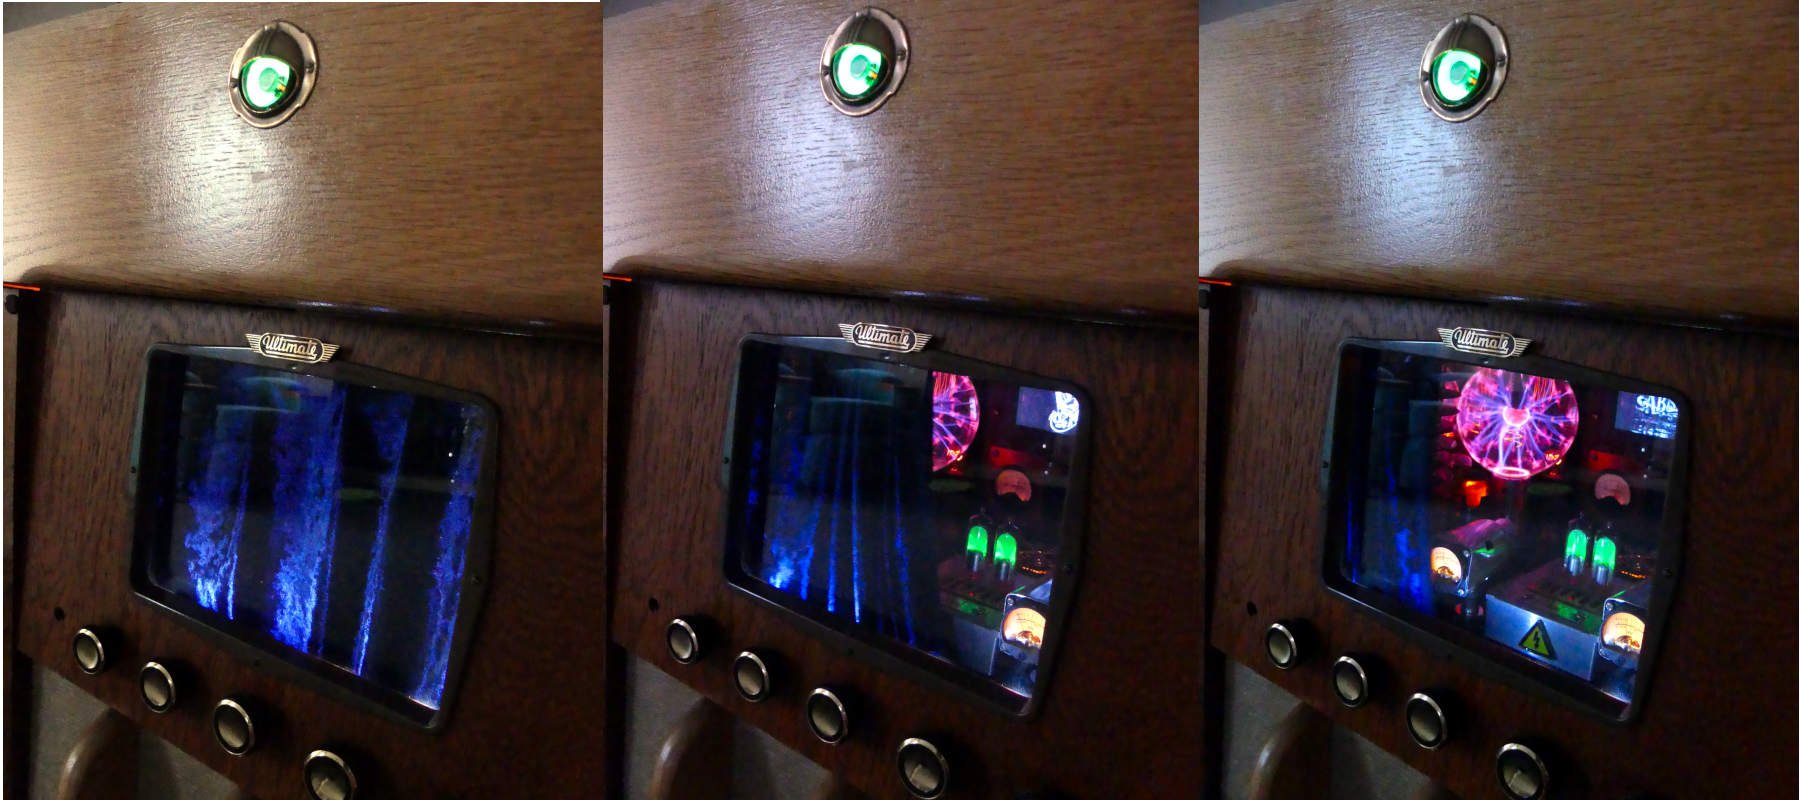
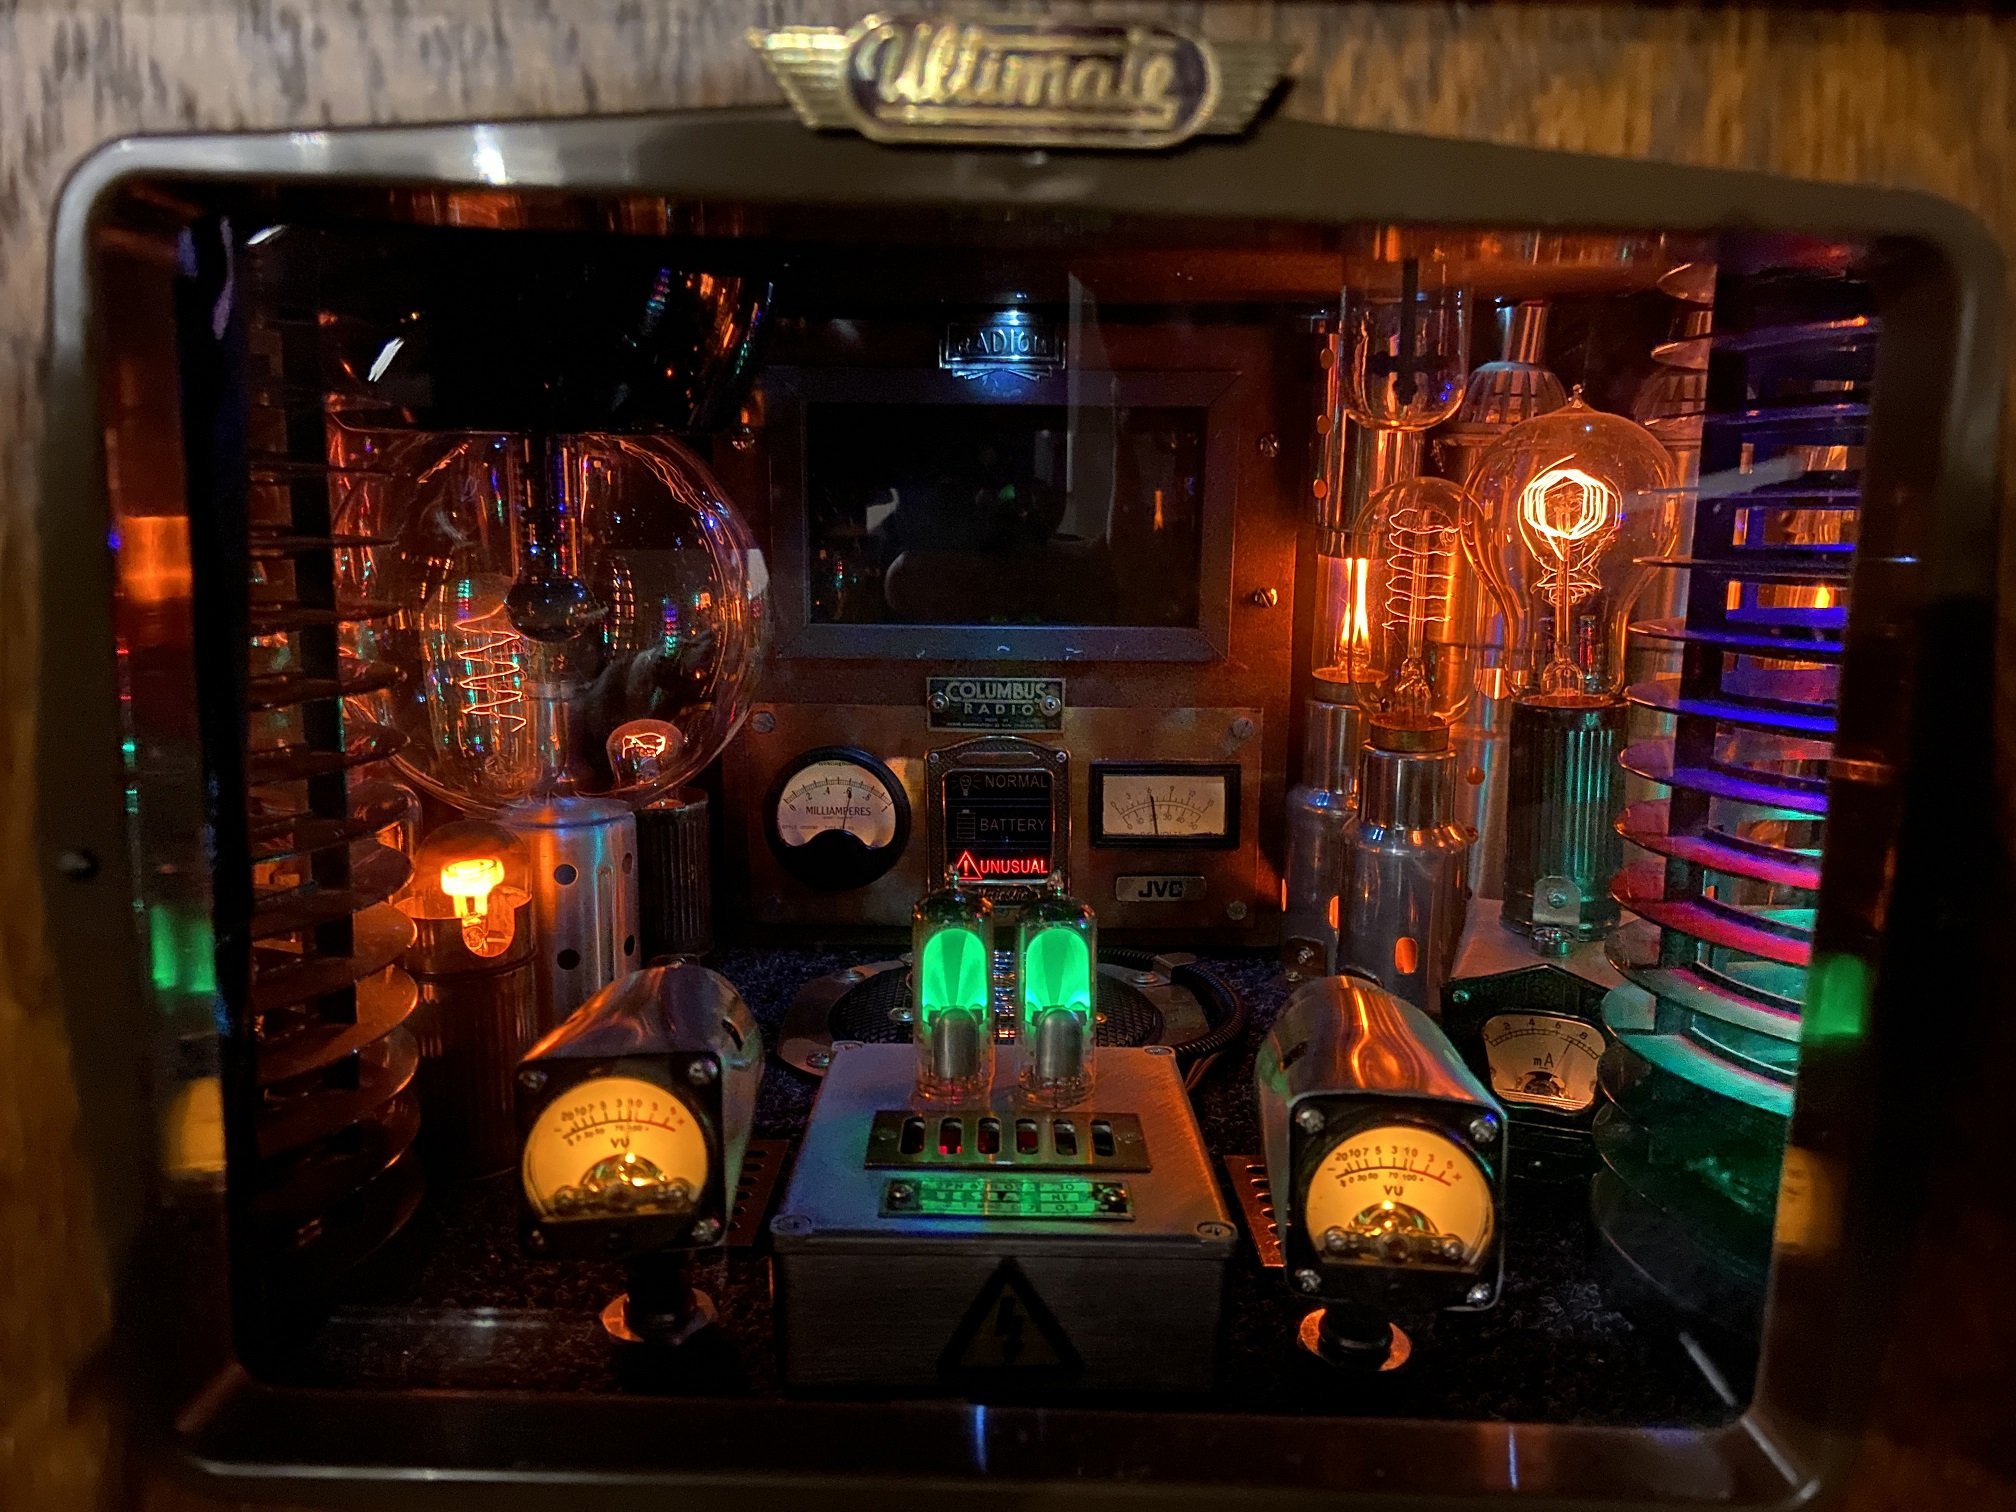
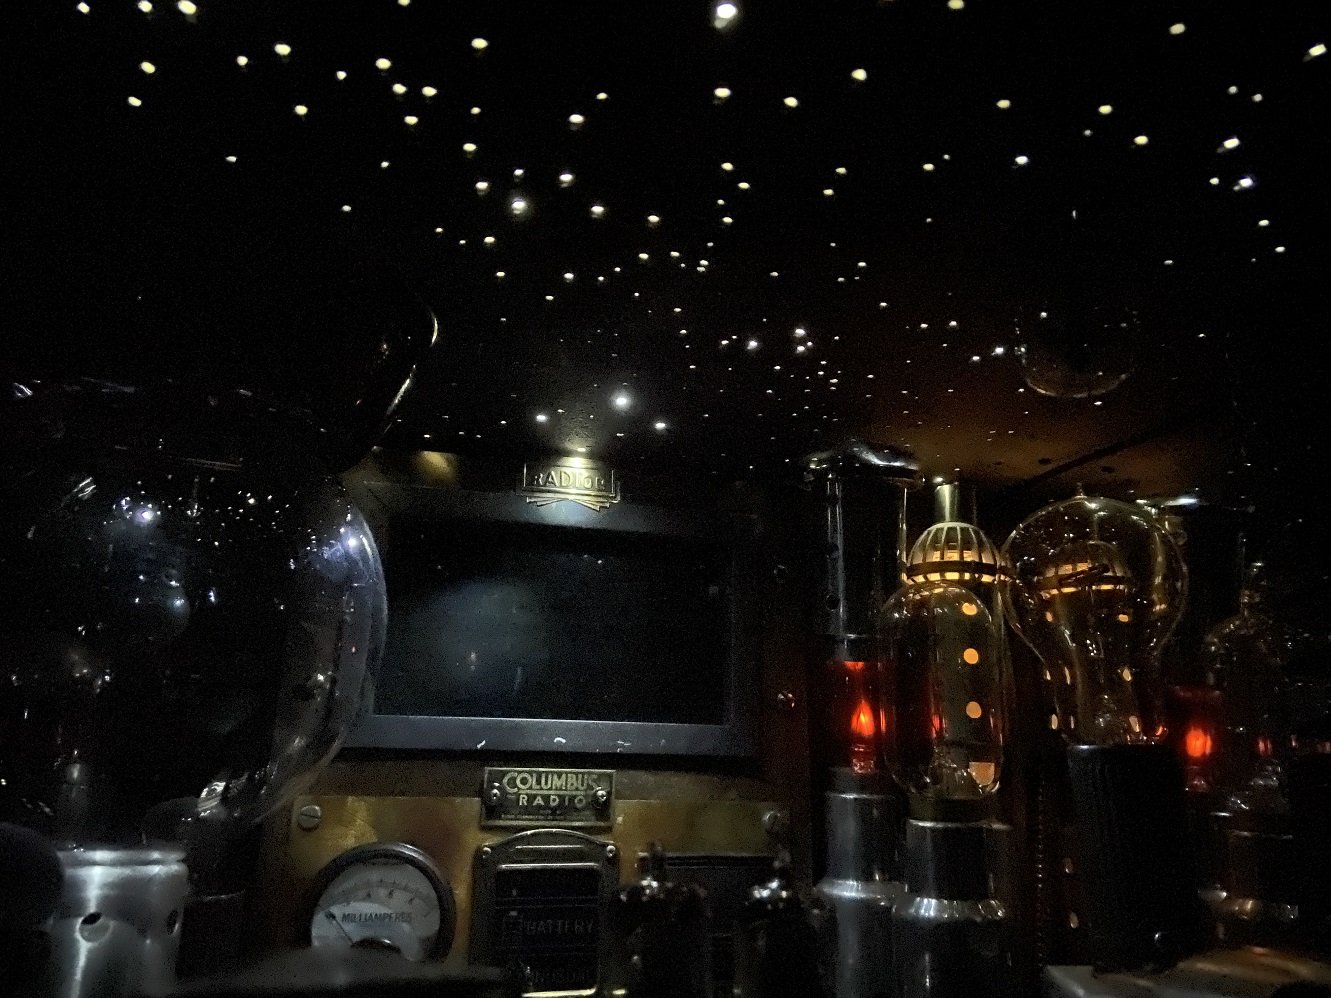
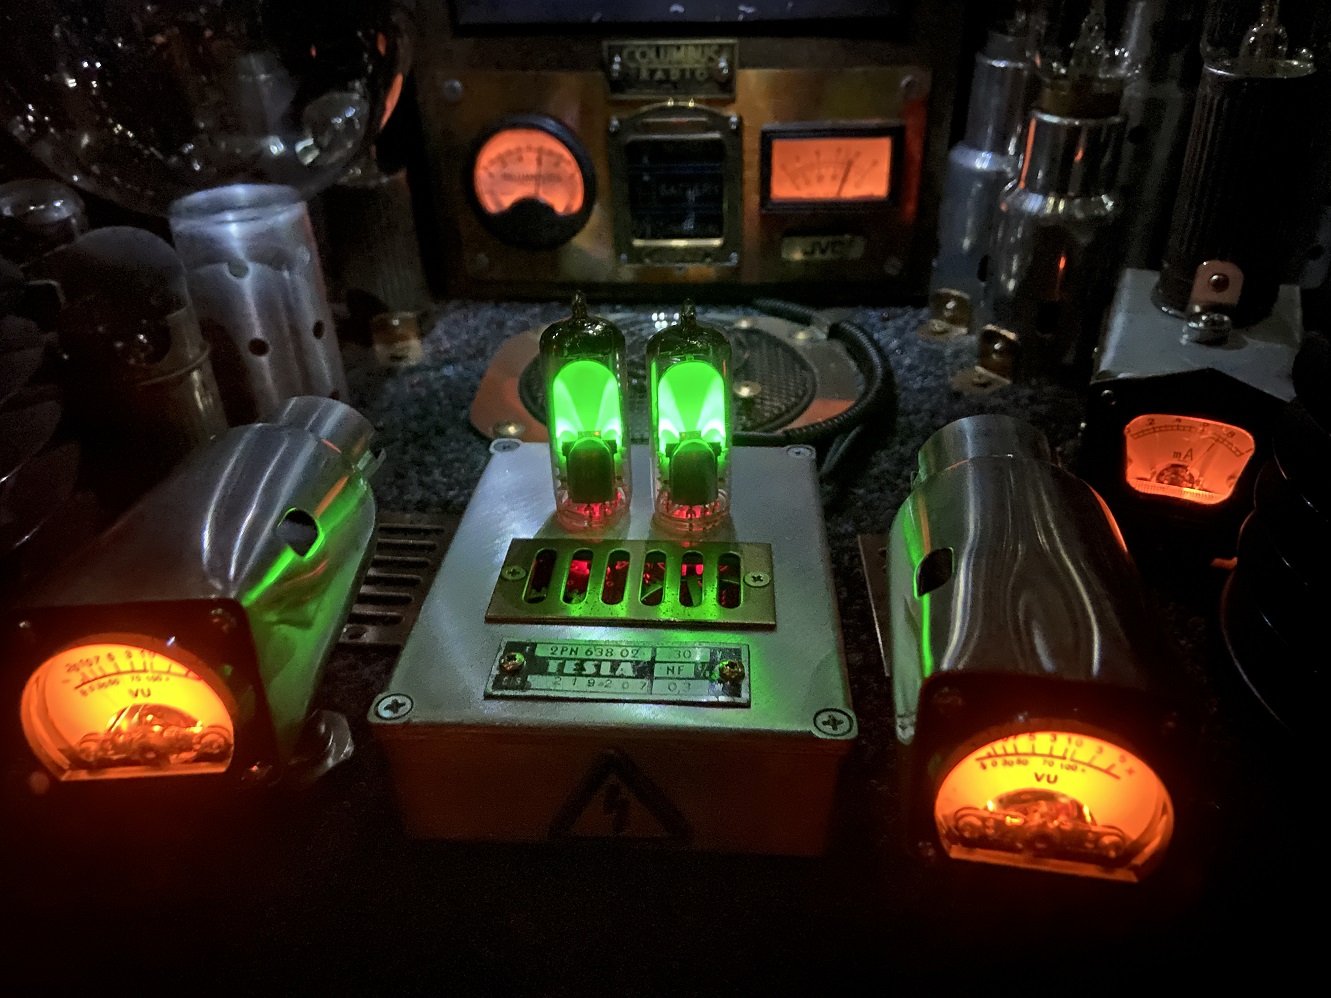
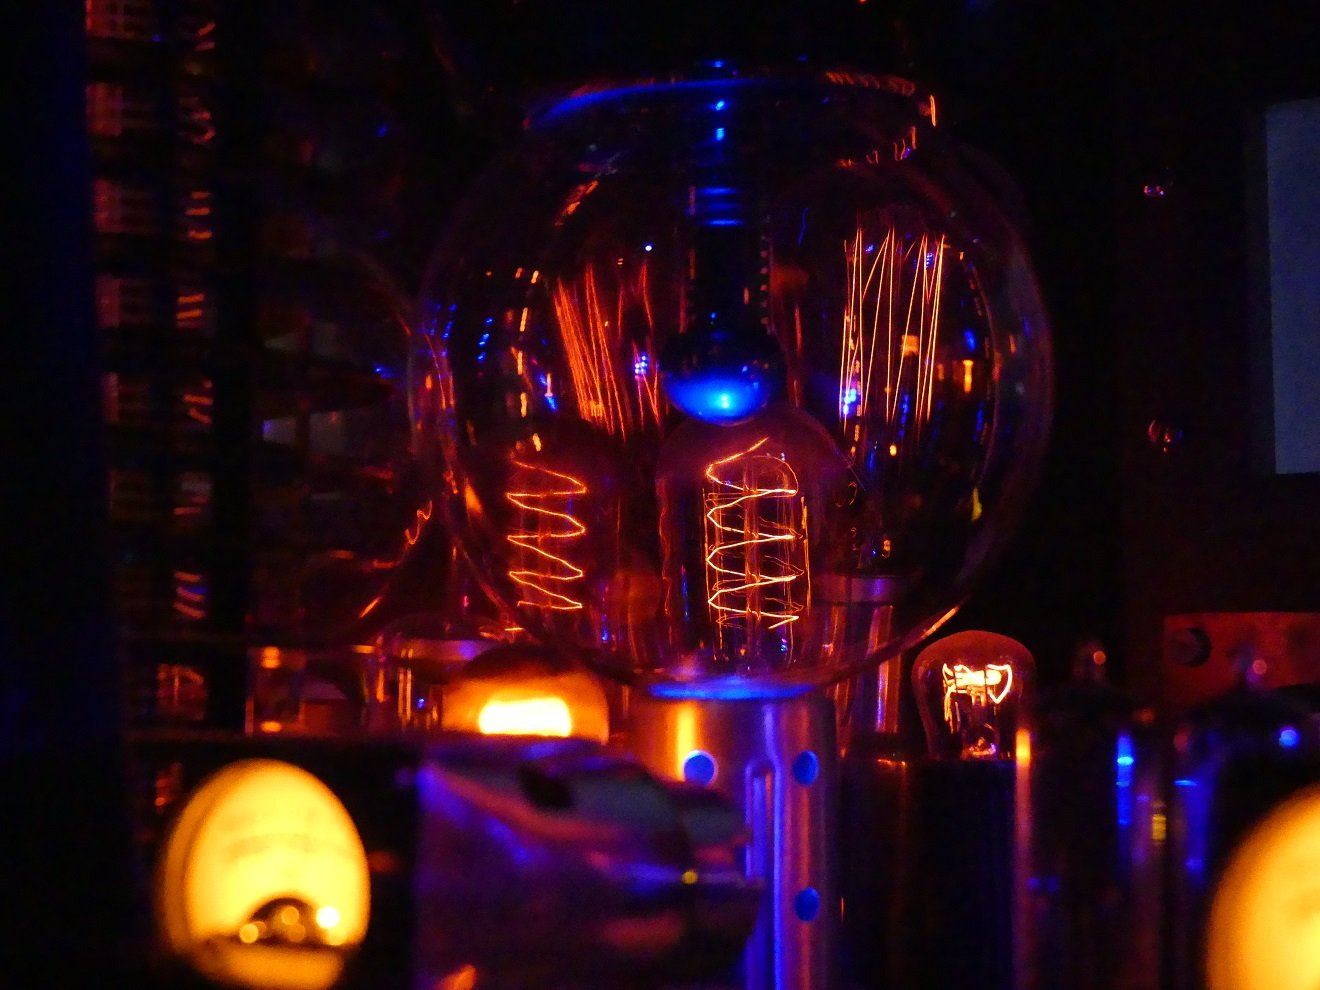
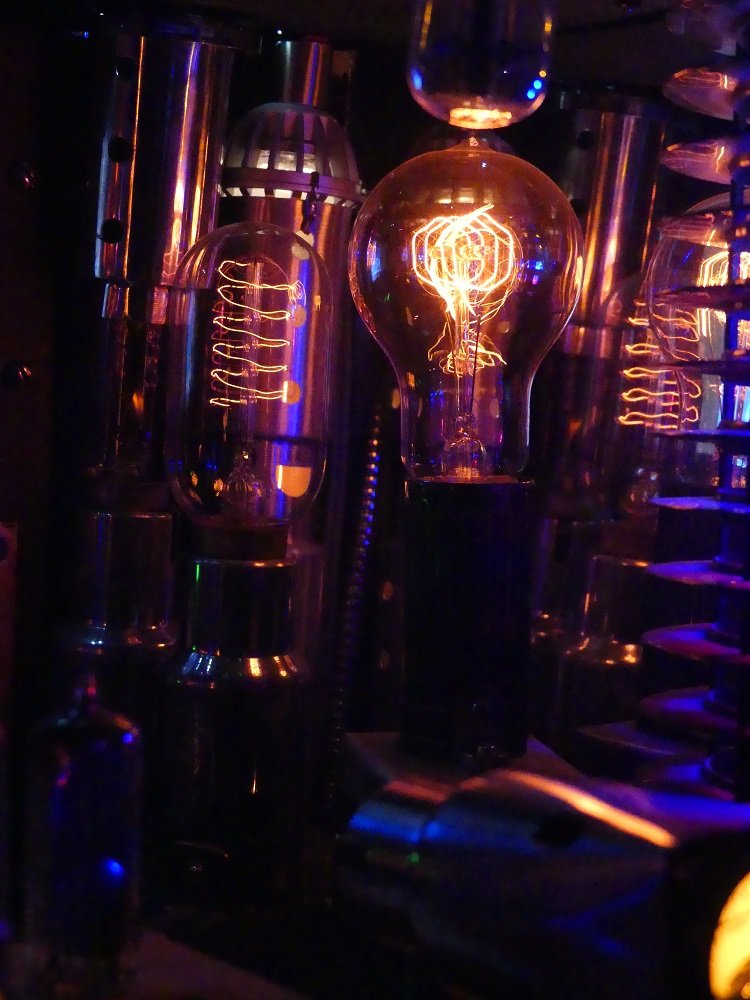
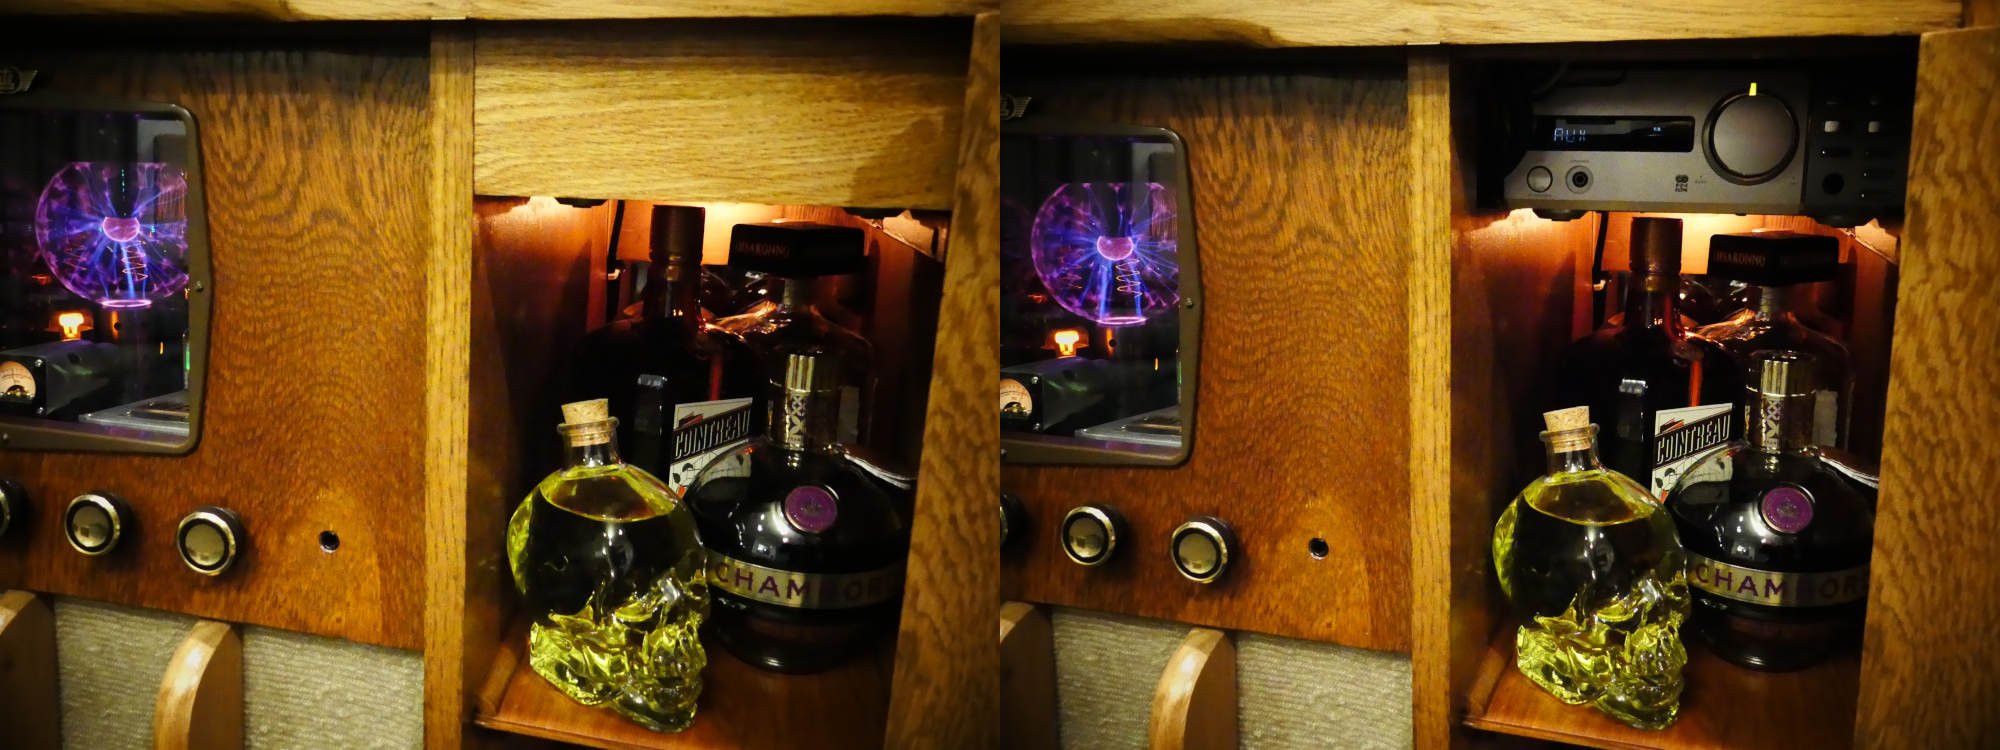
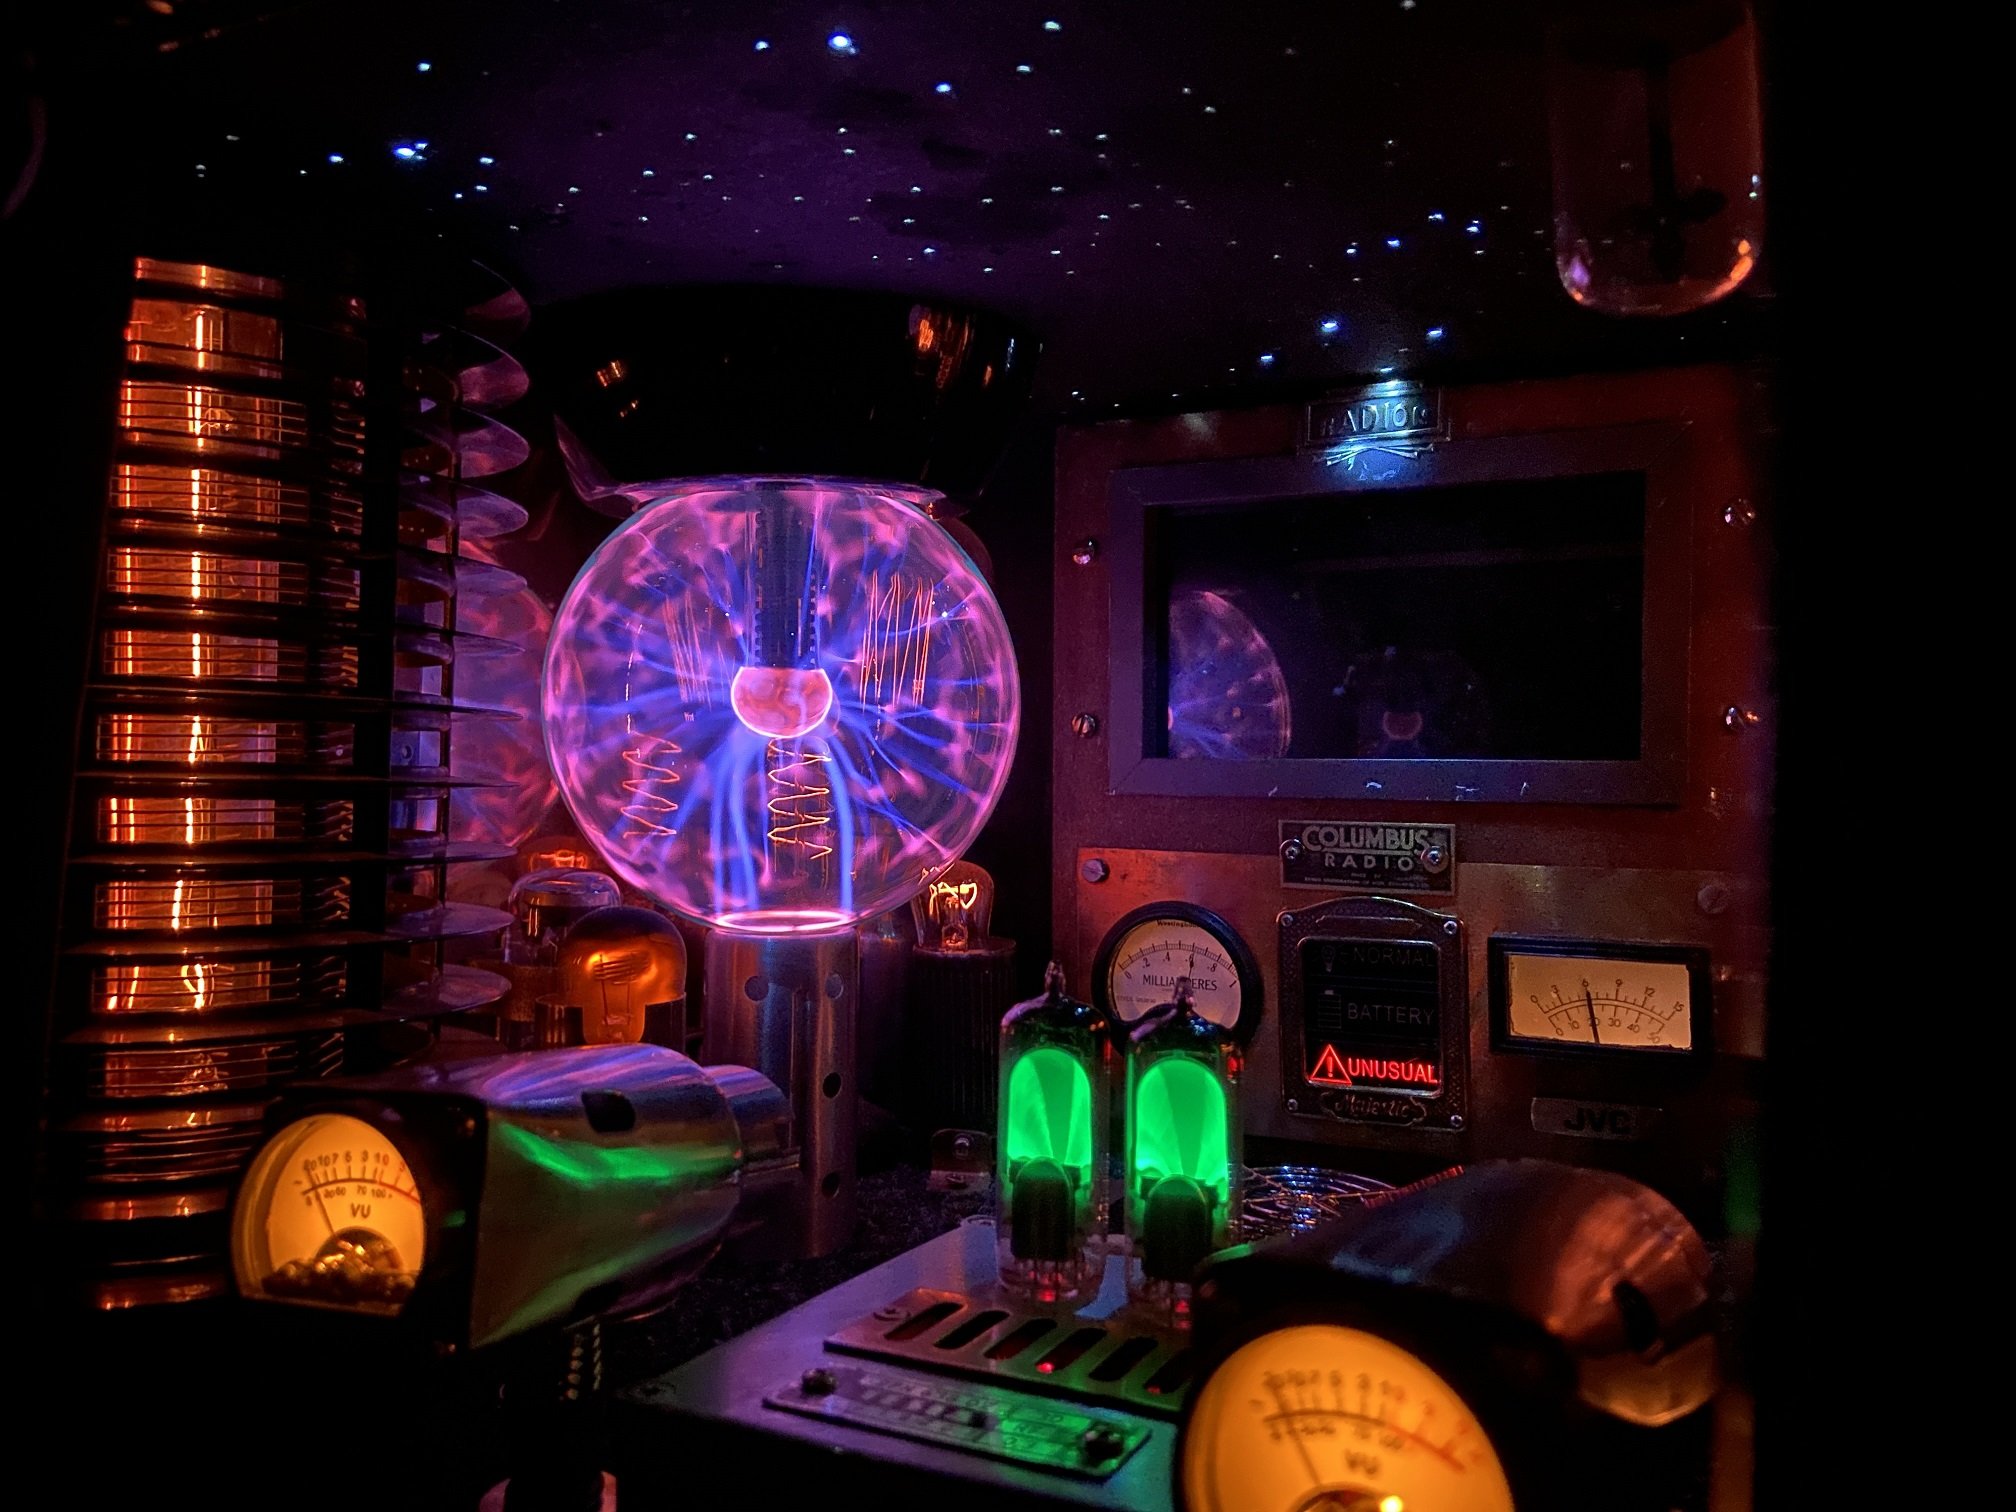
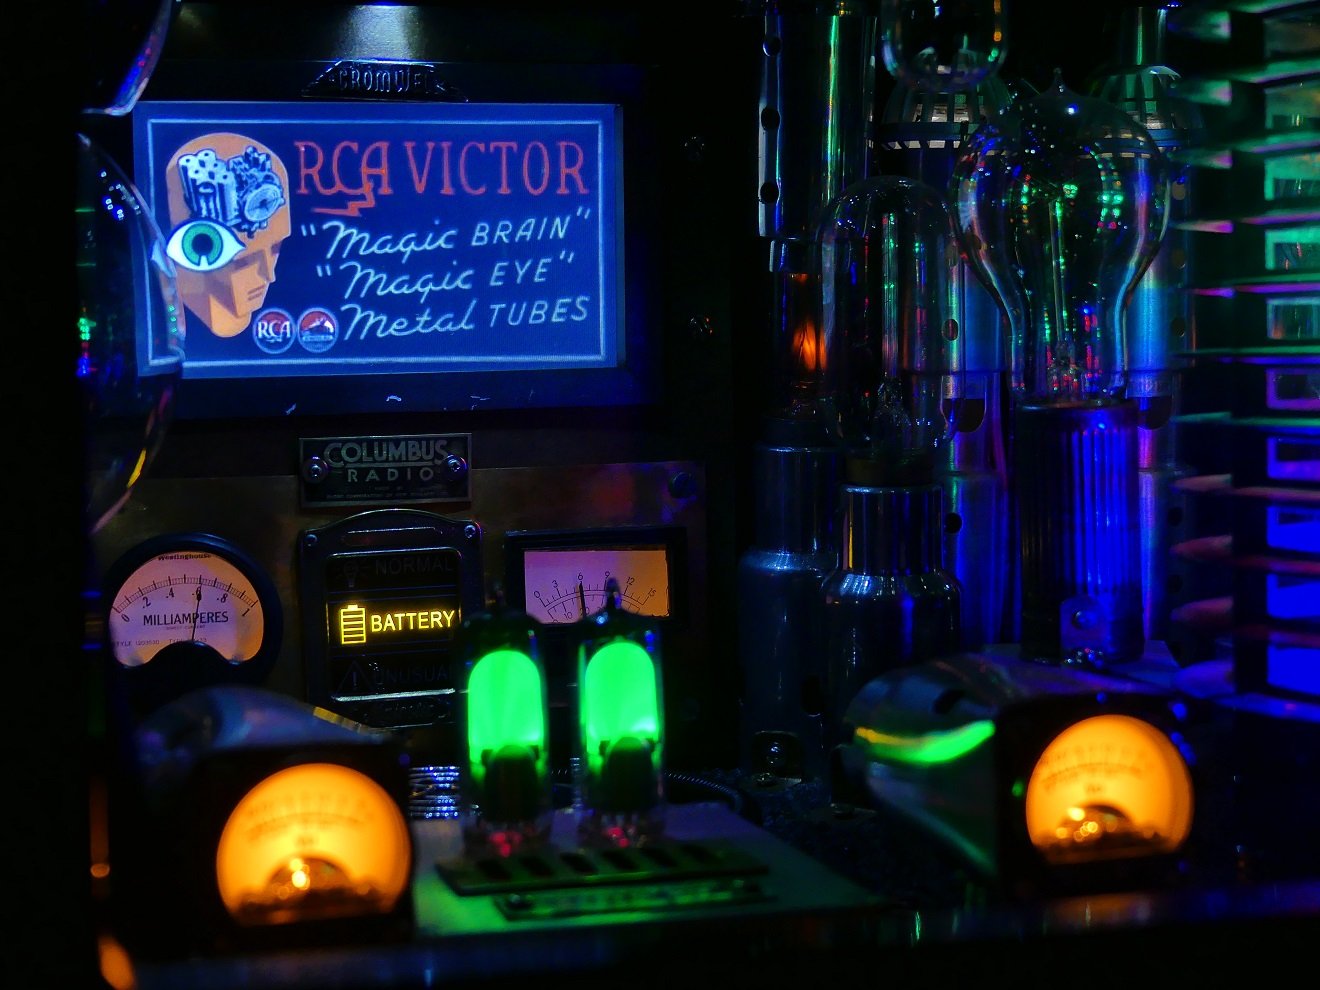
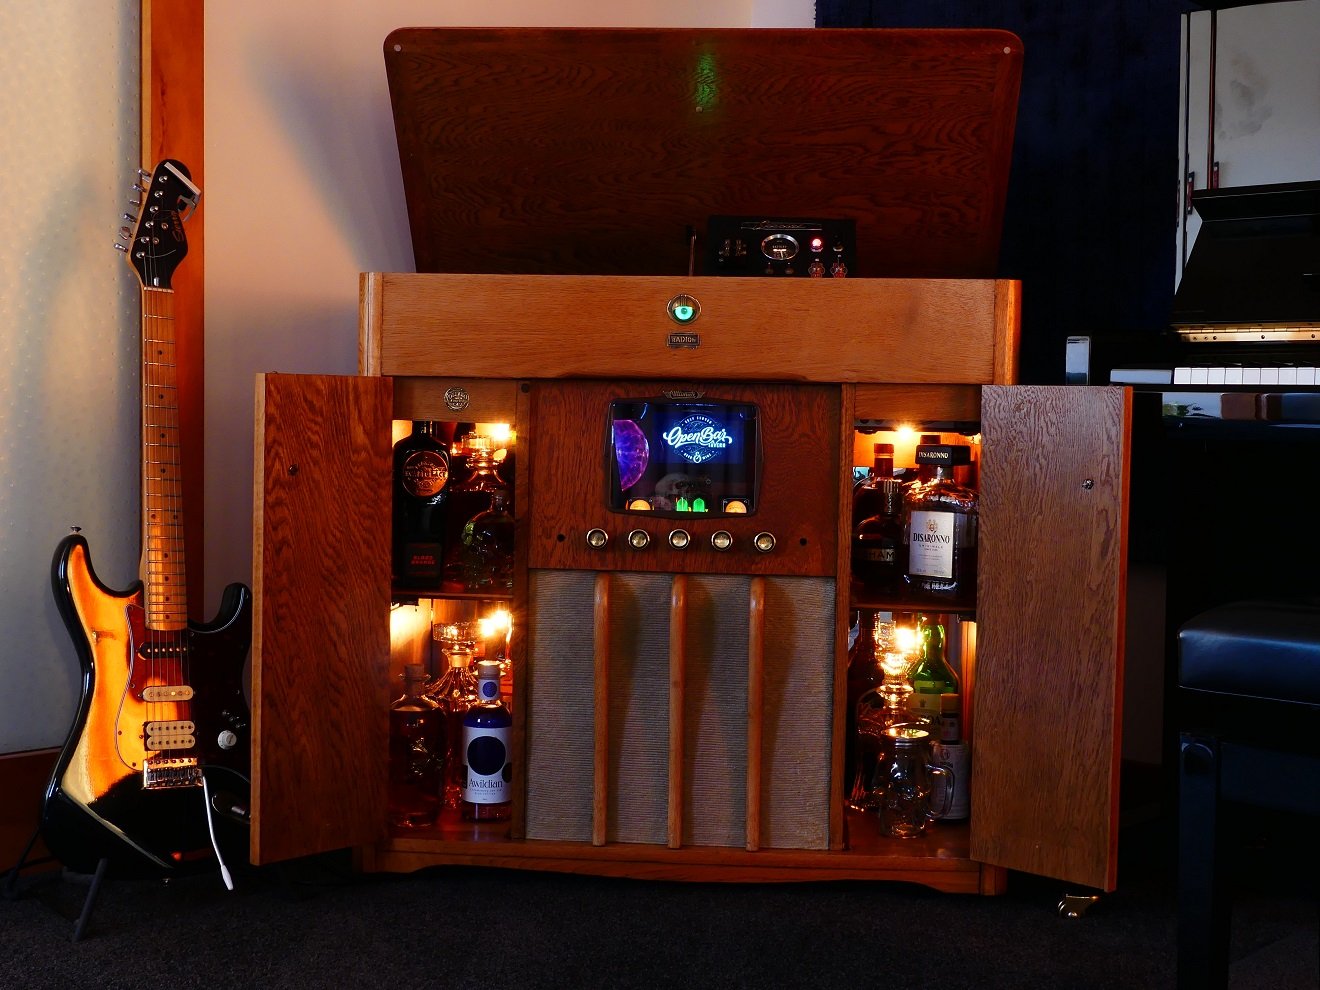
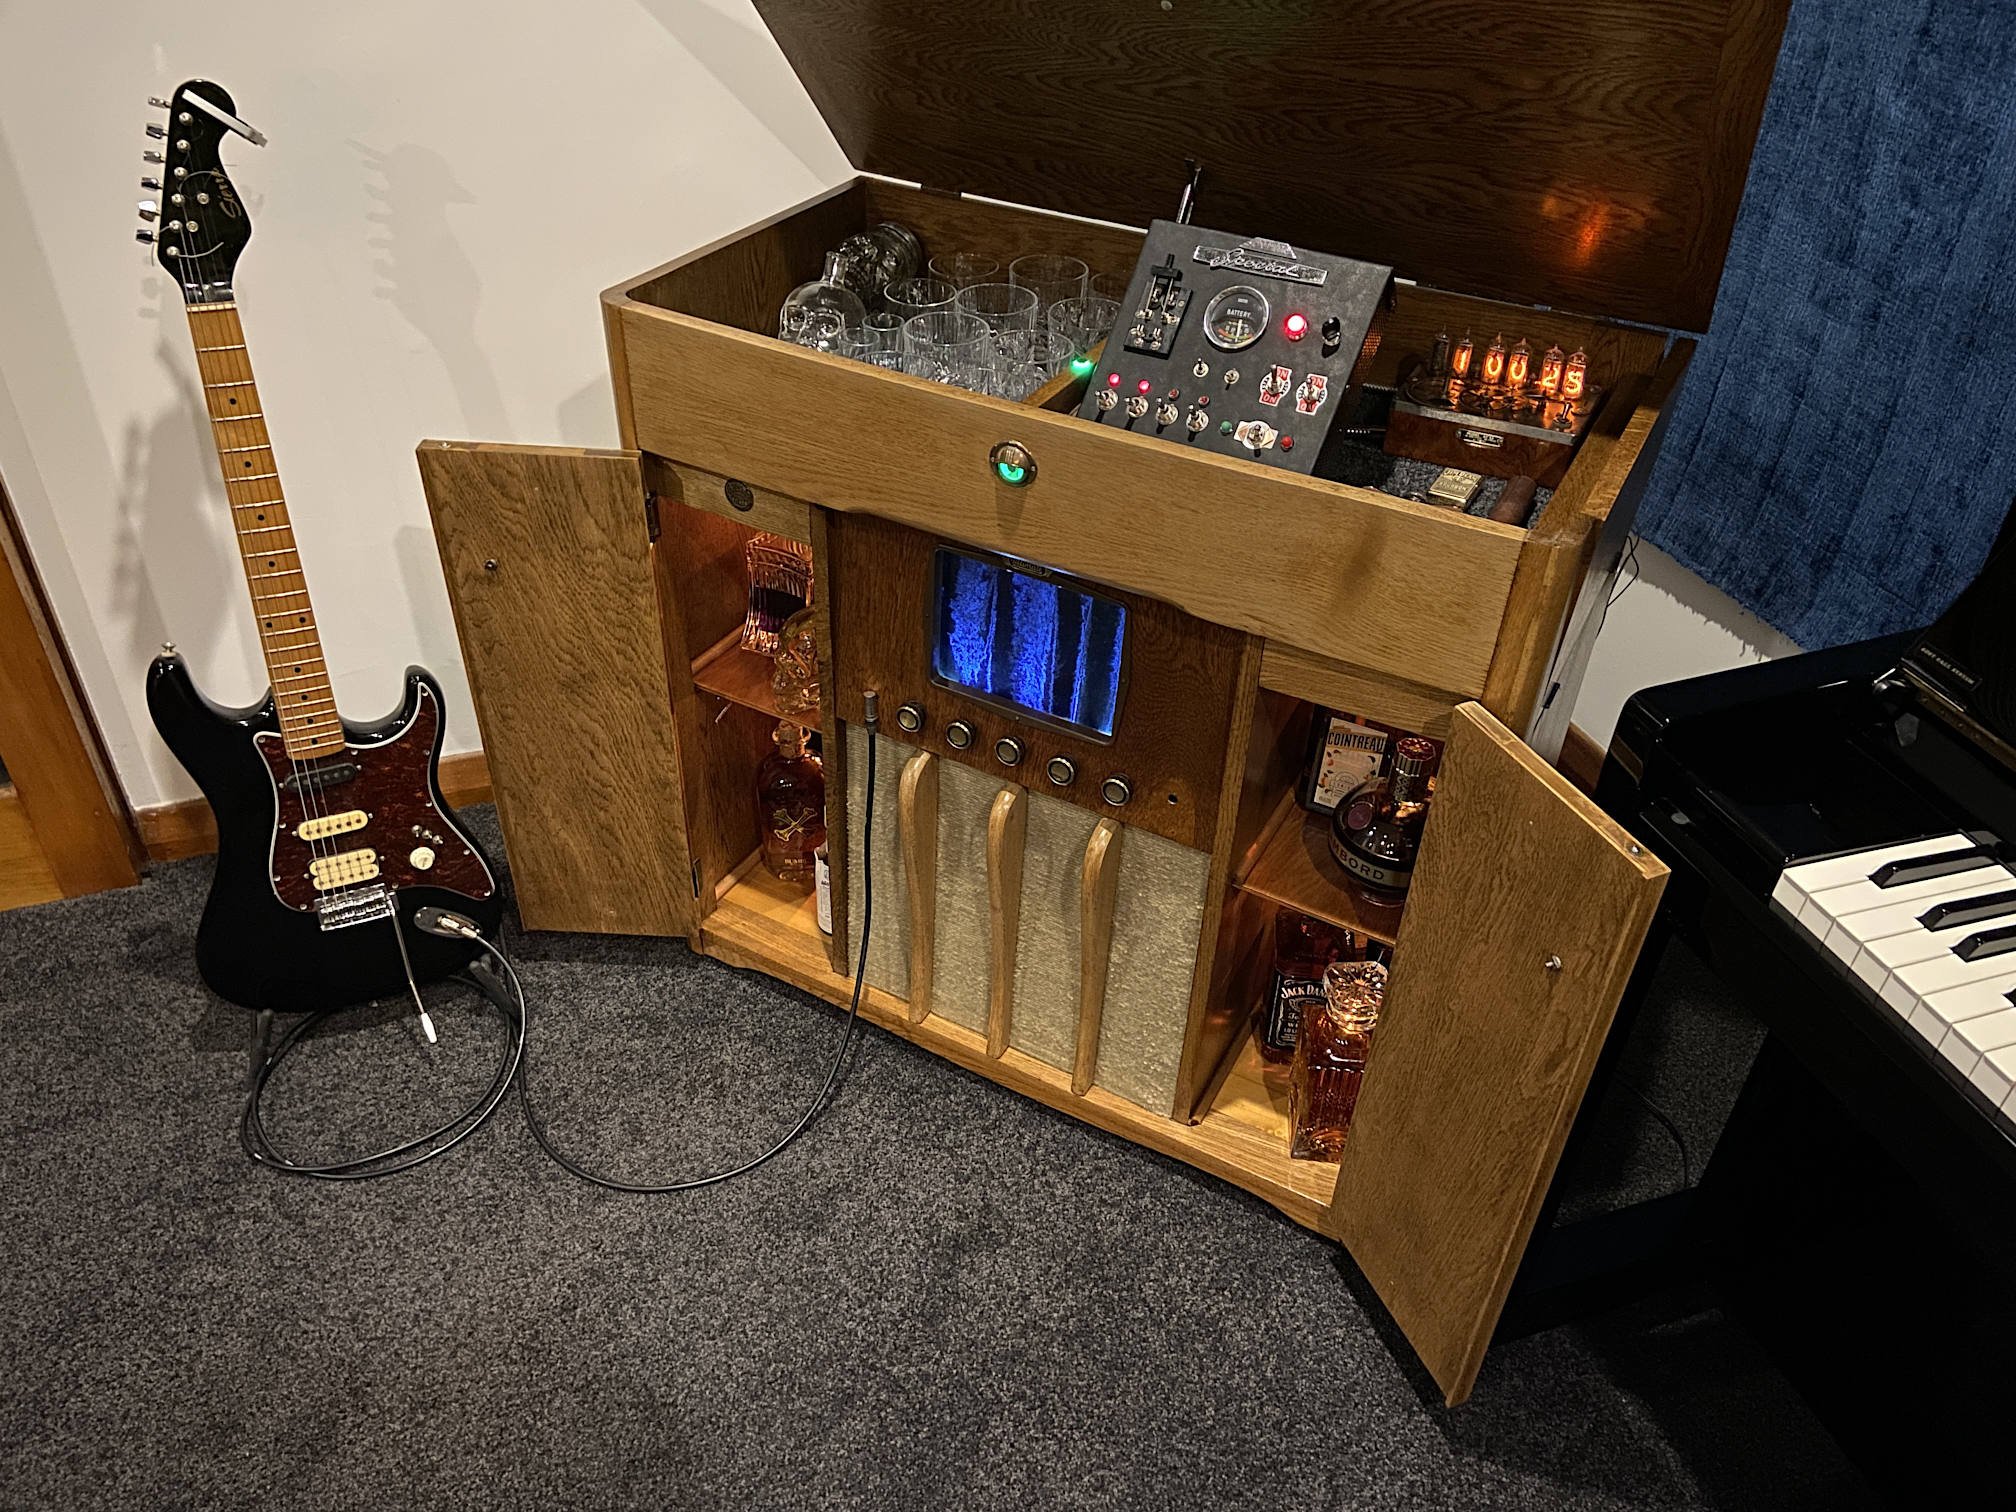
Go go gadget curtain: You can use the control panel to turn on and off various elements of my pointless box of lights to create different looks. Here's your basic 'starlight headliner' look: The slight glow from one of the orange neons is a bug 'feature', as is the fact that I positioned the Southern Cross constellation too close to the rear, causing its southernmost star to spotlight the 'Radion' logo above the TV. Turn on the analogue meters and the dancing Nixie tubes: Add the plasma globe, the TV (which normally can't be turned off - I unplugged it for the photos) and the neons: I deliberately positioned one neon bulb close enough to the plasma globe to show the induced glowing: Turn the globe off, put on its blue LED, turn on the incandescent bulbs behind it: I grabbed each variation of these vintage filament bulbs while they were still easy to come by. Now they're being replaced on the market by LED 'filament' bulbs, which just aren't the same. A side effect of these features is that the heat production / power consumption of my creation is a bit more than ideal, just like a real valve radio. Here's where the old micro system lives, in the side of the cabinet behind a cover that slides upward: Its display is very dim these days. If it ever looks at me funny, I'll replace it with something which can do CDs, Bluetooth and USB. For the time being, I use an aux cable. So yeah, you get the idea. (hail Satan) That's pretty much it. Slight variations thereof. I have run out of attachment space for this post anyway. I'll make a video at some point, and afterwards I'll probably only consult my pointless box of lights whenever I need a drink. Open bar!
- 33 replies
-
- 15
-
-
-
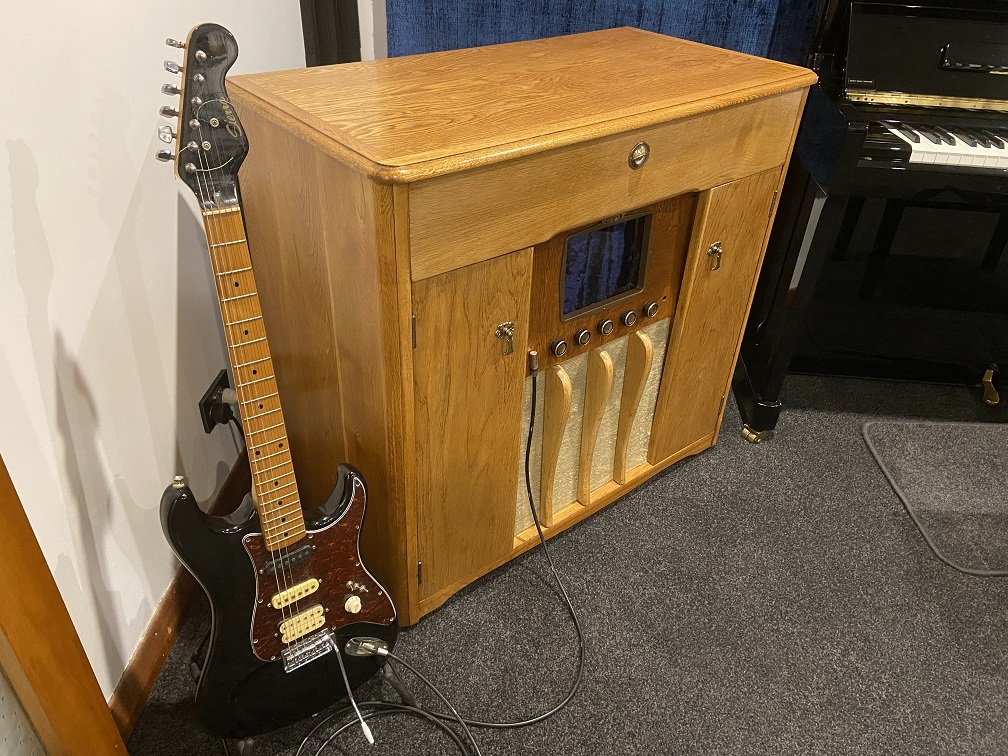
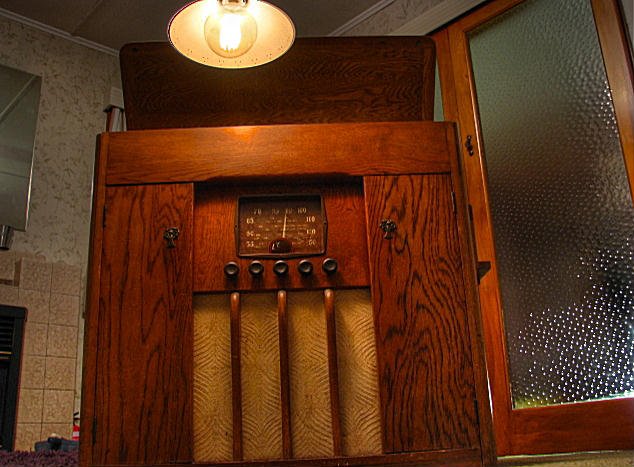
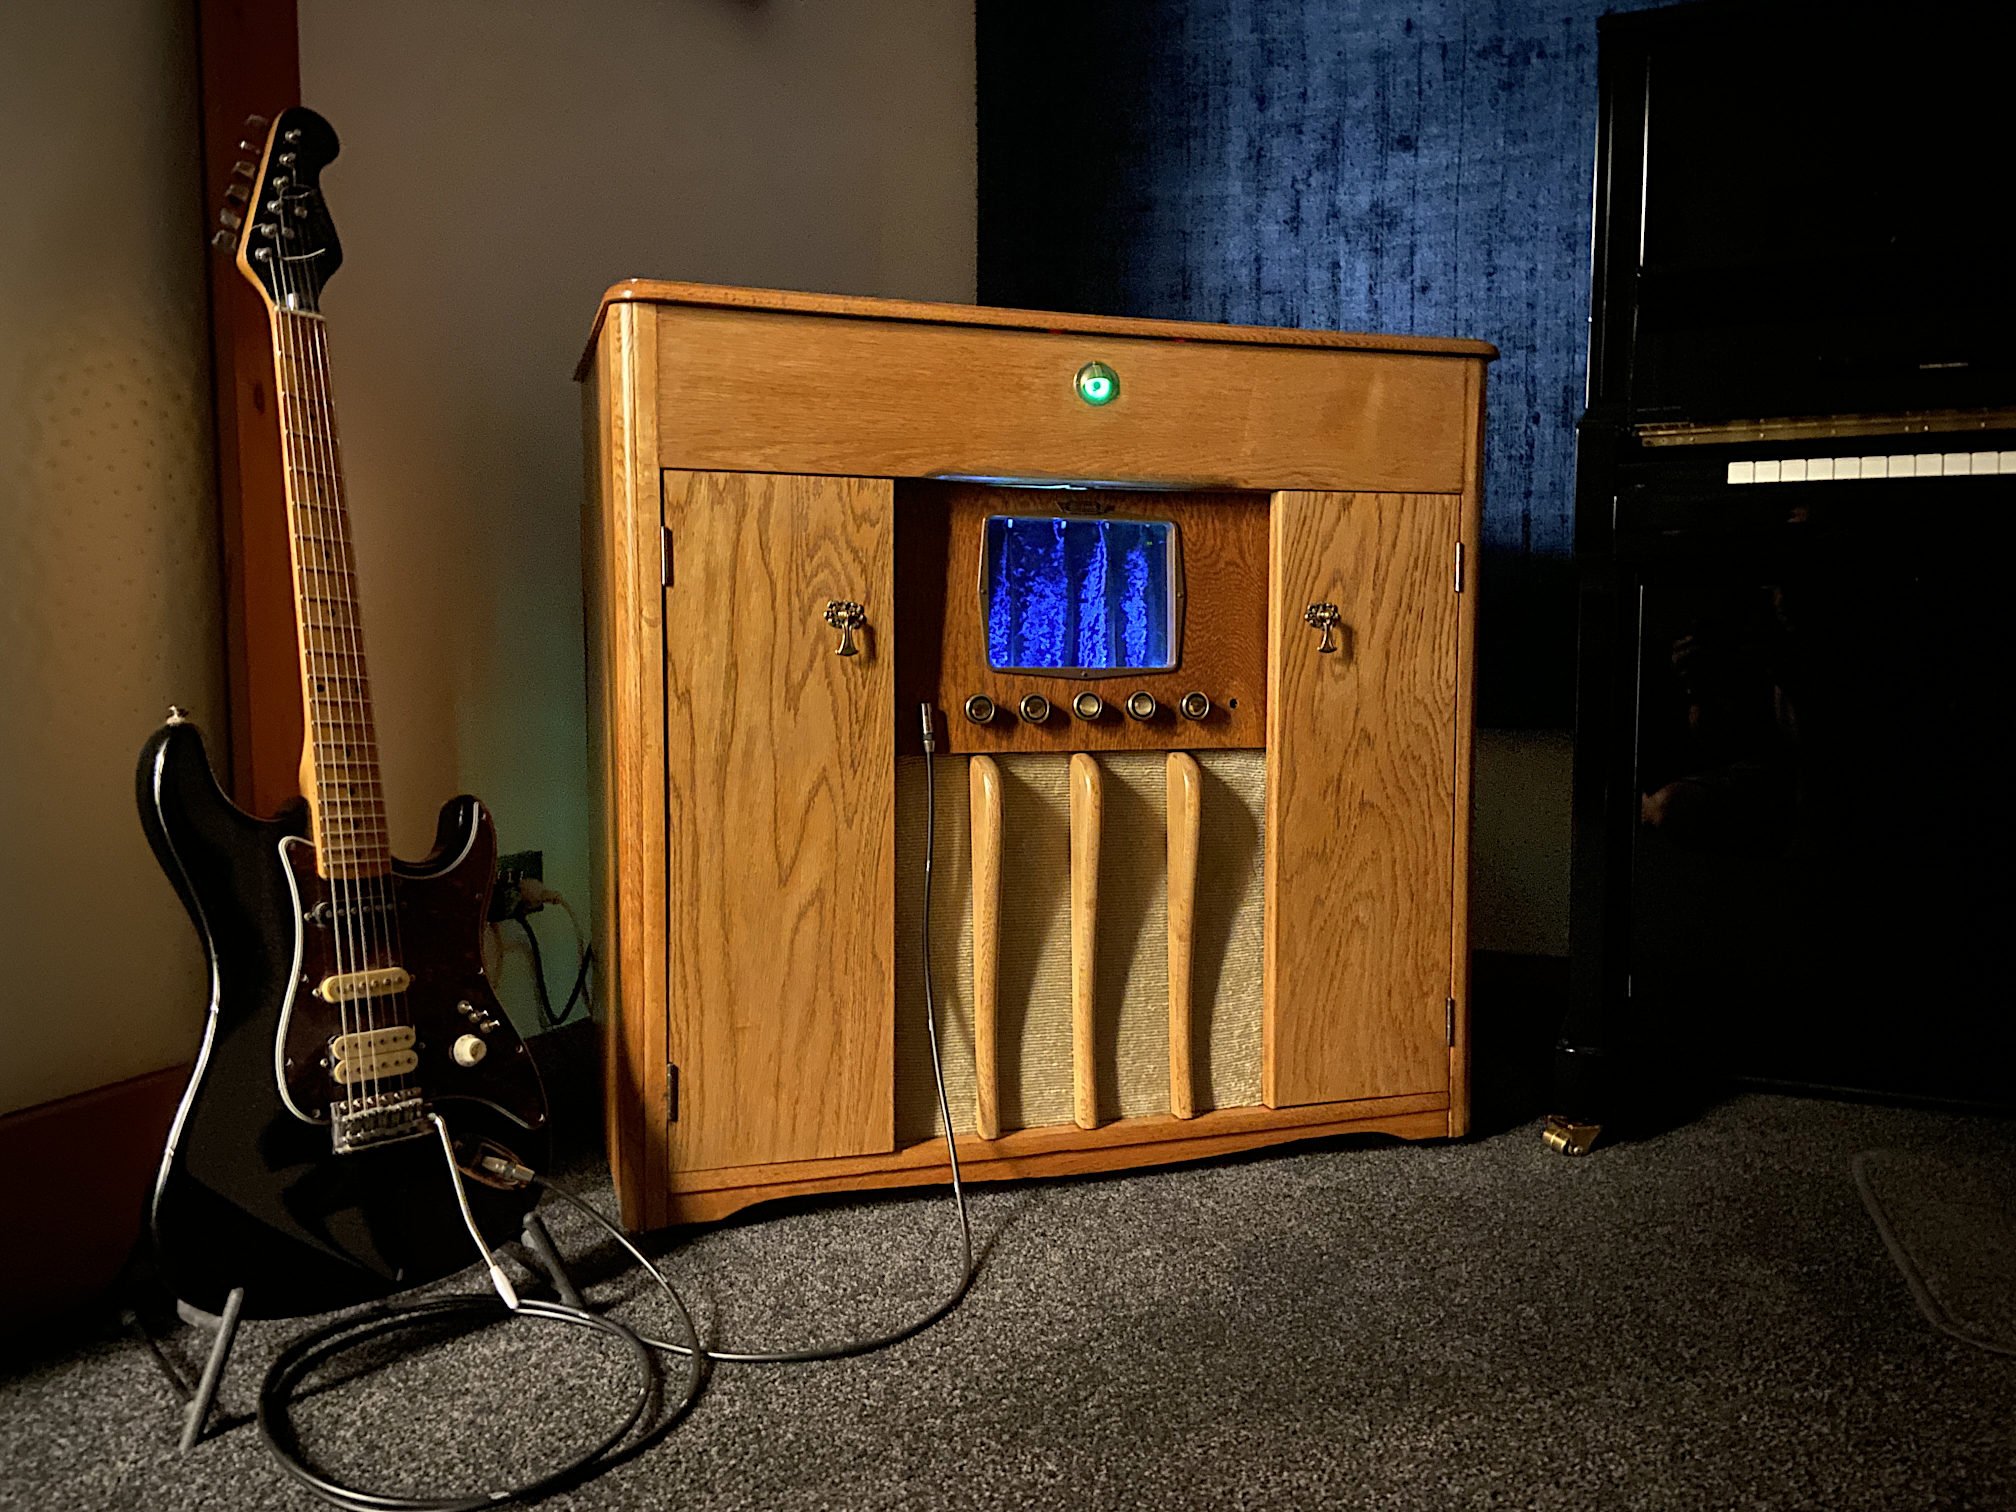
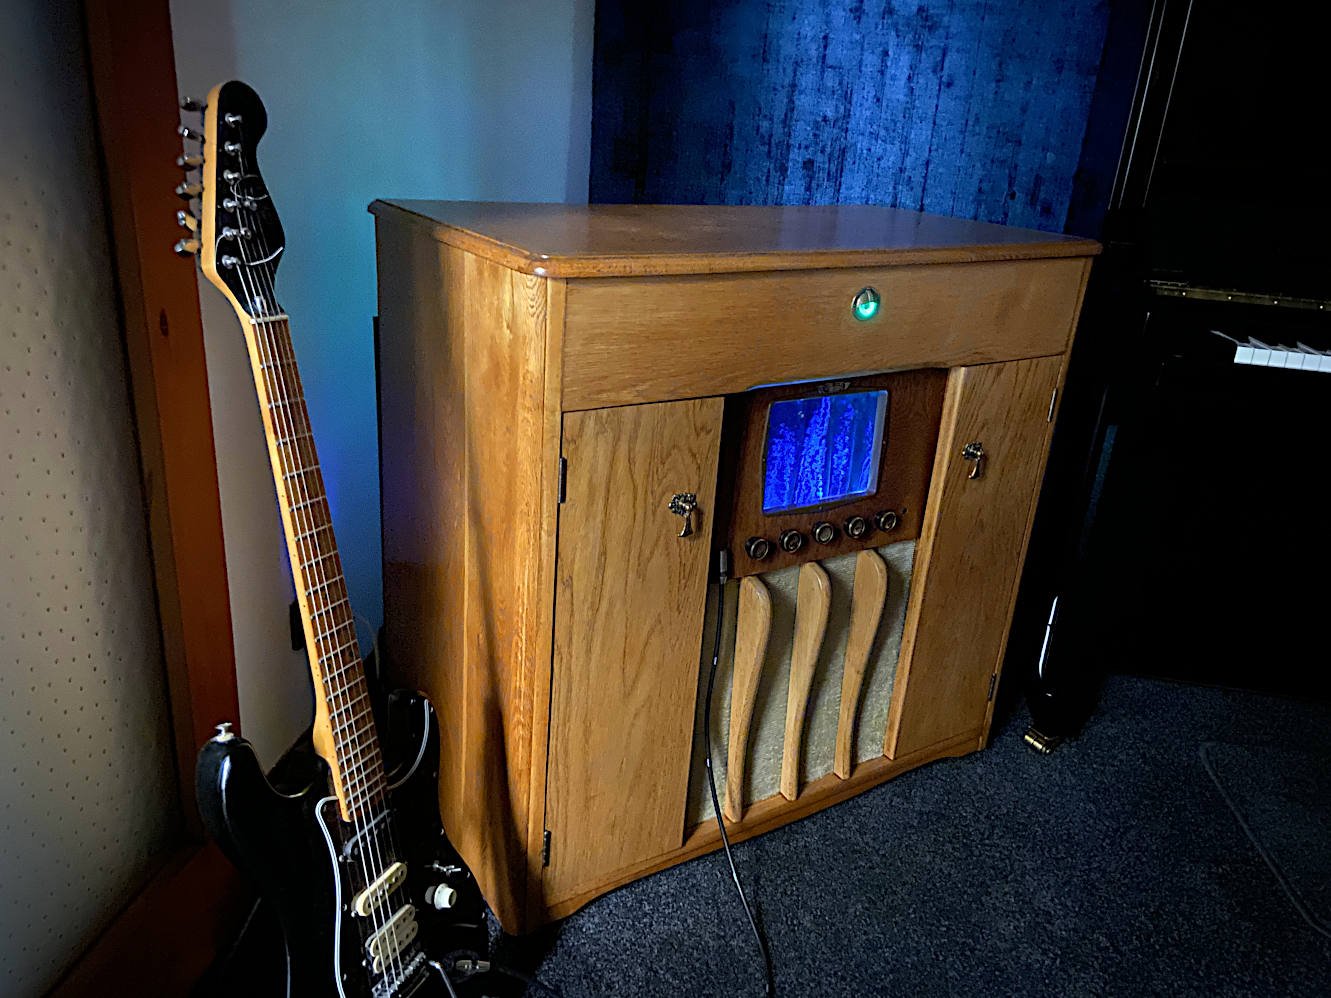
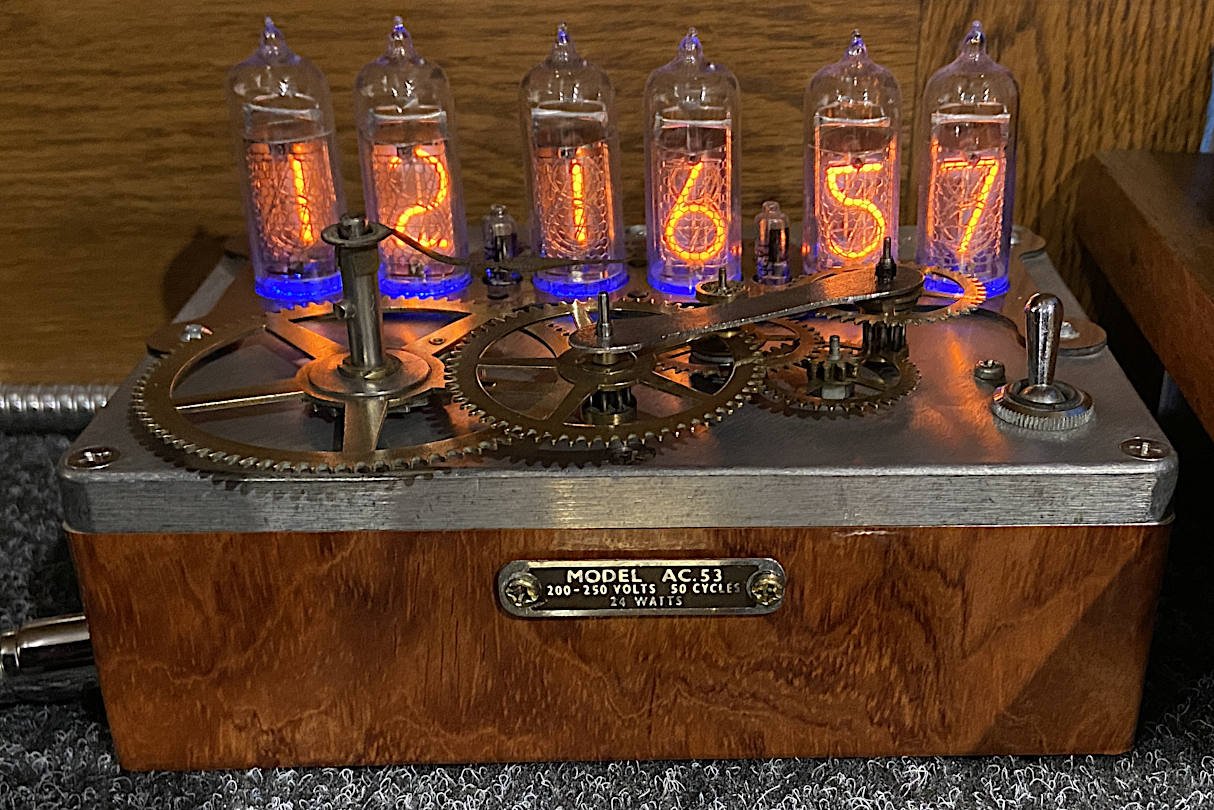
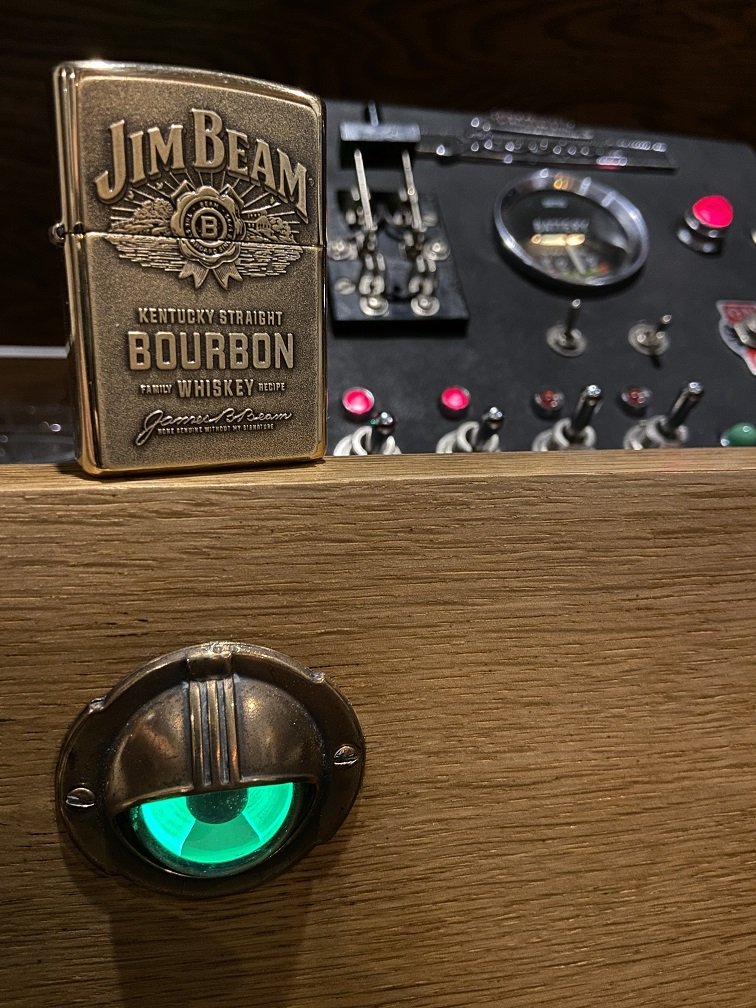
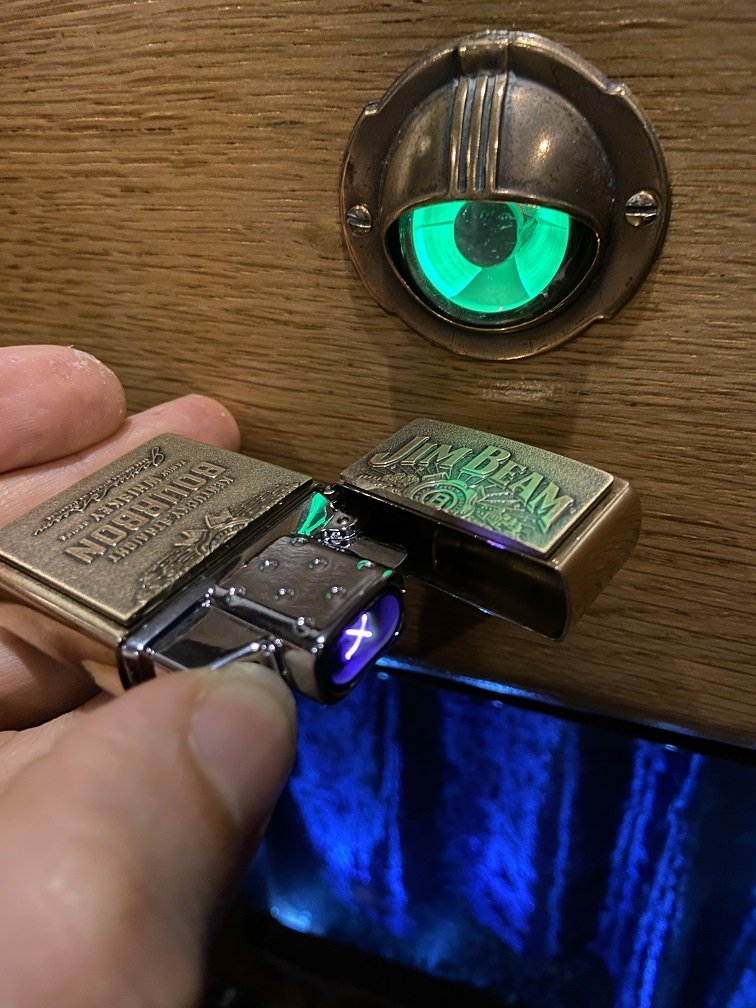
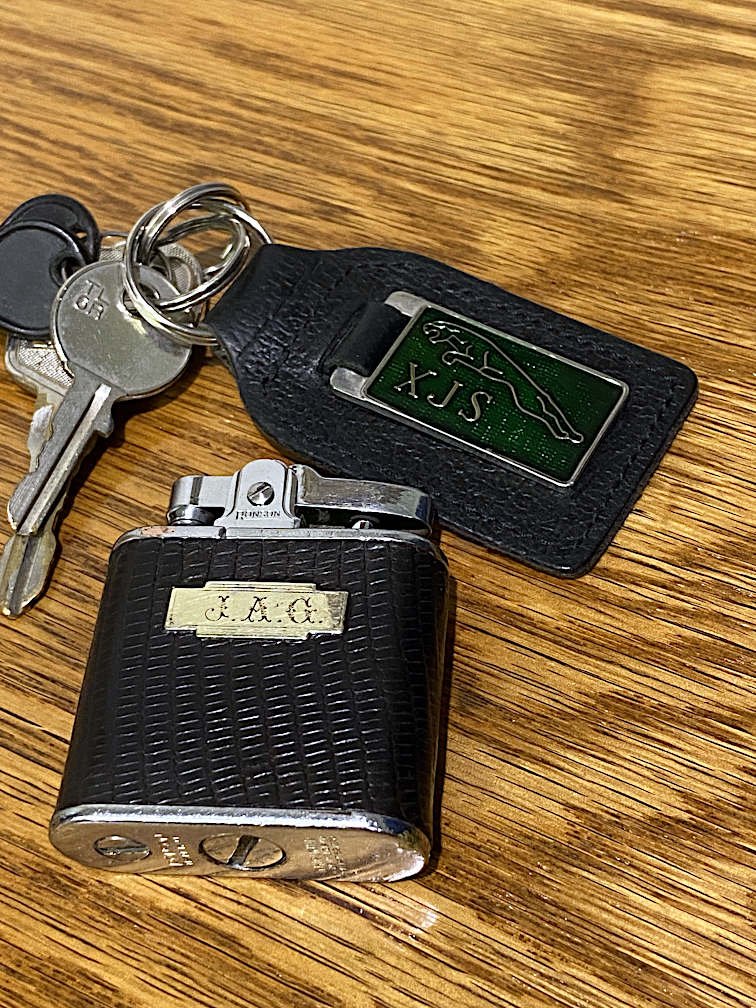
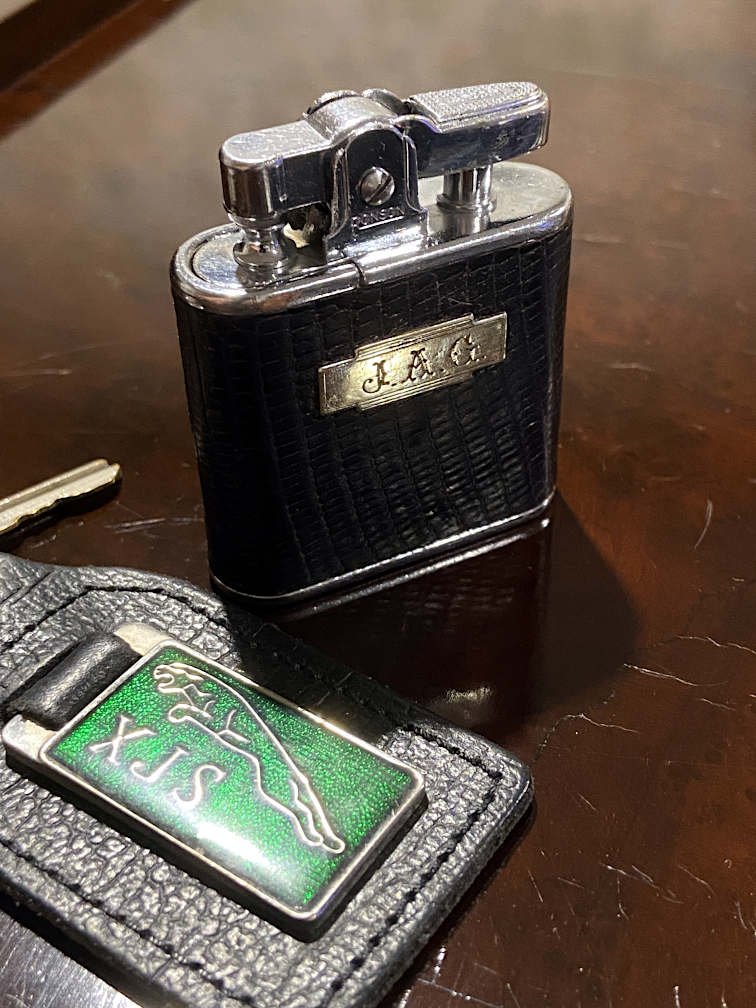
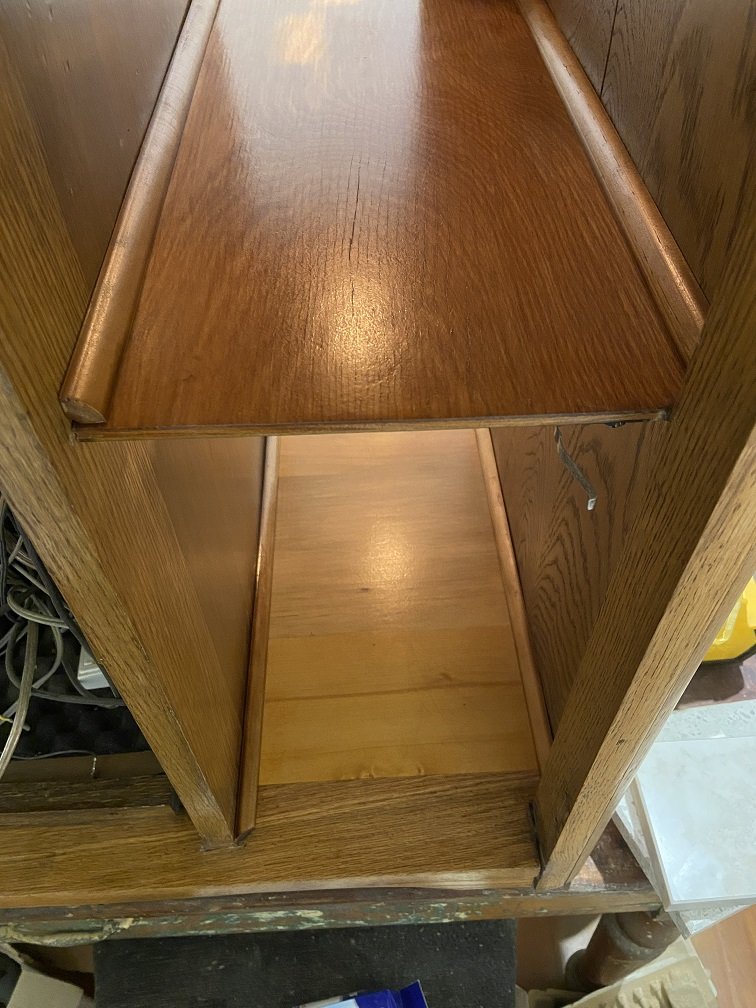
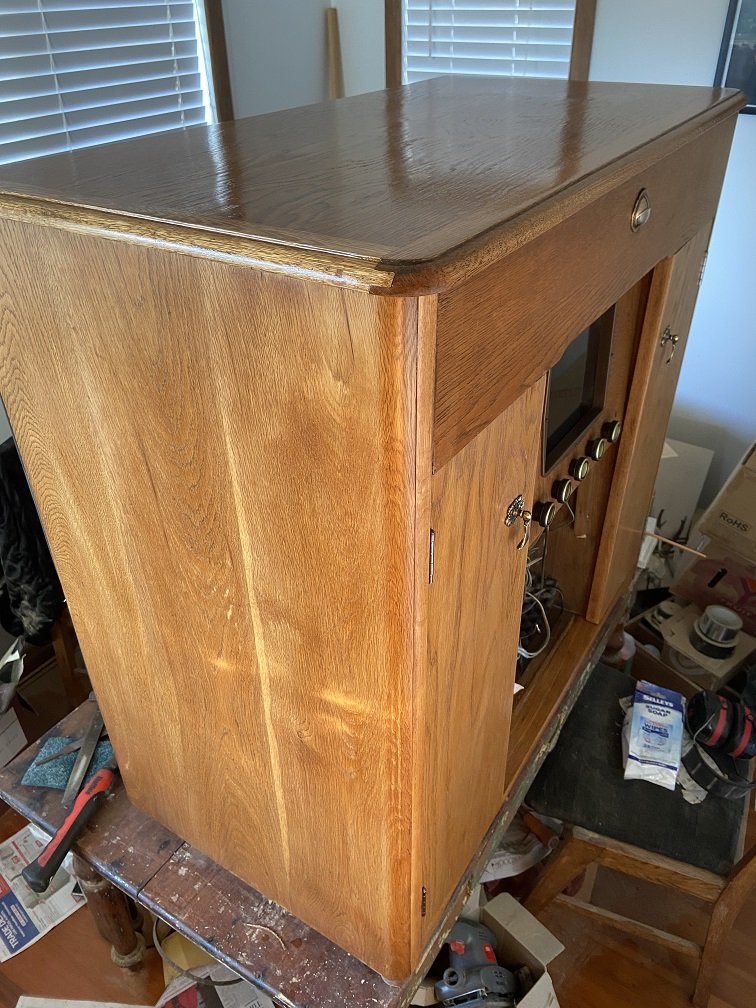
I've gotta throw up some photos here, so that I can post them on Facebook afterwards (oldschool gets the scoop). A reminder 'before' shot from 2012: The wood originally had a darker stain which did make the grain stand out more, but the HDR photographic effect is further exaggerating its stripiness. Now (below), the external changes to the cabinet are pretty minor, and the wood is a lighter shade (which wasn't intentional - I'm not a fan of light oak). The central panel with the knobs is the only one which still has its original finish, so it stands out as being too dark (especially after I waxed it). Power it up... This 'mysterious glow' effect (basically a convenient way to use up the last of my icicle LED lights) can be switched off: Here's another 'before' shot, with the radio and speakers stripped out: After: You can see my Nixie tube clock has found a new home in the top of this cabinet. I made up this clock from a kitset in 2015. I originally intended to house it inside the centre of the cabinet where the radio used to be, but not only was that an impractical place for it, the clock was also too bulky. If you turn on the switch to the right, the gears to attempt to spin. That mostly works. This is the upper shelf of the left side cupboard: You can see I've covered the ceiling with some copper mesh backed with blue velvet, to hide the holes where the record player originally was. All of these photos are taken from favourable angles / there are plenty of rough edges. My newest purchase for the cabinet is this lighter: It functions as either Jim Beam (with its oldschool lighter insert) or Jim Laser Beam (below): I haven't been brave enough to stick my finger in yet. More pics to come. =)
-
Check out my latest Jag-cessory: It's someone's scody old lighter, covered in 'brown lizard' and tobacco stains. But wait, when you clean it up, what does the engraving say.... Yep, it was once owned by Mister J.A.G. How good will that look next to my keys on the bar of the local TAB.
- 37 replies
-
- 29
-
-
-

-
SUGGESTIONS/RECOMMENDATIONS FOR VIVA CONVERSION
Thousand Dollar Supercar replied to La Viva 71's topic in Project Discussion
Be serious. What could you feasibly source quickly and inexpensively which wouldn't break or overpower the rest of the vehicle, requiring too many other upgrades? I like the idea of a garbage oldschool motor, because I love the sound of garbage. It may be that it's just easier to grab a small modern 4cyl Jap engine for this task though, cos whatever you can find in the nearest abandoned Nissan Micra would have more power than the existing motor. @La Viva 71, the user @yoeddynz has done two engine swaps on Vivas over the years - a rotary and a Mazda V6. There has been more than one other Viva on the forum too, and they may have build threads on here somewhere. We also have a user cletus who is a vehicle certifier. -
Hi Stevo. =) I presume this is a Mitsubishi Lancer GSR. Google says that ABS fault codes 41-44 are for the ABS solenoid valve system. Code 43 is the RR solenoid valve, so I presume RR = Rear Right, RL = Rear Left? Apparently some service manual says that probable causes include: Defective hydraulic unit Defective harness or connector Defective ABS-ECU Although I've never owned a car with ABS (this is oldschool.co.nz), I'm going to guess that you damaged a wire or unplugged something. Hopefully you can find a wiring issue which can be repaired without buying any new sensors etc.
-
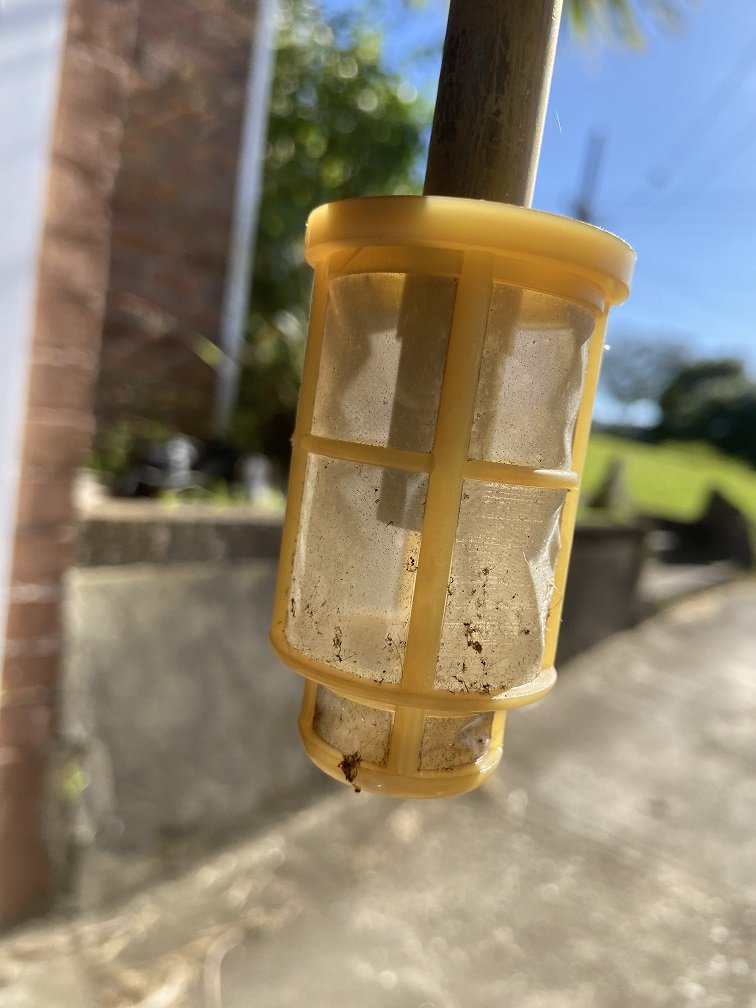
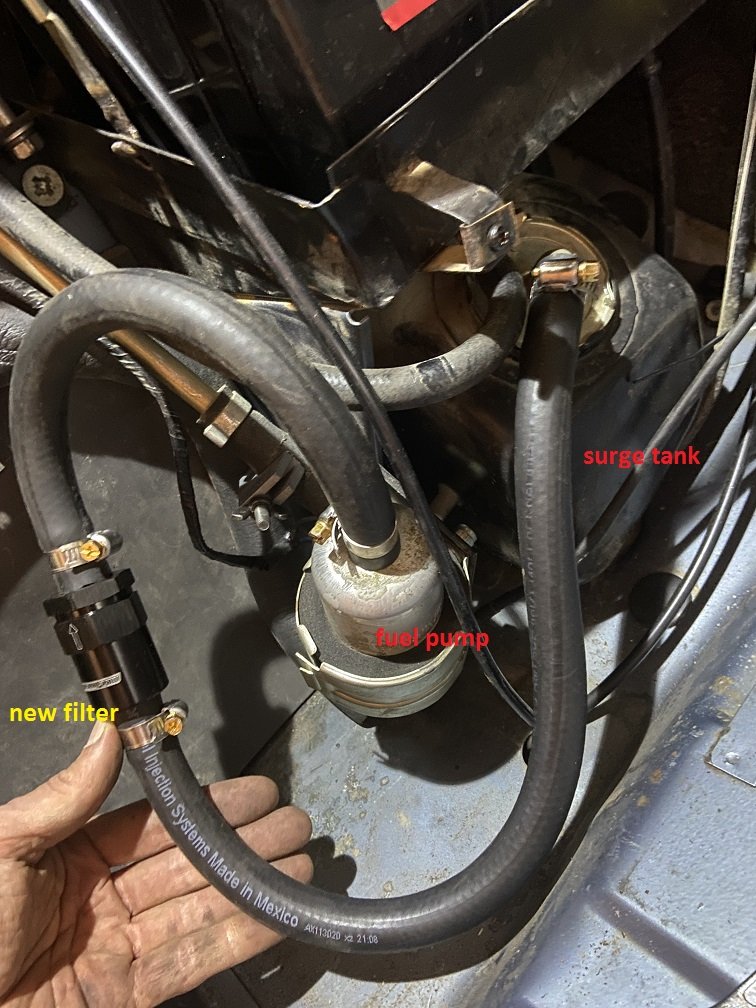
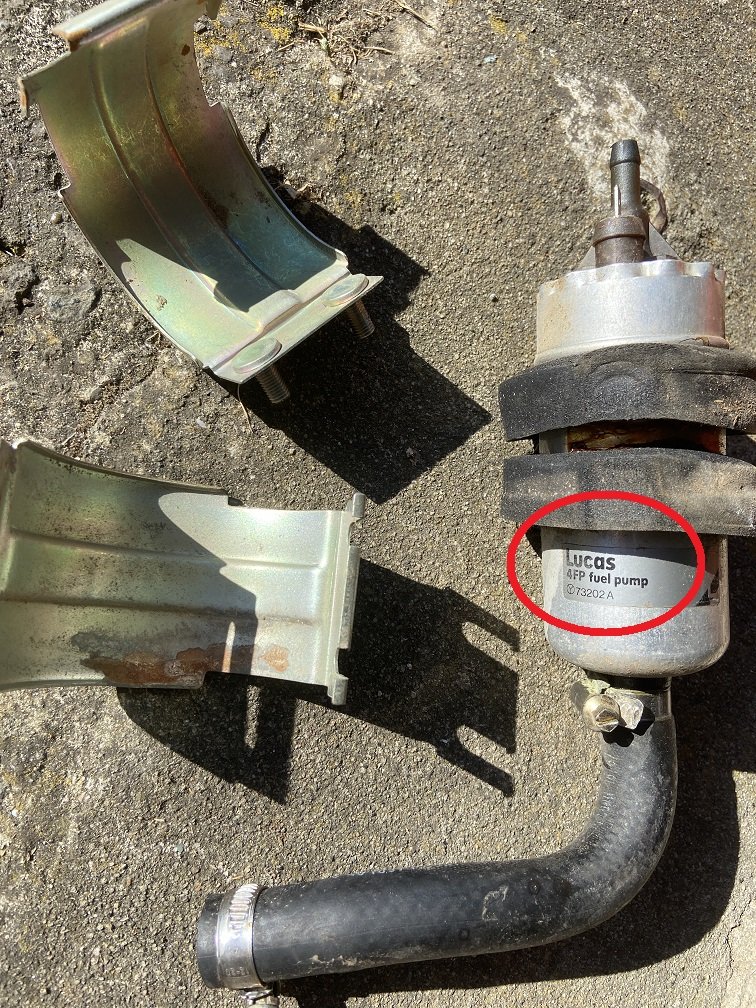
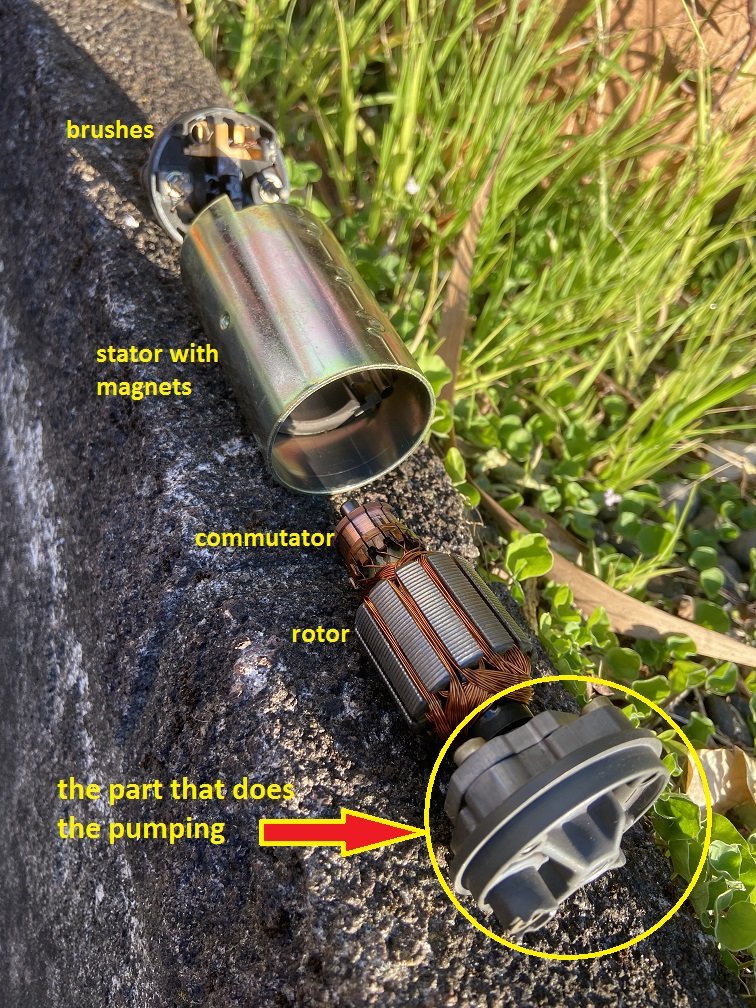
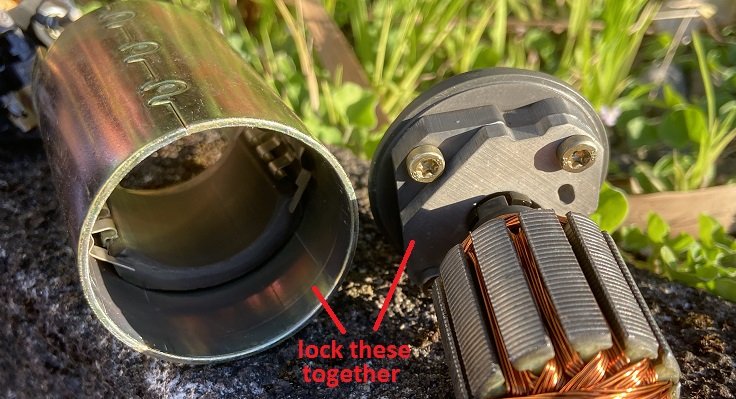
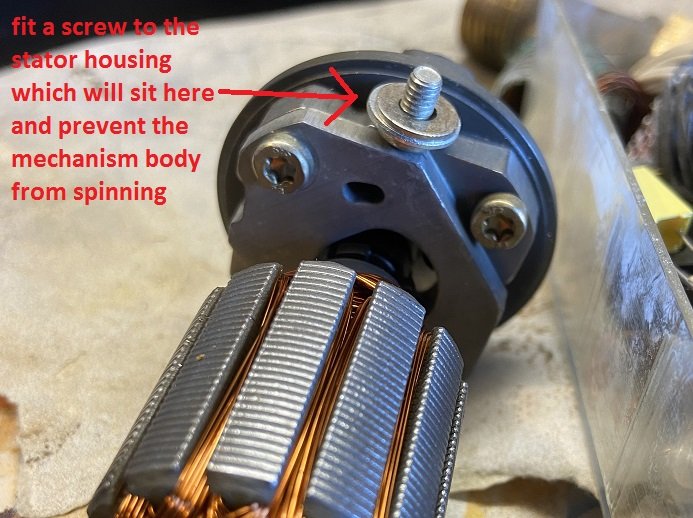
The verdict from the automatic transmission place was that the problem under hard acceleration wasn't caused by the auto! I was saved from having to spend lots of money on it. When the problem started to develop, it was only apparent at the top of second gear - it felt like the transmission wasn't making it into third gear, but in fact it must have been the engine running out of gas. Once again I'm lucky I didn't blow it up. I consulted the Barry Bible and apparently thirsty old Jags can suffer fuel starvation for several reasons: Fuel pickup blockage because the fuel tank likes to rust (my car has had a tank replacement in the past) Insufficient voltage to the fuel pump because of Lucas electrics Internal mechanical problems with the fuel pump Barry has answers for all of these issues, and he hasn't put me wrong before. His first recommendation is to remove the strainer from the pickup in the surge tank and substitute an external filter instead. I went and bought the required 1/2" size of fuel hose and filter, which of course you can't get from Repco/Supercheap. Then I took out the fuel pickup aaaand..... It's fine. I took it off anyway, because I'd already bought the parts to add the external filter: Ideally I'd find a bigger transparent filter which can be disassembled and cleaned, but maybe later. What's next... insufficient voltage. The voltage across the fuel pump turned out to be a constant 13.2V. That's presumably good enough - Barry said it should be at least 11V at idle. So the remaining fuel starvation cause is this: Barry describes this easy modification you can make to these fuel pumps to stop them playing up as they age. Yes you can just buy a non-Lucas fuel pump, but where's the fun in that. Plus this Lucas part is actually a Bosch part made in France. Apparently it's easy to un-crimp the top of the aluminium canister and mash out the internals.... I didn't find it easy. Violence was required. Here's what's inside: The part that does the pumping does not spin with the rotor. It has some internal impeller which is driven by the rotor, but the body of the mechanism needs to be held in place. The problem is that the only thing keeping it in place seems to be a rubber o-ring (not shown) pressing against the outer aluminium canister of the pump. As everything ages, eventually the part that does the pumping starts to slip and spin, meaning less relative speed of its impeller bits, meaning less fuel pressure. Then you get a crappy idle and fuel starvation at full power, and then you get burned pistons and you have to do a 350 Chev conversion. So here's the solution: how? By cunningly fitting a screw into the inside of the housing of the motor, we can lock the pump mechanism in position. The screw threads need to be ground off flush on the outside of the stator/casing so it can be jammed back inside the aluminium housing of the pump. By using the right number of washers under the screw head, it's impossible for the screw to come loose and fall out once the whole thing's reassembled. Genius. It was not easy to get the pump back together. It looks all mangled now and I'm surprised it still works and doesn't leak. I also replaced the regular fuel filter at the same time, because it had been installed over 14 years ago. Then I went for a drive, and yay, it seems to be fixed! The idle seems to be improved, which is something that has always bugged me. Most importantly I seem to be able to use full throttle right to redline again without the awesome AJ6 drinking its injectors dry. It's all the horsepowers that do it. Listen to them all on my crummy hand-held dashcam: All this mucking around has meant I still haven't changed any suspension bushes / subframe mounts or fixed the headlining. Hopefully I can fit some of those in by Nats.
- 37 replies
-
- 37
-
-
-
Too expensive for a parts car, too expensive to restore for what it would fetch... All the XJSs on TradeMe are always listed for twice what they'd actually sell for, and that's why Jaguar Workshop just relisted the $5k car for $6k after it didn't sell. Does Jaguar Workshop still have a 3-month waiting list? It would already be too late for me to get any work done there before Nats, which is a nuisance cos he's the only game in town. What tickling might your car possibly get? I've heard you can get free power out of the AJ6 by moving the crank timing pickup to advance the ignition timing, and that you can get less-free power with better cam profiles. Something about Jaguar designing the engine based on conservatism and guesswork. Before Christmas, the automatic transmission place where I went for an evaluation made an adjustment to the cable that runs from my throttle linkage to my transmission. Apparently the adjustment reduced the fluid pressure in the auto. Shifts are nicer now. I'm still nervous about letting the car rev out under hard acceleration though. I will do it again before the booking on the 3rd to make sure the problem's still there.
-
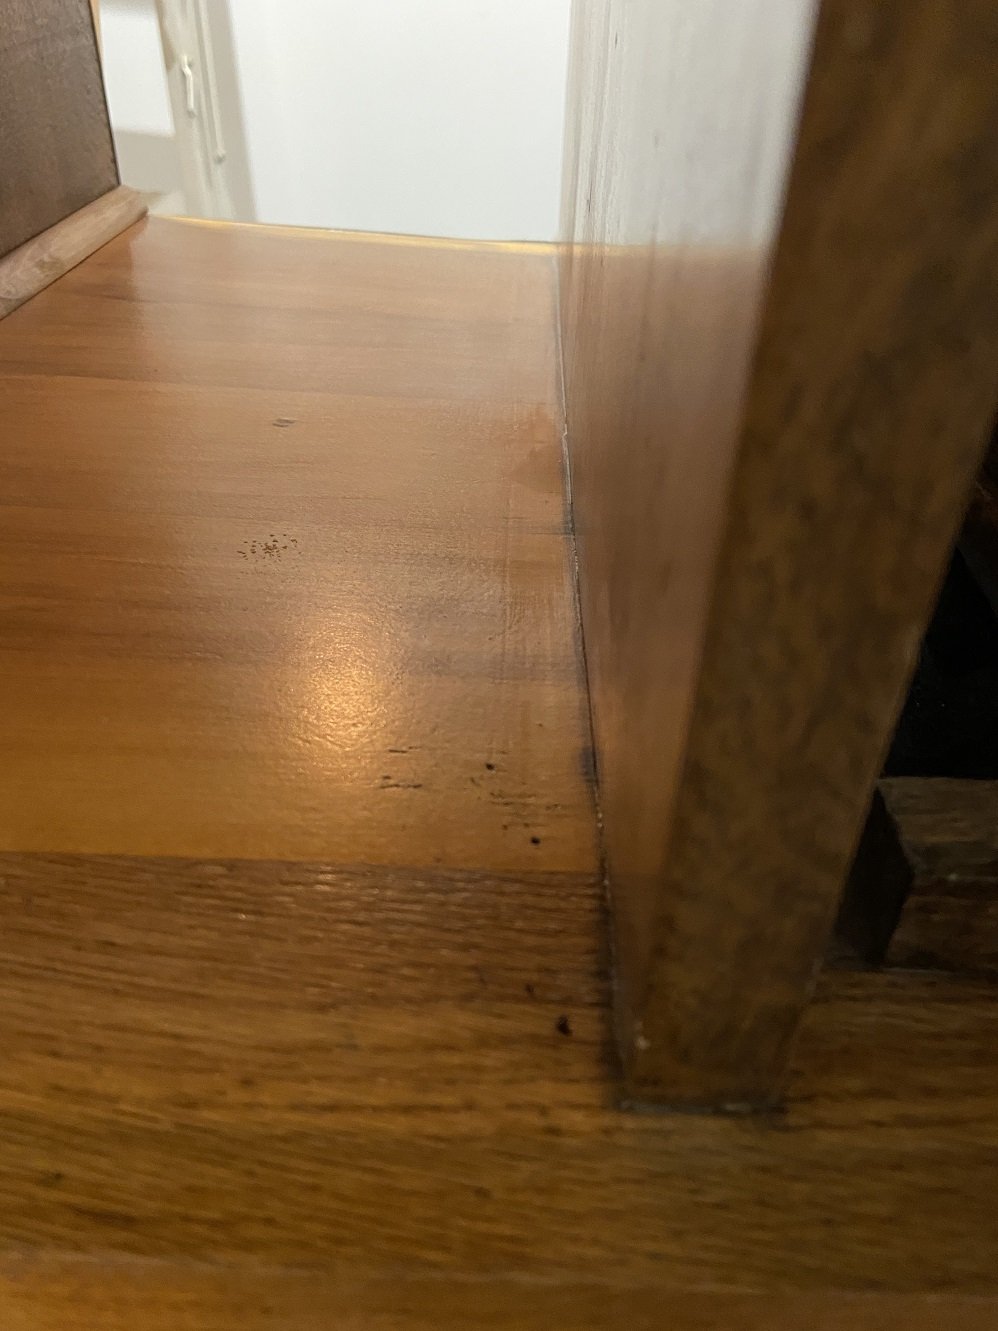
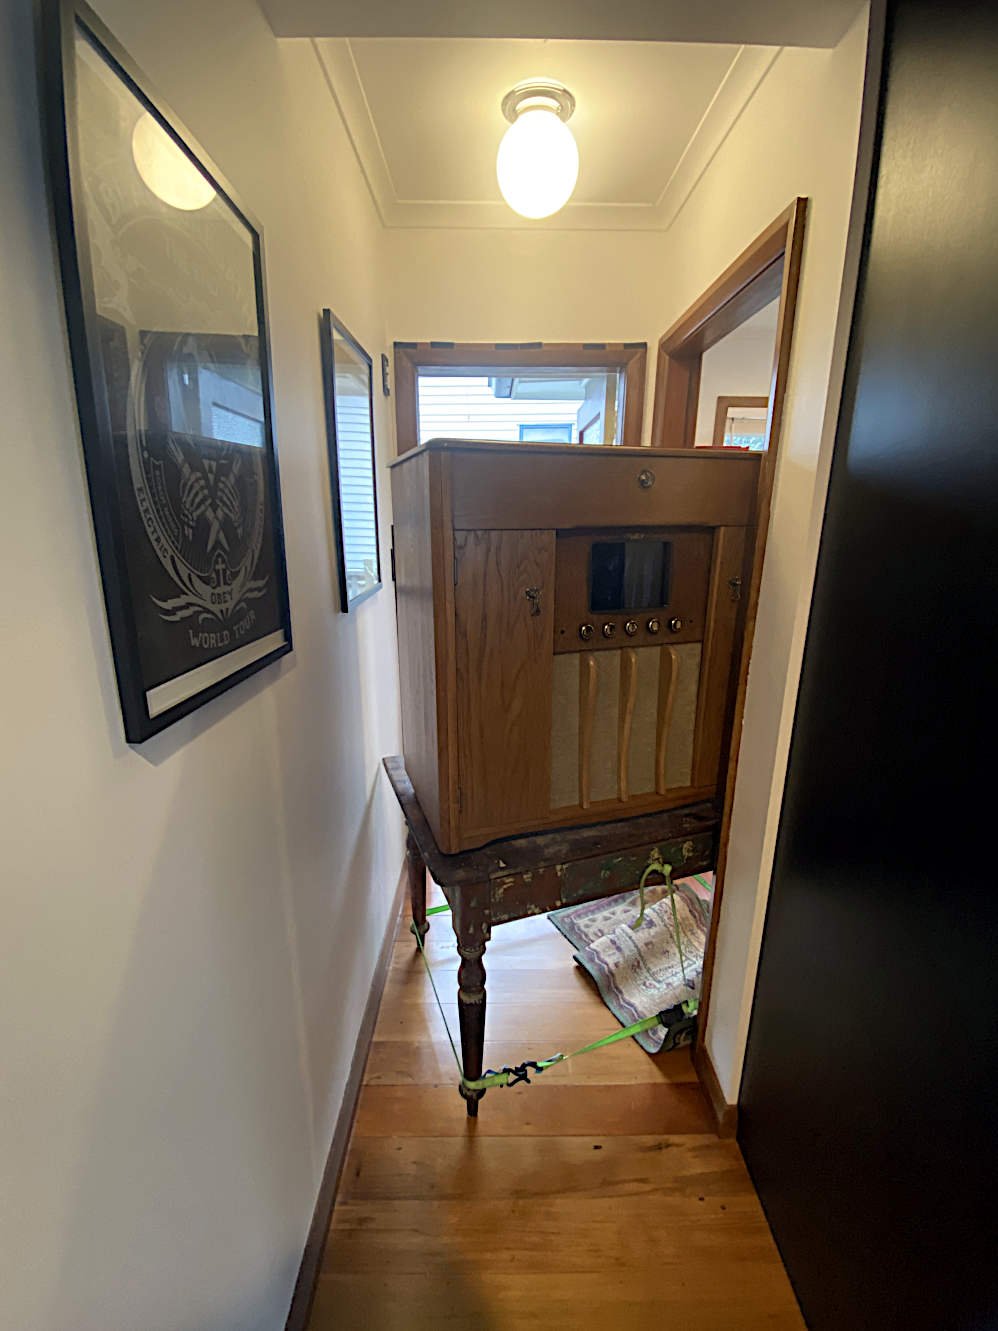
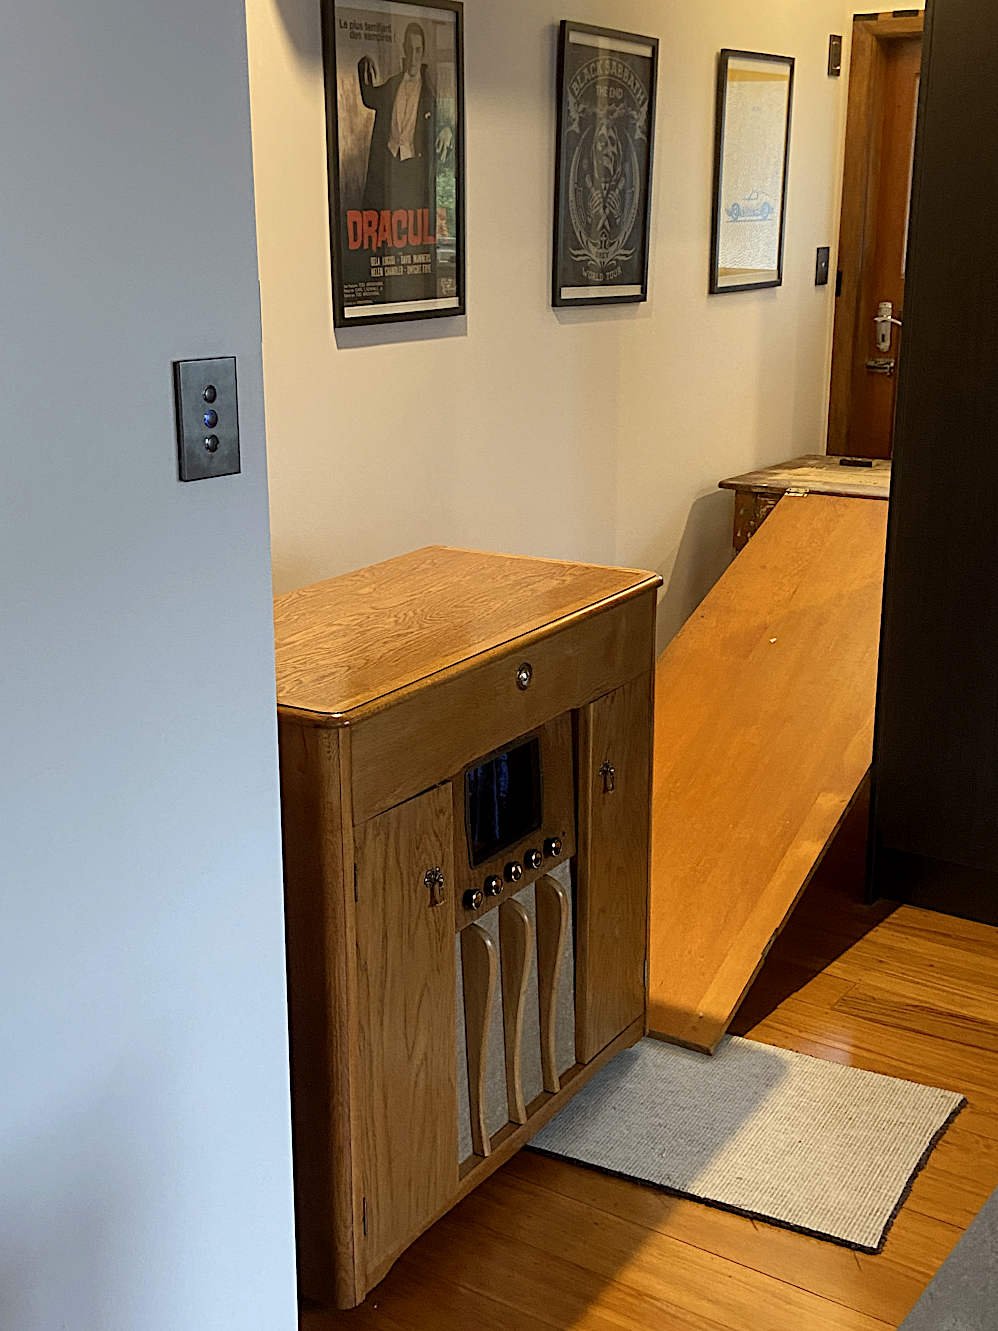
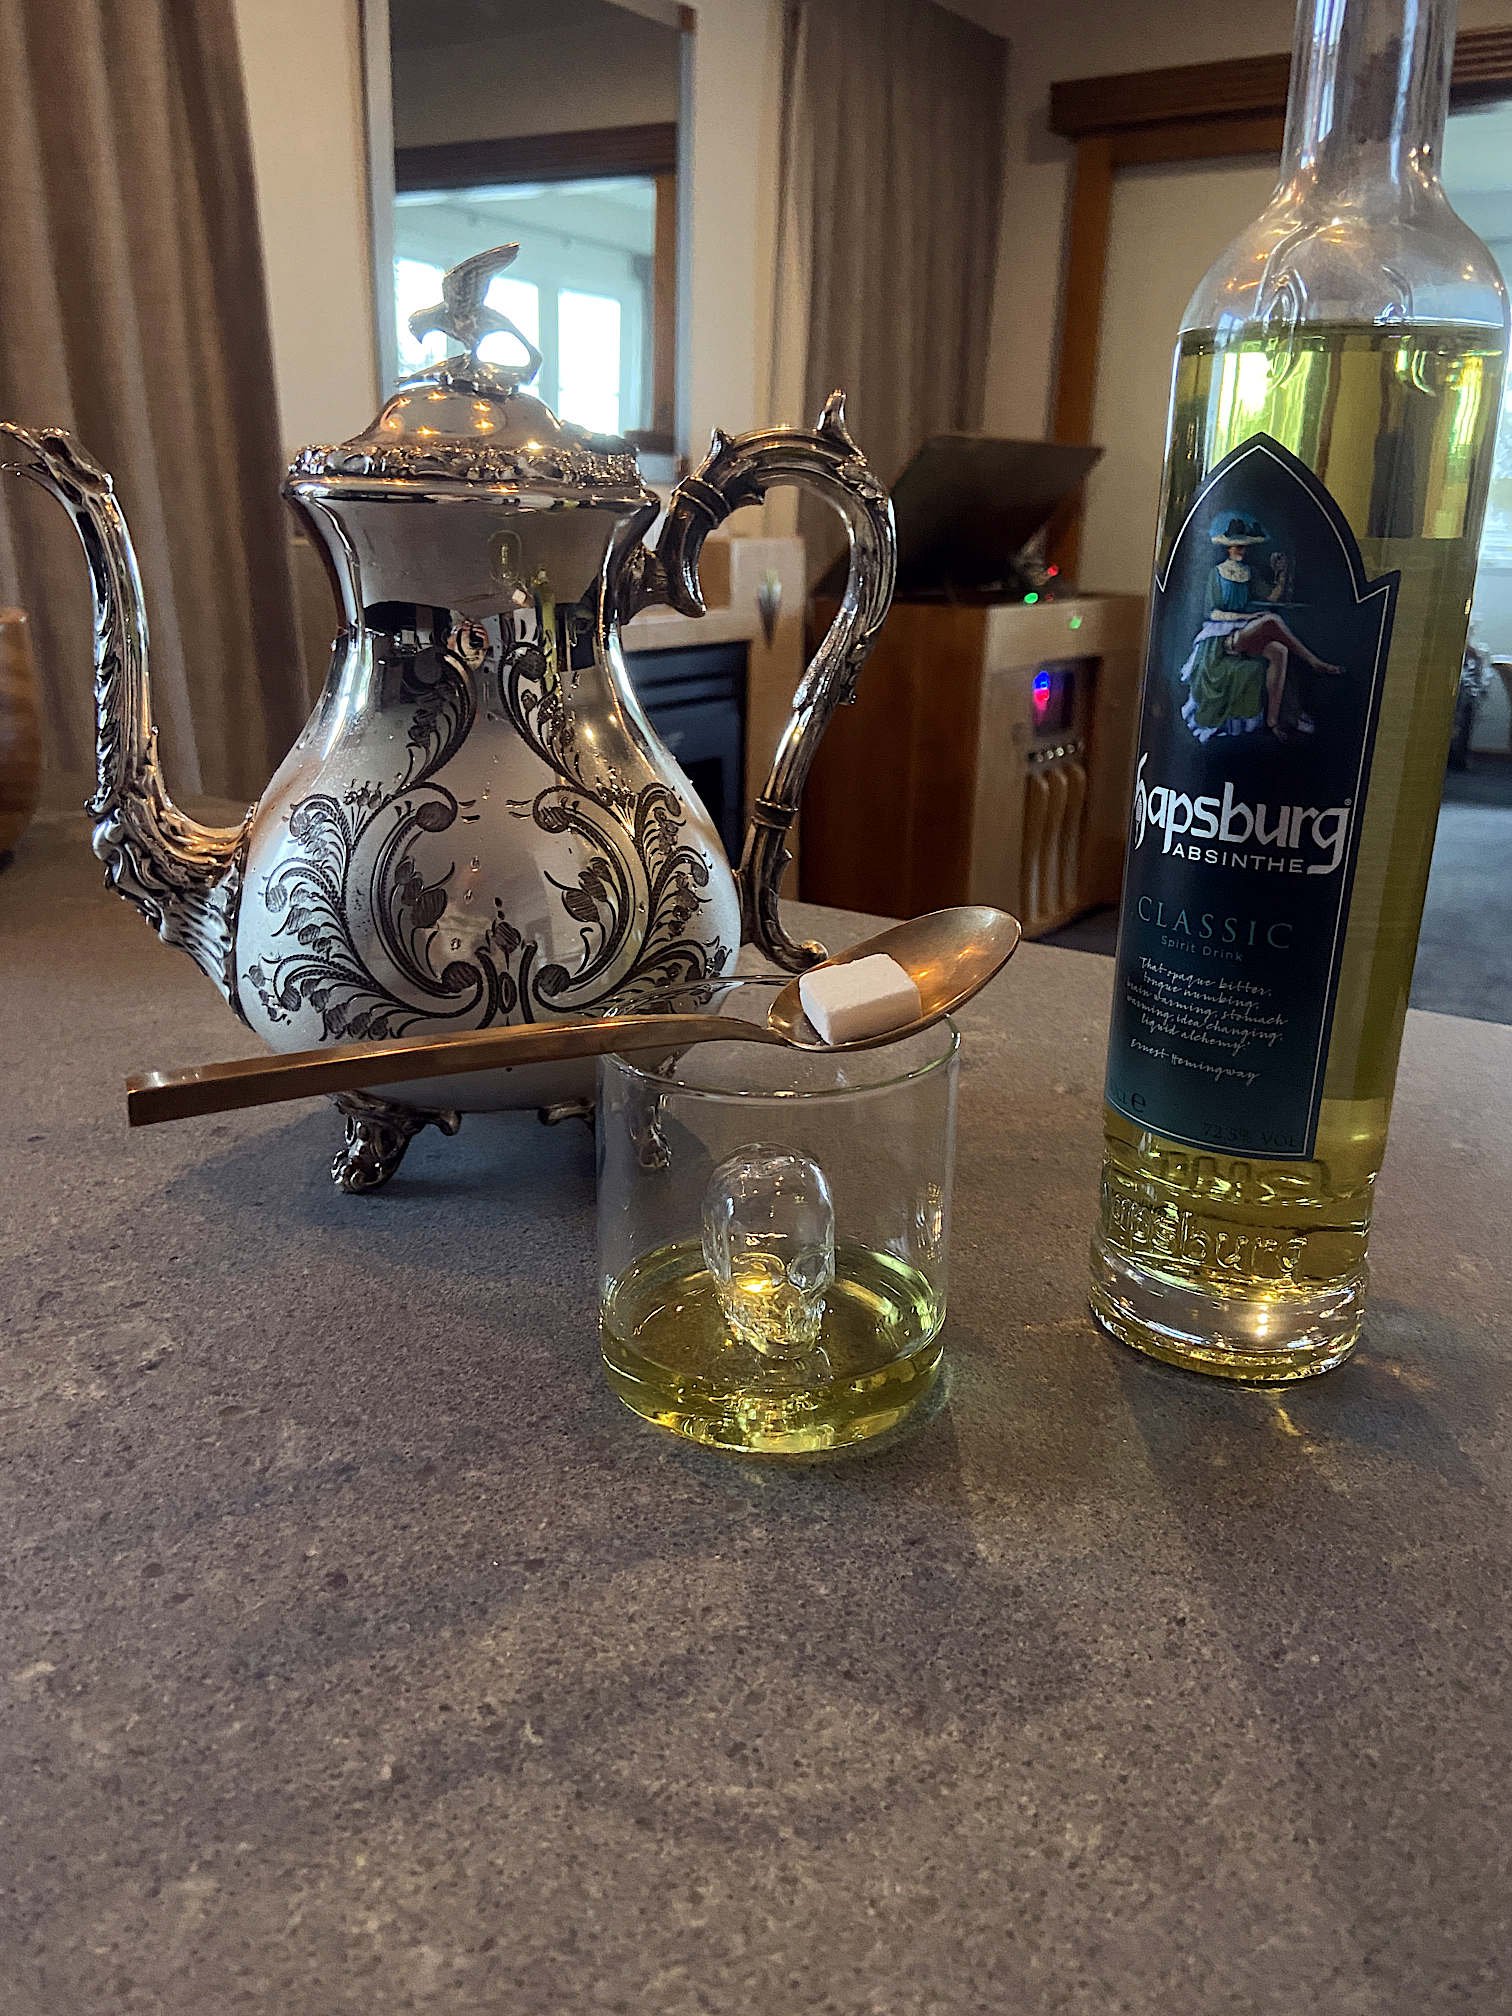
Hey, it's THIS thread. Still. For years this poster has been looking back at me from the hallway while I work on the radio cabinet: It's appropriate that it says 'ELECTRIC FUNERAL', and that beside 'THE END' you can see the reflection of the bottle of absinthe which I'm not allowed to open until the project is finished (or at least back in the living room), Cabinet restoration is not my friend. I decided I needed to refinish the internal shelves, but when I tried to do that, it was too hard to sand right up to the shelf edges. When I tried to varnish the shelves and the inner walls of the cabinet, it was hard to get the varnish to sit nicely across the edge gaps without runs. Any patches where I hadn't removed all of the original stain stood out, and the more I tried to access them, the more damage I did with the sander. So I just bought some pine edge mouldings and covered those areas up. You'd never know they weren't there to begin with. I put the refinished doors back on, but this highlighted that there was now too much colour mismatch between the doors and the upper front panel: *sigh* so I sanded and re-stained that upper front panel to match. This created even more dust, and I did a bit of collateral damage to the viewing window surround with the sander. =( After spending time making more bits fit, and adding another hidden switch for some more icicle lights which I've stuck to the back of the cabinet, I'd had enough. I decided it was suddenly imperative that the cabinet get out into the living room for the final touches so I could get on with other projects. The problem was that there was nobody around to help me lift the stupid thing down off its table. Even my neighbours were away. So I thought about it, lifted up the table one leg at a time, and put felt pads and a rug under its legs to protect the floor. Then I put a ratchet strap around the legs so I could lift one end of the table and drag the other end along the floor without the legs collapsing. So far so good. Onward, to victory! Dammit, the table can't make it around the corner. Don't worry, Mister B, I have a cunning plan to solve the problem. I dragged an old door out of the garage, pulled out the table's drawer slightly, sat the door on the lip of the drawer like so... ...and screwed the door to the table with some hinges. Since the radiogram is on castors these days, I planned to just roll it down the ramp. What could go wrong? Nothing. Absiiiinthe! So it turns out absinthe is pretty yuck so far, and that's coming from someone who likes aniseed / liquorice / etc. At least the radiogram has made it to the floor in the living room, so I can do a few final touches from a different visual perspective and then declare it finished. There's plenty more I could do, but I need to sell any further work as improvements to an already 'finished' project so the project doesn't turn into a running gag. To celebrate this milestone, I got hammered, cooked myself a gourmet meal of bacon, sat in front of the cabinet on my beanbag and gave its speakers some proper exercise. In the next few days I'll stock up the cupboards, finish a few things and take some photos.
- 33 replies
-
- 17
-
-
-
-
Even a non-turbo Barra makes more power than my 3.6 AJ6, and it looks like you can get the engines for under $2k. Barra engine in Jaguar XJC: https://www.streetmachine.com.au/features/hamish-davidson-barra-jaguar-xjc But look, a $5000 parts car: https://www.trademe.co.nz/a/motors/cars/jaguar/xjs/listing/4471498047 If only it was manual, and blue rather than grey, and for sale before Covid when I'd crashed mine, and someone hadn't bent the headlining, etc. I wonder if it idles smoothly and if the auto is good.
-
I knew you'd say that when I got your comment notification. Not sure why anyone would willingly convert their weekend classic TO diesel so that it can sound like a truck, smoke like a train and not go any faster.
-
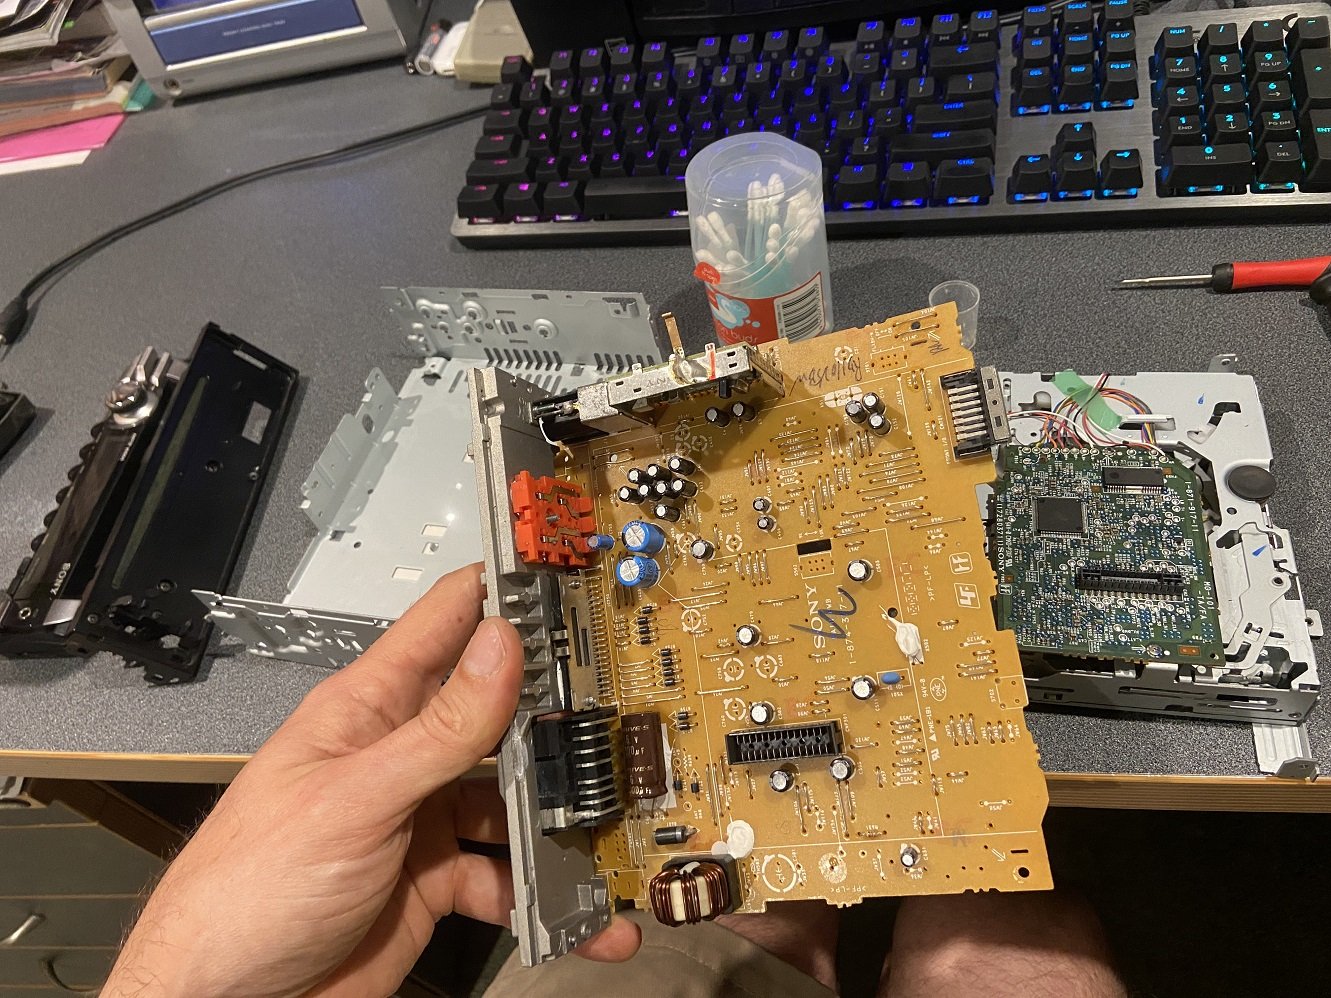
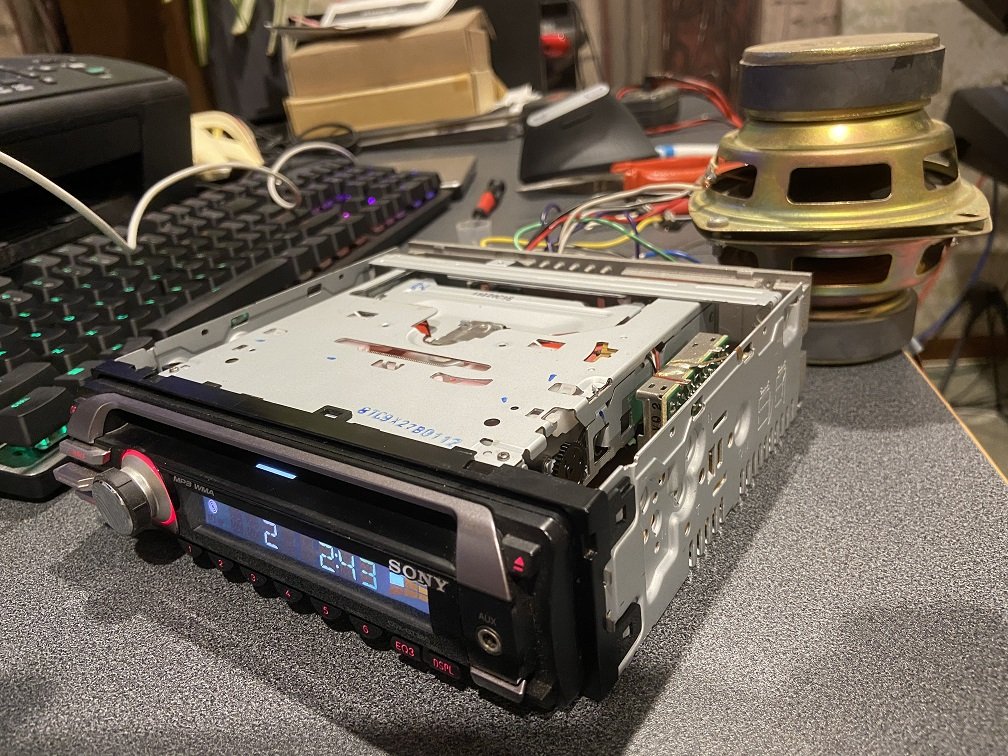
Headlining: The Toy Shop here in Auckland created their own fibreglass mould specially for XJS headlinings, and their price is....... $1,800.00 plus GST. It's slightly cheaper to ship a new headlining from the other side of the world. Auto: I went to see an automatic transmission place, and regrettably I've booked the Jag in with them to give its ZF 4HP22 auto a birthday. The auto has always been a bit noisy and a bit rough during my ownership, and I guess I tempted fate by having the fluid changed and occasionally driving like I just borrowed some oil paintings. It kinda sucks to be spending money on an automatic transmission, but manual parts cars don't exist, and manual conversion kits only exist for the V12. Tell me I should spend more money on a Chevy LS swap and end up missing Nats here. I did manage to improve the drivers window operation by flipping the rubber guide seal around, and I lubricated the passenger side central locking so much that it might actually work reliably for once. For the radio, I wasn't lucky enough for the problem to have been caused by speaker wiring. It was caused by water leaks. This quote from the XJ-S Barry Bible will explain: Can you believe the official fix for various disastrous design decisions in the A/C system is to fit a condensation deflector shield? Guess whose car is prior to VIN 163790 but isn't fitted with one. As part of diagnosing this, I dug out an older head unit which I originally bought for my Alfa ~15 years ago, and as an extra bonus I discovered my missing Iron Maiden greatest hits CD was still in it. I strategically taped over some of this head unit's vent holes to keep any water from getting in, and I figured I'd run it in the Jag for a while. Then I took apart the faulty head unit and cleaned the corrosion.... I reassembled it and set it up on a test bench running off an AC adaptor... It makes noise again! Jolly good show. Now I must build a condensation deflector shield.
- 37 replies
-
- 25
-
-
SR2’s 1947 Vauxhall “Rigamortice” Discussion thread.
Thousand Dollar Supercar replied to sr2's topic in Project Discussion
I think you need to fit a hazard light function so the trafficators flap like wings. -
Thousand Dollar Supercar's old piano
Thousand Dollar Supercar replied to Thousand Dollar Supercar's topic in Other Projects
Does he wreck them for parts? I wouldn't mind a set of brass pedals to replace my silver-painted iron ones, and a rare circular keyhole surround (mine is lost and I've stuck a plastic fake brass one on, which protrudes too much). I know I could easily buy a $1 piano to get some brass pedals, but then I'd have to collect and dispose of the thing. -
Thousand Dollar Supercar's old piano
Thousand Dollar Supercar replied to Thousand Dollar Supercar's topic in Other Projects
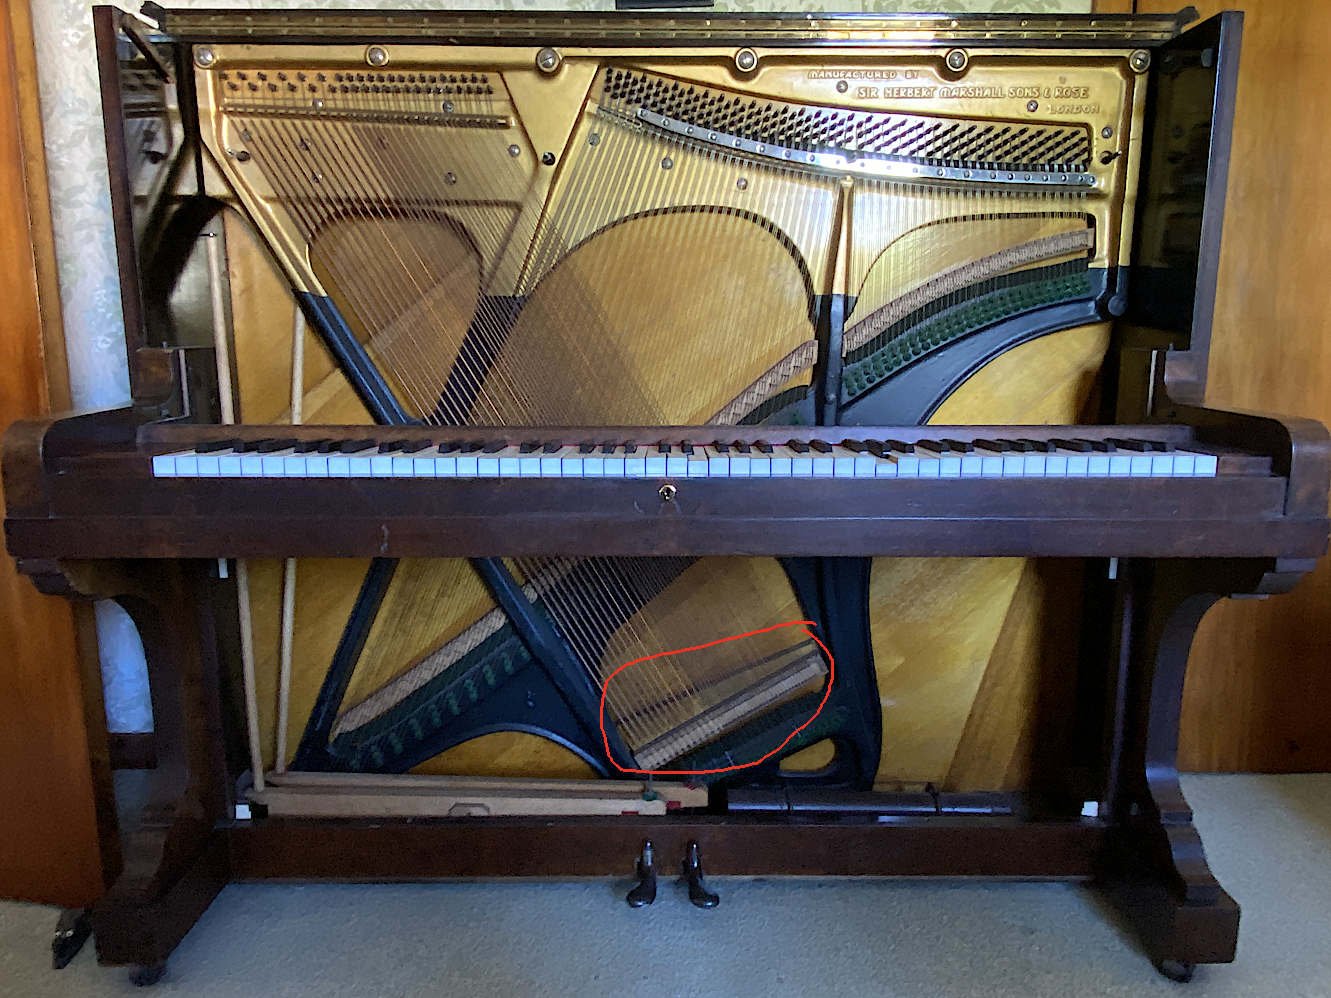
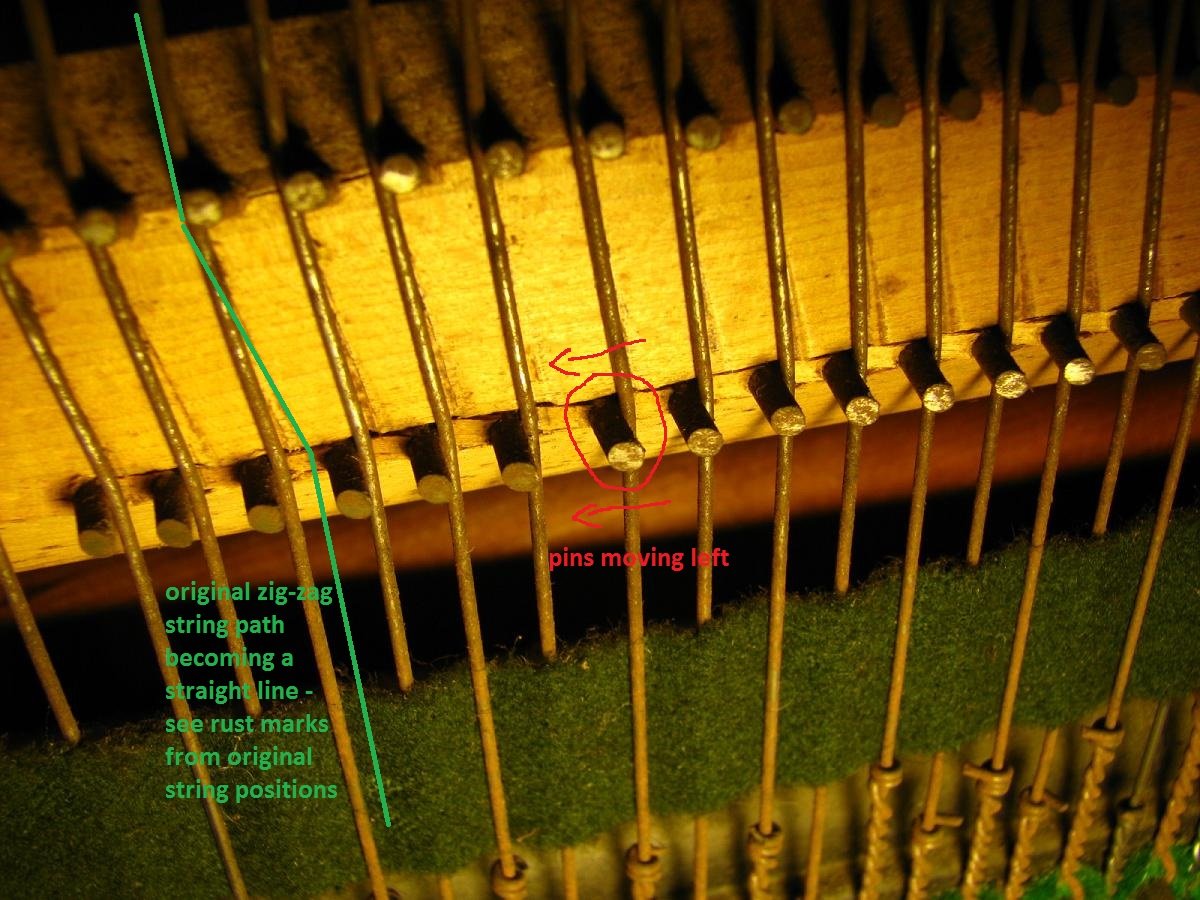
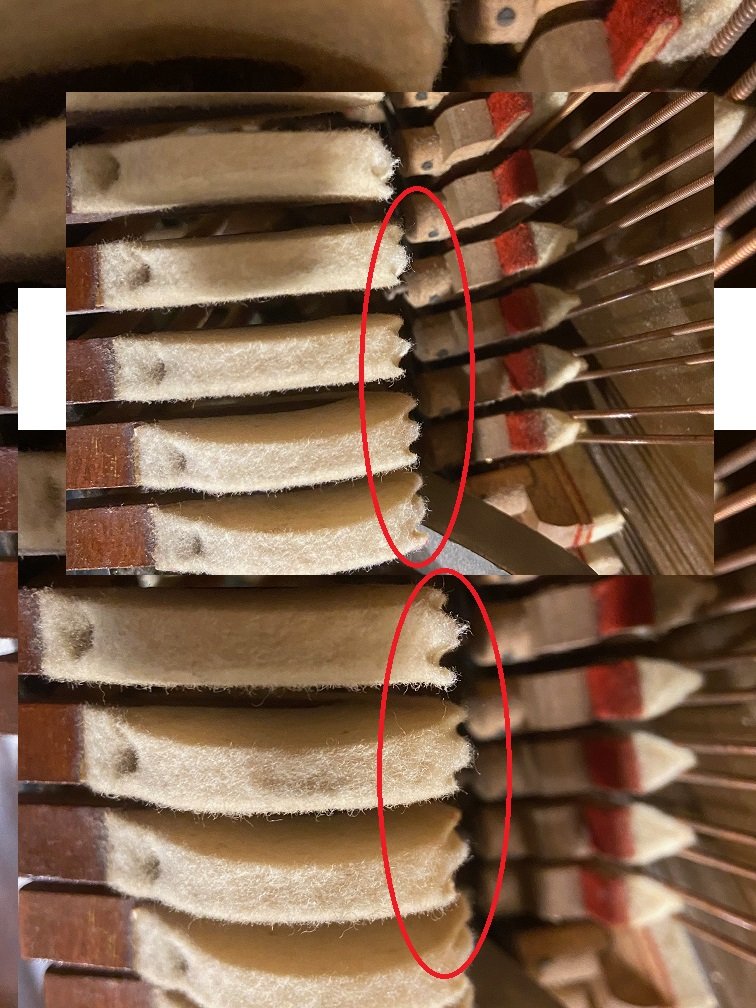
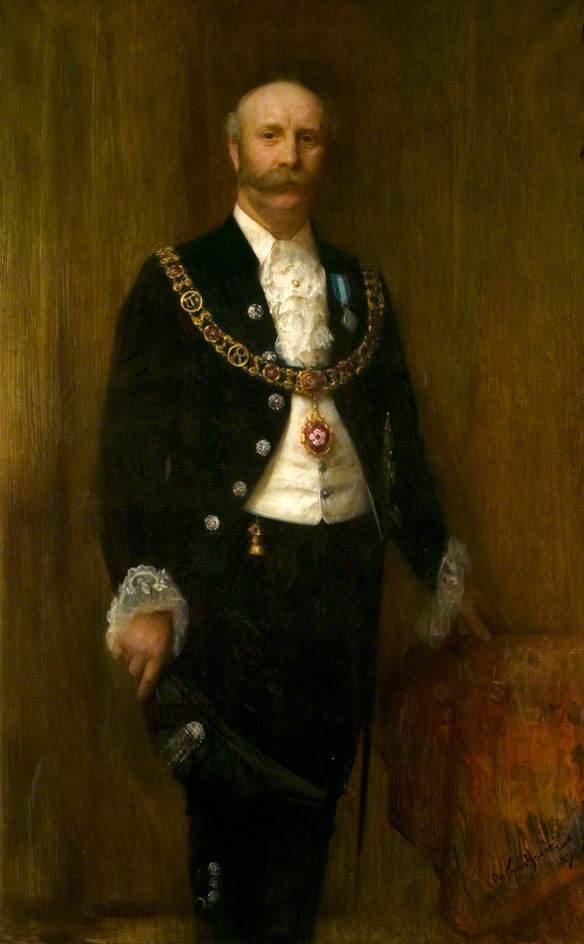
Everything's going according to plan. About as well as you'd expect! I had it tuned just last week and one or two strings slipped immediately. It's a big ask for a piano to survive nearly a hundred years in playable condition. Some selective refurbishment has been done, but the hammers and strings are original (save for the few I broke playing boogie woogie as a kid). Here's some of the stuff that's wrong: The bass bridge (circled in the photo) is shearing/collapsing in the bichord (two strings per note) section, allowing the bridge pins to move under the sideways pressure from the strings, affecting the tone. See later photo. Apparently the bass bridge has rolled, affecting the downbearing. The bridge is a cantilevered design, suspended in space and only attached to the soundboard at a point slightly closer to the soundboard's centre. This allows the bridge cap to be positioned closer to the bottom of the piano to maximise string speaking length, while having the string vibrations conducted into the soundboard at a more central point where the soundboard vibrates more freely. I think. The downside is that the bridge cap's not directly supported, so the cantilever can be crushed back against the soundboard under pressure from the strings, until the string downbearing is insufficient, affecting the tone again. The pinblock is wearing / tuning pins are getting loose. Due to wear from being tuned and due to the wood aging, the tuning pins get looser in the pinblock over time and they don't hold their tuning as well. In my piano there's also no more scope to hammer the pins further in to make them grip better. The hammers are wearing. See later photo. The felt hammers of a piano develop deep grooves over time from hitting the strings. It doesn't help if the felt is 99 years old. The felt gets compacted and hardened, and the contact point of the hammer gets flattened and enlarged, all of which affects the tone. Various bushings in the action are wearing. The hammers wobble left and right and the piano clatters like a typewriter. Some treble bridge pins are loose, creating false beats (an out-of-tune sound which can't be tuned away). What's the fix for all of this? Take all the strings off (to get at the bridges) and throw them away (because they're 99 years old, dull/oxidised/rusty, and would probably break during reinstallation) Take the tuning pins out (because the strings are off) and throw them away (because the worn pinblock no longer grips pins of this size firmly enough) Break the bridges off the soundboard Make new bridges from scratch and stick them on Install new larger tuning pins Make and install new strings Rebuild the action with new hammers The fact that new strings and bridges would have to be custom made would mean there was an opportunity to get super nerdy and redesign the piano using modern analysis and materials. Piano Barry warning. The scale design of a piano refers to the speaking lengths of the strings, their wire diameters, tensions, the copper wrapping of the bass strings etc.. Scale design is a mathematically complex task which probably took forever back in the day, but which now can be done more accurately with computer modelling. These days there is a greater selection of string wire thicknesses to choose from, and they've figured out the percentage of a wire's breaking strain which gives the best tone. So the impression I get is that they feed the piano's parameters into a computer and it corrects the homework of the original designers, allowing the piano to be rebuilt better, stronger and faster than new. It'd only cost six million dollars a bit more than a new piano. Here's the bass bridge for "interest": And here's some worn-out hammers for your viewing pleasure: Sir Herbert Marshall would not approve: The plan is to have the existing hammers reshaped early next year, along with giving them some new bushings to reduce the typewriter clatter. It'll be like polishing a rusty car / rearranging the seats on the Titanic.
-
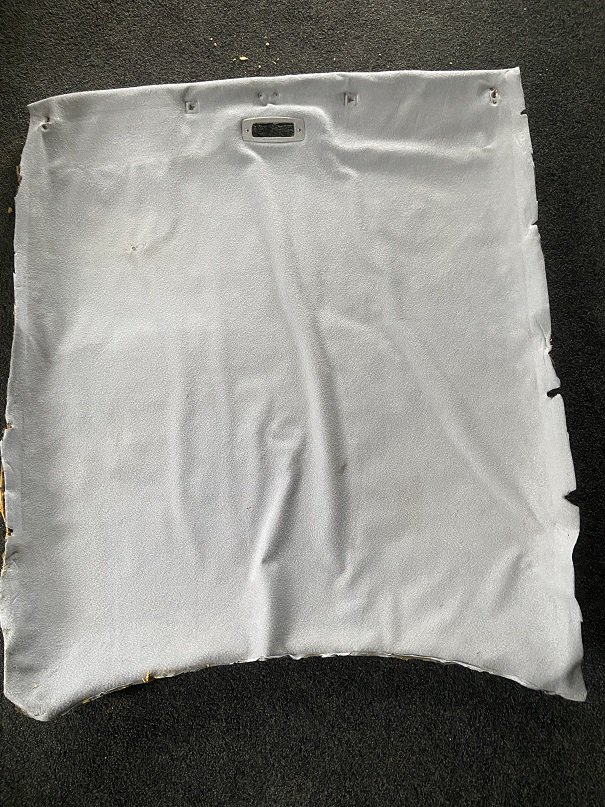
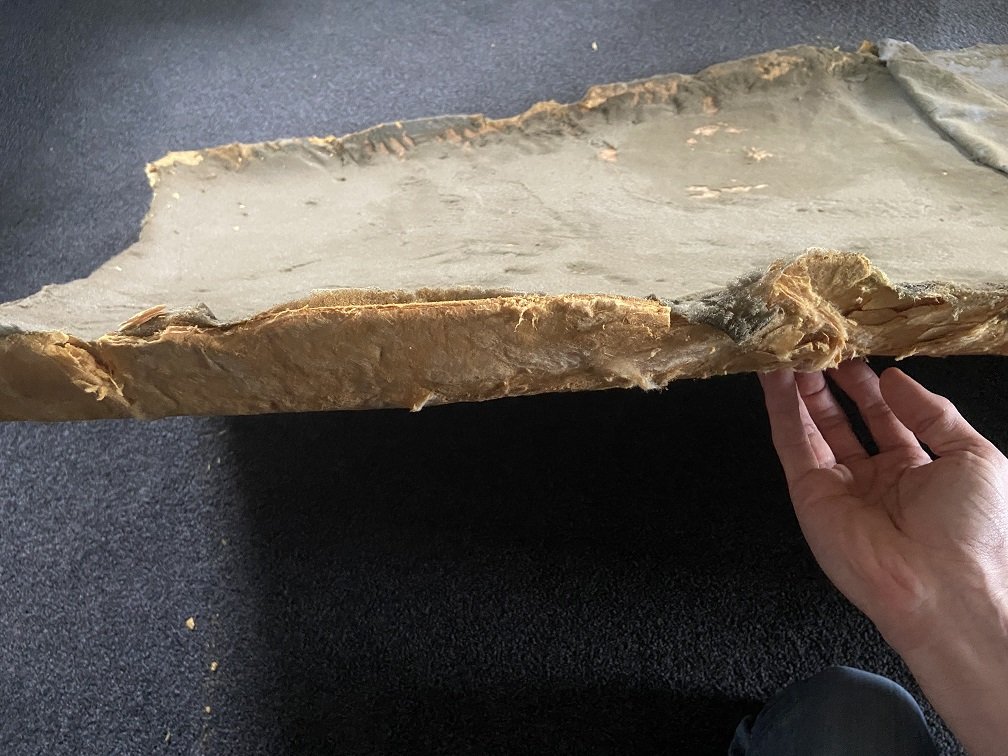
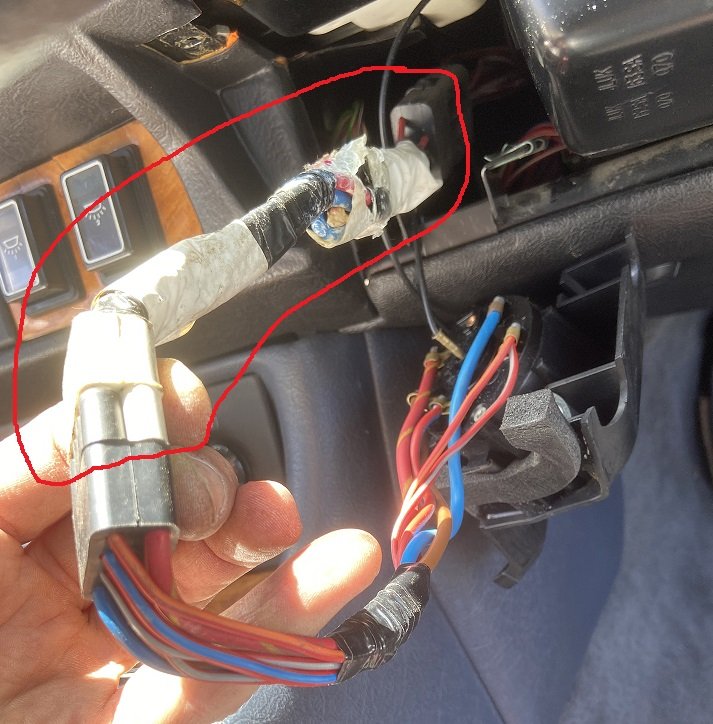
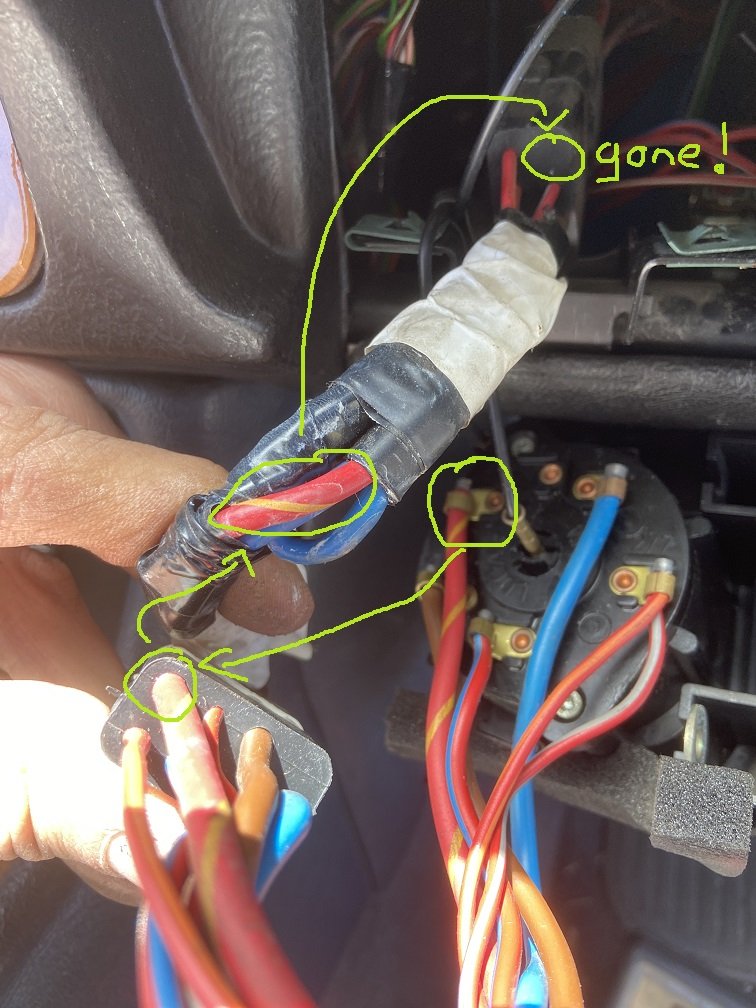
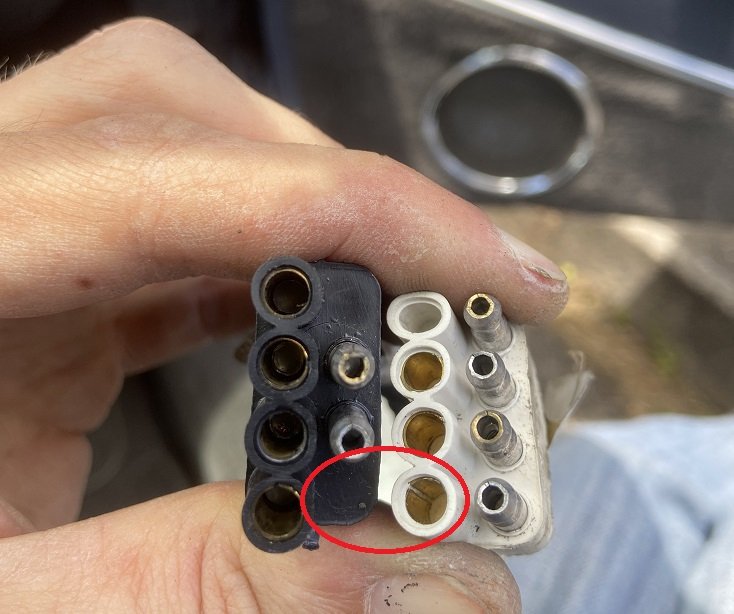
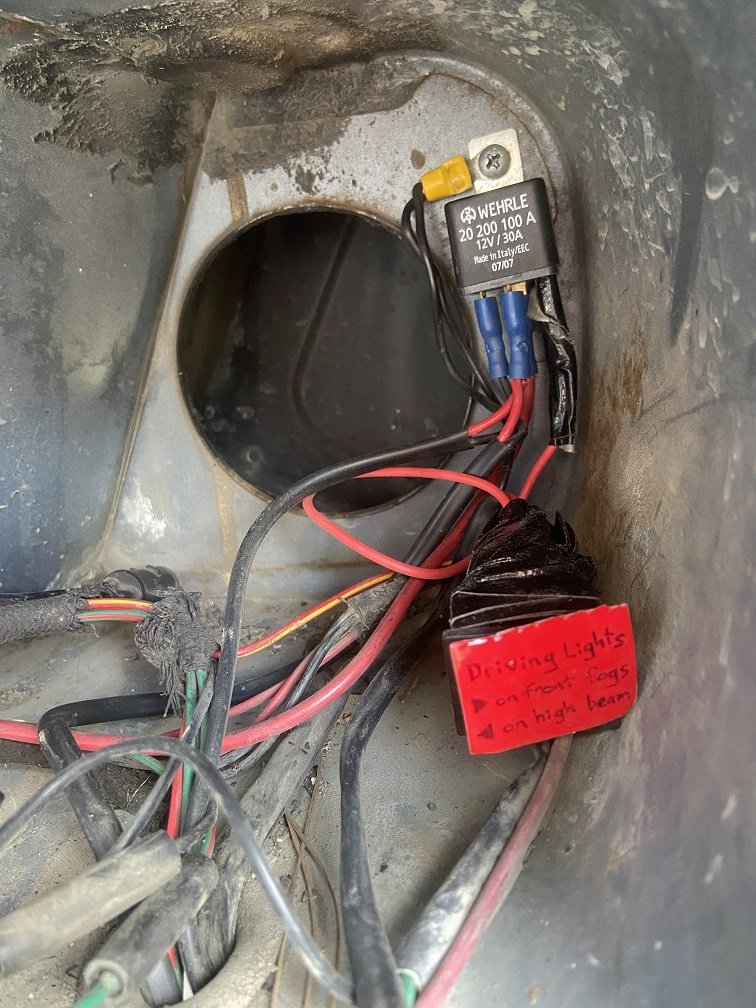
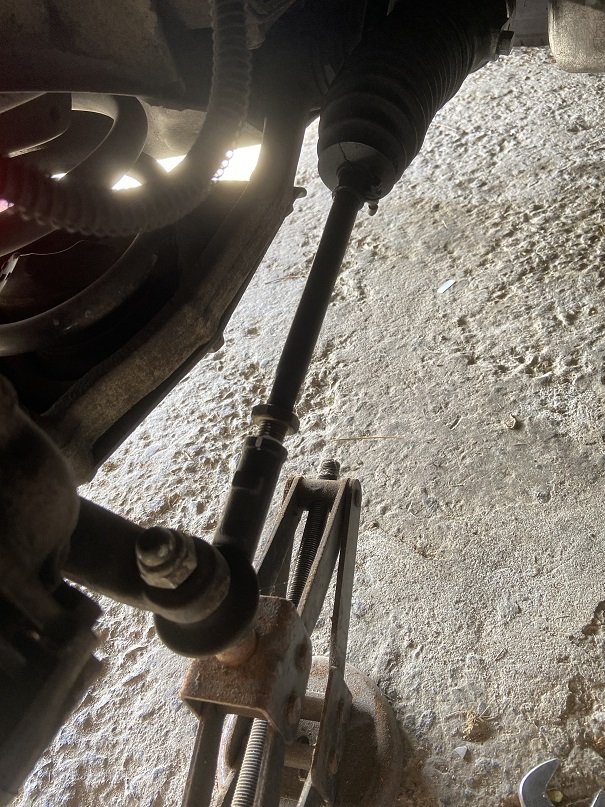
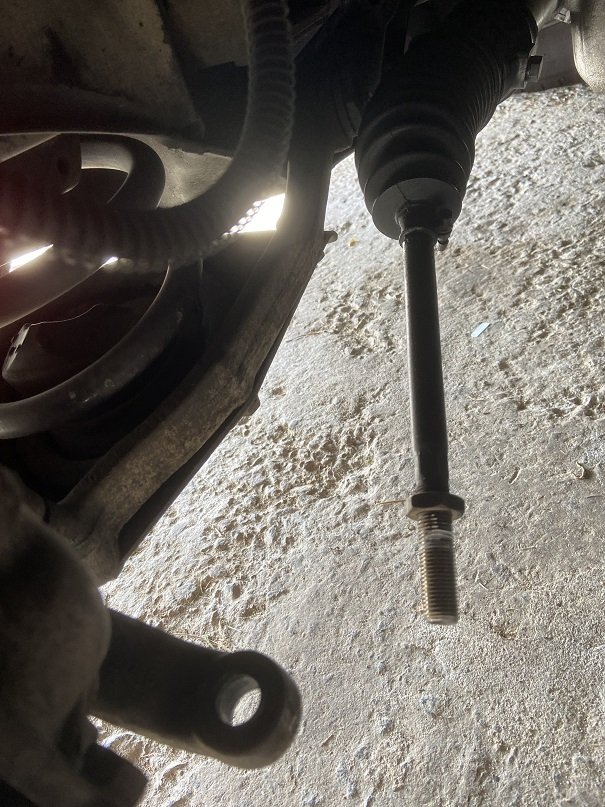
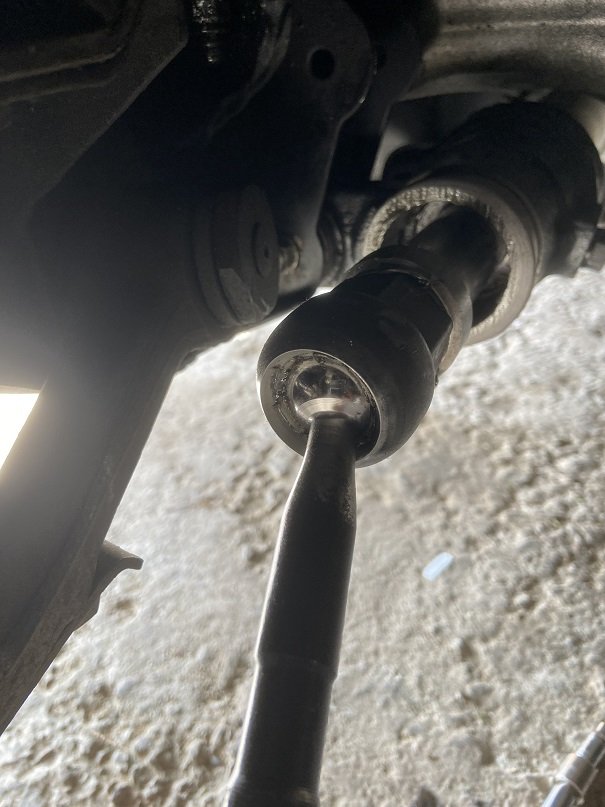
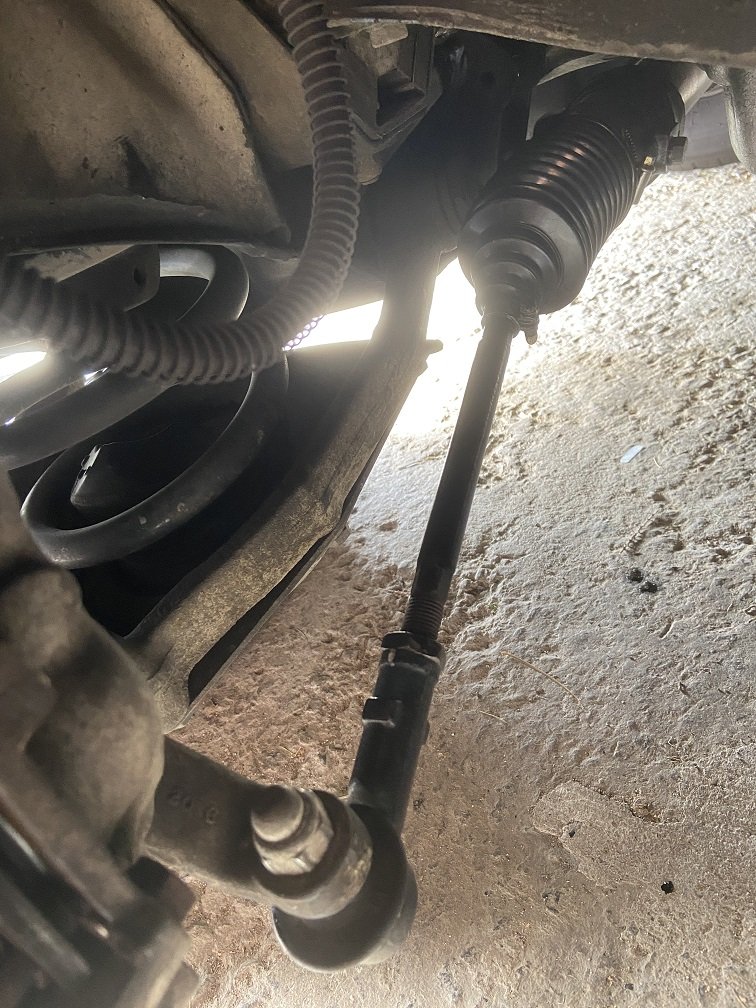
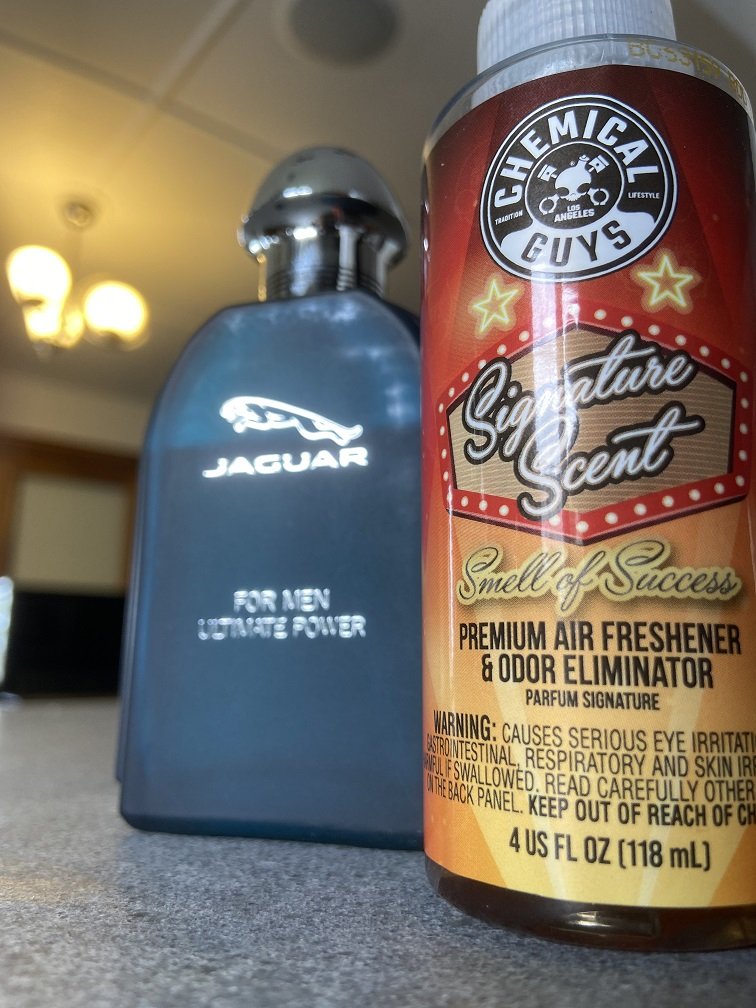
The headlining in the Jag started to sag badly, so I took the whole thing out. The backing is made of Weetbix covered in crumbling foam, and it's impossible to reuse at this point. The previous owner of my car was an upholsterer and his repair didn't last, cos nothing will stick to this flimsy mess. So now I have no headlining and no interior lights. You can get replacement headlinings which have the Weetbix backing shell replaced by fibreglass or something, but the shipping from the UK is crazy. On the Jag's last WOF inspection, they gave me a warning that they didn't like my aftermarket driving lights coming on with my high beams. Having the lights work that way made sense to me, but whatever, I figured I'd change them around to run off the front fog light circuit to keep the WOF man happy. Although my car didn't come with front fog lights from factory, it still has the dedicated fuse for them, and the dedicated SPARE fuse for them , and the headlight switch still has positions to activate them. So I figured I could just find the fog light plugs behind the bumper and they would already be functional / already be live when the headlight switch was set to the correct position. Right? Nope. After an hour or two of poking around, I found this stuffed in behind the headlight switch: It's an adapter for cars without fog lights, and its purpose is to stop the headlights from turning off when you turn the headlight switch to the fogs-only position. The adapter also prevents the fog light plugs from becoming live, because it breaks the connection to the fog light circuit. You know, that same circuit which is nevertheless fitted with a fuse and a spare fuse. You can see that the fog light circuit is discontinued in the photos below. So I just removed the adapter completely. Now my fog light circuit is live. The aftermarket driving lights in my car were conveniently run off a relay rather than directly off the high beam circuit. I added a switch to toggle that relay's coil supply between the high beam circuit and the fog light circuit, in case a different WOF man takes a different view of how my driving lights should work in future. The relay and switch are sitting inside of one of the headlight recesses: So now I have a way to drive around with just my driving lights on during the day, like a plonker. Then I actually went for the WOF, and failed because of a split steering rack boot. I replaced it all by myself, because I am a totally legit home mechanic. Currently on the Jag's to-do list: Find another solution for the headlining Get the auto looked at (I'm pretty sure it's slipping and getting worse, so I'm afraid to use full throttle now) Stop the drivers window sticking Fix the radio (some speaker wiring must be shorting somewhere, cos no sound comes out) Install the new rear subframe mounts Install the new rear trailing radius arm bushes I'm becoming more of a Jag man as time goes on. Check out my Jaaag fragrance collection, which lives in the car: "Jaguar: Ultimate Power" (a couple of sprays on the car makes it go faster), and of course the Smell of Success. Apparently, success smells like creme brulee / vanilla / caramelised sugar, whereas the Jaguar fragrance ironically smells like lemons.
- 37 replies
-
- 28
-
-
-
-
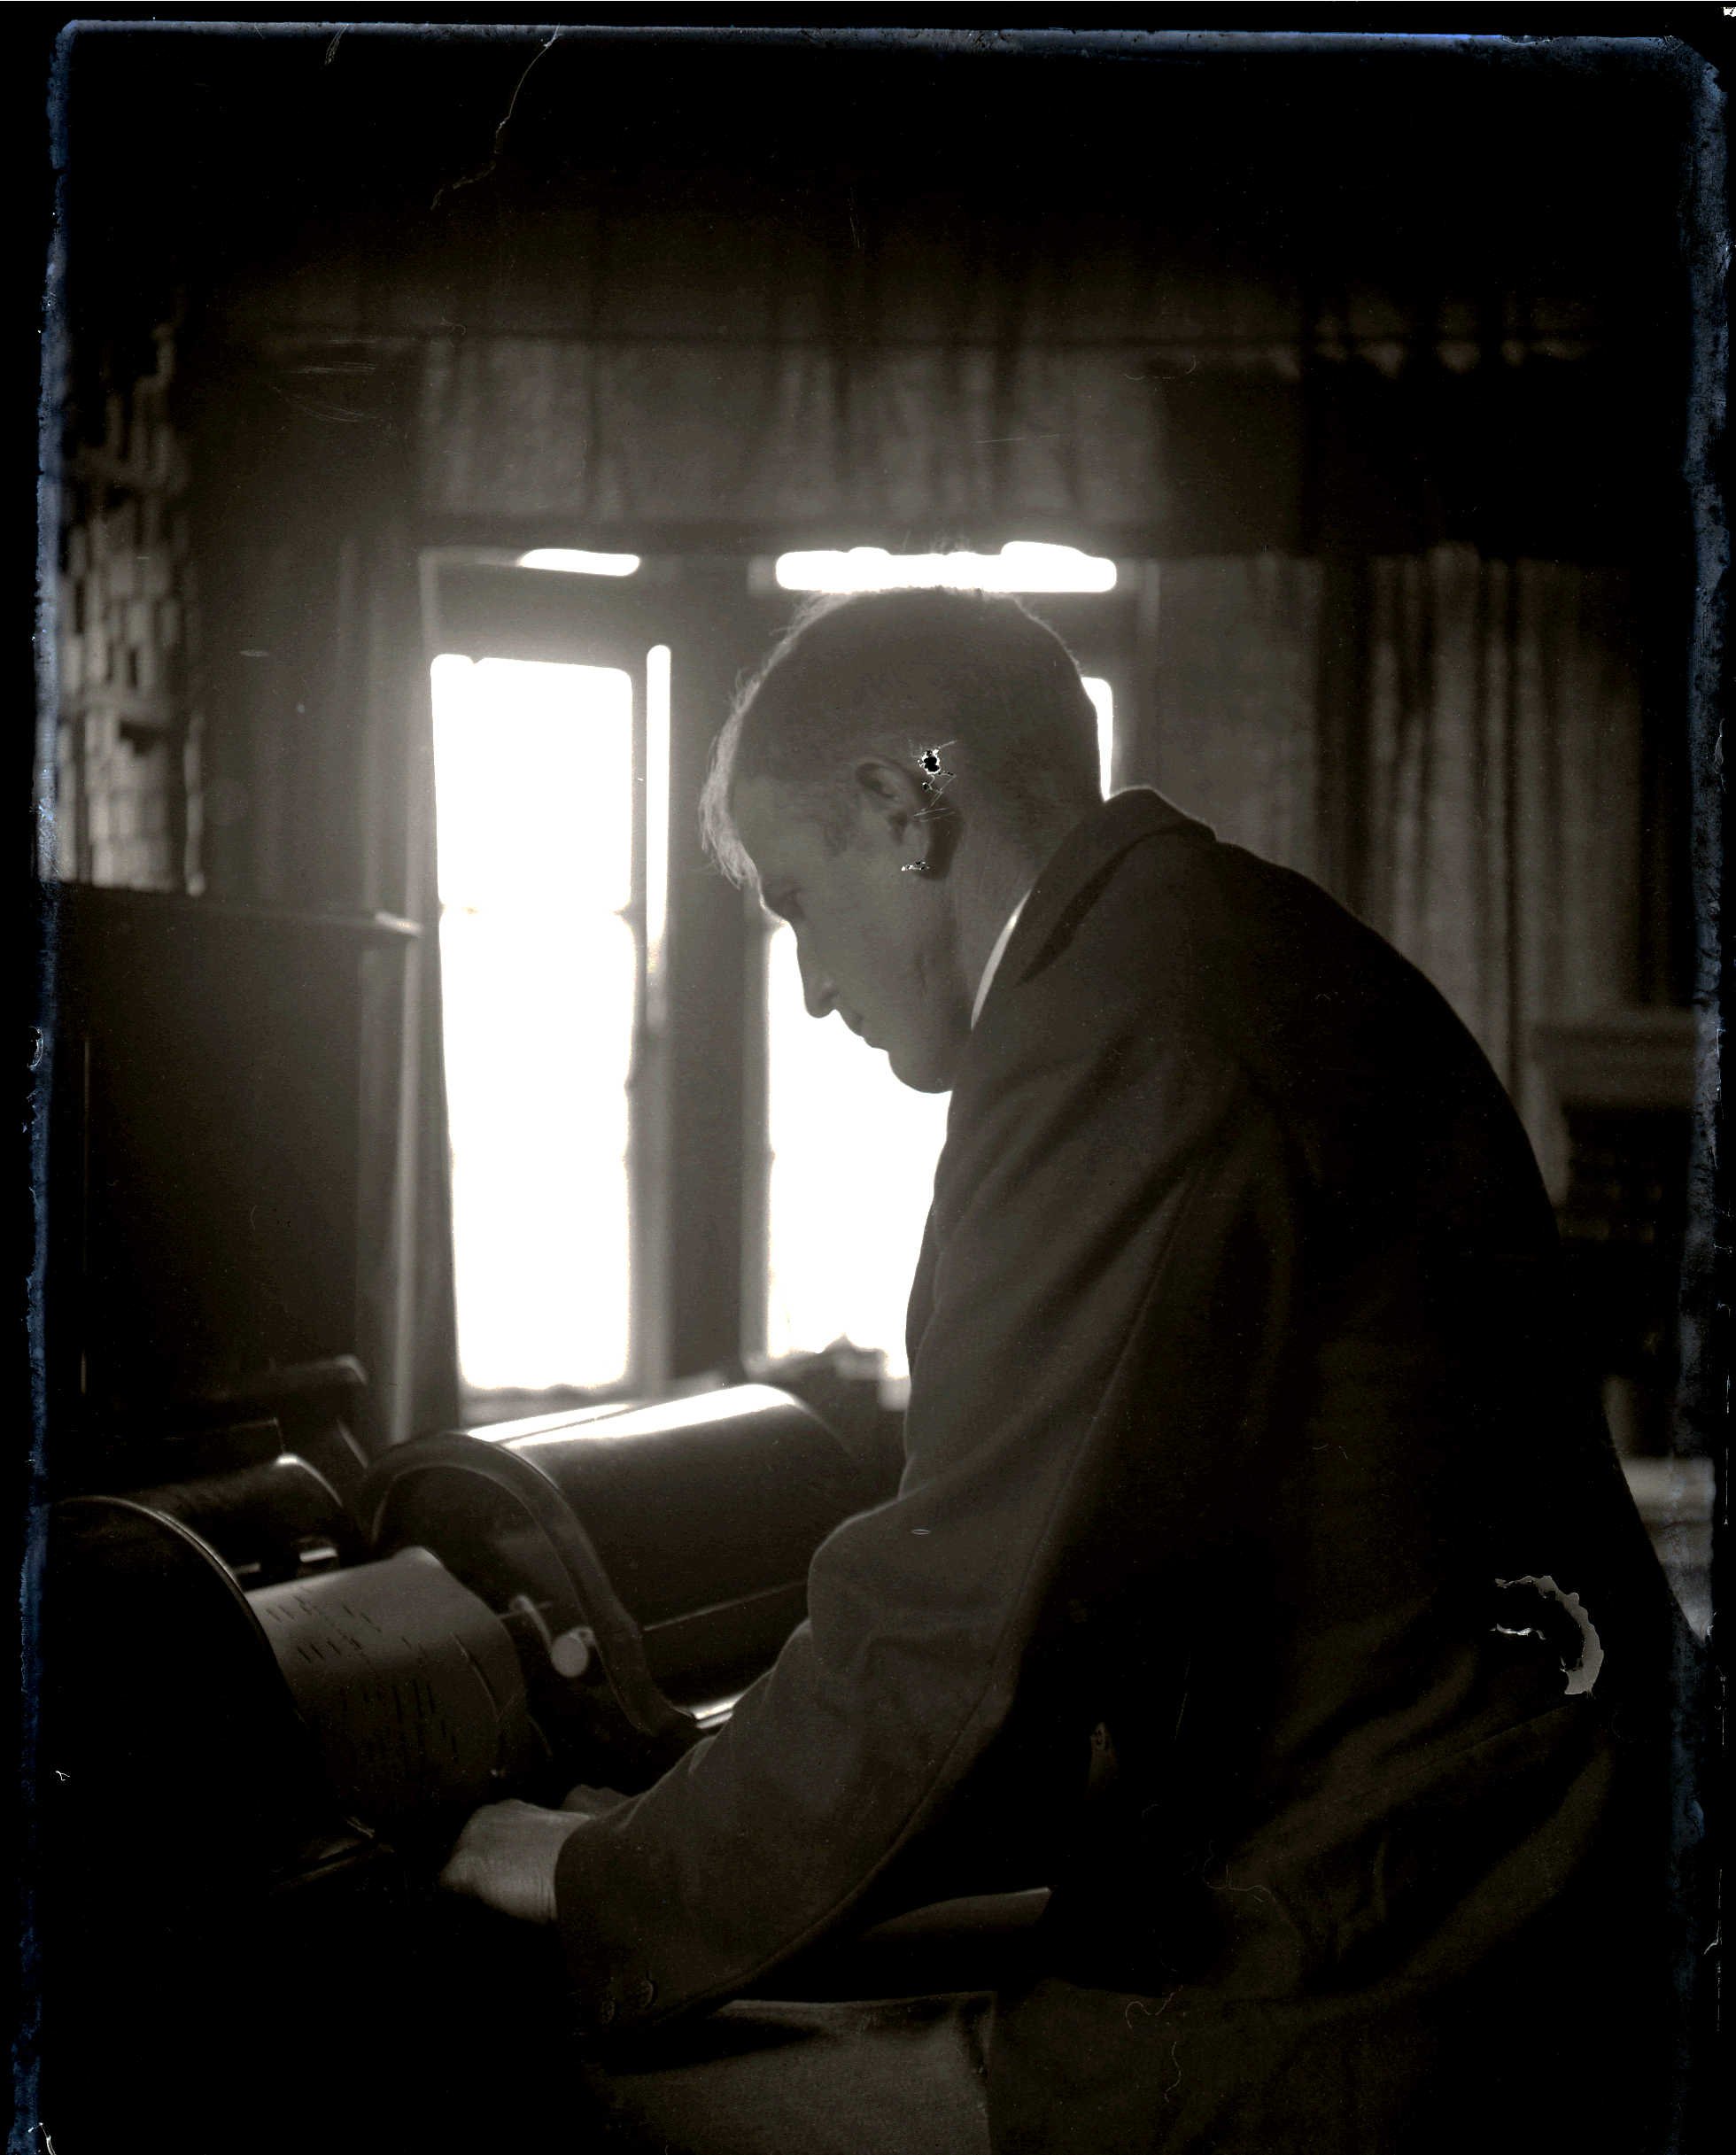
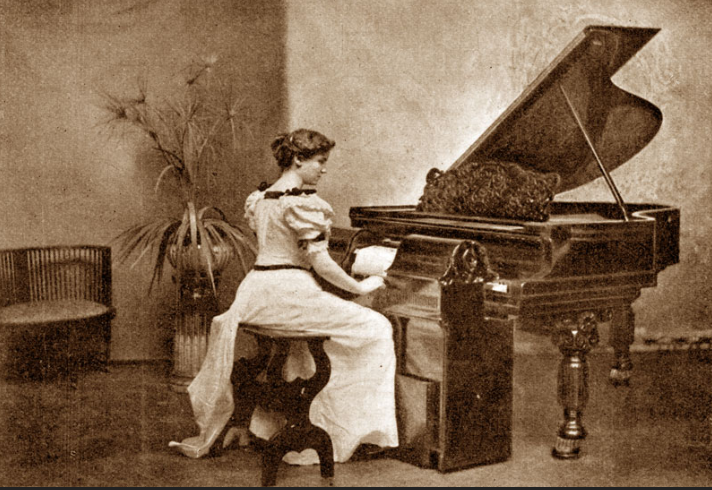
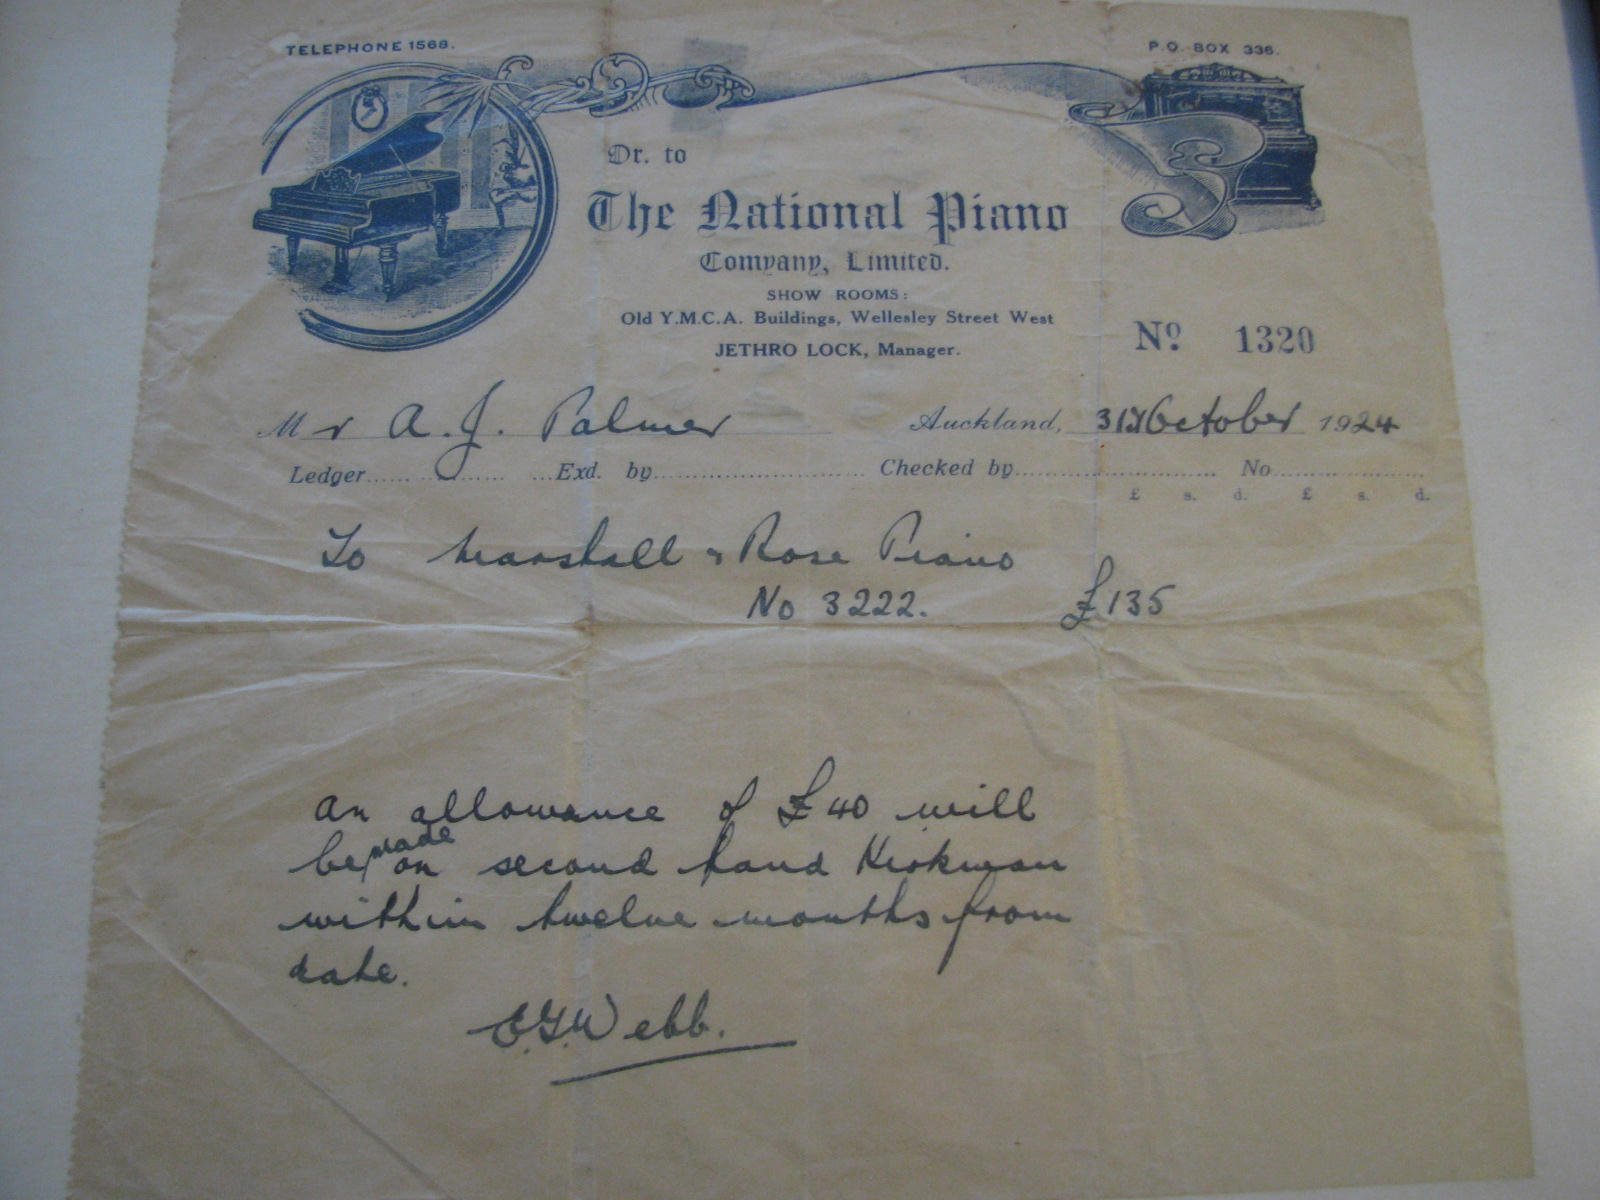
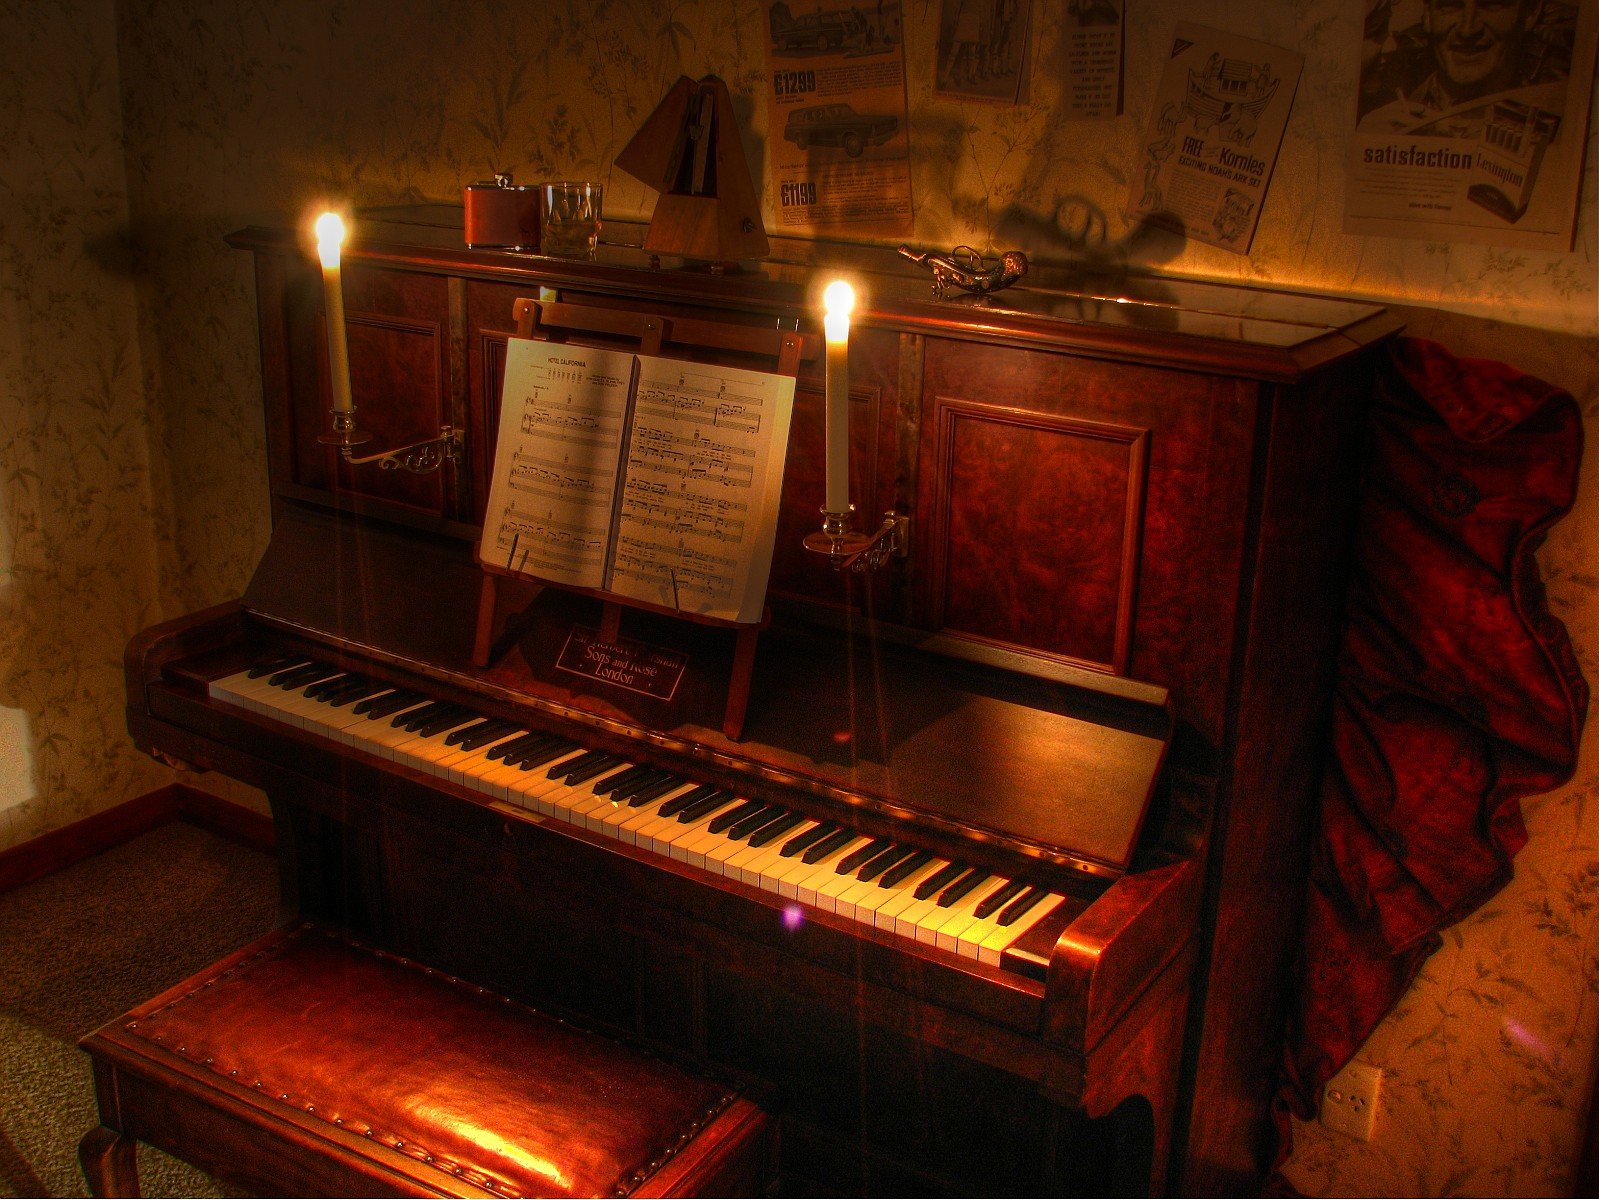
Uh-oh, it's time. This thread will be long and tedious and you probably shouldn't read it. Eventually there may be some videos but I need to bury them behind off-putting Barry stories. Four score and nineteen years ago, before the internet, computers, CDs, cassettes, before NZ switched to decimal currency, before TV, vinyl, WW2, the Great Depression, the popularisation of radio, before the majority of NZ families owned a car or even had electricity in the home, it was still the golden age of the piano. My great grandfather on my mother's side had just upgraded to a shiny new British piano (Japanese pianos weren't a thing yet, and German pianos had fallen out of favour in recent years for some reason). Somehow the receipt from that piano purchase survives to this day: More recently we also unearthed this photo of Great Granddad playing said piano: OK, so he's only "playing" the piano using a push-up pianola. These were a mechanical contraption that sat externally in front of the piano, somehow read scrolls of music via pneumatics and played the piano keys the same way a human would. A human was still required to power the device by pumping foot pedals, and then to take credit for the performance. They could also adjust things like volume and tempo on the fly via hand-operated sliders. Here's a random photo of a push-up pianola being used with a grand piano: When you think about it, this is a ridiculous amount of complexity, weight, cost, physical space, maintenance, effort etc just to reproduce music. Anyway, although using a pianola doesn't qualify one as a musician, my grandmother told me that Great Granddad would put a great deal of focus into adding expression via the pianola's levers. She recalled one instance where he finished a performance and heard applause coming from outside his window - someone walking down the street had stopped to listen. That's it, that's the highlight of the first part of this piano's life. From there, the piano's life was presumably pretty standard - a lot of sitting in the corner. My great grandfather had six children and the piano wound up with his youngest, my grandmother. Possibly the earliest memories of my life are of visiting my grandparents' house, where the piano sat in a back room down the hall. I would go down there, bash on the keys randomly, come up with a convoluted name for my amazing impromptu composition, then head to the front room where the adults would be talking and try to get their attention: "Did you hear that? It was called... um....um...." (invariably I had forgotten the name of my composition by then) The piano then passed to my parents while I was still young, possibly because my dad (who isn't from the piano's side of the family) showed some interest. Here's a top tip for any parents of young children: Tell the kid that if they go to bed early without any fuss like a good boy, their dad will play them a song on the piano as they fall asleep. This will mess them up for life. So I inherited the piano when I got my first house. Here it is at my place ten years ago, with a duvet jammed behind it: It's a Marshall & Rose upright, made in London in 1922 (best guess based on the serial number). That manufacturing date should have given it long enough to take a slow boat to NZ prior to its purchase here in '24. In car terms, you could liken this piano to something like a Rover P6 - an above-entry-level product, manufactured by a still-independent British company who would later be swallowed up by a conglomerate and produce less-unique products until the conglomerate went out of business for British reasons. Just as Rover would outsource the odd driveline component (a transmission here, an engine there), this piano uses a complete action assembly (the internal moving parts) from an outside supplier. The candleholders are aftermarket accessories which I added - basically they're the piano equivalent of fitting a roof rack and an external spare tyre to your P6 to make it look more 'classic car'. The piano's finished in burr walnut veneer hidden under darkened old varnish. Believe it or not I cannot find another exactly the same online. My plans for this thread are: to bore you all silly by rambling about piano stuff to document my project to record ten songs to celebrate the centenary of the piano's purchase. I've picked one song from every decade of the piano's existence (judge's decision is final and no correspondence will be entered into), and I plan to record one a month between January and October of 2024. Whether I find time to achieve this, let alone in video format, and whether I go through with making the results public, time will tell. The goal is that January will be the 1920s song, February the 1930s etc, and I will regret this very much.
- 14 replies
-
- 29
-
-