
- Popular Post

SR ROLLA
-
Posts
178 -
Joined
-
Last visited
Content Type
Forums
Downloads
Events
Gallery
Posts posted by SR ROLLA
-
-
- Popular Post
- Popular Post
I have been driving this around a bunch and got it tuned up by some people who know what they are doing (possibly).

Pretty happy with that. 110hp is up 10hp on the old set up. With a bit of welly it pulls noticeably harder than before and sounds absolutely glorious. When going for a bit of a zoom it feels like it really wants to go and go, love it.
However, it is hard to start and when sitting still it runs like it is a gnat's dick away from stalling. If you give it a little blip on the gas it will splutter and almost die as it comes back down. It's nearly impossible to pull away gently, the throttle response is quite all-or-nothing. It's easy to stall when manoeuvring and a couple of times when pulling out in traffic it has given a big lurch and then died right away, resulting in a panicked flooring and big rev-up to get out of the way of oncoming traffic. When I took it to the tuner I told him it was running rough and rich (my YouTube tune) and I wanted it easy to start and smooth through the range, for daily driving. He seems to have gone for max power performance at the higher end.
I expected a bit of a trade-off when going to a more race-oriented carb but this seems a bit much. No vacuum advance doesn't help either I guess. Is it just tough cookies? or have I got a bad tune for my needs and it could be tweaked to better suit round town driving? I have no other experience of owning a car with a set up like this, so don't really know exactly what is possible.
Any carb gurus out there have insight?
The specs are:
32mm venturi
Main Jet #130
Air Corrector #200
Idel Jet #50F9
Emulsion Tube F16Here's some non-boring images
-
 10
10
-
- Popular Post
- Popular Post
Fluids and filters changed, tank of gas, air in the tyres and off it went for a warrant. I was expecting there to be at least a few minor bugs. But nope.
I'm all legal and good to go.
-
18
-
- Popular Post
- Popular Post
So, I've been busy with lots of little jobs during the reassembly.
Refurbing badges
and fitting them, along with a fair few NOS ones too
Lots of NOS lenses and lights
Had to make up seals for some of them
I found a really good plastic restoration product for pieces like the louvers
And fitted them up
While de-orange peeling I managed to sand through the clearcoat on the passenger door, was fuming. So I had to repaint that.
Then it was time to get everything running nicely again so I can get back to driving it! I've been starting the engine up pretty regularly, so it's still running quite well. However I was having a problem with the throttle sticking, which seemed to be caused by one of the carb mechanisms being quite gunked up. When I tried to clean it all up the bloody things fell off.
Luckily I had these things lying around the garage and wouldn't you know it, they fit pretty well.
So I got them on with the help of a mechanic friend and managed to learn enough about carbs to roughly tune them myself via YouTube tutorials. They sound awesome. Far from optimal but smooth enough to drive around the neighbourhood for the first time in a couple of years. Was feeling pretty fucking chuffed with myself, I don't mind telling you.
So, WOF tomorrow, fix any issues that come up there, then a proper dyno tune. I'm interested to see how much difference there is compared to the factory set up.
Then drive the shit out of it.
Also need to clean it properly before I take some decent photos of the new paintjob in the sun…
-
25
-
Definitely @dwlee still a lot to do in terms of buffing and reassembly but it's so close now.
-
- Popular Post
- Popular Post
After all manner of little set backs (and, to be honest, cock ups due to me not really knowing what I'm doing) I was starting to feel like this job was never going to be done and then all of a sudden, here we are. I have a blue car again.
Managed to surprise myself by getting around the whole car with no major issues. The colour looks crazy different in bright light versus shade, it's very cool, I like it. The finish is a bit orange peely but I prefer fixing that to runs and there should be plenty of clear for me to cut that back and remove dust specks and whatnot to end up with a fairly nice, shiney, garage paint job.
It's far from perfect but heaps better than it was beforehand, so for a first ever attempt I'm going to take that as a win. Once it has had a little time to fully harden I will cut it back, buff and polish it up and then reassemble with the many restored and NOS parts I have been working away on gathering for the last couple of years.
-
35
-
- Popular Post
- Popular Post
So, I have had some time here and there to work on this lately. Did a couple of small jobs I had been worried about. Drilled out two snapped-off bolts in the front valance. I've never had much success with screw extraction but i managed to drill these out with no real damage. The thread of both holes is still good enough to hold their bolts so I'll take that as a win.
The next thing was to roll the rear guards. This was something the body shop was supposed to do but didn't, so I thought I'd give it a go myself. Better to do it now rather than paint everything and wish I'd done it later when I need 5mm extra to fit wide wheels or something. Got some technique advice from @sheepers and got to it slowly with tiny tap tap taps. Took a while and I was bricking it the whole time, but managed to get the lips all rolled up nicely without fucking anything up. Hooray! GTO arches are double walled so probably harder to muck up than on a lot of cars. I gained about 12mm extra space, which is better than nothing. I pinched the previously done front guards up a bit more too for max space possible, without flares.
I also got some paint matched up and finally started getting colour back on the car. I've started with the underside of the bonnet, inside the petrol flap and the top parts of the engine bay etc (not doing the full bay for now, maybe one day if the engine has to come out for anything) to test out the colour and my technique. Looking good so far I think. The colour does not match the original that well but looks really cool. Deep, dark blue inside but more purpleish and grey outside in the bright sun. Quite hard to capture in photos.

-
20
-
- Popular Post
- Popular Post
I have finally managed to get most of the shaping/repairs done, a few wavy bits and a couple of dings here and there, sorted now. I was also having some problems with leftovers from the old respray reacting with the primer and wrinkling on the roof. I solved the problem by bare metalling the whole roof and starting again, to be sure there was nothing underneath. All good now.
So now it's all painted up in filler primer, ready for blocking. It's looking quite good already, pretty crisp and straight. Bonnet and guards not attached properly here, which is why the alignment of the front end is all off.
Not bad for a noob effort, I think.
There's a tiny bit of fine tuning needed, shapewise, a couple of things which weren't easily visible until it was all light grey. But in general looking pretty good, will block it back and get it as straight as poss, then time for colour, at long last.
-
16
-
Mesh filters for the carbs arrived yesterday. Should be pretty cool.
-
8
-
-
- Popular Post
- Popular Post
Well, hallelujah, real progress that actually looks like something, for once!
The car is so small that the actual painting takes very little time. So, after months of slow stripping and prepping, all of a sudden it's starting to feel like it might actually be done one day.
Next up is a coat or two of filler primer to sand back and get everything as straight and sharp as poss, then colour.
-
18
-
- Popular Post
- Popular Post
So, still chugging away on this, finding all sorts under the paint. Nothing major, just annoying. All in all, very straight and rust free. I have been getting some spray gun tips from a friend, so far so good. A few patches of paint from one of the old resprays reacted weirdly, so had to re-strip back further in those areas. Front guards and both sides of the bonnet are primed and looking good. The rest of the car is all masked up, hoping to get it primed this week. Not very exciting really, but will be a big milestone for me to have it all covered and one colour again. Starting to feel like the end is in sight.
Also I figured that while it's still a garage queen for a wee bit longer I might go ahead and get some of these.
Will get the paint done, everything back together and warranted. Then, when that's done, fit these and sort out the new suspension.
-
13
-
Thanks for the input everyone. It's awesome how much knowledge and experience gets shared around on oldschool.
Cheers
-
My thinking on not using better, 2 part paint products while still very much a beginner was partly because of the increased toxicity, and the need for a higher level of protective gear, ventilation etc. Also, I thought it's illegal to spray those paints in suburb home garage type places? Not sure where I heard that though…
-
I've been stripping my car back and am just about at the point where I can start putting paint back on it. I found a bit of light surface rust under the old paint, so I have ended up with some large areas of bare metal. The plan is to use phosphoric acid to prep the metal, then etch prime over that. The first few (smaller) areas which I used the acid on came up a really clean and smooth matte silver. On the larger areas I have been getting a lot of streaking, some white, some yellow.
Is it normal for it too look like that? is it a case of not enough acid? Or too much? not long enough on before rinsing off? Or too long? not washing off properly? This is the first time I've used it and I'm struggling to find good reference online for how it should look.
This is one of the panels (The previous re-painter was a big fan of aggressive wire brushing it seems):
Once this is sorted is it sufficient to just scotchbrite and wipe down with wax and grease remover before spraying? I had Por-15 suggested to me, but reading through some of the posts on here the general consensus seems to be that it's pretty shit and not worth bothering with, so straight to an etch primer?
Cheers for any advice, pretty new to this but have already learned a lot getting to this stage. Keen to get the car all one colour again.
-
- Popular Post
- Popular Post
Looks like i-force has pooped itself and all my images are gone. Bummer.
Anyway, drove out of the garage for the first time in who knows how long to give it a bit of a rinse and rearrange the garage. Got a real ratrod vibe going on here.
Out and about 1 by Thomas Addison, on Flickr
Out and about 2 by Thomas Addison, on Flickr
Pretty much done with stripping now, just finishing up the underside of the bonnet. This is the first thing I will paint, get some practice in with the paint gun on a big area that doesn't matter much.
I've also been buying things. Found a single NOS fender mirror. These are usually astronomically priced for a pair, on the rare occasion they turn up at all. This one was surprisingly cheap and is super mint. There's one slight scuff on the side which I think will probably polish off completely. Nice.
NOS mirror by Thomas Addison, on Flickr
Got a cool gear knob to match my kitty cat headlights.
Gear stick by Thomas Addison, on Flickr
And lastly some 70s galant hubcaps. Really tidy and shiney. One has some curb scuffage, but no big deal. They came up on TM pretty cheap and I thought they make for another nice nanna spec wheel option. My current thinking is to have these, widen some steel wheels with the little centre caps and trim rings I have now and get a set of 14 inch japanese, period appropriate mags, as wide as poss without flaring the guards
hubcaps by Thomas Addison, on Flickr
-
15
-
So, 6 months later, I still haven't quite finished all the stripping. Found a few interesting things lurking under then paint. Nothing drastic, but things I'd rather not be there. So quite a bit more bare metal than originally intended, but meh, better to know there's no timebombs under the new paint I guess.
The passenger side guard had a skim coat of something pink which had rust starting under it. Not great. Also, i found that once I got an edge going I could flake big chunks of the top coat off easily, so that all had to go.
Fender top by Thomas Addison, on Flickr
Fender side by Thomas Addison, on Flickr
I also started taking back the area at the bottom of the guard, which was one of the bits I paid to get repaired at a bodyshop, before it came off the road. I could see that their filler was going over the pink stuff, so thought I better see how far down it went.
Fender bottom by Thomas Addison, on Flickr
hmmm. bog about 8mm thick over the whole area. The bodyshop were supposed to give the car back to me with no filler (partly to save on cost, partly because I'll need to be going over the whole car anyway and would rather have a good idea what's underneath). I guess this is why they decided to fill their repairs at no extra charge before giving me the car back. Not ideal.
Fender repair by Thomas Addison, on Flickr
Anyway, sexy all-nude fender now.
Bare fender by Thomas Addison, on Flickr
Quite keen for a bare metal GTO, but probably best not follow that line of thinking too far…
Also, the wobbly, chip-guard covered front valance is now stripped back. Pretty wavy and dinged up but should come up okay, it cuts back under the car at a pretty extreme angle, so you don't really see much of it anyway.
Valance by Thomas Addison, on Flickr
I discovered when I took the passenger side glass out that the bracket which runs along the bottom of the glass was totally poked. Must have had water sitting in it for a decent amount of time at some stage, rotten as and split most of the way in half. Even the rubber was encrusted with rusty bits welded onto it. Luckily one of the GCs on the GTO FB group had mint one which he dug out and got off to me quick as. So all awesome again now.
Glass bracket by Thomas Addison, on Flickr
Just the bonnet to go now, so fingers crossed that comes up good without more than a light sand, then It'll be time to prime the whole dang thing! Looking forward to that. Even though there will be a lot more sanding at that stage it should be a dream compared to the ballache that has been getting through all this stuff.
-
4
-
-
Any idea what it cost to get it filled in?
-
Finally took the sunroof out. Was a little worried about that job but it came out easy as. Unfortunately skills and budget both prevent the removal of this hole, so it will be going back in later.
Slowly getting there, found a couple more patches of filler on metal and light corrosion under the paint, so a few more bare metal patches but all looking okay so far, nothing I shouldn't be able to fix myself. The drivers door and rear quarter, the back and the boot are all done and looking okay. About halfway through the roof too which is looking pretty straight and good for the most part. The larger, flatter panels like the boot and roof are coming together much quicker than all the complicated shaped bits around the back half of the car.
-
3
-
-
I don't have any spare carb parts, sorry Nightsta
Have you got a build thread going on here? I know there would be a few guys keen to see it.
-
Been getting further and further into the stripping
Ended up finding a few patches where some repairs and ripples have been skimmed over and smoothed out with filler straight over bare metal. Very light rust between the filler and panel. Bummer.
So I've ended up stripping quite a lot back to bare metal, which I was hoping I wouldn't have to do. The plan is to get some good rust killer to make sure it's all cleaned up good then etch prime, thin skim of filler for the low spots and then back to sanding sanding sanding.Looks like there has been repairs under both tail lights, slightly munty welding, but nothing too bad, hidden with bog over bare metal again so that will need a bit of careful shaping to get it all straight and nice.
Then there's this:
Not quite sure what I'm looking at. Is the black corrosion? or some kind of rust-proofing layer? black primer? and why the bubbly/spotty texture? Can anyone identify what's going on here, do I need to strip all of this area back too?Any thoughts chat HERE
-
I'm not sure if you'll be able to look up parts by the rego. I think you will probably need a part number but if you know someone who works there that's willing to put in some time searching that will no doubt help.
-
Ha ha, nice Swannie.
Hey Fourtydogg, finding parts can be a bit of a mission, to be honest. Things pop up on TradeMe occasionally, always worth keeping an eye out. Most of my bits come from Yahoo Japan. You can use services like Buyee (http://buyee.jp/) to buy stuff which would normally only ship locally in Japan – it goes to their warehouse and then they forward on to NZ.
There are a couple of facebook groups too where parts come up from time to time. This one from Thailand: https://www.facebook.com/groups/107027213189/
This one too: https://www.facebook.com/groups/107027213189/There's a few retro parts pages on Instagram too.
Basically just lots of scouring the internet all the time. Mitsubishi NZ has a few bits and pieces but have been fairly picked clean by now.
Good Luck!
-
Hey Fourtydog, great to see that one went to someone on Oldschool, there was definitely a lot of interest.
On oldschool we separate the build threads and chat into 2 different threads. I'll chuck some links for you in the Discussion thread over here:
-
1
-
-
- Popular Post
- Popular Post
Also, I managed to get a NOS set of tail lights that didn't cost absolute moonbeams (just a small number of moonbeams). Pretty stoked with that, should look real nice.
-
10
-
So, I finished the dumb job I probably didn't need to do of underseal re-application a wee while ago. Looks pretty good now, nice and tidy. Plus I know there's nothing lurking under there. I stripped and did the insides of the guards too.
And I'm (slowly) getting through the excavation back through the years of paint layers. I think it should come up pretty good and straight. Trying to make sure I keep all the body lines nice and crisp.
The yellow strip is where the white decal was – previous painter just masked this (and the badges) up so the paint is a couple layers deeper above and below. Nice.
Between work, the wife, and the kids I can pretty much only work at it for fairly short stints but I'm trying to get out to it 3-4 nights a week for at least a little bit, so I can keep some momentum going. I guess slow progress is better than no progress.
-
8
-
 1
1
-


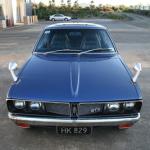
SR ROLLA's 1974 Mitsi Colt GTO
in Projects and Build Ups
Posted
The GTO is getting its stripes put back on today, pretty keen to see how that comes out.
Once I finished painting the car I decided to build an oldschool BMX as a companion piece. I got a cheap frame off TradeMe and set about collecting all the various bits and pieces from all over the internet. The frame was in pretty good nick, no damage, just some scrapes and scratches in the paint. A quick strip back and respray in GTO blue and it was looking all good. A few minor hiccups at assembly time but came together mostly pretty easily. Here she is: