


drftnmaz
-
Posts
1,135 -
Joined
-
Last visited
Posts posted by drftnmaz
-
-
I'd use a barra turbo and port the gate hole a little, they have factory 5psi gate actuator and sorta suit the engine size, just the manifold could be a pain...
Then malpassi low pressure rising rate reg
Electric fuel pump and large return line (often we would use ballast resisters to drop voltage to 10V to reduce efi pump flow to suit low presure)
Carb needs mod to equalize pressure in fuel bowl under boost
I'd use a BOV, even a factory one, recycle it if you don't like the noise
biggest problem IMO is timing, without being able to control timing then you have to pick the best compromise, which in turn slowly wears out your engine, but this may takes years to wear so often not mentioned...
barras have 2 versions of turbo, a 3576 and a 3582, I'd prefer the 3582 for a 4L(as it has a 60mm inducer) but If you wanna use a china turbo then post up ones your looking at and i'll have a look through them-
 1
1
-
-
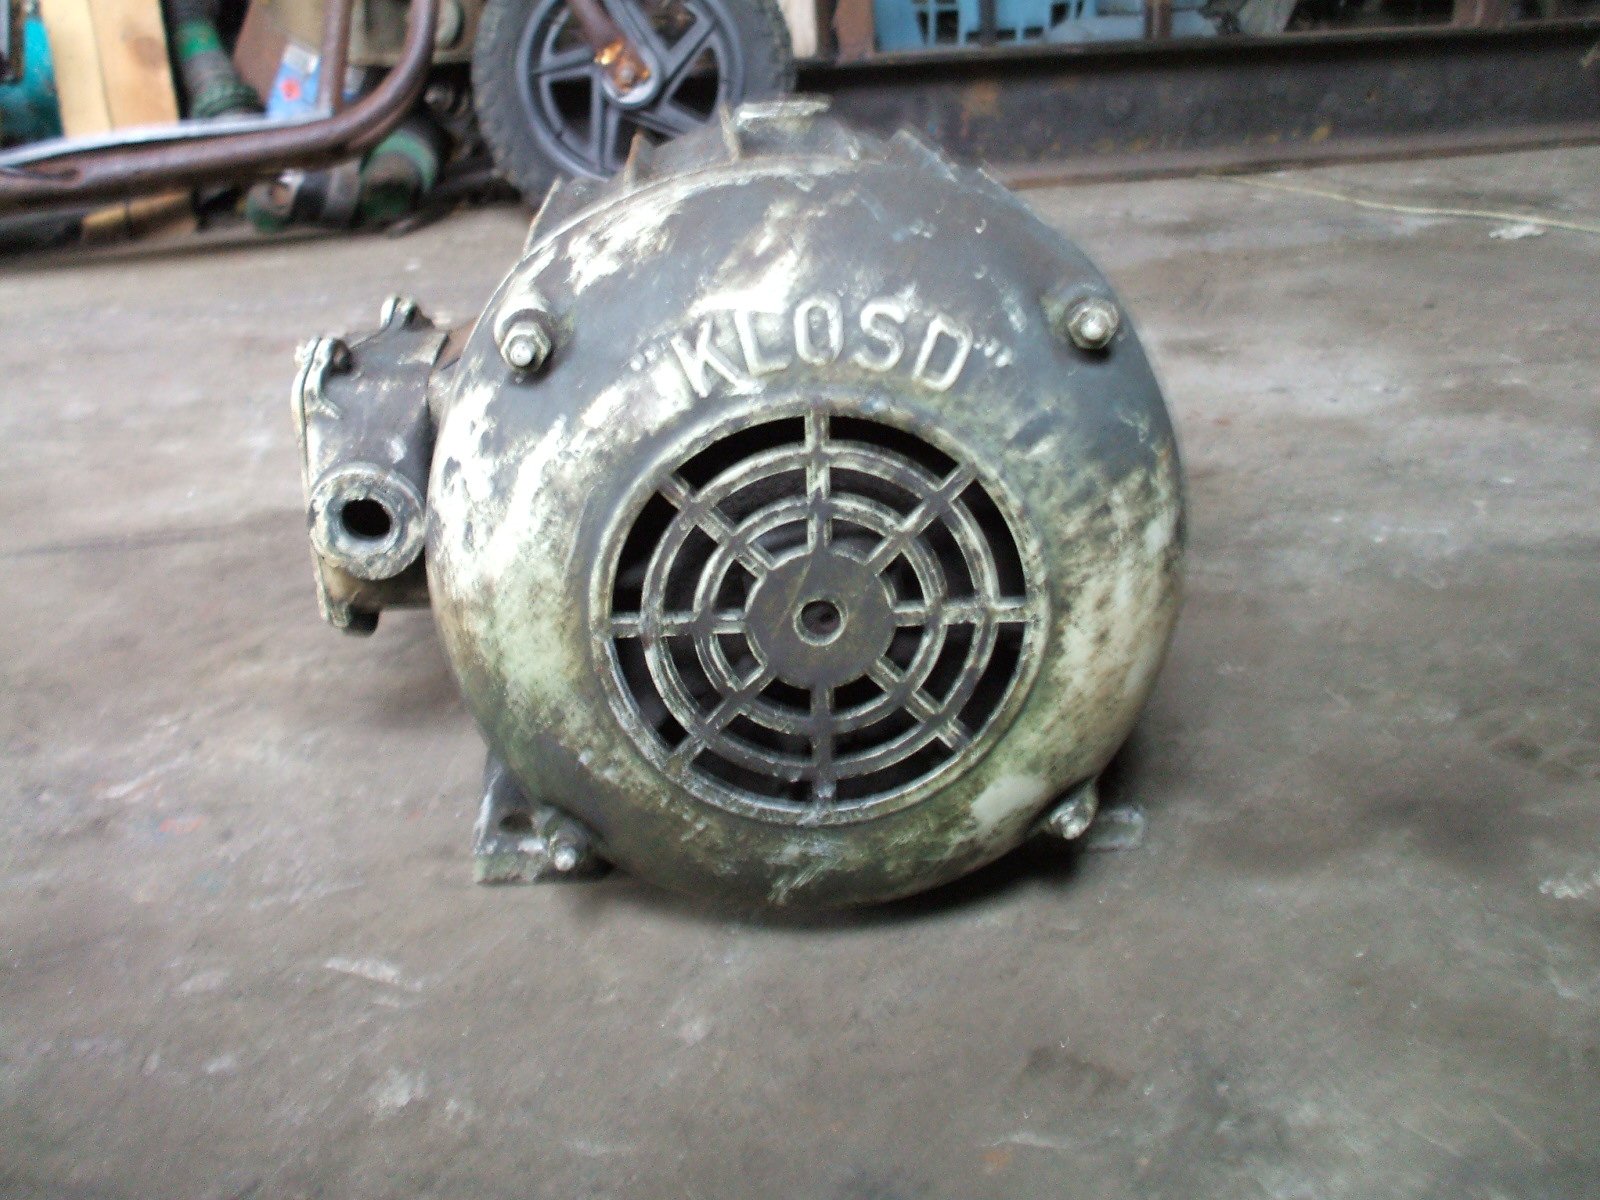
Does it have suitable wiring for Star and Delta options? alot of the old motors only have Star so won't like 240v (star is usually for 400V and Delta for 240V, or other way around if memory is slipping haha)
-
Generally speaking the more you advance the pump the faster/easier a diesel will start, and louder it knocks/ignities... you really notice it on some engines like ford transits, dunno how easy it is to adjust on your engine but could be worth a look/check/adjust
-
1
-
-
ahh yea so it's the good base of small mods(headwork, ex side, etc) that makes the cams look super impressive and give the mighty curve... then airflow from runner length/size that dictates peak power, but mess up the base and the curve can move around alot.
Wow that 20v is low! I have a friend with a 20v drift starlet (factory computer etc) and it goes really well, I really would have thought it was 110-120kw haha but guess his driving must be really good! -
Love watching all your vids! just abit jealous of your dyno! haha
I may have missed it but if it's not too late, how about a run with standard intake on bigport head with 193 cams? I found the smallpot version and it's quite impressive to see ~120kw with the factory intake, guessing bigport will be the same but curious to your thoughts?-
1
-
-
replace injectors as mentioned... pumps can get expensive and not so easy to change so leave it till last imo
I'm guessing it's got a 10psi actuator on the turbo... so I would remove actuator line to turbo and see how how much boost it makes(use your foot to control the boost, it may goto 30psi quite easily if fuel is turned way up haha), turn pump down until it only makes ~11psi total, then refit the line to actuator, this way you know your total fueling isn't too high... If the gate is open then it's wasting fuel")
Diesels are the opposite to petrol, they are safest when running lean.-
4
-
-
On 02/04/2021 at 18:09, MaxPower said:
hey after some advice, my 13bt diesel blew a head gasket today, I have a good condition 15b dyna engine I have been wanting to put in my cruiser for a while now 3.4L vs 4.1L. I was thinking about putting compound turbos on it. would the stock ct26 from the 13bt work with a hx40 I have? (has a 16cm rear housing) I don't mind getting the injection pump rebuilt\modified to suit boost and more fuels. cheers
From what i've picked up over the years for sizing compounds the rough rule for the cold side is the big turbo should be able to flow 2.5x the air of the little one, and the little one will need more wastegate flow (unless you want to run huge boost)
And for the turbine size you treat it as a n/a motor, IE your 15b turbo motor is rated at 114 kW, so you size the turbine housing side to suit a n/a 114kw diesel, maybe a touch bigger for less backpressure...
hx40 is just a frame size so doesn't give us alot to work off, but from your description i'm guessing it's the super common SMALL hx40 that is everywhere in nz for cheap (came from man buses and train engines I think) these have the 16cm non wastegated ex housing and a small compressor wheel (54/82mm) and the 2" outlet on the comp housing... the inducer on these comp wheels is only 54mm so it's smaller than some hx35's... so not the best pick for the flow you want, but will work to some extent so give it a go, but personally i'd be looking towards the 58 or 60mm inducer wheel for a compound and probably a smaller ex housing-
4
-
-
Front
Camber -2 because its street, if it was just track/drift then -4
Caster +4 (slightly higher if camber was track spec)
toe IN for the road (1mm a side), toe OUT for drift 2mm a side, I normally mark the tie-rods with paint pen once alignment is done and then check how much change one turn gives me so can change at the track from street to track and back before driving home.
Rear
camber -0.5 to -1
Toe IN 2mm a side, gives better directional grip (when on the throttle) -
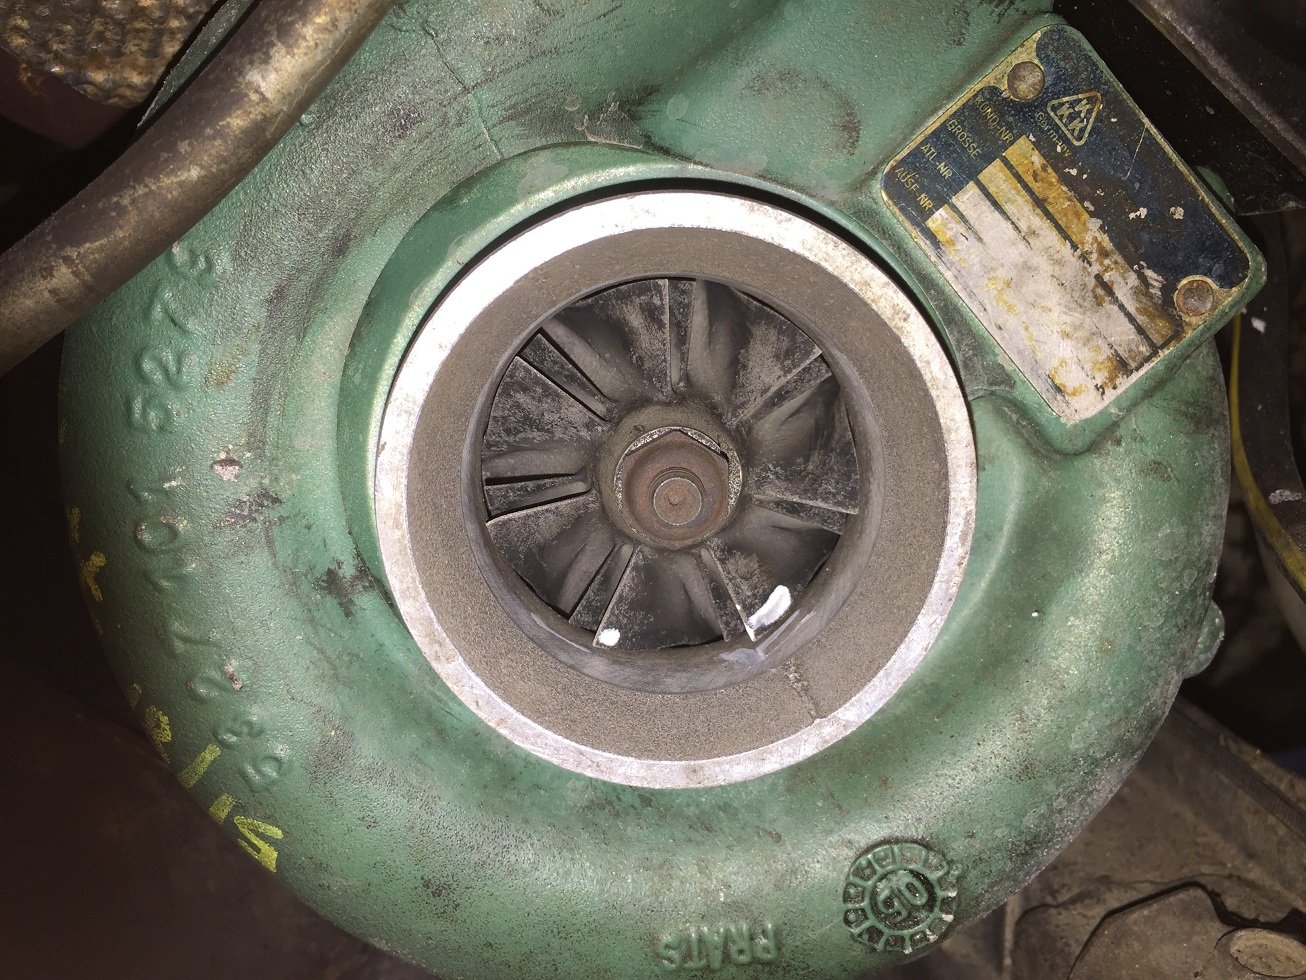
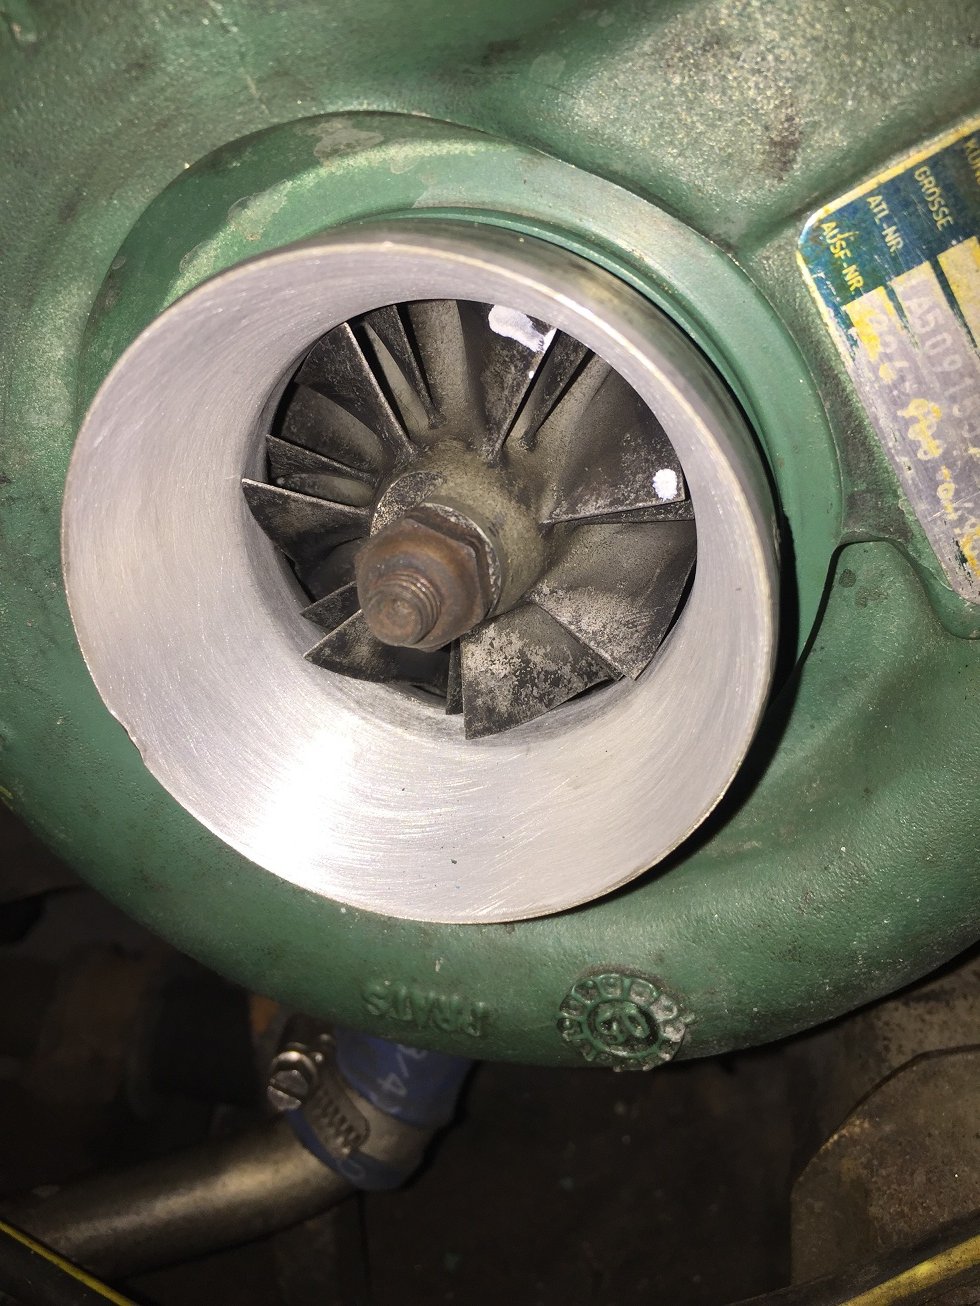
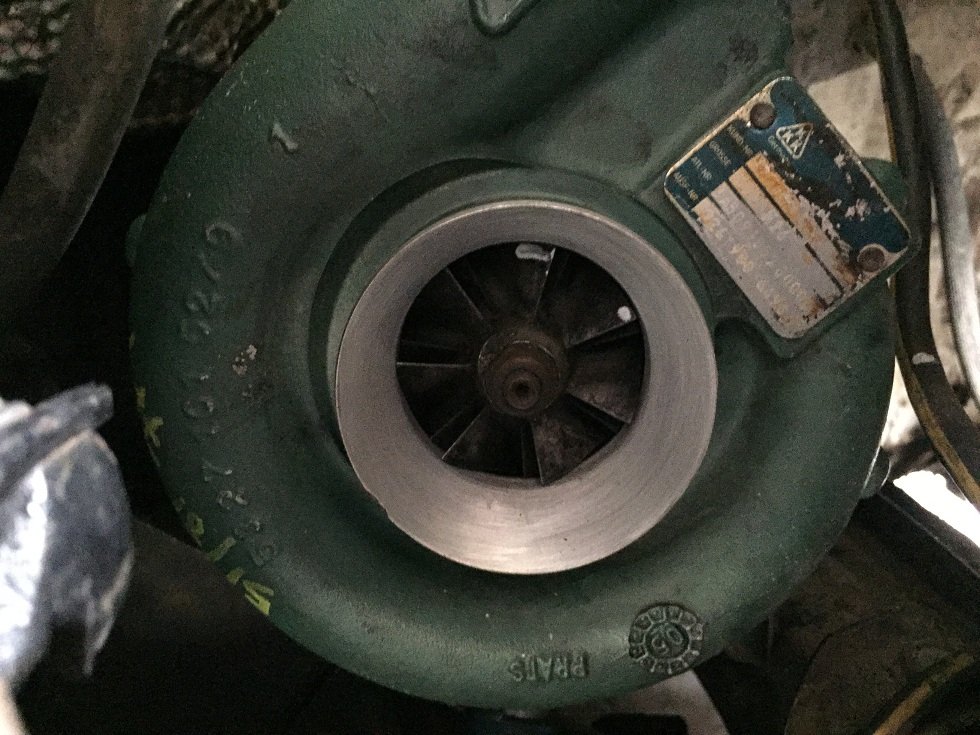
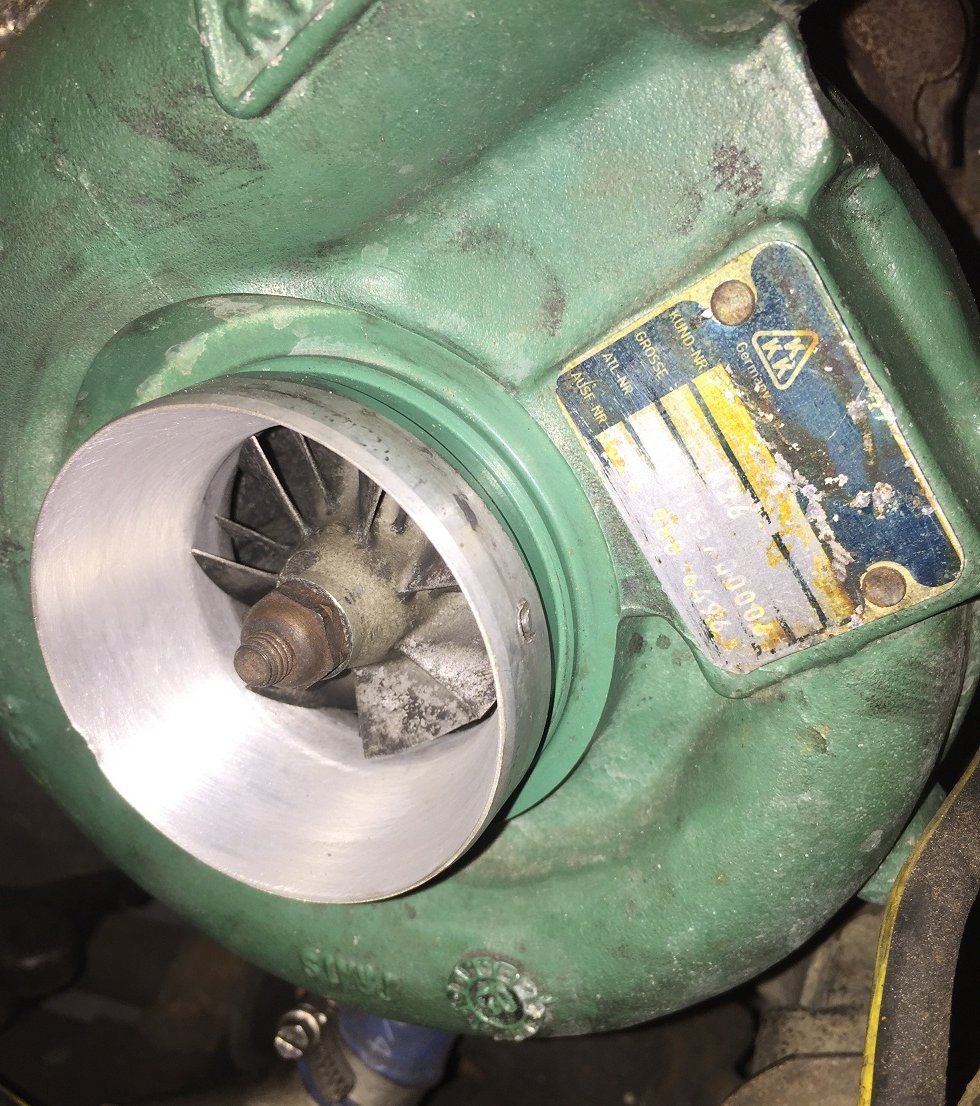
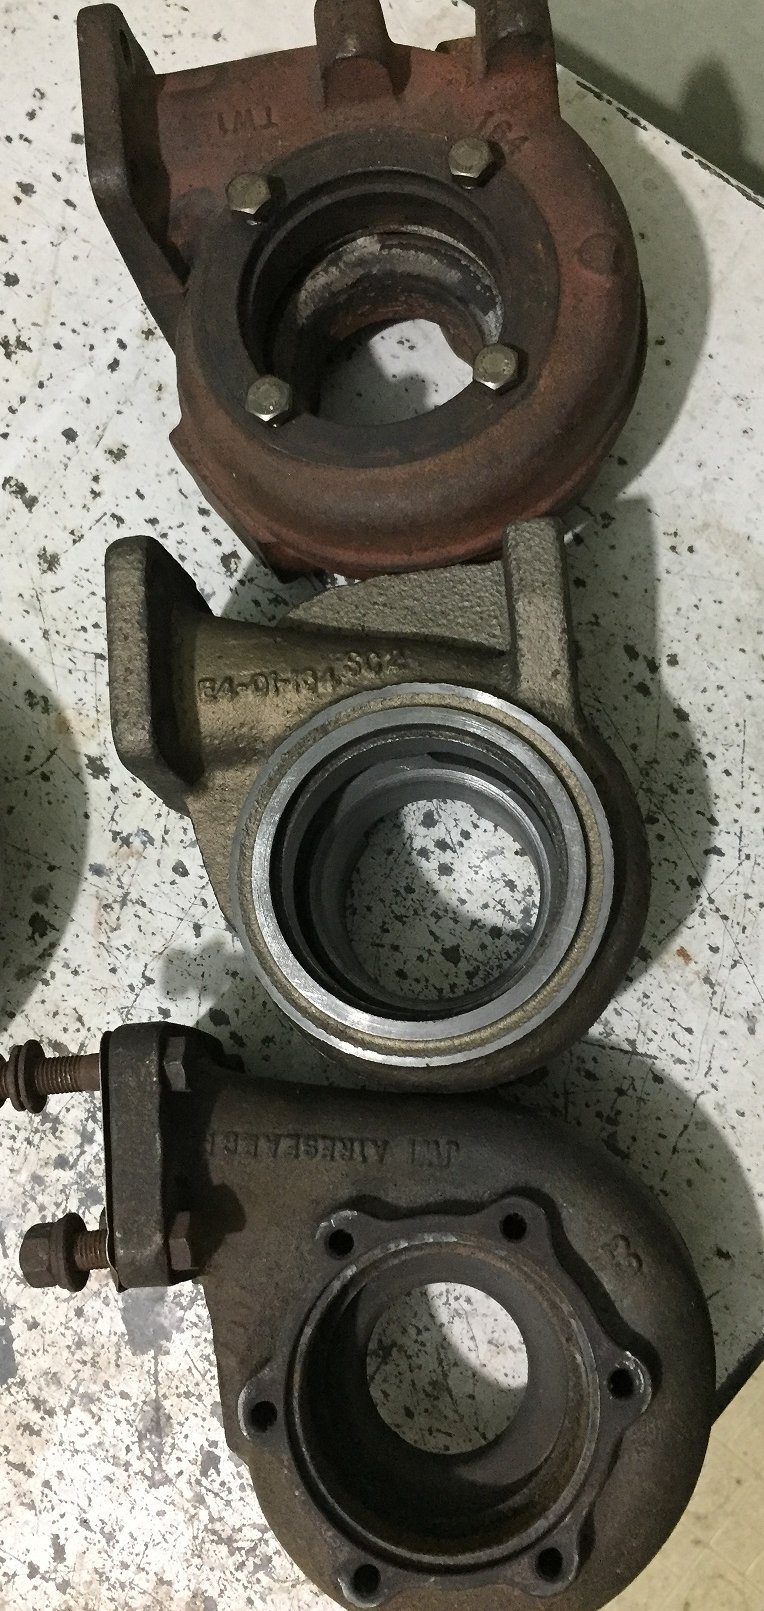
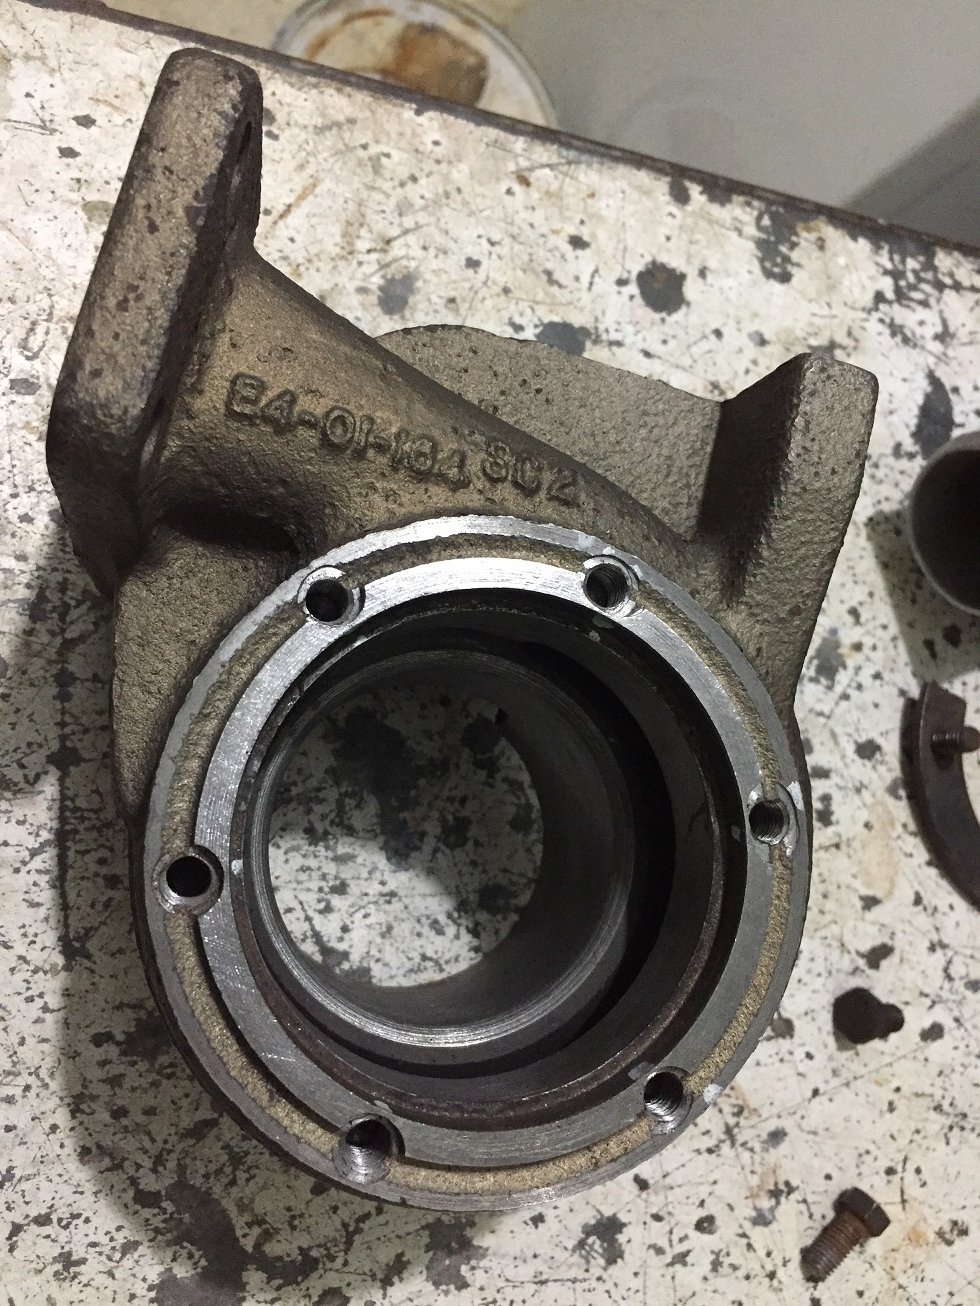
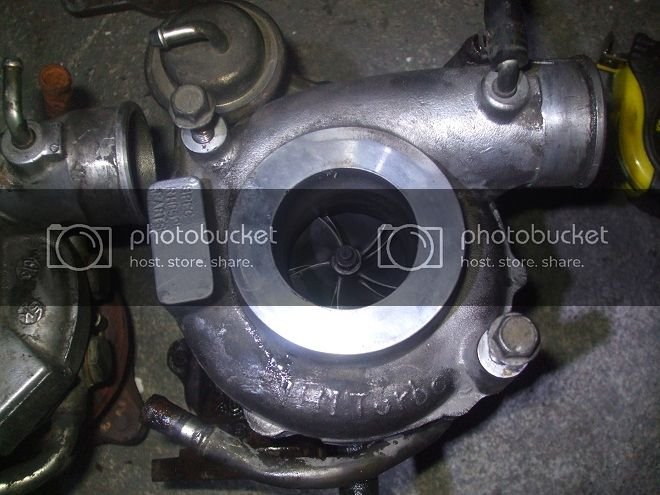
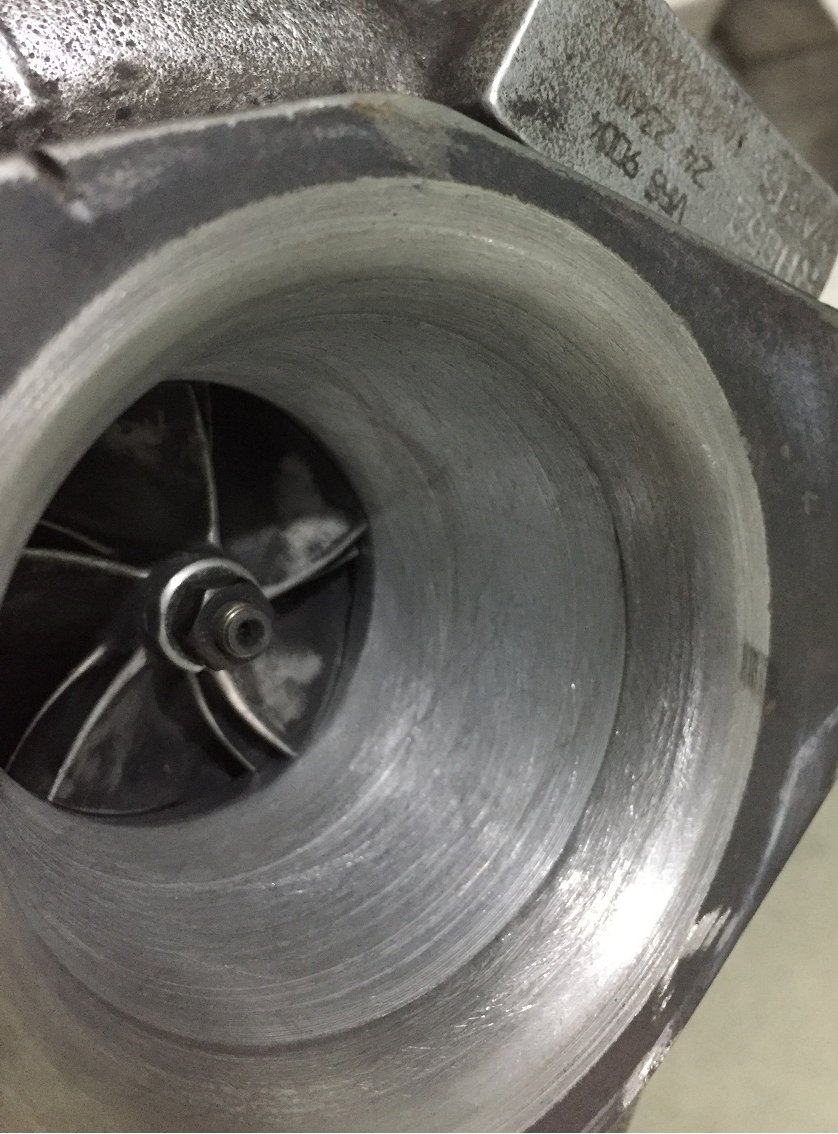
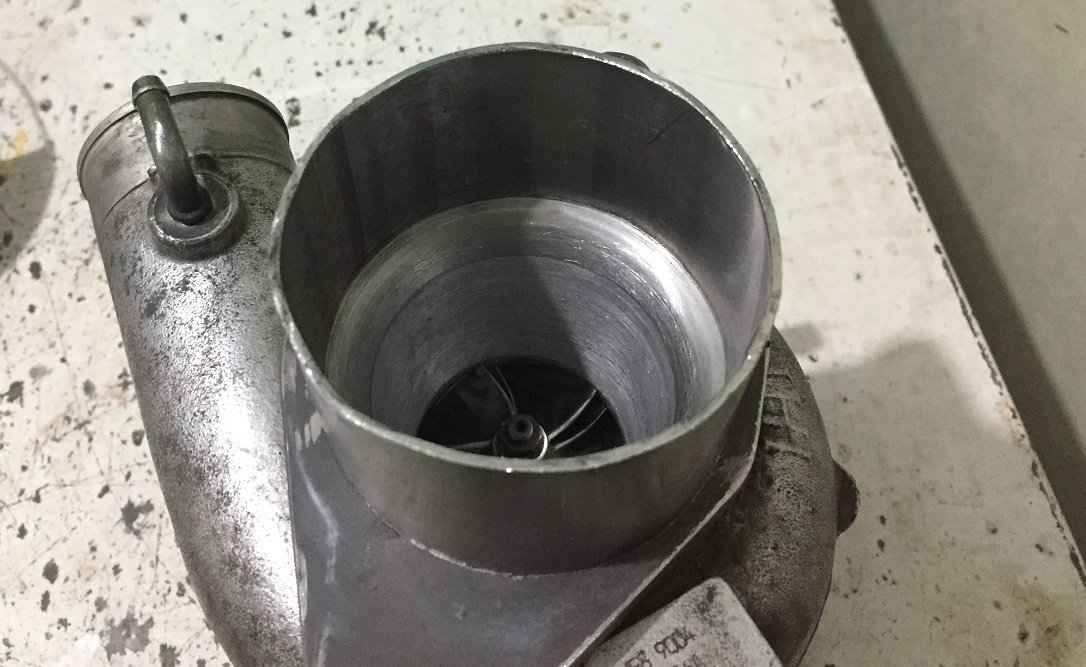
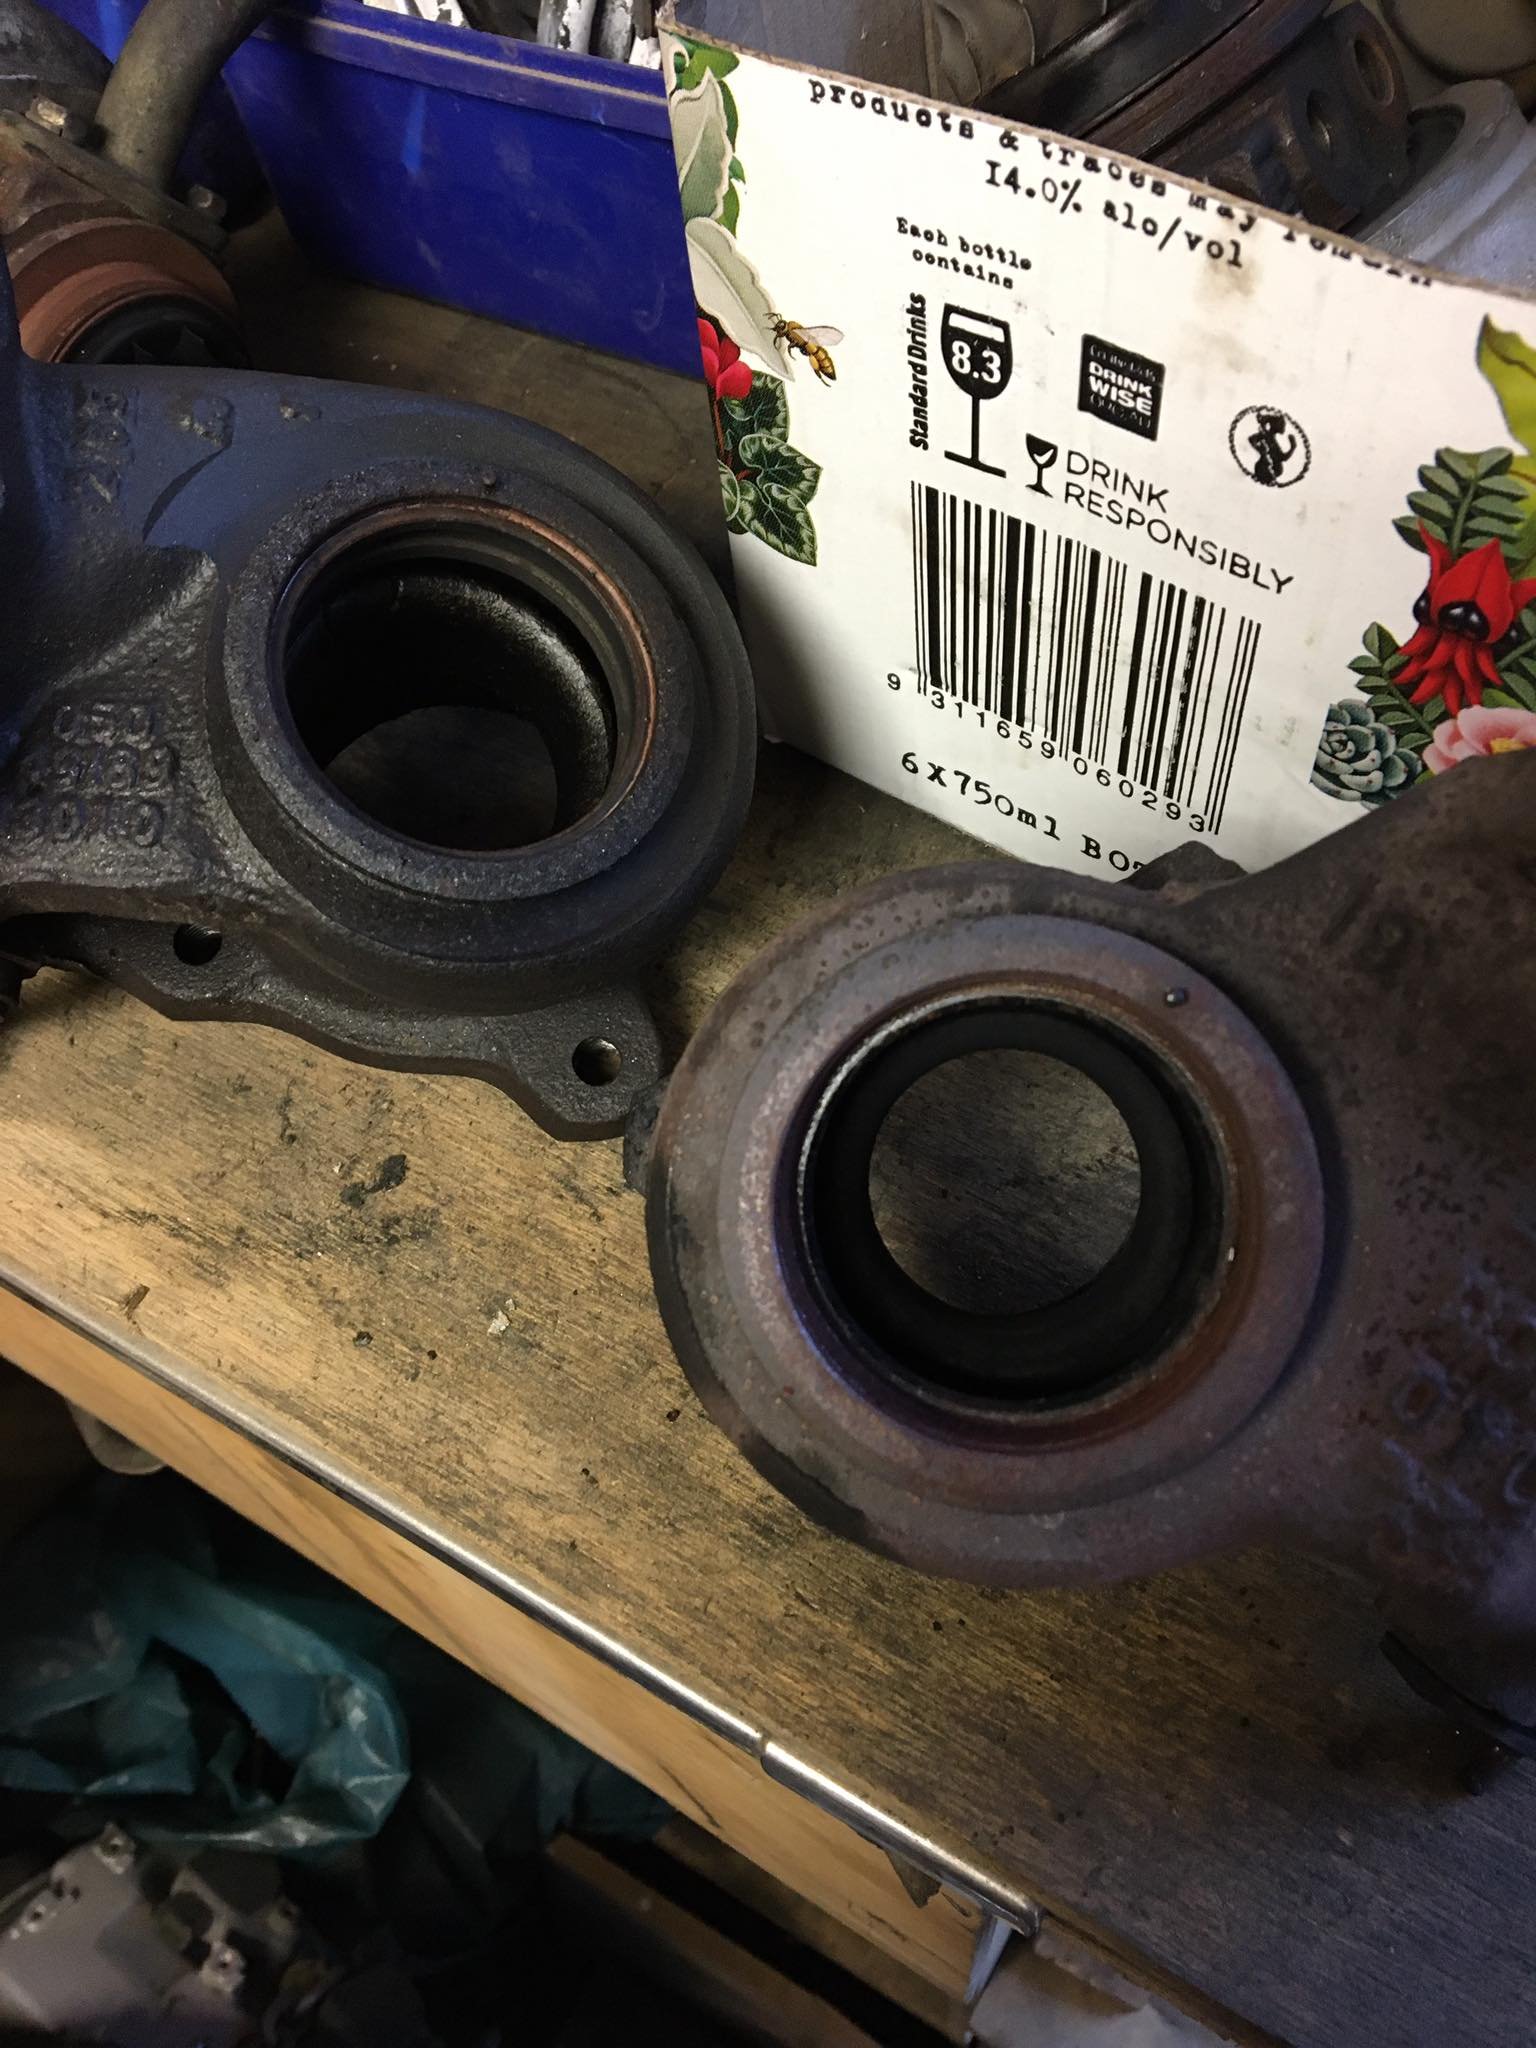
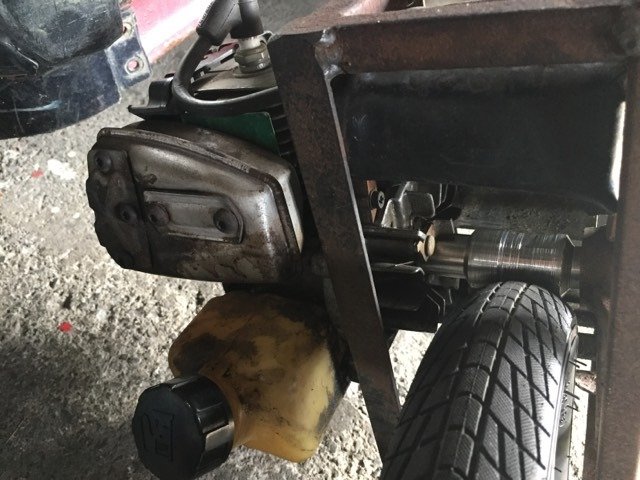
Next up I got some time to work on the drift car, poor thing hasn't been driven in over a year now... so while I was under the bonnet I thought I should tickle up turbo, It's a KKK K26 from volvo penta, (the marine series of volvo, hence the awesome green you see on alot of my turbos) specs just in case anyone cares is the common 53/64mm turbine(s200 to kids these days) and the comp is 51.7/81mm, not the best match for a sr20de and not the turbo I originally choose and fitted but it's on there and working. (it's a long story)
Here's what the turbo housing looks like factory, they cast a ~25degree taper in and the machine the throat from the other side because this cover is used from 42-57mm inducers. |
|
I marked it up and then removed, measured and worked out a 18.4degree angle will make the inlet 68mm and taper all the way to 1mm from the tips of compressor, I then hand finished it, which makes photo's look rubbish, and also dented it on install because it's rather thin at the edge now
## If anyone wants there turbo machined for cheap then hit me up, as long as I can fit it in my lathe then i'm happy to help.
-
6
-
-
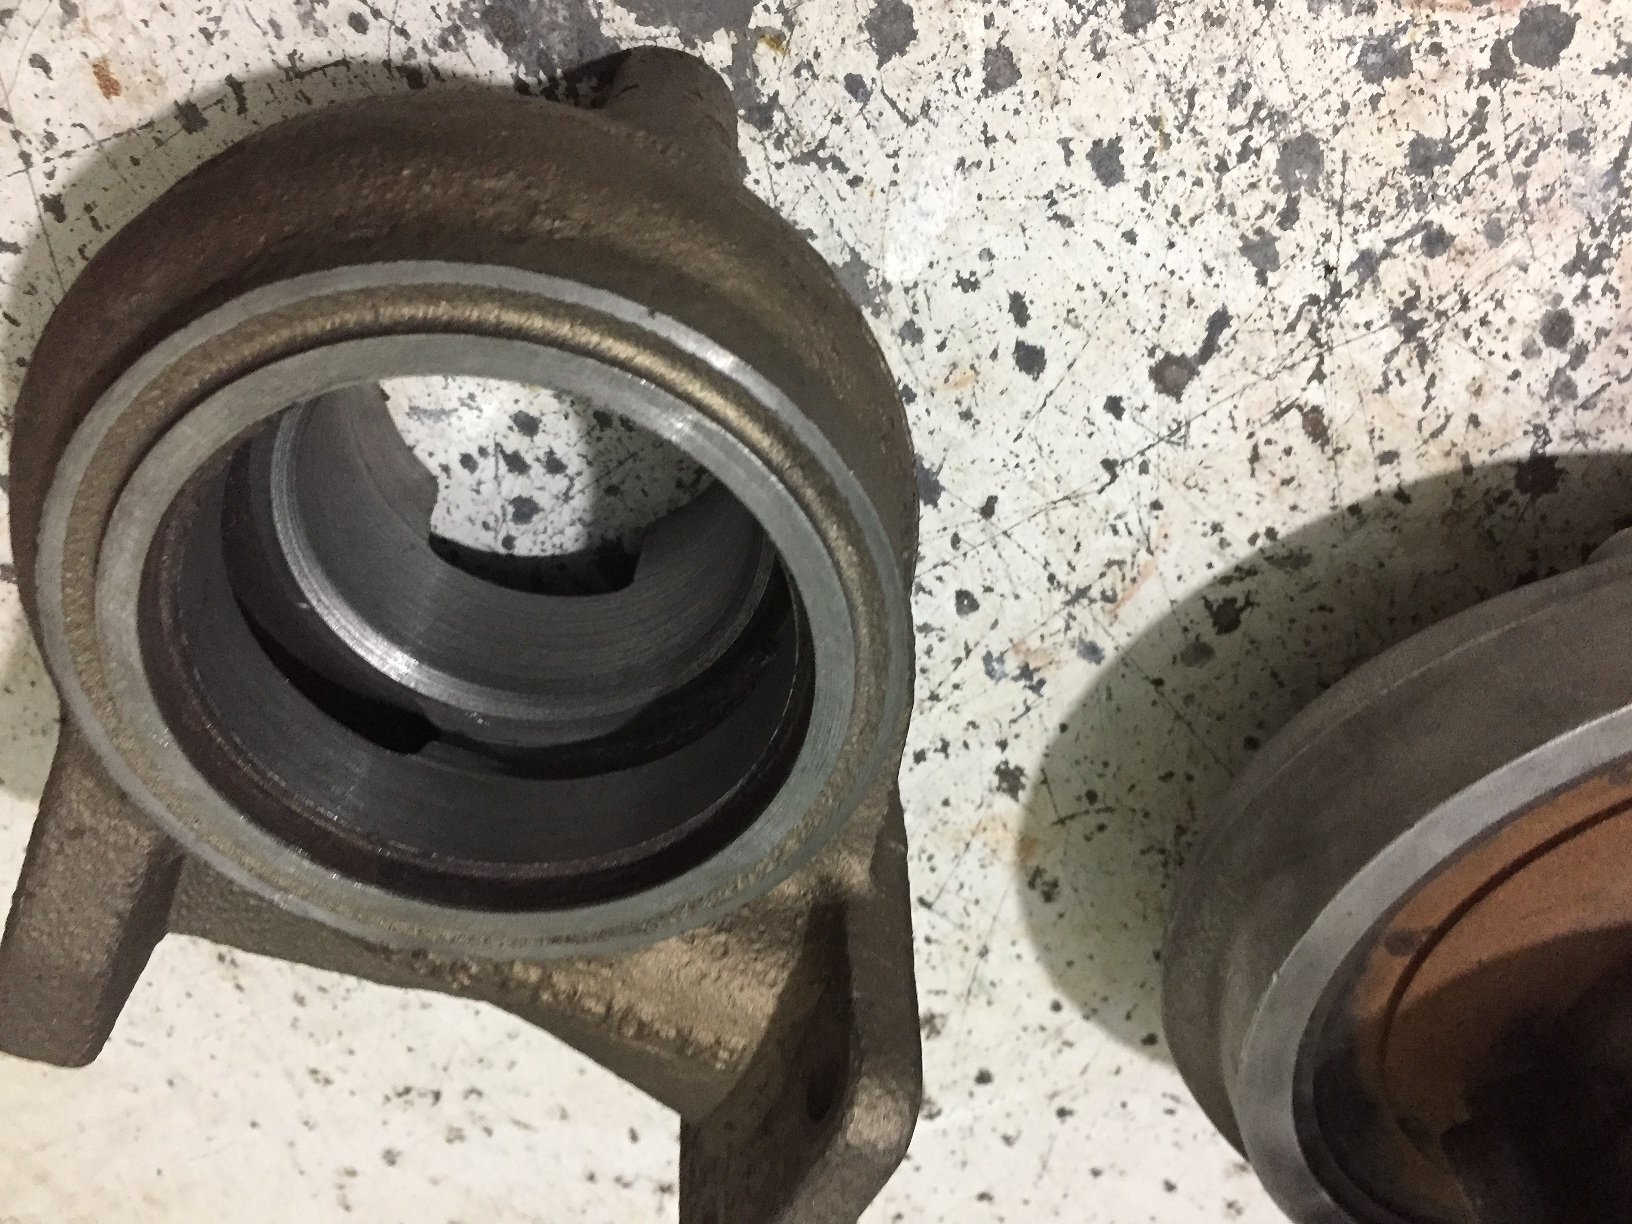
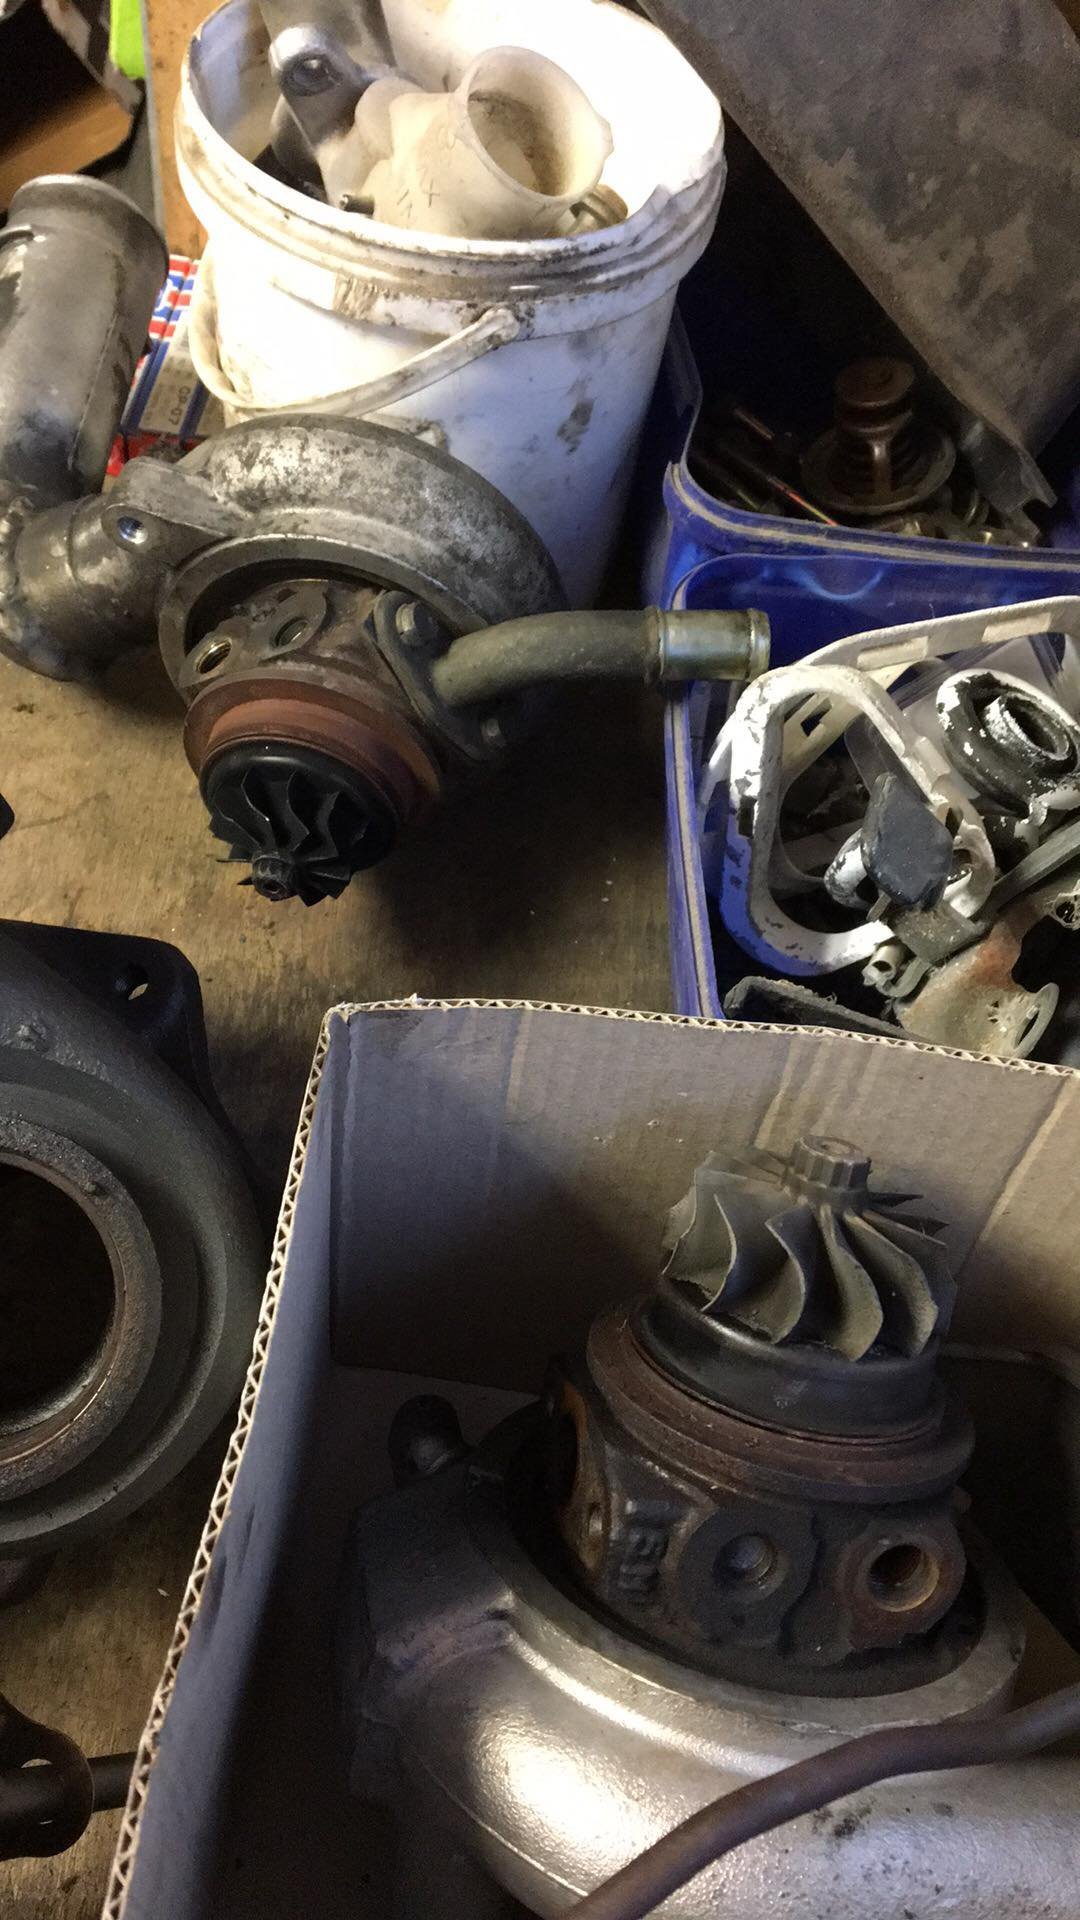
I wanted to put a hx40 into a smaller housing for use on a diesel, hunted through all my garrett housings and only found one that was suitable(saab 900 t3 0.63), but I wanted to save that housing for something else, all the 0.48's i had didn't really have enough meat on the sealing surface on the dump pipe... So I'd sorta given up until I remembered I had a Chinese hx30 on the shelf, it could be genuine but due to the fact the compressor snapped off the shaft and other small things I'm pretty sure it's from china
Now those of you that know turbos will know hx30 is alot smaller than the hx40 and the turbine housing uses a V-band connection to the center, and a hx40 uses the traditional 6 bolts (like garrett etc) SO i thought this wasn't a possible combo, but after many measurements and checking I decided to give it a hoon...
top is 14cm TS holset housing, middle is partly machined 8cm hx30 housing, bottom is 0.63 garrett t3
Here is the hx30 after the first lot of lathe work, v-band turned down, and inside from a 52/65mm wheel to 64/76mm turbine, The housing is clearly designed to take upto the 67/76mm wheel but machined to suit any size at the factory
Next up it went to see Emily and had the 6 flat areas machined and then milled and tapped to suit the normal hx40 spacing+retainer plate, It will also require a spacer/clamp plate but I don't have right size steel for that and it's too hard to buy anything in auckland during lockdown
And I thought it best to update the front housing while I was here, this is one of the smaller hx40 compressors, 54/82mm, more often this turbine would use the 60/82mm comp wheel.,,

-
6
-
-
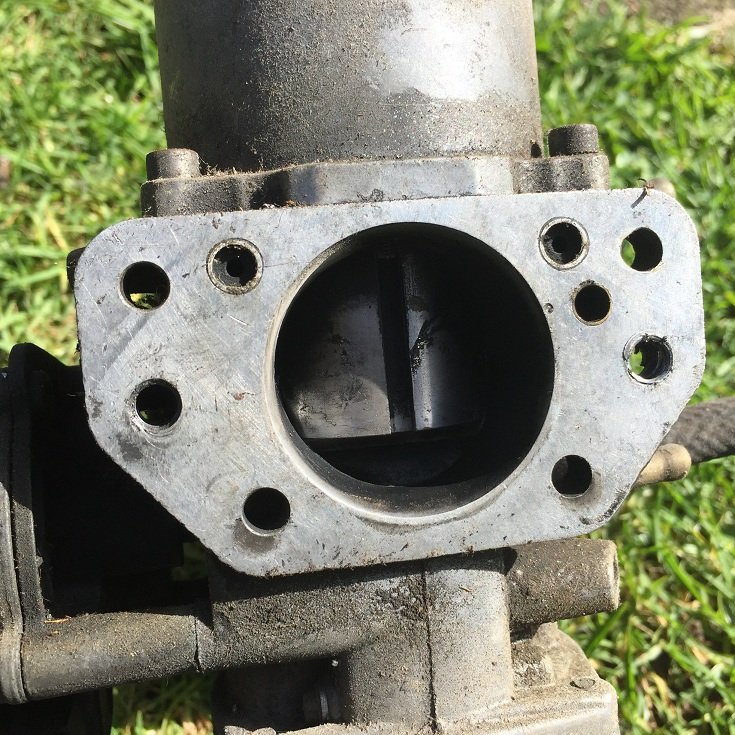
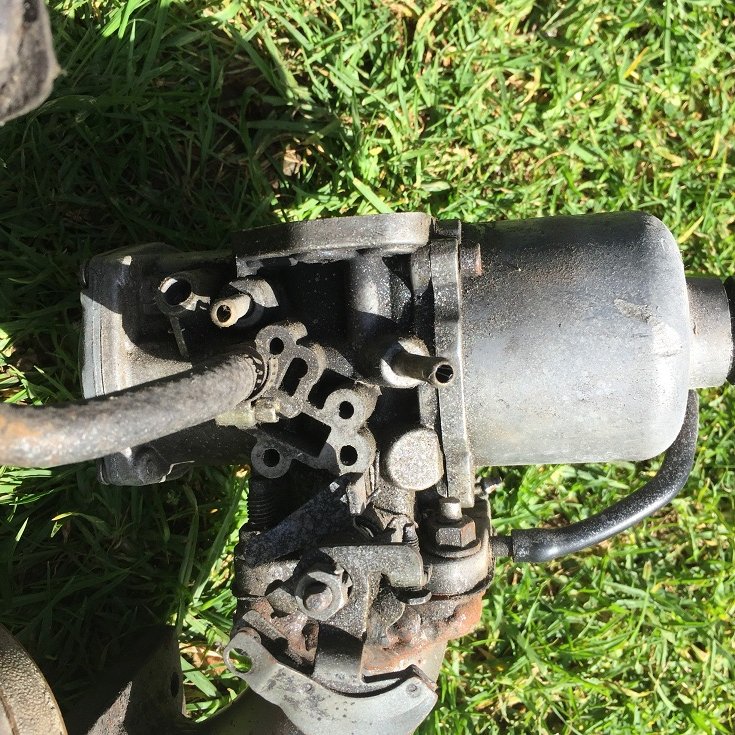
Yea the SU's are interesting to get your head around but once you do they are great! things like different oil or springs in the pot etc are great for fine tuning, but hard when rough tuning to know if they are close, also the turbo SU have a needle that was different to all the rest I came across, very thin at lower section and constant taper the whole way, lots of fuel when you need it!
Here's some pics, hopefully they help you in noticing the differences... The 2 things I found that usually limit carb setups are proper spark control and correct fuel pressure. -
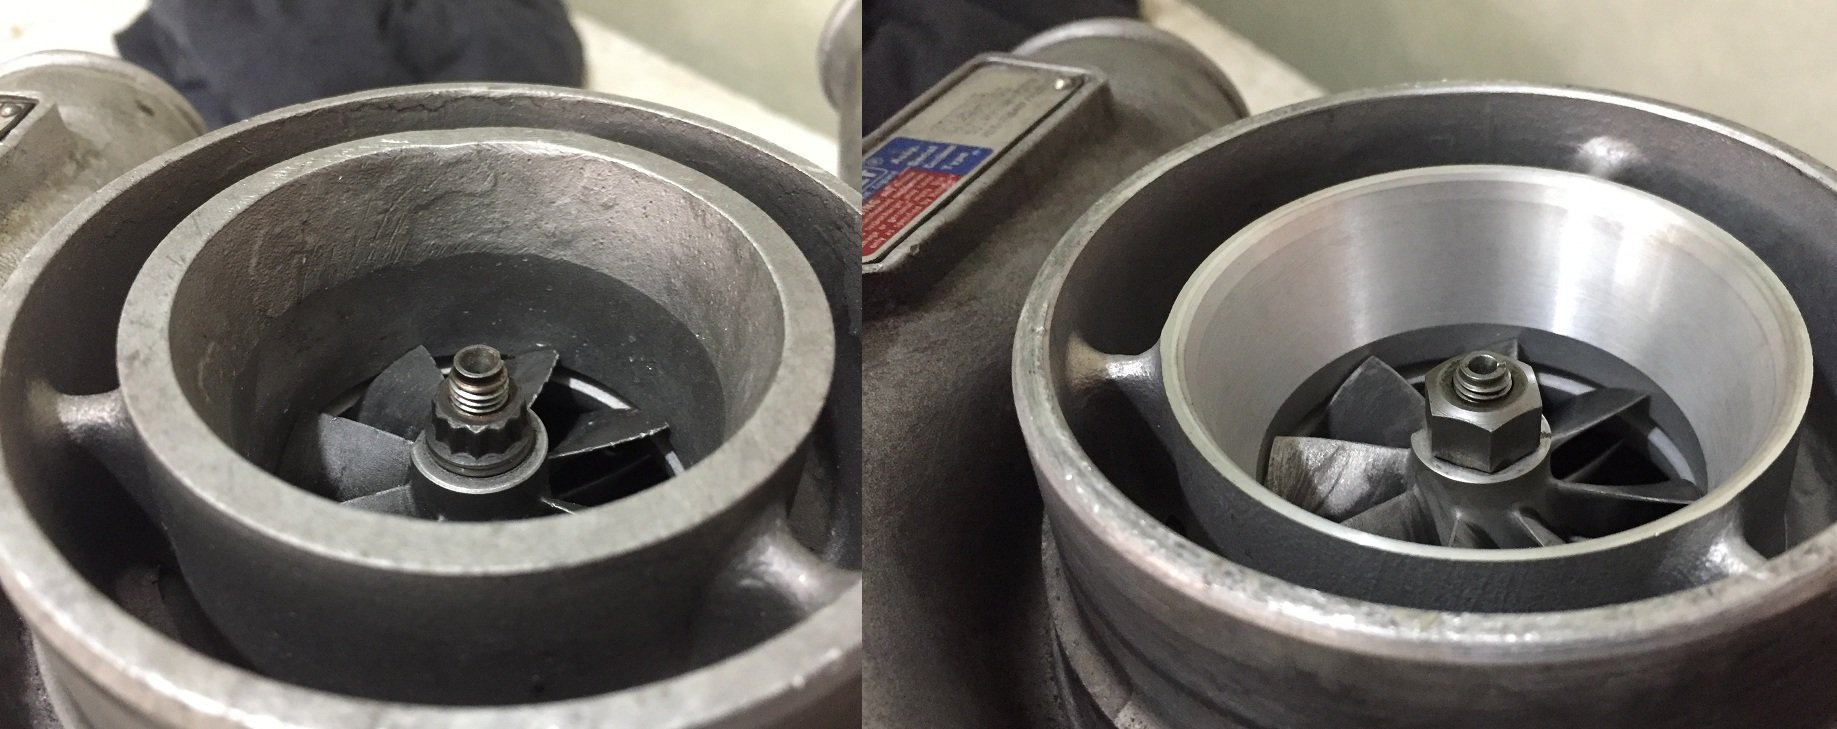
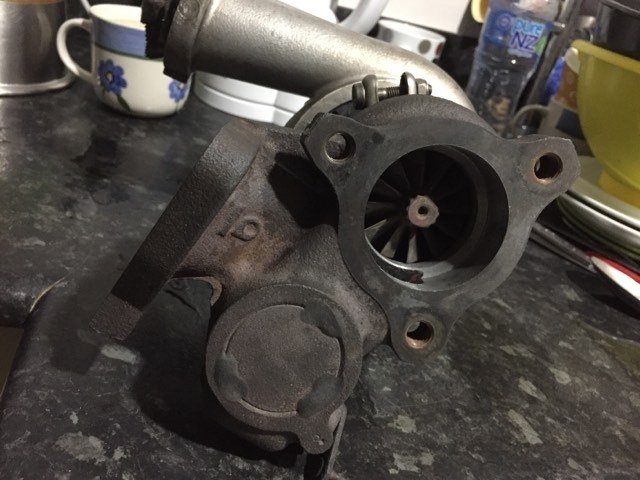
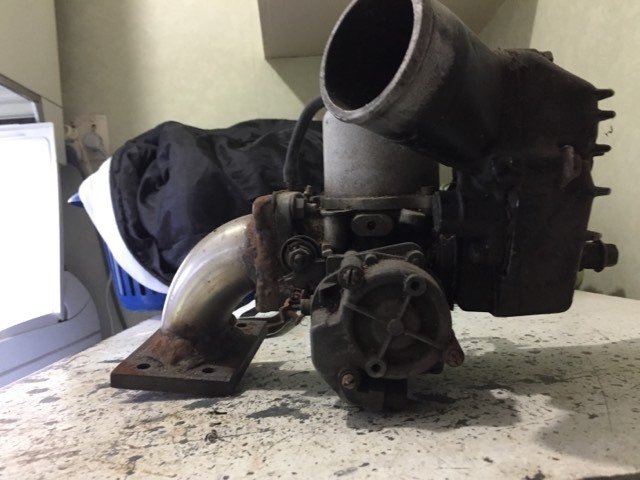
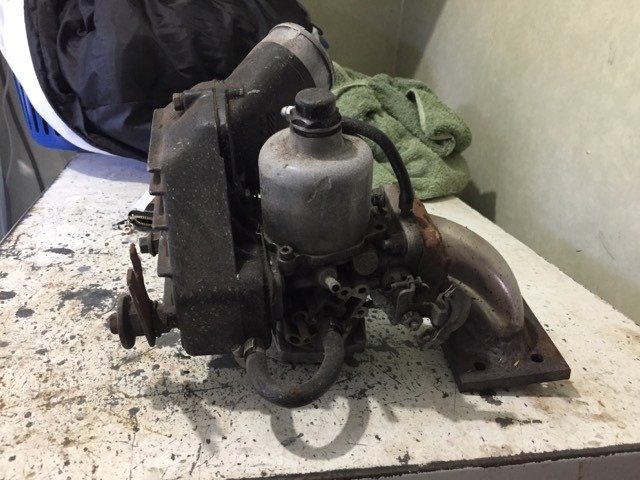
Well that wasn't so hard... So due to the lack of paying work atm i'll move onto my own turbos (silver linings aye!) first up is a turbo for my B6t BD mazda which I'm trying to get back on the road, factory they come with a VJ6 or VJ13 turbo, but these are mostly dead by now so everyone replaces them with a common VF10 from a subaru, these have the same awesome 9 blade turbine but a bigger inducer(7.5mm) on the compressor, I've run these before they are well suited, but then there's a size bigger again called a VF8, this changes to a 10blade turbine and another 5mm on the comp.
Vj6 = Turbine 43/52-9
Comp 32/52mm
VF10 =Turbine 43/52-9
Comp 39.5/52mm
VF8 =Turbine 46.5/52-10
Comp 44.5/56mm
So many years ago I got someone else to machine my b6t turbine housing to fit the VF8 turbine, in hindsight I think I'd rather build a hybrid of the vf8 comp on a vf10 turbine wheel, but let's just concentrate on moving forwards not changing the plan!
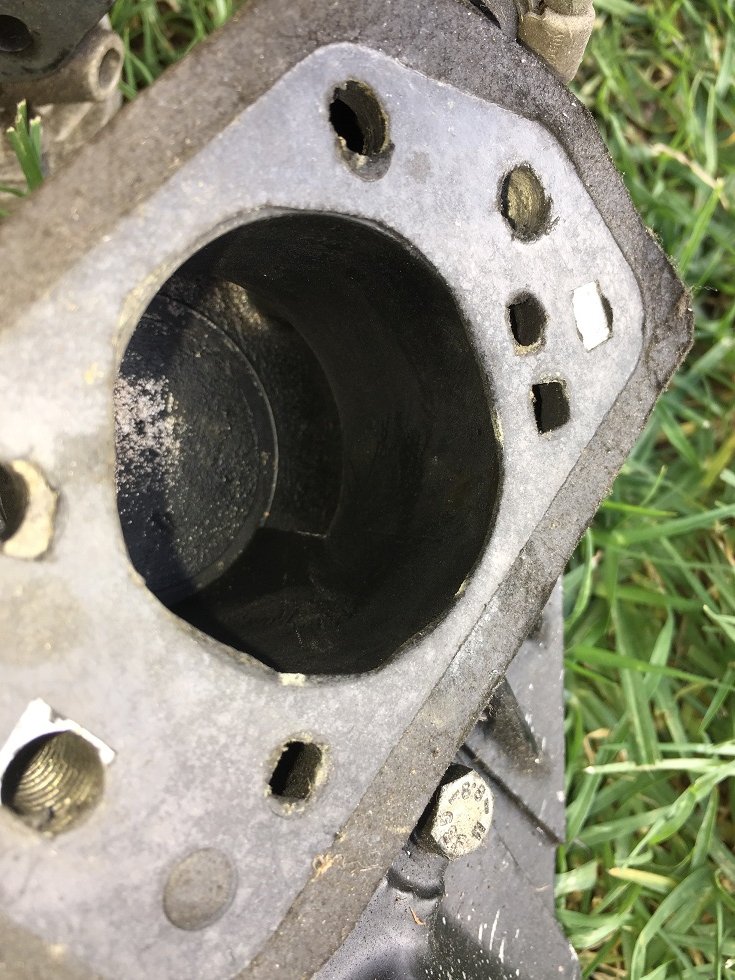
So i decided to tidy up the housings, first up the intake to the turbo, I forgot to take pics, got caught up with the mission at hand, but the internet can supply this pic to show the factory intake (50mm)
I made a 10mm bolt on plate (would have gone 8mm but couldn't find any in the workshop) then clocked her up on the lathe and made a 15degree taper from plate to wheel, bringing it to ~62mm then did a bunch of angles to make a bell-mouth of sorts, I will weld a 3" pipe to it that will goto the afm/filter, but won't do this until I can mock up in the car because I think I may have to angle that pipe...
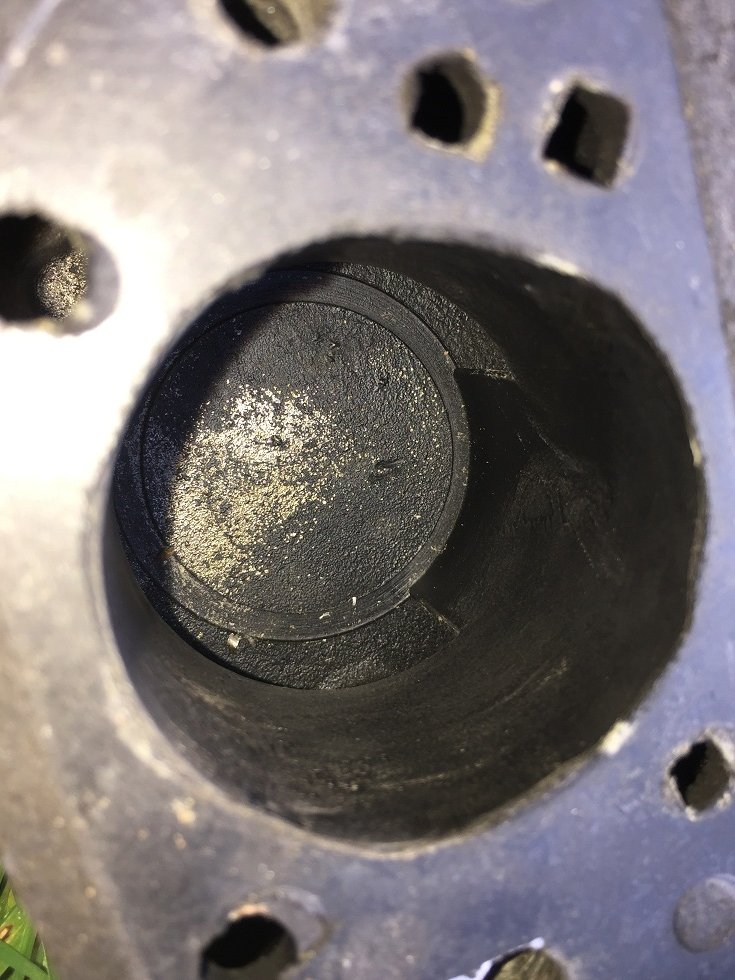
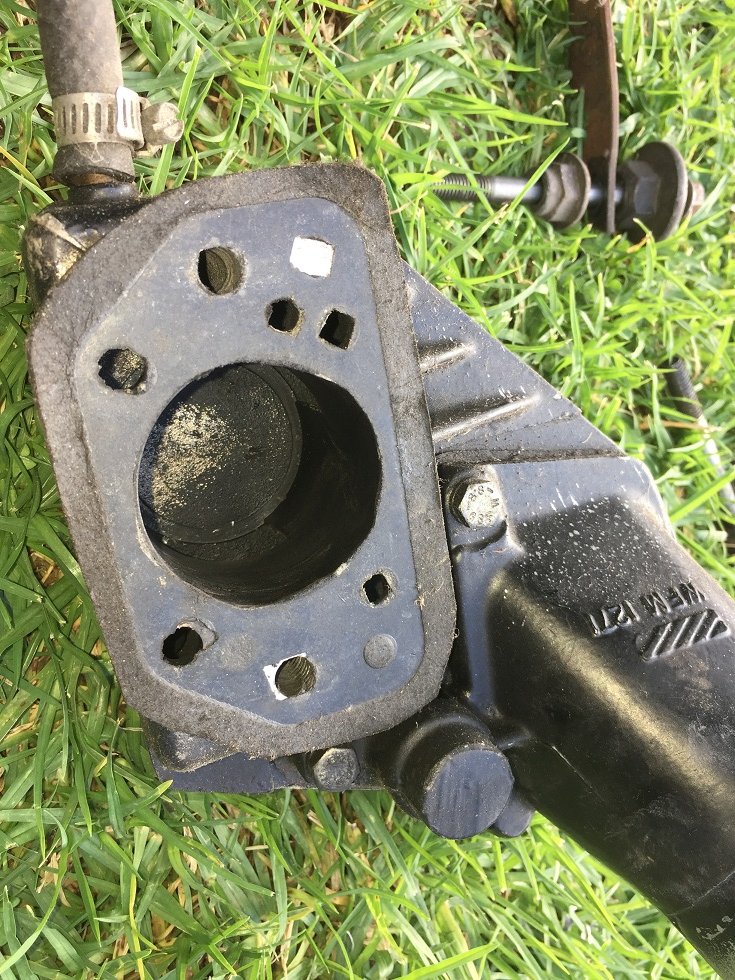
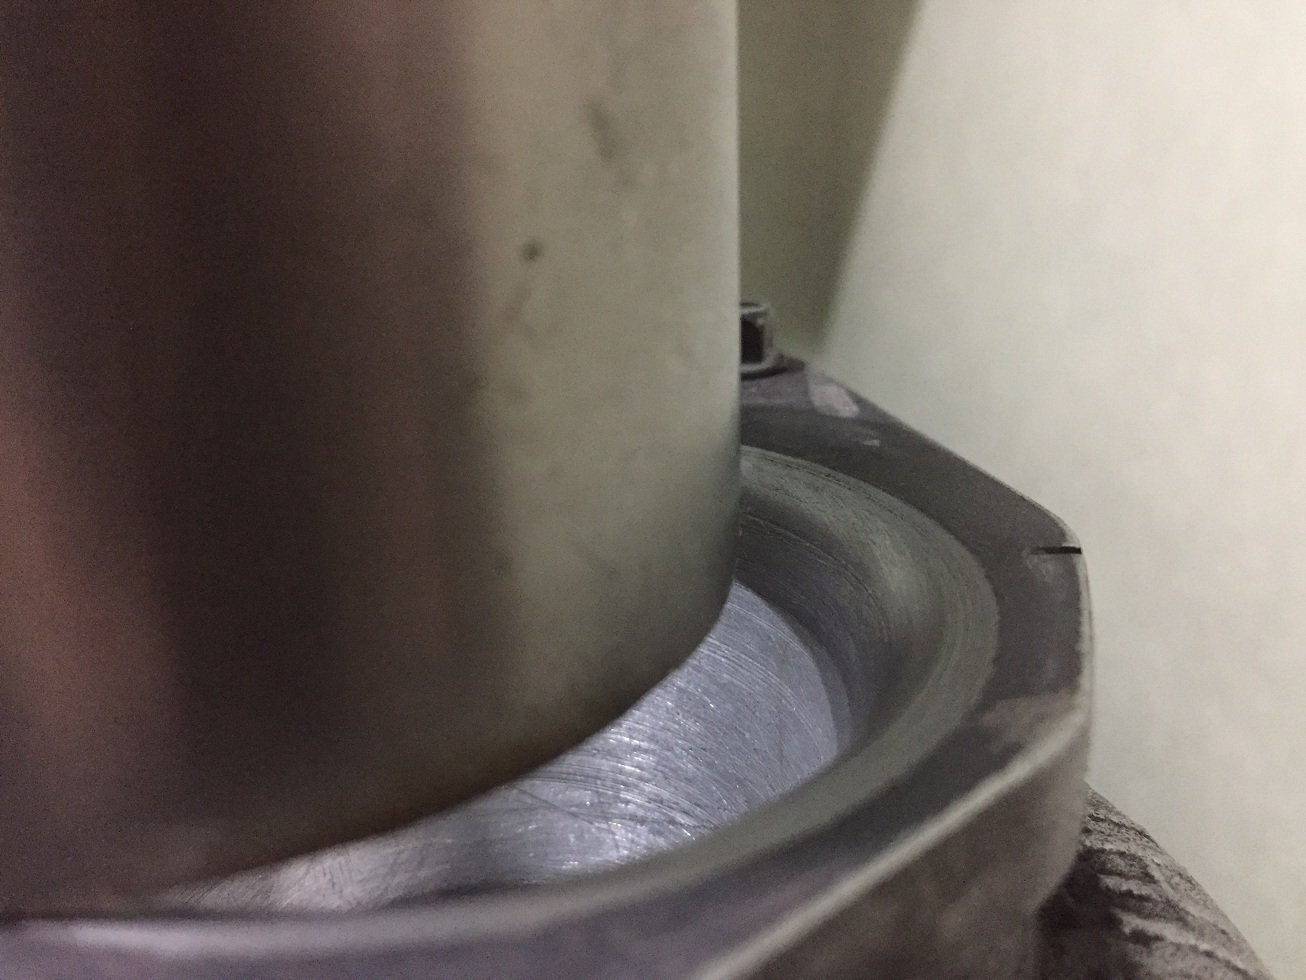
Next up I put the turbine housing in the lathe and tapered the exit from 48mm to 52mm(about the limit while still having a decent amount of flange to clamp) only ~5degrees of taper so hard to see in a pic, then I cut up my old dump pipe to get the flange, bolted it to the housing still in the lathe and bored out the flange to match(was 48mm), I also moved the washers between the flange and housing to space them apart so i could oversize this hole as the flange has some movement and I didn't want a lip if installed crooked by accident, also used a taper here to help the gasses to keep expanding and promote turbulent flow
Next up the turbine housing had a meeting with Emily, the wastegate hole was machined from 15mm to 22mm and offset upwards a couple mm, then flapper from the scrap td04hl housing was fitted (31mm replacing the 25mm) the arm was then welded to extend it so the flapper could fit, then re-drilled on it's new center, the flapper was put in the lathe and pin height adjusted to suit then welded into the housing, housing also needed a touch of clearance on side, but I don't have a die grinder atm so had to do it on the mill with not much room to do nicely... (you can see in this pic the first taper I did on the turbine exit, I went back and redid this to go almost all the way to the tips)
Now that wasn't so hard... up next I wanted a challenge, something I didn't know if it was possible... I have a few hx40's kicking around so wanted to put one of those into a small housing, but of course can't spend any money so have to find something in the collection-
1
-
-
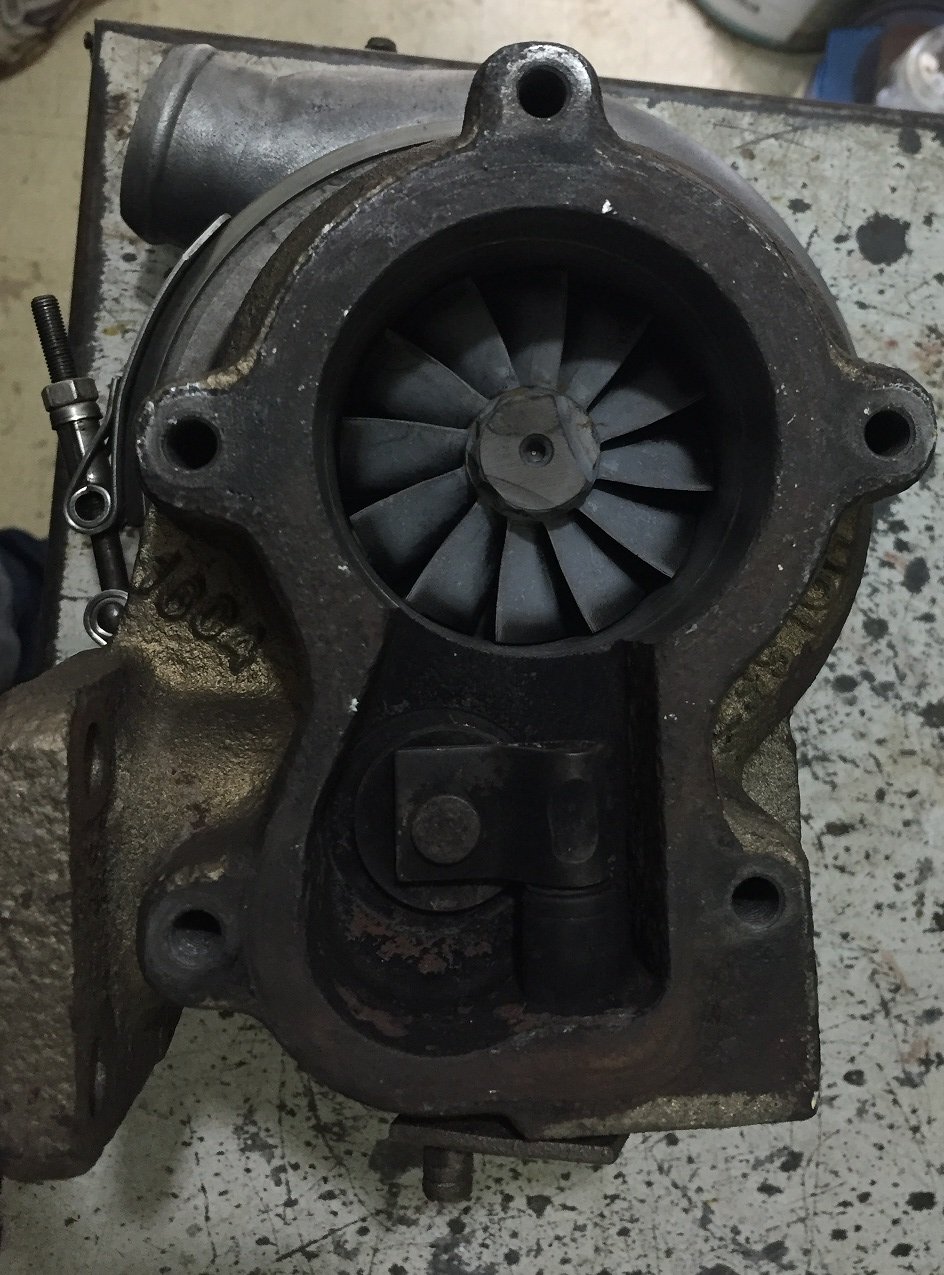
Those of you that know me in person will probably know that I love turbo's, and have a little collection, about 5 years ago I had a friend with a balancer at home I would commission to build turbos that i'd sell off for extra money for drifting, but one day he sold all his equipment and I stopped, but kept collecting some while trying to downsize the common ones.
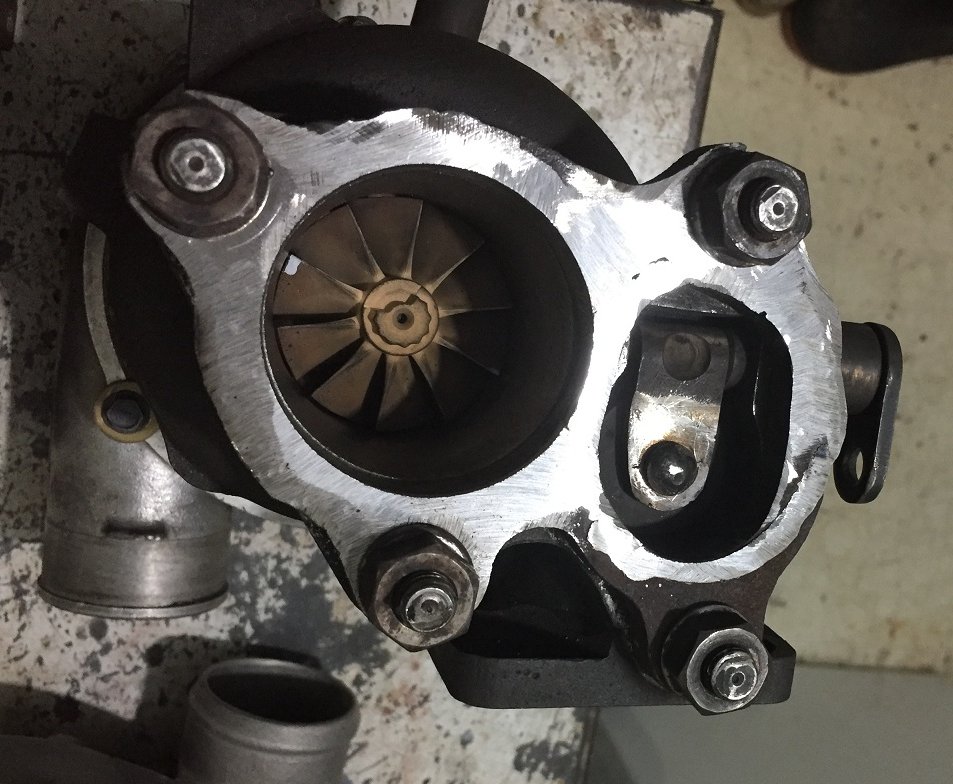
Then recently my buddy @Atex blew the turbo on his van, so after abit of research I found they ran a early Tdo4 turbo, so i found a really cheap Tdo4HL from a airtrek and offered it to him, a week later he asked me to machine the turbine housing out for him, I hadn't done this before but after seeing some pics I decided to give it a hoon and ordered some new cutting tips for the big boring bar I was yet to use.
3 days later I had the pieces in front of me, but the cutting tips were lost in the mail, but I was keen so pulled out the mini boring bar and devised a plan to make it work, I put the turbo in the lathe being held at the V-band/turbo end and then bored out the exit to 52mm so i could then flip the turbo around and hold from that end, then I could clock it up and machine the important end, boring it from a 39/47 wheel to 46/52mm, tbh this was pushing the limits of the material in the housing but I like a challenge!
Got it to fit, learnt a few lessons, wasn't my best work but hey it's only a l300, sent it on the courier the next day and he fitted it the day after, then I explained how to adjust fueling, later that night I got a video of it pulling 18psi, and a excited atex enjoying the boggie.
and some afterwards pics
Compressor went from 10T 35.5/49 upto a 15T 45.6/52mm so she moves alot more air now!
The 4d56? turbine housing is 4cm, and the old airtrek one was 5cm-
7
-
-
So now I guess your wondering what I use these machines for... well the mill I do make a couple products that pay it's way, the lathe however I generally only use for fun or mates projects, seeing as i'm learning I don't like to think i'm any good at it. So onto some of the toys...
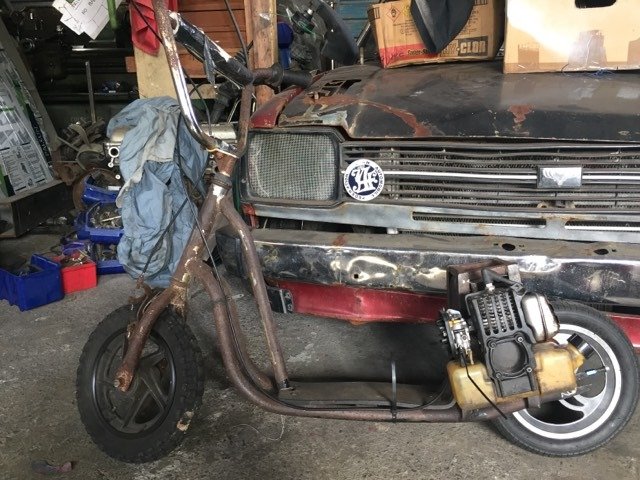
Decided I needed some 2stroke in my life so started small with a Goped for the kids, tried to keep it simple as possible, friction drive, no clutch, push start etc
The kids have to pass their license test on this before they are allowed to drive the gokart...
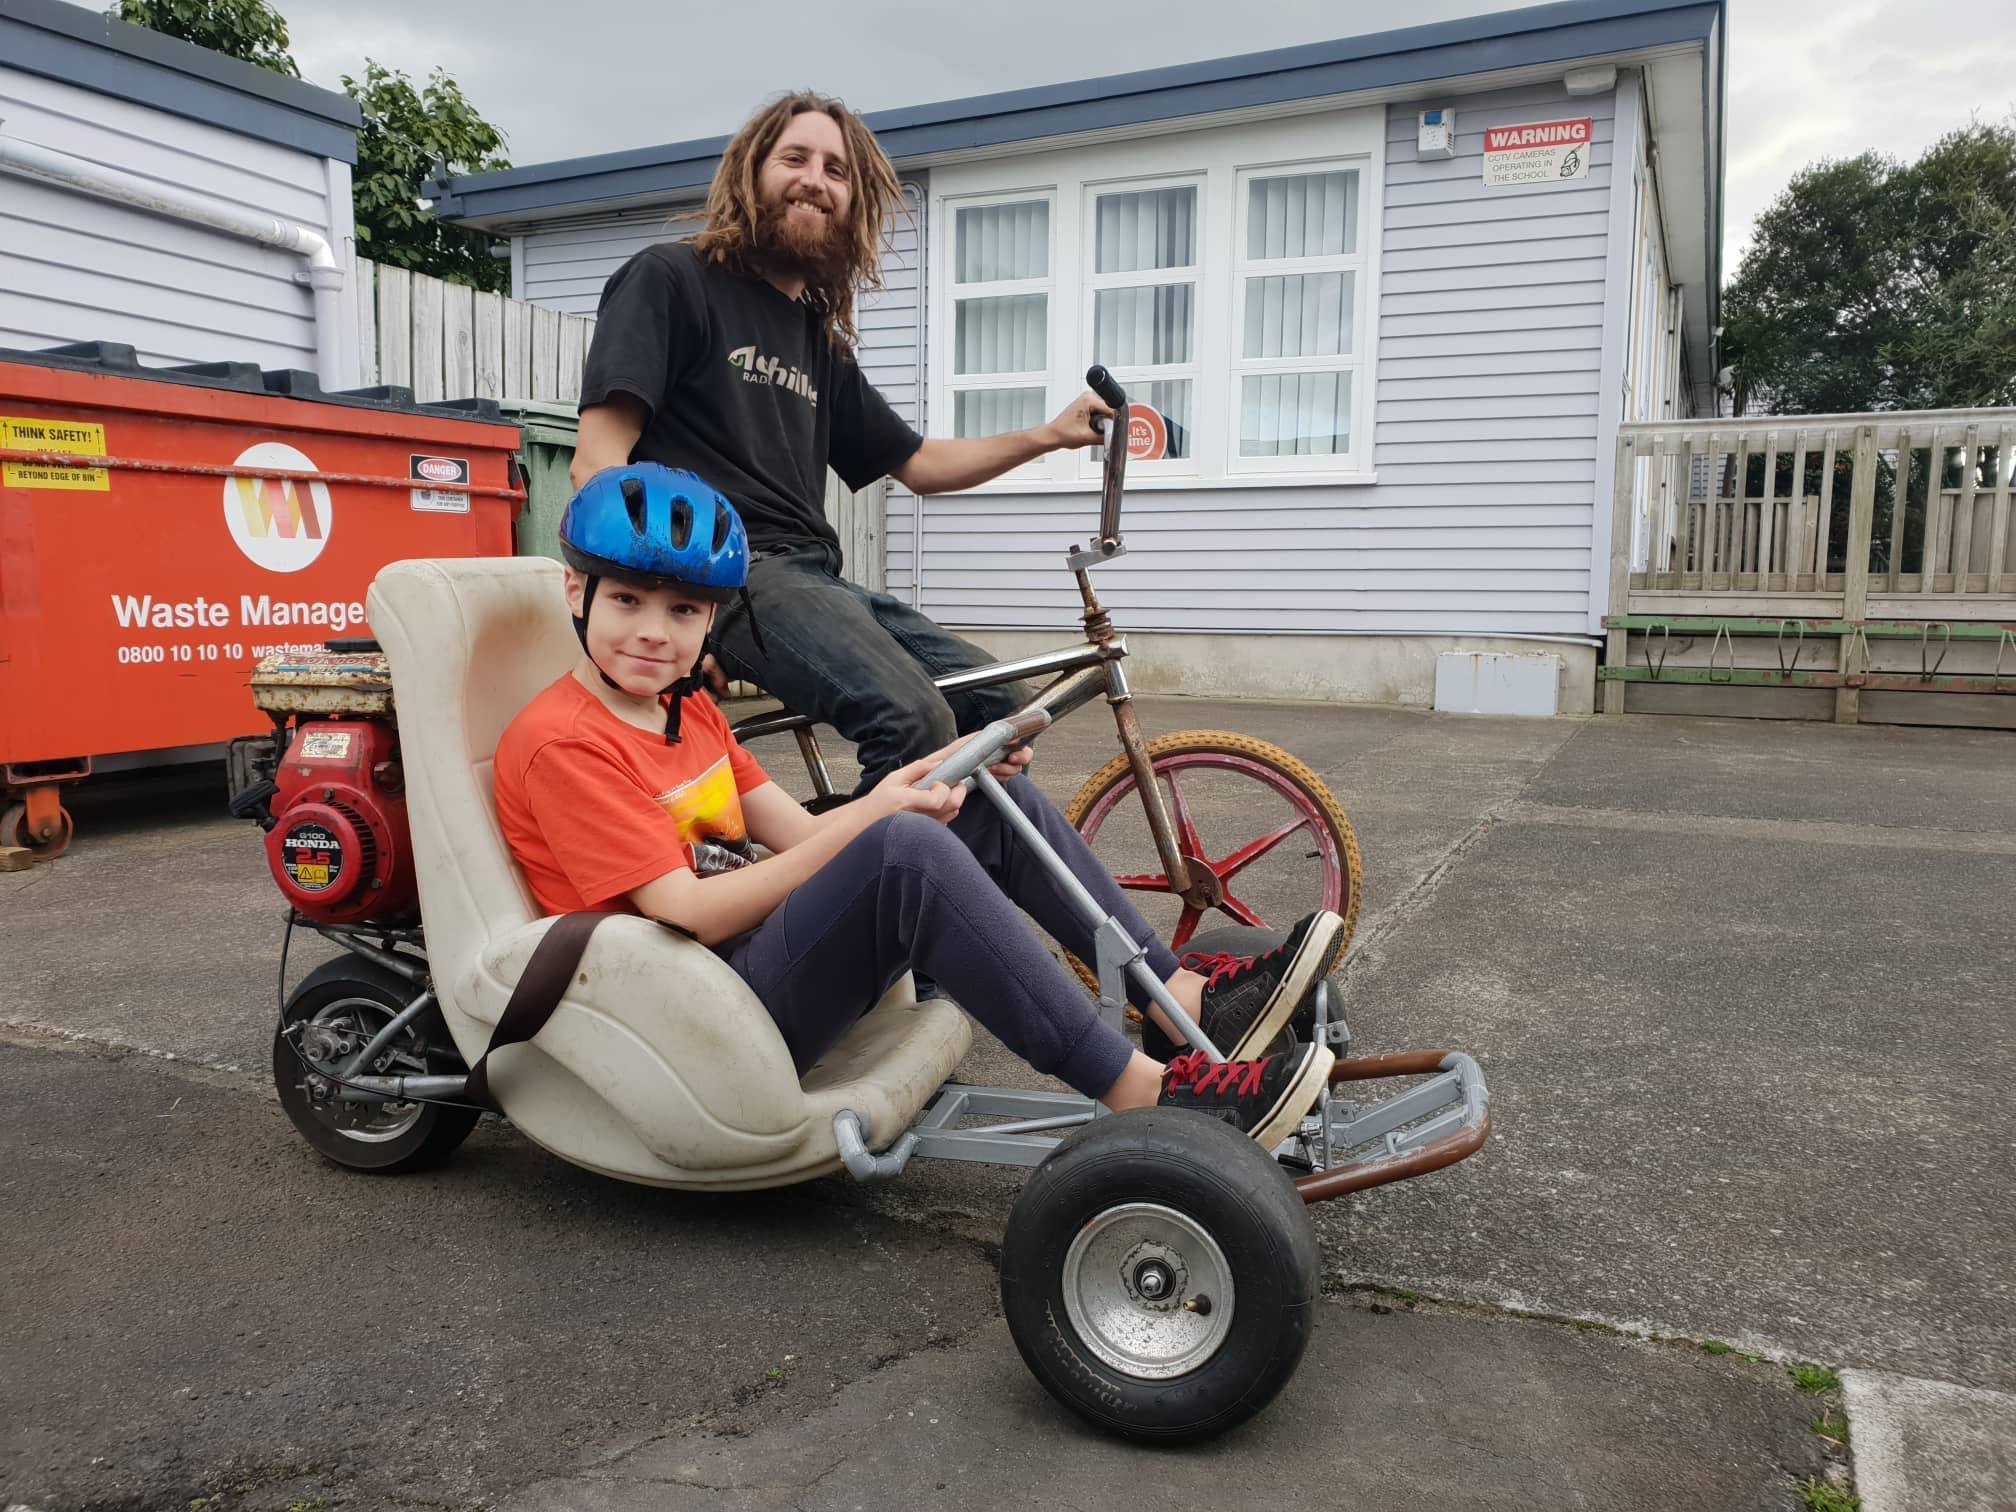
When the oldest nephew was young I promised him we'd build a gokart for his 10th birthday so after years of collecting parts and learning about the triangle of speed (fast, reliable, cheap, you can only pick 2) we had a free 100cc honda motor from a waterblaster, a bunch of steel from old school tables, a free seat (think it was a poolseat???) and we slowly came up with a design and started building it every school hoidays, but then his birthday got close so i finished it off, I donated some gokart wheels I had, spun up some spindles to suit the fronts, ended up having to buy a accelerator cable, a chain link, a clutch with 10t sproket, the rest was all scraps and things i'd build to suit.
And this is what we built, a 3 wheeled kart that teaches you lots about driving haha, Can see young josh lifting a wheel in the 2nd pic!
Next post up is Lockdown turbos, what i've been spinning up while work has dried up thanks to china.-
5
-
-
Next up I powered the motor up to half speed and slowly engaged the clutch lever and she started to spin! so I tried all the gears and found only one to be noisey, I guess this is the speed it spent most of it's life at... it's got 8 gears and it was number 7 (700rpm) so if I need to do alot of work at that speed i'll pick another gear and add more frequency to the motor, although I haven't tried over 70hz yet, would prefer to get the motor balanced if I was going to run it at 100hz or similar.
Then I twiddled the levers and spun the handles, clocked up a piece of steel and had a go at cutting, this wasn't pretty, not only did I not know what I was doing (all I had done is read a couple old lathe books) but everything had lots of wear so it wasn't long before it went wrong and I wound it into a area with lots of lash and it dug in... ok time to step back and assess... I pulled apart everywhere i could find wear and shimmed the best i could with what i could find in the workshop and with a bunch of trail and error got her to a usable state, and i was finally in the world of making round stuff")
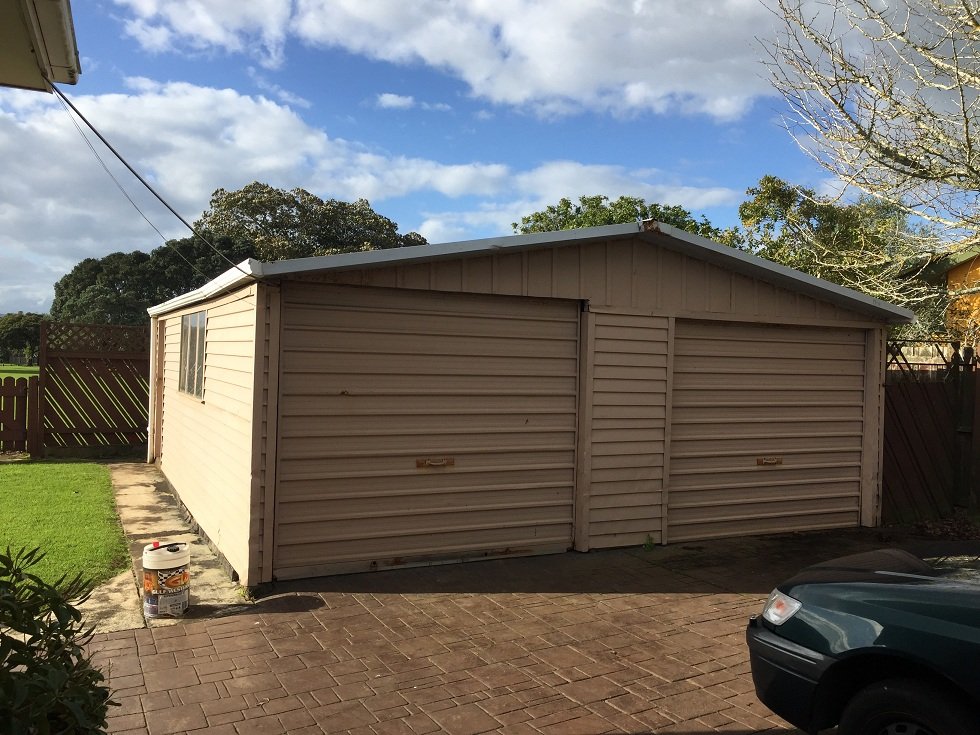
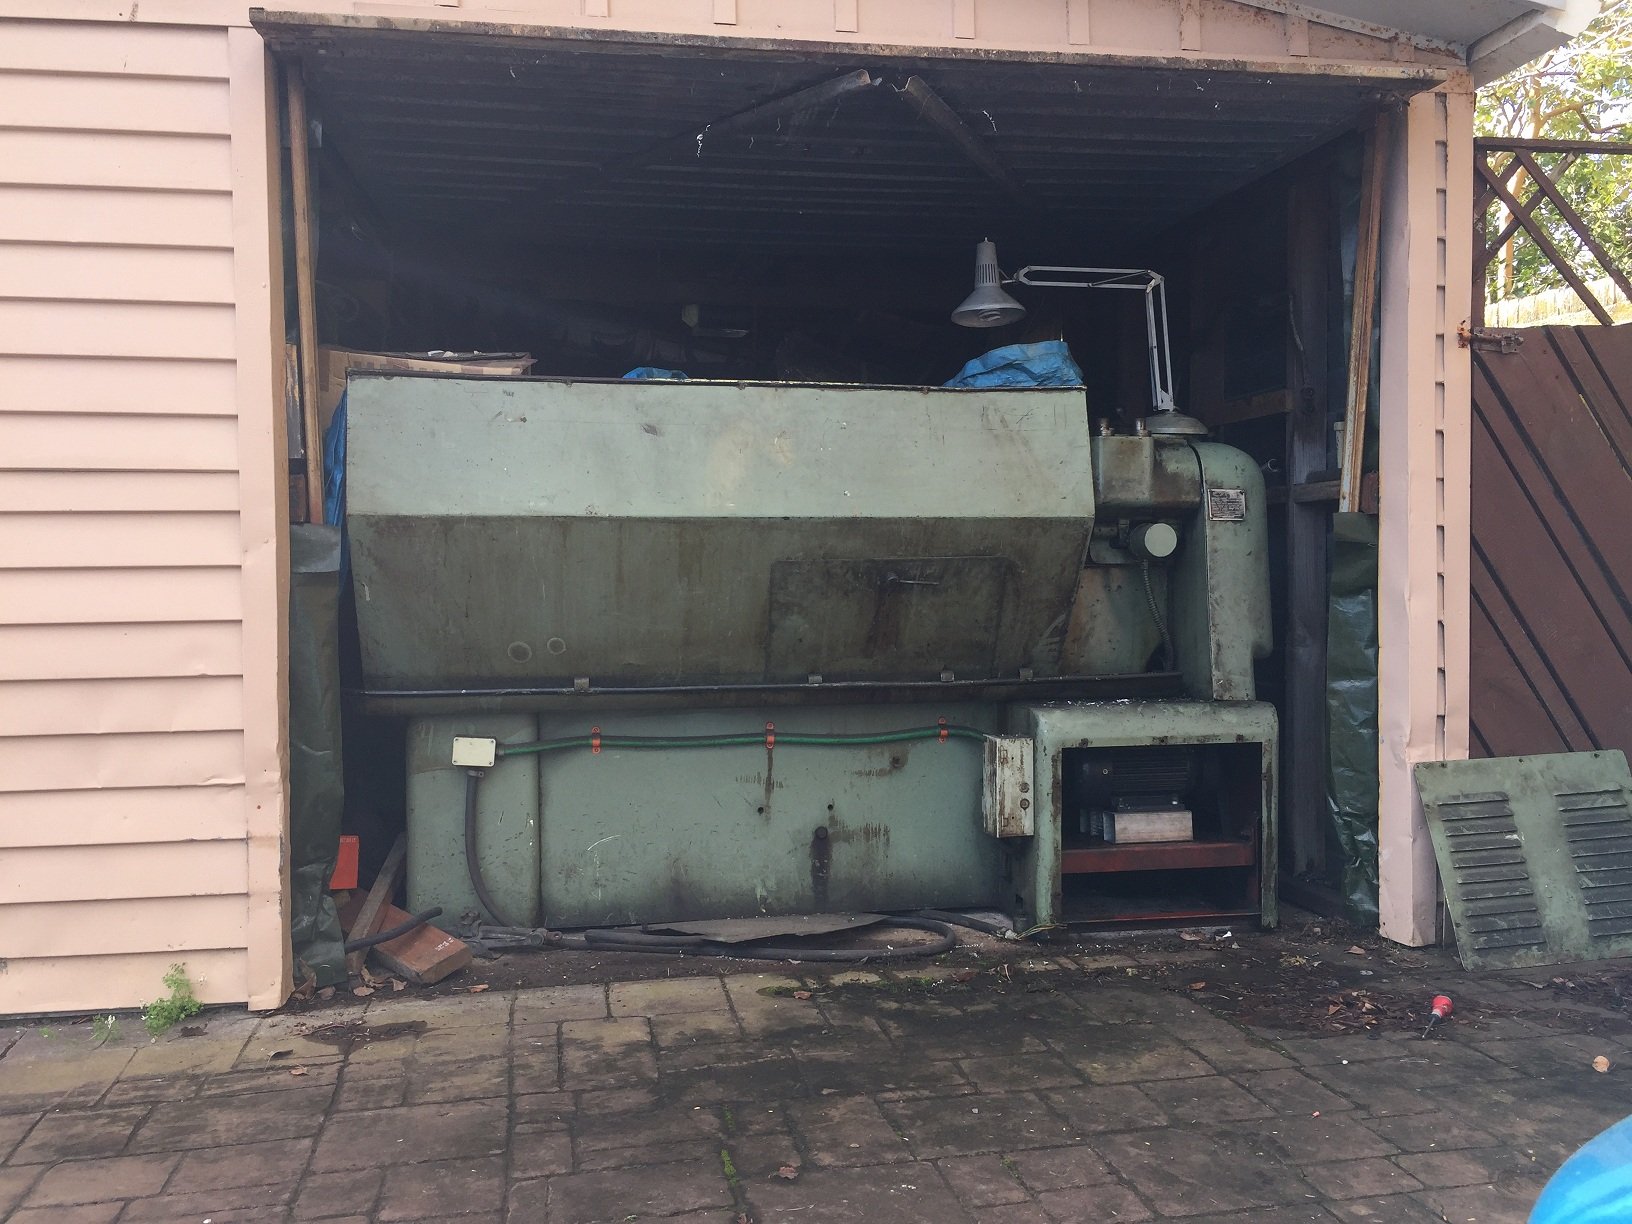
Here's the shed from outside, pretty boring but keeps my tools mostly dry
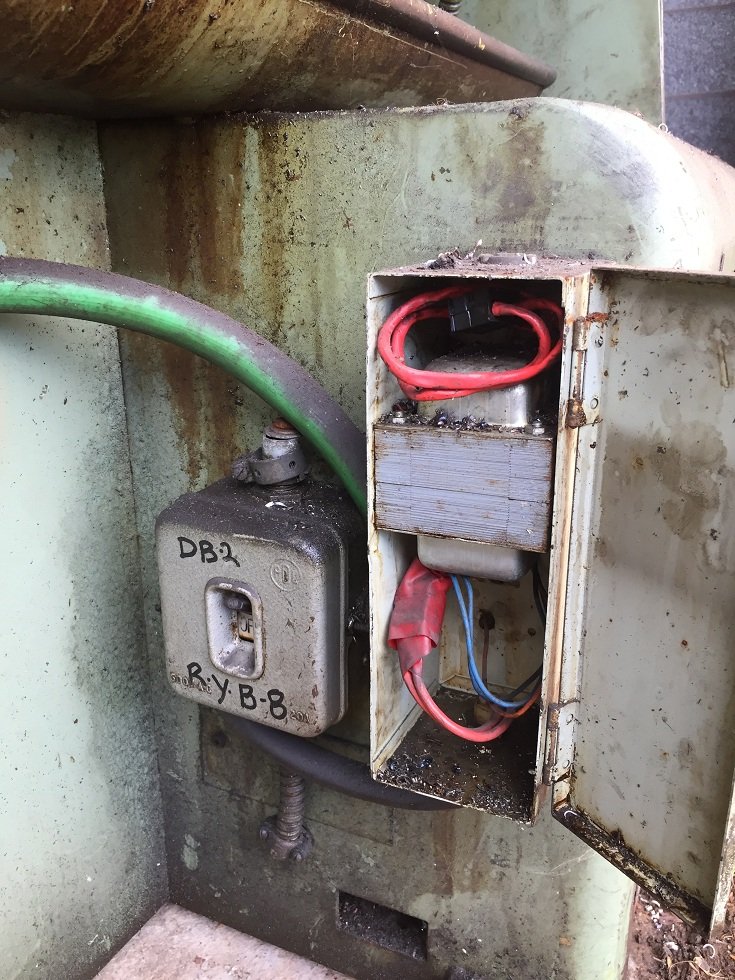
And the old Wiring and step down transformer for the missing light (would love to find a factory light but not easy in nz) This is all bypassed atm.
And found a old pic of Emily in my messy workshop, (it's not always this bad!) can also sorta see the oil burner heater behind the bonnet, and the start of a bbq next to it.-
1
-
-
For copper we would use a gas set with flame really rich (no oxy) then run it over the copper to put some black soot on the copper, then heat normally and when the soot disappears then it's the right temp, then aircool
-
Sweet, blowthrough is much better! I found with the blowthrough it didn't like the intake pipe to the carb to be in-line, I ended up using the ulgy boxy thing off the mg factory setup, it changed the airflow path and had slots around the side, I dug it out and took a pic for you, I might strip it down later and get a pic of the inside... when I later changed to the downdraft Aisan factory turbo carb from a daihatsu charade I added a plenum box on the top and also had a diffuser plate on the inlet
-
awesome toy man! and good to see you realized with the variable vane you have to wind them open a little bit, took me a few days to figure that out on my first variable vane turbo install!
I'm not sure exactly which turbo you are using but i've done draw-through before and learnt a lesson you might be interested in... you need a turbo with carbon seals to do draw through properly, if you use a normal turbo then the vacuum is too high across the compressor when you shut the throttle, and it kills the oil seal after a few hundred km's, however there is abit of info out there saying if you add a second throttle in-line and have it ever so slightly more closed that the SU throttle then it moves the high vacuum area to the first throttle rather than the turbo... I ended up using a SU carb from a mg montego which is factory blow-through after seizing the first turbo running draw-through, no risky fuel pooling in turbo inlet then aswell. -
All the clutch's i've seen on factory superchargers are a on-off type of deal, I think any pulsing of this signal would cause the clutch to die very quickly... I see the s/c as being a restriction even when it's turned off and free-wheeling so I would use the wastegate(on cooler piping) to bypass the s/c which will also help with the transition as it will open more and more as the turbo really takes over.
If your seriously considering 10k revs and 400hp (atw?) then I would recommend doing the calcs for air required at engine for those specs then look at comp maps, the G25's claim big numbers but real world seems to require high pressures to acheive... however the 60mm comp wheels are generally torque monsters for their size so if you can get the flow to match then it'd make for a nice driver -
I'd use a decent sized turbo and blow it into a cooler and then into the supercharger, I would also add a decent sized wastegate after cooler + before the s/c, that bypasses the s/c once enough boost is achieved (say 15 to 20psi) letting the turbo take over in the top range but still giving s/c down low torque and twin charged in the mid-range, hopefully the factory s/c has the normal clutch pulley you can turn off at mid revs, making it sequential, and of course i'd use e85, maybe water/meth but e85 would be easier IMO
-
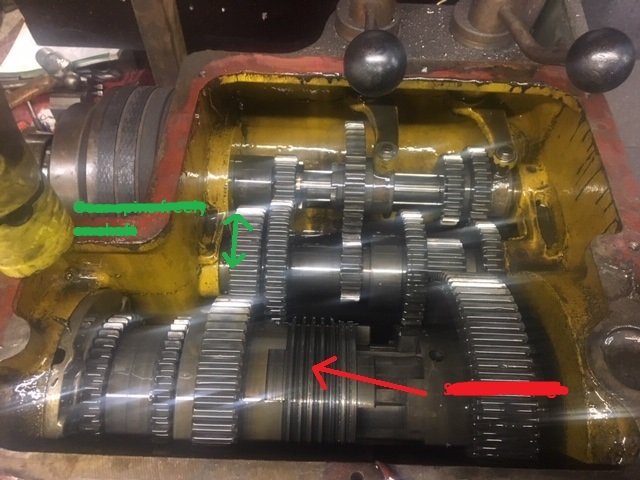
Next up was the gearbox... It had a sight level that was so dirty I thought the glass was stained, so I popped the top off and had a look, to my surprise the insides looked perfect, except the oil and a slight black grime on the outer edges of the oil level line, so I drained it out and emptied 4 or 5 cans of brake clean in there and got it looking decent, also got the sight glass good enough to see through, I figured out the ~equivalent oil needed was the typical tractor type oil so found a 20L container on trademe with only 2-3L missing for cheap so snapped that up and filled her up with fresh oil, took about 10L, again no pics but I found this one on the internet that is the same, ignore the writing...
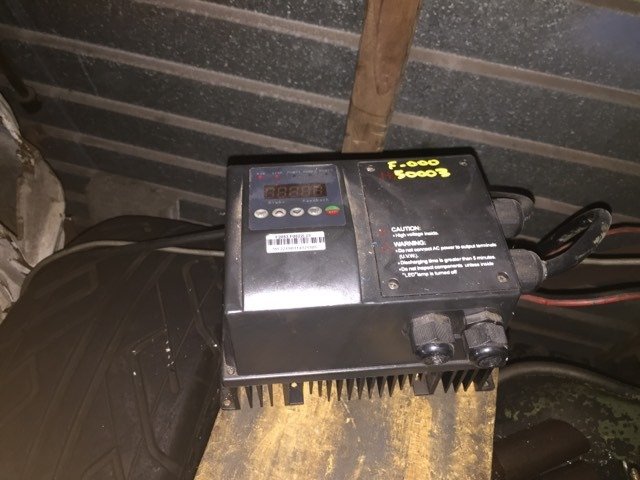
Next up it was time for a power source, I hunted around and found this water pump controller that also stepped 1PH to 3PH and was rated for 3hp, it was being $1 reserved on trademe so I took the gamble and got it for $25, at this point I was super dubious, but after a quick look through the china manual it seemed like it would do the job, and now it works a treat, I do have to run it in maintenance mode because it wants a pressure sensor or some such, but specs are unknown so I plan to try use this later as a safety cut-out. mean score and way better than using Emily's vsd on the other side of the garage.
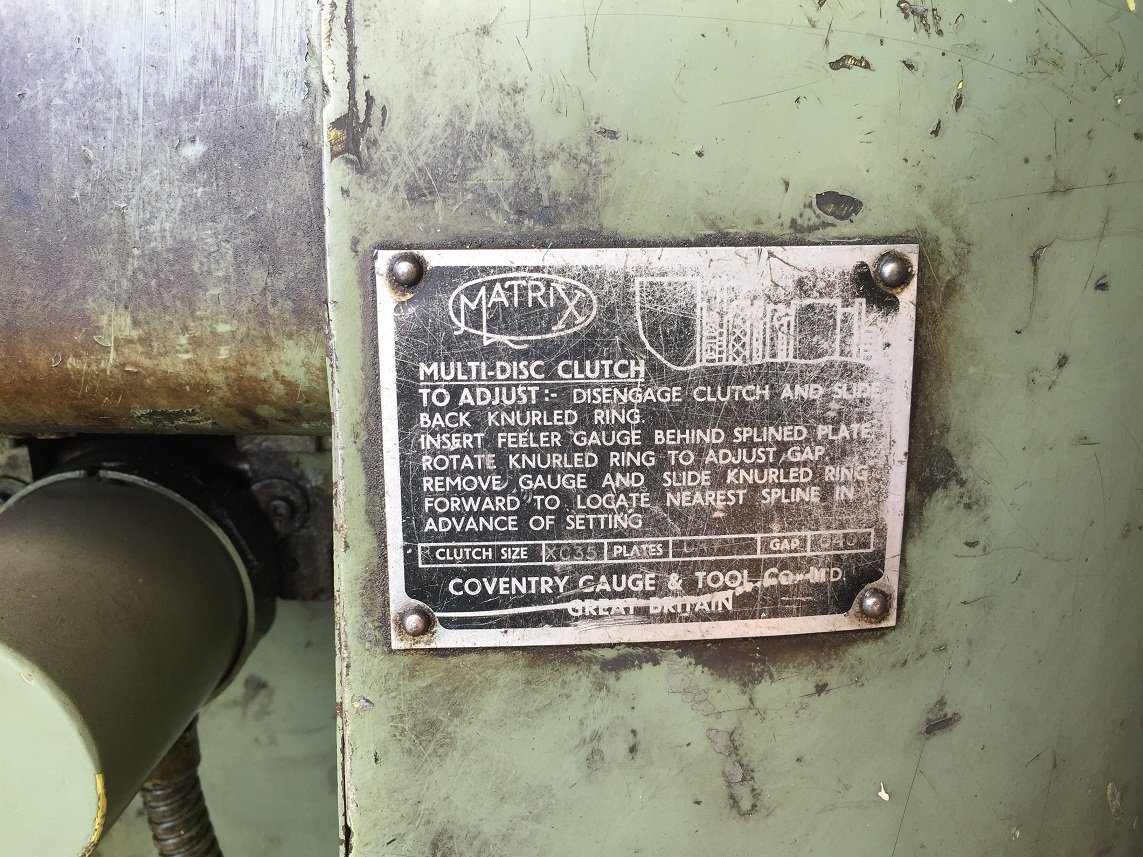
By now I had the basics sussed and had read the Colchester manual to try and figure out how things went... so I started playing with levers etc and noticed the clutch wouldn't disengage, luckily on the back there was some description of it's Matrix clutch so I pulled it apart and measured and cleaned and reset it, got it going but ended up changing specs slightly to reduce drag when disengaged, this old stuff is made to last!
-
6
-
 1
1
-
-
Whipped the back off and snapped a couple of pics of the china 3hp power machine, can see the 12.9 grade m10 bolt used for locking to the keyway, the end being ground down to 6mm? to suit (that reminds me, I should make a proper one with the lathe! planned to change the pulley size but quite happy with it now)
-
1
-
-
I hunted high and low for the old pickup pics of Charlotte but think they are lost, I have one corrupted hard-drive left to try, but for now you'll have to suffice with my words...
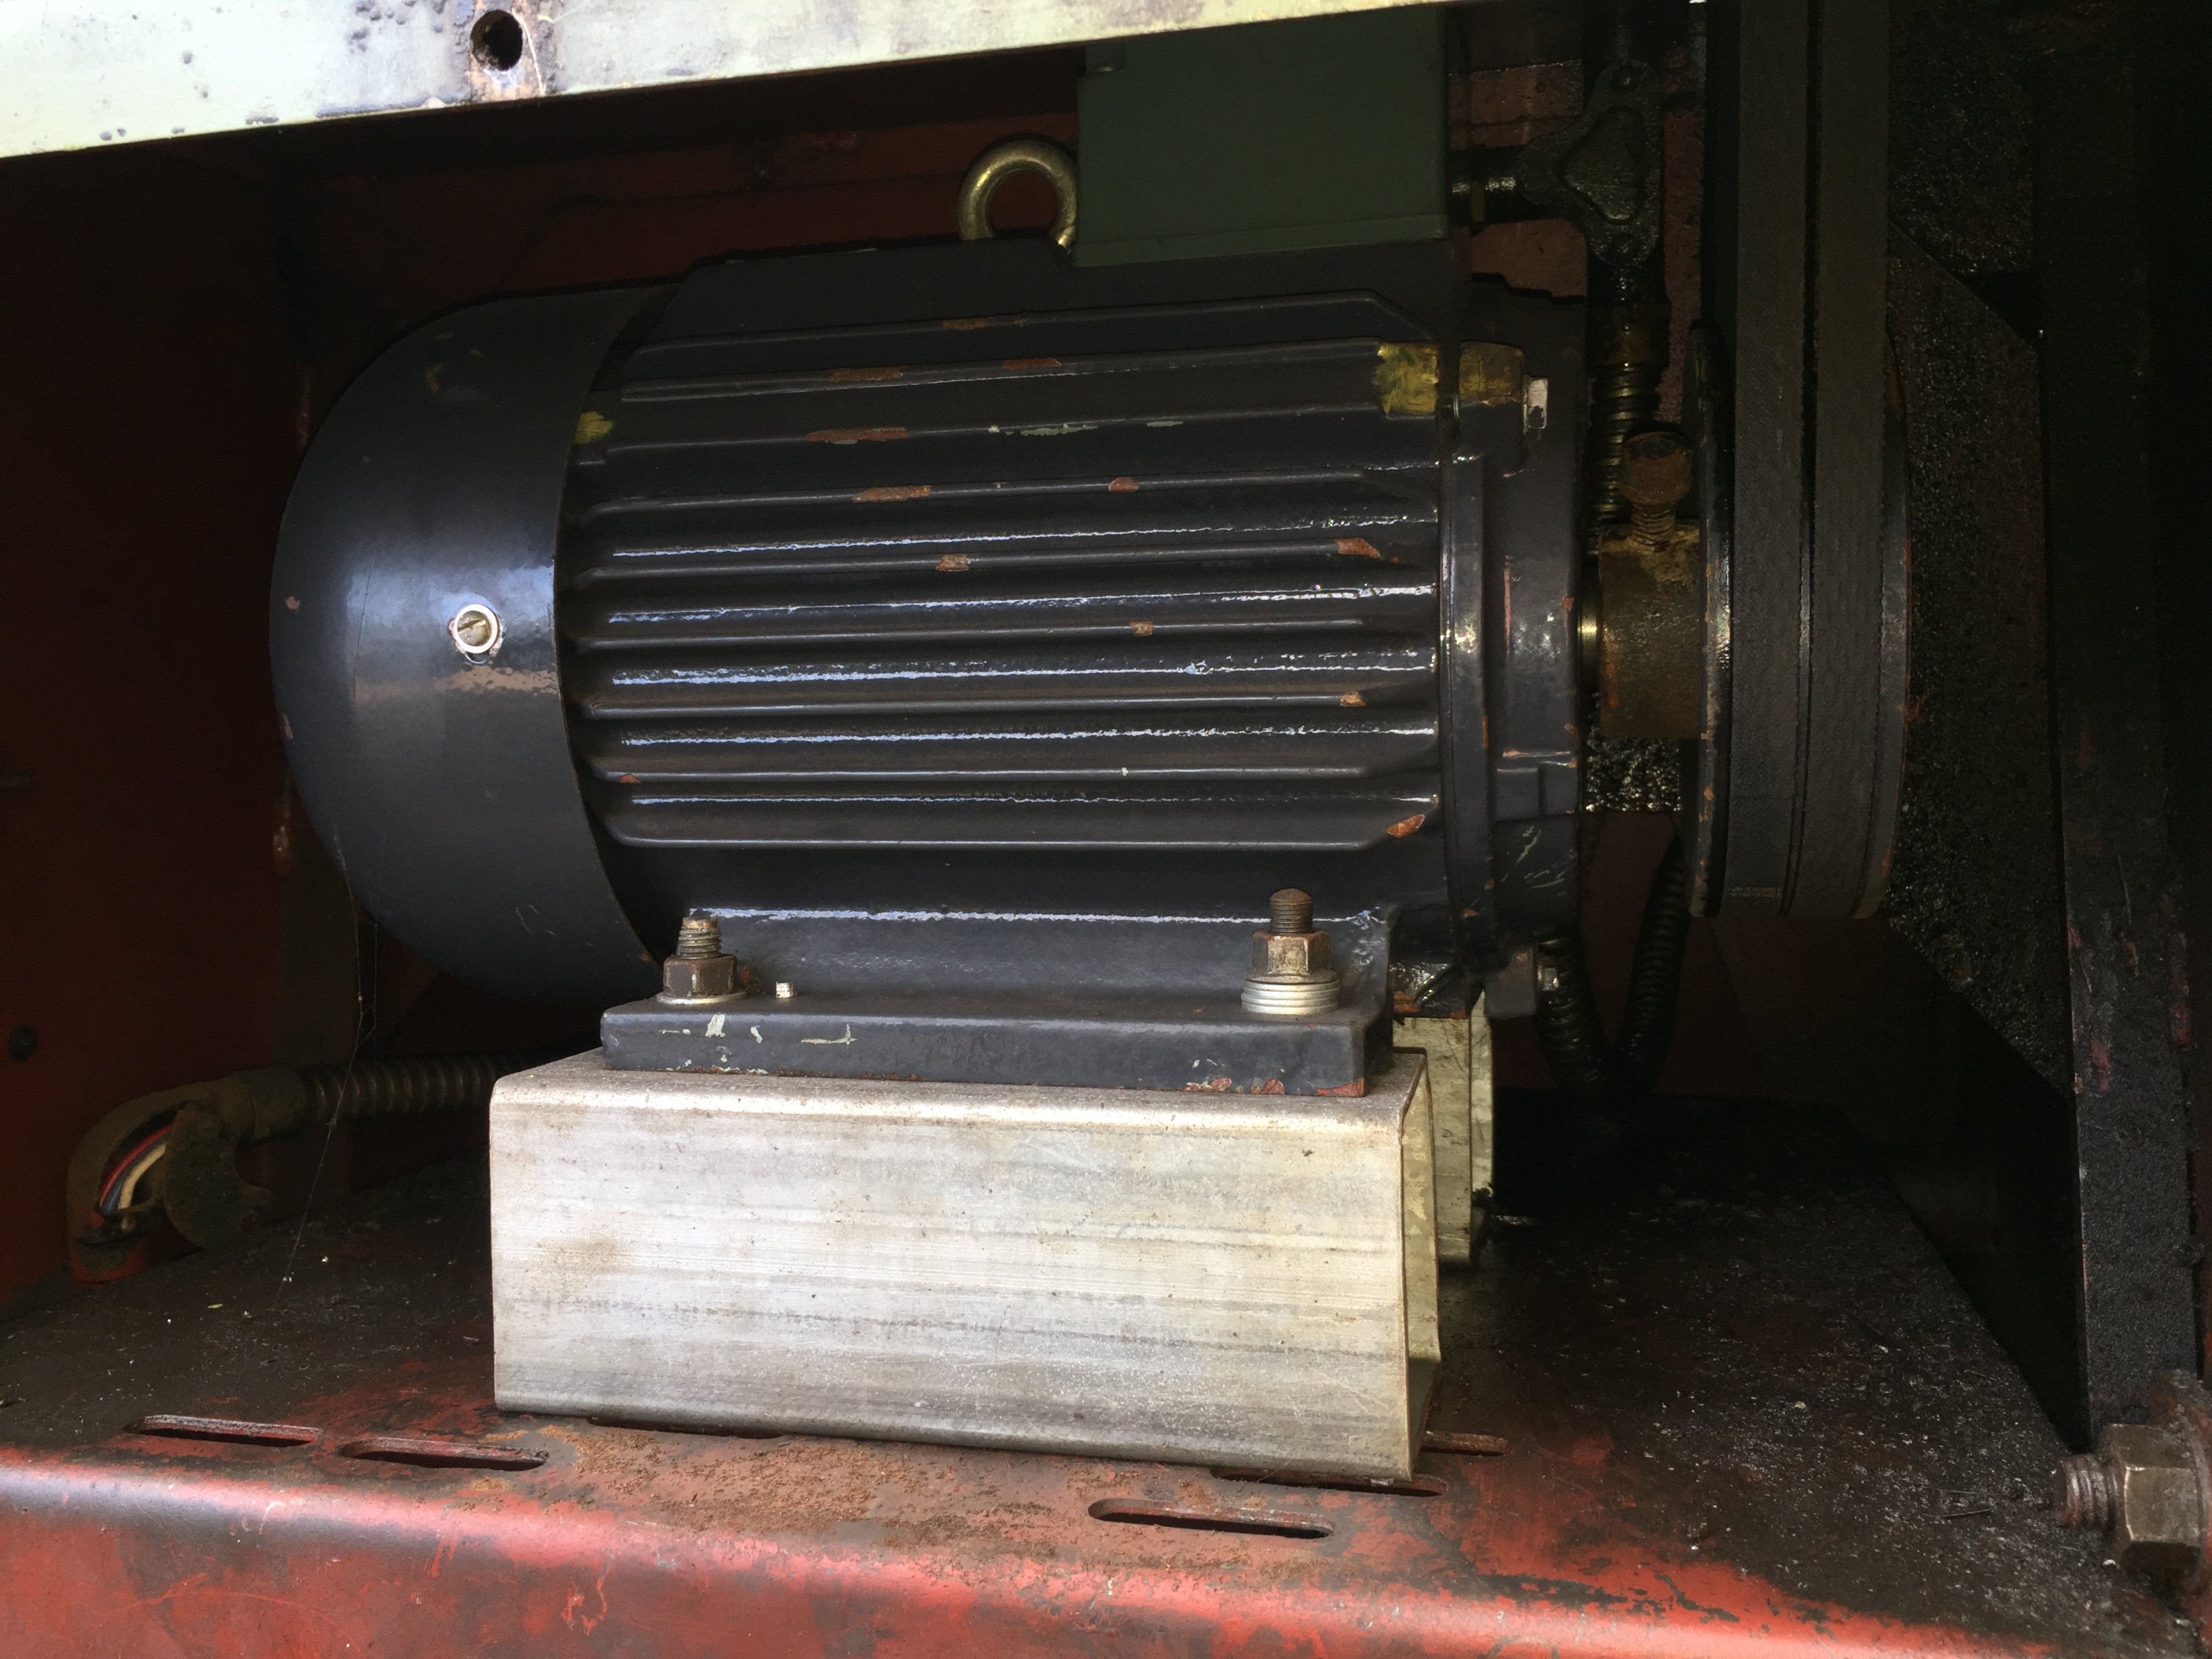
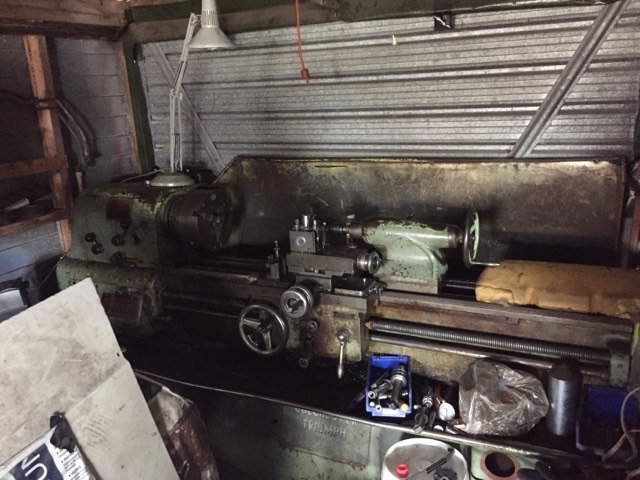
I've always wanted a lathe, probably more so than a mill, about a year after getting Emily I spotted a old Colchester roundhead on trademe that wasn't too far from my house, so I went and checked it out (knowing nothing about lathes haha) and fell in love with the shape and style, it was a $1 auction on trademe and bids were only at ~$60 so the place selling it got annoyed and chucked it outside in the rain thinking it was now going to scrap :/ I dried it best i could, got part numbers and wrapped in a tarp, waited till the end of the auction and thought i'd get it for sub $500, but of course there was a bidding war... I ended up getting for around $960 if I remember right. I quickly sold off a bunch of old JZ engines in the corner of my garage to make some space and then took Julie (my nissan atlas truck from the first post) to pickup the new lump of metal, they had a forkhoist so it was a simple pickup.
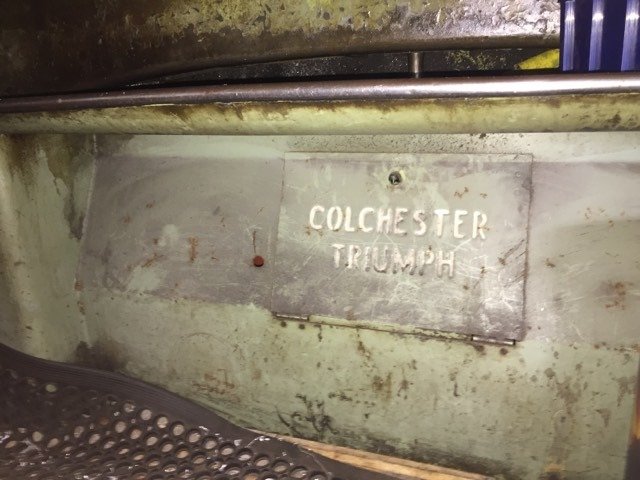
My new addition is a 1964 Colchester Triumph 7.5" Roundhead and was apparently 1045kg's, I got a PDF scan of the manual for free from a friendly chap in England which was pretty handy!
So now i was home, i had some room to store her but didn't know how to get off my truck and into the garage, so I called my buddy who's always up for one of my crazy missions and he as normal said he was keen,(wes, some of you will know him as 1ofaknd?) he came round after work and we used a engine crane/hoist to lift her just enough to drive the truck out of the way and drop to the ground, this was super sketchy! (and trust me i've done my fair share of sketchy things with helicopters and jet engines!) at one point I thought we'd lost it and it was gonna wreak the truck on it's way down, But we got lucky and then shoehorned her into my garage... (she's wider than the door so had to do a spiny twirl move to get her in place)
Now for the fun bit! getting her going, I knew the drive gears for the autofeed and thread cutting were missing so that side of the machine will be ignored for now as I need to learn the basic's first.
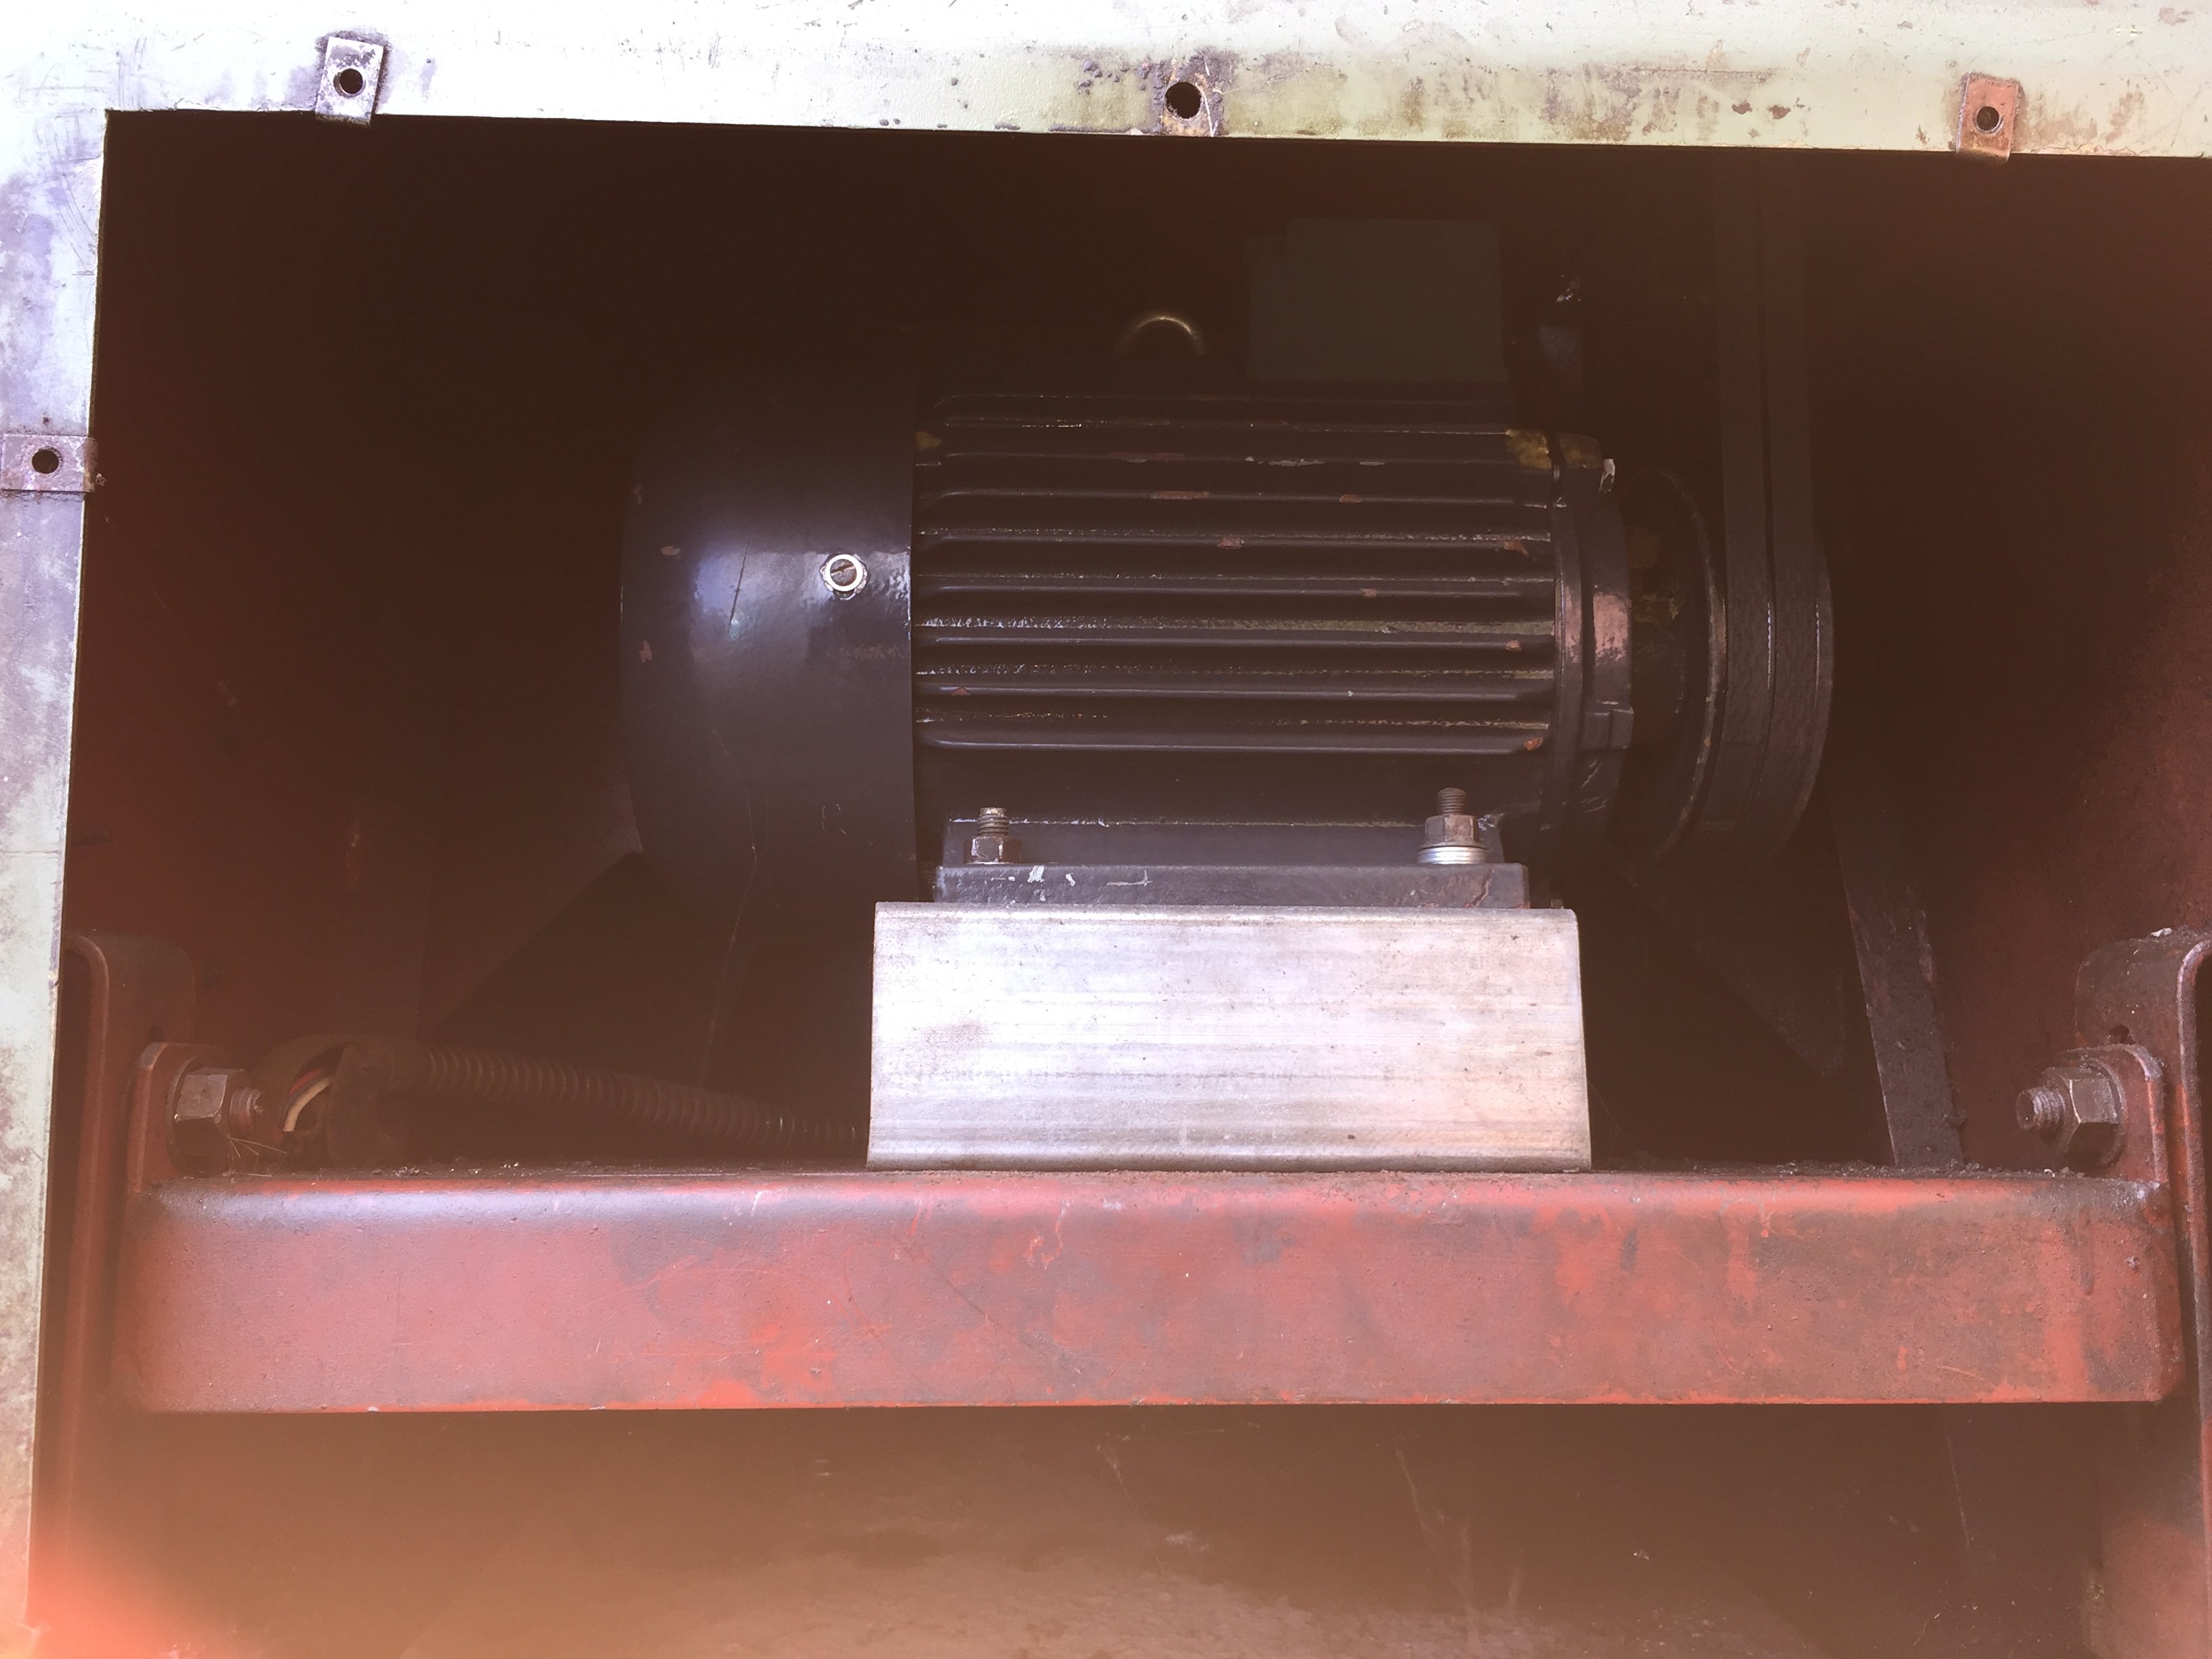
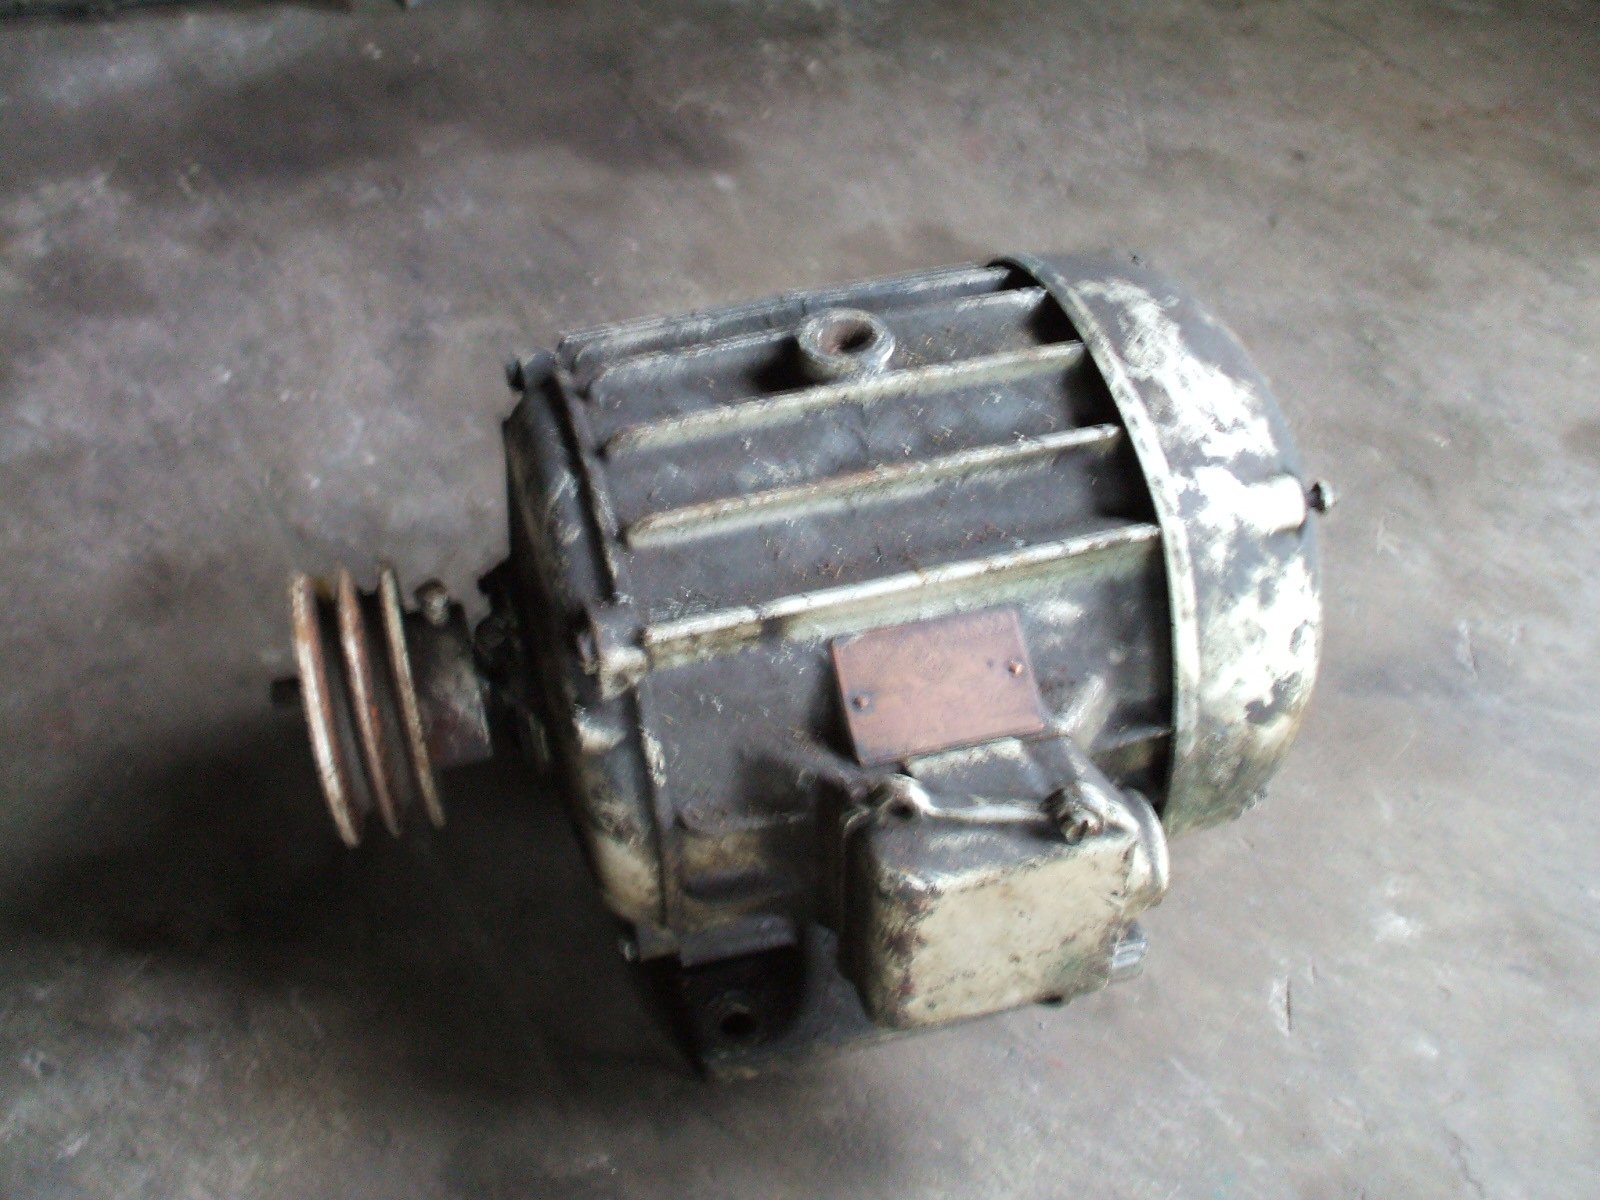
I removed the old motor, was meant to be a 5hp or at worst a 3hp, but what I found was a really old 1.5hp that was physically massive and had no provisions for running at 230V, it also had a small pulley so was driving the machine much slower than the speeds on the front plate.
This was removed and a 3hp/2.2kw modern chinese motor brought from trademe ($160?), second hand but didn't look like it was ever used, once I had it home and inspected I found it had lots of end float (like 2mm), so stripped it down and shimmed it up so the spring washer was actually controlling the end float now, pretty happy with such a easy fix!
Next up a brought a brand new double-A V-belt pulley(rare for me to buy new bits!) from bearingandengineering.co.nz but of course the center hole needed to be enlarged to the 28mm?? shaft, a job super easy on the lathe, but it didn't go yet, so i strapped it down to my rotary table and tried the best I could to get center then drilled out, was close enough lol, then instead of cutting a keyway I drilled a hole and tapped a thread, then using a high tensile bolt wound in from outside to locate it to the keyway
Then i mounted the motor to the factory plate, and realized i'd need to buy new longer belts to suit my new pulley size, and I'm too cheap for that when I didn't even know if the machine worked at this stage! so I then made some 3" spacer blocks to raise motor and use the old belts, was abit messy but it worked.-
4
-
-
- Popular Post
- Popular Post
On 06/08/2020 at 13:17, sheepers said:fuck i love Bridgeports.
i worked one of these machines for years when i was toolmaking. there is nothing you cant do with one of these and a few attachments.
good score!
Yep bridegports are gold! When i was hunting around I found alot of copies of the classic bridgeport and all of them just seemed to change the taper for the tooling so I thought getting the real deal was a pretty safe bet! It's truly amazing what you can make it do when you get it right!
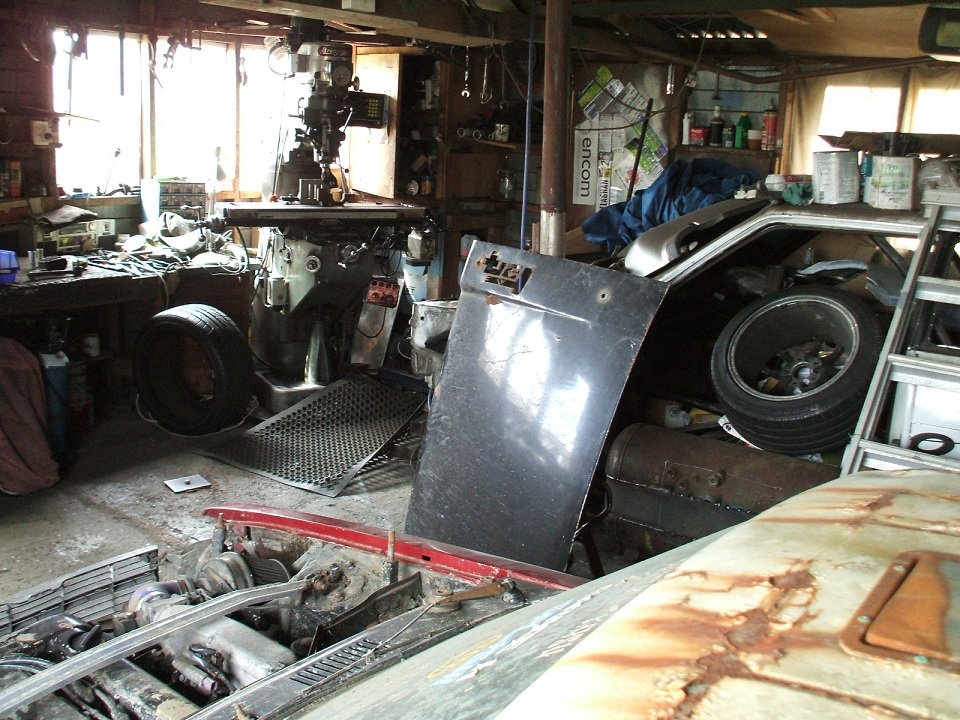
Today's yarn is what I call my subaru compressor (it's not subaru at all) but it has a electric motor in the middle with a shaft/crank out each end which spins 2 horizontally opposed pistons each, got it free from a mall that was upgrading the plant room, no idea what it was actually used for but think it was more a backup unit for starting a generator or something... anyway it shares the VSD with Emily and currently has no over-pressure cut-off but does seem to stop making boost around 120psi which is perfect, also think it might have a cracked piston because pressure can leak back through one of them, more future repairs /piston welding one day...
next yarn up is my round making mate Charlotte the Colchester, just trying to find old pics from the trip home, but I think they are lost :/
-
12
 |
|


First time attempt at +T
in Tech Talk
Posted
ok fair enough, if you can get the manifold to line up and seal then it's a solid start, (but easy enough to build a J pipe from factory manifold and fit turbo in a more suitable place? like the boot? haha) the ford turbos hold their value so prob $600-1k to get a genuine garrett so it might be out of the budget for such a build?
I don't have much experience with china turbos but i'd say any of the 'GT35's with big ex housings would work well (ford has 1.06 rear housing from factory) I'll keep a eye out on trademe and next time i'm out bulk buying turbos and see if i spot anything to suit a 4L
As for Vac retard of the timing under boost, i have also heard of people doing this but it can be hard to find a multi-direction diaphram to suit, early non computer turbo stuff would be the go for this, cordia/charade carb turbo etc, have heard the mazda b6t (even tho it's efi) may have but never checked.