

1963 AP5
-
Posts
352 -
Joined
-
Last visited
Posts posted by 1963 AP5
-
-
5 hours ago, HighLUX said:
Perfect, thanks so much
-
Quick question that I hope someone can answer for me.
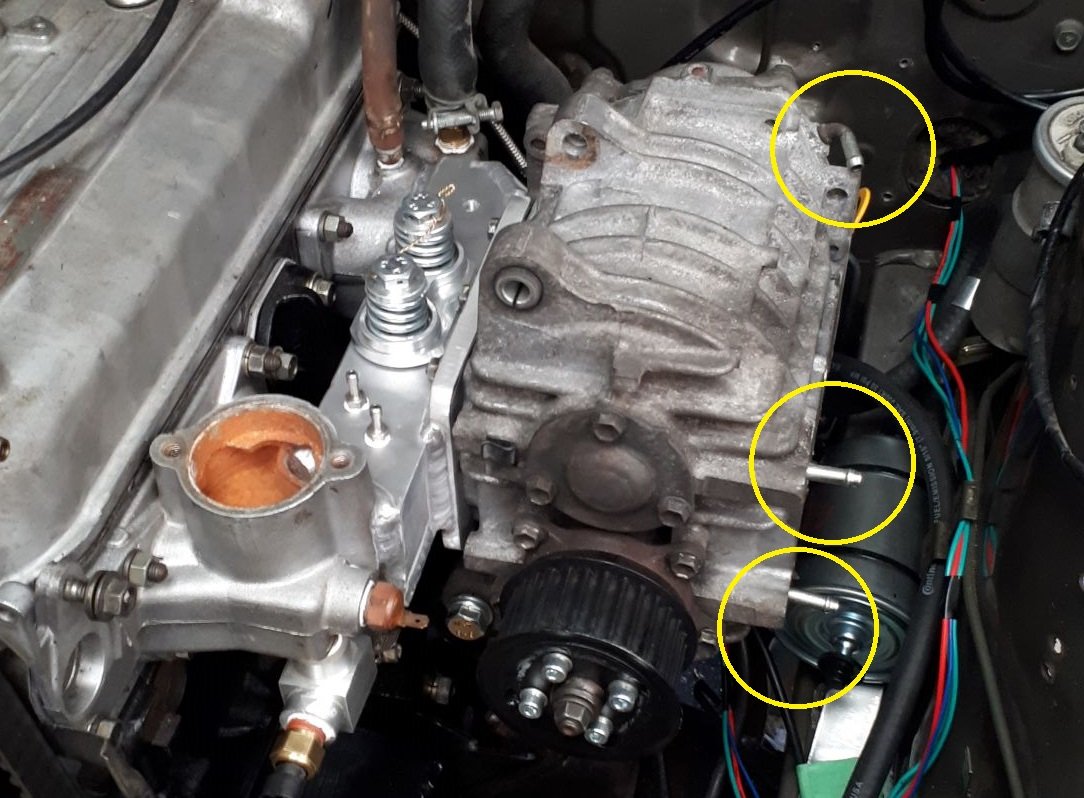
The Toyota SC14 supercharger has three hose fittings that I think are there to vent the gearbox and the forward bearing housings.
Can these simply be vented to atmosphere or do they need to be plumbed into the manifold on the low pressure side of the supercharger?
My supercharger is minus the factory pipework so I am not sure where these are connected on a factory set up.

-
- Popular Post
- Popular Post
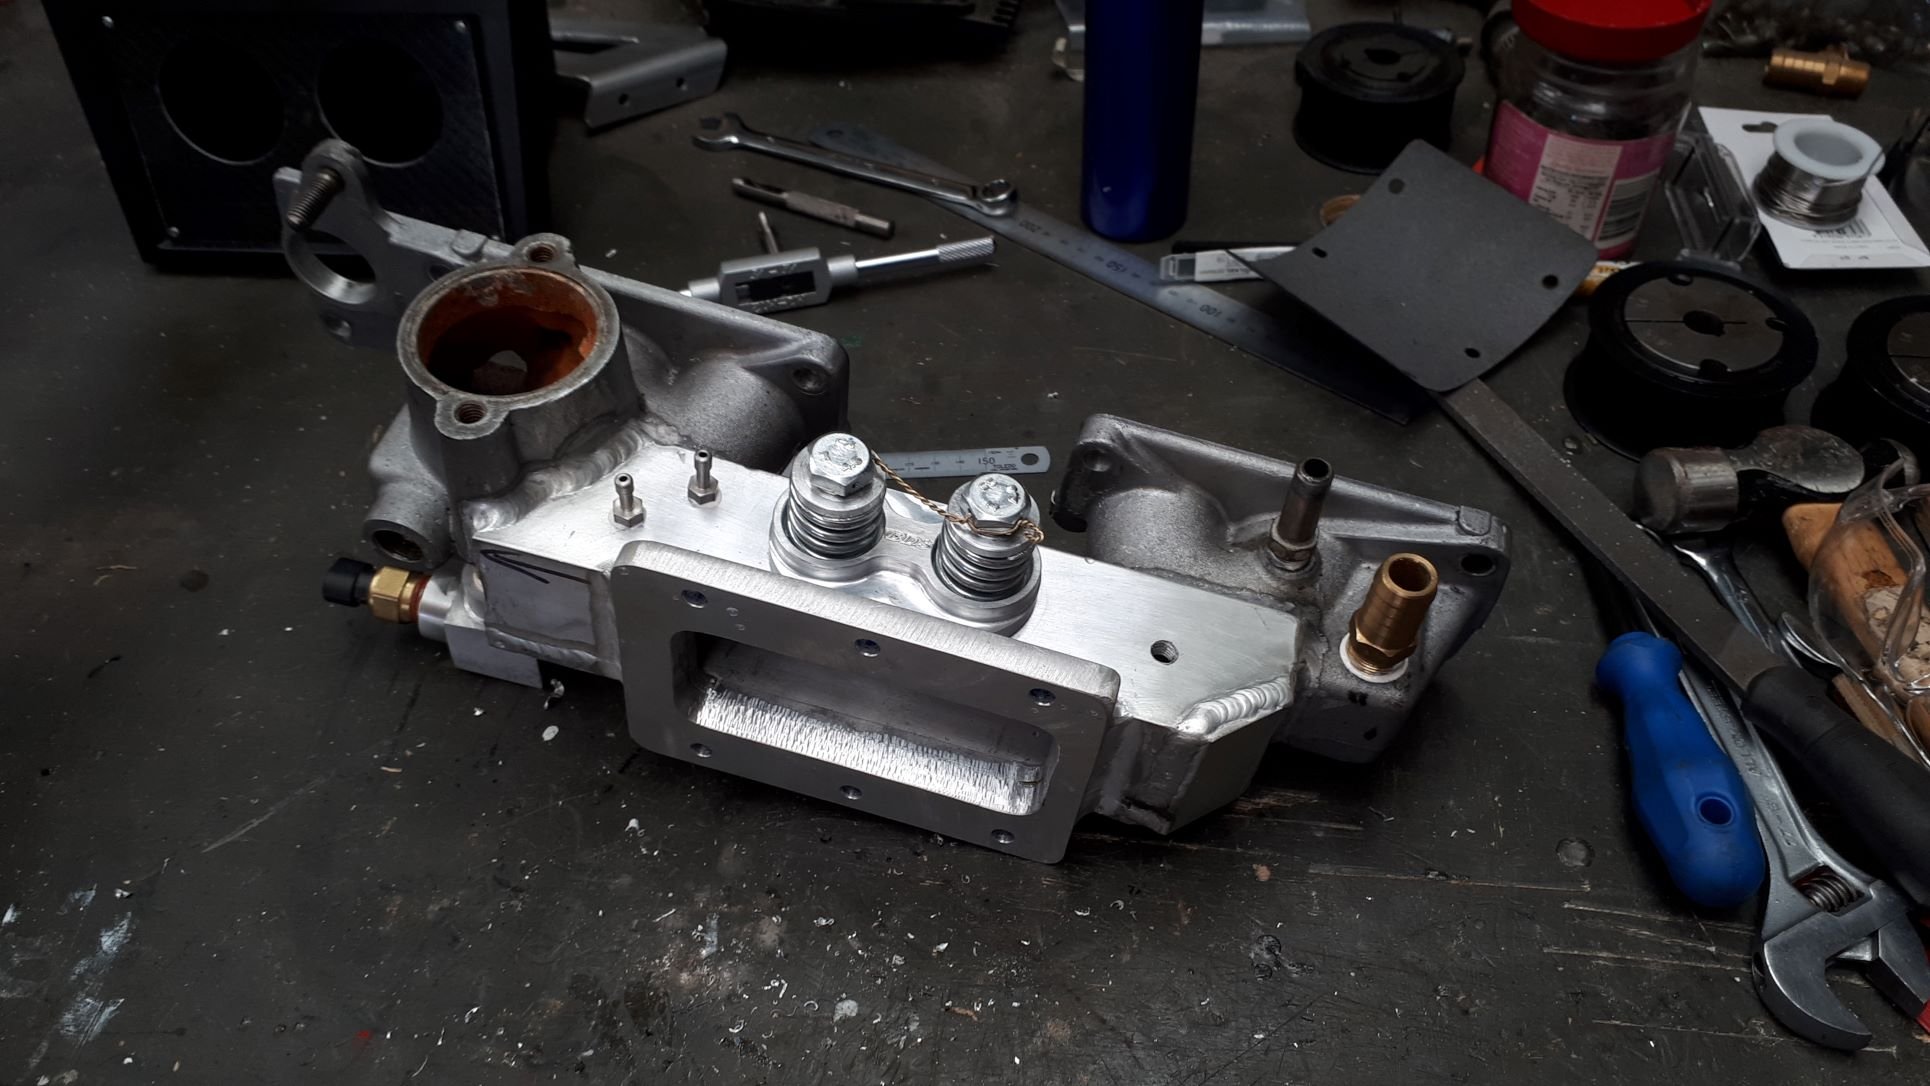
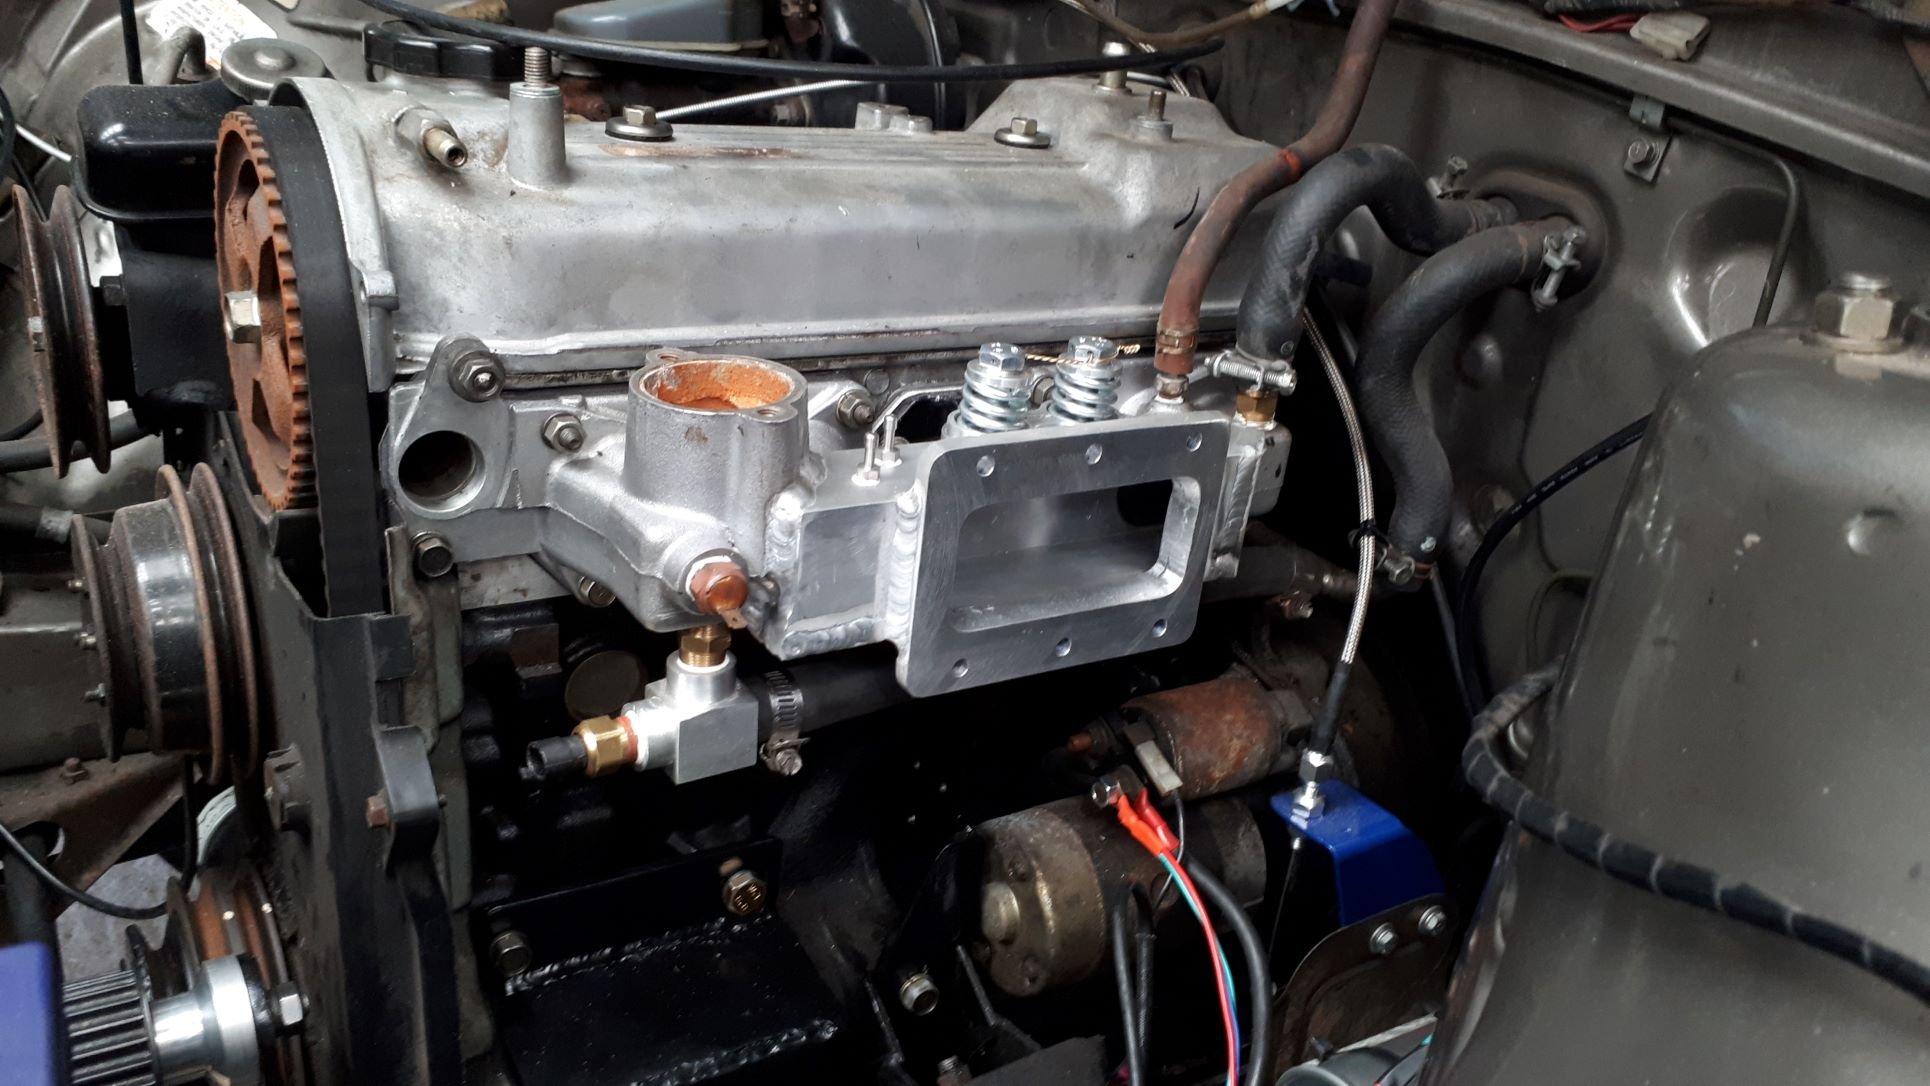
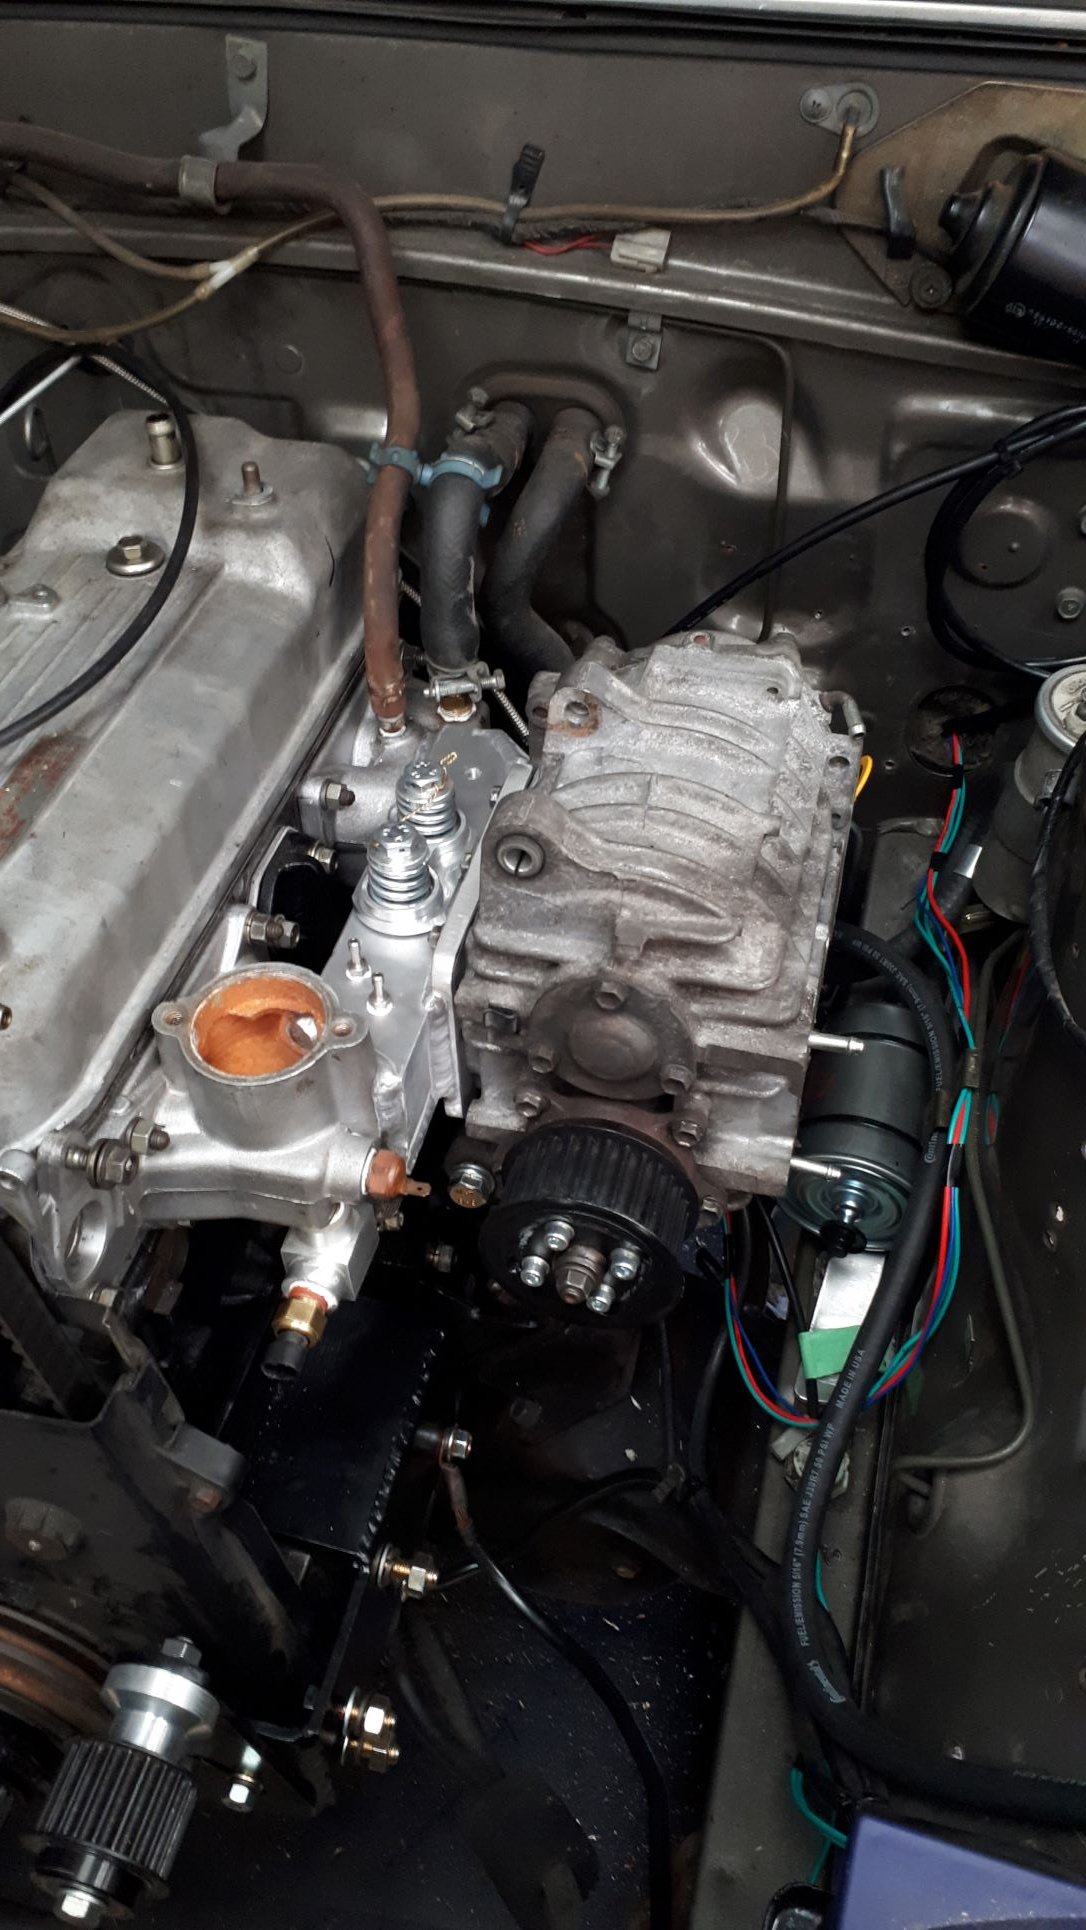
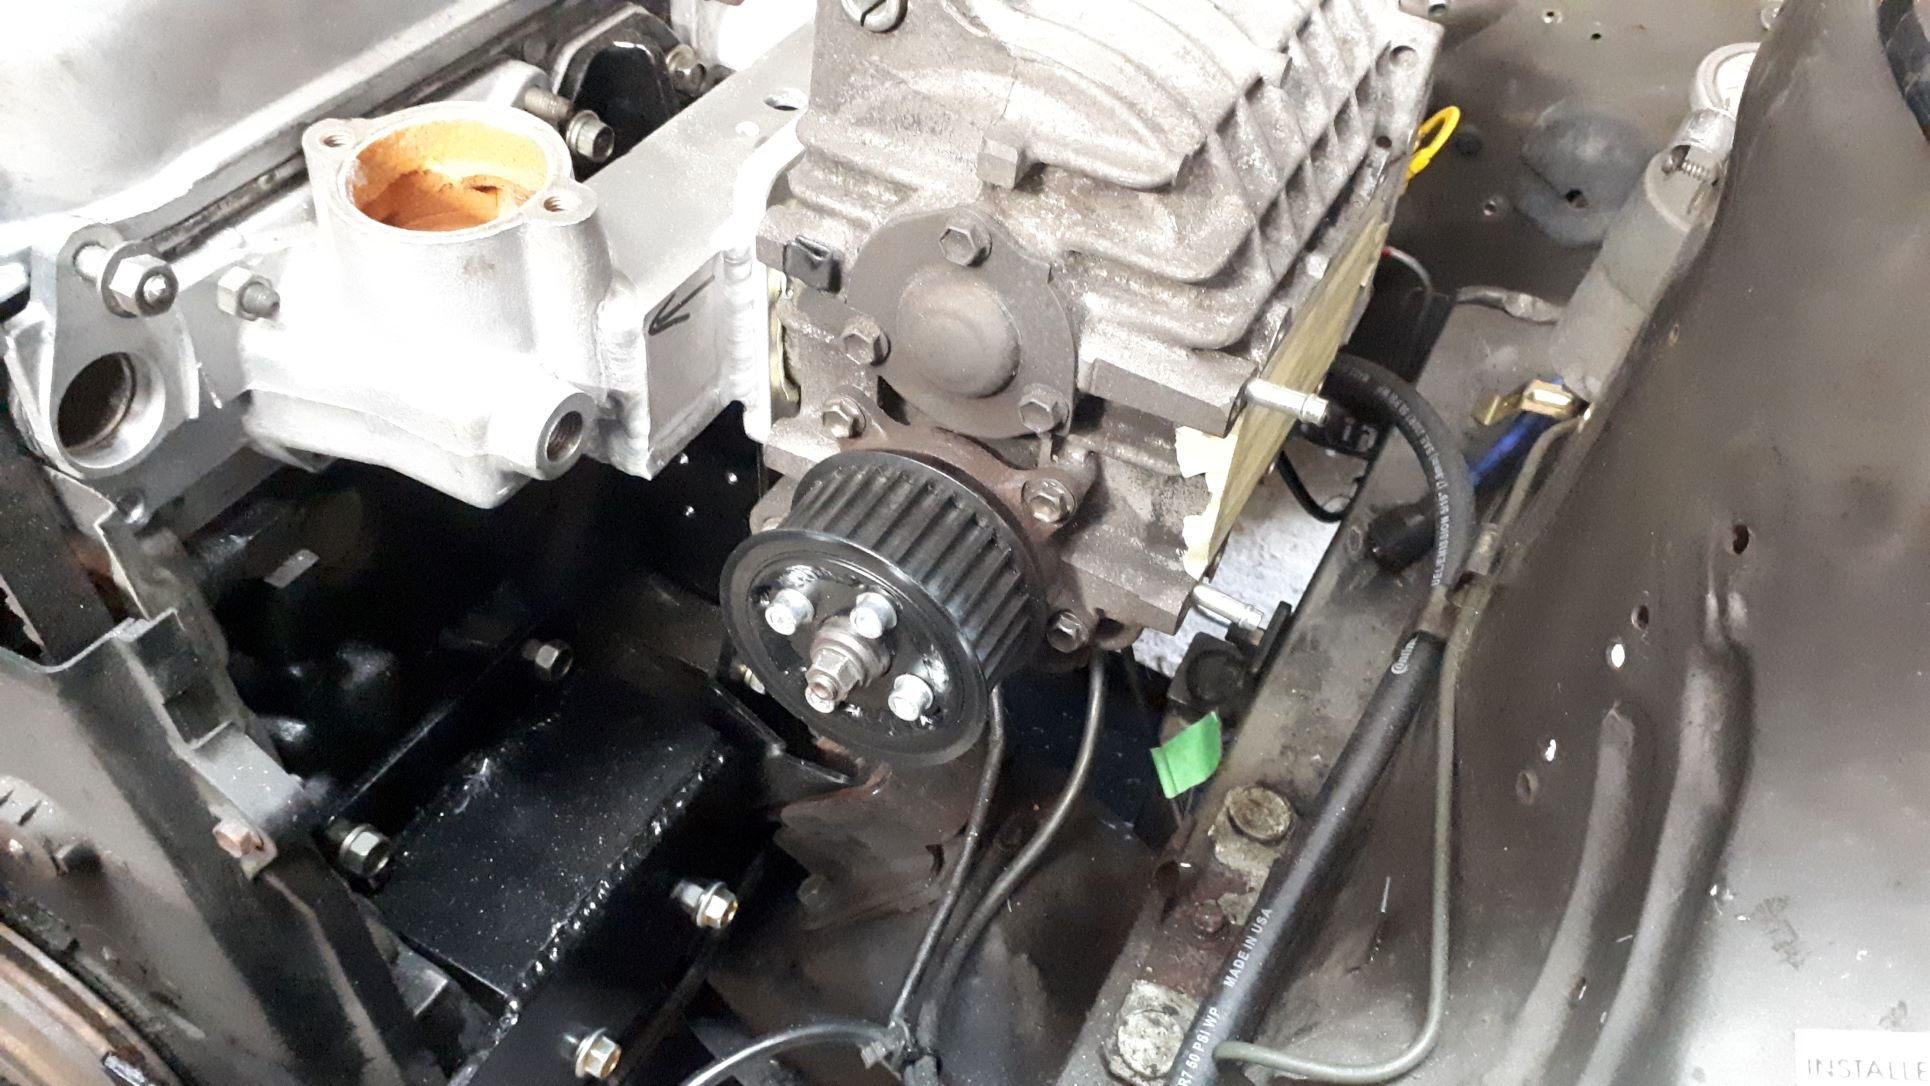
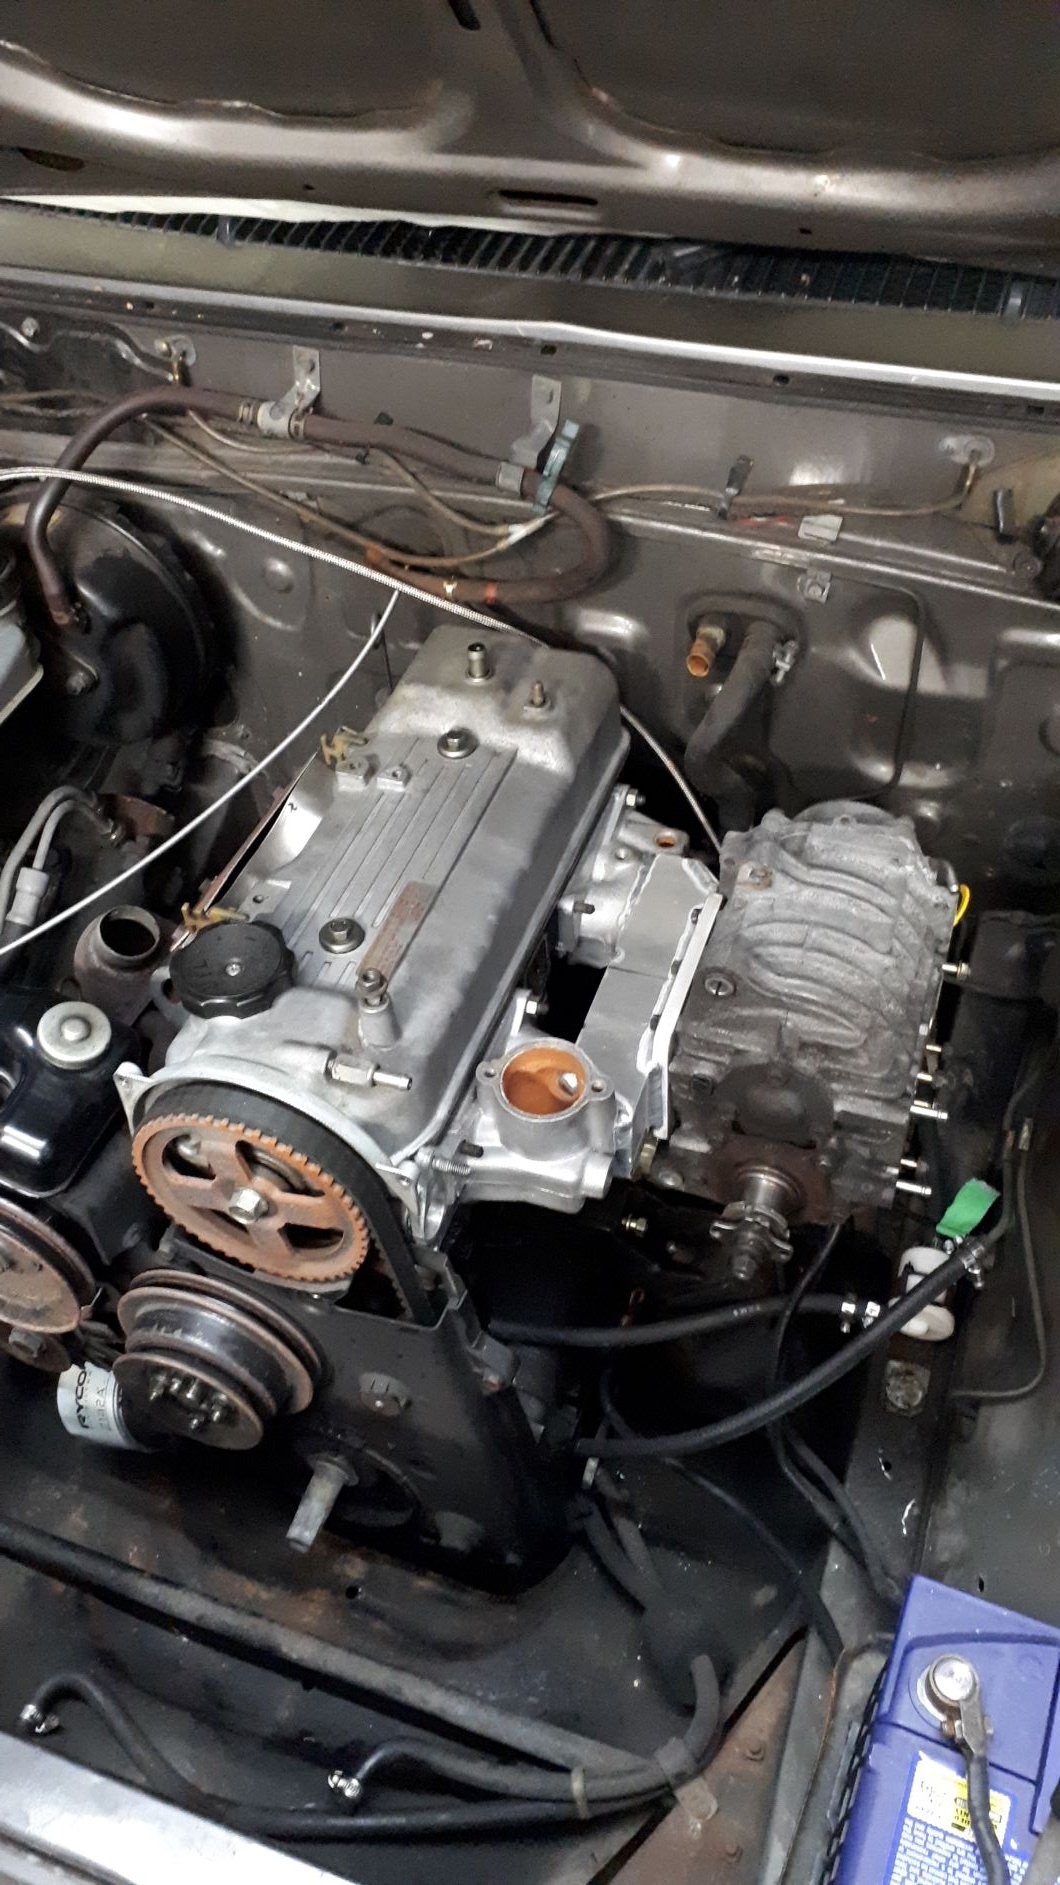
Now I am making real progress! I had all of the gasket faces on the manifolds machined flat because everything had distorted just a little through all the welding processes. I installed all of the fittings and hardware on the inlet manifold including a backfire valve (just in case). Made up some gaskets and installed the manifold and the supercharger on the engine for good this time.
-
 13
13
-
- Popular Post
- Popular Post
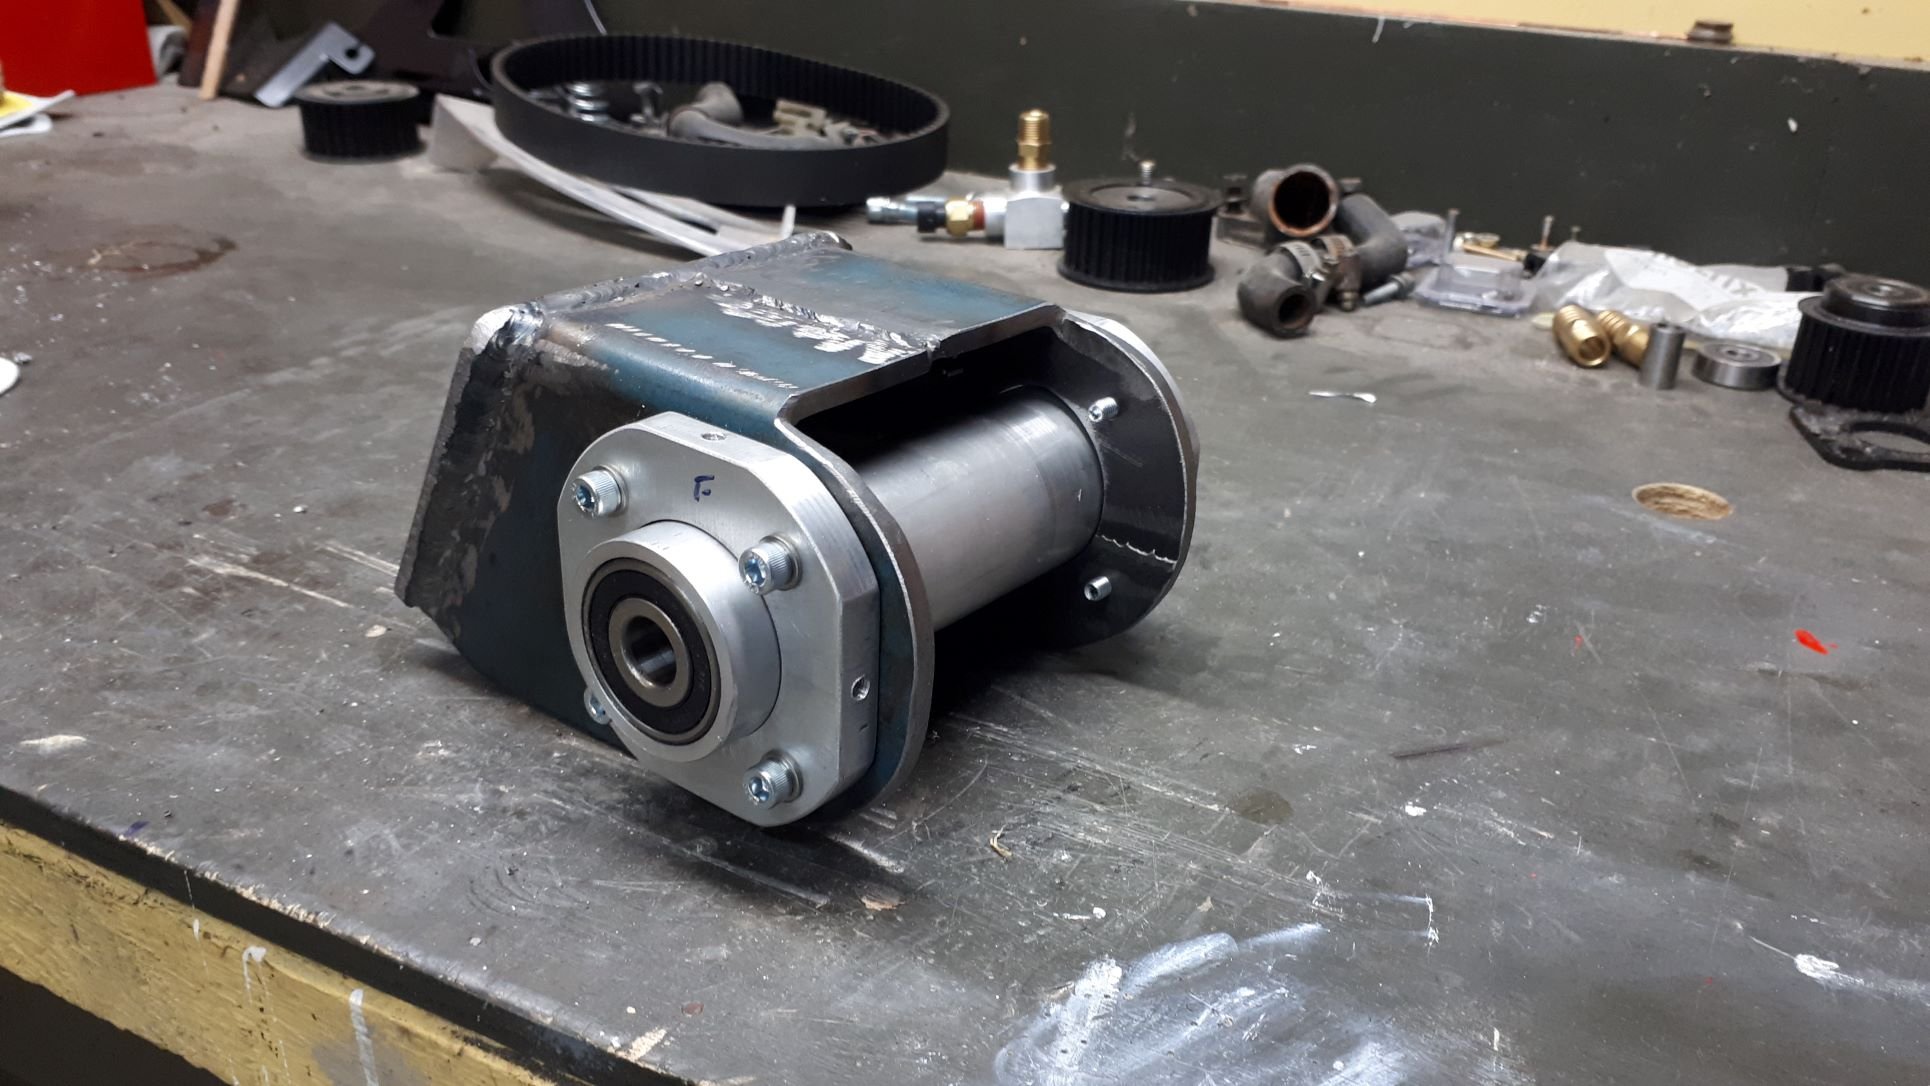
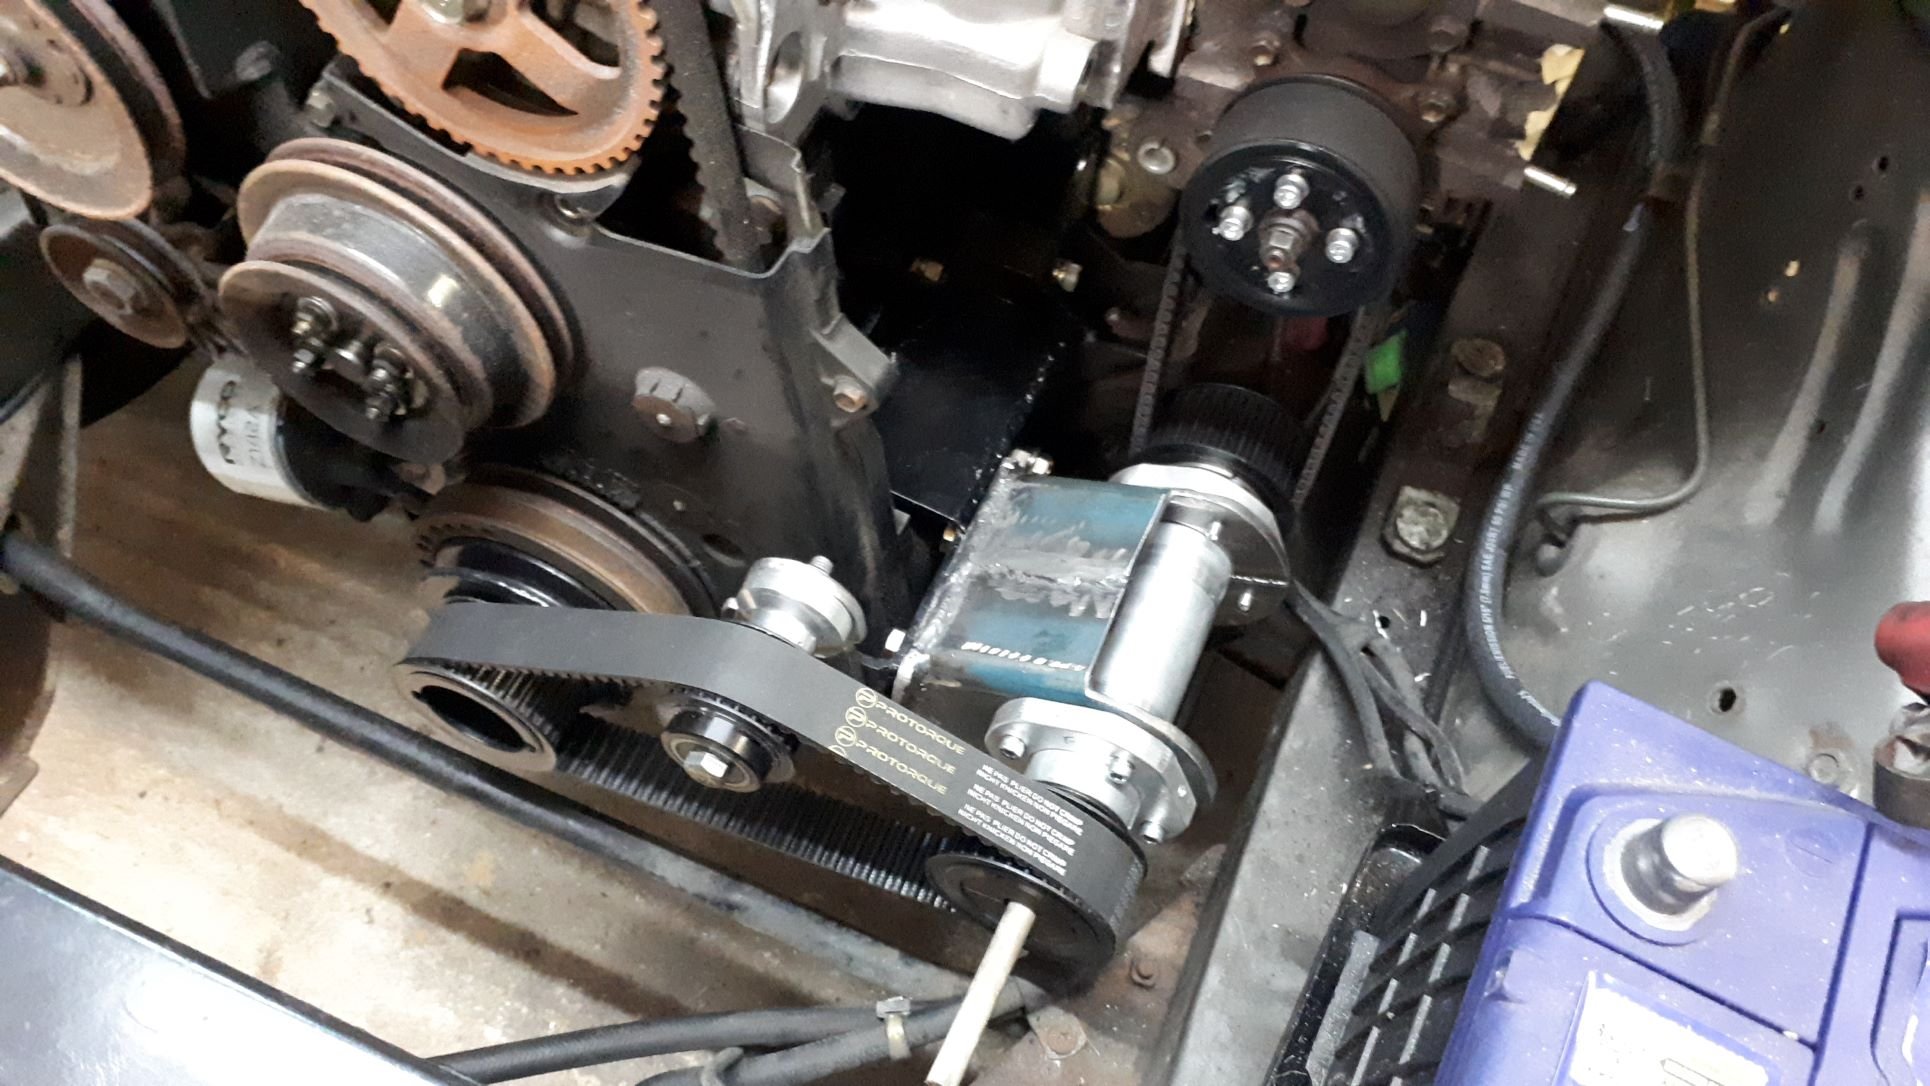
Once again, a while between updates but progress has been made. I set about building the lay shaft carrier assembly to replace my plywood mock-up and made the drive belt tensioner assembly. I very intentionally over engineered this stuff because I don’t want it to flex and kick the belts off randomly. Still got to get a steel shaft made up with keyways machined in it. It’s a bit of a creative way to drive the little blower but it looks like the belt drive system will all line up nicely and should be plenty noisy when running……….
-
20
-
 2
2
-
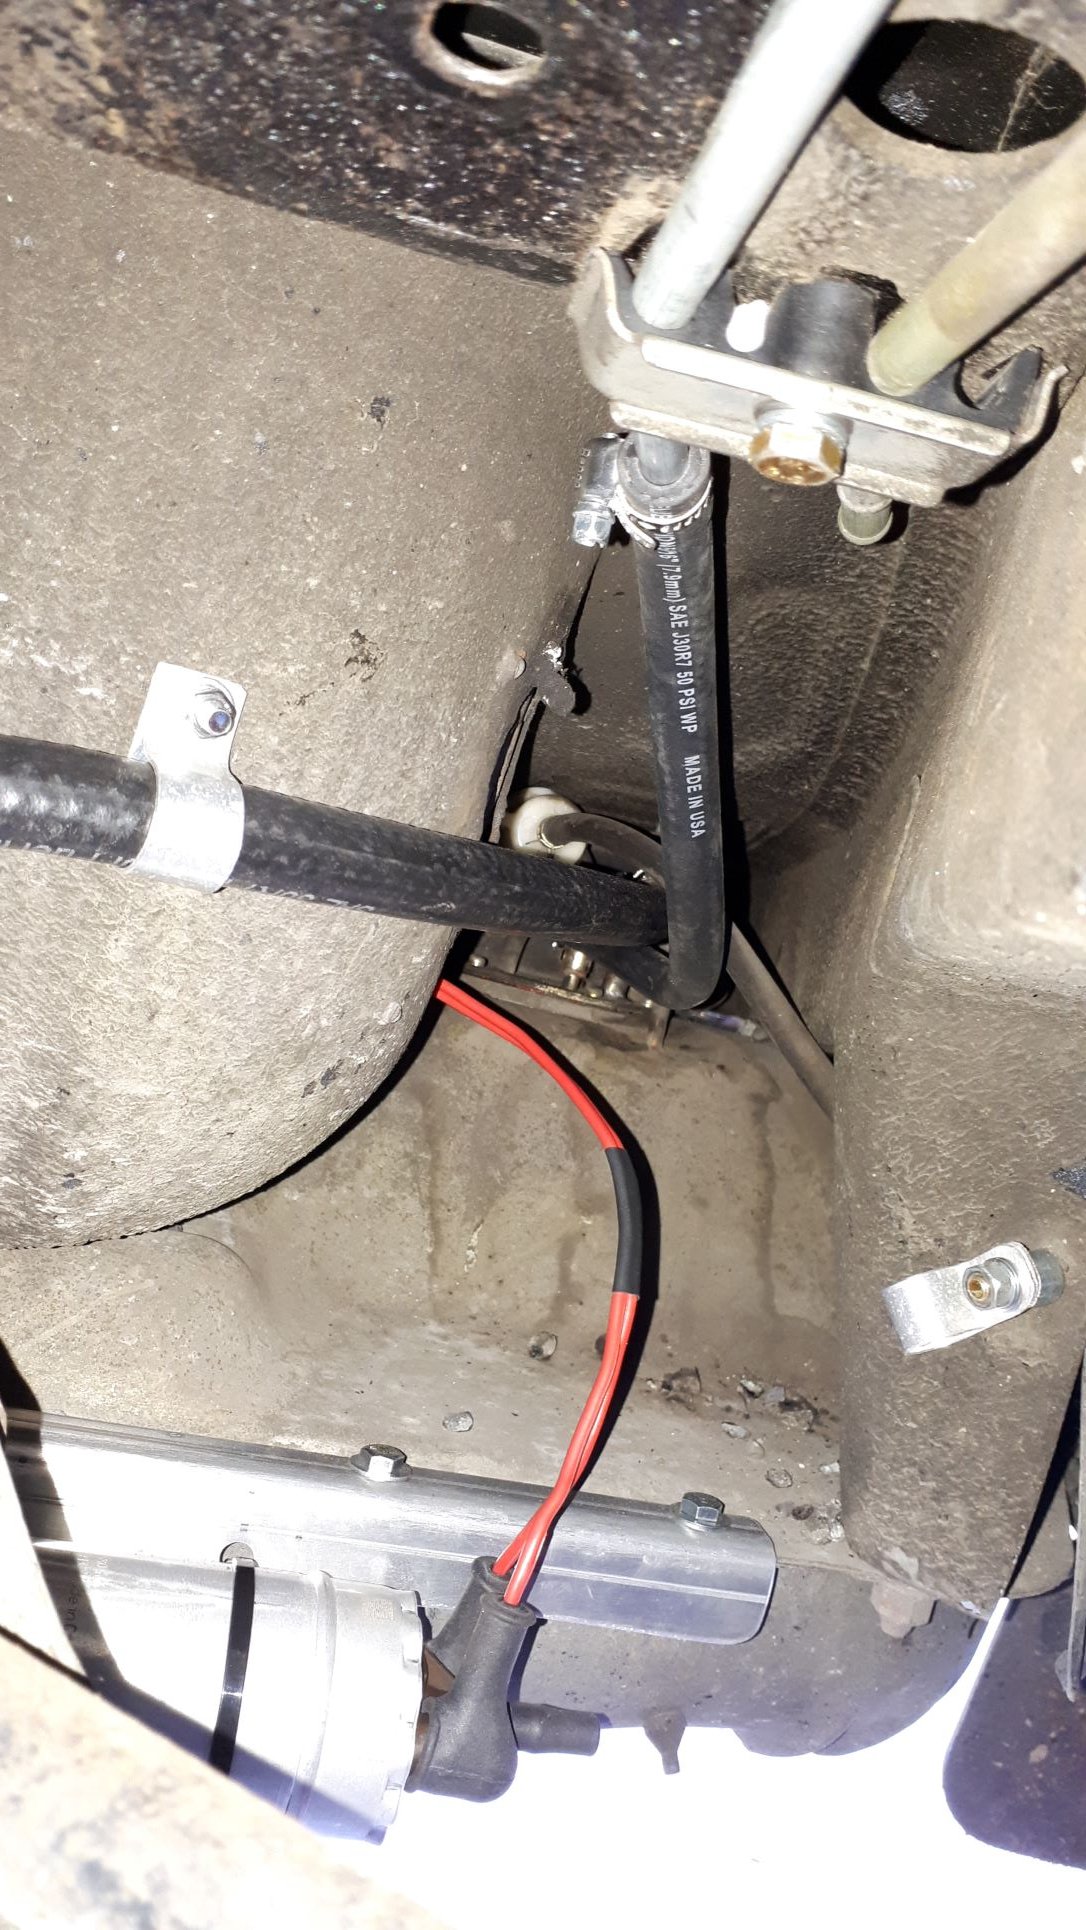
Been a while between updates due to other stupid life commitments but I am back into the Mitsi now.
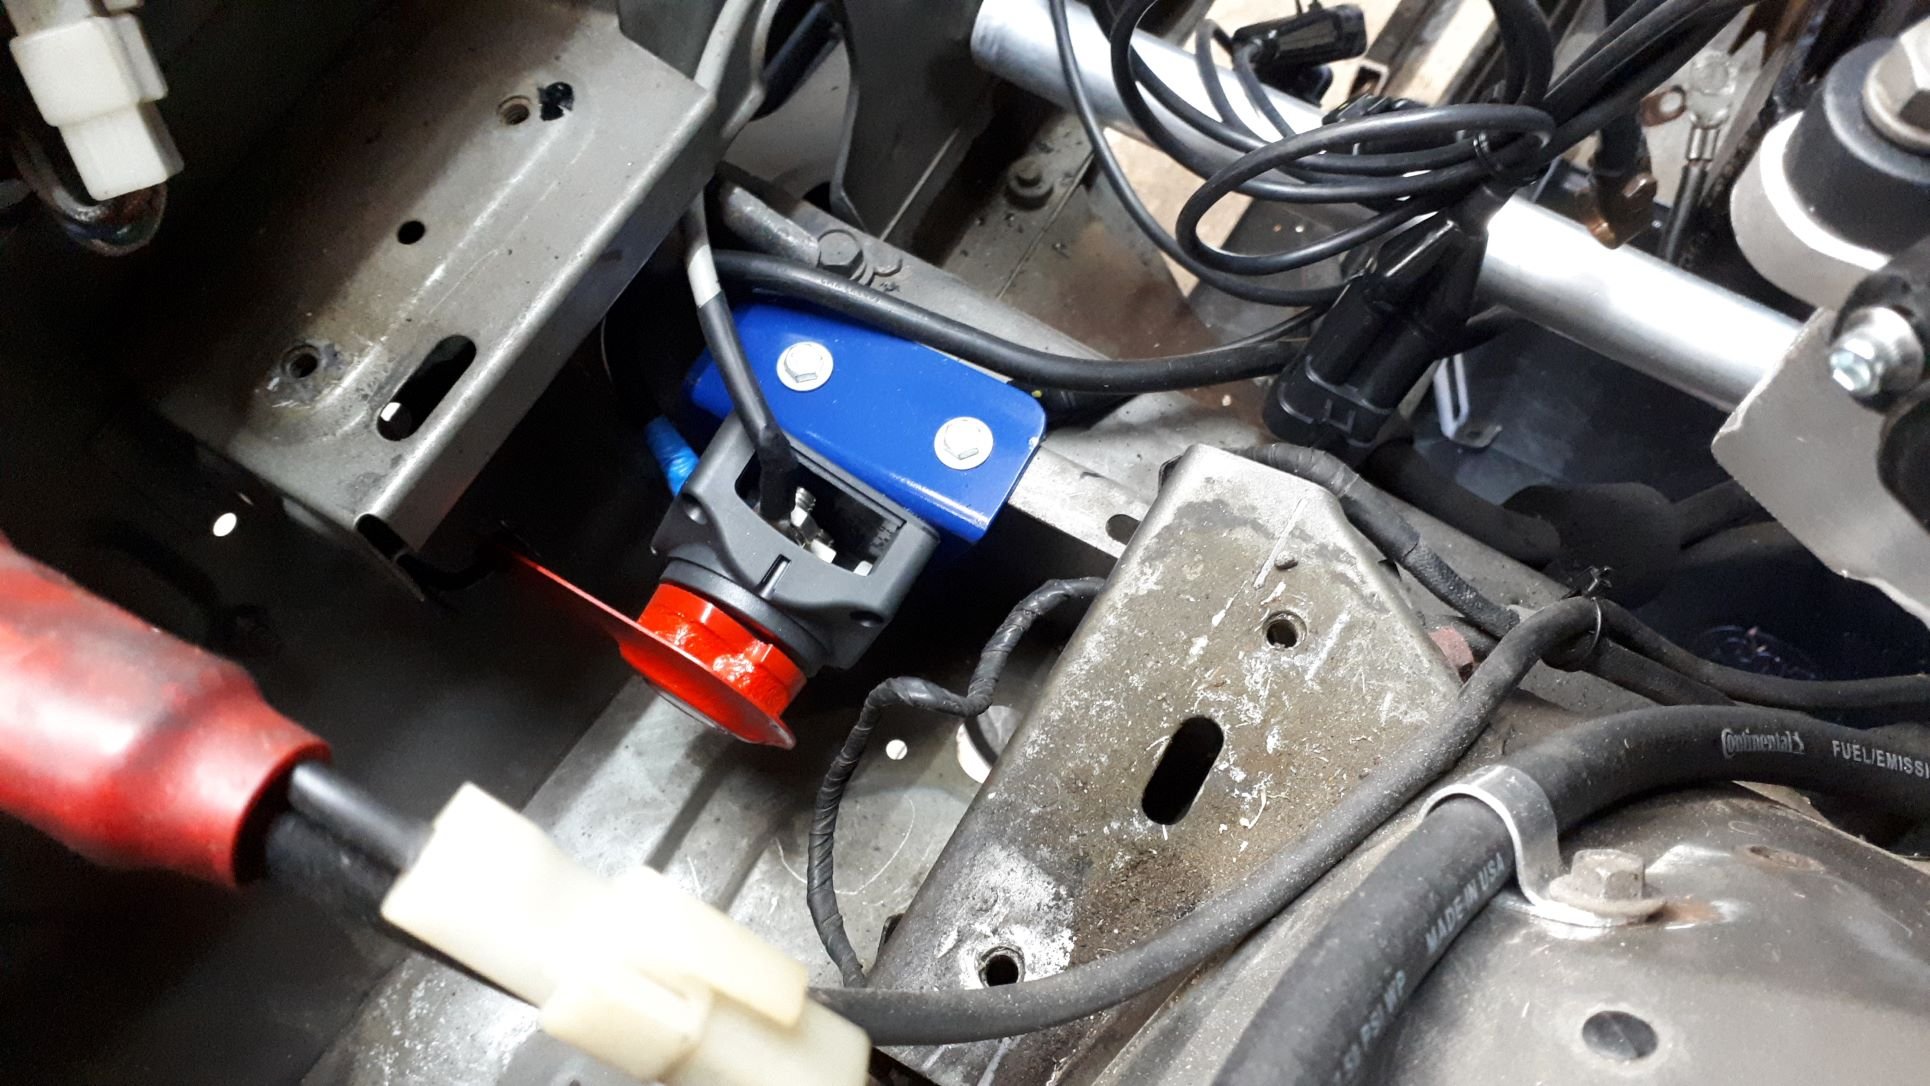
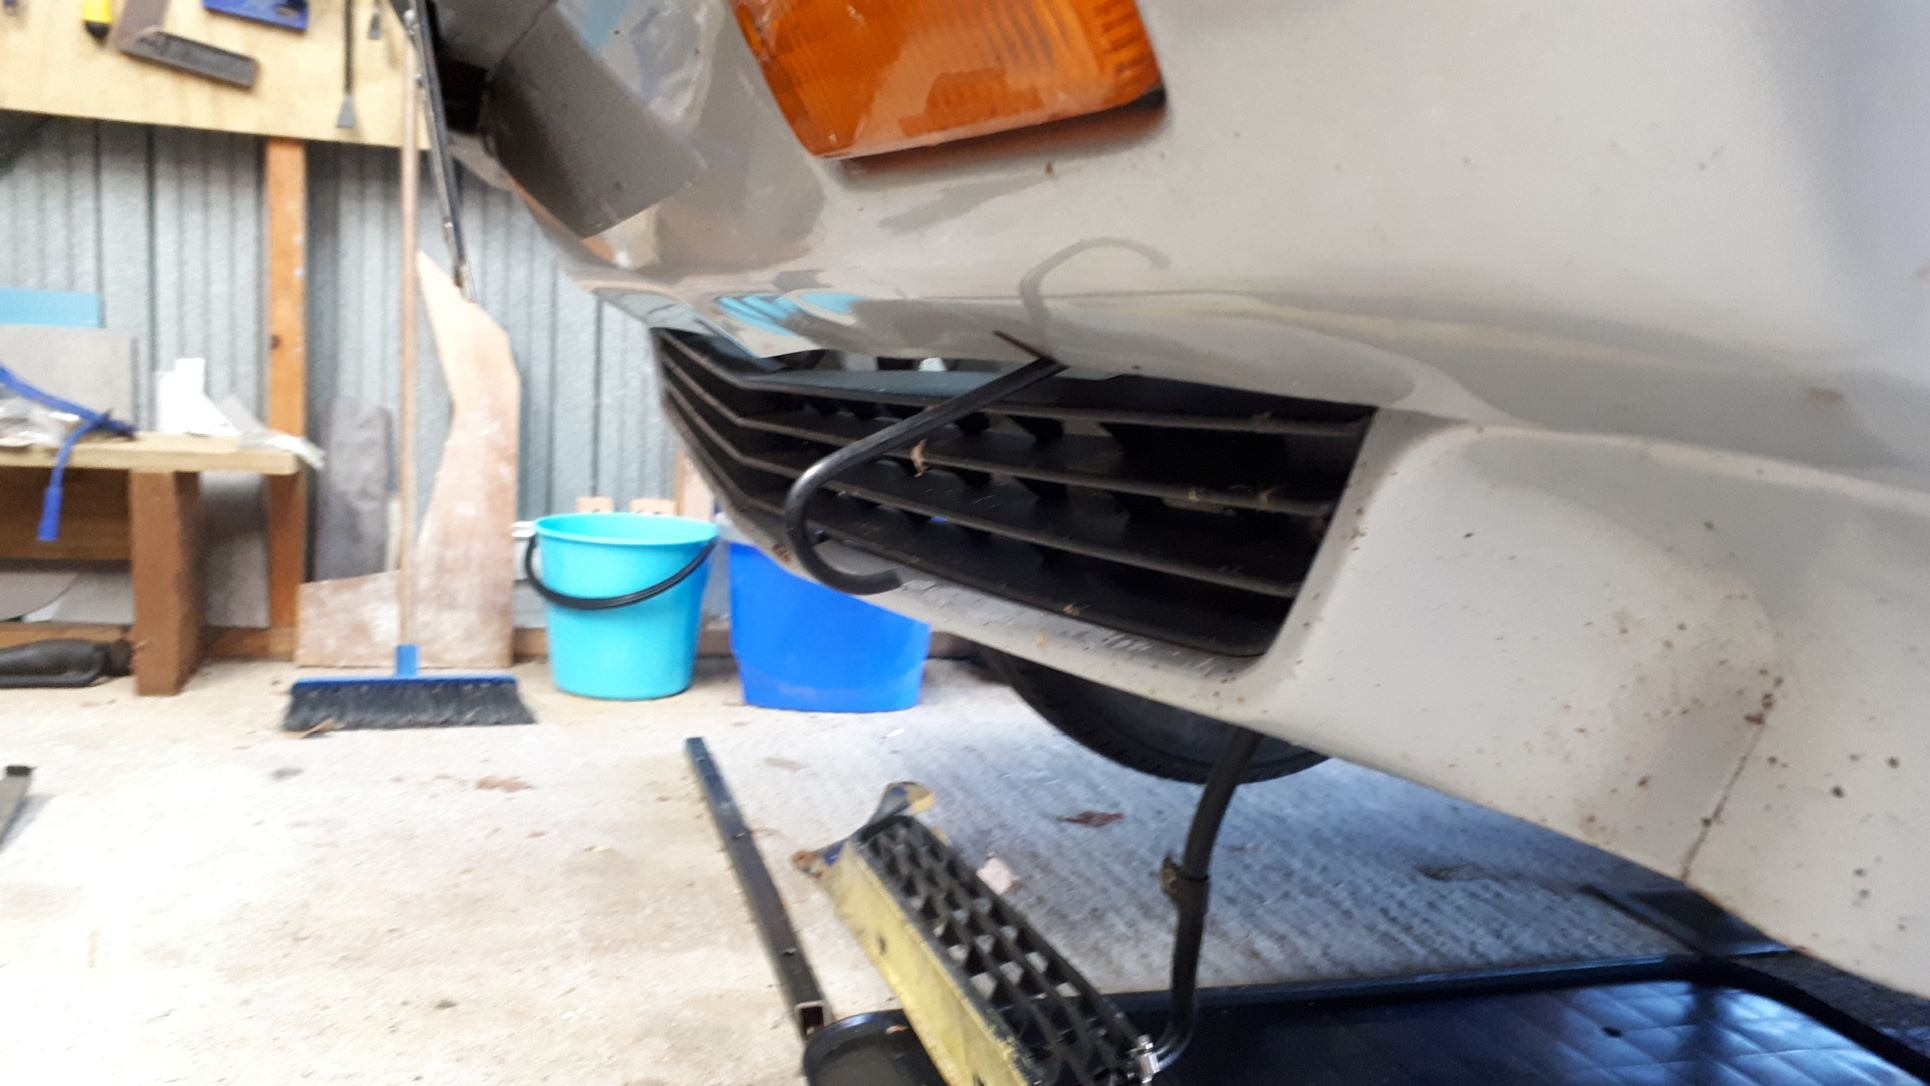
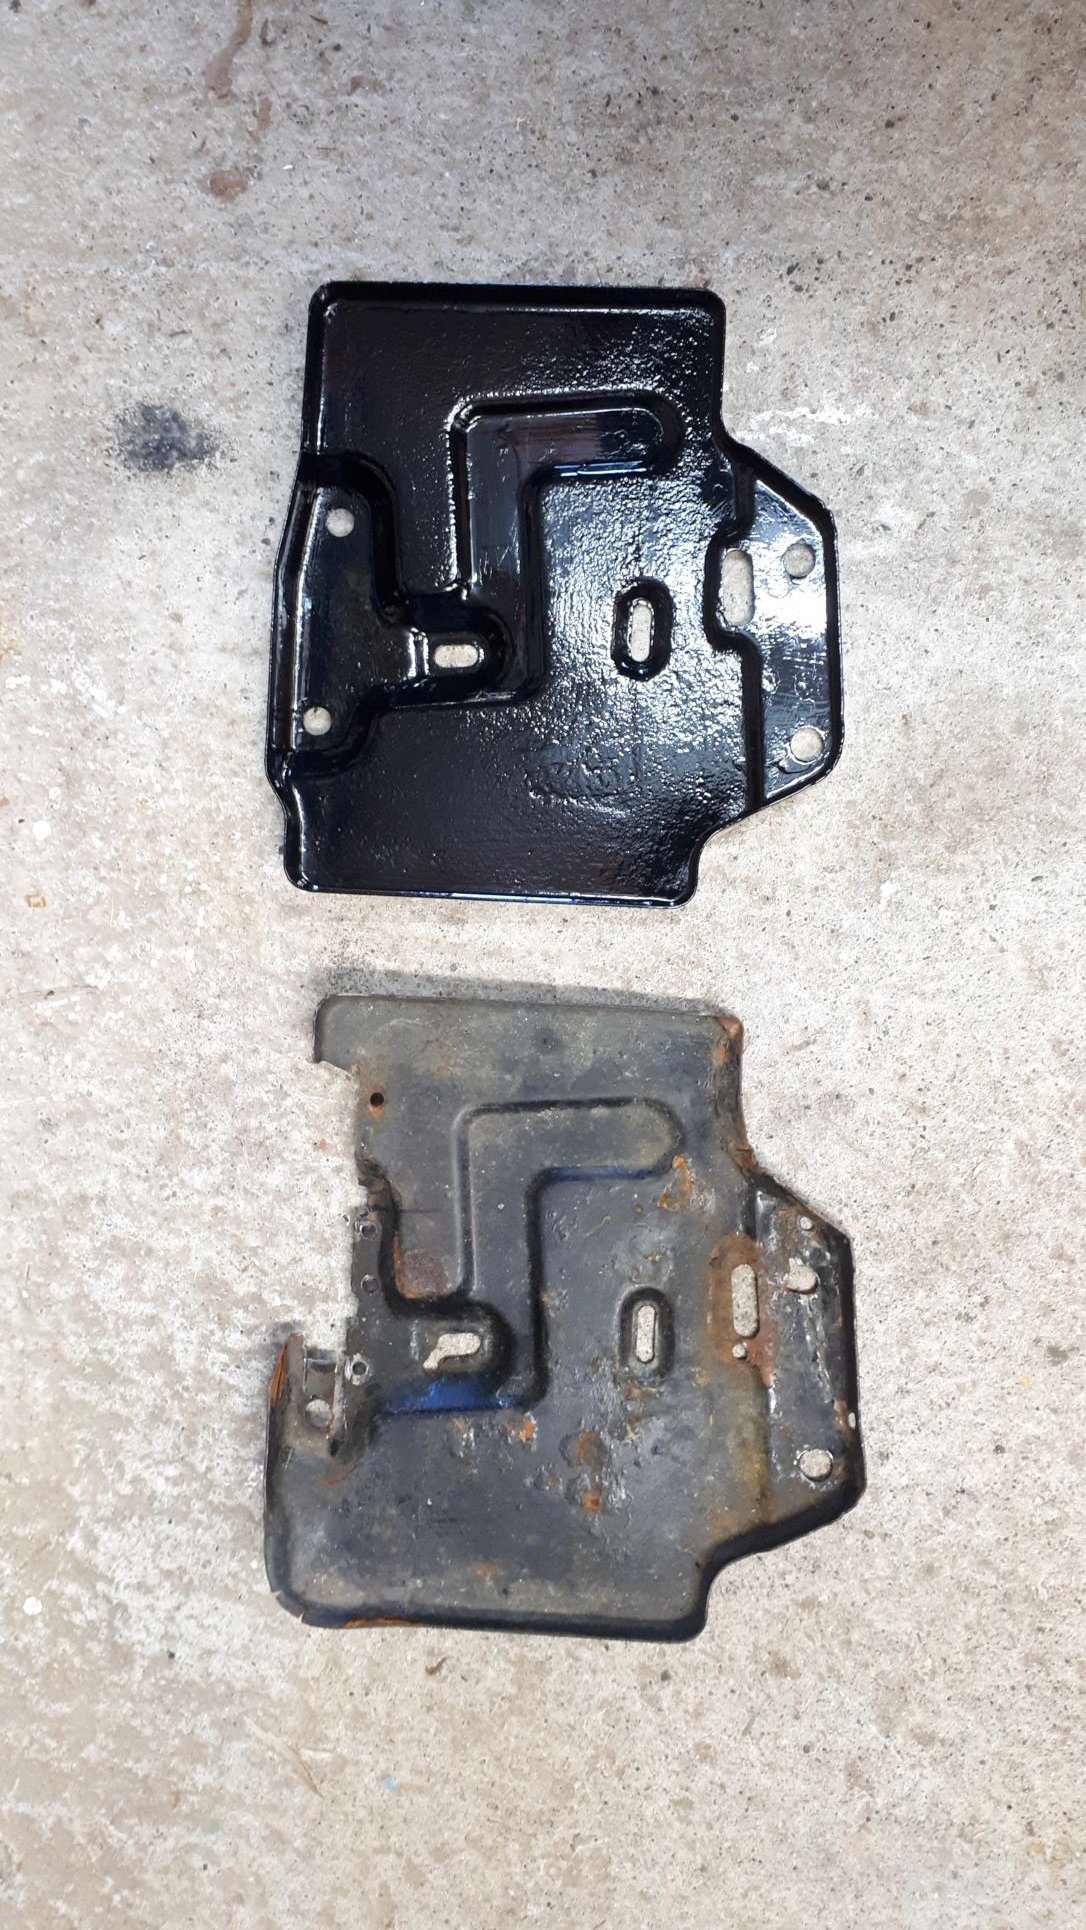
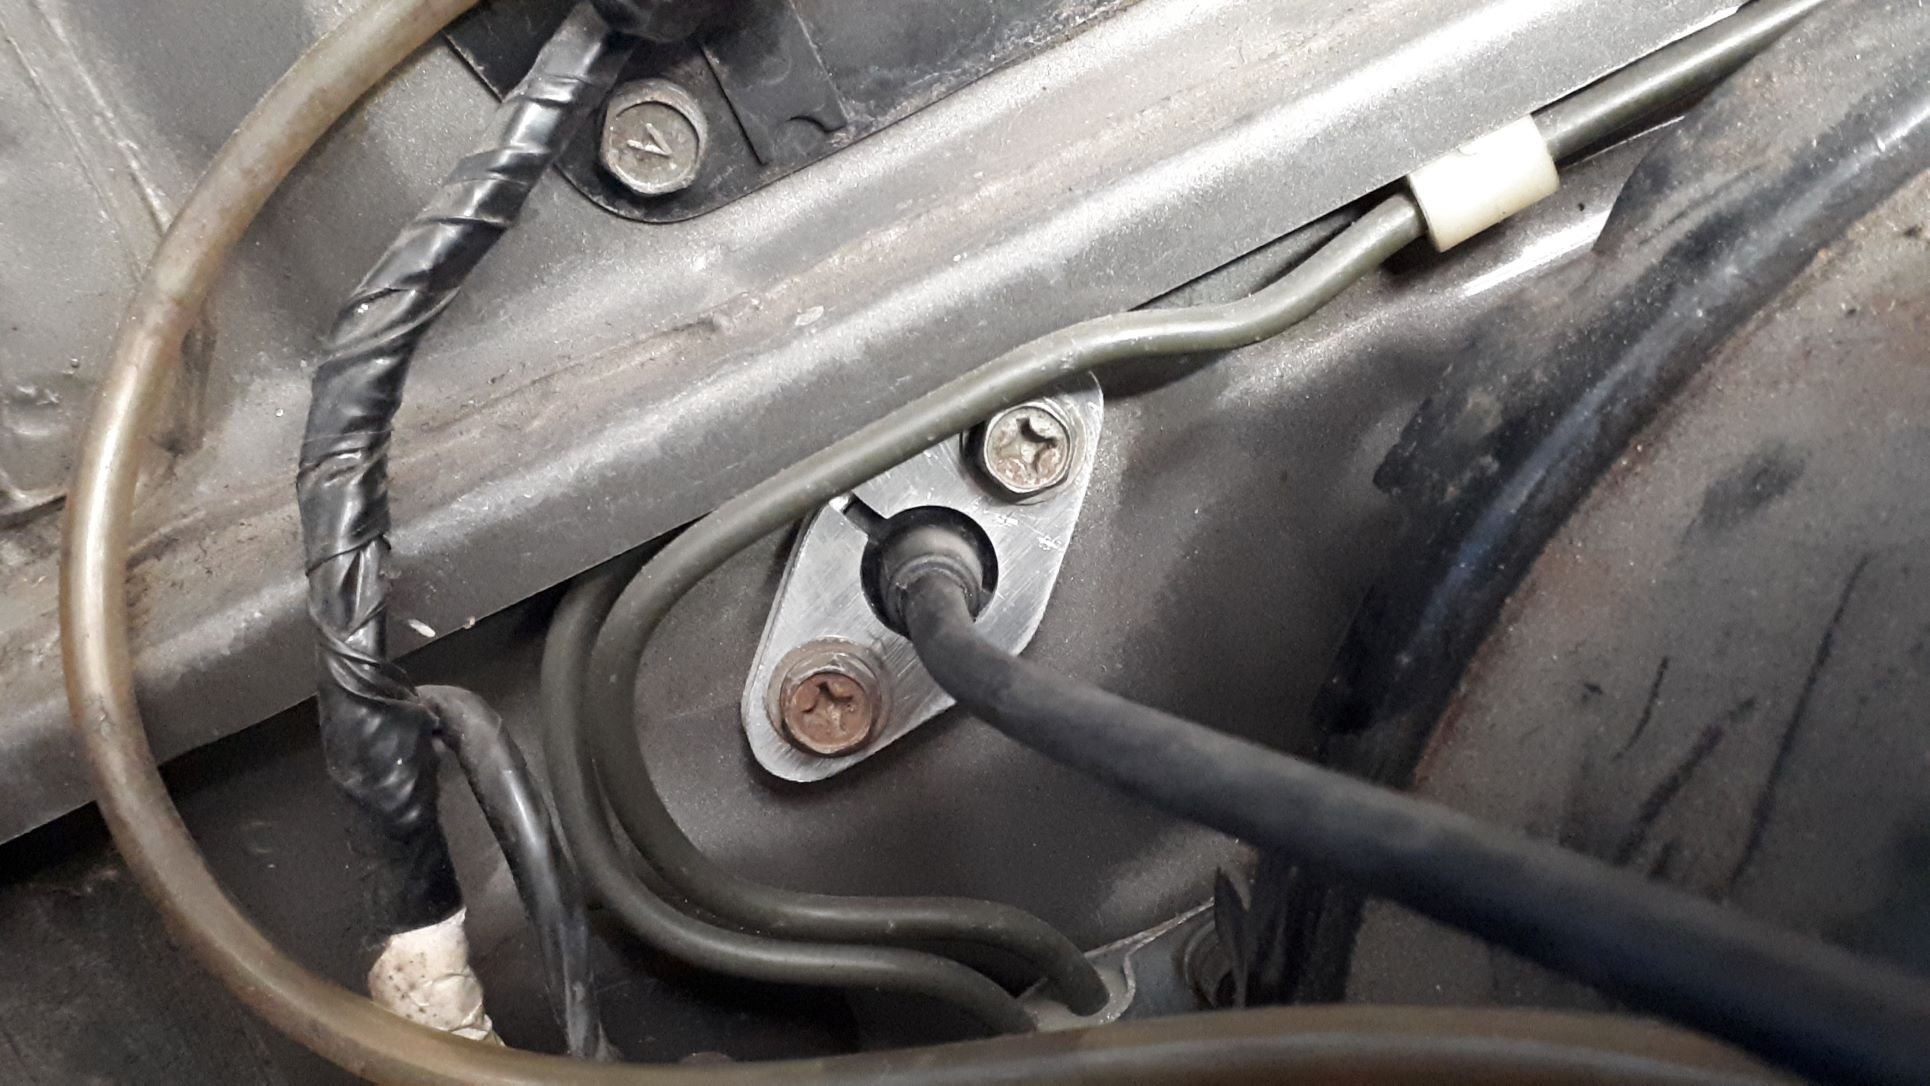
A little while ago @MaxPowerwas kind enough to let me scavenge a few odds and ends off an old Sigma shell that was heading for the metal recyclers. Among the treasure was a good battery tray. My car was once running on LPG and the battery tray was butchered to make way for LPG system components so it was good to find a new tray. I also installed a remote battery switch that can be operated from a push/pull rod under the bumper so I don't need to open and close the bonnet to disconnect the battery.

-
8
-
-
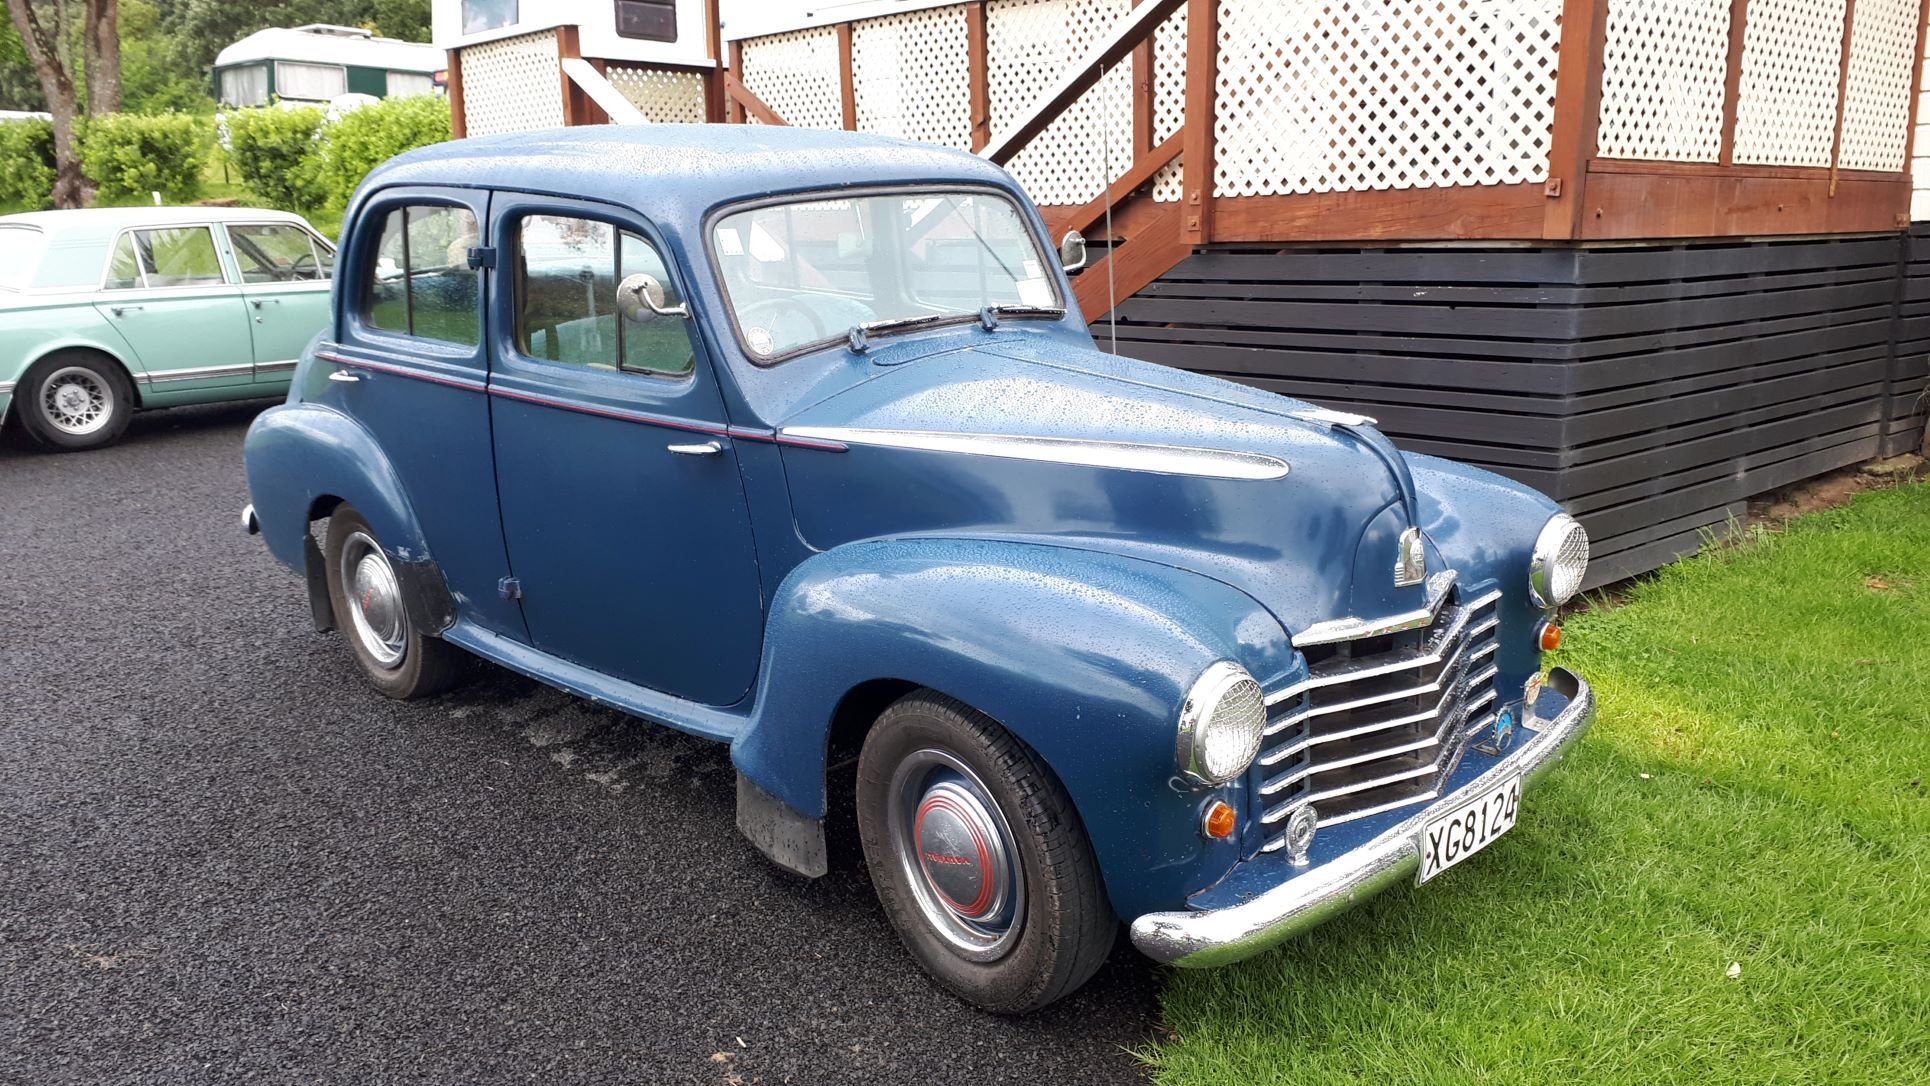
I came across this fine example at an event over the weekend.
It's a 1951 model so not quite the same as yours but I thought you might like it all the same.
-
1
-
-
- Popular Post
- Popular Post
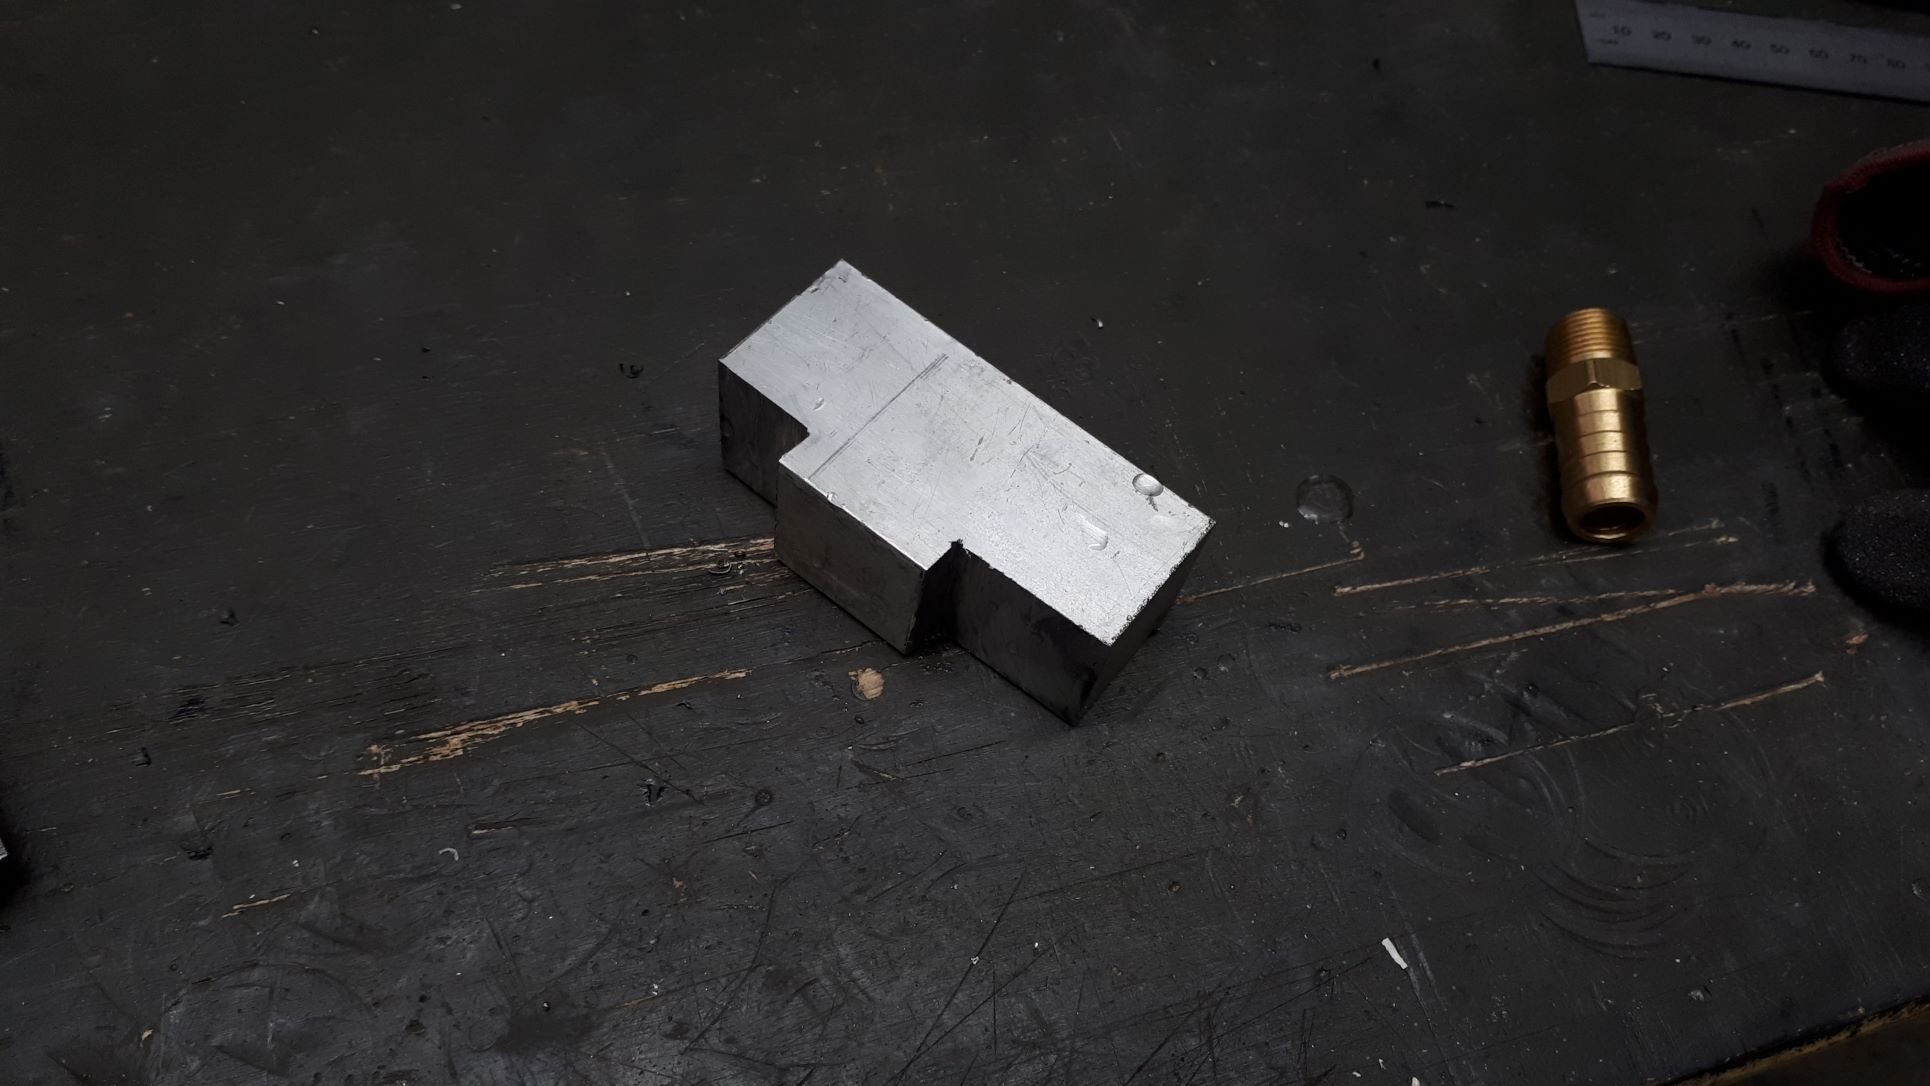
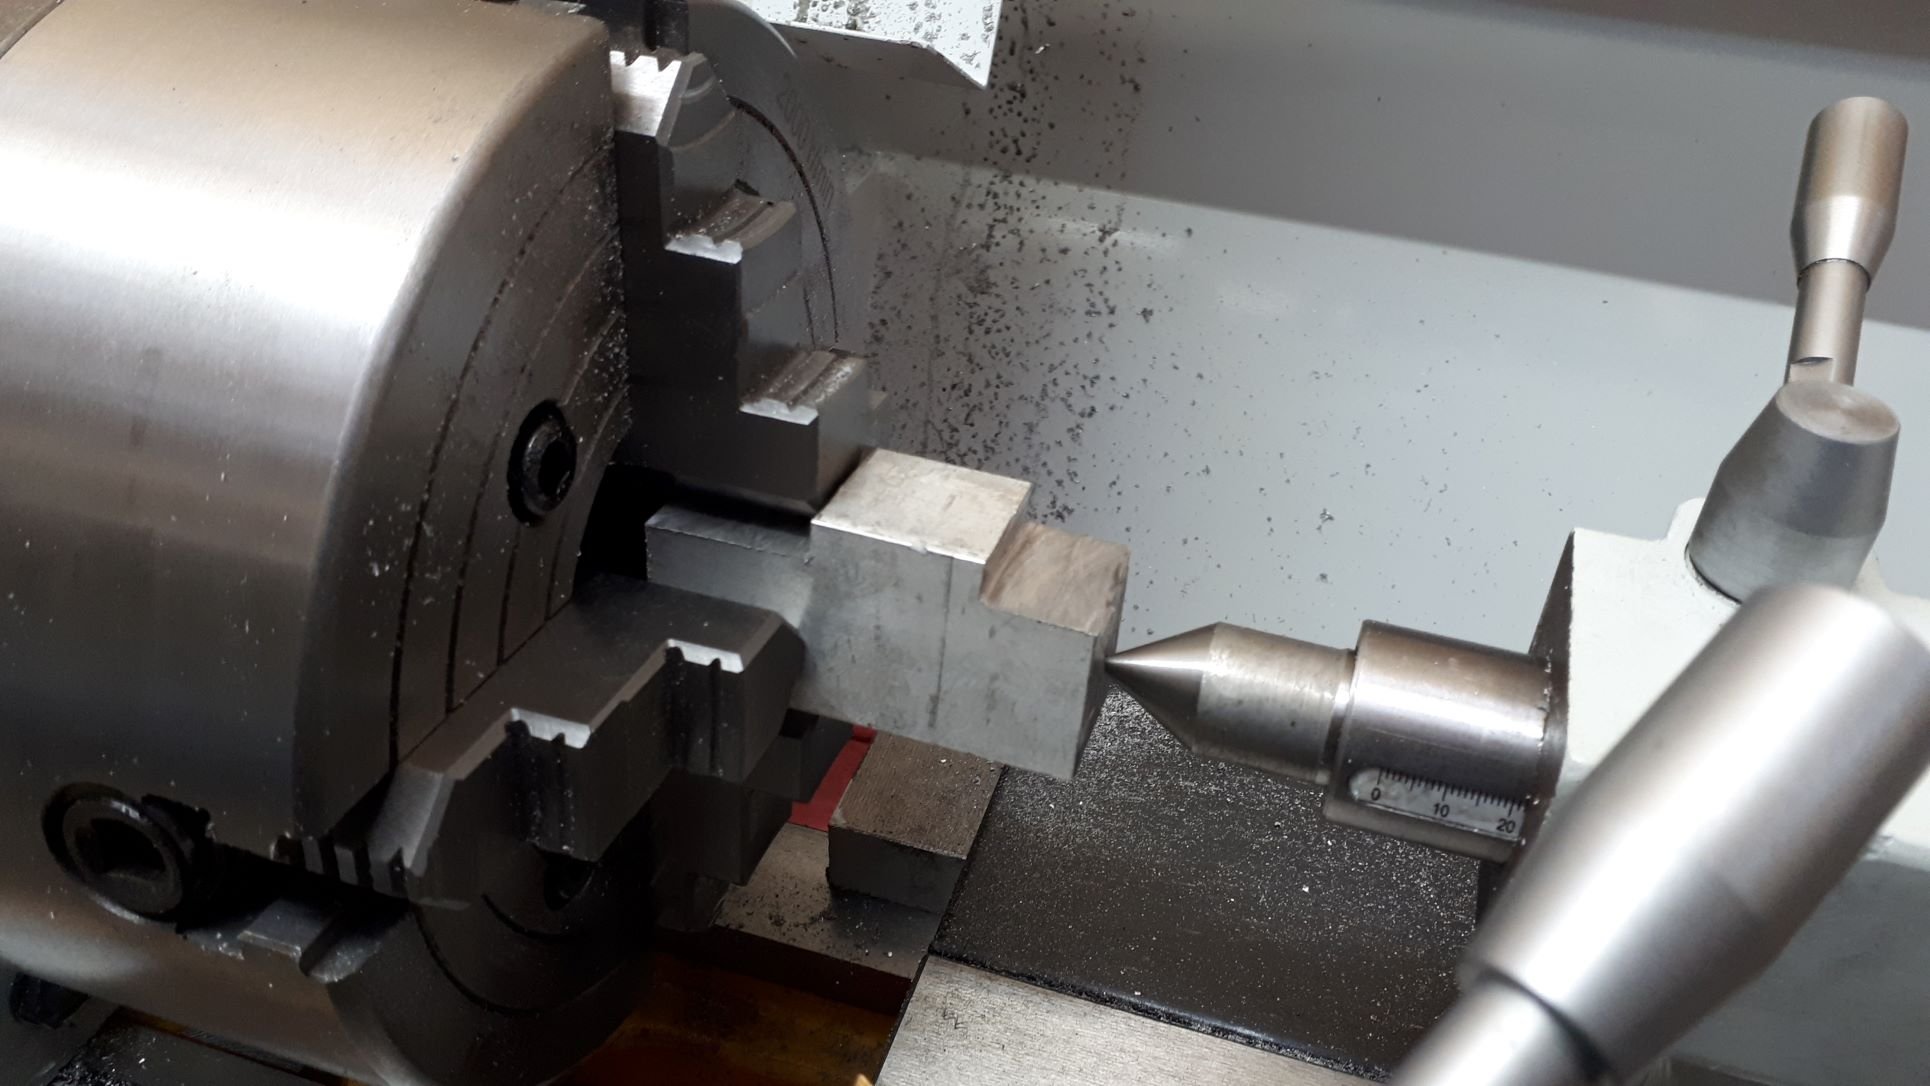
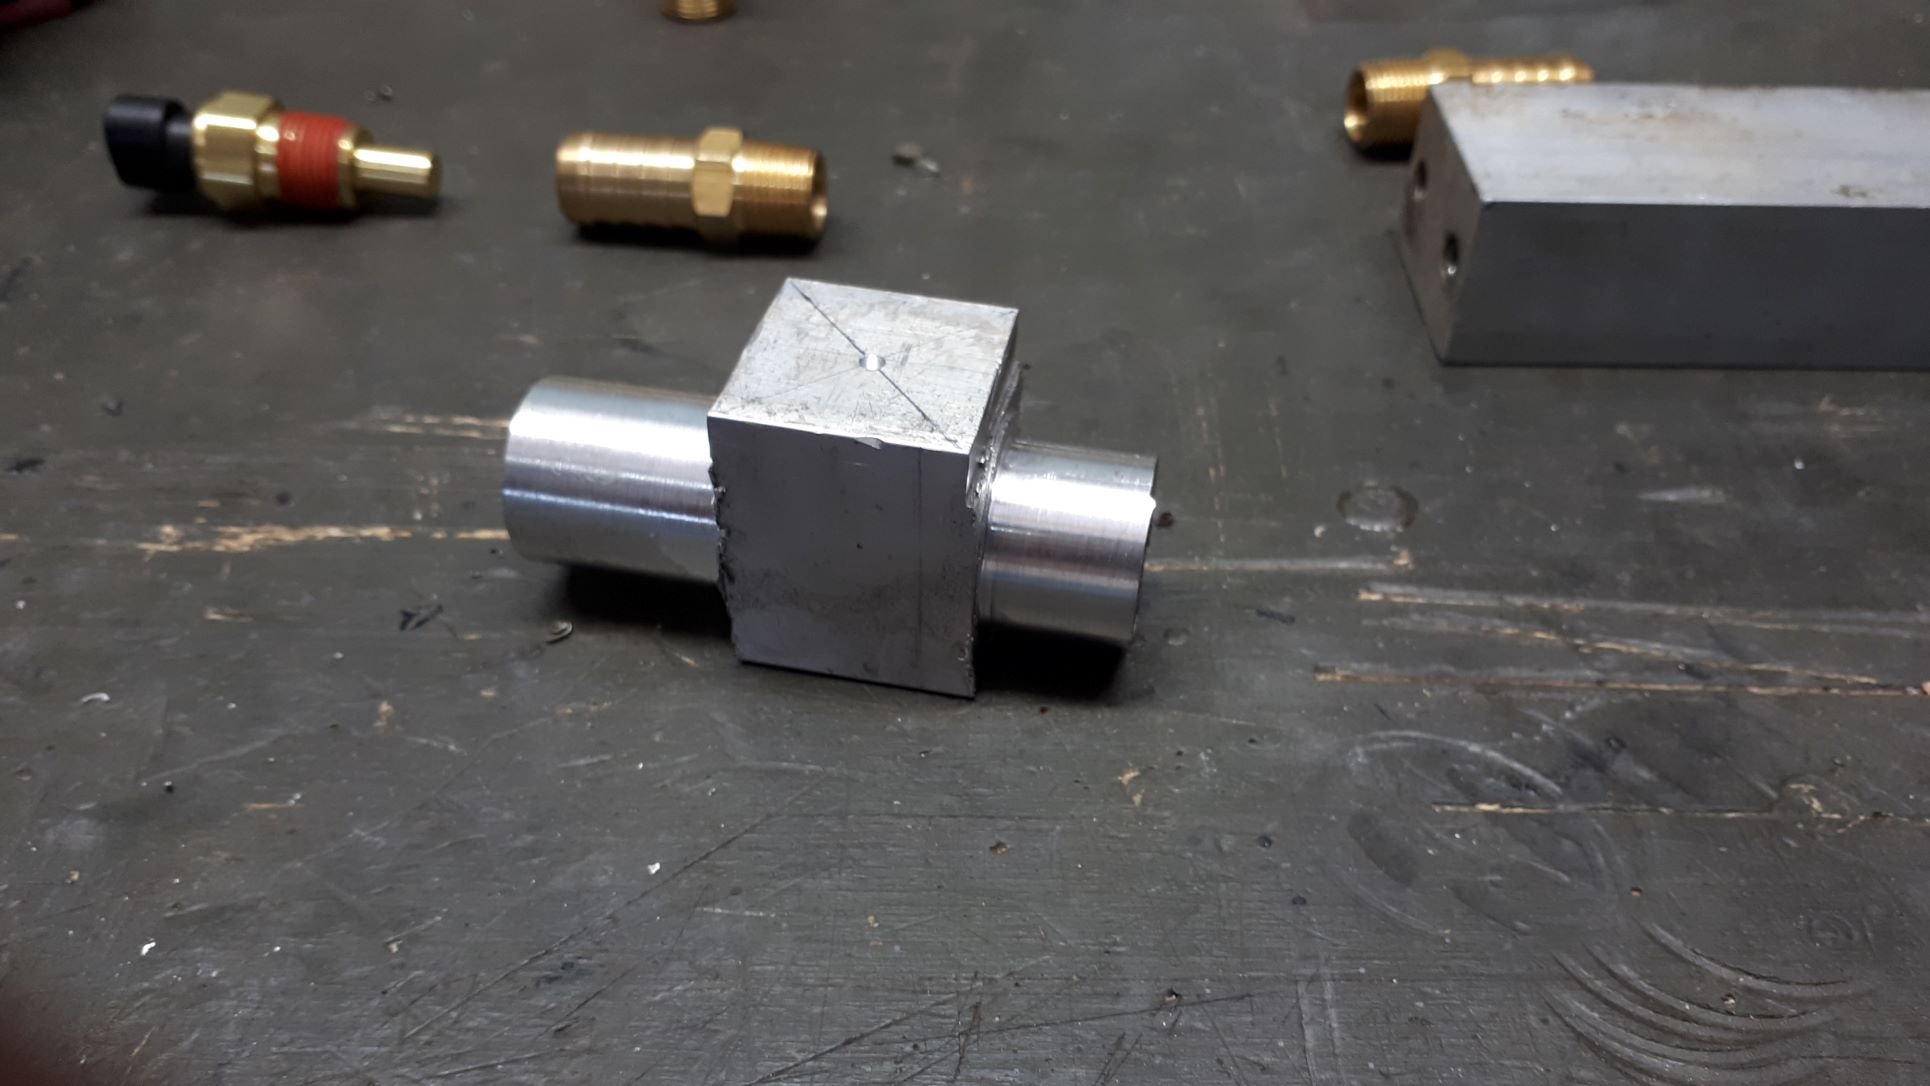
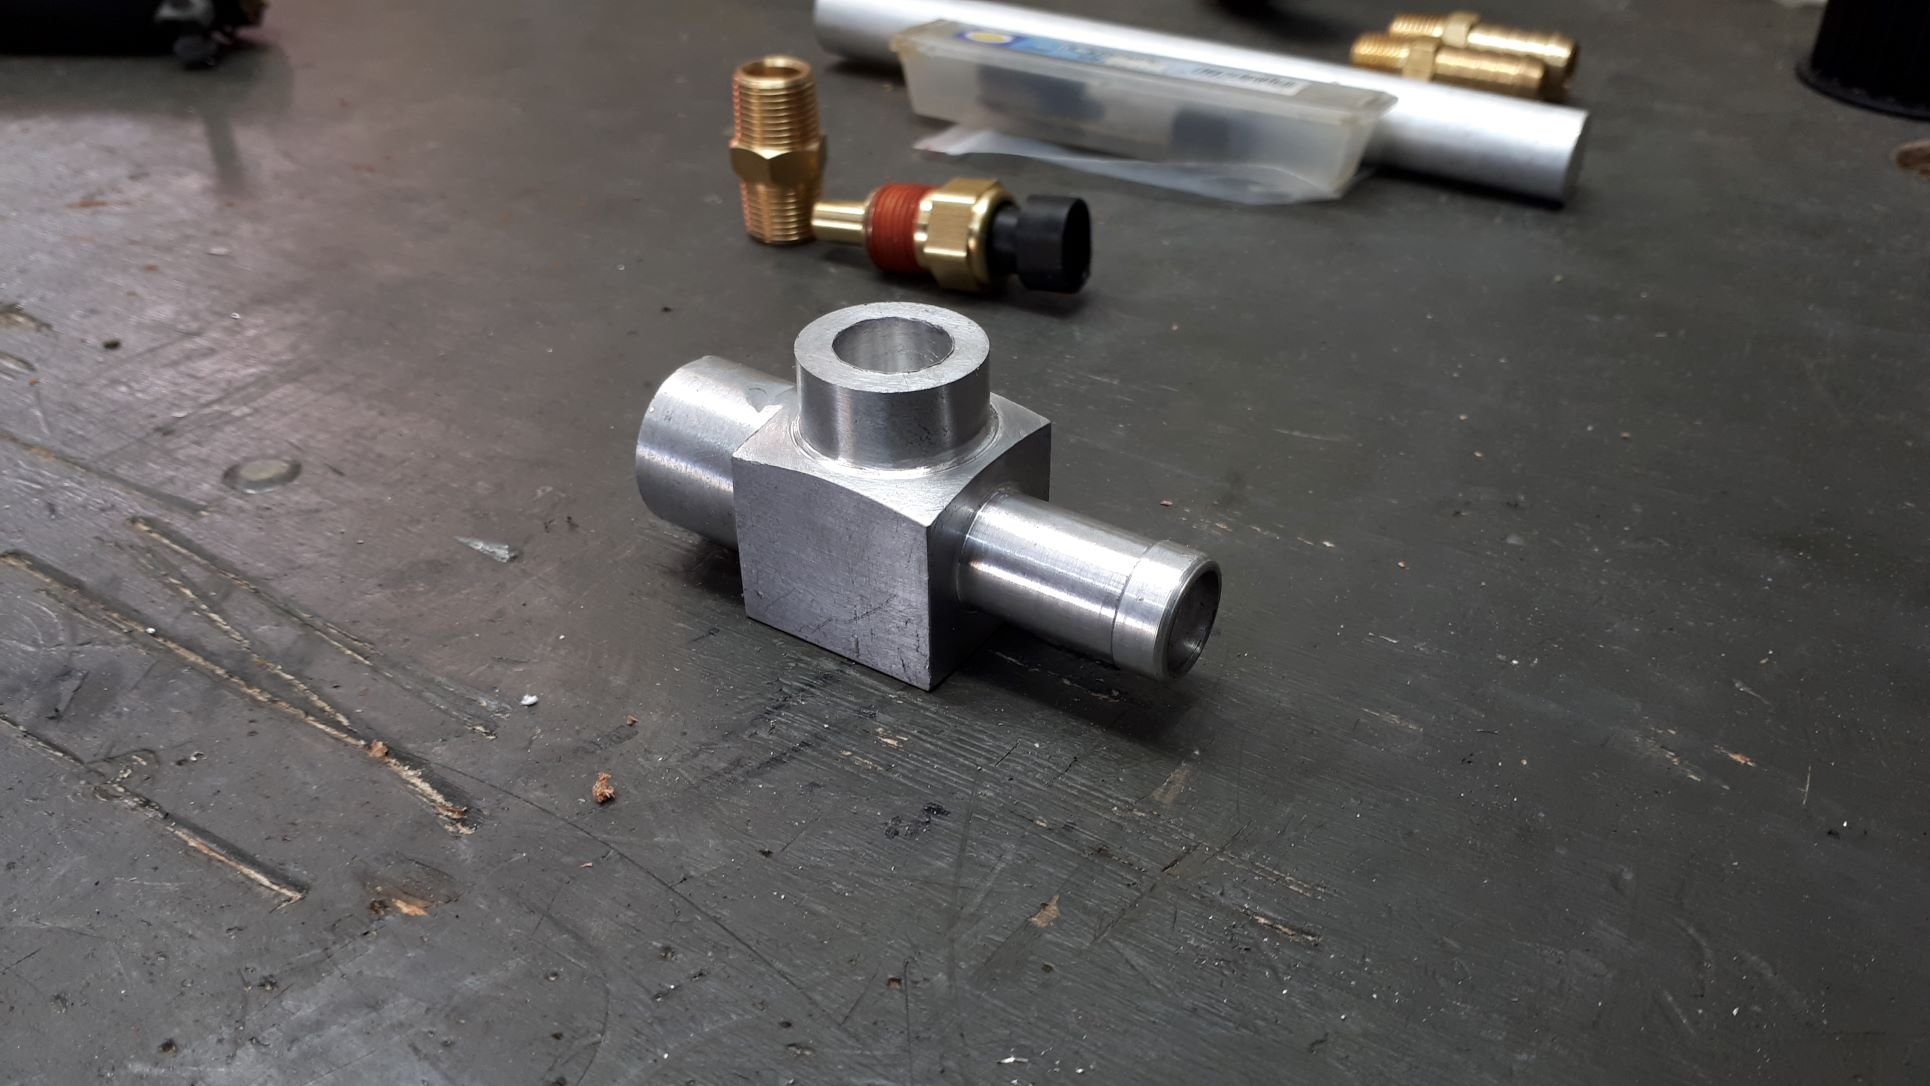
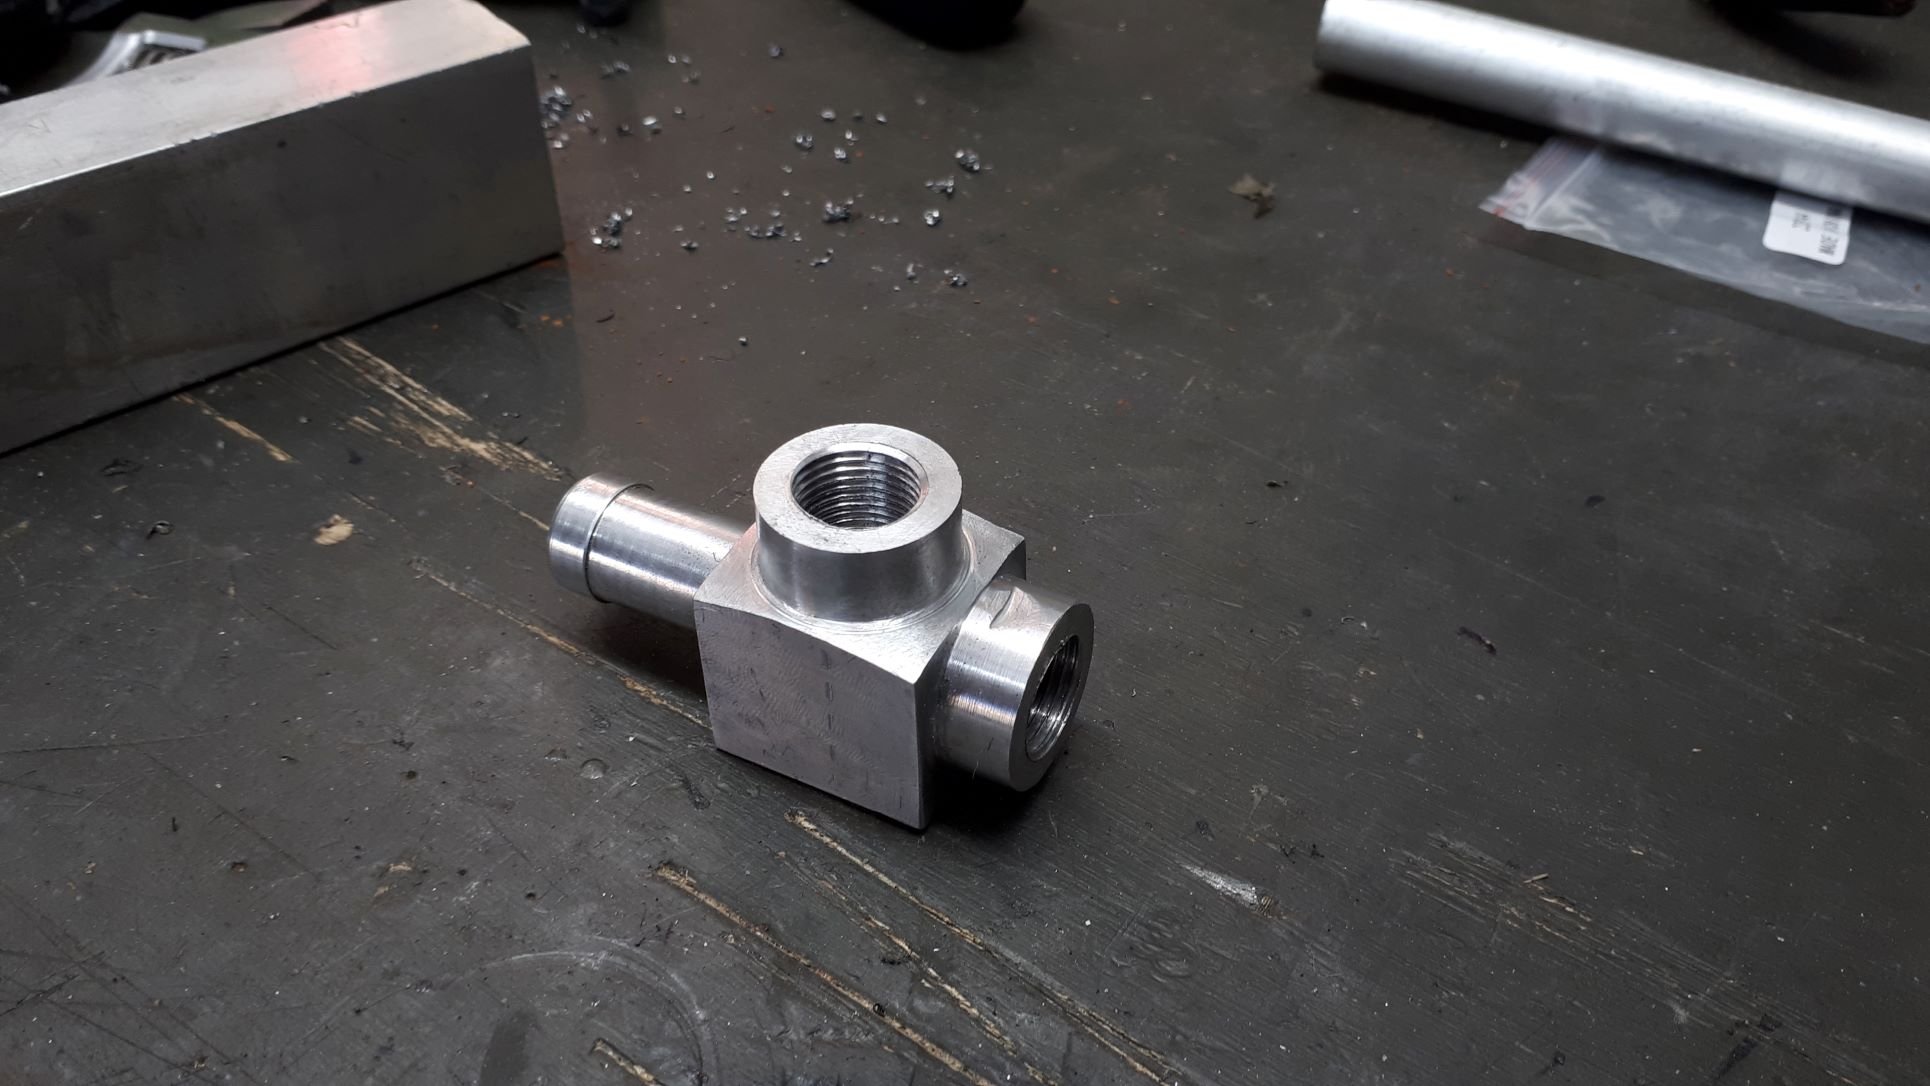
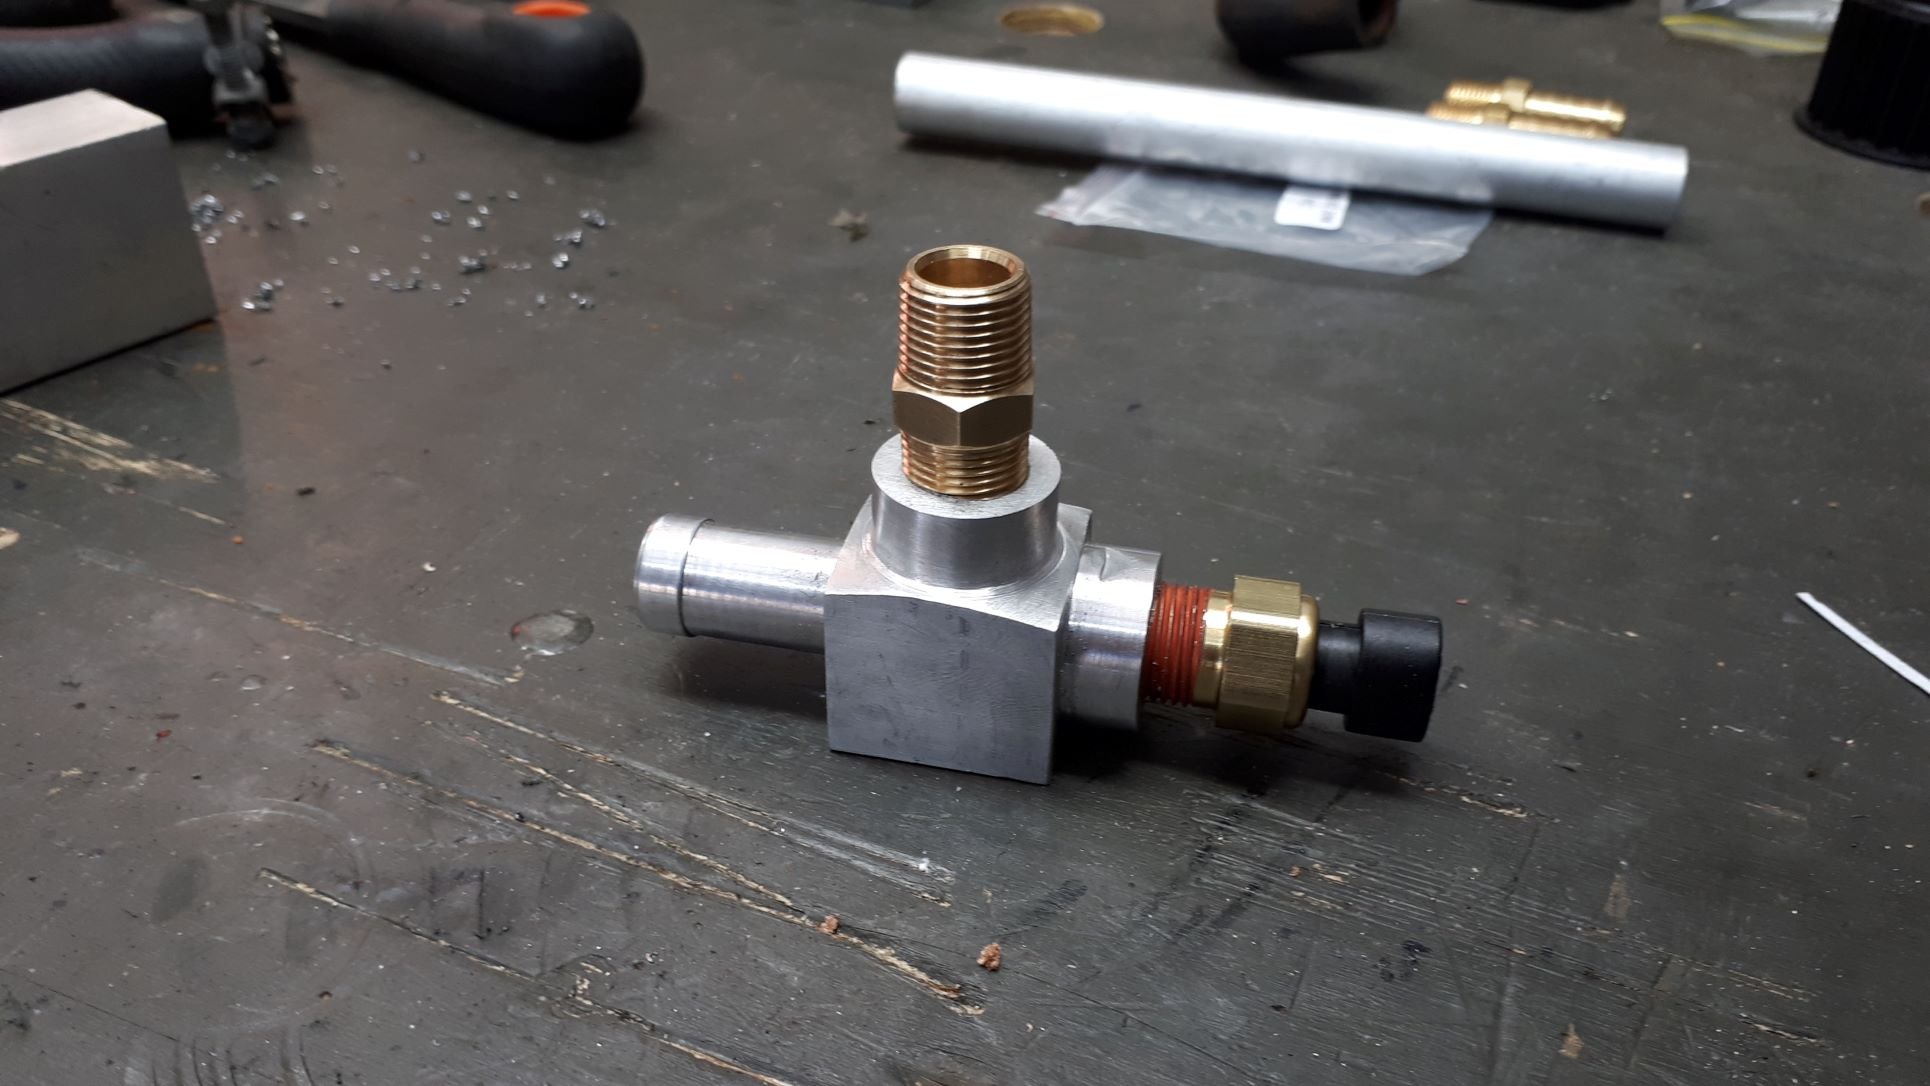
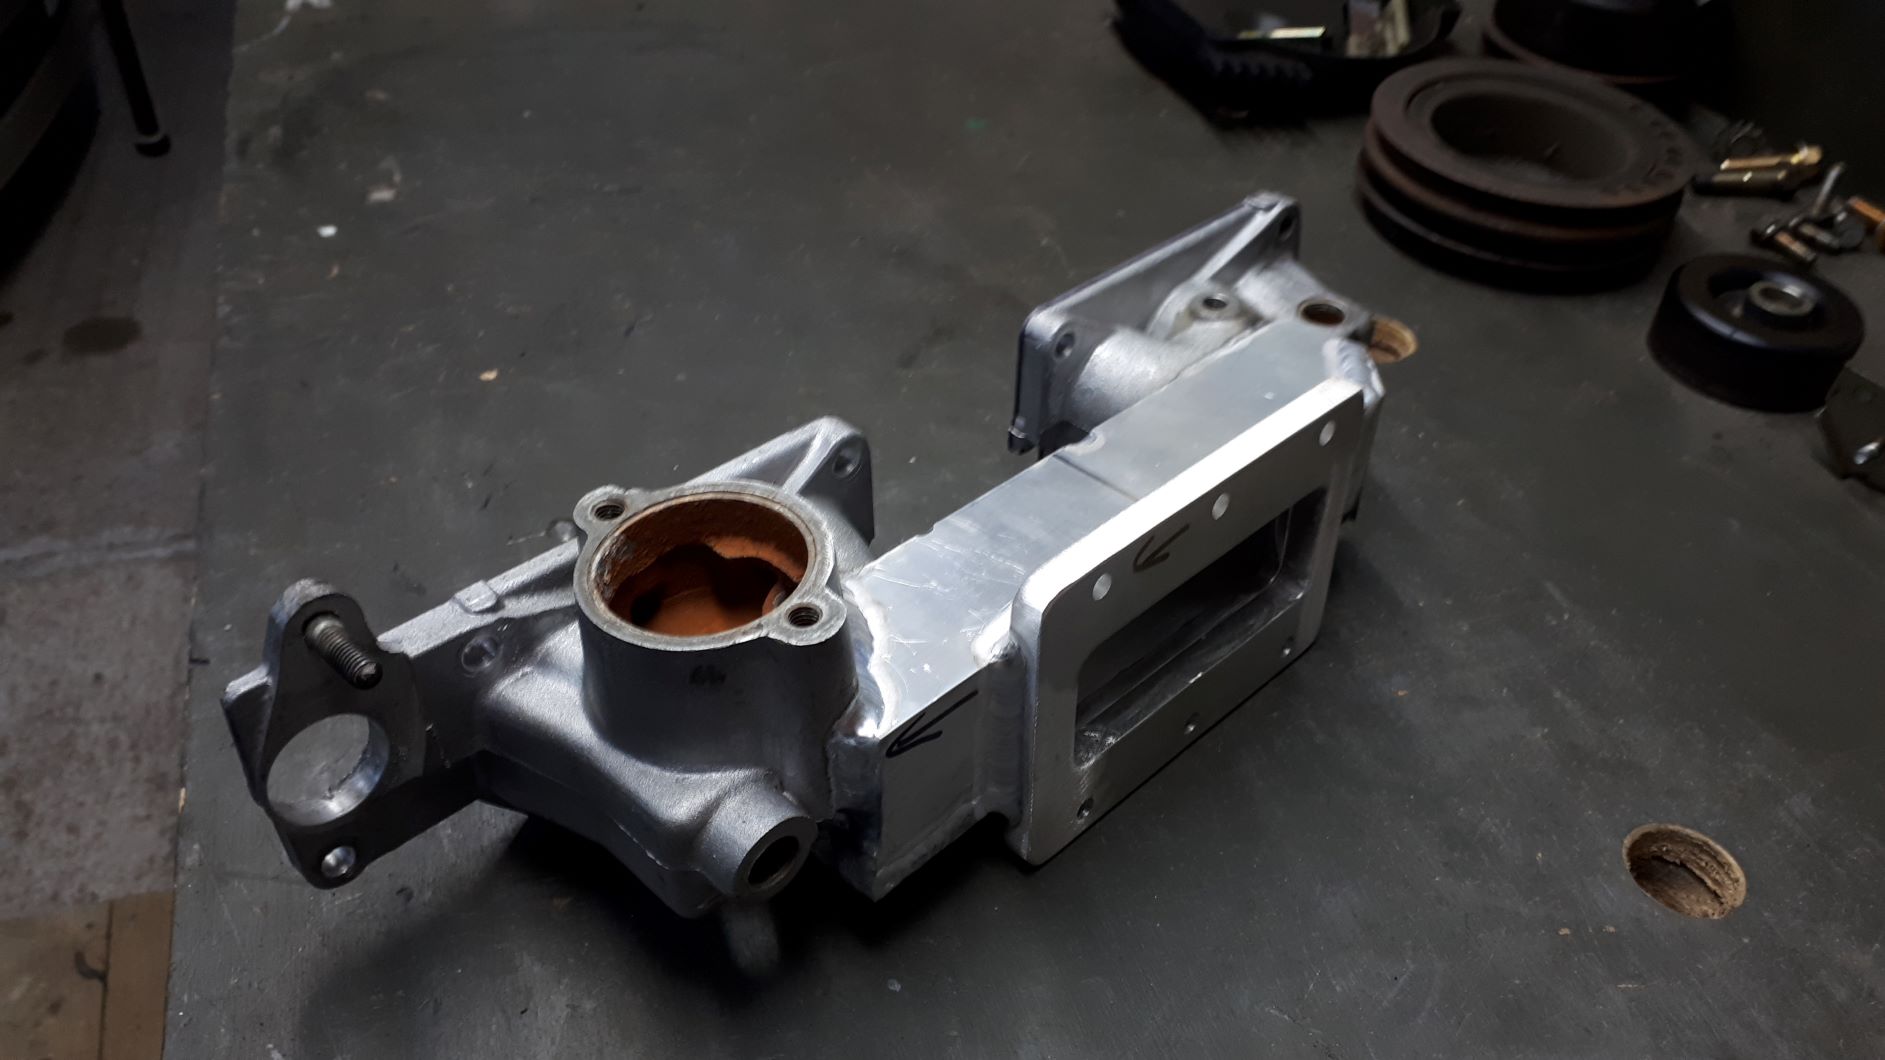
Hacking up the manifold resulted in the removal of some water fittings and I needed to reinstate the removed cooling system components. I had a nice piece of aluminium under the workbench so decided to make a custom fitting.
The lathe is a fairly new addition to the workshop, a couple of friends very kindly offered the use of workshop lathes however I decided that I had enough work to do to justify buying my own. Also I haven't used a lathe in many years and I knew that everything would take forever.
I have never tried to make anything like this before but I think came out pretty well.
-
27
-
- Popular Post
- Popular Post
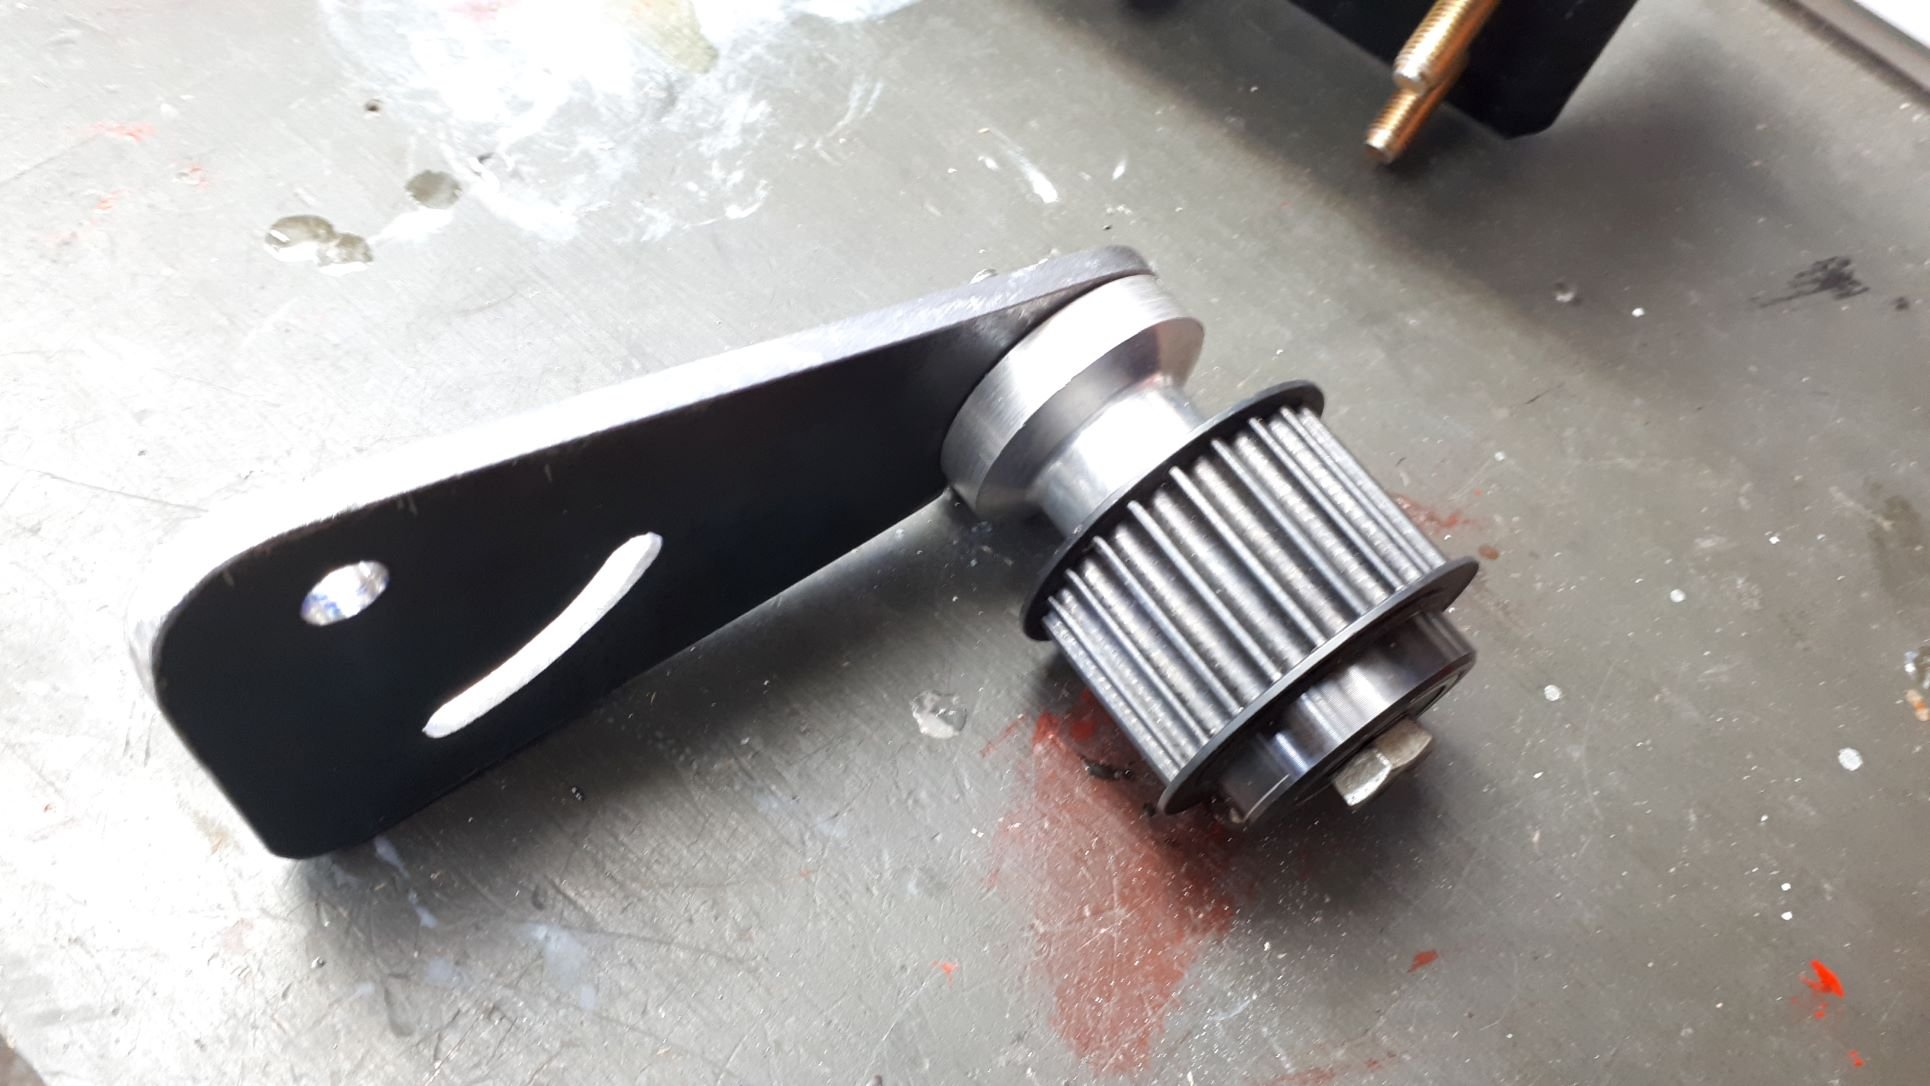
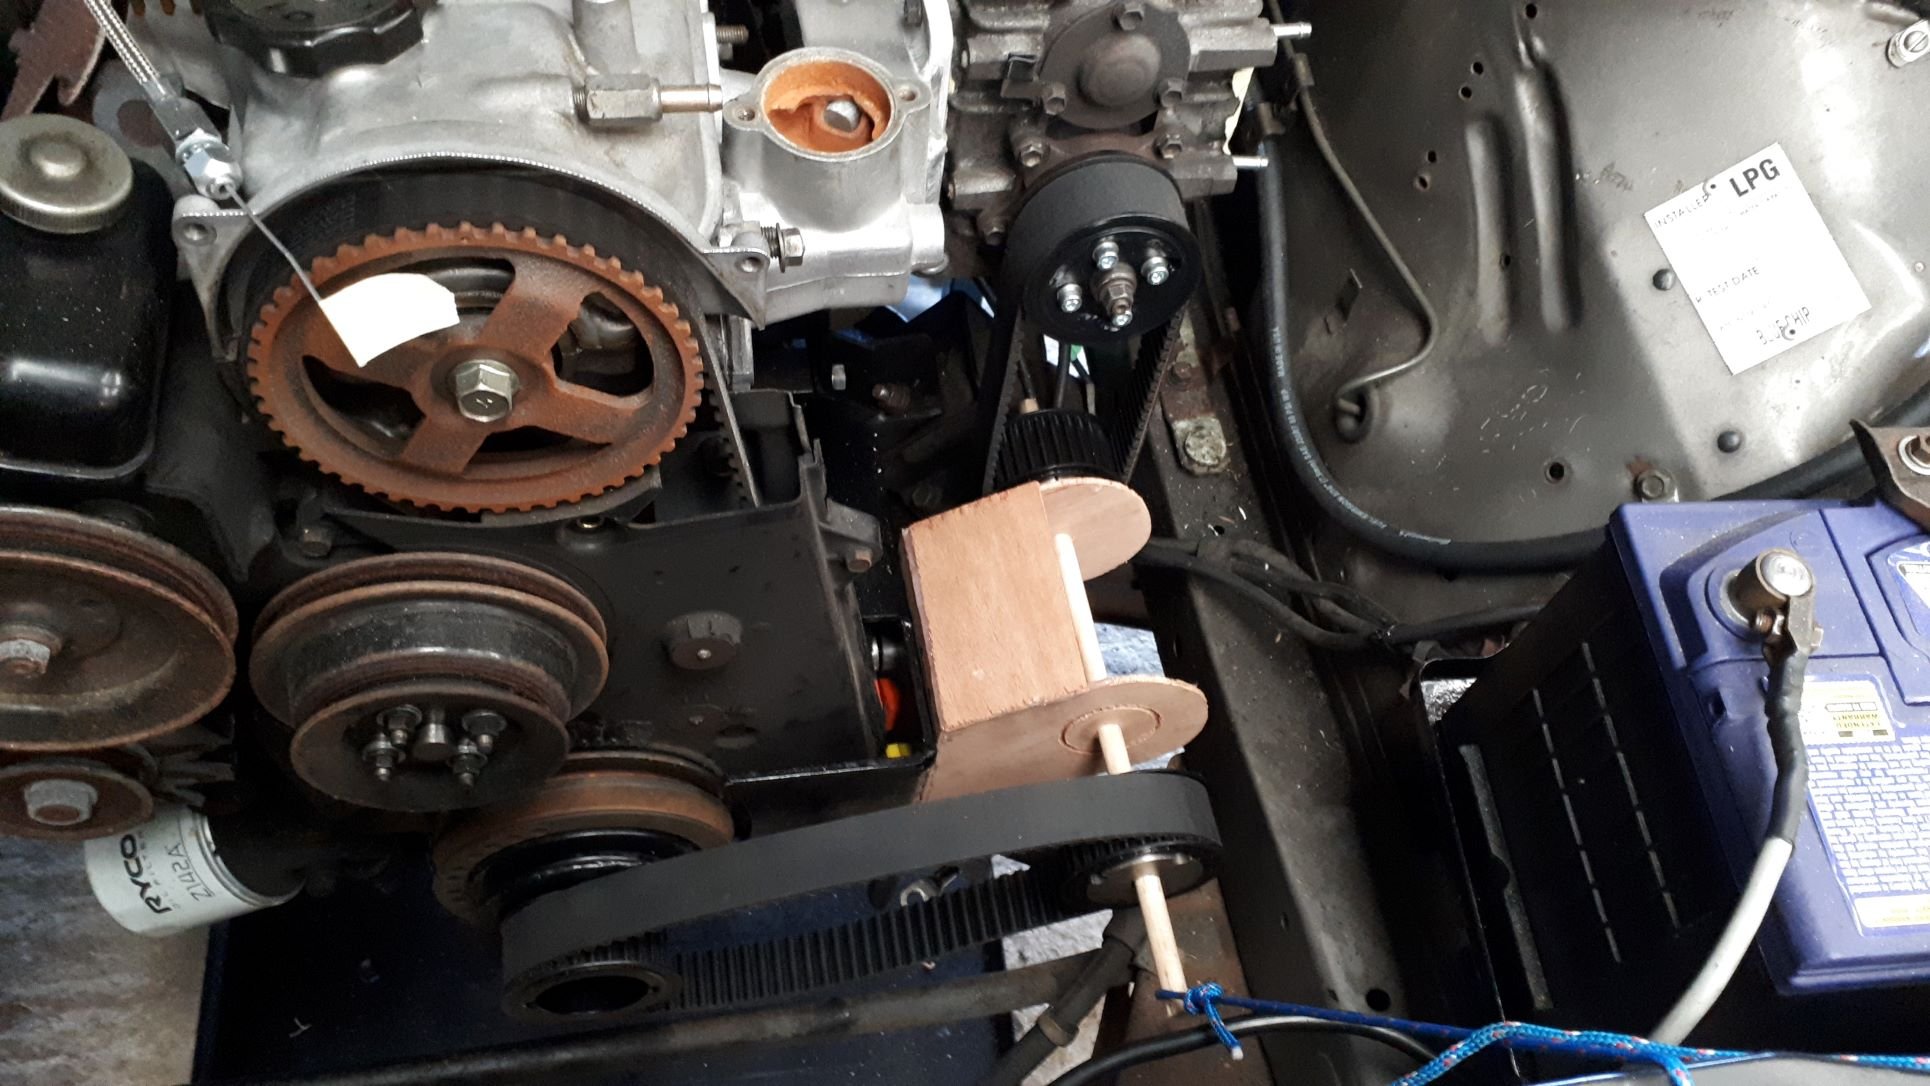
Now to figure out how to get drive from the crank to the supercharger. This was always going to be just a little Heath Robinson involving 2 belts and a lay shaft to bring the drive aft about 180mm. I mocked it up using thin plywood, hot glue and a piece of dowel and after a bit of mucking around I have the basic dimensions sorted. Now I can start fabricating something more substantial in steel. I also machined up a small pulley to accept bearings, this pulley will be the tensioner for the lower belt. The upper belt shouldn't require an additional tensioner as I can tension the belt when I position the lay shaft assembly. I am expecting this drive set up to be very noisy indeed!
-
15
-
- Popular Post
- Popular Post
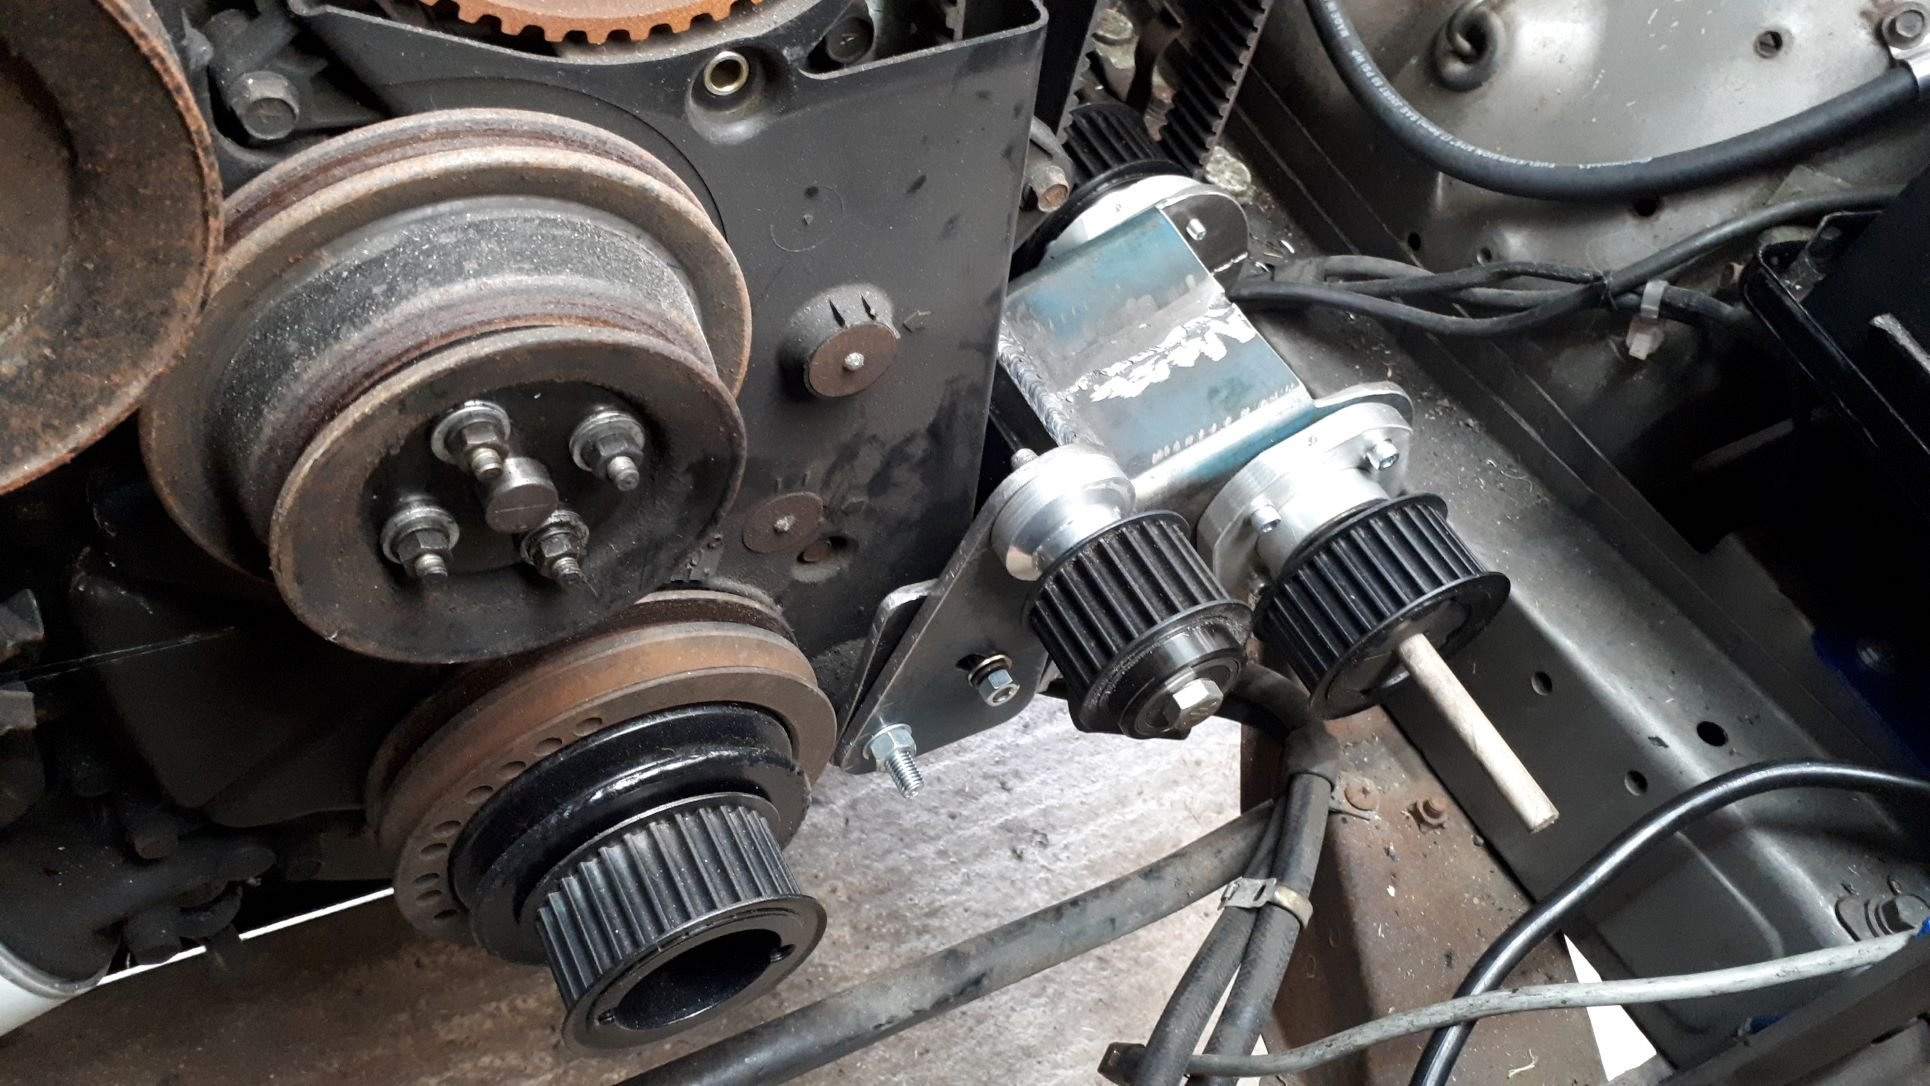
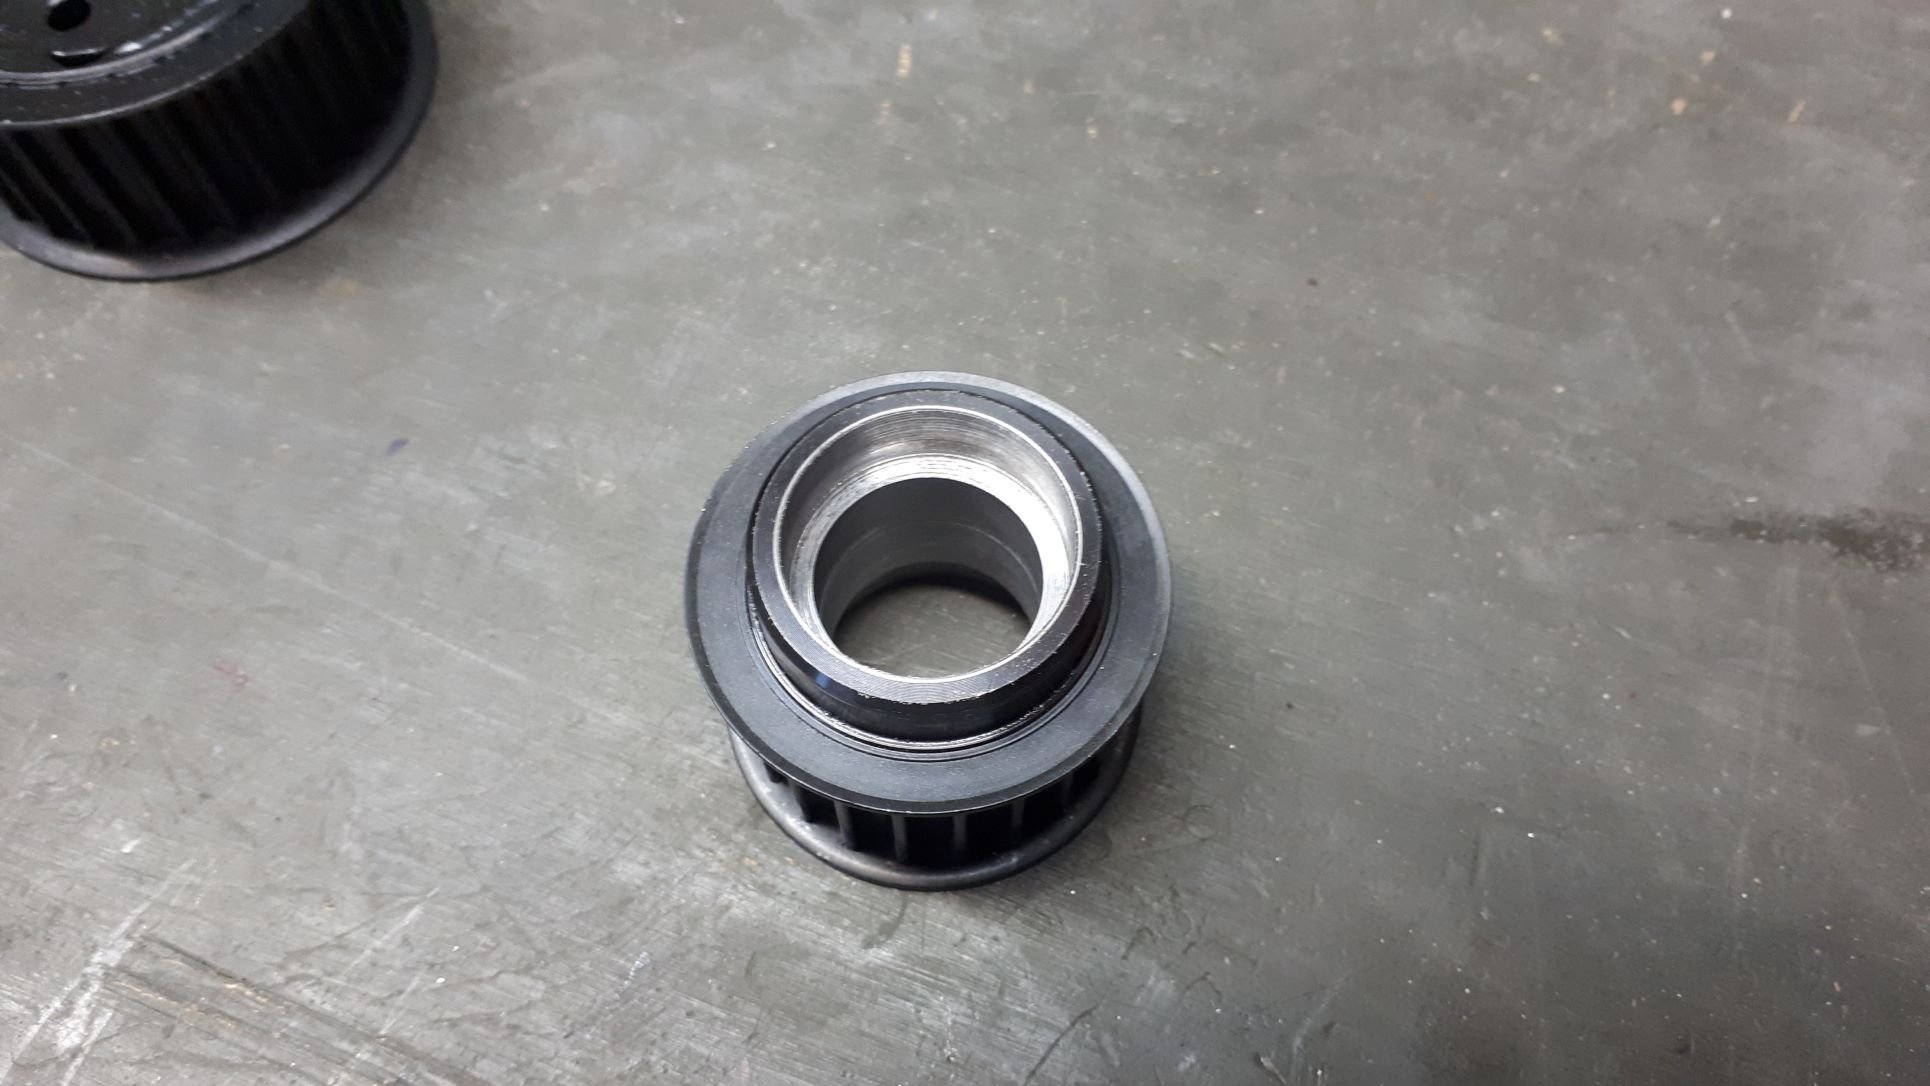
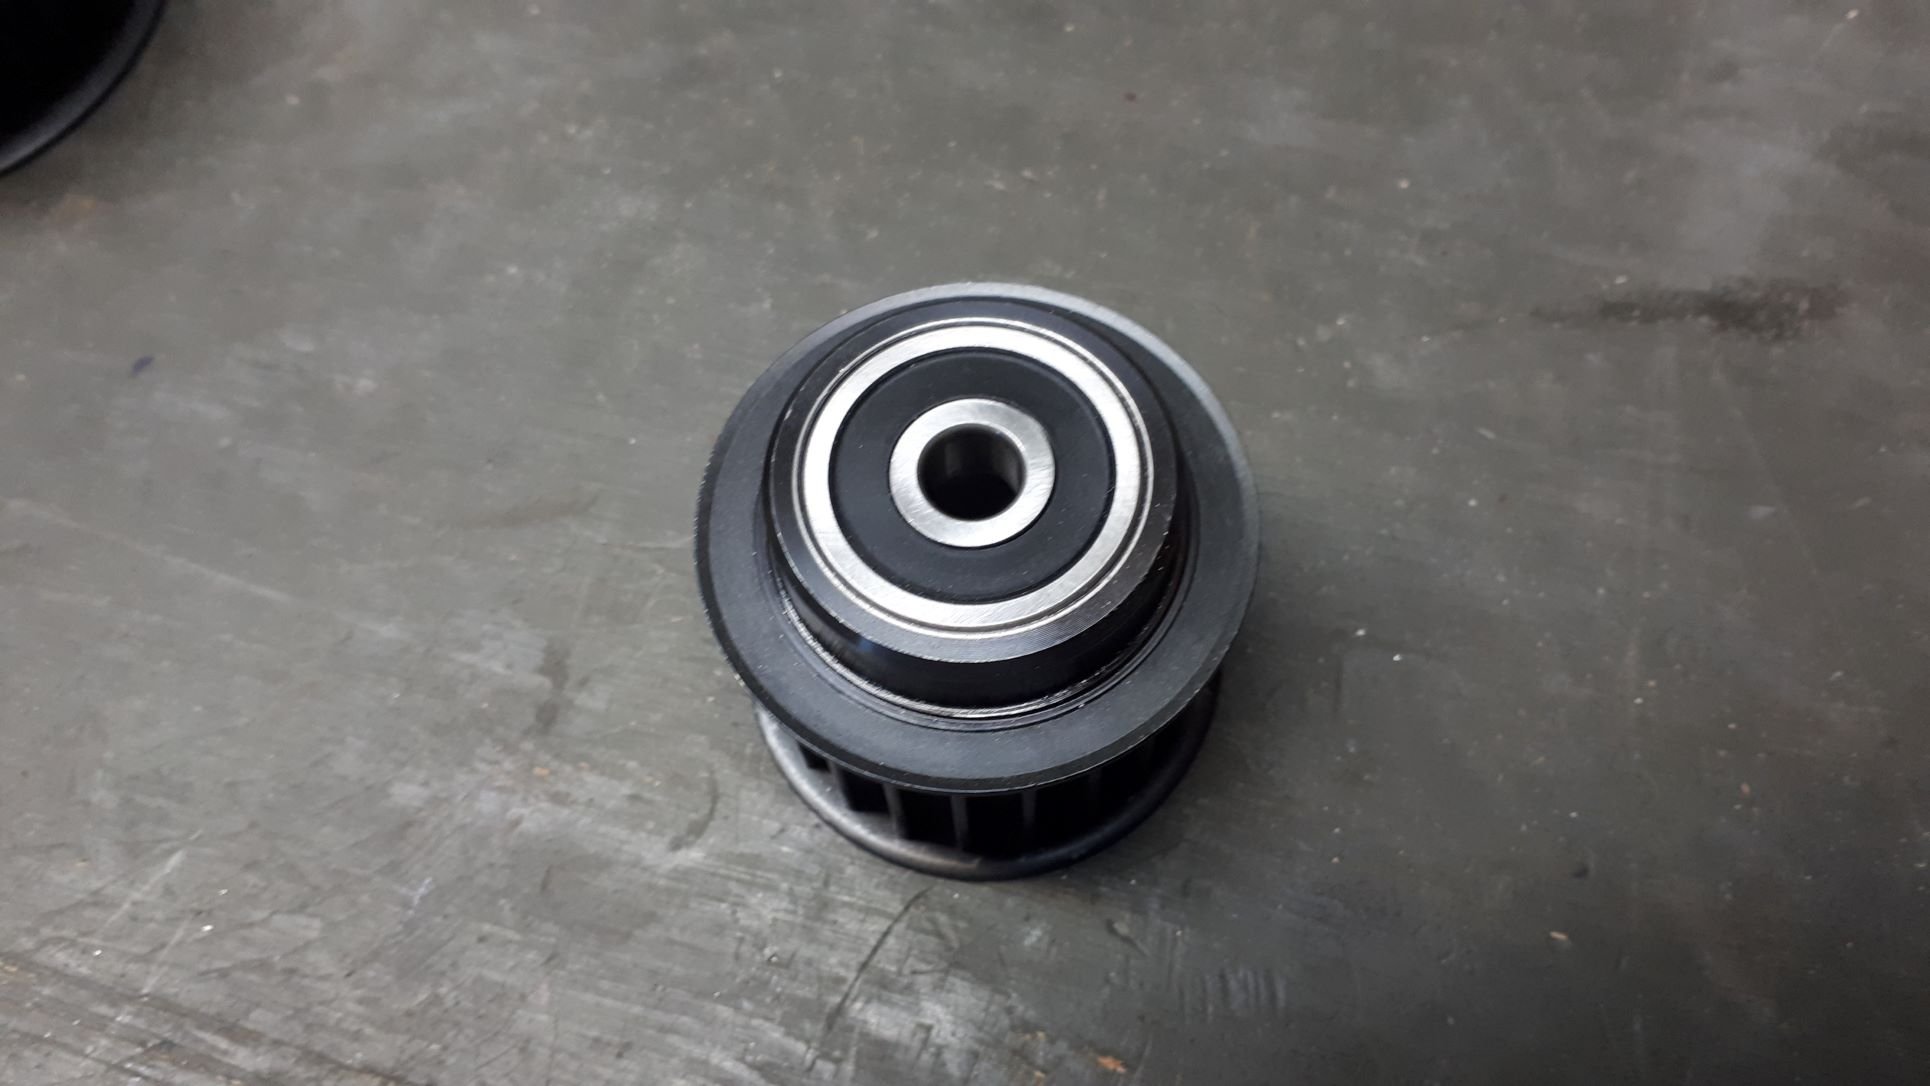
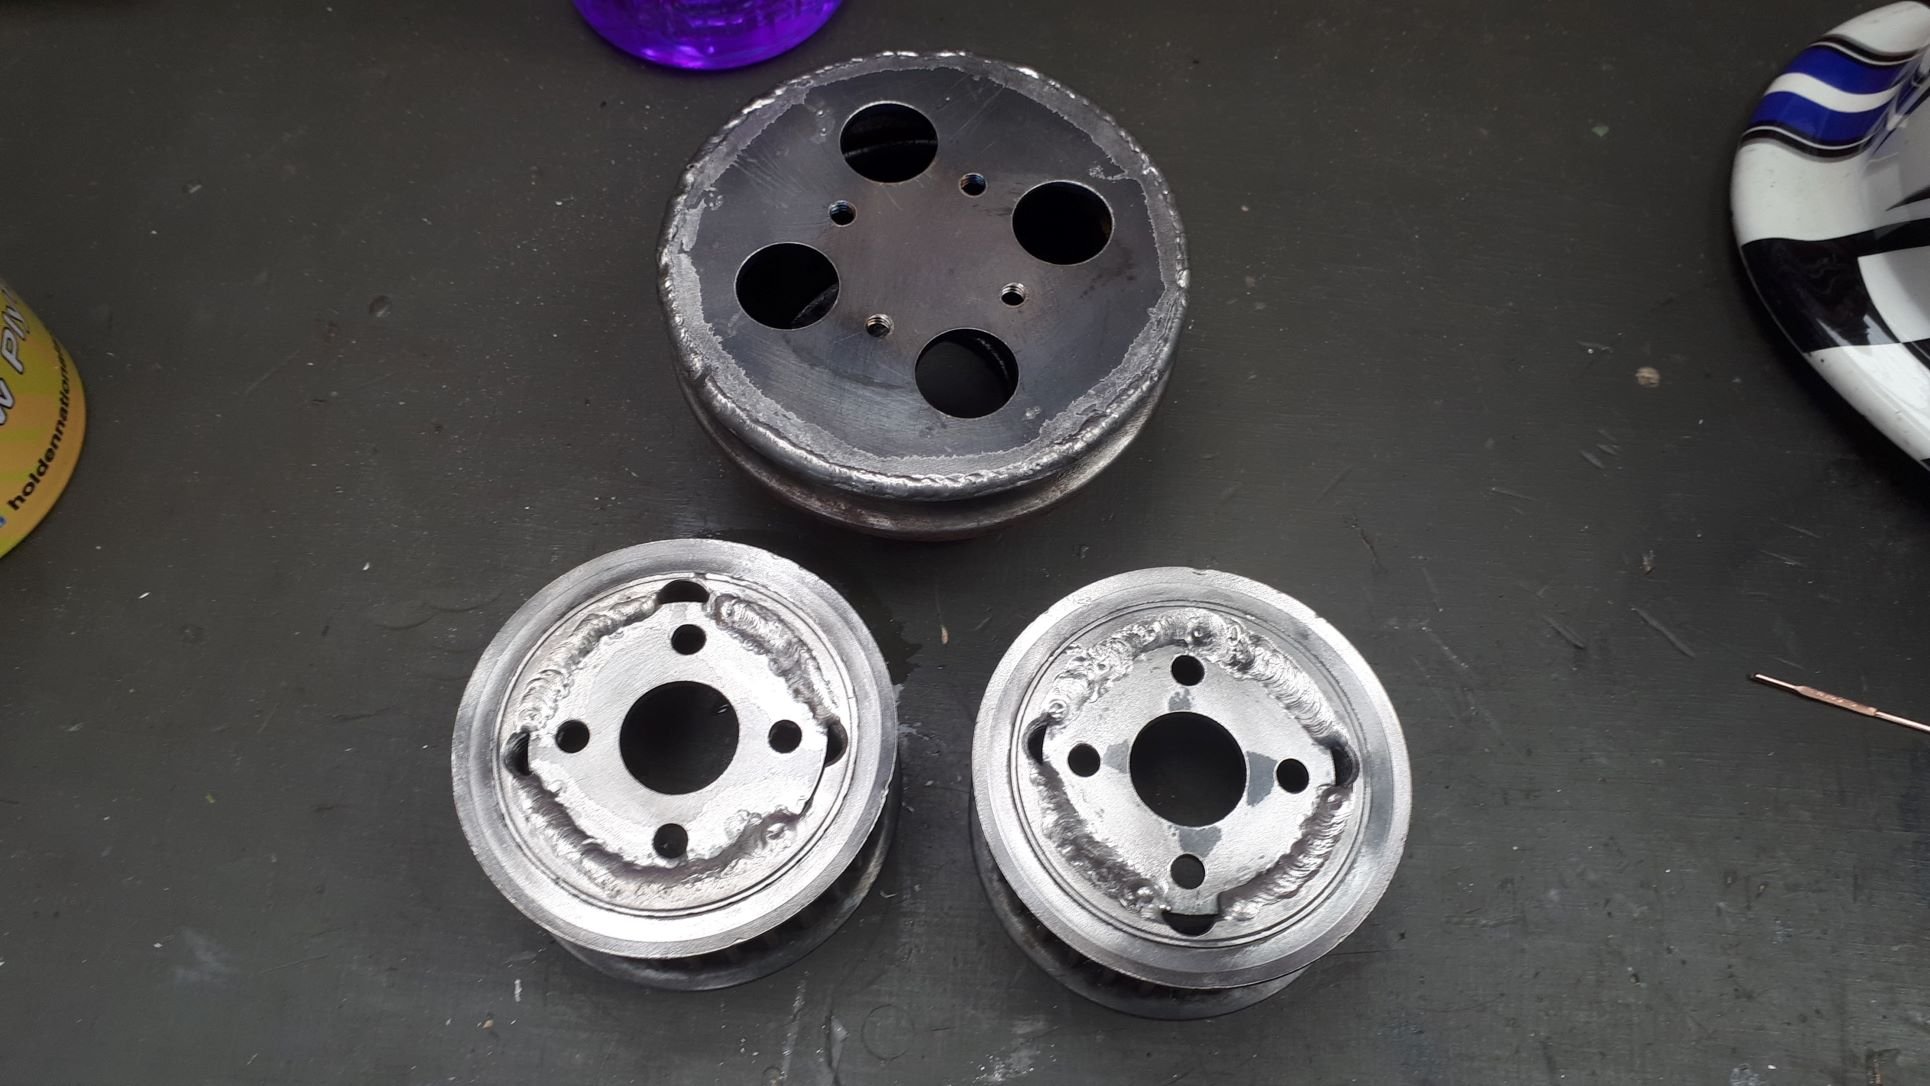
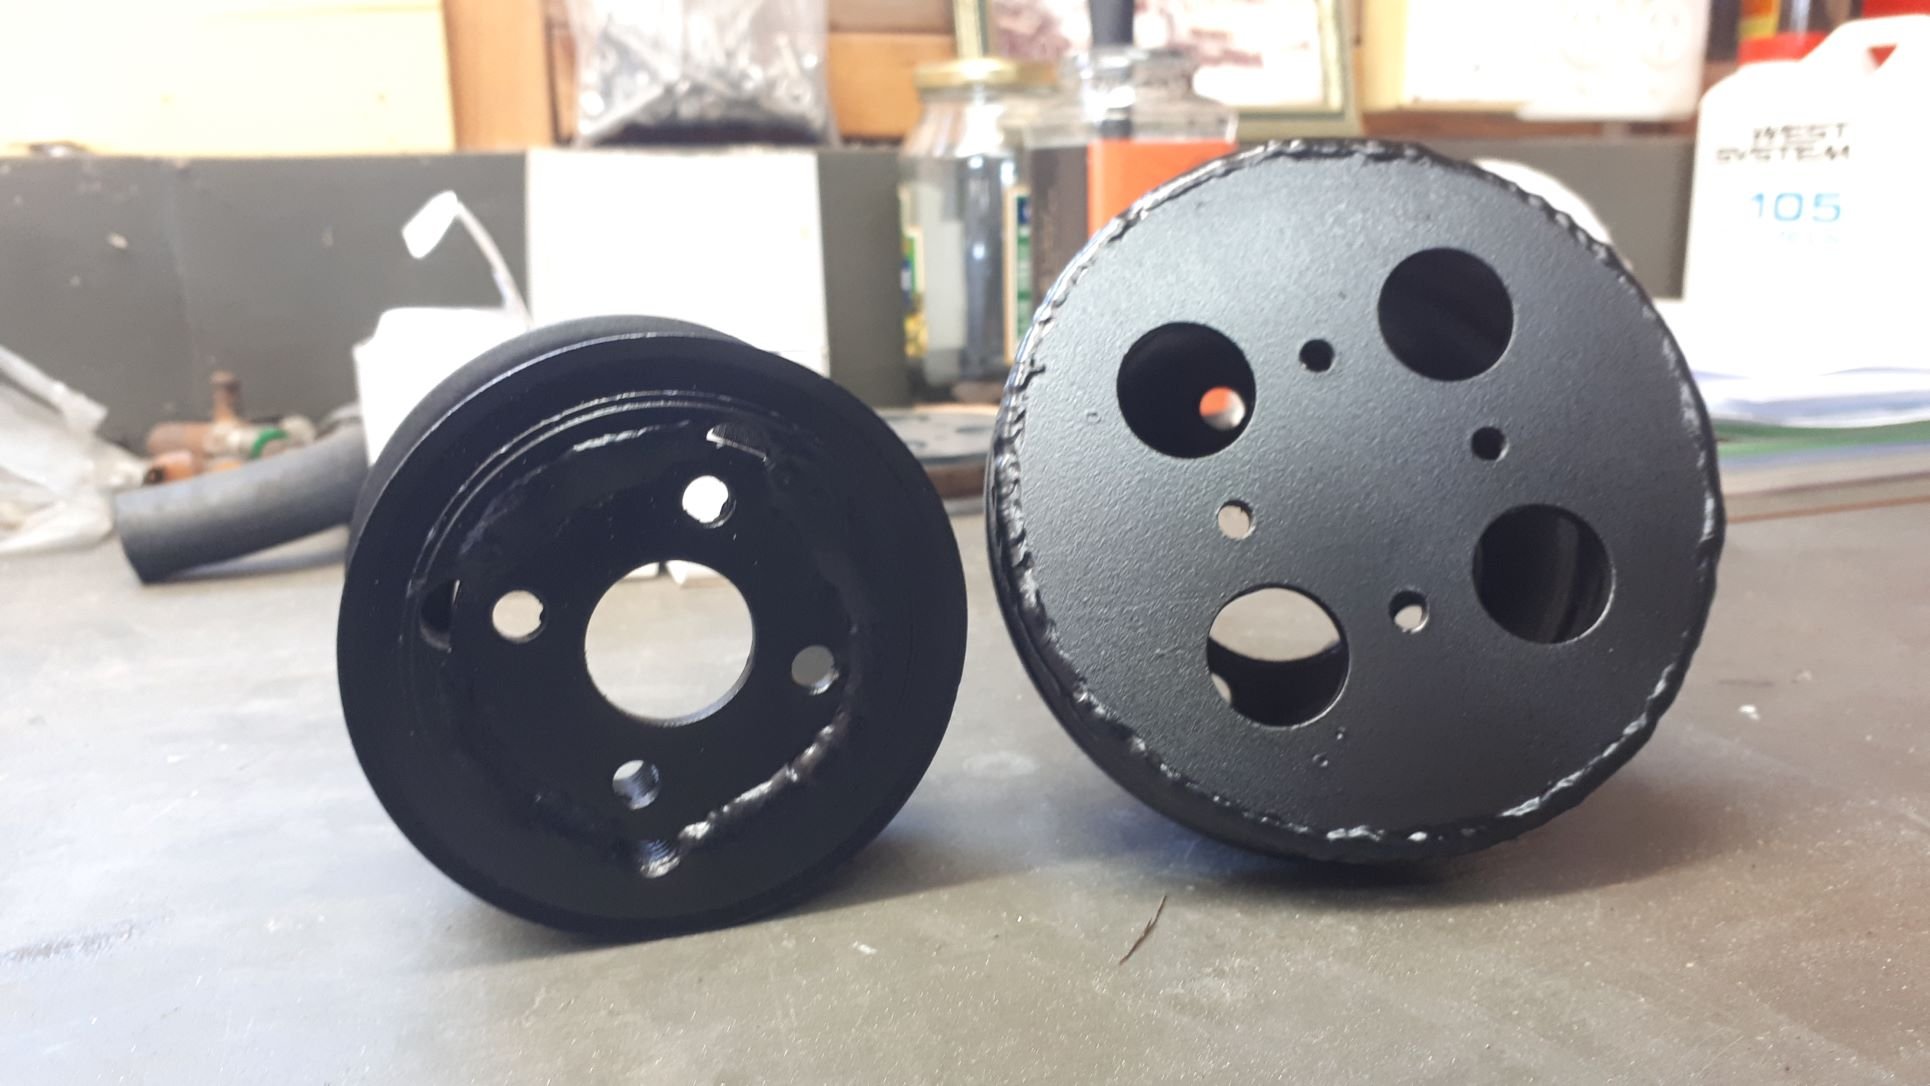
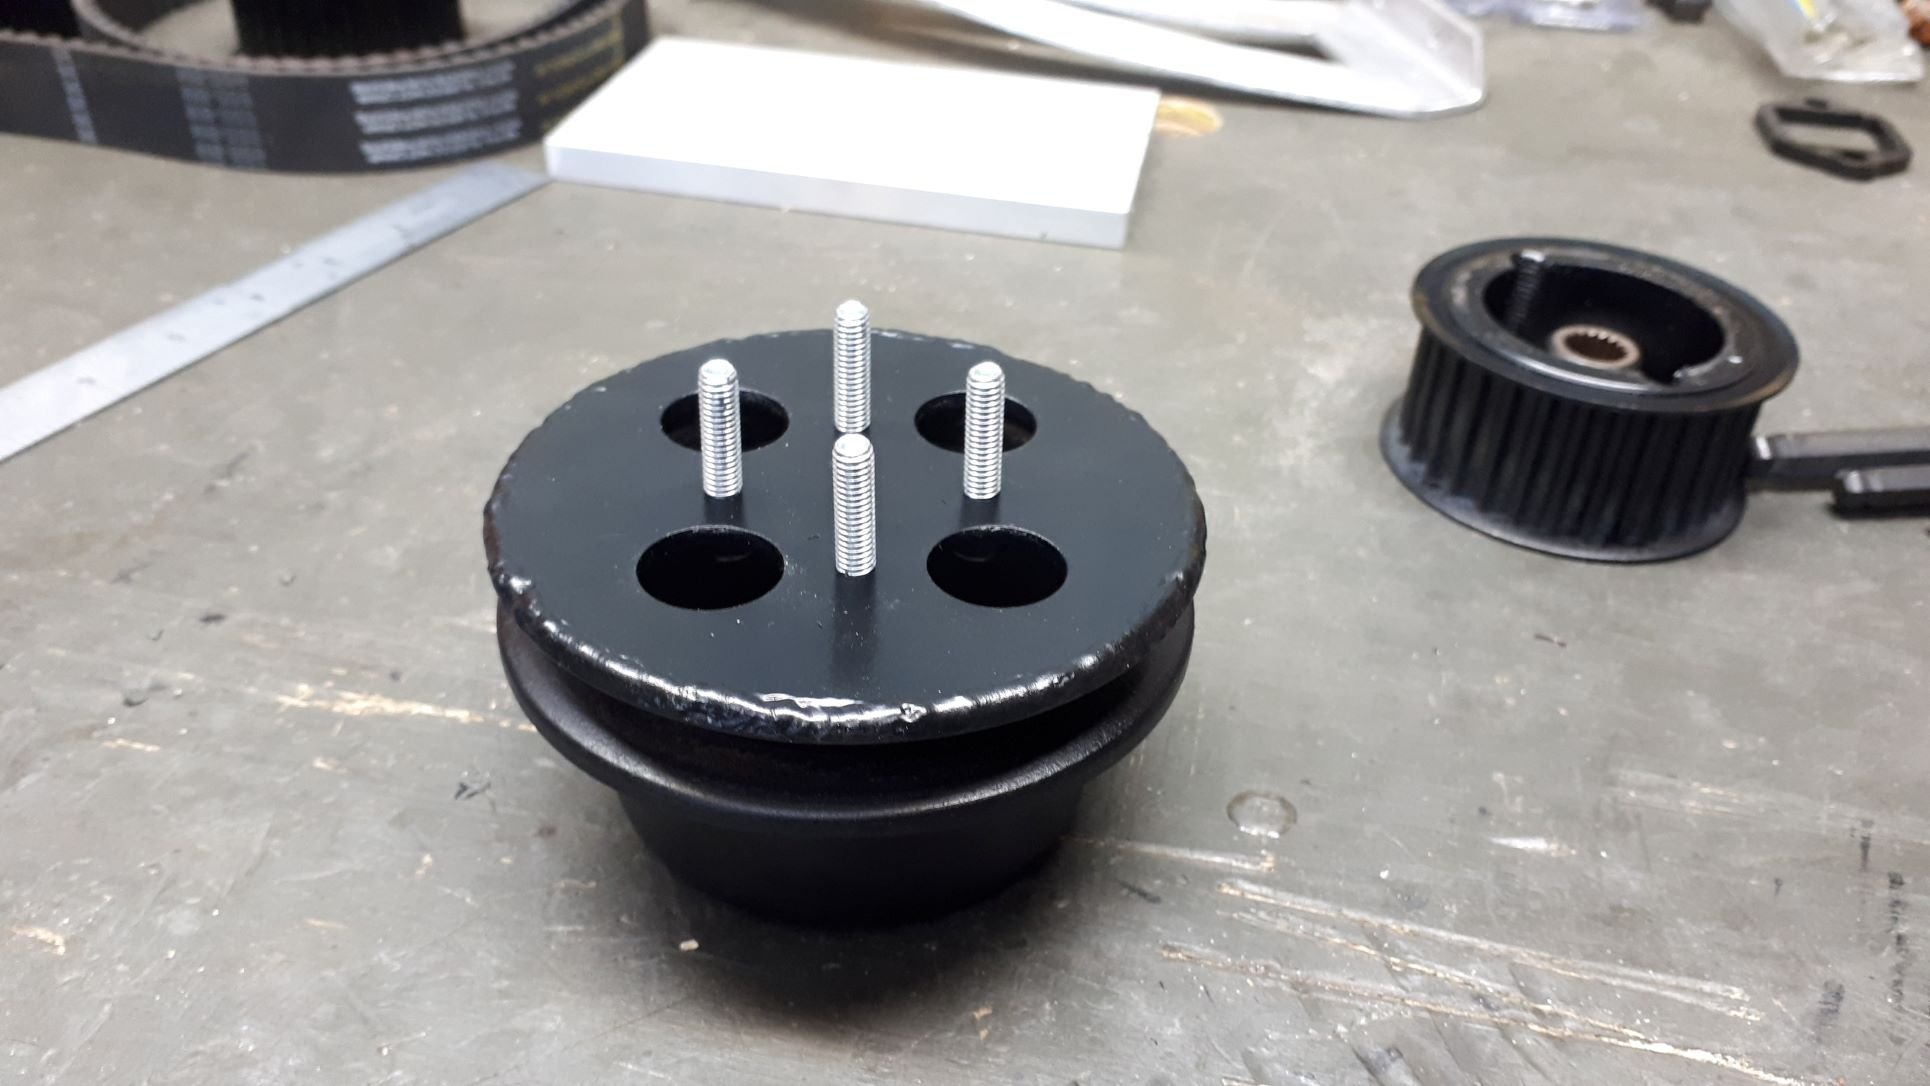
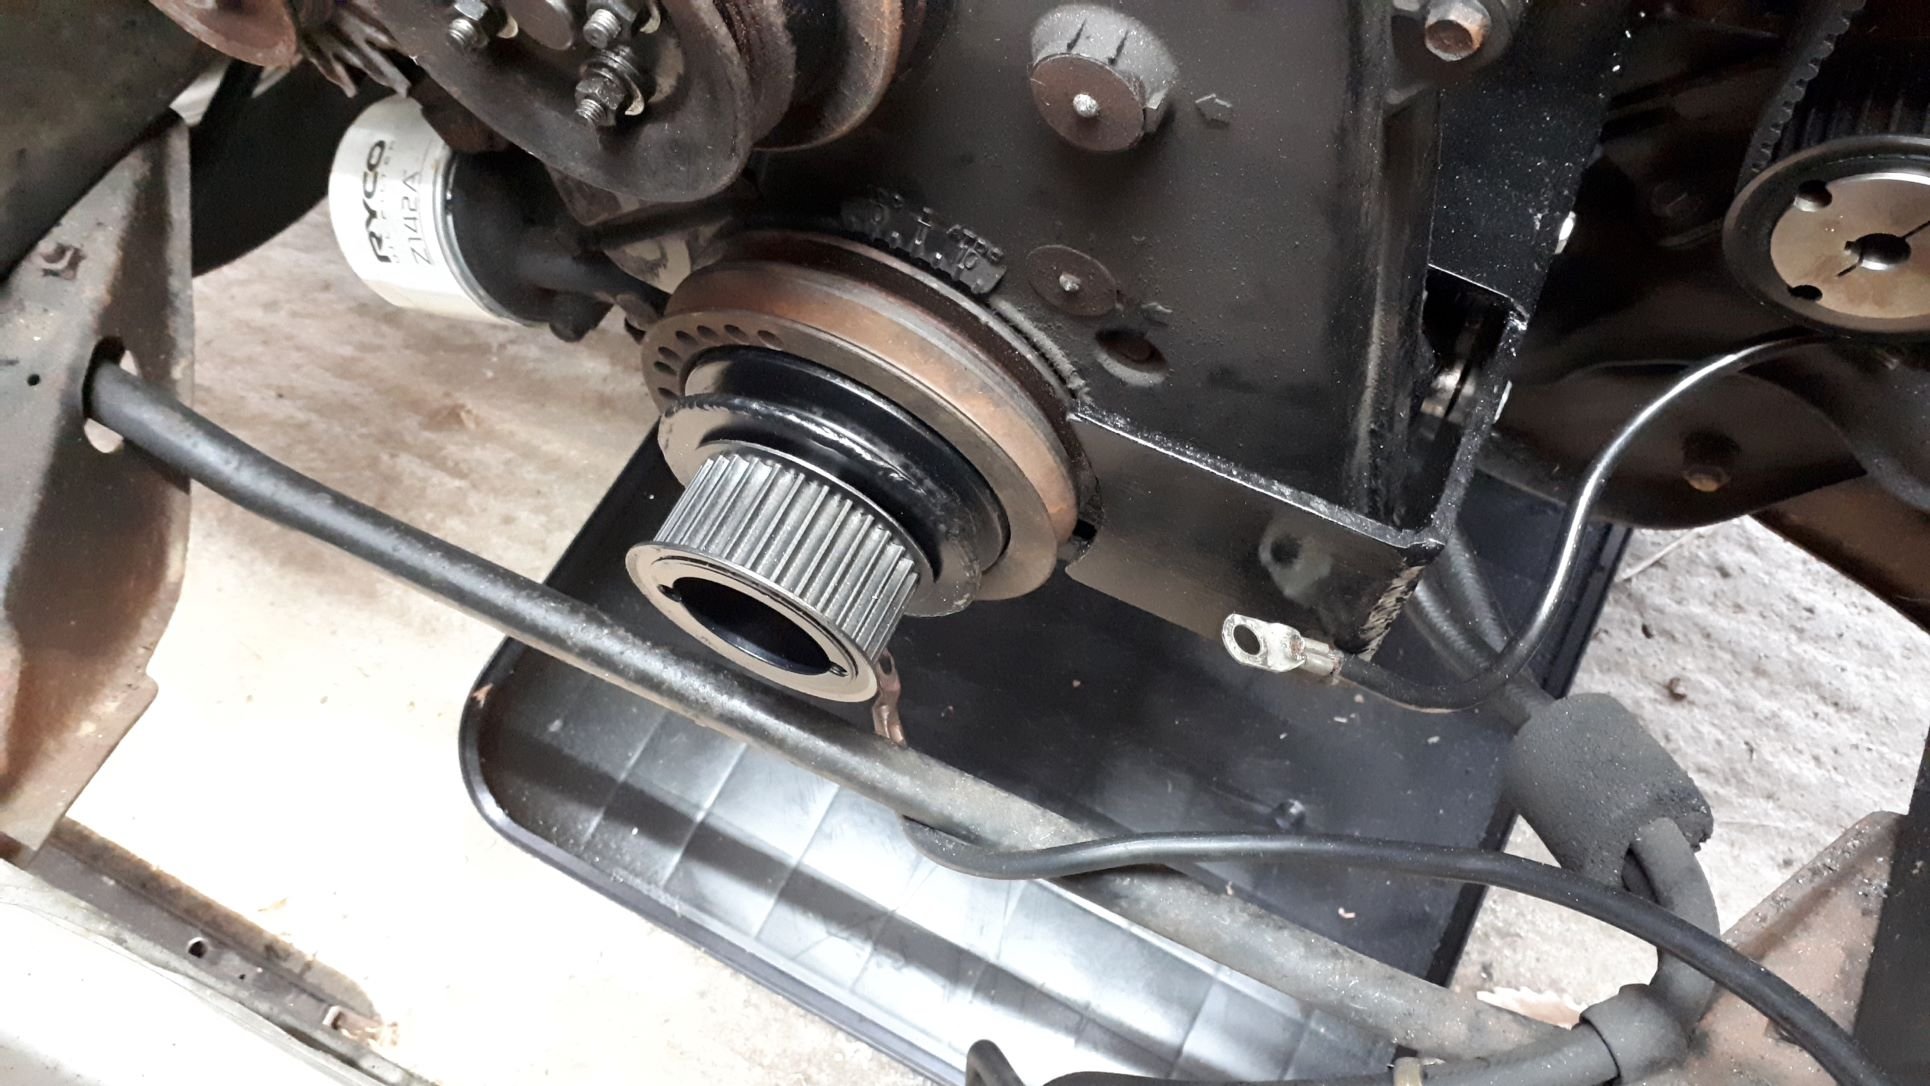
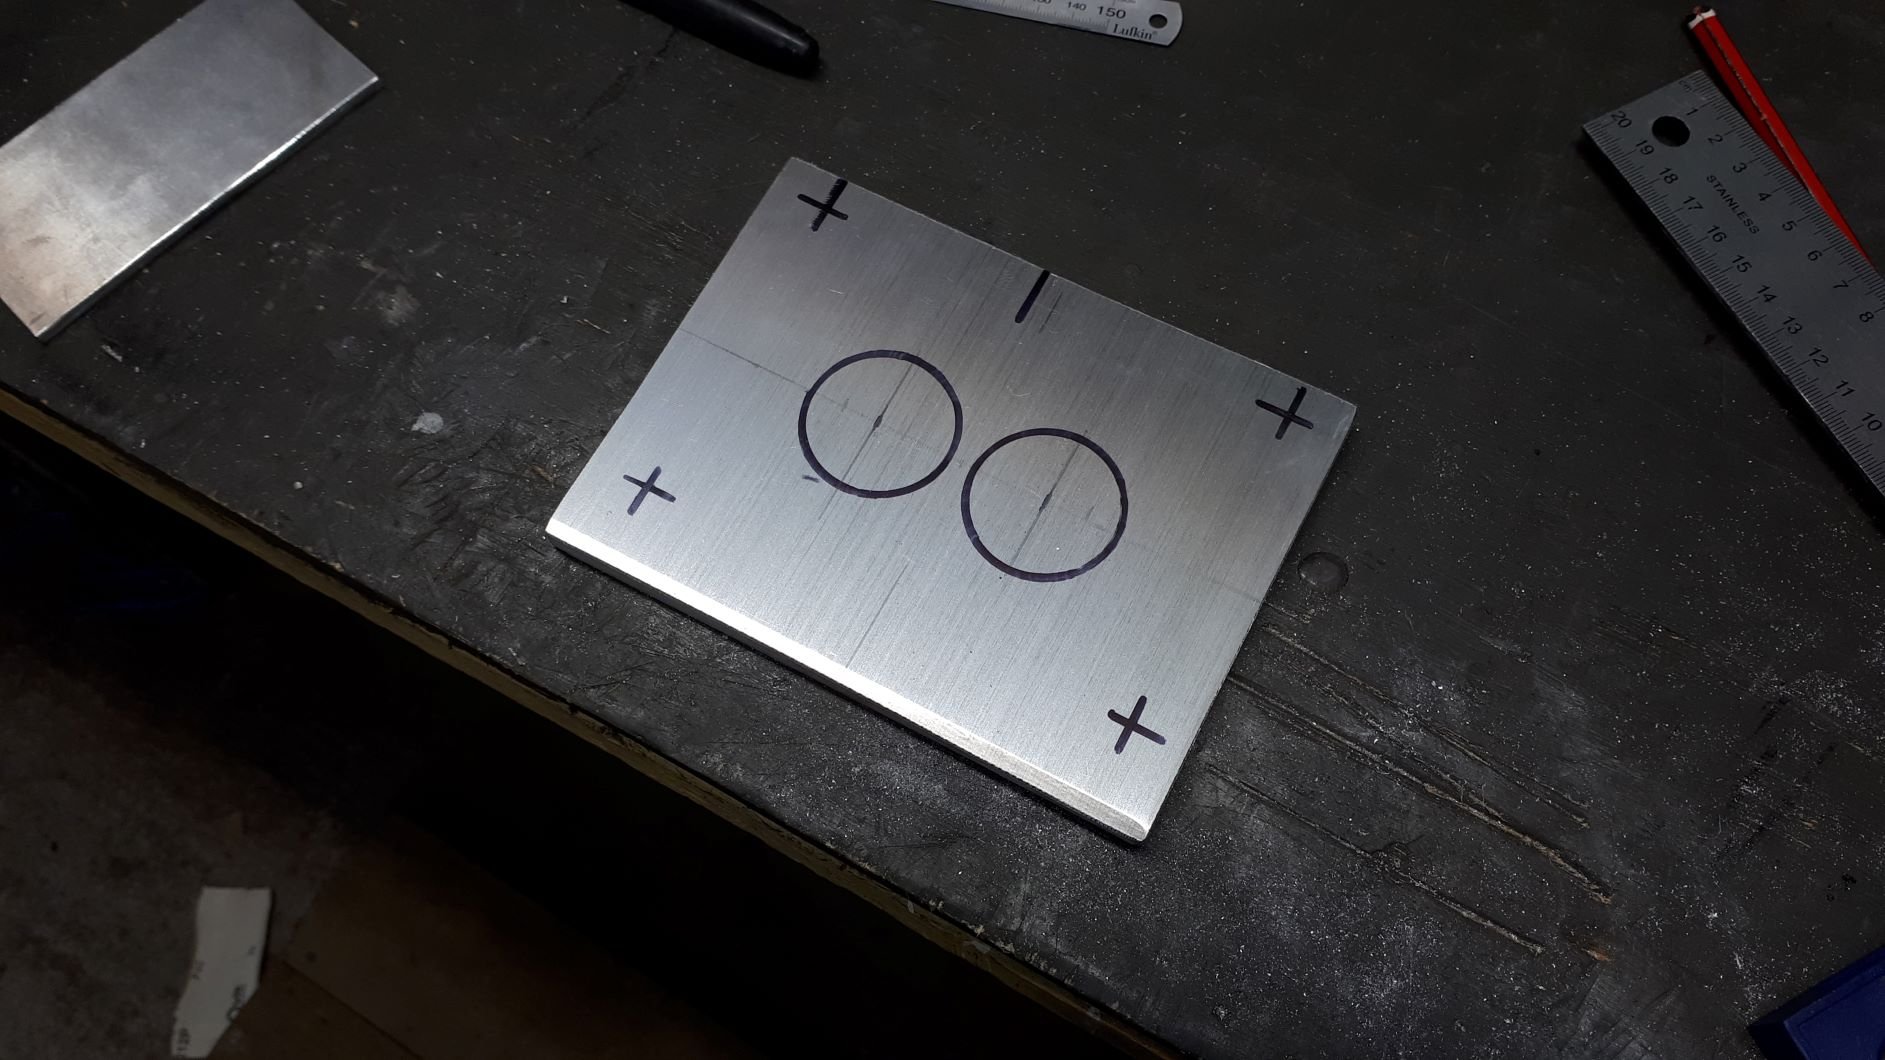
Now it's time to figure out how to get drive to the little supercharger. I had two choices when I started this project, make the drive system simple and compromise on the position of the supercharger making the manifolds awkward and difficult to fabricate, or mount the supercharger where I wanted it and get creative with the drive system. I close the latter and so the fun begins. I have started with the obvious and essential bits, a pulley on the crank and one on the supercharger. I had a nice disc laser cut to weld into the Sigma's factory crank pulley to allow attachment of the supercharger drive pulley. I modified a 8mm pitch timing belt pulley to fit the supercharger and also made one for the crank. It all bolted up alright and now I need to figure out the bits in between.
-
14
-
- Popular Post
- Popular Post
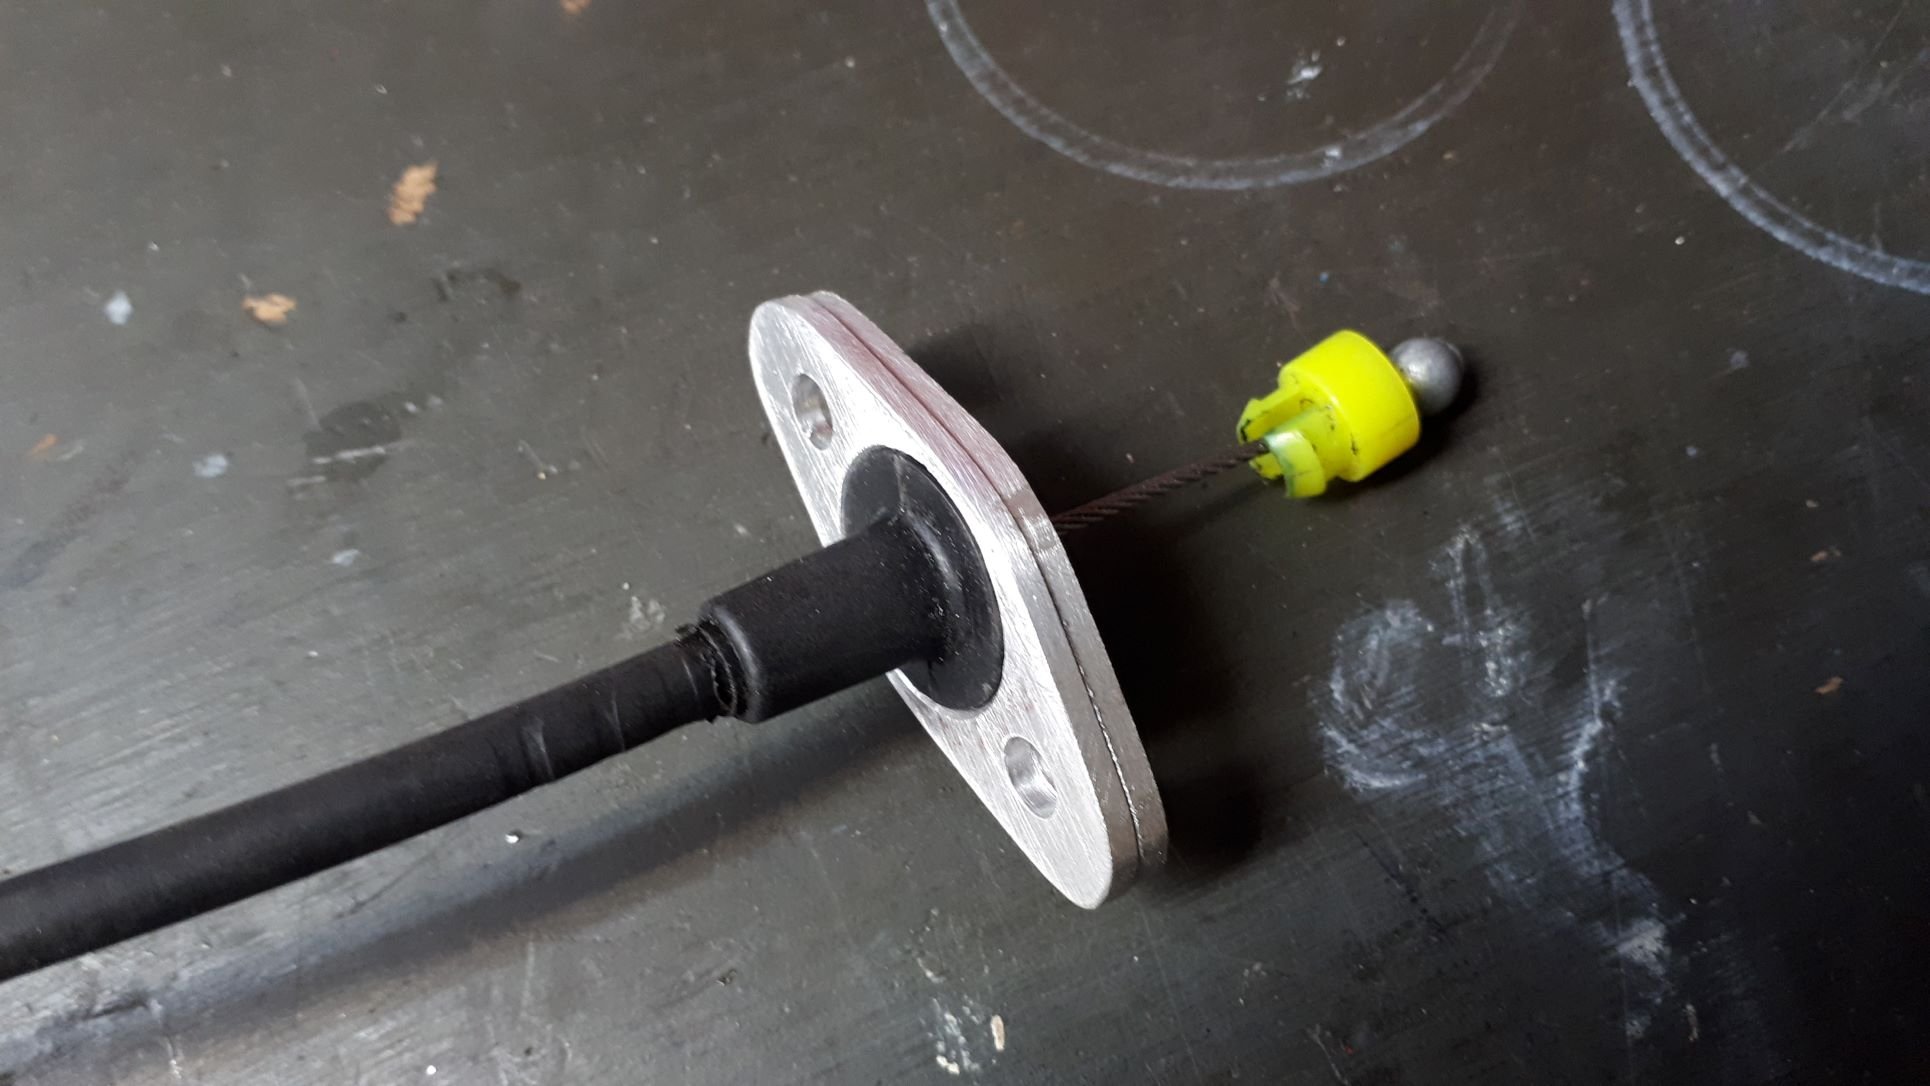
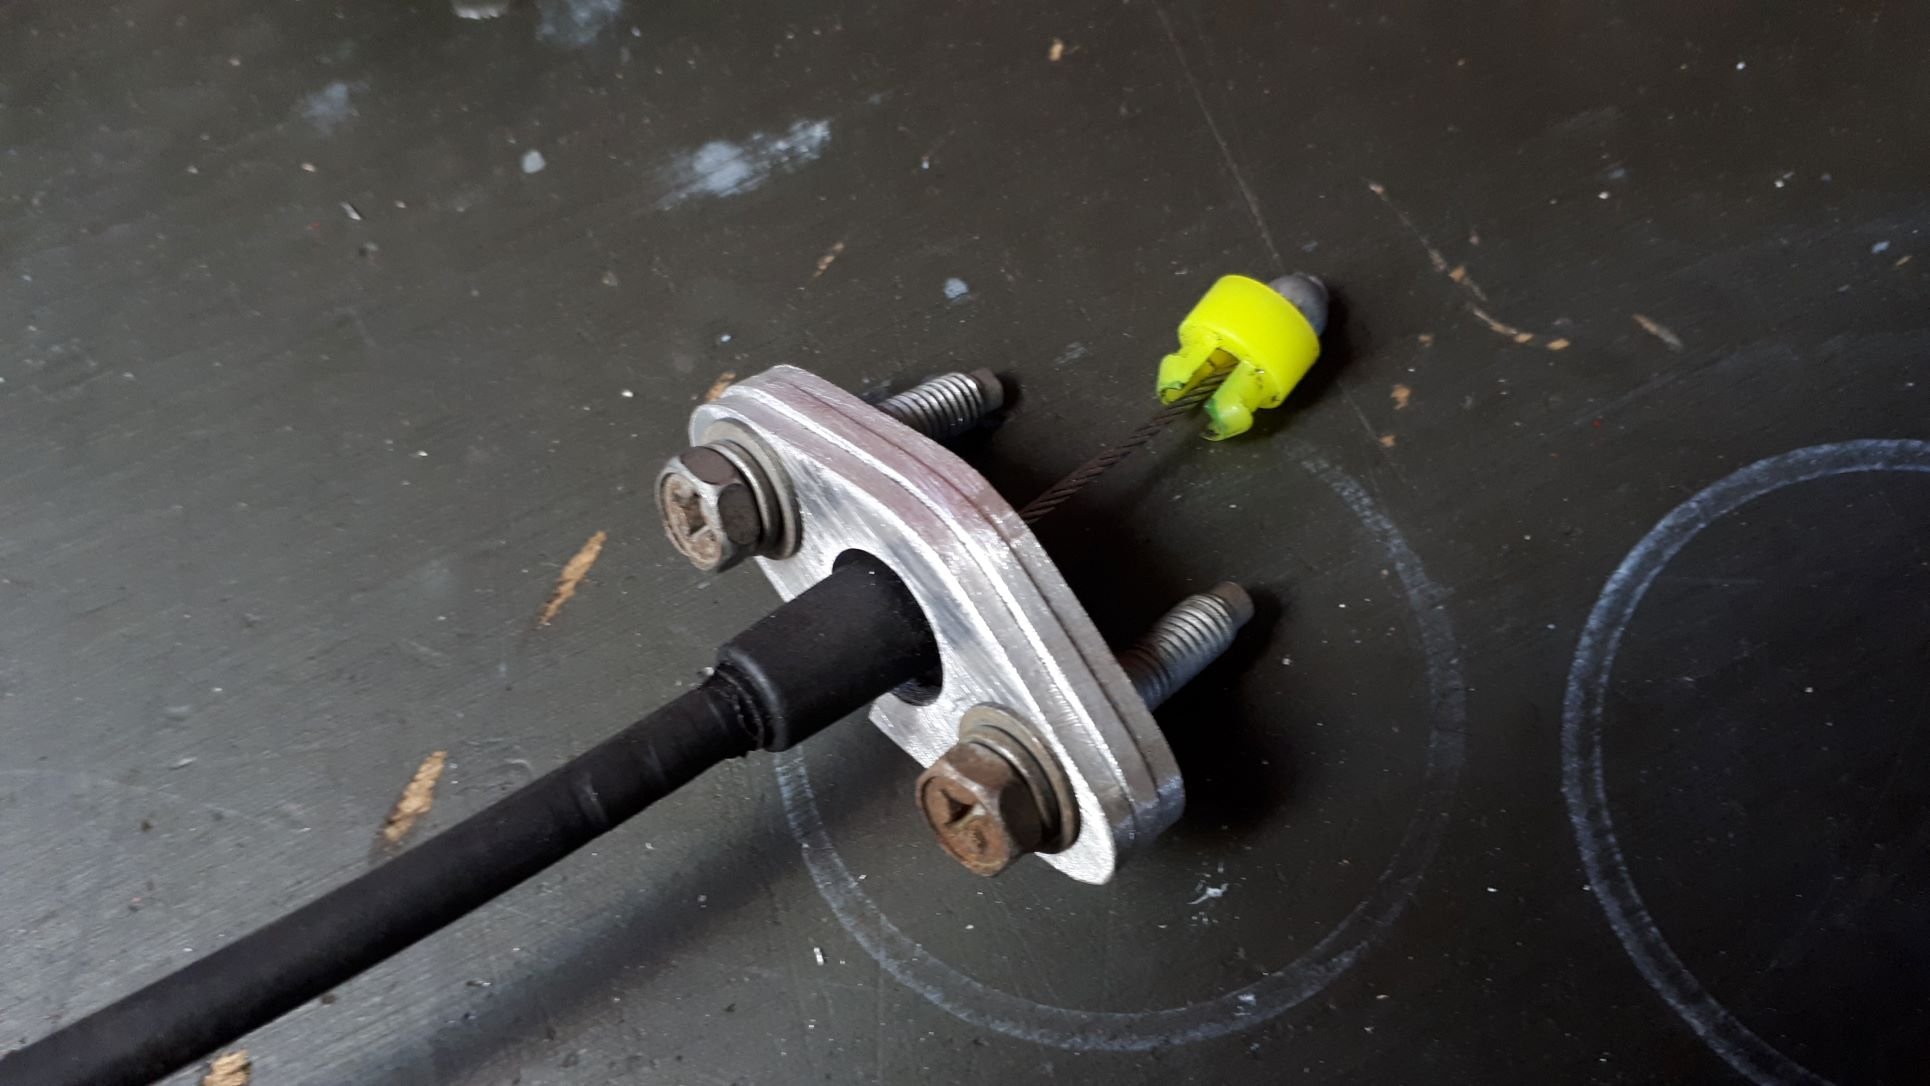
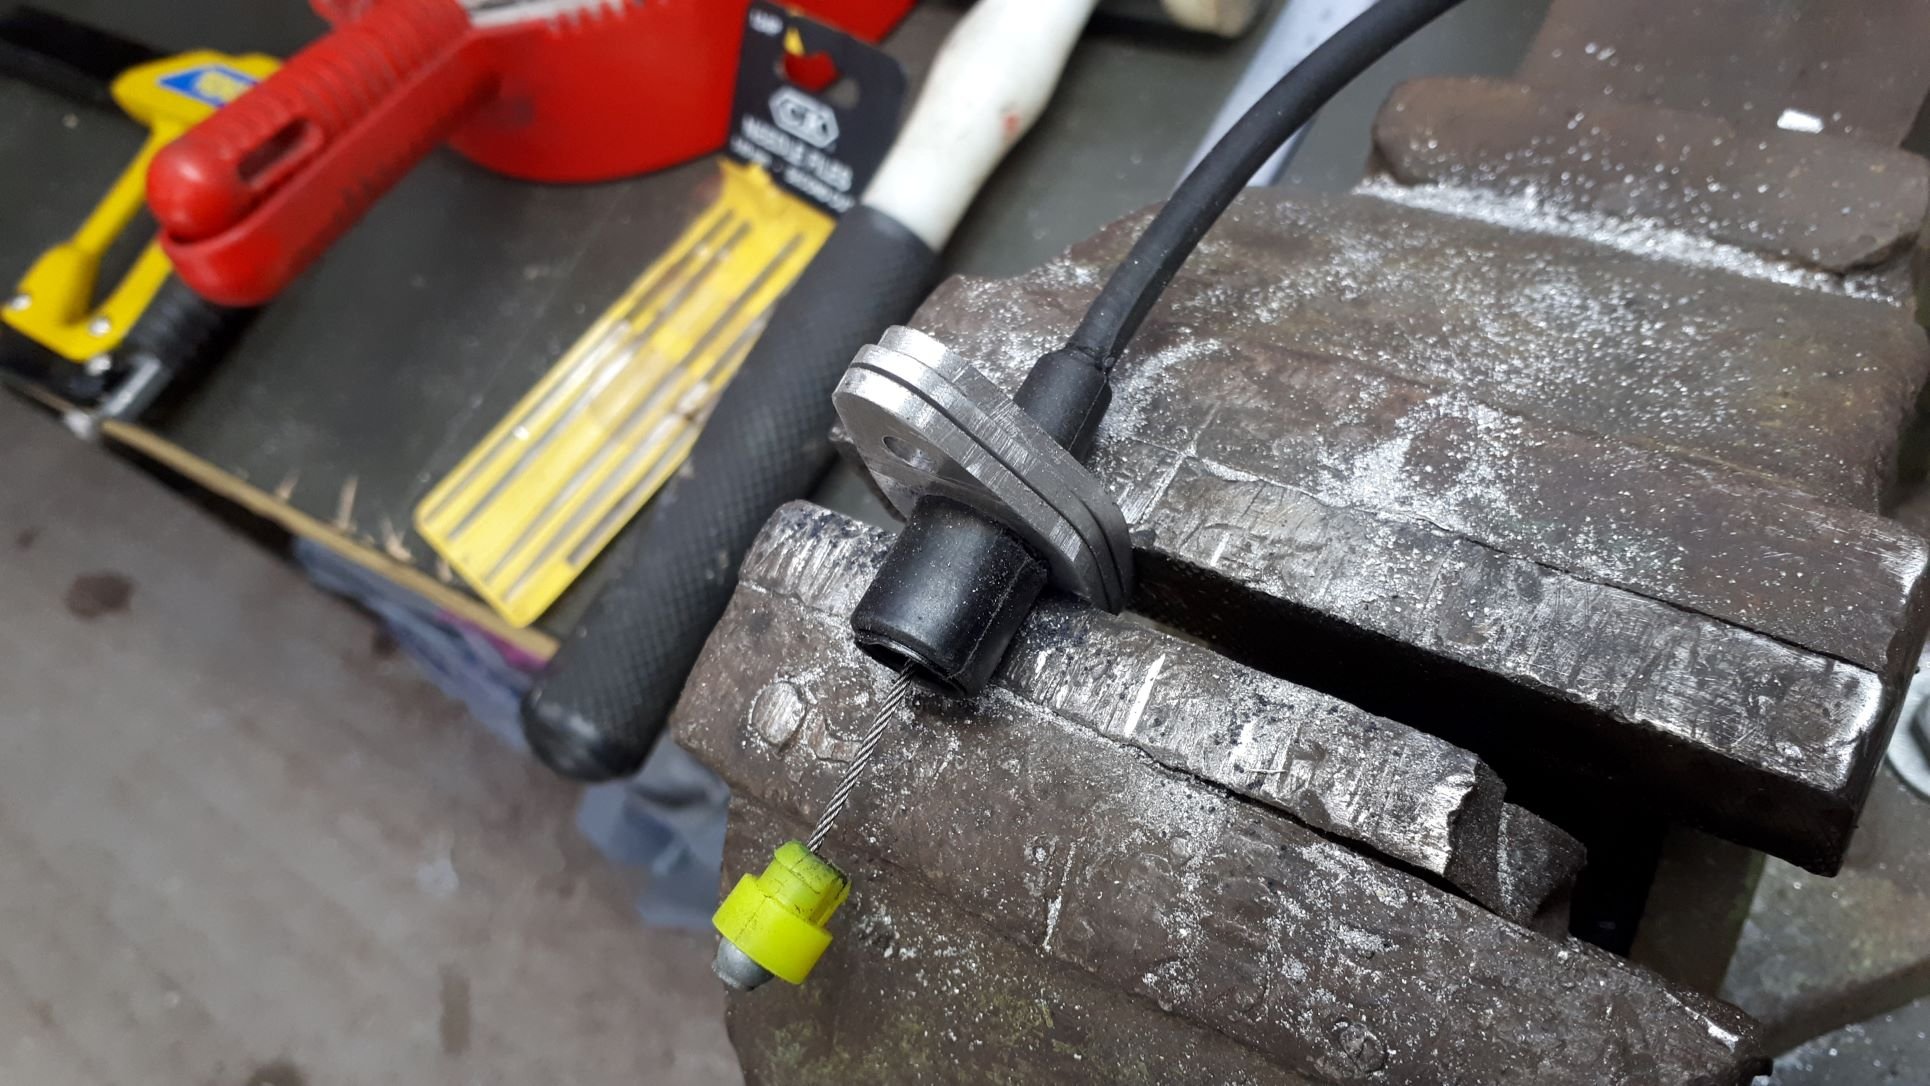
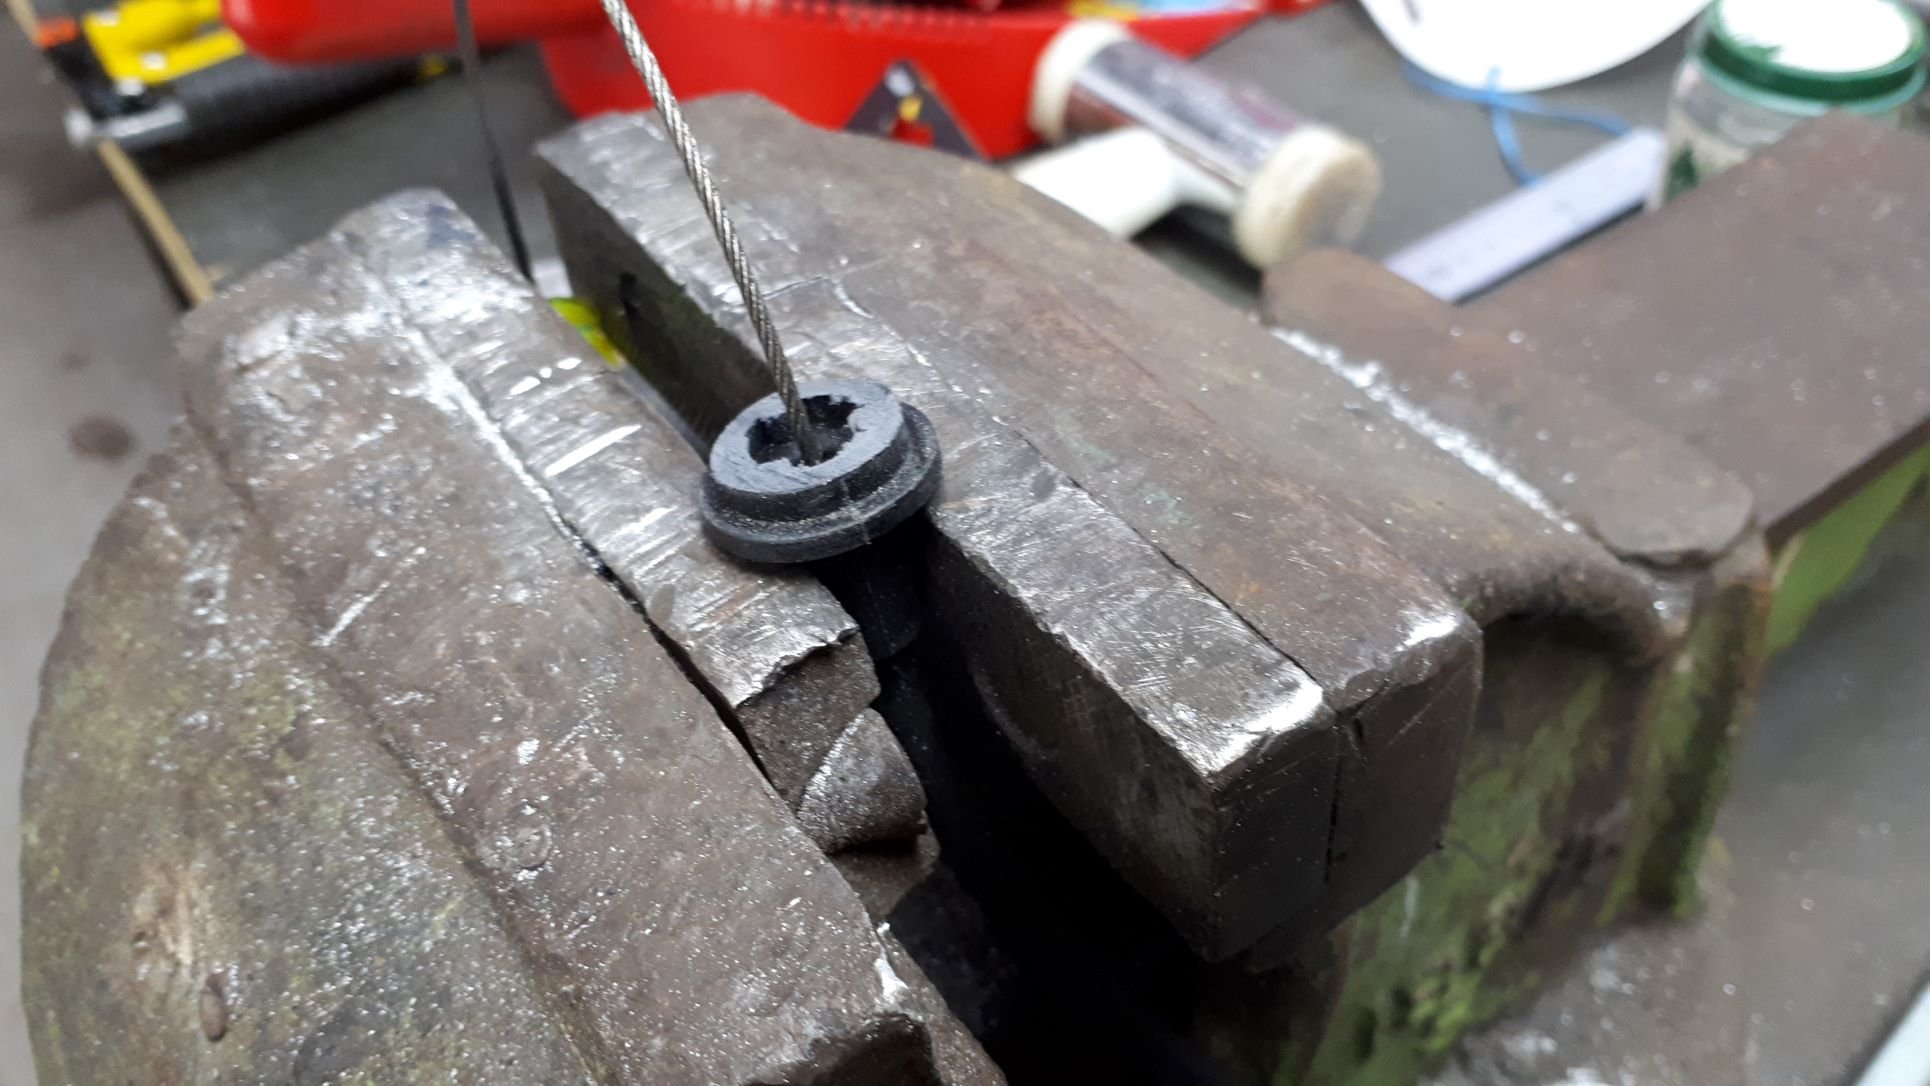
Here is a trick that others might want to use.
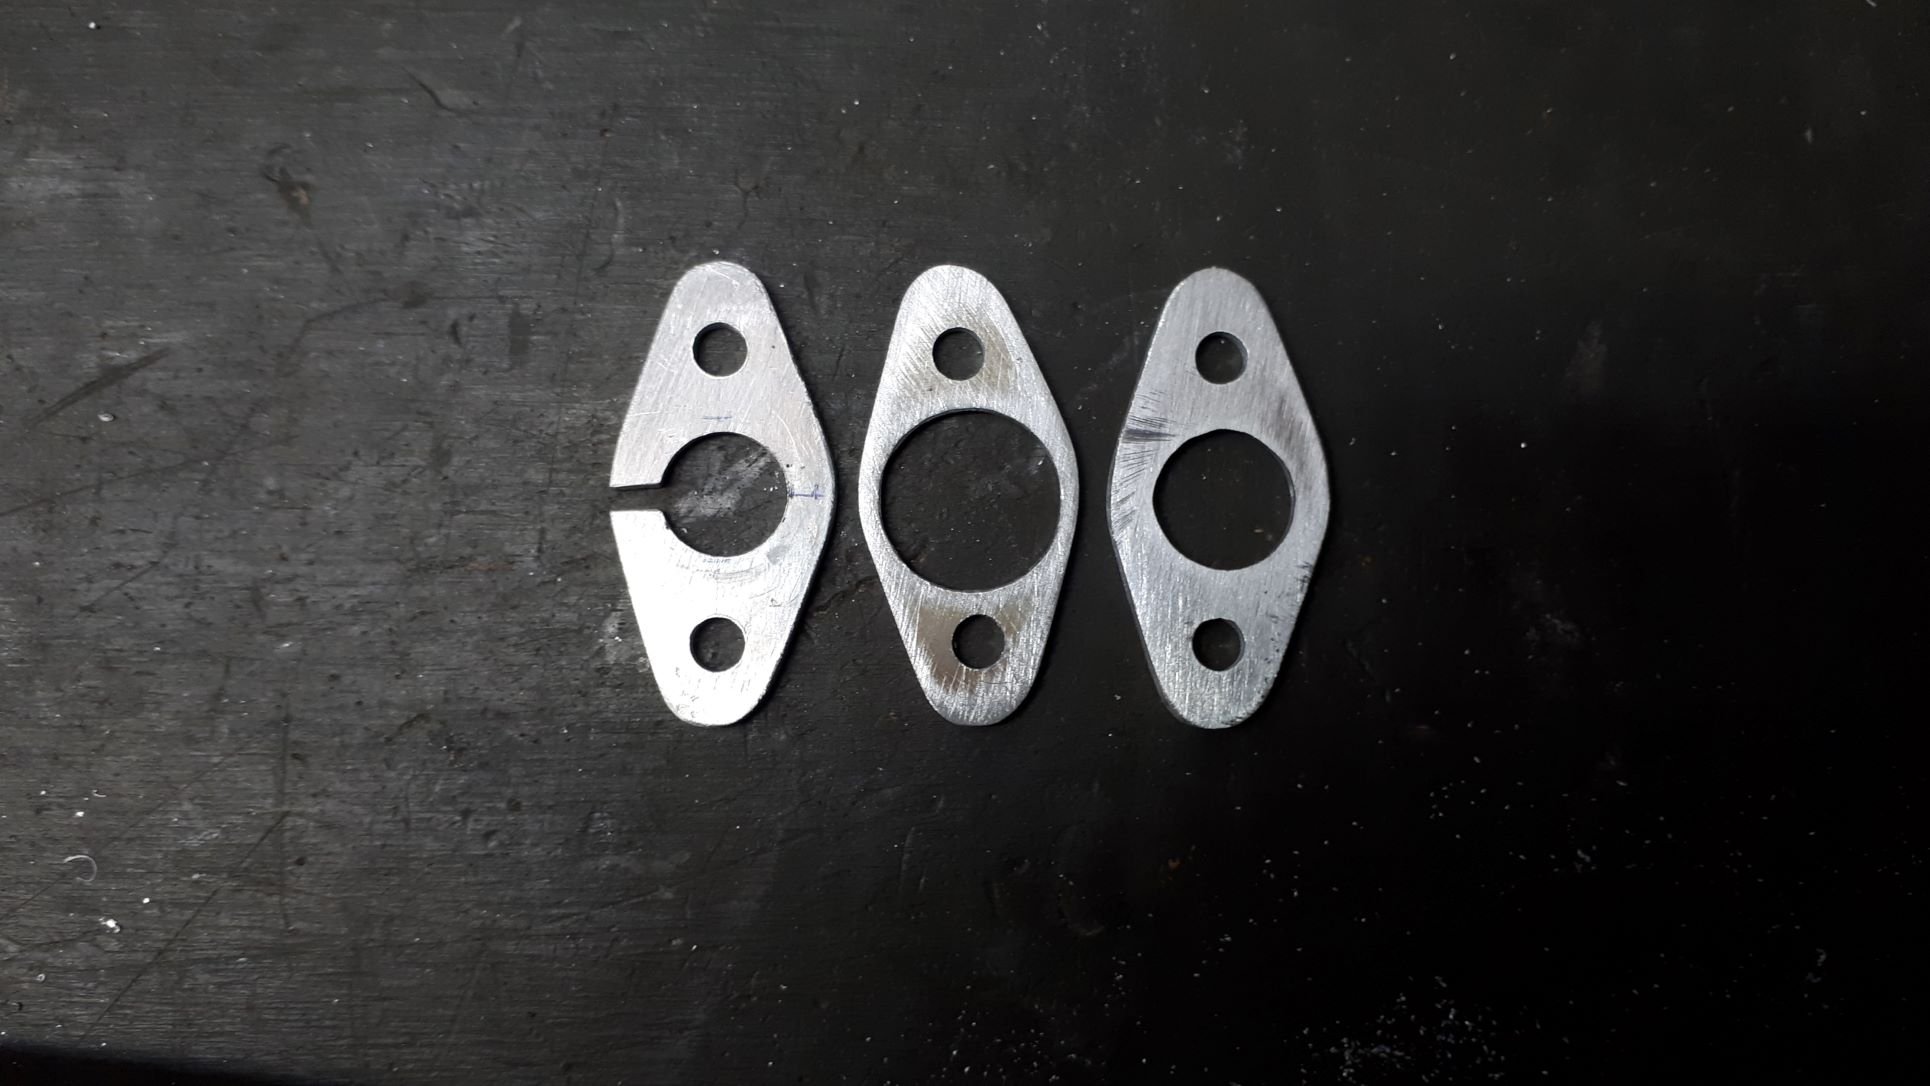
VT-VY commodores have a good throttle cable that can be easily adapted to fit almost any car. I have one in my Valiant and now also in the Sigma. They are dirt cheap, a decent length and are available from any Pick-a-Part in NZ. You simply make three plates to clamp the cable at the firewall (with fastening holes to suit your particular car) and if required do a little trimming of plastic and it works a treat.
-
18
-
2
-
- Popular Post
- Popular Post
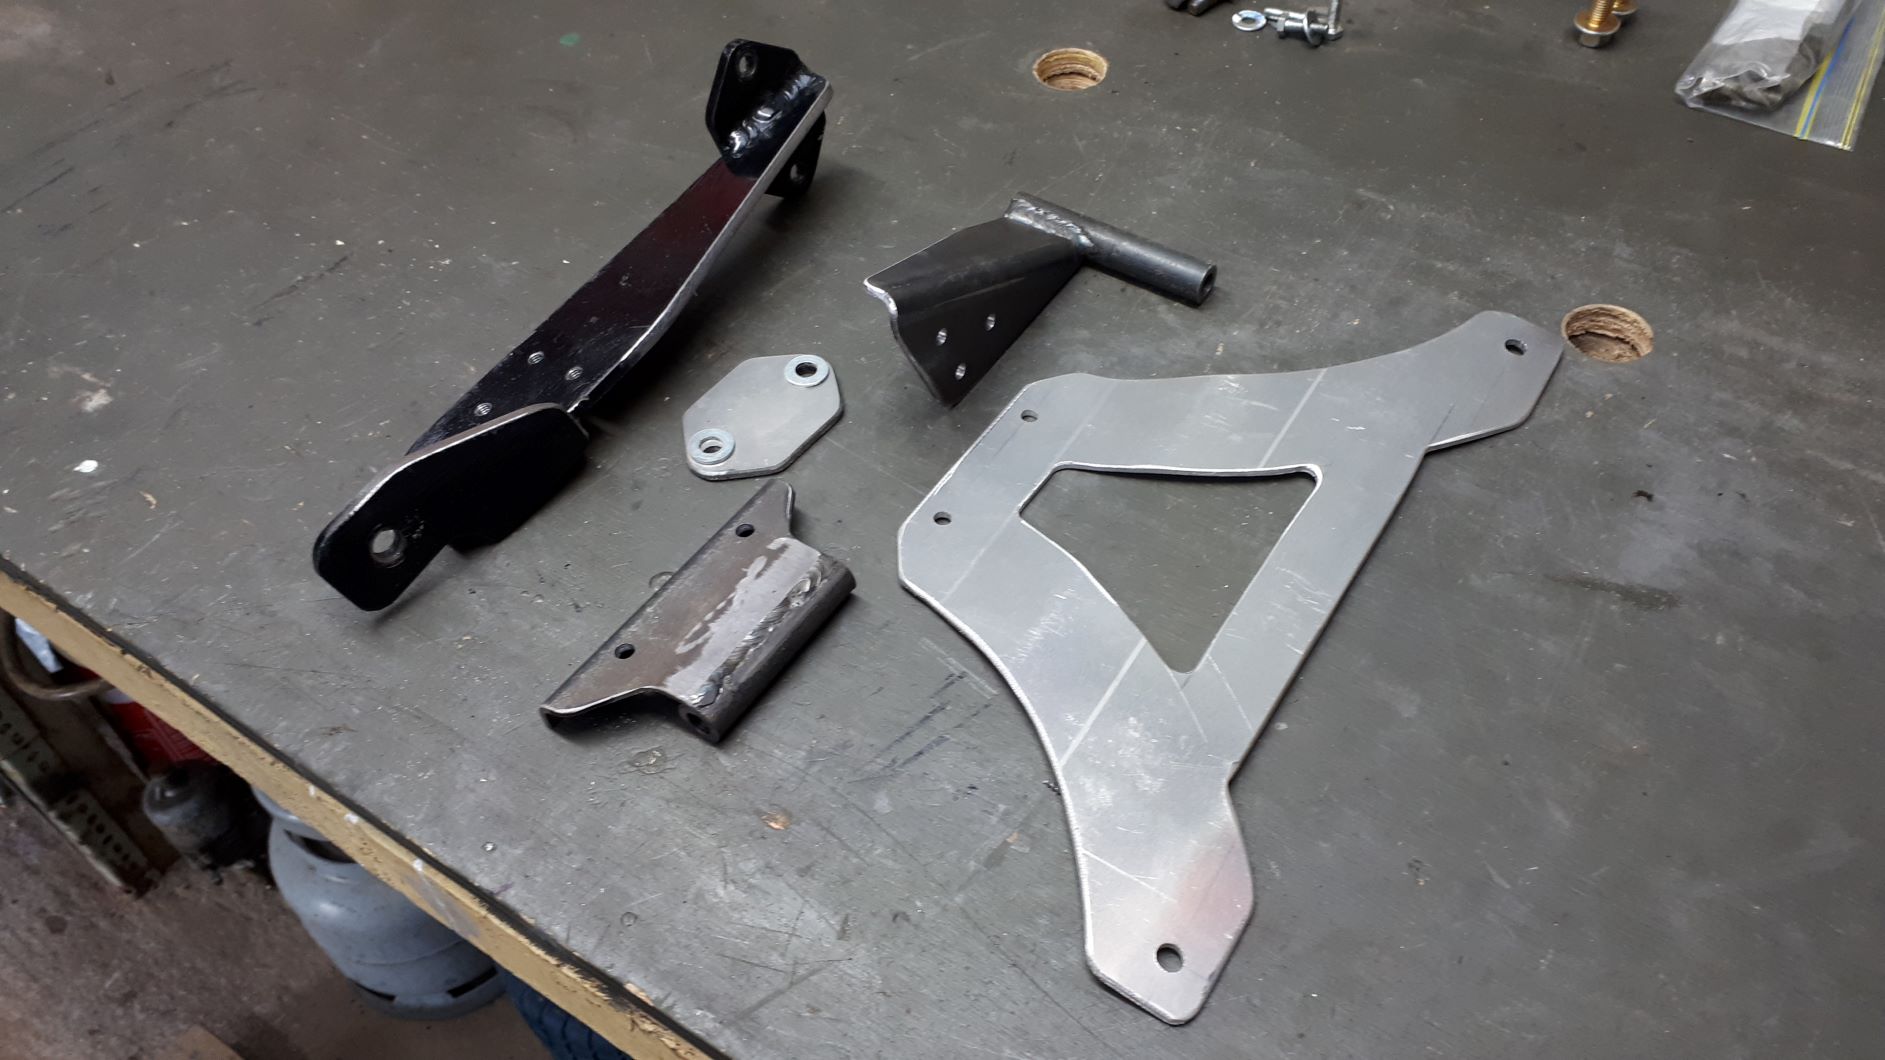
Nothing else to do this weekend but hang out in the garage and make brackets and fittings.
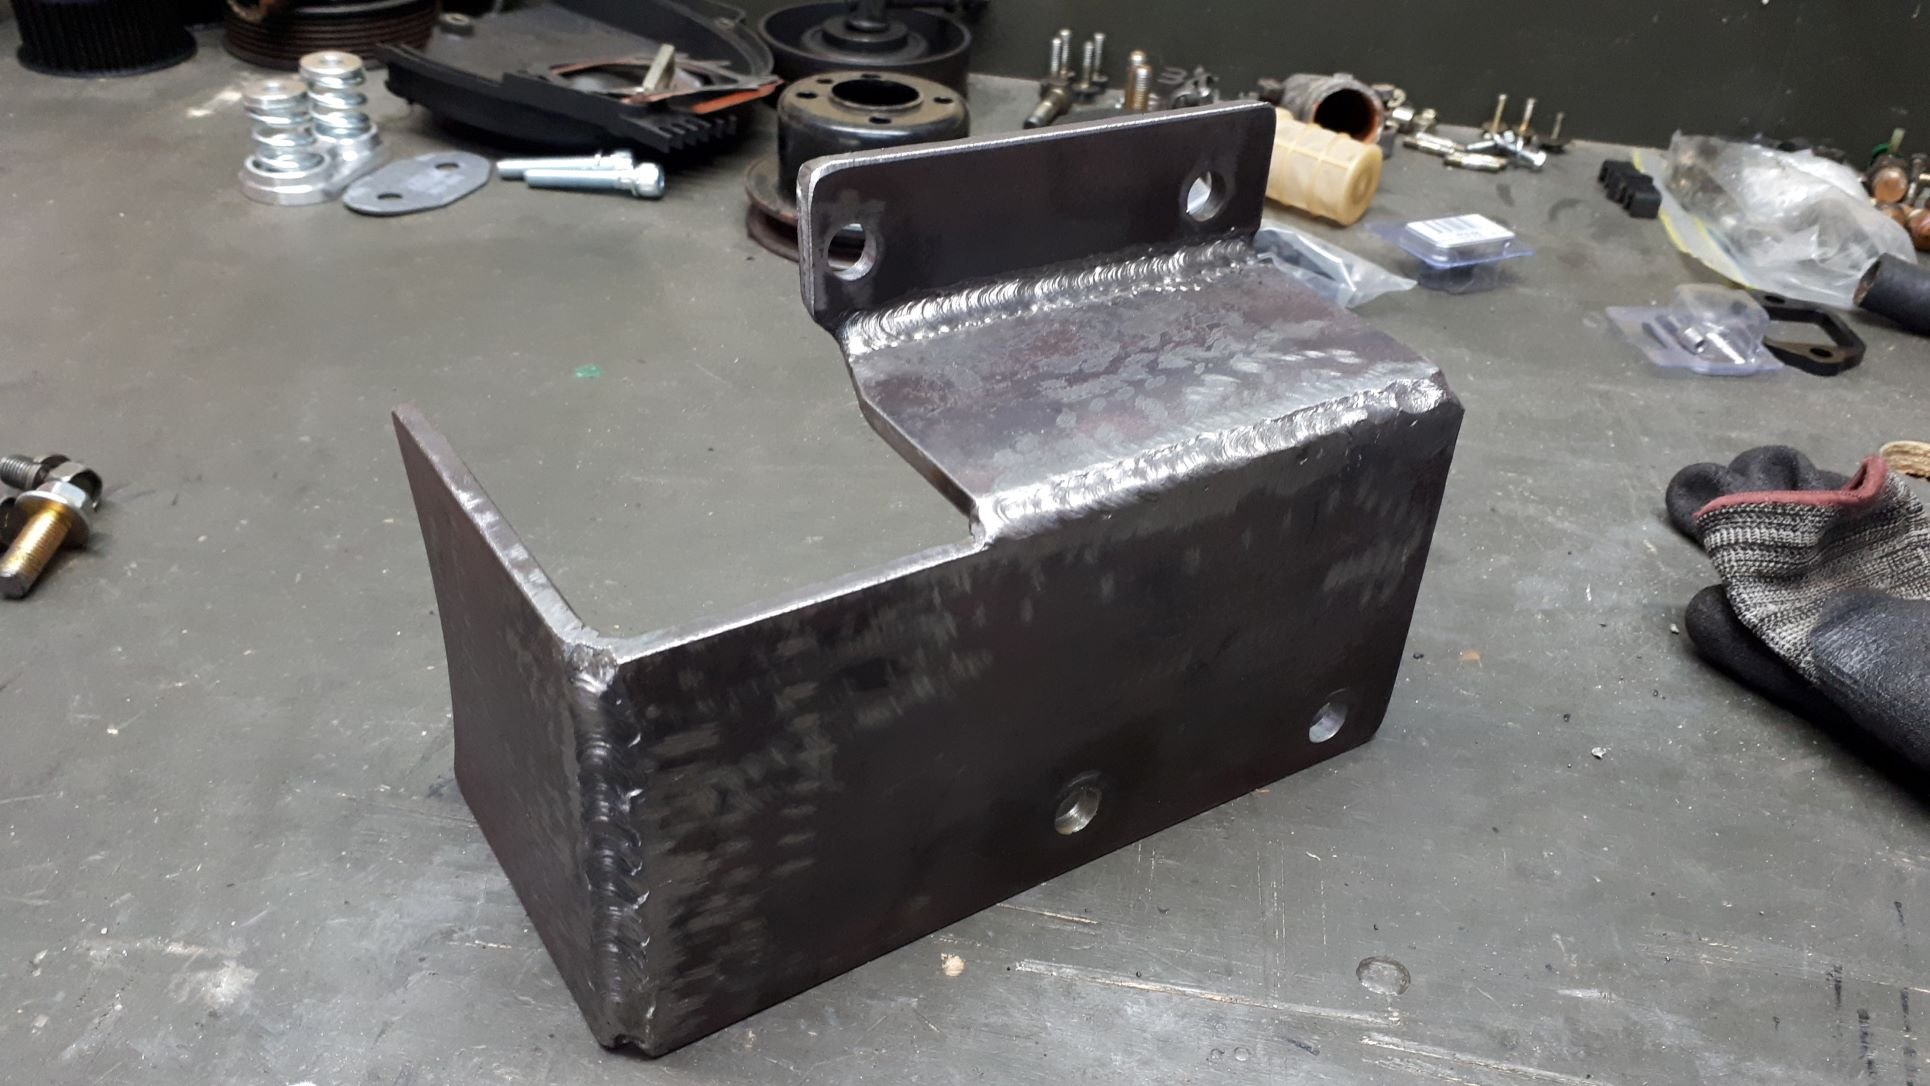
Made a beefy bracket to fit in the A/C position, this will provide a mount for the supercharger drive layshaft, the forward belt tensioner and anything else I might choose to attach to it. Apparently Argon is not essential so I wasn’t able to purchase any. In this situation it was out with the trusty little Lincoln Electric arc welder to stick the bits of metal together. Everything went together well and the bolt holes even lined up when I was finished.
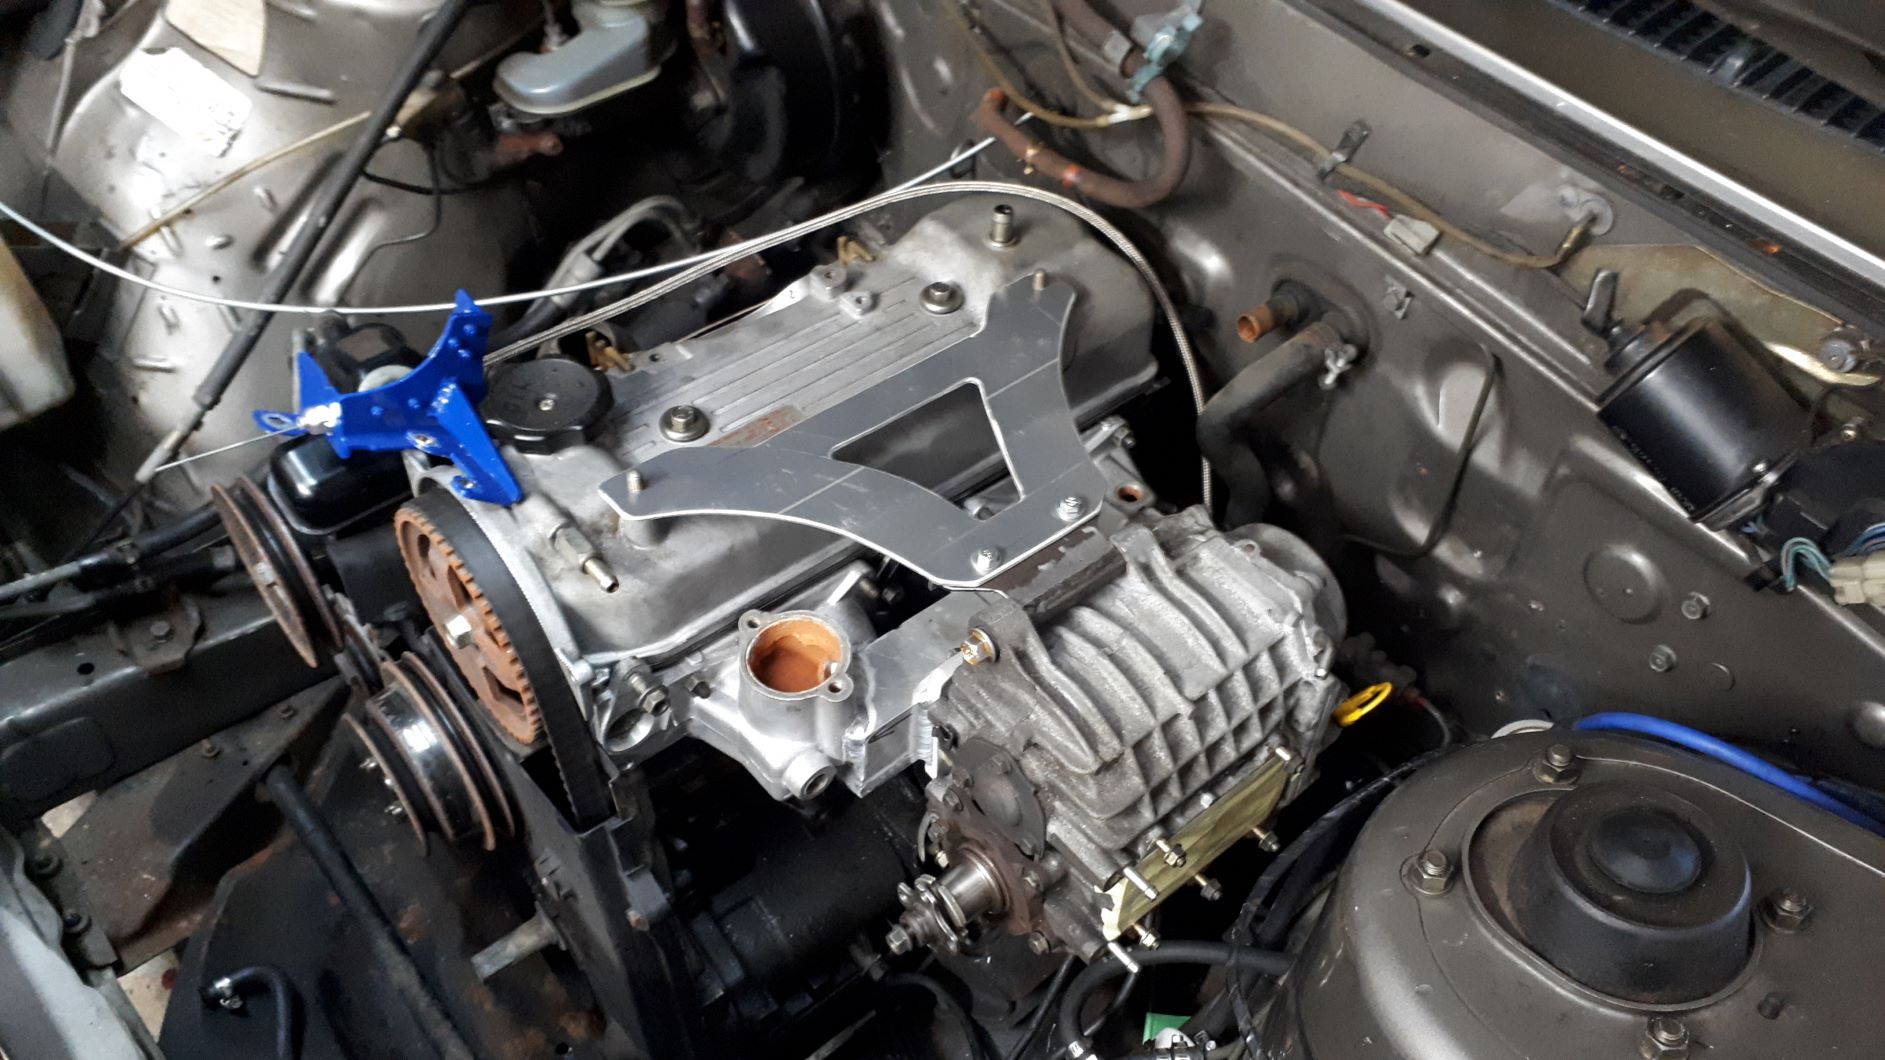
Made an unnecessarily fancy brace for the manifold that may or may not be necessary and also made a fan shroud for the electric fan.
-
11
-
Amazingly a few parts have shown up during lockdown so on with the show!
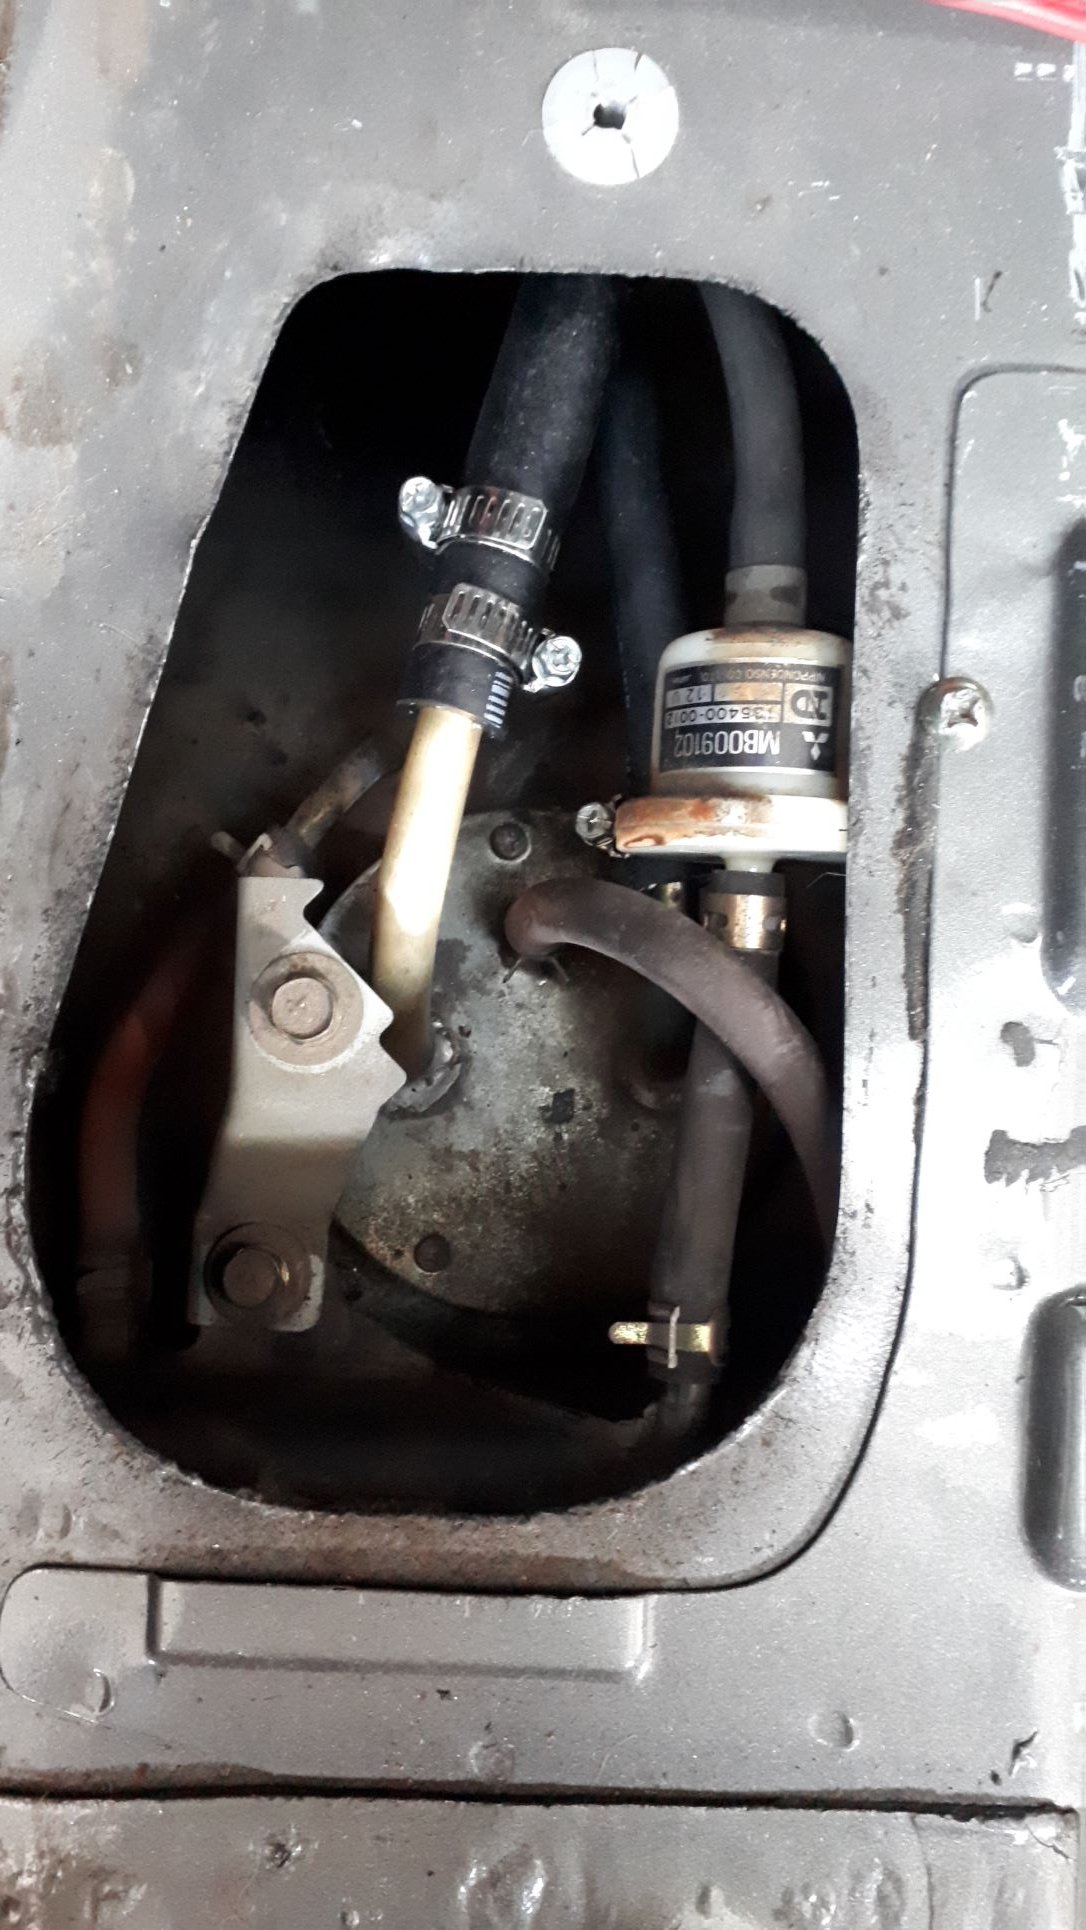
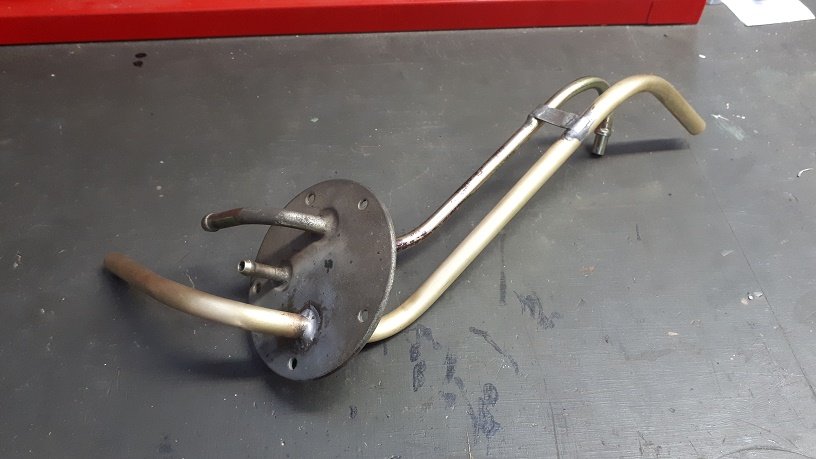
The fuel pick up strainer arrived so I got the fuel pick up reinstalled and also mounted the electric fuel pump.
I started installing the fuel lines however I ran out of 5/16 fuel hose so the last little bit will need to wait.
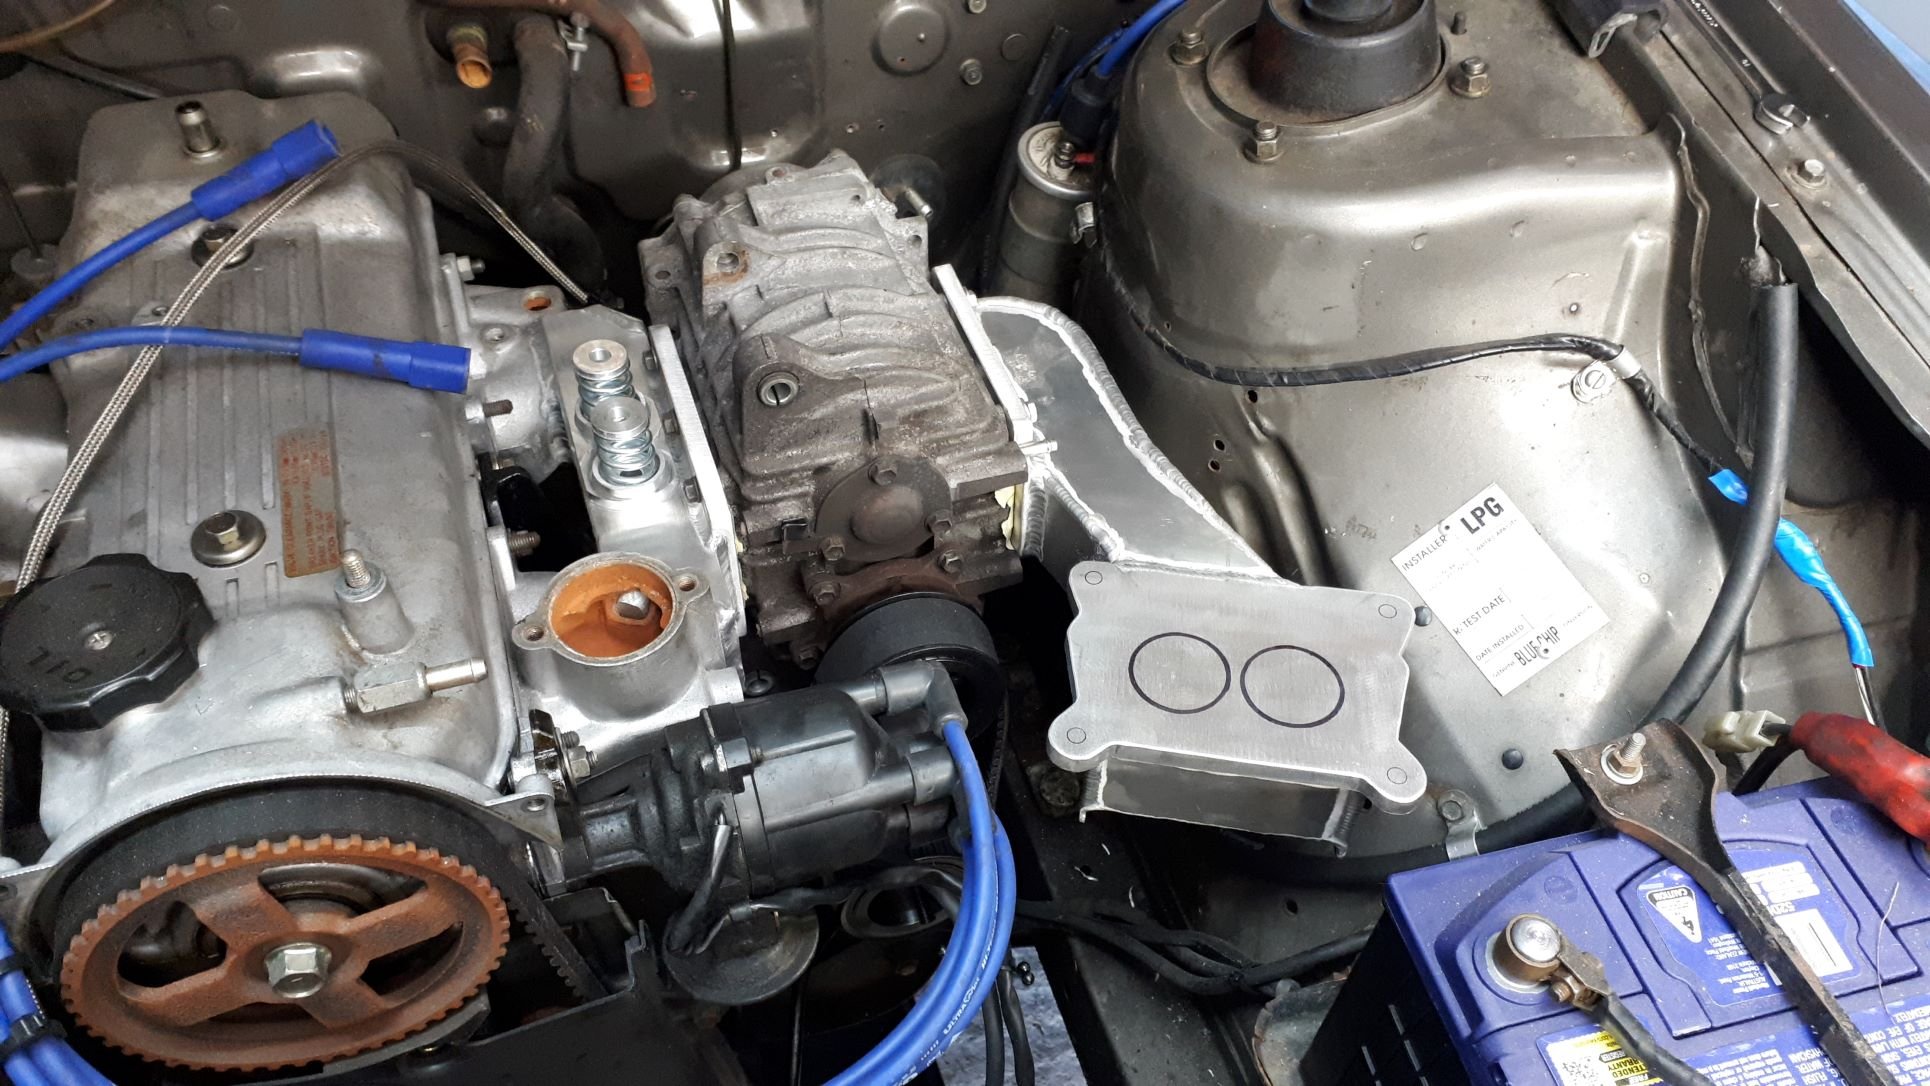
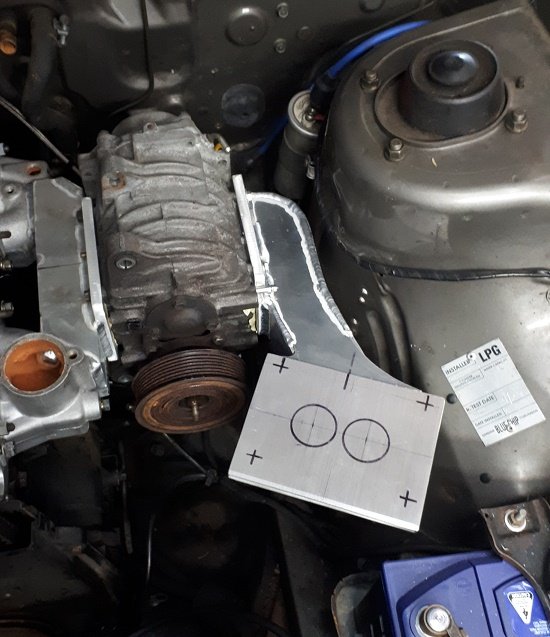
I got the position of the fuel delivery device sorted so I trimmed the manifold flange, I am happy that everything fits right where I planned so that's a win.
Old bogans will recognise the unmistakable shape of a Holley 2300 flange.
-
9
-
-
- Popular Post
- Popular Post
So I have been waiting for essential parts to arrive from overseas and have been keeping myself busy with little things.
The manifolds are all fitting nicely and all I need to do is trim the carburetor flange to size so it looks a little more attractive. I will wait until I have the carburetor mocked up in place before I do this to make sure I don't run into any clearance issues with the throttle and transmission linkages etc. It all ended up fitting very neatly around the strut tower and the carb should end up in a reasonable position with sufficient hood clearance.
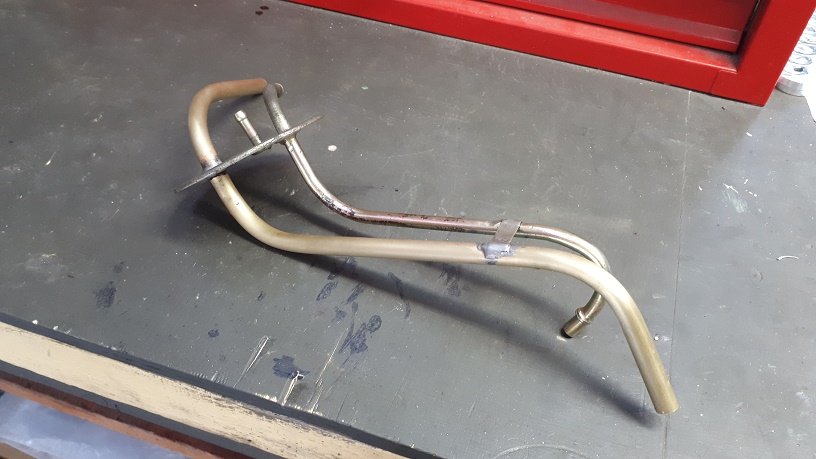
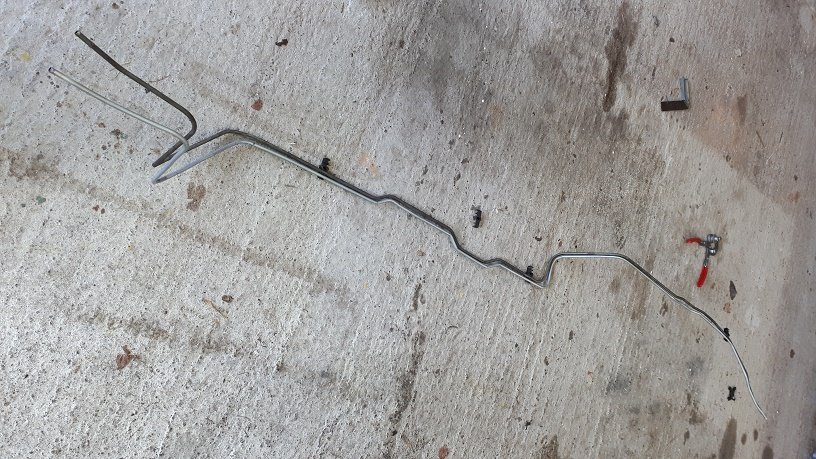
I also decided to fit larger fuel lines as the factory ones seemed very small. This is probably more for the future but since I am installing an electric fuel pump now I figured it was best to do the fuel lines as well. I removed the factory 1/4 inch return line from the car, and from the tank pick up assembly, and replaced it with a larger line that will become the fuel feed line. The original 5/16 fuel line will become the return. Bending all that hard line into the correct shape to fit with the factory lines was a challenge but it all turned out pretty well and looks neat and tidy installed in the car. I had to pull the driveshaft out to get access but no big deal.
-
16
-
- Popular Post
- Popular Post
Another dozen Steinlager to the man with the aluminium welding skills and another little bit is stuck together.
-
19
-
- Popular Post
- Popular Post
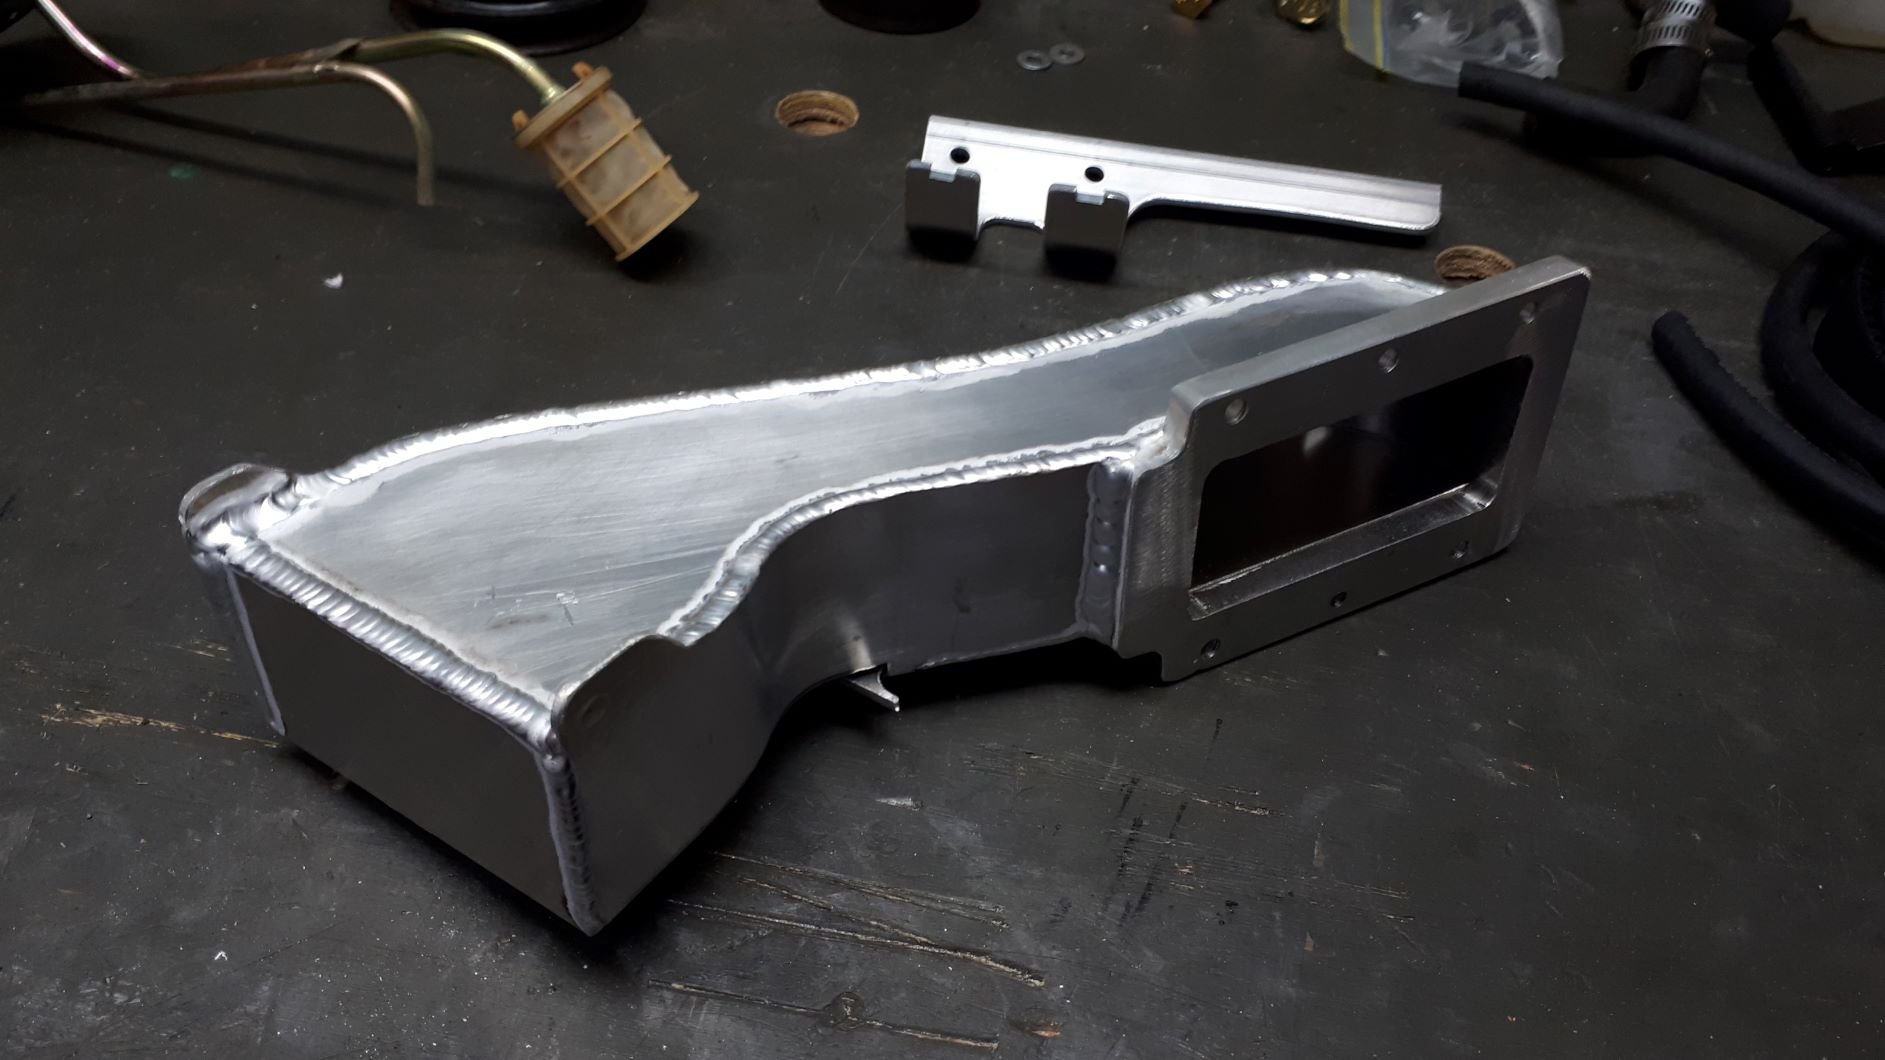
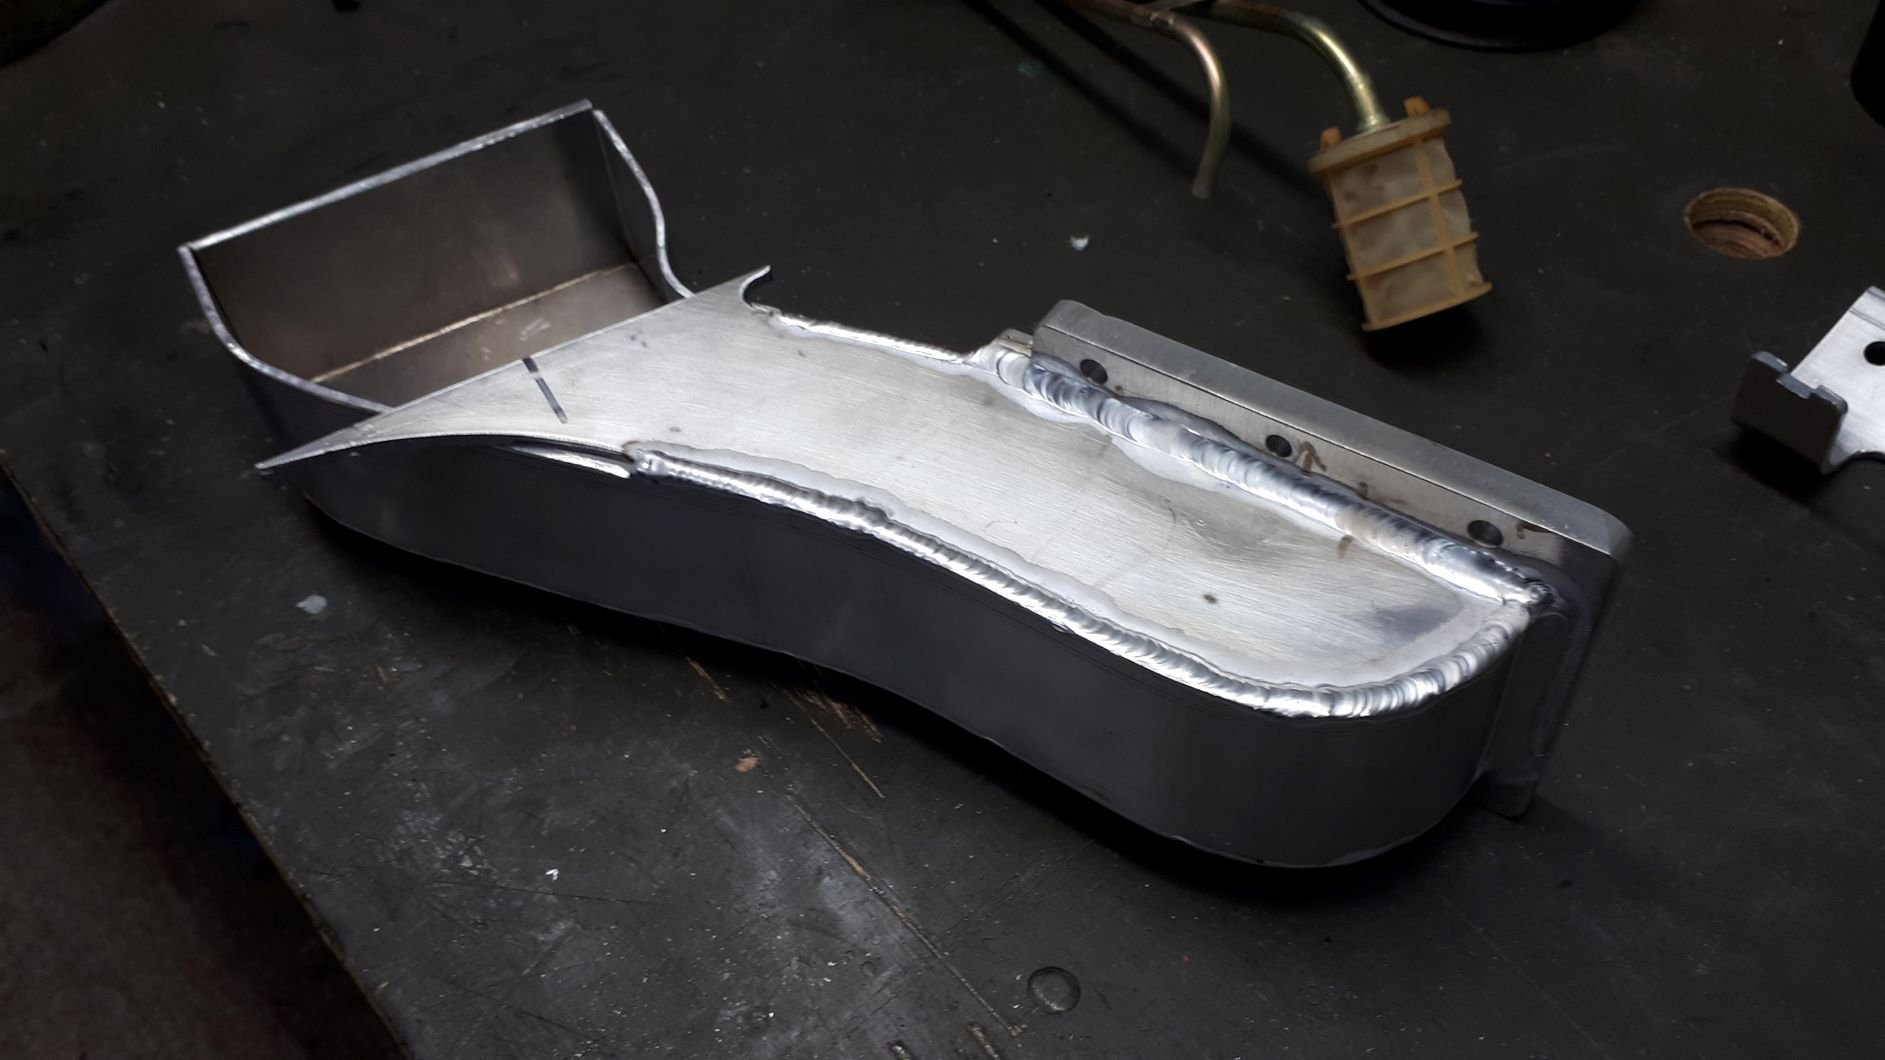
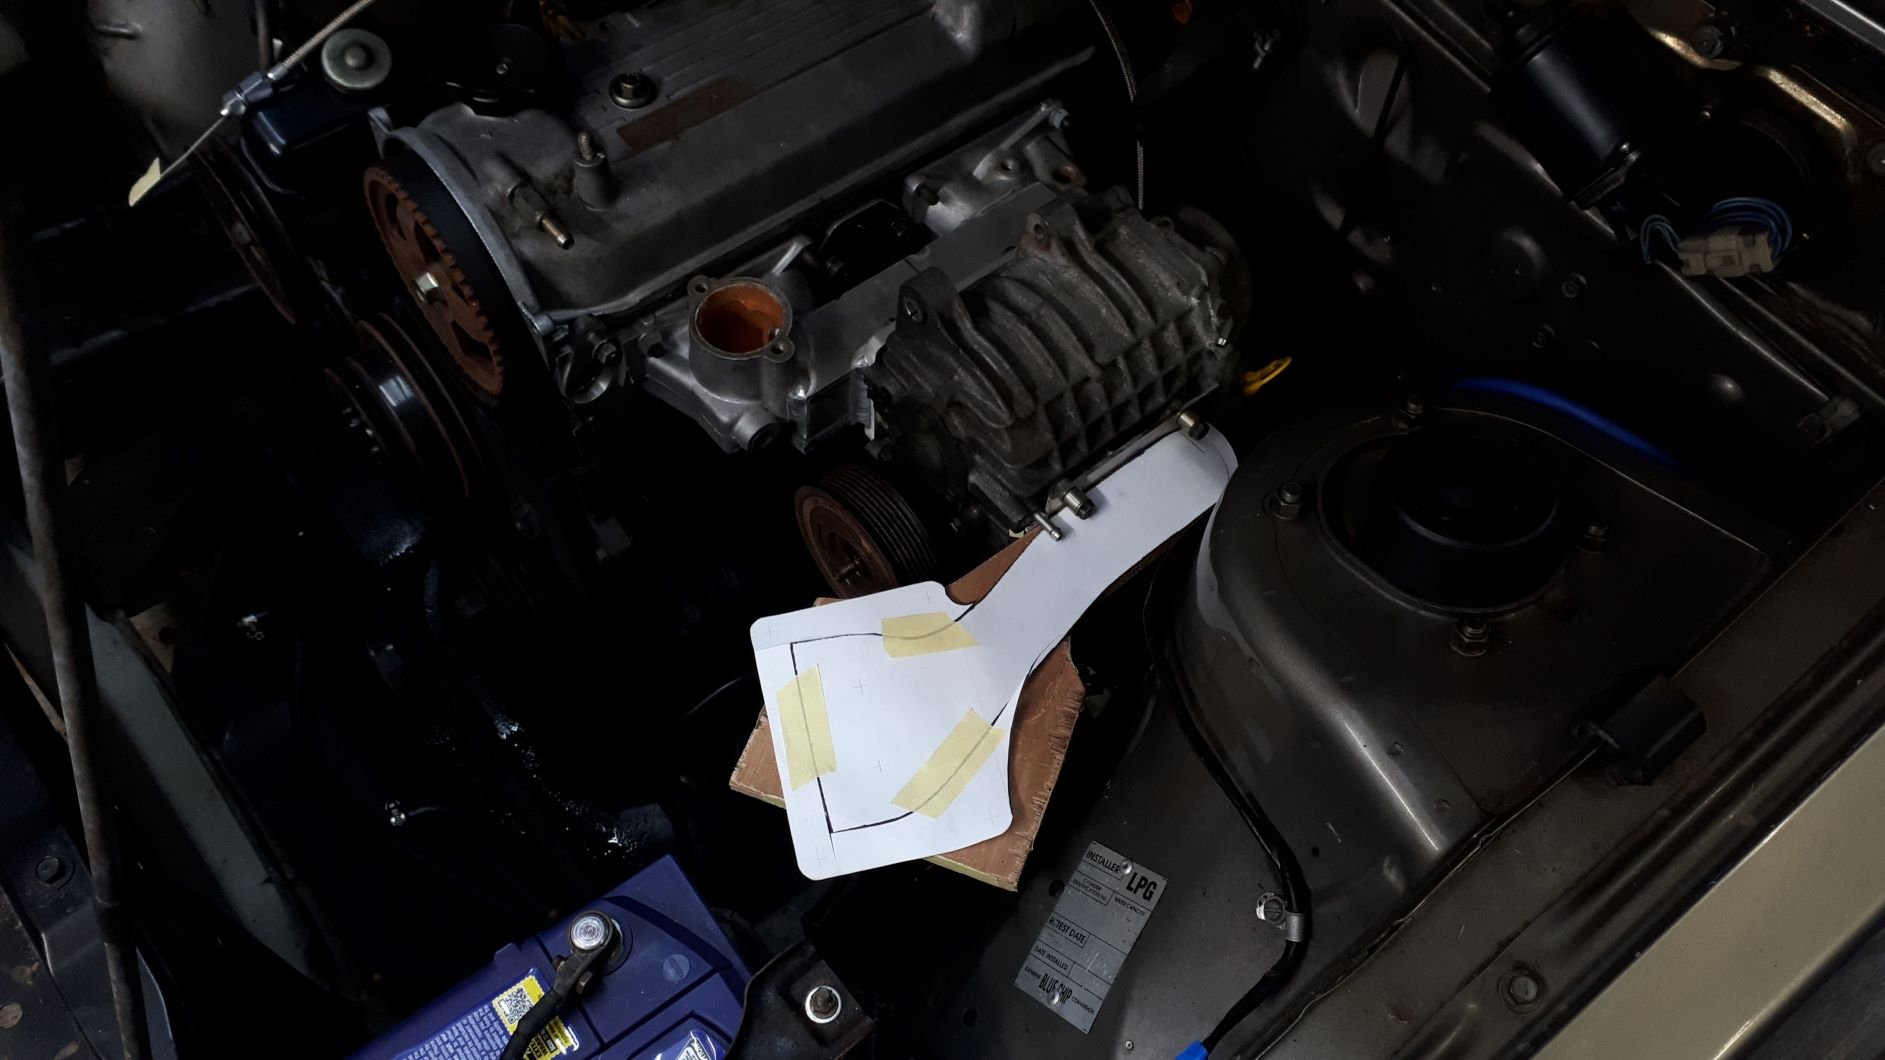
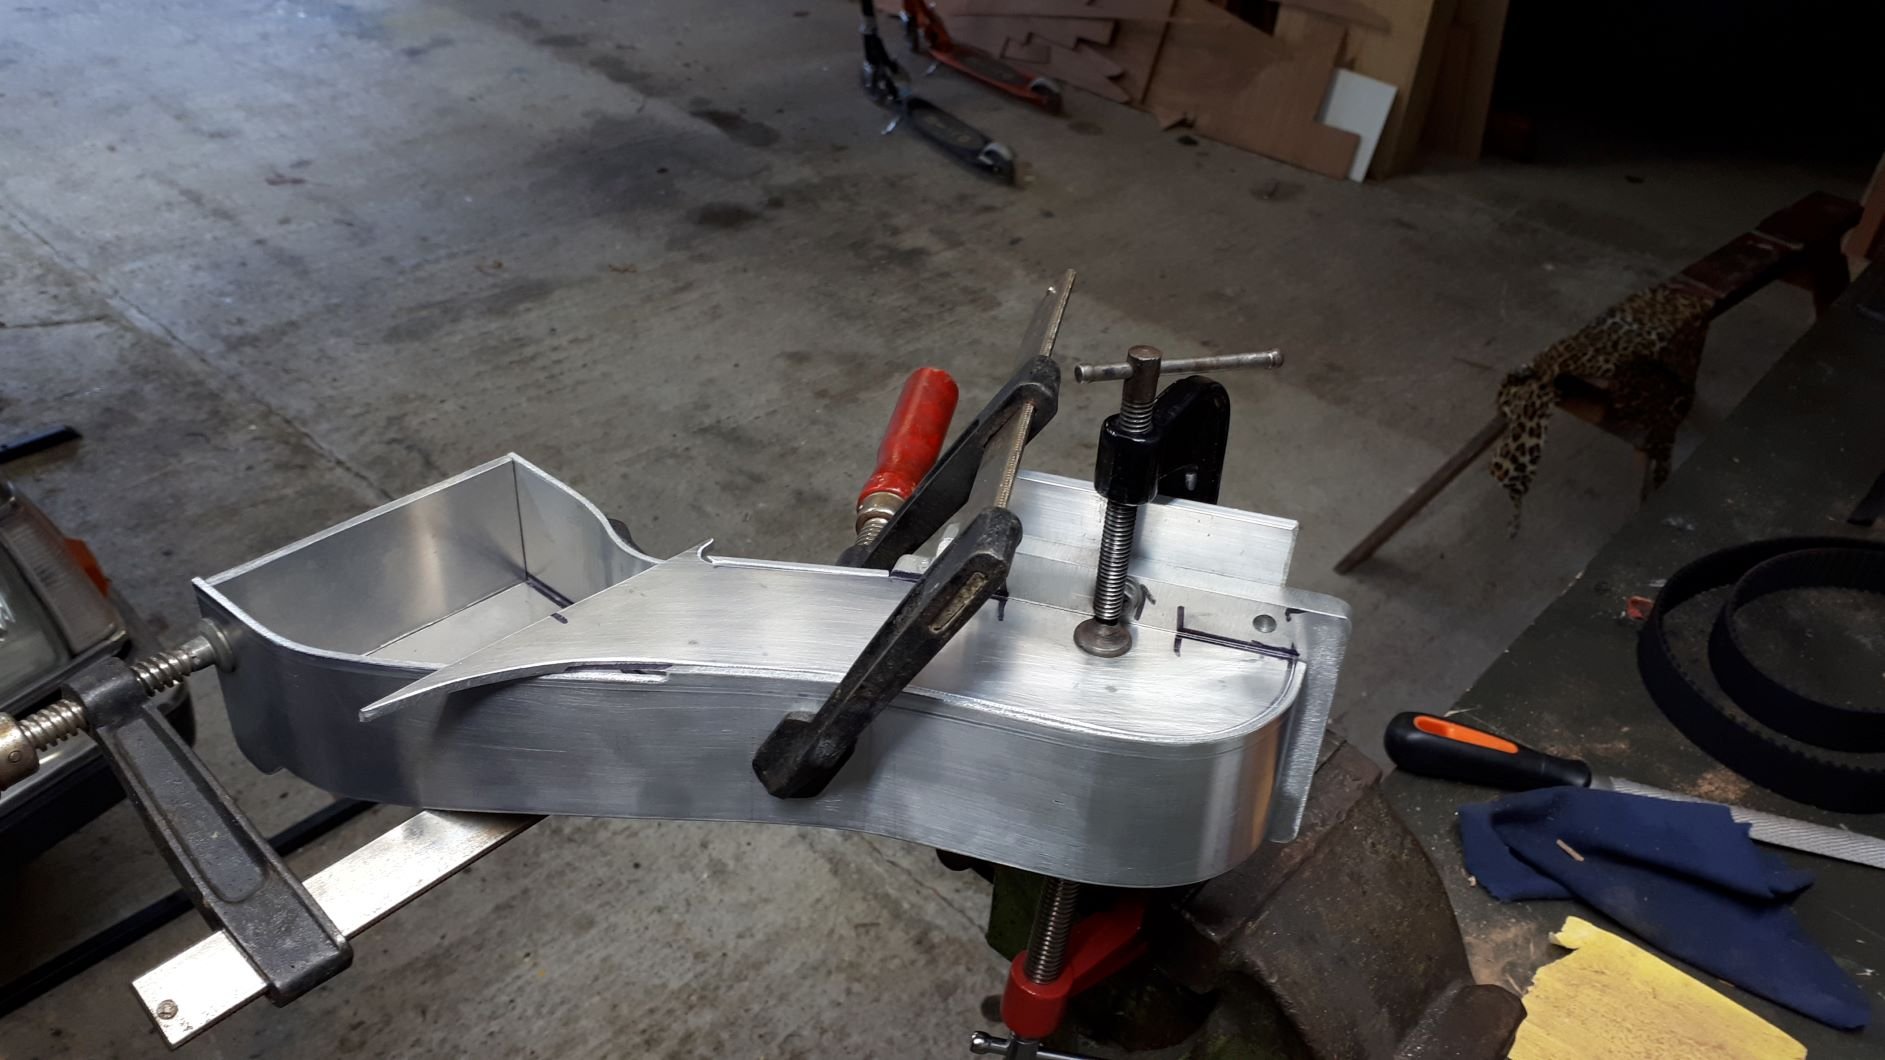
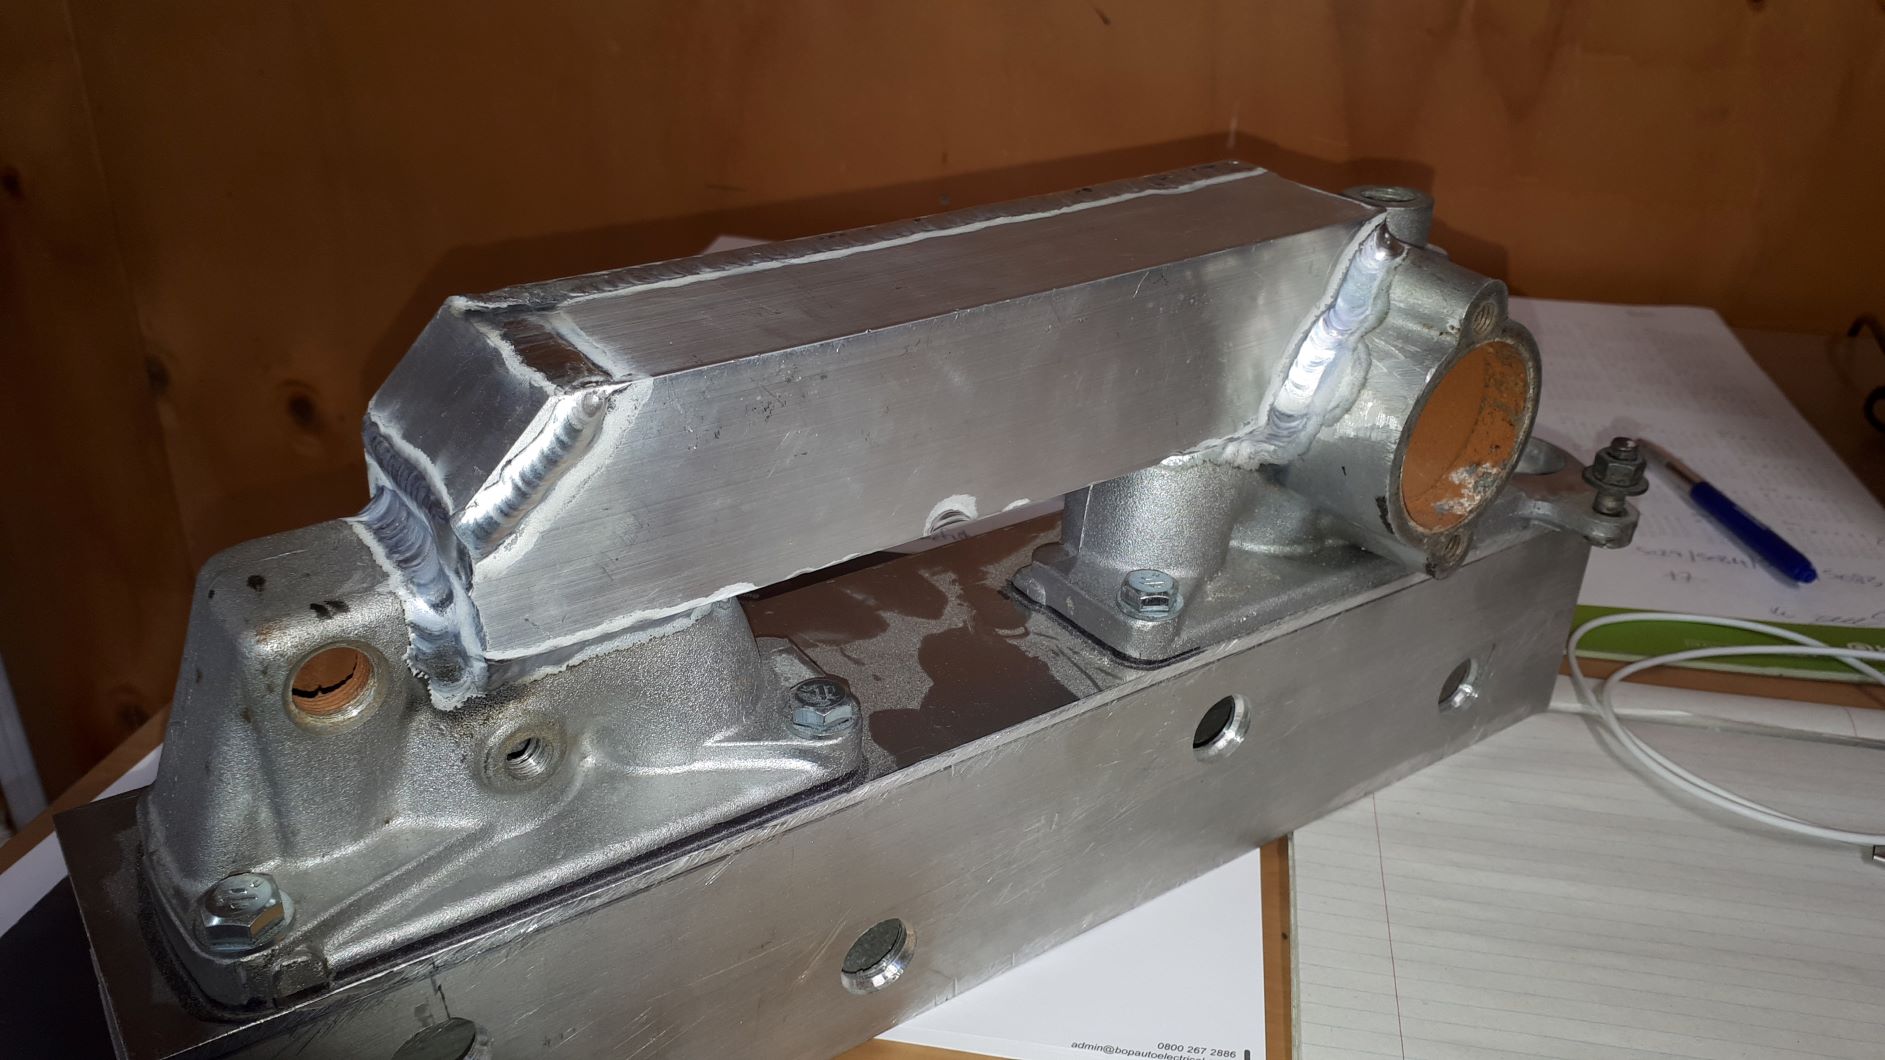
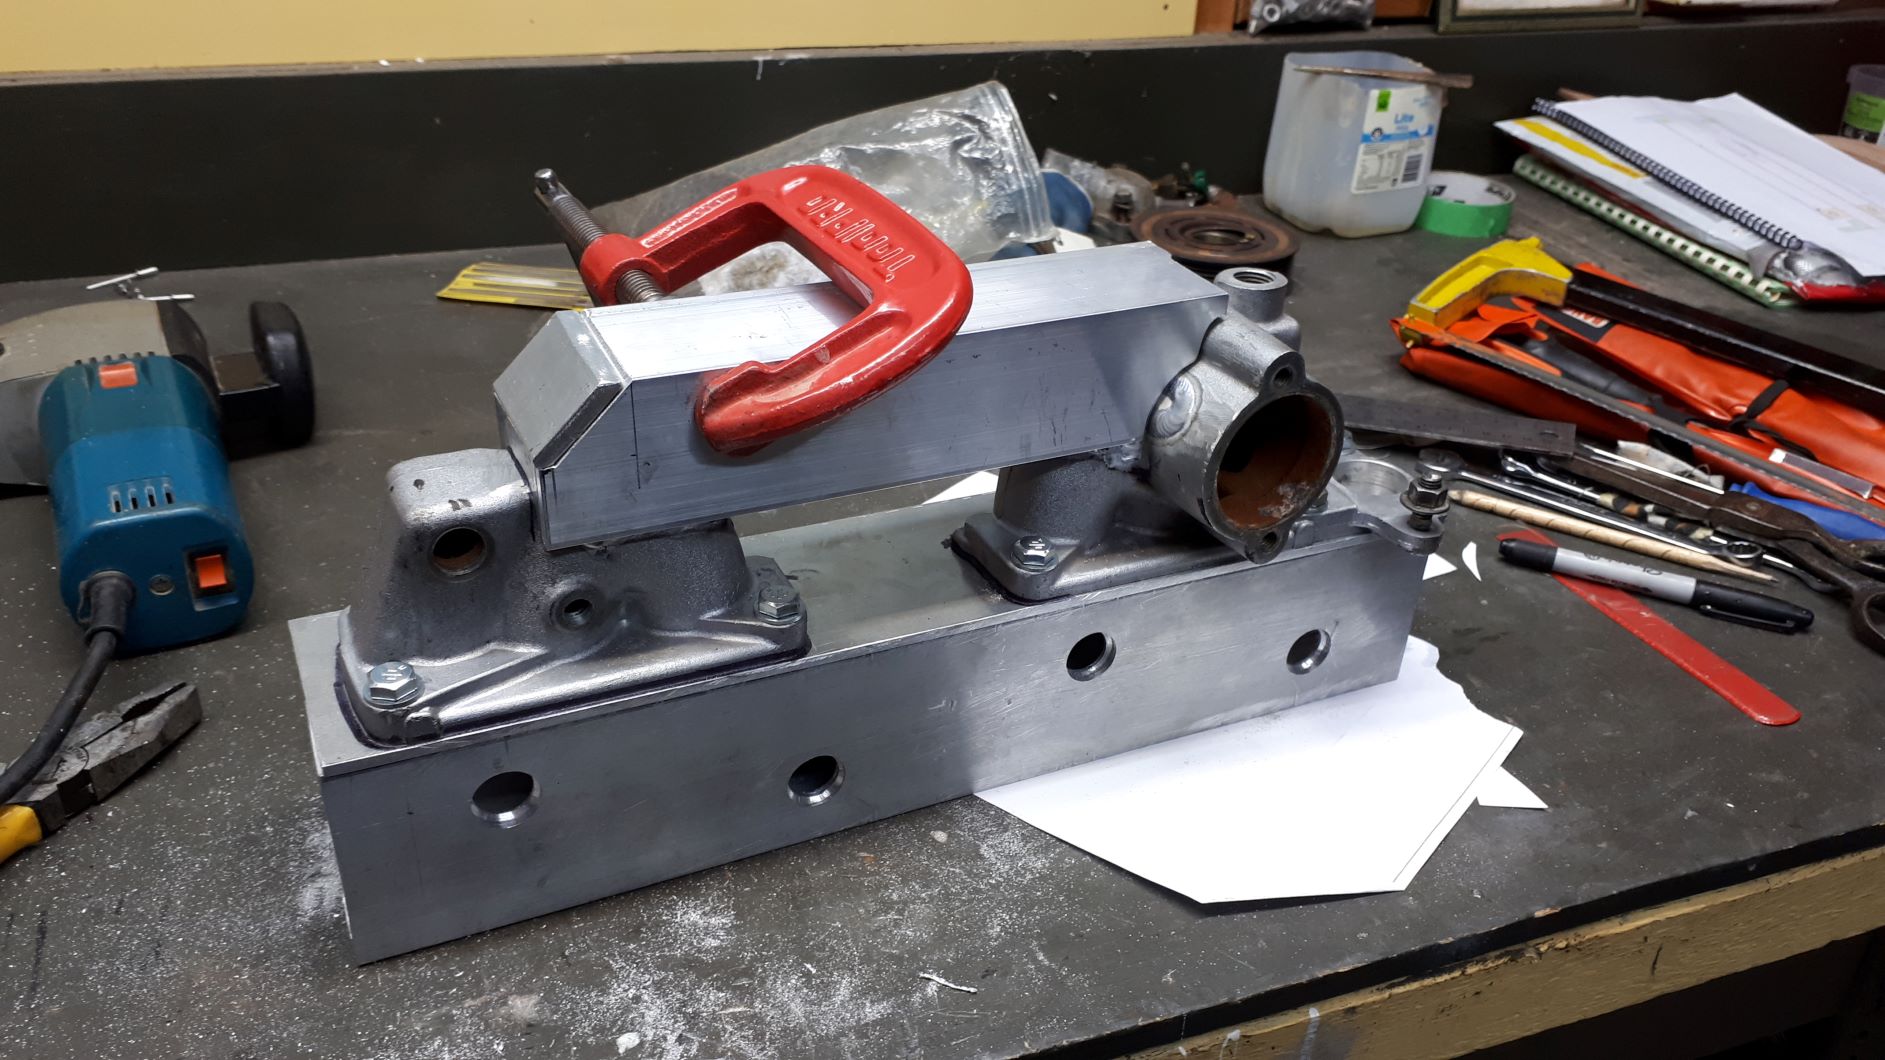
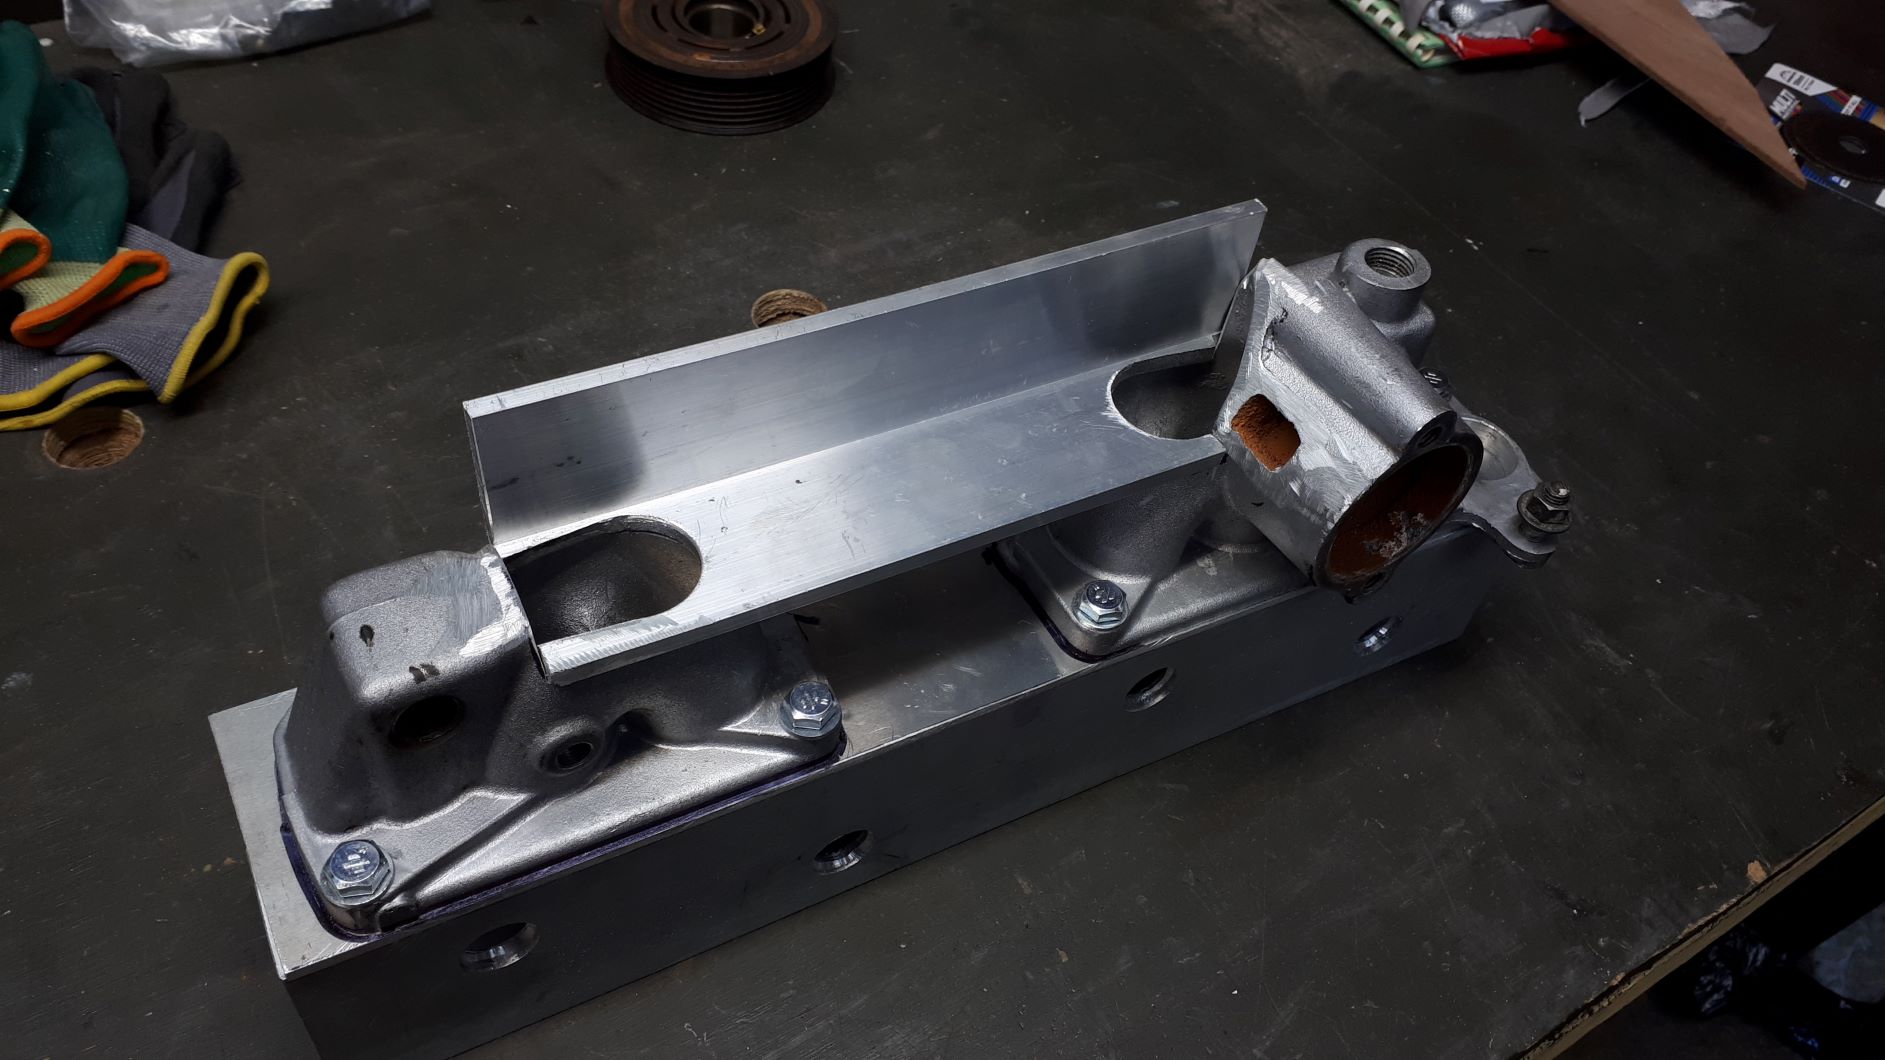
The next challenge is to figure out how to get the fuel/air from the fuel delivery device to the supercharger. Space is kind of tight so I decided to build a manifold that comes forward of the supercharger otherwise I will be cutting a hole in the bonnet. After a lot of head scratching and mocking up with paper, cardboard and plywood I arrived at this solution. Shaping the metal is a real challenge but it is coming together alright.
I started to make the flange for mounting the carb but I ran out of weekend before I got very far. It will be kind of large to accept a Holley 2300 flange but I am sure I will be able to trim it down when I have the exact position of the carburettor sorted out.
-
14
-
- Popular Post
- Popular Post
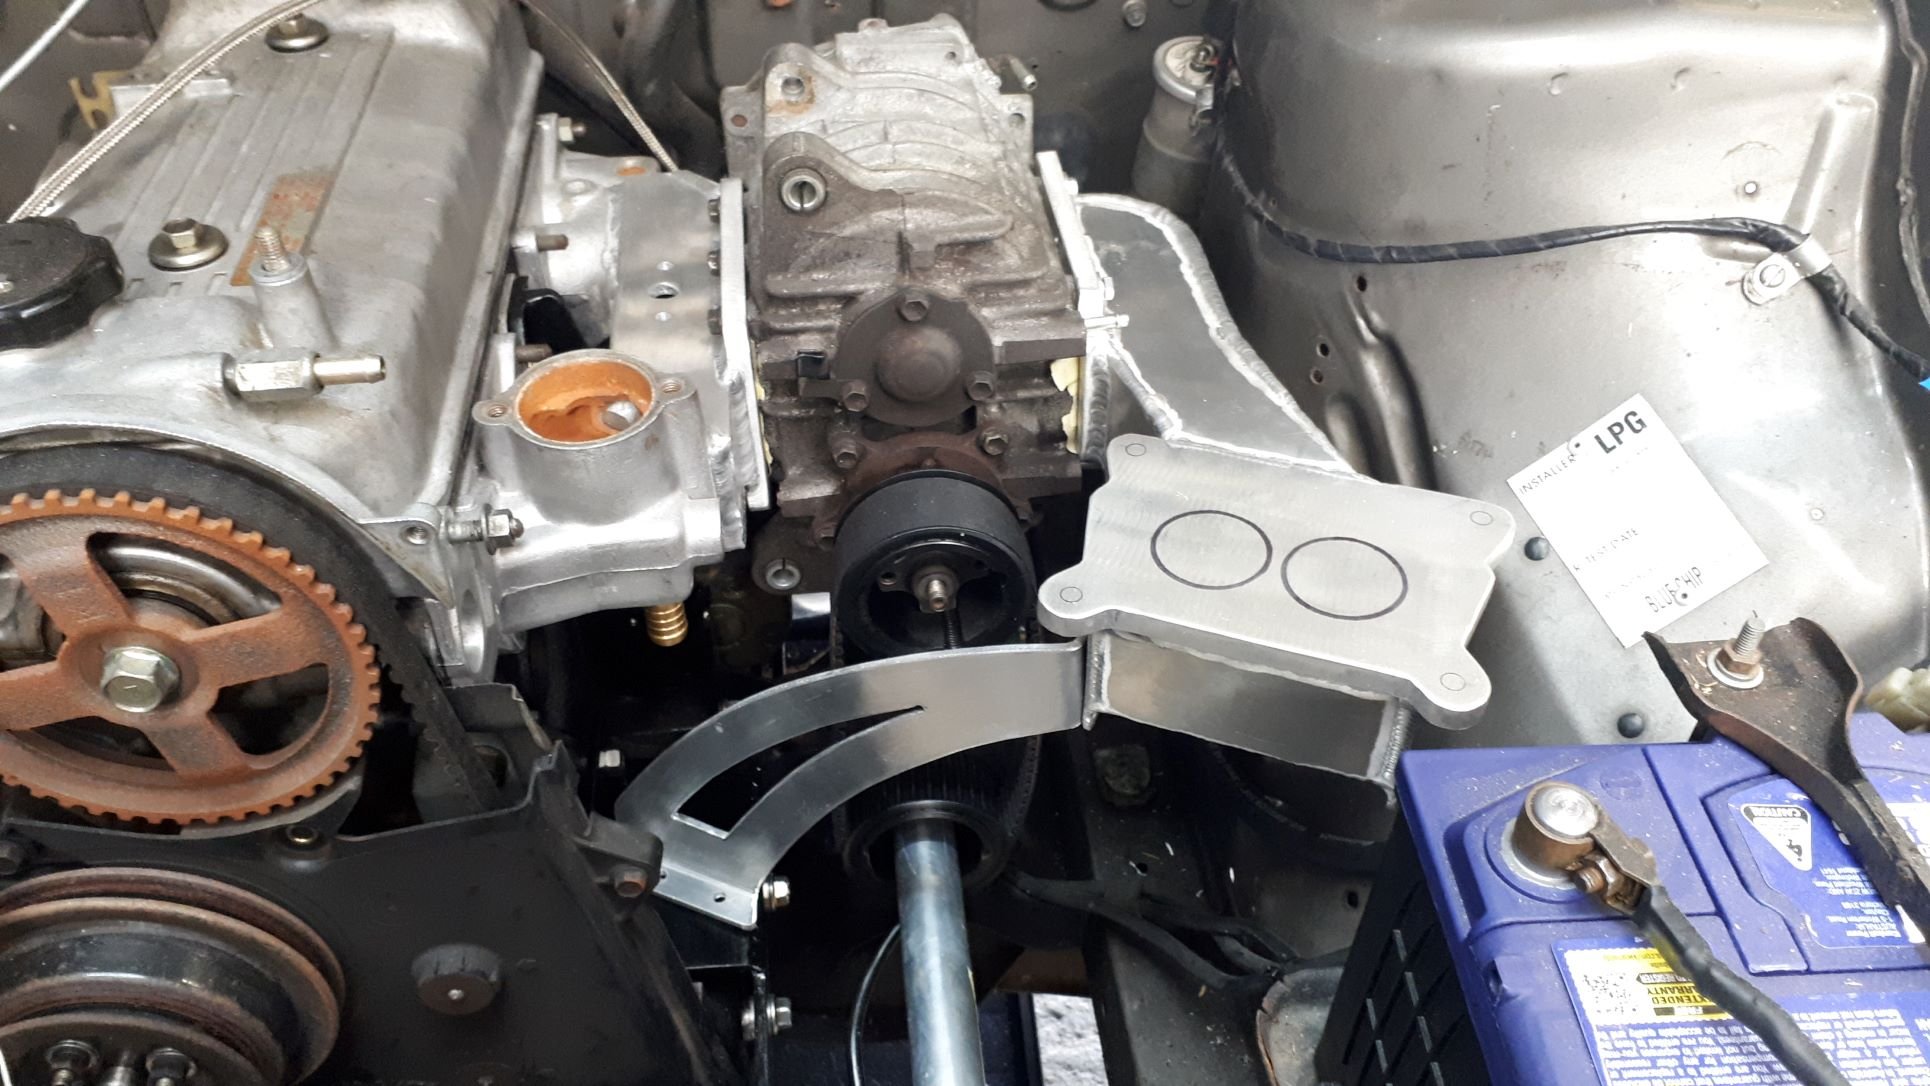
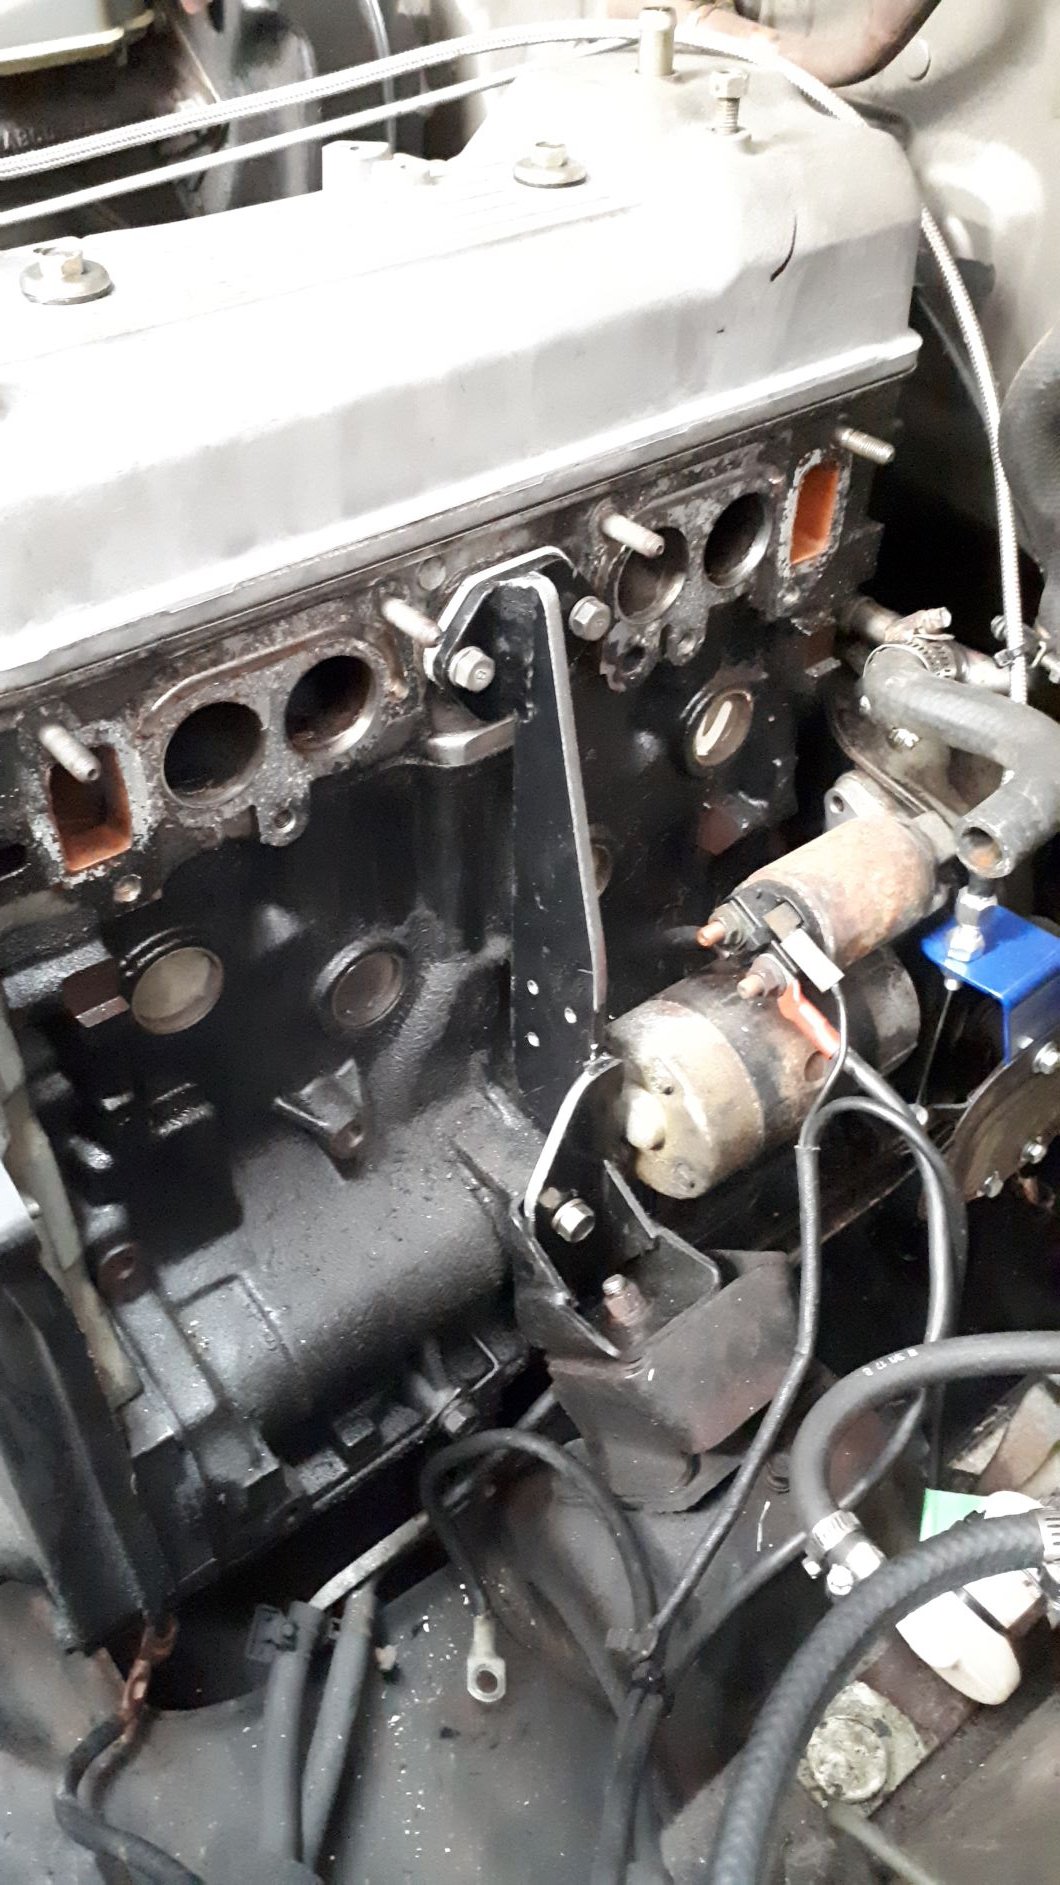
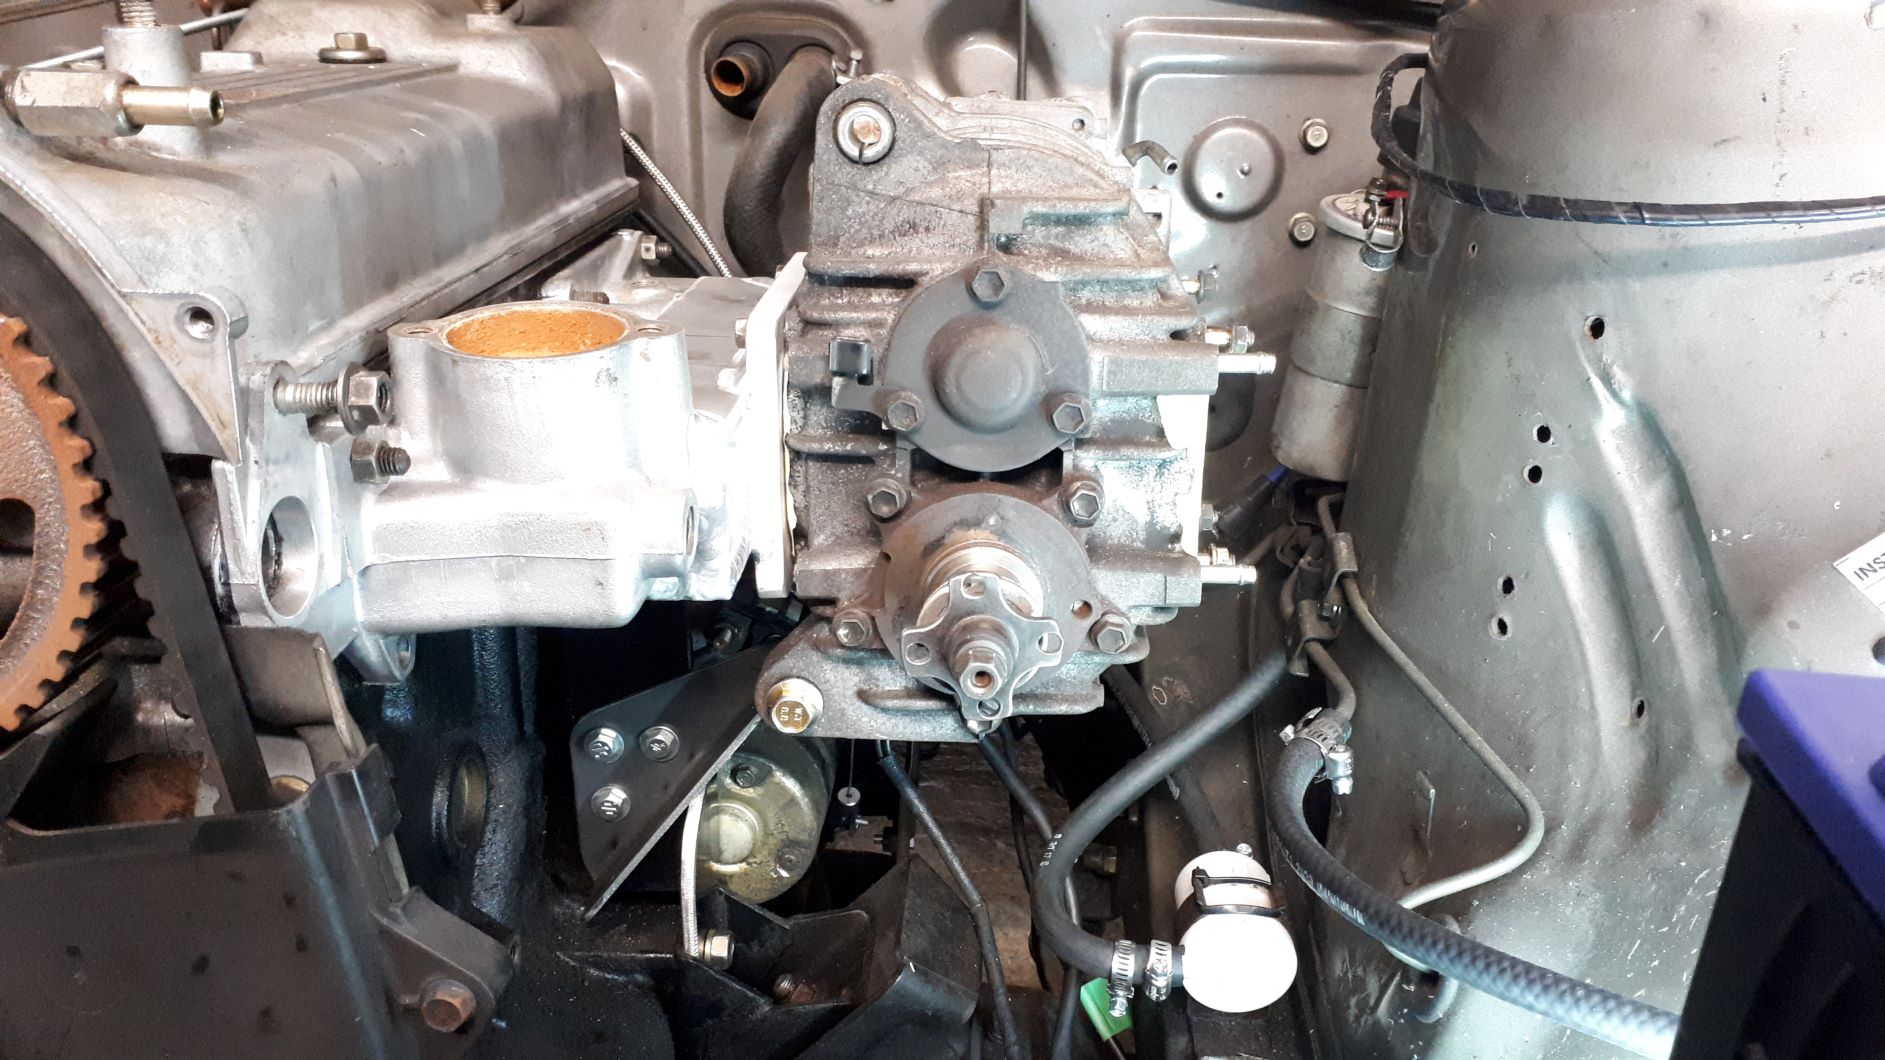
This weekend has been all about making some brackets so the supercharger isn't just dangling off the manifold.
I am going to use an electric fuel pump so I decided to repurpose the fuel pump mounting location and made a bracket to support the lower supercharger mount.
The upper mount is fastened back to a couple of studs on the engine that used to support the air filter assembly, I hope this is strong enough but didn't really have a lot of other options for this one.
-
21
-
- Popular Post
- Popular Post
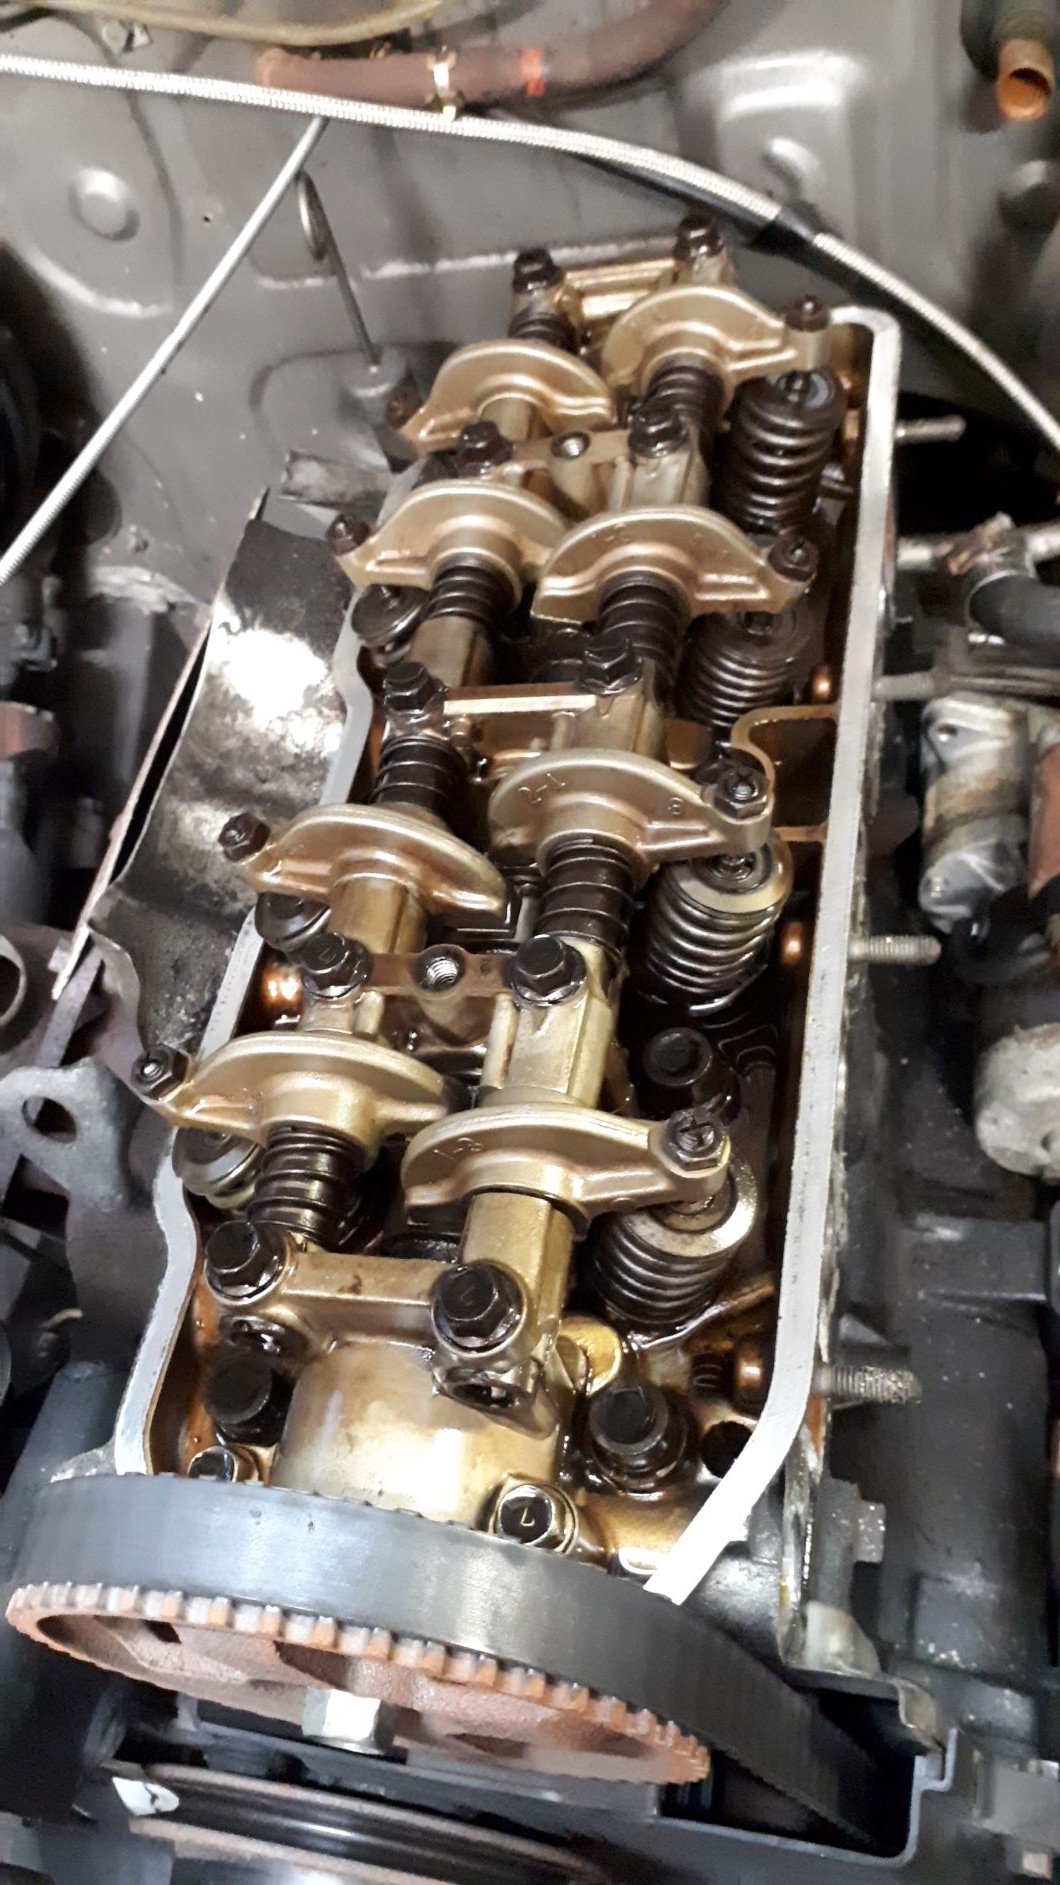
I figured I should probably have a look inside the engine to see if its actually worth the attention I am giving it. Good news is it seems to be in great condition, it's very clean so must have been well looked after over the years. It might even survive with the new belt driven intake.
I am also having second thoughts about the carburettor choice for this set up. I have been doing a lot of research and it seems that the Weber is not well suited to a draw through application. It seems that a 350 Holley is a much better option (as previously suggested by @RUNAMUCK). There is plenty of info available on modifying the power valve for boost reference so I will probably put the Weber to one side and look for a Holley to play with. If anyone has a decent 350 Holley that might be for sale please let me know.
-
12
-
1
-
- Popular Post
- Popular Post
Big progress today.
Now I need to figure out the drive system. I am planning on running an idler shaft down where the air conditioning compressor would be. This is necessary as the supercharger drive flange is positioned well behind the crank pulley. With this set up I will be running the supercharger via two drive belts but it seems like the most practical solution and will also avoid clearance issues when the distributor is reinstalled.
Right now I am liking the look of this.
-
22
-
1
-
- Popular Post
- Popular Post
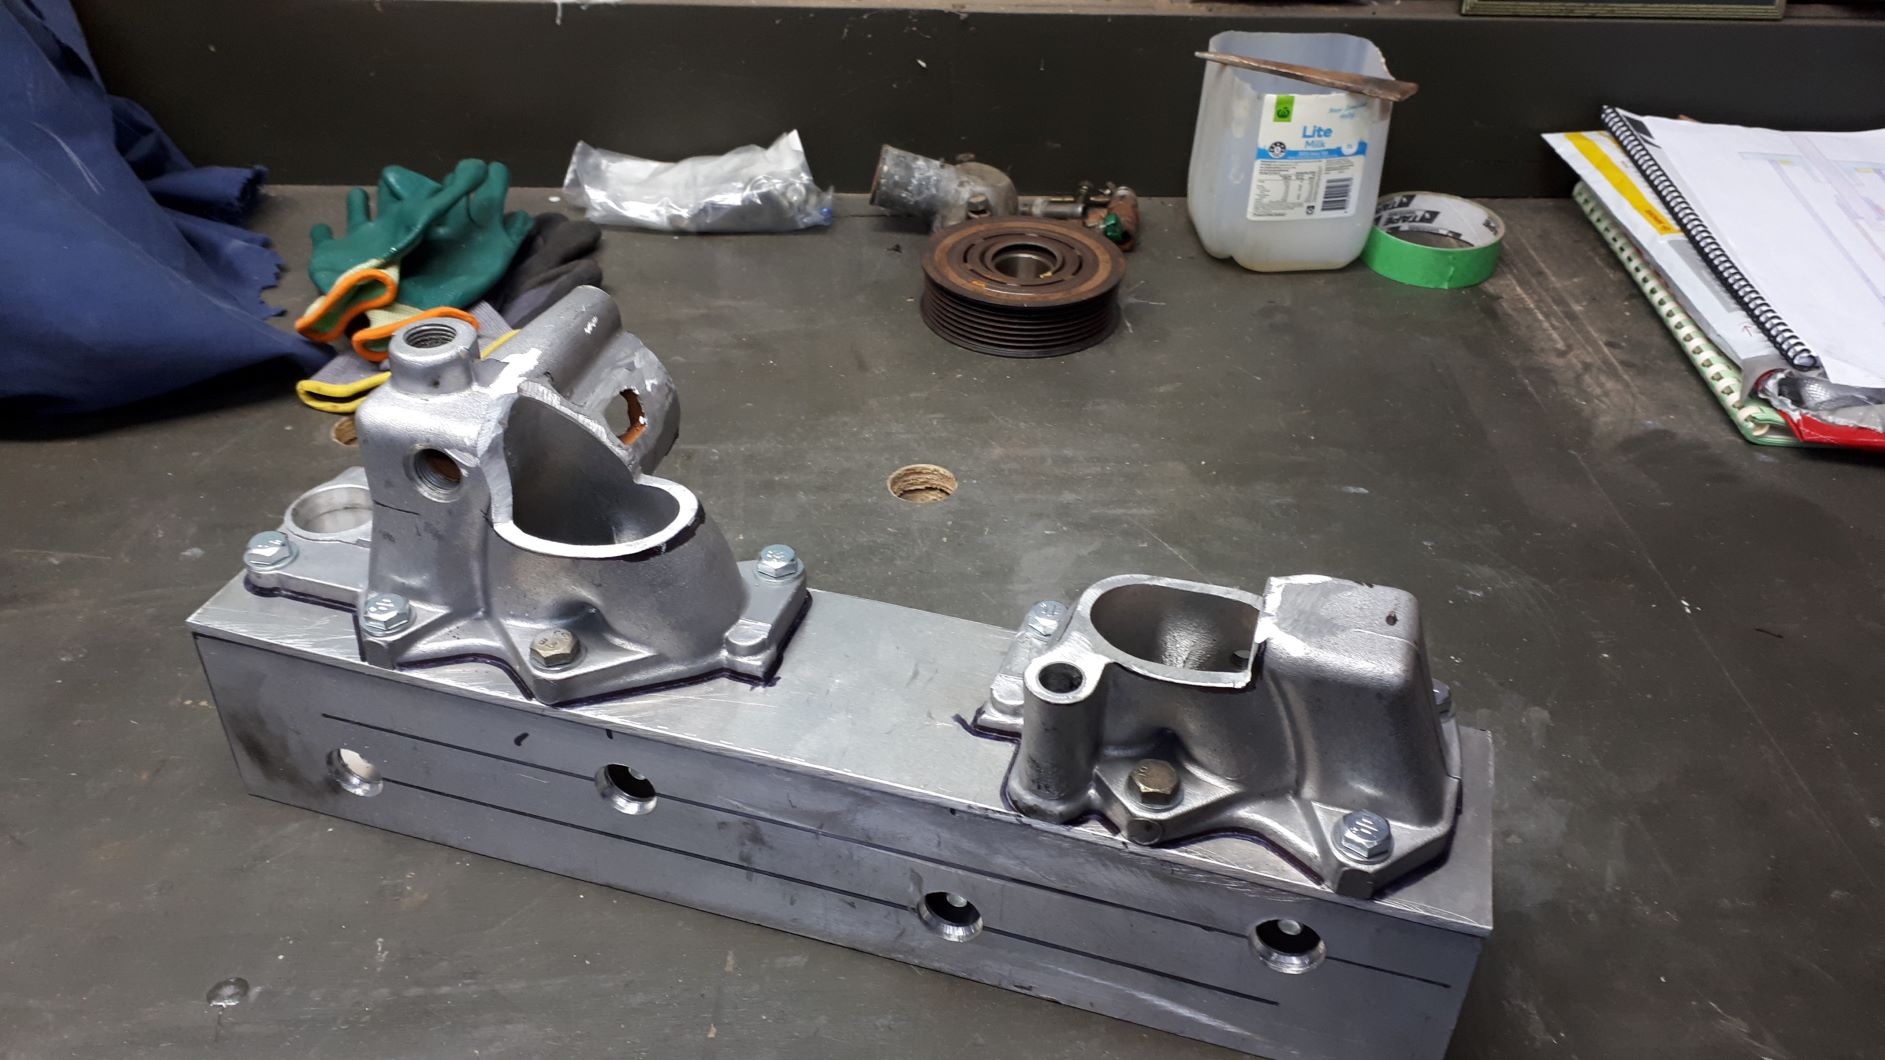
I got a bit more welding done on the manifold.
I'm not welding this myself, I have a good friend that is a very good aluminium welder/fabricator and he is doing the welding for me. I am making all the bits and he is sticking them together for me. I certainly couldn't weld like this!!
Now I need to cut a hole in it so I can attach a flange for the supercharger.
-
10
-
- Popular Post
- Popular Post
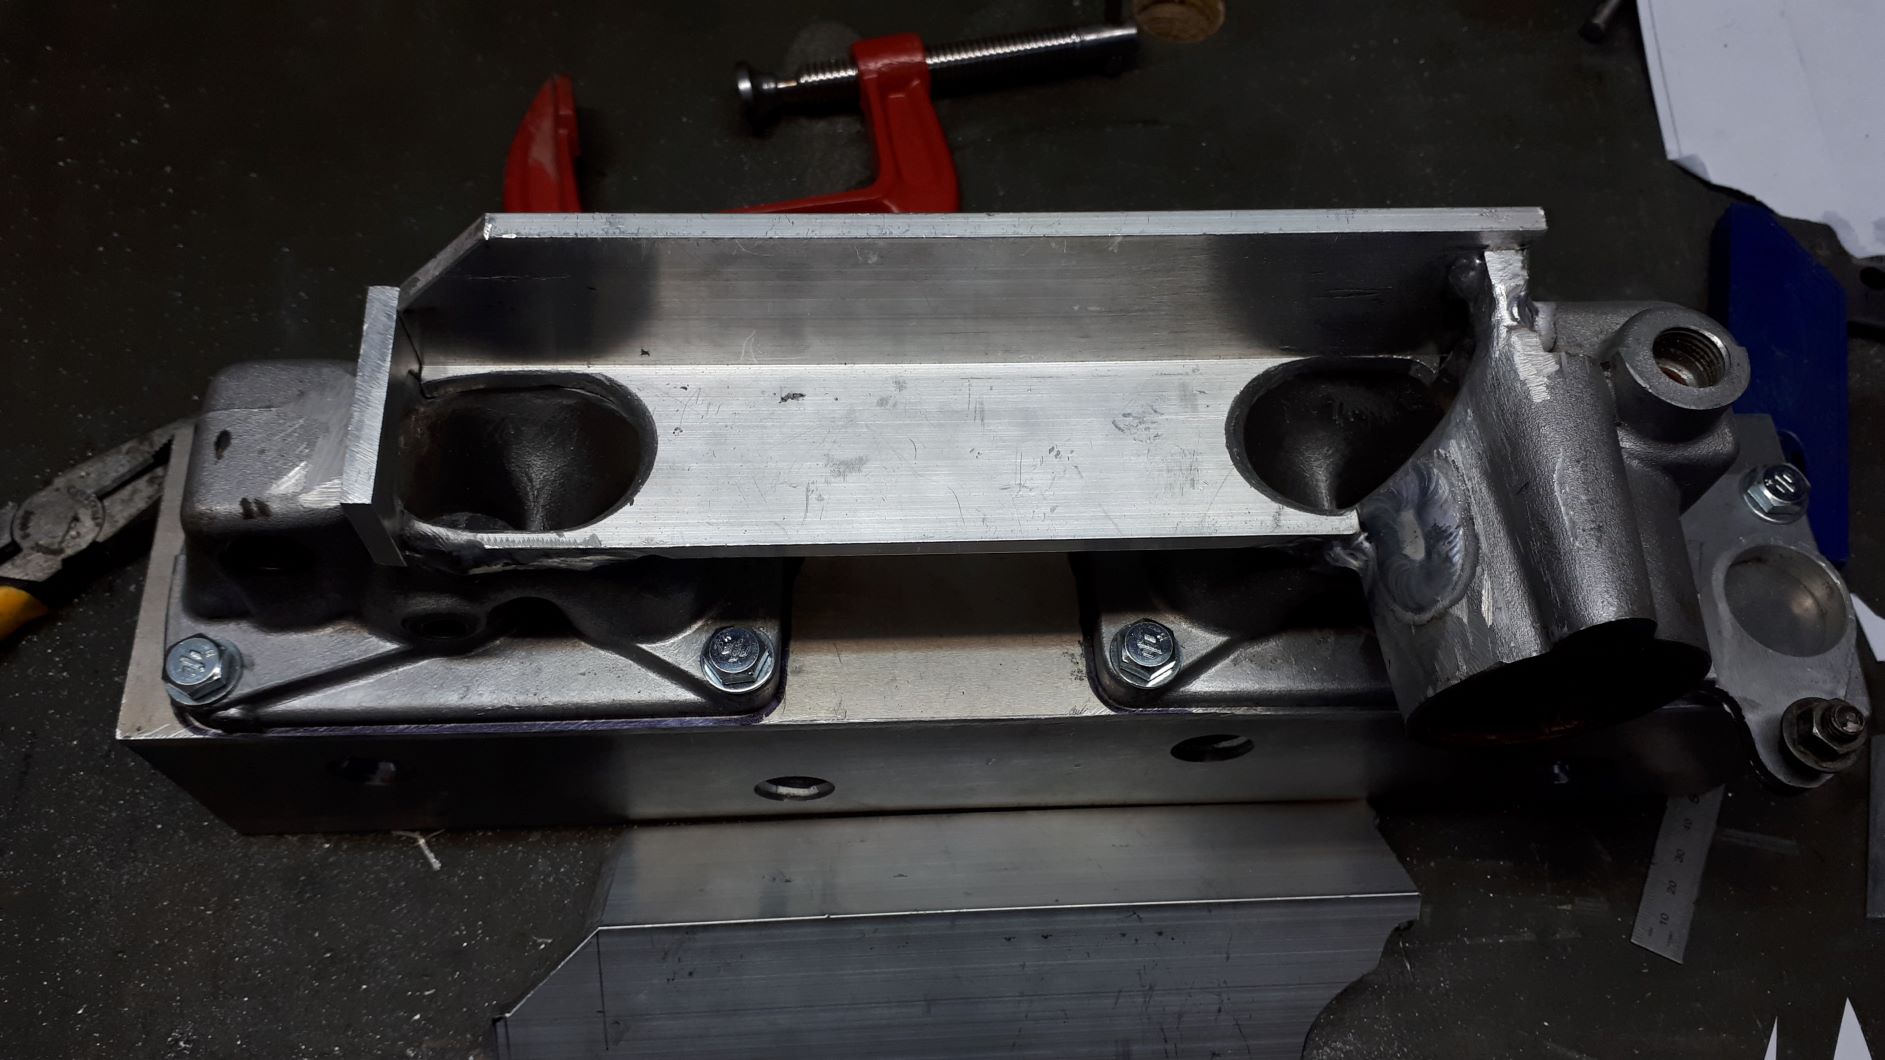
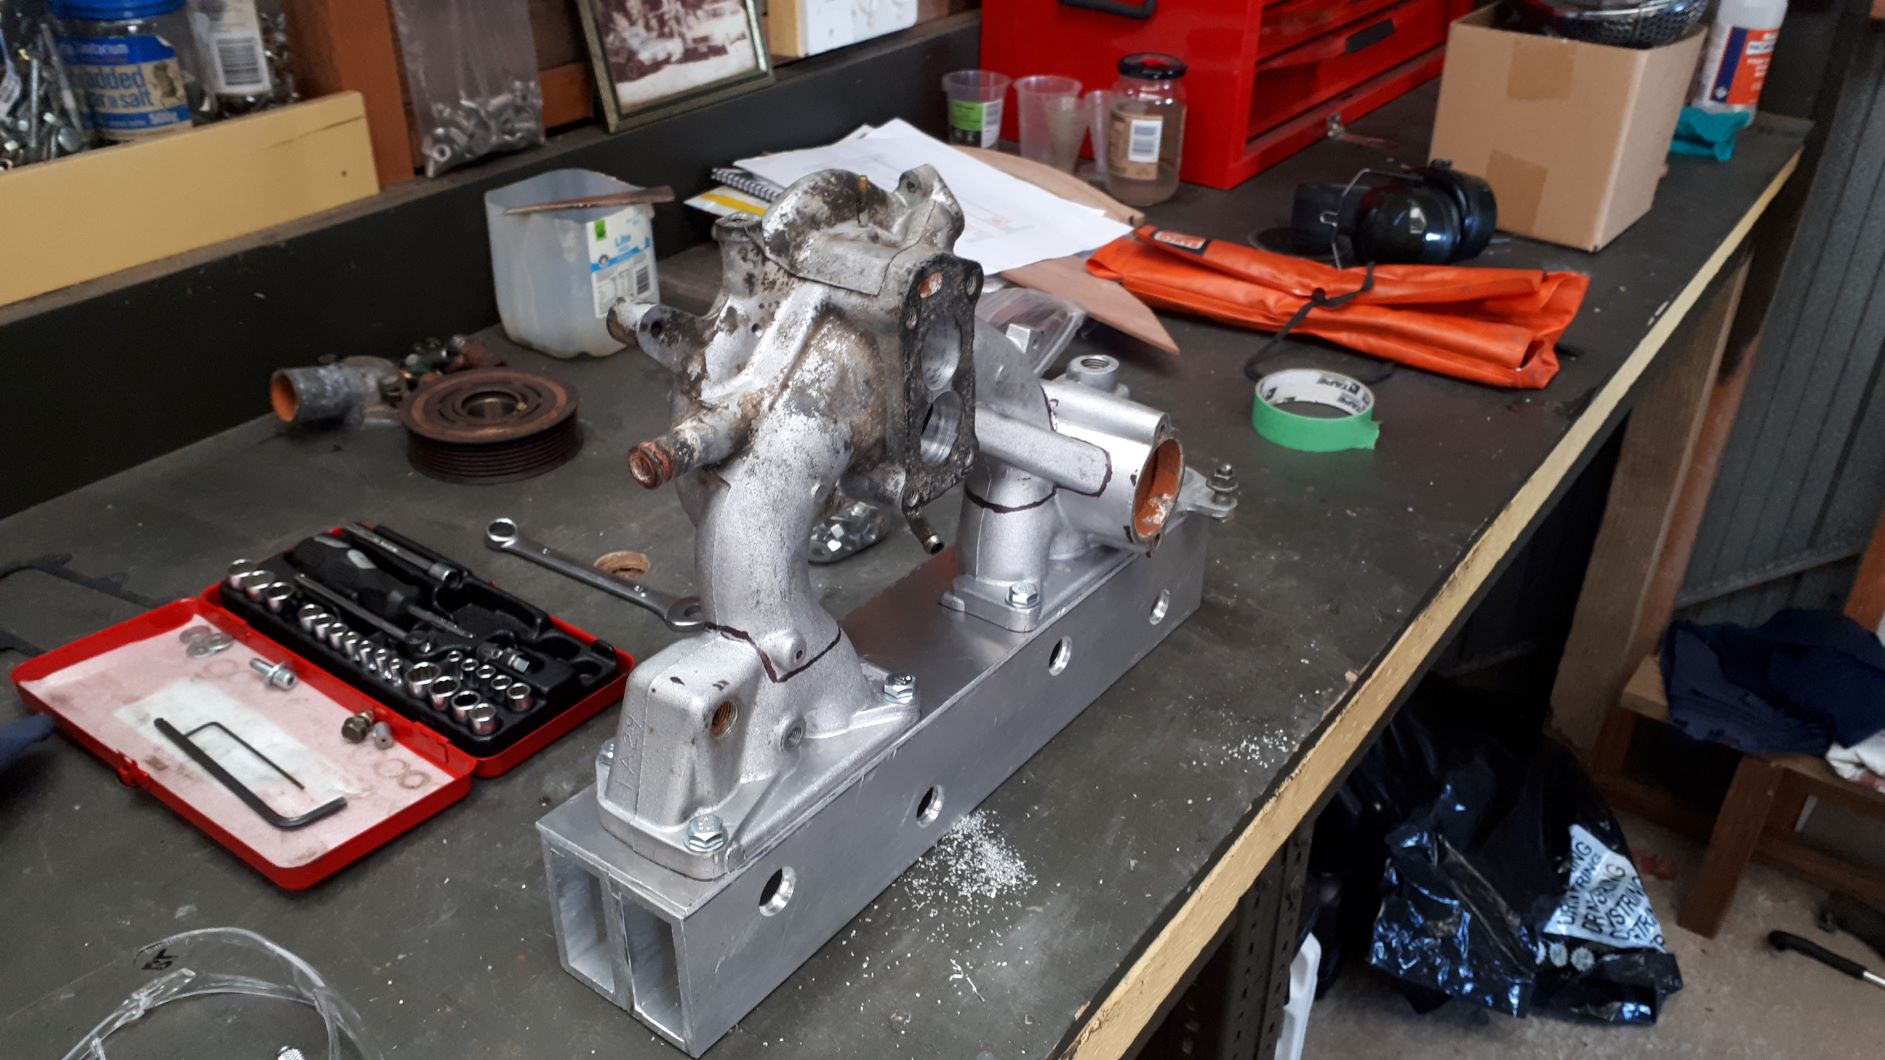
Another quick update, got some welding done on the manifold and did my best to smooth out the ports etc.
I am sure the design is far from optimum but I think it will work.
I made some more bits to box it in.
Now more welding....
-
14
-
- Popular Post
- Popular Post
Big thanks to @MaxPower for helping out with a spare manifold from one of his vans.
I checked online and for some reason you can buy a supercharger manifold for your Corvette or Mustang but there is no off the shelf option for your 1982 Mitsi Sigma.
I will have to make one, what could possibly go wrong?
I will post more pictures as the manifold comes together
-
15
-
1
-
I have yet to properly investigate the power valve set up on the Weber but I expect the principle is similar to the Holley. I believe it lives under the top plate and maybe it can be tuned or modified to work with the van supercharger. We will see I guess.......
-
On 06/04/2021 at 18:01, RUNAMUCK said:
Also if your engine is 2000cc, please run the blower at 1:1 ratio.
I assume you're sticking with the carb? If so, Please go drawthrough.
I ran a 32/36 for a while on an SC14. But I found a 350cfm Holley used truckloads less gas.
Thanks
Yep I am planning on doing a draw through set up using the 32/36 that I already have. I am pretty sure that the Holley would be better for this application but I have the Weber so I will give it a try. I am assuming you set up your Holley with an externally referenced power valve.
It is a 2000cc so I will start with a 1:1 ratio.
-
I'm trying to keep things as simple as possible so I am planning on building a draw through set up using the Weber.


SC14 supercharger vent ports question
in Tech Talk
Posted
Thanks,
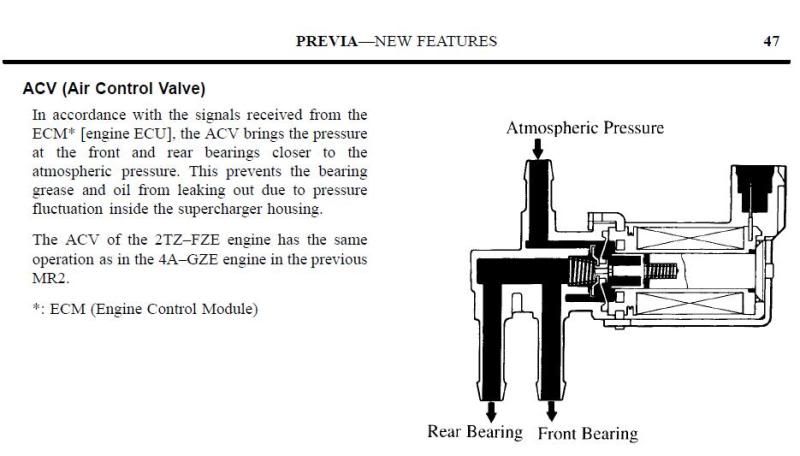
I dont have the air control vale as described in the Previa info that you supplied as my supercharger did not come with it included.
I am wondering under what conditions the ECU activates this valve.
It looks like it keeps the ports sealed when it is not energised and when the ECU energises the solenoid it vents the bearing housings to atmosphere.