

NZGT4
-
Posts
35 -
Joined
-
Last visited
Everything posted by NZGT4
-

NZGT4's '84 Corona wagon with Civic alloy half radiator
NZGT4 replied to NZGT4's topic in Project Discussion
HELP! I need a hand tuning my carb. The car wont start and its getting way to much fuel and I have a box of ciders sitting here if someone would mind coming and having a look. I've spent yesterday and today mucking around with timing/idle mixture screw/plugs and I've run of ideas on how to get it going. I'm in Greenhithe on the Shore. If no one is available to help are there any suggestions on a mobile mechanic that knows what they're doing with carbs? Cheers -
NZGT4 1974 Mercedes-Benz 280SE W116 "Helga"
NZGT4 replied to NZGT4's topic in Projects and Build Ups
Thoughts and ideas can go here //oldschool.co.nz/index.php?/topic/49473-nzgt4-1974-mercedes-benz-280se-w116-helga/ -
Bangbug mate, I could be very keen to get that rad off you if possible. I will rip out the old first and then I will try and get in contact with you about comparing the two and see if it will fit. I'm pretty sure the heater core is already disconnected but im not so sure about the exhaust in the cabin haha Defiantly going to get a flapper for it though
-
Say what you want about Helga, she can take it
-
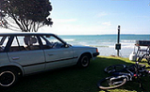
Kia ora! Meet Helga, the newest edition to the line up. Just got it off TradeMe for a massive $500. Its an insurance write-off as you might be able to tell from the picture. The damage isnt that bad really, the radiator is poked (if anyone has a spare hit me up) and and the top rad support is pretty bent. It still runs just fine though and it sounds awesome! Straight six for the win! The plan for Helga is to be a paddock basher at my folks place and to also enter the Dirt Drags in October down Cambridge ways. If you own a 280SE like this one and you need some parts then let me know and I might be able to take it off as long as I can still drive it haha I've got a little to do list.... -Fix radiator/retro fit another one off something at pick a part -Weld the diff. Need all the tractions for on the dirt -Straighten up the bonnet -Strip the interior to make it light weight (hahahahahaha....... its a bloody tank!) -Mad max exhaust through the bonnet -Pod filter -Maybe give it an oil change -Any other suggestions? like I said before, if you need parts hit me up, I'd rather see them go to use then just get completely smashed up. If you have any ideas on what we can do to it then also comment. Cheers
-
Turns out that photo didn't work of the prices.....
-
Well its been about a month since the rebuild and the car is going strong. As the days get colder the cold start has begun to get a bit weird. It hunts for quite a while and sounds like a rotary. I'm not savvy with carbs so I think I'm going to have to take it to someone to have a looksie at it. Apart from that it goes great! I've just been through my garage and I've found a a bag full of receipts so I put it in a spread sheet and for those that are curious about doing a rebuild this will give you a very rough idea of how much it may cost you. All the work carried out by West Auckland Engine Recondtioners was the only bit of labour I paid for and if I rebuilt the motor right the first time with the correct piston rings I wouldn't have had to get the rebore etc so minus $584.37 which will give you a total of $1342.28. Red = Labour Yellow = Rebuild second time In other news I bought a Trisco 3 1/4" Tacho gauge and I installed it last night. The gauge only came with screws but I want to use that double sided foam stuff so until I find some of that I haven't bothered taking a photo. The next lot of jobs to do are.... (in no specific order) -New park light bulb -New rear window wiper blade (shorter then factory so I can fit a Beach Hop decal) -Clean car -Polish car -Reblack door frames -Fix blockage in rear window sprayer -Clean inside of the car out -Replace gearbox cross member mount -Replace as many worn out bushings throughout -Get a wheel alignment -Make headlights better (at the moment you can see about 20m ahead on low beam which is pretty dodgy. High beam isn't much better) -Reseal the windscreen (it leaks, fingers crossed to rust) -Media blast/prime/sand/paint the set of modgies and put on. Any suggestions for colour choice for the wheels are welcome -Get tints all around (35%)
-
It's been a couple of weeks since the first rebuild but I have since got the motor back in and running. I put the motor back in up through the bottom and I will admit a crane would have been handy. Anyway I managed and on Monday last week everything was is, I say Monday but what I mean is 2:00am on Monday morning. On Monday afternoon I was having trouble getting it to turn over and I spent another night trying to figure it out. I managed to get it running but it was really rough and it didn't idle. After giving up and doing some googleing I figured that my timing was way out so on Tuesday I borrowed a timing light off mtbtimr and I managed to get it running smooth within 5 mins. Turned out I skipped a tooth with the dizzy and was obviously to tired from Sundays long night to figure it out. Anyway it drives great and I've been playing around with the timing to try and get it bang on and I think I've nailed it. Driving to work last week it ran faultlessly and I even went through some great Auckland traffic and the was no over heating or anything. Oh and the exhaust note is bloody awesome with the resonator deleted. It pops and crackles on down shift and my mate with a turbo Altezza said when he was following me through the Coromandel hills he couldn't hear his car over the noise mine was putting out haha. As many of you probably know Beach Hop was on last week and we went down just for Saturday and I've already started thinking about wacking a big lumpy V8 into the wagon but I think the misses will leave me if I did. Heaps of cool cars and good times. With the rebuild out of the way I just need to clock up some kms on the motor then I will start giving it the beans. I've nearly racked up 800km since last week so an oil change tomorrow and I'm good to go. Just need a wheel alignment and then I can start focusing on the aesthetics of the wagon. I've got a few snaps of the rebuild and other stuff...... The new pistons I ordered were wrapped up in such a cool oldschool way These pistons are just OEM but 1mm oversized so I gain about 42cc and go from 1770cc to 1812cc! Whoop whoop more power and torque...... How the bore should look Motor going in I stalked one of the lads at work, Fliboi on here, and snapped a couple of pics of the two Coronas I also picked up a new trailer from one of my misses friends mums place. Its a home built trailer from 1954 and is in need of a fix up but it will be easy enough I reckon. When I towed it home one of the guards fell off on the road due to the rotten sideboard giving way haha Oh and at West Auckland Engine Reconditioners they had this wicked Interceptor That's all I've got for now
-
NZGT4's '84 Corona wagon with Civic alloy half radiator
NZGT4 replied to NZGT4's topic in Project Discussion
I'm 95% sure that the little radiator isn't the problem. Ive seen an evo, a sr20det van and a 4age starlet running them and they havent had issues. I did find out from the engine builder that the piston rings didnt have enough back clearance, turns out ACL sold me the wrong ones and I didnt check the back clearance. I gapped them but just didnt do the back clearance. Whilst im waiting for the block to come back ive been cleaning up all the steering components. Any idea on what oil to use in the manual steering box as it has all leaked out? -
Not much has happened since it blew up. I have found out why I had the big failure though. Turns out ACL sold me the wrong piston rings and I didn't realise when I installed them on the pistons. ACL's part number was "PS1654-STD R/S MISTI 4G63". Now when I was rebuilding and saw the 4G63 I instantly thought hang on, that can't be right. So I checked the part number against the ACL online catalogue and for the Toyota 3T and it came up with the same part number. I continued on and I checked the gap of all the rings and they seemed within limits but what I didn't check was the back clearance of the rings on the pistons. This meant the the rings stuck out of the pistons but not enough for me to notice (first time rebuilding). I remember thinking that it was a bit hard to turn over once the crank and rods where all torqued up and I asked a couple of people and they said yea it will be with fresh rings. Turns out when the motor got a little warm on the motorway, the pistons must have expanded enough for the real damage to happen and forced the rings into the bores. I'm surprised that it got as far as it did. Lesson learnt thats for sure! I have managed to locate some oversized pistons from Bowden Engine Parts which is bloody fantastic as I didn't want to fork out for a set of forged ones. This morning though, I wanted to double check that I defiantly got the wrong rings from ACL. The rings are actually Grant Piston Rings from the US (ACL being the NZ supplier) and on their website the Toyota 3T piston rings have a completely different part number, P1450. I rang up ACL to have a rant at them and the bloke on the other end was pretty clueless so I shall ring the manager when he's in on Friday and give him a piece of my mind. I also checked the original PS1654 against the Grants Piston Rings Mitsubishi catalogue and it didnt even come up so I have no idea how ACL are running their show?? In other news, I was getting bored of cleaning parts whilst waiting for my block to come back and pistons to arrive so I did a wee modification to my exhaust..... The old And the new
-
NZGT4's '84 Corona wagon with Civic alloy half radiator
NZGT4 replied to NZGT4's topic in Project Discussion
Sorry man, i've got next to no spares for my wagon. Theres a dude on trademe selling a whole bunch of stuff but hes down in the south island -
Last night I pulled the motor. I didnt have a crane and i wanted to try a different method so I dropped the motor and subframe down and jacked the car right up and slide the motor out. It worked well and wasn't actually harder then pulling it out the top. I guess it was relatively easy because I don't have power steering to muck around with so its just a matter of undoing 18 bolts. Anyway, I stripped the motor for a damage assessment and it didn't look too good. This is the number 2 piston that I lost compression on. If you look closely you can see the top ring is actually being held into its groove by bits of melted piston that has scrapped down and held it in place. Also note that some of the oil ring has disappeared. I wondered why the oil pan was looking so metallic. I dropped the block off to WAER this morning and they will do some bore tidying up and let me know what size pistons to order. I'm most likely going to have to get forged pistons (probably Wiseco unless I find anything different) that are going to be over sized. Whilst waiting for that to happen I will clean up the front subframe and I would like to take some measurements of the calipers and brake discs so i can keep an eye out at Pick-a-part for an upgrade. Oh and I'm now looking for donations or sponsership as aftermarket pistons are friggen expensive.
-
Yo dude. Just pm you about a garage. Im at base as well. If need be you can you use mine
-
What a weekend. Got the motor painted and pretty and installed and it even started first pop! Photos...... All looking good. Went for a test drive down to Bunnings after running it for a while and making sure there weren't any leaks etc. Had no issues with it and came home and checked fluids and everything was looking good. But life isn't that easy. I went to help my old folks this afternoon and going along the North Western motorway I had a lose of power and the temp was climbing quite high so I managed to get off at Te Atatu and limb down to a side street and it stalled as soon as I put the clutch it. Shit. Initially I thought I had seized it because of the way it stalled. Took the plugs out and just let it cool and turned it over a few time to get the coolant circulating a bit. Luckily a friend from the GT4 club lived near by (also the dude that did the machining for me) so I sheepishly drove over to his and we started investigating. I had a thought that maybe it was running to lean because of the colour of the spark plugs so we changed the timing a little to advance it. That didn't do it so we tried the old rag-down-the-carby-to-flood-it trick just to get some more fuel in there but it was still missing. Took the plugs out again and there was next to no compression in number 2. Not what you want to find out just after a rebuild. I gentle drove home on just 3 cylinders and I started the task of figuring out where I had gone wrong...... It sucks taking 10 steps forwards then at least 40 steps back. Took the head off expecting to find a melted piston or a valve that had bits missing out of it but nothing obvious came to light. But, the bores of all four cylinders are well and truly scratched/scrapped. Its easy to feel the marks with my finger which is pretty bad. Plans from here are to pull the motor (again), strip the block, inspect everything, buy new pistons (probably) and get the blocked re-bored. Money, money, money. Anyway onwards and upwards................
-
-
I spent one evening cleaning up the gearbox which really, really filthy. When I removed it from the car I had to remove the gear lever assembly. Normally that has a rubber boot over it to stop stuff getting into the housing where the lever sits. The boot was split and the housing was full of shiat so I'm surprised that I could actually change gears. The rest of the gearbox is fine as is the clutch apart for the release bearing so I chucked another one in yesterday. I started to put the bottom end back together yesterday as well. It's not actually to difficult as I had the Toyota manual right next to me and I was constantly checking out how to vids on youtube and also messaging a mate that is an engine rebuilder. I only got the crank and pistons/rods in but I figured that was going to be the hardest part. That's where I'm up to at the moment. Time to have lunch and crack on (yah for night shift). I went around the whole thread thing a bit back to front but anyway, the discussion thread is here.... //oldschool.co.nz/index.php?/topic/46545-nzgt4s-84-corona-wagon-with-civic-alloy-half-radiator/
-
Kia Ora! Brief history of my 'Rona. I bought at the end of last year to be my daily drive. It was good nick with just over 230k's on the clock and on the test drive it felt nice and tight apart from one knock coming from the back. The knock was from the exhaust hitting the tow bar which resulted in getting a new rear muffler. I opted to get from the axle back a 2" exhaust set up with a "sports" muffler to give a nice rumble. Also when I picked it up from the previous owner he gave me a set of lowering springs for the front end so I chucked them in. After driving around like this for a wee while I noticed the radiator leaking/showing signs of "wetting" and rotting. Time for a rad swap! I used a Scarles Civic "half rad" as it was cheap and was going to be easy to make some brackets to install. I also figured, even though it is small it would still do a better job of the current set up. The factory shroud for the fan wouldn't fit the new rad and I had a spare electric fan off my GT4 project so I figured I would ditch the old clutch fan as well. Simple brackets to make it fit in the factory location. Welded up thanks to DKM over in Wairau. At the same time as replacing the rad, I needed to fix an exhaust leak and clean out the starter motor. When I took the exhaust manifold off I noticed a leak coming from the welch/frost/core plugs. Turns out they were almost rusted all the way through so in went a new set of those. After seeing the inside of the water jackets I decided that it would be best to change the water pump as well and for piece of mind I got a new thermostat and a couple of gaskets. This is what the final install looked like. I'm yet to wire in my thermo switch for the fan so currently its on all the time. After dorting around like this for maybe 3 weeks I notice a coolant leak coming from around the head/coolant inlet pipe. I figured it would just be one of the new gaskets that I put in not sealing but after more investigation I found some oil mixed in with coolant dribbling down the side of the block. Bugger. Head gasket was on the way out. I've never really cracked open a motor before and on my GT4 I had the motor rebuilt professionally but that cost me an arm and a leg and the neighbours dog. Seeing as the Corona had a very simple 3T motor I thought I would get amongst and do it myself. After whipping the head off it was easy to see where the head gasket was failing. The whole motor was actually looking in bad shape. It was obvious that there hadn;t been any actual coolant run through the motor for quite some time as there was heaps of corrosion in the head and the water galleries on the block where pretty bad as well. After stripping and cleaning the head I decided that it would be best to get it acid dipped to get ride of all the crap out of it and depending on how that came up whether or not to get it surfaced. Whilst tidying up the rest of engine bay I poked around the lifters for the push rods and discovered really sludgy oil with way to much grit and grim in it. What condition was the bottom end it??? The decision was made and after a long night I pulled the motor and gearbox out (go simple old school cars that only need one person) and stripped it right down. The oil pan had heaps of crap in it so I'm glad I did. I sent all the essentials to West Auckland Engine Reconditioners and they acid dipped the crank, pistons, rods, head and all the other stuff. New bearings where ordered (after struggling to find any) and piston rings and gasket sets for the whole motor. The rebuilders honed the block, polished the crank, skimmed the fly wheel and surfaced the head. I put the head back together on the weekend and I picked up the rest of the parts yesterday.
-
Alex's 1968 'oldman special' HB Viva discussion....
NZGT4 replied to yoeddynz's topic in Project Discussion
Kia ora Alex, Just read through your build and I have a question about the old 12A set up. When you drilled and tapped the compressor housing for your fuel drain, where did you drain it? Did you have some sort of return to the tank or back to infront of the carb? I'm trying to think of ways that you could plumb it without causing a massive boost leak. Cheers Ethan PS Jealous of you meeting and greeting Matt Farah haha -
NZGT4's '84 Corona wagon with Civic alloy half radiator
NZGT4 replied to NZGT4's topic in Project Discussion
Oh and fitted a new water pump for peace of mind! I love how its run off the fan belt and not the cam chain. Its so easy to replace! -
NZGT4's '84 Corona wagon with Civic alloy half radiator
NZGT4 replied to NZGT4's topic in Project Discussion
I picked up a whole load of parts for the old girl the other day. I cleaned up the starter motor and it starts so quickly now so I'm stoked. I replaced the welch plugs with shiny new brass ones that look nice. I put new gaskets on the in and out sides of the exhaust manifold so no more tractor sounds. And I finished my radiator brackets. Stoked with how they came out! And the finished product. Now to install the rad and fit the fan and the hot days can come at me! -
Kia Ora! My method of fixing up my failing cooling system. I went on a road trip over new years and my started motor crapped out. To have a look at the starter the headers have to be taken off. When I got them off i noticed that one of the welsh/frost/core plugs was leaking. Now I already new that the radiator was on its last legs/the core was rotting/tanks leaking and a heater hose needed replacing so I figured it was a good time for a cooling system overhaul. I went to a radiator shop for a quote and they said $275 for a new core with modified second hand tanks fitted. Not wanting second hand stuff and I new I could get cheaper, I was looking down the road of retro fitting an ally rad. I picked up a "half sized" civic alloy rad from Scarles for $130. Obviously, to make it fit will require some brackets made up and also some fan modifications. As well as the new rad, I've taken out the old welch plugs (no. 3 cylinder was the leaking one and I found no. 4 cylinders' was very close to castisrophically failing) and chucked the garden hose down there to flush all the crap out. Turned out I needed a pick and some wire to get rid of the rust and sludge from around the no. 4 cylinder. I don't think any anti-freeze had been used for quite some time. Anyway, the radiator install so far..... The old rad, notice the "soft" core on the lower left and right where it has started rotting. The new rad compared to the old. The alloy rad is a 3 core and here's hoping that a new alloy rad with an electric fan will be good enough to keep it cool. I made up some wicked CAD (the old cardboard-aided-design trick) templates to allow the rad to mounted in the factory location. I'm using 4mm think ally sheet and will get some L shaped supports welded on to stop any flex. Beacuse I'm using the smaller rad and its completely different the factory shroud wont be anygood so the old clutch fan is coming out. I have a spare 12" electric fan off my GT4 project that I shall be using. I will have to make up a switch for the fan and I don't really want a manual switch on the dash so I'm going to make an automatic switch using google knowledge to help me. I've found a wiring diagram to use and I've just bought a "Thermometer relay control module with probe" off Trademe. I just need to get a relay and fuse holder and I will be away laughing. I put an order through BnT today for all the welch plugs, gaskets and bit and bobs so hopefully should see the end result by the weekend.

