


AALAWS
-
Posts
331 -
Joined
-
Last visited
Posts posted by AALAWS
-
-
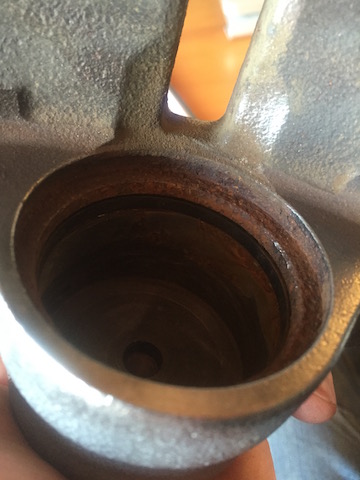
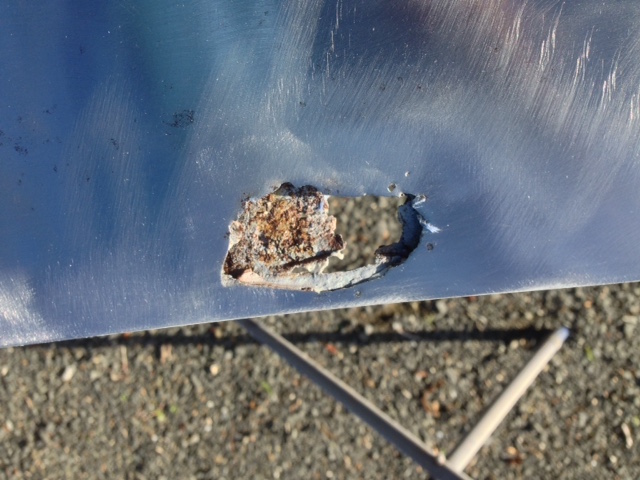
With looking at the photo of the caliper
it appears that it has rust under the seal but the rust on the top ridge isnt a huge issue as it only holds the moisture boot
best bet would be to get it bead blasted then see how bad the pitting is on the metal but would most likely be fine
i would say that the caliper piston has rust on it so would require a new one
but you need a caliper rebuild kit anyway.
would also recomend doing the rebuild yourself as saves abit $$
plus they are not hard to do.
Yo - thanks for the input!
Yeah i'll be dropping them off to be bead blasted tomorrow to get rid of that remaining rust. The pistons have come up mint with a gentle wire wheel so happy with that.
Re: the rebuild kit.....I have the toyota one, but stumbled onto a european outfit that reconditions calipers, and they look like a big operation.
http://www.budweg.com/product/details/341467?carId=23001
They have capped off the missing part but only sell their bits in bulk units so I'm on the charm offensive to see if I can pull a sneaky delivery

-
My project fund is rather low at the moment, so to keep things ticking over it's onto a few smaller jobs......which always seem to cost a bit anyway hah! So glad for the overalls and facemask etc - wire stalks flying everywhere!
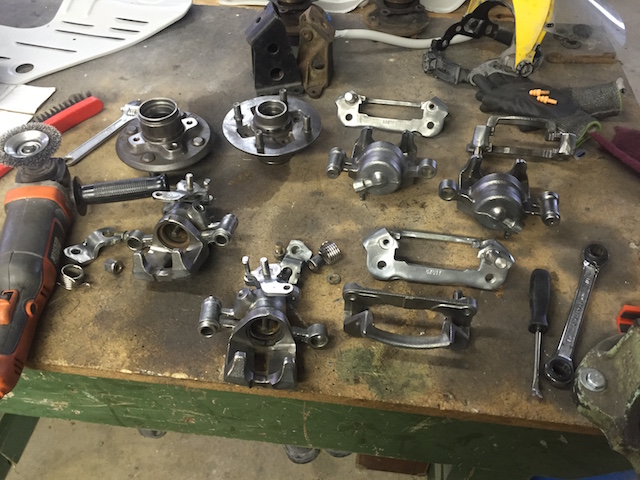
I've wire wheeled all the callipers and hubs ready for paint and rebuild.
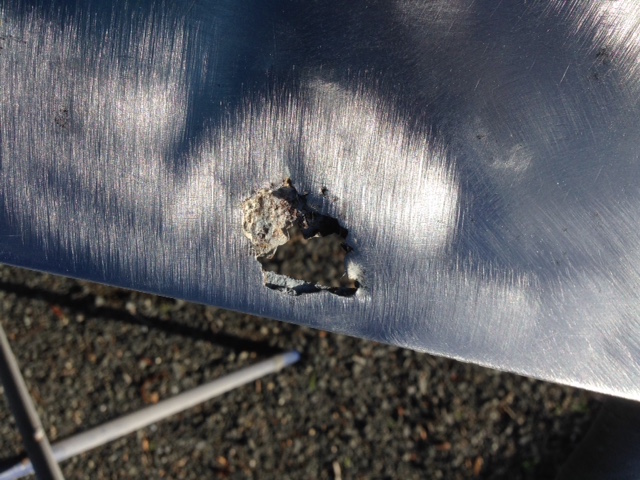
small problem of brushing off this little grommet....and theres none in the rebuild kit.
I'm asking though toyota at the mo....anyone have any ideas on where to get these?
Also some rust around the edge of the piston cylinder. I talked to a brake guy and he says they blast these parts....
Are they stuffed or saveable?
//oldschool.co.nz/index.php?/topic/49950-alasdairs-1974-ke25-corolla/page-3
-
yeah what Sheepers said and try smiths, national auto glass (NAGS) and Windscreens Direct (WD)......you never know your luck
-
I keep looking at my user name in posts and think I need a cool nickname like everyone else...........
-
yeah pretty happy with it......just need to learn how to fold and weld in new steel........or win lotto
-
- Popular Post
- Popular Post
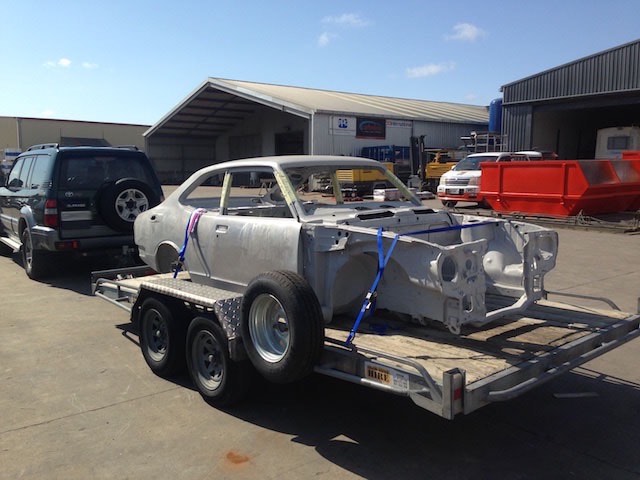
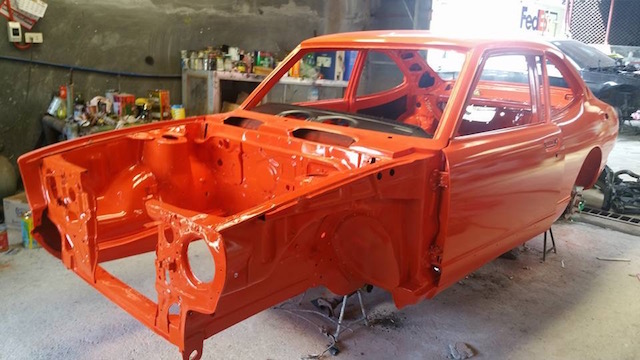
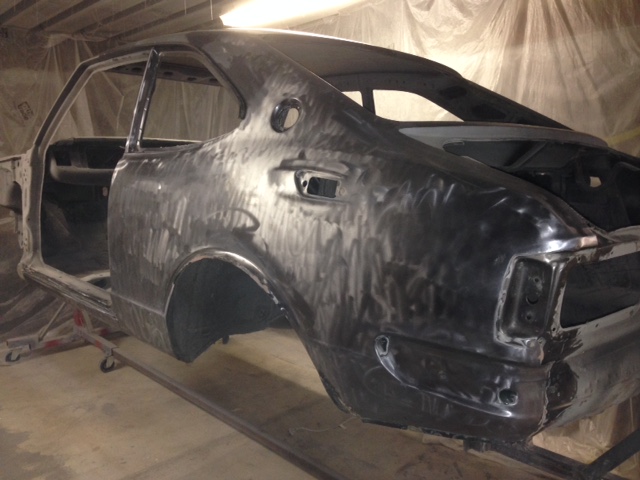
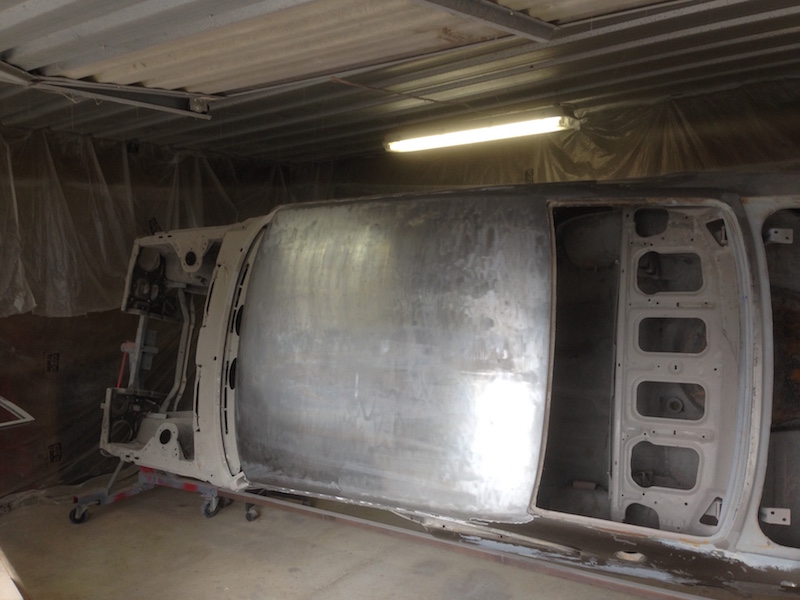
PROGRESS!!!!!!!
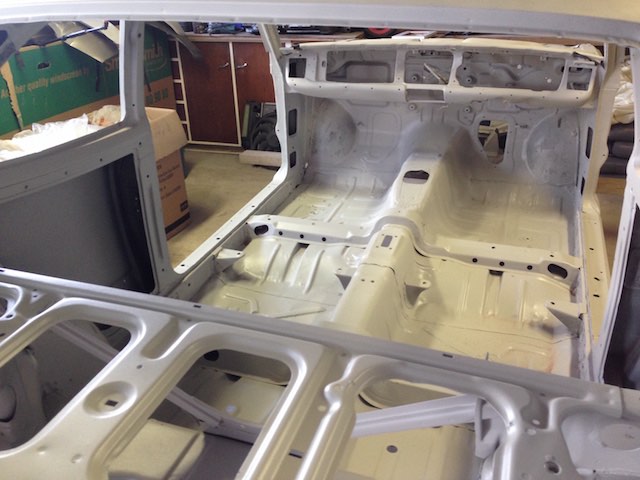
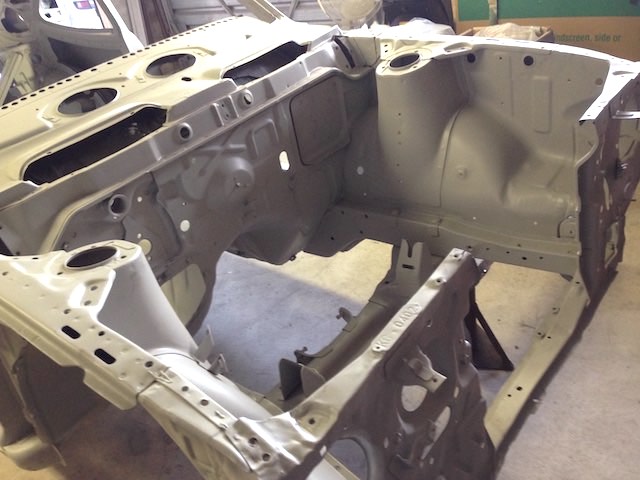
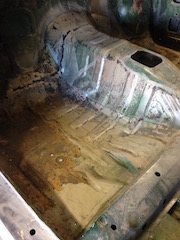
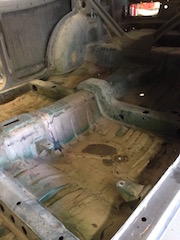
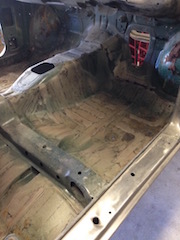
Picked up the shell etc from getting blasted and primed.
Waikato sandblasting did a good job of removing all the rust, paint etc from the underside and engine bay, and everywhere i couldn't........and with no panel warpage.
No extra rust uncovered! just a few spots where it's true extent was revealed
Also just a little bit of motivation (courtesy of some dude in the pillipines - SIC)
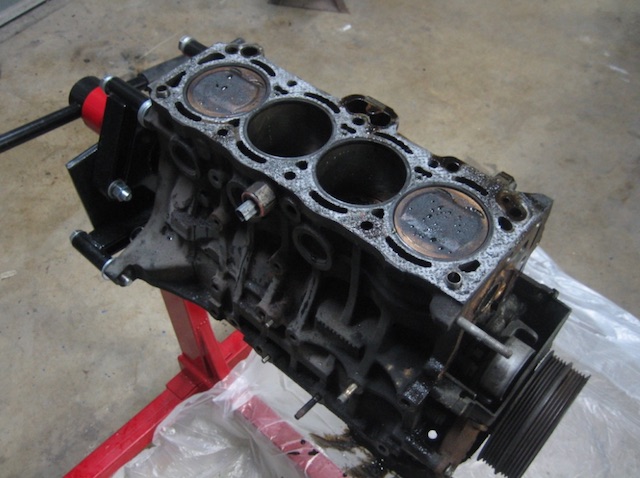
ALSO: Engine is all good, just need 0.5 OS pistons and new rod bolts.
Diff is all stripped and ready for leaf spring perches to be welded on.
//oldschool.co.nz/index.php?/topic/49950-alasdairs-1974-ke25-corolla/page-2
-
 13
13
-
Little by Little.....the story of the noob car restorer.
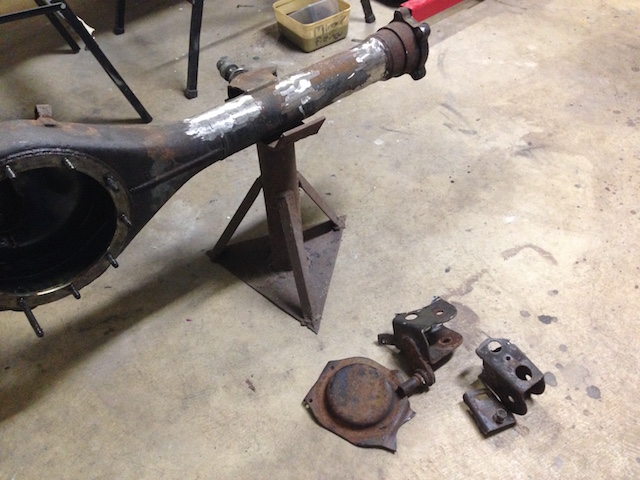
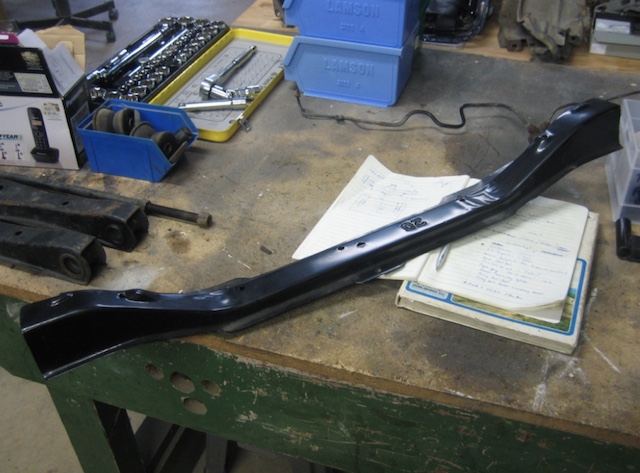
cut off half the un-needed mounts on the ae86 diff and left the pan hard mount for now. T3 does a te27 bar and mount kit that may work depending on exhaust etc.
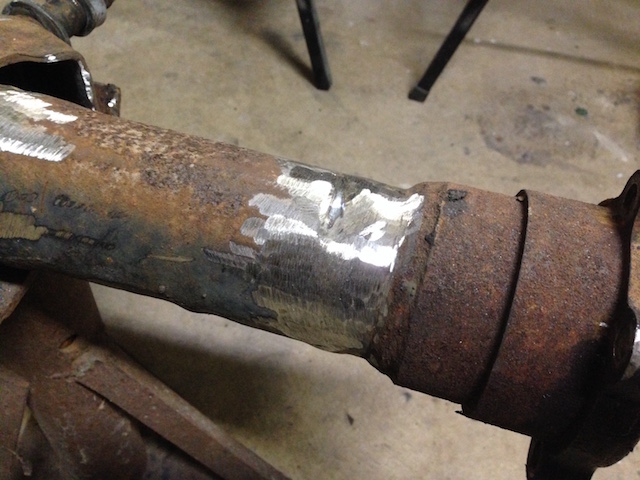
I cut into the tubing a little bit.....just wondered if I needed to fill/weld this up a bit for strength?
Also sent the engine and a few bits (hubs,callipers) to get dipped and checked over.
Nathan at Motor Preparations in Otorohanga is good to deal with. He's going to clean up the block and head, check the internals and let me know
what'll need replaced etc so that way I can budget for the rebuild - new cams, rwd water kit, cops.....port and polish.....whatever needs replacing.I'll paint it up, make it pretty, and stash it away for rebuild time when I'm ready to mock it up in the shell.
....and the shell and a bunch of other bits is on the way to get sandblasted and primed on wednesday!!! Stoked!!
-
2
-
-
Finally put an engine stand to proper use
This is my first time ever pulling an engine apart and it's going pretty well so far. Filthy as but looks in pretty good nick for 250plus kms
Turns out I went to college with the guy that owns the local engine rebuild shop so I'll be sending the block etc off to them to get it cleaned up and sorted for the rebuild.
Started prepping the ae86 diff for trimming off the mounts. The drain plug is STUCK, oh well we'll sort that later.....I was told I could keep the pan hard bar mounts for on the ke25......
a) be gentle...........
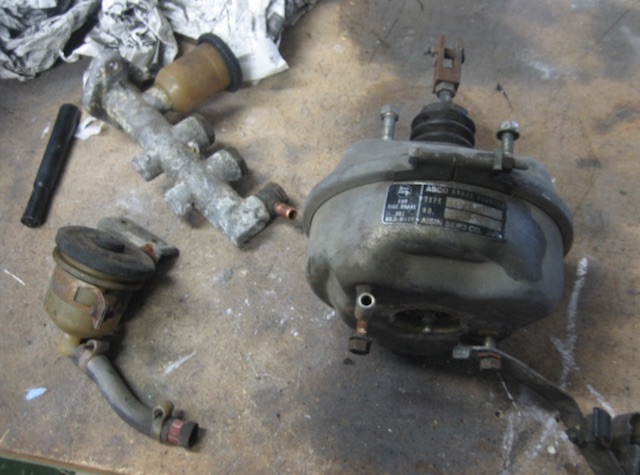
which one are the pan hard mounts? I assume I'll need to fab a mount on the chassis?Also had a few more goodies turn up in the mail.....
Cheers to Alex at ML Racing for sorting the postage on the te27 booster!
Whats the story abut cleaning/fixing these up? will the guts go flying everywhere if I open up the booster to clean it up?
//oldschool.co.nz/index.php?/topic/49950-alasdairs-1974-ke25-corolla/page-2
-
1
-
-
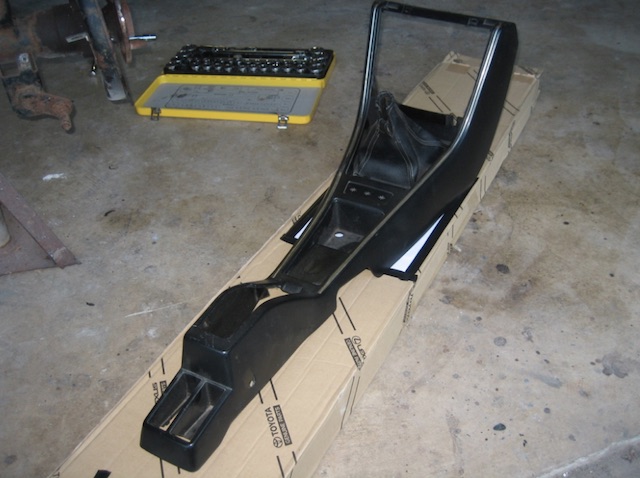
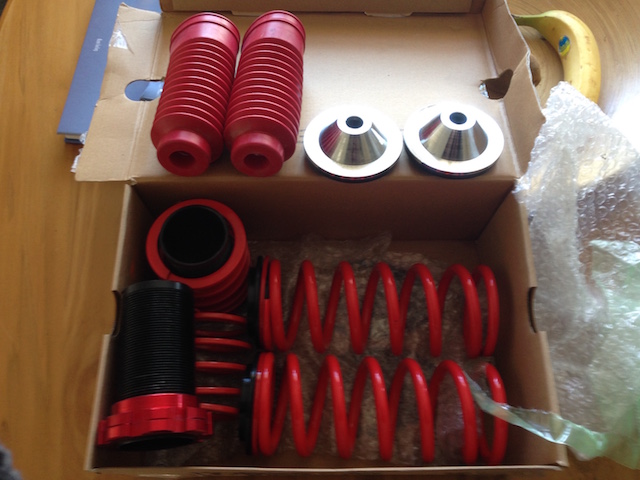
one shipment of goodies arrived.....few more parts to get and i'll get the front suspension all assembled and ready for later.
(just found my camera again so better photo's from now on too)
-
1
-
-
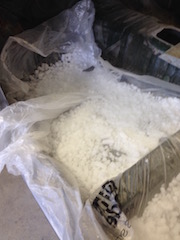
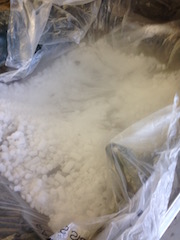
Dry ice works a treat when you grind it up a bit = no more sound deadening.
Only a few spots of surface rust under there thankfully.
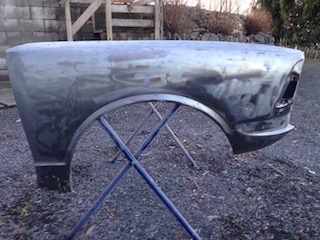
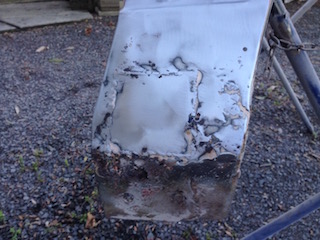
Stripped back my only genuine fender, found a mess on the bottom and another hack job on nose!!
I've got a few spare aftermarket ones but I hear they can be an average fit. I also ordered a rust repair panel for it and a few other goodies in the mail.
Now it's off to the sandblaster with a bunch of other bits.
Whats better for the subframe etc.......powdercoating or painting?http://oldschool.co....4-ke25-corolla/
-
2
-
-
go visit your local smith and smith and ask for a tube of sika urethane......probably give you one cheap or free
-
I llliiiiike it!!
-
1
-
-
Holy hell. Wat car is even underneath that pile of poo? It's partly MX5 but ???
Surely there can only one, these pics from 2014 so its going from bad to worse. Note towbar has now been cut off.
I feel visually violated by this.....WHHHHHHHHHHYYYYYYYYY!!!!!????!!!!??
-
Yes to flaps. For so many things. But pricey they be. Mitre ten had 10 pack warrior branded discs at $17. I thought nah they can't possibly be any good but bought some for a try. It turned out they worked fine and lasted as long as norton etc brands. But now discontinued
Apparently BOSCH has the new contract with M10 and is causing them to discontinue a lot of other brands and stock.
Would you guys rate flap discs over strip discs for paint/bog removal?
-
1
-
-
I had a mate give me an old 3M wire wheel that's enclosed in fibreglass.
Swears by it - reckons he's had it for over 8 years and still going strong on all the pitted rust.
Apparently 3M stopped making it, he reckons because it worked so well they didn't make any more.....
I'll give that a go over the rust spots and get some of your stuff also.
-
1
-
-
when you are striping all these panels are you coating them with anything straight after they are bare metaled?
also body looks in good nick
with that small patch of rust i would say go and get yourself a small portable sand blaster and buy some fine grade media like a glass aggregate
for all those small bits that need doing
all it would require is a air compressor to use it.
Yeah, I'm cleaning off the stripper with soapy water then some wax/grease remover and then coating/wiping it down with KEYPHOS.
Apparently it'll keep the metal rust free for 6-8 months, then just apply some more if need be - works a treat so far.
I'll look into the small blaster - thanks for the tip!
ps - is there something people put down over those patches before epoxy?
-
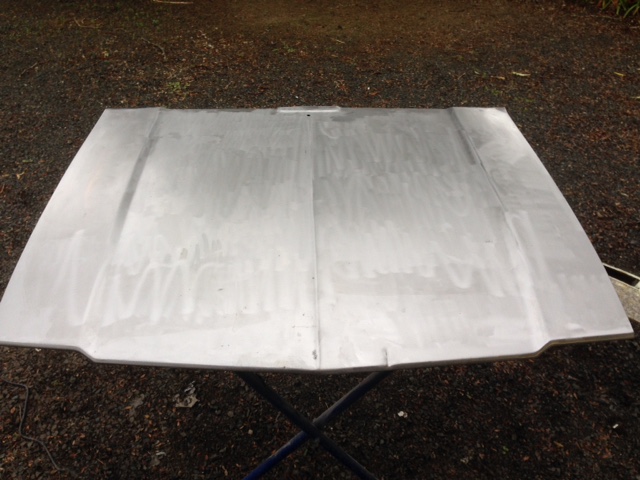
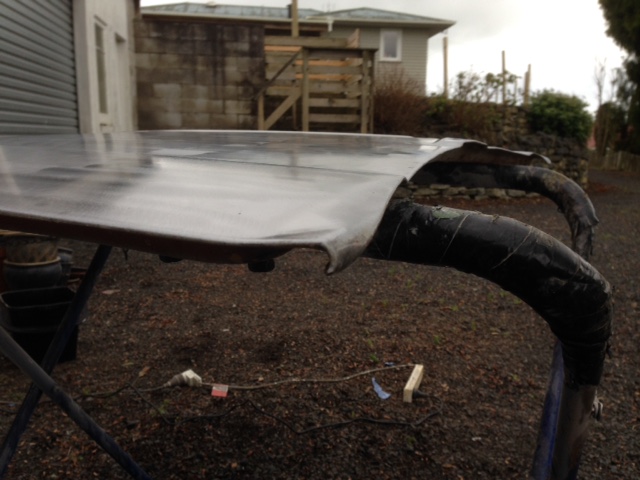
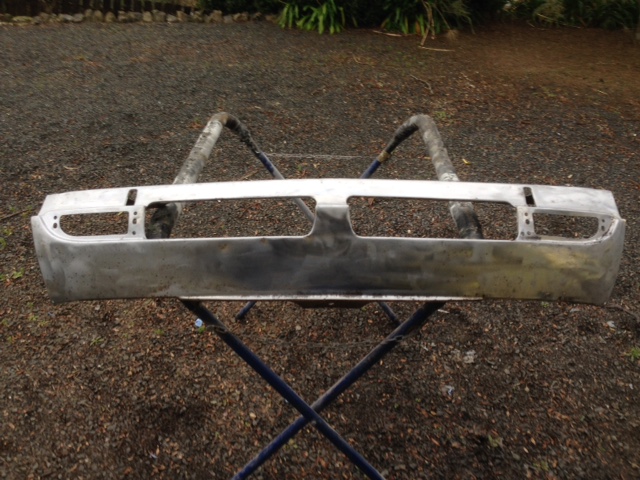
Churning through the strip discs now......just when Mitre 10 is going to stop stocking them!!
Only minor surface rust, a small dent and some bent corners........these are usually swiss cheese along the front - SO STOKED!
Easy fix for a panel beater?
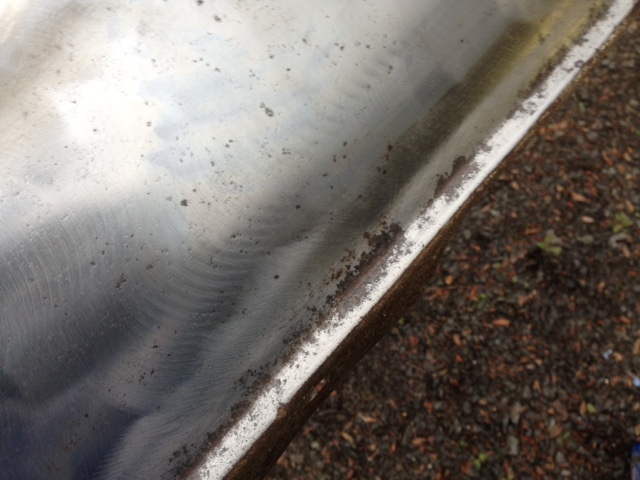
I have lots of small spots of surface rust here and there like this - do I leave it for sandblasting or what?
Help me out rust guru's!!
http://oldschool.co....4-ke25-corolla/
-
2
-
-
Looking good bro - respect for the metalwork skills
-
1
-
-
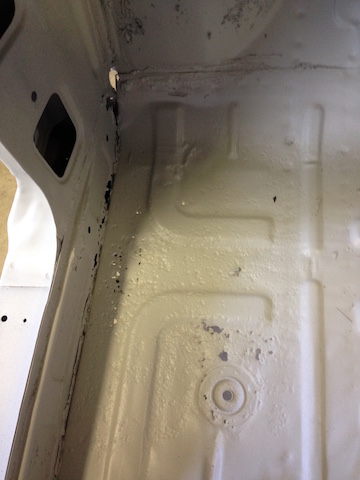
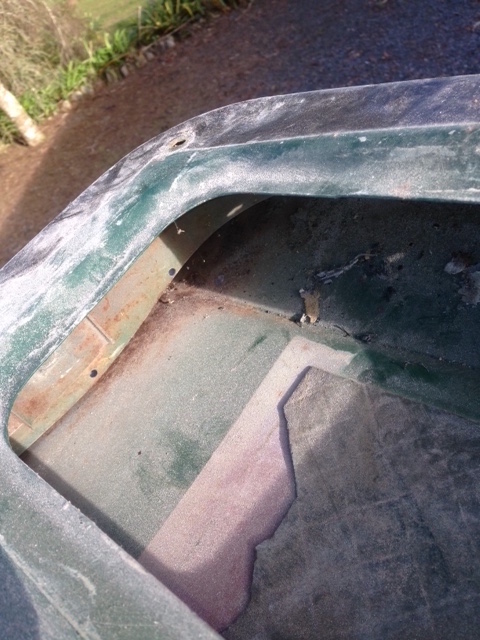
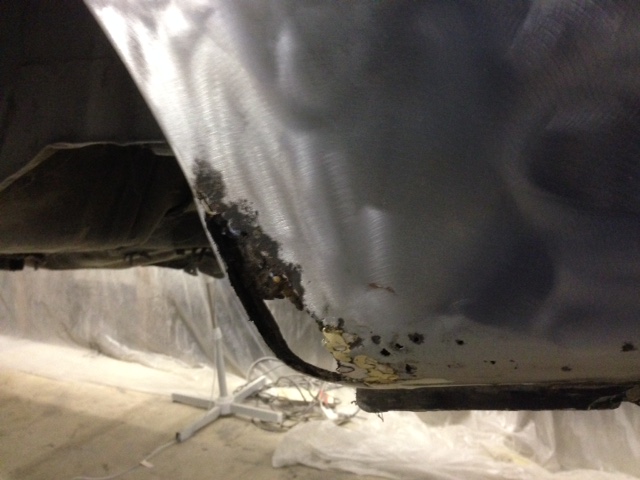
Got the boot stripped today - two big holes to deal with, all the way through
Also......what do you guys of to get rid of the surface rust inside your doors/panels like this stuff?
Some I could reach with a dremmel, just seeing what other options I have.....
Share your wisdom here http://oldschool.co....4-ke25-corolla/
-
1
-
-
dude this is looking like a pretty good shell really!
good shit
Yeah, was stoked to see such good steel under that quarter
-
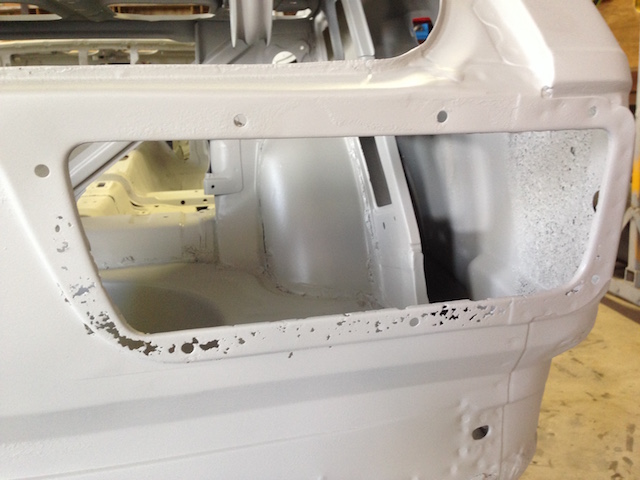
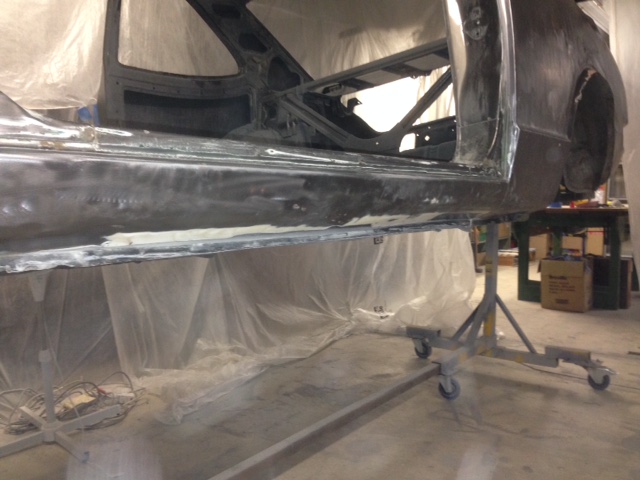
Stripped the passenger rear quarter and a few smaller spots......
Hardly any bog so came away nice and easy this time.
Bit of a crease/dent leading up to the tail light and a hole in the bottom corner, but otherwise really clean!
The sill is mint compared to the drivers side, a few dents but doesn't need to be replaced thankfully.
I'll send the shell to the local panel shop to be finished off by a mobile sand blaster and then epoxy primed
To do first:
Finish stripping door jams
Window apertures
Dry ice sound deadening
Remove bungs/screw mounts/door card mounts etc
......and........Strip top of boot, bonnet, passenger door, Beaver panel, fenders.......Yeah, getting there.......
Discussion thread here
-
2
-
-
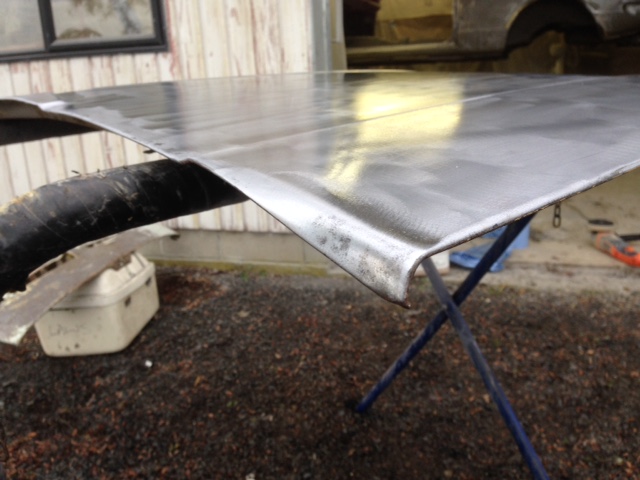
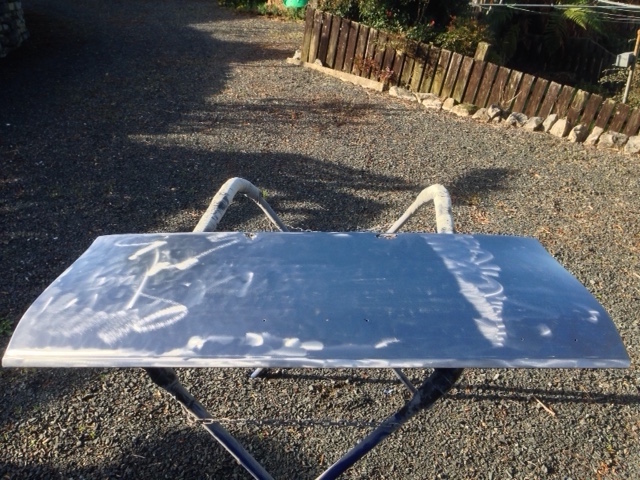
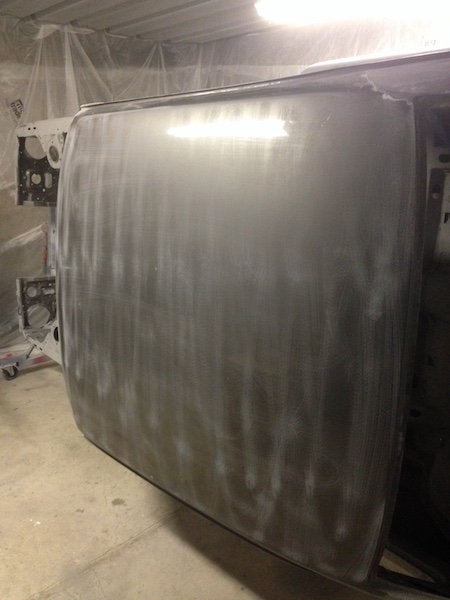
Got some shed time in yesterday avo......Stripped the roof/coated in Keyphos - great stuff! Just wipe it on and it stops any surface rust forming.
And no I haven't primed the inside - that's just the new layer of bog dust EVERYWHERE. SO MUCH DUST!
Only one small dent under it all which was nice.
I had two coats of the gunmetal grey, a layer of spray filler in spots and some red primer (didn't see any original green up there) to remove,
and even after scuffing the paint with some 60 grit, applying the stripper and wrapping it in plastic, I find I have to do it 2/3 times in some spots, and very thickly......is this normal?
I seem to spend HEAPS of time on the grinder with the strip disc too, thought the stripper would be more potent.....I'm using TERGO STRIP.
Also bought a 'dremel' from the warehouse to do the niggly bits around the doors and apertures.
With the $$ i'll have to spend on the body work, it's cool to be able to get as much done as I can myself.
-
8
-
-
So when are you putting one in?
Still stripping the paint of the shell and have rust to cut out etc.......it'll be a while.
It's a long term project but want to keep things ticking over best I can by looking into all facets of the build.
-
Cool thanks for that information, I am sure it failed as the black sticky goo was the stuff they put on the aperture when using the old rubber system that use to hold the screen in, they just urethaned over it when they bonded the screen in, it took me 3 hours to clean it off.
I got the clips for the molding on but not the trim I hope I can get that back on
You that'll do it ha ha. Rubber fit sealant mixed with urethane will leave you in the poo for sure.
There may be options for a generic rubber trim you can use as an option. I can't remember your car/screen fitment of the top of my head but glasscorp on bush rd in albany will have a range of universal mouldings you could choose from, or just pop into a smith and smith and ask if you can buy a few metres.....they'll probably just give you a bit


 which one are the pan hard mounts?


Alasdair's 1974 KE25 Corolla
in Project Discussion
Posted
so the brake place in Hamilton refused the job.......a) no tool to remove the rear handbrake bracket and after telling me on the phone they'd blast them for me, they said not unless they do the whole job.
Anyone know where I can simply get a little bit of rust removed around the top of the moisture seal??