AALAWS
-
Posts
331 -
Joined
-
Last visited
Everything posted by AALAWS
-
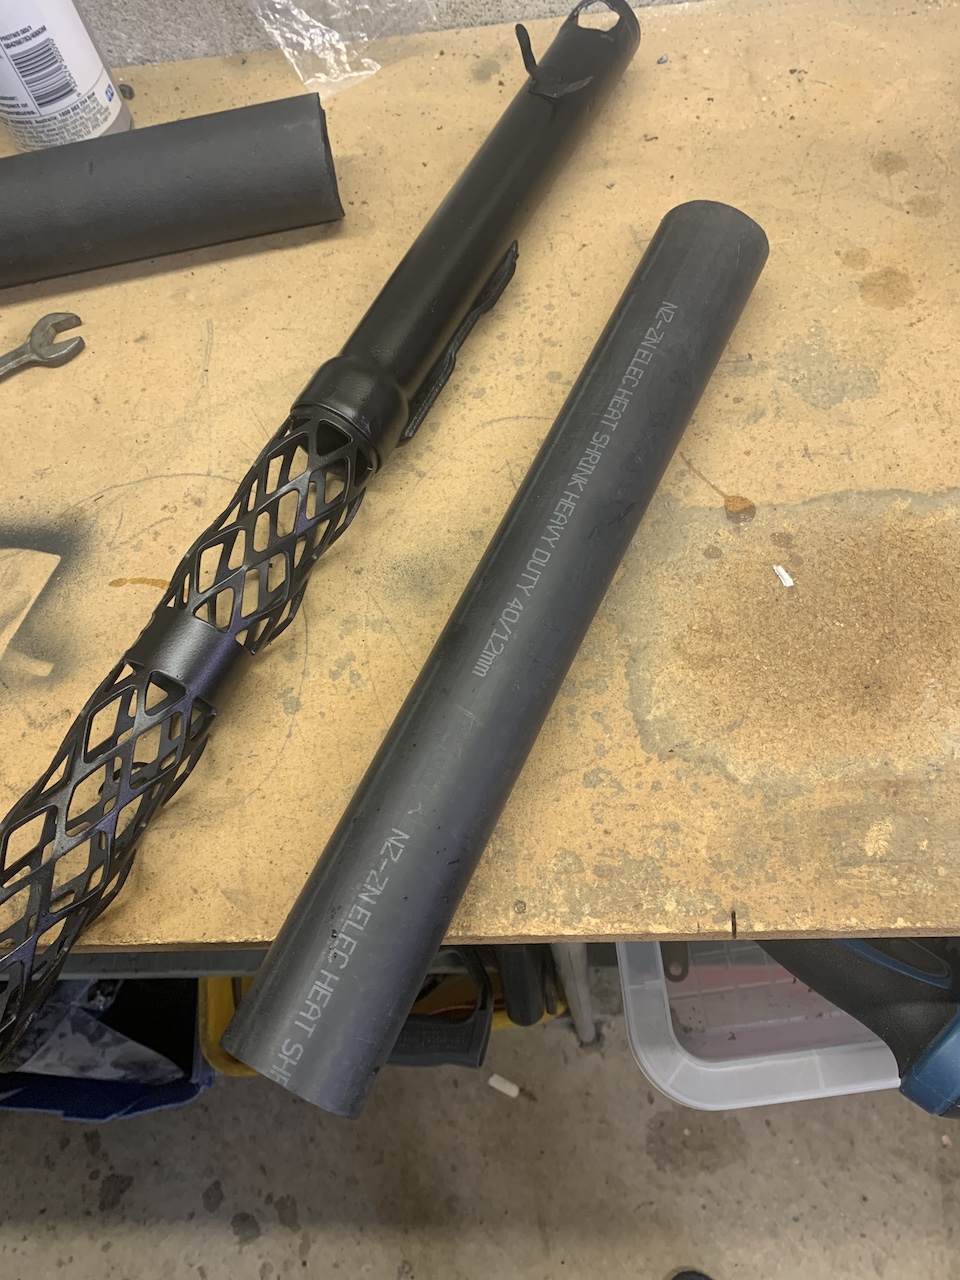
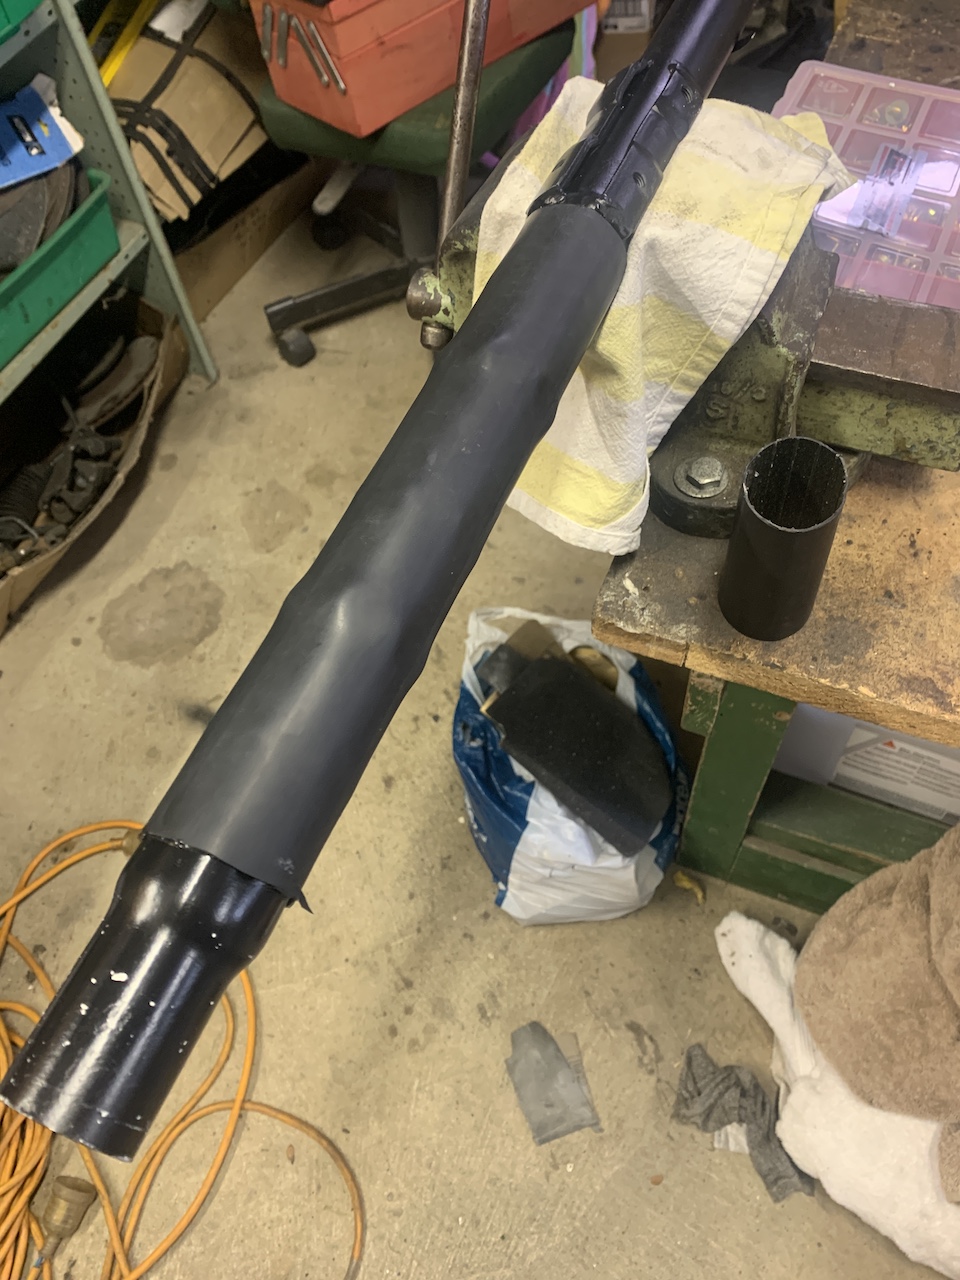
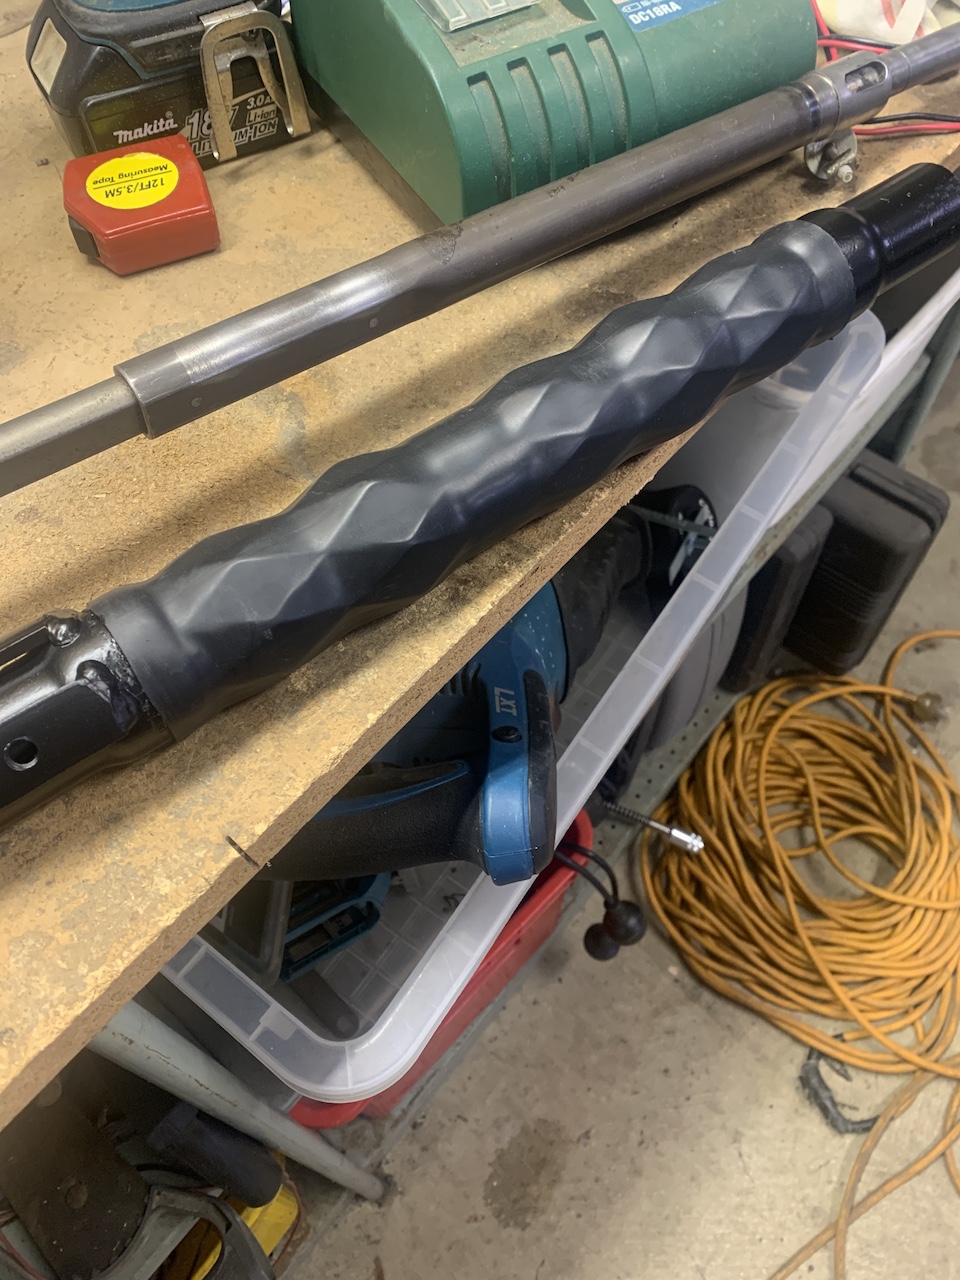
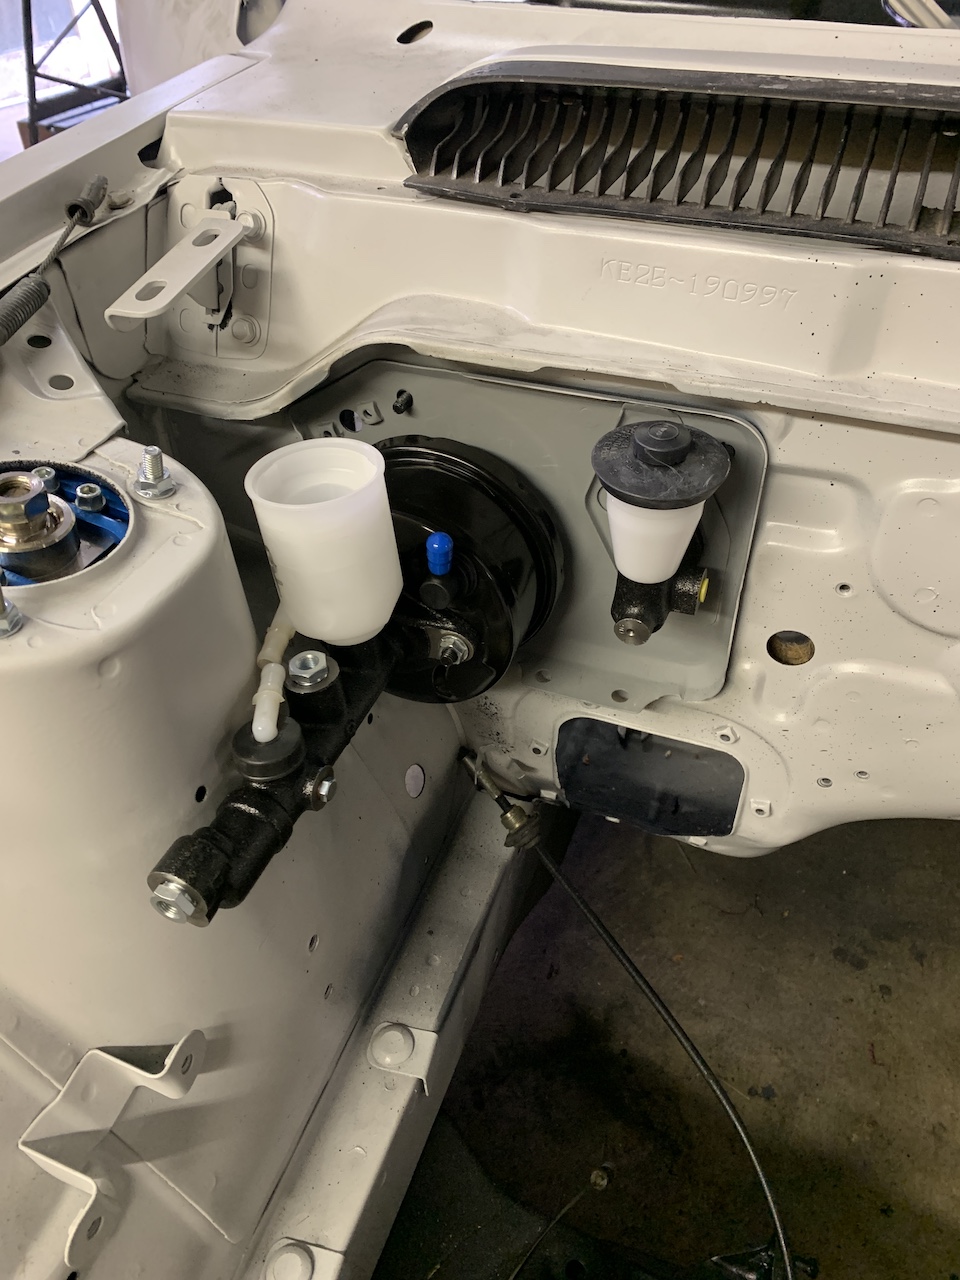
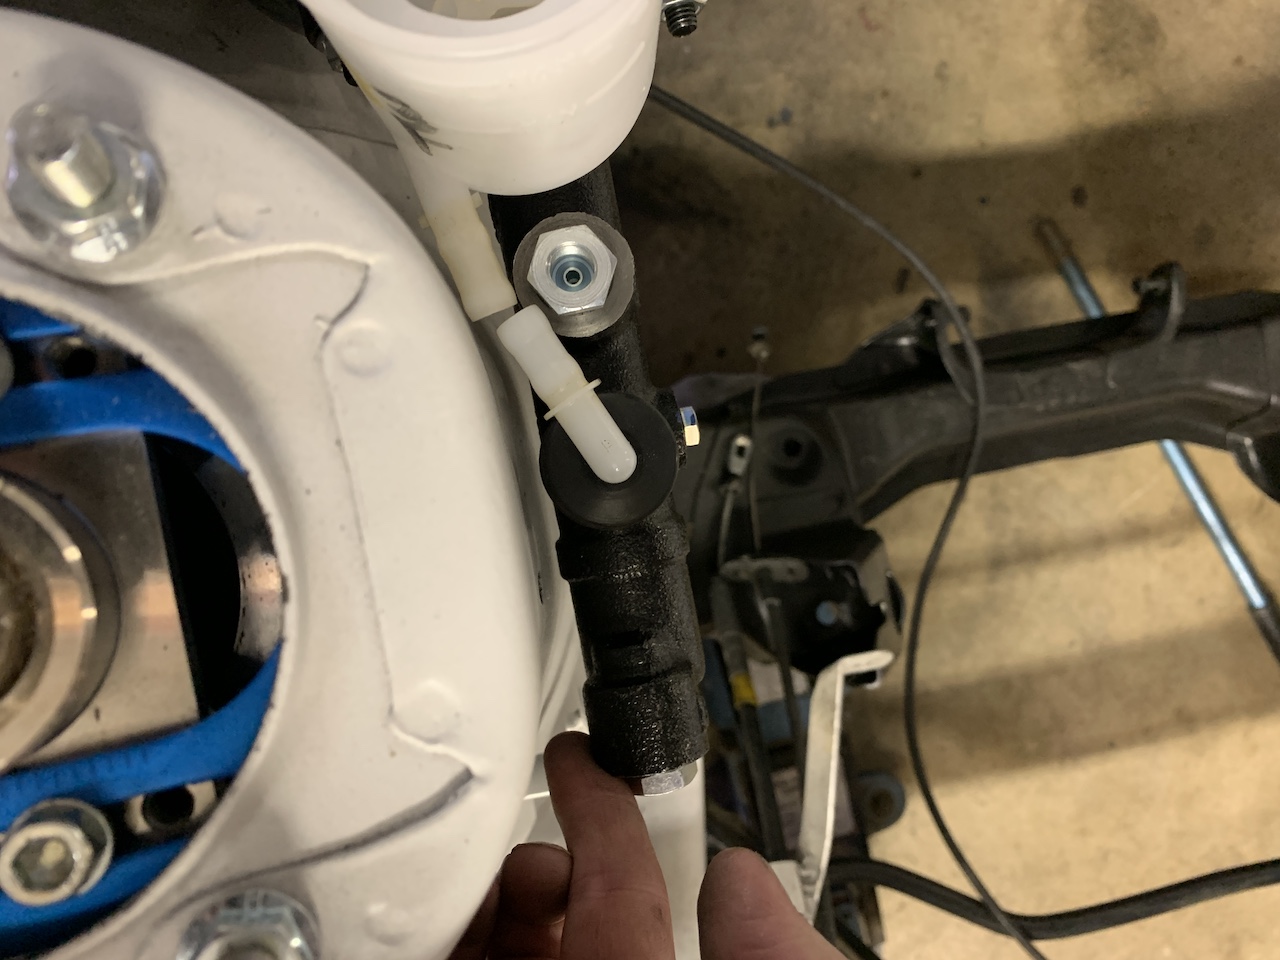
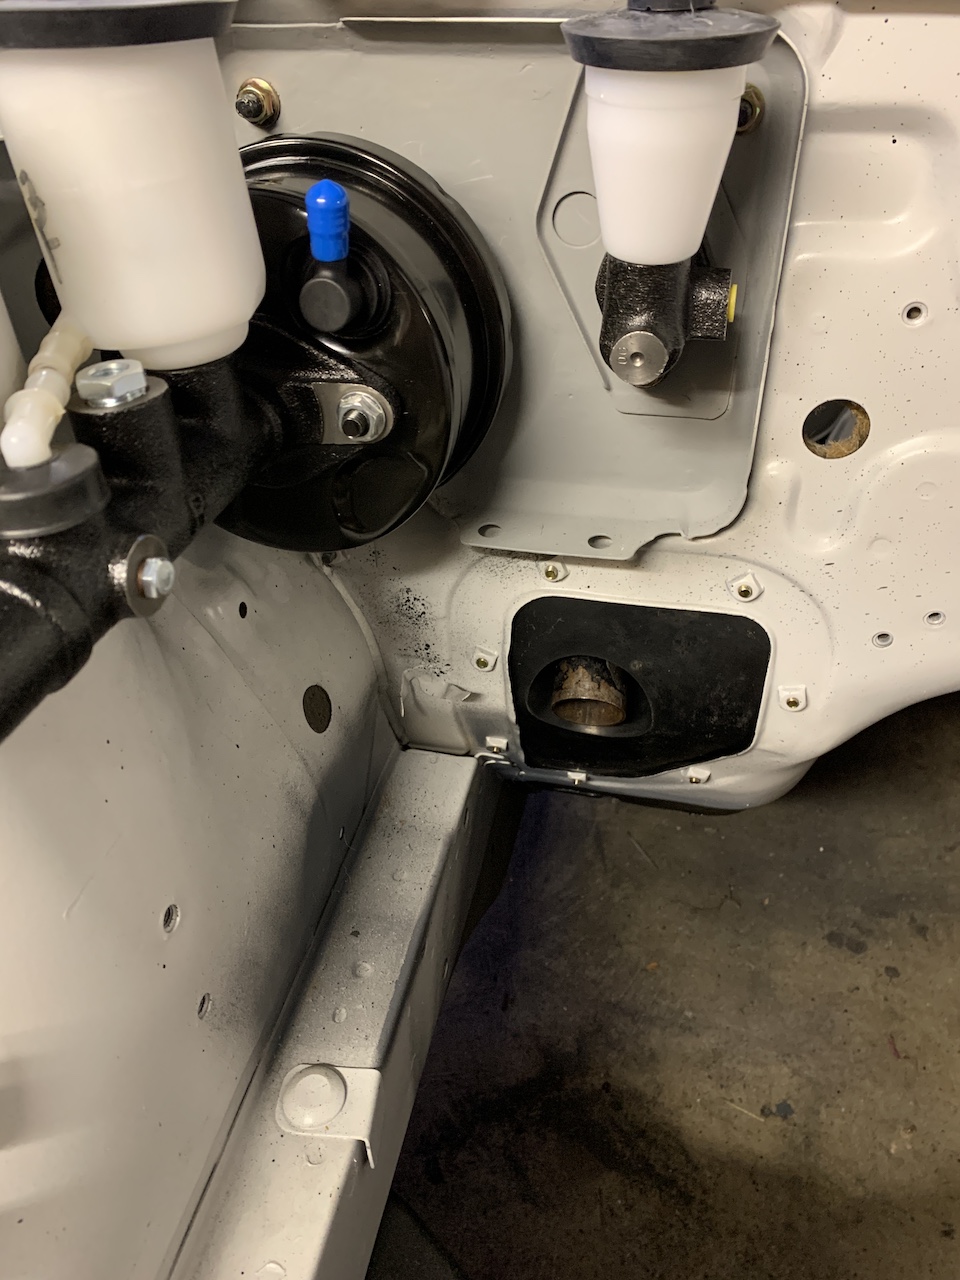
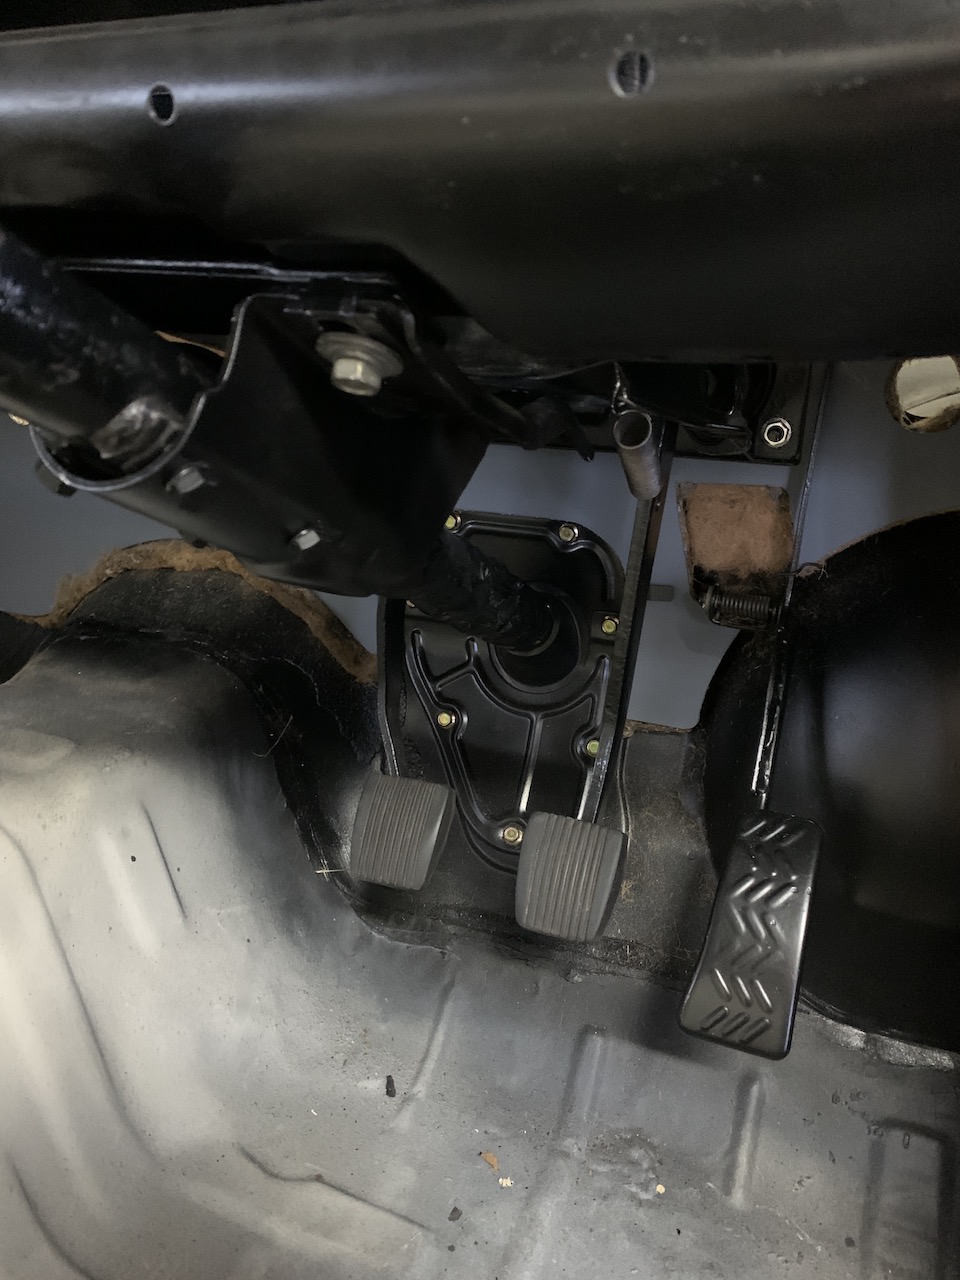
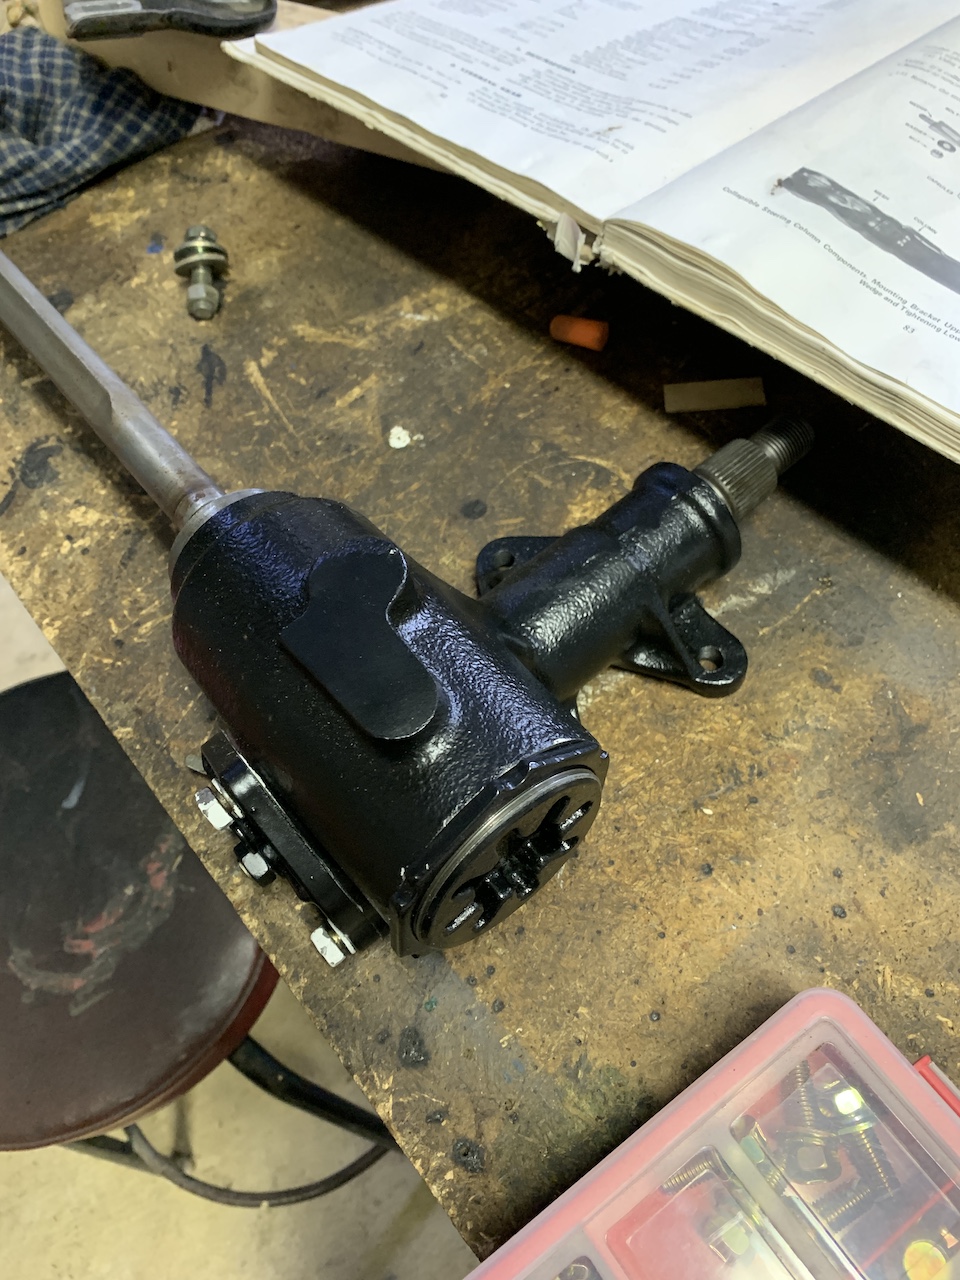
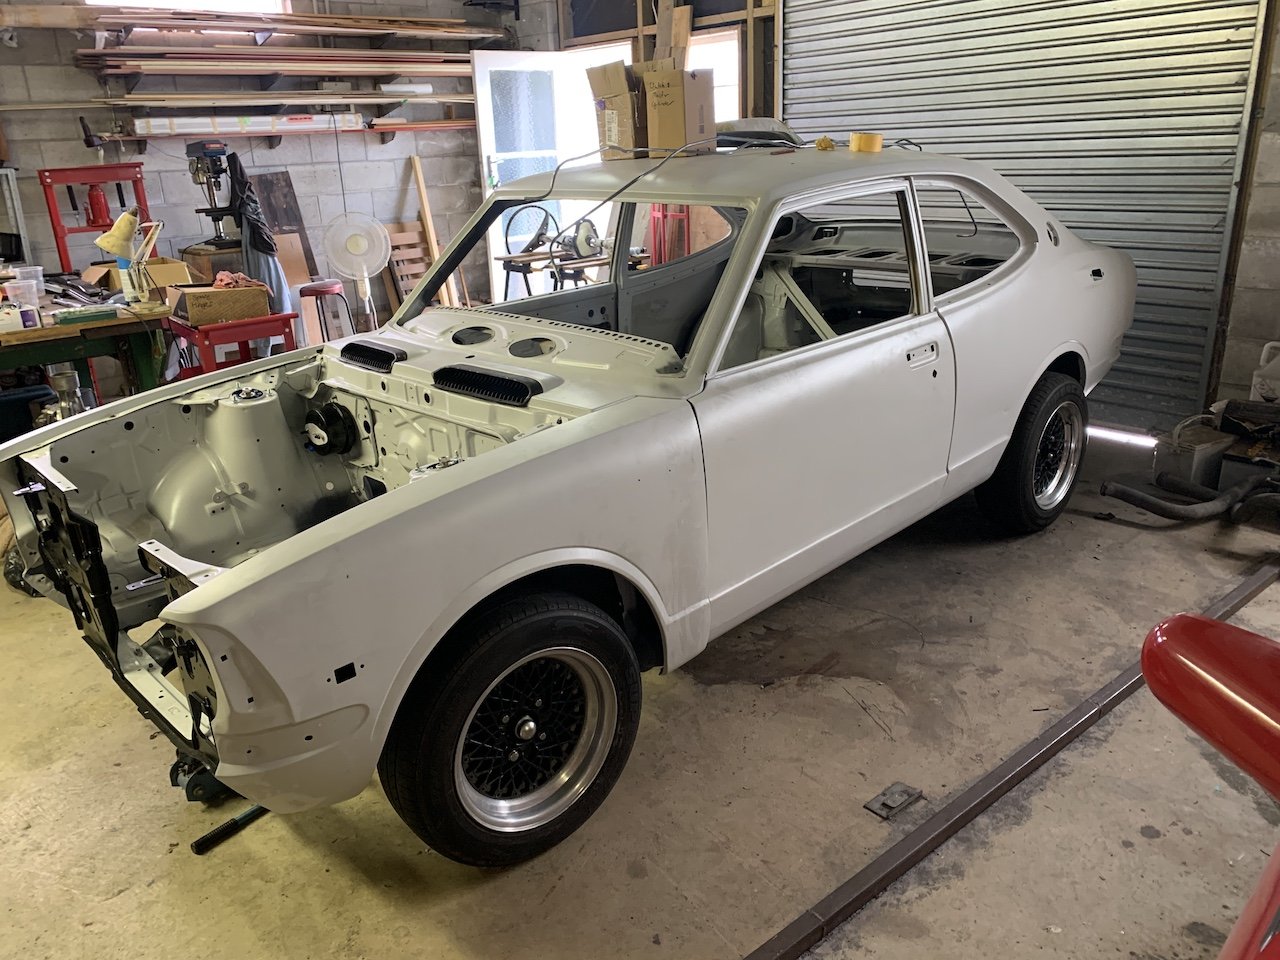
POST THREE of Three: I got some thicker heavy duty shrink wrap of a sparky mate to be the dust cover on my outer steering column - looks pretty noice. Fitted my new smaller brake booster and master, clutch master. It's pretty dang close to the strut tower, but a little manipulation of the firewall should pull it out a bit more. Fitted the steering column dust seat and the outer column along with the new hydraulic pedal box.......all fits very nice. Once the steering box is in it will be ready to roll/steer and the final panel touch ups/flare fitting can be done before I figure out my plan/$$ for paint.

- 71 replies
-
- 15
-

-
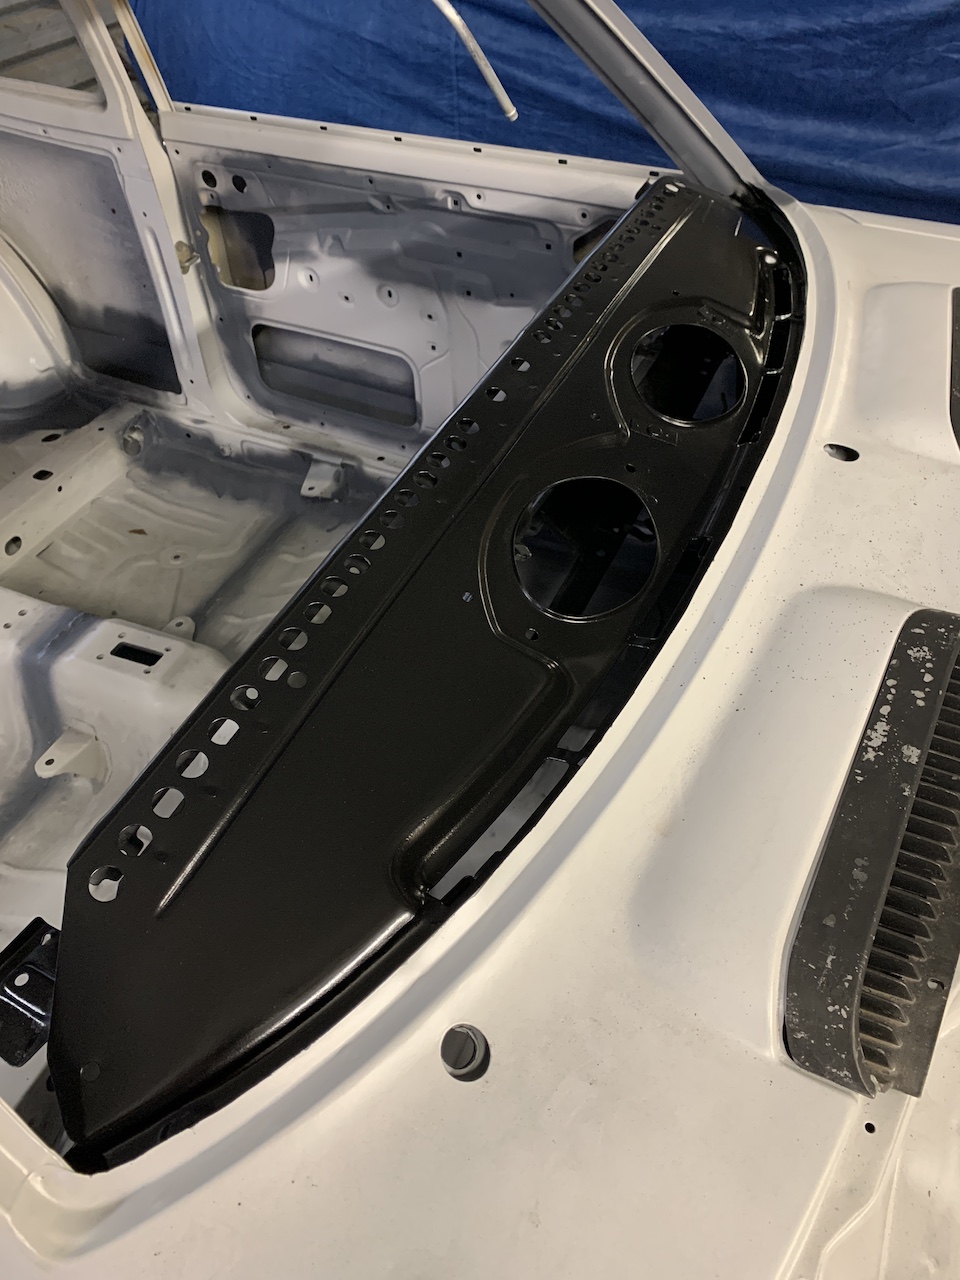
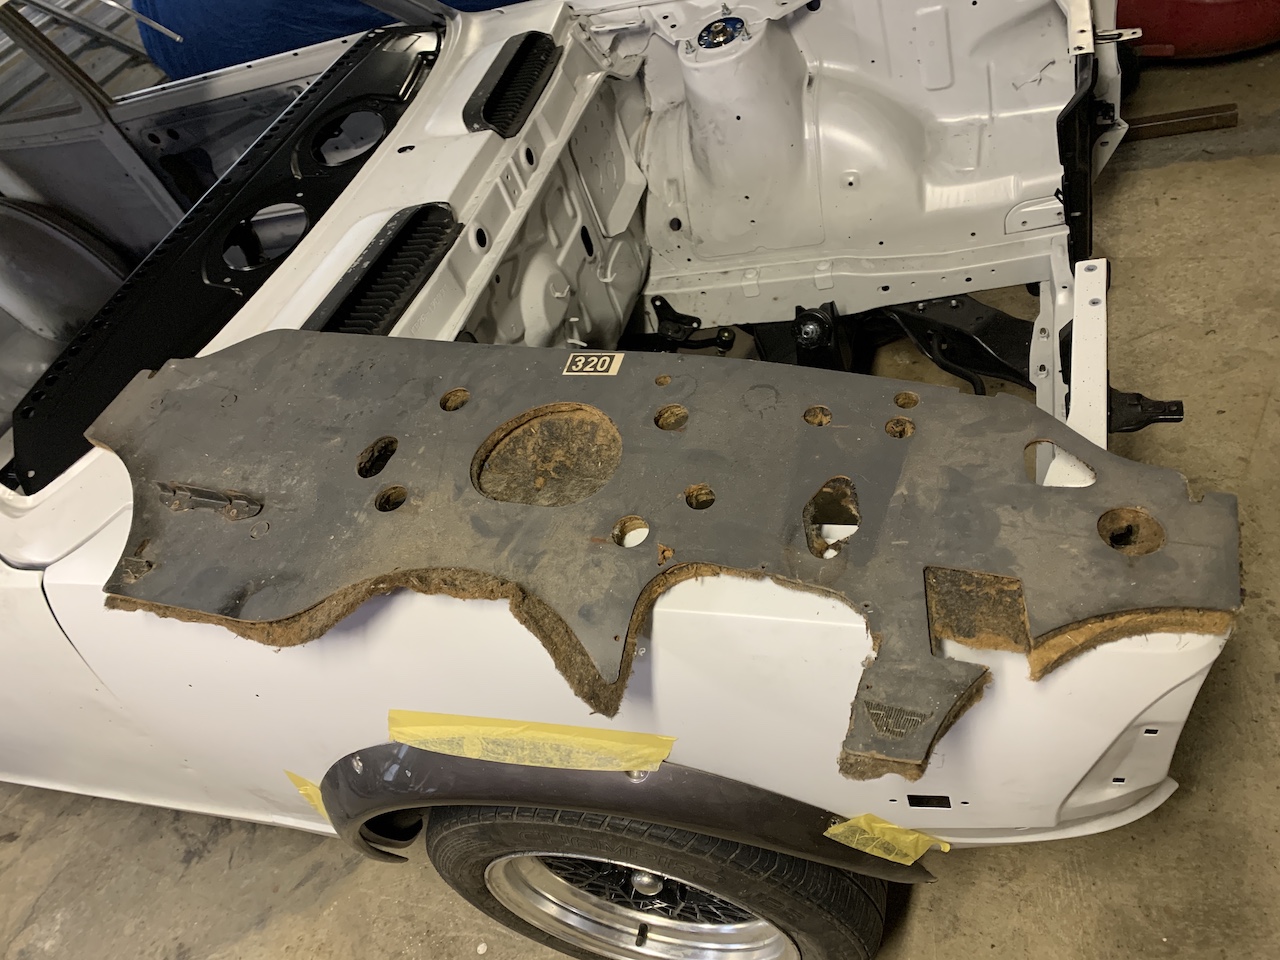
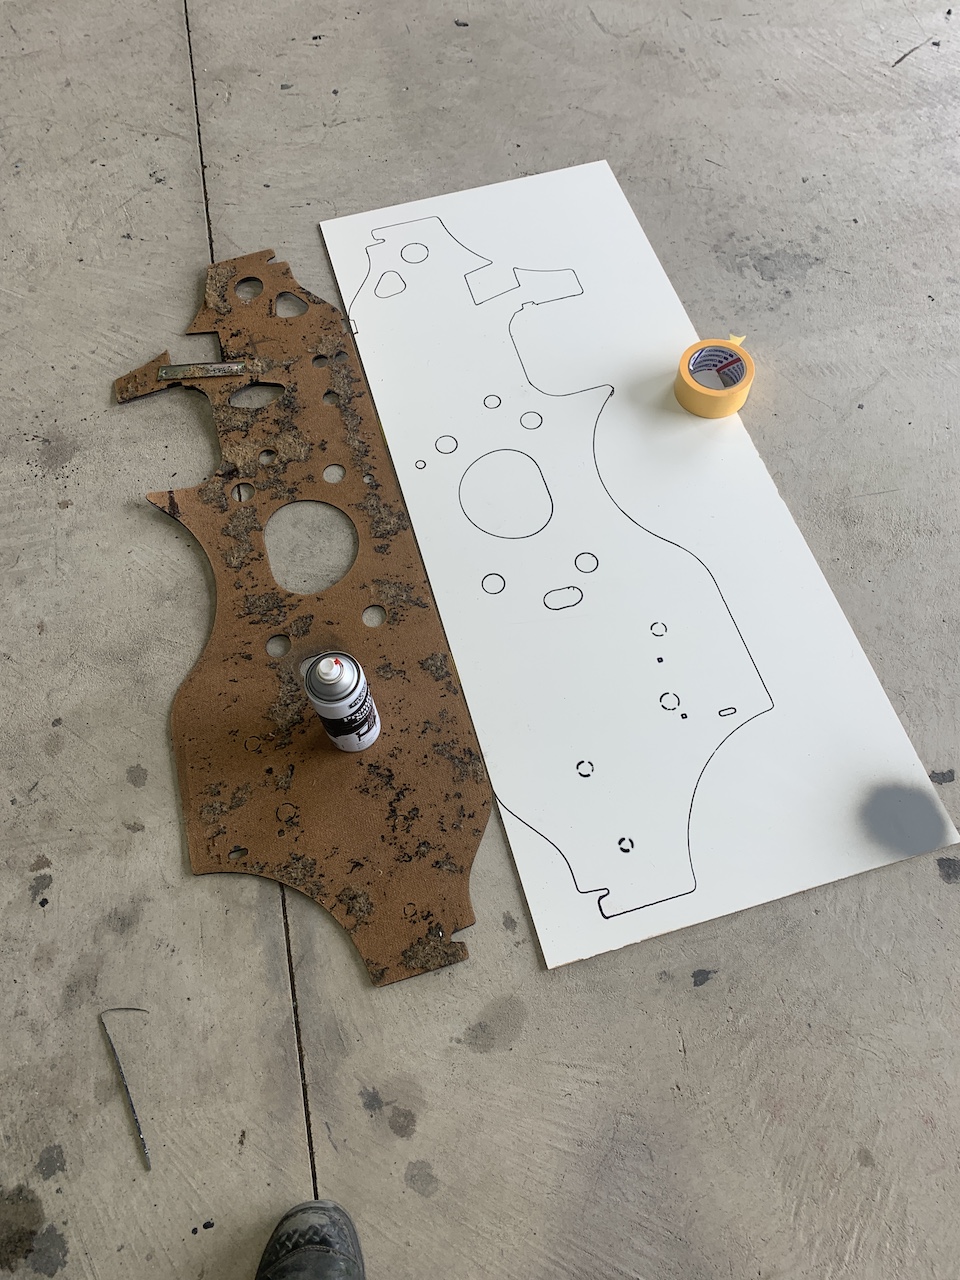
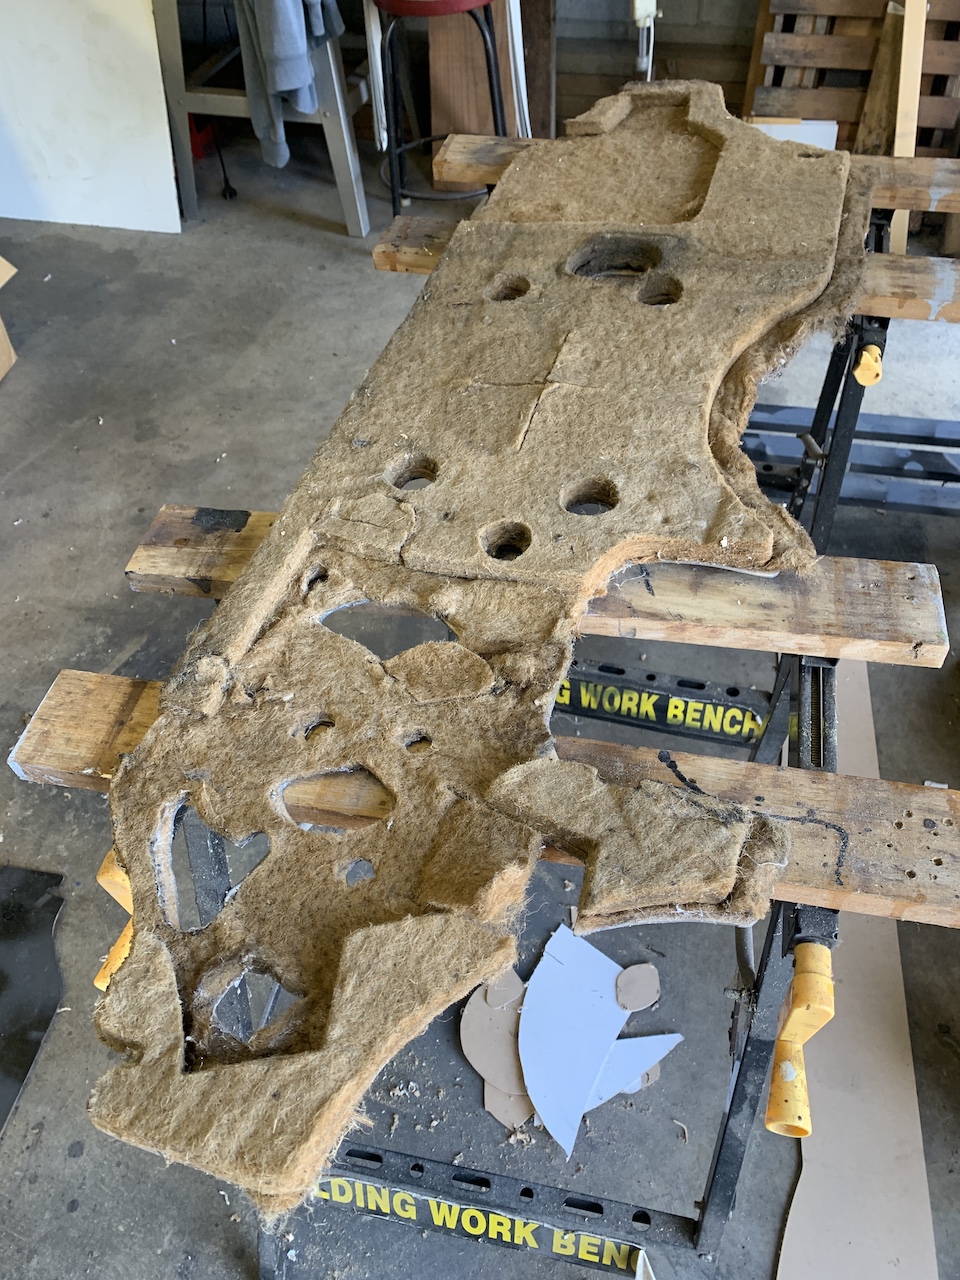
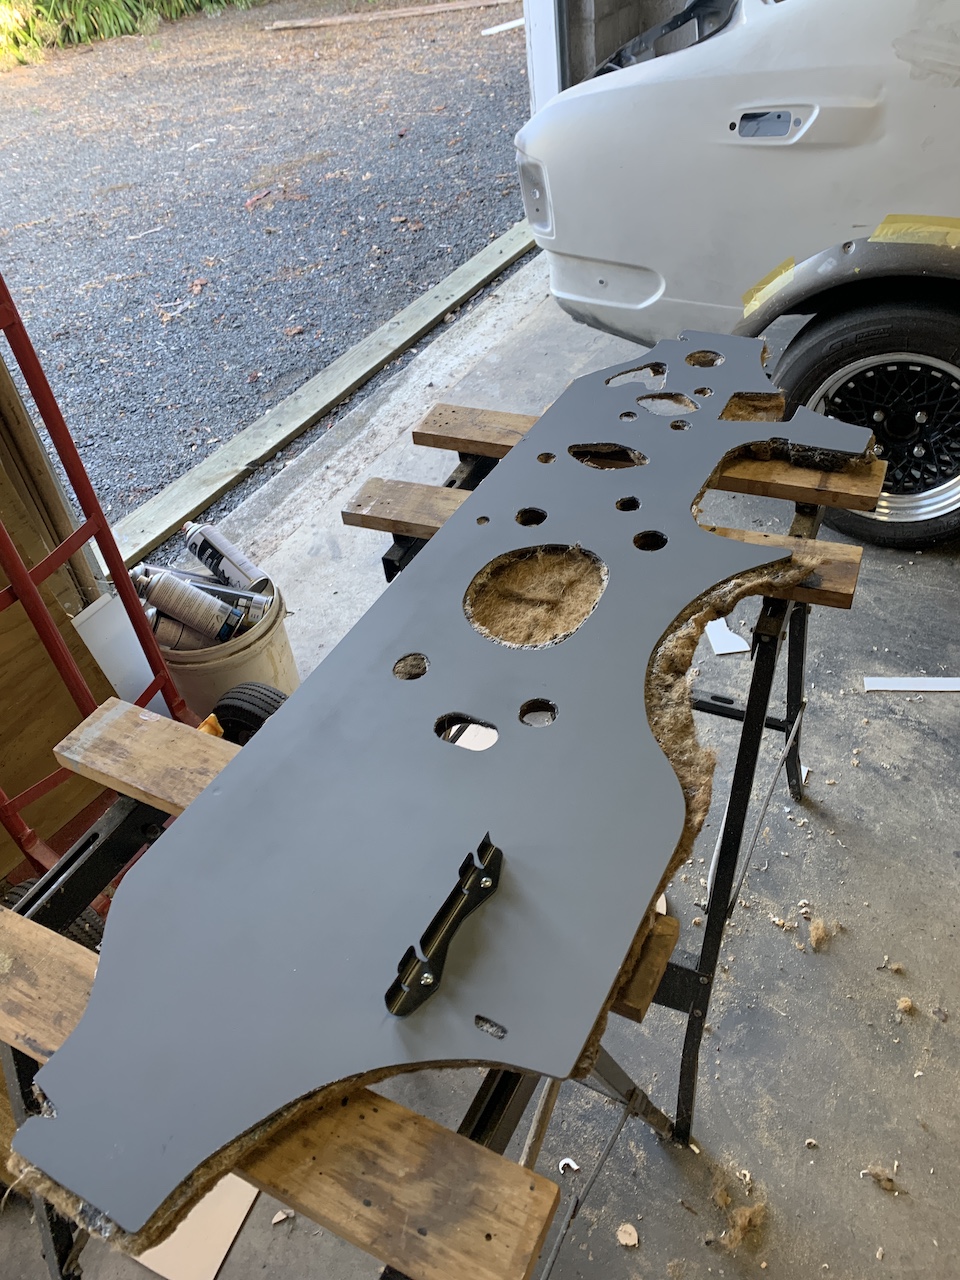
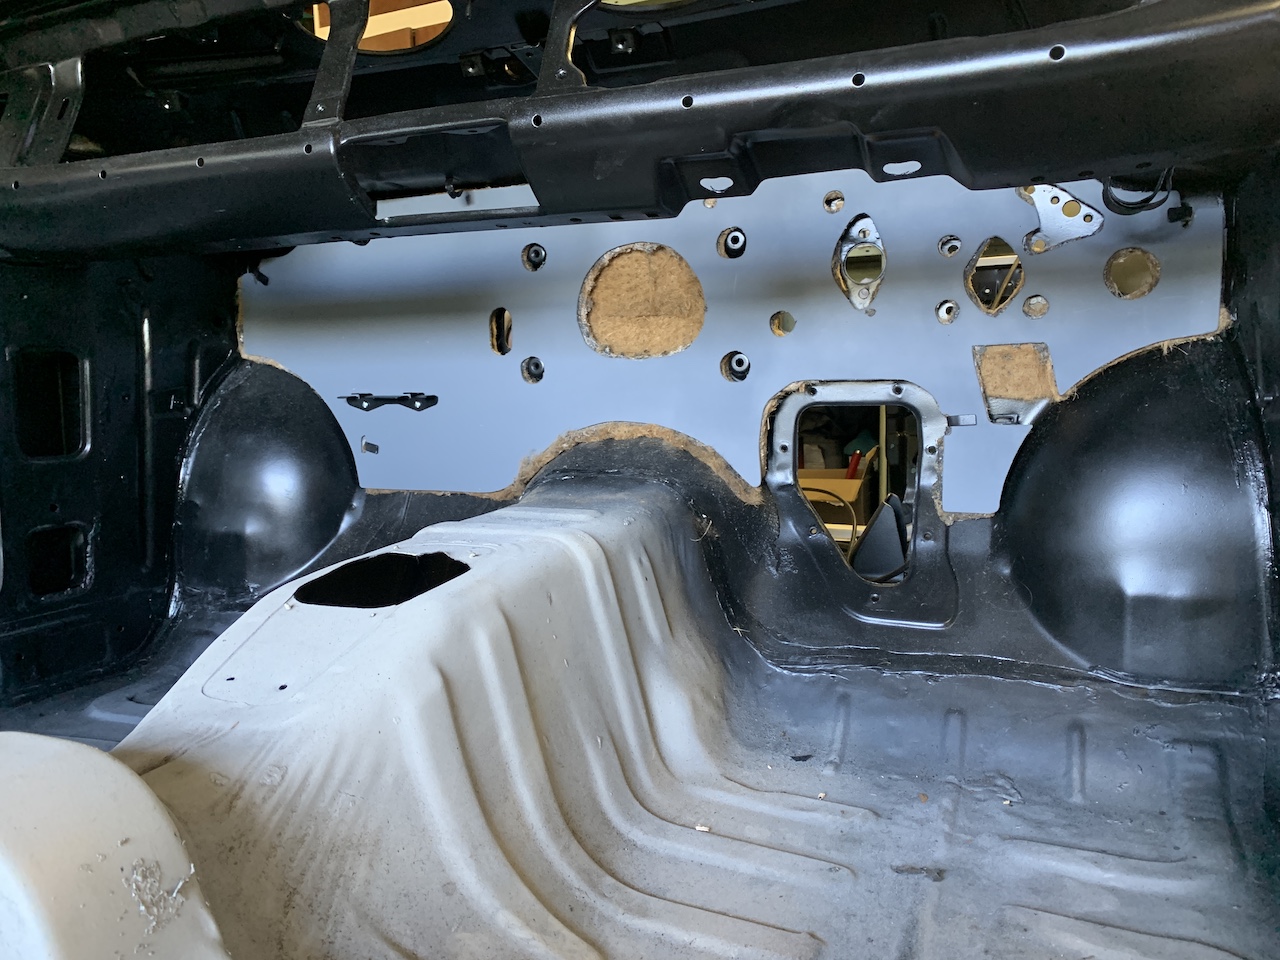
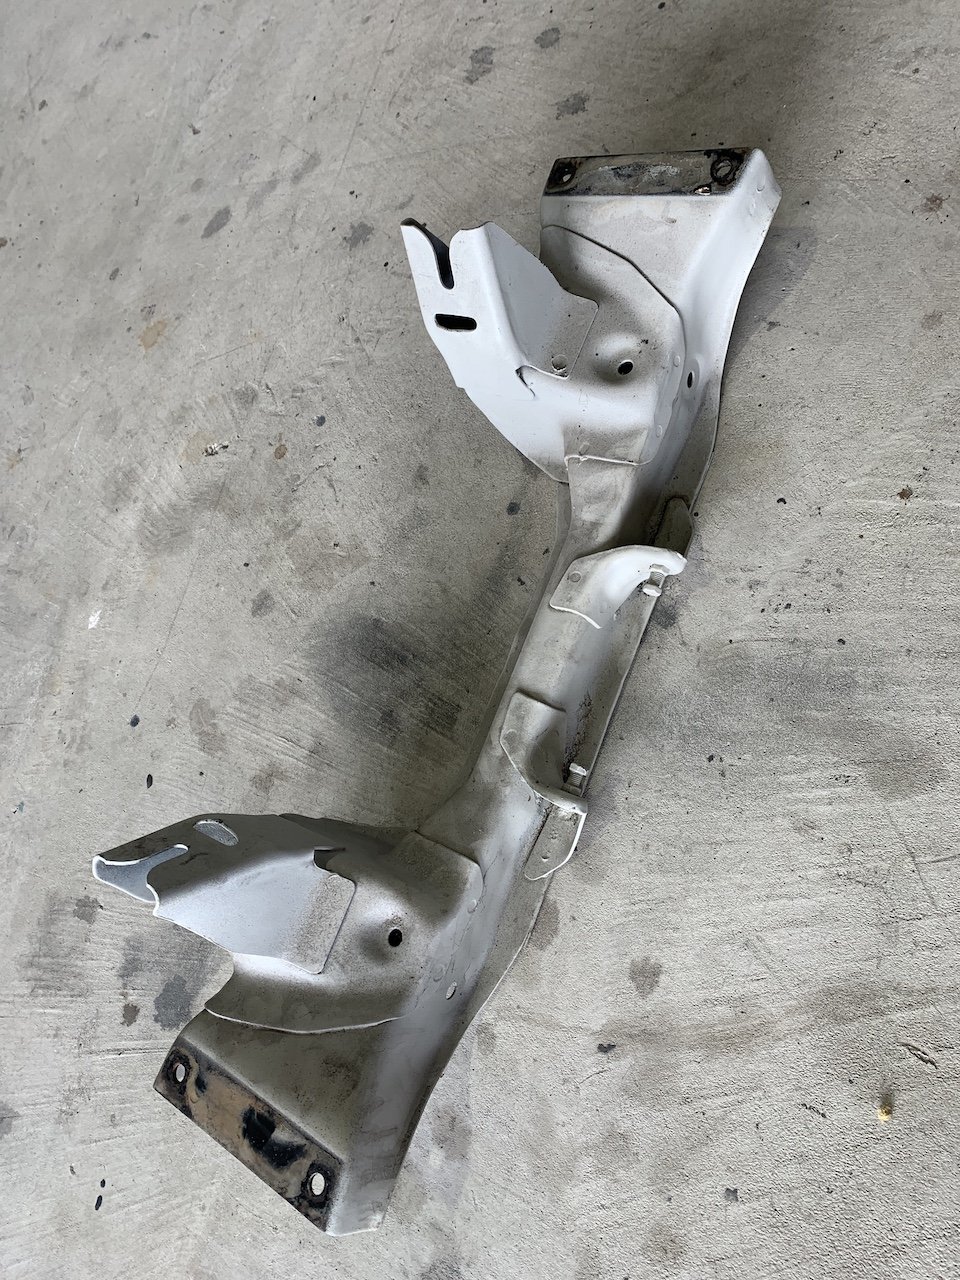
POST TWO of Three: Also gave the dash area and inner firewall a coat of black - having it body colour means potentially having some orange showing through. So like the front headlight panels, having it black makes for a better finish IMO. It was then time to modify/recreate the firewall panel to account for the new hydraulic clutch and brake booster mounting holes. Took the old one and marked out a new one, added a few new holes, a lick of paint, reattached the insulated backing and we're away...
-
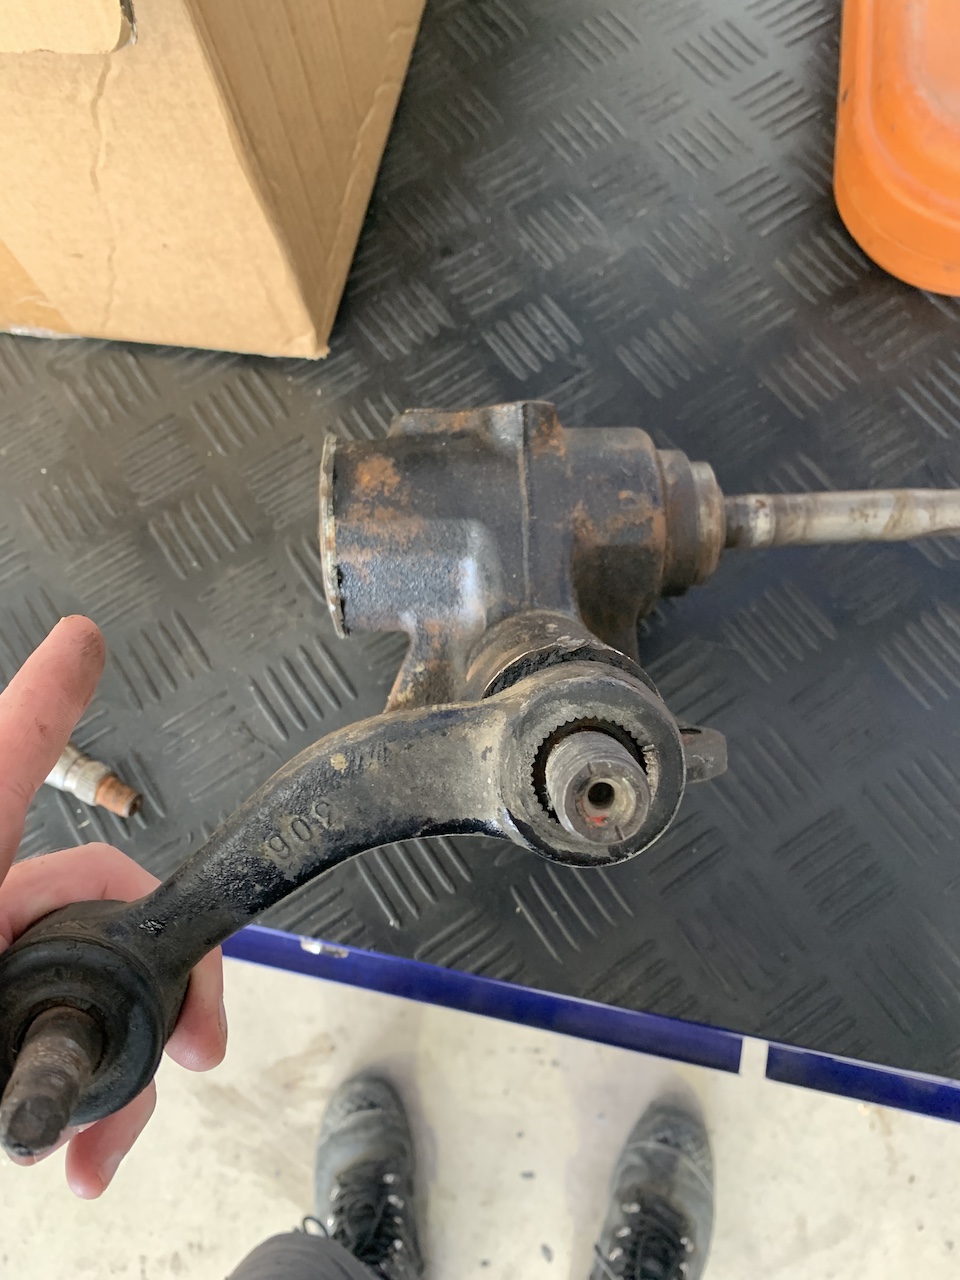
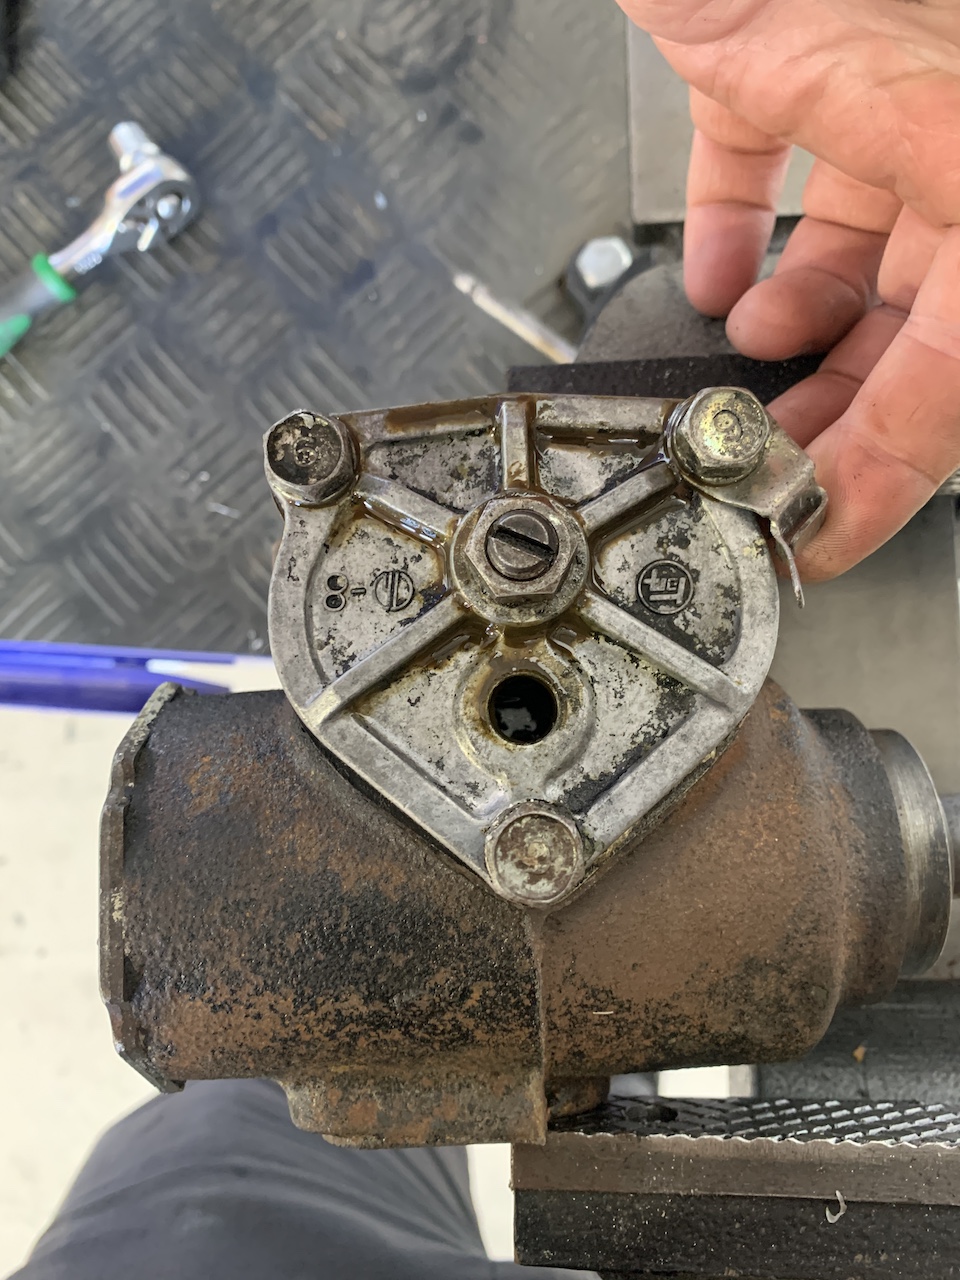
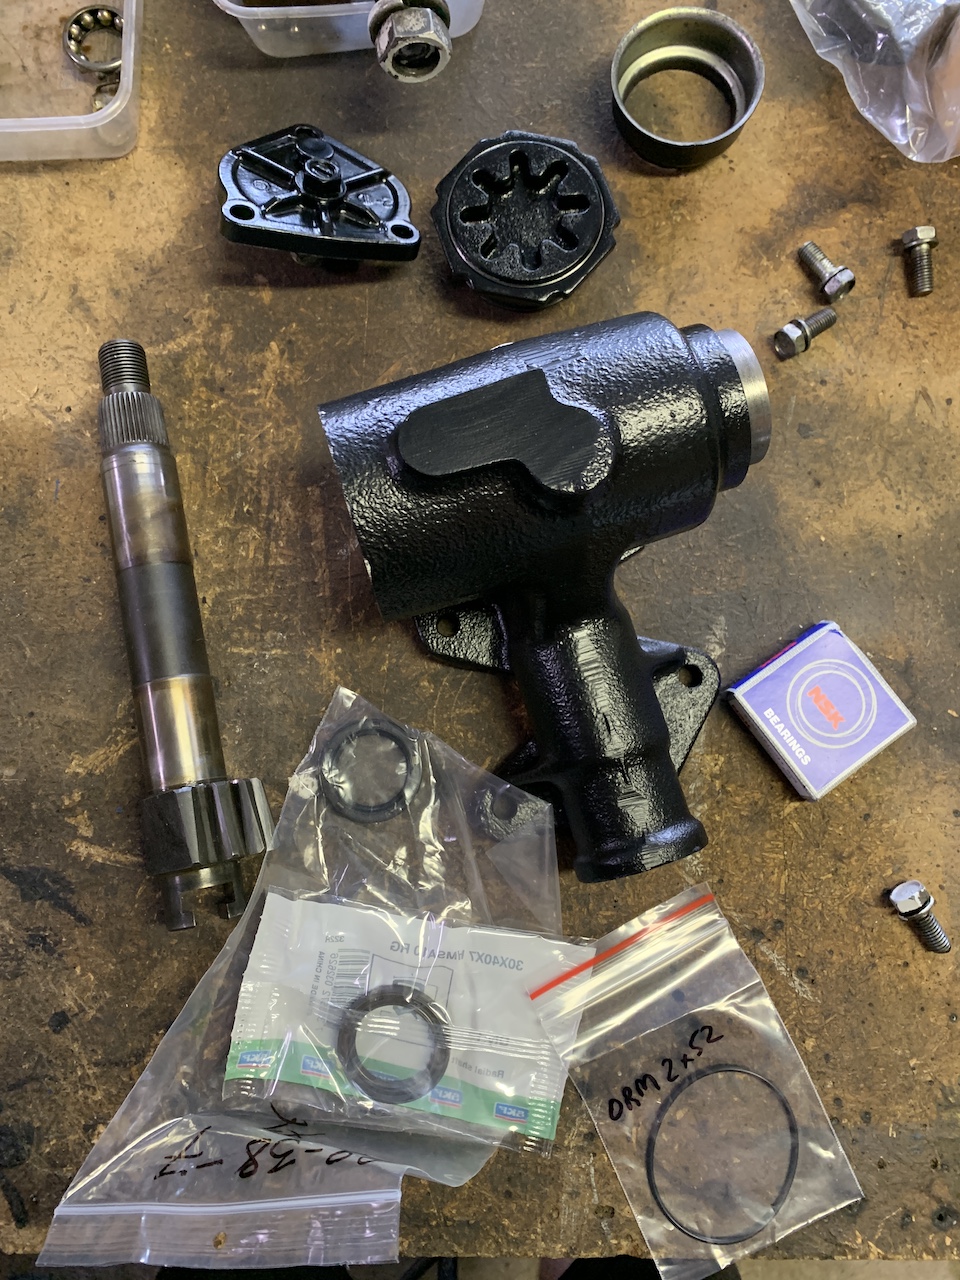
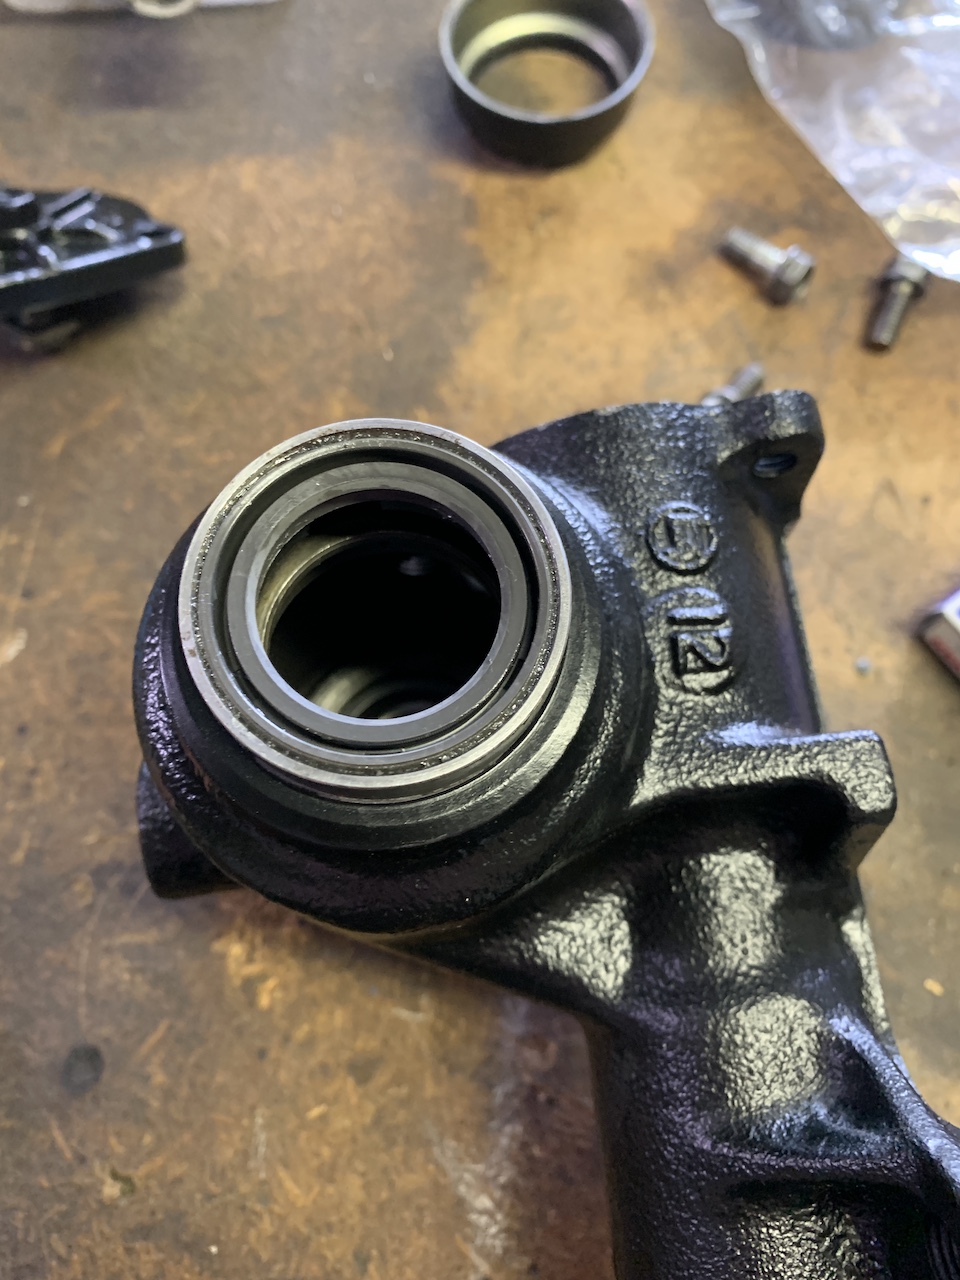
POST ONE of Three: I have two steering boxes so i stripped one to get the gist of it, cleaned it up, bought a few new seals etc, gave it a lick of paint and it'll be ready to go once I set the backlash and fill it with oil.
-
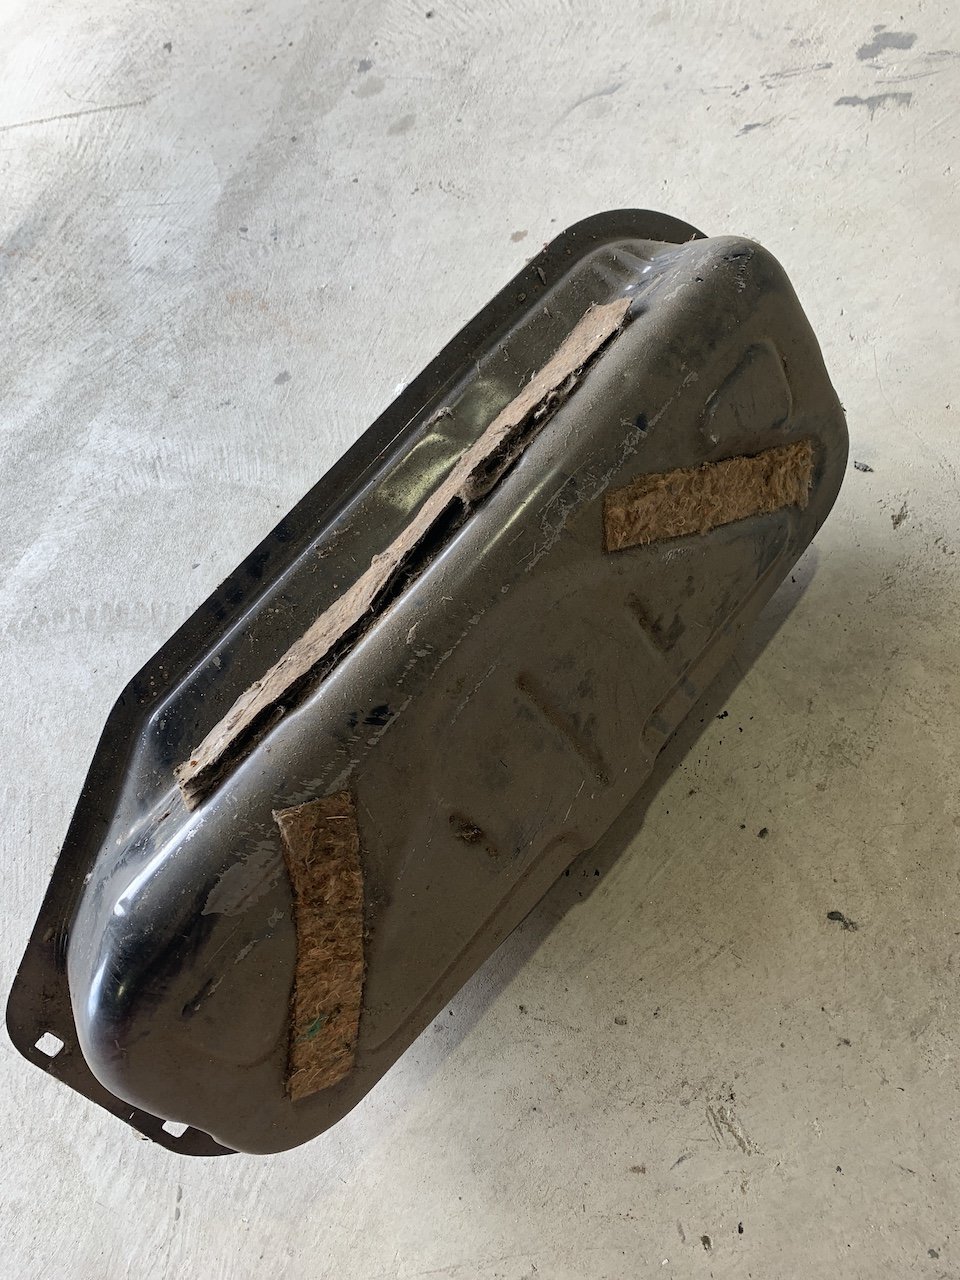
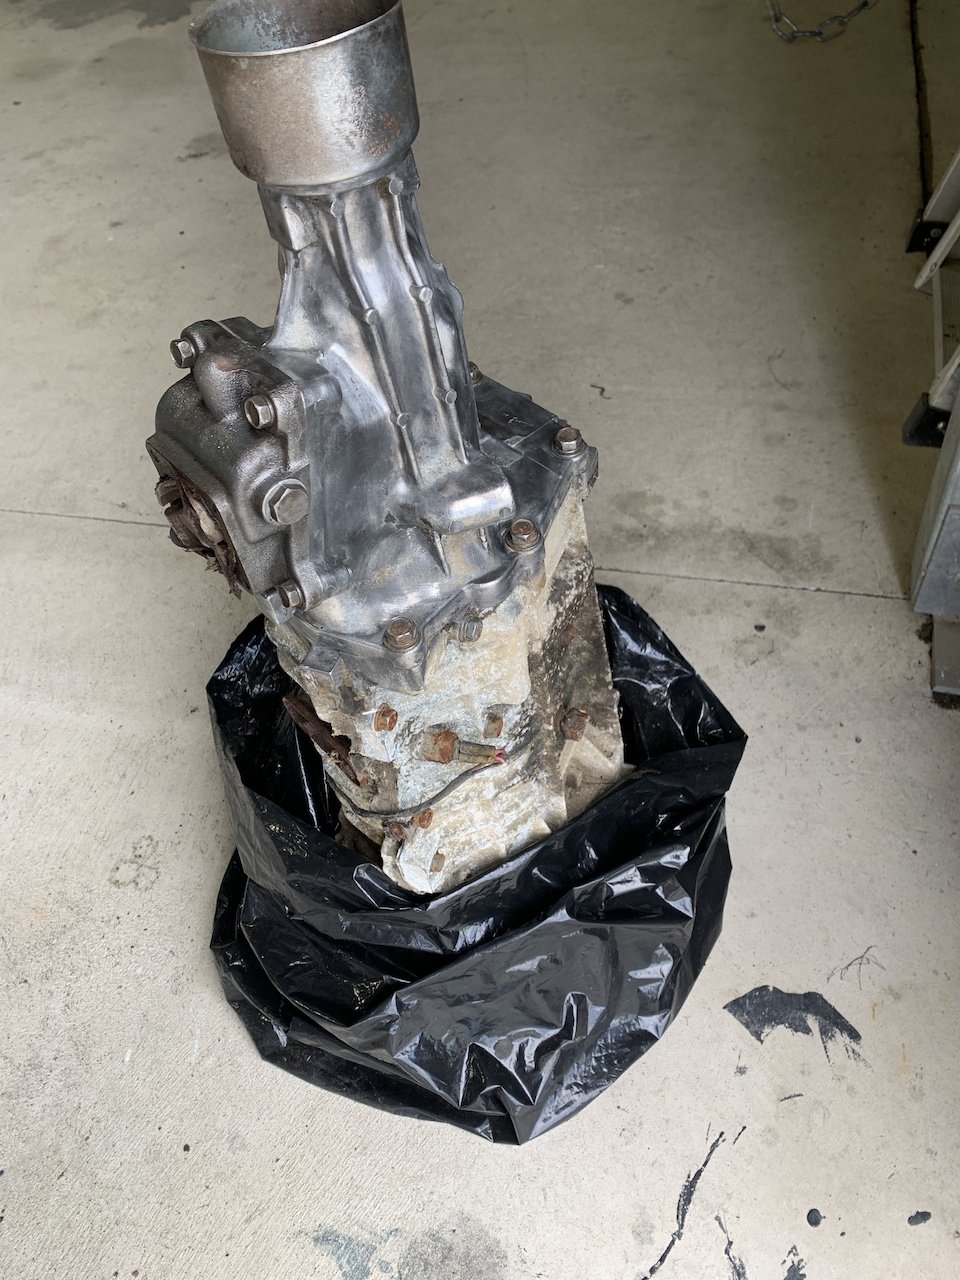
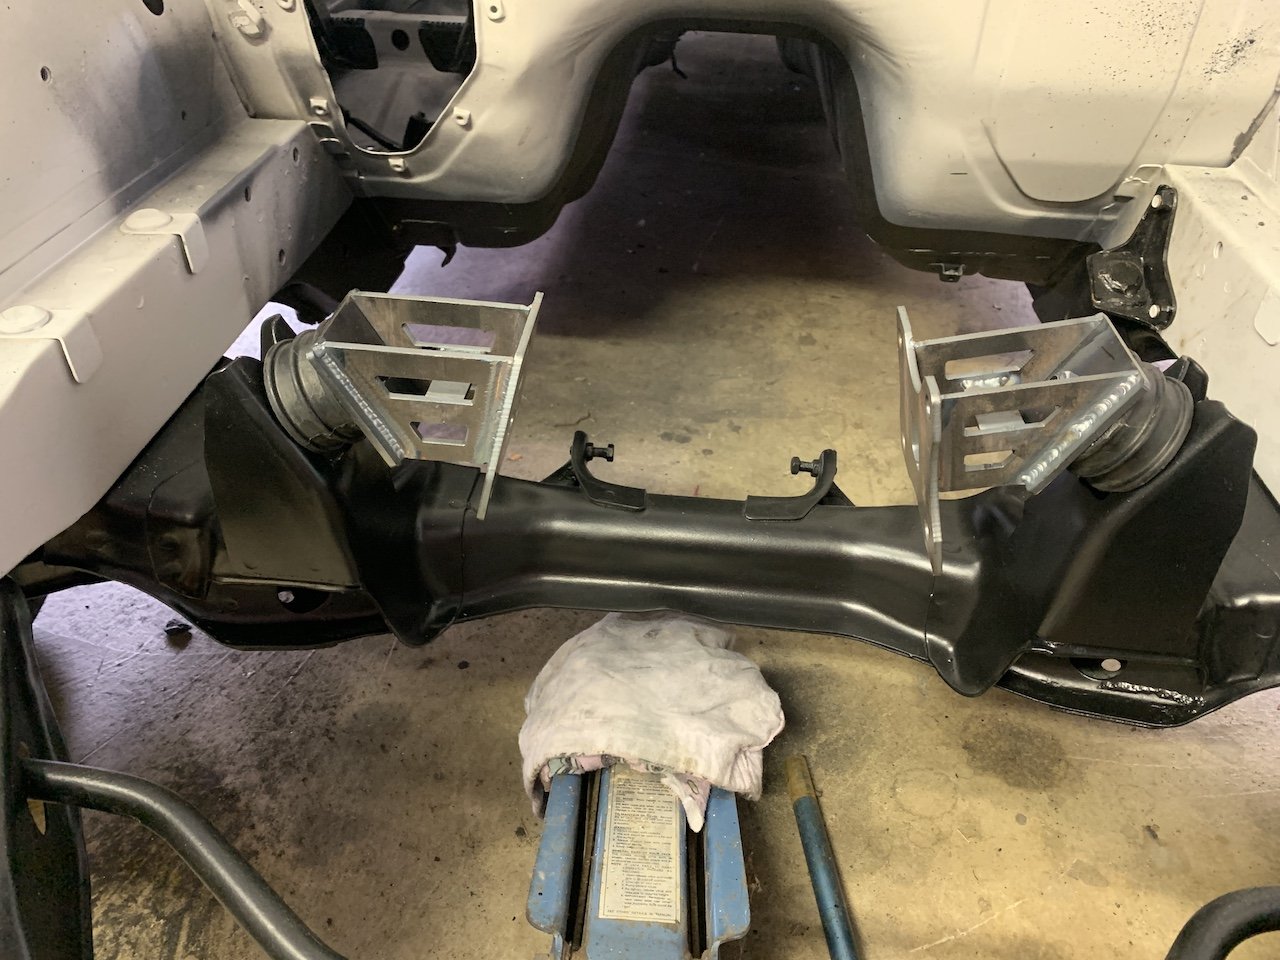
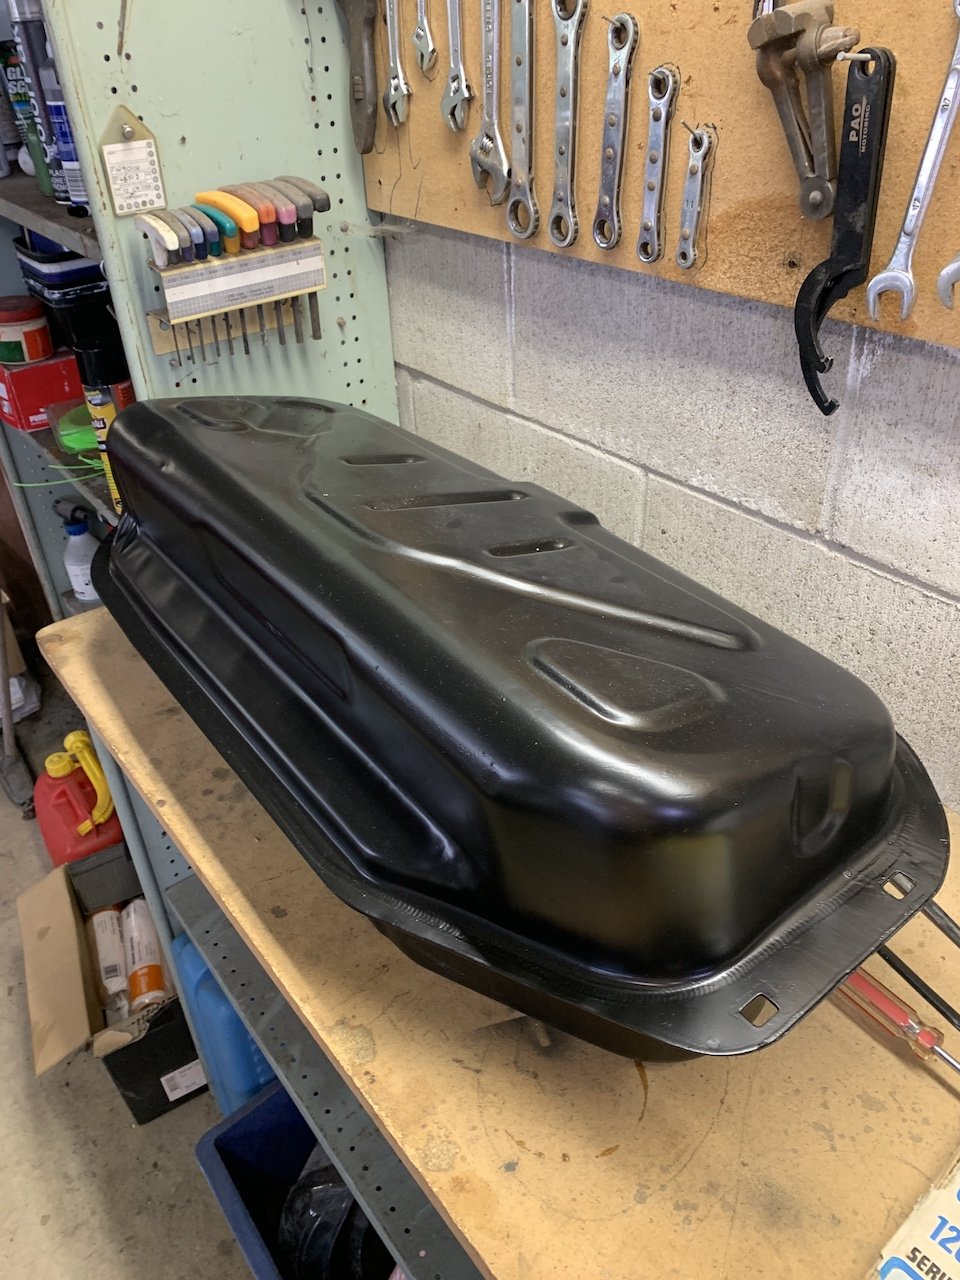
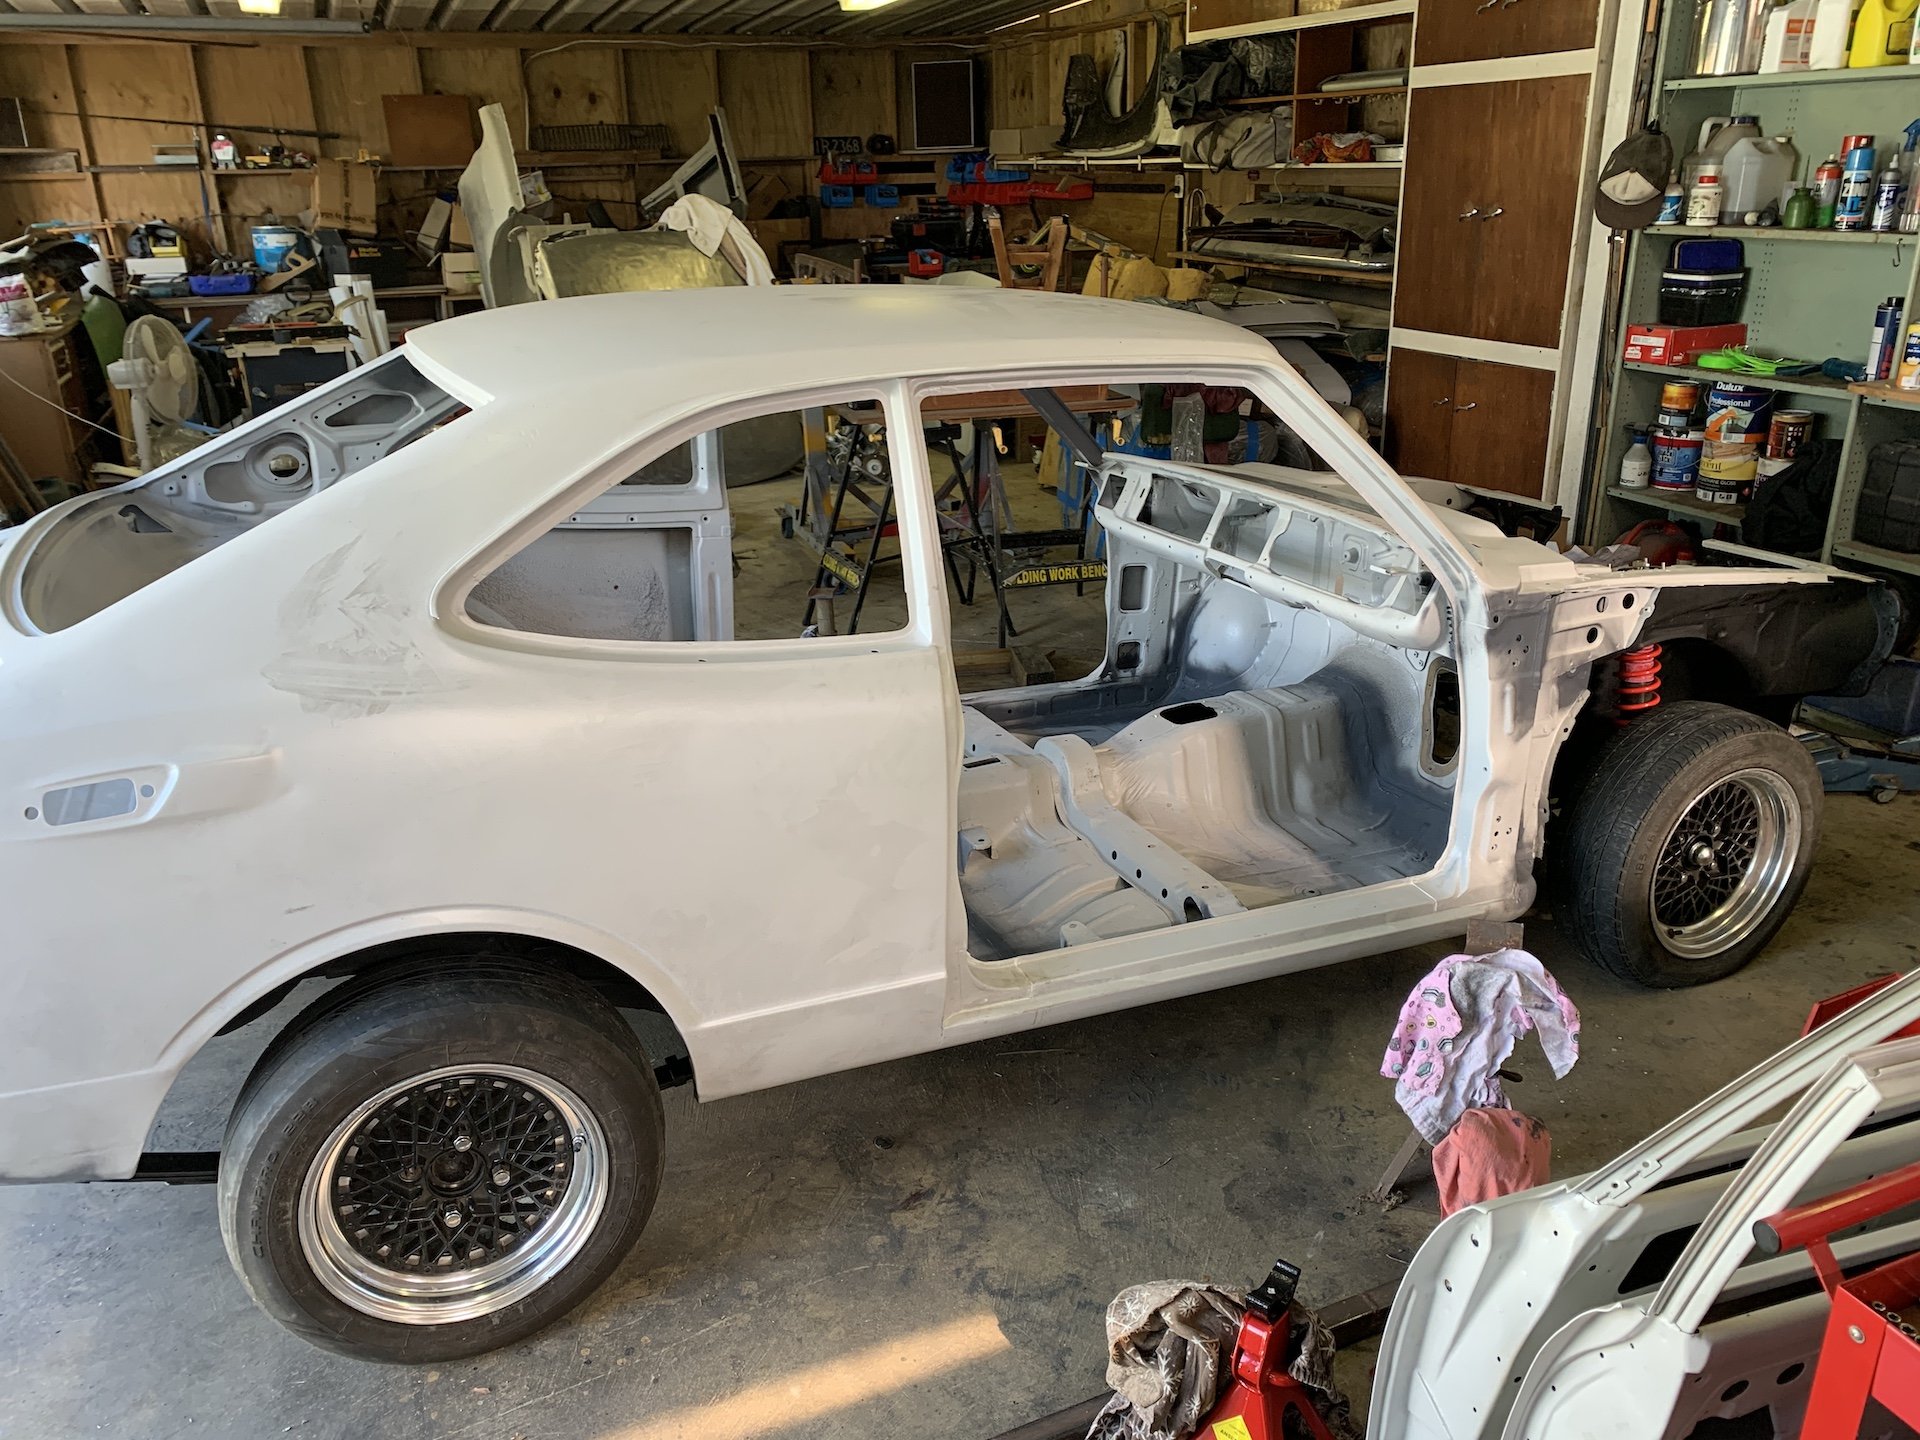
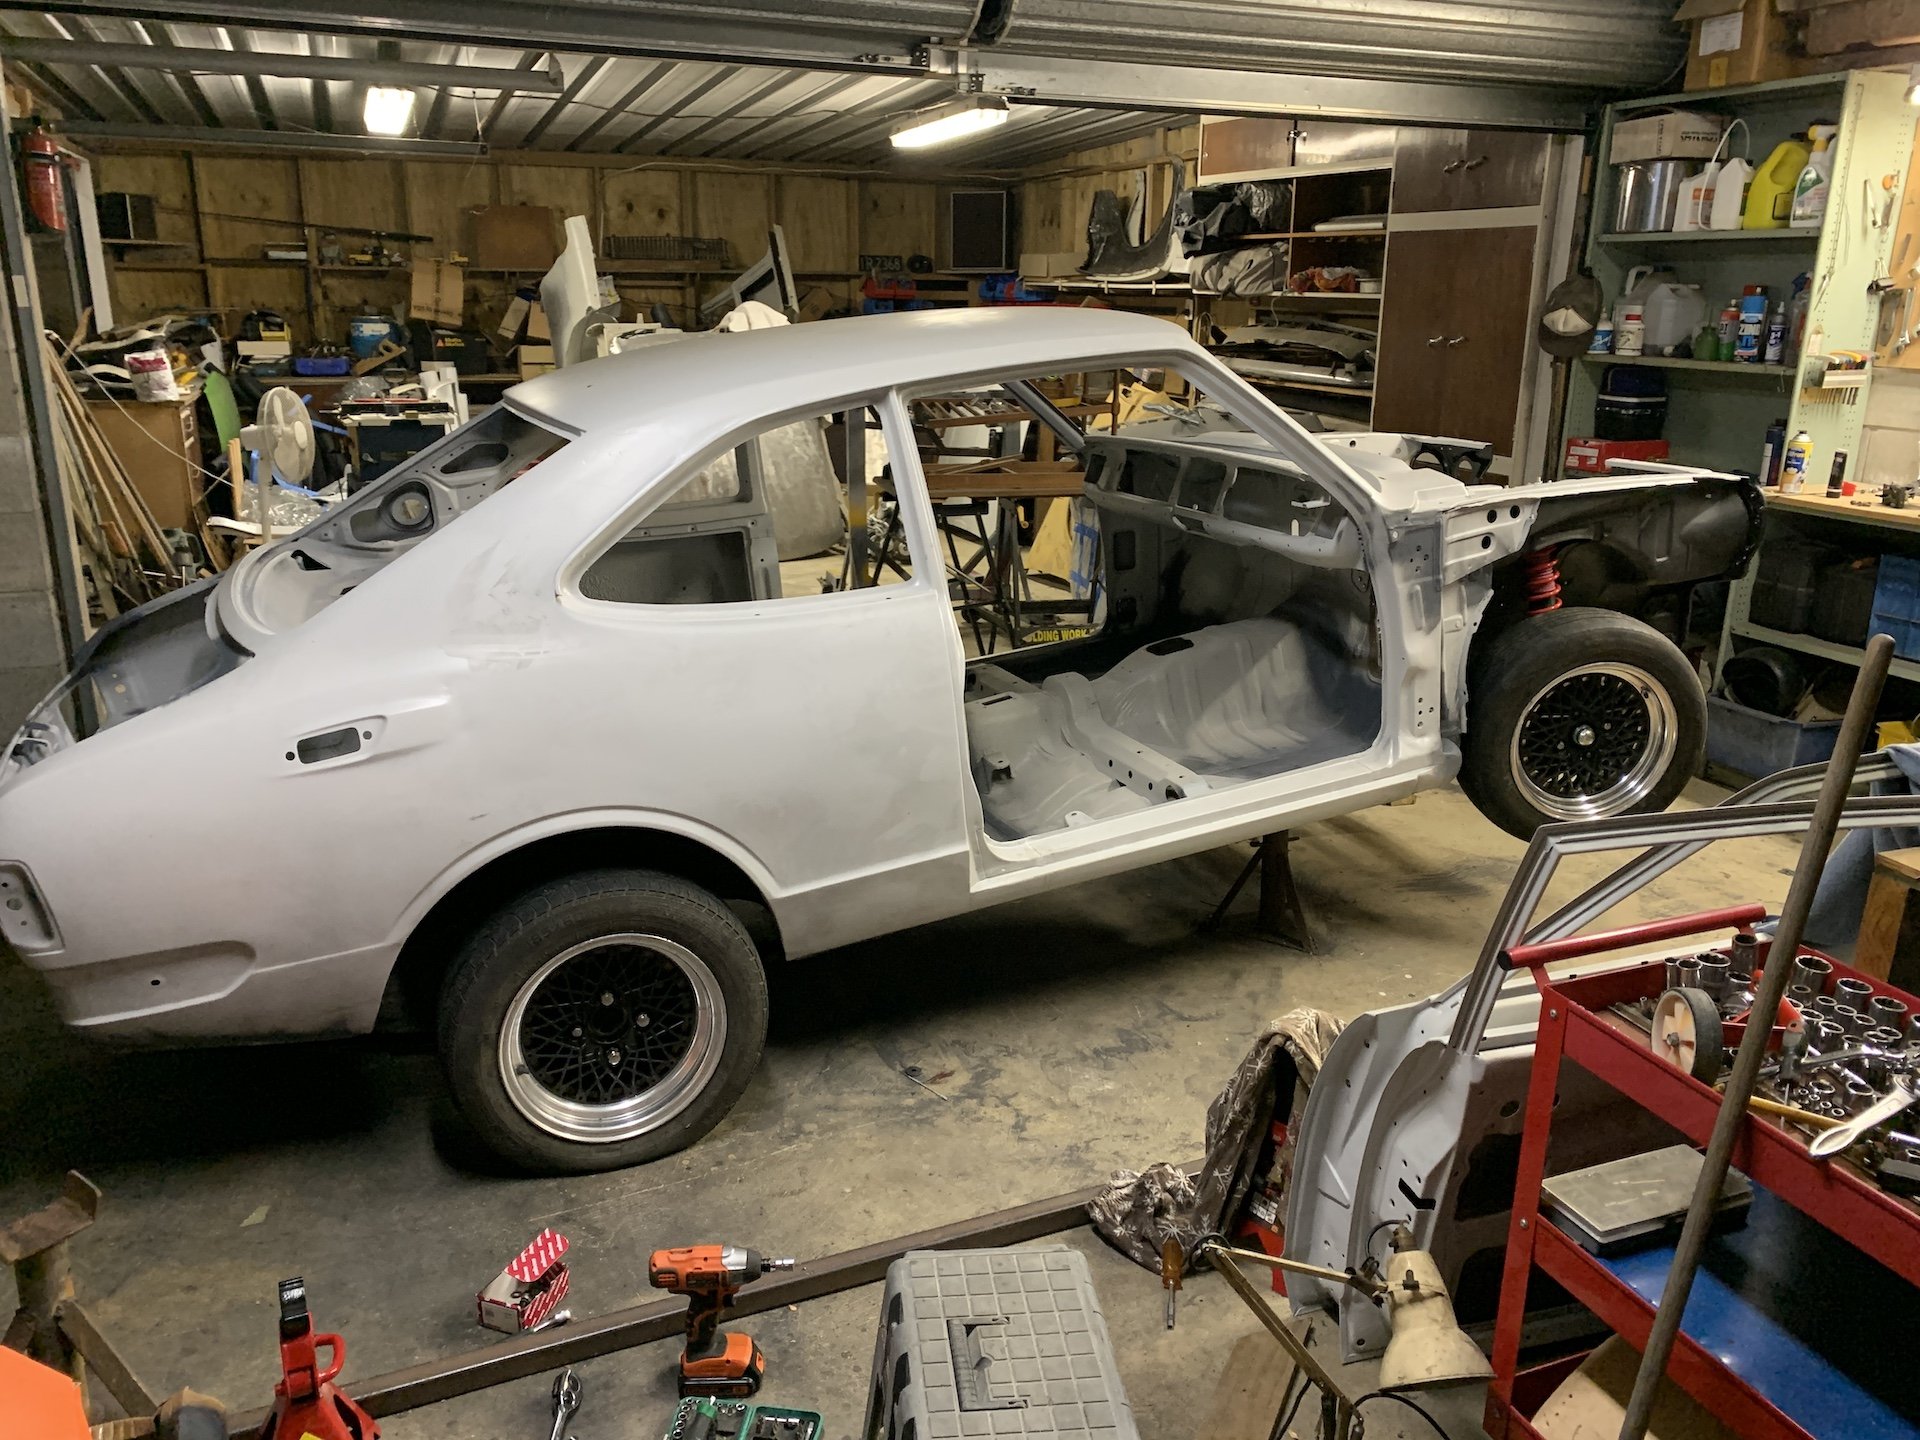
Now to list ALL the things I have done to this in the last 6 months......not much. I've struggled for motivation due to many things, but am starting again with a little by little approach. I've wasted too much time trying to figure out the perfect plan and what to do next, then second guess myself and think "oh this needs to happen before I can do that, but then I'll actually need to do this first" and so on and so on around in circles. I've avoided doing stuff because I don't want to do things twice, or keep taking bits on and off, but today I just said stuff it - just do some stuff, little by little and get moving. Today I simply fitted my doors and fenders and made a plan for a few other things. over the last few months I have achieved this: 1) Turns out the crossmember I purchased years ago with the modified mounts for a 4age were actually completely wrong! My reconditioned AE86 engine mounts and brand new cusco mounts will now be up for sale....so I cleaned up a factory crossmember I had and fitted it with the KE Conversions kit. 2) tyres kept going flat, fitted some inner tubes 3) cleaned up and primed the inside of my doors 4) bought a parts gearbox to swap the tail section onto my T50 - this is to maintain my factory shifter position and centre console. 5) cleaned up and painted a petrol tank 6) cleaned up some fuel lines next, I'll order my flares, get my steering box rebuilt and then start fitting the dummy engine etc to see what firewall holes/brackets are needing modified deleted etc.
- 71 replies
-
- 17
-
-
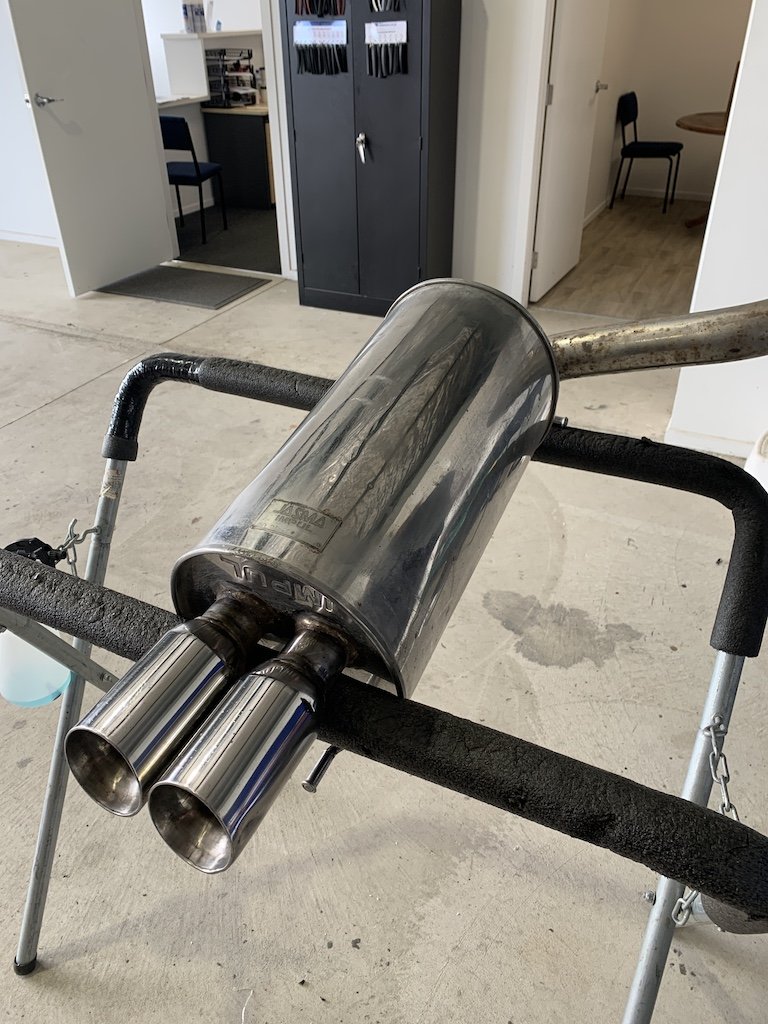
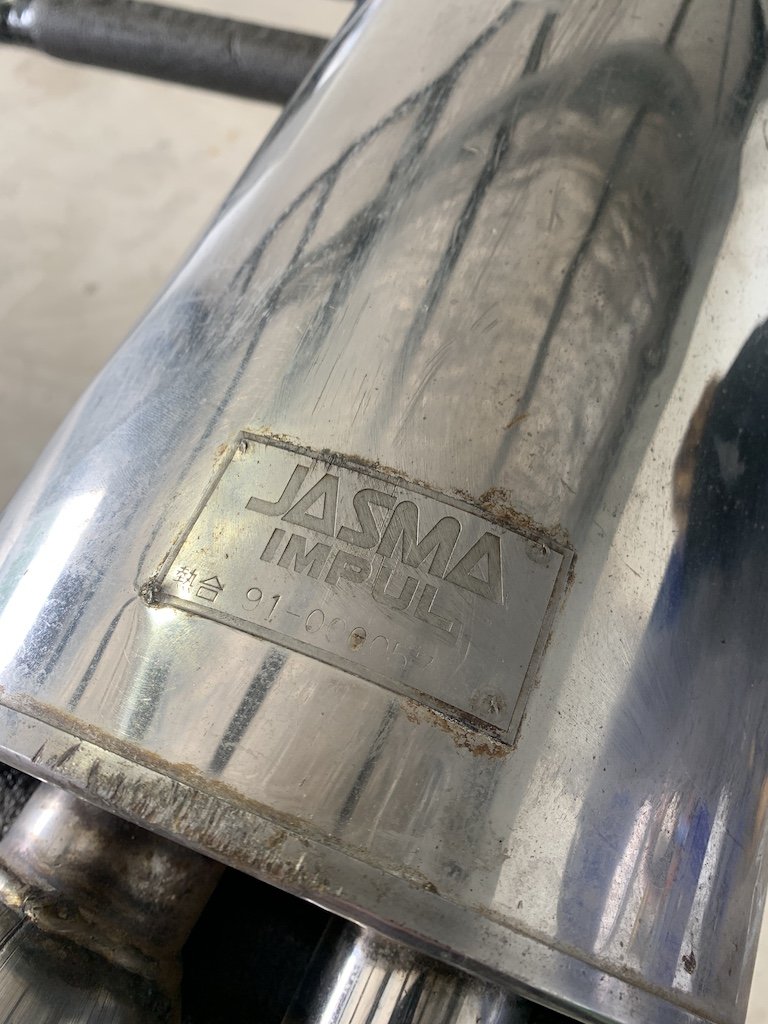
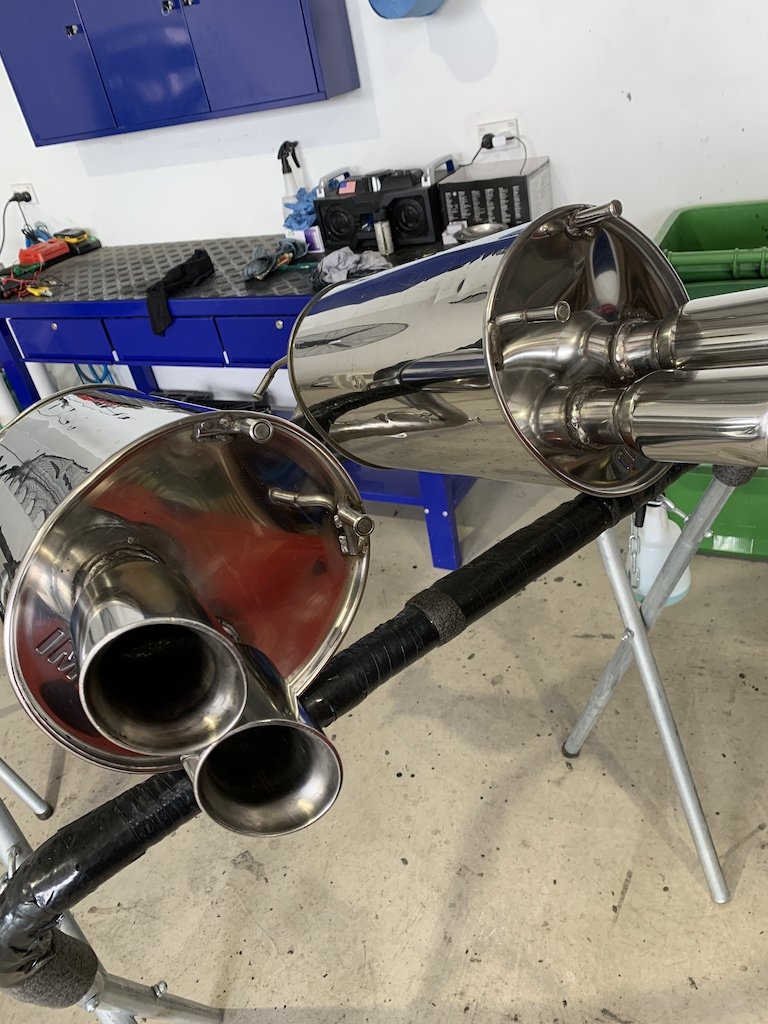
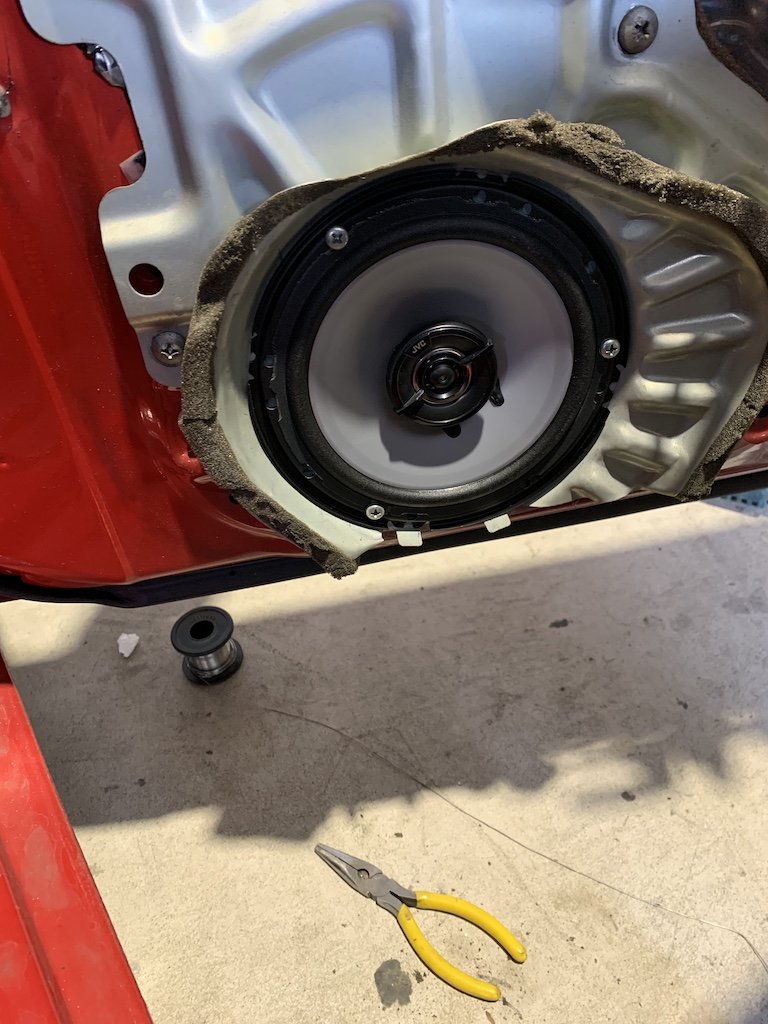
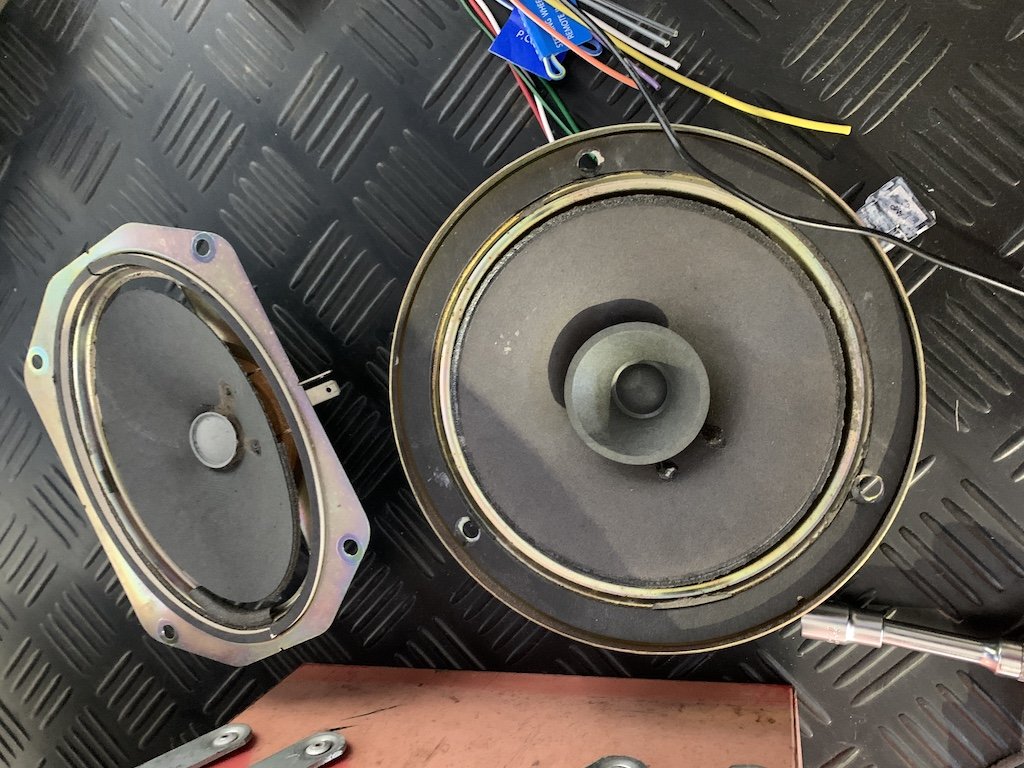
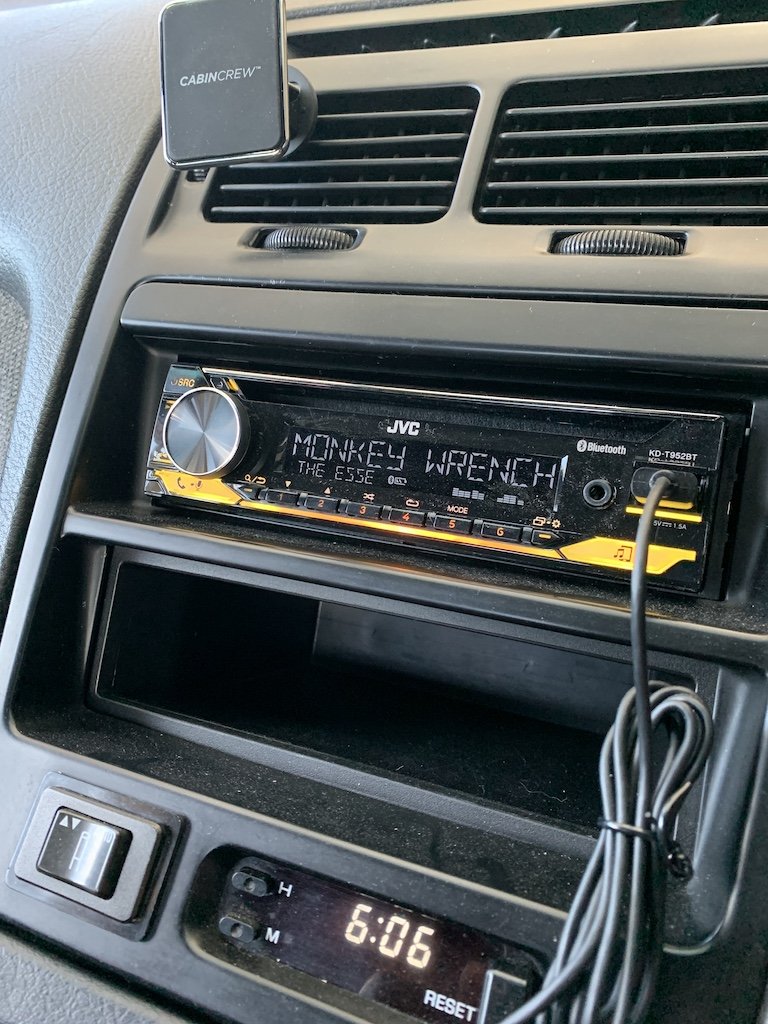
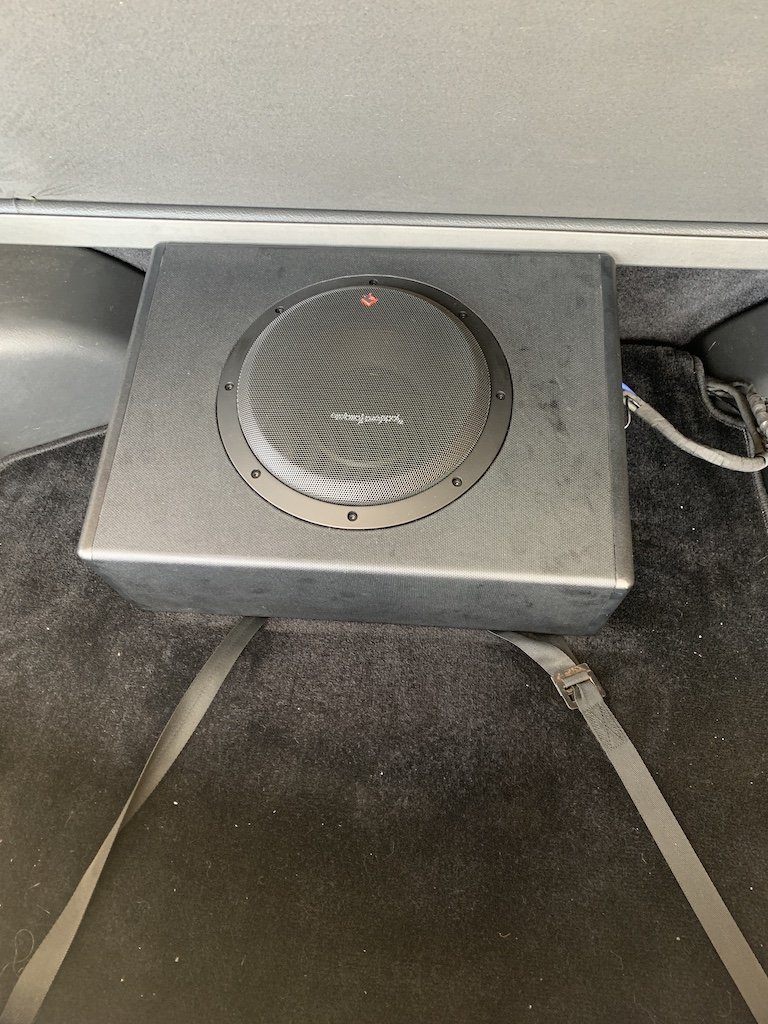
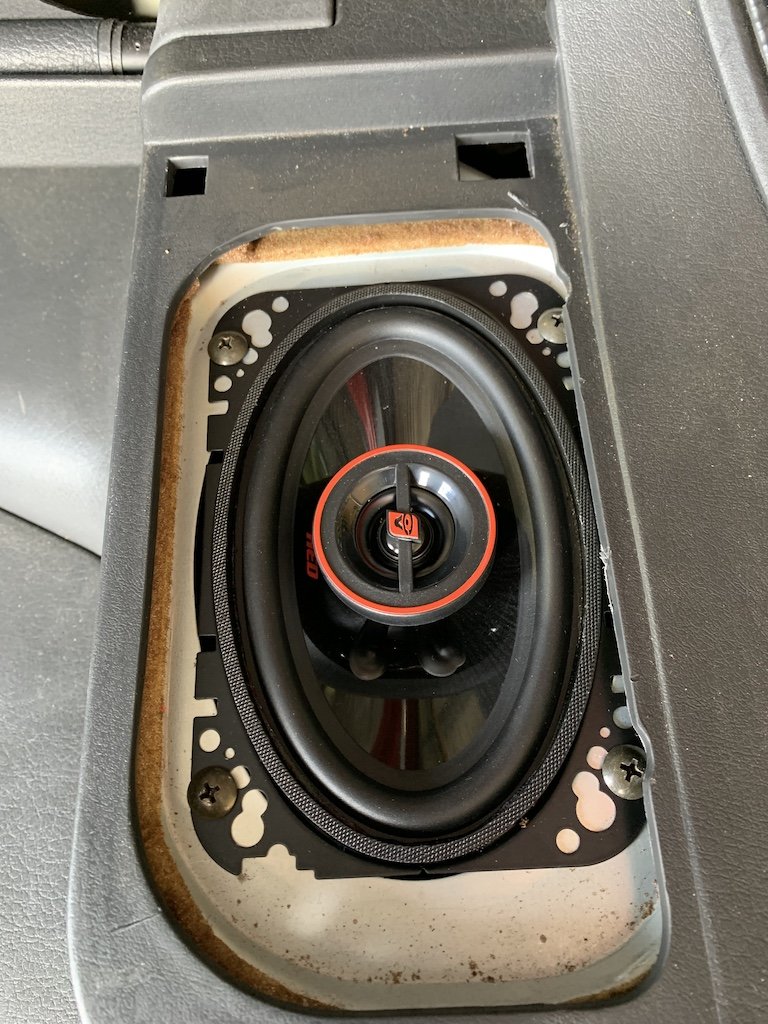
Gave it it's first real shakedown a month or so back. Drove it fairly hard out to the coast, could have been harder but was wanting to be a bit conservative with her....... I got to 10 mins out of Kawhia and she spat all her water....bah!! Found some water and nursed her into town and then eventually back home. Diagnosis was a loose hose, not one I had touched previously, and a possible crack in the overflow tank which turned out to be nothing. On to the good stuff - picked up these mufflers cheap. A local oil rep had them for years and wanted rid of them - he bought a crashed Z to turn into a stock car and the previous owner had only just fitted them so score! Gave them a polish and fitted them - nice change to the sound right away, got that nice burble when you come off the gas. More Gran Turismo goodness.... Also fixed my rattles in the cabin......kind off.....decent stereo and speakers to drown them out. Out with the old. and in with the new Just need to figure out how to keep the sub from moving without doing any obvious damage.... Velcro doesn't get a decent grip/work on the carpet and the targa straps don't work......any solutions fellas?
-
I get a bit of this with the high idle when cruising through town and it feels like it drives a bit by itself...
-
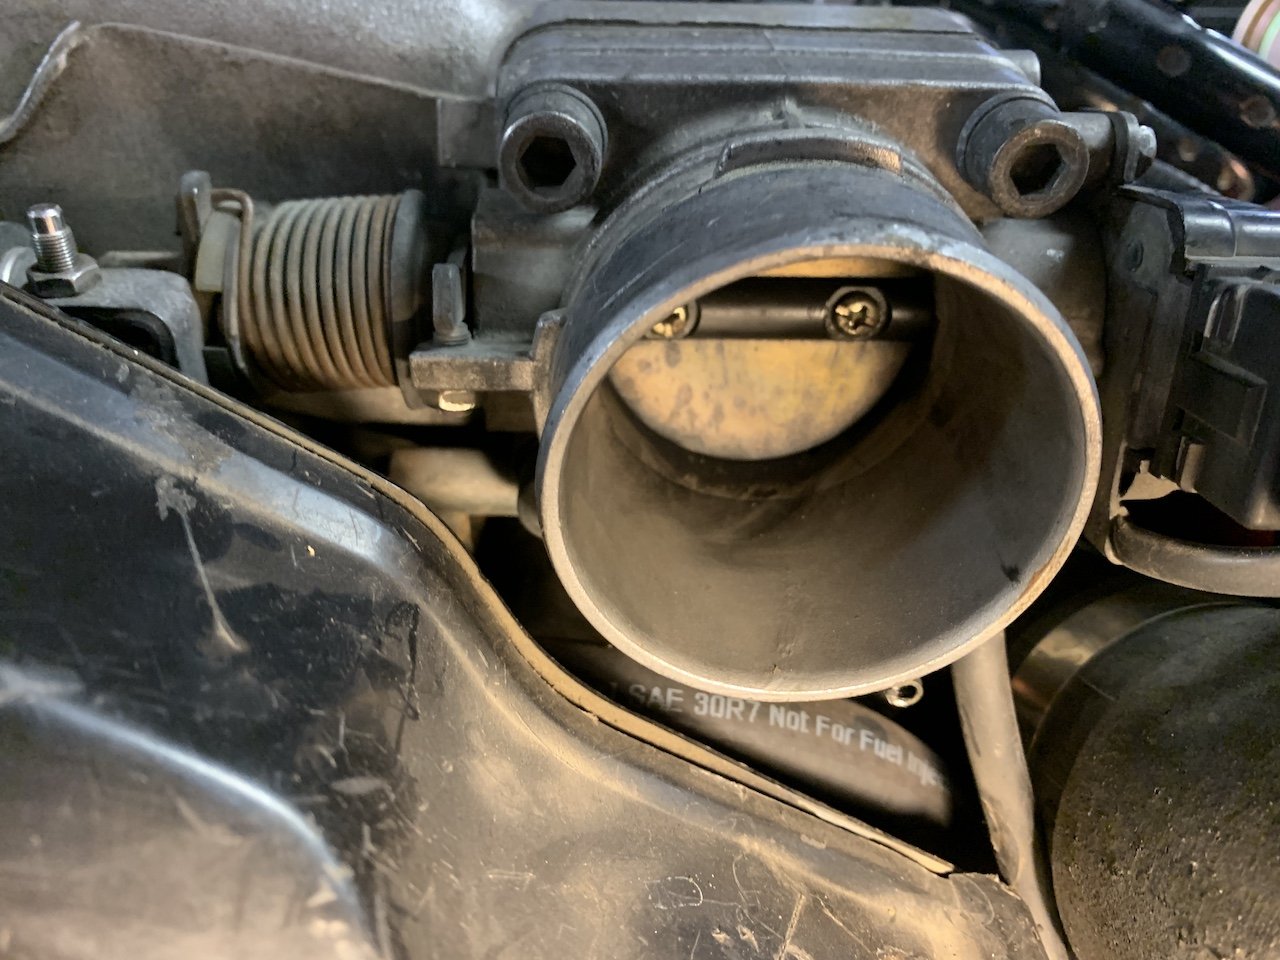
This is how it sits at the back of the engine - I'm assuming air flow is from right to left so would you remove the hose between the air regulator and the IAA unit or bypass the everything from before the air regulator? The throttle cables across the plenum seem pretty good - the throttles were closing up nicely when disengaged if that's what you mean?
-
not sure...... and answered ha ha......could it be a timing thing?
-
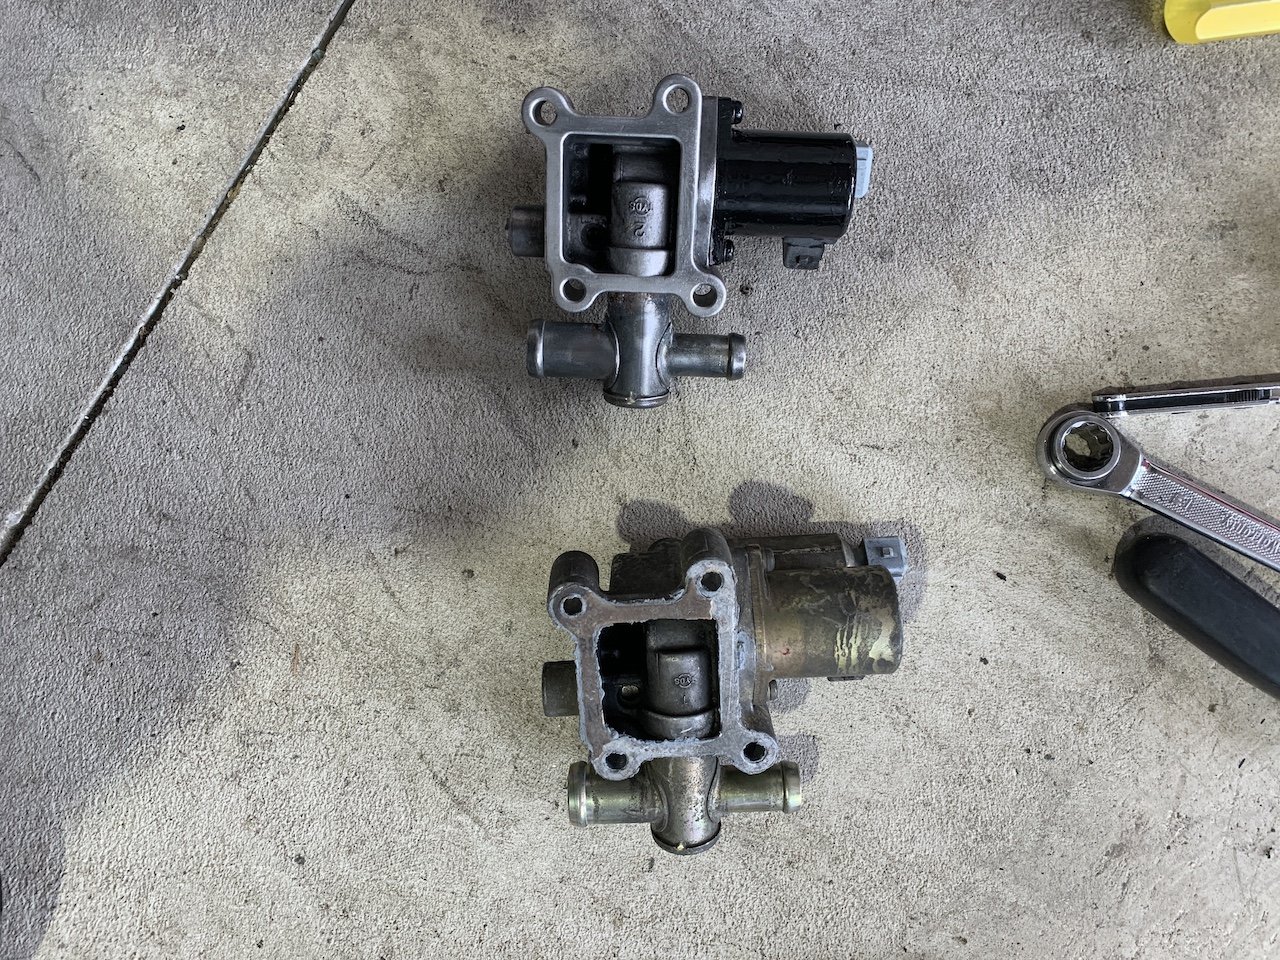
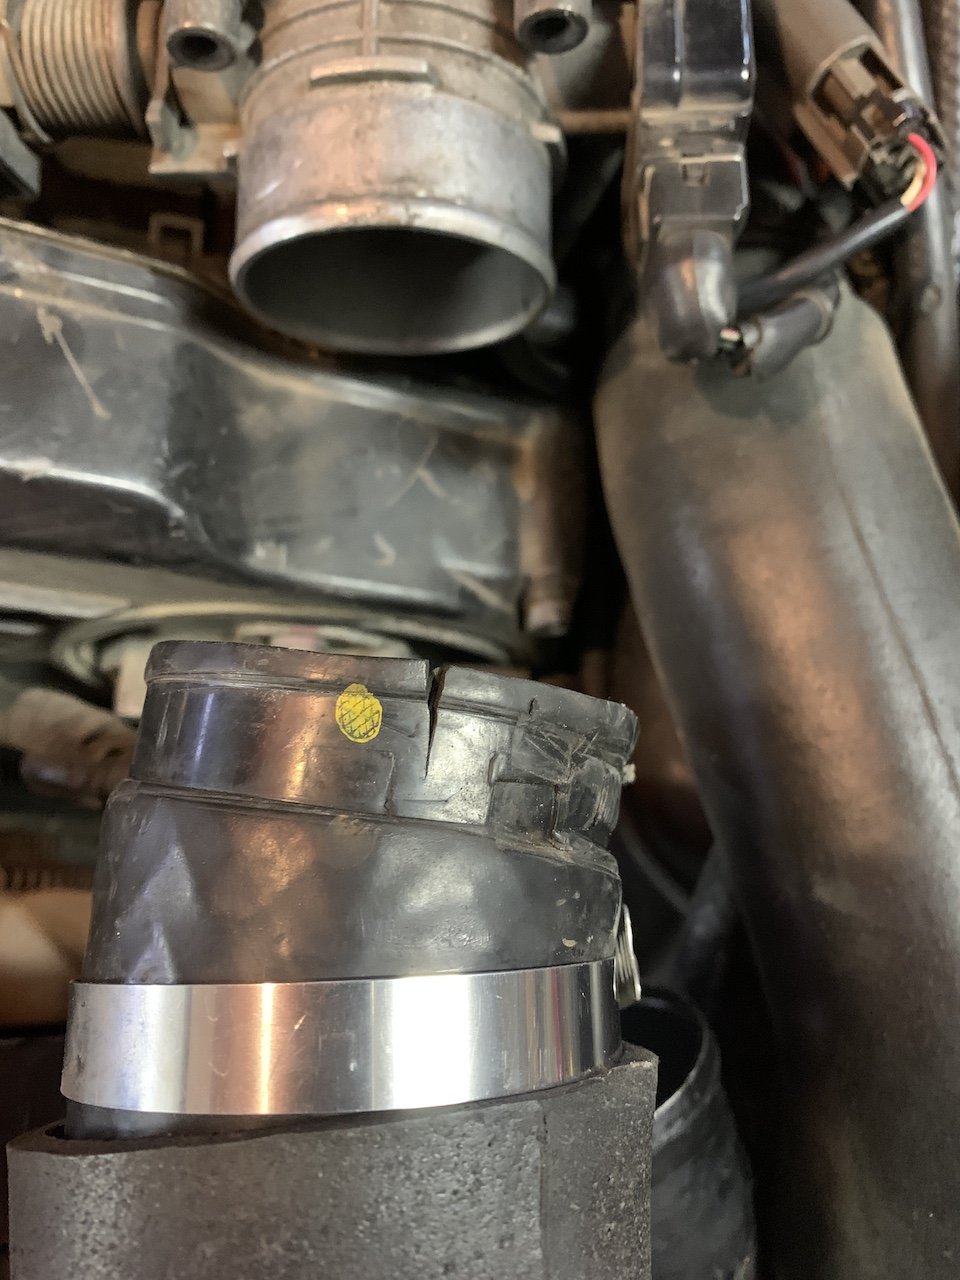
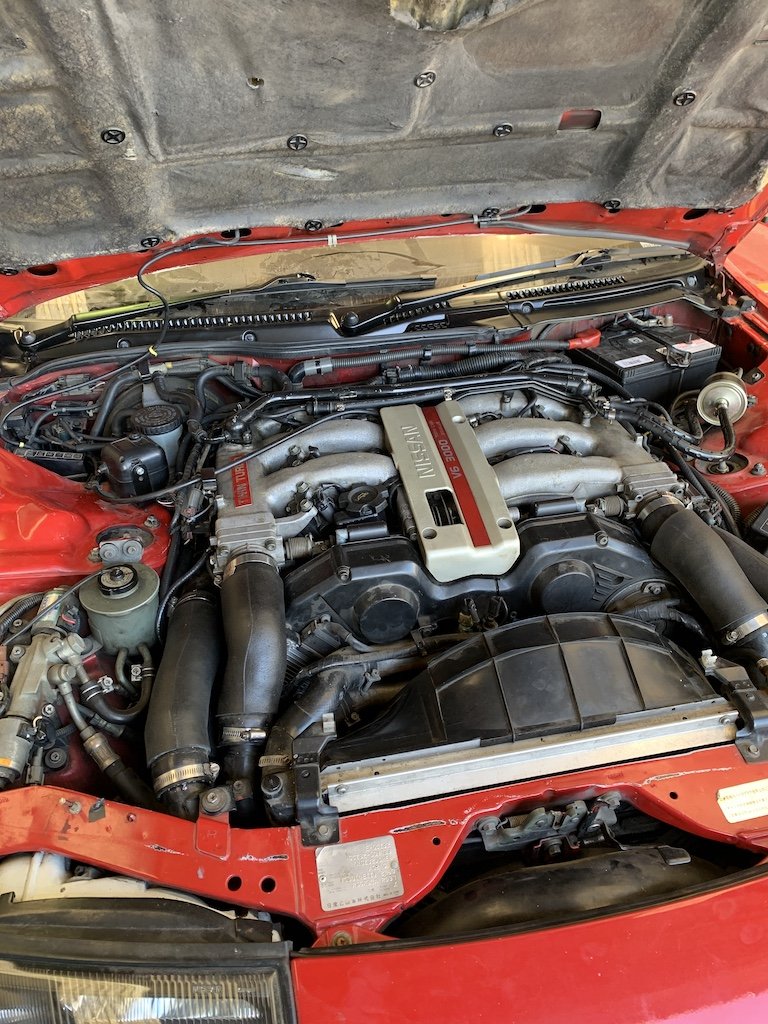
I've been trying to fix the idle with varying success. It's been sitting at around 2000rpm, even at a warm idle, so I got a second hand IACV. I stripped it down and thoroughly cleaned it and fitted it on Friday. I let it run up to temperature, unplugged the ACC solenoid and tried to use the Idle adjust screw to drop it down to the recommended range - even done right up - nothing changed. If all things went to plan, the idle would have been around 650 and then raised to the reccomended base idle of 700 with the ACC reconnected. This not working suggests either an issue with the throttle bodies or a vacuum leak. From there I checked the angle of the TPS and managed to get it to drop to around 1000rpm, but once I got it home after it got a bit warmer it was idling back at 1500rpm - a overall drop of 500 from before so a small victory. Today, after some more reading, I checked the resistance across the solenoids on both the new and old IACV's and ran 12v across them to see if they clicked and engaged. They all ran about 2 Ohms above the recommended but still engaged so no major issues there? "First off, check the solenoid resistance (don’t forget to clean the connectors first, as your readings won’t be accurate on an old corroded connector). FICD => ~22 Ohm AAC => ~10 Ohm". Mine were about 24 and 12 ohms I then cleaned the throttle bodies and checked they were correctly aligned. The passenger side intake hose had a small crack, once everything was clean I smeared a little gasket goo over it just to be safe. And the result after all this? Idle is now down to 1200rpm and the radiator fan isn't kicking in as loud too which is a bonus. Still not 700rpm resting idle though..... next? clean out the air regulator? pressure test for a vacuum leak? If I'm going to fit a decent exhaust I don't want to have a loud drone on idle. I'm a total noob at this so learning as I go - any Z32 guru's out there with some answers?
-
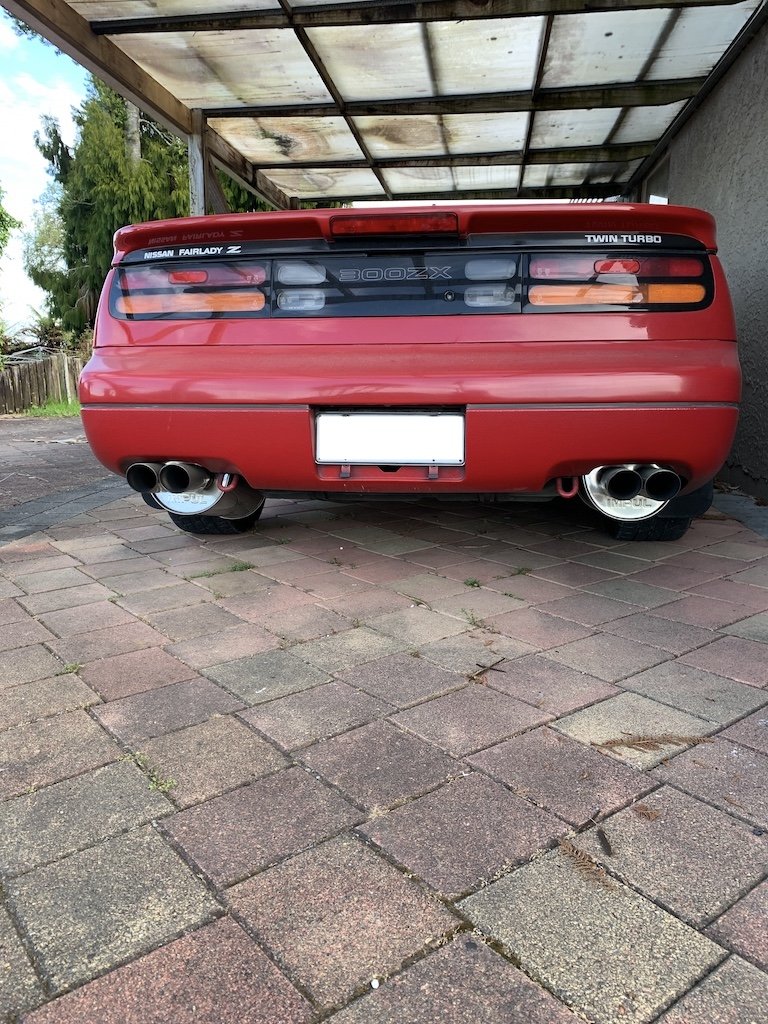
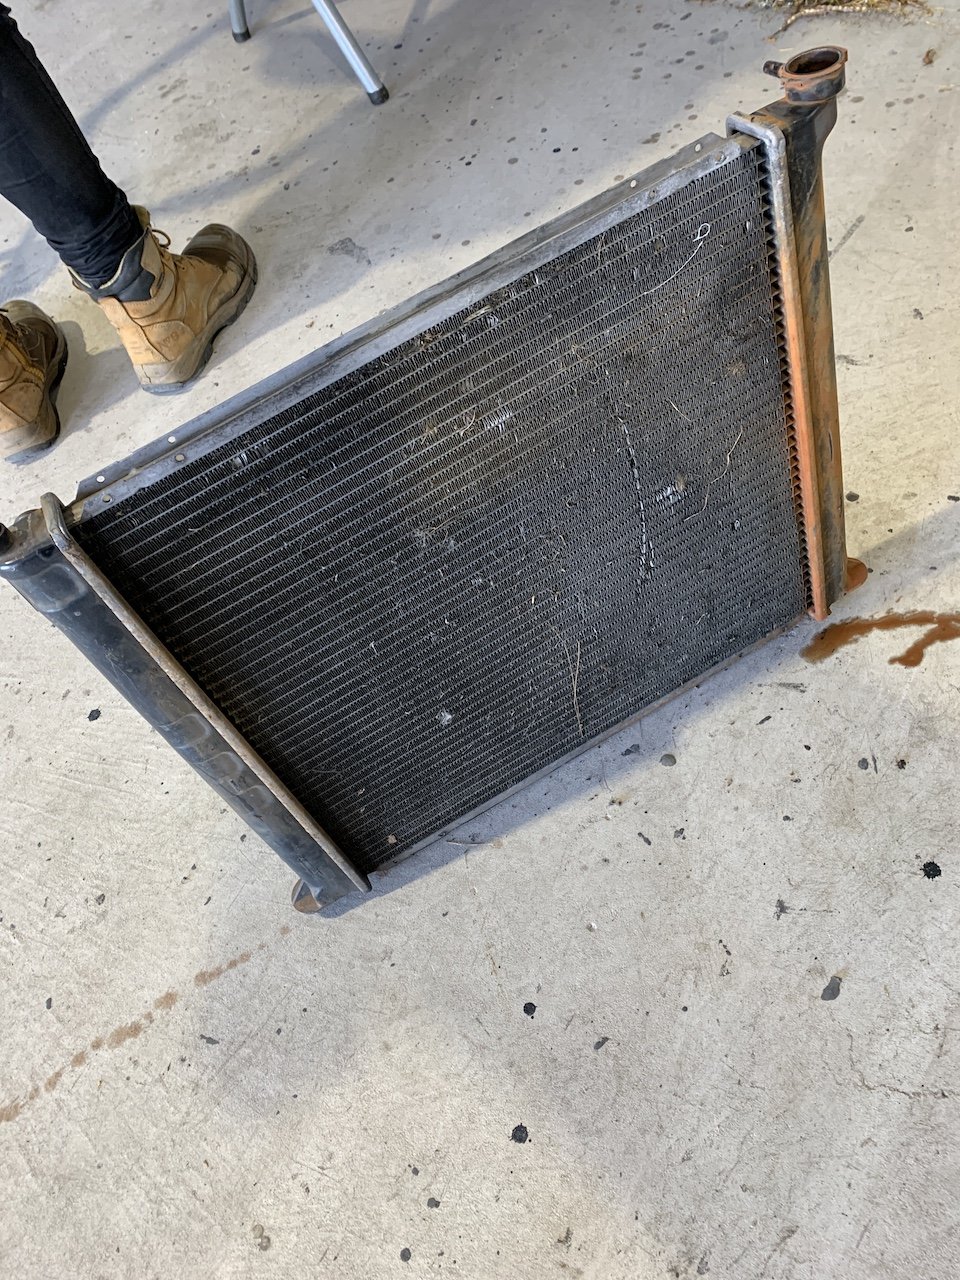
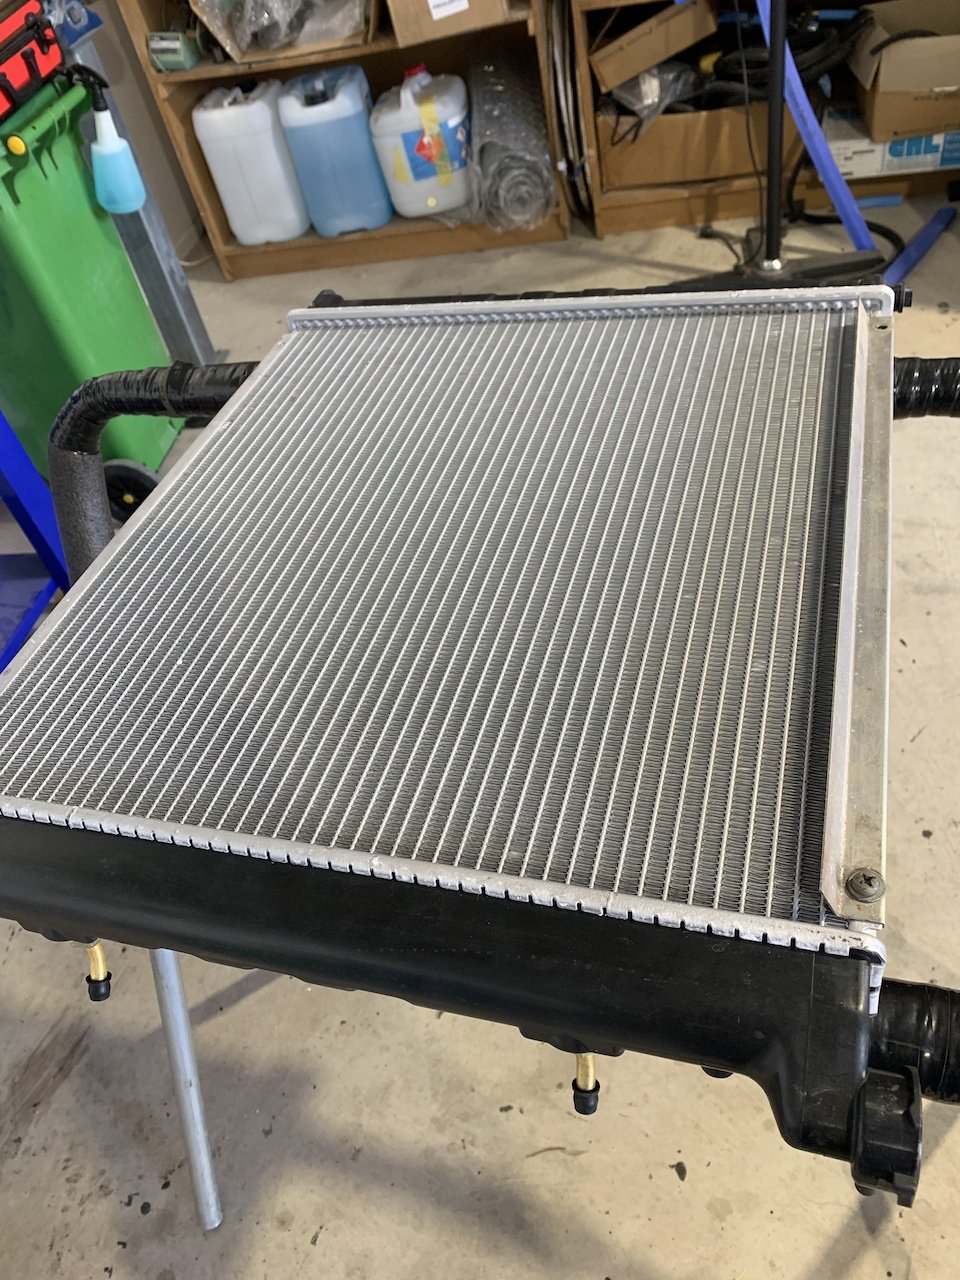
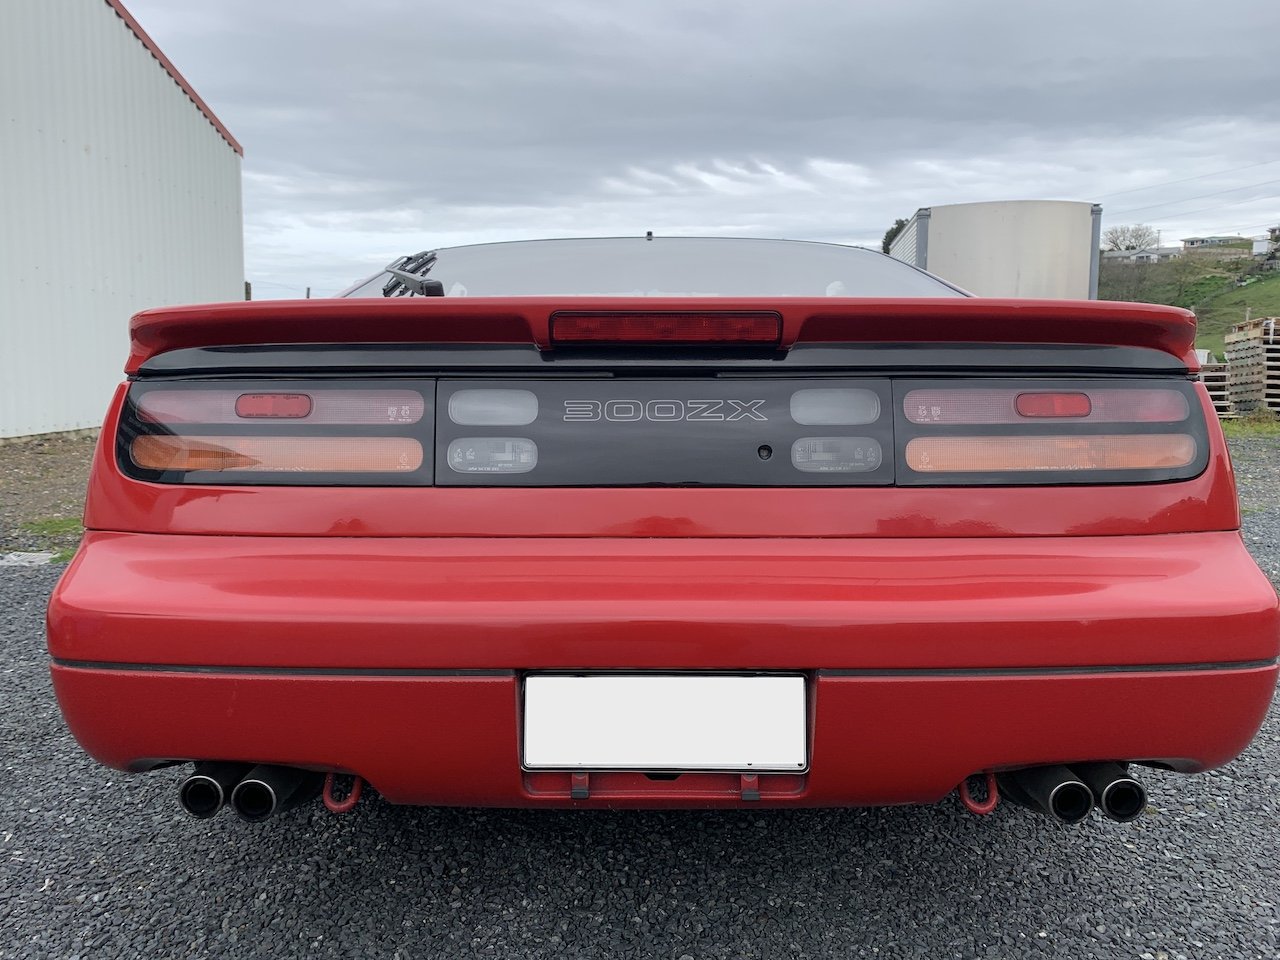
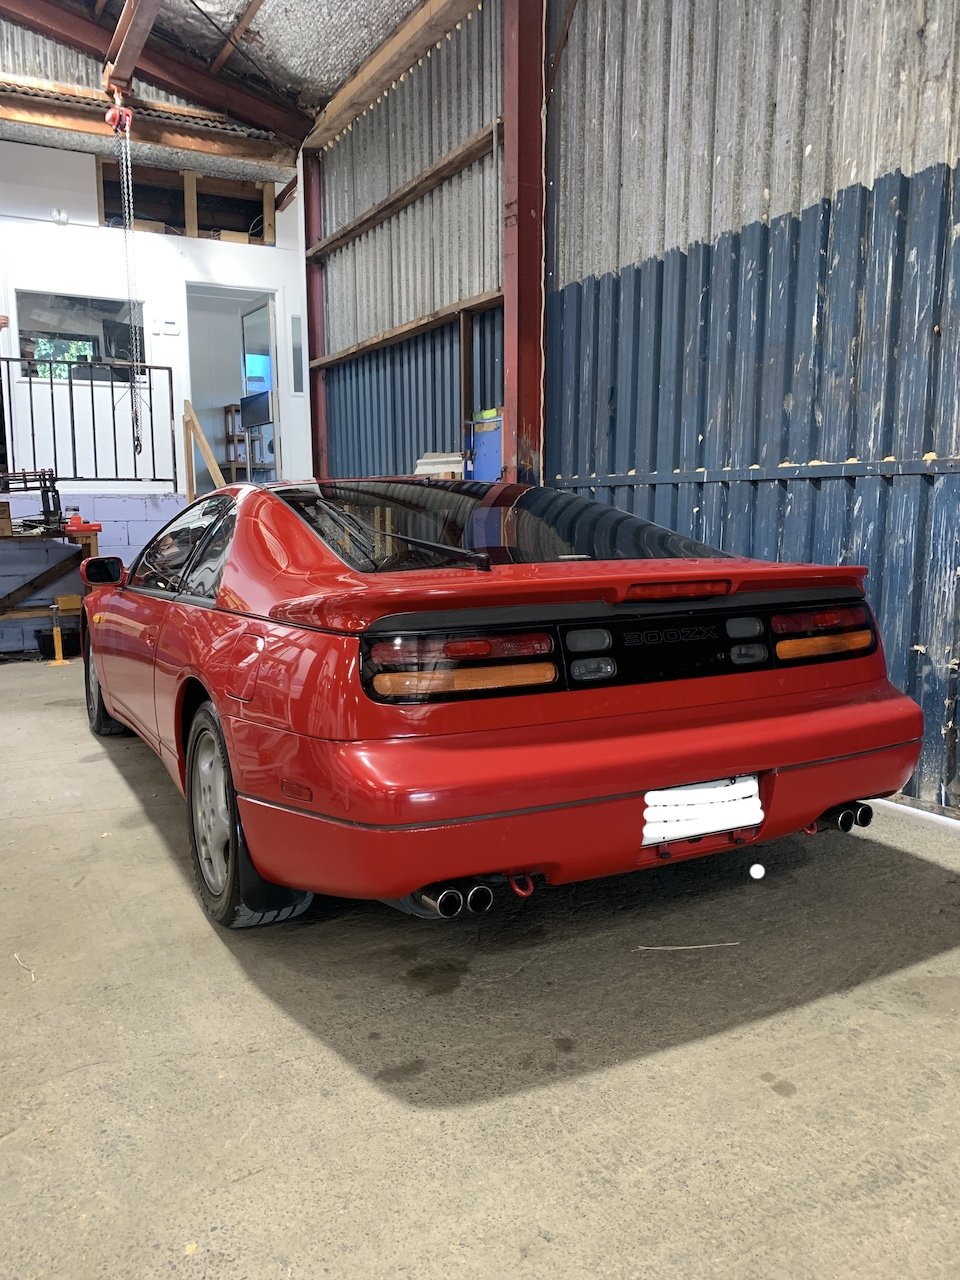
New radiator and rear hatch stickers. Old radiator was a calsonic brand.......felt a bit bummed I've lost a piece of Nissan racing heritage from my car, but i've gained another 10hp with the turbo sticker
-
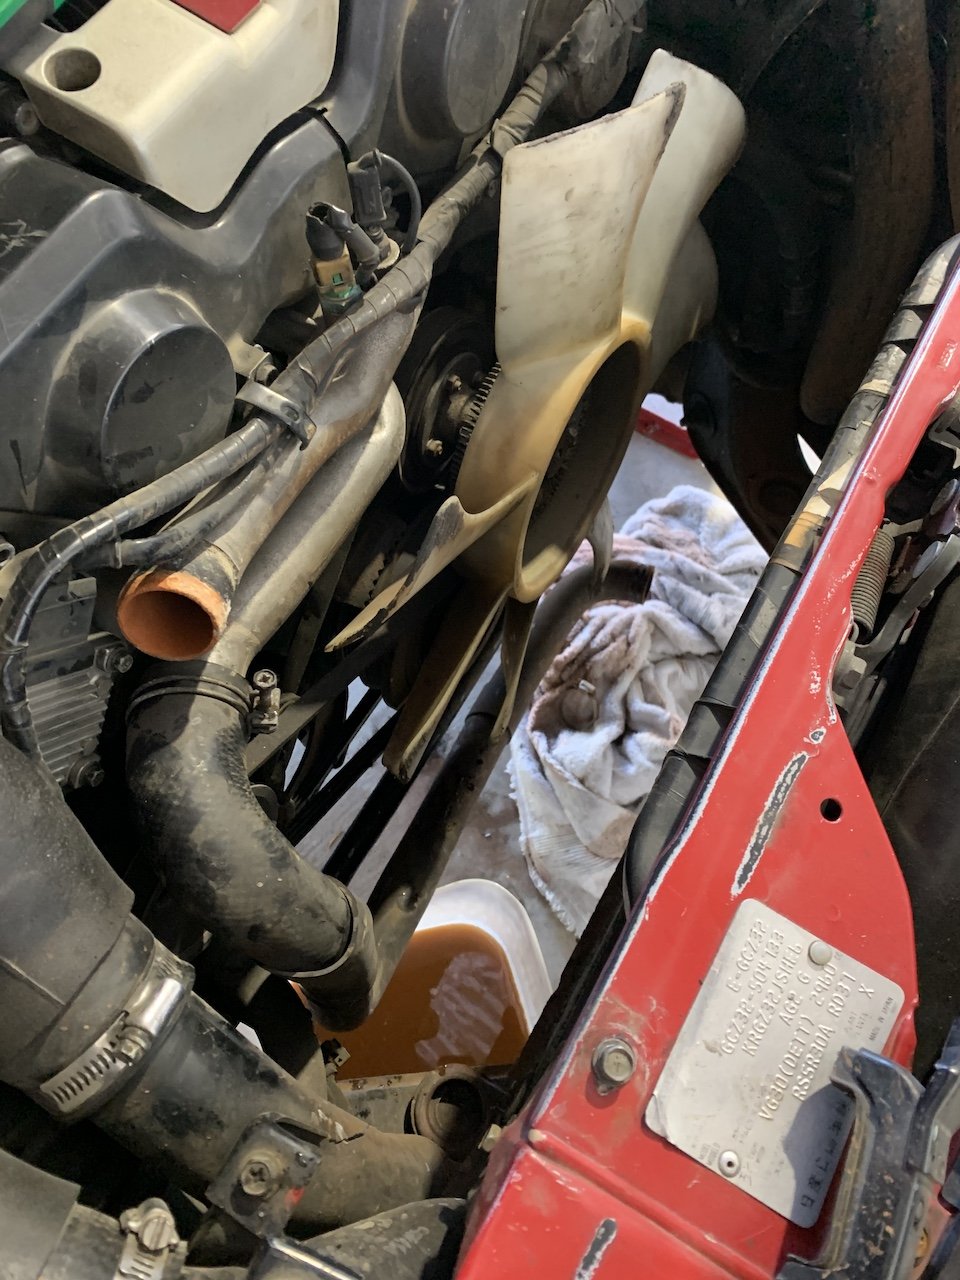
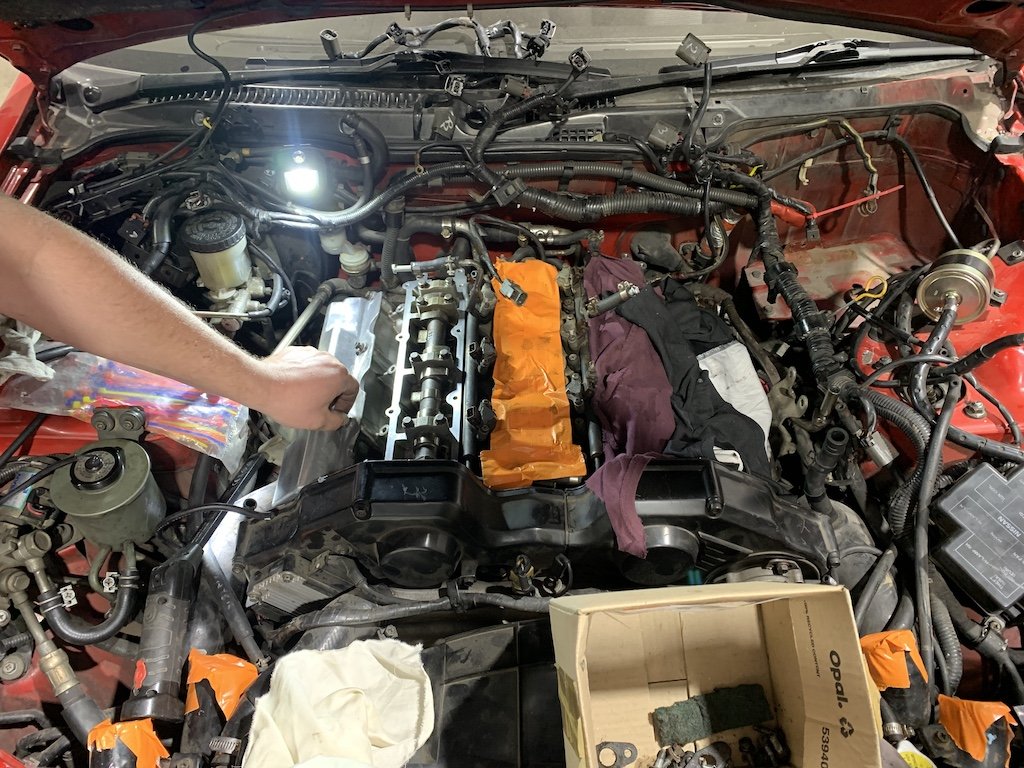
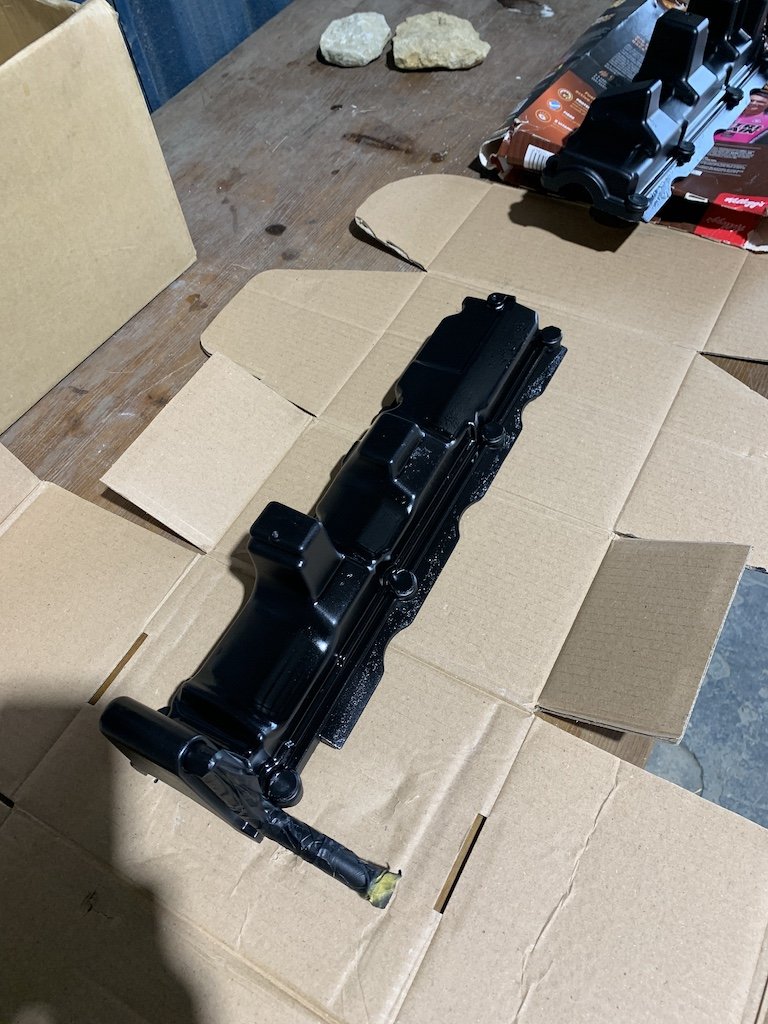
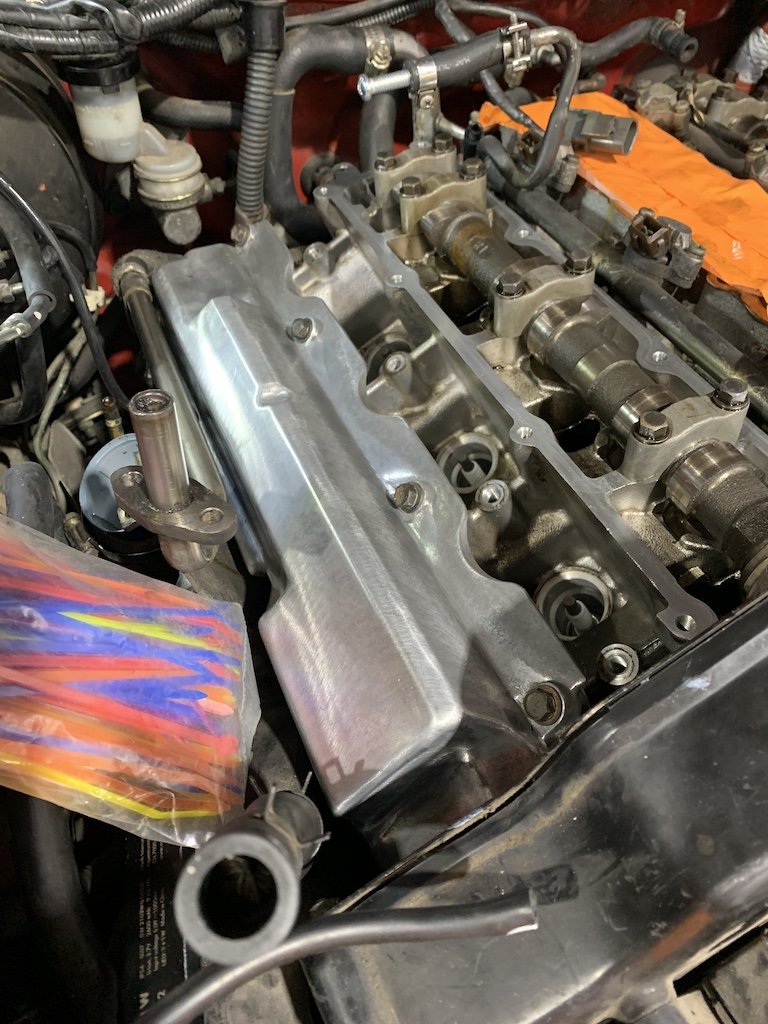
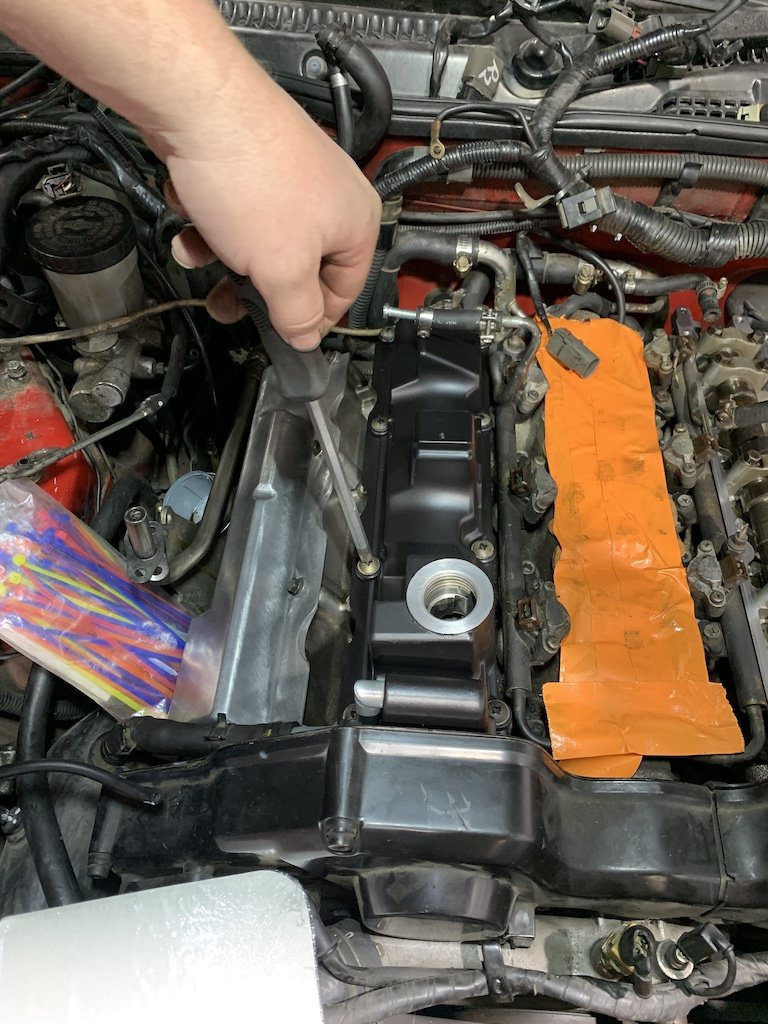
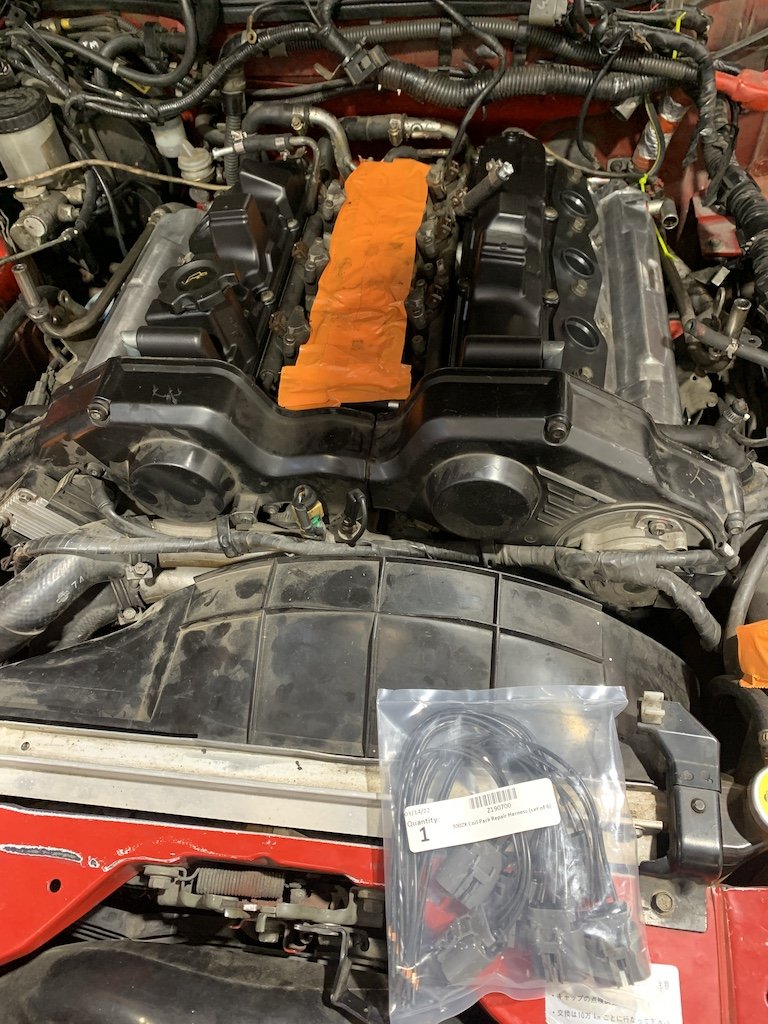
Months go by...... Car went to my mates workshop to replace the rocker cover gaskets, ignition plugs, Japanese manifold heater lines delete, and a few other bits and pieces. It sat there for months, getting a little progress, but between his fucked back, no staff, covid, workshop floods, roller doors falling off, trees over driveways........ it never got finished. So I took it to the local Nissan to finish up. New Wof and ready to go now. Gave the cam covers a clean up. These cars came with a heating system to keep the manifold warm in colder Japanese climates so we took the opportunity to delete these - thought about deleting the EGR too but left if just to avoid any future hassles. Tidied up the cowel panel and wipers and got it back to the workshop, but not after one other small scare....... Once Nissan assembled it all they noted a high idle so I have a new idle control valve on the way, and it had developed a water leak. The turbo coolant hard line had sprung a leak.......removing this means engine out.....FARRRRRRKK. Mechanic was able to sleeve it with some hose for now - so I'm planning a proper engine rebuild/refresh for sometime in the next few years, so until then its cruise and enjoy. Ordered a new radiator too so that'll go in soon, along with some good sounds hopefully. Just waiting for now before getting some wheels. Theres a few rattles and creaks I want to eliminate before I head out for a lower profile tyre.
-
Maybe I didn't fuck up the mounts on my diff then after all
-
Good spotting! funny thing is that it is neither that floor or diff that are in the current set up, but noted the positioning of the wheel! I'm just going to run with it until everything is built up and see where the dust lies..... who would have guessed an 40yr old car and swapping/bastardising parts would be problematic
- 90 replies
-
- 1
-

-
- CorollaCoupe
- SR
- (and 5 more)
-
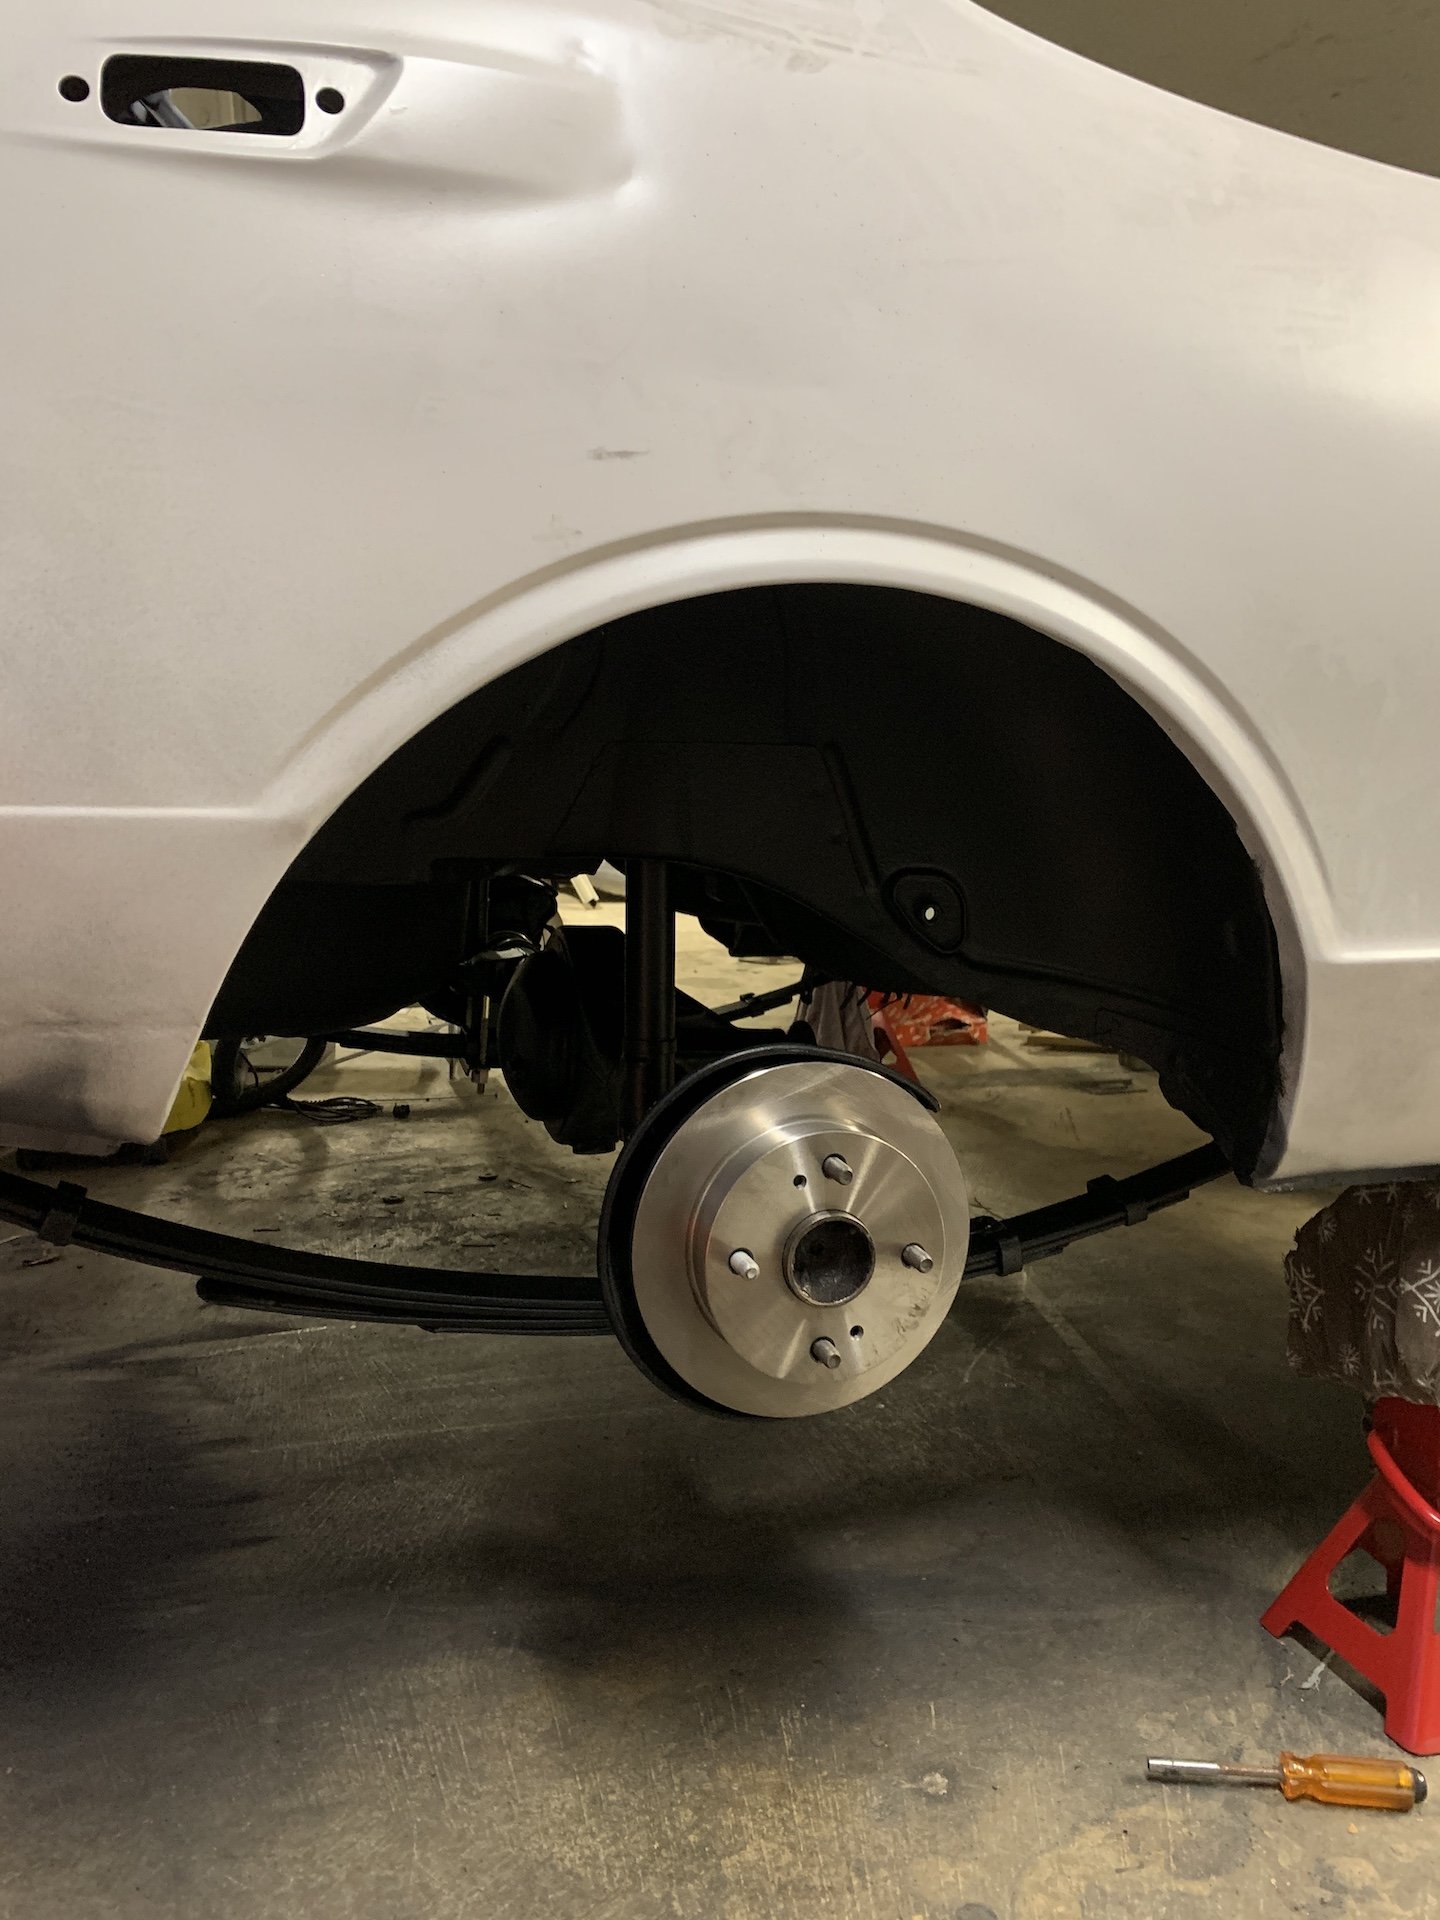
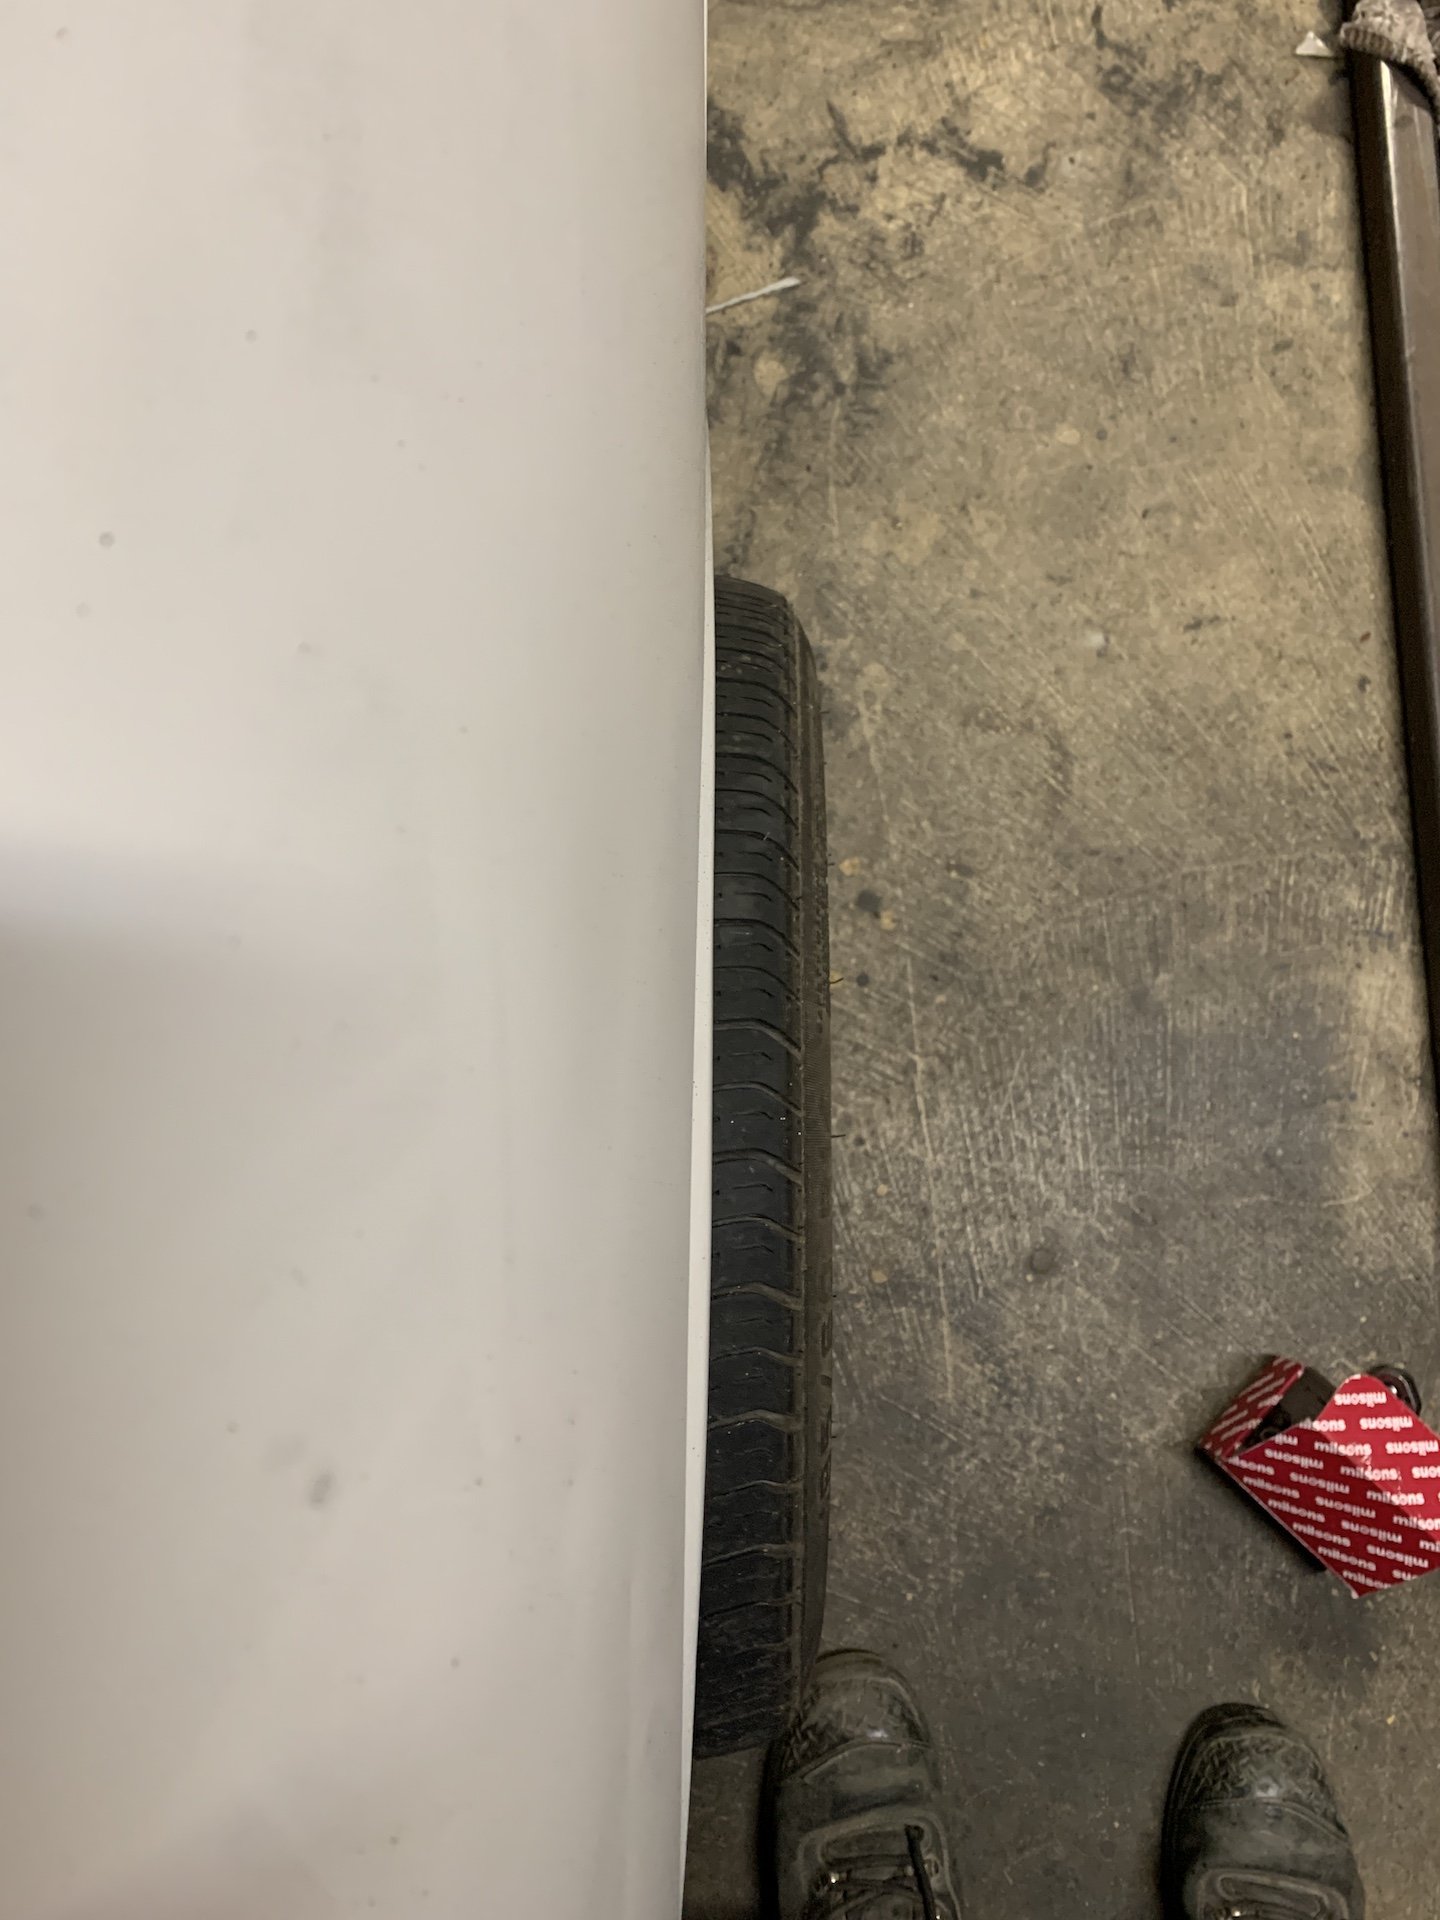
went up home with the worker to measure everything up based of the repair manual..... Everything was square and nicely aligned etc BUT Leaf spring mounts are sitting 10mm forward based on factory specs.......which isn't cut and dried because the image of the chassis in the manual was of the 2 dr sedan so meh! Anyhoo - rear wheels (which had different profile tyres and exaggerated the issue) were swapped to the front to get her rolling - I'll sort the rear axle "issue" another day.
-
yeah - just went up to the house with my worker to measure everything up. From what I can tell, everything is centered and aligned re: the chassis and the mounts etc, if anything the floor has maybe been put in a few mm forward, but it is even. The tyres are different profile on each side so that is exaggerating the issue, but the axle is sitting a bit off centre........I think it'll come down to seeing what it looks like once all the weight is in the shell, maybe using a shorter shackle for the rear spring mount to pull it in a bit... worst case scenario I get some new springs made up?
-
looking at the pics, one side is worse than the other, maybe it's just a simple alignment issue with the leaf spring perches? EDIT - turns out the shitty old tyres are a different profile so it is exaggerating the issue - but after measuring everything up, it is all even but sitting a bit far forward.
-
Hey Mate! I was so excited to get home last night and get her off the stands.......talk about wind out the sails! The leaf springs can only go one way so that's not an issue. I haven't got the drive shaft even made up yet and it's definitely not just in the photo...... The variables the way I see it are - AE86 Diff which has a wider diameter then the factory KE25, so the 2 inch lowering blocks will sit lower on the new diff than the old? The leaf spring perches could be sitting a bit forward, but I'd imaging any variation there will be minimal. The only other major variable is that is has the new floor, which was my first thought......is it too far forward? I torqued everything while it was up in the air, as per the old Gregorys ke25 manual, but maybe I should have done that while on it's wheels? looking at the pics, one side is worse than the other, maybe it's just a simple alignment issue?
- 90 replies
-
- 1
-

-
- CorollaCoupe
- SR
- (and 5 more)
-
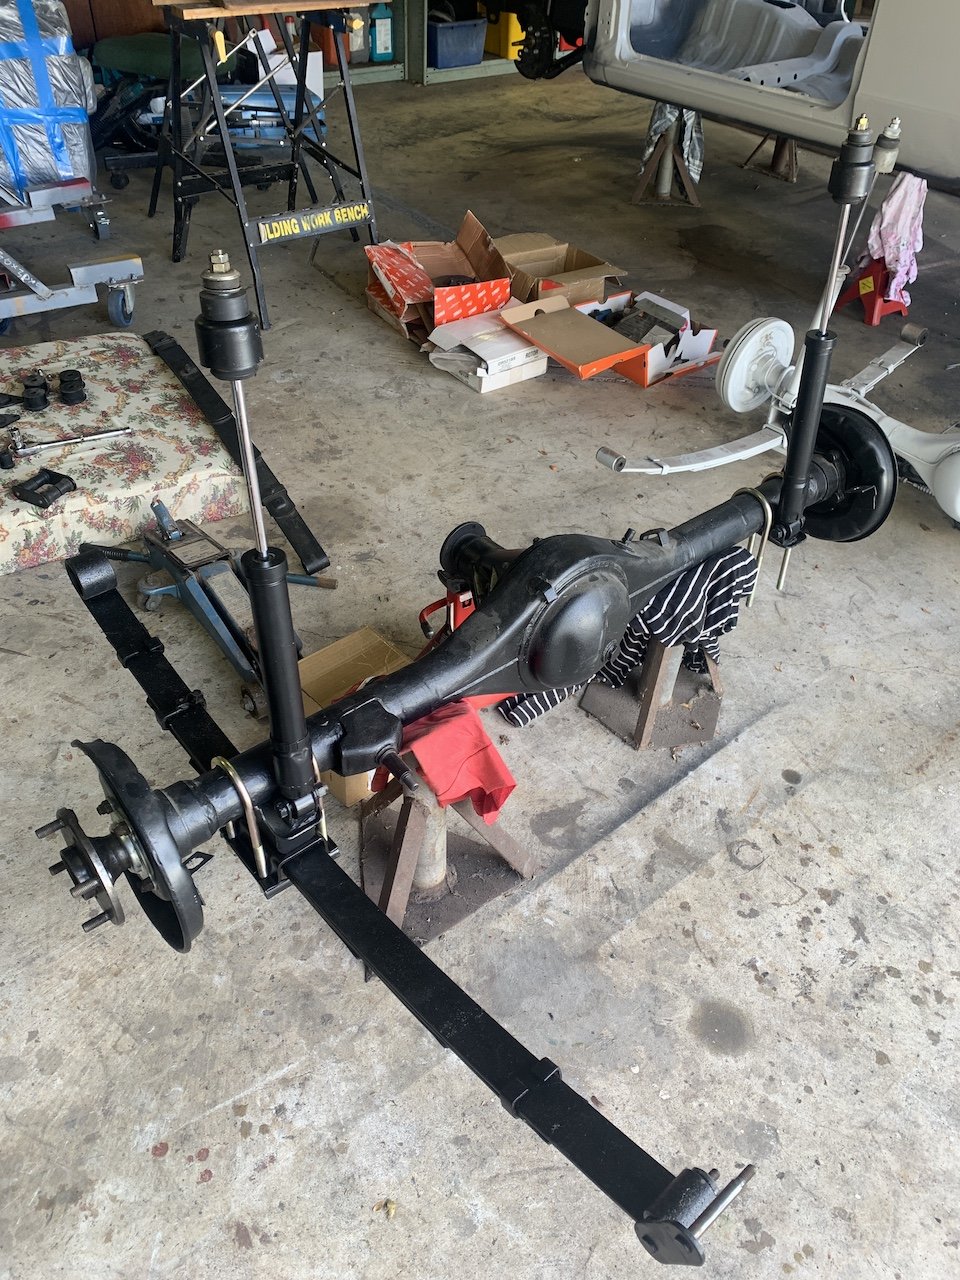
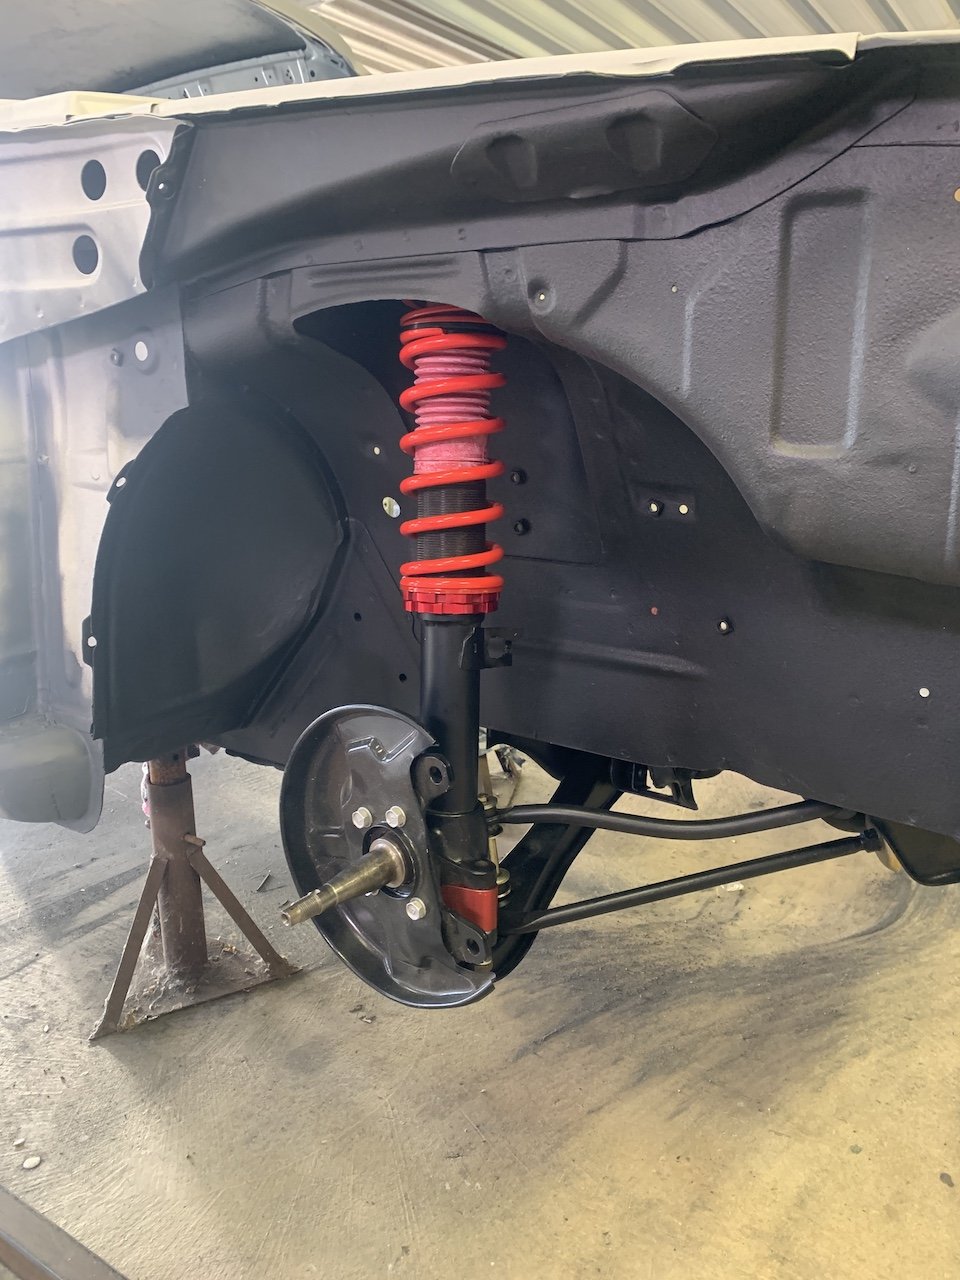
Progress......maybe?? Well the rear axle/springs are all in and torqued up, as are the front hubs........and she has some wheels on..... But I can't drop her onto the front wheels - the offset is all wrong and the tyres are touching the strut so I need to sort some different wheels for now ha ha. There is some good poke on the rear wheel, maybe some room for more with the flares on. BUT the rear wheels are not centred in the arch......Is this a MAJOR? My first thought was maybe an over reaction?? "Shit the front mounts are too far forward from the new floor being swapped in"....has anyone experienced this?? As per my manual I torqued everything up while it was on the jacks.....would this cause the issue? Oh boy....hopefully not a major!!
-
Cheers - I'm in the Waikato. Didn't take too long to make them up. Was my first fab job so was pretty fun to do. They are custom made to fit my chassis specifically, height and mounts etc..... I'll be holding onto them at least until the car is finished which would be a few years at this rate ha ha
-
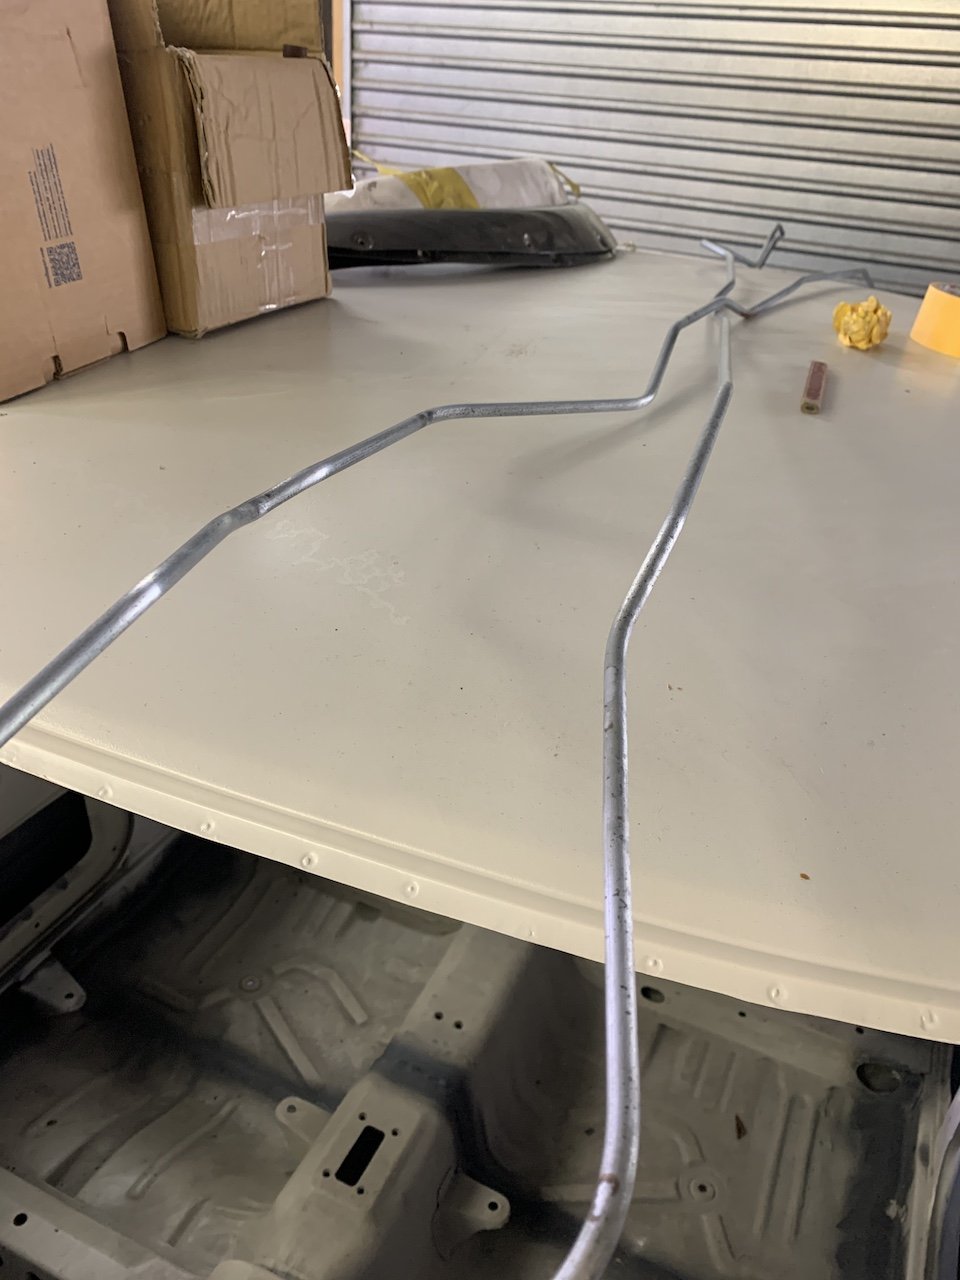
There's two types of KE2X sway bar.....the later one has more of a bend I'm it....will that work for you?
-
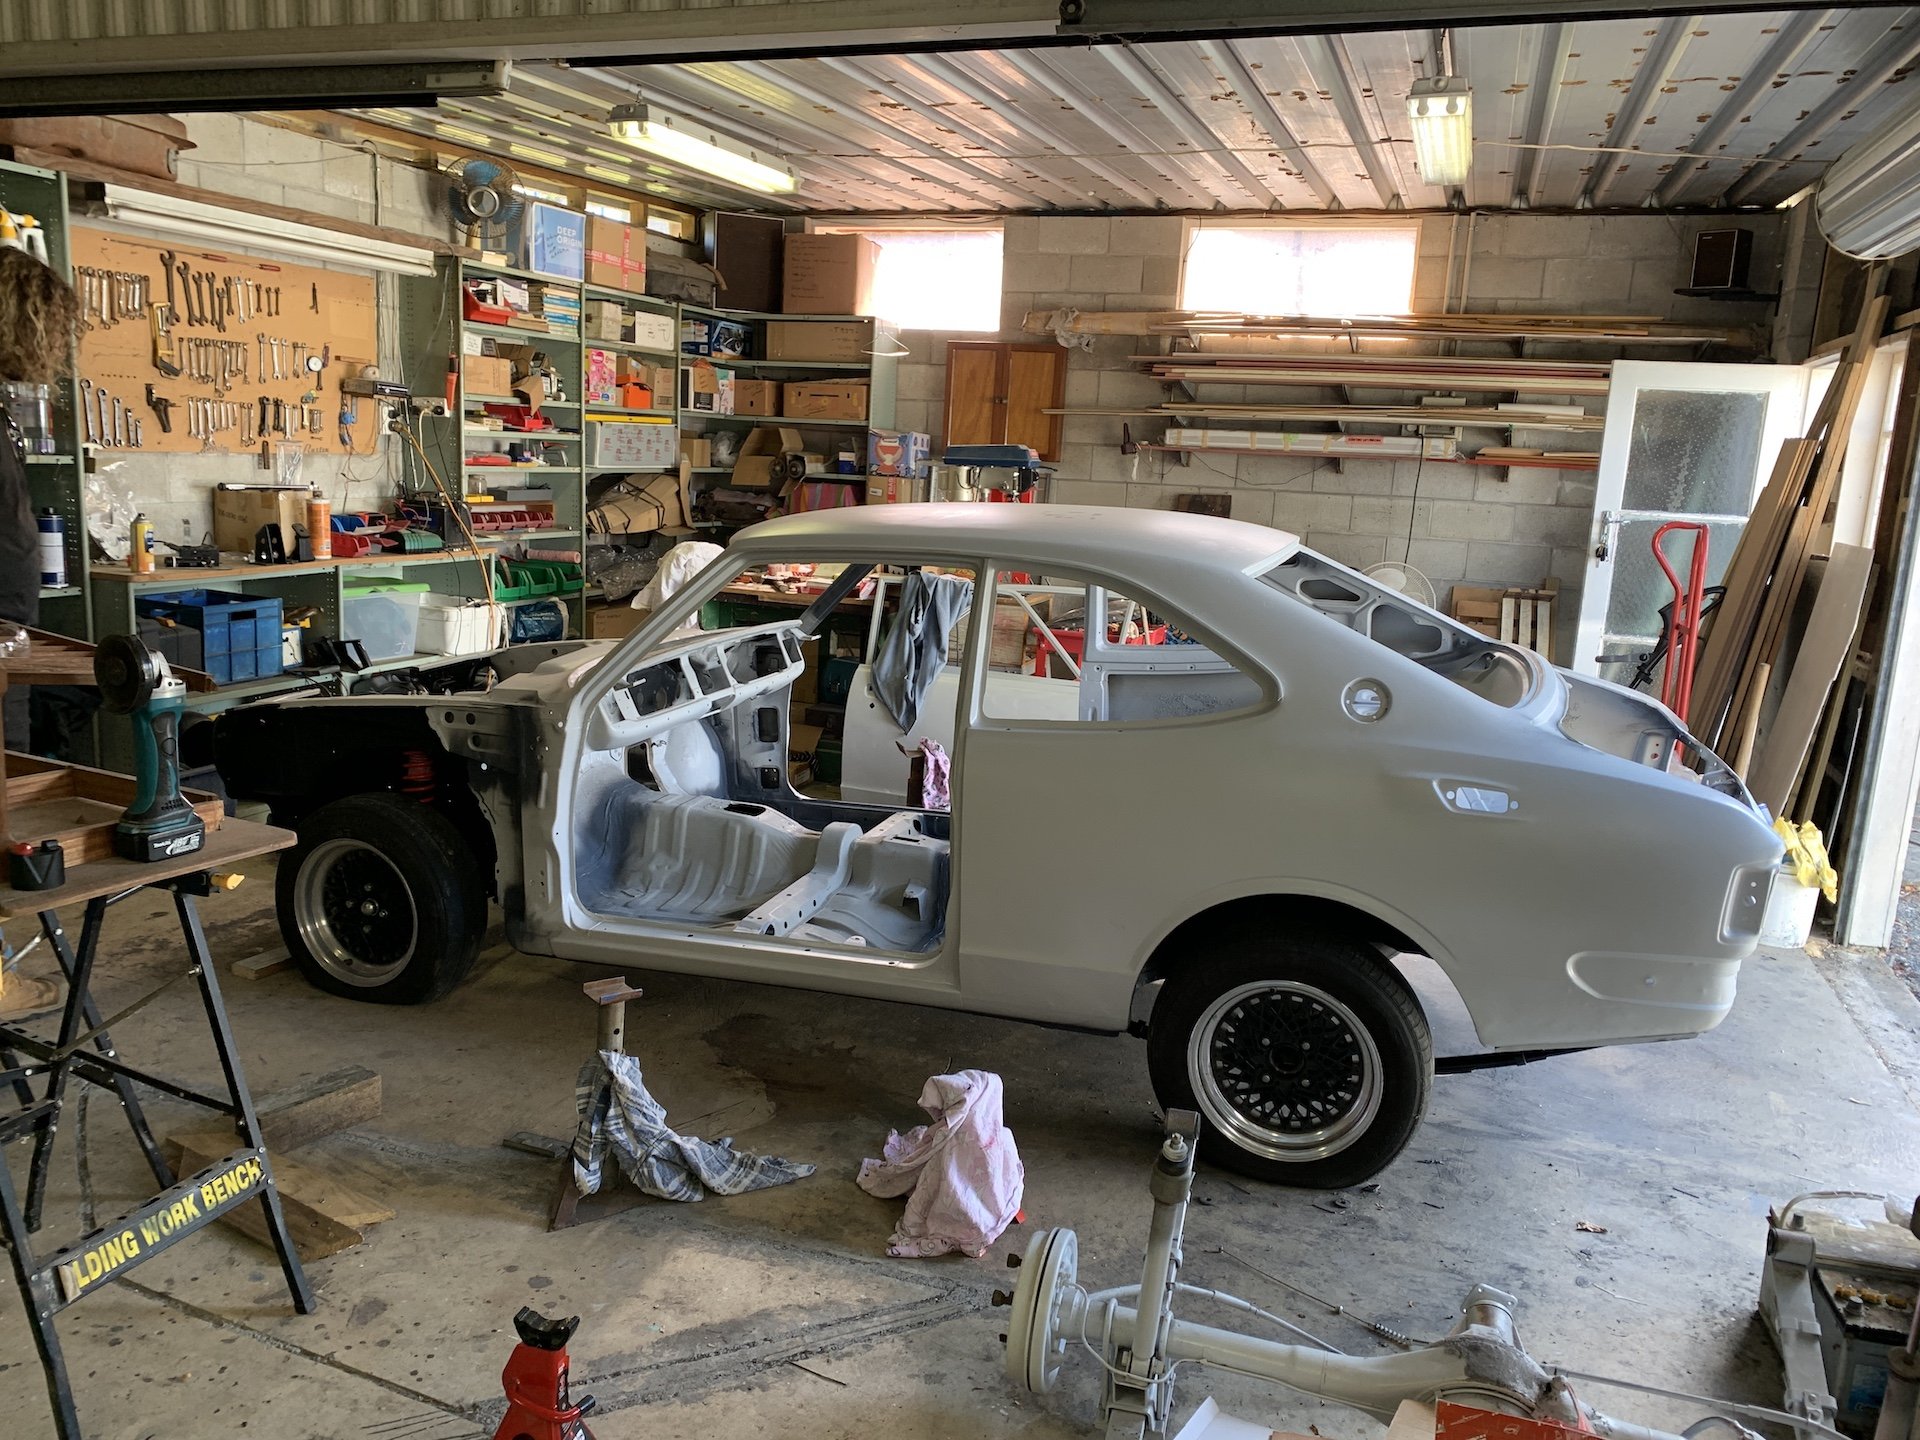
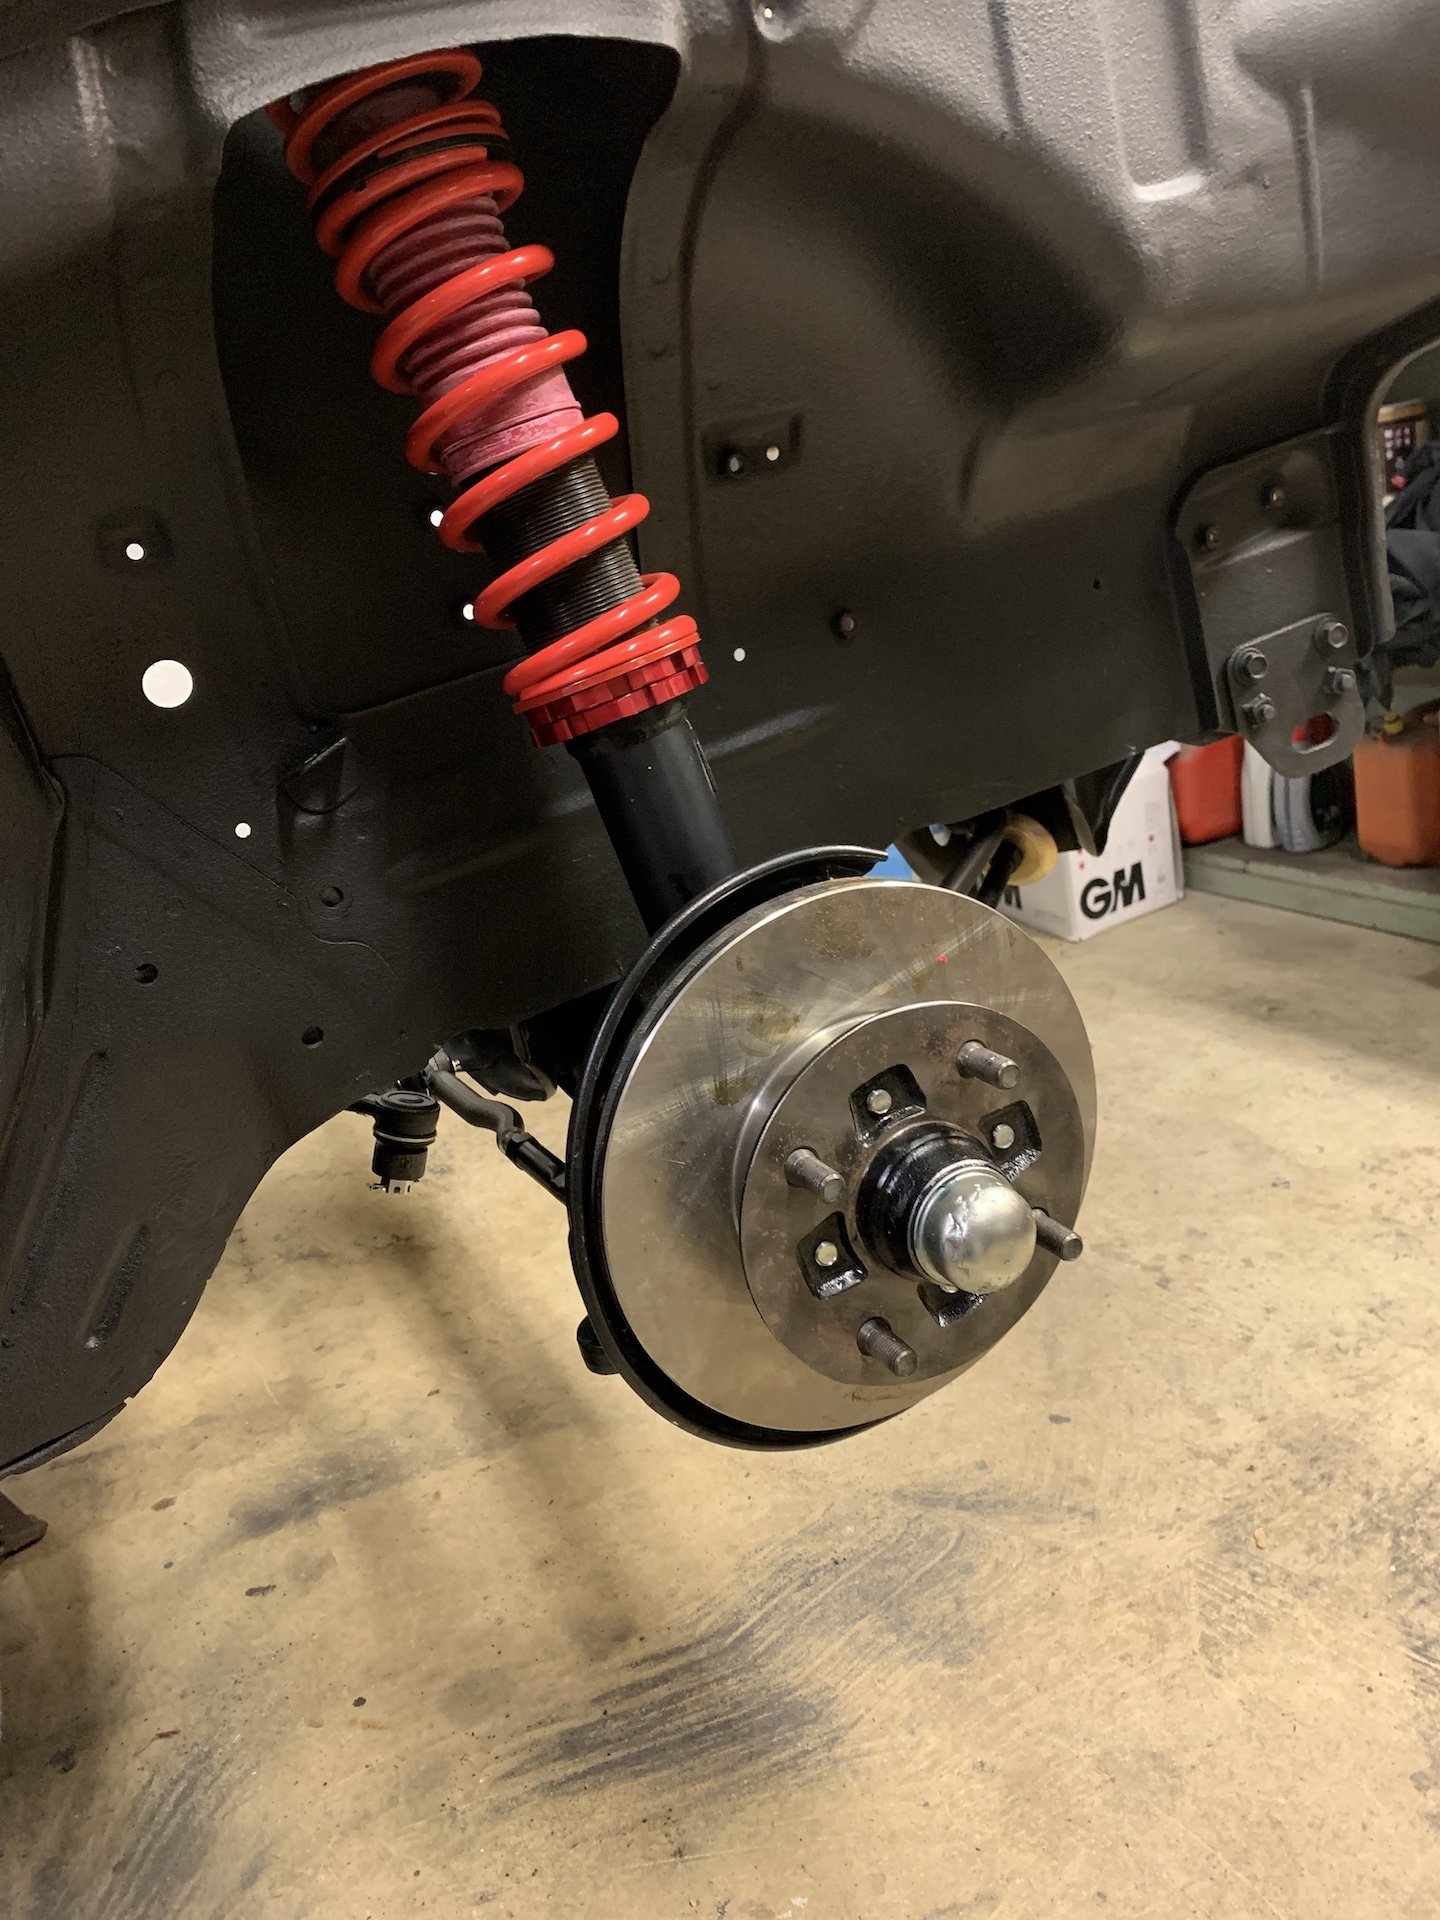
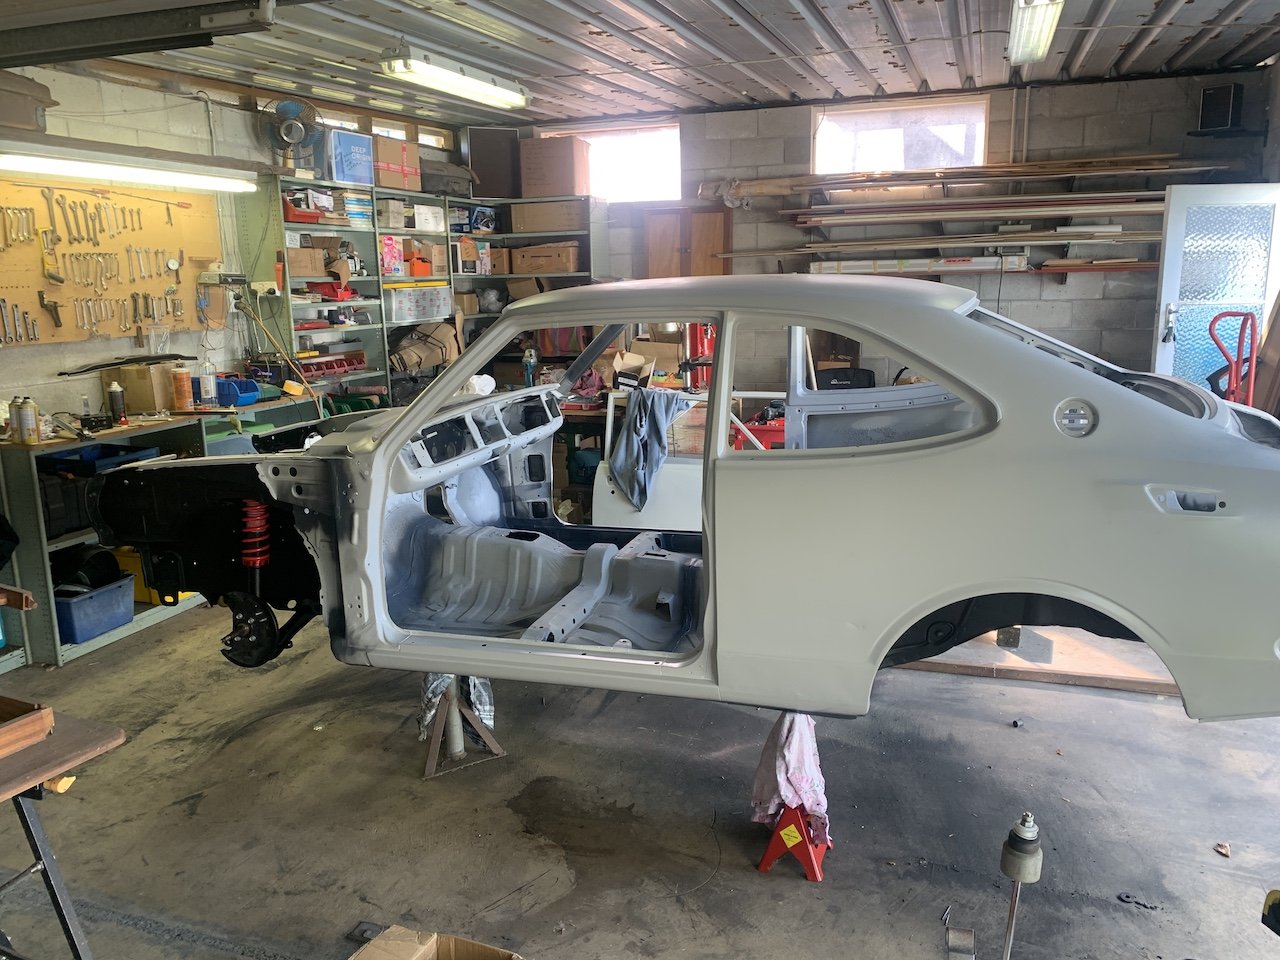
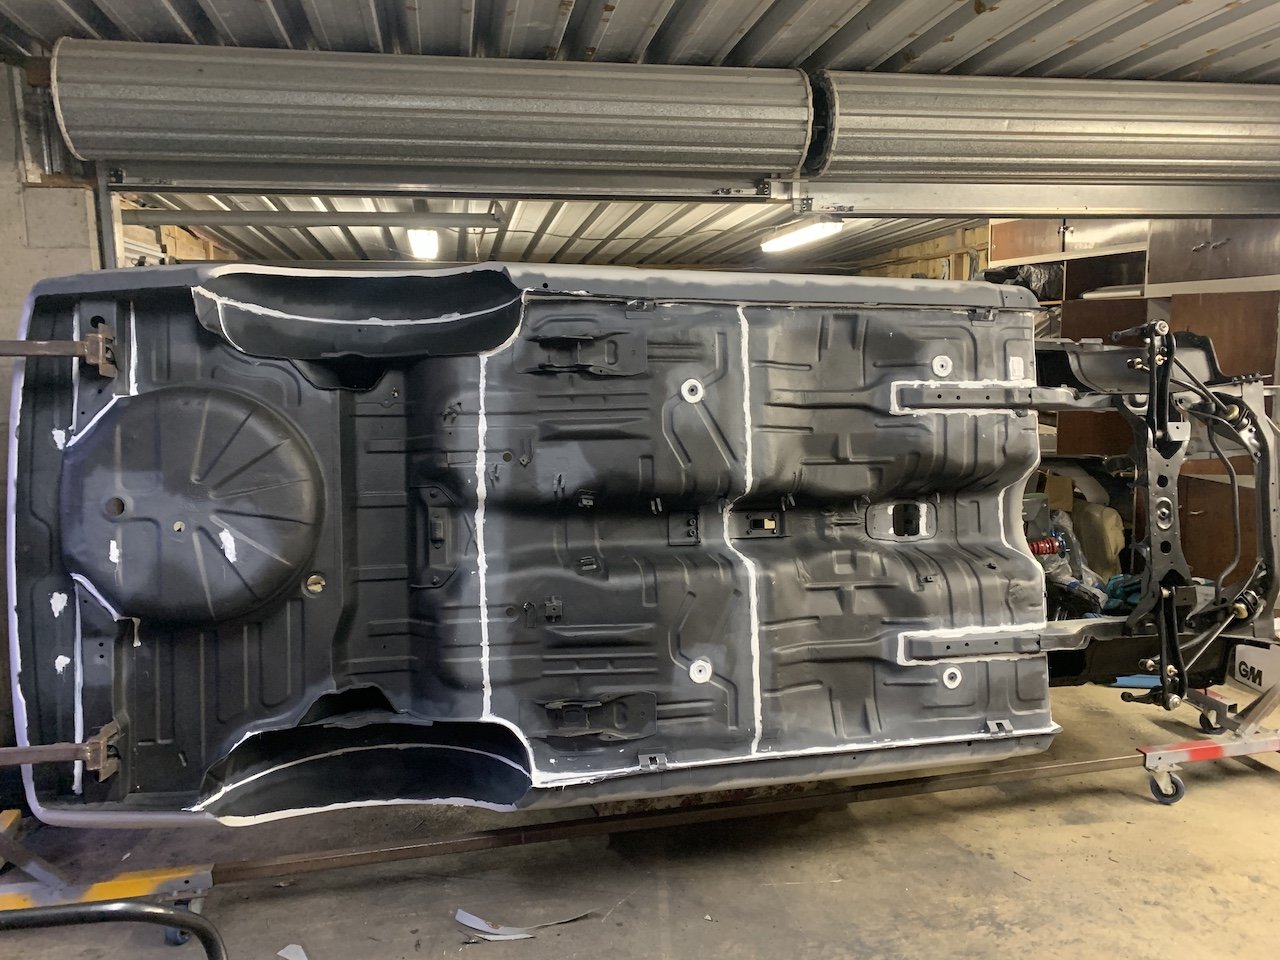
Milestone! Chassis is off the rotisserie! I finished RE doing the seam sealer and underseal. Turns out the underseal has two variants - water based and solvent based. Anyhoo, moving on..... I did want to get it on its wheels again this weekend but one of the handbrake brackets has broken off one of the leafs so I will get a spare welded on this week. I also need to get a torque wrench for the front ball joints as they are locked away under the RCA's/steering arms. So - plans are: All torqued up front subframe Repaired hand brake cable mount Mounted rear end Front hubs On Wheels!!
- 71 replies
-
- 18
-
-
Nah, I saw a pretty similar one driving north through town here the other day. I was driving to the workshop to see how the work on mine was going, and for a sec I thought someone had pinched it already ha ha
-
Thanks for the interest boys ^This^ You can buy the 'Nissan' ones for $300 odd and the 'Lambo' ones go for $1500 plus - great little side hustle if you could tap into the massive Diablo market They had to remodel the Diablo as the pop ups wouldn't meet changing safety rules in the US at the time so these were the best off the shelf option available.
-
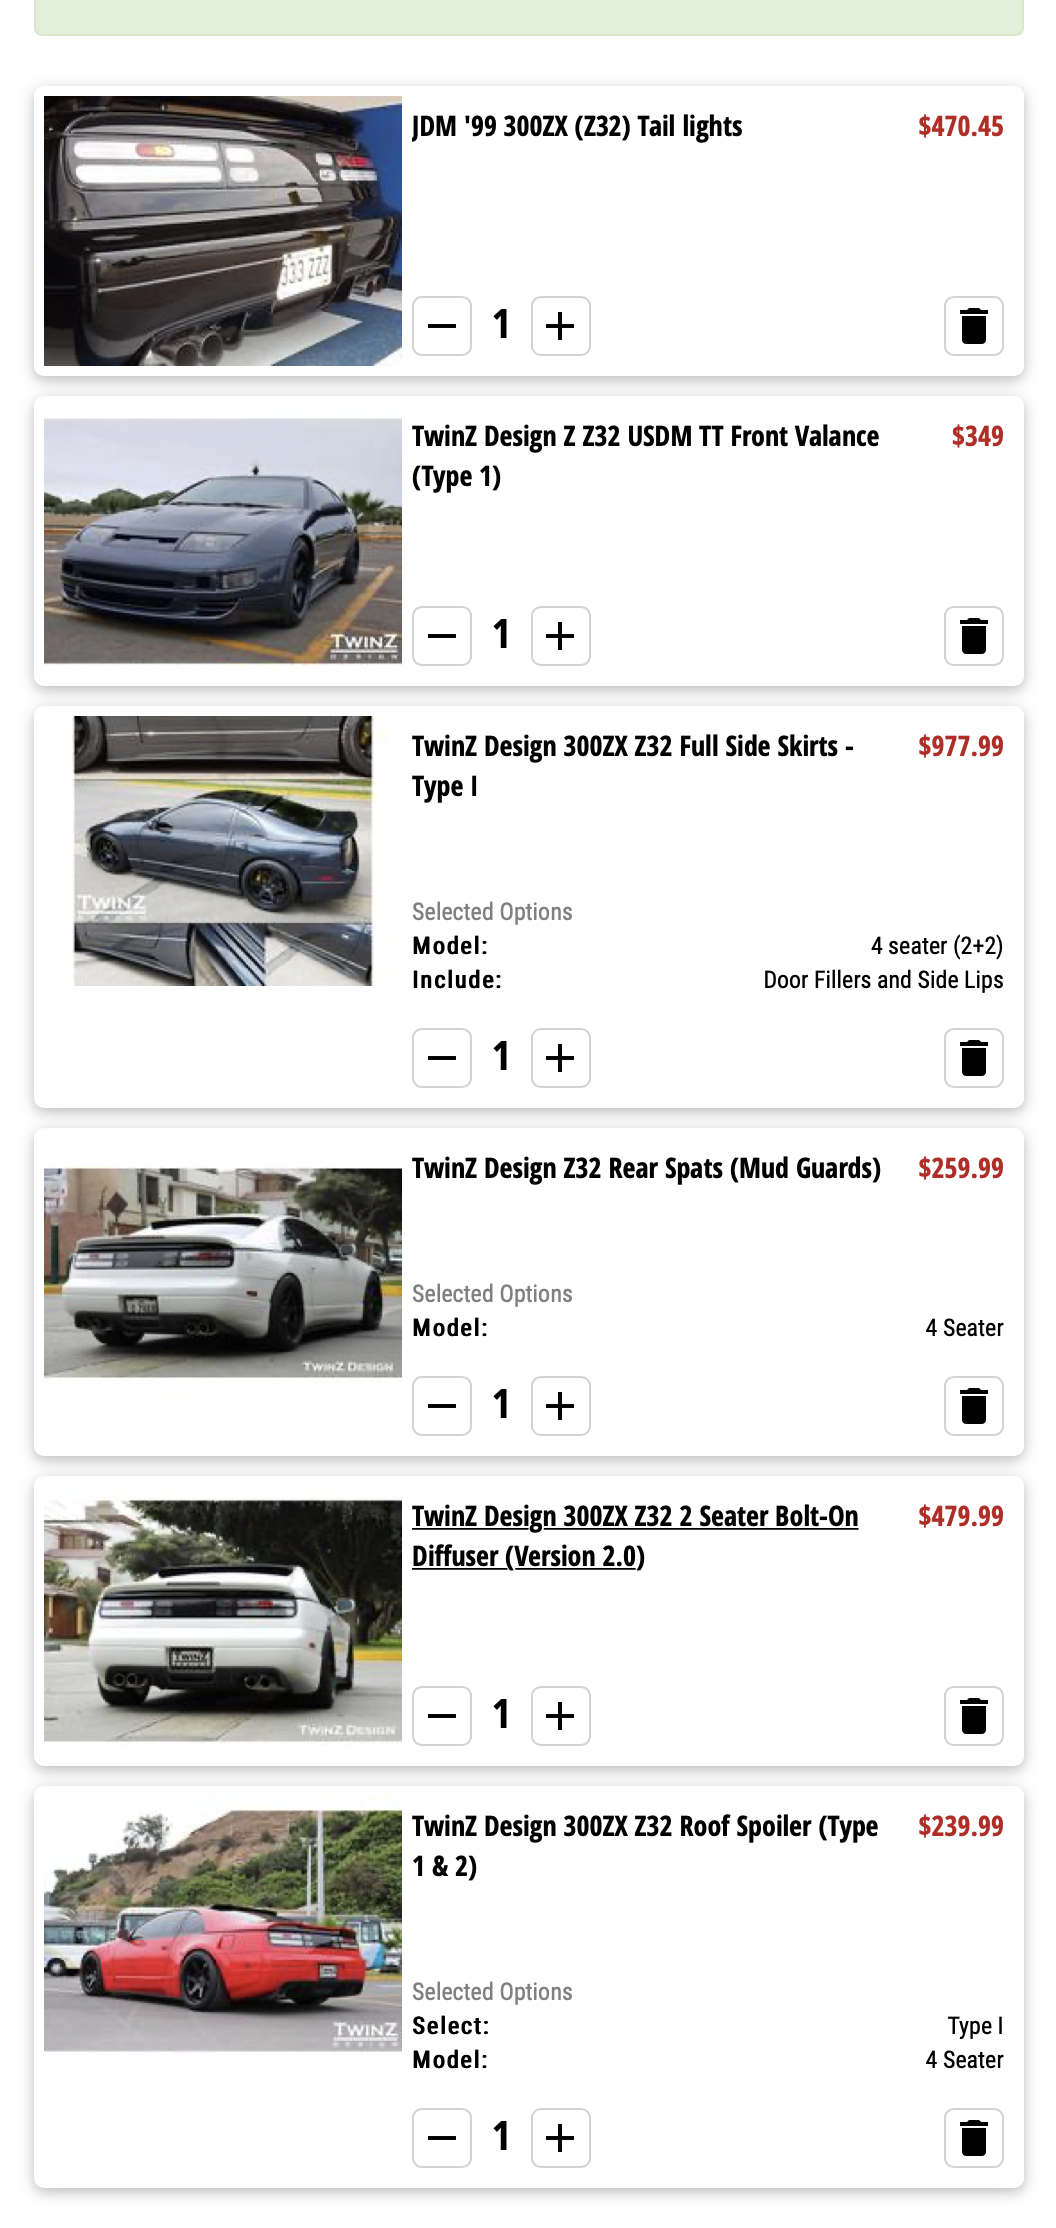
This is my Shopping cart....when I say shopping I mean browsing cart....... while thinking "Deep breath......FAAARK Gst and customs are going to screw me hard for this.......and why should the govt get money for nothing and it's bullshit because If I could buy it here I would so I'm not ripping NZ business off anyway you bastards".......and breathe.... rant over. I will try and hit up TwinZ Design directly myself for a better deal, their website directs you straight to Z1 Motorsports and you see the $$$$ mark up straight away. All these bits would fit snugly and require no damage to the original body work - the best compromise for a full kit. But I still need to account for getting the wheels, stereo and exhaust.......who is a good place to hit up for a decent cat back system in NZ?
-
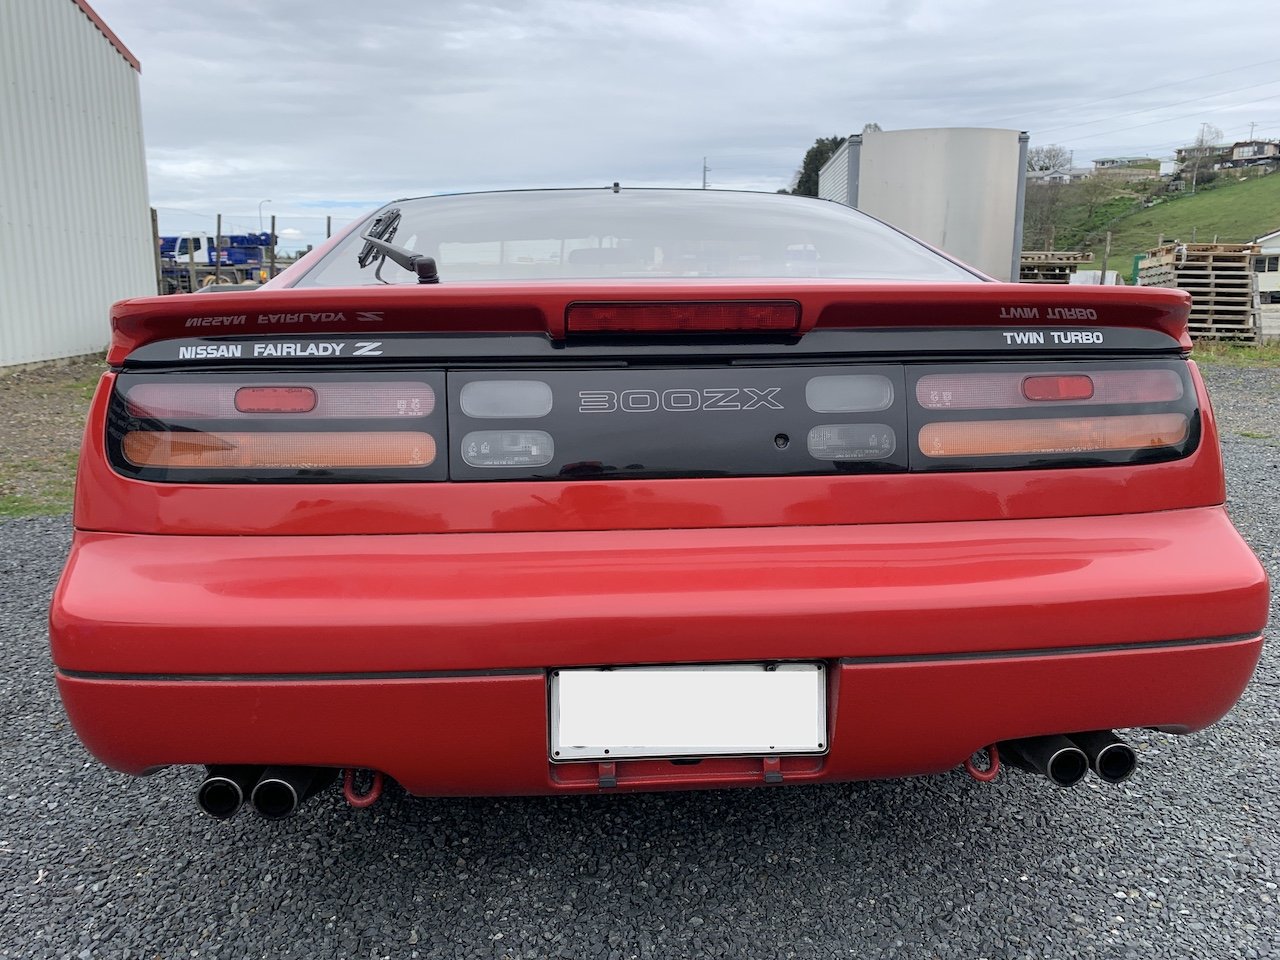
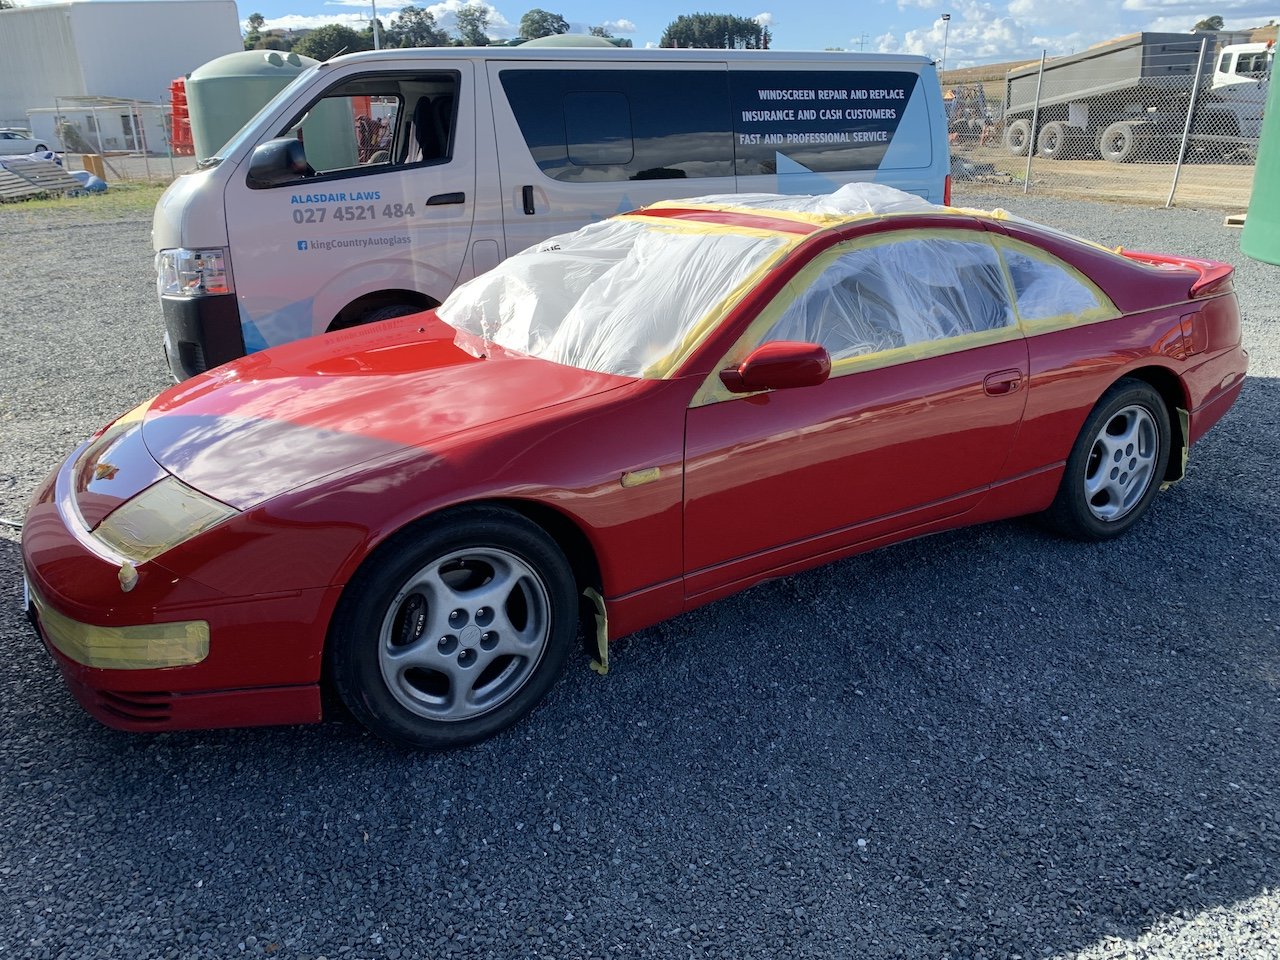
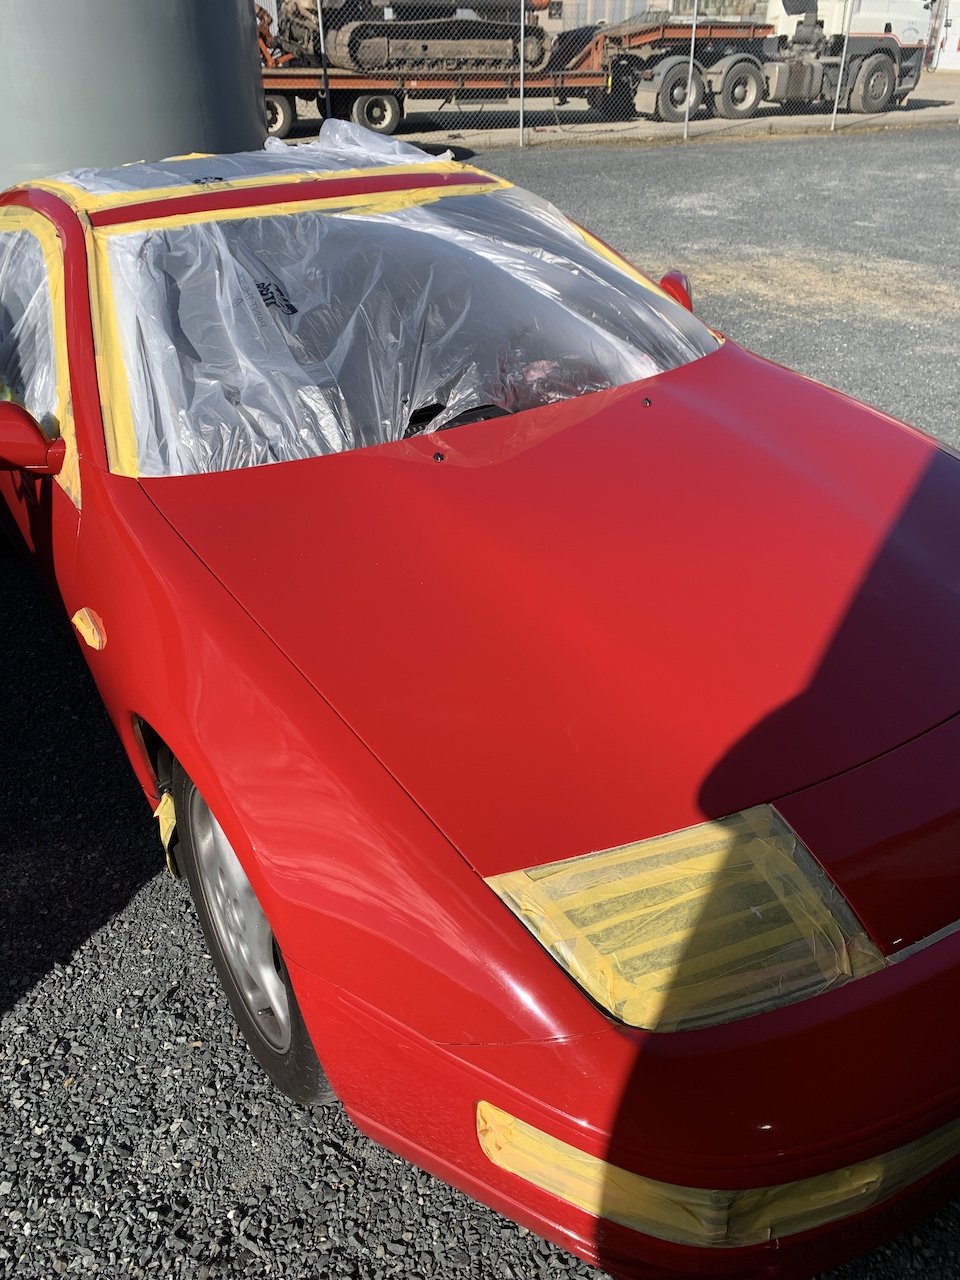
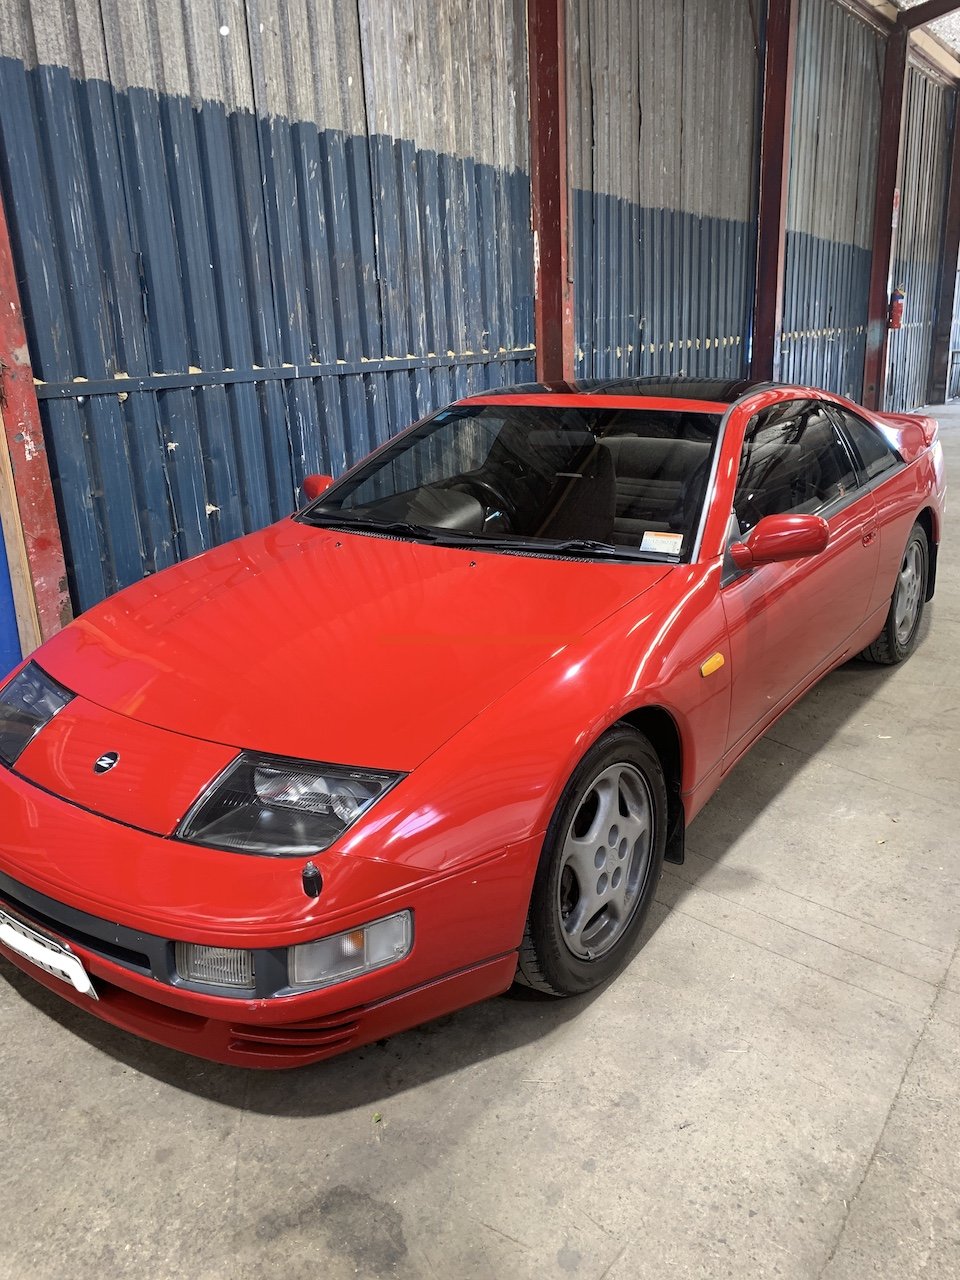
Masked her up and gave her a cut and polish. The drivers door, A pillar, rear fender and bumper are still original paint so were a bit dull compared to the newer paint. It came up really good, still differences in the colour but only if you go looking for it. Dropped off to a mate who is doing the rocker cover gaskets, replacing some pipes, upgrading the headlight bulbs anda few other little bits and pieces. I've ordered a new sticker for above the taillights too. Should have an update on wheel availability soon too.