Kimjon
-
Posts
2181 -
Joined
-
Last visited
-
Days Won
1
Everything posted by Kimjon
-
Yeah, makes sense. Good to think out loud sometimes and see what comes back. Thanks
-
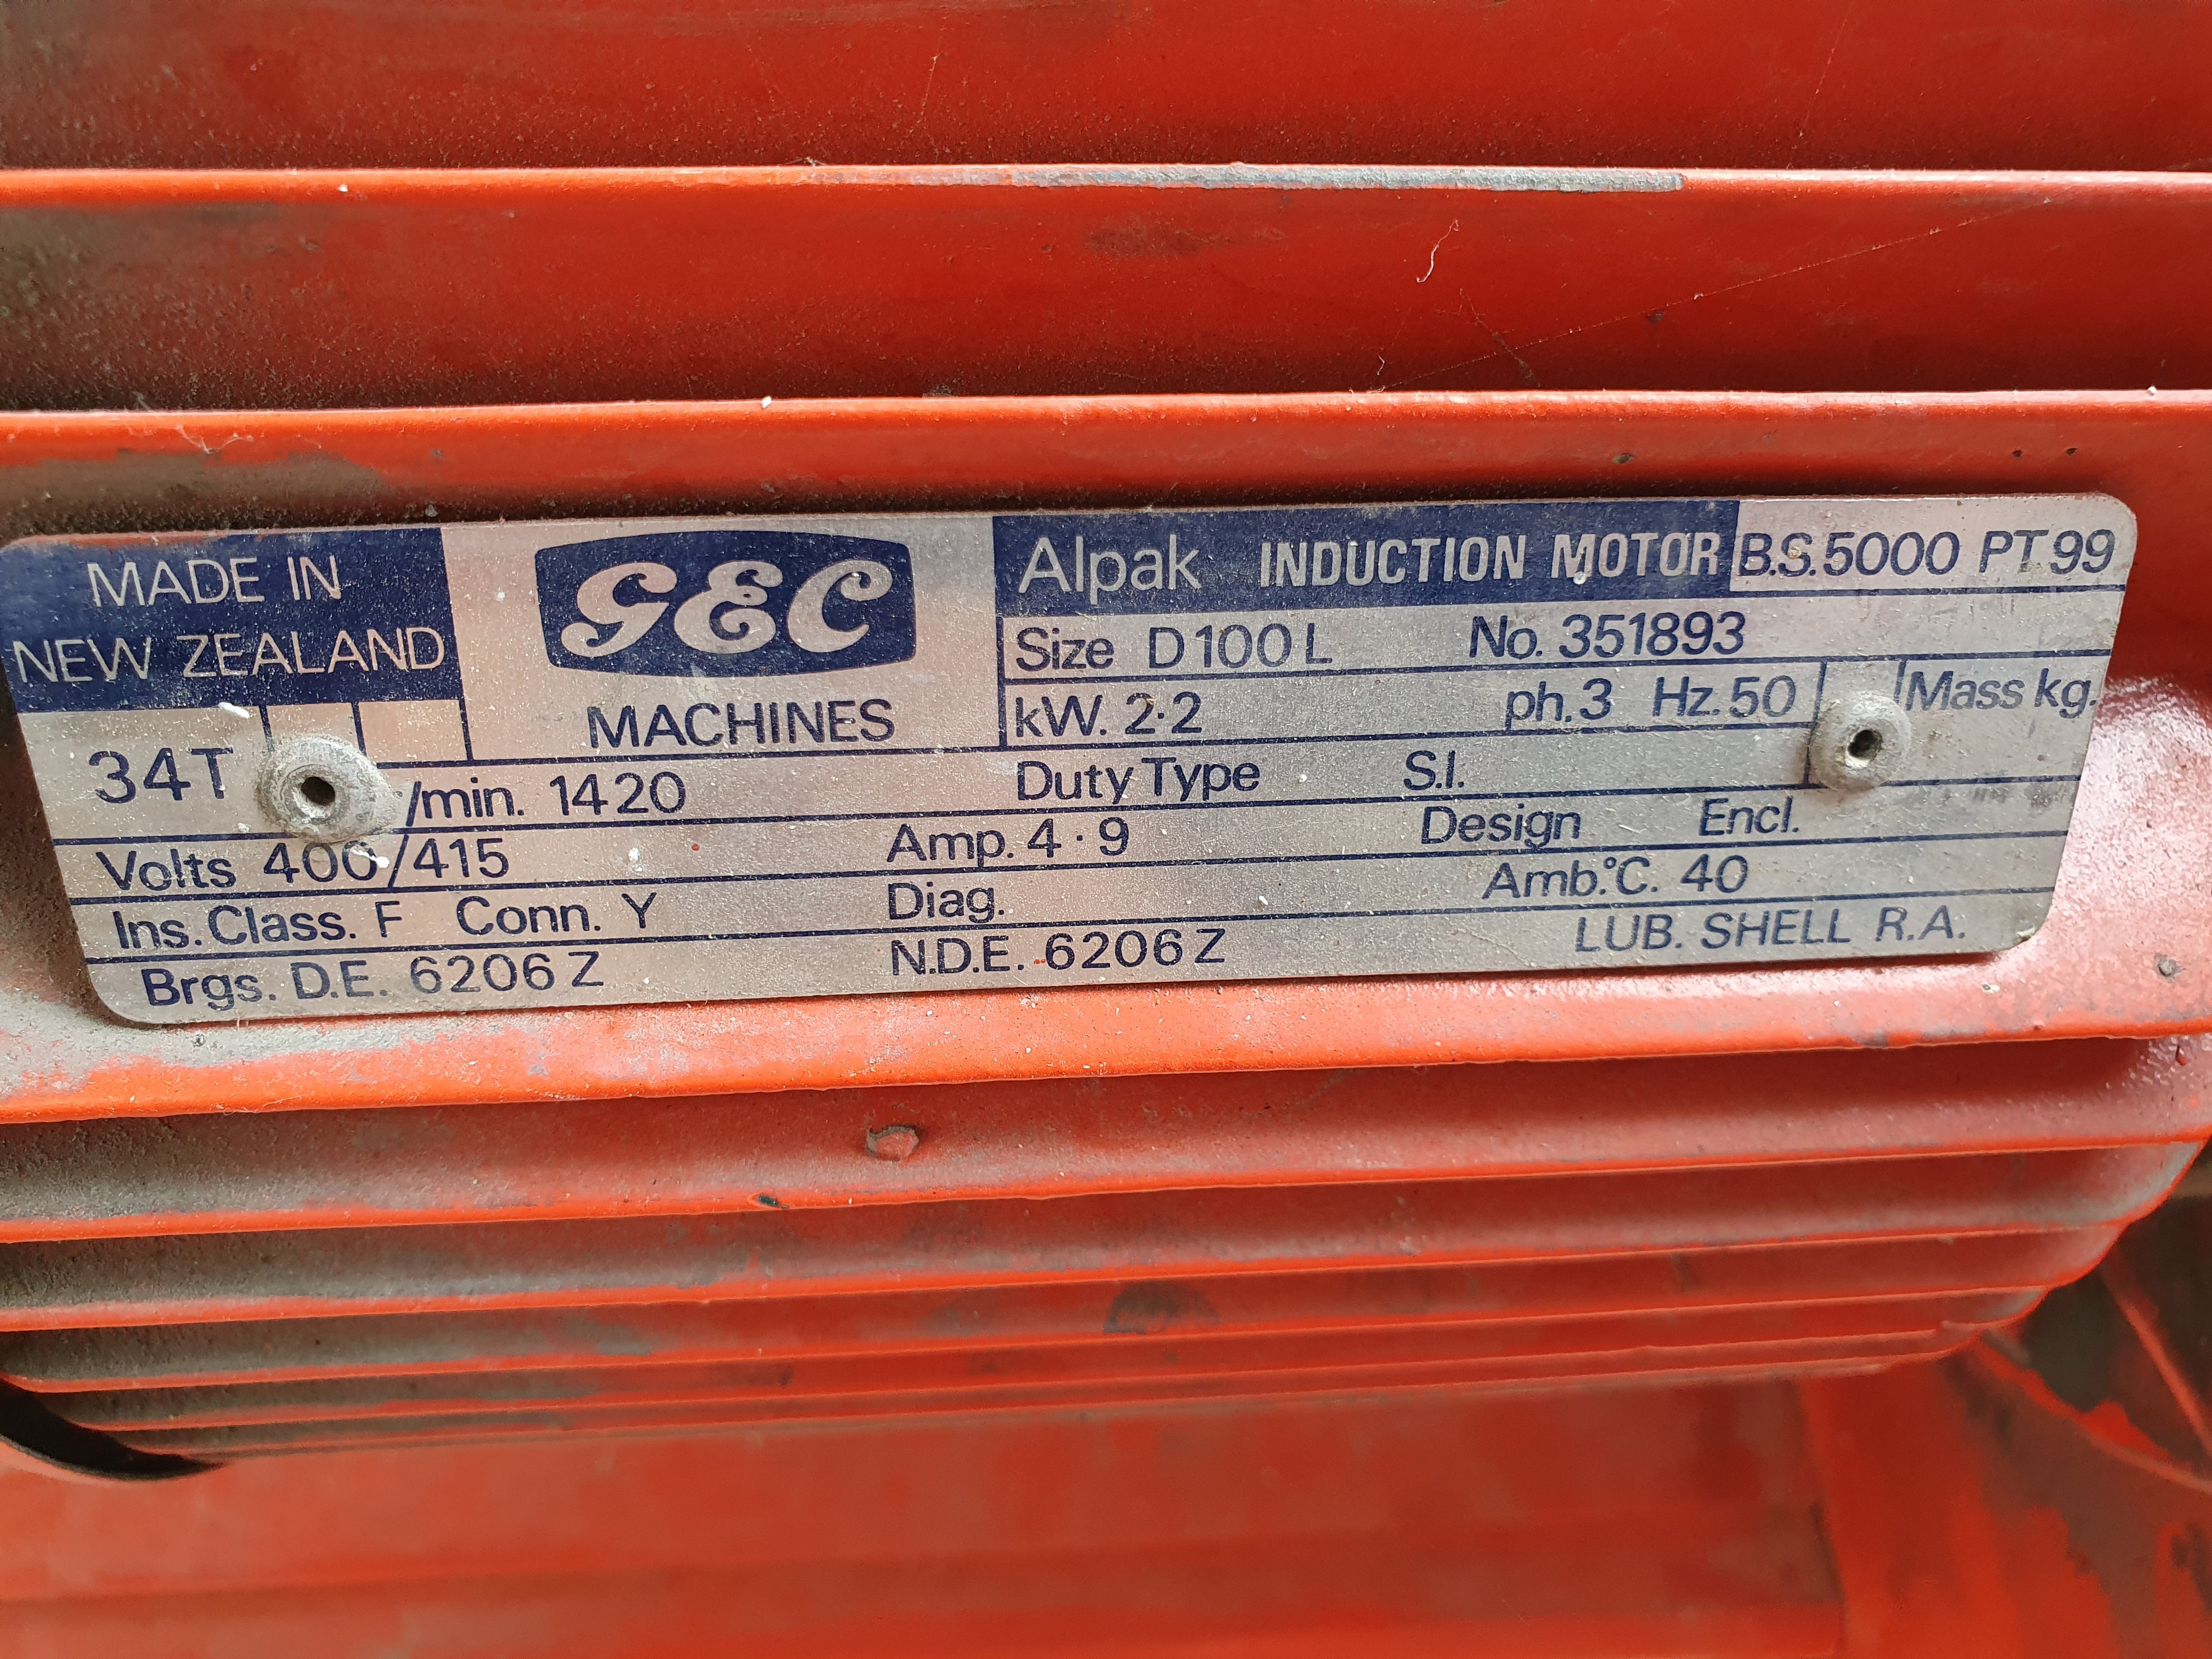
Thanks for the replies. I'm pretty quick to point out that I'm out of my depth knowledge wise here? As in clueless. Our house has 3 phases coming into the meter box (we live rural). Apparently 1 phase runs directly to our water heater. The other 2 phases split around the house circuits. The electrician put a 3 phase cable from the meter box to our shed, and connected 2 of the house phases up, but not the water heater one. Well that's my recollection of what happened? I am keen on the idea of 3 phase power, even if it's just one outlet that I run an extension cable to, as and when required. But thought if I could just adapt a 2.2kw single phase motor off a water pump or something then that could be a cheap win?
-
I'm interested in this. I've seen something on trademe along these lines, but I'm an electrical retard. I have a 3 phase cable running to my shed, but the sparky just took two of the phases and ran a circuit each way off a phase each. So I don't have 3 phase power, just 2 single phases, and a dead wire. Is it very expensive to get these phases wired up to an outlet for proper 3 phase?
-
This is a 3 phase motor, obviously...as that's what the tag says. My very basic knowledgeable of electric stuff is an equation I recall from school: P = V.I Now what's preventing me from losing this motor and substituting it for an equivalent 2.2kw power single phase alternative? If P = V.I 2.2kw = 240v x I I = 2.2x1000w ÷ 240v I = 9.17Amps Seams like not ridiculous amount of amps to draw? Is this possible? As simple as finding a 2.2kw single phase motor and adapting it to fit my application? Or is there a cheaper alternative to all the above? Ideas, thoughts, experiences please...????

-
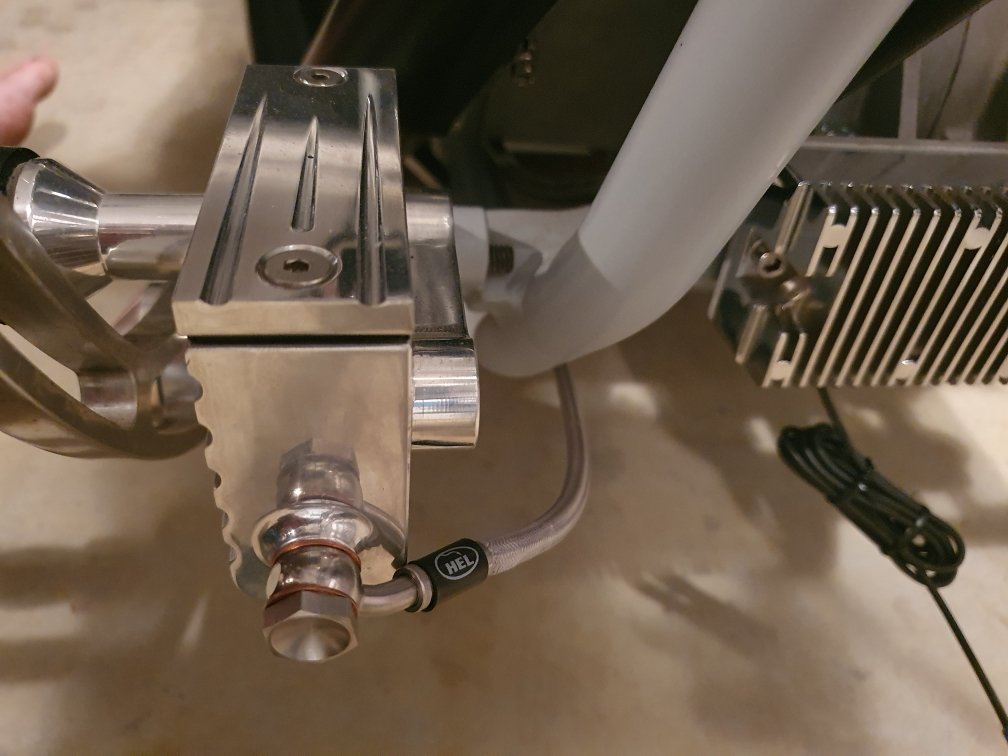
By fucking it up the first 2 times. It's not that hard, I used a bicycle cable and ran the route I wanted it to go, then measured required length off that. The hard part was the fittings. Pays to measure everything as the hand control may be different to the caliper, as too the foot reservoir to the rear caliper...they can all be completely different. The other problem is the angles the end fittings are bent at. They have tight radius and won't clear fuck all. I tried to do this with a 90° bend, but the radius was too tight and it wouldn't reach the hole (insert joke). So I had to do it with a 45° bend and add extra length to the line. My advice would be to take it to a brake place if you can, as it's cheaper to get it right first time, rather than fuck up multiple times like I did. Or if you're doing it yourself really check those banjo sizes, angles, rotations etc... and don't aim for hero tolerance on the lines...add a bit of fat in there.
-
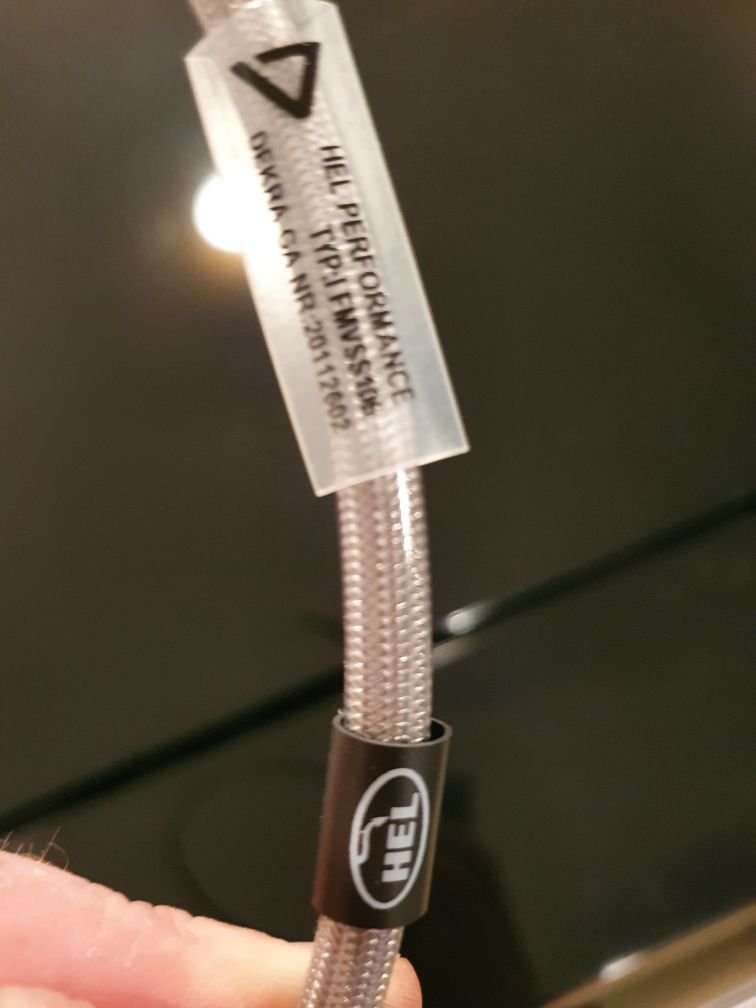
Hel brake lines arrived today. This is take 3 on the brake lines. All fits well, but I did have to bend the banjo a couple mm in the vice and rotate the fitting 90°. Hel have rotation as a selling point, but fuck me it took some force to do this.
-
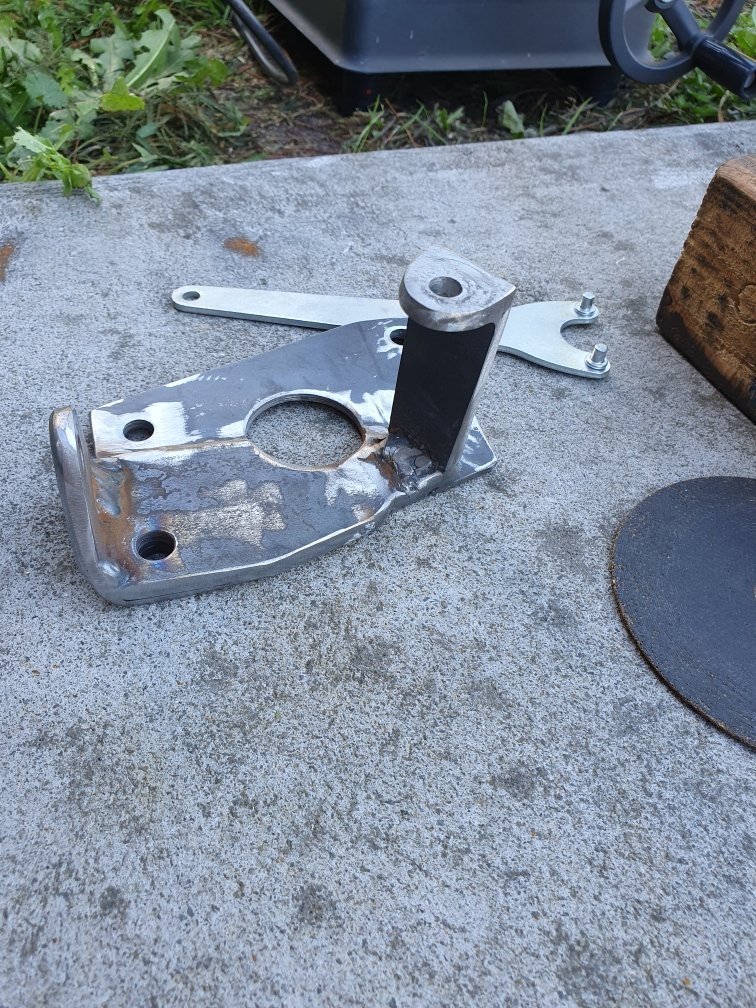
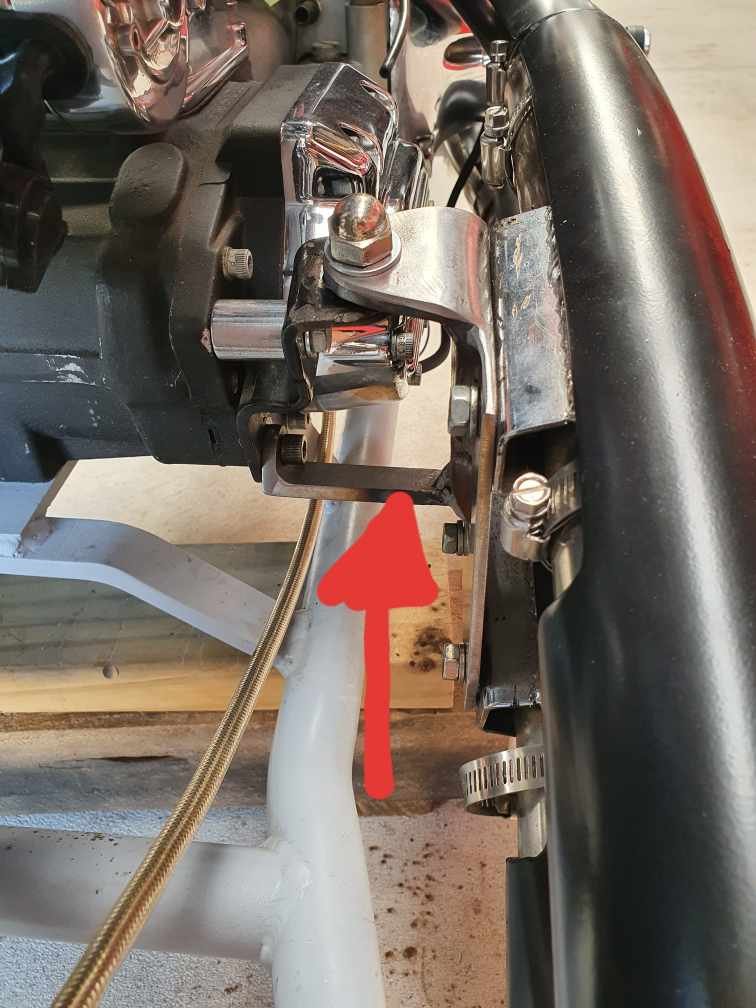
I've added a clamp fitting up near the timing cover too, and will weld actual to the frame there to further support the exhaust. That should do the trick. I've made all the bits, but don't want to weld it with the current problems I'm having with my welder.
-
Did a little tweak to my exhaust bracket by adding another support. This should brace it so it doesn't fatigue. My welder was playing up and feeding erratically, but got there in the end.
-

Random slightly cool stuff you built but not worth its own thread, thread
Kimjon replied to h4nd's topic in Other Projects
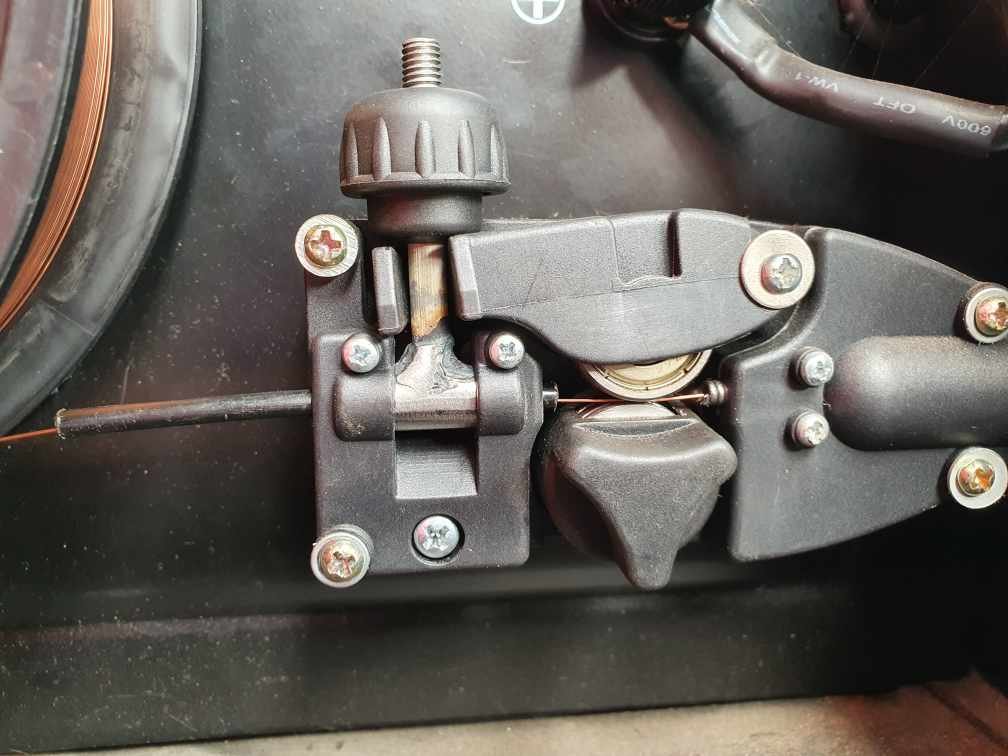
My mig welder has been misbehaving lately. I figured out the issue and did this fix. Bolt head is pulling out of the base, cheap shit plastic! Luckily I have a tig, so was able to weld this bolt to a bit of metal I turned up on the lathe. It's done the trick, but it's still being a bitch and acting up. The 0.6mm wire just doesn't seem to work in this welder. Weird, as I used to run it without issues. Maybe cheap brand? Anyways once lockdown is down I'll go back to 0.8mm.
-
Random slightly cool stuff you built but not worth its own thread, thread
Kimjon replied to h4nd's topic in Other Projects
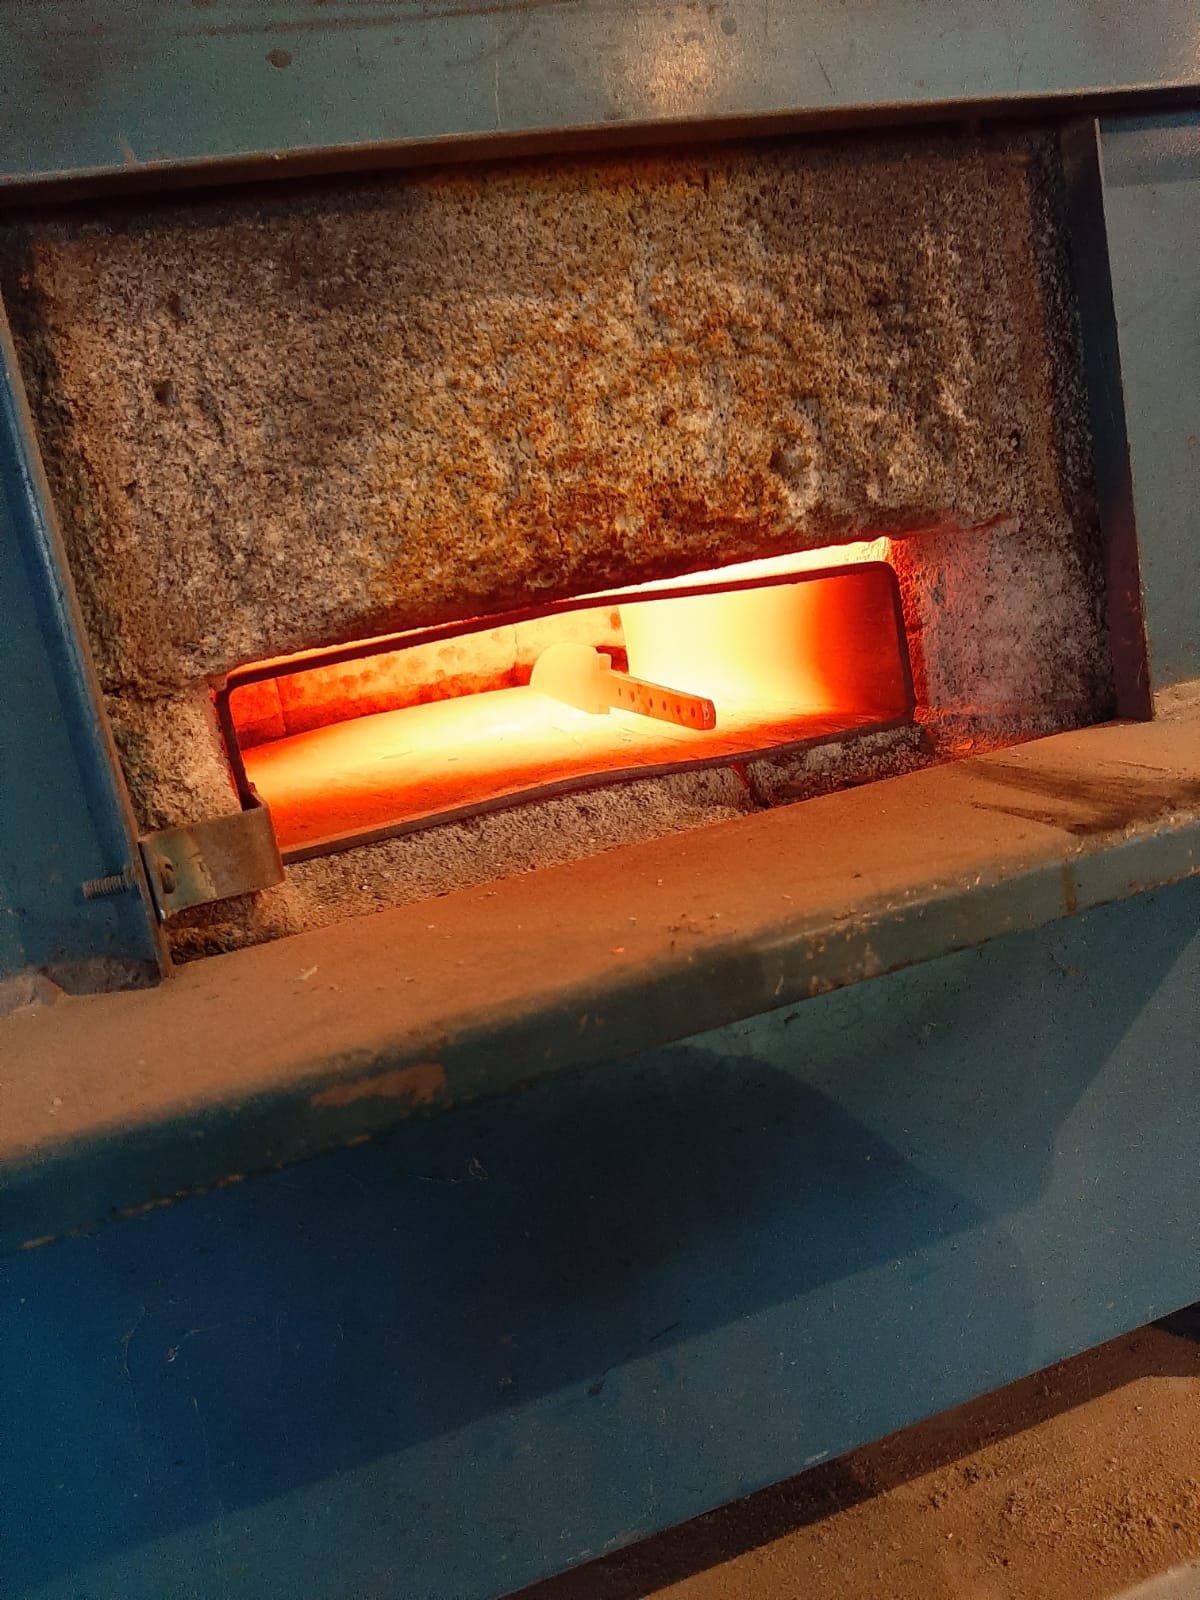
He just puts the files in his fireplace (wood burner) and leaves them there for a few weeks while warming his feet watching Netflix. This apparently heat cycles the steel and makes it go soft. He said it adds carbon too, but I'm not sure about that...sounds a bit weird? Anyway, the soft metal is easily worked and shaped. Once he's happy with the shape and it's all polished up, it then gets heat treated in the furnace. The furnace causes a little distortion and ruins the finish, but it doesn't take much effort to make it look good again afterwards. If you don't polish the blade prior to heat treatment, then it's a huge amount of work to get the scratches out because you're working with steel that is now back to the hardness of a file!
- 1289 replies
-
- 12
-

-

-
Random slightly cool stuff you built but not worth its own thread, thread
Kimjon replied to h4nd's topic in Other Projects
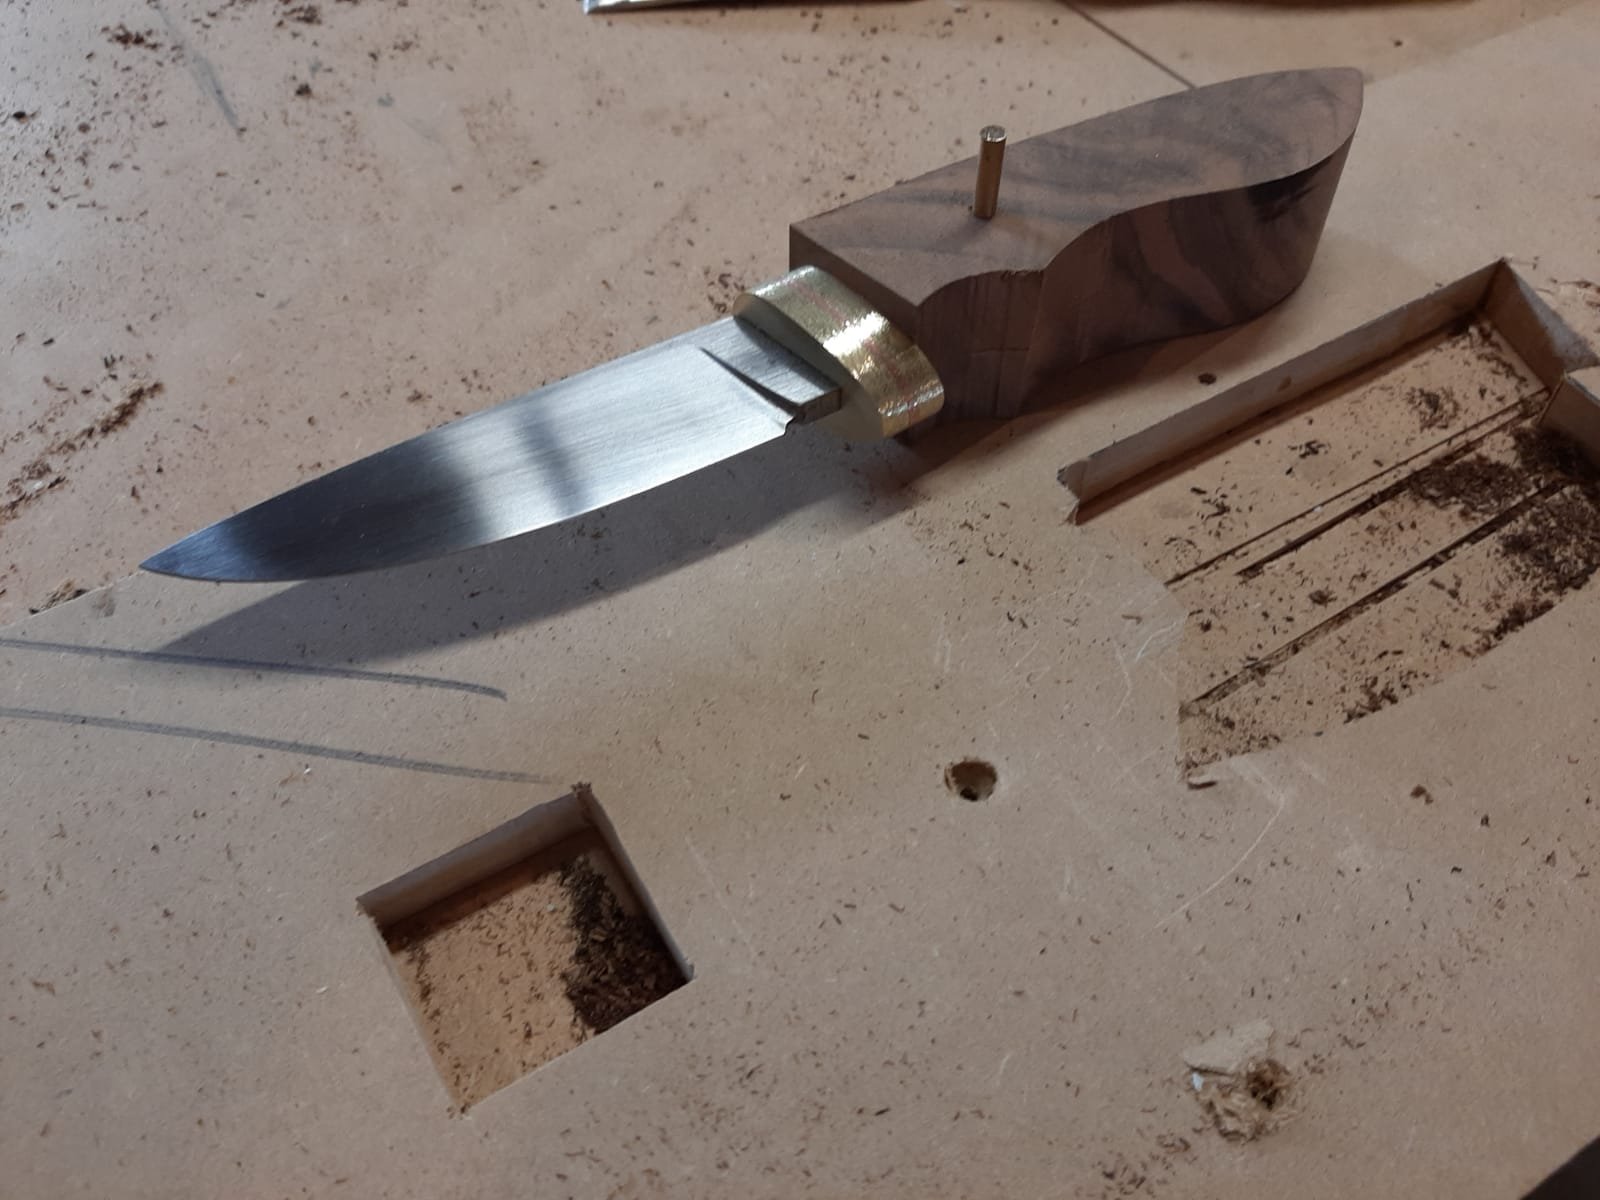
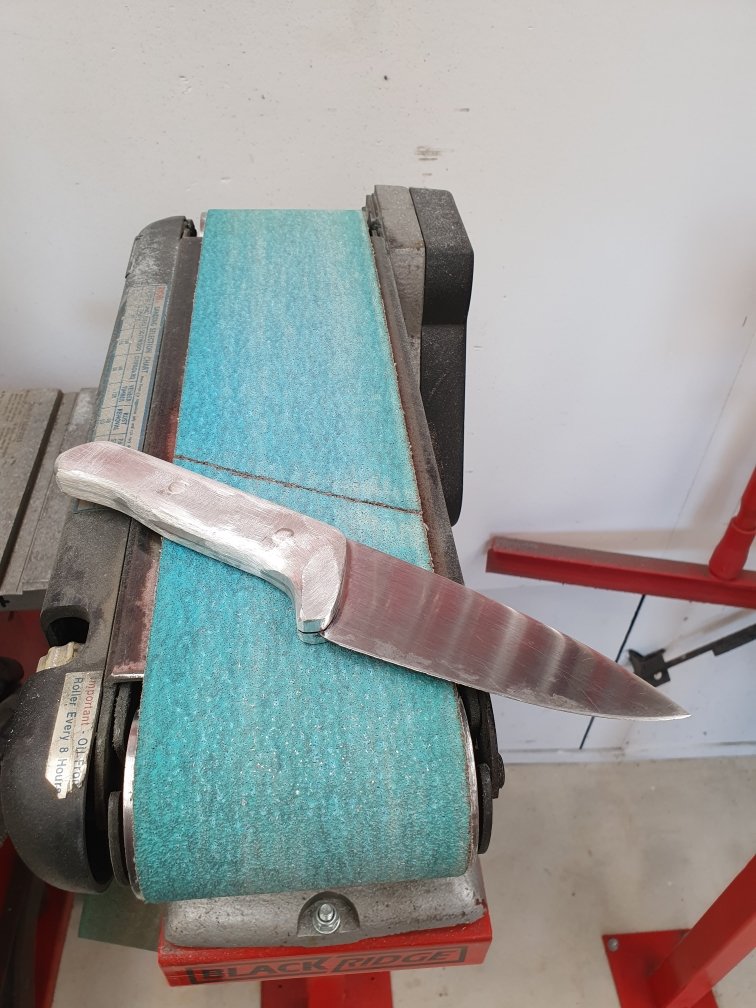
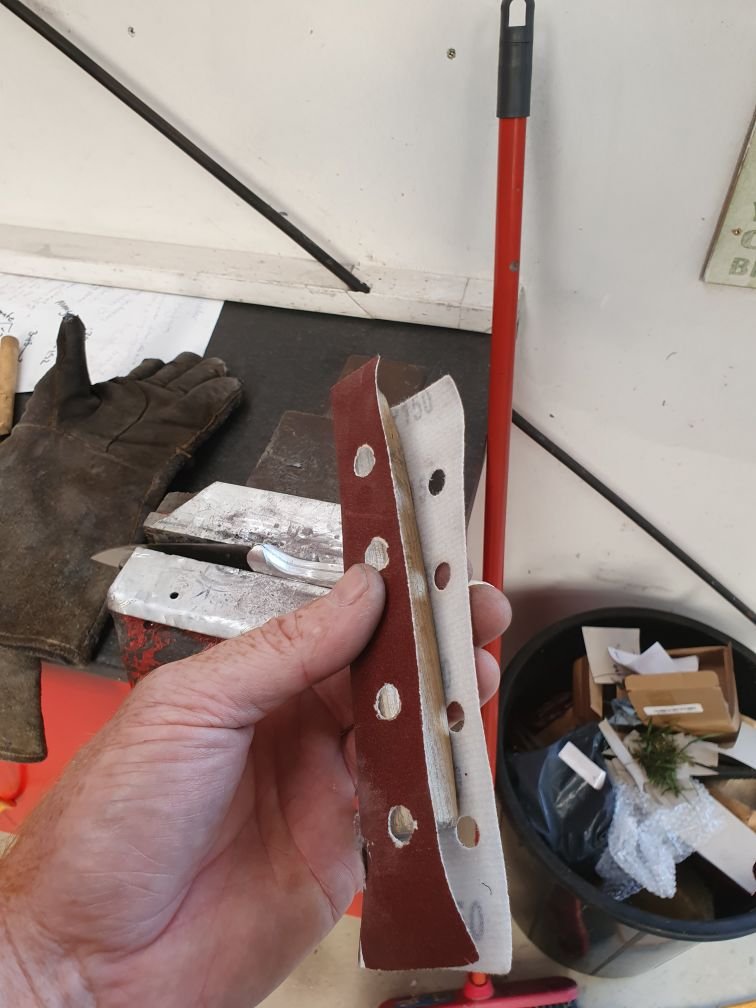
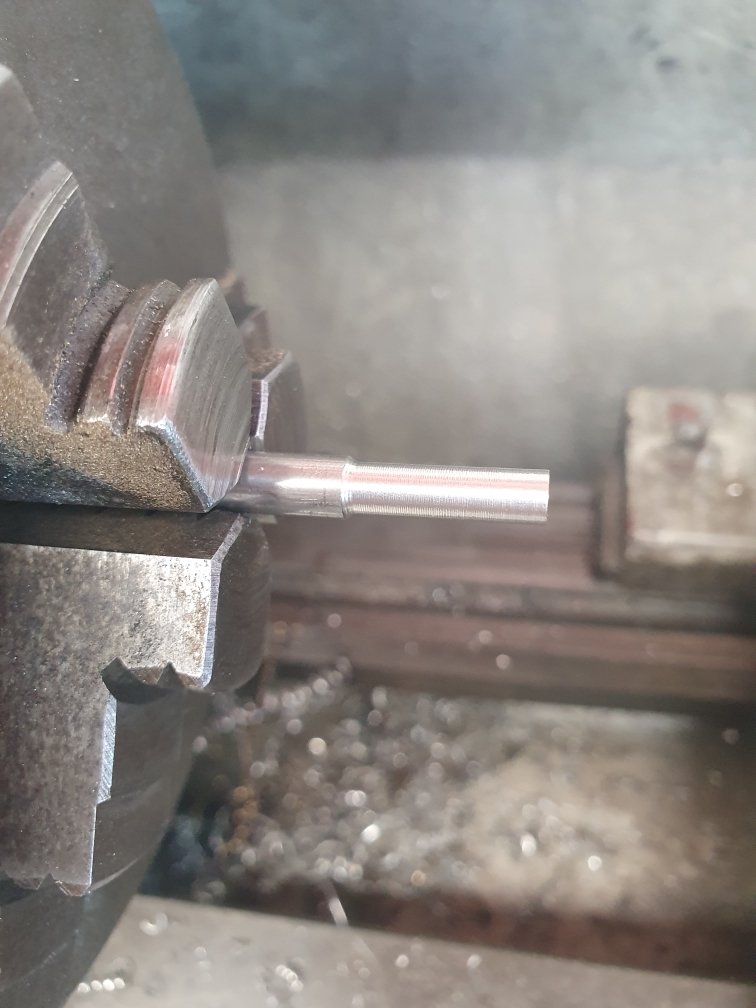
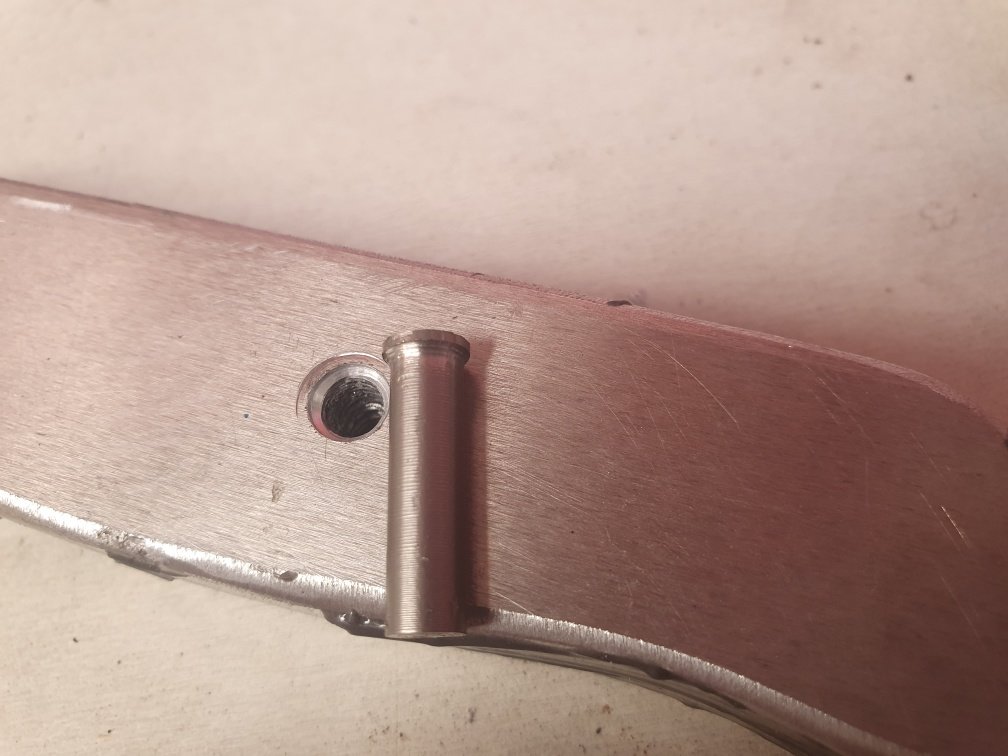
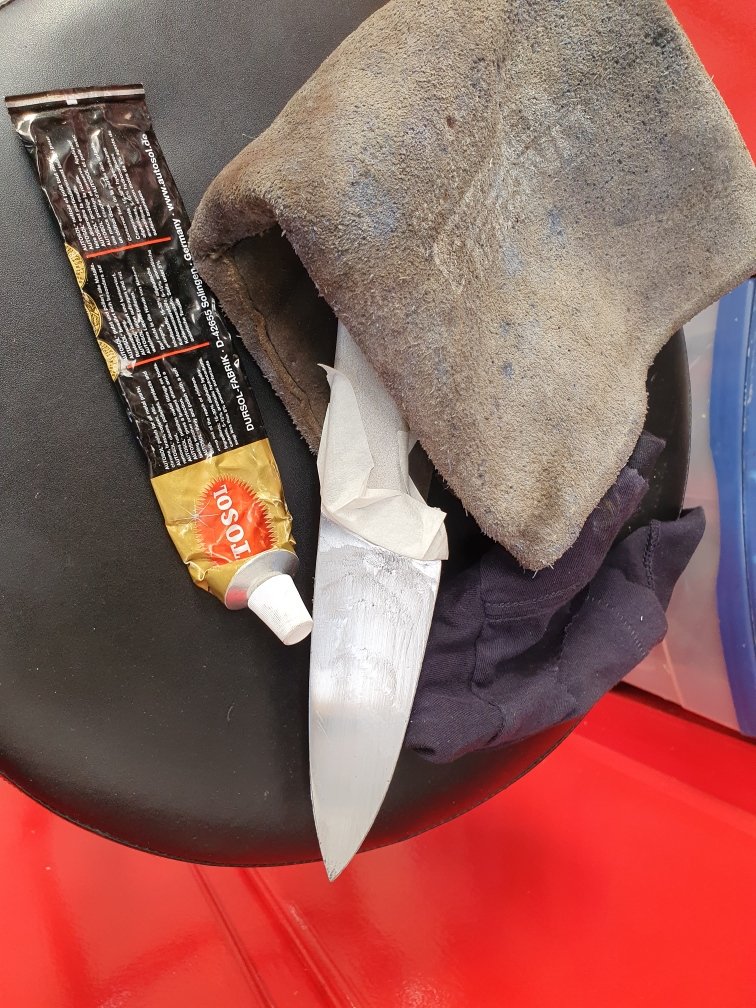
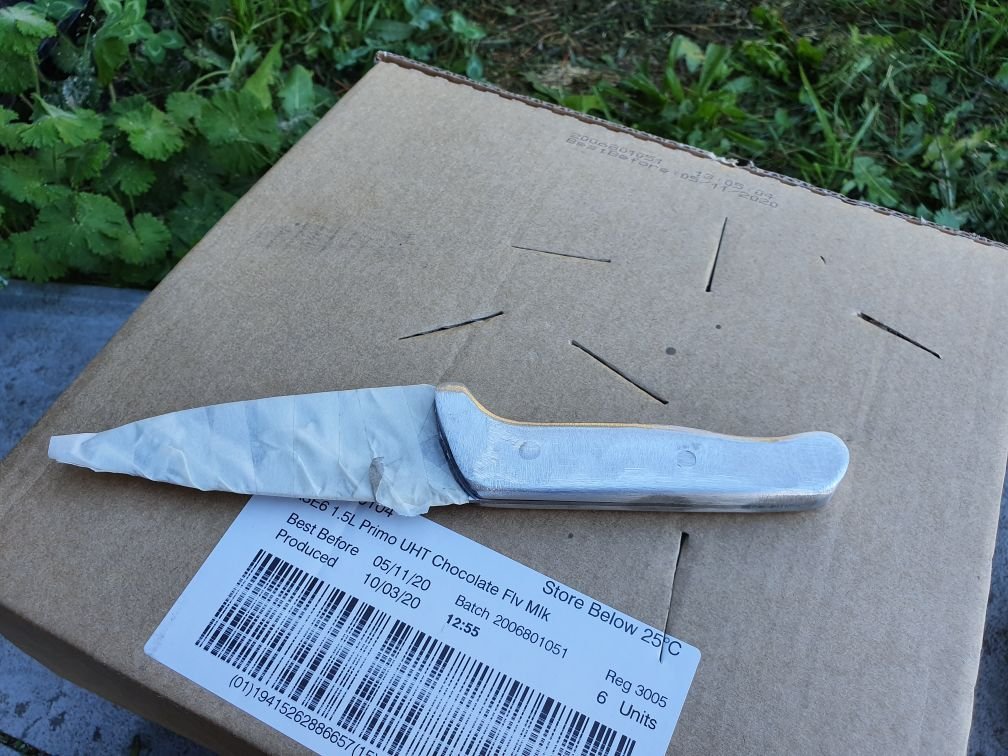
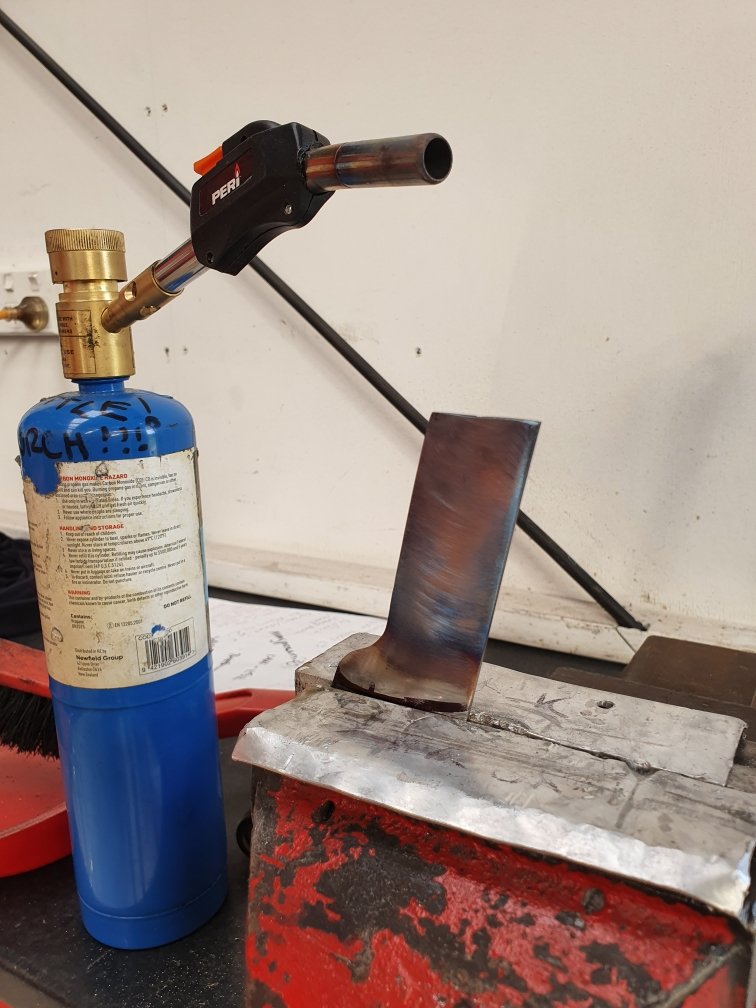
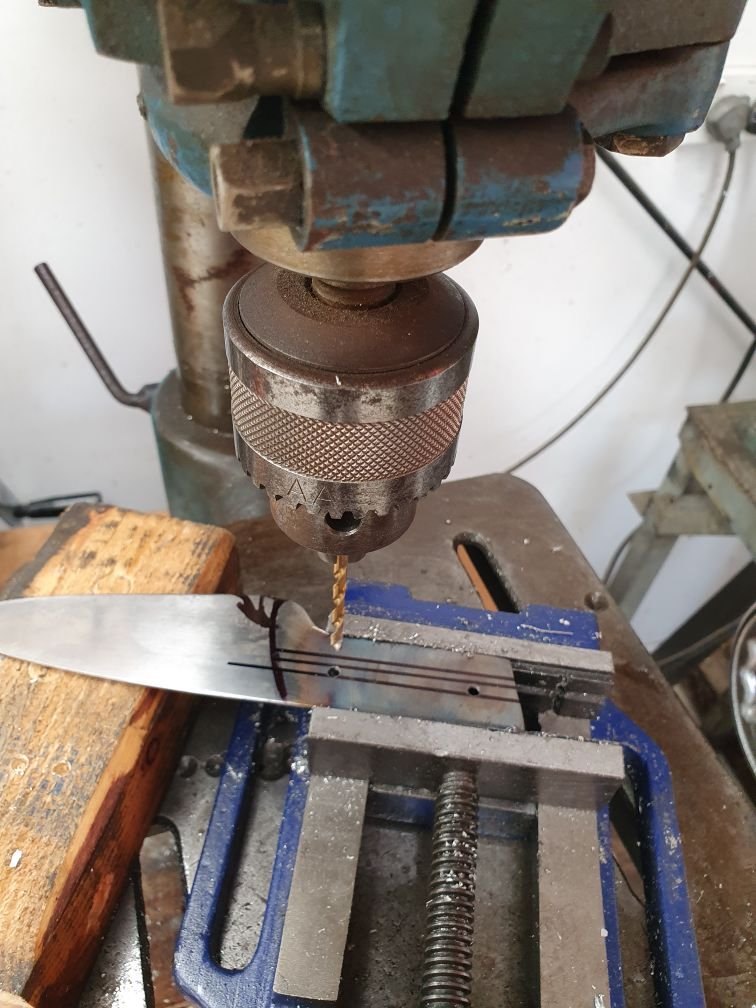
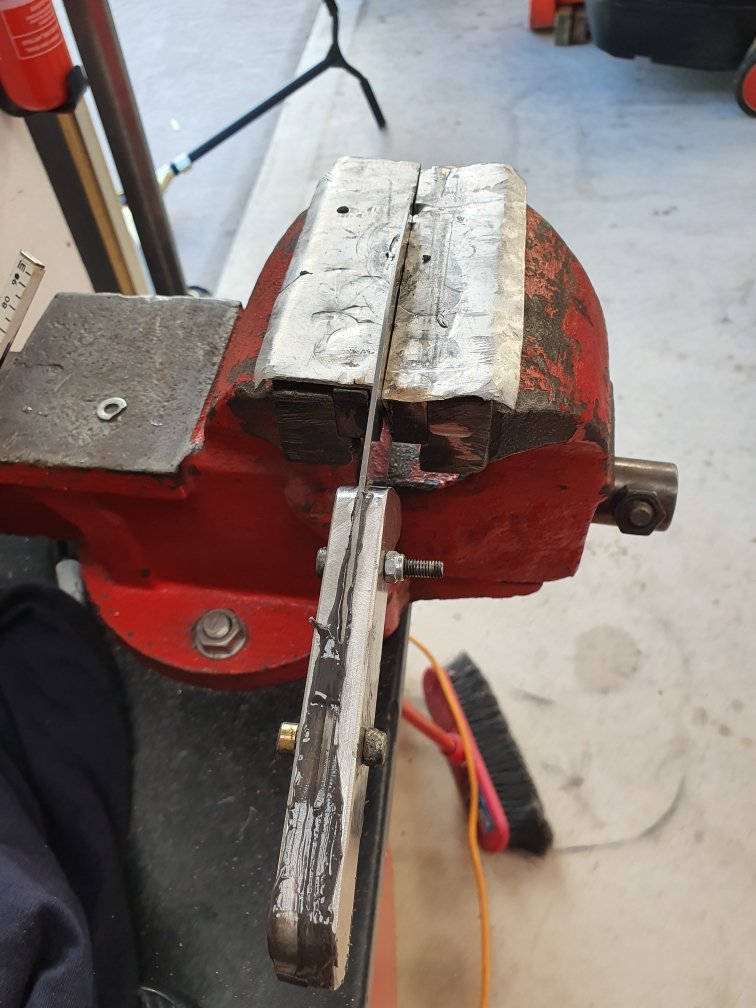
I'm no expert, just googled a few things and gave it a crack. The steel is an old saw blade that kitchen builders use for cutting stone with. They're about 400mm in diameter and about 2mm thick. I got a couple for free, as the blades were flogged out. I use a 40 grit flap wheel to slim the thickness down, then work through the grades to polish it up, eventually using a buffing wheel to polish. I do this process very carefully to avoid heating up the metal and ruining the steels heat treatment. The blow touch is to soften the handle steel. Two reasons for this: 1) So I can drill the hardened steel, without this spot heating the drill wouldn't cut through. 2) knives should have a softer tang/handle, as hardened steel is brittle and the handle junction is the highest stress point, so if it was left brittle it would snap. The vice acts as a heat sink and keeps the heat out of the blade. That's about all I can offer. My brother has a furnace and makes knives from files. But he does full on heat treatments etc. I try to avoid all this and just make basic stuff. -
Random slightly cool stuff you built but not worth its own thread, thread
Kimjon replied to h4nd's topic in Other Projects
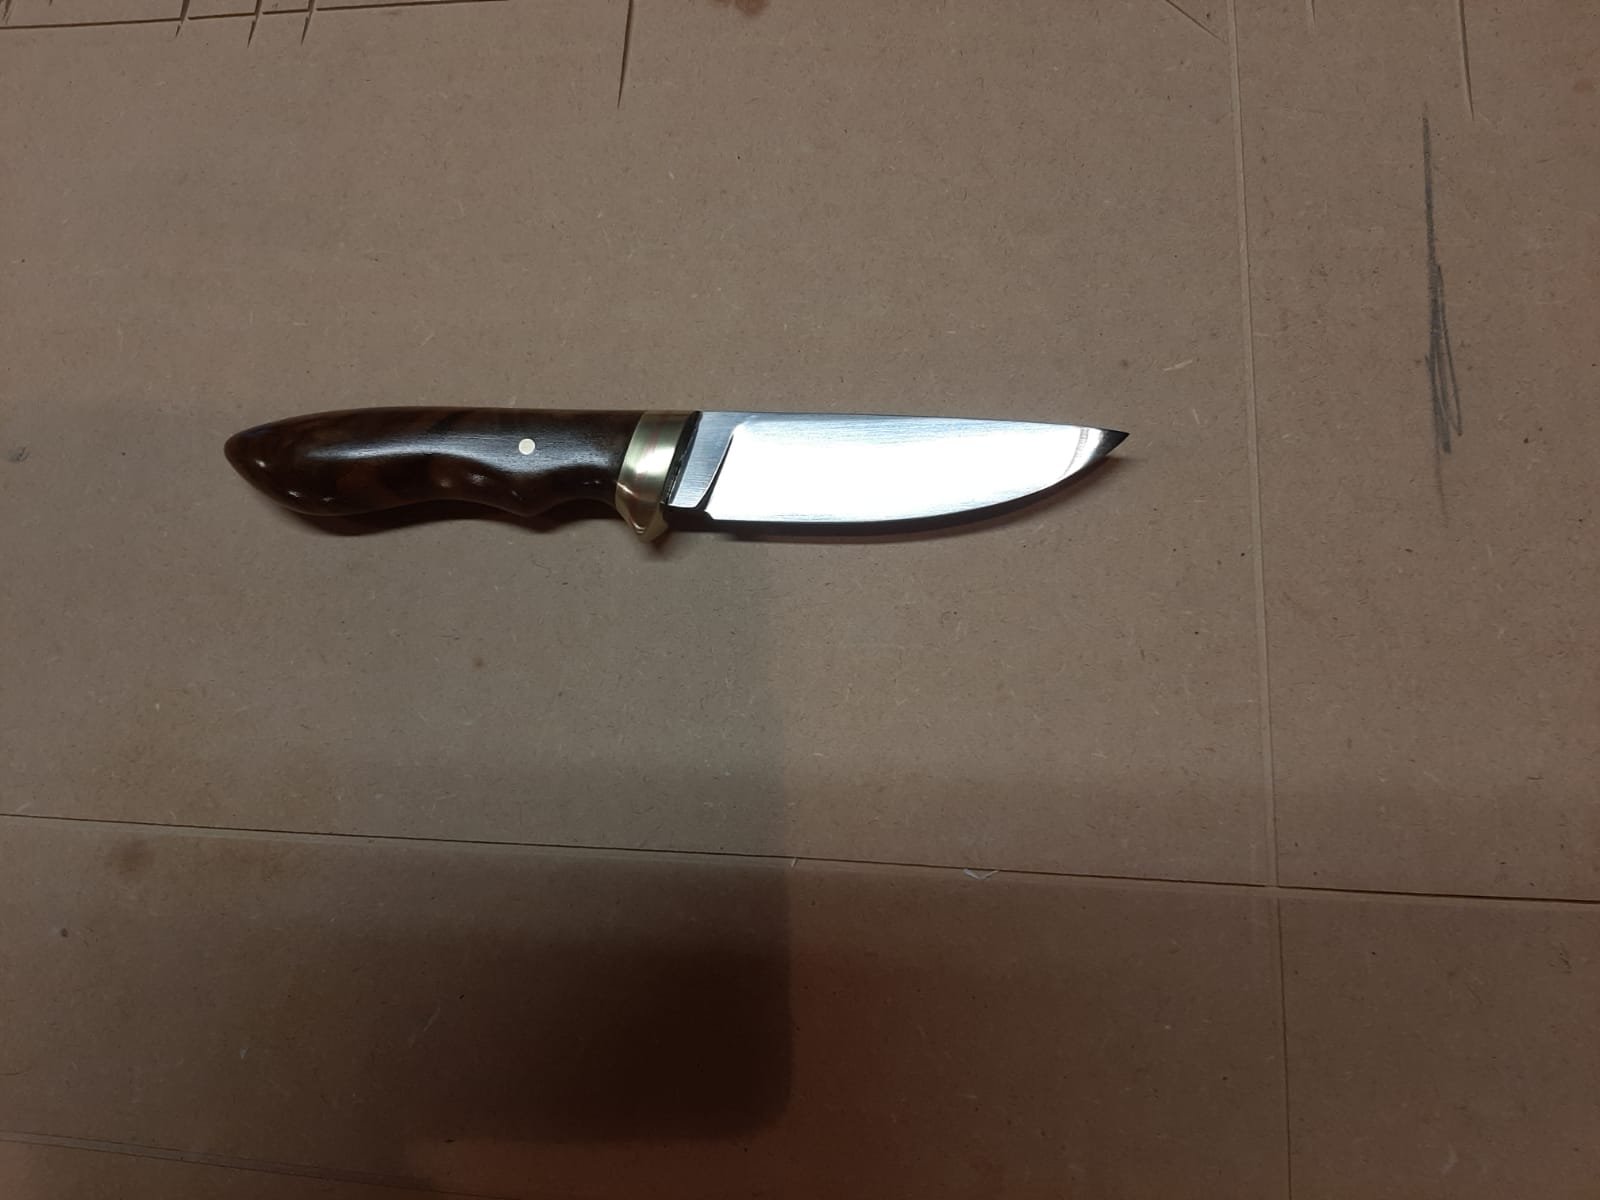
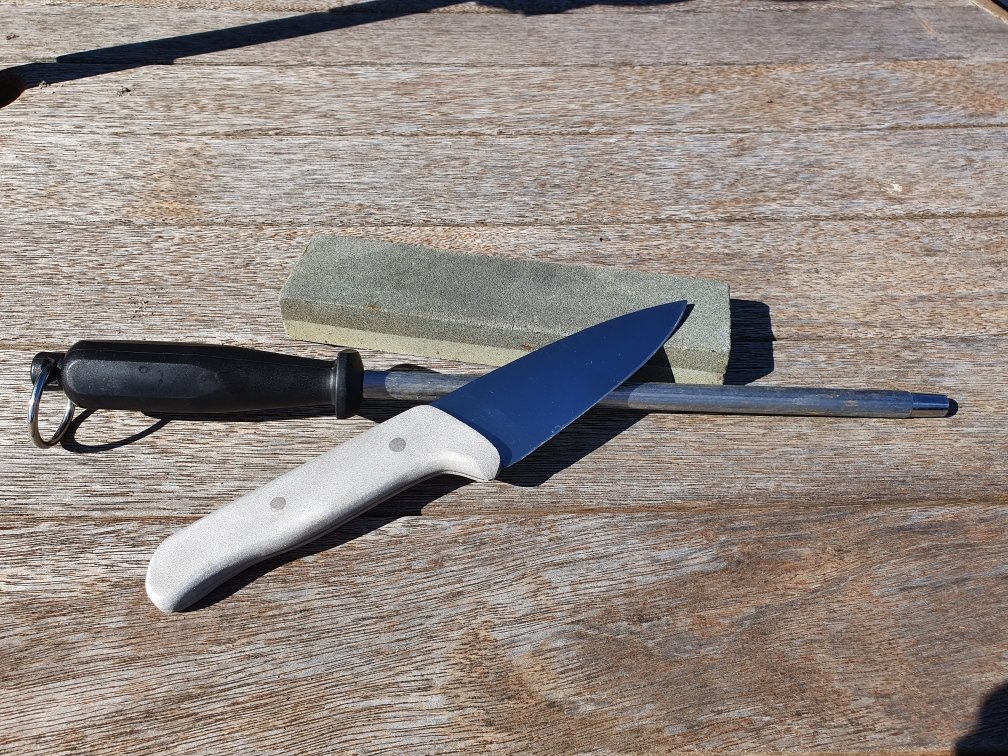
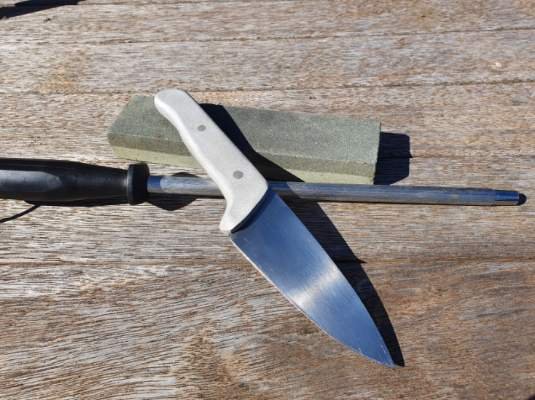
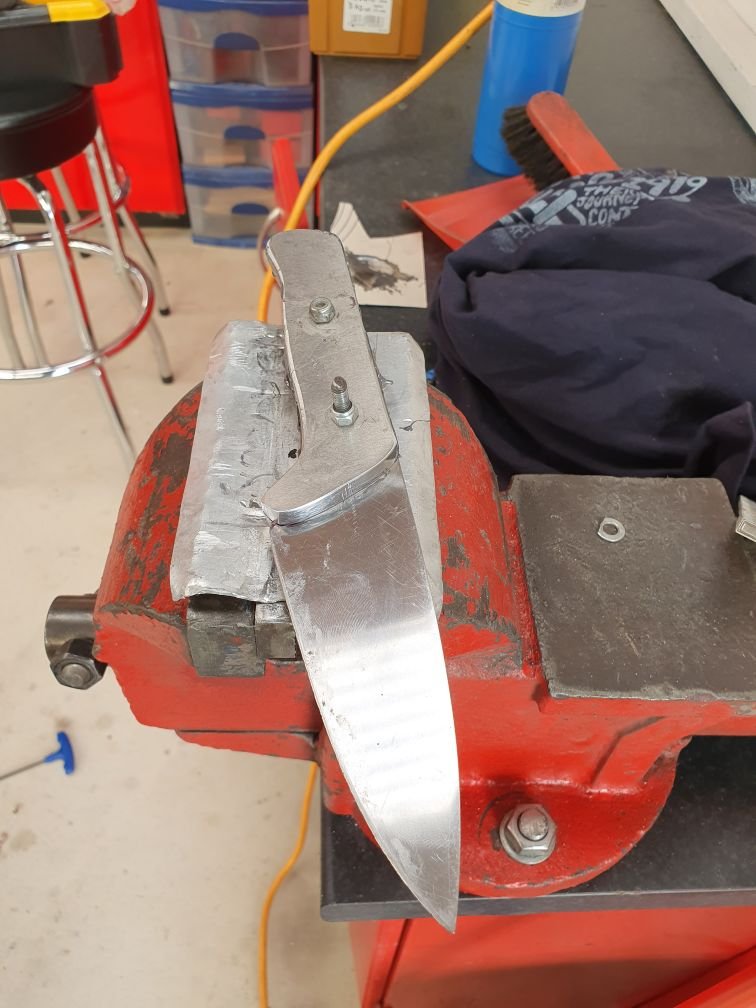
And finished: Then I sandblasted the handle for contrast and texture, and polished an edge on it sharp enough to cut you just looking at it! Posers photos below: I'm happy with it. Something unlike most knives people make at home, which was the goal.
- 1289 replies
-
- 19
-
-
It's certainly a possibility, but I really don't want the drama associated with warping the mating surfaces. That would create a real issue that I can't afford to have. The hardest part of making those other brackets was coming up with the measurements and figuring out what it needed to do in the first place. Building them all over again will be relatively easy the 2nd time around, once I can get hold of some steel.
-
Random slightly cool stuff you built but not worth its own thread, thread
Kimjon replied to h4nd's topic in Other Projects
Made a start on this, then decided that drinking piss and talking shit across the fence with my neighbours was more important than working on this. Will finish when less drunk.
-
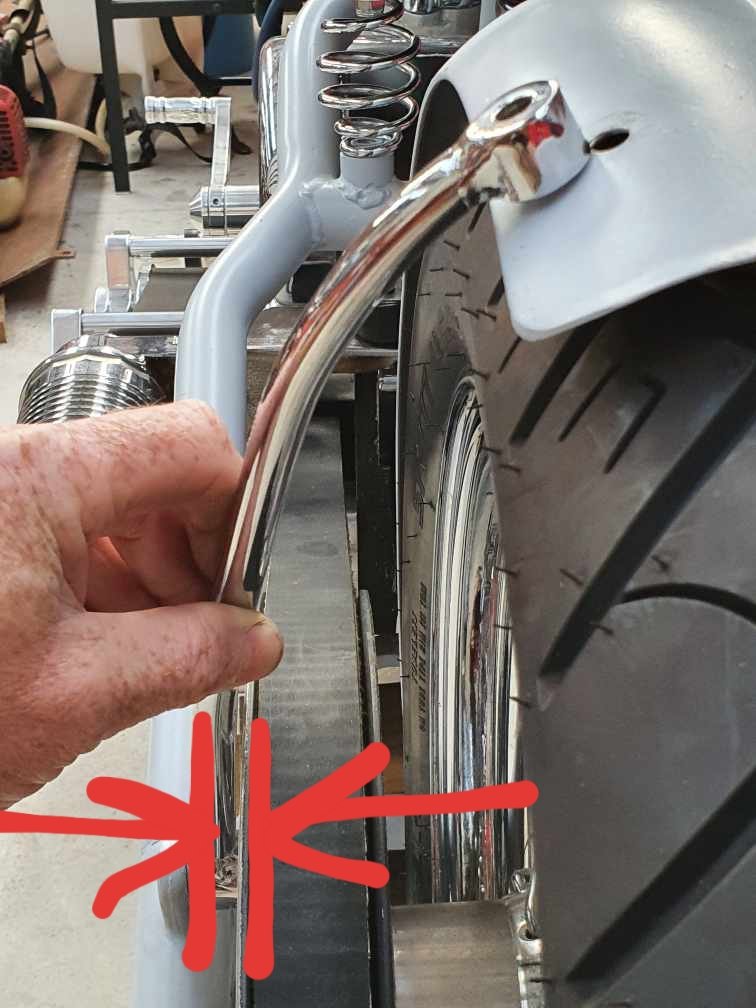
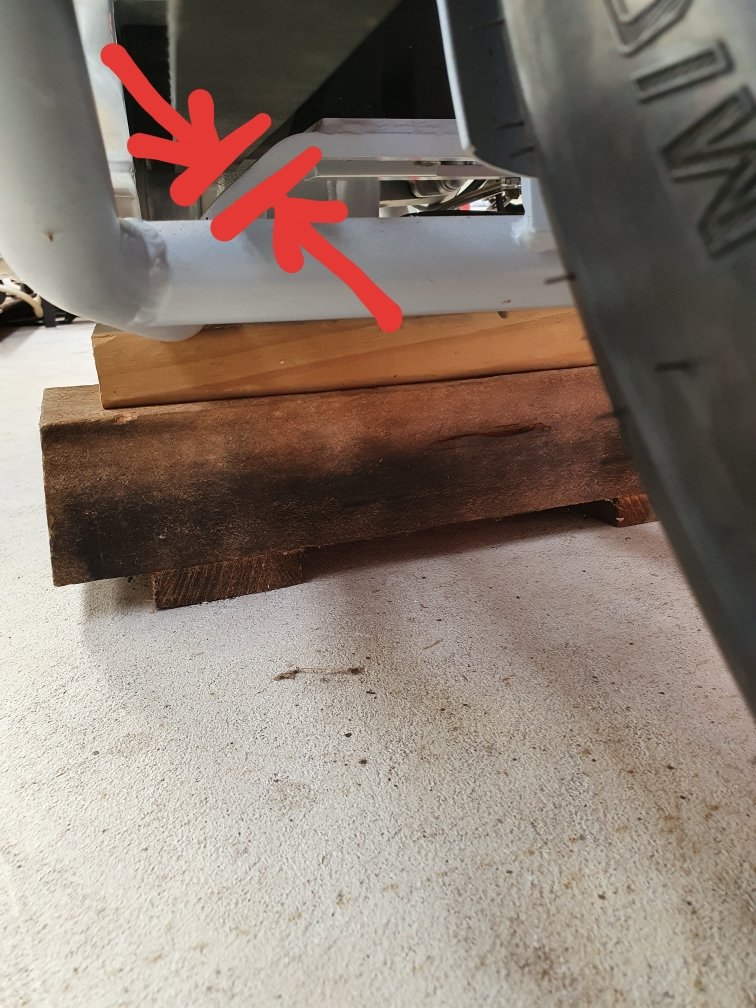
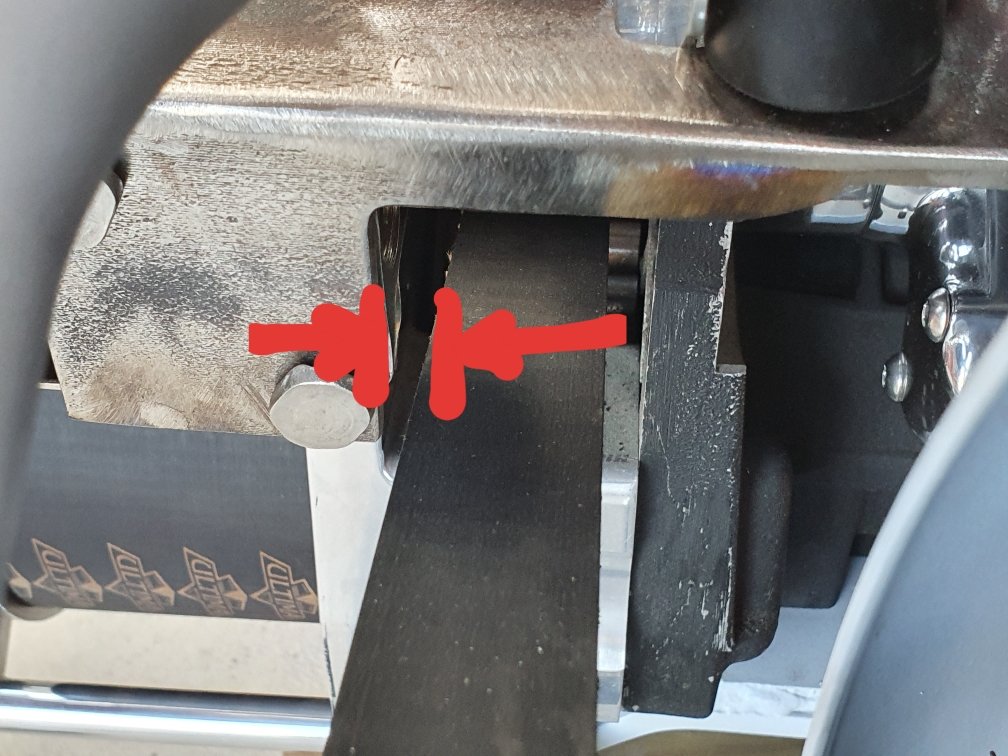
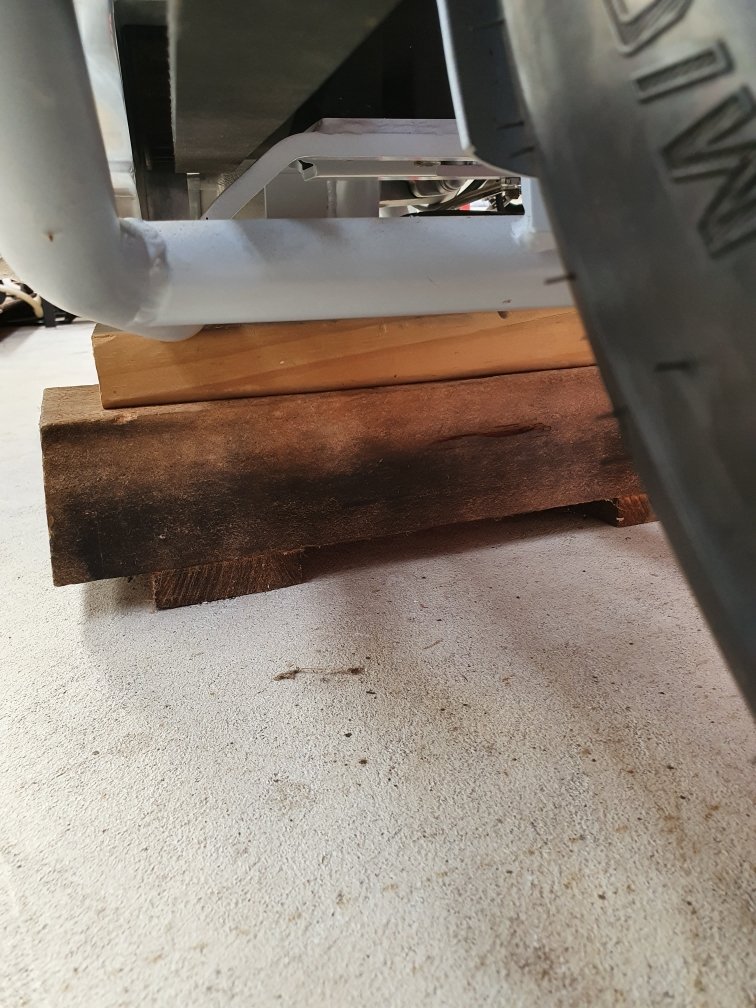
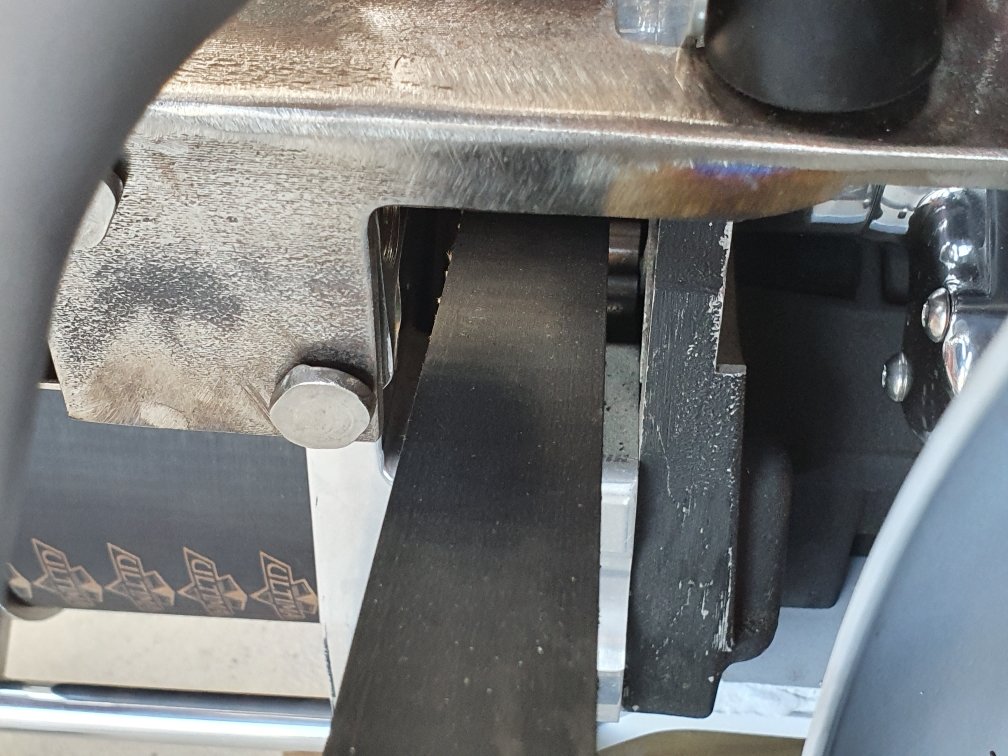
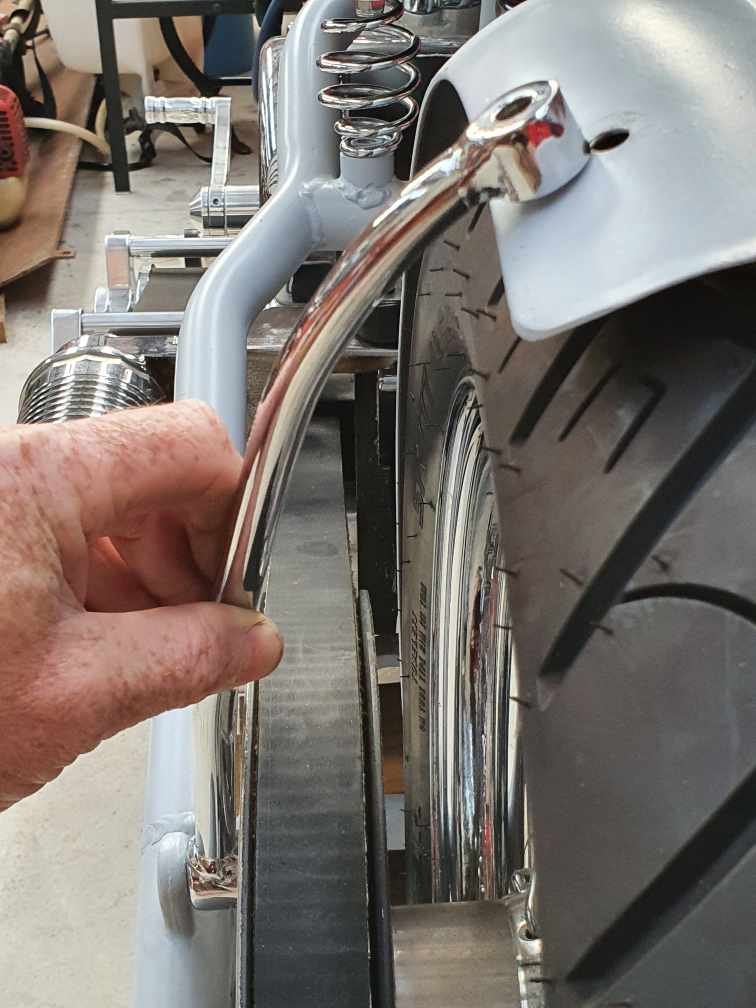
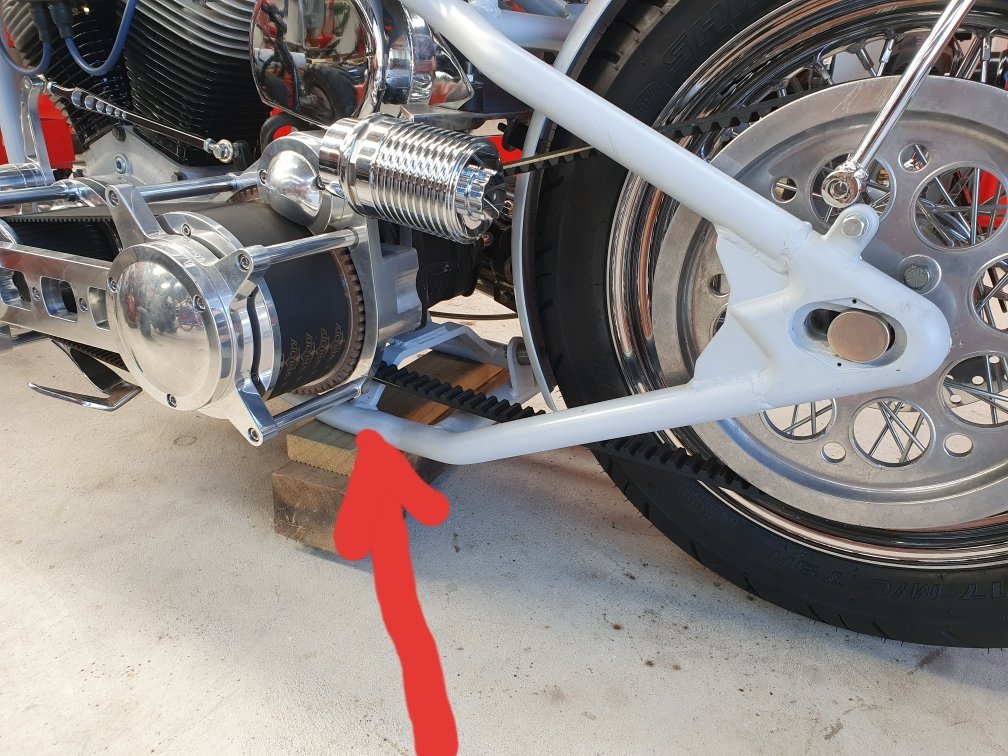
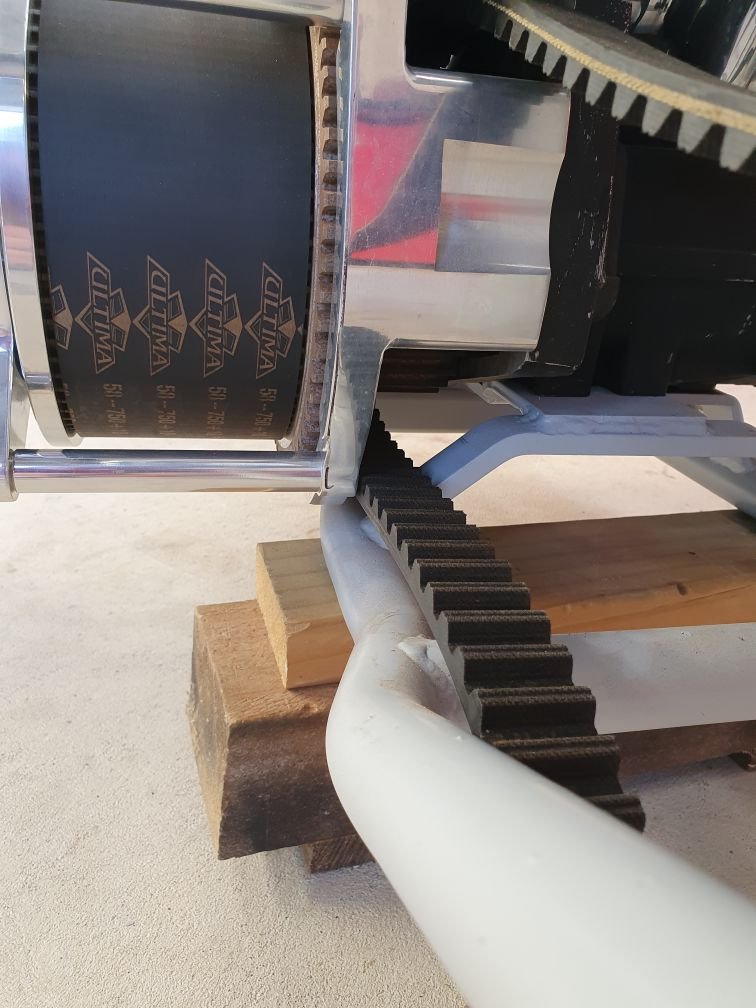
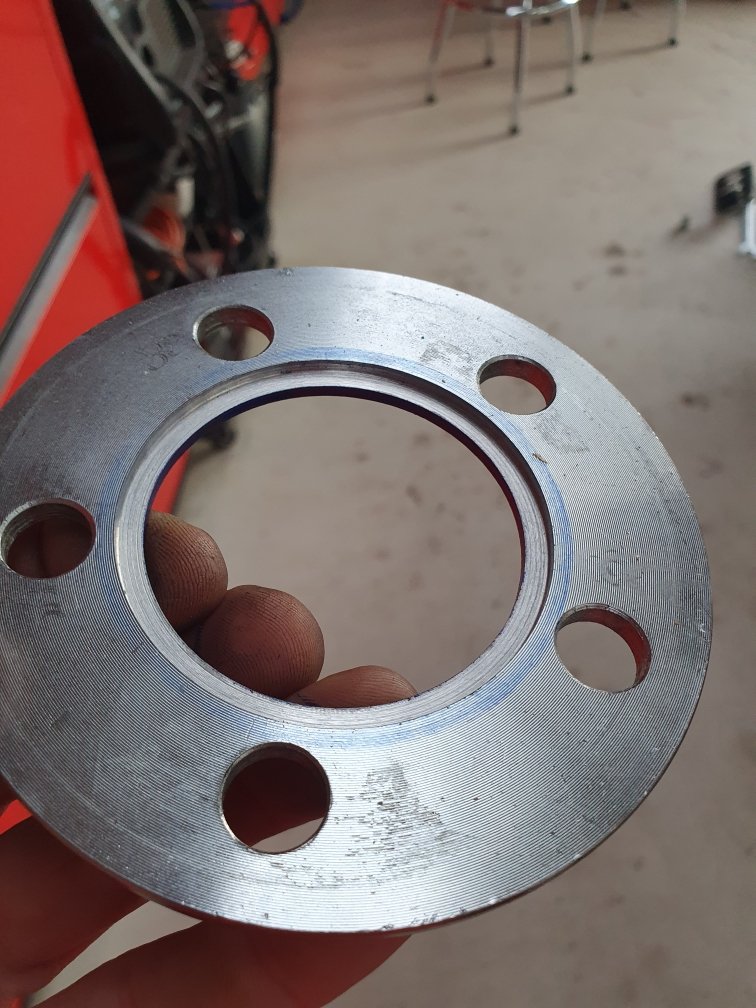
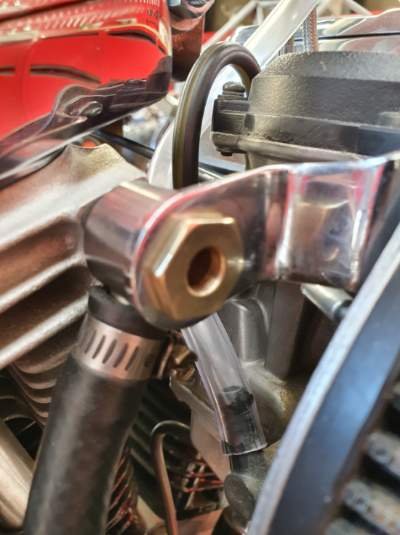
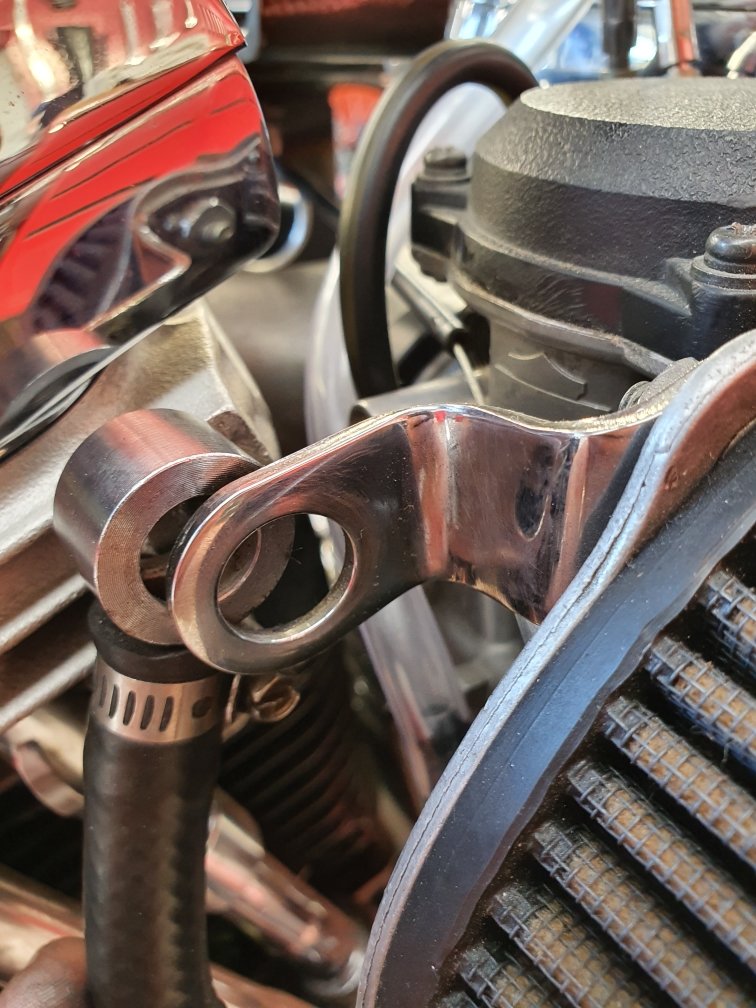
Balls!!!! Okay, looks like to be safe the 1/4" isn't the best idea, so better to go with a full 1/2" offset spacer for clearance. This is with the 1/4" spacer in. It clears the gearbox mount...but only just! If the belt slops around, as they do when you go WOT then suddenly back off...there is a chance of the belt whipping and hitting that mount. It may never happen, but may as well do it right. I could cut the mount, but I'd rather not fuck with that, as the motor and gearbox are sitting perfect right now, all fully aligned and flat on the same plain. But, as you all know. The moment you shift something, it creates flow ons. I now need to remake this fender strut. Double balls, as it cost me $50 to get this one chromed and it looked fucking good too! And This entire mounting system of holding the rear fender, oil tank and remote oil filter has to be remade too. It would work with 1/4", but not with the 1/2" offset. So this minor oversight is a bit of a cunt, as its created a lot of work.
-
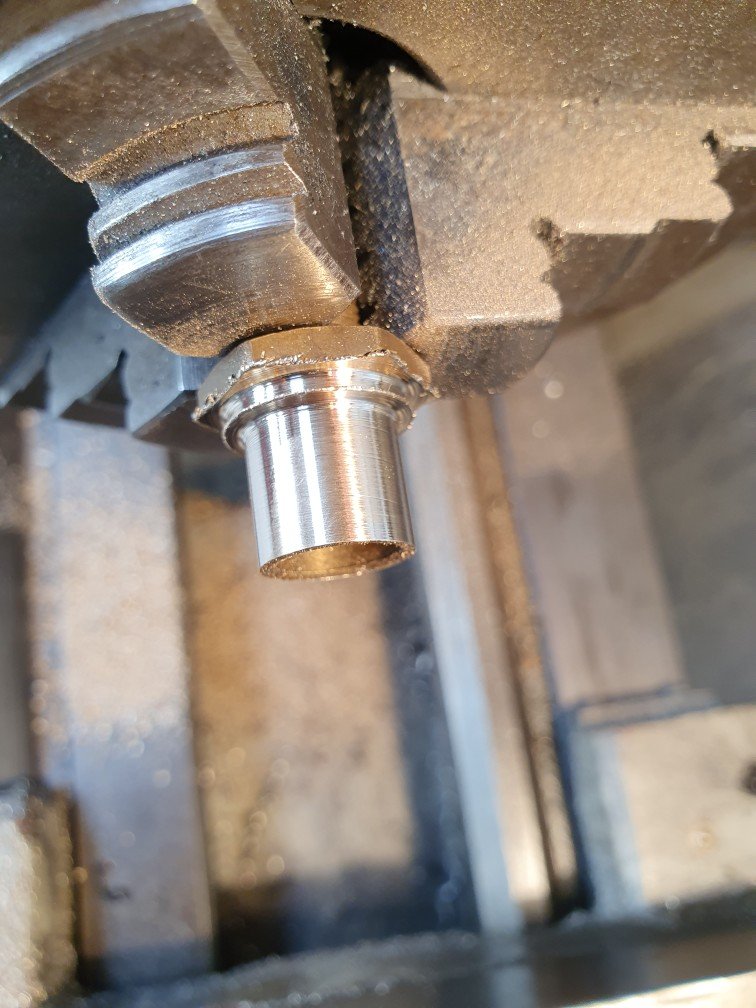
Was on a teleconference for 4.5hrs about health and safety today. I tried to fake attention for as long as I could. I lasted about 2 hours, then glazed over...far out...could have summed it up and just said "right you cunts, don't do anything dumb" and that would've just about covered it. Anyway, while this enthralling conference was going on I noticed something for the first time, a potential health and safety problem of my own, but not a bullshit hypothetical one, an actual real world problem. Yip, my belt could contact this gearbox mount. Fuck!!! (Warning 1:41 of your life you'll never get back if you watch this) So using what limited materials I have, I made this up. Hopefully its thick enough to space the pulley off the hub a sufficient amount? My entire bike is offset by 1/2", so I'm thinking a 1/4" spacer may not add up. It looks like it's going to work...but after that teleconference and an hour on the lathe all I can think about us getting fucked up so I don't have to think about today. Beer o'clock is well and truly calling. Fitting this can wait until tomorrow.
-
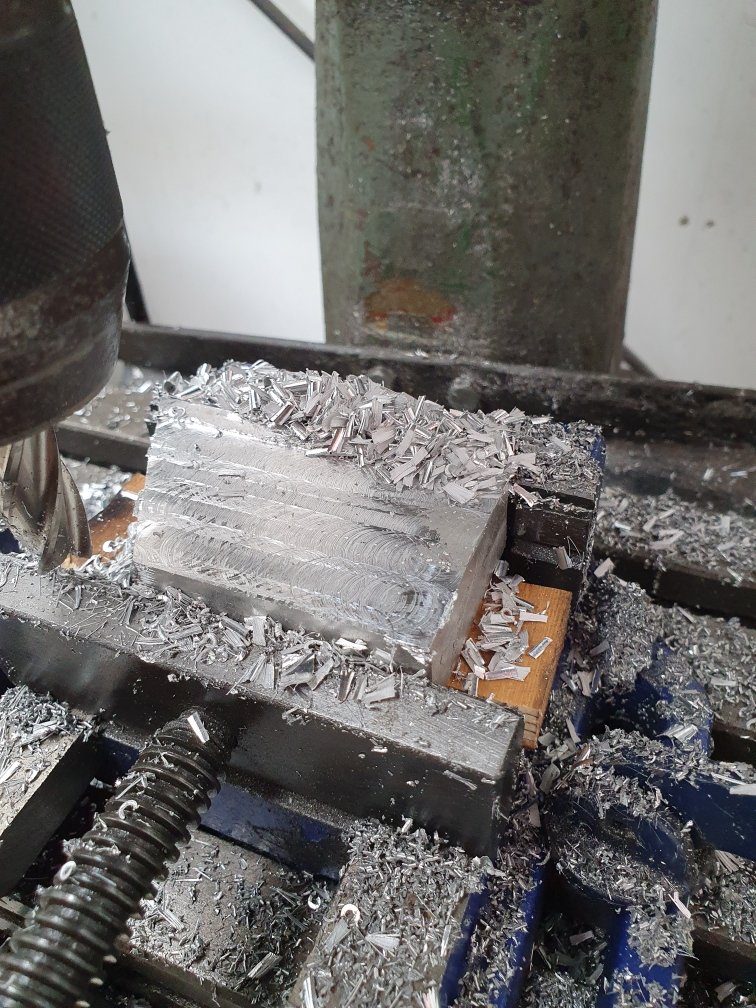
Mmmm, shiny. Buffed it up on the rag wheel. Bracket looks like it belongs there now. I learnt that aluminum is a very good conductor of heat, far out it gets very hot, very quickly... hot fingers! No pain, no gain or something like that all the tough kids used to say?
-
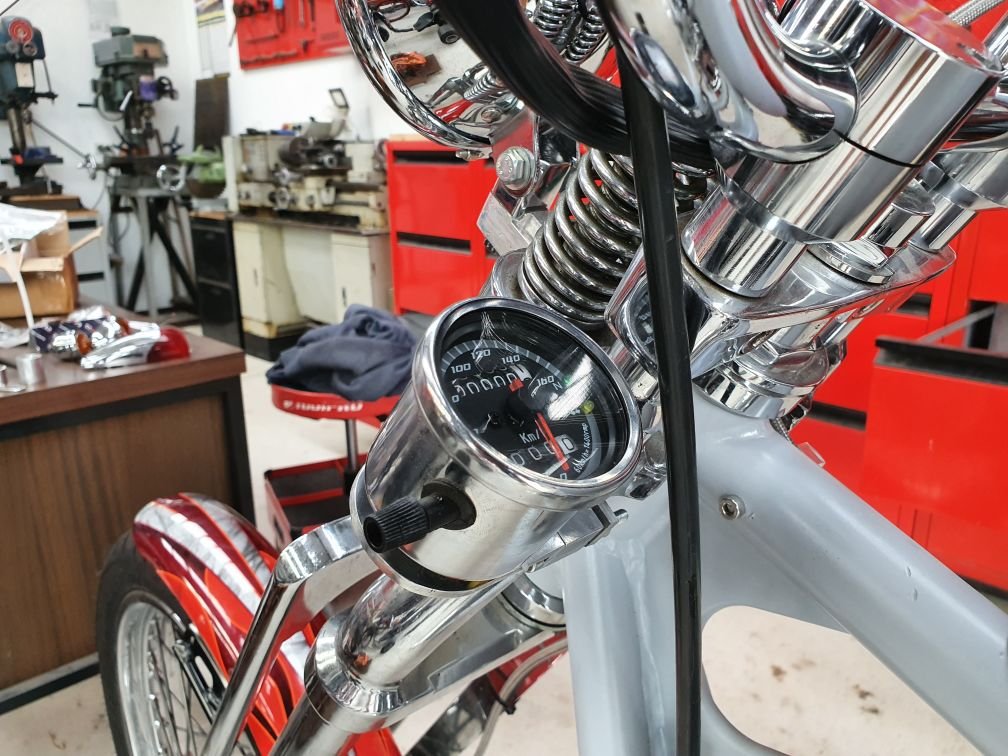
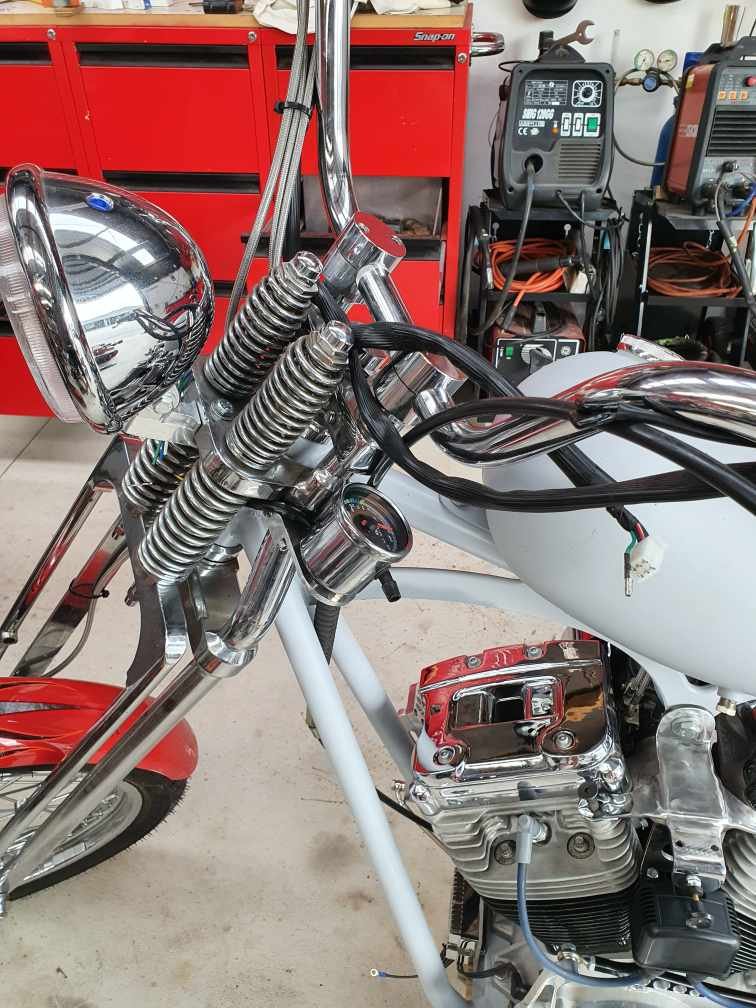
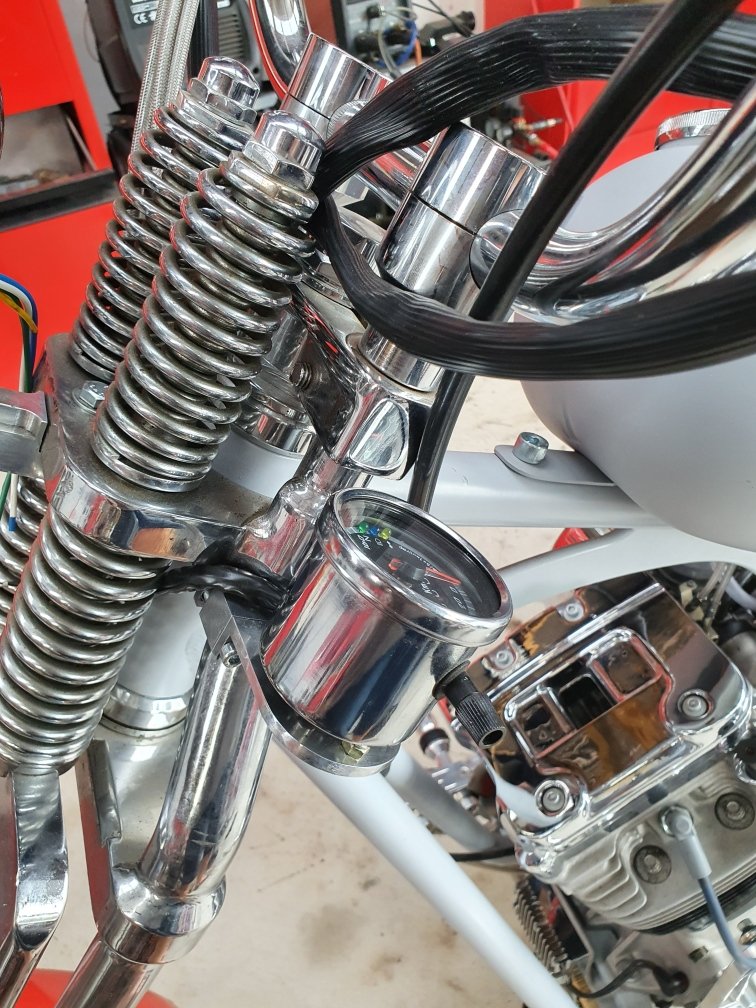
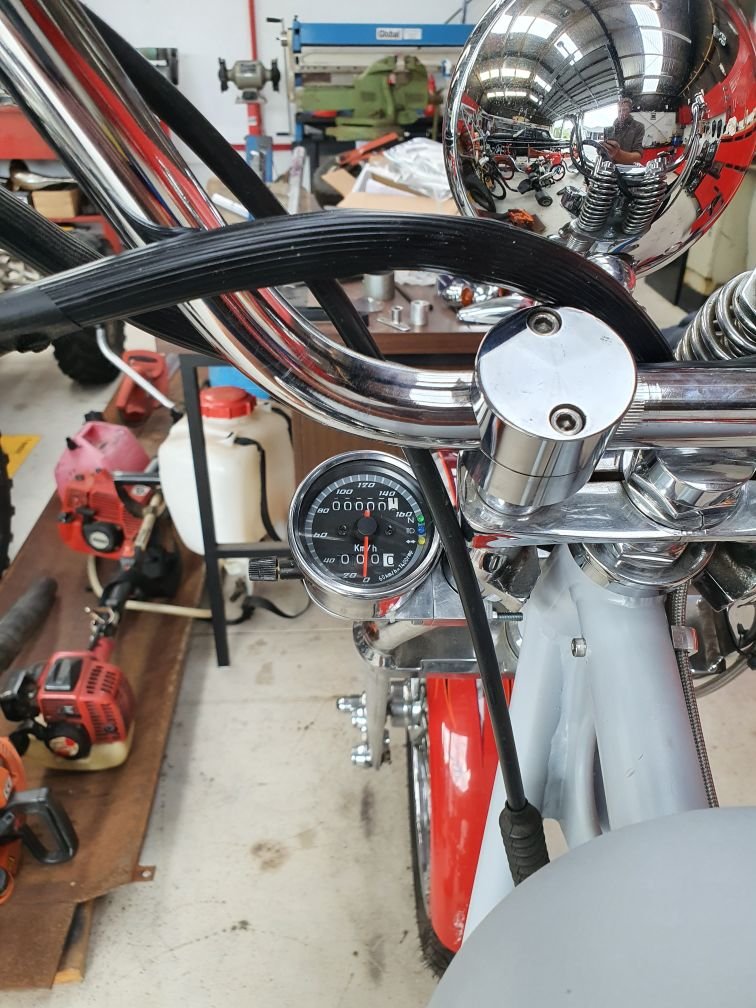
Here's a photo standing back a little bit, you hardly notice the little speedo hiding there. Sure, I'd rather not have it at all. But for what it is, it's not too offensive.
-
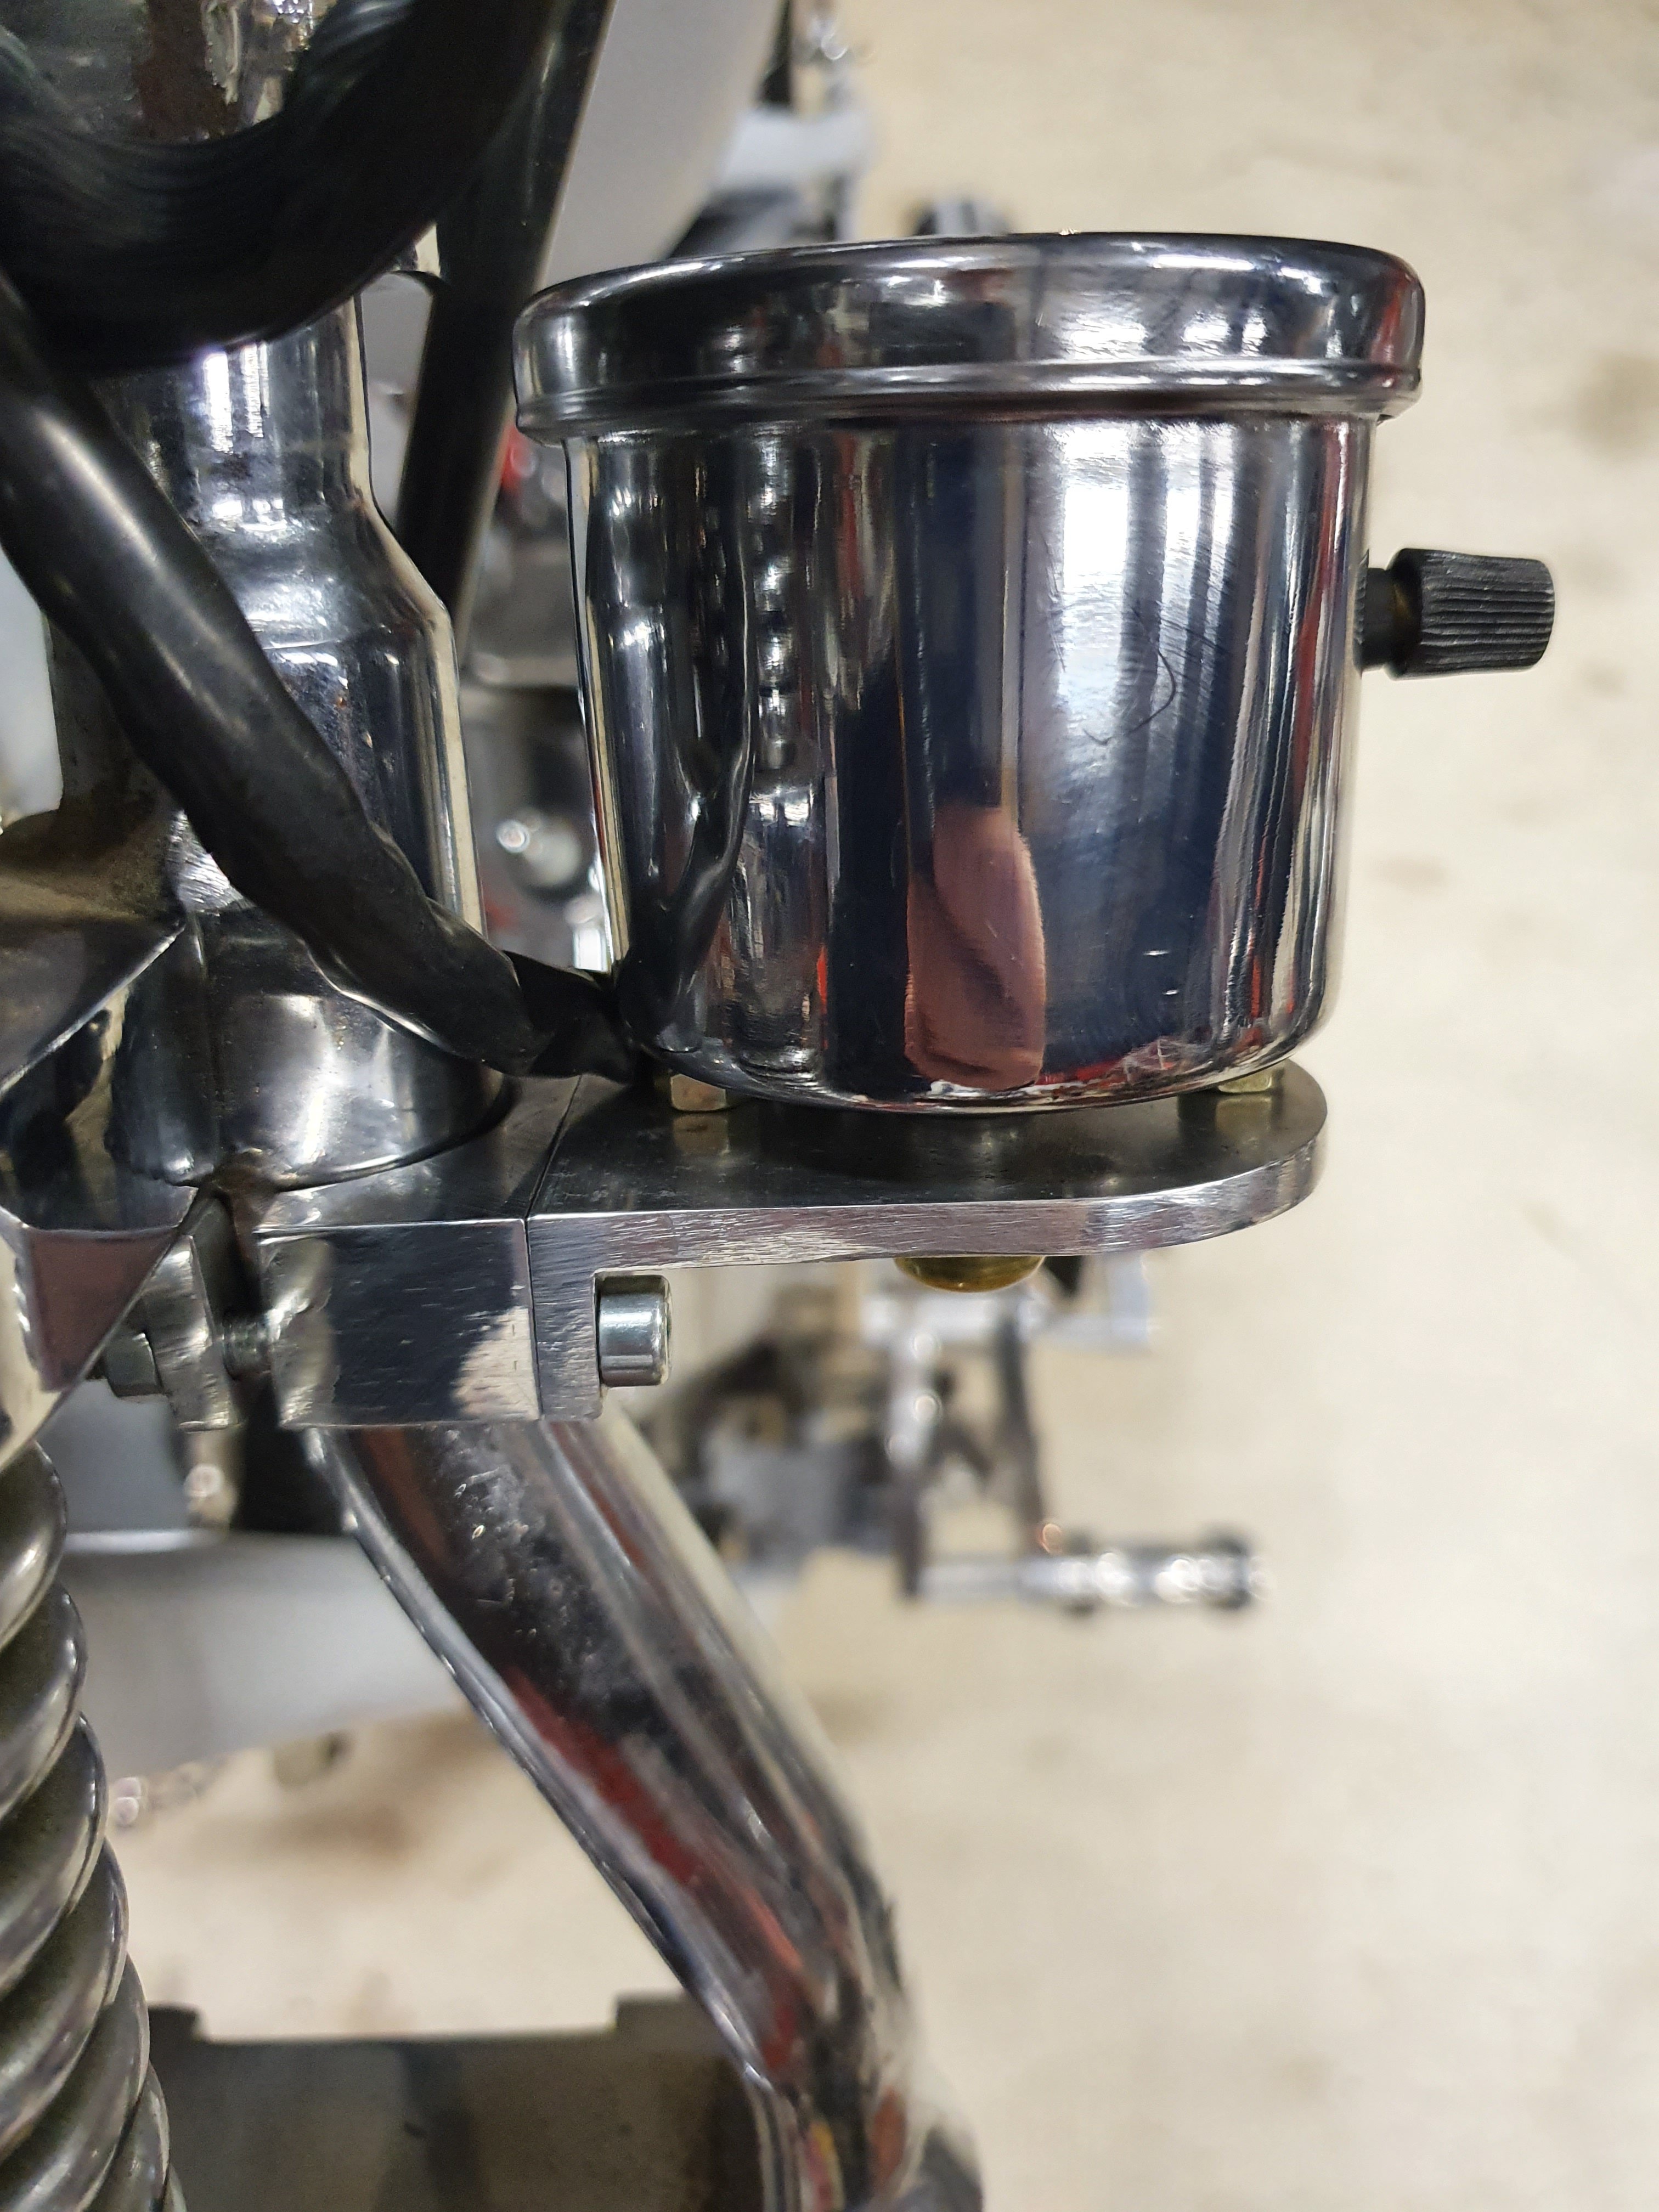
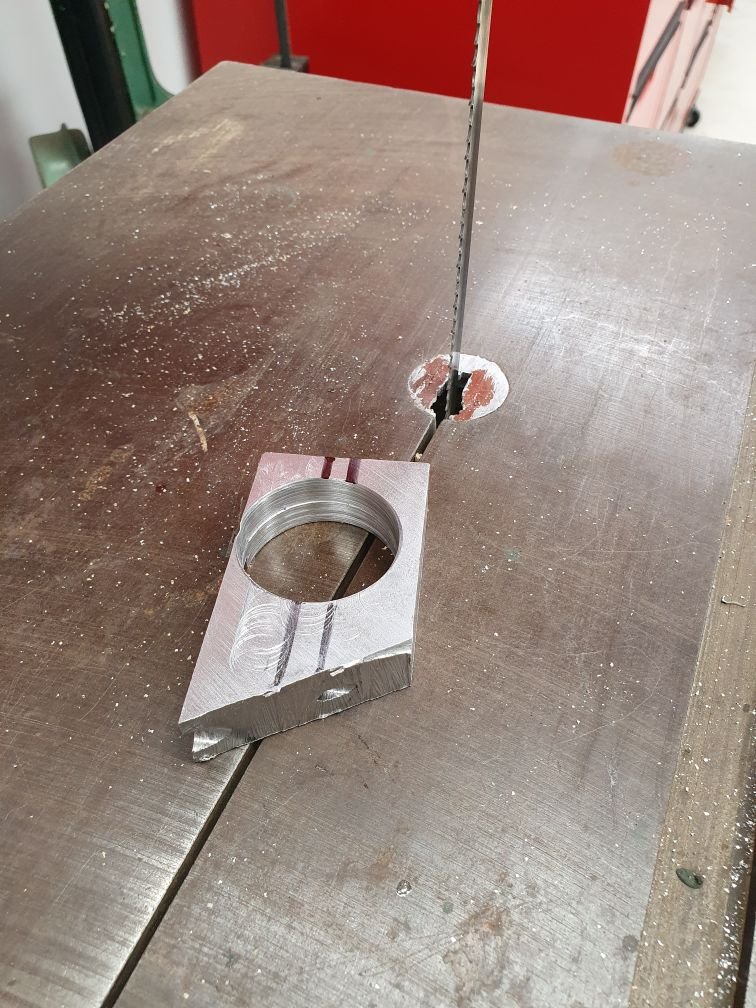
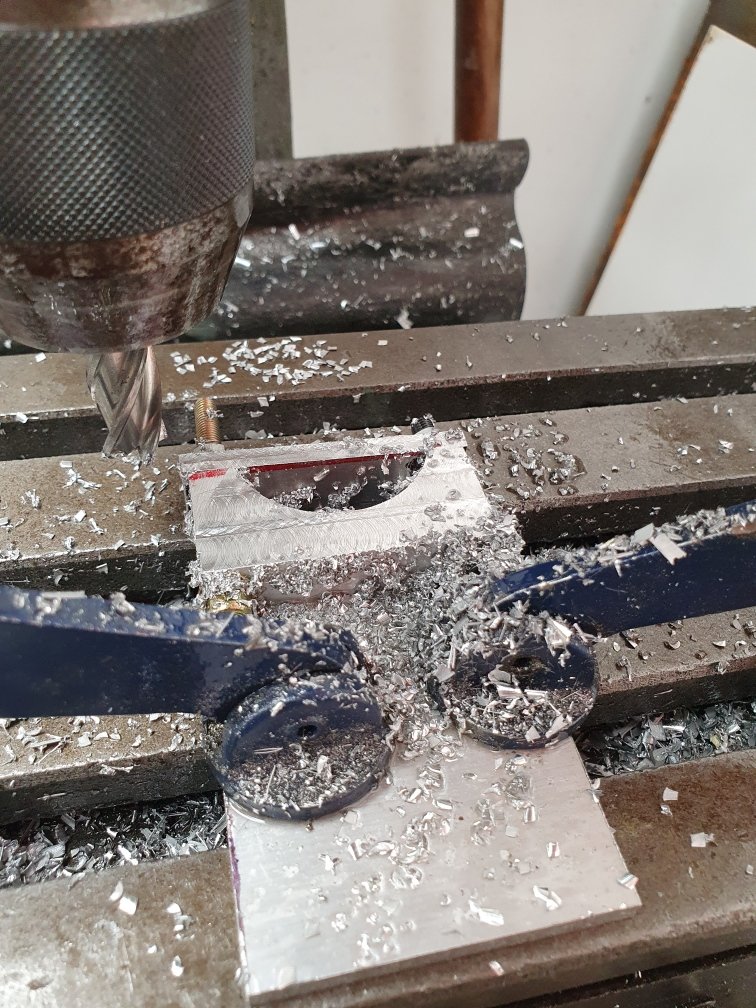
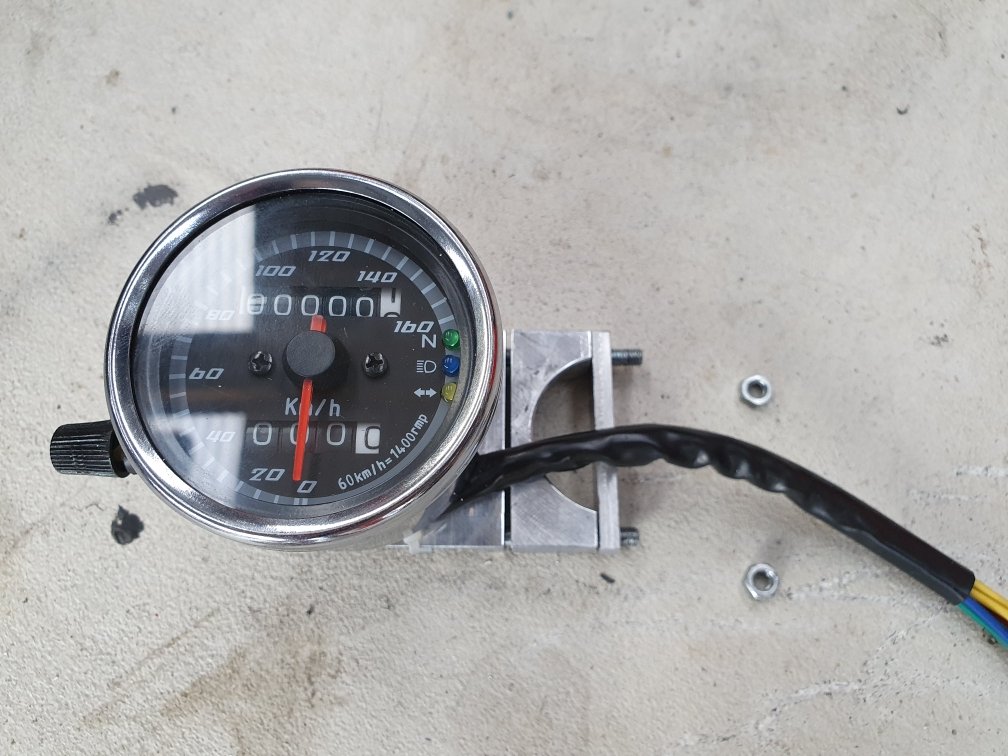
Today's efforts, take a chunk of scrap: Add some more scrap metal to it... Mill the bejesus out of it... Add a speedometer...and fuck yeah! Just in case you were wondering if I can actually see it when on the bike, the last pic was taken sitting on the bike. The cable has a straight line down to the speedo drive, so will look tidy and minimize the ugliness of needing a cable. And it keeps the handlebars looking clean, plus the springs are where a normal speedo goes, so all up I'm stoked with this.
-
Do it. Best thing I did was stick it on a dolly and roll it from my house to the workshop. That way it was in my sight and I couldn't ignore it anymore. It was in the house for 2 years and I basically didn't do any work on it because I couldn't be fucked going back and forth to the shed. Definitely buying a bike that goes, then modifying it from there is the smart way. Buying it one bit at a time isn't cheap and I've had to learn what every bit does along the way. Also I've brought many bits 2 or 3 times, as the compatibility issues between models and years has caught me out many times. But it's a fun journey all the same.
-
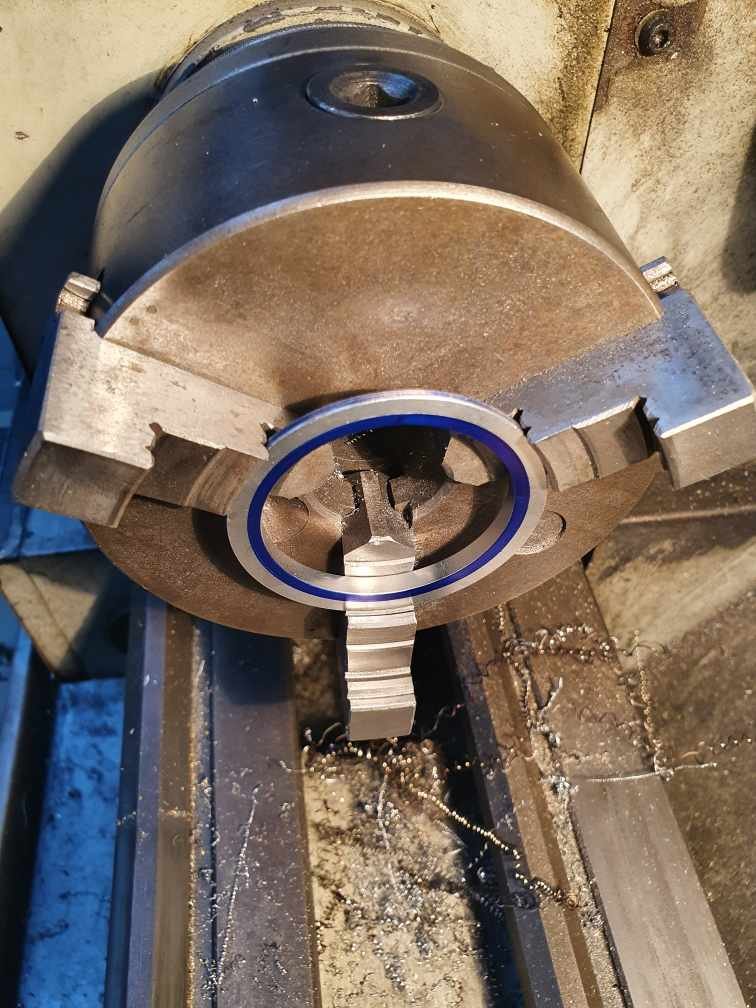
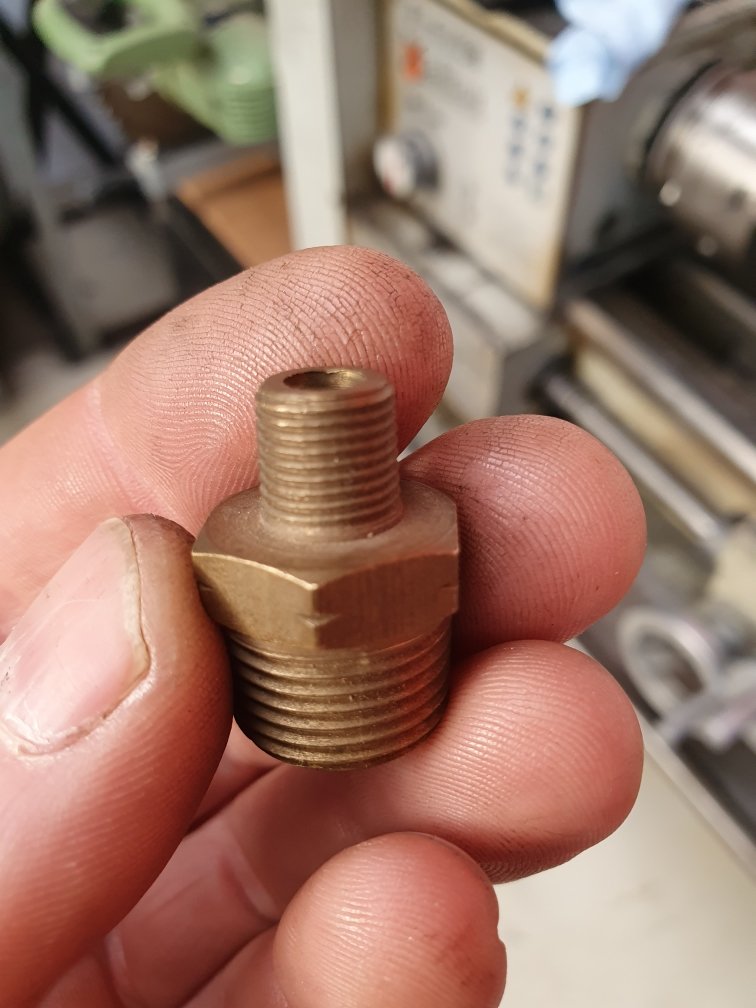
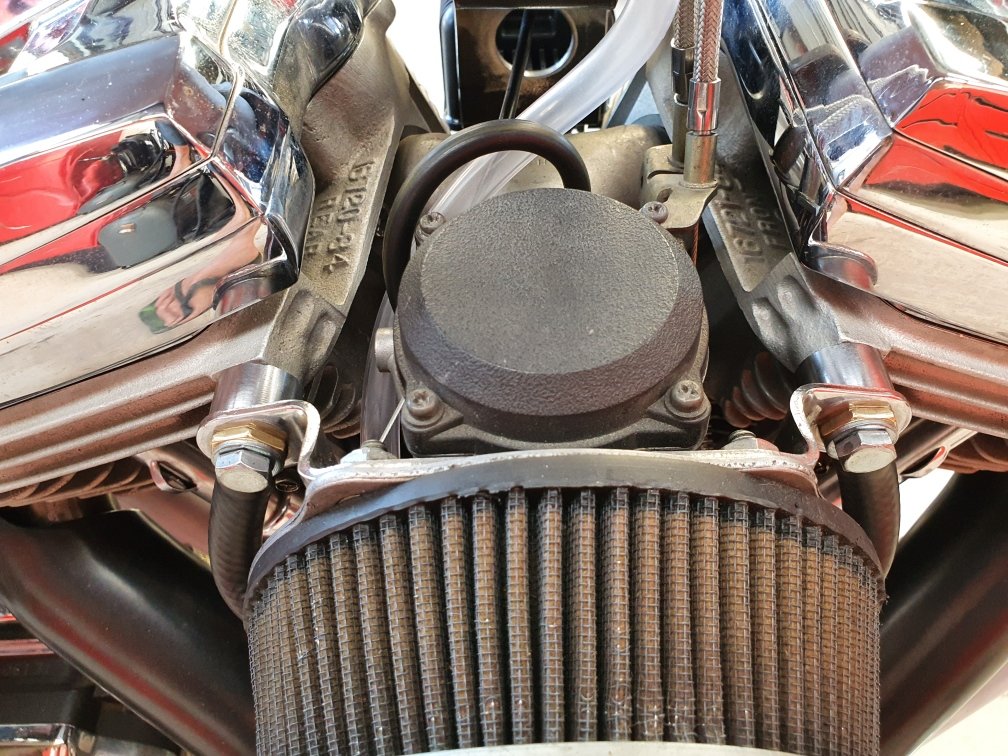
So, my model of motor was an earlier version of the Evolution 1340cc. The main difference between these two is the later evo's have a head vent for removing crankcase pressure and the early models have a crankcase breather. So mine has the crankcase breather, not the head vents. However my carburetor is off a later model, so is setup to suck crankcase gases from the heads. Banjos for head breathers. These are about 16mm diameter, quite big eh. Huge holes for oversized banjos to go in, but behind this is only a 5/16 unc (about 8mm) threaded hole in the head. So a 16mm banjo isn't going to go in an 8mm hole. So, my first idea was to eliminate the pcv system altogether. But then I'd have shifted the problem; ○ I'd have to make spacers for the carburetor steady. And ○ I would still have 2 hoese to block off coming from the air intake. So, my cunning plan, make a stepping washer to centre everything, then bolt it up with the required 5/16" bolts that will effectively blank off the pcv valves. So, time to get to work with shit lying around...covid19 lockdown prevents zipping into town to buy some materials, so I'll have to make do. This will work, just needs some love to shape it into something useful. Luckily I have a small box of these pneumatic fittings. Starting to look the part. Better. Fuck yeah! That'll do it...
-
Kimjon's 50cc (then later ... 150cc and 400cc...then 1000cc) of awesomeness!
Kimjon replied to Kimjon's topic in Two Wheels
Thanks both of you for giving your time to reply and for the hook ups for parts offers. I'm interested for sure, but now have a wee bit of knowledge and still near zero understanding. I think I need to get hands on (after lockdown of course) and get this bad-boy going to see what I'm dealing with. Then go from there. I'm so looking forward to doing this. I had a Suzuki SA50 when I was 20, then I gave it to my wife to be and it left an impression on me. Time to relive my cool days as a scooter rider... -
Kimjon's 50cc (then later ... 150cc and 400cc...then 1000cc) of awesomeness!
Kimjon replied to Kimjon's topic in Two Wheels
Is it the motor in factory form that sucks, or the drive system...or both? Could convert to cvt? -
Kimjon's 50cc (then later ... 150cc and 400cc...then 1000cc) of awesomeness!
Kimjon replied to Kimjon's topic in Two Wheels
@Raizer do any other scooters share a similar engine, or is there a Chinese clone equivalent out there? I've searched up a few Yamaha Jogs and they seem quite pricey for what they are. Any ideas welcomed, as this is all new to me. But I can fabricate pretty much anything, so it doesn't have to be a direct bolt in fit. Thanks -
Random slightly cool stuff you built but not worth its own thread, thread
Kimjon replied to h4nd's topic in Other Projects
Yeeeeeehahhhhh!!!!