
- Popular Post


Flash
-
Posts
1615 -
Joined
-
Last visited
-
Days Won
2
Posts posted by Flash
-
-
- Popular Post
- Popular Post
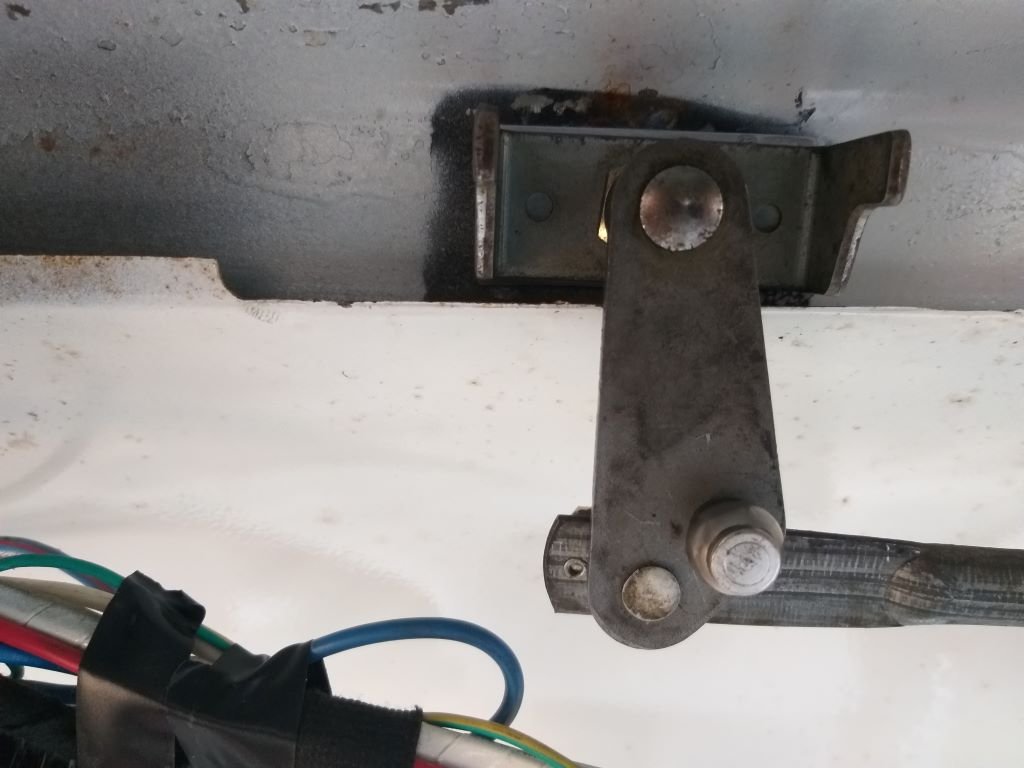
Started the morning off by fitting the freshly painted spacer to the LHS wiper spindle and then bolted the mechanism in place.
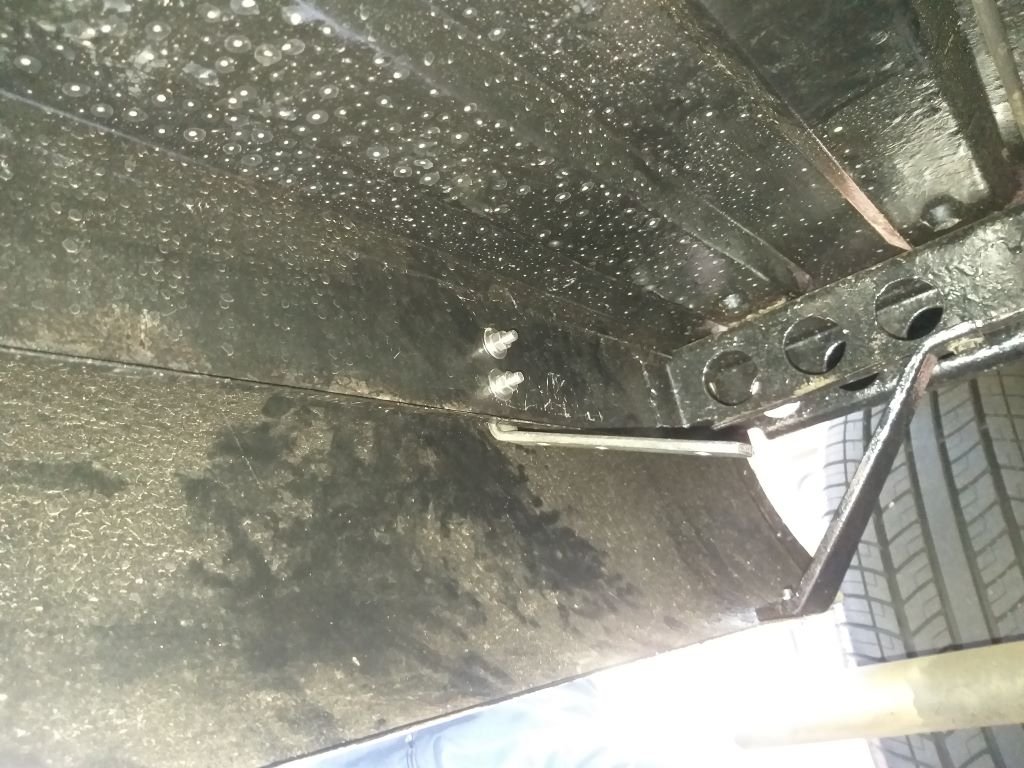
Managed to get a clear shot of the factory seam that I was talking about yesterday:

As you can see the factory had already trimmed the seam in the area of the spindles and I'm guessing that was done to provide the needed clearance for the Thames spindles, but just wasn't enough for the L300 ones.
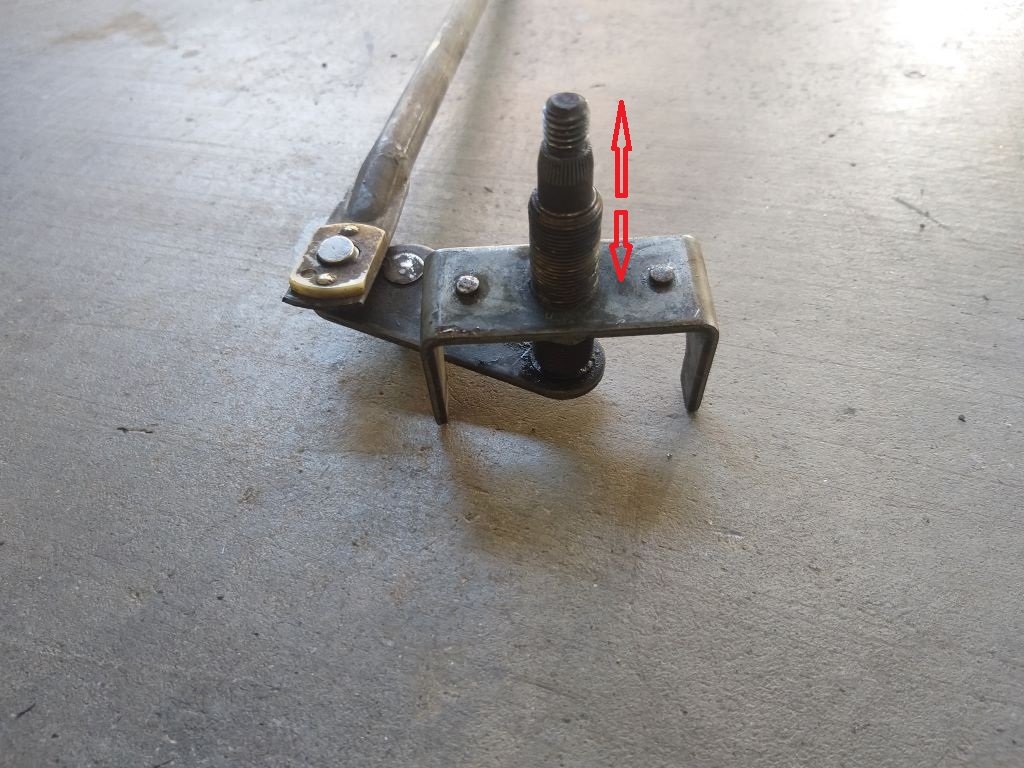
As you can see in the below photos there is still plenty of depth to the spindles even with my extra spacer.
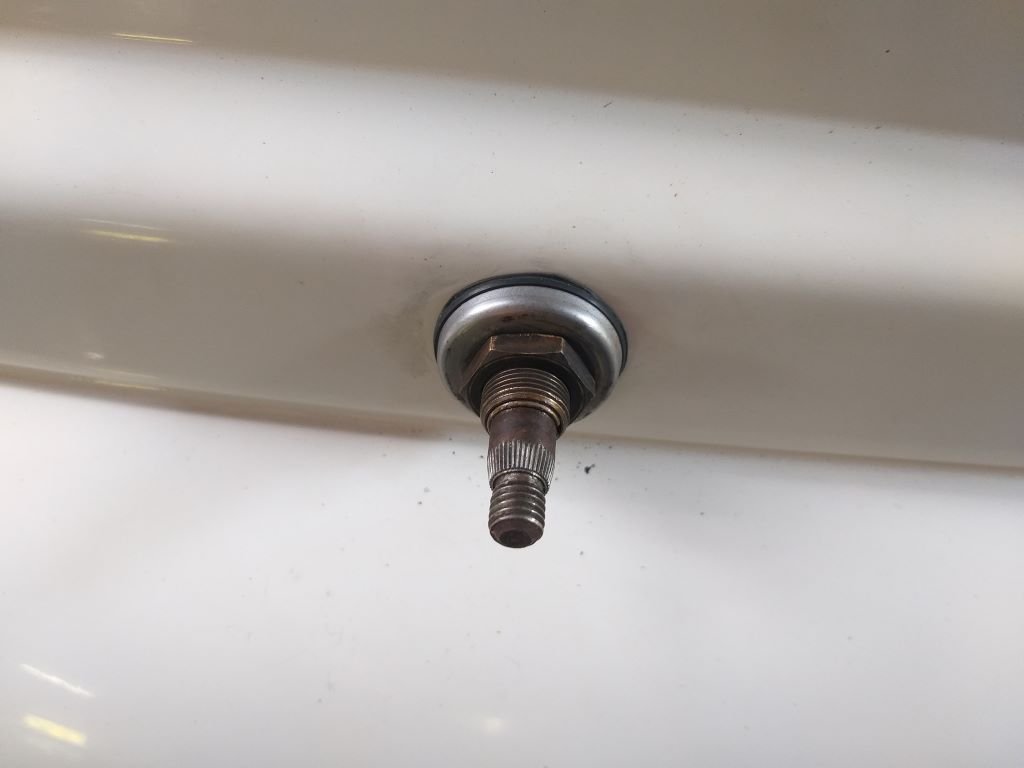
I'm liking the rubber seals and shaped washers that came with the L300 units. If the Thames units ever had rubber seals, they are long gone.
As can be seen the splines and threads are also in perfect nick.
With the spacer in place I chucked one of the L300 wiper arms on and Mrs Flash held the manky old wiper blade slightly off the windscreen while I climbed under the dash and manually manipulated the mechanism. The good news is that the LHS wiper sweep looks to be really good. The angle on the L300 wiper arm looks good, but the L300 blade is too long and goes well over the windscreen seal. Should be easy enough to source shorter wiper blades.
Spurred on with the success so far, I proceeded to make up a spacer for the RHS spindle.
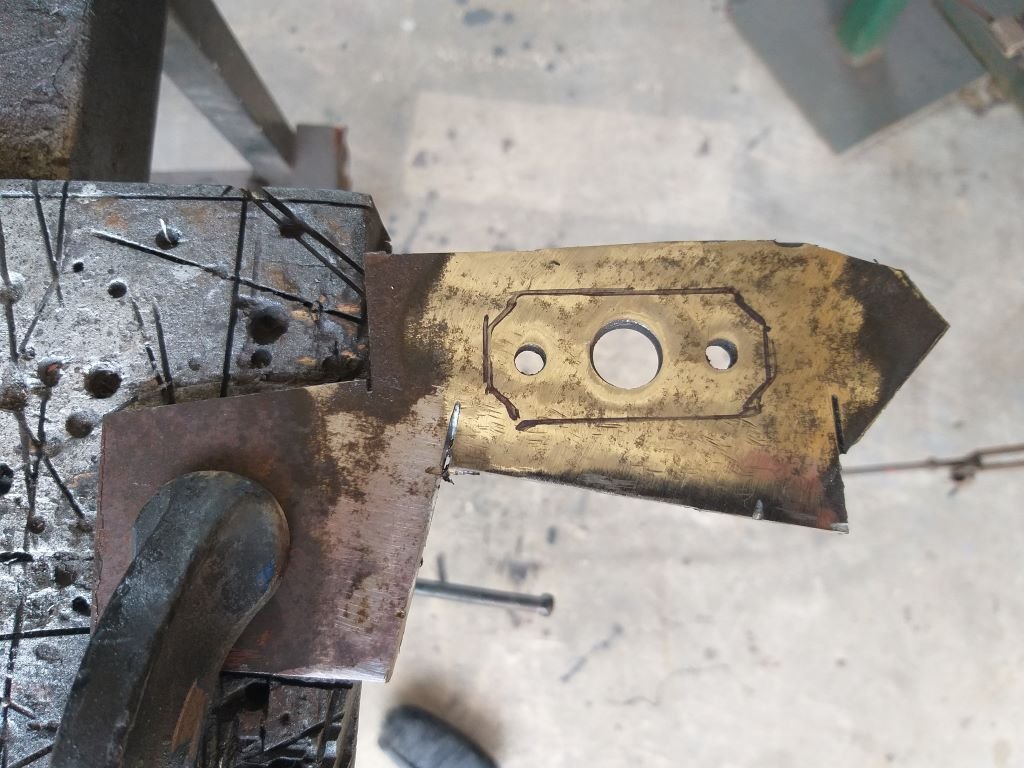
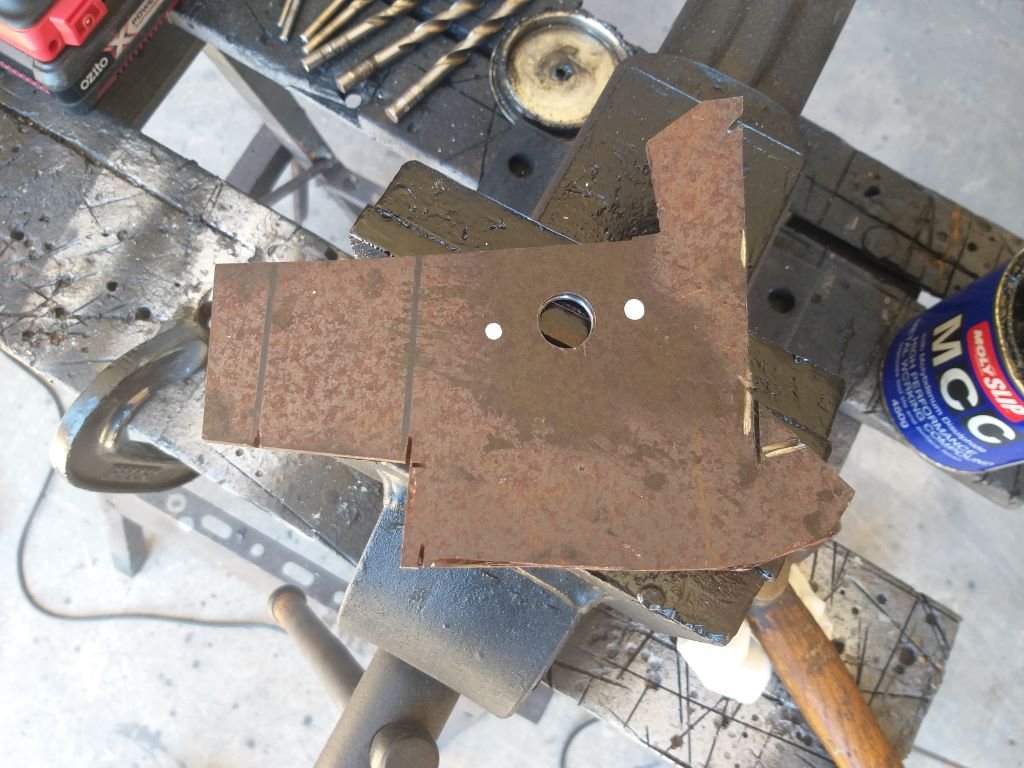
In order to explain why my spacers have the extra little locating holes on either side of the spindle hole I'll share this photo of the original L300 front panel that I kept when I wrecked that van:
My guess is that they prevent the spindle backing plate from rotating by holding it firmly in place.
Anyway, a quick "in progress" shot of the next spacer which has now been completed and has received its first coat of galv paint, so I thought I'd update you all on progress while the paint is drying.
-
 11
11
-
- Popular Post
- Popular Post
Okay, so whilst a big part of me just wants to concentrate on finishing off the a/c install, I've realised that there are a few dashboard related items that need to be addressed before I fit the under dash a/c unit.
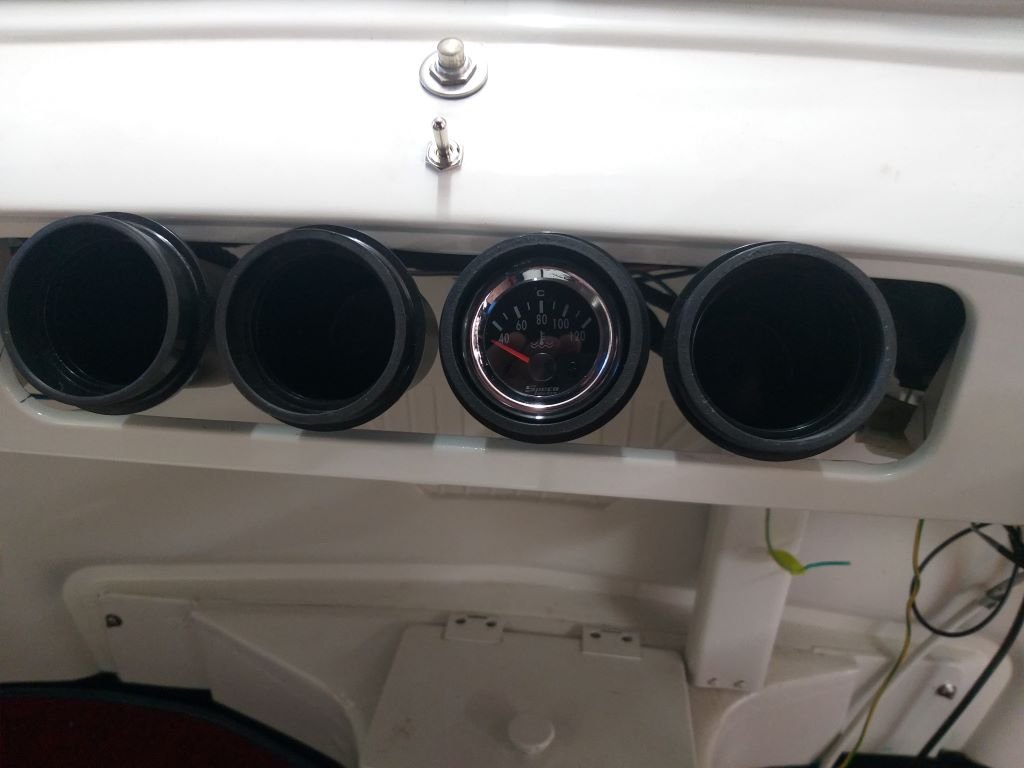
First up you may recall that we deleted the factory glove box and filled the opening with housings for some additional gauges. Photo of what we currently have which while functional looks bloody awful:
A few months of driving around with phones, sunnies, wallets and various other bits and pieces either sliding off the engine cover lid every time we take a corner or languishing in the passenger footwell has become tiring. So, a decision has been taken to reinstate the glove box and move the gauges elsewhere. But more about this later.
The more pressing matter is the current windscreen wiper setup which only really got used in anger two weeks back when we had the first rains in about 6 months. They managed a trip into town, but on the way home they suddenly seized up. Luckily the worst of the rain was over by then, but still this needs to be addressed now as it will be a real bugger to access the wipers once the under dash a/c unit has been mounted.
So, without further ado, I pulled the wiper mechanism out to see what is going on.
Yep, that doesn't look to flash. Now I had noticed a bit of play in the original wiper spindles particularly the passenger side one which I stupidly decided to ignore at the time and it looks to me like the spindle in question snagged up and the resulting torque of the motor did the rest of the damage.
With a bit of effort, I could probably re-bush the units, but the second issue is that the splines have taken some hits over the years and since the wiper arms are just push on units the fit feels a bit dodgy. The answer would be to source a set of pivots in better condition, but what are my chances of finding good ones especially considering the vast majority of used parts would come from the UK where rain is slightly more common an occurrence than here in Straya. So, my chances of finding replacement Thames pivots are probably nil.
The third issue is that the tubby 2 speed wiper motor that I have fitted to replace the original svelte looking vacuum unit now clashes with the glove box inner, so I'll need to modify the inner to clear the motor. The chances of my 60-year-old cardboard glove box inner surviving nip and tuck surgery are slim.
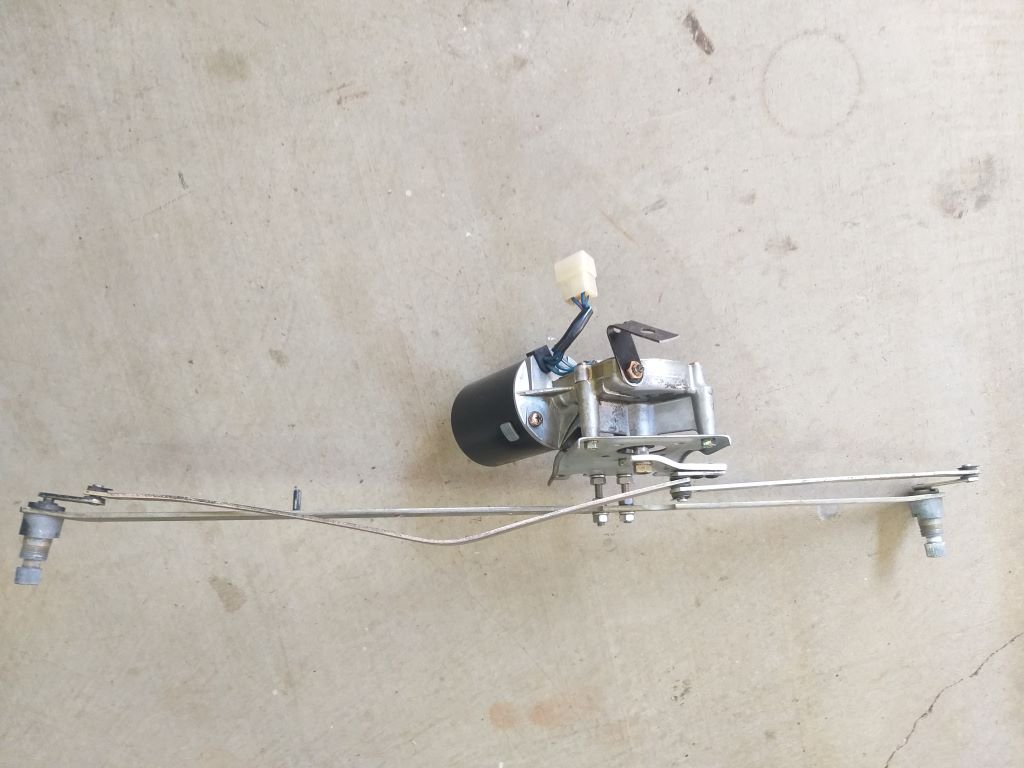
So considering all of the above I've decided to take a different route and it just so happens that I have this mechanism out of a Mitsi SD series L300 van languishing in the shed.
Way back when I was stripping my donor vans, I noticed that the SD series mechanism shared the exact dimensions with the Thames and at the time I did successfully do a test fit of the L300 unit which bolted straight up, but at the time I thought the Thames one was a simpler option as I didn't have to shorten the wiper blade arms. Checking out this mechanism the spindles are mint, just needed a bit of lube to make them perfect.
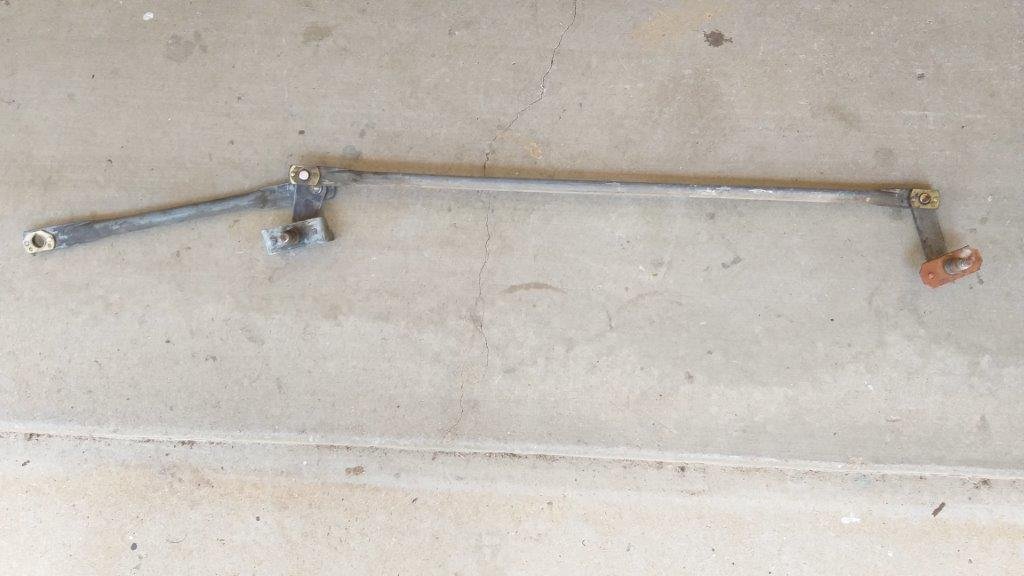
I bolted it into the van and apart from having to shorten the blade arms and fabricate a bracket for the wiper motor, the only other issue is that the LHS "conrod" hits the metal seam where the windscreen surround butts up to the front panel. Even although the seam is hidden under the dash I don't want to butcher it. Luckily the L300 spindles are a lot longer than the Thames units so my cunning plan is to make up a spacer for each pivot that will space the "conrods" away from the seam.
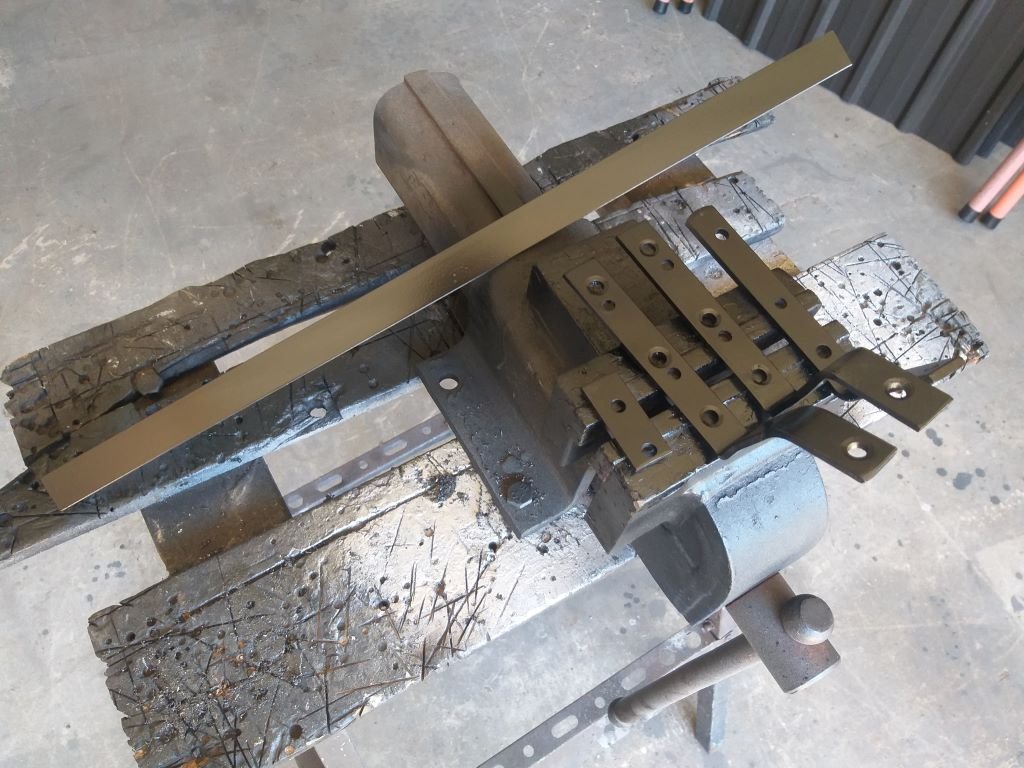
Not too much of an issue I reckon. so I started off by making up the first spacer out of an offcut:
Poked a few more locating holes and trimmed to suit:
Have given it a splash of galv paint which I've left drying overnight. If the test fit works out okay I'll make up a second one for the driver's side.
Thanks for looking.
-
11
-
- Popular Post
- Popular Post
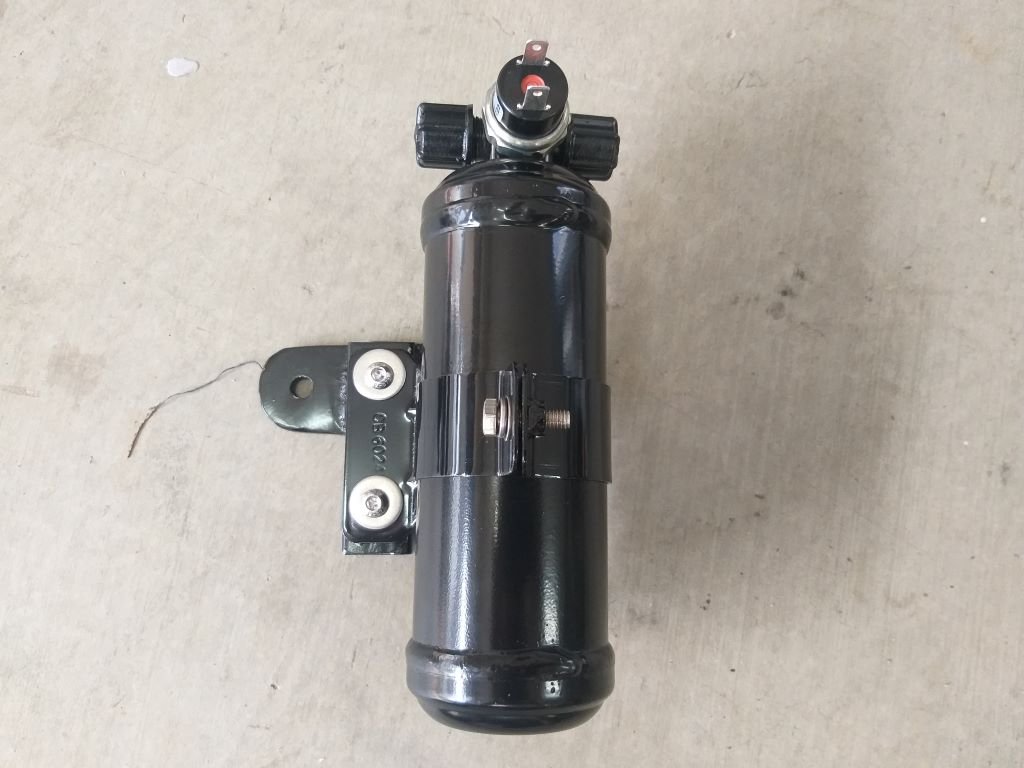
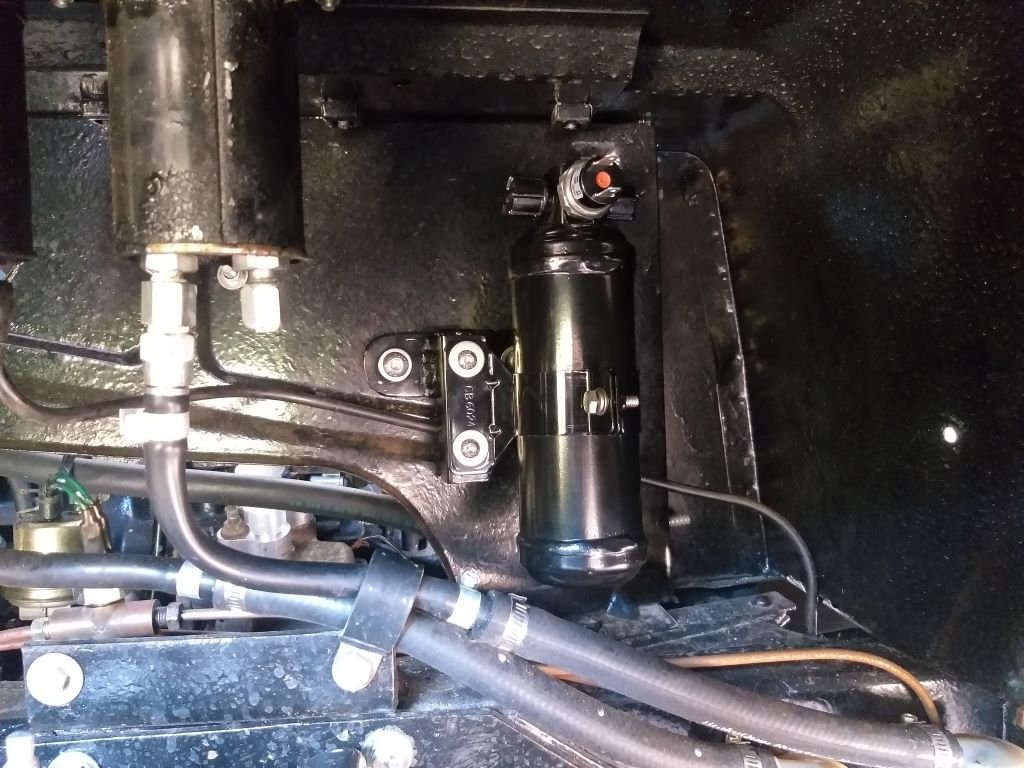
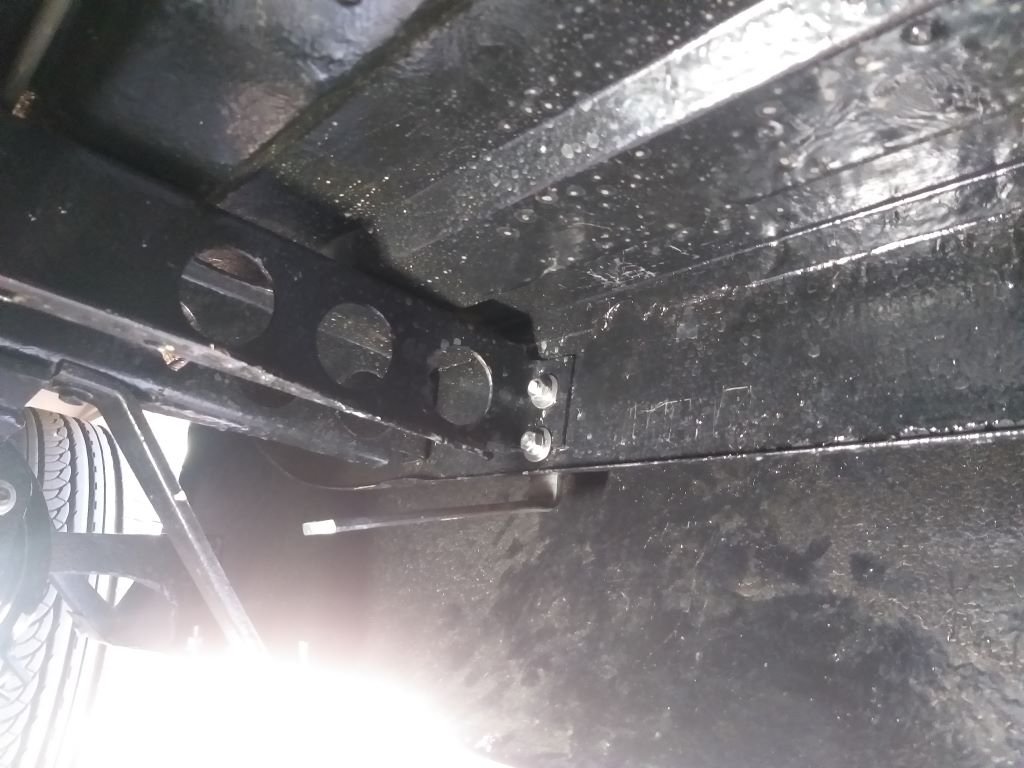
First thing this morning I fixed my newly fabricated receiver bottle mounting bracket to the bought one with a few stainless-steel fixings. Screwed in the pressure switch and she is ready to go.
Grovelled around in the wheel well with a few spanners, and then:
Next on the list is the under-dash unit.
-
10
-
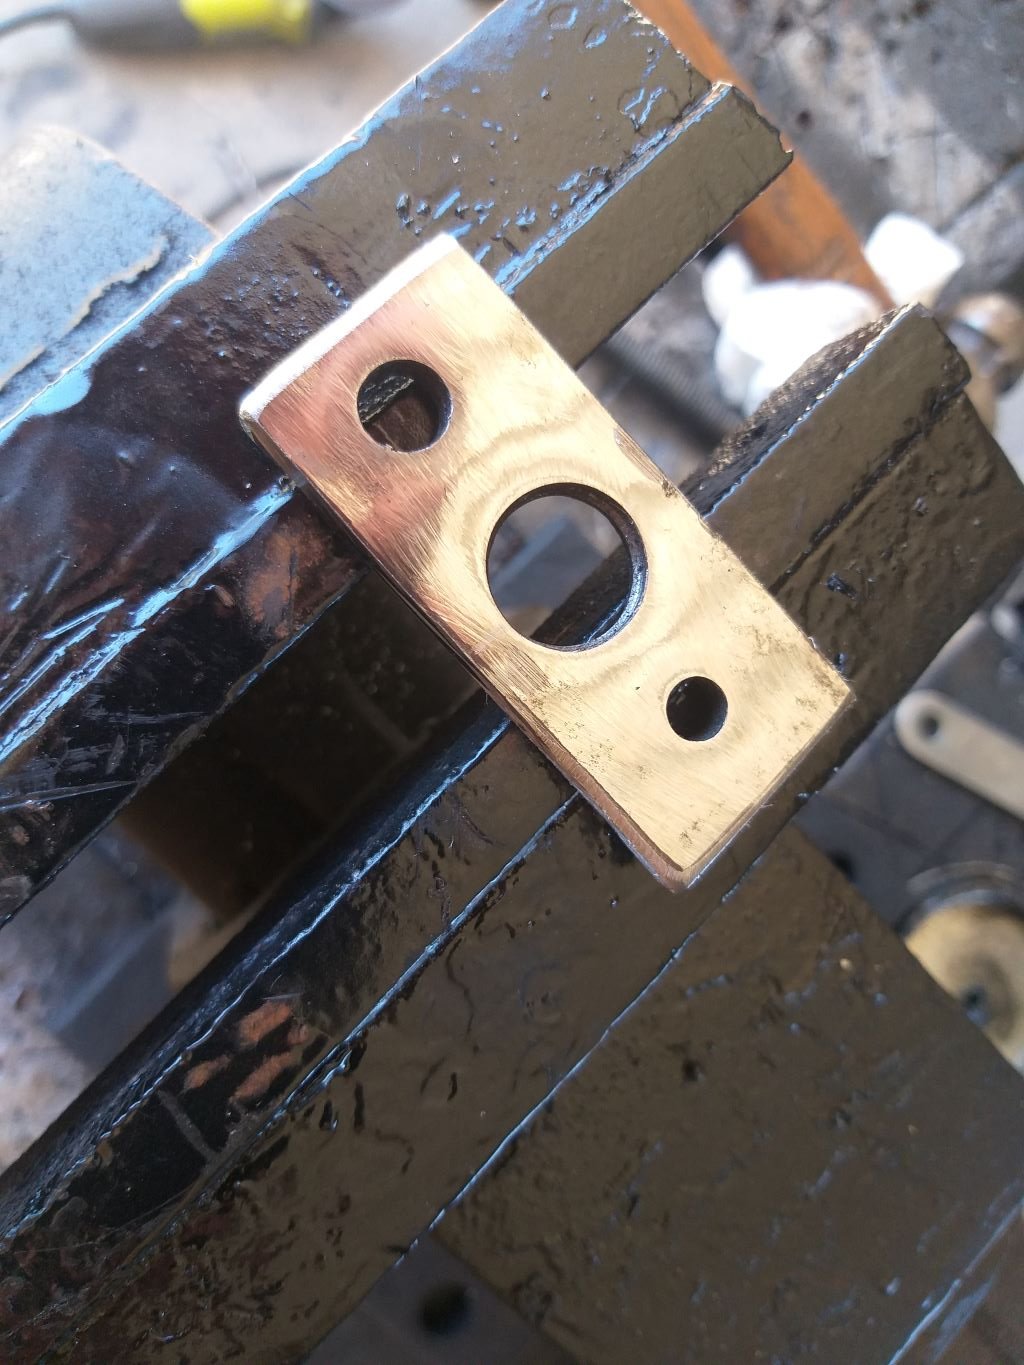
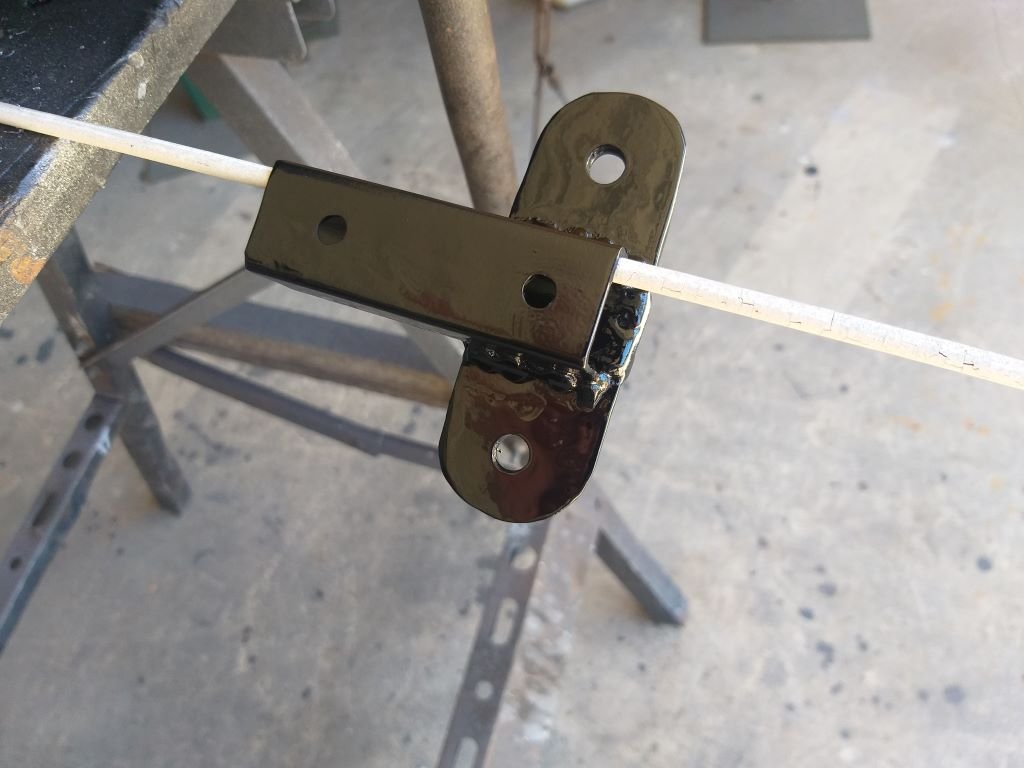
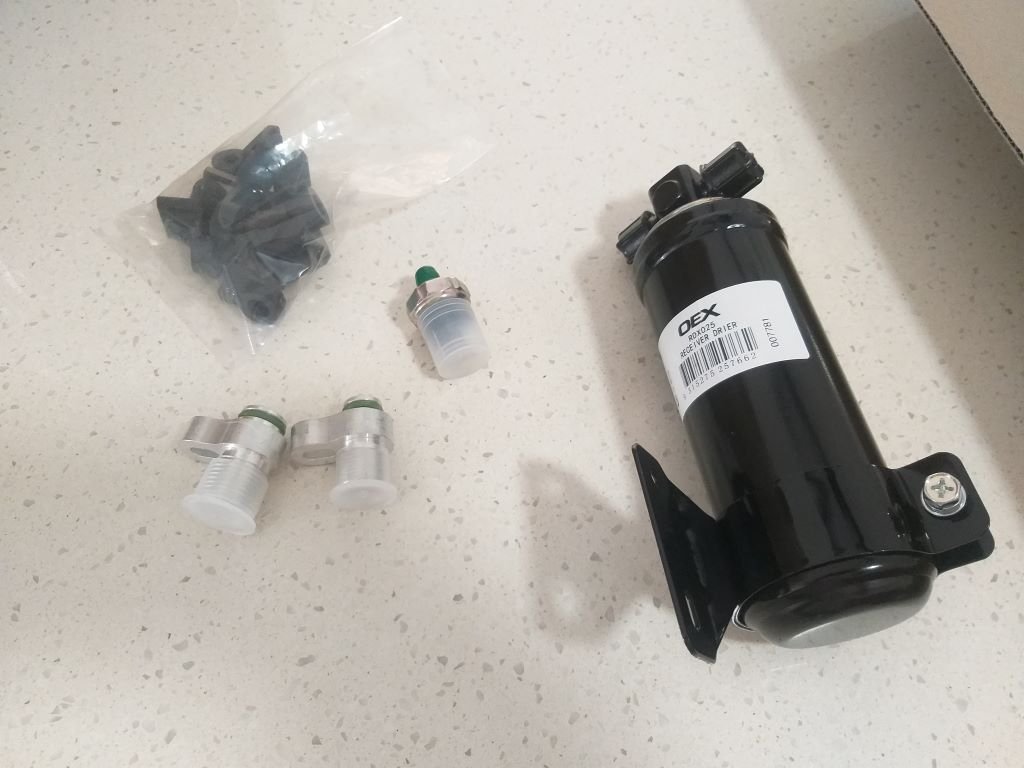
I promised to share my receiver/drier mounting bracket efforts with you all, so here goes.
The plan is to locate the drier in the RHS front fender well tucked up above the chassis leg. I decided to make use of the existing bolt holes that mount the coil in the engine bay because if I do go to an electronic distributor sometime in the future the coil will become redundant leaving me with empty holes which will mess with my OCD.
So the first step was to carve a little flat plate out of a steel offcut, and I then poked a few holes in said plate.
Test mounted like so:
The eagle eyed amongst you will likely spot the hydraulic clutch hard line that sits slightly proud of the side even although it has its own factory formed channel to live in, hence the need for the mounting / spacer plate.
Next step was to fizz a bit of square tube to my newly carved mounting plate and after a spritz of satin black I ended up with this puppy:
I've left it to dry overnight, and I'll assemble it all in the morning.
-
9
-
-
I'm back on the a/c install.
Today's task was to build a mounting bracket for my receiver/drier bottle, which is all done now, and I'll show you it in all its glory once the paint has dried, but in between coats I thought I'd tackle the a/c compressor inlet and outlet swaps.
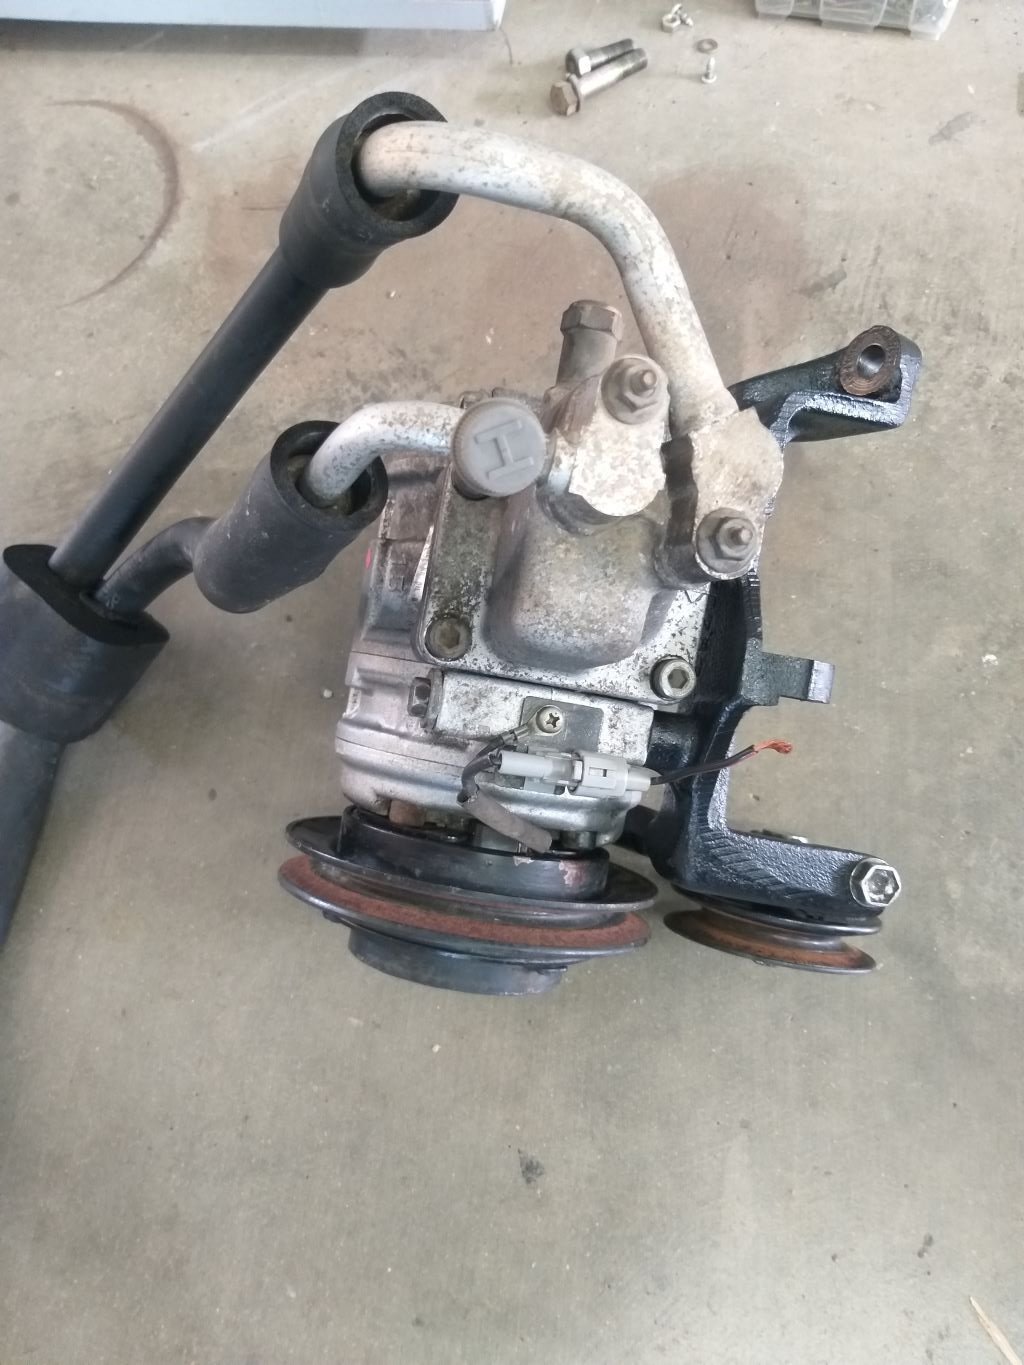
So, when I grabbed the compressor from my local wreckers I nabbed the inlet and outlet hoses at the same time.
There are two issues with these hoses.
First up the hard portion of the lines bend towards the side and wont clear the chassis leg on my van. Secondly both lines face forwards which makes sense for a standard a/c install where the condenser sits forward of the engine but in my case where my condenser is mounted underneath and towards the back of the van, I need the appropriate hose to face rearwards.
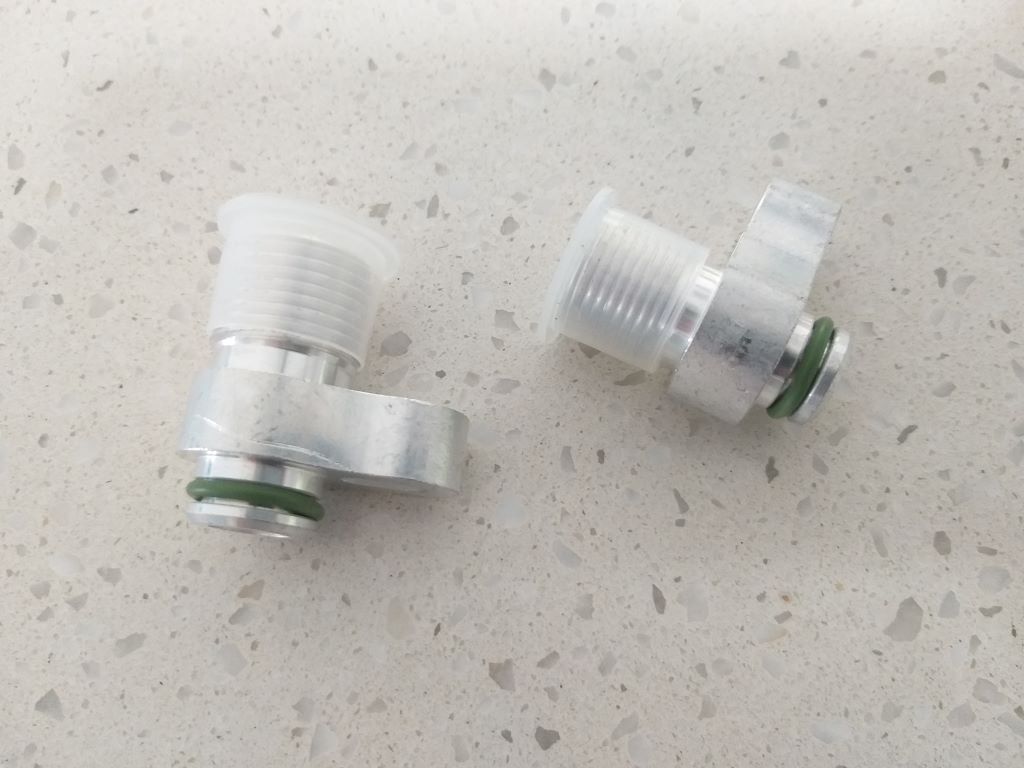
I was able to solve both issues by sourcing a set of pad to o'ring adapters specifically for the Denso compressor.
After giving the o'rings a bit of lube I was able seat them in their new home:
And that's the compressor all done until I start fabricating my hoses.
-
7
-
-
- Popular Post
- Popular Post
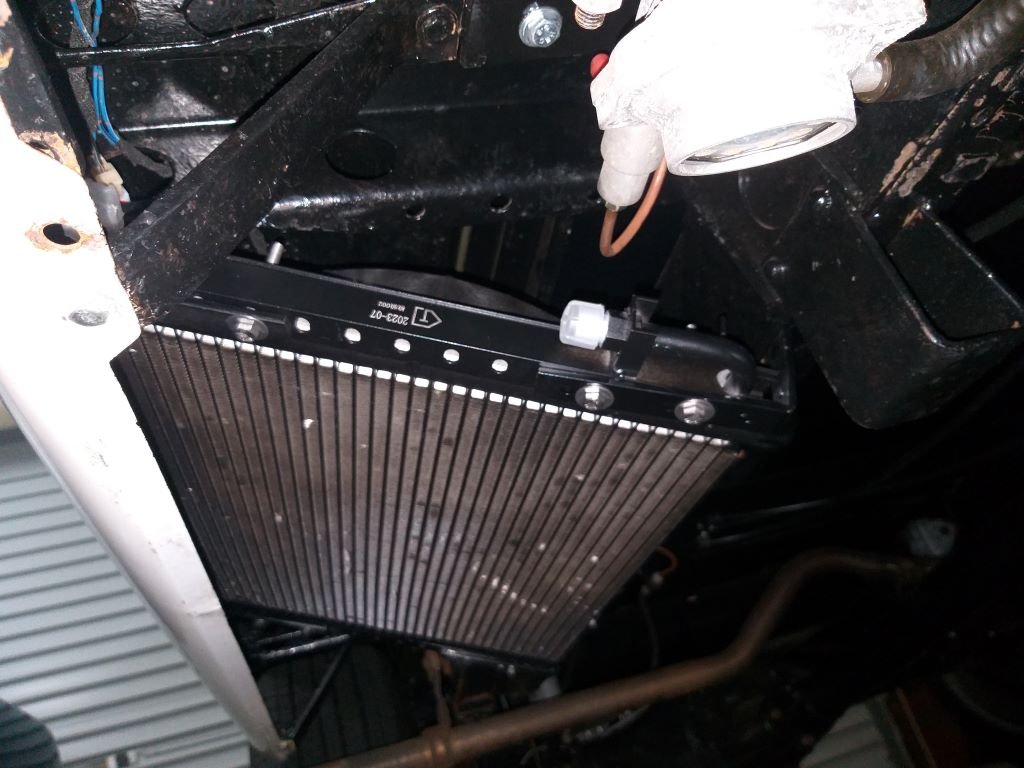
Well, strap yourselves in for an absolutely epic comedy of errors.
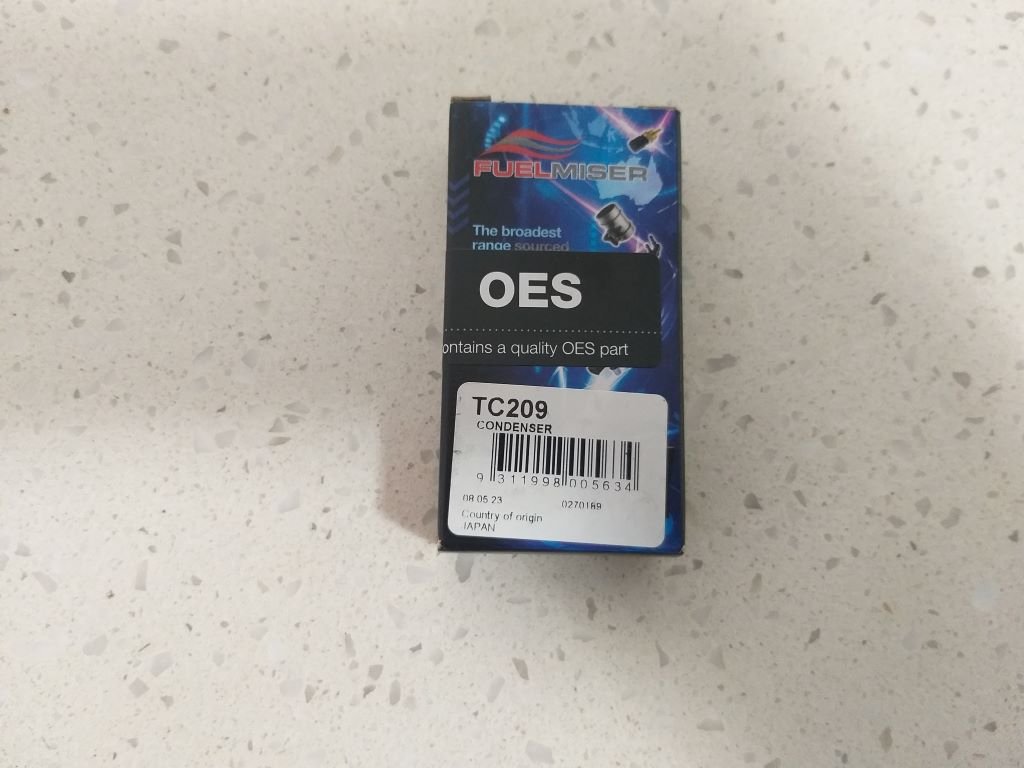
Yesterday just after lunch we got a call to say that something that we had ordered was ready for pickup in town. It being a relatively coolish day with a slight breeze we decided to take the Thames rather than the air-conditioned Mustang. So, Mrs Flash, our we dog and I headed off. On the way back from picking up our parcel we were navigating through the back streets of town when the Thames cut out. I managed to coast into a handy parking bay. Lifted the engine lid and checked the glass fuel bowl on the fuel filter - plenty of gas so I knew it wasn't that. Pulled the dizzy cap off and gave her a crank over. Sure enough no spark at the points. Okay I thought it's either a dodgy condenser or coil. Luckily, I was only a block away from the local Toyota aftermarket parts specialist so I figured I was in with a good chance of sourcing a new condenser. And yet .... nyett ... none in stock the bloke says - WTF. "Try Repco around the corner mate" he says.
So off to Repco I go and, yes, they have a condenser in stock .... winner.
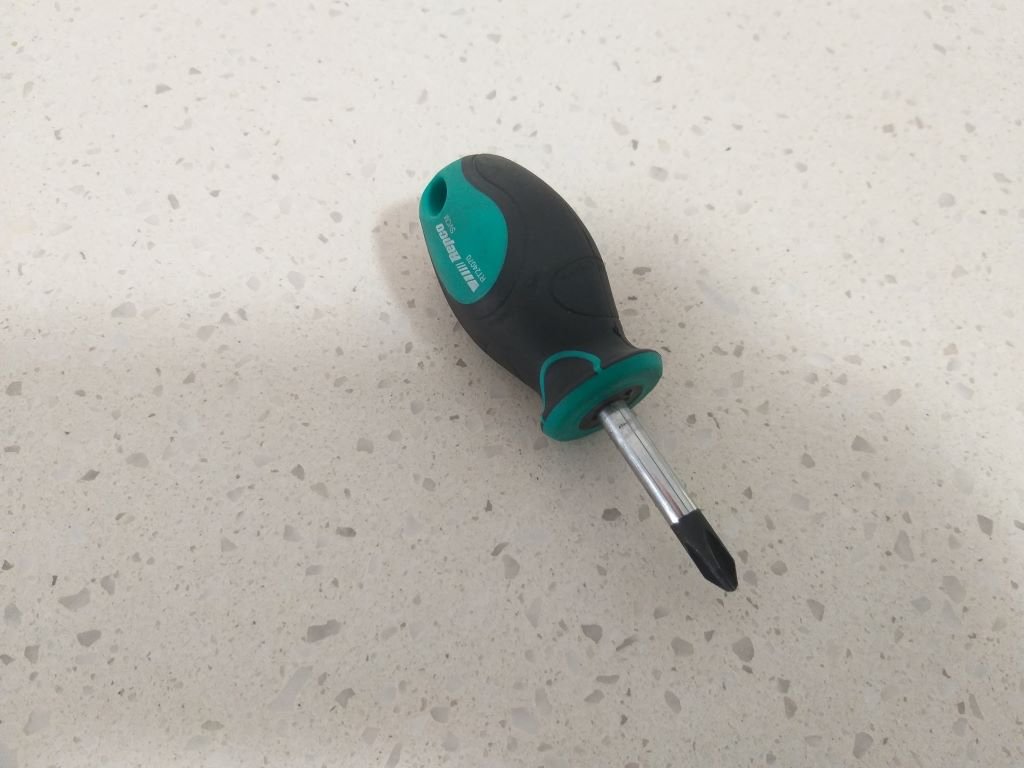
Okay, now all I need is a stubby Philips screwdriver and a pair of pliers and I'm home and hosed.
Repco had a stubby so I grabbed that.
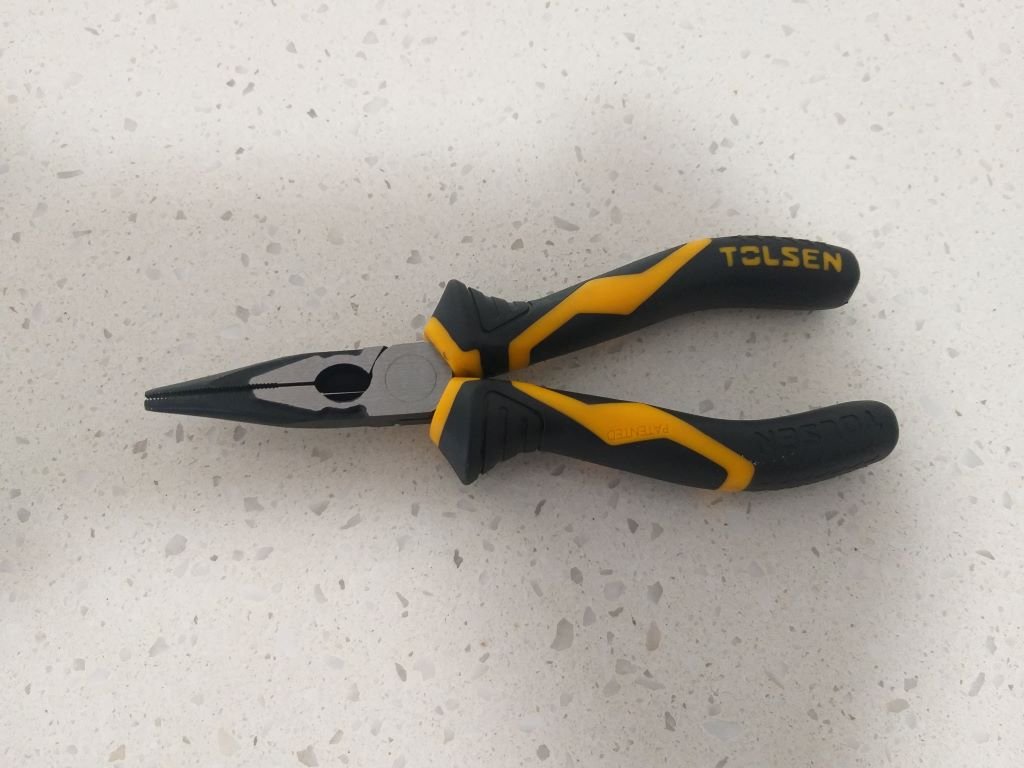
But they wanted moonbeams for a set of pliers, so I passed on those. Went back to the Toyota place as I had spotted a pair of pliers on sale there. Grabbed these puppies and headed on back to the van.
So now comes the easy part. Loosen the condenser off the dizzy body with the stubby screwdriver ... tick. Loosen the nut off the dizzy through bolt with the pliers .... tick. Make sure I don't drop the nut and spring washer as I remove them ... tick.
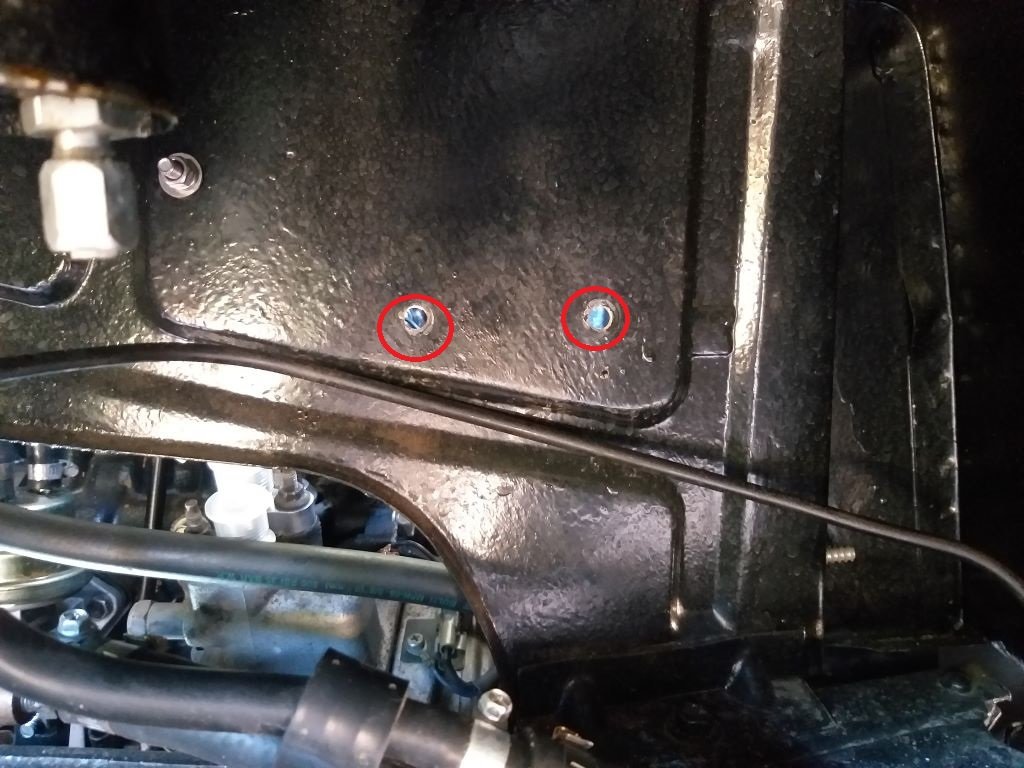
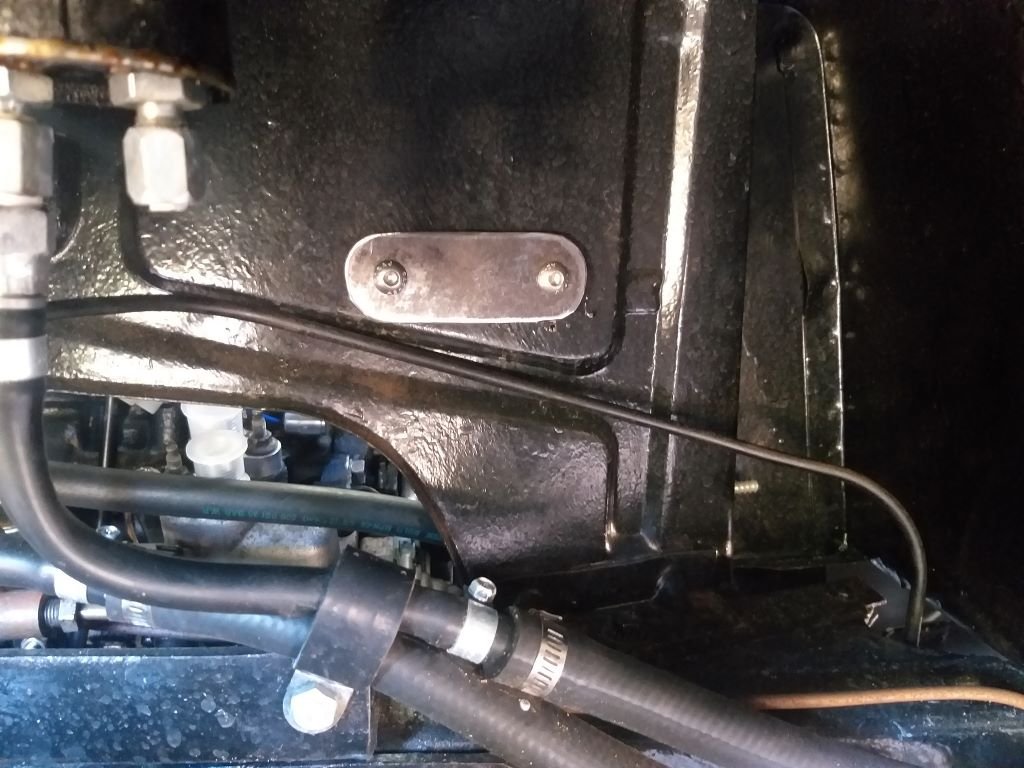
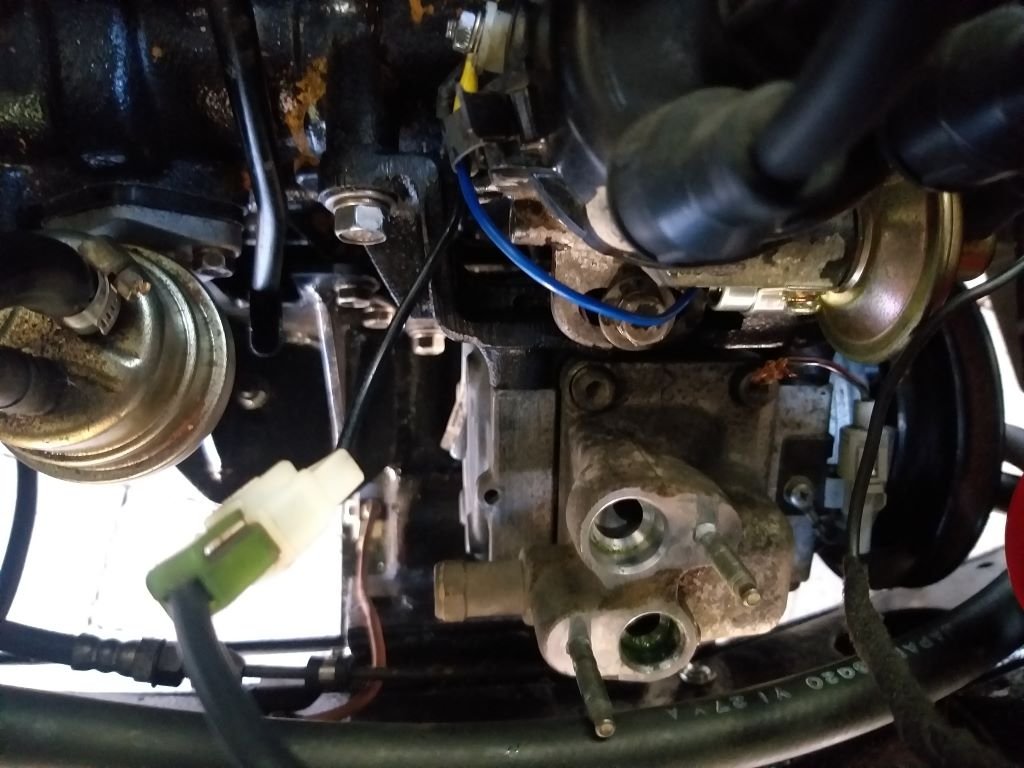
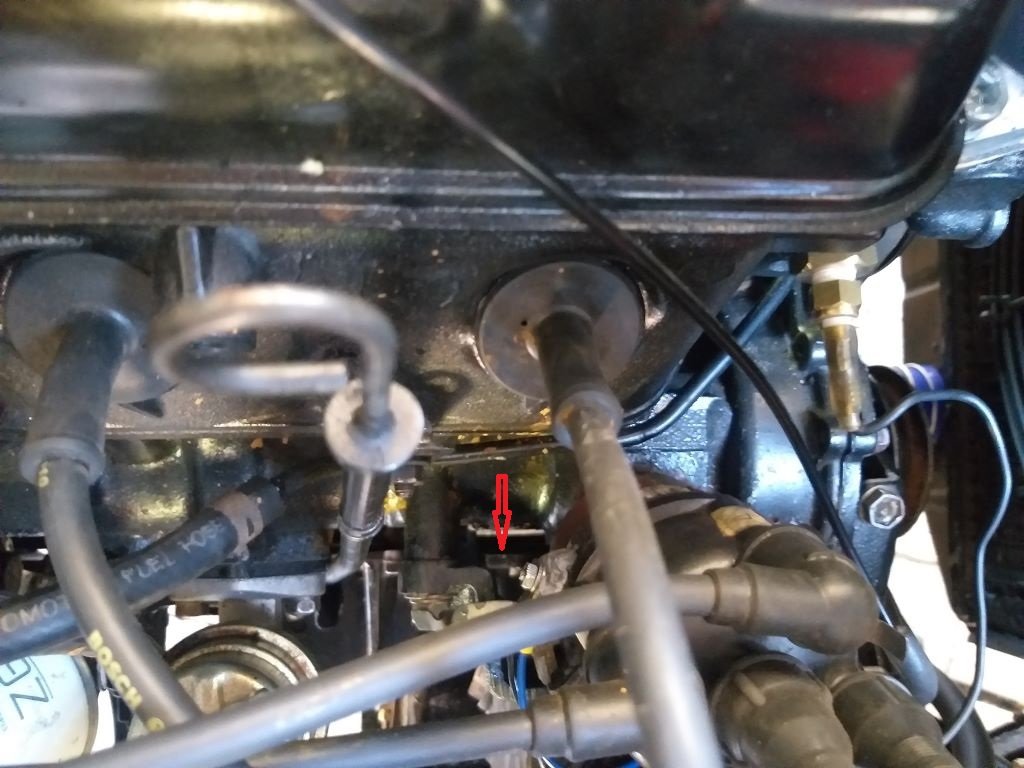
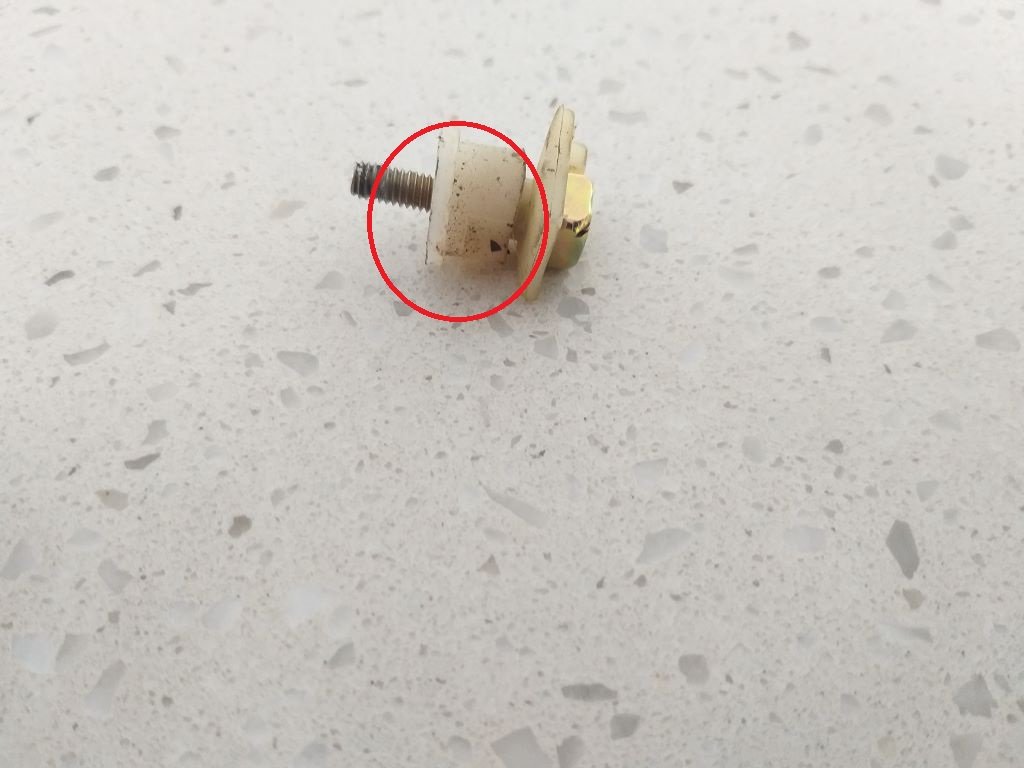
In my haste I forgot that the outer part of the little plastic isolator is loose once the nut is off, so ..... yes ..... you've guessed it in one .... numpty here manages to drop the little isolator down into the bowels of the engine bay ....... but not just anywhere .... no, no that would have been too easy. It manages to hit the sweet spot right between the a/c compressor bracket and the engine block. Like right down where the red arrow is pointing in the following photo:
Now that bracket has three sides to it so there is no way that you can get to the dropped part except from above. The gap is probably about 15mm wide and about 50mm deep. I could clearly see the part, but do you think I could get to it. To make matters worse the engine is nice and toasty so that just added to my overall feelings of happiness and joy.
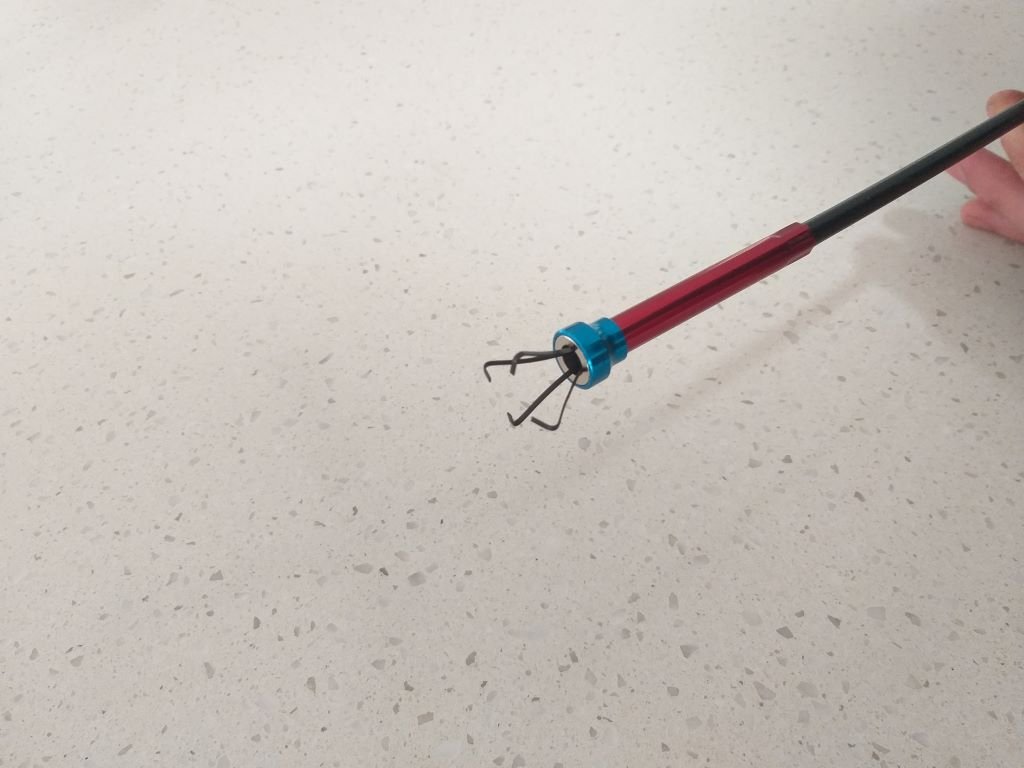
Okay so off to Repco I go and I figure a magnetic pickup isn't going to help me as the part is plastic, but maybe one of those claw-like grabbers will work.
Back to the van with my claw thingy and guess what ....... the thing is too wide to fit in the gap. Jeeez !
Okay, so after a bit of head scratching, I go across the road to one of those small convenience stores and luckily they sell a pack of blu-tac. Back to the van with my blu-tac. Stick it on the end of my new claw thingy. Poke it down into the gap and ........ the end of the thingy where the claw lives is too big to go in the gap and I'm about 30mm short of my target.
Time for Plan B, I think. So what if I plug the gap where the plastic isolator is supposed to go with some blu-tac. Maybe that will stop the wire from earthing on the dizzy body just long enough for us to limp home. Shoved some blu-tac about the place. Closed up the dizzy and gave it a whirl. She fired straight up. Winner!
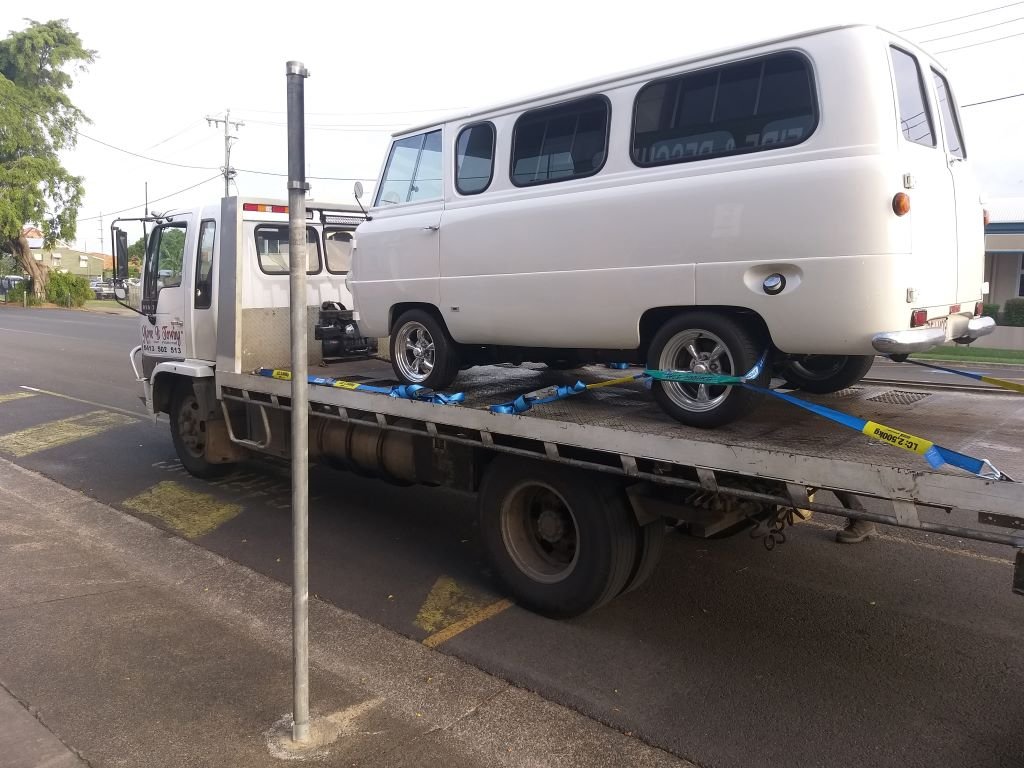
Started to pull off and she was running like a bag of dicks then she cut out. Obviously my blu-tac band aid wasn't cutting the mustard. By this stage it's dusk and the homeless types are starting to hit the streets and a few start giving us the eye, so Mrs Flash and I call it quits and I give Steve the towie a buzz.
Luckily he wasn't far away and nek minnit ....
What an undignified end to the day for the poor ol Thames.
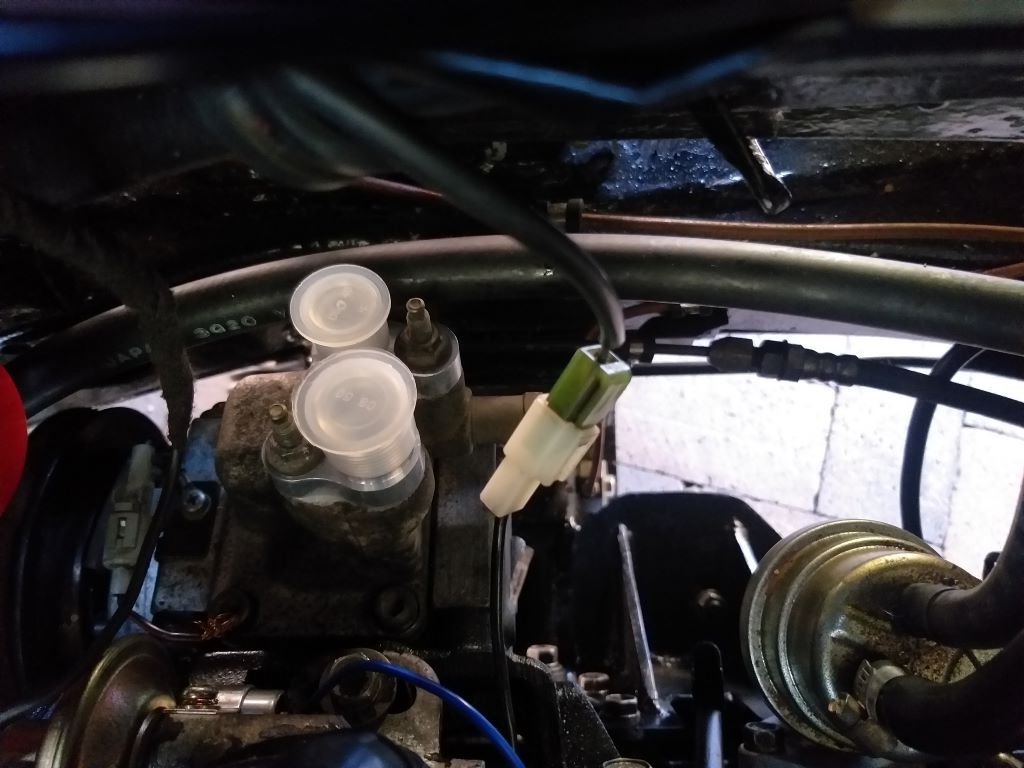
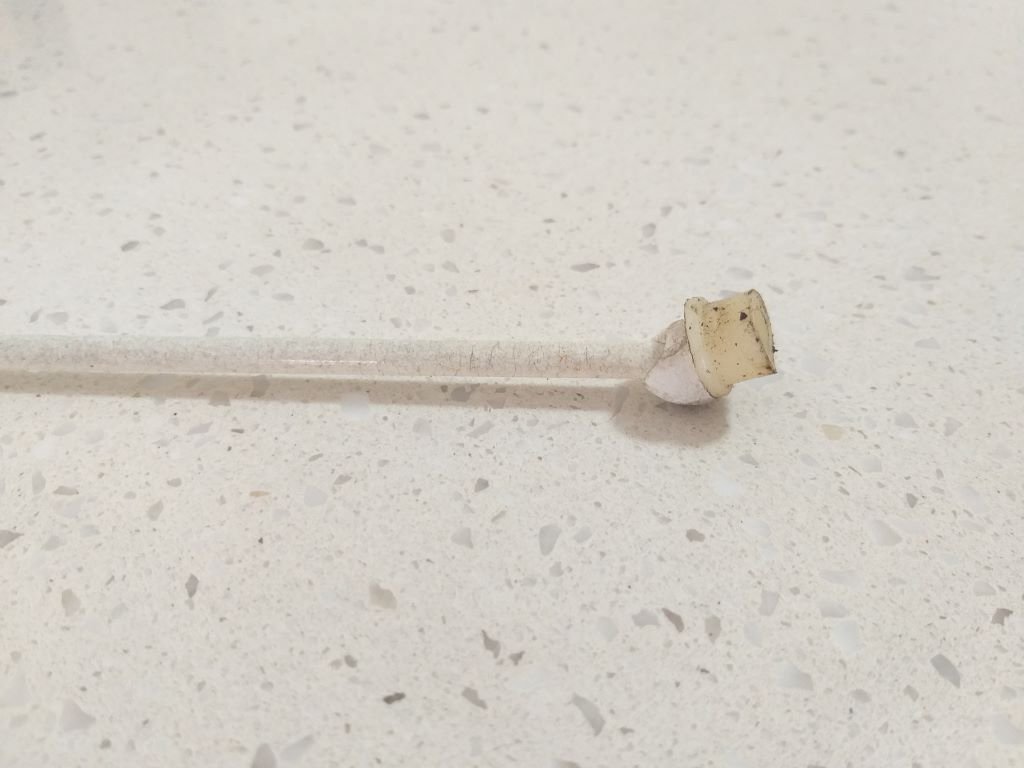
Fast forward to this morning and armed with a thin rod and a piece of blu-tac I make quick work of retrieving this puppy:
Who was very chuffed to be re-united with his mate:
Put it all back together and she fired straight up.
So, I'm left wondering whether it is actually the condenser or perhaps my coil is on its way out and is okay now that it has cooled down. Time will tell I guess, but needless to say I've now put together a pack of basic tools that will live in the van together with a few rags and some wet wipes. I've also added a spare dizzy cap and coil to my emergency pack, and I think I'll invest in a spare condenser and maybe some points. Long term plan is to convert to electronic distributor, but hopefully I can keep things going until then.
And so endeth my tale of woe.
Thanks for reading.

-
17
-
 2
2
-
 3
3
-
- Popular Post
- Popular Post
Late last week we did a town run and I was able to source the stainless steel nuts, bolts and washers that I needed to complete the a/c condenser installation.
Chucked the freshly painted brackets back on and took one last photo of the condenser in the light of day.
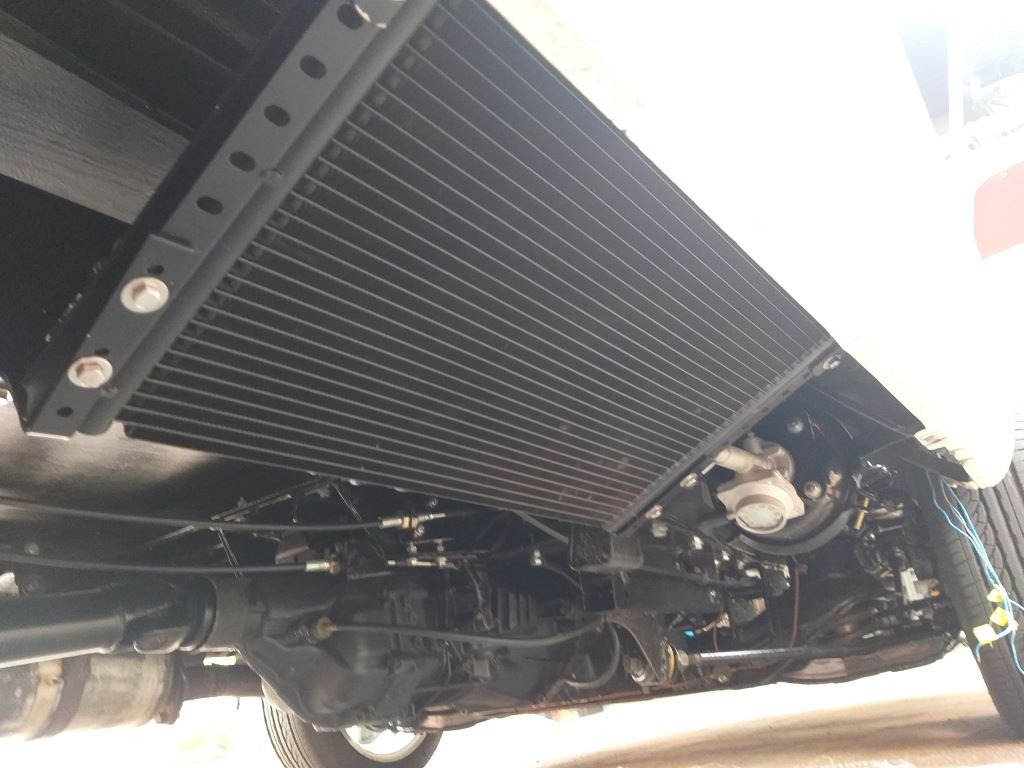
Managed to wriggle under the van and wrestle the works into position.
Not easy to photograph, but you get the idea.
Next up is the mounting of the receiver/drier bottle.
-
13
-
- Popular Post
- Popular Post
The front badge is a NOS unit so came already painted but the red was a bit patchy and faded from many years in storage.
Mrs Flash gave it a fresh coat and it now looks minty.
-
15
-
- Popular Post
- Popular Post
While I was waiting for the paint to dry on the second batch of a/c condenser mounting brackets. I pulled the remaining badges off so that Mrs Flash could give them a bit of loving.
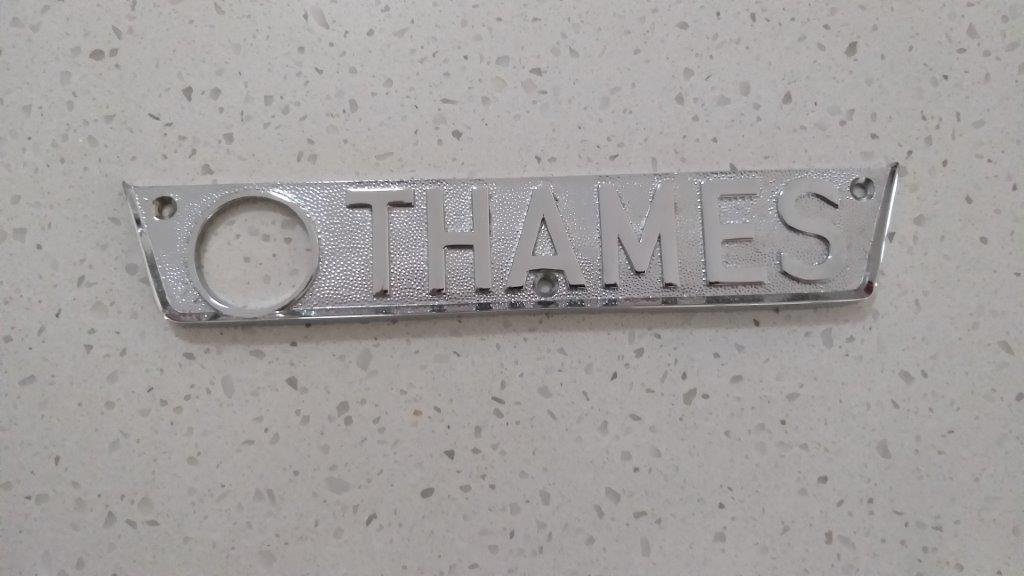
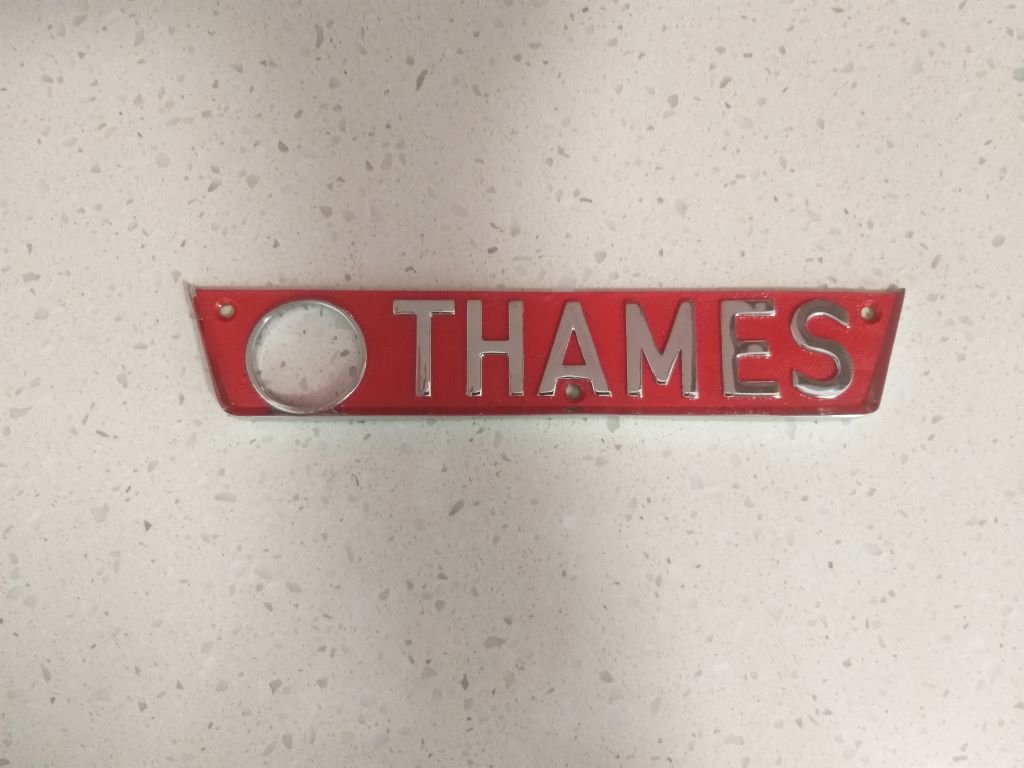
The reproduction rear badge that I sourced a while back came unpainted, so it looks a bit bland.
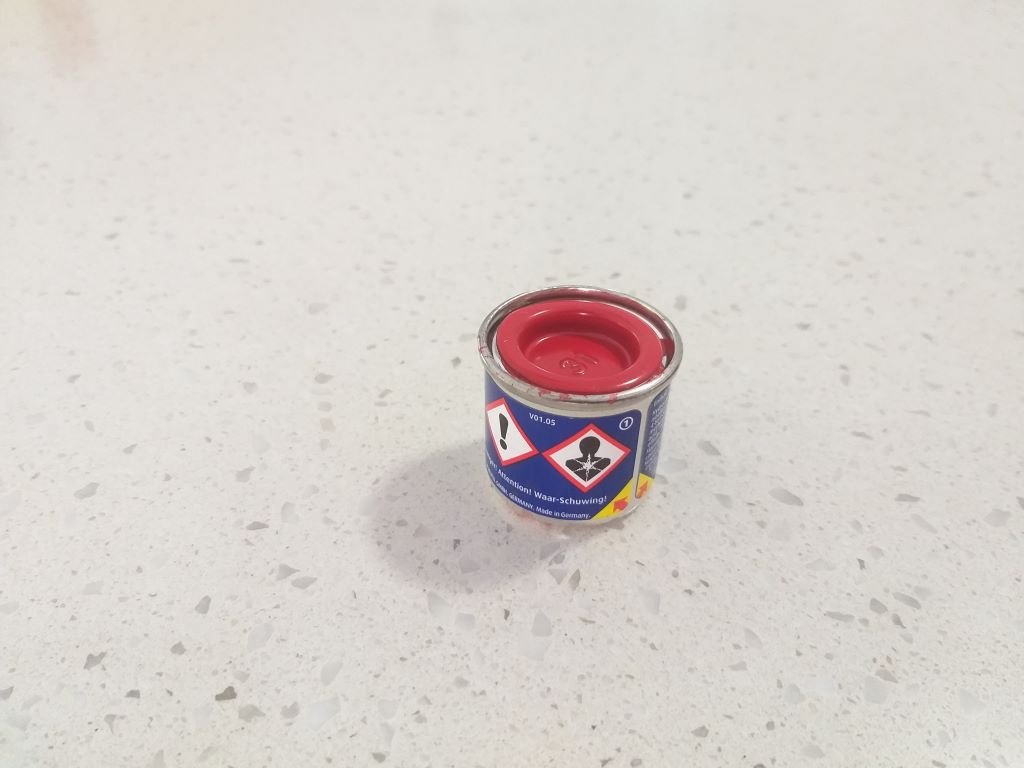
We ordered in a little pot of Revell enamel-based model paint (number 31 Firey Red Gloss).
Mrs Flash gave it a few dabs with a brush and it came out pretty mint.
The shadows in this photo make the chrome work look a bit manky, but in real life it's perfect.
A really nice touch is the round hole in the badge that the spare wheel winch handle fits through.
Talking about the spare wheel my original winch was seized solid and I tried unsuccessfully to resurrect it. But fear not as I have a cunning plan for a replacement that I'll talk about sometime in the future.
-
13
-
- Popular Post
- Popular Post
And that's all of the condenser mounting brackets done.
Some crappy quality photos of the brackets that mount to the body brace.
This is the bracket closest to the rear of the van:
And this is the one towards the front of the van:
With the test fit successfully behind me, I've stripped everything out once again and the first batch of mounts have already received their first coat of satin black.
More tomorrow.
-
13
-
- Popular Post
- Popular Post
Today I kicked off the a/c install.
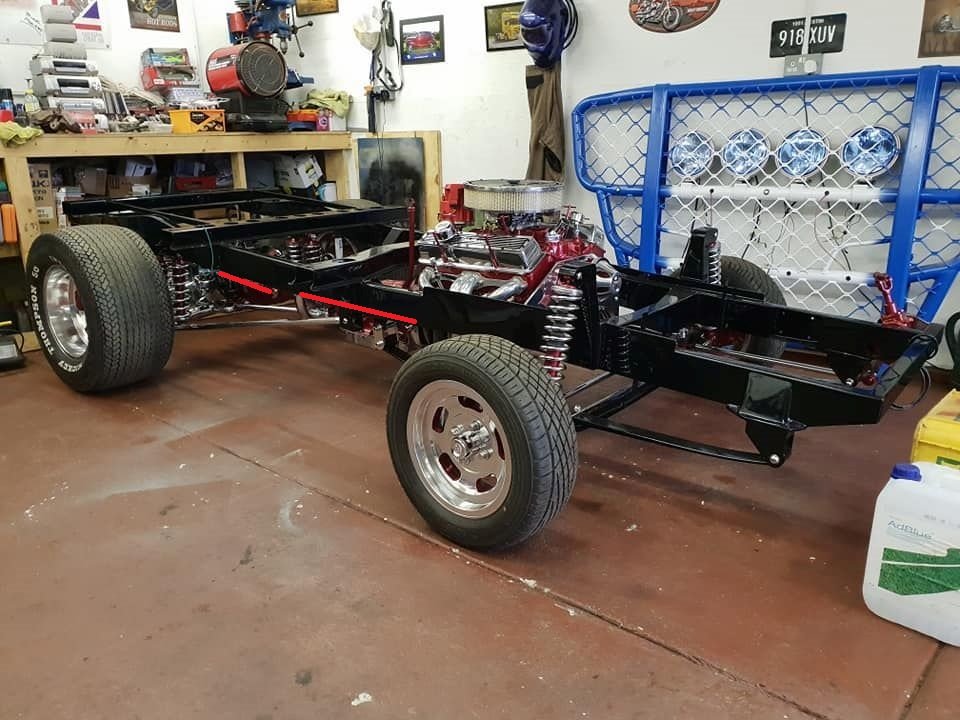
My intention has always been to mount the condenser somewhere underneath the van and I had previously targeted the area between the RHS main chassis leg and the smaller body brace that runs parallel with the chassis leg under the load area of the van. It's nigh on impossible to photograph this in real life so I've had to resort to using a photo of a highly modified bare Thames chassis that I found on the net a while ago.
The red lines in this image depict the proposed location for the front and rear edges of the condenser:
The outer brace sits a lot higher than the main chassis leg which is perfect as it allows me to position the condenser at a slight angle - something that is critical to make sure that gravity helps pool the liquid to the bottom of the condenser.
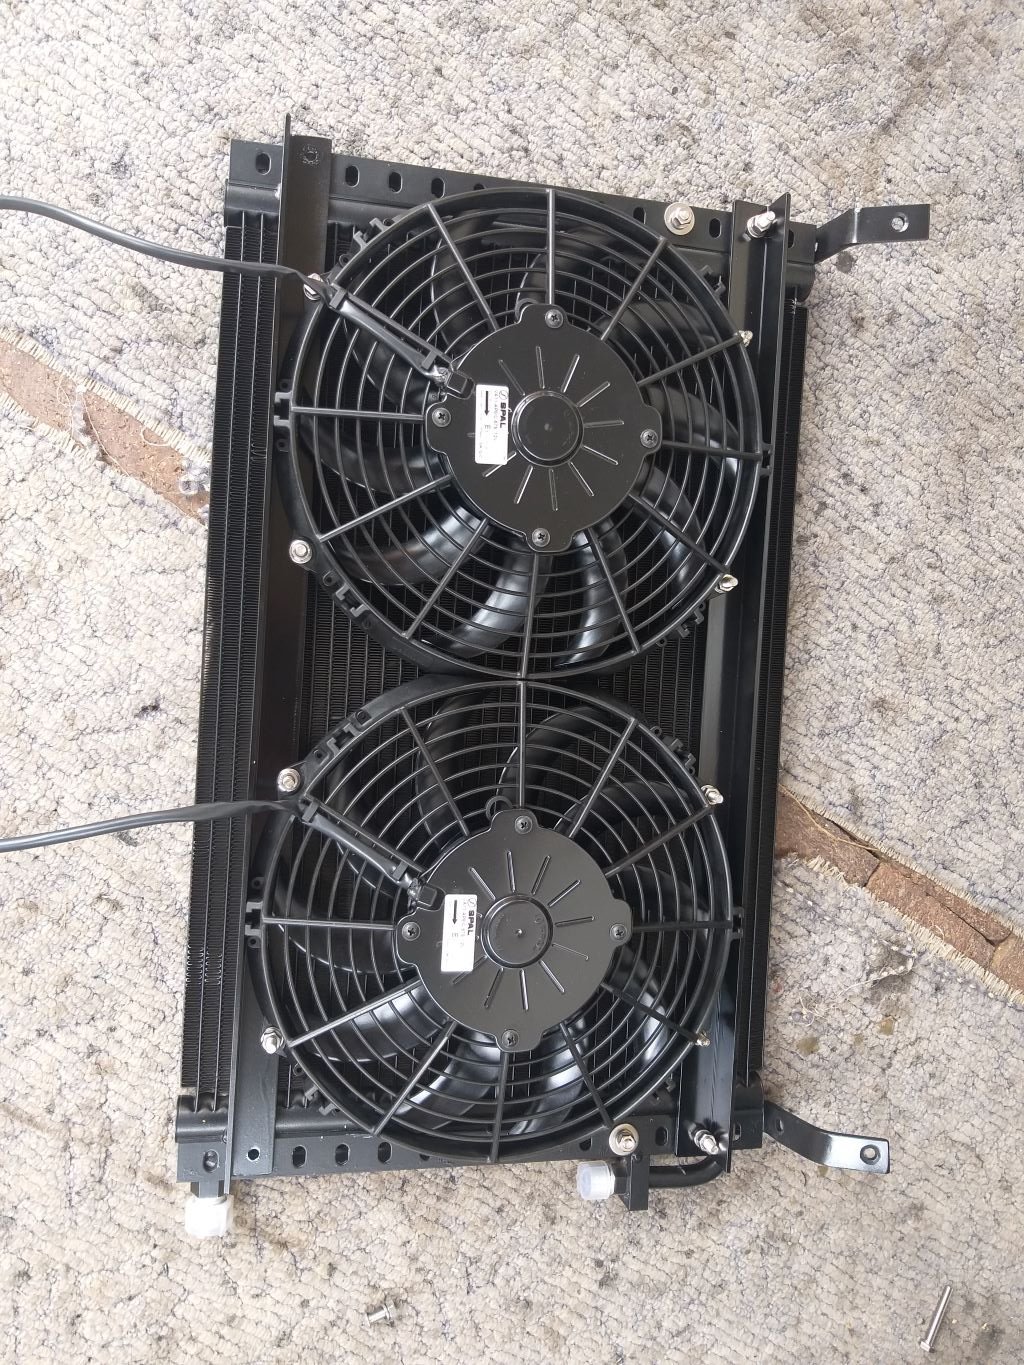
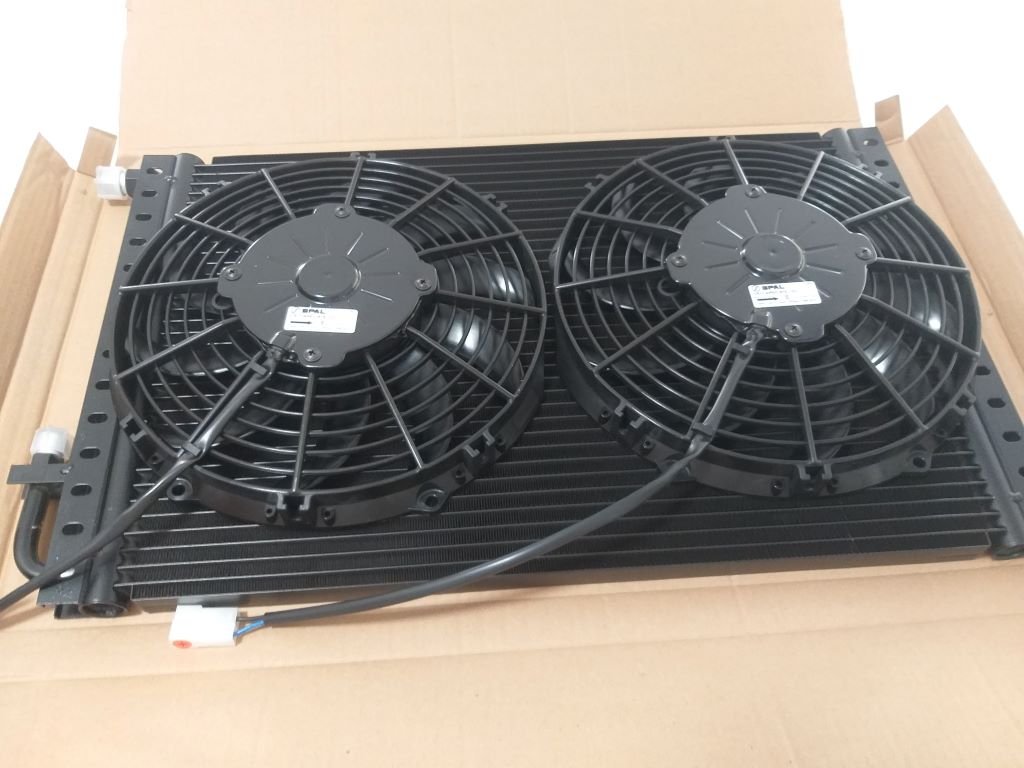
First step was to mount the twin Spal pusher fans to the top of the condenser so that I could check clearances between the underside of the floor and the fans. Used a bit of aluminium angle and a few stainless steel fixings to whip this up:
I had a 50% chance of mounting these on the correct side of the condenser, but my first test fit showed the condenser tilting the wrong way so out she came and I quickly flipped the fans.
Clearance is good, so I made a start on the mounting brackets.
More tomorrow.
-
11
-
- Popular Post
- Popular Post
Small job today.
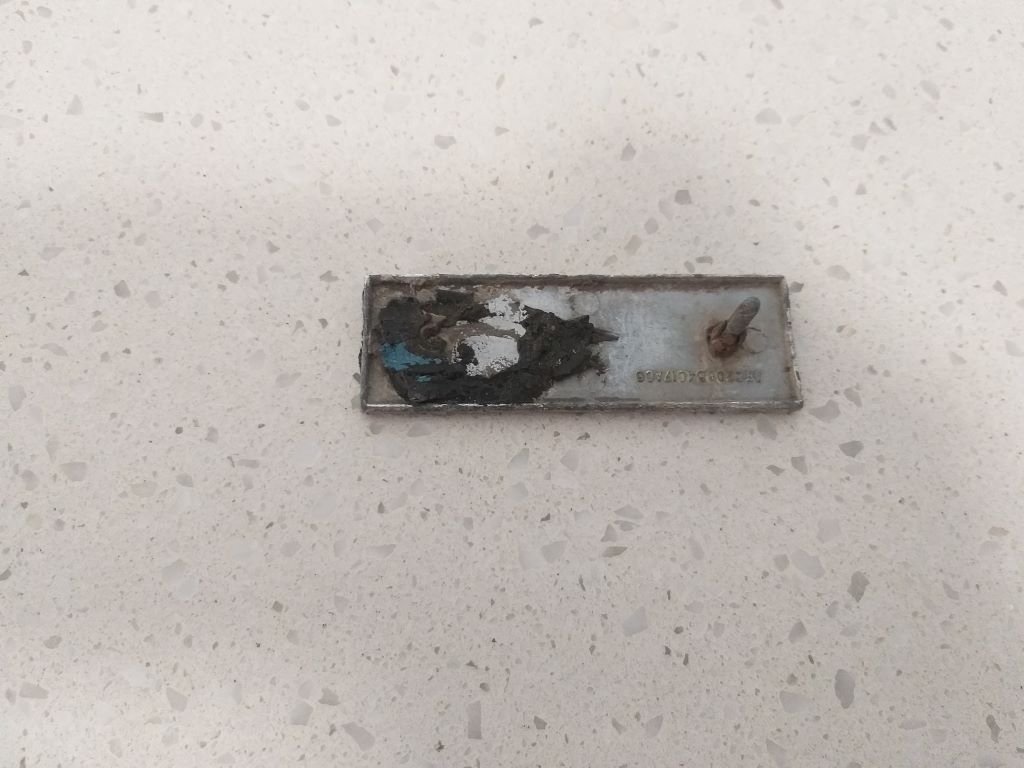
Way back in 2019 when I bought the van it came with a box of bits that hadn't yet been fitted by the panel beaters. Lurking in the bottom of the box was a sad looking fender badge.
I could have fitted it, but somewhere along the line one of the mounting pins had broken off and in the past, someone had done a bodge job that I wasn't keen to repeat on the fresh paintwork:
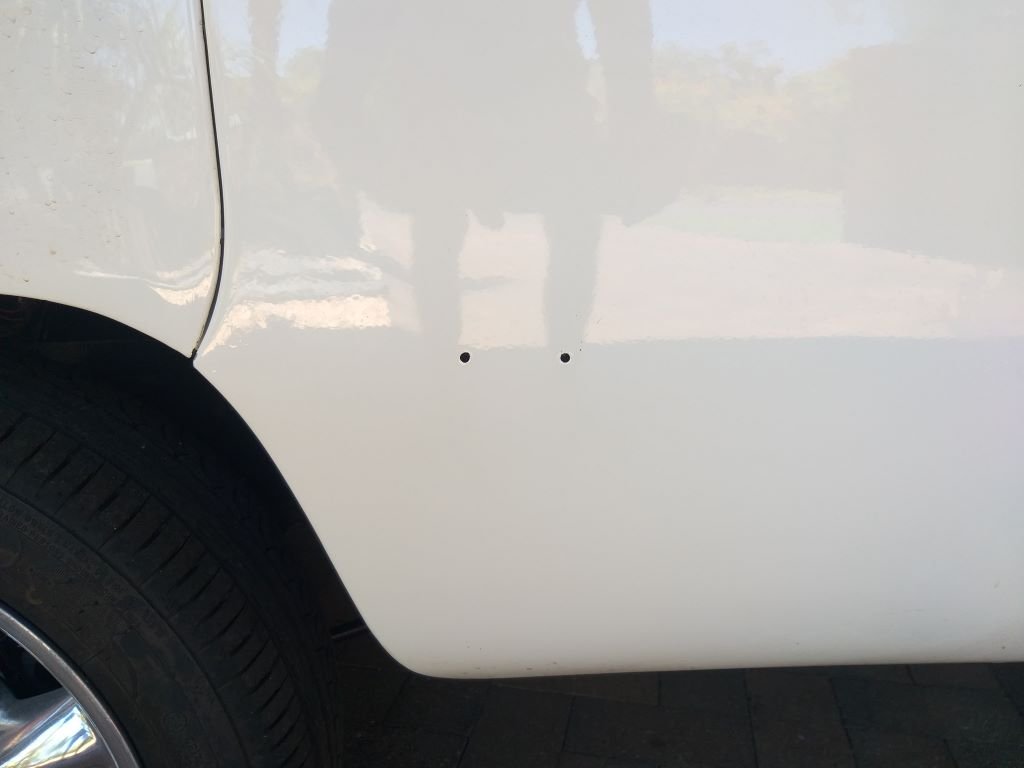
So, I've been rocking these two bodywork holes for way too long:
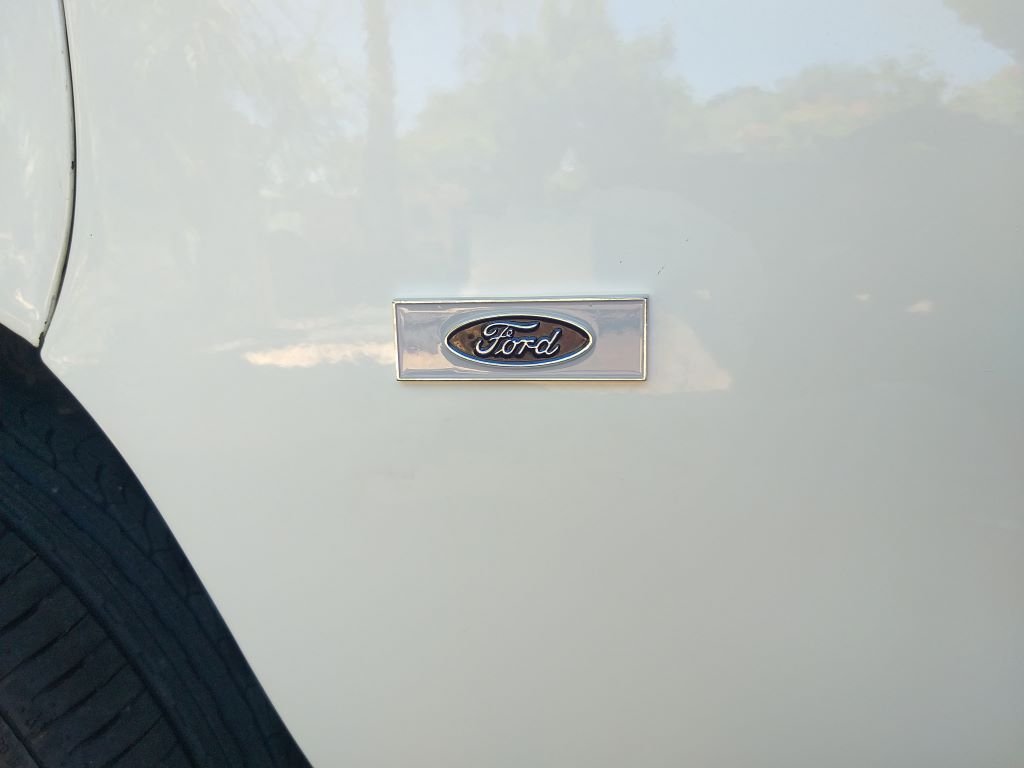
My OCD could no longer handle the situation so I did some research and it turns out that these badges are common across the early Cortina, Capri and Escort range. I managed to find an onshore supplier and yesterday this pitched up:
The same supplier sent me two fresh press clips, so I slapped the new badge on and everything is right in the world again.
Thanks for looking.
-
18
-
And I've now got the next batch of a/c related bits.
Receiver drier with mounting bracket, pressure switch and a pair of adapter pads for my Denso compressor.
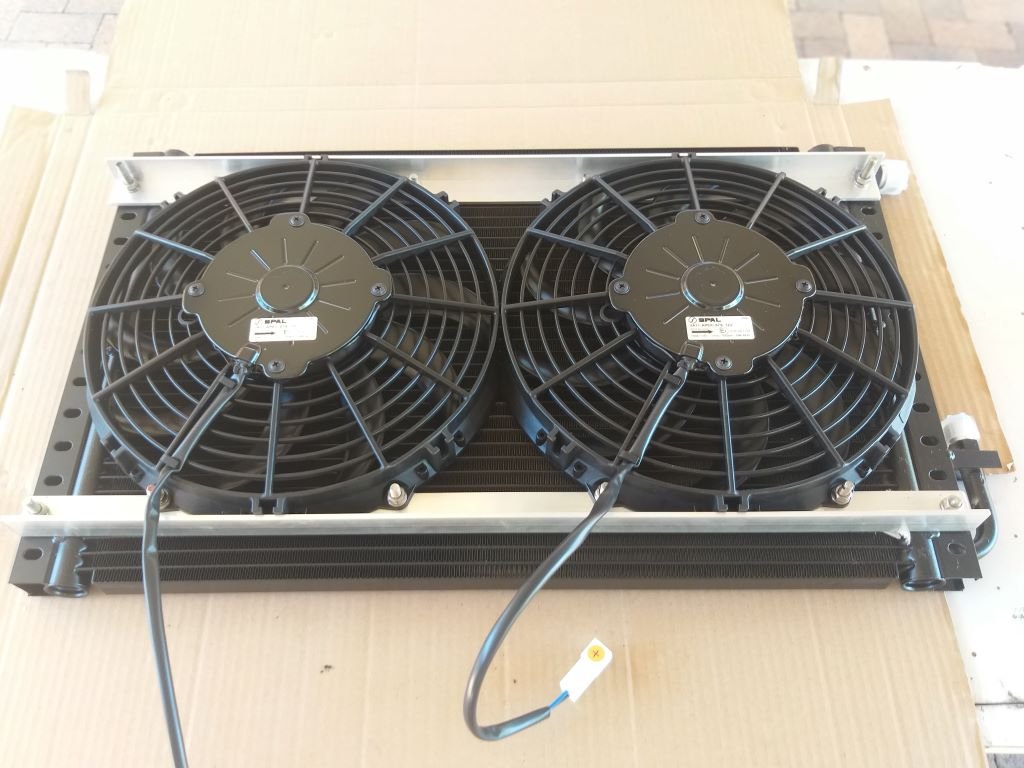
And then my 23-inch condenser and a pair of 10-inch Spal pusher fans.
I can't wait to start putting this lot together.
-
8
-
-
4 hours ago, tortron said:
Interested in kit, I'd like to put one on my l200. That or swap the doors for ones with 1/4 windows

AC place here just shrugged when I asked about retro mod/vintage air atuff
I guess Aus would be the capital of a/c retrofits, but I reckon fitting a/c to a L200 would be pretty straight forward since it has a conventional dashboard.
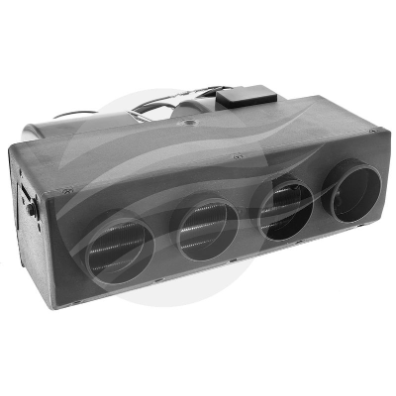
I'd be looking at a concealed dash unit something like this:
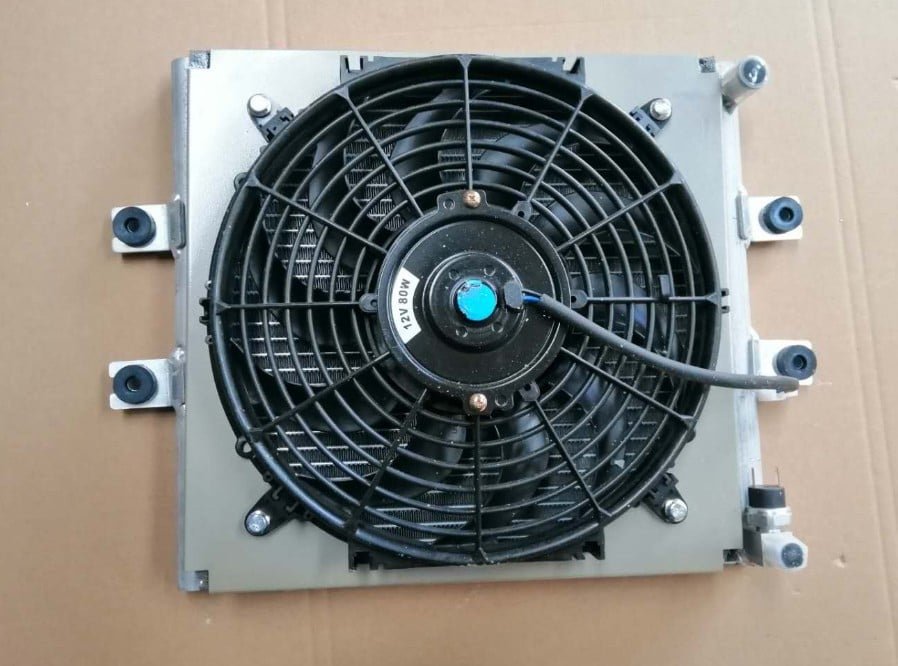
They go for around $400 Aus which is around half the price of the unit I bought and you are then able to plumb the outlets up to your existing dash vents using slinky pipe. You should be able to slip a universal condenser in front of your radiator or worst case scenario use a universal under tray ute unit like this:
Cost for that unit is also around $400 Aus.
Receiver/drier bottles are cheap as chips (about $30 Aus complete with mounting bracket)
Being a ute you won't need a grunty system so any belt driven compressor should do the trick.
My local a/c supplier (Speedy Air Spares - check out his website) provides DIY hose kits that you can crimp yourself. He is supply only, but has advised on heaps of retro fits including a local who has fitted a/c to his 60's VW bug.
I'm happy to help in any way I can Tori.
-
3
-
-
1 hour ago, sr2 said:
Woops! Just did a quick double check on Google - it's actually a front wiper motor.
All good mate.
-
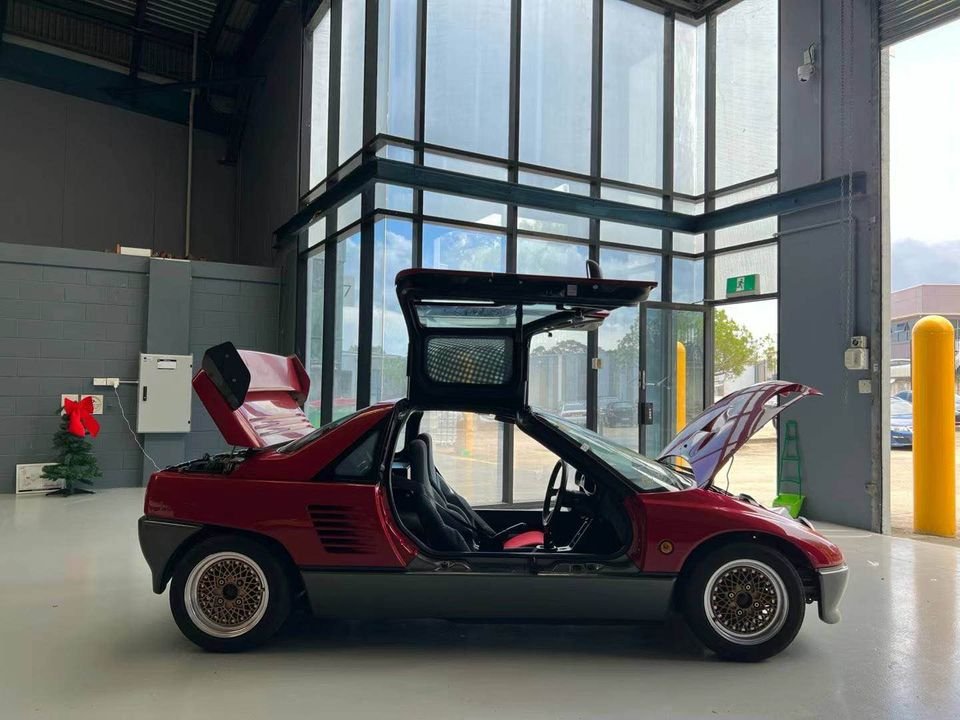
Mazda AZ1 for sale here in OZ. First time I've seen one.
-
8
-
-
27 minutes ago, sr2 said:
Hi mate, the wiper motor was off a Nissan Tilda C11 (2004 to 2011 I think?).
Thanks Simon. And it's the wiper for the rear screen ?
-
- Popular Post
- Popular Post
Well, it's official. The Thames van has taken over daily driving duties from our Mazda e2000 which headed off to its new owner last Saturday.
With the cash from the sale burning a hole in my pocket I figured it was time to violently execute "Project A/C" so I hit the "buy now" button on a few bits and pieces and there was much excitement when the courier dropped off the first of the boxes a few minutes ago:
And upon opening the box this little puppy peeked out into the light of day:
Noice !
-
13
-
You did a top job on the gauges Simon and the ignition switch is an absolute work of art. You just can't beat that vintage look.
Quick question for you regarding the Nissan wiper motor that you used. Do you know what model Nissan it came out of? I played around with a few options for the Thames, but I'm not that happy with my current setup so I'm thinking of doing a rework and your setup looks ideal.
-
It's a bunch of bits that I will be using @dmulally. I was lucky enough to find a factory bracket for the a/c compressor off a mid 90s Toyota Liteace that was running a 4YE engine - basically the same block as the 3Y that I am running so the bracket bolted straight up. I grabbed the Denso a/c compressor from the same wreck and it was still holding gas, so I'm hoping it will be okay.
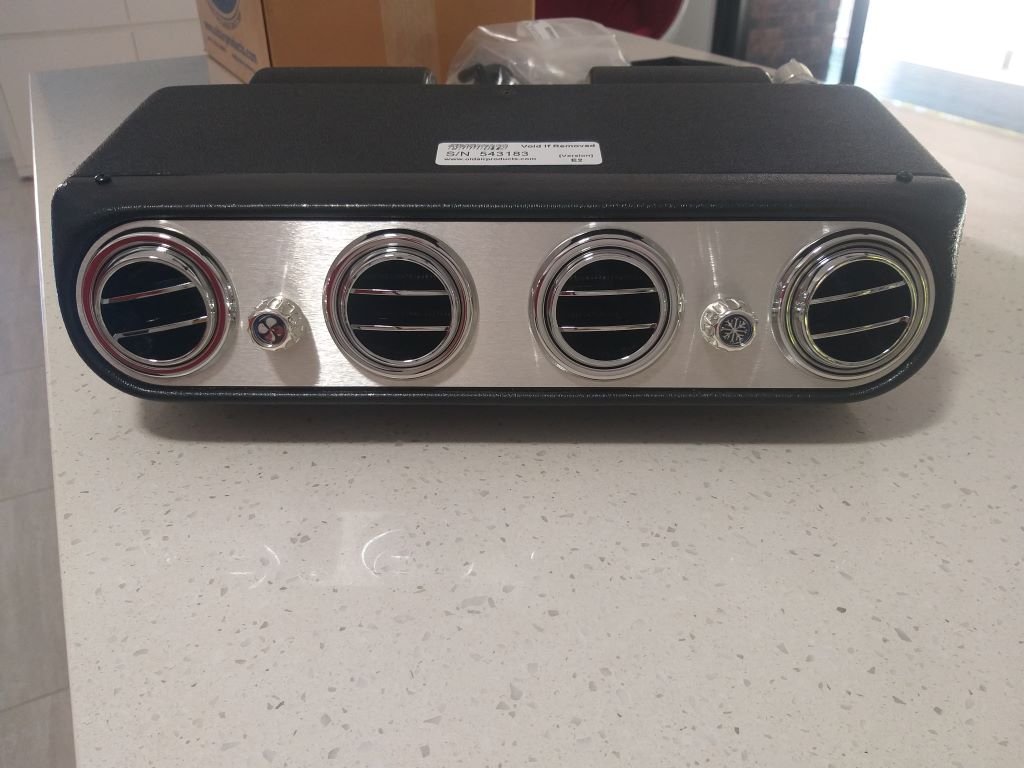
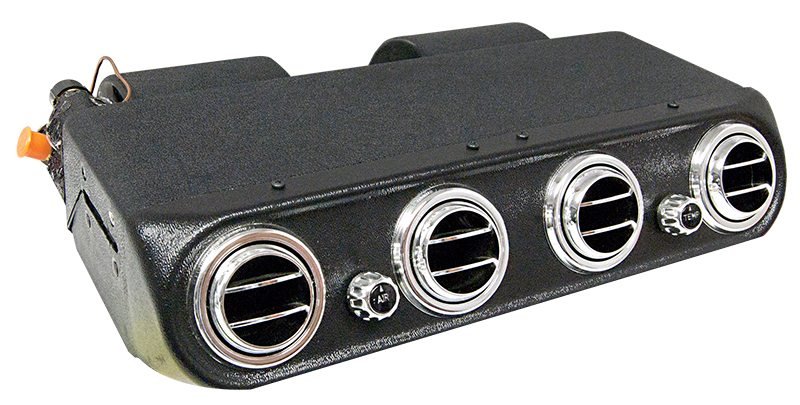
For the internal unit I am going with an underdash jobbie from Old Air Products. It was the only unit dimensions wise that works out depth wise so that it fits right up against the inside of the nose panel and doesn't protrude past the underside of the dashboard. This is the unit:
Except I've gone for the brushed aluminium face plate for a bit of extra bling.
In terms of the condenser, I'm going for the universal chassis mounted unit used on some utes and hot rods. It comes complete with a shroud and electric fan. Looks like so:
I have the option of running two of these units in series if I want to improve the efficiency of the system.
Then it's just a case of sourcing a receiver/ drier and a few other small components.
My local a/c supplier also stocks a hose kit supplied with a crimp tool for DIY installations. The hose kit is about $400 with ends, bulkhead fittings etc and includes the cost of the crimper. A mate of mine has just done a setup in his MK1 Capri using the same hose kit and he reckons it worked out perfectly.
I'm hoping to commence the install in the next couple of weeks and will update my build thread as I go.
-
5
-
-
1 hour ago, locost_bryan said:
This thread suggests 180F-220F (82C-104C). 95C (203F) is the midpoint, so sounds about right?
Thanks Bryan. That makes me feel a lot better. Our Moke runs at 80C all day long so I've been comparing the Toyota engine running temps to that which was making me a bit nervous.
-
2 hours ago, dmulally said:
95 at both high and low speed seems interesting in itself.
I think that's a fine temp though. Especially for where you are!
I've gone a bit troppo across here in the tropics. LOL
In other news we sold our modern van this past weekend so the Thames has taken over daily driving duties.
The modern van with its a/c made us a bit soft, so I'm furiously ordering a/c parts for the Thames at the moment.
-
6
-
-
13 minutes ago, dmulally said:
@Flash I'm sure you're all over it but have you put in an airscoop to the radiator in the front?
All the commer van's I have ever had have required it when lowered or they overheat at highway speeds.
@dmulallyYep, full scoop already in place. It dropped the max temp a little bit. I'm getting a consistent 95C max in both traffic and at top speed these days. Still feels a bit high to me but she seems happy enough. I'm going to give the rad another flush as I still seem to have a bit of a brown tinge in the coolant when I last drained the system. Not lots, but just enough to stain the bottom of the bucket that I drain the coolant into.
-
1
-
-
On 24/11/2023 at 15:50, igor said:
Loving the '50s diner vibe you've got going there Gordon. Where's the jukebox?
@ igor , now there's a thought!
A little Wurlitzer replica tucked up in one of the corners would look pretty cool I reckon.


Flash's 1965 Ford Thames
in Projects and Build Ups
Posted
Next step from a windscreen wiper perspective would be to fabricate a mounting bracket for the L300 wiper motor. Now I'm thinking that I can fine tune the positioning of the motor by either shortening or lengthening this intermediate drive shaft.
And hopefully that shouldn't affect the sweep in any way. Feel free to correct me if I am wrong.
I figured it would be better to finalise the glove box and under dash a/c unit installation and I can then position the wiper motor in the space left over.
So the first step was to retrieve the dusty old glove box for closer inspection. It's a bit grubby but still looks functional.
The underside of the glove box has a nifty mounting bracket that looks like so:
The pointy end of the triangular bracket mounts up to a little bracket welded to the inside of the front panel with the longer side resting up under the lip on the dashboard, like so:
Now I'm thinking that refitting the glovebox has the added advantage of allowing me to use the same mounting bracket to support the under-dash a/c unit. But in order to do that I need to add some fixings to the dash lip to make the bracket more rigid for the additional weight. I poked two extra holes in the dash lip and added some stainless-steel self-tappers and it's nice and solid now.
Next step was to take a closer look at the mounting brackets supplied with the a/c unit:
Those definitely aren't going to work for me, so I spent a bit of time doing some CAD and came up with these:
Grabbed some 3mm plate that I had in stock. Did a bit of cutting, did a bit of bending, poked a few holes to replicate the mounting slot and I ended up with two of these:
And the plan is to bolt my newly fabricate brackets to the factory glove box bracket in more or less this configuration:
So, the plan for tomorrow is to mount the glove box bracket back in the van and then offer up the a/c unit so I can work out exactly where the holes for my mounting bolts need to go.
Stay tuned for the next exciting episode.